/


Text
Contents
Title Page
1: Introduction
2: Materials
3: Your Mask Form
4: The Clay Molds
5: The Paper Mache
6: Finishing the Masks
7: Volto Mask
8: Bauta Mask
9: Plague Doctor Mask
10: Neanderthal Skull
11: Outlaw Mask
12: Cat Half-Mask
13: Butterfly Half-Mask
14: Owl Half-Mask
15: Duck Half Mask
16: Iron Celtic Helmet
17: Unicorn Mask
18: Kudu Display Mask
19: Gallery
20: About the Author
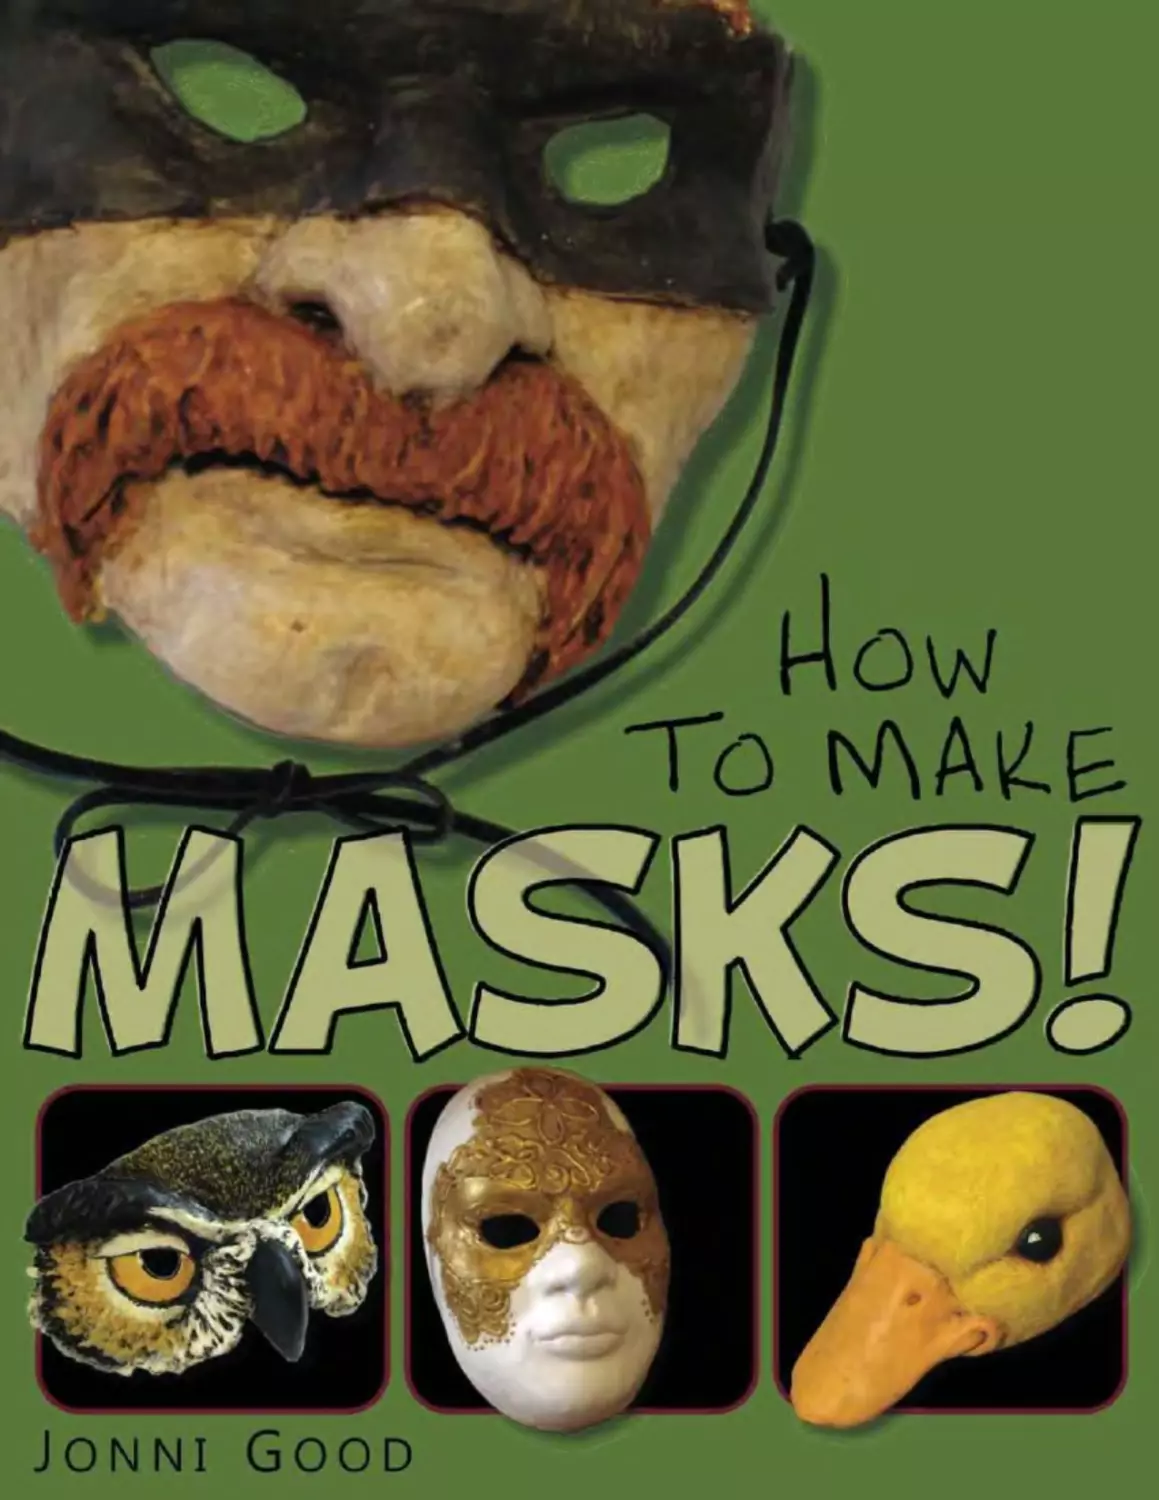
Easy New Way to Make a Mask for Masquerade, Halloween and Dress-Up Fun, With Just Two Layers
of Fast-Setting Paper Mache
Jonni Good
Wet Cat Books, Hendricks, MN
Copyright © 2012 Jonni Good
All rights reserved. No part of this book may be reproduced by any means whatsoever without
written permission from the publisher, except brief portions quoted for purposes of review.
Art Techniques, Sculpting
1:
Introduction
It’s just as much fun to make a mask as it is to wear it after it’s finished. And
remember—masks aren’t just for wearing. They make great wall art, too. With
just a few inexpensive materials and a few hours of “work,” you can populate
the walls of your home (or your costume chest) with brand new personalities,
creatures, and beasts.
Even more exciting, think of this—just by making a mask of your own
creation, you’re following in the footsteps of a tradition that goes back at least
35,000 years, to the days when Neanderthals still lived on earth. I think that’s
pretty amazing, don’t you?
It’s also fun to have a few masks in the toy box when children come to visit
(the Plague Doctor mask in Chapter 10 is my grandson’s favorite, although he
likes the Duck Hat, too).
Although I have experimented with many different methods for making
paper mache masks, I really started having fun with them when I began using
positive molds. This is a traditional method of making paper mache sculptures
of all kinds, and for good reason.
The mold lets us do all the sculpting with modeling clay, which is a much
more intuitive sculptural medium than paper mache. And, in the spirit of
starving artists everywhere, I like the fact that I can use my modeling clay
again and again to make new masks.
I like using Super Sculpey® for this purpose, but I don’t bake it. I just like
using a soft clay for my masks, and it’s the only soft modeling clay available in
my small town.
You can use any oil-based clay for your positive molds. If you can’t find a
modeling clay locally, you can buy some online.
Because the molds are only used once, each mask made by this process is a
one-of-a-kind original.
Once the paper mache has been applied to the mold and it dries hard enough
to stand on its own, it’s lifted off the mold. With the special plaster/glue paste I
use, this only takes a few hours if I set the mask in front of a fan. Then it can
be popped into a warm oven for another hour or so to make sure it’s dry all the
way through.
While it’s technically possible to start a mask in the morning and wear it that
evening, it’s definitely a good idea to give yourself a lot more time. You’ll
want to make sure your masks is totally dry, all the way through, and you
should give yourself time to finish it, too.
What’s New in This Book
Although making paper mache masks using positive molds is a time-honored
tradition, you’ll use some new materials to make the paper mache itself.
Instead of making paste with white flour and water, you’ll be using a mixture
of white PVA glue (the most popular brand in the U.S . is Elmer’s Glue-All®),
mixed with ordinary plaster of Paris.
If you want more time to work, and aren’t in such a hurry, you can use the
paste made with drywall joint compound and white glue, instead. Both recipes
are given in the Materials chapter.
For each mask you’ll also be using a few sheets of strong, stretchy paper
from a roll of Scott Shop Towels®. These products are sold at your local
hardware store or the DIY section of WalMart, and they cost just a few cents
per mask. Of course, if you give your masks as gifts or sell them at the local art
fair, you don’t have to tell people how little they cost to make.
You don’t even need a big dedicated studio space for your projects. Every
mask in this book was made on the top of a 14” square kitchen cart. (The kudu
would have been a bit easier to make on a larger table, but it still worked). I
use the cart because it’s high enough for me to work on comfortably while
standing up. You don’t need anything fancy to make paper mache.
About the Instructions:
There’s no need to make your masks in any particular order—just choose the
one that appeals to you and jump right in. However, since some of the masks
are more challenging than others, you might want to start with the Volto mask
first, just to get a feel for the materials.
All of the masks are made with the same basic methods, and I cover these
basics in detail in Chapters 2 through 6. When we get to the chapters showing
individual masks, I’ll assume that you’ve read the introductory chapters, since
repeating the repetitious steps would become, well, repetitious.
Each chapter will show you the way to sculpt your modeling clay to make
your mold, how to apply the paper mache over any challenging features, and
how to finish your masks to look like the ones shown at the beginning of each
chapter.
Then, if you discover that you enjoy making masks as much as I do, you
might want to use your new skills to copy a ceremonial mask from a museum
collection, or create masks for your local theater group. In fact, you can use
these methods to make any kind of mask you want—you are certainly not
restricted to the projects I could fit into these pages.
2:
Materials
The Paper
For the paper mache layers, you’ll need a roll of Scott Shop Towels®, made
by Kimberley-Clark. These exceptionally strong and absorbent blue paper
towels are made for mechanics and craftsmen, so you should be able to find
them in any American hardware store.
A nice person at the Kimberley-Clark company told me you can also find
their towels at Costco in the UK, and at Sam’s Club and Walmart in Mexico.
Unfortunately, they aren’t available in all countries, so you may need to
experiment with other brands.
These paper towels aren’t free, like the recycled newspapers many paper
mache artists like to use, but you only need a few sheets per mask. The
strength and stretchiness of this paper makes the entire process so much easier,
and the paper makes your masks incredibly strong.
The one drawback to using the towels is the thickness of the paper. The
edges don’t “melt” into the surface quite as well as thinner paper does, so you
can sometimes see where the pieces join together.
However, this isn’t as much of a problem as you might think. The
stretchiness of the paper lets us use much larger pieces, for fewer edges. Then,
any bumps or ridges that remain in the dried paper mache are smoothed out
with the easy finishing techniques I’ll show you in Chapter 6.
Plaster-Based Paste
To make the paste, mix together:
1/4 cup (60 ml) white glue (Elmer’s Glue-All® or any PVA glue)
1 tablespoon (15 ml) cold water
1 teaspoon (5 ml) vinegar (it slows down the plaster to give you more time
to work)
Then mix in:
1/4 cup (60 ml) plaster of Paris
You can thin the paste with water, but that will make it take a bit longer
before you can remove the mask from the mold. Be sure to use cold water—
warm water makes plaster set up faster, and you need all the time you can get
to spread the paste and apply the paper mache to your mold.
Because of the plaster, your paste might start to get too thick in the bowl or
on your brushes before you’re done applying the two layers of paper mache. In
that case, just put the thickened paste in the garbage, rinse your bowl and brush
(first in your bucket and then in the sink), and then make another batch.
Never rush the process of adding the paper mache layers just because your
paste is getting too thick—I’ve made that mistake a few times myself, and I
always regret it.
Note: This paste will harden quickly. If you like to work more slowly, or if
you’re working with a group of people, the joint compound-based paste may
work better for you. You’ll find that recipe later in this chapter.
Really Important Note: Before you mix your plaster-based paste or gesso,
half-fill a plastic bucket or old pan with water. Rinse your spoon, bowl and
brushes in the bucket, not in your sink. Plaster will harden under water—so
don’t put any plaster mixtures in your pipes unless you can afford a visit from
your local plumber.
Plaster-Based Paste
Gesso will cover small imperfections in the paper mache, and will create a
nice white ground for your paint. Traditional plaster gesso is made with hide
glue, but that’s hard to find and rather expensive. We’ll use white glue instead
—it works just fine. Mix your gesso just like the paste recipe.
1 tablespoon (15 ml) white glue
2 teaspoons (10 ml) water
2 tablespoon (30 ml) plaster of Paris
1⁄4 teaspoon (1 ml) vinegar
Small dab of white craft paint (optional)
Apply your gesso to the dry paper mache. You can sand between coats (use a
mask when sanding) or you can use a damp sponge, paper towel or finger to
polish the gesso. The gesso must be bone dry before sanding, but you can wet-
polish it just a few minutes after applying, as soon as the surface is dry.
Use liquid craft paint if you want your gesso to be an opaque white (or any
other color you prefer). Don’t use acrylic artists’ paint out of a tube—in my
experiments the more expensive tube paint thickens the gesso to the texture of
whipped cream, which is not terribly useful. Inexpensive craft paint works
better in this recipe.
Note: This gesso hardens quickly, and may harden in the bowl. If you like to
work more slowly, or if you’re working with a group of artists, the joint
compound-based gesso may work better for you.
Really Smooth Gesso Mix
For some masks you may want a porcelain-smooth finish. The easy way to
do that is to use one or two coats of the gesso recipe, sanding or wet-polishing
between coats. For the final coat of gesso, use this recipe:
1 tablespoon (15 ml) white glue
1⁄2 teaspoon (2 ml) cold water
1⁄4 teaspoon (1 ml) vinegar
1⁄2 tablespoon (7.5 ml) plaster of Paris
You can double the recipe if you’re making a larger mask. Don’t make too
much, or the gesso may thicken before you have time to use it all.
About Plaster of Paris
You can find plaster of Paris in hardware stores and art stores. When water is
added (or, in this case, white glue and water) plaster turns solid, but for our
purposes we don’t want it to get hard too quickly. To slow it down a bit we add
just a touch of vinegar to our paste and gesso mixtures. This will give you
from 10 to 20 minutes to work.
You may notice that the gesso in your brush starts to get hard before the
gesso in your bowl. Dried plaster paste on the surface of the paper mache will
cause the gesso in the brush to harden faster (I don’t know why it happens, but
it does). If you see this happening, just rinse out your brush, or use a fresh one.
I use cheap bristle brushes from the paint store, which cost about 49¢.
Plaster will harden underwater (that’s why I keep saying that you shouldn’t
dump left-over paste or gesso into your sink) but it never gets rock-hard like
concrete. That means that your paper mache surface will always stay slightly
water-soluble, so you can use a damp sponge, paper towel or even a damp
finger to polish the surface of your masks even after the paper mache and
gesso are completely dry.
This is much easier and less messy than sanding. However, since they aren’t
watertight, your masks must be protected from moisture with a final coat of
varnish, both inside and out.
I prefer to use a matte or satin acrylic varnish if the masks will be used
inside. For display masks, you can also use wax varnish or paste wax, which
gives the work a soft, warm finish. For outside use, you’ll want to use a
polyurethane varnish or marine varnish from the hardware store.
Since powdered plaster attracts water, even from the air, always keep your
bucket tightly closed.
Plaster sets up through a mysterious chemical action, which will usually
make your paper mache masks strong enough to lift off their molds in a few
hours if you set them in front of a fan. However, they still won’t be dry all the
way through. You can finish drying them in a warm oven (not over 200°F or
93°C) after they’ve been lifted from the mold (but never put modeling clay or
plastic in your oven). Or you could be patient and put them in a warm place, in
front of a fan, or just on a table where the cat won’t disturb them, and let them
dry naturally.
Joint Compound Paste and Gesso Recipe
This recipe can be used as an alternative to the plaster-based paste and gesso
recipes. The recipe using drywall joint compound hardens much more slowly
than the plaster-based recipes, so you can work as slowly as you like and still
get great results.
I recommend using this recipe if you’re working with a large group, or with
kids.
Because the paste won’t harden as quickly, you will need to leave it on the
form longer, to make sure it’s dry all the way through.
Never remove your mask before it’s hard enough to stand up on its own, no
matter which recipe you use. If you remove it too quickly, it will flatten out
like a pancake, and ruin your mask.
Mix:
1 part white glue
2 parts pre-mixed drywall joint compound
If using this recipe for paste, you can add a touch of water to make it thinner.
You can find drywall joint compound at your local hardware store. Get the
kind that’s already mixed. It comes in a plastic tub.
Other Materials You'll Need
Modeling Clay
The clay is used to create the positive mold that you’ll make for your masks.
I like using a soft modeling clay, because it allows me to work quickly, and the
soft clay is easy to pull out of the mask after it’s lifted off the mold.
Plastic Mask Form
The clay is applied over a mask form that gives the inside of your mask
room for your nose and eyes. Plastic forms are inexpensive, and can be
purchased online. Unfortunately, most plastic forms seem to be made for
children, so it’s difficult to find one that will fit older kids or adults.
Home-Made Mask Form
If you find a plastic mask form that fits, that’s great. Go ahead and use it.
However, if you can’t find one, don’t worry—I’ll show you how to make one
that will work just fine.
Acrylic Paint
You can use either liquid craft paint or artist’s paint from a tube. I also used
Metallic Paint for several masks, and Puffy Paint for raised designs.
Acrylic Glazing Liquid
I use the Golden brand glazing liquid, which I purchase online. You may be
able to find it at your local store.
Iron Coating
May be used instead of acrylic paint to make the rusty old Celtic helmet.
Optional.
Charcoal Stick
This is used only one time in this book, to soften the shadows on the
Neanderthal skull. Optional.
Acrylic or Polyurethane Varnish
Acrylic varnish can be purchased from any art store. For most masks, I
prefer the matte finish, but this is just a personal preference. If you intend to
wear the mask outside in the rain you may want to use a water-based
polyurethane finish from the hardware store.
Krylon Matte Finish
I use this product to seal the masks before adding a glaze. This prevents the
dark glaze from being absorbed unevenly. You could use the brush-on acrylic
varnish for this purpose, instead. If the previous paint layers appear to have
sealed the mask enough, you won’t need to use either product.
Plaster Cloth
We use plaster-impregnated gauze only for the home-made mask form. If
you will be using a plastic form, the plaster cloth is not needed.
Duct Tape
This is also used only for the home-made form.
Joint Compound
This is a product that’s used in the construction industry, for taping the joints
between two sheets of drywall on new walls. It looks like plaster that has
already been mixed with water, but it doesn’t harden as quickly as plaster. If
you don’t already have some, it isn’t absolutely necessary to run to the
hardware store to get some, but I always keep it on hand.
I use this product for my masks only when my paper mache comes out really
bumpy (usually because I was in too much of a hurry to do a good job during
the pasting process), and it’s used to create the veins on the Butterfly mask.
Any brand will work. It comes in a plastic tub. If the lid is kept tightly closed,
one bucket would last you for a very long time.
Petroleum Jelly and Thin Plastic Sheet
We use a sheet of thin plastic over our home-made mask forms to make it
really easy to lift the finished mask off the form. The petroleum jelly is used
under the plastic to keep it from slipping around.
Aluminum Foil
Use the cheapest foil you can find. We use it for the home-made mask form,
and to pad areas, like big beaks or noses, so we don’t need to use so much
modeling clay. The foil is left inside the horns on the Unicorn and Kudu
masks.
Hot Glue Gun
This is used to attach the stick to the owl mask, and to attach a hanger to
display masks. If you prefer, you can use a two-part epoxy cement instead. You
may also want to attach the ribbon or cord with a hot glue gun.
Tools
You also need to have these items on hand:
Small Bowl, Measuring Spoons and Measuring Cup (for the paste and
gesso)
Cheap Bristle Paint Brush (for spreading the paste and gesso)
Artist’s Brushes in your favorite sizes
Modeling Tools and a Knife (for working with the clay)
Sandpaper (for smoothing the edges of the mask after the excess paper has
been cut away.
Kitchen Sponge (for wet-polishing the gesso to get it smooth. You can also
use a paper towel for this purpose)
Small Plastic Bucket or Old Pan (for rinsing your bowls, spoons and
brushes so the plaster doesn’t end up in your sink)
Scissors
Ruler or Tape Measure
Craft Knife or Razor Knife (for trimming dried paper mache)
Small Fan (optional, but highly recommended)
Safety Issues
Plaster of Paris is dusty, and the very fine particles don’t belong in your
lungs. Wear a face mask when mixing plaster (you can find them at the
hardware store, often in the same section where you buy your plaster.) You’ll
also want to use that face mask when you sand your masks—or just wet-polish
them, instead.
Plaster can dry out your hands. If this becomes a problem for you, get
yourself a box of cheap plastic gloves from the hardware store.
If you’re working with younger children, you’ll want to use craft paints with
a non-toxic rating on the label, and don’t use the Instant Iron and Instant Rust
to make the Celtic Helmet, because it’s toxic. Gray and orange paint would be
a safer alternative.
Since knives are sharp, use caution when cutting the paper mache with your
craft knives.
3:
Your Mask Form
All of the masks in this book, except the Kudu display mask, are built over a
basic form that creates the shape of the inside of your mask. The inside shape
is important—there’s nothing more irritating than feeling your nose or
eyelashes constantly rubbing up against the inside of your mask. Of course,
you won’t need this chapter if you make masks to use as wall art.
Using a pre-made form is obviously a time-saver, and they usually cost just a
few dollars. You can find them online or at hobby and art stores.
Unfortunately, most plastic mask forms fit a child’s face, so if you want to
make masks for older kids or adults you will probably need to make your own
form. You don’t need to make an exact duplicate of your own face, and your
form doesn’t need to look nice—you just need to make sure there’s room
inside the mask so you’ll be comfortable wearing it. At the end of this chapter
I’ll also show you how to turn your basic mask form, either store-bought or
home-made, into a form that will let you make helmet-style masks that fit over
your head.
Materials and Tools
Plaster-Based Paste
Scott Shop Towels
Sandpaper
Aluminum foil
Wide and narrow duct tape
Plaster cloth
Petroleum jelly
Mirror
Cut your duct tape into pieces 4” to 6” (10 cm to 15 cm) long and stick them
to the edge of your work table. You’ll need the narrow ones to start with. If
you can’t find narrow duct tape, cut your wide tape lengthwise into strips about
1” (2.5 cm) wide.
Starting With Foil ...
Tear off a piece of foil that’s long enough to go around your face, and then
roll and crumple one long edge, as shown. Leave about 6” (15 cm)
uncrumpled.
Wrap the crumpled edge around your face and tape the ends together. Use
another piece of foil or a piece of paper as a strap around the back of your
head, to keep the foil in place on your face.
Carefully press the foil to your face. Fold the edges of the foil outward so
you don’t poke yourself in the eye with one of the sharp points, and try to
avoid catching your hair in any of the tape.
Add smaller pieces of foil to fill the empty spaces, and tape them on with
your narrow duct tape. Continue to carefully flatten the foil against your face
to make the inside as smooth as possible.
Carefully tape the area between the eyes and across the top of the nose with
the narrow tape. Then switch to the wider tape and cover the foil with at least
two layers. Keep pushing the foil up against your face as you work.
When the form is completely covered with several layers of tape, you should
be able to carefully remove it from your head, making sure you don’t bend the
outside edge even if you accidentally caught a few hairs in the tape. (It kind of
hurts...)
Add Plaster Cloth
Now that the basic shapes of your face have been captured by the foil and
tape, you’re ready to make a permanent mask form. Begin by applying a thin
layer of petroleum jelly to the inside of the shape you’ve just made. This helps
the plaster strips stay in place while you work—they slide around too much on
bare foil.
Cut your plaster cloth (available at all hobby shops) into strips about 2” (5
cm) wide and 6” (15 cm) long. You’ll need enough to cover the inside of the
form at least twice. Dip each strip in cold water, allow the excess water to drip
back into the bowl, and then lay the strip over the foil. Carefully push the
plaster strips into the indentation of the nose, and cover the eyes and
mouth. Rub the wet plaster with your fingers to spread the plaster out over the
spaces in the cloth.
Continue to add strips until you have at least two layers covering the foil.
Fold the ends of the strips back into the inside of the form so you’ll end up
with a smooth, reinforced edge. Your form will probably feel quite solid at this
point, and can now be set down on the table, nose side up.
When the form is solid enough to safely work on it, use your scissors to cut
away the foil and tape. The plaster form will be weirdly bumpy, but don’t
worry about it—we’ll fix that in the next steps.
Allow the plaster to dry for at least two more hours, in front of a fan, if
possible.
Smoothing the Form with Paper Mache
Your mask form should now be dry, but it still needs some work. Use some
fine sandpaper to knock off the top of the biggest bumps, but don’t worry too
much about getting it “perfect.” The paper mache layer will even things out
enough to make it work just fine.
For this step you’ll need one blue paper shop towel, edges removed and torn
in half, plus a few smaller pieces to fill in areas that the first two pieces don’t
cover. (Dampen the towels, then wring out as much water as you can.) You’ll
also need one batch of plaster-based paste.
Cover half of the face with the paste, using an inexpensive bristle brush. Be
generous—the paper towels will soak up the extra paste.
Lay one of your towels over the paste, pressing and stretching it so it covers
the plaster form without wrinkles. Take your time with this step. You may need
to tear the towel if it tries to bunch up under the nose or chin.
Brush the paste over the second half of the head, and also cover the edges of
the blue towel so the next piece will stick to it.
Lay the second half of the shop towel over the new paste, smoothing and
stretching as you did before.
If the two large pieces don’t completely cover the form, add more paste and
use smaller pieces to fill in the gaps.
Brush some paste around the inside edge of your form. You can then fold
over the excess paper to create a finished edge.
When the plaster is completely covered with one layer of paper mache, use a
soft wide brush to lay a thin layer of paste over the paper toweling. If there are
still any wrinkles in the paper, use your finger to smooth them out. Set the
form in front of a fan or in a warm place to dry for several hours or, preferably,
overnight. You can use the form as soon as it’s dry, or you can make it even
smoother by adding a layer or two of gesso, sanding between each layer. As
soon as it’s dry you can make your first mask.
Your form may still look a bit weird and bumpy, but as long as you have
room for your nose, it really doesn’t matter. You’re the only one who will ever
see it.
Helmet-Style Forms
Congratulations—you’re about to become an official member of the tinfoil
hat club...
Cover the top of your head, above your ears, with foil and tape, as shown
before.
When the tape-covered foil is solid enough to hold its shape, remove it from
your head. Place your face form inside the foil shape, as shown, holding it in
place with a few pieces of tape.
Cover the foil with plaster cloth. Be sure to overlap the seam so there’s a
good solid connection
When the plaster is hard, cut away the foil and tape.
Leave the mask form to dry completely.
When the plaster is dry, you can attach the form to a make-shift stand, as
shown. I used a clay flower pot, which I filled with plaster. Choose something
that is heavy enough to make the form stable while you’re working on it.
First, stuff the inside of the top portion of the form with newspaper, and
cover the paper with masking tape. Then tape the form to your stand, or use
plaster cloth, as I did. You can then cover the form with a layer of paper
mache.
If your form seems way too lumpy, like mine die, you can smooth it out with
joint compound.
4:
The Clay Molds
The positive molds are made with modeling clay (and sometimes light
cardboard or aluminum foil). The features are sculpted over the basic mask
form, which I discussed in the last chapter.
It’s easier to create the features with modeling clay instead of building up
features with more paper mache, and the masks are lighter and more
comfortable to wear. I use Super SculpeyTM for modeling, because I like
working with it and it’s available here in my small town—but any oil-based
modeling clay will work just fine. Many of the masks in this book can be made
with just one pound of modeling clay, but the larger masks will need more.
I almost always put a sheet of plastic over my custom-made form before I
begin modeling features with clay. The plastic sheet makes it easy to lift your
mask from the mold without distorting its shape or using tools to pry the mask
away from the clay, which can damage the inside of the mask.
It is possible to remove a mask from a mold even if you don’t use the plastic,
but you’ll need to let the paper mache dry at least overnight, instead of taking
it off the mold in just a few hours. You’ll also need to use plenty of petroleum
jelly to make sure the mask doesn’t stick to the form, and you’ll probably need
a long tool to dig under the mask to pry the clay away from the form. Using
the plastic is much easier, and there’s less chance of ruining your work.
If you use a plastic mask form, the plastic sheet isn’t absolutely needed.
Plastic First
Use a paper towel or your fingers to rub a thin layer of petroleum jelly over
your mask form. The petroleum jelly will make the plastic cling to the form
and follow all its contours.
Lay a sheet of thin plastic over the form, and smooth it out as much as
possible. If the plastic doesn’t want to stay where it belongs, use a bit more
petroleum jelly. Be sure to push the plastic down into the eye areas first.
To keep it from folding too much under the nose, cut the plastic from the
chin to the point of the nose. Smooth one flap over the form, then cover it with
petroleum jelly so the second flap will stick to it. Smooth everything down as
well as you can. (If your fingers have oil on them, they will probably stick to
the plastic. It may be easier to press the plastic over the form with a brush,
instead.)
You can use thin plastic wrap for masks that have very little clay on the
molds. The thin plastic will cause fewer wrinkles to show in the paper mache.
However, the plastic wrap is pretty flimsy, so whenever possible you’ll want to
use heavier plastic so it doesn’t tear when you lift the mask off the mold. A
piece of plastic from a garbage bag or grocery bag works better.
When it’s time to remove the mask from the form, pull the plastic down and
sideways to break the attachment between the plastic and the petroleum jelly.
Do this all away around. The mask will then fall away from the form. Take
your time with this step so you don’t distort the shape of the mask, which is
probably still a bit damp on the inside.
Sculpting the Molds
In each chapter I’ll show you how the features are sculpted to make the
masks. At any step you are certainly free to create features that fit your own
creative impulses.
Because the clay we use to make the mold remains soft, we don’t need to
worry about undercuts. You can create any shape you like, as long as none of
the clay will remain trapped inside the mask after the paper mache is dry.
That’s because modeling clay has oil in it—if the clay stays inside the paper
mache, the oil will eventually seep out and destroy the painted surface. It
won’t happen right away, but it will happen (I learned the hard way).
Remember that each bit of clay you add to the form changes both the
outside and inside shape of the mask. If the form is completely covered with
clay, the mask may no longer fit comfortably. For that reason, we will always
leave some portion of the mask form bare when adding clay. In these photos of
the Unicorn and Volto mask molds, the white plastic can be seen where no clay
has been added. These non-covered areas allow the finished mask to fit.
Tips:
Make sure you can see out of your mask:
Measure the distance between the middle of your own eyes. Then use that
measurement when placing eyes on your molds.
Exaggerate Details
You’ll be pasting two layers of thick paper over the positive mold. To make
sure the paper mache doesn’t hide the important details on your mask, go back
over your clay mold and deepen any line that may get lost.
Smooth the Clay
Before you add your paper mache you’ll want to smooth out the bumps and
dips that happen naturally when you’re working with modeling clay. Petroleum
jelly really helps. For deep areas that are hard to reach, you can use a knife or
modeling tool wrapped with a Scott Shop Towel that’s been dipped in
petroleum jelly, as shown smoothing out the eyelid on the Unicorn, above.
Petroleum jelly smooths the clay and keeps the paper mache from
sticking.
For more open places, put petroleum jelly on your Scott Shop Towel. Use
just enough petroleum jelly to make the towel move easily over the clay. Press
down with your fingers through the towel if you need to move a lot of clay or
to even out a curve. For some spots you might want to use your fingers,
instead.
Design Tips
Simplify, and Avoid Tiny Details
When you’re sculpting your mold you need to think about the way the mask
will look after the mold has been covered with two layers of paper mache. Tiny
details will get lost under the paper. Be sure you exaggerate any thin lines, like
the ones in the nose and mouth and around the eyes. It helps to use a soft
modeling clay, which works best with this bolder style of sculpting.
After you make several masks from your own designs, will will be more
comfortable with the idea of simplifying the shapes and features, and
visualizing how the design will work with the paper mache.
Consider Making a Small Clay Sketch:
Sculptors often create a small model, called a maquette, before attempting
the full-sized sculpture. This is really helpful for mask-makers, too. It lets you
determine in advance the best way to make the mask design fit the shape of
your own face. (I made three small-sized models before I was happy with the
Unicorn). A small clay sketch also gives you a chance to play with
expressions.
To make this process easier for myself, I made a tiny mask form with Super
Sculpey and baked it according to the package instructions. I used my life-
sized mask form as the model for the little one. The miniature form isn’t
strictly necessary, but it is fun to use. Now, when I make a sketch on paper, I
also make a quick sketch over my little mask form to see if the original design
will translate well into three dimensions.
If you don’t like the clay version as much as you liked your sketch, you can
keep playing with the little model until it turns into something you like, or you
can move on to a something else. Either way, you don’t invest very much time
on it because you don’t have to go through the entire process of making a real
mask.
When I started the cat mask, I played with the ears on a small clay sketch to
decide which expression I liked best. I then used the maquette as a model when
I sculpted the full-sized mold for the cat mask.
Lifting the Mask from the Mold
When the mask is dry enough to hold its shape, you can lift it off the mold
and remove all the clay from inside the mask, as shown in the photo. At that
point, the paper mache on the inside of the mask is probably still slightly
damp. You can pop the mask in a warm oven if you want to finish drying it
quickly.
Remember that you must never put the clay or the plastic-covered mask
form in the oven.
If you leave the paper mache on the mold for several days while you work
on another project, the modeling clay will tend to dry out and become a little
stiff, which makes it harder to remove. This happens most noticeably if you
put it in a warm place, like over a heat register. If possible, remove the mask
from the mold within 24 hours of applying the paper mache.
If you didn’t use a plastic sheet over your mask form, as described earlier,
the clay holds onto the form, and the paper mache holds onto the clay, so a tool
is needed to pry them apart. Work carefully and take your time so you don’t
gouge the inside of the mask.
Cleaning paste off your clay:
When you remove your masks from their molds, some of the dried paste will
be stuck to the clay. You’ll want to use your clay again to make more masks or
sculptures. I clean off my Super Sculpey by running the clay under warm water
to wash off as much of the paste as I can.
I like to knead in just a bit of petroleum jelly to replace any moisture that
may have been lost while the clay was being used. This method is probably not
recommended by the clay manufacturers, but it seems to work just fine.
5:
The Paper Mache
Your Scott Shop towels stretch when they’re wet. It’s the stretchiness and the
wet strength of these towels that allow us to cover our masks with much larger
pieces of paper than we could if we used newspaper. Simple molds like the one
I’m using for this demonstration can be covered with just four large pieces of
paper. Masks with protruding noses, deep chins or odd-shaped beaks may
require smaller pieces and more patience, but always try to use the largest
pieces that you can.
Basic Technique
Always start by tearing off all the edges of your towels, and then tear each
sheet in half. The towels tear fairly straight if you start on the perforated edge.
Wet the towels, and then squeeze out as much water as you can. (This helps
you get a nice smooth layer of paper mache. If the paper is used dry, it will
wrinkle when it’s dampened by the paste.) Then carefully separate the damp
towels and lay them out flat on your work table, within easy reach.
Brush paste on a little more than half of the mold with a cheap brush. For the
first layer, we’ll cover the mask with two pieces that go from the chin to the
forehead.
Lay a piece of damp paper towel over the paste. Tear the paper to expose the
clay that defines the mouth and eye holes.
Use your fingers to stretch the paper over the mask’s “skin.” If any bubbles
of air or paste form under the paper, use your fingers or the brush to chase
them out.
You may need to make tears in the paper to make it lie flat around the nose
and chin, where the paper often tries to fold.
Brush paste around the eye and mouth so you can fold the extra paper down,
forming the shape of the open spaces in the mask.
Press the extra paper down flat around the openings. You can use a tool to
help. (Tools also help when you need to press the paper deep into the nostrils
and other deep features, and to emphasize lines.)
Turn the mask around so you can reach the other side. Check the edges of
the paper to make sure it’s all been pasted down. Then finish brushing paste on
this side of the mask, and add the second piece
Add the second layer of paper mache, laying the paper crosswise so the
seams on both layers won’t overlap. Then use a soft brush to cover the final
layer with a coat of paste.
Go back over all the details to make sure they are as crisp as you want them.
Also, make a nice sharp crease at the outside edges of the mask, using a tool or
your finger. Set your mask aside and let it dry.
Important Note: Don’t try to dry your mask in the oven while it’s still on
the mold. If you used Super Sculpey for the mold, the oven would weld the
paper mache to the clay permanently. Oil-based modeling clay, plastic forms
and plastic sheets will melt. In other words, your mask will be ruined.
To speed up the drying, place your mask in front of a fan if you have one, or
just put it in a warm place to dry. You can use a warm oven to finish the drying
after the mask is lifted off the mold.
Covering Odd Shapes
On more highly-detailed masks, the paper will often try to fold up in spots
instead of laying down flat. In other places, the paper may not be able to
stretch far enough to cover the area.
To make sure the paper mache doesn’t make a bridge across dips and
valleys, press the paper into the deepest parts of the design first. You may need
to lift up on one edge of the paper and push the paper down into the dip with a
tool or knife, as shown in the exaggerated example on the bottom left.
If there still isn’t enough paper to go down into the dip, you will need to tear
the paper like you see in this photo. Fill in any gaps with another piece of
paper.
Don’t rush this process—take as much time as you need to stretch, push, tear
and smooth the paper over your mold. If you discover that your details are
getting lost no matter how carefully you apply the paper mache, try to make
your mold less highly detailed next time. After one or two masks you’ll know
how the finished paper mache will look when you’re working with your clay.
6:
Finishing the Masks
The specific instructions for finishing each mask will be found in the project
chapters. Some basic methods will be used on all the masks, and I discuss
those methods here.
Don’t remove your mask from its mold before it’s dry enough to stand up on
its own. If you do, the shape will slump and you’ll end up with a pancake with
a face on it. (I learned the hard way).
Preparing the Mask For Painting
When you lift your mask from the mold, use sharp scissors to cut away the
extra paper that hangs over the edge. Then sand the edge smooth.
I like to use the sanding pads that have a thin foam backing, because they
curve easily around the masks and they don’t crack or tear. I use the medium
grit.
Also go over the inside of the mask to feel if there are any pointy bits
sticking out that would cause discomfort when the mask is worn. This is
particularly important around the eyes. You might even want to hold the mask
in front of your face as though you were wearing it, to make sure it’s
comfortable. Sand or cut away any sharp protrusions.
At this point you can give your mask a coat of gesso, inside and out. After
one coat of gesso has been added, it will be obvious if there are any bumps or
wrinkles that gesso can’t cover.
Check the outside for unwanted bumps that formed when the paper mache
was added, and cut them off (carefully!) with a craft knife.
If a part dips more than you like, fill it in with joint compound. Allow the
joint compound to dry and then wet-polish it smooth.
Add one or more layers of home-made gesso. The photo above shows the
Plaster-Based Gesso, applied with a large stiff brush.
This photo shows the Really Smooth Gesso Mix. I often use the first recipe,
wet-polish it, and finish with a coat of the second recipe.
Wet-polishing is easier and faster than sanding. Use a slightly damp sponge
or shop towel.
Use a sharp pointy tool or craft knife to make a hole for the cord, 1⁄2 inch or
more from the edge—unless you’re using a hot glue gun.
Painting the Masks
You will be painting your masks with acrylic paints, and you can use any
colors you like—you don’t need to copy my masks unless you want to.
To bring out details after the paint is dry, I like to use Acrylic Glazing Liquid
mixed with dark paint.
I use this product by first painting it over a fairly small area on the mask, and
then either wiping it off or dabbing it off, depending on how much of the dark
color I wish to leave on the finished mask. Although I like the way this makes
the masks look, it’s certainly optional.
Before you use the glazing liquid, always have two paper towels on hand.
One of these towels should be dry, and the other one should be slightly damp.
The dry towel will leave dark color in the creases and crevices, and the glaze
will just lightly color the rest of the mask. To remove all of the glaze from any
area that gets too dark, use your damp towel.
The result can be subtle, like it is on the gold sections of the Volto mask, or it
can be rather dramatic, as it is on the owl’s feathers, shown below.
The glaze must dry completely before adding another coat of paint or
varnish. This can take up to 24 hours.
Important Note: Always make sure the gesso has been sealed by the paint
layers before adding glaze. If the gesso has not been sealed, the dark glaze will
be absorbed and it will make the mask too dark. To make absolutely sure, you
can spray the mask with Krylon Matte Finish or brush on a coat of matte
acrylic varnish before you use the glazing liquid.
Adding a Cord
Some people prefer to attach elastic or a strong ribbon or cord to the mask
with a hot glue gun, so no hole is needed.
If you don’t use hot glue, make a hole in the mask. If you first pass the cord
through a wide flat button your cord will be less likely to pull through the
paper mache wall. Pull both ends out through the mask, and tie on the outside.
Keep ribbon ends from fraying with a drop of white glue.
Adding a Hanger or Stick
You can attach a small metal hanger to a display mask with a hot glue gun.
You can find these hangers anywhere that picture hanging supplies are sold.
You can also use a glue gun to attach a stick to half-masks, so you can hold
them in front of your face instead of attaching them to your head with a ribbon.
Padding a Helmet-Style Mask
Make a helmet-style mask, like the Duck Hat, slightly larger than the mask
form. Then pad the inside using stick-on foam strips made for bicycle helmets.
You could also use the foam strips that are made for insulating doors and
windows, which you can find in any DIY store. The foam makes the hard
paper mache much more comfortable to wear. It also lets you make helmet-
style masks for a child even if you don’t have the exact head measurements.
Stick-on foam is a modern invention, of course, but ancient metal helmets
were also padded, usually with wool.
If your face-style masks will be worn for a long time or in a hot
environment, like a theater, it’s a good idea to make them larger than the face
so you can add foam padding. This is more comfortable to wear for two
reasons:
1. The face stays cool and,
2. The inside of the mask doesn’t become damp as you perspire.
7:
Volto Mask
The Volto mask is one of the most popular Venetian designs for carnivals
and masked balls. It’s almost always painted white (that’s why it’s sometimes
called the Ghost Mask). It may be decorated either elaborately or plainly,
depending on your tastes. Many of these masks have raised gold lace designs,
like the one in the photo.
If you have a plastic mask form with well-defined features, you could just
cover it with paper mache and skip any additional sculpting (but then you’d
miss out on half the fun!). These masks traditionally show a generic male or
female face, but if you want to add a bit more character to yours, there’s
certainly no rule against it. If you use a home-made mask form, cover it with a
sheet of plastic.
To finish your mask to look like the one in the photo, you’ll need:
Acrylic Paint
Puffy Paint (for the raised design)
Metallic Gold Acrylic Paint (and Metallic Bronze, optional)
Acrylic Glazing Liquid (for antiquing the gold)
Satin Acrylic Varnish
Make the Mold
Add clay to the tip of the nose and the nostrils to give the nose the shape you
want.
Sculpt the lips, as shown in these photos. (For good lip models, do a Google
image search for your favorite actor.) Emphasize the crease behind the wing of
the nose and between the lips so they don’t get lost under the paper mache.
If needed, add some classic cheekbones and redefine the eyebrows. Then add
two thin disks to define where the eye holes will go. You can give the eye
holes any shape you want.
Nose Shapes
Your mask form may already have a nose that you like, but it’s fun to play
around with different noses, to give your mask a different personality.
For my Volto mask, I added just enough clay to add more definition to the
standard nose on this plastic mask form.
In this example, more clay was added, and a strong central line turns it into a
male nose.
This nose has an upturned tip, a fun shape for a jester.
This nose has a definite personality!
Go to Google Image Search, and look at as many noses as you can. Play with
the shapes until your mask has the nose you want.
Add the Paper Mache
Prepare two or three paper towels as shown in a previous chapter. You may
also need some small pieces to fill in bare spots. Mix a batch of plaster-based
paste and apply the paper mache.. You will probably need to tear the paper
under the chin, nose and temples, so the paper will lie flat.
Push the paper deep down between the lips with a modeling tool or the tip of
a knife. If you think this line might be lost if you add a second layer of paper
mache, you can put just one layer over the lips.
Cover the rest of the mask with the second layer, smoothing and stretching
the paper to make it as smooth as possible. After you add the last coat of paste
over the paper mache, smooth down all the seams with a soft brush or a damp
finger.
Then set the mask in front of a fan or in a warm place to dry. Don’t remove it
from the form until it’s hard enough to hold its shape on its own.
Important Note: Reinforce the area where the cord will be attached by
adding an extra piece of paper mache at the edges of the mask, level with the
eyes.
Prepare the Mask for Painting
Cut off the excess paper and sand the edges.
If there’s only one layer of paper mache on the lips, reinforce them on the
inside with a small piece of paper, using gesso for paste.
Punch or drill a hole for the cord or ribbon, and then apply a coat of gesso to
the inside.
If desired, finish the inside with a coat of black acrylic paint.
Apply gesso to the front and sand or wet-polish. Use Really Smooth Gesso
mix for the top coat. Allow the gesso to dry.
Draw a lace design with pencil, and trace over the lines with Puff Paint.
Finish Your Mask
Be sure to give the Puff Paint plenty of time to dry. You’ll be painting over
the raised design, so it doesn’t matter what color of puff paint you use.
Before you draw the lace design on your mask, it really helps if you can take
a digital photo of your blank mask and print it out on copy paper. Try out a
variety of designs in pencil on the printed mask first. Once you have one you
like, you can then draw it onto the mask itself. Any penciled mistakes can be
easily removed with a damp sponge—or just leave them. The paint will cover
the pencil lines.
Since many traditional Volto masks are embellished with gilded lace, I did a
Google image search for “tatting” (a type of lace), and then simplified and
combined several of the designs.
When the Puff Paint is dry (it can take four hours or more) cover the mask,
including the lace design, with several coats of white paint.
Paint just the lace pattern with Metallic Gold.
Before moving to the next step, be sure you have two paper towels on hand.
One towel should be dry, and the other one should be slightly damp.
Mix a small amount of Burnt Umber with some Acrylic Glazing Liquid. If
you have some, you can add a small amount of Metallic Bronze, as I did. The
glaze will make the lace look like antique gold.
Lightly brush the glaze over the gold portion of the mask, using a small soft
brush.
Use the dry paper towel to remove most of the glaze, leaving just enough to
help define your raised lace pattern.
Use the damp paper towel to go back and remove the glaze from the white
parts of the mask. If you want, you can, brush a small amount of glaze over the
lips and nostrils, and the valley between the lips and nose. (It’s called the
philtral dimple, for you trivia buffs). Use your damp towel to remove most of
this glaze, leaving just a hint to bring out the features.
Let your mask dry completely, (the glaze can take up to 24 hours to dry).
Then give the white portion of the mask two or three coats of satin acrylic
varnish mixed with a small touch of white or antique white craft paint. This
will give your mask the look of glazed porcelain. When the varnish is dry, tie
on the cord or ribbon, and enjoy!
8:
Bauta Mask
This slightly strange-looking mask is a traditional Venetian design. It’s a
popular mask to wear at carnivals and Mardi Gras. The protruding upper lip
allows the wearer to talk and drink without removing the mask. This mask was
traditionally worn with a black tri-cornered hat and a long black coat.
If you leave off the lower lip (step 4 below) your mask will look like those
used in traditional Commedia dell'arte masked theater.
I used Lumiere® brand Pearl White and Bronze paints by Jaquard to finish
my Bauta mask. You might prefer to use gold paint, or blue, or any other color
that suits your fancy. You could also add a raised gold or silver lace pattern for
the upper half of the mask, like the Volto mask in the last chapter.
Remember to cover your mask form with plastic as shown in the chapter on
making your clay mold.
Make the Mold
Begin by modeling the eyebrows, which arch dramatically and almost meet
in the middle. Then add a bit of clay above the eyebrows to square off the
forehead.
Add prominent cheeks. Add a long noodle of clay to mark the edges of the
mask. The Bauta mask is traditionally quite square on the upper corners, and
the sides are straight.
Sculpt the long pointy nose, like the one shown. (If you decided to make a
Commedia dell'arte mask by leaving off the lower lip, do a bit of online
research to see the different noses that represent traditional characters). Add
disks of clay to mark the opening for your eyes.
Scrunch up some aluminum foil in a somewhat triangular shape, and hold it
onto the form with bits of clay. Then place a thin skin of clay over the foil to
shape the protruding upper lip, as shown.
Smooth out the modeling clay. Check your mask from all angles to make
sure it’s symmetrical, and then exaggerate any features, like the crease above
the nostrils, so they won’t be hidden under the two layers of paper mache.
Add the Paper Mache
Prepare three sheets of Scott Shop Towels. Then mix up a batch of plaster-
based paste and add two layers of paper mache. Take your time, because the
long, thin nose is a challenging feature to cover. Be sure to stretch the damp
paper over the paste so it’s as smooth as you can make it.
Tear the paper whenever it tries to fold instead of laying flat (this almost
always happens under a big nose). You may also need to tear the paper if it
tries to bridge the space between the cheek and upper lip, as shown in the
small photo below. Fill in any gaps with smaller pieces of paper.
Fold the paper around the eye and press flat. Make a nice crisp edge so it
will be easy to see where to cut when the mask is lifted off the mold.
Use a knife or modeling tool to smooth the area where paper has been turned
back around the eyes, and to push the paper deep into the nostrils and the
crease behind the wings of the nose. Don’t cover the underside of that weird
shelf-like upper lip.
If you go slowly, as you should, your paste may get too thick in the bowl or
on the brush. If this happens, just throw out the stiffened paste and make
another batch. Don’t hurry this process. (If you use the paste made with joint
compound, it won’t stiffen up in the bowl.)
Prepare the Mask for Painting
Cut off the extra paper around the edges.
If needed, reinforce the spot where the cord will be attached, using gesso as
paste.
Use a knife or modeling tool to remove excess paste around the eyes.
Sand the edges of the mask, the eye holes, and any rough spots inside and
out.
Punch or drill the hole for the ribbon.
Apply one or two coats of gesso, sanding or wet-polishing between coats
Finish Your Mask
If you intend to finish the back of the mask, do it now and allow the paint to
dry. Then apply a final layer of gesso to the front of the mask, using the Really
Smooth Gesso Mix recipe. Let it flow smoothly over the mask, and don’t brush
into the areas that are beginning to dry, because that will leave brush marks.
When the last layer of gesso is bone dry, you can give mask a nice pearly
glow by applying a coat of Pearl White paint with a very soft brush. (Of
course, you can paint your mask any color you like).
If you want, you can leave your mask this nice pearly color, without adding
the glaze shown in the following steps.
Allow the white paint to dry completely. Then mix together a small amount
of Burnt Umber, a tiny amount of Metallic Bronze, and some Acrylic
Glazing Liquid. You will also need two paper towels. One towel should be
dry, and the other one should be slightly damp. Make sure you have these
towels on hand before you begin the next step.
Liberally apply the glaze with a wide soft brush. Do a fairly small area at a
time. The glazing liquid keeps the acrylic paint from drying too fast so you
have plenty of time for the next step.
Wipe off almost all of the glaze with the dry paper towel, allowing the glaze
to remain in the deeper crevices. If too much glaze remains in a place where
you prefer the mask to be lighter, use the damp paper towel to remove the
glaze completely.
When the paint is dry you can add a protective finish of matte acrylic varnish
and attach the ribbons or cords. You’re now ready for a masquerade ball or that
dream trip to New Orleans for Mardi Gras!
9:
Plague Doctor Mask
The Plague Doctor mask was worn during the seventeenth and eighteenth
centuries by doctors—and some untrained, unemployed people who were
willing to act as doctors. These brave (or perhaps just desperate) souls were
hired by cities to treat victims of the bubonic plague. This is now a popular
mask to wear at carnivals, but its original purpose was rather grim—to help
doctors survive their close association with sick people. The long beak was
hollow and filled with medicinal herbs.
During an outbreak of an air-born illness (like the flu, for instance) it makes
sense to cover one’s face to help prevent infection. Unfortunately, the bubonic
plague is spread by fleas, so the costume probably didn’t do much good. This
mask is said to have originated in Paris in the early 1600’s.
This mask has been interpreted by artists in a wide variety of ways. I thought
it would be fun to use a common European long-beaked bird, the painted stork,
as my model. You can paint your mask white or black if you prefer more
conventional colors.
Traditionally, the glasses would have red lenses, but I made do with a red
ring around the inside of the frames. You can see the rest of the traditional
costume that was worn with this mask.
To finish your mask you’ll need Acrylic Paint, Acrylic Glazing Liquid, and
Matte Acrylic Varnish. If you have some on hand, you can also add a glaze of
Metallic Silver to the spectacles, as shown in the photo.
Make the Mold
Cover your mask form with thin plastic. Scrunch up some aluminum foil into
a long beak-like shape, and attach it to the front of the mask form with bits of
modeling clay, as shown above.
Flatten out a piece of modeling clay large enough to cover the beak with a
thin “skin” of clay. Use a knife or modeling tool to cut a line between the
upper and lower beak. Press in two nostrils at the top of the beak.
Use clay noodles to give your doctor some round spectacles. Measure the
distance between the lenses to make sure you’ll be able to see out. Use a long
noodle of clay to mark the outside edge of the mask.
Add the Paper Mache
Prepare three or four paper towels, as shown in the Paper Mache chapter.
Mix up a batch of plaster-based paste, and apply two layers of paper mache to
the mask. The challenge in this project is covering the beak smoothly—I
wound some long thin pieces of paper around the beak, but you my want to do
it differently. Be sure to smooth out the many edges where pieces overlap.
Use a knife or modeling tool to make a crisp line around the frames of the
glasses, and down the separating line between the upper and lower beak.
The beak is quite heavy, so be sure to support the mask so it won’t tip over
while you work.
Leave an empty space in the center of the spectacles so you can see out when
the mask is worn. You can trim any overhanging paper mache in this area after
the mask is dry.
Prepare the Mask for Painting
When dry, lift the mask from the mold. If you can’t pull the foil and clay
from the beak, cut a line down the underside with a craft knife.
Use a tool to pry the foil and clay out of the beak. (This process is a little
messy, as you can see.)
When the beak is empty, hold the two sides back together with rubber bands.
Mix up a 1⁄2 batch of paste and repair the wound with two layers of paper
mache. Don’t remove the rubber bands until the paper mache is dry.
Remove the rubber bands and trim the extra paper from around the edges of
the mask. Use a craft knife or razor knife to smooth the ridges left by the paste
where the rubber bands held the beak together.
Sand the edges, punch or drill a hole for the ribbon, and apply one or two
layers of plaster-based gesso. Sand or wet-polish the gesso, and apply one last
layer of Really Smooth Gesso Mix
While you’re waiting for the gesso to dry, you can take a few minutes to
decide how you’ll finish your mask. There are a number of old paintings and
engravings of doctors wearing this mask. You can find them doing an Internet
image search using the term “plague doctor mask” in the search bar. That will
also show you many of the ways that modern artists have interpreted this
mask.
Or, you can follow the instructions on the following pages, and make your
mask look like the one at the beginning of this chapter. The colors aren’t very
conventional, but I think they’re more fun than plain black and white.
Finish Your Mask
I filled an old wine bottle with water and used it to hold my mask upright
while I painted it.
Paint your mask yellow—I used Cadmium Yellow Light. Allow the paint to
dry.
Mix a light tan glaze. I used Golden Brown and Antique White acrylic craft
paint, mixed with Acrylic Glazing Liquid. Paint this over the yellow. The
original yellow will still show through, but the tan will mellow out the color a
bit, and make it more interesting.
When the tan glaze is dry, mix red and yellow paint to make a reddish
orange. Mix in some Acrylic Glazing Liquid or water to make the paint
transparent. Use a small flat brush to make some scalloped “feathers” on the
stork’s head.
Mix a bright red to go around the inside of the frames.
When the red is dry, paint the spectacles black.
Mix a very thin glaze, using just a small dab of Burnt Umber with Acrylic
Glazing Liquid. Make sure you have two paper towels, one dry and one
slightly damp, before applying the glaze over the mask, one small area at a
time. Brush the glaze on, then wipe off almost all of it. Leave just enough of
the dark brown to give the mask an antique look, and to bring out the line
between the top and bottom of the beak.
Since I had some Metallic Silver on hand, I mixed it with a little water and
brushed a thin wash over the frames after the black paint was dry. It makes the
spectacles sparkly, but this is definitely too much “fun” for a conventional
Plague Doctor mask. (I like it, anyway.)
Finish your mask with Matte Acrylic Varnish, and attach your ribbon.
10:
Neanderthal Skull
This skull was inspired by one that once belonged to a Neanderthal who has
been dead for at least 35,000 years. That’s about as dead as you can get, so it
would make a perfect mask for Halloween.
I simplified the bone structure quite a lot so it would be easier to make the
mask. A real skull has bones that bridge open space (the mandible and
zygomatic bones, or what we would call the lower jaw and cheek bones). If
you want an anatomically correct skull to take to a science fair, those bones
should be formed over aluminum foil, so no modeling clay gets trapped inside
the paper mache. If creepy is your aim, I think this simplified version works
just fine.
Make Your Mold
Begin by using your clay to outline the bony eye socket. The distinguishing
feature of a Neanderthal is the overhanging brow. This also causes the
forehead to slope much more than yours probably does.
Add the bony portion of the nose and the cheek bones. Place two flat disks
of clay for the eye holes—be sure to measure to make sure they’re placed so
you will be able to see out.
Add the muzzle, where the teeth go. Draw in the teeth with a sharp tool. Use
your modeling tool to make each tooth stand out. Remember to exaggerate the
dividing lines so they aren’t lost under two layers of paper mache. You may
also open the mouth, if desired. Leave all the teeth, or remove a few, as I did.
Add the lower jaw bone, which extends from the bony structure that holds
the teeth and up towards the ear. Smooth the clay.
Ad the Paper Mache
Take plenty of time to cover your mask with paper mache. There are a lot of
dips and bulges and changes in direction, so you’ll probably need to tear the
paper in many places to get it to lay smoothly over the skull. If your paste gets
too thick before you’re finished, just throw it out and make some more. But I
will confess—since this fellow spent at least 35,000 years in the ground, I
didn’t try too hard to smooth out all the bumps and ridges.
The teeth are rather challenging to cover without losing too much detail. Add
the first layer of paper mache and use a modeling tool to press the paper into
the lines between the teeth. You should be able to tell at that time if you can
get away with another layer of paper mache. If you decide to put only one
layer over the teeth, be sure to allow the mask to dry completely before
removing it from the mold. Then reinforce the teeth from the back of the mask
with small pieces of paper, pasted on with gesso.
When the mask is dry, add a layer or two of gesso. Punch or drill the hole for
the cord or ribbon unless you intend to attach the cord with a hot glue gun.
Finish Your Mask
Paint your mask dirt brown, and allow the paint to dry. Then cover a small
area of the mask with white glue.
Before the glue has a chance to dry, paint over it with warm white liquid
craft paint. I used Antique White.
Continue to cover the skull with glue and craft paint. It will crackle as it
dries, as shown in the photo above.
Apply a coat of Light Gray over the dried crackled paint. Use an almost dry
brush so much of the randomly-spaced cracks and dark spots show underneath.
Use Black paint to darken the eye sockets and the hollow area of the nose.
Blend the black paint at the edges, using a dry brush. When the paint is dry,
you can blend the dark areas a bit more naturally by rubbing a piece of
charcoal over the edges, and then smudging it with your finger. You can also
add a shadow for some of the bones with your charcoal. Spray the charcoal
with a fixative.
Add one last layer of grunge by applying a glaze using Burnt Umber and
Acrylic Glazing Liquid. Rub off most of the glaze. It will settle into the cracks
made by the glue and white paint. Use a damp paper towel to remove the glaze
from the teeth. Finish with Matte Acrylic Varnish.
11:
Outlaw Mask
This hombre’s mask might not do him much good, since he’s also wearing a
bright red mustache—I think he probably spends a lot of time in the hoosegow.
If you’d like your outlaw to be a bit more successful in his chosen profession,
you may want to give him a black mustache, instead.
A black ten-gallon hat, a six-shooter and a bandanna would complete the
costume.
Make the Mold
Put plastic over your mask form (there’s no plastic in the photos because I
hadn’t yet discovered the plastic trick when I made this mask). Sculpt some
cheekbones and eyebrows. There’s probably a pretty rough crowd out at
Outlaw Gulch, so I gave him a broken nose.
Add the lips and chin. To sculpt the expression, scowl into a mirror and use
yourself as a model, or just keep moving things around until you like what you
see.
Add a thin skin of modeling clay for the rag our hombre uses for a mask.
Add two flat pieces to define the holes he tore for eye holes. Just indicate the
basic mass of the mustache at this point, because the finer hairs on the
mustache and eyebrows will be added when we apply the paper mache.
Smooth out the clay and use a tool to emphasize details, like the gap between
the lips, to make sure they won’t be lost under the paper mache layers.
Add Paper Mache
Dampen two Scott Paper Towels and tear them in half. Use smaller pieces, if
needed, to get the paper to lie flat against our mold. You’ll need to make a lot
of tears for this fairly complicated shape, so take your time.
Use a tool to push the damp paper and paste deep into any details, like the
nostrils and the line between the lips.
When you add the second layer of paper mache, tear several long strips.
They should be about as wide as the mustache. Put paste on both sides of the
paper, then lay it over the mustache area. Use your tool to push and scrunch the
paper together, to create hair-like ridges. You can do the same for the eyebrows
if you want.
Prepare the Mask for Painting
When the mask is dry enough to remove from the mold, cut away the extra
paper around the edges. Sand the edges, punch or cut a hole for the cord (I
used a leather shoelace for this mask) and add a layer or two of Plaster Based
Gesso. Wet-polish the gesso, but remember to leave plenty of texture on the
mustache and eyebrows.
Painting the Mask
Make a glaze using Cadmium Red Light, Yellow Ochre, Raw Sienna and
White with Acrylic Glazing Liquid. Brush it on to the skin area and then wipe
it off immediately. Because the glaze is going over unsealed gesso, it will not
wipe off evenly. This will give your outlaw a fairly rough look, which seems
appropriate for a tough guy like this who spends many hours in the Texas sun.
Allow the previous glaze to dry completely. Then mix up a small amount of
Cadmium Red Light and Yellow with Matte Acrylic Varnish. Lightly brush it
over the previous layer.
Mix Cadmium Red Light with Raw Sienna for the mustache and eyebrows.
Red hair isn’t really this red, so you may want to tone it down with Yellow
Ochre for a more realistic look. Paint it onto the mustache and wipe off a little
on the top of the ridges for lighter highlights.
Mix Black and Burnt Umber with a bit of water and brush it over the
Outlaw’s mask. Use Yellow Ochre and an almost dry brush to add highlights to
the mustache and eyebrows.
When all the paint is dry, mix Burnt Umber with Acrylic Glazing Liquid.
Brush it over the mask and wipe it off with a dry paper towel. Wipe almost all
of it off the skin area, but leave the dark color in the shadows of the mustache,
mouth and nose. Allow to dry, finish with Matte Acrylic Varnish, and tie on the
cord.
12:
Cat Half-Mask
Back when it was common for people in Vienna to wear masks in public, the
cat mask was often worn by young noblemen who wanted to do something
slightly naughty (or perhaps slightly illegal) without anyone knowing who they
were. Now, of course, we just wear them for fun.
The clay mold for this mask can be made in either one stage or two,
depending on whether or not you wish to make a ruff around your cat’s cheeks,
like I did. Your cat’s expression will depend on the top shape of the eye, and
the position of the ears. (I made mine a bit irritated, since that’s my own cat’s
normal expression.) To finish your mask you’ll need Acrylic Paint, Acrylic
Glazing Liquid, and Matte Acrylic Varnish.
Make the Mold
Model the forehead first. See the small photos for details about how this area
shapes the top of the eye. Add clay on the side of the form’s nose to flatten it.
Add the cheeks, which also define the bottom shape of the eye, and add two
oval disks for the pupils. Define the lower inner corners of the eyes with a
modeling tool.
Add two pear-shaped balls at the lower end of the form’s nose, and add the
cat’s nose between the balls. The nose is shaped like the letter T.
Use strips of clay to define the top edge of the mask, and the strap where the
ribbon will be attached. Also add two C-shaped noodles of clay where the
cardboard ears will be added.
Cut two triangular ears out of light card stock. The cardboard used to make
cereal boxes is good for ears.
Push the ears down into the C-shaped clay. Move them around until you
have the expression you want. Trim the ears with scissors, if needed.
Blend the clay under the ears into the forehead. Smooth out all the clay,
using petroleum jelly on your fingers if needed.
Add the Paper Mache
Apply two layers of paper mache. Use a tool to push the paper deep into the
cat’s nostrils. Remember to add one extra piece of paper to the tab to reinforce
the area where the ribbon will be attached.
To make the holes so you can see out, use a knife or modeling tool to tear an
opening for the pupil, and carefully smooth the flaps over the rest of the eye.
Cover both sides of the cardboard ears with smaller pieces of paper. Be sure
to overlap these pieces onto the forehead to create a strong connection.
Add the Ruff Around the Cheeks
When you’re finished adding the paper mache to the mold, allow it to dry in
front of a fan or in a warm place until it is hard enough to handle. Then use
some modeling clay to put a nice fringe of fur around the kitty’s cheeks, as
shown. You may skip this step if you prefer a short-haired cat.
Cover the ruff with two layers of paper mache, smoothing the new edges
over the previous dried layers. Allow your cat mask to dry again before lifting
it from the mold.
Use a sharp pair of scissors to trim away the extra paper around the edge.
The inside of your mask will look like this.
Prepare the Mask for Painting
The cardboard inside the ears will show on the back of the mask. Mix up a
batch of plaster-based gesso, and use it as paste to add two small pieces of
paper mache over the inside of the ears.
Use the rest of the gesso to smooth out the back of the mask. When the gesso
is dry, paint the back of the mask and the front of the tab you made for the
ribbon with black paint.
Apply a coat of Plaster-Based Gesso to the front of the mask with a stiff
brush to make “fur.”
When dry, punch or drill a hole for the ribbon or cord.
Finish Your Mask
Paint the eyes green. Paint the inside rim of the hole black, and add a small
white reflection spot.
Mix a light, warm gray using Black, White and Burnt Umber.
Cover the front of the mask with this gray paint and allow to dry.
Define the edges of the eyes with black paint.
Mix Black with Acrylic Glazing Liquid. The first coat of glaze will leave
brush marks and much of the gray will show through. Allow the glaze to dry
completely.
To even out the brush marks, leaving a subtle texture on the fur, add another
layer of the dark glaze. You will still see some fur texture, but it will not be as
strong. When the final coat of black glaze is dry, you can add the white spots,
if desired. For Halloween, you may prefer to leave your cat all black.
I had some metallic paint on hand, so I mixed up a drop of Metallic Gold, a
drop of Metallic Silver, and water. I washed this over the green in the eyes,
which added just a hint of color and a bit of sparkle.
When the paint is dry, finish with a matte acrylic varnish and add your
ribbon or cord.
I chose to paint my mask in the colors and pattern of a tuxedo cat so it would
look equally appropriate at both a Halloween party or a masquerade ball. If
you prefer, you could paint your cat as a Siamese, a calico, a tabby, or
whatever colors you prefer. Your own cat might be willing to pose for you.
13:
Butterfly Half-Mask
The butterfly is a popular subject for carnival masks, and for good reason—
these masks are colorful and elegant, and they make the wearer seem
intriguing (and even a bit mysterious). Your mask can be worn with ribbons, as
shown here, or you can attach it to a stick, like the owl half-mask.
This is the only mask in this book that was not made with a clay mold. To
bring the wings up off the face, we use an armature made with light cardboard.
Before you begin, choose the type of butterfly that you wish to use for your
mask. I chose a species that’s called the Blue Pansy (or Eyed Pansy), because I
like the colors and I think the eye spots on the mask add some extra interest to
the design.
There are thousands of other butterflies to choose from, so feel free to pick a
different species, or copy the drawing on the next page. When making your
choice, the one thing to remember is that long extensions, like the ones you
find on some of the Swallowtail butterflies, will need to be reinforced with at
least one extra layer of paper mache.
This particular subject seems to cry out for a shimmery finish, so I added just
a touch of metallic paint to my acrylic craft paint, which gives just a hint of
glitter to the mask.
To finish your mask to look like the one in the photo, you’ll need:
Acrylic Paint to match your butterfly
Acrylic Glazing Liquid
Metallic Paint
Matte Acrylic Varnish
Joint Compound (optional)
Make the Mold
Draw your butterfly on a piece of paper. I made mine almost as wide as a
standard piece of copy paper, but you might need a different size. Measure the
distance between the eye holes to make sure you’ll be able to see out. When
worn, the butterfly will be upside down, with the antennae pointing towards
the floor.
Cut out your drawing and trace it onto light cardboard (not shown). The card
stock from a cereal box works well.
Tear a sheet of Scott Shop Towels in half, stack them together, and trace the
butterfly on the top towel.
Tear a second towel into two strips, about 2 1/2 inches wide. This will
become the strap that the ribbon or cord is attached to. Set your drawing on the
strips as shown, and trace the eye holes on the towels. Cut out the design on
your cardboard and paper towels.
Add the Paper Mache
Lay your dry paper towels on the mask form, to get a feel for where to brush
on the paste.
Cover your mask form with plastic wrap.
Then apply a coat of plaster-based paste where you determined that the
ribbon strap should go. Place one of the pieces you cut out for the strap over
the paste. The towel will stretch, so use the eye hole you saved from step 1 to
help you determine how to shape the eye. Add the second layer of paper
mache. Put the mask in a warm place to dry.
When the strap is dry, brush paste over the back of the light cardboard
butterfly shape you made in step 1.
Place the cardboard over the mask form, arranging the eye holes so they line
up with the holes in the strap. The paste will soften the cardboard so it can be
pressed and shaped over the form. Make sure it is pasted down all around the
eye, to get a solid connection. If the card is not soft enough, brush some water
over it with a soft brush.
Add paste to the cardboard butterfly, and apply two layers of paper mache,
using the paper towels you cut out previously. The wings will sag, so arrange
the curve of the wings in a way that you find pleasing, and prop them up with
small bits of clay (or anything you have handy that won’t stick to the paste).
For the body, tear off a small strip of towel and cover it with paste. Roll it up
into a body-shaped cylinder, and press it down over mask. The tail end is
pointy, and the head end is blunt (see next photo).
Cut two pieces of cord, (or use embroidery floss or cotton string). Lay them
over the top of the head, and prop up the ends on a piece of clay, as shown.
Paste a small piece of paper towel over the ends to attach them to the butterfly.
If you use soft string that won’t hold it’s shape on it’s own, dip it in paste
before attaching it to the head. This will stiffen the string when it dries. Hold
the antennae up high enough so they won’t tickle your nose when you wear the
mask.
Place the mask in a nice warm spot or in front of a fan, and allow it to dry
before lifting it from the mask form.
Prepare the Mask for Painting
When the mask is dry, lift it off the mask form and trim the ends of the
ribbon strap with a pair of scissors. Sand the edges of the mask.
Apply one or two layers of gesso, wet-polishing between coats. The surface
doesn’t need to be perfectly smooth, because the next step will even out any
irregularities. Punch or cut a hole for the ribbon, and paint the back of the
mask and the ribbon strap black.
Use your finger or a knife to spread joint compound over the wings and
body. Allow the joint compound to dry completely.
If you don’t have any joint compound, just give your butterfly a few coats of
plaster-based gesso. Then continue to step 3.
Wet-polish the joint compound after it dries. Then draw the butterfly’s veins
and color patterns onto the surface with a pencil, and incise the lines with a
sharp tool. In the photo you can see that I rushed things a little, and didn’t
allow the joint compound to dry completely—it’s easier to make lines in
slightly damp joint compound, but you have much more control if you wait for
it to dry.
If using gesso for this step, incise your lines while the gesso is still a little
damp.
Drill holes in the strap for a ribbon (not shown).
Finish Your Mask
Mix acrylic craft paint and just a touch of Metallic paint to give it a nice
shimmer. Brush the paint over your butterfly, following the color patterns of
whichever species you chose for your mask.
When the paint is dry, you may want to seal the butterfly with spray varnish.
I used Krylon Matte Finish because it dries quickly. Be sure to spray the
varnish in a well-ventilated room, or outside. You could brush on Matte
Acrylic Varnish instead.
Mix a glaze using Black craft paint and Acrylic Glazing Liquid. Dampen a
paper towel, and then brush the glaze over the butterfly, rubbing off most of
the glaze with the towel before it dries. This will leave the dark glaze in the
veins you cut into the joint compound.
Paint th strap black. When the glaze is dry, go back over the mask with your
colors in any area that got too dark. Finish with matte varnish and attach your
ribbon to the strap.
14:
Owl Half-Mask
Owls are a popular subject for masquerade masks, perhaps because they play
such an important role in so many fables and folk tales. In some cultural
traditions, the owl is a harbinger of doom, while in other places it’s seen as a
sign of great impending prosperity. For that reason, this mask will be creepy or
delightful, depending on where it’s worn.
This mask is held up with a stick, but if you prefer to wear it with ribbon
ties, just add clay noodles at the sides to make ribbon tabs. I made a pattern for
my mask, but you can sculpt yours freehand, if you prefer.
Make the Mold
To make a pattern, draw out your owl’s face on a piece of copy paper, using
the drawing above as a guide. Be sure to measure the distance between your
owl’s pupils so you’ll be able to see out.
Apply petroleum jelly to your mask form, and then stick your cut-out
drawing onto the form. Apply more petroleum jelly over the drawing and stick
a thin sheet of plastic over the form. You should be able to see the drawing
through the plastic.
Put two large rounded disks over the eyes. Surround the eyes with a noodle
of clay, and then flatten them, as shown. Add the eyelids and the two disks for
the pupils, which will become the openings for your eyes.
Sculpt the beak out of clay. It will hook over the human-shaped nose on the
mask form.
Add the “eyebrows” and the ridges of clay on the sides of the beak.
Then use noodles of clay to shape the edges.
Add Paper Mache
There are a lot of weird shapes on the owl’s face, so you will probably want
to use smaller pieces of paper towel than usual. Be sure to press the paper
mache down into all the curves and valleys, using a knife or modeling tool.
We’ll make some ruffles around the beak, along the outside edge of the cheek,
and on the outside ends of the eyebrows, with the second layer of paper mache.
To make the deep random ridges that define these feathered areas, put paste
on both sides of a long narrow strip of paper towel. Lay it over the area where
the ruffles are needed, and then push and scrunch the paper together into
pleats, using a modeling tool. The ruffles will rest on the clay noodle around
the outside edges. Use small flat pieces to cover the inside edges of the ruffles,
to make a smooth transition.
Finish the Mask
When the mask is dry, lift from the mold and sand the edges. Cover both
inside and out with one or two layers of plaster-based gesso. Wet-polish the
eyes and beak, and leave brush marks on the rest of the face.
When the gesso is dry, give the owl a base coat of light gray (black, burnt
umber and white). Leave the eyes unpainted. Allow to dry.
Mix golden brown craft paint with antique white, and paint the cheeks and
forehead. Go back over these areas with a dry brush and slightly lighter and
slightly darker paint, to give these areas a feathery look. End with very light
strokes using almost pure golden brown on the cheeks, as shown.
Paint the white parts with antique white, and then go back over them with
pure white, using an almost dry brush.
Paint the eyes yellow, and allow to dry. Then mix a small amount of
Cadmium red light or orange craft paint with water, and paint this watery mix
over the eyes so the yellow shows through.
Paint the black areas. To highlight the big feathers on the eyebrows, wipe off
just a bit of the black along the top of the ridges. The gray will then show
through. Use random strokes on the forehead for the brindle pattern of
feathers. Paint the edges of the eye holes black, and add a small white
reflection spot.
When all the paint is dry, seal the mask if needed, using spray finish or Matte
Acrylic Varnish. Allow to dry.
Dampen a paper towel, and then mix a dark glaze, using black, burnt umber
and Acrylic Glazing Liquid. Spread this glaze over the owl and wipe it off with
the towel. The dark color will bring out the ruffled texture of the feathers
around the beak and cheeks.
Allow the mask to dry, finish with acrylic vanish, and attach a stick to hold it
in front of your face, or use ribbons.
15:
Duck Half Mask
For a child’s trick-or-treat costume, I don’t think you could get much more
adorable than this duckling hat. It sits on top of the head, so there’s no need for
eye holes.
When you make your mold, the weight of the bill needs to be well-supported
if you use a full helmet-style form, like I did. It would be much easier to use a
form that is just the shape of the top of the head, so the bill can rest on the
table.
I made my mask bigger than the form. When the mask was finished I used
foam padding made for bicycle helmets to make it the right size. This is a good
idea even for helmet-style masks that will be used by adults, because it makes
the mask more comfortable to wear.
To finish your mask you’ll need Acrylic Paint, Acrylic Glazing Liquid and
Matte Acrylic Varnish.
Make the Mold
Put a layer of clay around the mask form to make the hat slightly larger than
the child’s head. I used a layer of clay about 1⁄2 inch thick and about 2 1⁄2 inches
wide. This forms the cheek area on the duckling. Wad up some aluminum foil
into a flattened ball, and use it as padding for the upper portion of the head.
Cover the foil with a skin of clay, and add a large ball of clay for the eye
where the cheek and top meet. Crumple some foil for the beak and hold it on to
the form with a few bits of clay. Support it underneath. I used a cut-down
toothpaste carton.
Surround the eyeball with two large noodles of clay, as shown.
Smooth out the clay around the eyes, leaving a horizontal valley in front of
and in back of the eye.
Add a thin layer of clay over the foil to sculpt the bill, as shown. Cover just
the top of the bill with clay, and leave the bottom open. Ducks don’t really
have smile muscles, but I gave my duckling a smile, anyway.
Add the Paper Mache
This is a fairly easy shape to cover with paper mache. I recommend doing it
in two stages. For the first stage, cover the mold in the usual way with two or
three layers of paper mache. Allow the paper mache to dry, lift the mask off
the mold, and pull out all of the clay except the clay and foil that forms the bill.
Cut away the excess paper around the edges.
Then add a layer of paper mache to complete the inside curve of the hat.
Don’t cover the bottom of the bill, because that would trap the clay inside.
Allow the mask to dry completely, and then remove the clay. This will help the
hat fit the head better.
Finish Your Mask
Sand the edges of the mask, and then cover with one or two layers of Plaster-
Based Gesso. Use a stiff brush to create a feather texture on the head. Sand or
wet-polish the bill to make it smooth.
Paint the whole mask yellow (I used Cadmium Yellow Light). Paint the eyes
black.
When the yellow is dry, paint the bill with a soft pinkish orange, made with
Cadmium Yellow Light, Cadmium Red Light, Yellow Ochre and White.
Brush on a glaze made with a mixture of Raw Sienna, Burnt Umber, and
Acrylic Glazing Liquid. Immediately rub off most of the glaze with a paper
towel. This will bring out the feather texture you made with the gesso.
Mix a very Light Blue and paint a reflection spot in each eye.
To bring all the colors together, I used one last glaze, made with Cadmium
Yellow Light and a touch of Cadmium Red Light, mixed with White. I added
enough Acrylic Glazing Liquid to make the mixture very transparent. This was
brushed over the entire mask, except the eyes.
When all the paint is dry, add foam strips to the inside of the mask, to make
it fit comfortably.
16:
Iron Celtic Helmet
This ancient iron helmet could be part of a costume for role-playing games,
or it could be displayed on a stand if you’re interested in military history. For
inspiration, I used a photo of a helmet that is now housed in the collection of
the Naturhistoiches Museum in Vienna. The original was first worn sometime
in the first century BCE, and was found in Yugoslavia (now Slovenia).
I admit that I changed the design on the cheek guards, (just because I felt
like it). If you’re a military arts or history buff, you’ll probably want to do
more research and follow the original design more carefully.
Make the Mold
Use aluminum foil to make the top of the mask form rounder, as we did for
the duck. Lay a “skin” of modeling clay over the form and foil. Add the brim
and rivets.
I used the side of a knife handle to beat my helmet smooth. It doesn’t have to
be too smooth, though, since it’s bound to get a little beat up during battle.
Add a rim, using sheets of clay attached to the bottom of the helmet. Small
rounds of clay flattened down look like rivets.
Make the cheek guards separately. Cut out the shape you want on a piece of
paper, and use it as a pattern to make both guards the same.
Add a slightly raised Celtic pattern. I chose one from the Book of Kells.
Add the Paper Mache
Apply two layers of paper mache to the helmet and both cheek guards. Use a
tool to push the paper into the lines and around the rivets, if your helmet
design has these details. The paper mache doesn’t have to be completely
smooth if you want an old, slightly beat-up look.
Use your tool to keep the details crisp on the cheek guards, and be sure to
push all air bubbles and excess paste out of the valleys of the design. The
second layer will go on much easier. Use a small brush to add the final layer of
paste so the paste doesn’t fill in the lines.
Prepare for Painting
When the paper mache is dry, cut the excess paper from the helmet and
cheek guards. The cutting line will be easy to see if you cut from the underside
of these pieces.
Create a hinge for the cheek guards using muslin or other soft fabric and
white glue. Attach the guards slightly forward of center—you will need to let
one dry completely before doing the other one. Prop up the guards to hold
them in the right position while the glue dries.
Apply one coat of Really Smooth Gesso mix. If you want the helmet to look
like it was buried in a field for several thousand years, you can rough up the
gesso by dabbing a few places with a dry paper towel, as shown.
As you can see, I left my helmet quite rough. The layer of paint will smooth
out the texture a little, but it will still look very old.
Finish the Mask
Give the helmet a base coat of Burnt Umber mixed with water. Allow to dry.
Paint the helmet a flat dark gray. Allow to dry, and then sponge on a glaze
using Raw Sienna for the rust. A series of glazes will give the mottled look of
natural rust.
Add a final coat of Matte Acrylic Varnish, or use Marine Varnish if the
helmet will be worn in the rain.
For a more realistic finish, you can us an iron paint that takes a rusty patina.
The one I like to use is an acrylic Iron Coating product from Sculpt Nouveau.
Other companies make similar products, and you can find them using the term
“iron paint” in your favorite search engine. To use the iron coating, follow the
manufacturers instructions.
17:
Unicorn Mask
Our pearly white unicorn is wearing a decorative silver ornament on his
forehead that was given to him by Boudica, the Celtic warrior queen. The
ornament has magic powers from a spell cast by the queen’s Druid priest. (The
magic, in this case, allows the person wearing the mask to see out.)
Any mask can be used as wall art, but this particular mask seems perfect for
that role. In fact, it would be a wonderful gift for anyone devoted to this fabled
beast. Since the horn would make a formidable weapon, this mask should not
be worn by a small child without supervision.
If you use a helmet-type mask form for the base of your mold, like I did, be
sure to support the muzzle, and prop up the sculpture so it can’t become
unbalanced and fall on the floor.
I used an Arabian horse for my model, because the dish-shaped face fits onto
a human mask form better than other breeds. The Arabian also has more of a
woodland look, which seems to be a good fit for the unicorn legends.
To help reduce the weight on the front of the Unicorn mask, I deliberately
shortened the muzzle. This works for a mythical beast like the unicorn, but if
you make a horse mask instead you may want to use more realistic
proportions.
Make the Mold
Use thick noodles of clay to outline the eye sockets, the forehead, and the
muzzle. This will help you place the features over the human face on your
form.
Crumple some aluminum foil into a snout-shaped cylinder, and use pieces of
clay to hold it onto the mask form. Add clay to level off the forehead and
between the eyes.
Put a thin skin of clay over the muzzle, and add clay to shape the cheeks. Put
a ball of clay in each eye socket, and outline the upper eyelids with noodles of
clay.
Add clay above the eye to fill in the eyebrow muscles. Use a modeling tool
to define the eye, as shown.
Pad the upper corners of the snout where the nose will be, and sculpt deep
nostrils.
Add two noodles of clay where the ears will be attached, above the forehead.
Put a circle of clay where the horn will go.
Sculpt the lips and chin of the unicorn.
Cut two ears out of light cardboard. A cereal box works well.
Press the ears into the two C-shaped clay noodles above the forehead, and
then press the clay up against the ears to create a smooth transition.
Run a noodle of clay behind the ears to outline the top edge of the mask.
Tear off a piece of aluminum foil about 18 inches long, fold it to about 8”
long, and then crumple and twist it into a horn. Press the horn into the circle of
clay on the forehead.
Check the sculpture from all angles to make sure it’s symmetrical. Smooth
the clay.
Add the Paper Mache
This is a challenging shape to cover with paper mache, so take your time.
Stretch and shape the damp paper towels over the mold, tearing wherever
needed. You may need to use smaller pieces than usual, which will result in
more edges. Because the mask is quite large, have at least four damp paper
towels ready before you begin.
If possible, avoid making a seam across the eyes. Tear the paper, as shown
below, to prevent the extra paper from folding up behind the eyes. Don’t cover
the underside of the snout with paper mache, because you need access to this
area when the paper mache is dry.
When the paste gets too thick in your bowl or on your brush, throw it out and
make another batch.
Prepare the Mask for Painting
When the mask is hard enough to lift off the mold, trim away the extra paper
around the edges. Sand the edges. The cardboard ears and foil horn will show
on the inside of the mask. Use small bits of paper to cover these areas, using
gesso as paste.
Then give your mask one or more coats of Plaster-Based Gesso, using a
large stiff brush to leave fur marks on the surface. If you think it would be
easier, you can cut the eye holes before adding the raised design, instead of
doing it last, as I did (see below).
To make the raised Celtic design on the unicorn’s forehead, I used a small
squeeze bottle filled with gesso. If the gesso seems too runny to hold it’s
shape, you can use less water. The gesso is easier to sand and carve than Puff
Paint, which I used for the gilded lace design on the Volto mask, but the
thicker gesso was more difficult to apply. You can use whichever one you
prefer.
For the design around his horn (and to give you a place to cut eye holes),
draw a design on a piece of copy paper. The large dark areas at the bottom of
the design will become your eye holes, so measure your design to make sure
you will be able to see out when you wear the mask.
Cut out your paper design and then dampen the back of the copy paper with
a sponge to soften it. Paste it onto the unicorn with gesso. The bottom corners
should be where your eyes will be when the mask is worn. (If you intend to use
this as a display mask, you don’t need to worry about the placement).
Squeeze the gesso or Puff Paint onto the design, leaving little gaps where the
silver strands will cross under each other.
Allow the paint or gesso to dry completely, before moving on to the next
step.
When the raised design is dry, use a craft knife to cut out the two large black
areas on the lower corners. Support the paper mache with a piece of foam or
wood from underneath, and use all the knife safety tips you learned from your
scout master.
This knotted Celtic design was adapted from an illustration I found in the
wonderful book Celtic Art: The Methods of Construction, by George Bain.
Finish Your Mask
Sand the inside edges of the eye holes you just cut out, and sand the raised
design, if needed. If the gesso or paint ran together, repair the design with a
sharp craft knife.
Paint the ornament and the horn with Metallic Silver paint.
Before moving to the next step, make sure you have two paper towels handy.
One should be dry, and the other one should be slightly damp.
Mix Acrylic Glazing Liquid with a small amount of Black and a drop of
Metallic Silver. Brush over the raised design. Also cover the silver on the horn.
Use the dry towel to remove the excess black glaze. Save the left-over glaze
for step 7.
Leave enough of the glaze to make the silver look antiqued, and to help
define the knot pattern.
When the glaze is dry, cover the extra black outside the raised design with
white paint. Then cover the entire head with Pearl White, except for the raised
design.
Paint the eye with Reddish Brown, and allow the paint to dry. Then paint the
oval-shaped pupil Black.
Use your black glaze to cover the eye.
Wipe off the glaze, leaving a soft black outline. Do the same for the upper
eyelid.
Mix Acrylic Glazing Liquid with Burn Umber, and brush this over the white
unicorn. Wipe most of it off with a paper towel, leaving just enough to leave
traces in the fur pattern you created with the gesso, and to define the mouth.
Mix a very light Blue, and give the eyes a spot of reflected light.
When all the paint is dry, finish your unicorn with Acrylic Varnish. Attach a
cord or ribbon, or, if you wish to use your mask as wall art, attach a hanger to
the back.
18:
Kudu Display Mask
The Greater Kudu has huge ears and horns. These features make this African
animal a striking subject for a display mask. I found photos online of some
beautiful antelope carvings made by Baule craftsmen that inspired me to give
my Kudu the warm glow of carved and polished wood. When you make a
mask like this to display on a wall, there’s no need to use a mask form or make
holes for eyes.
To finish this mask you’ll need Acrylic Craft Paint and Satin Acrylic
Varnish.
Make the Mold
Use aluminum foil to form the basic shape of the kudu’s head.
Crumple long strips of aluminum foil into gently curved horns, and tape
them to the top of the head. The foil should be tightly scrunched, because it
will stay inside the paper mache and help support the horns on the completed
mask.
Cover the head, (but not the horns), with a skin of modeling clay. Sculpt the
eyes and nose, add a ridge down the middle of the muzzle, and add a lump of
clay below each horn to hold the ears.
Roll up a long piece of foil and tape it to the front of the horns to make
ridges that almost meet at the bottom of the horns where they’re attached to the
forehead, and then winding around all the way to the top.
Cut two ears out of light cardboard, like the kind used to make cereal
boxes. Kudus have very large ears
Roll up the bottom end of the ears and tape the corners together. Put them in
position and pull the clay up around the ears to hold them in place.
Apply the Paper Mache
You will want to apply your paper mache in several stages, allowing each
stage to dry and harden before continuing. This will let you apply paper mache
to both the front and back of the mask without damaging the mold.
Apply two layers to the mask, and a third layer along the top edge to
reinforce it.
First, cover the areas where the horns and ears are attached so they’ll be
secure. Then cover the rest of the face.
If you gave your kudu exaggerated eyelids, like I did, first cover the top of
the eyelid, as shown.
Then tear another strip of paper and cover the eye. The seam will be along
the top of the eyelid, leaving the eye smooth.
Allow the paper mache on the front of the face to harden, and then turn the
mask over so you can add paper mache to the back of the ears.
If the horns are not as smooth as you would like, you can fix this with joint
compound.
After the joint compound is dry, wet-polish it with a scrubby sponge.
You can make the distinctive waves on the kudu’s horns when you apply the
last layer of paper mache. Use fairly small pieces of paper towel. While the
paste is still wet, use a tool to push the paper into small waves along the sides
of the large central ridge. The waves are less distinct towards the top of the
horns.
If you used joint compound to smooth out the horns, be sure to cover all of it
with this layer of paper mache. The horns will remain slightly flexible, and the
joint compound could crack when the mask is handled if it’s not protected by
paper mache.
Prepare the Mask for Painting
When the paper mache is dry, lift the mask from the mold and cut away the
extra paper around the edges.
Mix a double recipe of plaster-based gesso (unless you made your kudu a lot
smaller than I did). You can use the gesso as paste and cover the aluminum foil
at the bottom of the horns and the cardboard at the bottom of the ears with
paper mache. I also added small pieces of paper mache to give the edges a nice
neat finish. Use the rest of the gesso for the back portion of the mask that you
can see.
When the back of the mask is dry, turn it over and give the front a coat of
gesso. To get a smooth surface, use one layer of the Plaster-Based Gesso
recipe, wet-polish the gesso when it’s dry, and apply a final layer using a
double recipe of the Really Smooth Gesso recipe. If the mask is still not as
smooth as you would like, you can wet-polish again and give it another coat.
Don’t completely cover the waves you made along the horns.
Finish Your Mask
Mix Golden Brown craft paint (or Raw Sienna acrylic artists’ paint) with a
bit of water. Use a small brush to paint this over the gesso. The paint will not
cover the gesso evenly, but this is OK—the finish will get smoother as more
layers are applied.
When the first coat is completely dry, mix the same color you used before
with a little bit of Burnt Umber to darken it, plus a little water. Paint this over
the first coat. At this point, it will start to look a bit like leather.
Allow the varnish to dry overnight, and then give your mask one final coat
of the dark brown varnish mixture. This last coat will smooth out the colors,
but the first layers of golden brown will still show through, giving a warm,
wood-like glow.
If you want to go even darker to look like ebony, you can add a third layer of
paint and varnish, with more black in the mix.
When the varnish is dry you can attach a hanger to the back. If you want,
you can use a final coat of paste wax to soften the shine and make the mask
seem more like polished wood. Then hang him on your wall, and enjoy!
19:
Gallery
The masks in this chapter were created using the methods and materials
found in the first 6 chapters in this book. The designs, however, are completely
original and unique to the artists who created them. Thank you, Cory, Sharon
and Jim, for showing us how versatile these new paper mache methods can be.
Thorn & Vines Mask
by Cory Triplett
Photo by the artist. © 2012 Cory Triplett
Cory teaches art at Royal Valley Middle School in Mayetta, Kansas. He says
that he enjoys working with all different media, but paper mache is becoming
one of his favorites.
He has contributed several guest posts on the author’s blog, showing off
masks, theater props, and even a life-sized panther—all created by Cory and
his students with paper mache. You can see read his posts at
UltimatePaperMache.com (just type his name in the search bar).
Bear Mask
by Sharon Oman Moreno
Photo by the artist. © 2012 Sharon Oman Moreno
Sharon's drive to express her creative force has covered many genres
through the years. Winning Honorable Mention at an early age at a local
museum exhibition, followed by numerous Blue Ribbons of her wildlife art at
the County Fair, cemented her drive to create with any medium that took her
fancy.
For the past few years working in paper mache has been her main focus.
Bringing her visions to life through her sculpting and painting has fulfilled her
love for a good challenge. With paper mache she has also found a way to
address her sense of personal responsibility regarding the overwhelming waste
issue. Through her art, she is able to reuse and recycle much of her household
paper waste into transformations of whimsical creations.
You can see some of her art at http://www.etsy.com/shop/thepaintedladys
where she occasionally lists when she isn't working on her recently acquired
run down, falling apart, fixer-upper house.
Two-Faced Mime Mask
by Jim Kransberger
Photo by the artist. © 2012 Jim Kransberger
Jim says “my motto (words to live by) comes from a very famous artist,
Norman Rockwell: ‘If an image doesn't work, put a dog in it. If the dog doesn't
work, put a bandage on the dog.’ And, don't take yourself too seriously . . .
nobody else does.”
Jim is a sculptor working in clay, basswood, papier-mâché and mixed media.
He is primarily known for his humorous mechanical sculptures, which have
been shown in a number of fine art galleries and shows, including the 2012
Humor in Craft Invitational in Pittsburgh, PA.
Jim’s work was featured in the September/October 2011 issue of ARTsee
magazine and was featured in the book Humor in Crafts by Brigitte Martin. He
lives in Asheville, NC.
You can see some of Jim’s sculptures and learn more about him by visiting
his website, at http://www.JimKransberger.com
Little Red Riding Hood and the Big Bad Wolf
By the Author
Want to Learn More About Masks?
The techniques you’ve just learned can be used to create any kind of mask.
For inspiration, some of my favorite books about masks are:
Masquerade, by Maurice Tuchman. Creations by sixty of the world’s
foremost contemporary artists. It’s out of print, but your local library might be
able to find a copy. It’s definitely worth waiting for.
Masks and the Art of Expression by John Mack. An outstanding book with
over 150 masks from around the world.
Faces of Your Soul: Rituals in Art, Maskmaking, and Guided Imagery
with Ancestors, Spirit Guides, and Totem Animals by Kaleo Ching and Elise
Dirlam Ching. The use of art in self-expression, meditation, and healing.
20:
About the Author
Jonni Good is a paper mache sculptor, a blogger, and the author of four
popular non-fiction books for artist. She is currently working on a novel
featuring a paper mache sculptor as an accidental sleuth.
Jonni grew up in a small town in the state of Washington, but she spent
most of her life in large West Coast cities, working on non-art related (and,
therefore, boring) jobs. She now lives in small town in Minnesota - with
two dogs, a bossy cat, and over 100 paper mache sculptures and display
masks of animals.
She enjoys reading mystery novels and books about animal behavior, and
spends a lot of time in her organic vegetable garden when she’s not working
on a new book or a new mask or sculpture. You can always find her online
at:
http://www.UltimatePaperMache.com
Be the first to know when a new book comes out:
Sign up for Jonni’s email list. You’ll only hear from her when a new book
comes out. http://wetcatbooks.com/subscribe
Jonni’s other books for artists:
Make Animal Sculptures with Paper Mache Clay
How to Make Tiny Paper Mache Dogs: With Patterns for 27 Different
Breeds
How to Make Adorable Baby Animal Dolls
Endangered Animals Color and Learn Book
Jonni’s Mystery Novel:
The Owl Thief This is the first book in the Utah O'Brien murder mystery
series. It's a light, easy read with a character-driven plot. It features a
strong female lead in the role of amateur sleuth. The next book in the series
is coming soon.
Before You Go ...
Did you know that leaving a review at amazon.com can make a huge
difference for an independent author? If you enjoyed this book, please take
a moment write a few words about it so other readers can see what you
think. You can find the review form here:
http://amzn.to/1P4y4Cb
Just click on the “Write a Review” button at the top of the page.
Thanks for reading!