/


Author: Jones A.
Tags: carpentry woodworking diy wood carving wood crafts
ISBN: 0-8094-9529-5
Year: 1994
Text
                    TIME
THE ART OF WOODWORKING
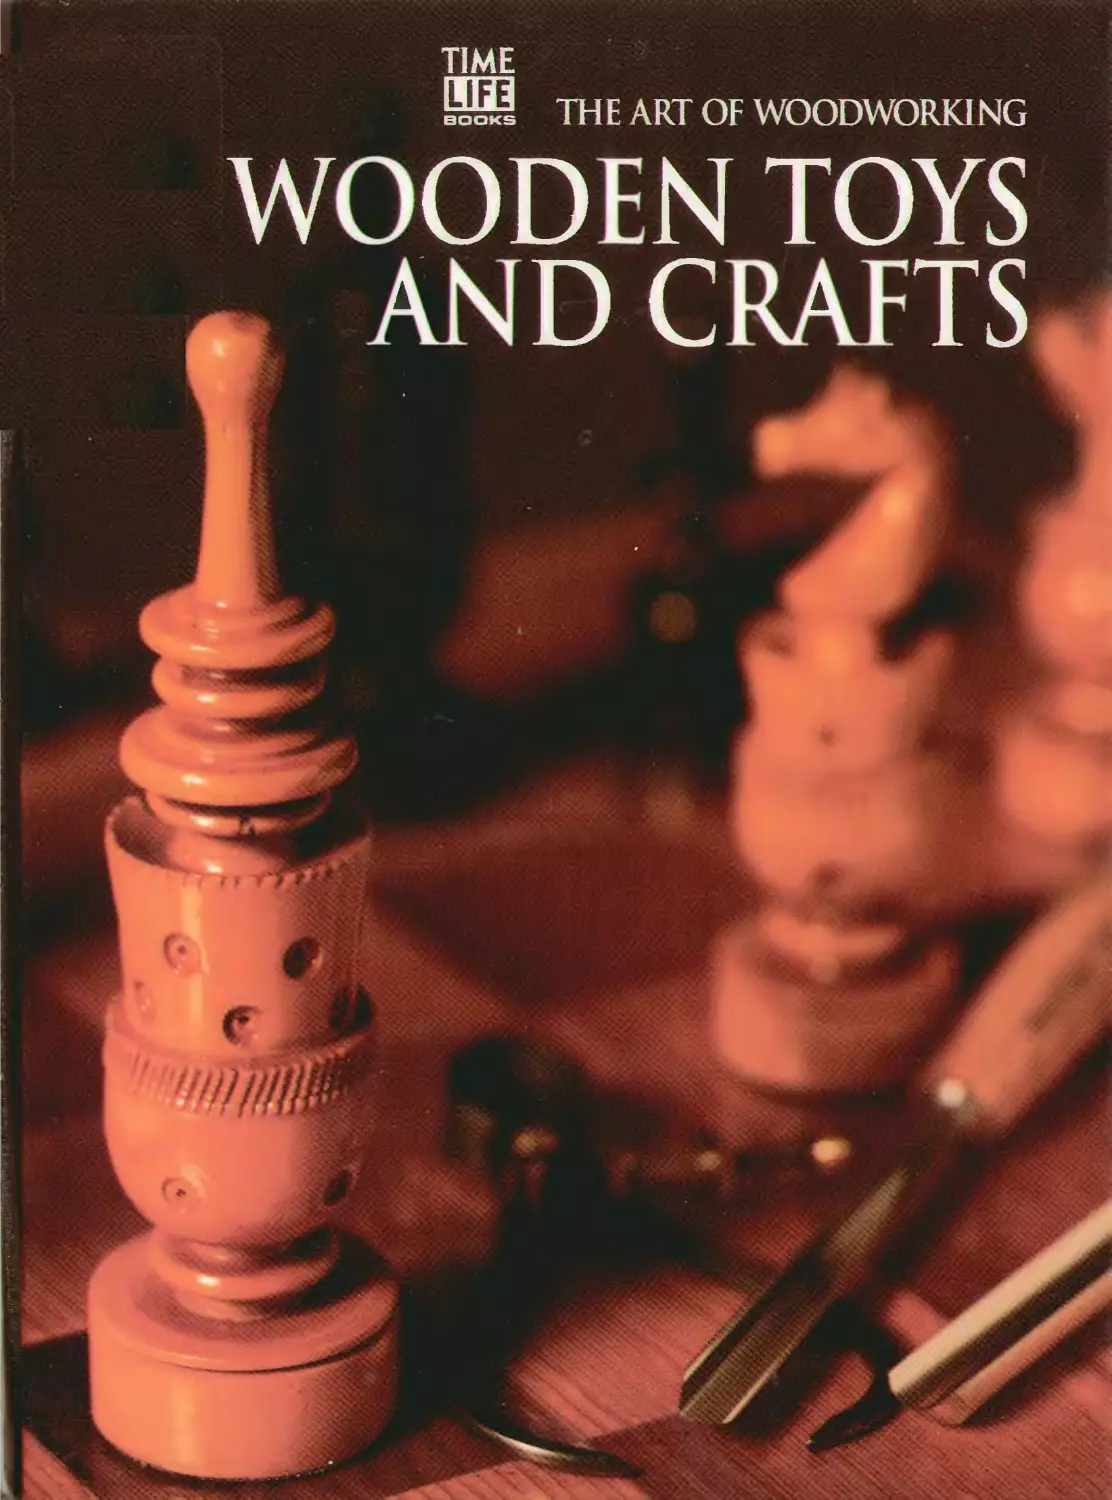
WOODEN TOYS
AND CRAFTS
•//>

WORKSHOP GUIDE
LATHE SPfFO CHART
I A* MM All ii/KNiSi. '.flllr.
[Inntrlftf Up If" . Ilu •> IK»<» . tit.. ►
.I'lMIMI fMHNlNt. MM I D*.
Upr t. loov i.'- :r i..nt
iWrt . <t hint
SCROU SAW SPEf.0 CHART
SprPlI
Chootirif ipetdt on iht wioil %.iw
Ihr ' |'«•«•<' ynu j»t < «n your • n II .iw .n Iroh |»i n.muli
f>r ri ^ivi'M o[«v<ttion riVprruhiffl tin mih <ial y\t tin ul
tnu: «nd Ih. Ie< d rah ,r. slu-wn in the < li.irt «i! Ml lt<
blade yotr install on th« m<»< nine i »h important F iif
tooth blade with more teeth per m< h yield line r nt<, t>ul
require a slower fe«d r.itr To tvoid wearingrut blade pit
mituM'lyor bie.tkingthem, or burningyur toe k, u•*■ ■' teed
r.itt' th.it ilk'W. -»wiliist toi>.rr from the <lit Ihr. will rcdut <
fir tion and heal buildup Remember lh.it it you ,ir<- ir.mr •
feed nl« Iv.W than ttv onc«.ugg«--.led in th< ch.irt. it* re.r<
your blade speed accordingly
SHOP MAUF
rEATHERROARDS
SHOP-MADE PUSH STICKS
I u_.ll,. .f" . >r. -rp jr. j «- Kfr,f ..♦ ,ln
,rr —* j ■■„ >r • v Vri' - i *jI >.f c'.ia J
a■ T r '" riifc« j,i_ se;wHSdr.i k:tn
■ & i J^jt; ■ ^ w ■ r ;}■ -v p- 'rml j wonspc\ e to
' k," r Iy , :„ ;e. - t.Oh. On--Lasr desif n
'>k.v.t «b m- ts< Jenuth =*r be varied to
* -j t thi ■ task jt hand Ti ■ makr a featherboard.
wt a •) ti 4b rriterat nneerd of a ■•
inrh th_k board. Mark a parallel Ine about
5 <nches from the mitered end. Then cut - -
Mnjh-wide slots to the marked line, creating
a row o* sturdy but pliable fingers. Finally, cut
a notch for a support board that can be clamped
to the machine table at a 90' angle to the
featherboard, providing added stability.
Push st.uks and b.cc *s fur rued n^ sir *a • n<> *• ■« ty, - : (i
woodwork ng toof are r crr.mcrciahy available, tut ,..j _ar.< a; .1/
maKe your own jsing .rjch stock. No ^ne -nape - ,. lej li ■■ u,"
a push stiCK that s compilable to use and su'iaDie ' ' thf- rr a
chine and task at hard. A 45 angle between the hariTe ard
the base (abose. left) is best for most Cuts on a table saw. T>-
leng base of a rectangu ar push stick (above, center °nahlec. y.
to apply neavy downward pressure on a workpiece. A push Uf is
(above, r.ght). with its long, wide base, is ideal for su-fai r.j ti e
face of a board on the jointer. It features a lip gJued to the tnd^r
side of the base, flush with one ena. Screw the handle to *.lv
top, positioning it so the back is even with the end uf the bjsi

THE ART OF WOODWORK!NG
WOODEN TOYS
AND CRAFTS
FRIENDS
BOOK SALE

THE ART OF WOODWORKING
WOODEN TOYS
AND CRAFTS
TIME-LIFE BOOKS
ALEXANDRIA, VIRGINIA
ST. REMY PRESS
MONTREAL-NEW YORK

THE ART OF WOODWORKING was produced hv
ST. REMY PRESS
PUBLISHER
PRESIDENT
Series Editor
Series Art Director
Senior Editor
Editor
Art Directors
Designers
Picture Editor
Writers
Research Assistant
Contributing Illustrator*
Administrator
Production Manager
System Coordinator
Photographer
Administrative Assistant
Proofreader
Indexer
Kenneth Winchester
Pierre Leveille
Pierre 1 Iome-Douglas
lrancine Lcmicux
Marc Cissini
Andrew |one.\
Nornund Boudreault, Luc Germain,
Michel Gigucre
Helene Dion, Jean-Guy Doiron,
Francois Daxhelet, Francois I ongpre
Christopher Jackson
John Dowling. David Simon
Adam Van Sertima
Gilles Beauchemin, Michel Blais,
Ronald Durepos, Michael Stockdale,
James Thcrien
Natalie Watanabe
Michelle Turbide
Eric Beaulieu
Robert Chartier
Dominique Gagne
Garet Markvoort
Christine M. Jacobs
ie-I ife Books is a division of Time I ife Inc.,
a wholly owned subsidiary of
THE TIME INC. BOOK COMPANY
TIME-LIFE INC.
President and CEO John M. Fahey
Editor-in-Chief John I. Papanek
TIME-LIFE BOOKS
President
\ 'ice-President, Director of Marketing
Managing Editor
Director of Design
Director of Editorial Operations
Consulting Editor
\'ice-President, Book Production
Production Manager
Qualit)' Assurance Manager
John I). Hall
Nancy K. Jones
Roberta Conlan
Michael Hentges
Ellen Robling
John R. Sullivan
Marjann Caldwell
Marlcne Zack
James King
THE CONSULTANTS
Giles Miller-Mead taught advanced cabinctmaking at Montreal
technical schools for more than ten years. A native of New
Zealand, he has worked as a restorer of antique furniture.
Fred Sncath is a retired educator who builds articulated
wooden tots and earlv musical instruments in Stony Creek, Ontario.
His work has been highlighted in Fine Woodworking And
( ontinuo magazines.
Chester Van Ness designs and builds wooden toys in his
Scotland, Ontario, studio. He also builds children's acliv ily
tenters for hospitals and doctors' offices and designs dust remo\al
systems for small workshops.
Wooden toys & crafts
p. cm. — (The Art of woodworking/
Includes index.
ISBN 0-8094-9529-5
1. Wooden tov making. Time-1 ife Books. I
tovs and crafts. III. Series.
TIT7-1.5.W6W65 1995
745.592—Jc20 94-24187
CIP
For information about any Time-1 ife book,
please call I -800-621 -7026, or write:
Reader Information
Time-Life Customer Sen ice
P.O. Box C-32068
Richmond, Virginia
23261-2068
Q 1994 Time-Life Books Inc.
All rights reserved.
No part of this book may be reproduced in anv form or by
any electronic or mechanical means, including information
storage and retrieval devices or systems, without prior
written permission from the publisher, except that brief passages
may be quoted for reviews.
First printing. Printed in U.S.A.
Published simultaneously in Canada.
TIME-LIFE is a trademark of Time Warner Inc. U.S.A.

CONTENTS
6 INTRODUCTION
12 TOYS AND CRAFTS BASICS
14 Lathe basics
17 Scroll saw basics
20 MODELS
22 Locomotive
31 Dump truck
36 Tractor
44 SLEIGHS AND SLEDS
46 Bent-runner sleigh
54 Yankee clipper
58 Toboggan
62 ROCKING HORSES
64 Stand-mounted rocking horse
78 Swinging horse
82 Traditional rocking horse
86 DOLLHOUSES
88 Anatomy of a dollhouse
89 Scale modeling
90 Customizing a dollhouse
96
98
105
108
114
116
122
125
130
136
138
140
142
144
GAMES AND PUZZLES
Chessboard and chessmen
Cribbage board
Puzzles
CRAFT CLASSICS
Jewelry box
Shaker box
Briefcase
Nutcracker
White cedar bird
Hand mirror
GLOSSARY
INDEX
ACKNOWLEDGMENTS

INTRODUCTION
Steve Malavolta on
HAND-CUT
WOODEN PUZZLES
"k /i y interest in woodworking has a lot to do with wood itself, which offers a
u " A Running variety of colors, different cutting and shaping abilities, and a w ide
range of tactile qualities. In the beginning of my career T explored these properties
by making lap dulcimers and guitars, incorporating a good amount of inlay. With
holiday gift-making being a tradition of mine, I once made a stand-up serpent
puzzle for my nephew. It was the start of a new career and what I sometimes consider
an obsession.
My earliest puzzles were only nicely colored and figured slabs of wood, cut into
somewhat undefined pieces and then framed. Currently I am incorporating my inlay
skills in a style similar to intarsia, creating three-dimensional architectural puzzles,
abstracts, and landscapes like the one shown on page 108. ^The inlav work, along
with the cutting of the puzzle pieces, is done on a scroll saw with a jewelers blade.)
.All of my woods are hand-picked for consistency of grain, color, and figure. These
qualities lead me as a designer into creating the individual piece.
There are a few properties that I always keep in mind when making what I
consider to be a good puzzle. First, the design needs to be visually pleasing. Then comes
the challenge. The complcxitv of the puzzle can range from the simple to the mind-
boggling. In all my pieces I use a standard-shaped puzzle piece with a well-defined
lobe and socket on each side to lock it to the others, a process that carries through
the whole puzzle. Alter years of freehand cutting, this is a proce^ that has become
second nature, and I find this part of my work to be very meditative.
Layering adds a unique touch to mv puzzles. It not only creates depth for the
design but also increases the pu/zle's difficulty. Because the woods are kept in their
natural colors, it enables me to finish the pieces on both sides, making solving the
puzzle even harder. Finishing is also an important part of my puzzles, as they are meant
to be handled, giving them a tactile as well as a visual appeal.
Each puzzle is made to be played, creating both entertainment and intellectual
challenge. I take pleasure in knowing that through the years I have been able to
combine both elements in each piece. My goal as a woodworker is to present my puzzles
as enjoyable, playable works of art of heirloom quality. My recommendation to vou
is to practice your woodworking techniques and enioy the pleasures that the
process of creating and the use of the finished piece gives back to you.
Steve Malavolta is a self-taught woodworker who
has been designing brain-twisting, hand-cut nood-
en jigsaw puzzles since 19 . He also makes letter
openers and sculptural lighting fixtures at Different
Grains, his Albuquerque, New Mexico studio.

ri*
J

INTRODUCTION
Don Buhler builds
A GLIDING
ROCKING HORSE
Building a rocking horse was more than a way to keep busy on long winter
evenings. It was the fulfillment of a dream that I had cherished for years
before I was a father. My wife, Darlene, and I have been blessed with one son,
Nathan, and one daughter, Melissa. Nathan Is first birthday present was to be a
rocking horse, hand-made by his dad.
As his birthday drew near, I started the project and soon found that Nathan
was engrossed with the building process itself. So I took him to my shop every
night where he watched me from his stroller. Hour after hour, he jabbered away
and watched intently until the magic moment each evening when his eyes became
too heavy to stay open. After he fell asleep it was 1 who enjoyed looking at him,
inspired by his presence. Creating something is rewarding in itself, but creating
something for your own child is a special treat.
The concept of a glider rocking horse came from observing the silky-smooth,
silent action of glider rocking chairs. The glider rocker is easy for small lots to
get moving on all types of floors. The one concern that I had, though, was that the
scissor action of the ^wing-arms could prove dangerous for j young child. This
prompted me to incorporate minimum clearances between the swing-arms and
the parts next to them into mv design. Several times throughout the project I
discarded and re-did the parts to make sure everything was absolutely right.
The part of the project that I enjoyed the most was carving the shape of the
horse, especially the head. This is where the horse took on "life." The parts that
Nathan enjoved were the final touches—the painting, the saddle, and the halter.
This made it look like a real horse that would be fun to ride.
I managed to finish the horse in time for Nathan's birthday, and he kned it. He
rode his horse every day and proudly told anyone who asked that "My Daddv
made it for me." Over months and then years, Nathan continued to ride his pony.
At about eight months of age, Melissa joined in the fun.
The horse has been ridden and enjoyed inside and outside our home for
seven years now and will always be cherished as part of our family memories.
Somehow when you build a toy for your child, it is so different than just buying
one. Happy building!
Don Buhler is a full-time woodworker
who runs Swan Valley Cabinet
Works in Swan River, Manitoba.
8

s^es-r
v\
SJ*.
B
* •. £f^ 4
I
'M
m

INTRODUCTION
Johannes Michelsen tips his
TURNED
HAT
/j fter years of turning bowls and \ ases in my spare time, I started to search for a
_^ . different sort of project, and hit on the idea of turning head wear. Being bus\
with life, I didn't seize upon the idea immediately but instead treated it as a joke,
putting bowls and vases on my head and calling them hats. Then late in 1990 my
wife and I were invited to a wedding with a country and western theme, and we were
asked to dress accordingly. This was the catalvst I needed. I figured that if I didn't
do "The Hat" for this occasion 1 probably never would. I chose a piece of black
cherry and turned a diameter large enough to fit the front-to-back measurement of my
head. This first effort lacked the grace of the hats I turn today, but was well received
despite its lack of true hat form.
My own head, being fairly round as averages go -6 bv 8 inches—was quite easy
to replicate in my first attempts at bending freshly turned hats. Vet as I became
familiar with more heeds I encountered more ovalness, some as much as 2 _ inches out
of round. Studying the tvpe and degree of distortion from various woods and the
different orientation of the bowk in the log led mc to the idea that I could turn the
hats green, conceivably using shrinkage and natural distortion to achieve a better
fit. It turned out this was not enough, and around hat number 501 decided to use force
to encourage more shape. This was done with 18-inch-long wood springs and
threaded rods clamped to the sides of the hat.
To get a custom fit I measure the head with a lead-filled "Curvex" ruler, and
transfer the shape to paper. Measuring front to back and side to side, I came up with an
average for the hat size. To this I add a sufficient amount to compensate for
shrinkage, and then turned the resulting diameter. I form the hat from a native northern
hardwood—maple, ash, butternut, walnut, or yellow birch—down to a final
thickness of about". inches, slightly thicker at the edge of the brim and the band for
strength, and thinner everywhere else for bendability and lightness. The bands are done
by pressing a thin piece of exotic wood against the hat as it spins. Ebony gi\ e> black;
rosewood, red; padauk, burnt orange; and so on. I clamp the hat for several days to
attain the two major dimensions. Once dry in its custom-fitted shape, it is sanded and
sprayed with 12-15 coats of acrylic lacquer for durability and weatherability.
The appeal of uood hats is apparently broad. I have customers across the
country and in Europe. They range from a cotton farmer in Louisiana who likes to wear
her derby on crop inspection trips to Hollywood personalities, and of course turned
wood collectors everywhere. The future for turned hats looks bright indeed.
Johannes Michelsen is a wood turner who once turned a cane
with a miniature, battery-powered lathe that served as the
handle. He operates a studio in Manchester Center, Vermont.
10

mm
*:
A.. * *
'*&*-***
■Ji v^
ft if rt rt tt if-it Hf ft'it ftitHftttftttttttt n n*r

TOYS AND CRAFTS BASICS
^ f ost of the requirements for build-
i -:.. ing furniture—functional designs,
proper tool setups and techniques, and
safe work habits -arc also crucial to
making toys and crafb. But wooden toys,
because they are intended for use bv
children, imolve other considerations.
Foremost among these is safety. As
shown below, toys intended for infants
and toddlers have to be large enough
that they cannot be swallowed and lodge
in a child's windpipe. And since children
explore as much with their mouths *:«.
with their hands, the wood species vuu
use for your projects and the finish \ on
apply—whether paint or a clear finish
must be non-toxic. The charts on page
13 rate the toxicity of various finishes
and wood species.
Because many toys are made with
turned parts, mam' of which are smaJL
the lathe and scroll saw are two of the
moNt commonly used tools. This chap
ter also explains how to set up both
machines and provides information on
some basic operations and techniques.
A coating of baby oil is applied
to a child's rattle with a cloth
while the toy is spinning on a lathe.
Toys designed for children must be
finished with a nontoxic product.
Baby oik which is actually scented
mineral oil, is one of the safest.
MAKING CHILD-SAFE TOYS
Checking toys for size
lf ycu a-e mak.rtg a toy for an mfe rt or tcd-
dler, yc« rrust ersure that neither tie toy
r-or any detachable parts -s sc small that
the child could swallow the p.ece and
choke on -t. The sixpie jjg shown at rght
ccrsist.ng of a wood Diock wth an oval
hole drilled through It. will help you
determine whether a toy is sized proper'y. Mark
the width of the ova1—Va inch -by
drawing two parallel lines across the boa'd.
Then adjust a compass to one-half this
measurement and draw two circles withir
the lines so the oval opening formed by
the circles will be 1J inches ong DnJI
out the opening. If any part of a toy, l.ke
the rattle showr. car. pass through the
hole, it is unsafe for a young child.
12

TOYS AND CRAFTS BASICS
CHILD-SAFE FINISHES
SAFE FINISHES
Baby oil
Mineral oil
Beeswax
Shellac
Paraffin wax
Raw linseed oil
Pure tung oil
Penetrating
Penetrating
Surface
Surface
Surface
Penetrating
Penetrating
SAFE FINISHES
Pure walnut oil
Carnauba wax
Non-toxic paint with
the seal of the Arts
and Crafts Materials
Institute or the words
"conforms to the ASTMD-4236"
Modeler's enamel paint
Penetrating
Surface
Surface
Surface
The chart above lists wood finishes that are considered safe
for toys that children may put into their mouths. Refrain from
using any other product—even if it is labeled as being
nontoxic or the Materials Safety Data Sheet compiled for the product
(available from the manufacturer) does not include any toxic
substances. A toxin must be present in concentrations greater
than 1 percent to be listed, and many such substances, such
as metallic driers added to finishes, usually comprise less
than 1 percent. Even after a finish is fully cured, rough
handling can cause a small portion of the finish to flake off and
be ingested. As a result, any toxic ingredient in a finishing
product is potentially harmful. After applying a finish, make
sure that the surface is completely dry before giving the toy
to a child. Paints that are safe once fully dry may give off
harmful volatiles as they cure. And do not assume that a paint
or finish is completely cured when it is dry to the touch. Some
products can take months to cure completely; refer to the
label instructions for drying times. The chart also distinguishes
between products that penetrate the wood or simply remain
on the surface.
TOXIC WOODS
TOXIC WOODS
Arbor vitae
Black spruce
Boxwood
California redwood
Cashew
Cocobolo
Ebony
European larch
R
RS
RS
RST
S
RS
RST
RS
TOXIC WOODS
European spruce
Imbuia
Iroko
Lacewood
Mahogany
Pine
Red cedar
Rosewood
RS
RS
RS
RS
RS
RS
RS
RS
TOXIC WOODS
Satinwood, Ceylon
Silky-oak
Teak
Wenge
Western red cedar
R= Respiratory ailments
S= Skin and eye irritations
T= Toxic effects
S
RS
RS
RS
RST
The dust from many wood species can pose health risks ranging
from respiratory ailments to skin and eye irritations. Some woods
contain chemicals that can cause toxic effects. The chart above
lists a number of species and their possible health effects.
13

LATHE BASICS
rTp he lathe shown below is a typical
JL freestanding model that will serve
vou well for most toy-making projects.
Lathe size is measured in two ways: swing
and capacit)'. Swing is twice the distance
between the hcadstock spindle and the
bed, which limits the diameter of blanks.
Capacity is the distance between the
hcadstock and tailstock, which limits the
length of blanks. The weight of a lathe is
important, as greater weight provides
more stability and dampens vibration.
Another feature to consider is how easy
it is to change speeds; larger workpieces
must be turned at lower speed* than
smaller ones. Changing the speeds ol
some lathes involves switching a drive
belt between two sets of stepped pulleys;
other models have variable-speed pullej
systems that allow the speed to be
changed without switching off the tool.
ANATOMY OF A LATHE
Headstock
Holds blanks; central
shaft that turns
spindle is attached to
motor via drive belt.
Removable cove'- allows
access to drive belt
and indexing head
Tool rest
Provides support and
fulcrum point for tools when
turning. Height of rest can
be adjusted and locked in
piace with tever
Tailstock spindle
A hollow shaft with a reverse taper that
holds centers in a friction fit; turning
tailstock handwheel advances and «
retracts spindle
Tailstock
handwheel
Advances and
retracts tail-
stock spindle to
secure workpiece
14

i
i
i
A
i
J
i
J
i
1
i
i
1
TOYS AND CRAFTS BASIC'S
BASIC TURNING TOOLS
Roughing gouge
Cutting tool ssed to
rough out cylinders from
square stock; ava:lab\e in width
between 7 and 1A inches
Spindle gouge
Used for cutting
beads and ccves and for
general swindle work; available in
widths between ar.d / inch
Parting tool
Narrow cutting tool used for
making sizing cuts and forming tenons;
available in . and ', inch widths
Skew chisel
Angled cutting tool used for making
beads, V-cuts, and shoulder cuts and
for smoothing surfaces; available in
widths between /I and 7/ inches
TURNING A CYLINDER
1 Marking the centers of the blank
To mount a blank between centers
on the lathe, mark two lines across
each end from corner to corner. The
lines will intersect at the center. Next,
use an awl to make indentations at
both points (above).
2 Mounting the blank on the lathe
Butt one end of the b:ank against the tailstock's live center. Supporting trie cth^-
end of the blank with one hand, slide the tailstock toward the headstock unt I tl.*
drive center in the headstock aligns with the indentation you made in stef 1 ^ u-
the tailstock in place wjth the locking lever and advance the the tai.st'je* v; r A\ ■ j
center by turning the handwheel until the blank s held firrTiiy beTv.^< ■ *■ *r ' :
(above). Secure the tailstock spindle in place with the sp.ndle 'r ■*
13

TOYS AND CRAFTS BASICS
3 Turning a cylinder
Holding a rotghing gouge with a
overhand grip, brace the blade on the
tool rest. Cut very lightly into the blank,
making sure that the bevel is rubbing
against the stock and moving the gouge
smoothly along the tool rest. The gouge
will begin rounding the corners of the
workpiece. The smoothest cuts are
made by moving the blade with the grain.
Continue making successively deeper
passes along the blank, raising the
handle of the tool with each pass, until the
edges are completely rounded and you
have a cylinder (right). Adjust the
position of the tool rest as you progress to
keep it as close to the blank as possible.
MAKING COVES AND BEADS
Turning a cove
Outline the cove on the blank with a pencil. Then, hold a spindle gouge in an
underhand grip with the flute pointing sideways and slice into the wood just inside one of
the marked lines with only the cutting edge of the tool. Slowly angle the tool handle
back towards the line until the bevel rubs on the workpiece, and make a scooping
cut down to the middle of the cove. As you make the cut, turn the handle to rotate
the bevel against the workpiece. The gouge should be flat on its back when it reaches
the center of the cove. Make the second cut from the opposite side of the cove.
Work in a downhill direction, as shown by the arrows—from a high point to a low
point on the blank; never cut uphill or against the grain, otherwise the tool will dig
into the wood. Repeat the process from both sides of the cove, keeping the bevel
rubbing on the stock at all times (above). Continue cutting back to the marked lines
until the cove is complete.
]
^ _
^y^
&
:-\
^v V-cut
\'r'\fX"
—^^C^/ \
J^-*K V^
U=P\
V ■- \^A
^\^$^m
/f^ ^^K'^''\
■"^toikx*- *'oJ^
<p^£^^^
0;^p^;: .>
^.v^Ss?^-
\m\
Turning a bead
A skew chisel enables you to turn beads
with sharp detail. Outline the bead on
the stock with a pencil, then make a V-
cut at each line. For best results, use
the long point of the chisel. Then,
working on one side of the V-cuts, widen the
cut, slowly lifting the handle so the
bevel rubs and the long point of the chisel
makes a rounded, rolling cut (above).
Repeat for the other side of the bead,
making sure your cuts are always made
in a downhill direction. Once the shape
of the bead is smooth, turn a round
shoulder on each side of the bead.
16

SCROLL SAW BASICS

TOYS AND CRAFTS BASICS
BLADE GAUGES AND THEIR USES
BLADE TYPES
Standard scroll blade
A coarse-cutting blade usually
ueed for cutting thick cr hard
stock; has teeth similar to
those on a nandsaw. Some
have pins or. the ends,
requiring a larger note for inside cuts
Skip-tooth fret blade
Ideal for cutting finer details;
the skip-tooth design allocs
sawdust to clear, reducing
friction and heat
Spiral blade
A standard blade twisted to
cut in all directions without
turning the stock; requires
greater skill for precise cuts
because it produces a wider
kerf than other blades
MAKING AN INSIDE CUT
1 Preparing the workpiece
Since a scroll saw blade is detachable,
you can bore a hole through the waste
area of your workpiece and slip the blade
through the hole. Make sure the hole is
large enough to accommcdate the blade.
Detach the blade, set the workpiece on
the saw table with the hole centered over
the table opening, and feed the blade
up through the hole (right).
GAUGE NUMBER
2/0
0
1
2
3
4
5
6
7
8
9
10
11
12
TEETH PER INCH
28
25
23
20
18
15
14
13
12
11.5
11.5
11
9.5
9.5
USES
For intricate work and thin
stock. Good for veneers and
materials such as hard
plastics and thin (Jfe- to %?-inch)
materials
For cutting tight radiuses in
thin 0L- to %-inch) stock,
veneers, and plastics
For cutting tight radiuses in
thicker {% inch or more)
materials, hard and
softwoods, and plastics
For cutting wood thicker
than 3/j> inch
ij
f j
ij
t:
fc:
Ij
ij
fj
i:
I

TOYS AND CRAFTS BASICS
2 Reattaching the blade
Slip the end of the blade into the blade clamp
mechanism and tighten it with the hex wrench supplied with the
machine to secure the blade in position (above).
Hold-down
3 Setting up the saw and starting the cut
Check the tension by pushing a board with moderate
pressure up against the blade; the blade should deflect about ",S
inch. To a'ljust the blade tension, release the tension lever,
then turn the tension adjustment screw clockwise to increase
tension on the blade and counterclockwise to reduce the
tension. Lock the tension iever back into position. As you gain
experence, you will be able to pluck the blade and listen for
the sound it makes to gauge the tension. Once the blade is
properly tensioned, lower the hold-down so that it presses
the workpiece firmly against the table. To start the cut, align
the blade with the cutting line and feed the workpiece with
both hands (above).
4 Finishing the cut
To cut tight curves pivot the work-
piece on the table, shifting your hand
position as necessary. For 90c or greater
turns, like those at the top of the stem
section in the leaf design shown at 'e^t.
cut slightly beyond the cutting line into
the waste section, then pivot the Acr*
piece, and continue along the "u:t ijg
line. Once you return to you*- ?iart>rn;
point, remove the waste se' t ■ u ■»• u
J detach the blade tc free the iwmi *i i., :i i
19

fA i
**«+

MODELS
\/\l heeled vehicles, large and
t > small, have been perennial
1 pcreni
favorites with children and adults
alike for generations. This chapter
shows you how to build three
wooden models that are based on
real-life counterparts: a locomotive,
a dump truck, and a tractor-rock
picker. As the photo on page 20
confirms, the results are certain to
please and delight.
These projects will exercise a
range of woodworking skills, from
the authentic detailing involved in
making the locomotive {page 22 \
and the simple, sturdy
construction techniques needed for the
dump truck -page 31, to the fine
shaping of the tractor and rock picker [page 36'.
The locomotive is a 1/32-bcalc model of an early 20th-Centurv
coal-burning steam engine. In addition to making all of its parts
to scale, you can use contrasting hardwoods to highlight
particular details of the model. The wooden parts of the
locomotive shown on page 20 were finished with three coats of
satin-finish polyurethane. Clear nail polish was applied to the
The boiler and smoke box of the
locomotive shown on page 20 can be turned from a
single blank on the lathe. As shown above,
the demarcation between the two elements
can be burned into the blank with a length of
wire fastened to shop-made handles.
brass parts to prevent tarnishing. By
adding railroad track* and ties and
displaying the train in a realistic
setting, the locomotive can be
transformed from toy to exhibit.
The dump truck is a sturdy toy
that faithfully recreates the tireless
strength of old-style trucks. It is built
to withstand even the most
punishing "driver" and its spacious box is
designed to hold a variety of articles
that its young owner might wish to
transport. The model featured in
this chapter is made with parts that
cannot pinch or squeeze a child's
hand, like the sloped ends of the
lever mechanism (page 35 L
The tractor and rock picker come
from a long line of rugged farming machinery. With its
attention to detail and realistic moving parts, this toy can serve an
educational function as well as provide many hours of play.
Whatever type of finish you apply to these vehicles,
remember to choose a nontoxic product if you are making the
model for a child. Refer to the Toys and Crafts Basics chapter [page
12 for more information on child-safe finishes.
Built by Doug Kenney of South Dennis, Massachusetts, the toy train shown at
left is a carefully crafted 1/32-scale reproduction of an American Standard steam
locomotive in operation at the turn of the 20th Century. To complete the realistic
setting, the train is displayed on rails and ties cut from contrasting hardwoods.
The rails measure -by-r n inch; the ties are: -by-' -by-3 inches.
21

LOCOMOTIVE
T
Building the engine shown below is
essentially a matter of preparing
all the parts illustrated on page 23 and
gluing them to the chassis. You can cut
and assemble or cut all the pieces first,
then glue only when all the components
are read). To help you produce a scale
model, the profile and dimensions of
all the necessary parts are provided. The
following pages show step-by-step
instructions for producing the more
challenging pieces.
Although the locomotive is made
mainly from wood, a few items of
metal hardware are required. You will need
'-inch-long No. 16 brass escutcheon
pins, for example, to attach the
connecting rods to the wheels. Drill pilot
holes for the pins inch from the
center of the wheels. The connecting and
drive rods are cut from 2 -inch-long
0.025-gauge '-inch-wide brass strips.
The spacing between the holes through
each end of the connecting rods should
be equal to the distance between the dri- attach it to the drive rod. Push the piston
ve wheels: 2 inches. X lake the piston into a 1 length of' ,-inch-diametcr tub-
from a 2,-inch-long,' :-inch-diameter ing, then fit the tubing into the cvlinder
brass rod with a hook at one end and glued to the chassis.

MODELS
ROOF OF CAB
WALLS OF CAB
/T A"
BASE OF CAB
1/'-
mm® v" w&m
/" C
r/"
:^i
r i
-K
2, I
<©/"
BOILER
1/
R"
00
PILOT
____j±ri
vi
\.
-is-' .""" as*——: _2x*-j—ij- ;
r.t,
T/''
HARDWARE
2s/' ( 2 -"
6'/"
2-/" - l ]/
-Si :
A
TRUCK AXLE
CHASSIS
/::(o J
; o \
WHEELS
V
-1 3"
V
L.
n
U O 2/" 'Q
..
9'/
VA
2/ ©
\u E—is
23

MODELS
Paired with the shop-made jig shown on page 25,
a drill press bores a spoke hole through one of the
locomotives wheels. Consisting of two rings that
sandwich the wheel the jig ensures that the wheels
will end up identical. The jigs outei ring features 12
brass bushings spaced equally around its
circumference. As a result, the spoke holes will be equidistant
around the wheels. After drilling the first hole, insert
a dowel or brass rod through the jig rings and the
wheel to keep the pieces from rotating as you bore
the remaining holes. See detailed instrutions on
page 25 for making this iig.
MAKING THE WHEELS
1 Cutting out the wheels
Clamp a backup pane to your dnlJ press table, then prepare
the wheel blanKS. C^t a >.-by-2',.-by-15-inch piece of hardwood
for the drii/e wheels and a v-by-bj-by-8-inch board for the *ront
wheels. Cut both sets of wheels the same way, using one hole
saw to define the r'.m and a smaller hole saw for tie f'ange
inside the rim. For the drive wneels, install a ? .-inch hole saw
in the drill press and cut four hcies in the workpiece, stopping
each one \_-inch from the underside of tne board. Repeat tne
process with a 2- nch hole saw, aligning the pilot b;t wth the
piJot hole cut by i.ke larger bit tabeve. left). Th's will ensure that
the flanges are the same wicth all arojnd the wheel. Fcl'ow tne
same procedure for the front wheels, using l'«- and 1- ncn ho'e
saws. Once a'i tne cuts are made, release the wheels from each
blank using a belt sander fitted with an 80-grit sanding belt.
Turn over the blank and secure it to the tcp of your bench. Mcve
the sanaer back and forth across ihe surface until it removes
eroug^ .vaste wood to expose the hole saw cuts (above, right.
You can now cut imitation spokes into the drive wheels !step £)
or use a jig (page 25, to construct more detailed drive vynees
with spokes made from dowe s.

MODELS
/
lF^ Drive wheel \
■ i — -~——
s/X. Wheel-holding jig
2 Cutting "spokes" into the drive wheels
To create the illusion that the drive wheels are spoked,
you can use a backsaw to kerf the outside faces of the
wheels. To hold the wheels as you cut them and ensure
that the kerfs are spaced equally, use a jig made from a
board slightly thicker than the wheels. For the jig, cut a
2~y(.-\nch hole into the middle of the board and mark the kerf
lines around the circumference of the hole. Spacing the
marks 3CT apart will allow you to cut 6 kerfs. Secure the
jig to your benchtop, insert the wheel in the hole, and
transfer the kerf marks onto it. Then holding the wheel in
place with an index finger, cut a kerf into the jig and At
inch into the wheel (left). Keep the saw teeth parallel to
the work surface. To cut each remaining kerf, rotate the
wheel in the jig until the next kerf mark aligns with the cut
in the jig and repeat the cut.
r~i§§
A SPOKE-HOLE JIG
The jig shown at right will enable you to make quick work
of drilling equidistant holes for spokes around the rim
of drive wheels like the ones shown in the photo on
page 20. The jig consists of two rings: an outer and
inner one. The wheel and hub are held steady for drilling
by the two rings; the flange along the wheel's
circumference prevents it from slipping out.
Cut the two rings from a board the same thickness as
the wheels. Use a 3-inch hole saw to define the outside
circumference of the outer ring and a 2-inch hole saw to
separate the two rings. Use a %-inch-diameter bit to drill
out the hole in the inner ring for the hub; use a short
length of dowel for the hub. To prepare the jig, assemble
the rings and the hub. and use a %nnch drill bit to bore
holes at 30° intervals through both rings. After drilling
the first hole, slip a %-inch dowel into it to keep the
rings aligned as you bore the remaining holes. Once all
the holes are drilled, insert a piece of brass tubing in
each hole in the outer ring, sized to accept a ^-inch
drill bit. Refer to the color photo on page 24 for
instructions on using the jig.
Inner ring
Kim fits inside wheel;
hub fits :nside ring
Wheel
%.im is 2. inches;
Inside diameter
is " A inches
Outer ring with brass tubing
Rim is 3 inches; inside
diamete- is 2 nches

MODELS
MAKING THE BASE ASSEMBLY
1 Shaping the chassis and the pilot
Refer to the anatomy illustration on page 22 for the
dimensions of the locomotive chassis. Cut it to shape on your band
saw and remove any marks left by the blade with a sanding
block. Make the pilot from a "i-by-214-inch hardwood board,
Jong enough to feed safely across your table saw. To cbt the
grooves in the pilot, adjust the blade height to '- inch and
position the rip fence for a cutting width equal to the width of
the blade kerf. Feed the board across the table to cut the first
groove, them shift the fence away from the blade by twice the
kerf width and repeat. Cut the remaining grooves the same way,
feeding the stock with a push stick and pressing the board
against the fence at the trailing edge of the stock with your
free hand (above). Once all the grooves are cut, saw the pilot
to shape on a band saw (below).
26

MODELS
2 Preparing the chassis for the wheels
Clamp a backup panel to your drill press table and
install a ;■ -inch bit to bore the axle holes for the drive
wheels. Mark the holes 1 inch and 3i inches from the back
end of the chassis. Then, holding the chassis on its side,
drill each hole through the stock (left). Bore matching holes
through the wheel hubs or centers.
3 Making the truck axle assembly
Refer to the anatomy illustration
(page 22) for the shape of the truck
axle, then cut out the shape on your
scroll saw (above). Drill the axle holes
in the assembly and front wheels
using a »-inch bit. Install the wheels
with "^-inch-diameter pegs.
4 Attaching the wheels to the chassis
To mount the front wheels, drill a >_-
inch-diameter hole into the underside of
the chassis near the front end and install
the truck assembly with a - -inch peg
(left). Also attach the dr've wheels to the
chassis using >_z-mcn-diameter pegs.
27

MODtLS
MAKING THE CAB
1 Cutting the windows
The locomotive cab consists of six
parts: two side walls, shown at left, a
firewall and base (below), the cab jack,
and the roof (step 3). Refer to the
anatomy illustration on page 22 for the
dimensions and shapes of these pieces. Cut
them all to size on your scroll saw. When
sawing the window notches in the s;de
walls, keep the stock from jumping off
the saw table with a hold-down (left).
2 Gluing the firewall and
the side walls to the base
Spread glue on the contacting surfaces
of the s'de walls and firewall and secure
them together with a handscrew (right).
Immediately appty adhes:ve to the base
and set the wall assembly on top, placing
a shim under the clamp to keep it level
while the glLe is curing.
28

MODELS
3 Shaping the roof
Make the roof of the cab from a ^-by-
2 .-by-2 4-inch piece of hardwood. Mark
the slope of the roof on the long edge
of the stock, then use a disk sander to
round over the surface. Holding the edge
of the stock flat on the sanding table, rock
the top of the roof back and forth across
the abrasive disk until you cut to the
marked line (right). Once you are
satisfied with the shape of the roof, glue it
to the rest of the cab and mount the cab
to the chassis on top of the cab jack.
MAKING THE BOILER AND DOMES
3oi\er and
smoke box blank
1 Turning the boiler and smoke box
You can turn the boiler and the l1 -
inch-long smoke box separately, using
contrasting woods. But if you wish to
make them from a single workpiece,
mount a 7/-inch-long blank between
centers on your lathe; white ash is a
good choice for these parts of the
project. Make the blank / inch longer if
you also want to produce the smoke box
hatch from the same blank. Turn the
workpiece into a cylinder with a roughing
gouge, then use a piece of wire to burn
a demarcation line between the boiler
and smoke box (photo, page 21). To turn
the smoke box hatch down to a diameter
of 1 inch and its top down to V inch,
use a skew chisel (left). If you are making
the hatch separately, use ^-inch dowel
stock cut from a contrasting hardwood.
29

MODELS
2 Preparing the boiler and smoke
box for the stack and domes
Once you have turned the boiler and
smoke box, bore the holes for the smoke
stack, the steam dome, and sand box
on your drill press. Cut a V-shaped wedge
out of a wood block, creating a jig that
will hold the workpiece steady as you drill
the holes. You need to bore three holes
with three different bits: one 1% inch in
diameter, located IA inch from the back
end of the boiler; a second 1 inch in
diameter, 2 inches away from the first
hole; and a third :/. inch in diameter,
located I inch from the front end of the
smoke box. Hold the workpiece securely
in the jig as you dril: each hole (left).
3 Making the domes
Shape the domes for the smoke
stack, steam dorre, and sand box from
dowel stock of the correct width. Install
a piloted round-over bit in a router and
mount the tool in a table. To help you
keep the dowel square to the cutter,
clamp a pair of guide blocks and a hold-
down to the table, as shown at right. Cut
a notch out of one end of the hold-down
and place it on a shim so the notch will
be just above the workpiece and prevent
it from jumping jp when it contacts the
bit. Standing on the right-hand side of
the table and holding the dowel against
the narrow guide block, advance the
workpiece toward the bit. When the
dowel contacts the pilot, press it against
the block and rotate it toward yourself
to shape the end. To finish the dome,
simply cut it to length. You can also
saw off the dome and glue it to a dowel
made from a contrasting hardwood. Once
all the domes are made, glue them to the
boiler and smoke box.
30

I
DUMP TRUCK
ne truck featured here is an exam-
1 pit of a sturdy toy designed with
chilJ safety in mind. The moving parts
have no pinch points and the truck's
surfaces are rounded and smooth.
Assembly is fairly straightforward. The
quantity and shape of all the parts
required are shown below and each can
be cut from either solid stock or birch-
\eneer plywood. All you need to hold
the pieces together are a few dowels,
although some connections can be
reinforced with screws. If you use screws to
complete this project, be sure to coun-
terbore the fasteners and cover the heads
with wood plug:>.
Designed by Chester Van \Tess of Scotland, Ontario, the dump truck shown above
is built to take abuse and punishment without giving any back. Its corners are
rounded and its surfaces are sanded smooth and finished with nontoxic paints.
ANATOMY OF A DUMP TRUCK
(C) Front
axle housing
/■ x1 "xZ'
(D) Rear
axle housing
i/"x3/ *,"■
■H
. (E) Fender
(J) Wheel
A-inch thick;
7 /r-inch diameter
C) Engine block
(^ y (G) Box hing
hinge
(I) Box base
tT x 3 / ' x 5 a
(A) Fire wall
a "x1'/"x2/'
(K) Chassis
■/.Hx2/"x9Y."
(L) Box side wall
-A"x *.'/-' a 5~~
(H) Box front wall
v x1/'x3/■■"
£
31

MODELS
MAKING A DUMP TRUCK
1 Cutting the chassis and axle housings
Make your chassis blank a little larger than its final
dimensions, then use your band saw to cut it to the
shape shown in the anatomy illustration (page 31).
Outline the profile on the stock, make the cuts on the
saw (above), then use a chisel to clean out any corners
or edges you could not cut square. To produce the bevel
at the back end of the chassis, use the band saw or a
stationary power sander, then sand all surfaces smooth.
Next, band saw the front and rear axle housings to shape.
2 Preparing the chassis and axle housings
for the wheels and box
Mark the holes on the chassis and axle housings for the
wheels and the box, then install a /-inch bit in your drill
press. To minimize tearout as the bit exits the stock, clamp a
backup panel to the machine table. Then set the chassis on
the panel with the mark aligned under the bit and, holding
the workpiece firmly, drill the hole (right). Repeat the process
to bore the holes in the axle housings. Since these pieces are
too small to hold by hand, clamp them to the backup panel
as you drill the holes. You can also bore the holes in the
chassis and axle housings before cutting them to shape.
32

MODELS
-J
1
3 Turning the wheels
To produce the wheels on your lathe, start by preparing a
simple turning jig on the band saw. Cut the block from 2-mch-
thick stock into a 6-inch-diameter circle, then screw it to a
faceplate and mount the plate on the lathe headstock. Next,
prepare the wheel blanks, cutting them from "/-inch stock with
a 2-inch hole saw mounted on your drill press. Outline one of
the wheels in the center of the turning jig, turn on the lathe and
use a scraper to cut a /-inch-deep recess within the outline.
Seat the blank in the recess, using double-sided tape to hold it in
place. You can now turn the blank: Position the tool rest close to
the workpiece and use a scraper to cut the treads and then a
spindle gouge to shape the recess around the wheel hub (above).
Remove the blank from the jig. affix the tape on the side you just
turned, and repeat the process to shape the other side of the
wheel. Repeat for the other wheels, keeping in mind that the
front and back wheels have slightly different profiles (page 31).
4 Drilling the cab window
Cut your cab blank roughly to size
and outline its contours, including the
window hole. Locate the hole 1^ inches
from the back end and 2 inches from
the bottom of the cab. Install a 1^-inch
spade bit in your drill press and clamp a
backup panel to the machine table to
minimize tearout. Clamp the stock in a
handscrew, secure the clamp to the
backup panel so the marked hole is directly
under the bit, and drill the hole (left).
33

MODELS
5 Shaping the cabin
Cjt the contours of the cab on your
band saw, feeding the stock with both
hands and being careful to keep them
c'ear of the blade (right). Next, cut the
fire wall and engine block to shape and
sand the pieces.
6 Gluing the engine block
and cab to the chassis
Start by gluing the cab to the chassis.
Once the adhesive has cured, spread
glue on the contacting surfaces of the
engine block and fire wall, and clamp
the pieces together. At the same time,
glue the front and rear axle housings to
the chassis. Once dry, glue the engine
block to the chassis and clamp it in
place on a flat work surface, using a
wood pad to protect the stock (below).
Fire wall ,
Cab
T^fcs
Engine
block
0
Rear axle housing
Chaesie
0,
\ Front axle housing
34

MODELS
7 Attaching the box to the chassis
Cut the box hinge and the pieces of the box on your band
saw. then drill a ,1-inch-diameter hole through the side of the
hinge for the dowel that will secure it to the chassis. Screw the
hinge to the underside of the box bottom, flush with the back
end, using a handscrew to hold the pieces snugly as you d-ive
the screws (above, left)- Counterbore the fasteners so you
can piug their heads. Next, assemble and glue the box togetn-
er, cutting a snallow rabbet around three sides of the bottom
to accept the sides and front. Once the adhesive has cured,
place ihe box on the chassis so the hinge rests in the slot.
Dab a little glue on the trailing end of the connecting dowel,
then slip the pin through the holes in the chassis and box
hinge to secure the box in place (above, right). Conceal the
screw heads with wood plugs.
8 Mounting the fenders and wheels
Complete the truck by installing the
fenders and wheels. Outline the fenders
on blanks and cut the pieces to shape on
a band saw or scroll saw. starting with
the notch on one face, then the curved
cut along the edge (left). Glue the fenders
in place, then mount the wheels to the
axle housings with dowels. You can now
finish the truck: be sure to use a child-
safe product (page 12).
35

TRACTOR
i :
fr
ft
' Made by Garnet Hall, ofStottghton, Saskatchewan the
tractor and rock picker shown at left straddle the line
between tor and display piece. To show ojf the beauty of
the various wood species used, this model was coated
with a clear finish. Although the tractor-rock picker can
be entirely shop-made, some of the parts, such as the
wheels, pegs, and dowels, are available at craft and
hobby shops. You can build the toy to scale by cutting
„^ the parts according to the full-scale plans provided below
_■-■■> and on page 37.
ANATOMY OF A TRACTOR
TRACTOR Muffler
i
t
*
i
k
ft
i
t
t
i
i
i
i
&
i
f
§
*
&
&
&
ft
§

MODFT.S
37

MODELS
ASSEMBLING THE TRACTOR
1 Shaping the body
Cut the tractor body roughly to size,
referring to the anatomy illustration on
page 36 for its shape and dimensions.
Outline the profile of the body on the
stock, cut it out on your band saw, and
sand the surfaces smooth. To curve the
edges of the body, install a piloted round-
over bit in a router and mount the tool in
a table. Fashion an auxiliary fence for the
infeed side of the table, cutting a notch
to cover the bit and rounding the front
corner. Screw the fence to a support board
and clamp both pieces to the table. Press
the stock against the pilot bearing as you
feed it across the table. Turn the body
over to shape the other side (right). Cut
the hitch, drill a hole through it and glue
it to the back of the tractor body.
Illlli^
K'
1 Hitch /
)A \jm
^3Ty(^
\ / Tractor body
SS%S>:-SSi5^§^S^^5S^ii§5
Hole for /\/
muffler / \s /
(^. /^
gggg:
-
i$*<§&2
>^j
2 Mounting the steering wheel, fuel cap, and muffler
Mark holes on the tractor body for the steering wheel
column, fuel cap, and muffler. Bore X.-inch-diameter holes for the
column and cap, and a '/..-inch-diameter hole for the muffler.
Make all the holes % inch deep. Fashion the steering wheel by
attaching a -/-inch wheel to a X.-inch-diameter dowel. Make
the fuel cap from a wood button or peg with a short shaft; a
length of %nnch dowel can form the muffler. Dab glue into the
three holes and set each piece in place (above). (It is easier to
sand the pieces before gluing them in position.) To finish the
muffler, drill a ^-inch-diameter hole through the middle of a
-X-inch dowel, spread some glue in the hole, and slip the dowel
over the smaller peg already in place.
38

MODFLS
3 Installing the front axle and wheels
Cut the axle on yojr band saw from
a p.ece cf l-by-2%-inch-thick stock and
sand its surfaces smooth. You need to
drul three 7 -inch-diameter holes into the
axle: one m each side for the wheels and
a third in the top to attach the axle to the
tractor body. Cla-np a backup pane' to
your drill press table and secure the axle
sn a handscrew as you bore each hole
(right). Drill a matching hole into the
underside of the tractor. You can make
the front wheels on the lathe (page 33),
then glue them to the axle and attach the
axle to the tractor body using pegs and
glue. The peg securing the axle to the
body can be left a little long to allow tr.e
axle to swivel.
IS
"<gP
V^
Mudguard' /
Fender i?se>e
Tailliqht hole
^ ' A
m*t>
'"Front sx'.e
4 Gluing the fenders
Cut the two parts of each fender
assembly on your band saw, making the
bases from /-inch-thick stock and the
mudguards from '-inch-thick stock. The
pieces on opposite sides of the tractor
should be mirror images of each other.
Drill holes into the ends of the mudguards
for the buttons and dowels that will serve
as the lights, then glue the mudguards
to their respective fender bases. Once
the adhesive has cured, glue tne fender
assemblies to the tractor body, making
sure the bottom edges of the p eces are
flush with each other. Jse a handscrew
to hold the fenders in position while the
adhesive cures (left). Glue wcoa buttons to
the front of the mudguards for headlights
and dowels to the back for ta Ihghts.
39

MODELS
5 Making the rear wheels
Use a compass to outline the 2-i-inch-
diameter wheels on 3/-inch-thick stock.
Then, clamp a backup board to your drill
press table and install a l^f-inch spade
bit in the machine. Holding the middle
of one wheel outline under the bit. drill
a hole to a depth of A inch. Repeat for
the other outline (left). Next, install a lA-
inch brad-point bit and bore holes for the
axle right through the stock. Cut out the
wheels on the band saw and sand their
rims round and smooth.
6 Mounting the rear wheels
Drill the axle hole through the
fenders and tractor body, then make the axle
by cutting >£-inch dowel stock to a length
of 2/? inches. Slip the dowel into the axle
hole in the tractor, dab a little glue on
both ends, and mount the wheels (right).
40

MODELS
MAKING THE ROCK PICKER
1 Making the fork
^RVrr.sg to the anatomy illustration
r p . v o7, cut the fork to shape from
a (neoe of -inch-thick stock. Sand all
the surfaces, ensuring that the contours are
a'ficoth and rounded. Then mark a line
across the fork A inch from its thick edge
and a series of parallel lines at /j-mch
intervals from the thin edge to the marked
line. Make a cut along each of the parallel
lines on your band saw (right), feeding
the fork with both hands and making sure
you keep your fingers clear of the blade.
2 Shaping the reel ends
Make the reel ends by cutting out two
1'/-inch-diameter wheels from /.-inch-
thick stock. Sand the wheels smooth and
drill a >.' -inch-diameter axle hole through
each one. To make the indentations along
the edges of the wheels, mark six radius
lines spaced 60° apart. You can then cut
the indentations by hand with a tapered
half-round file or on an oscillating spindle
sander with a thin spindle. On a spindle
sander, you will need to make a V-block
jig to do the job. For the jig, cut a 13CT
angle wedge out of a board, then drill a
hole through the jig centered on the angle's
apex; the hole should be large enough to
accommodate the spindle. Clamp the jig
to the sanding table, centering the spindle
in the hole. Turn on the sander, advance
the reel flat on the table with both index
fingers so that one of the radius lines is
aligned with the spindle, and cut the
indentation to a depth of /. inch (left)
Repeat for the remaining indentations.
41

MODELS
4 Gluing up the body
On your band saw, cut the parts of
the rock picker's body, including the
sidewalls, the base, and the bucket. Glue
the bucket sidewall to the interior. To
prepare the sidewalls for assembly, you
need to drill four holes in each one: one
each for the bucket, wheels, fork, and
reel. The holes for the fork and bucket
should be bL inch in diameter; make the
holes for the reel and wheels A. inch in
diameter. Once all the holes are drilled,
use a dowel and glue to join the bucket
to the sidewalls (right). Attach the reel
between the sidewalls with wooden pegs
and glue the base in place.
3 Assembling the reel
Install a -4-inch bit in your drill press
and bore a stopped hole into the middle
of each projection on the inside faces of
the reel ends. Make each hole A inch
deep. To join the reel ends together, cut
a 2"A-inch-long dowel for each pair of
holes. Then dab some glue in the holes,
insert the dowels into one of the wheels,
and fit the second wheel on top (left).
42

I
MODELS
5 Installing the hitch
Cut the hitch to shape on your band
>dv: and band its surfaces smooth. Drill
h l&s. m the hitch for the wheel pegs and
the peg that will join the hitch to the
tractur. Then spread glue on the
contacting surfaces of the hitch and sidewall,
and clamp the hitch in place on a work
table (right).
6 Mounting the fork and the wheels
Use glue and a dowel to attach the fork
to the sidewalls. To complete the project,
use glue and wooden pegs to join the
wheels to the rock picker (left) You are now
ready to apply a finish.
43

w;

^
H
i
-I
i
SLEIGHS AND SLEDS
Today, sleighs and sleds
conjure up images of children on
bright winter afternoons coasting
down snow-covered hills,
squealing with joy. The origins of the
conveyances featured in this chapter,
however, are far more practical. In
northern regions of the world, the
sled evolved centuries ago as a
humble yet efficient carrier,
transporting food and belongings over
ice and snow. From the Inuit
dogsled and the Laplander pulka to
the Russian troika and the
American "one-horse open sleigh " sleds
provided the edge that pre-indus-
trial northerners needed to survive
on snowy terrain.
Each of the three pieces described
in this chapter can trace its lineage
to one or more of these early
antecedents. The bent-runner sleigh pictured above and al
left is a refined version of the traditional sled. Its raised-deck
design is based on the sleds of Switzerland and Austria. Despite
its delicate appearance, the sound construction techniques
shown beginning on page 46 will produce a very sturdy sled.
The Yankee clipper (page 54) evolved in Colonial America,
and has been a popular fixture of winter frolicking since
Revolutionary times. Perhaps its most famous incarnation
The cherry sleigh shown above is an attractive
and sturdy wintertime conveyance for bundled-
up infants and toddlers. Once a child outgrows
the need to be pulled through the snow, the sleigh
can be transformed into a fast-moving sled. The
backrest is attached to the seat rails with
knockdown connectors. This model is based on a
design by Walter Tast of Winnipeg, Canada.
was "Rosebud", the sled that
played a key symbolic role in
Orson Welles' classic 1941 film
Citizen Kane. You can build
yourself a version of this sled with a
modest investment in wood.
The toboggan shown on page
58 is not Aery different from its
primitive forerunners, which were
used by North American natives
long before the arrival of
Columbus. Although the
toboggan may be based on an ancient
design, it is an ingenious means
of transportation, perfectly
adapted to travel in loose snow,
whereas raised-deck sleighs require a
packed-snow surface to glide
efficiently. The heart of any sled lies
in its runners, and each of the
three models in this chapter uses
a different design. The runners for the low-to-the-ground
clipper are the simplest to make. As shown on page 54, they
can be cut out on the band saw. The bent-runner sleigh
with its raised deck requires stronger runners, which are
curved by bending and laminating thin strips of wood. The
flat runners for the toboggan—constituting both deck and
gliding surface—are flexed to such a tight radius that steam
bending is the only practical way to make them.
A strip of ultra-high molecular weight plastic is
fastened to the underside of the sleigh runners shown at left.
Strong, flexible and easy to install, the strips protect the
wood runners and will make the sleigh glide better.
45

BENT-RUNNER SLEIGH
'~P he bent-runner sleigh featured in
JL this section blends traditional sled
design with modem woodworking
techniques. As shown in the photo below,
the legs are attached to the stretchers
with plate joints—a simple and sturdy
joinery method. The posts supporting
the backrest are secured lo the deck with
scrcwrs and metal cross dowels. Using
knockdown fasteners in this application
allows the backrest to be removed
easily, transforming the sleigh into a flat-
deck racer. The undersides of the runners
are covered with a layer of ultra-high
molecular weight plastic, a high-tech
material available from most plastics
distributors and some woodworking supply
houses. It will enhance the runners* slick-
A pair of legs for a bent-runner sleigh
are glued to one of the stretchers, while
a shop-made jig holds the pieces at the
correct angle. Plate joints (page 50) are
cut to reinforce the connection. Refer to
page 51 for instructions on making the
clamping jig.
ness and make them glide much better
on snow.
As described beginning on page 4",
the runners and backrest are made of
thin wood strips laminated together and
bent during glue up. Since both parts
share the same curvature, they can be
bent on the same form. Oak and ash
both have superior bending qualities,
and are the best choices if you want
strong and tough runners. But other
hardwoods, like maple, birch, and beech,
can be used. The sleigh shown in the
photo on page 44 is made of cherry,
another good choice.
Any sled must be built to withstand
abuse as well as the elements. Use only
stainless steel fasteners and a highly
water-resistant adhesive for glue up.
Finish the sleigh with marine varnish. Be
sure to finish the bottom of the runners
before attaching the plastic strips.

SLEIGHS AND SLEDS
MAKING THE RUNNERS
1 Ripping the runner stock
Cut the runner strips on your table
saw from a board wide enough to yield all
the runners you will need. The board
should be slightly thicker than the final
width of the runners. Position the rip
fence for an -/6-inch cutting width and
feed the workpiece with a push stick
(right). Use one hand to press the board
flush against the fence, being careful to
keep both hands well clear of the blade.
Cut an extra strip to use as a clamping
caul in step 3.
2 Making the bending form
To bend both the runner and
backrest strips, you will need a shop-made
bending form. For the jig, cut three
pieces of X-inch plywood, mark a
circle with a 6-inch radius on their top
surfaces, and cut out the curves on your
band saw. Also saw a long rectangular slot
in the center of each piece. Screw the
pieces of the jig together, making sure the
ends and edges are aligned. To facilitate
clamping the curve, drill a series of
holes with a spade bit slightly larger than
the clamp jaws you will be using;
remember to secure a backup panel to the drill
press table to minimize tearout (left).
47

SLEIGHS AIsTD SLEDS
3 Gluing up the runners
Screw the bending form to a base of
J/£-inch plywood and clamp the base to a
work surface. To prevent the runners from
sticking to the form, apply a thin coat of
paraffin wax to the form's outside edge.
Spread glue on one side of each strip of
the runner and stack the pieces, lining up
their ends. Leave an extra unglued strip
on the outside to protect the strips from
the clamp jaws. Place the stack along the
outside edge of the form and use clamps
to secure the strips against it, starting at
the curved end and working to the
opposite end (left). Let the setup cure for 8 to
10 hours. Bend the backrest the same
way, but align the center of the
lamination with the center mark on the form.
4 Jointing the lamination
Once the lamination is dry, remove it
from the form and joint one edge. Slowly
feed the workpiece across the cutters,
using push blocks to feed the workpiece
and apply downv/ard pressure on the
outside side of the knives (right). Never
position your hands directly over the cutters.
Next, cut the lamination to its finished
thickness on a planer.
48

SLEIGHS AND SLEDS
MAKING THE DECK
1 Preparing the slats
The sleigh's deck has an inward curve at the front end and
a matching outward curve at the back. Start by cutting the slats
slightly longer than their final length and mark a centerline on
a work surface. Then arrange the slats on the table. Place
:4-inch-thick spacer strips between the slats to maintain the
proper spacing. Then clamp the slats together edge to edge and
secure the assembly to the table, aligning the middle of the
deck with the centerline on the table. Next, use a shop-made
compass to mark the curves on the slats. For the compass, drill
two holes 9 inches apart through a wood strip; one hole should
accommodate an awl and the other a pencil (inset). Mark the
front curve on the slats so the arc ends about / inch from the
edges of the outside slats. Draw the back curve so the center of
the arc is 36 inches from the center of the front curve (above).
2 Cutting the deck slats
Cut the deck slat curves on a band
saw (left), then sand any marks left by
the blade; a spindle sander works well for
this type of work. Finally, bevel the edges
of the slats slightly with a sanding block.
49

SLEIGHS AND SLEDS
LEG
If
4"//
jf
1"\
I n //
1 r '
2'/"
eo\f
//5/"
3 Making the legs
Cut your leg blanks from 1-inch-thick stock to a width of
\A inches. Then miter the ends of each blank on your table
saw with the miter gauge adjusted to 60". Next, use a band
saw to cut one of the legs to the profile shown (above, left);
the finished leg can then serve as a template for cutting the
remaining ones. Sand away any marks left by the band saw
blade. The legs are joined to the runners with /f-inch-diame-
ter, 1 ^-inch-long dowels. To bore the dowel holes in the
legs, mark lines that intersect at the center of their bottom
ends. Then miter the end of a board at 60° to create a jig
that will brace the workpiece on your drill press table. Install
a Vf-inch bit in the machine and set the drilling depth to
slightly more than one-half the dowel length. Align the center
of the leg's bottom end under the bit, clamp the jig
alongside the leg and, holding the leg firmly against the table and
jig. bore the hole (above, right).
4 Joining the legs to the stretchers
Attach the legs to the stretchers with plate joints thin,
football-shaped biscuits of compressed wood ihat fit into
mating slots. Use the clamping jig shown on page 51 to
align the parts and mark center lines for the biscuit slots
across the joints between the legs and stretcher. Use a plate
joiner to cut a slot into the top end of the legs; hold the
workpiece in place with a clamp. Then secure the stretcher
to a work surface, align the guideline on the tool's faceplate
with the slot location mark on the workpiece, and cut the
slot (above). Repeat the procedure at the other slot locaticf-s,
then glue each pair of legs to its stretcher, as shown in the
photo on page 46.
50

SLEIGHS AND SLEDS
LEG-CLAMPING JIG
The jig shown at right, made entirely
from ri-inch plywood, makes it easy
to align the legs and stretchers of a
bent-runner sleigh for marking plate
joint slots and gluing up. Cut the
pieces so the distance between the
inside edges of the leg supports is the
same as the length of the sleigh's
stretcher. Trim the corners of the
stretcher support as shown to
accommodate the clamp jaws during glue-
up, then screw the strips to the base,
making sure that the leg supports
are square to the stretcher support.
Wax the top surface of the jig to
prevent the glued-up assembly (shown in
dotted lines) from bonding to it. The
photo on page 46 shows the jig in use.
L.
Stretzr.er
ASSEMBLING THE SLEIGH
1 Attaching the legs to the runners
Position the legs on the runners,
then mark the dowel holes on the
runners. Bore a hole at each mark
slightly deeper than one half the dowel
length. Then apply glue in the holes
and on the contacting surfaces
between the legs and runners, insert a
dowel into each hole in the legs, and
fit the pieces together (left). Clamp
the assembly, making sure the
stretchers are perpendicular to the runners.
51

SLEIGHS AND SLEDS
2 Installing the deck rails
Cut the dec* rails to size, curving
the back end using the same techniques
described on page 49 for the slats.
Position the rails on the strechers and
against the runners, and apply glue on
the contacting surfaces. Clamp the rails
in place and drill two pilot holes through
the runners into the front end of the
rails. Also bore holes through the rails
into the stretchers. Attach the rails to
the runners and stretchers with
countersunk stainless steel wood screws (right),
removing the clamps as you go.
3 Attaching the deck slats
Lay out the slats on the stretchers,
spacing them with :X-inch-thick wood
strips. The two center boards should
overhang the front stretcher by about 7A. inch.
Position the other boards so their ends
form a smooth curve. Drill countersunk
pilot holes through the slats into the
stretchers, temporarily remove the slats,
and apply a bead of water-resistant glue
along the stretchers. Reposition the slats •
on the stretchers and fasten them in
place with stainless steel screws (left).

SLEIGHS AND SLEDS
INSTALLING THE BACKREST
1 Making the support posts
Cut the support posts to size, then
mark the notches that will accommodate
iht backrest, referring to the anatomy
illustration on page 46. Cut the notches
on your table saw, installing a dado head
on the machine. Adjust the cutting height
to the thickness of the backrest slats,
then screw a board to the miter gauge as
an extension. Holding the workpiece flush
against the extension, align the end of
the notch outline with the blades, butt a
wood block against the workpiece, and
clamp it to the extension as a stop block.
Holding the stock against the extension
and the stop block, feed the workpiece
into the dado head. Keep both hands
clear of the blades. Make a series of
passes to finish cutting the notch,
shifting the workpiece sideways as necessary.
For the back post shown, turn the stock
around and repeat to cut the second
notch (right). Cut the notch on the front
post the same way. Once all the notches
are cut, screw the backrest to the posts.
2 Attaching the backrest to the sleigh
The backrest is secured to the sled
with "/-inch metal cross dowel
connectors. To prepare the support posts, drill
a r/.-inch-long %-inch-diameter hole
into the end of each one. Also bore a ¥-
inch-diameter hole through the center of
each post 1 inch from the bottom. Drill
another set of holes through the deck
slats at each post location to
accommodate the bolts. Fit a cross dowel into each
hole in the posts, then position the
backrest on the sleigh. Install a clamp across
the back support posts to bend the
backrest to the correct width, install the bolts
up through the deck and into the posts,
and tighten them by hand. Use a
screwdriver to align the cross dowel (left), then
finish tightening the bolts from
underneath with a hex wrench.

YANKEE CLIPPER
T""* he design of the clipper shown in
JL this section evolved as a response
to the abuse dished out by New
England winters—and the young
owners of these sleds. It is made from
carefully chosen wood, held together bv a
simple, rugged method of
construction. The Yankee Clipper consists of
only five main parts: two runners, two
stretchers, and a deck. The stretchers
The snowflake design on the clipper shown above transforms a simple plaything into
an attractive and elegant sled. As shown on page 56, such designs can be stenciled
onto the deck with a thick-bodied paint, such as quick-drying japan colors or acrylic
paint. This sled was built by John Sollinger of North Ferrisburg, Vermont.
are joined to the runners with round
mortisc-and-tenon joints, which are
then pegged with hardwood dowels.
Use a tough wood like ash or oak for
the runners and stretchers.
To keep the weight of the sled to a
minimum, make the deck from a light
species, such as white pine. For
maximum strength, glue the deck to the
stretchers. Although this approach
does not allow for expansion or
contraction of the deck, you can
compensate by selecting wood that is free
from checks and reinforcing the
connection with screws.
The secret to a fast sled lies in the
runners. In the 18th and 19lh Centuries,
the best sleds had shoes of silver steel
polished to a mirror finish. Today, mild
steel is a reasonable substitute. You can
buy lift-by-', inch bars at most hardware
stores and burnish the finished runners
with a belt sander.
MAKING THE FRAME
1 Making the runners
Outline the runners on a piece of:/-
inch plywood or hardboard and cut it out
as a template on your band saw. Use a
compass to outline the mortises for the
stretcher tenons on the template. They
should be positioned so that when the seat
deck is installed (page 56), its surface
will be flush with the top of the runners.
Drill a ^-inch hole at the mark left by the
compass point. (This will serve to center
the spade bit that you will use later to
drill the mortise.) Outline the handle,
then cut it out with a scroll saw or coping
saw, then trace the design onto your
runner stock (right), marking points for the
mortises. Cut the runners using a band
saw and the handle with a scroll saw or
coping saw, then bore the mortises on a
drill press fitted with a 1-inch spade bit.
Sand all the edges of the runners.
54

SLEIGHS AND SLEDS
2 Turning the stretchers
Mjke the stretchers from lX-inch-
squa^e stock, cut about lA inch longer
than you need. Mount the blank between
centers on your lathe and use a parting
tool to turn a 1-inch-diameter tenon on
each end. Use calipers to check the tenon
diameter as you go (right). Trim the ends
of the tenons, if necessary, but they
should be long enough to pass
completely through the runners.
3 Assembling the frame
Spread glue on the tenons on the
stretchers and in the runner mortises
and fit the pieces together, using a mallet
to tap the joints together, if necessary.
Rotate the stretchers so that their top
surfaces are parallel to the top edges of
the runners, then secure the assembly with
two bar clamps, protecting the stock with
wood pads and aligning the clamps with
the strechers. Next, reinforce the joints
with dowels. Holding the frame steady on
a work surface, drill a hole for a ~A-\x\c\\
dowel into the top edge of each runner
and through each stretcher tenon (left).
After boring each hole, dab a little glue
into it and tap in a dowel Once all the
dowels are installed, trim them flush
with a chisel.

SLEIGHS AND SLEDS
FINISHING THE DECK
1 Securing the seat
Make the seat by edge-gluing boards
together (page 98), then plane it to a
thickness of 'it inch. Cut the seat to fit
snugly between the runners then,
referring to the color photo on page 54, cut
the ends of the seat to shape on your
band saw, round over the edges, and sand
them smooth. With the seat upside down
on a work surface, spread glue on the
tops of the stretchers and clamp the seat
to the frame, using wood pads to protect
the stock. For added strength, drill a
series of countersLnk pilot holes through
the stretchers and into the seat. To avoid
boring through the seat, mark the drilling
depth—the thickness of the stretchers
plus no more than one-half the thickness
of the seat—on the drill bit with a piece
of masking tape. Drive a stainless steel
wood screw into each hole (right).
K
\^Sv Seat ^s\^ 1
n^ ^v ~ ^\^5<^Wood pad (
apt*' \
2 Making a stencil
Make a photocopy of the stencil design,
enlarging or reducing the image, as
appropriate. Then use carbon paper to transfer
the design to a piece of stencil board. Cut
out the pattern with a craft knife, pulling
the knife toward you (above). (A snowflake
pattern is shown on the back endsheet.)
3 Painting the seat
To help align the stencil precisely, draw reference lines centered on both the
seat and the stencil. Then align the reference lines and secure the stencil to the seat
with masking tape. If you are spraying the paint, hold an aerosol paint can 6 to 10
inches from the surface and direct the spray at the stencil until the exposed
wood is coated lightly with paint (above). You can also use a stenciling brush to
apply the paint. To avoid any bleeding, remove the stencil while the paint is wet.
Hnish the sled with several coats of marine varnish.
56

SLEIGHS AND SLEDS
FASTENING STEEL SHOES TO THE RUNNERS
1 Bending the shoes
Make a third sleigh runner (page 54)
to use as a bending form for the steel
shot's. As shown in the color photo on
page 54, this runner will need a bulge
along the top at the front end to form
a loop that with anchor the tow rope.
Measure along the edge of the runner,
cut the steel to length using a hacksaw,
and file off any burrs. Mark screw holes
on the shoes at every transition point
along the runner's edge, then drill a
countersunk hole through the shoe at
each point. To bend the shoe around
the runner, start at the back end; you
may need the help of a machinist's vise.
Hold the shoe in place with a C clamp,
then repeat the process at the front
end of the runner (right).
tolSJ
^P^^
^<'^
xHl,
V\ Extra ^
j/VV runner
y&^mK
/3teel shoe
v^B^^^ ^ ~~
ww.^^^^^^^^
^^^::
x^^
^^^^~^r^
<^II\. Angled ^"\
■^C^-^Si damping block /
w
'•'A^'J?
2 Securing the shoes
Set the sleigh on its side on a work
surface, then start installing a shoe at the
front end of one of the runners. Holding
or clamping the shoe tight against the
runner, drill a pilot hole into the runner,
using the hole in the shoe as a guide.
You may need to cut an angled clamping
block to keep the clamp jaws square to
the shoe. Then drive a screw in place
(left). Repeat the process at the next
hole and continue until both shoes are
installed. Because the steel will tend to
creep forward as each screw is tightened,
drill each pilot hole only after the
previous screw has been driven.

TOBOGGAN
'^j~-he flat-bottomed toboggan is a
J. means of transportation perfectly
adapted to its environment. The
runners are made bv steam bending narrow
siats around a form. Thev are then
fastened to crosspieces. A rope is threaded
through the crosspieces and serves two
purposes: setting and holding the nose
curve and providing a hand-hold for
breathtaking downhill rides.
Since the runners also serve as this
sled's deck and seat, it is important to
bend them precisely. 'I hey should have
a radius of 3 to 4 inches, with the curl
tightening slightly toward the end. For
best results, use a wood with .superior
bending qualities such as maple or ash
planed to inch thick.
To finish a toboggan, seal the top
.surface with a coat ot marine varnish. The
bottom should be treated with hot pine
tar, available from ski shops. This will
seal the wood and provide a surface to
hold the runner wax. Work in the pine
tar with a rag, using a propane torch on
a very low heat setting to keep the tar
fluid. To prepare the toboggan for a day
on the hills, rub on a layer of hard
crosscountry ski glide wax with a cork block.
The toboggan shown at left was made
from steam-bent maple. Also known as
a Canadian sled, this version is long
and sturdy enough to carry two or three
riders over the deepest snow.
MAKING THE RUNNERS
1 Preparing the slats
Toboggans general range in size froT.
3-foot sirg.e-seaters up to 6-xc:t nodels
fc twe or tnree ricers. Chce you rave
chosen a length, make yo^r slats 16 inches
longer to forr the bend at the nose. C„l
the s'ats 2 • inches wide from vnch-
th-ck stock. Next, smooth the edges of
eacn slat on a table-mounted router. Fit
tne tool witui a ;,-incui piloted round-over
Dit anc: use rnree feathersoards to help
you guide the slats across the table. Ciamp
one to the table r line with fie bit and
brace t with a sjpport board, and fix the
other two to the fence on either s'de of
the cutter. (In tne illustraton, tnefeath-
erboard op the cutfeed side of the b.t has
bee^ removed for cl arity.) Feed t^e s'ats
wth botu hands inght).
58

SLEIGHS AND SLEDS
2 Steaming the slats
HuiM d steamer like the one shown at
nj M fr, in two lengths of Schedule 80 ABS
P-; r» joined by an ABS T connector. Use
push-on end caps to prevent the steamer
from becoming over-pressurized. Glue a Jf-
mch connector pipe to the T connector and
attach the connector to a commercial
wallpaper steamer. To hold the wood above
condensed water in the pipes, install a
series of ^-inch zinc-coated machine bolts
just below the centerline of the pipes. Use
both steel and rubber washers to make an
airtight seal. Also drill a /-inch drain hole
at one end. Lastly, build a 2-by-4 frame
that will support the steamer on a slight
incline to allow condensed water to run out
of the drain hole. To use the steamer,
secure the push-on caps, turn on the device,
and let the steamer warm up. Once steam
begins to escape from the drain hole, place
a slat inside. Close the end cap tightly and
let the wood steam for about 30 minutes.
To avoid scalding your hands, wear work
gloves and use tongs when removing the
wood from the steamer (inset).
Scheduie 30
A&5 pipe
T-connector
3 Bending the slats
Cut a bending form from a board as
thick as the width of the slats, following
the profile of the toboggan. Screw the form
to a base made from two %-inch plywood
sheets and clamp the base to a work
surface. Bore three 1-inch-diameter holes
through the base for locking dowels around
the curved part of the form. The space
between the dowels and the edge of the
form should equal the slat thickness.
When you remove a slat from the steamer,
place it on the form and use a wedge to
secure the front end. Working quickly,
bend the slat firmly and steadily, inserting
dowels to secure the workpiece as you
proceed (left). Use bar clamps to secure the
slat to the straight edge of the form. Leave
the slats on the form until they are cool to
the touch—about 1 hour. The slats may
spring back 1 or 2 inches, but the correct
curve will be maintained with the rope.

SLEIGHS AND SLEDS
4#
4 Making the crosspieces
Make the crosspieces from 1-inch-
thick, j4-inch-wide stock and cut the
pieces slightly shorter than the combined
width of the slats. To cut the notches in
the crosspieces for the tow rope, install a
dado head in your table saw. adjusting its
width and the cutting height to A inch.
Screw a board as an extension to the
miter gauge and position the rip fence to
make the cut 1 inch from the end of the
crosspiece. Holding the workpiece flush
against the extension and the fence, cut
a notch, then turn the board around and
repeat to cut the notch near the other
end (left). You will need one crosspiece
at each end of the toboggan and at 11-
to 13-inch intervals between.
5 Attaching the crosspieces to the slat
Arrange the slats on a work surface,
align their ends, and butt their edges
together. Spread glue on the underside of
a crosspiece and clamp it across the slats
about 2 inches from the back end; make
sure the crosspiece is perpendicular to
the edges of the slats. Glue another
crosspiece in the middle of the bend at
the front end. Install the remaining
pieces at uniform intervals in between.
Then turn the toboggan over and drill
countersunk pilot holes through each slat
at every crosspiece location; bore two
holes through the outside slats and one
hole through the others. Mark the drilling
depth on the drill bit to avoid boring
through the crosspieces. Then drive a
screw into each hole (right).
60

SLEIGHS AND SLEDS
6 Preparing the crown piece
Make the crown piece that will cover
the front ends of the slats from the same
stock you used for the crosspieces, but
cut it about twice as wide and slightly
longer. With the same dado head
adjustment you used in step 4, raise the cutting
height to % inch. Center an edge of the
workpiece over the dado head and butt
the rip fence against the stock. Also
clamp a braced featherboard to the table
in line with the blades. Then use a push
stick to feed the piece into the dado
head, cutting a groove along the bottom
edge (right). Fit the piece over the ends
of the slats, then drill pilot holes through
it at each slat location. Secure the piece
in place with stainless steel screws. Also
bore a hole through the crown piece near
each end for the tow rope. Use a belt
sander to smooth the edges of the outside
slats flush with the ends of the crown
piece, and bevel the edges of the cross
pieces with a sanding block, eliminating
any sharp edges.
7 Finishing the toboggan
Finish the top surface of the
toboggan with a coat of marine varnish and the
bottom with pine tar (page 58). The final
touch is installing the tow rope. With the
toboggan flat on a work surface, use a
pair of clamps to hold the nose at the
desired bend. Then knot one end of the
rope and thread it through one hole in the
crown piece and through the notches in
all the crosspieces. Feed the rope across
the back-end crosspiece, then back up
through the remaining notches and knot
at the front (left). After releasing the
clamps, make sure the pressure is equal
on both sides of the toboggan. Adjust the
knots, if necessary. The toboggan nose
should have a fair amount of spring
without overstressing the wood.
61

I
ROCKING HORSES
I he modern rocking horse,
made mobile by curved
wood runners or springs, has
been a fixture of childhood for
most of the 20th Century. The
swing and sway of riding an
animal undoubtedly has
primordial appeal, dating to the
time when animals were first
domesticated by humans.
This chapter presents detailed
instructions for building three
different, but equally delightful,
rocking horses. The first version,
shown in the photo at left and
beginning on page 64, comes
closest to duplicating the shape,
coloring, and appearance of a
horse. This horse is attached to a
sturdy stand by means of metal
rods fixed to the animals hooves.
The rods enable the horse to
swing pendulum-like without
an\r danger of the toy falling over.
Among the most useful features of this horse are the footrests
positioned outside the stirrups. By fastening wood blocks to the
rests, you can fit the horse to the si/e of the child using it.
Despite its elegance and realistic appearance, the horse is
relatively easy to assemble from either solid wood or plywood.
Carving the lifelike details of the head and tail, and the
shaping of the body will provide an opportunity to expand—or
display—\our woodworking skills.
/l5 a way of personalizing a rocking horse, you can
design one with interchangeable heads. The deer head
shown above, carved by Fred Sneath of Stony Lake,
Ontario, has a mortise that fits over a tenon in the
fiamcwork of his swinging horse, featured on page 78.
Glued into the head, the antlers come from a living
deer, dropped by a male after its rutting season.
The swinging horse shown
beginning on page 78 relies on a
more stylized rendering of the
equine form, but it has several
ingenious features. First, it is easy
and inexpensive to build from 2-
by-4 stock. Second, some of the
parts pivot, enabling the horse
to be folded and stored. Third,
the horse has two seats, a small
one for a young child and a
larger one behind for an older child
or adult. Finally, as shown in the
photo at left, the head fits onto
the framework with a glueless
mortise-and-tenon, allowing
different heads to be used.
The final project, featured
starting on page 82, is a more
traditional rocking horse for a
toddler. Fas}' to build, this horse
sits on bent-laminated runners
and has a saddle seat supported
by a cross beam. This horse stands
close to the ground, making it ideal for the small child who is
not quite readv for a swinging or stand-mounted animal.
Part of the allure of a rocking horse is a lifelike finish. Refer
to the Toy and Crafts Basics chapter starting on page 12 for
information on choosing and applying child-sale paints and
finishing products. To protect the young users of these horses,
round over all contours and edges, sand all surfiices smooth, and
avoid any sharp corners or pinch points.
The stand-mounted horse shown at left, built bv Don Buhler of Swan River,
Manitoba, is designed to adapt to its rider's growth spurts. Tor a child whose
legs do not reach the footrests, wood blocks can be fastened to the rests. As the
child grows, smaller blocks can be used or removed altogether. The horse
features a hand-carved head and tail, a leather halter, and a suede saddle.
63

STAND-MOUNTED.ROCKING HORSE
ANATOMY OF A STAND-MOUNTED ROCKING HORSE
The rocking horse shown below
measures 23 inches high by 33
inches long. It can be fashioned
from virtually any stock, although
a wood suitable for carving (pine
or basswood, for example) should
be used for any of the parts that
need shaping, such as the head and
tail. The legs and body can be
constructed of plywood, which will
save you the concern of making
sure that the grain follows the
length of pieces for maximum
strength. However, you will have to
cover the plies with edge banding.
SIDE VIEW
Saddle
Suede fastened
wth braes tacks
Mane
Cut from A-inc^-
thick stock; glued
to side of head
Ear
Cut f<~om *-irch~
thick stock: glued
to side of nead
Tail
Cut from * AAncY,-
thicK stock; fastened
~o top of vedy
Rod block
V'-'x3 x5":
screwed to top
horizontal piece
and stand and
grooved to
accommodate
metal rod
Leg -
Cut from ^-inch-thick
stock; edge-glued to
stirrup and attached to
stand with metal rod
Head
Cut from 1 A-inch-
thick stock on
band saw and
carved and shaped
by hand; fastened
to top of body
Halter
Leather
fastened to heaa
with
upholstery nails
Stand support
Cut from A-inch-
thick stock:
screwed to
horizontal and
vertical stand pieces
Stirrup
Cut from ^-'.nch-
thick stock; edge-
glued to legs
64

ROCKING HORSES
REAR VIEW
CUTTING PATTERN FOR CURVED PARTS OF HORSE
1 square = 1 inch. Enlarge grid to produce a cutting
pattern of the appropriate size for your project.
Stand evpport
65

ROCKING. HORSES
Tht saddle back for a racking horse is
cut out on the baud saw from a piece
of --inch-thick stock. Once it is
sanded smooth, the saddle back will
be glued into an angled dado in the
body of the horse. Most of the horse's
parts, including the legs, body and
head, arc cut out on the band saw.
PREPARING THE STOCK
1 Outlining the cutting pattern on the stock
Prepare blarks for the carts of the ho^se that i/;il be
produced from your cutting pattern 'page 65;. These ;nc:bde the
legs, stirrups, head, ears, ta., and saddle bacK. Using i-.nc, p.y-
wood or, as shown above, sclid wooc, make the b'anks slig itly
areer thar tie pattern. For greatest strergth, ers^e tha* t^e
wood gra.T fo;iows the length cf p eces ' ke the egs and st rrur„s.
Ho'a.^E, the approp';ate p ece of the pattern cr eac^ aia-k t
tu™. trace its out -ne on the stock ait_h a ?enc:f 'above:.
66

ROCKING HORSES
2 Sawing parts to size
Once the parts for one side of the
horse have been outlined, cut them to size
on your band saw. Cut just to the waste
side of your cutting line (left), feeding the
stock with both hands and keeping your
fingers clear of the blade. Once the parts
for one side of the horse are sawn and
sanded to the line, use them as patterns
to outline the pieces for the other side.
3 Gluing up the legs and stirrups
Dry-fit the legs and stirrup for one side of the horse together and press the pieces together. Protecting the stock with wood
and mark a line for a biscuit, or plate, joint across the center of pads, secure the joints with a bar clamp (above). Position the
each seam. Use a plate joiner to cut a slot into the mating edges clamp jaws at the square ends of the legs and set the bottom end
of the pieces at each mark. Then spread glue along the edges of the assembly on a support shim to hold the pieces level while
and into the slots, insd a wood biscuit into each slot in the legs, the glue cures. Repeat the process for the other side of the horse.
67

ROCKING HORSES
SHAPING THE EARS, HEAD, AND TAIL
,fm~*
The ears of a rocking horse can be
smoothed to their final shape most easily on a
spindle sander. Although you can use a
rasp for shaping, the sander removes
waste wood more efficiently and is also
ideal tor smoothing marks left by the
band saw blade. Spindles of various sizes
can be installed to suit the curve of the
piece being shaped. Tin? spindle moves up
and down while it rotates, preventing the
paper from clogging and allowing you to
use the full surface of the sanding drum.
After power sanding the parts, use
progressively finer grits of sandpaper to hand-
sand all surfaces.
1 Carving the eyes and nostrils
Cut the horse's heaa to shape so the
woca gram is oriented across tie piece,
tnen outline the eyes ano nostri s on each
side. Refer to the a-atomy "lustration on
page 64 for the placement and size of
fiese detai Is. Then clamp the head to a
worK surface anc use a carv ng gouge of
the appropriate size to forrr the eyes and
nostrils. Hold ng tne toe! vertica"y with
the blade on your ojtl ne. strike the handle
witn a wooden ma let to cut about -l inch
deep .nto the wood. Make a second cut
(right), then clean up the cavity with a ch s-
el. Repeat the process to carve the nostrL
68

ROCKING HORSF.S
2 Shaping the mouth
(
. Once the eye and nostril are done,
use a triangular tile to clean up the
mouth opening (left). Then turn the
workpiece, reclamp it and repeat the
process ot carving the eyes and nostrils
and shaping the mouth on the other
side. Use the file in the same way to
shape and add detail to the tail
3 Shaping the head
Once all the surface detai.s have
been carved into the head, secure the
piece vertically in a bench vise and
use a rasp to round over its edges
(below). Leave the bonom end of the
head xlat. however, to facilitate
joining it to the body.
69

ROCKING HORSES
ASSEMBLING THE HEAD AND THE BODY
Most of the joinery (or assembling a
stand-mounted rocking horse is
simple? but precision is required. As shown
above, boring the hole through the
head for the handle is best done on a
drill press. Once the mane pieces are
glued onto the head, the hole can
be bored with a spade bit the same
diameter as the dowel that will be
used for the handle.
2 Gluing the ears to the head
Mark the 'ocation of the hand.e on the
head and bcre the hole for it or the drill
press (pnoto, above/. Then secure the head
in a bench vise and outline "he ocatior
of ihe ears on the siaes of the head. Apply
glue to the contacting surfaces and clamp
the ears in pJace (right). Now glue the
smaller mane pieces to the head.
1 Gluing the mane pieces to the head
Once the nane pieces are cjt to size (page 67), t">ey can be attached to the
head. The mane consists of four pieces: t^o la-ger ones located behind the ears
anc twc srra.ler pieces positioned between the ears and the eyes. SDread glue on
the larger p.eces and cr the mating Surfaces of the J-ead. set tne-n in place anc,
w th tne head upright on a wck su^cce, clarrp f lem secure y (abeve).
70

ROCKING HORSES
3 Fastening the head and tail to the body
> ■•Y-rtU'- iead and tail at opposite
- . -if tr,f uody and outline their loca-
j ^ the board. Then secure the board
dgri- jp -n a bench vise and drill
countersunk clearance holes through the body
with in your outlines; bore two holes for
the head and one for the tail. Spread glue
on the bottom end of the head and within
the outline on the body and, holding the
*iead in position on the board, drive the
screws through the body and into the head
(right) Reposition the body in the vise,
and repeat the process to attach the tail
4 Gluing the body to the leg support board
Spread glue on the contacting surfaces of the body and the adhesive cures Use a fifth clamp to secure the assembly to a
leg support board and center the body on the board. As shown work surface, placing a block under the clamp jaw to distribute
above, use four cldmps to hold the pieces together wh.le the the pressure.
71

ROCKING HORSES
MOUNTING THE SADDLE BACK
1 Cutting the dado for the saddle back
Clamp the body and leg support board
to a work surface, protecting the stock
with a wood pad. Cut the saddle back on
the band saw (photo, page 66) and p ace
it on the body about 1 inch in front of
the tai.. Tilt the saddle back until it rests
against the tail, then outline the location
of the piece on the body. Because the dado
shoulders must be sloping, cut them with
a backsaw. Holding the saw at the same
angle at which the saddle back will be
tilted, about 15c. cut to a depth of aDout
' inch on the back of the dado. Clear the
waste with a chisel. Holding the chisel
flat-side down, slice through the wood
from one ena of the dado to the other
(left). Make sure the bottom of the dado
slopes toward the tail so that the saddle
back lies flush with the tail.
2 Gluing the saddle to the body
Prepare a set of clamping blocks for
gluing the saddle back in place. Make an
arched block with a concave curve the
same shape as the top edge of the
saddle back and two angied blocks cut with
the same angle as the bottom of the dado.
Spread glue on the bottom edge of the
saddle back and in the dado and clamp
the workpiece in place, using the clamping
blocks to direct the pressure squarely on
the joint (right).

I
ROCKING HORSES
INSTALLING THE LEGS
1 Preparing the legs for the metal rods
Before fixing the legs to the body,
drill holes into their inside faces for the
rods that attach the horse to the stand
Mark the rod locations on the hooves
and bore /-inch-deep holes with a drill
press (above), using a brad-point bit
the same diameter as the rods.
2 Gluing the leg assemblies to the body
Position each leg-and-stirrup assembly aganst the body and mark a line along the
inside of the assembly where it meets the edge of the body. Then spread glue on the
assemblies above your line and on the contacting surfaces of the body and fit the
pieces together. With the legs upright on a work surface, install two bar clamps to press
the top edges of the assemblies against the underside of the body and four more
clamps to secure the assemblies to the sides of the body. Use long wood pads with the
second set of clamps to distribute the pressure along the length of both joints (above).
\\U !)\l\
\\
j 1
i
K A L
rr^XNjN^^r ^?
\ \ Leg \ /
\ \ bracket \ /
1 \ \ \ ^ \
\ \ \ support
1
1
\^-—\
T^^\ 1
o\ \
3 Gluing the leg supports
and brackets to the body
Referring to the anatomy illustration of
the horse (page 64), cut the leg
brackets to size. Also saw two leg supports
from :4-inch stock. Spread glue on the
contacting surfaces of the pieces and
set them in place. As shown at left, the
brackets fit between the legs at each
end of the body while the supports .ie
flush against the legs and the underside
of the body.
73

ROCKING HORSES
SHAPING THE HORSE
Shaping the body
Secure the horse to a work surface by
clamping one leg in a handscrew and
clamping the handscrew to the table. Use
a rasp to shape the horse's body. Holding
the tool with both hands, work from the
top of the t.orse to the bottom to round
over the edges of the body and legs (left).
Continue until you have smoothed all the
sharp edges and corners. Before installing
the saddle and halter (page 75) or
mounting the horse to the stand (page 76),
apply a finish to the horse.
ASSEMBLING THE STAND
1 Building the framework
Refer to the anatomy illustration for the dimensions of
the stand pieces. Dry-fit the four boards together and mark
screw holes on the top and bottom pieces in line with the
vertical boards. Drill a counterbored hole at each mark and a
pilot hole into the ends of the vesical boards and screw the
pieces together. Then fit the stand brackets in the top
corners of the stand and mark a screw hole on each side of the
corner. Drill counterbored holes and fasten the brackets to
the stand (right). Once the pieces are assembled, conceal
the screw heads with wood plugs.
74

ROCKING HORSES
2 Installing Hie stand base
1 ".*- nasi' consists of two boards, one
?♦ Bin h e lrd of the stand. With the stand
■:i ■:» s.de on a work surface, hold one
roard in position and mark three screw
Soles on its underside. Use counterbored
screws to attach the board to the stand
inght). Repeat at the other end of the
stand. Paint or finish the stand.
INSTALLING THE SADDLE AND HALTER
1 Installing the saddle
Cut the saddle to shape from a
piece of heavy suede leather, test fit
it on the horse, and trim it, if
necessary, to make sure it fits between the
neck and the saddle back. Spread
glue on the underside of the saddle,
position it on the horse, and secure
the perimeter of the saddle to the
body with upholstery tacks spaced at
equal intervals (left). Then dab some
adhesive in the hole through the mane
and insert the dowel that will serve as
the handle.

ROCKING HORSES
2 Installing the halter
Make the halter from the same
suede leather used for the saddle,
cutting it into %-inch-wide strips. You will
need six strips: two around the top of
the head, passing between the ears and
mane, two around the jaw, and two more
to join these. Test-fit the strips in
position, trimming them long enough to loop
around the metal rings. Spread glue on
the underside of the strips and set them
in position on the head. Loop the ends
of the strips around the rings and use
upholstery tacks to secure them (right).
MOUNTING THE HORSE TO THE STAND
1 Attaching the metal rods to the hooves
Have two ^o-inch-diameter metal rods prepared at a metal-
working shop to the shape and dimensions shown in the
illustration above, at left. Holding the horse upright on a work
surface, squeeze one of the rods to fit between the legs (above,
right) and insert the ends into the holes you drilled in the
hooves. Repeat at the other end of the horse.
76

ROCKING HORSES
2 Securing the horse to the stand
Once both rods have been fixed to
the horse, prepare the blocks that will
secure the rods to the stand. Cut the
pieces of wood to size, then saw two V-
inch-long dadoes about -/ inch from the
front end of each block. The dadoes
should be the same width as the diameter
of the rods. Position the block on the top
piece of the stand about 3A inch from the
end and drill counterbored holes through
the stand piece and into the block. Place
the horse on the stand and, holding the
block steady, insert the top of the metal
rod into the dadoes in the block. Then
fasten the block to the stand from
underneath (right). Repeat the process to mount
the tail end of the horse to the stand. Do
not plug these holes so you can unscrew
the block periodically to lubricate the ends
of the rods with wax.
Y\/
/f
/
Rod bfock^
\ /^::\-
\ \
/ ~~~^ ^
y^-
^1
. r i
°\
J
&S ■^fe^rjfos.j
/ Its
/ ill
3 Installing the footrest
The final step in making the horse
is attaching the footrest to the stirrups.
With the horse resting on its side on a
work surface, position the footrest against
the stirrups and drill two counterbored
screw holes for each stirrup. If you plan to
add wood blocks to the footrest to
accommodate a smaller child, drill pilot holes
for them into the ends of the foot rest
before fastening it to the stirrups. Then,
holding the footrest against the stirrups
securely, screw the footrest in place (left).
77

SWINGING HORSE
Head
r'crse head car
re rradf as *or a
sta^d-r"cu"teA
rrCK^g o-Sc?
j/a-3?. S'7): a
~*r '■quo}' "lo^se
is ther. cut across
Xue tputton ena
[page b^\
Handle/suspeneion rail
---inch dowel ttucK, 30
inches tong, with a turned
k*ob at each end
Vertical frame pieces
^wo 33-i."iCl"-.jrg --sy-
4s lacked tcgetner
v.'ith th"Ou^h '-one's;
Tn? pieces &ara*!cr
tne V.ead support a'
tne top
zo"ta' r'a've p'sce
at fre nvdd\e
Seat locking pin
Metal p'K securest seat orack-
et tc ho^zor ta. frarr.e piece; -
corks pressed onto ends serve
as a protectee cove*-
Supporting rope
Features a metal
clip at the top e"i
th?t attacV.es to
an eye hook tr-ead-
ed into a joist
78

ROCKING HORSES
PREPARING THE STOCK
1 Cutting the parts to size
Refer to the anatomy illustrations of the horse on page 78 to size the
parts. Make the head from a 2-by-12 as you would for a stand-mounted
horse, then cut a through mortise through the boitom end (page 84). Curve
the bottom ends of the head support and one end of the frame pieces on
your band saw. For tie seat, you can use a bicycle seat as a template. To
make the spacer disks, use a compass to outline the 3 '-inch c.rcles on
your blank and cut them out on the band saw (above).
2 Smoothing the stock smooth
Once you have cut all the pans of the
horse to size, smooth the edges of the stock
with sandpaper or on a spindle sander. Be
sure to preserve the rounded end of pieces
like the head support (above).
3 Preparing the frame pieces for assembly
Mark holes for the dowels that will join the frame pieces
together. On the vertical pieces, mark a hole about 1 / inch
from the top, and four more at 8-inch intervals. You will also
need to drill a hole about \h inch below the top one for the
handle. On the horizontal piece, mark the hole 1 A inch from
the front end. Clamp a backup board to your drill press table
and set the vertical pieces on top, aligning the edges and ends
of the boards. Install a spade bit the same diameter as your
dowei stock, then drill the top and bottom holes first so you
can use the handle and footrest to keep the boards aligned as
you bore the remaining holes (left). To avoid tearout, drill the
holes from both sides of the stock. Next, bore the holes in the
horizontal piece and the head support, making sure the holes
in the support piece and the vertical pieces line up. Use a
smaller bit to drill the holes in the horizontal piece for the seat
locking pins; refer to the anatomy illustration for the location
of these holes. Finally, drill a hole through the edge of the
horizontal piece near the back end for the supporting rope.
79

ROCKING HORSES
MOUNTING THE HEAD
1 Joining the head to the head support
Cut a tenon at the top of the head
support to fit the through mortise in the
bottom of the head. Then spread glue on
the contacting surfaces of the pieces, H
the tenon into the mortise. and use a
handscrew to hold the joint together o" a
fat work surface (left).
2 Inserting a spacer
Once the glue has cured, use a wood
spacer to fill the portion of the mortise
left open by the tenon. Cut the spacer on
your band saw, test-fit t in the gap. and
use sandpaper to improve the fit. if
necessary. Then spread glue on the spacer
and insert it in the mortise (right). Clamp
it in place until the adhesive cures.
80

ROCKING HORSES
ASSEMBLING THE HORSE
jy
0<*A -
O
<w
o
- Spacer-^/.
- Met^/ ivas/ier
^ Hardboard
waahere
horizontal
'frame piece
Support
t bracket
1 Assembling the frame pieces
Before assembling the horse, cut the 14-inch hardboard
washers for the joints between the two vertical pieces. Then
set one of the vertical pieces on a work surfaces and insert
the handle and dowels in their respective holes. Slip a washer
around each dowel, then install the head support, the
horizontal frame piece, and the circular spacer disks. Add another
set of washers and slip the second vertical piece in place
(above). Use metal washers for the joint between the vertical
and horizontal frame pieces, since this connection must stand
up to considerable friction. Once all the pieces are in place,
drive a finishing nail through each dowel and into the vertical
frame pieces to secure the framework.
2 Installing the seat
Once you have cut the seat and seat brackets to size, drill
clearance holes through the brackets for attaching them to
both the seat and the horizontal frame piece. Screw the
brackets to the underside of the seat (left), then use the locking
pin to secure the seat to the framework. To cover the sharp
ends of the pin, glue a wooden pad to one end and push a cork
onto the other end once the seat in in place.
81

TRADITIONAL ROCKING HORSE
A deft strikeJrow oti wtisi's brush
applies the finishing witch to an t-ye of
the rocking hese shown at right. A
good part or'the appeal of a wooden
toy depends on careful finishing. The
runners, cross braces, and foot rest of
this horse were coated with pure tung
oil. Tlie rest of the horse was finished
with nontoxic paint: four coats of
black paint on the entire body then
two coats of white paint to bring out
details like the tail, mane, eyes,
nostrils, and mouth.
ANATOMY OF A TRADITIONAL ROCKING HORSE
82

ROCKING HORSES
ASSEMBLING THE HORSE
1 Bending and laminating the runners
Use a bending form to give the runners their curved shape
and glue up the pieces of the laminations. For the form, adjust
trammel points to a radius of 45 inches and mark two arcs near
opposite edges of a 2-by-12 plank. Cut along both lines on your
band saw, then make parallel cuts on the outside pieces, to
accommodate the 1/ inch thickness of the runners. Screw the middle
piece of the form to a plywood base, then prepare the runner
stock. Rip twelve y—inch-thick strips from a 1/-inch-wide piece
of hardwood witn good bending qualities, like ash. Line the edges
of the form with wax paper to prevent the lamination from
sticking to the form. Then spread glue on one side of each strip and
butt six of them together against each edge of the form. Press
the outside pieces of the form against the strips to bend them
slightly. Bend and secure the lamination with bar clamps (above).
Let the laminations cure for 8 to 10 hours, then joint the edges
of the runners and round their ends on the band saw.
2 Bending and laminating the runners
Before assembling the horse, test-fit
the pieces together and mark the edge
half-laps that join the body support to the
vertical braces (inset). Clamp the cross
braces to the runners about 6 inches from
each end. Then, with the body support
centered on the braces, use a try square to
mark lines on the body support
perpendicular to the top of each brace (left). Use
the thickness of the vertical braces to add
another set of lines parallel to the first two;
these lines outline the half-laps. Cut the
edges of the half-laps halfway across
the width of the body support on the
band saw and remove the waste pieces
with a chisel. Use the half-laps in the
body support to mark the mating half-laps
in the vertical braces, then make the cuts.
Curve the bottom ends of the support board
on the band saw and sand all surfaces.
83

ROCKING HORSES
•„
:>^<c
>J Body euppo'rt
Vertical | 1
brace -*^^ \ \
Cros& \ \
brace -^^ s\ 1 /
4\ 1 \
1 ^^M '"-^
1 \Kl -^
/
3 Attaching the body support to the braces
Once the half-laps are finished, unclamp the cross braces
from the runners, dry-fit the body support and vertical braces
together, and position the pieces on the cross braces. Mark
and drill counterbored screw holes on the top edge of the body
support in line wit1! the vertical braces, on the bottom face of
the cross braces in line with the vertical braces, and near the
corners of the cross braces in line with the runners. Spread glue
in the half-laps, then screw the braces together and attach the
body support to the vertical braces (above).
4 Installing the runners
Apply glue to the underside of the cross braces in line
with the runners and clamp the runners in position. Using the
counterbored holes in the braces as a guide, drill pilot holes
into the runners and screw them in place (above). Glue in
hardwood plugs cut from a contrasting hardwood to cover all
the screw heads.
5 Preparing the head and tail
Before shaping the head and tail (pages
68 and 69), use your table saw to cut the
through mortises that will join them to the
body support. To steady the stock during
the cut, clamp a featherboard to the saw
table in line with the blade; brace the
featherboard with a support piece and
shim the featherboard to keep the work-
piece from wobbling. Align the center of
the leading end of the blank with the saw
blade, butt the rip fence against the work-
piece, and make the cut. Turn the work-
piece end-for-end. shift the fence away
from the blade by the thickness of the kerf,
and repeat the cut. Continue widening the
dado this way (right) until the blank fits
properly on the body support.
84

ROCKING HORSES
6 Mounting the head, tail, and seat
Test-fit the head blank on the horse,
outline the location of the vertical brace
on it, and cut the notch on your band saw.
Shape the tail and head as you would for
a stand-mounted horse (page 68) and
glue ears to the sides of the head. Bore
a hole through the head for a dowel
handle (page 70) and glue it in place. Then
spread glue in the notches in the tail and
head, and position them on the body
support (above). Next, cut the seat to size,
sand its surfaces smooth, and position
it on the body support. Outline notches
on the seat for the head ana tail, then cut
them on the band saw. Cut the footresi,
round over its ends with sandpaper, and
screw it to the runners, again counter-
boring the fasteners. Set the seat in
place (left) and fasten it to the body
support with counterbored screws. To
complete the assembly, cover the screw
heads with hardwood plugs.
85

H H H H tt H H H H HI
ai ii ii «i hi ii si ii hi hi in in in hi ibi 'it isi is1 1:1 isi isi 1:1
flvi^nHi ^''™

DOLLHOUSES
well-built (tollhouse can
j7\ survive for as long as an
actual dwelling and entertain
generations of youngsters—
and adults. This chapter will
show you how to put the
finishing touches on the type of
dollhouse you can build from
a kit. The emphasis is on
producing a realistic and
entertaining house, one thai will be
sufficiently well-designed and
sturdy to w ithstand the only
real hazard to which it will
have to endure: the busy hands
of its owner.
Building and adding
accessories to a dollhouse require a unique skill—the ability to work
in miniature. The chapter will examine the most important
considerations, including scale modeling and using
specialized dollhouse-making tools {page 891, wiring the interior so
that lighting can be installed [page 90), and adding interior
flooring and roofing shingles tpagc 921.
As with any woodworking project, proper planning and
preparation arc essential. Keep a few tips in mind. If you are
The interior of a dollhouse can be made as lifelike
as your woodworking skills and patience allow. The
interior shown above, built by Carlo Zappa of
Montreal, Quebec, comes complete with
mini-furnishings, family photos, and other memorabilia.
using a kit, be sure to read the
instructions before removing
the parts from their
packaging. The components usually
come in sheets of stock that
must be sanded on both sides
with a 200-grit wet/dry paper;
for best results, use an orbital
sandcr. Also sand the edges of
the individual parts once thev
are removed from their sheets
so they w ill fit together
cleanly. And before gluing up the
parts, test-assemble them
with tape and make any
necessary adjustments before
applying adhesive.
Decide how you you will finish and paint the dollhouse
before you try assembling it. It is a good idea to paint the
trim, for example, before installing it. Use last-drying acrylic
paint rather than oil-based products. And remember to sand
painted surfaces between coats, to smooth any raised grain,
ensuring that the next coat adheres properly. Lastly, wood
surfaces should be painted on both sides; otherwise they may-
end up warping.
[except for its miniature scale, a classic
dollhouse, like Tlie Jefferson model shown at left,
could almost pass for the real thing.
Available in kit form, this project includes doors,
windows shutters, siding, and a shingle roof
87

ANATOMY OF A DIE-CUT DOLLHOUSE
Shingled roofing
Shingles can be
bought pre-cut and
eta'med, or made in
the shop {page 94)
bricked chimney
Bricks can be simulated with paint or
' bought at a hobby supply store and
attached to the shell (page 95)
Strip flooring
Floorboards are
available h sheet "
form or as pre-cut
board lengths-, can
also be shop-made
{page 92)
Furniture
Available in kit form
or ready-made,
representing a variety
of styles and
periods: can a1 so be
custom-designed
and built to suit
your dollhouse
Wiring
Wiring systems vary,
from the insulated wire
type, embedded in the
dollhouse structure,
to the flat-copper wire-
tape style shown, which
is applied to the shell
and later covered with
paint or wallpaper
{page 90)
Lighting
Light fixtures are sold at most
craft stores: bulbs are also
available, if you wish to create
fixtures from scratch. Lay out
your lighting before proceeding
with the wiring of the dollhouse

SCALE MODELING
i i na the shell of your (tollhouse has
A * been assembled, the decorative
elements can be installed. This is one of the
most challenging parts of the proiect.
Period furniture, individualized rooms,
wallpaper and decorations, lighting,
customized window frames, and
doorways all enhance a dollhouse's appeal.
Whether or not these elements are
custom-made, assembled from a kit, or
selected from ready-made objects, they
can mirror the tastes and creative
impulses of the maker.
Customizing a dollhousc can involve
investing in some specialized equipment.
But no special skills—other than
patience and time—are required. If the
thought of copying a real-life object
seems loo challenging, you can refer to
one of the many dollhousc enthusiasts'
publications available. These are an
excellent source of information on
specific projects; many also provide tips on
recreating objects using readily available
items, as described in the Shop Tip
below. Many publications also include
plans, scaled to miniature, for
reproducing furniture and other decorative
items, like the chair shown at right.
The main concern in building objects
in miniature is choosing an appropriate
texture for the materials you are using.
Wood grain must be tight and fabric
designs small enough in scale to
realistically represent the object in mmiature.
The small stock needed is readily
available from hobby supply shops, but many
parts can be salvaged, The listing at right
details some of the tools required for
miniature work.
Smaller than a child's hand,
the stick chair shown above
can give a doUlwuse a warm,
lived-in appearance.
oi m iii di a*
SHOP TIP
Jill *hi fa w Ifci Wi M iiE Mi tf» ■;•* -ft
A shop-made sink
A doWhouee version of a porcelain sink
for a kitchen or bathroom can be made
from a c\ean plastic jelly cr butter con-
tamer. Faint the tub white, then
trim the lip a little,
apply some glue
under the edge, -J~
and insert the tub
in tne counter-top. _'_'_
A DOLLHOUSE TOOL KIT
The following is a list of common
and specialized tools needed to
build and decorate a dollhouse:
• Small and large scissors for cutting
sheets of wood and fabric
• Tweezers (pointed and angled) for
holding small parts and steadying
brads for hammering
• Toothpicks for spreading glue into
tight spots
• Straight pins for holding parts in
position before gluing
• Artist's brushes (several sizes) for
painting details and applying glue
• Glue syringe for injecting adhesive
into hard-to-reach places
• Pencil for scribing layout and
cutting lines
• Ruler for measuring and marking
straight edges
• Craft knife with No. 11 blades for
cutting thin materials
• Wire cutter or nail clippers for
making custom parts from metal and
trimming wires
• Needle-nose pliers for holding
small parts during assembly and
punching pilot holes for brads
• Small hammer for driving brads
• Masking tape and transparent tape
for holding parts while glue is curing
• Emery board for filing edges and
sizing parts
• Mini-miter box and saw for cutting
miniature trim and molding
• Small C clamps and clothes pins
for holding stock during glue up
• Pin vise drill for penetrating doll-
house shell and making pilot holes
for brads
• Single-edge razor blades for cutting
precise edges
• Wax paper and rags for clean up
89

CUSTOMIZING A DOLLHOUSE
Once the shell of a dollhouse is
assembled, the next step is
planning the design of its interior and
exterior. This section will show vou how to
install a wiring system, wood flooring,
and roofing shingles.
*KV<
'~ 1
s
/
k_kk:
A hacksaw in a mini-miter hox cuts a piece of window trim to
length. Like other scale-she toob needed for dollhouse-building,
the box and saw are available at most hobby shops.
Wiring a dollhouse is easy if you use
a lighting kit. The type shown below uses
double-copper-band tape with adhesive
backing. The step-by-stcp procedures
that follow will work with most
commercial kits.
There arc many ways to install
flooring in a dollhouse. Carpet-style
flooring, made with a suitable fabric that has
the texture of carpeting in a miniature
scale, is one popular choice. You can also
buy sheets of flooring that look much
like wood floors; these feature an
adhesive backing. As shown beginning on
page 92, a third option involv es making
and installing your own customized
wood floorboards.
The roof can be covered with pre-cut
shingles, available at most hobby shops.
Before buying shingles, measure the total
surface area of the roof and add 25
percent to take into account the overlap of
shingles. Purchase extra shingles to allow
for waste. As with floors, you can make
your own shingles in the shop, as
explained starting on page 94.
INSTALLING LIGHTING
1 Installing the tape wiring
Start by drawing a layout- or wiring
diagram—of the dollhouse interior,
marking the locations of light fixtures, outlets,
junctions, and any anticipated future
additions. Then transfer the diagram to
the surface of the interior with a pencil.
Make sure your arrangement conforms to
the instructions included in the
installation manual supplied with the wiring kit.
In the case of a double-copper-band tape
wiring system, for example, the wiring run
must start V„ inch from the edge of an
outside wall to allow room for the junction
splice to be installed. Run the tape around
the corner and into the interior (right),
pressing it into place on the wails. Once
the first line has been mounted on the
inside wall, stop and attach the splice
junction (step 2).
90

TOYS AND CRAFTS
2 Testing the wiring
Attach the junction splice supplied with the kit to the wiring by pressing it onto
the copper tape on the outside wall of the dollhouse. Secure the junction to the wall
with a small wood screw. Next, check the conductivity of the wiring to ensure
sufficient voltage is running through it. Plug the lead wire into the junction and the
transformer at the other end of the wire into a wall outlet. Ther, touch the leads of the
test probe supplied to the copper foils beside the junction (above). The light should
come on; if not, make sure that the lead wire switch is turned on. If it is, refer to the
owner's manual for instructions on troubleshooting the transformer.
3 Extending the wiring upward
To extend the wiring up a wall to
the ceiling or the upper floor, lap a
piece of wiring at a 90° angle over the
run already installed on the wall. To
secure the connection, use needle-nose
pliers to push two pairs of brads through
both sets of wiring into the wall (above).
Test the new run as you did in step 2.
i« iilKiliiililililiiiilili
SHOP TIP Ii.imIIj
Marking the
wiring layout
To make sure the wiring
along the interior walls
of a dollhouse runs at a
uniform height to scale,
your layout lines must
be straight. To help you
scribe a straight line
in the cramped interior
of the house, use the
lid of ar\ audio cassette
box as a guide.
91

TOYS AND CRAFTS
4 Installing lighting fixtures
A light fixture can be installed at any
point along the wiring. To connect a fixture
without a plug, use a pin to punch small
holes into the copper tape large to accept
the lead wires from the fixture. Insert the
wires into the holes, then secure the wires
in place with brass brads. For a fixture
with a plug, like the one shown at left, you
will need to fix an outlet to the wiring. Drill
or punch holes into the tape for the outlet
prongs, press the prongs in place, and
insert the fixture plug into the outlet.
INSTALLING FLOORING
1 Ripping the floor boards
Cut your flooring stock to length and
plane it to a thickness of:/ inch. Because
you will be cutting the boards & inch wide,
make a special table saw insert for this
operation. (If you use the insert supplied
with the saw, the narrow boards could jam
in the saw table, resulting in kickback.) To
make an insert that will minimize the gap
between the blade and the table opening,
use the standard insert as a template to
cut a blank from a piece of wood of the
same thickness. Crank the blade to its
lowest setting and set the new insert in
place. Position the rip fence to straddle
the insert, making sure that it is not
directly above the blade. Then turn on the saw
and raise the blace to a height of % inch,
cutting a slot in the insert. To rip the floor
boards, position the rip fence for a cutting
width of 'A inch and use a push block to
feed the workpiece across the saw table,
pressing the stock flush against the fence
with your free hand (right).
92

TOYS AND CRAFTS
2 Gluing down the floor boards
Once your boards are cut, glue them down to a subf'oor
Defore installing the flooring '.u the dollhojse. For the subfloor,
use ^»-inch model aircraft plywood, available at most craft
supply stores. Cut a piece larger than the floor, set it on a work
surface, and outline the floor on it. Clamp a guide board along
each end of the outline, then spread an even coating of glue
on the subfloor within the outline. Starting at one end, position
a floor board on the subfloor. butting one edge against the
guide board and making sure the ends are a'igned with the
outline. Continue gluing down the boards edge to edge (above)
until you reach the other guide board.
3 Securing the floor boards
Once the last floor board is glued down, remove the guide
boards and place a piece of plywood at least as large as the floor
on top of it. Place two 2-by-4s on top of the plywood, making
sure the plywood cau. is perfectly t.at on the floor. To keep the
floor boards butted edge to edge, cut two .vmch-thick wood
pads as long as the floor is wide, butt them tightly against the
edges of the floor on shims as thick as the subfloor, and clamp
them to the work surface. Then clamp the caul in place, using
the 2-by-4s to distribute the clamping pressure (above)
IlllliilllllllllllliliiilliiiJlSlllililJii
SHOP TIP
Laying out irregular floors
If the floors of your dollhouse have
an irregular shape, you can use
sheets of paper to map out the
flooring. Lay individual pieces of
paper on the floor, trimming them
to fit precisely within the walls, and
tape the pieces together. Next,
remove the paper template from
the dollhouse, set it on top of the
subfloor materia}, and trace its
outline. Then cut the subfloor to size
on a scroll saw or band saw.
93

TOYS AND CRAFTS
INSTALLING SHINGLES
1 Laying out the roofing
To make sure the shingles are installed straight and
with the desired amount of overlap, mark guidelines for
them on the roof. Position a shingle in a bottom corner of
the roof with the amount of overhang you want; k inch is
adequate. Then mark a guideline for the starter row along the
top end of the shingle. Holding the first shingle in place,
position another above it -overlapping the first and mark a
second guideline the same way. Use the spacing between
the two marks to draw a series of pencil ticks up the roof to
the ridge. Repeat the process at the opposite corner and at
both ends on the other side of the roof, then use a
straightedge and a pencil to join the marks, forming guidelines for
installing the shingles. Clamp the straightedge to the roof at
both corresponding marks as you draw each line (left).
I—W:
^^^^^^^^^^^^^^^^^
I
SHINGLE-CUTTING JIG
Made from wood scraps, the
guillotine-like jig shown at right is ideal
for making your own shingles. Start
by sawing the guide block and blade
guide. Cut a dado out of the guide
to fit the plane blade you will use,
then screw the guide to the block.
Rout a dado through the assembly
to accommodate your shingle stock,
screw on the base, then make the
stop block, beveling one edge. The
distance between the stop block's
beveled edge and the opening in
the guide block equals the desired
thickness of the shingles.
To use the jig, slip a plane blade,
bevel facing out, into the blade
guide and slide vertical-grained
shingle stock through the opening
until it contacts the stop block.
Shingle stock
Blade gjlde
94

TOYS AND CRAFTS
I«i iiiiiiiiiiiillliiiiiiiiifii
SHOP TIP
Spacing bricks
When installing bricks
on a tollhouse, you
need to leave gaps
between the bricks
for mortar. To ensure
that the spacing
between rows is
uniform, you can use pop-
sicle sticks as spacers,
as shown here. Set the
horizontal spacing by eye,
2 Gluing down the shingles
Install one row of shingles at a time.
Spread glue between the starter
guideline and the bottom of the roof, and set
the shingles in place, aligning the top
end with the guideline. Adjoining
shingles should butt together edge to edge.
Glue down each row of shingles the same
way (above).
95

«*{****
awM**.*
*^s^

GAMES AND PUZZLES
As a toy maker, you do not need
to limit your creations to a
young audience. The games and
puzzles featured in this chapter will
captivate adults and children alike—
v\ ithout causing you much expense.
Most games and puzzles can be
fashioned from wood scraps left
over from other projects.
As shown beginning on page 98,
a chessboard can be glued up from
strips of contrasting wood, such as
ash and walnut, cut from two
boards. The 32 chessmen needed
for the game can be turned on a
lathe from small blanks. The crib-
bage board illustrated on page 105
was produced from a piece of pur-
pleheart left over from another
project. And the layered jigsaw puzzle
featured in the photo on page 108
was assembled from small bits of different-colored hardwoods,
including bubinga, walnut, and vvenge.
The making of wooden games and puzzles has a long
history, hi 1760, English craftsman John Spillsbury created what
'Hie 3-D puzzle shown above was produced on
a band saw by Ray Levy ofSoquel, California.
Vie secret to a good solid-wood puzzle lies
in planning the saw cuts. Hie pieces must
slide apart easily yet present an interesting
challenge to reassemble. To minimize the
width of the kerfs between the pieces, it is best
to use the thinnest blade that will do the job.
gluing maps to thin sheets of
mahogany and cutting out the
features for his lessons. As shown start-
ing on page 108, you can apply
Spillsbury's techniques to produce
jigsaw puzzles out of paper and
wood. In fact, you can produce a
puzzle illustrating virtually any
image that can be rendered on
paper, from postcards and road
maps to place mats and color
photocopies. Just glue the paper onto a
wood base and cut the puzzle on a
band saw or scroll saw.
The projects described on the
following pages can be as simple or
as challenging as your woodworking
skills allow. The chessmen
illustrated on page 102, for example, are
fairly easy to turn on the lathe, but
you can make them as elaborate as
you like. Similarly, a basic cribbage board can be embellished
by adding contrasting veneer inlay to the base wood before
drilling the peg holes. And as you become more proficient at
cutting out jigsaw puzzles, you can tackle projects that feature
he called "dissected maps for the teaching of geography" by smaller pieces, creating more elaborate results.
The all-wood chessboard shown at left was assembled from
alternating strips of ash and walnut, and mounted in a
walnut frame. The piece shown, a 6-inch-high king, was turned
by woodworker Michael Mode ojXew Haven, Vermont.
9"

CHESSBOARD AND CHESSMEN
The traditional method for
constructing a chessboard involves
inlaying square veneers of contrasting wood
onto a substrate. The technique shown
on the following pages is simpler to
execute, but the results are comparable. Start
by ripping eight strips of contrasting
v\ood and edge-gluing them together
{below.. Then crosscut the panel into
strips again and reglue the alternating
dark-and-light pieces together to form
the familiar checkered pattern (page 99).
Tor your stock, choose any two
species that contrast visually, such as
MAKING A CHESSBOARD
1 Gluing up the strips
Set your bar clamps on a work surface
and lay the strips on them, alternating
dark and light pieces. Use as many ciamps
as necessary to support the stock at 24-
:o 36-inch intervals. Mark the end grain
orentation of each striD, then experiment
with the arrangement of the strips until
you have a visually pleasing pattern,
making sure that the end grain of adjacent
boards runs in opposite directions. This
wih help keep the chessboard from warp-
ng. Next, mark a triangle on the strips tc
help you arrange them correctly should
you move them prior to glue up. Standing
the strips on edge, spread glue on each
one. Butt the s:rips together and align
them, then tighten the c amps to close the
joints; use wood pads to protect the stock.
Place a third clamp across the top of the
strips, centering it between the two
underneath. Keeping the assembly as flat as
possible (right), tighten all the clamps until
there are no gaps between the boards and a
thin glue bead squeezes out of the joints.
ash and walnut. Cut the boards about
50 percent longer than the finished size
of the chessboard, plane them to a
thickness of , inch and rip them into strips
1: to 3 inches wide, depending on your
board's final dimensions. To avoid
having to joint the edges of the strips, do
the ripping with a combination blade
on your table saw.
Once the board is glued up and
mounted, you can turn your attention
to turning the chessmen. Patterns and
procedures for producing the various
pieces are presented starting on page 102.
A small strip of sandpaper smooths a bishop still
mounted between centers on a lathe, tor best results,
switch on the lathe, hold the paper in both hands,
J and lift it against the workpiece from underneath.
98

GAMES AND PUZZLES
2Crosscuttingthe panel into strips
Once the glue has cured, you are
ready to crosscut the glued-up panel into
strips of alternating light and dark squares.
To prevent the panel from lifting off the
saw table during the cut, feed it using a
jig (inset). Make the device from >4-mch
plywood, cutting the base with a hp at one
end. Fasten the hold-down to the base so
it overhangs the lipped edge by about 2
inches. Lastly, screw a push stick-type
handle to the hold-down at the jig's
trailing end. To set the cutting width, butt
the straight edge of the jig against the rip
fence and position the fence so the strips
will be exactly the same width as the first
series you cut. Holding the jig flush against
the fence and the panel square in the jig's
notch, cut the strips. Use one hand to
push the jig forward and the other to
steady the board (right). Cut a few extra
strips to give you more flexibility at glue-
up time (step 3).
3 Making the chessboard
Glue the crosscut strips together with
bar clamps as in step 1. Use two clamps
underneath the strips and tighten them,
protecting the stock with wood pads. To
keep the edges of the strips aligned, place
two more clamps across the top of the
stock, arranging them at a 90° angle to
the two underneath. Again, use wood
pads. Since you are gluing end gram to
end grain, the glue bond is only needed to
hold the strips together until the
chessboard is mounted to a substrate panel
(step 5). Holding the strips down flat,
apply enough clamping pressure to butt
the mating surface together with a
minimal amount of glue squeeze out (left).
99

GAMES AND PUZZLES
4 Leveling and smoothing the chessboard
Use a belt sander to make the top surface of the chess- overlapping strokes; avoid sweeping the sander in a circular
board perfectly flat and smooth. To keep the board from mov- fashion. Then turn the board around and repeat. Once the sur-
ing as you sand it. clamp a plywood stop block to your work face is flat, repeat the process, sanding diagonal to the grain
surface. Install an 80-grit sanding belt in the tool and set the and a final time with the grain (above). Turn the workpiece
board down so you will be sanding across the grain. Make a over and sand the other side the same way.
few passes across the entire surface, using straight, smooth,
5 Mounting the chessboard to a substrate
Use %-inch plywood for the substrate
panel, cutting it & inch wider and longer
than the chessboard to allow for
expansion and contraction of the solid-wood
board. Spread glue on the underside of
the chessboard and the top surface of
the substrate and press the two pieces
together, centering the chessboard on the
panel. To hold the board in place while
you install the clamps, drive two small
screws through the substrate into the
chessboard. Make sure the fasteners do
not split the board or penetrate its top
surface. Set the assembly astride a
sawhorse, using C clamps to secure the
board and substrate together. Use wood
cauls to distribute the clamping pressure
evenly (right).
100

GAMES AND PUZZLES
6 Making a frame for the chessboard
Make the frame from a 4/-inch-wide board sl.ghtly more
than twice as Jong as the chessboard. Start by shaping both
edges of the frame stock. Install a piloted molding bit in your
router and mount the tool m a table. Align the fences with the
bit pilot and use three featherboards to support the stock
during the cut: Clamp two to the fence, one on each side of the
cutter, and a third to the table. Hold the workpiece flush
against the fence as you shape each edge (above, left). Finish
the cut with a push stick. Rip a 1-inch-wide strip from each
edge of the stock, then plow a rabbet into the straight edge of
each p-ece. Make the depth of the rabbet equal to the
combined thickness of the chessboard and substrate, and its width
Y- inch. Finally, cut the frame pieces to length, mitering the ends
with a hand saw or a power miter saw (above, right).
7 Mounting the frame to the chessboard
Start by gluing the frame pieces
together. Apply glue on the mitered ends
and fit them together, using the
chessboard as a form and being careful not to
spread any adhesive on the chessboard or
substrate. Hold the frame together with a
web clamp (left). Once the adhesive has
cured, spread glue in the rabbets in the
frame only where the frame will contact
the substrate. Set the chessboard and
substrate in the frame and clamp the
assembly together. Finish-sand the
chessboard with a random-orbit sander ijtted
with a fine-grit disk.
101

GAMES AND PUZZLES
1
DESIGNS FOR CHESSMEN
You need to make two sets of the pieces
shown below from contrasting woods. Each
set should include eight pawns, two
castles, two knights, two bishops, one queen,
| Pawn Caetle Knight
I
MAKING CHESSMEN
1 Turning the pieces
To produce a chessman on your lathe, transfer the pattern
(above, top) to a hardboard template, cut it out and mark the
diameter of each element in the turning—V-cuts, urns, and
beads—on the template. Mount a blank between centers on
the machine and use a roughing gouge to turn the piece into
a cylinder. Then, holding the edge of the template against the
blank, use a pencil to transfer the layout lines to the work-
piece (above, left). For the pawn shown, make the V-cuts with
a skew chisel, then use a small spindle gouge to turn the urn
and beads (above, right).
102

GAMES AND PUZZLES
2 Parting off the chessman
Once you have turned the piece,
smooth its surface with sandpaper
(photo, page 98), then part it off from the
lathe. A skew chisel will enable you to
preserve the rounded end of the piece.
Holding the tool with an underhanded
grip and bracing the handle against your
hip, make a series of V-cuts with the long
point of the blade until the piece breaks
off. Since the workpiece is thin, support
it lightly with your free hand as you turn
it, keeping your fingers well clear of the
tool rest (above). Once the piece is off
the lathe, sand the top smooth. To
finish the job, weight the bottom of the
chessmen; this will prevent the top-
heavy pieces from toppling. Drill a
shallow hole in the bottom of the pieces and
melt in some solder; non-flux solder with
50 percent lead works best. Once the
solder hardens, cover each hole with a
felt base. Adhesive-backed felt is
available in most hardware stores as
prepunched disks or in sheets that can be
trimmed to size.
#11 I 111 11 i iffft111
SHOP TIP
A layout tool for
multiple turnings
A chess set requires 32
pieces; transferring layout lines
to each workpiece can be time-
consuming. A series of jigs like
the one shown at right enables
you to do the job quickly and
accurately. Trace your design
onto a piece of scrap and drwe
a finishing nail into
the edge at each
transition point. Snip off
the nail heads and file
the ends to sharp
points. Simply press
the jig against the
spinning blank; the
nails will score all
the layout lines on
the blank at once.
103

GAMES AND PUZZLES
PREPARING THE CASTLE
1 Drilling the hole in the top
The castle is one of the chessmen that
needs some additional work after you
finish with it on the lathe. Cut the top flat,
then fit your drill press with a bit of the
same diameter as the top of the castle,
less % inch. To hold the piece steady on
the machine table, cut small notches in
the jaws of a handscrew and secure the
piece in the notches. Center the castle
under the bit, clamp the handscrew to the
table, and bore the hole to about the first
bead on the piece (right).
2 Notching the castle turrets
Remove the handscrew from the drill
press and clamp it to a work surface.
Shape the castle turrets with an ^-inch-
diameter round file. Holding the file per- '
pendicular to the castle, draw it across
the top to cut two notches in the walls left
by the drill bit. Stop filing about % inch
above the bead. Since the turret walls are
thin, use light pressure, particularly when
filing the second set of notches (left).
Locate the second set 90D away from the
first. Use the same file to cut the notches
in the King and Queen's crowns.
104

CRIBBAGE BOARD
' T1 !jc fit A step in making a cribbage
1 board i* to determine its final
dimensions based on the number of
holes you plan to drill. Typically,
cribbage boards feature a starting line of
iour holes and four rows of 30 holes
each. The pattern shown in the
photograph at right and in the illustration
below also includes a center row with
20 holes to tally up the number of games
won. A 4-by- 12-inch board will give you
enough room to space the holes
properly. If you intend to turn the pegs (page
107), plan on drilling -inch-diameter
holes. Pins thinner than this will be
difficult to produce.
Molding the ends and edges of a cribbage board adds visual interest
to a simple, classic design. The board shown above was made from
a piece ofpurpleheart; the pegs were turned from birch dowel stock.
MAKING THE BOARD
1 Preparing the board for drilling
Before drilling the peg holes in the
cribbage board, make a paper template of
your hole pattern. To reproduce the pattern
shown in the inset, enlarge it on a
photocopier or copy the pattern on a piece of
graph paper to suit the dimensions of your
blank. Draw straight lines for the rows and
mark each hole with an x, making sure to
leave sufficient room around the edges for
molding the board (page 106). Cut the
template to the same length and width as
your blank and fix the sheet to the board
with artists' spray adhesive (left).
105

GAMES AND PUZZLES
2 Drilling the holes
Set the blank on your drill press table,
align one of the outside rows under the
bit, and clamp a board to the table flush
against the workpiece. The board will serve
as a fence, helping you keep the holes in
each row perfectly aligned. Set the drilling
depth at one-half the board thickness and
bore the holes, keeping the workpiece
flush against the fence. Once the first
row is finished, turn the board around
and drill the other outside row of holes.
Reposition the fence to bore the
remaining rows, then continue drilling (left). If
boring has caused some tearout on the
top surface of the board, joint the face,
using a push block to feed the board slowly
across the knives set for a very fine cut.
Finally, sand the board smooth.
3 Molding the cribbage board
Install a piloted molding bit in a router,
mount the tool in a table, and set a
shallow depth of cut. To support the board as
you shape its edges, clamp a featherboard
to the fence above the bit. Minimize tear-
out by cutting into the end grain of the
board first, shaping the ends before the
edges. While running the board past the
bit, keep it flush against the fence (right).
Once you have shaped all four sides, raise
the cutting height, and repeat the process
until the desired profile is achieved.
106

GAMES AND PUZZES
MAKING THE PEGS
1 Turning the pegs
Install a Jacobs chuck on the head-
stock of your lathe. Make the cribbage
pegs from hardwood dowels, such as birch.
For each peg, cut a length of dowel about
1 inch longer than needed. Mount the
blank in the chuck and use a small spindle
gouge to taper the peg, working from the
wide to the narrow end (right). Then
fashion a head on the wide end of the peg.
Spindle
gouge
2 Parting the pegs off
Part the peg off the lathe with a
small skew chisel. Cupping your fingers
loosely around the peg. make a V-cut
just above the top end of the peg's
head (left). The peg should drop nto
your hands.
107

PUZZLES
Designed and made by Steve Nfalavolta of Albuquerque, Ne^v Mexico, the multi-
layered puzzle shown above was assembled from five different woods. From
bottom to top, the species are araribciy walnut bubinga, wenge, and olivewood.
Although making a
three-dimensional jigsaw puzzle like the one
shown in the photo at left would
challenge even the most reasoned
woodworker, producing a flat version (below.
is a relatively simple undertaking. You
can select any image for a puzzle: a
drawing, postcard, map, or photo. If you do
not want to cut up the original, make a
color photocopy. In either case, the
image should be on a fairly heavy-weight
paper. For the base of the puzzle, use
hardboard or Baltic birch plywood.
Softwood plywoods made from Western
fir or Southern pine tend to splinter and
require meticulous sanding.
The number of piece;, in a puzzle
determines its difficulty -both in
making it and reassembling it. As shown on
page 109, the size of the pieces should
be consistent, but you can shape the
individual pieces as your skill and
creativity dictate. The only requirement is
thai each piece must contain at least one
lobe or socket for each edge.
MAKING A FLAT JIGSAW PUZZLE
1 Mounting the image to the base
Cut tne puzzle's Dase slightly srraller
than the image you are using, then bond
the paper to the base using a spray
adhesive. Flatten down the paper (right), the-
trim the excess flush with the edges of
the base using a sharp utility knife.
108

GAMES AND PUZZLES
2 Mounting the cutting pattern
As a guide to cutting the puzzle,
make a cutting pattern. On a sheet of
paper the same size as your -mage,
outline a grid of squares approximating the
size of the puzzle pieces, then draw
the lobes and sockets of each piece. Use
artist's temporary spray adhes ve to mount
the pattern to the image (above).
3 Cutting the puzzle into strips
(
1 Cut out the puzzle on your scroll saw in two steps. To prevent the workpiece
from being lifted off the table by the saw's cutting action, install a commercial
hold-down on the guide assembly. Start by sawing the workpiece into strips (above),
following your cutting pattern. To ensure that the pieces hold together when the
puzzle is assembled, flare the tops of the lobes outward.
4 Cutting out the pieces
Once the puzzle has been cut into
strips, cut out the individual pieces. Feed
each strip across the scroll saw tab'e with
both hands, making sure your fingers are
clear of the blade (left). Make sure the
hold-down is pressing the workp-ece f 'at
on the table. Once aii the pieces are tut,
peel off the cutting patten
109

GAMES AND PUZZLES
MAKING A BLOCK PUZZLE
1 Securing the cutting
patterns to the block
Cut a block of soft wood, such as bass-
wood, poplar, or ash, into a 3%-square-
inch block. Round the edges of the block
with a router and sand all its surfaces.
Since this a three-dimensional puzzle,
two cutting patterns are required; the ones
shown in the inset will yield a challenging
puzzle. Enlarge the patterns on a
photocopier to 3% inches square, then use
artists' temporary spray adhesive to mount
them to adjacent sides of the block,
making sure the arrows are aligned (left).
2 Cutting the first face
Install a '/^-inch-wide hook-tooth
blade on your band saw. For best results,
change the pulleys on your band saw to
produce a slow blade speed of roughly
1200 feet per minute. (For a typical
1725 rpm motor on a 14-inch band saw,
you should install a l'/inch drive pulley
on the motor and an 8-inch driven pulley
on the saw.) Set the block on the saw
table so that one of the cutting patterns
is facing up. Aligning the blade with one
of the cutting marks, feed the block
slowly into the blade with both hands (right).
A slow feed rate will prevent the blade
from bowing, which would produce an
irregular kerf and prevent the puzzle
from sliding apart.
110

GAMES AND PUZZLES
3 Reassembling the block
Before you can cut the adjacent face
of the block, you need to put it back
together. Use two strips of strong
masking tape, making sure all four sides of tne
block are flat and perfectly aligned (right).
4 Cutting the adjacent face
Place the block back on the band
saw table so that the cutting pattern on
the adjacent side is facing up and cut
along the marked lines (left). Once all the
cuts are made, remove the cutting pat
terns and the tape from the block. If the
puzzle does not Slide apart easily, sand
the saw kerfs with a piece of Edidpaper
wrapped around a dowe'.
Ill

NATURAL WOOD. JIGSAW PUZZLE
MAKING AN ALL-WOOD JIGSAW PUZZLE
1 Cutting out the main elements
The method shown here and on page 113 allows you to
creaie three puzzles with the same basic design, but with
different colors and cutting patterns. Plane three boards to a
thickness of ^ inch and trim them to the same length and
width. Aligning the edges and ends of the boards, bond them
together temporarily with dabs of epoxy glue at the corners.
Then draw your design directly on the top piece with a pencil,
starting with a J£- to ^inch border on all sides. The design
should have the same number of elements as layers—in this
case, mountains, sun, and sky. This enables you to mix and
match the elements, creating three differently colored
puzzles. Install a fine blade in your scroll saw; a 0.016-inch-thick
and 0.043-inch-wide blade will work well. Using a hold-
down to keep the workpiece from lifting off the saw table,
cut along the marked lines separating the main elements
(right). Feed slowly to prevent the blade from bowing; the
three layers must be identical. Leave the border line intact.
2 Sanding the elements
Separate the three layers with a utility knife, then com- tern across the border line so the frame will be part of the
bine the nine pieces into three mountain-sun-sky groups, puzzle. Then, to give the puzzle the illusion of depth, use
mixing up the colors. Working on each group individually, a spindle sander to bevel the mating edges of the puzzle,
mark your cutting pattern directly on the wood. Each piece Avoid sanding off too much wood or you will end up with
should have at least 3 or 4 lobes or sockets; extend the pat- noticeable gaps between the pieces.

GAMES AND PUZZLES
3 Cutting out the frame pieces
Once the bevels have been sanded, cut
out the the frame pieces on the scroli saw.
With the hold-down in position, cut alcng
the border line and the lobe and socket
marks (left), feeding the workpiece with
both hands.
4 Mounting the frame pieces to a base
Cut a wood base to the same size as your
puzzle, then spread some glue on the
underside of the frame pieces and position them
on the base. To secure the pieces while the
adhesive cures, lay a grid of clamping blocks
across the assembly to distribute the
pressure and clamp down the blocks (above).
5 Cutting the pieces
If >
f your scroll saw features variable speed, adjust it to about 1000 strokes per
minute; if you have a two-speed machine, choose the siow setting. Cut out the
individual pieces of the puzzle as you would for a flat jigsaw puzzle (page 109).
Work slowly, since the pieces will tend to jump as the workpiece becomes smaller
113

H H H H H It II It H It It ft #1 It It It It . Bi tfcW tt tt W tt
^
/

-»
CRAFT CLASSICS
\ A / hcther your goal is to
y V produce a keepsake
that will endure as a testament
to your woodworking skill or
make a gift lor a loved one or
friend, the projects featured in
this chapter will test vour
abilities and delight the most
discriminating audience. The
jewelry box shown at right and
on page 116, for example, relies
on classic joinery techniques
to transform a basic
container into an attractive and
useful treasury. The corners of the
box are dovetailed and the tray
under the hinged lid is
assembled with finger joints. A half-
mortise lock and an inlav
The pan ferro jewelry box shown above conceals a
partitioned tray that sits in recesses routed in the sides
of the box. The dovetails were produced with a router
and a commercial jig, while the finger joints holding
the tray together were cut on the table saw.
The result is a case that is
sturdy yet lightweight—and a rare
woodworking project that you
can carry with you.
The nutcracker shown on
page 130 is a fitting project for
someone with some basic
wood turning experience. The
figure consists of more than a
dozen small parts, and features
articulated joints that enable
the nutcracker to strike several
lifelike poses, from holding up
a flag to brandishing a sword.
\W\\c the nutcracker is a
relatively time-consuming
project, requiring about 20 hours
to assemble and finish, the
white cedar bird shown on
recessed into the top of the lid add the finishing touches. With
the same basic techniques and the right dividers or shelves,
you can make custom boxes to hold anything from cigars to
artist*' supplies.
Making a Shaker box, like the one featured starting on page
122, requires a different set of skills. Here, hardwood stock is
resawn into -inch-thick strips, which are moistened in hot
water and bent around a wooden core.
The section on making a wooden briefcase (page 125)
showcases a familiar item in a new light. Using solid wood or
veneered plywood, the case is assembled using either miters
and splines or box joints; the top pivots on concealed hinges.
page 136 can be made in a matter of minutes once the technique
has been mastered. In fact, the project is designed to be executed
quickly, since it involves slicing a wet-wood blank into a series
of thin strips. While the wood is green and pliable, the strips can
be fanned out into a tail pattern.
The final project in the chapter, the hand mirror, is tailor-
made for producing multiple copies. Once you have built the
simple jig that allows you'to plow out the recess for the minor,
the rest of the job is straightforward work on the band saw
and the router table. As shown on page 139 you can give each
mirror a onc-of-a-kind appeal by laminating contrasting wood
species and creating unique patterns for the blank.
Based on a design by Fred Sneath of Stony Lake, Ontario, the nutcracker at left
features articulated joints that allow the wrists, elbows, and shoulders of the figure to
move. The nutcracking jaw/crank, which runs vertically up through the torso,
pivots on a metal rod. As shown on page 130, Snealli's nutcrackers spring to life
with the combination of finishes he uses—a base coat of methane covered by artists'
acrylics for the colored parts and brush-on lacquer for the metallic accents.
115

JEWELRY BOX
A jewelry box should do more than
keep the dust off valuables. It should
also suggest strength and security—and
express the elegance of its contents. The
box shown in the photo at left satisfies
these requirements in a number of ways.
It is made from an exotic hardwood—
Made from paufcrro, the jewelry box
shown above measures 9 inches long
by b ' - inches deep and 5 ,~ inches high.
The box sits in a rabbeted base joined
at the corners by miters.
pau ferro—and is joined at the corners
by through dovetails, a sturdy joint that
adds visual interest. The half-mortise
lock protects the contents from prying
fingers and accents the design of the
piece. The tray inside the box features
dividers for sorting smaller items and is
assembled with finger joints.
For a box of the proportions shown,
use '_- to Vinch-thick stock for the the
box and „-inch-thick wood for the tray.
To protect the jewelry from scratches,
you can line the inside of the box and
tray with a soft material such as felt or
flocking (page 129).
MAKING THE BOX
1 Routing the dovetails
To cut the dovetails for the box with a router and the jig
shown above, screw the pin- and tail-board templates to backup
boards, then secure one of the tail boards (the sides of the box)
end up in a bench vise. Clamp the tail template to the workpiece
so the underside of the template is butted against the end of the
board. Also clamp a stop block against one edge of the workpiece
so the tails at the other end and in the other tail board will match.
Install a top-piloted dovetail bit in the router and cut the tails by
feeding the tool along the top of the template and moving the <-
bit in and out of the jig's slots. Keep the bit pilot pressed against
the sides of the slots throughout. Repeat to rout the tails at the
other end of the board, and in the other tail board. Then use the
completed tails to outline the pins on the front and back of the
box. Secure the pin board in the vise, clamp the pin template to
the board with the slots aligned over the outline, and secure a
stop block in place. Rout the pins with a straight bit (above).
116

CRAFT CLASSICS
2 Routing the recesses for the tray
The tray inside th.e bcx 'ests ;- a
recess routed into both sides of the ocx
Before cutting the recesses, dry-assemble
the box and determine what shou.d be the
top of the box depending on the grain and
figure of the wood. Label the pieces to
facilitate reassembly, then outline the
recesses on the sides and set one of the
pieces inside-face up on a work surface.
You can make a simple jig to keep the
router bit within the outline by cutt.ng a
notch out of a piece of plywood and
clamping it to the workpiece. Also clamp a stop
block along the tails to prevent from cutting
into them. Install a straight bit ;n the
router, set the cutting depth to Y inch and
rout the recess. Repeat for the other side
(left), then square the corners with a chise,.
3 Preparing the box for the bottom
The bottom of the jewelery box fits into
a rabbet along the inside of the box. Dry-
fit the parts together, then clamp the unit
securely, installing the jaws on the sides
of the box. Fit a router with a piloted
rabbeting bit of a diameter equal to one-half
the thickness of the stock. Then mount
the router in a taDle and set the cutting
height to the thickness of the bottom
panel you will be using. Set the box right-side
up on the table and, starting at the
middle of one side, feed the stock into the bit
against the direction of bit rotation.
Keeping the pilot bearing butted against the
workpiece, feed the box clockwise (right).
Continue pivoting the box on the table
until you return to your starting point. Use
veneered plywood for the bottom and cut
the panel to fit the opening. The plywood
will not expand 01 contract with changes
:n humidity, allowing you to glue and nail
t in place.

CRAFT CLASSICS
INSTALLING THE LOCK
Cutting the lock mortise
Lay the front of the box inside-face up and position the lock
face-down midway between the pins and flush with the top
edge of the board. Trace the outline of the hardware (inset),
then extend the lines onto the top edge of the board. Now
clamp the front of the box to your work surface and use a chisel
to cut a shallow mortise for the faceplate lip in the top edge of
the board. Score the mortise outline on the inside face of the
board then, holding the chisel horizontally and bevel up, shave
away the waste in thin layers (above). The central portion of the
mortise, which will hold the lock housing, must be deeper than
the portion housing the faceplate. Periodically test-fit the lock
in the cavity and use the chisel to deepen or widen the mortise
as necessary. Once the faceplate is flush with the inside face
of the board, set the lock in the mortise and mark the location
of the keyhole. (The mortise for the lock can also be cut out
with a router, but work carefully, especially if you are doing
the job freehand. Do not try to rout right to the edge of the
mortise outline; instead, finish the cut with a chisel.) Now drill
a hole for the key through the board and use a small, round file
to refine the opening to the shape of the key, then install the
escutcheon over the keyhole and screw the lock to the front of
the box. You can now glue up the box.
MAKING THE BASE MOLDING
1 Shaping the molding stock
Because the pieces for the base
molding are relatively narrow, shape both edges
of a wide board, then rip the molding
from the board. Install a molding bit in a
router and mount the tool in a table. To
prevent kickback, use three featherboards,
clamping one to the table in line with the
bit and two to the fence, one on each
side of the cutter. (The featherboard on
the outfeed side of the fence has been
removed for clarity.) Shape both edges of
the board, feeding it along the fence (right).
118

CRAFT CLASSICS
2 Preparing the molding for the box
Cut rabbets in the molding by fitting your table saw with a
dado head. Adjust the width of the head to two-thirds the
thickness of the stock and the cutting height to one-third the stock
thickness. Fasten an auxiliary fence to the rip fence and notch it
with the dado head. Use two featherboards to support the stock,
clamping one to the fence above the blade and one to the table;
brace the second featherboard with a support board. Feed the
stock along the fence to cut a rabbet on one edge, then repeat
on the other edge, making both passes with a push stick (above).
Now rip the molding pieces from the board. If you wish, you can
use a band saw to cut a relief pattern in the molding like the one
shown in the photo on page 116, creating feet at each corner.
3Mitering and installing the molding
You can saw the molding pieces to
length with a miter box or on a power miter
saw adjusted for a 45° cut. Lay the stock
on edge against the fence, butt a board
against the workpiece, and clamp it in
place as a hold-down. To ensure the
molding fits the box perfectly, make the first
cuts a little long, test-fit the molding under
the box, and trim the pieces to fit (left).
Spread glue on the mitered ends of the
molding and secure the pieces together
with a web clamp, using the box as a form.
Once the glue has cured, apply adhesive in
the rabbets and set the box on the mJdinp,
119

CRAFT CLASSICS
MOUNTING THE LID
1 Installing the inlay
Mark two lines across the lid of the box that intersect at its
center. Mark corresponding lines that cross at the center of the
inlay, then positicn the inlay on the top so the four reference
marks line up and trace the outline with a pencil (above, left).
Clamp the top to a work surface and use a router fitted with a
straight bit to cut the recess to within A inch of your outline;
the depth of the recess should equal the inlay thickness. To
complete the recess, score the outline with a utility knife and
■w^w
wWllmML
Sk« b^^^^^^^avT-L?-~ /
|S?? Chisel—^h^&-^
\\ x
\\ ^
\\ \
-A
_\
1
iCg^
cut to the marked outline with a chisel (above, right). Then
spread a thin coating of glue in the recess, set the inlay in
place, and clamp it down using a wood block to distribute the
pressure. Once the glue has cured, sand the inlay flush with
the surface. Now install a piloted round-over bit in a router and
bullnose the edges of the top by making a pass on each side,
making sure you keep the bearing butted against the stock while
you feed against the direction of bit rotation.
2 Installing the lid hinges
Attach the hinges to the jewelry box
in two steps. Start by outlining one leaf of
each hinge on the lid, then cut mortises
within the outlines and fasten the hinges
to the lid. Make the mortises V^ inch
deeper than the leaf thickness. Next,
position the lid on the box and outline
the remaining leaves on the top edge of
the back of the box. Clamp the box to a
work surface and use a chisel to cut the
mortises (right).
120

CRAFT CLASSICS
3 Installing the lid and the
lock strike plate
Before fastening the hinges to the box,
"nount the strike plate to the underside
of the lid. Position the plate on the lock
and turn the key to hold the plate in place.
Apply double-sided tape to the strike plate
and position the lid on the box. Turn the
Key again to release the strike plate and
remove the lid; the plate will be in position
on the lid. Outline the strike plate on the
surface, remove the tape, and cut a
mortise within the outline to the depth of the
plate. Then drill pilot holes and screw the
plate in place (right). To complete the lid
installation, screw the hinges to the box.
INSTALLING THE TRAY
Making the tray
Cut the sides of the tray to fit in the
recess in the box and join the pieces with
box joints (page 125). Before assembling
the tray, cut dadoes for the dividers in the
inside faces of the front and back. Glue
up the tray, cut and insert the dividers
(left), and set the tray in the box. Sand
the tray as necessary to fine-tune its fit.
As a final touch, you can attach a chain to
the lid and box to prevent the lid from
opening too far and straining the hinges.
121

SHAKER BOX
}^ irst produced in the 1790s, Shaker
boxes were made in graduated sizes
to hold household goods; when empty
they could be nested inside one
another. The smallest size, 00G\ is a 1 inch-by-
2-inch ellipse; the largest box, number
20, made horn two bands more than 9
feet long, is 26 inches by 38': inches.
The oval boxes remain popular today,
and can be easily made from commercial
kits, which sell the bands already cut to
the proper thickness and size and the
templates needed to trace the distinctive
"swallowtail" fingers. You may choose
to cut the bands yourself from a
hardwood such as cherry or maple.
Made from quartersawn cherry veneers,
the round Shaker boxes shown at left
are soaked in boiling water until they
are soft enough to be bent around a
form. Once the joint is marked on the
edge, the sheets are then clinched with
copper tacks and allowed to dry.
BENDING A SHAKER BOX
1 Cutting the fingers
To make a Siaker box from a
commercial kit. first prepare the stock for the
two bands—one for the box and one for
the top. The bands are typically resawn
from hardwood stock to a thickness of /-
inch. For best results, use straight-grained,
quartersawn stock that has been air dried
to a moisture content of 15 to 20 percent.
Use the proper-sized finger template to
outline the fingers on the box band (right)
then mark the tack holes and drill them
with a Annch bit. Repeat for the top band.
122

CRAFT CLASSICS
2 Beveling trie fingers
r' ;-"' tv. bands to a backup board
'm i/e1 the * r.gers with a ut uty kn.fe.
'"i. I *.' the Knife firmly mVi both hands
' yr 3"gle cf 10' around the fingers
' frti\ Then taper the outside face of the
I ' -i:e end of eacn band using a belt
^ider. starting with the taper about 17
r hes in from the end. This wil! ensure a
■ .o»!n overlap and uniform thickness
:;nce the bands are bent.
3 Marking the joint
Soak the box and lid bands in tu
water until they are soft—typ.cap y al..
20 minutes. Remove the box Nr. j fr
the water and wrap it around f ^ " '
sized box core so the beveleH ' ■ " r
over the tapered end. Ma^t jr.'" i
ma'k across the eages :r *' j >v
the ends overlap (left' **--; " .>
fingers pressed *\r,T. \ ' *••>
prevent ther" f«- r ,. " ■ ■

CRAFT CLASSICS
4 Tack-nailing the box
Working quickly, slip the band off the
core, rebend X so that the pencil marks line
up and tack-na.l it throjgh the holes you
drilled in step 1 using the appropriate
copper tacks. To cinch the tacks inside the
band, use a length of iron pipe clamped to
your bench as an anvil (left). Once the box
bands are tack-nailed, place two shape
holders inside the band—one at each
edge—to maintain the oval form as it dries.
5 Shaping the lid band
Shape and tacK-r.ail the top band for
the box 'id, using the drying box band as a
bending form and shape holder as it dries
(right). Allow two days for the two bands to
dry. To complete the box, cut a lid and
bottom from kiln-dried quartersawn stock
to tit inside the bands, dril" f-inch pilot
holes, ana use toothpicks as pegs to
secure the pieces.
124

BRIEFCASE
\ wooden briefcase should have all
. the leatures of any well-made brief-
*.iic: clean, attractive lines and
lightweight strength. With a material such as
wood, this can present a challenge, since
strength and lightness are an
uncommon combination. When sizing your
stock, make the briefcase frame as thin
as possible without sacrificing solidity.
It you are using walnut or cherry, the
stock should be at least '< inch thick. The
side panels of the briefcase should also
be sturdy, since they help hold the unit
together and keep the frame square. A
good choice is Vinch hardwood
plywood. The side panels of the case shown
in the photo at right arc made of solid
white cedar boards edge-glued
together. Solid-wood sides are more attractive
than plywood, but not as rigid—and
solid wood may present problems due to
wood movement.
The design described in this section
uses concealed Soss-typc hinges and a
laminated handle. The inside of the case
can be lined with leather or, as shown
on page 129, flocked with artificial suede.
Made from cherry and white cedar,
the briefcase shown at right features
corners that are joined by miter-and-
splinc joints. The finger-joint method
described below will produce an
equally sturdy case.
MAKING THE BRIEFCASE FRAME
1 Cutting the finger joints
You can cut the notches for finger joints one after another
on your table saw with a simple jig made from an extension
board fastened to the miter gauge. Set the cutting height of the
blade to the stock thickness, clamp the extension to the miter
gauge, and feed it into the blade to cut a notch. Slide the
extension along the gauge so the gap between the notch and
the blade is equal to the notch w:dth, then screw the extension
to the gauge. Cut a second notch, then insert a wooden key in
the *irst notch so it projects at least 1 inch from the extension.
Butt the edge of one of the frame pieces against the key. hild
its face against the extension and cut a notch. Then fit re
notch over the key and make a second cut. Continue cuttin~
notches in this manner (above, left) until you reach th- .}; ■•
side of the workpiece. To cut the remaining fmgers. t"_ir *
workpiece around and fit the first notch you cjt ^r". ... y
Butt one edge of :he mating board against tre firs* t i
feed it into the blade (above, right). Conti«~ue r ".' ' ' n-. '
the board following the same procedure yuu j^ j * . > i ■ rt .
125

CRAFT CLASSICS
2 Gluing up the frame
Use a small nail to spread glue in between the fingers
in the frame pieces, applying as even a coat as possible.
Fit the boards together and secure the joints with four bar
clamps, aligning a clamp with each side of the frame just
inside the fingers. To check the frame for square,
measure the diagonals between opposite corners (above). The
two results should be the same. If not, install another
clamp across the longer of the two diagonals, setting the
clamp jaws on those already in place. Tighten the clamps
a little at a time, measuring as you go until the two
diagonals are equal.
3 Ripping the frame in two
Divide the frame into two parts -the main body and
the top—on your table saw. Fasten a 6- to 8-inch-wide
auxiliary fence to the rip fence and adjust the cutting width to
one-third to one-quarter the height of the frame, ensuring
that the blade aligns with one of the fingers of the corner
joint. Set the cutting height slightly above the thickness of
the stock. Feed the frame into the blade with both hands,
keeping it flush against the fence (right).
f
126 *

H
H
H
4
CRAFT CLASSICS
4 Preparing the frame for the hinges
The hinges that will connect the lid and
body of the frame together fit into holes in
the edges of the stock. Clamp an auxiliary
plywood table to your drill press table and
install a bit equal to the hinge diameter. Set
the cutting depth equal to the length of the
hinge cylinder, adding 3A inch to allow for the
rabbet you will cut around the frame in step 5.
Holding the lid on the table, bore the holes
into the edge of the bottom about 3 inches
from each end (right). Repeat on the body.
5 Preparing the lid and body for assembly
Install a rabbeting bit in a router and mount the tool in a table. Start by
routing a rabbet around the inside edges of the lid. Make the depth of the cut Yc
inch, with a width equal to one-half the stock thickness; the resulting lip will
mate with a rabbet in the body (step 7), allowing the pieces to interlock when
the case is closed. Next, you need to rout rabbets along the outside edges of the
lid and body to accommodate the side panels of the briefcase. Raise the cutting
height to the side panel thickness and set the lid outside-face down on the
router table. Pressing the stock against the bit pilot, feed the lid in a clockwise
direction (above) until the rabbet is cut all around the perimeter. Repeat on the
outside edges of the body.
127
6 Squaring the corners of the rabbets
The router will leave rabbets wtlir*-m
ed corners. To square the corners, r'amr. fh
lid to a work surface, protect.np tfi" it r
with a wood pad, and use a r h -«- ■ n i .
the waste (above). Repeat to eq vc ^ 'ir
bet corners on the bndy.

CRAFT CLASSICS
1
^"^•rl
'I
!1 jH^^^
if*'1
•ST "IF k /&%
i 1
8 Installing the side panels
Cut the side panels of the briefcase to fit in the rabbets along the outside
edges of the lid and body. Spread glue in the rabbets, set the panel in place,
and install clamps around the perimeter of the piece at 6-inch intervals to
secure the panel in place as the adhesive cures (above).
7 Preparing the body for the lid
Cut the rabbets to mate with the lid around
the inside edge of the body on your table saw.
Leaving the auxiliary fence you used in step 3
on the rip fence, set the cutting height so.the
rabbet you cut will mate with the one in the lid;
one-half the stock thickness should be about
right. Holding the inside edge of the body
against the fence, feed it into the blade (left).
Repeat the cut on the remaining three sides.
9 Making the handle
Make the briefcase handle by face-gluing
three pieces of '/-inch-thick wood together.
For added strength, alternate the grain
direction of the boards. Outline the shape of the
handle on the top piece and cut it out on
your band saw (above). Then round over the
top edge of the handle on a table-mounted
router and finish shaping it to fit your hand
with a spindle sander. Attach the handle to
the case with glue and screws drilled and
countersunk from inside the case.
128

CRAFT CLASSICS
 r\ Installing the hinges
1 vJ The hinges shown above have a small setscrew that Tighten the setscrews to secure the hardware in place (above)
makes the cylinder expand when tightened. Loosen the setscrews. Line the interior of the case (step 11), if desired, then insert
then push the hinge cylinders into their holes in the case body. the hinges into the lid and tighten the hinge screws to com-
The cy'inders should be flush with the bottom of the rabbet. plete the installation.
n Flocking the interior
Flocking is a simple, inexpensive
way to impart a suede-like feel to almost
any surface, such as the inside of the
briefcase or a jewelry box. Kits are
available from most woodworking suppliers.
Start by coating the surface with the adhe
sive provided, then, holding the flocking
gun 8 to 10 inches from case at an aiiR^
betwen 45° and 90°, pump on the titer
Let the adhesive dry for about 10 *>-jur
and remove any excess *iber, wr i *» < a
be reused for other projects 1 ■ >, "■■.»!«
the briefcase screw a par ^ i'./i \ \* •
es to the main body a^d 1r j *■ neei *'m ■
case closed.
129

NUTCRACKER
C haping and assembling the many
<J parts of the nutcrackers shown in
this section may be time-consuming,
but with a methodical approach, the
process is not difficult. And as the
photo at left shows, the results are well worth
the trouble.
Most of the parts are produced on the
lathe; in fact, all the major components—
the torso and head, the arms and the
legs—are turned from only three blanks,
which makes assembly simpler and more
precise. Sawing all the arm parts from a
single spindle turning, for example, helps
ensure that the arms will be of uniform
size and that the elbow joints will fit
together well. Once the major parts-are
done, the hands, feet, and nose can be
carved to fit and indix idualize the figure.
Choose a soft, easy-to-shape wood
like basswood for the main components
of the nutcracker. Ash is a good choice
for the jaw/crank; the wrists are best
made from standard birch doweling.
Distinctive coloring and attention to detail breathe life into the nutcrackers shown
at left, built by Fred Sneath of Stony Lake, Ontario. Although the main parts of
the figures' -the torso, arms and legs—are virtually identical, the nutcrackers are
given unique personalities with different paints, helmets, and facial features. The
beard and hair can be made from imitation fur, yarn, or carpeting.
ANATOMY OF A NUTCRACKER
Epaulets
Cut from the wide
end c* tooth pcK5
3/'-inch dowel
Elbow joint
[page ^l
Sword
Wade 'rom r^.af\e
130

CRAFT CLASSICS
MAKING A NUTCRACKER
1 Turning the head and torso
Cut a blank that is long enough for the
head and torso and mount it between
centers on your lathe. Use a spindle gouge
and a skew chisel to turn the blank to the
shape shown at right, making the
diameters at the shoulders and hips about equal.
Once the turning is done, leave the blank
spinning on the machine and use a piece
of sandpaper to smooth the surface,
bringing the abrasive up to the stock from
below. Make sure the lines defining the
belt remain distinct. Then cut the head
from the torso on a band saw.
2 Cutting out the channel
for the jaw/crank
Cut the channel in the torso for the
jaw/crank in two steps, starting on the
band saw. Outline a y-inch-wide channel
in the middle of the torso from the top to
the belt line, then secure the piece ir a
handscrew so the outline s facing up.
Pushing the clamp to feed tne torso into
the blade, cut the sides of the * hanrir\
then clear out the waste with a series of
angled cuts (left). Square tr.t bottom of
the channel with a ituse".
131

CRAFT CLASSICS
tm
3 Angling the jaw/crank channel
Once the channel in the torso is
finished, secure the piece back side up in a
bench vise and extend the channel along
the back of the torso to hold the bottom
of the jaw/crank. Holding a chisel at an
angle to the piece bevel-side up (above),
shave away the waste wood in thin layers
to create a slope that angles outward
from the middle of the crank mortise to
the bottom of the torso. Cut the recess so
the top surface o~ the jaw/crank will be
flush with the back of the torso—or
protrude only slightly—when it is installed.
?ljs
^fi&l
fts
■4?
^■^^^ V-b\ock']\q ^^-,
2^^R *\ ^^"-^ \ ^^
--^dp^N
■^-nr"' 'l-^"^S
Recess for
jaw/crank ^J)
A .si- ^
»i
iff"!
nvJ m
4 Drilling the pin and shoulder holes
Referring to the anatomy illustration (page 130) for their location, mark the
holes for the jaw/crank pin and the shoulders on the torso so the holes will be
perpendicular to the channel. Cut a wedge out of a board to make a V-block jig, set the
torso in the jig, and place the jig on your drill press table. Install a bit the same
diameter as the steel pin, align the marked holes for the pin under the bit, and
clamp the jig to the table. Drill the hole for the jaw crank (above), then reposition
the torso in the jig and drill the shoulder holes.
5 Turning the legs and arms
Mount a blank between centers on
your lathe, ensuring that it is long enough
to yield both legs, including the tenons that
will join the legs to the torso and feet. Use
a roughing gouge to turn the blank into a
cylinder, a skew chisel (right) and a
spindle gouge to add details, and a parting
tool to define the tenons. Once the legs
are turned, saw them apart. Turn the arms
the same way, allowing an extra -A inch for
the overlap at the elbow joint.
132

CRAFT CLASSICS
6 Installing the jaw/crank legs
and shoulders
^e'e-ri'jg to the anatomy illustration on
nage 130, cut the jaw/crank to shape and
!jx :t .r place with the steel pin. Then
test-f.t the legs against the torso, mark
tf-e leg tenons on the torso, and drill the
ho es to the tenon length. Now glue the
legs in place. Carve the feet and drill a
ho.e into each one to accept the tenon
at the bottom of the legs. It is easier to
drill the dowel holes into the sides of the
shoulders before they have been sawn
from the arm spindle; secure the arm
spindle in a V-block jig (page 132) as
you bore the holes on the drill press. Now
cut the arms into their various sections
-upper arms, lower arms, and
shoulders—and drill the holes into the bottom
cf the shoulders for the dowels that
wii: join them to the upper arms. All the
holes should be drilled halfway through
the stock. Glue the dowels into the
shoulder, leaving % inch of the pins protruding.
Wait until the adhesive has cured before
fitting the shoulders into the torso (right);
otherwise, the glue may bond the joints in
place and not allow them to articulate.
7 Carving the elbow joints
Each elbow joint is an open mortise-
and-tenon joint which pivots around a
dowel. Cut the tenons in the lower arms
and the mortises in the upper arms on
your scroll saw. Then clamp one of the
lower arms to a work surface, using an
arched clamping block to protect the
stock. Round over the tenon with a disk
sander or gouge and a cnisel (left); this
will improve the articulating movement of
the elbow joint. Repeat with the other
lower arm.
133

CRAFT CLASSICS
\ ~"" Hv ^v VpPer
r-^^ 1 \ \ 8rm j
N
Lower \ ^^
arm l^
""v V-block jig ^^
8 Assembling the elbow joint
Fit the lower and upper arms together, then place the assembly in your
V-block jig clamped to the drill press table. With one side of the arm facing
up, drill right through the mortise and tenon (above). Cut a length of dowel
to span the joint and sand the ends smooth, then slip the dowel into the hole.
To allow the elbow to move, do not use any glue You may need to continue
rounding over the tenon to perfect the fit. as described in step 7.
9 Preparing the wrist
Refer to the anatomy illustration on page
130 for details of the wrist-to-hand joint. The
wrist consists of two lengths of %-inch dowel:
one with a ball carved on the top end and
another with a matching socket on the
bottom. The piece with the socket fits snugly in
a hole in the hand. To cut the socket, secure
one dowel end-up in a handscrew and fit a
rounded grinding stone in a drill press (above).
Grind the socket, then carve the matching
ball in the other piece.
 r\ Assembling the wrist
X \J The two parts of the wrist are held
together by an elastic band. To prepare
the pieces, clamp one in a handscrew and
secure the handscrew to a work surface.
Then fit an electric drill with a small bit
and bore an angled hole that starts at the
edge of the flat end and exits in the middle
of the ball- or socket—end. Repeat on
the other edge (right) and for the other
part of the wrist. Feed a length of elastic
band through the holes to tie the pieces
together, using a thin length of wire to
help you thread the elastic. Next, carve the
hands and drill two holes into each: one
into the bottom to accept the wrist and
a smaller one to hold a flagpole or sword.
134

CRAFT CLASSICS
■1
•4
n Shaping the helmet
Use a sp.ndle sander to shape the
■ ;f rarker's helmet. To produce the design
:-><::: at right, remove waste wood from
tk'ee Sides of the stock, sanding each side
d . tt e at a time to help keep the des gn
symmetrical. Other helmet shapes are
*>owr in the color photo on page 130;
t'.ese helmets were shaped while the head
■ iank was still on the lathe.
1 Q Finishing the nutcracker
1.C- Turn a finial that crowns the he'met
from a 7°-inch dowel. Include a tenon at
the bottom of the fin'al to fit a matching
hole in the helmet, then glue the pieces
together- (left). To attach the head to the
torso, drill matching holes in thei'
contacting surfaces and glue jn dowels to secure
the connection. Finish by assembl.ng the
arms and carving the nose and belt buckle.
You can also add details to the
nutcracker's uniform, inc'uding buttons, epaulet
trim, an insignia and trouser leg tr.m.
135

WHITE CEDAR BIRD
A marvel of green woodworking, the
white cedar bird shown in this
section seems to defy logic. Made from a
single piece of cedar, its wing feathers
form a 3 ^inch-wide fan that stays in
place without a single drop of glue.
Using a Technique developed by the late
Chester Nutting, Edmond Menard of
Cabot, Vermont, crafted the white cedar
bird shown at left. Sliced from a single
block of fresh wood, the bird's feathers
spread out easily when the wood is wet,
but lock into place when the wood
dries. Menard has made more than
50,000 birds since 1976; he can carve a
bird in under W minutes.
The key to success with this technique
is to use frcshlv cut white cedar, which is
pliable as long as it stays moist. Start
preparing the bird blanks as soon as
possible after the tree has been felled, Buck
the tree into 18-inch lengths, square up
the log on the jointer, and cut it into '.-
inch-thick strips on your band saw. Next,
move to the table saw and rip the strips
1 inch wide and crosscut them into 8-
inch lengths—enough for two birds. If
you prepared more blanks than you can
use right away, wrap them in plastic and
store them in the freezer.
The only remaining tool needed for
this project is a sharp shop knife, used
to notch the feather shape and slice the
individual feathers, and a scroll saw to
cut the profile of the bird.
CRAFTING A CEDAR BIRD
r
1 Carving the blank to shape
Trace the profiles of the bird (above, /eft) on the top and
bottom of your blank Draw lines a ong the sides to connect
the transition points. The notches in the ta.! section will
allow the individual feathers to interlock, as shown in step 4.
Once the outlines are done, secure the blank with one side
facing up in a bench vise Use a shop knife to slice away
waste to the marked outlines, cutting away from your body
(above, right).
136

CRAFT CLASSICS
2 Splitting out the tail feathers
Use a sharp knife to slice the tail section of the blank into
feathers. Holding the blank firmly, pull the blade squarely into
the end grain, cutting slices of aboutlr inch thick (above).
Stop the cut when you reach the body section of the blank.
Since you are cutting toward your hand, push the blade slowly
and carefully through the wood. Once you have shaved halfway
through the thickness of the blank, turn it over and work toward
the middle from the other side. You may need to snap off a
feather near the tail's center to make room for the blade as the
pieces begin to spread. With a 1-mch-wide blank, you should
be able to produce about 30 feathers.
3 Cutting the profile
1 Once all the feathers are cut. outline the front of the bird
on the blank, then cut it out on your scroll saw. To keep the
workpiece from chattering, press it against the saw table with
hold-down (above). Use the knife to finish the shaping. Proceed
quickly to the next step while the wood is wet and pliable
4 Spreading the wings
Starting at the top of the b •■
the second feather to one s.Ci , r
arrowhead-shaped ena over * " '
er. Repeat with the next V *
but spread it to the ofw
in this manner, sprea - '
outward (left) and t: .i
the previous featnpr
project, you can lu-
and marks en the t
wood has dr<& 3 ' i '
gle, light 1 f
137

HAND MIRROR
Practical and elegant, hand mirrors
like those shown in this section are
relatively simple to make, but you will
have to devote some time to setting up.
The first step is to decide the diameter
of the mirror glass; 5-inch beveled glass
works well, but other sizes are available.
You will then need to produce two
templates for laying out the mirror on your
stock: one for the shape of the mirror
body and a round one for the
diameter of the glass recess. Use clear acrylic
plastic for both templates to enable you
to see the grain and figure of the wood
a^ you locate the outline on your blanks.
Make the mirror from *-inch-thick
stock. To cut the recess for the glass, use
a router paired with a plywood
template. Fitted with a straight bit and a
template guide, the router will
duplicate the template's profile on the work-
piece. The recess should bel inch larger
than the glass to allow for wood
movement. Make the template long enough
to allow you to clamp it in place u ithout
interfering with the router.
Frgonomically designed to fit comfortably in the hand, the
minors shown above can be made from solid wood or, like
the sample on the right, from laminated strips of contrasting
species. Both were made by Ken Picon, of Austin, Texas.
MAKING A HAND MIRROR
1 Outlining the mirror body
Design your mirT>r on a piece of acryl ic
plastic and cut it cut as a template on
the band saw. Then set the template on
your mirror body blank with the length of
the mirror parallel to the grain of the
blank; position the template to best
accentuate the grain and figure of the
wood. Outline the template on the stock
with a pencil (right). Repeat with the
template for the glass recess.
138

CRAFT CLASSICS
2 Routing the recess
To make the routing template, outline
the recess on a piece of plywood and add
the diameter of the template guide, then
cut the hole on a scroll saw or router. Set
the mirror blank on a work surface and
clamp the template on top, centering the
hole over the recess outline. Adjust the
router to cut a ^-inch-deep recess, then
plunge the bit into the stock until the
base plate is flat on the template. Ride
the template guide along the edge of the
template to define the perimeter of the
recess, then move the router in small
clockwise circles to clear the remaining
waste. If you are working with hard wood,
you may have to make several passes to
reach the final depth.
I f i Hiiiiiiiiili
SHOP TIP
Making laminated-wood hand mirrors
-Hand mirrors made from laminated
strips of contrasting wood add visual
flair to the final product and are fairly
simple to make. Start with two
contrasting blanks about % inch thick. Place
one on top of the other and temporarily
bond the pieces face to face with a drop
of epoxy at each comer. Draw the
mirror pattern on the top piece, then
cut it out through both blanks on
your band saw. Carefully pry the
pieces apart and simply glue them
back together, bonding the central
portion of each blank with the outside
pieces of the other. To allow for the saw
blade kerf, you can ateo add a strip of
veneer to each glue joint.
3 Cutting the mirror body
Once the recess is done, cut out the
mirror body on your band saw. keeping
both hands clear of the b!ade \abvvc\
Sand the edges, then use a table mount
ed router fitted with a rouniJ )vei t il t> i
shape the edges. Fix the r,las<. to thp t Jv
with clear silicone adhesive.
139

GLOSSARY
ABC
Aliphatic glue: A strong, all-purpose
glue ideal for bonding porous
surfaces; withstands humiditv and
heat well.
Bead: A convex shape turned in
spindle work; see cove.
Bench dog: A round or square peg
made of metal or wood that fits
into a hole in a workbench to hold
a workpiece in place.
Bending form: A jig used to bend
steamed or laminated wood.
Bevel cut: A cut at an angle from
face to face along the length or
width of a workpiece; see miter cut.
Box joint: Identical interlocking
fingers tiiat mesh to form a corner joint.
Caul: A board placed between clamps
and the workpiece to distribute
clamping pressure.
Chuck: An accessory mounted in
the headstock or tailstock of a lathe
to hold a blank for turning.
Clearance hole: A hole bored in a
workpiece to accommodate the
shank of a screw; see counterborc
hole and countersink hole.
Counterbore hole: A hole drilled
into a workpiece permitting the
head of a screw or bolt to sit below
the wood surface so that it can be
concealed by a wood plug.
Countersink hole: A hole drilled
into a workpiece that allows a screw-
head to lie flush with or slightly
below the surface.
Cove: A concave decorative profile
cut in wood, usuallv along an edge;
see bead
Cross dowel connector: A
knockdown fastener that accepts a bolt
or screw, typically used to reinforce
a butt joint involving an end-
grain surface.
D-E-F-G-H-l
Dado: A rectangular channel cut
across the grain of a workpiece.
Downhill cutting: In spindle work
on the lathe, cutting with the grain
rather than against it; working across
the grain from a high point to a low.
Escutcheon: A decorative fitting
installed around a keyhole to
prevent damage to the surrounding
wood by the key.
Faceplate turning: A turning
technique in which the grain of the
workpiece is perpendicular to the
lathe's axis; the workpiece is usuallv
only mounted to the headstock of
the machine. See spindle turning.
Featherboard: A board with thin
fingers or "feathers" along one end,
clamped to the fence or table of a
stationary tool to hold the work-
piece securelv.
Feed rate: The speed at wrhich a
workpiece is pushed into the blade
or cutters of a woodworking
machine, or the rate at wrhich a tool is
pushed into a workpiece.
Fingernail grind: The curved shape
ground on the edge of a turning
gouge; so-called because the profile
is similar to the curve on the end
of a fingernail.
Flocking: Spraying very fine felt
fibers onto a surface coated with an
adhesive to simulate suede.
Grain: The arrangement and
direction of the fibers that make up wood.
Headstock: The fixed end of a lathe
incorporating the drive spindle;
connected to the motor by one or
more drive belts.
Inlay: A decorative strip of metal,
wood, or marquetry that is glued
into a groove cut into a workpiece.
J-K-L-M-N-O-P Q
Jacobs chuck: A three-jaw chuck
used to hold small turning work in
the headstock or drilling
attachments in the tailstock of a lathe.
Jig: A device for guiding a tool or
holding a workpiece in position.
Jointing: Cutting thin shavings from
the surface of a workpiece until it is
flat and perpendicular to the
adjoining surface.
140

Kerf: I he cut made by a saw blade.
laminate bending: Bending wood
by resawing into thin, flexible strips
and then gluing up the strips around
a curved form.
Lathe capacity: The maximum
length and diameter of workpieces
that can be mounted on a lathe.
Lobes and sockets: The interlocking
joints used in jigsaw-type puzzles.
Miter cut: A cut that angles across
the face of a workpicce; see bevel cut.
Mortise-and-tenon: A joinery
technique in which a projecting tenon
on one board fits into a cavity—the
mortise—in another.
Parting tool: A cutting tool used
primarily to make sizing cuts on the
lathe and part off workpieces.
Pilot hole: A hole bored into a
workpiece to accommodate a nail
shaft or the threaded part of a screw;
usually slightly smaller than the
fastener diameter. The hole guides the
fastener and prevents splitting.
Pilot bearing: A cylindrical metal
collar either above or below the
router's bit that rides along the
workpiece or a template, guiding
the bit during the cut.
Plate joint: A method of joining
wood using oval wafers of
compressed wood that fit into slots cut
in mating boards.
Push block or stick: A device used
to feed a workpiece into the blade,
cutter, or bit of a tool to protect the
operator's fingers.
R-S
Rabbet: A step-like cut in the edge
or end of a workpiece; usually forms
part of a joint.
Roughing gouge: A lathe tool
usually used to turn a square blank into
a cylinder.
Sizing cuts: A cut to a specific depth
made with a parting tool on a lathe.
Skew chisel: A lathe cutting tool
with an angled cutting edge beveled
on both sides; used to make basic
and decorative spindle cuts.
Soss hinge: The trade name for a type
of cylindrical hinge that is concealed
in mortises in mating workpieces.
Spindle gouge: A turning tool with
a curved cutting edge beveled to 30°
used for cutting beads and coves
and for general spindle work.
Spindle turning: A turning
technique in which the grain of the work-
piece is parallel to the lathe's axis;
the workpiece is held between
centers in the tailstock and headstock.
Also known as turning between
centers. See faceplate turning.
Stop block: A block of wood clamped
to the fence or miter gauge of a
stationary tool to enable a workpiece to
be positioned properly for repeat cuts.
Strike plate: A metal plate attached to
a door or box frame that engages the
the bolt or latch of a doorknob or key.
Substrate: A piece of plywood or
solid wood used as a core in
veneering or laminating.
T-U-V-W-X-Y-Z
Taper cut: A sloping cut on a
spindle turning that decreases its
thickness at one end.
Tearout: The ragged edges
produced when a blade or cutter tears
the wood fibers rather than cutting
them cleanly.
Template: A pattern, typically made
of plywood or hardboard, used with
a power tool to produce multiple
copies of an original.
Ultra-high molecular weight
plastic (UHMW): Very dense, long-
wearing plastic that can be fastened
in strips.
141

INDEX
Page references in italics indicate an
illustration of subject matter. Page
references in bold indicate a Build It
Yourself project.
A B-C D
Beads (turning.', 16
Bent-runner sleighs. See Sleighs
Blades:
Scroll saws, 18
Boxes:
Jewelry boxes, 7/5, 116-121
Shaker boxes, 115, 122-124
Briefcases, 115, 125-129
Flocking, 129
Buhler, Don, 8-9
Build It Yourself:
I eg-clamping jigs for sleighs, 51
Shingle-cutting jigs, 94
Spoke-hole jigs for drill presses,
24,25
Cedar birds, 115, 136-137
Chessboards, 96, 97, 98-101
Chessmen, 96, 98
designs, 102
finishing, 704
layout tools for multiple turnings
(Shop Tip), 703
turning, 102-103
Jigs for holding down panels on
the table saw, 99
Coves, 76
Cribbage boards, 105-106
Pegs," 107
Cylinders:
Turning, 75-76
Decorative techniques, 82
Stencils, back endpaper, 54, 56
Dollhouses, tS6, 87, 88
Flcctrical lighting, 90-92
marking wiring layout (Shop
Tip), 97
Flooring, 90, 92-93
laving out irregular flooring
(Shop Tip», 93
Interior decoration, 8, , 89
shop-made sinks (Shop Tip), 89
Shingles, 90, 94-95
shingle-cutting iigs, 94
Spacing bricks f Shop Tip), 95
Tool kits, 89
Dovetail joints:
Jewelry boxes, 7J6
Dump trucks, 21,57-35
Wheels, 33, 35
L-l G HI
Electrical lighting:
Dollhouses, 90-92
marking wiring layout (Shop
T\ph9l
Featherboards, front endpaper
Finger joints:
Briefcases, 125
Finishes:
Non-toxic, 72, 13
Stencils, back endpaper, 54, 56
Toboggans, 58,61
See also Decorative techniques
Flocking, 729
Flooring:
Dollhouses, 90, 92-93
laying out irregular flooring
'(ShopTip),^
Games, 97
Cribbage boards, 105-106
pegs, 707
See also Chessboards; Puzzles
Gliding horses, 8-9, 62, 63, 64-65
Body design and assembly, 66-67,
71, 73-74
Heads, 68-,
Saddles and saddle backs, 66, 72, ~5
Stands, ~4-75, ~6-77
Green wood:
Cedar birds, 115, 736-757
Hall, Garnet, 36
Hand minors, 115, 75S-739
Laminated-wood hand mirrors
(Shop Tip), 759
Hats, 10-77
Horses. See Rocking horses
j-k-L-M
Jewelry boxes, 7 75, 7 76-727
Locks, 118,121
Jigs:
Bending forms, 4/
For determining safety of toy size, 72
Jigs for holding down panels on the
table saw, 99
Layout tools for multiple turnings
(Shop Tip), 703
Leg-clamping jigs for sleighs, 51
Shingle-cutting iigs, 94
Spoke-hole jigs for drill presses, 24,
25
Jigsaw puzzles, 97, 108-109
All-wood, 7 72-773
Joinery:
Dovetail joints, 776
Finger joints, 725
Kenney, Doug, 21
Lamination techniques:
Briefcase handles, 726'
Laminated-wood hand mirrors
(Shop Tip), 759
Sleigh runners, 47-48
Last, Walter, 45
Lathes, 74
Layout tools for multiple turnings
(Shop Tip), 103
Speed, front endpaper
See also Turning
Levy, Ray, 97
Locks:
Jewelry boxes, 7 7S, 727
Locomotives, 20, 21, 22-23, 26-27
Boilers and smoke boxes, 27, 29-30
Cabs, 2S-29
Wheels, 24-25, 27
spoke-hole jigs, 24, 25
Malavolta, Steve, 6-7, 108
Menard, Fdmond, 136
Michclsen, Johannes, 10-71
Mirrors, 115,735-759
Laminated-wood hand mirrors
I Shop Tip), 739
Mode, Michael, 97
Model vehicles, 21
See also Dump trucks; Locomotives;
Tractors
142

\utirackers, 7/4, 115, 130-135
Nutting, Chester, 136
Picou, Ken, 138
Planers:
Short stock, back endpaper
Thin stock, back endpaper
Push sticks, front endpaper
Puzzles, 6, 97, 108
Block puzzles, 9" 110-111
Jigsaw puzzles, 97, / 08-109
all-wood, 112-113
Rocking horses, 63
Interchangeable heads, 63
Stand-mounted gliding horses, 8-9,
62, 63, 64-65
body design and assembly, 66-67,
77, 73-74
heads, 6S-~1, ~6
saddles and saddle backs, 66, 72,
75
stands, 74-75, 76-77
Swinging horses, 63, 78-~9, 81
heads,\so
Traditional, 63, 82, 83-85
runners, 83
Rock pickers, 21, 36, 37, 41-43
Runners:
Bent-runner sleighs, 45, 47- 48, 51
ultra-high molecular weight
plastic, 44, 46
Rocking horses, 83
Sleds, 54, 5~
Toboggans, 45, 58-59
S-T-l \
Safety precautions:
Featherboards, front endpaper
Finishes, 12, 13
Push sticks, front endpaper
Toy size, 12
Wood toxicity, 12-13
Scroll saws, 77
Blades, 18
Inside cuts, 18-19
Speed, front endpaper
Shaker boxes, 115, 122-124
Shingles:
Dollhouses, 90, 94-95
Shop Tips:
Dollhouses, 89, 91, 93, 95
Games, 103
Hand mirrors, 139
Size of toys, 12
Sleds, 45, 54-56
Decorati\e stencils- back endpaper,
54, 56
Runners, 54, 57
See also Sleighs; Toboggans
Sleighs, 46, 49-50
Assembly, 51-53
Leg-clamping jigs, 51
Runners, 45, 4~~-48, 51
ultra-high molecular weight
plastic, 44,46
See also Sleds
Sneath, Fred, 63, 78- 115,130
Sollinger, John, 54
Spillsbury, John, 97
Spindle sanders, 68
Steamers ^ools , 59
Steel shoes (runners), 5~
Stencils, back endpaper, 54, 56
Swinging horses, 63, 7S- _9, 81
1 leads, 80
Table saws:
Jigs for holding down panels on
the table saw, 99
Toboggans, 45, 58-61
Finishes, 58, 61
Runners, 45, 5<S-59
See also Sleds
"Fools:
Dollhouses, 89
Planers, back endpapei
Spindle sanders, 68
Steamers, 59
Turning tools, 75
See also Scroll sawTs; I athes; Table
saws
Tractors, 21,36, 38 39
Rock pickers, 21, 36, 3", 47-43
Wheels, 39, 40
Trains. Sec Locomoti\es
Trucks, 21, 37-35
Wheels, 33, 35
Turning:
Beads, 76
Chessmen, 102-103
layout tools for multiple turnings
(Shop Tip), 103
Coves, 76
Cribbage pegs, 70"
Cylinders, 15-16
Hats, 10-77
Tools, 75
Van Ness, Chester, 31
T>v-x-i-z
Wheels:
Dump trucks, 33, 35
1 ocomotives, 24-25, 27
spoke-hole jigs, 24, 25
Tractors, 39, 40
White cedar birds, 115, 736-737
Woods:
Green, 736
Toxicity 12-13
Yankee clipper sleds, 45, 54-56
Decorati\ e stencils, back endpaper,
54, 56
Runners, 54, 57
143

ACKNOWLEDGMENTS
The editors wish to thank the following:
TOYS AND CRAFTS BASICS
Delta International Machinery/Porter-Cable, Gueiph, Out.; Health And Welfare Canada
(Product Safety Division), I ongueuil, Que.; Record Tools Inc., Pickering, Ont.;
Chester Van Ness, Scotland, Ont.; Woodcraft Supply Corp., Parkcrsburg, WV
MODELS
Adjustable Clamp Co., Chicago, II; Black & Decker/Elu Power Tools, Towson, MD;
Delta International Machinerv/Porler-Cable, Gueiph, Ont.; Garnet I lall, Stoughton, Sask.;
Doug Kennev, South Dennis, MA; Tool Trend Ltd., Concord, Ont.; Chester Van \ess, Scotland, Ont.
SLEIGHS AND SLEDS
Adjustable Clamp Co., Chicago, II; A.J. Douglas Angus, Richmond, BC; Delta International
Machinerv/Porter Cable, Gueiph, Ont.; Mike Dunbar, Portsmouth, Nil; Walter Last, Winnipeg, Man.;
Jean-Pierre Masse, Montreal, Que.; Norway Nordic, Ste-Anne-dc-Bellevue, Que.; Ryobi America Corp.,
Anderson, SC; Sears, Roebuck and Co., Chicago, 1L; John Sollingcr, North Ferrisburg, VT;
Steiner/Lamello A.G. Switzerland/Colonial Saw Co., Kingston, MA; Tool Trend Ltd., Concord, Ont.
ROCKING HORSES
Adjustable Clamp Co., Chicago, IL; Don Buhlcr, Swan River, Man.; Delta International
Machinerv/Porter-Cable, Gueiph, Ont.; Great Neck Saw Mfrs. Inc. (Buck Bros. Di\ision),
Millbury, MA; Rvobi America Corp., Anderson, SC; Fred Sneath, Woodview, Ont.
DOLLHOUSES
Adjustable Clamp Co., Chicago, IL; Canplay/Kitchencr Importers, Ajax, Ont.; Delta International
Machinery/Porter-Cable, Gueiph, Ont.; Greenleaf Products Incorporated, Honeyoye Falls, NY;
Hobby World, Montreal, Que.; Carlo Zappa, Montreal, Que.
GAMES AND PUZZLES
Adjustable Clamp Co., Chicago, IL; Black & Decker/Elu Power Tools, Tov\son, MD; Delta International
Machinerv/Porter-Cable, Gueiph, Ont.; Donjcr Products Corp., Belle Mead, NJ; Ray Lew, Soquel, CA;
Steve Malavolta, Albuquerque, NM; Michael D. Mode, New Haven, XT\ Record Tools Inc., Pickering, Ont.;
Tool Trend I td., Concord, Ont.; Woodcraft Supply Corp., Parkersburg, WV
CRAFT CLASSICS
Adjustable Clamp Co., Chicago, IL; American Tool Co., Lincoln, NE; Delta International
Machincrv/Portcr-Cable, Gueiph, Ont.; Great Neck Saw Mfrs. Inc. 'Buck Bros. Division), Millbun1, MA;
Hitachi Power Tools U.S.A. Ltd., Norcross, GA; David Keller, Petaluma, CA; Edmond Menard, Cabot, VT;
Ken Picou Design, Austin, TX; Record Tools Inc., Pickering, Ont.; Ryobi America Corp., Anderson, SC;
Sears, Roebuck and Co., Chicago, IL; Fred Sneath, Woodview, Ont.; The Home Shop, Charlotte, MI;
Tool Trend I td., Concord, Ont.; Woodcraft Supply Corp., Parkersburg, WV
The following persons also assisted in the preparation of this book:
Lorraine Dore, Martin Francoeur, Ruth Karp, Roger Landrcville, Rob I utes, Jim McRae, Brvan Quinn
PICTURE CREDITS
Cover Robert Chartier
6,7 Michael Tincher
8,9 Brian Milne/First 1 ight
10,11 Marie Louise Derua/
62 Brian Milne/First Light
144

WORKSHOP GUIDE
IWt) IUJIMCNNI 1*1
• ••».( <* •• I • •• • ••♦ » I ,»,.,»,» »l,.«l
• • • .•»•», «* I #, l»,v 4> In t II 1 |Ui
• I |l .«. 1*M • •<• I *•••! »< '«*> )( ..••*>< |l- < •♦••
» «j»< ■< ,.,..< «rit| •- •• M*»« • ,.»• II* »..,
. — . «** M* »«mm> »'.. >.—„ 4. II* .(,. ti «., J
•»•». I »«..rM' 11 »>• % l», .1 I l,.n, «». U
» «*-l 11.» «...*,,,«.. . M|(. II... |,»4. «♦. ,,,'•(
»,,<< H«m, . .,• , •' • •>« ' -» t'» nt« '.. »
II, ••»» II.*, ■■,. I -M*.. • ,s* . I.»«l^ 4m|
H< mI#*..# .1 Hw *.»b,..<» 1, I., ,r-. I H. >.■
D ).»,.,< !•!«!. I> , vl • ti |l|, ».,< M|',
l'«,il^wil»«>n I •». II* . v«4» ,.|
4 1' U,#- 4 -N Hi* t.,h»,|'|. • 4 I., .»« '
!«>• *<*)• II - ► ,♦•« • > '!»• «r ♦>)*. v N««t
l«,«l H,» *..,»• >>( II * *>><h| >r. < |' ,. 11
II.► ■ *4«* »M.| ?••• *.►,.< . MM 4 | I »l||l
I. «V>< - «>.•» 1«*t<l , ,,\s mtt 1,1 , M1I4 I v.,I
0> ,P II.• , MiK I, ll.t, I * t, ,„ |..4I,| Mi,'
M.» | tf • , I ••■<»» - ",|.,.,AI, |l,. J '|,,. .
,uthl /.(I |»„. .v. ,,| II... ,.,,!> ,|
Mm- «.-*», «-.|. ».,.4... I
3
:jrr\:
11 \m &&?*
MINU1 I*A1 II HN