/


Author: Bammes G.
Tags: anatomy animal anatomy fine art art books
ISBN: 978-0-486-43640-1
Year: 2004


Text
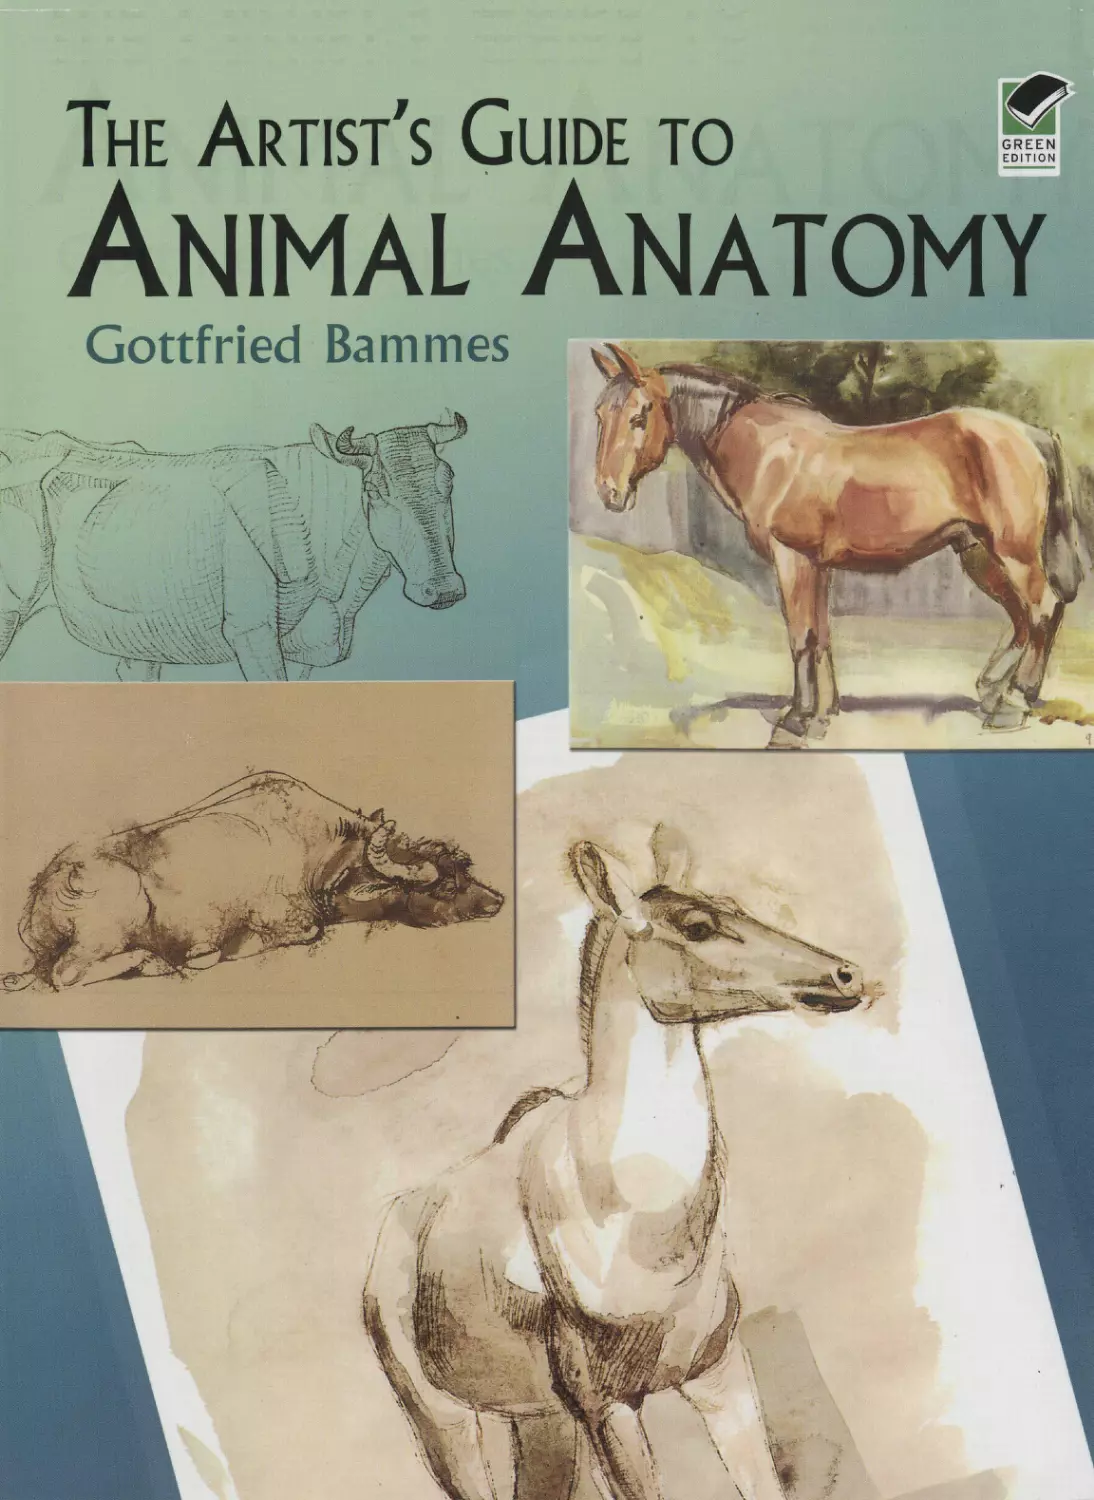
                    The Artist's Guide to
Animal Anatomy
Gottfried Bammes

OCR FineReader
ENGLISH
EE3 KOPPEKTYPbl
The Artist's Guide to
ANIMAL ANATOMY
Gottfried Bammes
Dover Publications, Inc
Mineola, New York

At Dover Publications we're committed to producing books in an earth-
friendly manner and to helping our customers make greener choices.
Manufacturing books in the United States ensures compliance with
strict environmental laws and eliminates the need for international
freight shipping, a major contributor to global air pollution.
And printing on recycled paper helps minimize our consumption of
trees, water and fossil fuels. The Artist's Guide to Animal Anatomy was printed on paper made with 10% post¬
consumer waste, and the cover was printed on paper made with 10% post-consumer waste. According to
Environmental Defense's Paper Calculator, by using this innovative paper instead of conventional papers, we
achieved the following environmental benefits:
Trees Saved: 6 • Air Emissions Eliminated: 563 pounds
Water Saved: 2,046 gallons • Solid Waste Eliminated: 303 pounds
For more information on our environmental practices, please visit us online at www.doverpublications.com/green
Translated from the German by Judith Hayward in association
with First Edition Translations Ltd., Cambridge, England.
Copyright
German-language edition copyright © 1989 by Ravensburger Buchverlag
Otto Maier GmbH
English-language edition copyright © 1994 by Transedition Books, a division
of Andromeda Oxford Limited
All rights reserved.
Bibliographical Note
This Dover edition, first published in 2004, is an unabridged republica¬
tion of the English translation originally published by Chartwell Books, Inc.,
Edison, New Jersey, and Transedition Books, Oxford, England, in 1994. The
original German edition was Die Gestalt des Tieres, published by Ravensburger
Buchverlag Otto Maier GmbH, Wiener Neudorf, Austria, in 1989.
Library of Congress Cataloging-in-Publication Data
Bammes, Gottfried.
[Gestalt des Tieres. English]
The artist’s guide to animal anatomy / Gottfried Bammes ; [translated from
the German by Judith Hayward],
p. cm.
ISBN-13: 978-0-486-43640-1
ISBN-10: 0-486-43640-3
1. Morphology (Animals) 2. Anatomy, Comparative. 3. Animal mechan¬
ics. I. Title.
QL799.B3513 2004
743.6—dc22
2004052892
Planet Friendly Publishing
y/ Made in fhe United States
>/ Printed on Recycled Paper
GREEN Text: 10% Cover: 10%
EDITION Learn more: www.greenedition.org
Manufactured in the United States by Courier Corporation
43640302
www.doverpublications.com

List of contents
Introduction/ 7
1.	Basic principles in drawing animals / 9
1.1	Deciding on specific impressional qualities / 9
1.2	Anatomical knowledge used to pinpoint essence / 9
1.3	Understanding the structural design of an animal /II
1.4	Deciding on a viewing angle /15
2.	Body cover textures /17
3 • Learning about proportion - a first priority / 23
3.1	Proportion - a distinctive feature of animal	form / 23
3.2	Establishing proportion - a practical guide	/ 26
3.3	Practical work on proportion / 29
4.	Repose and motion - structural and dynamic rules / 33
4.1	Modes of standing, sitting and lying / 33
4.2	Modes of locomotive movement / 35
4.3	Exercises in repose and motion / 41
4.4	Freedom - improvisation - experiment / 47
5 • The forms of the hindleg / 49
5.1	Drawing the construction of the skeleton / 49
5.2	The musculature / 55
5.3	Studies based on a constructional approach and on
visualization / 57
6.	The forms of the foreleg / 65
6.1	Drawing the shoulder and foreleg of specialized
runners/65
6.2	Disposition of the musculature in specialized
runners/69
6.3	The whole leg of a runner: constructional analysis and
drawing from imagination / 71
6.4	Drawing the shoulder and foreleg of carnivores / 80
6.5	Basic disposition of the musculature / 84
6.6	A constructional approach combined with
visualization/87
6.7	The special shape of the shoulder girdle in
primates/94
7.	The form of the trunk / 95
7.1	Study of the vertebral column as a structure
creating form/95
7.2	Drawing the thorax as a plastic core /102
7.3	Drawing the skeleton of the whole trunk /105
7.4	Disposition of the pure trunk muscles /106
7.5	Graphic aids to depicting the body /108
S.	Head forms/113
8.1	Types of skull structures /113
8.2	Drawing the skull constructionally /119
8.3	The head and the shapes of its soft parts /122
8.4	Drawing the head as a whole /130
9 • Coming to terms with the whole animal figure /134
9.1	Drawings as built designs /135
9.2	Sketching/136
9.3	Free play/138
List of contents

Introduction
This book does not start from the outer appearance of the
animal body. Instead we start our graphic construction from
within - an approach that we have tried and tested many times.
We first set out the rules in accordance with which the shape of
an animal is constructed, rules derived from the animal’s
environmental adaptation and way of life. This raises the
question of the match between the demands made on the
animal and its response to them, of functions required and
construction able to fulfill those functions. The interaction of
these factors makes sense of formal attributes in terms of fitness
for purpose. Interdependencies and interactions become clear
in details of proportioning, the static and dynamic behavior of
the organization of the body as a whole, the details of skeletal
construction and the arrangement of its motor forces, the
muscles. Students will thus become conversant with criteria that
virtually make things fall into place of their own accord, with a
little thought; they will learn to see that a form must be as it is
and cannot be any other way.
Learning to understand that forms are governed by consistent
rules is the gateway to grasping the essence of form at all levels
of graphic studies. For this study purpose we have selected a
small number of representative types of animal form: two
herbivores, the horse and the cow, the structural design of
which is geared exclusively toward locomotion; as walking and
running animals they have attained a high degree of
specialization. Next come two carnivores, the dog and the lion,
which have undergone modifications in the construction of the
skull (in particular the teeth and position of the eyes), the front
part of the body (which performs more functions than the rear
part), and above all in the extremities of the limbs. Because it is
closest to the human form, we only touch on the most universal
constructional type, the anthropoid ape.
Using these representative examples it is not hard to find
similarities with other animal forms. Looking at a basic
structural design common to all these animal types makes it
clear that there is one fundamental form set against which that
of an individual species appears as a variant, a special case of the
universal. The principle of one structural design with variants is
brought home at every turn when we explore proportion.
Before embarking on any drawing we learn the characteristic
proportions of the perissodactyl (the horse) as opposed to the
artiodactyl (the cow), and those of the hunter that pursues its
prey (the dog) as against those of the hunter that lies in wait
(the cat). The basic principles of drawing set out in Chapter I,
and such anatomical knowledge as is here, especially concerning
construction, are directly related to questions of proportion.
The position in the body of the pivotal points associated with
Introduction

movement is closely linked to proportional attributes. This
allows a smooth, logical transition from studies of proportion to
studies of resting positions and locomotive movements.
Information about the machinery of movement helps make us
familiar with the functional system comprising the skeleton
structure, the groups of functional muscles attached to it, and
their position in relation to the axes of the joints.
This resolves yet another problem: how the muscles work.
Moreover, an understanding of how the dimensions of all masses
obey consistent rules and of the .plastic quality of masses comes
automatically with understanding the layout of the muscle
system.
Methodical intermeshing of topics also lies behind the
learning of particular graphic skills in every chapter. We begin
with exercises designed to help toward grasping overall
structural plan, continue with studies of proportion and go on to
studies of resting positions and movements. At this point, in all
chapters, we tackle work going beyond objective study and
introduce imaginative drawing. The idea that life studies are an
end in themselves would discourage creativity.
However, even a life study from nature should not be thought
of as a straightforward reproduction of nature; it should make a
convincing statement about the subject and its predominant
characteristics. Drawing understood as a constructing process,
exploring the interplay of framework forms and variable soft
forms, is therefore recommended.
The method of graphic study set out in this book promotes
the development of many and varied capabilities and skills:
observation, visual memory, powers of visualizing capacity,
combinational ability, imaginative power and sensitivity.
Franz Marc, in the words of H. Biinemann, sought ‘in all
investigative responsibility and seriousness’ to capture the
structure of the animal organism working ‘from its most
intractable aspect, the structure of the bones’. He thus
accumulated a wealth of inner perception, a sure foundation on
the basis of which he was later able to find the large, embracing
form and confident, defining line, and even to invent freely
imagined fantasy creatures.
It is in this sense that I offer my anatomical approach for
artists. Once consistent rules governing form have been
recognized, they can be embroidered on. This book sets out to
develop the ability to see with understanding and to call on what
is known to create a mental image. The visual repertory stored in
the artist’s head must contain a high degree of practical and
visual simplification for only simple things can be remembered.
The working methods outlined in this book, interweaving
step-by-step sequences and proposed solutions, are designed to
achieve the above goals and tasks in a methodological,
systematic program.
We use anatomical analysis not for the sake of analysis, but in
order to create order, making connections and discovering
consistent rules governing form. An excellent means of doing
this is to explore the dialectic between formal and functional
connections, to look at the interaction between the demands
made on the animal form - as a whole and in its component
parts - and its ability to respond to those demands.
I see the transformation of the multiplicity of factual
anatomical information into images that can be visualized as one
of my most important objectives in teaching.
If the forms that make up the body, the skeletal structure in
particular, are to be drawn as distinctive and memorable, this can
only be done by seeking for simplicity, reducing forms to
elements, distilling them, reaching the essence of form; this is
completely different from reproducing their mere outward
appearance. Once the key to simplification of form has been
found, the door is opened to drawing animal forms from a
mental image of them, i.e. without the direct presence of an
animal model, to understanding the construction of the body,
which is based on the dialogue between the core masses of the
body - the thorax, pelvis and skull - and the other
constructional framework forms as they interact with the soft,
fleshy parts.
Inevitably, not all drawings based on the guidance offered here
will be masterpieces, but one thing should give satisfaction to all
who follow it: both emotionally and intellectually they will have
become close to the creatures with whom we share the earth.
Introduction

1.
1.2
Anatomical knowledge used to pinpoint
Basic principles in drawing animals
1.1
Deciding on specific impressional qualities
All subjects - here animals - possess their own specific qualities
which arouse our interest and invite us to capture them in
drawing: these we might call their impressional qualities. The
student should decide which of the wide range of potential
impressional experiences is the most powerful, and start by
concentrating only on that, allowing the others to fade into the
background. By filtering the way we observe and look at things,
we can soon learn what to pick out as essential, which could be
any one of a number of things - proportional peculiarities,
shapeliness, slimness, delicacy, massiveness, squatness, power,
color and structure of skin or coat, actions and functions of the
body in repose and in movement. The list could go on and on.
Here are some suggestions as to how to select the essential in
animal models:
•	Go round a zoo, get a general idea of the various forms of
animal and make a note of what impresses you most.
•	Consider the strongest impression in terms of drawing, not
overtaxing yourself by attempting to bring in other attractive
aspects, however fascinating they may be.
•	Be quite clear as to whether proportion, function, surface
texture, solidity or structure excites you most.
•	Having reached your decision, concentrate on just that one
aspect and attempt to convey it in drawing. If you try to
introduce too much into your drawing in one go, there is a
risk that no impressional quality will be fully developed - the
result will be a jumble of non-essential, haphazard
observations with no independent, stable graphic concept.
In capturing the impressional quality we make a first step
toward finding expression. By proceeding in this selective way
we sharpen our perception of formal and impressional
characteristics, which trains us to look for expression as a
crucial criterion in every line we draw. Ultimately this enables
us to control a multiplicity of factors and use symbols and
shorthand to convey what touches us most.
essence
What appears essential to the eye, however, does not depend
only on its impressional qualities. Since we must also interpret
its substance, we need a basic knowledge of animal anatomy.
This enables us to see through the surface of the animal that is
the object of our observation and perceive it as an articulated
entity (fig. 1), and at the same time prevents it from being
dissipated into an accumulation of individually observed details.
We need to be able to recognize fundamental factors, not to
know all the details of external appearance.
The purpose of anatomical knowledge for artists is to make it
possible to construct from within. We deconstruct the superficial
visual impact, using anatomical analysis and close observation, in
order to reduce things to their essentials and assess main and
subsidiary forms.
The artist seeks to use anatomical knowledge to achieve unity
and simplicity of form based on insight into essence.
So	what are the main points?
•	What the structural designs of animals have in common and
the differences between them. Seeing construction as the
body’s answer (form) to the demands made on it for
performance (function) is crucial in this.
•	Proportional anatomical characteristics governed by
function.
•	Following on from the above: establishing hierarchy of form.
•	Formal attributes governed by structure and dynamics
(fig. 2).
•	How the whole connects.
•	Condensing the forms of individual parts of the skeleton
(fig. 3) and the joint and muscle systems (figs 86,88).
•	Building up accurate mental images of form.
•	The structural interplay within the body, helping toward
producing a structural drawing (figs 11,130-34).
Seeing the body as a constructed system helps develop a mental
reconstruction in which each individual part finds its place in the
structural unity of the whole.
This way of thinking quite naturally turns natural appearance
into abstract images and makes a statement about animal forms.
The artist’s own individual way of looking, thinking and behaving
will be carried over into artistic activities; this lends attempts to
learn and understand about form the necessary stability.
Thus the primary and ultimate contribution of anatomical
knowledge for artists as I see it is to make possible a statement
about natural appearance and to underpin the power of form
to carry conviction; this contrasts with the essential emptiness
of schematic formulas.
Section 1.2
Anatomical knowledge used to pinpoint essence

1	KNOWLEDGE OF FORMAL
STRUCTURE LEADS TO AN
UNDERSTANDING OF FORM
Anatomical knowledge enables an artist to
see through an organic entity and
perceive it as an articulated unit. This
prevents us from copying outward
appearances slavishly and teaches us
about the structural interplay between
framework forms and the soft parts of the
body.
2	RULES OF FORM BASED ON
DYNAMICS AND STRUCTURE
a)	The profile is determined by the
angles of the bones and the muscle
forces that serve to fix the joints in
sequence and so to facilitate locomotive
movement.
b)	The back and front views of the
skeletal structure show only slight angles
at the joints. They mainly demonstrate
how weight is transferred onto the feet.
In a simplified linear drawing we see the
course of the statically determined
framework of the rear and front
extremities.
Section 1.2
Anatomical knowledge used to pinpoint essence

3	ILLUSTRATION OF THE
CONSTRUCTION AND SHAPE
OF A JOINT
Reducing form to constructional
elements produces condensations that
are convincingly simple, as in this left
hock of a horse; these become concepts
that can be conjured up in the mind and
put to good use in life studies.
a)	The first phase gives the crucial
directions and main forms.
b)	The second phase shows increasing
formal differentiation, emphasizing the
unity of form and function. Investigations
of this kind reveal recurring sculptural
similarities between animals of widely
differing forms.
thirds of the total body weight (fig. 4). As a result, between the
carpal and fetlock joint it has become perfectly straight (a
columnar shape). Non-fatigable tendons and the snap-joint at
the elbow (of the horse) provide joint fixings that conserve
muscle power (fig. 6b). The slanting direction of the scapula
absorbs part of the forward thrust of the vertebral column. Thus
the two forelegs have a primarily supporting function and
during locomotive movement they transmit the forward thrust
of the trunk.
The thrust from the two hindlegs is transferred without loss of
power via the downward-sloping pelvis onto the vertebral
column (fig. 7b). Several angles in the skeleton of the leg
contribute to this. Straightening out these angles lengthens the
limb, so releasing the forward thrust. That is why the two rear
legs support only one third of the total body weight (fig. 4). The
many angles and the particularly powerful extensor muscles of
the associated joints are the main factors behind the pushing-off,
lifting movement of the hindlegs.
Everything relating to the shape and direction of the bridge
structure of the mammal’s body, especially the directions
followed by the various limbs and their pivotal points (fig. 9),
must be thoroughly understood before it can be given
elementary graphic expression (fig. 8), because these angles and
directions have a considerable impact on the moving thrust.
1.3
Understanding the structural design of an
animal
The organic form of an animal represents a system that controls
the body and a piece of organization that we describe as a
structural design. Perceived in this light, it is a working model
which makes the main features shared with other forms just as
clear as any differences from them.
The body of a mammal is built like a bridge (fig. 4) whose
vaulted span is represented by the vertebral column running
from the chest to the loins. It is held by two supporting pillars at
the front and back, i.e. the front and rear legs, at a height that is
specific to the animal in question.
The bridge arch, which is shaped like a flat C, is concave on
the side of the animal’s abdomen, counteracting the forward
and backward thrust exerted by the weight of the trunk. The
bridge arch is therefore clamped passively by ligaments in the
vertebral column, and actively by the rectus abdominis muscle
(%• 5).
The two forelegs between which the thoracic vertebral column
is suspended with the help of flexible straps of muscle (figs 6a,
6b) have to carry the greatest burden, supporting about two-
Section 1.3
Understanding the structural design of an animal

4	PRINCIPLES OF THE
CONSTRUCTIONAL DESIGN AND
WEIGHT DISTRIBUTION OF THE
BODY
The way in which the front extremities
have developed into a column and the
hind extremities into a push-off force
thanks to their extensile joint angles ties
in with the fact that two-thirds of the
body weight is supported by the front
legs and one-third by the rear legs. The
red lines indicate the positions of the
points of support.
5	THE CRUCIAL SECURING OF THE
BRIDGE ARCH
The vertebral column extends like the
arch of a bridge between the front and
back end of the animal. The pelvis and
the shoulder girdle take the thrust (red
arrows) developed by the weight of the
intestines. The muscles in the
hindquarters serve as an anchor for the
bridge construction at the rear, and the
neck muscles secure it at the front. In
brown: bracing by ligaments.
6	CONSTRUCTION OF THE FRONT
PILLAR OF THE BRIDGE
a)	Front view: suspension of the thorax
by straps of flexible muscle between the
scapula and the humerus.
b)	Side view: joints that carry a
particularly heavy load are reinforced by
non-fatigable tendons and snap (elbow)
joints. The balance between the head and
neck on one hand and the thorax on the
other is maintained with the pivotal point
on the shoulder blade working like the
counterweight on a crane.
Section 1.3
Understanding the structural design of an animal
sterno-
mandibular
muscle
continuation
of active
bracing by
rump muscles
rectus abdominis
flexible
nuchal ligament
M. serratus
magnus
deep pectoral
muscle
biceps
suspension of-
the trunk on
flexible
muscle straps
surface and deep
flexor digitorum
muscles

7	CONSTRUCTION OF THE REAR
PILLAR OF THE BRIDGE
The thrust can be transferred onto the
vertebral column by straightening the
angular joints of the hindleg without any
loss of power because of the position of
the pelvis (slanting downward).
a)	The pelvic girdle and leg in back view.
b)	The angle of the knee is fixed in
repose by a loop of ligaments and the
other joints by non-fatigable tendons.
surface and deep flexor digitorum muscles
bracing ligaments between
pelvis and sacrum
8	STEP-BY-STEP APPROACH TO
DRAWING THE STRUCTURAL
DESIGN OF ANIMALS
a)	The purpose of the exercise is to make
sure of the directions followed by the
vertebral column and the limbs.
b)	The framework can easily be adapted
for movement (study of a cheetah’s
movement).
Section 1.3
Understanding the structural design of an animal
loop of ligaments
on patella
back view

8c) The behavior of the constructional
framework, the vertebral column in
particular, when upended (large cat),
d) A sitting position and stretching
radically alter the directions studied.
9	MAIN JOINTS AND PIVOTAL
POINTS
The horse again serves as a representative
example of how the pivotal points are
situated in the skeletal structure of other
land mammals. The red rings indicate
pivotal points relating to locomotive
movement, the red dots in white rings
other pivotal points.
Section 1.3
Understanding the structural design of an animal

1.4
Deciding on a viewing angle
To depict an animal body three-dimensionally it is necessary to
be clear about the relationship between the person drawing and
the object, the viewing angle and the horizon line, all of which
contribute to a perspective view (three-quarter angle, viewed
from below or above). Not every viewing angle is equally well
suited to displaying distinctive formal features. A direct,
unangled view (side, front or back) for example shows fewer of
these features than a three-quarter view from above or below
(figs 10a, 10b). We also have to consider foreshortening and
intersections (fig. 11). Three-dimensional projections of this
kind enhancing distinctive features are essential in depicting
animals.
Another factor is important: the position of the body in the
surrounding space and its relationship to it. This in turn means
making sure that the body, and all its various sections and
parts, has graphically clear viewing planes enclosing the body
with fixed three-dimensional gradients (fig. 11). This requires
clarifying the large and small masses and simplifying them, so
articulating the spatial gradient of each plane. Drawing in where
cross-sections are imagined to be (figs 11a, lib); helps to
highlight the special shape of the body in question.
10	SIMPLIFIED THREE-DIMENSIONAL
DRAWINGS HELPING TO JUDGE
THE VIEWING ANGLE
The beginner should decide on the
horizon line (H, dotted line) or eye level
in relation to the animal’s body before
putting pencil to paper.
a)	The horizon line located above the line
of the animal’s back gives - in addition to
the three-quarter angle - a view from
above which has the effect of producing a
rising line for the standing surface and
the general direction of the back line.
b)	The horizon line lies through the
middle of the body of the animal with the
result that all axes above the horizon line
fall and all those below it rise.
Section 1.4
Deciding on a viewing angle

11 USING LINES TO MODEL FORMS
AND CREATE CONTRASTS
In using hatching for modeling, the
gradients of the planes of the body
should be perceived as the meeting of the
forms composing it.
a)	It is important to express the
convergence of planes decisively.
Preliminary sketches to clarify things can
make the task easier.
b)	By emphasizing the main viewing
planes attention is focused in back, side
and top views. Both these drawings also
make clear the different shapes of .the
animal and human body: the animal
thorax is compressed from the sides, the
human thorax from the front to back.
Section 1.4
Deciding on a viewing angle

2.
Body cover textures
As well as proportions, structural and dynamic phenomena and
movement, body cover - its coat or the special nature of its skin
- is one of the great impressional qualities of an animal's form
and appearance. For this very reason it is important that no
attempt should be made to imitate its physical appearance. The
discovery of graphic techniques that can imply the texture of an
animal’s body cover is far more effective.
Consideration of this problem now and not later, as a
secondary concern, is in line with our intention of broad
preparation, laying the foundations of the means to be used to
achieve desired effects. The artist needs to build on those
graphic expressive possibilities required at the outset. The
different body cover textures offer a rich field of activity for
conveying distinctive and characteristic features convincingly.
Experiment with different techniques is needed.
•	Avoid techniques that are remote from nature.
•	Every medium has its own expressive language; pencil and
pen differ from graphite stick ((fig. 15), red crayon (fig. 16) or
chalks, and a brush on a dry ground (figs 14,22) from one on
a wet ground.
•	A linear approach with pen and ink will give sharp definition
to outlines (fig. 64).
•	Inks, conventional or Indian, on a ground sprayed with water
(fig. 17) produce fuzzy, exciting textures (figs 142,143) which
it is impossible to control fully.
•	Indian ink on an evenly moistened ground (fig. 18) produces
clayey, velvety contours.
•	Opaque paint, applied half dry with a thick brush,
satisfactorily suggests a shaggy, bristly, rough coat (fig. 19).
This technique allows rapid, controllable work.
•	Using fluid media on grounds of varying wetness means that
the colors run, and it is difficult to control their spread. An
experienced watercolor artist can exploit this to create a free,
airy effect suggesting a fluffy coat (figs 21,145), but it is
impossible to predict technical quirks of this kind reliably or
control them fally.
•	Effects that are hard to control using mainly marks (fig. 78)
contrast with the shapes created using a well-filled watercolor
brush (fig. 22). The latter are produced by applying the brush
fluently and smoothly, letting it trail, and finally lifting it off
the paper.
•	A very different method is to use the wax batik process on
paper - it can be employed to full advantage in drawings and
patterns of the animal body (fig. 20).
12	THE TEXTURAL APPEAL OF
ANIMAL FUR
Along with renewed interest in
natural form there was also an
increased awareness of the texture of
animal fur in Renaissance art.
Antonio Pisanello (1395-c. 1455),
Cheetah, jumping to the right.
Pen and watercolor on parchment,
6V4X 9 in (16 x 23.1 cm), Paris, Louvre
13	CAPTURING THE FORM OF
AN INDIVIDUAL SPECIES
This work again shows the artist
turning away from the formalistic,
medieval approach to the study of
animals as an artistic field in its own
right.
Antonio Pisanello (1395-c. 1455), Fox,
lying down and facing left.
Pen and watercolor on white paper,
51/2x81/2in (13.7 x 21.4 cm), Paris, Louvre
Section 2
Body cover textures

The way watercolor paint runs when it is freely applied produces
lively dappled effects. Furthermore, using watercolor can save a
lot of time compared with laboriously drawing in an animal’s
coat.
The above is by no means an exhaustive list of the basic
methods that can be used to convey quite specific body cover
textures expressively, and a combination of one or more of these
techniques gives a virtually unlimited range. Once a suitable
technique has been chosen, avoid doing preliminary sketches
which are then worked up in different kinds of materials. They
can all too easily disturb or even destroy unity of execution.
Sketching constrains and prevents you from setting about
finding the best way of conveying surface texture quickly with
complete freshness, power and freedom.
Bare skin with no covering of fur or hair also requires us to
look for distinctive features. Cracks, armor, bark-like fissures and
clusters of wrinkles or scattered creases all have to be conveyed
in an individual yet appropriate way.
The recommendations made here and on the following pages
are intended as basic guidelines only: there is an enormously
rich range of possibilities for conveying textures in a naturalistic
way.
14	CONVEYING SURFACE TEXTURE BY MEANS OF
COLOR
The horse’s short, gleaming coat and its pile are conveyed here
by the interplay and modulation of red, pink, carmine, raw
sienna, burnt sienna, ocher and olive green.
The author, Mill horse, c. 1950.
Watercolor, 161/2x221/2 in (42 x 57.5 cm)
16	THE ELOQUENCE OF RED CHALK
Red chalk or sanguine has similar qualities to graphite. It can be
applied on its side or as an edge, delicately touched on or
wielded powerfully and incisively. Used with the right paper it
can produce very wispy, fluffy effects.
Far right: red chalk applied on its side, its edge and swiveled.
These shapes were produced by using the chalk in these
different ways without any preliminary sketching.
Section 2
Body cover textures

15	GRAPHITE AND ITS POTENTIAL
Six-sided or four-sided graphite sticks
make an immediate mark - sometimes
too quickly and freely! - producing
marvelously lush lines and emphasizing
painterly effects as well as graphic texture.
Inexperienced users are apt to smudge
their work.
Section 2
Body cover textures

17	PEN AND INDIAN INK ON A
GROUND SPRAYED WITH WATER
When combined with watery substances
Indian ink tends to spread. If you spray
water over paper in a fine mist, the ink
will spread into a network of fine
branches, which can be very helpful in
suggesting a shaggy coat texture.
18	INDIAN INK ON A THOROUGHLY
DAMP GROUND
Indian ink applied to damp fine-grained
watercolor paper tends to run,
producing velvety graphic effects ranging
from light gray to black.
19	GOUACHE PAINT APPLIED
HALF-DRY
Using a free approach and applying
opaque paint with a thick brush,
characteristic coat textures (here the coat
of a Hanuman monkey) can be
suggested. But the drawing must not
turn into a hard-edged silhouette cut-out.
Section 2
Body cover textures

20	BATIK USING A WAX PENCIL ON
COLORED PAPER
The batik technique is ideally suited to
conveying the markings of an animal’s
coat. Against a medium-light colored
paper the light or white line of the wax
crayon stands out particularly well. A
watercolor wash is then applied over it,
which does not adhere to the wax lines.
21	CREATING TEXTURE BY A
PAINTING TECHNIQUE
The running potential that watercolors
have when wet is applied to wet has an
esthetic appeal all of its own, as well as
expressing the soft fluffiness of an
animal’s appearance.
The author, Angora cat, 1967.
Watercolor, WuxTh. in (26 x 18.5 cm)
Section 2
Body cover textures

22	BRUSH DRAWING ON A DRY
GROUND
Recording rapid movement from life or
from imagination at lightning speed using
a well-filled watercolor brush will be
expressive only if the brush is smoothly
applied and not lifted. The size of the
depiction must therefore relate to the
size of the brush. Shapes of varying width
can be achieved only by varying the
pressure used and letting the brush trail.
a)	The maximum width of a brush stroke
with the brush on its side.
b)	A stroke made with the brush full
length.
c)	A fine line drawn with the same brush.
Section 2
Body cover textures

3.
Learning about proportion - a first
priority
3.1
Proportion - a distinctive feature of
animal form
The contours given to an animal’s form by the proportions
typical of its species are at least as fascinating as body cover
texture. Animal shapes are rational. Proportion is the expression
of an order. We can overlook distinctions such as the difference
between a hoof and a paw, but clearly established proportions
can virtually stand alone for the unmistakable overall form, in
which individual distinctions are then revealed as subordinate.
For example, a horse’s square proportions are noticeably
different from the low rectangle of a cow’s body, so much so that
there is no need to inspect them more closely and look for the
detailed attributes of the perissodactyl or the artiodactyl.
Thus studying the proportions of an animal body is a first
priority. In depicting an animal body we must achieve an
overriding sense of order, with individual components fitting
into a unified whole. Forming a clear idea of the
interrelatedness of the whole comes before any other
consideration. This involves:
•	Not using a standardized ‘basic formula’ of the type
recommended by many art teachers who force natural form
and their students into a set mold.
•	Adopting instead a flexible approach which can be applied to
any animal type so that every proportional peculiarity can be
seen and recognized.
•	Avoiding rigid, a priori rules of proportion which would be
constricting, and concentrate investigating proportions.
Proportion may be defined as the relationship of the parts to the
whole. The physical structure typical of each species is typified
by the interrelationship of its dimensions.
Section 3.1
Proportion - a distinctive feature of animal form

23	PROPORTIONAL
CHARACTERISTICS OF A
HUNTER THAT LIES IN WAIT
(LION)
The relationship between the length
of the trunk and its height from the
ground, expressed as a rectangle using
head length as a module,
demonstrates the low, elongated
proportions of this animal type.
KL = head length
The proportion of the animal tells us something about its way
of life and adaptation, and accordingly can be seen as a pattern
with a purpose. It conforms to certain rules: for example the
proportions of a hunter that lies in wait (fig. 23) are different
from those of a hunter that pursues its prey (fig. 24). Hunters
that lie in wait have a squat, massive skeletal structure and
musculature, containing an explosive capacity for powerful
short-distance sprinting, springing on their prey and bringing it
down. Hunters that pursue their prey, on the other hand, keep
going until their quarry is exhausted; they are long-distance
‘light athletes’, needing long legs and a slim, light build.
Animals that lie in wait include the lion, puma, tiger, leopard
and panther as well as the short-legged domestic cat. All these
species have a low trunk matched by a short, powerful neck and
head, whereas hunters that pursue their prey (members of the
dog family such as the wolf, coyote, fox and many breeds of pet
dog) typically have long legs matched by a long slim neck and
head, and large lungs.
Herbivorous running animals (e.g. the horse family^have a
trunk that stands high off the ground (fig. 25). Their long legs
afford their sole chance of survival when they are pursued. Flight
rather than the weaponry provided by offensive tusks or horns
Section 31
Proportion - a distinctive feature of animal form

24 PROPORTIONAL
CHARACTERISTICS OF A
HUNTER THAT PURSUES ITS
PREY (DOG)
In contrast to the hunter that lies in
wait (fig. 23) the ratio of trunk height
to trunk length produces a virtual
square. The limbs are long and lightly
built and their contours stand out
clearly from the line of the stomach.
Animals with this tall build outside the
horse family are tylopods (camels and
related species) and animals with
horns on their forehead (e.g. deer,
cattle (fig. 26), antelopes and gazelles).
for attack and defense is their crucial adaptation to a dangerous
environment.
The law of correlation applies again here: as the legs become
longer, so does the length of the neck. A short neckrsuits short
legs (ability to reach food).
The proportions of primates differ from those of the animal
forms mentioned so far. If the human form is shown on all fours
(fig. 27), the torso slopes down toward the head (because of the
shortness of the arms) and rises as it approaches the buttocks
(because of the length of the legs, shown with a marked bend at
the knees in our diagram). The position of the neck end of the
vertebral column and the shape of the head make it hard to look
forward. The animal forms mentioned already, however, are
perfectly well equipped to look ahead of them.
The anthropoid ape (fig. 28) - a gorilla in our diagram - on
the other hand, as a creature that can climb, hang and swing,
needs extremely long arms with a long reach. The rest of the
body is used as a pendulum. When the gorilla climbs its short
legs are used mainly for bracing. The correspondence between
way of life and proportion is perfect. The marked difference in
the lengths of the front and back legs means that the torso of the
primate slopes down steeply.
Section 3.1
Proportion - a distinctive feature of animal form
KL = head length

25	PROPORTIONAL
CHARACTERISTICS OF A
PERISSODACTYL (HORSE)
The height and length of the trunk'are
those of a square. We perceive such a
relationship as harmonious and well
balanced. The body is powerfully
equipped for running and jumping.
The line of the stomach lies at almost
half the height of the trunk.
KL = head length
Another important distinguishing proportional feature, the
dimensions of the thorax, must not be overlooked. All true
quadrupeds that walk on the ground have a narrow, compressed
thorax with great depth between the vertebral column and the
sternum, which means that the forelegs can be suspended
unimpeded along the sides of the thorax. Through evolution the
ability of primates to stand in a semi-upright position has
resulted in the thorax becoming square in cross-section, while
upright human stance has caused a decrease in the depth of the
thorax and an increase in its width (making it easier to maintain
balance, see also fig. 11).
After this rough outline of proportion as a general
distinguishing feature of animal form, we shall now see how
proportion can be more exacdy determined.
3.2
Establishing proportion - a practical guide
We first work out the regular proportional relationships of
heights, lengths and widths, then compare them with one
another and with the whole. This is called the analogous or
simultaneous method.
Section 3.2
Establishing proportion - a practical guide

26	PROPORTIONAL CHARACTERISTICS
OF AN ARTIODACTYL (COW)
The fact that the length of the trunk is
greater than its height gives the animal’s
form a squat appearance, further
reinforced by the fact that the elbow and
knee are well above the outline of the
stomach. NB: the head is carried at the
same height as the rest of the back.
KL = head length
It is a good idea for beginners to use a basic module, such as
the distance from the tip of the muzzle to behind the start of the
ear (which also marks the rear limit of the skull). This distance,
i.e. head length, is easy to measure on a living,animal The
heights of the exposed part of each leg and the trunk and the
length of the trunk can then be obtained in terms of this
module. The withers (the elevation at the point where the back
joins the neck) and croup (an elevation of the line of the back
near the sacrum) are taken as the highest points of the trunk.
The length of the trunk is measured from the part of the chest
that projects farthest at the front to the point on the
hindquarters that projects farthest at the rear, i.e. the two ischial
tuberosities (figs 23-26).
From these measurements it is possible to establish a
characteristically proportioned rectangle based on the trunk,
with essential factors and the height at which the trunk is
carried. Other measurements such as neck length can also be
obtained using the same module, or fractions of it.
•	Use a profile view wherever possible.
•	First establish the rectangle of the trunk, and only then add
other information such as neck or head length or the height
of the line of the stomach.
Section 3.2
Establishing proportion - a practical guide

27	PROPORTIONAL
CHARACTERISTICS OF MAN
AND ANTHROPOID APE
(CHIMPANZEE)
Human proportions in the all-fours
position highlight the shortness of the
arms and great length of the legs. As a
result the outline of the back drops as
it approaches the head.
Primates that can climb, swing and
hang have very long arms with which
to grip and very short legs. As a result,
the outline of the back slopes down
towards the rear in a C shape.
KL = head length
The sequence of steps for establishing proportion is as follows
(fig. 29a-d):
•	Use a compass or two pencils held like a compass to measure
one head length from life (step 1, fig. 29a).
•	Using the module you have just established, measure the
height at the front of the trunk from the sole of the front hoof
to the withers (step 2, fig. 29a). Result: height at withers,
2%H.
•	Measure the length of the trunk in the same way (step 3,
fig. 29b). Result: the length of the trunk of this horse is
also 22/3H.
•	Establish the height at the rear of the trunk in the same way
(step 4, fig. 29c). Result: 2%H.
•	Join all four points to form a rectangle (step 5, fig- 29d).
Result: the rectangle so formed is here equivalent to a square.
•	Draw a line half the height of the trunk (step 6, fig. 29d) and
check whether the line of the stomach is above, below or at
the same level as the halfway line.
•	Determine neck length in terms of the head length module
(step 7, fig. 29d), and draw in the head length as a directional
line.
In this way we have established the rectangle formed by,the
trunk and legs, as well as the lengths of the neck and head.
Fig. 29 offers ideas for further measurements.
Section 3.2
Establishing proportion - a practical guide

28	COMPARISON OF THE
PROPORTIONS OF A HUMAN
BEING AND OF A GORILLA IN
AN UNNATURALLY ERECT
POSE
The makeup of the height and the
width call for special attention. The
human pelvis is considerably higher
(longer legs). The gorilla’s legs barely
measure 2V2H, while its arms are
equivalent to 4 H.
Immediately this proportional framework has been
established work can start on the structure of the rest of the
animal form, starting with the position of the limbs and the
accents (e.g. the apexes of curves).
This procedure can be applied in just the same way to the
forms of any and every mammal (figs 23-26), and can be
simplified by estimating the trunk heights, then comparing them
with one another and the estimated length of the trunk. In
doing this you will gradually develop the ability to work freely,
independently of exact measurements, an important preliminary
step when working from life. You will learn to estimate, training
the eye to assess measurements more and more reliably,
resorting to exact measurement only occasionally when you are
uncertain of something.
3.3
Practical work on proportion
We shall now assume that the preliminary exercises in
measuring and establishing the rectangle formed by the trunk
are behind us. When studies of proportion are carried out with a
drawing material that can be applied rapidly and used on its side
(e.g. red chalk), I would make the following recommendations
(fig. 30):
•	Choose a piece of red chalk that is the right length when
applied on its side to convey the basic shape of the trunk in a
single broad stroke (b, a). The length of the chalk will
determine the eventual size of the study.
•	The chalk should not be constantly lifted from the paper:
convey the basic forms (including the limbs) in a single
stroke.
•	Experiment with swiveling the chalk round in an arc to
produce triangular and trapezoid shapes (c), and use clear
shapes such as these to build up whole limbs (d) and
ultimately the entire animal form (e).
From this point on we can start including the first movements,
still depicted two-dimensionally. If you doubt that it is possible
to combine studies of proportion with movements, you may like
to carry out the following small but very instructive diversion.
Reinforce what you have learnt about proportion in figs 23-26 by
making small, movable proportion blocks (fig. 31) of individual
limbs with overlaps which can be used to make prints. Drill tiny
holes in the blocks where the pivotal points are located - these
must always match up when prints are made. If you put a small
pin through these holes you can be sure that the next block will
be placed in the right position directly overlapping the shape
that has already been printed.
Please note:
•	Any color can be used for printing. It is best to apply the
paint or ink with a flat brush, then press down the shape as
you would a block.
•	Areas left blank in printing can add to the charm of the
technique.
•	The paint or ink need not be applied on the block evenly.
•	It is always possible to overprint on an impression already
made, perhaps using a different color.
•	To make it clearer which legs are ‘on top’, i.e. nearer to the
viewer, they should be printed more heavily.
Learning about proportion is a new, preparatory step toward
expressing movement in repose and locomotive motion. Once
we are also sure of the construction of the animal’s framework,
(see figs 4 and 8a-d), then we are well placed to tackle the next
set of problems.
Section 33
Practical work on proportion

29 TAKING PROPORTIONS STEP-BY-
STEP FROM LIFE, USING THE
SIMULTANEOUS METHOD
The objective, is to establish ihe rnost.
imppnarii proportional fatic^'BegAning-
with thedimelisiDr^of the
fbrmed bv the trunk and' legs:
pencil or better still a coiflp^ m&sM?
the basic module, one head length (k). J - •
a)	Establish H (l);and using it as$. •
module measure the’height fromjhe ; v
front foot to the withers'tj?)! . \	...	V
b)	Measure from the foremost point-of . I
the chest to the very back of the’pelvis •
.(ischial tuberosity) (3) rniernis ofH. * ;
Section 33
Practical work on proportion

c)	Measure the height-from the back
foot to the croup in terms of. H (4).
d)	Draw a square encompassing
these measurements;^)', and mark
the halfway point of the height (6)
to get an approximate guide to.rhe •
line of the stomach. Measure the :.
length of the neck from the withers
to the ear (7).
This method, establishing lengths .
that are similar or the same / .
(simultaneous method)’, can be
practiced on any animal form. '
Section 33
Practical work on proportion

30 TWO-DIMENSIONAL STUDIES
USING A BROAD MEDIUM
The purpose of the exercise is to use a
broad medium (red chalk) to convey
proportions quickly on paper in concise,
simple forms.
a, b) Conveying the mass of the trunk
with a piece of red chalk applied full
length on its side, and adding the rear
limbs in the same way.
c, d) The shapes making up the hind -
and forelegs produced by simply
swiveling the chalk.
e) The complete animal form - the way
in which the material was handled to give
virtually geometric shapes is still
discernible in the overlapping areas.
Red chalk on A3 paper
Section 33
Practical work on proportion

4.
Repose and motion - structural and
dynamic rules
We are not entirely free to choose how to convey positions in
repose involving movement or locomotive movements so that
they are clearly understandable; how we make a standing
position - whether on four legs or two - look like a standing
position and not like a fall. What ultimately determines whether
we perceive locomotive movement as hesitant, tripping or
propped up is how the representation matches with natural
laws. Repose and motion are both subject to the laws of gravity
and always depend on the relationship between the center of
gravity and the supporting surface. We must bear in mind that
(fig-32):
•	A body’s center of gravityis the notional center point of the
body mass which is the only point that needs to be supported
for the body to maintain its position in repose (balance).
•	Th t gravitational plumb line (gravity line) runs straight down
from the center of gravity, indicating the gravitational pull.
•	The supporting surface (standing surface) is whatever the
body is resting on in a standing, sitting or lying position.
•	Stability is the resistance a body exerts on a horizontal
supporting surface to being pushed or toppling over.
•	Balance in repose obtains if the body’s center of gravity is
located over the supporting surface.
31	PRINTING IN COLOR WITH
MOVABLE PROPORTIONED
BLOCKS
Before preparing the blocks, the shapes
and proportions of the chosen animal
should have been established (fig. 25).
When applying paint or ink to the blocks
with a brush you can graduate the
intensity and shade, or partially overprint
an impression already made in a different
color.
Print using acrylic paints on A4-size paper
Compared with human stability, animal stability is extremely
good because:
•	the standing surface covered by an animal’s four feet is large;
•	its center of gravity is low;
•	its stability increases as the body weight rises.
If for any reason the center of gravity goes outside the
supporting surface the body loses its balance and falls over in the
direction in which the center of gravity is displaced (the tipping
edge). An animal’s center of gravity is in the front third of the
body (fig. 32), and if the body is shifted backward or forward it
can move over the supporting surface, with the various axes of
the body (the alignment of the pelvis, the trochanter major on
either side and the points of the shoulder blades) still remaining
horizontal (fig. 33). But the axis shift into slanting positions if the
body ceases to be supported evenly on all four feet.
4.1
Modes of standing, sitting and lying
What happens functionally in the standing position changes
when the standing surface is reduced (to standing on three or
two feet, figs 34,35). The whole organism makes an immediate
and continuous endeavor to equalize forces. It reacts sensitively
to slight changes in the relationship between the position of the
center of gravity and the size of the supporting surface. These
changes can arise from the need to off-load weight and relax
(fig. 35) when one leg is lifted or the neck is bent sideways.
What are the essential changes in form that result from
counterbalancing weight?
•	When the body is supported on three feet in walking (lifting
of the front swinging leg, fig. 34) the center of gravity must be
shifted sideways so as to be above the supporting leg.
•	Consequently the supporting leg is in a slanting position.
•	The point of the shoulder blade on the side of the supporting
leg is higher than that on the unsupported side.
•	When the body is supported on three feet in a standing
position with one of the hindlegs carrying no weight (a
typical relaxing attitude in the horse), the weight-bearing
hindleg is in a more slanting position, and the pelvis drops
toward the unsupported side (fig. 35b). This is comparable to
what happens to a human being in a contrapposto position
(fig-35a).
•	The decreased distance between the pelvis and the ground is
reflected by the trailing leg inevitably taking up a
compensatory position: i.e. there is greater flexing at the
joints.
We find particularly striking changes in form in the standing
position of a cat washing its raised front paw The shoulder blade
on the weight-bearing opposite side protrudes sharply. When a
horse is standing on its hindlegs (the levade position) the
muscles in the hindquarters have to exert a powerful effort to
pull the body’s center of gravity sharply back above the rear
hoofs. Stable balance is turned into labile balance.
Section 4.1
Modes of standing sitting and lying

There are two main modes of sitting: sitting upright on the
hindquarters end without any support from the forelegs (apes,
bears) and sitting on the haunches (fig. 36a, linear outline) with
the supporting forelegs straightened for structural reasons. The
main features of changing from a standing position to sitting on
the haunches are (fig. 36):
•	The forelegs stay more or less where they are (fig. 36a).
•	The hindlegs bend at the joints, the top sections of the legs
(the femur and tibia) touch one another, and are brought up
near the supporting forelegs.
•	The vertebral column as it extends from the thoracic to the
lumbar vertebrae forms a C-shape with a clear hump.
The transition from sitting on the haunches to a lying position
differs from one species to another (dogs and cats, fig. 36a):
•	The hindlegs stay where they are, but are brought closer
together.
•	The front part of the body is pushed forward. The forelegs lie
straight out from the paw to the elbow. The sternum helps
support the weight.
The transition from a standing to a lying position (fig. 36b) goes
as follows:
•	The front and back paws remain where they are.
•	All joints fold up simultaneously, but the front part of the
body slides back a little.
•	The vertebral column bends between the thoracic and lumbar
sections.
An intermediate mode between standing and lying (in cats) is
the mousing position where the body is half crouching and half
squatting (e.g. when feeding), with the feet tucked under the
body From this crouching position the joints can suddenly jerk
into a standing and springing position. When hoofed animals are
in a lying position (fig. 37) the fetlock joint bends sharply so that
the front feet can tuck up under the cannon bone. The back foot
is rolled to one side of the rear shank.
32	POSITION OF THE CENTER OF
GRAVITY AND HOW IT SHIFTS
The low-lying center of gravity (red dot)
above a supporting surface that is
constant in size gives the animal good
equilibrium and great stability. If the body
is moved forward or backward the center
of gravity can shift considerably (see pale
gray outlines). The continuous red line is
the gravity line, which falls within the
standing surface.
33	POSITION OF THE CENTER OF
GRAVITY AND ITS IMPACT ON
PLASTIC ACCENTS (MARKED IN
RED)
When the animal’s weight is supported
evenly on all four feet the axes of
important corresponding plastic accents
are horizontal.
a)	Rear view, marking the position of the
croup, the hip tuberosities, and great
trochanters.
b)	Front view, marking the regular
horizontal alignment of the points of the
shoulder blades.
Section 4.1
Modes of standing, sitting and lying

4.2
Modes of locomotive movement
The body in repose often makes behavioral movements which
do not involve moving from place to place.
Locomotive movement, from one place to another, is effected
by thrust from the hindlegs. The center of gravity located
forward the front is pushed forward beyond the standing surface,
and a fall is prevented by one of the forelegs moving ahead. Thus
the thrust always comes from behind. How does the thrust occur?
•	The hindleg that is farthest forward (fig. 38) becomes the one
that propels movement as the joints extend. The propelling
or bracing leg transmits power via the hip joint onto the
pelvis.
•	Meanwhile the other hindleg (the swinging leg) is lifted off
the ground and in a slightly flexed position swings like a
pendulum past the support point of the leg providing the
thrust and extends as it prepares to touch the ground
(becoming in turn the bracing leg).
The procedure described is fundamental, and applies to both
four-time movement and the amble. Either of these main gaits
of the horse can change in tempo from a stride to a trot, gallop
or jump.
The characteristics of the stride in four-time movement are
the alternating combinations of the legs that provide bipedal
support (fig. 38):
•	At the outset the animal is supported on three legs (phase 1)
with one leg raised at the front; this is followed by diagonal
support provided by one weight-bearing foreleg and one
weight-bearing hindleg on opposite sides of the body
(phase 2). The diagonally opposite swinging legs are
moving forward.
•	The forward-moving swinging foreleg touches the ground so
that there is now a supporting leg at both back and front on
the same side of the tody (phase 3).
34	STRUCTURAL AND FUNCTIONAL
EFFECTS WHEN A FORELEG IS
RAISED
The reduction of the standing surface to
just one leg at the front and two at the
back necessitates a sideways shift of the
center of gravity towards the supporting
foot, pushing the whole supporting leg
into a very slanting position. As a result
there are twists in the longitudinal axes of
the trunk seen in section.
35	STRUCTURAL AND FUNCTIONAL
EFFECTS WHEN ONE HINDLEG
CARRIES NO WEIGHT
These effects are similar to those
described in fig. 34, and are similar to the
human pose with one standing leg and
one trailing leg (a). Because of a lack of
support the standing leg must again
adopt a slanting position as the center of
gravity shifts, and the pelvis on the
unsupported side drops down (b). The
trailing leg is therefore forced to take up a
compensating position (the joints are
bent, and the foot may be placed in
front).
Section 4.2
Modes of locomotive movement

36	TWO MODES OF LYING DOWN
a)	In moving from a sitting to a lying
position the-front of the body is pushed
forward and the forelegs laid flat from the
elbows to the pads of the feet, while the
hindlegs are tightly folded.
b)	In moving from a standing to a lying
position, the forefeet stay in position
while the rear of the body is pushed back,
and the hindlegs then fold down.
37	STUDIES OF POSITIONS IN
REPOSE (NILGAI ANTELOPE)
The animal’s slender limbs and rapidly
changing positions are best depicted with
a material that can be used flat but is also
capable of outlining delicate shapes with
a single line.
Red chalk on A3-size gray paper
Section 4.2
Modes of locomotive movement

Movement continues as follows:
•	Changeover to the reverse diagonal bipedally supported
position (phase 4). The front of the foot nearest to view now
lies a long way back, and the opposite hindleg is a long way
forward, while the leg that is about to give the next forward
thrust is still swinging.
Thus in the walking gait in four-time movement there are six
main phases:
•	Phase 1\ Starting off supported on three feet, with two points
of support at the back.
•	Phase 2\ Diagonal bipedal support from a foreleg and a
hindleg on opposite sides of the body.
•	Phase 3: Bipedal support from a fore- and hindleg on the
same side of the body.
•	Phase 4: Change to diagonal bipedal support from opposite
sides of the body, reversing the leg position in phase 2.
•	Phase 5: Support on three feet, with two points of support at
the front and one at the back.
•	Phase 6: Bipedal support from a fore- and hindleg on the
same side of the body (the opposite side from that supported
in phase 3).
When the limbs on one side of the body are lifted at the same
time while the opposite side takes on the supporting function,
this is described as an ambling gait (elephant, bear, grayhound,
giraffe, camel). Big cats do not as a rule alternate support as in
the four-time movement just described but when excited both
they and dogs sometimes change to an ambling gait. The cow
though basically an animal that uses four-time movement is
always half-ambling.
The trot is next in speed to the walking gait (fig. 39), and
follows the same principles in the sequence of support.
However, the greater thrust exerted by the hindlegs throws the
body forward so powerfully that between the points where it is
supported diagonally on one side and then on the other there is
a phase where no leg is touching the ground {suspension
phase).
38	PHASES IN THE STRIDE IN FOUR¬
TIME MOVEMENT SHOWING
THE GRAVITY LINE
These diagrams of the horse’s walking
gait indicate where the feet touch the
ground (solid black), together with the
standing surface applicable in each case.
The positions of the swinging legs are
outlined in black.
Phase 3
Phase 2
Phase 1
Phase 5
Phase 4
Section 4.2
Modes of locomotive movement
Phase 6

Main phases of the trot (fig. 39)
•	Phase 1: The body is thrown forward and supported
diagonally, BL (back left) - FR (front right).
•	Phase 2: The two supporting legs, BL-FR, are lifted, transition
to the suspension phase.
•	Phase 3: The two diagonally opposite legs which were
swinging in phase 1 are set down to give diagonal bipedal
support.
•	Phase 4: Transition to the suspension phase.
•	Phase 5\ As Phase 3, on opposite feet.
•	Phase 6: Same feet on the ground as in Phase 5; near fore and
off hind swing forward.
In the trot three legs never touch the ground simultaneously.
The gallop (fig. 40): This is the fastest form of locomotive
movement, and involves a leaping action. The movement of the
legs on the right and left of a central line is not identical. The
lively forward thrust on the frontquarters means that one or
both forelegs are required to support the oscillation
(transmitting the body’s centrifugal force). The body is launched
still further forward past the supporting leg so that it too has to
be lifted off the ground (suspension phase). At that point first
one hindleg, then the other, makes contact with the ground.
Main phases of the gallop
•	Phase 1: The body is supported on three feet, BL, BR and FR.
•	Phase 2: BR becomes a swinging leg: diagonal bipedal
support, BL and FR. FL gets ready to touch the ground.
•	Phase 3: Support on one foot.
•	Phase 4: Lifting of this bracing leg leads to the suspension
phase.
•	Phase 5: Forward movement of the hindlegs which touch the
ground shortly after one another.
•	Phase 6: FR also touches the ground so that the body is again
supported on three feet.
For thousands of years before the invention of photography
there was confusion among artists as to the actions actually
involved in locomotive movement. The problem of depicting the
gallop was wrongly resolved by showing the two hindlegs braced
as if the horse were about to jump, with the two forelegs both
raised off the ground and bent at the fetlock, or stretched
forward as if the horse were making a high, wide jump.
39	PHASES OF THE TROT
The sequence reads from right to left. In
contrast to the walking pace which is
never in suspension, in the trot a
suspension phase succeeds the
diagonally supported start. It is in turn
followed by reverse diagonal bipedal
contact with the ground, etc.
Phase 6	Phase	5	Phase	4
Section 4.2
Modes of locomotive movement
Phase 3	Phase	2	Phase	1

The dog moving full tilt (fig. 41)
The front of the body is brought close to the hindlegs that
provide the thrust, then the body is gradually catapulted forward
with the forelegs at first flexed. With the powerful extension of
all their joints the hindlegs too leave the ground (suspension
phase). The forelegs are brought down by a powerful flexing of
the elbow joint and reach down to touch the ground. Meanwhile
the two hindlegs ‘overtake’ the forelegs, touching down well
ahead of them. The vertebral column which is hunched up
contributes to the moving process by flexing, then shooting out
like a tension spring as it extends, so supporting a long forward
reach by the forelegs.
The horse's jump (fig. 42)
The jump can be executed from the trot or the gallop. The
hindlegs are flexed to give thrust. The whole body including the
neck area is raised up, and the front limbs are tightly flexed. The
upward and forward impetus leads to the suspension phase. The
tight flexing of the forelegs is relaxed. Finally the two forelegs are
extended to receive the impact of landing. The hindlegs are now
flexed and tucked into the body, while the vertebral column
forms a concave curve near the loins and the neck is retracted.
This demonstrates the need to position the front parts of the
body well forward at lift-off, adopt an intermediate position for
all parts of the body in the suspension phase, and retract the
neck sharply on landing (balance).
The cat leaping from a crouching position (fig. 43)
•	The body is lowered, the vertebral column hunched and the
hind legs bent up beneath the middle of the body.
•	Push-off from behind, with the fore-limbs still drawn into the
body.
•	Extension of the hindlegs and the vertebral column.
•	The suspension phase as the hindlegs are further extended
and the forelegs are brought forward.
•	The body’s centrifugal force is absorbed on landing by
marked flexing of the shoulder- and elbow-joints. The joints
of the hindlegs are bent to draw them forward under the
body.
40	PHASES OF THE GALLOP
The sequence reads from right to left.
The leaping locomotive movement starts
with three hoofs touching the ground,
then two diagonal feet, next a single
support, then a suspension phase,
followed by first one hindleg and then
the other being brought forward and set
down. Finally the foreleg touches the
ground again as at the outset.
Phase 3	Phase	2	Phase	1
Phase 6= Phase 1	Phase	5	Suspension	phase
Section 4.2
Modes of locomotive movement

41	PHASES OF THE MOVEMENT OF
A DOG MOVING FULL TILT
The sequence reads from right to left.
The most important features: both
hindlegs push off, the whole body shoots
out during the suspension phase, the two
forelegs touch the ground and the
hindlegs come forward to touch down
ahead of them, with the back forming a
pronounced curve.
42	THE HORSE'S JUMP SHOWN IN
THREE PHASES
The sequence reads from right to left.
The most important features: both
hindlegs push off while the forelegs are
tighdy flexed; the suspension phase with
the legs less tightly flexed to almost the
same extent at front and back; landing on
the extended forelegs, with the hindlegs
tightly flexed.
43	PHASES IN THE SPRING OF A CAT
The sequence reads from right to left.
From a crouching position: the hindlegs
push off while the forelegs are drawn up
to the trunk; the body shoots out; in the
suspension phase the whole body is fully
extended; the cat lands on its forelegs
while the hindlegs are drawn up to the
trunk.
Section 4.2
Modes of locomotive movement

44	PHASES IN THE AMBLING GAIT
OF THE GIRAFFE
The sequence reads from right to left,
demonstrating how the legs are lifted
each time on the same side, which results
in a slightly swaying gait.
4.3
Exercises in repose and motion
When looking at practical work on proportion w^ were able to
show that our approach opened the door to the integration of
proportion and locomotive movement. We now return to this
idea, but first some more advice for positions in repose.
Once again an informed choice of medium can make it easier
to draw systematically. Knowledge, experience and skills already
acquired are practiced and reinforced in combined work on
proportion and positions in repose and motion. It is best to
select difficulties down to a minimum. Here again we ask what
the different materials can do for us, what language they speak:
•	Broad, dry materials (chalks) facilitate not only rapid work,
but the concentration of larger masses (fig. 45).
•	Similarly, the movable proportioned block could again be
used. If the combination of proportion and movement is
considered overtaxing the expression of movement alone
could be concentrated on first.
•	A watercolor brush (figs 46-50) can catch positions in repose
with movement fluently and smoothly in a matter of seconds.
•	Pointed drawing implements such as a pen, pencil or felt-tip
encourage a free approach when drawing from life or working
from imagination (fig. 51).
The wet medium of watercolor, quick and responsive, can
excellendy convey the fleeting expression of movement. You
have to be a little patient with yourself, for you will not achieve
the results you want without taking time to train and accumulate
experience. The round watercolor brush has to obey at just the
right moment like one of the fingers of the hand. Drawing with a
watercolor brush (figs 46-50) involves:
•	The ability to work quickly.
•	Concentration on the expression of movement.
•	The continuity and flow of an uninterrupted method of
working.
•	A high degree of concentrated observation.
•	The training of visual memory.
•	Sympathetic insight into the essence of movement.
•	Pressure to use shorthand abbreviations and avoid getting
bogged down in detail.
Section 4.3
Exercises in repose and motion

When drawing with a watercolor brush avoid:
•	Breaking off and improving. It is better to start again.
•	A mismatch between too big a picture and too small a brush.
•	Drawing a preliminary outline with the brush and filling it in.
Materials needed when drawing with a watercolor brush:
•	Use a brush that absorbs a generous amount of water, is
flexible, responds quickly to pressure and still has a good
point.
•	Have plenty of transparent watercolor paint ready mixed.
•	Choose a color that suits the color of your paper.
Again do not attempt to make a silhouette outline!
45	A COMPLEX AND
DIFFERENTIATED DEPICTION IN
REPOSE WITH CHALK
a)	Disregarding details, the outline is
primarily established as a triangular
shape, applying the chalk in broad
strokes. The angular shapes result from
deliberately keeping the edges of the
chalk strokes sharp and unblurred.
Medium-hard black chalk on A4-size
kraft paper
a
Section 4.3
Exercises in repose and motion

b
Section 4.3
Exercises in repose and motion
A successful working method with watercolor (figs 46-50):
•	Preliminary drawings would cancel out the meaning of the
work.
•	The shape of the animal should be drawn from head to
hindleg without a break.
•	Where forms overlap or intersect, separating lines should be
omitted.
•	The different forms and their intensity should emerge from
varying the pressure with which the brush is applied.
•	Pressing, trailing, turning and pulling all contribute toward a
personal style for each artist.
•	Application and practice are indispensable, particularly at this
point.
•	The profile view is preferable to practice brush technique,
providing the best opportunity of drawing freely (fig. 46). If
three-dimensional views cannot be avoided (fig. 47) it is best
to use blank areas to suggest formal articulation.
b) The principles used in drawing (a) are
retained in this two-color study. Mass and
solidity are built up, and contrasts
reinforced. More attention is paid to
individual shapes.
Bistre and red chalk on A3-size kraft
paper

46	STUDY OF MOVEMENT USING A
BRUSH
Whether an animal model is present or
not, the study should be executed in a
single, consecutive stroke in a matter of
seconds. Straightforward profile views are
recommended to start with.
Round watercolor brush and watercolor
paint on A4-size paper
47	BRUSH STUDIES WITH
FORESHORTENING
Foreshortening, covered areas and
intersections in three-dimensional views
or where several animals partly conceal
one another are difficult to convey using a
single application of the brush as the
constituent forms have to be separated by
blank areas; otherwise the result can be
an amorphous mass.
Watercolor brush and watercolor paint
on A4-size watercolor paper
Section 4.3
Exercises in repose and motion

48-50 BRUSH STUDIES OF THREE-
DIMENSIONAL VIEWS
The comments on fig. 47 apply here too.
Brush studies executed really smoothly
with no ‘spluttering’ are a superb means
of capturing the essence of movement.
Work from a Bammes teacher’s further
training course, Schule fur Gestaltung,
Zurich.
Watercolor brush and watercolor paint
on A3-size paper
Section 4.3
Exercises in repose and motion

51	TRAINING THE VISUAL
IMAGINATION
No exploration of a problem area should
be regarded as completed until
knowledge and ability have been tested in
graphic work from imagination. This tests
the certainty with which we can conjure
up what we know, more readily reveals
what has not been understood, and
encourages creative experiment.
Drawing pen and Indian ink on A4-size
paper
52	VISUAL MEMORY AND
VISUALIZING
Capturing the expression of movement
that takes place in a matter of seconds
involves visual memory, visual experience
and imaginative power. It is possible to
improve all these, especially if the artist is
sure of the processes of movement.
Franz Marc (1880-1916), Leaping horse
from behind, and Two views of a leaping
horse in profile, 1910.
Pen and Indian ink, 4 x 12% in
(10 x 30.8 cm)
Section 4.3
Exercises in repose and motion

4.4
Freedom - improvisation - experiment
The student should now be aware of increasing freedom and a
looser approach, the freedom to omit, should have the ability to
take in all that is happening in a movement at a single glance and
work spontaneously. The boundaries become fluid. Though it is
important not to let everything learned so far slip away, the aim
now is to work unpretentiously and without a fixed purpose: this
is free play, therapy, an entertaining pastime, so you travel light.
Rather than setting out to draw phase 3 of a horse in a field, you
should simply start drawing and make something of whatever
comes. You can use whatever you have to hand: write in the
sand, scribble in the margin of a newspaper or on a paper
napkin. Forget all the highfalutin stuff!
The following suggestions are made for spontaneous work
(% 51):
•	Use whatever implements you are most familiar with.
•	As you want to draw what you feel immediately, the size of the
animal form should be kept suitably small, clear and compact
(saving time).
•	Large outlines call for lavish elaboration, otherwise they often
do not work two-dimensionally because they appear empty.
•	An instrument that produces fine lines has a fixed relationship
with the size of the figure, but it can also be useful for
conveying delicacy.
•	A lavish, elaborate result is not expected from spontaneous
work in which the imagination and a sense of the essential are
nurtured.
•	Be bold in your search for form. Do not worry about drawing
in a line a second or third time.
•	Openness of presentation is also part of improvisation:
ultimate solutions and final definitions have no place here.
Conveying a sense of movement - easily recognizable in the
work of such masters as Franz Marc (fig. 52) or Josef Hegenbarth
(fig. 53) - requires another expressive component which might
be called ‘sharpness of movement’. Incomplete work, not
comprehensive and fully detailed, in fact conveys to the observer
a sense of rapid movement which cannot be perceived in total
clarity. Even modern photography has given up trying to freeze a
view of cascading droplets of water into a thousandth of a
second. In sketches of ideas by the great masters of graphic art it
is often in fact the improvised, freshly recorded movement that
is truthful and convincing in its non finito, its lacunae, its
openness to possibilities and its intimations. As Toulouse-
Lautrec, Delacroix, Steinlen or Hegenbarth so tellingly
demonstrate, the use of medium too should follow the
actual or imagined experience of movement with free, light
nimbleness.
Section 4.4
Freedom - improvisation - experiment

However, it would be a mistake to think that everything jotted
down with such seeming effordessness had no source other than
pure spontaneity, sudden impulse and an ardent temperament.
All great proficiency is based on an immense store of visual
experience and knowledge of how things fit together.
Investigation of proportion and the problems of forms assumed
in repose and motion are very much resolved by a complex view,
to a large extent ignoring detail. However, without the
enrichment and enhancement that a thorough acquaintance
with individual forms provides, the repertory of forms is soon
exhausted. The practical knowledge offered in the following
chapters thus serves to provide that essential increased store of
information, so that new skills can be fed into the stream of
graphic expertise.
53	MOVEMENT RECORDED IN
SHORTHAND
Sketching is always a test of whether an
essential has been understood - here
movement seems almost to have been
perceived by a somnambulist. This
expressiveness was the artist’s only
concern in leaving out all non-essentials.
Thus a quick scribble becomes a solution
that is complete in itself.
Josef Hegenbarth (1884-1962), Horse
rearing.
Pencil study in the possession of the
artist’s widow
Section 4.4
Freedom - improvisation - experiment

5.
The forms of the hindleg
Familiarity with the most important aspects of anatomical
structure is a major object of our study, starting with a review of
the structural and dynamic components of the skeleton and
concluding with the arrangement of the various groups of
muscles. Both are keys to a practical understanding of form for
graphic purposes, using observation, knowledge and skill to
weld visual experiences together into an indivisible whole.
5.1
Drawing the construction of the skeleton
It is helpful at this point to bear in mind what has already been
said about overall construction (chapter 1, section 3) and the
forces that release movement (chapter 4, section 2). The hindleg
is adapted to its structural and dynamic function in a number of
basic formal characteristics relating to fitness for purpose (fig.
54), including:
•	the nature of its articulation;
•	its greater length in absolute terms compared with the foreleg
(except in brachiating animals);
•	the number, make-up and sequence of the angular joints;
•	the special structure with joints located so as to save muscle
power;
•	the specific dimensions of the musculature in relation to
particular joints;
•	the way in which the foot is specialized and developed.
All these factors, which are directly or indirectly accessible to the
eye, have an influence on the structure of form.
The two hindlegs form the rear support of the bridge
construction (see chapter 1, fig.5), and combine with the pelvis
to become the body’s center of movement. They also play an
important role in species-specific proportions (the shape of the
rectangle formed by the trunk - see chapter 3, figs 23-27).
Evolutionary changes in way of life have led to changes in the
position and relationship of the limbs to the ground:
•	Plantigrades evolved into digitigrades, e.g. animals of prey
walking on the end sections of the metatarsus (fig. 23), and
unguligrades (hoofed animals) that walk on the end joints of
the digits (hoof).
•	The stilt-like upright position of the foot of the unguligrade
was accompanied by considerable elongation of the
metatarsus (figs 54a, b).
The number and sequences of joint angles are the same in the
hindlegs of all mammals, in line with the push-off function they
perform (fig. 54a), but the angles vary. When the legs are
extended (pushed off from the ground) the angles increase, and
when they are flexed the angles decrease. The angles in question
are:
•	the angle at the hip joint between the pelvis and the femur;
open to the front;
•	the angle at the femuro-tibial joint; open to the back;
•	the angle of the tarsal joint between the tibia and the
metatarsus; open to the front;
•	the angle of the first digital joint; open to the front.
The angles of the joints, which are very striking in profile,
contribute to expressing the dynamic nature of their form, in
conjunction with the groups of muscles associated with them
(fig. 59). These two factors combine to produce the curving
shape of the limbs. The decisive axes of movement (pivotal
points) are the dominant features: in animals that run well these
are the cross-axes (at right angles to the direction of movement)
which are characteristic of hinge joints and make flexion and
extension possible (fig. 56). While flexing and extending are in
progress the formal appearance of the joints and the direction of
the sides of the angles alter, especially from the femuro-tibial
joint downward:
•	The angle of the extended femuro-tibial joint in association
with the contour of the muscles is obtuse (fig. 56a),
•	and when flexed it is broken into several facets because in the
femuro-tibial joint the fossa and condyles of the femur roll
over the tibia in a backward movement.
In terms of drawing this means that the shape of the femuro-
tibial joint appears particularly massive and obtuse (fig. 56b).
•	The angle of the extended tarsal joint is very shallow, so that
the calcaneum can be seen protruding vertically.
•	When the tarsal joint is flexed it closes to form an acute angle,
and the calcaneum sticks out noticeably toward the back
(fig. 56b).
•	The first, second and third phalanges of the digits are far
more capable of being flexed than of being extended.
All this implies that the possibilities of movement as we come
to the end sections of the leg are increasingly confined to fine-
tuning the way the foot is used, though the broad outlines of its
movement are decided high up at the hip joint: in animals that
run well the hip joint’s essential mechanics are restricted to
bending and stretching (flexion and extension).
Section 5.1
Drawing the construction of the skeleton

pelvic girdle
longitudinal axis
axis of the neck
of the joint
axis of the shaft
of the femur
cross-axis of the
femuro-tibial joint
axis of the shaft
of the tibia
metatarsus
cross-axis of the
tarsal joint
axis of the shaft
of the metatarsus
calcaneum
approx.
cross-axis of the knee joint
knee base
external angle of the leg c. 174°
axis of the shaft
of the tibia
cross-axis at top of
ankle joint
pelvic girdle
center of gravity
longitudinal axis
neck of hip joint
‘Collodiaphys’ angle 120° -130°
load-bearing line
axis of the shaft of the
femur
c
54	SIMILARITIES AND DIFFERENCES IN THE ARTICULATION OF AN ANIMAL'S
HINDLEG (A; B) AND THE HUMAN LEG (C)
The number of sections in both forms of leg is the same, and there is little difference in
their constructional lines in front or back view. In profile however there are
considerable differences, notably the marked angularity of the animal leg as an
extensible device providing forward thrust.
The outline drawing shows how the main articulated forms connect, and the gray
shading shows the subsidiary forms articulating from the constructional connections.
55	PELVIS OF A HERBIVORE (HORSE)
INDICATING POINTS THAT HAVE
AN IMPACT ON SURFACE
MODELING
Between the areas marked in red there
are layers of hip and rump muscle that fill
the space staked out by the skeletal
shape. Three-quarter rear view, seen
externally from the left.
Section 5.1
Drawing the construction of the skeleton
pelvis
imss-axis
femur
90'*- ]\<k
1201'-150°
tibia
fibula
140" U160"
phalanges
b
a
cross-axis of the first
’phalanx of the digit
cross-axis of the
•second phalaax
,cross-axis of the
third phalanx
sacrum
(simplified)
tuberosity on sacrum
part of iliac wing or
fossa
ischial tuberosity
tuberosity on hip
main ilium
hip joint cavity
symphysis pubis
crest of pubis

56 THE PLASTIC EFFECTS OF THE
MECHANICS OF THE KNEE
It is important for the graphic artist to
have some knowledge of the mechanical
changes that take place in the femuro-
tibial joint to get a clear understanding of
the various forms it can assume:
a)	The femuro-tibial joint in a relatively
extended resting position forms an accent
at the meeting point of an obtuse angle
(the accent results from the position of
the patella).
b)	The flexed joint as it turns and rolls
produces a virtual right angle the sides of
which meet at the patella.
c)	When the joint is extremely flexed and
the condyles of the femur are turned
round their own axis without locomotive
movement, the angle between the femur
and the tibia is sharply produced.
Section 51
Drawing the construction of the skeleton

Section 5.1
Drawing the construction of the skeleton

57 DRAWING THE SKELETAL
STRUCTURE OF A HORSE'S
HINDLEG
a)	Basic directions of the sections of the
leg and their pivotal points.
b)	The subsidiary forms and the joint axes
are added to the skeletal outline;
dimensions decrease in size the further
down the leg we travel.
c-f) The forms of the foot and the digits
merit particularly careful study.
58 DRAWING THE SKELETAL
STRUCTURE OF THE HINDLEG OF
A MEMBER OF THE DOG FAMILY
(WOLF)
Virtually the same procedure is followed
as in fig. 57. The three-dimensional,
three-quarter rear view of the foot affords
a view of the shallow vaulting of the
metatarsus (depicted as a complex
entity), which is hollow on the side of the
sole.
Model study drawn by the author at a
Bammes teachers’ further training
course, Schule fur Gestaltung, Zurich,
A4 paper
Section 5.1
Drawing the construction of the skeleton

The formal characteristics relating to movement and mechanics
are much less striking in the front and rear views (figs 54b, c). We
are instead aware of structure, a qualitatively different
characteristic of form. The leg’s supporting nature emerges
because the pronounced angles associated with the profile view
are absent. The form taken by the skeleton of an animal’s leg
(fig. 54b) is not totally dissimilar to the human leg (fig. 54c).
As the center of movement and sculptural core of the rear of
the trunk the pelvis requires careful observation (fig. 55):
•	Branching off from the closed circular construction are the
sculptural shapes of the hip bone with the hip tuberosity
sticking out at the side toward the front, and the tuberosity of
the sacrum (the croup) at the top,
•	the ischial tuberosities at the rear,
•	and at the front above, the protective spine of the sacrum.
The stable annular construction of the pelvis slopes forward at a
shallow angle, receiving the arch of the vertebral column and
virtually continuing it, and transmits the thrust of the leg onto
the vertebral column by way of the top of the hip joint
embedded into the hip-joint cavity.
Unless you are completely sure of the structure of the leg, you
should make a graphic study of the essential forms of an actual
skeleton, following a set sequence of working steps.
The skeleton of the hindleg of an ungulate (horse) is used to
illustrate certain points (fig. 57):
•	the simplified form of joint condyleS and/or ball joints (a);
•	their positions relative to one other and the associated joint
angles;
•	the progressive narrowing of the bone shafts (b);
•	the shapes, always curved to a greater or lesser degree;
59 MUSCLES OF THE HINDLEG OF
THE HORSE CONCENTRATED IN
FUNCTIONAL GROUPS (SIMPLIFIED)
To understand the leg properly as a
constructed form, it is almost essential when
drawing to leave out individual muscles and
how they combine into complex masses.
Section 5.1
Drawing the construction of the skeleton
muscle moving femur forward
(flexor of the hip joint)
muscle moving femur back
(hip extensor)
muscle moving femur back
and extensor of knee when
leg is on the ground
quadriceps (four-headed
extensor of knee)
adductor group
flexor of knee and depressor of tip of foot
(when leg is supporting no weight)
levator of foot which also moves foot forward
(when leg is supporting no weight)
tendinous cord of extensor
digitorum
tendinous cord of flexor
digitorum

•	clarification of the visible planes and their three-dimensional
distortions;
•	cross-sections given as a guide to modeling;
•	subordination of the subsidiary forms to the main ones;
•	careful constructional treatment of the joints and the form of
the foot, preparing for detail studies (c).
On the skeleton of the leg of a carnivore (fig. 58) note:
•	the light construction of curved sections of the limb;
•	the vertical position of the iliac wings, which are directed
upward and forward;
•	the way the foot is set down on the ground at the end of the
metatarsus;
•	the convex vaulting of the metatarsus on the upper side, its
scooped-out concavity on the sole;
•	the position of the digits: the different position of the
phalanges in the dog and the lion needs to be worked out - a
stepped drop of the phalanges in the dog because it does not
have retractable claws, and the roof-like indentation of the
phalanges in the cat with its retractable claws.
The above observations are intended as a preparation for
understanding the leg musculature, with the muscles grouped
into formal complexes. When considering the framework forms
we largely ignore their subsidiary forms as details, in order to
make the formal connections stand out all the more clearly (cf.
fig. 54); the important thing to grasp is the links in the whole
that take the pressure. With this in mind we look for the crucial,
correlated points where the links of the chain connect. Making
these continuous connections crystal clear is part of the task of
creating order which is foremost for the graphic artist.
5.2
The musculature
If we are to understand the living form as a structural dialogue
between hard, fixed skeletal forms and soft, variable muscle
forms, we must give priority to the framework considered
constructionally and functionally. So all that need be said about
the leg muscles for present purposes is this: a muscle’s mode of
operation depends on where it crosses the joint axes between its
point of origin and its insertion: if it passes in front of the cross¬
axes it is generally used for extension, if it passes behind for
flexion (other functions are omitted). This means (see fig. 59):
•	Muscles at the front in the space between the pelvis and
femur move the femur forward, i.e. are flexors of the hip
joint.
•	Muscles in the rear part of the pelvis and the sacrum pass
behind the cross-axis of the hip and femuro-tibial joint to the
tibia. They are extensors of the hip joint and - since they
cover two joints - flexors of the femuro-tibial joint
(commonly called rump muscles).
•	Muscles that emerge from tht front of the pelvic area and the
femur and extend in front of the cross-axis of the femuro-
tibial joint to the tibia (passing by the patella) are extensors of
the knee (e.g. a four-headed muscle known as the
quadriceps).
If the leg is placed on the ground the rump muscles operate as
bracing forces pushing forward. If the leg is bearing no weight
they propel the femur and consequently the whole leg
backward.
Groups of muscles with a position and function in front of and
behind the cross-axis of the tarsal joint:
•	The muscles that are in the front exterior area of the tibia, so
passing over the front of the tarsal joint and down to the
metatarsus or in some cases the digit (as in the horse), are
levator muscles for the foot and extensor muscles for the digit.
•	The muscles that occupy the space between the femur and
the tibia on the side of the patella and go down to the
calcaneum (by means of the powerful Achilles tendon) are
flexors of the femuro-tibial joint and depressors of the tip of
the foot, operating through the tarsal joint.
•	Tendinous cords (activated by muscles located high up at the
femur and tibia) to the rear of the metatarsus and the digits
are flexors of the digital joints.
Wherever functional systems are illustrated in this book, the
reader is asked to remember that information is given in very
general and simplified terms. We here touch on a leading theme
of this book, that of the basic skeletal structure which differs
from one animal form to another, truly a theme with many
variations. For example, the cow and carnivores have no real
rump muscles, as the flexors of the knee start from the ischial
tuberosities, not up at the sacrum. It would be possible to cite
other differences between genera relating to the presence or
absence of muscles in different forms of the foot. There is
however one factor relating to the distribution of muscle masses
which is common to all animals. Those that are arranged at the
front or back of the cross-axes are the crucial driving forces of
locomotive movement. This means that the flexor-extensor
volumes lie on the front or back contour of the leg. This in turn
flattens the animal leg between the two sides - in contrast to the
human leg.
Moreover, the bulk of the musculature is always located near
the trunk, i.e. it is always nearer the upper pivotal points than
the lower ones. Thus the mass formed by the buttock muscles
which direct the hip joint is in the pelvic area, the four heads of
the knee extensor are nearer the femur than the knee, the rump
muscles are nearer the hip joint than the femuro-tibial joint, etc.
To put it another way, there is basically a continuous decrease
in muscle mass as we move toward the periphery (unloading).
So that they can be fully effective, the joints are not laden with
muscle mass. In an extreme example the joints at the end of the
horse’s leg are controlled by means of long, taut tendons.
Section 52
The musculature

60 FIRST PHASE IN THE LAYOUT OF
THE LIVING HINDLEG (HORSE)
The point of the assignment is to mark
the reference points of the skeleton
(shown in red shading) and show the
directions of the sections of the leg
unambiguously. It is preferable to use
straight contour lines to encourage the
use of concise accents. The different
planes, even very small ones, are also
indicated.
Pencil on A paper
Section 5.2
The musculature

61	ENHANCING THE SOLIDITY OF
THE LIVING HINDLEG
To avoid swamping the drawing with too
much detail, an attempt is made to
emphasize the convergence of large,
important planes. The masses are so
constructed that a structural and
sculpturally convincing order can be
created from them.
Pencil on A3-size paper
5.3
Studies based on a constructional
approach and on visualization
The construction of the skeleton and the disposition of the
muscle system have been taken as guidelines for the
understanding of the body’s forms. We now bring these two
topics together in some practical work, first turning to an
exploration of the structural interplay between forms. The
approach adopted in fig. 59 has already set us in this direction.
The next sequence of examples continues and we shall then
move on to a new level, testing the ability to retain and adapt
knowledge in studies based on visualization. Strictly
construction-based forms which do not encourage superficiality
or effects for effect’s sake come first. After this strict training and
self-discipline we shall find the free, relaxed approach to forms
in studies based on visualization all the easier.
Section 53
Studies based on a constructional approach and on visualization

Section 5.3
Studies based on a constructional approach and on visualization
62 MIXED MEDIA BRUSH STUDIES
(ZEBU)
The quickly sketched forms produced
with a small bristle brush and diluted*
Indian ink are followed by detail studies
using a combination of pen, Indian ink
and pencil to insert further details.
Indian ink, bristle brush, pen and
pencil on A3-size paper

63	MOVING FROM INTENSIVE
OBSERVATION TO FLUENT LINE
Intensive treatment of what can be seen
(a) - here the hindlegs of a panther -
gradually develops into an increasingly
free linear record (b).
Section 53
Studies based on a constructional approach and on visualization

What are the primary considerations in drawing with a
constructional concept of form (fig. 60)?
•	First look for the points of reference that relate to the
skeleton and join them together to see the shape they make.
•	Thus, do not start off by thinking of the outline shape. This
would all too easily degenerate into copy drawing of the outer
appearance (losing all feeling for structure).
•	Using the marks you have made, develop the viewing angle to
the body, the planes that form the roof-like top cover of the
body (space between the sacrum, sacral tuberosity, great
trochanter and the ischial tuberosity) and the planes visible at
the sides: outside, inside and rear.
•	This basic approach should be adhered to even when dealing
with small or slender forms like those of the tibia and foot.
•	The basic forms and their main three-dimensional gradients
should be set down in this way using straight lines. Curves
should be avoided for the time being as they can detract from
the succinctness of the form.
A block-like, relatively unfaceted image will emerge, an abstract
creation ready for further development. It can then be enhanced
(figs 11,60)'by:
•	Elaborating the hollows and three-dimensionality of the body
•	Using hatching which can suggest the different angles of the
planes quite clearly. The facets that emerge show where the
forms meet with maximum contrast.
•	Drawing in lines where the cross sections would run, which
encourages thinking ‘in the round’ and helps organize the
hatched areas to establish the spatial gradients.
Painterly effects using light and shade are alien to
construction-based studies of this kind which depend on their
underlying concept for their power to convince the observer
that form has been understood. They represent a distillation of
form, concisely encompassed in three-dimensional and solid
organization. Careful, non-naturalistic studies of form such as
these very soon engender new ways of looking and ideas of
execution which may seem to leave the basics that have been
assimilated behind, but in fact continue them and raise them to a
higher level (figs 62,63):
•	The drawing should be constructed using a small, full, flat
brush which forces you to set down only the most important
constructional aspects of form and paves the way to
discovering abbreviated ways of conveying form.
•	A pencil or crayon is good for conveying massed groups of
forms in their different sizes, and rounded, straight and
convex shapes contrasting with powerful or gentle curves and
firm forms.
•	Once these skills have beeii mastered it is only a short step to
recording with fluency.
Now we come to what I see as the most important outcome
for artists of all anatomical study: the ability to work from the
imagination productively and creatively, the act of expressing an
accumulated store of perception, experience and knowledge in
drawings from the visual imagination. The example we shall
choose to illustrate this is a bucking horse (fig. 64). What general
expectations can we have of such an exercise?
•	A solid working study fit for its purpose, which is reliable,
convincing and can be constructed and developed in its most
important aspects;
•	The achievement of thinking through an assignment and
recognizing essentials.
•	Intrinsic harmony of the whole.
The following principles are of prime importance:
•	Harmony of proportions and unity of formal language.
•	The contribution of structural and/or dynamic components.
•	The integration of functions, heightening and exaggerating
them.
•	Clarity as to the viewing angle and the three-dimensional
situation.
•	Reduction of forms to elements as a working aid.
•	The nature and sequence of intersections, foreshortenings
and three-dimensional organization.
What working method is to be recommended for coming to
terms with this type of project (fig. 64)?
•	Simplifying (reducing to elements) the trunk-neck-head and
limbs (a, b), then linking the cylindrical and four-sided shapes
to one another.
•	Establishing their spatial directions and the direction of any
movement.
•	Only then introducing any differentiation (c).
•	Adding further anatomical factors (fig. 65), especially joints
and free modeling masses.
The ability to create form and movement should be constantly
retested using different media (figs 66,67) or reversing the
viewing angle.
Developing powers of visualization and imagination - quite
apart from other subjective factors such as responsiveness,
ability to see combinations and associations, sympathetic insight,
abstraction, analysis, etc. - is emphatically not outside the realm
of teaching and methodology. Visualization is one of the most
important means of welding together all forces and ensuring
their smooth and harmonious collaboration.
64	PRELIMINARY DRAWINGS
LEADING UP TO WORK FROM
IMAGINATION ALONE
It would be a sad loss if pictorial
imagination and ideas were ever only
directed toward depicting things that can
be directly seen. That is why we mobilize
our store of acquired knowledge and ‘run
it’ in front of our mental eye. The power
to visualize then proves its worth. This is
the act of looking reproduced, prompted
by aids in the shape of simplified forms.
Section 53
Studies based on a constructional approach and on visualization

Section 53
Studies based on a constructional approach and on visualization

65	DRAWING FROM
IMAGINATION: A FRESH START
Once basic factors such as the expression
of movement, the three-dimensional
situation and proportion (fig. 64) have
been worked out and are familiar, work
from imagination turns back to the
interplay of organic forms, which are now
both differentiated and enhanced. Here
we show students what can be done on
the theme of the bucking horse.
Pen and Indian ink on A4-size paper
Section 53
Studies based on a constructional approach and on visualization

66	CONSTRUCTING A DRAWING
FROM IMAGINATION USING
SKILLS AND EXPERIENCE
ACQUIRED
Reverting to the technical experience
gained in studies with a brush, a further
check is made on imaginative capability.
We see the bucking horse in the same
gesture as in figs 64 and 65, but now at an
altered viewing angle and imagined from
a different point of view (three-quarter
front view).
Watercolor and flat watercolor brush on
A4-size paper
Section 53
Studies based on a constructional approach and on visualization

67	AN EVEN FREER APPROACH
Another variation on our theme, with a
different viewpoint and type of horse.
The drawing is executed in a gently
exploratory manner, and the ‘sharpness
of movement’ emphasizes the theme still
more.
Watercolor crayon, diluted with plain
water in places, on A3-size paper
Section 53
Studies based on a constructional approach and on visualization

6.
The forms of the foreleg
Again the construction of the skeleton of the limb can be
explained with reference to the animal’s way of life. As the
shoulder does not have to provide thrust, it can take on more
differentiated and varied tasks, again specific to the species in
question; we shall therefore deal separately with the types of
construction found in animals adapted to running, carnivores
and primates. Any forelimb that has to make gripping
movements during climbing or hanging has different
constructional requirements.
Cats with their ability to climb must be able to use their-paws
to cling to trunks and branches. This means a freer use of the
arm in general, as well as the ability to turn the paw as a result of
the ability of the radius to turn round the ulna. In animals that
are specialized runners, ungulates, there is no need for this
functional ability or the construction that goes with it. Primates
on the other hand have an astonishing range of arm and hand
movement in every direction. As well as the ability of the
shoulder girdle and shoulder joint to move freely in every
direction, there is the hand's ability to grip. The unit
incorporating the shoulder and foreleg has become an all¬
purpose instrument in primates. In spite of constructional and
functional differences between animal types in the way in which
the front limb is used, there are some common features:
•	the number and sequence of the joints,
•	the directions followed by sections of the limbs,
•	the positions of the joints in relation to the trunk, especially
the shoulder and elbow joints,
•	the disposition of the musculature in relation to the joint
axes.
Drawing the shoulder and foreleg of
specialized runners (fig. 68)
Animals in which the sole functions of the shoulder and foreleg
are to support the weight of the front of the body and transmit
the thrust conveyed by the rear limbs are what we mean by
specialized runners. Let us first consider the skeletal structure of
ungulates.
•	They have an undivided shoulder girdle (scapula) which is
the basis of the pendulum movement of the free-swinging
shoulder and foreleg mass. It is not fixed like the pelvis, but
can move beyond the thorax in a backward and forward
direction.
•	The angle between the scapula and humerus is open to the
Section 6.1
Drawing the shoulder and foreleg of specialized runners
6.1

back. At the pivotal point (shoulder joint) the humerus
reaches forward by means of extension, and backward by
means of flexion, so that the whole limb mass is capable of a
forward-backward swing.
•	The scapula is flexibly suspended on muscle straps (fig. 6).
This makes it possible for the trunk to have spring suspension
during walking, running and jumping. There is no clavicle.
•	The shoulder girdle and humerus nestle in close to the steep
side of the thorax, which helps the pendulum movement and
virtually directly supports the body’s center of gravity.
•	The front limbs are positioned in the middle of the frontal
body mass - two-thirds of the total body mass (almost at the
point of equilibrium of the head, neck and thorax).
•	The radius is fused with the ulna, and forms a straight line
with the carpal joint and metacarpus (saving muscle energy).
•	The tendons are non-fatigable and the elbow joint can be
fixed (a snap joint).
•	All joints other than the shoulder joint are purely hinging joints to
safeguard the dominating flexing and extending movements.
•	The metacarpal bones are elongated like stilts, prolonging the
leg pendulum.
•	The end members of the digits are made of a hard-wearing
horny material adapted for standing and walking on the tips
of the toes.
The shoulder girdle
In specialized runners the shoulder girdle consists of only the
scapula, the part least affected in all animal forms by adaptation
specific to the species. It is a triangular bone with rounded-off or
pointed corners, pointing down and forward as it gets narrower,
and containing the socket of the shoulder joint. The spine
running down the scapula indicates its slanting position even on
the living animal.
The forearm and carpal joint
These are the essential factors for drawing purposes:
•	The carpus of the hand or foot is always jointed on to the
radius (as in humans).
•	For ungulates that are purely specialized runners the radius’s
ability to turn the foot would be more of a hindrance than a
help so, as we have seen, the radius and ulna are fused
together.
•	The radius supports the weight of the front of the body; the
‘back of the hand’ is pointing forward (pronation position)
and is wider than it is deep.
•	The carpus complex makes flexion and extension possible in
the carpal joint. When flexed the metacarpal bones disengage
into two superimposed rows. This gives rise to the wide, flat
shape of the carpal joint (at the carpus it is therefore a sliding
joint).
Metacarpus andfirst digital joint
•	The weight of the body of perissodactyls is offloaded onto
one powerful metacarpal bone.
•	At the bottom and back of the metacarpus are two sesamoid
bones which account for the thickened shape above the
fetlock.
•	The roller at the end of the metacarpus has a sharp-edged
guiding ridge (see the side drawing in fig. 68) to ensure the
hinging movement in flexing and extending.
•	The subsequent joints are constructed on the same, very
close-fitting principle.
•	The end member of the digits is protected in a horn shoe.
Distinctive plastic features of the shoulder andforeleg of a
specialized runner in profile
The plastic features of the skeleton are easier to recognize in the
foreleg than the hindleg - the following stand out:
•	The continuous modeling of the scapula, especially at the
upper edge near the withers, with the spine of the scapula
clearly visible. The sloping angle of the scapula is evident.
•	There is almost a right angle between the scapula and
humerus which presses through the pectoral muscles at the
front of the chest to form the point of the shoulder joint
(foremost point for measuring the length of the trunk) which
serves as a ledge on which a horse collar can rest.
•	The end of the muscle-clad humerus is indirecdy indicated by
the sharply projecting ulna.
•	The skeleton of the forearm becomes bare of muscles only at
the level of the carpal joint on the outside and at front, while
the inside of the radius is uncovered for its entire length.
•	At the rear to the side where the carpus starts the pisiform
juts out, providing the profile of the living leg with a heel
leading into the metacarpus.
•	The shape of the foot is determined by the skeleton, except
for flexor tendons which stand out prominently on the flexing
side.
•	The backward-pointing sesamoid bones above the first digital
joint cause a nodular swelling in the form at the foot.
The skeleton of the foreleg in front view
•	The wide step-like shoulder girdle stands out clearly from the
neck.
•	The inside of the radius above the knee joint is emphasized
by a sharply projecting bulge.
•	The carpus is very wide.
•	The forearm characteristically slants inwards.
68	STEP-BY-STEP WORKING STUDY
OF THE SHOULDER AND
FORELEG OF THE HORSE
a)	The directional lines of the sections of
the limb are established with the length
of each.
b)	Three-quarter front view emphasizing
the series of joint axes and shapes. Red
shading: formal components determining
the modeling of the living leg.
c)	Detail study of the shape of the elbow
joint: the fusion of the ulna and radius in
specialized runners has resulted in this
becoming a pure hinge joint.
Section 6.1
Drawing the shoulder and foreleg of specialized runners

Section 6.1
Drawing the shoulder and foreleg of specialized runners
scapular cartilage
scapula
spine on scapula
origin of biceps,
glenoid cavity
through-axis of
shoulder joint
cross-axis of
shoulder joint
humerus
elbow
cross-axis of
elbow joint
radius fused
with ulna
pisiform
cross-axis of
carpal joint
carpal complex
metacarpus
sesamoid bone
cross-axis of first
digital (fetlock) joint-
fetterbone
(long pastern)
cross-axis of middle
digital joint
cross-axis of hoof joint
coronal bone (short pastern)
coffin bone

Graphic investigations of skeletalforms of the shoulder and
foreleg (fig. 68)
•	The lengths of the sections of the limb should be visually
assessed (a).
•	The directions of the sections should be established (a).
•	Emphasis should be placed on the constructional forms (b,
c), and care taken to draw in the lines followed by the joint
axes and three-dimensional axes (based on viewing angle).
•	It is important to make clear what is mechanically feasible,
•	and to make sure no formal accents are omitted.
•	Attention must be paid to curves in the sections of the
skeleton (skeletal forms are neither rigid nor straight).
Impact of joint mechanics on form (fig. 69)
The flexible, mobile positioning of the scapula and the way in
which it can stick out at the top mean that it is not a constant
plastic shape:
•	The humerus is brought forward by extending the shoulder
joint, and moves back if it is flexed.
•	When the carpal joint flexes, the two rows of bones disengage
(fig. 69b). The way in which the metacarpus tucks under in a
lying position produces an enlargement and blunting of the
mass of the carpal joint.
•	The reverse side of the flexed digital joints does not consist of
a smooth curve, but of small arcs interrupted by articulation.
69	JOINT MECHANICS IN THE
SHOULDER AND FORELEG OF A
SPECIALIZED RUNNER (HORSE)
a)	A slight shift in the position of the
scapula (swinging it forward) prepares
for a considerable swinging movement of
the limb governing the use of the foot,
which can be further affected by the
combined effect of the other joints in the
foreleg.
b)	Angles of the joints in a closed
position (passive flexing, e.g. when lying
down).
Section 6.1
Drawing the shoulder and foreleg of specialized runners

6.2
Disposition of the musculature in
specialized runners
As the freedom of movement of the peripheral joints is
increasingly restricted, there is a corresponding diminution of
muscle. Given that the muscles around the joints close to the
trunk (shoulder joint and to some extent elbow joint) are
generally the same in all animal forms, there are also more
analogies in their disposition (fig. 70):
•	Muscles from the skeleton of the trunk encompassing the
shoulder girdle form the group of trunk-shoulder-girdle
muscles with the task of suspending the trunk between the
scapulas (figs 25a, b) or suspending the limb from the spinal
column when it is not bearing any weight.
•	Muscles from the skeleton of the trunk encompassing the
humerus and forearm are trunk-limb muscles with the task of
swinging the limb forward and backward in animals that walk
on the ground, and of performing hoisting movements in
climbers (apes).
•	The muscles acting on the limb itself are called true limb
muscles.
The two first-mentioned groups of muscles are sometimes
superficial and thin and sometimes concealed, so they are not
discussed here.
70	MUSCLES OF THE FORELEG OF
THE HORSE GROUPED
ACCORDING TO FUNCTION
(SIMPLIFIED)
In order to understand the form of the
leg as a constructional concept (see also
%• 59), you should omit detail studies of
muscles and their complexes.
a)	The profile view with the joint axes
(black dots) and the associated muscle
groups makes the rhythm of the shapes
clear.
b)	The front view, again with the cross¬
axes marked, shows how all muscle
masses flatten off at the sides.
Section 6.2
Disposition of the musculature in specialized runners

The group of true limb muscles in specialized runners
These are situated with reference to the moving joint axes (figs
68,70) which govern the functions (fig. 70):
•	Muscles occupying the space in front of the spine of the
scapula and consequently lying in front of the cross-axis of the
shoulder joint and inserted at the humerus operate
extension, so moving the humerus forward.
•	The space behind the spine of the scapula in the open angle
between the scapula and humerus is occupied by flexors lying
behind the cross-axis of the shoulder joint.
•	The three-part extensor of the elbow joint (the triceps)
operates simultaneously in this area: it lies behind the cross¬
axis of the elbow joint.
•	The front space between the humerus and forearm is
occupied by flexors lying in front of the cross-axis of the
elbow joint.
•	The layer of muscles lying in front of the leg in the area above
the elbow joint traveling in front of its cross-axis and down to
the carpal joint and digital joints has a double function:
flexion at the elbow joint and extension at the joints below.
•	Muscles lying at the back of the forearm and foot may even
pass over the cross-axes of the elbow, knee and digital joints,
acting as flexors of the latter two.
In terms of plasticity this disposition has the following effects
(figs 70a, b):
•	The flexors and extensors layered one behind the other
invariably create a deep mass, i.e. in their spread from the
front of the leg to the back (a), while the front view (b) from
side to side is very much flattened off.
•	The lower limb has a covering of muscles at the front and on
the outside, never on the inside of the leg.
•	From just above the carpal joint the modeling of the skeleton
is dominant as the peripheral joints have only long, taut
tendons passing over them.
These focal points are the basis of our graphic treatment of the
foreleg of specialized runners.
71	USE OF A CONSTRUCTIONAL
DRAWING TO STUDY THE FORM
OF THE SHOULDER AND
FORELEG OF A LIVING ANIMAL
The shoulder girdle is elaborated as a flat,
triangular attachment to the side of the
thorax and standing out clearly from the
start of the neck at its side. Study of the
free leg is supported by indicating the
alternating muscle and skeletal masses.
Pencil on A4-size paper
Section 6.2
Disposition of the musculature in specialized runners

6.3
The whole leg of a runner: constructional
analysis and drawing from imagination
The suggestions made as regards the hindleg again apply here,
and further criteria should be borne in mind:
•	In modeling, the position of the triangle in the shoulder area
should be based on the direction of the spine on the scapula.
•	The narrow shape of the scapula - running from the upper
shoulder, standing out from the rest of the body and
becoming increasingly prominent as it reaches the shoulder
joint - must be worked out (fig. 71a).
•	The shape of the side of the shoulder girdle should be
brought together to form a triangle.
•	The shoulder joint should be made to stand out well at the
front as a clearly projecting curve.
72	ARCHITECTURAL DRAWING OF
THE SHOULDER AND FORELEG
If a structural drawing is not based on
analytical understanding of the skeletal
and muscle structures (see figs. 68,70)
any drawing attempt will result in a
muddle. In the learning process a
structural drawing is an intermediate
stage, opening up the way to many forms
of artistic representation, to an abstract
shorthand depiction of form, and various
decorative and monumental approaches.
Black chalk on A3-size paper
Section 6.3
The whole leg of a runner: constructional analysis and drawing from imagination

73	TYPICAL FORM OF A COW'S LEG
In comparison with the horse the shapes
of the muscles and bones of the cow,
particularly their most prominent
features, are harder and more angular.
Attention should be paid in particular to
the great width of the carpal joint and the
bend above and below it.
74	ANALYTICAL KNOWLEDGE AND
FREEDOM OF EXECUTION
COMBINING IN A UNIFIED
WHOLE (NILGAI ANTELOPE)
When working freely from life,
knowledge of the rules governing
anatomical form and its modifications
must have become second nature, so that
you need to glance at the real,
continually moving animal only
occasionally to provide the essential
finishing touches.
Watercolor crayon, pen, brush and
watercolor on A3-size drawing paper
Section 6.3
The whole leg of a runner: constructional analysis and drawing from imagination

Section 6.3
The whole leg of a runner: constructional analysis and drawing from imagination

•	The pronounced cone shape of the forearm - flattened at the
sides - should be worked out and clarified with cross-sections.
•	Note the contrast between the dimensions of the forearm and
those of the cross-section of the carpal joint.
•	The difference between the metacarpus, again deeper than it
is wide, and the dimensions of the carpal joint should be
made clear.
•	The bulging strands of the flexor tendons should appear taut
and rigid (fig. 71b).
•	The slenderness of the first phalanx should be clearly
contrasted with the swelling above the hoof.
•	The angularity of the elbow should be accentuated, not
smoothed off.
The shoulder and foreleg of the cow (fig. 73) are generally more
angular than those of the horse, and the carpal joint is extremely
broad. But above all emphasis must be placed on the bend
between the upper leg and metacarpus: this is generally far more
pronounced in ruminants (fig. 73) than in horses.
Drawing from nature is not an opportunity to display
erudition,-but rather a combination of a visual experience and
the application of knowledge, an attempt to interpret. A master
such as Leonardo da Vinci was always trying to ensure his artistic
work was ‘correct’ by carrying out special detail studies and
continually endeavoring to extend his repertory of forms
(fig. 76). What would become of the most marvelous ideas for
pictures if in creating them artists could not draw on all they
have stored in their imagination? Rethel was not in a position to
observe how Phrygians broke in horses (fig. 77), and Picasso did
not have to rush off to an arena to sketch a bull attacking a
toppled horse (fig. 78). Visual experience and the ability to
visualize underpin and guarantee the discovery of convincing
organic form. Without these the poetry of moving form will not
be imparted.
The leg of a specialized runner: drawing from imagination
In further exercises from imagination (fig. 80):
•	We can test what has been - and has not yet been -
understood.
•	We want to avoid producing work where muscle structure
and forms have been only half assimilated, so reinforcing the
seeing habits associated with them.
•	We want to give equal weight to empathy, feeling and the
power to conjure up images, alongside pure study from
nature.
•	If in so doing we touch on areas not yet tackled, we should
not be daunted.
Because we want to stimulate imaginative activity we shall not
move on immediately to a set theme where forms are reduced to
elements. Our preliminary attempt takes the following form
(fig. 80):
•	Take your widest watercolor brush generously filled with
diluted paint and make carefree, sweeping, energetic strokes
across the paper with it - make a real mark.
•	You should have no set shape or predetermined concept in
mind.
•	Let the marks run and arrange themselves and take your
inspiration from them.
•	Only then should you take a pen and ink and follow whatever
shapes your marks may suggest, for instance the curve of a
bent neck.
Make a necessity of chance. The pen will be helpful as the
work takes on more definition: let the creative idea flow from
your pen. It is important to repeat such experiments again and
again. Deriving pleasure from play takes its place alongside a
strict search for form.
We now return to that search, exploring the theme of a
collapsing horse (figs 79a, b - 84):
•	Start by using basic blocked shapes for all parts and show how
the angular shoulder girdle nestles into the barrel shape of
the trunk (fig. 81).
•	It is important to be totally concrete regarding solidity and
three-dimensionality.
•	Experiment to see how the gesture you have in mind works
out most expressively.
•	Rather than being satisfied with your first attempt, improve
on it with a graphic texture (fig. 82).
•	Vary the theme, exaggerating the gesture, starting all over
again with forms reduced to elements (fig. 83).
•	If you think you have found an expressive gesture and a clear,
functionally convincing solution, be daring and try it out on a
larger, more ambitious scale conceived more as a full-scale
picture (fig. 84).
Continuing to work freely in this way with fluid and more precise
media, heightening the gesture into angularity, dislocation and
even tragedy, will make you aware of how great a store of
imagination you can call on and explore, and how inexhaustible
it is.
Section 6.3
The whole leg of a runner, constructional analysis and drawing from imagination

75	EXPLORATORY CHARACTER OF AN ARTISTIC STUDY
The rising interest in reality and curiosity toward nature in the Italian early Renaissance
engendered the abundance of analytic detailed observations such as that recorded here
on expensive parchment.
Antonio Pisanello (1395 - c. 1455), Cow, facing left, rising from a lying to a standing
position.
Silver point (worked over with a brush?) on parchment, 7 x 9 in (17 x 23.1 cm),
Paris, Louvre
76	ELEVATING A NATURAL THING
TO THE ROLE OF ARTISTIC
SUBJECT
Given new and greater value by the artist
with his deep insight into nature and its
laws, the familiar horse’s leg becomes the
object of artistic curiosity.
Leonardo da Vinci (1452-1519), A horse’s
foreleg in different positions.
Drawing, Windsor, Royal Library
Section 6.3
The whole leg of a runner: constructional analysis and drawing from imagination

77	ARTISTIC USE OF VISUALIZED
NATURAL FORMS IN A PICTORIAL
CONCEPT
An artist’s idea for a picture cannot
always rely on the availability of a model
from life. Rethel, who belonged to the
Romantic school and was a master of its
attractive forms, has transformed
imagined but believable natural figures
into severe, clear-cut, monumental forms.
Alfred Rethel (1816-59), Strength
(Phrygians breaking in a horse).
Dresden, Kupferstichkabinett (print
room)
78	THE INDIVISIBILITY OF PERSONAL
EXPERIENCE, EXPERIENCE OF
NATURE AND VISUAL
EXPERIENCE
Two animal figures, two species, each in
an appropriate gesture, texture and form,
drawn with classic linearity in a single
rhythmic flow that has its origin in the
maturity derived from observation.
Pablo Picasso (1881-1973), Bull and
horse, 1927.
Etching, 7V2x 11 in (19.2 x 27.9 cm)
Section 6.3
The whole leg of a runner, constructional analysis and drawing from imagination

79a SKETCH OF AN INITIAL IDEA
FOR ASET THEME:
COLLAPSING HORSE
The pen or pencil reacts seismo-
graphicaUy to the ebb and flow of the
imagination. Whether such drawings are
clumsy or skillful, appealing or
unappealing, is not the point of the
exercise. This uncorrected example
highlights the way in which the masses
are brought out in enveloping curves.
Pen and Indian ink on A4-size paper
79b DRAMATIZING THE GESTURE BY
REINFORCING THE CONTRASTS
The theme and the formal solution do
not yet match up convincingly, so further
attempts are made to convey the subject
better; the broader contrasts do not
resolve the problem satisfactorily, still
giving too strong an impression that the
horse is running away.
Monotype on glass, approximately A3-
size
Section 6.3
The whole leg of a runner, constructional analysis and drawing from imagination

80	MAKING MARKS AS A WAY OF STIMULATING
IMAGINATIVE POWER
Making colored marks on paper in a random way can give rise
to all sorts of shapes which can be exploited as a preliminary to
free invention. A few bold curves drawn in with a pen and
Indian ink can enable a mark to crystallize into the figure aimed
for, backed up by one or two curving strokes with the brush:
the result is a horse rearing.
Watercolor and pen on A4-size paper
81	CLARIFYING FORMS BY REDUCING THEM TO
ELEMENTS: A PREPARATORY STAGE FOR A DRAWING
FROM IMAGINATION
Form should not be elucidated by starting with an outline, but
by indicating the basic volumes. These build up into a formal
structure which calls on knowledge of anatomy, which is used
to supply the building blocks of work based on visualization.
Pencil on A4-size paper
82	ENHANCING A THEMATIC ASSIGNMENT BY USING
A TEXTURE BASED ON RANDOM MARKS
Even the smudges printed from the fantastic textures of a
monotype can give rise to ideas that inspire the artist to draw a
collapsing horse into them with a pen. However, it is open to
question whether the gesture of collapsing has been
convincingly conveyed.
Pen and Indian ink drawing on blot textures in acrylic paint
printed as a monotype, A4-size paper
Section 6.3
The whole leg of a runner, constructional analysis and drawing from imagination

83	WORKING STUDY FOR A NEW
CONCEPT OF THE THEME OF
THE COLLAPSING HORSE
The new concept - inspired by the fact
that the gesture had still not been
convincingly conveyed - introduces a
configuration of highly expressive
components which highlight what is
happening functionally.
Pencil on A4-size paper
84	FINISHED VERSION OF THE
INITIAL SKETCH
Between fig. 81 and this picture there is a
division of work in which the discovery of
the form is transferred to the working
study, so that points of emphasis can be
reinforced in the finished drawing. Color
is applied to give contrast and pen to
indicate articulation.
Pen on wet watercolor paint, A4-size
paper
Section 6.3
The whole leg of a runner: constructional analysis and drawing from imagination

6.4
Drawing the shoulder and foreleg
of carnivores
As has already been said, the shoulder girdle is the area that
varies least from the general structural design, and this applies to
the cat family too, as far down as the elbow joint. The crucial
variation here relates to the independently formed, unfused ulna
and the radius that can move round it, providing pronounced
supination and pronation in cats - though it is very restricted in
dogs. This ability requires the radius to cross the ulna to a
greater or lesser degree as it travels down toward the foot, which
results in cats having a broad carpal joint, while dogs have a
narrower one (figs 86b, f). The following specific functional
demands are made by the carnivores’ way of life (fig. 86):
•	Sideways movement (abduction) of the humerus in the
shoulder joint of cats (climbing, attack).
•	Ability of cats - which can climb - to turn the paw.
•	When the paw is placed on the ground the rear of the paw
faces forward (pronation position (fig. 86e, h).
•	In profile the paws of dogs and cats differ in their direction:
the dog’s paw bends slightly forward after the carpal joint
(figs 86a, d), while the cat’s is straighter (figs 83e, h).
•	In front view the cat’s paw is more angular in the forearm
section (fig. 86f) than that of the dog which pursues its prey
(fig. 86b).
The paw of a carnivore displays very different features from
the foot of an ungulate (fig. 86):
•	A fan-like five-rayed metacarpus (only four rays at the back).
•	Existence of a pollex or thumb at the top of the paw, which
has a functional purpose only in cats (spread of the paw).
•	Development of the phalanges into claws, retractable in the
cat, non-retractable in the dog.
•	The weight of the body is supported on the extremities of the
metacarpus, hence the existence of pressure-distributing pads
on the digits.
•	The metacarpus curves clearly both lengthwise and
transversally (short digital muscles are located in this area).
Using constructional simplifications in the ulna and radius and
the metacarpus, we once again illustrate the shared and
diverging features of form in the skeletons of the foreleg of the
horse, lion and ape: it is especially important to note how the
radius and ulna twist round one another in carnivores and
primates. Yet again the formal connections are emphasized (as in
fig. 83), in line with the criteria previously recommended for
studies of the skeleton.
The course of the pivotal axis in the forearm of the lion is
marked with a red dotted line in fig. 88a, b, c to help you
understand the bone structure with its striking functional and
plastic impact.
85	THREE DIFFERENT TYPES OF
CONSTRUCTION IN THE
SHOULDER AND FORELEG
a)	Specialized runner (horse)
b)	Carnivore (lion)
c)	Brachiating animal (ape)
The forearms of the carnivore and the
brachiating animal are represented as
helically twisted complexes, although the
ulna and radius are in fact fully indepen¬
dently formed. The paw or hand is
attached almost exclusively to the radius.
86	SKELETON OF THE LEFT
SHOULDER AND FORELEG OF
CARNIVORES
Top row: dog; bottom row, lion. The
constructional differences between these
and specialized runners are very evident
in the construction of the forearm and
the paw. Here the ulna and radius exist as
two separate, fully developed single
bones. The radius crosses the ulna so
that the rear of the paw faces front
(pronation position). The foot is five-
rayed.
a,	e) External profile
b,	f) Front view
c,	g) Back view
d,	h) Internal profile
Section 6.4
Drawing the shoulder and foreleg of carnivores

Section 6.4
Drawing the shoulder andforeleg of carnivores

87	WORKING STEPS IN GRAPHIC
STUDIES OF THE SKELETON OF
SHOULDER AND FORELEG OF A
DOG
a)	Investigating the relative lengths and
directions of skeletal sections in front
view.
b)	Finished study of the basic factors
(in a)).
c)	Detail of the foot with the directions of
the digits, three-quarter external view.
d)	Detail of a claw.
e)	Three-quarter front view.
f)	Internal view.
Section 6.4
Drawing the shoulder and foreleg of carnivores

88	STUDY OF THE SKELETON OF
SHOULDER AND FORELEG OF A
LION, EMPHASIZING THREE-
DIMENSIONALITY AND
CONDENSING FORMS
An essential of this study is to explore
how organic forms penetrate space when
distorted in several ways. Here again the
capacity of the bones of the lower limb to
change position merits special attention.
a, b) Right forearm showing the pivotal
axis of the radius turning round the ulna.
c)	Door-hinge principle in the forearm
where a ‘wing’ (the radius) swivels round
the longitudinal axis.
d)	Shape of a lion’s thorax.
Model study drawn by the author at a
Bammes course at the Schule fur
Gestaltung, Zurich
Section 6.4
Drawing the shoulder and foreleg of carnivores

6.5
Basic disposition of the musculature
The same criteria as before apply for understanding the
disposition of the functional groups of muscles. However, in the
cat family the position of the foot in relation to the ground and
its extremely varied functional uses have resulted in the lower
part of the limb having a powerful muscle covering - in contrast
to ungulates - in order to operate the carpal joint and the
phalanges (fig. 89). The extensors of the carpal joint pass in front
of its cross-axis, originating on the lowest external section of the
humerus and being inserted to the base near the carpus at the
back of the metacarpus (fig. 92a). The flexors on the other hand
are behind the cross-axis, originating on the lowermost inside
section of the humerus and being inserted at the base of the
hollow side of the metacarpus (fig. 92b).
The flexion group is the more massive because of the great
and versatile use of the paw, and its importance to survival. To
underline the athletic, compact form of the shoulder and
forearm of the lion (fig. 89) as a hunter that lies in wait, we also
depict those of the dog to demonstrate the light build of the
hunter that pursues its prey (fig. 90).
cross-axis of the carpal
joint
through-axis of the carpal
joint
extensor of the shoulder joint
(in front of scapular spine)
deltoid muscle
(part near scapula)
flexor of the elbow joint which also brings the
forearm forward (humero-radial muscle)
89	MUSCLES IN THE SHOULDER AND
FORELEG OF A CARNIVORE
(LION, SIMPLIFIED)
The modus operandi of individual foreleg
muscles assembled into functional groups
and scapula and humerus muscles can be
deduced from their position in relation to
the joint axes (black dots, and at the
carpal joint three-dimensionally drawn
axes).
v three-headed extensor of
the elbow joint (triceps)
group of extensors of the carpal joint and digits
(extensor tendons of digits not shown)
group of flexors of the
carpal and digital joints
deltoid muscle, part near
acromion and scapula
muscle bringing forward the
humerus (arm-neck-head muscle)
Section 6.5
Basic disposition of the musculature

90	MUSCLES IN THE SHOULDER
AND FORELEG OF THE DOG
As in all other mammals the muscles that
operate on the carpal joint and the digital
joints (in red) are arranged with the cone
of the muscle near the pivotal point
nearest to the trunk.
91	MUSCLES IN THE SHOULDER
AND FORELEG OF THE COW
As in fig. 90 the muscles in the forearm
are shown in red; in contrast to those of
the carnivore they travel down to the
digits in very long tendons, thus allowing
the skeletal shape to make the dominant
impression.
humero-radial muscle
ulnar-metacarpal flexor
ulnar-metacarpal flexor
tendon of superficial
flexor digitorum
tendon of deep
flexor digitorum
epicondyle muscle
radio-metacarpal extensor
common extensor
digitorum
extensor of third to fifth digits
long abductor of the
pollex (thumb)
ulnar-metacarpal extensor
tendon of radio-
metacarpal extensor
tendon of common
extensor digitorum
tendon of extensor of
third to fifth digits
deep flexor digitorum,
ulnar head
ulnar-metacarpal flexor
ulnar-metacarpal extensor,
here acting as a flexor
deep flexor digitorum,
radial head
tendon of ulnar-
metacarpal extensor
tendon of deep
flexor digitorum
tendon of superficial
flexor digitorum
tendinous shaft of
interosseous muscle
tendon of superficial flexor digitoru
tendon of deep
flexor digitorum
epicondyle muscle
radio-metacarpal extensor
common extensor
digitorum
ateral extensor digitorum
long abductor of
pollex (thumb)
tendon of radio-
metacarpal ext.
tendon of common
extensor digitorum
tendon of common
extensor digitorum
tendon of lateral
extensor digitorum
Section 6.5
Basic disposition of the musculature

92	PRINCIPLES OF THE
ARRANGEMENT OF MUSCLES IN
THE FOREARM OF A LION
To make it easier to understand how the
muscles are arranged to operate the
carpal and digital joints, the directions
they follow are indicated in colored
bands. These show:
a)	front view with skeletal forms,
b)	back view with skeletal forms.
The flexors have a greater mass than the
extensors.
c)	Abstract illustration of origin and
insertion points, without any indication of
the skeleton of the forearm. The flexors
(red) originate at the internal epicondyle
of the humerus, while the extensors
(blue) originate at the external
epicondyle of the humerus, and they are
inserted on the back and front (hollow)
sides of the bottom of the metacarpus
respectively
Section 6.5
Basic disposition of the musculature

93	FRONT PAWS OF TWO CARNIVORES
a)	Lion’s paw.
b)	Dog’s paw.
The illustration emphasizes the stubby shape
of the lion’s paw, and the graceful shape of
the dog’s, the former with a short metacarpal
construction and the retractable claws, the
latter with a long metacarpal construction and
non-retractable claws.
ulnar-metacarpal
extensor
extensor of pollex
and index digit
6.6
A constructional approach combined with
visualization
Patient observation and much repetition are now required to
embark on the fairly slow process of building up an informed
repertoire. The following principles should be borne in mind
(figs 94,95):
•	It is important to grasp the main muscle masses (fig. 94) and
follow them, however restless the animal’s movements may
be. The movements and views that recur most often are the
typical ones.
•	Attention should be paid to the sharpness of any skeletal
protuberances.
•	The basics of the skeletal form should always be explored by
drawing in peace and quiet at home after life studies at a zoo
(fig. 94b).
•	Bearing in mind what positions the forelimb and paw appear
in most frequently, reduce what you have observed to the
simplest, blocked shapes (fig. 94c).
•	The position of the pollex (thumb) on the inside of the paw
and the way in which the forearm and metacarpus positions
correspond because of the radius’s ability to turn (figs 94,95,
96) must also be explored.
Drawing from imagination
Here again we shall use a set theme, and the lack of an actual
animal as a model should be no cause for complaint: its very
absence often leads to a quicker, readier grasp of the essential.
Using the example of a big cat crouching and stretching, (fig. 97):
•	Go through the same steps as in figs 80,81,82 and 83, and
sketch in the taut curve of the cylinder formed by the trunk
(fig. 97a).
•	Bring the shoulders and forelegs including the scapula
forward in an expressive way (fig. 97b).
•	Show the hindlegs folded down ready to spring, paying
attention to the dimensions of the body’s masses.
•	The shoulders and forelegs should be treated in the same
way, bringing out the distortion in the forearm (width of the
paw placed on the ground).
•	In the cat that is stretching, indicate how the lumbar region
forms a concave bend with the chest section (fig. 97c).
•	Show the forelegs splayed out wide apart, with the claws out
and the metacarpus spreading out like a fan.
•	Spatial recession should be heightened by exaggerating the
real volume of the forearm and paw.
•	The eyes should be drowsily closed, no threatening gesture
(mouth closed).
•	In conveying solidity ensure that the small shoulder area
nestles tight against the steep side of the thorax, while the
forearm spreads out like a fan right down to the paw.
Once these fundamentals have been assimilated the student can
begin on a picture, always provided the preliminary work is done
thoroughly (fig. 98).
radio-metacarpal extensor
humero-radial muscle
common extensor digitorum
lateral extensor digitorum
long abductor of
pollex (thumb)
insertion of tendons of
long extensor of pollex
Section 6.6
A constructional approach combined with visualization
. ulnar-metacarpal
extensor
humero-radial
muscle
radio-metacarpal extensor
common extensor
- lateral extensor
digitorum
long abductor of
pollex (thumb)
tendon of long extensor
of pollex

Section 6.6
A constructional approach combined with visualization
radial capitulum
ulna
radius
ulna
carpus complex
stylus prolongation of the radius
metacarpal complex
claw digit of the pollex

94	THE IMPACT OF THE MUSCLES
ON THE MODELING OF THE
SHOULDERS AND FORELEGS OF
A TIGER; THE VARIOUS WAYS IN
WHICH THE PAW IS HELD AND
PLACED
a)	The diagonal direction of the radius
can also be seen as a line separating
extensor and flexor muscles. Although it
is covered with fur the paw is an
articulated mass.
b)	Skeleton of the left forearm of the lion
in the pronation position (back of the
paw facing forward).
c)	Variations in the paw position mainly
showing supination, pronation, flexion
and extension.
95	STUDIES FROM LIFE OF A
JAGUAR, CONCENTRATING ON
THE PLASTIC BEHAVIOR OF THE
SHOULDERS AND FORELIMBS
Careful drawing finds the expression of
the scapula in a standing, weight-bearing
position and the attitude of the paw
where the carpal joint is bent producing
inward-turning supination. The paw
stretched out in front is in a pronation
position (back of the paw facing upward)
Section 6.6
A constructional approach combined with visualization

96a PAWS IN VARIOUS POSITIONS
Top right: lion’s paw in pronation.
Bottom left: jaguar’s paw in pronation
with foreshortening from the front, and a
paw in an intermediate position between
supination and pronation.
96b STUDIES OF THE JAGUAR FROM
LIFE
A prime consideration in these studies is
the shape and attitude of paws held in
different ways.
Section 6.6
A constructional approach combined with visualization

97	VISUAL STUDIES OF TWO
CONTRASTING POSES: A BIG
CAT CROUCHED AGGRESSIVELY,
AND STRETCHING
The psychological and functional
expression is once again centered on
formulating the behavior of trunk and
head.
a)	Overall tension of the trunk. The
practical knowledge now attained is
exploited in a working study of the idea.
Formal stability comes from simplification
and the juxtaposition of clear planar
directions.
b)	The drawing of the gesture with the
emphasis on the behavior of the limbs
bears the same considerations in mind.
c)	The gesture of stretching - note the
hollow curve formed by the vertebral
column.
Section 6.6
A constructional approach combined with visualization

98	WORKING UP A STUDY INTO A
FINISHED PICTURE
To free up what has been established in,
the idea sketch it is often useful to
change to different, more responsive
media.
Red chalk and watercolor paint on
colored paper
99	SPECIAL FORM OF THE
SHOULDER AND FORELIMB OF
THE APE
a)	Directions of the skeleton of the arm
with the external angles and the crossed
position of the radius (pronation).
b)	Total turning axis of the arm from the
shoulder joint down to and including the
radio-ulnar joints enabling the radius to
turn, along with the axes of other
individual joints.
c)	Left arm, with the various joint axes
that serve to control the use of the hand
drawn in, starting with the internal
clavicular joint.
d, e) Skeleton of the forearm and
metacarpus shown diagrammatically,
together with the way in which the radius
turns at the proximal and distal radio¬
ulnar joints.
Section 6.6
A constructional approach combined with visualization

pivotal axis of
the entire arm
Section 6.6
A constructional approach combined with visualization
^pine of scapula
cross-axis of internal
clavicular joint
^longitudinal axis of
internal clavicular joint
clavicle
tip of shoulder
(acromion)
through-axis of internal
clavicular joint
cross-axis of the
shoulder joint
through-axis
of
shoulder joint
Wmerus
cylindrical joint at bottom of humerus (trochlea)
cross-axis of elbow joint
radial capitulum
radius
ulna
through-axis of carpal joint
cross-axis of carpal
joint (wrist)
carpus complex*
thumb (pollex)'

6.7
The special shape of the shoulder girdle in
primates
Many of the factors we are already familiar with through looking
at the shoulder and foreleg of carnivores are repeated in
primates, but there are further, unique factors enabling primates
to swing, hang and move from tree to tree (fig. 99):
•	The two-part nature of the shoulder girdle (scapula and
clavicle).
•	The perfect, combined elbow joint with the radius's capacity
to turn round a common pivotal axis of the entire arm (b)
using the superbly developed proximal and distal radio-ulnar
joints.
•	The ellipsoidal carpal joint (wrist) that can move at two levels
with flexion, extension and abduction toward the thumb and
the little finger.
•	The existence of a hand rather than a paw, with a thumb that
can move of its own accord to join fingers which are
themselves able to move independently.
The versatility of the hand is the result of the combined
operation of all the constructional factors in the skeleton of the
arm:
•	The mobile two-part shoulder girdle is the effective base for
versatile use of the arm.
•	The clavicle serves to brace the arm away from the thorax.
•	Subtly differentiated use of the hand is produced by six joints:
the internal clavicle joint,
the external clavicle joint,
the shoulder joint (ball and socket joint with three basic axes:
swinging forward and back, sideways adduction and
abduction, inward and outward rotation),
the humero-ulnar (elbow) joint with a cross-axis for flexion
and extension,
the proximal and distal radio-ulnar joints working on a door-
hinge principle for supination and pronation,
and the ellipsoidal carpal (wrist) joint with cross-axis and
abduction toward the thumb and the little finger.
This marvelous construction which is also present in human
beings means that the hand can be used at any point within the
cone described by the free arm. The hand’s ability to grip as a
result of the opposite position of the thumb means primates
have a qualitatively unique and innovative instrument in
comparison with the foot and the paw.
100	SHOULDER GIRDLE AND ARM
SKELETON OF A GORILLA
The scapula with its extensive surface (dark
shading) is the extremely mobile base of the
arm and an appropriate, practical necessity for
climbing and hanging. Compared with man,
the scapula is further to the side of the thorax
which is virtually square in cross-section.
Section 6.7
The special shape of the shoulder girdle in primates

7.
The form of the trunk
In considering the trunk we again give pride of place to skeleton
forms - the vertebral column, thorax and pelvis (the latter
already touched on in connection with free suspension of the
hindlegs). We shall not go into the subtleties of the precise
anatomical construction of the vertebral column or thorax, but
seek to assimilate their general appearance. As with the limbs,
there are common factors in the structural design of the trunks
of all species, but in the case of the trunk it is more important to
bring out the specifics of each animal.
The vertebral column, perceived as the arch of a bridge, has
no great mass, the important factors to bear in mind when
drawing it are the partly concealed location of its moving points
and its outline shape. The thorax is inevitably considered as the
invisible plastic core, the pure trunk muscles completing,
fastening and shaping the trunk between the pelvis and thorax.
The pelvis can either be regarded as part of the trunk or along
with the hindlegs. In Chapter 5 it was considered as the base for
the free-swinging leg pendulum and as a link between the legs
and the vertebral column.
7.1
Study of the vertebral column as a
structure creating form
This marvel of function and construction:
•	supports the weight of the internal organs of the chest and
stomach;
•	protects the central nerve tracts;
•	facilitates the use of the directional sensory organs,
particularly through its attachment to the head;
•	plays a contributory role in respiration;
•	plays a contributory role in locomotive movement through
changes in its curvature;
•	alters the spatial relationship between the pelvis and thorax.
It is divided into the following sections: cervical vertebrae (CV),
thoracic (or dorsal) vertebrae (TV), lumbar vertebrae (LV) and
caudal vertebrae (CAV). The different sections are capable of
different movements:
•	The CV section has the greatest all-round freedom of
movement for holding and using the head.
•	The TV section has the ability to move sideways and twist
lengthwise (torsion). Limited flexion and extension.
•	The LV section is capable of very limited lengthwise torsion.
•	In the CAV section there is all-round unrestricted movement
(in practical terms lengthwise torsion is not required).
Each vertebra consists of a body articulated with back-pointing
spinous processes which vary in length from very long to very
short and are linked together by ligaments; the points of these
form the backbone, determining the specific, expressive back
contour of each species of animal in repose and motion. The
course followed by the back contour, the line of the back, is one
of the crucial vehicles of expression in animal form. The
extended crest of a range of mountains is what makes it
impressive, and the spine of the course of the back has the same
function in an animal. Let us consider a few examples (fig. 101):
•	Brown bear, highest point is the sacrum, and from there the
line bends forward in a long, shallow, C-shaped hump, and
falls away sharply behind.
•	Gorilla: highest point in the line of the back is close behind
the head, which makes the head look pulled in. It then falls
continuously down to the tip of the sacrum. The overall line
of the back is a shallow C-shape.
•	Human being (leaning forward on all fours): highest point
where TV give way to LV (lumbar hump). A long curve slopes
down to the back of the head which lies much lower than the
sacrum. The overall line of the back is C-shaped, but in an
upright attitude (fig. 101 bottom left, shown in an unnatural
horizontal position) it is a double-S-shape.
•	Horse: withers and croup are more or less on the same
horizontal level. The line of the back at the withers forms a
convex curve with a shallow fall to the LY a shallow convex
rise to the sacrum, then another shallow fall.
•	Cow: the whole vertebral column climbs slightly toward the
tip of the sacrum. At the transition from the TV to the LV
there is a very shallow angle open toward the animal’s back.
•	Big cat (lion): horizontal line from the withers to the croup
with a smooth transition from the TV to the LV From the
croup there is a shallow drop toward the tail.
•	Dog: withers and croup on the same horizontal level. The line
of the back between them forms a very obtuse angle open at
the top.
The mechanics of the vertebral column in flexion and extension
produce the following effects on form:
•	When the neck and head are raised (extension) there is a
marked curve at the point where the CV give way to the TV:
neck-chest curve.
•	The withers stand out when the neck is lowered (flexion).
•	A bend occurs in the vertebral column where the TV give way
to the LV when carnivores are sitting (lumbar hump), and a
dip (extension) occurs in the suspension phase of jumping
and when taking off (figs 42,43).
•	The lowering of the neck causes tension in the ligament
connection between the withers and the head (flexible nuchal
ligament), causing the spinal processes in the withers to
straighten up and strengthen the shape of the back of the
neck.
Section 7.1
Studies of the vertebral column as a structure creating form

IstCV 2ndCV 7th CV	13th	TV
molding formed by
transverse processes
coccyx
intervertebral disc
molding formed by	molding formed by	molding formed by
spinous processes	transverse processes 12th TV IstLV articular processes 5th LV
7th CV 1st TV
interarticular space
1st TV
facet for
articulation
with ribs
Human vertebral column
Human being on all fours
2ndCV
IstCV
dens (odontoid process)
of 2nd CV (axis)
Section 7.1
Studies of the vertebral column as a structure creating form
1st TV
IstLV
6th LV
12th R floating
13th R floating
Brown bear
7th R
12th TV
IstCV
7th CV
1st TV
IstLV
last LV
13th (or lumbar)
R floating
7th R
Gorilla
S
IstCV
CV
7th R
floating
ribs
S
itransverse process
7th CV
12th TV
IstLV
5th LV
body of vertebra
TV
CV
LV

Horse
CV = cervical vertebra(e)
TV = thoracic vertebra(e)
LV = lumbar vertebra(e)
S = sacrum
18thTV IstLV 6thLV
IstCV
2ndCV 7th CV
13thTV IstLV
7th LV
1st TV
IstCV
7th CV 1st TV
7th LV
arrangement, the outline shape of the
thorax formed by the ribs, the angle
between the thorax and the vertebral
column and the spinous processes.
IstCV
2ndCV
101 COURSE AND SHAPE OF THE
BACK AND THE THORAX IN
VARIOUS ANIMAL FORMS
Cumulatively the tips of the spinous
processes which are linked together form
the characteristic line of the back of each
animal form; this is not the same as the C-
shaped bridging arch found in all animal
forms made by the bodies of the vertebrae.
The articular, transverse and spinous
processes combine with processes of
their own kind to form ‘moldings’.
Attention should be paid to the rib
Section 7.1
Studies of the vertebral column as a structure creating form
s
7th cv 1st TV
18th R
IstCV 2nd CV 7th CV 1st TV
13th TV
IstLV
6th LV
S
•13th R
Cow
•8th R
S
Lion
,2nd CV
13th R floating
9th R
Dog
13thTV IstLV
S
- 13th R floating
9th R

These simplified comments imply two important factors where
studies of animals are concerned: the course of the line of the
back is a vehicle for expressing movement and at the same time
an indicator of the three-dimensional situation - the position of
the central axis of the body in space. I would advise the following
procedure:
•	First judge the overall course of the direction of the vertebral
column (clarifying the viewing angle), noting its rises and
falls.
•	The starting point should not be a detail or a ‘cut-out’
silhouette. The course of the central axis should be drawn
without lifting your pen, in a single line running from the tip
of the nose to the tip of the tail.
•	Practice doing this until you are completely confident of
direction, rises and falls, and relative lengths of each section.
•	Constantly observe how much the overall expression changes
with the alteration of the line of the back. Contour lines and
internal forms should not be added until you are sure of the
course and shape of the line of the back.
•	This work should be done very fast, almost intuitively.
Only once these skills have been acquired can modeling be
developed on a sound basis (fig. 106). When trying to work out
what happens to form if the trunk is twisted (front of the body
straight, thighs lying sideways), it is a good idea to get things
clear by reducing forms to elements, imagining the trunk as a
twisted four-sided mass (fig. 105). This method is also useful for
solving similar problems in drawing from imagination.
If you cannot convey this two-dimensionally, shape a piece of
Plasticine into a four-sided log with slightly rounded corners.
Holding both ends, twist them carefully in opposite directions
until you achieve the required torsion. In theory you should get
a shape (fig. 105b-e) that is twisted like a propeller. Simplifying
things in this way is intended to make organic shapes
transparently clear by means of uncomplicated, easy-to-do
intermediate working stages, and to fix functional thinking in
your mind through hands-on experimentation.
102	THE IMPORTANCE OF THE COURSE OF THE VERTEBRAL COLUMN IN STUDIES FROM NATURE
The way in'which mounds and hollows succeed one another in the line of the back underlines both functional
and psychological factors and the position of the body in space. It is therefore advisable first of all to grasp the
disposition of the vertebral column as a vehicle of expression.
Bottom right: the clarification process is complete, and drawing has been reduced to a minimum, highlighting
dynamics and the gradients of the shapes.
Drawing pen and Indian ink on A3-size paper
Section 7.1
Studies of the vertebral column as a structure creating form

103a MORE FINISHED STUDY FROM
NATURE
The drama of feeding-time is over and
peace again reigns, providing an
opportunity to elaborate the study in
terms of solidity, intersections and detail.
The graphic artist must use this
elaborating phase to bring together and
assimilate a larger range of impressions.
Red chalk on A3-size paper
103b Opaque paint on A4-size paper
Section 7.1
Studies of the vertebral column as a structure creating form

Here we only touch on the impact of the mechanics of the
vertebral column on changes of shape in the thorax. Let us at
least look at the latter’s behavior when the vertebral column is
twisted laterally (fig. 104). The framework of the thorax and the
shape of the ribs has to be compressed on the side of the
concave curve, and stretched on the opposite side where the
convexity of the side of thorax is further emphasized.
104a BEHAVIOR OF THE THORAX
WHEN THE VERTEBRAL
COLUMN BENDS LATERALLY
If the convex stresses of the thorax are
visualized, it is easy to reconstruct its
formal behavior. Accordingly the
convexity on the inwardly curving side of
the thorax is compressed, while the
opposite side is extended.
104b VISUALIZATION OF A LATERAL
BEND IN THE VERTEBRAL
COLUMN OF A DOG
The backbone shape created by the
spinous processes is shown as a laterally
curved, upstanding strip, while the
transverse processes on the convex side
are more widely spaced and those on the
concave side move closer together.
Section 7.1
Studies of the vertebral column as a structure creating form

105	STEPS TOWARD
UNDERSTANDING TORSION OF
THE VERTEBRAL COLUMN
a)	Drawing based on a piece of Plasticine
modeled to represent the twisted trunk.
b, c) The same in front view with
powerful foreshortening.
d)	Plasticine model, side view.
e)	Using what has been learnt from (d) to
approximate the visualized organic form.
f)	Study from imagination using
perceptions gained from the Plasticine
model.
Section 7.1
Studies of the vertebral column as a structure creating form

7.2
Drawing the thorax as a plastic core
The complex of the thorax takes the shape of a vessel with
typical curves and dimensions. Let us look at its basic
constructional features (fig. 106):
•	overall convexity in the direction of stress from the back to
the stomach and from front to back;
•	the decreasing size of the^anterior thoracic opening which is
the main basis for the cross-section shape of the neck;
•	the increasing size of the posterior thoracic opening, though
its width may vary (passage to the herbivores’ large intestinal
tract or the carnivores’ narrow one);
•	the flexible, movable gridwork of the ribs and their costal
cartilages (with wide variation in the number of ribs);
•	the thorax connected by articular attachments to the vertebral
column at the back, and on the abdominal side finishing at
the sternum to which most ribs (the ‘true’ ribs) are joined.
Differences in the thorax as between one animal type and
another are reflected in its dimensions (fig. 106):
•	Human being, the shape is compressed between the chest and
vertebral column, with a marked reduction in the size of the
thorax to give balance in upright stance, but is considerably
wider from side to side. In cross-section it is kidney-shaped.
•	Dog: the sides are compressed with great depth between the
stomach and vertebral column typical of a runner. In cross-
section it is like a blunt-tipped almond standing on end.
•	Lion: in cross-section it is almost the reverse of the dog’s, an
almond shape with the narrower end pointing up to the back,
the blunt end down to the stomach.
•	Horse: asymmetrical barrel shape, with the flatter side
uppermost.
•	Cow: virtually symmetrical. Cross-section a blunt spindle
shape.
•	Anthropoid ape: almost as wide as it is deep (semi-upright
stance). Cross-section virtually square, with rounded corners.
In fig. 106 the thorax is conceived as a plastic core, and is
blocked in: this approximates to its appearance in graphic terms.
The following criteria must be borne in mind when drawing it:
•	To establish its layout: draw a line on both the back and the
stomach logically following the course of the central line (line
of symmetry), based on the relevant viewing angle.
•	Draw in cross-sections of the thorax which change as we
progress from front to back; those between the shoulders
and forelegs are always narrower, those at the back become
wider.
•	In doing so, do not allow yourself to be diverted by the line of
the ribs. Imagine the cross-sections intersecting the level of
symmetry internally at right angles (fig. 109).
•	The thorax should be drawn either as a closed block or as a
hollow body.
•	Apexes of curves should always be emphasized, as should the
convergence of different spatial planes and gradients which
appear as facets.
•	Remember always to draw constructionally; indeterminate
hatching can be a trap (fig. 109).
Anyone who has no access to animal skeletons should make
models of differently shaped thoraxes and try drawing them.
Here we depict them (three-dimensionally) in front view, cross-
section and at various angles (fig. 108). It is also possible to take
the outline of the profile view (fig. 101) as a guide. What can be
learned from an actual model of a thorax?
•	The body must be viewed from every conceivable angle
(ensuring that there are no gaps in your ability to imagine it
three-dimensionally).
•	The technical practice gained in this preparatory stage will
heighten your capacity to observe three-dimensionally and
your sense of touch.
•	And encourage a considerably deeper and more lasting inner
comprehension of the form.
This study will ensure that when you look at the living animal,
however much its thorax may be covered with hair, you are
always aware of it as a plastic core.
106	SCULPTURAL SHAPE OF THE
THORAXES OF VARIOUS
ANIMALS, IN SIMPLIFIED BLOCK
FORM
Depicting the thorax as an enclosed
shape reinforces understanding of its
importance as a plastic core. In all forms
of the thorax - except in primates - note
the narrow sides in the area of the
shoulder girdle; also the considerably
smaller thoracic mass of carnivores as
opposed to herbivores.
Section 7.2
Drawing the thorax as a plastic core

dog	dog	human	being
horse	horse	human	being
cow	cow	anthropoid	ape	(gorilla)
feline (lion)	feline	(lion)	anthropoid	ape	(gorilla)
Section 7.2
Drawing the thorax as a plastic core

107	SIMPLIFIED THREE-QUARTER
FRONT VIEW OF A COW'S
THORAX
What is striking is the barrel-like expanse
of the herbivore’s thorax at the end near
the pelvis, and its compressed shape
between the shoulder girdle.
withers,
condensed
and simplified
1st pair of ribs
sternum
108	GRAPHIC SIMPLIFICATION OF A HORSE'S THORAX
The first impression is one of closed forms with varying degrees of
curvature. Lines drawn within the forms do not represent the ribs.
Model studies done by the author while teaching.
Pencil on A4-size paper
Section 7.2
Drawing the thorax as a plastic core

7.3
Drawing the skeleton of the whole trunk
Drawing the skeleton is always associated with the task of
creating order. This means that:
•	Everything must be in its right and proper place.
•	The constructional design must show through as the
predominant principle.
•	The forms must be worked out as relating to their function.
•	Construction and function must be clearly perceptible as
constant and permanent elements.
Thus drawing the skeleton (fig. 109) involves:
•	working like an architect, clarifying supporting and supported
elements in their positions in space;
•	determining the optical weight with which each component
is perceived;
•	awareness of comparative impressional qualities;
•	determining the relative value of detail;
•	understanding the configuration of forces, forms and
directions with reference to the structural design and direct
expression (gesture);
•	simplifying forms so that functions and their interaction with
other links in the working chain are clearly brought out.
These principles cannot be considered and realized
independently of one another. The omission of any one of them
from the drawing process would cause discrepancies in overall
organization and order. What appears as structure includes
contrasts of form and contrasts of substance. Drawing the
complete skeleton of the trunk is again a preparatory stage for
understanding the disposition and extent of the trunk muscles.
109	CONSTRUCTIONALLY SIMPLIFIED
FORMS OF THE SKELETON OF A
HERBIVORE (COW)
The simplifications relate primarily to the
spinal column and the associated thorax
which determine the shape of the line of
the back and the body volume.
Vertical lines drawn on the thorax indicate
where cross-sections of the different
convex stresses would run.
Pencil on A3-size paper
Section 73
Drawing the skeleton of the whole trunk

7.4
Disposition of the pure trunk muscles
As with the limbs, the disposition of the musculature is based on
the three axes of the spinal column: through, transverse and
longitudinal axes. The muscles extending inside the skeleton of
the trunk are thin but wide, and therefore play an important role
in forming the shape between the pelvis and vertebral column.
Of the three differentiated functional groups of muscles, we need
concentrate only on the pure trunk muscles (which close the
gaps within the skeleton of the trunk).
It is worth nothing (fig. Ill):
•	the use of the pelvis and sacrum as the center of movement
(where the muscles originate);
•	insertion on the various levers on the spinal column
(processes) and thorax (ribs).
These levers serve to:
•	alter the sizes of the thorax and the abdominal cavity;
•	alter the position of the thorax and spinal column relative to
the pelvis;
•	participate in respiration (back extensors assist breathing in),
excretion and birth (pressing on abdomen);
•	contribute to locomotive movement by extending and flexing
the vertebral column.
Position and function:
•	Muscles placed to the side of through-axes (running from
back to stomach) of the spinal column effect lateral bending.
•	Muscles lying above the transverse axes are extensors, those
on the abdominal side are flexors.
•	Muscles that cross the longitudinal axes diagonally are
twisting muscles (for torsion).
Joint trunk-shoulder-girdle muscles and trunk-limb muscles
are not dealt with here. Instead we must familiarize ourselves
with the three most important trunk muscles, which shape the
abdominal cavity on all sides, forming a cylinder:
•	The rectus abdominis muscles originate at the pubic crest
and tuberosities and are inserted into the sternum and the
costal cartilage of the true ribs. They thus lie on the
abdominal side of the transverse axes and make flexion of the
vertebral column (convex arching) possible.
•	The spinal extensor muscles (common muscular mass), the
counterpart of rectus abdominis, originate at the sacrum,
pelvis and vertebral column and are inserted along the
vertebral column to the front on the right and left of the
spinous processes, particularly to the lumbar vertebrae: they
form a powerful cord. They effect bending of the vertebral
column (hollow arch, i.e. extension).
•	External oblique abdominal muscles originate over a large
area (ilium, pubic bone in the pelvis, lateral edge of rectus
abdominis), and are inserted at the ribs. The fact that they cross
the longitudinal axes of the vertebral column diagonally means
that they effect torsion. They work with the rectus abdominis
muscles (flexion of the vertebral column, lateral bending).
110	POSITIONS OF THE PURE
TRUNK MUSCLES IN RELATION
TO THE AXES OF THE
VERTEBRAL COLUMN (CROSS-
SECTION IN FRONT OF THE
PELVIS)
The vertical through-axes (running from
back to stomach) make it possible for the
trunk to bend laterally, the horizontal
longitudinal axis through the bodies of
the vertebrae makes it possible for that
axis to twist (torsion), and the transverse
axes allow flexion and extension. The
positions of the muscles relative to the
various axes are indicated.
111	DISPOSITION AND FORM OF
PURE TRUNK AND NECK
MUSCLES
a)	Spinal extensor muscles, rectus
abdominis, transversus abdominis,
pectoral wall muscles and some neck
muscles of the dog.
b)	Similar illustration of the muscles of
the horse, but including the external
oblique muscles and more neck muscles.
Section 7.4
Disposition of the pure trunk muscles

through-axis
lumbar fascia
transverse axis
longitudinal axis
tuberosity of sacrum
sacrum
internal
lumbar muscles
transversus abdominis
internal oblique
abdominal muscle
tuberosity of hip
transversus abdominis
external oblique
abdominal muscle
tendinous layers,
slightly separated
rectus abdominis
without its sheath
exchange
tendon
ischial tuberosity
internal oblique abdominal muscle
external oblique
abdominal muscle and
its aponeurosis attaching
to the sheath of rectus
abdominis
Dog
Horse
Section 7.4
Disposition of the pure trunk muscles
transversus abdominis
exchange tendon
rectus abdominis
rectus abdominis
trapezius muscle of head
longest spinal muscle, fused with lumbar
part of muscle running from ilium to ribs
cervical and dorsal
trapezius muscles
' ■*?
m
gf /
~ W i
is-
m
4 &
: g I
external intercostal muscle
internal intercostal muscle
trapezius muscle of head
lumbar fascia including
longest spinal muscle
ligaments of pelvis
spinal extensors
inner sheath of rectus abdominis
outer sheath of rectus abdominis
linea alba
sheath of rectus abdominis
with muscle removed
tendinous plate
trachea'
tooth of external
oblique abdominal muscle
tendinous skin of external
oblique abdominal muscle

7.5
Graphic aids to depicting the body
Study from nature concentrating exclusively on investigating the
construction of natural forms would lead to a blurring of artistic
objectives, so we suggest step-by-step methods as aids to
thinking and working to be followed at the same time as the
other approaches outlined in this book.
Working with the line of the tiack as a two-dimensional contour
The variation of the line of the back and the way in which its
course typifies animal forms were discussed and illustrated in
section 7.1 (fig. 101). The course of the vertebral column can
virtually represent the whole animal in drawing.
Changes in the appearance of the line of the back of a given
animal form can be interpreted as functional effects or as arising
from particular three-dimensional situations. The line of the back
is the principal vehicle of expression of the overall form. The
very height of the back above the ground plays an important role
in imparting graphic expression. As well as mechanical
movement of the vertebral column (e.g. in eating) the line of the
back also indicates psychological, direct expression through
gesture. In view of this, we shall first concentrate on the most
commercial possible profile view. As the eye glides along the line
of the profile the hand becomes a transcribing instrument. We
put pen to paper at the tip of the muzzle and draw a single line
running down to the back foot (fig. 112):
•	Record the line of the back of a placid animal (e.g. a
ruminant), always using the head length as a module for
measuring. Mentally estimate the overall length in terms of
this, marking off these lengths if desired.
•	Close attention should be paid to the direction followed by
the line of the back.
•	Pen, fountain pen or ballpoint should not leave the paper.
•	Repeat the exercise again and again until you are truly
conversant with the rhythm of the form.
•	Show the line of the neck in different positions, either from
imagination or using your animal model’s movements. The
mass of the trunk can now be added in red chalk used on its
side, then the limbs.
•	Repeat the whole process several times, assessing the lengths
intuitively.
For the time being it is a good idea to stick with your
accumulated visual experiences and not to turn immediately to a
different animal form. When drawing shy, restless animals (e.g.
nilgai antelopes) it is difficult to complete the outline from front
to back from the model, and once again it is necessary to
depend on optical memory and knowledge.
Further advice:
•	If you want to compare the flow of your line with the animal
during drawing, do not lift your pen from the paper.
•	It is imperative that the rises and falls should be in more or
less the correct place as you draw.
•	This shorthand symbol should be drawn in seconds. While
training yourself in this way you should forget everything in
the world except that line of the back.
To heighten concentration:
•	No longer look at the page, only at the animal.
•	Do the opposite: no longer look at the animal, but record
your visual experience without looking up.
Working patiently in this way makes the whole figure part of you.
That is what the artistic freedom spoken of by true masters is
really about. Abandon yourself totally to the flowing line
experienced by the eye, and then record it: this is the secret of a
freedom that will leave you totally fulfilled.
It is now possible to move on to drawing the whole animal,
also in this shorthand way. The extension of this ability comes
almost unprompted (fig. 113). There is no longer any anxiety or
haste in case the animal model suddenly changes its stance or
position. You can simply carry on drawing, enriching your ability
to sketch spontaneously, conveying solidity by a few economical
touches (fig. 114).
These procedures unquestionably come more and more to
depend on intuition. Great works achieved in this way resemble
one another and have this in common, not least in the search for
the artistic essence associated with Zen. And our series of exer¬
cises can well conclude with colored sketches drawn with a brush.
So far we have primarily considered the outline form in
profile, but how can the line of the back be used as an aid in
three-dimensional views?
Working with the line of the back to solve solid, three-
dimensional problems
If the animal is standing still in profile this is a stroke of luck for
the beginner, but things do not always work out that way. If it is
impossible to choose the view, the line of the back must be used
to suit the circumstances. Its twists and turns - an important
motif of form that must be mastered for three-dimensional
representation - need to be carefully checked, especially if the
line is partly concealed. The horizontal axes which in the basic
profile view were relatively unimportant now play a much
greater role, especially if the animal is in repose when it is rare
for the ends of these transverse axes to be horizontally aligned.
The line between the tips of the two scapulas or between the
tuberosities of the hips are examples of such cross-axes, and can
be drawn in as guides, intersecting the course of the line of the
back. Together they form the basis of a three-dimensional
reference system for the graphic artist. Once this system of
corresponding spatial references has made things clear, it forms
the beginning of a mastery of foreshortening. If the system is put
down on paper bit by bit, a mental working model with separate
working stages is automatically set up. What I cannot accept is
the approach in which disc-shaped schematic forms, circles,
ellipses, ovoids of formal outlines, are used to achieve attractive
formulas ‘easily’. Sleights of hand such as these are on a par with
teaching children to draw a fir tree by telling them to think of an
upside-down ice cream cone. These mindless formulas always
result in the loss of independence, of a sense of something
organic and growing.
Section 7.5
Graphic aids to depicting the body

We shall use a study of a tiger lying down to describe a better
method, following it through step by step (fig. 115):
•	In line with what you have already done, draw the line of the
back without a break from the tip of the muzzle to the tip of
the tail, even where it may be concealed (a).
•	Draw in the simplified forms (determined by function and
space) of the cross-axes intersecting the line of the back -
establishing the three-dimensional reference system, (a)).
•	The system is then expanded by inserting the basic masses of
the body: the ovoid shape of the head, the cylinder of the
neck, the flattened thorax, the cylindrical insertion in the
lumbar region, the ovoid shape of the pelvic area, the cylinder
of the tail. All these masses are ordered and arranged one
behind the other along the three-dimensional trail laid by the
line of the back(b).
•	Next the basic shapes and directions of the limbs can be
added to the plastic cores already drawn in.
•	With increasing experience this guide to construction is called
on less and less, because it is implicitly present to the inner
eye (c).
112	RECORDING THE LINE OF THE
BACK OF A CONSTANTLY
MOVING ANIMAL (NILGAI
ANTELOPE)
These examples demonstrate the
uninterrupted drawing of the line of the
back from the tip of the muzzle to the
back foot. You need a suitable writing
implement providing an automatic flow
so that you are not forced to break the
line. A high level of concentrated
observation soon engenders a feeling for
the animal form. You get to know it
through and through.
Drawing pen and Indian ink on A4-size
paper
Section 7.5
Graphic aids to depicting the body

113	DRAWING THE WHOLE ANIMAL
FORM COMES NATURALLY
Skills already acquired (fig. 107) enable us
to record the whole form coherently in
one flow without having to depend on a
fixed pose.
Pencil on A4-size paper
114	ACHIEVING THE FREEDOM TO
DRAW WITH SOLIDITY
Experience, knowledge and drawing that
has become second nature produce
indissoluble unity, even allowing solid
features to be brought in without any
rush and independently of the animal
model.
115	SERIES OF MENTAL AND
WORKING STAGES IN
CONSTRUCTING A THREE-
DIMENSIONAL REFERENCE
SYSTEM
a)	Clarify the tightness and course of the
curves in the line along the center of the
body from nose to tail with a series of
intersecting arcs (cross-axes) at spatially
and organically important places.
b)	Convey the different sections of the
body by means of simplified basic masses,
with the flat, simplified shapes of the
limbs added on.
c)	The guiding framework and
simplifications of form fade into the
background, and three-dimensional and
organic articulation is emphasized by
sharpening the intersections.
d)	Use the stripes of the fur to reinforce a
solid, three-dimensional impression: the
transverse stripes are treated like cross-
sections, and vary in their degree of
curvature and thickness.
116	MENTAL AND WORKING
STAGES CONCLUDE IN A
FINISHED DRAWING
The shading of the paper together with
very reserved blank areas on the head
aim for a painterly effect: the creation of a
visual and practical center.
Pen and sepia-colored Indian ink, on a
watercolor wash, partly spray; A4-size
typing paper
Section 7.5
Graphic aids to depicting the body

Section 7.5
Graphic aids to depicting the body

•	Ultimately the guiding framework can disappear entirely from
the drawing (d).
Drawing in an animal’s coat, e.g. a tiger’s stripes, can be a
welcome device for underlining the solidity of the figure still
further, as the stripes run round the body like cross-sections
(fig. 116).
•	It is important to put feeling into your picture, emphasizing
some areas, understating others and creating curving, floating
transitions into space (fig. 116).
•	Create an optical center which attracts the gaze of the
observer, perhaps part of the body or the head and the eyes
(fig. 116).
The head and the expression produced by it are undoubtedly
peculiarly important when human beings and animals face one
another.
117	STARTING TO COMBINE
KNOWLEDGE OF FORM WITH
USE OF COLOR
There is no great shift in moving from a
graphic study to one involving color,
particularly as the contour effect of the
black is very close to a drawn line of the
back.
Panther walking. Watercolor and pen on
a ground colored with acrylic, worked
over with oil pastel and pure
turpentine, A4-size paper
Section 7.5
Graphic aids to depicting the body

8.
8.1
Types of skull structures
Head forms
The living head is the combination of a number of formal
components of various constitution: the bony skull and its soft
forms such as muscle, skin, cartilage, connective tissue and
sensory organs. The construction of the skull must again be
regarded as the most important thing, and as with the limbs, we
shall examine how the various formal features fit together. It is
the interaction of the functional and constructional formal
features that gives the image of skull types. Only then need we
familiarize ourselves with the other formal components relating
to soft forms.
One of the essential formal features of animal structural design
is that the head with its sensory organs and feeding equipment
should be at the front, as one pole of the horizontal organization
of the body. The disposition of the totally concealed site of the
brain, the protected sensory organs, the feeding apparatus is
what gives distinctive form to the head and skull. The character
of each animal type is most cogently concentrated here, its rank
in the hierarchy; it is on the head that we find such distinctive
features as manes, whiskers, colored markings, horns and antlers
- show qualities.
This brings a new factor into our consideration of
constructional components of form: self-advertisement. There
are forehead attires and hair claddings as well as weird and
wonderful colorings which defy analysis in terms of pure
practicality.
Just as we have learned that the shape and course of the line
of the back or the limbs can typify a species, so the head with its
individual gestures and attitude can be understood as a direct
expression of inner mood. On the other hand, in looking at the
line of the back with the head at the front we also discovered
species - specific ways of carrying the head that have nothing
whatsoever to do with any particular, transitory state of mind,
but are permanent postures with no psychological implications.
In the following sections we shall look closely at the
construction of the skull in our chosen animal types.
The skull consists of two sections, the cranial skull and the
facial skull (including the lower jaw or mandible). The former is
a protective, closed, ovoid capsule for the brain, and whereas in
human beings it is the upper part of the skull, in animals it is the
rear part.
The facial skull in all its subtle diversity, with hollows, grooves,
openings, breaks, curves, ledges and sharp edges, is directed
forward and precedes the cranial skull in space. This produces
the predominating horizontal direction from the tip of the
muzzle to the ledge marking the back of the head. The general
structural design of an animal is dependent on this crucial
direction. The following factors relating to the form and mass of
the two sections have general application (figs 118,119):
•	the degree of the development of the brain and its mass;
•	the function and importance of the sensitive sensory organs
(eyes, nose, ears);
•	the performance and construction of the tools relating to
ingesting and breaking up food (chewing equipment).
The cranial skull is enclosed by areas that can be designated:
•	the forehead;
•	the crown of the head;
•	the temples;
•	the back of the head;
•	the base of the skull (concealed).
The division between the cranial and facial skull varies according
to the type of skull and cannot always be depicted in the same
way. The course of the base of the skull (a thin-boned bottom lid
to the skull capsule) can more or less be followed using these
guidelines:
•	in apes it runs from the jutting brow (ledge above the eyes);
•	in carnivores from a bend in the line of the profile;
•	in horses from just above the widest point of the skull;
•	and in cows a little higher above the widest point of the skull.
The base of the skull then runs down from this front
demarcation to the opening of the auditory canal. After that it
cannot be followed because it is covered by neck muscles. At the
sides (on the temples), the skull capsule is enclosed by
masticatory muscles, to the rear by the back of the neck and
head (where the cervical muscles are inserted), and on top by
the small, flat forehead.
Skull construction reveals species - specific structural forms
relating to adaptation to ways of life, differing as between the
herbivore (fig. 123), the carnivore (fig. 119), and the ape (fig. 118).
There are variations between different species of herbivore,
but the size of the facial skull with the long nasal passage,
powerful grinding and crushing teeth, lateral position of the eyes
with a bony annular eye frame and a small cranial skull are
common to all herbivores. The overall form is like a trihedral
prism.
Section 8.1
Types of skull structures

Form of the horse's skull (fig. 120)
•	The horse’s facial skull has a long pyramidal shape that is
compressed laterally
•	There is a huge ridge of bone near the nape of the neck
marking the rear end of the skull capsule (insertion of the
flexible nuchal ligament).
•	There is a weak ridge of bone at the top of the skull capsule
that stops and forks in the forehead area, forming part of the
orbital ring with a bridge to the zygomatic arch.
•	The nasal passage narrows as it approaches the muzzle and
comes out at the tip of the twin nasal bones.
•	The back of the nose is straight and slim, widening at the
sides to the upper jaw. Here there is a sharp-edged stepped
angle, forming a crest in the cheek which is a typical feature
of the horse.
•	There are rows of incisor teeth in the upper and lower jaws,
which close at the front like biting tongs.
•	There is a gap between the molar and incisor teeth.
•	The powerful, almost rectangular lower jaw has a rising
branch going up to the pivotal point (temporo-maxillary
joint). The branch forks into a condyloid process carrying the
joint roller and a coronoid process (where the masticatory
muscle is inserted).
•	The transition from the cheek crest to the zygomatic arch is
shaped like a handle.
Form of the cow's skull
•	The skull is short, massive, squat and broad.
•	The basic shape is pyramidal as in the horse, but less
compressed laterally (approximately a trihedral prism).
•	The end of the cranial skull is indicated on the back of the
neck by an obtuse, transversely rectangular area where
muscles are inserted.
118 SKULL OF AN ANTHROPOID
APE (CHIMPANZEE),
EMPHASIZING THE SECTIONS
OF THE SKULL
In the anthropoid ape the size of the
facial skull (brown) is greater than that of
the cranial skull (khaki), which falls from
the brow ridge toward the nape of the
neck.
119 SKULL OF A CARNIVORE (LION),
EMPHASIZING THE LINE OF THE
PROFILE AND SHOWING THE
RELATIONSHIP BETWEEN THE
CRANIAL AND FACIAL SKULL
Lines of equal length each corresponding
to a measurement of the cranial skull are
marked in red. The characteristic bend in
the profile of the feline skull forms an
angle of about 150°.
In the extremely simplified lower
drawing the size of the cranial skull (dark
shading) in relation to the rest of the
skull is indicated.
Section 8.1
Types of skull structures

•	There is a swollen thickening between the horns (crest of
the frontal bone) marking the highest and farthest back curve
of the cranial skull.
•	The area between the orbital cavities and this crest has a
regular rectangular shape.
•	The nasal area is blunt.
•	The cheek crest is not pronounced.
•	There are no incisors in the upper jawbone.
•	The short, strong zygomatic arch runs from the orbital cavity
to the opening of the auditory canal.
•	The forehead-nose profile is almost perfecdy straight.
•	The lower jaw from the incisor teeth to the angle of the jaw
forms a convex curve.
Skull of the carnivore
The relationship between the size of the cranial and facial skulls
shifts little in favor of the cranial skull. The facial skull is shorter
and less bulky. The overall appearance suggests an almost ovoid
shape with the jawbones jutting out as an independent form.
The shape of the teeth, including the dagger-shaped canines and
jagged side teeth equipped with a polished cutting edge, is
adapted to breaking bones and cutting through meat. Other
features common to all carnivores are:
•	a bend in the line of the profile where the facial skull meets
the cranial skull (especially pronounced in felines);
•	reduced size of the masticatory apparatus (crushing and
cutting). The food is not chewed after being cut up, but
swallowed (swallowing skull);
•	very large coronoid process on the branch of the jawbone;
•	zygomatic arch forming a powerful handle shape jutting out
sharply to the side;
•	protective hollow for the eyeball is only a groove (ocular
groove);
Section 8.1
Types of skull structures

•	eyes positioned to look forward (accurate three-dimensional
vision for seizing prey);
•	powerful bony ridge on the crown of the head and at the end
of the cranial skull (point of origin of the masticatory muscles,
insertion of cervical muscles).
Shape of the dog's skull (figs 122,125)
•	The basic form is ovoid with the blunt end at the back of the
head.
•	The tip of the muzzle and the nape of the neck are on exactly
the same horizontal level.
•	The surface of the neck is triangular with a sharp point (crest¬
like protuberance on the posterior occipital bone).
•	There is a crest on the crown of the cranial skull like the ridge
on a helmet.
•	The parietal crest forks and arches down to the ocular
groove, forming a hook-like process of the frontal bone,
matched below by a hook-like process of the jawbone.
•	The condyle of the lower jaw sits in a cavity of the very
projecting zygomatic arch and under the lateral curve of the
skull capsule (transmission of masticatory pressure).
120	DIFFERENT TYPES OF SKULL
DRAWN CONSTRUCTIONALLY
a)	Three-quarter rear view of a horse’s
skull tipped slightly to one side.
b)	View into the open skull capsule from
behind, with the occipital bone removed.
c)	Leopard’s skull with open jaw
d)	Skull of a female gorilla.
Observe how the way in which the forms
continue and cross one another on both
sides has been made visible.
body of sphenoid bone
rising jawbone branch
temporal cavity
Section 8.1
Types of skull structures
cribriform plate

•	The zygomatic arch joins the area at the back of the teeth and
cheeks (here too masticatory pressure is transmitted onto the
jawbone).
•	The profile line of the lower jaw near the cheek and teeth
forms a very shallow curve.
Altogether the shape of the dog’s skull is reminiscent of Gothic
architecture. Like the rest of its build, the skull is graceful (a
hunter that pursues its prey).
Shape of the lion's skull (figs 119,124)
Most of the differences in the cranial skull between the lion and
other animal types relate to proportion:
•	The shape is a compressed, blunt ovoid (note the shortness
of the facial skull), with the greatest width being a little more
than half the length of the skull.
•	A large shelving bend in the profile line at the transition from
the facial to the cranial skull (especially in the tiger, panther
and domestic cat).
•	The zygomatic arches jut out to the side to an exceptional
degree (as in the dog they form the widest head
measurement).
•	The ocular groove is directed straight forward.
•	The line of symmetry on the skull near the nasal and
temporal bone is marked by a clear groove.
Altogether the lion’s skull is reminiscent of Baroque architecture.
It is heavy and massive, corresponding to the generally athletic
build of a hunter that lies in wait for its prey.
Skull of the anthropoid ape (figs 118,120d)
•	The cranial skull no longer seems like an appendage inside a
considerably larger overall form consisting of the facial skull.
Its size and visibility make it recognizable in its own right, and
it has a considerable impact on the shape of the head and
skull.
•	The two parts of the skull are clearly separated by a ridge
above the eyes (brow protuberance), and in profile there is a
sharp bend between the facial and the cranial skull.
•	The eyes are sunk in hollow pyramids enclosed on all sides,
the bases of which lie close together and nearly vertically,
forming the apexes of the pyramids deep under the base of
the skull.
•	The position of the orbital cavity is directed straight to the
front (controlling the activity of the hands).
•	The nasal passage is quite shallow, short and sunken so that
even the soft nose projects very little in profile, or not at all.
•	The upper and lower jaw project relatively far out, continued
by the position of the incisor teeth.
•	The incisor teeth areas of the upper and lower jaw rrfeet in an
obtuse to right angle, and the chin has no point.
•	The canines are distinct cones standing out from the other
teeth, and the molars have broad, masticating crowns.
•	The rising branch of the jawbone ranges from slender to
powerful (especially in the gorilla).
•	The zygomatic arch is relatively slender and in comparison
with carnivores the curve is slight.
•	The cranial skull of males may have great bony ridges (the
gorilla) or not (the chimpanzee).
The central column of the face - a continuous connection
running from the front of the lower jawbone, via the upper jaw,
the passage of the nose and the inner wall of the orbital cavity -
transmits masticatory pressure to below the base of the skull
where it is diverted to its horizontal surface. From the rising
branch of the jawbone upward the masticatory pressure is taken
over by the temporal area and cancelled in the crown of the
head.
The construction of the types of skull described is thus
determined by the spaces enclosed (cranial capsule, nasal and
oral cavities) and by the reinforcing directions accepting the
masticatory pressure which run from the front of the lower jaw
to the crown of the head. The way in which main forms stand
out, their formal connections, the subordinate character of the
secondary, transitional and bridging forms are all linked with this
way of looking at things. This is an ordered framework which
exists objectively, and has been made transparently clear: it
attains its highest form of architectonic development in the skull.
This framework character is also the theme of constructional
drawing of the skull.
121	PROPORTIONAL STUDY OF THE
SKULL OF A HERBIVORE
(HORSE)
Frontal view of skull indicating the
relationship between height and width.
Measurements in centimeters
Section 8.1
Types of skull structures

Section 8.1
Types of skull structures
arch above eyes
coronoid process of lower jaw
zygomatic arch
lower canine*
upper canine'

8.2
Drawing the skull constructionally
The constructionally determined forms of the skull undergo
further adaptation to meet the demands of graphic design.
Concealed forms, directions, corners and sharp edges drawn to
show (fig. 123):
•	The skull shape with its many components is simplified and
reduced to the block-like shape which essentially expresses
the skull type (a).
•	After this rough shape of the greater whole has been
established, graduated surface planes can be drawn in (b).
•	The skull should be treated as a crystalline structure with
polished facets and curves, which can be emphasized by
drawing in cross-sections where you think they should be (b).
•	These help in the basic organization of the areas of hatching
conveying modeling - this has nothing to do with shading.
•	In line with our previous graphic approach, the skull too
should be laid out according to a spatial reference system on
the line of symmetry and the three-dimensional cross-axes
intersecting it, (a).
•	This should all be followed through logically in drawing (a).
122 PROPORTIONS OF A DOG'S
SKULL VIEWED FRONTALLY AND
THREE-DIMENSIONALLY
a)	The greatest width and height of the
skull can virtually be inscribed in a circle
with its center at the start of the nose. If
the points of the skull are joined this
produces a pentagon (red lines).
b)	The ovoid shape of the skull is
emphasized, with only a few subsidiary
shapes projecting beyond the ‘egg’.
c)	Cranial and facial skull viewed three-
dimensionally showing the spatial planes
and gradients with the help of cross
sections.
123	SIMPLIFYING FORMS AS A
PRELIMINARY TO CONVEYING
THE ACTUAL SHAPE WITH ITS
MANY COMPONENTS (HORSE)
a)	Simplification based on a trihedral
prism allowing the basic three-
dimensional factors to be checked easily.
b)	Constructionally simplified actual
shape of the skull, with the spatial
directions indicated by lines following the
cross-sections.
Section 8.2
Drawing the skull constructionally

124 ARCHITECTURALLY INTERPRETED
SKULL SHAPE (LION)
The architectural nature of the lion’s
features only becomes striking when a
large number of components is inserted
into the shape - here in the ‘Baroque
style’.
a) Solid, three-dimensional view Similar
or identical directions in the gradients of
the planes and how they continue are
worked out as connections,
b, c) The same skull with an open jaw,
revealing the hollows and dome-like
vaulting as the essential formal images
and highlighting their ‘Baroque’
appearance.
Section 8.2
Drawing the skull constructionally

•	Set about your work like an architect, i.e. explore the
groundplan shapes of the cranial and facial skill, erect the
walls of the building, its domes, vaulted apexes, cantilevered
arches etc. above the groundplan.
•	It is best to choose planes and gradients that provide good
three-dimensional contrasts (made easier by reducing the
forms to elements as has already been done).
Drawing the skull constructionally is one of the most interesting
and instructive tasks in drawing, though one of the most
difficult. It trains the ability to imagine appearances like no other
method of drawing, for the skull is in fact the determining formal
basis of the head. Drawing the skull constructionally creates
distillations of form and excludes mere acceptance of externals.
The figures in section 8.1 all convey the constructional nature of
different types of skull and how to set them out graphically in
constructional terms. In case the student is unable to find life
models, the figures also set out to impart a minimal ability to
visualize the essentially different types of skull, serving as bridges
between thinking what is inside and determining what is outside.
125 GRACEFUL ARCHITECTURE OF
THE SKULL (DOG)
The slenderness and delicacy of a dog’s
skull is reminiscent of Gothic
architecture. Both these studies attempt
to give a complex condensation of the
form of the skull with its many details as a
pointed ovoid shape.
a)	Three-quarter front view of skull,
indicating its most important subsidiary
forms.
b)	The same skull, three-quarter back
view, revealing the end of the skull with
its bony ridges arranged like a frame.
Section 8.2
Drawing the skull constructionally

8.3
The head and the shapes of its soft parts
126a MUSCLE SYSTEM IN A
HORSE'S HEAD
The system of muscles operating the
opening and closing of the jaw and of
sensory apertures is shown as a network
of directional lines. Note the position of
the masticatory muscles in relation to the
pivotal point of the temporo-maxillary
joint (red arrows indicate pulling
direction of muscles effecting closing,
blue arrows those effecting opening).
Red circular muscles operate closure of
the sensory organs, blue lines represent
muscles that open the apertures.
1	temporal muscles
2	ocular muscles
3	levator of nose and lip
4	levator of upper lip
5	nasal muscle
6	transverse nasal muscle
7	annular mouth muscle
8	abductor of lower lip
9	masseter (masticatory muscle)
10	pectoro-maxillary muscle
11	masseter (masticatory muscle)
12	internal alar muscle
13	throat-jaw muscle
14	jawbone section of masseter
15	masseter
16	external alar muscle
17	biventral muscle of the lower jaw
The soft parts are all those parts of the head that are not bony.
They can change shape to suit the activities of the eyes, nose,
mouth and ears. They also include the muscles of the head
(masticatory and fa'cial muscles). The component forms include
the eyes, nose, mouth and ears.
Muscles of the head (fig. 126)
These are very briefly considered by reviewing the directions
they follow:
•	Muscles concerned with chewing are the bulky masticatory
muscles which move the temporo-maxillary joint and press
the lower jaw against the upper jaw, originating at the
jawbone or cheek crest (horse and cow) and being inserted ai
the angle and climbing branch of the jawbone (thick and
bulky in carnivores).
•	Facial muscles concerned with opening and shutting sensory
organ apertures originate from a fixed base, the skull, but are
inserted in the malleable cutaneous parts surrounding the
apertures. Annular muscles close the apertures, while radially
arranged ones open them.
Section 8.3
The head and the shapes of its soft parts

Among the masticatory muscles that merit special mention are
the masseter (figs 126,127,128,129) and the temporal muscle,
the former because of its impact on the shape of the cheek, the
latter because it covers the area of the temple, having a
considerable plastic effect in carnivores and anthropoid apes.
The facial muscles, however, none of which has to operate a
bony lever as they virtually only have to move the skin, are not
bulky and have very little plastic impact on appearance. Their
effects on the skin in opening or closing the sensory apertures
do nonetheless produce creases and wrinkles which also serve as
spontaneous signs of mental and psychological states and are
perceived as conveying intelligible messages in contact between
animals or between animals and human beings: baring the teeth
and laying the ears back as threatening gestures, rolling the eyes
in terror, wrinkling the back of the nose as a result of raising the
upper lip, flaring the nostrils.
126b PARTS AND MUSCLES OF THE
HEAD VIEWED FROM ABOVE
eyebrow muscle
annular eye muscle
levator of nose and upper lip
levator of upper lip
levator of upper lip
buccinator
cheek muscle
transverse nasal muscle
edge of X-shaped or alar cartilage of the nose
inner or front edge of the auricle
external or rear edge of the auricle
superior adductor of the auricle
long levator of
the auricle
M. scutularis
depressor of auricle
M. scutularis
forehead section of M. scutularis
scutiform cartilage
temporal section of M. scutularis
Section 8.3
The head and the shapes of its soft parts
levator of the
auricle

scutiform cartilage
M. scutularis
forehead muscle
upper adductor ojjfthe auricle
short levator
lower adductor of
the auricle
annular eye muscle
inner lid ligament
abductor of lower evelid
canine muscle
127 SOFT PARTS OF THE HEAD OF A
COW
The only muscles with plastic significance
are those that effect closure of the
masticatory apparatus.
levator of nose and upper lip
proper levator of upper lip
wet muzzle
upper and middle adductor of the auricle
M. scutularis
external and lower adductor of the auricle
forehead muscle
abductor of lower eyelid
short levator of auricle
ala of atlas
jugular vein
1	proper levator of upper lip
2	annular mouth muscle
3	cheek muscle
4	caninus muscle
5	abductor of lower lip
6	maxillary muscle
7	facial vein
8	M. stemomandibularis
9	masseter
10	mandibular gland
11	depressor of auricle
12	M. stemomastoideus
parotid gland
mandibular gland
Section 8.3
The head and the shapes of its soft parts
annular eye muscle
upper eyelid
nictitating membrane
caruncle
levator of nose and upper lip
lachrymal groove

128 SOFT PARTS OF THE HEAD OF A
LION
Only muscles making up the masticatory
apparatus are significant in plastic terms:
the skull is rounded to an ovoid shape by
the temporal and masticatory muscles.
levator of the auricle
abductor of the auricle
jugular vein
depressor of auricle
laryngeal muscle
M. stemohyoideus
masseter
lymph gland of oesophagus
temporal muscle
annular eye muscle
levator of nose and upper lip
abductor of eyelid
nasal speculum
caninus muscle
parotid gland
M. deidocervicalis
mandibular gland
M. stemooccipitalis
abductor of lower lip
cheek muscle
insertion of biventral muscle
129 SOFT PARTS OF THE HEAD OF A
DOG
M. scutularis
M. scutularis
cutaneous muscle section of external
levator of upper eyelid
abductor of lower eyelid
M. zygomaticus
cervical subcutaneous muscle
Section 8.3
The head and the shapes of its soft parts
jawbone section of external levator of upper eyelid
cheek muscle-

130	PARTS OF THE HEAD OF A
CARNIVORE (DOG) ASSEMBLED
a)	Combination of forms in the head as a
whole.
b)	Shapes and directions of the planes of
the head.
c)	The eye viewed in profile.
d)	Frontal view of the eye.
e)	Frontal view of the nasal speculum.
f)	Protruding soft nose viewed in profile
with side slits of the nostrils.
Section 8.3
The head and the shapes of its soft parts

Shapes and plasticity of the eye
The only factor common to all animals is that the spherical glassy
body of the eyeball, surrounded by membrane, is opened and
closed. The shape formed by the eyelids and the position of the
eyeball within them vary from species to species. In drawing the
eye of the horse - used as a representative example - the
following principles should be followed (fig. 131):
•	The eye is placed at the side of the head (typical of animals
that take flight). Seen from the front the eye is foreshortened.
•	The three-dimensional effects of the overlapping of the
eyeball and eyelids must be conveyed.
•	The upper lid must be distinguished from the covering fold
located above it by the crease in the upper lid.
•	It should never be forgotten that the area directly round the
eye represents the plastic continuation of the shape of the
eyeball. Its spherical form and the lids covering it are very
similar to those of a horse chestnut bursting out of its skin.
•	The lids themselves have mass, so that the eyeball is not in
fact popped into a paper-thin mask-like cut-out sector.
•	In herbivores the inner corner of the eye is a little more
recessed than the outer corner, in carnivores much more so
(figs 128,129).
•	There are no eyelashes on the lower lid.
•	The iris is a browny-yellow color.
•	The shape of the pupil (in ungulates and ruminants) is
transversely oval, while in cats it is vertical.
131	THINGS TO NOTE WHEN
DRAWING THE EYE OF A
HORSE
The drawing must make the eye
intelligible as a sphere surrounded by the
cover of the eyelids which follow its
shape. Viewed from all angles eyeball and
eyelids overlap and intersect, and this is
important in depicting the eye.
a)	Full view
b)	Three-quarter front view
c)	Front view
d)	Side view
e)	Three-quarter rear view
f)	Rear view
Section 8.3
The head and the shapes of its soft parts

Shapes and plasticity of the nose and mouth
The closeness of the nose and mouth to one another means they
are often mutually dependent in function and form. The dog’s
nose (fig. 129), which protrudes a long way, is an organ for
picking up scent on the ground, protruding even beyond the
upper lip. The way in which the lips of many herbivores
protrude beyond the nose is adapted to taking food, though the
lips and nose of the cow (fig. 127) extend to about the same
point. In carnivores (figs 128,129) the corner of the mouth is
elongated because of a loose flap of skin (chops), spare skin
enabling the jaws to open wide.
Nose and mouth of the horse (fig. 126)
•	On the right and left of the nasal septum cartilage there is
bag-shaped elongated cartilage and connective tissue,
forming the nostrils.
•	These are not as far forward as the front section of the lips,
and are nearer to the lip than in the cow.
•	The shape of the nostril is like a tilted C, with the break
occurring near the top, a little to the side.
•	The upper lip starts directly below the nostrils.
•	The corner of the mouth is surrounded by seams.
•	The upper and lower lip are supported from behind by upper
and lower incisors.
•	The part of the lower lip in front of the incisors has a swollen
roundness, at the back it develops into a dome-shaped
mound of connective tissue. There is a velvety covering of
hair on both upper and lower lip.
Nose and mouth of the cow (fig. 132)
•	The nose and mouth are wide and blunt.
•	The nostrils are farther apart than in the horse and more
compact.
•	The shape of the nostrils resembles an upturning spiral, with
the blunt end near the lips.
•	The nostrils are directed more to the sides than the front.
•	The area between the nostrils and the mouth fissure is damp
and therefore gleaming.
•	The sides of the upper lip overhang the corner of the mouth.
•	The nose and mouth are suspended at an obtuse angle above
the bony brace of the upper jaw (which has no incisor teeth).
•	From the front edge of the lower lip extending out and to the
side there is a baggy thickening of the connective tissue.
Nose and mouth of the dog (fig. 129)
According to the breed of dog there are variations from the
bluntest shape (bulldog) to the most elongated (greyhound).
•	The soft nose is made up of tube-shaped cartilage.
•	The wings of the nose and the speculum in front view vary
from a rounded-off lozenge shape to a circle; in profile they
are triangular.
•	The speculum has a shallow, vertical notch between the
nostrils which carries on down to the upper lip and the
mouth.
•	The sides of the nose fold up in a curve and are damp and
gleaming. The nostril forms a slit in profile.
•	The side of the upper lip swells in a curve (pushed out by the
two canines in the upper and lower jaw).
•	The mouth fissure rises in a shallow angle, running up into
the chops at the side and the corner of the mouth.
•	The edges of the lips have virtually no mass of their own.
•	On the front and side of the upper lip there are several
overlapping rows of tactile hairs.
Nose and mouth of the big cat (fig. 128)
•	The profile from the nose to the lower jaw almost ends in a
right angle (because of the projecting nasal speculum), the
upper lip has tactile hairs, and there is hair on the chin.
•	The nasal speculum forms a low, wide Y-shape.
•	The central axis of the speculum is marked by a shallow,
vertical groove continuing into the upper lip and down to the
mouth fissure.
•	The wings of the nose flare back, and are rolled in.
•	There are slit-like recesses round the sides of the wings of the
nose.
•	A small strip of the lips is hairless and dark-colored, the
mouth fissure runs down from the center to the sides, and
there are chaps over the corners of the mouth.
•	The sides of the upper lip are pushed out and supported by
canines.
•	There are several rows of tactile hairs in the upper lip.
•	The lower lip has a fairly long, dense covering of hair.
Shapes and plasticity of the ear (figs 126,127,128,129)
The outer ear consists of very flexible, malleable ear cartilage
shaped like a bag with a pointed (herbivores), blunt-pointed
(canines and domestic cats), or rounded (big cats and bears)
opening. Near the skull the ear muscle travels through a
stabilizing pipe which varies in length.
Shape of the horse's ear (fig. 126)
•	The ear stands straight up.
•	The inner and outer edge of the ear converge at the tip.
•	The inner edge of the ear running up to the tip of the ear
from the auricle opening is twisted.
Shape of the cow's ear (fig. 127)
•	The ear is positioned at the side, protruding horizontally
below the horn.
•	The overall shape is like a spoon, but ending in a blunt tip.
•	The auricle aperture is directed very much downward.
•	The inner (or upper) edge of the ear running up to the tip of
the ear from the auricle aperture is twisted.
•	The outer (or lower) edge of the ear curves steeply down
from the auricle aperture, then bends back toward the tip of
the ear
•	The inner edge of the ear is far more hairy than the outer edge.
132	MODELING OF NOSE AND MOUTH OF THE COW
The blunt shape of the nose-mouth area results from the wide
spacing of the nostrils, with the moist speculum between them
and the corner of the mouth framed by the upper lip.
Section 8.3
The head and the shapes of its soft parts

Section 8.3
The head and the shapes of its soft parts

Shape of the cat's ear (fig. 128)
•	In large cats, especially lions, the ear is a bluntly rounded
shell-shape with no tip (in domestic cats there is a rounded
tip).
•	The auricle is positioned slightly on the slant and turned
outward.
•	The outer edge of the ear near the auricle aperture is often
split, with a vertical pocket of skin. There is then a clear curve
and the edge of the ear turns up.
•	The inner (or front) edge of the ear is well covered with long
tufts of hair.
Thus the component parts of the animals’ heads vary with
function and form: they do not constitute a constant,
unchanging order.
8.4
Drawing the head as a whole
In drawing an animal’s head we have of course to assimilate both
the basic and subsidiary forms of each animal type. At the same
time we feel driven to express the sensations we experience in
looking at an animal’s head; we want to grasp and animate our
object with that drive.
We shall consider some qualities derived from subjective
experience in the drawings reproduced on the following pages,
which demonstrate that object and subject can be integrated to
produce artistic unity, and we see this as a final phase of graphic
study. But so that practical knowledge is not too easily sacrificed
133	BASIC FORM OF THE HEAD OF
A HERBIVORE (HORSE)
The basic shape is a narrow triangular
prism produced by the long facial skull
and general lateral flattening, highlighted
further by the flat vertical plane extending
through the masseter from the cheek
crest to the lower jaw
134	BASIC FORM OF THE HEAD OF
A CARNIVORE (LEOPARD)
The distinctive plastic features are the
ovoid basic shape rounded by the
masseter, the relatively short facial skull,
the forward-looking eyes and the bend in
the profile where the forehead meets the
bony nose.
Section 8.4
Drawing the head as a whole

to subjective expressivity, in drawing the head building with
masses and structures must again come first (figs 133,134).
The features of each skull type are not fundamentally
weakened by the soft forms. On the contrary, these round and
close gaps in the skeletal shapes, giving the living appearance its
formal unity. This makes us aware of basic shapes such as the
trihedral prism typical of herbivores or the ovoid of carnivores,
irrespective of whether the masticatory muscles in the cheek,
jawbone-angle area make the cheek into a flat, vertical facet of a
trihedral prism (as in herbivores), a blunt ovoid shape (cats) or a
long ovoid form (dogs). There are no muscles that stand out
from the surface created by the skeleton.
In order to come to terms with textural and structural factors
we again use hatching to follow the planes of the body in the
following drawings.
Experiential qualities and a painter’s ability to express them
open up wide scope. In the early Renaissance a painterly concept
of drawing was not yet widely accepted.
Pisanello (fig. 136a) for example conveys the plasticity of the
horse’s head, a well-modeled relief, using an extremely fine nib
to depict the whorls of hair and the pile of the coat. He exploits
the natural texture, to convey spatial contours and the tension of
the curves.
This very analytical, classical Renaissance concept later lost
ground to Impressionist ways of conveying appearance. Adolf
Menzel (fig. 137) may serve as just one example among countless
others. Much is conveyed by suggestion, painterly tonal values
and blank areas. The liveliness of the expression lies in the
controlled jotting, the glow of the coat, the way marks are woven
together to produce textures that suggest color.
135	DISTINCTIVE FEATURES OF THE
HEAD OF A BIG CAT IN FRONT
VIEW (LIONESS)
Like the skull as a whole, the head in
front view is shaped like a large
pentagon, with the vertical central axis
characterized by the furrow in the brow,
the wide back of the nose, the relatively
wide space between the eyes and the
broad, shallow Y-shape of the speculum.
Section 8.4
Drawing the head as a whole

136a COAT TEXTURE AS AN
ORGANIZING FACTOR IN
DRAWING WITH A PEN
Before special painterly ways of seeing
were developed in Baroque art, one of
the most important tasks of art was to
convey the form of natural objects with
total clarity. The modeling of the relief of
the head has been effected here by using
extremely delicate hatching following the
directions and texture of the coat: no
attempt is made to convey color by
graphic means.
Antonio Pisanello (1395-c. 1455), Horse’s
head in front view, with hanging harness.
Pen on white paper, 103/4 x 63/4 in (26.9 x
16.8 cm), Paris, Louvre
136b LIVELY, PAINTERLY EXECUTION
IN A BAROQUE DRAWING
Peter Paul Rubens (1577-1640), Horse’s
head.
Black, red and white chalk, Vienna,
Albertina
Section 8.4
Drawing the head as a whole

The unfathomable psychological aspect when facing an
anthropoid ape positively demands color as a vehicle for mood.
The head of a male bearded orangutan (fig. 138) gazes from the
secret depths of his eyes, cast into shadow by the jutting
eyebrows. The light, blueish purple of the forehead is encircled
by a red halo of short head hair. The whole middle part of the
face sinks into inscrutable darkness with the bright dome of the
upper lip emerging from it, enclosed by the round, rust-red
frame of the beard.
It is perfectly possible that quite different ways of using
experience will emerge from these briefly stated principles as the
artist’s work develops a life of its own. The ways in which artists
can identify subjectively with their object are as many and varied
as the personalities of artists.
137	THE USE OF REALISTICALLY
CONVINCING PAINTERLY
MEANS
Unlike classical Renaissance art, the
Impressionist approach does not find
artistic beauty in form, but in suggestion
of mobile living appearance, using such
means as areas left blank. This drawing
derives liveliness and credibility from the
suggestiveness of its controlled jottings.
Adolf Menzel (1815-1905), Two views of
the head of Emanuel, a saddle horse.
Study for an unexecuted picture of a
parade, 1873.
Pencil, 8 x 5 in (20.4 x 12.5 cm), Berlin,
Nationalgalerie
138	ESSENTIAL UNITY OF OBSERVED
FACTS AND PERSONAL
EXPERIENCE (MALE
ORANGUTAN)
A life study only conveying the bare
facts will become wooden and dull if it is
not supported by sympathetic feeling and
poetic interpretation.
Gottfried Bammes (b. 1920), Head of a
contemplative orangutan, 1984.
Watercolor on yellowish Ingres paper,
13 xl83/4 in (32.4x48 cm)
Section 8.4
Drawing the head as a whole

9.
139	ANIMAL FORMS DRAWN AS
BUILT DESIGNS
A study conceived as a constructed
drawing requires us to bring together all
we have learnt about anatomy in a total
design concept, concentrating primarily
on the structure of the body framework
and including movement. This provides
the basis for visualizing and imaginative
power.
Coming to terms with the whole
animal figure
Drawing animals is not simply a question of fitting component
parts together: we attach much more importance to layout and
design - with their great potential for turning the experience of
seeing, stored visual knowledge, discovery into something
visible to others - than to representation. By ‘design’ we mean
turning an idea into a picture, working from a creative idea or
discovery and using a variety of media, irrespective of whether
they are handled patiently and thoughtfully or quickly and
spontaneously.
Section 9
Coming to terms with the whole animal figure
a) Typical figure of a herbivore (horse)

9.1
Drawings as built designs
The following are the main principles to be adopted in the
pursuit of built design (fig. 139):
•	The creation of order among masses and forms, assigning
them their correct optical weight, in conjunction with the
visualization of simplified forms. Construction of a hierarchy
of forms (assigning values to forms).
•	Developing a structural interplay between firm framework
shapes and soft, variable muscle shapes.
•	Bringing out the interaction of factors relating to proportion,
construction, structure and dynamics.
•	The integration of essential form as discovered in the animals
treated here as representative.
The above principles have often been repeated in this book,
but it must be remembered that ‘built designs’ are far from being
the ultimate objective of our studies. On the contrary, they are a
departure point for the appearance of individual and subjective
components of artistic creativity, for the ability to visualize,
imaginative power, intuition and inspiration. It is only from the
starting point of drawings solid in construction and design that
the way is truly open for us to call on the figure seen by our
inner eye, the free-floating inner picture, the traces of which we
capture in the sketch from imagination, the quick study of
movement, or in free experiment with different means and
media. We thus cross the boundary between what is concretely
based to lapidary, free abbreviation. We move between these two
poles: between the solidity of what is known through and
through in practical terms, and freedom of expression and
secure shorthand. Because trivia are absent, inner pictures
derived from visual experiences often have great density of
essence. Our memory has sifted out chance aspects that were
not memorable by forgetting them. A course book such as this
can only put forward principles to be followed and stimulate the
student to work creatively. The truly artistic creative act cannot
be taught.
b)	Typical figure of a herbivore (cow)
Section 9.1
Drawings as built designs

9.2
Sketching
Sketching can be a planning stage, an independent activity or a
training exercise. The essence of sketching is not speed -
quickly jotting down in a few lines - but sureness of touch and
an ascetic economy of means, often used to capture just a single
aspect of the essential form. Of course the circumstances in
which a sketch is executed influence the chosen approach and
the lavishness of the means. There is a difference between
conjuring up the massive repose of a standing bull (fig. 140),
with powerful contours that require the outline to contribute
greatly to the achievement of expression, using heavy hatching
and a few smears of paint to convey the volume of the body;
following the performance of a horse in the circus arena, trotting
on the lunge (fig. 142) or rearing (fig. 53), drawing in pencil as if
galvanized; and sketching a sniffing dog (fig. 141), with its tense
back and neck, its moving tail and thin legs.
These few examples serve to demonstrate that sketching is not
synonymous with speed, and certainly not with imprecision,
carelessness or aimless freedom. A vague, haphazard approach,
jotting down a snippet of what has been seen here, there and
everywhere, comes from uncertainty as to the objective.
Sketching with a knowledge of one’s objective needs sureness of
touch and engenders it. It also produces something that is
complete in itself, and not just a scrap. When we look at figs 53
and 142 we should not wonder if the artist would have finished
the sketches if he had had more time. With singular preciseness
he has sketched just one single impression in an extremely
concentrated form, with dynamism, expression of movement
and just a hint at the circus background. The frantic lines are
jotted down working almost blind, without looking down.
In this book life study has predominated, but in time you can
be free of this, provided you have practiced looking with total
intentness and have a valuable store of intensely felt events and
visual experiences. This is where European and Asian
approaches come close to one another: Chinese Buddhist art
c)	Typical figure of a carnivore (dog)
Section 9.2
Sketching

and Japanese Zen art (fig. 143) rest on inner perception. A work
of art has to open up suddenly like a mystic illumination, it must
arise like a flash of lightning from the depths of the unconscious.
That is why means are whittled down to a minimum - nothing to
do with being in a hurry; a few brush strokes are enough to
follow the innermost traces of the soul.
In his Indian ink drawing of a horse Sesshu lifted his brush
only twelve times, and the animal stopping abruptly in its tracks
is there (fig. 143b). The same is true of Hokusai’s Galloping
horse which has pictorial symbolism and poetic terseness. And it
is surely right to point to the spiritual kinship of the American
artist Sklar who characterizes a raccoon (fig. 146) from the tip of
its nose to the toes of its back paws in a single curving line.
d) Typical figure of a carnivore (lion)
Section 9.2
Sketching

9.3
Free play
The call made on our inner resources in drawing means that it is
more than just a hobby. But one of the forms it can take is free
play ‘Human beings can only play if they are human in the full
sense of the word, and are only wholly human when they play’
(Schiller).
Free play means joy in practicing what we are fully conversant
with. Doubts and worries which can sometimes be burdensome
retreat. We are free to discover, invent and experience, open to
daring, experiment and chance. Play attempts free creativity,
observes the rules of the game, is a creative force. We are not
talking about purely mental acrobatics, but making and doing
and the freedom that comes with them, using various materials
and media. Materials that are easy to handle are eminently well
suited to our purpose, and working with them will suggest new
ideas.
Our program for play may consist of:
•	switching from close study to working freely (fig. 47);
•	playing with pure line (figs 63,113);
•	a dialogue between the line and the mark (fig. 144);
•	a dialogue between line and texture (fig. 147b);
•	turning a mark into a form (figs 148,149).
140	ASSESSING WHAT CAN BE
DONE IN A LIMITED TIME
The artist must to some extent anticipate
from the animal’s behavior how long the
model is likely to stand without moving,
and decide what means to use for the
sketch. For this drawing it was obviously
possible to enhance the quick outline
with texture, producing an impression of
self-contained power.
Wilhelm Rudolph (1889-1982), Bull.
Pencil, smudged, 10 x 14 in
(25.4 x 36.3 cm)
Section 93
Free play

Section 93
Free play
141	DRAWING WITH A BRUSH - A
QUICK METHOD OF WORKING
There is a limit to what a quick sketch can
contain. What is expressed here is the act
of sniffing. A small flat brush filled with
diluted Indian ink makes it possible to
work quickly, presenting the image in
broad lines, with powerful contours and
virtually no breaks.
Diluted Indian ink and bristle brush on
A4-size paper
142	INFLUENCE OF A TIME LIMIT ON
THE MEANS USED
The tempo of movement and the
changing scenes before him force the
artist to record at great speed and with
extremely limited means. The seeming
cursoriness is in fact extreme
concentration on the expression of
movement. Small dimensions are
appropriate for notes of this kind.
Josef Hegenbarth (1884-1962), Sketches
of a circus scene. Pencil

a
Section 93
Free play
144	A PARTNERSHIP OF LINE AND
MARK
On its own, line carries on a monolog;
combined with the patch, a dialog. The
contrapuntal, highly contrasted play
between the two is unmistakable: the
broad patches make the line appear
narrower, and the line reinforces the
broad effect of the patches.
The author, Bear at ease, 1984.
Drawing pen and watercolor brush and
diluted Indian ink on A3-size paper
143	JAPANESE ZEN ART
Shorthand symbols denoting natural
phenomena are not entirely in keeping
with European ideas of study from
nature. These lines drawn with a brush in
next to no time result from deep insight
into the essence of animal life. They have
nothing to do with speed per se and are
the opposite of tense; they come from
inspiration.
a)	Sesshu (1420-1506), Horse. Indian ink
drawing, Nagoya Tokugawa, Japan
b)	Katsushika Hokusai (1760-1849),
Galloping horse (from Mangwa). Indian
ink and brush

145	OPEN DETAIL-SURENESS OF
EXPRESSIVE TOUCH
Brush marks, silhouettes and the
directions of the limbs are the main
expressive elements used to convey form
in this free play with means. Work such as
this could not be produced without
lifelong familiarity with the daring but
cruel sport of bull-fighting.
Pablo Picasso (1881-1973), Attack on a
bull, 1957. Brush and Indian ink
146	A LITTLE SAYS A LOT
The sweeping curve from the tip of the
nose to the back foot and a few minimal
lines (so surely placed!) for the head
create an unmistakable animal form, akin
in its economy to the spiritual attitude
underlying Zen art.
George Sklar (b. 1905), Raccoon, 1947.
Brush drawing, Wkx9lkin (27.4x 24.1
cm), Philadelphia Museum of Art
147	PLAY BETWEEN LINE AND
TEXTURE
The fact that lines drawn in ink on paper
sprayed with water run a little creates a
relationship between them and
independently drawn textural structures.
Here chance effects are welcome,
a)	The author, Bear at rest, 1984.
Pen and Indian ink on A3-size green-
colored paper sprayed with water
Section 93
Free play

b)	The author, Sleepy water buffalo, 1984.
Pen and Indian ink on A3-size brown-
colored paper sprayed with water
Pure line is a track, a moving progression, and its rises and falls
reflect hope and despair. If it entirely encompasses the form by
returning to the starting point it creates an inside and an outside
that are unambiguously defined.
The playful forms magically evoked by a few strokes in
Picasso’s bull-fighting scene (fig. 145) are not the outcome of a
one-off flying visit to the arena, but an outpouring of lifelong
visual observations and experiences, like the free play with line
and patch (fig. 144) that suffice to express the comfortable well¬
being of a bear. While the mark stretches and spreads, the line
moves constantly toward its goal. Marks can be arranged without
any connection, but in their dialog with the line they are
assigned a place.
Hatching and marks as internal shapes can suggest texture.
The interplay of line and texture can be attractive if the line does
not always progress with needle-sharp fineness, but trickles and
runs, thus bringing happy accident into the game (fig. 147). Both
playfulness and tension would disappear if the mark were simply
used to fill in the contours of the figure. So the way in which
marks are arranged and amassed, their size and the distance
between them are part of the free play.
Collage (fig. 148) is also a suitable medium for this approach:
unlike fluid watercolor, it does not force us to hurry. We can
create textures that combine to produce form.
Just as the line and the mark or line and texture can carry on a
game, the mark itself can run to give a form. If all we put down
on paper are marks that run, the tension provided by articulation
will be lacking, so here and there we carefully confine the flow,
bringing in a little detail. A definite form eventually evolves from
the mutual enhancement and completion (fig. 149). If we then
include the variations available with color the graphic
possibilities are endless.
The progression followed in this book from practical
information to practical study, on to work from visualization and
imagination and finally to free play, is based on my experience.
Freedom comes at the end of a long process of preparation, not
depending on fashion but growing and maturing as our artistic
ideas develop.
Section 93
Free play

148	PLAYFUL COLLAGE EFFECTS
The massiveness of the bull was first
established with a broad brush outline of
the contours and main forms. All sorts of
offcuts of transparent self-adhesive foil in
two different colors were then used to
introduce textural effects into the outline.
The author, Bull, 1984.
Wide flat paintbrush and diluted Indian
ink, offcuts of colored self-adhesive foil
on A4-size paper
149	DARING ELABORATION OF THE
RANDOM MARK
The mark working on its own from pure
chance can very well be used to evoke
texture and form.
To avoid losing formal articulation and
reduce the risk of the mark taking on a
meaning of its own, all that is needed are
often only a few carefully placed hard
edges defining form.
The author, Donkey, 1984.
Section 9.3
Free play

DOVER BOOKS ON ART INSTRUCTION
Practical Guide to Etching and Other Intaglio Printmaking Techniques, Manly
Banister. (0-486-25165-9)
Illustrating Nature: How to Paint and Draw Plants and Animals, Dorothea
Barlowe and Sy Barlowe. (0-486-29921-X)
Acrylic Painting: A Complete Guide, Wendon Blake. (0-486-29589-3)
Acrylic Watercolor Painting, Wendon Blake. (0-486-29912-0)
Figure Drawing Step by Step, Wendon Blake. (0-486-40200-2)
Landscape Drawing Step by Step, Wendon Blake. (0-486-40201-0)
Oil Landscapes Step-by-Step, Wendon Blake. (0-486-41527-9)
Oil Portraits Step by Step, Wendon Blake. (0-486-40279-7)
Watercolor Landscapes Step by Step, Wendon Blake. (0-486-40280-0)
Bridgman’s Life Drawing, George B. Bridgman. (0-486-22710-3)
Constructive Anatomy, George B. Bridgman. (0-486-21104-5)
Drawing the Draped Figure, George B. Bridgman. (0-486-41802-2)
Animal Sketching, Alexander Calder. (0-486-20129-5)
Chinese Painting Techniques, Alison Stilwell Cameron. (0-486-40708-X)
Carlson’s Guide to Landscape Painting, John F. Carlson. (0-486-22927-0)
The Artistic Anatomy of Trees, Rex Vicat Cole. (0-486-21475-3)
Perspective for Artists, Rex Vicat Cole. (0-486-22487-2)
Chinese Brush Painting: A Complete Course in Traditional and Modern
Techniques, Jane Evans. (0-486-43658-6)
Art Students’ Anatomy, Edmond J. Farris. (0-486-20744-7)
Abstract Design and How to Create It, Amor Fenn. (0-486-27673-2)
Painting Materials: A Short Encyclopedia, Rutherford J. Gettens and George
L. Stout. (0-486-21597-0)
Figure Painting in Oil, Douglas R. Graves. (0-486-29322-X)
Life Drawing in Charcoal, Douglas R. Graves. (0-486-28268-6)
Abstraction in Art and Nature, Nathan Cabot Hale. (0-486-27482-9)
Creating Welded Sculpture, Nathan Cabot Hale. (0-486-28135-3)
On Drawing Trees and Nature: A Classic Victorian Manual with Lessons and
Examples, J. D. Harding. (0-486-44293-4)
Geometric Patterns and How to Create Them, Clarence P. Hornung.
(0-486-41733-6)
Painting and Drawing Children, John Norton. (0-486-41803-0)
Complete Guide to Watercolor Painting, Edgar A. Whitney. (0-486-41742-5)
Paperbound unless otherwise indicated. Available at your book dealer,
online at www.doverpublications.com, or by writing to Dept. 23, Dover
Publications, Inc., 31 East 2nd Street, Mineola, NY 11501. For current price
information or for free catalogs (please indicate field of interest), write
to Dover Publications or log on to www.doverpublications.com and see
every Dover book in print. Each year Dover publishes over 500 books on
fine art, music, crafts and needlework, antiques, languages, literature,
children’s books, chess, cookery, nature, anthropology, science, math¬
ematics, and other areas.
Manufactured in the U.S.A.

ART/DRAWING
The Artist's Guide to
Animal Anatomy
Gottfried Bammes
This superbly illustrated and easy-to-follow guide by an internationally
renowned artist and teacher illuminates many biomechanical concepts impor¬
tant in portraying a variety of animals in a wide array of positions. Nearly
150 illustrations, 78 of them in color, offer artists and students a systematic
approach to learning proportion, rules of repose and motion, and basic forms.
Following lessons on skeletal and anatomical details, the student learns to cre¬
ate accurate, lively portrayals of horses, cows, dogs, lions, gorillas, bears, and
other engaging creatures. Directions are provided for drawing subjects in poses
ranging from static to rapidly moving. An excellent guide for drawing animal
forms accurately and freely, this guide will be of value to students at all levels
of expertise.
The author, according to art critic Marshall Vandruff, “draws animal anatomy
with authority and is one of those rare artists who can draw with technical pre¬
cision as well as with wild expressiveness.” Along with his other major work,
The Artist’s Guide to Human Anatomy, this book represents the distillation of
Bammes’s insights and ideas. Together, the two volumes comprise an essential
addition to the working library of any artist or illustrator.
Unabridged Dover (2004) republication of the English edition first published by
Transedition Books, Oxford, 1994.
Planet Friendly Publishing
%/ Made in the United States
>/ Printed on Recycled Paper
GREEN Text: 10% Cover: 10%
EDITION Learn more: www.greenedition.org
At Dover Publications we’re committed
to producing books in an earth-friendly
manner. To learn how this title earned
the Green Edition seal, please turn to the
copyright page at the start of this book.
See every Dover book in print at
www.doverpublications.com
00759 43640
$19.95 USA PRINTED IN THE USA
ISBN-13:978-0-486-43640-1
ISBN-10:0-486-43640-3
5 1995
9 780486 436401
Cover design by ]eff A. Menges
8
8
UPC