/


Tags: weapons military affairs machine gun
Year: 1941


Text
THE BREDA
MACHINE GUN
MODEL 30
Compiled by
H.Q. TROOPS, ERITREA AREA
September, 1941
K.A.P.P. 1/1000/6/42
CONTENTS
Page
General Notes ... 4
Detailed description for armourers use ... 5-13
Contents of maintenance box ... 13-14
Section 1.—Holding, Aiming, Firing.
Lesson 1.—Introduction and Loading the
charger ... 14-15
” 2.—Loading, Unloading, Sightsetting ... 15-16
” 3.—Holding, Aiming, Firing ... 16-17
Section 2.—Stripping, Cleaning, Mechanism.
Lesson 4.—Stripping and assembling ... 17-18
” 5.—Additional stripping ... 19-20
” 6.—Cleaning, lubrication and
maintenance ... 20-21
” 7.—Care and cleaning — daily and
before firing ... 21-22
” 8.—Care and cleaning — during intervals
of firing ... 22
” 9.—Mechanism 22-24
Section 3.—Elementary Handling, Stoppages, Immediate
Action.
Lesson 10.—Elementary Handling (The Gun
Team) ... 25-27
” 11.—Immediate action and Stoppages ... 27-38
3
THE BREDA MACHINE GUN - MODEL 80
GENERAL NOTES
An air cooled, recoil operated weapon. Is fired shoulder-
controlled from a bipod. To avoid overheating, strain, and
excessive expenditure of ammuntion, bursts should be of
5 or 6 rounds.
To preserve the life of the barrel; it is advisable to change
after every 200 rounds at rapid rate.
GENERAL DESCRIPTION
Muzzle Velocity
Calibre
Barrel
Rate of fire
Length (overhall)
Weight
Method of loading
Type of sights
2050’ per second.
6.5 mm. (.256”).
4 grooves, right hand turn.
400 to 500 rounds per minute.
48”.
21 lbs.
Chargers of 20 rounds.
Foresight — blade.
Backsight — bed.
A “V” sight.
Graduated from 300 metres to
1500 metres.
There is no marking for 400
metres.
Fixed sight up to 300 metres.
(As the variation between metres
and yards gives a discrepancy
of 70+ at 750+ a deduction of
50 from each range up to 750+
will give a reasonably accurate
elevation. Subsequent corrections
are made by observation of
strike.)
The secret of success with this weapon is:
“KEEP IT CLEAN - KEEP IT LUBRICATED”
4
DETAILED DESCRIPTION OF THE PARTS
(For use of Unit Armourers)
PREDOMINATING FEATURES
1. Protecting jacket (body extension).
2. Foresight.
3. Bracket for attachment of legs bipod.
4. Recesses inside body.
5. Interrupted threads for union of guard trigger and body.
6. Lugs for fixing body cover.
7. Fermeture nut.
8. Guide fermeture nut (with locking wedge).
9. Safety piston.
10. Bed backsight.
11. Lever retaining fermeture nut.
12. Spring lever retaining fermeture nut.
13. Guard trigger.
14. Catch safety (hand).
15. Trigger.
16. Wings securing guard trigger to butt.
17. Guide spring recoil.
18. Pin firing release.
19. Block breech.
20. Spring recoil.
21. Spring buffer.
22. Spring pin firing.
23. Pin firing.
24. Pump lubricating cartridges.
25. Butt.
26. Grip guard trigger.
27. Strap butt.
28. Legs bipod.
29. Tubular catch fixing bipod legs.
30. Recess for leg plunger. Open position.
31. Recess for leg plunger. Closed position.
32. Shoes.
33. Rib of shoes.
34. Barrel.
5
The Body.
At the front is an attachment for the union of the body
extension, and at the rear nine interrupted threads in groups
of three for the attachment of the guard trigger. Above are
two lugs which serve as a joint for the combined cover-body
with box lubricating. This cover-body closes the two aper-
tures. The forward aperture forms the housing for the
fermeture nut and contains two recesses for the engagement
of the guide fermeture nut; in the rear of the aperture are
two holes for the bolt fixing guide fermeture nut; this bolt
is fitted with a catch and plunger to facilitate removal of the
guide and a recess is formed on left side of body for correct
engagement of the plunger.
In the rear aperture of the body are formed two ribs; in
the right hand rib is an orifice which enables lubricant from
the spout of the lubricating box to pass through to the
cartridges. At the rear is a housing which contains the
safety piston and spring, also a screwed cap which, when
fully screwed down, ensures that the point of the piston
projects through the inside of the body; there is also a recess
for the head of catch securing body cover.
At the rear of the body is the maker’s marking of the
weapon; the bed backsight, and the catch, operated by twin
ears which secures the body to the guard trigger. The box
lubricating contains the lubricant, and on its rear face are two
indentations to engage the plunger of the catch cover in either
open “A” or closed “ C” positions. (C-o = CHIUSO =
CLOSED - A APERTO = OPEN). The upper surface is
machined to break up the reflection of light and facilitate
aiming. At the rear is the backsight of tangent aperture type
graduated from 300 to 1,500 metres; is fitted with a slide,
operated by a knurled head which transmits the movements
through a pinion and rack. There is no marking for 400
metres. A fixed “V” sight is provided which is equivalent to
300 metres.
On the right of the body there is an aperture in which the
magazine enters, and at the rear a housing for the ejector.
A plate cover is fitted for retaining the feed block and ejector,
this also acting as a recess for the engagement of the catch
handle cocking when in the forward position. At the right
rear are grooves for the reciprocating movement of the
handle cocking, and three recesses which, when placed in
alignment with similar studs on the handle, enable it to be
removed from the body. There is also a recess for engaging
6
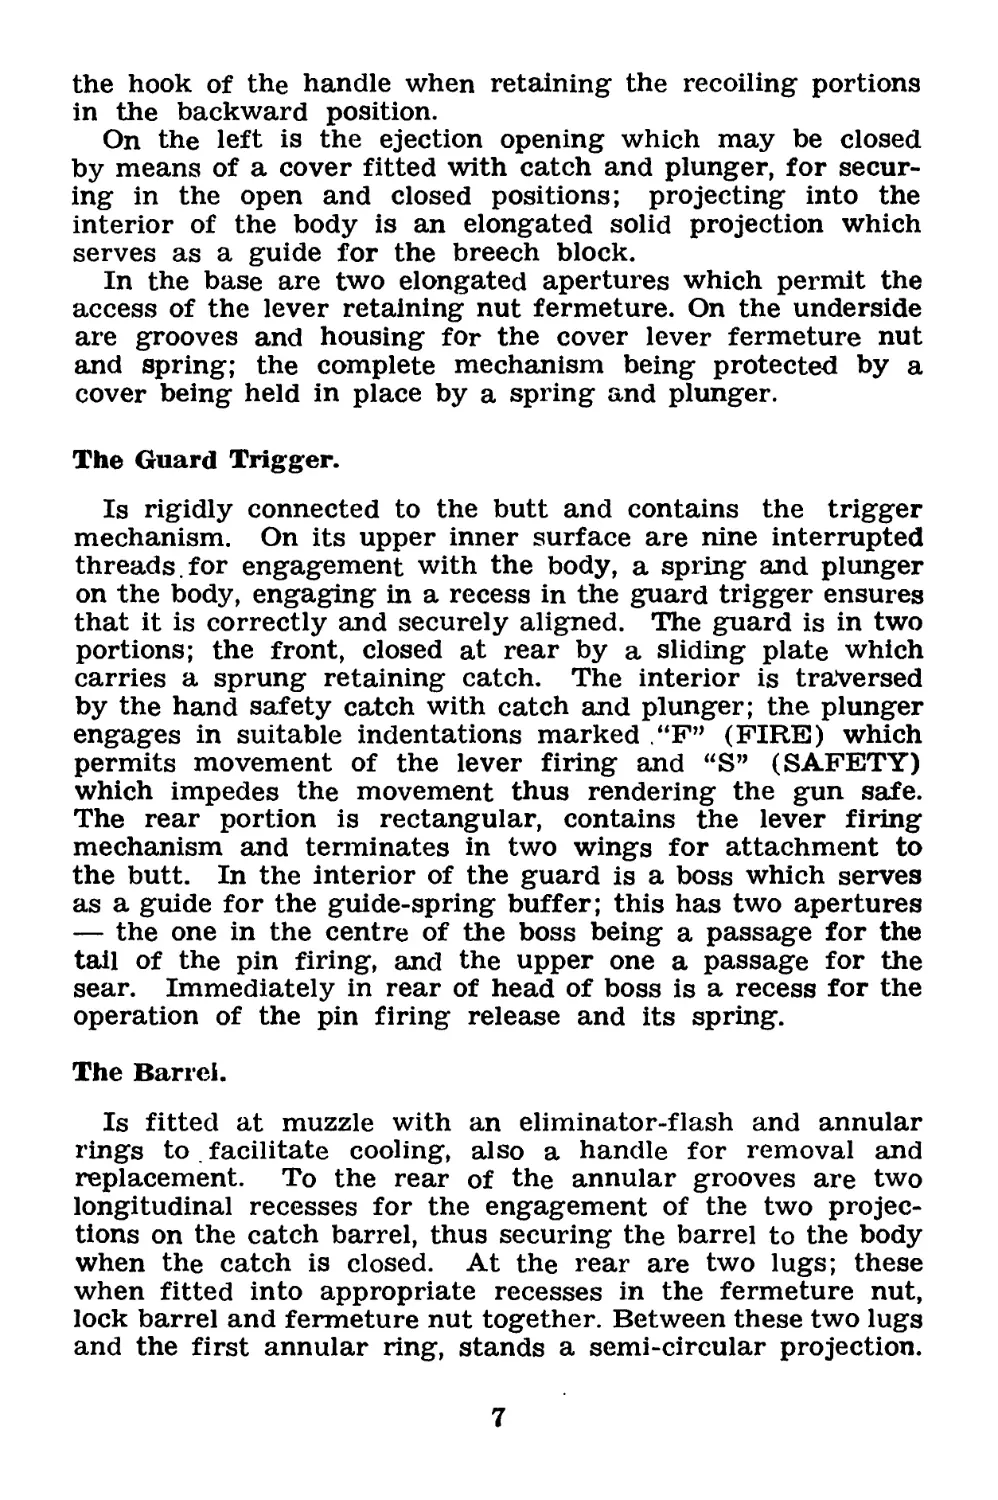
the hook of the handle when retaining the recoiling portions
in the backward position.
On the left is the ejection opening which may be closed
by means of a cover fitted with catch and plunger, for secur-
ing in the open and closed positions; projecting into the
interior of the body is an elongated solid projection which
serves as a guide for the breech block.
In the base are two elongated apertures which permit the
access of the lever retaining nut fermeture. On the underside
are grooves and housing for the cover lever fermeture nut
and spring; the complete mechanism being protected by a
cover being held in place by a spring and plunger.
The Guard Trigger.
Is rigidly connected to the butt and contains the trigger
mechanism. On its upper inner surface are nine interrupted
threads, for engagement with the body, a spring and plunger
on the body, engaging in a recess in the guard trigger ensures
that it is correctly and securely aligned. The guard is in two
portions; the front, closed at rear by a sliding plate which
carries a sprung retaining catch. The interior is traversed
by the hand safety catch with catch and plunger; the plunger
engages in suitable indentations marked ,“F” (FIRE) which
permits movement of the lever firing and “S” (SAFETY)
which impedes the movement thus rendering the gun safe.
The rear portion is rectangular, contains the lever firing
mechanism and terminates in two wings for attachment to
the butt. In the interior of the guard is a boss which serves
as a guide for the guide-spring buffer; this has two apertures
— the one in the centre of the boss being a passage for the
tail of the pin firing, and the upper one a passage for the
sear. Immediately in rear of head of boss is a recess for the
operation of the pin firing release and its spring.
The Barrel.
Is fitted at muzzle with an eliminator-flash and annular
rings to . facilitate cooling, also a handle for removal and
replacement. To the rear of the annular grooves are two
longitudinal recesses for the engagement of the two projec-
tions on the catch barrel, thus securing the barrel to the body
when the catch is closed. At the rear are two lugs; these
when fitted into appropriate recesses in the fermeture nut,
lock barrel and fermeture nut together. Between these two lugs
and the first annular ring, stands a semi-circular projection.
7
This prevents the closing of the catch barrel unless the
barrel is completely home. Midway along the barrel are four
longitudinal ribs to position the barrel inside the projector
foresight. The barrel is rifled to 6.5 mm. and chambered for
the cartridge model 91 for machine guns. A recess on the
rear face permits the operation of the extractor.
The Body Extension.
Is fixed to the body and held by two flush securing screws.
It provides support to the barrel and positions the magazine
in the open position. On the front is the foresight, and on the
opposite side are lugs for the attachment of the legs bipod;
on the right is an aperture for the tooth of the magazine lock-
ing lever, and on the left a bracket for the attachment of the
sling. At the rear, an aperture is formed in the base for the
protrusion inside the body of the operating lugs of the 2atch
barrel; on the left exterior is an indentation for positioning
the plunger catch barrel. The lugs in the centre of the catch,
when engaged in their appropriate position at the rear of the
barrel, serve to position and secure the barrel during firing.
The Block Breech.
Has five lugs at the head, which, in the forward and back-
ward action correspond to five recesses in the fermeture nut.
It carries the extractor, and opposite has a groove for the
free passage of the ejector head; below this groove are two
teeth and these, engaging the cartridge held in feed block,
carry it forward into the chamber.
In the body of the breech block is a longitudinal aperture
for the passage of the tooth of the pin firing and safety
piston; a raised portion on its rear upper surface terminates
in a ramp which determines the distance for the operation
of the tooth of safety piston and tooth of pin firing. On the
left is a broad longitudinal groove in which operates the
guide breech block in the body. At the front Is an inclined
plane which engages the rear tooth of the lever-retaining
fermeture nut. At right rear is a projection for the engage-
ment of the tooth of the cocking handle and through the
centre is a hole, tapered at front for the passage of the pin
firing; on rear circumference is a cannelure for the bearing
of the spring recoil.
The Nut Fermeture.
On its upper surface carries two lugs with inclined faces
which operate in conjunction with the inclined portion of
8
the guide fermeture nut. At the base is a recess for the en-
gagement of the front tooth of the lever retaining fermeture
nut. Inside at front are two raised segments. These, when
the barrel is turned to the locked position, securely hold the
barrel in the fermeture nut against the face of block breech.
Inside at rear are five raised portions which, when aligned
with their appropriate recesses in the block breech, enable
it to close and the fermeture nut to rotate, thus sealing the
breech.
The Lever Retaining Fermeture Nut.
Has a housing for its spring and a cover to unite it with
the body. The lever has two teeth; the forward tooth rising
through front aperture in the body, engages the recess in
the fermeture nut the rear tooth protruding through its
aperture, and meeting the inclined plane at front of block
breech is depressed. This also lowers the front tooth and
permits the free rotation of the fermeture nut from left to
right, and when the breech block is fully home the fermeture
nut seals the breech.
The Guide Fermeture Nut.
Has two outside arms terminating at the front with lugs,
and at the rear with two semicircular recesses. It is traversed
by an inclined plane which operates in conjunction with the
lugs on fermeture nut.
The right arm carries an adjusting wedge secured in back
or forward position by a transverse sliding key. This adjust-
ing wedge controls the amount of rotary locking movement
which the fermeture nut is permitted. When it is placed et
the rear of the guide fermeture nut, the maximum rotation
of the fermeture nut is allowed (correct position for new
barrels). When placed in the forward position the rotation
of the fermeture nut is minimised due to the earlier engage-
ment of the adjusting wedge (correct position for worn
barrels). When the correct position is determined, the
adjusting wedge must be securely positioned by its sliding
key.
The Spring Recoil.
Is a strong spiral spring with a normal uncompressed
length of 15 and three quarter inches. It engages at the front
with the cannelure at base of block breech, and at the rear
against the raised base of the guide spring recoil.
9
The Guide Spring Recoil.
Is a hollow cylinder of two diameters. The interior of the
larger diameter serves as a housing for the spring buffer,
and the exterior for the spring recoil; the inside of the
cylinder of smaller diameter serves as a passage for the pin
firing and the front face forms a base for the spring pin
firing.
The Handle Cocking.
Serves to draw back the recoiling portions by hand, has
a projecting tooth for engaging the block breech, pud four
recesses for its removel from the body. On its exterior front
is a claw which holds the handle in the forward position
during firing, and at the rear is a lever with serrated face,
bearing on its inner surface a hooked claw; this, when
projected into the body retains the recoiling portions in the
backward position. To operate, the handle must be pulled
back by hand, and the serrated lever forces inward against
its spring; by releasing the handle the recoiling portions are
now retained in the backward position by the hooked claw
engaging in recess in body.
To release pull back the cocking handle, and the recoiling
portions are now held in check by the handle only.
The Firing Mechanism.
Consists of lever firing and trigger, pin firing release, piston
safety, pin firing and spring pin firing.
The leVer firing consists of the lever, the sear and the
spring lever firing. When the trigger is pressed, the sear is
forced forward and its inclined face depresses the pin firing
release, thus releasing pin firing.
The pin firing release operates in a recess in the boss of
the guard trigger, and on its upper surface carries a recess
in which the sear engages, on its lower surface is a position
for its operating spring; in the centre is an aperture, cham-
fered on the front face to permit easy access by rear of pin
firing, and sharp on rear face for the retention of the pin
firing until the pin firing release is operated by the sear.
The Safety Piston.
Is situated on a platform in the body and operates in its
appropriate aperture in the breech block. The interior is a
hollow cylinder and its exterior base terminates in a tooth
in the form of an inclined plane.
10
Important.—When the piston is assembled to the gun, the
beak or head of tooth must face the rear of the gun and
project into the interior of body. The spring chamber must
be uppermost and contains a spring whose function is to
cause the beak of piston to protrude through the body. It is
secured in position by a screwed cap, having in its centre an
orifice for lubricating the piston.
The tooth piston projecting through into the inside of the
body, prevents the pin firing going forward until the com-
pletion of the forward movement of the block breech; then,
the piston is lifted by the ramp of the block breech; this does
not take place until the breech is completely sealed.
The firing pin consists of the point and the head with two
teeth to engage the tooth of the safety piston, and the stem
which terminates in a lug for engagement with the pin firing
release.
The spring firing pin is a coiled spring and uncompressed
has a length of 7 and seven eighths inches.
Components of Ejection.
Consist of the ejector and the extractor. The ejector has
an oval head and a catch operated by a coiled spring. The
projecting head of ejector, being opposite the head of
extractor, causes the fired case to be ejected on the backward
movement of the breech block.
The extractor has a head for engaging the rim of the
cartridge; a hole at the base for positioning, and a pivot and
spring.
The Feed Block.
Consists of feed block, magazine and charger. The feed
block carries on its upper and lower surfaces projections for
engagement with the right side of the body; it has curved
lips to receive the cartridges when presented by the magazine
to the two teeth on the front face of breech block. The upper
lip has an orifice for the passage of the lubricant from the
reservoir to the cartridge. Closing the feed block is a cover
with operating spring, and a T shaped cannelure which
serves to unite the magazine and the feed block. It has a
rectangular aperture to receive the hook of the closing lever
when the magazine is closed. At the base of the mouth is a
large slot, and in the centre projects a small tongue; when
the magazine is closed to the gun it compresses and lowers
the cartridge release and permits the cartridges to pass for-
ward to the mouth of the feed block.
11
The Magazine.
Is secured to the cover of the feed block by means of a
dovetailed projection on its front face sliding into a corre-
sponding cannelure on the cover feed block. On this face is
a sprung lever for securing to the cover and on the opposite
side is a hooked lever with serrated head operated by a spiral
spring; this hook lever secures the magazine to the feed
block during firing. At the base of magazine is a claw, having
an arm situated on the top of the magazine; this claw when
engaged in its appropriate aperture in the body extension,
positions the magazine while loading and during transport.
The lever is operated by a spiral spring. The arm situated on
top of the magazine has a projection on the end for quick
release of claw from body extension, and enables the maga-
zine to be rapidly placed in the closed position., Situated on
the underside is a bracket which carries the cartridge release;
it is operated by a spring, and protrudes in the interior of
magazine, it operates only when the magazine is in the open
position. When the magazine is closed to the gun, the tongue
of feed block withdraws the cartridge release and permits
cartridges to move forward against the inner lips of feed
block.
On the upper surface is a longitudinal aperture which
provides a passage for the indicator platform magazine; this
indicator, coloured red, is an integral part of the platform
and serves to indicate to the firer the number of cartridges
remaining in the magazine. In the interior is a laminated
main spring and the platform is of white metal. When the
magazine is empty the platform is retained by the cartridge
release.
The Charger.
Is of brass and when filled contains 20 cartridges. Consists
of two grooves, the broader for the base of the cartridge and
the narrower for the bullet. The ends are closed by soft
brass tongues and a handle is formed to facilitate loading.
The Automatic Cartridge Lubricating Pump.
Consists of the oil reservoir and pump. In the reservoir
is carried the lubricant for the automatic lubrication of the
cartridges. The pump consists of the body and piston with
bevelled head; this bevelled head protruding into the interior
of the body engages with the breech block during recoil and
run out, thus causing the pump to operate and force lubricant
12
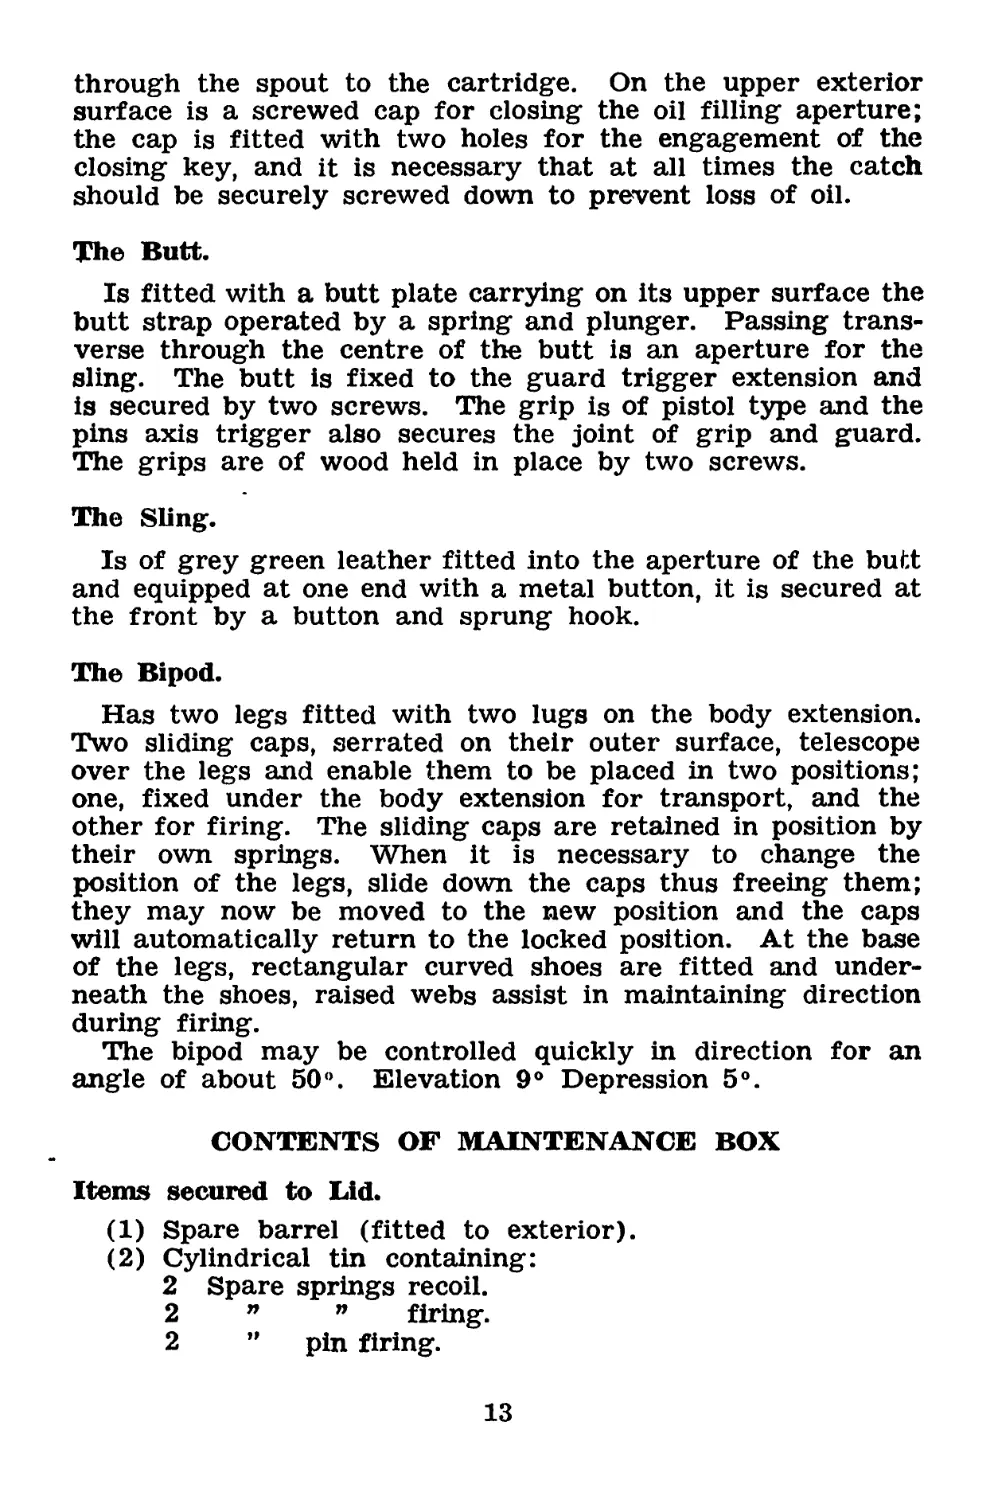
through the spout to the cartridge. On the upper exterior
surface is a screwed cap for closing the oil filling aperture;
the cap is fitted with two holes for the engagement of the
closing key, and it is necessary that at all times the catch
should be securely screwed down to prevent loss of oil.
The Butt.
Is fitted with a butt plate carrying on its upper surface the
butt strap operated by a spring and plunger. Passing trans-
verse through the centre of the butt is an aperture for the
sling. The butt is fixed to the guard trigger extension and
is secured by two screws. The grip is of pistol type and the
pins axis trigger also secures the joint of grip and guard.
The grips are of wood held in place by two screws.
The Sling.
Is of grey green leather fitted into the aperture of the butt
and equipped at one end with a metal button, it is secured at
the front by a button and sprung hook.
The Bipod.
Has two legs fitted with two lugs on the body extension.
Two sliding caps, serrated on their outer surface, telescope
over the legs and enable them to be placed in two positions;
one, fixed under the body extension for transport, and the
other for firing. The sliding caps are retained in position by
their own springs. When it is necessary to change the
position of the legs, slide down the caps thus freeing them;
they may now be moved to the new position and the caps
will automatically return to the locked position. At the base
of the legs, rectangular curved shoes are fitted and under-
neath the shoes, raised webs assist in maintaining direction
during firing.
The bipod may be controlled quickly in direction for an
angle of about 50°. Elevation 9° Depression 5°.
CONTENTS OF MAINTENANCE BOX
Items secured to Lid.
(1) Spare barrel (fitted to exterior).
(2) Cylindrical tin containing:
2 Spare springs recoil.
2 ” ” firing.
2 ” pin firing.
13
(3) 2 Spare springs magazine.
(4) Brush cleaning body.
(5) Brush for oiling.
(6) Brush cleaning barrel. (7) Rod cleaning barrel (in three pieces). Interior of Box. (1) 1 Can oil (for lubricating oil) (2) 3 Cans (for Breda oil or olive oil or British oil “A”) (3) Tin for spare parts (contents shown below) (4) Screwdriver. (5) Hammer (with soft metal head) (6) Spare magazine. (7) 2 Punches (8) Tool combination. (9) „ hand extractor. (10) „ plug clearing. Tin for spare parts. Contents: (.) (.) (.) 1 only (.) (.) (.) (.) 1 only (.) (.) (.) (.)
Spare Ejector ” safety piston ” cap housing safety piston with spring ” sear ” extractor ” lever retaining fermeture nut. Springs: (.) (.) (.) (.) (.) (.)
Lever firing. Release firing pin. Lever retaining fermeture nut. (.) (.) (.)
(.) These Items will be carried in the spare parts wallet, when
such wallet is issued.
SECTION 1. HOLDING, AIMING, FIRING.
Lesson 1. Introduction and Loading the Charger.
Stores: Gun, Dummies, Charger.
1. Introduction.
During the first 10 minutes of the lesson the instructor will
give a brief description of the weapon. (General Notes.)
2. Loading the Charger.
Instructor demonstrates:
1. Holding the charger in the left hand with the tongue
turned upwards, place the first cartridge on the lower step
14
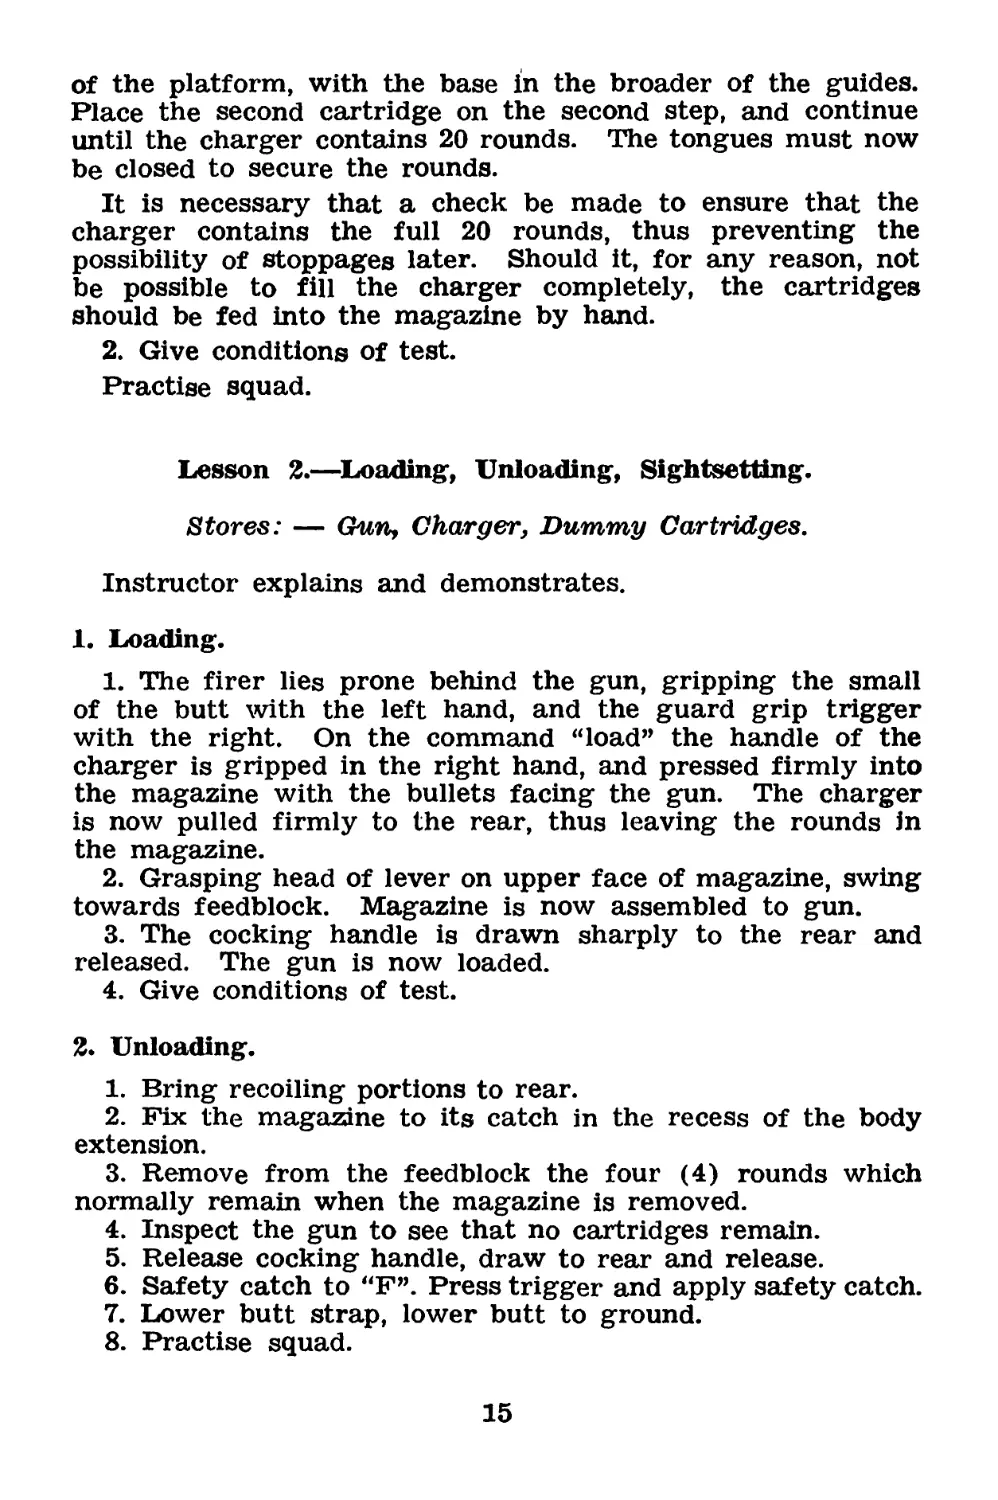
of the platform, with the base in the broader of the guides.
Place the second cartridge on the second step, and continue
until the charger contains 20 rounds. The tongues must now
be closed to secure the rounds.
It is necessary that a check be made to ensure that the
charger contains the full 20 rounds, thus preventing the
possibility of stoppages later. Should it, for any reason, not
be possible to fill the charger completely, the cartridges
should be fed into the magazine by hand.
2. Give conditions of test.
Practise squad.
Lesson 2.—Loading, Unloading, Sightsetting.
Stores: — Gun, Charger, Dummy Cartridges.
Instructor explains and demonstrates.
1. Loading.
1. The firer lies prone behind the gun, gripping the small
of the butt with the left hand, and the guard grip trigger
with the right. On the command “load” the handle of the
charger is gripped in the right hand, and pressed firmly into
the magazine with the bullets facing the gun. The charger
is now pulled firmly to the rear, thus leaving the rounds in
the magazine.
2. Grasping head of lever on upper face of magazine, swing
towards feedblock. Magazine is now assembled to gun.
3. The cocking handle is drawn sharply to the rear and
released. The gun is now loaded.
4. Give conditions of test.
2. Unloading.
1. Bring recoiling portions to rear.
2. Fix the magazine to its catch in the recess of the body
extension.
3. Remove from the feedblock the four (4) rounds which
normally remain when the magazine is removed.
4. Inspect the gun to see that no cartridges remain.
5. Release cocking handle, draw to rear and release.
6. Safety catch to “F”. Press trigger and apply safety catch.
7. Lower butt strap, lower butt to ground.
8. Practise squad.
15
3. Sightsetting.
1. Instructor describes the backsight, graduated from 300
to 1500 (metres). Explains that for all practical purposes
markings may be considered as “yards.”
There is a fixed “V” sight for ranges up to 300 yards.
2. To adjust sights, raise the leaf, rotate the milled head
screw until top of slide is on the line beneath the figure
denoting the required range. When not in use the leaf of
backsight will be lowered. When “50’s” are required the top
of the slide will be positioned halfway between graduations.
3. Give conditions of test.
4. Practise squad.
4. Single loading.
1. In the absence of the magazine, the gun may be loaded
by hand, one cartridge at a time being fed into the ejection
opening, having first completely pulled back the cocking
handle, and fixed the catch in the rear position.
2. It is necessary that attention be drawn to the necessity
for securing the cocking handle thus, otherwise the pin firing
may not be retained by the pin firing release, and should the
breech block go forward, it may strike the cap of the
cartridge and cause an explosion ouside the barrel.
3. Practise squad in single loading.
5. To reload.
When the magazine is empty, it will be opened, clipped
against the side of the body extension, reloaded and closed
to gun. The gun is recocked and firing continued.
Lesson 3.—Holding, Aiming and Firing.
Stores required. — Gun, aiming disc, landscape target
if available
Instructor explains and demonstrates.
1. Holding.
(a) The firer lies prone behind the gun, gripping the small
of the butt with the left hand, and the guard grip trigger
with the right. First finger of right hand on trigger. The
shoulder strap rests above the firer’s shoulder. The cheek
rests on the butt. The gun must be held firmly into the
shoulder.
16
(b) Instructor demonstrates how to use elbows as a means
of obtaining elevation and depression.
(c) Practise squad.
2. Aiming.
(a) Instructor explains that rules of aiming are the same
as for service rifles.
(b) Questions squad on rules of aiming.
3. Firing.
When firing, the trigger must be pressed decisively, and
the gun will normally be fired in bursts of five or six rounds.
(Practise squad in holding, aiming, and firing, using aiming
disc or landscape target.)
SECTION 2.—STRIPPING, CLEANING, MECHANISM.
Lesson 4.—Stripping and Assembling.
Stores required. — Gun, Spare parts.
Instructor will describe each component as it is removed.
Stripping is necessary for the correct cleaning of the gun,
and the exchange of broken parts. Care must be taken to
adhere to the correct sequence of stripping. No unnecessary
force will be used. During practise, to avoid damage to the
gun, no time limits will be set.
Sequence.
Ensure that the gun is unloaded and magazine empty.
1. Removal of butt, recoil spring, recoil spring guide, and
buffer spring.
Remove butt by pressing forward the two serrated ears at
the base of the bed-backsight, thus disengaging the plunger
from the recess in the guard trigger. Rotate the butt to the
right (60°). Withdraw butt. Care must be taken to resist
the outward pressure of the recoil spring.
2. Breech block, pin firing, and spring pin firing.
Pull the cocking handle to the rear, until the projections
are released from recesses in the body. The components,
including the cocking handle, may then be taken out by
hand.
3. The body cover.
Position head of securing catch at “A”. Remove axis pin
at front. Remove cover.
17
4. The magazine from feed block.
Release magazine from body extension, press forward
securing lever, and slide off magazine.
5. Plate cover, ejector, and feed block.
Raise the plate cover ejector and remove. Press out
ejector. Draw back feedblock until its projections are dis-
engaged from body. Remove.
в. The barrel.
Withdraw sprung head and lower catch barrel. This releases
operating lugs from their engagement. Rotate barrel from
right to left one quarter turn.
Push barrel forward until rear end is disengaged from
fermeture nut. Withdraw barrel to rear until it is completely
free from housing.
7. The guide fermeture nut.
Pull out spring head of securing bolt, rotate until arm is
in horizontal position.
Remove bolt and draw guide fermeture nut to rear. This
releases the two curved front teeth from recess in body.
Remove guide.
8. Fermeture nut.
Lift out from housing.
ASSEMBLING
Reverse the order of stripping.
Particular attention must be paid to the following points:
(a) When replacing the fermeture nut ensure that it is
in the open position, with the two operating lugs to the left.
(b) When replacing the barrel, turn the handle to the
right after engagement with the fermeture nut. Should the
handle not be turned, the barrel cannot be properly closed
due to the semi-circular projection at rear of barrel fouling
the catch. Should the catch barrel not correctly close, the
barrel is incorrectly engaged.
Should the gun be fired in this condition, an explosion will
occur without the breech being correctly sealed. This is
extremely dangerous to the firer, and may cause the barrel
to be forced violently forward.
(c) When replacing the recoiling portions, the cocking
handle will be replaced first, then the breech block, followed
by firing pin and springs.
18
Lesson 5.—Additional Stripping.
Stores required. —- Gun, Spare Barts Box complete.
1. The magazine.
To remove main spring from magazine. (This is a difficult
manoeuvre and will only be carried out when strictly
necessary.)
Draw the platform to the base of the magazine by forcing
down the indicator with pliers or screwdriver, until the plat-
form can be removed from the longitudinal slot.
The spring may now be removed from magazine.
In replacing, ensure that the spring is refitted in the same
position as when removed.
2. Piston safety.
Unscrew cover and remove.
Remove Piston, Safety.
When replacing, ensure that hook of piston faces the flrer.
8. Lever retaining fermeture nut.
Depress plunger and withdraw cover to rear. Remove
cover.
Push out axis pin, remove lever and spring. Assemble in
reverse order.
4. Firing mechanism.
Remove screws and nuts keeping trigger guard to butt,
and detach butt.
Remove trigger axis pin, and detach guard trigger.
Withdraw trigger and firer lever.
Remove Safety Catch hand.
withdraw sliding plate with aid of punch. Remove spring,
firingWever.
Depress pin firing release, and push out sear from rear.
Remove pin firing release and spring.
Assemble in reverse order, except that sliding plate is
replaced after trigger axis pin.
When assembling pin firing release, ensure that chamfered
edge is facing the muzzle end of gun.
Ejection Opening cover.
Raise plunger and tap cover back with soft metal hammer
until clear of guide grooves.
19
Extractor.
Push out pin and remove extractor.
Assemble in reverse.
Lesson 6.—Cleaning, Lubrication and Maintenance.
Stores required : •— Gun, cleaning kit, spare parts.
Instructor explains:
The cleaning of the gun will be carried out frequently
and carefully to ensure that it is always in a fit condition
to function correctly. It should be kept lightly oiled.
1. Ordinary cleaning.
Will be carried out immediately after firing; after subject-
ion to rain or dust, or as considered necessary. The recoil-
ing portions may be cleaned with paraffin, ensuring before
replacement all traces of paraffin are removed.
Thorough cleaning.
Should be carried out periodically as considered necessary,
or after lengthy periods of firing.
The gun should be completely stripped, carefully cleaned
and re-assembled.
When necessary to clean the interior of the magazine the
housing of the lever retaining fermeture nut, or the interior
component parts of the guard, trigger, this will normally be
done under the supervision of an officer or N.C.O.
2. Lubrication.
The oil reservoir should be kept filled with oil, an operation
necessary after every thousand rounds. The lubricant used
for this purpose is Oil Breda. This is a mixture which is
anti-freezing, even at low temperature, and is used both to
lubricate the mechanism and the cartridges. In the event of
Oil Breda not being available, pure Olive Oil may be used,
or in the absence of both these oils, British Oil “A”. M.80
with one teaspoonful of Sulphur to a pint of oil.
General service oil may be used for other parts of the
weapon.
3. Maintenance.
To ensure the regular functioning of the gun, it is necessary
that special attention be paid to lubrication, ensuring that
congealed oil does not impede the regular movements of the
working parts.
20
The gun should be oiled constantly as a protection against
damp, and when stored should be coated with grease.
To ensure that normal functioning of the gun is maintain-
ed, and to receive from the gun the longest possible life, the
only repairs which will normally be carried out are the ex-
change of the various spare parts and such repairs as are
obviously within the capability of the armourer.
Instructor questions squad.
Lesson 7.—Care and Cleaning.
Daily and Before Firing.
Stores required :— Gum, magaazines, spare barrels,
cleaMing kit, spare parts box.
Cleaning consists of :
Cleaning rod (in three parts).
Oil containers.
Flannelette.
Wire brush.
Brush, cleaning barrel.
Brush, cleaning body.
Brush, Oil.
The various articles of the cleaning kit will be explained
as they are used.
Daily cleaning.
Explain and Demonstrate.
Clean both barrels, using the cleaning rod. A dry piece
of flannelette will be put through the eye at the end of the
cleaning rod. The rod will be placed in from the breech end.
When jae barrel has been cleaned with dry flannelette, a
slightly® smaller piece of flannelette, well oiled, will be
similarly used to oil the barrel.
Note.—If the gun has been used for instructional purposes,
it may be necessary to strip it completely in order to clean
the working parts thoroughly.
BEFORE FIRING
Strip completely.
Clean the components and remove any traces of congealed
oil. Check the condition of the components noting particular-
ly the recoiling portions and springs/ Fill the lubricating box
with Breda OU, and ensure the spout is free from obstruction.
21
Lubricate the recoiling portions, and ensure that the spring
in the magazine is working correctly. Examine the charges
for distortion. Check and clean contents of spare parts box.
Question and practise squad.
Lesson 8.—During Internals of Firing.
Unload.
Oil working parts as necessary.
Refill lubricating pump.
If reserve ammunition available refill empty chargers.
After Firing.
Strip completely.
Clean barrels using boiling water if necessary. Clean
thoroughly all components. Particular attention must be paid
to remove fouling from breech block, fermeture nut and
guide fermeture nut.
Clean interior of body. Oil all parts and re-assemble.
Clean and check contents of spare parts box.
Question and practise squad.
Lesson 9.—Mechanism.
It will greatly assist the work of the instructor if a spare
gun, stripped down, is available during the periods of instruc-
tion on mechanism.
Stores required:
Gun (assembled)
Gun (stripped)
Spare parts box complete.
Diagram (if available).
Dummy cartridges.
Chargers.
Action of the Mechanism.
Instructor demonstrates, explains, and asks questions at
the end of each phase.
22
When the lever of the safety catch is placed in the top
position (marked MF”) and the magazine assembled to the
feed block the cocking handle is drawn to the rear.
Backward Action by Hand.
On drawing the cocking handle to the rear, the breech
block, and firing pin, are withdrawn, and the recoil spring
and spring firing pin compressed.
The first movement of the cocking handle causes the breech
block to be withdrawn. The fermeture nut, being connected
by its five lugs, is also drawn back, bringing with it the
barrel.
During this movement, the upper lugs on the fermeture
nut bearing against the traversing portion of the guide
fermeture nut, cause the fermeture nut to rotate to the left,
until it engages the front tooth of the lever retaining, and
remains stationary. This movement brings the recesses in
the fermeture nut opposite the lugs on the head of the breech
block, allowing the breech block to continue its backward
movement.
Forward Action.
On pressing the trigger the spring recoil asserts itself
carrying forward the breech block and cocking handle. The
latter, at the end of its run, is held stationary by its catch
becoming engaged in the forward recess. The firing pin is
held to the rear by the pin firing release.
The breech block during its forward movement, slides a
cartridge from the feed block into the chamber. Immediately
the lugs of the breech block have entered their recesses in
the fermeture nut, the inclined plane on the underside of the
breech block depresses the rear tooth of the lever retaining,
which causes the forward tooth to be depressed.
The breech block, in the final stages of its forward move-
ment, c&ises the fermeture nut (now freed from the front
tooth of the lever retaining) to rotate to the right, its lugs
traversing the guide fermeture nut. The inclined plane at
rear of breech block has lifted up the safety piston, allowing
for free forward movement of the firing pin.
The movement of the fermeture nut being „completed, the
breech is now sealed, by the lugs on the breech block bearing
against the opposing lugs on the fermeture nut. This causes
a secure union of the breach block, fermeture nut and barrel.
The gun is now ready to fire.
23
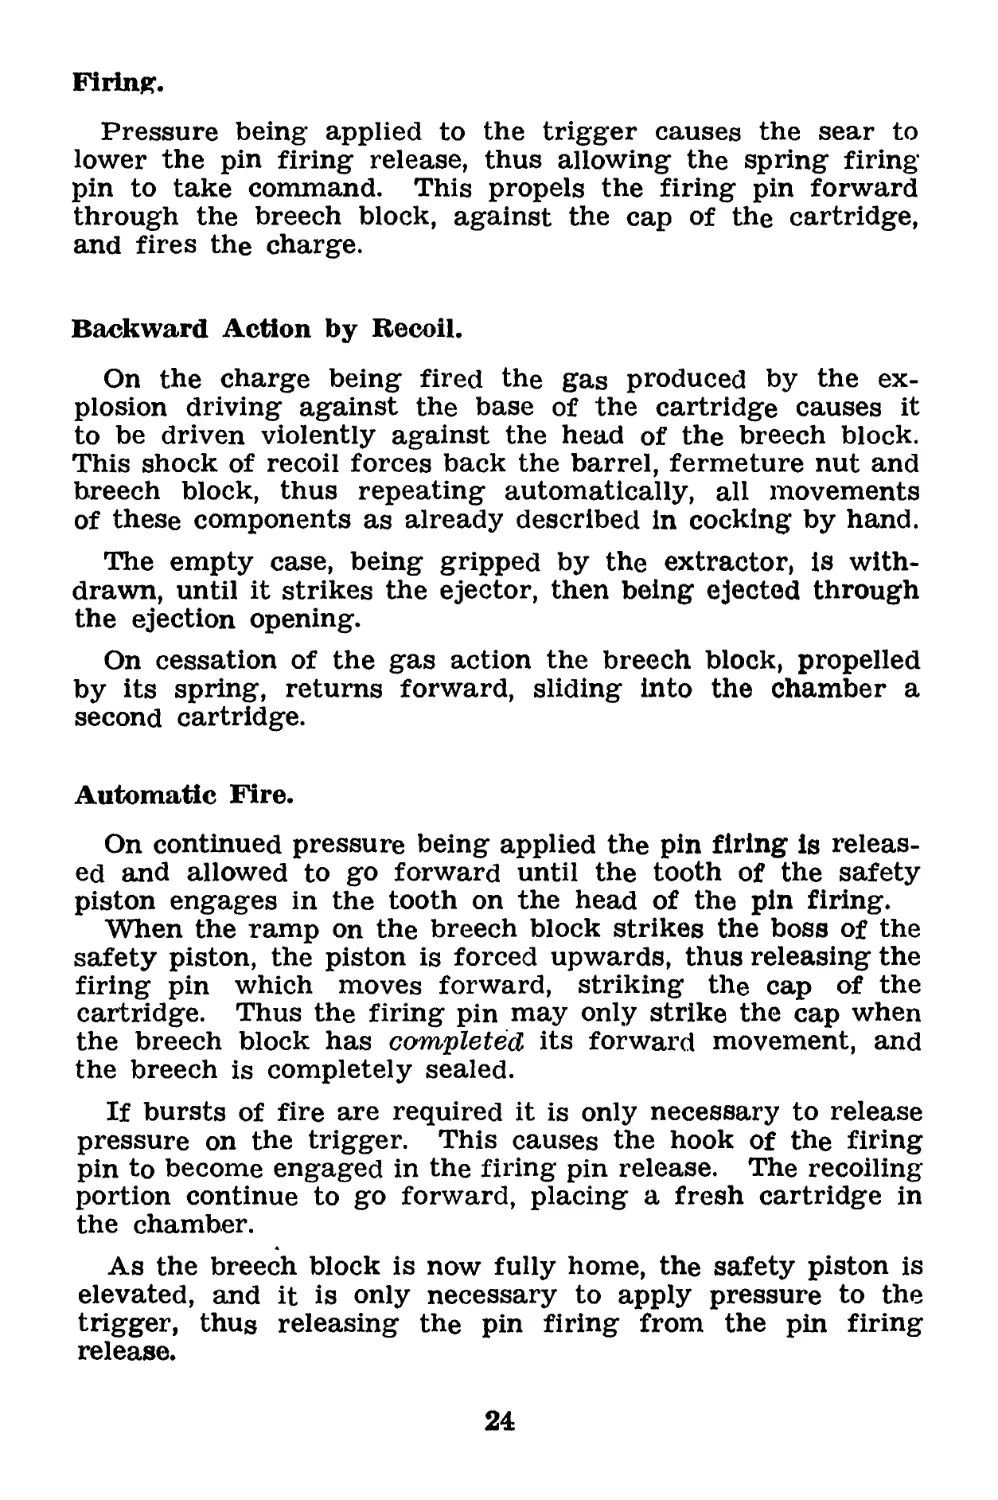
Firing.
Pressure being applied to the trigger causes the sear to
lower the pin firing release, thus allowing the spring firing
pin to take command. This propels the firing pin forward
through the breech block, against the cap of the cartridge,
and fires the charge.
Backward Action by Recoil.
On the charge being fired the gas produced by the ex-
plosion driving against the base of the cartridge causes it
to be driven violently against the head of the breech block.
This shock of recoil forces back the barrel, fermeture nut and
breech block, thus repeating automatically, all movements
of these components as already described in cocking by hand.
The empty case, being gripped by the extractor, is with-
drawn, until it strikes the ejector, then being ejected through
the ejection opening.
On cessation of the gas action the breech block, propelled
by its spring, returns forward, sliding into the chamber a
second cartridge.
Automatic Fire.
On continued pressure being applied the pin firing is releas-
ed and allowed to go forward until the tooth of the safety
piston engages in the tooth on the head of the pin firing.
When the ramp on the breech block strikes the boss of the
safety piston, the piston is forced upwards, thus releasing the
firing pin which moves forward, striking the cap of the
cartridge. Thus the firing pin may only strike the cap when
the breech block has completed its forward movement, and
the breech is completely sealed.
If bursts of fire are required it is only necessary to release
pressure on the trigger. This causes the hook of the firing
pin to become engaged in the firing pin release. The recoiling
portion continue to go forward, placing a fresh cartridge in
the chamber.
As the breech block is now fully home, the safety piston is
elevated, and it is only necessary to apply pressure to the
trigger, thus releasing the pin firing from the pin firing
release.
24
SECTION 3.—ELEMENTARY HANDLING, STOPPAGES,
IMMEDIATE ACTION.
Lesson 10. — Elementary Handling. The Gun Team.
1. Stores.
Gun.
Maintenance.
Ammunition box, complete with chargers and dummy
cartridges.
Groundsheets.
2. Before the lesson begins, stores are laid out, with the
gun on the left, ammunition to the right of the gun, and
maintenance box a few paces to the rear and in the centre
of gun ammunition.
Ground sheets should be placed in “Action” and “Cease
firing” position.
3. If at any time the instructor wishes to change round
the gun numbers, he should order “Fall Out 1” No. 1 becomes
No. 3, No. 2 becomes No. 1, and No. 3 becomes No. 2.
The instructor may change over the whole gun team at
any time he wishes to do so by giving the command “Fall in”
on which command the whole squad will fall in a few paces
in rear of stores. The instructor may now number off the
squad and continue drill from the command “Take Post.”
4. Instructor explains and demonstrates each movement.
“Fall In”
Squad falls in, in single rank, a few paces in the rear of
stores, is numbered off, and stood at ease.
“Take Post”
The whole come to attention. No’s 1, 2 and 3, turn to the
right, double off, and act as under. Remainder of the squad
as soon as No’s 1, 2 and 3 are in position, turn to left and
double to left of stores to watch movements of gun team.
No. 1.—Lies down and examines gun as follows:
(a) Barrel to ensure correctly placed.
(b) Magazine for correct fitting to feedblock.
(c) Tests recoiling portions.
(d) Opens ejection cover.
(e) Places safety catch at “Safe” and tests.
On receipt of report from No. 2, reports No......... gun
“Correct” (or otherwise.)
25
No. 2.—Lies down on left of ammunition box. Inspects
ammunition in chargers, and, on receipt of report from No. 3,
reports to No. 1, ° Ammunition and spare parts correct” (or
otherwise.)
No. 3.—Lies down on left of maintenance box. Inspects
spares including barrel, and, on completion, reports to No. 2,
“ Spare parts correct” (or otherwise.)
“Prepare for Action”
No. 2.—Removes charger from ammunition box and loads
magazine by pressing charger firmly into magazine, with
bullets facing the gun. The charger is now withdrawn sharp-
ly, thus leaving the cartridges in the magazine. Closes
magazine to feedblock. Returns empty charger to ammuni-
tion box. Closes ammunition box.
“Action”
No. 1.—Jumps up, carrying gun by butt and asbestos
handle, doubles forward to “Action” position, places gun
down gently, lies prone behind it, loads the gun. He awaits
further orders.
No. 2.—Allows No. 1 a few paces start. Jumps up, carry-
ing ammunition box, doubles forward to the “Action” position,
lies down on right of No. 1. He then opens ammunition box,
removes loaded charger, and prepares to feed gun.
No. 3.—Allows No’s 1 and 2 to take up position of action
jumps up, doubling forward with maintenance box, placing it
in a convenient position beside No. 2.
Doubles back and lies prone a few paces in rear of gun.
Fire Orders. A Fire Order is Given.
"Stop.”
No. 1.—Knocks down back sight, places safety catch at
“Safe,” withdraws cocking handle to rear (see footnote) rests
butt and lowers shoulder strap.
“Go On”
No. 1.—Raises backsight, releases cocking handle, raises
shoulder strap, and brings gun into shoulder. When comfort-
able places safety catch to “Fire” and carries on firing.
“Unload” (If firing, command “Stop” will always precede this
order.)
26
No. 2.—Removes magazine from feed block and secures
to body extension. Clears loose rounds from feedblock and,
on conclusion, reports to No. 1, “Feedblock clear.”
No. 1.—Proceeds to clear gun by releasing cocking
handle, pulling to rear and again releasing. Raises butt into
shoulder, presses trigger, sets safety catch at “safe”, lowers
shoulder strap, lowers gun to ground, reports “gun clear.”
“Cease Firing”
No. 2.—Will close the lid of the ammunition and mainte-
nance boxes, after having replaced such spares as were lying
at the gun, and push maintenance box clear of gun, to right.
No. 3.—On seeing No. 2 position maintenance box, will
double forward, pick it up and return to original “prepare
for action” position. When No. 3 is clear, No’s 1 and 2 will
pick up gun and ammunition respectively, and double with
them the original “Prepare for Action” position. All numbers
will then lie perfectly still.
“Barrel Changing ”
1. Practise in barrel changing will be given in the “Action”
position. The actions of No’s 1 and 2 are as follows :
When the barrel requires changing No. 1 will call out (to
No. 2) “Barrel,” at the same time pulling the cocking handle
to rear. When No. 2 has replaced barrel, releases cocking
handle and carries on firing.
No. 2.—Disengages barrel catch, removes barrel and im-
mediately replaces fresh barrel.
2. Give conditions of test.
Practise squad.
(Foot note). This action is carried out to withdraw the live
round from the chamber, thus safeguarding against pos-
sible self explosion of the round.
Lesson 11.—Immediate Action and Stoppages.
Stores required :
Gun.
Spare parts.
Dummy cartridges.
Landscape target.
Groundsheets.
27
Instructor’s Note :
Instruction in immediate action and stoppages will take the
following form :
(a) Instructor sets up the stoppage and demonstrates im-
mediate action.
(b) Sets up stoppage again, opens body cover, and explains
to squad condition of the gun at time of stoppage, and explains
the cause.
(c) Practises squad in immediate action.
Instructor explains :
INTRODUCTION
1. Correct attention to points before and during firing will
minimise the stoppages on the gun. It is necessary at all
times to inspect carefully the various components and to
anticipate possible stoppages. The substitution of damaged
parts, particularly deformed springs, will assist in prevention
of stoppages.
2. Springs which have become shortened through any cause
whatsoever must not be stretched in an attempt to restore
them to their normal length. If it is not possible to exchange
the springs immediately it is preferable to continue using them
in their shortened state.
3. It is necessary to emphasise that when pressure is ap-
lied to the trigger it must be drawn to the rear for its maxi-
mum possible movement. Failure to do this will result in the
subsequent breaking of the firing pin.
4. At all times when the cocking handle is secured in the
rear position it will be kept engaged by pressure of the firers
right hand. (This avoids the possibility of the cocking handle
becoming free, thus allowing the recoiling portions to move
forward while stoppages are being remedied.)
5. Should it be necessary to use the hand extractor while
the barrel is hot, care must be taken to safeguard against
possible self explosion of the round.
6. Stoppages are divided into “Probable” and “Possible”
stoppages. Immediate action in all cases is as follows:
(a) Draw the cocking handle to the rear and secure.
(b) Glance through the ejection opening into the feedway,
to ascertain, if possible, cause of the stoppage. The firer will
also feel inside the feedway with fingers of left hand.
Immediate action is not considered complete until the aim
is relayed and the trigger pressed.
28
PROBABLE STOPPAGES
1. Misfire.
Explain and demonstrate with gun loaded that if the gun
stops, firer will draw back the cocking handle and secure.
He will look and feel into the feedway to ascertain
(a) If there is any obstruction in the feedway.
(b) If there is any obstruction in the chamber.
He will release the cocking handle and resume firing.
Instructor again sets up the stoppage, and explains and
demonstrates that at the time of the stoppage the recoiling
portions are forward, and a live round is in the chamber.
The firing pin goes forward but no explosion takes place.
Explains that cause of stoppage is a misfire.
Practise squad in I.A., and question as to cause of stoppage.
2. Broken or bent firing pin spring or friction of the firing
pin in the breech block.
Instructor explains and demonstrates that if after applying
I.A., and pressing the trigger the gun does not fire, the gun
will be unloaded and stripped down to the breech block.
It will then be examined for
(a) Broken or bent firing pin point.
(b) Broken firing pin spring.
(c) Dirt in the breech block causing friction of the firing
pin.
Replace or clean as necessary.
The gun will be assembled and firing resumed.
Instructor again sets up stoppage and explains that con-
dition of gun at the time of stoppage was the same as for
misfire. Explains that it is unlikely that two misfires follow
each other.
Explains that stoppage is due to:
(a) Broken or bent firing pin point
or
(b) Broken firing pin spring
or
(c) Dirt in the breech block, causing friction on the firing
pin.
Practise squad in I.A.
29
3. Empty magazine.
With an empty magazine on the gun, the instructor de-
monstrates and explains that when the gun stops the firer
applies I.A. On feeling inside the feed-block the magazine
platform can be felt, indicating that the magazine is empty.
The gun is reloaded and firing continued.
Instructor sets up stoppage again, and shows squad the
condition of the gun. The magazine platform is close up
against the lips of the feed-block, and there is no round in
the chamber.
Practise squad in I.A.
4. Separated case or damaged round.
Instructor sets up the stoppage and demonstrates and
explains that when the stoppage occurs the firer attempts to
apply I.A. The cocking handle will only come to the rear
with great difficulty. On feeling inside the feed-way a round
is felt not fully home in the chamber. The barrel is removed
and the separated case or damaged round removed by means
of the clearing plug or cleaning rod.
The barrel is replaced and firing resumed.
Instructor again sets up stoppage and shows squad condi-
tion of the gun. The cartridge is not housed correctly in the
chamber, recoiling portions cannot complete forward move-
ment and the firing pin is held to rear by the safety piston.
Explains that cause of stoppage is a separated case (or
damaged round) in chamber.
Practise squad in I.A.
5. Incomplete sealing of the breech (due to dirt in fermeture
nut, housing or mechanism.)
Instructor sets up stoppage, and demonstrates, and explains
that when the gun stops, pressure on the trigger does not
send the firing pin forward. The firer applies I.A. and
resumes firing. The gun fires a few rounds and stops again.
The cocking handle is drawn to the rear and secured. The
gun is inspected for:
(a) Dirt in the fermeture nut.
(b) Dirt in the housing fermeture nut.
(c) Dirt in the mechanism.
30
Cleaning of the affected part is carried out and firing re-
sumed.
Instructor again sets up stoppage and explains to squad
condition of the gun.
The recoiling portions have not completed forward move-
ment. The breech is not completely sealed. The firing pin
is held to rear by safety piston.
Practise squad in I.A.
6. Oblique feed (incorrect presentation of the cartridge to
the chamber.)
Instructor demonstrates and explains that when the gun
stops the firer applies I.A. A live round can be seen protrud-
ing obliquely from the feed-block. The round is removed by
means of the hand extractor, or, if this method is not success-
ful, by removing the magazine and clearing the feed-block.
Firing is resumed.
Instructor again sets up stoppage and shows squad condi-
tion of gun.
Explains that cartridge should be propelled forward to
enter chamber freely. It passes in an oblique line and is held
by the head of the breech-block and the fermeture nut.
Practise squad in I.A.
Instructor demonstrates:
If the gun should stop in this condition again the firer will
remove the cartridge and inspect the gun for:
(a) Weak magazine spring.
(b) Damaged lips of feed-block.
Practise squad.
7. Faulty ejection.
(a) Instructor explains and demonstrates that when the
gun stops, firer applies I.A. An empty case and live round
are causing an obstruction in the feedway.
The obstruction is removed and firing continued.
Setting up the stoppage again, the instructor shows squad
the condition of the gun.
31
During backward movement of the recoiling portions the
empty case is not ejected, and remains in the feedway. On
coming forward the breech-block feeds a round from the
feedblock. This round is jammed against the empty case.
Explains that cause of stoppage is faulty ejection.
Practice squad in I.A.
(b) Instructor demonstrates and explains that, if after
firing a few rounds gun again stops in this condition, the
firer will remove the obstruction, and inspect the gun for:
(a) Broken or damaged ejector or spring.
(b) Dirt in, or faulty lubrication of mechanism.
(c) Faulty lubrication of cartridge, due to empty pump
or obstruction in the spout.
The affected part will be replaced, cleaned or lubricated
as necessary.
Firing will be resumed.
Practise squad.
8. Incorrect extraction.
Instructor explains and demonstrates that when the gun
stops firer applies I.A. An empty case is in the chamber and
a live round from the feedblock is being borne against its base.
Firer removes obstructed cartridge and empty case by
means of the hand extractor. (If empty case cannot be re-
moved by this means, the barrel will be removed and the case
forced out by means of cleaning rod.)
Instructor having again set up stoppage, shows squad
condition of gun.
The fired case is not extracted during the backward move-
ment of the recoiling portions.
When the recoiling portions come forward, feeding a fresh
cartridge from the feedblock, this cartridge finds the chamber
obstructed.
Practise squad in I.A.
(b) Instructor demonstrates and explains that if after
firing a few rounds gun again stops in this condition, the
firer will examine the gun for:
Broken extractor spring.
Practise squad.
32
POSSIBLE STOPPAGES
1. Broken or distorted lever retaining fermeture nut or
broken recoil spring, causing repeated incomplete sealing
of the breech.
Instructor practises squad in Probable Stoppage 5, and then
demonstrates that if the gun stops again in this condition,
after having cleaned and lubricated the fermeture nut, hous-
ing, or mechanism, the firer will strip the gun and inspect for:
(a) Broken or distorted lever retaining fermeture nut.
(b) Broken recoil spring.
Replace as necessary.
Instructor sets up stoppage again and explains to squad
that if the lever retaining is broken or distorted the breech
will not be sealed correctly.
A broken recoil spring will have the same effect, the breech
block not being propelled forward with sufficient force to
rotate the fermeture nut.
Practise squad.
Breakage or wearing of pin firing.
Instructor removes butt and demonstrates action of pin
firing and pin firing release.
Instructor explains to squad that breakage or wearing of
the pin firing is caused by dirt of fragments accumulating in
the pin firing release, or by incorrect pressure of the trigger
by the firer.
In both cases the pin firing release is not depressed to its
fullest extent, thus preventing free movement of the firing
pin through the aperture of the pin firing release, causing the
pin firing to strike against the pin firing release during the
formers rapid backward and forward movement.
Should the firing pin break or become worn at the bent,
where it engages the pin firing release, a “runaway gun”
may result, as release of pressure on the trigger does not
cause the bent to become engaged in the pin firing release.
The spring pin firing therefore propels the firing pin for-
ward each time the latter comes to the rear.
Instructor explains, that should this happen, on active
service the gun may be kept in the shoulder until the
magazine is empty, when the gun will be stripped down to
the breech block, and the pin firing exchanged.
33
Should it be necessary to stop the gun firing, No. 2 will
release the magazine from the feed block.
Instructor questions squad.
Explosion outside the barrel.
Instructor removes safety piston and demonstrates to
squad that in the event of the safety piston becoming worn,
the firing pin is allowed to go forward before the breech is
correctly sealed.
Should this happen the cap of the cartridge is struck and
the round exploded before it is correctly housed in the
chamber.
This may prove extremely dangerous to the firer.
The safety piston must be examined, and if worn or da-
maged, replaced.
Instructor questions squad.
34
IMMEDIATE ACTION AND STOPPAGES — PROBABLE STOPPAGES.
Cause Effect on Gun Remedy Action if stoppage recurs
1. Misfire or Empty Magazine. Firing pin goes for- ward but no explo- sion takes place Apply I.A. If feed way is clear, and magazine contains cart- ridges, release cocking handle and carry on fir- ing. If magazine empty reload, carry on. If stoppage recurs: Examine gun for (a) Broken or bent firing pin point or broken spring. (b) Friction of the firing pin in breech-block.
2. Separated case or damaged round. The cartridge is not housed correctly in the chamber. Recoil- ing portions can- not complete forward movement. Safety pis- ton retains firing pin in rear position. Apply I.A. If pulling back the cock- ing handle does not remove the separated casing or damaged round, change barrels, reload, carry on firing. (No. 2 will remove se- parated casing or da- maged round from bar- rel by means of clear- ing plug or rod respec- tively) . Not likely to recur. Note: This stoppage is easy to recognise as the recoiling portions can usually only be brought to the rear with great difficulty. In the event of the firer being unable to draw cocking handle to the rear the barrel will be removed first.
3. Incomplete sealing of the breech, due to dirt in ferme- ture nut, housing or mechanism. Recoiling portions do not complete forward movement owing to friction set up by dirt in fermeture nut, housing or mechan- ism. The breech is therefore not sealed. Apply I.A. Examine gun for dirt in fer- meture nut, housing or me- chanism. Clean and lubricate as necessary.
Cause Effect on Gun Remedy Action if stoppage recurs
4. Oblique feed i.e., incorrect present- ation of cartridge to chamber. Cartridge should be propelled forward by breechblock to enter chamber freely. It passes in an oblique line, and is held by the head of the breech block and fermeture nut. Apply I.A. Remove cartridge, necessary using hand extractor. if the Examine gun for: Weak magazine spring or damaged lips of feed- block.
5. Faulty ejection. During backward movement of the recoiling portions, the empty case is not ejected, and remains in the feedway. On coming forward the recoiling portions and the cartridge from the feed block, are jammed by the empty case. Apply I.A. Remove empty case from feed way. Examine gun for: (a) Broken or damaged ejector or spring. Replace. (b) Dirt in or faulty lubrication of me- chanism. Clean and lubricate. (c) Faulty lubrication of cartridge. Re-fill pump and examine spout.
6. Incorrect tion. extrac- The fired case remains in the chamber, and the following cartridge finds the chamber obstructed. Apply I.A. Remove obstructed cartridge. Remove empty case by means of hand extractor. If not successful, re- move barrel and force out case by means of rod. Examine extractor and spring. Replace as ne- cessary.
POSSIBLE STOPPAGES.
Cause Effect on Gun Remedy Remarks
1. Broken or distort- Repeated incomplete ed lever retaining sealing of the breech, fermeture nut or Broken recoil spring. If stoppage recurs, even after carrying out immediate action as in “Possible stoppages 3”— (i.e. cleaning and lubricating of fermeture nut, housing and mechanism), inspect gun for broken or distorted lever retaining fermeture nut, and broken recoil spring.
2. Worn barrel. Repeated faulty ejec- tions, due to wastage of the gases caused by the explosion. If stoppage recurs after ap- plication of immediate action (Possible stoppage 5) change barrel and have . the worn barrel tested A.F.B. 202.
Cause
Effect on Gun
Remedy
Remarks
Breakage of the pin Should the firing pin
firing. break, or become
worn at bent where
it engages the release
firing pin, a “runa-
way gun” may result,
as release of pressure
on the trigger does
not keep the firing
pin to rear.
No. 2 removes magazine from The breakage or wear-
feedblock. No. 1 strips gun ing of the firing pin is
and replaces firing pin. caused by dirt or frag-
ments accumulating in
the pin trigger release
or by incorrect pressure
of the trigger by the
firer.
In both cases the firing
pin is not afforded free
movement through the
aperture of the pin fir-
ing release, causing the
pin firing to strike
against the pin firing
release during the form-
ers rapid backward and
forward movement.
4. Explosion outside Owing to breakage Examine piston safety, replac-
the barrel. of piston safety, the ing as necessary.
pin firing is allowed
to go forward and
strike the cap before
the breech is correctly
sealed.
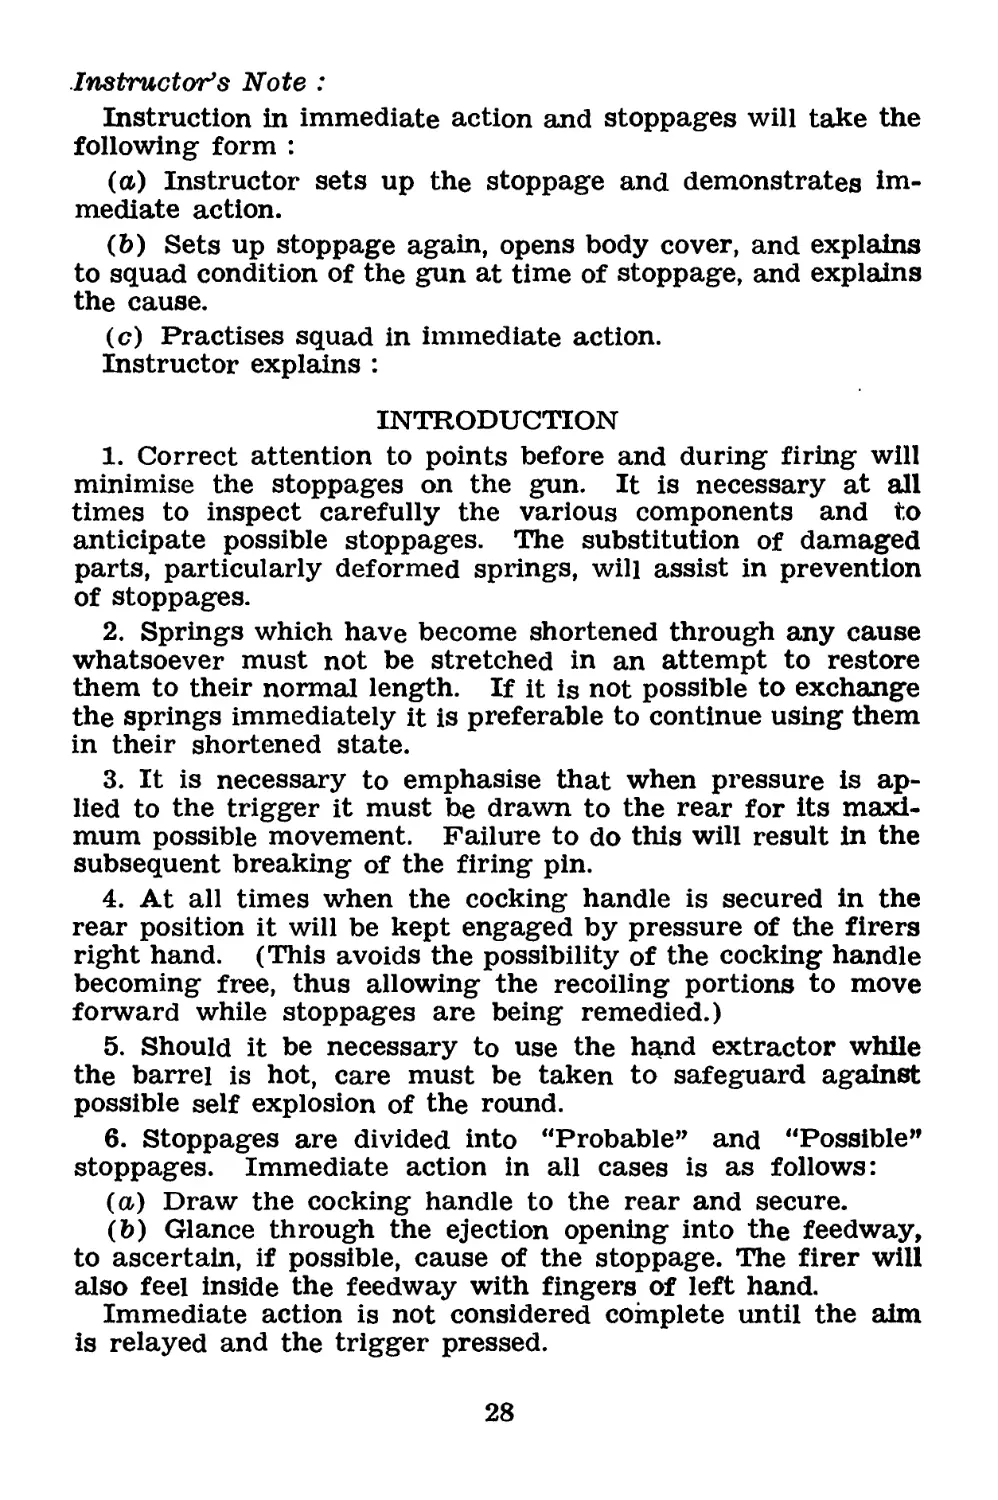
BREDA MACHINE GUN MODEL 30
MIUKT
6
9
10
12
/8
15
78
19
23
21
1.Л—
16
Wjarwwwr. «MWMfrjg.
17
20
fbAVkss
ж
2
3
4
5
6
7
8
9
10
11
12
Gun Breda L/A Model 30.
Tangent Sight with Slide assembled.
Bolt Breech.
Pin firing.
Ejector.
Sear.
Feed Block.
Body 8a Body Extension.
Fermeture Nut.
Nut Pump lubricating body.
Head Elevating Slide
Barrel.
-***’**№>
8A
74
13 Handle Cocking assembly complete.
14 Cover Housing lever retaining Fermeture Nut.
15 Butt.
16 Butt Plate with strap.
17 Cover Ejection opening.
18 Cover Plate Ejector.
19 Pin Joint Cover
20 Pin guide Fermeture Nut.
21 Cap Housing Safety Piston with spring.
22 Pump Lubricating (Body).
23 Body Ejector.
SKETCH No. S. 2/1
T.S.
BREDA MACHINE GUN MODEL 30
SII1515T 2
1 Cover. 2 Slide Tangent Sight. . 3 Platform Magazine. 4 Extractor. 5 Magazine Assembly Catch. 6 Guide Spring Recoil. 7 Grip Trigger Guard (left) 8 Grip Trigger Guard (right) 9 Trigger Guard 10 Lever Retaining Fermeture Nut. 11 Rear Magazine Catch. 12 Lever Firing With Trigger. 13 Front Magazine Catch. 14 Safety Catch. 15 Spring Tangent Sight. 16 Ejector Complete. 17 Cartridge Release. 18 Pin Joint Cover. 19 Spring Pin Firing. 20 Pin Extractor. 21 Pin Axis Firing Lever. 22 Spring Magazine. 23 Guide Fermeture Nut. 24 Release Firing Pin. 25 Piston Safety. 26 Piston Pump Lubricating. 27 Piston Spring Strap Butt. 28 Pump Lubricating Assembled. 29 Sight Tangent With Open Sight. 30 Ratchet Pin Slide Tangent Sight. 31 Magazine. 32 Catch Barrel. 33 Cap Housing Piston Safety. 34 Cap Oil Reservoir. 35 Rear Catch Cocking Handle. 36 Body Trigger Guard. SKETCH No. S. 2/2
1 Leg Tripod right. 9 Cylindrical Tin Box. For spare recoil springs, spring pin
2 Leg Tripod left. firing, and pin firing.
3 Hammer. 10 Top View of Maintenance Box Showing Clips for spare
barrels.
4 Punches.
11 Maintenance Box.
5 Charger Magazine. 12 Pouch Magazine.
6 Tool Combination. 13 Box spare parts.
7 Tool Hand Extractor. 13a Shelves of Box spare parts.
8 Tool Plug clearing. 13b Shelves of Box spare parts.
SKETCH No, S. 2/3
TABLE OF COMPONENTS
BREDA
MACHINE GUN MODEL 30
1
2
3
4
5
6
7
8
9
10
11
12
13
14
15
16
17
18
19
20
21
22
23
24
25
26
27
28
29
30
31
32
33
34
Protecting Jacket (Body Extension).
Foresight.
Bracket For Attachment Of Logs Bipod.
Arms For Fixing Body Cover.
Fermeture Nut.
Safety Piston.
Bed Backsight.
Lever Retaining Fermeture Nut.
Spring Lever Retaining Fermeture Nut.
Guard Trigger.
Catch Safety (Hand).
Trigger.
Wings Securing Guard Trigger To Butt.
Guide Spring Recoil.
Block Breech.
Spring Recoil.
Spring Buffer.
Spring Pin Firing.
Pin Firing.
Pump Lubricating Cartridges.
Butt.
Grip Guard Trigger.
Strap Butt.
Legs Bipod.
Tubular Catch Fixing Bipod Legs.
Recess For Leg Plunger. Open Position.
Recess For Leg Plunger. Closed Position.
Shoes.
Rib Of Shoes.
Barrel.
SKETCH No. 8. 2