/


Author: Hall M.J.
Tags: knitting needlework diy crafts and creativity crocheting
ISBN: 978-0-89689-662-8
Year: 2008


Text
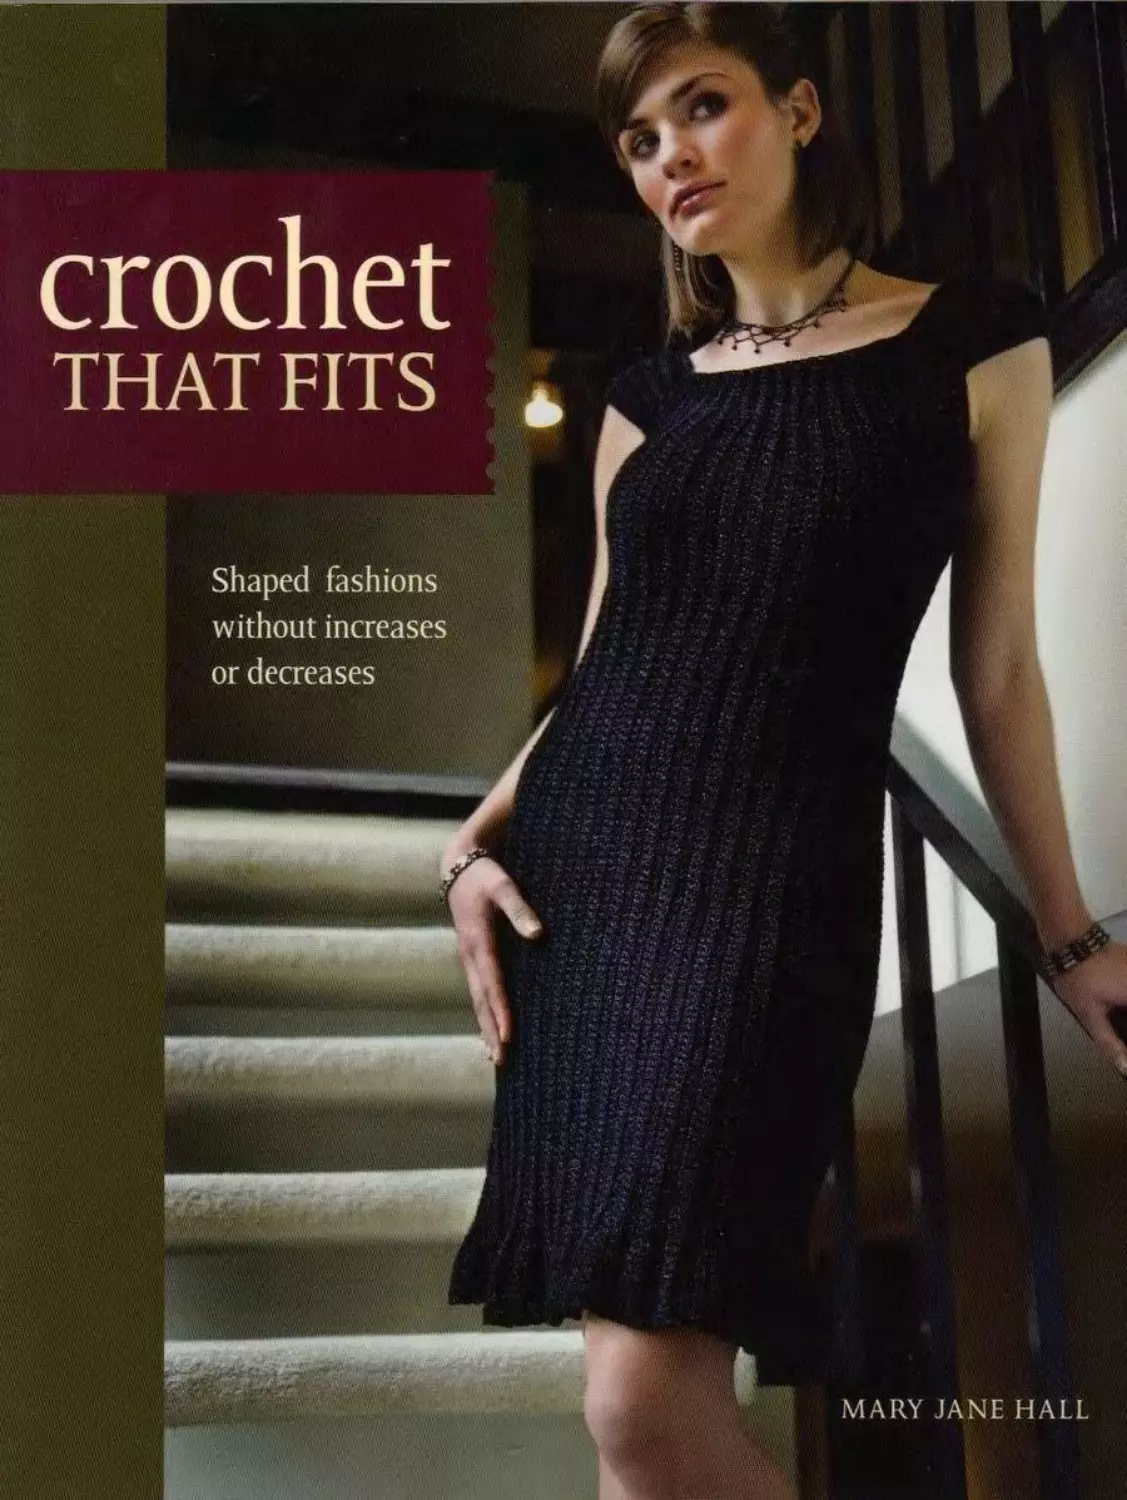
                    Shaped fashions
without increases
or decreases
MARY JANE HALL
crochet
THAT FITS
ABOUT the AUTHOR
ary Jane Hall has been crocheting for
thirty-eight years and has taught more
than sixty people how to crochet. She
specializes in crochet fashion design
and is a Professional member of the
Crochet Guild of America (CGOA).
Mary Jane is passionate about crochet
and loves designing trendy wear-
ables. She designs full time and has
had many of her original designs
published in various books and maga-
zines. She has given the talks “How to
Get Published" and “Designing Tips”
to local crochet groups, including the
Dayton. Ohio, chapter of the Crochet
Guild of America.
Originally from Texas, Mary Jane
currently lives in Ohio. She has been
married for thirty-eight years, and she
and her husband, Terry, have three
grown children who are all married
and have families of their own. They
enjoy their grandchildren, who are a
huge part of their lives. Mary Jane
manages a “free” clothing store, called
United Voluntary Services, which
clothes more than 1.500 people in their
county every- year.
Mary Jane’s first crochet book,
Positively Crochet: 50 Fashionable
Projects and Inspirational Tips, is
currently available. Visit Mary Jane’s
Web site at www.mjcrochet.com.
This book is dedicated to
all the new and experienced crocheters out
there who have been a little scared of making their first
crocheted garment. I know you do not want to be stuck making
scarves, pot holders or afghans for the rest of your life. You, too, can
enjoy making crochet wearables, and it is my desire that you experi-
ence the same joys I do by making something for yourself or others you
can be proud to wear. I believe this book will open up a whole new
world to the beginning crocheter or to the person who has
thought they could never make crocheted garments.
Its much easier than you may think!
acknowledgments
[‘Jfcsta-k would not have been possible without book
> editor Candy Wiza, who believed in me
_ - ;_Ted me the past year while I was writing
я? two books. Any time I was stressed or discour-
- ' = - ready to encourage me and lift me up.
1w3uidlike to thank my family and friends for
L£ « p ruent and loving with me while I worked on
i started it immediately after my last book
ic print, and it has taken many long months
z~ everything. It has not been easy, and I
г c i .T the fact that they all believe in me and
» t--7 there to cheer me on!
Msiof my determination and steadfastness came
ttsassy precious mama: I followed in her footsteps
_r.r. z a dream by authoring books. And, Daddy,
J raw you are looking down from Heaven, proud of
ж. Td Eke io thank my sisters, Judy and Donna, who
aaed —e renew this book and gave valuable input
sfcn I needed a second opinion. I will not forget all
Ae _x uragement you gave me. Thank you, Terry, my
Mased husband and friend, for being patient with
ж t for all the times you did grocer}' shopping and
jwrrui:chores while I was busy at the computer or
a project for this book.
I also want to thank my three wonderful children
and their spouses, who are all precious to me. Brian
and Anca, thank you for understanding when I had
to focus on this book. Jamie and Virgil, thanks for
encouraging me; Tracy and Ashley, thanks so much
for believing in me. Of course, I must mention the
sweetest, cutest grandchildren on this earth: Jade,
Chloe, Sophia and little Coen. I love you all so much!
I want to thank all the pattern testers who were
willing and eager to help me out, and the contract
crocheters who restitched items in a different color
to be photographed for the book. Thanks so much
to: Rachel Berent, Karen Blumberg, Yvonne Bowser.
Adrienne Clark, Alyssa Denen, Pam Frye. Christy
McMahon, Judy Morrison, Aminta Moses, Maclana
Mowry, Sharon Mowry, Kimberly Stevens and Annette
Stewart. And a special thanks to my friend Cindy
Gillespie, who was there to make sure everything went
smoothly when putting the final manuscript together. I
truly could not have done this without all of you!
Last but not least, I want to thank my editors.
Susan Lowman, Toni Toomey and Stefanie Laufers-
weiler. and the entire staff at Krause Publications for
their hard work related to the publication of this book.
5
TABLE o/CONTENTS

8 Introduction
GETTING STARTED
11	Abbreviations Guide
12	Stitches to Know
16	Checking Your Gauge
17	Choosing Your Yarn or Thread
'! S How Graduated Stitching Works
18	Sizing Information
ЛП CHAPTER 1
SIX DESIGNS FROM
ONE BASIC PATTERN
2 2 Where It All Began: The Basic Caplet Pattern
24 Basic Capelet
27 Short Skirt
30 Turtleneck Capelet with Arm Warmers
33 Pom-Pom Poncho
36 Toboggan Hat
39 Hobo Bag
CHAPTER 2
BEYOND THE BASICS
Little Black Dress
Cap-Sleeve Top
Balletneck Sweater
Shoulder Wrap with Edging & Flower
Sweater Bag
Striped. Sleeveless Turtleneck Sweater
Slippers with Rose
Flared Tweed Hat with Mittens
Scarf with Flared Ends
Scarf with Ruffled Ends
Wavy Fringed Scarf
Textured Headband 1
Textured Headband 2
Smooth Headband
Hemp Choker
Textured Belt
Beret
CHAPTER 3
LACY. OPEN-WEAVE
GARMENTS
Baby-Doll Top
Little Girl’s Dress
Long Flared Skirt
Ruffled Shrug
Lacy Tunic
CHAPTER 4
TWO-COLOR ACCESSORIES
Houndstooth-Check Felted Purse
Houndstooth-Check Scarf
Wave-Stitch Coin Purse
Resources
Index
I
INTRODUCTION
crochet's beginnings:
bright and boxy
Is your concept of crocheted
garments the stiff and boxy
creations of the past? Flip through
books from the 1940s and ’50s and
you’ll find crocheted garments
tastefully done with smaller yam
or thread. Crochet experienced a
huge boom in the ’60s and ’70s,
and with it came the bright (some-
times garish) color combinations
of the day that some crocheters
say gave the craft a bad name.
This was also the time that
inexpensive acrylic yarns were
introduced, which helped make
crochet affordable to the masses.
But, when crocheted with a hook
that is too small, these yarns
have all the comfort of a straight-
jacket. Still, when I Hip through
my crochet magazines and almost
every crochet book I have from
that era. I see some fabulous
designs that remain popular
and fashionable today.
crochet for today: a formed fit that flatters
I am one of a growing number of designers who has set a goal of trying
to reverse the myth that crochet cannot possibly be comfortable and
flatter the figure. If you picked up this book because the sophisticated
number on the cover caught your eye, 1 hope I can convince you further
with the projects inside. If you are a knitter who has turned away from
crochet in the past because of its reputation for being stiff and unflat-
tering, I hope I can change your mind. I personally love the look, feel
and fit of knitting, but I’m addicted to the fun of crocheting and all the
amazing lacy designs that can be created with no other craft.
In this book, I will show you how to crochet garments (and acces-
sories) that are not only soft and drapeable but fitted and flattering
by using my unique Graduated Stitch Method—combining stitches of
varying heights within the same row—with the right size hook and
yarn. Even beginners can make fabulous shaped yet simple crocheted
clothing with this method, which eliminates the need for the sometime-
complicated process of using increases and decreases (the addition or
subtraction of stitches) to give a piece its shape.
□4d stitches, new method
all the stitches used in the book’s projects are not new, but my
< is very nontraditional in the way the items are formed. Most
г ~ т л earables in this book are not unusual or unique in the way
□ are styled. What does make them different is the way the designs
2^ rreated and how they get their shape. Instead of the cumbersome
ё-с sometimes confusing task of crocheting in the round, you use
—aruated stitches to construct each item. With my method you are
-ssectially creating garments with squares and rectangles, but the
±_->-.ed item does not appear that way.
7-.~ duated stitching is also what helps mold a piece to the body if
к _ desire a fitted look. Placing shorter stitches on the same row as
- stitches causes the piece to “cup” in at certain areas, resulting in
 fit without the hassle of figuring out increases and decreases. In
isct. you won’t find a single increase or decrease in this book.
li you prefer a looser fit than what is shown in the project photos, I
rer simple instructions for adjusting each garment to your taste.
custom-fit creations to
your size and shape
This book provides patterns and
instructions for making garments
for sizes up to an adult 3X. Most of
the items in this book can easily be
made to fit a toddler or child as well
by following the additional instruc-
tions given.
Even though I list actual stitches
and the number of rows needed to
make these garments up to an adult
size 3X. I also show how to create any
project from scratch without having to
follow a pattern and how to custom fit
it to your unique body. After all, every
individual’s body shape is different.
A longtime complaint of many plus-
sized crocheters is that the patterns
they have used just do not fit their
shape, no matter what size they make.
A woman with a classic pear shape
may end up with a garment that’s
too small in the hips or too large in
the bust area. I believe the method of
graduated stitching I’ve created will
change all of that and help eliminate
those frustrations.
9 i
i
same start, different endings
A big benefit of the projects is that several different pieces can be
made from the same fundamental design. The basic capelet in the first
chapter can become a skirt, hat or even a purse. Some projects call for
a different-size yarn and hook, but you’ll still be able to build all those
items from the same basic pattern. I tell you how to adjust many of
the designs in the book to create entirely new items. The baby-doll top
on page 96, for instance, can be modified to make a lacy skirt of any
length or a little girl’s dress, using the same technique and shape.
I draw upon my sewing background to offer finishing touches such
as weaving tiny elastic through the edge of a top to help it stay on
the shoulders, as opposed to decreasing in that area as you normally
would for the same effect.
bye-bye, blankets!
Maybe you’ve thought you are
destined to make only scarves,
pot holders or afghans for the rest
of your crocheting days. This book is
dedicated to showing beginners and
advanced crocheters alike that you
can make projects that go beyond a
simple square or rectangle.
You may have felt intimidated
by patterns for shaped garments
that require increases, decreases or
working in the round. I hope those
days are gone forever as you try my
new method of graduated stitching
and learn how to make flattering
fashions the easy way.
10
I
GETTING STARTED
abbreviations guide
z??'e\’iation meaning
approx approximately
beg beginning
bio back loop only
ch(s) chain(s)
cont(ing) continue(ing)
de double crochet
Throughout the book you will see
abbreviations for crochet terms and
other words that appear frequently
in the instructions. After you’ve
been crocheting a while, you will
remember the terms without
needing to refer to this list, but it’s
helpful when you’re first beginning.
dtr
flo
hdc
hdtr
htr
lp(s)
opp
oz
patt
pm
rem
rep(ing)
rnd(s)
RS
sc
sk
si st(s)
sp(s)
St(s)
tog
tr
V-st
double treble (yarn over 3 times)
front loop only
half-double crochet
half-double treble
half-triple crochet
loop(s)
opposite
ounce(s)
pattern
place marker
remaining
repeat(ing)
round(s)
right side(s)
single crochet
skip
slip stitch(es)
space(s)
stitch(es)
together
triple crochet (yarn over 2 times)
V-stitch
whip st	whip stitch
WS	wrong side
wt weight
yo yarn over (wrap yarn around hook)
11
- - - ' Е - ONE
SIX DESIGNS Jrom
: NE BASIC PATTERN
ith a few modifications, a simple capelet design can result in a number
of beautiful endings, including a skirt, hat, poncho or purse. Each
project will have its own set of instructions because the yarn, hooks and
number of stitches used may vary. Most of these projects require using
two hook sizes on the same row, as well as shorter and taller stitches to
create the shaped effect shown. Don’t be intimidated, though:
All the projects are easy enough for a beginner.
21
where it all began
THE BASIC CAPELET PATTERN
One day I wanted to make a
capelet that would have a smaller
neck area. I personally do not
mind crocheting things in the
round, but some people are afraid
to even try. I have taught many
to crochet, so I am always trying
to come up with easy ways my
students can do things.
For this particular capelet, I
had the idea to make a rectangle I
could seam up on one side to look
like it was crocheted in the round.
I have known for years that
working in the back loop will help
cause a garment to stretch. I have
studied knitting and what makes
it drapeable. Knitting is less
dense than crocheting because the
needles catch only one loop. But
in crochet stitches are formed by-
picking up two loops at a time,
making the piece thicker
or denser.
Traditionally, to get the shape of a capelet in the round, you would
use one hook size, and you would have to start either at the bottom
and decrease at the neck or start at the neck and increase as you work
downward. But with my method of graduated stitching, you do not ever
increase or decrease. Instead of starting at the neck and working the
entire capelet in the round—increasing as you go—the smaller part
that narrows at the top-neck section is done with a shorter single-
crochet stitch and a smaller hook, causing it to narrow on its own.
(See the basic capelet diagram on page 25.)
Changing the hook size on the same row emphasizes the differ-
ence in heights even more. After sewing the side seam, the piece may
look too small, but when the piece is put on, it stretches to fit around
the shoulders. As mentioned before, what makes the piece stretch is
the fact that you are using the back-loop-only (bio) method when you
crochet the rows.
The piece will have ridges. This is also called ribbing and is a pattern
stitch normally used for sweater cuffs. Working in the back loop causes
the piece to stretch even more, providing a fit that hugs the body.
22
aidr. _• л top or sweater this way. with vertical rows instead of
-a -tai rows, gives a flattering fit.
T - ' how I came up with the Graduated Stitch Method. I
нбИ1у began to think of ways this method of using different
a - heights on the same row could shape and form other flat-
-garments. I looked at my basic capelet design and said,
- a: rise can I do with this piece?” My imagination ran wild,
d I came up with ten different projects based on this same
peiet pattern. Some of those projects are featured on the
я^.-.ng pages. Other projects I made from the basic capelet
rtem are not shown in this book: a round pillow cover, a lamp
ade a felted bowl and a Christmas tree skirt. Perhaps those
— r decor items can be reserved for another book?
Ibe projects on the following pages are all easy enough for
- - - - rs but enjoyable enough for the more experienced. If you’ve
г made anything else in crochet before now, you’ll find these
to be verv simple!
SKILL LEVEL:
BULKY
BULKY
Abultado
BEGINNER
О £ovA*c-€D
This capelet pattern is
incredibly versatile, as
you will see in the projects
to come. It has no increases
or decreases, and you won’t
believe how easy it will be for
you to make any of the five
projects that follow based
on this single pattern.
You will be able to
make any project in
any size, custom fitting
it to your body.
basic capelet
“•S sizes XSM (SM, MED, LG, XLG, 1X, 2X, 3X)
gawge
With К hook, 6 sc and 4 sc rows = 2" (5cm)
“ s same capelet can be made for all girls' sizes (from
—to girl's size 16) (see Pattern Notes). Sizes are
ceterm ned by number of beg chs and rows worked.
- - s-”ed length (including scalloped rows on
bottom edge): approx 121/ги (32cm) long
shed bottom width: approx 44" (46“, 48", 50",
54 56". 58"); 112 (117, 122, 127, 132, 137, 142,
*47] cm
materials
3.3. 3, 4, 4, 4, 4) skeins (2.8 oz/84 yd/80 g per
£«= - -5 bulky yarn
-sed in this project: Patons Rumor alpaca-blend
.e'- in Hibiscus Heather (Substitutes: Moda Dea
S r or Moda Dea Gleam)
: ~e$ <J ЮУз (6.5mm) and N/13 (9mm) crochet hooks
•am needle
5‘ten marker
22* <23-. 24-. 25*. 26*, 27'. 28*. 29*)
56 (58. 61. 64. 66.69. 71, 74) cm
at narrow*»? width
44-(46- 48’, 50*. 52*. 54*. 56*. 58")
112(117.122.127. 132, 137. 142. 147) cm
at widos! width
With N hook, 8 de and 4 de rows (at widest point)
= 4" (10cm)
stitches used
ch, sc, de, si st
pattern notes
All sts are worked in the bio. Sts for the scalloped
edging are worked in both Ips. Rows are worked
vertically from side to side, making it easy to add
rows to fit body if needed. Beg ch will be at back
seam. Two hook sizes are used on the same row.
For a longer capelet: Make beg ch longer and
add to the number of de on each row.
For larger than a size 3X: Work more rows to fit
around shoulders, using the same basic capelet
instructions. For a longer capelet, make beg ch
longer and add to the number of de on each row.
For all girls' sizes: Make your beg ch the length
you want by holding it up to the wearer. Use the
same basic capelet instructions, remembering
that if you use a smaller yarn (and possibly smaller
hooks), you may need to work more chs and sts
on each row. Work as many rows needed to wrap
around the shoulders.
basic capelet diagram
The finished piece will look like this
before sewing the side seam. The sc
and de stitches will be on the same
row, and you’ll change your hook size.
instructions
.411 sts are worked in the bio. With N
hook, ch 15; change to К hook and ch
9-24 chs total. (For longer capelet:
Add to the 15 chs here with N hook,
for desired length. Then add same
number of de on each row.)
Row 1: (RS) With К hook, sc in 2nd
ch from hook and in next 7 chs. Pm
in last sc made (8 sc made will form
the neck); change to N hook and de
in last 15 chs; turn - 23 sts. At this
point, piece should measure approx
10" (25cm) long.
Row 2: With N hook, ch 3 (counts
as first de), sk first de, de in bio of
next 14 de. Take marker out of sc and
place in last de made; change to К
hook and sc in bio of next 8 sc; turn
- 15 de and 8 sc (23 sts total).
scalloped edging
Row 3: With К hook, ch 1, sc in bio of first 8 sc. Pm in
last sc made. Change to N hook and de in bio of next
14 de, de in 3rd ch of beg ch-3; turn - 23 sts.
Rows 4-44 (46, 48, 50, 52, 54, 56, 58): Rep rows
2 and 3 appropriate number of times, ending by
working a Row 2 rep. For wider capelet: Add more
rows (working an even number of rows if you plan to
work scalloped edging); end off after last row. When
lying flat, before seam is sewn, the basic capelet
should measure approx 44" (46". 48", 50". 52", 54", 56",
58"); 112 (117, 122.127.132, 137, 142. 147) cm at the
widest point (bottom) and approx 22" (23", 24", 25",
26", 27", 28", 29"); 56 (58, 61. 64. 66, 69. 71, 74) cm at
the narrowest (top).
assembling capelet
With RS tog, match up sts on foundation ch and last
row. Sew side seam with yarn and yarn needle.
Worked in both Ips.
Rnd 1: With RS facing and К hook, join with si st in
center of any de row at wide end (bottom) of capelet.
(De sts will be sideways - horizontal.); * ch 3, si st in
center of next horizontal de; rep from * around entire
capelet edge, ending with si st in first si st - total
number of ch-3 sps will be same as total number of
rows you worked on capelet. (Example: If you worked
48 rows, you will have 48 ch-3 sps.) Do not turn.
Rnd 2: SI st in first 2 chs of next ch-3 sp. * ch 7. sk next
ch-3 sp. si st in next ch-3 sp; rep from * around, ending
with si st in first si st - total number of ch-7 sps will
be half the total of rows you worked. (Example: If you
worked 48 rows on capelet. you will have 24 ch-7 sps.1
Rnds 3-4: SI st in first 4 chs of next ch-7 sp; * ch 7, si
st in 4th ch of next ch-7 sp. rep from * around, ending
with si st in first si st - same number of ch-7 as Rnd
2. End off after last rnd. Weave in loose ends.
26
SK LL LEVEL:
. ze neck of the capelet
dromes the waist on this
:ed-look skirt. It can be
-zde in any size from infant
adult 6X; all you have to
lengthen or shorten
beginning chain. Make
wide or narrow as
_eeded by choosing
zze number of rows
rked. A pretty,
:c:ional edging can be
added to make it
extra special.
size
pattern notes
Fits toddler and girl sizes 1-2 (3-4, 5-6, 7-8,
8-10, 10-12, 12-14, 14-16)
This same skirt can be made for all women's sizes
up to 6X (see Pattern Notes).
Finished length: approx 9" (10", 11", 1214", 1314",
14Уг", 15Уг", 1614’); 23 (25, 28, 31, 34, 37, 39, 42) cm
Finished waist: approx 16" (17", 18", 19", 20", 21",
22", 23"); 41 (43, 46, 48, 51, 53, 56, 58) cm
materials
1 (1, 1, 2, 2, 2, 3, 3) skeins (6 oz/330 yd)
#3 light worsted-weight yarn
This skirt has one seam in back. Beg ch will be
length of skirt minus У2" (1cm). Rows are worked
vertically, making it easy to add rows to fit the
body if needed.
For all women's sizes, up to 6X: With J hook,
make beg ch the length you desire the skirt to be
With H hook, sc into 2nd ch from hook and in next
10 chs (11 chs total for waist section). Change to J
hook and work de in rem chs. Follow rows 2 and
3 of girl's skirt instruction (bio, so it will stretch),
replacing the number of de with number of de you
worked into your beg ch on Row 1. Keep working
until you have enough rows to fit around your
body. Remember to work an even number of rows
if you plan to work sps for drawstring and edging
End off and sew back seam. Weave in ends.
Used in this project: Caron Simply Soft acrylic
yarn in Country Blue (Substitute: Red Heart Hula)
Sizes H/8 (5mm) and J/10 (6mm)
crochet hooks
Yarn needle
Stitch marker
gauge
With H hook, 9 sc and 8 sc rows =
2" (5cm)
With J hook, 11 de and 6 de rows
(at widest point) = 3" (8cm)
stitches used
ch, si st, sc, de
Special stitch: shell (for optional
scalloped edging): (sc, hdc, 2 de,
hdc, sc) in ch-5 sp
ж
Лл /
Ж


28
к
instructions
All sts are worked in the bio.
With J hook, ch 22 (26. 30, 34. 38, 42, 46. 50). For
shorter or longer skirt: delete or add chs here,
deleting or adding to the de section at bottom of skirt.
Change to H hook and ch 12 - 34 (38,42, 46, 50, 54,
58, 62) chs.
Row 1: (RS) With H hook, sc in 2nd ch from hook
and in next 10 chs (11 sc made). Pm in last sc made;
change to J hook, de in next 22 (26. 30, 34, 38, 42. 46.
50) chs; turn - 33 (37, 41, 45. 49, 53, 57, 61) sts.
Row 2: With J hook, ch 3 (counts as first de), sk first
de. de in bio of next 21 (25, 29.33, 37. 41, 45,49) de.
Take marker out of sc and place in last de made;
change to H hook, sc in bio of next 11 sc; turn - 33
• 37,41.45,49. 53, 57, 61) sts.
Row 3: With H hook, ch 1, sc in bio of first 11 sc. Take
marker out of de and place in last sc made; change to
J hook, de in bio of next 22 (26, 30, 34, 38,42,46, 50)
de, ending with last de in 3rd ch of beg ch-3; turn - 33
(37,41,45,49, 53, 57, 61) sts.
Rows 4-64 (68, 72, 76, 80, 84, 88, 92) or to desired
width: Rep rows 2 and 3 appropriate number of times,
ending by working a Row 2 rep. End off after last row
Weave in ends. When lying flat, before seam is sewn,
the skirt should measure approx 16" (17", 18", 19",
20", 21", 22", 23"); 41 (43, 46. 48. 51, 53. 56. 58) cm at
narrowest point (top waist) and approx 32" (34", 36",
38", 40". 42", 44", 46"); 81 (86, 91.97, 102, 107, 112,
117) cm at widest point (bottom). With RS tog, match
up foundation ch and last row. Sew seam with yarn
and yarn needle. Turn RS out.
drawstring waist
With RS facing and H hook,join yarn with si st in top
center back edge at seam; ch 5 (counts as first de and
ch-2 sp); * sk next row, de in edge of next row, ch 2; rep
from * around, ending with si st in 3rd ch of beg ch-5.
End off. - 32 (34, 36,38, 40, 42, 44. 46) de and 32 (34,
36. 38. 40. 42,44, 46) ch-2 sps. If you added or deleted
rows on your skirt: The number of de and ch-2 sps will
be half the number of rows you worked. (Example: 66
rows = 33 de and 33 ch-2 sps.)
drawstring
Ch 170. End off. Weave drawstring or ribbon through
ch-2 sps, beg at center front. Weave in ends.
optional scalloped
edging (not shown)
Rnd 1: With RS facing and H hook join yarn with
si st in top edge of any de row at bottom edge of skirt;
* ch 5. sk next row, si st in top edge of next row; rep
from * around, ending with si st in joining si st - 32
(34, 36, 38, 40.42. 44. 46) ch-5 sps.
Rnd 2: Ch 1. * shell in next ch-5 sp, si st in next si st;
rep from * around, ending with si st in joining si st.
End off. - 32 (34,36,38,40,42,44, 46) shells. Weave
in loose ends.
/or less bulk
A lighter-weight yarn will make your skirt
less bulky, but realize you may need to use
smaller hooks, and your gauge will change.
29
SKILL LEVEL:
style you want.
MEDIUM
WOVEN
Medio
BEGINNER
e .ADVANCED
BEGINNER
43b (WTERMSplATE
If you like turtlenecks,
this is the capelet for you.
The neck combined with the
navy tweed yarn make it a
perfect addition to your fall
or winter wardrobe. It may
appear small once finished,
but remember that it
stretches around the
shoulders. The
quick and easy arm
warmers (see page 32)
really add to this chic
set. Make them longer or
shorter, depending on the
turtleneck capelet with
arm warmers
30

turtleneck capelet
size	gauge
Fits sizes XSM (SM, MED, LG, XLG, 1X, 2X, 3X)
This same capelet can be made for smaller girls or
larger women's sizes (see Pattern Notes).
Finished length: approx 13" (33cm)
Finished bottom width: approx 40%" (42", 43%",
44%", 46", 47%-, 483/д", 50"); 104 (107, 110, 114,
117, 120, 124, 127) cm
materials
2 (2, 2, 2, 3, 3, 3, 3) skeins (100 g/210 yd per
skein) #4 medium worsted-weight yarn
Used in this project: Plymouth Galway
Colornep wool blend yarn in Navy
Blue (Substitutes: Plymouth Tweed
or Caron Simply Soft Tweed)
Sizes K/10.5 (6.5mm) and G/6 (4mm) crochet hooks
Yarn needle
instructions
All sts are worked in the bio.
With К hook, ch 25. change to G hook and ch 23 - 48 chs.
Row 1: With G hook, sc in 2nd ch from hook and in
next 21 chs (22 sc made will form the turtleneck);
change to К hook and de in next 25 chs; turn - 47 sts.
Row 2: With К hook, ch 3 (counts as first de), sk first
de, de in bio of next 24 de (25 de made); change to G
hook and sc in bio of next 22 sc; turn - 47 sts.
Row 3: With G hook, ch 1. sc in bio of first 22 sc;
change to К hook and de in bio of next 25 de, ending
With G hook, 9 sc and 8 sc rows = 2" (5cm)
With К hook, 13 de and 6 de rows (at widest point)
= 4" (10cm)
stitches used
ch, sc, de
pattern notes
Two hook sizes are used on the same row. Rows are
worked vertically, making it easy to add rows to fit
the body if needed.
For a higher turtleneck: Make beg ch longer and
work more sc in that area on each row.
For a longer capelet: Make beg ch longer and
add to the number of de on each row.
For smaller girls' or larger women's sizes: See
the basic capelet Pattern Notes on page 25.
with last de in 3rd ch of beg ch-3; turn - 47 sts.
Rows 4-61 (63, 65, 67, 69, 71, 73, 75) or to desired
width: Rep rows 2 and 3 appropriate number of times.
End off after last row. When lying flat, before side
seam is sewn, this capelet should measure approx
403/4" (42", 43%", 443Д", 46". 47%", 483/t", 50"); 104 (107,
110, 114,117,120.124,127) cm at the widest point
(bottom) and approx 15%" (15%", 16%", 16%", 17%",
17%", 18%", 18%"); 39 (40, 41. 43, 44. 45, 46. 48) cm
at the narrowest point (top neck). Fold piece in half.
Match up foundation ch and sts on last row. Sew up
side seam. Fold down narrow top edge of capelet,
forming turtleneck. Weave in ends.
31
arm warmers
size
One size fits most.
Finished length: 15" (38cm)
materials
1 skein (100 g/210 yd) #4 medium worsted-weight yam
Used in this project: Plymouth Galway Colornep
wool blend yarn in Navy Blue (Substitutes: Plym-
outh Tweed or Caron Simply Soft Tweed)
Size J/10 (6mm) crochet hook
Yarn needle
gauge
10 hdc and 6 hdc rows = 3м (8cm)
stitches used
ch, hdc
pattern notes
For shorter wrist warmers: Work less chs at beg
for desired length.
For wider (larger) or smaller (child's sizes) arm
warmers: Work more or less rows.
instructions
Make 2.
All sts are worked in the bio.
Ch 52.
Row 1: Hdc in 3rd ch from hook, hdc in each rem ch
across; turn - 51 hdc (skipped chs count as first hdc).
Row 2: Ch 2 (counts as first hdc), sk first hdc. hdc in bio
of next hdc and in bio of each hdc across, ending with
last hdc in first skipped ch on Row 1; turn - 51 hdc.
Row 3: Ch 2 (counts as first hdc), sk first hdc. hdc in
bio of next hdc and in bio of each hdc across, ending
with last hdc in 2nd ch of beg ch-2; turn - 51 hdc.
Rows 4-16: Rep Row 3.13 times more.
Row 17: Ch 2, sk first hdc, hdc in bio of next 44 hdc. ch
2 loosely, skip next 2 sts (for thumb hole), hdc in bio of
last 4 hdc, ending with last hdc in 2nd ch of beg ch-2 -
49 hdc and 1 ch-2 sp for thumb hole. End off. Fold piece
in half, matching up foundation ch and sts on last row
Sew side seam with yam needle. Weave in ends.
32
size
stitches used
Fits girl sizes 1-2 (3-4, 5-6, 7-8, 10-12, 12-14)
ch, sc, de
This same poncho can be made for an adult (see
Pattern Notes). Sizes are determined by number
of beg chs and rows worked.
Finished length: approx 11" (28cm) plus 2" (5cm)
pom-poms
Finished bottom width: approx 33%" (35", 36%”,
38%", 40", 41%"); 84 (89, 93, 97, 102, 106) cm
pattern notes
Two hook sizes are used on the same row. Rows
are worked vertically from side to side, making it
easy to add rows to fit the body if needed. Beg ch
will be at side seam.
For a longer poncho: Make beg ch longer and
add to the number of de on each row.
materials
3 (3, 3, 4, 4, 4) skeins (5 oz/140 g/255 yd per skein)
#5 bulky yarn
To make an adult-sized poncho: Work more
rows to fit around the shoulders, using the same
basic poncho instructions. If a longer poncho is
desired, work a longer beg ch and add de to the
number of de listed.
Used in this project: Bernat boucle yarn in Soft
Rose (Substitute: Lion Brand boucle)
Sizes H/8 (5mm) and K/10.5 (6.5mm)
crochet hooks
1 pack Pink Pony beads with large holes
Yarn needle
Stitch marker
gouge
With H hook, 7 sc and 5 sc rows =
2’ (5cm)
With К hook, 10 de = 4" (10cm); 3 de
rows (at widest point) = 2’/г" (6cm)
All sizes: If you use a smaller or
larger yarn than what the pattern calls
for, your gauge will change from the
gauge listed here.
34
instructions
All sts are worked in the bio.
’".:h К hook, ch 20; change to H hook and ch 11 -
31 chs total. (For longer poncho: Add to the 20 beg
dis here with size К hook to desired length. Then add
? •me number of de on each row.)
Row 1: With H hook, sc in 2nd ch from hook and in
-ex: 9 chs. Pm in last sc made (10 sc made will form
neck); change to К hook and de in last 20 chs; turn
- 30 sts. Note: At this point, piece should measure
approx 11" (28cm) long.
Row 2: With К hook, ch 3 (counts as first de), sk first
:de in bio of next 19 de. Take marker out of sc and
: lace in last de made: change to H hook and sc in bio
: next 10 sc; turn - 20 de and 10 sc (30 sts total).
Row 3: With H hook, ch 1, sc in bio of first 10 sc. Take
marker out of de and place in last sc made: change to
К hook and de in bio of next 20 de, ending with last de
r. 3rd ch of beg ch-3; turn - 30 sts.
Rows 4-40 (42, 44, 46, 48, 50): Cont working in patt,
rep rows 2 and 3 appropriate number of times and
<ding by working a Row 2 rep. For wider poncho:
Add more rows, making sure you work an even
- zmber of rows if you plan to add pom-poms and
•r.nge. so they will be evenly spaced around. End off
liter last row. When lying flat, before side seam is
-ewn. this poncho should measure approx 3314" (35",
Э6Ч". 3814", 40", 41%"); 84 (89. 93,97,102,106) cm at
:-e widest point (bottom) and approx 16" (16%", 17W.
18 A. 19%", 20"); 41 (43, 44, 47, 49, 51) cm at the
.-.irrowest point (top neck).
W>h RS tog, match up foundation chs and sts on last
row. Sew side seam with yarn and yarn needle.
pom-poms
Each pom-pom is approx 2" (5cm) in diameter.
You can use a pom-pom maker, or follow this simple
method: Cut a %" (2cm) piece of cardboard. Wind the
yarn around the cardboard approx 105 times. Cut a
12" (30cm) piece of yarn and slip it through the Ips.
(Note: Use a plain piece of pink yarn with the boucle
because the boucld yarn tends to break easily.) Tie the
yam securely so it will not come loose. Slip the Ips off
the cardboard. Cut the Ips on the untied end and fluff
out the pom-pom. Trim to desired size.
Tie pom-poms evenly spaced around bottom edge
of poncho (approx every 3-4 rows).
fringe
Cut 6"-7" (15-18cm) strands of yarn for fringe. The
number you cut will depend on the number you place
between each pom-pom. Take 1-2 strands to place
between each pom-pom. folding the strand so one will
be longer than the other. Place a bead on the end of
each strand and tie a knot to secure. Rep this around
entire the poncho. Weave in the ends.
35


—*
SKILL LEVEL:
MOYEN
Medio
BEGINNER
AOVANCGO
th’TeRMEE.»/’
The neck edge on the basic
capelet pattern becomes
the crown of this unisex hat.
which can be made in any size
for a child or adult—even for
a doll! Try using textured
yarn for a different look.
The braids are fun, but
you could attach a
pom-pom just as
easily. Work shorter
rows for a beanie or
skullcap.
toboggan hat
- -_s al sizes, depending on number of rows
a : '<ed. Hat shown will fit a child; is approx 7Уг"
' ’im long with 2" (5cm) brim folded up x 17“
-3 on circumference.
For a shorter hat or infant size: Work less chs
at beg for a shorter hat, and work less rows to fit
around any size infant head.
For a larger adult size: Work more chs at beg to
get the length you want with the turned-up edge,
and work more rows to custom fit around head.
tazierials
For an 18" (46cm) doll: With H hook ch 16, with
F/5 (3.75mm) hook ch 5 - 21 chs. Work doll hat
* f-ank (4 oz/375 yd per hank) #4 medium
•c*s:ed-weight yarn in multicolor blues, purples
and greens
using the basic hat instructions, with 4 sc and 16 de
in each row for a total of 20 sts in each row, working
enough rows to fit around the doll's head (approx
23 rows). Add a pom-pom to the crown, if desired.
Jsed in this project: Handpainted Sock-
ezze 75% Superwash wool and 24% nylon
;'om www.yarnsmiths.com) (Substi-
---T Sed Heart TLC Essentials)
S zes H/8 (5mm) and I/9 (5.5mm)
zrocnet hooks
>am needle
wuge
th H hook, 8 sc and 6 sc rows = 2"
:5cm)
-h I hook, 13 de and 6 de rows = 3"
3cm)
stitches used
zr sc, de
pattern notes
z-ec ch will be at side seam. The entire
-at is worked in the bio, which causes the
a* to stretch and gives a textured ridge.
Ж
37
instructions
All sts are worked in the bio.
With H hook, ch 42.
Row 1: (RS) sc in 2nd ch from hook and in
next 10 chs; change to I hook, de in next 30
chs; turn - 11 sc and 30 de (41 sts).
Row 2: With I hook, ch 3 (counts as first
de), sk first de, de in bio of next 29 de;
change to H hook, sc in bio of next 11 sc:
turn - 30 de and 11 sc (41 sts).
Row 3: With H hook, ch 1, sc in bio of first
11 sc; change to I hook, de in bio of next 30 de,
ending with last de in 3rd ch of beg ch-3; turn
- 11 sc and 30 de (41 sts).
Rows 4-34: Rep rows 2 and 3.15 times more,
then rep Row 2 once more. End off after last
row, leaving a 10" (25cm) tail. With RS tog.
match up foundation chs and sts on last row. Pin
in place. Sew side seam. With 10" (25cm) tail and
yarn needle, gather narrow top edge (sc end) to close
up crown. Tie ends of yarn to secure. Turn RS out and
fold up bottom edge.
braids
Approx 9" (23cm) long.
Wind yarn around a 12" (30cm) piece of cardboard
41 times (the same way you'd make a tassel). Cut a
12" (30cm) piece of yarn and slip it through top Ips.
Tie the yarn securely so it will not come loose. Cut
ends at bottom and take off cardboard. Wrap yarn
around the folded yarn at top, about Vi" (1cm ) down
from the top and secure (as you would a tassel). Sepa
rate the 81 strands into 3 sets of 27 strands each, and
braid each one. (Each braid should have 3 sets of 9
strands each.) Secure end of each braid by wrapping
yarn around strands approx 2" (5cm) from end and
secure by tying a knot. You can tie a bow with yam or
ribbon here.
Place braids on RS of crown. Attach to hat by weaving
the loose ends at tops of braids into inside of crown
and secure. Weave in ends.
38
VEDIUM
4O*EN
Medio
SKILL LEVEL:
purse when you’d rather
attach a leather strap.
Instructions are also
given for a crochet
chain drawstring, but a
The neck of the basic capelet
becomes the gathered bottom of
this bag. You could even choose to
rather the bottom of the capelet
and use the neck opening at the
top. It has a crocheted handle
that can be tucked inside the
pretty ribbon can look more
formal. Dress up the bag as
much as you want with beads,
fringe or a tassel on the bottom.
hobo bag
BEGINNER
e
size
pattern notes
Approx 9" (23cm) high x 7" (18cm) wide
(without strap)
materials
2 balls (100 g/135 yd per ball) #4 medium
worsted-weight yarn
Used in this project: Reynolds Cabana cotton
blend yarn in Plum (Substitutes: TLC Cotton Plus
or Lion Brand Cotton)
You can make the bag in the same manner as
the capelet, with the same size yarn and same
hook sizes, but it will be big. To make it smaller
and firmer, use a smaller, stiffer yarn and smaller
hooks. Just as with the capelet, this purse is
worked from side to side, and the beg ch will be
your side seam.
For a smaller bag: Shorten your beg ch and
work less rows (in multiples of 6 for top edging
to work evenly).
Sizes I/9 (5.5mm) and F/5 (3.75mm) crochet
hooks
1 yd (91cm) of Vi' (1cm) wide satin ribbon
(optional)
2 wooden beads (with hole large enough
for yarn and needle to go through)
Yarn needle
Stitch marker
Any length leather strap with latch hooks
on each end (optional)
gauge
With I hook, 13 de and 6 de rows =
З/2” (9cm)
stitches used
ch, si st, sc, de
40
instructions
All sts are worked in the bio.
With size I hook, ch 29; change to F hook, ch 6 - 35
chs total.
Row 1: (WS) With F hook, sc in 2nd ch from hook and
in next 4 chs (5 sc made); change to I hook and de in
last 29 chs; turn - 34 sts.
Row 2: (RS) With I hook, ch 3 (counts as first de),
>k first de, de in bio of next 28 de; change to F hook
and sc in bio of next 5 sc; turn - 29 de and 5 sc (34
sts total).
Row 3: With F hook, ch 1. sc in bio of first 5 sc;
change to I hook and de in bio of next 29 de, ending
with last de in 3rd ch of beg ch-3; turn - 34 sts.
Rows 4-36: Rep rows 2 and 3, 16 times more, ending
by working a Row 2 rep; do not end off.
to assemble bag
With RS tog, match up sts on foundation ch and last
row. Place pins along seam edge to hold in place.
Using I hook, loosely si st in each st across rows
through both thicknesses, starting at sc (bottom)
end and working toward de (top) end; do not end off.
Turn bag RS out.
top edging of bag
Rnd 1: With I hook, ch 5 (counts as de and ch-2 sp), *
de in top of de on next row, ch 2, de in top of beg ch-3
on next row. ch 2; rep from * around, ending with de
in top of de on next row, ch 2: si st in 3rd ch of beg
ch-5 - 36 de and 36 ch-2 sps.
Rnd 2: Ch 3 (counts as de), de in next ch-2 sp; * de in
next de, de in next ch-2 sp; rep from * around; join
with si st in 3rd ch of beg ch-3 - 72 de.
Rnd 3: Change to F hook; * ch 5, sk next 2 de, si st in
next de; rep from * around, ending with si st in first
si st; end off - 24 ch-5 sps.
bottom of bag
Turn bag inside out. With yarn needle, weave yarn
through sc around edge of circle and pull tightly to
gather, closing up hole. Work a few more sts to secure
and end off. Turn bag RS out.
drawstring chain
With F hook, ch 110. End off.
Weave chain or optional ribbon through ch-2 sps on
Rnd 1 on top edging of bag; gather and tie in a bow to
close. Place bead onto loose end of drawstring with yarn
needle and push bead close to st. Tie 2 knots under
bead, to hold in place. Insert end back through bead
and weave into chain.
crocheted strap
(worked on inside of bag)
On inside of bag, below drawstring row. pm at each
side where you want to place strap. Join yarn with
si st in st to right of marker. Ch 60, without twisting
ch, join with si st in other side of bag in st to right of
second marker, si st in st to left (where marker was
placed). Turn and de in each ch across, si st in st on
other side of bag next to st where yarn was joined.
End off. Weave in ends.
41
CHAPTER TWO
BEYOND the BASICS
expand your wardrobe with seventeen more graduated-stitch projects,
from a little black dress that fits like a glove to cute and cozy slippers.
None of these designs are alike, with one exception: The cap-sleeve top
is similar to the little black dress, only shorter.
43
SKILL LEVEL:
LIGHT	tjr,,.уч c ...
ADVANCED
BEGINNER
SS 0
This stunner is the one you
saw on the cover—perfect for
a night out. The yarn chosen
for it is light and airy, and the
dress stretches and molds to
the body for a comfortable fit
that flatters.
little black dress

I 44
I
I
before you begin
GETTING THE RIGHT FIT
’Alien you think “little black dress,” you probably
imagine a flattering fit, right? Well, that’s exactly what I
have tried to achieve with this design. The basic pattern
.s easy to follow, but I’ve also given instructions on how
you can custom fit this dress to flatter your own unique
body shape. For instance, if you are larger or smaller
busted than average, or have narrower or under hips, 1
have come up with an easy way for even a beginner to
get a custom fit.
The length of the dress shown comes to the top of the
Knee on a person who is 5'5" (165cm) tall. If you want
your dress to be shorter or longer, all you have to do
s make your beginning chain longer or shorter than
specified (add to the beg chain of 132). Make sure you
add the same number of de to the de section below the
empire waist that you added to the beginning chain. If
you need a wider dress for your particular figure, simply
add more rows than designated.
All the stitches are worked in the back loop only (bio),
so this dress will stretch and conform to the body for
a curve-hugging fit. Another key to success with this
pattern is using a smaller DK (#2) weight yam and a
larger hook than the size recommended for that yarn
weight. This makes your garment nice and drapeable.
These principles apply to any crochet garment, and once
you catch on to this easy concept, you’ll be able to make
your own custom-fit tops and sweaters as well, using my
Graduated Stitch Method.
As you can see in the diagram, this dress is made up
of straight rows consisting of single, half-double, double-
and triple-crochet stitches. These stitches are all worked
on the same row, and the different heights of the stitches
is what shapes the dress—not increases or decreases.
This pattern is very easy to follow because you basically
repeat Row 1. Placing markers at the beginning or end
of each section (single, half-double, double and triple
crochet on same row) will help you keep track of each
section and will make counting so much easier.
little black dress diagram (without straps)
This is basically a rectangle, but it doesn': Jock that way,
because the shorter single-crochet stitches on the same
row shape the dress, making it look like you decreased.
The taller triple-crochet stitches make it look like you
increased on the bottom, but none of the patterns m
this book have increases or decreases. Rows are worked
vertically, from side to side, in the back loop only.
options
This pattern is so versatile, and there are many ways
you can modify it to your taste.
You may want to make spaghetti straps instead of
the straps shown in the photo. To make spaghetti
straps, join the yarn with slip stitch in the desired
stitch on the top edge of the front, chain the
desired amount to go over the shoulder, and join
with slip stitch in the desired stitch on the top
edge of the back. Repeat in the desired stitches for
the second strap.
You may want a closer fit under the bust (8 half-
double crochet at the high waist). (See the
cap-sleeve top on page 49.) You can either work all
single crochet (instead of half double), or just work
the half-double crochet in both loops, so it won’t
stretch as much there. You could also do the same
with the single crochet at the neck edge (in both
loops so it won’t stretch ). Or you could even use a
smaller hook on the neck and waist.
You may not wish to have the bottom ruffle on your
dress. If so, then work double-crochet stitches to
the end of the row and just eliminate the triple-
crochet stitches.
If you have a larger bust, you may not want to taper
the half-double crochet stitches right below the
bust. If you don’t want to taper the stitches at the
empire waist, simply work double-crochet stitches
there instead of using the half doubles. Working
more rows than the pattern calls for will also
make that section (17 double crochet) larger to fit
your bust.
easy does it
Because this is not an intricate stitch pattern,
it's easy to watch TV or talk with a friend
while working on this project.
using stitch markers
After working a few rows, you may not need
the markers. But by using markers, you
won't have to count the whole row at once.
Counting each section (between markers)
makes it much easier.
size
Fits sizes XSM (SM, MED, LG, XLG, 1X, 2X, 3X);
size shown is XSM
All sizes: approx. 31 (79cm) long from neck edge
to bottom edge (without straps).
Finished bust: approx. 283A" (32", 36%", 40",
44У4", 48", 523/4u, 56"); 73 (81, 93, 102, 114, 122,
134, 143) cm
Note: See Sizing Information on page 18 to
choose appropriate size.
materials
8 (10, 12, 14, 16, 18, 20, 22) balls (1.75 oz/166
yd/50 g each) #3 light worsted-weight yarn
Used in this project: Patons Brilliant yarn in Black
Dazzle (Substitute: Nashua Grand Opera yarn)
Sizes F/5 (3.75mm) and G/6 (4mm) crochet hooks
Dritz Beading Elastic in black
Yarn needle
Stitch markers
46
pattern notes
gauge
With G hook:
7 sc = 114" (4cm); 10 sc rows = 214“ (6cm)
8 hdc = 1%" (4cm); 10 hdc rows = 314“ (8cm)
17 de = 4" (10cm); 10 de rows = 4" (10cm)
10 tr = 214" (6cm); 10 tr rows = 6" (15cm)
With F hook (on straps): 20 de = 4" (10cm);
10 de rows = 314" (9cm)
stitches used
ch, si st, sc, hdc, de, tr
This dress is made to hit right above the knee on a
5'5" (165cm) tall person but can be made longer or
shorter by adding or deleting chs at the beg. After
you have worked the 2nd row, hold piece up to
your body (from neck area, as in photo). Adjust beg
ch if needed. Remember to add same amount of de
in de section of row (add to the 86 de) as chs added
to beg ch. This dress is worked in 2 pieces from
side to side. Straps are added after front and back
are sewn tog. Elastic is crocheted onto top edge
so straps will stay on shoulders. Rows on the dress
are worked vertically, from side to side, in the bio. If
you want your dress to be more form-fitting, delete
rows or make it one size smaller.
instructions
All sts are worked in the bio.
front
All sizes: With G hook, loosely ch 132.
Row 1: Sc in 2nd ch from hook and in next 9 chs (10
sc made), pm in last sc made; de in next 17 chs (for
bust area), pm in last de made: hdc in next 8 chs (for
empire waist), pm in last hdc made; de in next 86
chs, pm in last de made: tr in next 10 chs (for flare at
bottom of dress); turn - 131 sts.
Row 2: Ch 4 (counts as first tr), sk first tr. tr in bio of
next 9 tr, take marker out of de and place in last tr
made; de in bio of next 86 de. take marker out of hdc
and place in last de made; hdc in bio of next 8 hdc,
take marker out of de and place in last hdc made; de
in bio of next 17 de. take marker out of sc and place in
last de made; sc in bio of next 10 sc; turn - 131 sts.
Row 3: Ch 1, sc in bio of first 10 sc. take marker
out of de and place in last sc made; de in bio of next
17 de, take marker out of hdc and place in last de
made: hdc in bio of next 8 hdc, take marker out of de
and place in last hdc made; de in bio of next 86 de,
take marker out of tr and place in last de made; tr
in bio of next 10 tr, ending with last tr in 4th ch of
beg ch-4; turn - 131 sts.
Rows 4-36 (40, 46, 50, 56, 60, 66, 70): Rep rows 2
and 3 for desired width, ending by working a Row 2
rep. End off after last row.
Note: The piece may look small, but keep in mind that
it stretches, so once the side seams are sewn, the dress
should fit, according to the size you are making. If
piece does not fit around the front of your body, you
may need to add more rows.
47
back
Work same as front. With RS tog, match up
sts at sides and pin in place. Sew seams
with yarn and yarn needle, starting at
bottom edge, leaving last 4"-4,Лв (10-
11cm) open for armhole opening (forming
a “V”). You can adjust the armhole
opening later, if needed.
straps
Make 2.
All sts are worked in the (bio).
With F hook, ch 45 to measure approx. 8'
(20cm), without stretching.
Note: After you have worked 2 rows, place
strap at the shoulder to make sure it is long
enough for your body. You may have to adjust the
beg ch and number of de in each row.
Row 1: De in 4th ch from hook (skipped chs count as
first de), de in each rem ch across; turn - 43 de.
Row 2: Ch 3 (counts as first de), sk first de, de in blu
of each de across, ending with last de in first skipped
ch; turn - 43 de.
Row 3: Work same as Row 2. ending with last de in
3rd ch of beg ch-3.
Rows 4-10: Rep Row 3, 7 times more. End off after
last row.
attaching straps to dress
Gather short ends of strap with yarn and yarn needle
to measure approx. 2" (5cm) wide <or the width of sc
section at top of dress, above bust area). Secure yam
with knot so it will stay in place. With RS tog, match up
gathered ends of strap with the side edge of top where
the sc sts begin and end. (See diagram for attaching
straps on page 53.) Pin in place. Sew each end of strap
to opening at side seam (on front and back). Rep on
other side of dress. Placing strap here will allow you to
wear straps at the shoulder, or you can wear straps off
the shoulders by pushing them down a little.
adding elastic to neck edge
Beg in back, tie black elastic to any st on neck edge,
leaving a 3" (8cm) tail. With RS facing and F hook,
join yarn with si st in same st as elastic, work sc
evenly spaced around entire neck edge, encasing
elastic between dress and sc sts; join with si st in
first si st. Try on dress and adjust elastic to fit. End
off yarn and secure elastic with knot. Weave in ends.
If needed, add elastic to bottom edge of straps in same
manner. Weave in ends.
j 48
I

SKILL LEVEL
ear this attractive top
th a skirt for an elegant
ok. or go casual and pair
nth jeans. Lengthen the
design by adding to the
double-crochet stitches below
the empire waist, and you
nave a dress! The shiny
threads in the yarn
used here add a
pecial touch
ADVANCED
BEGINNER
cap-sleeve top
49
size
Fits sizes XSM (SM, MED, LG, XLG, 1X, 2X, 3X)
Finished length: approx 21" (53cm) from shoulder
to bottom edge
Finished bust: 30" (34", 38", 42", 46", 50", 54",
58"); 76 (86, 97, 107, 117, 127, 137, 147) cm
Note: See Sizing Information on page 18 to
choose appropriate size.
materials
5 (5, 6, 7, 8, 9, 10, 11) balls (1.75 oz/128 yd/50 g
each) any #3 light worsted-weight yarn
Used in this project: Nashua Grand Opera
yarn in Faded Lavender (Substitute: Patons
Brilliant yarn)
Size F/5 (3.75 mm) crochet hook
Dritz Beading Elastic in black
Yarn needle
Stitch markers
gawge
6 sc and 4 sc rows = 1" (3cm)
18 de and 8 de rows = 4" (10cm) at widest point
on de rows
stitches used
ch, si st, sc, hdc, de, tr, picot, shell with picots
picot = ch 3, si st in 3rd ch from hook
shell with picots = [hdc, picot (de, picot) 3 times,
hdc] in specified st or sp
pattern notes
This top is made similar to the little black dress on
page 44, so read the notes on the dress before
starting. It can be lengthened or shortened by
adding or deleting chs at the beg. After you have
worked the 2nd row, check to see if the top is the
length you want. Be sure to place the piece up to
area of your neck, as it shows in the photo. This
would be the time to adjust your beg ch. It does
not matter how many chs you add; just remember
to add the same amount of de in de section of row
(29 de on front or 58 de on back). If you do not want
a fitted empire waist, work de or hdc in place of sc
on front under the bust area. This top is worked in
two pieces from side to side, with a seam on each
side. Straps are worked and then added separately
after the front and back are sewn together.
For a longer top: Because 18 de measure 4"
(10cm), add 9 chs at beg and 9 more de on each
row per 2" (5cm).
For a fuller bust: Add to the bust area, if
needed, in the 20 de, placed over the fullest part.
Add same number of chs and de on back.
9 tr and 3 tr rows = 2" (5cm)
50
instructions
S'.= are worked in the bio of front and back; sts are
-• rked in both Ips on shell edging.
front
Ch 80.
Row 1: (WS) Working in back bar of chs, sc in 2nd ch
from hook and in next 9 chs, pm in last sc made; de in
next 20 chs (for bust area), pm in last de made; sc in
next 8 chs, creating a fitted empire waist: hdc in next
ch. pm in hdc just made; de in next 29 chs, pm in last
de made, tr in next 11 chs. creating flare at bottom;
turn - 79 sts.
Row 2: (RS) Ch 4 (counts as first tr), sk first tr, tr in
bio of next 10 tr, take marker out of de and place in
last tr made; de in bio of next 29 de; hdc in bio of next
hdc. take marker out of hdc on previous row and place
in hdc just made; sc in bio of next 8 sc, take marker
out of de and place in last sc made; de in bio of next 20
de. take marker out of sc and place in last de made; sc
in bio of next 10 sc; turn - 79 sts.
The top at this point should measure approx 16V£"
(42cm) long.
As mentioned in the Pattern Notes, this would be the
time to make fitting adjustments in the beg ch to add
to the length or the bust.
Row 3: Ch 1; sc in bio of first 10 sc. take marker out
of de and place in last sc made: de in bio of next 20 de;
take marker out of sc and place in last de made; sc in
bio of next 8 sc: hdc in bio of next hdc, take marker
out of hdc on previous row and place in hdc just made;
de in bio of next 29 de, take marker out of tr and place
in last de made; tr in bio of next 11 tr. ending with
last tr in 4th ch of beg ch-4; turn - 79 sts.
Note: After working a few rows, you may not need
the stitch markers.
Rows 4-30 (34, 38, 42, 46, 50, 54, 58): Rep rows 2
and 3 for desired width, ending by working a Row 2
rep. End off after last row.
Note: If piece does not fit around front of body, you
may need to add more rows. To add more rows, add
an even number of rows on front and back so shells
on the edging and seams will come out right. Keep in
mind that this top stretches, so once the side seams
are sewn, the top should fit according to the size
you are making. Sizes are graded in increments of
2" (5cm) on front and 2" (5cm) on back, adding 4"
(10cm) per size around.
cap-sleeve top diagram 1
(without straps)
The back is the same as the front
but without the sc rows
51
back
Work same as front, replacing the 8 sc under bust
area with 8 de. Work back sts as follows: (10 sc, 58 de
and 11 tr - on all rows - 79 sts). With RS tog, match
up sts at sides and pin in place. Sew seams with yarn
and yarn needle, starting at bottom edge, leaving last
414"-5" (11-13cm) open for armhole opening (forming
a “V”). You can adjust the armhole opening later after
straps arc added, if needed.
Note: This top is meant to be fitted. Add more rows
(even number) for a looser fit.
straps
Make 2. All sts are worked in the bio.
Ch 41 (41, 41, 41, 45, 45. 45, 45).
top edge of each armhole opening on front and back at
**V” with Row 1 at top of armhole opening and pin in
place (see diagram on page 53). Sew strap with yam
and yarn needle. Placing strap here will allow you to
wear straps at the shoulder, or you can wear straps
off the shoulders by pushing them down a little. Rep
on other side of top. Turn top RS out.
shell edging for straps
Right strap: With RS of right strap facing and top
upside down join yarn with si st in first unjoined st
on back armhole opening next to Row 10 of strap.
Row 1: * Ch 5, sk next 3 sts on strap, si st in next st:
rep from * across, ending with last si st in next st on
front armhole opening: turn - 10 (10,10,10,11.11.
11,11) ch-5 sps.
Row 1: (RS i De in 4th ch from hook (skipped chs
count as first de), de in each rem ch across; turn
- 39 (39, 39, 39, 43, 43, 43, 43) de.
Row 2: Ch 3 (counts as first de), sk first de,
de in bio of each de across, ending with
last de in first skipped ch; turn - 39 (39,
39. 39, 43, 43, 43, 43) de.
Row 3: Work same as Row 2, ending
with last de in 3rd ch of beg ch-3.
Rows 4-10: Rep Row 3, 7 times more.
End off after last row. Strap should
measure approx 814" (814", 814", 814".
914". 914", 914", 914") x 414"; 22 (22, 22,
22, 24, 24, 24, 24) cm x 11cm.
attaching straps to top
Gather short ends of strap with yam
and yarn needle to measure approx 214"
(6.4cm). Secure yarn with knot so it will
stay in place. With RS tog, place strap at
52
Row 2: Ch 1, sc in first ch-5 sp; * ch 5, sc in next
ch-5 sp; rep from * across; ch 3, join with si st in next
st on armhole opening; turn - 9 (9, 9. 9, 10, 10, 10,
10) ch-5 sps.
Row 3: Ch 1, sc in ch-3 sp; * shell with picots in next
ch-5 sp, sc in next ch-5 sp; rep from * across. Sizes
XSM-LG will end with a shell in last ch-5 Ip, si st in
next st on armhole opening. Sizes XLG-3X will end
with a si st in last ch-5 Ip. End off - 5 shells.
1 shell with picots = (1 hdc, picot. 1 de, picot, 1 de.
picot, 1 de, picot, 1 hdc)
Left strap: With WS of left strap facing and top
upside down, join yam with si st in first unjoined st
on back armhole opening next to Row 10 of strap.
Work rows 1-3 same as right strap edging.
center of next tr; rep from * around entire bottom
edge of top. working last si st in first si st - 60 (68, 76,
84. 92, 100,108, 116) ch-5 sps. If you added or deleted
vertical rows to top. number of ch-5 sps should be
same as total number of rows on front and back tog.
Row 2: SI st in next 2 chs, ch 1, sc in next ch; * ch 5,
sc in next ch-5 sp; rep from * around, ending with si st
in first sc - 60 (68, 76. 84. 92,100,108,116) ch-5 sps.
Row 3: Ch 1; work same as Row 3 of shell edging for
straps, beg at first * around bottom edge of top. End
with last sc in last ch-5 sp; join with si st in first si st.
End off- 30 (34, 38,42. 46. 50. 54, 58) shells. If you
added or deleted vertical rows to top, number of shells
should be half the total number of rows you worked
on front and back tog.
bottom shell edging
Row 1: With RS facing, join yarn to center of any
tr st at bottom of back; * ch 5, si st in center ch
of next ch-4 (which counts as a tr st), ch 5, si st in
adding elastic to neck edge
Beg in back, tie black elastic to any st on neck edge,
leaving a 3" (8cm) tail. With RS facing, join yam
with si st in same st as elastic, work sc evenly spaced
around entire neck edge, encasing elastic between
top and sc sts; si st in first si st. Try on top and adjust
elastic to fit. End off yarn and secure elastic with
knot. Weave in ends.
place strap ends here
cap-sleeve top
diagram 2 (attaching
the straps)
53
SKILL LEVEL:
LIGHT
LEGER
Ligero
0 ADVANCED
BEGINNER
0 INTERME&!/
Fitted or loose? Long sleeves
or short? This popular
classic is all about options.
Graduated stitching is used
only at the neck area. Because
this sweater is worked in the
back loop only, it stretches.
therefore allowing lots of
ease. The decorative
ribbon can be left
off if you prefer a
simpler look.
balletneck sweater
size
' ts sizes XSM (SM, MED, LG, XLG, 1X, 2X, 3X)
Note: See Sizing Information on page 18 to
choose appropriate size.
= nished bust: 28" (32", 36", 40", 44", 48", 52",
56 ); 71 (81, 91, 102, 112, 122, 132, 142) cm
materials
- 4, 5, 5, 6, 6, 7, 7) skeins (3 oz/85 g/221 yd per
skein) #3 light worsted-weight yarn
Used in this project: Bernat Satin Sport
Substitute: Lion Brand Microspun)
Size 1/9 (5.5mm) crochet hook
1% yds (114cm) of %" (2cm) wide satin ribbon
Yam needle
Stitch markers
Aleene's OK To Wash-lt glue (optional)
gauge
If you have more than 12 hdc to 3" (8cm), your sts
are too tight, and you need to use a larger hook.
instructions
12 hdc and 9 hdc rows = 3" (8cm)
(bio sts and rows)
4 hdc and 4 hdc rows = 11/s" (3cm) (sts in both Ips:
yoke and cuffs)
6 tr = 1%" (4cm)
stitches used
ch, si st, sc, hdc, tr
pattern notes
All sts except the yoke and cuffs are worked in
the bio. The beg ch is at the side, and the sweater
is worked from side to side. The top area of the
sleeve is worked onto the armhole edge after the
side seams are sewn. The piece for the bottom
of the sleeve (the insert that is underneath) is
worked separately, and rows are attached to the
underarm opening as you go. Then the lower-
sleeve insert is sewn to the upper-sleeve piece.
For a tighter fit: Make sweater one size smaller
or delete rows in the front and back section.
For a longer top: Add to beg ch by adding 1
ch per hdc. 4 hdc per 1" (3cm) or 12 hdc per 3"
(8cm). Be sure to add extra number of hdc to each
row of pattern to avoid confusion.
For short sleeves: Instead of chaining 62 on Row
1 of sleeve, delete number of hdc by deleting chs
(4 hdc per 1" [3cm], or 12 hdc per 3“ [8cm].
All sts are worked in the bio.
front
All sizes: Loosely ch 48.
Row 1: (WS) hdc in 3rd ch from hook and in each rem
ch across; turn - 46 hdc.
For XSM, SM, MED and LG only:
Row 2: (RS) Ch 2 (does not count as a st), hdc in
55
bio of each hdc across, ch 21 (armhole section}; turn - 46 hdc and 21 chs. At this point, rows 1 and 2 (underarm rows) should measure approx 1Ш" (29cm) in length. Row 3: (Beg of row is at neck edge.) Sc in 2nd ch from hook, hdc in next 19 chs (20 sts worked on ch), hdc in bio of next 46 hdc; turn - 66 sts (65 hdc and 1 sc). Row 4: Ch 2 (does not count as a st), hdc in bio of each hdc, sc in bio of next sc; turn - 66 sts. Long rows should measure approx 16’/2" (42cm). Row 5: Ch 1, sc in bio of first sc, hdc in bio of next 65 hdc; turn - 66 sts. Rows 6-40 (46, 52, 58): Rep rows 4 and 5 appropriate number of times, ending by working a Row 4 rep. End off after last row. Row 41 (47, 53, 59): This begins the first of 2 short rows at the side edge. With WS facing, beg at top neck edge, count over 20 sts and pm in 21st st. Join yarn with si st in same st as marker, ch 2 (does not count as a st), hdc in bio of same st and in next 45 hdc; turn - 46 hdc. Row 42 (48, 54, 60): Ch 2, hdc in bio of each hdc across. End off - 46 hdc. For XLG and 1X only: Rows 2-3: Ch 2 (does not count as a st), hdc in bio of each hdc across; turn - 46 hdc. Rows 4-7: Work same as rows 2-5 on XSM. Rows 8-62 (68): Rep rows 4 and 5 on XSM appro- priate number of times, ending by working a Row 4 rep. End off after last row. Rows 63 (69): Work same as Row 41 on XSM. Rows 64-66 (70-72): Ch 2, hdc in bio of each hdc across; turn - 46 hdc. End off after last row.	For 2X and 3X only: Rows 2-5: Ch 2 (does not count as a st), hdc in bio of each hdc across; turn - 46 hdc. Rows 6-9: Work same as rows 2-5 on XSM. Rows 10-72 (78): Rep rows 4 and 5 on XSM appro- priate number of times, ending by working a Row 4 rep. End off after last row. Row 73 (79): Work same as Row 41 on XSM. Rows 74-78 (80-84): Ch 2, hdc in bio of each hdc across; turn - 46 hdc. End off after last row. Note: First and last 2 (2, 2, 2. 4, 4, 6, 6) rows are short underarm rows. back Work same as front. right seam With RS tog, match up sts on first and last short rows. Pin in place. Sew seam at right of sweater with loose si sts, catching both Ips of each st in short row area. Left seam will be sewn later. diagram A attaching upper sleeve to balletneck sweater rxxk end \	j	Attach yarn here \	J	(bio) and *c in first —iS	«с. hdc in next 19 hdc »nd then ch 63 _	iooscly for skxive You'll have 81 «s on each row of sleeves.
56
-ight sleeve
“_-st 20 sts on Row 1 of upper sleeve will be crocheted
to side edge of armhole opening. With back of
- - eater on your lap and front facing, place sewn
- am to your left and neck edge to your right.
Joper sleeve:
row 1: With RS facing and working in free Ips of chs
a: beg of first long rowjoin yarn with si st in first ch
з: neck edge at far right on front piece; see diagrams
A on page 56 and В on page 57), ch 1, sc in same sp as
joining, hdc in bio of next 19 sts. ch 63; turn - 1 sc, 19
hdc and 63 chs.
Row 2: Being careful not to twist ch, hdc in 3rd ch
from hook (skipped chs do not count as a st), hdc in
next 60 chs (61 hdc in ch), hdc in bio of next 19 hdc. sc
m next sc; turn - 81 sts (80 hdc and 1 sc).
Row 3: Ch 1, sc in bio of first sc, hdc in bio of next 80
hdc: turn - 81 sts.
around top and sides of your arm to determine if you
need more or less rows. Remember you will have the
added lower sleeve that will be sewn to upper sleeve
(see diagram D on page 58).
Lower sleeve insert:
Lower sleeve will be sewn to upper sleeve later.
Row 1: With RS of short underarm rows facing join yam
with si st in top of last hdc on last short underarm row at
underarm edge (see diagram C on page 57). Ch 63; turn.
Hdc in 3rd ch from hook (skipped chs do not count as a
st), hdc in next 60 chs join with si st in edge of underarm
(short rows at beg and end of front and back that were
seamed), si st in edge of next row on underarm, ch 1;
turn - 61 hdc.
Row 2: Hdc in bio of next 61 hdc; turn - 61 hdc.
Row 3: Ch 2 (does not count as a st), hdc in bio of
next 61 hdc, join with si st in edge of underarm, ch 1;
turn - 61 hdc.
Row 4: Ch 2 (does not count as a st), hdc in bio of next
80 hdc, sc in bio of next sc; turn - 81 sts.
Rows 5-19 (21, 23, 23, 25, 25, 27, 29): Rep rows
3 and 4 appropriate number of times, ending by
working a Row 3 rep. End off after last row - 81 sts
on each row. Put sweater on and place upper sleeve
Row 4: Rep Row 2.
Row 5: Rep Row 3.
Row 6: Rep Row 2. Size XSM-MED - end off. Sizes
LG-3X, keep repeating rows 3 and 2 until rows meet
at other side edge of armhole, filling up the open
space. This piece will hang loose.
diagram В
attaching upper
sleeve, continued
At this point,
upper sleeve is
loose end not
attached to back
at shoulder or
Iwor sleeve
insert yet.
attaching underarm piece
(lower sleeve insert)
short rows at
underarm edge
Attach yarn for
first row of lower
sleeve here next to
21st st. and ch 63
/ Sleeve was
/ attached here.
Lower sleeve insert will oe loose
and will be scamod on each side
to upper sleeve sides later
57
»
left seam and left sleeve
Sew left side seam of sweater same as right side
seam. Turn sweater over so back is facing. Work left
upper-sleeve piece and left underarm insert same as
for the right sleeve.
Sew upper sleeve to lower sleeve: (Right sleeve) Turn
sweater inside out. With RS tog, sew each side of lower
sleeve to each side edge of upper sleeve. Sew A to A and В
to B. Sew left sleeve same as right sleeve (see diagram D
on page 58). Sew rem 20 sts on upper sleeves to armhole
openings on front and back. Turn sweater RS out.
same st as joining, sc in valley (between ridges), * sc
in top of next ridge, sc in valley, rep from * around.
SI st to first sc. Do not turn.
Rnds 2 and 3: Ch 2 (does not count as a st), hdc in same
st as joining, and in each sc around, sl st to first hdc.
Rnds 4 and 5: Ch 2; * hdc in next 9 hdc, sk next hdc:
rep from * around: hdc in rem hdc as needed; join
with sl st in first hdc.
Rnd 6: (Rnd where ribbon will be placed) Ch 4. tr in
next hdc and in each hdc around; join with sl st in 4th
ch of beg ch-4.
yoke
All sizes - worked in both Ips.
Rnd 1: With RS facing,join yarn with sl st in edge
of any row on back neck edge of sweater. Ch 1, sc in
Rnd 7: Ch 1, sc in same ch as joining, sc in each tr
around; join with sl st in first sc.
Rnd 8: Ch 1. sc in same sc as joining and in next 8 sc;
* sk next sc, sc in next 9 sc; rep from * around, sc in
rem sc as needed; join with sl st in first sc. End off.
optional sleeve cuff
Many sleeves begin at the wrist and can’t be length-
ened if they’re too short, but with this method you can
add the optional cuff if you have longer arms.
Rnd 1: With RS of sleeve facing Join yarn with sl st
in edge of any row at lower edge of sleeve, ch 1, sc
in same st as joining, sc in edge of each row around;
join with sl st in first sc.
Rnds 2-7: Ch 2 (does not count as a st), hdc in same
stitch as joining and in each st around Join with sl st
in first hdc. End off after last row.
Rep rnds 1-7 on other sleeve.
finishing
Weave in loose ends, using a fabric glue such as
Aleene’s OK To Wash-It to secure ends, if needed. Cut
ends of ribbon at a slant and weave through tr rnd of
yoke as follows: With front of sweater facing and beg
where desired, weave ribbon and tie it into a bow.
58
SKILL LEVEL
(WRAP):
MEDIUM
MOYEN
Medio
BEGINNER
©ADVANCED
BEGINNER
Q INTERMEDIATE
SKILL LEVEL
(EDGING, FLOWER):
BULKY

BULKY
Abu'tado
BEGINNER
0 ADVANCED
BEGINNER
e
The beginner will have
no problem making the
basic wrap. Dress it
up with decorative
lace edging and a
connective flower, or
leave off these adorn-
ments for a simpler look.
shoulder wrap
with edging & flower
size
stitches used
Fits sizes XSM-SM (MED-LG, XLG-1X, 2X-3X)	ch, si st, sc, de
Approx 8" tall x 37" (40", 43", 47") wide; 20cm x
94 (102, 109, 119) cm
To work shell: [(de, ch 2) 4 times, de] in
designated sc.
materials
To work small shell: [(de, ch 2) 3 times, de] in
designated st.
Main body: 2 skeins (3 oz/197 yd/85 g per
skein) any #4 medium worsted-weight yarn (A)
Used in this project: Lion Brand Wool
Ease in Oxford Gray
Edging (optional): approx 1 oz of
1 skein (4 oz/335 yd/113 g) of any
#2 fine sport-weight yarn (B)
Used in this project: Red Heart
Luster Sheen yarn in black (Substitute:
#3 crochet thread)
Flower (optional): approx ’/2 oz of
1 skein (2.80 oz/84 yd/80 g) of any
#5 bulky yarn (C)
Used in this project: Patons Rumor in
Hibiscus Heather (Substitute: any
#4 medium worsted-weight yarn)
Sizes J/10 (6mm) and G/6 (4mm) crochet
hooks for wrap; D/3 (3.25mm) hook for edging;
I/9 (5.5mm) for flower
Yarn needle
gauge
With G hook, 6 si sts = 1" (3cm)
pattern notes
This wrap is made in
one piece with no seam.
It has de worked on the
same row with si sts,
which form the ties. De
stitches (center) are worked
in the bio, but the si sts on
With J hook, 10 de and 6 de rows = 3" (8cm)
With D hook, 1 shell = 114" (3cm)
With I hook, flower = 3" (8cm) diameter
the ends (ties) are worked in the
flo. This wrap can be made wider or narrower by
adding chs to or deleting them from center of
beg ch in multiples of 4 and adding same number
of de to each row.
60
b
fistructions
With color A and G hook, ch 27.
Change to J hook and ch 93 (105.
117.129). Change to G hook and
ch 28 - 148 (160.172,184) chs.
Row 1: (WS) Loosely sl st in 2nd
ch from hook and in next 26 chs.
Change to J hook and de in next
93 (105.117,129) chs. Change to
G hook and loosely sl st in next 27
chs; turn - 54 sl sts and 93 (105,
117,129) de.
Row 2: With G hook, ch 1, sl st
loosely in (flo) of next 27 sl sts. Change
to J hook and de in (bio) of next 93 (105.
117.129) de. Change to G hook and sl st
loosely in (flo) of next 27 sl sts; turn - 54
sl sts and 93 (105,117, 129) de.
Rows 3-16: Rep Row 2, 14 times more. End off
after last row.
Note: For taller wrap, work more rows.
optional open-shell edging
Sts are worked in both Ips.
flower
Sts are worked in both Ips.
With I hook and color C, loosely ch 52. Sc in 2nd ch
from hook; * sk next ch, small shell (see Stitches Used
on page 60) in next ch, sk next ch, sc in next ch; rep
from * across to last 6 chs; sl st in last 6 chs. End off,
leaving a 14" (36cm) tail - 11 petals (small shells).
Row 1: With WS facing and D hook, join color В with
sl st in first de at top edge of wrap, ch 1, sc in same de
as joining; * ch 6. sk next 3 de, sc in next de; rep from
across, ending with sc in last de, sl st in next 2 sl sts
on tie; turn.
Row 2: Shell (see Stitches Used on page 60) in first sc;
* sc in next ch-6 Ip, shell in next sc, rep from * across;
sk next sl st on tie, sl st in next sl st, end off - 24 (27.
30, 33) shells. Rep rows 1-2 on opposite edge of wrap.
Optional: Before rolling petals to form flower, work a
sc edging along top edge with color B.
With yarn needle, weave a strand of C through
bottom straight edge and pull tail to slightly gather
bottom of flower, rolling it with first shell in center
and 6 sl sts at outer edge, shaping petals into a rose.
Take several sts through all thicknesses to secure in
place. To form a circle (in back of flower) stitch tail at
end of 6 chs and sl sts to bottom of flower for closure.
It will resemble a napkin holder. Weave in ends.
Insert ties (sl st ends of wrap) into circle.
61
SKILL LEVEL:
BULKY
BULKY
Abuitado
BEGINNER
©ADVANCED
BEGINNER
@ INTERMEDIATE
If this sizable bag still isn’t
big enough to stash all
your stuff, make it larger by
adding more rows. A tip to
remember when making any
purse: Crochet tightly so it
will be firm enough to hold
its contents.

size
Approx 11" (28cm) tall x 18" (46cm) wide (at widest
point), 8" (20cm) wide (at top), without handle
materials
3 skeins (3.5 oz/121 yd/100 g per skein) any
=5 bulky yarn
Used in this project: Patons Shetland Chunky
75% acrylic/25% wool yarn in Taupe (Substitute:
Sernat Softee Chunky, Moda Dea Tweedie Dee or
3atons Rumor)
Sizes J/10 (6mm) and G/6 (4mm) crochet hooks
1 brown purse handle with metal rings at ends, any
size; handle shown is approx 13“ (33cm) when folded
Yarn needle
gauge
With G hook, 10 sc and 9 sc rows = 2" (5cm)
With J hook, 10 de and 6 de rows (at widest
point) = 3" (8cm)
stitches used
ch, sc, de
pattern notes
This purse is worked in one piece, folded and
seamed up on each side. The narrow top edge is
folded over, and then the handle is attached.
instructions
All sts are worked in the bio.
With G hook, ch 22; change to J hook and ch 60;
change to G hook and ch 23 - 105 chs.
Row 1: (RS) With G hook, sc in 2nd ch from hook, and
in next 21 chs; change to J hook and de in next 60 chs;
change to G hook and sc in rem 22 chs; turn - 104 sts
22 sc. 60 de, 22 sc) on same row.
Row 2: With G hook, ch 1, sc in bio of first 22 sc;
change to J hook and de in bio of next 60 de; change to
G hook and sc in bio of next 22 sc; turn - 104 sts.
Rows 3-37: Rep Row 2.35 times more, or for desired
width of bag/purse. End off after last row. Fold piece
in half with sc sections at top and WS tog. Match up
sts on each side and pin in place. Sew side seams and
weave in ends.
Note: For a wider or more open neck on the purse,
work the sc on each end with a hook larger than size
G. Change back to size J hook for de in center of rows.
Fold top edge over to RS and tack down. Attach
handles to inside-top side seams.
getting a handle on it
If you have trouble finding purse handles
you like, recycle handles from an old purse
you already have or visit a thrift store, where
you'll find a variety of purses for a very
reasonable price which you can remove
the handles from.
63
SKILL LEVEL:
LIGHT
If the task of weaving in
ends seems like a huge
chore, substitute the stripes
in this project for a solid color.
Try making the top without
the turtleneck for a totally
different look.
LEGER
Lige<o
ADVANCED
BEGINNER
striped, sleeveless
turtleneck sweater
size
F ts sizes XSM-SM (MED-LG, XLG-1X, 2X-3X);
size shown is a small
Note: See Sizing Information on page 18 to
zhoose appropriate size.
finished length (all sizes): 23" (58cm) from top of
Turtleneck to bottom
F nished bust: 31" (38%“, 43%“, 50%"); 79 (97, 110,
129) cm
materials
10 (10, 10, 12) balls (50 g/92 yd per ball) any
=3 light worsted-weight yarn: 2 (2, 2, 3) balls in
each color
Used in this project: Goshen by Valley Yarns
(cotton, modal and silk blend) in Linen (A), Lake
(B), Mulberry (C), Purple Haze (D) and Green
Apple (E) (Substitute: Caron Simply Soft)
Size G/6 (4mm) crochet hook
Yarn needle
Stitch markers
gauge
14 sc and 11 sc rows = 3" (8cm)
16 de and 9 de rows = 4" (10cm)
stitches used
ch, si st, sc, hdc, de
striped, sleeveless turtleneck
sweater diagram
pattern notes
Beginning chain is at side seam, and rows are
worked vertically. Side and shoulder seams are
sewn, and then the turtleneck is worked onto the
neck edge and attached as you go.
Color sequence for front and back: А, В, C, D, E
Color sequence for collar: A, С, E, B, D (or desired
color sequence)
For a longer top: 4 de = 1" (3cm), so add 4
more chs per each additional inch desired. Add
same number of de on each row as number of
chs added.
For a little girl's dress: Follow the same basic
pattern, but use a smaller-weight yarn such as a
#2 fine sport-weight. Make your beg ch length
needed for any size girl, and then work number of
rows needed to fit front of body. Work back same
as front.
65
instructions
All sts are worked in the bio.
front
Notes: Following color sequence
(A-E), working I row of each color
throughout. Rows 1-5 (7, 9, 11)
form first shoulder strap at neck
edge, and rows 31-35 (37-43,
41-49, 47-57) form 2nd shoulder
strap at neck edge.
With A. ch 89. For a longer top, add
to the beg ch (see note on page 65).
Row 1: (RS) Sc in 2nd ch from hook, sc in
next 27 chs, hdc in next ch, de in next
59 chs. End off; turn - 88 sts (28 sc, 1 hdc
and 59 de).
Row 2: With WS facing, join В with si st in bio of
first de, ch 3 (counts as de), sk first de, de in bio of next
58 de, hdc in bio of next hdc, sc in bio of next 28 sc.
End off; turn - 88 sts.
Row 3: With RS facing,join C with si st in bio of first
sc. ch 1, sc in bio of same sc as joining, sc in bio of next
27 sc, hdc in bio of next hdc, de in bio of next 59 de.
End off: turn - 88 sts.
Rows 4-5 (7, 9, 11): Rep rows 2 and 3,1 (2, 3, 4)
times more, changing color at beg of each row and
following color sequence (A-E).
Row 6 (8, 10, 12): With WS facing Join next color
yam with si st in bio of first de, ch 3 (counts as de),
sk first de, de in bio of next 58 de, hdc in bio of next
hdc, sc in bio of next 19 sc. leaving rem 9 sc unworked
(neck edge). End off; turn - 79 sts (59 de, 1 hdc and
19 sc).
Row 7 (9, 11, 13): With RS facing, join next color
yarn with si st in bio of first sc, ch 1, sc in bio of same
sc as joining, sc in bio of next 18 sc, hdc in bio of next
hdc, de in bio of next 59 de. End off; turn - 79 sts.
Row 8 (10, 12, 14): With WS facing Join next color
yam with si st in bio of first de, ch 3 (counts as de), sk
first de. de in bio of next 58 de, hdc in bio of next hdc.
sc in bio of next 19 sc. End off - 79 sts.
Rows 8-30 (10-36, 12-40, 14-46): Rep rows 7-8
(9-10,11-12, 13-14) appropriate number of times,
then rep Row 7 (9, 11,13) once more, changing color
at beg of each row and following color sequence.
Hold piece up to body. Keeping in mind that 5 (7, 9.
11) more rows will be worked and piece will stretch
because of sts being worked in bio, add or remove
rows (in increments of 2 rows) as needed to fit your
body.
Row 31 (37, 41, 47): (Rows for other strap) With RS
facingjoin next color yarn with si st in bio of first sc.
66
±. 10, sc in 2nd ch from hook and in next 8 chs (9 sc
ca strap), sc in bio of same sc as joining, sc in bio of
aext 18 sc. hdc in bio of next hdc, de in bio of next 59
i: End off - 88 sts.
Sows 32-35 (38-43, 42-49, 48-57): Rep rows 2 and
: 2 13.4. 5) times more, changing color at beg of each
- -v and following color sequence.
□ack
Work in same color sequence as front.
With A, ch 80. For a longer top, add same number of
beg chs as on front.
Row 1: (WS) sc in 2nd ch from hook and in next 18
chs. hdc in next ch. de in next 59 chs. End off; turn
- 79 sts (19 sc. 1 hdc and 59 de).
Row 2: With RS facing, join В with si st in bio of first
de. ch 3 (counts as de), sk first de, de in bio of next 58
de. hdc in bio of next hdc. sc in bio of next 19 sc. End
off- 79 sts.
Row 3: With WS facing, join C with si st in bio of first
sc. ch 1, sc in bio of same sc as joining, sc in bio of next
18 sc. hdc bio of next hdc, de in bio of next 59 de. End
off: turn - 79 sts.
Rows 4-35 (43, 49, 57): Rep rows 2 and 3 appro-
priate number of times, changing color at beg of each
row and following color sequence (A-E).
side and shoulder seams
With RS tog, match up sts at side of front and back
first and last rows). Place safety pins along edges
to hold in place. Beg at bottom st, sew seam up to st
number 48 (or to 12th de below hdc if top is longer)
with matching yarn and yarn needle, but do not
secure or end off. Rep on other side. With RS tog,
match up 5 (7, 9, 11) rows at shoulder strap, and sew
back shoulder seam with yarn and yarn needle. Turn
top RS out and try it on to make sure the armholes
fit. Adjust by sewing up more or less sts at sides. End
off and secure.
turtleneck collar
With RS facing, starting at back, join desired color
(or first color of color sequence in Pattern Notes) with
si st in top edge of any sc row. Ch 24.
Note: Colors on collar will not be matched up with
colors on front and back, because you will work 1 de
at the end of every 2 sc rows. In other words, you will
be skipping every other sc row as you attach collar to
neck edge.
Row 1: De in 4th ch from hook (3 skipped chs count
as de), de in each rem ch across. Sk next sc row on
neck edge, si st in edge of next sc row. End off; turn
- 22 de.
Row 2: With WS facing, sk next sc row on neck edge
and join next color with si st in edge of next sc row,
de in bio of each de across, working last de in first
skipped ch on Row 1. End off; turn - 22 de.
Row 3: With RS facing, join next color in bio of first
de, ch 3 (counts as de), sk first de, de in bio of next 21
de, sk next sc row on neck edge, si st in edge of next sc
row. End off - 22 de.
Row 4: Work same as Row 2. working last de in 3rd
ch of beg ch-3.
Rep rows 3 and 4 around entire neck edge, following
color sequence. With RS of Row 1 and last row of collar
tog, sew seam, making sure seam is on underside of
collar when folded over on outside. Weave in ends.
If desired, tack down folded collar to neck edge
on back.
67
SKILL LEVEL:
BULKY	В. GI NN E R
£4 ADVANCED
BEGINNER
BULKY	л\\ь
Abviudo	ER M ED I AT E
Crochet yourself a pair
of these comfy slippers to
keep your toes toasty on
chilly nights. Elastic woven
through the top edge holds
them snugly around the foot.
slippers with rose
68
~ -.s .vomen's sizes 5-6 (7-8, 9-10)
-эргох 8%" (1014s", 12м); 22 (27, 31) cm long
~z custom fit to any size foot, including smaller or
='cer sizes, see Pattern Notes.
^jterials
' skein (3.5 oz per skein) any #5 bulky-weight
•am (A)
Used in this project: Yarn Bee Dreamy Chenille
- Dark Plum (Substitutes: Lion Brand Suede or
=-y ~4 medium-weight yarn)
' oal #3 crochet cotton in lavender (for rose) (B)
3 yds #3 crochet thread in green (for leaf) (C)
S zes J/10 (6mm) and E/4 (3.5mm) crochet hooks
~.vo black 25" (64cm) strands Dritz Beading
E astic
•arn needle
gauge
With J hook, 7 sc and 5 sc rows = 2" (5cm)
With E hook, rose = 2’/2" (6cm) diameter
stitches used
ch, si st, sc, hdc, de
pattern notes
The slippers are basically worked in a square in
the bio. Ends are seamed, and elastic is woven
through top edge to help keep the slippers on
the foot. The rose is worked in one long strip and
then rolled up.
For smaller foot: Work only enough chs at beg to
fit around the sides and bottom of foot. Work less
rows, following the pattern, to fit a smaller foot.
For larger foot: Work enough chs at beg to fit
around sides and bottom of foot. Following the
pattern, work more rows than specified to fit a
longer foot.
instructions
All sts are worked in the bio.
Make 2.
For all women’s sizes 5-10: with J hook and color A.
ch 23. (For wide feet, work more chs here to fit around
foot and more sc on each row.)
Row 1: (WS) Si st in 2nd ch from hook, sc in next 20
chs, si st in last ch: turn - 22 sts.
Rows 2-22 (26, 30): Ch 1, si st in bio of first si st, sc
in bio of next 20 sc, si st in bio of last si st; turn -
22 sts. End off yarn after last row, leaving a 12"
(30cm) tail for sewing scam. Place slipper around foot.
Add or delete rows as needed for proper length.
seams
Fold slipper in half widthwise. With RS tog, sew
seams at short ends with yarn and yarn needle. Turn
RS out. Try slipper on foot to make sure it fits. Add
or delete rows to fit, if necessary. With needle, weave
elastic through Ips on inside of slipper at top edge,
pulling elastic so slipper will fit snugly around foot.
69
Tie ends of elastic to secure. Weave in ends.
rose
Make 2. Worked in both Ips.
With E hook and color B. ch 6. leaving a 12" (30cm) tail
for gathering bottom edge of flower later.
Row 1: Sc in 2nd ch from hook and in next ch, hdc in
next ch. de in last 2 chs; turn - 5 sts.
Row 2: Ch 3 (counts as de), sk first de. de in next de,
hdc in next hdc, sc in last 2 sc: turn - 5 sts.
Row 3: Ch 1. sc in first 2 sc, hdc in next hdc, de in
next de, de in 3rd ch of beg ch-3; turn - 5 sts.
Rows 4-44: Rep rows 2 and 3, 20 times more, ending
with a Row 2 rep. Do not end off; turn.
Row 46: Rep Row 3.
Row 45: Ch 3 (counts as de), sk first sc, de in next sc,
hdc in next hdc, sc in next de, sc in 3rd ch of beg ch-
3; turn.
Rows 47 and 48: Rep rows 2 and 3.
Row 49: Ch 3 (counts as de), sk first de, de in next de,
hdc in next hdc, si st in last 2 sc. End off. Weave tail
at beg of Row 1 through bottom edge of Row 1 over to
beg st on Row 1, then through edge of rows and pull
to gather, rolling up as you go, with Row 1 in center,
so it will form a rose.
leaf
Make 2.
With E hook and color C, ch 12. si st in 2nd ch from
hook, sc in next ch, hdc in next ch, de in next 8 chs,
ch 1, si st around post of last de in and in ch at base of
last de. ch 3 (counts as de), working in free Ips of chs
on opp side, sk first ch. de in next 7 chs. hdc in next ch.
sc in next ch, si st in last ch. End off. Weave in ends.
Sew leaf and rose to top of slipper as shown in photo.
70
SKILL LEVEL:
BULKY
MEDIUM
MOYEN
BULKY
©ADVANCED
BEGINNER
O' intermedia
Styled much like the popular
isherman’s hat, this hat looks
nandsome on anyone. This
pattern features most of the
p-aduated stitches in the
book: however, the bulky
:weed yarn makes this a
fast one to finish. On
page 74 are instruc-
tions for making a
pair of mittens to match.
flared tweed hat
with mittens
'.л	VUiru алш ШI ;'!0
71
flared tweed hat
size
Fits women's sizes SM, MED and LG
Project model is approx 9" (23cm) from crown to
brim x 22" (56cm) circumference.
materials
For body of hat: 1% skeins (3 oz/123 yd/85 g
per skein) any #5 bulky yarn
Used in this project: Patons Shetland Chunky
Tweeds in Earthy Brown
For flower: 1 oz any #4 medium worsted-
weight yarn
Used in this project: Moda Dea Washable Wool
in Moss Green
Size I/9 (5.5mm) crochet hook
1 flat washable bead, approx 5/e" (2cm) diameter
Matching sewing thread and sewing needle
Yarn needle
gauge
13 de and 6 de rows = 4" (10cm)
stitches used
ch, sl st, sc, hdc, de, htr, tr
pattern notes
This hat is worked from side to side, and all sts are
worked in the bio, so the hat will stretch around
the head.
instructions
All sts are worked in the bio.
With brown, ch 30.
Row 1: (WS) Working in back bar of chs, sl st in in
2nd ch from hook, sc in next 2 chs, hdc in next ch, de
in next 19 chs, htr in next ch, tr in next 5 chs; turn
- 29 sts (including sl st).
Row 2: (RS) Ch 4 (counts as first tr), sk first tr, tr in
bio of next 4 tr, htr in bio of next htr, de in bio of next
19 de, hdc in bio of next hdc, sc in bio of next 2 sc, sl st
in last sl st; turn - 29 sts.
Row 3: Ch 1, sl st in sl st. sc in bio of next 2 sc. hdc
in bio of next hdc, de in bio of next 19 de, htr in bio of
next htr, tr in bio of next 4 tr, tr in 4th ch of beg ch-4,
turn - 29 sts.
Rows 4-34: Rep rows 2 and 3, 15 times more, then
rep Row 2 once more. End off after last row, leaving
an 18" (48cm) tail for sewing side seam.
There is no front and back to this piece. Place founda-
tion ch and last row, with RS tog. Starting at bottom
flared edge, sew side seam with tail and yam needle
With yarn needle, weave yarn through top edges
(crown) and pull to gather, closing up hole at top.
Secure and end off.
72
top stitching
With yarn needle and double strand of
green, weave yam through all rows
between 8th and 9th sts from the
bottom edge (see photo). Secure
ends. Weave in all ends.
xlower
Sts are worked in both Ips.
With green, ch 38.
Sc in 2nd ch from hook; * hdc in next
ch. de in next ch, 3 tr in next ch, de in
next ch, hdc in next ch, sc in next ch;
rep from * across - 49 sts (6 petals).
End off, leaving a 10" (25cm) tail. With
yarn needle, weave tail through lower
straight edge and pull to gather, forming
a flower with 6 cupped petals. Sew ends of
flower tog to secure.
finishing
Center flower on RS of hat on top of woven strands.
Sew flower to side of hat, tying 2-3 knots on WS to
secure. Sew bead to center of flower with sewing
thread and needle. Weave in ends.
switch it up
Instead of sewing the flower onto the hat,
attach a pin in back and use it as a remov-
able accent on a lapel or a purse. Make
flowers of many different colors so you
can switch them out.
73
1
mittens
size
Fits women's sizes XSM-MED (LG-XLG)
Finished length: approx 9" (10"); 23 (25) cm
materials
For body of mittens: 1 skein (3 oz/123 yd/85 g
per skein) any #5 bulky yarn
Used in this project: Patons Shetland Chunky
Tweeds in Earthy Brown
For flowers: 1 oz any #4 medium worsted-
weight yarn
Used in this project: Moda Dea Washable Wool
in Moss Green
Sizes I/9 (5.5mm) and J/10 (6mm) crochet hooks
(see Pattern Notes)
2 fiat washable beads, approx ’/2" (1cm)
instructions
Yarn needle
Stitch markers
gauge
With I hook: 14 de = 4" (10cm); 7 de rows =
4" (10cm)
With J hook: 14 de = 43/e" (11cm); 7 de rows = 4
3/8" (11cm)
stitches used
ch, sl st, sc, hdc, de
pattern notes
For sizes XSM-MED and flowers, use the I hook;
use the J hook for sizes LG-XLG. The mittens are
worked from side to side, and all sts are worked in
the bio. The graduated stitches shape the mittens
and form the tightness at the wrists. The cuff is
flared and has a green flower attached at the
wrist. The mittens have only one seam.
All sts are worked in the bio.
With appropriate size hook and brown, ch 33.
Row 1: (RS) Working in back bar of chs, sl st in 2nd
ch from hook, sc in next ch, de in next 20 chs. sc in
next 4 chs, hdc in next ch. de in next 5 chs, turn - 32
sts (1 sl st, 1 sc. 20 de. 4 sc. 1 hdc and 5 de).
Row 2: Ch 3 (counts as first de), de in bio of next 4 de.
hdc in bio of next hdc, sc in bio of next 4 sc, de in bio of
next 20 de. sc in bio of next sc, sl st in next sl st; turn
- 32 sts.
Row 3: Ch 1, sl st in next sl st, sc in bio of next sc. de
in bio of next 20 de. sc in bio of next 4 sc. hdc in bio of
next hdc. de in bio of next 5 de; turn - 32 sts.
Rows 4-15: Rep rows 2 and 3. 6 times more. End off
after last row.
74
side seam
With RS tog, fold mitten in half,
matching up foundation chs with sts
on last row. Place marker through
both thicknesses (front and back)
in 16th st from end with 5 de
(wrist end). Starting at wrist end.
sew a side seam from lower edge
up to and including 16th st, with
long piece of yarn and yam needle,
using a whip st. Secure last st. End
off. Turn mittens RS out.
thumb
Sts are worked in both Ips.
Rnd 1: With RS facing, appropriate
size hook and seam at left join brown
with si st in st to right, of seam (17th st),
ch 2 (counts as first hdc), de in seam, pivot
mitten to left, hdc in next 4 sts on left side
edge of mitten (to left of seam); to connect to
other side of mitten, take Ip off hook, insert
hook in 4th st from right side of seam, put Ip
back on hook and pull Ip through st on right side of
mitten (to right of seam); ch 2 (counts as hdc), hdc in
next 3 sts on right side edge (to right of scam), working
last hdc in same st as joining; join with si st in 2nd ch
of beg ch-2, do not turn - 10 sts.
Rnd 2: Ch 2 (counts as hdc). de in next de. hdc in next
4 hdc. hdc in 2nd ch of next ch-2, hdc in last 3 hdc;
join with si st in 2nd chain of beg ch-2 - 10 sts.
Rnd 3: Ch 2 (counts as hdc), de in next de. hdc in each
rem hdc; join with si st in 2nd ch of beg ch-2 - 10 sts.
Rnds 4-5: Rep Row 3, 2 times more - 10 sts.
Rnd 6: Si st in each st around. End off. leaving a 6"
(15cm) tail. With yarn needle and tail, weave yarn
through si sts on Rnd 6 to close up hole.
Turn mitten WS out. Beginning at sts above thumb,
sew remainder of mitten side seam. Do not end off yarn.
Weave yam through edge of sts on top edge of mitten,
pulling tight to close up hole. Sew 1-2 sts through all
thicknesses to secure. End off. Turn RS out.
Rep instructions for other mitten. There is no left or
right mitten. Weave in ends.
flower
With I hook and green, follow instructions for flower
on page 73. Sew flowers to mittens at wrist, same as
hat (make sure to sew flowers on opposite sides of
mittens to make one left and one right mitten). Sew
beads to center of flowers.
75
Graduated stitches are what
give this scarf a gradual
flare at each end. A bulky
yarn is best, but the scarf
could be made with just about
any weight of yam. Wear
it loose around your neck,
wrapped around with the
ends hanging, or tied
into a bow for an
BULKY
Abultadc

BULKY
SKILL LEVEL:
О BEGINNER
©ADVANCED
BEGINNER
Л INTERMEDIATE
ultrafeminine look.
scarf with flared ends
size
stitches used
approx V/2 (center width) x 60" (4cm x 152cm)
ch, sc, hdc, de, htr, tr
materials
pattern notes
1 skein (1.75 oz/90 yd/50 g per skein)
#5 bulky yarn
Used in this project: Bernat Bling Bling in
Spotlight Sage
For a shorter scarf: Work less chs at beg.
For a wider scarf: Work more rows.
Size N/15 (10mm) crochet hook
Yarn needle
put a bead on it
This beaded version was made with Lion
Brand Suede yarn, in Waterlilies Print. Visit
www.mjcrochet.com for instructions.
gouge
5 sc and 4 sc rows = 2" (5cm)
6 de and 3 de rows = 23/*" (7cm)
8 tr and 3 tr rows = 4" (10cm)
instructions
Worked in both Ips.
Ch 111.
Row 1: Tr in 5th ch from hook (4 sk chs count as
tr), tr in next 7 chs, htr in next 2 chs, de in next 5
chs, hdc in next 2 chs, sc in next 72 chs. hdc in next
2 chs, de in next 5 chs, htr in next 2 chs, tr in next 9
chs: turn - 108 sts.
Row 2: Ch 4 (counts as first tr), sk first tr, tr in next
8 tr. htr in next 2 htr, de in next 5 de, hdc in next 2
hdc, sc in next 72 sc, hdc in next 2 hdc, de in next 5
de, htr in next 2 htr, tr in next 8 tr, tr in first skipped
ch; turn - 108 sts.
Rows 3 and 4: Rep Row 2 twice, working last tr in
4th ch of turning ch-4. End off after last row. Weave
in ends.
77
SKILL LEVEL:
FINE
AN
Fino
fiEGjNNER
ADVANCED
BEGINNER
INTERMEDIATE
This scarfs flirty ruffles
are made by using several
different stitches with
varying heights on the same
row. Tiny sequins in the yarn
give it a bit of flash. It can be
worn as an ascot or tied at
the neck, or just let the
к ends hang loose.
scarf vith ruffled ends
size
pattern notes
approx 2У2" (center width) x 43" (6cm x 109cm)
materials
1 hank (225 yd/100 g per hank) #2 fine
sport-weight yarn
Used in this project: South West Trading
Company Yang (silk, bamboo and wool blend with
sequins) in Celery Green (Substitute: Tilli Tomas
Disco Lights, 100% spun silk with sequins)
Size H/8 (5mm) crochet hook
Yarn needle
gauge
13 sc = 4" (10cm); 9 sc rows = 2" (5cm)
6 sts in brackets = 2" (5cm)
stitches used
ch, sc, hdc, de, htr, tr, hdtr, dtr
The graduated stitches are worked in the bio at
the ends of the scarf. The center of the scarf is
made using a single crochet worked in the front
loop only, creating a different look than the tradi-
tional single crochet.
For a wider scarf: Work more rows.
For a longer scarf: Add to your beg ch, remem-
bering to add same number to sc section (center
section of scarf).
try it in teal
This bold and
beautiful teal
version was
made with the
Tilli Tomas
Disco Lights
yarn in Jade.
instructions
Ch 143.
Row 1: Working in back bar of chs, hdtr in 6th ch
from hook (5 skipped chs count as dtr), tr in next
ch. htr in next ch, de in next ch. hdc in next ch. sc in
next 127 chs, hdc in next ch, de in next ch, htr in
next ch. tr in next ch. hdtr in next ch, dtr in last ch:
turn - 139 sts.
Row 2: Ch 5 (counts as first dtr), sk first dtr, hdtr in
bio of next hdtr, tr in bio of next tr, htr in bio of next
htr, de in bio of next de, hdc in bio of next hdc. sc in flo
of next 127 sc, hdc in bio of next hdc. de in bio of next
de, htr in bio of next htr, tr in bio of next tr. hdtr in bio
of next hdtr, dtr in bio of next dtr: turn - 139 sts.
Rows 3-12: Rep Row 2. 10 times more. End off after
last row. Weave in loose ends.
79

This unique scarf resembles
ones that have motifs sewn
together, but in this case
alternating taller and shorter
stitches worked on the
same row create the effect.
Fringe added with pretty
ladder yarn (sometimes
called carrying
yarn or thread)
makes the scarf
far from ordinary.
SKILL LEVEL:
Ф BEGINNER
ADVANCED
BEGINNER
BULKY
wavy fringed scarf
80
М11Ш
size
stitches used
approx 4" x 46“ (10cm x 117cm) plus fringe
ch, sc, hdc, de, tr
materials
Pattern stitch: 2 sc, 1 hdc, 2 de, 3 tr, 2 de, 1 hdc
(11 sts)
skein (100 g/3.5 oz/164 yd per skein) #5 bulky
suedelike yarn (A)
pattern notes
ball ladder yarn (B) (sometimes called carrying
yarn or thread; 12 yds used)
Try not to work sts too tight so scarf won't cup in.
Used in this project: Yarn Bee Dreamy Chenille
n Dusty Lilac (Substitute: Lion Brand Suede)
Size N/15 (10mm) crochet hook
Yarn needle
gauge
Each motif of 11 sts = 4 wide x 5%" long
10cm x 13cm)
instructions
All sts are worked in both Ips.
With 1 strand A and 1 strand В held tog, ch 98.
Row 1: De in 3rd ch from hook (2 skipped chs count
as hdc), de in next ch, tr in next 3 chs. de in next 2 chs,
hdc in next ch. (sc in next 2 chs, hdc in next ch, de in
next 2 chs, tr in next 3 chs, de in next 2 chs, hdc in next
ch) 8 times; turn - 97 sts.
Rows 2-4: Ch 2 (counts as first hdc), sk first st, de in
next 2 sts, tr in next 3 sts, de in next 2 sts, hdc in next
st, (sc in next 2 sts, hdc in next st, de in next 2 sts, tr
in next 3 sts, de in next 2 sts, hdc in next st) 8 times;
turn - 97 sts. End off after last row.
fringe
Cut 30 14" (36cm) strands of B. Take 3 strands at
a time and fold in half. Attach each set of 3 folded
strands to sts at both ends of scarf. Trim ends.
finishing
Weave in ends. You may have to steam this scarf to
make it lie flat.
81
LIGHT
LEGER
Ug®ro
SKILL LEVEL:
EEG INNER
©ADVANCED
BEGINNER
@ ’WTER.MEOlATE
The beautiful colors of the
sock yarn in this head-
band—which makes a good
ear warmer, too—are perfect
for your fall/winter wardrobe.
The adjacent single-crochet
and triple-crochet stitches
create the raised texture.
textured headband 1
iiawiiminBiimiBmwiw iwniwiwiwit
size
stitches used
2Va" x 42" (6cm x 107cm)
ch, sc, de, tr
One size fits most.
materials
1 skein (50 g/1.76 oz/164 yd per skein)
#3 light worsted-weight yarn
Used in this project: Moda Dea Sassy Stripes
sock yarn in #6250 (Crayon)
pattern notes
All sts are worked in both Ips. Working a sc next
to a tr is what creates the raised stitches.
For a smoother look: Eliminate the tr and work
all de in the center section.
For a wider headband: Work more rows.
Size G/6 (4mm) crochet hook
Yarn needle
gauge
5 sc and 7 sc rows = approx Ш" (3cm)
8 de and 6 de rows in patt = 2" (5cm)
instructions
Ch 174.
Row 1: (RS) Sc in 2nd ch from hook and in
next 43 chs. de in next 85 chs, sc in last 44
chs; turn - 173 sts.
Row 2: Ch 1. sc in first 44 sc, (sc in next de, tr in
next de) 42 times, sc in next de, sc in last 44 sc;
turn - 173 sts (42 raised sts).
Row 3: Ch 1. sc in first 44 sc, de in next 85 sts, sc in
last 44 sc; turn - 173 sts.
Rows 4-7: Rep rows 2 and 3 twice. End off after
last row. Weave in loose ends.
83
SKILL LEVEL:
LIGHT
LEGER
Ligero
№
ADVANCED
BEGINNER
.'YEPMEi
This headband, made with
a cotton-blend yarn that’s
nice and light for summer,
will be less stretchy. With a
bulkier, soft yarn and a much
larger hook (such as size J. К
or N), you can make a scarf
instead of a headband
(the same goes for the
project on page 82).
textured headband 2
size
2Уг' x 31" (6cm x 79cm)
stitches used
ch, sl st, sc, tr
One size fits most.
materials
pattern notes
Worked in both Ips. Sc next to tr creates the
raised stitches.
1 hank (2 oz/105 yd per hank) #3 light
worsted-weight yarn
Used in this project: Pearls by Prism hand
yarn in Moss/Olive with metallic threads
Size G/6 (4mm) crochet hook
Yarn needle
gauge
5 sl sts and 8 sl st rows = 1" (3cm)
8 sc and 9 sc/tr rows= 2" (5cm)
instructions
Ch 145.
-dyed
Row 1: (RS) Sl st in 2nd ch from hook and in next 42
chs, sc in next 58 chs, sl st in last 43 chs; turn - 144
sts (86 sl sts and 58 sc).
19 times, tr in next sc, sl st in last 43 sl sts; turn - 144
sts (20 raised sts).
Row 2: Ch 1, sl st in first 43 sl Sts, sc in next sc, (tr
in next sc, sc in next 2 sc) 19 times, sl st in last 43 sl
sts; turn - 144 sts (19 raised sts).
Row 3: Ch 1, sl st in first 43 sl sts, sc in next 58 sts, sl
st in last 43 sl sts, turn - 144 sts.
Row 4: (Raised sts are staggered on this row.) Ch 1.
sl st in first 43 sl sts (tr in next sc, sc in next 2 sc)
Row 5: Rep Row 3.
Rows 6-8: Rep rows 2-4.
Row 9: Rep Row 3.
Row 10: Rep Row 2.
Row 11: Rep Row 3. End off. Weave in ends.
85
SKILL LEVEL
LIGHT
BEGINNER
If smooth is more your style
try making this pretty head
band sans the raised stitches
LEGER
L-cero

smooth headband
size
2%" x 36" (6cm x 91cm)
One size fits most.
materials
1 ball (1.75 oz/200 yd/5O g per ball) variegated
=3 lightweight yarn
Used in this project: Bernat Cool Crochet in
Tie Dye Shades
Size G/6 (4mm) crochet hook
Yarn needle
gauge
5 sc and 7 sc rows = 1“ (3cm)
9 de and 7 de rows = 2%" (6cm)
stitches used
ch, sc, de
pattern notes
All sts are worked in both Ips.
For a wider headband: Work more rows.
instructions
Ch 161.
Row 1: (RS) Sc in 2nd ch from hook and in next 38
chs. de in next 82 chs. sc in last 39 chs; turn - 160 sts.
Rows 2-7: Ch 1, sc in first 39 sc, de in next 82 de,
sc in last 39 sc; turn - 160 sts.
End off after last row. Weave in ends.
87
SKILL LEVEL:
BEGINNER
G ADVANCED
BEGINNER
® ’NTFRMEpiATE
This simple project can be
completed in just thirty
minutes. The choker is
reversible and can be made
longer for a necklace, if you
prefer. Make several in
different colors for yourself
or for your friends.
hemp choker
88

size
Finished length: 14" (36cm)
One size fits most.
materials
gauge
1 shell = approx %" (2cm)
stitches used
ch, si st, sc, hdc, de, tr
15 yds (14m) fine hemp twine
Used in this project: Darice Fine Hemp Twine in
Natural color, available at craft stores (Substitutes:
jute or crochet thread)
pattern notes
For a longer choker: Add chs in multiples of 6.
Sts are worked in both Ips.
Size #5 (1.9mm) steel crochet hook
16 tiny wooden beads, with holes large enough
for needle to go through, approx 5mm diameter
One 1/2n-%" button (1-2cm)
Yarn needle
Needle (narrow enough to go through
holes in beads)
instructions 1
String beads onto twine with needle.
Ch 98.
Row 1: (WS) Sc in 2nd ch from hook; * hdc in
next ch. de in next ch, 2 tr in next ch, pull up a
bead and si st around it, tr in same ch as 2 tr (you
will have 3 tr in 1 ch with a bead in the center st),
de in next ch. hdc in next ch, sc in next ch (shell
made); rep from * across. Do not end off - 129 sts
(16 shells).
closure loop
Ch 6-10 (depends on the size of your button); turn;
si st in edge of last sc made on Row 1; turn, work
8 - 12 sc in loop; join with si st in last si st. End off.
Sew button to other end of choker. Weave in ends.
Note: Raised side of choker is shown, but it also can be
worn on the opposite side.
89
SKILL LEVEL:
BEGINNER
FINE
example of how gradu-
ated stitching can transform
ordinary stitches into an
interesting project. The raised
texture is created by working
in the back loops of each
row.
FIN
Fino
This unique belt is a prime
textured belt


size
‘	'4cm) wide x desired length
stitches used
ch, sc, hdc, de, htr, tr, hdtr, dtr
materials
soool (7 oz/200 g per spool) #2 sport-weight yarn
Used in this project: Hilos 100% nylon cord #18
О ive Green (Substitute: J&P Coats Crochet
Nylon cord or any #2, #3 or #4 weight yarn)
S ze F/5 (3.75mm) crochet hook
Sewing thread to match cord or yarn
pattern notes
You can work this belt in any length for a child or
larger adult just by subtracting or adding rows.
Any size yarn or cord can be used, but if you want a
wider belt, you'll have to either double the cord/yarn
throughout the pattern or use a much bulkier yarn.
For a scarf: Use a bulky yarn and a larger hook
with this pattern.
belt buckle with УЛ" (4cm) center opening
Yarn needle
Sewing needle
gauge
1 sts (sc, hdc, de, htr, tr, hdtr and dtr) = УЛ" (4cm)
3 stitch pattern rows, measured at 2 dtr
ends = 2У2" (6cm)
instructions
All sts are worked in the bio, creating the ridges.
Ch 8.
Row 1: Sc in 2nd ch from hook, hdc in next ch, de in
next ch, htr in next ch, tr in next ch. hdtr in next ch.
dtr in next ch: turn - 7 sts.
Row 2: Ch 1. sc in bio of next dtr. hdc in bio of next
hdtr, de in bio of next tr. htr in bio of next htr. tr in
bio of next de, hdtr in bio of next hdc, dtr in bio of
next sc; turn - 7 sts.
Rep Row 2 for desired length. End off after last row.
Weave in ends.
assembly
Loop beg of belt around center post of buckle and sew
down end to secure.
91
SKILL LEVEL:
MOYEN
Medio
BEGINNER
ADVANCED
BEGINNER
INTERMEDIA
Many berets have been
spotted on fashion runways
lately, but this one is a
classic version that will
never go out of style.
ШШ1Ш
size	gauge
One size fits most.	With G hook, 4 sc and 4 sc rows (at widest point) = 1" (3cm)
Project model is approx 12" (30cm) diameter
at widest point.	With J hook, 11 hdc and 6 hdc rows = 3" (8cm)
materials	stitches used
1 skein (3.5 oz/100 g/223 yd per skein) #4 medium worsted-weight yarn	ch, sl st, sc, hdc
Used in this project: Patons 100% Classic Merino Wool in Deep Olive	pattern notes All sts are worked in the bio. This is a basic rectangle
Sizes J/10 (6mm) and G/6 (4mm) crochet hooks	with smaller sts on each end that will shape the hat. The beg ch is at the side seam. After the seam
Yarn needle	is sewn, the hat becomes a tube, and the crown is made by gathering one edge to form a circle.
Stitch markers	For a child's-sized hat: Make your beg ch shorter and work less rows.
instructions
With G hook, ch 1; change to J hook and ch 29; change to G hook and ch 8 - .38 chs.	Rows 4-64 (or to desired length): Rep rows 2 and 3 for desired length, ending by working a Row 2 rep. End off after last row, leaving a 20" (51cm) tail for
Row 1: With G hook, sc in 2nd ch from hook and in next 6 chs, pm in last sc made; change to J hook and hdc in next 29 chs; change to G hook and sl st in last ch; turn - 37 sts (7 sc, 29 hdc and 1 sl st).	sewing. Match up foundation ch and last row. Pin in place. Sew side seam with tail and yarn needle. crown
Row 2: With G hook, ch 1, sl st in bio of first sl st; change to J hook and hdc in bio of next 29 hdc. Take marker out of sc and place in last hdc made; change to G hook and sc in bio of next 7 sc; turn - 37 sts.	With yarn needle and a 20" (51cm) strand of doubled yarn, weave yarn through sts at ridged sc end of hat. Pull yarn and gather crown into a circle, taking addi- tional sts to close up hole.
Row 3: With G hook, ch 1, sc in bio of first 7 sc. Take marker out of hdc and place in last sc made; change to J hook and hdc in bio of next 29 hdc: change to G hook and sl st in bio of last sl st; turn - 37 sts.	Secure and weave in all ends. Note: If your beret is too big, delete rows. If its too small, add rows.
93
CHAPTER THREE
LACY, OPEN-WEAVE GARMENTS
Space out with these airy projects. The pattern for a stylish baby-doll top
can easily be modified to create a dress or skirt. More delicate designs
include a soft ruffled shrug and a lovely lacy tunic.
95
SKILL LEVEL:
О ADVANCED
BEGINNER
This cute empire-waist top
can be worn over a tank top.
Leave the straps plain or add
a small ruffle at the shoulder.
You can make a cute summer
dress just by making a longer
beginning chain. Later in
this chapter you’ll learn
how to use the instruc-
tions for the lower
part of this top to
make a skirt that
flatters any size.
before you begin
TECHNIQUES YOU WILL USE
This rundown of the techniques used will be useful to
read before you get started.
The lacy part at the bottom uses the graduated-stitch
method with a lacy look, gradually flaring at the bottom.
The bodice is worked in one piece from side to side,
with the back-loop-only method, so the bodice will
stretch to fit around the bust. It has one seam that will
be in the back, forming a tube.
Normally a bodice for this type of top may be worked
and gathered at the bottom to fit around the top edge of
the lower part of the lacy top. The two pieces would then
be sewn together. Sometimes the top edge of a garment
is loose, and decreases would have to be made to make
it fit around the neck and shoulder area. My second
technique with this top is that the shorter single-
crochet stitches will shape the bodice (at top and bottom
edge) to fit around the bust without decreases. The
shape will be made as you crochet the rows by using
shorter stitches on each end. This way there should be
no gathers at the bottom of the bodice, and the top edge
of the bodice should fit without having to decrease.
The straps are crocheted right onto the top.
size
Fits sizes XSM (SM, MED, LG, XLG, 1X, 2X, 3X)
Note: See Sizing Information on page 18 to
choose appropriate size.
Finished length: 20" (51cm) plus straps
Finished bust: approx 293Д" (3316", 37%", 4116",
453/4", 49/2", 533/4", 5714"); 76 (85, 96, 105, 116,
126, 137, 146) cm
materials
6 (9, 11, 13, 15, 17, 19, 21) balls (150 yd per ball)
#3 cotton thread
Used in this project: J&P Coats Royale #3 Fashion
Crochet 100% cotton thread in Warm Rose (Substi-
tutes: Bernat Cool Crochet or Patons Grace)
Size F/5 (3.75mm) crochet hook
116—2 yds (137-183cm) of 3/e“ (1cm) wide ribbon
Yarn needle
Stitch markers
gauge
Straps: 3 sc = Уз" (1cm); 16 sc rows = 3" (8cm)
Bodice: 21 de = 4" (10cm); 11 de rows = 4" (10cm)
Lower front and back: 1 de shell = 1" (3cm);
9 de shell rows = 4" (10cm)
stitches used
ch, sl st, sc, hdc, de, htr, tr, hdtr, dtr
Special stitches: De shell (2 de, ch 2, 2 de); htr
shell (2 htr, ch 2, 2 htr); tr shell (2 tr, ch 2, 2 tr);
hdtr shell (2 hdtr, ch 2, 2 hdtr); dtr shell (2 dtr, ch
2, 2 dtr); to work V-sts (sc, hdc, de, htr, or tr V-st)
(for ruffle on strap), work designated st, ch 2, and
designated st in same st [Example: (de, ch 2, de)
in same st is a de V-st]
pattern notes
The bodice and skirt of the top are worked in
vertical rows from side to side.
For an adult dress: Follow the same instructions
for the top, but add to your beginning chain for
the extra length. Start with the number of chains
called for in the top pattern and add chains in
increments of 6. Each 6 chs will add approx 1/г"
(4cm) to length. Continue with dtr and dtr shells
to the end of your chain, making sure to add the
extra dtr and dtr shells on each row as you count.
Example: 36 extra chs will add approx 9” (23cm)
to length, working 6 more dtr shells and 6 more
dtr in each row, following patt as established.
instructions
Beg ch is at side seam, and rows are worked vertically
from side to side.
lower front
Worked in both Ips.
Ch 62. For longer or shorter top, add or delete chs in
increments of 6.
Row 1: (RS) Sc in 2nd ch from hook and in each rem
ch across; turn - 61 sc.
Row 2: Ch 3 (counts as de), sk next 2 sc, de shell in next
sc, [sk next 2 sc. de in next sc, sk next 2 sc, de shell in
next sc] 2 times; [sk next 2 sc, htr in next sc, sk next 2
sc, htr shell in next sc] 2 times; [sk next 2 sc, tr in next
sc, sk next 2 sc, tr shell in next sc] 3 times, sk next 2 sc,
hdtr in next sc, sk next 2 sc, hdtr shell in next sc. sk next
2 sc. dtr in next sc, sk next 2 sc. dtr shell in next sc, sk
next 2 sc, dtr in last sc; turn - 61 sts (10 shells and 11
sts).
Note: You should have 3 de shells, 2 htr shells, 3 tr shells,
1 hdtr shell and 1 dtr shell on each row -10 shells on
each row. Piece should measure approximately
(34cm) long.
Row 3: Ch 5 (counts as first dtr), dtr shell in next dtr
shell, dtr in next dtr, hdtr shell in next hdtr shell, hdtr
in next hdtr, [tr shell in next tr shell, tr in next tr] 3
times, [htr shell in next htr shell, htr in next htr] 2
times, [de shell in next de shell, de in next de] 2 times,
de shell in last de shell, de in 3rd ch of beg ch-3; turn.
Row 4: Ch 3 (counts as de), de shell in next de shell;
[de in next de, de shell in next de shell] 2 times; [htr
in next htr, htr shell in next htr shell] 2 times; [tr in
next tr, tr shell in next tr shell] 3 times; hdtr in next
hdtr, hdtr shell in next hdtr shell; dtr in next dtr, dtr
shell in next dtr shell; dtr in 5th ch of beg ch-5; turn.
Rows 5-29 (33, 37, 41, 45, 49, 53, 57): Rep rows
3 and 4 appropriate number of times, ending by
working a Row 3 rep. End off after last row. Add
more rows if needed.
98
lower back
Work same as lower front. With
RS tog, line up sts at side edges on
front and back (first and last rows).
Pin in place and sew front to back
using yarn and yam needle, making
sure there is a sc row at each side
seam. Turn RS out.
At narrow top edge, join thread/
yam with sl st in edge of any st, ch
1, sc in same st as joining, sc evenly
spaced around entire top edge,
making sure work lies flat; join
with sl st in first sc. End off.
bodice
Piece is worked in the bio.
Ch 32. (To shorten or lengthen bodice area
that covers bust, add or delete chs here.)
Row 1: Sc in 2nd ch from hook, hdc in next ch. de in
next 27 chs. hdc in next ch, sc in last ch, turn - 31 sts.
Row 2: Ch 1. sc in first sc, hdc in next hdc, de in next
27 de, hdc in next hdc, sc in last sc. turn - 31 sts.
Rows 3-82 (92, 104, 114, 126, 136, 148, 158):
Rep Row 2 appropriate number of times. Place bodice
around bust to make sure it fits. Add or delete rows
if needed. End off after last row. With RS tog. match
up sts on first and last rows. Sew side seam. Add or
delete rows as needed to fit around bust.
bodice attachment to lower piece
With RS tog, place either long edge of bodice tog with
narrow top edge of lower front and back, easing in to
fit. Secure edges with safety pins, making sure bodice
seam is in center back between lower side seams.
With thread/yarn and yarn needle, sew bodice to skirt
with whip st. Turn top RS out. Join thread/yam in
st at center top back edge of bodice, ch 1, sc in same
st as joining, sc evenly spaced around rem top edge,
keeping work flat; join with sl st in first sc. End off.
straps
Worked in both Ips.
Try top on and pm where you want straps to be on
front and back of top edge of bodice.
Row 1: With RS of front facing,join thread/yarn with
sl st in st at right of marker, ch 1, sc in same st as
joining, sc in next 2 sts; turn - 3 sc.
Row 2: Ch 1, sc in next 3 sc; turn - 3 sc.
Rows 3-43 (43, 45, 45, 47, 47, 49, 49) or to desired
length: Rep Row 2 appropriate number of times.
End off after last row, leaving 6" (15cm) tail. With RS
tog, sew end of strap to back of top where marker was
placed. End off.
99
Note: The strap should measure approx 8" (8". 8V2n,
8Wt 9", .9", 9%", 9ЧГ); 20 (20, 22, 22, 23, 23, 24, 24)
cm. If you add or delete rows, make sure you work an
uneven number so the ruffle will come out right. The
strap will stretch, so you may not need more rows.
With RS facingjoin thread/yarn with si st in st on
top edge of bodice next to inside neck edge of strap.
Sc in edge of each row across neck edge of strap, si st
in next st on bodice edge. End off. Rep on other strap.
optional ruffle for strap
Row 1: With RS facing, join yarn/thread in st on top
edge of bodice next to outside edge of strap. Sc in edge
of each row across outside edge of strap, si st in next
st on bodice edge. End off.
in next st (tr shell should be in center st on row),
(sk next st, tr V-st in next st) 2 times, (sk next st, htr
V-st in next st) 2 times, (sk next st. de V-st in next st) 3
times, sk next st. hdc V-st in next st, (sk next st, sc
V-st in next st) 2 times, si st in last 2 sts (on sizes XSM
and SM only, si st in next st on side edge of bodice).
End off. Rep on other strap.
finishing
With RS facing, work sc evenly spaced around bottom
edge of top. End off. Weave in ends. Block top if
necessary.
Starting at center front, weave ribbon through sps
on each row of lower piece between first de and de
shell at top edge of lower piece below bodice and tie
into a bow.
Row 2: Pm in center st on outside edge of strap
(Row 1). Starting from right of center st, count
over 21 sts and pm in 21st st. Rep on left side
of center st, placing marker at 21st st to left.
With RS facing, join thread/yarn with si
st in st to right of marker at far right of
strap (on sizes XSM and SM only, this
st will be on side edge of bodice at
armhole opening). SI st in st where
marker was placed, working along
outside edge of strap, sc in next 2
sc, hdc in next 2 sc, de in next 5
sc, htr in next 3 sc, tr in next 17
sc, htr in next 3 sc, de in next 5 sc,
hdc in next 2 sc, sc in next 2 sc,
si st in st where other marker was
placed, si st in next st on strap (on
sizes XSM and SM only, this last
si st will be at side edge of bodice
at armhole opening), turn - 45 sts
(2 si sts, 2 sc, 2 hdc, 5 de, 3 htr, 17
tr, 3 htr, 5 de, 2 hdc, 2 sc, 2 si sts).
Row 3: Ch 1, si st in first 2 si sts,
(sc V-st in next st, sk next st) twice, hdc
V-st in next st, (sk next st, de V-st)
3 times, (sk next st, htr V-st) twice, (sk next
st, tr V-st in next st) twice, sk next st, tr shell
100
i
к
SKILL LEVEL
FINE
INTERMEDIATE
Your little girl will look
adorable in this lacy dress.
a pattern based on the
baby-doll top on page 96. It’s
perfect for warmer weather or
even for a flower girl to wear
in a wedding. The sheen of
the specialty yarn gives it
sparkle; or make it in
an alternate yarn
14	Л
BEGIN’
ADVAN
FIN
Fino
little girl’s dress
WlWWWWWIW

101
i
size
Fits sizes 2-3 (4-5, 6-7, 8-10); green dress shown
is a size 4-5, and pink dress shown is a size 2-3
Finished length: approx 23%' (25%", 28%",
30%"); 59 (65, 72, 78) cm long from strap to
bottom edging
Chest: approx 21 (23", 25", 27й); 53 (58, 64, 69) cm
materials
For green dress: 3 (3, 4, 5) balls (1.75 oz/
200 yd/50 g per ball) any #2 fine sport-weight
yarn
Used in this project: Bernat Cool Crochet
70% cotton/30% nylon yarn in Sage
For pink dress: 5 (5, 6, 7) balls (1.75 oz/136 yd/
50 g per ball) any #2 fine sport-weight yarn
Used in this project: Patons Grace 100% cotton
in Blush
(Substitute for either dress: J&P Coats Royale
#3 Fashion Crochet cotton thread)
Bodice: 10 de and 6 de rows = 2" (5.1cm)
Straps: 3 sc and 2 sc rows « ’/2" (1cm)
stitches used
ch, sl st, sc, de, htr, tr, hdtr, dtr
Special stitches: de shell (2 de, ch 2, 2 de);
htr shell (2 htr, ch 2, 2 htr); tr shell (2 tr, ch 2, 2 tr);
hdtr shell (2 hdtr, ch 2, 2 hdtr); dtr shell (2 dtr,
ch 2, 2 dtr)
Sizes G/6 (4mm) and F/5 (3.75mm) crochet hooks
V/2 yds (137cm) of 3/e" (1cm) wide ribbon
2-3 hooks and eyes or snaps for closure in
back of dress
Optional: 1 yd (91cm) matching fabric for lining
Yarn needle
gauge
Skirt: With G hook, 1 de shell and 1 htr =
Г/л" (3cm); 2 de shell rows = 1" (3cm); 1 tr shell
and 1 tr = V/2" (4cm); 2 tr shell rows = 1%" (3cm)
pattern notes
This dress is worked similar to the baby-doll top
on page 96. The bodice will be worked in both
loops (not back loop only like the adult top),
because the bust area does not need to stretch.
The skirt of this dress is also worked in both loops
and will be made in one piece, with only one
seam in the back. Custom fit this dress to your
child by adding or eliminating vertical rows.
When working shell in shell of previous row, work
shell in center ch-2 sp of shell on previous row.
Finishing details: You may need to steam block
this dress. The optional lining requires some
sewing knowledge. Another option: Wear a slip.
102
I 7
I
instructions
Beg ch will become seam in the back. Sts are worked
in both Ips.
skirt front
With G hook, ch 75 (81,87,93). (If you want the dress
to be longer or shorter, work more or less chs in multi-
ples of 6.) Each set of 6 chs will create 1 more shell and
a single st and will make the dress approx Ш" (4cm)
longer. Just add more tr shells and tr on each row.
Row 1: (RS) De shell in 6th ch from hook (first 3
skipped chs count as de), sk next 2 chs, htr in next
ch, sk next 2 chs. htr shell in next ch, (sk next 2 chs,
tr in next ch. sk next 2 chs, tr shell in next ch) 7 (8,
9, 10) times; (sk next 2 chs, hdtr in next ch, sk 2 chs,
hdtr shell in next ch) 2 times; sk next 2 chs; dtr in
next ch, sk next 2 chs, dtr shell in next ch. sk next 2
chs, dtr in last ch; turn. You should have 1 de shell, 1
htr shell, 7 (8. 9,10) tr shells, 2 hdtr shells and 1 dtr
shell on row with single sts between each shell. You
will also have 1 de at de shell end and 1 dtr at dtr
shell end - 12 (13,14,15) total shells on each row.
Row should measure approx 18" (19V6", 21", 22’Л");
46 (50, 53, 57) cm.
Row 2: Ch 5 (counts as dtr), dtr shell in next dtr shell,
dtr in next dtr, (hdtr shell in next hdtr shell, hdtr in
next hdtr) 2 times, (tr shell in next tr shell, tr in next
tr) 7 (8, 9, 10) times; htr shell in next htr shell, htr in
next htr; de shell in next de shell, de in first skipped
ch on Row 1; turn - 12 (13,14,15) shells.
Row 3: Ch 3 (counts as de), de shell in next de shell;
htr in next htr, htr shell in next htr shell; (tr in next
tr. tr shell in next tr shell) 7 (8, 9, 10) times; (hdtr in
next hdtr, hdtr shell in next hdtr shell) 2 times; dtr in
next dtr, dtr shell in next dtr shell, dtr in 5th ch of beg
ch-5; turn - 12 (13, 14,15) shells.
Row 4: Work same as Row 2, working last de in 3rd
ch of beg ch-3.
Rows 5-42 (46, 50, 54): Rep rows 3 and 4 appropriate
number of times. End off after last row. Add more or
less rows than indicated if the designated number
of rows do not fit around the child’s body. Work even
number of rows if working shell edging.
bodice
Worked in both Ips.
Row 1: With RS facing and G hook, join yam with si
st in top right comer of narrow edge of dress skirt (3rd
skipped ch at beg of Row 1), ch 1, sc in same ch as joining,
sc in next ch; * 3 sc around de post on next row ** ; 2 sc
in beg ch-3 sp on next row; rep from * across top edge of
skirt, ending last rep at ** ; turn -105 (115,125.135) sc.
Row 2: Ch 3 (counts as de), sk first sc, de in next sc
and in each sc across; turn - 105 (115, 125,135) de.
Row 3: Ch 3 (counts as de), sk first de. de in next de
and in each de across; turn - 105 (115,125,135) de.
Rows 4-8 (10, 12, 14): Rep Row 3, 5 times more. End
off after last row. You may want to add or eliminate
rows depending on desired length.
back seam of dress
With RS of dress tog, line up sts and pin in place. Beg
at lower edge, sew back seam loosely with yarn and
yarn needle up to bottom of bodice (this will be up to
the first row of bodice). Bodice back will be left open,
and snaps or hooks will be sewn there later.
straps
Worked in both Ips.
Pm in 11th (15th, 19th, 23rd) st and in 41st (44th, 47th,
50th) st to right and left of back on top edge of bodice.
103
Row 1: With RS of front facing and G hook, join yarn
with si st in st to right of marker, ch 1, sc in same st.
sc in next 2 sts; turn - 3 sc.
Rows 2-21 (25, 29, 33) or to desired length: Ch 1. sc
in each sc across; turn - 3 sc.
End off after last row. Try on dress and make sure
straps are the right length. If you add rows (in multi-
ples of 4), keep in mind that the strap will stretch.
With RS tog, center and sew end of strap to back of
top where markers were placed. Rep on other strap.
There should be 9 (13,17, 21) de from center of back
to back of strap and 21 (25, 29. 33) de between straps
on center of front.
shell edging (on top of dress, straps)
With RS facing and F hook join yarn with si st in
first de on top back edge of bodice, ch 1, sc in same de
as joining, |sk next de, 5 de in next de (shell made), sk
next de, sc in next del 2 (3, 4, 5) times (last sc should
be worked in st next to strap); sc in edge of first row
on strap, [sk next row. 5 de in edge of next row (shell
made), sk next row, sc in edge of next row] 5 (6, 7, 8)
times (last sc should be worked in edge of last row on
strap); sc in next de on top front edge of bodice, [sk
next de, 5 de in next de (shell made), sk next de, sc in
next de] 5 (6, 7, 8) times (last sc should be worked in
st next to strap); sc in edge of first row on next strap,
[sk next row, 5 de in edge of next row (shell made), sk
next row, sc in edge of next row] 5 (6, 7, 8) times (last
sc should be worked in edge of last row on strap); sc
in next de on top back edge of bodice, [sk next de, 5 de
in next de (shell made), sk next de, sc in next del 2 (3,
4, 5) times (last sc should be worked in last de on top
back edge of bodice) - 9 (12,15, 18) shells across top
edge of bodice and 5 (6. 7,8) shells along edge of each
strap. End off.
armhole
With RS facing and F hook, join yarn with si st in st
to right of unworked edge of either strap on top edge
of bodice, sc in edge of first row on strap, [sk next row,
5 de in edge of next row (shell made), sk next row, sc
in edge of next row] 5 (6. 7, 8) times, si st in next st on
top armhole edge of bodice - 5 (6, 7, 8) shells. End off.
Rep on unworked edge of other strap.
optional shell edging (on bottom)
With RS facing and F hook, join yarn with si st in st at
center back seam on lx>ttom edge of dress, ch 1, sc in
same st as joining; * 5 de in center of next dtr or in 3rd
ch of next ch-5 sp. sc in st at base of same dtr or in base
of same ch-5 sp; rep from * around, ending with si st in
first sc - 42 (46,50,54) shells.
Note: If you added more rows to the shirt, you should
have the same number of shells as the number of rows
you worked on the skirt.
optional lining
Measure lacy skirt of dress to determine length of
lining. Add Г-2" (3-5cm) (for folding over) at top
and same amount at bottom of fabric (for hem). For
width of lining, double the width of skirt below bodice
and add 2"-3" <5-8cm). For example: your lining on
the size 2-3 should be at least 20" (51cm) long x 23"
(58cm) wide. Cut fabric to proper measurements.
Fold bottom edge over 14" (1cm) and sew in place by
machine or hand. Fold top edge over 14" (1cm) twice
and sew in place. Bottom hem will be determined by
length and size of dress you are making. Fold lining
in half with RS of side edges tog. Starting at top, sew
back center seam, leaving about 6" (15cm) open at
the bottom (for slit at bottom of lining). Gather top
edge of lining with long sts so it will fit around bodice.
With RS of lining toward inside of dress, pin gathered
top edge of lining to Row 2 of bodice with lining seam
and skirt seams matching. With sewing needle and
thread, hand st in place.
finishing
Weave in ends. Sew hook and eye or snaps on each side
of bodice in back. Starting at center front, weave ribbon
through sps between de and de shells below bodice at
top edge of skirt and tie into a bow.
104
SKILL LEVEL:
FIN
Fino
BEGINNER
ADVANCED
BEGINNER
INTERMEDIA!
This charming skirt is
worked the same as the
lower part of the baby-doll
top on page 96, only longer.
The taller stitches at the
bottom are what form the
pretty flare. Make the skirt
shorter or longer to suit
your style, or add an
optional edging
for a dressier
look. You might
wear it as a strapless
dress in the summer-
time because it stretches
to fit around the body.
size
Fits sizes XSM (SM, MED, LG, XLG, 1X, 2X, 3X)
Finished length: approx ЗГ (79cm) long, all sizes
Hip approx 31" (33", 35' , 37я, 39", 41", 43", 45м);
79 (84, 89, 94, 99, 104, 109, 114) cm
See Pattern Notes to custom fit for larger or
smaller sizes.
materials
4 (4, 5, 5, 6, 6, 7, 7) skeins (3.52 oz/218 yd per
skein) any #2 fine sport-weight yarn
Used in this project: Sinfonia 100% mercerized
cotton in Khaki (available at Hobby Lobby,
www.crochetstyleetc.com and www.craftsetc.
com) (Substitutes: Patons Grace, Patons Brilliant,
Bernat Satin Sport)
Size G/6 (4mm) crochet hook
Yarn needle
Stitch markers
gauge
Be sure to check your gauge. If gauge does not
match, change to larger or smaller hook.
3 de shells + 3 de in patt and 8 de shell rows =
4м (10cm)
6 chs (1 shell) = approx 1%" (3cm)
stitches used
ch, si st, sc, de, htr, tr, hdtr, dtr
Special stitches: de shell (2 de, ch 2, 2 de);
htr shell (2 htr, ch 2, 2 htr); tr shell (2 tr, ch 2, 2 tr);
hdtr shell (2 hdtr, ch 2, 2 hdtr); dtr shell (2 dtr,
ch 2, 2 dtr); picot (ch 3, si st in 3rd ch from hook)
pattern notes
Beg ch and rows are worked vertically, with one
seam in back. The drawstring waist is at the hip, and
an optional edging is added to the bottom edge.
For a shorter skirt: Work less chs at beg by elim-
inating 6 chs per shell and working less de shells
on each pattern row.
For a longer skirt: Work more chs at beg in
multiples of 6 till you get the desired length, and
then add to number of de shells on each pattern
row (15 de shells + extra shells).
For a custom-fit larger or smaller skirt: (For sizes
larger than 3X or smaller than adult XSM) Work beg
ch the length you want (in multiples of 6 plus 3 on
beg ch, for a toddler or even a size 6X). Following
skirt pattern, work as many de shells as needed, 1 htr
shell, 1 tr shell, 1 hdtr shell, and 1 dtr shell at bottom
of skirt if you want the flare. Work as many rows
as needed to fit around body, and then follow the
instructions for drawstring and edging, if desired. To
omit flare, omit taller shells and taller sts at bottom
of each row and work only de shells, and de across
entire row.
For a straight skirt minus the flare: Work all
de shells and de to the end of each row and omit
the taller sts at the bottom of skirt.
For a looser fit: If you do not like the "mermaid"
look, just add more rows.
For a strapless drawstring dress: Make the
dress the same as the skirt and tie the drawstring
above the bust. Add more chs in multiples of 6 at
beg for a longer dress.
106
instructions
Work in both Ips.
For all sizes: ch 117.
Beg ch should measure approx 32" (81cm) when
slightly stretched.
Row 1: (RS) De shell in 6th ch from hook (first 3
skipped chs count as de); (sk next 2 chs, de in next ch,
long flared skirt diagram
de $h»1l rows
beginning chain starts in
back, where seam will be
H.p: 31 ‘ (33*. 35*. 37*. 39*.
41*. 43*. 45*)
79 ;84. 89, 94, 99.
104. 109. 114) cm
S
This skirt is
worked in one
piece and
seamed in the
back.
Rows are worked
vertically.
sk next 2 chs. de shell in next ch) 14 times; sk next
2 chs, htr in next ch, sk next 2 chs, htr shell in next
ch: sk next 2 chs, tr in next ch, sk next 2 chs, tr shell
in next ch; sk next 2 chs, hdtr in next ch, sk next 2
chs, hdtr shell in next ch; sk next 2 chs, dtr in next
ch, sk next 2 chs. dtr shell in next ch; sk next 2 chs,
dtr in last ch; turn - 19 shells with one st between
each shell, 1 de at beg and 1 dtr at end. Row should
measure approx 29" (74cm).
Row 2: Ch 5 (counts as first dtr), dtr shell in next
Row 3: Ch 3 (counts as first de), de shell in next de
shell, (de in next de. de shell in next de shell) 14 times,
htr in next htr. htr shell in next htr shell, tr in next tr,
tr shell in next tr shell, hdtr in next hdtr, hdtr shell
in next hdt shell, dtr in next dtr. dtr shell in next dtr
shell, dtr in 5th ch of beg ch-5, turn - 19 shells.
Row 4: Work same as Row 2. ending with last de in
3rd ch of beg ch-3.
dtr shell, dtr in next dtr, hdtr shell in next hdtr shell,
hdtr in next hdtr. tr shell in next tr shell, tr in next tr,
htr shell in next htr shell, htr in next htr, (de shell in
next de shell, de in next de) 15 times, ending with last
de in first skipped ch at beg of Row 1; turn - 19 shells.
the side-to-side advantage
The incredible thing about this method of
crocheting (side to side) is that all you have
to do is add more or less rows than indi-
cated if the designated number of rows are
not right for you. This goes for all of the
garments in this book.
Rows 5-62 (66, 70, 74, 78, 82, 86, 90) or to desired
width: Rep rows 3 and 4 appropriate number of times,
End off after last row. Number of rows for each larger
size listed (mermaid fit) will give a 2" (5cm) increase
in size. Add more or less rows in multiples of 2 rows
to fit around body. This skirt will stretch, so even if it
looks small, it may be a perfect fit. With RS tog, line
up sts on foundation ch and last row. Sew back seam
with yam and yarn needle.
waist and drawstring
Note: Waist is meant to be at hip.
Turn skirt RS out. Join yarn with si st in any sp at
waist edge (de end), ch 5 (counts as first de and ch-2
sp); * de in next sp, ch 2; rep from * around entire top
edge; si st in 3rd ch of beg ch-5 - same number of ch-2
sps as number of rows. End off.
107
i
Drawstring: Ch 250. End off. Beginning at
center front of skirt, weave drawstring through
ch-2 sps around top edge and tie into a bow.
Adjust ch length if needed. Weave in ends.
optional edging
Rnd 1: With RS facing,join yarn
with sl st in top of any dtr on
bottom edge of skirt. Working in
top ch of beg ch-5 or in top of dtr on
each row, ch 7; * sc in top of next
row, ch 7; rep from * around; join
with sl st in joining sl st - same
number of ch-7 sps as number of
rows. Do not end off.
Rnd 2: Sl st in next ch-7 sp, ch 3
(counts as first de); in same ch-7 sp
work [picot, de, picot, htr, (picot, tr)
2 times, picot, htr, (picot, de) 2 times],
sc in next ch-7 sp, * in next ch-7 sp work
((de, picot) 2 times, htr, (picot, tr) 2 times,
picot, htr, (picot. de) 2 times]; rep from *
around; join with sl st in 3rd ch of beg ch-3. End

off. Total number of shells will be half the number
of rows worked on skirt. Weave in ends.
108
SKILL LEVEL:

L

SUPER FINE
SUPER FIN
Super Fino
A BEGINNER
0 ADVANCED
BEGINNER
О INTERMfeD:ATE
Using a smaller yarn with a
larger hook is what makes
this light and delicate shrug
so soft and drapeable.
:”-W

kav'.
ruffled shrug

109
stitches used
ch, sl st, de, tr
pattern notes
This shrug is worked in horizontal rows, from one
sleeve across back to other sleeve. The long edge
is the foundation chain. Ruffles are worked onto
the shrug sleeves as you go, which allows you to
avoid the task of sewing them on later. All sts are
worked in both Ips.
size
Fits sizes XSM-SM (MED-LG, XLG-1X, 2X-
3X)
Finished measurements before sewing
seam: approx 16/2“ (17%", 1914", 2014") x
4714“ (5114", 55У2". 5714"); 42 (45. 50, 52) cm
x 121 (131, 141, 146) cm
materials
1 (2, 2, 3) balls (88 oz/249 yd/25 g per ball)
any #1 super-fine fingering-weight yarn
Used in this project: Crystal Palace Kid
Merino in Roses (Substitute: Knit Picks
Palette or Patons Baby yarn)
Size I/9 (5.5mm) crochet hook
Yarn needle
Stitch markers
gauge
8 de with ch-1 sp between each = 4" (10cm)
7 de rows = 4" (10cm)
110
instructions
Ch 172(186, 200, 206).
Note: If you want sleeves to be longer, work more chs
in multiples of 2. Then work more de and ch-1 sps in
center of rows between triple crochets. In other words,
if you work 174 chains, that will give you one more de
and ch-1 sp, and you would have 75 de in center of the
row instead of 74.
Row 1: Tr in 8th ch from hook (skipped chs count
as tr and ch-1 sp), (ch 1, sk next ch, tr in next ch)
3 times, (ch 1. sk 1 ch, de in next ch) 74 (81.88,91)
times. Pm in last de made. (Ch 1, sk next ch. tr in next
ch) 5 times; turn - 84 (91, 98,101) sts and 83 (90, 97,
100) ch-1 sps. Place Row 1 across arms and back to
check length. If necessary, adjust length as desired
before proceeding. Adjust number of (de, ch 1) on each
row also.
Row 2: Ch 4 (counts as first tr), (ch 1, sk next ch-1 sp,
tr in next tr) 4 times, (ch 1, sk next ch-1 sp, de in next
de) 74 (81, 88. 91) times, (ch 1, sk next ch-1 sp, tr in
next tr) 4 times, ch 1. sk next ch. tr in next ch; turn
- 84 (91,98,101) sts and 83 (90,97,100) ch-1 sps.
Rows 3-29 (31, 34, 36): Rep Row 2 appropriate
number of times, ending off after last row.
ruffled shrug diagram
taller stitches
cause the
sleeves to
flare on the
ends -►
beginning cha n is at
long lower edge
The shrug is worked in one piece with ruffle on each
end. The ruffle at neck, back and front sides is worked
last, and each row of the ruffle is attached as you go.
47tt- (5114'. 5544', 5Л4Ч wide
121 (131, 141, 146) cm
._g
ruffle
Work around entire neck and bottom edge.
With RS facing,join yarn with si st in any de on back
neck edge, ch 17.
Row 1: Tr in 8th ch from hook (skipped chs count
as tr and ch-1 sp), (ch 1, sk next ch, tr in next ch)
2 times, (ch 1, sk next ch, de in next ch) 2 times, ch 1,
si st in next (de, ch-1 sp and de) on shrug edge; turn
- 4 tr, 2 de and 6 ch-1 sps.
Row 2: (Ch 1, sk next ch-1 sp, de in next de) 2 times,
(ch 1, sk next ch-1 sp, tr in next tr) 4 times, working
last tr in 2nd skipped ch at beg of Row 1; turn - 2 de,
4 tr and 6 ch-1 sps.
sleeve seams
Fold shrug in half widthwise (across arms). Match
up sts and ch-1 sps on first and last rows. Place
markers or pieces of yam to hold in place. Count
over 22 sps and pm at 22nd sp. Starting at ruffled
edge (arm opening), attach yarn and si st loosely
to 22nd sp (where marker was placed), sewing arm
seam. Option: You can sew the seam with yarn
needle and yarn with whip st if you prefer. Rep on
other side for other sleeve. Turn shrug RS out. Try
shrug on to check armhole depths/sleeve seams
and adjust if necessary.
Row 3: Ch 5 (counts as first tr and ch-1 sp), sk first
tr, tr in next tr, (ch 1, sk next ch-1 sp. tr in next tr)
2 times, (ch 1, sk next ch-1 sp. de in next de) 2 times,
ch 1, si st in next (de, ch-1 sp and de) on shrug edge,
si st around next ch-1 sp on edge, si st to top of next
de on shrug edge, turn - 4 tr, 2 ch and 6 ch-1 sps.
Row 4: Work same as Row 2, working last tr in 4th ch
of turning ch-5; turn.
Rep rows 3 and 4 around entire shrug opening edge.
End off after last row. With RS tog, sew first and last
rows of ruffle tog, matching up sps, same as sleeve
seams. Weave in ends.
111
SKILL LEVEL:
e
О
3EGINNER
ADVANCED
BEG'NNER
INTERMEDIATE
This tunic’s features—
higher neckline, side slits,
looser fit and longer length—
were designed with the fuller
figured woman in mind, but
the garment looks fabulous
on smaller sizes, too. For a
simpler look, try it in a
L solid color.
size
Fits sizes XSM-SM (MED-LG, XLG-1X, 2X-3X);
size shown is XLG
Finished bust: approx 33" (40/2", 48”, 55’/2”);
84 (103, 122, 141) cm
Finished length: approx 23" (23", 24”. 24”);
58 (58, 61, 61) cm, before stretching
materials
1	hank (16 oz/1400 yd hank) any #2 fine
sport-weight yarn
Used in this project: Interlacements Rick Rack
II	100% rayon yarn in Renaissance (Substitutes:
Bernat Cool Crochet, Patons Brilliant)
Size H/8 (5mm) crochet hook
1’/г-3 yds (137-274cm) of 1 " (3cm) wide ribbon
(optional)
Yarn needle
Stitch markers
gauge
1	de cluster = 5/e" (2cm) wide
2	de clusters, 2 sc and 4 ch-4 sps in patt =
33/Z (10cm)
3	de c aster rcws and 3 cb-4 ro*s -	»
3* (8cm)
stitches used
ch, si st, sc, de, tr, dtr
To work de cluster: (Yo, draw up a Ip in desig-
nated ch-4 sp, yo and draw through 2 Ips on
hook) 4 times, yo and draw through 4 Ips on hook,
yo and draw through last 2 Ips on hook.
To work tr cluster: * Yo twice, draw up a Ip in
designated ch-4 sp, (yo and draw through 2 Ips
on hook) 2 times; rep from * 3 times more; yo and
draw through 4 Ips on hook, yo and draw through
last 2 Ips on hook.
To work dtr cluster: * Yo 3 times, draw up a Ip in
designated ch-4 sp, (yo and draw through 2 Ips
on hook) 3 times; rep from * 3 times more; yo and
draw through 4 Ips on hook, yo and draw through
last 2 Ips on hook.
pattern notes
This tunic is worked in one piece, and then the
side and underarm seams are sewn. Flare at the
bottom of tunic and on the ends of the sleeves
is created by working taller stitches. This tunic is
very stretchy, so keep that in mind when choosing
size to make. Gauge is crucial; if yours does not
match what is listed, change to a different-size
hook.
instructions
All sts are worked in both Ips.
tunic front (at bottom)
Beg ch is at side seam.
All sizes: Ch 56 to measure approx 14” (36cm)
without stretching.
Row 1: Sc in 8th ch from hook (skipped chs count as
ch-4 sp); * ch 4. sk next 3 chs, sc in next ch; rep from *
to end, turn - 13 ch-4 sps.
113
Row 2: (Ch 4, de cluster in next ch-4 sp. ch 4. sc in
next ch-4 sp) twice, (ch 5, tr cluster in next ch-4 sp,
ch 5, sc in next ch-4 sp) 4 times, ch 5, tr cluster in last
ch-4 sp. dtr in 4th skipped ch; turn - 7 clusters total
(2 de clusters and 5 tr clusters).
Row 3: * Ch 4, sc in next ch-4 sp; rep from * across,
ending with last sc in turning ch-4 sp; turn -
13 ch-4 sps.
Row 4: Work same as Row 2, ending with dtr in top
of dtr on row before last row; turn. Piece should now
measure approx 13" (33cm) - 7 clusters.
Rows 5-35 (43, 51, 59): Rep rows 3 and 4 appropriate
number of times, ending with a Row 3 rep. End off
after last row.
front bodice and sleeves
Front: Pm on side you have indicated as RS. With RS
facing,join yarn with si st in top left-hand corner of
piece, (de cluster edge), ch 52 for right sleeve. End off.
With RS facingjoin yarn with si st in top right-hand
corner, ch 53 for left sleeve. Do not end off.
Row 1: Sc in 2nd ch from hook; * ch 4. sk next 3 chs, sc
in next ch; rep from * across to end of ch 53, working
last sc in corner sc of tunic front, ** ch 4. sk next
cluster row, sc in next sc between cluster rows; rep
from ** across to corner, working last sc in left comer
sc of tunic front, *** ch 4, sk next 3 chs, sc in next ch;
rep from *** across to end of ch 52. working last sc in
last ch; turn - 43 (47, 51, 55) ch-4 sps.
Row 2: Ch 6. dtr cluster in first ch-4 sp, ch 6. sc in
next ch-4 sp, ch 5, tr cluster in next ch-4 sp, ch 5. sc in
next ch-4 sp, (ch 4, de cluster in next ch-4 sp, ch 4, sc
in next ch-4 sp) 18 (20, 22, 24) times; ch 5, tr cluster
in next ch-4 sp, ch 5, sc in next ch-4 sp, ch 6, dtr
cluster in last ch-4 sp. dtr in last sc; turn. You should
have 22 (24, 26. 28) total clusters on each cluster row.
You’ll have 1 dtr cluster and 1 tr cluster at each end
and 18 (20,22, 24) de clusters between the ends. All
sizes - 7 clusters on each sleeve.
Row 3: * Ch 4, sc in next ch-sp; rep from * across.
ending with last sc in turning ch-6 sp; turn - 43 (47,
51, 55) ch-4 sps.
Row 4: Work same as Row 2, ending with dtr in top of
dtr on row before last row; turn.
Rows 5-16 (16, 18, 18): Rep rows 3 and 4 appropriate
number of times.
left shoulder and top of sleeve
Row 1: [Ch 4, sc in next ch-sp] 19 (21, 23,25) times;
turn - 19 (21, 23,25) ch-4 sps.
Row 2: [Ch 4, de cluster in next ch-4 sp, ch 4, sc in
next ch-4 sp] 8 (9,10.11) times; ch 5, tr cluster in
next ch-4 sp, ch 5, sc in next ch-4 sp; ch 6, dtr cluster
in last ch-4 sp, dtr in top of dtr on row before last row;
turn -10 (11,12,13) clusters.
Row 3: * Ch 4, sc in next ch-sp; rep from * across,
ending with last sc in turning ch-4 sp; turn -19(21,
23, 25) ch-4 sps.
Row 4: Rep Row 2.
Row 5: Rep Row 3. End off.
right shoulder and top of sleeve
Row 1 on opposite side. With WS facing, join yarn
with si st in top of first dtr on other sleeve end. Rep
rows 1-5 of left shoulder. You will have 10 (11,12,13)
clusters at top of each sleeve (from neck edge to end
of sleeve).
back bodice and sleeves
Row 1: With RS facing Join yarn with si st in last
sc on Row 5 of left shoulder. Loosely ch 19. Without
twisting ch Join with si st in last sc on rows of right
shoulder; turn, (ch 4, sk next 3 chs, sc in next ch)
5 times, ending with si st in joining si st - 5 ch-4 sps.
End off. Try on tunic, and if you decide you want
neck opening to be bigger, you’ll need to take out this
114
ch 19 and 5 ch-4 sps, add more rows in multiples of 2
to both shoulder areas (which would be added to Row
25 of shoulder), then rework this ch 19 and 5 ch-4 sps.
Row 2: With WS facing,join yarn with sl st in first sc
on Row 5 of right shoulder, rep Row 2 of Front Bodice
and Sleeves.
Rows 3-16 (16, 18, 18): Rep rows 3-16 (16,18.18) of
Front Bodice and Sleeves. End off after last row.
tunic back (at bottom)
Lay tunic on flat surface and turn so the last row
you worked is at the top. Count over 13 ch-4 sps on
last row from end of each sleeve and pm in next sc on
each sleeve. There should be 17 (21, 25, 29) ch-4 sps
between markers. Turn piece sideways so the front is
to your left, one sleeve is at the top and other sleeve is
at the bottom. Working edge of rows in space between
markers, on back bodice, join yarn with sl st in sc
where you placed lower marker (see diagram). Ch 56.
Row 1: Rep Row 1 of tunic front - 13 ch-4 sps. After
last sc is worked in last ch, sl st in sc on edge of back
bodice (where beg ch was joined). Sl st in next 4 chs of
next ch-4 sp on edge on back bodice so you will be at
height of de to work first de cluster when you turn for
next row. This \nll take the place of the ch 4 at beg of
Row 2 of tunic front; turn.
Row 2: Ch 1. rep Row 2 of tunic front beg with
first de cluster in first ch-4 sp, end with dtr in 4th
skipped ch; turn - 7 clusters total (2 de clusters and
5 tr clusters).
Row 3: Rep Row 3 of front, end with last sc in next sc
on back bodice, sl st in next 4 chs of next ch-4 sp on
back bodice; turn - 13 ch-4 sps.
Row 4: Work same as Row 2, ending with dtr in top of
dtr on row before last row; turn - 7 clusters.
Rows 5-35 (43, 51, 59): Rep rows 3 and 4, ending
with a Row 3 rep. Make sure last sc on last row is
worked in upper marked sc. Sl st in same sc. End off
after last row.
lacy tunic diagram
This tunic is worked in one piece.
seaming
With RS tog, sew sleeve and side seam, beg at end
of sleeve and ending at 4th cluster on side (side slits
formed). Rep on other sleeve and side.
optional edging: open shells
With RS facing, join yarn with sl st in st at bottom
left-hand corner of tunic front, sc in same sp; * (ch
2, de, ch 2, tr, ch 2. de, ch 2] around post of next dtr
(next to tr cluster), sc in top of next dtr; rep from *
across front bottom edge, ending with last sc in st at
bottom righthand corner. End off. Rep on bottom of
tunic back. Number of open shells will be the same as
number of cluster rows you worked. If desired, work
shells on ends of sleeves in same manner.
finishing
Weave in ends. Add ribbon by weaving through spaces
on bottom row of bodice. This tunic may need to be
steam blocked.
115
CHAPTER FOUR
TWO-COLOR ACCESSORIES
Sometimes two colors are better than one. Re-create the timeless
houndstooth check for a scarf or purse, or, for a look that’s more
vibrant, try a wave-stitch pattern that combines two contrasting
but complementary colors.
117
SKILL LEVEL:
MEDIUM
ADVANCED
BEGINNER
MOYEN
Medio

The classic houndstooth-
check pattern often comes

in black and white, as seen
in more dressy clothing and
accessories. This purse shows
a blue and taupe combina-
tion that could easily fit
into an everyday casual
look with jeans.
Felting this acces-
sory gives it a
wonderful finished
look that highlights the
pattern rather than indi-
vidual stitches.
houndstooth-check
felted purse
size
Sewing needle and thread to match lining fabric
Before felting: approx 24" (61cm) wide (at widest
point) x 101/2" (27cm) tall (folded and lying flat)
After felting: approx 16 (41cm) wide (at widest
point) x 6%" (17cm) tall (folded and lying flat);
12У2" (32cm) opening
materials
#4 medium worsted-weight yarn: 2 skeins blue
and 1 skein taupe 100% wool or other natural
fiber that will felt (3.5 oz/220 yd/100 g per skein)
Used in this project: Cascade 220 Peruvian
highland wool yarn #9327 and #8408 (Substitute:
Patons 100% Classic Merino Wool)
Size J/10 (6mm) crochet hook
1	set of purse handles
Snap for tabbed closure
1	decorative button for tab
Уз yd (30cm) Peltex extra-firm stabilizer (optional)
У2 yd (46cm) fabric for lining (optional)
Yarn needle
4" x 12!4" (10cm x 31cm) box with plastic bag over
it; laundry detergent; baking soda (for felting)
Tacky glue
gauge
Before felting, and crocheting loosely:
11	hdc = 4" (10cm)
10 hdc rows = 4" (10cm)
8 sts (alternating sc and de) = 3" (8cm)
8 rnds (alternating blue and taupe) « 3“ (8cm)
stitches used
ch, si st, sc, hdc, de
pattern notes
The houndstooth pattern is made by changing
colors every rnd with graduated stitches of alter-
nating sc and de. All sts are worked in both Ips.
Pattern stitch: Alternating sc, de, sc, de; next
row — work de in sc, and sc in de.
instructions
purse bottom	Row 2: Ch 2 (counts as hdc), sk first hdc, hdc in next
hdc and in each hdc across, working last hdc in first
Note: The bottom of the purse should measure approx	skipped ch at beg of Row 1; turn - 52 hdc.
19” x 5” (48cm x 13cm) before felting.
Rows 3-12: Ch 2 (counts as hdc), sk first hdc. hdc in
With blue, ch 53.	next hdc and in each hdc across, working last hdc in
2nd ch of beg ch-2: turn - 52 hdc.
Row 1: Hdc in 3rd ch from hook (skipped chs count as
hdc), hdc in each rem ch across: turn - 52 hdc.
119
>
4
body of purse
Note: From the bottom of the purse, the body measures
lOfa" (27cm) tall x 24" (61cm) at its widest point when
laying flat before felting. Leave blue Ip on hook; drop
blue yarn toward back of piece, but do not end off blue.
Make a slipknot with taupe and place it on hook. Pull
taupe through the blue Ip. Leave blue yarn loose in
back. It will be picked up at beg of Rnd 2.
Rnd 1: Working across short edge of bottom piece with
taupe, ch 1; * sc around post of next hdc, de around
post of next hdc, rep from * across short edge - 12 sts
on short edge.
Working along long edge, * sc in next st. de in next st;
rep from * across long edge - 52 sts on long edge.
Work 12 sts along next short edge and 52 sts along
next long edge as before - 128 sts total.
Leave taupe Ip on hook; drop taupe yarn toward back
of piece, but do not end off. Pull blue through the
taupe Ip.
Rnd 2: With blue, (sl st. ch 2, de) in first sc; * sc in
next de, de in next sc; rep from * around, ending with
sc in last de - 128 sts. Let blue lie loose at back of
work and pull taupe through blue Ip.
Rnd 3: With taupe, (sl st, ch 1, sc) in first de; * de
in next sc, sc in next de; rep from * around, ending
with de in last sc. Drop taupe and pull blue through
taupe Ip.
Note: Blue rows will always begin with a de and end
with a sc. Taupe rows will always begin with a sc and
end with a de.
fibers for felting
When you want to felt any item, make sure
you use 100% natural animal fibers, such
as wool or yarn, that is meant for felting.
Man-made fibers will not felt.
Rnds 4-28: Rep rnds
2 and 3, ending by
working a Rnd 2 rep.
End off after last rnd.
Note: For a taller
purse, work more
rnds. Two rnds =
approx ’/г" (1cm) when
felted, depending on
the felting process.
purse tab
before felting

With blue, ch 9.
Row 1: Hdc in 3rd from hook (skipped chs count as
hdc), hdc in each rem ch across: turn - 8 hdc.
Row 2: Ch 2 (counts as hdc), sk first hdc, hdc in next
6 hdc, hdc in first skipped eh on Row 1; turn - 8 hdc.
Row 3: Ch 2 (counts as hdc), sk first hdc, hdc in next
6 hdc. hdc in 2nd ch of beg ch-2; turn - 8 hdc.
Rows 4-14: Rep Row 3, 11 times more.
Row 15: Ch 2 (counts as hdc), sk first 2 hdc, hdc in
next 3 hdc, sk next hdc, hdc in next hdc, leaving beg
ch-2 unworked. End off. You’ll have holes where the
hdc were skipped, but they’ll close up when felted -
5 hdc.
Tab will be sewn on after it is felted, so you can
determine how long you want it to come in the front.
Weave in loose ends.
felting
The purse in the photo on page 118 was felted so the
stitches do not show, resembling fabric. Items can be
felted in different ways, depending on how much you
want the stitches to disappear or how much you want
your item to shrink. Different washing machines and
water temperatures may also cause an item to felt
and shrink differently. You may only need to put your
120
item through the wash once, or you may have to put it
through a cycle up to 4 times. To felt this purse, follow
these instructions.
Step 1: Place purse and tab inside zippered pillowcase.
Put into washing machine on lowest water level and
hottest setting. If water is not hot enough, turn up heat
on water heater or pour boiling water into machine as
it fills up. Place tennis shoes (or tennis balls) in washer
to help with agitation. Add 1 tablespoon laundry
detergent and !4 cup baking soda. Run washing cycle.
You may have to repeat this process 1-2 more times
depending on the look you desire.
Step 2: Rinse in cold water; reshape and let spin to
remove excess water.
Step 3: Before the felting process, have a 4" x 1214"
(10cm x 31cm) box ready with a plastic bag over it.
(Have more than one size box ready in case the purse
doesn’t end up the size you expect.) Immediately
place the wet purse onto the box, making sure it’s a
tight fit. Let it air dry completely for 2-3 days.
sewing on tab and handles
Tab: After purse is completely dry, sew beg edge of tab
to inside of purse at center back with 1У2" (4cm) of tab
down inside purse. You can place tab down inside as
far as you want, depending on how much you want
your tab to show in the front and how tightly you
want the tab to close the purse.
Handles: Place straight pins where you want handles
to be sewn, approx IV2" (4cm) from top and
<4-5cm) from tab edges. Sew handles to front and
back of purse with yarn and yarn needle.
adding optional lining
Cut stabilizer: for bottom - 1 piece 1114" x 314" (29cm
x 8cm); for long sides - 2 pieces UW x 534" (29cm x
15cm) each
Note: If your purse did not end up the same size, cut
your stabilizer pieces approx 1" (3cm) smaller than
the dimensions of the
bottom and sides.
Glue each stabi-
lizer piece to inside
of purse with tacky
glue, making sure
you leave approx
W (1cm) of purse
edge showing at
top. Cut a piece of
lining fabric 18" x 19
(46cm x 48cm), or 1"
(3cm) wider than purse and
1" (3cm) taller than top edges when
lying flat). The extra 1" (3cm) of fabric at the top of
each side will be folded over to be sewn inside purse.
Fold fabric in half so it will measure 18" x 9W (46
x 24cm). Sew У2" (1cm) wide seams on short sides,
leaving long, top edge open. Fold will be at bottom
inside purse. Place lining inside purse and adjust to
fit if necessary. Fold top edge of lining over approx
I'-l’/y (3cm-4cm) toward WS of purse to fit, leaving
about W (1cm) of purse showing on inside. Pin lining
to purse around inside top edge and hand sew in
place with needle and thread.
finishing
Tuck center top of purse ends to inside and tack fold
together to secure. Sew button to top front of tab.
Mark placement of snap, and sew one side of snap to
front of purse and other side of snap to back of tab.
try a houndstooth-check scarf
Flip to the next page to make a nonfelted,
houndstooth-check scarf that's perfect for
men or women. The color combination used
is just one of many possible. Made with
single-crochet and double-crochet stitches,
this advanced-beginner scarf is not difficult
at all to create, but pay a little more atten-
tion as you work: You will be alternating
stitches and it would be easy to miss a stitch.
121
houndstooth-check scarf
size
5" x 52" (13cm x 132cm) or desired length
materials
#4 medium worsted-weight yarn: 1 skein
(3.5 oz/223 yd/100 g) gray; 1 skein (3.5 oz/
170 yd/100 g) green
gauge
6 sts (alternating sc and de) and 6 rows =
2“ (5cm)
6 rows = 2%“ (6cm)
stitches used
ch, sc, de
Used in this project: Patons 100% Classic Merino
Wool in Dark Grey; Lion Brand Vanna's Choice
acrylic in Dusty Green
Size J/10 (6mm) crochet hook
Yarn needle
pattern notes
All sts are worked in both Ips. See page 17 for
instructions on how to change yarn color on the
last stitch of each row.
instructions
With gray, ch 16.
Row 1: With gray, sc in 2nd ch from hook, * * de in
next ch. sc in next ch: rep from * across. Change
to green on last 2 Ips of last sc. End off gray,
leaving a 6" (15cm) tail; turn - 15 sts.
Row 2: With green, ch 3 (counts as first de); sk
first sc, * sc in next de. de in next sc; rep from
* across. Change to gray on last 2 Ips of last de.
End off green, leaving a 6” (15cm) tail;
turn - 15 sts.
Row 3: With gray, ch 1; sc in first de; * de in next sc,
sc in next de; rep from * across, ending with sc in 3rd
ch of beg ch-3. Change to green on last 2 Ips of last sc.
End off gray, leaving a 6” (15cm) tail: turn - 15 sts.
Rep rows 2 and 3, 65 times more, for desired length.
At end of last row, do not change colors. End off.
Weave in loose ends.
122
SKILL LEVEL:
MEDIUM
MOYEN
Medio
ADVANCED
BEGINNER
The graduated stitches
in this pattern result in
a particularly beautiful
piece when you use two
complementary colors. You
can use the same pattern
to make a larger purse or
even a scarf. The wave
stitch isn’t difficult.
but closely follow
the stitch diagram
on page 125 to avoid
making mistakes.

wave-stitch
coin purse

123
size
вУг" x4" (17cm x 10cm)
materials
#4 medium worsted-weight yarn: 1 skein (3 oz/
165 yd) green; 1 skein (5 oz/256 yd/140 g) purple
Used in this project: Caron Simply Soft acrylic in
Dark Sage; Red Heart Soft Yarn (acrylic) in Grape
Size F/5 (3.75mm) crochet hook
% yd (23cm) fabric for lining (optional)
1 green zipper, 7" (18cm) long (optional)
1-3 large beads for pulling zipper closed (optional)
Peltex extra-firm fusible stabilizer (optional)
Yarn needle
Sewing needle and thread to match lining and
zipper (optional)
gauge
5 sc = 1" (3cm)
2 sc rows = 3/e“ (1cm)
1 oval-shaped pattern consisting of 2 purple rows =
2“ x 1" (5cm x 3cm)
stitches used
ch, sc, hdc, de, tr
pattern notes
Sts are worked in both Ips. Try working your
stitches tight so the coin purse will be firmer. You
have the option of adding a lining and a zipper.
For a scarf: Work the stitches much looser so it will
be soft. Repeat rows 2-9 as many times as needed
to make a scarf with horizontal rows (same as the
coin purse). Or form long vertical rows by working
your beginning chain as long as desired in multi-
ples of 12 plus 11.
instructions
purse sides (make 2)
With green, ch 35.
Row 1: (RS) Sc in 2nd ch from hook and in each ch
rem across; turn - 34 sc.
Row 2: Ch 1. sc in each sc across, changing to purple
on last 2 Ips of last st (see page 17 for how to change
yarn colors). Do not end off green. Let it lie loose to be
picked up at the end of Row 4; turn - 34 sc.
Row 3: With purple, ch 3 (counts as de), sk first sc, de in
next sc, hdc in next sc, sc in next sc; * ch 2, sk next 2 sc,
sc in next sc. hdc in next sc, de in next 2 sc, tr in next 2
sc, de in next 2 sc, hdc in next sc, sc in next sc; rep from
* to across last 6 sc; ch 2. sk next 2 sc, sc in next sc, hdc
in next sc, de in last 2 sc, turn - 28 sts and 3 ch-2 sps.
Row 4: Ch 3, sk first de, de in next de, hdc in next hdc,
sc in next sc; * ch 2, sk next ch-2 sp, sc in next sc, hdc in
next hdc. de in next 2 de, tr in next 2 tr, de in next 2 de,
hdc in next hdc, sc in next sc; rep from * across to last
6 sts; ch 2, sk next ch-2 sp, sc in next sc, hdc in next
hdc, de in next de, de in 3rd ch of beg ch-3, changing to
green on last 2 Ips of last st as before, allowing purple
to lie loose; turn - 28 sts and 3 ch-2 sps.
Row 5: W’ith green, ch 1. sc in first 4 sts; working
around ch-2 sps on previous 2 rows, sc in 2 skipped
sc 3 rows below (green row); * sc in next 10 sts on
previous row, sc in 2 skipped sc 3 rows below; rep
124
stitch diagram

Rep rows 2-9 for patt.
Row 9 (A;
TTTffffr>
Row 8(B)
Row 7 (8)
Row 6 (A)
Row 5 (A)
Row 4 (8)
Row 3 (8)
Row 2 (A)
Row 1(A)
0<oo0
A - groon yam
8 - purple yarn
О - ch

-г^^оооо
T-hdc
from * across to last 4 sts; sc in next 3 sts, sc in 3rd ch
of beg ch-3; turn - 34 sc.
Row 6: Ch 1, sc in each sc across, changing to purple
on last st; turn - 34 sc.
Row 7: With purple, ch 1, sc in first sc; * hdc in next
sc, de in next 2 sc, tr in next 2 sc, de in next 2 sc, hdc
in next sc, sc in next sc, ch 2, sk next 2 sc; sc in next sc;
rep from * across, omitting ch-2 and sc at end of last
rep; turn - 30 sts.
Row 8: Ch 1, sc in first sc, * hdc in next hdc, de in next
2 de, tr in next 2 tr, de in next 2 de, hdc in next hdc, sc
in next sc, ch 2; sk next ch-2 sp, sc in next sc; rep from
* across, omitting ch-2 and sc at end of last rep and
changing to green on last st: turn - 30 sts and 2 ch-2 sps.
Row 9: With green, ch 1, sc in first 10 sts: * working
around ch-2 sps on previous 2 rows, sc in 2 skipped sc
3 rows below; sc in next 10 sts; rep from * across;
turn - 34 sc.
Rows 10-17: Rep rows 2-9.
Row 18: Rep Row 2. Do not change color at end of
row. End off.
optional stabilizer
Cut 2 pieces of fusible stabilizer approx (1cm)
smaller than purse sides. Fuse to WS of purse sides
as per manufacturer instructions.
With RS tog, match up sts and sew seams at sides
and bottom of purse, leaving long edge open at top.
Turn RS out.
optional lining and zipper
Lining: Cut 2 pieces of lining fabric Уг" (1cm) wider
than purse width and height on 3 sides, but 1" (3cm)
taller at top, so it can be folded over for hand-sewing
into purse. Sew 14" (1cm) seams on sides and bottom,
leaving top edge open. Place lining down inside purse
and fold top edge over toward inside of purse. Take
out lining and press folded edge at top. Place back
down inside purse and hand-stitch to inside top edge
with sewing needle and thread.
Zipper: Pin zipper to top edges of lining and hand-
stitch in place. Place 1-3 beads on yarn and tie a knot
at one end to keep beads in place. Attach other end of
yarn to hole in zipper pull and secure.
125
RESOURCES
yarn companies
other resources
I want to thank all the yam companies who were so
generous in supplying yarn for the designs in this book.
Bernat, Patons
and Lily Yarns
320 Livingstone Ave. S.
Listowel, Ontario.
Canada N4W 3H3
(888) 368-8401
bernat.com
patonsyarns.com
lilyyarns.com
Caron International
P.O. Box 222
Washington. NC 27889
caron.com
Cascade Yarns
(206) 574-0440
cascadeyarns.com
Coats & Clark
(J&P Coats)
P.O. Box 12229
Greenville, SC 29612
(800) 648-1479
coatsandclark.com
Crochet Style Etc.
(Hilos Omega nylon
crochet cord and
Sinfonia cotton yarn)
6278 Youngland Dr.
Columbus, OH 43228
(614) 205-3210
crochetstyleetc.com
126
Crystal Palace Yarns
160 S. 23rd St.
Richmond, CA 94804
(510)237-9988
straw.com
crystalpalaceyarns.com
Hobby Lobby Creative
Centers (Yarn Bee Yarns)
7717 SW 44th St.
Oklahoma City, OK 73179
(405) 745-1200
hobbylobby.com
craftsetc.com
Interlacements Yarns
P.O. Box 3082
Colorado Springs,
CO 80934
(719)578-8009
interiacementsyarns.com
Lion Brand Yarn
135 Kero Rd.
Carlstadt, NJ 07072
(800) 258-9276
lionbrand.com
Plymouth Yarn
Company, Inc.
500 Lafayette St.
Bristol, PA 19007
(215) 788-0459
plymouthyarn.com
South West
Trading Company
(866) 794-1818
soysilk.com
WEBS - America's
Yarn Store
Kathy Elkins
75 Service Center Rd.
Northampton, MA 01060
(800)367-9327
yarn.com
Westminster Fibers, Inc.
Yam Division
165 Ledge St.
Nashua. NH 03060
(800) 445-9276
westminsterfibers.com
YarnSmiths
1230 Mitchell Blvd.
Springfield. OH 45503
(888) 550-5648
yarnsmiths.com
Busy Beaver Arts & Crafts
3445 Dayton-Xenia Rd.
Dayton, OH 45432
(937)429-3920
Arlene Graham's Fiberworks
4013 Dayton-Xenia Rd.
Beavercreek, OH 45432
(937) 429-9276
fiberworksdayton.com
Hancock Fabrics
1 Fashion Way
Baldwyn, MS 38824
(877)322-7427
; hancockfabrics.com
JoAnn Fabric and Craft Stores
5555 Darrow Rd.
Hudson, OH 44236
; (888) 739-4120
joann.com
Michaels Stores, Inc.
( 8000 Bent Branch Dr.
Irving, TX 75063
(800) 642-4235
michaels.com
Prism Arts, Inc.
prismyarn.com
Tilli Tomas
Boston, NLA 02130
(617)524-3330
tillitomas.com
t
1
INDEX
Abbreviations, defined. 11
Arm warmers, 32
Back loop only (bloi method. 18
Bags. 39-41. 62-63
Beading, 77, 89
Beret. 92-93
Bodices, 99,103, 114-115
Braids, 38
Bulk, reducing. 29
Bulky yarns. 17
projects. 24-26.33-35,62-63.
68-70.71-75.76-77,80-81,
88-89
Capelet. basic. 24-26
Capelet pattern
designs from, 24-41
versatility of, 21-24
Chain stitch. 12
Choker, hemp. 88-89
Closure loop, 89
Color, changing, 17
Crochet, with graduated
stitching. 18-19
Crown, beret, 93
Cuff, sleeve. 58
Decreases, shaping without, 97
Diagrams
attaching sleeve to sweater.
56-58
baby doll top. 98
cap sleeve top. 51, 53
capelet, 25
little black dress, 45
little girl's dress, 102
long flared skirt, 107
ruffled shrug, 111
striped, sleeveless turtleneck
sweater, 65
wave-stitch, 125
Double crochet stitch, 13
Double treble stitch, 15
Draping. 19
Drawstring, 29.41. 107-108
Dresses, 44-48. 101-104
Edgings. 26. 29, 41.52-53,61.
104. 108. 115
Elastic, adding, 47-48, 53
Felting, 118-121
Fibers, for felling. 120
Fine yams, 17
projects, 78-79. 90-91,101-
104,105-108,112-115
Flared ends, 76-77
Flower, 61, 73, 75
Fringe. 35,80-81
Front loop only (flo), 60. 79
Gauge, checking, 16
Graduated stitch method. 18-19
development of. 23
Half-double crochet stitch, 13
Half-double treble stitch, 15
Half-triple crochet stitch, 14
Hats. 36-38. 71-73,92-93
Headbands, 82-87
Hook sizes, varying on same
row. 31, 34
Houndstooth pattern, 118-122
T^af, 70
Length, adjusting, 50
Light yams, 17
projects. 27-29,44-48,49-53,
54-58,64-67,82-83,84-85.
86-87
Lining, 104, 121,125
Loops, both, 81.83,85.87,102,
110.113,119, 122,124
See also Back loop only (bio),
Front loop only (flo)
Markers. 46
Medium yams. 17
projects. 30-32.36-38.39-41,
59-61.71-73,92-93.118-121.
123-125
Mittens, 71, 74-75
Pom-poms, 35
Poncho, pom-pom. 33-35
Purses. 118-121. 123-125
See also Bags
Resources. 126
Ribbing, defined, 22
Rose. 68.70
Rows, adding. 51
Ruffles, 78-79, 111
Scalloped edging, 26. 29
Scarves, 76-81,121-122
Seams, 19. 56.58
mitten, 75
sewing, 19
side and shoulder. 67
sleeve. Ill
slippers, 69
sweater, 115
Shell stitch, 28
Shoulders, and sleeve, 114
Shoulder wrap, 59-61
Shrug, ruffled, 109-111
Side-to-side method. 18.107
Single crochet stitch, 12
Size, 18
adjusting, 40.50. 55,69.106
before and after felting, 119,
121
getting right fit, little black
dress. 45
Skirts, 27-29.103,105-108
Sleeves. 55-57, 111. 114-115
Slippers with rose. 68-70
Slip stitch, 12
Stitches
comparing heights, 19
lacy-looking, 97
types, 12-15
Straps. 41,47-48,52, 99.100,
103-104
Striping, 66-67,83
Superbulky yams. 17
Superfine yarns. 17
project. 109-111
Sweaters, 54-58, 64-67
Tab. purse. 120-121
Texture, 82-85. 90-91
Thread. See Yams
Thumb, mitten. 75
Top stitching, 73
Top. 49-53,96-100
Triple crochet stitch, 14
Tunic, 112-115
Turtleneck capelet, 30-31
Turtleneck collar. 67
Waist, and drawstring. 107-108
Wave-stitch coin purse. 123-125
Yams
bulky-weight projects, 24-26,
33-35, 68-70, 71-75. 76-77,
80-81,88-89
carrying. 80
choosing, 17
fine-weight projects, 78-79,
90-91, 101-104.105-108. 112-
115
light-weight projects, 27-29,
44-48, 49-53, 54-58, 64-67.
82-83. 84-85, 86-87
medium-weight projects.
30-32. 36-38,39-41.59-61.
71-73.92-93.118-121.123-
125
resources for. 126
superfine-weight project.
109-111
Yam weight system, 17
Zipper. 125
127
>
I
NEEDLECR AFTS/CROCHET
Get your crochet into SHAPE!
DISCOVER THE EASY WAY TO CROCHET
FLATTERING, FEEL-GOOD FASHION
Say “goodbye” to crochets stiff, boxy, hippie-child reputation, and “hello"
to Crochet that Fits... garments that fit your shape, accessories that fit your
style, and looks that fit right in with todays fashion trends!
This book teaches an innovative, easy way to crochet fashions that
are soft, shaped and drapeable—from a little black dress that fits like a
glove, to a lacy baby-doll top, cute and cozy slippers, ruffled shrugs, hobo
bags and more. By using Mary Jane Hall’s Graduated Stitch Method,
along with the correct size hook and yarn, anyone can make flattering,
form-fitted items! Different stitch heights do all the shaping for you,
without the hassle and confusion of figuring out increases or decreases.
With this method you are essentially building garments with squares and
rectangles, but the finished product is shaped and not boxy.
•	33 step-by-step projects feature a wide variety of patterns for adults
and children
•	an illustrated stitch guide makes getting started quick for any level
•	detailed instructions make it easy to adjust the patterns to suit any
shape—because one size does not fit all!
Easy enough for a beginner and stylish enough for the more experienced
crochet enthusiast, these are projects you’ll enjoy making and feel good
wearing. With fits like this, you’ll never think about crochet the same
way again!
Discover imagination,
innovation and inspiration at
www.mycraftivity.com
Connect. Create. Explore.
US S22.9
Z2114	(CAN S25.5
ISBN-13: 978-0-89689-662-3
ISBN-10: 0-89689-662-5
5 2 2 9-
BULKY
SKILL LEVEL:
BEGINNER
©
\© WTERMEpjATE
Гл is poncho pattern is
usually the same as the
i iult capelet. You can make
к adult or infant-sized by
adding or deleting chains
s: :he beginning and by
i rking more or less rows
get the width you
want. The pom-poms
are a fun touch, but
you could replace
*.nem with beaded
fringe worked around
:he entire edge.

pom-pom poncho
ШИИЯШШИ -I