/


Tags: knitting history of christianity handmade handicrafts days of craft magazine chrismas craft
Year: 2023
Text
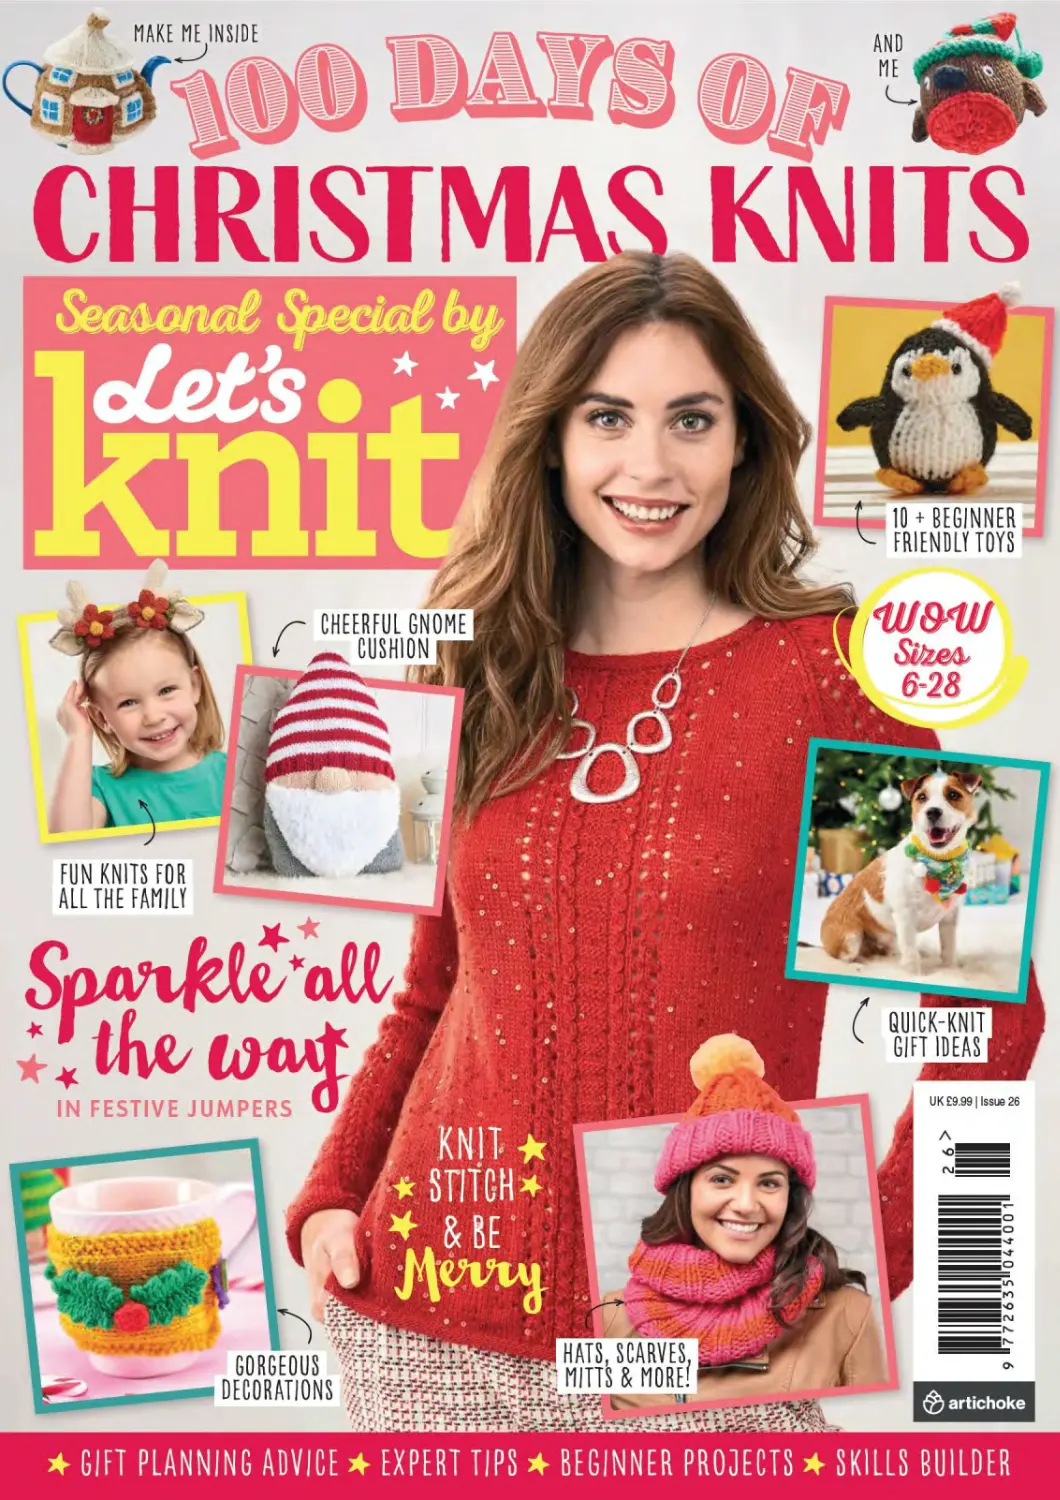
                    CHRISTMAS KNITS
IN FESTIVE JUMPERS
FUN KNITS FOR
ALLTHE FAMILY
CHEERFUL GNOME
cushion™
( QUICK-KNIT
k GIFT IDEAS I
IN FESTIVE JUMPERS OfiVJudfl
[Д>]
GORGEOUS ';
DECORATIONS
HATS, SCARVEo,
MITTS & MORE?
,J|
10 + BEGINNER
FRIENDLY TOYS
Sitee&
. 6-23
7тп>
artichoke
4 GIFT PLANNING ADVICE 4 EXPERT TIPS 4 BEGINNER PROTECTS 4 SKILLS BUILDER
GIFTS THEY’LL
TREASURE FOREVER
Unlock 450+ Christmas patterns with
Let’s Knit Together,
including gifts for
the whole family!
letsknit.co.uk/christmas
Join our online knitting club
Visit
WELCOME...
Canny knitters know that it's never too
early to start knitting for Christmas!
So raid your yarn stash and ready
your needles, as we have a fabulous
selection of gifts and novelty knits
that will get you in the festive mood,
whatever the season!
From cute snowmen, angels and
robins, to cheeky elves, penguins
and reindeer, there are lashings of
delightful toys ready to fill your little
ones' stockings and hearts.
We also have a huge variety of
decorations including present sacks,
wreaths, tree ornaments and bunting.
You'll be sure to impress Santa with all
your crafty Christmas touches!
And don't miss our holiday gift and
outfit ideas starting on page 74 - we
have all the classics such as socks,
hats, slippers and scarves, as well as
several catwalk-inspired knits that
will look gorgeous on
the big day - try our
cropped bobble top
(p116), merry mosaic
cardi (pl 20) or chic
boxy jacket (p86).
With so many exciting
projects to choose from,
if you're not sure where
to begin, check out our
gift planning advice
on page 76 for some
handy tips before you
start. Happy knitting!
P.S. Be sure to check
out the letsknit.co.uk
special offer on page
132, for a lovely bundle
of festive yarn!
Clrumkc
ckavacktj
aalowl
MEET THE TEAM .
CONTENT CREATOR
Sally Narraway
sally.narraway@craftihive.com
ART EDITOR
Fiona Palmer
HEAD OF	I
SUBSCRIPTIONS GROWTH
Andrea Turner
CLIENT SOLUTIONS MANAGER
Jayne Owles
PHOTOGRAPHY
Novo Studios novostudios.co.uk
artichoke
Published by Artichoke Medio Ltd. © Artichoke Media Ltd 2023.
Jubilee House. 92 Lincoln Road, Peterborough, Cambridgeshire,
United Kingdom, PEI 2SN. Printed in the UK by William Gibbons. All
rights reserved. Distributed by. Seymour Distribution Ltd, 2 East Poultry Avenue, London
EC1A 9PT. *44 (0) 207429 4000. seymour.co.uk
Items made from projects published by 100 Days Of are for personal use only and cannot
be sold or used for commercial purposes. Multiple copies of any part of this publication
may not be made, and no part of this publication whether in its original form or a
reproduction thereof may be sold. All projects featured within 100 Deys Of are reproduced
in good faith that they do not infringe any copyright All published prices are correct at time
of original press but are subject to change.
The publishers are not responsible for any safety issues arising from any items created from
projects contained within 100 Days Of magazine. Adult supervision is required when using
scissors. Toys and decorations with small parts are not suitable for children under three
years of age. If making a toy or decoration for a very young child, omit any buttons, beads
or embellishments and embroider the details instead. Always ensure that all pieces are
sewn on securely. Babies should be supervised when playing with toys. While all possible
care has been taken to ensure the accuracy of projects, we are not responsible for printing
errors or the way in which individual work varies. We recommend using the main specified
yarn for every project to produce the best results. If using an alternative, swatch yarn
carefully before choosing to use it for your project. Please read instructions before starting
construction. Pattern updates can be found at 100daysofcrafts.com
★
* 100 DAYS OF CRAFTS *
PROJECTS...
6 Bauble wreath
Craft this bright and colourful ornament
8 Snowman family
Whip up a frosty trio
10 Festive fir cushion
Try our tree-mendous Christmas cover
12 Rita & Robbie robins
Knit our adorable Christmas duo
14 Robin cosy
Add a festive flourish to your tea breaks
16 Mug cosies
Even your cuppa can be snug with this cover
18 Present sack
A yarntastic tote sure to impress Santa
20 Christmas bows
Add a crafty flourish to all your festive gifts
22 Gift bags
Try these delightful festive face designs
25 Gift card pouches
Give vouchers a personal touch this year
26 Scandi stocking
Challenge yourself with this Fair Isle knit
29 Mistletoe dec
Add a little romance to your festive parties
30 Santa's laundry line
Spread holiday cheer with this fun bunting
32 Yule log
Knit a sweet robin decoration
34 Elf on a shelf
This cheeky chap is sure to find mischief
36 Santa artwork
Try your hand at knitted cross-stitch
38 Rupert reindeer
Santa has a new helper, and he's super cute!
40 Candle wreath
Start the festivities with our classic dec
42 Gnome cushion
Give your sofa a stylish seasonal makeover
44 Santa Claus
Knit up our favourite jolly man
47 Mini wreath decs
Batch make these beauties
48 Cottage cosy
Capture a classic seasonal look
50 Puppy playhouse
Cute canines and their Christmassy kennel
53 Roald penguin
Little ones will love this Antarctic cutie
54 Table runner
Dine in seasonal style with a sparkly knit
56 Dog hat & bandana
Tails will be wagging with this ensemble
59 Team Santa
Get yourself in the festive mood
60 Toy soldiers
Our merry marching dolls make great gifts
62 Sweet treats
Spruce up your tree with quick-knit decs
* 100 DAYS OF CRAFTS *
PLUS...
76 Keep calm this Christmas
Quick knits and gifting top tips for
seeing you through the festive period
125 How to knit
Essential tips and techniques to
get you started plus all our knitting
abbreviations explained
MAKE-
WITH" Watch out for this
logo for projects that
are family-friendly!
V
106 Unisex beanie
Play it cool in this easy-wear slouchy hat
108 Christmas socks
A new pair is a Christmas must-have!
110 Festive hats
Jolly knits tpyour Christmas Day attire
112 Reindeer headwear
Who doesn't love a novelty hat?
115 Cosy cowl
You'll only need one skein for this make
116 Short bobble jumper
It's bright, cropped and oh-so-cosy
118 Scandi yoke sweater
Yule love this festive Fair Isle knit
65 Bauble ornaments
Whip up a set in colours to suityour scheme
66 Christmas cones
Our quirky knitmas trees are fab for newbies
68 Heart warmer
Keep a loved one cosy with a sweet blanket
71 Mini tree decs
Use your yarn stash to make these fab firs
72 Angel doll
No Christmas tree is complete without one!
73 Party chain
Set the scene for festivities
74 Hottie cover
These classic covers make ideal presents
78 Snowman sweater set
Tots and their teddies will love these
82 Applique jumper
Transform an everyday sweater in a jiffy
84 Glittering clutch
Add a knitty touch to your outfit
86 Boxyjacket
Look sensational in this versatile knit
89 Beaded purse
Add a little glitz to your outfit
90 Pearl bead cardigan
This elegant cardi suits all sizes
93 Striped scarf
Gift our striking scarf
94 Bobble hat & cowl
Knit up this super-chunky set this weekend
96 Eyelet mitts
Try this chic chevron design
98 Glitzy jumper
You'll be ravishing in red in this beauty
101 Easy headband
Little girls will adore this glamorous make
102 Fair Isle beanie
Knit our classic hat in shades to suit
104 Cabled socks
Keep your toes toasty
120 Merry mosaic cardi
This chic garment is easier than it looks!
123 Festive slippers
Candy-cane footwear... so sweet for feet
I
' DON’T MISS OUR NEXT ISSUE
I ON SALE 7TH SEPTEMBER
i 100 DAYS OF
CHRISTMAS CROCHET
* 100 DAYS OF CRAFTS *
DESIGNER HELEN ARDLEY
Bauble wreath
Start spreading the Christmas cheer with this
bright and colourful ornament
KIT LIST
★ Yarn: Rico Essentials
Merino DK, (A) shade 05
Red, (B) shade 03 Purple, (C)
shade 42 Green, (D) shade
60 Natural, (E) shade 46
Khaki, one 50g ball of each
★ Needles: 3.75mm
★ Beads: red, small
★ Cardboard ring: 4cm x
28cm ★ Curtain ring: one
★ Flower arranging wire:
approx 65cm ★ Sewing
cotton and needles
Toy stuffing
Size: 35cm across
6 ALTERNATIVE YARN
King Cole Merino Blend DK
SMALL BAUBLE (MAKE 18-
4 IN YARN A, 6 IN YARN B.
5 IN YARN C, 3 IN YARN D)
Using 3.75mm needles and
chosen yarn, cast on five sts
□ Foundation row: p
□ Row 1 (RS): k1, * ml, k1,
rep from * to end. Nine sts
□ Row 2 and all WS rows: p
□ Row 3: as Row 1.17 sts
□ Row 5:k2, * ml, k2, rep
from * to last st, k1.24 sts
□ Row 7: k2, * ml, k2, rep
from * to end. 35 sts
□	Rows 8-16: starting with
a p row, work in st st
□	Row 17: k2, * k2tog, k2, rep
from *to last st, k!. 27sts
□	Row 18 and all WS rows: p
□ Row 19: as Row 17.21 sts
□	Row 21: k2, * k2tog, k1, rep
from * to last st, k1.15 sts
□	Row 23: (k2tog) to last st,
k1. Eight sts
□	Row 24: (p2tog) to end.
Four sts
□	Row 25: pass second, third,
and fourth sts over first and
off the needle
□	Pull tight and fasten off
TO MAKE UP
Sew seam using mattress
stitch, leaving a gap to stuff
bauble into a round shape.
Sew up remaining gap
LARGE BAUBLE (MAKE 6-
2 IN YARNS A & D. 1 IN YARNS
D & A. 2 IN YARN$ C & 0,
1 IN VARNS 0 & 0
Using 3.75mm needles and
main yarn, cast on five sts
□	Foundation row: p
□ Row 1:k1, * ml, k1, rep
from * to end. Nine sts
□	Row 2: p
□	Row 3: as Row 1.17 sts
□	Row 4: p
□	Row 5: as Row 1.33 sts
□	Row 6: p
□	Row 7: k2, * ml, k2, rep
from * to last st, k1.48 sts
□	Rows 8-10: beg with a p
row, work in st st
Change to contrast yarn
□ Work two rows in st st
Change to main yarn
□ Work two rows in st st
□ Work six rows of Chart
Change to contrast yarn
□ Work two rows in st st
Change to main yarn
□ Work two rows in st st
□ Next row: k2, * k2tog, k2,
rep from * to last two sts, k2.
37 sts
□	Next row: p
□	Next row: k2, * k2tog, k2,
rep from * to last three sts,
k2tog, kl. 28 sts
□	Next row: p
□	Next row: (k2tog) to end.
14 sts
□	Next row: (p2tog) to end.
Seven sts
□	Next row: (k2tog) to last st,
k1. Four sts
□	Pass second, third, and
fourth st over first
□	Pull tight and fasten off
TO MAKE UP
Work as Small bauble
LEAF (MAKE 5)
Using 3.75mm needles and
yarn E, cast on three sts
□ Foundation row: p
□ Row 1: kl, yfwd, k1, yfwd,
k1. Five sts	’
□	Row 2: p
□	Row 3: k2, yfwd, k1, yfwd,
k2. Seven sts
□	Row 4: p
□	Row 5: k3, yfwd, k!, yfwd,
k3. Nine sts
□	Cont to inc as set on every
alt row until there are 15 sts
□ Next row: starting with
a p row, work five rows in st st
□ Next row: si 1, k1, psso,
к to last two sts, k2tog. 13 sts
□ Next row: p
□	Cont to dec as set on every
alt row until three sts rem
□	Next row: si 1, k2tog, psso.
One st
□	Fasten off
TO MAKE UP
Use wire to thread Baubles and
form a circle. Twist ends of wire
together and thread back
through first and last bauble.
Thread beads onto wire to
form loops and sew Leaves
and beaded loops randomly
around wreath. To make
wreath more solid, spread glue
over one side of cardboard ring
and carefully place Baubles
on top. Leave overnight to set.
Sew curtain ring to top of
wreath for hanging
+ SEEP129F0RALIST
* OF ABBREVIATIONS
BAUBLE WREATH CHART
WIRING WELL
Flower wire comes in a
variety of shapes and
sizes, so it's important to
get the right kind to keep
your baubles in place on
your wreath. Ideally you
want a thick wire, as this
means the wire will be
bendable by hand but still
able to hold the weight of
the baubles. You can find
flower wire at most garden
centres or craft stores.
Additionally you can glue
your baubles to the wreath
to give them a little more
security; be sure to choose
a non-yellowing variety
* 100 DAYS OF CRAFTS *
* 100 DAYS OF CRAFTS »
DESIGNER SACHIYO ISCHII
Snowman family
This knitted trio certainly won't melt come summer - so
what better project to get started on for Christmas?
KIT LIST
★ Yarn, DK: Santa's
Beard, Gold Coin,
Rosy Cheeks, Brussels
Sprouts, Icicle, dark
brown ★ Needles, 4mm
★ Tapestry needle
★ Scissors
Height: 11 cm
BODY (MAKE 3)
Using 4mm needles and
Santa's Beard cast on eight sts
□ Row 1 (WS): p
□ Row 2: (kfb) to end. 16 sts
□ Rows 3-13: starting with a
p row work in st st
□ Row 14 (neck): (k2, k2tog)
to end. 12 sts
□	Rows 15-23: starting with
a p row work in st st
□	Row 24: (k2tog) to end.
Six sts
Cut yarn leaving a long tail,
thread tail onto tapestry
needle and thread through
rem sts, fasten off
NOSE (MAKE3)
Using 4mm needles and
Gold Coin cast on six sts
Cut yarn leaving a long tail,
thread tail onto tapestry
needle and thread through
rem sts, fasten off
HAT (MAKE 3
-	1 IN EACH COLOUR)
Using 4mm needles and
Icicle, (Rosy Cheeks, Brussels
Sprouts) cast on 30 sts
□ Row 1: к
□	Row 2: p
□	Row 3: (kl, k2tog) to end.
20 sts
□	Rows 4-6: starting with a p
row work in st st
□	Row 7: (k2tog) to end. Ten sts
Cut yarn leaving a long tail,
thread tail onto tapestry
needle and thread through
rem sts, fasten off
SCARF
-UN
Using 4mm needles and Rosy
Cheeks (Brussels Sprouts,
Icicle) cast on three sts
□ К until piece meas 20cm
Cast off
(MAKE 3
EACH COLOUR)
SCARF BOBBLE(MAKE 6
- 2 IN EACH COLOUR)
Using 4mm needles and
Brussels Sprouts (Icicle, Rosy
Cheeks) cast on ten sts
□ Rows 1 -5: starting with
a p row work in st st
Cut yarn leaving a long tail,
thread tail onto tapestry
needle and thread through
rem sts, fasten off
TO MAKE UP
With fastened-off yarn end sew
Body halfway. With cast-on
yarn end, work gathering thread
along cast-on edge and draw
tightly. Stuff and sew closed.
With same yarn, work a
gathering thread around neck,
draw in gently. Sew Nose edges
tog to make into small bobble,
sew to Head. Using dark brown
DK back st a mouth and
embroider French knot eyes.
Seam Hat and sew to head. Sew
pom-pom on top. Sew Scarf
Bobbles to Scarf ends and wrap
around neck. Weave in all ends
TO MAKE A POM-POH,
WIND THE CHOSEN YARN
AROUND TWO FINGERS
30 TIMES AND TIE AROUND THE
CENTRE WITH STRONG COTTON
THREAD. CUT LOOPS AND TRIM
TOP
TIP!
* 100 DAYS OF CRAFTS *
* 100 DAYS OF CRAFTS *
DESIGNER SIAN BROWN
Festive fir cushion
Christmas cushion covers are a brilliant way to embrace the
season without overhauling your entire design scheme
10
KIT LIST
★ Yarn: Stylecraft
Classique Cotton DK,
shades (A) 3667 Sky
Blue, four 50g balls,
(B) 3097 Leaf, (C) 3656
Toffee, (D) 3360
White, (E) 3672 Poppy,
one 50g ball of each
★ Needles: 4mm
★ Buttons: five ★ Tape
measure ★ Tapestry
needle ★Scissors
★ Cushion pad, 30cm
TENSION SQUARE
★	20 sts x 28 rows
★	10cm x 10cm
★ Over st st
★ 4mm needles
ALTERNATIVE YARN
Cascade Fixation yarn
NOTE: made in one piece
PATTERN
Using yarn 4mm needles and
B,	cast on 86 sts
□	Row 1: (k1, p1) to end
□	Row 2: (p1, k1) to end
These two rows set moss st
□	Work three more rows in
moss st
□	Next row (WS): p to end
Change to yarn A
□ Beg with a к row, work
in st st until Back meas 30cm
from cast-on edge, ending
after a RS row
□	Next row (WS): к to end
□ Beg with a к row, work
13 rows in st st
Motif
NOTE: motif is worked in
intarsia with embroidery
added when finished
□ Row 1 (WS): p22, p across
Row 1 of Chart (reading chart
from left to right), p22
□ Row 2: k22, к across
Row 2 of Chart (reading chart
from right to left), k22
□ Cont in st st working
appropriate row of Chart unti
74 rows have been worked
Cont in yarn A only
□ Beg with a p (WS) row,
work 13 rows in st st
□ Next row (RS): p to end to
mark turn
Overlap
□ Cont in st st for 6cm
NOTE: ensure sts on needle
sit just above the cast-on
edge, if they don't adjust
Change to yarn В
□ Work one row in st st
Buttonhole band
□ Row 1:(k1, p1)toend
□ Row2:(p1, kljtoend
These two rows set moss st
□ Row 3 (buttonhole row):
moss st six, (k2tog, yon, moss
st 16) four times, k2tog, yon,
moss st six
□	Row 4: as Row 2
□	Row 5: as Row 1
□ Cast off
TO MAKE UP
Block and press under a dry
cloth. Using yarn A, D and E,
FIR CUSHION CHART
KEY
□ YARN A	 YARN В	 YARN C
embroider French knots
on tree. Using yarn D,
embroider star at top of tree
in long stitches, and stars
around top half of front.
INTARSIA
Intarsia is the process of
creating different motifs
in different yarn colours.
Unlike Fair Isle, you don't
bring the unused strands
of yarn across the back
Pin and sew side seams
overlapping buttonhole
band as shown. Sew on
buttons to correspond
with buttonholes
of your work. Instead, you
allow the yarn not in use
to hang down or wind
it into a small, neat ball.
Twist the strands together
to avoid holes
* 100 DAYS OF CRAFTS *

DECOR
WITH А
DIFFERENCE
J
DESIGNER SACHIYO ISCHI1
Rita & Robbie robins
This adorable duo love nothing more than cuddling
up to sing the morning chorus on a crisp winter's day
KIT LIST
★	Yarn, DK: Christmas
Pud, Robin Red, Evergreen,
black * Needles: 5mm
★ Tapestry needle
★	Scissors ★ Stuffing
★	White felt
Rita height: 12cm; Robbie
height: 10cm
12
Using 5mm needles and
Christmas Pud cast on ten sts
□	Row 1 and every odd-
numbered row: p
□	Row 2: kfb in each st to
end. 20 sts
□	Row 4: (kl, kfb) to end.
30 sts
□	Row 6: (k2, kfb) to end.
40 sts
□	Rows 8-21: starting with
a к row work in st st
□	Row 22: (k2, k2tog) to end.
30 sts
□	Row 23: p
□	Row 24: (k1, k2tog) to end.
20 sts
□	Row 25: p
□	Row 26: (k2tog) to end.
Ten sts
Cut yarn leaving a long tail,
thread tail onto tapestry
needle and thread through
rem sts, fasten off
RED BREAST
Using 5mm needles and
Robin Red cast on ten sts
□	Rows 1 -7: rep Rows 1 -7
of Body. 40 sts
Cast off
WING (MAKE 2)
Using 5mm needles and
Christmas Pud cast on 14 sts
□	Rows 1 -4: starting with a p
row work in st st
□	Row 5: p2, (p2tog, p2) to
end. 11 sts
□	Row 6: к
□	Row 7: pl, (p2tog) to end.
Six sts
Cut yarn leaving a long tail,
thread tail onto tapestry
needle and thread through
rem sts, fasten off
BEAK
Using 5mm needles and black
DK cast on 16 sts
□	Row 1 (WS):p
□	Row 2: (k2, k2tog) to end.
12 sts
□	Row 3: (p2tog) to end.
Six sts
Cut yarn leaving a long tail,
thread tail onto tapestry
needle and thread through
rem sts, fasten off
TAIL
Using 5mm needles and
Christmas Pud cast on 16 sts
□	Rows 1 -4: (k2, p2) to end
□	Row 5: (k2, p2tog) to end.
12 sts
□	Row 6: (k1, p2)toend
□	Row 7: (k2tog, p1) to end.
Eight sts
□	Row 8: (kl, pl) to end
□	Row 9: (k2tog) to end.
Four sts
Cut yarn leaving a long tail,
thread tail onto tapestry
needle and thread through
rem sts, fasten off
HAT
Using 5mm needles and
Evergreen cast on 40 sts
Work in foil four-stripe
sequence: Evergreen,
Robin Red
□	Rows 1 -6: starting with
a к row work in st st
□	Row 7: (k3, k2tog) to end.
32 sts
□	Rows 8-10: starting with
a p row work in st st
□	Row 11: k2tog, (k1,k2tog)
to end. 21 sts
□	Rows 12-22: starting with
a p row work in st st
□	Row 23: (kl, k2tog) to end.
14 sts
□	Row 24: p
Cont in Robin Red only
□	Row 25: (k2tog) to end.
Seven sts
Cut yarn leaving a long tail,
thread tail onto tapestry
needle and thread through
rem sts, fasten off
BOBBLE
Using 5mm needles and
Evergreen cast on 12 sts
□	Rows 1 -5: starting with
a p row work in st st
Cut yarn leaving a long tail,
thread tail onto tapestry
needle and thread through
rem sts, fasten off
ROSSIE
BODY
Using 5mm needles and
Christmas Pud cast on
eight sts
□	Rows 1 -5: rep Rows 1 -5
of Rita's Body. 24 sts
□	Rows 6-13: starting with
a к row work in st st
□	Rows 14-16: rep Rows
24-26 of Rita's Body. Eight sts
Cut yarn leaving a long tail,
thread tail onto tapestry
needle and thread through
rem sts, fasten off
RED BREAST
Using 5mm needles and
Robin Red cast on eight sts
□	Rows 1 -5: rep Rows 1 -5
of Rita's Body. 24 sts
Cut yarn leaving a long tail,
thread tail onto tapestry
needle and thread through
rem sts, fasten off
WING (MAKE 2)
Using 5mm needles and
Christmas Pud cast on
eight sts
□	Row 1 (WS): p
□	Row 2: (k2, k2tog) to end.
Six sts
□	Row 3: p
□	Row 4: (k2tog) to end.
Three sts
Cut yarn leaving a long tail,
thread tail onto tapestry
needle and thread through
rem sts, fasten off
BEAK
Using 5mm needles and
black DK cast on eight sts
□	Row 1: (p2, p2tog) to end.
Six sts
□	Row 2: (k2tog) to end.
Three sts
Cut yarn leaving a long tail,
thread tail onto tapestry
needle and thread through
rem sts, fasten off
TAIL
Using 5mm needles and
Christmas Pud cast on eight sts
□	Rows 1-3: (k2, p2)toend
□	Row 4: (k2, p2tog) to end.
Six sts
□	Row 5: (k1, p2tog) to end.
Four sts
Cut yarn leaving a long tail,
thread tail onto tapestry
needle and thread through
rem sts, fasten off
HAT
Using 5mm needles and
Evergreen cast on 24 sts
□	Rows 1 -4: starting with
a к row work in st st
Work in foil two-row stripe
sequence: Robin Red,
Evergreen
□	Row 5: к
□	Row 6: p
□	Row 7: (kl, k2tog) to end.
16 sts
* 100 DAYS OF CRAFTS «
UMie,
Row 8: p
Row 9: (k2tog) to end.
Eight sts
Rows 10-12: starting with
a p row work in st st
Cont in Evergreen only
Row 13: rep Row 9. Four sts
Cut yarn leaving a long tail,
thread tail onto tapestry
needle and thread through
rem sts, fasten off
BOBBLE
Using 5mm needles and
Evergreen cast on eight sts
Rows 1 -3: starting with
a к row work in st st
Cut yarn leaving a long tail,
thread tail onto tapestry
needle and thread through
rem sts, fasten off
TO MAKE UP
Using fastened-off yarn end
seam Body halfway. With
cast-on yarn end work a
gathering thread along cast-on
edge and draw tightly. Sew
base, stuff Body and sew
closed. Thread Christmas Pud
onto tapestry needle and
pierce from centre of base, take
out needle from lower back of
Body and rep, pull to flatten
base. Using fastened-off yarn
end seam Red Breast to edge,
sew to Body. Seam Wings and
Beak, sew to Body. Sew Tail to
Body. Cut four 8mm circles of
white felt and place two on
each face. Using Christmas Pud
make two French Knots for
eyes, piercing through felt.
Using fastened-off yarn end
seam Hat to cast-on edge.
Seam Bobble, stuff and work
gathering thread along cast-on
edge. Use yam end to attach
to tip of Hat. Attach Hat to
Body, rolling cast-on edge
slightly. Weave in all ends
* 100 DAYS OF CRAFTS «
DESIGNER NICOLA VALIJI
Robin cosy
Add a festive flourish to your tea breaks
with this novelty knit
KIT LIST
★ Yarn: Paintbox Simply
Aran, shades (A) 210
Coffee Bean, (B)213 Rose
Red, (C) 200 Paper White,
(D)222 Buttercup Yellow,
one 100g ball of each,
oddment of black yarn
Needles: 5mm
★ Stitch holders
★ Safety toy stuffing
Tapestry needle
To fit a standard four-cup teapot
ALTERNATIVE YARN
Caron Simply Soft
14 TENSION SQUARE
24 sts x 30 rows
' 10cm x 10cm
★ Stocking stitch
★ 3.5mm needles
BASE
Using 5mm needles and
yarn A, cast on 72 sts
□ Row 1: * k2, p2, rep from
* to end
□ Rows 2-4: as Row 1
Back
Divide for Back as foils:
□	Row 5: k34, turn, place rem
38 sts on holder
□	Rows 6-28: beg with
a p row, work in st st
□	Cut yarn and place sts
on holder
Front
□	Row 5: rejoin yarn A to 38
sts on holder, cast off four sts,
к to end. 34 sts
□	Row 6: p
Change to yarn C
□	Rows 7-28: beg with
a к row, work in st st
Change to yarn A
□	Row 29 (RS): k34 sts from
needle, k34 sts from holder.
68 sts
□	Row 30 and all WS rows: p
□	Row 31: (k6, k2tog) eight
times, k4.60 sts
□	Row 33: (k5, k2tog) eight
times, k4.52 sts
□	Row 35: (k4, k2tog) eight
times, k4.44 sts
□	Row 37: (k3, k2tog) eight
times, k4.36 sts
□	Row 39: (k2, k2tog) to end.
27 sts
□	Row 41: (kl, k2tog) to end.
18 sts
□	Row 43: (k2tog) to end.
Nine sts
□	Row 44: p1, (p2tog) to end.
Five sts
□	Cut yarn leaving a tail,
thread through rem sts, pull
tight and fasten off
TUMMY
Using 5mm needles and
yarn B, cast on 30 sts
□	Row 1 (RS): к
□	Rows 2-12: beg with a p
row, work in st st
□	Row 13: skpo, к to last two
sts, k2tog. 28 sts
□	Row 14: p2tog, p to last
two sts, p2tog. 26 sts
□	Rep last two rows three
times more. 14 sts
□	Cast off
EVES (MAKE 2)
Using 5mm needles and
yarn C, cast on eight sts
□	Row 1: к
□	Cut yarn leaving a tail,
thread through rem sts, pull
tight and fasten off
BEAK
Using 5mm needles and
yam D, cast on eight sts
□	Row 1: к
□	Row 2: p
□	Row 3: k1, skpo, k2, k2tog,
k1. Six sts
□	Row 4: p
□	Row 5: k1, skpo, k2tog,
k1. Four sts
□	Row 6: p1, p2tog, p1.
Three sts
□	Row 7: si 1, k2tog, psso.
One st
□	Fasten off
WINGS (MAKE 2)
Using 5mm needles and
yarn A, cast on ten sts
□ Rows 1-18: к
□	Row 19: k1, skpo, к to last
three sts, k2tog, k!. Eight sts
□ Rows 20-21: к
□	Rep last three rows twice
more. Four sts
□	Row 28: skpo, k2tog.
Two sts
□	Cast off
TO MAKE UP
Place Base around teapot
and pin where seams are to
be joined to fit spout and
handle. Remove and sew
seam edges on wrong side,
turn right side out. Place
Tummy to white section of
Base, add a small amount of
stuffing to Tummy and sew in
place. Position Beak at top
centre of Tummy and sew in
place. Position two Wings
either side of Tummy and sew
cast-on edge to Base. Using
yarn A, tie a few strands to
top of Base as feathers. Make
up Eyes by gathering up yarn
tails and sewing to cast-on
edge to make a circle. Using
oddments of black yam,
embroider pupils in centre
of Eyes, then attach just
above Beak
TOP
TIP!
TAKE TIME OVER
LABELLING YOUR
KNITTED PIECES AND
STUFFING YOUR ROBIN’S TUMMY,
AS THIS WILL IMPROVE THE
OVERALL AESTHETIC OF YOUR
FINISHED MAKE
* 100 DAYS OF CRAFTS *

DESIGNER NICOLA VALIJI
Mug cosies
Snuggled up on the sofa with a hot chocolate
in hand, does it get any better than that?
KIT LIST
★ Yarn, DK: Sparkly Gold,
Red Nose, Sugar Plum,
Mistletoe, Light Fawn,
Leafy Green ★ 3.5mm
needles ★ Stuffing ★ Two
2cm buttons ★ Tapestry
needle ★ Scissors
Length (ind. tie): 28cm
16
HOLLY COSY
MAIN
Using 3.5mm needles and
Sparkly Gold cast on 18 sts
□ Row 1: (k1, pl) to end
□ Row 2: (p1, kl) to end
□ Rows 3-4: rep Rows 1 -2
□ Row 5: rep Row 1
□	Row 6: p1, k1, p1, к to last
two sts, p!, kl
□	Row 7: k1, pl, kl, pto last
two sts, kl, p1
□	Rep Rows 6-7 until piece meas
23cm, ending with a Row 7
□	Rep Rows 1 -2 twice
□ Next row: rep Row 1
Cast off
TIE
Using 3.5mm needles and
Sugar Plum cast on 13 sts
□ Row 1: (kl, pl) to last st, kl
□ Row 2: k1, p to last st, k1
□ Row 3 (button hole): kl, pl,
kl, yfwd, k2tog, к to last two
sts, p1, kl
□ Row 4: rep Row 2
□ Row 5: rep Row 1
Cast off
HOLLY LEAF (MAKE 4)
Using 3.5mm needles and
Mistletoe cast on 17 sts
□ Row 1: к
□	Row 2: p
□	Row 3: kl, (yfwd, k2tog)
to end
□	Row 4: p
□	Row 5: к
Cast off
BERRY (MAKE 2)
Using 3.5mm needles and
Red Nose cast on three sts
□	Row 1: (kfb) to end. Six sts
□	Row 2: p
□	Row 3: (kl, kfb) to end.
Nine sts
□	Row 4: p
□	Row 5: k1, (k2tog) to end.
Five sts
Cut yam leaving a long tail,
thread tail onto tapestry
needle and thread through
rem sts, fasten off
TO MAKE UP
Sew Tie to one side of Cosy
and button to other side. Sew
cast-on and cast-off edges of
Leaves tog to make picot
edge. Fold in half horizontally
then sew down middle to form
Leaf shape. Gather cast-on sts
of Berry, stuff lightly and sew
to cast-off edge. Sew Leaves
and Berries to each side of
Cosy. Weave in all ends
TREE COSY
MAIN
Using 3.5mm needles and Red
Nose work as for Holly Cosy Main
TIE
Using 3.5mm needles and
Sugar Plum work as for Holly
Cosy "Ле
TREE (MAKE 2)
Using 3.5mm needles and
Mistletoe cast on 14 sts
Work in foil two-row stripe
sequence: (Mistletoe, Leafy
Green) three times, Mistletoe
□	Rows 1 -4: starting with
a к row work in st st
□ Row 5: к
□	Row 6: p2tog, p to last two
sts, p2tog. 12 sts
□	Rows 7-14: rep Rows 5-6
four times. Four sts
Change to Leafy Green
□ Row 15: к
□	Row 16: (p2tog)to end.
Two sts
□	Row 17: k2tog. One st
Fasten off
TREE TRUNK (MAKE 2)
Using 3.5mm needles and
Light Fawn cast on four sts
□	Rows 1 -4: starting with
a к row work in st st
Cast off
TO MAKE UP
Sew Tie to one side of Cosy
and button to other side.
Lightly stuff Trees and sew
Tree and Trunk to each side of
Cosy. Make two small Sparkly
Gold pom-poms and sew to
top of Trees. Weave in all ends
* 100 DAYS OF CRAFTS *
TOP
TIP!
WANT TO GIVE
YOUR COSIES A
MORE RUSTIC FEEL?
TRY USING A TWEED YARN
GOOD FOR
BEGINNERS
17
« 100 DAYS OF CRAFTS *
18
DESIGNER DAWN FINNEY
Present sack
If you know someone who deserves to be on the nice list,
whip up this for them to treasure year after year
KIT LIST
★ Yarn, DK: Classic Red,
Candy Pink, Snowflake
Pink, Icy Mint, Powder Blue
★ 4mm needles
★ Tapestry needle
★ Scissors ★ Pom-pom
maker (optional)
Size: 21 cm x 27cm
SACK
Using 4mm needles and
Classic Red cast on 100 sts,
leaving a long tail
Note: leave short tails when
changing colours, see panel
□ Row 1: (k1, pl) to end
□ Row 2: (pl, kl) to end
□ Rows 3-106: rep Rows 1 -2
52 times
□ Row 107: rep Row 1
□ Row 108: p1,k1,p1,
(k2tog, [yfwd] twice, k2tog,
[k1, p1 ] three times) nine
times, k2tog, (yfwd) twice,
k2tog, kl, p1, k1.100 sts
□ Rows 109-112: rep Rows
1 -2 twice
□ Rows 113-114: к
Cast off kwise, leaving
a long tail
SACK TIE
Using 4mm hook and Fluffy
Blue make a ch approx 80cm
long
Fasten off
TO MAKE UP
Using tapestry needle and
cast-off tail, join side of Sack
with mattress st. Using
cast-on tail, graft base of sack
tog. Pass Sack Tie through
holes in Row 108. Using Fluffy
Blue, create two large
pom-poms. Join to each end
of Sack Tie. Weave in all ends
4-------
WHY NOT TRY...
Why not mix up your
techniques and crochet
the Sack Tie!
STRIPE IT
The sack is made in the
foil stripe sequence:
14 rows Classic Red,
eight rows Candy Pink,
12 rows Snowflake Pink,
six rows Icy Mint,
12 rows Powder Blue,
four rows Candy Pink,
ten rows Icy Mint,
eight rows Classic Red,
12 rows Candy Pink,
six rows Snowflake Pink,
four rows Powder Blue,
eight rows Icy Mint,
eight rows Powder Blue,
two rows Snowflake Pink
ONLINE KNIT
THE ULTIMATE
ONLINE DESTINATION
FOR CHRISTMAS
KNITTING
New festive patterns added
every week - you won’t
be stuck for inspiration!
Join our community for a
Christmas to remember
-J 3,000+ _
patterns
SECRET
FACEBOOK
GROUP
letsknit.co.uk
* 100 DAYS OF CRAFTS *
I
DESIGNER AINE MARRIOTT
Christmas bows
Add a crafty flourish to all your festive gifts with
these five easy toppers
KIT LIST
★ Yarn: DK, shades (A)
Gold, (B) Pale Blue, (C)
Red, (D) Green, (E) Fluffy
White, (F) Turquoise, 22g
of each Needles: 4mm
Tapestry needle
Size: Holly Bow, 12cm wide;
Double Bow, 11 cm wide;
Classic Bow, 7cm wide; l-cord
and Ribbon bows, both 5.5cm
wide
20
NOTE: alternate colourways
are shown in brackets
I-CORDBOW
(MIKE 2)
Using 4mm needles and yarn
A (B), cast on three sts
□ Row 1: * к one row, do
not turn, si sts back onto LH
needle, pull yarn across back
of work
This row sets l-cord
□	Rep Row 1 until work meas
20cm
□	Cut yarn leaving a tail,
thread through rem sts, pull
tight and fasten off
Shape into bow and wrap
matching yarn around centre
to hold shape
RIBBON BOW
(MAKE 2)
Using 4mm needles and yarn
C (D), cast on 54 sts
□	Row 1: к
□	Cast off
Shape into bow and wrap
matching yarn around centre
to hold shape
CLASSIC BOW
BOW (MAKE 3)
Using 4mm needles and yarn
D (A, B), cast on ten sts
□	Rows 1-10: к
□	Row 11: (k2tog) to end.
Five sts
□	Row 12: к
□	Row 13: (kfb) to end. Ten sts
□ Rows 14-23: к
□	Cast off
SNOWBALL (MAKE 4)
Using 4mm needles and yarn
E, cast on eight sts
□	Rows 1 -4: beg with a к row,
work in st st
□	Row 5: (k2tog) to end. Four sts
□	Cut yarn leaving a tail,
thread through rem sts, pull
tight and fasten off
TO MAKE UP
Wind yarn E around centre
of Bows made in yarns В and
D. Wind yarn A around yarn
A Bow. Seam row edges of
Snowballs and stuff lightly.
Use length of yarn E to attach
to matching centres
DOUBLE BOW
LABBE BOW
Using 4mm needles and yarn
F, cast on nine sts
□	Row 1: к
□	Row 2: p
□	Row 3: (kfb) to end. 18 sts
□ Rows 4-28: cont in st st
□	Row 29: (k2tog) to end.
Nine sts
□	Rows 30-34: cont in st st
□	Row 35: (kfb) to end. 18 sts
□ Rows 36-60: cont in st st
□	Row 61: (k2tog) to end.
Nine sts
□	Row 62: p
□	Row 63: к
□	Cast off pwise
SMALL BOW
Using 4mm needles and yarn
A, cast on five sts
□	Rows 1 -3: rep Rows 1 -3
of Large Bow. Ten sts
□ Rows 4-22: cont in st st
□	Rows 23-29: rep Rows
29-35 of Large Bow. Ten sts
□ Rows 30-48: cont in st st
□	Work as for Large Bow
from Row 61 to end
CENTREPIECE
Using 4mm needles and yarn
C, cast on five sts
□	Rows 1 -20: beg with
a к row work in st st
□ Cast off
TO MAKE UP
Join cast-on and cast-off
edges of each Bow. Place
Small Bow over Large Bow and
stitch through centre. Wrap
Centrepiece around middle
of Bows and join cast-off and
cast-on edges. Sew in place
HOLLY BOW
BOW
Using 4mm needles and yarn
E, cast on seven sts
□	Rows 1-2: к
□	Row 3: (kfb) to end. 14 sts
□	Rows 4-33: к
□	Row 34: (k2tog) to end.
Seven sts
□	Rows 35-39: к
□	Rows 40-71: rep Rows 3-34
□	Rows 72-73: к
□	Cast off
LEAF (MAKE 2)
Using 4mm needles and yarn
D, cast on 15 sts
□	Row 1: к
□	Row 2: p
□	Row 3: kl, (yfwd, k2tog)
to end
□	Row 4: p
□	Row 5: к
□	Cast off pwise
BERRY
□	Using 4mm needles and
yarn C, work as Snowball
on Classic Bow
TO MAKE UP
Join cast-on and cast-off
edges of Bow. Wrap length
of yarn E around centre. Join
cast-on and cast-off edges
of Leaf. Fold edge in half and
oversew. Sew Leaves to front
of Bow. Sew Berry in place
4-----------------''
WHY NOT TRY...
Why not knit an i-cord that
can fit around a present?
This will go perfectly with
your woolly bows
* 100 DAYS OF CRAFTS *

DESIGNER NICOLA VALIJI
Gift bags
Delight friends and family with an adorable angel,
a traditional Santa Claus or a cheeky elf design
22
KIT LIST
★ Yarn: King Cole Tinsel
Chunky, shades (A) 216
Emerald, (B) 215 Claret, (C)
208 Gold, one 50g ball of
each; Deramores Studio
Chunky, shades (D) 70818
Fir, (E) 70815 Ruby, (F)
70801 Frost, Deramores
Studio DK, shades (G)
70068 Vanilla, (H) 70008
Lavender, (I) 70011
Peridot, (J) 70006 Ruby, (K)
70001 Frost, one 100g ball
of each; Stylecraft Special
DK (L) 1240 Soft Peach,
one 100g ball ★ Needles:
4mm, 5.5mm ★ Tapestry
needle ★ Safety toy
stuffing': Medium
pom-pom maker
★	Crochet hook: 3.5mm
and 5.5mm  Toy eyes:
black, 8mm, six
TENSION SQUARE
DKyarn
★	22 sts x 28 rows
★	10cm x 10cm
★	Stocking stitch
★	4mm needles
Chunky yarn
★	12 sts x 17 rows
★	10cm x 10cm
★	Stocking stitch
★	5.5mm needles
ELF GIFT BAG
Using 5.5mm needles and
yarn A, cast on 21 sts
□ Rows 1-12: beg with a к
row, work in st st
Change to yarn E
□	Row 13: к
□	Row 14: p
Work drawstring holes
as foils:
□	Row 15: kl, (yfwd, k2tog)
to end of row
□	Rows 16-34: beg with
a p row, work in st st
Change to yarn A
□	Rows 35-60: beg with
a к row, work in st st
Change to yarn E
□	Rows 61 -79: beg with
a к row, work in st st
Work drawstring holes
as foils:
□	Row 80: p1 (yrn, p2tog)
to end
□	Row 81: к
□	Row 82: p
Change to yarn A
□	Rows 83-94: beg with
a к row, work in st st
□ Cast off
ELF FACE
Using 4mm needles and
yarn L, cast on 14 sts
□ Row 1: kfb, к to last st, kfb.
16 sts
□ Row 2: p
□ Rep last two rows four
times more. 24 sts
□ Rows 11 -22: beg with
a к row, work in st st
□ Row 23: skpo, к to last two
sts, k2tog. 22 sts
□ Row 24: p
□ Rep last two rows three
times more. 16 sts
□ Row 31: as Row 23.14 sts
□ Cast off
ELF HAT
Using 4mm needles and
yam K, cast on 24 sts
□ Rows 1 -5: к
Change to yarn I
□	Rows 6-9: beg with a к
row, work in st st
□	Row 10: k2tog, к to last two
sts, k2tog. 22 sts
□	Row 11: p2tog, p to last
two sts, p2tog. 20 sts
□	Rep last two rows four
times more. Four sts
□	Row 20: (k2tog) twice.
Two sts
□	Row 21: p2tog. One st
□	Cast off
ELF EARS (MAKE 2)
Using 4mm needles and yarn
L, cast on 11 sts
□	Row 1: к
□	Row2:p
□	Row 3: k1, (k2tog) five
times. Six sts
□	Cut yarn, thread through
rem sts, pull tight and fasten off
ELF NOSE
Using 4mm needles and yarn
L, cast on six sts
□	Row 1: kfb, k4, kfb. Eight sts
□	Rows 2-4: beg with a p row,
work in st st
□	Row 5: k2tog, k4, k2tog.
Six sts
□	Cut yarn, thread through
rem sts, pull tight and fasten off
ELF SCARF (MAKE 2 SIDES)
Using 4mm needles and yarn
I, cast on six sts
□	К every row until piece
meas 15cm
□	Cast off
SANTA GIFT BAG
Work as for Elf bag, using
These drawstring bags are
pulled together using a
crochet chain. To create this
chain, you will first need to
make a slip knot and slide
it onto your hook. With
the slip knot facing you,
bring your yarn over from
yarn В instead of yarn A and
yarn D instead of yarn E
SANTA FACE
Work as for Elf face, using
yarn L
SANTA HAT
Work as for Elf hat, using
yarn J instead of yarn I
SANTA NOSE
Work as for Elf nose, using
yarn J instead of yarn L
SANTA EARS (MAKE 2)
Using 4mm needles and yarn
L cast on eight sts
□	Row 1: к
□	Row 2: p
□	Cut yarn, thread through
rem sts, pull tight and fasten off
CROCHET CHAIN
the back to the front and
hook it. Next, pull the yarn
through your slip knot to
produce your first finished
chain stitch. For this pattern,
you will need to keep
making chain stitches until
you create an 80cm length
* 100 DAYS OF CRAFTS *
“ТЧасе pinA ivhe'ce
g&u want the egeA
to g& to get the
fMMitton c&Wiect”
DESIGNER NICOLA VALIJI
GOOD FOR
BEGINNERS
* 100 DAYS OF CRAFTS *
2k
SANTA BEARD
Using 4mm needles and yarn
К cast on 24 sts
□	Rows 1 -8: к
□	Row 9: k2tog, к to last two
sts, k2tog. 22 sts
□	Rows 10-18: rep Row 9.
Four sts
□	Row 19: (k2tog) twice.
Two sts
□	Row 20: k2tog. One st
FAIRY GIFT BAG
Work as for Elf bag, using
yarn C instead of yarn A and
yarn F instead of yarn E
FAIRY NOSE
Work as for Elf nose
FAIRY FACE
Using 4mm needles and yarn
L cast on 14 sts
□	Row 1: kfb, к to last st, kfb.
16 sts
□	Row2:p
□	Rep last two rows four
times more. 24 sts
□	Rows 11 -22: beg with a к
row, work in st st
□	Row 23: skpo, к to last two
sts, k2tog.22 sts
□	Row 24: p
□	Row 25: as Row 23.20 sts
□	Row 26: p
Change to yarn G
□	Row 27: as Row 23.18 sts
□	Row 28: p
□	Row 29: as Row 23.16 sts
□	Row 30: p
□ Row 31: as Row 23.14 sts
□ Cast off
HALO
Using 5.5mm needles and
yarn C cast on 20 sts
□ Row 1: к
Cast off
DRESS
Using 4mm needles and yarn
H cast on 14 sts
□	Row 1: p
□	Row 2: k1, ml, к to last st,
m1,k1.16 sts
□	Rep last two rows four
more times. 24 sts
□	Cast off
WINGS (MAKE 4 SIDES)
Using 4mm needles and yarn
H cast on 12 sts
□	Row 1: p
□	Row 2: k1, ml, к to last st,
ml, kl. 14 sts
□	Row 3: p
□	Rep last two rows twice
more. 18 sts
□	Rows 8-11: beg with a к
row, work in st st
□	Row 12: skpo, к to last two
sts, k2tog. 16 sts
□	Row 13:p
□	Rep last two rows once
more. 14 sts
□	Row 16: as Row 12.12 sts
□	Row 17: p2tog, p to last
two sts, p2tog. Ten sts
□	Cast off
EDGE OF WINGS (MAKE 4 SIDES)
Using 5.5mm needles and
yarn C cast on 30 sts
Cast off
TO MAKEUP
All gift bags are made up in
the same way. Fold bag in half
at tinsel section with WS
together, and sew row edges
together leaving top open.
Turn RS out. Using yarn D for
Elf Bag, yarn E for Santa bag
and a 5.5mm hook, make a
crochet chain 80cm long.
Using yarn H for the Fairy bag
and a 3.5mm hook, make a
crochet chain 80cm long.
Thread chains through
drawstring holes and tie in
a bow. For Elf bag: sew Face
onto front of bag, lightly stuff
Face. Place Hat onto top
section of Face and sew into
place, adding a small amount
of stuffing. Make nose by
[ Jointofaijal letsknit.co.uk
gathering up yarn tail and
sewing around piece to form a
circle, gather up stitches and
place a small amount of
stuffing in middle. Sew Nose
to middle of Face. Using yarn J
embroider a mouth. Sew two
eyes to Face. Make Ears by
gathering up yarn tail and
securing to make an ear
shape. Sew each ear to either
side of Face. Sew two pieces
of Scarf to bottom of Face and
tie in a knot. Make a pom-pom
in yarn F and sew to top of hat.
For Santa bag: make up Face,
Ears, Eyes, Nose and Hat with
pom-pom in same way as Elf
bag. Place Beard on bottom
section of Face and sew into
place. For Fairy bag: make up
Face, Eyes, Nose in same way
as Elf bag. Place Dress at
bottom of Face and sew on
tinsel section, adding some
stuffing. Sew Halo onto yarn G
section on top of Face. To
make hair, cut 17cm lengths of
yarn G. Fold in half and tie in
middle, attach bunches to side
sections of Face. Add yarn H
bows to top of bunches. To
make wings, sew two sections
together on WS leaving a gap
for stuffing, turn RS out and
stuff. Sew up hole, place tinsel
edging to Wing edge and
sew into place. Sew each
wing to back of bag so it is
visible from front of bag
3,000+
GARMENTS, TOYS,
BABYWEAR AND
HOMEWARE
PATTERNS
Enjoy unlimited access
to thousands of knitting
patterns, including hundreds
of designer exclusives with
Let’s Knit Together.
Our online knitting club
is ready to welcome
knitters of all abilities
* 100 DAYS OF CRAFTS *
DESIGNER NICKY FIJALKOWSKA
Gift card pouches
KIT LIST
★ Yarn: Stylecraft Special
DK, shades (A) 1263 Citron,
(B) 1246 Lipstick, (C) 1002
Black; Sirdar Ophelia,
shade (D)0107 Bunny,
small amounts of each.
★	Needles: 4mm
★	Thread: cotton, black
★ Buttons: 1 cm, black, two
Size: Present, 6.5cm x 10cm;
Santa, 6.5cm x 11 cm
TENSION SQUARE
★	20 sts x 29 rows
★	10cmx 10cm
★	Stocking stitch
★ 3.25mm needles
PRESENT POUCH
POUCH (MIKE 2)
Using 4mm needles and yarn
A,	cast on 16 sts
□	Row 1 -30: beg with a к row,
work in st st
□ Cast off
RIBBON PIECE ONE
Using 4mm needles and yarn
B, cast on four sts
□	Work in garter st (k each
row) until piece meas 11cm
□ Cast off
RIBBON PIECE TWO
□	Work as for Ribbon piece
one until piece meas 14cm
□	Cast off
RIBBON PIECE THREE (MAKE 2)
Using 4mm needles and yarn
B, cast on three sts
□	Work in garter st (k each
row) until piece meas 10cm
□	Cast off
TO MAKEUP
Place Present pouch pieces
together, and using yarn A
sew sides leaving one short
side open to create a little
pocket. Using yarn B, join end
seams of Ribbon piece one to
create a loop, and slip over
Present pouch so it wraps
around the centre. Using yarn
B, join end seams of Ribbon
piece two to create a loop,
and position longwise around
present. Using yarn B, join
end seams of two remaining
Ribbon pieces and sew loops
onto top to create 'bow'. To
insert gift card, simply slip off
ribbon piece two, insert card,
then slip loop back on again
SANTA POUCH
POUCH (MAKE 2)
Using 4mm needles and yarn
B,	cast on 16 sts
□	Rows 1-10: beg with a к
row, work in st st
Change to yarn C
□	Rows 11-14: cont in st st
Change to yarn В
□	Rows 15-28: cont in st st
Change to yarn D
□	Row 29: * k1, pl, work from
* to end
□	Rep last row three times
□ Cast off
TO MAKE UP
Matching your seaming yarns to
your knitting, sew up two long
side seams and cast-on short
sides to create a little pocket,
leaving cast-off short side open,
so you can insert the gift card.
Using yarn A, embroider a
running stitch belt buckle. Using
black cotton thread, sew two
buttons into position above belt
« 100 DAYS OF CRAFTS *
DESIGNER DAWN FINNEY
Scandi stocking
Stretch your skill set with this cheery challenge piece, that
includes a Norwegian star in Fair Isle and heel shaping
26
KIT LIST
★ Yarn: DK, shades (A)
Turquoise, (B) Grey,
(C) Red, (D)Pink, (E) Lilac,
(F) Variegated pink/lilac
mix, approx 22g of each
★ Needles: 3.5mm
★ Stitch holders: two
Tapestry needle
Length: 45cm
TENSION SQUARE
★	23 sts x 32 rows
★	10cm x 10cm
★ Stocking stitch
★ 3.5mm needles
STOCKING CUFF
Using 3.5mm needles and
yarn A, cast on 74 sts
□ Row 1 (RS): k2, * p2, k2,
rep from * to end
□ Row 2: p2, * k2, p2, rep
from * to end
Last two rows form rib
□ Work eight more rows in rib
Upper leg section
Change to yarn B, leaving
long tails
□ Rows 11 -22: beg with a к
(RS) row, work 12 rows in st st
NOTE: letter foil instruction
indicates shade
Join in yarn В
□ Row23:k2B, * klC, klB,
rep from * to end
NOTE: letter foil row number
indicates shade for row
□ Row 24 (C): p to end
Cut yarn B, join in yarn D
□ Row25: k2D, * k1C, kID,
rep from * to end
Cont in yarn Donly
□ Rows 26-30: beg with a p
row, work five rows in st st
Norwegian star motif section
NOTE: work in Fair Isle
technique stranding colours
not in use across back of work
□ Row31:k5D, (kl A, k7D,
k1 A, k9D) three times, k1 A,
k7D,k1A, k6D
□	Row32:p6D, (p2A, p5D,
p2A, p9D) three times, p2A,
p5D, p2A, p5D
□	Row33:k5D, (k3A, k3D,
k3A, k9D) three times, k3A,
k3D, k3A, k6D
□	Row 34: p6D, (p4A, pl D,
p4A, p9D) three times, p4A,
pl D, p4A, p5D
□	Row 35: kl D, (k4A, k1 D,
кЗА, к ID, кЗА, k1D, k4A,klD)
three times, k4A, k1 D, кЗА,
k1D, k3A,k!D, k4A, k2D
□	Row 36: (p3D, p4A, pl D,
p2A, pl D, p2A, p1 D, p4A)
four times, p2 D
□	Row37:k3D, (k4A,k1D,
klA, k1D, klA, kID, k4A, k5D)
three times, k4A, k1 D, k1 A,
kID,k1A, kID, k4A,k4D
□	Row38:p1D, (P1A, P3D,
p4A, p3D, p4A, p3D, p1 A)
three times, then p3D, p4A,
p3D, p4A, p4D
□	Row39:k1D, (klA, k7D, klA,
k7D, k! A, k1 D) four times, kl D
□ Row 40: pl D, (pl A, p3D, p4A,
p3D, p4A, p3D, pl A) three
times, p3D, p4A p3D, p4A, p4D
□ Row 41: k3D, rep (k4A,
kID, k1A, k1D, klA, kl D, k4A,
k5D) three times, k4A, k1 D,
k1A, kID, k1A, kID, k4A, k4D
□ Row 42: (p3D, p4A, pl D,
p2A, pl D, p2A, p! D, p4A)
four times, p2 D
□	Row 43: k1 D, (k4A, kl D,
кЗА, kID, кЗА, kID, k4A,klD)
three times, k4A, kl D, кЗА,
k1D, кЗА, kID, k4A, k2D
□	Row 44: p6D, (p4A, pl D,
p4A, p9D) three times, p4A,
p! D, p4A, p5D
□	Row45:k5D, (кЗА, k3D,
кЗА, k9D) three times, кЗА,
k3D, кЗА, k6D
□	Row 46: p6D, (p2A, p5D,
p2A, p9D) three times, p2A,
p5D, p2A, p5D
□	Row47:k5D, (klA, k7D,
k1 A, k9D) three times, k1 A,
k7D,k1A, k6D
Cont in yarn D only
Lower leg section
□	Rows 48-52: beg with
a p row, work five rows in st st
Join in yarn C
□	Row 53:k2, *k1C,klD,
rep from * to end
□	Row 54 (C): p to end
Cut yarn D, join in yarn E
□ Row 55: k2E, * klC, klE,
rep from * to end
Cont in yarn E only
□ Rows 56-72: beg with
a p row, work 17 rows in st st
Join in yarn C
□	Row 73:k2E, * klC, k1E,
rep from * to end
□	Row 74 (C): p to end
Cut yarn E, join in yarn A
□ Row75:k2A, * k1C,k1A,
rep from * to end
Cont in yarn A only
□	Rows 76-83: beg with a p
row, work eight rows in st st
Join in yarn C
□	Row 84: pl A, * p1 C, p1 A,
rep from * to last st, pl A
Cont in yarn C only
□ Row 85 (С): к to end
Cut yarn A, join in yarn F
□ Row 86: p! F, * p!C, p! F,
FAIR ISLE
This name is often used for
stranded colourwork and
entails alternating between
two shades on the same
row. It involves picking up
and dropping strands to
knit with the correct colour
as indicated in the pattern.
You can do this holding two
rep from * to end
Cut yarn C, cont in yarn F only
□ Row 87: к to end
□ Row 88: p to end
Heel section
□ Row 89: k55, turn, k36
Work heel flap on these 36 sts
only, place two sets of rem sts
on st holders
Cont for heel flap as foils:
□ Row 1 (RS): * si 1 pwise
wyib, kl, rep from * to end
□ Row 2: si 1 pwise wyif, p to end
□ Rows 3-36: rep last two
rows 17 times more. (18 chain
selvedge sts on each side of
heel flap)
□ Row 37: k20, ssk, kl, turn
□ Row 38: si 1 pwise, p5,
p2tog, pl, turn
□ Row 39: si 1 pwise, к to one
st before gap, ssk [one st from
each side of gap], kl, turn
□ Row 40: si 1 pwise, p to
one st before gap, p2tog
[one st from each side of
gap], p1, turn
□ Rep last two rows until all
heel sts have been worked,
ending after a RS row and
ssk, foil by a WS row and
p2tog. (20 sts on heel flap)
Cut yarn, leaving a medium tail
Foot section
Using 3.5mm needles and
with RS facing, rejoin yarn F
at base of heel flap, leaving
strands in your right hand,
but holding one in your
left hand (as in crochet)
reduces tangled strands.
Aim to pick up each colour
in the same way each
time in a way that avoids
crossing the strands on the
wrong side
* 100 DAYS OF CRAFTS *
вм
DESIGNER
DAWN FINNEY
WHY NOT TRY...
Create a stir this year with
a set of colourful stockings
- see what exciting colour
combos you can come up
with using six shades!
COOL FOR
YULE
the Norwegian stab
моЩа, he sake to
em the back ofc
toctgeA secttonA ofr
eme ccdetub s& you
dealt end up with
27
« 100 DAYS OF CRAFTS *
28
a medium tail
□	Row 1 (RS): k20 heel flap
sts, pick up and к 18 sts up
first side of heel flap, k38 from
holders, pick up and к 18 sts
up second side of heel flap,
k57 and pm for new beg of
rnd. 94 sts
□	Row 2: p! F, * p1 C, pl F, rep
from * to last st, p1 F
□	Row 3 (С): к to end
Cut yarn F, join yarn В
□	Row 4: pl В, * p! C, pl B, rep
from * to last st, р1 В
Cont in yarn В only
□	Row 5: k38, ssk, k14, k2tog,
k38.92 sts
□	Row 6 and foil WS rows: p
□	Row7:k37, ssk,k!4, k2tog,
k37.90 sts
□	Row 9: k36, ssk, k14, k2tog,
k36. 88 sts
□ Row1l:k35, ssk, kl4,
k2tog, k35. 86 sts
□ Row13:k34, ssk,k!4,
k2tog, k34. 84 sts
□ Rowl5:k33, ssk, k14,
k2tog, k33. 82 sts
□ Row17:k32, ssk,k!4,
k2tog, k32. 80 sts
□ Row 19: k31, ssk, k14,
k2tog, k31.78 sts
□ Row 21: k30, ssk, kl 4,
k2tog, k30. 76 sts
□ Row 23: k29, ssk, kl 4,
k2tog, k29. 74 sts
Join in yarn C
□ Row 24: pl B, *p1C, p1B,
rep from * to last st, р! В
□ Row 25 (С): к to end
Cut yarn B, join in yarn D
□ Row 26: pl D, * pl C, p1 D,
rep from * to last st, pl D
Cont in yarn D only
□ Rows 27-38: beg with a к
row, work 11 rows in st st
Join in yarn C
□	Row 39: k2, *k1C,k1D,rep
from * to end
□	Row 40 (C): p to end
Cut yarn D, join in yarn F
□ Row41:k2F, * k1C, k1F,
rep from * to end
Cont in yarn F only
□	Rows 42-49: beg with a к
row, work eight rows in st st
Join in yarn C
□	Row 50: plF, * p1C, p1F,
rep from * to last st, p! F
Cont in yarn C only
□	Row 51: к to end
□	Row 52: p to end
Shape toe
□	Row 53 (RS): kl 7, k2tog,
ssk, k32,k2tog, ssk, kl 7.70 sts
□	Row 54 and foil WS rows: p
□	Row 55: k16, k2tog, ssk,
k30, k2tog, ssk, kl 6.66 sts
□ Row 57: kl 5, k2tog, ssk,
k28, k2tog, ssk, k15. 62 sts
□ Row 59: k14, k2tog, ssk,
k26,k2tog, ssk, k14. 58 sts
□ Row 61: k13, k2tog, ssk,
k24,k2tog, ssk, k13.54 sts
□ Row 63: k12, k2tog, ssk,
k22, k2tog, ssk, k12.50 sts
□ Row 64: p10, p2tog, p1,
p2tog, pl 9, p2tog, pl, p2tog,
pl 1.46 sts
□ Row 65: k! 0, k2tog, ssk,
kl 8, k2tog, ssk, klO. 42 sts
□ Row 66: p8, p2tog, p1,
p2tog, p15, p2tog, p1, p2tog,
p9. 38 sts
□	Row 67: k8, k2tog, ssk, kl 4,
k2tog, ssk, k8.34 sts
□	Row 68: p6, p2tog, p!,
p2tog, p11, p2tog, pl, p2tog,
p7.30 sts
□	Row 69: k6, k2tog, ssk, kl 0,
k2tog, ssk, k6.26 sts
□	Row 70: p4, p2tog, p1,
p2tog, p7, p2tog, p1, p2tog,
p5. 22 sts
□	Row71:k4, k2tog, ssk, k6,
k2tog, ssk, k4.18 sts
Cut yarn, leaving a long tail,
and pull through rem sts to
cast off
HANGING LOOP
Using 3.5mm needles and
yarn A, cast on five sts
□	Row 1 (RS):k1,*p1,k1,
rep from * to end
□ Rep Row 1 until work meas
14cm
□	Cast off in patt, leave a
long tail
TO MAKE UP
Using cast-off tail, in yarn A
thread through cast-off sts,
pull tight to draw toe closed,
then use mattress stitch to
seam sides together until
next long tail of yarn A is
reached. Fasten off yarn end
and use rem yarn A tail to
seam rest of stocking,
ensuring patterns are
maintained. Use tails to sew
any gaps around the heel
flap closed. Fasten off and
weave in all yarn ends. Fold
Hanger in half and use
cast-off tail to overstitch it
to rib section of cuff at back.
Weave in yarn ends
* 100 DAYS OF CRAFTS *
Mistletoe dec
Will you enjoy о cheeky smooch underneath
KIT LIST
★ Yarn, DK: White, Green
★ Needles: 3mm double-
pointed, 3mm straight
★ Toy stuffing * Tapestry
needle ★ Scissors
Size: 16.5cm long
MAIN STEM
Using two 3mm dpns and
yarn D, cast on three sts
□ Row 1: к to end, do not
turn, slide sts to opposite end
of needle pulling yarn across
back of work
This row sets l-cord
□	Rows 2-30: work l-cord as set.
Cont until l-cord meas 30 rows
Leaf
□	Row 1 (RS): (kfb) to end.
Six sts
□	Row 2 and all WS rows: p
to end
□	Row 3: (kfb, k2) to end.
Eight sts
□	Row 5: (kfb, kl) to end. 12 sts
□ Rows 6-16: cont in st st
□	Row 17: (kl, k2tog) to end.
Eight sts
□	Row 19: (k2, k2tog) to end.
Six sts
□	Cut yarn leaving a tail,
thread through rem sts, pull
tight and fasten off
29
SHORT STEM
□	Using 3mm dpns, pick up
and к three sts from Main
stem four rows from first Leaf
□ Work four rows in l-cord
□	Work Leaf as for Main stem
MEDIUM STEM
□	Using 3mm dpns, pick up
and к three sts from middle
of rem section of Main stem
□	Work ten rows in l-cord
□ Work Leaf as for Main stem
BERRIES (MAKE 3)
Using 3mm needles and yarn
B, cast on nine sts
□	Rows 1 -4: beg with a p
(WS) row, work in st st
□	Row 5: (p2tog, p1) to
end. Six sts
□	Cut yarn leaving a tail,
thread through rem sts pull
tight and fasten off
Sew seam, lightly stuffing as
you go. Gather cast-on edge.
Sew Berries to stems
TOP
TIP!
TIE MATCHING
SATIN RIBBON
AROUND THE
MAIN STEM TO TURN YOUR
MISTLETOE INTO A HANGING
DECORATION, OR TO TIE IT
ONTO A PARCEL

# 100 DAYS OF CRAFTS *
DESIGNER NICOLA VALIJI
Santa’s laundry line
Make sure Father Christmas is ready for his
rounds with this fun clothes line bunting
30
KIT LIST
★ Yarn: Deramores Studio
DK, shades (A) Frost, (B)
Ruby, (C) Ebony, (D) Peridot,
(E) Oatmeal, one 100g ball
of each A Needles: 3.5mm
Safety toy stuffing
★ Ribbon: gingham, 1,5m
Small clothes pegs
< Tapestry needle
Size: Vest: 6.5cm tall; Sack,
5.5cm tall; Top, 6cm tall;
Trousers, 7cm tall (excl.
braces); Mittens, 3cm long;
Hat, 3.5cm tall (excl. bobble);
Scarf, 18cm long (excl. tassels);
Socks, 3.5cm tall; Pants, 3.5cm
tall; Boots, 4cm tall
TENSION SQUARE
★	21 sts x 29 rows
★	10cmx 10cm
★	Stocking stitch
★ 3.5mm needles
TROUSERS
Using 3.5mm needles and
yarn A, cast on 15 sts
□ Row 1: к to end
Change to yarn В
□ Rows 2-19: beg with
a p row, work in st st
□ Cast off
BRACES (MAKE 2)
Using 3.5mm needles and
yarn C, cast on 33 sts
□ К one row
□ Cast off
Fold first Trouser Leg in half
and sew from cuff up to 2cm
before cast-off edge. Repeat
for other leg. Join pieces
together at gap. Attach
Braces to trousers, crossing
at back
TOP
BODY
Using 3.5mm needles and
yarn A, cast on 26 sts
□ Row 1: к to end
Change to yarn В
□	Rows 2-15: beg with a p
row, work in st st
□	Cast off
SLEEVES (MAKE 2)
Using 3.5mm needles and
yam A, cast on ten sts
□ Row 1: к to end
Change to yarn В
□	Rows 2-13: beg with a p
row, work in st st
□ Cast off
Fold Body so row edges meet
at back seam. Sew this closed
then stitch across top of
cast-off edge. Using yarn C,
embroider four small buttons
on front. Fold Sleeves in half
and sew together. Sew to Body
KAT
Using 3.5mm needles and
yarn A, cast on 20 sts
□ Rows 1-2: к to end
Change to yarn В
□	Rows 3-8: beg with a к row,
work in st st
□	Row 9: (k2tog) to end. Ten sts
Change to yarn A
□	Rows 10-13: beg with a p
row, work in st st
□	Cut yarn leaving a tail,
thread through rem sts, pull
tight and fasten off
Sew seam to colour change
using yarn tail, feed tail
through first row of bobble
and pull tight to shape. Seam
rest of hat to brim
SOCKS
(MAKE 2)
Using 3.5mm needles and
yarn D, cast on ten sts
□ Row 1: к to end
□ Row 2: p to end
□ Row 3: cast off two sts,
к to end. Eight sts
□ Row 4: cast off two sts,
p to end. Six sts
□ Row 5: к to end
□ Row 6: p to end
□ Row 7: к to end
□ Cast off
Fold Sock in half and sew
row-edges, leaving top open
SACK
Using 3.5mm needles and
yarn E, cast on 14 sts
□ Rows 1-2: к to end
□ Row 3: p to end
□ Row 4: kl, (k2tog,yfwd)
to last st, k1
□ Rows 5-29: beg with
a p row, work in st st
□ Row 30: k1, (k2tog, yfwd)
to last st, k1
□ Row 31: p
□ Rows 32-33: к
□ Cast off
Fold in half and sew row-
edges leaving top open.
Thread yarn E through eyelets
and tie in a bow
SCARF
Using 3.5mm needles and
yarn D, cast on 40 sts
□ Rows 1 -4: beg with a к row,
work in st st
□ Cast off
Add tassels to each end of Scarf
EASY EYELETS
Santa's sack has	with a knit two together
deliberate holes, called	(k2tog) decrease. To work
eyelets, and these are	the yfwd, bring the yarn
used for threading	towards you between
through the yarn to tie	the needles then take it
up the sack. They're	over the top of the right
made by pairing a yarn	needle so you can knit
forward (yfwd) increase	the next stitch
MITTENS
(MAKE 2)
Using 3.5mm needles and
yarn A, cast on ten sts
□ Row 1: к to end
Change to yarn D
□	Rows 2-6: beg with a к row,
work in st st
□	Row 7: (p2tog) to end. Five sts
□	Cut yarn leaving a tail,
thread through rem sts, pull
tight and fasten off
Sew row-edges up to
cast-on row
BOOTS
(MAKE 2)
Using 3.5mm needles and
yarn C, cast on 12 sts
□ Row 1: к to end
□	Row 2: p to end
□	Row 3: cast off two sts,
к to end. Ten sts
□	Row 4: cast off two sts,
p to end. Eight sts
□	Row 5: к to end
□	Row 6: p to end
Change to yarn A
□	Rows 7-9: к to end
□	Cast off
Fold in half and sew row-
edges leaving top open
PANTS
FRONTS BACK (ALIKE)
Using 3.5mm needles and
yarn A, cast on ten sts
* 100 DAYS OF CRAFTS *
“Sew up all the
pieces ua p&u
gn to cw&id hewing
snch a big joh cd
the end!”
DESIGNER NICOLA VALIJI
□	Rows 1 -4: beg with a к row,
work in st st
□	Row 5: cast off three sts,
k4, cast off three sts
Re-join yarn A
□	Rows 6-8: beg with a p row,
work in st st
□	Cast off
Place two pieces with WS
together and sew, leaving top
and leg holes open. Using yarn
B, embroider Y-front detail
VEST
FRONT & BACK (ALIKE)
Using 3.5mm needles and
yarn A, cast on 12 sts
□	Rows 1 -12: beg with a к
row, work in st st
□	Row 13: cast off one st, k2,
cast off four sts, k2, cast off
final st. Six sts
□	** With WS facing, rejoin
yarn A to first set of three sts
and beg with a p row, work
three rows in st st
□	Cast off
□	Rep from * * to end
Sew side seams and stitch
across tops of shoulders
TO MAKE UP
Place all pieces onto ribbon and
clip into place using small pegs
« 100 DAYS OF CRAFTS *
DESIGNER SUSIE JOHNS
Yule log
This everlasting yule log and robin decoration
will be admired for years to come
32
KIT LIST
★ Yarn: Rico Essentials
Merino DK, shades (A) 61
Beige, (B) 56 Dark Brown, (C)
05 Red, (D) 60 Natural, one
50g ball of each ★ Needles:
3.25mm straight, 3.25mm
double-pointed ★ Stitch
holder ★ Tapestry needle
★ Thick cardboard ★ Safety
toy stuffing ★ Wire: 12cm
long, two piece ★ Tape
measure ★ Scissors
Base: 24cm x 16cm; Log: 16cm
long; Robin: 11.5cm tall
TENSION SQUARE
★ 26 sts x 36 rows
★ 10cm x 10cm
★ Stocking stitch
★ 3mm needles
LOG
Using 3.25mm straight needles
and yarn A, cast on five sts
□ Rows 1 -2: (kfb) to end. 20 sts
□ Row 3 and all odd-
numbered rows: к
□	Row 4: (k1, kfb) to end. 30 sts
□	Row 6: (k2, kfb) to end. 40 sts
□	Row 8: (k3, kfb) to end. 50 sts
□	Row 10: (k4, kfb) to end.
60 sts
Cut yarn A and join in yarn В
Bark
□	Next row: * p2, k1, rep
from * to end
□	Next row: * p1, k2, rep
from * to end
□	Rep last two rows until
work meas 16cm
Cut yarn В and join in yarn A
Shape end
□	Row 1: (k4, k2tog) to end.
50 sts
□	Row 2 and all even-
numbered rows: к
□	Row 3: (k3, k2tog) to end.
40 sts
□	Row 5: (k2, k2tog) to end.
30 sts
□	Row 7: (kl, k2tog) to end.
20 sts
□	Row 9: (k2tog) to end. Ten sts
□	Row 11: (k2tog) to end.
Five sts
□	Cut yarn leaving a tail,
thread through rem five sts,
pull tight and fasten off
SNOW
Using 325mm straight needles
and yarn D, cast on 12 sts
□	** Rows 1-2: к
□	Row 3: kfb in first st, к to
end. 13 sts
□	Rep Row 3 five times more.
18 sts
□	К three rows
□	Next row: k2tog, к to end.
17 sts
□	Rep last row five times
more. 12 sts
□	Next row: к
□	Rep from * * three times more
□ Cast off
BASE
Using 3.25mm needles and
yarn D, cast on 52 sts
□	Work in garter st (k every
row) until work meas 32cm
□ Cast off
NOTE: patt starts at top of head
Using 3.25mm dpns and yarn
C, cast on six sts and
distribute evenly between
three needles
□	Rnd 1: (kfb) to end. 12 sts
□ Rnd 2: к
□	Rnd 3: (k1, kfb) to end. 18 sts
□	Rnd 4: к
□	Rnd 5: (k2, kfb) to end. 24 sts
□	К six rnds
□	Rnd12:(k3, kfb)toend.
30 sts
□	Rnd 13: к
□	Rnd 14: (k4, kfb) to end. 36 sts
□	Rnd 15: к
□ Rnd 16: (k5, kfb) to end. 42 sts
Shape breast
NOTE: worked using short-
row shaping (see panel)
□ Row 1: k38, turn
□ Row 2: p34, turn
□ Row 3: k32, turn
□ Row 4: p30, turn
□ Row 5: k28, turn
□ Row 6: p26, turn
□ Row 7: k24, turn
□ Row 8: p22, turn
□ Row 9: k20, turn
□ Row 10: p18, turn
□ Row 11: k30, do not turn
Resume working in rnds as foils
□ Rnd 1:к
Join in yarn A
NOTE: letter foil each
instruction indicates yarn shade
□ Rnd 2: * k1 A, k1 C, rep
from * to end
Cut yarn C, cont in yarn A only
□ К ten rnds
□	Rnd 13: (k5, k2tog) six
times. 36 sts
□	К two rnds
□	Rnd 16: (k4, k2tog) six
times. 30 sts
□	Rnd 17: к
□	Rnd 18: (k3, k2tog) six
times. 24 sts
□	Rnd 19: к
□	Rnd 20: (k2, k2tog) six
times. 18 sts
□	Rnd 21: (kl, k2tog) six
times. 12 sts
□	Cast off
BACK
Using 325mm straight needles
and yarn B, cast on two sts
□	Row 1: (kfb) twice. Four sts
□	Row 2 and all WS rows: p
□	Row 3: k1, ml, k2, ml, k1.
Six sts
□	Row5:k1, m1,k4, m1,k1.
Eight sts
□	Row 7: k1, ml, k6, ml, k!.
Ten sts
□	Beg with a p row, work five
rows in st st
□	Row I3:k1, ml, k8, ml, kl.
12 sts
□	Row 15: kl, ml, k5, ml, k5,
ml, k1.15 sts
□	Row 17:kl, ml, k6, ml, kl,
ml, k6, ml, k1.19 sts
□	Row 19: k1, ml, k6, ml, k5,
ml, k6, ml, kl.23 sts
□	Beg with a p row, work 15
rows in st st
□	Next row: k1, skpo, к to last
two sts, k2tog, kl. 21 sts
□	Next row: p
□	Rep last two rows four
times more. 13 sts
□	Next row: kl, skpo, k2, si 1,
k2tog, psso, k2, k2tog, kl.
Nine sts
□	Next row: p3, p3tog, p3.
Seven sts
□	Cast off
TAIL
Using 325mm straight needles
and yarn B, cast on 12 sts
□	Beg with a к row, work 20
rows in st st
□ Cast off
WING (MAKE 2)
Using 3.25mm straight needles
and yarn B, cast on three sts
□	Row 1 and all WS rows: p
□	Row2: kl, (ml, kl) twice.
Five sts
□	Row 4: k2, ml, k1, ml, k2.
Seven sts
□	Row 6: k3, ml, kl, ml, k3.
Nine sts
□	Row 8: k4, ml, k1, ml, k4.
11 sts
« 100 DAYS OF CRAFTS *
□	Row 10: к1, skpo, k2, ml,
kl, ml, k2, k2tog, k1
□ Rows 12 and 14: as Row 10
□	Row 16: k1, skpo, к to last
three sts, k2tog, kl. Nine sts
□ Rows 17-19: cont in st st
□	Rep Rows 16-19 twice
more. Five sts
□	Next row: k1, si 1, k2tog,
psso, k!. Three sts
□	Beg with a p row, work
three rows in st st
□	Cast off
BEAK
Using 325mm straight needles
and yarn A, cast on two sts
□	Row 1 (WS): p
□	Row 2: (kfb) twice. Four sts
□	Rows3:p
□	Row 4: kfb, к to last st, kfb.
Six sts
□	Row 5: p
□	Rows 6-7: rep Rows 4-5.
Eight sts
□	Cast off
TOP TIPS
ж When you are
instructed to "turn" midway
through a row, simply
swap the needles over in
your hands so the other
side is facing you. Leave
the rest of the stitches
from that row unworked
and continue back across
the stitches you've just
knitted or purled
★ The robin is mostly
knitted in the round and
the legs are made from
wire wrapped with yarn.
Use florists' wire for this
as it's easy to bend
★ This project uses
smaller needles than you'd
expect for a D К yarn to
create a nice, firm fabric
★ The base is made from
thick cardboard, but for
longevity, you may want
to use hardboard or
plywood instead
★ Any smooth DKyarn
will work for this project.
As just one ball of each
shade is needed, why not
see what's in your stash?
TO MAKEUP
Sew seam of Log, stuffing as
you go. Sew running stitch
around cast-on row, then pull
tight to gather. Fasten off
yam. Using yarn B, embroider
circles of small chain stitches
to look like the rings of a tree.
Position Snow on Log so it
covers seam and stitch in
place. Cut cardboard 24cm x
16cm and fold Base piece
around it. Sew around
remaining three sides. Sew
running stitch around cast-on
row for Robin's Head and
body and pull to gather. Stuff
body firmly. Stitch seam on
Tail then cut cardboard to fit.
Insert card into Tail then insert
Tail into base of Body and
sew to secure. Sew side seam
of Beak and stitch to face.
Using yarn B, embroider eyes,
as shown. Wrap Back piece
around Head and body and
sew in place. Attach Wings.
Bend one end of each length
of wire into a foot shape with
three toes, leaving the raw
end pointing down to secure
into Log. Wrap yarn tightly
around wire until Leg and foot
part is completely covered,
leaving section to be inserted
into Log uncovered. Insert top
of Leg into base of body,
securing with a dot of glue.
Insert uncovered end of wire
into Log
* 100 DAYS OF CRAFTS *
DESIGNER SACHIYO ISCHII
Elf on a shelf
When he's not causing mischief, you'll find Toby helping parents
to create wonderful festive scenes for children to wake up to
KIT LIST
★ Yarn, DK: Mistletoe,
Sparkly Gold, Leafy
Green, Light Fawn, Red
Nose; 4-ply, dark brown,
small length ★ 3.5mm
needles ж Stuffing
★ Two 4mm black eye
beads ★ Cotton thread
★ Tapestry needle
★ Scissors
Height (sitting): 12.5cm
34
BODY & HEAD
Using 3.5mm needles and
Mistletoe cast on ten sts
□ Row 1 (WS) and every
odd- numbered row: p
□ Row 2: (kfb) to end. 20 sts
□ Row 4: (k1, kfb) to end. 30 sts
□ Row 6: (k2, kfb) to end. 40 sts
□ Row 8 (edge): p
□ Rows 9-15: starting with
a p row work in st st
□ Row 16: (k2, k2tog) to end.
30 sts
□ Rows 17-23: starting with
□ Row 13: к
Change to Light Fawn
a p row work in st st
□ Row 24 (shape neck): (k1,
k2tog) to end. 20 sts
Change to Light Fawn
□ Row 25: p
□	Row 26: k5, (kfb) ten times,
к to end. 30 sts
□	Rows 27-33: starting with
a p row work in st st
□	Row 34 (eyeline): k9, (k2tog)
six times, к to end. 24 sts
□	Rows 35-37: starting with
a p row work in st st
□	Row 38: (k2, k2tog) to end.
18 sts
□	Row 39: p
□	Row 40: (k2tog) to end.
Nine sts
Cut yam leaving a long tail,
thread tail onto tapestry
needle and thread through
rem sts, fasten off
ARM (MAKE 2)
Using 3.5mm needles and
Mistletoe cast on 12 sts
□	Rows 1-11: starting with
a p row work in st st
□ Row 12: (k2, k2tog)toend.
Nine sts
Cut yarn leaving a long tail,
thread tail onto tapestry needle
and thread through rem sts,
fasten off
EEG (MAKE 2)
Using 3.5mm needles and
Leafy Green cast on12 sts
□ Rows 1 -5: starting with
a p row work in st st
Work in foil two-row stripe
sequence: Sparkly Gold,
Leafy Green
□ Rows 6-17: starting with
a к row work in st st
Change to Sparkly Gold
□ Row 18: к
□ Row 19: p
Cast off
BOOT (MAKE 2)
Using 3.5mm needles and
Red Nose cast on ten sts
□ Row 1 (RS): (kfb) to end. 20 sts
□ Row 2: p
□ Row 3 (edge): p
□ Rows 4-6: starting with
a p row work in st st
□ Row 7 (shape ankle): k6,
(k2 tog) four times, к to end. 16 sts
□ Row 8: p
□ Row 9: k6, (k2tog) twice,
к to end.14 sts
□	Row 10: p6, p2tog, p to
end. 13 sts
□	Row 11: к
□	Row 12: p
Cast off
EAR (MAKE 2)
Using 3.5mm needles and
Light Fawn cast on five sts
Г Row 1 (WS):p
□ Row 2: skpo, k1, k2tog.
Three sts
□	Row 3: p
□ Row 4: si 1, k2tog. Two sts
□ Row 5: p2tog. One st
Fasten off
SCARF
Using 3.5mm needles and
Sparkly Gold cast on four sts
□ Rows 1-70: к
Cast off
HAT
Using 3.5mm needles and
Leafy Green cast on 30 sts
□ Rows 1 -4: starting with
a к row work in st st
Work in foil two-row stripe
sequence: Sparkly Gold,
Leafy Green
□	Rows 5-10: starting with
a к row work in st st
□	Row 11: (k3, k2tog) to end.
24 sts
□	Row 12: p
□	Row 13: (k2, k2tog) to end.
18 sts
□	Row 14: p
Cont in Leafy Green only
□	Row 15: к
□	Row 16 and every even-
numbered row: p
□	Row 17: (k1, k2tog)toend.
12 sts
□	Row 19: к
□	Row 21: (k 1, k2tog) to end.
Eight sts
□	Row 23: (k2tog) to end.
Four sts
Cut yarn leaving a long tail,
thread tail onto tapestry
needle and thread through
rem sts, fasten off
HAT BOBBLE
Using Red Nose wind yarn
around two fingers 30 times
and tie centre tightly. Cut loops
and trim to make pom-pom
TO MAKE UP
Using fastened-off tail sew
seam from top of Head to
Neck. With cast-on yarn end
work a gathering thread
along cast-on edge of Body
and draw tightly. Sew Body
halfway, stuff Head and
Body avoiding neck. Sew
seam closed. Using Light
* 100 DAYS OF CRAFTS *
Fawn, work a gathering
thread around neck and draw
tightly, then work gathering
thread along dec row on face
and pull gently to make
eyeline dent. Sew Leg seams,
leaving cast-on and cast-off
edge open. Stuff Leg. Fold
Boots vertically in half and
sew base with overcast sts.
Stuff toes, insert Legs and
secure Boots with a few sts all
around. Sew Legs to Body.
Sew Arm seams and stuff,
sew to Body. Using Light Fawn
make a nose with a French
knot. Sew eye beads to Head.
Using dark brown 4-ply
embroider mouth. Take two
Sparkly Gold strands and
backstitch to forehead,
leaving loops for hair. Seam
Hat and attach pom-pom
to tip. Sew Hat to Head,
sew Ears underneath. Wrap
Scarf around Neck. Weave
in all ends
XMAS
CLASSIC

* 100 DAYS OF CRAFTS *
DESIGNER ELLA AUSTIN
Santa artwork
This wall art is simple to make with a background of stocking
stitch stripes, with the detail added afterwards in cross-stitch

36
KIT LIST
Yarn, DK: Fluffy, Merry
Magenta, Cheeky Pink,
Dusky Blue, Tinsel Teal
★ 3.5mm needles ★ Pins
★ Tapestry needle
* 23cm x 28cm picture
frame ★Scissors
To fit frame: 23cm x 28cm
Using 3.5mm needles and
Merry Magenta cast on 41 sts
□ Row 1: к
□	Row 2: p
□	Rows 3-10: starting with
a к row work in st st
Change to Cheeky Pink
□	Row 11 (Row 2 of chart): к
□	Row 12: p
□	Rows 13-21: starting with
a к row work in st st
Change to Merry Magenta
□	Row 22 (Row 13 of chart): p
Change to Dusky Blue
□	Row 23 (Row 14 of chart): к
□	Row 24: p
□	Rows 25-67: starting with a
к row work in st st
Change to Tinsel Teal
□	Row 68 (Row 59 of chart): p
Change to Cheeky Pink
□	Row 69 (Row 60 of chart): к
□	Row 70: p
□	Rows 71-77: starting with
a к row work in st st
Change to Tinsel Teal
□	Row 78 (Row 69 of chart): p
□	Rows 79-97: starting with
a к row work in st st
Cast off
Work main image and
lettering in cross-stitch (see
panel) foil chart, leaving Fluffy
until last; work smile in chain st
TO MAKEUP
Block by wetting with cool
TOP
TIP!
KEEP YOUR CROSS STITCHES NEAT BY ALWAYS WORKING THE
BOTTOM AND TOP ‘LEGS' IN THE SAME DIRECTION
« 100 DAYS OF CRAFTS *
DECOR
WITH A
DIFFERENCE
water and pinning to size on
a flat absorbent surface to
dry, allowing for an overlap
on frame backing by 1 -2cm
all around. Once dry, weave
in all ends. Centre work RS
up on frame backing and
fold edges over to back,
making sure wording will be
visible when framed. Hold
in place by working long sts
between opposite row ends,
then between cast-on and
cast-off edges. Assemble
frame without glass. If work is
very stretched, use extra tape
to overlap work and back of
frame to help secure
+ SEEP129F0RALIST *
7 ¥ OF ABBREVIATIONS
IN STITCHES
Cross stitch: this is a
technique that covers
a fabric with simple
embroidered crosses by
counting across rows and
stitches to create blocks
of colour according to
a chart
Single cross-stitch:
insert needle from
back of work to front at
bottom-left of st to work
over. Make diagonal
leg from bottom-left to
top-right of st, inserting
needle through to back
and out at front at
bottom-right of st. Make
second diagonal leg
over first, to top-left of
st, covering it with a
cross-stitch
Row of cross-stitches:
work row of single legs all
in same direction, then
work back along row
crossing over top with
second leg of st. Secure
tail on WS by working
over it with first few sts
* 100 DAYS OF CRAFTS *
DESIGNER SACHIYO ISCHII
Rupert reindeer
Step aside Rudolph, a new little guy has landed
on our roof and eaten our carrots!
KIT LIST
★ Yarn, DK: Mistletoe,
Leafy Green, Light Fawn,
Sugar Plum, Red Nose,
Sparkly Gold ★ 3.5mm
needles ★ Two 6mm eye
beads ★ Black cotton
thread ★ Skewers
★ Stuffing ★ Tapestry
needle ★ Scissors
Height: 25cm
38
BODY
Using 3.5mm needles and
Sparkly Gold cast on ten sts
□	Row 1 and every odd-
numbered row: p
□	Row 2: (kfb) to end. 20 sts
□	Row 4: (k1, kfb) to end. 30 sts
□	Row 6: (k2, kfb) to end. 40 sts
□	Row 8: к
□	Row 10: (k9, kfb) to end. 44 sts
□	Rows 11-17: starting with
a p row work in st st
□	Row 18: (k4, k2tog, k3,
k2tog)to end. 36 sts
□	Rows 19-25: starting with
a p row work in st st
□	Row 26: (k4, kfb, k3, kfb)
to end. 44 sts
□	Rows Т1-УГ. starting with
a p row work in st st
□	Row 38: (k9, k2tog) to end.
40 sts
□	Row 39 and every odd-
numbered row: p
□	Row 40: (k2, k2tog) to end.
30 sts
□	Row 42: (kl, k2tog) to end.
20 sts
□	Row 44: (k2tog) to end.
Ten sts
Cut yarn leaving a long tail,
thread tail onto tapestry
needle and thread through
rem sts, fasten off
HEAD
Using 3.5mm needles and
Sparkly Gold cast on ten sts
□	Row 1 and every odd
numbered row: p
□	Row 2: (kfb) to end. 20 sts
□	Row 4: к
□	Row 6: (k1, kfb) to end. 30 sts
Change to Light Fawn after
Row 15
□	Rows 7-17: starting
with a p row work in st st
□	Row 18: (k2, kfb) to end.
40 sts
□	Row 19: p
□	Row 20: (k3, kfb) to end.
50 sts
□	Rows 21-27: starting with
a p row work in st st
□	Row 28: (k3, k2tog) to end.
40 sts
□	Rows 29-34: rep Rows
39-44 of Body. Ten sts
Cut yarn leaving a long tail,
thread tail onto tapestry
needle and thread through
rem sts, fasten off
NECK
Using 3.5mm needles and
Sparkly Gold cast on 18 sts
□	Rows 1 -5: starting with
a p row work in st st
□	Row 6: k2, (k2tog,k2)
to end. 14 sts
□	Rows 7-21: starting with
a p row work in st st
□	Row 22: k3, k2tog, k4,
k2tog, к to end. 12 sts
□	Rows 23-24: starting with
a p row work in st st
Cast off
EAR (MAKE 2)
Using 3.5mm needles and
Light Fawn cast on 14 sts
□	Row 1 and every odd-
numbered row: p
□	Row2:k2, (k2tog, k2)
to end. 11 sts
□	Row 4: к
□	Row 6: k2tog, (k1, k2tog)
to end. Seven sts
□	Row 8: k1, (k2tog) to end.
Four sts
Cut yarn leaving a long tail,
thread tail onto tapestry
needle and thread through
rem sts, fasten off
EEG (MAKE 4)
Using 3.5mm needles and
Leafy Green cast on 16 sts
□	Rows 1-11: starting with
a p row work in st st
□	Row12:k4, (k2tog, k4)
to end. 14 sts
□	Row 13:p
□	Row 14: (k5, k2tog) to end.
12 sts
□	Rows 15-19: starting with
a p row work in st st
□	Row 20: (k4, k2tog) to end.
Ten sts
□	Row 21: p
Change to Sugar Plum
□	Row 22: к
□	Row 23: p
□	Row 24: k3, kfb, k2, kfb,
к to end. 12 sts
□	Row 25: p
□	Row 26: к
□	Row 27 (edge): к
□	Row 28: к
□	Row 29: (p2tog) to end. Six sts
Cut yarn leaving a long tail,
thread tail onto tapestry
needle and thread through
rem sts, fasten off
TAIL
Using 3.5mm needles and
Light Fawn cast on 14 sts
□	Row 1 -8: rep Rows 1 -8 of
Ear. Four sts
Cut yarn leaving a long tail,
thread tail onto tapestry
needle and thread
through rem sts, fasten off
LONG ANTLER (MAKE 2)
Using 3.5mm needles and
Sugar Plum cast on ten sts
□	Rows 1 -38: starting with
a p row work in st st
Cutyarn leaving a long tail,
thread tail onto tapestry
needle and thread through
rem sts, fasten off
MEDIUM TINE (MAKE 2)
Using 3.5mm needles and
Sugar Plum cast on ten sts
□	Rows 1-12: starting with
a p row work in st st
Cut yarn leaving a long tail,
thread tail onto tapestry
needle and thread through
rem sts, fasten off
SMALL TINE (MAKE 2)
Using 3.5mm needles and
Sugar Plum cast on ten sts
□	Rows 1-10: starting with
a p row work in st st
Cut yarn leaving a long tail,
thread tail onto tapestry
needle and thread through
rem sts, fasten off
NOSE
Using 3.5mm needles and
Red Nose cast on ten sts
□	Row 1 (WS): p
□	Row 2: (kfb) to end. 20 sts
□	Rows 3-9: starting
with a p row work in st st
□	Row 10: (k2tog) to end.
Ten sts
Cut yarn leaving a long tail,
thread tail onto tapestry
needle and thread
through rem sts, fasten off
COLLAR
Using 3.5mm needles and
Red Nose cast on 30 sts
□ Rows 1-2: к
Change to Mistletoe
□	Rows 3-6: starting with
a к row work in st st
Change to Red Nose
□ Rows 7-9: к
Cast off pwise
BELL
Using 3.5mm needles and
Light Fawn cast on ten sts
□	Rows 1 -5: starting with
* 100 DAYS OF CRAFTS *
a p row work in st st
Cut yarn leaving a long tail,
thread tail onto tapestry
needle and thread through
rem sts, fasten off
TO MAKEUP
Using fastened-off tail, sew
Body halfway. With cast-on
tail, work gathering thread
around cast-on edge and
draw tightly. Sew up Body,
stuff and close seam. Rep for
Head. Seam Ears and, with
seam in front centre, sew
base corners tog. Sew Ears
to Head. Sew eye beads to
Head. Seam Antlers and Tines
from fastened-off tail, stuffing
as you sew. Pull thread tight
to shape curve along Long
STEADY ON
To keep your reindeer
stable, insert wooden
skewers through the
Head, Neck, Body and
front Legs. You can also
place dried beans in the
bottom of the hind Legs
IF YOU’RE GIFTING RUPERT TO
A CHILD, SWAP THE SAFETY EYES
FOR FRENCH KNOTS AND DON’T
USE THE STABILISING SKEWERS
TOP
TIP!
Antler. Sew Medium and
Small Tines to Long Antler
Sew Antlers to Head. Seam
and stuff Nose, sew Nose to
Head. Seam Neck, stuff and
sew to Body. Seam each Leg.
Using Sugar Plum insert
needle from sole, take needle
out from Leg seam and rep.
Pull thread gently to flatten
sole of foot. Stuff and sew
to Body. Seam Tail and with
seam in front centre, sew
base corners tog. Sew to
Body. Seam Collar and attach
Bell to front. Insert Neck
through Collar and sew Neck
to Head. Weave in all ends
GOOD FOR
BEGINNERS
# 100 DAYS OF CRAFTS *
DESIGNER DAWN FINNEY
Candle wreath
Start the festivities with our Christmas-ready decoration
featuring cosy candlelight and wintry foliage
KIT LIST
★ Yarn: DK yarn, shades
(A) Cream, (B) Yellow, (C)
Green, (D) Red; Fluffy yarn,
shade (E) White, small
amounts of each
Needles: 3.75mm
★ Tapestry needle
Embroidery hoop:
20.5cm diameter
Height: 21.5cm
LARGE CANDLE
40
Using 3.75mm needles and
yarn A cast on 20 sts
□ Beg with a к row, work
11 cm in st st
□	Cast off, leaving a long tail
SMALL CANDLE
Using 3.75mm needles and
yarn A cast on 20 sts, leaving
a short tail
□	Beg with a к row work 8cm
in st st
□	Cast off, leaving a long tail
FLAME (MAKE 2)
Using 3.75mm needles and
yarn В cast on three sts
□ Row 1 (RS): (kfb) twice, k1.
Five sts
□	Row 2 and every even-
numbered row : p
BLOCKING
This finishing technique
relaxes the stitches and
makes them more
uniform. It's great for
shaping fabrics so it's
easier to join them
together when sewing
up. Wet your finished knit
□	Row 3: kfb, k2, kfb, k1.
Seven sts
□	Row 5: kfb, k6. Eight sts
□	Row 7: k6, k2tog. Seven sts
□ Row 9: k5, k2tog. Six sts
□ Row 11: k4, k2tog. Five sts
□ Row 13: k3, k2tog. Four sts
□ Row 15: k2, k2tog. Three sts
□ Row 17: k1, k2tog. Two sts
□	Row 18: p2tog. One st
□	Fasten off
HOLEV LEAF (MAKE 4)
Using 3.75mm needles and
yam C cast on one st
□ Row1 (RS): kfbf. Three sts
□ Row 2 and every even-
numbered row: p
□	Row 3: (kfb) twice, kl. Five sts
□ Row 5: kfb, k2, kfb, k!.
by either submerging it
in water or spraying it
with a water spray bottle.
After dampening your
work, pin it on a flat
surface, such as a towel
laid out on a table. Leave
to dry naturally
Seven sts
□	Row 7: kfb, kA, kfb, k1. Nine sts
□ Row 9: kfb, k6, kfb, k!. 11 sts
□ Row 11: cast off two sts,
к to end. Nine sts
□	Row 12: cast off two sts,
p to end. Seven sts
□	Row 13: к
□	Row 14 and every even-
numbered row: p
□	Row 15: kfb, k4, kfb, kl.
Nine sts
□	Rowl7:kfb, k6, kfb,kl.11 sts
□ Row 19: cast off two sts, к
to end. Nine sts
□	Row 20: cast off two sts,
p to end. Seven sts
□	Row21:kl,k2tog, k2,
k2tog. Five sts
□	Row 22: p
□	Row23:k1, (k2tog) twice.
Three sts
□	Row 24: p2tog, p!. Two sts
□ Row 25: k2tog. One st
□	Cut yarn leaving a tail,
thread through rem sts, pull
tight and fasten off
BERRIES (MAKE 3)
Using 3.75mm needles and
yarn D cast on one st, leaving
a short tail
□	Row 1 (RS): kfbfbf. Five sts
□	Rows 2-4: beg with a p row
work in st st
□	Row 5: к to end, pass first
four sts over fifth st in reverse
order. One st
□	Rows 6-15: rep Rows 1 -5
twice
□	Cut yarn leaving a tail,
thread through rem sts, pull
tight and fasten off
TO MAKE UP
Wrap yarn E around
embroidery hoop, leaving a
short tail. Cut yarn, tie tails
together to secure and weave
in. Fold Candle pieces in half
vertically, use cast-off tail to
close top of Candle using
mattress stitch, repeat for
base of Candle. Place Small
Candle next to Large Candle,
overlap them and sew
together with a few stitches
on WS. Lightly block Holly
Leaves and allow to dry
thoroughly. Join Leaves to
Candles using running stitch.
Use cast-off tails to attach
Leaves to hoop by wrapping
them around it and securing
firmly. Work gathering stitch
along edges of first Berry
(Rows 1 -5), pull to gather
into a ball shape. Rep for
remaining Berries, join first
and third Berries tog with a
few stitches. To define them,
wrap yarn around joins
between each Berry a few
times by passing it through
centre of cluster, over join and
back through centre, pulling
tightly. Join Berries to middle
of Holly Leaves. Lightly block
Flames and allow to dry
thoroughly. Use yarn D to attach
Flame to top of each Candle.
Use cast-off tails to attach
Flames to frame by wrapping
them around it and securing
firmly. Weave in all ends
* 100 DAYS OF CRAFTS *

DESIGNER NICOLA VALIJI
Gnome cushion
Make sure you're not Gnome Alone this Christmas with
company from this cute cushion
42
KIT LIST
★ Yarn: King Cole Big
Value Chunky, shades (A)
547 Grey, (B) 1747 Sand,
(C) 545 Wine, (D)822
White, one 100g ball of
each; King Cole Cuddles
Chunky, shade (E) 350
White, one 50g ball
★ Needles: 6mm ★ Blusher
★ Safety toy stuffing
★ Tapestry needle
Size: 45cm x 27cm
ALTERNATIVE YARN
Cygnet Chunky; Sirdar
Snuggly Snowflake Chunky
TENSION SQUARE
★	14 sts x 20 rows
★	10cm x 10cm
★	Stocking stitch
★	6mm needles
CUSHION SIDE (MAKE 2)
Using 6mm needles and yarn
A, cast on 30 sts
□ Row 1 (WS): p to end
□ Row 2: k1, ml, к to
last st, ml, k1.32 sts
□ Row3:ptoend
□ Rows 4-11: rep Rows 2-3
four times. 40 sts
□ Rows 12-35: beg with
a к (RS) row, work in st st
Change to yarn В
□	Rows 36-42: cont in st st
Change to yarn C
□	Row 43: p to end
□	Rows 44-48: (k2, p2) to end
Change to yarn D and work in
four-row stripe sequence
of yarn D, yarn C as foils:
□	Rows 49-54: beg with a p
(WS) row, work in st st
□	Row 55: p2tog, p to last
two sts, p2tog. 38 sts
□	Row 56: к to end
□	Row 57: p to end
□	Row 58: k2tog, к to last two
sts, k2tog. 36 sts
□	Rows 59-61: cont in st st
□	Row 62: k2tog, к to last two
sts, k2tog. 34 sts
□	Rows 63-64: beg with
a p (WS) row, work in st st
□	Row 65: p to end
□	Row 66: k2tog, к to last two
sts, k2tog. 32 sts
□	Rows 67-88: rep Rows 65-66
11 times. Ten sts
Change to yarn D
□	Row 89: p to end
□	Row 90: k2tog, к to last two
sts, k2tog. Eight sts
□	Row 91: p2tog, p to last
two sts, p2tog. Six sts
□	Row 92: k2tog, k2, k2tog.
Four sts
□	Row 93: (p2tog) twice. Two sts
□	Cast off
BEARD
Using 6mm needles and yarn
E, cast on 40 sts
□	Rows 1 -4: beg with a к (RS)
row, work in st st
□	Row 5: k2tog, к to last two
sts, k2tog. 38 sts
□	Rows 6-8: beg with a p
(WS) row, work in st st
□	Rows 9-16: rep Rows 5-8
twice. 34 sts
□	Row 17: k2tog, к to last two
sts, k2tog. 32 sts
□	Row 18: p to end
□	Rows 19-24: rep Rows 17-18
three times. 26 sts
□	Row 25: k2tog, к to last two
sts, k2tog. 24 sts
□	Row 26: p2tog, p to last
two sts, p2tog. 22 sts
□	Rows 27-34: as Rows 25-26
four times. Six sts
□	Row 35: k2tog, k2, k2tog.
Four sts
□	Row 36: (p2tog) twice.
Two sts
□	Cast off
NOSE
Using 6mm needles and yarn
B, cast on six sts
□	Row 1 (RS): kfb, к to last st,
kfb. Eight sts
□	Row 2: p to end
□	Row 3: as Row 1. Ten sts
□	Rows 4-8: beg with a p
(WS) row, work in st st
□	Row 9: k2tog, к to last two
sts, k2tog. Eight sts
□	Row 10: p to end
□	Row 11: as Row 9. Six sts
□	Cut yarn, thread
through rem sts, pull tight
and fasten off
TO MAKE UP
Place right Sides of Cushion
together and join, leaving
cast-on edges open. Turn right
side out and stuff firmly. Close
gap. Place Beard level with
top of yarn A section at centre
and at top of yarn В section
at edges. Sew in place with
a small amount of stuffing
behind Beard. For Nose, run
a gathering thread all around
edges and pull to form a
sphere. Stuff and stitch in place
just above Beard. Apply small
amount of blusher to cheeks
* 100 DAYS OF CRAFTS *
Tfwi cuihicn
dcutUj ujx
<v
STUFFED
TO LAST
For an item with a lot
of stuffing, the key to
achieving a good shape
is to tease out the stuffing
to an even consistency
before filling the item.
Start with a couple of
large handfuls and, after
fluffing it up, insert half
and use the other half as
a guide to the density of
the next handfuls
* 100 DAYS OF CRAFTS *
DESIGNER SACHIYO ISCHII
Santa Claus
Our favourite jolly man has arrived to deliver the
presents, but have you been naughty or nice?
KIT LIST
★ Yarn, DK: Santa Red,
Rosy Cheeks, Winter Berry,
Snowy White, Silver Buckle,
Festive Yellow, Holly Green
★ 3.5mm needles
★ Two 6mm black eye
beads ★ Black cotton
thread ★ Stuffing ★ Stitch
holder ★ Tapestry needle
★ Scissors
Height: 23.5cm
44
LEGS, BODY & HEAD
*	Using 3.5mm needles and
Santa Red cast on 14 sts
□	Rows 1 -5 (right leg): starting
with a p row work in st st
□	Row 6: k4, (kfb, k4) to end.
16 sts
□	Rows 7-17: starting with
a p row work in st st
□	Row 18: (k3, kfb) to end. 20 sts
□	Row 19: p *
Cut Santa Red, move sts onto
st holder
Rep from * to * once then knit
Legs tog as foils:
□	Row 20: k20 from Right leg,
k20 from st holder. 40 sts
Note: change to Winter Berry
after Row 27
□	Rows 21 -37: starting with
a p row work in st st
□	Row 38: (k8, k2tog) to end.
36 sts
□	Rows 39-51: starting with
a p row work in st st
□	Row 52: (k2, k2tog) to end.
27 sts
□	Row 53: p
□	Row 54 (shape neck):
k2tog, k1, (k2tog, k2)toend.
20 sts
Change to Rosy Cheeks
□	Row 55: p
□	Row 56: (kfb) to end. 40 sts
□	Rows 57-65: starting with
a p row work in st st
□	Row 66 (shape eyeline):
k12, (k2tog) eight times,
к to end. 32 sts
□	Row 67-73: starting with
a p row work in st st
□	Row 74: k2tog, (k1, k2tog)
to end. 21 sts
□	Row 75: p
□	Row 76: k1, (k2tog) to end.
11 sts
Cut yarn leaving a long tail,
thread tail onto tapestry
needle and thread through
rem sts, fasten off
JUMPER
Using 3.5mm needles and
Snowy White cast on 60 sts
□ Rows 1-2: к
Change to Santa Red
□	Rows 3-6: starting with
a к row work in st st
□ Row 7: (k4, k2tog) to end.
50 sts
□	Rows 8-14: starting with
a p row work in st st
□	Row 15: (k3, k2tog) to end.
40 sts
□	Rows 16-22: starting with
a p row work in st st
□	Row 23: (k2, k2tog) to end.
30 sts
□	Rows 24-30: starting with
a p row work in st st
□	Row 31: (k1, k2tog) to end.
20 sts
Cast off
SLEEVE (MAKE 2)
Using 3.5mm needles and
Snowy White cast on 16 sts
□ Rows 1-2: к
Change to Santa Red
□	Rows 3-12: starting with
a к row work in st st
□ Row 13: (k2, k2tog) to end.
12 sts
□	Rows 14-19: starting with
a p row work in st st
Cut yarn leaving a long tail,
thread tail onto tapestry
needle and thread through
rem sts, fasten off
GLOVE (MAKE 2)
Using 3.5mm needles and
Festive Yellow cast on ten sts
□ Rows 1 -8: starting with
a p row work in st st
Cut yarn leaving a long tail,
thread tail onto tapestry
needle and thread through
rem sts, fasten off
NOSE
Using 3.5mm needles and
Rosy Cheeks cast on ten sts
Cast off
HAT
Using 3.5mm needles and
Snowy White cast on 44 sts
□ Rows 1 -4: к
Change to Santa Red
□ Rows 5-8: starting with
a к row work in st st
□ Row 9: (k9, k2tog) to end.
40 sts
□	Row 10: p
□	Row 11: (k3, k2tog) to end.
32 sts
□	Row 12: p
Change to Winter Berry
□	Rows 13-18: starting with
a к row work in st st
□	Row 19: (k6, k2tog) to end.
28 sts
□	Row 20: p
Change to Holly Green
□	Rows 21 -24: starting with
a к row work in st st
□	Row 25: k4, (k2tog, k4) to
end. 24 sts
□	Row 26: p
□	Row 27: (k2, k2tog) to end.
18 sts
□	Rows 28-30: starting with
a p row work in st st
□	Row 31: (k2tog) to end.
Nine sts
□	Row 32: p
Cut yarn leaving a long tail,
thread tail onto tapestry
needle and thread through
rem sts, fasten off
BOOT (MAKE 2)
Using 3.5mm needles and
Silver Buckle cast on 12 sts
□	Row 1 (WS): p
□	Row 2: (kfb) to end. 24 sts
□	Row3:p
□	Row 4: к
□	Row 5 (edge): к
□	Rows 6-11: starting with
a к row work in st st
□	Row 12: k9, (k2tog) three
times, к to end. 21 sts
□	Row 13: p
□	Row 14: k9, k3tog, к to end.
19 sts
□	Rows 15-20: starting with
a p row work in st st
Cast off kwise
BEARD
Using 3.5mm needles and
Snowy White cast on two sts
□	Row 1: (kfb) to end.
Four sts
□	Row 2: kfb, к to last st, kfb.
Six sts
□	Row 3: к
□	Rows 4-23: rep Rows 2-3
ten times. 26 sts
□	Rows 24-30: к
□	Row 31: skpo, к to last two
sts, k2tog. 24 sts
□	Row 32: к
□	Rows 33-52: rep Rows
31 -32 ten times. Four sts
□	Row 53: (k2tog) to end.
Two sts
□	Row 54: k2tog. One st
Fasten off
BELT
Using 3.5mm needles and
Holly Green cast on four sts
□ Rows 1-55: к
Cast off
BUCKLE
Using 3.5mm hook and
Festive Yellow make 20ch
Fasten off
* 100 DAYS OF CRAFTS *

46
TO MAKEUP
Using fastened-off yarn end
seam from top of Head to neck.
Using Santa Red, seam Body
halfway. Seam each Leg and
stuff Head, Body and Legs.
Insert safety eyes. Close Body
but leave bottom of Legs open.
Using Rosy Cheeks work
gathering thread around neck
and draw tightly. Fold Boot
lengthwise and sew sole. Sew
back seam of Boot and stuff
toes. With Body seam on back
side, insert Leg into Boot and
sew Boot to Leg. Using Silver
Buckle pierce sole of Boot, take
needle out to ankle and rep. Pull
thread to flatten sole and shape
ankle. Rep for other Leg. Cover
Body with Jumper and seam at
back. Attach Belt. Sew Buckle to
Belt. Seam Hat and attach to
Head. Stitch ends of Nose tog
to make bobble, sew to face.
Fold Beard in half horizontally
and sew side edges. Stuff lightly
and attach to face. Seam Glove
and stuff. Wrap with Sleeve and
secure with sts around cuff.
Seam Sleeve and stuff. Sew
Arm to Body. Rep for other
Arm. Using Festive Yellow make
a 2.5cm pom-pom and sew to
tip of Hat leaving a 3cm tail
of yarn. Weave in all ends
SACK
Using 3.5mm needles and
Holly Green cast on ten sts
□ Row 1 (WS): p
□ Row 2: (kfb) to end. 20 sts
□ Row 3 and every odd-
numbered row: p
□ Row 4: (k1, kfb) to end. 30 sts
□ Row 6: (k2, kfb) to end. 40 sts
□ Row 8: (k3, kfb) to end. 50 sts
□ Row 10: (k4, kfb) to end. 60 sts
NOTE: change to Festive
Yellow after Row 17
□	Rows 11 -29: starting with
a p row work in st st
□	Row 30: (k2tog) to end. 30 sts
NOTE: change to Silver
Buckle after Row 33
□	Rows 31-36: starting with
a p row work in st st
Cast off kwise
STRING
Using 3.5mm hook and
Winter Berry make 60ch
Fasten off
TO MAKE UP
Sew seam and stuff. Keep
cast-off side open. Weave ch
through decreased row and tie
bow at Front. Weave in all ends
TOP
TIP!
IF USING YOUR SANTA AS A DECORATION TO BRING
OUT YEAR AFTER YEAR, WEIGH HIM DOWN ВГ FILLING
HIS LEGS WITH PLASTIC PELLETS AND POP HIM ON THE
MANTELPIECE TO BE ADMIRED
# 100 DAYS OF CRAFTS *
DESIGNER LYNNE ROWE
Mini wreaths
Hang these on doors, windows, mirrors, hooks,
wherever you need a little festive cheer!
KIT LIST
★ Yarn: DMC Natura Just
Cotton, shades (A) N61 Red,
(B) N35 Cream, (C) N09
Grey, one 50g ball of each,
(D) N14 Green, oddments
★ Needles: 2.5mm * Cable
needle: small ★ Polystyrene
rings: 12cm, three ★ Beads:
small, white, green, red
v Fabric glue Ribbon:
tartan, 10mm wide, 1 m
Diameter: 14cm;
circumference: 17 cm
RED WREATH
Using 2.5mm needles and
yarn A,cast on 20 sts
□ Work in st st until piece
will fit around ring when
slightly stretched
□ Cast off
TO MAKE UP
Sew cast-on and cast-off edges
together using mattress stitch
for a flat seam. Place knitted
piece around ring, bring long
edges together and join with
slip stitch or mattress stitch.
Wrap a short length of ribbon
once around seam to cover
and slip stitch in place. Make
a hanging loop of approx
5cm from ribbon and slip stitch
end to back of wreath. Sew
yam D, cast on two sts
□ Row 1: к
□	Row 2: p
□	Row 3: (kfb) twice. Four sts
□	Rows 4-6: beg with a p row,
work three rows in st st
□	Row 7: (k2tog) twice. Two sts
□	Row 8: p
□	Row 9: k2tog. One st
□ Fasten off
Weave ends into WS and trim.
Sew leaves together at cast-on
edge, overlapping slightly. Stitch
on two or three red beads.
Attach to wreath with fabric
glue using photo as a guide
GARTER
STITCH WREATH
NOTE: do not cut yarns at
each colour change, instead
carry yarn up the side of work
when not in use. Using 2.5mm
needles and yarn A, cast on
18 sts. Work in garter st in foil
colour sequence:
□ Work two rows in yarn A
□ Work two rows in yarn В
□ Work two rows in yarn C
□ Cont until piece reaches
required length, ending after
two rows in yarn C
□ Cast off
Make up as for Red Wreath,
omitting beads. Add Holly
Sprig to hanging ribbon
CABLED WREATH
Using 2.5mm needles and
yarn B, cast on 22 sts
□ Row1 (RS):k8,p1,k4,p1,k8
□ Row 2: p8, kl, p4, k1, p8
white and green beads to front,
using more white than green
HOLLY SPRIG
NOTE: make one sprig for
Red Wreath and one for
garter stitch wreath
LEAVES (MAKE 2)
Using 2.5mm needles and
□	Rows 3-4: rep Rows 1 -2
□	Row 5: k8, pl, C4F, p1, k8
□	Row 6: rep Row 2
□	Rep Rows 1 -6 until piece
will fit around ring when
slightly stretched
□	Cast off
Make up as for Red Wreath,
adding green beads to centre
of every alternate cable
4-------
WHY NOT TRY...
Why not make
additional holly leaves
and attach earring
fixings to them to create
festive jewellery?
NEAT CABLES
When working the first
purl stitch after each
cable it's important to
keep your yarn as taut
as possible to avoid
a loose, baggy stitch
« 100 DAYS OF CRAFTS *
DESIGNER LUCINDA GANDERTON
Cottage cosy
Put another log on the fire and treat yourself
to a brew in this seasonal knit
KIT LIST
★ Yarn: Patons Wool Aran,
shades (A) 202 White,
(B) 205 Caramel, (C)229
Cranberry, (D) 256 Heaven,
one 50g ball of each,
oddments of 4ply: Dark
Green, Light Green, Yellow,
Orange, Purple ★ Needles:
4.5mm ★ Toy stuffing
★ Tapestry needle
To fit a teapot 15cm tall
x 45cm diameter
ALTERNATIVE YARN
King Cole Merino Blend Aran
48 TENSION SQUARE
★	18 sts x 25 rows
★	10cm x 10cm
★ Stocking stitch
★ 4.5mm needles
FRONT & BACK (ALIKE)
Using 4.5mm needles and
yarn A, cast on 43 sts
□ Rows 1 -4: (k1, p1) to last st, k1
Cut yarn A, join in yarn В
□	Row 5: к
□	Row 6: p
□	Row7:k2,(p3, k1 )tolastst,k1
□	Rows 8-10: beg with a p
row, work in st st
□	Row 11: (p3, k1) to last
three sts, p3
□	Row 12: p
□	Rows 13-20: rep Rows 5-12
□ Rows 21 -22: rep Rows 5-6
once more
□	Row23:k2, (p2tog, p1, k1,
p3, kl) to last st, k!. 38 sts
□ Rows 24*26: cont in st st
□	Row 27: p2, (kl, p2tog, p1,
k!, p2) to last st, k1.33 sts
□ Rows 28-30: cont in st st
□	Row 31: (kl, p2tog, p1, k1,
p1) to last three sts, k2tog, k1.
27 sts
□	Rows 32-34: cont in st st
□ Row 35: (k3, k2tog) to last
two sts, k2.22 sts
□	Rows 36-38: cont in st st
□	Row 39: (k2, k2tog) to last
two sts, k2.17 sts
□	Row 40: p
□	Row 41: (k1, k2tog) to last
two sts. 12 sts
□	Row 42: p
□	Row 43: (k2tog) to end. Six sts
□	Row 44: (p2tog) to end.
Three sts
□	Row 45: k3tog. One st
□	Fasten off, leaving a long tail
ROOF
Using 4.5mm needles and
yam A, cast on 60 sts
□ Row 1: к
□	Row 2: p
□	Row 3: (k5, kfb in next st) to
end. 70 sts
□	Rows 4-5: p
□	Row 6-7: к
□	Row 8: p
□	Row 9: (k5, k2tog) to end.
60 sts
□	Rows 10-12: beg with
a p row, work in st st
□	Row 13: (k4, k2tog) to end.
50 sts
□	Row 14: p
□	Row 15: (k3, k2tog)toend.
40 sts
□	Row 16: p
□	Row 17: (k2, k2tog)to end.
30 sts
□	Row 18: p
□	Row 19: (kl, k2tog)toend.
20 sts
□	Row 20: p
□	Row 21: (k2, k2tog) to end.
15 sts
□	Row 22: p
Cut yam A, join yarn В
□	Rows 23-28: (k1, p1) to last
st, k1
Cut yarn B, rejoin yarn A
□ Rows 29-30: к
□	Rows 31-32: p
□	Row 33: (k2tog) to last st,
k1. Eight sts
□ Cast off
FRONTDOOR
NOTE: start with doorstep
Using 4.5mm needles and
yam A, cast on ten sts
□ Rows 1 -4: (kl, p1) to end
□ Row 5: к
□ Row 6: p
□	Rows 7-10: rep Rows 1 -4
□ Row 11: к
Cut yam A, join yarn C
□	Row 12: p
□	Row 13:p
□	Row 14: к
□ Row 15: p2, k6, p2
□ Row 16: k2,p6,k2
EMBROIDER WREATH
Leaves: Embroider the
leaves in detached chain
stitch. To do this, first bring
the needle up through the
fabric from back to front
then take it back through
the fabric very close to the
starting point leaving a
little loop on the front of
the work. Bring the needle
up through the fabric
a short distance away,
coming through the loop,
then sew a small straight
stitch to keep the loop in
place
□	Rows 17-18: rep Rows 15-16
□ Rows 19-22: rep Rows 13-16
□	Rows 23-26: rep Rows
15-16 twice
□	Row 27: p
□	Row 28: к
□	Cast off
PORCH
Using 4.5mm needles and
yarn A, cast on 18 sts
□	Row 1: p
□	Row 2: к
□	Row 3: (k2, ssk) twice, (k2,
k2tog) twice, k2.14 sts
□	Row 4: p
□	Row 5: k2, ssk, k1, ssk,
k2tog, kl, k2tog, k2. Ten sts
□	Row 6: p
□	Row 7: (ssk) twice, k2,
Baubles: Embroider the
baubles using French
knots. First, bring the yam
out through the fabric
from back to front. Second,
tension the yarn in your left
hand, and wrap the needle
around the yarn from back
to front - the more wraps,
the larger the knot. Next,
still holding the yarn tightly
with your left hand, insert
the needle back into the
fabric and pull the yarn
through, releasing your left
hand at the last minute.
* 100 DAYS OF CRAFTS *
(k2tog) twice. Six sts
□ Row 8: p
□ Cast off
UPPER WINDOWS (ALIKE)
Using 4.5mm needles and
yarn D, cast on seven sts
□ Beg with a к row, work four
rows in st st
□ Cast off all sts
□	With RS facing and using
yarn A, pick up and к five sts
along left edge, turn
□	Next row: k5
□	Cast off, leaving final st
on needle
□	With RS facing and using
yarn A, pick up and к seven
sts along bottom edge, turn
□ Next row: k8
□	Cast off, leaving final st
on needle
□	With RS facing and using
yarn A, pick up and к six sts
along right edge, turn
□ Next row: k7
□	Cast off all sts
Thread yarn A onto a tapestry
needle and sew two long
stitches over window to divide it
into four panes. Anchor them
with a small cross stitch in centre
LOWER WINDOWS (ALIKE)
Using 4.5mm needles and
yarn D, cast on seven sts
□	Beg with a к row work six
rows in st st
□ Cast off all sts
□	With RS facing and using
yarn A, pick up and к seven
sts along left edge, turn
□ Next row: k7
□	Cast off, leaving final
st on needle
□	With RS facing and using
yarn A, pick up and к seven
sts along bottom edge, turn
□ Next row: k8
□	Cast off, leaving final
st on needle
□	With RS facing and using
yarn A, pick up and к eight sts
along right edge, turn
□	Next row: k9
□	Cast off leaving final st on
needle
□	With RS facing and using
yarn A, pick up and к nine sts
along top edge, turn
□	Next row: kl 0
□ Cast off all sts
Embroider as for Upper
window
TO MAKE UP
Sew Front and Back together,
with a 7cm seam each side
of the top and a 2cm seam
at each bottom corner. Join
sides of Roof, then sew cast-on
edge of Roof to Cottage, 7cm
down from point, leaving a
gap. Lightly stuff then close
gap. Push cast-off edge down
inside Chimney and tuck a
wisp of stuffing inside. Fold
doorstep back and slip stitch
cast-on edge to centre of Front
cast-on edge. Sew door
centrally to front, then sew
down outside edges of step.
Embroider wreath (see panel).
Sew Porch above Door,
stitching down side and top
edges. Sew Upper windows in
place so top edges lie under
eaves and lower windows are
four rows below them
* 100 DAYS OF CRAFTS *
DESIGNER SACHIYO ISCHII
Puppy playhouse
These canine cuties have decorated their kennel for
the festive season - it looks just like a gingerbread house!
50
KIT LIST
★ Yarn: King Cole Merino
Blend DK, shades (A)
41 Oatmeal, (В) 1529
Sahara, (C) 46 Aran, (D)
855 Mustard, one 50g ball
of each; King Cole Merino
Blend 4ply, shades
(E) 703 Cranberry, (F) 1775
Evergreen, one 50g ball of
each; (G) Yellow-green DK,
(H) Red tweed DK,
(I) Yellow DK, (J) Red 4-ply,
(K) Yellow 4ply; (L) Green
4ply, (M) White fleecy yarn,
small amounts of each
★ Needles: 2.75mm
straight, 3.75mm straight;
2.75mm double-pointed
★ Cardboard: 40cm x
20cm ★ Safety toy stuffing
★ Stitch holder ★ Tapestry
needle
Kennel: 13cm tall, 12cm wide,
7cm deep; Mummy dog, 7cm;
puppies, 5cm
KENNEL
RIGHT PANEL &. HALF FRONT
PANEL (WORKED IN ONE PIECE)
Using 2.75mm needles and
yarn A, cast on 31 sts
□ Rows 1-3: к
□ Row 4: p20, k1, p10
□ Row 5: к
□ Rows 6-19: rep Rows 4-5
seven times
□ Row 20: as Row 4
□ Row 21: kf b, k10, cast off to
end. 12 sts
Fasten off last st. Rejoin yarn
to rem sts
□	Row 22: p
□	Row 23: kfb, к to last three
sts, k2tog, k1
□	Row 24: p
Leave sts on a holder
LEFT PANEL & HALF FRONT
PANEL (WORKED IN ONE PIECE)
Using 2.75mm needles and
yam A, cast on 31 sts
□ Rows 1-3: к
□ Row 4: p10, k1, p20
□ Row 5: к
□ Rows 6-19: rep Rows 4-5
seven times
□ Row 20: as Row 4
□	Row 21: cast off 20 sts,
к to last st, kfb. 12 sts
□	Row 22: p
□	Row 23: kl, k2tog, к to last
st, kfb
□	Row 24: p
Join panels
□	Row 25: k!, k2tog, k9, cast
on six sts, from Right panel:
k9, k2tog, kl. 28 sts
□	Row 26: p
□	Row 27: kl, k2tog, к to last
three sts, k2tog, k1.26 sts
□	Row 28: p
□	Rows 29-48: rep Rows
27-28 ten times. Six sts
□	Row 49: kl, (k2tog) twice,
k1. Four sts
□	Row 50: (p2tog) twice. Two sts
□ Pass first st over second st
and fasten off
BACKPANEL
Using 2.75mm needles and
yarn A, cast on 30 sts
□	Rows 1-2: к
□	Beg with a к row, work 20
rows in st st
□	Row 23: k!, k2tog, к to last
three sts, k2tog, k1.28 sts
C Row 24: p
□	Rows 25-46: rep Rows 23-24
11 times. Six sts
□	Row 47: k1, (k2tog) twice,
k1. Four sts
□	Row 48: (p2tog) twice. Two sts
□ Pass first st over second st
and fasten off
ENTRANCE
Using 2.75mm needles and
yarn B, cast on 50 sts
□ Rows 1-6: * kl, p1, rep
from * to end
□ Cast off pwise
ROOF
NOTE: yarn is held double
throughout. Using 3.75mm
needles and two strands of
yarn B, cast on 16 sts
□ Work in garter st (k every
row) until work meas 21 cm
□ Cast off
TO MAKE OP
Cut pieces from cardboard
using template. Stitch
Entrance around front'door'
opening, folding band
horizontally and sandwiching
front piece. Attach Back panel
to Side panels. Construct
cardboard template. Attach
knitting to cardboard, sewing
base edge to cardboard.
Secure top ends of front and
Back panels and top side
corners to cardboard with
a few stitches. Attach Roof
WREATH
Using two 2.75mm dpns and
yarn G, cast on five sts
□ Work a 30-row i-cord
□ Cast off
Join cast-on and cast-off
edges. Embroider French
knots using red 4-ply yarn.
Make a small bow with yellow
DK and stitch to top of ring
GROUP & CONQUER
This project requires
you to knit a lot of small
components. As you finish
each one, it is a good idea
either to label it, or at least
to keep them grouped
together, especially when
LARGE STOCKING
Using 2.75mm needles and
yarn M, cast on 18 sts
Cut yarn M, join in yarn J
□ Beg with a к row, work 11
rows in st st
□ Row 12: p14, turn
□ Row 13: si 1, k9, turn
□ Row 14: si 1, p10, turn
□ Row 15: si 1, k11, turn
□ Row 16: si 1, p12, turn
П Row 17: si 1, к to end
□ Rows 18-21: cont in st st
□ Row 22: * p1, p2tog, rep
from * to end. 12 sts
□ Cut yam, thread through
rem sts, pull tight and fasten off
SMALL STOCKING (MAKE 2)
Using 2.75mm needles and
yarn M, cast on 18 sts
Cut yarn M, join in yarn J
□ Beg with a к row, work
eight rows in st st
□ Row 9: k11, turn
□ Row 10: si 1, p6, turn
□ Row 11: si 1, k7, turn
□ Row 12: si 1, p8, turn
□ Row 13: si 1, k9, turn
□ Row 14: si 1, p to end
□ Rows 15-17: cont in st st
□ Row 18: * p1, p2tog, rep
from * to end. 12 sts
□ Cut yarn, thread through
rem sts, pull tight and fasten off
BOBBLES
NOTE: make eight in yarn J
and seven in yam L. Using
it comes to each of the
dogs, where you will be
making not only the body
and head (in one piece)
but also separate ears,
front legs, back legs and
tails, plus scarves and hats
* 100 DAYS OF CRAFTS *
2.75mm needles,cast on ten sts
□	Beg with a p row, work six
rows in st st
□	Cut yarn, thread through
rem sts, pull tight and fasten
off. Stitch side seams of
stockings. Sew side seams of
each Bobble. Stuff, then sew
running stitch around cast-on
edge, pull tight to gather
STAR
Using 2.75mm needles and
yarn K, cast on ten sts
□	Row 1: (kfb) in each st. 20 sts
□	Row 2: p
□	Row 3: (k1, kfb) ten times.
30 sts
□	* * * Row 4: p6, turn
□	Next row: k2tog, k2, k2tog,
turn. Four sts
□	Next row: p
□	Next row: (k2tog) twice,
pass first st over second st,
turn. One st
□	Next row: pfb, turn. Two sts
□	Next row: (kfb) twice,
turn. Four sts
□	Next row: p
□	Next row: kfb, k2, kfb,
turn. Six sts
□	Next row: p, keep sts on the
main needle ***
□	Move on to next set of six
sts and rep from * * * to * * *
four times more
□	Next row: (k1, k2tog) ten
times. 20 sts
□	Next row: p
□	Next row: (k2tog) ten
times. Ten sts
□	Cut yarn, thread through
rem sts, pull tight and fasten
off. Use cast-off tail to sew
centre. Sew running stitch
around cast-on edge and pull
to gather. Sew side seams.
Attach all ornaments to Kennel
MUMMY DOG
BODY
Using 2.75mm needles and
yarn C, cast on ten sts
□	Row 1 (WS): p
□	Row 2: (kfb) in each st. 20 sts
□	Row 3: p
□	Row 4: (k1, kfb) ten times.
30 sts
□	Rows 5-25: cont in st st
□	Row 26 (neck): (k1, k2tog)
to end. 20 sts
□	Row 27: p2tog, p to last
two sts, p2tog. 18 sts
□	Rows 28-35: cont in st st
□	Row 36 (shape eye): k4,
(k2tog, k1) three times, k2tog,
k3.14 sts
□	Rows 37-39: cont in st st
□	Row 40: k2tog, (k1, k2tog)
to end. Nine sts
□	Cut yarn, thread through
rem sts, pull tight and fasten off
EARS (MAKE 2)
Using 2.75mm needles and
yarn D, cast on six sts
□	Beg with a к row, work two
rows in st st
□	Row 3: skpo, к to end. Five sts
□	Row 4: p2tog, p to end.
Four sts
□	Row 5: skpo, k2tog. Two sts
□	Row 6: p2tog. One st
□	Fasten off
BACK LEGS (MAKE 2)
Using 2.75mm needles and
yarn C, cast on eight sts
□	Rowl (WS):p
□	Row 2: (kfb) in each st. 16 sts
□	Beg with a p row, work
three rows in st st
□	Row 6: k5, (k2tog) three
times, k5.13 sts
□	Row 7: p
□	Row 8: k5, k3tog, k5.11 sts
□	Rows 9-13: cont in st st
□	Row14:k2, (kfb, k2) three
times. 14 sts
□	Rows 15-18: cont in st st
□	Row 19: (p2tog) seven
times. Seven sts
□	Cut yarn, thread through
rem sts, pull tight and fasten off
FRONT LEGS (MAKE 2)
□	Rows 1 -8: work as for Back
legs. 11 sts
□	Rows 9-18: cont in st st
□	Row 19: (p2tog) five times,
p1. Six sts
□	Cut yarn, thread through
rem sts, pull tight and fasten off
TAIL
Using 2.75mm needles and
yarn D, cast on eight sts
□	Beg with a p row, work
eight rows in st st
□	Row 9: (p2tog) to end.
Four sts
□	Cut yarn, thread through
rem sts, pull tight and fasten off
SCARF
Using 2.75mm needles and
yarn H, cast on seven sts
□ Work in garter st (k every
51
« 100 DAYS OF CRAFTS *
52
row) until work meos 22cm
□ Cast off
TO MAKE UP
Using yarn tail, sew head and
body, and stuff. Sew running
stitch around cast-on edge
and pull to gather. Sew
running stitch over decreasing
row on face to create eyeline
dent. Sew Leg seam, then
stuff. Sew running stitch
around cast-on edge and pull
to gather. Thread a tapestry
needle with yarn C and sew
from centre sole, to front
ankle and repeat. Pull gently
to flatten sole and shape
ankle. Attach Legs to Body.
Sew Tail seam and attach.
Attach Ears with WS facing
down. Using dark brown yarn,
embroider eyes in French
knots, and mouth and nose
with backstitch. Make 3cm
tassels on each end of Scarf.
Tie around neck
PUPPIES (MAKE 2)
BODY
Using 2.75mm needles and C,
cast on ten sts
□ Row 1 (WS): p
□ Row 2: (kfb) in each st. 20 sts
□ Rows 3-15: cont in st st
□ Row 16 (neck): (k2tog, k2)
five times. 15 sts
□ Rows 17-23: cont in st st
□ Row 24 (shape eye): k4,
(k2tog, k1) twice, k2tog, k3.
12 sts
□ Rows 25-26: cont in st st
□ Row27: (pl, p2tog)four
times. Eight sts
□	Cut yarn, thread through
rem sts, pull tight and fasten off
BACK LEGS (MAKE 2)
Using 2.75mm needles and
yarn C, cast on eight sts
□	Beg with a p row, work five
rows in st st
□	Row 6: k3, k2tog, k3. Seven sts
□ Rows 7-11: cont in st st
□ Cut yarn, thread through
rem sts, pull tight and fasten off
FRONT LEGS (MAKE 2)
Using 2.75mm needles and
yarn C, cast on five sts
□ Work a seven-row i-cord
□ Cut yarn, thread through
rem sts, pull tight and fasten off
EARS (MAKE 2)
Using 2.75mm needles and
yarn D, cast on four sts
□ Beg with a p row, work two
rows in st st
□	Row 3: (p2tog) twice. Two sts
□ Pass first st over second st
and fasten off
TAIL
Using 2.75mm needles and
yarn D, cast on six sts
□ Beg with a p row, work four
rows in st st
□	Row 5: (p2tog) three
times. Three sts
□	Cut yarn, thread through
rem sts, pull tight and fasten off
SCARF
Using 2.75mm needles and
yam J, cast on five sts
□	Work in garter st (k every
row) until work meas 10cm
□ Cast off
HAT
Using 2.75mm needles and
yarn M, cast on ten sts
Cut yarn M, join in yarn J
□ Beg with a к row, work
eight rows in st st
□	Row 9: (k2tog) to end. Five sts
□	Row 10: p
□	Cut yarn, thread through
rem sts, pull tight and fasten off
TO MAKE UP
Make up as Mummy Dog. Sew
seam on Hat and sew to Head
* 100 DAYS OF CRAFTS *
DESIGNER SACHIYO ISCHII
Roald penguin
Meet Roald, our exchange student from Antarctica
KIT LIST
★ Yarn, DK, (A) Red 2g,
(B) Black 10g, (C) White 3g,
Yellow ★ 3.5mm needles
★ Tapestry needle
★ 4mm eye beads
★ Sewing needle and
thread ★ Toy stuffing
★ Scissors
Size: 8cm tall
NOTE: wind an extra bobbin
of yarn В
BODY & HEAD
Using 3.5mm needles and
yarn B, cast on 12 sts
□	Row 1 (WS): p
□	Row 2: (k1, kfb) three times,
(kfb, k1) three times. 18 sts
□	Row 3: p
□	Row 4: (k2, kfb) three times,
(kfb, k2) three times. 24 sts
□	Row 5: p
Join in yarn C
Letter foil instruction indicates
yarn shade, twist yarns tog on
WS to avoid a hole forming
□ Row 6: k9B, k6C, k9B
Cont as foils, keeping colours
correct:
□	Rows 7-13: beg with
a p (WS) row, work in st st
□	Row 14 (neck): (k2, k2tog)
three times, (k2tog, k2) three
times. 18 sts
□	Row 15: p
□	Row 16: k7, (kfb) four
times, k7.22 sts
□	Rows 17-19: beg with
a p row, work in st st
□	Row 20: k7, k2tog, k4,
k2tog, к to end. 20 sts
Cont in yarn В only
□	Rows 21-23: cont in st st
□	Row 24: (k2tog) to end.
Ten sts
□	Cut yarn leaving a tail,
thread through rem sts,
pull tight and fasten off
WINGS (MAKE 2)
Using 3.5mm needles and
yarn B, cast on ten sts
□	Row 1 (WS): p
□	Row2:k2, (k2tog, k2)
to end. Eight sts
□	Row3:p
□	Row 4: k2, (k2tog) twice,
k2. Six sts
□	Row 5: (p2tog) to end.
Three sts
□	Cut yarn leaving a tail,
thread through rem sts, pull
tight and fasten off
BEAK
Using 3.5mm needles and
Yellow DK, cast on four sts
□	Row 1 (WS): p
□	Row 2: (k2tog) twice. Two sts
□	Pass first st over second
and fasten off
FEET (MAKE 2)
Using 3.5mm needles
and Yellow DK, cast on four sts
□	Rows 1-4: к
□	Cast off
HAT
Using 3.5mm needles and
yam C, cast on 18 sts
Change to yarn A
□	Rows 1 -4: beg with a к (RS)
row, work in st st
□	Row 5: (k1, k2tog) three times,
(k2tog, kl) three times. 12 sts
□	Row 6: p
□	Row 7: (k2tog) to end.
Six sts
□	Cut yarn leaving a tail,
thread through rem sts, pull
tight and fasten off
53
BOBBLE
Using 3.5mm needles and
yarn C, cast on ten sts
□	Cut yarn leaving a tail,
thread through rem sts, pull
tight and fasten off
TO MAKE UP
With fastened-off yarn end
of Body, sew seam halfway.
With cast-on yarn end, work a
gathering thread along cast-on
edge and pull tight. Sew seam
a little further, attach safety
eyes if using. Stuff Body and
close seam. With yarn C, work a
gathering thread over Row 14
decrease row. Seam Wings and
attach to Body. Attach Beak and
Feet to Body. Attach eye beads
if using. Stitch ends of Bobble
together. Seam Hat, attach
Bobble, stuff and attach to Head
* 100 DAYS OF CRAFTS *
DESIGNER KELLY MENZIES
Table runner
Dine in style with this winter wonderland setting that uses
white yarn with a glitzy silver strand plied throughout
KIT LIST
★	Yarn: Cascade Yarns
Sunseeker, shade 35 White,
two 10Oq balls ★ Needles:
4.5mm ж Tapestry needle
Size: 33.5cm widex 124cm long
TENSION SQUARE
★	20 sts x 26 rows
★	10cm x 10cm
★	Over pattern
★	4.5mm needles
54
Using 4.5mm needles, cast
on 77 sts
Lower edging
□	Row 1 (WS):sl1,*p1,kl,
rep from * to end
□	Row 2: si 1, * yfwd, k2tog,
rep from * to end
□	Row 3: si 1, * kl, p1, rep
from * to end
Main pattern
□	Rowl (RS):si 1, k1, * pl,k5,
(yfwd) four times, ssk, k4, rep
from * to last three sts, pl, k2
□	Row 2: si 1, k2, * p3, p2tog
tbl, (yrn) four times, drop
extra wraps from prevyfwds,
DROP IT
When dropping extra
wraps from your yarn
forwards and yarn round
needles, you can see
which loops to drop as
they won't be connected
to your previous row.
Simply slip them off the
needle and allow them
to unravel, giving you an
p2tog, p3, kl, rep from
*	to last two sts, k2
□	Row3:sl 1, k1, * p1, k2,
k2tog, (yfwd) four times, drop
extra wraps from prevyrns,
ssk, k2, rep from * to last
three sts, pl, k2
□	Row 4: si 1, k2, * pl, p2tog
tbl, (yrn) four times, drop
extra wraps from prevyfwds,
p2tog, p!, k1, rep from * to
last two sts, k2
□ Row 5: si 1, kl, * pl, k2tog,
(yfwd) four times, drop extra
wraps from prevyrns, ssk, rep
from * to last three sts, p!, k2
□ Row 6: si 1, k2, * pl, drop
extra wraps from prevyfwds,
turn, cast on four sts using the
two-needle method, with RS
facing and beg at bottom of
dropped sts, insert RH needle
from front to back under five
loose stitches, drawing them
up together, place RH needle
over top of working yarn at
back of work and draw back
underneath dropped stitches,
bringing a loop of working yarn
under and over front of
dropped stitches, place this
loop on to LH needle and pull
tight, cast on four sts using
two-needle method, turn, pl,
k1, rep from * to last two sts, k2
Rows 1 -6 set main patt
□ Cont in main patt until
work meas 123.5cm, ending
after a Row 6
Top edging
□	Rowl (RS):sl 1, * kl, pl,
rep from * to end
□	Row 2: si 1, * yrn, p2tog,
TOP
TIP!
THIS LACE PATTERN
INVOLVES CREATING
ELONGATED STITCHES,
THEN GROUPING THEM TOGETHER.
THE YARN USED IS CLOSE TO A DK
INTENSION, BUT USING LARGER
NEEDLES ENHANCES THE LACE EFFECT
rep from * to end
□	Row 3: si 1, * p1 tbl, k1,
rep from * to end
□	Cast off in rib
TO MAKE UP
Weave in all loose ends.
Block to even out lace pattern
SEE И29 FOR A LIST*
OF ABBREVIATIONS
« TOO DAYS OF CRAFTS *

DESIGNER NICOLA VALIJI
Dog hat & bandana
This cute ensemble for your pooch is sure to melt some
hearts on Christmas day - let the tail wagging ensue!
KIT LIST
★ Yarn, DK: Santa Red,
Leafy Green, Variegated,
Golden Yellow, Snow
White, Blush Pink
★ 3.75mm needles
★ Medium and small
pom-pom makers
★ Tapestry needle
★ Scissors
Size: to fit a 30-35cm dog's
head, 32cm circumference at
ear holes, 30cm length (not
incl. pom-pom). Bandana
triangle: 18cm width, 16cm
depth. Bandana tie: 48cm long
56
HAT
Using 3.75mm needles and
Santa Red cast on 72 sts
□ Rows 1-10: (k2, p2)toend
Change to Leafy Green and
work in foil six-row colour
sequence: Leafy Green, Golden
Yellow, Snowy White, Santa Red
□ Rows 11 -24: beg with
a к (RS) row work in st st
□ Row 25: к 12, cast off 12 sts,
к until there are 24 sts from
gap, cast off 12 sts, к to end
□ Row 26: p12, cast on 12
sts, p24, cast on 12 sts, p12
□ Rows 27-36: beg with
a к row work in st st
□ Row 37: (k2tog, k4) to end.
60 sts
□ Rows 38-42: beg with a p
row work in st st
□ Row 43: (k2tog, k3) to end.
48 sts
□ Row 44-48: cont in st st
□ Row 49: (k2tog, k2) to end.
36 sts
□ Rows 50-60: cont in st st
□ Row 61: (k2tog, k!) to end.
24 sts
□ Rows 62-66: cont in st st
□ Row 67: (k2tog, k4)
to end. 20 sts
□ Rows 68-72: cont in st st
□ Row 73: (k2tog, k3) to end.
16 sts
□ Rows 74-78: cont in st st
□ Row 79: (k2tog, k2) to end.
12 sts
□ Rows 80-84: cont in st st
□ Row 85: (k2tog, k1) to end.
Eight sts
□ Row 86-88: cont in st st
Change to Golden Yellow
□ Rows 89-93: cont in st st
□ Row 94: (p2tog) to end.
Four sts
Cut yam leaving a tail, thread
through rem sts, pull tight and
fasten off
TREE
Using 3.75mm needles and
Leafy Green cast on 13 sts
□ Rows 1-3: к
□	Row 4: k2tog, к to last two
sts, k2tog. 11 sts
□	Rows 5-6: к
□	Row 7: as Row 4. Nine sts
□ Rows 8-9: к
□ Row 10: as Row 4. Seven sts
□ Rows 11-12: к
□ Row 13: as Row 4. Five sts
□ Row 14: as Row 4. Three sts
□ Row 15: si 1, k2tog, psso.
One st
Fasten off
TRUNK
Using 3.75mm needles and
Blush Pink cast on four sts
□ Row 1: к
Cast off
MAKE A POM-POM
If you don't have a pom
pom maker, create your
own! For the large pom-
pom on the hat, cut two
matching 5cm-diameter
cardboard rings. Bear in
mind that a larger central
hole results in a smaller
but fuller finished pom-
pom. Place rings together
Cut lengths of yarn and
wrap them around the rim
until the hole is filled. Insert
sharp scissors between the
BANDANA
TRIANGLE
Using 3.75mm needles and
Variegated cast on two sts
□ Row 1: kfb, k1. Three sts
□	Row 2: p
□	Row 3: kfb, k1, kfb. Five sts
□	Row 4: p
□ Rows 5-40: rep Rows 3-4.
41 sts
Cast off
SIDE BORDERS
Using 3.75mm needles, Golden
card and snip the wrapped
strands. Thread a longer
length of yarn between
the rings and tie tightly
to secure your pom pom.
Remove the rings and
trim any untidy strands.
Leave the long strand
for attaching your pom-
poms to the cover. For the
smaller pom-poms on the
bandana, reduce the size
of your cardboard rings
and repeat
* 100 DAYS OF CRAFTS *

TREAT
YOUR PET

TOP
TIP!
YOU CAN EASILY EXTEND
THE LENGTH OF THE
YELLOW TIES ON THE NECK
SCARF FOR BIGGER DOGS BY WORKING
A FEW MORE ROWS EITHER END
* 100 DAYS OF CRAFTS *

Yellow and with RS facing,
pick up and к 29 sts from
cast-on edge to cast-off edge
□ Rows 1 -3: к
Cast off
Rep for other border working
from cast-off edge to cast-on
edge
NECK STRAP
Using 3.75mm needles and
Golden Yellow cast on six sts
□ К every row until work
meas 48cm
Cast off
TREE & TRUNK
Work as for Tree and Trunk of Hat
top, sewing down row edges
on WS to cast-on edge. Turn RS
out. Make a medium-sized
pom-pom using mix of all yarns
and sew to top of Hat.
Embroider each Tree with
baubles using mix of yarns.
Sew one Tree to Hat at front.
Place Trunk at base of Tree and
secure. Using Golden Yellow
add a top bauble in satin stitch.
For Bandana, sew Neck Strap
to cast-off edge of Triangle.
Make seven pom-poms and
sew to edges of Triangle.
Embroider and attach Tree and
Trunk to middle of Triangle
TO MAKE UP
For Hat, gather fastened-off
SEE P129 FOR AUST
OF ABBREVIATIONS
d£t’s%
SPECIAL
OFFER
FREE YARN
BUNDLE FOR
NEW ANNUAL
MEMBERS'
Receive 1,056g festive yarn
FREE when you join our
online knitting club for the
year. Plus get access to:
★ 3,000+ knitting patterns
★ Exclusive knitalongs
★ 100+ how-to videos
★ Friendly community
* Ts & Cs appt/. See website for details
letsknit.co.uk
* 100 DAYS OF CRAFTS *
DESIGNER CORINNE BRADD
Team Santa
Get yourself in the festive mood by whipping up
St Nick and his team of elves ready to trim the tree
KIT LIST
Yarn, DK: red, white,
green Beads: wooden,
10mm, 23 mm, 30mm;
pearl, 7mm Pom-poms:
7 mm, pink; 20mm, white
Felt: red, green
Ricrac, white, pink,
green Scissors
Pom-pom makers:
5.5cm, 7.5cm Polyester
toy stuffing Embroidery
thread and needle Glue
Black pencil Sewing
threads and needle
Size: Present, 6.5cm x 10cm;
Santa, 6.5cm x 11 cm
ELVES
1 Choose two colours of yam,
one light and one bright.
Wind these simultaneously
around the 5.5cm pom-pom
maker, making at least 40
wraps on each side. Tie the
pom-pom tightly, leaving
20cm long ends of yarn.
2 Thread the ends through
the centre of the 10mm and
23mm beads, then push them
down so the smaller bead is
hidden. Knot the ends of the
yarn above the top bead.
3Cut felt in a quarter circle,
6cm. Stitch a star in the
centre with embroidery
thread, then fold in half and
oversew to make a hat. Check
the fit over the bead before
trimming with ricrac.
4Thread the long yarn
ends through the hat, then
glue the brim to the large
bead. Add a pearl bead to
the point, then knot the ends
of yarn to secure and make a
hanging loop. Draw two eyes
in the centre of the head.
SANTA
"1 Wind red yarn at least 100
I times around each side of
the 7.5cm pom-pom maker.
Tie tightly, leaving two 20cm
lengths of yarn. Clip the pom-
TOP
TIP!
UNTREATED
WOODEN
BEADS WILL
i ALLOW FELT TIP PENS TO
' BLEED, SPOILING YOUR
CHARACTER’S FEATURES.
PENCIL, BIRO, CRAYON
OR EVEN UNDILUTED
PAINT WILL CREATE MUCH
CLEANER MARKS
59
pom into a perfect ball, but
do not cut off the long ends.
2 Thread these ends through
the 10mm, 30mm and
10mm beads. Push them down
so the bottom bead is hidden
and thread the yarn through
the top bead a second time
to hold the stack in place.
3Cut a 7cm quarter circle
from red felt. Fold this in half
and oversew to make a hat.
Check the fit over the largest
bead before hemming the
lower edge and trimming with
ricrac. Stitch a small white pom-
pom to the point of the hat.
4Thread the long ends of
the pom-pom through the
hat so they emerge halfway
up the front. Glue the brim
of the hat to the largest bead,
then knot the ends of yarn to
secure and make a hanging
loop. Use a few small stitches
to bend the point of the hat.
5 Glue a pink pom-pom to
the centre of the large
bead and draw closed eyelids
above. Apply glue to the
lower front of the bead and
fix the toy stuffing fibres to
make a beard, pulling the
ends into a point.
* 100 DAYS OF CRAFTS *
DESIGNER SACHIYO ISCHII
Toy soldiers
Nothing says Christmas like the opening notes of The Nutcracker
- and your own little soldiers will love these merry marching dolls
KIT LIST
★ Yarn, DK: Snowy White,
Blush Pink, Night Sky, Jolly
Purple, Santa Red, Festive
Blue, Golden Yellow, Fir
Green; 4-ply: dark brown
★ 4mm needles ★ 4mm
crochet hook ★ Stitch holder
★ Stuffing ★ Black thread
★ Needles: sewing, tapestry
★ Liquid glue ★ Four 5mm
black safety eyes ★ Blusher
Height: 21cm
60
LEGS, BODY 8. HEAD (MAKE 2)
Using 4mm needles and
Snowy White cast on 14 sts
□ Rows 1 -3: к
□	Rows 4-12: starting with
a p row work in st st
Cut yarn, keep sts on a holder
Work Left Leg as for Right
Leg. Do not cut yarn, cont to
Body as foils:
□	Row 13: kl 4 Left Leg, kl 4
from holderjoining legs. 28 sts
□	Rows 14-20: starting with
a p row work in st st
Change to Santa Red (Festive
Blue)
□	Rows 21 -22: starting with
a к row work in st st
□	Row 23: (k2, k2tog) to end.
21 sts
□	Rows 24-28: starting with
a p Row work in st st
□	Row 29: (k1, k2tog) to end.
14 sts
□	Rows 30-33: starting with
a p row work in st st
Change to Blush Pink
□	Row 34: p
□	Row 35: k1, (kfb) to last st,
kl. 26 sts
□	Rows 36-40: starting with
a p row work in st st
□	Row 41: k6, (k2tog, k1) four
times, k2tog, k6.21 sts
□	Rows 42-46: starting with
a p row work in st st
□	Row 47: (kl, k2tog) to end.
14 sts
Cut yarn leaving a long tail,
thread tail onto tapestry
needle and thread through
rem sts, fasten off
JACKET (MAKE 2)
Using 4mm needles and Santa
Red (Festive Blue) cast on 30 sts
□	Rows 1-3: к
□	Rows 4-14: starting with
a p row work in st st
□	Row 15: (k3, k2tog) to end.
24 sts
□	Rows 16-18: starting with
a p row work in st st
□	Row 19: (k2, k2tog) to end.
18 sts
□	Row 20: p
□	Row 21: (k1, k2tog)to end.
12 sts
Cast off
SHOE (MAKE 4)
Using 4mm needles and
Night Sky cast on eight sts
□	Row 1 (WS): (pfb) to end.
16 sts
□	Row 2: к
□	Row 3 (edge): к
□	Rows 4-7: starting with
a к row work in st st
□	Row 8: k4, (k2tog) four
times, k4.12 sts
□	Row 9: p
□	Row 10: k4, (k2tog) twice,
k4.Ten sts
□	Row 11: p4, p2tog, p4.
Nine sts
□	Rows 12-13: starting with
a p row work in st st
Cast off
HAT (MAKE 2)
Using 4mm needles and Jolly
Purple cast on 24 sts
□	Rows 1 -9: starting with
a к row work in st st
□	Row 10 (edge): к
□	Row 11: к
□	Row 12: (p2, p2tog) to end.
18 sts
□	Row 13: к
□	Row 14: (p1, p2tog)toend.
12 sts
□	Row15:k
□	Row 16: (p2tog) to end.
Six sts
Cut yarn leaving a long tail,
thread tail onto tapestry
needle and thread through
rem sts, fasten off
HAT STRAP (MAKE 2)
Using 4mm hook and Jolly
Purple make 18ch
Fasten off
HAND (MAKE 4)
Using 4mm needles and Blush
Pink cast on eight sts
□	Rows 1-4: starting with
a p row work in st st
Cut yarn leaving a long tail,
thread tail onto tapestry
needle and thread through
rem sts, fasten off
SLEEVE
-ZIN
Using 4mm needles and
Santa Red (Festive Blue) cast
on ten sts
□	Rows 1-11: starting with
a к row work in st st
Cut yarn leaving a long tail,
thread tail onto tapestry
needle and thread through
rem sts, fasten off
SHOULDER PAD (MAKE 4)
Using 4mm needles and
Golden Yellow cast on 12 sts
□	Rows 1 -4: starting with
a к row work in st st
□	Row 5: (k2tog) to end.
Six sts
Cut yarn leaving a long tail,
thread tail onto tapestry
needle and thread through
rem sts, fasten off
EACH COLOUR)
BELT (MAKE 2)
Using 4mm needles and
Night Sky cast on 26 sts
Cast off
BLUE SOLDIER ONLY
-SASH (MAKE 2)
Using 4mm hook and Fir
Green make 30ch
Fasten off
TO MAKE UP
Sew Head to neck, stitch Body
halfway. Sew Legs to crotch
and stuff Body, avoiding neck
area, close Body seam. With
Blush Pink, work a gathering
thread along neck and pull
tightly. Sew Shoe seam and
stuff. Using Night Sky, pierce
foot from sole, take needle
out from top of shoe and
repeat. Pull thread to flatten
sole and shape ankle. Insert
Shoe to trouser leg and
secure with sts around trouser
hem. Rep for other Leg. Wrap
Body with Jacket piece and
sew seam at back of Body,
attach Belt. With Blush Pink,
use French knot for nose.
Attach eye beads. With dark
brown, embroider mouth.
Seam and stuff Hat and
attach to Head. Attach Strap
at sides of Head. Thread Jolly
Purple and insert needle from
top of hat, take it out from
back of head and rep. Pull
thread to make dent at centre
of Hat. Sew Hand and stuff,
wrap Hand with Sleeve piece
and stitch to cuff. Sew up
Sleeve seam and stuff, wrap
top end of stuffed Arm with
Shoulder Pad and secure to
Arm with sts. Sew Pad seam
and attach Arm to Body, rep
for other Arm and attach
Arms to Body. For red soldier,
embroider lines with Golden
Yellow and make French knots
« 100 DAYS OF CRAFTS *
UkU inafa
ex de Ш
< 100 DAYS OF CRAFTS %
11 Protei
Cric?A
Nu^rajA
eafrf«curr/ s^nH
Uff«np -,//	1
Aa//arOUj
TAKE
THE NEXT
STEP
on ends of each line. For blue
soldier, attach sash, wrapping
around back of neck. Wind
Golden Yellow three to four
times around three fingers.
With a length of Golden
Yellow, tie one end firmly,
cut loops to make a tassel.
Separate strands and wet the
tip with liquid glue. Attach
tassel to centre of Hat. Colour
cheeks with pink pastel or
blusher. Weave in all ends
TOP WHEN FASTENING OFF
T|pi EACH SECTION, MAKE
SURE WU LEAVE
LONG YARN TAILS TO MAKE
SEWING UP A BREEZE!
DESIGNER NICOLA VALIJI
Sweet treats
Everyone knows that more is more when it comes to Christmas
decs, so spruce up your tree with these quick-knit ornaments!
62
KIT LIST
★ Yarn: Stylecraft Special
DK, shades (A) 1001 White,
(B) 1420 Camel, (C)1246
Lipstick, (D) 1004 Dark
Brown, (E) 1826 Kelly Green,
one 100g ball of each
★ Needles: 4mm
Safety toy stuffing
★ Ribbon: gingham, red,
1.5cm x 2m Drinking
straws: two ★ Stitch holder
★ Tapestry needle
Lollipop: 14cm tall (complete);
Gingerbread man: 14cm tall;
Christmas pud: 9cm diameter
(plus holly); Candy cane: 11cm
tall (to bend); Sweet: 9.5cm
wide (inc wrapper ends);
Gingerbread house: 11cm tall
ALTERNATIVE YARN
Cygnet DK
TENSION SQUARE
★ 22 stsx28 rows
★ 10cm x 10cm
★ Stocking stitch
★ 4mm needles
LOLLIPOP
OUTER SWIRL
Using 4mm needles and yarn
A, cast on 50 sts
□	Rows 1 -6: к to end
□	Cast off
INNER SWIRL
Using 4mm needles and yarn
E, cast on 30 sts
□	Rows 1 -6: к to end
□	Cast off
STICK COVER
Using 4mm needles and yarn
A, cast on 20 sts
□	Rows 1 -3: beg with a к (RS)
row, work in st st
□ Cast off
BOW
Using 4mm needles and yarn
C, cast on 30 sts
□ Row 1: к to end
□ Cast off
TO MAKEUP
Place Inner Swirl on top of
Outer Swirl and roll into a flat
disc. Sew together securely.
Place Stick Cover around a
drinking straw and cut straw
to size. Stitch edges together
to encase straw. Sew Stick
to Swirls. Tie Bow into shape,
securing centre with wraps of
yam C and attach securely.
Cut a 15cm length of ribbon
and fold in half. Attach to
back of Lollipop
GINGERBREAD MAN
FRONT/BACK (MAKE 2)
NOTE: worked from the head
down
Using 4mm needles and yarn
B, cast on ten sts
□	Row 1 (WS): p to end
□ Row 2: kfb, к to last st, kfb.
12 sts
□	Row3:ptoend
□	Rows 4-5: rep Rows 2-3.14 sts
□	Rows 6-12: beg with a к
(RS) row, work in st st
□	Row 13: p2tog, p to last
two sts, p2tog. 12 sts
□	Row 14: k2tog, к to last two
sts, k2tog. Ten sts
□	Row 15: as Row 13. Eight sts
Cast on for arms as foils:
□	Row 16: cast on eight sts,
к these sts, к to end. 16 sts
□	Row 17: cast on eight sts,
p these sts, p to end. 24 sts
□	Rows 18-21: beg with a к
(RS) row, work in st st
□	Row 22: cast off six sts,
к to end. 18 sts
□	Row 23: cast off six sts,
p to end. 12 sts
□	Rows Ik-TT.beg with
a к (RS) row, work in st st
□	Row 28: kfb, к to last st, kfb.
14 sts
□	Rows 29-32: beg with
a p (WS) row, work in st st
Divide for legs as foils:
□	Row 33: p7, turn, place rem
sts on a holder. Seven sts
Cont on these sts only
□	Rows 34-38: beg with
a к (RS) row, work in st st
□	Row 39: p2tog, p to last
two sts, p2tog. Five sts
□	Cast off
With WS facing, rejoin yarn
to rem seven sts on holder
□	Next row: p7. Seven sts
□	Rep Rows 34-39 once
□ Cast off
BOW
Using 4mm needles and
yarn C, cast on 30 sts
□ Row 1: к to end
□	Cast off
TO MAKE UP
Place Front and Back with
wrong sides together and
sew around edge leaving
a gap. Turn right side out
and stuff lightly, then close
gap. Tie Bow as for Lollipop.
Sew to neck. Using yarn D,
embroider eyes, nose, mouth
and buttons. Using yarn A,
embroider zig-zags as icing
on legs and arms. Cut a 15cm
length of ribbon and fold in
half. Attach to back of head
SAFETY FIRST
As with any decorations,
be sure to keep these out
of immediate contact
with fairy lights and
away from naked flames,
such as candles or a fire
* 100 DAYS OF CRAFTS *

Attach Wrapper ends to each
side of Sweet and secure.
Cut a 15cm length of ribbon
and fold in half. Attach to
back of Sweet
GINGERBREAD HOUSE
FRONT/ВДСК (MAKE 2)
Using 4mm needles and
yarn B, cast on 20 sts
□ Rows 1 -20: beg with a k
(RS) row, work in st st
Change to yarn A
□ Row 21 :k to end
□ Row 22: cast on four sts, k
these sts, k to end of row. 24 sts
□ Row 23: as Row 22.28 sts
□	Row 24: k2tog, k to last two
sts, k2tog. 26 sts
□	Rows 25-35: rep Row 24
11 times. Four sts
□ Row 36: (k2tog) twice. Two sts
□ Cast off
CHRISTMAS PUD
PUDDING
Using 4mm needles and
yarn D, cast on six sts
□ Row 1 (RS): (kfb) to end. 12 sts
□ Row 2: p to end
□ Row 3: as Row 1.24 sts
□ Row 4: p to end
□ Row 5: * k1, kfb, rep from
* to end. 36 sts
□	Rows 6-20: beg with a p
(WS) row, work in st st
Join in yarn A and work in
stranded colourwork, letter foil
instruction indicates shade
□	Row 21: k3D, k1 A, (k4D,
kl A) six times, k2D
□	Row 22: pl D, (p3A, p2D)
seven times
Continyarn Aonly
□	Row 23: k to end
□	Row 24: p to end
□	Row 25: * k1, k2tog, rep
from * to end. 24 sts
□	Row 26: p to end
□	Row 27: (k2tog) to end. 12 sts
□	Row 28: p to end
□ Row 29: (k2tog) to end. Six sts
□ Cut yarn leaving a tail,
thread through rem sts, pull
tight and fasten off
HOLLY LEAVES (MAKE 2)
Using 4mm needles and
yarn E, cast on 17 sts
□ Row 1 (RS): k to end
□ Row 2: p to end
□ Row 3: k1, * yfwd, k2tog,
rep from * to end
□ Row 4: p to end
□ Row 5: k to end
□ Cast off
BERRY
Using 4mm needles and
yarn C, cast on six sts
□ Rows 1 -4: beg with a k (RS)
row, work in st st
□ Cut yarn leaving a tail,
thread through rem sts, pull
tight and fasten off
TO MAKEUP
For Pudding, gather stitches
around cast-on edge, then
seam row ends almost to top,
leaving a gap. Turn right side
out, stuff and close seam. For
each Holly Leaf join cast-on
and cast-off edges to make
a faux picot edge. Fold strip
in half and join down middle
to form leaf shape. For Berry,
work a gathering thread all
around edge and pull tight to
shape. Attach Holly Leaves on
top of Pudding with Berry in
middle. Cut a 15cm length of
ribbon and fold in half. Attach
to back of Pudding
CANDY CANE
CANE
Using 4mm needles and
yarn A, cast on eight sts
□	Row 1 (RS): k to end
□	Row 2: p to end
Change to yarn C and work in
foil two-row stripe sequence:
yarn C, yarn A
□ Rows 3-34: beg with a k
(RS) row, work in st st
□ Cut yarn leaving a tail, thread
through rem sts and pull tight
BOW
Using 4mm needles and
yarn E, cast on 30 sts
□ Row 1: k to end
□ Cast off
TO MAKE UP
Using cast-off yarn tail join
row ends, leaving cast-on
edge open. Place drinking
straw inside Candy Cane and
bend. Close cast-on edge.
Tie Bow as for Lollipop and
attach. Cut a 15cm length of
ribbon and fold in half. Attach
to back of Candy Cane
SWEET
OUTER SWIRL
Using 4mm needles and
yarn A, cast on 60 sts
□ Rows 1-6: k to end
□ Cast off
INNER SWIRL
Using 4mm needles and
yarn C, cast on 40 sts
□ Rows 1-6: k to end
□ Cast off
WRAPPER ENDS
Using 4mm needles and
yarn A, cast on ten sts
□ Rows 1-5: k to end
□ Row 6: (k2tog) to end. Five sts
□ Cut yarn leaving a tail,
thread through rem sts, pull
tight and fasten off
TO MAKE UP
Join Swirls as for Lollipop.
DOOR
Using 4mm needles and
yarn C, cast on six sts
□ Rows 1 -4: beg with a k (RS)
row, work in st st
□ Cast off
WINDOWS
Using 4mm needles and
yarn D, cast on four sts
□ Rows 1 -3: beg with a k (RS)
row, work in st st
□ Cast off
BOW
Using 4mm needles and
yarn E, cast on 30 sts
□ Row 1: k to end
□ Cast off
TO MAKE UP
With right sides together, sew
Front and Back, leaving a
gap. Turn right side out and
stuff lightly. Close gap. Place
Windows and Door onto
Front and sew into place.
Using yarn D, embroider
short straight stitches for
a doorknob. Using yarn C
and yarn E, embroider small
straight stitches to roof in
several places as sweets.
Tie Bow as for Lollipop and
attach just below roofline. Cut
a 15cm length of ribbon and
fold in half. Attach to Back
* SEEP129F0RALIST
OF ABBREVIATIONS
* 100 DAYS OF CRAFTS *
DESIGNER SUSIE JOHNS
Classic baubles
This dec duo is easy to whip up - why not make
TEARDROP BAUBLE
Using 3.5mm dpns and Santa
Red cast on six sts, divide sts
evenly between three dpns
□ Rnds 1-6: к
□ Rnd 7: (k1, kfb) to end.
Nine sts
□ Rnds 8-11:k
□	Rnd 12: (kfb) to end. 18 sts
□ Rnds 13-16: к
□	Rnd 17: (k2, kfb) to end. 24 sts
□ Rnds 18-21: к
□	Rnd22:(k3, kfb) to end. 30 sts
□ Rnd 23-26: к
□	Rnd 27: (k4, kfb) to end. 36 sts
□	Rnd 28: к
* * Change to Fir Green, do
not cut Santa Red
□ Rnd 29: к
Change to Snowy White
NOTE: colour in brackets foil
instruction indicates which
yarn to use
□	Rnd 30: * k1 (Santa Red),
k1 (Snowy White), rep from
* to end
□	Rnd 31: * k1 (Snowy
White), k1 (Santa Red), rep
from * to end
□	Rnds 32-33: rep Rnds 30-31
Sew in ends
Change to Fir Green
□	Rnd 34: к
Change to Santa Red **
□	Rnds 35-38: к
□	Rnd 39: (k4, k2tog) to end.
30 sts**
□	Rnds 40-43: к
□	Rnd 44: (k3, k2tog) to end.
24 sts
□	Rnds 45-48: к
□	Rnd 49: (k2, k2tog) to end.
18 sts
□	Rnds 50-53: к
□	Rnd 54: (k2tog) to end.
Nine sts
□	Rnds 55-58: к
□	Rnd 59: (k1, k2tog) to end.
Six sts
□	Rnds 60-63: к
Cut yarn, thread tail through
all sts to fasten off
HANGING LOOP
Using 4mm needles and
Santa Red cast on 36 sts
Cutyam, thread tail through last
st worked, slip sts off needle
TO MAKE UP
Stuff firmly. Sew in ends. Sew
ends of Hanging Loop to
centre top ***
FAIR ISLE BAUBLE
Using 3.5mm dpns and Santa
Red cast on six sts, divide sts
evenly between three dpns
□	Rnd 1: (k1, kfb) to end.
Nine sts
□	Rnd 2: (kfb) to end. 18 sts
□	Rnd 3: (k2, kfb) to end. 24 sts
□	Rnd4: к
□	Rnd 5: (k3, kfb) to end. 30 sts
□	Rnd 6: к
□	Rnd 7: (k4, kfb) to end. 36 sts
□	Rnds 8-10: к
Rep from** to** of Teardrop
Bauble
□	Rnds 17-19: к
□	Rnd 20: (k4, k2tog) to end.
30 sts
□	Rnd21:k
□	Rnd 22: (k3, k2tog) to end.
24 sts
□ Rnd 23: (k2, k2tog) to end.
18 sts
□	Rnd 24: (k2tog) to end. Nine sts
□	Rnd 25: (k1, k2tog) to end.
Six sts
Cut yarn, thread tail through
all sts to fasten off
« 100 DAYS OF CRAFTS *
DESIGNER NICOLA VALIJI
Knitmas trees
These quirky cones will look fob on the mantelpiece or festive
table and are ideal for beginners who want to try new stitches
66
KIT LIST
★ Yarn: Deramores Studio
DK, shades (A) 06 Ruby,
(B) 02 Pearl, (С) 12 Fir, (D)
16 Lapis, (E) 82 Mustard;
one 100g ball of each
★ Needles: 3mm ★ Safety
toy stuffing ★ Tapestry
needle ★ Pom-pom maker
Cable Knit Tree: 20cm tall, 8cm
wide (at widest point).
Red & White Tree: 19cm. tall,
9cm wide (at widest point).
Paper Chain Tree: 18cm tall,
9cm wide (at widest point)
TENSION SQUARE
★	28 sts x 34 rows
★	10cm x 10cm
★	Stocking stitch
★	3mm needles
RED & WHITE TREE
Using 3mm needles and yarn
A, cast on 55 sts
□ Row 1: к
□	Row 2 (RS): к
□	Rows 3-7: beg with a p row,
work in st st
Change to yarn В
□ Rows 8-11:k
Change to yarn A
□	Row 12: (k2tog, k3) to end.
44 sts
□	Row 13: (k 1, p1) to end
□	Row 14: (p1, k1) to end
□	Rows 15-18: rep Rows
13-14 twice
□	Row 19: rep Row 13
Change to yarn В
□	Rows 20-23: к
Change to yarn A
□	Row 24: (k2tog, k2) to end.
33 sts
□	Rows 25- 31: beg with a p
row, work in st st
Change to yarn В
□	Row 32-35: к
Change to yarn A
□	Row 36: (k2tog, k1) to end.
22 sts
□	Row 37: (k1, p1) to end
□	Row 38: (p1, kl) to end
□	Rows 39-42: rep Rows
37-38 twice
□	Row 43: rep Row 37
Change to yarn В
□	Rows 44-47: к
Change to yarn A
□	Row 48: (k2tog) to end. 11 sts
□	Rows 49-55: beg with a p
row, work in st st
□	Cut yarn leaving a 20cm tail
and thread through remaining
sts, pull tight and fasten off
BASE
Using 3mm needles and yarn
B, cast on five sts
□	Row 1 (RS): (kfb) twice, k1,
(kfb) twice. Nine sts
□	Row 2 and every even-
numbered row: p
□	Row 3: k1, (kfb) to end. 17 sts
□	Row 5: k1, (kfb, k1) to end.
25 sts
□	Row 7: k1, (kfb, k2) to end.
33 sts
□	Row 9: kl, (kfb, k3) to end.
41 sts
□	Row1l:k1,(kfb, k4)to
end. 49 sts
□ Cast off
PAPER CHAIN TREE
Using 3mm needles and yarn
C, cast on 55 sts
Row 1: (k1, p1) to last st, k1
□ Rows 2-11: as Row 1
□ Row 12: k1, pl, kl, (p3tog,
k1, p1, k1, p1, k1) six times,
p1, kl, pl, k!. 43 sts
□ Rows 13-23: rep Row 1
□ Row 24: k1, p1, k1, (p3tog, k1,
p1, k1, p1, k1) five times. 33 sts
□ Rows 25-36: rep Row 1
□ Row 37: k1, p1, k1, (p3tog,
k1, p1, k1) five times. 23 sts
□ Rows 38-48: rep Row 1
□	Row 49: k1, p1, k!, (p3tog,
k3tog) three times, p1, k1.11 sts
□	Rows 50-57: rep Row 1
□	Cut yarn leaving a 20cm
tail and thread through rem
sts, pull tight and fasten off
PAPER CHAINS (MAKE 21
IN EACH COLOUR)
Using 3mm needles and yarn
A, B, D or E, cast on eight sts
□ Cast off
BASE
□	Using yarn C, work as for
Base of Red & White Tree
CABLE KNIT TREE
Using 3mm needles and yarn
B, cast on 54 sts
□	Row 1: (кб, рб, k6) three times
□	Row 2 (RS): (рб, кб, p6)
three times
□	Row 3: as Row 1
□	Row 4: (рб, C6F, рб) three
times
□	Row 5: (кб, рб, кб) three times
□	Row 6: (рб, кб, рб) three times
□	Rep Rows 1 -6 once more
□	Row 13: (k2tog, k2, k2tog,
рб, k2tog, k2, k2tog) three
times. 42 sts
□	Row 14: (p4, кб, p4) three
times
* 100 DAYS OF CRAFTS *
□	Row 15: (kA, рб, kA) three
times
□	Row 16: (pA, C6F, pA)
three times
□	Row 17: (kA, p6, kA) three
times
□	Row 18: (pA, k6, pA) three
times
□	Rep Row 15
□	Rep Rows 1A-18 once more
□	Row 25: (k2tog, k2tog, p6,
k2tog, k2tog) three times. 30 sts
□	Row 26: (p2, k6, p2) three
times
□	Row 27: (k2, p6, k2) three times
□	Row 28: (p2, C6F,p2)
three times
□	Row 29: as Row 27
□	Row 30: as Row 26
□	Rep Row 27
□	Rep Rows 26-30 once more
□	Row 37: (k2tog, p6, k2tog)
three times. 2A sts
□	Row 38: (p1, k6, p1) three
times
□	Row 39: (k1, p6, k1) three times
□	Row AO: (pl, C6F, pl) three
times
□	Row A1: (kl, p6, k1) three
times
□	Row A2: (p1, k6, p1) three
times
□	Rep Row 39
□	Rep Rows 38-A2 once more
□	Row A9: * k1, (p2tog) three
times, k1, rep from * to end
□	Row 50: (p1, k3, p1) three
times
□	Row 51: (k1, p3, kl) three
times
Cut yarn leaving a 20cm tail
and thread through rem sts
Fasten off
BASE
□	Using yarn В work as for
Base of Red & White Tree
TO MAKE UP
Turn to wrong side and sew
from top to cast-on edge. Turn
right side out and stuff. Stitch
row-ends on Base to form Base
into a circle and sew cast-off
edge of Base to cast-on edge
of tree cone. Make a small
pom-pom to add to top of each
tree. Sew Paper chains from
row-ends to make a cirde, place
next chain through circle and
sew. Continue until all chains
have been linked, place this
around tree and sew into place
« 100 DAYS OF CRAFTS «
DESIGNER NICOLA VALIJI
Heart warmer
Send your love with a cute coverlet that's just the right size to
keep a lap warm while reading, working, watching TV or knitting!
68
KIT LIST
★ Yarn: Paintbox Yarns
Simply Aran, shades (A)
220 Banana Cream, (В)
253 Blush Pink, (C) 224
Pistachio Green, one 100g
ball of each, (D) 226 Slate
Green, two 100g balls
★ Needles: 5mm
★ Cable needle
★ Tapestry needle
Each square (approx): 14.5cm
x 14.5cm. With border (approx):
65cm long x 80cm wide
ALTERNATIVE YARN
James C. Brett Baby Aran
TENSION SQUARE
★	18 sts x 24 rows
★	lOcmx 10cm
★	Stocking stitch
★	5mm needles
PLAIN SQUARE
(MAKE 4)
Using 5mm needles and yarn
А (В, C, D), cast on 27 sts
□ Rows 1 -34: beg on a к (RS)
row, work in st st for 34 rows
□ Cast off
MOCK CABLE SQUARE
(MAKE 4)
Using 5mm needles and yarn
А (В, C, D), cast on 32 sts
□ Row 1 (RS):p2,*sll,k2,
psso, p2, rep from * to end
□ Row 2: k2, * p1,yrn, pl, k2,
rep from * to end
□ Row 3: p2, * k3, p2, rep
from * to end
□	Row 4: k2, * p3, k2, rep
from * to end
□	Rows 5-36: rep Rows 1 -4
□ Cast off
LACE HEARTS
(MAKE 4)
Using 5mm needles and yarn
А (В, C, D), cast on 28 sts
□ Rowl (RS):k1,(k5,k2tog,
yfwd, k6) twice, kl
□ Row 2 and every foil WS
row: p to end
□	Row3:k1, (k4, k2tog,yfwd,
k!, yfwd, skpo, k4) twice, k!
□	Row 5: k!, (k3, k2tog, yfwd,
k3, yfwd, skpo, k3) twice, kl
□	Row 7: kl, (k2, k2tog,yfwd,
k5, yfwd, skpo, k2) twice, kl
□	Row 9: k!, (k1, k2tog, yfwd,
k7, yfwd, skpo, k!) twice, kl
□	Row 11: kl, (k2tog, yfwd,
k9, yfwd, skpo) twice, kl
□	Row 13: kl, (skpo, yfwd, k3,
k2tog, yfwd, k4, yfwd, k2tog)
twice, kl
□	Row 15: kl, (k2, yfwd, skpo,
k2tog, yfwd, k1, yfwd, skpo,
k2tog, yfwd, k2) twice, kl
□ Rows 16-18: beg on a p
(WS) row, work in st st
□ Rows 19-34: rep Rows 1-16
once more
□ Cast off
CONTRAST
HEART BLOCK
(MAKE 4)
Using 5mm needle and yarn
А (В, C, D), cast on 27 sts
Commence working from
Chart, working from bottom up
and reading RS rows from right
to left and WS rows from left to
right, carrying first colour
across back of motif and
catching strand every three sts
□ Rows 1 -34: beg with a к
(RS) row, work from Chart,
join in yarn В (D, В, C) as
indicated on Row 7 until motif
is complete, cont in yarn A (B,
C, D) only to complete Chart
HEART CABLE
(MAKE 4)
Using 5mm needles and yarn
А (В, C, D), cast on 30 sts
□	Rowl (RS):p9,kl2,p9
□	Row 2: k9, p12, k9
□	Row 3: p9, k2, C4B, C4F, k2, P9
□	Row 4: k9, p12, k9
□	Row 5: p9, T4B, k4, T4F, p9
□	Row 6: k9, p2, k2, p4,
k2, p2, k9
□	Row 7: p8, ТЗВ, p2, C4B,
p2,T3F, p8
□	Row 8: k8, p2, k3, p4, k3,
P2, k8
□	Row 9: P7, T3B, p3, k4, p3,
T3F, P7
□	Row 10: k7, p2, k4, P4, k4,
p2, k7
□	Row 11: p7, k2, p4, C4B,
p4, k2, p7
□	Row 12: k7, p2, k4, p4, k4,
p2,k7
□	Row13:p7, T4F, C4B, C4F,
« 100 DAYS OF CRAFTS *
HEIRLOOM
KNIT
IN STITCHES
C4B: si two sts onto cn,
hold at back of work, k2,
k2 from cn
C4F: si two sts onto cn,
hold at front of work, k2,
k2 from cn
T4B: si two sts onto cn,
hold at back of work, k2,
p2 from cn
T4F: si two sts onto cn,
hold at front of work, p2,
k2 from cn
T3B: si one st onto cn,
hold at back of work, k2,
p1 from cn
T3F: si two sts onto cn,
hold at front of work, pl,
k2 from cn
* 100 DAYS OF CRAFTS *

70
Т4В, р7
□ Row 14:к9, р12, к9
□ Rows 15-34: rep Rows 5-14
twice more
□ Row 35:p9,k12, p9
□ Row 36:k9, p12, k9
□ Cost off
TO MAKE UP
Sew in loose ends and block
squares. Oversew them
together (see panel) using the
schematic for placement, if
desired, before adding Borders
SIDE BORDERS
(MAKE 4)
Using 5mm needles, yarn D
and with RS facing, pick up
and к 81 sts along squares
□ Row 1: kl, * p1, k1, rep
from * to end
Last row sets moss st
□ Rows 2-9: as Row 1
□ Cast off
T0P/B0TT0M
BORDERS
(MAKE 4)
□ Using 5mm needles and
ALL SEWN UP
For a patchwork blanket, it
is easier to sew the blocked
squares into strips, then join
the strips. Use one of the
square colours for each
edge and keep stitches
discreet and even. Oversew
cast-on and cast-off edges
for each strip, ensuring that
the squares will lie flat,
before using mattress stitch,
or oversewing again, to join
the strips together. Finish
by knitting on the borders
THE CONTRAST HEART
SQUARES ARE WORKED IN
STRANDED COLOURWORK,
BUT YOU CAN FOLLOW THE CHART
IN INTARSIA OR EVEN WORK A
TOP
TIP!
yarn D, with the RS facing
pick up and к 105 sts along
squares and Side Borders
□ Row 1: kl, * pl, kl, rep
from * to end
Last row sets moss st
□ Rows 2-9: as Row 1
Plain square Yarn В	Heart cable Yarn A	Contrast heart block 4	Plain square Yarn C	Lace heart Yarn В
Mock	Plain	Heart	Mock	Contrast
cable	square	cable	cable	heart
Yarn C	Yarn D	Yarn В	Yam D	block 1
Lace	Mock	Lace	Contrast	Heart
heart	cable	heart	heart	cable
YarnC	Yarn В	Yarn A	block 3	Yarn D
Mock	Lace	Contrast	Heart	Plain
cable	heart	heart	cable	square
Yarn A	Yam D	block 2	Yarn C	Yarn A
« 100 DAYS OF CRAFTS *
DESIGNER SUSIE JOHNS
Mini tree decs
Use your yarn stash to craft these treetastic
decorations that would also make nifty gift tags
KIT LIST
Yarn: 4-ply, (A) Red, (B)
Blue, (C) Green, one 12g
ball of each ★ Needles:
3.25mm ★ Toy stuffing
★ Tapestry needle
★ Scissors
Size: 11.5cm tall
FRONT &. BACK (ALIKE)
Using 3.25mm needles and
yarn C, cast on 23 sts
□ Row 1: к each st tbl
□ Row 2: si 1, к to end
□ Rows 3-4: k2tog, к to end
□ Row 5: si 1, к to end
□	Rep Rows 2-5 until three
sts rem
□	Next row: si 1, k2tog, psso.
One st
□ Fasten off, leaving a 75cm tail
POT
Using 3.25mm needles,
yarn A and with RS facing,
pick up and к nine sts in
centre cast-on edge
□ Beg with a p row, work
three rows in st st
□ Next row (dec): k2tog, к to
last two sts, k2tog. Seven sts
□ Rep last four rows once
more. Five sts
□	Next row: p
□ Cast off
BAUBLE(MAKE 5)
Using 3.25mm needles and
yarn B, cast on 12 sts
□	Cutyarn and thread tail
through all sts, pull tight to
form a circle and fasten off
TO MAKE UP
Sew side edges of Bauble
together neatly. Place Front
and Back of tree with RS
71
together and sew side edges
using backstitch. Turn right
way out. Lightly stuff tree and
Pot. Oversew bottom edge of
tree and sides and bottom of
Pot. Attach Baubles. Using
three strands of yarn C, make
a plait and attach both ends
to top of tree for hanging loop
* 100 DAYS OF CRAFTS *
DESIGNER SACHIYO ISCHII
72
ngel doll
No Christmas tree is complete without a heavenly angel
at the top to watch over proceedings
KIT LIST
★ Yarn: King Cole Pricewise
DK, shades (A) 3024
Vintage Rose, (B) 201
Cloud, (C) 149 Blush, (D)
307 Crocus, (E) 037 Taupe,
(F) 1740 Mustard, (G) 1741
Fudge, (H)001 White, (I)
009Red, (J)080Buttermilk,
(K) 341 Topaz, (L) 022
Jade, one 100g ball of
each; 4ply, Dark Brown,
oddment ★ Needles:
3.5mm Beads: 4mm, 18
★ Safety toy stuffing
* Sewing needle
★	Sewing thread: black
★	Blusher or pastel
★	Card ★ Tapestry needle
Size: 14cm tall
Change to yarn C
□	Row 39: p to end
□	Row 40: k2, (kfb) 11 times,
k2.26 sts
□	Rows 41 -47: cont in st st
□	Row 48 (eyeline): кб, (k2tog,
k1) four times, k2tog, кб. 21 sts
□ Rows 49-53: cont in st st
□	Row 54: k1, (k2tog, k2)
to end. 16 sts
□	Cut yarn, thread through
MAKE ME
LOVE ME
TENSION SQUARE
★ 26 sts x 32 rows
★ 10cm x 10cm
* Stocking stitch
★ 3.5mm needles
CAPE
Using 3.5mm needles and
yam H, cast on 40 sts
□ Rows 1-3: к to end
□ Row 4 (WS): k2, p to last
two sts, k2
□ Row 5: к to end
□ Rows 6-7: rep Rows 4-5
once more
□ Row 8: k2, p to last two sts, k2
□ Row 9: (k2, k2tog) five times,
(k2tog, k2) five times. 30 sts
□ Rows 10-13: rep Rows 4-5
twice more
□	Row 14: k2, p to last two sts, k2
□	Row 15: (k2, k2tog) three
times, k2tog, k2, k2tog,
(k2tog, k2) three times. 22 sts
□ Cast off


BODY & HEAD
Using 3.5mm needles and
yarn H, cast on ten sts
□ Row 1 and all WS rows:
p to end
□	Row 2: (kfb) in each st to
end. 20 sts
□	Row 4: (k1, kfb) to end. 30 sts
□ Row 6: (k2, kfb) to end. 40 sts
□	Row 7: p to end
□	Row 8 (edge): p to end
_ Rows 9-2 3: beg with
a p row, work in st st
□	Row 24: (k2, k2tog) to end.
30 sts
□	Rows 25-35: cont in st st
□ Row 36: (k1, k2tog) to end.
20 sts
□ Row 37: p to end
□ Row 38: (k2, k2tog) to end.
15 sts
SLEEVES & ARMS (MAKE 2 OF EACH)
Using 3.5mm needles and
yarn H, cast on 18 sts
□ Rows 1 -3: beg with a p
(WS) row, work in st st
□ Row4:k2, (k2tog, k2)to
end. 14 sts
□	Rows 5-7: cont in st st
□	Row 8: k2tog, (k1, k2tog) to
end. Nine sts
□	Rows 9-10: cont in st st
□	Cut yarn, thread through
rem sts, pull tight and fasten off
4--------ф--------4?
WHY NOT TRY...
To create your very own
festive fairy, omit the halo
and choose coloured yarn for
the dress and wings
WINGS (MAKE 2)
Using 3.5mm needles and
yarn H, cast on 30 sts
□ К 35 rows
□ Cast off
HALO
Using 3.5mm needles and
yarn F, cast on 22 sts
□ Cast off
TO MAKE UP
Using yarn tail, sew head seam
to neck. Sew body from neck
half way. Using yarn tail, gather
thread along cast-on edge
and draw tightly. Sew rest of
base. Sew body a little further
and stuff, avoiding neck area.
Close body. Using yarn C, work
a gathering thread along neck
TOP
TIP!
ATTACH A LOOP OF
ELASTIC AT THE BACK
OF THE ANGEL TO SLIP
OVER THE UPPERMOST BRANCH
OF THE TREE
and draw tightly. Using yarn
C, embroider a French knot
for nose. For hair, using yarn J,
embroider long back stitches to
cover head. Leave long ends on
both sides of face and tie with
yarn F. Attach Cape. Wrap each
Arm with Sleeve and secure
Arm at cuff. Seam Sleeve and
attach to Body. Stitch ends of
Halo together and attach to
head. Work a running thread
in centre of Wing and pull to
gather. Attach to back of body
« 100 DAYS OF CRAFTS *
DESIGNER KAREN WIEDERHOLD
Party chain
Set the scene for festivities with this fun knitted
decoration that's ideal for beginners
x MAKE-
HOLDING TOGETHER THE
ENDS OF THE STRIPS
And sewing up that
WAY WILL PRODUCE AN UNSIGHTLY
RIDGE. FOR A NEAT FINISH, HOLD
THE ENDS SIDE BY SIDE, BEFORE
SEWING IN A LACING TECHNIQUE
SO THAT THE SEAM IS FLAT
73
KIT LIST
Yarn, DK: various colours
★ 4mm needles Scissors
Tapestry needle
Length: 1 m
GARTER STITCH RING (MAKE 6)
Using 4mm needles and
chosen yarn cast on 40 sts
□ Rows 1 -5: к
Cast off
MOSS STITCH RING (MAKE 6)
Using 4mm needles and
chosen yam cast on 40 sts
□	Row 1: k1, p1
□	Row 2: p1, k1
□	Rows 3-4: rep Rows 1 -2
□	Row 5: k1, pl
Cast off
SIMPLE RING (MAKES)
Using 4mm needles and
chosen yarn cast on 40 sts
□ Rows 1-2: к
□	Row 3: p
□	Rows 4-5: к
Cast off
TO MAKE UP
Arrange strips in desired
colour and texture sequence.
Sew first strip into ring. Loop
second strip through first ring
and sew into a ring. Cont until
all are connected. Sew in ends
* 100 DAYS OF CRAFTS *
DESIGNER SIAN BROWN
Hottie cover
Long winter evenings will seem extra cosy
with these great textured makes
74
KIT LIST
★ Yarn: Debbie Bliss
Falkland Aran, shades (A)
07, Mustard, (B) 14, Claret,
two 100g hanks of each
★ Needles: 4.5mm, 5mm
★ Cable needle
★ Small Buttons: four
Hottie cosies: to fit a 2-litre
hot water bottle, actual meas
23cm x 33cm. Mug cosies:
to fit large mug, actual meas
8cm tall x 9.5cm diameter
TENSION SQUARE
Mustard set
★	20 sts x 26 rows
★	10cm x 10cm
★	Stocking stitch
★ 4.5mm needles
Claret set
★	21 sts x 24 rows
★	10cm x 10cm
★	Over patt
★ 4.5mm needles
ALTERNATIVE YARN
MillaMia Naturally Soft Aran
MUSTARD COVER
Using 4.5mm needles, cast on
98 sts
Work in patt as tolls:
□	Row 1: p2, (k1, p2) to end
□	Row 2: k2, (p1, k2) to end
□	Row3:p2, * T4, P2, (k1,p2)
twice, rep from * to end
□	Row 4: as Row 2
□	Row 5-18: rep Rows 1 -4 three
times, then Rows 1 -2 once more
□	Row 19: p2, * (k!, p2) twice,
T4, p2, rep from * to end
□	Row 20: k2, (pl, k2) to end
□ Row21:p2, (kl, p2)toend
□ Row22:k2, (pl, k2) to end
□ Row 23-32: rep Rows 19-22
twice, then Rows 19-20 once
more
These 32 rows form patt
□ Work a further 32 rows in patt
□ Rows 65-68: rep Rows
1 -2 twice
□ Eyelet Row: p2, kl, (yrn,
p2tog, k!, p2, k1) to last five
sts, yrn, p2tog, kl, p2
□ Work a further 15 rows
in rib as set
□ Cast off in rib
TO MAKE UP
Join back seam. With seam
placed centrally down centre
back, join bottom seam. Make
a twisted cord approx 100cm
long and thread through
eyelets to tie at centre front.
Make two small pom-poms
and attach to each end of cord
MUSTARD MUG COSY
Using 4.5mm needles, caston
56 sts
Work in patt as foils:
□ Row 1: p2, (kl, p2) to end
□ Row 2: pl, k1, (p1, k2) to
last three sts, p1, kl, p1
□ Row3:p2, (T4, p2,k1,p2)
to end
□ Row 4: as Row 2
□ Row 5-19: rep Rows 1 -4 three
times then Rows 1 -3 again
□ Next row: cast on three sts,
p1, k1, (pl, k2) to last three
sts, p1,k1, p1
□	Next row: p2, k2tog, yfwd,
patt to end
□	Cast off in patt
TO MAKE UP
Join seam along first three rows.
Sew on button and fasten
CLARET COVER
Using 4.5mm needles, cast
on 86 sts
□	P one row
□	Inc row: p4, (ml, p6) 13
times, ml, p4.100 sts
Change to 5mm needles
□ P one row
Work in patt as foils:
□	Row 1: k1, (k3, Tw2R, Tw2L)
to last st, k1
□ Row 2 and every WS row:
p to end
□ Row3:k1,(k2,Tw2R,Tw2L,
k1) to last st, k1
□ Row5:k1, (k1,Tw2R, Tw2L,
k2) to last st, kl
□ Row 7:k1, (Tw2R, Tw2L, k3)
to last st, k1
□ Row9:k2, (Tw2L,k3,Tw2R)
to last seven sts, Tw2L, k5
□ Row 11: k1, (Tw2L, k3,
Tw2R)to last st, k1
□ Row13:k5, (Tw2R,Tw2L,
k3) to last four sts, Tw2R, k2
These 14 rows form patt
□ Work a further 56 rows in
patt, ending after a Row 14
□ Rows 71 -74: rep Rows 1 -2
twice
□ Eyelet row: k4, (k3tog,
yfwd, k4) to last five sts,
k3tog, yfwd, k2.86 sts
Change to 4.5mm needles
□ Rib row: (kl, p1) to end
□ Work a further 14 rows
in rib as set
□ Cast off in rib
TO MAKE UP
Join Back seam. With seam
placed centrally down centre
Back, join bottom seam. Make
HOW TO MAKE A POM-POM
Start with two pieces of
cardboard cut into the
shape of a ring donut.
The larger your donut, the
bigger the pom-pom will
be! Lay them together,
then wrap yarn round and
round the edges until they
are completely covered
IN STITCHES
Tw2R: slip next st on to a
cn, hold at back of work,
k1, then kl from cn Tw2L:
slip next st on toacn,
hold at front of work, k1,
then k1 from cn
T4: slip next three sts on
to a cn, hold at back of
work, k1, slip the two p sts
from cn on to LH needle,
bring cn to front, p2 from
LH needle, k1 from cn
a twisted cord 100cm long
and thread through eyelets to
tie at centre front. Make two
small pom-poms and attach
one to each end of cord
CLARET MUG COSY
Using 4.5mm needles, cast
on 50 sts
□ К two rows
□ Inc row: k4, (ml, k6) seven
times, ml, k4.58 sts
and you have to feed the
yarn through the centre
with a needle. Cut around
the edge of the circles,
then secure the centre
by knotting yarn around
it before removing the
cardboard. Fluff and trim
for a super-neat pom pom!
* 100 DAYS OF CRAFTS «
Change to 5mm needles
Work in patt as foils:
□	Row 1: k1, (Tw2L, k3,Tw2R)
to last st, kl
□	Row 2 and every WS row:
kl, p to last st, k1
□	Row3:k5, (Tw2R,Tw2L,k3)
to last four sts, Tw2R, k2
□	Row5:kl, (k3, Tw2R, Tw2L)
to last st, kl
□	Row 7: kl, (k2, Tw2R, Tw2L,
k1) to last st, kl
□	Row9: kl, (kl,Tw2R,Tw2L,
k2) to last st, k!
□	Row 11: k1, (Tw2R, Tw2L,
k3) to last st, kl
□	Row13:k2, (Tw2L,k3,Tw2R)
to last seven sts, Tw2L, k5
□	Row 15 (dec): kl, (skpo, k3,
Tw2R) to last st, k!. 50 sts
Change to 4.5mm needles
□ Next row: cast on three sts,
к to end
□	Next row: kl, k2tog, yfwd, к
to end
□	Cast off
TO MAKE UP
Join seam along first three
rows. Sew on button and fasten
TOP
TIP!
TO MAKE A TWISTED
CORD, CUT TWO 3M
LENGTHS OF YARN AND
KNOT AT EACH END. INSERT A
KNITTING NEEDLE THROUGH ONE
END AND TWIST UNTIL THE STRAND
STARTS TO KINK. FOLD THE CORD
IN HALF AND LET IT TWIST BACK
ON ITSELF. KNOT TO SECURE
# 100 DAYS OF CRAFTS *
keep Calm this
4 Christmas *•
4----Ф
Quick knits
and top tips
for the festive
period
It is supposed to be the most
wonderful time of the year,
a time to knit, stitch and
be merry. Unfortunately,
we crafters often find it
exceedingly stressful. Not only
are there the usual worries of
battling the Christmas crowds
and catering for a sudden
influx of relatives, but we've
complicated matters further
by choosing to handmake a
number of our gifts! While
it may feel like there aren't
enough hours in the day, nor
days left to go, it's not as late
as you think. So, take a deep
breath and be inspired by
these speedy patterns and
stress-saving ideas.
—Ф—4s>
Make a plan
We're not talking about a fully blown spreadsheet here -
although if that's your thing go for it - but it's important
to have a plan. Start off with the five 'w's...
• WHO? Which of your friends and relatives would you like
to craft for? Don't say everyone you know because that's
not realistic. Make a list, either on your computer or device,
or the old-fashioned way with a pen and paper.
• WHAT? There are so many patterns to choose from,
which will you choose? Garments, accessories,
homewares, or something completely different?
Pair your'who' list with perfect pattern ideas.
< WHY? As much as we'd like it to be, 'to show how much
you care' isn't always the best reason for a handknitted gift.
Will the recipient wear, use or appreciate the gift? If the
answer is 'no' or you're not sure, strike them from the list!
• WHERE? Can you get the yarn from your local yarn shop?
How about your needles? If something's not in stock
but your LYS sells the brand, they might be able
to order it in for you. Don't be afraid to ask!
• WHEN? Look again at your list, then consider this.
Will you have time to make it all? If you know you've
got certain evenings or weekends free, that's great,
but be sensible and don't be overambitious.
STASH BUSTERS
Christmas often brings a bit of a strain to the purse-
strings, so take a look at what's in your yarn stash. Look
out for designs that use lots of colours and ones that
use value yarn, such as this Easy Spotty Cushion, which
you can download for free at letsknit.co.uk
* 100 DAYS OF CRAFTS *
DctanUaJL
p vntalU Canx jaWj
z <U
Ask people what they
want - it might not be
such a surprise, but then
you'll know they are
getting something they
want and will appreciate
because you made it.
This can be especially
important when knitting
garments and getting
sizing right. This Easy
Striped Jumper has
a relaxed fit and
comes in sizes 8-26 -
download it for free
at letsknit.co.uk
WEEKEND
WONDERS
Saturday and Sunday give
us office-job knitters two full
days of uninterrupted craft
time. It's an ideal opportunity
to tick off some gifts from
our to-do list. How about
whipping up this gorgeous
Felted Wreath, which can be
downloaded for free at
letsknit.co.uk
Terrific toys
Mini characters make lovely
stocking fillers for little ones,
such as these quick-to-knit
Cosy Christmas Bears, which
can be downloaded for free
at letsknit.co.uk
KNIT IN A NIGHT
If you've got an evening spare,
dedicate it to knitting a mini
make or a chunky knit that will
knit up quickly. How about a
cosy hat or teacosy, or these
Rainbow Mittens, which can
be downloaded for free at
letsknit.co.uk
YARN PICKS
Not everyone is as
obsessed with gorgeous
yarns and fibres as you
are, which means your
recipients are unlikely to
appreciate the
finer details when it
comes to washing and
drying knitted items.
With that in mind, make
sure you include clear
instructions on how to
care for you gift - and
if in doubt, choose a
superwash yarn!
WORK
IN A WEEK
There are still a few
weeks to go before
the big day, so you
don't have to resort to
'coasters all round* just
yet. Homewares and
accessories like bags,
hats and scarves are
non-size specific so make
ideal gifts. Or how about
treating your pooch
to this Pet Christmas
Stocking? You can
download it for free at
letsknit.co.uk
SMALL & SWEET
Knits for babies and toddlers are really quick due to
their size. Even baby garments are relatively speedy
to make. Download this Baby Dinosaur Hoodie in four
sizes from 0-12 months for free at letsknit.co.uk
KEEP IT SIMPLE
Don't overreach yourself by trying to learn a brand-new
technique at the same time as making a perfectly finished
present. It will only lead to stress. Stick to patterns
you know you can knit confidently and well. That way
you're less likely to make mistakes and get frustrated.
And you'll be able to enjoy the crafting process - after
all, it is why we became knitters in the first place!
* 100 DAYS OF CRAFTS *
DESIGNER SUSIE JOHNS
Snowman sweater set
Tots and their teddy bears will love wearing
these matching Christmas jumpers!
78
KIT LIST
★ Yarn: Rico Essentials
Merino DK, shades (A) 29
Cobalt Blue, 8 (9,10) 50g
balls, (B) 60 Natural, 6 (7,
8) 50g balls, (C) 05 Red,
two 50g balls, (D) 56 Dark
Brown, (E) 42 Green, (F) 74
Pumpkin, (G) 90 Black, one
50g ball of each Needles:
3.25mm, 4mm ★ Stitch
holder Tapestry needle
Teddy's jumper: fits a 45cm bear
TENSION SQUARE
★	22 stsx 28 rows
★	10cm x 10cm
★	Stocking stitch
★ 4mm needles
ALTERNATIVE YARN
Patons Diploma Gold DK
CHILD’S JUMPER
FRONT
Using 3.25mm needles and
yarn A, cast on 78 (88,98) sts
□ Row 1: [k1, p1 ] to end
□ Rep last row 9 (10,11) times
Change to 4mm needles
□ Beg at Row 11 (5,1) and
where marked for your size,
work from Chart until Row 100
CHART SUCCESS
When working from the
charts (overleaf), odd
numbered rows are RS rows
and should be read from
right to left, while even-
numbered rows are WS
rows and should be read
from left to right. When
working large areas of the
(108,118) has been completed
□	Work 0 (8,18) more rows
in st st
Divide for neck
□	Next row: k30 (34, 38), turn,
leaving rem sts on holder
□	Next row: p
□	Dec one st at neck edge
on next and every foil alt row
until 27 (30, 34) sts rem
□	Next row: p
□ Cast off
With RS facing, slip centre
18 (20, 22) sts on to holder
□	Rejoin yarn to rem 30
(34, 38) sts, к to end
C Complete second side of neck
to match first, reversing shaping
BACK
□	Working in yarn A
throughout, work as for Front
until Back meas four rows
fewer than completed Front
Divide for neck
□	Next row: k28 (31,35) sts, turn
Leave rem sts on a holder
□	Next row: p
□	Next row: к to last st, k2tog.
27 (30, 34) sts
□	Next row: p
□ Cast off
With RS of work facing, slip centre
22 (26, 28) sts on to a holder
□	Rejoin yarn to rem 28 (31,
35) sts, к to end
motif, try to avoid stranding
yarns across the wrong side
of the wor k instead, wind
small quantities of yarn
on to bobbins and use a
separate bobbin for each
block of colour, twisting the
yarns together at points
where colours change
□	Next row: p
□	Next row: skpo, к to end
□	Next row: p
□	Cast off
SLEEVES (MAKE 2)
Using 3.25mm needles and
yarn A, cast on 45 (47, 49) sts
□	Row 1: * kl, pl, rep from
* to last st, k1
□	Row 2: * pl, kl, rep from
* to last st, p1
□ Rep Rows 1 -2 a further
2 (3,4) times
Change to 4mm needles
□ Beg with a к row, work in st st
inc one st at each end of fifth
row, then at each end of every
foil sixth row 10 (7,8) times,
then every foil fourth row 0
(6,9) times. 67 (75, 85) sts
□ Cont without shaping until
work meas 24 (28, 32) cm
□ Cast off
NECKBAND
Join the right shoulder seam
□ Using 4mm needles, yarn A
and with RS facing, pick up and
к 6 (8,8) sts down left front
neck, 18 (20,22) sts from Front
neck holder, 6 (8, 8) sts up right
Front neck, two sts down right
Back neck, 22 (26,28) sts from
Back neck holder and two sts up
left Back neck. 56 (66, 70) sts
□ Row 1: [kl, pl ] to end
□ Rep Row 1 a further 5
(6, 7) times
□ Cast off in rib
SCARF(MAKE 2)
Using 4mm needles and yarn
C, cast on nine sts
□ К four rows
Do not cut yarn C, join in yarn E
□ К four rows in yarn E
□ К four rows in yarn C
These eight rows set patt
□ Cont in patt, carrying
colour not in use up side of
work, until work meas 17cm
□ Cast off
NOTE: See Teddy Jumper for
how to make up
TEDDY JUMPER
FRONT
Using 3.25mm needles and
yarn A, cast on 42 sts
□ Row 1: (k1, p1) to end
□ Rep last row twice more
Change to 4mm needles
□ Beg working from Chart
until Row 40 of Chart has
been completed
Divide for neck
□	Next row: k14, turn
Leave rem sts on a holder
□	Next row: p2tog, p to end.
13 sts
□	Next row: k11, k2tog. 12 sts
□	Next row: p to end
□ Cast off
With RS facing, slip centre
14 sts on to holder
□	Rejoin yarn to rem 14 sts,
к to end
□ Complete second side of neck
to match first, reversing shaping
BACK
Using 3.25mm needles and
yarn A, cast on 42 sts
□ Row 1: (k1, p1) to end
□ Rep last row twice more
Change to 4mm needles
□ Beg with a к row, work 44
rows in st st
□ Cast off
SLEEVES (MAKE 2)
Using 3.25mm needles and
yarn A, cast on 34 sts
□ Row 1: (kl, pl) to end
□ Rep Row 1 three times
Change to 4mm needles
□ Row 5: kfb, к to last st, kfb.
36 sts
□	Rows 6-10: cont in st st
□	Row 11: kfb, к to last st, kfb.
38 sts
□	Rows 12-16: cont in st st
□ Row 17: kfb, к to last st, kfb.
40 sts
* 100 DAYS OF CRAFTS *

80
□ Beg with a p row, work five
rows in st st
□ Cast off
NECKBAND
Join right shoulder seam
□ Using 3.25mm needles, yarn
A and with RS facing, pick up
and к seven sts down left front
neck, 14 sts from front neck
holder, seven sts up right front
neck and 18 sts from centre of
cast-off edge on Back. 46 sts
□ Row 1: (kl, pl) to end
□ Rep Row 1 twice more
□ Cast off in rib
SCARF(MAKE 2)
Using 4mm needles and yarn
C, cast on four sts
□ К two rows
Do not cut yarn C, join in yarn E
□ К two rows in yarn E
□ К two rows in yarn C
These four rows set patt
□ Cont in patt, carrying
colour not in use up side of
work, until work meas 7cm
□ Cast off
TO MAKE UP
On both jumpers, join left
shoulder and neck seam.
Stitch top of Sleeve to side
edge, matching shoulder
seam to centre top of Sleeve,
then sew Sleeve and side
seams. Weave in ends.
Embroider any fine details
in Swiss darning, following
Chart. Stitch one end of each
Scarf piece to side of
snowman's neck and tie
loosely, or cross piece over
1st 2nd 3rd
size size size
size 100 DAYS OF CRAFTS *
FESTIVE KNITTING
FUN AWAITS
DISCOVER
450+ HOLIDAY
~ PATTERNS ~
ENJOY NEW KNITALONGS
--& ONES FROM OUR----
I LIBRARY I
___I MASTER I_
. NEW STITCHES .
& LEARN HANDY
1 TECHNIQUES Г
ЛГ111 +
HOW-TO
VIDEOS
“Plus celebrate your
progress with fellow
members and ask for
tips along the way on
our private Facebook
group and friendly
community hub”
LKT Team, Sally
A GENUINELY
FRIENDLY CLUB
Join our online knitting club
Visit
letsknit.co.uk/christmas
DESIGNER SUSIE JOHNS
Applique jumper
Transform an everyday sweater with these festive
patches that can be whipped up in a jiffy
82
KIT LIST
★ Yarn: (Pudding) Rico
Essentials Merino DK,
shades (A) 56 Dark Brown,
(B) 60 Natural, (C)42
Green, (D) 05 Red, one
50g ball of each; (Tree)
King Cole Merino Blend DK
shades (A) 9 Scarlet, (B)
33 Bottle, (C) 55 Gold, one
50g ball of each; (D) King
Cole Cosmos, shade 1099
Stardust, one 25g ball
Needles: 4mm, 3.25mm,
3.75mm ' Tapestry needle
★ Stitch holder ★ Sequins,
six ★ Sewing needle and
thread ★ Scissors
Pudding: 22cm diameter.
Tree: 37cm tall x 23cm wide
PUDDING
Using 4mm needles and yarn
A, cast on ten sts
□	Row 1: p
□	Row 2: kl, (kfb) twice, к to last
three sts, (kfb) twice, kl. 14 sts
□ Row 3: pl, (pfb) twice,
p to last three sts, (pfb) twice,
pl. 18 sts
□	Rows 4-5: rep Rows 2-3
once more. 26 sts
□	Row 6: k1, kfb, к to last two
sts, kfb, к 1.28 sts
□	Row 7: pl, pfb, p to last
two sts, pfb, p!. 30 sts
□	Rows 8-9: rep Rows 6-7
once more. 34 sts
□	Row 10: kl, kfb, к to last
two sts, kfb, k!. 36 sts
□	Row 11: p
□ Rows 12-15: rep Rows
10-11 twice more. 40 sts
□ Row 16: kl, kfb, к to last
two sts, kfb, kl. 42 sts
□ Rows 17-19: cont in st st
□	Rows 20-23: rep Rows
16-19. 44 sts
□	Row 24: kl, kfb, к to last
two sts, kfb, k!. 46 sts
□ Rows 25-43: cont in st st
□	Row 44: kl, skpo, к to last
three sts, k2tog, kl. 44 sts
□ Rows 45-47: cont in st st
□	Rows 48-51: rep Rows
44-47. 42 sts
□	Row 52: kl, skpo, к to last
three sts, k2tog, k1.40 sts
□	Row 53: p
□	Rows 54-55: rep Rows
52-53 once. 38 sts
□	Row 56: kl, skpo, к to last
three sts, k2tog, k1.36 sts
□ Row 57: pl, p2tog, p to last
three sts, p2tog tbl, p!. 34 sts
□ Rows 58-61: rep Rows
56-57 twice. 26 sts
□ Row 62: kl, (skpo) twice,
к to last five sts, (k2tog) twice,
kl. 22 sts
□ Row 63: p1, (p2tog) twice,
p to last five sts, (p2tog tbl)
twice, p1.18 sts
□ Rows 64-65: rep Rows
62-63 once more. Ten sts
□ Cast off
CREAM
Using 4mm needles and yarn
B, cast on four sts
□ Rows 1 -3: beg with a p row,
work in st st
□ Row 4: kl, ml, k2, ml k!.
Six sts
□ Rows 5-7 : cont in st st
□ Row 8:k1, ml, k4, ml, k1.
Eight sts
□	Row 9: p
Cut yarn and leave sts on a
holder
□	Rep Rows 1 -9 four times
more, do not cut yarn after
last rep
□ Row 10: к 7, kfb, then
working across sts on holder
with RS facing, (kfb, k6, kfb)
three times, kfb, k7.48 sts
□	Row 11: p
□	Row 12: kl, skpo, к to last
three sts, k2tog, kl
□	Row 13: p
□	Rep Rows 30-31 four times
more. 38 sts
□ Complete as for Pudding
from Row 56 to end
HOLLY LEAF (MAKE 3)
Using 3.25mm needles and
yarn C, cast on five sts
□ Row 1: к
□ Row 2: cast on one st,
к to end. Six sts
□ Rows 3-5: as Row 2. Nine sts
□ Row 6: cast off two sts, к to
end. Seven sts
□ Row 7: as Row 6. Five sts
□ Rows 8-19: rep Rows 2-7 twice
□ Row 20: k2tog, к to end.
Four sts
□ Row 21: as Row 20. Three sts
□ Row 22: si 1, k2tog, psso.
One st
□ Fasten off
BERRY (MAKE 2)
Using 3.25mm needles and
yarn D, cast on four sts
□ Row 1: к
□ Row 2: (kfb) four times.
Eight sts
□ Rows 3-8: к
□ Row 9: (k2tog) four times.
Four sts
□ Row 10: к
□ Cut yarn, thread through rem
sts, pull tight and fasten off
TO MAKEUP
Stitch Cream to Pudding, as
shown. Embroider chain
stitches along centre of leaves,
then weave in ends. Stitch
leaves to top of Pudding. Sew
running stitch around edge of
Berry, stuff with yarn ends, then
pull up and secure. Stitch to
base of Holly leaves
* 100 DAYS OF CRAFTS *
TREE
TUB
Using 3.75mm needles and
yam A, cast on nine sts
□ Row 1: si 1, к to end
□ Rows 2-4: as Row 1
□ Row 5: si 1, kfb, к to last
two sts, kfb, k1
□ Rep Rows 1 -5 three times
more. 17 sts
□ Row 21: si 1, к to end
□ Rows 22-26: as Row 21
Cut yarn and leave sts on
a holder
TREE
Using 3.75mm needles and
yarn B, cast on 17 sts
□ Row 1: k17, к 17 sts from
holder, turn, cast on 17 sts. 51 sts
□ Rows 2-3: к
□ Rows 4-5: si 1, к to last
three sts, k2tog, k1.49 sts
□ Rows 6-7: si 1, к to end
□ Rep Rows 4-7 five times
more. 39 sts
□	Rows 28-29: cast on five
sts, к to end. 49 sts
□	Row 30: si 1, k2tog, к to last
three sts, k2tog, k1
□	Row 31: si 1, к to end
□ Row 32: as Row 31
□	Rep Rows 30-32 seven
times more. 33 sts
□ Rows 54-55: cast on five
sts, к to end. 43 sts
□	Row 56: si 1, k2tog, к to last
three sts, k2tog, k1
□	Row 57: si 1, к to end
□	Row 58: as Row 57
□	Rep Rows 56-58 until
five sts rem
□	Next row: k2tog, k1,
k2tog. Three sts
□	Next row: k3tog. One st
□	Fasten off leaving a long
tail for sewing
STAR
Using 3.25mm needles and
yarn C, cast on nine sts
□ * * Row 1: к
□ Row 2: kl, kfb, к to last
two sts, k2tog
□	Rep Rows 1 -2 four times
more
□	Cast off leaving one st
on needle
□	With RS facing, pick up and
к eight sts along row edge * *
□	Rep from * * to * * five
times more but do not pick up
sts at end of last rep
□	Fasten off
r EASY
' UPCYCLING
ь IDEA
THE PATCH
CAN ALSO
BE STITCHED
ONTO BAGS OR
CUSHIONS FOR
QUICK, SEASONAL
ACCESSORIES
BAUBLE(MAKE 6)
Using 3.25mm needles and
yarn A, cast on five sts
□ Row 1: к
□ Row 2: (kfb) to end. Ten sts
□ Row 3-4: rep Rows 1 -2.20 sts
C Cast off
TINSEL
Using 3.25mm needles and
yarn D, cast on 90 sts
□ К one row
□ Cast off
TO MAKE UP
Stitch two straight edges of
Baubles and Star. Press lightly,
then stitch Star to Tree. Arrange
each Bauble into a circle and
sew to Tree adding a sequin
to centre of each. Sew Tinsel
diagonally across Tree, as shown
* 100 DAYS OF CRAFTS *
DESIGNER CHARMAINE FLETCHER
Glittering clutch
This glam bag is a great way to add a knitty
touch to your outfit this party season
84
KIT LIST
★ Yarn: James C. Brett
Twinkle DK, shade TK21,
one 100g ball ★ Needles:
4mm straight, 4mm and
3.75mm, both double-
pointed ★ Beads: 6mm, 30
★ Fabric: lining, 30cm x
40cm ★ Sewing needle
and thread ★ Pins
★ Tapestry needle
Bag: 17cm deep x 20cm wide.
Strap: 15cm x 6cm
TENSION SQUARE
★	22sts x 26 rows
★	lOcmx 10cm
★ Stocking stitch
★ 4mm needles
BAG
Thread 22 beads onto yarn
(see panel)
Using 4mm dpns and leaving
a 70cm yarn tail, cast on 88
sts, distribute evenly over four
needles, join in the rnd taking
care not to twist sts, pm for
beg of rnd
Chevron section
□	Set-up (seam allowance):
к three rnds
□	Rnd 1: p to end
□	Rnd 2: к to end
□	Rnds 3-4: rep Rnds 1 -2
□	Rnd 5: p to end
□	Rnd 6: * k2tog, k2, (inc 1)
twice, k3, skpo, rep from
* to end
□	Rnd 7: к to end
□	Rnds 8-11: rep Rnds 6-7
twice more
□	Rnd 12: as Rnd 6
Rnds 1 -12 set patt
□	Rep Rnds 1-12 once more
Bamboo Stitch Section
□	Set-up: к two rnds
□	Rnd 1: * yfwd, k2, pass
yfwd over two к sts, rep from
* to end
□	Rnd 2: к to end
Rnds 1 -2 set patt
□	Rep Rows 1 -2 nine times more
Bead/Hem/Eyelet Section
Change to 3.75mm dpns and
commence as foils:
□	Rnd 1: p to end
□ Rnds 2-3: к to end
□	Rnd 4: k2, pb, * k3, pb, rep
from * to last st, k1
□	Rnd 5: к to end
□	Rnd 6: p to end
□ Rnds 7-9: к to end
□ Rnd 10 (eyelets): k20, k2tog,
(yfwd) twice, skpo, k40, k2tog,
(yfwd) twice, skpo, k20
□ Rnd 11: к to end, working
tbl in second yfwd of each pair
□ Cast off kwise, leaving a
70cm tail
STRAP
Using 4mm straight needles and
thumb method, cast on 11 sts
□ Rows 1 and 3 (WS): * pl,
k1, rep from * to last st, p1
□ Row 2: * k1, p1, rep from
* to last st, k!
□ Row 4: si 1 pwise wyib,
к to end
□ Row 5: si 1 pwise wyif, к to end
□ Rep Row 5 until work meas
36.5cm, ending after a RS row
□ Next row: * p1, k1, rep
from * to last st, p1
□ Next row: * k1, p1, rep
from * to last st, k!
□	Next row: * p1, k1, rep
from * to last st, pl
□ Cast off in rib
HOLDER
Thread eight beads onto yarn
Using 4mm dpns and thumb
method, cast on 16 sts,
leaving a 30cm tail, distribute
evenly over four needles, join
in the rnd taking care not to
twist sts, pm for beg of rnd
□ Rnds 1-2: к to end
□	Rnd 3: p to end
□ Rnds 4-5: к to end
□	Rnd 6: pb, * kl, pb, rep
from * to last st, k1
□	Rnd 7: к to end
□	Rnd 8: p to end
□ Rnds 9-10: к to end
□	Cast off kwise leaving
a 30cm tail
TO MAKE UP
With WS of Bag together,
pin sides near cast-on so that
chevrons line up. Using cast-on
yarn tail, mattress stitch seam
closed one stitch above cast-on
edge. At one end of Strap,
concertina rib section and hold
gathers in place by weaving
THREADING BEADS
Thread a sewing needle
with cotton and knot to
make a loop. Pass the end
of the yarn through the
loop and fold over. Place
a bead onto the sewing
tail under and over ribbed
edge. Pull gently and secure.
Do not cut yarn tails. Insert
end through one eyelet in Bag
from RS to WS. Sew end to Bag
one stitch from cast-off edge.
Repeat with other end of Strap.
Fold hem, concealing ribbed
ends. Pin in place. Sew cast-off
edge to Bag along purl line.
Fold edges of Holder together
along purl lines, then mattress
stitch closed. Turn out so beads
are on outside. Using knitted
bag as a template, trim lining
fabric to fit, leaving 1.5cm
allowance for side seams and
2cm for hem. Seam sides and
oversew raw edges. Pin lining
in place and slip stitch hem just
above cast-off edge of knitted
bag. Place Holder over Strap
and draw towards bag to close
needle and slide it down
onto the yarn. For the bag,
thread a total of 22 beads.
Repeat this for the holder,
threading on eight beads
before casting on
* 100 DAYS OF CRAFTS *

DESIGNER SUSIE JOHNS
Boxy jacket
Look sensational in this versatile statement knit -
pair with a skirt or jeans for effortless chic
KIT LIST
★	Yarn: Stylecraft Life
Aran, shade 2306 Cardinal,
5 (6,6,7) 100g balls
★	Needles: 4.5mm
★	Tapestry needle ’ Stitch
holders ★ Hook and eye
tape Stitch markers
TENSION SQUARE
★	18 sts x 32 rows
★	10cm x 10cm
★	Moss stitch
★	4.5mm needles
86
BACK
Using 4.5mm needles, cast
on 83 (91,99, 107) sts
□	Row 1 (RS):kl, *p1,k1,
rep from * to end
Row 1 forms moss st
□	Rep Row 1 until work meas
22 (23, 24, 25) cm, ending
after a WS row
Shape armholes
□	Cast off 3 (4, 5,6) sts at
beg of next two rows
□	Dec one st at each end of
next and every alt row 6 (7,8,
9) times. 63 (67, 71,75) sts
□ Work 39 (41,43,45) rows in
moss st ending after a WS row
KOOK AND EYE TAPE
Most of us know this
under the brand name,
Velcro. It's mostly used
on items that need to be
attached and unattached
quickly and easily. Hook-
and-eye tape is, as the
name suggests, a tape
Shape neck
□	Rowl: work 21 (23,23,25)
sts in moss st for right back, turn
and leave rem sts on holder
□	Row 2: moss st to end
□	Row 3: moss st to last six
sts, p3tog, kl, pl, k1
□	Rep Rows 2-3 twice more.
15(17, 17,19)sts
□	Work three rows in moss st
□	Cast off in moss st
□	Rejoin yarn to sts on holder,
castoff centre21 (21,25,25)
sts, then work left back to
match right back, reversing
neck shaping
Left front
Using 4.5mm needles, cast
on 41 (45,49,53) sts
□	Row 1 (RS): kl, * p1,k1,rep
from * to end
Row 1 forms moss st
□	Rep Row 1 until work meas
22 (23,24,25) cm, ending
after a WS row * *
Shape armhole
□	Cast off 3(4, 5,6) sts
at beg of next row
□	Dec one st at beg (armhole
edge) of next 7 (8,9,10) RS
rows. 31 (33,35, 37) sts
□	Work in moss st for 19
(21, 23,25) rows, ending
after a WS row
Shape neck
□	Row 1: moss st to last six
sts, p3tog, k1, p1, k!
in two halves that has
small metal hooks along
one of the tapes and
corresponding eyelet loops
on the other tape. It comes
in a choice of colours and
is available as sew on,
fusible or self-adhesive.
□	Rows 2-3: moss st to end
□	Row 4: cast off 8 (8,10, 10)
sts, moss st to end
□	Row 5: moss st to last six
sts, p3tog, kl, pl, k1
□	Row 6: moss st to end
□	Rep Rows 5-6 twice more.
15(17,17,19) sts
□	Work 20 rows in moss st
□	Cast off in moss st
Right front
□	Work as for Left Front to * *
□	Next row (RS): moss st to end
Shape armhole
□	Cast off 3 (4, 5, 6) sts at
beg of next row
□	Dec one st at end (armhole
edge) of next 7 (8, 9,10) RS
rows. 31 (33, 35, 37) sts
□	Work in moss st for 19 (21,23,
25) rows, ending after a WS row
Shape neck
□	Row 1: k1, pl, k1, p3tog,
moss st to end
□	Row 2: moss st to end
□	Row 3: cast off 8
* 100 DAYS OF CRAFTS *


88
(8, 10, 10) sts, moss st to end
□ Row 4: moss st to end
□ Row 5: kl, pl, kl, p3tog,
moss st to end
□ Rep Rows 4-5 twice more.
15(17,17,19)sts
□ Work 21 rows in
moss st
□ Cast off in moss st
TO MAKE UP
Join shoulder seams. Attach
top of each sleeve to armhole
edge, then join side and Sleeve
seams. Fold cuffs onto RS at
markers and catch stitch in
place. Using matching thread,
stitch two halves of hook and
eye tape to front edges of
jacket by hand or machine
SLEEVES (MAKE 2)
Using 4.5mm needles,
cast on 43 (45, 47, 49) sts
□ Work in moss st for 16 rows,
pm at each end of last row
□ Work in moss st for
16(16,20, 20) rows
□ Next row: k!, ml, moss
st to last st, ml, kl
□ Working in moss st
throughout, inc one st at each
end of every foil 16th (14th,
12th, 10th) row until there
are 59 (63, 67,71) sts
□ Cont in moss st until work
meas 45cm from markers,
ending after a WS row
Shape top
□ Cast off 3 (4, 5, 6) sts at beg
of next two rows
□ Row 3: skpo, moss st to last
two sts, k2tog
□ Row 4: moss st to end
□ Rep Rows 3-4 6 (7, 8, 9)
times. 39 sts
□ * Work three rows in moss st
□ Next row: skpo, moss st to
last two sts, k2tog **
□ Rep from * to ** four times
in total. 31 sts
□ Rep Rows 3-4 seven times.
17 sts
□ Cast off in moss st

* 100 DAYS OF CRAFTS *
Beaded purse
Add a little glitz to your outfit with this handy
zipped clutch featuring a wristlet loop
KIT LIST
Yarn: Rowan Cotton
Glace shade 831 Dawn
Grey, two 50g balls
★ Needles: 3mm, 3.25mm
Beads: Debbie
Abrahams Beads size 8,
colours 34, 39, 42, one bag
of each Zip: 26cm
Lining fabric: 14cm x
28cm to give a 1cm hem
Size: 12cm wide x 26cm long
TENSION SQUARE
★	23 sts x 44 rows
10cm x 10cm
★	Over pattern
3.25mm needles
FRONT
□	Thread three beads of each
colour onto yarn. Rep until you
have 462 beads on yarn
Using 3.25mm needles, cast
on 58 sts
□	Row 1: к
□	Row 2: k4, *p5, k4, rep from
* to end
□	Row 3 (RS): k4,*(b1,k1)
twice, Ы, k4, rep from * to end
□	Row 4: k4, *p5, k4, rep from
* to end
□	Row 5: к
□	Row 6: k4, *p5, k4, rep from
* to end
□	Rep Rows 3-6 until you have
24 rows of beads
Change to 3mm needles
□	Next row (WS): k, dec one st
across row. 57 sts
□	Next row: к
□	Next row: p
□	Next row: k1, * Ы, k1, rep
from * to end
□	Next row: к
□	Cast off
SPARKLE
IN STITCHES
Ы: bead one as foils -
bring yarn to front, slide
bead up so it sits close to
work, slip next st pwise,
take yarn back ready to
к next st, leaving bead at
front of work
BACK
□	Work as Front
HANDLE
□	Thread three beads of each
colour onto yarn. Rep until
you have 27 beads on yarn
Using 3mm needles, cast on
55 sts
□	Row 1: k1, * Ы, k1, rep
from * to end
□	Cast off
TO MAKEUP
Place WS together, sew
down both side seams and
bottom. Sew zip into place.
Make lining and attach inside
purse. Sew handle to side of
bag. Using sewing thread
and needle, attach strands
of beads to bottom edge
89
Discover iw patterns «л...
3,000+
GARMENTS,
BABY, TOYS AND
HOMEWARE
PATTERNS
Enjoy unlimited access
to thousands of knitting
patterns, including hundreds
of designer exclusives with
Let’s Knit Together.
Our online knitting club
is ready to welcome
knitters of all abilities.
Join today at letsknit.co.uk
* 100 DAYS OF CRAFTS *
DESIGNER JULIA HOWE
Pearl bead cardigan
This on-trend cardi is an understated and elegant knit
that suits all shapes and sizes
90
KIT LIST
★ Yarn: Wendy Fleur DK,
shade 3351 Stephanotis,
3(3,3,4, 4, 4, 5, 5) 100g
balls ★ Needles: 3.75mm,
4.5mm ★ Stitch holders
★ Buttons: one ★ Beads:
from M&S Pearl Collection
43cm three-strand
necklace, approx 123
★ Sewing needle and
thread ★ Tapestry needle
TENSION SQUARE
★	20 sts x 26 rows
★	10cm x 10cm
★	Stocking stitch
★ 4.5mm needles
BACK
Using 3.75mm needles cast
on 93 (97,103,109,115,119,
125,129) sts
□	Row 1 (RS): k1, * pl, k1, rep
from * to end
□	Row 2: p1, * kl, pl, rep
from * to end
These two rows set rib
□	Rep last two rows three
times more
Change to 4.5mm needles
□	Beg with a к row, work in
REVERSING SHAPING
The right and left sides of
a garment are a mirror
image of each other, which
means you often can't
work a straight repeat of
the pattern instructions.
They will need reversing.
For example, where you
st st until Back meas 30 (31,
32, 33, 34,35,36, 37) cm,
ending after a WS row
Shape raglans
Cont in st st as foils:
□	Cast off five sts at beg of
next two rows. 83 (87, 93,99,
105,109,115,119)sts
□	Dec one st at each end of
next and 6 (7, 8, 7, 8, 9, 9,10)
foil fourth rows. 69 (71, 75,
83, 87, 89,95,97) sts
□ Work three rows
□	Dec one st at each end of
next and 9 (7, 6, 9, 8, 6, 6, 4)
foil alt rows. 49 (55,61,63,
69, 75, 81,87) sts
□	Work one row
□	Dec one st at each end of
next 6 (8,10,10,12,14,16,
18) rows. 37 (39,41,43,45,
47, 49,51) sts
Shape back neck
□	Next row: k2tog, k14 (14,
14,17,17,17,17, 20), turn
Leave rem sts on a holder
□	Cast off 3 (3,3,4,4,4,4,5) sts
at beg of next and two foil alt
rows AT THE SAME TIME cont
to dec one st at raglan edge
on every row until two sts rem
□ Next row: k2tog. One st
□ Fasten off
□ With RS facing rejoin yarn
to rem sts, cast off centre 5 (7,
9, 5, 7,9,11, 7) sts and
complete to match first side
rev shapings
cast off at the beginning
of a WS row for the first
side of the back neck, you'll
need to cast off at the
beginning of a RS row for
the other side. The same
principle applies with the
decreases for the armholes
LEFT FRONT
Using 3.75mm needles, cast on
48 (50,54,56,60,62,66,68) sts
□ Row 1 (RS): k1, * p1, k1,
rep from * to last st, kl
□ Row2:p2, * kl, p1, rep
from * to end
□ Rep last two rows three
times more
Change to 4.5mm needles
□ Next row: к to last five sts,
pl, k1,p1, k2
□ Next row: p2, [kl, pl]
twice, p to end
These two rows form patt
□ Cont in patt until front
matches Back to beg of raglan
shaping, ending after a WS row
Shape raglan
□	Next row: cast off five sts,
patt to end. 43 (45, 49,51,
55,57,61,63) sts
□	Work one row in patt
□	Dec one st at raglan edge
on next and 6 (7, 8, 7,8, 9, 9,
10) foil fourth rows. 36 (37,
40,43,46, 47, 51,52) sts
* 100 DAYS OF CRAFTS *
№
ШТНЕ BEADS ARE
STITCHED ON ONCE
THE KNITTING IS
COMPLETE SO YOU CAN ADD
AS MANY AS YOU LIKE!
puitX petavv =
DESIGN
WITH A
DIFFERENCE
SIZING
Dress size (approx):
8 (10,12,14,16,18, 20,22)
To fit chest (cm): 81 (86, 91,
97,102,107,112,117)
Actual chest (cm):
93 (97,103,109,115,119,
125,130)
Length to shoulder
from centre back neck
to hem (cm): 54 (56, 58, 60,
62, 64,66,68)
91
□ Work three rows in patt
□ Dec one st at raglan edge
of next and 6 (5, 5, 8,7, 6, 6,
4) foil alt rows, ending after
a WS row. 29 (31,34, 34,38,
40, 44, 47) sts
Seventh & eighth sizes only
□ Dec one st at raglan edge
on next - (-, -, -, -, 2,4) rows.
- (-,	42,43) sts
All sizes
Shape front neck as foils:
□ Next row: k2tog, к to last
five sts, turn
Leave rem five sts on a
holder and cont on rem
23(25,28,28, 32,34,
36, 37) sts
First, second, third & fourth
sizes only
□	Cast off three sts at beg of
next and 0 (0,1,1,	-, -) foil alt
row then dec one st on 5 (6, 5,
5, -, -, -, -) foil rows AT THE SAME
TIME cont to shape raglan by
dec one st on 3 (2, 1, 1, -, -, -,
-) foil alt rows then one st on
every row until two sts rem
Fifth, sixth, seventh
& eighth sizes
Cast off - (-, -, 4, 5, 5, 5) sts
at beg of next and foil alt row,
then dec one st on - (-, -, -, 5,
6, 6, 7) foil rows AT THE SAME
TIME cont to shape raglan by
dec - (-, -, -, 1,0,0,0) st on foil
 (’,1 ,0, 0,0) foil alt rows
from prev dec, then dec one st
on every row until two sts rem
All sizes
□	Next row: k2tog. One st
□ Fasten off
RIGHT FRONT
Using 3.75mm needles, caston
48 (50,54,56,60,62,66,68) sts
□	Rowl (RS):k2, * pl, kl, rep
from * to end
□	Row 2: pl, * kl, pl, rep
from * to last st, p1
□	Rep last two rows three
times more
Change to 4.5mm needles
□	Next row: k2, * pl, kl, p1,
к to end
□	Next row: p to last five sts,
[kl, pl ] twice, pl
These two rows form patt
□ Work as for Left front
reversing shapings
SLEEVES (MAKE 2)
Using 3.75mm needles, cast
on 39 (41,43,45,47,49,51,
53) sts
□	Work seven rows in rib as
for Back
□ Next row (inc): rib4, * ml,
rib 5 (5,6,6,6, 7, 7, 7), rep
from * five times more, ml,
rib to end. 46 (48,50,52,54,
56,58,60) sts
Change to 4.5mm needles
□ Beg with a к row, work in st
st inc one st at each end of
seventh and 6 (6,5, 5, 2, 2, 2,
2) foil eighth rows then one st
at each end of 3 (3,4, 4, 7, 7,
7, 7) foil tenth rows. 66 (68,
70, 72, 74, 76, 78, 80) sts
□ Cont without shaping until
Sleeve meas 41 (41,42, 42,
43, 43, 44, 44) cm, ending
after a WS row
Shape top
□	Cast off five sts at beg of
next two rows. 56 (58, 60, 62,
64, 66, 68, 70) sts
□	Dec one st at each end of
next and 4 (6, 6, 7, 7,7, 7,7)
foil sixth rows. 46 (44,46,46,
48, 50, 52, 54) sts
□	Work five rows
□	Dec one st at each end of
next and 3 (-, 1,1,4, 5, 6, 7)
foil 4th (-,4th, 2nd, 2nd, 2nd,
2nd, 2nd) rows. 38 (42,42,
42, 38,38, 38, 38) sts
□	Work3 (3,3,1,1,1,1,1)rows
All sizes
□	Dec one st at each end of
every row until 12 sts rem
□ Work one row
□	Cast off loosely
NECKBAND
Join raglans
□	Using 3.75mm needles and
with RS facing, beg at Right
front, si five sts from holder
onto needle, rejoin yarn, pick up
and к 19 (19, 21,21,23, 23,
25,25) sts around right side of
neck to Sleeve seam, ten sts
across top of Sleeve, evenly 29
(31,33,35,37,39,41,43) sts
around Back neck, ten sts across
top of Sleeve, 19(19,21,21,
23, 23,25, 25) sts around left
side of neck then work across
five sts from holder as foils:
pl, kl, pl, k2. 97 (99,105,
107,113,115,121,123)sts
□ Row 1: p2, * kl, pl, rep
from * to last st, pl
□	Row 2: k2, * p1, kl, rep
from * to last st, k1
These two rows set rib
□ Row 3: as Row 1
□	Row 4: rib 5, cast off two
sts, rib to end
□	Row 5: rib to gap, cast on
two sts, rib to end
□	Rows 6-8: cont in rib
□	Cast off evenly in rib
TO MAKE UP
Join side and sleeve seams.
Sew on button to correspond
with buttonhole. Sew on
beads placing randomly
* 100 DAYS OF CRAFTS *
DESIGNER HELEN ARDLEY
Striped scarf
Knit our striking eyelet scarf in a classic red
KIT LIST
★ Yarn: Debbie Bliss Rialto
DK, shades (A) 001 White,
six 50g balls, (B) 012 Red,
two 50g balls •' Needles:
4mm ★Tapestry needle
★	Scissors Tape measure
26cm wide x 210cm long
TENSION SQUARE
★	17 sts x 25 rows
★	10cm x 10cm
* Over pattern
★ 4mm needles
Using 4mm needles and yarn
B, cast on 46 sts
□ К two rows
Now work in patt as foils:
□ Row 1: kl, * yfwd, k1, rep
from * to last st, k1.90 sts
□ Row 2: k1, p to last st, kl
□ Row 3: k1, * k2tog, rep
from * to last st, k1
□ Rows 4-5: k1, * yfwd,
k2tog, rep from * to last st, k1.
46 sts
□ Rows 6-7: к
These seven rows set patt
* * Change to yarn A
□	Work five reps of patt
Change to yarn В
□	Work one rep of patt * *
□	Rep from ** to ** until
work meas 210cm, ending
after a yarn В rep
□	Cast off
Sew in all loose ends. Cut 140
lengths of yarn B, each 20cm
long. Gather into 14 groups of
ten strands and make seven
tassels for each end of scarf
93
TOP
TIP!
FIND ALTERNATIVE
YARNSATYARNSUR.COM.
ALWAYS SWATCH FIRST
TO ENSURE A GOOD MATCH
# 100 DAYS OF CRAFTS «
DESIGNER LUCINDA GANDERTON
Bobble hat & cowl
Knit up this super-chunky set this weekend,
in shades as hot as you dare wear!
KIT LIST
★ Yarn: Erika Knight Maxi
Wool (A) 217 Miss Pinkaby,
two 100g skeins, (B) 214
Manga, one 100g skein
★ Needles: 10mm
Ready -made pom-pom:
8.5cm diameter Colour
matched cotton to
attach pom-pom Cable
needle Tapestry needle
Hat: to fit average sized ladies'
head; depth (excl. bobble):
21cm (with turnback folded
over). Cowl circumference:
90cm; height: 20cm
94
TENSION SQUARE
★	8 sts x 12 rows
10cm x 10cm
★	Stocking stitch
★	10mm needles
1OO+
HATS, SCARVES & MITTS
И FOR ALL THE FAMILY Д
letsknit.co.uk/categories
IN STITCHES
C4F: si next two sts on to
cn, hold at front of work,
k2, k2 from cn
HAT
Using 10mm needles and yarn
A, cast on 62 sts using
two-needle method
□ Row 1: (k2, p2) to last two
sts, k2
□	Row 2: (p2, k2) to last two
sts, p2
These two rows set 2x2 rib
□ Work ten more rows in 2x2
rib Cut yarn A, join in yarn В
□ Work six more rows in 2x2 rib
Main hat
□	Row 1 (RS): p4, (k4, p6) five
times, k4, p4
□	Row 2: k4, (p4, k6) five
times, p4, k4
□	Row 3: p4, (C4F, p6) five
times, C4F, p4
□	Row 4: as Row 2
□	Rows 5-6: rep Rows 1 -2
□	Rows 7-10: rep Rows 3-6
□ Row 11: p2tog, p2, (C4F, p2,
p2tog, p2) five times, C4F, p4.
56 sts
□	Row12:k4, (p4, k5)five
times, p4, k3
□	Row 13: p2tog, p1, (k4, p2,
p2tog, p1) five times, k4, p4.
50 sts
□	Row 14: k4, (p4, k4) five
times, p4, k2
□	Row15:p2, (C4F, p2,
p2tog) five times, C4F, p1,
p2tog, p1.44 sts
□	Row 16: k3, (p4, k3)five
times, p4, k2
□	Row 17: p2tog, (k4, p1,
p2tog) five times, k4, p2tog,
p1.37 sts
□ Row 18: (k2, p4) six times, k1
□ Row 19: pl, (ssk, k2tog,
p2tog) six times. 19 sts
_ Row 20: k1, (p2, k1) six times
□ Row 21: p1, (k2tog, p1) six
times. 13 sts
□	Row 22: kl, (pl, kl)
six times
□	Cut yarn leaving a tail,
thread through rem sts, pull
tight and fasten off
TO MAKEUP
From RS, join side edges with
mattress stitch, as far as
colour change. Turn inside out
and seam turnback. Weave
in ends. Sew bobble to top
COWL
Using 10mm needles and yarn
A, cast on 118 sts
□	Work ten rows in 2x2 rib as
for Hat
Cut yarn A, join in yarn В
□ Work four more rows in 2x2
rib Cut yarn B, rejoin yarn A
□ Work 12 more rows in 2x2
rib
□	Cast off in rib
Join side edges with mattress
stitch. Weave in ends
* 100 DAYS OF CRAFTS *

DESIGNER GEORGIA FARRELL
Eyelet mitts
With a dainty chevron design, these fingerless mitts are
knitted in a super soft merino for warmth and cosy appeal!
KIT LIST
★ Yarn: Yarn Stories Fine
Merino DK, shade 2510
Leaf, one 50g ball
★ Needles: 3.5mm double-
pointed, 4mm double-
pointed ★ Tapestry needle
★ Stitch markers
Circumference: 18cm;
length: 15.5cm
TENSION SQUARE
★	22 sts x 30 rows
★	10cm x 10cm
★	Stocking stitch
★ 4mm needles
96
LEFT HAND
Using 3.5mm dpns, cast on 41
sts, distribute over three needles
and join in the rnd taking care
not to twist sts, pm for beg of md
□ К seven rnds
Change to 4mm dpns
□ Rnd 8: kl, pl, kl 7, p1, к to end
□ Rnd 9: kl, p1, k2,yfwd, ssk,
k9, k2tog, yfwd, k2, p1, к to end
□ Rnd 10: as Rnd 8
□	Rnd 11: kl, pl, k3,yfwd, ssk,
k7, k2tog, yfwd, кЗ, p1, к to end
□ Rnd 12: as Rnd 8
□	Rnd 13: kl, p1, k4, yfwd, ssk,
k5, k2tog, yfwd, k4, p1, к to end
□ Rnd 14: as Rnd 8
□	Rnd 15: k1, p1, k5,yfwd, ssk,
k3, k2tog, yfwd, k5, p1, к to end
□ Rnd 16: as Rnd 8
□	Rnd 17: kl, p!, k6, yfwd, ssk,
k1, k2tog, yfwd, кб, p1, к to end
□ Rnd 18: as Rnd 8
□	Rnd 19: kl, p1, k7, yfwd,
si 1, k2tog, psso, yfwd, k7, p1,
к to end, turn
Commence working back and
forth in rows as foils:
□ Row20(WS): p21,
kl, pl7, kl, pl
□ Row 21 (RS):k1,p1,k2,
yfwd, ssk, k9, k2tog, yfwd, k2,
p1, к to end
□ Row 22: as Row 20
□	Rnd 23: k1, p1, k3, yfwd, ssk,
k7, k2tog, yfwd, кЗ, p1, к to end
□ Row 24: as Row 20
□	Row 25: k1, p1, k4, yfwd, ssk,
k5, k2tog, yfwd, k4, p1, к to end
□	Row 26: as Row 20
□	Row27:k1, p1, k5,yfwd,ssk,
k3, k2tog, yfwd, k5, p1, к to end
□ Row 28: as Row 20
□	Row 29: k1, p1, k6, yfwd, ssk,
k1, k2tog, yfwd, кб, p1, к to end
□ Row 30: as Row 20
□	Row 31: kl, p1, k7,yfwd,
si 1, k2tog, psso, yfwd, k7, pl,
к to end
□	Rep Rows 20*27 once more
Return to working in the rnd
as foils:
□	Next rnd: kl, p1, k17, p1,
к to end
□	Next rnd: k1, p1, кб, yfwd,
ssk, kl, k2tog, yfwd, кб, p1,
к to end
□	Next rnd: к 1, pl, к 17, pl,
к to end
□	Next rnd: k!, p1, k7, yfwd,
si 1, k2tog, psso, yfwd, k7, p1,
к to end
□	Next rnd: k!, p1, k! 7, p!,
к to end
□	Rep last rnd twice more
Change to 3.5mm dpns
□ К seven rnds
□	Cast off
Weave in any loose ends. Block
RIGHT HAND
Using 3.5mm dpns, cast on 41
sts distribute over three needles
and join in the rnd taking care
not to twist sts, pm for beg of rnd
□ К seven rnds
Change to 4mm dpns
□	Rnd 8:k21,p1,k17, p1,k1
□ Rnd 9:k21,p1,k2,yfwd,
ssk, k9, k2tog, yfwd, k2, p1, k1
□	Rnd 10: as Rnd 8
□	Rnd 11:k21,p1,k3,yfwd,
ssk, k7, k2tog, yfwd, k3, p1, k!
□	Rnd12:as Rnd8
□	Rnd 13:k21,p1,k4,yfwd,
ssk, k5, k2tog, yfwd, k4, p1, kl
□	Rnd 14: as Rnd 8
□	Rnd 15:k21, p1, k5,yfwd,
ssk, k3, k2tog, yfwd, k5, p1, k!
□	Rnd 16: as Rnd 8
□	Rnd 17:k21,p1,k6, yfwd,
ssk, k1, k2tog, yfwd, кб, p1, k1
□ Rnd 18: as Rnd 8
□	Rnd 19: k21, p1, k7, yfwd,
si 1, k2tog, psso, yfwd, k7, p1,
k1, turn
Commence working back and
forth in rows as foils:
□ Row 20 (WS):p1,k1,p17,
k1, p to end
□ Row21 (RS):k21,P1,k2,
yfwd, ssk, k9, k2tog, yfwd, k2,
pl, kl
□ Row 22: as Row 20
□ Rnd 23:k21,P1,k3,yfwd,
ssk, k7, k2tog, yfwd, k3, p!, k1
□ Row 24: as Row 20
□ Row25:k21,p1,k4, yfwd,
ssk, k5, k2tog, yfwd, k4, p!, k!
□ Row 26: as Row 20
□ Row27:k21,pl,k5,yfwd,
ssk, k3, k2tog, yfwd, k5, p!, k1
□ Row 28: as Row 20
□	Row 29: k21, p1, кб, yfwd,
ssk, k1, k2tog, yfwd, кб, p1, k1
□ Row 30: as Row 20
□ Row31:k21, p1, k7, yfwd,
si 1, k2tog, psso, yfwd, k7, pl, k1
□ Rep Rows 20-27 once more
Cont working in the rnd as foils:
□ Nextrnd:k21,p1,k17,p1,kl
□ Next rnd: k21, p1, кб, yfwd,
ssk, k1, k2tog, yfwd, кб, p!, kl
□ Nextrnd:k21,p1,k17, pl, kl
□ Next rnd: k21, p1, k7, yfwd,
si 1, k2tog, psso, yfwd, k7, pl, k1
□ Next rnd: k21, p1, k17, p1.
k1 to end
□	Rep last rnd twice more
Change to 3.5mm dpns
□ К seven rnds
□	Cast off
Weave in any loose ends. Block
THUMB HOLE EDGING (ALIKE)
□	Using 3.5mm dpns, pick up
and к 18 sts down each edge
of thumb opening, join in the
rnd, pm for beg of rnd. 36 sts
□ К four rnds
□	Cast off
Weave in any loose ends. Block
to finished measurements
* 100 DAYS OF CRAFTS «
* 100 DAYS OF CRAFTS *
DESIGNER PAT MENCHINI
Glitzy jumper
This ravishing red beauty is a Christmas jumper with a difference
- it's knitted in an eyecatching sequinned yarn with lace sections
KIT LIST
★ Yarn: King Cole Galaxy
DK, shade 686 Red,
5(6,6,6, 7, 7) 50g balls
★ Needles: 2.75mm,
3.25mm, 4mm ★ Stitch
holder ★ Tapestry needle
★ Tape measure ★ Scissors
TENSION SQUARE
★	22 sts x 28 rows
★	10cm x 10cm
★	Stocking stitch
★ 4mm needles
98
FRONT
Using 2.75mm needles and
thumb method, cast on 97
(107,119,129, 141,151 )sts
NOTE: Take care not to cast
on tightly
□ Beg with a p row for RS,
work seven rows in rev st st
Change to 4mm needles
□ P one row * *
Work in st st with Panel as foils:
□ Row 1 (RS): k36 (41,47, 52,
58, 63), work Row 1 of Panel,
k36 (41,47, 52,58, 63)
□ Row2:p36 (41,47,52,58,
63), work Row 2 of Panel, p36
(41,47, 52, 58,63)
THUMB CAST ON
This is a quick method
that gives a firm, yet slightly
stretchy cast-on edge. It's
ideal for textured yarns.
Leaving a long yarn tail
about four times the width
of your project, make a
slipknot and place it on
the needle. Wrap the tail
yarn around your thumb
□ Rows 3-4: as Rows 1 -2 but
working Rows 3-4 of Panel
These four rows set the patt
□ Cont in patt until work
meas 36cm allowing for lower
edge to roll under and ending
after a WS row
Shape raglan
□	Rows 1 -2: cast off 2 (3,4, 4,
5, 6) sts, work to end. 93 (101,
111,121,131,139)sts
Second, third, fourth, fifth
& sixth sizes only
□	Row 3: k1, skpo, work to
last three sts, k2tog, k1
□ Row 4: p!, p2tog, work to
last three sts, p2tog, p!
□	Row 5: as Row 3
□	Row 6: cont without shaping
□	Rep Rows 3-6 - (0,2, 5,7, 8)
times more. - (95,93,85, 83,
85) sts
All sizes
□	Next row: k1, skpo, work to
last three sts, k2tog, k1
□	Next row: cont without
shaping
□	Rep last two rows until 51
(55, 57,61,63,67) sts rem,
ending after a WS row
Shape neck
□	Next row: k1, skpo, work
across 11 (12,12,13,13,
then insert the needle
underneath the strand
in front of your thumb to
make a loop. Wrap the
working yarn from left to
right around the needle and
place the loop from your
thumb onto the needle.
Remove your thumb and
pull tight to cast on a stitch
14) sts, turn
Cont on this group of sts for
left half of neck
□ ** * Work five rows dec at
raglan edge on every RS row
as before and dec one st at
neck edge on all five rows.
6(7, 7, 8, 8, 9) sts
□ Keeping neck edge
straight, cont to dec at raglan
edge as set on every RS row
until three sts rem * * *
□ Next row (WS): p1, p2tog.
Two sts
□	Cast off
With RS facing, place next 23
(25,27,29, 31,33) sts
on a holder
Neatly rejoin yarn to neck edge
□ Next row: work to last three
sts, k2tog, k1
□	Work as left half from * * *
to ***
□	Next row: p2tog, p1. Two sts
□ Cast off
BACK
□	Lower Right Half: casting
on 50 (55,61,66, 72, 77) sts
work as Front to * *
Work in st st with Panel as foils:
□ Row 1 (RS):k24 (29,35,40,
« 100 DAYS OF CRAFTS *
:г тГтФяИ
* г <-г1т-?т7Т’
TIME ТО
SPARKLE
SIZING
Dress size (approx):
6-8(10-12.14-16,18-20,
22-24,26-28)
To fit chest (cm):
76-81 (86-91,97-102,
107-112,117-122,
127-132)
Actual chest (cm): 88
(97,108,117,127,137)
Length from top
of shoulder (cm):
58 (59,61,62,63, 65)
Sleeve seam (cm): 44
IN STITCHES
tw3: si next two sts, k1,
pass second st on right
needle over st just knitted
and к into back of it, now
pass third st on right
needle over first two sts
and к into back of it
PANEL
(WORKED OVER 25 STS)
_ Row 1 (RS):k5,p1,k3,
p7, k3, P1,k5
Row2:p5,k1,p3, k7,
p3, kl, p5
_ Row 3: yfwd, skpo,
k2tog, yfwd, k1, p1, tw3,
pl, k5, p1, tw3, p1, kl,
yfwd, skpo, k2tog, yfwd
□ Row4:p5,k1,p3, kl,
p5, kl, p3, k1, p5
These four rows form
Panel
99
* 100 DAYS OF CRAFTS *
46,51), work Row 1 of Panel, k1
□	Row 2: k1 firmly, work Row
2 of Panel, p to end
□ Rows 3-4: as Rows 1 -2 but
working Rows 3-4 of Panel
Cont in patt as set, working
shaping as foils:
□	Row 1: к to last 27 sts, ml,
kl, work Row 1 of Panel, kl
□	Row 2: work without shaping
□	Row 3: к to last 26 sts, work
Row 3 of Panel, k1
□	Row 4: work without shaping
□	Rep last four rows until
there are 62 (67, 73, 78, 84,
89) sts, ending after Row 1
□ Work one row without
shaping
□ Next row (RS): к to last 26
sts, cast off 26 sts
Cut yarn and slip rem 36 (41,
47,52, 58, 63) sts on holder
□ Lower Left Half: commencing
50 (55,61, 66, 72,77) sts
work as Lower Right half to * *
Work in st st with Panel as foils:
□ Row 1 (RS): k1, work Row 1 of
Panel, k24 (29,35,40, 46,51)
□ Row 2: p to last 26 sts, work
Row 2 of Panel, k1 firmly
□ Rows 3-4: as Rows 1 -2 but
I UU working Rows 3-4 of Panel
Cont in Patt as set, work
shaping as foils:
□	Row 1: kl, work Row 1 of
Panel, k1, ml, к to end
□	Row 2: work without shaping
□	Row 3: k1, work Row 3 of
Panel, к to end
□	Row 4: work without shaping
□	Rep last four rows until
there are 62 (67, 73, 78, 84,
89) sts, ending after Row 1
□ Work two rows without
shaping
□	Next row (joining row):
work to last two sts, p2tog,
now with WS facing p across
36(41,47, 52, 58, 63) sts on
stitch holder of Right Half. 97
(107,119,129, 141,151 )sts
□	Work without shaping in st
st with centre panel to match
Front until work meas same as
Front to beg of raglan shaping,
ending after a WS row
Shape raglan
□	Work as Front until 93
(95, 93, 85, 83, 85) sts rem
□	Next row: k1, skpo, work
to last three sts, k2tog, k1
□ Next row: work without
shaping
□	Rep last two rows until 39
(41,43,45,47,49) sts rem,
ending after a RS row
□	Next row: p2tog, work to
last two sts, p2tog
Slip rem 37 (39,41,43,45,
47) sts on a holder
SLEEVES
□	Casting on 44 (46, 48, 52,
54, 56) sts work as Front to * *
Work in st st with mini eyelet
panels as foils:
□	Row 1 (RS): k8 (7,8,8, 7,8),
[yfwd, skpo, k2tog,yfwd, k8 (10,
10,12,14,14)] twice, yfwd, skpo,
k2tog, yfwd, k8 (7,8, 8, 7, 8)
□ Rows 2-4: beg with a p row,
work three rows in st st
These four rows set patt
□ Cont in patt, inc one st at
each end of next row, then on
every foil 8th (8th, 6th, 6th,
6th, 4th) row until there are 50
(62,64, 76, 64, 64) sts, then on
every foil 10th (1 Oth, 8th, 8th,
6th, 6th) row until there are
68 (72, 80,86,92, 96) sts
□ Cont without shaping until
Sleeve meas 44cm, allowing
for lower edge to roll under
and ending after a p row
Shape raglan
□	Rows 1 -2: as Front. 64 (66,
72, 78, 82,84) sts
First, second, third & sixth
sizes only
□	Row 3: k1, skpo, work to
last three sts, k2tog, k1
□ Rows 4-6: work three rows
without shaping
□	Rep last four rows 1 (2,1, -,
-, 0) times more. 60 (60, 68, -,
-, 82) sts
All sizes
□	Next row: k1, skpo, work to
last three sts, k2tog, k1
□	Next row: p
□	Rep last two rows until
14 sts rem
□	Next row: p2tog, p10, p2tog
Slip rem 12 sts on a holder
NECKBAND
Join all raglans except right
back raglan using mattress
stitch or a fine back stitch
□ Using 2.75mm needles
and with RS facing, к across
37 (39,41,43,45, 47) sts on
Back holder, then 12 sts from
left Sleeve, pick up and к 11
(13,13, 14, 14, 16) sts evenly
down left edge of Front neck,
к across 23 (25,27, 29, 31,
33) sts on holder, pick up and
к 11 (13, 13,14,14, 16) sts
evenly up right edge of Front
neck, к across 12 sts from
right Sleeve. 106 (114, 118,
124,128,136) sts
□	Beg with a к row, work five
rows in rev st st
Change to 3.25mm needles
□ Work two more rows
□	Cast off loosely
TO MAKE UP
Join remaining raglan seam
and edges of Neckband. Join
side and Sleeve seams. Sew
down the 26 cast-off sts of
lower right half of Back lightly
to WS of corresponding section
of lower left half of Back
* 100 DAYS OF CRAFTS *
DESIGNER NICOLA VALIJI
Easy headband
Add a touch of glamour to your little one's
wardrobe with a sparkly hair accessory
TENSION SQUARE
★ 129 sts x 34 rows
★ 10cm x 10cm
★ Stocking stitch
★ 3mm needles
KIT LIST
★	Yarn: Twil leys
Goldfingering, shade 5
Silver, one 25g ball
★	Needles: 3mm ★ Beads:
pearls, large, three
★	Ribbon: 80cm, 2cm
wide, silver ★ Tapestry
needle
Size: 60cm long
FLOWERS (MAKE 3)
Using 3mm needles, cast on
109 sts
□	Beg with a к row, work four
rows in st st
□	Next row: cast off one st, *
si one st from RH to LH needle,
cast on three sts using two
needle method, cast off five
sts, rep from * to end of row
□ Fasten off
TO MAKE UP
Coil picot strip into circle from
one end to other, and pin to
keep coil secure. Sew on wrong
side to form flower. Sew a pearl
bead into middle of flower.
Place all three flowers onto
ribbon and sew into place
PERFECT
FOR
PARTIES
101
* 100 DAYS OF CRAFTS *
DESIGNER GRAEME KNOWLES-MILLER
Fair Isle beanie
Knit our classic winter warmer in shades to suit your recipient -
it's easy to knit with the help of the chart
KIT LIST
★	Yarn: Debbie Bliss Iris,
shades (A) 06 Turtle, (B) 01
Swan, one 50g ball of each
★ Needles: 5mm circular
or dpns, 5.5mm circular or
dpns ★ Stitch markers
TENSION SQUARE
★	20 sts x 24 rows
★	1 Ocm x 10cm
★	Fair Isle pattern
★ 5.5mm needles
102
Using 5mm circular needles
or dpns and yarn A, cast on
72 (84, 96) sts. Join in the rnd
taking care not to twist sts,
pm to mark beg of rnd
□ Rnd 1:[k1,p1] to end, sm
This rnd sets Rib patt
□ Cont in rib until work
meas 4cm
Body
Change to 5.5mm circular
needles or dpns
□	Rnd 1: k, sm
□	Rnd 2: join in yarn B, and
work Rnds 1 -13 of Chart,
working motif 6 (7,8) times
across rnd
Cont in yarn A only
□	К every rnd until piece
meas 12.5 (14, 15) cm from
cast-on edge
Crown
□	Rnd1:*k12(14,18),pm,rep
from * six times. 72 (84,96) sts
□	Rnd 2 (dec): * k2tog, к to
Л^‘ЛЙ,п^*8ЕЕИ29НЖА115Т4
□	Rnd 3: * к to marker, sm,	OF ABBREVIATIONS
FAIR ISLE CHART
KEY
RS: knit
yarn A
yarn В
,4 и vy**.!
rep from * six times
□ Rep Rnds 2-3 until 24 sts
rem, ending after a Rnd 3
□ Next rnd: [k2tog] to end.
12 sts
□	Next rnd: [k2tog] to end.
Six sts
□	Cut yarn leaving long tail,
thread through rem sts, pull
tightly and fasten off
Sew in ends and block to shape
« 100 DAYS OF CRAFTS *

DESIGNER SARAH MURRAY
Cabled socks
These snug slouchy socks ore sure to keep your toes
nice and toasty throughout the winter
104
KIT LIST
★ Yarn: Rowan Kid
Classic, shade 876
Drought, three 50g balls
Needles: 3.75mm,
4mm, both double-
pointed, sets of five
★ Stitch holder
★ Cable needle ★ Stitch
marker ★ Tapestry needle
To fit (ladies shoe size): 4-8
TENSION-SQUARE
★ 18 sts x 24 rows
★ 10cm x 10cm
★ Stocking stitch
★ 4mm needles
ALTERNATIVE YARN
Knitcraft Aran Yarn
CUFF
Using 3.75mm needles, cast
on 60 sts using thumb
method, distribute evenly
across four dpns being careful
not to twist. Join in the rnd,
pm for beg of rnd
□ Rnd 1: * кЗ, p3, rep from
* to end
□ Rep last rnd eight times more
□ Next rnd: * кЗ, p3, k3, (inc
pwise in next st) three times,
(кЗ, p3) three times, rep from
* once more. 66 sts
Leg
Change to 4mm needles
□ Rnd 1: * work Rnd 1 of
Central cable panel, work Rnd
1 of Side cable panel, rep
from * once more
□ Rnd 2: * work Rnd 2 of
Central cable panel, work Rnd
2 of Side cable panel, rep
from * once more
Last two mds set position of patt
□ Keeping continuity of patt
correct, cont until sock meas
35cm from cast-on edge,
ending after Rnd 24 of
Central cable panel
Heel
□	Next row: (k2tog, kl) nine
times, turn
□	Next row: s1 I, p18, p2tog
tbl, turn. 20 sts
SI next 36 sts onto a holder
and work in rows on these
20 sts as foils:
□	Next row: si 1, к to end
□	Next row: si 1, p to end
□	Rep last two rows six
times more
Pm in centre of last row
Turn heel
□ Next row: si 1, к to two sts
past marker, skpo, k1, turn
□ Next row: si 1, p to two sts
past marker, p2tog, p1, turn
□ Rep last two rows five times
more. Eight sts
Instep
□ Next rnd: k8, pick up and к
ten sts along side of heel,
using a second dpn work
across 36 sts on spare needle
as foils: work last six sts of Rnd
1 of Side cable panel, work
Rnd 1 of Central cable panel,
work first six sts of Rnd 1 of
Side cable panel, using a third
dpn, pick and к ten sts along
side of heel, k4. 64 sts
Gusset
Cont in rnd as foils:
□ Next rnd: k! 1, k2tog, k1,
work last six sts of Rnd 2 of Side
cable panel, work Rnd 2 of
Central cable panel, work first
six sts of Rnd 2 of Side cable
panel, k1, skpo, k11.62 sts
□ Next rnd: k! 3, work last six
sts of Rnd 3 of Side cable
panel, work Rnd 3 of Central
cable panel, work first six sts of
Rnd 3 of Side cable panel, k! 3
□ Next rnd: k10, k2tog, k!,
work last six sts of Rnd 4 of Side
cable panel, work Rnd 4 of
Central cable panel, work first
six sts of Rnd 4 of Side cable
panel, k1, skpo, k10.60 sts
□ Next rnd: k12, work last six
sts of Rnd 1 of Side cable
panel, work Rnd 5 of Central
cable panel, work first six sts of
Rnd 1 of Side cable panel, kl 2
□ Next rnd: k9, k2tog, k1, work
last six sts of Rnd 2 of Side
cable panel, work Rnd 6 of
Central cable panel, work first
six sts of Rnd 2 of Side cable
panel, kl, skpo, k9. 58 sts
□ Next rnd: k11, work last six
sts of Rnd 3 of Side cable
panel, work Rnd 7 of Central
cable panel, work first six sts of
Rnd 3 of Side cable panel, kl 1
□ Next rnd: k8, k2tog, kl,
work last six sts of Rnd 4 of
Side cable panel, work Rnd 8
of Central cable panel, work
first six sts of Rnd 4 of Side
cable panel, k!, skpo, k8.56 sts
Foot
□ Next rnd: k10, work last six
sts of Rnd 1 of Side cable
panel, work Rnd 9 of Central
cable panel, work first six sts of
Rnd 1 of Side cable panel, k! 0
Last row sets position of patt
□ Keeping continuity of patt
correct, cont without shaping
until Foot meas 20cm from
back of heel (or desired
length - ensuring foot is 2cm
shorter than desired finished
length, and ending after an
even numbered rnd)
□ Next rnd: kl 0, si third st on
LH needle over first two sts
and si off needle, k2, (k2tog,
k!) 10 times, si third st on LH
needle over first two sts and
off needle, k1.44 sts
Current position marks new
start of rnd
CENTRAL CABLE PANEL
□	Rnd 1: (кЗ, p3) twice,
(рЗ, k3) twice
□	Rnd 2: (wrap3, p3)
twice,(p3, wrap3) twice
□	Rnd 3: as Rnd 1
□	Rnd 4: as Rnd 2
□	Rnd 5: кЗ, рЗ, T4L, p4,
T4R, P3,k3
□	Rnd 6: wrap3, (p4, k3)
twice, p4, wrap3
□	Rnd 7:T5L, p2, T4L, p2,
T4R, P2,T5R
□	Rnd 8: p2, кЗ, рЗ, k3, p2,
кЗ, рЗ, k3, p2
□	Rnd 9: p2, T5L, p1, T4L,
T4R, p1,T5R, P2
□	Rnd10:p4, k3,p2, k6,
p2, k3, p4
□	Rnd 11: p4, T5L, C6B,
T5R, P4
□	Rnd 12: рб, k12, p6
□	Rnd13:p6, (C6F) twice,
p6
□	Rnd 14: as Rnd 12
□	Rnd 15: p4, T5R, C6B,
T5L, p4
□	Rnd 16: as Rnd 10
□	Rnd 17: p2, T5R, p1, T4R,
T4L, p1, T5L, p2
□	Rnd 18: as Rnd 8
□	Rnd 19:T5R, p2, T4R,
P2,T4L,p2, T5L
□	Rnd 20: as Rnd 6
□ Rnd 21: кЗ, p3, T4R,
P4,T4U рЗ, k3
□ Rnd 22: as Rnd 2
□ Rnd 23: as Rnd 1
□ Rnd 24: as Rnd 2
SIDE CABLE PANEL
□	Rnd 1: p3, bind3, p3
□	Rnd 2: рЗ, кЗ, рЗ
□	Rnd 3: as Rnd 2
□	Rnd 4: as Rnd 2
* 100 DAYS OF CRAFTS *
IN STITCHES
Bind3: slip third st on LH
needle over first two sts
and slip off needle, then
k1,yfwd, kl
C6B: si next three sts onto
cn and hold at back of
work, k3, then k3 from cn
C6F: si next three sts onto
cn and hold at front of
work, k3, then k3 from cn
T4L: si next three sts onto
cn and hold at front of
work, p1, then k3 from cn
TAR: si next st onto cn and
hold at back of work, k3,
then p1 from cn
T5L: si next three sts onto
cn and hold at front of
work, p2, then k3 from cn
T5R: si next two sts onto
cn and hold at back of
work, k3, then p2 from cn
Wrap3: yfwd, k3, lift
yfwd over three sts on RH
needle
DON’T FEEL
YOU MUST
USE A SOCK
YARN FOR THESE SOCKS
- ANY SNUGGLY ARAN
WOULD WORK
TAKE
ON THE
CHALLENGE A
* 100 DAYS OF CRAFTS *
DESIGNER VERONICA SHAW
Unisex beanie
This easy-wear ribbed hat has plenty of ease
for that effortlessly cool slouchy effect
KIT LIST
★ Yarn: Fyberspates
Vivacious 4ply, shade 618
Plum Imps, one 100g skein
★ Needles: 3mm circular
(40cm), 3mm double-
pointed, set of five
Stitch marker Bulb
pins: 28 Tapestry
needle Tape measure
To fit: average-sized adult
head; brim: 56cm ind.
negative ease; depth: 24cm
106
TENSION SQUARE
★ 36 sts x 40 rows
★ 10cmx 10cm
★ Over patt
★ 3mm needles
SLOUCH
Using 3mm circular needles,
cast on 168 sts loosely
Join to work in the md,
making sure not to twist sts,
pm for beg of rnd
□ Rnd 1: * p2, kl, rep from
* to end
□ Rnd 2: as Rnd 1
□ Rnd 3: * p2, T1 inc2, P2,k1,
rep from * to end . 224 sts
□ Rnd 4: * p2, k3, p2, k1, rep
from * to end
□ Rnd 5: * p2, si 2, kl, p2sso, p2,
k!, rep from * to end. 168 sts
□ Rnds 6-8: as Rnd 1
□	Rnd 9: * p2, k1, p2, T1inc2,
rep from * to end. 224 sts
□	Rnd 10: * p2, kl, p2, k3, rep
from * to end
□	Rnd11:*p2, k1,p2, sl2, kl,
p2sso, rep from * to end. 168 sts
□ Rnd 12: as Rnd 1
□	Rep Rnds 1 -12 four times
more, then Rnds 1 -6 once
more. 66 rnds
Shape crown
Change to four dpns when
there are too few sts for
circular needle
□	Rnd 1: * p2, k1, rep from *
to end
□	Rnd 2: * (p2, k1) seven
times, p2tog, kl, rep from * to
end. 161 sts
□	Rnd 3: * (p2, kl, p2, Tl inc2)
three times, p2, kl, pl, T1 inc2,
rep from * to end. 217 sts
□	Rnd 4: * (p2, kl, p2, k3)
three times, p2, k1, p1, k3, rep
from * to end
□	Rnd 5: * (p2, k1, p2, si 2, kl,
p2sso) three times, p2, kl, p1,
si 2, kl, p2sso, rep from * to
end. 161 sts
□	Rnd 6: * (p2, kl) three
times, p2tog, k1, (p2, k!)
twice, p2tog, kl, p1, k1, rep
from * to end. 147 sts
□	Rnd 7: p all p sts and к all к
sts to end
□	Rnd 8: * (p2, kl) twice,
p2tog, kl, p1, kl, (p2, k1)
twice, (pl, k1) twice, rep from
* to end. 140 sts
□ Rnd 9: * p2,T1inc2, p2,k1,
pl, T1 inc2, pl, kl, rep from *
to end. 196 sts
□ Rndl0:*p2, k3,p2,k1,pl,
k3, p1, k1, rep from * to end
□ Rnd1l:*p2, si 2, kl,p2sso,
p2, kl, p1, si 2, kl, p2sso, p1,
kl, rep from * to end. 140 sts
□ Rnd 12: * p2, kl, p2tog, k1,
(pl, kl) twice, rep from * to
end. 126 sts
□	Rnd 13: p all p sts and к all
к sts to end of rnd, sm
□	Rnd 14: * p2tog, kl,
(pl, kl), three times, p2, kl,
(pl, k1) three times, rep from
* to end. 119 sts
□	Rnd15:* (p1,k1,p1,
T1inc2) twice, p2, k1, p1,
Tlinc2, pl, kl, p!, T1 inc2, rep
from * to end. 175 sts
□	Rnd 16: * (pl, kl, pl,k3)
twice, p2, kl, pl, k3, p1, kl,
p1, k3, rep from * to end
□ Rnd17:*(p1,kl,p1,sl2,
k1, p2sso) twice, p2, kl, pl,
si 2, k1, p2sso, pl, kl, p!, si 2, k1,
p2sso, rep from * to end. 119 sts
□ Rnd 18: * k2tog, (pl, k!)
three times, p2tog, kl, (pl,
k1) three times, rep from
* to end. 105 sts
□ Rnd 19: p all p sts and к all
к sts, to last st, si 1, rm, return
slipped st to LH needle
unworked ready for next rnd and
replace marker on RH needle
□ Rnd 20: * k2tog, pl, (kl,
p1) six times, rep from * to
end. 98 sts
□	Rnd 21: * kl, p1, (k1, pl,
T1 inc2, pl) three times, rep
from * to end. 140 sts
□	Rnd 22: * k1, pl, (kl, p1,
k3, p1) three times, rep from
* to end
□	Rnd 23: * kl, pl, (kl, p1, si
2, kl, p2sso, pl) three times,
rep from * to end. 98 sts
USING BULB PINS
There is an increase of two
stitches every other 'pussy
willow stitch' on Rounds
3 and 9, and the original
stitch count is restored on
Rounds 5 and 11. After
working Rounds 1 and 2
of the stitch pattern the
first time, place a bulb pin
at the cast-on edge of the
IN STITCHES
T1inc2: work into next
st on LH needle as foils:
[kl into st below, yfwd,
k1 into same st below].
Three sts on RH needle
with a 'tuck' below needle
□ Rnd24: * kl,k2tog, pl, (kl,
pl) twice, k2tog, (k1, pl)
twice, rep from * to end. 84 sts
□ Rnd 25: к all к sts and p all
p sts to end
□ Rnd 26: * k2tog, pl, (k1,
pl) twice, k2tog, pl, kl, pl,
rep from * to end. 70 sts
□ Rnds 27-28: (kl, pl) to end
□ Rnd 29: * k2, k2tog, rep from
* to last two sts, k2.53 sts
□ Rnd 30: к to end of rnd, rm
□ Cut yarn to 100cm and
thread yarn doubled through
rem sts (making sure that
there is enough yarn to tie
off), draw up to inside of
slouch and secure tightly with
two overhand knots
TO MAKE UP
Weave in all ends. Wet or steam
block gently without stretching
л SEEP129F0RALIST
^0F ABBREVIATIONS
hat brim on every other
knitted rib stitch beginning
with the first knitted rib
stitch, which acts as an
extra aid to placing the
'pussy willows' on round
three. Leave in place until
the first two repeats of
the stitch pattern are
established
* 100 DAYS OF CRAFTS *

“ bfoull he working in the bound on hoth cVindaJc and
double painted needle^ s& it\ a gheai teaJining cuJu/e
ifr gon be just beginning goub in- the- boundjouhneg!”
DESIGNER VERONICA SHAW
[TTJ INSPIRED BV WENDY
lf]4l BERNARD'S‘JAPANESE
11Ш STITCHES UNRAVELLED’
BOOK, THIS LOOSE-PITTING
SLOUCH HAT FEATURES THE ‘PUSSY
WILLOW’ STITCH, A VERY PRETTY
RIB STITCH SEQUENCE WITH A
TWIST THAT IS METHODICAL AND
EASY TO MEMORISE
MINDFUL
MAKE
107
# 100 DAYS OF CRAFTS *

DESIGNER LYNNE ROWE
Christmas socks
Make this festive footwear as boldly coloured
or understated as you please
108
KIT LIST
★ Yarn: Scheepjes Invicta
Extra, shades (A) 1344
Beige, (B) 1342 Cream,
(C) 1466 Green, (D) 1421
Red, one 50g ball of
each ★ Needles: 2.5mm
double-pointed, set of
five ★ Stitch markers
★ Tapestry needle
NOTE: Only oddments of yarns
C and D are required but if you
like you can use the rest of
these balls to make a second
pair, switching the colours
TENSION SQUARE
★	34 sts x 44 rows
★	10cm x 10cm
★	Stocking stitch
★ 2.5mm needles
PUDDING SOCKS
Using yarn A, cast on 56 (60,
64,68, 72) sts onto one 2.5mm
dpn, do not join in the rnd
□ Rib rnd 1 (RS): * k2, p2, rep
from * to end, do not turn
Starting from opposite end of
needle, distribute sts evenly
over four dpns, join in the rnd,
pm for beg of rnd
□ Rib rnds 2-20: * k2, p2, rep
from * to end
FOOT LENGTHS
Here are the average
lengths for shoe sizes in
the UK. If you are making
these as a gift, work until
the foot measures 4.5
(4.5, 5, 5, 5.5) cm less than
these measurements.
Leg & Ankle
□	К five rnds
Change to yarn В
□	К one rnd
Work next rnd for your size
as foils:
□	First size only: к to last
three sts, k2tog, k!. 55 sts
□	Second size only: к to
end. 60 sts
□	Third size only: к to last
two sts, ml, k2. 65 sts
□	Fourth size only: к 17, ml,
k34, ml, к to end. 70 sts
□	Fifth size only: k1, k2tog, к
to last three sts, skpo, k1.70 sts
□	Work Chart for your size,
rep patt five times across rnd
Cont in yarn В
□	К one rnd
Work next rnd for your size
as foils:
□	First size only: к to last two
sts, ml, kl. 56 sts
□	Second size only: к to
end. 60 sts
□	Third size only: к to last
three sts, k2tog, k1.64 sts
□	Fourth size only: k1, k2tog, к
to last three sts, skpo, k1.68 sts
□ Fifth size only: k2, ml, к to
last two sts, ml, k1.72 sts
Cut yams C and D
□	Work 25 (35,35,35, 45)
rnds in st st in five-rnd stripe
sequence of yarns A and B,
ending after a yarn A stripe
Heel
□	Row 1: k14 (15,16,17,18),
turn
UK1 (205cm), UK 2 (21.5cm),
UK3 (22.5cm), UK4 (23cm),
UK 5 (24cm), UK 6 (24.5cm),
UK 7 (25.5cm),
UK 8 (26.5cm),
UK9 (27cm), UK 10 (28cm),
UK 11 (28.5cm)
Cut yarns A and B, change to
yarn D
□ Row2;p28 (30,32,34,
36), turn
Work back and forth in rows
on these sts only, si rem sts
onto one spare dpn
□ Row 3: si 1 kwise, k!, * wyib
si 1 pwise, k1, rep from * to
end, turn
□	Row 4: wyif si 1 pwise,
p to end, turn
□	Rep Rows 3-4 a further
11 (12,13,14,15) times
Shape heel
□	Row1:sll kwise, k15 (16,
17,18,19), skpo, kl, turn
□	Row 2: si 1 pwise, p5,
p2tog, pl, turn
□	Row 3: si 1 kwise, к to one
st before gap, skpo, kl, turn
□	Row 4: si 1 pwise, p to one
st before gap, p2tog, pl, turn
* 100 DAYS OF CRAFTS *

SIZING
То fit: child (small adult,
average adult, medium
adult, large adult)
To fit circumference
(cm): 18.5 (20,21,
22,23.5)
Actual circumference
(cm): 16.5 (17.5,
18.5,20,21)
□	Rep last two rows until
all sts have been worked.
16(18,18,20, 20) sts rem
NOTE: for first, third and fifth
sizes, omit k1 or p1 at end of
last two rows
Instep
Change to yarn В
□	К across 16 (18,18,20,20)
heel sts, pick up and к 13 (14,
15,16,17) sts along heel flap,
pick up and к one st from gap
between end of picked up sts
and instep sts, pm, к across
next 28 (30,32,34, 36) sts of
instep, pm, pick up and к one
st from gap before heel flap,
pick up and к 13 (14, 15,16,
17) sts along next edge of
heel flap. 72 (78,82,88,92) sts
Pm for new beg of rnd and
evenly distribute sts over needles
Maintaining stripe sequence
throughout, cont as foils:
□	Rnd 1: к to three sts before
marker, k2tog, kl, sm, k28
(30, 32, 34, 36) sts of instep,
sm, kl, skpo, к to end of rnd
□	Rnd 2: к all sts and slip
all markers
□	Rep last two rnds until 56
(60,64, 68, 72) sts rem
□	Remove beg of rnd marker,
First, second & third sizes only
□ Rnd 3:as Rnd 2
□ Rep Rnds 1 -3 a further 3 (2,
2, -, -) times. 40 (48,52, -, -) sts
SECOND PAIR
Work as for Pudding Socks
in foil shades:
к to next marker
This is new beg of md
□ Cont in st st and stripe
sequence until work meas 4.5
(4.5,5, 5, 5.5) cm less than
total foot length, ending after
a complete stripe
NOTE: if you wish to work
extra rnds for the foot,
change to yarn D rather than
beginning a new stripe
Toe
Change to yarn D
□	Rnd 1: * k1, skpo, к to three
sts before marker, k2tog, kl,
sm, rep from * once more
□	Rnd 2: к all sts and slip
markers
All sizes
□	Rep Rnds 1 -2 until 24 sts rem
□	Divide sts evenly over two
dpns and graft toe using
Kitchener Stitch
Weave ends into wrong side
and block
□	Work second sock to match
□	Cast on using yarn C and work
cuff and first five rnds of leg
□	Change to yam В and
work Chart
□	Change to yarn C and cont
with leg working five-md stripe
sequence of yarns C and D
□	Work heel using yarns A or В
□	Cont in stripe sequence
for foot
□	Use yarns A or В for toes
GREAT FOR
GIFTING
« 100 DAYS OF CRAFTS *
DESIGNER SUSIE JOHNS
Festive hats
Forget that flimsy paper hat you get in your cracker,
up your Christmas Day attire with these jolly hats
110
KIT LIST
★	Yarn: Santa Hat: (A)
King Cole Merino Blend DK,
9 Scarlet, two 50g balls,
(B) King Cole Moments DK,
470 White, one 50g ball;
Elf Hat: King Cole Merino
Blend DK, (A) 9 Scarlet, (C)
854 Fern, one 50g ball of
each ★ Needles: 3.25mm,
4mm needles ★ Large bell
★ Tapestry needle
★ Stuffing ★ Scissors
TENSION SQUARE
★	22 sts x 30 rows
★	lOcmx 10cm
★ Stocking stitch
★	4mm needles
SANTA HAT
Using 4mm needles and Yarn
A cast on 108 sts
□	Rows 1 -20: starting with
a к row work in st st
□	Row 21: (klO, k2tog)to
end. 99 sts
□	Rows 22-28: starting with
a p row work in st st
□	Row 29: (k9, k2tog) to end.
90 sts
□	Rows 30-36: starting with
a p row work in st st
□	Row 37: (k8, k2tog) to end.
81 sts
□	Rows 38-42: starting with
a p row work in st st
□	Row 43: (k7, k2tog) to end.
72 sts
□	Rows 44-48: starting with
a p row work in st st
□	Row 49: (кб, k2tog) to end.
63 sts
□	Rows 50-54: starting with
a p row work in st st
□	Rows 55-90: cont to dec
on every sixth row as set until
nine sts rem
Cast off
Using 4mm needles and Yarn
В pick up and kl 08 sts along
cast-on edge
Starting with a p row work
17 rows in st st
Cast off
BOBBLE
Using 4mm needles and Yarn
В cast on ten sts
□ Row 1: kfb, к to last st, kfb.
12 sts
□	Row 2: к
□	Rows 3-12: rep Rows 1 -2
five times. 22 sts
□	Rows 13-18: к
□	Row 19: k2tog, к to last two
sts, k2tog. 20 sts
□	Row 20: к
□	Rows 21 -30: rep Rows
19-20 five times. Ten sts
Cast off, leaving a long tail
ELF HAT
Using 4mm needles and Yarn
C cast on 84 sts
□	Rows 1 -14: starting with
a к row work in st st
□	Row15:(k10, k2tog)to
end. 77 sts
□	Rows 16-22: starting with
a p row work in st st
□	Row 23: (k9, k2tog) to end.
70 sts
□	Rows 24-30: starting with
a p row work in st st
Row 31: (k8, k2tog) to end.
63 sts
□	Rows 32-38: starting with
a p row work in st st
□	Row 39: (k7, k2tog) to end.
56 sts
□	Row 40-44: starting with
a p row work in st st
□	Row 45: (кб, k2tog) to end.
49 sts
□	Rows 46-50: starting with
a p row work in st st
□	Rows 51 -86: cont to dec on
every sixth row as
set until seven sts rem
Cast off
BRIM
Using 3.25mm needles and
Yarn A cast on six sts
□	Row 1 and every odd-
numbered row: к
□	Row 2: kfb, k1, k2tog, yfwd,
k2. Seven sts
□	Row 4: kfb, k2, k2tog, yfwd,
k2. Eight sts
□	Row 6: kfb, k3, k2tog, yfwd,
k2. Nine sts
□	Rows 8-11: cont to inc as
set. 11 sts
□	Row 12: cast off five sts
kwise, kl, k2tog, yfwd, k2.
Six sts
Rep Rows 1 -12 a further
12 times
Cast off
TO MAKE UP
Using tails of yarn, backstitch
side seam of both Elf Hat
and Santa Hat on WS.
Backstitch border on Santa
Hat. Fold border in half and
slip stitch cast-off edge to
inside of Hat along cast-
on row. Using yam tail,
sew running stitch around
all edges of Bobble. Place
stuffing in centre, pull yarn tail
to gather edge and enclose
stuffing in a little pouch.
Secure yarn and sew to end of
Santa Hat. Stitch short ends
of Elf Hat Brim tog. Place Brim
inside Hat with WS tog and
stitch long edges. Turn Brim
to RS and hold in place with a
few sts. Stitch bell to pointed
end of Hat. Weave in all ends
* 100 DAYS OF CRAFTS *

DESIGNER EMMA DU
Reindeer headwear
We love a novelty hat at this time of year but why should kids
have all the fun? Our designs fit toddlers, teens and adults too
112
KIT LIST
★ Yarn: Drops Lima,
shades (A) 619 Beige, two
50g balls, (B) 206 Light
Beige, (C) 2923 Goldenrod,
(D)7O7 Rust, (E) 705
Green, one 50g ball of
each Needles: 3.5mm
and 4.5mm double-pointed,
4.5mm (40cm) circular
★ Safety toy stuffing
★ Stitch markers
★	Stitch holders
Headband: metal, 5mm
★ Tapestry needle
★ Tape measure ★ Scissors
TENSION SQUARE
★	19 sts x 25 rows
★ lOcmx 10cm
★ Stocking stitch
★ 4.5mm needles
ALTERNATIVE YARN
King Cole Merino Blend DK
HAT
Using 4.5mm circular needles
and yarn A, cast on 72 (80, 88)
sts, join in the rnd taking care not
to twist sts, pm for beg of rnd
□ P one rnd
□ Work in st st [k every rnd]
until Hat meas 4 (5,7) cm, pm
for rolled edge
□ Cont in st st until Hat meas
10 (11, 13) cm from marker
Place 9 (10,11) markers on
last rnd eight sts apart
□ Next rnd: * к to two sts
before marker, k2tog, rep
from * to end. 64 (72, 80) sts
□ Cont to dec as set on every
alt rnd until 8 (8,8) sts rem,
switching to dpns when there
are too few sts to fit around
circular needle
□ Cut yarn leaving a tail,
thread through rem sts, pull
tight and fasten off
ANTLER (MAKE 2)
Using 4.5mm dpns and yarn
B, cast on 12 sts, divide evenly
over three needles, join in the
rnd taking care not twist sts,
pm for beg of rnd
□ Rnds 1-5: к to end
□ Rnd 6: k1, pm, k1, pm, k14
□ Rnd 7: k1, sm, ml r, k1, ml I,
sm, k10.14 sts
□ Rnd 8: к to end
SWITCHING TO DPNS
When knitting in the round
on a circular needle, the
length of your needle
should be smaller than
the circumference of your
work so your stitches can
fit comfortably without
being stretched. When
decreasing for the top of
your hat, you'll reach a
stage where your stitches
can no longer fit around
your needle so it's time to
switch to double-pointed
needles. Holding your first
dpn in your right hand,
work a quarter of your
stitches from your circular
needle. Using a second dpn
work the next quarter and
continue this way until all
your stitches are on dpns
* 100 DAYS OF CRAFTS *
XMAS
CLASSIC
□	Rnd 9: к1, sm, k1, ml r, k1,
mil, kl,sm, kl0.16sts
□	Rnd 10: к to end
□	Rnd 11: k1, sm, k2, m1r, k1,
ml I, k2, sm, k10.18 sts
□	Rnd 12: к to end
□	Rnd 13:k1, sm, k3,m1r,k1,
ml I, k3, sm, k10.20 sts
□	Rnd 14: к to end
□	Rnd 15: k1, place next nine
sts on a holder, turn, cast on
one st, turn, k10.12 sts
□	Rnds 16-23: к to end
□	Rnd 24: [k2tog] to end. Six sts
□	Cutyarn leaving a tail,
thread through rem sts, pull
tight and fasten off
□	Place nine sts from holder
onto three dpns, rejoin yarn
and pick up and к three sts at
opening, pm for beg of rnd.
12 sts
□	К seven rnds
□	Next rnd:[k2tog] to end.
Six sts
□ Cut yarn leaving a tail,
thread through rem sts, pull
tight and fasten off
Stuff evenly with toy stuffing
INNER EARS (MAKE 2)
Using two 4.5mm dpns and
yarn B, cast on three sts
□ Row 1 (WS): p to end
□ Row2:k1,yfwd, k1,yfwd,
k1. Five sts
NOTE: Make sure to twist all
yfwd sts on foil purl rnds by
purling into the back of the
loop to close hole
□ Row3:ptoend
□ Row 4: k2, yfwd, k1, yfwd,
k2. Seven sts
□ Row 5: pto end
□ Row 6: k3, yfwd, k1, yfwd,
k3. Nine sts
□ Row 7: p to end
□ Row 8: k4, yfwd, k1, yfwd,
k4.11 sts
□ Row 9: p to end
□ Row 10: ssk, к to last two
sts, k2tog. Nine sts
□ Row 11: p to end
□	Rep Rows 10-11 until three
sts rem
□	Next row (RS): si 1, k2tog,
psso. One st
□	Fasten off
OUTER EAR (MAKE 2)
Using two 4.5mm dpns and
yarn A, cast on three sts
□ Rows 1 -9: work as for Inner
Ear
□	Row 10: k5, yfwd, к 1, yfwd,
k5.13 sts
□	Row 11: p to end
□ Row 12: ssk, к to last two
sts, k2tog. 11 sts
□ Row 13: p to end
□ Rep Rows 12-13 until three
sts rem
□	Next row (RS): si 1, k2tog,
psso. One st
□	Fasten off
Pair Outer and Inner Ears
together and sew around
edge to join
ROWER CENTRE (MAKE 2)
Using two 3.5mm dpns and
yarn C, cast on five sts
□ * * К to end, do not turn,
slide to opposite end of needle,
pull yarn across back of work
□ Rep from * * five times more
□ Cast off leaving a tail
Using yarn tail, sew through
all edge stitches and pull to
gather, forming a ball
ROWER PETALS (MAKE 10)
Using 3.5mm dpns and yarn
D, cast on six sts, divide evenly
over three needles, join in the
rnd taking care not to twist,
pm for beg of rnd
□ Rnd 1: к to end
□ Rnd 2: [kfb] to end. 12 sts
□ Rnd 3: к to end
□ Rnd 4: * k2, yfwd, k2, rep
from * to end. 15 sts
NOTE: Make sure to twist all
yfwd sts on foil knit rows by
knitting into the back of the
loop to close hole
□ Rnd 5: к to end
□ Rnd 6: * k2, k2tog, k1, rep
from * to end. 12 sts
□ Rnd 7: к to end
□	Rnd 8: * k2, k2tog, rep from
* to end. Nine sts
□	Rnd 9: к to end
□	Rnd 10: * k!, k2tog, rep
from * to end. Six sts
□ Rnd 11: к to end
□ Cut yarn leaving a tail,
thread through rem sts, pull
tight and fasten off
Line up five petals and sew
through base of each to join
in a ring. Secure Flower centre
in middle
LEAVES (MAKE 2)
Using two 3.5mm dpns and
yarn E, cast on three sts
□ Row 1: p to end
□ Row 2: k1, yfwd, k1, yfwd,
k1. Five sts
NOTE: Make sure to twist all
yfwd sts on foil purl rows by
purling into the back of the
loop to close hole
□ Row 3: p to end
□ Row 4: k2, yfwd, k1, yfwd,
k2. Seven sts
□ Row 5: p to end
□ Row 6: k3, yfwd, k1, yfwd,
k3. Nine sts
□ Row 7: p to end
□ Row 8: k4, yfwd, k1, yfwd,
k4.11 sts
□ Row 9: p to end
□ Row 10: ssk, к until two sts
rem, k2tog. Nine sts
□ Row 11: p to end
□	Rep Rows 10-11 until three
sts rem
□	Next row (RS): si 1, k2tog,
psso. One st
□ Fasten off
Sew Leaves to flowers
HEADBAND
□ Using 3.5mm needles, work
Antlers, Inner and Outer Ears,
Flower centres, Flower petals
and Leaves as for Hat
HEADBAND COVER
Using 3.5mm dpns and yarn
A, cast on five sts
□ * * К to end, do not turn,
slide to opposite end of needle,
pull yarn across back of work
□ Rep from ** until i-cord
covers Headband
Slide metal headband into i-cord
□ Cast off
Sew Antlers, ears and flowers
to Headband using photo as
a guide
IN STITCHES
mil: insert LH needle into
horizontal bar between
sts from front to back, к
into back of this loop
ml r: insert LH needle into
horizontal bar between
sts from back to front,
к into front of this loop
« 100 DAYS OF CRAFTS «
DESIGNER CHARMAINE FLETCHER
Cosy cowl
You'll only need one skein for this winter
accessory that will add warmth without the bulk
KIT LIST
★ Yarn: Cascade Yarns®
220 Superwash Merino,
shade 29 Red, one 100g
skein ★ Needles: 3.75mm
and 4mm, both double-
pointed sets of five and
40cm circular, 4mm and
5mm, both straight
★ Bead: 20mm diameter
★ Sewing needle and
thread ★ Stitch marker
★ Brooch pin ★ Tapestry
needle ★ Tape measure
Cowl: 20cm tall x 50cm
circumference at widest point;
corsage: 8cm diameter
TENSION SQUARE
* 22 sts x 25 rows
★ 10cm x 10cm
★ Stocking stitch
★ 4mm needles
□ Rnd 9: ML in each st to end
□ Rnd 10: к to end
□	Cut yarn leaving a 25cm
tail, thread through rem sts
twice, pull tight and fasten off
Secure yarn near centre on
wrong side but do not cut yarn.
Use yarn tail to attach bead to
centre front. Sew on brooch pin
CLASP
Using 4mm needles, cast on
28 sts leaving a 30cm yarn tail
□ Row 1: к to end
□	Row 2: p to end
□	Row 3 (fold): kl, p to last st, k!
□	Row 4: p to end
□	Row 5: k!, p to last st, kl
□	Row 6: pl, к to last st, p!
□	Row 7: kl, p to last st, k1
□ Row 8: p to end
□	Row 9 (fold): k1, p to last st, k!
□	Row 10: p to end
□	Row 11: к to end
□	Cast off kwise leaving
a 30cm tail
115
COWL
Using 4mm circular needle and
thumb method, cast on 110 sts,
leaving a 70cm yarn tail, join
in the rnd taking care not to
twist sts, pm for beg of md
□ Rnd 1: к to end
□ Rnd 2 (fold): p to end
□ Rnd 3: к to end
□ Rnds 4-9: p to end
□ Rnds 10-15: к to end
□ Rnds 16-21 :ptoend
□ Rnd 22 (dec): * k20, k2tog,
IN STITCHES
ML: к next st but leave it
on left needle, bring yarn
to front between needles,
wrap it around left thumb
clockwise, к same st, then
next st, return these two sts
to LH needle and knit tog tbl
rep from * to end. 105 sts
□ Rnds 23-27: к to end
□	Rnds 28-33: p to end
□	Rnds 34 (dec):*k19, k2tog,
rep from * to end. 100 sts
□	Rnds 35-39: к to end
□	Rnds 40-45: p to end
□	Rnds 46 (dec): * k!8, k2tog,
rep from * to end. 95 sts
□	Rnds 47-51: к to end
□	Rnds 52-57: p to end
□	Rnds 58-63: к to end
□	Rnds 64-69: p to end
□	Rnd 70: к to end
□	Rnd 71 (fold): p to end
□	Rnd 72: к to end
□	Using 5mm needle, cast off
leaving a 70cm yarn tail
CORSAGE
Using 4mm dpns, cast on
24 sts, distribute over three
needles, leaving a 30cm yarn
tail, join in the rnd taking care
not to twist, pm for beg of rnd
□ Rnd 1: к to end
□ Rnd 2:pto end
□ Rnd 3: ML in each st to end
□ Rnd 4: к to end
□ Rnd 5: ML in each st to end
□ Rnd 6 (dec): * k2tog, k1,
rep from * to end. 16 sts
Change to 3.75mm dpns
□ Rnd 7: ML in each st to end
□ Rnd 8 (dec): * k2tog, rep
from* to end. Eight sts
KNITTING IN THE ROUND
Some common stitch
patterns are worked
differently when knitted in
the round. That's because
you always have the right
side of the work facing you
TO MAKE UP
Pin bottom and top hems of
Cowl in place, taking a bottom
stitch from the hem and a stitch
directly below it from cowl, stitch
down top and bottom hems.
Pleat Cowl. With WS of Clasp
facing, wrap Clasp around Cowl
and sew short edges together.
Fold long edges to centre, pin
in place and mattress stitch
closed. Secure and trim all yarn
tails. Turn Clasp right way out,
adjusting to cover start/finish
of Cowl, pin brooch in place
and never need to turn
and work back the other
way. To make stocking
stitch, you knit every round
and for reverse stocking
stitch, you purl every round
« 100 DAYS OF CRAFTS *
DESIGNER SIAN BROWN
Short bobble jumper
Cropped, cosy and with just the right amount of fluff, this chic
design is a new twist on your trad Christmas jumper
116
KIT LIST
★ Yarn: (A) Sirdar
Country Classic 4ply,
shade 970 Cherry Red,
4 (4, 5, 5,5, 6,6,6) 50g
balls, (B) Rico Design
Essentials Super Kid
Mohair Loves Silk, shade
039 Cherry, 4 (4, 5, 5, 5,
6, 6,6) 25g balls
★	Needles: 3.25mm,
4mm ★ Stitch holders
★ Tapestry needle
TENSION SQUARE
★	22 sts x 27 rows
★	10cm x 10cm
★ Stocking stitch (yarns A
and В held together)
★ 4mm needles
BACK
Using 3.25mm needles and
yarns A and В held together,
caston 98(102,110,114,
122,126,134,138) sts
□ Row 1: k2, [p2, k2] to end
□ Row 2: p2, [k2, p2] to end
These two rows set rib
□ Work eight rows more in rib,
inc 1 (3,0,2,1,3,0,2) sts evenly
across last row. 99 (105,110,
116,123,129,134,140) sts
Change to 4mm needles
□ Beg with a к (RS) row, work
four rows in st st
□ Next row (bobbles): k5 (8,
5,8,6, 9, 6, 9), MB, [klO, MB]
8(8,9,9,10,10,11,11)
times, k5 (8,5, 8, 6, 9, 6, 9)
□ Beg with a p row, work in st
st without shaping until Back
meas 28cm from cast-on
edge, ending after a WS row
Shape raglan armholes
□ Cast off 4 (5, 6,7,8,9,10,
11) sts at beg of next two
rows. 91 (95,98,102,107,
111,114,118)sts**
□	Next row: k2, skpo, к to last
four sts, k2tog, k2
□	Next row: p to end
□	Rep last two rows 25 (26,27,
28, 30,31,32, 33) times more.
39 (41,42,44,45,47,48,50) sts
Place these sts on a holder
FRONT
□	Work as given for Back to
“.91 (95,98,102,107,111,
114,118) sts
□	Next row: k8 (9,10,11,12,13,
14,15), skpo, ktolast 10 (11,12,
13,14,15,16,17) sts, k2tog,
k8 (9,10,11,12,13,14,15)
□	Next row: p to end
□	Rep last two rows 25 (26,27,
28, 30,31,32, 33) times more.
39 (41,42,44,45,47,48,50) sts
Place these sts on a holder
SLEEVES (MAKE 2)
Using 3.25mm needles and
yarns A and В held together,
caston 58 (58,62, 66,70,70,
74,78) sts
□	Row 1: k2, [p2, k2] to end
□	Row 2: p2, [k2, p2] to end
These two rows set rib
STRETCHY CAST OFF
This pattern asks you to
cast off in rib. This not
only fits neatly with the
pattern but adds a little
bit of stretch too. If you
are a tight knitter, it is
best to go up a needle
size for the cast-off
row. Alternatively, you
could use a variation
on the stretchy cast off
IN STITCHES
MB: к into front, back,
front, back and front of
next st, turn, p5, turn, k5,
turn, p5, turn, k5, pass
second, third, fourth and
fifth sts over first st and
off needle to complete
bobble
□	Work eight rows more in
rib inc 1 (3,2,0,1,3, 3,1) sts
evenly across last row. 59 (61,
64, 66,71,73,77,79) sts
Change to 4mm needles
□	Beg with a к (RS) row work
four rows in st st
□	Next row (bobbles): k7 (8,
4, 5,2,3,5, 6),MB,[k10,MB]
4 (4, 5, 5, 6, 6, 6, 6) times, k7
(8,4,5,2,3, 5, 6)
□	Beg with a p row, work
three rows in st st
□	Next row (inc): k3, ml, patt
to last three sts, ml, k3
□	Work seven rows in st st
□	Rep last eight rows twice,
then inc row once more. 67
(69, 72, 74, 79,81,85, 87)sts
□	Cont without shaping until
Sleeve meas 17cm from cast-on
edge, ending after a WS row
Shape sleeve top
□	Cast off 4 (5,6, 7, 8,9,10,
method by purling the
first two stitches, then
purling these same
stitches together, knit
the next stitch on the
left needle, then knit this
together with the stitch
on the right-hand needle.
Continue across the
row, keeping the rib
pattern correct.
* 100 DAYS OF CRAFTS *
дкеш rnafu
11) sts at beg of next two
rows. 59 (59, 60,60,63, 63,
65, 65) sts
Next row: k2, skpo, к to last
four sts, k2tog, k2
□ Work three rows in st st
Rep last four rows 6 (7, 7, 8,
9,10,10, 11) times more. 45
(43, 44, 42, 43,41,43,41) sts
Next row (dec): k2, skpo, к
to last four sts, k2tog, k2
Next row: p to end
Rep last two rows 10 (9,10,
9,9, 8, 9, 8) times, then dec
row once more. 21 (21,20,
20,21,21,21,21 )sts
Next row: p to end, dec 0
(0,0, 0, 0, 0,1,1) sts in centre
of row. 21 (21,20,20,21,21,
20, 20) sts
Place these sts on a holder
NECKBAND
Work across sts on holder in foil
order left Sleeve, Front, right
Sleeve, Back, working as foils:
Using 3.25mm needles,
yarns A and В held together
and with RS facing, kl 9 (19,
18,18,19,19,18,18), skpo,
k2tog, k35 (37, 38, 40, 41, 43,
44, 46), skpo, k2tog, kl 7 (17,
16, 16,17, 17,16,16), skpo,
k2tog, k37 (39, 40, 42, 43, 45,
46, 48). 114 (118,118,122,
126,130,130,134) sts
Row 1: k2, [p2, k2] to end
Row 2: p2, [k2, p2] to end
These two rows set rib
Work five rows more in rib
Cast off in rib
TO MAKE UP
Weave in all ends. Sew
raglansand Neckband seam.
Join side and underarm
seams. Lightly block to
measurements
I WHEN HOLDING
TWO YARNS
_______I TOGETHER,
BE SURE TO CATCH BOTH
STRANDS WHEN KNITTING
EACH STITCH TO AVOID
UNSIGHTLY LOOPS, AND
REMEMBER TO FOLLOW
THE CARE INSTRUCTIONS
OF THE MORE DELICATE
YARN WHEN LAUNDERING
«^5^
DAY TO
NIGHT STYLE
DESIGNER ANNIKEN ALUS
Scandi yoke sweater
From its corrugated rib to its beautiful bauble motif, we love
everything about this gorgeous garment!
118
KIT LIST
★ Yarn: Cascade Yarns®
Heritage Silk, shades (A)
5619 Christmas Red 3
(4,4,5, 5) 100g skeins,
(B) 5618 Snow, one 100g
skein ★ Needles: 3.25mm,
(40cm and 80-100cm)
circular and double-
pointed ★ Stitch markers
★ Waste yarn ★ Tapestry
needle ★ Tape measure
TENSION SQUARE
★ 24 .5 sts and 37 rows
(after blocking)
★ 10cm x 10cm
★ Stocking stitch
★ 3 .25mm needles
SIZING
Dress size (approx):
8-10 (12-14,16-18, гО-
22, 24-26)
To fit chest (cm): 86 (97,
107,117,127)
Actual chest (cm): 97
(107,117.5,127,137)
Length (cm): 58 (59, 60.5,
61,62)
Sleeve length (cm): 43
(44.5,45,45.5, 46)
SWEATER
Using 3.25mm 40cm circular
needle and yarn B, cast on
160(164,170,184,194) sts,
join in the rnd, taking care not
to twist sts, pm for beg of rnd
atright shoulder
Join in yarn A
NOTE: letter foil instruction
indicates yarn shade
□ Rnd 1: [kl B, p1 A] to end
□ Rep Rnd 1 five times more
Cont in yarn A only, changing to
longer circular needles if needed
Increase round 1
Work for your size as foils:
□ First size only: [k2, ml,
(k3, m!) four times, k2, ml ]
ten times. 220 sts
□ Second size only: [ (k3, ml)
twice, (k2, ml) 13 times, (k3, ml)
three times] four times. 236 sts
C Third size only: [(k1, ml ) six
times, (k2, ml) 37 times, (kl,
ml) five times] twice. 266 sts
□ Fourth size only: [(kl, m!)
six times, (k2, ml) 40 times, (k!,
ml) six times] twice. 288 sts
□ Fifth size only: [(k1, ml)
seven times, (k2, m!) 42 times,
(k!, ml) six times] twice. 304 sts
Shape back neck(all sizes)
□ Row 1 (RS): k20 (22,24, 26,
28), turn
□ Row 2 (WS): si wyif & wrap st,
pl 49 (161,180,195,207), turn
□ Row 3: si wyif & wrap st, к to
four sts before double st, turn
□ Row 4: si wyif & wrap st, к to
four sts before double st, turn
□ Row 5: si wyif & wrap st, к to
four sts before double st, turn
□ Row 6: si wyif & wrap st, к to
four sts before double st, turn
□ Row 7: si wyif & wrap st, к to
four sts before double st, turn
□ Row 8: si wyif & wrap st, к to
four sts before double st, turn
□ Row 9: si wyif & wrap st, к to
four sts before double st, turn
□ Rnd 10: к to end working
dbl sts as a single st
The dbl sts at the left shoulder
can look a little loose if
worked as a single st so work
to one st before the dbl st, si
one st kwise, si one st pwise, к
both slipped sts tog
□ Cont in st st without
shaping until Back yoke meas
8 (8.5, 9, 9,9.5) cm
GERMAN SHORT ROWS
Work to the turning point
and turn so you're ready to
work the next row. With the
yarn in front, slip the first
stitch purlwise then wrap
the stitch by taking the
working yarn over the right-
hand needle and pulling
up on the stitch until the
stitch from the previous
row pulls across the needle
(it will look like a strange
double stitch). Knit as
directed. As you come
to the 'double stitches'just
knit the strands together as
one stitch. Visit Anniken's
blog at annisknittingblog.
blogspot.com and search
for German Short Rows
* 100 DAYS OF CRAFTS *
Increase round 2
Work for your size as foils:
□ First size only: [k3, ml, (k4,
m 1) four times, k3, m 1 ] ten
times. 280 sts
□ Second size only: [(k4, ml)
five times, (k3, ml) 26 times,
(k4,m1) five times] twice. 308 sts
□ Third size only: [(k2, ml)
seven times, (k3, ml) 35
times, (k2, ml) seven times]
twice. 364 sts
□ Fourth size only: [(k2, m!) six
times, (k3, ml) 40 times, (k2,
ml) six times] twice. 392 sts
□ Fifth size only: [(k2, ml) 11
times, (k3, ml) 36 times (k2,
ml) 11 times] twice. 420 sts
Commence Chart (all sizes)
□ Reading all Chart rows
from right to left, starting at
the bottom and working up,
work Rnds 1 -23 of Chart,
working patt 20 (22,26,28,
30) times across rnd
Cont in yarn A only
□ К one rnd
Increase round 3
Work for your size as foils:
□ First size only: [(k3, ml)
four times, (k4, ml, k3, ml)
17 times, (k3, ml) three
times] twice. 362 sts
Second size only: [(k4, m!)
ten times, (k3, ml) 26 times, (k4,
ml) nine times] twice. 398 sts
_ Third size only: [ (k5, ml)
seven times, (k4, ml) 28
times, (k5, m!) seven times]
twice. 448 sts
□ Fourth size only: [ (k5, m!)
six times, (k4, ml) 34 times, (k5,
m!) six times] twice. 484 sts
Z Fifth size only: [(k3, ml) three
times, (k4, ml) 48 times, (k3, ml)
three times] twice. 528 sts.
All sizes
□ Cont in st st without shaping
until Back yoke meas 23.5
(24.5,26,27,28) cm
NOTE: adjust length to fit as
required
Divide for body & sleeves
NOTE: use knitted or cable
cast-on method and remove
marker on next rnd
□ Next rnd: к to last 35 (39,
45, 49, 54) sts, place next 70
(78, 90, 98,108) sts on waste
yarn for Sleeve, turn, cast on 4
(5,5,6, 6) sts, pm for beg of
rnd, cast on 4 (5,5, 6, 6) sts,
turn, k! 11 (121,134,144,
156) across Front, place next
70 (78,90,98,108) sts on
waste yam for Sleeve, turn,
cast on 8 (10,10,12,12) sts,
kl 11 (121,134,144,156)
across Back to end, к to end.
238 (262,288, 312, 336) sts
□ Work in st st until Body
meas 54 (55, 56.5,57, 58) cm
from back neck or desired
length minus 4cm for rib
NOTE: letter foil instruction
indicates yarn shade
□ Next rnd: [k1 B, p1 A] to end
□ Rep last rnd 11 times more
Cont in yarn В only
□ Next rnd: [kl, p1 ] to end
□ Cast off pwise
SLEEVES(ALIKE)
□ Using 3.25mm circular
needle and magic loop
technique or dpns, return
Sleeve sts to needles, using
yarn A and starting at centre
of underarm, pick up and к
4 (5,5,6,6) sts, pick up and I
one st in gap, k70 (78, 90, 98
108), pick up and к one st in
gap, pick up and к 4 (5, 5, 6,
6) sts, pm for beg of rnd. 80
(90,102,112,122) sts
□ Work ten rnds in st st
□ Next rnd (dec): kl, k2tog,
к to last three sts, ssk, kl
□ Cont in st st working dec
rnd every 10 (8, 7, 6, 6) rnds
13(16,19, 20, 23) times
more. 52 (56, 62, 70, 74) sts
IN STITCHES
sl wyif & wrap st: see
panel on German Short
Rows
□ Cont in st st without
shaping until Sleeve meas
39(40.5,41,41.5,42)cm or
desired length minus 4cm for
rib. Join in yarn В
NOTE: letter foil instruction
indicates yarn shade
□ Next rnd: [k1 B, p! A] to end
□ Rep last rnd 11 times more
Cont in yarn В only
□ Next rnd: [k1, p1 ] to end
□ Cast off loosely pwise
TO MAKE UP
Weave in ends. Soak sweater
in lukewarm water with a bit
of wool wash for a few
minutes. Gently squeeze out
water. Roll in a big towel and
squeeze out as much excess
water as possible. On a flat
surface, stretch sweater to size
and shape. Use blocking wires
to pin in place. Leave to dry
119
TOP
TIP!
AS THIS TOP IS WORKED
IN Ж IT WILL TAKE A
LITTLE LONGER TO KNIT,
SO GIVE YOURSELF PLENTY OF TIME
CHART
KEY
Yarn В
Щ Yarn A
в a
* 100 DAYS OF CRAFTS *
DESIGNER CHLOE ELIZABETH BIRCH
Merry mosaic cardi
We love it when a pattern is easier than it looks and that's
always the case with the slip stitch technique used here
120
KIT LIST
★ West Yorkshire Spinners
Re:Treat Chunky, shades
(A) 552 Adore, 3(4,4,5)
100g balls, (B) 010 Pure,
2(2,2,2) 100g balls, (C)
1016 Purpose, 1 (2, 2, 2)
100g balls ★ Needles:
6mm, 6.5mm, both
straight, 6mm (100cm)
circular ★ Stitch markers
Tapestry needle
TENSION SQUARE
★	14 sts x 19 rows
★	10cm x 10cm
★	Stocking stitch
★ 6.5mm needles
★	14 sts x 28 rows
★	10cm x 10cm
★	Swirl slip stitch patt
★ 6.5mm needles
BACK
Using 6.5mm needles and yarn
C, cast on 74 (86,98,110) sts
□ * * К three rows
Join in yarn A
NOTE: letter in square
brackets at beg of row
indicates shade for row
□	[A] К two rows
□	Work Rows 1 -24 of Swirl Slip
Stitch patt using yarn В as
colour 1 and yarn A as colour 2
□	[С] К three rows
□	Next row (WS): [C] k2tog,
к to end. 73 (85, 97, 109) sts
Commence Small Dot patt
as foils:
□	Next row (RS): [A] к to end
□	Next row: [A] p to end
□	Next row: [B] k1, * si 1, kl,
rep from * to end
□	Next row: [B] к 1, * si 1 wyif,
k1, rep from * to end
Last four rows set Small
Dot patt
□	Rep last four rows three
times more * *
Cont in yarn A only
□	Beg with a к row, work in
st st until work meas 33cm
from cast-on edge, ending
after a WS row
Pm at each end of last row
to mark armholes
□	Cont in st st until armholes
meas 21 (23,25, 27.5) cm
from markers, ending after
a WS row
Shape shoulders
□	Cast off 8 (10,11,13) sts
at beg of next two rows. 57
(65,75, 83) sts
□	Cast off 8 (10,12, 13) sts
at beg of next two rows. 41
(45,51,57) sts
□	Cast off 9 (10,12,14) sts
at beg of next two rows.
23 (25,27,29) sts
□	Cast off
LEFT FRONT
Using 6.5mm needles and yarn
C, cast on 38 (44, 50, 56) sts
□	Rep from * * to * * as for
Back. 37 (43, 49, 55) sts
Cont in yarn A only
□	Beg with a к row, work in
st st until work meas 33cm
from cast-on edge, ending
after a WS row
Pm at each end of last row to
mark armhole and front edge
Shape front
□	Row 1 (RS): к to last three sts,
k2tog, k1.36 (42,48, 54) sts
□	Row 2: p to end
□	Row 3: к to end
□	Row 4: p1, p2tog, p to end.
35 (41,47, 53) sts
□	Row 5: к to end
□	Row 6: p to end
□	Rep Rows 1 -6 a further 5 (5,
6, 6) times. 25 (31,35, 41) sts
Second & fourth sizes only
□	Rep Rows 1 -2 once more.
- (30, -, 40) sts
All sizes
□	Cont in st st without
shaping until armhole meas
21 (23,25, 27.5) cm from
markers, ending after a WS row
Shape shoulder
□	Next row (RS): cast off
8(10, 11, 13) sts, к to end.
17 (20,24, 27) sts
□	Next row: p to end
□ Next row: cast off
8(10, 12, 13) sts, к to end.
9(10,12,14) sts
□	Next row: p to end
□	Cast off
RIGHT FRONT
Using 6.5mm needles and yarn
C, cast on 38 (44, 50, 56) sts
□	Rep from * * to * * as for
Back. 37 (43, 49, 55) sts
Cont in yarn A only
□	Beg with a к row, work
in st st until work meas 33cm
from cast-on edge, ending
after a WS row
« 100 DAYS OF CRAFTS *
SWIRL SLIP STITCH PATT
MULTI-
COLOURED
MARVEL
Worked over six sts plus two
NOTE: si oil sts pwise
Row 1 (RS): using colour
1, k1, * si 1, k5, rep from
* to lost st, k1
□ Row 2, 4, 6 and 8: using
shade used in prev row,
к all sts in matching colour
and si all contrasting colour
sts pwise wyif
Row 3: using colour 2, k1,
* kl, si 1, k3, si 1, rep from *
to last st, k1
Row 5: using colour 1, k1,
* si 1, к 1, si 1, k3, rep from *
to last st, k1
Row 7: using colour 2, k1,
* k1, si 1, k4, rep from * to
last st, k1
Rows 9-10: using colour
1, к to end
Rows 11-12: using colour
2, к to end
Rows 13-14: using colour
BORN SLIPPY
Slip stitch colourwork
is one of our favourite
techniques and if you
can work two-row
stripes, you can create
the Swirl Slip Stitch
effect. Rather than
carrying the yarns
not in use along with
you as you do in Fair
Isle patterns, with
mosaic or slip stitch
colourwork, you are
only using one shade
at a time. Slipping
certain stitches means
you are able to
reintroduce previous
shades into your row.
Slip your stitches
purlwise and keep
your movements small
to avoid stretching
your stitches
1, к to end
Row 15: using colour 2
as Row 7
Row 16,18, 20 and
22 : as Row 2
□ Row 17: using
colour 1, as Row 5
□ Row 19: using
colour 2, k1, * k1,
sl1,k1,sl1,k2,
rep from * to last
three sts, k!
Row 21: using
colour 1, kl, *
k2, si 1, k3, rep
from * to last
three sts, k1
Rows 23-24:
using colour 2, к
to end
Rows 1 -24 rows
set Swirl Slip
Stitch patt
121
SIZING
Dress size (approx):
8-12(14-18,20-24,26-30)
To fit chest (cm):
81-91 (97-107,112-122,
127-137)
Actual chest (cm):
104(121,138,156)
Length to back neck (cm):
57 (59,61,63.5)
Sleeve length (cm): 46
122
Pm at each end of last row to
mark armhole and front edge
Shape front
□	Row 1 (RS): kl, ssk, к to
end. 36 (42,48, 54) sts
□	Row 2: p to end
□ Row 3: к to end
□	Row 4: p to last three sts,
p2togtbl, p1.35 (41,47,53)sts
□ Row 5: к to end
□	Row 6: p to end
□	Rep Rows 1 -6 a further 5 (5,
6,6) times. 25 (31,35,41) sts
Second & fourth sizes only
□	Rep Rows 1-2 once more.
-(30,-, 40) sts.
All sizes
□	Cont in st st without shaping
until armhole meas 21 (23,25,
27.5) cm from markers, ending
after a RS row
Shape shoulder
□	Next row (WS): cast off 8
(10,11,13) sts, p to end. 17
(20,24, 27) sts
□ Next row: к to end
□ Next row: cast off
8 (10,12,13) sts, p to end.
9 (10,12,14)sts
□ Next row: к to end
□ Cast off
SLEEVES (MAKE 2)
Using 6mm needles and yarn
C, cast on 31 (35, 37, 41) sts
□ Row 1 (RS):k1, * pl, kl, rep
from * to end
□ Row 2: p1, * k1, p1, rep
from * to end
These two rows set 1 x1 rib
□ Cont in 1 x1 rib until Sleeve
meas 5cm from cast-on edge,
ending after a RS row
□ Next row (WS): pl, * pfb,
rep from * to last 0 (2,0,2) sts,
pO (2,0,2). 61 (67, 73, 79) sts
Change to 6.5mm needles
and commence Sleeve Spot
patt as foils:
NOTE: letter in square
brackets at beg of row
indicates yarn shade for row
□ ** * Row 1 (RS): [В] к to end
□ Row2:[B] p to end
□ Row3:[A] k1,*sl1,k1,
rep from * to end
□ Row 4: [A] kl, * si 1 wyif,
kl, rep from * to end
□ Row 5: [В] к to end
□ Row 6: [B] p to end
□ Row 7: [A] k2, * si 1, kl.
rep from * to last st, kl
□ Row 8: [A] k2, * si 1 wyif,
k1, rep from * to last st, k!
□ Rep last eight rows twice
more, then rep Rows 1 -2 once
more * * *
□ Next row (RS): [A] kfb, к to
end. 62 (68, 74, 80) sts
□ Next row: [A] к to end
□ Next two rows: [В] к to end
□ Work 23 rows in Swirl Slip
Stitch patt, using yarn C as
colour 1 and yarn В as colour 2
□ Next row (WS): using B,
k2tog,[k28 (31,34,37),k2tog]
twice. 59 (65,71,77) sts
□ Next two rows: [A] к to end
□ Rep from *** to *** once
more
□ Next two rows: [С] к to end
□ Next row: [В] к to end
□ Next row: [B] p to end
□ Next row: [C] kl, * si 1, k1,
rep from * to end
□	Next row: kl, * si 1 wyif, kl,
rep from * to end
Cont in yarn В only
□	Beg with a к (RS) row, work
in st st until Sleeve meas
46cm from cast-on edge,
ending after a WS row
□ Cast off
BORDER
Join both shoulder seams
□ Using 6mm circular needle,
yarn В and with RS facing, beg
at lower edge of Right Front,
pick up and к 50 sts evenly up
to marker, 32 (36, 39, 42) sts
evenly up to shoulder seam,
23 (25,27,29) sts evenly
along Back neck, 32 (36, 39,
42) sts evenly down Left Front
to marker, 50 sts evenly down
Left Front to cast-on edge.
187(197,205,213) sts
□ К one row
Change to yarn C
□ К one row
□ Cast off kwise
TO MAKE UP
Insert Sleeves in position by
folding each Sleeve in half and
placing fold to shoulder seam,
sew in position between
markers. Join side and Sleeve
seams. Weave in ends. Pin
garment to measurements
given, cover with a damp
cloth and leave to dry
SEEP129F0RALIST*
OF ABBREVIATIONS
AS YOU ARE
CHANGING
COLOUR
EVERY TWO ROWS,
CARRY THE YARN UP
THE SIDE OF THE
WORK TO AVOID
CUTTING AND
REJOINING
EVERYTIME
< 100 DAYS OF CRAFTS *
DESIGNER LUCINDA GANDERTON
Festive slippers
New slippers are a seasonal tradition, so keep your toes toasty
this Christmas by knitting these candycane inspired slippers
KIT LIST
Stylecraft Naturals
Organic Cotton, shades (A)
7170 Poppy, (B) 7173
Bone, (C) 7171 Leaf, one
50g ball each Needles:
4mm Pom-pom maker:
4cm Tapestry needle
Size: M; length (approx): 25cm.
NOTE: see panel for how to
work different sizes
TENSION SQUARE
20 sts x 32 rows
10cm x 10cm
Over patt
4mm needles
ALTERNATIVE YARN
Rico Design Essentials
Cotton DK
MAIN SUPPER (MAKE 2)
Using 4mm needles and yarn
A, cast on 30 sts, leaving a
20cm yarn tail
□ Row 1 (RS): kl 4, (k1,m1)
twice, kl 4.32 sts
□ Row 2: к to end
Change to yarn В
□	Row 3: k15, (kl, ml) twice,
k15.34 sts
□	Row 4: p to end
Change to yarn A
C Row 5: kl 6, (kl, ml) twice,
k16.36 sts
□	Row 6: к to end
C Row 7: k! 7, (kl, ml) twice,
k17.38 sts
□	Row 8: к to end
Change to yarn В
CRow9:k18, (kl, ml) twice,
k18.40 sts
□	Row 10: p to end
Change to yarn A
ERow11:k19, (k1,m1)
twice, k19. 42 sts
E Rows 12-14: к to end
123
« 100 DAYS OF CRAFTS *
“7©^ the sthipes,
caMuj. the yabn not
in иле up the side to
avoid having to cut it
eveAg time, and gontt
have pnveA ends to
weave in!”
DESIGNER LUCINDA GANDERTON
Main foot
* Change to yarn В
□ Row 15: к to end
□ Row 16: p to end
Change to yarn A
□ Rows 17-20: к to end *
□ Rows 21 -44: rep from * to *
four times more
Shape toe
Change to yarn В
□ Row 45: k2, ssk, k34, k2tog,
k2. 40 sts
□	Row 46: p to end
Change to yarn A
□	Row 47: k2, ssk, k32, k2tog,
k2.38 sts
□	Rows 48-50: к to end, pm
at each end of Row 50
Change to yarn В
□	Row 51: к to end
□	Row 52: p to end
Change to yarn A
□ Rows 53-56: к to end
Change to yarn В
□	Row 57: k2, ssk, k30, k2tog,
k2.36 sts
□	Row 58: p to end
Change to yarn A
□	Row 59: k2, ssk, k28, k2tog,
k2.34sts
□	Row 60: к to end
□	Row 61: k2, ssk, k5, k2tog,
ssk, k8, k2tog, ssk, k5, k2tog,
k2.28sts
□	Row 62: к to end
Change to yarn В
□ Row 63: k2, ssk, k3, k2tog,
ssk, k6, k2tog, ssk, k3, k2tog,
k2.22 sts
□	Row 64: p to end
Cont in yarn A only
□	Row 65: k2, ssk, k1, k2tog,
ssk, k4, k2tog, ssk, k1, k2tog,
k2.16 sts
□	Row 66: к to end
□	Row 67: k2, (ssk) twice, k4,
(k2tog) twice, k2.12 sts
□	Cast off, leaving long
yarn tail
CUFF(MAKE 2)
Fold Slipper in half
lengthways and using cast-on
yarn end and with WS tog,
seam heel using mattress st
□ Using 4.5mm needles,
yarn C and working from WS
between markers, pick up and
к 33 sts along each side edge
as two sts per stripe and one st
on either side of seam. 66 sts
□ К 19 rows
□ Cast off
TO MAKE UP
Fold Slipper in half as before
and seam cast-off edge and
sides up to markers to shape
toe. Make two 4cm pom-poms
with a mix of remaining yarns.
Sew one to each Slipper
SEE P129 FOR A LIST*
OF ABBREVIATIONS
SIZEWISE
You can change the
length of the main foot
for more sizes. To shorten
by 2cm, repeat Rows 15-
20 three times instead
of four. To increase the
length by 2 cm, repeat
Rows 15-20 five times
instead of four. You'll
also need to alter the
number of stitches in the
turnover, based on two
stitches per stripe
* 100 DAYS OF CRAFTS *
ш та мт
Essential tips and techniques for all your knitting projects
BACKWARD
LOOP METHOD
CABLE CAST ON METHOD
This is a really quick and
easy cast on that is often
used by beginners. The
finished edge is not as neat
as for other methods, so it
is best for edges that will be
hidden in seams or by tassels.
Leaving a short yarn tail,
make a slip knot and place
it on the needle.
This gives a really strong, firm edge and is a good
method to use when instructed to cast on in the
middle or at the beginning of a row.
Step 1: Wrap the working yarn
around your thumb and hold
the yarn taut.
Step 2: Insert the needle below
the strand coming in front
of your thumb to make a loop
on the needle.
Steps 1 -3: Work as Steps 1 -3
for the 2-needle method (see
overleaf), you'll have two
stitches on your needle. The
slip knot counts as a stitch.
Step 5: Use the tip of the RH
needle to pull the strand through
between the stitches, slip this
loop on to the LH as before.
Step 3: Remove your thumb
and pull the working yarn tight
Note: Repeat Steps 1 -3
until all stitches are cast on.
Remember your slip knot will
count as the first stitch.
Finished edge
TENSION SQUARE
Many projects, especially
garments, include a test
knitted square to check
your tension is correct.
Step 1: Using the same yarn
and needles your pattern
lists, cast on the number
of stitches stated plus five
more, and work in the
specified stitch for the same
number of rows plus five
more, then block the square.
Step 2: Use pins and a ruler
to mark out a 10cm square
area in the centre. Count
the number of stitches
and rows over 10cm. If
your stitch and row counts
match the tension square
then the size and shape of
your finished item should
be correct. If you have too
many stitches, go up a
needle size; if there are too
few, go down a needle size.
I LONG-TAIL
I THUMB METHOD
, This is also a quick method
and gives a firm, yet
slightly stretchy cast-on
edge. Leaving a long yarn
[ tail about four times the
width of your project,
make a slip knot and
place it on the needle.
Note: Repeat Steps 4-5 until
all stitches are cast on.
SUBSTITUTING
YARN
★ Choose one with a similar
tension to the specified yarn,
going by the details given on
the ball band of the yarns
(as the pattern may use a
different stitch). Also, look
at the meterage of the new
yarn, rather than the weight
of the ball. Not all 50g balls
have the same meterage
and you don't want to run
short when nearing the
end of your project.
★ Consider the fibre
content and how this
might affect the finished
project. For example,
cotton yarn will knit up very
differently to wool. Plus,
don't forget to check the
care instructions of your
new yarn. Not all yarns are
machine washable.
Step 4: Insert your RH needle
between the first two stitches
on the LH needle, wrap the
working yarn around the tip
of the RH needle.
j Step 2: Insert the needle
i underneath the strand
J coming in front of your
। thumb to make a loop on
• the needle, then wrap the
। working yarn from left to
। right around the needle.
j Step 3: Transfer the rest of
i the loop from your thumb to
• the end of the needle, remove
। your thumb and pull tight.
•	Note: Repeat Steps 1 -3
{ until all stitches are cast on;
•	remember your slip knot will
J count as the first stitch.
125
* 100 DAYS OF CRAFTS *
2-NEEDLE METHOD
This creates a neat, strong
edge. Some find this easier
as it's based on the knit
stitch. Leaving a short yam
tail, make a slip knot and
place it on one needle.
Step 1: Hold this needle in your
LH, then insert the RH needle
through the slip knot. Wrap the
working yarn around the tip of
the RH needle from left to right.
Step 2: Using the tip of the
RH needle, hook the wrapped
strand and pull it through the
slip knot.
Step 3: Inserting the LH needle
up through the new loop
from front to back, slide
the new loop from your
RH to LH needle.
Note: Repeat Steps 1 -3
until all stitches are cast on,
inserting your RH needle
through the stitch at end
of the LH needle each time.
126
KNIT
This is the most basic stitch
in knitting. Hold the needle
with the stitches in your
left hand and the empty
needle in your right hand.
Step 1: Insert the right hand
(RH) needle through the
front of the loop on your
lefthand (LH) needle.
Step 2: Wrap the yarn
around the tip of the RH
needle from left to right.
Step 3: Use the RH needle
to pull this wrapped strand
through the loop on the LH
needle and drop the loop
off the LH needle.
Note: Knitting every stitch is
called garter stitch. This is a
reversible pattern that looks
almost identical on both sides.
PURL
The other important stitch in most knitting patterns is the purl stitch.
Step 1: Insert the RH needle
from right to left into the loop
on the LH needle.
BLOCKING
This creates the correct
dimensions and evens out
stitches by stretching and
shaping your finished items.
Wet blocking: dampen the
pieces, gently squeeze out
excess water, pin to correct
measurements, leave to dry.
CHARTS
Some knitters find charts a bit
confusing, but once you've
mastered the basics, they are
relatively easy to use. Most
charts usually start in the
bottom right hand corner,
with right-side rows being
read from right to left, and
wrong-side rows being read
from left to right - although
if you're working in the round,
then all rows are read from
Step 2: Wrap the yarn around
the tip of the RH needle from
right to left.
Working one row knit and one
row purl produces stocking
stitch - this is what it looks like
from the right side of the work.
Steaming: lay a damp cloth j
over your work and gently iron i
over the top. Don't iron directly [
on your knitting. Continue until ।
the cloth is dry. Alternatively, *
gently hover over your work ।
with the iron and apply steam •
until the knitting relaxes. Pin ।
to the desired measurements J
and allow to set.
right to left. Each square is
a single instruction, with the
symbol within that square
indicating what the instruction
is: for example, a blank square
on a right-side row often
means the stitch needs to be
knitted, but on a wrong-side
it means the stitch needs to
be purled. Look through your
chart before beginning the
row to ensure you understand
everything you'll need to do.
Step 3: Use the RH needle
to pull the wrapped strand
through the loop on the LH
needle and drop the loop
off the LH needle.
This is what it looks
like from the wrong
side of the work.
Note: Unless your pattern
tells you otherwise, the knit
row will be the RS of your
work. When the purl row is
the RS, this is called reverse
stocking stitch.
JOINING IN A
NEW BALL
OF YARN
Try to join a new ball of
yarn at the beginning
of the row. Insert your
needle into the first stitch
of the row, then lay the
tail of the new yarn over
the top of the old one
and knit the stitch. We've
used a different colour to
show the technique, but
this also demonstrates
how to join a new colour
to work stripes.
* 100 DAYS OF CRAFTS *
CASTING OFF
The cast-off row is the final row of your project and is
usually worked in consistency with the stitch pattern.
Knitwise:
Step 1: Knit two stitches,
* insert the tip of the LH
needle into the second
stitch from the tip of the
RH needle.
Step 3: Knit one stitch *,
repeat from * (in Step 1) to
* until one stitch remains on
the RH needle.
Purlwise:
When casting off on a purl
row, purl two stitches, then
move the yarn to the back of
the work before passing the
stitch over and off the needle.
Step 2: Use the LH needle
to lift this stitch over the one
nearest the end of the RH
needle and drop it off the
needle. One stitch has been
cast off.
Step 4: Cut the yarn leaving
a tail, then insert this tail
through the remaining loop
on the needle. Pull it tight to
secure your stitch.
In Pattern:
This example is for 2x2
rib. Work the stitches in
accordance with the stitch
pattern, but remember to
move the yarn to the back of
the work before passing the
stitch over.
IDENTIYING
STITCHES
Beginner knitters
often ask, "How
do I know when
to knit or purl?"
It's actually really
easy to tell. A knit
stitch looks like a
V-shape and a purl
stitch will have a
bump. This is what
is meant when
you are instructed
to 'knit the knit
stitches and purl
the purl stitches as
they appear.'
KNIT INTO
FRONT&BACK
)F STITCH IKFB)
This is one of the
most commonly used
methods of adding a
stitch. It is worked into
the stitch. It does leave
a horizontal strand on
the right side (RS) of the
work, but in garter stitch
this is almost invisible.
Step 1: к into the first
stitch on the left-hand
(LH) needle, but do not
slip it off the needle.
Step 2: Move the right-
hand (RH) needle around
and knit into the back
loop of the same stitch.
Step 3: Drop the stitch
from the LH needle.
127
MAKE ONE (Ml)
ALSO KNOWN AS
'MAKEONE LEFT (MIL)
This increase method is
worked between the stitches
and is ideal for stocking
stitch fabrics.
Step 1: Insert the LH needle into
horizontal bar between the last stitch
on the RH needle and first stitch on
the LH needle from front to back.
Step 2: Knit into the back of this loop
The finished stitch leans to the left.
MAKE
ONE
RIGHT
(MIR)
This
increase is
worked in a
similar way
to 'make
one left',
but knit into
the front of
the loop in
Step 2.
* 100 DAYS OF CRAFTS *
PURL TWO
TOGETHER (P2TOG)
Sometimes you will be instructed
to decrease on a purl row. It is
important to use the stitch that leans
the correct way when it is viewed
from the right side of the work.
Step 1: Insert needle into next two
stitches as if to purl.
Step 2: Wrap the yarn around the
needle and pull through both loops.
128
Note: This decrease leans to the right
on the RS of the work.
PURL TWO TOGETHER
THROUGH THE BACK
LOOPS [P2T0GTBL)
This decrease uses a similar
principle to p2tog
Step 1: Move
the needle around
to the back of the
work and insert
it through the
second stitch on
the LH needle and
into the first stitch.
Step 2: Wrap
the yarn around
the needle and
purl through
both loops.
Note: This
decrease leans to
the left on the RS
of the work.
SLIP. SLIP. KNIT (SSK)
This technique also decreases two knit stitches into one.
Step 1: Insert the RH needle into the
next stitch on the LH needle as if to
knit and transfer the stitch to the RH
needle, do the same with the second
stitch - it is important to slip the
stitches one at a time.
Step 3: Insert the RH needle through
the back loop of these two stitches,
wrap the yarn around the needle and
pull through both loops.
KNIT TWO TOGETHER (K2T0G)
This method is used to decrease two knit stitches into one.
Step 1: Insert the RH needle into the
next two stitches at the same time.
Step 2: Return sts to LH needle.
Note: The finished decrease leans
to the left on a knit row.
Step 2: Wrap the yarn around the
needle and pull through both loops.
HSLi'K2T6G.’PSs’d)’’
Slip one, knit two together, pass
slipped stitch over (si 1, k2tog, psso)
• Sometimes called the'central double
! decrease', this technique decreases
i two stitches and does not lean in any
. particular direction.
Note: The finished decrease leans to
the right on a knit row.
* 100 DAYS OF CRAFTS *
FINISHING
Step 1: Weave in ends on
the wrong side of the work,
along seams if possible.
Instead of tying any knots,
it's preferable to secure the
yarn by splitting a stitch and
pulling the yarn through it.
Step 2: Steam, press or wet
block all individual pieces
and leave them to dry
thoroughly before sewing up.
Step 3: Use the correct
technique for sewing pieces
together - this will result in
a more professional finish.
Step 4: Take care to follow
the correct washing and
drying instructions for your
fibre - you should find
these on the ball band.
KITCHENER STITCH
This technique is used to
graft toe stitches together
on socks. Before starting,
hold the two needles with
the remaining stitches
parallel. The loose end of
yarn should be coming from
the back needle and lying
to the right of the work.
Step 1: Thread yarn end
onto a tapestry needle
and insert it purl wise into
the first stitch on the needle
closest to you. Pull the yarn
through but leave the
stitch on the needle.
Step 2: Insert the tapestry
needle knitwise into the
first stitch on the back
needle and pull the yarn
through, leaving the stitch
on the needle.
Step 3: Having set up as for
Steps 1 and 2, repeat Steps
3 and 4 until all stitches have
been grafted. Insert the
tapestry needle knitwise into
the first stitch on the front
needle and slide the stitch
off. Before you pull the yarn
through this stitch insert the
tapestry needle into the next
stitch on the front needle
purl wise and pull the yarn
through, this time leaving
the stitch on the needle.
Step 4: Insert the tapestry
needle purlwise into the
first stitch on the back
needle and slide it off.
Before pulling the yarn
through this stitch, insert
the tapestry needle into the
next stitch on the back
needle knitwise and pull the
yarn through, leaving the
stitch on the needle.
0
alt
approx
beg
C4F
C4B
cm
cn
cont
dd
dec
dpn(s)
foil (s)
inc
к
kfb
kfbf
k2tog
kwise
к wrap
tog with
st
LH
ml
mlp
no stitches, times or
rows
no stitches, times
or rows for that size
alternate
approximately
beginning
(cable 4 front) slip two
stitches on to cable
needle, hold at front of
work, k2, k2 from
cable needle
(cable 4 back) slip two
stitches onto cable
needle, hold at back of
work, k2, k2 from cable
needle
centimetres
cable needle
continue (ing)
double decrease
decrease (ing)
double pointed
needle(s)
following (follows)
increase (ing)
knit
knit into the front and
the back of next stitch
knit into the front,
back and front of the
next stitch
knit two stitches
together
knitwise
insert right hand
needle up through the
wrap and into the
stitch, knit the wrap
together with stitch
left hand
make one stitch, by
picking up the
horizontal loop before
next stitch and knitting
into the back of it
make one stitch, by
picking up the
horizontal bop before
next stitch and purling
into the back of it
meas measure (s)
mm millimeters
N1 (2, 3) needle 1(2,3)
p purl
patt pattern
pb place bead
pfb purl into the front and
back of next st
pm place marker
p2tog purl two stitches
together
prev previous
psso pass slipped stitch over
and off needle
p2sso pass two slipped
stitches over and
off needle
pwise purlwise
rem remain (ing)
rep repeat (ing)
rev st st reverse stocking stitch
(p on RS row, к on
WSrow)
rm remove marker
rnd(s) round(s)
RH right hand
RS right side
skpo slip one, knit one, pass
slipped stitch over
sk2 po slip next stitch purlwise,
knit two together, pass
slipped stitch over
and off needle
si 2, kl, slip next two stitches
p2sso knitwise at the same
time, knit one, pass both
slipped stitches ever
p w rap Slip the wrapped stitch
tog with from the left hand to
st right hand neede, insert
left hand needle into
wrap, return stitch to left
hand needle, purl wrap
and stitch together
si 1 slip one stitch
si st slip stitch
sm slip marker
sp (s) spoce(s)
ssk one by one slip the next
two stitches knitwise. Put
your left needle through
the front loops of both
slipped stitches and knit
them together
st (s) stitch (es)
st st stocking stitch (k on RS
row, ponWSrcw)
tbl through the back loop (s)
w&t Take the yam between
(onknitrw») the needles to the front of
the work, slip the
next stitch from the
Left Hand needle to the
Right Hand needle
purlwise, take the yarn
between the needles
back to its original
position, slip the stitch
back to the Left
Hand needle and turn
(onpuHrowt) Take the yam between
the needles to the back
of the work, slip the
next stitch from the
Left Hand needle to the
Right Hand needle
purlwise, take the yarn
between the needles back
to its original position, slip
the stitch back to the Left
Hand needle and turn
WS wrong side
wy ib with yam in back
wyif with yarn in front
yb yarn back
yfwd yarn forward (between
knit stitches)
yo workyfwd/yon/ymas
appropriate
yoh yam over hook
yon yarn over needle
(between a purl and a
knit stitch)
yrn yarn round needle
(between purl stitches
and between a knit and
a purl stitch)
y2 rn wrap yarn twice
around needle
★ repeat instructions
following the asterisk
as many times as
instructed
()[] work instructions inside
the brackets as many
times as instructed
LOOSE ENDS
Follow these steps for
sewing in any loose ends:
1	Thread the yarn onto
a tapestry needle and
work with the WS of the knit
facing upwards.
2	Insert the needle under
the loop of each stitch,
and draw it through. Work
it up and down the loops of
the stitches for 8cm.
3Cut the yarn close to the
fabric.
/ If you are weaving at a
i"colour change, be sure
to work the loose end into
the corresponding colour to
prevent it from being visible
at the front of the work.
JOINING
COLOURS
To join in a new colour,
work the first stitch of the
new row using two ends
of yarn, one from the new
ball and one from the
tail of the old ball,
then continue in the
new colour only.
129
* 100 DAYS OF CRAFTS *
BEGINNING
A SEAM
How to start sewing
up your project
Place the pieces next to each
other RS up, push a threaded
tapestry needle through the
fabric after the first stitch,
moving from front to back.
Push through after the first
stitch on the second piece,
moving from back to front.
130
SWISS DARNING
To create coloured patterns or motifs on your knitted items, thread
a blunt-ended tapestry needle with a contrasting yam that matches
the weight of the main work. Insert it through the fabric from back
to front, bringing it out at the bottom of the V of the required
stitch. Following the diagonal line of the V of the stitch, insert the
needle below the bottom two strands or loops at the base of the
stitch above, then take it back through the original entry point.
F RENCH KNOT	]
Step 1:
Bring the
needle
through to ;
the right
side of the
fabric where you want to
; position the knot. Wrap the
thread two or three times
; around the needle.
Step 2: Hold the thread
close to the surface of the
fabric, then pull it tight and
[ re-insert the needle into
the fabric close to where it
I emerged from.
Step 3:
Keeping
the tension
on the
wrapped thread, pull the
needle through to the
back of the work; the knot
formed should sit on the
surface of the fabric.
3
MATTRESS
STITCH
Join knitted pieces
together with this
invisible method
With the two pieces next
to each other, hook the
horizontal bar of the first
stitch with a needle. Move to
the other piece and hook the
first horizontal bar of the stitch
on that side. Repeat, moving
from one piece to the next.
SATIN STITCH
Step 1: Starting on the
wrong side of your work,
pull the needle through to
the base of the outline to
be filled and push through
the opposite side, forming
a long, straight stitch.
2
Step 2: Underneath the
work, move the needle
down to the spot next to
the first stitch and make
a parallel line of thread.
Repeat this process until
the design is filled.
SLIP KNOT &
CHAIN (CH)
You'll need a series of chain
stitches for a crochet chain
Step 1:
Make a
slip knot
and put
it on the
neck of
the hook - don't pull it too
tight or it will be difficult to
stitch with. Coming from
behind, wrap the yarn
around the hook from right
to left, across the 'neck'.
Step 2: Catch the yarn and
use the hook to pull it down
through the slip knot. You
have now made one chain
(ch). Continue to make
more chains, as directed in
the pattern.
STUFFING A TOY
To successfully stuff your
knitted toy, it is essential
that you tease out your
stuffing beforehand to
prevent unsightly lumps
and bumps. Another tip
is to take your time. You
need to strike the perfect
balance between over and
under stuffing your project,
so don't be afraid to start
again if your toy doesn't
sit right. Finally, you should
make use of a smaller
knitting needle, as this will
help you to push the stuffing
into awkward areas such
________as feet or ears_______
MAKING FACES
Embroidered straight
stitches are versatile and
are ideal for faces on
toys. Sewing them really
closely together is perfect
for noses, while shorter
stitches allow you to create
a curved smile. If you're
not very confident, practise
stitching on a test swatch
first, as a wonky face
can make or break a
knitted toy
SLIPKNOT
Step 1: Hold the yarn under
your left thumb, wrap it
twice around your left index
and middle fingers, with the
second loop closer to the
base of the fingers. With
the backs of the fingers
uppermost, insert the tip of
the needle beneath the first
loop and over the second,
then pull the second loop
under the first
Step 2: Remove your
two fingers and gently
tug on both ends of yarn
to tighten the slip knot
around the needle
HOWTO
CROSS STITCH
1	Bring the
needle
out at A
and make
a diagonal
stitch to B, an equal distance
up and to the left of A. Bring
the needle out at C, directly
below В and level with A.
2	Make a
second
diagonal
stitch to D,
immediately
above A and level with B.
To work a second adjoining
cross, bring the needle out
atC again.
3Work cross
stitches in
the same way
across the row
working in
the same direction for neat
results. Complete all the A to
В stitches first then go back
along the row doing C to D.
* 100 DAYS OF CRAFTS *
THE UK’S FRIENDLIEST
ONLINE KNITTING CLUB
“The people are so
friendly, the courses and
knitalongs are amazing,
and I really feel this group
is of great importance”
“I love being able to
share my passion for
knitting with like
minded people”
Patricia
“There’s always someone
willing to help, advise and
support. It doesn’t matter
if you are experienced
or just a newbie”
Emma	Hilary
• Become a member of the club today!
Visit letsknit.co.uk
FREE RECEIVE 1KG YARN KIT WORTH £24.99
WELCOME WITH AN ANNUAL MEMBERSHIP*
YOUR BUMPER 1.056G
YARN BUNDLE INCLUDES
48 BALLS IN SIX EXCLUSIVE
SHADES PLUS ESSENTIAL TOOLS
- GET STARTED RIGHT AWAY!
I WOW! 1
48 YARN
BALLS IN
I TOTAL 4
3.75MM
I METAL I
I HOOKJ
1 VERSATILE COLOURS SUIT
CLASSIC & MODERN MAKES!
I 3.75MM I
BAMBOO
NEEDLES
 SPECIAL
VARIEGATED
 YARN M


Join the UK’s friendliest knitting club and receive this free welcome gift, plus:
3,000+ knitting patterns
Exclusive knitalongs
100+ how-to videos
Member-only competitions
Visit
letsknit.co.uk
• NEW ANNUAL MEMBERS ONLY UK MAINLAND DELIVERY ONLY WHILE STOCKS LAST. FOR FULL TERMS + CONDITIONS VISIT WWW.LETSKNIT.CO UK