/


Text
ESSENTIAL GUIDES,TIPS {.TUTORIALS
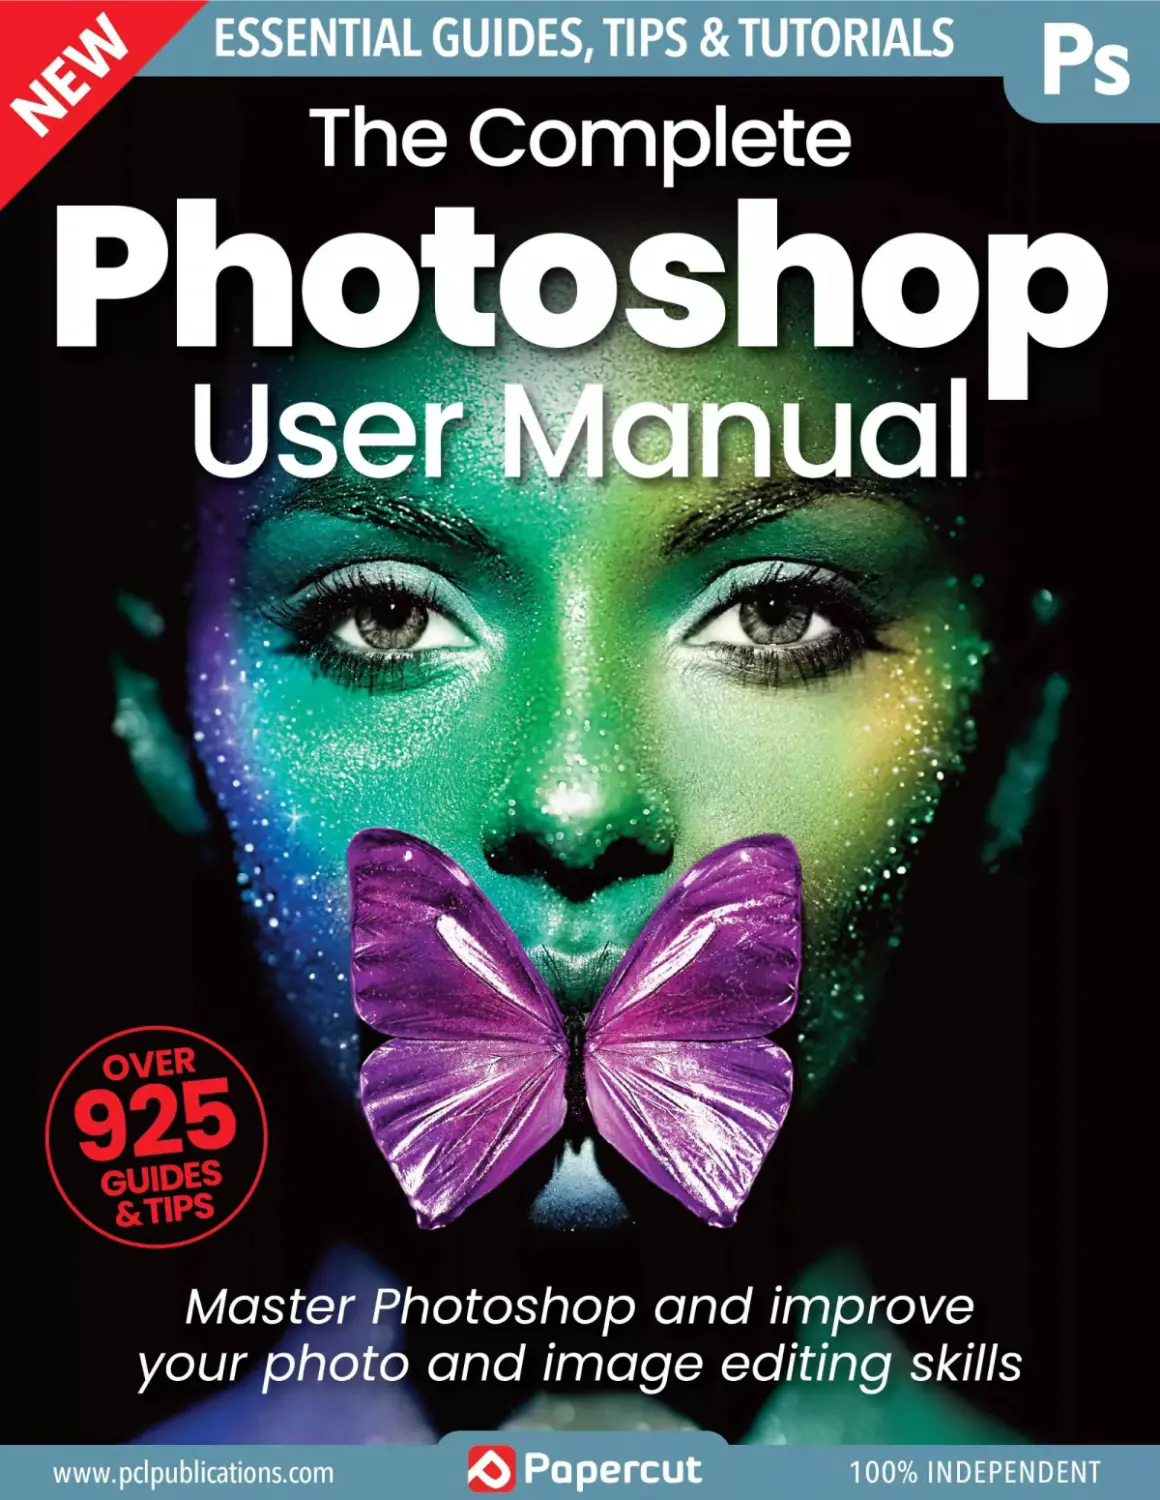
The Complete
Master Photoshop and improve
your photo and image editing skills
www.pdpublications.com
«О Papercut
100% INDEPENDENT
The Complete
Manual Series
Available on ii Readlij
CANON PHOTOGRAPHY & CAMERAS
The Complete
Canon
Camera Manual!
Master your Canon camera
and improve your photographic skills
UPDATED FOR IPHONE 14 MODELS
tSENDAL GUIDES, TIPS & TUTTTRtfli S
ESSENTIAL GUIDESJIPS&TtnORIALS Q
fThe Complete
Photography
c^Hvlanual
UPDATED FOR macOS VENTURA
* The Complete
MacBook
User Manual
r The Complete
iPhone
&iOS@
User Manual
Master your iPhone and iOS 16
FO R ALL MACS & MACBOOK S g
* The Complete
macOS
Monterey
ESSENTIAL GUIDES. DPS & TUTORIALS
The Complete
Outdoor
Photography
898; Manual
FOR ALL MAC STUDIOS & DISPLAYS gj
jZ The Complete
Mac
Studio
Manual
Master your Apple Mac Studio & Display
FOR ALL MACS & MACBOOKS
* The Complete
macOS
Ventura
Manual
Master your Mac & MacBook with
expert step-by-step guides
ESSENTIAL GUIDES, TIPS a TUTORIALS p
The Complete
Photoshop
UsenManuaP
925-
Master Photoshop and Improve
your photo andjmoge editing skills
FOR PC. MAC a MOBILE DEVICES^
The Complete
Home
Networking
Manual 84
The essential step-by-step OuMJf$
guide to mastering your \ик/
home network & smart devices
LINUX. PYTHON & C++ CODING <j>
r The Complete
Linux
Coding Manual
Master Linux and
improve your
programming
& coding skills
LEARN PYTHON A C++CODING </>
The Complete
& Python
Manual
Essential coding guides & projects
The Complete
Internet
Security
^Manual '
*»AHN|NG
*Teep yoursek
secure and
e
КПГ1
Я0
For a full list of titles available visit:
www.pclpublications.com
The Complete
Photoshop
User Manual
Your photo editing journey starts here!
Let us show you just how powerful Photoshop is,
while discovering a range of tools and techniques
that can make excellent digital artists of us all. Even
if you are a beginner, Photoshop is easier to learn
than you might imagine. This guide begins with the
various tools and editing basics that can get you
up and running in no time. The second half
concentrates on some creative projects that will
expand on what you've learnt and have you
creating new images just like a digital professional.
Э Papercut
www.pclpublications.com
Welcome to
Photoshop
8 Main interface
10 The toolbar__________________
12 Menus________________________
14 Keyboard shortcuts___________
16 Photoshop preferences guide
18 The Photoshop home screen
20 YourfirstPSDdocument
22 Open and save your first image
24 Placing and importing images
26 Using layers
28 Yourfirst composition
30 Yourfirst cut out
32 Selection tools
34 Yourfirst layer mask
36 Yourfirst set of adjustments
38 Yourfirst type tool project
4? ) Learn
and Improve
42 Adjusting exposure
44 Contrast and saturation
46 Gradient fill & paint bucket
48 Curvesand levels
50 Cropping and resizing
52 Content-aware fill and scale
56 Non-destructive enhancement!
58 Non-destructive enhancement 2
60 Brushes, pencil and eraser
62 Making selections
64 Modifying selections
66 Quick mask mode
68 Healing brush tools
70 The Clone stamp tool
72 Perspective cloning
4 www.pclpublications.com
Enhance
Your Skills
Plugins
Round-up
Creative
Project Guides
Ps
76 The Pen tool and paths
78 Adding a graduated filter
80 Correcting lens distortion
82 Panorama stitching
84 Colour replacement
94 Manual install
94 Photoshop install
94 Photoshop Elements
95 Luminar4
96 PixeISquid
96 StockSolo
97 Blow Up 3
97 Aurora HDR
114 Artwork compositing
122 Dual lighting effect
130 HDR panoramas
136 Perfect portraits
142 The midas touch
148 Enhancing your photos
154 White to any colour
Your Questions
Answered
Camera Raw
Glossary
of Terms
Sometimes, Photoshop
may throw you a curve ball
and do something you may
not expect. It may even throw
up errors you've not seen
before. Don't worry, we have
a section that might help you
out if you're in trouble.
100 Processing rawfiles
102 Camera raw
104 The toolbar
106 The edit menu
108 Raw workflow
FREE
DOWNLOAD
MAGAZINE
Worth £9.99
WITH THIS BOOKAZINE
See Page 162 for details...
wwww.pclpublications.com 5
I WELCOME TO PHOTOSHOP IPs
Welcome to
Photoshop
Over the years, Adobe has continually refined and
honed the tools available in Photoshop, but at its
heart, the basics have always remained the same.
You can simply crop a photo, create a complex and
multi-layered artwork or anything in between. Let’s
take a look at what Photoshop is all about.
wvMW.pclpubllcatjons.com ~J
MAIN INTERFACE
Main Interface
This is Photoshop’s
graphic user front end
Photoshop has a great interface, with a
dark slate grey work area, slightly lighter
menu and palette bars and sharp white text.
It looks great and really makes photos stand
out from the background. Let’s see what it
has to offer.
Menu Bar
You’ll find all the menu options here and many
more nested menus to control all aspects of
Photoshop. Read on for more details.
Tool Palette
Here you’ll find your main editing tools. The
following pages look at the individual tools and
what you can do with them.
Tool Option Bar
For each tool on the palette there are options,
such as brush size or softness. You’ll find them
in this area.
Document Window
Each window you open will have its own tab
to identify it. It includes the document name,
current scaling and colour space being used.
Document Details
Here you’ll find the compressed and real size
of your document. You can also call up other
information such as document pixel dimensions.
[useful tip
I You can set up your own workspaces to reflect
I the way you work and save them so that you
I can quickly switch from one to another.
Active Image
The new interface provides a larger area
to work on your images, with a darker
background colour.
8 www.pclpubllcations.com
MAIN INTERFACE WELCOME TO PHOTOSHOP
Rulers
Use these to accurately measure positions
on your image and drag guidelines from
here to help line up text and layers.
Palettes
There are a number of interchangeable
palettes available, which you can choose
from the Window menu.
Workspace Option
Choose between preset workspace
arrangements, including 3D workspaces,
zoom and Share for Commenting.
Fly-out Palettes
You can set up your own custom list of
frequently used palettes and access them by
clicking on these buttons.
Layer Palette
Here you’ll find the layers of the image you’re
currently working on. Layers at the top of the
stack will appear above those below.
Layer Options
Here you can add effects, layer styles,
adjustments and other options to your
currently active layers.
www.pclpublications.com 9
WELCOME TO PHOTOSHOP
THE TOOLBAR
The Toolbar
Let’s take a look at Photoshop’s main editing tools
The main elements of the Photoshop Toolbar haven’t changed all
that much since the introduction of Layers and the Move Tool with
version 3.0, back in 1994. The shape has changed a bit, elongating
into a single column to take advantage of today’s larger monitors and
a few more tools have been added, but anyone who’s familiar with any
previous version of Photoshop will soon feel right at home.
olbar
Move Used to move pixel information on ♦J* Move Tool
the active layer or selection. You '□ Artboard Tool
can also create multiple layouts using the Artboard feature.
Eyedropper The Eyedropper and its extensive list of alternatives provide you with tools that can tell you more about the image you’re working on, such as colour values, sizes and object count. fl Eyedropper Tool 3D Material Eyedropper Tool Color Sampler Tool Ruler Tool Note Tool *23 Count Tool
Marquee The Marquee is used to select an area of the active layer. Alternative options include an elliptical shape and single row or column selections. L_J Rectangular Marquee Tool О Elliptical Marquee Tool Single Row Marquee Tool ** Single Column Marquee Tool
Lasso The Lasso is also used to make area selections from the active layer by clicking or drawing a line around the area to be selected. (p Lasso Tool Polygonal Lasso Tool Magnetic Lasso Tool
Spot Healing Another tool that has seen some changes in the latest version, the Spot Healing Tool is for removing small blemishes such as stray hairs or dust spots from your images. Spot Healing Brush Tool Healing Brush Tool О Patch Tool PC Content-Aware Move Tool +O Red Eye Tool
Magic Wand
This tool can select an area based
on its colour. The alternative option
is Quick Selection, or the newly
updated Object Selection Tool that
scans the image automatically.
Object Selection Tool
Г/ Quick Selection Tool
Magic Wand Tool
Crop
The Crop Tool has seen a major
overhauls in the past, but it still does
the same job. Use it to select one
area of an image and discard the rest.
tj. Crop Tool
[21 Perspective Crop Tool
X Slice Tool
X Slice Select Tool
Frame Tool
The Frame Tool can be used to create
placeholder frames for images. You
can create any kind of shape and
drop an image into it.
X Slice Select Tool
M Frame Tool
ft Eyedropper Tool
Brush This is a basic but useful tool for all / Brush Tool
types of image editing, painting and a Pencil Tool
drawing. Alternatives include the Color Replacement Tool
equally useful Pencil Tool, as well as colour replacement and mixing. Mixer Brush Tool
Clone Stamp
Clone Stamp is used to copy one
area of an image onto another. It
can remove any unwanted element
in your image.
History Brush
The History Brush can be used to
selectively restore certain areas of
an image to a previous state.
Eraser
As the name implies, the Eraser Tool
is a special brush that can delete an
area of an image, layer or selection.
X Clone Stamp Tool
::X Pattern Stamp Tool
History Brush Tool
Art History Brush Tool
dL Eraser Tool
Background Eraser Tool
Magic Eraser Tool
] 0 www.pclpublications.com
THE TOOLBAR
Gradient
The Gradient Tod can apply a fill-in
to an area that fades gradually from
one colour to another.
El Gradient Tool
Paint Bucket Tool
3D Material Drop Tool
Zoom
This zooms in to an area of the image.
Again it is most often used via a
shortcut, ri this case CTRL + or CTRL -.
Rotate View Tool
Q Zoom Tool
Smudge
The Smudge Tool and its options,
can be used to blend and alter
colours and details in the image.
4 Blur Tool
A Sharpen Tool
Smudge Tool
Edit Toolbar W.
This tool enables you to customise ••• " ••• Edit Toolbar...
your toolbar to add or remove tools to 1 a n
your specific requirements. t
Burn
Bum and its alternatives Dodge and
Sponge, are based on photographic
darkroom techniques and are used
to selectively lighten, darken images.
} Dodge Tool
Bum Tool
Sponge Tool
Switch Colour
Clicking on the first icon sets the
colours to their defaults. The other
swaps the background and
foreground colours over.
Pen
The Pen Tod is used to draw
smooth curves for lines or
selections, using something
called Bezier curves. They can
produce great results.
Type
The Type Tool is another area that
has continued to receive various
updates and overhauls and is now
part of a powerful text system.
0 Pen Tool
& Freeform Pen Tool
(0 Curvature Pen Tool
Add Anchor Point Tool
Delete Anchor Point Tool
b Convert Point Tool
T Horizontal Type Tool
IT Vertical Type Tool
ПГ Vertical Type Mask Tool
ТГ* Horizontal Type Mask Tool
Set Colour
Clicking here brings up the
colour chooser palette, which
lets you choose the foreground
or background colours.
Quick Mask
The Quick Mask mode is a
great way of making complex
selections using the drawing and
painting tools.
Path Selection
Paths are used for many purposes
in Photoshop. Use this tool and its
alternative to select a path to use.
Path Selection Tool
Direct Selection Tool
Screen Mode
Click here to switch between the
current screen mode and a full-
screen view of your current image.
tS • (P Standard Screen Mode
П Full Screen Mode With Menu
Full Screen Mode
Line
The Line Tool and its alternatives
are used to create shapes and
paths on your images. It is very
useful for graphics work and adding
arrows and custom shapes.
Hand
The Hand Tool is used to navigate
around a large image. It is most
often used via the space bar.
□ Rectangle Tool
О Rounded Rectangle Tool
О Ellipse Tool
О Polygon Tool
/ Line Tool
Custom Shape Tool
< Hand Tool
Rotate View Tool
QJ USEFUL TIP
I Most of the tools in the toolbar
I have alternative options,
I denoted by the small arrow
I below and right of the icon.
I Click and hold on the icon to
I see the pop-up alternative
I menu. This diagram shows
I the alternative menus for each
I tool. You can move the toolbar
I around by dragging the border
I at the top, or switch back to the
I old two-column look by clicking
I the double arrow.
www.pclpublications.com Ц
MENUS
к j| One look at the menus and you
И |Лг| || IIC begin to understand Photoshop’s
H complexity and versatility
^Fhe main interface of Photoshop has no fewer than twelve menus and a Help option, each with many options and with many additional nested
I sub-menus. It’s vital to become familiar with the contents of the most important ones, because once you know where to look for everything
you’ll be able to work more quickly, efficiently and confidently. Let’s take a look at some of the key menu listings.
File
Edit
Image
Layer
New... XN I
Open... XO
Browse in Bridge... XXO
Open as Smart Object...
Open Recent ►
Close XW
Close All xxw
Close and Go to Badge... oxw
Save xs
Save As... OXS
Save a Copy.. xxs
Reven F12
Export ►
Generate ►
Share-
Invite...
Search AOobe Stock...
Place Embedded-
Place Linked...
Automate ►
Scripts ►
Import ►
import from iPhone or iPad ►
File Info- XOXI
Version History
Print... XP
Print One Copy XOXP |
File----------------1
The most important options here are
New... to create a new document,
Open... to open your file, Save
to save your current project in its
default file format and location and
Save As... which gives you the
option to save in a different format
or location and to change the file
name. Also in the File menu are the
important Automate and Scripts
sub-menus, which provide advanced
batch processing and automated
editing options.
Undo Extrusion from Text Layer xzl
1 Reoc
Toggle Last State XXZ
Copy XC
Paste XV
Paste Special ►
Search Check Spelling- Find and Replace Text... XF
Fill- Stroke... Ofs
Content-Aware scale XOXC
Puppet Warp Perspective warp Free Transform XT
Transform ►
Sky Replacement...
Define Brush Preset.. Define Pattern-
Purge ►
Adobe PDF Presets.. Presets Remote Connections.. ►
Color Settings... Assign Profile... Convert to Profile- OXK
Keyboard Shortcuts... XOXK
Menus... Toolbar... XOXM
Mode ►
Adjustments ►
Auto Tone OXL
Auto Contrast XOXL
Auto Color OXB
Image Size... XXI
Canvas Size- xxc
Image Rotation ►
Trim... Reveal All
Duplicate... Apply Image- Calculations...
Variables ►
Analysis ►
Image —1
The Image menu is where
you come to make changes
to the whole image, including
Mode (colour type), Image
Size, Canvas Size and Image
Rotation, but the most
important thing you’ll find here
is the Adjustments sub-menu,
Contact Sheet II...
Conditional Mode Change...
Fit Image...
Lens Correction...
Merge to HDR Pro...
Photomerge...
Edit----------------1
The Edit menu has many features
you’ll find familiar if you use a
word processor, including Copy,
Paste and Cut functions and even
a spelling checker, although you’ll
probably find it quicker to use
the keyboard shortcuts for these.
You’ll also find the useful features
Fill, Stroke, Content-aware Scale,
Puppet Warp and Free Transform,
as well as the colour profiles and
Preferences sub-menu.
Brightness/Contrast... Levels... Curves... Exposure... XL XM
Vibrance...
Hue/Saturation... XU
| Color Balance... и? в
which Adobe could probably
have made into a separate
main menu in its own right.
Under Adjustments you’ll find
all your main image controls,
such as Brightness/Contrast,
Levels, Curves, Hue/Saturation
and many more. You’ll find
many of these duplicated on
the Adjustment Layer palette.
I New ►J
Copy CSS
Copy SVG
Duplicate Layer...
Delete ►
Quick Export as PNG OX1
Export As... XOX1
Rename Layer-
Layer Style ►
New Fill Layer ►
New Adjustment Layer ►
Layer Mask ►
Vector Mask ►
Create Clipping Mask XXG
Mask All Objects
Smart Objects ►
'Video Layers ►
Rasterize ►
New Layer Based Slice
Group Layers XG
Hide Layers X,
Arrange ►
►
Lock Layers... X/
Merge Visible OXE
Flatten image
Matting ►
Layer-------------1
Layers are a vital feature of
Photoshop. The most important
options here though are New,
which lets you create and
name a new layer and New
Adjustment Layer, which adds
a non-destructive editing layer
to your image. The Merge and
Flatten options can also be
found here along with Mask and
Slice options.
12 www.pclpublications.com
MENUS
WELCOME TO PHOTOSHOP
Type
\ FW-
SV0**’
More from Adobe Fonts...
Panels
Anti-Alias
Orientation
OpenType
Extrude to 3D
Create Work Path
Convert to Shape
Rastenze Type Layer
Convert to Paragraph Text
Warp Text-
Match Font-
Font preview size
Language Options
Update All Text Layers
Manage Missing Fonts
Paste Lorem Ipsum
Load Default туре Styles
Save Default Type Styles
Type---------------1
The latest version of Photoshop
includes many new text
presentation and handling
options. Most of these can be
found in the fly-out Character
and Paragraph panels on the
right of the screen or the Panels
option. Others can be found
here, including 3D text, warping
and special foreign language
options and glyphs.
All
Deselect
Reselect
Inverse
X/
Kt
OKI
sc**
Filter
Convert for Smart Fifers
Neural Alters...
Filter Gallery...
Adaptive Wide Angle...
Camera Raw Filter...
Lens Correction...
Liquify...
Vanishing Point...
3D
Blur
Blur Gallery
Distort
Noise
Pixelate
Render
Sharpen
Stylize
Video
Other
Skylum Software
"KF
ТОКА
OKA
OKR
OKX
TKV
Filter ----------
Photoshop CS6 and Creative Cloud
saw a major overhaul of the Filters
menu, with many new options,
including the amazing Adaptive
Wide Angle feature. There’s the
ever-popular Liquify filter, automatic
lens distortion correction, as well
as a huge range of other filters and
effects. Make sure you don’t go too
wild though, most of them are best
used sparingly!
View
Proof Setup
Proof Colors
Gamut Warning
Pixel Aspect Ratio
Zoom in
Zoom Out
Fit on Screen
Fit Layer(s) on Screen
100%
200%
Print Size
Actual Size
Flip Horizontal
Pattern Preview
✓ Snap
Snap To
Clear Canvas Guides
New Guide...
New Guide Layout
New Guides From Shape
Window
Arrange
Workspace
Find Extensions on Exchange (legacy)...
Extensions (legacy)
►
OX;
730
Actions
7 Adjustments
Brush Settings
Brushes
Channels
Character
Character Styles
□one Source
7 Color
Comments
Glyphs
Gradients
Histogram
History
Info
All Layers
Deselect Layers
Find Layers
Isolate Layers
TKA
TOKF
Color Range...
Focus Area...
Select
The Select menu contains the main
tools that let you control any or all
selections that are currently active
within your current document.
Whether you’ve got the Lasso
Tool active, Quick Selection or
Magic Wand, you can modify and
transform those selections here.
You can also select all your layers
or just items in selected layers.
View------------
The View menu is home to the
basic viewing controls such as
zoom level, but again you’ll want
to control those using shortcuts
to save time. You’ll also find the
very useful controls for the Snap
functions, including guide lines,
essential when you’re laying
out a more complex design or
composing text on an image.
Layer Comps
7 Layers
Libraries
Measurement Log
Navigator
Notes
Paragraph
Paragraph Styles
Paths
Patterns
Properties
Shapes
Styles
Swatches
Timeline
Tod Presets
Version History
Window —
This isn’t a menu you’ll be using
constantly, but it does hold some
very useful features, such as the
Arrange and Workspace sub-menus,
which allow you to control the layout
of tabs, windows and the various tool
palettes and panels.
о
New 3D Layer from File...
Merge 3D Layers
Export 3D Layer...
Spherical Panorama
Get More Content..
New 3D Extrusion from Selected Layer
New 30 Extrusion from Selected Path
New 3D Extrusion from Current Selection
New Mesh from Layer
Croup All Objects In Scene
3D
This is one of the more recent
additions to the Photoshop
workspace. The 3D menu lets
you turn your document into a 3D
environment where you can turn text
into 3D objects, import 3D geometry
and use lighting tools to create works
of 3D art and computer generated
imagery. You can even modify your
object’s surface colours and textures.
www.pclpublications.com 13
KEYBOARD SHORTCUTS
Keyboard
Shortcuts
There’s always a quicker way of doing
almost everything in Photoshop
<\|USEFULTIP
I Learning the keyboard shortcuts
I will speed up your editing and you
I can also set up your own in the Edit
I menu. Just be aware of creating
I ‘shortcut collisions’ where a custom
I shortcut is the same as a current
I default one.
One of Photoshop’s best features is its huge list of fully customisable keyboard shortcuts. Almost all of the program’s functions can be
accessed quickly by pressing various combinations of keys and once you learn those shortcuts your workflow will speed up immensely.
You can even make up your own for your most frequently-used operations.
Customising Shortcuts
You’ll find the Keyboard Shortcut preferences
menu at the bottom of the Edit menu, although
naturally it has its own keyboard shortcut,
Alt+Shift+Ctrl+K. You’ll find an exhaustive list
of all Photoshop functions, broken down into
category headings matching the names of the
main menus. You’ll find that many operations
already have their own default shortcuts. You
can easily change these, or even add your own
new ones. To apply a shortcut to an operation,
first locate it in the list and then click in the space
to the right of the name. You’ll see a small text
window appear and the next key or combination
of keys that you press will appear here. If the
combination is already used by another shortcut
you’ll see a notification warning you of this and
asking if you want to proceed with the change. If
you click Accept the new shortcut will be applied
immediately. Take care when making your own
shortcuts that you don’t accidentally overwrite
some useful defaults.
Application Menu Command
se+N
ss+o
Opt+36+O
Shift+3€+O
> Photoshop CC
~ File
New-
Open...
Browse in Bridge...
X*N
X*O
Opt*X+O
Shift* X*0
X*W
Opt*X+W
Shift* X+W
X*S
Shift*X*S
Opt*X+S
F12
J
Set: Mark 1 (modified)
A
Open as Smart Object-
Open Recent*
Clear Recent File List
Close
Close All
Close and Go to Bridge-
Save
Save As...
Keyboard Shortcuts Menus
Shortcuts For: Application Menus
Use Legacy Channel Shortcuts
14 www.pclpublications.com
KEYBOARD SHORTCUTS
Some Useful Default Shortcuts
Here are some of the more commonly-used shortcuts for image editing. There are many more of course, but it’s worth taking the time to
memorise these ones. You’ll work efficiently and they’ll make your life a whole lot easier.
CREATE NEW LAYER LEVELS
| shift J + | control j+ N j j control j 4- [_
CLOSE CURRENT DOCUMENT CURVES
control j + W j control j +
CLOSE ALL DOCUMENTS INCREASE BRUSH SIZE
alt| + |c°ntrol|+| W | Ш
SAVE CURRENT DOCUMENT DECREASE BRUSH SIZE
td+(_Ll 111
SAVE AS control j + I shift * a 1 BRING CURE shift IENT LAYER TO TOP +1 control j +
INVERT SELECTION PASTE FROM CLIPBOARD
shift j +| control j 4- ] ~| j [ control j 4-V j
ZOOM IN VIEW COPY TO CLIPBOARD
control j 4- + j j control j 4-C j
ZOOM OUT VIEW CUT TO CLIPBOARD
control + I j j control j 4-[ X j
FIT ON SCREEN FREE TRANSFORM
|сотего1Но 1 [control] 4-1 T j
100% ZOOM TURN SNAP ON OR OFF
a|tI + [control] + | > | j shift ] 4-1 control] + j . j
SHOW RULERS SELECT ALL ON CURRENT LAYER
I control [+ [ R | j control] + A
UNDO LAST STEP
MOVE CURRENT LAYER UP
SHOW OR HIDE GRID
DESELECT ALL
TOGGLE LAST STATE
MOVE CURRENT LAYER DOWN
HELP
—
Important Note
On a PC the Ctrl key for your
shortcuts looks like this on a
standard Windows keyboard.
If you use a PC and you see
an instruction in this title to
use a Cmd key, then just use
Ctrl instead.
On a Mac computer the
Ctrl key is replaced by the
Cmd key on a standard Mac
keyboard. If you use a Mac
and you see an instruction in
this title to use the Ctrl key,
just use your Cmd key instead.
www.pclpublications.com ] 5
PHOTOSHOP PREFERENCES GUIDE
Photoshop
Preferences Guide
Here are all the preferences
and what they do
AFTER
Photoshop is nothing if not customisable. You can
shape and adjust the user interface to suit your own
needs and make it a very personalised, and customised,
workspace. Not only can you choose what appears in
the main toolbar, you can also arrange and group the
various windows and features
entirely to your preference.
That accounts for the items
you interact with on the
screen, however there are
also a number of options
you can tweak to adjust
various ‘under the hood’
settings, as it were, too.
Photoshop has a listing of
all its Preferences both
general and specific, so
we thought we’d share
the salient points with
you here.
] g www.pclpublications.com
PHOTOSHOP PREFERENCES GUIDE SHOP
Preferences
G«ner»i Cokx Picker Adobe
interface .
* HUD Color Picker Hue Strip (Small)
Toote Image Interpolation: Bicubic Automatic
Hxtory Lop
File Handling O’”'0"*
Export Auto-Update Open Documents
Performance _. _
Disable the Home Screen
Scratch Disks
Cursors Use Legacy ’New Document* Interface
Transparency A Gamut stop Transform when Placing
Units & Rulers
Guides. Grid & Slices Use Legacy Free Transform
мир-'"* Z74 workspace changes will take e
Type vl/
3D
Enhanced Controls Reset All Warning Dialogs
Technology Previews
Appearance
Color Theme:
Standard Screen Mode: Default
Full Screen with Menus: Default
Full Screen: Black
Artboards: Default
Presentation
©
Highlight Color: Default
Color
Border
~ Drop Shadow
Drop Shadow
* None v
v Line
Artboard settings only apply to GPU RGB m
Ul Language: English: International «
Ul Font Size; Large
□ Scale Ul To F<
Changes will take effect the next time you start Pho
Options
Auto-Collapse Iconic Panels
□ Auto-Show Hidden Panels
□ Open Documents as Tabs
Q Enable Floating Document Window Docking
□ Large Tabs
Enable Narrow Options Bar
Changes wil take effect the next time you start P
Restore Default Workspaces
® Under Photoshop CC > Preferences >
General (Cmd + K) you will see the list of
preferences available. The General preferences
provide you with options to use some legacy
features from older versions of Photoshop,
Clipboard options, Smart Object creation and more.
®The next preference option is Interface.
This is one you are likely to access more
than most. This section primarily concerns itself
with the appearance of your workspace. The main
Colour Theme and the various colours employed
by the screen modes are set here.
®The Workspace preferences are fairly
simple and let you Auto-Show or Auto-
Collapse panels as required without the need to
manually open their properties. The Tools section
below that allows the use of Tooltips and panning
and zooming options can be turned on or off here.
Preferences
History Log
Fie Saving Options
image Previews Always Save □ Save As to Original Folder
□ Thumbnail D Save in Background
Append File Extension Always - g Automatically Save Recovery
information Every:
□ Use Lower Case
10 Minutes
Quick Export Format
PNG □ Transparency Smaller File (8-bit)
Quick Export Location
О Ask where to export each time
Export files to an assets folder next to the current document
Metadata
None ~
Color Space
Q Convert to sRGB
Available RAM: 30656 MB
Ideal Range 16861-22073 MB
Let Photoshop Use: 21459 MB (70*1
History & Cache
Optimize Cache Levels and Tie Size for:
Web/Ul Design
Default / Photos
Huge Pixel Dimensions
Options
Graphics Processor Setti
Detected Graphics Proces:
NVIDIA Corporation
NVIDIA GeForce GTX 6801
□ Um Graphics Processoi
Advanced Settings...
History States: I
Cache Levels: >
Cache Tile Sire:
Set Cache l
History Log lets track your actions in
each Photoshop session and then save
them out as a text file. File Handling offers a set
of options to control the use of Image Previews
and File Extensions. You can also adjust the File
Compatibility options such as layered Tiff files.
©Export contains a few options that govern
what format your images are if you choose
to use the Quick Export function. You can also
decide on a Quick Export Location, choose if any
Metadata is appended to the image format and
what Colour Space the image will be.
©Performance is a key area in which to
spend some time as it will greatly speed up
your work if set up correctly. Here you can control
how much RAM Photoshop uses and, if your
graphics card is compatible, to allow the use of
advanced Graphics Processor Settings.
Active? Drive
1 □ Macintosh HO
2 Work Storage 4
3 C Master D
4 Time Machine
5 Master В 2TB
6 Mark Storage 1
Free Space
742.48GB
31&41G8
1236.02GB
43.58GB
235.13GB
683.21GB
Information
Startup
Units
Rulers: Millimeters
Type: Points
Column Size
Width: 180 Points
Gutter: 12 Points
New Document Preset Resolutions
Print Resolution: 300 Pixel
Screen Resolution: 72 Pixel
Pornt/Pica Size
О PostScript (72 points/lnch)
Traditional (72.27 points/lnch)
Guides
Canvas BCyan
Artboard Light Blue
Show Inactive Artboard Guides
©Scratch Disks lets you use hard drive
storage as virtual RAM, whilst Cursors lets
you specify the precision, size and shape of the
Brush Tip. Transparency and Gamut govern the
transparent, background grid size and in what
colour a Gamut warning will appear.
©Units & Rulers is fairly self-explanatory with
options for in which units of measurement
your Rulers and Type sizes appear. Grids, Grid &
Slices is a useful set of options when you need
precise grids added to your document in terms of
colour and grid line frequency.
®You can control the use of Plug-Ins and
Type Options in the next two preference
sections. Then there is the 3D section where you
can set VRAM usage, 3D Overlays and Interactive
Rendering. Enhanced Controls for Touch Bar and
Technology Previews round out the list.
www.pclpublications.com J 7
WELCOME TO PHOTOSHOP
THE PHOTOSHOP HOME SCREEN
The Photoshop
Home Screen
We show you what the Photoshop user front
end has on offer in the latest versions
In the good old days of Photoshop CS, you
had a product that you opened up and
simply started using with nothing else getting
in the way. These days that is no longer the
case. The Adobe Creative Cloud series of
covering every topic you can think of. From
every creative need.
apps now offer user interactive front-end
USEFULTIP
Want to learn more about
Photoshop and all its techniques?
The Home Screen has a number of
links to some very useful tutorials,
as shown above, that will walk you
through some of the essential skills
needed to get you up and running.
environments that are more than just a list of
recently opened files. Now you can browse
and sort those files and display them in
thumbnail or list form. That’s not all, you also
have access to Adobe’s online web tutorials
basic videos on getting started with layers
and cutting out images, to more advanced
topics, you have a library of knowledge at
your beck and call. Even creating a new
document has a huge wealth of choice for
18 www.pclpublications.com
THE PHOTOSHOP HOME SCREEN WELCOME TO PHOTOSHOP
Ps
New file
Open
A Home
-‘2’- Learn
FILES
Pl Your files
Э * -
®When you open Photoshop, rather than
just going direct to the workspace, you
are first presented with the Adobe Photoshop
CC Home screen. The main part of the window
concerns itself with the display of your Recent files
in ascending or descending order.
®ln the top left of the screen you can click on
the menu items. Home is active by default,
but you can click on the Learn button to display
a page of available tutorials from which you can
choose. At the bottom, there is the option to go to
Adobe.com for even more.
Below the Learn option is LR Photos. When
you click on this option, it displays a page
of your Lightroom images that are stored online.
View them and choose which ones you would like
to select for import. They will then download and
open in Photoshop.
и
©For your reference, in the top left corner is
the PS icon. If you click on that, it will open
the Photoshop workspace, but no images will be
opened. You can start your workflow if needs be,
or you can click on the Home button to return to
the Home screen once more.
©The next option on the left of the Home
screen is Create New. When you click on
this button the New Document screen will appear.
The first screen will list Recent items and the
document sizes available will reflect image sizes
you’ve used in the past.
®You can input your own dimensions in the
Width and Height fields and choose a unit
of measurement for your new document. You can
select the Orientation, Resolution, Color Mode and
even Pixel Aspect Ratio. Then click Create to open
the document and start working.
TEMPLATE DETAILS
Abstract Visions Photo
Masks
By Wavebreak Media
St Adobe Stock
A set of photo masks in a variety of shapes on
brightly colored backgrounds.
©Across the top of the New Document
window, you will see a number of Blank
Document Presets from which you can choose.
First is any you have saved yourself, then there are
the Photo presets. These are a range of standard
photo print sizes such as 7 x 5 in @ 300ppi.
® Below the Presets are a number of masking
Templates, provided free by Adobe, for you
to use. They range from Gallery Frames to Collage
Layouts. When you click on any of the templates,
you will see a set of details listed to the right of the
New Document window.
®lf you click the See Preview button,
you can look at the templates in more
detail prior to deciding if you want to download
it or not. There are also Presets and making
Templates for Print, Art & Illustration, Web,
Mobile and Film & Video.
www.pclpublications.com ] 0
WELCOME TO PHOTOSHOP
YOUR FIRST PSD DOCUMENT
Your First PSD
Document
Let’s start at the very beginning and walk you through
the process of making your very first document
You might think that opening or creating a
new Photoshop document is a very
simple task to achieve. In the days of older
versions of Photoshop that was certainly true
with its original start up sequence. You either
opened a photo, or you made a new
document and started work. These days, with
the advent of Photoshop CC, it’s a slightly
more involved affair and goes way beyond
anything that has been seen in Photoshop
before. The newest version of the program
has a Home screen and a more interactive
front end, offering a lot more choice from the
very moment you open the program. Let’s
start at the very beginning, dive in and have
a quick look at what the Home Screen has
on offer for the new user, create a couple
of different documents and get to know the
options available to us.
2000 pb^end
2000 x 2000 px» 300
Edit your photos
Tweak lighting and colors and remove things.
Browse tutorials
Recent
fantasy-505400Sjpg
10 seconds ago
planet-IO-orange-blue-final-
smalLjpg
27 seconds ago
spdce-4169495.jpg
26 seconds ago
portrait-4572313.jpg
26 seconds ago
Sort Recent
Layers
Q Kind
Normal
Opacity: 100%
Fill: 100%
Layer 1
ES Ф Ц
AFTER
BEFORE
20 www.pclpublications.com
YOUR FIRST PSD DOCUMENT
File | Edit Image Layer Type Select
New... 3€N
Open... 3€O
Browse in Bridge... X Э€ О
Open as Smart Object...
Open Recent ►
Close 3€W
Close All X 3€ W
Close and Go to Bridge... O3€ W
Save 3€S
Save As... O3€S
Revert М2
®lf you have never used Photoshop before,
the first time you open the program you are
presented with the Welcome screen giving you the
option to take a tour, check out the new features
or just open an image and get started on your
new project.
®lf you’ve used Photoshop a few times, your
Home screen will look slightly different.
It will display any recent images you have been
working on as a set of thumbnails. You can click
on any thumbnail to open that file and resume
working on it.
®To create a new document, you can either
go to the top file menu and choose File >
New (Cmd + N), or simply click on the Create New
button on the left of the Home screen. Either option
will open the New Document screen, ready to start
your project.
Height Orientation Artboards
2000 0 E □
Resolution
300 Pixels/Inch
Color Mode
RGB Color v 8 bit
Background Contents
©We’ve chosen a 2000 x 2000 pixel
document. The default resolution is 300
pixels/inch and in RGB Color mode with White
Background Contents. If you are not familiar with
Colour Mode and Colour Profile, you can happily
stick with the defaults for general use.
®When you hit the Create button, a new
document is created with your settings
applied from the New Document screen. Since we
opted for the Background Contents to be white, the
new document will be created with the Background
layer appearing as a locked, white layer.
®lf you look at the Background layer in
your layers palette, you will see the small
Padlock icon that indicates the layer is locked. If
you click on the Padlock icon, you can unlock the
layer and turn it onto a standard, editable layer
called Layer 0.
RGB Color
Bbit
Background Contents
White
White
Black
Background Color
Transparent
1
Custom
Just for comparison, if we start going
through the new document procedure once
more, we can also alter the Background Contents
and, in this case, choose Transparent instead.
Now, when you hit the Create button, you will have
a different looking document.
This time, when your new document
appears, it will have a transparent
background layer, called Layer 1, which will also be
unlocked and ready to edit. Transparent layers are
easy to spot since you will see the chequerboard
pattern of white and grey squares.
®That is your first document created. So
far so good, now, of course, you can start
populating the document with images and graphics
to create your very own work of art. Don’t worry if
you’ve not tried it before. We can show you how
it’s done.
www.pclpublications.com 21
OPEN AND SAVE YOUR FIRST IMAGE
Open and Save
\bur First Image
A quick guide on how to open new photos and
images in Photoshop, and then save your edits
true Photoshop masterpiece has to start
somewhere right? In order to create that
masterpiece you have to be able to open and
navigate to your various image assets, and
then fire them up in Photoshop in order to
begin working on them. Photoshop is no
different to many other programs in that it
allows you to bring up a browser window in
order to find the files you require. It also has
its own methods for both managing and
locating your images in the form of Adobe
Bridge, which lets you search for images as
well as keyword them making future searches
much easier. This is all useful stuff, so get
ready to try it out.
>4005.ДО
tantasy-3554709 lpg
AFTER
tantasy-
goddess-
fi
&
22 www.pclpublications.com
OPEN AND SAVE YOUR FIRST IMAGE
CC File | Edit Image Layer Type Select
New... XN
Open...
Browse in Bridge... ft X3€O
Open as Smart Object...
Open Recent ►
Close xw
Close All xxw
Close and Go to Bridge... oxw
Save xs
Save As... OXS
Revert
Export ►
1 Generate ►
UCUty-41W?eOJPO
god<M«s-5O2M97.|pg
©Since we’ve covered how to create a
new document, it seems worthwhile just
touching on the other options available. One of
which is simply to open a base photo. You have the
Open option on the Home screen, or, from the top
file menu, you can choose File > Open (Cmd + O).
®This calls up a new window where you can
browse your computer’s folders for any
stored images. It makes sense to try and keep all
your image files in a centralised repository, rather
than casting around the darkest comers of your
hard drive.
®Once you have found your image, it is
simply a case of either double-clicking the
image in question, or highlighting it (or several
images at once) and then clicking on the Open
button at the lower right of the browser window.
They will then open in Photoshop.
CC | File | Edit Image Layer Type Select
New... XN
Open... XO
Open as Smart Object...
Open Recent ►
Close XW
Close All XX W
Close and Go to Bridge... О X W
Save XS
Save As... OXS
Revert F12
Export ►
_MRK1210.jpg
®☆☆☆☆☆
Date Created: 07/01/2018, 04
Date Modified: Today, 09:15:i
6.26 MB
Document Type: JPEG file
1.3 s at f/11.0 -0.67, ISO 64
Focal Length: 30.0 mm
4253 x 2642 @ 300 ppi
Color Profile: Adobe RGB (19
Landscape, ocean, water
©If we can step back to the Home screen
for a moment. Rather than using the File >
Open menu command, you can choose instead
to use the File > Browse in Bridge (Alt + Cmd
+ O). Bridge is Adobe’s image management,
cataloguing and key wording application.
Rather than just using a standard browser
window, you can use Adobe Bridge to find
your images, display them, arrange them in date
order and even add specific keywords making
them that much easier to search for, and find, if
you need them again.
You can click single images and add
keywords or you can select images in bulk,
and, in the Keywords section of Bridge, click the
New Keyword button and add keywords specific
to those you have currently highlighted. They will
then be displayed alongside the images.
Metadata Keywords =
//11.0 1.3 4253 x 2642
[Ml -0.67 6.25 MB 300 ppi
X 15064 Adobe RGB RGB
* Ale Properties
Alename _MRK1210.jpg
Document Type JPEG file
Application Adobe
Date Created 07/01/2018,
i °.p®n
Open With
Move to Bin
Get Info
Adobe Photoshop 2022.app (default)
D)
Qb
Format:
Save:
Color:
У Photoshop
C Adobe Acrobat.app
□ Adobe Illustrator 2O22.app
Э Adobe Photoshop Elements Editor.app (17.0 (2
Large Document Format
BMP
CompuServe GIF
Dicom
Photoshop EPS
IFF Format
JPEG
JPEG 2000
JPEG Stereo
Multi-Picture Format
PCX
Photoshop PDF
®ln Bridge, you can browse your images
in much the same way as in a browser
window except you have a lot more control over
what you can do with them. You also have a lot
more image data available to you, which is found
in the Metadata section.
®When you have found your image, click
on it to highlight it and then right-click it to
bring up a context menu where you can choose
from a number of options. In this case, we would
go for the Open With > Adobe Photoshop 2022
(default) option.
©If you open a Jpeg and do not add any
new layers, when you save it after editing,
it will be saved in its original Jpeg format. If,
however, you make edits that involve layers and
adjustments, then it will need to be saved in PSD
format to retain those layers.
www.pclpublications.com 23
PLACING AND IMPORTING IMAGES
Placing and
Importing Images
Now we will show you how to bring content into your
document and make it look amazing
t’s very easy to find and open a photo, work
with it, and then save it again, without the
need to turn it into a native Photoshop PSD
file that retains all the layers and adjustments
information within it. We’ve looked at creating
new documents from scratch, so now we can
take our newly created blank document, start
importing images and begin the process of
building a basic design with just a couple of
images. As simple as this guide may appear,
it is a cornerstone to what makes Photoshop
so useful as an image editing and digital
manipulation tool for photographers and
designers alike. We will use this tutorial to get
used to bringing in images and working with
them on their layers.
24 www.pclpublications.com
PLACING AND IMPORTING IMAGES
WELCOME TO PHOTOSHOP
©Opening a single image is a fairly simple
process, which Photoshop makes even
easier thanks to the number of ways you can interact
with your files before opening them. Now, having
made a blank document to your requirements, we’ll
go a step further and populate it.
®To begin, a quick word about the two
methods on offer for imported images.
You can use the Place Embedded option, which
embeds images as Smart Objects that can be
edited independently of your active document, but
are still contained within it.
©Secondly, you have the Place Linked option.
This means you have an image that once
placed in your document retains a link to the original file
that you placed. Now, if you edit the original image, the
next time you look at your document containing that
image, it will update to the latest saved version.
1
71616.png
jpg
>-502549
jpg
INDD
fantasy-3554709, fantasy-419
• keei
photosh...at
shot
Screenshot
Scree
Here, we have used File > Place
Embedded. Start by navigating to the folder
with the first image you’re using, highlight it and
then click the Place button, or simply double-click it
to open it in the document on its blank layer. Note
the layer name changes to the image name.
®You can now move, scale and rotate the
image before you commit to finally placing
it on its layer. Click and drag the cover control
points to scale the image to fully fill the document.
Then you can hit Enter on your keyboard to
commit the changes.
®Go to File > Place Embedded again and
this time choose a second image. We have
a skeleton character we want to bring in to a new
layer. Place this new image, and then use the
control points to scale the image and also drag it
to your preferred position.
©Both images, since they are embedded,
are placed as Smart Objects. If you look
in the lower right corner of their thumbnail, you’ll
see the small icon that denotes a placed Smart
Object. If you are happy with them, you can
convert them to standard pixels.
® Right-Click on your layers to call up the
Context menu. Look down the list and
you will see the Rasterize Layer option. When you
select this, you will convert each of the Smart
Objects into normal pixel-based images that now
behave like standard photos.
©You have created a basic document with
two layers. It might seem quite simple,
but this is what makes Photoshop so versatile
and offers you the chance to take various image
elements and combine them in amazing new
ways to create stunning artworks.
www.pclpublications.com 25
USING LAYERS
Using Layers
Understanding layers is fundamental to Photoshop editing
The concept of Layers was first
introduced with Photoshop 3.0 in
1994, and has become the very core of
Photoshop image editing, as well as being
imitated by every other image editing
program on the market. Layers are exactly
what they sound like; the elements of the
image are stacked up and displayed in
descending order. Since layers can include
transparency, lower layers can be visible
through higher layers.
Effects, adjustments and operations can
be applied to individual layers, or to all
the layers at once. You can: move layers
around relative to one another, change the
order of layers in the stack, turn layers on
or off and delete layers, without affecting the
others. Some people seem to have a hard
time getting their head around the concept
of layers, so the best way to think of them is
as a pile of glass panels with the elements
that make up the image painted onto them,
with you looking down on them from above
to see how they stack up.
FRONT
Layers have a number of advantages. For one
thing, the ability to change one element on one
layer without affecting the other layers means
that you can edit your image non-destructively.
For example if you want to perform an operation
on a layer but you’re not sure how it’s going
to turn out, just make a duplicate layer, set the
original to be invisible, then do your editing on the
copy. If you don’t like the result, you can simply
delete it and go back to the original.
There are four main types of layer. There are
Pixel layers, which contain the graphical elements
of the image. There are Text layers, which
contain text information which can be edited
and resized. There are Vector layers, which
contain vector information such as shapes and
work paths, and then there
are Adjustment layers, which
contain embedded commands
that affect the layer immediately
below. We’ll look at Adjustment
layers in more detail on the
following pages.
There is a downside to using
layers, and that is the file sizes
they generate. Adding layers and
the information that goes along
with them massively increases the size of the file,
so when you’ve finished editing and you want
to save the picture you’ve created, it’s usually a
good idea to Flatten the image, which merges all
the layers together into a single image.
ВД USEFUL TIP
I Click on a layer, press and hold the Shift key
I on your keyboard and click on another layer
I to multi-select a number of layers.
26 www.pclpubllcatlons.com
USING LAYERS
WELCOME TO PHOTOSHOP
The Layer Palette
Knowing your way around the Layer palette is vital if you want to make the best use of this feature.
Blend Mode
Determines how the layer interacts with the
layer below it. Can be changed for every layer
one by one, or for a group.
Opacity
Controls how transparent the layer is, and how
much of the layer below will show through.
You can use the slider or numeric value.
Layer Filters
Choose to display only one type of layer, or all
of them, and by selecting the drop-down you
can select the order in which you show them.
Visibility
Clicking on the eyeball simply renders the
layer and all its effects invisible. Also, Alt +
left-click to view that layer on its own.
Layer Styles
This panel lets you add effects such as
drop shadow, bevelled edges, inner glow,
gradient overlay and much more.
Fill
Similar to Opacity, but only works on pixel
information, ignoring blending options and
layer effects.
Layer Locks
By clicking on these buttons you can lock the
layer from any further activity. Transparency,
image pixels and position can be locked
independently of each other.
Text Layer
There are several different types of layer. Text
layers, not surprisingly, contain text characters.
Background
The Background layer is the default bottom
layer, and always starts off locked when you
open a new Photoshop document.
Link Layers
Highlight a few layers and then click this
button to link the layers. Transform and
Move commands will affect all linked layers.
Layer Mask
Add a mask to a pixel-based layer, to reveal
or conceal information, using black to
conceal or white to reveal.
Adjustment Layer
An alternative to the main layer
menu, and here you can add all the
adjustment effects such as Levels,
Brightness and Contrast and Saturation.
New Group
Creates a new layer group, into
which you can drag and drop layers,
which helps you to organise layers in a
big complicated composition.
©New Layer
Clicking on this button
creates a new blank layer
directly above the currently
active layer.
©Delete Layer
Does exactly what you’d
expect it to do. Click to delete the
currently active layer, or drag a layer
onto the button to delete it.
www.pclpublications.com 27
YOUR FIRST COMPOSITION
Your First
Composition
This is when you discover the power
of Photoshop
Now is the chance to get to the nitty gritty
of what Photoshop is all about. Working
with layers in a document and importing
various images and graphics is a key part of
how Photoshop functions. Opening a photo
and then adding layers of adjustment or
additional elements on top is what makes
Photoshop the incredibly useful image
editing program it has become. You can
simply enhance a favourite photo to make
its colours look more vibrant and the details
a little sharper, or you can create amazing
compositions by combining various images,
or parts of them, in new and exciting ways
that will have your viewers wishing they could
do it too.
28 www.pclpciblications.com
YOUR FIRST COMPOSITION
®This new artwork starts with the opening
of a base image. In this case, we chose
File > Open (Cmd + O) and then navigated to
where our background image was stored. We have
chosen a pasture background image for our new
composition. Now we can add more elements.
®lf you wanted to, you can keep a browser
window open on your computer that
contains your images and, rather than going
through the open and find procedure, you can
simply bring the browser window to the front and
drag your next image on top on the base image.
®This means our dropped image will open
on its own layer, which will be named
after the title of the file. In this example, an image
of a warrior princess now sits above our base
image on a new layer. Next, we need a little more
background interest to flesh out the scene.
©Using the same drag and drop technique,
we add a mythical creature that sits quite
nicely in the background. There is one problem
however; the horse now appears to be covering
our foreground character. This is when layers
become so useful.
©By clicking and holding the mouse over the
layer containing the horse, we can actually
drag that layer so that it sits underneath the layer
containing the princess. Now, with our figure in the
foreground and the horse behind her, the image
makes more sense.
©Since each element is on a separate
layer, they can be edited and manipulated
independently of each other. For instance, the
horse might look better if it were the other way
around, so the layer could be flipped horizontally
for a different composition if you wanted.
Convert to Smart Object
New Smart Object via Copy
Edit Contents
Reset Transform
Relink to File...
Relink to Library Graphic...
Replace Contents...
Export Contents...
Convert to Linked...
Convert to Layers
Rasterize Layer [ \
Rasterize Layer Sty
nisahip I av₽r Mack
®lf you go to the layer options palette, you
can click on the Create A New Layer button
and then add a layer between the horse and the
base image called ‘shadows’. Here you can use a
soft black brush to add some shadow to anchor
the creature to the ground more realistically.
©Since both the figure and the horse are
Smart Objects, when we are happy with
their final placement, orientation and size, we right-
click on them, choose Rasterize Layer from the
menu and convert them to normal pixel images in
each of their layers.
©One final addition for this example is a
new layer named ‘mist’, which is placed
between the princess and the horse. This layer
of mist contains white brush marks and then, to
complete this dramatic composition, its Opacity
can dropped to about 45%.
www.pclpublications.com 2 9
YOUR FIRST CUT OUT
Your First
Cut Out
Learn how to cut out parts of one
image to use on another
f we are talking about key skills that
make Photoshop the most popular photo
editing program around, then we have to
talk about the ability to cut out parts of
one image and then use it as part of anther
image entirely. Cut outs are another staple of
image enhancement and manipulation that
are essential skills to have. It is lucky for us
that Photoshop has a number of tools at its
fingertips that can help make the process
less of a chore. We are going to take two
images and then cut out part of one and use
it on the other. Yes, it’s a very simple tutorial,
but it’s also very useful. This is a skill you will
need to use a lot if you wish to create works
of art involving multiple image sources. It’s
not as daunting as you might imagine and we
can show you how.
3 0 www.pclpublications.com
YOUR FIRST CUT OUT
X cutout forestjpg @ 33.3% (RCB/84
♦F. |Z2OO 2000 1800 1600
p Lasso Tool L
Ро|У9°па1 Lasso Tool L
Magnetic Lasso Tool L
tl- °
J.
®We have gone to File > Open and then
navigated to a folder containing the two
images we want to combine. They consist of a shot
of a model along with a very moody woodland shot
we want to use as a backdrop. We select both and
then click on Open to get started.
®We need to concentrate on the girl’s image
first since we want to remove her from
her background. This image has one immediate
benefit in that, for the most part, the girl’s outline is
reasonably well defined against the lighter colours
of the background she is pictured front of.
®\Ne could choose the Lasso tool (L) and
try to draw freehand around the outline
of the girl. This can be a time-consuming, tricky
and relatively inaccurate way to do it when there
are other tools available to us in Photoshop’s
comprehensive selection arsenal.
:e Edge Select Subject Sele
Ml Layers □ Enhance Edge Select
I @25% (RGB/8#)
Ф1п this example, the Quick Selection tool
(W) could be a better option, but since
this is a recently updated version of Photoshop,
there are newer selection tools that might be
even better. The Select Subject button in the tool
options bar is just the ticket.
©The Select Subject tool will automatically
scan and analyse the image for you and
then it will make a best guess of what it considers
to be the main subject and put a selection around
it. Since our model is posing against a plain
background, the selection is fairly accurate.
©Luckily, we have additional tools that allow
us to refine the selection still further using
the Select and Mask tool. We can click on it and
use the Refine Edge Brush tool (R) to brush over
any areas that might be in need of some targeted
refinement and we can use the Refine Hair tool.
ile Image Layer Type Select Filter 3[
Undo Lasso
Redo
Toggle Last State
XZ
xxz
•cl
Fade...
8#)
Cut
XF
XX
Copy
XV
Paste
Clear
Search
Check Spelling.
XF
®lf you’re happy with the refinement, click
OK to proceed and return to the main
image. You can now go to Edit > Copy (Cmd + C)
to copy all the pixels inside the selection area you
have created. You can then click on the document
tab of the other image to open it.
Now we can go to Edit > Paste (Cmd
+ V) and paste the cut out girl into this
document on its own layer, which is called ‘Layer
1 ’ by default. The figure can be moved, scaled and
rotated if we wish until we have it how we want it
against the woodland background.
All we did next was to use a couple of
Levels adjustments to add more contrast to
the figure and a little Color Balance adjustment on
the woods to make their colours more compatible.
The end result is a fine example of how to quickly
make cut outs in Photoshop.
www.pclpublications.com 3]
WELCOME TO PHOTOSHOP SELECTION TOOLS
Selection Tools
This fundamental technique allows multiple methods
for isolating specific areas of your image
The ability to select discrete areas of an image and change them
in isolation is fundamental to Photoshop editing and to help
with this there are many different ways of making that selection.
The most frequently used are the Marquee tools, which allow
you to select regular shapes such as rectangles, ellipses and lines. For
irregular shapes there are several Lasso tools, which let you draw the
area to be selected. For quicker selections there are the Magic Wand and
Quick Selection tools.
Common Options
If you look across the top left of your menu bar,
you will see there are common tool options for all
of the selection tods. After the Home button and
the Tool preset picker are the selection options.
The row of four buttons are: New Selection,
which is the default setting; Add To Selection,
which can also be activated temporarily by
holding down the Shift key; Subtract From
Selection, also activated by the Alt key; and
Intersect With Selection, which selects only from
areas you have already selected.
Edge Refinement
The next option is Feather, which softens the
edge of the selection based on the number of
pixels you enter in the Feather input field. This
is useful for gradual effects where you do not
want a hard edge around your active selection.
If you want even more control, the edge of the
selection can be further adjusted by using Select
and Mask, which uses sophisticated edge-
detection techniques to automatically select
around things like fine hair or soft and blurred
edges. You are given a number of options and
tools to control just how much refinement and
adjustment you want to apply to your selection.
A number of selection tools are also included
within the Select and Mask panel itself.
Object Selection Tool
The most recent update to Photoshop has seen
a number or improvements to the selection tools
on offer. Most notable is the Object Selection
Tool which can scan your image and individually
target all the differentiated objects in your
photo. This is a handy new feature and when
used in conjunction with all the other selection
methods such as Select Subject, Select Sky
and all those shown opposite, you have lots to
choose from.
C^l USEFUL TIP
I You can use the Quick Selection tool to
I quickly paint a selection using an adjustable
I round brush tip. As you drag, the selection
I expands outward and automatically finds
I and follows defined edges in the image. If the
I tool isn't visible in your toolbar, hold down
I the Magic Wand tool to see the fly-out menu
I with the additional options that are available
I to you.
32 www.pdpuWications.com
SELECTION TOOLS
Rectangular Marquee
Single Column Marquee
Make a selection of a rectangular area of any
size or aspect ratio. Just click and drag to the
right size. Hold down the Shift key to constrain
the selection to a square shape and use the
arrow keys to move the selection area.
This option creates a selection of just a single
vertical column of pixels. This is useful for tidying
up other selections or crops that are just a little
too big. Click near the area you want to select
and then drag the marquee to the exact location.
Create a selection of an elliptical shape of any
size or proportion. Just click and drag to the size
and shape you need and hold down the Shift key
to draw a circle. If you hold down the Alt key the
ellipse will be centred on the starting point.
Magnetic Lasso
Lasso
Single Row Marquee
This tool uses edge-detection to try to match your
selection to the edges of the subject in the image.
You simply draw a line as closely as possible to
what you want and it should automatically snap to
the edge. Works best on high contrast areas.
The Lasso is also used to make area selections
from the active layer, but this time the shape can be
irregular, marked out by clicking or drawing a line
around the area to be selected. Join up your lasso
at the point you started to close the selection.
This is the same as Single Column Marquee,
but this time it selects a single horizontal row
of pixels. As with the Single Column Marquee
option, click near the area you want to select and
then drag the marquee to the exact location.
Polygonal Lasso
Magic Wand
Quick Selection
The Polygonal Lasso lets you draw a point-to-
point line around your subject. It can only draw
straight lines, but by using very short sections it’s
possible to approximate a curved line. To draw
curved lines you need to use the Pen tool.
This tool lets you make selections from areas of
the same colour and brightness and by adjusting
the tolerance and whether or not it will select
contiguous areas, you can use it to do things like
automatically select all the sky in your image.
This tool lets you paint a selection and uses edge
detection to try to match the selection to the
nearest hard edge in the image. Again it’s often
only an approximation and will have problems
with blurred or low contrast edges.
www.pclpublications.com 33
YOUR FIRST LAYER MASK
Your First
Layer Mask
An introduction to one of the key
ingredients of Photoshop work
Photoshop’s use of layers is one of the
most important aspects of what makes
it is so versatile and enables the user to
unleash their full creativity. Once you include
the ability to add masks to those layers, you
have yet another very powerful tool that lets
you blend or hide parts of one image on
a layer and control how they interact with
another. Masks are not only very useful in
hiding or revealing parts of an image, they
can also be used, in conjunction with an
adjustment layer, to provide the same
function of hiding or revealing parts of the
effect you’ve chosen. We are getting ahead
of ourselves however. Let’s take a look at
how you can use a simple mask to produce
a very cool effect. In this case, cover up part
of a base image and allow part of another
image to show through to transform the look
of the original.
34 www.pdpublications.com
YOUR FIRST LAYER MASK WELCOMETO PHOTOSHOP
0
0
/ Quick Selection Tool W
y?* Magic Wand Tool W
[rJ Object Selection Tool W
®We have opened an example image of a
beautifully scenic lakeside mounain scene.
As lovely as this image is, we want to be able
to replace the sky with something a little more
exciting, and masking is a method that allows us
to do just that.
We have another photo with a great night
sky that should work well with our original
mountain image. We simply drag and drop the
sky image onto the active document, which then
appears on its own layer. We then scale the image
so that the sky fills most of the frame.
Making the new layer invisible for a
moment, we make the Background image
active by clicking its layer, then go over to the
toolbar and choose the Quick Selection Tool (W).
This tool allows for simple area selection based on
detecting contrasting edges.
fx □ О □ @
»tyles Channels
X
©Because the outline of the mountain against
the featureless sky is very well defined,
the Quick Selection Tool can easily select the sky
alone. All you do is click the tool on an area of sky
and then slowly drag the cursor around the sky
area, selecting more sky as you go.
®Any white masked area allows that part of
the layer be seen, whilst any black part of
the mask hides that part of the layer. The result is
that only the interesting sky area of the top layer is
visible, while the featureless sky is hidden on the
layer below.
®Make the top layer visible and active again
and you will notice you r active selection
that encloses the sky area (indicated by the black
and lines known as marching ants) is now overlaid.
We want to turn this area into a mask that hides the
area outside the selection.
To view the mask on its own, hold the Alt
key on your keyboard and left-click on
the mask itself. The Quick Selection Tool made
a decent job of discerning the edge between the
mountain and the featureless sky. Alt + left-click on
the mask to return to normal view.
©Keeping the selection active, go down to
the layer options palette and choose Add
Layer Mask. When you do, a mask will be added
to the top layer in the shape of the selection you
made. The area inside the selection is white, the
area outside the selection is black.
To move the sky in the top layer around,
but keep the mask in the correct position,
you can click on the small Chain link icon between
the layer thumbnail and the layer mask thumbnail.
This unlinks the image from the mask so either can
move without affecting the other.
www.pclpublications.com 3 5
YOUR FIRST SET OF ADJUSTMENTS
Your First Set
of Adjustments
The use of adjustments in Photoshop are another
key aspect of non-destructive editing
What do we mean when we say non-
destructive? Well, in simple terms,
if you open a photo shot as a jpeg file and
make all your edits and enhancements
directly to the image itself, you will find that
unless you save the results as another jpeg
file, the original will be lost to you. You have
effectively overwritten the original with your
edited version and there is now no way to
retrieve it. Unless you specifically wanted
to only use the edited version from then
on, that could be a very annoying outcome.
This is where Photoshop’s use of layers
and adjustment layers comes in very handy.
Something simple like a boost to brightness
and contrast need not be applied to the
image itself. You can use an adjustment
layer to affect the image, which means if
you remove the adjustment layer, the image
returns to its previous state. Not only that,
once you use layers, you can save your
work as a PSD and create a document with
everything you’ve used also preserved. You
can go back into it at any time and make
further adjustments knowing that the base
original has not been affected.
3 6 wwwpclpublications.com
YOUR FIRST SET OF ADJUSTMENTS
Brightness: 64 qk
Contrast: 20 Cancel
Auto
Use Legacy
D Preview
©Let’s take a fairly typical example as our
first step into adjustment layers. We have
a photograph of a young lady taken indoors. The
image is a bit underexposed and lacking any
real punch and colour. That’s ok, we can use
adjustment layers to help us.
The image can remain as a locked
Background layer. If you go to the Layer
Options panel, click on the Create New Fill or
Adjustment Layer button and choose Brightness/
Contrast from the list that appears. An adjustment
layer will now appear above your main image.
If the Properties panel does not
automatically appear, simply double-click
the adjustment layer thumbnail (not the mask) and
the properties panel will appear for that particular
adjustment; in this case, two sliders that control
Brightness and Contrast.
Solid Color...
Gradient...
Pattern...
Brightness/Contrast...
Levels...
I Curves...
Exposure...
©This image looks better after a +50 boost
to the Brightness along with a small -8
adjustment to the Contrast. The problem is that
the darkest areas still look too black with not much
visible detail. There is another adjustment that can
help out in this case.
©Click on the Create New RII or Adjustment
Layer again and choose Levels to add a
Levels 1 adjustment above Brightness/Contrast
1. Levels gives you more control, of any shadows,
midtones and highlights in the image, than
Brightness and Contrast alone can offer.
©Click on the middle slider and move it to the
left, all the middle tones will get lighter. You
can also move the Black Point slider below slightly
to the right, to remap solid black to progressively
lighter tones. The darker areas should now show
more detail.
®Now we can address the colour in the
image. At the moment, all the colours look
a little subdued. We can boost the vibrancy of the
image with another adjustment layer. This time,
choose Hue/Saturation and add that to the top of
the growing layer stack.
®How much you decide to boost saturation
is purely down to personal taste. In this
case, the Hue has a +5 adjustment, Saturation is
+49 and Lightness +6. Because these adjustments
are all on layers, they can be modified or removed
at any time with no issue.
You aren’t limited to standard adjustments
either. If you wish, you can experiment with
Things like Gradient Map. This uses several colours
initially, to replace the lightest and darkest tones in
the photo. In this case dark purple blends into red,
then orange, then bright yellow.
www.pclpublications.com 37
YOUR FIRST TYPE TOOL PROJECT
Your First Type
Tool Project
Get to know what the various Type Tool options can
do to really lift your artwork
BEFORE
he introduction of text and type effects
in Photoshop now means that you
can create cool logos or even documents
with paragraphs of text in them, if you
want. Although you don’t have the more
complex control of text that you might
have in desktop publishing programs such
as InDesign, you can still produce simple
text layouts, and other effects with relative
ease, thanks to a set of useful tools and
text controls. You can produce normal
horizontal text and vertical text if required,
and you can also use both vertical and
horizontal text to create masks. The only
limiting factor is the number of fonts you
carry on your system. The more fonts you
have, the more choice you have.
et, c
cididu
ndis
s ac
ur adipiscing elit, sed
labore et dolore magna
es gravida. Risus com*
lacus vel facilisis.
38 www.pclpublications.com
YOUR FIRST TYPE TOOL PROJECT
©Having opened an image, in the form of
a photo of a sunset beach, we want to
incorporate it with some text in order to use it as
a title graphic. To access the Type tools, we need
to go to the toolbar on the right and click on the
Horizontal Type Tool (T).
When you click on the Type tool, your
options menu at the top of your screen will
reflect what is available for that specific tool. In this
case, you can choose your font, the weight of that
font and the size you want it to be, along with some
other basic options.
©If you drag an area with the Type tool on
your image, it will automatically create a
new text layer and then display some default text to
show you what it looks like in your chosen font and
size. We can then type in whatever text we want to
use; we have simply typed ‘BEACH’.
T • т Horizontal Type Tool T
IT Vertical Type Tool T
J |‘TP Vertical Type Mask Tool T
□ T Horizontal Type Mask Tool T
tT 100 pt
aa Crisp
If you highlight your text, you can add some
Warp Text effects by clicking on the icon
in the options menu. Here, you can choose from
a number of effects such as Arc, Bulge, Fisheye
and Flag. Our example is a simple Wave effect with
sliders to control Bend and Distortion.
That was one option. Now, to use text to
create a mask, go to the toolbar again and,
this time, choose the Horizontal Type Mask Tool (T).
We have dragged out a text box over the flowers
and typed the word ‘BEACH’ again in large text.
We can move/scale the text box if necessary.
You will see that the area inside the text
shows the image clearly. Anything shown
that is outside the text is currently coloured red,
which means when you move on to the next stage
of the masking process, using this text mask, it will
not be selected.
Lorem ipsum dolor sit amet, consectetur adipiscing elit, sed
do ciusmod temper incididunt ut laborc ct dolorc magna
aliqua. Quis ipsum suspendisso ultncos gravida. Risus com-
©Click on the Commit Changes button, the
text will turn into an active selection. At this
point, you have a couple of options. You can click
on a selection tool like the Lasso Tool, right-click
the selection, then choose Layer Via Copy to copy
the area inside the text to a new layer.
Йл- If you prefer, you can go to the layer
options panel and choose Add A Mask.
This will mask the entire image of the beach
scene, leaving only the area inside the selection
visible. When masking, remember that white
reveals and black conceals.
®As mentioned, you can also create
paragraphs of text by dragging out a
text box of the size you want. Placeholder text
will appear in the box and you can then use the
Character and Paragraph properties to format your
text to suit your preferences.
www.pclpublications.com 3 9
Improve
Like many new skills, Photoshop may be easy
to follow, but more challenging to master. All
it takes is time, patience and the willingness
to learn. After taking a look at some of the
essential aspects of Photoshop, let’s get you
trying a few more techniques and tools to add
to your skill set. Every new skill takes you closer
to being a confident and experienced user.
www.pclpublications.com 41
LEARN AND IMPROVE
ADJUSTING EXPOSURE
Adjusting
Exposure
Correcting your exposure mistakes is easy with Photoshop
Even with the sophisticated technology found in the light metering
systems of modern digital cameras, they are not infallible. Some
lighting conditions can confuse them, resulting in pictures that are over
or under-exposed.
All cameras have a limited dynamic range, levels of illumination at which they
record featureless pure white or featureless pure black. The tonal variation available
between those two extremes depends on the quality of the lens, sensor and image
processor that captured it, along with the bit-depth of the file type used to record
it. For maximum bit-depth it’s always best to use Raw mode, since this will usually
Brightness/Contrast
|У"-'Д Layer Type Select Filter 3D View Plugins Window
store images in 42-bit or even 48-bit form, capturing greater dynamic range.
We’ll look at improving the exposure of the more common JPEG images from a
compact camera. JPEG images are usually
only 24-bit, so have less latitude for any
exposure recovery.
Over-exposure tends to be more of
a problem than under-exposure, since
bumed-out highlights contain no detail, but
the JPEG format is surprisingly good at
capturing detail in areas that might initially
look like featureless black. As a result it’s
often possible to rescue shots that are
quite badly under-exposed, although this
will also amplify any noise in the image, so
there is a trade-off for image quality.
This shot was taken using centre-
weighted metering against backlighting
and as a result the bright part of the
horizon is exposed reasonably well but
the foreground is under-exposed. It
would have been a better idea to use
spot metering, but we can still rescue the
photo using an image editing program.
The quickest and easiest way to brighten the photo is
to simply tum up the brightness. You’ll find Brightness/
Contrast as an adjustment layer in the palette on the right,
or in the Image > Adjustment menu. The Brightness/
Contrast function in recent versions of Photoshop has
been changed to improve contrast and tonal balance
when adjusting the brightness of your images.
By moving the Brightness slider to the right, the overall
brightness of the entire photo is then increased, but the
new algorithm retains a reasonable balance in shadow
tones. You can tweak the effect with the Contrast slider,
the result is reasonably acceptable.
Image Size-
Canvas Size-
Image Rotation
Duplicate...
Apply Image...
Calculations...
Analysis
Vibrance...
Hue/Saturation...
Color Balance...
Black & White...
Photo Filter...
Channel Mixer...
Color Lookup...
Invert
Posterize...
Threshoid...
Gradient Map...
Selecttve Color..
Shadows/Highllghts...
HDR Toning...
42 www.pclpublications.com
ADJUSTING EXPOSURE
LEARN AND IMPROVE
Levels
Photoshop offers another way of altering brightness
and contrast, but this time with more subtlety and
control, by adjusting the Levels histogram. You’ll
find Levels in the same Image > Adjustment sub-
menu as Brightness/Contrast. The Levels histogram
is basically a graph showing the proportion of
pixels in the image at each colour intensity. The
far left-hand end of the graph represents black
and the right-hand end is white, with every tone in
between represented by a spike on the graph. On
the bottom axis of the graph are three points, the
left representing the black cut-off point, the right
the white cut-off point and the one in the middle
representing the mid-tone point.
As you can see from the graph our image is
mostly shadows and mid-tones with little highlights,
so we need to brighten some of those shadows
into mid-tones. The way we do this is by moving
the mid-tone and highlights points left towards
the shadows. This has the effect of bringing out
a lot of the detail from the shadow areas without
burning out any more highlights. It also leaves the
deeper shadow areas intact. It is a far better way of
adjusting the exposure of a photograph than simply
altering the Brightness/Contrast, however it isn’t
quite the best way. Adjusting the Levels mid-point is
still strictly linear in its adjustment.
Curves
The Curves adjustment option, again found in the
Image > Adjustment menu and as an adjustment
layer option, is a method of changing the relative
brightness of specific tones and ranges of tones
within an image, giving precise control over
exposure. Learning to use it properly is a core skill
in image editing and will enable you to make precise
and subtle changes to the brightness and relative
contrast of not just of the image as a whole, but
also of individual colour channels.
Drag the Curves output line around by clicking at
any point, then moving the handle that appears. To
improve this picture we need to brighten the shadows
and mid-tones, while simultaneously darkening
the highlights, so we should drag the lower side of
the curve upwards and the upper part of the curve
downwards, creating an inverted S-shaped curve.
As with many Photoshop techniques, the key here
is subtlety. Push the curve too far and you’ll ruin the
picture, so keep an eye on it as you progress.
USEFULTIP
4s with most Photoshop editing techniques,
subtlety is the key. If you push the curves too
far you’ll lose detail.
www.pclpublications.com 4 3
LEARN AND IMPROVE
CONTRAST AND SATURATION
Contrast
and Saturation
Using curves and blend modes to improve colour
saturation and contrast in your digital photos
When you take a digital photo of a scene,
you are relying on your camera to be
able to capture all the colours and tones that
you see. Unfortunately most digital cameras
simply aren’t capable of recording the full
range of colours and shades that the human
eye can see, so your photo of what was a
bright and colourful scene may prove to be
a bit of a disappointment when you see it
on your monitor. Fortunately there are many
different ways to improve both contrast and
colour saturation, which might help to restore
some of the sparkle to your photos. Let’s
take a look at some of the alternatives.
•т т n a
®As an example we’ll use this snapshot
of a parrot. In reality the colour of the
scene is much more intense than it looks here,
but the digital camera that was used to take the
photo was set to a neutral and flat colour mode
to capture as much dynamic range as possible.
This mode generally leaves images looking a
bit pale and lacking contrast and vibrant colour.
This shouldn’t be a problem as the shot is well
exposed and contains plenty of detail that will
suit the increase in saturation.
The simplest way to improve the saturation
is by adding a Hue/Saturation adjustment
layer. Like many other parts of the program, Hue/
Saturation has been improved in Photoshop,
producing a smoother result than previous
versions. If you were to boost the saturation by
about +50, you’d restore some of the missing
colour, but it's a scattergun approach and doesn't
offer much fine control. It can also increase noise
in shadow areas in JPEG images. Let’s look at
more options.
A much more controllable way to adjust
both saturation and contrast is to use a
Curves adjustment layer. We've already looked
at Curves in the section on adjusting exposure,
but by using Blend Modes we can also use
Curves to enhance saturation. In Normal blend
mode the curve will change both contrast and
saturation. We’re using the same S-shaped
curve, which boosts brightness at the upper
end of the scale and darkens shadows at the
lower end.
44 www.pclpublications.com
CONTRAST AND SATURATION
LEARN AND IMPROVE
1
□ aSBCEEl
Auto L.V.r.
'.мла - В 0 T п Д *
Luminosity - Opacity: 100%
UJ- °° a 4* П fl RH: 100% *
8 Curves
0 J Background
A
By changing the blend mode to
Luminosity, the curve will only affect
brightness, so an S-shaped enhancement
curve will improve contrast, lightening
highlights and darkening shadows without
affecting colour saturation.
©Conversely, by using a Color blend
mode, an S-shaped curve will alter
colour saturation without affecting brightness,
so shadows and highlights are unaffected. This
is great to keep noise under control.
©Another way to improve saturation is
a Photoshop function called Vibrance,
which can also be applied as an adjustment
layer. Vibrance is a difficult thing to quantify. It is
a saturation function, but it works on a graph,
affecting the least saturated areas most, and the
most saturated areas least. On a picture like this
it can help, but it has to be used with contrast
enhancement for best effect, which may again
cause an increase in noise. This option is less
intense than using Saturation. Vibrance is best
used when processing a Raw image file.
www.pclpublications.com 4 5
LEARN AND IMPROVE
GRADIENT FILL AND PAINT BUCKET
Gradient Fill &
Paint Bucket
Fill layers and selections with colours, textures
and gradients
One very useful facility that Photoshop
provides is the Gradient tool. It can fill an
area of a layer with a gradual blend between
multiple colours. You can choose from a
selection of pre-set gradient fills or create your
own. It’s a great way to add gradient filters for
enhancing photographs, or to create effects
such as vignettes and centre-spot soft-focus.
Let’s take a closer look at how it works.
You’ll find the Gradient tool about halfway
down the Tool Palette. It has its own unique set
of options in the Tool Options bar, the main one
being the Gradient Picker, which lets you choose
from a list of pre-set gradients.
a.
я
a Gradient Tool G
<J>a Paint Bucket Tool ° G
4*>e 3D Material Drop Tool G
0
46 www.pclpublications.com
GRADIENT FILL AND PAINT BUCKET
LEARN AND IMPROVE
=ite Edit Image Layer Ту
899264.jpg
.0 300 350 400 450
Next to this is a row of buttons that create different
gradient shapes. The default setting is a straight
Linear Gradient, but other options include Radial,
Angle, Reflected and Diamond shapes.
Like the Brush tools the Gradient has blend
modes that let you mix the gradient colour fill with
the layer below it in various ways. This is a great way
to enhance landscape shots, by using an orange-
to-transparent gradient fill in Color mode, as in the
example seen here.
Photoshop comes with a selection of default
pre-set gradients loaded, but there are other packs
of gradients available. You can load in these other
packs via the Gradient menu. If you open the
Gradient Picker you’ll see a small icon like a cog
wheel. If you click on this you’ll see the menu, with
the list of standard gradient packs available to load
at the bottom.
Other Gradient tool options include the overall
layer opacity, reversing the direction of the gradient
colour mix, changing the “dither” of the colour
mixing and toggling the transparency.
Below are the main gradient types that you can
choose from the tool options bar at the top left of
your screen.
If you click and hold on the Gradient tool you’ll
find that one of its options is the Paint Bucket
tool, which is used to fill an area, a layer, or a
selection with a solid colour. In combination
with layer transparency and blend modes it’s
a great way to add a colour tint or filter to a
whole image.
If you use the Paint Bucket on the
background layer of your image it will fill in an
area of contiguous colour in much the same
way as the Magic Wand tool. To add a tint to a
whole image, create a new layer then fill it with
the colour. It will fill the whole layer and you can
then use layer transparency and blend modes
to achieve the effect you’re looking for.
To get this vintage photo effect, we used
a sand brown colour, at 100% opacity and
a Colour blend mode, which combines the
fill colour with the tones and colours of the
background image.
USEFUL TIP
Remember that the Paint Bucket uses the
same edge detection as the Magic Wand
tool. If you want to fill the whole screen, use
a new layer.
www.pclpublications.com 47
LEARN AND IMPROVE
CURVES AND LEVELS
Curves
and Levels
The most versatile way to adjust brightness
and contrast in your digital images
You’ll find the Curves function in the Image >
Adjustments menu, or use the keyboard shortcut
Cmd+M. The Curves dialog looks a bit daunting
at first; a graph with a diagonal line running up the
middle of it, like a difficult piece of maths homework.
It’s nothing to be scared of though and is in fact the
most useful and versatile tool for making adjustments
to the exposure and tonal balance of your images.
We’ll use this female portrait as the image to begin
with. What we want to do first is crop it down so we
just have the main part of her face and hair with some
trees beyond.
The Curves graph is a histogram showing the relative
strengths of different tones within the image. It shows the
input distribution along the bottom of the graph and the
output up the vertical axis. The straight diagonal line from
corner to corner indicates that there is a 1:1 ratio between
input and output at all tones; the output is exactly the
same as the input, as you’d expect. It Is by adjusting the
line and altering the ratio of input tones to output tones,
that we can achieve a number of effects. The left-hand
end of the horizontal axis represents the darker tones,
while the right-hand end represents the highlights.
File Edit Image Layer Type Select
Mode ►
Filter 3D View Window
О. О Resize
Adjustments
|3264ijPfl@66.7 Auto Tone
Auto Contrast
Auto Color
Image Size...
Canvas Size...
Image Rotation
YO98L
O3€B
X3€l
XKC
Trim.
Duplicate...
Apply Image...
Calculations...
Apply Data Si
Analysis
Desaturate
Match Color-
Replace Color.
Equalize
Brightness/Contrast...
Levels...
Curves...
Exposure...
Vibrance...
Hue/Saturation...
Color Balance...
Black & White...
Photo Filter-
Channel Mixer...
Color Lookup...
Invert
Posterize...
Threshold...
Gradient Map...
Selective Color.
Shadows/Highlights...
HDR Toning...
3€U
XB
VO3€B
The Curves graph can be manipulated in several
ways. You can move the line directly, by clicking
on it to place new anchor points and then dragging
these points into new positions. You can also use the
arrow keys to nudge a selected point up, down, left
or right. There’s no limit to where the line can start or
finish, or where it goes in between, which can lead to
some extraordinary results.
In later versions of Photoshop there’s an even
more useful way to use Curves. Just to the lower
left of the histogram you’ll see a button with a hand
and two arrows on it. If you click this button and
then move the cursor over the image you’ll notice a
point on the line move up and down as the cursor
passes over lighter and darker areas. Pick a spot
that you want to lighten, click on it and drag upward
and you’ll see the tone curve move to match. Using
this awesome feature you can selectively lighten or
darken pretty much every tone in the image.
48 www.pclpublications.com
CURVESAND LEVELS
LEARN AND IMPROVE
Boosting Contrast
Add two anchor points to the tone curve roughly
one-third of the way from either end. Drag the
shape of the line into a narrow S-shaped curve,
slightly raising the upper half of the curve and
lowering the lower half of it, leaving the mid-
point and both ends in the same positions.
This will brighten the lighter areas of the image,
while darkening the darker areas, increasing
the contrast while maintaining the same overall
exposure. It’s an excellent way to make very
precise adjustments to contrast. Mid-tone
lightness can be adjusted by moving the mid-
point on the curve up or down.
Emphasising Highlights
Emphasising Shadows
Brightening Mid-tones
To boost the highlights of an image move the
highest point leftwards along the top horizontal
axis. This increases the brightness of the lighter
pixels and may cause the brighter highlights to be
burned out, but the result can be quite pleasing
for the right kind of image. This technique works
well in monochrome, producing an ethereal high-
key image.
Moving the lowest point on the curve to the right
will darken the shadows, but this will lose both
shadow and mid-tone detail. This can be alleviated
by moving the mid-point of the curve upwards
slightly, flattening the upper part of the curve and
brightening the mid-tones. This emphasising of
shadows is very similar to boosting contrast, but
can create a more extreme result.
For images with very high contrast sometimes it is
necessary to boost the mid-tones to balance the
image. To do this, set three points on the tone curve
at roughly equal positions along the curve and then
move the middle one upwards to achieve the effect.
The other two points act as anchors, keeping the
shadows and highlights unchanged. Moving the
mid-point downwards has the opposite effect.
Levels
A quick, easy and accurate
way to adjust brightness
and contrast
In the Image > Adjustments menu you’ll also find
the Levels function, keyboard shortcut Cmd + L.
The Levels function is easier to use than Curves
and lets you quickly adjust the black and white
points and overall brightness of your image. It’s
particularly useful for images that contain a lot
of light or dark areas, such as dark objects on a
light background, because it provides a method
for fixing the lightest and darkest areas of the
image, while leaving the mid-tones free to be
adjusted upward or downward.
www.pclpublications.com 49
LEARN AND IMPROVE
CROPPING AND RESIZING
Cropping
and Resizing
Changing the size of a digital photograph
Sometimes a digital photograph
can be the wrong size. Maybe
you’ve got too much of the
surroundings in the picture, when
you wanted to concentrate on just
the main subject, or maybe the
whole image is too big, and you
need to make it smaller to send
via email or publish on a website.
Doing both of these things is very
quick and simple in Photoshop.
We’ll use this landscape shot of an
old shack and lake as the image to
start with. What we want to do first is
crop it down so we just have a tighter
view of the shack.
®The best tool for the job is, not
surprisingly, the Crop Tool. You’ll find it
in the tool palette, fourth down from the top. It
looks a bit like two set-squares.
®The Crop Tool is very easy to use. Simply
click near one comer and then drag a
box around the area you want to crop. Don’t
worry if you don’t get the size exactly right first
time, because you can adjust the size of the box
by using the drag-handles on each side and
corner. Press Enter to perform the crop.
Edit fl
Select Filter 3D \ L
CXL
.1 Layer Type
Mode
Adjustments
Auto Tone
Auto Contrast
Auto Color
(RGB/8
Image Size... n ХЯ1
Canvas Size...
Image Rotation
Trim...
Duplicate...
Apply Image...
Calculations...
Apply Data Set.
®Next we’ll resize the image to make it a
more manageable size. To do this you’ll
need to get to the Image menu and select
Image Size, or use the keyboard shortcut
Alt + Cmd + I.
Image Size: 5.38M
Dimensions: v 1707 px x 1102 px
Fit To: Original Size
r— Width: 1707 Pixels
8
l- Height: 1102 Pixels
Resolution: 300 Pixels/lnch
□ Resample: Preserve Details 2.0
Reduce Noise: A 0
Cancel Г OK
©In the Image Size dialog box, check
the box marked Resample Image,
and open the drop-down option panel below
it. We’re reducing the size of this picture, so
select Preserve Details 2.0.
50 www.pclpublications.com
CROPPING AND RESIZING
LEARN AND IMPROVE
In the Pixel Dimensions panel, enter
the width that you want your image to
appear. If we were preparing this picture for a
website, a width of 800 pixels would be ideal.
The height will change automatically to keep
the aspect ratio the same. Press OK to resize
the picture.
Select Filter 3D
iiai
X3€l
Canvas Size... к ХЭ6С
Image Rotation ►
Crop
Trim-
Reveal All
Duplicate...
Apply Image-
Calculations...
Variables ►
Apply Data Set...
Next, go back to the Image menu,
but this time choose Canvas Size, or
use the keyboard shortcut Cmd + Alt + C.
Canvas Size will allow you to be able to extend
the dimensions of your current document by
adding extra pixels to the image. Bear in mind
this is different than simply resizing the image.
Canvas Size
Current Size: 1.18M /------
( OK
Width: 800 Pixels V-----
Height: 516 Pixels Canc<
New Size: 1.14M
Width: 800 Pixels
Height; 500 Pixels
Relative
Anchor:
x I /
-► •
® You’ll see the current size in pixels at
the top of the panel, with the width
as 800 pixels. In the lower window put in a
height of 500 pixels. If your main subject is
not in the centre of the frame, you can alter
the anchor point by clicking on the arrows
surrounding the box below. Click OK to
perform the resize. You’ll get a warning that
you’re about to chop off part of the image,
but just ignore it.
Now we’ve resized the image to 800 x 500,
a convenient size for display on many mobile
devices, and ideal for uploading to a website
or sending via email.
www.pclpublications.com 51
LEARN AND IMPROVE
CONTENT-AWARE FILL AND SCALE
Content-aware
Fill and Scale
Photoshop contains image processing technology so
advanced it looks like magic
Photoshop CS4 introduced the world to an
amazing new technology called Content-
aware Scaling, which can resize an image
while preserving the proportions of important
image elements. It works by analysing the
image and removing lines of pixels that
contain relatively little information, so that a
plain background will be affected before the
main subject. The best way to illustrate the
effect is with examples, such as this image of
a tree and clouds.
Content-aware Scaling
®lf we resize the image vertically by 60
percent using the standard Photoshop
Image Size menu option, the tree and clouds
will end up looking flattened and out of
proportion, since their height has also been
reduced by about 60 percent.
©However if we use Content-aware
Scaling, the clever algorithm detects
that the areas that are just sky contain relatively
little information and so this time when we
re-scale the image it deletes those pixels first,
preserving the more information-rich pixels that
hold the details including the tree. As a result a
60 percent height reduction leaves the scene
looking relatively unchanged, although the area
of blue sky has been reduced.
® You’ll find Content-aware Scaling
in the Edit menu, but it will be
greyed out unless you’ve converted the
image into a layer.
©You use Content-aware Scaling in just
the same way as the normal Image
Size option. Either drag the handles on each
edge in the direction you want, or directly enter
the proportions into the text boxes on the tool
options bar. Content-aware Scaling works for
both height and width and can also be used to
enlarge an image.
52 www.pclpublications.com
CONTENT-AWARE FILL AND SCALE
LEARN AND IMPROVE
Content-aware Fill and Move
Photoshop CS5 took the content-aware technology further with the introduction of Content-aware Fill. This extremely useful function can fill in blank
areas of an image with an approximation of the surrounding area, which makes it particularly handy for filling those triangular edges that are left after
rotating an image, for example when levelling the horizon line. Again it’s relatively easy to use.
©Starting with an image that has just been rotated, leaving
those empty triangles, take the Magic Wand tool and select
the plain areas.
©There will be a short pause while Photoshop analyses the
image, but then it will fill in the blank areas with a texture derived
from the content of the immediately surrounding area.
10 pixels should do nicely.
® You’ll find Fill in the Edit menu. Click on it and you’ll see the Fill
options window appear. Content-aware should be selected by
default, but if not choose it from the drop-down menu.
® Content-aware Move is a new feature introduced with
Photoshop CS6 and uses the same technology as Content-
aware Fill. The idea is that you can select an object on a background
and move it to a new area of the image. The Content-aware algorithm
should automatically fill in the area that you moved from and also
blend in the moved object.
In practice it’s not actually much use unless the object to be moved
is on a virtually plain background, in which case it’s often simpler to
use the Clone Stamp anyway, but some people may find it useful.
s ..™
Spot Healing Brush Tool J
ф Healing Brush Tool J
* " Оpatch T°o1 J
X. Content-Aware Move Tool J
+<> Red Eye Tool Ltf
File Edit Image Layer Type Select Filter]
Stroke...
Content-Aware FBI...
Content-Aware Scale X О X C
Puppet Warp
Perspective Warp
Free Transform X T
Transform ►
www.pclpublications.com 53
MORE PHOTOSHOP ESSENTIALS
Photoshop
Essentials
As you’ve progressed through this manual, you’ll have
become more familiar with how Photoshop works, and
should now be ready to take on a few more features
that are key to successful image editing. We’ll delve
even deeper into the toolbox, learning more about
layer-based editing, making selections and cloning.
MORE PHOTOSHOP ESSENTIALS
NON-DESTRUCTIVE ENHANCEMENT PART 1
Non-destructive
Enhancement m.
A great way to edit your images without damaging them
Although there are many editing options
in the Image > Adjustment menu, they
all have one thing in common. When you
apply them to an image the effect they
have is destructive, because they discard
information from the original image. For
example, if you apply Curves, then Hue/
Saturation, then add a Photo Filter effect,
that’s three operations that have discarded
information, each one degrading your
image quality. If you apply an operation
repeatedly, such as multiple Curves
corrections, you’ll actually be able to see
the degradation. The only way to undo
the damage done by these modifications
is to revert to an earlier version by using
undo or the History palette, but that also
undoes all your subsequent editing as well.
This degradation is much worse with 8-bit
than with 16-bit images, since there’s less
information to start with.
Levels...
Curves... -
Exposure...
Vibrance...
Hue/Saturation..
Color Balance...
Black & White...
Photo Filter...
Channel Mixer...
Color Lookup...
Invert
Posterize...
Threshold...
Qrarliont Man
It’s impossible to avoid this image degradation
altogether, but by using Adjustment Layers
we can reduce it as much as possible.
Adjustment Layers sit above the pixel layer in
the stack and their effects are applied in real
time as the layers are displayed. That way
if you change your mind about an effect, or
wish to change it after it has been applied,
your alteration doesn’t have any further
effect on the layer below it and the image
degradation isn’t applied until the layers are
merged when flattening the image.
You can apply Adjustment Layers in several
ways. First, you’ll find a list of available layers
in the Layer > New Adjustment Layer menu.
Second, if you have the Adjustments palette open
(it’s open in the default interface workspace) you
can click on the button for the layer you want to
apply. Third, you can click on the middle button
at the bottom of the Layer Palette. All of these
offer exactly the same list of options and produce
the same results.
56 www.pclpublications.com
NON-DESTRUCTIVE ENHANCEMENT PARTI
MORE PHOTOSHOP ESSENTIALS
The Adjustment Layer Palette
Click on any of these buttons to instantly create a new adjustment layer.
ф Brightness/Contrast
Edit image tonal range.
ф Levels
Adjust colour and tonal range.
ф Curves
Adjust points through the tonal range.
ф Exposure
Adjust an images’ exposure range.
ф Vi bra nee
Enhance less saturated colours first.
© Hue/Saturation
Alter Hue, Saturation and Lightness.
ф Colour Balance
Add colour to shadows and highlights.
ф Black and White
Convert to monotone or greyscale.
Photo Filter
Add custom colour cast to images.
Channel Mixer
Create tinted or greyscale images.
Colour Lookup
Add preset colour effects to images.
Invert
Inverts image colours like a negative.
Posterize
Adjust the number of tonal levels.
Threshold
Convert to black and white bitmap.
Selective Colour
Alter individual primary colours.
©
0
©
0
©
©
©
©
Gradient Map
Maps an image to a custom gradient fill.
Before and After
This photo of a girl and her horse was taken on an intermediate
level digital camera on a fairly overcast day. The subject was
photographed against a dark green foliage and overall, the image
lacks any contrast. By applying Levels, Saturation and Color Balance
adjustments to the image, the colours have been saturated and
contrast enhanced to bring back some life and detail to the image.
www.pclpublications.com 57
MORE PHOTOSHOP ESSENTIALS
NON-DESTRUCTIVE ENHANCEMENT PART 2
Non-destructive
Enhancement
Add effects non-destructively with Layer Masks
While a Quick Mask function is an easy way to selectively edit your pictures, the
more traditional method is to use Layer Masks. The advantage to this method
is that it is non-destructive, so if you don’t like the results you can just go back and
start again. It is also repeatable, because you can use the same mask for multiple
effects, saving you time and effort. For this quick tutorial we’ll use a Layer Mask to
apply a selective monochrome or colour extraction effect. We’ll start with this bright
image of a lady in a red dress. The red tones will remain in colour while the rest of
the picture will be changed to black and white.
®To start with, right-click on the thumbnail of the
photo in the layer palette and select Duplicate
Layer from the menu. Alternatively click and drag the
layer thumbnail in the palette onto the New Layer
button at the bottom of the palette, which will also
duplicate the layer.
Image Type Select Fitter 3D View Plugins Window H<
I New ► I
I
Duplicate Layer..
®Next, activate the new layer by clicking on it in the
palette and then click on the Add Layer Mask button
at the bottom of the palette.
®A white square will appear in the layer palette
representing the new mask. Double-click on this
and the Layer Mask palette will fly-out. This palette lets you
configure the mask in a variety of ways.
Layer Mask О Го
Density: 100%
A
Feather: 0.0 px
Re,ine: Select and Mask...
Cotor Range...
58 www.pclpublications.com
NON-DESTRUCTIVE ENHANCEMENT PART 2
MORE PHOTOSHOP ESSENTIALS
©Click on the Color Range button and you’ll
see a new window appear with a colour
range picker and the cursor will change to an
eyedropper tool. Click on the red material of the
dress and adjust the sliders so that as much of
the colour as possible is selected, but none of the
background. Click OK when you’re happy.
Select and Mask...
Color Range...
Invert
You can adjust the parameters of the
Black and White effect with the sliders
on the window that appears. The results
are a matter of personal taste, so adjust the
parameters until you’re happy.
®Now we’ve got a mask that covers the
shape of the dress but what we need is a
mask that leaves the chosen colour, while covering
everything else, so click on the Invert button
that swaps the mask and the background. This
effectively creates a hole in the layer through which
the background layer will be visible.
Next we can apply the effect to the top
layer. For this one we’ll use the Black
and White menu option, since it’s a quick
and easy effect. You’ll find it in the Image >
Adjustments menu.
AFTER
Always remember that layer masks do not
erase any of a layer’s detail, it just makes
certain details invisible without deleting
them. This is referred to as non-destructive
image editing.
ww.pclpublications.com 59
®The Layer Mask can be used to produce
any kind of selective effect like this and
the great part of it is that the original image is
still intact in the background layer, so if you’re
unhappy with the finished result you can just
delete the effect layer and start again. However
as you can see, with a little cleaning up of the
layer mask, the effect is working well.
BRUSHES, PENCILAND ERASER
Brushes, Pencil
and Eraser
Photoshop has many tools
to help you create images as
well as edit them
Although it is primarily designed and best known as an image
editing program, Photoshop also offers a range of versatile
tools, allowing you to create original artwork as well as adapting
existing images. The brushes, pencils and eraser are designed
to behave as much like their real life counterparts as possible,
to make using them an intuitive process. If you have a graphics
tablet and a pen, this helps even more.
The Brush Tool
The most useful drawing implement is the
Brush (keyboard shortcut B), which is a multi-
purpose tool that can emulate almost any type
of drawing tool imaginable, be it a fine pencil,
a felt-tip marker pen, a soft-bristle brush, an
airbrush, or anything in between. The Brush tool
has received a major upgrade for version CS6
and now has more options and more presets
than ever before, giving you unparalleled
versatility for creating your own artistic
Photoshop masterpieces.
You select the Brush tool by clicking on its
icon in the tool palette, but to get the most out
of it you need to open the new Brush palette by
clicking on the little folder-shaped icon in the
options bar.
When you take a look at the new Brush
palette you’ll be blown away by just how
customisable it is. You can adjust the shape
of the brush tip, the density, length, thickness,
stiffness and angle of the brush bristles and
adjust or disable brush spacing. As well as
The Pencil Tool
The Pencil tool used to be a separate
item from the Brush tool, but with radical
expansion of the Brush in Photoshop to
include simulations of numerous types of
pencil, the Pencil tool itself is now just a
variation of the Brush tool and uses the
same options palette. It’s not without its
uses though.
The Pencil can be used as a secondary
brush, which can save time swapping
between pre-sets and can also be used to
apply a stroke to work paths. You can press
Shift + В to make it appear. By default it
uses the 1 pixel brush size. The pencil tool
is limited to hard-edged brush shapes of
various sizes.
60 www.pclpublications.com
BRUSHES, PENCIL AND ERASER MORE PHOTOSHOP ESSENTIALS
this there are many more options, allowing you
to add random scattering, noise, texture, wet
edge simulation, airbrush-like build-up and both
shape and colour dynamics. If this degree of
control is too time-consuming there are also
dozens of preset brushes, a small sample of
which you can see in the picture shown below.
There are preset brushes to simulate airbrushes,
pastel crayons, big soft brushes, small stiff bristles,
pencils, felt pens, sponges and even template
brushes to quickly draw grass or leaves. The
options and adjustments can be applied to preset
brushes, so you can customise them for your
own specific needs. You can even make your own
brushes if you want.
As well as options for the appearance and
texture of the brush, there are also options for
how it interacts with the layer that you paint
on. These are called Blend Modes and you can
choose which one to use by clicking on the
Modes button in the tool options bar.
Many people may choose to use Photoshop
with a pen and tablet device, such as the
Wacom Intuos range shown here. The Brush
tool includes options for pen tablet users, such
as allowing pen pressure to control either brush
size or opacity. -----
The Eraser Tool
The Eraser tool (keyboard shortcut E) is a
specialised variation on the brush tool and uses
the same palette options. It differs from the
standard brush in that it can render pixels from
a layer transparent, allowing the layer beneath to
show through. If used on the background layer it
paints in whatever the current background colour
is set to.
As well as the Brush palette options, the
Eraser also has tool options including Opacity,
Flow and one unique one, Erase to History, which
can be used in conjunction with the History
palette to selectively undo changes in layers. The
Mode options for the Eraser are Brush, Pencil or
Block, which is a small square-shaped eraser of
fixed size and full opacity.
a.
Eraser Tool E
Background Eraser Tool E
Magic Eraser Tool E
There are two other Eraser options available if
you click and hold on the Eraser tool. Background
Eraser can, as the name suggests, erase parts
of the background, but it does this by converting
the background into a layer. Magic Eraser simply
combines the Magic Wand tool with the Eraser tool
and selectively erases contiguous areas of colour.
www.pclpublications.com (51
MORE PHOTOSHOP ESSENTIALS
MAKING SELECTIONS
Making
Selections
The ability to select and modify only part of an image is
fundamental to how Photoshop works
One of the most basic features of Photoshop is the ability to
modify only part of an image, leaving the rest unchanged.
The way that we do this is by using Selections, and there are
several tools and menu operations that we can use to help us
achieve this.
After the Move Tool, the next three icons on the Tool Palette
are all selection tools, giving you a wide range of methods for
isolating an area of your image. Some are fully manual, while
others use varying degrees of automation.
The most basic selection tools are the Rectangular and
Elliptical Marquee Tools. These both allow you to manually select
a simple shape of any size, or of a fixed size or aspect ratio. You
can select several areas, either separately or joined together,
and with a hard edge or a soft feathered edge. The various Lasso
Tools let you select an area of irregular shape, again with the
option of a feathered edge. You can draw the area freehand, or
use point-to-point lines for greater precision.
Let’s take a look at the process of making a selection, and
examine the various options that are available.
Elliptical Marquee Tool
®The Elliptical Marquee Tool works in
much the same way as the Rectangular
Marquee, but draws a curved shape.
®As with the Rectangular Marquee,
you can set the size or aspect ratio. A
ratio of 1x1 draws a circle, other ratios draw
ellipses of various sizes.
® Feather: о px
x MRK_0165.jpg @25% (RCB/8*) x
♦£> 18 16 14 12
(') Rectangular Marquee Tool M
, 5 (_) Elliptical Marquee Tool j M
" single Row Marquee Tool °
3 Single Column Marquee Tool
tl-
—
To draw an ellipse around your
subject, imagine that it’s actually a
rectangle, start from one corner and drag to
the diagonally opposite corner. This can be
tricky to get right, so alternatively hold down
the Alt key and start from the centre of where
you want your ellipse to be.
62 www.pclpublications.com
MAKING SELECTIONS MORE PHOTOSHOP ESSENTIALS
Simple Area Selection
X MRK_O165.jpg @ 16.7% (RGB/8*)
ф 9
iZj " L- J Rectangular Marquee Tool l\M
О Elliptical Marquee Tool JM
4 Single Row Marquee Tool
J Single Column Marquee Tool
Feather: 30 □
6.7% (RGB/8*)
Style:
Sofrens edges o* the selection
®To make a soft-edged selection, type a
number into the Feather box. The higher
the number, the more blurred the edge will be.
©Let’s start off with the simplest selection
tod, the Rectangular Marquee. This is
used, as the name implies, for selecting simple
rectangular shapes.
Type Select Filter 3D
®To draw a square, click on a point where you
want one of the comers to be, then hold and
drag to the diagonally opposite corner. You’ll see
the “marching ants’’ line of the selection box appear
following the cursor.
Normal
styb •/ Fixed Ratio K width: 1
ra-33879.png @ 200% (Layer 1, R<
11 12 13 14
®You can draw a freehand rectangle, or fix
the size or aspect ratio by using the Tool
Options. Let’s draw a perfect square selection
by setting a ratio of 1x1.
This time if you draw a selection and fill it,
you’ll see that the edges are very blurred,
with the marquee “marching ants” line in the
middle of the blurred area.
©If you use the Paint Bucket Tool to fill the
area you’ve selected you’ll see that the
edges are very sharp.
USEFUL TIP
If you want to select more than one area or
add to the current selection, holding down
the Shift key will temporarily put the tool into
“Add to Selection” mode.
For selecting more complex shapes, the
best option is the Polygonal Lasso Tool,
or if you want to draw freehand, then the Lasso
Tool is the one to go for. Drawing freehand may
be quite odd using a mouse, but with a little
practice you can use it with confidence.
With the Polygonal Lasso, you
click around the edge of the area
you want to select. When you complete
the loop, or double-click, the selection is
completed and you’ll see the “marching
ants’’ border.
A Polygonal Lasso selection is ideal if you
want to cut or copy a complex shape out
of a background, for example to make it part of
another picture. It is particularly helpful when your
subject has lots of straight, regular edges that are
easy to follow.
www.pclpublications.com Q 3
MODIFYING SELECTIONS
Modifying
Selections
Photoshop has sophisticated tools to refine selections
Photoshop’s standard selection
tools: the Marquee, Lasso and
Magic Wand, are fine for making basic
selections of regular, well defined
shapes, but they’re not so good at
picking out soft-edged or very fine
shapes. One thing in particular, that has
always been a problem, is the edge of
fine or untidy hair. Take the photo shown
here for example:
This image is representative of a typical
studio setting, with good lighting and
against a plain background. Photos like
this are used all the time for catalogues,
advertising posters and the like.
However, in order to fit these needs the
model will have to be separated from the
background. With a plain background like
this, it would be tempting to use a normal
selection tool such as the Magic Wand.
However if we try it, what we end up with is
something like this:
Modify Selection
Photoshop has other tools to modify a selection
which you’ll find, appropriately enough, in the
Select menu, under Modify. The options include:
Border, Smooth, Expand, Contract and Feather.
They’re all relatively simple, but useful nonetheless.
We have some examples to show you.
Border converts the single-line selection into a
border of the specified width. You can use this
selection to create a border around your original
selection by using the Paint Bucket Tool. Be
aware that the border extends an equal amount
from either side of your original selection.
Smooth removes the kinks and wrinkles from
the line of your selection. It's useful when you’re
selecting smooth-edged objects, but it will round
off the corners of any irregular shapes. The larger
the value of Smooth Selection, the smoother and
less detailed the selection becomes.
64 www.pclpublications.com
MODIFYING SELECTIONS MORE PHOTOSHOP ESSENTIALS
As you can see, the edge around the
model’s hair looks terrible. The automatic
Magic Wand selection has produced a very
jagged edge, because it can’t distinguish
between the fine edge of the hair and the
background. Fortunately the latest version
of Photoshop has a feature called Select
and Mask, which is capable of making
much finer distinctions.
Select and Mask is very easy to use. Starting
with a Magic Wand or Polygonal Lasso
selection as close as possible to the edge
of the hair, or any other soft edge, click on
the Refine Edge button on the Tool Options
bar. In the dialog window that opens, in Edge
Definition, check the box marked Smart Radius
and use the square brackets keys to set the
brush size so that it’s large enough to cover
the hazy edge area around the hair. Then
simply paint around the edge, overlapping both
the model and the background.
When you’ve been around all the edge
area that you want to refine, click OK and
then wait a few seconds while the program
recalculates the edge. As you can see here,
the result is a good improvement over the
first attempt.
Expand, as the name suggests, expands the
size of the selection by the specified number
of pixels. The larger the value you expand the
selection by, the more the detail and shape of
your original selection will begin to decrease
as it enlarges outwards.
Contract is the opposite of Expand. It shrinks
the size of the selection by the specified
number of pixels. As with the Expand option,
the more you Contract the selection, the
more the original selection shape’s detail will
become less well defined.
We’ve looked at Feather before. It softens the
edge of the selection by the radius set in the
dialog box. It’s perhaps the most useful option
here, particularly if you're trying to copy and
paste the selection into a background. Unlike
Smooth, this creates a soft vignette effect.
www.pclpublications.com Q 5
MORE PHOTOSHOP ESSENTIALS QUICK MASK MODE
Quick Mask
Mode
USEFUL TIP
By varying the transparency of
the Quick Mask selection you can
alter the effect of the edit you
want to perform.
There’s a quicker way of editing selections and masks
Often when editing in Photoshop it’s useful to be able to
block off certain areas that we don’t want to be affected.
For that we use masks and there are several ways of creating
them, but by far the easiest is Quick Mask, a fantastically
useful feature that was first introduced in Photoshop 7. Quick
Mask lets you create and edit masks and selections quickly
and easily using any of Photoshop’s pixel painting tools to
apply a brushed mask with freehand strokes of the mouse.
It’s extremely simple to use, but it can produce a wide and
varied range of results. You’ll find the Quick Mask mode
button near the bottom of the Tool Palette. Clicking it will
toggle Quick Mask mode on or off.
The most basic way to use Quick Mask is with the brush tool. When you
switch on Quick Mask, you’ll notice that the foreground and background
colours change to black and white. Select a normal paint brush and start
painting in black. You’ll see that instead of black, the colour is a translucent
red. Paint this colour over the area you want to mask.
If you make a mistake and overlap your area, simply switch to the white
background colour. Painting white will erase the mask.
66 www.pclpublications.com
QUICK MASK MODE MORE PHOTOSHOP ESSENTIALS
Gradient Mask
There are other ways to apply Quick Mask. For example it can be used
with the Gradient Tool to produce gradual mask effects. Simply enter
Quick Mask mode, then select the Gradient Tool. Drag a gradient fill
over the area you wish to affect and when you release the Mouse button
you’ll see that the gradient effect is in translucent red, like the painted
Quick Mask.
You can now use this gradient mask to produce graduated effects on an
image. For instance, on this picture we can darken the sky and leave the
foreground as it is by using a graduated Levels function. The gradient mask
ensures a smooth transition from the full effect at the upper edge to zero effect
at the lower edge of the picture.
www.pclpublications.com 57
HEALING BRUSH TOOLS
I Healing Brush
I Tools
I Clean up minor blemishes, dust spots and
stray hairs with the Healing Brush Tools
Even with a modern digital camera, your
photos may have slight imperfections.
Maybe it’s just a stray hair or an unwelcome
skin blemish in a portrait, or maybe some
dust has managed to get onto your sensor,
causing dark spots on your photo.
Whatever the reason, sometimes you
need to remove some small features from
your images and the best tools for this are
the Healing Tools. There are five Healing
Tools in Photoshop, which you can see
if you click and hold on the Spot Healing
Brush Tool icon in the tool palette.
Spot Healing Brush Tool J
j Healing Brush Tool J
£3 Patch Tool J
X1 . 4^4 Content-Aware Move Tool J
о Red-Eye Tool J
USEFULTIP
To get the best out of the
healing tools, you need
to work with care and not
overdo the effect. The key to
success is to be subtle. There
is also no reason you can’t
use several of the healing
brushes to make sure you get
a perfectly healed image.
Content Aware Move
The Healing Brush is a legacy from older versions of
Photoshop. It does much the same job as the Spot
Healing Brush, but is rather less sophisticated. It
works in much the same way as the Clone Stamp
Tool. To heal a blemish, you first need to set a sample
point by clicking on an area of similar texture while
holding down the Alt key, then painting the sample
over the blemish. As ever, when it comes to healing
and cloning techniques, subtlety is the key. You may
find that it might take several attempts to get a good
texture that doesn’t stand out as being cloned in.
The Content Aware Move Tool was introduced in
Photoshop CS6. The idea is that you can simply
draw a selection around an object and then drag it to
another place. The program analyses the surrounding
area and fills in the source with a matching texture. In
practice the Content Aware Move Tool is only useful
in very specific circumstances, when the object you
want to move is surrounded by a uniform texture. You
will find that the more even the texture, the better the
final result. Backgrounds such as grass and blue sky
are much more successful candidates for this.
The Patch Tool is used for repairing larger areas.
It can be used in one of two ways; either draw
around the area you want to replace and then
drag the sample to an area of matching clean
texture, or sample an area of clean texture and
then drag it over the part you want to replace.
Here, a patch of wooden floor can be used to
remove some bread crumbs from the shot. As
you drag the patch, it will show you a real-time
overlay over your target area so you can align it
as best you can to ensure a good patch.
68 www.pclpublications.com
HEALING BRUSH TOOLS MORE PHOTOSHOP ESSENTIALS
Red Eye is caused by light from a camera flash
reflecting off the blood vessels at the back of the
eye when the pupil is wide open. It’s possible to
avoid it by proper camera technique, but if you find
it in one of your portraits, Photoshop has a quick
and easy tool to help remove it. Simply click on the
offending redness and the tool will automatically
analyse how much redness there is in the subject’s
eyes and remove it and replace it with a more
natural-looking tone which is usually black or a very
dark tone.
For removing small objects such as dust spots
and stray hairs, the Spot Healing Brush is the
most useful and effective tool at your disposal. In
some cases, you can even remove larger objects
and people. When you use it to paint over an
object, the brush samples the area around it
and replaces the object with a simulation of the
background. The way that it samples can be
selected and the most effective option is Content
Aware sampling. The brush parameters can be
adjusted like any other brush.
USEFUL TIP
Camera sensors pick up dust spots over
time. Use the Spot Healing Brush to remove
unwanted sensor dust spots that appear
on your digital images. As you can see
from these examples, you can also remove
larger objects as long as you have an even
background behind it, otherwise the effect
might look fake.
www.pclpublications.com 69
THE CLONE STAMP TOOL
The Clone
Stamp Tool
USEFULTIP
Vary brush size by using the
open and close square brackets
keys and vary brush hardness
with the curly brackets.
Remove unwanted elements from your photos
The Clone Stamp Tool (also known as the Clone Brush in some
programs) is one of the most useful items in your image editing
tool kit. Despite recent developments such as Photoshop’s Spot
Healing Tool and Content-aware fill, it is still the most precise and
reliable way to retouch photographs, allowing you to remove unwanted
elements such as dust spots, skin blemishes, lens flare, telephone
lines and other intrusive objects from your pictures. Because the
process is entirely manual it can be somewhat time-consuming,
but the results are often superior to the output of the more modern
automatic tools.
The Clone Stamp works by copying (“cloning”) pixels from a selected target
area and placing them over the unwanted objects. Using the Clone Stamp,
it is relatively straightforward to remove even quite large unwanted objects
from a photo. Our example is a close up portrait photo, taken in a studio
setting, of a young girl.
We decided it would be a good demonstration of the power of the Clone
Stamp Tool to use it for one of its classic purposes. Since Photoshop has
been able to do it, retouching skin is one of those techniques that were
designed with the Clone Stamp Tool in mind. This girl's portrait reveals
some blemishes that can be removed with this tool.
70 www.pclpubllcations.com
THE CLONE STAMP TOOL MORE PHOTOSHOP ESSENTIALS
®Go to your toolbar and select the Clone
Stamp Tool (S). For the image we’re
working on, a brush Size of about 25 - 45 pixels
will be fine. You can make the brush Hardness
anywhere between 0% - 40%. We’re going to
start with the blemishes under her left eye.
0
/ -___________________________
? X Clone Stamp Tool к S
. :’:X Pattern Stamp Toole'S
Make sure that you have the Aligned
option ticked. This means that the
sampling area of your brush moves as your brush
does, otherwise you will clone the same sampled
area repeatedly until you alter it.
L O’
Aligned Sample: Current & Below -
Use same offset for each stroke
Ю0 1050 1100 1150 1200 1250 1300 1350 14i
®Rnd an area of clean skin next to the
blemish and then press your Alt key. A
small target icon will appear. Anything under
this target will be your sample to be used as
the starting point of the cloning. Left-click your
mouse to confirm this as your sample area.
®Now move your cursor over the top of the
face and position it over the small blemish
directly below the area you just sampled. It is
shown as an overlay so you can see what you are
about to clone on top of your figure. If you click
your mouse over the blemish, the clean skin just
sampled will be cloned over the top of it.
®You can now choose another clean
target sample below her left eye and
clone skin from that side over the blemishes just
below her eye. If you notice any repeated areas
that stand out as being cloned, or differences in
brightness and skin tone, you can choose a new
target area and clone in some new skin to keep
the pattern random.
®Now that you know how to clone a
clean area of skin and use it to remove
blemishes, you can start to work around the face
and remove any other blemishes required..
©As you clone, watch out for any obvious
repeating patterns that give the game
away. These repeats appear because you have
a blemish in your original sampled area which is
being stamped over the target skin. Patterns like
this highlight the fact that cloning has been used.
If you see any patterns like this emerging, you can
press Cmd + Z and undo those steps and find a
clean area of skin to sample and try cloning over
your target area again.
©Another trick to help you, is to create a
new transparent layer and clone your new
pixels onto that. Make sure you have Current And
Below selected from the Sample: menu. You can
then clone onto this clean layer, preserving all the
pixels underneath on the base layer.
www.pclpublications.com 71
PERSPECTIVE CLONING
Perspective
Cloning
Clone out items accurately using the Vanishing Point tool
The Clone Stamp Tool is very powerful as we’ve already seen,
but on its own, it does have its limitations. The shortcomings of
the Clone Stamp Tool are most obvious when trying to clone out an
item that is on top of a very regular pattern with a perspective. The
repeating pattern of a brick wall or tiled floor looked at from an angle
will appear to recede into the distance and get smaller, or get closer
and larger. The Clone Stamp Tool cannot match this perspective on its
own and your cloning will look pretty bad. It’s ok though. Photoshop
has just the tool to help with this tricky form of cloning. It can be found
under the Filter menu and is called the Vanishing Point Tool.
The Vanishing Point Tool lets you
define an area of perspective
pattern that covers your target to
be removed. Once you have defined
the area, any cloning you perform
inside that area will follow the
perspective of the scene faithfully.
This means your cloned sample area
will increase or decrease in size as
you move it around the scene.
72 www.pclpublications.com
PERSPECTIVE CLONING MORE PHOTOSHOP ESSENTIALS
® We’ve created a tricky cloning challenge
for ourselves. We have a toy car on a tiled
floor background. The challenge is going to be
to completely remove the toy car and maintain a
good tiled pattern and hopefully keep the relative
brightness of the tiles intact.
©In this example, just using the Clone Stamp
Tool straight out of the box is going to give
you problems. If you sample a clean area of tiled
floor near the car and position your cursor over the
parts of the car you want to remove, you will see
straight away that they won’t line up.
®We are going to clone out the car, but
rather than destroy the original pixel data,
we are going to clone onto a new layer so we can
do it as a non-destructive edit. Go to the layers
palette and click on the Create a New Layer button.
The new layer appears above the base image.
With the new layer selected, make sure
that in the menu bar, the Sample option is
set to Current & Below. This means that data will
be cloned from the base image and placed on the
layer above so as not to destroy the original image
that you started with.
Keep the new layer active and choose
Filter > Vanishing Point from the menu. This
opens the Vanishing Point panel. Next, click on an
area that covers the car and adheres to the comers
of the tiles. This area you've defined will control
how the cloned samples match the perspective.
©Click and drag the box you’ve created and
make it bigger to give you more sampling
areas to work with. This is fine as it will follow the
perspective of the tiled floor precisely. Before you
start cloning, make sure Heal is set to Luminance
so cloned areas are the correct brightness.
©Click the Stamp Tool (S) and Alt + Left-Click
to define a clean area of tile. Use a point
where tiles intersect and then move your cursor
over a corresponding area of tile with the car on it
and start to paint out the car. The Luminance Heal
will make the cloned areas the correct brightness.
®Work your way around the car in small
increments. You can Alt + Left-Click to re-
sample a new area of clean tile at any point. Once
the car is removed, you can go over any slight
mismatched areas and do a final clean up until you
have the tiled floor empty.
©Once done, click OK to commit the all the
cloning changes and return to your main
document. If you look at the new layer you created,
all your cloning work is on that layer and the original
image containing the car is completely untouched.
This is the beauty of layer-based editing.
www.pclpublications.com 73
Enhance
Your Skills
Photoshop can make your images look amazing.
It is used by graphic designers, digital artists and
photographers the world over. The only choice
к you have to make is deciding what tools are best
\ for the kind of editing you want to do. This section
лЛ adds a few more strings to your bow, ready for
V you to take on any creative challenge.
www.pclpubllcations.com 75
THE PEN TOOL AND PATHS
The Pen Tool
and Paths
Draw smooth curved paths with the versatile Pen tool
л-/4 Pen Tool P
(Freeform Pen Tool P
Add Anchor Point Tool
. Л Delete Anchor Point Tool
|4 Convert Point Tool
The quickest and most common way to make
selections is to use the Polygonal Lasso
tool but since that only draws straight lines from
point to point it isn’t ideal for making accurate
selections around curved edges. Photoshop
does have an extremely useful tool for making
smooth curves though, and it’s called the Pen
tool (keyboard shortcut P).
Rather than creating a selection directly like
the Lasso tool, the Pen tool is used to create
a Work Path. A Work Path in Photoshop is
a vector graphic outline which can be used
for several functions, including shaped text,
outline strokes and of course selections. A path
consists of straight and curved lines segments
connected with points. You can leave a path
open to form a straight or curved line, or close a
path to form a shape.
Paths are independent of any particular layer,
so you can use the same path to create shapes
on more than one layer of an image, and you
can copy a path from one image to another.
Using the Pen tool and Paths effectively is a
complicated process that takes a lot of practice
to master, but it’s worth the effort, because
once you crack it you’ll be able to make smooth
curves and selections around almost any shape.
If you want to use Photoshop in a professional
capacity it’s an essential skill to leam.
USEFUL TIP
If you need to repeat the same selection on
multiple layers, save your selection as part
of the image. You can then load it in again to
save repeating work.
JQ www.pclpublications.com
THE PEN TOOL AND PATHS
ENHANCE YOUR SKILLS
Using the Pen Tool
Using the Pen tool effectively takes some practice and a lot of patience. Here’s the low-down on how it works.
s
Д* 0
& & Pen Tool к P
— 0 Freeform Pen r6ol P
Add Anchor Point Tool
Delete Anchor Point Tool
/ |\ Convert Point Tool
о
®The Pen tool works by using anchor points connected by lines. Unlike the
Brush Tools which paint pixels, the Pen Tool creates vector-based
shapes. To draw a curved line, first select the Pen tool from the Tool Palette.
©Click with the pen tool at three or four points on the line you wish to
draw; these are called anchor points, and you’ll see that there are
straight lines connecting them.
0
0
T.
e.
& Pen Tool P
(0 Freeform Pen Tool P
Add Anchor Point Tool
Delete Anchor Point Tool
|\ Convert Point Tool
1 J
0
s J
®Next, click and hold on the Pen tool icon, and select the Convert Point
tool. You use this to manipulate the anchor points and control the
curvature of the line.
©Click and hold on any of your anchor points, and drag away from the
point. You should see two lines with handles on the ends extrude from
the anchor point. This is called a tangent line.
3D
<<
Layers 3D Channels Paths Styles
lir
< Work Path
—<
1
®lf you move the cursor around you'll see the line linking your anchor
points flex and bend. You can use this to bend the line to match the
curvature of the edge you’re trying to follow.
®With practice and patience you can bend a curved line around even quite
complex shapes. If you open the Paths palette you’ll see the work path
you’ve created appear in the list.
www.pclpublications.com 77
ADDING A GRADUATED FILTER
Adding a
Graduated Filter
Graduated filters can improve photos by adding
depth and colour to the sky
Photographers use graduated filters
placed in front of the camera lens
to selectively change the exposure and
sometimes the colour of part of a picture,
usually to darken the sky to bring out details
in the clouds and balance the exposure with
the landscape in the foreground. They come
in many different shapes, sizes and colours to
fit all types of camera system.
As with most photographic techniques, it’s
possible to duplicate the effect of graduated
filters using Adobe Photoshop and as usual
there are several ways to accomplish this. For
this example we’ll use a landscape photo of a
sunrise over a field.
78 www.pclpubllcations.com
ADDING A GRADUATED FILTER
ENHANCE YOUR SKILLS
Graduated Filter in Camera Raw
Since this photo was taken using Raw mode, we can use the Graduated Filter tool in Adobe Camera Raw (ACR). ACR is the Raw processing
application supplied with each version of Photoshop and allows you to add the effect during processing. This is by far the best way to do it, since it
preserves the maximum amount of detail in the photograph.
®When you open the image in Adobe
Camera Raw, you’ll see a row of tool
icons across the top of the main image window.
The Graduated Filter icon is to the right.
®When you click on the Graduated Filter
icon, you’ll see the control panel on the
right of the screen change. The filter can apply
many different effects, but the one we want to
use is a reduction in exposure. A setting between
-2.00 and -2.70 should produce a suitable effect
for this picture.
®To apply the filter, drag a line down from
the top of the screen to the horizon line.
You’ll see a horizontal and vertical dotted line like an
inverted T. You’ll also notice that you can change the
angle of the line by moving the cursor left and right.
To constrain the line to the vertical, hold down the
Shift key while dragging.
©The red dotted line marks the lower, least
saturated edge of the gradient effect, but
there is also a green line at the top of the frame. This
marks the top or most saturated edge of the effect,
with a smooth gradient between the two lines. If you
drag this green line down, more of the image will be
at maximum effect and the gradient will be shorter.
Graduated Filter in Photoshop
a Gradient Tool p G
<J>* Paint Bucket Tool " G
®Al3D Material Drop Tool G
®lf your photo wasn't taken in Raw
mode, you can apply a graduated
filter using the Gradient Tool. To set up the
graduated filter, first select the Gradient Tool,
then set the foreground colour to dark blue
by clicking on the foreground square and
then using the colour picker.
®Next, in the tool options bar, click
on the gradient editor and select
Foreground to Transparent, click on the button
for Linear Gradient, set the Blending mode to
Overlay and the Opacity to 100 percent. Make
sure the boxes for Dither and Transparency
are checked.
To apply the gradient to the picture, start
at the top of the frame and then click and
drag down to the horizon line. If you hold down
the shift key it will constrain the line to the vertical.
The blue is blended into the sky making it darker.
It’s always a good idea to tailor the blend colour to
match the sky. Apply again if you want it darker.
www.pclpublications.com 79
ENHANCE YOUR SKILLS
CORRECTING LENS DISTORTION
Correcting
Lens Distortion
Correct the optical distortion of ultra-wide lenses
with Photoshop’s Adaptive Wide Angle
One of the new features introduced with Photoshop CS6 is
called Adaptive Wide Angle; this can warp and bend an
image to undo the optical distortion common to all very wide
angle lenses. We’ve all seen photographs taken with “fish-
eye” lenses. These lenses are called ultra-wide-angle, because
the angle of view that they can capture can be as much as
180 degrees. Naturally the ability to squeeze half a room into
the same shot comes at a price and that is extreme optical
distortion. Straight and parallel lines appear to be bent,
perspective is massively shortened and familiar objects take on
almost unrecognisable proportions. In the photo opposite, the
straight uprights of the pillars and floor seem to curve strangely,
everything appears to bulge outwards and the whole effect is
certainly quite disconcerting.
Ct 30% Filter 3D View Window Last Filter Help jned S
Convert for Smart Filters
Filter Gallery...
Adaptive Wide Angle... XO3SA
Camera Raw Filter... ;; O3€A
Lens Correction...
Liquify... s'
Vanishing Point... X3€V
3D ► if
Blur ►
Blur Gallery ►
Distort ►
Noise ► \\
Pixelate ►
Render ► w
k.1 Sharpen ► 1
Stylize ►
1 Video ►
©Adaptive Wide Angle attempts
to correct at least some of these
problems and can warp the picture to undo
most of the optical distortion. Remarkably it
can do all this while still preserving most of
the detail in the picture. You’ll find Adaptive
Wide Angle in the Filters menu.
®ln the Adaptive Wide Angle interface,
first select the Constraint Tool from the
panel on the upper left of the main screen and
select Fisheye from the Correction drop-down
menu. Pick one of the vertical lines, in this case
the pillars in the foreground, click near the top
of it and drag a line down the length of it. You
should find that the line will automatically curve
to follow the line, but you can drag the control
handle in the mid-point of the line to match it
up to the curvature.
®The line will automatically warp the
picture to make the curved line
straight. You’ll see that there is a circle
overlaid on the line, with two more control
handles where they intersect. You can drag
these handles, rotating the line to bring it
into a vertical position. If you hold down the
shift key it will automatically snap to vertical
right away.
80 www.pclpublications.com
©Pick a line on the opposite side of the
picture and repeat the process by
dragging a line down the uprights of the pillars
ranged on the right of the image. This too will
automatically straighten up the line.
©Again, drag the handle on the circular
line to move the upright into a vertical
position. If you’ve done it right the vertical
curvature distortion of the image should now
be looking better. You may notice that the
correction isn’t quite perfect; there may still be
some slight curvature of the various uprights
and horizontals, but it’s certainly a great
improvement and the vertical structures are
much straighter. You can carry on and try to
correct more of the curvature, but be aware
of how much warping is being applied to the
image to straighten everything out. Click OK
when you’re done to finalise the correction.
®The process will have left some empty
spaces at the edges of the image, so it
will be necessary to crop the image to remove
these. This does mean losing some of the original
photograph, but the result is much less distorted
than it was at the start.
www.pclpublications.com 31
ENHANCE YOUR SKILLS
PANORAMA STITCHING
Panorama
Stitching
Get the whole of the landscape
into one ultra-wide picture
Many digital cameras have a feature
known as “Panorama Stitching” or
“Panorama Assist” mode. It’s there to
help with a particular type of photograph,
BEFORE
or rather series of photographs, in which
successive shots are taken as the camera
is panned across a scene. After you take
the first shot, the camera shows the edge
of that shot superimposed on the monitor
so you can match up the position of
features in successive shots, producing a
long continuous photo showing an entire
panoramic scene. You can also shoot your
pan sequence manually, especially if you
have a tripod handy to keep the camera
level. When it’s done well the results can be
breathtaking, but getting a satisfactory result
isn’t as easy as it looks.
We’ll use this example of a five-shot sequence
taken at a sweeping beach location.
Window Help
Arrange ► И Tile All Vertically
Workspace ► Щ Tile All Horizontally
Find Extensions on Exchange... si 2-up Horizontal
Extensions ► И 2-up Vertical
ia[ з-up Horizontal
3D HE 3-up Vertical
Actions ХГ9 US 3-up Stacked
Adjustments |U]4-UP
Brush Settings F5 :::
Brushes 11 Consolidate All to 1
Channels
Character
Character Styles Tile
Clone Source Float in Window
Color re Float All in Window
Glyphs Match Zoom
Histogram Match Location
Having downloaded our panorama
pictures from the camera into a folder
on the PC, it’s time to fire up Photoshop and
stitch them together into a panorama. Locate
the files on your hard drive and open all of
them in Photoshop. If you go to the Window
> Arrange menu you can view them all at
once in various arrangements. Not essential,
but it gives you a chance to make a last-
minute exposure check.
®ln Photoshop you’ll find Photomerge in
the Hie menu under Automate, along
with several other automatic processes.
The Photomerge window offers
a number of options for how to
arrange your panoramic shots. For a simple
landscape panorama like this the Auto
option should work fine. Click on the Add
Open Files button to add the five shots to
the Photomerge list and check the top two
options and the bottom option to attempt to
fill blank areas with the Content Aware tool.
82 www.pclpublications.com
PANORAMA STITCHING
©Once you click OK the merging
process starts and it is completely
automatic. It will take a while to complete,
possibly quite a long while if you have a slow
computer and/or very large image files.
Once the Panorama has been
rendered, you’ll see that there are
areas where the program has had to warp
the pictures to correct for perspective.
This is where the Content Aware Fill tool
will have attempted to add something that
looks a bit like sky and sea. Depending
on how well the fill works, you can always
crop out these areas.
®You can also use the Crop tool to
straighten out any slight tilt in your
horizon, but hopefully you won’t need it. The
finished result should look something like this.
www.pclpublications.com 33
COLOUR REPLACEMENT
Colour
Replacement
Swapping one colour
for another
One relatively simple operation that you
can do in Photoshop is to replace one
colour with another. By using some of the
selection tools we looked at earlier, along
with the Hue/Saturation controls, we can
change the colour of individual objects in our
photos, such as replacing the colour of the
cat’s green eyes in this shot.
p.
у СУ Quick Selection Tool W
-l-i X* Ma9'c Wand Tool к W
11^ Object Selection ТооГ W .
©Selecting large areas of the same
colour is one of those few occasions
where the Magic Wand tool is actually
useful, so we’ll use it as a starting point here.
With a tolerance setting of 40-50 it should
be able to pick out the items without too
much trouble.
ISO 200
®With the Magic
Wand, it’s best
to add a bit at a time. Click on an area that’s a
mid-tone for the total area you want to select, and
you’ll find that the wand tool will select an area
around it. The size of the selection will depend
on the tolerance setting. By holding down the
Shift key and carefully clicking on areas around
your starting selection, you can add more areas.
If the wand selects any wrong areas, you can
use Cmd+Z to undo that step, and try again
more carefully, possibly adjusting the tolerance
downwards if it keeps happening.
(p Lasso Tool L
Polygonal Lasso Tool L
Magnetic Lasso Tool L
®When you’ve reached the limit of
what you can usefully select using
the Magic Wand tool, you can finish your
selection using the Lasso tool. By setting
the Feather to zero you can produce a
sharp-edged selection. Alternatively, use the
Selection Brush tool.
©Again hold down the Shift key to add
more areas to your selection. If you
need to remove any areas from the selection,
such as the dark edges of the eyes, you can
subtract by holding down the Alt key and
going around them with the Lasso.
84 www.pclpublications.com
COLOUR REPLACEMENT
ENHANCE YOUR SKILLS
®When you’ve selected all the bits you
want to repaint, you can save the
selection for later use, to save you doing all that
work again if you change your mind.
Although there are several filters we
could use at this point, the most
versatile way to change the colour of the
selected area is the Hue/Saturation/Lightness
option. This is common to most editing
programs. In Elements you’ll find it in the
Enhance menu.
®You have three options under the
Hue/Saturation setting. Leave the
Lightness slider in the middle position
to preserve the overall brightness of the
object, but you can experiment by moving
the Saturation and Hue sliders around.
As you move the Hue slider, the colour
will start to shift through the spectrum of
colours, or you can produce subtle colour
changes with lower saturation settings, or
say to hell with subtlety and go for broke
with full saturation or Colorize the eyes.
ve As: colour replacement.jpg
Tags:
Ц Downloads
®When you’re happy with the result, or
when your eyes start bleeding, you
can clear the selection by using the keyboard
shortcut Cmd+D, and then save the result.
When you save the final image as a .PSD file
in Photoshop or Elements, the selections are
saved as well, embedded in the file.
www.pclpublications.com Q5
I YOUR QUESTIONS ANSWERED Ps
Ps
Your
Questions
Answered
Every now and again, as you learn new programs
like Photoshop, Lightroom and Elements, you may
encounter head-scratching moments that can send
you flicking through a user manual. We’ve gathered
up a few of the more frequently asked questions, and
answered them for you.
www.pclpublications.com 87
YOUR QUESTIONS ANSWERED
Photoshop, Lightroom and Elements Q&A
When Photoshop arrived on the scene all
those years ago, no-one could really have
predicted just what a monumental impact it would
have on the fields of design, photography, art, and
of course, image manipulation. Be in no doubt that
there is a lot to learn, but also comfort yourself
in the knowledge that it is also easier to grasp
the basics than you might think. In this section,
Q: What is the main
difference between
Photoshop and Lightroom?
A. New users are sometimes caught out
between what one program can offer over
the other and what kinds of work can be
done with them. This was particularly true a
while back when you had some disconcerting
naming conventions that gave you: Adobe
Photoshop, Adobe Photoshop Lightroom
and Adobe Photoshop Elements. New users
were not entirely sure what was what. Now we
have: Adobe Photoshop CC, Adobe Lightroom
Classic, Adobe Lightroom CC and Adobe
Photoshop Elements. Let’s try and break this
down for you.
based graf
layers and
you to mar
Adobe Photoshop is a pixel-
based graphics editor. It uses
1 tools to enable
manipulate photos, cut
things out, paste others in and
create entirely new works of art. It has become
an industry standard for artists everywhere.
Wikimedia Commons
A searchable library of images formed under
the Wikipedia umbrella project. As well as their
collection of photos, you can access videos,
audio files and various media without restriction.
Adobe Photoshop Elements
is also a graphics editor
for hobbyists but where
Photoshop is a complex beast,
Elements contains a number
of the same features but presented in a much
simpler way with a lot more automation
provided for new users.
Adobe Lightroom Classic and
its mobile-focused sibling
Lightroom CC are used as a
means to import, organise
and find your digital photos.
They offer image adjustments that use non-
destructive methods to preserve your original
file. Typically, photographers use Lightroom
to catalog their images and edit them. Things
such as brightness, contrast and saturation are
applied to get the very best out of an image
we shall cover a Q&A session where we will try to
answer some of the more common (and perhaps
not so common) questions that users both new
and old are asking. There are no silly questions,
even experienced users don’t know every single
thing there is to know about Photoshop. We can
speak from experience to that point. There’s always
something new to learn, some little trick or feature
Qi Where can I get
free pictures to practice
Photoshop with?
A. Luckily, there are a number of great
Internet sites that make free images available
to you. ‘Free’ can be a relative term, so make
sure you check each site you visit for their
licensing restrictions. For example, some
can be free to download for personal use
only, while others can be downloaded, used
commercially or redistributed without any
restrictions.
Flickr: The Commons
First port of call is Flickr: The Commons.
Here you can browse through the world’s
public archives. Many museums, institutions
and libraries make images available with no
copyright, as do many Flickr users.
DeviantArt
Another huge repository of photographs, art and
other media. Whilst a lot is free to use, artists will
have individual restrictions on how their work is
used. Check before you download anything.
that we haven’t tried before that can have an
impact on how we work. There’s also the general
knowledge section of owning and using it that can
be invaluable too. So, let’s get started and canter
through a number of Q&As. Some are relatively
simple. Some may be commonly asked questions.
Some might be quite random. Hopefully, all are
useful in some way. Read on.
Q: Do I really have to
pay a monthly subscription
to use Adobe programs?
A The short answer is yes, if you want the
most up to date versions of these programs.
Only Elements can be bought outright.
You can still purchase copies of
Photoshop CS6,
but Adobe no
longer support
it with new
updates. Old
pre-subscription
g copies of
I Lightroom are
f not available for
purchase any more.
Pixabay
Packed with nearly 2 million stock photos and
illustrations, this site allows all images to be
used freely for any purpose with no attribution
required, although a thank you posted on the
artist’s profile page wouldn’t go amiss.
14141
88 www.pclpubllcations.com
YOUR QUESTIONS ANSWERED I PsE
Other Cun
0
Qi Jpeg files used to open in Photoshop when I double-
О Standard
Precise
Beep When Done
^Export Clipboard
° Resize Image During Place
О Always Create Smanobiects whence
Q: In Photoshop, my cursor
sometimes changes shape.
Why does this happen?
/X If you’ve been working with the type
tool or any tool other than your brush, this
can sometimes happen. If you’ve returned
to the brush tool only to find that it has
changed shape, then you may have possibly
switched to the precise cursor option. All you
have to do is press the Caps Lock button
on your keyboard to return to your standard
cursor. Pressing Cmd + К will take you to the
preferences panel where you can also specify
more cursor parameters.
Painting Cursors
O Standard
Precise
Normal Brush Tip
Full Size Brush Tip
Qi I keep getting a Clipboard Export error when switching
to another program. Can it be stopped?
A. If you are experiencing the clipboard
error, press Cmd + К to open up your
preferences panel and click on the General
option. Here you will find the Export Clipboard
option. Make sure it is unchecked. This means
any Photoshop clipboard data you have is
unable to be pasted outside Photoshop.
You are still able to paste clipboard data into
Photoshop from outside.
clicked them, now they open in another program. How do I
change that?
a The most likely answer is that you may
have installed a new program that has taken
over the file association for your images. Using
your file browser on a PC or Finder on a Mac,
navigate to an image file that is opening in
the wrong program. On a PC, right-click on it
and the select Open With > Choose Default
Program. From there you can select which app
to associate with that file type. On a Mac, find
a file with the wrong association and highlight
it. Click the Get Info button (Cmd + I) in the info
panel that appears click the Open With menu.
All available applications will be displayed. Click
on the Photoshop app and below that click
the Change All button. This ensures all images
of that file type will now be associated with
Photoshop by default.
Q: All my panels have
disappeared from the Photoshop
workspace. What did I do?
/X We’ve done this ourselves any number
of times by accident. An inadvertent press of
the Tab key will hide all your panels to maximise
the workspace. A quick glance at either side of
the workspace area will show two thin panel. If
you hover your cursor over them, the panels will
pop out for you to use and then hide themselves
again when you move the cursor off them. Just
press the Tab key again to reinstate the panels to
normal operation.
у < HDR Efex Pro 2 app (default)
d Adobe llustrator 2O21.app
Ц Adobe Photoshop 2O2O app
Adobe Photoshop 2021 aop •
vant to change all your
2021.app documents to
lication "Adobe
Ц Adobe Photoshop 2O21.app
Use this application to open all docunv
to an Adobe Photoshop
with extension ".jpg"
Cancel
L
Qi I’ve been working on
an image but why can’t I
save it as a jpeg?
/А. There are a couple of things you need
to check. Firstly, if you have added layers
either intentionally or by accident, it will want
you to save it as a layered .PSD file unless you
tell it otherwise. You also need to check what
colour mode you’re in . If for some reason the
mode has been changed to 32 Bits/Channel,
jpeg is not a format option to save in. Go to
Image > Mode and check out the dropdown
menu. Typically, a normal jpeg image is in
8 Bits/Channel mode. One other thing to
check is the overall file size of the image. Very
large images, those that might be in 32 Bits/
Channel mode, or documents comprised of
many layers and effects will only allow them to
be saved in other formats such as Photoshop
Raw and large format .PSB files.
History Log.
Move to Bin
Get Info
Open
Open With
Edit image Layer Type
Qi Why are certain filters
and options greyed out
on certain images? Others
seem to work fine.
/А. That’s an easy one to remedy. It sounds
like the Zoom Resizes Windows button may
not be active. Press Cmd + К to bring your
preferences up and go to the Tools section.
. You’ll need to double check your image
and what bit depth it has been saved as.
Typically if your image shows a bit depth of 16
Bits/Channel or 32 Bits/Channel, then certain
filters and functions will not work. You’ll need
to go to Image > Mode and set the bit depth
to 8 Bits/Channel. Then they should work fine.
File
About Photoshop.
About Plugins
Services
Hide Photoshop
Hide Others
Show All
Quit Photoshop
General...
Interface...
Workspace.
Л3€Н
XMH
File Handling...
Export...
Performance...
Are you sure you want to change the
extension from ".jpg" to ".psd"?
Photoshop
YOUR QUESTIONS ANSWERED I
Rename r
Qi When I zoom an image in Photoshop, the window remains
the same size and I have to scale it manually to see the picture
in full. Is there a way around that problem?
Here you II see the Zoom Resizes Windows
option. Make sure it is checked and now
your window will scale as you zoom your
image until you reach the limit of the available
workspace. Alternatively, you can dock the
document window to the workspace. Drag
the document to the edge of the workspace until
you see a blue line appear. Let go of the mouse
and the document window is now docked to the
workspace and remains the same size even if
you reduce the image to a very small size.
Preferences
Qi I’ve saved a jpeg from
Photoshop. When I try to
open it, it says ‘Could not
open “xxx.jpg” because an
unknown or invalid JPEG
marker is found. What has
happened to the file?
A This is another irritation that can befall
you sometimes. This usually comes about
because even though you saved it with a
.jpg filename, you have in fact saved it in
a .PSD format. In the most recent version
of Photoshop, it will warn you that you are
trying to name a file incorrectly. If you have
older versions of Photoshop like CS6, this
can be a common occurrence. Navigate to
the problematic file and rename the file and
change the .jpg extension to .psd. You’ll be
asked to confirm this, so click OK. The file will
be renamed and you should now be able to
open the file again in Photoshop.
' Q: I’m new to Photoshop.
After installing it I also have
an application called Adobe
Bridge. What is it for?
A. Very simply put,
Adobe Bridge is a neat asset
management program that lets
you preview, catalog, keyword
I and search through your image
and asset library. You can also add metadata,
rename files in bulk and launch Photoshop.
flUJO 1/320
К -2ЛЗ
Q isoieo
□ Animated Zoom
Keep jpg
90 www.pclpublications.com
YOUR QUESTIONS ANSWERED IPs
I
Adobe photoshop
Enable Type layer glyph alternates
•B
Number of Recent Fonts to Display: 10
Q: Which version of
Lightroom is better; Lightroom
Classic or CC?
This might be more about how serious
you are about image processing. Over the
last couple of years, Adobe have renamed
and revamped Lightroom to the point it now
exists as two versions. Lightroom Classic
is an advanced desktop-focused version
with a complete set of modules that allow
the serious photographer to get the most
out of their images. Lightroom CC is a pared
down mobile version that offers more basic
controls to edit your photos. It is arguably
considered an entry level application for
photo processing and adjustment.
GH When editing text in
Photoshop, a small panel
of alternate text characters
keeps appearing. This is a
bit annoying, can I easily
turn this off?
you can. This small flyout panel is
a quick method of showing you alternative
characters and symbols. If you don’t want
this panel to appear whilst editing text, go to
Photoshop > Preferences > Type and find the
check box named Enable Type Layer Glyph
Alternatives and make sure it is unchecked.
The text flyout box will be disabled after that.
Q: Am I only able to open
raw files in Lightroom for
image processing?
A. Not at all. While it’s true that Lightroom
primarily supports a large number of native
camera raw formats such as Canon’s CR2
format, Nikon’s NEF format and the Olympus
ORF format, you can also open PNG, TIFF,
JPEG and DNG formats too. Lightroom also
supports Photoshop’s own PSD document
format too.
Adobe Photoshop
Elements 2023
G G G О
G 1(G) © ©
FF1 n CF1 la
□ Use ESC key to commit text
Qi Do I need Photoshop
if I already have a copy of
Photoshop Elements?
A. That really depends on whether the
tools provided by Elements continue to fulfil
your image editing requirements. Elements
can be purchased outright and does not
require a monthly subscription, which makes it
an attractive proposition. It is less expensive
than Photoshop, but this means that it has a
number of limitations and has less features
and advanced options. If you use Elements
and find yourself always in need of greater
creative functionality, then Photoshop is your
next upgrade path. Otherwise, sticking with
Elements continues to make sense.
www.pclpublications.com 91
i PLUGINS ROUND-UP Ps
Ps ____
Plugins
Round-up
Plugins are small, self-contained programs that
add extra effects and workflow possibilities to the
Photoshop toolset. Plugins can simply be a single
effect added to your image. They can also be
something more complex, like a self-contained mini
editor. Let’s take a look at some of the more notable
plugins available for Photoshop at the moment.
www.pclpublications.com 93
Group Share
Window Help
Plugins Panel
Я Adobe Photoshop Elements 2019
- @|= ш s $ - v
h View Action Group
fl
Share
Q Adobe Photoshop 2021
* |^= [Ш О -
l View Action
Adobe Photoshop 2021
Adobe Photoshop
Elements 2019.app
Adobe Photoshop
zozt.app
configuration
| Support Files
gj= UD f=3 О *
View Action
r ±
Group Share Add
Д Plug-Ins
= tm s m - fl c
View Action Group Share Add 1
I
ES3B Google
Photoshop
ts Editor, app
PLUGINS
Featured plugins
All plugins
о
Manage plugins
SEARCH
Q Name or keyword
□ Plug-ins
View
Plug-ins
d
Action Group Sht
Elements install
As we’ve already noted, there are so many
plugins available, it can be a chore to wade
through them all to figure out what is best for you.
Moreover, you need to be aware of what versions
of Photoshop any particular plugin is compatible
with. Some are fairly universal, others may need
updated plugins. When purchasing, double-
check version numbers to avoid disappointment.
Before we dive in and regale you with some prime
plugin choices, we thought we’d cover the main
question asked by anyone new to plugins. If
you’ve downloaded one, you then have to install
it; but how do you do that? Well, there are in fact a
couple of ways you can approach it, and it’s pretty
easy, so here we go.
First things first is to download your
plugin. It may be in a compressed format
such as a zip file. Unpack the ZIP file.
Then copy the unpacked folder. Then you
need to navigate to the folder that contains
the Photoshop plugins. Paste your copied
plugin into Photoshop’s plugins folder.
Start your version of Photoshop. Click on
the Filter menu. At the bottom should be
the name of the plugin you just pasted into
Photoshop’s plugins folder. Click it to open
and enjoy.
The latest versions of Photoshop CC lets
you browse, install and manage plugins
from a handy interface. From the top
menu, select Plugins > Browse Plugins.
This will bring up your Creative Cloud
app. Here you can browse for free or paid
plugins and install them with ease. For
example, we clicked on the PixeISquid
3D objects browser. You can view details
about the plugin of your choice and then
download it. Once downloaded, you can
go back to the plugins menu and your
downloaded plugin will be displayed at the
bottom. Click on it to activate it. That’s all
there is to it.
Browse Plugins...
ii Scree
Installing plugins on Elements is a similar
process to Photoshop’s manual install.
In this case, the target plugins folder
is found within the Adobe Photoshop
Elements Support Files folder. Paste your
downloaded plugin there and restart
Elements. The new plugin should be
visible at the bottom of the Filter menu.
Manual install
Photoshop install
PS PLUGINS ROUND-UP
Get switched on with plugins
Generator
*
Use 3D objects in Photoshop
Lens Correction.
Liquify...
Vanishing Point..
Blur
Blur Gallery
Distort
Noise
Pixelate
Render
Sharpen
Stylize
Video
Other
Window Help
Plugins Panel
Browse Plugins...
Manage Plugins...
PixeISquid ► PixeISquid
Stylize
Texture
Other
Digimarc
Aexify 2..
94 www.pclpublications.com
www.pclpublications.com
PLUGINS ROUND-UP
Applications/
Install Luminar 4 as plugin:
Adobe Photoshop
Adobe Photoshop Lightroom
Adobe Photoshop Elements
Apple Aperture
Creative
MRK5125-HDR-Pano.jpg
Al Sky Replacement
Sky Selection
Horizon Blending
Horizon Position
Relight Scene
Enhancer
Classic B&W
Doc: 88.1M/88.1M
Space required 1.28 GB
Space available: 694.37 GB
objects into your photos, add sunrays, or
just extract as much detail from an image as
you desire. If you have unwanted objects in
a photo, then the Erase tool will make short
work of removing them. Add to that a noise
reduction tool, a large number of creative
presets called ‘Looks’ and a landscape
enhancer, you have a powerful photo editor
on your hands that could have a major
impact on how you approach your workflow.
This is a fully featured creative photo editor,
and a powerful one at that. Luminar is
designed to work as either a standalone
product or as a plugin for Photoshop and
Lightroom. It is a photo editor, browser and
raw processing application, all in one. It is
packed with impressive tools to turn your
favourite photos into creative works of art.
Luminar is designed to be as intuitive as
possible, meaning you can fire it up and
master its controls very quickly. The learning
curve is not too steep and you can spend
more time creating, rather than scratching
your head wondering what to do next.
Moreover, Luminar is not a subscription-
based product. You pay for it outright and
then it’s yours. At £81, it represents a good
deal considering how much you get for such
a relatively small outlay.
At its simplest, it is a powerful, raw
processing application much like Lightroom,
offering non-destructive edits and endless
methods of image adjustment. Beyond that,
Luminar comes into its own by offering a
wealth of creative options and manipulation
tools that will keep you busy for ages. You can
use the browser to organise your photos and
then begin work on your chosen edit. Using
the Al Sky Replacement Tool, you can instantly
change a sky to better suit the mood of the
picture. The algorithms built into the application
can accurately drop a new sky into your photo,
taking care not to remove small details like
leaves and grass. If you want, you can even
relight the scene for a totally new look. All the
effects you bring to bear on your images can
be added as layers, which gives you a lot of
control and non-destructive editing to boot.
Portrait photographers also have an amazing
set of tools to enhance their subjects, with
Al Skin Enhancer and Portrait Enhancer. It
can quickly and accurately remove unwanted
blemishes, but preserves all the important stuff
like pores and hair. Again, clever algorithms
save you time. No complex masking is needed,
but you have the option to tweak any of the
edits if you want.
With Luminar, you can drop additional
Luminar Looks: Essentials
PS PLUGINS ROUND-UP
Pixel Squid
Free with limited object choices. $199 per year for access to all 3D assets.
Free Stock Sear
This is a 3D asset browser
that gives you access to
the tens of thousands
of design objects
PixeISquid have
available. They are
fully realised 3D
objects that you
can spin around
as if it were a solid
object, so it better
matches the orientation
needed to fit your image
Й Selection Areas
Sele. ..art
3D objects, and whether you want the object
to cast shadows. In the PixeISquid preview
window, you can rotate and angle the object
to help it match the perspective present in
but if you wanted to get down and dirty with
the layered PSD file, you could no doubt
introduce some more shadows to help your
image blend in better.
requirements. You can use the free version
which gives you access to over a hundred
free objects, as well as watermarked versions
of everything else in their library. You will
PixeISquid
Free Watermarked Lightboxes
П
Free unwatermarked PNGs and PSDs
ПВО
StockSolo Free to use. No restrictions on photos.
A
s
D
Depth
StockSolo is a stock photography library
search engine that gives you access to
many thousands of photos, that are free
for personal and commercial
use. No subscription is
required and you have
immediate access to
countless high quality,
full resolution images;
with no restrictions.
First, download the
3.2 Million photos inside Adobe Photoshop
need to create an account, but it is easy to set
up and ready in minutes. To use un-watermarked
versions, you will need to upgrade to their
subscription service, which runs at $199 per
year. Personally, we feel this is a little steep for
a niche product, but if you require the use of 3D
objects in your projects on a regular basis, then
the cost is a little more justified.
You simply fire up the plugin and choose
which object you want to appear in your
document. Place your chosen object and scale
it to the required size. You have the options
to choose low resolution or high resolution
Photoshop plugin and install it. When you start
up Photoshop, you’ll find the plugin under
Plugins > StockSolo. The plugin activates and
you can browse, or search by keyword, for
images. StockSolo has the option to search for
free images from a number of stock library sites.
At the time of writing, it allows you to search
Pixabay, Pexels and Unsplash. You simply put a
subject name in the search field and hit Search
to access the libraries of the stock image sites.
If you create a blank document of a certain size
® StockSolo
your photo. The object in your document
will update to match the preview. When you
have the object just as you want it, you can
click the Embed Smart Object button and
a layered PSD will be created, which gives
you a lot of control over the object in terms
of layered effects, selection areas, depth
mapping, shadows and fog. Be aware that
the high resolution objects can slow your
machine down if it is a little underpowered.
This is a fun little plugin. The main downfall
is that you cannot light the objects to match
the lighting in your photo for added realism,
(say 3000 pixels by 2000 pixels), when you
find an image you like, click on the Place
button and it will be downloaded and inserted
at the correct size to fill your document.
Images are downloaded as Smart Objects,
which you can rasterize if you so wish.
This is a very handy little plugin, and it lets
you quickly find and download images directly
into your documents. Given that you have
access to all those high-resolution photos from
a free plugin, what’s not to like?
96 www.pclpublications.com
PLUGINS ROUND-UP Ps
Blow Up 3 30 day trial. $79 one off purchase.
Reducing an image to a much
smaller size presents
no problems in day
to day use. A good
original at 4000
pixels wide, when
reduced to 800
pixels wide, will
look fine. However,
what happens if the
reverse is true and
you need to blow up
a 800 pixel wide image to
4000? This is an extreme example, but if you
are faced with this dilemma, you just have to
scale the 800 pixels up and hope it comes
out ok. Plugins like Blow Up 3 can help by
using algorithms to upsample the image
and retain as much detail and sharpness as
possible. Of course, concessions have to be
made, since you are interpolating an image
and injecting pixels where there were none
to begin with. Results of our 800 pixel to
4000 pixel test were mixed. Although some
finer detail of the girl’s hair was maintained,
it still looked a little painterly and you could
make out a definite repeating pattern through
areas of similar tone. Adding a little more grain
to the image before scaling helps to reduce
the impact of the repeating pattern, but how
much you add does come down to personal
preference. Also bear in mind that the quality
of the original image is the key to how well it
can be enlarged. A compressed jpeg is going
to suffer, since all those inherent artefacts will
result in more of that unwanted repeat pattern
than you might possibly like.
Starting with a larger original, we tried
to scale an image from 3000 pixels to 6000
pixels. With a little finessing of the settings,
the results proved to be quite acceptable.
They’ll never be archival quality, but if you
need the extra pixels, then it is certainly
an option. At $79 for such a niche plugin,
we wonder if Photoshop’s own resampling
algorithms are good enough to make you
reconsider the value of this particular plugin.
Aurora HDR 30 day money back period. £92 for 5 licenses.
Crop & R««<ze
Stretch
a •
Document Size Custom
Height
Resolution
Add Grain
Enlargement Tuning
Sharpen Edges
ОГ10П41
800
800
Width
Height
pixeisM
4000
4000
500%
500%
High dynamic range (HDR), images are the
result of combining 3 or more bracketed
photos to give you a result that contains more
tonal data than you can capture in one photo
alone. Once you have your set of bracketed
photos, you need to be able to combine them
to create your final HDR image. There are
plenty of applications out there to merge your
photos and produce a final result. Photoshop
and Lightroom are among them of course,
but Aurora HDR is an advanced HDR creation
package that gives you a huge amount of
control over your images, and is used by a
number of industry leading photographers.
Aurora HDR works as both a Photoshop
and Lightroom plugin, as well as a standalone
application. There’s no subscription, it’s just a
one-time purchase and it’s yours. Be aware of
which versions of Photoshop and Lightroom it
works with though. We tried the demo, which
didn’t appear to work with Photoshop 2020,
although the newer versions do, according to
the website. Presumably support for Photoshop
2021 is on the way. Until it is supported, you can
of course run it in its standalone form anyway.
First off, if you don’t have bracketed images,
you can import one image and
Aurora HDR will still be able to
create an HDR image from that.
Just be aware that if the sky of
an image is far too overexposed
and detail is lost, no amount
of clever algorithms will save it.
Although, if you’ve already read
the review about Luminar 4, you
do at least have the option to drop a
completely new sky in there!
If you do have a bracketed sequence
of images, then you can open these
together and Aurora HDR will merge them
automatically. It can align images, and
apply deghosting techniques to reduce
the impact of any moving objects in the
scene; using one of the sequence images
as a reference. You also have the option to
apply a colour denoise filter and remove
chromatic aberrations in each image. Then
the process of enhancing the results begins.
You have a huge set of tools at your disposal
that let you bring out every last pixel of
detail and tonal data. You can also layer
your adjustments, add radial and gradient
filters, choose from a number of presets and
so on. You can even save your edits as a
preset, to apply to any subsequent images.
It is certainly powerful and the control you
have is impressive. Beware though, it is all
too easy to get a bit heavy handed with your
edits. A good HDR is all about subtlety, so
keep an eye on those edits.
www.pclpublications.com 97
I ADOBE CAMERA RAW Ps
Adobe
Camera Raw
When you install Photoshop, you also get a very
useful application called Camera Raw. It allows you
to edit Raw files captured by digital cameras. A
' Raw file offers a higher quality than standard jpeg
files. Think of Camera Raw as the little brother of
w ' Lightroom, which offers you a digital darkroom
where Raw files can be processed.
ADOBE CAMERA RAW
PROCESSING RAW FILES
Processing
Raw Files
For the best possible quality,
shoot in Raw mode
All digital SLRs and Compact System Cameras, and most of
the better compact cameras, have a shooting option called
Raw mode. You’ll usually find it in the menu as an option under
image quality. Raw mode offers greatly improved image quality
over the usual JPEG image file format, and is recommended
for all serious photographers. Let’s take a closer look at Raw
mode, find out how it works and see how it can help you
produce better photographs.
What is Raw Mode?
Lens Sensor Processor JPEG Output
Raw mode is a special image recording option
that is available on digital SLRs, Compact System
Cameras, and other high-quality digital cameras. If
your camera has this option, you have access to
much higher image quality than the standard JPEG
file format.
Essentially, Raw mode is just what it sounds
like. It’s the raw data pretty much straight from
the camera’s sensor. In a digital camera the
photographic image is, as I’m sure you’re aware,
captured by an electronic image sensor. This
sensor has millions of tiny photocells that produce a
charge when they are exposed to light; the brighter
the light, the higher the charge. Digital camera
sensors don’t record the colour of the light hitting
them, just the brightness, so a special mosaic of
coloured filters is placed in front of the sensor,
called a Bayer filter.
Naturally, the image generated by the sensor and
filter wouldn’t make much sense to the unaided
eye, so the signal from the sensor feeds into the
camera’s image processor, a combination of
computer electronics and software which turns the
brightness data from the sensor, adjusted for the
colours in the Bayer filter, into a full colour digital
image that you can view and print.
Part of that process includes reducing the
bit-depth of the basic image data (the amount of
1 s and Os used by a computer to describe each
pixel), usually from 36-bit (12 bits per channel)
100 www.pclpublications.com
USEFUL TIP
Modern cameras all come supplied with
Raw processing software, although if you
have Photoshop, it has Adobe Camera Raw
built in as part of the application. Try to get
used to always shooting in Raw mode on
your camera. The quality and processing
possibilities are much greater than JPEG
files. These days, even some camera phones
have the ability to shoot in Raw format.
They are larger file sizes than JPEGs but
the benefits become clear once you start
to understand how much more processing
ability you have. Your photos will see a
marked improvement when you use Raw.
or even 48-bit (16 bits per channel) to 24-bit (8
bits per channel), which makes a smaller and
more easily processed file, but loses some colour
depth because of the smaller palette that can be
represented by that many bits. Other adjustments
to the colour balance, such as unusual white
balance settings, can also reduce image quality, as
will heavy noise reduction.
In order to save space on the memory card,
produce faster transfers and make it easier to
display and print the photograph on a computer,
the image is usually converted to a compressed
JPEG file. Unfortunately JPEG compression also
reduces the image quality, and can introduce
artefacts into some areas of the image.
The main advantage of Raw shooting, apart from
the improvement in overall image quality, is that it
bypasses the in-camera image processing, such
as white balance, saturation, sharpness etc. This
sounds illogical, but it’s not really. The processing
that takes place in the camera is pre-set before the
shot is taken, and irreversible once the image has
been converted to a JPEG file. By shooting in Raw
mode, you can make the processing adjustments
after the shot has been taken, and if you need to
change them you can do so as long as you have
the original Raw file.
The downside to Raw file recording is of course
that the saved files are much larger, so they take
a lot longer to save to the memory card, and you
can fit fewer of them on there. For a typical 16MP
DSLR, a high quality JPEG file will be around
8MB, while a Raw file will be around 25MB, over
three times the size.
Many of the more recent DSLRs have the
ability to record Raw and JPEG image files
simultaneously. This has the advantage of the
convenience of JPEG with the versatility and
quality of Raw, but takes up even more space on
your memory card. Fortunately the price of very
large memory cards is falling almost daily, so this
needn’t be much of a problem.
www.pclpublications.com 101
ADOBE CAMERA RAW
CAMERA RAW
Camera Raw
The new look for Photoshop’s Raw processor
Photoshop comes with Camera Raw
as standard. It offers a range of
processing options that enable you to
get the best out of your photos, including
exposure adjustment, sharpening, noise
reduction, colour correction and automatic
correction for lens distortion. It’s regularly
updated so it’s compatible with the latest
cameras and lenses. It recently underwent
a major update and the layout has been
redesigned to match the look of the
mobile version of Lightroom.
Film Strip
This shows all the files you currently have
open in thumbnail format and is displayed on
the left side of the screen. You can alter its
orientation and display it along the bottom of
the screen if preferred. Click the one you want
to work on.
Image Window
The image you are currently working on
is displayed here. All the changes and
adjustments you make to the file is shown
here in real time. If you alter the before and
after view options the screen will be split in
half accordingly.
Ratings and Preferences
The lower middle of the interface has a
ratings panel so you can apply a star rating
to each image you’re working on. The small
trashcan button will reset the rating to zero
stars. Below that is a clickable link to Camera
Raw’s preferences.
Zoom and Orientation
The lower left area has two controls that let
you control the amount of magnification of
the currently active image that range from
6% to 1600%. Next to that is the show/hide
Filmstrip button and orientation options.
102 www.pclpublications.com
CAMERA RAW
I ADOBE CAMERA RAW
[ps]
Control Tabs
The user interface breaks the
workflow down into discrete
sections, each with its own
tabbed palette of controls and
adjustment sliders. Switch
between them by clicking on
their name to expand each panel
such as Basic and Curve.
Info, Edit, Profile
Below the Histogram are three
small panels. The first displays
information about the camera
settings used. The second lets
you choose if you are using Auto
or B&W colour settings. The
third is the colour profile selector
and browser.
Histogram
This displays the distribution of
tones in your image and changes
as you apply different exposure
and colour adjustments. Darkest
tones are on the left of the graph
and brightest on the right. It
displays RGB colours and the
combined colours.
Toolbar
This holds all the main selectable
tools including Edit, Crop and
Rotate, Spot Removal and
Masking. The options for the tool
you select will be displayed in
the main control tab panel to the
left of the toolbar and changes
with each tool you choose.
_MRK5936-HDR.dng (2 of 4)
- Nikon D8T
Exposure
Contrast
Highlights
------A
Shadows
Whites
Blacks
> Curve
> Detail
> Color Mixer
> Color Grading
> Optics
> Geometry
> Effects
> Calibration
www.pclpublications.com 103
ADOBE CAMERA RAW I
THETOOLBAR
The Toolbar
Get to know all the tools you have at your
disposal in the current version of Camera Raw
The Toolbar in the newly updated layout of Camera Raw sits
vertically in the top right side of the interface. It is broken down
into a series of buttons that you can click. Each button you click, will
display its particular tools in the main control panel situated right
next to the Toolbar. This version now looks more like Lightroom, the
mobile-focused version.
Crop —
Aspect Ratio Custom w fi
Angle 0.00
Q Constrain to Image
Rotate & Flip
О С И 2
IS0160 15-30@18 mm f/11 1/10i
Create New Mask
.Ji*. Select Subject
W Select Sky
/ Brush
H Linear Gradient
(•) Radial Gradient
Color Range
Luminance Range
(?) Click to learn more about Masking.
Edit
First in the Toolbar is the Edit button.
Clicking on this displays the main
tools that you will be using to edit and
adjust your photos. Edit is broken
down into nine sections that cover
all your typical adjustment tools such
as altering Brightness and Contrast,
Hue and Saturation, Detail and Noise
Reduction. There are also tools to
correct optical flaws in camera lenses
and alter image geometry amongst
other options.
Crop & Rotate
As the name of this next tool
suggests, this is where you can alter
the aspect ratio of your image and
perform a crop on it to either remove
an unwanted part of the image, or
get it to more closely adhere to a
compositional guide such as the Rule
of Thirds. It also offers a levelling tool
that can be dragged over a slanted
horizon to instantly correct it and
options to rotate the image and flip it
vertically and horizontally.
Spot Removal
This is a useful tool that can remove
spots and blemishes from your image
by either cloning another area over
the offending spot, or healing the
area in question by blending other
pixels into that area. You can choose
the Size, Feather and Opacity of
the brush which can still be moved
once placed if required. If you have
multiple images selected, the choices
you make will be applied to all
selected images at once.
Masking
The most recent update to Adobe
Camera Raw (version 14.0.1) sees a
number of tools being amalgamated
into a unified section all its own. The
Adjustment Brush, Linear Gradient
and Radial Gradient that appeared
separately, now all sit under the
Masking button. You also have the
new Select Subject and Select Sky
options as well as tools to create
masks for Color Range, Luminance
Range and Depth Range.
104 www.pclpublications.com
THE TOOLBAR
ADOBE CAMERA RAW IPs
^3 ^3 ЕЗ
Brush & Gradients
The Brush, Graduated and Radial
adjustment tools work just as they did
before they were all amalgamated into
one. Each tool has a set of adjustment
parameters that appear in the tabbed
palette on the right of the screen. You
can manually brush adjustments onto
your image or use the two gradient
options to affect areas of your image
and apply brightness, exposure,
contrast, saturation, sharpness and
much more.
Select Subject/Sky
The two tools are something that up
until now, only existed as a selection
option in Photoshop. Now though,
Select Subject and Select Sky have
made their way to Camera Raw.
When you activate each one, it scans
the image for the most obvious
subjects in the image or the main sky
area and creates a mask for you. You
can then apply various adjustments
to those areas just as you would as if
you had masked the area manually.
Color/Luminance
The Color Range and Luminance
Range tools are variations on the
methods you can use to select an
area. The Color Range tool, as the
name suggests, lets you sample an
area of colour you wish to adjust and
will only affect that chosen range of
colours. Alternatively, the Luminance
Range selection method allows
you to choose areas of a specific
brightness and then apply your
adjustments to just those areas.
Red Eye Removal
Red eye is caused by the flash from
a camera reflecting off blood vessels
in the inside of the eye giving
the owner of those eyes a rather
demonic appearance. Pets can also
suffer from this affliction but their
eyes glow green. Modern cameras
have red eye reduction ability, but
sometimes they slip through. This
tool can easily remove both red eye
and pet eye and restore them to a
more normal appearance.
Snapshots
2021-11-2610:05:50
2021-11-26 10:05:58
2021-11-26 1006:00
Snapshots
If you are working on a particularly
involved edit to one of your photos, it
may be prudent to use the Snapshots
feature at key points during the edit.
Adding a Snapshot saves the image
in its current state and allows you
to step back through your edits to a
point in time when the Snapshot was
created. You can still step forward
as well since each Snapshot is a
non-destructive save point in the
adjustment process.
Presets □ —
Mark 2
ф Beta feature. Click for info.
▼ User Presets
3 shot settings
☆ A Basic good one 0
basic 1
basic 1 medium
Presets
Pressing the Presets button in
the toolbar presents you with an
extensive list of image presets. This
means that you can apply one-click
adjustments to your photos. These
presets range from High Contrast
colour adjustments to Cross Process
effects and a number of Creative and
Black and White options too. You can
also save any number of user-defined
presets too and these are added to
the User Presets list.
Reset to Open
Reset to Default
Apply Previous Settings
Apply Snapshot
Apply Favorite Preset
Create Snapshot... О
Create Preset... О
Copy Edit Settings
Copy Selected Edit Settings... X
Pa<?fp Frtit Sr:
More Settings
Represented by three small dots,
this button opens a menu of some
additional options that allow you to
Reset your image to one of a number
of previous states. You can also
apply either a favourite preset or a
Snapshot. If you have a sumner of
active settings you like and want to
save it as a preset, you can export
these to a named file. You can also
Load or Save settings and set Raw
defaults for newly opened images.
Additional tools
At the bottom of the toolbar on the
right, there are also four additional
buttons. The magnifying glass is the
basic zoom tool (Z), then the Hand Tool
(H) lets you click and drag your image
around the screen. Press the spacebar
to activate the same tool. The Sampler
(S) lets you select a number of points
and display their current RGB colour
values. The Grid Overlay (Shift + G)
helps general alignment of horizontal
and vertical items.
www.pclpublications.com 105
ADOBE CAMERA RAW
THE EDIT MENU
The Edit Menu
Camera Raw has a powerful set of features all nested
within a series of easily accessible control tabs
The main interface of Camera Raw is comprised of a series of
menus, each with a series of control sliders and some additional
menu tabs to access further features. Although you will no doubt
spend most of your time working in the Basic panel, when used in
conjunction with adjustments from the other control panels, you will
be able to enhance your images beyond what you thought possible.
v Basic <•>
White balance Custom -
Temperature 5900
Tint -2
Exposure ♦0.75
Contrast 0
Highlights -50
Shadows ♦ 54
Whites ♦ 1
Blacks -15
Texture ♦ 35
Clarity -5
Dehaze 0
Vibrance ♦ 50
Saturation ♦ 30
> Curve
v Detail <•>
Sharpening 120 ▼
1Й
Radius 2.0
--------------A------------
Detail 25
---A-----------------------
Masking 0
A —--------------------
Noise Reduction 0 ▼
A ———
Detail
Contrast
Color Noise Reduction 25 ▼
---д-----------------------
Detail 50
---------------A
Smoothness 50
------------A
For a more accurate preview, zoom the
preview size to 100% or larger when
adjusting the controls in this panel
> Color Mixer
> Color Grading
> Optics <•)
> Geometry <S>
v Color Mixer
Adjust HSL * -i’Q
Hue Saturation Luminance All
Reds 0
------------------A-----------------
Oranges 0
Yellows 0
------------------A-----------------
Greens о
Aquas 0
Blues 0
------------------A-----------------
Purples 0
------------------A-----------------
Magentas 0
-----------------A------------------
> Color Grading
> Optics &
> Geometry &
> Effects <s>
> Calibration
Basic
The Basic panel in Camera Raw
is probably the one you will spend
the most time in and also making
the most important global image
adjustments. You can adjust White
Balance, Exposure, Contrast,
Highlights and Shadows as well
as Whites and Black. To bring out
detail, you can use Texture, Clarity
and Dehaze to reduce haze in your
photos. You can also adjust Vibrance
and Saturation to boost the purity of
the colours in your image.
Curve
The Curve options in Camera Raw
behave very much like the Levels
and Curves Adjustments you can
make in Photoshop itself. The
basic Parametric adjustments allow
you to use sliders to individually
adjust Highlights, Lights, Darks
and Shadows. The Point Curve
adjustment allows you to place
custom control points. You can work
with individual RGB curves too. There
is also a Targeted Adjustment Tool for
greater tonal editing precision.
Detail
Here you can handle Sharpening
and Noise Reduction. Sharpening
works by increasing the contrast
of the brightest and darkest edges
in your image. The Detail and
Masking sliders can effectively
suppress the halo effects of over
sharpening. The Noise Reduction
settings help you reduce the
amount of image noise and colour
artefacts seen in high ISO photos
with options to retain as much
detail in your images as possible.
Color Mixer
The Color Mixer panel is where
you can get to grips with the
colours in your images and how
you can affect them. The first
panel is Hue, which lets you alter
a specific range of colour values
such as reds for example; then
alter their hue to make them more
magenta or make orange more
yellow or blue more purple. The
other panels allow the adjustment
of their Saturation (intensity) and
Luminance (brightness).
106 www.pclpublications.com
THE EDIT MENU
v Optics 6»
Profile Manual
Q Remove chromatic aberration
□ Use profile corrections ▼
Setup Default ~
Lens Profile
Make Tamron **
Model TAMRON SP 15-30mm F2... -
Profile Adobe (TAMRON SP 18-3... ~
Correction Amount
Distortion 100
Color Grading
Colour Grading controls how much
of a certain colour appears in the
highlights or shadows of your
images. Interactive colour wheels
are used to choose the colour of
the overall image and those in the
shadows and highlights. Those
chosen colours will start to dominate
the brightest and darkest areas.
Sliders determine whether Highlights
or Shadows are more dominant and
how intense they are.
Optics
Throughout its life, Camera Raw has
been updated at regular intervals.
Each new update brings the latest
profiles that can automatically assess
your photo and determine what lens
was used on the camera that took the
shot. Once it knows what lens was
used, it can apply a set of corrections
that can eliminate lens aberrations
and distortions specific to that
lens. It does also allow for manual
adjustments and Defringe control.
Geometry
The Geometry feature gives you
control over the horizontal and
vertical balance and geometry of
your photos. From simply levelling
a slanted horizon to correcting
perspective in both the vertical and
horizontal plane, you can apply an
automatic adjustment that scans the
image for strong upright edges and
horizontal ones and corrects them.
You also have the option to apply
transformations manually as well.
Effects
The Effects panel allows you to add
Grain to your image, with three values
to control its impact. You can specify
the Grain, the Size of the grains and
the Roughness of the image grain
you apply. The other effect is Post
Crop Vignetting which allows you to
darken the outer edges of the photo
before and after you’ve cropped the
photo. You can control the Amount,
Midpoint, Roundness, Feather and
Highlights.
v Calibration
Process Version 5 (Current)
Shadows
Tint 0
---A----
Red Primary
Hue 0
A
Saturation 0
-----------------A----------
Green Primary
Hue 0
Saturation 0
USEFUL TIP_______________________________________________________
The filmstrip is the area dedicated to displaying thumbnail images of the currently selected images you are
working on in Camera Raw. One useful feature you can employ to save time when editing similar images is to
copy your edits and adjustments from one image to other images in your filmstrip. Take one image and edit it to
suit your preference. The colour, brightness and contrast and various other adjustments have been made to get
the most out of that specific image. You can then click the thumbnail of the active image, hold the Cmd key and
select another, or multiple, similar images from the filmstrip which will also be highlighted. You can then hover
your cursor over the top right of the originally edited image and click the Synchronize icon that appears. Choose
which adjustments you want to copy to the other images or simply click Check All and press OK. When you do,
all the edits from the first image will be applied to any additionally selected images in the filmstrip.
Calibration
Calibration is a module more
powerful than it may look at first
glance. Mainly used as a calibration
for your camera it can be a brilliantly
creative tool. You could think of the
Calibration panel as a more refined
Hue and Saturation adjustment tool.
You can alter the Tint value found in
the shadows of your image, as well
as adjust the general use of Hue and
Saturation in the Red Green and Blue
channels of your image for much
finer control.
Synchronize
□ Optics
□ Chromatic Aberration
Q Lens Profile Corrections
Q Lens Manual Distortion
Q Lens Manual Vignetting
□ Geometry
□ Upright Mode: Off
Q Manual Transforms
Q Effect*
□ Grain
Q Poet Crop Vignetting
Q Calibration
□ Process Version
Q Crop
Axect Ratio
Straighten Angie
www.pclpublications.com 107
Ps]
WHAT IS RAW MODE? I
RAW WORKFLOW
Raw Workflow
Make your images look their absolute best
Ask any five professional photographers
about the process they use to create their
pictures, you’ll get five different answers. The
amount of processing and adjustment used
will vary, depending on the job at hand and
the type of final image required, as well as the
type of camera used to take the photo and
the use to which the photo will be put. There
are certain operations that will be common
to most photos that you’ll want to process,
so we’ll take a look at a common general
purpose workflow that will be suitable for
most types of photo. Our example will be
using a sunrise photograph taken on a rocky
formation down on the coast.
®lf you look at the histogram at the top
right of the screen you’ll notice that the
line at the right (brightest) end of the graph is
peaking at both ends and flat in the middle.
Ideally the graph should fill the area between
the lightest and darkest ends of the range, so
we need to slightly reduce the lighter end of the
graph without causing under-exposure.
IS0160 15-30015 mm f/11
Edit Auto
Protile Adobe Color -
> Basic
> Curve
> Detail
> Color Mixer
e V
®To ensure that we don’t lose too much
detail to highlight clipping, click on the
arrow in the top right comer of the histogram
window. This turns on the highlight clipping
warning. Any over-exposed areas will turn bright
red in the image window. Clicking on the left
button turns on the shadow clipping warning.
®ln the Basic panel, hold down the Alt key
(Option on Mac) and begin to move the
exposure slider to the right. With the key held down,
all you’ll see will be the over-exposed areas. You can
do this with any of the first six sliders and it’s a good
way to make adjustments without going too far.
©We can spend a while carefully adjusting
the various sliders by hand to try and
equalise the histogram, but the quickest way to get
close to the optimum result is to let Camera Raw
do the hard work. If you click on Auto the software
will automatically adjust the image to produce a
good approximation to a balanced exposure. It’s
probably not going to be ideal, but it will give us
a good starting point. You’ll notice that the sky
along the horizon is over-exposed or very near to it,
but that’s OK. We're looking for a good spread of
tones and that includes white.
108 www.pclpublications.com
RAW WORKFLOW
WHAT IS RAW MODE? IPs
®The Auto adjustment has made a good
job of this particular picture, but for
landscape shots a little bit of extra saturation
usually looks good, so we’ll boost the vibrance
and the saturation to get the colours of the
sunlight, water and rocks to really pop out.
Texture 0
Clarity 0
Dehaze 0
Vibrance +13
Saturation 0
> Curve
©Camera Raw also provides another
method of adjusting exposure: by altering
the tone curve. Although it’s no more accurate
than using the sliders many people will prefer it
because it’s nice and simple and gives a good
visual representation of what we’re doing. It’s
also a lot harder to burn out the highlights using
curves. By adjusting the highlights to decrease a
portion of the overexposed areas and by boosting
shadows, it is possible to quickly equalise the
histogram without losing too much quality.
©Camera Raw offers a useful lens
correction feature under its Optics panel.
The Tamron wide-angle lens used to take this
picture is a nice bit of glass, but it’s not perfect.
Although it’s hard to see at a glance, this wide-
angle shot does suffer from some pincushion
distortion and slight chromatic aberration.
Fortunately Camera Raw comes pre-loaded
with correction profiles for a huge list of popular
lenses, including this one. All you need to do
to automatically correct the optical distortion
caused by the lens is to check the box Use
Profile Corrections. You’ll see the change happen
to your image immediately.
v Optics <s>
Profile Manual
Remove chromatic aberration
Use profile corrections ▼
Setup Default ~
Lens Profile
Make Tamron v
Model TAMRON SP 15-30mm F2... ~
Profile Adobe (TAMRON SP 15-3... -
Correction Amount
Distortion 100
----A
Vignette 100
A
Defringe ▼
Sample fringe £
(J) Use the eyedropper to sample
purple and green areas of fringing
Chromatic aberration is just as easy
to fix. Click on the Remove Chromatic
Aberration button to automatically remove it.
You’ll need to zoom in near the edge of the frame
to see the difference, but you’ll notice the effects
at once.
Profile Manual
Cjj^Remove chromatic aberration
Q Use profile corrections
Setup Default
Lens Profile
©The next step is largely a matter of
personal taste, but you can also choose
to use a preset profile for the colour calibration
too. Just below the histogram, click on the Profile
panel and from the drop-down menu select your
preferred profile. Choose Browse to see more.
There are now a number to choose from. This
sets the colour rendering profile to the preset.
IS0160 15-30015 mm f/11 1/60s
Edit Auto B&W
Profile Adobe Color . *
> Basic <•>
> Curve
+®
l
www.pclpublications.com 109
WHAT IS RAW MODE?
L Л
ADOBE CAMERA RAW WORKFLOW
©For this particular image, the sky is a bit lighter than we prefer, but
we can easily darken it down a bit by adding a high quality digital
graduated filter in Camera Raw. Click on the Masking button in the toolbar
on the right edge of the screen and you can add a Linear Gradient. Set the
exposure slider between -1.5 or -2, then in the image window drag down
from the top of the picture to just below the horizon line to apply the filter. If
you hold down the shift key while dragging, it will stay parallel with the top
of the frame.
©Next we have the Save Options. Camera Raw gives you the option to
output the processed image in a number of different ways, but which
one you use will depend on what you want to do with the finished image. For
most purposes the default settings will be ideal, but you may need to select
a different colour space and for maximum colour fidelity you can output in
16-bit format. You can also choose an image size different from the native
resolution of your camera, but be aware that choosing a larger size doesn’t
magically create new pixels; the image will be enlarged using a resampling
algorithm. If you’re planning to print the picture you might also want to look
at the sharpening options. When you’re happy with your choices, click Save.
The picture will be saved according to your preferences.
You also have the option to save a particular group of adjustment
settings in order to use them later on other images. You can apply a
selection, or all the settings at once, if you wish. Once you have a group of
adjustments you want to save, click on the More Image Settings icon in the
110 www.pclpublications.com
ADOBE CAMERA RAW WORKFLOW
WHAT IS RAW MODE?
You may notice that you will
often see small white dots next
to some or all of the toolbar
icons on the extreme left of
the screen. These are simply
small indicators that are there
to inform you that an edit using
that tool has been used on
your image and is active.
Auto B&W
im f/11 1/250s
AFTER
©From the options menu, choose Save Settings. This will open the
Save Settings dialog panel where you can specify which settings can
be saved. You can choose to Check All or manually choose by checking or
un-checking your preferred adjustments listed in the panel. Click Save and
name your Preset. Our example is called ‘New Landscape Preset.xmp’.
©Once saved, the Preset you created is added to the list of User
Presets. If you have an image to which you want to apply this Preset,
open it in Camera Raw as normal and then scroll down to where ‘New
Landscape Preset’ is listed. A real-time display shows the effect it has on your
image. If you click it, the adjustments will be applied to the active image.
Subset All
Save Settings
□ Profile: Adobe Landscape
□ Basic
Q Curve
□ Detail
□ Color Mixer
Q Color Grading
Q Optics
□ Geometry
□ Effects
□ Calibration
5 Process version
Q Crop
□ Spot Removal
Q Masking
ф Beta feature. Click for info.
▼ User Presets
3 shot settings
A Basic good one
basic 1
landscape 1 [^.
Mark 1
Mark 1 New
Mark?
rcoiup'icne
New L arid sea De Preset
nik HDR 1
рало 1
phantom 3 new
Phantom basic
www.pclpublications.com Ц1
I CREATIVE PROJECT GUIDES Ps
,Ps^
Creative
Project Guides
How about taking on some new projects to really
let your digital creativity loose? Part of the fun of
learning how to use Photoshop is tackling a variety
of photo editing and image manipulation scenarios.
It helps you understand how best to approach
them, and what tools are right for the job. It also
helps sharpen your growing creative skills.
www.pclpublications.com 113
p S CREATIVE PROJECT GUIDES
ARTWORK COMPOSITING
BEFORE
Compositing
Artwork
, '4 I
AFTER
How to incorporate multiple image
elements into a unique piece of artwork
If there is one area that really helps artists to show off their skills, it is
in the creation of unique images and fantasy artworks. Websites like
DeviantArt and Pixabay are full of images that have been assembled in
Photoshop, using many disparate components to create a final, cohesive
end result. Part of the attraction of those websites is that artists and
photographers create content and allow others to download their images
and use them for their own artworks. If you find yourself wanting to create
your own brand new fantasy
image, then Photoshop is perfect. It
lets you put each image element on its own layer and
with some careful editing and masking, you can blend them to produce
a final image worthy of any fantasy genre. So why don’t we have a go
right now? In our example, we’ve downloaded a number of free images
which we are going to assemble into a final artwork.
114 www.pclpublicatfons.com
ARTWORK COMPOSITING
CREATIVE PROJECT GUIDES
• Photoshop Ид!Д Edit Image Layer Type Select Filter 3D View Plugins
Let’s kick off the process by firing up Photoshop and from the file menu
selecting Re > Open. Navigate to where your images are stored. Our
base image is a jpeg file called ‘landscape’. If you double-click your image or
click the Open button, the image will open in Photoshop as a new document.
®Our main background image, sourced from Pixabay, is 2700 pixels wide
x 3540 pixels high. Any brushes and other effects used in this document
will be sized according to the scale of this image. If you’re using other images of
different sizes, scale your brushes proportionally to your image if needed.
QKind ~ S <3 T Ц £) •
Normal v Opacity: 100% v
Lock: 83 / pf £ All: 100% *
®This layer is named ‘landscape’. It makes sense to name all your
layers as you create them, just so you don’t lose track of all the
elements. More complex creations in Photoshop can use many layers and
adjustments, so be aware of this as you proceed.
©Now we need to start bringing in the various image elements needed
In this creation. A rocky outcrop is needed as our foreground, so we
need to go to File > Open, and navigate to our foreground image named
‘rock’. This can be double-clicked to open it in its own window in Photoshop.
®The part of the image that interests us is just the rock foreground. The
sea and sky are not needed. This means we need to select just the
rocky area. There are a number of ways you can do it, but it’s probably easiest
to go to the toolbar and choose the Quick Selection Tool (W).
©With the tool selected, and using a relatively small brush size of
50 pixels, you can click on the rock foreground and start to drag
the selection tool across all of the rocky areas. Because there is sufficient
contrast between the rock and the sea and sky, just the rock is selected.
www.pclpublications.com 115
CREATIVE PROJECT GUIDES
ARTWORK COMPOSITING
©When you have all the foreground rock selected, you can copy the pixels
within the selection by going to Edit > Copy or pressing Cmd + C. This
copies the selected area to the clipboard. Click on the document tab of your
original ‘landscape’ image to make it the active window.
©Now you can either go to File > Paste or press Cmd + V. This pastes the
rock image you selected into your document. Notice that a new layer will
be created for it. You can name the layer ‘rock’. We positioned the image at the
bottom of the document to create an outcrop overlooking the scene.
®Now we can continue to bring other image elements into the document.
Go to File > Open and navigate to your next image element. We have a
series of stone figures which have already been cut out by its author. We prefer
the statue down in the lower left of the file.
©Because the statue is already on a transparent background, we can
simply pick the Lasso Tool (L) and draw around it so it is completely
enclosed by a selection. Then you can either go Edit > Copy again or press Cmd
+ C. The statue will be copied to the clipboard.
QKind v H T Ц £| *
©Back to the work in progress and press Cmd + V to paste the statue into
the document. Make sure this new ‘statue’ layer is between the ‘rock’
and ‘landscape’ layers. We prefer the statue to be facing the other way, so we
can go to Edit > Transform > Flip Horizontal to have it face the other way.
®Next, the statue needs to be scaled up a bit. With the ‘statue’ layer
active, go to Edit > Transform > Scale. Control points will appear
around the image which you can drag to enlarge the statue. We scaled it up
and placed it slightly to the left of the frame.
116 www.pclpublications.com
ARTWORK COMPOSITING
CREATIVE PROJECT GUIDES
/ Brush Tool
£ Pencil Tool
□J/ Color Replacement Tod
Mixer Brush Tool
я
®We want the statue to appear as if it is some giant artefact dwarfing
the surrounding landscape. We also want it to look like it has foliage
growing up around it, rather than looking like it’s just been dropped there. From
the Layer Options panel, choose Add Layer Mask.
©A layer mask will be added to the ‘statue’ image. Click the layer mask
thumbnail to make it active. This is important as the next step requires
brushing onto the mask and not the image itself. Go to the toolbar and choose
the Brush Tool (B) from the menu.
®With the Brush Tool active, you can go to the Tool Options panel at the
top of the document and open the Brush Preset Picker. We need a brush
of about 60 pixels with Hardness set to 0% so it will be nice and soft. Then, set
the foreground colour to Black, using the Set Color tool.
®Now you can begin to paint with a black brush onto the statue’s layer
mask. Each brush stroke of black will hide that part of the statue and the
foliage underneath will show through. You can paint areas around the toes and
make it look like foliage is growing up around its feet.
Normal ~ Opacity: 100% ~
- S / 4* h 6
Fill: 100% *
©If you press Alt + Left-Click the layer mask thumbnail, you can view your
handywork. The brush marks are enough to make the statue look more
a part of its surroundings, and gives it scale relative to the landscape it is in. You
can click on the statue layer thumbnail to exit this view.
®Now we can continue layering in new elements. Go File > Open and
bring in another image of the moon which we copied to the clipboard.
We pasted, scaled and positioned the moon in the working document in a layer
called ‘moon’, between the ‘landscape’ and ‘statue’ layers.
www.pclpublications.com 117
CREATIVE PROJECT GUIDES
ARTWORK COMPOSITING
®The moon looks odd hanging there in front of the clouds, but we can
blend it in with some masking. Right-Click the ‘moon’ layer thumbnail
and choose Select Pixels from the list. Alternatively, you can press Alt + Right-
Click the ‘moon’ layer thumbnail. This makes a selection of the moon.
®With the selection still active, click on the ‘landscape’ layer. Now choose
any selection tool such as the Lasso (L). Right-Click inside the selection
area denoted by the ‘marching ants’ and choose Layer Via Copy from the list.
This has just copied the section of sky directly under the moon.
<±
0.
T
[jJ Gradient Tool
<*>* Paint Bucket Toot s
4*\3D Material Drop Tool
®This copied area will appear on its own layer which you can call ‘moon
mist’. You can click and drag this layer so it appears above the ‘moon’
layer. The moon image will effectively disappear, but it is still there. Click on the
‘moon mist’ layer to make sure it is active.
® Press Cmd + D to ensure no selections are active. In the Layer Options
panel, click on the Add layer Mask button. A layer mask will appear on
the 'moon mist’ layer. Click the layer mask thumbnail to make it active, then go
to the toolbar and choose the Gradient Tool (G).
Use the Gradient Tool Options Panel to make sure you have the
Foreground to Transparent type selected in the Gradient Editor. Now you
can click and drag the Gradient Tool from the top of the moon down to the lower
part of the moon. When you let go, a black gradient will be created on the mask.
©Where the gradient is solid black, the ‘moon mist’ layer is concealed.
As the gradient fades to transparent, more of the layer is revealed. This
creates the illusion that the moon is just visible through the atmosphere. You can
also make the ‘moon’ layer Opacity 85% to help it blend in.
118 www.pclpublications.com
ARTWORK COMPOSITING
CREATIVE PROJECT GUIDES
® We’re going to add a foreground character. Go to File > Open and navigate
to your image and open it; ours is called ‘girl’. We need to extract her from
the image. There are a few ways to do this, but Photoshop has introduced the
Select Subject feature that can automate the selection process for you.
®The Select Subject tool has done a reasonable job apart from her toes.
Select the Lasso Tool (L) and make sure the Add to Selection button is
active in the Tool Options panel. Now you can draw around the parts of her feet
that haven’t been selected, ready for the next part.
Global Refinements
Smooth 0
A
Feethet 0.0 рм
A
Contrast 04
A
Shift Edoe 0%
A
Clear Selection invert
v Output Settings
П Decontaminate Colors
©Click the Select and Mask button in the Tool Options panel. Use the
Refine Edge Brush Tool (R), to refine the quality of the mask around
the girl. Increasing the Edge Detection Radius to 8 pixels can help. Click the
Decontaminate Colors button, choose New Layer with Layer Mask, then click OK.
®Copy and paste the new layer into your working document. Put this new
layer at the top of the stack above the ‘rock’ layer and name it ‘girl’. You
may want to scale both her and the rocks to a slightly smaller size by pressing
Cmd + T and dragging and scaling until you have it how you want it.
®We also added a layer between the girl and the rocks called ‘shadow’.
We simply used a small, soft, black brush to add a dark area under her
feet, to make it look she was standing on the rocks. Next, we went to File >
Open and double-clicked on a file called ‘clouds’ to open it.
®We copied and pasted the clouds image onto its own layer between
the statue and rock layers. Then we clicked the Add Layer Mask
button whilst holding the Alt key to add a black Layer Mask to the cloud image,
effectively concealing it for the moment.
www.pclpublications.com 119
CREATIVE PROJECT GUIDES
ARTWORK COMPOSITING
®We then chose a 500 pixel soft brush and set its colour to white. Then,
by painting white brush marks on the black layer mask, we were able to
reveal areas of cloud to give the illusion of a fog layer hovering above the foliage
and around the base of the statue.
®We also added a ‘mist’ layer between the ‘cloud’ and rock’ layers and
used a 1200 pixel soft white brush to add extra mist, just by the girl’s
head and shoulders. We dropped the ‘mist’ layer’s Opacity to about 50%. This
gave a little separation between the girl and the statue.
®At this point we want to add a little glow, as if the sun is just off to one
side of the scene. We added a new layer called ‘glow’ between the
‘cloud’ and ‘mist’ layers. Then we used a 1200 pixel soft white brush to paint a
large blob off to the left of the scene, below the statue’s mouth.
®The ‘glow’ layer’s Blend Mode needs to be changed to Linear Light. Then
go to Image > Adjustments > Hue/Saturation (Cmd + U), to bring up the
Hue/Saturation panel. Make Hue +20, Saturation +40 and Lightness -40, and
check the Colorize button. The white blob should now be a warm glow. Click OK.
Properties »
□ Levels
Preset: Custom v
RGB * Auto
assn
Layers
QKind v S Э T П £)
Normal - Opacity: 100%
®ln the Layer Option panel, click the New Fill or Adjustment Layer button
and choose Levels. Make sure ‘Levels 1 ’ is at the very top of the layer
stack. In the Levels’ properties panel, drag the mid-tone slider to the right, then
drag the White Point slider to the left to darken the image.
®Then take a large 1600 pixel soft, black, brush and begin to paint on
the ‘Levels 1 ’ layer mask to reveal areas you want to be at their original
brightness such as the glow, moon, clouds and other areas that you like. This
adds a little more mood to the overall look of the scene.
120 www.pclpubllcations.com
ARTWORK COMPOSITING
CREATIVE PROJECT GUIDES
Tone: Shadows V Layers
Q Kind v [Z
Cyan Red -25
|\ Normal
Magenta kr Green
——— 0 Lock: -Й / 4*
Yellow Blue
*25
Tone: Highlights
Cyan
Red
QKind
H
♦30
Normal
Magenta
Green
0
Lock: JS / 4* £$
Blue
-35
Yellow
We then added a new Color Balance adjustment layer to the top of the
stack. We added Cyan and Blue to the Shadows and Red and Yellow to
the Highlights. Preserve Luminosity was unchecked. This added more drama to
the scene and also evens out the global colour palette a little.
®Then we added a Photo Filter adjustment, and used Sepia as the
filter colour; setting its Density to 25% and unchecking the Preserve
Luminosity button. This adds a global colour cast to the image that ties all the
various objects of differing colours together.
Properties
Master
SD Hue/Saturation
QKind
Opacity *00%
Lock: / 4* t~S ft Fil '004
Bring your
vision to life
Compositing allows you to create amazing artworks.
®A new Hue/Saturation adjustment layer was added to boost the
overall saturation of the scene. We then thought that the addition of a
small flock of birds in the middle distance would add some more scale to the
statue. This final tweak meant that our fantasy scene was now complete.
subject. Most typically, they are used in a studio setup and can add a
lot of drama to a portrait session. One coloured light is used to strongly
with access to expensive studio space and photographic
equipment, but with a good source image, Photoshop can turn a normal
illuminate the subject from one side and then the second light is brought in
to add a cross-lit effect, with another complimentary colour, on the other
side. This can be done with just the head and shoulders or the whole body,
portrait into an image with just as much drama as those captured by the
pros. Since this is Photoshop, we can take it a step further with extra
effects to enhance the image even more.
DUAL LIGHTING EFFECT
CREATIVE PROJECT GUIDES
ghting effect
®The key to a good dual lighting effect is to select a good source
image, with the potential to be turned into a final dramatic photo. If
you don’t have your own, you can find plenty of images on Pixabay, Pexels
and other free sites, which are attribution free.
®Our example is of a young footballer holding a soccer ball. As you
can see, he has been lit quite dramatically along each side of his
body, creating what is known as rim lighting. This is a great example that
can benefit from the dual lighting effect.
®This example image is 2832 pixels wide by 4240 pixels high. Our
settings and brushes used are based on an image this size. If you
are using images either smaller or larger, you may need to adjust some
settings to account for the different sizes in your own image.
©Now the process of adding the dual colours can begin. Go to the
Layer Options panel and click on Create New Fill or Adjustment
Layer. Then choose Gradient Map. This will let you remap the pixels in
your image to a new colour, or series of colours.
Properties » I = -o—
Gradient Map
Al
&_______________________________________L 4
New
Reverse
Method: Perceptual v
В
Q
T
Color Stop
®The new layer Gradient Map 1 will be added above your base
image, on its own layer. You can double-click the layer to bring up
its properties panel. In the properties panel, click the gradient and it will
take you on to the Gradient Editor panel.
©We need to edit the colours used in this gradient. The far left of
the gradient is black and that is fine for this image, but we will
need to click on the far right Color Stop to change its colour. When you
do, the Color Picker below it is activated. Click it to continue.
www.pclpublications.com 123
CREATIVE PROJECT GUIDES
DUAL LIGHTING EFFECT
Gradient Type: Solid ~
Smoothness: 100 v %
0
c
Stops
= ==
Smoothness: 100 %
Stops
®When you click the Color Picker, you can choose whatever colour you
want from the palette provided, but select a nice vibrant colour to use as
the first part of the dual lighting effect. In this case, we altered the Color Stop to a
bright blue and clicked OK to continue.
©The next part is down to personal preference and the brightness of
your image, but if you click the Color Midpoint slider and push it to the
left, you’ll notice that the image increases in brightness. This is because you
are mapping blue to more of the mid-tone values in the base image.
®When you are happy with the results, click OK on the Gradient Editor
panel to return to the main work in progress. Next, click on the Create
New Fill or Adjustment Layer button again and add a new Gradient Map 2
layer to your document, above the first one.
®Now, go through the Gradient Editor process as you have just done,
and this time create a gradient that goes from Black, on the far left,
to a bright colour on the right, by clicking on the right Color Stop again and
choosing a bright colour from the Color Picker.
V Opacity: 100% ~
©Once again, you can slide the Color Midpoint to the left to increase
the brightness and inject more colour into the darker areas and mid-
tone areas. The orange is the second colour we’ll use in the dual lighting
effect. When you’re happy, click OK to proceed.
® We’ve decided that the footballer will be lit with a blue light on the left
side of his body and the orange will light him on the right side. Click
on the layer mask thumbnail of Gradient Map 2 and press Cmd + I to invert
the mask, which is currently white, to black.
124 www.pclpubllcations.com
DUAL LIGHTING EFFECT
CREATIVE PROJECT GUIDES
®The orange gradient is hidden for the moment, since the mask has now
been inverted to black. Always remember that in masking terms, black
conceals and white reveals pixels. What we need to do now is selectively reveal
areas of the orange gradient map on our footballer.
©Go over to the toolbar and select the Brush Tool (B). Then, in the
Tool Options panel at the top of the document, adjust the brush size
to about 125 pixels and make sure Hardness is 0%. Then make sure the
Foreground Color is set to white before you proceed.
®With the Gradient Map 2 layer mask selected, begin to paint white
onto the mask in the areas you want the colour to appear. Since we
want it to look like he’s being lit by an orange light from the right-hand side,
choose the brightest areas on the right of his body.
®As you paint white on the mask, more and more of the orange
gradient map will appear turning his skin that colour. If you paint an
area you didn’t want orange, switch the foreground colour to black and
conceal those unwanted areas, then switch back to white.
Layer Style
Blending Options
General Blending
Blend Mode: Normal
Opacity: A 100 %
Advanced Blending
©After a bit of trial and error with the application of the brush strokes,
blends and chosen areas, we got a result we quite liked. The effect
of being lit with two different coloured studio lights is working well. Next, we
want to blend those colours into the subject a bit more realistically.
®Next, double-click the Gradient Map 1 layer and it will open the Layer
Style panel. We will use the Blend If properties to blend this coloured
layer into the base image below in a more realistic way, by letting more of the
base layer’s darker colour show through the layer above.
www.pclpublications.corn 125
CREATIVE PROJECT GUIDES
DUAL LIGHTING EFFECT
Blend If: Gray
Layer Mask Hides Effects
Vector Mask Hides Effects
®To use the Blend If function, Alt + Left-Click on the left-most Underlying
Layer tab, to split it in half. Splitting it allows for much finer blend control.
Drag the right half of the tab to the right. This will allow the subtle blending of the
base layer’s darker areas with those of the bright blue gradient map layer.
®Now it’s time to perform the same action with the orange Gradient
Map 2 layer. The effect you get from it can be subtle, but it means
both the coloured gradient maps are blended into the original image. Next,
let’s add a little bit of a flourish to finish the image off.
® We’ve got a nice light painting image off a free image site that we
want to combine with our main image. We have an example called
‘light.jpg’ that we opened in a separate document. We then pressed Cmd +
A to select all pixels and then pressed Cmd + C to copy it.
®Back in our main document, you can paste the image you just copied
to the clipboard using Cmd + V, or if the copy is the same size as
your main document, Shift + Cmd + V to paste it in place. Obviously the light
painting image covers the footballer but we can address that next.
®Make sure the light’ layer is at the top of the layer stack. Now we can
change its Blend Mode to Lighten. In this case, only pixels brighter
than 50% grey will show up. Darker pixels are effectively invisible, revealing
the footballer below. The next problem is uncovering the footballer’s face.
©Keep the light’ layer active and click on the Add Layer Mask button in
the layer options panel. Now, for the moment, make all layers invisible,
except the base image, and make that active by going to Select > Subject,
which will automatically scan the image and make a selection of the footballer.
126 www.pclpublications.com
DUAL LIGHTING EFFECT
CREATIVE PROJECT GUIDES
®Make sure you keep the selection of the footballer active and make
all layers visible again. Then click on the Layer Mask thumbnail of the
‘light’ layer. Choose the Brush Tool and use a small black brush of about 125
pixels to paint across the area where the footballer’s face is obscured.
®As you paint, the footballer’s face is revealed with each stroke. The
selection you made of his outline is creating a nice crisp mask, and each
brush stroke is constrained by the selection, so you don’t paint anything other
than the inside of the selected area. So far, so good. Let’s keep going.
lackground
Solid Color.
Gradient...
Pattern...
Brightness/Contrast...
Levels...
Curves...
Exposure...
Vibrance...
Hue/Saturation...
Color Balance...
Black & White...
Photo Filter...
Channel Mixer...
Color Lookup...
Invert
Posterize...
Threshold..
Gradient Map... к
Selective Color..Л
®The ‘light’ layer is just a single colour blue at the moment, but it would
be nice to be able to colour a part of the light paint effect to match
the orange glow on his right-hand side, as if the swirling light pattern is
responsible for creating the blue and orange lighting effect on his body.
®Keep the ‘light’ layer active and go to the Layer Options panel below
the layers panel, click the New Fill or Adjustment Layer button and
choose Gradient Map again. A new layer called Gradient Map 3 will be added
to the top of the layer stack, with a Layer Mask in place.
www.pclpublications.com 127
CREATIVE PROJECT GUIDES
DUAL LIGHTING EFFECT
Double-click this new gradient map layer to open its properties and
click on the Clip to Layer button, to make sure this adjustment only
affects the ‘light’ layer below it and nothing else. Then click the gradient to
enter the Gradient Editor as you did before.
©Once you are back in the Gradient Editor, choose an orange gradient
and adjust the Midpoint slider to suit your preference for brightness.
Click OK and you’ll see that the light swirl image is now turned completely
orange. That’s ok, since we can use the mask to conceal some of it.
©Click the Gradient Map 3 layer mask to make sure it is active and
choose the Brush Tool from the toolbar. Use a soft black brush to
paint on the mask, revealing the original blue swirl pattern on the left side of
the footballer’s body once more, and° leaving orange areas on the right.
®At this point we thought the image could use a little punch, so we
added a Levels adjustment layer at the top of the layer stack and
increased the brightness of the highlight areas and the mid-tones too. The
brighter image is now looking very vivid and dramatic.
128 www.pclpublicatjons.com
DUAL LIGHTING EFFECT
CREATIVE PROJECT GUIDES
_ Screen v Opacity: 100% v
a?
Lock: ЕЗ X Й-’ ft nil: 100% v
For a final effect, we added an image of blue and orange smoke. We then
used the same Select > Subject technique to create a mask that, when
filled black, made the smoke look like it was sitting behind our main subject.
©A small amount of a white gradient fill on the mask, at the bottom of
the image, created the effect of some smoke rising around his waist.
With that, the image with the dual lighting effect was complete.
Gradient maps can create cool light effects in Photoshop.
Light
fantastic!
PS CREATIVE PROJECT GUIDES | HDR PANORAMAS
If you are out and about doing landscape photography, there are times when
you are faced with some compositional and technical challenges that could
affect the quality and overall impact of your photos. One area that regularly
demands your attention is that of exposure and getting a beautifully balanced
tonal range. When trying to photograph scenes of very high contrast, that
can be a very tall order. A lot of photographers will employ the HDR (high
dynamic range) technique. This is where they will shoot the scene at three or
values that can be merged at a later time on the computer.
Great, but what happens if you are also tasked with shooting a very wide
panoramic shot that cannot be captured in one go? You would need to
create a series of images where you pan from left to right, capturing a series
of narrower, overlapping slices of the scene, then splicing those together
into a wide-angle shot on your computer. Now imagine trying to do a super-
wide panorama in HDR as well? How would you go about processing all
those images and creating a viable HDR panorama at the end?
HDR PANORAMAS
CREATIVE PROJECT GUIDES
®As luck would have it, Photoshop and its accompanying digital darkroom
- Camera Raw, have everything you need to be able to assemble the
multiple images, and multiple exposures, into one final image that you can
process as if it were an in-camera original shot, taken out in the field.
©Our example is a super-wide HDR shot that needs to be assembled and
processed. It is comprised of 5 x 3-shot HDR images, where the camera
was panned left to right to capture a much wider area than could be captured
with one shot alone. So we have 15 images that need to be combined.
? 2022 File View Stacks Label Tools Window Help
Undo Move
3€Z
®Each 3-shot HDR capture comprises: one average exposure, one that is
underexposed to keep detail in the sky and one that is overexposed so
there is detail in the foreground. When merged and processed, it simulates an
image that has more tonal data; similar to what the human eye sees.
©The key to a successful merge is to work on all the images and apply all
the same adjustments at the same time. To do this, you can open Adobe
Bridge and navigate to where your images are stored. You can press Cmd + A to
select all of them, or choose Edit > Select All in the top menu bar.
Open in Camera Raw.
Purge Cache for Selection
Edit Capture Time...
Revert Capture Time to Original
Copy
®AII the images will be selected. Now you can right-click any of the images
and choose Open in Camera Raw. This will open up Camera Raw and,
depending on how you have your filmstrip positioned, it will display all the images
in your HDR panorama sequence down the left side or along the bottom.
©Right-click any one of your images and choose Select All (Cmd + A), from
the menu. This will select all 15 of the images, so any changes made
will be applied to all of them at the same time. Once you’re happy all images are
highlighted, you can start the basic adjustments process.
www.pclpublications.com 131
CREATIVE PROJECT GUIDES
HDR PANORAMAS
v Optics <*>
Profile Manual Q Remove chromatic aberration & Use profile corrections ▼
Setup Default
Make Lens Profile Canon xz
Model Canon EF 16-35mm f/2.8 ..
©Since the images were taken on a Canon 5DMK3 digital camera, with a
16-35mm wide-angle lens, there will be some barrel distortion present
that Camera Raw can eliminate for you. Over in the main control panel on the
right, click on the Optics tab to reveal the corrections that can be made.
®lf you click on both the Remove Chromatic Aberration and the Use Profile
Corrections buttons, it will asses your image and remove any optical
issues created by the lens used at the time of capture. It correctly identified the
lens that was used and removed the distortion.
Merging HDR panorama preview...
Cancel
©You could opt to try and add a number of exposure adjustments at this
point, but instead, you can right-click an image over in the filmstrip and
choose the Merge to HDR Panorama option. Any adjustments can easily be
made once the HDR panorama has been created.
®A word of warning here. As the process begins, it may take some time to
both merge the HDR sequences and then create the panoramic image
from all 15 images. Imagine if you captured a 7 x 5-shot HDR sequence. You
would now be waiting for 35 photos to be merged and a panorama created!
©As long as you have plenty of overlap between the shots, Camera Raw
should be able to identify anchor points and successfully stitch the
images together. It analyses each image and aligns them to make sure they are
as sharp as possible. When done, it will display a Merge Preview for you.
®At first the image may look a bit underwhelming. You have a very dark
foreground and a bright sky. Bear in mind that the image now contains
much more tonal information than just one single image alone. This extra data
just needs to be coaxed out of the image for a perfect HDR image.
132 www.pclpublications.com
HDR PANORAMAS
CREATIVE PROJECT GUIDES
©If you look at the Merge Preview options, you have a number of tweaks
you can make before you commit to creating the final merged panorama.
The Projection option lets you choose if the image is mapped to a sphere, a
cylinder or is set to show near or far objects in a more extreme way.
©Spherical is the default option and the most commonly used. Also on by
default is the Auto Crop feature. If you turn it off, you can see a preview
of the entire image and how the 5 segments were warped and stitched together,
leaving gaps around the perimeter of the scene.
Perspective
Boundary Warp
65
^Flll Edges
Q Projection options are not editable after the
merge is completed.
Image Workflow
Apply Auto Settings
Auto Crop
ф Bracketed HDR panoramic merge creates HDR
mages with Align Images on, and Deghost off. Tc
use different settings, merge HDR brackets first
and then combine the resulting HDR DNGs into a
panorama.
®You can alter the Boundary Warp value by moving the slider to the
right. As you do, the image will be warped in an attempt to plug the
gaps between the image and the blank areas left by the stitching and warping
process. We opted Warp 65 and clicking the Fill Edges button to fill the gap.
®We now have the base image ready. The edges have been filled with
Content-Aware pixels. The only other option you may want to look at
is the Apply Auto Settings button. This will assess the image and apply some
default adjustments to get you started. One click and the image transforms!
use different settings, merge HDR brackets first
and then combine the resulting HDR DNGs into a
panorama.
Cancel
к у
Merge..7^.
Option-click to save result to the same folder as
the source images with default file naming.
©Now you can click the Merge button and type a name for the result in
the Merge Result window. When done, your HDR, merged panorama
will appear on the screen. The auto settings have actually done a great job. The
highlights have been darkened and shadows eliminated for a balanced shot.
If you look at the image information at the bottom of the screen, you will
see that the combined images now gives you a panorama that is 10025
pixels wide by 3240 pixels high, and has a file size of 32.5MP. If you also look at
the Basic adjustments, you can see how the Auto settings altered them.
www.pclpublications.com 133
CREATIVE PROJECT GUIDES
HDR PANORAMAS
®We were pretty happy with the auto results and made just a few simple
adjustments to finish it off. We added more warmth to the image by
increasing the Temperature up to 6500, and under the Colour Grading tab, we
injected some blue into the shadows and yellow into the highlights.
®We then clicked on the Masking button and added a Linear Gradient
(G). The gradient was added to the top of the image and dragged
down to the horizon. We then used the Light controls to darken the sky a little
and used the Temperature slider to add just a shade more blue to it.
134 www.pclpublications.com
HDRPANORAMAS
®We tweaked the exposure just a little and then went down to the
Texture, Clarity and Dehaze sliders and increased Texture to bring
more detail into the image, as well as increasing the Clarity to boost micro-
contrast. A little more Vibrance and Saturation completed the image.
®Once complete, it’s just a case of clicking the Done button and
returning to Adobe Bridge. The newly created HDR panorama will be
visible and ready to be opened in Photoshop for any further image editing, or
opened in Camera Raw again and saved as a jpeg or other image format.
This is how you see
the bigger picture
Let Photoshop and Camera Raw transform your photos.
www.pclpublications.com 135
CREATIVE PROJECT GUIDES
Perfect
BEFORE
Portraits
PERFECT PORTRAITS
AFTER
We show you the key to beauty
retouching for great skin
Before the advent of digital technology, it was the job of the makeup artist
to get the skin looking perfect on set or in the studio. Now, thanks to
Photoshop you are the makeup artist. You can control exactly how you want
your model to look in the final image. As ever, there are numerous ways you
can go about retouching skin. Some techniques are very simple but do not
give natural results. Some take it to extremes and end up with their models
looking like mannequins. Of course, there has been much debate about the
use of retouching and manipulation of body
shape. All we are looking to do is make our model’s skin
look as healthy and glowing as possible. We are going to use a technique
called frequency separation. Simply put, you break the base image down
into two components. One layer carries just colour and tonal information,
the other layer holds detail and texture. This means you can work on one,
without affecting the other. It’s a simple and effective method.
PERFECT PORTRAITS
CREATIVE PROJECT GUIDES
portrait.jpg
® Let’s begin by firing up Photoshop and from the file menu selecting File
> Open. Navigate to where your images are stored. Our base image is a
jpeg file called ‘portrait’. If you double-click your image or click the Open button,
the image will open in Photoshop as a new document.
®Fbr your reference, the image is 3000 pixels wide x 4500 pixels
high. Throughout our tutorial we will be using settings and brushes
appropriate to an image of this size. If you are using images of different sizes,
your settings and brushes may need to scale to match your image dimensions.
®Now we need to separate this image into its component elements for
this process to work properly. If you go to Layer > Duplicate Layer, or
hit Cmd + J on your keyboard, you can create a duplicate of the base image.
Name this new layer ‘color’. Then create a second duplicate called ‘detail’.
©For the moment, turn off the visibility of the ‘detail’ and ‘Background’
layers, leaving the ‘color’ layer visible. Go to Filter > Blur > Gaussian
Blur and choose a Radius value that is just enough to blur out any sharp
details. A value of 25 pixels was just enough for this image.
®Next, make the ‘detail’ layer visible, again by clicking the eyeball button
next to the thumbnail, and make sure it is the active layer. Go to Image
> Apply Image to open up the Apply Image window. This lets you blend two
images together for a range of effects.
©Under Layer: select color and under Blending: choose the Subtract
option. This means the ‘detail’ layer and the ‘color’ layer are blending
to create a desaturated image. Make sure Scale: is 2 and Offset: is 128 for
optimum results. Click OK to continue to the next step.
www.pclpublications.com 137
CREATIVE PROJECT GUIDES
PERFECT PORTRAITS
QKind
V Normal
Dissolve
Pin Light
Hard Mix
Difference
Exclusion
Subtract
Divide
Hue
Saturation
Color
Luminosity
Linear Light
Darken
Multiply
Color Burn
Linear Burn
Darker Color
Overlay
Soft Light
Hard Light
Vivid Light
Lighten
Screen
Color Dodge
Linear Dodge (Add)
Lighter Color
Fill: id
Jpacity: iq
®The ‘detail’ layer has now changed after its blended integration with
the ‘color’ layer below it. To remove all vestiges of colour, go to Image
> Adjustments > Desaturate (Shift + Cmd + U). The image will now look like a
greyscale image. This is where all the detail will be kept in this process.
©Next, click on the Blend Mode panel and choose Linear Light from
the dropdown list. In combination, the ‘detail’ layer blending into the
blurred ‘color’ layer below now looks like the original image, except it now
requires those two layers to achieve it.
'ea - ’~rr'
Sample Current Layer к ,,
Current & Below
All Layers
For the next step, make sure the ‘detail’ layer is the only visible layer
and that it is currently active. Go to the toolbar and select the Clone
Stamp Tool (S). Up in the Tool Options panel, click the Brush Presets button
and select a brush of about 45 pixels and Hardness 0%.
This is critical: make sure the Sample panel is set to Current Layer.
You do not want what you are about to do next to be influenced by
any other layers. We’re going to use the Clone Stamp Tool to copy and paste
areas of clean, unblemished skin onto areas we want to look just as clean.
138 www.pclpublications.com
PERFECT PORTRAITS
CREATIVE PROJECT GUIDES
©Pick your first blemish. Find an area of clean skin next to it and place
your cursor over it. Press the Alt key and left-click that clean area. You
have just sampled an area of clean skin. Move your cursor over the target
blemish and left-click to paste the clean sampled area over the top.
to remove them. When cloning, take care not to overdo it, and watch out for
tell-tale repeating patterns that signal incorrect use of the clone stamp tool.
©Because you are cloning skin on top of skin, this technique avoids
problems that result in loss of detail, or noticeable blurring of areas
that have been retouched. With a little patience and care, your subject’s skin
should look noticeably fresher and cleaner, ready for the next step.
©Click on the eyeball icon on the 'color' layer to make it visible again
and you should now be able to view the fruits of your labours. The
cleaned up ‘detail’ layer is blended back into the ‘color’ layer below, and the
result is that you now have a subject with perfect skin.
www.pclpublications.com 139
CREATIVE PROJECT GUIDES
PERFECT PORTRAITS
®At this point you could sit back and conclude that your work is done,
but there is another trick you can employ to enhance this portrait
image still further. You may notice that the subject’s skin has shiny hotspots
on it. With a little attention, this can be removed quite easily.
®Make sure the ‘color’ layer is active and then go to the toolbar and
select the Lasso Tool (L). Use this tool to drag a selection around the
shiny area of the forehead. If you need to add more areas to this selection, go
to the Tool Options bar and click the Add to Selection button.
©Your Lasso Tool cursor will have a small plus symbol (+) next to it
to indicates that you can add additional selections to the ones you
already have. We worked our way around the face, picking out areas that
looked a little shiny and were in need of attention.
®When you have all the areas that require some attention selected, go
to Select > Modify > Feather (Shift + F6). This panel lets you feather
the edge of the selections you’ve made. For the size of image we’re working
with, a radius of 45 should work just great. Click OK to continue.
140 www.pclpubllcations.com
PERFECT PORTRAITS
CREATIVE PROJECT GUIDES
Select ЦЦПД 3D View Plugins Window Help
Filter Gallery
Anti-alias
Convert for Smart Filters
Neural Filters...
Filter Gallery...
Adaptive Wide Angle.
Camera Raw Filter...
Lens Correction...
Liquify...
Vanishing Point...
ID
Blur
Blur Gallery
Distort
Noise
Pixelate
Render
Sharpen
Stylize
XF
XOXA
OXA
OXR
oxx
Gaussian Blur...
Lens Blur...
Motion Blur...
Radial Blur...
®The selections will be softened ready for the next step. Go to Filter > Blur
> Gaussian Blur to bring up a blur panel. Remember that you are working
on the ‘color’ layer that is already blurred, but you can blur these specific areas
even more.
®ln the Gaussian Blur panel, choose a Radius value that blurs those areas
of skin even more, and is just enough to reduce the amount of shine on
the subject’s skin. If you overdo it, it will look obviously blurred. In this case, a
value of 65 pixels was enough to soften the shiny skin areas.
Create a flawless
complexion
Now you have the key to perfect skin.
®Now you can sit back and take in the work you’ve done to this
portrait. The skin now looks like it has had the attention of a good
makeup artist. The blemishes are gone, but the skin still looks like skin, with
pores and detail, and not like a smooth shop dummy.
Ps CREATIVE PROJECT
TH
AFTER
BEFORE
W
Touch
Turn the subjects of your
photos into solid gold
King Midas was a character from Greek and Roman legend who wished that
all he touched could turn to gold. When he got his wish, he nearly starved
to death since his food was also turning to gold. He then realised his error and
quickly wished for an end to the golden touch! Well, thanks to Photoshop, you
can turn things into gold and not worry about your next meal being inedible.
Using some fairly simple techniques, you can turn subjects in your photos
into golden objects, that have a beautiful lustre that only comes from solid
gold. We will take
a photograph and
manipulate it in such
as way as to give it shine, highlights and
the colours you associate with this precious metal. A couple of
layers, a few adjustments, perhaps a new background of your choice and
you will be celebrating your own power of the Midas touch.
THE MIDAS TOUCH
CREATIVE PROJECT GUIDES
® Let’s begin by opening Photoshop and going to File > Open, or
clicking Cmd + О to open a new image. Our chosen example is of
a simple marble statue that we are going to turn into gold. Double-click the
image or click Open to bring it into Photoshop as a new document.
®The image has a plain background which is helpful to us, since it
creates a nice, clean edge between the statue and her background.
Selecting the statue will be much easier because of this. It’s worth taking this
into account when choosing your own subjects for this effect.
®The image we are using is 2740 pixels wide by 4000 pixels high. Any
brush sizes and adjustment values added are based on an image of
this size. If you are working on a project of a different size, bear this in mind
as you may have to alter values to accommodate the different dimensions.
©It’s always a good idea to start a project by creating a duplicate of your
base image. This means that if all else fails, you still have your original
which will remain untouched and unaffected. Simply press Cmd + J to create
a duplicate layer. We named our new layer ‘statue’.
®Next we’re going to remove the statue from her background. As we
mentioned, since the statue has a nice clean edge which is easily
visible against the background, you can go to Select > Subject and let
Photoshop do all the hard work for you, and make a selection of the statue.
©You'll see the black and white dotted lines of the selection appear
(marching ants), and you can right-click inside the selection and
choose Layer Via Copy, from the context menu that appears. This will select
all pixels within the active selection and copy them to a new layer.
www.pclpublications.com 143
CREATIVE PROJECT GUIDES
THE MIDAS TOUCH
®The cut out of the statue will appear on a new layer called ‘Layer 1
You can rename it if you like. Layer 1 is what we will work with to
create our gold effect. For the moment, click on the visibility icons of the other
layers (the eyeball icon), so they are invisible.
®For clarity, while working on the cut out, we went to the layer options
panel and clicked Create New Fill or Adjustment Layer and added a
Solid Color adjustment Layer. Make sure it is below the ‘Layer 1 ’ cut out of
the statue. We made the Color Fill a strong blue to help the statue stand out.
fx D э □ @
Create new fill or adjustment layer
X2
D □ ®
Solid Color...
Gradient...
Pattern...
Brightness/Contrast...
Levels...
Curves...
Exposure...
Vibrance...
Color Balance...
Black & White...
Photo Filter...
Channel Mixer...
Color Lookup...
Invert
Posterize...
Threshold...
Gradient Map...
Selective Color...
Preset: Custom
Master
Hue: 0
A
Saturation: -100
•A
g Adjustmenu
P Add an adjustment
®Make sure ‘Layer 1 ’ is selected and go back to the layer options panel
and click Create New Fill or Adjustment Layer again. Choose Hue/
Saturation. A new layer called Hue/Saturation 1 will be added above the
statue cut out. We want to make a very simple change to the statue.
®ln the properties panel for the Hue/Saturation 1 layer, click on the Clip
To Layer button. This will ensure that any adjustments will only affect
whatever is directly beneath this layer in the stack. Push the Saturation slider
fully to the left to completely desaturate the statue.
ckground
Solid Color...
Gradient...
Pattern...
Brightness/Contrast...
Levels...
Curves... к
Exposure..
Vibrance...
Hue/Saturation...
Color Balance...
Black & White...
Photo Filter-
Channel Mixer...
Color Lookup-
Invert
Posterize...
Threshold-
Gradient Map...
Selective Color...
©Next, we need to begin to apply a shine and lustre to the statue that
mimics the look of metal. There are various ways to do this with
multiple layers, but there is also a nice quick method. Go to the layer options
panel, click Create New Fill or Adjustment Layer and choose Curves.
®Make sure Curves 1 is clipped like the Hue/Saturation layer, so it only
affects the cut out image below. Then click the curve to add points
which you can drag to create a sawtooth set of curves like the example
shown. This adjustment should create a chrome effect on your image.
144 www.pclpublications.corn
THE MIDAS TOUCH
CREATIVE PROJECT GUIDES
О 3DLUT File
Abstract
Device Link
Q Dither
2Strip.look
3Str<pkx>k
Bleach By pass, look
Candleiight.CUBE
Crisp.Warm.look
Crisp. Winter.look
DropBlues.3DL
EdgyAmber3DL
FallColors.look ’
filmstock_50.3dl
FoggyNight.3DL
Fuji ETERNA 2500 Fuji 3510 (by Adobe)
Fuji ETERNA 250D Kodak 2395 (by Adol
Fuji F125 Kodak 2393 (by Adobe) cube
Fuji F125 Kodak 2395 (by Adobe).cube
Fuji REALA 500D Kodak 2393 (by Adotx
Futuristic Bleak.3DL
Horror8lue.3DL
Kodak 5218 Kodak 2395 (by Adobe).cut
О Curves
Custom
©Next we need to turn the chrome effect to gold. Click the Create New
Fill or Adjustment Layer button again and choose Color Lookup and
make sure that this adjustment is also clipped to the cut out below it. Now
choose the 3DLUT preset EdgyAmber.3DL and watch your image transform.
©The preset colours the cut out to create a very nice facsimile of gold.
At this point, you can return to the Curves 1 properties and tweak the
settings to get an even nicer gold effect. A little extra contrast seems to really
get that gold colour to punch right out at you.
У Normal
Dissolve
Darken
Multiply
Color Burn
Linear Burn
Darker Color
Lighten
Screen
Color Dodge
Linear Dodge (Add)
Lighter Color
Opacity: 100% ~
All: 100% vx
Overlay
Soft Light *
Hard Light
Vivid Light
Linear Light
Pin Light
Hard Mix
H
I '
Clip Thumbnails to Layi
У Clip Thumbnails to Doc
No Thumbnails
Small Thumbnails
Medium Thumbnails
У Large Thumbnails
Lock: / 4* ft Ь Fill: 100%
fr О Э S ©
b '
X2
®Next, add a new layer to the very top of the layer stack and name it
‘Highlights’. Go to the Blend Mode options menu and choose Overlay.
We want to add some lovely specular highlights, that will really make the gold
shine, but we need a mask in the shape of the cut out statue.
Layers Paths
E QKind ~ S Q T П fl •
_ Overlay ~ Opacity: 100% ~
Lock: S3 / Ф ft' A Fill: 100% ~
® Click on Layer 1 which contains the cut out statue and right-click it
and choose Select Pixels from the menu. This creates a selection In
the outline of the statue. Click back on the Highlights layer to make it active
and click Add Layer Mask in the Layer Options panel.
л о
tL. 3
£
8
/ • Brush Tool В
Pencil Tool 1 В
— color Replacement Tool В
**/Mixer Brush Tool В
□I
0
я
я. «
©A mask in the shape of the statue is added to the Highlights layer.
All this does is let you paint anywhere on the Highlights layer, but
brushstrokes will only be visible in the area of the mask that is white. Any
other areas in black will conceal pixels on the layer.
®Go to the toolbar and select the Brush Tool (B). Choose a soft brush
of around 250-500 pixels and make sure the Foreground Colour is set
to white. If you press D, you can set the colours to their defaults of black and
white and use X to toggle which is the foreground colour.
www.pclpublications.com 145
CREATIVE PROJECT GUIDES
THE MIDAS TOUCH
®Make sure the Highlights layer is active and that you have the layer
thumbnail selected, and not the mask layer thumbnail. Using the soft
white brush you chose, start to dab areas of white in places where you would
like to see a nice strong highlight appearing on the statue.
©Since the Highlight’s Blend Mode is set to Overlay, the white brush
marks create little hot spots on the gold coloured figure. The pixels are
brightened but not simply painted white. This means you can now add brush
strokes anywhere on that layer to brighten the gold, metal effect below.
®We worked our way around the statue, adding bright highlights to all
the areas we felt would be reflecting a bright light source. Her face,
arms, fingers, hair and dress were all treated to some brush strokes to really
start to sell the idea of her being made of solid gold.
®For the sake of good housekeeping, since the number of layers was
starting to increase, we clicked the Highlights layer, held the shift key
and clicked on Layer 1 to select them all. While selected, clicking Create New
Group, adds them to a new Group folder we named ‘Gold’.
fcl midas touch
Stroke
Inner Shadow
Inner Glow
Satin
Color Overlay
Gradient Overlay
Pattern Overlay
Outer Glow
□ Drop Shadow
®We replaced the blue fill background for something more visually
appealing. We opened a stone image in Photoshop called ‘stone’, and
then copied and pasted it into the active document we were working on. This
new layer was placed directly underneath the Gold group folder.
©One final thing we wanted to add was a hint of a shadow behind the
gold statue. Double-click the Gold group folder to open up the Layer
Style properties panel. In the Styles list on the left, choose the Drop Shadow
option at the bottom. We chose black with a Multiply Blend mode.
146 www.pclpublications.com
THE MIDAS TOUCH
CREATIVE PROJECT GUIDES
Layer Style
Styles
Blending Options
Bevel & Emboss
Contour
Texture
Stroke [+]
Inner Shadow [+|
Inner Glow
Drop Shadow
Structure
Blend Mode: Multiply
Opacity: л 60 %
&
Angle / 65 * Use Global Light
Distance: A 500 px
Spread А 0 4
Size: A 62 px
Satin
Color Overlay [+|
Gradient Overlay [+]
Pattern Overlay
Outer Glow
□ Drop Shadow Щ
Quality
Contour
Noise:
Anti-aliased
0 4
□ Layer Knocks Out Drop Shadow
Make Default Reset to Default
®The Opacity was set at 60%, Distance was 500px and Size 62px.
While this panel is active, you can actually click and drag the shadow
around with your cursor if you prefer. We finally settled upon a shadow on the
statue’s left side, as if there was a light source to the right and above.
®With those final adjustments, your statue’s transformation from marble
to solid gold is complete. This technique can be used on various
subjects, just remember to choose ones that can be easily removed from
their backgrounds. So now you know. What else deserves the Midas touch?
This is how
you strike gold
An effective and visually stunning technique.
p S CREATIVE PROJECT GUIDES
ENHANCING YOUR PHOTOS
J.*-
AFTER
BEFORE
Photos
tr£.
Enhancing
Your
A few simple adjustments
can make all the difference
Here’s a scenario to ponder. You’re out with your camera, taking shots
of some beautiful scene. It’s sunrise down by the water’s edge. The
light is amazing, the clouds are well defined and lit by the rising sun, there
is a glow along the horizon and some cool reflections in the wet sand
at your feet. You compose a strong, yet simple shot and click off a few
frames. When you get home and download them to your computer, you
open them up and you’re surprised at how different the images look to
how it was in real
life. The images
are a bit washed
out, the colours seem a little
weak. Did you get your camera settings wrong? There’s every
chance you didn’t. Sometimes what you see with your own eyes is not
how the camera will interpret it. Your eyes have greater dynamic range
than any sensor and they see more tonal variations. Don’t worry though,
with a few simple steps, you can take that image and enhance it to not
only match, but surpass, the conditions present when you took the shot.
Adding more detail, contrast and saturation is referred to as making them
‘pop’. Here’s how you can make your own images ‘pop’.
ENHANCING YOUR PHOTOS
CREATIVE PROJECT GUIDES
Content
Open
Open With
Purge Cache for Selection
enhancing your photos.dng
Reveal in Finder
Edit Capture Time...
Open in Camera Raw...
Revert Capture Time to Original
Copy
Duplicate
Move to Trash
Move to
Copy to
Place
®Our example is a moody evening hilltop chapel image. Although the
exposure is a little off, it should be quite recoverable because of the
leeway offered by the Raw file. The sky is a little bit overexposed, but you’ll be
surprised what you can do with it.
®Our image is shown here in Adobe Bridge, which is the application
designed to manage, catalogue and keyword your image library. Since
this is a Raw file, we can go ahead and open it up in Camera Raw, by right-
clicking on it and choosing Open In Camera Raw.
> Curve
> Detail
> Color Mixer
> Color Grading
> Optics
> Geometry
v Optics €>
Profile Manu.i
Q Remove chromatic aberration
Q Use profile corrections ▼
Setup Default ~
Lens Profile
Make Tamron ~
Model TAMRON SP 15-30mm F2... -
®The image will open in Camera Raw, ready for editing. One of the first
things to do is to click on Edit (E), in the toolbar and then choose the
Optics panel. When you click it, the Optics panel will expand showing you all
the available options for lens correction.
©Profile Corrections assesses what equipment has been used to
capture the image and removes any lens distortion from the Tamron
15-30mm lens that was used in this example; as well as any purple/green
fringing that lenses can sometimes produce.
Profile Adobe Color
v Basic
b
White balance A* Shot
Temperature
Tint
Exposure 0.00
------------A
Contrast 0
Highlights 0
-------------A
Shadows 0
Whites 0
Blacks 0
®Next, click on the Basic tab. This is where the majority of the required
adjustments can be made to your image. Elements like Temperature,
Tint, Exposure, Contrast, Saturation, Highlights and Shadows can all be
altered here.
©We’ve made some simple changes to the picture. The Highlights and
Whites have been reduced to keep detail in the bright areas of the
clouds, and the Shadows and Blacks have been lightened. Texture, Clarity,
Dehaze, Vibrance and Saturation have been increased.
www.pclpublications.com 149
CREATIVE PROJECT GUIDES
ENHANCING YOUR PHOTOS
♦
ISO 31 15-30@15mm f/11 1/250s Q.
4-
Create New Mask <t>
.-i-. Select Subject j
Select Sky
• ••
J Brush И
H Linear Gradient 0
®The next thing that would be a good improvement to the shot is to
make the sky stronger at the top of the frame. Go to the toolbar and
click the Masking button and choose the Linear Gradient option. Be aware
that if a sky is too bright and burnt out, this effect may not work very well.
©With the Linear Gradient chosen, click and drag from the top of the
picture to a point just below the horizon. The values for the graduated
filter are zeroed out at first, so there is no apparent change. This is handy,
since we can demonstrate the effect the adjustments make.
®When using the Linear Gradient the start point, which is displayed
in red, will apply the effect at 100 per cent opacity. The effect then
gradually fades to zero opacity at the end point, which is displayed in white.
You can think of this as a digital version of a filter used on a camera.
®When you use the grad filter, its properties will be displayed on the
right of the screen. We started by altering the Temperature slider to
-30 at this point in the edit, and the Tint value was changed to +30 to help
add more depth to the colours in the sky and clouds.
О We dropped Exposure to -1.70 and Contrast was increased to +55
to give it a little more punch. At this point in the processing stage,
Highlights were -15, to reclaim some detail in the brightest parts. Shadows
were +10 and Whites were left at 0 and Blacks -10.
®The amount of Texture and Clarity was also boosted quite a bit to
+40 and +25 respectively, to add midtone contrast to the clouds; and
Dehaze was left unaltered, but Saturation was left at 0. The sky is darker now,
and the clouds have more colour, definition and contrast.
150 www.pclpubllcations.corn
ENHANCING YOUR PHOTOS
CREATIVE PROJECT GUIDES
®You can add more graduated effects to the foreground by clicking
Create New Mask and clicking on Linear Gradient again. The new
gradient will have all its adjustment parameters at zero, ready for you to begin
adding them to suit your preference.
©With the new grad active, you can alter all the settings until you have
something you like. We’ve altered values to brighten the foreground
and altered the Temperature and Tint values, to make the ground a little more
brown. Texture and Clarity has also been boosted.
Adjustment Preset None *
v Light
Exposure *0.45
Contrast 0
Highlights +20
Shadows 0
Whites *15
Blacks 0
v Color
Temperature *46
®You can also make more targeted adjustments using the Brush (K), to
paint adjustments onto your image. All the parameters you can adjust
can be seen in the properties panel. You can alter the Size, Feather, Flow and
Density in the properties panel as well.
®With the adjustment brush applied to the clouds, you can set about
altering the properties if you wish. We’ve made the brightest areas of
the clouds warmer and boosted the Exposure, Highlights and Whites to bring
out the light tones in the clouds, without losing detail.
©Each Gradient or Brush you add can be clicked on and the values
tweaked at any time. We went back to the Linear Gradient (G), and
clicked on the top grad and decreased the Exposure value a little more, and
boosted the cool tones.
®The edits are coming along nicely. The image is more tonally balanced
and enhances the moody look that was present at the time of
shooting. The colour temperature has been increased for warmer tones and
the clouds have more detail and contrast.
www.pclpublications.com 151
CREATIVE PROJECT GUIDES
ENHANCING YOUR PHOTOS
®Next, we want to boost the colours of the horizon a little more using
the Radial Gradient (J). This has been amalgamated with the Linear
and Brush filters and behaves like the Linear Gradient, but its effect is circular/
elliptical rather than a straight line.
©With the Radial Gradient selected, click and drag out an ellipse along
the centre of the horizon, just above the line of distant hills. The
properties start at zero by default again, so we are able to demonstrate the
changes as we make them.
®lf you wish, you can click on the centre pin of the filter and move it
around to any part of the picture without any issue. After trying a few
positions we’ve just placed it on the horizon where the sun is lighting up the
sky and the land in front of the chapel.
®To give the image even more of a glow, we want to warm up the
horizon. You can actually colour the filter by clicking on the Hue selector
from the Radial Gradient properties, on the right of the screen, and selecting a
tint that suits the scene best. You can boost the Saturation if needed.
v Ught
Exposure -0.15
Contrast 0
Highlights 0
Shadows 0
Whites 0
Blacks 0
----------A------------------
v Color
Temperature +10
Tint 0
®You can also alter the filter’s other properties to further amend the
quality, colour and brightness of the effect to your taste. We’ve altered
Exposure to -0.15 and Temperature to +10. Remember that you can go back
into this adjustment and alter it at any time.
©One final, optional adjustment is to add a small amount of
vignette to the picture. If you go to the Effects panel, add
Vignetting to darken the edges of the photo. We’ve made the Amount
-15, Midpoint 50 and Feather 60.
152 www.pclpublications.com
ENHANCING YOUR PHOTOS
CREATIVE PROJECT GUIDES
Tint *1
-----------------A-----
Exposure *0.35
Contrast 0
----------A-----------------
Highlights -45
---A - —
Shadows +45
A
Whites -20
------A ------ —
Blacks >5
------------A
Texture >25
----------------Л-----------
Clarity >15
Dehaze >5
®Back in the Basic panel, we’ve made some final edits to the
image, boosting Exposure a little, lifting the Vibrance and
Saturation and increasing the strength of the Whites. We also made a
crop of the image. Our adjustments for this image are now complete.
®You can just click on the Done button and apply all the adjustments
you made non-destructively to the file. When you do, the image
will show the changes made along with small icons in the top right of the
thumbnail to indicate it has adjustments and crops attached.
www.pclpublications.com 153
p S CREATIVE PROJECT GUIDES
WHITE TO ANY COLOUR
AFTER
White
BEFORE
-«Vc
to Any
ColourS
Realistically transform white
into any other colour
ne of the many techniques that Photoshop allows us, the digital
artist, to do is to manipulate colour and tone. Changing the colour
of an object to a totally different colour is not too hard, but to do it in a
realistic way can be a bit more challenging. The complexity increases
when your original colour is white. Imagine trying to change a white
shirt into a black one. How would you even do that and make it look
convincing? Well, this tutorial aims to show you a relatively easy way
to take a white
object with shadows
and highlights and convert its colour
into any other colour, and still look great. We also take it a
step further and convert the white object to black. In our example, we
have a studio portrait shot, where the subject is wearing a plain white
shirt which we want to be any other colour than that. Let’s get into it.
WHITE TO ANY COLOUR
CREATIVE PROJECT GUIDES
®Fire up your copy of Photoshop and go to File > Open (Cmd + O),
and navigate to where you have stored your example that you want to
convert. As we mentioned, our example is a fashion model in a studio setup
wearing blue jeans and a white shirt. The shirt is our focus in this tutorial.
®Our particular document is 3540 pixels wide by 5310 pixels high. Any
brushes and adjustment values used are set according to this size of
image. If you are working with an image that is a different size, be aware that
you may need to alter your values to suit your image size.
А с/ - / & C? T
x whhejpg @ 53.9% (RCB/8)
у
tl-
/ Quick Selection Tool nW
Magic Wand Tool W
Object Selection Tool W
©Since the shirt is the subject of our tutorial, the first thing we need
to do is to create a selection of it. This can be achieved in a number
ways. Feel free to use whatever selection method you prefer. Choose the
Lasso Tool, Pen Tool or Magic Wand; it’s entirely up to you.
©Since the shirt is quite well-defined here, we opted to use the Quick
Selection Tool (W). It was then a case of dragging the brush around
the perimeter of the shirt, adding to the selection as you go. Keep adding any
areas the brush misses until it is all selected with marching ants.
If you have any problem areas that the Quick Selection Tool cannot
cope with, you can always switch to the Lasso Tool and click the
Add To Selection button in the Tool Options panel to add areas of shirt to the
selection, or click Subtract From Selection to do the opposite.
©Spend some time getting the selection as accurate as you can, but
don’t worry if it isn’t pixel perfect since, in the following steps, there
will be ways you can refine your initial selection area, if you need to. Once you
have your selection ready, you can proceed to the next step.
www.pclpublications.com 155
CREATIVE PROJECT GUIDES
WHITE TO ANY COLOUR
®Go to the Layer Options panel and click on Create New Fill or
Adjustment Layer. Choose Solid Color from the menu. This will add a
masked Color Hll 1 adjustment layer above your main image, in the shape of
your selection. Double-click the Color Fill1 thumbnail to open its properties.
®ln the (Solid Color) Color Picker, choose a colour that you want to use
to replace the white shirt. We have chosen a bright red colour to begin
with. Since this is a non-destructive adjustment layer, you can come back to
this at any time and alter the colour to something else if required.
®At the moment, the red colour is just an opaque blob, with no detail
in it whatsoever. Keep the Color Fill 1 layer active and go the Blend
Mode panel and change it from Normal to Multiply. Now, you will be able to
see the darker tones of the shirt below, showing through into the red colour.
®As we mentioned, you can alter the colour of the fill at any time by
double-clicking the thumbnail and going to the Color Picker and
selecting a new colour. We went back in and chose a blue colour this time,
but we couldn’t help noticing that the colours still looked a little flat.
ck: S3 / ❖ ft ft Fill: 100
©We decided that adding Curves adjustments would do the trick, but
realised each new adjustment would need its own mask so only the
shirt was affected. Rather than multiple masks for each layer, we selected
what we currently had and created a new group Folder called Group 1.
®Now, you can simply drag the mask from the Color Fill 1 layer and
drop it onto the Group 1 tab. All subsequent adjustment layers can
be put in this Group and they all share the same mask. This saves a bit of
messing around, and the need to create multiple masks of the same thing.
156 www.pclpubllcations.com
WHITE TO ANY COLOUR
CREATIVE PROJECT GUIDES
®So now Group 1 currently consists of the Color Fill 1 layer and a
Curves 1 layer we have yet to adjust. Double-click Curves 1 to open
the Properties panel. We want to use this adjustment to add a little more
contrast and punch to the blue colour and the shirt.
®lf you double-click the Color Fill 1 layer and go to the Color Picker
again, choosing solid black just doesn’t look right. The truth is that
absolute black doesn’t really allow any detail to show through. You’re better
off choosing a dark grey which looks more authentic anyway.
Altering the curve as shown to a flat s-curve increases the dark
areas and brightens the highlight areas for a better looking result.
That’s great, but what happens if you want a really dark colour? In fact, what
happens if you want the darkest colour of all - black?
®The black shirt looks ok, but it could do with more enhancement to
show more highlights and detail. That’s not a problem. Go to the
Layer Options panel again and click Create New Fill or Adjustment Layer and
add a new Curves 2 adjustment layer above your current layers.
©Double-click the Curves 2 layer thumbnail to open its Properties panel.
Click on the curve down in the shadows and drag it up vertically near
the top as shown. The shirt will appear to turn light grey, but we can now
adjust its Layer style to make it look much better.
® Double-click the Curves 2 layer, to the right of the layer mask
thumbnail. This opens up the Layer Style panel. We will be working
in the Blend If section. Click and drag the left-most Underlying Layer slider
towards the right and notice how the black starts to bleed through.
www.pclpublications.com 157
CREATIVE PROJECT GUIDES
WHITE TO ANY COLOUR
Vector Mask Hides Effects
Blend If: Gray
s
®The current blend is looking quite harsh but if you press Alt and
click the slider, you can break it in half and drag the right half further
towards the right. As you do, you will see the tones change to more subtle
dark greys. Tweak the two halves of the slider to suit your taste.
®You could sit back now and call it done, but what happens if you want
just a little more shine to the black shirt? Go to the Layer Options
panel and add a third Curves adjustment layer. Alter the curve by dragging
the shadows vertically like you did in the last step.
Blend If: Gray v
This Layer: 0 255
E
Underlying Layer: 47 / 125 255
©Double-click to the right of the Curves 3 layer to open the Layer Style
panel again. Click on the left-most Underlying Layer slider and drag
it towards the right and split it to refine the blend. You should notice that the
shirt has more contrast and appears a little shinier.
®Now that you have all these adjustments set up for a darker and shinier
look, you can go back to the Color Fill 1 layer, open its properties and
choose any dark colour to get the same feel across a broad range of dark
colours, that look a bit like silk because of the range of highlights.
158 www.pclpublicatfons.com
WHITE TO ANY COLOUR
®Bear in mind that if you want to use lighter colours at any time, the
current set of adjustments may not work so well. If you want to go
back to a light blue for instance, simply choose the new lighter colour and
turn off the Curves 2 and Curves 3 adjustment layers, if required.
We took the time to try a few colours to see how well the technique
holds up. We were happy with the results and had a range of colours
from yellow, blue, dark blue, purple and black that all came out really well.
Bear in mind certain colours may require tweaks of the Curves layers.
Show your
true colours
Simple effects for maximum results.
Glossary
A list of terms you may
encounter as you learn
Active layer
The layer currently selected in the Layers panel.
Adjustment layer
A layer that lets you apply colour and tonal
adjustments to your image without permanently
changing pixel values. Use adjustment layers to
experiment with colour and colour tones. You can
think of an adjustment layer as a veil through which
the underlying layers are seen.
Adobe RGB
The RGB colour space profile created by Adobe
Systems, Incorporated. It provides a large gamut of
colours. (See also RGB.)
Aliasing
The jagged edges seen at the edges of diagonal
lines, arcs, and so on, caused by pixels lining up in a
saw-tooth pattern.
Alpha channels
Masks, which let you manipulate, isolate, and protect
specific parts of an image. In Photoshop, alpha
channels are called saved selections. To save an alpha
channel, choose Select > Save Selection. To load an
alpha channel, choose Select > Load Selection.
Anti-aliasing
The smoothing of jagged edges in digital images by
averaging the colours of the pixels at a boundary.
Artefact
Any unexpected and undesired change to a digital
image caused by incorrect settings or faulty
processing. Examples include blooming, moir£,
sharpening, and noise.
Aspect ratio
The ratio of an image's width to its height. It is used
to determine how an image fits on a page or monitor.
Background layer
The bottom-most layer in an image, usually
containing the image data. The Background layer
is always locked. If you want to change its stacking
order, blending mode, or opacity, you must first
convert it to a regular layer.
Backlight
Light coming from a source behind the subject.
Batch processing
Performing one or more tasks to a group of files at
the same time.
Bit depth
The number of colours used to represent a pixel in
an image. A 1-bit image is black and white; an 8-bit
image can have 256 colours or shades of grey; a
16-bit image can have 65,536 colours.
Bitmap image
An image consisting of rows and columns of pixels
in computer memory. Also called a raster image.
Bitmap file formats include BMP, GIF, JPEG, PSD,
PICT, and TIFF. (See also vector graphics.)
Bits per channel
Determines how many tones each colour channel
can contain.
Blending mode
A feature that controls how pixels in an image are
affected by a painting or editing tool. The blend
colour is applied to the base (original) colour to
produce a new colour.
QKind v И <Э
Screen O|
Lock: S3 / «J» Ц Ь
Brush preset
A brush with preset settings for size, thickness and
so on. Photoshop includes several brush presets
for you to choose from, and you can create a large
number of your own presets as well.
Burning
The selective darkening of a part of an image.
Camera raw format
A format describing data exactly as it is captured
by a camera sensor, with no in-camera processing
applied to the capture.
Canvas
The workspace around an existing image, within the
image window. Layer data may lie outside of the
canvas, but it will be clipped to the canvas when
the image is flattened. You can change the size and
colour of the canvas by choosing Image > Resize >
Canvas Size.
Channel
A construct for describing the colour data in an
image. A black-and-white greyscale image has one
channel, an RGB image has three, and a CMYK
image has four.
Clipboard
The temporary holding area for data stored with the
Cut or Copy commands.
Clone
To paint with the Clone Stamp tool. You must set a
sampling point on the active layer before you paint
with the Clone Stamp tool.
CMYK
Cyan, magenta, yellow, and black; the inks most
printers use to produce colour images. Photoshop
includes full support for CMYK mode.
Colour cast
An unwanted or unexpected colour shift in a photo.
For example, a photo taken indoors without a camera
flash may have too much yellow.
Colour channels
The component colours from which all colours in an
image are created. Usually refers to red, green, and
blue (RGB).
Colour depth
Measures how much colour information is available
to display or print each pixel in an image. Greater
colour depth means more available colours and more
accurate colour representation in the digital image.
Colour management
A system used to achieve consistent colour as an
image travels from one device to another.
Colour temperature
The degree of heat (in degrees Kelvin) that an object
would have to absorb before it glowed in a certain
colour. Each colour is associated with a colour
temperature, as are various kinds of light.
Compression
A technique that reduces the file size of bitmap images.
Cropping
Trimming a portion of an image to improve its
composition or to create a frame around it.
Definition
Sharpness or clarity of detail in an image.
Dithering
The approximation of an unavailable colour through
the use of two or more available colours. The colour
of adjacent pixels is changed in an attempt to
reproduce the unavailable colour.
Dodging
The selective lightening of any part of an image.
Dots per inch (dpi)
A measure of printer resolution. High dpi settings
produce prints with fine detail. Also used for
monitors. (See also pixels per inch (ppi).)
Duotone
A two-colour greyscale file that uses two custom inks.
Embedded profile
An ICC (colour) profile resident in an image file.
This profile ensures that image colours are correctly
interpreted.
EPS
Encapsulated PostScript. A file format used to save
images that will be used in illustration and page-
layout programs.
EXIF
Exchangeable Image File Format. A standard for
simplifying the exchange of data between cameras
and software. The data may include camera model,
date and time the photo was taken, camera settings,
shutter speed, and so on.
Exposure
A measure of the amount of light in which a photo
was taken. Underexposed digital photos are too dark;
overexposed ones, too light.
Feathering
The softening of an edge of a selection.
Fill layer
A type of layer that contains a solid colour, a pattern,
or a gradient as an interchangeable attribute. (See
also layer and adjustment layer).
Filters
Options to alter the look of an image, for instance, to
make it look like a mosaic, add unique lighting, apply
distortions, and so on.
Flattening
Merging all visible layers into the Background layer to
reduce file size.
Font
A set of letters, numbers, punctuation marks, and
symbols that share a common weight, width, and style.
48-bit RGB colour
A high-bit image mode that can contain thousands
of colours per channel. Photoshop supports 8-bit or
16-bits per colour channel, so an RGB image can be
a total of 24-bit or 48-bit, depending on the bit depth
per channel.
Gamma adjustment
The contrast resulting from darkening or lightening
the mid-tones of an image.
Gamut
The range of colour that a device can reproduce.
Gaussian blur
A softening effect applied through a bell-shaped
distribution of tones and colours.
GIF
Graphic Image File Format. A file format suitable for
images that contain line art, large areas of a single
colour, and text. Web animations are done with
images in GIF format.
Gradient
Any of several methods for achieving a smooth
transition between two adjacent colours, including
black and white.
Greyscale
A single-channel image that includes only black,
white, and shades of grey. Depending on the bit
depth, greyscale images can reproduce various
shades of grey.
Halftone
A monochrome image made up of variably sized
dots simulating the shades of grey in a photograph.
It is used for reproducing photographs on PostScript
printers and printing presses.
Highlight and shadow
The lightest and darkest colours in an image.
Histogram
A bar chart showing the distribution of the pixel
values in a digital image.
Hue
The colour reflected from or transmitted through
an object. In common use, hue is the property that
allows a colour to be distinguished as red, blue,
yellow, and so on.
ICC
International Colour Consortium. ICC device profiles
are the industry standard for reproducing colours
accurately across devices such as scanners,
monitors, and printers.
Image cache
A section of hard disk space used as virtual memory.
The image cache speeds the on-screen redraw of
high-resolution images.
160 www.pclpublications.com
Image mode
The colour mode of an image, such as Greyscale
or RGB.
Indexed colour
A colour that is rendered by using a pixel value as an
index to a panel of 256 or fewer colours.
JPEG
Joint Photographic Experts Group. A committee of
experts that develops algorithms for compressing
computer image files. Also, any graphic file to which
a JPEG algorithm is applied. JPEG is the format
generally used to share photographs over the web.
JPEG compression
A lossy compression technique that reduces image
data and file size.
Panorama
A broad view of a subject, usually a landscape, made
by overlapping individual shots as they are taken and
then merging them to form one image.
Layer group
A collection of layers saved with a Photoshop image.
Layer mask
A protected area in an adjustment layer. Areas below
the mask cannot be edited.
Levels
Functionality for adjusting colour and tone. With a
Levels adjustment, you can set shadow and highlight
values to use a full tonal range, adjust middle tones
only, correct colour casts, and so on.
Locked layer
A layer in the Layers panel that has the lock icon
applied. No changes can be made to a locked layer.
A Background layer is always locked.
Lossless compression
An image-compression technique that prevents
image degradation caused by data loss. Lossless
techniques usually use lower compression ratios
than lossy techniques.
Lossy compression
An image-compression technique using compression
ratios that result in the loss of some image data.
Matting
A method for simulating transparency in images
displayed on web pages. When transparency is
not supported, you can specify a matte colour that
matches the background to simulate transparency.
Midtone
An area that falls between the brightest highlight and
the darkest shadow.
Moire
A wavy striped pattern in an image, resembling the
pattern of watered silk. Moir6 can be an artefact
caused by a camera's inability to capture the detail
in an image.
Monitor resolution
The resolution of a monitor, described in pixel
dimensions. The size of an image displayed on-screen
depends on the pixel dimensions of the image, the
size of the monitor, and the monitor resolution.
Noise
An artefact caused by interference or camera error.
Noise is often seen as stray pixels of unexpected
colour or a generally "grainy" appearance. Certain
compression techniques can amplify noise.
Opacity
The extent to which something blocks light. You can
change the opacity of layers, filters, and effects so that
more (or less) of the underlying image shows through.
Layer
A mechanism for overlaying and combining multiple
images. Layers are like transparent sheets of glass
that you can stack and rearrange.
PDF
Portable Document Format. An Adobe file format
that captures the elements of a printed document,
including graphics and photos, as an electronic
image. You can search, navigate, print, and e-mail
PDF documents.
Perspective
The angle or level from which a photograph is taken;
the camera-eye view.
Pixel
The basic, rectangular unit of data that a digital
image consists of. The edges of pixels can produce a
saw-tooth pattern unless anti-aliasing is used.
Pixel dimensions
The number of pixels along the width and height of
an image. This is a measure of the amount of image
data in the photo, not its physical size when printed
or displayed on a monitor.
Pixels per inch (ppi)
A measure of image resolution stored in a camera or
computer file. High ppi settings produce photographs
with fine detail and large file size. (See also dots per
inch (dpi).)
PostScript
A language developed by Adobe that describes the
appearance of text, graphic shapes, and sampled
images on printed or displayed pages.
Printer profiles
Profiles that describe how printers reproduce colours.
Progressive scan
A process of displaying images on-screen that draws
60 complete frames of video from left to right every
second. Progressive scan creates a cleaner, clearer
picture than interlaced video.
PSD
The native uncompressed file format of Adobe
Photoshop, based on the TIFF standard.
Quick mask
A mask channel created in Quick Mask mode.
Red eye
The reflection of the camera flash from the retina
of a photographed subject, resulting in a red dot in
the subject’s eye. You can eliminate it automatically
when you import images or by using the Red Eye
Removal tool.
Resolution
A measure of the clarity and sharpness of an image.
In digital images, it is measured in pixels per inch.
RGB
A model for representing colours on a computer
display. Red, green, and blue (RGB) are combined
in different proportions to represent any colour. The
RGB model can represent 256 x 256 x 256 colours.
Sample
To select a colour with the eyedropper in order to use
it with a drawing or painting tool.
Saturation
The purity, or strength, of a colour. A fully saturated
colour contains no grey. Saturation controls make
colours more vivid (less black or white added) or
more muted (more black or white added).
Selection
A part of an image selected for manipulation of
any kind, duplication in a layer, colour correction,
deletion, rotation, and so on. The selection consists
of all the pixels, fully or partially selected, contained
within the selection boundary.
Sharpening
In photo-editing programs, any functionality that
enhances the details at the edges of photographed
objects and people. Sharpening is often applied as
part of in-camera processing as well, although no
sharpening is applied to camera raw file images.
Skewing
Deviation of the content of an image from a vertical
or horizontal axis. Skewing can be a camera artefact
or an intentionally applied effect.
Smoothing
A technique for averaging the values of neighbouring
pixels to reduce contrast and create a soft, blurry effect.
Stroke
(1) An outline around an image or part of an image
created with the Stroke command or with a drawing,
painting, or selection tool. (2) The characteristics of
the lines created with one of the painting or drawing
tools, especially brushes.
Swatches
Preset colours that you can choose from in the
Colour Swatches panel.
Rendering
Converting a vector layer such as a shape layer or a
text layer into a normal layer.
Resample
To change the resolution of an image by changing its
pixel dimensions. Downsampling is decreasing the
number of pixels, and resampling up (or upsampling)
is increasing the number.
TIFF
Tagged Image File Format. A digital image format
widely used for images that are to be printed or
published. TIFF images can be compressed losslessly.
Transform
To scale, shrink, enlarge, skew, distort, rotate, or
change the perspective of a layer, selection, or shape.
Transparency
In digital photography, the functionality that supports
transparent areas in an image or image layer. Certain
image formats do not support transparency.
Unsharp mask
A technique that sharpens details in an image by
increasing the contrast between light and dark areas.
(The name originates from traditional photography,
where contrast is increased by adding a slightly
blurred negative over the original.)
Vector graphics
Lines, shapes, and other graphic image components
stored in a format that incorporates geometric
formulas for rendering the image elements. For this
reason, the graphics scale without degradation of
image quality, and there are no jagged lines in the
output. Adobe Illustrator is a vector graphics program.
Vignetting
A darkening of the edges of an image.
Warping
A distortion of an image, often text, to conform to a
variety of shapes. For instance, a line of text can be
warped in the shape of an arc or wave.
White balance
A function that compensates for the different
rendering of identical colours under different sources
of light: incandescent, fluorescent, sunlight, and
so on.
White point
A reference point used to represent white. This
reference point is used to calculate all other colours
in the image.
www.pclpublications.com 161
Get Your Exclusive
FREE Gift Worth
£9.99 Here!
Download
Your FREE
Copy of
Tech Shopper
Magazine
REE Software! Great Games! Essential Hank»».
папа ware!
TECH 170
I SHOPPER
—C Д Z 1 N E Яте-««.•«« «
_______________
"I Q* AMAZING
I A GADGETS
APPS & GAMES INSIDE!
Head over to your web
browser and follow these
simple instructions...
a
Home Security
Inside & Out!
. Reed our expert gu.de
to Google’s notebook!
1/ Enter the following URL: www.pclpublications.com/exclusives
2/ Sign up/in and from the listings of our exclusive customer downloads, highlight
the Tech Shopper Magazine option.
3/ Enter your unique download code (Listed below) in the "Enter download code" bar.
4/ Click the Download Now! Button and your file will automatically download.
5/ Your file is a high resolution PDF file, which is compatible with the majority of
customer devices/platforms.
Exclusive Download Code: pcl37862re
NOTE: This is a limited reader offer running from 1st July 2023 to 1st December 2023.
Terms and conditions apply and can be found at www.pclpublications.com
The Complete
Manual Series
Available on i Readlij
r The Complete 1
Mac
User Manual
Master your Mac. MacBook & macOs
ТаГ895 ____
FOR DIGITAL & RLM CAMERAS
* The Complete
Black & White
Photography
Manual
FOR DIGITALS FILM CAMERAS
* The Complete
Landscape
Photograph"
Manual!
Masterprofessional techniques and
improve your photography
910
FOR AU GOPRO CAMERA USERS
r The Complete
GoPro
User Manual
Master your GoPro camera and
shoot amazing photos and videos
DESKTOP PC. LAPTOPS SURFACE
mR SMARTPHONES 8 TABLETS^
The Complete
Samsung
Galaxy
Manual
MASTER PYTHON PROGRAMMING </>
* The Complete
Python
Coding Manual
FOR ALL CHROMEBOOK MODELS
The essential manual
to improve your Pytrihn coding skills
F The Complete
Chromebook
User Manual
Master your Chromebook and
GoogleS Chrome OS
jb^EORP^MAC&MOBI LE DEVICES
Master your Samsung
Galaxy devices
мммфмМШммт Ф Papercut
<0 Poparcut w* mnrtHtxnr
»«* шодеюви
ЮПШОЕГНМП
FOR ANDROID. APPLE. PCS MAC Q
* The Complete
Instagram
User Manual
step-by-step
guides to
mastering
Instagram
FOR ANDROID. APPLE, PCS MAC 0
F The Complete
WhatsApp
_ Manual
485;
TiwlkJ'F
Smart step-by-step guides to
mastering your WhatsApp account
FOR USE WITH ALL APPLE iPADS
* The Complete
iPad
User Manual
The essential step-by-step manual to
mastering your iPad and iPadOS 16
>oo*
875
FOR APPLE WATCH SwatchOS
r The Complete
Apple
Watch
Manual ®,
For a full list of titles available visit:
Master your Apple Watch & watchOS 9
www.pclpublications.com
PS-TECHNIQUES
Photoshop Does It Best. Uts
Create Strange New Worlds.
From Artwork Concept
To Conclusion
Turn Your Favourite Portrait
Into An Artistic Pencil Sketch.
Master Adobe Camera Raw to
Make The Most of Your Raw File
Transform Portraits
With Creative Effects
Next Level Processing In
Your Digital Darkroom
Then don't miss our NEW Photoshop
magazine on Reodlij now!
Want to master Photo Editing?
100X INDEPENDENT
W1
Click our handy link to read now: https://bit.ly/3xKgzFX
Learn exciting photo editing
techniques that are truly inspired
Professional Photo Edil
Photoshop
The Complete Manual Series:
Photoshop Image Editing
19 | ISBN: 978-1-914404-64-1
Published by: Papercut Limited
Digital distribution by: Readly, Zinio & Pocketmags
© 2023 Papercut Limited All rights reserved. No part of this
publication may be reproduced in any form, stored in a retrieval
system or integrated into any other publication, database or
commercial programs without the express written permission of
the publisher. Under no circumstances should this publication and
its contents be resold, loaned out or used in any form by way of
trade without the publisher's written permission. While we pride
ourselves on the quality of the information we provide, Papercut
Limited reserves the right not to be held responsible for any
mistakes or inaccuracies found within the text of this publication.
Due to the nature of the tech industry, the publisher cannot
guarantee that all apps and software will work on every version of
device. It remains the purchaser’s sole responsibility to determine
the suitability of this book and its content for whatever purpose.
We advise all potential buyers to check listing prior to purchase
for confirmation of actual content. All editorial opinion herein is
that of the reviewer - as an individual - and is not representative of
the publisher or any of its affiliates. Therefore the publisher holds
no responsibility in regard to editorial opinion and content.
This is an independent publication and as such does not
necessarily reflect the views or opinions of the producers of
software or products contained within. This publication is not
endorsed or associated in any way with Adobe Inc, Photoshop,
Lightroom, Elements or any associate or affiliate company.
All copyrights, trademarks and registered trademarks for the
respective companies and developers are acknowledged.
Additional images contained within this publication are reproduced
under licence from Shutterstock and Pixabay. Cover images are
used for illustrative purposes only and are not representative of
content. Guides in this title are based on Adobe Photoshop,
Camera Raw, Elements, Lightroom and Lightroom Classic. Adobe
is a registered trademark of Adobe Systems, registered in the US
and other countries. Adobe © 2022-2023 Adobe Systems.
Some content may have been previously published in other titles.
We advise potential buyers to check the suitability of contents prior
to purchase. All information was correct at time of print.
a Papercut Limited
Registered in England & Wales No: 04308513
ADVERTISING - For our latest media packs please contact:
James Gale - email: jgale@pclpublications.com
INTERNATIONAL LICENSING - Papercut Umited has many groat
publications and all are available for licensing worldwide.
For more information email: jgale@pclpublications.com