/


Text
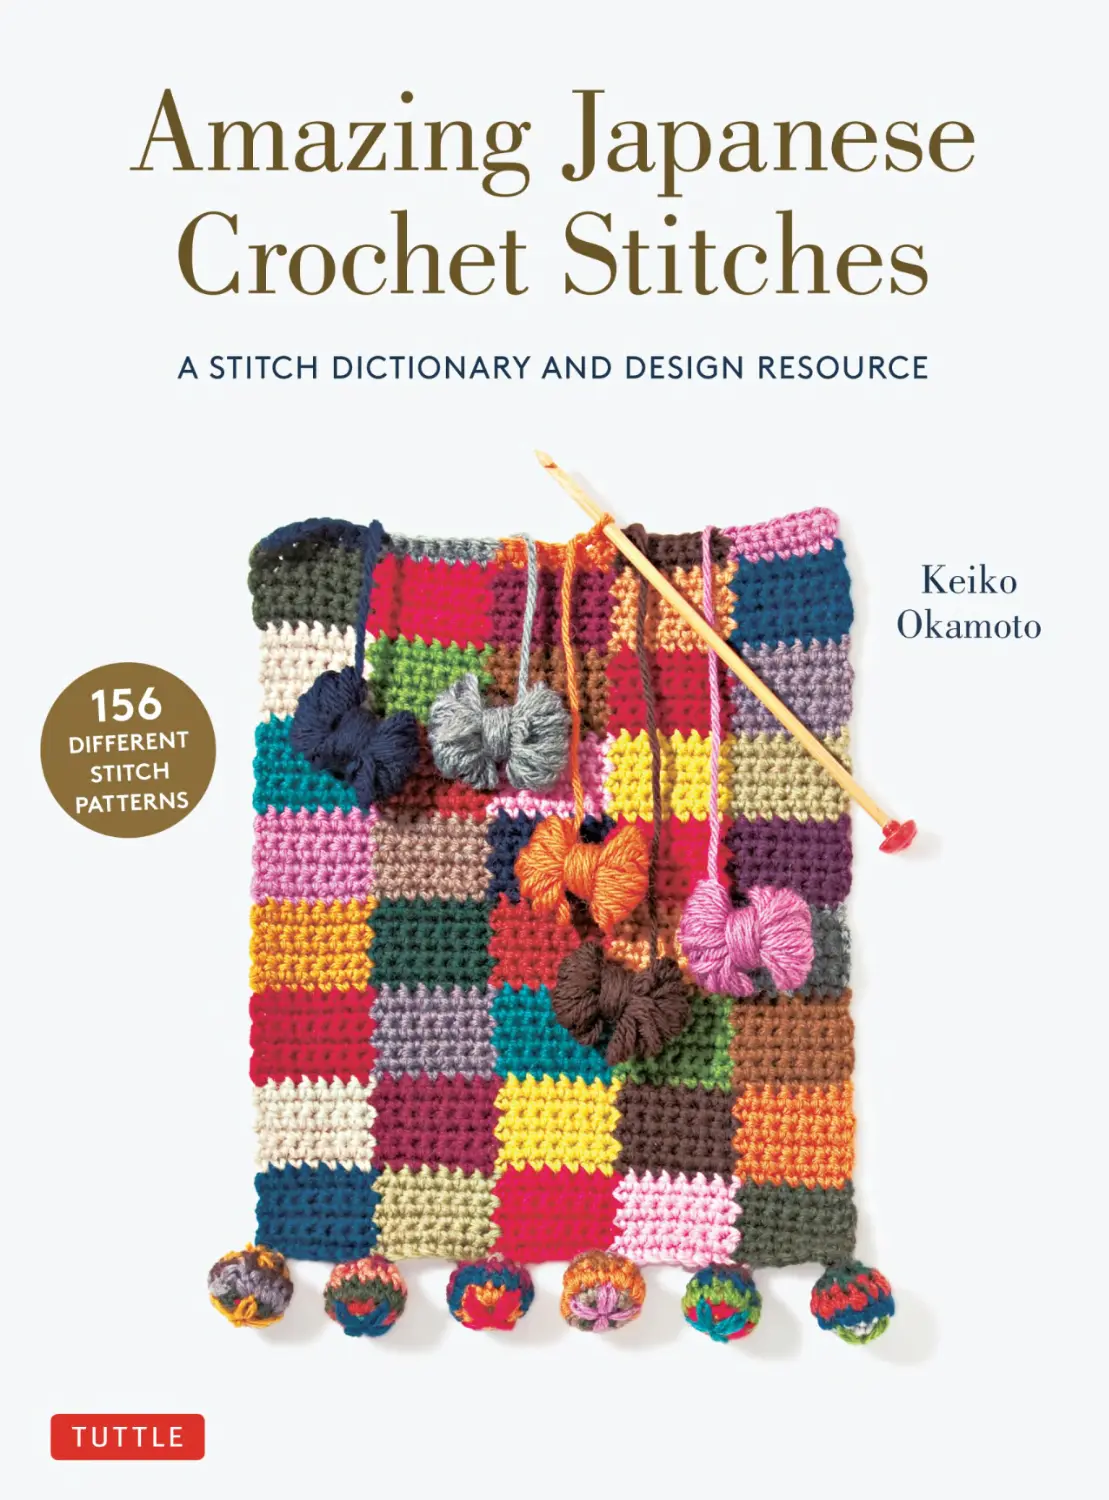
                    Amazing Japanese
Crochet Stitches
A STITCH DICTIONARY AND DESIGN RESOURCE

Keiko Okamoto
Translated by

Cassandra Harada

T UT T L E Publishing
Tokyo Rutland, Vermont Singapore

Contents
Colorwork Crochet Patterns 4
Beaded Crochet Stitch Patterns 20
Lace Patterns 22
Broom Stick Crochet 30
Motifs 36
Crocheted Irish Lace 56
Edgings 64
From the Pattern to a Finished Item
Yarns Used in this Book 88
Instructions 89
Crochet Basics 108

YARN MAKERS IN THIS BOOK

http://www.olympus-thread.com
http://www.clover.co.jp
http://www.diakeito.co.jp
http://www.naitoshoji.co.jp
http://www.puppyarn.com
http://www.hamanaka.co.jp
http://www.richmore.jp
http://www.skiyarn.com
http://www.daruma-ito.co.jp
NOTE: The yarns used in this book

are Japanese brands with limited
availability outside of Japan. The yarn
chart on page 88 shows thicknesses,
put up and hook recommendations to
aid you in substituting your favorite yarns.

76

I think crochet is a truly unique craft, because you can use one single yarn to create an infinite
number of interesting shapes and patterns.
I have been working in the hand knitting and crochet industry for 25 years. In that time, I’ve
worked to innovate and use different crocheted and knitted fabrics outside of the usual box hand
crafters have created in. I’ve put together 156 new stitch patterns in one book to stimulate creativity
and help crocheters find new avenues for integrating crochet into their daily life.
Until now, a book like this has never been written. We’ve continued our journey outside of the
box and created vests, bags, shawls, and other accessories to be crocheted with an adventurous
and experimental spirit.
This book has something for everyone from the pro to the beginner. Beginners can use this book
to understand a variety of new techniques and methods, but more experienced crocheters
can read this book, put aside the “rules” and learn to truly play with yarn, and be more creative and
imaginative in your work.

■ All of the symbols used in the chart are as shown in the Stitch
Dictionary on page 89 and explained in the Crochet Basics section
starting on page 108. When fabric is worked flat, odd numbered
rows are crocheted right to left, and even numbered rows are
worked left to right (rows are numbered in the chart). In rows 1-6
of the motif, back post single crochet stitches will be worked from
the back side on right side rows and from the front side on wrong
side rows.

41 Diamond Yarn Dia Tasmanian Merino
Hook US 3mm [JP 5/0]

■ From the cast on chain until the first arrow is one full pattern
repeat. The “1” indicates the first row of the pattern repeat. Those
5 rows are to be repeated. The images show crocheted fabric that
has more repeats than what is shown in the diagram.
■ For each crochet stitch pattern, the specific yarn and hook size
used are noted. Please refer to this in order to achieve correct
gauge. The chart on page 88 is a visual guide to yarn textures and
thicknesses, should you need or wish to substitute a different yarn.
On each page, the pattern for each project is reduced to stitch
repeats for proper calculations.
■ Depending on the stitch pattern, the edge of your work will
have a different shape. Please keep that in mind and use it to your
advantage when you build your work.
■ Please use these stitch patterns freely to play in the world of
crochet. Be experimental and childlike in your discovery of which
patterns are good for different projects. There are no rules, so let’s
discover together! If you feel lost in your play, just come back to
this book for advice and guidance.

W All garments.

6
5

1

NOTE: The patterns and projects in this book were conceived
and executed using metric measurements. All inch measurements
are approximate. We encourage you to use the metric measurements
if possible, as this may yield more precise results.

7 stitch repeat

Rows 1 and 4, when working the dc, fold the picots forward and insert
the hook into the single crochet a row below for a more 3D effect.
3

Colorwork Crochet Patterns
1 Richmore Percent

Hook US 3mm [JP 5/0] Instructions on page 6

W This pattern and gauge are universal for everything including bags, shawls,
sweaters and decorative edging.

2a Clover Petits Fours

Hook US 3mm [JP 5/0] Instructions on page 6

W This can be used for a bag, or in place of a pom pom at the end of a scarf.

4

These photos are around 65% of the actual size.

COLORWORK CROCHET PATTERNS

2b Clover Petits Fours

3 Hamanaka Pom Beans

Hook US 3mm [JP 5/0] Instructions on page 6

Hook US 3mm [JP 5/0] Instructions on page 6

W Bags, scarfs, placemat.

These photos are around 65% of the actual size.

5

2a,2b Clover Petits Fours

Sample photo on pages 4–5
MOTIF B

MOTIF A

MOTIF B COLORS
⑫

2-a
Tan
Pink
Black
Brown
Orange
Beige

Rounds 11-12
Rounds 9-10
Rounds 7-8
Rounds 5-6
Rounds 3-4
Rounds 1-2

⑪
⑨
⑦
⑤

2-b
Navy
Dark Green
Blue
Navy
Dark Purple
Bright Yellow

③

※On even numbered rows, work into one half of the single
crochet stitch.
※On odd numbered rows, reach two rows down to work into
the back half of the stitch in order to create a petal effect.

CENTER

HOW TO ASSEMBLE THE MOTIFS

MOTIF A COLORS

Color A
Color F
Color E
Color D
Color C
Color B
Color A

Color F

Repeat twice

Color E

Color D

2-a
Tan
Black
Pink
Beige
Orange
Dark Brown

2-b
Dark Green
Bright Yellow
Dark Purple
Light Green
Navy
Blue

Whip stitch

Motif B

(WS)

(RS)

Motif A

※Attach the two pieces by whip stitching half stitches
from each piece together as indicated by the diagram.
※When finishing each chart section, leave about 1⅛ yd
(1 m) of each color attached in order to work the edging.

1

Sample photo on page 4

Color C
Color I →

6
5

Color H→

Color B
1

Color G →

5

Color F →

Color A
1

Color E →
1

Color D→
4

STITCH PATTERN

3

Color C→

3

Sample photo on page 5

2

Color B→

1

MOTIF A
6 stitch repeat

※Unless otherwise specified, use Color A.
※After the first stitch, all subsequent dc stitches are through the back loop.
Fold the picot to the front and work into the back of the stitch below.

MOTIF B

8

⅞” (21mm) crochet ring
24

6

⅜” (8mm)
crochet ring

※Number of single crochet stitches.
※A motifs: Following the dotted lines, work each motif and connect them as you go.
※Work motif B as you follow the dotted lines working motif A.

COLORWORK CROCHET PATTERNS

5

Sample photo on page 8
COLORWORK CHART
33
30

2-a,b Sample photo on page 4-5
☆

☆

☆

☆

= Color B

= Color C

= Color D
= Color E
= Color F
WORKING FROM THE
= Baryon daisy stitch
TOP DOWN

25

⅝” (1.5c)

=

☆

= Color A

☆

☆

☆
20

15

10

※For the next row, fold the chain
stitches forward and work into
the back.

1
15

10

5

1

Braid
Color G

※Worked entirely in single crochet
⅝” (1.5c)

5

20

2” (5c)

Wrap with
Color B

※For the braids: Make one per doll. Insert, wrap from the back and
pull through to the front at the indicated markers in the chart.
SLIP STITCH WHERE INDICATED

12

Sample photo on page 14

Color D

4
3

Color C

2
1

Color B

Color A

Pattern repeat

= Attach yarn
= Cut yarn
※Color changes every second row

Continuation of 23
Sample photo on page 18

INSTRUCTIONS

22

Sample photo on page 18

INSTRUCTIONS

INSTRUCTIONS
1. Work a crossed dc as
indicated. Ch 3 from left
most dc. Slip st to right dc.
1. Sc 1, ch 12.

Work into the sts indicated
by the dotted line.

5. To complete the
2. In the next base 3. Continue work- 4. Row 4: At the
fabric, instead of
chain stitch,
ing single
indicated stitch,
adding a new loop 2. Work 5 sc over top of the
work one sc.
crochet into
create another
at the indicated
the chain loop.
chain loop to the
3 st chain.
place, continue
front of the fabric
working across
12 sts. Repeat
in sc.
steps 3 and 4.
3. Work the next dc.
7

4 Richmore Percent

Hook US 3mm [JP 5/0] Instructions on page 90

W This pattern can be used across all garments such as: vests,
jackets, bags, waist warmers or scarves.

5 Richmore Percent

Hook US 3mm [JP 5/0] Stitch pattern on page 7

W It can be used for bags, shawls, small items and children’s vests.

8

These photos are around 60% of the actual size.

COLORWORK CROCHET PATTERNS

6 Richmore Percent
Hook US 3mm [JP 5/0]

24

22

5

B

W Bags, scarves.
POM POM

1

Center
26
25

※Pom pom is finished with a strand of yarn in the center
FINISHING
While twisting the yarn tail leftover, attach the pom pom,
continue twisting the tail and reattach to the cloth. Weave in ends.

A
4

2 row repeat

3
2

Pom pom
1

24 st repeat

※If the color of yarn is changed every second row,
the piece will have 13 colors. B has 12 colors.
※Leave a 8” (20 cm) tail at the end of each section.
These photos are around 65% of the actual size.

9

7 Richmore Percent

Hook US 3mm [JP 5/0] Instructions on page 90

8 Richmore Percent

Hook US 3mm [JP 5/0]

COLOR SCHEMATIC
23

= Color A

= Color B

20

= Color C

= Color D

= Color E
15

※The entire piece is worked in sc
※The squares marked with Color D
are lazy daisy stitches

10

5

1
14

10

10

5

1

These photos are around 60% of the actual size.

COLORWORK CROCHET PATTERNS

9 Richmore Percent

Hook US 3mm [JP 5/0] Instructions on page 90

COLOR SCHEMATIC

= Color A
= Color E
・ ・

= Color B
= Color F

= Color C

= Color D

= Cross stitch embellishment
after the base is crocheted

※The entire piece is worked in sc
※Repeat = 14 sts and 15 rows

15

10

5

1
14

These photos are around 65% of the actual size.

10

5

1

W 7–9 Bags, arm warmers, shawls,
jackets.
11

10 Richmore Percent

11 Richmore Percent

Hook US 3mm [JP 5/0], US B1 [JP 3/0] Instructions on page 13

Hook US 3mm [JP 5/0], US B1 [JP 3/0] Instructions on page 13

W 10, 11 Bags, arm
warmers, shawls,
jackets.
12

These photos are around 65% of the actual size.

COLORWORK CROCHET PATTERNS

10 Richmore Percent

Sample photo on page 12

COLOR SCHEME AND EDGING

6 stitch repeat

3
2

1

Pattern Hook US B1 [JP 3/0]
※Row 1 is worked in Color C,
Rows 2·3 are worked in Color D.

37
35

30

25

20

= Color A

= Color B

= Color D

= Color E

= Color C

※Except for the edging, use a US 3mm [JP 5/0] hook.
Work in sc.
※For edging, use a US B1 [JP 3/0] hook.

15

10

5

1
8

11

5

1

Sample photo on page 12
COLOR SCHEMATIC
40

2
1

35

INSTRUCTIONS

30

1. Work the 1st row.

25

20

2. Row 2: Work 2 slip stitches, work 7 half
double crochet (hdc) over top the ch sts.

15

10

3. While reverse passing the Tunisian
crochet stitch, yarn over each time
and pull through the 3 loops 7 times.

5

1

= Color A

= Color B

= Color C

= Color D

= Color E

6 5

1

※Except for the edging, use a Hook US 3mm [JP 5/0] hook. Work in sc.
※Edging is worked with a US B1 [JP 3/0] hook.

3

4. Ch4, slip st in the sc stitch indicated
by the arrow. This is one complete
pattern repeat.

2
1

※Rows 1·2 are worked in Color A
Row 3 is worked in Color B

4 st repeat

5. Continue completing one repeat at
a time in the same manner.
13

12 Olympus Emmy Grande

Hook US 2mm [JP 2/0] Instructions on page 7

W Tunics.

13 Hamanaka Sarie Wash Cotton (Crochet)

Hook US 2.5mm [JP 4/0]

W Jackets, bags. Pattern can be used upside down as well depending on the use of the edging.

4
3
2
1

= Color A
14

= Color B

7 st repeat
These photos are around 65% of the actual size.

COLORWORK CROCHET PATTERNS

14 Olympus Emmy Grande

Hook US 2mm [JP 2/0] Instructions on page 90

W Cardigans, pullovers, tunics.

16 Puppy Puppy Pure Silk
Hook US 2.5mm [JP 4/0]

15 Hamanaka Titi Crochet
Hook US B1 [JP 3/0] Instructions on page 90

W Pullovers.

W Cardigans, pullovers, tunics.
4
3
2
1

= Color A
= Color B

These photos are around 60% of the actual size.

8 st repeat

15

17 Diamond Yarns Diaangelica, Diakisara

Hook US 3mm [JP 5/0] Instructions on page 91

W Jacket.

18 Puppy Silkid Fine, Ilios

Hook US 2.5mm [JP 4/0]

W Jackets, bags, edgings.
10

Color B

Color E
=

Color D
5

Color C

In the row below, work 15 dc. Slip st 1
into the first stitch of the circle motif.
Begin crocheting the next dc.

Color B
1

= Color A
16

6 st repeat

These photos are around 70% of the actual size.

COLORWORK CROCHET PATTERNS

19 Puppy Ilios, Puppy Pure Silk

Hook US 2.5mm [JP 4/0]

8

5

Color D
Color C
Color D
Color C
Color B
Color A
Color B

1

Color A
3 st repeat

20 Richmore Topping (Gradation),
Suspense Hook US 2.5mm [JP 4/0]

4
3
2
1

= Color A
= Color B

8 st repeat

=

= Ch 8, attach to the designated location with
sc to the previously worked treble crochet.

21 Hamanaka Brillian, Span Glass

Hook US E4 [JP 6/0]

4
3
2
1

= Color A
= Color B
= Color C

W 19–21 This stitch pattern can be used for jackets,
or pullovers and cardigans.
These photos are around 60% of the actual size.

6 st repeat

※Color B dc sts should be worked around the ch sts below, wrapping the sts.
When reaching for the row to attach stitches to, insert hook through the rows
in between so the stitch is woven through the work.
17

22 Richmore Percent

Hook US 3mm [JP 5/0]

4
3
2
1

= Color A

= Color B

= Color C

= Color D 4 st repeat

※Symbol explanation on page 7

23 Richmore Percent

Hook US 3mm [JP 5/0]

6
5

1

= Color A

= Color B

= Color C 3 st repeat

5

1

= Color A

24 Puppy Queen Anny

Hook US E4 [JP 6/0]

W 22–27 This pattern can be used for any garment.
18

= Color B

= Color C 4 st repeat

※Row 5: Work the dc into the crossed dc underneath the ch st picot.
The dotted line indicates the point of crocheting the next row into place.
Fold the picot row to the front to reach the hook insertion point.
※Symbol explanation on page 7
These photos are around 65% of the actual size.

COLORWORK CROCHET PATTERNS

25 Clover Champagne

Hook US 3mm [JP 5/0]

6

1

= Color A

= Color B

4 st repeat

26 Puppy Puppy New 4 Ply
6

Hook US 2.5mm [JP 4/0]

5

4
3
2
1

= Color A
= Color B
8 st repeat
= Insert hook into 4 indicated spaces, yarn over and draw
through loop from all spaces. Slip stitch through all loops.
INSTRUCTIONS
1. Sc1, ch3.
2. From the row below, insert hook into each of the 4 chain
stitches indicated, yarn over, and draw out a loop, one by one.
3. From two rows below, insert the hook into the indicated
spaces, yarn over, and draw out two loops.
4. On the left side of the work, draw through loops from the
indicated stitches.
5. Yarn over, slip st through all loops.
6. Ch 3, sc1.

27 Clover Petits Fours Champagne

Hook US E4 [JP 6/0]

8
5

1

= Color A

= Color B

= Color C 6 st repeat

These photos are around 65% of the actual size.

19

Beaded Crochet Stitch Patterns

28 Diamond Yarn Diakisara
Hook US B1 [JP 3/0], Round beads 3mm

4
3
2
1

= Bead

29 Olympus Emmy Grande

12 st repeat

Hook US 2mm [JP 2/0], Round beads 3mm

Instructions on page 91

W 28, 29 All garments, shawls.

20

These photos are around 65% of the actual size.

COLORWORK
BEADED
CROCHET
CROCHET
STITCH
PATTERNS
PATTERNS

30 Diamond Yarn Dia Tasmanian Merino Fine
Hook US B1 [JP 3/0], Round beads 3mm

Color D
6
5

Color C
Color B

1

= Color A
= Bead

= Color B

= Color C

= Color D

12 st repeat

PATTERN

Beads

1

※Work the designated number of beads into the first row of sc

31 Olympus Emmy Grande

Hook US 2mm [JP 2/0] Crochet ring 8mm

Round beads 3mm Instructions on page 43

32 Olympus Emmy Grande

Hook US 2mm [JP 2/0]

Round beads 3mm

10

5

1

W 30–32 Patterns are great for use in shawls, bags or edgings.

= Color A
= Bead

= Color B

12 st repeat

※Chart symbol explanation on page 95

These photos are around 60% of the actual size.

21

Lace Patterns

33 Naito Shoji Alpaca Peru

Hook US B1 [JP 3/0] Instructions on page 92

34 Hamanaka Pure Wool (Fine)
9
7

Hook US B1 [JP 3/0]

Instructions on page 91

INSTRUCTIONS

1)

7

2)
9
7

3)
9
7

4)

9

W 33, 34 Shawls, tunics.

7

5)

9
7

Connect the two picots together with a slip st. at the point indicated by the arrow.
22

These photos are around 55% of the actual size.

COLORWORK
LACE
PATTERNS
CROCHET PATTERNS

35 Hamanaka Pure Wool (Fine)

Hook US B1 [JP 3/0]

2
1

11 st repeat

36 Hamanaka Exceed Wool M (Fingering)

Hook US B1 [JP 3/0]

2
1

W 35, 36 All garments, shawls.
These photos are around 65% of the actual size.

17 st repeat

23

37 Hamanaka Fair Lady

Hook US E4 [JP 6/0]

2
1

= Wrap 8 times to form a coil stitch (See 4 st repeat
page 109 for explanation of coil stitch)

38 Clover Alpaca Mjuk

W All garments, shawls.

Hook US 3mm [JP 5/0]

2
1

9 st repeat

39 Hamanaka Pure Wool (Fingering)
Hook US B1 [JP 3/0]

W All garments, shawls and bags.

2
1

12 st repeat

W All garment, shawls.

24

※The light colored stitches are the under netting beneath the patterning on top
※Work a slip stitch into the indicated space 3 rows below

These photos are around 60% of the actual size.

COLORWORK
LACE
PATTERNS
CROCHET PATTERNS

40 Hamanaka Sonomono Roving

Hook US E4 [JP 6/0]

41 Diamond Yarn Dia Tasmanian Merino
Hook US 3mm [JP 5/0]

W Bags, mini scarves and edgings.

W All garments.

= Wrap 8 times for coil stitch
(See page 109 for instructions)

2

6

1

5

2 st repeat
1

42 Richmore Percent

7 st repeat

Hook US 3mm [JP 5/0]

※Rows 1–4 dc are worked into the indicated stitch by folding the picot
forward in the row below and inserting the hook two rows down.

3
4
1
2

6 st repeat

W Edgings, bags and mini scarves.
These photos are around 60% of the actual size.

※See page 34 for symbol explanation
25

43 Puppy Puppy New 4 Ply

Hook US 2.5mm [JP 4/0]

2
1

= Right traveling dc 3 stitch cable

11 st repeat

= Left traveling dc 3 st cable

4

3

2

1

4 st repeat

44 Puppy Puppy New 4 Ply

Hook US 2.5mm [JP 4/0]

45 Puppy Puppy New 4 Ply
Hook US 2.5mm [JP 4/0]

8

5

1

10 st repeat

W 43–46 All garments, shawls.
26

These photos are around 65% of the actual size.

COLORWORK
LACE
PATTERNS
CROCHET PATTERNS

46 Richmore Excellent Mohair (Count 10) Gradation

Draw out a long loop

Hook US 2.5mm [JP 4/0]

4
1

4 st repeat

13 st repeat

= Draw out 13 long loops from indicated places. Sc together.

These photos are around 65% of the actual size.

27

47 Ski Yarn Ski Robin

Hook US B1 [JP 3/0]

2
1

8 st repeat

W Shawls, all garments, good for summer
yarns and mohair.

48 Ski Yarn Ski Robin

Hook US 2.5mm [JP 4/0]

2
1

6 st repeat

W Drawstring bags and shawls.

28

These photos are around 55% of the actual size.

COLORWORK
LACE
PATTERNS
CROCHET PATTERNS

49 Puppy Puppy Pure Silk

Hook US E4 [JP 6/0]

4
3
2
1

4 st repeat

50 Puppy Puppy Pure Silk

Hook US 2.5mm [JP 4/0]

W Shawls and garments.

2
1

5 st repeat
Insert the crochet hook
into the tightened ch st

W Shawls and garments.

After working the 5 indicated
stitches together, pull the
stitch closed tightly.

51 Ski Yarn Ski Robin

Hook US 2.5mm [JP 4/0]

4

3

2

1

W Bags, or if different yarn is used, this can also be
used for garments.
These photos are around 60% of the actual size.

※Detailed instructions on page 95

10 st repeat

29

Broom Stick Crochet

52 Richmore Silk Cotton
Richmore Eau dé Ciel

Hook US E4 [JP 6/0]
Hook US B1 [JP 3/0]

HOW TO WORK FROM THE OPPOSITE SIDE—HOW TO JOIN

= Color A

= Color B

5

5

4

4

3

3

2

2

1

1

12 st repeat

4 loops single crocheted together
Draw out 4 loops from the designated sc st,
make the loops large enough to loosely fit
around two fingers.

W 52, 53 All garments, shawls.
30

These photos are around 60% of the actual size.

COLORWORK
BROOM
STICKCROCHET
CROCHETPATTERNS

53 Richmore Suvin Gold Meteor

Hook US 2.5mm [JP 4/0]

48 st repeat

24 loops
6 loops

6 loops
3

6 loops

6 loops
4

2

6 loops

6 loops
6 loops

6 loops
24 loops

12 loops

5

24 loops

12 loops

6 loops

6 loops
6 loops

= Color A
= Color B

1

6

6 loops

= Attach yarn
= Cut yarn
=

CENTER

※All of the stitches worked into the ch stitches will be
broom stick crochet. The loops should be ⅞” (2 cm) long.
※Draw out the specified number of loops for each stitch and slip st together
These photos are around 60% of the actual size.

31

54 Puppy Shetland, Puppy Pure Silk

55 Naito Shoji Alpaca Peru

Hook US 3mm [JP 5/0] Instructions on page 95

Hook US 2.5mm [JP 4/0] Instructions on page 34

W 54–57 All garments.
32

These photos are around 70% of the actual size.

COLORWORK
BROOM
STICKCROCHET
CROCHETPATTERNS

56 Puppy Ilios, Puppy Pure Silk

57 Ski Yarn Ski Nice

These photos are around 80% of the actual size.

Hook US 2.5mm [JP 4/0] Instructions on page 34

Hook US E4 [JP 6/0] Instructions on page 35

33

55

Sample photo on page 32

5 loops
26 loops

26 loops

5 loops

※Cast on 172 sts
※Broomstick loops are worked in rows 7 and 11
※The length of the loops in row 7 is 1⅜” (3.5 cm).
The length of the loops in row 11 is 1” ( 2.5 cm).
※In row 8, row 7 loops are worked together into one slip st.
※In the 11th row, insert hook into all loops and close.

5 loops
⑪

24 loops
⑧

Attach yarn

26 loops

26 loops

5 loops
⑦
⑤
③
①

Continuation of 42
3 st repeat

Sample photo on page 25

56

ROWS 1 • 2 LEFT ENDING INSTRUCTIONS
1)

Sample photo on page 33
⑦

2)

③

3)

②

⑧
⑨

ROWS 3 • 4 LEFT ENDING INSTRUCTIONS

1)

2)

Rows 7-9…Color B
Rows 1-6…Color A
Sl stitch through 3 dc
3)

4)

Row 2 broomstick crochet
Row 1 broomstick crochet

⑧

⅝” (1.5c)

INSTRUCTIONS
1. Cast on 42 sts. Row 1: sc broomstick crochet should be worked
through the back loop
⅝” (1.5c)
2. Row 2: work into the top of the previous row sc.
③
3. Row 3: Complete the broomstick crochet loops by working
them together with sc.
4. In row 8, work the loops you created in row 1 together 3 at a time.

①
②

Slip stitch left and right side dc together
34

COLORWORK
BROOM
STICKCROCHET
CROCHETPATTERNS

57

Instructions on page 33

③

②
①

Ch 48

MOTIF A
※Worked in one color
※Row 1: Working into the back loop, create 48 loops (⅝”/1.5 cm) into the indicated sts.
※Row 2: Work 48 loops into the sc indicated. Close all 48 rings with one st.
※Row 3: Attach yarn to the cast on sts. Follow the chart and gather the loops 6 at a time with an sc.
The center sc between loop gathers should be attached to row 2.
MOTIF B
※Crochet the whole piece in one color.
※Row 1: Work into the back loop and create 24 loops (⅜”/1 cm).
※Row 2: From row 1 sc, create 24 loops (⅝”/1.5 cm).
※The first row of 24 loops should be threaded and pulled snug to close the center of the motif.
※Row 3: Row 2 loops should be gathered 3 at a time and closed with the indicated crochet stitches
while joining it to the previously made motif pieces.

ATTACHING THE MOTIFS B

MOTIF A

③

①

②

Ch 24

35

For charts and symbol explanation, please see pages 38 and 39.

58b

Motifs
58a, b Ski Yarn Ski Cotton Gloss Ski Nice
Hook US 2.5mm [JP 4/0]

58a

W 58a, b Bags, arm warmers, shawls, jackets.

60 Richmore Percent
Hook US 3mm [JP 5/0]

59a

61 Richmore Percent
Hook US 3mm [JP 5/0]

59a, b Diamond Yarns
Dia Tasmanian Merino,
Dia Tasmanian Merino Fine
Hook US 3mm [JP 5/0]

59b

W 58–66 Garments and accessories.

36

These photos are around 75% of the actual size.

COLORWORK CROCHET PATTERNS
MOTIFS

62 Richmore Percent

Hook US 3mm [JP 5/0]

63 Richmore Percent
Hook US 3mm [JP 5/0]

64 Richmore Percent

Hook US 3mm [JP 5/0]

66 Diamond Yarns Dia
Tasmanian Merino
Hook US 3mm [JP 5/0]

65 Hamanaka Pure Wool (Fine)

These photos are around 75% of the actual size.

Hook US B1 [JP 3/0]

37

All sample photos for these patterns are on page 36

58a
58b

CENTER
CENTER

= Color B
= Color A
※2 colors worked in the round

= Color B
= Color A
※2 colors worked in the round

59a,b
③

61

②

⑤
④
③

CENTER

Row 3… Color B
Rows 1·2… Color A

②

CENTER

Baryon rose stitch
in Color C

Row 1… Color A Rows 2·3·5… Color B
Row 4… Color C
※Work row 2 through the back loop

Flower… Color A
※Work into the front half of the stitch
※Slip st the flower motif to the sc stitches
as indicated

60
⑤
④

Point for
attaching motifs

②
① CENTER

Rows 2·3… Color B
Rows 1·4·5… Color A

※Line up the motifs, whip stitch them together one stitch at a time.
38

COLORWORK CROCHET PATTERNS
MOTIFS

All sample photos for these patterns are on page 37

63

CENTER MOTIF (COLOR A)

62

⑤ ④
③

②

CENTER

※Row 4: Fold row 3 forward, attach the sc to row 2.

WRONG SIDE MOTIF (COLOR B)
⑨
⑧
⑦

= Color A

= Color B

⑥

= Color C

※6 sts, 6 rows sc. Use a different color for the center 4 sts.
Center motif
Row 4

64

※Row 6 of the center motif: Fold row
5 forward and work into the sc in row 4.

③
②

CENTER

Rows 2·3… Color B
Row 1… Color A
※In rows 2 and 3 feel free
to change and play with color!

65

66
⑤

⑤

④

③
④
②

CENTER DECORATION

②

CENTER

CENTER

Row 5… Color C
Rows 3·4… Color B
Rows 1·2… Color A

Color C
※Sc is worked into front half of row 2 dc

Rows 5·6… Color B
Rows 1–4… Color A

※Row 3: Sc into row 2 dc through back half of the st
39

For charts and symbol explanation, please see page 42.

67 Hamanaka Titi Crochet

Hook US 2mm [JP 2/0]

68 Olympus Emmy Grande
Hook US 2mm [JP 2/0]

69 Diamond Yarn Dia
Tasmanian Merino
Hook US 3mm [JP 5/0]

70 Hamanaka Couche, Silk
Mohair Parfait
Hook US 3mm [JP 5/0]

71a, b Richmore Percent

Hook US 3mm [JP 5/0]

71a

58a

71b

W 67–75 Garments and accessories.

40

These photos are around 75% of the actual size.

COLORWORK CROCHET PATTERNS
MOTIFS

For charts and symbol explanation, please see pages 42 and 43.

72 Hamanaka Pure Wool Fine Exceed Wool M (Sport weight)

Hook US B1 [JP 3/0]

73 Puppy Puppy New 4 Ply
Hook US 2.5mm [JP 4/0]

74 Richmore Percent

Hook US 3mm [JP 5/0]

75 Puppy Shetland

These photos are around 75% of the actual size.

Hook US E4 [JP 6/0]

41

67

69

Sample photo on page 40

Sample photo on page 40

⑤
⑤
④

④
③

③

②

②

CENTER

Rows 3–5… Color B
Rows 1·2… Color A

①

CENTER

71a, b

Sample photo on page 40
FLOWER
CENTER OF
THE FLOWER

Rows 3·4… Color B
Rows 1·2… Color A

CENTER

68

CENTER

Sample photo on page 40

Color C

※Weave in ends. Attach to the
center of the flower motif.
Rows 2·3… Color B
Row 1… Color A

⑤
④

③
②
①

= Attach yarn
= Cut yarn

CENTER

⑤
④
③
②
①

CENTER

Row 5… Color B
Rows 1–4… Color A
Color B

※Weave in ends. Attach to the
center of the flower motif.

70

Sample photo on page 40

75

Sample photo on page 41
⑤
④

③

③

②
①

②
①

CENTER

CENTER

Row 3… Color B
Rows 1·2… Color A

42

Row 5… Color B
Row 4… Color C
Row 3… Color B
Rows 1·2… Color A

COLORWORK CROCHET PATTERNS
MOTIFS

72

Sample photo on page 41

①

Small motif
Color A

CENTER
②

①

CENTER

※In the ch sts next to the 4 dc together, the slip sts should be
worked into the two strands at the top of the ch st. Otherwise,
insert the hook into the open space and work around the ch sts.

74

Large motif Row 2… Color B
Rows 1·2… Color A

Sample photo on page 41

②
①

73

CENTER

Sample photo on page 41
⑥

⑤

Rows 3–4… Color C
Row 2… Color B
Row 1… Color A

※Whip stitch the motifs together

CENTER

31

Sample photo on page 21

Row 6… Color C
Rows 3–5… Color B
Rows 1·2… Color A

= ⅜” (8mm) crochet ring

※Row 5 slip st should be worked into the
sc in row 4 through half of the stitch.
※Row 6 slip st should be worked into row
4 sc half stitch as indicated.

= Bead
= Attach yarn
= Cut yarn
※The first stitches are dc. As soon as you begin crocheting, begin working dc.
※Work one row of motifs at a time.
※When returning, work the slip sts to attach the motifs into the two strands at the top of the indicated dc.
※The chart shows the work from RS. The finished cloth is used with WS facing forward as the beads will present properly on that side.
43

76 Clover Alpaca Mjuk

Hook US 3mm [JP 5/0] Instructions on page 46

78 Richmore Percent

Hook US 3mm [JP 5/0]

Instructions on page 47

77 Naito Shoji Alpaca Peru
Hook US 2.5mm [JP 4/0] Instructions on page 46

W 76–83 Garments, bags or any accessories.
44

These photos are around 80% of the actual size.

COLORWORK CROCHET PATTERNS
MOTIFS

80 Hamanaka Pure Wool (Fine)
Hook US B1 [JP 3/0] Instructions on page 47

79 Hamanaka Sonomono Sport Weight
Hook US 2.5mm [JP 4/0]

Sonomono Bulky
Hook US J10 [JP 10/0] Instructions on page 47

81 Richmore Percent
Hook US 3mm [JP 5/0]
Crochet rings 20mm square,
Crochet rings 12mm
Instructions on page 47

83 Richmore Percent
82 Hamanaka Luna Mole Hook US G6 [JP 7/0]
Exceed Wool FL (Sport) Hook US 2.5mm [JP 4/0]

Hook US 3mm [JP 5/0]
Instructions on page 46

Instructions on page 46
These photos are around 80% of the actual size.

45

76

Sample photo on page 44
15 st repeat
⑮

⑫

⑩

⑧

⑥

④

②

⑲
⑯
◎

◉

⑭

INSTRUCTIONS

⑫

1. Instructions on how to work the sts inside these boxes.
2. Remove the hook from the stitch and insert it through back loop in
the indicated stitch on the right side marked with (black circle dot).
3. Insert the hook into the live stitch on the left side. Draw through
the stitch on the right. Ch 1 to close.
※Work all sts in the same manner, regardless of the
number of sts inside the box.

77

82

⑩
⑧
⑥

③

Sample photo on page 44

Sample photo on page 45
⑦
⑥
⑤

※Row 5: For sts worked through back loop,
those sts should be worked into the front loop of row 4.
※Row 12: For sts worked through back loop,
sc should be worked into the back loop of row 4.

③

83

CENTER

Sample photo on page 45
④
③
②
CENTER

= Color A
= Color B
※Row 2: Work into row 1 sc
※Row 4: Work into row 2 sc.
46

= Color A

= Color B

= Color C

Row 18… 88 sts
Row 17… 80 sts
Rows 15·16… 72 sts
Rows 12·13… 48 sts
Row 11… 36 sts
Rows 6–10… 48 sts
Rows 3–5… 36 sts
Rows 1·2… 24 sts

COLORWORK CROCHET PATTERNS
MOTIFS

78

79

Sample photo on page 44

Sample photo on page 45

CONNECTION METHOD

MOTIF

⑥
⑤

④
④

③

②

CENTER

= Color A
= Color D

CENTER

= Color B or Color C

※Row 3: Dc should be worked into the
center ring. Fold the first two rows
to the front in order to work the sts.

80

= For this version of the coil stitch,
wrap 16 times. See page 109 for
instructions.

= Color A
= Color B

※Row 5 coil sts should be worked into the space under
row 4 ch sts. Ch 3 and slip st as indicated into the
row below.

Sample photo on page 45
⑧

= Color B
= Color A

⑤

④
③
①

Baryon
rose stitch

CENTER

※Embroider the center with Color B

81

Sample photo on page 45

②

CENTER MOTIF

①

=

20 mm square crochet ring

12 mm crochet ring

※Work in Color A
※Navy is worked first to connect the rings, and then the purple stitches are worked after.

※Work in Color B
※The slip stitches on either side of the treble crochet that have been worked together
should be worked into the ch sts on the square ring motifs. The ch sts should be folded
forward and the slip sts worked into the back so the picots rest on top of the work.
※Row 2 ch4 should be worked behind the square motif rings.
47

For charts and symbol explanation, please see page 50.

84 Hamanaka Pure Wool (Fine)

Hook US B1 [JP 3/0]

85 Hamanaka Silk Mohair Parfait,
Exceed Wool M (Fingering)
Hook US B1 [JP 3/0]

86 Richmore Percent
Hook US 3mm [JP 5/0]

87 Diamond Yarns Dia
Tasmanian Merino
Hook US 3mm [JP 5/0]

88 Hamanaka Pure
Wool (Fine)
Hook US B1 [JP 3/0]

W 84–91 Garments, shawls and most items.
48

These photos are around 80% of the actual size.

COLORWORK CROCHET PATTERNS
MOTIFS

89 Richmore Percent
Hook US 3mm [JP 5/0]
Instructions on page 51

90 Puppy Silkid Fine
Hook US 2.5mm [JP 4/0]
Instructions on page 50

91 Hamanaka Exceed
Wool M (Fingering)
Hook US B1 [JP 3/0] Instructions on page 51
These photos are around 80% of the actual size.

49

84

85

Sample photo on page 48

Sample photo on page 48
④
③

CENTER

③

③

④

= Color A

CENTER

88

= Color B

Sample photo on page 48

= 12mm crochet ring

86

87

Sample photo on page 48

Sample photo on page 48

③
②
①

②

Slip stitch

90

Sample photo on page 49
②
③
①
CENTER

⅞” (2c)

50

WORKING THIS SYMBOL
1. Draw out a ⅞” (2 cm) loop.
2. Working into the space under the ch sts,
yarn over and draw out another loop.
3. Yarn over once more draw out another ⅞” (2 cm) loop.

※The loops drawn out in round three should be worked together 7 at a time.

COLORWORK CROCHET PATTERNS
MOTIFS

89

Sample photo on page 49

★

⑤
★

★

②
★

CENTER
★

★
★

★

Slip stitch

※★Work a sc into half of the ch stitch indicated

91
99

Sample photo on page 49
⑦

Sample photo on page 53

⑤

④
②

CENTER

CENTER

51

93 Hamanaka Wash Cotton Crochet
[JP 3/0] Instructions on page 54

92 Hamanaka Titi Crochet
Hook US B1 [JP 3/0] Instructions on page 54

94 Daruma Cafe Organic
Cotton for Crochet
Hook US 2mm [JP 2/0] Instructions on page 55

95 Olympus Emmy Grande
Hook US 2mm [JP 2/0] Crochet ring 12mm
Instructions on page 55

96 Olympus Emmy Grande
Hook US 2mm [JP 2/0]
Crochet ring 12mm
Instructions on page 54

W 92–99 Garments, shawls and accessories.
52

These photos are around 80% of the actual size.

COLORWORK CROCHET PATTERNS
MOTIFS

97 Hamanaka Wash Cotton Crochet
Hook US B1 [JP 3/0] Instructions on page 55

98 Hamanaka Wash Cotton Crochet
Hook US B1 [JP 3/0] Instructions on page 55

99 Ski Yarn Ski Cotton Gloss
Hook US 2mm [JP 2/0] Instructions on page 51

These photos are around 80% of the actual size.

53

92

Sample photo on page 52

96

③

Sample photo on page 52

②
①

CENTER

②

④

⑤

⑥
⑦
⑧

93

⑨

Sample photo on page 52

CENTER

⑩
⑪

③
②
①

CENTER

123

Sample photo on page 61

20

②
③
④

⑥
⑤

= Attach yarn
= Cut yarn

1 repeat

※Padding cord is 118⅛” (300 cm) x 3 folded in half
Padding cord
※The numbers indicate the number of sc
※Row 6 should contain 50 repeats
※Row 6 is worked separately into the legs of the stitches of row 5
54

15

COLORWORK CROCHET PATTERNS
MOTIFS

94

Sample photo on page 52

97

Sample photo on page 53

④

Close

③

CENTER

④
③

Row 4… Color B
Rows 1–3… Color A

95

②

CENTER

Sample photo on page 52
⑤

④

= Cut yarn

③

②

CENTER

= 12 mm crochet ring
= Attach yarn
= Cut yarn
Rows 2·4… Color B
Rows 1·3·5… Color A

98

Sample photo on page 53
⑧

※Row 4 dc should be worked into the space
below the slip sts in the previous row.

⑤
④
③

CENTER

Clover Picot

※Row 1 = 24 sts
※Row 8 clover picots slip sts should be worked into the dc sts.
55

Crocheted Irish Lace
100‒114 Olympus Emmy Grande
100

101
Hook US 2mm [JP 2/0]

Instructions on page 58

102

104

Instructions on page 58

Instructions on page 59

103

Instructions on page 58

Instructions on page 58

105

106

Instructions on page 58

Instructions on page 58

W 100–114 Shawls, bags and all garments.
56

These photos are around 75% of the actual size.

COLORWORKIRISH
CROCHETED
CROCHET
LACEPATTERNS

107

Instructions on page 92

108

109

110
Instructions on page 59

113

114

Instructions on page 59

Instructions
on page 71

111

Instructions on page 59

112

Instructions on page 59

Instructions on page 93

Instructions on page 59

These photos are around 75% of the actual size.

57

100

Sample photo on page 56

27

Padding cord
20

104

Sample photo on page 56

21

= Attach yarn
= Cut yarn

101

Join here

27

※Padding cord = 19⅝” (50 cm) x 4
※The numbers indicate the number of sc sts

10

Sample photo on page 56
10

②

10

⑨

24

③

5
5

⑧

①

20

④

⑦

⑤
⑥
Padding
cord

= Attach yarn
= Cut yarn
※Padding cord = center ring wrapped 30 times around a pencil
※The numbers inside the motifs are the order in which the motifs are worked
※The numbers on the outside of the motifs are the number of sc sts

103

Padding cord B

Padding cord A

5

= Attach yarn
= Cut yarn
※Padding cord A = center ring wrapped 20 times around a pencil
Padding cord B = 27½” (70 cm) x 4
※The numbers listed are the number of sc sts

Sample photo on page 56
10

105

Sample photo on page 56

8

8

10

10

2

12

12

1

4 st repeat
14

14
15

Padding cord

15

※Padding cord = two sets of 19⅝”
(50 cm) x 4 folded in half
※The numbers indicate the number
of sc sts
= Attach yarn
= Cut yarn

58

106

Sample photo on page 56
3
2
1

2 st repeat

COLORWORKIRISH
CROCHETED
CROCHET
LACEPATTERNS

102

108

Sample photo on page 57

Sample photo on page 56

Padding cord

※Wrap the padding for the center 30 times around a pencil
※Sc 30 sts

g
Paddin

cord B

109

Sample photo on page 57

Padding
cord A
16

16

16

25

Padding cord

※The center ring should be wrapped 20 times around a pencil
※Padding cord for motif B is 47¼” (120 cm) of yarn x 6
※The numbers shown are the number of sc sts
※The brown sc sts are worked into the open space created by the ch sts and dc sts in the second row
※After working the motif, twist the petals in order to create the desired shape

111

Sample photo on page 57

112

15

= Attach yarn
= Cut yarn
※Padding cord 59” (150 cm) folded 4 times
※The numbers listed are stitch counts for row 1

Sample photo on page 57
CENTER OF FLOWER

PETALS
③
②
14

Padding
cord

12

⑨⑧

⑥

④

②
CENTER

Padding
cord

=
※Padding cord 63” (160 cm) x 3, folded 4 times

114

※Padding cord: 31½” (80 cm) x 4
※Rows 2–3 sc sts should be worked into
the back post of the indicated sc sts

※Whip stitch the center of the
flower into the indicated position

Sample photo on page 57

2
1

12 sts = 1 repeat

59

115‒127 Olympus Emmy Grande

Hook US 2mm [JP 2/0]

115

116

Instructions on page 62

Instructions on page 62

117

118

Instructions on page 62

Instructions
on page 62

119

Instructions
on page 62

120

121
60

Instructions on page 63

Instructions
on page 93

W 115–127 Shawls, collars, bags and garments.
These photos are around 75% of the actual size.

COLORWORKIRISH
CROCHETED
CROCHET
LACEPATTERNS

122

123

Instructions on page 93

Instructions on page 54

124

125

Instructions on page 63

Instructions on page 63

126

Instructions on page 94

127 Instructions on page 94
These photos are around 75% of the actual size.

61

All sample photos for these patterns are on page 60

116

115
5

Padding cord

4

※Using the wide end of a large crochet hook or a large dowel rod,
wrap the padding cord for the center motif 25 times.
7

117

Padding cord

24 Padding

cord
⑧

25

※Padding cord: 118⅛” (300 cm) x 3, folded 4 times
※The numbers listed are the number of sc sts
※Long legged sc sts should be worked into the spaces created by ch sts

6

119

19

5

14

⑥

⑦
5

13
12

5

Connect with sc

14

5

③

24

④
6

LEAF/ LARGE

6

6

19

13

6

⑤
6

5
5

10

LEAF/ SMALL

11
10
9
8

9
8
7
6

1
2

1
2

3
4
5
6

3
4
5

7

①

② 30

2

20

STEM

= Attach yarn
= Cut yarn

1

ATTACH SMALL
LEAF HERE

9

※Padding cord: Using a marker or a dowel about ⅝” (1.5 cm) in width, wrap
the padding cord 20 times. Make 8 of these padded rings and set them aside.
※The number of sc sts for the padded center
※Work the motifs in the order of the numbers listed in the center motifs

1

6

ATTACH LARGE
LEAF HERE

10

Padding cord

7

※Padding cord: 8” (20 cm) x 4
15
14

118
MOTIF

THE DECORATIVE
DANGLING BOBBLES

27

Make 2 sc2. 1 bobble is 15 sts, 1 bobble 20 sts

27

CENTER

Padding cord B

27

⑩
②

CENTER
27

Padding cord A

21

※Padding cord A: 67” (170 cm) x 3, folded 2 times
※Attach the decorative bobbles to the center of the motif
62

※Padding cord B 6 times

④

⑥

⑧

⑦
⑥

④

②

CENTER

COLORWORKIRISH
CROCHETED
CROCHET
LACEPATTERNS

121

Sample photo on page 60

⑨

⑩

⑧
⑥

⑦

②

③

④
⑪

①

⑤

2
1

※⑦ Slip st into the ch sts from the ws

124

22 st repeat

Sample photo on page 61

MOTIF

19

20

Padding
cord B

Padding
cord A

DECORATIVE
CENTER
Padding
cord C
40

※Padding cord A: Wrap 20 times around a pencil
※Padding cord B: 67” (170 cm) x 3, folded in half.
※Padding cord C: Wrap 30 times around a pencil
※The numbers listed on the chart are the number of sc sts
※Whip stitch the decorative center motif into place on
the center of the larger motif

125

Sample photo on page 61

MOTIF
Work into the dc sts
19

④

Padding
cord A

Padding
cord B

DECORATIVE
CENTER
Padding
cord C
44

※Padding cord A: Wrap 20 times around a pencil
※Padding cord B: 59” (150 cm) x 3, folded in half
※Padding cord C: Wrap 30 times around a felt-tip marker
※The numbers listed on the chart are the number of sc sts
※Whip stitch the decorative center motif into place on
the center of the larger motif.
63

Edgings
128‒133 Olympus Emmy Grande
Hook US 2mm [JP 2/0]

128

Instructions on page 66

129

Instructions on page 66

130

Instructions on page 66

131

Instructions on page 66

132

Instructions on page 66

133

Instructions on page 94

W 128–133 Edgings and lariats.
64

These photos are around 80% of the actual size.

COLORWORK CROCHET PATTERNS
EDGINGS

For charts and symbol explanation, please see page 67.

134, 136, 137, 139, 140 Hamanaka Pure Wool Sport Weight

Hook US B1 [JP 3/0]

134

135 Hamanaka Exceed Wool FL Sport Weight

Hook US 3mm [JP 5/0]

136

137

138 Diamond Yarns Dia Tasmanian Merino Fine

Hook US B1 [JP 3/0]

139

140

W 134–140 Edgings.
These photos are around 75% of the actual size.

65

All sample photos for these patterns are on page 64

128

4
2
1

24 st repeat

129
4
3
2
1

6 st repeat

Same st

130

2

1

2 st repeat

131

4
3
2
1

※Row 1 sc sts should be worked through back loop

5 st repeat

132

※Finish the edging with sc sts
66

26 st repeat

3

COLORWORK CROCHET PATTERNS
EDGINGS

All sample photos for these patterns are on page 65

134

1
2

18 st repeat

135
2
1

= Attach yarn

5 st repeat

= Cut yarn

136
1 st repeat

= Coil stitch: Explanation on page 109

137

7
8
6

5
5
4
4
4
5

1

18 st repeat

138

4
3
2
1

※Row 3: For the indicated sts worked into the row below,
work into the back post of row 2.

2 st repeat

139

5

5
4

5

4
4

8

4

1

※Work the slip st into the ch sts

11 st repeat

140

4
3
2
1

10 st repeat

67

141, 144 Hamanaka Titi Crochet
141

Hook US B1 [JP 3/0]

Instructions on page 70

142 Olympus Emmy Grande

Hook US 2mm [JP 2/0] Instructions on page 71

143 Olympus Emmy Grande

Hook US 2mm [JP 2/0] Crochet ring 12mm Instructions on page 70

144

Instructions on page 71

W 141–144 Edgings, lariats and necklaces.
68

These photos are around 80% of the actual size.

COLORWORK CROCHET PATTERNS
EDGINGS

145, 146 Hamanaka Titi Crochet
145

Hook US B1 [JP 3/0]

Instructions on page 70

146

Instructions on page 70

147 Puppy Puppy
Pure Silk
Hook US B1 [JP 3/0]
Instructions on page 70

148 Hamanaka Titi Crochet

Hook US B1 [JP 3/0] Crochet ring 8mm Instructions on page 71

W 145–148 Edgings and lariats. 145–147 Also for lariats and necklaces.
These photos are around 80% of the actual size.

69

③

141
Sample photo
on page 68

Row 3… Color B
Rows 1·2… Color A

②

= Attach yarn
= Cut yarn

CENTER

Color C

2
1

※The stitches used to connect the motifs should be worked in sc

9 sts 1 repeat

143
Sample photo
on page 68
12 mm
crochet ring

= Attach yarn

1 repeat

= Slip sts should all be worked as sc

= Cut yarn

145
Sample photo
on page 69
CENTER

= Attach yarn
= Cut yarn

Rows 2… Color B
Row 1… Color A

※Row 2: As you are working the petals, slip sts should be worked 2 per 1 sc st in the first row.
BERRY

146

LEAF AND FINISHING

Sample photo
on page 69

⑧

9

⑥
④

CENTER

1 repeat

②

Stem
Berry

※Attach the stems of the berries to the vine with a slip st
※Row 8: Pass the yarn through all sts and pull snug to create a berry.

147 Sample photo on page 69
9

9 9

9

9

9 9

9

9 9

9

9 9

9

9 9

=

3
2
1

= Color A

= Color B

※The numbers listed on the chart are the number of dc sts
70

7 sts 1 repeat

9 9
★

INSTRUCTIONS
1. Ch 5
2. Turning ch 3, insert hook into the 5th ch st (indicated
by the +). To create the puff petals, work hdc 9tog.
3. Ch 3. Slip st into the st indicated by the +.
4. Repeat this twice more
5. Ch 4, slip st into indicated sc st.

COLORWORK CROCHET PATTERNS
EDGINGS

144

148

Sample photo on page 69

Sample photo on page 68
5

2
1
3
4

Repeating motif crochet

1

1
2

= Attach yarn

= 8mm crochet ring

142

1 repeat

= Cut yarn

1 repeat

Sample photo on page 68

= Attach yarn
= Cut yarn

2

1

= Color A

110

3 row repeat

※Work slip st into the indicated ch sts

= Color B

Sample photo on page 57

11

7

11

Padding cord

7

7

※Padding cord = 59” (150 cm) x 3
※Numbers listed on the chart are the
number of sc sts
※Row 3: Work back post sts into row 2 sc

10

12
9

7

HOW TO WORK THE FLOWER
22

7

1)

2)

3)

71

For charts and symbol explanation, please see page 74.

149 Diamond Yarn
Tasmanian Merino
Fine Hook US B1 [JP 3/0]

150 Richmore Suvin Gold Meteor Hook US 2.5mm [JP 4/0]

151 Richmore Meteor

Hook US 2.5mm [JP 4/0]

152 Hamanaka Pure (Fine)

Hook US B1 [JP 3/0]

W 149–152 Edgings and lariats.
72

These photos are around 80% of the actual size.

COLORWORK CROCHET PATTERNS
EDGINGS

For charts and symbol explanation, please see page 75.

153 Richmore Percent

Hook US 3mm [JP 5/0]

154 Daruma Sarato Wool

155 Olympus Emmy Grande

156 Richmore Percent

Hook US B1 [JP 3/0]

Hook US 2mm [JP 2/0]

Hook US 3mm [JP 5/0]

W 153–156 Edgings.
These photos are around 75% of the actual size.

73

All sample photos for these patterns are on page 72

149
4

= Attach yarn
= Cut yarn

3
2
1
5
6

7 sts 1 repeat

151

150
7
6

5
4
3
2
1

= Color A

= Color B

= Attach yarn

= Cut yarn

※The overlapping symbols are omitted
※Folding row 5 forward, work row 6 treble crochet sts into row 4 sc sts.
4
3
2
1

INSTRUCTIONS

=

=

1. Begin the pattern with 4 ch sts. Continue with 6 more ch sts and slip st into the first ch st.
2. Ch 3, into the first ch st, dc 4, Do this 6 more times.
3. Ch 3 slip st into the 4th ch st. Ch 2

152
7

5

1

8 sts 1 repeat
=

74

COLORWORK CROCHET PATTERNS
EDGINGS

All sample photos for these patterns are on page 73

154
4

3
2
1

= Color A

= Color B

9 sts 1 repeat

1. Row 2 is a WS row, therefore the left most tr crochet is worked first, then work the sc picots.
2. Right side treble crochet: Yarn over twice and insert hook into indicated sc st. Draw out a loop.
3. Yarn over once more, draw through both loops
INSTRUCTIONS
4. Insert the hook into the space between the legs of the st from step one. Yarn over and draw out a loop.
5. Yarn over once more. Draw through 3 loops.
6. Yarn over once more and draw through two loops
※Row 4 slip st should be worked through back loop into the ch sts
※Photograph is of the WS

156
HOW TO CONNECT THE MOTIFS

153
Motif B
Motif A

12

Twist the yarn by rotating the hook

24

= Color A

= Color B

※Remove the hook from the live stitch and
connect the motifs at the indicated sc sts
2 row repeat
2
1

※Change colors every two rows
※The second row of sc is worked into the first with the twisted fringe in between
HOW TO WORK (Worked from the left because WS is shown)

※Connect motifs A one by one. Pass motifs B through
motif A and work one circle motif at a time.
※Connect B motifs as they are worked.

155

① ②

1. Step 1 sc, draw out a loop 2⅜” (6 cm) long.
2. Twist the hook 15 times
3. Fold in half and allow the loop to twist back on itself. Work into sc.

HOW TO CONNECT THE MOTIFS

MOTIF

Color B

Color A

15
30

※Pass the ch sts through the previously worked circle motif.
Connect the ch sts and work in the round.
COLOR C PATTERN

1 repeat

3
2
1

75

From the Pattern to a Finished Item
16 of these patterns were picked up and made into all sorts of fun and interesting items.
The work is accompanied with the designers comments and hints on making.

Flower Motif Lariat (page 78)
FROM PATTERN 145

Botanical Infinity Necklace (page 79)
FROM PATTERN 132

Irish Crochet Lace Collar (page 80)
USE PATTERNS 107, 110, 113, 114, 115, 123

76

Circle Bag (page 82)
A COMBINATION OF PATTERNS 1 AND 2

Vitamin Color Scarf (page 83)
FROM PATTERN 6

Two Way Shawl (page 84)
FROM PATTERN 33

Vest with Sculptural Floral Motif (page 86)
FROM A COMBINATION OF PATTERNS 76, 77, 79, 83

77

Flower Motif Lariat
Connect as you go, and make it as long as you like.This project only requires
a small amount of yarn and you crochet until you run out!
YARN Hamanaka Titi Crochet
CROCHETED BY Fumie Kojima
PATTERN ON PAGE 96

78

Botanical Infinity Necklace
Here, the creamy single color of the original stitch pattern is swapped for a chic color scheme.
Two strands make a gorgeous necklace.
YARN Olympus Emmy Grande
CROCHETED BY Fumie Kojima
PATTERN ON PAGE 96

79

80

Irish Crochet Lace Collar
Romantic lace is always a favorite. This collar was designed to be both easy and vintage-looking.

YARN Olympus Emmy Grande
CROCHETED BY Yukie Yamazake
PATTERN ON PAGE 97

81

Circle Bag
Working the chart as is will create a lovely circle motif.
Creating the fabric for the center and sewing it together is all you need to do to create a stylish bag!
YARN Clover Petits Fours
CROCHETED BY Hisako Hariguchi
INSTRUCTIONS ON PAGE 100

82

Vitamin Color Scarf
Add the pom pom fringe to the first motif and use some funky
bright colors to create this eye-catching accessory!
YARN Richmore Percent
CROCHETED BY Emiko Suzuki
INSTRUCTIONS ON PAGE 102

83

84

Two Way Shawl
Because of the characteristics of pineapple motif lace crochet, you don’t even need to worry
about working an edging. Enjoy it as a shawl, or add a button and make a vest!
YARN Naito Shoji Alpaca Peru
CROCHETED BY Chihoko Nakamura
PATTERN ON PAGE 104

85

86

Sculptural Flower Motif Vest
This kind of crochet is the signature style of Keiko Okamoto.
Crocheters intermediate level and above can really revel in the challenge of this piece.

YARN Naito Shoji Alpaca Peru, Alpaca Naska Lopi
CROCHETED BY Hiroko Miyamoto
PATTERN ON PAGE 106

87

Yarns

The yarns pictured here are shown exact thickness, all listed with put up size, recommended hook size and meterage.

Olympus Yarns

Silkid Fine

Titi Crochet

25g ball, 120 yd (110m), Hook US 2.5mm–
E4 [JP 4/0–6/0]

40g ball, 186 yd (170m), Hook US 2 mm–
B1 [JP 2/0–3/0]

Emmy Grande

Puppy Pure Silk

50g ball, 238 yd (218 m), Hook US 0.5 mm–
B1 [JP 0–2/0]

40g ball, 175 yd (160m), Hook US B1-3mm
[JP 3/0–5/0]

Llios

Clover Yarns

25g ball, 93 yd (85m), Hook US B1-2.5mm
[JP 3/0-4/0]

Percent
40g ball, 131 yd (120m), Hook US 3 mm–
E4 [JP 0/5–0/6]

Excellent Mohair Gradation

Champagne
25g ball, 87 yd (80m), Hook US 3mmE4 [JP 5/0–6/0]

Hamanaka Yarns
Richmore Yarns

Hamanaka Yarns

20g ball 218 yd (200m), Hook US B1–2.5 mm [JP 0/3–0/4]
(held single) US E4–G6 [JP 0/6–0/7] (held double)

Alpaca Mjuk

Sonomono Roving

Meteor

25g ball, 109 yd (100m), Hook US 3mmE4 [JP 5/0–6/0]

40g ball, 70 yd (64m), Hook US H8 [JP 8/0]

25g balll, 125 yd (115m), Hook US 2.5mm–E4
[JP 4/0–6/0]

Petits Fours

Sonomono Sport

Suspense

40g ball, 131 yd (120 m), Hook US 2.5mm [JP 4/0]

25g ball, 114 yd (105m), Hook US E4-G6 [JP 0/6–0/7]

20g ball, 58 yd (53m), Hook US E4-G6
[JP 6/0–7/0]

Sonomono Chunky

Diamond Yarns
Diamond Tasmanian Merino Fine
35g ball, 194 yd (178m), Hook US B1-2.5mm
[JP 3/0–4/0]

Diamond Tasmanian Merino
40g ball, 131 yd (120m), Hook US 2.5-3 mm
[JP 4/0–5/0]

Diaangelica
25g ball, 73 yd (67m), Hook US 3mm-E4
[JP 5/0–6/0]

Diakisara
30g ball, 177 yd (162m), Hook US 2 mm–
B1 [JP 2/0–3/0]

40g ball, 43 yd (40m), Hook US 6.5mm–8mm
[JP 15–8 mm]

Hamanaka Pure Wool Fingering
40g ball, 175 yd (160m), Hook US B1 [JP 3/0]

Topping (gradation)
25g ball, 175 yd (160m), Hook US B4-E4 [JP 0/3-0/6]

Eau dé Ciel
25g ball, 164 yd (150m), Hook US 2 mm–B1
[JP 2/0–3/0]

Silk Cotton
Exceed Wool M Fingering
40g ball, 175 yd (160m), Hook US B1 [JP 3/0]

Exceed FL Sport
40g ball, 131 yd (120m), Hook US 2.5mm [JP 4/0]

40g ball, 120 yd (110m), Hook US 3 mm–
E4 [JP 0/5–0/6]

Suvin Gold
40g ball, 147 yd (135m), Hook US 2.5mm–E4
[JP 4/0–6/0]

Couche
40g ball, 120 yd (110m), Hook US G6 [JP 7/0]

Motohiro Yarns
Ski Robin

Fair Lady 50
40g ball, 109 yd (100m), Hook US 3mm [JP 5/0]

30g ball, 98 yd (90m), Hook US 3mm–E4
[JP 5/0–6/0]

Silk Mohair Parfait

Ski Nice

50g ball, 109 yd (100m), Hook US B1 [JP 3/0]

25g ball, 240 yd (220m), Hook US 2 mm–B1
[JP 2/0–3/0]

30g ball, 125 yd (116m), Hook US 2.5mm–E4
[JP 4/0–6/0]

Alpaca Naska

Span Glass

Naito Shoji
Alpaca Peru

50g ball, 109 yd (100m), Hook US E4 [JP 6/0]

25g ball, 149 yd (137m), Hook US B1 [JP 3/0]

Lopi

Pom Beans

100g ball, 109 yd (100m), Hook US J10 [JP 10/0]

25g ball, 65 yd (60m), Hook US 3mm [JP 5/0]

Puppy Yarns Daidoh
Puppy Yarns

Luna Mole
50g ball, 149 yd (70m), Hook US G6 [JP 7/0]

Queen Anny
50g ball, 106 yd (97m), Hook US E4-H8
[JP 6/0–8/0]

Sarie

Shetland

Brillian

40g ball, 98 yd (90m), Hook US 3mm–
G6 [JP 5/0–7/0]

40g ball, 153 yd (140m), Hook US 2.5–3 mm
[JP 4/0–5/0]

Puppy New 4 Ply
40g ball, 164 yd (150m), Hook US 2 mm2.5mm [JP 2/0–4/0]

88

25g ball, 131 yd (120m), Hook US 2.5mm [JP 4/0]

Wash Cotton Crochet
25g ball, 113 yd (104m), Hook US B1 [JP 3/0]

Ski Cotton Gloss
40g ball, 154 yd (141m), Hook US 2 mm–B1
[JP 2/0–3/0]

Yokota Yarns
Salatto Wool Worsted
40g ball, 111 yd (102m), Hook US 2.5mm–E4
[JP 4/0–6/0]

Cafe Organic Crochet 20
20g ball, 87 yd (80m), Hook US 2 mm–B1
[JP 2/0–3/0]

※PHOTOGRAPHY Kana Watanabe
NOTE: Yarns may be discontinued or otherwise
unavailable. When substituting yarn used in a
pattern in the book, hold your yarn up to the
photo for comparison. This will give you a good
idea as to whether your yarn is a workable match.

Instructions
PATTERN CHARTS

PROJECT PATTERNS

Patterns 4, 7, 14, 15 — Page 90
Patterns 17, 34, 29 — Page 91
Patterns 33, 107 — Page 92
Pattern 113, 120, 122 — Page 93
Pattern 126, 127, 133 — Page 94
Pattern 54, 32, 51 — Page 95

Flower Motif Lariat, Botanical Infinity Necklace — Page 96
Irish Crochet Lace Collar — Page 97
Circle Bag — Page 100
Vitamin Color Scarf — Page 102
Two Way Shawl — Page 104
Sculptural Flower Motif Vest — Page 106

Stitch Dictionary Crochet Basics

SYMBOL

STITCH NAME

Chain Stitch (Ch St)
Slip Stitch (Slip St)

2 Double Crochet (Dc) into
Same St

111

Half Double Crochet (Hdc)
3 St Popcorn St into Sc

PAGE

3 Double Crochet (Dc) into
Same St

111

5 Half Double Crochet (Hdc) 114
Popcorn St

108

2 Double Crochet (Dc) into
Same St

111

(With 1 ch st between sts)

Double Crochet (Dc) 5 Sts
Together Popcorn St

2 Double Crochet into Same
111
Chain Space (Ch Sp)

5 Double Crochet (Dc) into
Same Space Popcorn St

(Work into chain space (ch sp)

(Work into the ch space)

108

Single Crochet (Sc)

108

5 Double Crochet (Dc) into
Same St

Half Double Crochet (Hdc)

108

Double Crochet (Dc)

114

115

115

Ch 3 Picot with a Slip St

115

5 Double Crochet into Same 112
Chain Space (Ch Sp)

Ch 3 Slip St Picot
(Between ch sts)

115

109

Back Post Single Crochet
(BPsc)

112

Crossed Double Crochet
(Crosse Dcs) Dc 1x1 Cross

116

Treble Crochet (Tr)

109

Front Post Double Crochet
(FPdc)

112

1x1 Lc Dc (Right st over left) 116

Double Treble Crochet
(Dtr)

109

Back Post Double Crochet
(BPdc)

112

1x1 Rc Dc (Left st over right) 116

Treble Treble Crochet

109

Single Crochet 2 Together
(Sc2tog)

113

Sc Loop St

Coil Stitch

109

Half Double Crochet 3
Together (Hdc3tog)

113

Solomon’s Knot (Love Knot) 117

Single Crochet into Back
Loop (Sc into Blo)

110

Double Crochet 2 Together
(Dc2tog)

113

Single Crochet Color Work

117

Half Double Crochet
through Back Loop
(Hdc Tblo)

110

Double Crochet 4 Together
(Dc4tog)

113

Casting on the Center Ring

118

Double Crochet through
Back Loop (Dc Tblo)

110

Double Crochet Bobble Sts
(Dc popcorn sts 2tog)

113

Ch Stitch Circular Cast On

118

2 Single Crochet (Sc) into
Same St

110

Half Double Crochet 3 Tog
into Same St (Hdc 3 Puff St)

114

Crocheting with Beads

119

3 Single Crochet (Sc) into
Same St

110

3 Double Crochet (Dc) Puff St 114

Joining Motifs Using Slip Sitch

119

5 Double Crochet (Dc)
Puff St

“Join as you go” Motif Connecting
Method Using Single Crochet

119

2 Half Double Crochet (Hdc) 111
into Same St

112

(Work into the ch space)

114

116

89

4

7

Sample photo on page 8
COLOR CHART

Sample photo on page 10
COLOR CHART

Pom pom

4
3
2
1
7

5

1

※All sts are sc
※1 repeat = 7sts. The color scheme is changed every 4th row
8

POM POM

5

EMBROIDERY
1

Lazy daisy stitch

7

CENTER

5

※All sts are worked in sc
※1 pattern = 7 sts. The color scheme changes every 8 rows.

※Change the yarn every row
※Tuck the tails into the center, continue with embroidery.
※Attach as indicated

14

15

Sample photo on page 15

Sample photo on page 15

13

10

5

6
5

1

= Color A
= Color B

6 sts 1 repeat

4
3
2
1

= Color A
= Color B

90

7 sts 1 repeat

1

17

Sample photo on page 16

= Color A
= Color B
= Work into the sc crochet in the row below
= Work a dc, wrapping over the ch or sc 4 rows below
※Except for the symbols above, work sc into the front loop of the ch 2 rows below.

10

5

1

10 sts 1 repeat

Continuation of 34
Sample photo on page 22

10

9
7
5

1

13 sts 1 repeat

29
Sample photo
on page 20

8

5

1

= Work bead st
16 sts 1 repeat
= After the ch sts, work beads into the indicated sts and work dc.
※When the previous row creates a ch sp, and the current row indicates dc, work into the same ch space.
91

33

Sample photo on page 22
26
25

20

Attach yarn

15

10

5

1

28 sts 1 repeat

107

Sample photo on page 57
⑧
11

⑦
9

⑤
7

③
①
8

※Row 3: Back post sc should be worked into dc st 2 rows below
※Rows 5–7: Back post sc should be worked into indicated sc st two rows below

92

113
Sample photo
on page 57

2

1

8 sts 1 repeat

120
Sample photo
on page 60

2

1

7 sts 1 repeat

1. Ch 4, ch1, insert hook into 4th ch st. Yarn over, draw out a loop (2 sts should be on the hook).
2. Insert the hook from below so the yarn wraps around, and draw out a loop (now there should be 3 sts on the hook).
INSTRUCTIONS 3. Re-insert the hook into the 4th ch st. Yarn over and draw out a loop (4 loops on the hook).
4. Yarn over, draw through 3 loops.
5. Yarn over, draw through two loops.
6. Slip st into 4th ch st
7. Ch 4
8. Fold the indicated st forward and work a sc

122

Sample photo on page 61

⑨
⑦
⑤
②

※Sc back post st: Work into back post of the indicated st 2 rows below.

93

126

Sample photo on page 61
SLIP ST HERE

2

1

※Work a slip st into 5th ch st
※For all rows except the 2nd row, when working an sc, fold the picot

8 sts 1 repeat

in the previous row forward and work into the back of the slip st.

127

Sample photo on page 61
5
4

3

2
1

6 sts 1 repeat

133

Sample photo on page 64
4
3
2
1

9 sts 1 repeat

94

54

Sample photo on page 32
A

HOW TO CONNECT
1

11
10

A
5

1

2

3

4

1 repeat
※Connect the loops as shown in the diagram below

B
11
10

B
5
4
3
2
1
1

1 repeat

= Color A = Color B
= Attach yarn
= Cut yarn

※Pattern A is shown upside down
※The beginning edge should have a standing row of sc

= Color C
HOW TO CONNECT AND FINISH THE LOOPS

※The loops should be 1” ( 2.5 cm) long

※Pick up 3 loops on each side of the work to connect

Continuation of 32

Continuation of 51

Sample photo on page 21

Sample photo on page 29

HOW TO WORK
THIS COMBINATION

HOW TO WORK
THIS COMBINATION

1. The slip stitch in the first row should be worked into the back loop of the sc below
2. The rightmost dc st should be worked into half the sc just in front of the slip st
3. The next two dc sts should be worked folding the ch sts forward, working into
the sc sts below.
4. The leftmost dc st should be worked as step 1 on the left side
HOW TO WORK
THIS COMBINATION

1. Right dc should be worked into the sc st in the row below
2. Folding the ch sts forward, work the next two dc into the sc sts below
3. Work the left most dc the same as step 1, on the left side.

1. Work to the left end, ch 6.

2. Insert hook into indicated st and draw
out a long loop.

3. Secure the loop with a slip st.
ch 5, sc1, ch 4, draw out another loop.

4. Secure the loop with a slip st.

HOW TO WORK
THIS COMBINATION

1. Fold the fabric forward and insert the hook under the 3rd ch st
and draw out a loop
2. Yarn over again, insert the hook into the same st, and draw
out another loop.
3. There are 3 loops on the hook. Draw through all 3 loops, yarn over,
and draw through 2 remaining loops.

95

Flower Motif Lariat

PAGE 78

YARN Hamanaka Titi Crochet Dark brown 5 g,

INSTRUCTIONS

Dark Brown (18) 5g, Yellow (7) 25g
HOOK SIZE Hook US B1 [JP 3/0]
FINISHED SIZE: WIDTH 1⅝” (4 cm)
LENGTH 53½” (136 cm)

Work the first row of all motifs and set them aside.
Change colors, and connect the motifs as you work
the second row. All motifs.

LARIAT HOOK US B1 [JP 3/0]

1⅝”
(4c)

CENTER

= Attach yarn
= Cut yarn

1 repeat
About 53½” (136 cm), 30 pattern repeats

※The slip st in the second row should be worked by inserting the hook into 2 sc at a time

COLOR SCHEME
Row 2
Row 1

Botanical Infinity Necklace

Yellow
Dark Brown

PAGE 79

YARN Olympus Emmy Grande Moss Green (288) 20g,

INSTRUCTIONS

Beige (736) 15g, Maroon (778) 5g
HOOK SIZE Hook US 2mm [JP 2/0]
NOTES DIAMETER ⅞” (2 cm), Wrapped button: Make 1
FINISHED SIZE: A 2½”(6.5 cm) LENGTH 30⅜” (77 cm)
B 2½”(6.5 cm) LENGTH 19⅝” (50 cm)

Begin with ch sts. Change the yarn at the designated
place, and continue crocheting. Work one button.
Attach it to the designated place. Use the space in
the 1st pattern in the first row as a buttonhole.

NECKLACE HOOK US 2MM [JP 2/0]
30 st repeat (4⅝” [11.8 cm])

1st leaf
Work into the post

2nd leaf
Work into the post

Flower motif (Beige)

6

6

Slip st into the second
Work a slip st into
the first slip st

2⅛” (5.5c)

9 Brick red
9

Slip st
into the 3rd

6

7

2

Cast on
1

5 st repeat

Button

A: About 30⅜” (77 cm) make 201 ch sts = 6 pattern repeats + 3 sts)
B: About 19⅝” (50 cm) (make 135 ch sts = 4 pattern repeats + 3 sts)

※Work in Moss Green unless specified

FLOWER MOTIF

= Attach yarn
= Cut yarn

⅜” (1c)

WRAPPED BUTTON
HOOK US 2MM [JP 2/0]

※Lastly work 3 ch sts as a “stem”

and cut the yarn.
②

③

⑥
CENTER

①

※Attach yarn to the crocheted stem and begin working
※Worked flat, back and forth. The RS is displayed.

96

※Make a button.
※Cut the tail to about 11¾” (30 cm) and

pass it through the last 8 sts. Pull snug.

Irish Crochet Lace Collar

PAGE 80

YARN Olympus Emmy Grande White (804) 180 g
HOOK SIZE Hook US 2mm [JP 2/0]
FINISHED SIZE: LENGTH 10½” (26.5 cm)
FRONT LENGTH 11” (28 cm)

INSTRUCTIONS

Work the indicated numbers of motifs, blade, and patterns of both A and B. Use some toile fabric to create an
identically sized collar and use that to map your design
and motif placement.
Many of the motifs can be connected and attached while
you are working the background netting.

⅝” (1.5c)

⅝” (1.5c)

21” (53c)

2⅛” (5.5c)

MOTIF CHART
(WS)

④ʼ 3½” (9c)

④

9” (23c)

③ʼ

12⅝” (32c)

COLLAR EDGE3½” (9c)
(PATTERN A)

②

Shoulder line

6¾” (17c)

Shoulder line

⅝”
(1.5c)

Place one flower
1⅛” (3c)

③
③

①

10” (25c)

COLLAR EDGE
(PATTERN A)
¼” [0.5c] (1 row)

BACK
GROUND
NETTING

⑤
Back center

17” (43c)
Ch 145

PATTERN B

※Work all sts in JP 2
※If you would like to use this map, for actual

size, expand 430% on a copy machine.

Padding cord 5

⅝” (1.5c)

PATTERN A COLLAR EDGE 3 st repeat
※Cut a long tail from motif B, fold it as indicated

and use it as padding cord for the next motif.
Continue working along the collar in that manner.

1

Padding cord
※Work the sc sts into a pre-made chain

④ ④ʼ BRAID ※④: 1 ④’: Work 2

1 repeat

Padding
cord

The part that is
now round Slip st

⅞” (2c)

App. 89⅜” (227 cm), 65 pattern repeats
※Wrap the center padding cord around a large pen or dowel rod 17 times.
※④ = While you’re working 2 motif sections and 3 indicated ch sts, connect the blade to B using slip sts.

97

③③ʼ MOTIF C
※Padding cord ③: 59” (150 cm) x 3, ③’: 47¼” (120 cm) x 3.
※The numbers listed are the number of sc sts.
※In the flower portion of the motif, the back post
sc in row 3 should be worked into the indicated
3c)
1⅛” (
sc sts from row 2.
※Starting at ③, work the first 5 flowers as
indicated, coming back to the starting
position and working 2 more flowers on
the back end of the branch motif.

7

7

10

Padding cord

7

7
10

10

End
7

10

Begin

7

HOW TO WORK
THE FLOWER
1)
2)

10
7

20

3)

MOTIF B Work 3

MOTIF A Work 8
⑧
11

⑦
9

⑤
7
20

③

②

①
③

8

④

⑥
⑤

15

1 repeat

Padding cord

= Attach yarn
= Cut yarn
3½”[9c]
※Padding cord: 118⅛” (300 cm) x 3, folded in half.
※The listed numbers are the number of sc sts
※In all, row 6 has 50 repeats.
※Work round 6 into the base legs of round 5 so the stitches float on top like petals

98

2⅛”[5.5c]
※Sc back post sts in row 3 should be worked into indicated sc in round 2
※The back post sts in rounds 5–7 should all be worked 2 rows below

BACKGROUND NETTING

Background netting lines

HOW TO CONNECT THE MOTIFS

8 row repeat

1

2

2 row repeat

99

⑤ PATTERN B (Work 1)

Attach yarn

※Placket (ch 80), border between the placket and hem (ch 2) Hem: ch 548 in succession.
※In the border st between the hem and placket, work two sc into each indicated ch st, then work the next pattern repeat.

12 st repeat
About 89⅜” (227 c) (ch 713 sts (60 pattern repeats)

Border sts between placket and hem

Back center

App. ⅞” (2c)

1

Circle Bag

PAGE 82

YARN Clover Petits Fours , Navy Blue (956) 50g, Blue

INSTRUCTIONS

Green (957), 50g, Dark Purple (951), Bright Yellow
(960), Light Green(958) 15g, Blue (954)
15g, Dark Green (959) 10g
HOOK SIZE Hook US 3mm [JP 5/0]
FINISHED SIZE: WIDTH 7” (18 cm) DEPTH 7” (18 cm)
BOTTOM WIDTH 3½–6” (9‒15 cm)
GAUGE 4” (10 cm) STRIPED PATTERN 19 sts x 15 rows
HANDLES WORKED SC 19 sts x 22 rows

Beginning with the indicating marker, work the
motif in alphabetical order. Finish each section of
motif as you work it. Work the back side in the
same manner. Work the center section of the bag
from the center out, as the chart indicates, and
use the finishing diagram to sew the bag together.

A

E

E

E

(-6 sts)

A

CHART 1
BOTTOM/SIDE
RIGHT SIDE
(STRIPED
PATTERN)

C

App.

F
B
A

D

◇

ws
5 ro

(-6 sts)

5c]
2” [ sts)
(10

B

BOTTOM/SIDE
LEFT SIDE

B

F

E

●

Work 29 sts

1c)

or A

6” (15c) work 29 sts

Work into 3
pattern repeats

F

⅜” (1c)

D

7½” [19c]
(29 rows)

Sew here

HANDLES

3½” [9c] (17 sts)
G

HOW TO FINISH
3½”[9c]
(20 rows)

(-2 sts)

B

G

B

C

B

C

E

A

AIN
E M
Y
BOD
D

E

MOTIF B

F
A

B

10

(17 sts)

Bottom/Side
Last row

Ch6, continue working into the 8 sts from
the base of the side panel, join in the
round and continue working the handle.

100

A

A
D

E

10
9

1

Handles (Start
working here)

A

F

B

F
C

E

D

●

1
29

Center

B
C

REDUCING THE HANDLE WIDTH

C

C

F
B

1

D

F

D

E

Whip stitch together
here
Bottom/side
◆
Left side

F

MOTIF A

D

2” [5c] (12 sts)

※Work both vertically and horizontally
※Sew the two handles ▲▽ together at the indicated markers
※Work all parts using US 3mm [JP 5/0] hook

1

B

Main body of the
handles: Whip stitch
5 rows together.
Whipstich here

A

B

1¾”[4.5c]
(10 rows)

CHART 2
HOW TO WORK THE HANDLES

G

B

HANDLES

◇

2” [5c] (12 sts)

G

Color

Color B Color G
Leave 1 st

Color B Color G

(-2 sts)

Pattern (1 row)

IN PATTERN

E

C

(-6 sts)

B

⅜” (

Col

C

2½” [6.5c]
(9 rows)

C
D

F

5” [12.5c]
(20 rows)

Colo

(-6 sts)

rA

Chart 1

3½” [9c] (17 sts)

D

F

D

Diameter 6¼” (16c)

B

C

work in the round.
◆

E

MAIN BODY (MOTIF A)
Work 2

D

Color B

⅜” (1c)
F

(1row)

C

3½”[9c]
(20 rows)

(-2 sts)

A

B

Diameter
2⅜” (6c)

1¾” [4.5c]

HANDLES (10 rows)
WORKED
IN SC

App
.
[ ⅞”
(6 r 2c]
ows
)

Leave 1 st

(-2 sts)
☆= Ch 6, join and Color B

CHART 2 Color G

2” [5c] (12 sts)

Color G

2” [5c] (12 sts)

BOTTOM/
SIDE
Start working the side panel here

※The bottom, side and handles should be worked symmetrically.

MOTIF A HOOK US 3MM [JP 5/0]

MOTIF B COLOR SCHEME

MAIN BODY (MOTIF B)
HOOK US 3MM [JP 5/0] Work 2

Rows 11–12
Rows 9–10
Rows 7–8
Rows 5–6
Rows 3–4
Rows1–2

⑫
⑪
⑨

Color B
Color F
Color A
Color B
Color D
Color E

Navy Blue
Dark Green
Blue
Navy Blue
Dark Purple
Bright Yellow

⑦
⑤
③

CENTER

※Even rows Work into the front leg of the st in the row below
※Odd rows Work into the back leg of the same row
Color A

HOW TO FINISH THE MOTIFS
Color F

WHIP STITCH

MOTIF B

(WS)

(RS)
Color E
Repeat color scheme twice

MOTIF A

Color D

Color C

※Attach the raised center and whip stitch from the back

BOTTOM/SIDE
(STRIPED PATTERN)
CHART 1

29

Color E →

6
5

Color B

Color D →
25

1
5

Color A
1
20

1

PATTERN

15

※Stitch together the first and last rows to finish the circle
※Leave a 1⅛ yd (1 m) tail at the end of each pattern repeat

to use for the edging

Color G
Color F
Color E
Color D
Color C
Color B
Color A

Blue Green
Dark Green
Bright Yellow
Dark Purple
Light Green
Navy Blue
Blue

Color C →

8

Color G →
5

Color E →
Color D →
Color B →

8 st repeat

MOTIF A, SIDE AND BOTTOM
COLOR SCHEME

Repeat the color scheme 3 times

10

1

Cast on
Center
Ch 29

6 st repeat

※Use Color B unless otherwise specified
※Aside from the indicated 2nd treble crochet, all treble crochet sts are worked through back loop.

The picots in the 1st row are worked by folding the previous row down and working into the back.
101

Vitamin Color Scarf

PAGE 83

YARN Richmore Percent 25 colors 3 g each, Purple

INSTRUCTIONS

(62g) 10g
HOOK SIZE Hook US 3mm [JP 5/0]
FINISHED SIZE: WIDTH 3¾” ( 9.5 cm)
AROUND THE OUTSIDE 45” (114 cm)

Follow the color scheme chart while working the
scarf. Work two pieces in the same manner. Graft
them together. Leave tails of yarn after each color
section is worked, use the tails to attach the pom
poms. Work pom poms as indicated by the chart.

MOTIF A, B

MOTIF A COLOR SCHEME
24

22

B

5

COLOR
Color M
Color L
Color I
Color J
Color I
Color H
Color G
Color F
Color E
Color D
Color C
Color B
Color A

MAIN BODY
Orange
Green Tea
Ochre
Dark Brown
Yellow Green
Grey Purple
Dark Green
Purple
Green
Olive
Navy Blue
Blue
Black

COLOR
Color X
Color W
Color F
Color V
Color U
Color T
Color S
Color R
Color Q
Color P
Color O
Color N

MAIN BODY
Grape
Pink
Purple
Pink Beige
Deep Pink
Maroon
Brick Red
Persimmon
Deep Orange
Brown
Ash tea
Chocolate

COLOR
Color I
Color C
Color D
Color A
Color M
Color K
Color E
Color B
Color L
Color H
Color F
Color G

POMPOM
Yellow Green
Navy Blue
Olive
Black
Orange
Ochre
Green
Blue
Green tea
Grey Purple
Purple
Dark Green

1

26

MOTIF B COLOR SCHEME

25

A
4

2 row repeat
3
2
1

COLOR
Color T
Color Q
Color P
Color X
Color W
Color F
Color O
Color Y
Color V
Color S
Color R
Color U

24 st repeat
※By changing colors every other row, A motif should use 13

different colors and B motif should use 12 different colors.
※Leave an 8” (20 cm) tail at the end of each motif.
POM POM Make 72

CENTER

※To finish the pom poms: Insert the leftover

tails into the center using a darning needle.

102

FINISHING INSTRUCTIONS

While twisting the tail yarn, string the pom pom on the
twisted yarn with a needle, fold the tail in half and let it
twist back on itself until you reach the crocheted fabric,
and weave in your end to secure the tassel to the fabric.

Pom pom

POMPOM
Maroon
Deep Orange
Brown
Grape
Pink
Purple
Tweed
Wine
Pink Beige
Brick Red
Persimmon
Deep Pink

p

E

Color A

24
9.5c] (
3¾“ [ ake
M

sts)

MOTIF A

COLOR I

※Use the tail

CORD

P

☆12, in 12 colors

POM POM

0

Q

R

S

T

SC
AR
(M F RI
OT GH
IF
B) T

A 3¾“ [9.5c] (24 sts)

B

C

D

E

F

G

H

※All should be worked on hook size US 3mm [JP 5 /0]

Diameter ⅝” (1.5c)

COLOR G

M

3¾” [9

B

F

G

H

I

J

K

L

RU

COL
O

★12, in 12 colors

RT

Color N

C

Ap

POM POM

.5c] (24 sts)

D

c

[24

. 9½
”

)

row
s

] (2
6

COL
O

SCARF
J

U

V

F

W

X

MOTIF A

I

Ap
p.
8
2( 4 ⅝”
row [22
s) c]

K

COLOR G

L

COLOR I

M
A

COLOR G

3¾” [9.5c]
(24 sts) Make

Mattress stitch

103

COLOR I

B
C
E

Q

P

O

N

(A)

D

R
S

F

H
I
J

M

L

K

T
U
V
F

SCARF LEFT
(B)

G

W

COLOR G

X

COLOR U

COLOR I

A

COLOR T

B
C
E

(A)

D

F
G
H

L

K

J

M

I

Two Way Shawl

PAGE 84

YARN Naito Shoji Alpaca Peru Camel
HOOK SIZE Hook US 2.5mm [JP 4/0]
FINISHED SIZE: WIDTH 15⅜” (39 cm)
LENGTH 48” (122 cm)
GAUGE 4” (10 cm) flat and in pattern:

INSTRUCTIONS

Work the shawl according to the chart. When the main body of
the shawl is complete, work the edging as indicated. Attach the
crocheted pom poms in place as buttons in the indicated position.
Use the holes in the netting on the opposite side for buttonholes.

(6 pattern repeats)

Work edging into the 22 pattern
repeats along this edge

=

12¼” [31c] (44 rows)

1 repeat

2⅜” (6c) (8 rows) ⅜” [1c] (1 row)

30.5 sts x 14 rows

SHAWL
(STITCH PATTERN)

(7 net repeats)

(1 net repeat)

(7 net repeats)

47¼” (120 cm) ch 365 = 13 repeats + 1 st

(14.5 net repeats)

(13.5 net repeats)

IN PATTERN
Work edging into the 91 pattern repeats along this edge

⅜” [1c] (1 row)

Attach button here

Button Hole

※Work all on a size US 2.5mm [JP 4/0] hook

WORK IN PATTERN

BUTTON (CROCHETED BALLS) 2

26
25

CENTER

20

※Leave a 8” (20 cm) tail, thread the tail through the last row of sts,

15

26 row repeat

pull tight and draw through the center to hide the leftover yarn.

EDGE PATTERN
1

10

Work into the top 2 strands
and 1 strand of the post

5

1

Cast on
28 row repeat

104

1 repeat

Start

105

SHAWL

1

Edge Pattern

1

5

10

15

20

25

30

35

40

44

1

5

8

This is where you attach the
button

4 st repeat

= Attach yarn
= Cut yarn

Sculptural Flower Motif Vest

PAGE 86

YARN Naito Shoji Alpaca Peru Natural (100) 170g,

INSTRUCTIONS

Beige (202) 130 g, Alpaca Naska Dark brown (211)
75g, Brown (204) 45g, Lopi Beige (86) 60g,
Dark brown (53) 40g
HOOK SIZE Hook US J10, US E4, US 2.5mm [JP 10/0,
JP 6/0, JP 4/0]
FINISHED SIZE: BUST 34” (86 cm), LENGTH 16½”
(42 cm), SHOULDER WIDTH 13” (33 cm)

Crochet the required number of motifs in their
correct color schemes. Lay out the motifs with back
side up and where the motifs overlap, slip stitch
them together where appropriate. Keeping in mind
the elasticity of crocheted fabric, make sure the
motifs are not spaced too far apart.

ARRANGEMENT OF THE MOTIFS (FROM THE BACK SIDE)
3” (7.5c)

7” (18c)

3” (7.5c)
3⅛” (8c)

3” (7.5c)

3” (7.5c)

3⅛” (8c)

D-①

⅞” (2c)

2c

⅞” (2c)
C-①

D-①

D-①

E

D-①
C-①

D-②
C-②

D-①

D-②

D-①

7” (18c)

B
D-①

C-①

D-②

A

D-①
E

MOTIF C-②

C-②

C-①

D-①

D-①

MOTIF B

D-①

MOTIF

A

B

D-①

C-①

D-②

C-①

6½” (16.5c)

D-①

C-②

MOTIF E

8” (20.5c)

D-①

D-①

C-①

A
C-②

C-②
B

C-①

B

C-①

C-①

C-①
C-②

2⅛” (5.5c)

34” (86c)
※In some places, the motifs will overlap. Use a slip stitch to attach the motifs in an invisible manner.

MOTIF C HOOK US J10, US E4 [JP 10/0, JP 6/0]
ALPACA NASKA, LOPI
⑥
⑤

MOTIF C COLOR SCHEME

②

CENTER

※In the 5th row, the 4 coil stitches are worked into the

ch space in the 4th row. After the 3rd ch st, the slip st
should be worked into the ch sts in the 4th row.
※Work the Lopi motifs using a size US J10 [JP 10/0] hook.
Work the Alpaca Naska motifs using a size US E4 [JP 6/0] hook.
106

3½” [9c]

④

Rows 5·6
Row 4
Rows 1–3

C– ① Work 11
C– ② Work 7
Alpaca Naska Dark Brown
Lopi Beige
Lopi Dark Brown
Alpaca Naska Dark Brown

= Coil stitch worked with 13 wraps.

See page 109 for instructions on how to work this stitch

15½” (39.5c)

E

15” (38c)

D-①

MOTIF A

7” (18c)

B

MOTIF A HOOK US 2.5MM [JP 4/0] ALPACA PERU 4
15 st repeat
⑮

2⅛” (5.5c)

⑫

⑩

⑧

⑥

④

②
◎

CENTER

MOTIF A COLOR SCHEME
Rows 4–15
Rows 1–3

Natural
Beige

1⅝” (4c)

◉

INSTRUCTIONS
1. Work the sts in the box from right to left
2. Remove the hook from the left most stitch, insert the
hook into the back loop of the right most stitch (marked
with the black circle)
3. Reinsert the hook into the live st from the left most stitch
in the box, draw the loop through the back loop and ch1
to close.
※Work in the same manner regardless of how many
sts are in the gray box

MOTIF B HOOK US 2.5MM [JP 4/0] ALPACA PERU BEIGE 6
MOTIF D HOOK US E4 [JP 6/0]
ALPACA NASKA

⑲
⑯
⑭
⑫
⑩
⑧

2⅜” (6c)

⑥

※D- ①: Make 16 brown motifs
D-②: Make 4 dark brown motifs

4¾” (12c)

③

MOTIF E HOOK US E4 [JP 6/0]
ALPACA NASKA BROWN 4

CENTER

2½” (6.5c)

Row 88… 88 sts
Row 17… 80 sts
Rows 15·16… 72 sts
Rows 12·13… 48 sts
Row 11… 36 sts
Rows 6–10… 48 sts
Rows 3–5… 36 sts
Rows 1·2… 24 sts

※Row 5 should be worked into row 4 by folding row 4 forward and working into the back loop
※Row 12 should also be worked into the back loop of row 4 to create a 3D effect

107

Crochet Basics

WORKING THE BASIC STITCHES
Chain Stitch (Ch St)

1 st chain
stitch

3rd chain
stitch

❶ Insert hook into first loop
as indicated and yarn over as
indicated by the arrow.

❷ Grab the yarn with the
hook and draw through a loop
as the arrow indicates.

❸ Yarn over again, draw
through another loop.

❹ Continue working in this
manner until you have created
the desired number of stitches.

❶ Insert the hook into the
two strands at the top of the
previous row, as indicated by
the arrow.

❷ Yarn over, draw through a
loop.

❸ In the second st, insert the
hook into the two strands at
the top of the st. Draw through
a loop.

❹ Continue working in the
same manner where indicated.

❷ Yarn over the hook, draw
through a loop.

❸ Yarn over again, draw out a ❹ This is the completed sc.
loop through both loops resting Continue working steps 1–3 to
on the hook.
complete the row.

❷ Yarn over, draw through as
the arrow indicates.

❸ Yarn over the hook, draw
through all three loops resting
on the hook.

Slip Stitch (Slip St)

Single Crochet (Sc)
Symbol used by Nihon-Vogue
Standing
chain 1

Common symbol for
Japanese crochet

❶ Insert the hook into the
two strands at the top of the
very first stitch, as indicated
by the arrow.

Half Double Crochet
(Hdc)
Standing
chain 2

❶ Yarn over the hook, insert
the hook into the two strands
at the top of the stitch in the
row below, as the arrow
indicates.
108

❹ This is the completed hdc.
Repeat steps 1–3 to complete
the row.

Double Crochet
(Dc)

Standing
chain 3

❶ Yarn over the hook.
❷ Yarn over, draw
Insert the hook into the
through a loop as the
two strands at the top of
arrow indicates.
the stitch in the row below,
as the arrow indicates.

❸ Yarn over, draw a loop ❹ Yarn over, draw a loop ❺ This is the completed
through two loops on the through the remaining two dc. Repeat steps 1–4 to
hook.
loops on the hook as the
finish the row.
arrow indicates.

Treble Crochet
(Tr)
Standing
chain 4

❶ Yarn over twice, Insert the
hook into the two strands at the
top of the stitch in the row below,
as the arrow indicates.

❷ Yarn over, draw through a
loop as the arrow indicates.

❸ Yarn over again, draw through ❹ The completed tr. Repeat
two loops, yarn over, draw
steps 1–3 to complete a row in
through one loop, yarn over one
this manner.
last time and draw through
remaining loops. Follow the
arrows, in numerical order.

Double Treble
Crochet (Dtr)
Standing
chain 5

❶ Yarn over hook three
times and insert hook into
the top two strands of the
stitch in the row below.
Treble Treble
Crochet

❷ Yarn over, draw a
loop through as the arrow
indicates.

❸ Yarn over, draw a
loop through the first two
loops on the hook.

❹ Yarn over, draw a loop
through the next two loops
as the arrow indicates, yarn
over and in numerical order
draw through a loop as each
arrow indicates.

❺ This is the completed
dtr. Continue working the
row by repeating steps
1–4.

❷ Draw a loop through
the strands at the top of
the stitch.

❸ Yarn over and draw a
loop through the first two
loops on the hook.

❹ Yarn over again, draw
through the next two loops
on the hook, and continue
in numerical order, yarn
over, and draw through as
the arrows indicate.

❺ This is the completed
treble treble crochet.
Continue working stitches
in the same manner by
repeating steps 1–4.

Wrap 4
times
Standing
chain 6

❶ Yarn over 4 times.
Insert the hook into the top
two loops of the stitch in
the row below, as the arrow
indicates.
Coil Stitch

Wrap 7
times

Chain 1
Draw
through
8 loops

Chain 1

❶ Yarn over the hook 7
times and insert the hook
as the arrow indicates.

❷ Yarn over, draw a
loop through the stitch as
the arrow indicates.

❸ Yarn over again, draw ❹ Yarn over, draw
❺ This is the completed
through all loops except the through the last two loops coil stitch.
last, as the arrow indicates. on the hook.
109

Single Crochet
into Back Loop
(Sc into Blo)

Single crochet
through Back Loop
(Sc tblo)

2nd row
Standing
chain

Standing
ch 1- slip st

❶ Insert hook into blo as ❷ Yarn over, draw
indicated by the arrow.
through a loop as indicated by the arrow.

❸ Yarn over again, draw ❹ This is the completed
through the two remaining sctblo. Continue working
loops on the hook.
in this manner, inserting
the hook into the back leg
of the top of the stitch.

Insert hook into the stitch
indicated by the arrow.

Half Double Crochet
through Back Loop
(Hdc Tblo)

❶ Yarn over once and insert
hook into the back loop as
indicated by the arrow.

❷ Yarn over and draw a loop
through 1 loop.

❸ Yarn over and draw a loop
through all three loops resting
on the crochet hook.

❹ This is the completed hdc
tblo. To complete the following
sts, continue repeating steps
1–3.

❶ Yarn over and insert hook
into the indicated strand.

❷ Yarn over again and draw a
loop through one loop as indicated by the arrow.

❸ Yarn over again and draw a
loop through the first two loops
on the hook. Then yarn over
again and draw through remaining loops as indicated by the
second arrow.

❹ This is the completed dc
tblo. To create more of these
stitches, repeat steps 1–3.

❶ Work 1 sc into top loops of
the st from the previous row.

❷ Insert hook into same stitch
and yarn over.

❸ Work a second sc into the
same stitch in the same manner.

❹ 2 scs worked into the same
stitch. 1 stitch increased.

❶ Work 1 sc into top loops of
the st from previous row.

❷ Work one more sc into the
same st.

❸ Work one more sc into the
same stitch as the arrow
indicates.

❹ 3 sts worked into the same
stitch. 2 sts increased.

Double Crochet
through Back Loop
(Dc Tblo)

2 Single Crochet
(Sc) into Same St

3 Single Crochet
(Sc) into Same St

110

2 Half Double
Crochet [Hdc] into
Same St

Chain 1
Standing
Base Chain ch 2

❶ Yarn over hook and
insert hook into back loop
of chain and draw through
as the arrow indicates.

❷ Work 1 hdc.

❸ Yarn over hook and
work one more hdc in the
same manner.

❹ Complete the hdc as
the arrow indicates.

❺ 2 hdc into same
stitch. 1st increased.

2 Double Crochet
(Dc) into Same St
Standing
ch 3
Chain 1 Base Chain

❶ Insert hook into back loop of
the chain sts in the base chain.

❷ Work 1 dc. Yarn over.

❸ Insert the hook into the
same st. Work the second dc.

❹ 2 dc into same st. 1st
increased.

❷ Work another dc into the
same loop as indicated.

❸ Work a third dc into the
same loop as indicated.

❹ Completed 3 dc into one st
completed. 2 sts increased.

❸ Insert the hook into the
same stitch as indicated and
work another dc.

❹ The completed 1dc, 1 ch,

❸ Work a dc st, ch 1.

❹ Insert hook into same ch
space and work another dc.

3 Double Crochet
(Dc) into Same St
Standing
ch 3
Chain 1 Base Chain

❶ Work a dc into the back loop
of the indicated stitch of the
base chain.

2 Double Crochet
[Dc] into Same St

※1 ch worked between

2 dc sts

Chain 1
Standing
ch 3
Chain 1 Base Chain

❶ Work a dc into the back loop
of the indicated ch st. yarn over.

2 Double Crochet
[Dc] into Same
Ch Space

Standing
ch 3

❷ Ch 1 and yarn over again.

1dc into same st.

Draw through a loop

※Work into ch space

❶ Yarn over, insert hook into
the chain space as the arrow
indicates.

❷ Yarn over, and draw through
a loop.

111

5 Double Crochet
[Dc] into Same St

Work 5 dc
into same st

Sc 1

Ch 2

Insert the hook into
the same stitch

Insert hook
into back
loop

Standing
ch 1

❶ Yarn over, insert hook into
back strand of ch st.

Ch 2

❷ Dc 1.

5 Double Crochet
[Dc] into Same
Ch Space

❸ Work 4 more dc sts into the
same st, in the same manner.

Insert the
crochet hook
into ch space

※Work into the

same ch space

❶ Work 1 dc into the indicated ch space.

❷ Work 4 more dc into the same ch
space.

❸ In this diagram, 1 sc st has been
worked into the next ch space.

Back Post Single
Crochet [BPsc]

❶ Insert hook from back to
front around the post of the st 2
rows below.

❷ Yarn over hook and pull yarn
out to the current level.

❸ Yarn over and draw through 2 ❹ To work another BPsc, skip
loops on the hook.
one and work into the second sc
from the previously worked st.

Front Post Double
Crochet [FPdc]

❶ Yarn over hook and
❷ Yarn over and draw
insert hook from front to through a loop as the
back around the post of
arrow indicates.
the dc of the previous row.

❸ Yarn over again and
draw a loop through 2
loops on the hook.

❹ Yarn over again and
draw through the final
loops.

❺ To work the next
stitch, skip one stitch from
the previous row and work
into the second stitch from
the stitch just worked.

❶ Yarn over hook and
❷ Yarn over, draw
insert hook from back to through a loop as the
front around the post of
arrow indicates.
the dc of the previous row.

❸ Yarn over and draw
through two loops as the
arrow indicates.

❹ Yarn over and draw
through the final two
loops.

❺ The completed BPdc.

Back Post Double
Crochet [BPdc]

112

Single Crochet 2
Together (Sc2tog)

❶ Insert hook into the both ❷ Insert hook into the next
loops of the previous row as sc as arrow indicates and
shown and yarn over hook.
draw through a loop.
Draw a loop through.

❸ Yarn over and draw
through all 3 loops on the
hook.

Half Double Crochet
3 Together
(Hdc3tog)

❹ The completed sc2tog.

1st
3rd 2nd
stitch
stitch stitch
Chain 1
Base
chain Standing
ch 2

❶ Yarn over and Insert the
hook into the back loop of the
indicated ch stitch. Draw out a
loop.
Double Crochet 2
Together (Dc2tog)

❷ Yarn over and Insert the
hook into the back loop of the
indicated ch stitch. Draw out a
loop.

Draw through
a loop

Incomplete dc

❸ Yarn over and draw through
all 6 loops resting on the
hook. Ch 1 to close.

Unfinished
2 dc

❹ The completed hdc3tog.

Draw through
to close

Standing
chain 3
Base chain

❶ Work one unfinished dc to
the state as shown in the
diagram, yarn over and insert
hook into the back loop of the
next ch st.

❷ Draw through all loops on
the hook to close.

Double Crochet 4
Together (Dc4tog)

❸ Draw through all loops on
the hook to close.

❹ The completed dc 2 tog.

Incomplete
dc 4 sts
Chain 1
Standing
chain 3

❶ Yarn over hook.

❷ Work one incomplete dc.
Work 3 more dc in the same
manner into the next three sts
as indicated by the arrows.

Double Crochet
Bobble Sts

Incomplete
dc 2 sts

❸ Yarn over and draw through
all loops resting on the hook.

❹ Draw through all loops to
close. The completed dc4tog.

Incomplete dc
2 sts

Chain 2
Standing
chain 3

❶ Work an incomplete dc into
the two strands at the top of the
st in the row below. Yarn over
hook.

❷ Work one more incomplete
dc into the same st. Skip over 3
sts in the row below.

❸ Work two more incomplete
❹ The completed puff st (dc 4
dc sts into the 4th st as indicated. tog).
Yarn over hook, draw a loop
through all 5 loops resting on the
hook.
113

Half Double Crochet
3 Tog into Same St
(Hdc 3 Puff St)

1st
3rd 2nd stitch
stitch stitch
1st stitch
Standing
ch 2
Chain 1 Base chain

❶ Yarn over hook and insert
hook into back loop of indicated
st in the base chain.
3 Double Crochet
[Dc] Puff St

❷ Draw out a loop, yarn over,
insert hook again and draw out
another loop. Do this step one
more time.

❸ Yarn over hook and draw a
loop through 7 loops resting on
the hook.

❹ The completed 3 hdc puff st.

Incomplete
dc 3 sts

Chain 2
Standing
ch 3

※Work into the ch space

❶ Yarn over hook. Insert hook
into ch space indicated by the
arrow.

❷ Work an incomplete dc.

❸ Work 2 more incomplete sts
in the same manner. Yarn over
hook and draw a loop through all
loops resting on the hook.

5 Double Crochet
[Dc] Puff St

❹ The completed 3 dc puff st.

Incomplete
dc 5 sts

1st stitch
Standing
ch 3
Chain 1 Base chain

❶ Yarn over hook, insert hook
into back loop of indicated st on
base chain.

❷ Work an incomplete dc st.
❸ Yarn over hook and draw a
work 4 more incomplete dc sts as loop through all loops resting on
the arrow indicates.
the hook.

Half Double
Crochet [Hdc]
3 Puff St
Worked into an Sc

Chain 1

Incomplete
dc 3 sts

Draw out the loop

Work 1 sc

❶ Yarn over hook and
insert hook into indicated
post of the previously
worked st.

5 Half Double
Crochet [Hdc]
Popcorn St

❹ The completed 5 dc puff st.

❷ Draw out a loop and
yarn over hook. (incomplete hdc)

❸ Repeat this step two
more times. Yarn over
hook.

❹ Draw a loop through
all loops resting on the
hook and insert hook into
indicated st (2 sts in front
of previously worked st.

❺ Ch 1. Work 1 sc.

The bobble will show on the
opposite side (Row 2 WS)

Row 1 (RS)

Draw a loop through
Draw a loop through
Chain 1
Chain 1
Standing
ch 2
Base chain

Standing
ch 2

Chain 1

❶ Work 5 hdc sts and remove
hook from loop. Insert hook into
the top loops of the 1st hdc from
front to back, then again into the
loop.
114

❷ Draw a loop through the top
of 1st st.

❸ Work 5 hdcs and remove
hook from loop. Insert hook into
the top loops of the 1st hdc from
back to front then again into the
loop and draw loop through the
top of 1st as shown.

❹ Yarn over hook and ch1 to
close the st. The completed 5hdc
popcorn.

Double Crochet
[Dc] 5 Sts Together
Popcorn St

Row 1 (RS)
Chain 3 Slip stitch

Draw a loop through
Chain 1
Standing
ch 3
Chain 1
Base chain

❶ Work 5 dcs into the back
loop of ch st and remove hook
from loop. Insert hook into the
top loops of the 1st dc from front
to back then again into the loop.
5 dc Popcorn into the Same
Space (To Be Seen on
the Back Side)

❶ Work 5 dc into 1 st. Remove
the hook from the live loop and
insert it as indicated by the arrow.

5 Double Crochet
[Dc] into Same
Space Popcorn St

❷ Draw loop through the top of
1st st as shown.

❸ Yarn over and ch 1.

❹ The completed 5dc popcorn.

Draw through
a loop to close

❷ Draw through a loop as
indicated.

❸ Work the next st. (the
popcorn st will be seen on the
reverse side)

(RS)
Draw the loop through the
first loop on the hook

Chain 1

Standing
ch 3

※Work into the ch space

❶ Work 5 dc sts into the ch
space in the row below.

❷ Remove the hook from the
live st. insert it into the two
strands at the top of the first dc
and insert it through the back of
the live st as the arrow indicates.

❸ Draw the live loop through
the original loop.

❹ The completed 5 dc popcorn
st into ch space.

❷ Yarn over and draw through
as shown.

❸ The completed ch3 slip st
picot.

st.

Ch 3 Picot with a
Slip St
Chain 3

❶ Ch 3, as the arrow indicates,
insert the crochet hook into the
strands indicated at the base of
the previously worked sc.
Ch 3 Slip St Picot
(between ch sts)

❹ Continue by working the next

Chain 2

Draw through
Chain 3
Chain 3

※When working

Crocheted netting

❶ After working the first 3 ch
sts, work 3 more ch sts and
insert the hook into the half
stitch indicated.

❷ Yarn over and draw through
as shown.

❸ The completed picot.

❹ Continue working ch sts.

115

Crossed Double
Crochet
(Crosse Dcs)
Dc 1x1 Cross

Yarn over once
more and draw
through

Chain 1
Standing
ch 3

❶ After working one double
crochet in the 2nd stitch from the
beginning of the row, yarn over
and insert the hook into the
stitch behind the first double
crochet.

❷ Folding the first stitch
forward a bit, yarn over again and
draw through a loop.

❸ Yarn over, draw through both
loops on the hook.

❹ This is the completed stitch.

❷ Yarn over hook, insert hook
into the indicated st and draw
through a loop. Yarn over hook
once more.

❸ First, draw a loop through
the first two loops resting on the
hook, yarn over once more and
draw a loop through two more
loops.

❹ The completed 1x1 LC dc.

1x1 Lc Dc

※Right stitch over left

Insert hook into
stitches 1 and 2
as the arrow
indicates

Chain 1
Standing
ch 3

❶ Work a double crochet
stitches in the order the arrows
indicate.

1x1 Rc Dc

Insert the hook
into the
stitches in
number order
※Left stitch over right as indicated

Yarn over
slip st

Chain 1
Standing
ch 3

❶ Work dc sts into each of the
sts as indicated by number.

❷ After working the first dc st,
work the second by folding the
work forward and working from
behind the first worked st.

❸ Draw through and complete
the second dc.

❹ The completed 1x1 RC dc.

Sc Loop St
Tension the
yarn on your
middle finger
Standing
ch 1

❶ Insert hook into both loops of
indicated st.

Draw through
a loop

Yarn over

Tension the yarn
on your middle
finger

❷ Tension the yarn on the middle
finger.

❸ Draw the yarn through as the
arrow indicates.

Draw through
to close
Tension the yarn
on your middle
finger

❹ Work dc sts into each of the
sts as indicated by number.

116

❺ Yarn over once more and
repeat by holding down yarn with
your middle finger.

❻ Continue working these sts
by repeating steps 1–5

❼ The loops will be shown on
the WS of the fabric.

Solomon’s Knot
(Love knot)

Draw
through

Draw
through
Single
crochet

❶ Chain 2, draw out a
long loop on the second
stitch. Yarn over hook
and draw through.

❷ Insert hook into the
back loop of the long
chain.

❸ Yarn over again and
draw through 2 loops to
work a single crochet.
This makes one stitch.

Work 1 single
crochet

❹ Pull up the loop on
the hook. Repeat steps
1–3.

❺ Continuing from row 1,
insert hook into the single
crochet stitch.

Work into this st

Skip this stitch

❻ Yarn over and draw through. ❼ Yarn over again and draw
through two loops. (single
crochet)

❽ This creates one pattern repeat.
Skip one single crochet, and work
the next.

❾ Row 3: Make 4 turning chain
stitches and work 1 stitch. Insert
hook into the two strands on top
of the single crochet of the
previous row.

Single Crochet Color Work

❶ Switch to CC instead of MC when
drawing through for the last time.

❷ Yarn over hook and draw through by ❸ Work single crochet with CC.
wrapping both strands.

❺ Work single crochet with MC.

❻ Continue working by changing colors in ❼ At the end of the row, work one standing chain.
the same way.

❽ Beginning of the second row on WS.

❾ Bring CC to the WS of work. Work
single crochet as indicated in the same
manner as the first row.

⓫ Row 3: (RS) Continue working
the yarn not in use into the single
crochets of the opposite color.

❹ When drawing through with CC for
the last time,

❿ Work until the end of the row, work one standing
chain.

⓬ At the end of the 3rd row: change ⓭ At the end of the row, ch 1.
colors when drawing through for the
last time at the end of the row.

⓮ 4th row: (WS) Continue working
in the same way.

117

Casting on the Center Ring
Tail

Pinch with your thumb
and index finger

Working yarn

❶ Wrap the yarn twice around
your left index finger.

❷ Slide the loops off of your
finger and pinch the loop with
your thumb and index finger to
hold in place.

❸ Tension the working yarn
with your left hand. Insert the
crochet hook into the two
loops, yarn over and draw
through a loop.

❹ Yarn over, draw through a
loop as the arrow indicates.

❺ This is one completed
stitch.

Tail

❻ Yarn over and chain 1. ❼ This becomes the
standing chain.

❽ Insert the crochet
hook into the loop once
more as the arrow
indicates. Yarn over and
draw through a loop.

❾ Yarn over again and
draw through all remaining loops.

Insert the hook under both
strands of the stitch

Gently tug in the
direction the arrow indicates

⓬ Find the original tail yarn.
If you gently tug on this yarn,
the ring will close snugly.

❿ This diagram shows
the completed single
crochet. Complete the
specified amount of single
crochet stitches.
Working yarn

⓫ Find the tail to
tighten the center of the
ring.
The closed row with
the slip stitch

Pull to close

⓭ Pull the tail and close the
ring.

⓮ Find the top of the very

⓯ The first row is complete.

⓰ Chain 1.

first single crochet worked,
and insert the crochet hook
under the two strands of that
stitch. Yarn over and draw
through all loops on the hook.

Ch Stitch Circular Cast On

Chain 6

Insert hook into
the top loop of
the indicated
stitch and the
back loop

Slip stitch

Completed slip stitch

First stitch

❶ Chain the appropriate
number of stitches.

❷ Insert hook into back loop
of the first chain.

❸ Yarn over hook and draw
❹ Chains formed into a circle.
through both loops (slip stitch).

❺ Chain 1.

Insert hook into both loops at
the top of the stitch and slip
stitch the ring closed
Wrap the chain
circle as you
work stitches

Standing chain

❻ Insert the hook into the
chain ring and yarn over. Work
stitches and wrap the original
chain ring as you go.
118

❼ Yarn over, draw through
both loops at the same time
(single crochet).

❽ A completed single crochet ❾ When the required number
stitch.
of stitches is complete, insert
the crochet hook into the first
single crochet stitch.

❿ Draw through all loops at
once. (Slip stitch).

Crocheting with
Beads
Chain Stitch

❶ After stringing the beads

❷ Repeat step 1. The beads

on the working yarn, pull one
bead to the base of the last
stitch. Reach over the bead,
yarn over the hook and pull
the stitch through the live
stitch on the hook.

will rest on the horizontal
strand at the back of the
stitch.

Double Crochet

Beaded Single
Crochet

❶ In the row below, draw
out a single loop. Move one
bead next to the loop. Reach
over the bead, yarn over and
draw through both loops.

❷ The beads will rest on
the back of the fabric.

❶ Work the double crochet
as usual until the last step.
Move a bead near the second
loop, reach over the loop, yarn
over and draw a single loop
through both remaining loops.

❷ The beads rest on the
back of the fabric.

How to Join the Motifs (Using Slip Stitch)

Slip
stitch

Ch 2
1st piece

2nd piece

❶ Insert the crochet hook into the
space around the chain stitches
indicated by the arrow.

❷ Yarn over and draw a loop through
the space and existing stitch on the
hook.

❸ The completed stitch.

“Join as you go” Motif Connecting Method Using Single Crochet
1st piece

Chain 2

Insert hook into space
indicated by the arrow

2nd piece

❶ Insert hook into the space created by
the chain stitches as the arrow indicates.

❷ Yarn over and draw through a single
loop.

❸ Yarn over.

Draw through
all remaining
loops

❹ Draw through the two remaining loops.

❺ The completed single crochet connection.
119

BOOKS TO SPAN THE EAST AND WEST
Our core mission at Tuttle Publishing is to create books which bring people together one page at a time.
Tuttle was founded in 1832 in the small New England town of Rutland, Vermont (USA). Our fundamental
values remain as strong today as they were then—to publish best-in-class books informing the Englishspeaking world about the countries and peoples of Asia. The world is a smaller place today and Asia’s
economic, cultural and political influence has expanded, yet the need for meaningful dialogue and
information about this diverse region has never been greater. Since 1948, Tuttle has been a leader in
publishing books on the cultures, arts, cuisines, languages and literatures of Asia. Our authors and
photographers have won many awards and Tuttle has published thousands of titles on subjects ranging
from martial arts to paper crafts. We welcome you to explore the wealth of information available on Asia
at www.tuttlepublishing.com.

Published by Tuttle Publishing, an imprint of Periplus Editions (HK) Ltd.
www.tuttlepublishing.com
KAGIBARIAMI NO MOYOU 156 SEN (NV70124)
Copyright © Keiko Okamoto/NIHON VOGUE-SHA 2012
All rights reserved.
English translation rights arranged with NIHON VOGUE Corp. through
Japan UNI Agency., Tokyo
Photographers: Hitomi Takahashi, Yoko Kimura, Kana Watanabe
English Translation ©2021 Periplus Editions (HK) Ltd.
Translated from Japanese by Cassandra Harada
ISBN 978-0-8048-5406-1; ISBN 978-1-4629-2241-3 (ebook)
It is not allowed to reproduce and sell (in stores, via Internet auctions
etc.) the items included in this book. Please bear in mind that this
book is only for enjoying crafts.
All rights reserved. No part of this publication may be reproduced or
utilized in any form or by any means, electronic or mechanical,
including photocopying, recording, or by any information storage and
retrieval system, without prior written permission from the publisher.
Original Japanese edition
Design Okamoto Keiko
Crafts people involved in sample production Idomoto Sayuri;
Kasakawa Miyoko; Kido Noriko; Kojima Fumie; Saeki Sugako; Suzuki
Emiko; Seino Kanae; Tsuchitani Miyuki; Nakagawa Yoshiko; Nakajima Etsuko; Nakamura Chihoko; Hariguchi Hisako; Hibi Satoko;
Matsuoka Kazue; Matsutomi Chikako; Matsubara Etsuko; Kashihara
Satomi; Miyamoto Hiroko;Miyamoto Mayumi; Yamazaki Yukie
Book Design Washizu Design Jimusho
Photography Takahashi Hitomi (Cover Art) P88, Kimura Yoko
(swatch photos), Watanabe Kana (Page 88 yarn explanations)
Styling Enai Tomomi, Tracing Matsumoto Yumiko
L&B Cooperative Editing/ L&B Ishihara Shoko; Ide Tomoko;
Enomura Michiko.
Editing/NV Planning Toshie Yano; Usami Motoko.

Printed in Singapore
2101TP
23 22 21
10 9 8 7 6 5 4 3 2 1
®

TUTTLE PUBLISHING is a registered trademark of Tuttle Publishing,
a division of Periplus Editions (HK) Ltd.

120

AUTHOR PROFILE

Okamoto Keiko resides in Kobe, Japan and owns atelier K’sK.
She works across several mediums including knit, crochet,
sewing, weaving, spinning and embroidery. She develops
design work based in current trends and her own ideas.
In addition to teaching at Nihon Vogue Academy, she
holds classes, teaches workshops, produces exhibitions
(Tokyo, Milan, etc.) fashion shows, and participates in a wide
range of other activities such as providing design samples
to manufacturers and publishers, and makes occasional
television appearances.
Along with this book, Ms. Okamoto has also written
several books, including Knit Designs for Me, Adult Winter
Knits and Spring and Summer Shawls and Cowls.

Distributed by:
North America, Latin America & Europe
Tuttle Publishing
364 Innovation Drive
North Clarendon, VT 05759-9436 U.S.A.
Tel: 1 (802) 773-8930
Fax: 1 (802) 773-6993
info@tuttlepublishing.com
www.tuttlepublishing.com
Asia Pacific
Berkeley Books Pte. Ltd.
3 Kallang Sector #04-01, Singapore 349278
Tel: (65) 6741-2178
Fax: (65) 6741-2179
inquiries@periplus.com.sg
www.tuttlepublishing.com