/


Author: Special Tactics LLC
Tags: military affairs special services combat operations
ISBN: 978-0-9984555-4-9
Year: 2021


Text
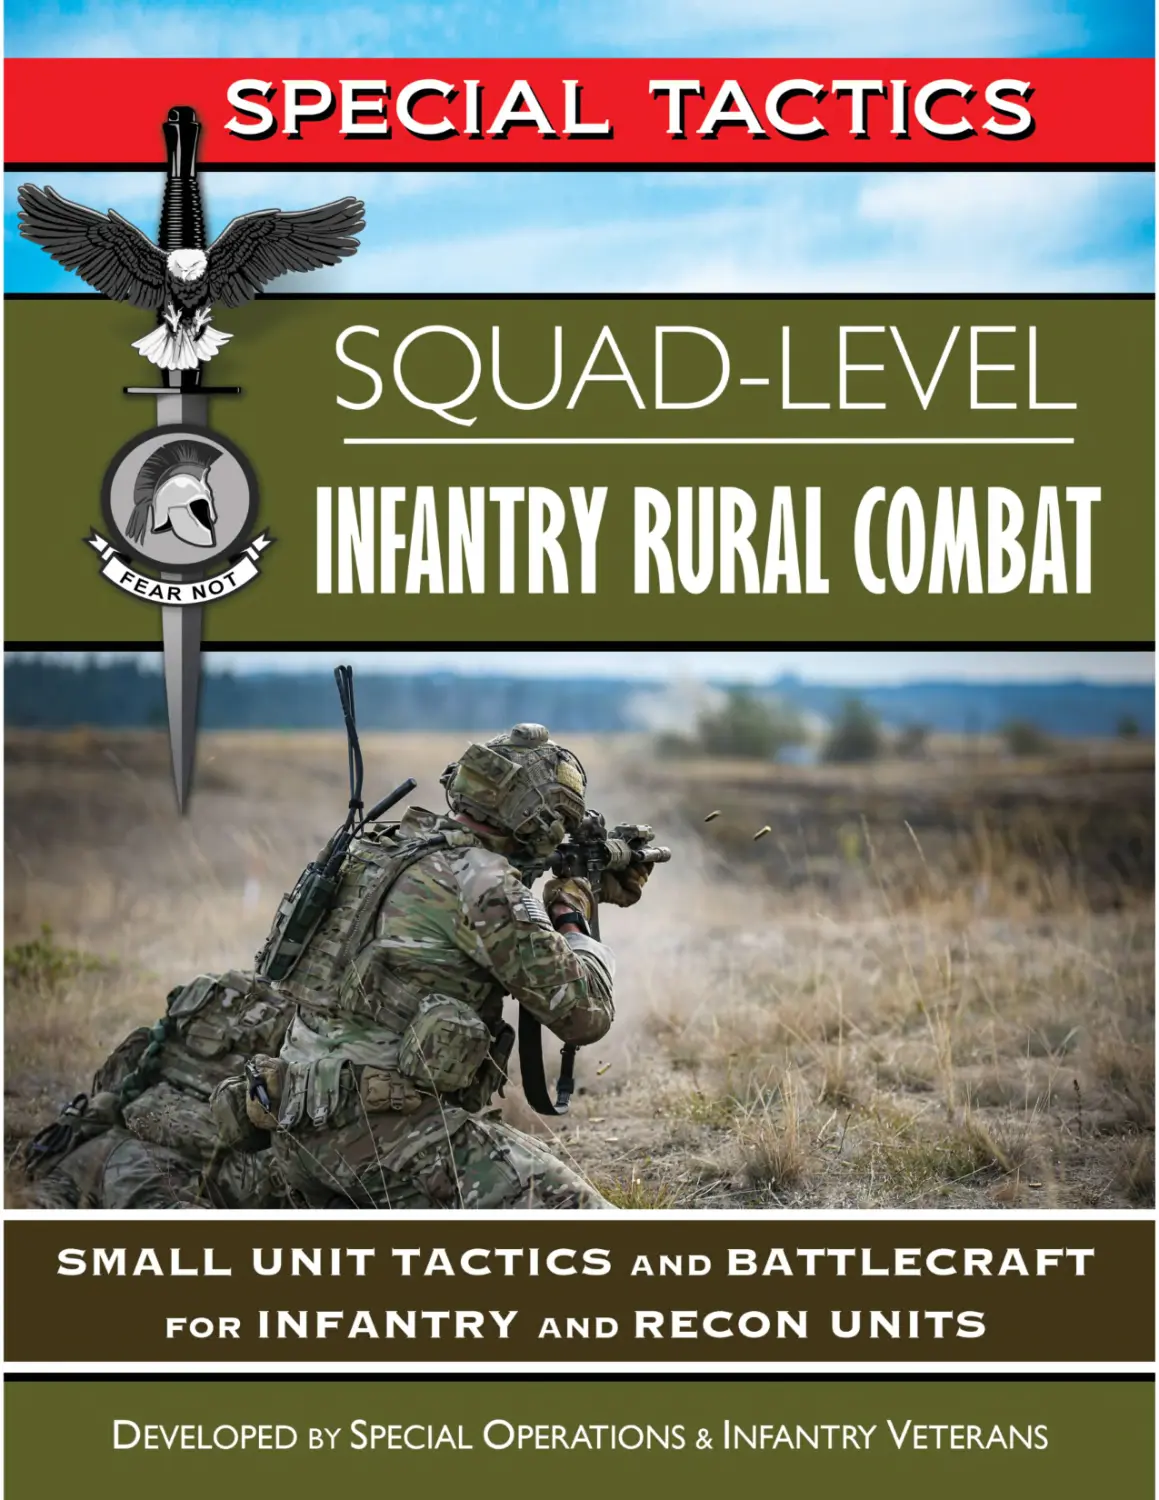
                    SQUAD-LEVEL
INFANTRY RURAL COMBAT
SMALL UNIT TACTICS AND BATTLECRAFT
FOR INFANTRY AND RECON UNITS

Special Tactics, LLC
Special Tactics and the Special Tactics Logo are registered trademarks of Special Tactics, LLC
© 2021 by Special Tactics, LLC
ISBN 978-0-9984555-4-9

Except as permitted under U.S. Copyright Law, no part of this book may be reprinted,
reproduced, transmitted, or utilized in any form by any electronic, mechanical, or other means,
now known or hereafter invented, including photocopying, microfilming, and recording, or in
any information storage or retrieval system, without written permission from Special Tactics,
LLC.

2

Table of Contents
COURSE OVERVIEW: INFANTRY COMBAT VS. INFANTRY DOCTRINE........................................... 7
WHAT THIS BOOK COVERS .................................................................................................................. 8
WHO THIS BOOK IS FOR AND HOW TO USE IT ......................................................................................... 9
INTRODUCTION: THE FOUR PILLARS OF SURVIVAL .................................................................. 11
PROPER MINDSET ........................................................................................................................... 11
SITUATIONAL AWARENESS ................................................................................................................. 11
SKILL PROFICIENCY ........................................................................................................................... 12
PHYSICAL FITNESS ............................................................................................................................ 12
INFANTRY COMBAT CONCEPTS AND FUNDAMENTALS ............................................................ 13
HOW THIS BOOK IS ORGANIZED.......................................................................................................... 14
UNIT ORGANIZATION SQUADS, TEAMS AND MACHINE GUNS ................................................. 16
SIZE OF THE SQUAD.......................................................................................................................... 17
TEAMS AND SUB-ELEMENTS .............................................................................................................. 17
SQUAD WEAPONS OVERVIEW ............................................................................................................ 18
SUCCESSION OF COMMAND ............................................................................................................... 20
SQUAD ORGANIZATION OPTIONS ........................................................................................................ 20

TACTICAL MOVEMENT
INTRODUCTION TO FORMATIONS ........................................................................................... 26
MOBILITY AND CONTROL .................................................................................................................. 26
FIREPOWER .................................................................................................................................... 27
VULNERABILITY ............................................................................................................................... 27
WIDE SPACING VS. TIGHT SPACING ..................................................................................................... 29
LEADER POSITIONING ....................................................................................................................... 30
TEAM FORMATIONS ................................................................................................................ 32
Wedge .................................................................................................................................... 33
Diamond ................................................................................................................................. 40
Arrowhead .............................................................................................................................. 45
Single-File ............................................................................................................................... 50
Staggered-File ........................................................................................................................ 53
On-Line ................................................................................................................................... 56
Staggered-Line ....................................................................................................................... 59
Echelon ................................................................................................................................... 62
3

SQUAD FORMATIONS ............................................................................................................. 68
Squad Column......................................................................................................................... 69
Squad Line .............................................................................................................................. 71
Squad Echelon ........................................................................................................................ 73
Squad Wedge ......................................................................................................................... 75
Squad Vee ............................................................................................................................... 77
MOVEMENT TECHNIQUES ....................................................................................................... 79
Traveling ................................................................................................................................. 81
Guard Elements ...................................................................................................................... 82
Squad Bounding ..................................................................................................................... 86
Individual Buddy Rush ............................................................................................................ 89
Bounding by Buddy Team ....................................................................................................... 94
COMBAT APPLICATIONS .......................................................................................................... 98
Individual Movement.............................................................................................................. 99
Situational Awareness .......................................................................................................... 103
ROUTE PLANNING AND NAVIGATION .................................................................................... 109
THE INDIRECT APPROACH ................................................................................................................ 111
COVER/CONCEALMENT VS. OBSERVATION/FIELDS-OF-FIRE .................................................................... 112
THE MILITARY CREST...................................................................................................................... 114
TACTICAL USE OF TERRAIN AND LAND NAVIGATION .............................................................................. 115
Straight Line Movement ....................................................................................................... 116
Checkpoints .......................................................................................................................... 117
Handrails .............................................................................................................................. 120
Backstops ............................................................................................................................. 121
Completing the Route ........................................................................................................... 122

BATTLECRAFT
TRADITIONAL BATTLE DRILLS ................................................................................................ 123
THE LOGIC OF BATTLE DRILLS ........................................................................................................... 123
BATTLE DRILLS VS. BATTLECRAFT ...................................................................................................... 124
Supress and Flank ................................................................................................................. 126
Common Problems ............................................................................................................... 133

4

IMMEDIATE ACTION .............................................................................................................. 138
NAVIGATION ROLES AND ROUTE SELECTION ........................................................................................ 139
IMMEDIATE ACTION RESPONSE PRINCIPLES ......................................................................................... 143
Facing Movement ................................................................................................................. 144
Wheel Movement ................................................................................................................. 145
Collapse Movement .............................................................................................................. 146
Combat Application .............................................................................................................. 147
Alerts and Fire Commands ................................................................................................... 148
OFFENSIVE COMBAT WITH TWO ELEMENTS .......................................................................... 149
Attack by Fire........................................................................................................................ 150
Bounding to Tactical L .......................................................................................................... 153
Bound to Support Position .................................................................................................... 157
Harassing Attacks ................................................................................................................. 162
Deep Flanking Maneuvers .................................................................................................... 167
OFFENSIVE COMBAT WITH THREE ELEMENTS ........................................................................ 172
Reinforcing the Support ........................................................................................................ 173
Reinforcing the Assault......................................................................................................... 177
Hammer and Anvil ................................................................................................................ 182
DEFENSIVE COMBAT ............................................................................................................. 186
Halts ..................................................................................................................................... 187
Assigning Sectors of Fire ....................................................................................................... 192
Breaking Contact .................................................................................................................. 197
Reverse Slope Defense .......................................................................................................... 201
FURTHER TRAINING COURSES AND RESOURCES .................................................................... 203

5

To those who have gone before us, the living and the fallen

6

COURSE OVERVIEW
Infantry Combat vs. Infantry Doctrine
There are countless manuals, books, schools, and schoolhouse curricula that focus on infantry
doctrine. Doctrine is a critically important building block for all military operations. It provides a
set of commonly understood procedures and vocabulary to ensure members of a military force
are on the same page and speaking the same language. A military force cannot fight effectively
without sound doctrine. However, if this was a book about infantry doctrine, it would only be
useful for the military forces that shared that same doctrine. The doctrinal procedures of one
force often differ from those of other forces. Even within the U.S. military, the Army and Marine
Corps take quite different doctrinal approaches to squad level operations.
Therefore, we specifically designed this book to focus on areas that are neglected by
doctrinal teachings and publications, namely topics that deal with real-world tactics, techniques
and procedures for defeating a living, thinking enemy on the battlefield. Doctrine, by design,
leaves a degree of flexibility when it comes to the specific ways to fight and win in real combat.
The intention is that doctrine provides a general guideline and it is up to individual leaders to
refine their own tactics and fighting skills to fit the specific real-world mission requirements.
Unfortunately, there are few resources to help leaders with this difficult second task and units
often have little time to practice fighting under realistic conditions. Special Tactics aims to help
fill that knowledge gap.
Doctrine, as it is taught in most military manuals and military schools focuses primarily
on processes. For example, in schools that teach small unit tactics, students are primarily graded
on whether or not they complete prescribed steps in the correct order. In field exercises,
scenarios are often canned and even variables tend to be predictable. The opposing force
(OPFOR) is frequently under-strength and isn’t allowed to fight aggressively to win, but instead
simply rolls over and dies once the students execute the assigned procedures according to
doctrine. There is nothing wrong with this sort of training since it is intentionally structured to
help students master a baseline of doctrinal processes. However, learning doctrine alone does
not necessarily help you know how to win an actual fight on the battlefield.

7

To take one example from a U.S. military school, two officers received perfect scores on a
planning exercise. However, upon examining each of the officers’ tactical plans, one officer used
the terrain effectively while the other emplaced his machine guns directly on a hilltop 20minutes before sunrise, which would have made them very easy for the enemy to see against
the lighted sky. In a real-world combat situation only one of these two officers would have
achieved success, but because the schoolhouse grading system focused only on whether
students correctly followed a doctrinal process and completed specific doctrinal steps, both
officers received identical, perfect marks for the planning exercise.
This story is not intended to discredit or devalue doctrinal schools. Once again, doctrine
and process-based learning is a critical component of military operations. Exercises that teach
rote memorization of doctrine and procedures have their place. However, it is important to
recognize the gap that results when the vast majority of military schools teach only doctrine and
processes and neglect the art of how to win a fight in a real-world combat situation. Some junior
leaders might not even be aware that another art exists beyond doctrine and outside of it,
because all they have studied and trained on is doctrine. To win on the battlefield, both doctrine
and real-world combat mastery are needed.
This book aims to help fill a gap in the education of infantrymen and infantry leaders. This
book focuses on proven techniques and concepts to help a squad win in combat. Instead of rehashing topics that are frequently discussed in other manuals or schoolhouses, this book looks
for the missing pieces that are frequently left out of an infantryman’s education. This book goes
into detail on topics such as team/squad formations, tactical movement, route selection, tactical
use of terrain, fire and maneuver.
Once again, this book is intended to be useful for any infantry unit regardless of its
doctrine. The vast majority of topics discussed in this book are not covered in official doctrinal
publications and if they are covered, they are covered only very generally. Therefore, infantry
leaders should be able to simply “plug in” most of the techniques and concepts in this book into
their existing doctrine and SOPs (Standard Operating Procedures). If there are any sections of
this book that contradict your specific doctrinal requirements, the book is designed to be
modular and flexible so you can pick and choose the techniques that work for your unit while
putting aside others that are not a good fit.

What This Book Covers
The topic of infantry operations is vast and complex and it would be impossible to cover all
aspects of infantry operations in detail in a single book, even if focused only on the squad level.
This book goes into much more detail than most doctrinal manuals. For example, this book
spends approximately 200-pages covering topics that take up only 18-pages in the 2011 Ranger
Handbook. Given that the Ranger Handbook is approximately 350-pages, it would take almost
4,000 pages to address all the topics discussed in the Ranger Handbook with the detailed
approach taken by this manual. Therefore, to keep the manual readable and usable we have had
to leave many topics out to be covered in future manuals.
8

We consider the material in this book to be the most universally applicable to all infantry
operations. This book essentially focuses exclusively on what would be termed “battle drills” in
doctrinal manuals, along with the necessary knowledge of topics such as formations, tactical
movement and terrain to make execution of battle drills effective. This book is about how to
destroy the enemy with fire, maneuver and close combat. Regardless of the mission set and
greater operational context, those core combat skills should generally remain useful.
That being said, the tactics and concepts in this book will be less useful if not plugged in
to a larger operational context. For example, this book will be more useful if employed in
conjunction with a publication like the Ranger Handbook that discusses topics like mission
planning, the orders process and patrolling, which are not covered in this book. In other cases,
like COIN (Counterinsurgency Operations), this book will be more useful if employed in
conjunction with our Small War Tactics manual or another COIN doctrinal publication. In short,
in order to focus on the art of actual infantry combat, this book leaves out many other important
topics that are critical components of infantry operations.

Who This Book is For and How to Use It
While intended primarily for infantry and recon units operating in a rural environment, the
concepts and techniques in this book should be useful for any individual or tactical unit fighting
outdoors. Law Enforcement officers might find themselves in a firefight with criminals or gangmembers in the woods or may have to pursue perpetrators on foot in a rural environment.
Security professionals might need to plan roving patrols through rural terrain or provide close
protection for clients in rural environments. A citizen living in a rural area may need to defend
his/her property in the event they encounter a trespasser with deadly intentions. Not all the
information in this book might apply to every one of these individuals, but the general
knowledge and concepts have applications to many aspects of tactics and self-defense.
This book is also not only intended to be useful for small unit leaders or squad-level
troopers. Having a firm grasp and understanding of squad-level combat is critical for the mastery
of platoon-level combat and company-level combat. Understanding the nature of small unit fire
and maneuver is even useful for higher-level commanders at the operational and strategic levels.
Even if you are in command of an entire corps or army, the actual calculus of victory or defeat
plays out at the ground level, where individual combatants, teams and squads fight for survival
in close combat. Having a greater contextual understanding of the lowest levels of combat can
be useful for higher-level commanders, especially if it has been a while since they have
experienced warfare from the tip of the spear.
Just reading this book will not make you more effective in rural combat. You must
practice the techniques in this book over and over as part of a more complete tactical training,
weapons training and fitness program in order to truly enhance your combat performance.
While you can read this book from cover-to-cover for background, you will find that some
sections are repetitive which is intended to make each section of the book self-contained. A more
practical way to use the book is to reference the sections that are most relevant to you in the
9

context of a larger training program. The book is designed to complement other books from
Special Tactics as well as online courses and in-person training. Reading this book is only the
beginning to becoming proficient at the art of infantry rural combat.
One final note on terminology, this book sometimes uses the terms “troops” or “troopers”
to refer to infantrymen. This is simply intended to make the book familiar and compatible with
all military forces. For example, Marines specifically use the term “Marine” and never use the
Army term of “Soldier” to describe their personnel. By using neutral terms, the passages in this
book could be referring to any military force: Army, Marine, Navy, Air Force, Special Operations
or NATO/Allied.

10

INTRODUCTION
The Four Pillars of Survival
The “four pillars” of survival are proper mindset, situational awareness, skill proficiency and
physical fitness. These pillars form the basis for success in all combat situations. This manual is
intended not only to teach specific techniques, but rather to increase the reader’s actual chances
of survival and success in a real-life emergency. An expert marksman who is not mentally
prepared for the stress of combat and not ready to employ lethal force can lose to an untrained
adversary. Lack of situational awareness, even for a moment, can cause an experienced fighter
to fall victim to unskilled enemies. Therefore, any combat training program must rest on the
following four pillars.

Proper Mindset
Proper mindset is the most critical of the four pillars. In the simplest terms, people with the
proper mindset devote significant time and energy to protecting themselves and their loved
ones from the worst-case scenario. Many people will learn to shoot a pistol or study a martial art
but their skills decline quickly because they fail to practice frequently enough. Having the proper
mindset means being tough, determined, never cutting corners and taking every precaution to
ensure survival. In a combat situation, having the proper mindset means being prepared to
employ lethal force without hesitation and never quitting during the fight regardless of fear or
pain. The training suggestions in this manual will help you develop the proper mindset.

Situational Awareness
Lack of situational awareness is one of the leading causes of failure or death in combat situations.
In modern society, most people’s situational awareness is very low. They generally spend their
day wrapped up in their own thoughts and problems and pay little attention to what is going on

11

around them. People who live in relatively secure environments fall into even deeper levels of
complacency and unpreparedness. The mentality of, “it can’t happen to me,” can ultimately
prove to be disastrously wrong. Most victims of crime, terrorism and other deadly attacks lived
their lives thinking, “it can’t happen to me.”
People with the proper mindset understand the importance of situational awareness and
make disciplined efforts to cultivate it. Situational awareness begins with awareness of the threat
and awareness that bad things can happen to anyone. Situational awareness involves trying to
remain alert at all times without being paranoid. Situational awareness also involves keeping up
with local news, and studying trends in violent crime. Those committed to protecting their
families might conduct research to identify registered sex offenders in their area. When you
travel to a new city, it is useful to learn which neighborhoods have a higher crime rate and plan
your route accordingly. The best way to improve your situational awareness is to make a
conscious effort to continually cultivate and improve it.

Skill Proficiency
Once you have the proper mindset and maintain good situational awareness, the next step is to
ensure you have the proper skills or “tools” to protect yourself in a combat situation. When
striving to improve skill proficiency it is important to choose the best skills and techniques that
are simple, effective, easy to perform and can realistically apply to a real-life scenario. Then you
must practice these techniques repeatedly until they become second nature. This will maximize
the chances that you will respond immediately in a high-stress situation. The central focus of this
manual is to help you build skill proficiency.

Physical Fitness
Fitness is a critical but often overlooked factor that affects your chances of survival in a combat
situation. Even skilled fighters with the proper mindset and high levels of situational awareness
can lose a fight simply because they run out of energy. In order to maintain adequate levels of
combat fitness, you do not need to achieve the same fitness level as a professional or Olympic
athlete. Rather, the key is merely to stay healthy, maintain a decent level of cardiovascular
endurance, running speed, functional strength and coordination. Popular commercial fitness
programs don’t always focus on the most useful abilities needed for combat. For example, many
people jog but how many also run sprints to build speed? Simply being able to run fast without
falling is one of the most critical survival skills in a gunfight or emergency situation, yet most
people rarely practice sprinting. For those interested in combat fitness, Special Tactics provides
a range of books and courses on the subject.

12

INFANTRY COMBAT
Concepts and Fundamentals
Due to a number of factors, there is some degree of confusion about the true nature of infantry
combat or what infantry combat would look like in a real-world scenario. While this book is
intended to be useful for all types of infantry combat, before diving into specific tactics,
techniques and procedures, it is useful to understand how these tactics might apply to a bigger
operational picture.
One factor that has led to confusion and misunderstandings about infantry combat is the
predominance of Counterinsurgency (COIN) operations during the first two decades of the
twenty-first century. During this time, infantry units were required to perform tasks that shared
more in common with peacekeeping operations, community policing or counterterrorism than
they did with traditional infantry missions. In many cases, the concepts and mandates of the
COIN mission directly contradicted the nature of traditional infantry combat. While COIN
operations require restraint, the surgical application of force and even emotional empathy,
traditional infantry operations require aggressiveness, violence of action and massing maximum
firepower at the decisive time and place. Both COIN operations and traditional infantry
operations are important, but the predominance of COIN has led many infantrymen to forget
about the nature of infantry combat in a high-intensity, conventional war.
The other main factor that has led to confusion about infantry combat is the nature of
infantry training in some doctrinal schoolhouses. The most well-known infantry schools focus
either on COIN scenarios taken from real-world mission data, or on traditional infantry small unit
patrolling, taken largely from experience in the Vietnam War. Small unit patrolling rarely involves
a unit larger than a platoon and entails a unit moving by itself through enemy territory, setting
up an ORP (Objective Rally Point), conducting a leader’s recon of an objective, executing a raid
or linear ambush on a small enemy force, then moving to and occupying a patrol base.
Small unit patrolling is an important part of infantry operations but even in conventional
warfare it is only one part of a larger picture and the majority of infantry missions and combat
will likely look very different from the classic squad-level patrol or linear ambush. In most
conventional warfare scenarios, squads will generally not be operating alone, patrolling behind

13

enemy lines. In most cases squads will be operating as part of a platoon or even more likely, as
part of a company or battalion. If squads or platoons are conducting independent patrols, those
patrols would still be closely coordinated with higher-level operations. This dramatically changes
what a real-world infantry mission would look like compared to what most junior leaders are
used to experiencing in the schoolhouse.
Another classic misconception about infantry combat is that it will likely take the form of
one small unit encountering an enemy small unit deep in the woods. While this book does use
such scenarios to demonstrate tactical concepts, these scenarios are not likely to actually take
place in real life the way they are depicted in this book. In what situation would one squad be
walking through the woods and bump into another squad that was walking through the woods?
Do such chance encounters sometimes occur in conventional warfare? Yes of course. However,
infantry squads are much more likely to find themselves taking part in larger operations to
defend or capture key terrain such as hilltops and river crossings. Such operations frequently
involve the integration of combined arms (tanks, artillery and aircraft) and often include
prepared defensive positions and fortifications.
This book is designed to be useful for all types of infantry operations. Whether you are
engaged in COIN/peacekeeping operations, small unit patrols or high-intensity conventional
warfare, the basic fundamentals for how to destroy the enemy through fire, maneuver and close
combat always apply in some form. That being said, to truly benefit from the teachings in this
book you must understand them in a larger operational context. A technique in this book might
depict one squad bounding forward and using the terrain to destroy another squad by fire.
However, in a real world application, that exact same concept or maneuver might be employed
by a squad that is acting as the local support-by-fire for a platoon that is the assault element for
a company-level attack on a fortified position. The techniques in this book are only building
blocks. Employing them effectively requires a broader understanding of the nature of real-world
infantry combat.

How this Book is Organized
This book follows a fairly logical sequence as it builds up to the point of teaching how to fight
and defeat the enemy using fire, maneuver and close combat. The next sections begin with
discussion of how to organize the squad into fire teams and machine gun teams and where to
assign/position leaders. It then goes on to a detailed discussion of infantry formations at both
the team and squad level, highlighting the advantages and disadvantages of each. Not all of
these formations might fit with your doctrine or prove useful to your unit, but understanding
them is critical to mastering combat maneuvers.
The book then goes on to discuss tactical movement techniques at the individual, team
and squad level. Once you understand formations, the next step is to learn how to move using
those formations in a way that gives you a tactical advantage over the enemy. This section also
discusses specific combat applications for tactical movement techniques that are frequently left
out of most tactical manuals and training schools. Next, the discussion progresses to tactical
14

navigation and route selection, applying the movement techniques you just learned to longer
distance movements over various types of terrain, using the terrain to your advantage as much
as possible based on the specific mission requirements.
Finally, the book transitions to a discussion of fire, maneuver and close combat, how to
fight and defeat the enemy on the battlefield. This section begins by linking the previous
discussions of formation, movement and navigation to the moment where troops make contact
with enemy forces. The book then covers immediate action, the traditional battle drill concept
and the advantages and disadvantages of traditional battle drills. The next chapters cover fire
and maneuver for two-element squads and three-element squads. Finally, the book concludes
with a discussion of defensive combat at the squad level.

15

UNIT ORGANIZATION
Squads, Teams and Machine Guns
Unit organization or unit structure is the first topic to discuss when learning infantry tactics at
any level. While it is not the most exciting topic, it provides a frame of reference that is necessary
to understand all other aspects of tactics. Units and sub-units are the building blocks for tactical
formations, tactical maneuvers, tactical plans and command-and-control systems. The
important thing to understand about unit organization is that while each military force or
country has quite specific ways of organizing forces, there is no single best way to organize. Each
system has its own advantages and disadvantages. While you will likely need to adhere to the
restrictions of your own force’s military doctrine, understanding the deeper principles and
concepts behind unit organization will improve your professional competence and combat
performance.
The squad is generally considered the smallest infantry element capable of independent
combat missions and tactical maneuver. While it is possible to conduct missions with any size
element, even a single person, it is rare for modern military forces to deploy an element smaller
than a squad into combat by itself. The most common exception to this rule would be
conducting reconnaissance missions with smaller elements, but even these smaller elements
generally operate with the support of additional troops. Therefore, the squad level is the logical
starting point for studying infantry tactics.
The term “squad” is the term used by most conventional U.S. military forces but of course,
other countries and organizations may use different terms. For example, the British military uses
the term “section” in place of squad. In some special units, a squad-sized elements might be
called a “team.” Therefore, while we use the term “squad,” the same tactics and concepts can
apply to any squad-sized element regardless of what it is called.

16

Size of the Squad
Squads are generally comprised of 7-13 infantrymen There are a number of factors that affect
the size of an infantry squad and in turn, the size of the squad affects its capabilities. In modern,
mechanized warfare, the size of the squad frequently relates to the carrying capacity of the
vehicle the squad is supposed to ride in. However, since squads might employ different types of
vehicles based on availability and mission profile, this can require units to make some ad-hoc
adjustments to unit sizes to better fit the vehicles being used for a mission.
Casualties can also make it necessary to adjust unit sizes. People who get too fixated on
having an exact number of troops in a squad forget that in high-intensity combat, the size of a
squad might change from one second to the next. For these reasons, it is important to
understand the deeper principles and concepts behind squad organization. Therefore, if the size
of the squad must change based on the situation, the unit still remains organized and is able to
operate like before.

Teams and Sub-Elements
In most modern, professional militaries, squads are divided into sub-elements. In the U.S.
military, these smaller elements are called “teams” or “fireteams.” For example, in the U.S. Army
a squad includes two, four-person teams. In the U.S. Marine Corps, a squad includes three, fourperson teams. Splitting the squad up into teams or sub-elements allows the squad to conduct
independent maneuver since one element can provide supporting/suppressive fire while the
other element moves. We will discuss fire and maneuver in much more detail later in the book.
At this point, it is only important to understand that dividing the squad into multiple elements
allows those elements to split up and do different things, making the squad more capable and
versatile.
However, dividing the squad into multiple elements also creates more complexity and
requires additional subordinate leaders to lead those sub-elements. Militaries that are less welltrained, less professional or have few junior leaders might choose not to split the squad up into
multiple elements. Instead, a single squad-leader controls the entire squad as a single element
that moves and fires as one. While less capable and flexible, this arrangement is easier to control.
The disadvantages of this arrangement are also less relevant in military forces that rely on
numbers and attrition rather than maneuver and combat skill.
Teams within a squad can also vary depending on the type of weapons they use. We will
discuss this more in the next paragraph. Some teams might be made up primarily of riflemen
and carry less weight. These teams focus more on mobility and closing with the enemy. Other
elements might be built around a machine gun or heavy weapon. Machine gun teams are
typically smaller, only 2-3 people, since their purpose is primarily to employ the gun itself to
provide supporting fire. Extra rifles are more useful for the elements that are advancing and
closing with the enemy.
17

Squad Weapons Overview
Most squad members will carry an assault rifle or automatic rifle, usually either 5.56mm or
7.62mm. The assault rifle is light weight and reasonable accurate and powerful. While most
assault rifles have the ability to fire in a fully automatic mode, they are generally more effective
when operated in single-shot mode. In addition, individual riflemen generally don’t carry
enough ammunition to fire their rifles on full-auto for any length of time. Below is an example of
a common 5.56mm assault rifle with no optics attached.

While the rifle is the most common infantry weapon, the machine gun is typically the most
decisive and important weapon in the squad. The firepower provided by a machine gun can
sometimes be considered greater than the rest of the squad weapons combined. This is because
of the machine gun’s high rate of fire, greater range and the armor penetration of the larger,
faster machine gun bullets. Since it is such a critical weapon, most modern squads will employ
at least one machine gun. However, the way these guns are employed and organized in the
squad can vary. Below is an example of a 7.62 mm medium machine gun.

In the U.S. military, light machine guns (5.56 mm) are organic to each team. This means the
machine guns go wherever the team goes. However, medium machine guns (7.62 mm) are not
organic to the squad but are assigned at the platoon-level, one unit level above the squad. This
18

allows the platoon leader to assign the machine guns to whatever squad he/she chooses. Ideally,
each squad will have a medium machine gun attached. Therefore, a typical U.S. Army squad will
have 2 x light machine guns and 1 x medium machine gun. Below is an example of a 5.56 mm
light machine gun.

Not all military forces organize their machine guns in this way. In some forces, medium machine
guns are organic to the squad. This means that the machine gun is actually part of the squad and
goes everywhere the squad goes. In some cases the squad might have additional light machine
guns distributed among the other teams or in other cases, the single medium machine gun will
provide the centerpiece of firepower while the rest of the squad focuses on speed and mobility.
The other most common squad weapon is the grenade launcher. The grenade launcher
is particularly useful for firing at areas that the squad members cannot directly see, since
grenades can be lobbed over hills and walls etc. In the U.S. Army, each team has one person who
is equipped with a 40mm grenade launcher. Therefore, the standard U.S. Army squad has a total
of 2 x light machine guns, 2 x 40mm grenade launchers and an optional attachment of at least 1
x medium machine gun. Below is an example of an assault rifle equipped with a 40mm grenade
launcher.

19

Succession of Command
One of the most critical aspects of any unit’s organization is the succession of command. Most
infantry doctrine will advocate reviewing the succession of command during an operations
order or pre-mission briefing, however, in most cases, the leader will only emphasize the first few
levels of command and there will not be an established or rehearsed plan for what to do if all or
most of the leaders in the unit are lost.
Instead of just mentioning it during the operation order, succession of command should
be emphasized in every aspect of training and operations. The succession command will go from
the senior leader down to the most junior unit member and everyone in the unit must know the
succession of command by heart. More importantly, during training events units have to practice
reacting when leaders are killed. Junior personnel must be able to step up, assume command
and continue the fight without the unit losing momentum.

Squad Organization Options
Given the factors just discussed about squad size, the option of splitting the squad into multiple
teams/elements and the assignment of squad weapons, there are a number of different ways to
combine these various factors when organizing the infantry squad. Each option has its own
advantages and disadvantages. As already stated, in most cases military personnel will be
somewhat restricted in how they can organize their squads. However, it is still very useful to
understand the advantages and disadvantages of the available options to better understand
your own strengths and weaknesses, understand enemy strengths and weaknesses and to be
ready to make ad-hoc organizational adjustments in extreme or special situations.
The main options available when organizing a squad relate to how many teams or sub
elements you choose to employ (generally two or three), whether your teams are balanced or
unbalanced, and how you position/assign leaders and heavy weapons. The following pages and
illustrations go into more detail on the advantages and disadvantages of each option. Note that
the following examples only offer a selection of common organization options and there are
nearly unlimited ways to organize combat units.

20

SQUAD ORGANIZATION OPTIONS
Number of Teams or Sub-Elements
How many teams a squad is divided into is generally dictated by organizational/unit doctrine.
However, it is useful to understand the pros and cons of each approach. In general, more teams
offer greater flexibility but are more difficult to control. Generally speaking, squads with more
sub-elements have to be larger since each sub-element should include at least three or four
personnel. In some cases casualties, manpower constraints, lack of qualified leaders or the
limitations of transport vehicles might make it more difficult to employ multiple teams in each
squad. In these cases, understrength teams might need to be combined in order to increase
combat effectiveness and mitigate risk.

21

SQUAD ORGANIZATION OPTIONS
Unbalanced Teams
While it is possible to keep equal numbers of personnel in each team, it is also an option to assign
more personnel to one team than to the other. There are a number of advantages and
disadvantages to this approach. Assigning more personnel to the assault or maneuver element
offers more flexibility, including the ability to conduct split-team maneuvers. In addition, a larger
assault element is better able to press the assault after sustaining casualties. However, having
pre-designated assault (maneuver) and support elements reduces flexibility since each element
always has to play the same role. If both teams are similar, either one can choose to assume the
assault or support role based on the situation. A smaller support element is also more vulnerable
on its own and less able to defend itself from flanking attacks.

22

SQUAD ORGANIZATION OPTIONS
Independent vs. Integrated Squad Leader
There is no single right answer for where to assign the squad leader. Each option has advantages
and disadvantages. When employing an independent squad leader, you keep the squad leader
separate from both teams and assign each team its own team leader. The squad leader can
remain between the teams and move back and forth as needed. To employ an integrated squad
leader, the squad leader leads one team and the ASL (Assistant Squad Leader) leads the other
team. In this situation, both SL and ASL act as team leaders but the SL is still in overall control of
the squad. Generally this option is better suited to experienced units since it requires each team
leader to act on his/her own initiative without central authority. The diagram below compares
the advantages and disadvantages of employing an independent squad leader vs. an integrated
squad leader.

23

SQUAD ORGANIZATION OPTIONS
Machine Gun Option 1: Independent
There is no single right answer for where to assign an attached machine gun. Each option has
advantages and disadvantages. One option is to keep the machine gun separate from the teams.
In this situation, it is usually best for the squad leader to also be independent so he/she can
control the gun and position it at the most advantageous location on the battlefield. Note that
in squads with multiple machine guns, you might employ both independent and integrated
guns. An example of this is the U.S. Army rifle squad where the light machine guns are integrated
into the teams but the medium machine gun is generally independent and remains with the
squad leader.

24

SQUAD ORGANIZATION OPTIONS
Machine Gun Option 2: Integrated
Another option is to keep the machine gun with one team. The machine gun can be assigned
either to the squad leader’s team or the assistant squad leader’s team and can move either in the
lead or in trail. Note that even if the machine gun is integrated into a particular team that does
not mean that the gun cannot be assigned to the other team as needed. Still, it is more difficult
for the gun to move back and forth between teams as it does when independent. Integrated
machine guns are also the norm for units that employ unbalanced teams where one of the teams
is a smaller support element. The gun will naturally be assigned to the support team.

25

TACTICAL MOVEMENT
Introduction to Formations
When learning to move tactically as a unit, one of the first things you must understand is tactical
movement formations. Formations dictate how troops position themselves in relation to each
other. Formations are important for a number of reasons that we will discuss in more detail in
this chapter. Each formation has pros and cons in terms of mobility, firepower and vulnerability.
You will have to give up an advantage in one area to gain an advantage in another.

Mobility and Control
Mobility is how fast you can move and change direction without breaking the formation. In
general, the more team members are “following behind” one another, the greater mobility the
formation will have. This is because it is easy to run fast and change direction when all you have
to do is follow the person in front of you, even in the dark or rough terrain. The more team
members are “side-by-side” the less mobile the formation is and the slower you will have to move
to maintain your formation, especially at night or in difficult terrain.
Mobility and control are related. When it is easy to move and change direction quickly
without breaking formation, control is generally greater as well. However, formations where
every team member can be seen by more than one fellow team member also offer more control
than formations where one team member is isolated on the edge of the formation. For example,
while moving in a single file makes it easy to move fast and in some ways it is easy to control the
formation because of its simplicity, there is also a risk of leaving the last person in the formation
behind, so control is less effective from that perspective. In terms of accountability, a diamond
formation where all team members can see each other and see the leader offers better control.
When evaluating the mobility and control offered by each formation, you must consider your
specific mission requirements, the terrain and enemy situation.

26

Firepower
Firepower is how much fire you can mass in a given direction without adjusting formation.
Formations will typically offer good firepower in some directions but not in others. The reason
why formations offer better firepower in a one direction and poorer firepower in another, is
because of the risk of team members accidentally shooting each other. If a team member is
between you and the target, he/she is “masking” your fire and you cannot fire past them safely.
In the example below, only one team member can fire safely to the front and all other
team members cannot fire to the front without risking shooting team members in front of them.
However, in this case all team members can fire safely to the side. This formation therefore has
poor firepower to the front and good firepower to the sides.

Vulnerability
In order to gain an advantage in mobility or firepower in one direction, a formation will have to
make itself vulnerable to fire from another direction. Enfilade fire is when the trajectory of fire is
aligned and parallel with the long axis of a formation. This is the most lethal orientation of fire
for several reasons. The more linear a formation is, the more vulnerable it will be to enfilade fire
along its long axis. This is because as a bullet passes through the formation, it will have a greater
chance of hitting someone if the entire team is in a line. A single bullet can also pass through
two people. Enfilade fire also makes the shooter’s job easier, since he/she can target the entire
formation without having to traverse the weapon to the left or right. . The image below shows
an example of enfilade fire. For all these reasons, formations that are more linear are particularly
vulnerable to fire from certain angles.

27

While more linear formations are particularly vulnerable to enfilade fire that passes through
their long axis, they are less vulnerable to fire that is perpendicular to the long axis for several
reasons. Each incoming bullet has less chances of hitting and if it does hit someone, it will pass
through the formation and not hit anyone else. It is more difficult for the shooter to engage
multiple targets since he/she will have to traverse left and right to engage each target. The
picture below shows an example of this.

28

Wide Spacing vs. Tight Spacing
Another critical question to consider when it comes to tactical formations is spacing. While in
some cases, doctrine provides specific prescriptions on exactly how far apart troops should be,
this is generally not the best approach. It works better to naturally spread out and contract the
formation based on the terrain and the situation. There are advantages and disadvantages to
wider spacing and tighter spacing. The ideal amount of spacing between troops depends on the
terrain and the situation.
In most combat situations, wider spacing is preferable because it reduces the
vulnerability for the formation. One burst of fire or explosion is less likely to kill two team
members. As a rule of thumb, spreading out with at least 5-10 meters between troops offers
significantly reduced vulnerability. However, in dense vegetation or limited visibility conditions,
wide spacing can make controlling the formation very difficult and increase the chances of
leaving a team member behind, especially if someone is injured under fire.
Tight spacing increases vulnerability to enemy fire and explosions but also increases
speed and control. When speeding up or moving through dense terrain, a unit might
momentarily tighten its formation to increase control and make movement easier. The unit can
then spread out again once the terrain opens up. One important point to remember is that in
some types of terrain (like tall grass) the formation might be able to see each other standing up,
but as soon as they take fire and have to go prone, they will completely lose visual contact. In
these situations, slightly tighter spacing might be necessary. The image below shows an example
of wide spacing vs. tight spacing.

29

Leader Positioning
Another important question relating to formations is where in the formation the leader should
position himself/herself. Of course the leader’s position does not need to be fixed and he/she
can move around as necessary based on the situation. The two most common options for leader
positioning are in the front of the formation and in the center of the formation.
Positioning in the front of the formation allows the leader to “lead from the front,”
motivate subordinates and set the pace of the advance. This method is often preferable when
subordinates are less experienced and need more direction. However, positioning in the front
also makes the leader more vulnerable and makes it more difficult for him/her to control the
formation.
When the leader is in a more central location this allows the leader to easily see and
control the team without turning his/her head all the way around. It also reduces risk for the
leader since the lead person (point man) in the formation is frequently in greater danger. The
central position is generally preferable for more experienced units where subordinates can be
trusted in the lead position. The diagrams below compare the advantages and disadvantages of
front and central positioning and give examples in a team formation.

30

Another advantage of placing the leader in a central position and not at the head of the
formation is that it allows the lead person in the formation (the pointman) to focus completely
on looking for threats. When done correctly, being a pointman is a very demanding, fulltime job.
Leading the formation is also a demanding job. If the leader is also responsible for navigation,
map checks and/or compass checks, it can be dangerous for the leader to take out a map or
compass when leading the formation. Ideally, the pointman should not be looking down at a
map but rather watching the terrain ahead, staying alert for boobytraps, hazards and nearby
enemies.
There are some other special cases and consideration when it comes to leader
positioning. One factor is the leader’s proximity to the machine gun or heavy weapon. In some
cases, the leader will want to move closer to a heavy weapon in order to direct or control its fire.
Another scenario involves the leader placing himself/herself on the edge of a formation in order
to provide a coordination point with another unit. Finally, in cases when accountability is
particularly important, the leader may want to position in the back of a formation to be able to
carefully watch all members of the unit. In cases when a unit has a “second in command” or 2IC,
it can be a good idea for the 2IC to position in the rear to monitor troops while the leader moves
to the best location to fight the enemy. The diagram below gives some examples of these special
cases just described.

31

TACTICAL MOVEMENT
Team Formations
Team-level formations dictate how individual team members position themselves in relation to
each other. This chapter covers eight different formations, all of which are incorporated into U.S.
Military doctrine by either the Army, Marine Corps or Special Operations Forces. Understanding
the advantages and disadvantages of each formation is a critical first step to understanding how
to move tactically and defeat the enemy in combat. The eight formations covered in this chapter
are depicted in the diagram below.

32

TEAM FORMATIONS: WEDGE
Wedge (Heavy Right) – General Description
The wedge (or heavy right/left) offers good mobility and control while still allowing rapid
massing of firepower to the front. The wedge does not provide an ideal “central location” for the
team leader so when moving in a wedge it is generally best for the team leader to lead. As already
discussed, putting the team leader in the front of the formation offers both advantages and
disadvantages. Apart from the team-leader being in the front, the positions of the other team
members can vary. However, if you divide a four-person team into buddy teams, it makes sense
for the team leader to be buddied with the heavy weapon (light machine gun) as shown in the
picture below. This means putting the machine gun on the “light” side of the formation, which
would be to the left in the picture below. It is also important to note that the team member on
the end of the heavy side is somewhat isolated and might be left behind in stressful situations.

33

TEAM FORMATIONS: WEDGE
Wedge (Heavy Right) – Sectors of Fire
The sectors of fire in the wedge formation are fairly logical. The sectors below are generalized
and can vary based on the situation. It is also important to remember that the sectors show
where each team member is responsible for covering, not necessarily the limits of where they
are able to shoot. For example, while the person on the far right rear of the formation is primarily
responsible for rear security, he/she can still fire to the front if needed.

34

TEAM FORMATIONS: WEDGE
Wedge (Heavy Right) – Firepower vs. Vulnerability
The wedge provides fairly balanced firepower in all directions. All troops can fire to the front and
are spread out well to keep an enemy to the front from achieving enfilade fire on the formation.
At least two weapons can fire to the front left, one of which is generally the light machine gun.
However, there are some angles to the right-rear that only one weapon can engage without
turning or adjusting the formation.

35

TEAM FORMATIONS: WEDGE
Wedge (Heavy Left) – General Description
The general considerations for the heavy left formation are the same as for the heavy right
formation. The wedge offers good mobility and control while still allowing rapid massing of
firepower to the front. The wedge does not provide an ideal “central location” for the team leader
so when moving in a wedge it is generally best for the team leader to lead. As already discussed,
putting the team leader in the front of the formation offers both advantages and disadvantages.
Apart from the team-leader being in the front, the positions of the other team members can vary.
However, if you divide a four-person team into buddy teams, it makes sense for the team leader
to be buddied with the heavy weapon (light machine gun) as shown in the picture below. This
means putting the machine gun on the “light” side of the formation, which would be to the right
in the picture below. It is also important to note that the team member on the end of the heavy
side is somewhat isolated and might be left behind in stressful situations.

36

TEAM FORMATIONS: WEDGE
Wedge (Heavy Left) – Sectors of Fire
The sectors of fire for the heavy left formation are the reverse of the heavy right formation. It is
important to note that while the rear person in the formation can be a “free floater” and move
back and fourth to assume either heavy left or heavy right positions, this is generally not
preferable since it can confuse other formation members and will throw off buddy team
assignments within the team. The sectors below are generalized and can vary based on the
situation. It is also important to remember that the sectors show where each team member is
responsible for covering, not necessarily the limits of where they are able to shoot. For example,
while the person on the far left rear of the formation is primarily responsible for rear security,
he/she can still fire to the front if needed.

37

TEAM FORMATIONS: WEDGE
Wedge (Heavy Left) – Firepower vs. Vulnerability
Firepower vs. vulnerability of the heavy left are the reverse of the heavy right. The wedge
provides fairly balanced firepower in all directions. All troops can fire to the front and are spread
out well to keep an enemy to the front from achieving enfilade fire on the formation. At least two
weapons can fire to the front right, one of which is generally the light machine gun. However,
there are some angles to the left-rear that only one weapon can engage without turning or
adjusting the formation.

38

TEAM FORMATIONS: WEDGE
Wedge – Different Team Sizes
The wedge formation can vary depending on the number of people in the team. When there are
three or five people in a team the wedge will no longer be unbalanced so there will no longer be
“heavy right” or “heavy left” options. When adding a sixth person to the formation, generally the
best option is to move the team leader back to a central position in the middle of the wedge
behind the point man. Having more than six people in a wedge formation can make the
formation difficult to control and you would probably be better off splitting the element once
again into smaller teams. If you must add additional people to the formation they can attach to
the wings of the wedge, extending the formation further out.

39

TEAM FORMATIONS: DIAMOND
Diamond – General Description
The diamond formation is similar to the wedge but is slightly easier to control while still offering
good firepower to the front. In the diamond formation, the fourth person tucks into the rear of
the formation, forming a diamond, instead of extending out on the left or right wing of the
formation. It is easier for the rear team member to provide rear security in the diamond formation
since he/she is in the rear center of the formation and is less likely to get disoriented when
glancing backwards, especially at night. The exact positioning of team-members within the
formation can vary. In the example below, the team leader is in the rear of the formation but the
team leader can also position in the front. In either position, the formation places greater
demands on the team leader since he/she will have to double as pointman or rear security.

40

TEAM FORMATIONS: DIAMOND
Diamond – Sectors of Fire
One of the advantages of the diamond formation is that it makes sectors of fire very simple and
balanced. Sectors of fire can be easily described as front, rear, left and right. This simplicity makes
it less likely that gaps will develop in the 360-security, especially at night or in dense terrain.

41

TEAM FORMATIONS: DIAMOND
Diamond – Firepower vs. Vulnerability
The diamond provides good distribution of firepower in all directions. When firing to the front,
rear, left and right, three weapons have clear fields of fire. When firing at an angle to the frontright, front-left, rear-right or rear-left, only two weapons can fire without adjusting the formation.
So there are small portions of the 360-degree arc that are slightly more vulnerable. Because the
formation is not linear, there is no angle where an enemy can catch the team in true enfilade fire.

42

TEAM FORMATIONS: DIAMOND
Diamond – Rapid Change of Direction
Another advantage of the diamond formation is the ability to rapidly change direction without
having to turn the formation. For example, the team can turn 90-degrees to the right by letting
the person on the right become the pointman. Not all units might want to do this since it requires
shuffling the team members to different positions relative to the direction of travel. However,
experienced teams that do not have problems swapping roles can benefit from a symmetrical
formation like the diamond.

43

TEAM FORMATIONS: DIAMOND
Diamond – Different Team Sizes
The diamond formation is somewhat less versatile than other formations in terms of the number
of people that can be in the formation. It is not possible to form a diamond with less than four
people. Adding additional people to the diamond formation can get confusing and negate the
advantages of the formation. The one option is adding a fifth person, usually the team leader, to
the center of the formation. This gives the diamond formation the added advantage of a central
position from which the team leader can control the element.

44

TEAM FORMATIONS: ARROWHEAD
Arrowhead (Modified Diamond) – General Discussion
The modified diamond or arrowhead formation combines many of the advantages of the wedge
formation and the diamond formation. The formation is easy to control and offers good
distribution of fire to all sides. Since, no team member is on the “end” of the formation you are
less likely to accidentally leave someone behind. The arrowhead also provides an ideal central
location for the team leader and a dedicated point man, which allows the leader to focus on
leadership activities and navigation. Generally, the heavy weapons like machine guns or grenade
launchers will position on the flanks, to the rear of the team leader.

45

TEAM FORMATIONS: ARROWHEAD
Arrowhead – Sectors of Fire
One disadvantage of the arrowhead formation is that because the team leader is in the center of
the formation, that means the remaining 3 team members will have to cover larger sectors. Also,
since there are two troops evenly spaced in the rear of the formation no position lends itself to
an obvious rear security responsibility. You can choose to adjust the sectors and designate one
of the flankers as a dedicated rear security or you can have both flankers cover the rear on their
respective sides.

46

TEAM FORMATIONS: ARROWHEAD
Arrowhead – Firepower vs. Vulnerability
Equal distribution of fire in all directions makes this formation a good choice when an attack
might come from any angle. There is no angle where at least three guns cannot fire
simultaneously. However, while the arrowhead provides balanced firepower in all directions, you
cannot mass all firepower in any single direction without adjusting formation. Adjusting the
formation is fairly easy since the person opposite the direction of fire only needs to move a few
steps and position next to the team leader.

47

TEAM FORMATIONS: ARROWHEAD
Arrowhead – Rapid Change of Direction
Like the diamond, the arrowhead formation has the ability to rapidly change direction without
having to turn the formation. For example, the team can rapidly turn to the right by letting the
person on the right become the pointman. Not all units might want to do this since it requires
shuffling the team members to different positions relative to the direction of travel. However,
experienced teams that do not have problems swapping roles can benefit from a symmetrical
formation like the arrowhead.

48

TEAM FORMATIONS: ARROWHEAD
Arrowhead – Different Team Sizes
The arrowhead offers some useful possible arrangement possibilities with later teams. You need
at least four people in the team to form the arrowhead. With a five-person team, the best option
is essentially to use the same five-person configuration as the diamond formation, though you
can push the right and left side team members back slightly if that offers better control. With six
or seven people the best option is to augment the pointman and employ a two-person point
team. Since the job of pointman is so taxing, having two people on point can prove very effective
if they are properly trained and know how to work together.

49

TEAM FORMATIONS: SINGLE-FILE
Single-File – General Description
The single-file formation is one of the simplest formations you can use for movement, especially
at night, since all each person has to do is follow the person in front of them. However, the singlefile is very vulnerable from the front and rear and is therefore not ideal as a fighting formation.
The exception to this is that the file allows rapid massing of fire to the sides/flanks since the team
member can all turn 90-degrees to the left or right and all fire in the same direction. It is easy for
the trail team member to get left behind in the dark, however, the file also makes it easier to
quickly take headcounts. The single file formation is most appropriate in very dense terrain when
there might only be one movement path and not enough room for troops to move forward sideby-side. An example of this is a thick jungle where you have to cut your own path. There is a fair
degree of flexibility in how team members can position themselves in the file. The team leader
can position in the front, rear or a central position based on the situation.

50

TEAM FORMATIONS: SINGLE-FILE
Single-File – Sectors of Fire
Troops moving in a file distribute their fire in four directions to cover 360-degree security. The
team members in the front and back cover those directions respectively. The remaining team
members in the center of the formation alternate covering to the right and left.

51

TEAM FORMATIONS: SINGLE-FILE
Single-File – Firepower vs. Vulnerability
The single-file formation is extremely vulnerable to fire from the direct front and rear and has
little ability to return fire in those directions. It is very easy for an enemy machinegun to the front
or rear to achieve enfilade fire and send bullets ripping straight through the long axis of the
formation. However, the formation is less vulnerable from the sides/flanks and has excellent
firepower in those directions.

52

TEAM FORMATIONS: STAGGERED-FILE
Staggered File – General Description
The staggered file has many of the same advantages of the single-file but mitigates some of the
single-file formation’s vulnerabilities. It is still very easy to move in the staggered file but the
formation offers a bit better firepower to the front and rear and is less vulnerable to enfilade fire.
The formation can stagger to either side and team members have flexible options for how to
position themselves within the formation. The team leader can position in the front, center or
rear based on the situation. The staggered file is a good option for quick movement in dense
terrain but if the terrain is extremely dense, there might not be enough room to stagger the file
and the single-file will be the only option.

53

TEAM FORMATIONS: STAGGERED-FILE
Staggered File – Sectors of Fire
The sectors of fire in the staggered file are essentially the same as the single-file but the stagger
makes it easier for team members to identify their sectors. Except for those in the front and rear,
the team members staggered to the left cover left and the team members staggered to the right
cover right. The stagger also allows two people to fire to the front and rear.

54

TEAM FORMATIONS: STAGGERED-FILE
Staggered File – Firepower vs. Vulnerability
Like the single-file, the staggered file is vulnerable to fire from the front and rear, however it is
slightly less vulnerable since the troops are more spread out laterally, making it more difficult for
an enemy machine gun to achieve enfilade fire. The staggered file has excellent firepower to the
sides/flanks.

55

TEAM FORMATIONS: ON-LINE
On-Line – General Description
The line makes massing firepower to the front the easiest since all team members can fire
forward with full fields of fire. Because it is difficult to maintain the line while moving, the
formation can be slow and difficult to control, especially at night or in rough terrain. For this
reason it is generally best to use another formation while moving, then shift to the line once the
team is stationary and prepared to return fire. The team leader will generally position near the
center of the line to best control fire on either side. However, as discussed earlier, in some
situations the team leader might want to position on the extreme right or extreme left of the line
to act as a coordination point with another unit to the left or right.

56

TEAM FORMATIONS: ON-LINE
On-Line – Sectors of Fire
Because the line formation is intended to mass firepower to the front, it offers less security to the
sides and rear. The troops on the extreme left and right of the formation will generally cover to
the left and right. You can either designate one of them to also watch the rear or you can have
both of them watch the rear on their respective sides.

57

TEAM FORMATIONS: ON-LINE
On-Line – Firepower vs. Vulnerability
The line formation is designed to mass firepower to the front. It is also relatively easy for the
individual team members to pivot 180-degrees to mass firepower in the opposite direction.
However, the formation is extremely vulnerable to fire from the sides/flanks and has little ability
to return fire in those directions.

58

TEAM FORMATIONS: STAGGERED-LINE
Staggered Line – General Description
The staggered line offers many of the same advantages of the line formation while reducing
vulnerability from the flanks. The staggered line makes massing firepower to the front the easy
since all team members can fire forward with nearly full fields of fire. While team members
staggered to the rear might have slightly constricted fields of fire, those staggered to the front
will have even wider fields of fire. It therefore makes sense to put heavy weapons staggered to
the front. Because it is difficult to maintain the line while moving, the formation can be slow and
difficult to control, especially at night or in rough terrain. For this reason it is generally best to
use another formation while moving, then shift to the line once the team is prepared to stop and
return fire. The team leader will generally position in the center of the line and stagger to the
rear to be able to see and control the fire of troops to the left and right. However, as discussed
earlier, in some situations the team leader might want to position on the extreme right or
extreme left of the line to act as a coordination point with another unit.

59

TEAM FORMATIONS: STAGGERED-LINE
Staggered Line – Sectors of Fire
Because the line formation is intended to mass firepower to the front, it offers less security to the
sides and rear. The troops on the extreme left and right of the formation will generally cover to
the left and right. You can either designate one of them to also watch the rear or you can have
both of them watch the rear on their respective sides.

60

TEAM FORMATIONS: STAGGERED-LINE
Staggered Line – Firepower vs. Vulnerability
The line formation is designed to mass firepower to the front. It is also relatively easy for the
individual team members to pivot 180-degrees to mass firepower in the opposite direction. The
staggered line is slightly less vulnerable to the sides and rear than the line and is slightly more
able to return fire in those directions.

61

TEAM FORMATIONS: ECHELON
Echelon Right – General Discussion
The echelon right makes massing firepower to the front or right easy since all team members
can fire in those directions with nearly full fields of fire. It is essentially a hybrid between the line
and the file, equally balancing the advantages and disadvantages of each. Because the echelon
right is an unbalanced formation, it is generally only useful when you are relatively sure that
enemy contact will come from the right. The team leader can position anywhere in the formation
based on the situation.

62

TEAM FORMATIONS: ECHELON
Echelon Right – Sectors of Fire
The sectors of fire for the echelon right are similar to those for the line except that the lead person
in the formation will also have to cover the left. The rear team member also has a large area to
cover. This means that coverage to the front and right is better than coverage to the rear and
left.

63

TEAM FORMATIONS: ECHELON
Echelon Right – Firepower vs. Vulnerability
The echelon right formation provides excellent firepower to the front and to the right. The
formation is extremely vulnerable to fire from the left/front and right/rear and has little ability to
return fire in those directions.

64

TEAM FORMATIONS: ECHELON
Echelon Left – General Discussion
The echelon left is the reverse of the echelon right and makes massing firepower to the front or
left easy since all team members can fire in those directions with nearly full fields of fire. It is
essentially a hybrid between the line and the file, equally balancing the advantages and
disadvantages of each. Because the echelon left is an unbalanced formation, it is generally only
useful when you are relatively sure that enemy contact will come from the left. The team leader
can position anywhere in the formation based on the situation.

65

TEAM FORMATIONS: ECHELON
Echelon Left – Sectors of Fire
The sectors of fire for the echelon left are the reverse of those for echelon right. Coverage to the
front and left is better than coverage to the rear and right.

66

TEAM FORMATIONS: ECHELON
Echelon Left – Firepower vs. Vulnerability
The echelon left formation provides excellent firepower to the front and to the left. The
formation is extremely vulnerable to fire from the right/front and left/rear and has little ability to
return fire in those directions.

67

TACTICAL MOVEMENT
Squad Formations
While team formations dictate the positioning of individual troops in relation to each other,
squad formations dictate the positioning of teams in relation to each other. At the team level
each team can use whatever formation it chooses based on the situation or a higher leader’s
orders. There are many possible combinations of team formations that can be used in each
squad formation. Therefore, to represent squad formations teams will be shown as colored
shapes labeled A, B or C etc. Individual soldiers within the teams will not be depicted in most
squad level formation diagrams.

68

SQUAD FORMATIONS: SQUAD COLUMN
Squad Column – General Discussion
The column formation provides good mobility and is easy to control. Movement is easy when
one team can simply follow the other. Spacing between the two teams can vary depending on
the situation. Closer spacing offers better control and speed of movement. Wider spacing
reduces vulnerability. Having one team in the lead and one team in trail also allows the lead team
to act as an advanced guard for the trail team We will discuss spacing and guard elements more
in the next section covering squad movement techniques. If the lead team makes contact with
enemies to the front, the trail element is in position to maneuver to either the left or right to
respond to the enemy. In very restricted terrain like jungle, sometimes the column formation
(with teams in file) is the only formation option. The diagrams below depict examples of the
squad column formation with two-team and three-team squads.

69

SQUAD FORMATIONS: SQUAD COLUMN
Squad Column – Squad and Team Combination Examples
As already discussed, squad formations describe the position of teams in relation to each other.
Within those teams, the troops can assume whatever team formation best fits the situation. The
example on the lower left is commonly used by the U.S. Army. Placing the lead team in a wedge
allows massing of firepower to the front while using a diamond in the rear improves control and
makes it easier to provide rear security. The example on the right employs an arrowhead in the
lead and a staggered file in the rear. Whether there are two or three teams in the squad, you can
combine the various team formations in any combination to fit the situation.

70

SQUAD FORMATIONS: SQUAD LINE
Squad Line – General Discussion
The on-line or line formation allows the squad the ability to mass fire to the front. However, the
line can be difficult to control while moving, especially in restricted terrain. For this reason,
squads will often move using another formation, and stop before shifting to the line formation.
In some situations, a squad might advance on-line when assaulting forward through an objective
or when sweeping/searching an area. The squad line is typically employed with teams also online or in staggered line which means all personnel are spread out side-by-side (abreast) and able
to fire forward without risk of friendly fire. The picture below depicts a squad line that has only
two teams, however, the line formation can be employed regardless of the number of teams in
the squad.

71

SQUAD FORMATIONS: SQUAD LINE
Squad Line – Squad and Team Combination Examples
As with other squad formations, the troops within the subordinate teams can assume whatever
team formation best fits the situation. The two examples below show how different team
formations can be employed in a squad line. In the top example, the teams are in wedge
formations while in the bottom example the teams are in staggered lines. The top example offers
better control and mobility while the bottom example offers better fields of fire to the front. Each
formation combination has different advantages and disadvantages.

72

SQUAD FORMATIONS: SQUAD ECHELON
Squad Echelon – General Discussion
The echelon formation calls for offsetting the trail team(s) to either the left or right in a diagonal
configuration. The direction in which the trail team is offset can be called the “strong side.” The
echelon formation provides additional security and firepower to the strong side. It will also be
easier for the trail element to maneuver to the strong side and easier for the element to quickly
break contact if they encounter enemies to the strong side. The echelon also makes it easier for
both teams to fire to the front quickly if needed, since unlike in the column formation, the lead
team is not blocking the trail team’s field of fire to the front.

73

SQUAD FORMATIONS: SQUAD ECHELON
Squad Echelon – Squad and Team Combination Example
As with other squad formations, each team in the echelon can assume its own team formation
and each of the many possible combinations has its own advantages and disadvantages. In the
example below, the lead team is in a formation that is easy to control for quick movement while
the team echeloned to the right is already in position to provide immediate fire to the front and
right in support of the lead team.

74

SQUAD FORMATIONS: SQUAD WEDGE
Squad Wedge – General Discussion
The squad wedge is easiest to control when employing a three-team squad. It calls for placing
one team in the lead with the other two teams echeloned to each side. The wedge allows almost
the same frontal firepower as the line but is easy enough to control that it can also be used as a
movement formation, even when traveling long distances or in wooded terrain. The wedge
makes it very easy for the squad to come on-line quickly and fire to the front. It is possible to
employ a squad wedge with a two-team squad. The squad leader leads the formation with each
team in echelon to the left and right. However, this formation can be difficult to control,
especially at night or in restricted terrain.

75

SQUAD FORMATIONS: SQUAD WEDGE
Squad Wedge – Squad and Team Combination Example
Below is an example of how to combine team formations in a squad wedge with three teams.
You can employ team formations in any combination, including using a different formation for
each team. However, the more complicated the formation gets the more difficult it will be to
control and maintain, especially in low visibility conditions. The example below shows one of the
most simple combinations with both the squad and subordinate teams in wedge formations.
While this arrangement is simple it is also very effective, since it is easy for the squad to
maneuver, but also easy for the individual teams to quickly come on-line and mass fire to the
front or sides.

76

SQUAD FORMATIONS: SQUAD VEE
Squad Vee – General Discussion
The squad vee is easiest to control when employing a three-team squad. It calls for placing two
teams, online (abreast) in the lead with one team to the rear in reserve. The vee formation allows
for rapid massing of firepower to the front, while still leaving a reserve element far enough back
to maneuver if needed. However, like the line, this formation is difficult to control. It is possible
to employ a squad wedge with a two-team squad. The squad leader remains in the rear of the
formation with each team extending forward in echelons to the left and right. However, this
formation can be difficult to control and is only useful in specialized situations like searching
roads for boobytraps etc.

77

SQUAD FORMATIONS: SQUAD VEE
Squad Vee – Squad and Team Combination Example
Below is an example of how to employ the squad vee with a three-team squad. By focusing the
majority of manpower to the lead, the vee makes it possible to mass heavy firepower to the front
immediately if the squad should make chance contact. In this example, the lead teams are in
wedge formations ready to come on line and fire to the front, while the rear team stays with the
squad leader in a staggered file ready to move quickly and flank around to either side or augment
the line.

78

TACTICAL MOVEMENT
Movement Techniques
Movement formations dictate the positioning of troops or teams in relation to each other and
offer different levels of advantage in mobility/control, firepower and vulnerability. Movement
techniques have to do with how the unit maintains security and prepares itself to make contact
with the enemy. Squad movement techniques ensure that if/when the squad encounters enemy
forces, the squad is in the most advantageous possible position and is not caught by surprise.
Movement techniques generally call either for the employment of a guard element, or moving
in “bounds” where one element bounds forward while the other element remains stationary
providing cover and security.
Guard elements provide early warning of enemy contact and prevent the squad from
becoming decisively engaged all at once. Essentially, if the squad is moving in one, tightlypacked group and it encounters an enemy force, the enemy will be able to see and engage the
entire squad immediately. The entire squad will be under fire and it will be difficult for the squad
to maneuver with enemy bullets cracking overhead. By pushing a smaller guard element out to
the front, flanks or rear, if that guard element makes contact with the enemy, the enemy will only
see that guard element, not the entire squad. If the enemy opens fire on the smaller guard, only
the guard element will be suppressed while the rest of the squad will be free to maneuver.
To use an analogy, one way of thinking about guard elements is that they allow you not
to show all of your cards. Pushing out a guard element means that you can keep the majority of
the squad back, out of sight of the enemy and free to maneuver. For guard elements to work,
you must take the terrain into account. For example, even if a guard element is far away from the
main element, if you do not use the terrain properly, an enemy that encounters the guard
element might still be able to see the main element. There must be enough masking terrain
features between the guard element and the main element to keep the main element hidden.
In addition to guard elements, movement techniques can call for bounding. Bounding
means that one element remains stationary while the other element moves. Having one element
move at a time offers a number of advantages. Stationary elements are much better able to
provide security or “overwatch” than moving elements. Stationary elements have an easier time

79

spotting movement and using optics to search for enemies that are farther away. Stationary
elements also make less noise so they are better able to hear enemies around them. Finally,
stationary elements are already in a formation and stable position to fire. For all these reasons, a
stationary element is much more able to provide security and covering fire than a moving
element. Keeping one element stationary allows it to provide overwatch and security for the
moving element(s).
As with guard elements, effective use of terrain is very important for bounding. For
example, a moving element must not move forward so far that the overwatching element can
no longer support it. The idea of bounding is for both elements to be mutually supporting and
able to cover each other in the event of enemy contact. When a moving element reaches a good
position to stop and set up overwatch, it will alert the other element which will then become the
mobile element and move to yet another position to stop and set up overwatch. The two
elements trade off in this manner, only one element moving at a time. There is always at least
one element that is remaining still to provide overwatch. You can execute bounding by team,
buddy team or with individual troopers.

80

MOVEMENT TECHNIQUES: TRAVELING
Traveling in Formation
Traveling is simply moving in any standard formation as a unit without using any guard elements
or bounding. Therefore, the traveling movement technique does not take advantage of any of
the security benefits just discussed. Traveling is just the standard, baseline movement technique
designed to be used when enemy contact is not likely or in an emergency situation where speed
and unit integrity are critical. For traveling, the spacing between teams should be relatively close
(approximately 20 meters) in order to maximize control, accountability and movement speed.
Because teams are closely spaced and there are no guard/overwatch elements, the squad will be
very vulnerable. You can use traveling with any squad formation. You are essentially just moving
as a unit in the base formation itself. The example below shows a squad traveling in a squad
column formation.

81

MOVEMENT TECHNIQUES: GUARD ELEMENTS
Advanced Guard (Traveling Overwatch)
When enemy contact is likely to come from the front, it is advisable to employ an advanced guard
element. To deploy the advanced guard, push a single team forward approximately 50-meters.
While 50-meters is a good rule-of-thumb, the actual distance will vary depending on the
situation and terrain. If you are operating with a three-team squad, push only one team forward
and leave the other two teams in a normal traveling configuration. It is also possible to use an
even smaller element, like a two-person buddy team, as an advanced guard if you have limited
personnel in the squad. In U.S. Army doctrine at the squad level, this movement technique is
called “traveling overwatch.”

82

MOVEMENT TECHNIQUES: GUARD ELEMENTS
Flank Guard
When enemy contact is likely to come from the flank (side), it is advisable to employ a flank guard
element to the left and/or right. To deploy the flank guard, push a single team or element out to
the side of the main formation approximately 50-meters. The actual distance will vary depending
on the situation and terrain When employing a flank guard for a two-team squad, you may
choose to use a 2-person guard element instead of an entire team. It is possible to employ two
flank guards, one to the left and one to the right, except because a squad has relatively few
personnel, this is not always practical.

83

MOVEMENT TECHNIQUES: GUARD ELEMENTS
Rear Guard
In some situations, when enemy contact is likely to come from the rear, it is advisable to employ
a rear guard element. To deploy the rear guard, leave a single team or element to the rear of the
main formation approximately 50-meters. The actual distance will vary depending on the
situation and terrain. When employing a rear guard for a two-team squad, you may choose to
use a 2-person element instead of an entire team. Employing a rear guard can be dangerous
since if the squad is attempting to break contact with pursuing enemies and the rear guard
sustains a casualty, the squad will have to go back to evacuate the casualty.

84

MOVEMENT TECHNIQUES: GUARD ELEMENTS
Terrain and Spacing Considerations for Guard Elements
There are several guidelines to consider when choosing how far guard elements should push
out from the main formation. The guard element should be far enough out so that if it makes
contact with enemy forces, those forces should not be able to see the main element. This will
allow the main element to remain undetected and maneuver on the enemy. The guard element
should be far enough out to see past major terrain obstacles (hills, ridgelines etc.) before the
main element. The guard element should not be so far out that it loses contact with the main
element or becomes isolated in the event that it takes casualties. Both elements should be
mutually supporting. It is possible to employ guard elements outside visual range of the main
element. However, this incurs greater risk and requires detailed communications plans and
control measures. When operating with only a small, squad-sized element this becomes even
more difficult and risky so it is generally better for squads to keep guard elements within visual
range. Larger units like platoons or companies have more ability to provide support and can
employ larger, more self-sustaining guard elements.

85

MOVEMENT TECHNIQUES: SQUAD BOUNDING
Squad Bounding by Team (Successive)
When enemy contact is expected, it is usually advisable to move only one team at a time while
the other team provides cover (or overwatch). Successive bounding is slower but offers more
control and reduces the chances of friendly fire, especially at night. To conduct successive
bounding (also known as “lead and trail”) the lead team will move forward to the next covered
position while the trail team provides overwatch. Once the lead team is in position the trail team
will move up until it is even with the lead team. The lead team will once again bound forward
while the trail team covers. Once the lead team is in position the trail team will move up until it
is even with the lead team.

86

MOVEMENT TECHNIQUES: SQUAD BOUNDING
Squad Bounding by Team (Alternating)
When enemy contact is expected, it is usually advisable to move only one team at a time while
the other team provides cover (or overwatch). Alternating bounding is faster but offers less
control and increases the chances of friendly fire, especially at night. To conduct alternating
bounding (also known as “leapfrog”) one team will move forward to the next covered position
while the other team provides overwatch. Once the first team is in position the other team will
move past to take the lead and occupy the next covered, overwatch position. The two teams will
continue to bound past each other, leapfrogging from one covered position to the next.

87

MOVEMENT TECHNIQUES: SQUAD BOUNDING
Spacing Considerations for Bounding
There are several guidelines to consider when deciding how far to bound forward. These are
similar to the concerns for how far out to employ a guard element. A team should not bound so
far that it loses contact with the other team. For example, a team should not bound over a hill
and out of sight. A team should not bound so far that the two teams are unable to be mutually
supporting and assist each other with casualty evacuation if necessary. A team should bound far
enough to see more than the stationary team can see. Not all bounds will be the same length,
since the distance of each bound depends on the terrain and the situation. One bound might be
short while the next will be very far.

88

MOVEMENT TECHNIQUES: INDIVIDUAL BUDDY RUSH
STEP 1: Divide the Team into Buddy Teams
While you can use the bounding movement technique as a squad, you can also use it as a team.
One common approach is the individual 3-5 second rush or the “buddy rush” when you are
under fire or assaulting through an enemy position. When conducting 3-5 second rushes, you
can have one team member rush forward at a time. This maximizes the team’s volume of
suppressive fire since all but one of the weapons will always be firing. However, this technique is
slow and can be difficult to control. Another technique is the “buddy rush” where team members
split up into buddy teams, then bound individually, alternating with their buddies. Buddy rushes
can employ either alternating bounds or successive bounds. In the diagram below, the team is
split up into two buddy teams and the individual troopers are labeled 1-4 for demonstration
purposes.

89

MOVEMENT TECHNIQUES: INDIVIDUAL BUDDY RUSH
STEP 2: One Buddy Covers and the Other Bounds
To execute one buddy in each team will lay down suppressive fire. In the example below, the
even numbered troopers (2 and 4) lay down fire. The odd numbered troopers (1 and 3) identify
their next covered and concealed firing positions, get up, rush forward for 3-5 seconds and then
take cover behind the position. Combat experience has shown that 3-5 seconds is the
approximate period of time it takes for the enemy to see you, aim at you and engage you.
Therefore, by rushing forward only for 3-5 seconds you aim to be prone and behind cover before
the enemy can react and shoot at you.

90

MOVEMENT TECHNIQUES: INDIVIDUAL BUDDY RUSH
STEP 3: Bounding Troops Stop and Cover the Others
In the example below, after the odd numbered buddies finish bounding to the next position,
they will get down and begin laying down covering fire. Once the odd numbered buddies begin
firing, the even numbered buddies can bound forward. Some schools call for buddy teams to
communicate verbally, yelling back and forth to let each other know when they are ready to
move, moving or set in their cover positions. The problem with verbal communication in a
firefight is that the sound of the gunfire is very loud and you may not be able to hear your buddy
or may misunderstand what your buddy is saying. Therefore we recommend not relying on
verbal communication. Instead, you can hear when your buddy is laying down fire when he/she
starts to shoot. That is your signal to move. When you get down and start shooting that is your
buddy’s signal to move.

91

MOVEMENT TECHNIQUES: INDIVIDUAL BUDDY RUSH
STEP 4: Bounding Troops Stop and Cover the Others
This alternating sequence continues with one person from each buddy team bounding forward
as the other person provides covering fire. Once again, the numbers are included only for
explanatory purposes to keep track of each team member.

92

MOVEMENT TECHNIQUES: INDIVIDUAL BUDDY RUSH
Problems with the Individual Buddy Rush
While the individual buddy rush is a valid technique, it can be difficult to execute safely in a highstress situation, especially for a less experienced team in limited visibility conditions. In the
previous examples, the trees were distributed evenly for the purpose of clear explanation. In the
real world, available cover might not be as conveniently positioned as in the example below. The
available cover might draw bounding troopers into the line of fire of their teammates. Once
again, this is a particularly serious risk at night or in low visibility conditions where the bounding
line can lose its continuity and become more and more disorganized with each bound. Once
again, this does not mean you should not use the individual buddy rush technique but if you do,
be particularly aware of this danger.

93

MOVEMENT TECHNIQUES: BOUNDING BY BUDDY TEAM
STEP 1: Divide the Team into Buddy Teams
As just explained, the individual buddy rush technique can be dangerous in high-stress, lowvisibility conditions. An alternative that we recommend is bounding by buddy team. Bounding
by buddy team can be easier to control and may reduce the chance of troops running into each
other’s fields of fire. Bounding by buddy team also makes it easier for troops to stay in their lanes
even when the distribution of cover is uneven as in the picture below. To execute this technique,
you still divide your team into two buddy teams as shown below.

94

MOVEMENT TECHNIQUES: BOUNDING BY BUDDY TEAM
STEP 2: One Buddy Team Covers and the Other Moves
First, one of the two buddy teams will open fire to provide support. In the example below, the
buddy team on the right provides suppressing fire while the team on the left bounds forward.
The teams will still keep their bounds within the 3-5 second limit to avoid getting seen and shot
by the enemy.

95

MOVEMENT TECHNIQUES: BOUNDING BY BUDDY TEAM
STEP 3: Bounding Buddy Team Stops and Covers the Other
Once completing the first bound, the bounding team will stop, take cover and begin laying down
suppressive fire. When the other team (the team on the right in the example below) hears the
fire begin, they will identify their next covered positions, get up and bound forward.

96

MOVEMENT TECHNIQUES: BOUNDING BY BUDDY TEAM
STEP 4: Bounding Buddy Team Stops and Covers the Other
The bounding process continues in this way with the team on the right providing cover and the
team on the left bounding forward, then the team on the left providing cover with the team on
the right bounding forward. While this technique can be somewhat easier to control than the
individual buddy rush, there is still a chance that the buddy teams might accidentally bound into
each other’s lines of fire so all troops must remain alert and be sure to stay in their lanes.

97

TACTICAL MOVEMENT
Combat Applications
Movement formations and movement techniques govern how the squad moves as a unit
through its immediate surroundings. Choosing the ideal movement formation and movement
technique helps ensure the s quad is in the most advantageous possible position should it make
unexpected contact with enemy forces. However, movement formations and techniques are
only half of the equation. The other half is choosing the best possible route or path over the
terrain while considering actual combat contingencies. Even if you expertly employ movement
formations and techniques, if you choose to move through an exposed open field or get bogged
down in a swamp, you may place yourself at a disadvantage.
The following section gives examples of applying movement formations and techniques
to real-world combat situations where enemy contact is likely or expected. There are no fixed
formulas for how to do this and like all other tactical skills, the most critical factor in effective
application is repeated practice under realistic conditions. If you take the principles in this
section, apply them to what you have already learned about movement formations and
techniques and then experiment and practice in the field against a live, thinking opponent, you
and your unit will rapidly improve your ability to move tactically on the battlefield.
While the following section offers some of the most critical concepts relating to tactical
movement, these concepts are often those that are most frequently left out of tactical manuals
or blocks of instruction in tactical schools. Therefore, we encourage you to pay particular
attention to this next section and apply the concepts and principles explained in your own
training regimen.

98

COMBAT APPLICATIONS: INDIVIDUAL MOVEMENT
Typical Individual Movement Mistakes
Even if a unit masters and correctly employs all of the movement formations and techniques
discussed so far, they may still find themselves at a great disadvantage in combat against an
adversary that knows how to apply movement formations and techniques to the reality of
combat. One of the most common mistakes is to simply walk forward in a straight line without
paying attention to the surrounding terrain. Individual squad members are either more
concerned with maintaining the exact “shape” of the formation, or perhaps they are fatigued or
not paying attention. Whatever the reason, if you find yourself walking in a straight line and the
squad unexpectedly takes fire, you may find yourself in the open when the bullets start flying.
This will bring up the question of whether you should immediately dive to the ground, or sprint
to the nearest cover and then go to the ground. Ideally, with more forward thinking and better
individual movement techniques, you would not even have to make that decision. The image
below illustrates how an individual squad member can walk forward in a straight line without
regard for cover, concealment and the surrounding terrain.

99

COMBAT APPLICATIONS: INDIVIDUAL MOVEMENT
Moving from Cover to Cover
It is better for every individual squad member to move from cover to cover, even when walking
through the woods when enemy contact is not likely. Using the same diagram from the previous
page, if you had moved a few meters to your left you would have been walking along a path with
plenty of available covered positions. You don’t actually need to take cover behind each of these
positions but should you come under fire at any given moment, you are either already behind
cover and all you have to do is get down, or you are already moving towards the next piece of
cover and you will not be caught in the open for long.

100

COMBAT APPLICATIONS: INDIVIDUAL MOVEMENT
Moving from Cover to Cover as a Unit
When moving as a unit, each individual unit member should use the same movement technique
of proceeding from one covered position to another. The team or squad can still maintain its
formation, spacing and general orientation but positioning will fluctuate as needed based on
the surrounding terrain. When moving from cover to cover as a unit, you must also consider
where your teammates may take cover. For example, in the illustration below, the team member
on the far left should not move along the dotted red line and take cover behind the tree to
his/her front right. Even though there might not be anything wrong with taking cover behind
that tree when moving as an individual, when moving as a team you must consider that the team
member to your right will move to that tree. While it is possible for two team member to take
cover behind the same object, it is generally preferable to stay spread out if possible.

101

COMBAT APPLICATIONS: INDIVIDUAL MOVEMENT
Altering Movement Speed Based on the Terrain
When moving from cover to cover, you shouldn’t just change direction, you should also change
speed. Pick up the pace between cover and slow down when you are close to cover. If there are
big gaps you may even want to run. Speeding up between covered positions reduces the
amount of time you spend exposed in the open. However, when you are moving fast, it is harder
to spot movement around you and harder to hear the enemy. So, when you are moving fast, you
might as well focus your attention on the path in front of you, watching out for obstacles and
ensuring you do not trip. Then, when you slow down next to each cover, take that time to
carefully look around you for the enemy. You can even momentarily stop to look and listen for
signs of enemy presence. Before you speed up again and move to the next covered position,
quickly make eye contact with your fellow teammates to ensure no one is trying to signal you or
drifting out of contact. Finally, identify the next covered position before you speed up, then pick
up the pace to reach the next covered position.

102

COMBAT APPLICATIONS: SITUATIONAL AWARENESS
Looking for the Enemy – What to Expect
As already discussed in the previous section, whenever you slow down or stop when moving
near a piece of cover, you should focus your attention on looking for the enemy. However, to
truly be effective at spotting enemies on the battlefield, you must do a lot more than simply
“keep your head on a swivel” as conventional wisdom would suggest. When most people keep
their head on a swivel they are subconsciously looking for (or expecting to see) the image on the
lower left. However, in reality, a more skilled and competent enemy might look more like the
image on the lower right. The only way you are going to detect the enemy on the lower right is
not by swinging your head around on a swivel, but by knowing exactly where to look and
focusing on that spot to identify any small inconsistencies in color, glare, movement, shadow or
outline.

103

COMBAT APPLICATIONS: SITUATIONAL AWARENESS
Where Not to Look – Open/Clear Areas
When you keep your head on a swivel, you are looking at everything around you. However, most
of what is around you is not worth too much of your attention, at least nothing more than a quick
glance. For example, the picture below shows a typical wooded area that is relatively open and
free of vegetation. The large trees provide good cover should you make contact with the enemy.
There are a number of places where enemies could be hiding in this picture but there are also
many places where the enemy is most likely not hiding.

Unless you are facing an enemy that operates in subterranean tunnels or buries himself, there
are most likely no threats in the open area that is plainly visible around you, marked in red in the
image below. While you should not completely ignore this area, you can focus your attention on
areas where the enemy is more likely to be hiding.

104

COMBAT APPLICATIONS: SITUATIONAL AWARENESS
Where Not to Look – Isolated Cover
Another place where enemies are less likely to be hiding is behind pieces of isolated cover. The
reason for this is because while isolated cover might provide good protection and concealment
initially, it doesn’t offer any safe route of retreat. If you hide behind a piece of isolated cover when
adversaries are close by you are essentially stuck there and it is only a matter of time before you
get flanked. Most enemies will not want to put themselves in this position. Pieces of isolated
cover also present less of a threat because there are only so many enemies that can hide behind
a single isolated tree, rock or log. For all of these reasons, when searching for the enemy, you can
focus less of your attention on isolated cover. However, it is important to remember that not all
enemies might be smart or rational and some may have no fear of sacrificing themselves to kill
a few members of your unit. Such enemies might have no problem hiding behind isolated cover,
waiting for you to pass by and then opening fire or tossing a grenade, knowing their chances of
escape are minimal. Therefore, depending on the environment and the nature of your enemy,
you still may need to remain aware of potential threats hiding behind isolated cover.

105

COMBAT APPLICATIONS: SITUATIONAL AWARENESS
Where Not to Look – Brush with No Cover
While it is not impossible, it is less likely that enemies will hide in thick bushes that provide no
actual cover or protection from bullets. There are several reasons for this. First, smarter, more
competent enemies will try to take advantage of both cover and concealment, not just
concealment. Second, finding a good prone firing position in very thick bushes or briars can be
difficult. In most cases when you lie down, you won’t be able to see more than a foot in front of
you because bushes are blocking your view. If you move far enough forward to see more clearly,
the bushes will no longer be masking your position. It can also be uncomfortable to lie down in
thick brush for long periods and difficult to change positions or adjust your aim. For all of these
reasons, enemies will tend not to lie tangled in the middle of bushes with no cover. However,
skilled enemies can camouflage carefully prepared, dug-in or fortified positions to look like
natural brush. Less skilled enemies may also hide behind bushes, even though doing so provides
them little cover or observation. So, you should not completely discount bushes when searching
for the enemy.

106

COMBAT APPLICATIONS: SITUATIONAL AWARENESS
Looking for the Enemy – Most Likely Enemy Positions
Open/clear areas, isolated cover and brush with no cover are just a few examples of places where
the enemy is less likely to be hiding. As you search for the enemy, use common sense and past
tactical experience to anticipate the locations where the enemy is most likely to be, then focus
on those areas carefully. Look for small inconsistencies in color, glare, movement, shadow or
outline. Look for disturbed earth, overturned leaves, broken or disturbed branches, flattened
grass, moss scraped off rocks or trees etc. You may not be close enough to see such small details
but do your best to identify even the smallest signs of enemy presence. Returning to the picture
below, having ruled out the less likely places where an enemy could be hiding, we can zero in on
two spots that present a greater threat. The two areas marked in green near the large fallen logs
offer a combination of cover and concealment where more than one person could hide. It would
also be easier for enemies hiding in these locations to pull back or break contact, particularly in
the location on the left. While skilled enemies would know it is not always ideal to pop up and
fire over a fallen log (because popping your head up over a piece of cover makes you easier to
spot) they might stay low to the ground and shoot around the log or use a combination of cover
provided by the log and nearby trees, along with concealment provided by bushes. This is an
example of the type of enemy activity you should be looking for around the two fallen logs. It is
also important to remember that even if you do not spot the enemy before he opens fire, by
using the techniques just described you will have a must better chance of pinpointing the enemy
after he opens fire. In many cases, infantry units come under fire and it takes a while to identify
where the fire is coming from. This process speeds up if you are already expecting the fire to
come from specific locations and know where to look.

107

COMBAT APPLICATIONS: SITUATIONAL AWARENESS
Looking for the Enemy – Planning Your Reaction
Once you determine the locations where the enemy is most likely to be hiding, you should use
that information to help you decide where to seek cover should you take fire from that direction.
You may choose to alter your path towards a different piece of cover that offers better protection
in the direction of greatest threat. In some cases you might identify two pieces of cover, one that
provides better protection against an attack from the right and one that offers better protection
against an attack from the left. The more you can use your brain, anticipate enemy actions and
prepare to react quickly, the better your chances of survival should you come under fire.
However, it is also important not to overthink the situation and try to pre-plan every action in
response to every possibility. When you first practice going through the process explained above
including moving from cover to cover, looking for the enemy and planning your reactions
accordingly, you might feel overwhelmed or confused, just as shooting a weapon or performing
a hand-to-hand fighting movement can seem awkward at first. However, the goal is for all of
these thoughts and actions to become instinctive or second nature. When you walk by a
potential threat area to your left, you will instinctively feel exposed and gravitate towards a piece
of cover that protects you from that direction. The goal is to develop a “game sense” for combat
just as skilled athletes develop a game sense for their sport.

108

TACTICAL MOVEMENT
Route Planning and Navigation
Movement formations and movement techniques govern how the squad moves as a unit
through its immediate surroundings. Choosing the ideal movement formation and movement
technique helps ensure the s quad is in the most advantageous possible position should it make
unexpected contact with enemy forces. However, movement formations and techniques are
only half of the equation. The other half is choosing the best possible route or path over the
terrain. Even if you expertly employ movement formations and techniques, if you choose to
move through an exposed open field or get bogged down in a swamp, you may place yourself
at a disadvantage.
The best possible route depends on many factors. However, the most important factor is
your assigned mission. If the mission objective is to search and attack enemy forces, a more
exposed route with better observation and fields of fire might be the best option since after all
you are not trying to avoid enemy contact. There are other situations where a more exposed
route might be preferable. One example is a presence patrol in a counterinsurgency operation
where physical presence or deterrence is critical. Another example is a mission where speed is
critical, calling for movement over unrestricted terrain.
While taking a more exposed route with better observation might be appropriate for
some missions, other missions might call for taking maximum advantage of concealment. If the
objective is to infiltrate enemy territory and avoid detection, a route through densely vegetated
low ground might be ideal. This route might be much slower and offer very limited observation.
However, based on the mission requirements these disadvantages are not relevant. The most
important factor is avoiding detection and minimizing exposure.
Many other mission-related and environmental factors can influence which route is best
in a given situation. For example, when operating at night, moving at the base of a hill can offer
better observation of your surroundings. This is because it is easier to look up and see enemies
silhouetted against the sky than it is to look down and see enemies in the darker low ground.
Therefore, if a mission is primarily going to take place at night, it might be better to plan a route
along the low ground than on the high ground. However, if you know that vegetation or marsh

109

in your area of operations makes the low ground impassible you may have to adjust your route
accordingly. In summary, the best route for one mission might be completely different than the
best route for another mission, even if the start and end points are the same.
The illustration below gives an example of the options just discussed. The route on the
far right passes through low ground and might be a good choice for infiltrating undetected into
enemy territory. The route in the middle is over higher ground which is more exposed but offers
better observation and fields of fire for a search and attack or presence patrol. Finally, the route
on the left still takes advantage of the terrain but runs along the base of the hill, making it a
potentially good route for a night mission. Each of the three routes might be a good choice in a
different situation.

110

The Indirect Approach
One of the most important principles in route planning is the concept of the indirect approach.
In the terrain example below, your mission is to assault an objective on the face of a hill. The
slope approaching the objective head-on is fairly gentle. To the right of the objective (as oriented
in the image) are steep, rocky cliffs. What is the most effective approach to the objective?
Approaching the objective head on is clearly easier. That approach will allow for greater
speed of movement, better fields of fire, greater control and less fatigue. However, because this
approach is the easiest and most likely, it is also the approach the enemy will expect you to take,
meaning it will be the most carefully observed and most heavily defended.
Flanking around to the right forces you to negotiate very difficult terrain, scaling steep
cliffs to reach the objective. Movement will be slow, dangerous and you will be seriously
vulnerable when scaling the cliffs. However, because the approach is so difficult, the enemy
might not expect you to attempt it. They may leave the cliffs undefended and you will take the
enemy by surprise.

111

The indirect approach is not always the best option. However, history has proven that the
indirect approach often proves more effective than the direct approach and affords greater
surprise. The term “indirect approach” was first coined by Basil Liddell-Hart, an interwar British
military officer and theorist who contributed greatly to modern military thinking. In the words of
Liddell-Hart, “Throughout the ages, effective results in war have rarely been attained unless the
approach has had such indirectness as to ensure the opponent’s unreadiness to meet it…In
strategy, the longest way round is often the shortest way home.”
There are many historical examples of how the indirect approach contributed to victory
in battle. In December 1943, the 1st Special Service Force used the indirect approach to destroy
German gun positions on Mont La Difensa which were considered invincible. The Germans left
one approach undefended because it was a sheer cliff that was thought unscalable. Using their
mountaineering expertise, the 1st Special Service Force scaled the cliffs, catching the Germans
completely by surprise and destroying the gun positions.
While scaling cliffs is one of the most commonly used examples of the indirect approach,
there are many ways you can surprise the enemy by choosing a route that is more difficult. In
World War I, T.E. Lawrence surprised the Turks at Akaba by crossing a supposedly uncrossable
desert with indigenous forces riding camels. The Germans surprised the French in 1940 by
driving tanks through the densely wooded Ardennes Forrest which the French had assumed was
impassible by tanks. There are many ways to use the indirect approach to achieve surprise and
avoid the strength of the enemy defense. Therefore, it is always important to consider the
advantages of the indirect approach when planning a route to an objective.

Cover/Concealment vs. Observation/Fields-of-Fire
In general, as cover and concealment improve, observation and fields of fire decrease, and vice
versa. It is rare to have both good cover/concealment and good observation/fields of fire. It is
possible to have both excellent observation and good cover, but that generally requires digging
in or establishing defensive positions.
In discussing these factors, it is first critical to differentiate between the definitions of
cover and concealment. Cover provides protection from bullets, shrapnel and other types of
hostile weapons or fire. Concealment only provides protection from enemy observation, not
enemy bullets. So, for example a very large tree or stone provides good cover since it can stop
bullets. A thick bush might provide good concealment but provides virtually no cover since
bullets can pass through a bush easily.
While these distinctions seem obvious, it is common for even experienced fighters to
mistake concealment for cover, falsely believing they are safe from enemy fire just because the
enemy cannot see them. One common example of this in urban combat involves tactics that call
for taking cover behind walls inside a building. In most cases, interior walls are not bulletproof
and if you attempt to use them as cover the enemy will likely just shoot you through the wall.

112

In rural terrain, the availability and nature of cover and concealment typically follows
predictable patterns. Higher ground generally offers better cover because if you notice, the
biggest trees generally grow on higher ground. Large rock formations that provide excellent
cover can also be easier to find on higher ground. However, higher ground is typically more
open, less vegetated and moving on higher ground can sometimes skyline you against an
illuminated background. Therefore, higher ground typically offers less concealment than lower
ground.
The lower ground generally offers better concealment because of the thick brush and
bushes that live on the low ground. Water runs downhill and it is therefore common for many
small plants to grow in the low ground. However, because there is often less sunlight on the low
ground, it can be less common for large trees to grow there, meaning there is generally less cover
on low ground. The thick brush of the low ground provides little protection against bullets and
shrapnel. In summary, high ground generally provides better cover but less concealment while
low ground provides better concealment but less cover.
Because of all the factors just discussed, high ground also typically offers better mobility,
observation and fields of fire. Because there is less brush to negotiate on high ground and the
earth is firm and dry, it is easier to move quickly across high ground. The lack of vegetation and
higher vantage point also provide better observation and field of fire from the high-ground.
Moving through low ground can be more difficulty and often requires cutting your way through
briars and the ground is often wet or swampy. There are of course exceptions to all of these
trends but understanding common patterns in the nature of terrain on high ground and low
ground can be very useful for route planning.

113

The Military Crest
In hours of daylight, it is best to move on the military crest of a hill. The military crest is as high
on the hill as possible without skylining yourself, but low enough so that there is no dead space
further down the hill. In the example on the lower left, one of the troops is on the military crest
but the other one is too high up the hill to see all the way down the face of the hill. There is dead
at the base of the hill where enemies could be hiding. In the example on the lower left, one of
the troops is on the military crest but the other is too high up the hill and is skylining himself
above the horizon.

While it is best to move on the military crest in daylight, it can be beneficial to move further
down the hill during hours of darkness. At night, the best way to detect the enemy is often to
see him against the sky or to hear him. Therefore, at night it can be helpful to move as far
towards the low ground as possible without getting caught up in the noisy, thick brush. This
allows you to look up the hill and see enemies approaching from the higher ground while it is
difficult for them to look into the dark low ground and see you.

114

In some environments the low ground is also more damp which means it can be less noisy to
move across. On damp ground there are fewer dry sticks and twigs you can break under your
feet. Also, since there are generally fewer large trees growing on low ground, that means there
will be fewer dry leaves to rustle and make noise as you walk through them. For all of these
reasons, moving on the low ground can be quieter at night and offer you better chances of
spotting nearby enemies.

Tactical Use of Terrain and Land Navigation
The concepts in this chapter help you use terrain to your advantage in different situations and
how to navigate from one point to another while maintaining the tactical edge. Tactical use of
terrain and ease of travel/navigation can sometimes run counter to each other. For example, the
easiest way to navigate from point A to point B is often to walk along a road or navigate between
the largest, most obvious terrain features. However, these options are both not ideal in most
tactical situations when you are trying to maintain security and avoid detection by the enemy.
While moving down an open road is generally not the best option, you still must be able
to identify terrain features around you to know where you are and where you are going. In order
to be effective as a combat unit, you must learn to do this reliably and effectively while still
maintaining the tactical advantage. There are certain techniques and tricks to keep yourself
oriented while moving tactically in rural terrain. These techniques become particularly important
at night and in low visibility conditions when infantry missions are most likely to take place.
These techniques include the use of checkpoints, handrails and backstops.

115

ROUTE PLANNING: STRAIGHT LINE MOVEMENT
Disadvantages of Straight-Line Movement
When moving from one point to another in the field, less experienced units often move in a
straight line using “dead reckoning.” Dead reckoning involves using a map to identify a distance
and direction (azimuth) to an objective, then using a compass and pace count to move exactly
that distance on that azimuth. While this method of navigation makes planning and execution
simple, there are several reasons why is it generally not a good idea to move in a straight line.
First, when you move in a straight line it is easier for the enemy to track you, attack you, or predict
your destination. If the enemy can predict your location in the future they can set an ambush for
you or call in artillery on your formation. Second, if you are moving in a straight line you are most
likely not taking advantage of the terrain in the ways discussed earlier. Finally, in some cases it
might be difficult to find a straight path that is free of obstacles and easy to travel. For all these
reason, walking in a straight line is rarely the best option.

116

ROUTE PLANNING: CHECKPOINTS
Use of Checkpoints to Avoid a Straight Line Route
Instead of moving in a straight line to your objective or final destination, it is better to identify a
series of checkpoints along your way and move from one checkpoint to another. A checkpoint
(or waypoint) is an intermediate destination or stop along your route. Each leg of your route
starts and ends with a checkpoint. When planning your route, you should identify the azimuth
and distance for each of these legs, along with reference points and terrain features to help you
orient yourself as you move. It is important to be able to pinpoint your exact location at any given
time during your mission since you might need to unexpectedly change course, call in artillery
or medical evacuation assets.

117

ROUTE PLANNING: CHECKPOINTS
Poor Choices for Checkpoints
When selecting checkpoints for your mission route, one of the first things to know is what types
of terrain features make bad choices for checkpoints. Some examples of poor checkpoint options
include road intersections, open areas and hilltops. Inexperienced leaders often choose these
terrain features as checkpoints because they are easy to identify on the map and easy to find on
the ground. However, they are not good choices for checkpoints in a combat operation because
they are all areas that are exposed and frequently trafficked by both enemy and civilians. Even if
you don’t walk right up on them, getting near them is still dangerous.

118

ROUTE PLANNING: CHECKPOINTS
Good Choices for Checkpoints
Good checkpoints can be difficult to find and there is no fixed formula for choosing good
checkpoints. A good checkpoint needs to meet the contradictory criteria of being discrete
enough to avoid enemy attention, but obvious enough for your unit to be able to find on the
ground, often at night or in poor visibility conditions. Two terrain features that can sometimes
meet these difficult criteria are trail-stream intersections (not ones that include bridges) and tips
of draws. Each of these terrain features is still relatively easily identifiable, even in limited
visibility, but they are also less exposed and less commonly occupied by enemy or civilians.

119

ROUTE PLANNING: HANDRAILS
Employ Handrails to Avoid Drifting Off Course
A handrail is a linear, easily identifiable terrain feature that you keep within view to your left or
right to stay on course. If you lose sight of the handrail or accidentally bump into it, you know
you are drifting off course. Some terrain features make good handrails and some do not. Roads
are bad handrails. They are frequently traveled by enemy and civilians, staying near them is
dangerous. Draws or low-ground make good handrails. They are still easy to identify (you can’t
cross them without knowing) but they are less visited by civilians or enemy. On the map below,
the road (market in red) would make a poor handrail but the edge of the low ground (marked in
blue) would make a better handrail.

120

ROUTE PLANNING: BACKSTOPS
Employ Backstops to Avoid Overshooting the Objective
A backstop is a linear, easily identifiable terrain feature that lets you know when you have gone
too far. As is the case with handrails, some types of terrain features make better backstops than
others. A good backstop is a hilltop, ridgeline or low-ground. These terrain features don’t change
over time and they are still easy to identify. Roads and small streams make poor backstops. They
change over time and the roads or streams on a map don’t always match reality. On the map
below the low-ground or ridgeline marked in blue would make a good backstop. The trail/road
marked in red would not be a good choice for a backstop.

121

ROUTE PLANNING: COMPLETING THE ROUTE
Combining Checkpoints, Legs, Handrails and Backstops
Combining all of the points already discussed on how to use terrain to your advantage and how
to plan a route, the ultimate objective is to be able to plan a route with a series of checkpoints
and legs from a start point to an objective. Ideally the route should make maximum use of the
terrain and include control measures such as handrails and backstops. The map and route plan
below are not to scale and serve only as an example. The route goes from a patrol base to an
ambush objective and includes two checkpoints. The grid coordinates for both the start point,
end point and checkpoints are specified, along with the distance and azimuth between each
point. The plan also includes handrails and backstops. Once again, the map, map graphics and
navigational data are generalized and are meant only as an example.

122

BATTLECRAFT
Traditional Battle Drills
Movement formations, movement techniques and tactical route planning all help ensure that
your squad is in the most advantageous possible position if you make contact with the enemy.
The next step is knowing what to do when you actually make contact and the bullets are flying.
For many modern military forces, the answer to this question begins with a battle drill. In general
terms, a battle drill is a standardized set of actions or procedures designed to allow a unit to
rapidly react to enemy contact without needing a deliberate decision-making process. Having a
pre-planned, pre-rehearsed response to enemy action allows a unit to react quickly and retain
the initiative.
The concept of the battle drill was originally developed by the great military thinker Sir
Basil Liddell Hart who served in the British Army during World War I and in the interwar period.
Battle drills have evolved over the years and form a critical part of modern tactical doctrine.
However, we would argue that while the logic of battle drills is sound and important to know,
the way battle drills are frequently taught can lead to inflexibility and may be confusing or
problematic when trying to achieve optimal results in combat. Therefore, in the next section we
review the concept of the battle drill and examples of common battle drill principles as a starting
point for discussing more flexible approaches to fire and maneuver.

The Logic of Battle Drills
While this manual aims to move beyond rigid application of pre-rehearsed battle drills and
identify some of the shortcomings in battle drill doctrine, it is first import to understand the
intended logic behind battle drills. The main reason why battle drills prove less effective in
combat is because practitioners often misunderstand how battle drills are supposed to be used.
When understood and applied properly, battle drills are not incompatible with the concepts,
tactics, techniques and procedures covered in this book. However, as they are commonly

123

misunderstood and incorrectly applied, battle drills can lead to less flexible, less effective combat
units.
Like all doctrine, battle drills are not intended as a rigid prescription that must be followed
to the letter. Battle drills are a guideline or start point upon which to build and adjust your tactics
based on the situation. The problem is that while they may not be intended to be followed as a
rigid process, that is often the way they are written in manuals. Readers often glance over the
comments in the introductory paragraphs that state that battle drills are a guideline and skip
directly to the steps, which are presented in a fairly rigid, prescriptive manner.
The second, often misunderstood logic of battle drills is that they are primarily designed
to buy time for leaders to make a better, more flexible decision based on the situation. In combat,
freezing or failing to act/respond quickly is never beneficial. Initiative and aggressive action
alone is sometimes enough to secure victory in battle. However, in infantry combat, it can
sometimes take time for a leader to fully understand the situation, let alone make a decision and
execute a course of action. The idea behind a battle drill is that it gives the unit something to
execute (or begin executing) right away in order to retain the initiative and keep the enemy off
balance while the leader gathers information, assesses the situation and comes up with a course
of action.
Once again, while this logic makes sense, it is often misunderstood. However, when
presented in a slightly different way with a few modifications, the same core logic behind battle
drills becomes easier to grasp and apply in real combat scenarios. More importantly, execution
becomes more flexible which means momentum is less likely to break down in highly stressful,
rapidly changing combat conditions.

Battle Drills vs. Battlecraft
In this book, we attempt to frame battle drills as they were originally intended to be
framed, as guidelines for more creative action and as starting points to retain the initiative and
buy time for the leader to make a decision. Rather than simply offering the steps of a battle drill
as a fixed prescription, in the next chapter we will outline the steps for a typical battle drill and
then go on to discuss some potential disadvantages that might come from executing the battle
drill exactly according to the prescribed steps.
The following chapters will then discuss “immediate action response” (the term we use
for immediate action drill) which is essentially smaller, more flexible versions of the traditional
battle drill that still accomplish the battle drill’s main objective of offering a starting point to buy
time for the leader to make a decision. The next sections will then essentially break down the
component parts of the battle drill and expand upon them in a discussion of fire and maneuver
with either two elements or three elements.
We consider this approach to learning battle drills, immediate action, fire and maneuver
to be more conducive to flexibility and creative thinking. We use the term “battlecraft” to
describe this approach, drawing from another British military term from the World War II era. We
chose the term battlecraft because the term “craft” suggests a deeper, more complex
124

understanding or artform beyond a rigid drill or process. Battle drills, an understanding of them
and how to apply them forms one component of battlecraft. Immediate action response
training, fire and maneuver, tactical use of terrain and close combat tactics also are component
parts of the larger discipline of battlecraft.
As we have already discussed, while there are many books and schools that cover infantry
doctrine, the actual discipline of knowing how to fight and defeat the enemy on the battlefield
is often overlooked and could be considered a lost art in some ways. Battlecraft offers a new term
to describe a new way of thinking about infantry combat and the real-world tactics, techniques
and skills required to win on the battlefield.

125

TRADITIONAL BATTLE DRILLS: SUPRESS AND FLANK
STEP 1: Lead Team Makes Contact and Returns Fire
The standard squad level battle drill taught by the U.S. Army and many other allied military forces
could be described as a suppress and flank battle drill. The squad will usually start off moving in
column formation with one team in the lead and one team in trail. When the lead team makes
contact with the enemy it will come on-line facing the enemy and return fire.

126

TRADITIONAL BATTLE DRILLS: SUPRESS AND FLANK
STEP 2: Squad Leader Communicates with Lead Team
At this point, the squad leader will communicate with the lead team, either by radio or by
running up to the lead team to assess the situation. At this time, the squad leader will generally
bring or send the machine gun up to support the firing line in contact. If the lead team has
encountered a large enemy element the squad leader might decide to break contact. If the
enemy is smaller the squad leader might decide to have the team in contact handle the situation,
or bring up the trail team to flank around to the left or right.

127

TRADITIONAL BATTLE DRILLS: SUPRESS AND FLANK
STEP 3: SL Identifies Movement Reference Points
Before leaving the lead team, the squad leader will generally identify some reference points on
the terrain in the direction of the enemy contact. While keeping track of one’s location while
flanking around to assault an enemy position might seem easy, it is not uncommon for flanking
elements to get lost or even accidentally double back and shoot their own squad members,
especially at night or in limited visibility. Identifying some terrain features or reference points
leading to the enemy position can be helpful to keep the flanking element on track. If possible,
try to choose reference points or terrain features that are unique and easily identifiable from
multiple directions. Picking “a tree” as a reference point in a forest probably won’t work.

128

TRADITIONAL BATTLE DRILLS: SUPRESS AND FLANK
STEP 4: Squad Leader Designates Shift-Fire Point
Next, it is useful to designate target reference points for the suppression/support element,
particularly for the machine gun. At a minimum, the squad leader should pick an easily
identifiable point to help the suppression element shift fire once the assault element begins to
cross the objective. If the suppression element is firing heavy weapons at the enemy, when it
comes time for the assault element to assault through the enemy position, the assault element
might get hit by bullets fired by the support element. It is therefore critical for the support
element to shift fire in a safe direction or to cease fire all together to avoid shooting friendly
troops. Before leaving the support element, the squad leader will identify a point on the ground
past which the support element should shift fire once the assault element is in position to assault.

129

TRADITIONAL BATTLE DRILLS: SUPRESS AND FLANK
STEP 5: Squad Leader Guides Rear Team in Bold Flank
The squad leader will then move back to the rear team and lead the team around to flank the
enemy, watching out for the movement reference points he/she previously identified. The
conventional wisdom is generally to execute a “bold flank” meaning to move around in a wide
arc. If the flanking movement is not bold enough, the enemy will be able to see the flanking
element coming.

130

TRADITIONAL BATTLE DRILLS: SUPRESS AND FLANK
STEP 6: Flanking Element Assaults Through Objective
Upon reaching the assault position, the squad leader will give the shift fire signal to the support
element to ensure the flanking element does not run into friendly bullets. The squad leader will
then hand control over to the flanking team leader and allow the team leader to aggressively
assault forward and engage the enemy in close combat. The team leader will generally use
buddy rushes or bounding techniques when assaulting through. The squad leader will remain in
a position to best coordinate the movement of the assault team with the incoming fire from the
support element.

131

TRADITIONAL BATTLE DRILLS: SUPRESS AND FLANK
STEP 7: Assault Element Reaches Limit of Advance
Once the assault element has eliminated all threats and reached the end of the enemy positions,
the assault team leader or squad leader will call out “LOA” or (limit of advance) to get the
assaulting element to stop and hold in place, remaining in a line formation. The support element
will then pick up and move forward, also assaulting across the objective and forming a line
perpendicular to the assault line. At this point the squad will perform “actions on the objective”
which can include a number of different activities including checking the dead and caring for
casualties.

132

TRADITIONAL BATTLE DRILLS: COMMON PROBLEMS
PROBLEM 1: Engagement Distance and Ammo Load
The previous sections offered a general explanation of the standard, doctrinal suppress and flank
battle drill. While as we have already mentioned, this drill is intended only as a guideline or
starting point for tactical maneuver, there are a number of problems with using the unmodified
battle drill exactly as prescribed in the book. The first has to do with the length of the flank. A
typical engagement range in conventional warfare could be as far as 200m or 300m. This means
if the flanking element makes even a moderately bold flank (as shown in the picture, the total
movement distance for the flanking element will likely be farther than 500m. Moving 500m over
rough terrain in full gear, especially at night can take time. Then consider that if the machine
guns in the support position are firing at a sustained rate of fire, based on standard U.S. Army
basic ammo loadouts, the light machine guns will have probably expended their ammunition
and the medium machine guns will be at least half-empty by the time the assault element is in
position to assault. These figures cannot be exact since many variables come into play, however,
with the weapons and ammo available to the squad, a long, bold flank will likely present
problems.

133

TRADITIONAL BATTLE DRILLS: COMMON PROBLEMS
PROBLEM 2: Exposure to New Threats and Isolation
Given the engagement distances just discussed, by the time the flanking element is approaching
the assault position, it will be able to see a lot farther and a lot more than the area originally
visible to the support element. In the example below with shaded observation areas, the lead
team understandably makes contact near the limit of its observation range and will see only one
enemy element. As the trail team flanks around and moves ahead, it may see and be exposed to
additional enemy elements that are not visible to the support element. The support element
therefore cannot provide covering fire to help protect the flanking element. Furthermore, given
that the flanking element is attempting a bold flank, the flanking element might be so far away
that it is not even be visible to the support element when these new enemy forces appear. This
could leave the flanking element completely isolated and facing potentially superior forces. At
this point the two elements are no longer mutually supporting and therefore cannot effectively
break contact.

134

TRADITIONAL BATTLE DRILLS: COMMON PROBLEMS
PROBLEM 3: Unpredictable Enemy Reaction
The basic battle drill formula also assumes that the enemy either chooses to do nothing or is
unable to do anything because they are completely suppressed by supporting fires. While either
of these results is possible, it would be foolish to assume that the enemy will do nothing in every
case. Combined with the possibility mentioned earlier of additional enemy units further away
that you didn’t initially spot, there are quite a few possibilities for enemy counteraction. The
enemy might attempt to flank you from the same side or the opposite side of your flanking
element. The enemy might attempt to attack and destroy your support element or anticipate
your flank and wait in ambush for your assault element. Even more likely, the enemy will simply
try to pull back and break contact. Any of these actions changes the scenario and makes the basic
battle drill formula break down in some way.

135

TRADITIONAL BATTLE DRILLS: COMMON PROBLEMS
PROBLEM 4: Enemy Indirect Fire
As already discussed, depending on the engagement range it can take the assault element a
while to bound around into the assault position. If the enemy has indirect fire assets like mortars
or artillery, he will likely call in a fire mission as soon as the engagement starts. You should study
patterns for enemy artillery employment and response time in your area of operations to know
the approximate time window you have before rounds start falling on your position. If the enemy
response time is fast, it might not be safe or wise to leave a supporting element in place for a
long period of time.

136

TRADITIONAL BATTLE DRILLS: COMMON PROBLEMS
PROBLEM 5: Attacks from Other Directions
Battle drills as explained in doctrinal manuals can be applied to enemy contact in any direction.
However, because the specific examples, drawings and steps in the manuals often focus on
contact to the front, military units frequently end up practicing only attacks to the front and fail
to practice executing the battle drill in different directions. While the fundamental steps and
movements of the drill remain generally the same, there are some important changes in how
you execute the drill based on the direction from which the attack is coming. Taking a more
flexible approach to fire and maneuver from the outset sets you up for success when
encountering enemies from different directions.

137

BATTLECRAFT
Immediate Action
As already discussed, the logic behind battle drills is sound but the practice and application of
battle drills often becomes more rigid and inflexible than was originally intended by the doctrine
writers. This book advocates a slightly different approach to infantry combat that we believe is
more flexible, easier to understand and more focused on real-world application than it is on
process. We refer to this new approach as battlecraft. At the foundation of battlecraft is the
concept of an “Immediate Action Response” (sometimes referred to as an Immediate Action Drill)
is similar to a battle drill but differs in some key ways.
In their application, battle drills can end up being too “big.” Most battle drills offer steps
or prescribed actions that go from initial contact to consolidation and reorganization on the
objective. In short, the battle drill tells you exactly what to do from the moment the shooting
starts until the enemy is destroyed. An immediate action drill only offers steps to respond to the
initial contact with the enemy and the drill ends there. This allows for a quick, reflexive response
to enemy fire but does not lock the squad into any specific course of action after that.
While the most common term is immediate action “drill,” we prefer to call it immediate
action “response.” The reason for this is even though immediate actions have to be instinctive
and reflexive, there is still some flexibility required. Essentially, you cannot simply perform the
drill the same way every time. The terrain and situation will always be unpredictable and if you
train for immediate action like a drill that never changes, you may not make the right choices in
the heat of a stressful moment.
The following section explains how to train for and execute an effective immediate action
response. To be truly effective, you must not apply the immediate action response in isolation,
but rather it should build off of everything you have already learned. If you are moving over the
most advantageous terrain, employing the optimal movement formations and techniques, you
will already be halfway to executing a good immediate action response.

138

Navigation Roles and Route Selection
The first step to executing an effective immediate action response is ensuring that you are
moving along a route that puts you in the most advantageous position should you make contact
with the enemy at any given point along the route. If you employ the concepts already discussed
in the section on navigation and route planning you will likely be on the way to achieving this.
The map below (taken from the section on navigation and route selection) gives an example of
a route with checkpoints and legs that attempts to take advantage of the terrain based on the
mission. As already mentioned, the map is not to scale and is intended only as an example for
explanatory purposes.

For the reasons already explained in the previous section, the route does not follow an exact
straight line but rather consists of checkpoints with specific distances and azimuths from one
checkpoint to the next. In the example above, the squad will change direction three times while
moving to the objective which offers advantages over moving along a single straight line.
However, it would be even safer and more effective if the squad was able to change direction as
needed and adjust its path according to the terrain between each checkpoint as well. Therefore,
the squad would be constantly changing direction to take advantage of the terrain, rather than
just changing direction three times.
Accomplishing this begins with assigning specific roles for different squad members
when it comes to navigation. It can also be helpful to use the arrowhead (modified diamond)
formation for several reasons. As already explained, if the pointman is also responsible for
139

navigation and checking the map, it is likely the pointman will become overly burdened. Walking
point is a difficult job and it is best for the pointman to be able to focus full attention on the
enemy and the surrounding terrain, without having to look down at a map and compass. The
lead team leader is a good choice to assign as the lead navigator for the squad. This allows the
squad leader to focus on the bigger, tactical picture and communicate with higher headquarters.

Therefore, as in the picture above, the pointman focuses outward on the enemy to allow the lead
team leader to keep track of the squad’s position on the map, along with the azimuth and
distance to the next checkpoint. However, if the team leader is not actually in the lead of the
formation, leading the squad, how can he/she ensure that the squad is going in the right
direction?
The answer is that the navigator only provides general adjustments to the squad’s course
and it is the pointman who actually determines the squads path along the terrain. Periodically,
the pointman will look back and the navigator will give a hand signal (generally pointing with a
knife hand) to indicate the direction to the next checkpoint. The navigator will emphasize if the
squad is drifting to the right or left as needed. Essentially, the navigator becomes the pointman’s
compass. However, the pointman will not follow the compass azimuth directly since traveling in
a straight line will most likely not take full advantage of the terrain or put the squad in the best
possible position to respond to chance contact with the enemy.
In summary, the navigator determines the general route and ensures the squad arrives at
the desired location. The pointman determines the specific route based on the terrain and most
likely enemy positions. By allowing the pointman to move on the most advantageous terrain,
you are prepping the ground to make your immediate action response as effective as possible
140

should you make contact with the enemy at any point along your route. The image below shows
an example of how the straight-line azimuth between two checkpoints can differ from the actual
path the pointman chooses to follow based on the terrain. In the example below, the pointman
avoids exposing the squad to enemy observation by walking over the crests of hills and takes
advantage of the military crest, ensuring the squad has the best possible observation of the
surrounding terrain. It is true that in the example below, the blue route is longer than the orange
route and might take longer to travel. There may be cases when the squad has to move in a
straight line because of time constraints or other factors. However, in most cases it is best to take
maximum advantage of the terrain while moving.

In the example above, the pointman chose a route that takes advantage of the terrain in terms
of high-ground vs. low ground, the military crest and the protection offered by terrain features.
There are other factors that the pointman must consider when choosing where to lead the
squad. As discussed earlier, each trooper in the squad should focus his/her attention outward
and anticipate where the enemy might be hiding, then adjust his/her movement accordingly to
take advantage of cover and concealment. The pointman must do the same thing except the
pointman must do so for the entire squad, not just for himself/herself.
For example, the pointman might determine that the most likely direction of an enemy
attack is from the right side and then identify a piece of cover to his/her front that provides good
protection from such an attack. If the pointman immediately moves towards that piece of cover
without considering the rest of the squad, he/she is making a mistake. The pointman should look
for terrain where the entire squad can effectively take cover in the event of enemy contact. This
could mean looking for a rise or dip in the terrain where the entire squad could fit, or a long rock
formation providing multiple firing positions. In many cases, terrain with good cover and
concealment for the entire squad is terrain with plenty of thick trees capable of stopping bullets.

141

The image below shows how a pointman might select a route that brings the squad through
areas where there are plenty of trees to provide cover. There are some trees along the straightline distance marked with the orange line, but there may not be enough trees for every member
of the squad to find an effective piece of cover quickly. However, the route marked in blue brings
the squad through areas with more trees and therefore more available cover and concealment.

The image above is intended to serve only as an example and as already explained, cover and
concealment does not always come in the form of trees but may also include slopes in the terrain,
rocks, fallen logs etc. The pointman must remain aware of all available cover and concealment
when choosing the best route for the squad. The pointman must also consider which route gives
each squad member the best observation and fields of fire.
With the navigator (lead team leader) choosing and plotting the best route on the map,
the pointman picking the best route through the terrain based on the situation, and each
individual squad member picking the best individual movement path based on his/her
immediate surroundings, the squad is in the best possible position to execute an effective
immediate action response should it make contact with the enemy at any moment along the
route.

142

Immediate Action Response Principles
Navigation and route selection by the navigator (lead team leader) and pointman will put the
squad in the best possible position to execute an effective immediate action response should it
make contact with the enemy at any point. However, navigation and route selection are only half
of the equation. The second half of the equation is to execute a smooth movement to get the
entire team or squad on-line facing the enemy, behind cover and returning effective fire as
quickly as possible.
The following pages give some general ideas and principles for how to accomplish these
things. However, there are rarely fixed formulas for tactical movements that work every time.
Some doctrinal manuals or schoolhouses offer complex instructions, dictating how each
member of the squad or team should move to get into a firing line in a specific order or sequence.
These instructions sometimes change based on the direction of enemy attack and the formation
that the team/squad is using. In high-stress situations, following complex movement patterns is
usually difficult. In addition, since it is critical for troopers to find the best possible cover, the
reality of the terrain might not match the dictated movements of a rigid, doctrinal system.
Therefore, the only way to get better at effectively executing an immediate action
response is to practice over and over, reacting to enemy contact from different directions while
moving across different types of terrain. While the following pages offer some options for how
to come on-line facing different directions, the best option is generally to simply “collapse” the
formation in the direction of contact. Each trooper might not find an ideal, covered firing
position immediately so if necessary, the squad members can adjust position or move to the left
or right as needed. In addition, the team leader or squad leader might want to be close to the
heavy weapons to better direct their fire. Leaders may have to adjust position in the formation
to be closer to the heavy weapons.

143

IMMEDIATE ACTION: FACING MOVEMENT
Each Trooper Pivots Towards Contact
One of the easiest immediate action movements simply involves changing the orientation of the
formation. In the example below, the team is already in a single-file formation. If the team takes
contact to the right or left side, all the troopers have to do is turn to the left or right
simultaneously and seek cover. This works best with formations that are more linear. When
moving in a wedge formation, a team can easily come on-line when making contact to the front
or rear. Essentially, you can execute a facing movement when you are in a linear formation that
is already on-line with the enemy contact.

144

IMMEDIATE ACTION: WHEEL MOVEMENT
Formation Wheels Towards Contact
In some cases, you might be moving in a more linear formation and make contact in a direction
that is not on-line with how your weapons are currently oriented. In the example below, if the
team wedge made contact to the front, minimal adjustment of the formation would be needed.
However, when the wedge makes contact to the left, the troopers need to adjust position to get
online so they all have fields of fire. One way to do this is simply to rotate (or wheel) the whole
formation in the direction of contact. This keeps the same orientation of troops to each other.
For example, if the team leader is in the center of the formation and the machine gun is on the
left, those troops will be in the same position as the team comes online. However, one of the
major problems with the wheel movement, as show in the image below, is that the trooper on
the outside of the wheel sometimes has to move very far to get on-line. This problem gets worse
the greater the initial spacing of troops in the formation. Therefore, in many cases the wheel
movement is not the ideal choice when executing an immediate action response. While the
example below depicts executing a wheel from a wedge formation, the wheel movement can
apply to any formation.

145

IMMEDIATE ACTION: COLLAPSE MOVEMENT
Each Trooper Moves to Nearest Cover
The collapse movement is generally the quickest and most effective option when you make
contact in a direction that is not on-line with the orientation of your formation. In the example
below, each trooper moves directly to the nearest piece of cover while maintain spacing with
the rest of the team. This means that troopers will not necessarily maintain their orientation to
each other. For example, in the picture below, if the team leader starts out in the center and the
machine gun starts out on the left side, after collapsing on line the team leader is on the far right
side and the machine gunner is in the center. In some cases this might not be a problem but in
other cases the leader might want to reposition to better control specific weapon systems. For a
highly experienced team, this is sometimes less necessary. While the example below depicts
executing a collapse movement from a wedge formation, the collapse movement can apply to
any formation.

146

IMMEDIATE ACTION: COMBAT APPLICATION
Taking Advantage of the Terrain
In the examples on the previous pages of facing movements, wheel movements and collapse
movements, for the sake of demonstration and clarity, the troopers in the images start off in a
perfectly shaped formation and have to move some distance to their covered firing positions. In
reality, if you are following the guidance on tactical movement from earlier in this book, troopers
should already be next to cover or at least close to cover when they make contact. The example
below shows a team moving in an arrowhead (modified diamond) formation but adjusting the
formation to stay close to nearby cover. Looking at the example below and imagining how the
team would react to contact from the front, left, right or rear, it is easy to see how no single
formula (facing movement, wheel or collapse) can dictate how a unit will react every time. Once
again a unit must practice repeatedly and be prepared to adjust position if needed.

147

IMMEDIATE ACTION: ALERTS AND FIRE COMMANDS
Direction, Distance and Description
At the same time that the team or squad is executing its immediate action response, it must also
be communicating to pinpoint the enemy’s location. This involves calling out the enemy’s
direction, distance and description (abbreviated as the 3D’s). Anyone in the squad can call out
the 3D’s since any member of the squad might have the best observation of the enemy. Once
one trooper calls out the 3D’s the others should echo the information throughout the squad so
everyone knows where the enemy is. When you first make contact, you might not have all the
information. You might initially only have a general direction. Call out the information you know
as you try to learn more specifics. In addition to the 3D’s, if you are talking to a specific weapon
system like a machine gun or grenade launcher you can give other instructions or fire commands
such as the rate of fire or type of ammunition to use. It is important to call out direction, distance
and description in that order since it makes it easier to find the target. First the shooter scans
left/right to the direction, then searches along that line to the correct distance, then looks for the
specific target at that location. The image below gives an example of how to call out the 3D’s.

“CONTACT ONE O’CLOCK, 100 METERS, RPG“

148

BATTLECRAFT
Offensive Combat with Two Elements
Combat maneuvering generally requires at least two elements. This is because conventional
wisdom dictates that no element should move under fire without another element providing
support or suppressive fire to keep the enemy’s heads down. In simple terms, if you attempt to
rush towards an enemy position without supporting fire, the enemy will be able to engage and
kill your troopers fairly easily. However, the idea of a support element is to lay down enough fire
on the enemy position to kill or suppress the enemy force. Even if your fire does not kill all of the
enemy troops, the enemy will have to take cover from your fire and will not be able to return
accurate fire. This is the concept of suppression. The support element will suppress the enemy
while the maneuver element moves to a position of advantage. There are several examples of
how to apply this simple fire and maneuver concept on the following pages.
While most of the examples on the following pages depict a standard squad with two
teams for demonstration purposes, the two “elements” in the tactical maneuvers described do
not necessarily have to be teams. One element could be a team while the other might be a
machine gun. In a three-team squad, one element might be comprised of two teams and the
other element might be a single team and a machine gun. In short, two-element maneuver does
not mean you necessarily have only two teams. It means there are two moving pieces in the
maneuver itself.
The section that follows offers several examples of how to maneuver with two elements.
These examples are not designed to be followed in a rigid manner, but they are rather intended
to illuminate flexible, tactical concepts that can apply to many situations. We have tried to focus
on the tactical concepts that are the most effective and most likely to prove useful in a real
combat scenario. The section is labeled as “offensive combat” since in most cases, the types of
maneuvers described are most applicable to the offense. However, at the squad level, the lines
between offense and defense can blur and the maneuvers in the following pages could also
potentially apply to defensive combat.

149

TWO-ELEMENT COMBAT: ATTACK BY FIRE
STEP 1: Lead Team Makes Contact and Returns Fire
One of the problems with robotically executing the same suppress and flank battle drill every
time you make contact, is that sometimes you may already be in a position of advantage and
flanking around would not only increase your exposure but would decrease the effectiveness of
your fires against the enemy. For example, you might catch the enemy exposed in the open while
finding yourself on high-ground with plentiful cover and concealment. Especially if you are
armed with superior weapons with better optics and greater engagement range, there is no
reason to close with the enemy. If the enemy is less effective than you are in fighting at longer
range, closing with the enemy actually negates your advantage and plays to the enemy’s
strengths. Therefore, in some cases the best course of action is not to maneuver at all but simply
remain in place and destroy the enemy with accurate, effective fire.

150

TWO-ELEMENT COMBAT: ATTACK BY FIRE
STEP 2: Trail Team Moves On-Line with Lead Team
If you decide to attack by fire, you will want to get as many weapons into the fight as possible,
especially any heavy weapons like machine guns. This will sometimes call for just moving the
trail team up to the team already in contact and massing all available firepower on the enemy.
In some cases, you might not find yourself exactly standing on the ideal terrain when combat
begins. In these cases you may need to maneuver slightly or bound to the left or right to occupy
the most advantageous terrain. Either way, the goal is to get as much firepower as possible
engaging the enemy from the most advantageous terrain as quickly as possible.

151

TWO-ELEMENT COMBAT: ATTACK BY FIRE
STEP 3: Maneuver or Reposition as Necessary
Once it appears that the enemy is destroyed you must not grow complacent and assume there
is no possibility of additional threats. There may be more enemy forces coming from the same
direction or the enemy could be flanking around to surprise you. Either way, you should assess
the situation and decide on the best course of action. You might choose to remain in place
quietly, watch and listen for enemies. Keep in mind however that if the enemy has artillery there
might be artillery rounds falling on your position in the next few minutes. You might choose to
adjust position slightly for better cover or observation. You may choose to fall back to a better
defensive position or you may choose to start maneuvering towards the enemy to assess the
damage you caused in your attack by fire. Whatever you choose to do, remain alert for additional
enemies in the area and be prepared to continue to fight if needed.

152

TWO-ELEMENT COMBAT: BOUNDING TO TACTICAL L
STEP 1: Lead Team Makes Contact and Returns Fire
The maneuver begins like most maneuvers, with one team making contact with the enemy,
executing an immediate action drill and returning fire. In this case, the trail team is already
echeloned to the right because of the proximity of high ground and the possibility of enemies
hiding on the other side of the hill. We also don’t need to specify where to place the machine
gun or the squad leader. The squad leader may choose to attach the gun to either team. The
squad leader can also choose to remain with the gun or attach to the opposite team. If the squad
leader is already integrated into one team or the other (as discussed in the organization chapter)
then obviously he/she will remain with that team.

153

TWO-ELEMENT COMBAT: BOUNDING TO TACTICAL L
STEP 2: SL Bounds Trail Team to Advantageous Terrain
Unlike in the traditional battle drill, the squad leader will aim to get more weapons into the fight
as soon as possible. This might mean bringing both teams on-line next to each other. However,
it is better for the squad leader to pick a piece of terrain that offers an additional tactical
advantage for the first bound location. The team already in contact is most likely not on ideal
terrain since it probably had to get down and return fire immediately once it unexpectedly made
contact with the enemy. Therefore, the squad leader should start improving his/her tactical
advantage right away by bounding elements to advantageous terrain. Advantageous terrain
might include high ground or terrain with better cover/concealment or observation/fields of fire.
It is also advisable if possible, for the squad leader to start increasing the angle between the two
bounding teams, working towards a 90-degree “tactical L” as an ultimate goal. In the example
below, B Team is able to take advantage of some terrain to mask its movement while bounding
to its first position.

154

TWO-ELEMENT COMBAT: BOUNDING TO TACTICAL L
STEP 3: Next Bound Achieves Tactical L
Once B Team is in position laying down suppressive fire on the enemy, A Team can bound
forward and to the left to occupy the next piece of advantageous terrain. In this case, A Team is
not able to take advantage of terrain to mask its movement but the high ground to the rear of
its firing position will help prevent the team from skylining. No piece of terrain or route to get
there is perfect. The leader must determine the best bounding locations based on this situation.
In the example below, the two teams have achieved a “tactical L” meaning the enemy is taking
fire from two perpendicular (90-degree) directions. This makes it difficult or impossible for the
enemy to take cover since taking cover from one direction of fire will generally expose him to
the other direction of fire. By continuing to attack by fire from this tactical L position, you will be
probably be able to destroy the enemy with fire alone.

155

TWO-ELEMENT COMBAT: BOUNDING TO TACTICAL L
STEP 4: One Team Can Assault if Necessary
While you might be able to destroy the enemy with fire alone since he is caught in a 90-degree
crossfire, you may still have to assault through or choose to assault through for some reason. In
this case, A Team is close enough to assault while B Team ceases or shifts fire. In most cases, it is
advisable to cease fire rather than shifting fire or lifting fire, especially at night. While shifting fire
makes sense in a controlled environment like a live-fire range, it is difficult to accomplish safely
in a real combat situation, especially at night or under limited visibility. That is not to say you
cannot shift fire but if you choose that option, make sure you have redundant control measures
and communications in place to reduce the risk of friendly fire.

156

TWO-ELEMENT COMBAT: BOUND TO SUPPORT POSITION
STEP 1: Lead Team Makes Contact and Returns Fire
In some cases the team that initially makes contact might not be in a good position to provide
supporting fire. Maybe there is no cover and concealment available or maybe it is difficult to see
the enemy. For this example, we will say that A Team cannot see the enemy well because there
is tall grass between A Team and the enemy position. Therefore, A Team cannot provide effective
supporting fire because of lack of cover and poor observation. A Team will still get on-line and
lay down suppressive fire as well as they can.

157

TWO-ELEMENT COMBAT: BOUND TO SUPPORT POSITION
STEP 2: Trail Team Bounds to Support-by-Fire Position
In some cases, the team that initially makes contact might not be in a good support position but
the squad leader may see a good potential support position nearby. In the illustration below, the
high ground to the right offers a good support position and the terrain offers some masking to
allow the trail team to move into the support position undetected. A Team will not be able to lay
down effective suppressing fire but they can at least harass the enemy and distract them to help
B Team move into the support position safely. In general, because the squad leader has identified
B Team as the support element, the machine gun should move with B Team to the new support
position if possible. Once arriving at the support position, B Team and the machine gun will
begin to suppress the enemy force. It is also important to take distances into account. Bounding
to a support position works better if the enemy and potential support position are not too far
away. If the flanking element has to travel too far, it runs the risk of getting isolated or separated
from the other team.

158

TWO-ELEMENT COMBAT: BOUND TO SUPPORT POSITION
STEP 3: Assault Team Bounds Through the Objective
Just like the traditional battle drill, the support element provides suppressing fire while the
assault element engages the enemy in close combat. However, the roles are simply reversed.
Instead of the lead team (or first team to make contact) becoming the support element and the
flanking team becoming the assault element. the flanking team provides support and the team
to initially make contact assaults. As already stated, in this scenario there was tall grass between
A Team and the enemy. While this terrain did not lend itself to effective supporting fire, it could
provide good concealment for an assault element to creep forward into close combat range
undetected.

159

TWO-ELEMENT COMBAT: BOUND TO SUPPORT POSITION
STEP 4: Assault Team Assaults the Objective
Once A Team is close enough to assault the enemy position, B Team will shift, lift or cease fire to
avoid accidentally shooting members of the assault team. A Team will then assault the enemy
position. As already stated, in most cases it is advisable to cease fire rather than shifting fire or
lifting fire, especially at night. While shifting fire makes sense in a controlled environment like a
live-fire range, it is difficult to accomplish safely in a real combat situation, especially at night or
under limited visibility. That is not to say you cannot shift fire but if you choose that option, make
sure you have redundant control measures and communications in place to reduce the risk of
friendly fire.

160

TWO-ELEMENT COMBAT: BOUND TO SUPPORT POSITION
STEP 5: Assault Team Reaches Limit of Advance
Once the assault element has eliminated all threats and reached the end of the enemy positions,
the assault team leader or squad leader will call out “LOA” or (limit of advance) to get the
assaulting element to stop and hold in place, remaining in a line formation. The support element
will then pick up and move forward, also assaulting across the objective and forming a line
perpendicular to the assault line. At this point the squad will perform “actions on the objective”
which can include a number of different activities including checking the dead and caring for
casualties.

161

TWO-ELEMENT COMBAT: HARASSING ATTACKS
STEP 1: Lead Team Makes Contact and Returns Fire
In some cases you might not want to become decisively engaged with the enemy but you will
want to try to cripple the enemy, knock him off balance or disrupt his ability to pursue you or
interfere in your operation. Depending on how the enemy manages risk and handles casualties,
causing just a few casualties in a unit can seriously reduce that unit’s effectiveness or even render
that unit combat ineffective. If the terrain and situation allow, you could potentially launch some
harassing attacks before breaking contact or continuing on to your ultimate objective. In this
example, the lead team makes contact and the squad leader decides to use the terrain to the
right to facilitate some harassing attacks on the enemy unit.

162

TWO-ELEMENT COMBAT: HARASSING ATTACKS
STEP 2: B Team Moves into a Supporting Position
While the lead element lays down suppressive fire, B Team bounds around to the right, using the
terrain to mask its movement. B Team moves forward into a good position to lay down
supporting fire on the enemy.

163

TWO-ELEMENT COMBAT: HARASSING ATTACKS
STEP 3: A Team Breaks Contact and Moves Behind the Hill
With B Team providing supporting fire, A Team falls back, disappears behind the hill and swings
forward to a position where it is masked by the terrain. At this point the enemy can no longer
see A Team and does not know where it is.

164

TWO-ELEMENT COMBAT: HARASSING ATTACKS
STEP 4: Both Teams Break Contact and Displace
Once A Team is safely behind the hill, B Team can also pull back and use the terrain to hide from
the enemy. At this point the enemy will no longer see your forces. Given where they last saw you,
they may expect that you are still in vicinity of the lower hilltop, or perhaps that you have pulled
back away from them in the direction you came. It is not certain what the enemy will do at this
point, but it is possible that they might try to pursue and re-engage your forces. In this example,
the enemy continues to move forward hoping to make contact or flank your forces. At this point
you have broken contact with the enemy and you have the option to pull back and continue to
break contact or you can attempt to re-engage and deliver a harassing attack.

165

TWO-ELEMENT COMBAT: HARASSING ATTACKS
STEP 5: A Team Delivers a Harassing Attack to the Flank
As the enemy advances, you decide to push A Team forward and deliver a harassing attack
against the enemy’s flank. You also decide that you want to pass by the enemy and continue
moving towards your objective so you bound B Team forward so it can take up another firing
position past A Team if necessary. At this point you have already hit the enemy once with frontal
fire and have now hit the enemy again with flanking fire. It is likely you have caused some
casualties. In addition, because you have stayed mobile and hit the enemy from different
directions, the enemy may think your force is larger than it really is. For all these reasons, you
have probably disrupted the enemy unit to the point where it will no longer try to pursue you.
Even if the enemy unit was larger to begin with, you may have neutralized it as a threat.

166

TWO-ELEMENT COMBAT: DEEP FLANKING MANEUVERS
STEP 1: Lead Team Makes Contact and Returns Fire
In some cases the terrain might not favor an assault from the front or from the flank and the best
assault position might be behind the enemy. Circling around behind the enemy can also have
other advantages since it forces the enemy to completely reverse direction 180-degrees to face
you. Attacking from the rear might also help you achieve a greater level of surprise. However,
the biggest concern with flanking all the way around to the rear is the time it will take and the
distance you will have to travel. You might not be able to keep suppressive fire on the enemy
the entire time and might need to momentarily break contact and then reestablish contact. Or
you might need to keep the enemy fixed with harassing fire to conserve ammunition. In this case
the lead element makes contact with the enemy, performs its immediate action drill and begins
to lay down suppressive fire.

167

TWO-ELEMENT COMBAT: DEEP FLANKING MANEUVERS
STEP 2: Trail Team Bounds to Support Position
The squad leader decides that the best course of action is to attack the enemy from the rear.
However, he realizes that he will not be about to get the squad all the way around in a single
bound. It is also important to remember that you cannot suppress from one direction and assault
from the opposite direction since you will be running into your own bullets. In this case, the
squad leader decides to establish the support position on some high-ground about 90-degrees
from the initial contact angle.

168

TWO-ELEMENT COMBAT: DEEP FLANKING MANEUVERS
STEP 3: A Team Flanks Around to the Rear
With B Team providing suppressive fire, A team uses the terrain to flank around to a position
behind the enemy. As mentioned before, it might take a while for A team to flank all the way
around so B Team might have to conserve ammo. Also, any time you are conducting a deep flank,
you must remain especially aware of your surroundings since there might be other enemy units
in the area that you did not spot initially when you made contact.

169

TWO-ELEMENT COMBAT: DEEP FLANKING MANEUVERS
STEP 4: Assault Team Moves Into Assault Position
Once reaching a position behind the enemy, the assault team will come on-line and move into
the assault position. It is especially important for the assault team to remain alert for threats to
the flanks and rear since there could be other enemy units in the area.

170

TWO-ELEMENT COMBAT: DEEP FLANKING MANEUVERS
STEP 5: Assault Team Assaults Through the Objective
At this point the assault team will assault through the objective from the rear and the maneuver
will play out like any other flanking battle drill. When attacking from the rear it is also important
to consider any friendly units that might be operating behind your formation. Given that the
maximum range of most infantry weapons is several thousand meters, you want to make sure
your stray bullets do not fly back into friendly lines.

171

BATTLECRAFT
Offensive Combat with Three Elements
Adding a third element to combat maneuvers can give you many more tactical options on the
battlefield. However, adding a third element also increases the complexity of any maneuver and
makes the battle more difficult to control. In general, units should master two-element
maneuvers first and only progress to three-element maneuvers when they have a baseline of
experience. Two-element maneuvers are simple, fast, easy to control and can bring victory in
most situations. Effectively adding a third element can allows the unit to gain some additional
advantage such as destroying more enemy forces or mitigating risk caused by unknown
variables. The following pages contain a few examples of how to incorporate a third element
into your tactical maneuvering.
While most of the examples on the following pages depict a standard squad with three
teams for demonstration purposes, the three “elements” in the tactical maneuvers described do
not necessarily have to be teams. Two elements could be a teams while the third might be a
machine gun. In short, three-element maneuver does not mean you necessarily have three
teams. It means there are three moving pieces in the maneuver itself.
The examples that follow are not designed to be executed exactly as described, in a rigid
manner. They are rather intended to illuminate flexible, tactical concepts that can apply to many
situations. We have tried to focus on the tactical concepts that are the most effective and most
likely to prove useful in a real combat scenario. The section is labeled as “offensive combat” since
in most cases, the types of maneuvers described are most applicable to the offense. However, at
the squad level, the lines between offense and defense can blur and the maneuvers in the
following pages could also potentially apply to defensive combat.

172

THREE-ELEMENT COMBAT: REINFORCING THE SUPPORT
STEP 1: Lead Team Makes Contact and Returns Fire
When engaging an enemy with three elements, in some cases you might want to use the third
element to reinforce the support position in order to lay down more suppressive fire on the
enemy. Reinforcing the support position also makes it easier to displace the support position
and attached machine guns while engaging the enemy. Displacing the support position is
particularly useful when facing enemies who have artillery support since they will likely call in
artillery on your support position once you open fire. By displacing your support position you
make it harder for the enemy forward observers to deliver accurate fires on your position. In the
example below, the lead element makes contact with the enemy, comes on-line and returns fire.

173

THREE-ELEMENT COMBAT: REINFORCING THE SUPPORT
STEP 2: B Team Reinforces Support Position
Looking at the terrain and the situation, the squad leader decides to send B Team to reinforce
the support position and use C Team for the flanking element. B Team moves up onto the high
ground to the right of A Team and opens fire on the enemy position. C Team begins to flank
around to the left, using the terrain to mask movement as much as possible.

174

THREE-ELEMENT COMBAT: REINFORCING THE SUPPORT
STEP 3: A Team Displaces
Once B Team masses an adequate volume of fire on the enemy, A Team displaces to a position
on the right side of the high ground and then resumes firing on the enemy. C Team continues to
flank around using terrain to its advantage. When displacing, A Team should take advantage of
the terrain, cover and concealment as much as possible. When A Team and B Team are once
again both firing on the enemy position, the center of the support-by-fire line will have displaced
considerably from the location where the enemy first took fire. Meanwhile, C Team has
continued to use the terrain to flank around the left side of the enemy position.

175

THREE-ELEMENT COMBAT: REINFORCING THE SUPPORT
STEP 4: C Team Assaults Through the Objective
C Team reaches the assault position and assaults through the objective just like in any other
battle drill. A Team and B Team on the support line can cease fire, lift fire or shift fire to ensure
they do not accidentally shoot members of C Team.

176

THREE-ELEMENT COMBAT: REINFORCING THE ASSAULT
STEP 1: Lead Team Makes Contact and Returns Fire
While one option is to use the third team to reinforce the support position, another option is to
reinforce the assault/flanking element. There are a number of reasons the squad leader might
choose to do this but one of the most common is uncertainty about what the assault element
might encounter as it flanks around. As already discussed, the flanking element can discover
additional enemy forces after moving out and find itself at a disadvantage or outnumbered. In
the example below, A Team first makes contact and returns fire to suppress the enemy.

177

THREE-ELEMENT COMBAT: REINFORCING THE ASSAULT
STEP 2: Assault Element Flanks in Echelon Formation
The squad leader anticipates there might be additional enemies hiding behind the hill and
decides to bring B Team and C Team on the assault. B Team leads the flanking movement with
C Team echeloned to the right. A Team continues to suppress the enemy position.

178

THREE-ELEMENT COMBAT: REINFORCING THE ASSAULT
STEP 3: Flanking Element Identifies New Enemy Position
As B Team and C Team flank around, using the terrain as much as possible they identify an
additional enemy position behind the hill as the squad leader had anticipated. Because there are
two teams in the flanking element that gives the squad leader the ability to assign one team as
a “local support-by-fire” to suppress and fix the new enemy position.

179

THREE-ELEMENT COMBAT: REINFORCING THE ASSAULT
STEP 4: C Team Suppresses New Enemy Position
C Team comes online and lays down suppressive fire on the new enemy position. Once the
enemy is suppressed or neutralized, B Team turns to the left and moves into the assault position.
As much as possible, C Team should ensure that all enemies to the right are suppressed, and that
B Team is not exposing itself to unexpected threats from different angles not covered by C Team.
If the threat from the new enemy position is too great or difficult to suppress, the two flanking
teams can focus their attention on the new position and either attempt to destroy it or break
contact. The additional team in the flanking element gives the squad leader more options and
additional security for dealing with unexpected problems like the example below.

180

THREE-ELEMENT COMBAT: REINFORCING THE ASSAULT
STEP 5: Lead Team Makes Contact and Returns Fire
With C Team providing local support-by-fire, B Team is able to assault the main enemy objective.
A Team will shift, lift or cease fire once B Team begins the assault. After the assault is complete,
all three elements can make a decision about how to deal with any remaining enemy forces. C
Team might become the new support position and A Team or B Team could flank around or
attack by fire.

181

THREE-ELEMENT COMBAT: HAMMER AND ANVIL
STEP 1: Lead Team Makes Contact and Returns Fire
One problem with the traditional suppress and flank battle drill is that it is possible for the enemy
to escape or break contact if the volume of fire laid down by the support element is not
overwhelming. If your goal is to destroy the enemy force and you have three elements, you can
use the third element to prevent the enemy from retreating or to set up an ambush along his
line of retreat. There are many ways to do this but one of the simpler ways is to use a road or
linear danger area to your advantage. In the example below, the maneuver begins with the lead
element making contact, coming on-line and laying down suppressing fire.

182

THREE-ELEMENT COMBAT: HAMMER AND ANVIL
STEP 2: B Team Sets Up MG on the Road as C Team Flanks
Once the lead time makes contact and begins suppressing the enemy, the squad leader decides
to use the road to the right as an “anvil” against which to drive the enemy force. The squad leader
sends B Team and at least one medium machine gun to establish a Principle Direction of Fire
(PDF) along the road. At the same time, C Team will flank around to the right in a standard
flanking maneuver against the enemy position.

183

THREE-ELEMENT COMBAT: HAMMER AND ANVIL
STEP 3: C Team Assaults Through the Objective
Once in the assault position, C Team will assault through the objective just as in a standard
flanking battle drill. A Team will cease fire, shift fire or lift fire to ensure they do not shoot
members of the assault team. B Team and the machine gun will maintain coverage of the road
and remain concealed as much as possible.

184

THREE-ELEMENT COMBAT: HAMMER AND ANVIL
STEP 4: C Team and MG Engage Retreating Enemies
In a standard suppress and flank battle drill, unless the enemy is completely suppressed by the
supporting element, there is nothing to stop the enemy from executing a break contact drill and
bounding back, away from the assault element. In the example below, in order to fall back the
enemy needs to cross a road. That road is covered by B Team and a medium machine gun. So,
when the enemy falls back and exposes himself crossing the road, he will be hit by your machine
gun bullets. The enemy will be especially vulnerable when crossing the road. If enemy troops are
wounded and fall in the road it will create additional stress for the rest of the element since they
will have to expose themselves to evacuate the casualties. If the enemy decides not to cross the
road because of the machine gun, they will be fixed in place and vulnerable to C Team’s assault.
This is just one example of how the third element can be used to surprise or ambush a retreating
force. In this example the presence of the road allows the ambushing element to remain close
to the rest of the squad. In other cases, you might send the ambushing element further away
along the enemy’s expected line of retreat. This can achieve greater surprise but is also risky since
you are splitting up your elements, probably at distances where they are no longer mutually
supporting.

185

BATTLECRAFT
Defensive Combat
In general, squads will not conduct sustained, deliberate defensive operations by themselves. A
squad simply does not have enough firepower or manpower to establish a deliberate defense
able of repelling an enemy assault. Squads can form components of larger platoon, company
and battalion defensive positions and we will therefore discuss the more detailed aspects of
defensive infantry combat such as the development of engagement areas, establishment of
primary, alternate and supplementary positions and the integration of fires and obstacles in
other books focused on larger formations. This book will focus on the types of defensive combat
that relate specifically to the squad itself.
While a squad might not be able to establish a true, deliberate defense, the squad will
establish defensive postures frequently during typical operations. Any time the squad needs to
halt or occupy a position for any length of time, the squad is executing a form of defensive
operation. As already mentioned, at the squad level the lines between offense and defense can
blur and the squad might use defensive combat techniques while maneuvering against an
enemy on the battlefield. Tactical maneuvers designed to allow the squad to pull back or break
contact can also be considered defensive maneuvers since they do not seek the capture of
terrain or destruction of the enemy.
In short, the following section on defensive combat is abbreviated and simplified,
focusing only on the most critical aspects of the defense at the squad level. We have saved a
more detailed discussion of defensive operations for future manuals on deliberate defense,
heavy weapons employment, and platoon/company-level operations. Such manuals offer a
better context for studying defensive operations as a whole. However, the concepts in the
following pages will still prove useful to small unit leaders and apply to any type of defensive
operation at any level.

186

DEFENSIVE COMBAT: HALTS
Short Halt
When conducting squad-level operations, you might need to stop momentarily and assume a
hasty defensive position. Perhaps the squad-leader needs to contact a map check or call higher
headquarters on the radio prior to continuing on the mission. Whatever the reason for stopping,
when conducting a short halt you want to be able to move out again right away, which means
you will not take off your rucksacks. To minimize your exposure it is best for the squad members
to take a knee however there might be some cases when this is not possible. Below are two
examples of short halt formations. In the example on the right, the squad maintains its
movement formation while providing 360-degree security. In the example on the right, the
squad forms a circle and faces out. Finally, one of the most important factors in any short halt
that is usually not depicted in manuals is that each individual trooper should take cover behind
a tree or obstacle if possible. Thus, the actual formation will not look like a perfect circle but will
conform to the terrain and available cover. The squad leader (and machine gun if present) can
move wherever most needed in the formation.

187

DEFENSIVE COMBAT: HALTS
Long Halt – No Medium Machine Gun
Kneeling on one knee with a heavy rucksack can prove taxing over time. Therefore, if the squad
needs to stop for any length of time it is best to transition from the short halt formation to the
long halt formation. The long halt generally entails removing rucksacks, going prone and placing
troops in “strongpoint” positions of 2-3 troops each. After breaking into buddy teams, one
trooper will provide cover while the other removes his/her rucksack and goes prone. Then the
prone trooper will provide cover while the other trooper removes his/her rucksack. There is no
one best position for the rucksack so it is up to you where you are most comfortable placing the
rucksack. Keep in mind factors like visibility and the ease of accessing the rucksack. The rucksack
can also sometimes provide some degree of cover depending on what is in it. When troops go
prone, especially when fatigued at night, there is the chance they will fall asleep and fail to
provide effective security. In groups of 2 or 3, troops can watch each other to stay awake. They
can also alert each other to potential threats through touch. The technique of interlocking the
legs can make staying awake and communication easier. The example below shows a long halt
formation with a 9-person squad, no medium machine gun and four, two-person strongpoints.

188

DEFENSIVE COMBAT: HALTS
Long Halt – Medium Machine Gun Attached
If you have a medium machine gun attached to your squad it can greatly enhance your security
during a long halt. Many doctrinal manuals and schoolhouses suggest always moving the
machine gun to the front of the formation (or 12-o’clock position). This can be a good option
since the greatest threat is often to the front. However, it is better to place the machine gun
where it is most needed based on the situation, which may or may not be to the front. The
direction of greatest threat could be to the sides or rear. Also, there might be a position that
offers the machine gun particularly good cover and concealment or observation and fields of
fire. In some cases, you might want to move the machine gun a bit farther out to better cover a
road, danger area or open area. In the example below the machine gun is covering to the front
and the other two A-Team strongpoints have widened out and adjusted their sectors
accordingly.

189

DEFENSIVE COMBAT: HALTS
Long Halt – 2-Person and 3-Person Strongpoints
As already discussed, when conducting a long halt it can be useful to break the squad up into
strongpoints. You can form strongpoints with either two or three troopers depending on the
number of people in the squad and the number of strongpoints you wish to employ. Each
strongpoint may or may not include a medium machine gun or light machine gun. One
advantage of the three-person strongpoint is that it lends itself well to rest plans. You can have
two people pulling security while the third person rests and then rotate as needed while
maintaining 66-percent security. Or you can have one person pulling security while the other
two rest and rotate, maintaining 33-percent security.

190

DEFENSIVE COMBAT: HALTS
Long Halt – Different Configurations
There is no fixed formula for how to set up your long halt. You can use any combination of 2person or 3-person strongpoints. The examples so far have shown how to set up four, 2-person
strongpoints with a 9-person squad, with and without an added machine gun. The examples
below give options for 8-12 person squads, without a machine gun. Keep in mind these are not
the only options. For example, with a 10 person squad you might choose to employ one 3-person
strongpoint and three 2-person strongpoints instead of the configuration below. It is also very
important to remember that the formations in real life will probably not be completely
symmetrical. You should position the strongpoints in the locations with the best cover,
concealment and observation based on mission requirements.

191

DEFENSIVE COMBAT: ASSIGNING SECTORS OF FIRE
Overlapping Sectors of Fire
When remaining stationary for any length of time or occupying a defensive position, the squad
leader should assign sectors of fire to ensure there are no gaps in the squad’s 360-degree security
coverage. In the example below of a long halt with four 2-person strongpoints, the sectors of fire
are depicted in blue (A Team) and green (B Team). When assigning sectors, the squad leader
should ensure that all sectors overlap so there are no gaps in coverage. It is generally best for
sectors to overlap no further than 35-meters out, which is the approximate distance of handgrenade range. You can assign sectors for each strongpoint or you can assign sectors for each
individual trooper.

192

DEFENSIVE COMBAT: ASSIGNING SECTORS OF FIRE
Left Limit and Right Limit
In order for sectors of fire to be useful, the individual troopers who are covering those sectors
must have a clear idea of the left limit and right limit of their sectors. It is up to the squad leader
(and/or the subordinate team leaders) to go from position to position assigning left and right
limits to each position or trooper. When assigning left and right limits, it is helpful to use
reference points on the ground if they are available. In the example below, the trooper’s sector
extends between the two large trees. It is also possible to assign sectors using specific compass
azimuths. Writing down compass azimuths can be useful as a redundant measure. If a trooper
forgets the reference point, he/she can pull out the compass to re-verify the sector. However,
when under fire, troopers will probably not have time to reference their compass to determine
their sector. If no reference points are available, the squad can plant aiming stakes to mark the
left and right limits of each sector.

193

DEFENSIVE COMBAT: ASSIGNING SECTORS OF FIRE
How to Assign Sectors
It is very unlikely that there will be two large trees in the open in just the right position to mark
the limits of a sector. In reality, the terrain is more likely to look like the picture below. It is a
common mistake for leaders to move hastily and simply point and say, “your left limit is that dead
tree and your right limit is the crooked tree… got it?” without bothering to verify that the trooper
has actually identified the left and right limits. This is problematic, especially at night. Given the
left and right limits depicted in the image below, what follows is an example of a more reliable
way to assign sectors. Every time the leader asks a question he/she must get a response or
confirmation from the trooper…
RIGHT LIMIT: You see the clump of trees right in front of you? Look to the right. Do you see the
open area? Ok, just to the right of that open area is a dead tree leaning to the left with some dead
branches coming out on the left. Do you see it? Yes? Ok that is your right limit.
LEFT LIMIT: You see the clump of trees right in front of you? Look to the right until you see the
first open space. There is one tree with a thin trunk growing up through that open area, do you
see it? Ok, to the left of that tree are some bushes on the ground. Just to the left of those bushes
is a thin, evergreen tree with a small bush behind it. Do you see it? Yes? Ok that is your left limit.

194

DEFENSIVE COMBAT: ASSIGNING SECTORS OF FIRE
Dead Space
When assigning sectors, you will identify some areas within each sector where an enemy could
hide. This could be areas behind a small hill, or sunken areas in a dip in the terrain as in the
example below. These areas are known as dead space and they are areas that you cannot engage
with direct fire weapons like rifles or machine guns. It is important to identify these areas and
plan for what to do should the enemy try to take advantage of them. If you are particularly
concerned about certain areas of dead space you may want to assign indirect fire weapons (such
as grenade launchers or mortars) to cover these areas. You may also be able to emplace
obstacles, traps or mines to block off these areas. As already discussed, this manual does not go
into detail on defensive planning and operations but at the most basic level, it is important to
understand the concept of dead space and how to employ the squad’s weapons accordingly.

195

DEFENSIVE COMBAT: ASSIGNING SECTORS OF FIRE
Uneven Sectors
In the example from earlier in this chapter, the sectors of fire for each strongpoint were all evenly
distributed. In some cases, even distribution of fire might be a good idea. In other cases, you
might want to mass the majority of your defensive firepower in one direction to cover a specific
threat or danger area. In the example below, all of A Team’s firepower is primarily focused
between the 11-o’clock and 1-o’clock directions while B-Team covers the rest of the 360-degree
arc. This is just one example of how the squad leader might want to mass his defensive firepower
in one particular direction while assuming risk in other directions.

196

DEFENSIVE COMBAT: BREAKING CONTACT
STEP 1: Lead Team Makes Contact and Returns Fire
Breaking contact falls under the category of defensive combat. In some situations, you might
make unexpected contact with enemy forces and decide that you want to break contact or pull
back. This might be because you have encountered a large enemy force or because you do not
want to become decisively engaged with the enemy. The maneuver begins like any other battle
drill with the lead team coming on-line and laying down suppressive fire.

197

DEFENSIVE COMBAT: BREAKING CONTACT
STEP 2: Trail Team Moves into Support Position
Once you decide to break contact, the squad leader will push the trail team into a position where
both teams can fire on the enemy. In the example below, the squad began in echelon formation
which can make it easier to push the trail team out to the side. Also, in the example below, B
Team moves up online with A Team in order to mass maximum firepower on the enemy and
stem his advance. In other cases, B Team might pull back at an angle to a position where it is still
possible to fire on the enemy. This will help the squad break contact faster but the massing of
fire on the enemy might not be as effective.

198

DEFENSIVE COMBAT: BREAKING CONTACT
STEP 3: A Team Pulls Back with B Team in Support
With both teams laying down suppressive fire on the enemy, fixing the enemy in place, one team
can bull back and begin creating distance. As with any maneuver, the teams will want to take
maximum advantage of the terrain to protect themselves from enemy fire and to maximize the
effectiveness of their own fire.

199

DEFENSIVE COMBAT: BREAKING CONTACT
STEP 4: A Team Provides Support while B Team Pulls Back
After pulling back, A Team will identify a good position to provide supporting fire, stop, come
on-line and begin firing on the enemy. Once the volume of fire is enough to keep the enemy
suppressed, B Team will fall back to create additional distance, then stop at a new support
position and continue laying down fire. The squad will continue bounding back in this way until
it has broken contact with the enemy. Keep in mind that the enemy might try to pursue and you
might need to continue bounding back, using terrain to your advantage until contact is broken.

200

DEFENSIVE COMBAT: REVERSE SLOPE DEFENSE
STEP 1: Set Up on the Reverse Slope
While your defensive options as a lone squad are limited, one technique that can prove very
effective, especially against a larger force, is the reverse slope defense. This technique is also
particularly effective around the time of dawn, dusk or on nights when the sky is illuminated.
During these times, the low ground is dark but it is easy to pick out silhouettes against the sky.
In the example below, you set up on the reverse slope and wait in ambush for the enemy. The
figure in the illustration is kneeling but in reality your force will probably be prone and behind
cover. Note that the enemy cannot see you as they approach.

201

DEFENSIVE COMBAT: REVERSE SLOPE DEFENSE
STEP 2: Engage the Enemy as He Crests the Hill
As the enemy crests the hill, they silhouette themselves against the sky, making themselves easy
to see and engage. You remain in the low ground where it is difficult for the enemy to spot you.
This makes it almost certain that you will surprise the enemy. By the time the enemy sees you it
is generally too late. As already mentioned, this technique can be effective against a larger force
since only a portion of the force can crest the hill at any one time. You can engage the troops
coming over the hill but any other enemy troops further back in the formation will still not be
able to see you or engage you. When conducting a reverse slope defense, you must still be
careful of enemy elements flanking around to attack you from the sides.

202

FURTHER TRAINING
Courses and Resources
This manual provides an overview of squad-level infantry rural combat. However, the manual
leaves many areas unexplored especially when it comes to other elements of infantry combat
including mission planning, small unit patrolling, ambush, recon, machine gun employment and
deliberate defensive operations. There are a variety of other Special Tactics manuals, both
current and in production, that are designed to complement this manual. For more information
on these manuals, please visit www.specialtactics.me.
Every Special Tactics manual has a companion online course. If you cannot find the online
course associated with your manual that means it is still in production and has not yet been
released. Visit our website to explore our growing selection of online courses. Online courses
compliment the material covered in the manual and present knowledge and information in a
variety of multimedia formats including interactive presentations, animations, videos and
podcasts. All online courses also include interactive quizzes, tests and a serial-numbered
completion certificate.
Finally, Special Tactics also offers in-person training. For information about upcoming
courses or to request a custom course at your location please contact us on our website. If you
have any other questions, comments or suggestions regarding this manual, the Special Tactics
staff welcomes you to contact us on our website at www.specialtactics.me. We look forward to
hearing from you and hope you found this manual worthwhile. Thank you for keeping our
country and communities safe.

203