/


Tags: weapons
Year: 1989

Text
ТС 23-14
JUNE 1989
S3b!!^S=!k
TRAINING AND
EMPLOYMENT
HEADQUARTERS, DEPARTMENT OF THE ARMY
DISTRIBUTION RESTRICTION: Approwed for public rehm: djBtribtrtMft * uuBmitacL
*ТС 23-14
TRAINING CIRCULAR HEADQUARTERS
NO. 23-14 DEPARTMENT €F THE ARMY
Vfeshingtcn, DC, 14 June 1989
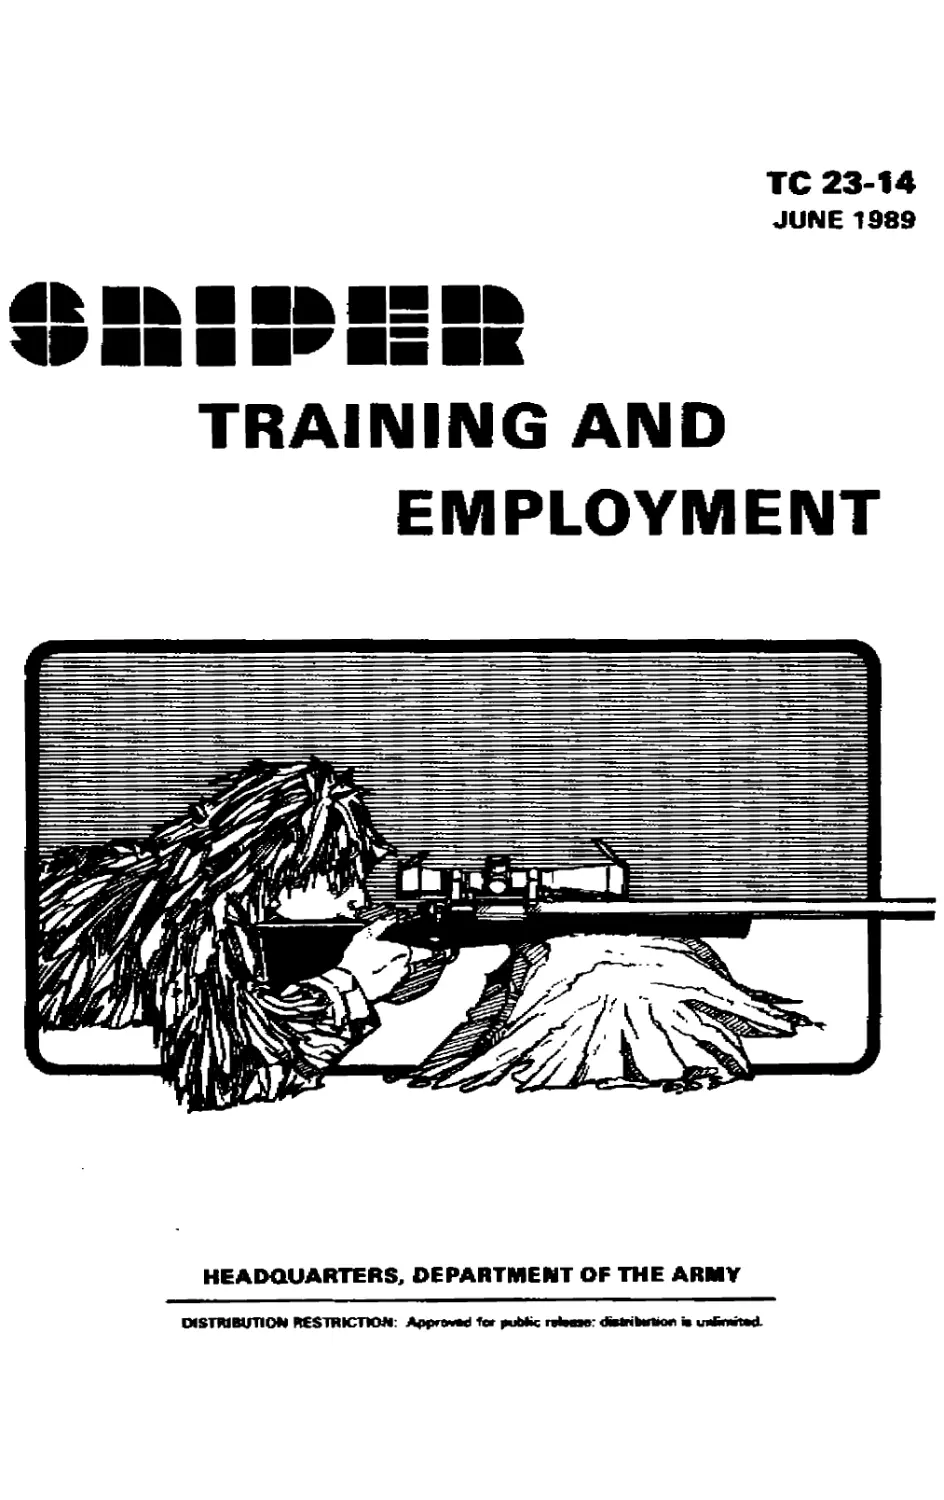
SNIPER TRAINING AND EMPLOYMENT
CONTENTS
Page
PREFACE............-....................................... iv
CHAPTER 1.. INTRODUCTION
1-1. Historical Background....................... 1-1
1-2- Mission....................................... 1-3
1-3. Organization ....................,............ 1-4
1-4. Personnel Selection . ...................... 1-5
CHAPTER 2. EQUIPMENT
Section I. Sniper Rifles .............................. 2-1
2-1. M21 Sniper Weapon System ................ 2-1
2-2- M24 Sniper Weapon System ................ 2-5
Section IIr Sniperscopes ......................-......... 2-15
2-3- Auto-Ranging Telescope....................... 2-15
2-4. Leopold M3A Telescope . .................. 2-24
Section III. Ammunition ................................ 2-26
2-5- Special Ball ............................. 2-26
2-6- Blanks ..................................... 2-27
Section IV- Optical Observation Equipment ......... 2-27
2-7. Observation Telescope ..................... 2-27
2-8- Binoculars ............................. 2-28
2-9. Night Vision Sight ....................... 2-30
2-10. Night Vision Goggles (AN/PVS-5) ........... 2-31
DISTRIBUTION RESTRICTION: Approved for public release;
distribution is unlimited.
*This publication supersedes TC 23-14, 27 October 1969.
Page
Section V. Clothing and Additional Equipment ....... 2*32
2-11. Camouflage.................................. 2-32
2-12. Additional Equipment ....................... 2-33
CHAPTER 3. SNIPER MARKSMANSHIP
3-1. Using the Fundamentals of Marksmanship.. 3-1
3-2. Following Through .................... ... 3-9
3-3. Calling the Shot............................ 3-10
3-4. Zeroing the Rifle .......................... 3-11
3-5. Considering Weather Effects............. 3-12
3-6. Firing One Round ........................ 3-L7
3-7. Holding Off for Elevation or Wind ....... 3-18
3-8. Engaging Moving Targets ................. 3-19
CHAPTER 4. FIELD TECHNIQUES
4-1. Camouflage ............................... 4-1
4-2. Cover and Concealment .................... 4-6
4-3. Movement and Land Navigation ............. 4-8
4-4. Selection and Occupation of
Sniper Positions ....................... 4-17
4-5. Construction of Sniper Positions ........ 4-20
4-6. Observation and Target Selection ........ 4-28
4-7. Information Records ................... 4-32
4-8. Range Estimation..................... 4-40
CHAPTER 5. EMPLOYMENT
5-1. Sniper Teams ............................. 5-1
5-2. Offensive Employment ..................... 5-2
5-3. Defensive Employment ................... 5-3
5-4. Retrograde Employment.................... 5-3
5-5. MOOT Employment ....................... 5-4
5-6. Countersniper Operations ............... 5-4
APPENDIX A. FIELD TRAINING EXERCISES ................. A-l
APPENDIX B. SNIPER SUSTAINMENT PROGRAM ............... B-l
APPENDIX C. SNIPER'S DATA CARD........................ C-l
APPENDIX D. MEASUREMENTS ............................. D-l
APPENDIX E. REFERENCE TABLES ....................... E-l
APPENDIX F. SNIPER PATROL ORDERS ................... F-l
APPENDIX G< REPRODUCIBLE FORMS ......................... G-l
GLOSSARY............*............................ Glossary-1
REFERENCES .................................. References-1
INDEX ............................................. Index-1
ТС 23-14
PREFACE
This circular provides doctrine for the tactical employment
of the infantry sniper. It also provides the information
needed to train and equip snipers and to plan their missions
and operations. It is intended for use by commanders,
staffs, instructors, and soldiers at training posts, Army
schools, and units.
The proponent of this publication is BQ, TRADOC. Submit
changes for improving this publication on DA Form 2928
(Recommended Changes to Publications and Blank Forms) and
forward to the Commandant, OS Army Infantry School, ATTN:
ATSH-IN-2B, Fort Benning, GA 31905-5595.
Unless otherwise stated, whenever the masculine gender is
used, both men and women are included.
iv
ТС 23-14
CHAPTER 1
INTRODUCTION
A sniper has special abilities, training, and equipment.
His job is to deliver discriminatory, highly accurate rifle
fire against enemy targets which, because of range, size,
location, fleeting nature, or visibility, cannot be engaged
successfully by the rifleman. Sniping requires the develop-
ment of basic infantry skills to a high degree of perfec-
tion* A sniper’s training incorporates a wide variety of
subjects designed to increase his value as a force multi-
plier and ensure his survival on the battlefield. The art
of sniping requires learning and repetitiously practicing
these skills until mastered. A sniper must be highly
trained in long-range rifle marksmanship and fieldcraft
skills to ensure maximum probability of effective engage-
ments and minimum risk of detection. Perfection must be
reached before a sniper takes part in combat operations.
1-1* HISTORICAL BACKGROUND
The term "sniper* originated in the 19tb century with the
British Army in India where the snipe was a favorite game
fowl. The snipe is small and fast, and an extremely diffi-
cult target. The successful snipe hunter was an expert shot
and proficient in other arts of the hunter. Therefore, the
term "sniper" came to signify one who possessed all the
skills of a successful snipe hunter. However, the profi-
ciency of the military sniper evolved into an art as
advancements in weapons, equipment, and techniques were
made.
a. The use of sharpshooters (or snipers) can be traced in
US military history from the Revolutionary War. During
the American Civil War, General Hiram Berdan was an
exponent of the art and helped perfect the techniques used
by snipers.
b. In World War I, the British Army encountered expert
German marksmen equipped with special rifles and tele-
scopic sights. The term "sniper** was applied and
popularized. German snipers forced the British Army to
employ the same techniques, and under the leadership of
Major Hesketh-Pr itchard, a sniper course {the first Army
School of Sniping, Observing, and Scouting) was organized.
By the end of the war, the British were able to beat the
Germans at their own game.
c. After World War I, the emphasis on sniping decreased
-- except in Soviet Russia. In 1933, Russia began
1-1
training and equipping snipers. By World War II, they had
carefully integrated sniper tactics into their tactical
doctrine so that their snipers could operate as a well-
drilled team. Each man knew exactly where to move and
what to do.
d. During World War II, the US Army armed unit marksman
with an Ml, MIC, or M1903 Springfield rifle to conduct
sniper activity. The results and effects differed between
commanders and units. A specific lesson learned in the
employment of snipers was that a sniper is a weapon of
opportunity — a typical rifleman cannot be arbitrarily
assigned the sniper mission. Every marksman is not a
sniper, but every sniper is a marksman.
e. Combat in Korea, using US Army and Marine Corps units,
again reflected a lack of command appreciation for the
techniques of employment and capabilities of snipers.
American units, equipped with a new sniper rifle (the MID
with M84 telescopic sight), seldom relied upon snipers,
although countersniping and interdiction by sniper fire
was used in some instances. Recommendations resulting
from the Korean war included the need for centralized
sniper schools, a flexible sniper organization, use of
skilled personnel, and the need to train commanders how to
use a sniper’s capabilities correctly. As a result, the
United States Army Infantry School was tasked with the
mission of organizing a sniper school. This mission was
undertaken in coordination with the United States Array
Marksmanship Training Unit during 1955 and 1956. The
program reiterated the lessons learned:
(1) The best active protection against enemy snipers is
a trained sniper.
(2) The skills required of a trained sniper must be
superior to the average rifleman.
(3) A sniper must be a skilled shooter with a special-
ized weapon.
(4) A sniper must be well-trained in the combat skills
of the individual soldier.
(5) Unstructured, incomplete training and the lack of
doctrine inhibit the use of snipers.
(6) Education of commanders is vital to ensure the
proper use of a sniper.
1-2
This program was short-lived because of the lack of
understanding and appreciation throughout the Army for the
value of a sniper. With the adoption of the M14 service
rifle, no provision was made for an M14 sniper rifle. The
designation of a sniper in the rifle squad was discon-
tinued. The sniper training program became optional.
f. The conflict in Vietnam revived the need for snipers.
Enemy forces in that conflict demonstrated the effec-
tiveness of sniper employment techniques under varying
tactical conditions. The US Army conducted division-level
sniper training courses and educated commanders at all
levels on the use of snipers.
q» During operation "Urgent Fury" in 1983, the US Array
Rangers employed snipers in Grenada. Target reductions
were successful against enemy mortar positions at ranges
up to 880 meters. The reduction of fires from these
positions was critical to the mission’s success and
illustrates the continuing value of sniper employment.
1-2. MISSION
The primary mission of a sniper in combat is to support
combat operations by delivering precise long-range fire on
selected targets. By this, the sniper creates casualties
among enemy troops, slows enemy movement, frightens enemy
soldiers, lowers morale, and adds confusion to their
operations. The secondary mission of the sniper is that of
collecting and reporting battlefield information.
a. A well-trained sniper, combined with the inherent
accuracy of his rifle and ammunition, is a versatile
supporting arm available to an infantry commander. The
importance of the sniper cannot be measured simply by the
number of casualties he inflicts upon the enemy.
Realization of the sniper's presence instills fear in
enemy troop elements and influences their decisions and
actions. A sniper enhances a unit’s firepower and
augments the varied means for destruction and harassment
of the enemy. Whether a sniper is organic or attached, he
will provide that unit with extra supporting fire. The
sniper’s role is unique in that it is the sole means by
which a unit can engage point targets at distances beyond
the effective range of the service rifle. This role
becomes more significant when the target is entrenched or
positioned among civilians, or during riot control
missions. The fires of automatic weapons in such
operations can result in the wounding or killing of
noncorabatants.
1-3
b. Snipers are employed in all levels of conflict- This
includes conventional offensive and defensive combat in
which precision fire is delivered at long ranges- It also
includes combat patrols, ambushes, countersniper opera-
tions, forward observation elements, military operations
on urbanized terrain, and retrograde operations in which
snipers are part of forces left in contact or as stay-
behind forces- Chapter 5 discusses sniper employment
techniques in detail-
l-3- ORGANIZATION
In light infantry divisions, the sniper element is comprised
of six battalion scouts organized into three 2-man teams.
They may perform dual missions, depending on the need. In
the mechanized infantry battalions, the sniper element is
comprised of two riflemen {one team) located at each rifle
company headquarters- The commander designates missions and
priorities of targets for the team and may attach or place
the team under the operational control of a company or
platoon. In some specialized units, snipers may be
organized according to the needs of the tactical situation.
a. Sniper teams should be centrally controlled by the
commander or the sniper employment officer. The SEO is
responsible for the command and control of snipers
assigned to the unit. In light infantry units, the SEO
will be the scout platoon leader or the platoon sergeant.
In heavy or mechanized units, the SEO will be the company
commander or the executive officer. The duties and
responsibilities of the SEO are:
(1) Advising the unit commander on the employment of
snipers.
(2) Issuing orders to the team leaders.
(3) Assigning missions and types of employment.
(4) Coordinating between the sniper team and unit
commander.
(5) Briefing the unit commander and team leaders.
(6) Debriefing the unit commander and team leaders.
(7) Training of the teams.
1-4
b. The sniper team Leader is responsible for the day to
day activities of the sniper team, His responsibilities
include:
(1) Assuming the responsibilities of the SEO that
pertain to the team in the SEO’s absence,
(2) Training the team.
(3) Issuing necessary orders to the team.
(4) Preparing for missions.
(5) Controlling the team during missions.
c, Snipers work and train in two-man teams. * One man’s
primary duty is that of the sniper, while the other serves
as the observer. The sniper’s weapon is the sniper weapon
system. The observer has the standard service rifle,
which gives the team greater suppressive fire and protec-
tion. When mounted with a night observation device, the
night capability of the team is enhanced.
1-4. PERSONNEL SELECTION
Candidates for sniper training require careful screening.
Commanders must screen the individual’s records to determine
his potential aptitude as a sniper. The rigorous training
program and the increased personal risk in combat require
high motivation and the ability to learn a variety of
skills. Aspiring snipers must have an excellent personal
record.
a. The following are the basic guidelines to use when
screening sniper candidates:
(1) Marksmanship- The sniper trainee must be an expert
marksman. Repeated annual qualification as expert is
necessary- Successful participation in the annual
competition-in-arms program and an extensive hunting
background also indicate good sniper potential.
(2} Physical condition- The sniper, often employed in
extended operations with very little sleep, food, or
water, must be in outstanding physical condition- Good
health means better reflexes, better muscular control,
and greater stamina. The self-confidence and control
that come from athletics, especially team sports, are
definite assets to a sniper trainee.
1-5
{3) Vision. Eyesight is the sniper's prime tool.
Therefore, a sniper must have 20/20 vision or vision
that is correctable to 20/20. However, wearing glasses
could become a liability if they are lost or damaged.
Color blindness is also considered a liability to the
sniper, due to his inability to detect concealed targets
that blend in with the natural surroundings.
(4) Smoking.. A sniper should be a nonsmoker» Smoke or
an unsuppressed smoker’s cough can betray the sniper’s
position, and even though he may not smoke on a mission,
refrainment may cause nervousness and irritation, which
lower his efficiency.
(5) Mental condition. When commanders screen sniper
candidates, they should look for traits that would
indicate the candidate has the right qualities to be a
sniper. The commander must determine if the candidate
will pull the trigger at the right time and place. Some
traits to look for are reliability, initiative, loyalty,
discipline, and emotional stability. A psychological
evaluation of the candidate can aid the commander in the
selection process.
(6) Intelligence. Trainees must be personnel of high
intelligence. A sniper's duties require a wide variety
of skills. He must learn —
о Ballistics.
о Ammunition types and capabilities.
о Adjustment of optical devices.
о Radio operation and procedures.
о Observation and adjustment of mortar and artillery
fire.
о Land navigation skills.
o- Military intelligence collecting and reporting.
о Identification of Threat uniforms/equipment.
b. In sniper team operations involving prolonged inde-
pendent employment, the sniper must also display effective
decisiveness, self-reliance, good judgment, and common
sense. This requires two other important qualifications;
they are--
1-6
(1) Emotional balance. The sniper must be capable of
calmly and deliberately killing targets that may not
pose an immediate threat to him. It is much easier to
kill in self-defense or in the defense of others than it
is to kill without apparent provocation. The sniper
must not be susceptible to emotions such as anxiety or
remorse. Candidates whose motivation toward sniper
training rests mainly in the desire for prestige may not
be capable of the cold rationality that the sniper’s job
requires,
(2) Fieldcraft, The sniper must be familiar with and
comfortable in a field environment, An extensive
background in the outdoors and knowledge of natural
occurrences in the outdoors will assist the sniper in
many of his tasks. Individuals with such a background
will often have great potential as a sniper.
1-7
ТС 23-14
CHAPTER 2
EQUIPMENT
This chapter describes the equipment necessary for the
sniper to effectively perform his mission. He carries only
what is essential to successfully complete his mission,
Sniper equipment may be classified as individual, team, and
special.
Section I- SNIPER RIFLES
A sniper’s mission requires a durable rifle with the capa-
bility of long-range precision fire. The current US Army
sniper weapon system is the M21. It is being replaced by
the M24 sniper weapon system.
2-1. M21 SNIPER WEAPON SYSTEM
The National Match M14 rifle (Figure 2-1) and its scope make
up the M21 sniper weapon system. The rifle is accurized IAW
United States Army Marksmanship Training Unit specifications
and has the same basic design and operation as the standard
M14 rifle (FM 23-8), except for specially selected and hand-
fitted parts.
a. Differences. Significant differences are as follows:
(1) The barrels are gauged and selected to ensure
correct specification tolerances. Bores are not
chromium plated.
(2) The stock is walnut and impregnated with an epoxy.
(3) The receiver is individually custom fitted to the
stock with a fiberglass compound.
(4) The firing mechanism is reworked and polished to
provide for a crisp hammer release. Trigger weight is
between 4.5 to 4.75 pounds.
(5) The suppressor is fitted and reamed to improve
accuracy and eliminate any misalignment.
(6) The gas cylinder and piston are reworked and
polished to improve operation and reduce carbon buildup.
(7) The gas cylinder and lower band are permanently
attached to each other.
2-1
(в} Other parts are carefully selected, fitted, and
assembled.
Figure 2-1. National Match M14 rifle*
b* Inspection. If the sniper discovers a deficiency
while inspecting the rifle, he will report it to the unit
armorer* The following areas should be inspected:
(1) Check the appearance and completeness of all parts.
Shiny surfaces should be treated,
(2) Check the flash suppressor for misalignment, burrs,
or evidence of bullet tipping. The suppressor should be
tight on the barrel.
(3) Check the front sight to ensure that it is tight,
that the blade is square, and that all edges and corners
are sharp.
(4) Check the gas cylinder to ensure it fits tightly on
the barrel. The gas plug should be firmly tightened.
(5) Check the forward band on the stock to ensure it
does not bind against the gas cylinder front band.
(6) Check the handguard. It should not bind against
the receiver, the top of the stock, or the operating
rod.
»
(7J Check the firing mechanism to ensure the weapon
will not fire with the safety "on,” and that it has a
smooth, crisp trigger pull when the safety is "off."
(8) Check the rear sight tension by turning the aper-
ture up to the ”10" position and then pressing down on
top of the aperture with a thumb. If the aperture can
be pushed down, the tension must be readjusted.
(9) Check the stock for splits or cracks.
2-2
Care and Maintenance. Extreme care has been used in
building this sniper rifle. A similar degree of attention
must be devoted to its daily care and maintenance.
(1) The rifle should not be disassembled by the sniper
for normal cleaning and lubrication. Disassembly should
be performed only by the armorer during his scheduled
inspections or repair, and it will be thoroughly cleaned
and lubricated at that time.
(2) The following materials are required for cleaning
the rifle:
о Cleaning rod (7.62-mm, 3-piece brass, or 1-piece
coated type).
о Lubricating oil.
о Bore cleaner.
о Weapon grease.
о Patches.
о Bore brush.
о Shaving brush.
о Toothbrush*
о Cleaning rags.
(3) The recommended procedure for cleaning and lubri-
cating the rifle is as follows:
о Wipe off old oil, grease, and external dirt from
the weapon.
о Clean the bore out by placing the weapon upside
down on a table or. in a weapon cradle. Then push a
bore brush dipped in bore cleaner completely through
the bore and pull it back out* Repeat this four or
five times.
о Clean the chamber and bolt face with bore cleaner
and a chamber brush or toothbrush.
о Clean the chamber, receiver, other interior areas,
and the flash suppressor with a rag or patches.
2-3
о Wipe the bore out by pushing clean patches through
the bore until they come out of the bore clean,
о Wipe off the chamber and interior surfaces with
patches until clean.
о With the bolt and gas piston to the rear, place one
drop of bore cleaner in between the rear band of the
gas system and the lower side of the barrel. Do not
put bore cleaner in the gas portl
о Lubricate the rifle by placing a light coat of
grease on the operating rod handle track, camming
surfaces in the hump of the operating rod, the bolt's
locking lug track, and in between the front band lip
of the gas system and the metal band on the lower
front of the stock.
о Place a light coat of oil on all exterior metal
parts.
d. Rear Sights. The M21 is equipped with National Match
rear sights (Figure 2-2). The pinion assembly adjusts the
elevation of the aperture. By turning it clockwise, it
will raise the point of impact. Turning it counterclock-
wise will lower the point of impact. Each click of the
pinion is 1 MOA (minute of angle) (see Appendix D). The
hooded aperture is also adjustable and provides .5 MOA
changes in elevation. Rotating the aperture so that the
indication notch is at the top will raise the point of
impact .5 MOA. Rotating the indication notch to the
bottom will lower the strike of the round. The windage
knob adjusts the lateral movement of the .rear sight.
Turning the knob clockwise will move the point of impact
to the right and turning it counterclockwise will move the
point of impact to the left. Each click of windage is -5
MOA,
Figure 2-2. National Match rear sight.
2-4
2-2. М24 SNIPER WEAPON SYSTEM
The components of the М2 4 system (Figure 2-3) are
о System case,
о Bolt action rifle,
о M3Ar fixed 10x scope,
о Scope case,
о Detachable iron sights (front and rear).
о Deployment case,
о Optional bipod,
о Cleaning kit.
о Soft rifle case.
о Operator’s manual.
Figure 2-3. M24 sniper weapon system.
2-5
a. Rifle. The M24 is a 7.62-mm, bolt action, 5-shot
repeating rifle. The rifle was designed primarily for
prone shooting, but can be fired from other positions.
Components of this rifle are:
о Kevlar stock with adjustable shoulder stock.
о Rock 5R barrel♦
о Model 40x long action with special trigger guard and
floor plate assembly that allows conversion to a magnum
caliber.
о Modified model 700 trigger.
(1) The safety. The safety is located on the right
rear side of the receiver and provides protection
against accidental discharge under normal usage when
properly engaged.
(a) To engage the safety, place it in the "S”
position (Figure 2-4).
(b) Always place the safety in the "S" position
before handling, loading, or unloading the weapon.
(c) When the weapon is ready to be fired, place the
safety in the "F" position (Figure 2-4).
POSITION
Figure 2-4. Safety.
2-6
(2) Bolt assembly* The bolt assembly locks the round
into the chamber and extracts the round from the
chamber*
(a) To remove the bolt from the receiver, place the
safety in the ’S" position, raise the bolt handle and
pull it back until it stops. Then, push the bolt stop
release up (Figure 2-5) and pull the bolt from the
receiver.
BOLT STOP RELEASE
Figure 2-5. Bolt stop release.
(b) To replace the bolt, place the safety in the "S”
position, align the lugs on the bolt assembly with the
receiver (Figure 2-6}, slide the bolt all the way into
the receiver, and then push the bolt handle down.
Figure 2-6» Bolt alignment.
2-7
(3) Trigger assembly. Pulling the trigger fires the
rifle when the safety is in the "F* position. The
operator may adjust the trigger pull force from a
minimum of 2 pounds to a maximum of 8 pounds. This is
done using the 1/16-inch alien wrench provided in the
deployment kit. Turning the trigger adjustment screw
(Figure 2-7) clockwise will increase the force needed to
pull the trigger. Turning it counterclockwise will
decrease the force needed- This is the only trigger
adjustment the sniper should make-
Figure 2-7- Trigger adjustment-
b. Inspection- The M24 weapon is designed to be repaired
by its user. Deficiencies that cannot be repaired by the
sniper will require manufacturer warranty work. Refer to
TH 9-1005-306-10 that is furnished with each weapon
system. The sniper must be completely familiar with this
TH- The following areas should be checked when inspecting
the 1424;
(1) Check the appearance and completeness of all parts-
(2) Check the bolt to ensure it locks, unlocks, and
moves smoothly,
(3) Check the safety to ensure it can be positively
placed into "Sn or nF" position easily without being too
hard or moving too freely -
(4) Check the trigger to ensure the weapon will not
fire when the safety is in the “S* position, and that it
2-8
has a smooth, crisp trigger pull when the safety is in
the nF“ position*
(5) Check the guard screws for proper torque (65 inch-
pounds) .
(6) Check the scope mounting ring nuts for proper
torque (65 inch-pounds).
(7) Check the stock for any cracks, splits, or any
contact it may have with the barrel.
(8) Inspect the scope for obstructions, such as dirt,
dust, moisture, or loose or damaged lenses.
Care and Maintenance. The M24 does not require the
tame amount of maintenance as the M21; but it does require
tome.
{1) The following materials are required for cleaning
the rifle:
о Cleaning rod (7.62-пяп, 3-piece brass, or 1-piece
coated type) .
о Lubricant (CLP/LSA).
о Rifle bore cleaner (RBC).
о Pa tches.
о Bore and chamber brushes*
о Toothbrush.
о Cleaning rags.
(2) The recommended procedure for cleaning and lubri-
cating the rifle is as follows:
о Remove the bolt assembly from the receiver and push
the floor plate latch (Figure 2-7) to release the
floor plate.
о Lay the weapon on a table or in a weapon cradle
with the barrel laying lower than the receiver, and
the ejection port facing down.
2-9
о Attach a bore brush to the cleaning rod and dip it
in bore cleaner.
о Push the bore brush all the way through the bore
from the chamber end of the rifle and then pull it
back through the bore. Repeat this four or five
times.
о Clean the chamber with a chamber brush and bore
cleaner until it is clean.
о Attach a cleaning tip with a patch and push it
through the bore from the chamber end of the rifle.
о Repeat this with clean patches until the patches
come out clean.
о Clean the bolt face with a brush and bore cleaner.
о Wipe clean the interior of the receiver and
magazine with cloth or patches.
о Pull a piece of paper or thin plastic underneath
the bottom of the barrel in the groove between the
barrel and the forestock. Keeping it inside this
space, pull it all the way to the chamber and then
push it back out. This cleans out any obstruction and
ensures no contact is made between the stock and
barrel.
о Put a thin layer of lubricant on the bolt lugs and
cocking cams. The exterior metal surfaces of the
weapon have been specially treated and require no
coating with any lubricant unless the weapon is to be
stored for a long time.
о Apply a thin coat of lubricant on the bore,
chamber, bolt face, and the exterior of the trigger
guard assembly if the weapon is to be stored. Before
firing, these areas must all be wiped dry.
d. Disassembly. Occasionally the weapon will require
disassembly; however, this should be done only when
absolutely necessary, not for daily cleaning. An example
of this would be to remove an obstruction that is stuck
between the forestock and the barrel. When disassembly is
required, the recommended procedure is as follows:
2-10
о place tbe weapon so it is pointing in a safe
direction.
о Ensure the safety is in the "S" position,
о Remove the bolt assembly.
о Loosen the mounting ring nuts (2) (Figure 2-8) on the
scope and remove the scope.
о Remove the trigger guard screws (2) (Figure 2-9).
c Lift the stock from the barrel assembly (Figure
2-10).
о For further disassembly, refer to TM 9-1005-306-10.
Figure 2-9. Ring nuts.
TRIGGER GUARD SCREWS
Figure 2-9. Trigger guard screws.
2-11
(a) MAJOR ASSEMBLIES
(b) RIFLE
Figure 2-10. Disassembled weapon*
e* Iron Sights. The M24 has detachable front and rear
iron sights, which give the sniper a back-up sighting
system.
(1) To attach the front sight to the barrel, align the
front sight and the front sight base dovetails and slide
the sight over the base. Next, tighten the screw
slowly, ensuring the screw seats into the recess in the
sight base (Figure 2-11).
2-12
CUT-OUT PORTION
Figure 2-11. Front sight attachment.
{2) To attach the rear sight to the receiver, remove
one of the three set screws, align the rear sight with
the rear sight base located on the left rear of the
receiver (Figure 2-12). Tighten the screw to secure the
sight to the base.
Figure 2-12, Rear sight attachment.
(3) Adjustments of elevation are made by turning the
elevation knob located on the top of the rear sights.
Turning the knob in the direction marked “DP" will raise
the point of impact. Turning in the opposite direction
will lower the point of impact» Each click of adjust-
ment equals «25 MOA.
(4) Adjustments in windage are made by turning the
windage knob located on the right side of the rear
sights. Turning the knob in the direction marked "R"
will move the point of impact to the right. Turning it
in the opposite direction will move the point of impact
to the left* Each click of adjustment equals .25 MOA.
(5) There are 12 divisions, or 3 MOA adjustments in
each knob revolution. Total elevation adjustment lati-
tude is 60 MOA and 36 MOA windage adjustments. Adjust-
ment scales are of the "vernier" type. Each graduation
on the scale plate equals 3 MOA. Each graduation on the
sight base scale equals 1 MOA. To use, note the point
at which graduations on both scales are aligned. Count
the number of full 3 MOA graduations from "0* on the
2-13
scale plate to "0" on the sight base scale* Add this
figure to the number of 1 MOA from "0f on the bottom
scale to the point where the two graduations are aligned
(see Figure 2-13). After zeroing the sight to the rifle
30
15
ALIGNED
ALIGNED
3 MOA + 1 MOA = 4 MOA
15 MOA + 2 MOA = 17 MOA
Figure 2-13* Rear sight adjustment.
at the preferred range, loosen the elevation and windage
indicator plate screws with the hex wrench provided.
Align the "0" on the plate with the "0" on the sight
body* Retighten the plate screws* Now, loosen the set
screws in each knob and align the ”0" of the knob with
the reference line on the sight. Pressing the knob
against the sight, tighten the set screws. The click
can be sharpened or softened to your preference by
loosening or tightening the spring screws equally on
each knob* You can now make windage and elevation
corrections and return quickly to "zero" standard*
f. Loading* The M24 has an internal, 5-round capacity
magazine* To load the rifle —
о Point the rifle in a safe direction.
о Ensure the safety is in the "S’ position*
о Raise the bolt handle and pull it back until it
stops.
2-14
о Push five rounds of 7.62-nnn special ball ammunition
one at a time through the ejection port into the
magazine. The bullet end of the rounds should be
aligned toward the chamber.
о Push the rounds fully rearward in the magazine.
о Once the five rounds are in the magazine, push the
rounds downward while slowly pushing the bolt forward
over the top of the first round.
о Push the bolt handle down. The magazine is now
loaded.
о To chamber a round, raise the bolt and pull it back
until it stops.
о Push the bolt forward. The bolt will remove a round
from the magazine and push it into the chamber.
о Push the bolt handle down.
о To fire, place the safety in the "F" position and
pull the trigger.
Section II. SNIPERSCOPES
A sniperscope mounted on the rifle allows the sniper to
detect and engage targets more effectively than he could by
using the iron sights. Unlike sighting with iron sights,
the target's image in the scope is in focus with the aiming
point (reticle). This allows for a more focused picture of
the target and aiming point at the same time. Another
advantage of the scope is its ability to magnify the target.
This increases the resolution of the target’s image, making
it clearer and more defined. Keep in mind, a scope does not
make you shoot better, it only helps you see better.
2-3. AUTO-RANGING TELESCOPE
Auto-ranging telescopes are part of the N21 system. There
are two types of ARTS found on the M21 system; the ART I and
the ART II. The basic design and operating principle of
both scopes are the same. Therefore, they will be described
together, but their differences will be pointed out.
a. Components. The ART has a commercially procured 3 to
9 variable power telescopic sight, modified for use with
2-15
the sniper rifle. This scope has a modified reticle with
a ballistic cam mounted to the power adjustment ring on
the ART I (Figure 2-14). The ART II (Figure 2-15) has a
separate ballistic cam and power ring. The ART is mounted
on a spring-loaded base mount that is adapted to fit the
M14. It comes with a hard carrying case used to transport
it when it is not mounted to the rifle.
LOCKING RING POWER RING LOCK ELEVATION TURRET
Figure 2-14. ART I scope.
Figure 2-15. ART II scope.
2-16
b. Magnification. The ART’s increased magnification
allows the sniper to see the target clearer.
(1) The average unaided human eye can distinguish
detail of about 1 inch at 100 yards (1 minute of angle).
Magnification, combined with well-designed optics,
permit resolution of this 1 inch divided by the
magnification. Thus a 1/4 MOA of detail can be seen
with a 4x scope at 100 yards or 1 inch of detail can be
seen at 600 yards with a 6x scope.
(2) The lens surfaces are coated with a hard film of
magnesium fluoride for maximum light transmission*
(3) Located midway on the scope tube are the elevation
and windage turrets with dials that are used for zeroing
adjustments. These dials are graduated in .5 MOA
increments.
(4) These telescopes also have modified reticles. The
ART I scope has the basic cross hair design reticle with
two vertical stadia lines that appear at target dis-
tances, 15 inches above and 15 inches below the hori-
zontal line of the reticle (Figure 2-16). It also has
two horizontal stadia lines that appear at target
distance, 30 inches to the left and 30 inches to the
right of the vertical line of the reticle.
Figure 2-16. ART I reticle.
2-17
(5) The ART II scope reticle (Figure 2-17) consists of
three posts; two horizontal and one bottom vertical
post. These posts represent 1 meter at the target’s
distance. The reticle has a basic cross hair with two
dots on the horizontal line that appear at target
distancer 30 inches to the left and 30 inches to the
right of the vertical line.
Figure 2-17. ART II reticle*
(6) A ballistic cam is attached to the power adjustment
ring on the ART I scope, and the ART II scope has a
separate power ring and ballistic cam.
(7) The power ring on both scopes increases and
decreases the magnification of the scope, while the
ballistic cam raises and lowers the scope to compensate
for elevation.
(8) Focus adjustments are made by screwing the eyepiece
into or away from the scope tube until the reticle is
clear.
c. Scope Mount. The ART mounts are made of lightweight
aluminum consisting of a side-mounting plate and a spring-
loaded base with scope mounting rings. The mount is
designed for low profile mounting of the scope to the
2-18
rifle, using the mounting guide grooves and threaded
hole(s) on the left side of the receiver. The ART I has
one thumb screw that screws into the left side of the
receiver (Figure 2-18). The ART II mount has two thumb
screws; one is screwed into the left side of the receiver,
and the other is screwed into the cartridge clip guide in
front of the rear sight (Figure 2-19).
THUMB SCREW
Figure 2-18. ART I mount.
THUMB SCREWS
Figure 2-19. ART II mount.
d. Design and Operation. The ART scopes are designed to
automatically adjust for the needed elevation at ranges of
300 to 900 meters.. This is done by increasing or
decreasing the magnification of the scope until a portion
of the target’s image matches the represented measurement
of the scope’s reticle.
(1) For example, adjust the power ring on the ART I
scope until 30 inches of an object or a person’s image
(beltline to top of head) fits exactly in between the
2-19
vertical stadia lines (top stadia line touching top of
the head and bottom stadia line on the beltline)*
(2} Another example of this is to adjust the power ring
on the ART II scope until 1 meter (approximately 40
inches) of a person or an object's image appears equal
to one of the posts in the reticle.
(3) When turning the power ring to adjust the target's
image to the reticle, the ballistic cam is also being
turned. This raises or lowers the scope itself to
compensate for elevation. Therefore, once the scope's
magnification is properly adjusted in proportion to the
target's image, the ballistic cam has at the same time
adjusted the scope for the proper elevation needed to
engage the target at that range.
(4) The ART II scope has a locking thumbscrew located
on the power ring used for connecting and disconnecting
the power ring from the ballistic cam. This allows the
sniper to adjust the scope on the target (auto-ranging
mode) and then disengage the locking thumbscrew to
increase magnification {manual mode) without affecting
the elevation adjustment.
e. Zeroing. The ART scope should be zeroed at 300
meters. Ideally, this should be done on a known-distance
range, with international bull-type targets. When zeroing
the ART scope —
(1) Remove the elevation and windage adjustment caps
from the scope.
(2) Turn the power adjustment ring to the lowest
position (3). On the ART II scope, ensure the locking
thumbscrew is engaged and that the ballistic cam moves
when the power ring is turned.
(3) Assume a good prone supported position that allows
the natural point of aim to be centered on the target.
(4) Fire three rounds, using good marksmanship
fundamentals with each shot.
(5) Make the needed adjustments to the scope after
placement of the rounds has been noted (Figure 2-20).
Be sure you remember —
2-20
о That each mark on the elevation and windage dials
equals .5 MOA* (.5 MOA at 300 meters equals 1*5
inches♦)
о That turning the elevation dial in the direction of
the UP arrow will raise the point of impact; turning
it the other direction will lower it*
о That turning the windage dial in the direction of
the R arrow will move the point of impact to the
right; turning it the other direction will move it to
the left*
ELEVATION SCALE - INTERNAL ADJUSTMENT
TOP
Figure 2-20* Elevation and windage scales.
(6) Repeat the steps in (4) and (5) above until two
3-round shot groups are centered on the target.
(7) After the scope is properly zeroed, it will
effectively range on targets out to 900 meters in the
anto-ranging mode*
2-21
2-4- LEOPOLD M3A TELESCOPE
The М3A telescope is mounted on the M24 sniper weapon
system. The design and operating principle of the M3A scope
are different than the ART series of scopes. The most
noticeable difference in the M3A is the method that is used
to adjust the scope for varying distances.
a. Components. The M3A consists of the telescope, a
fixed mount, extendable sun shade for the objective lens,
and dust covers for the objective and eyepiece lens-
b. Magnification. The telescope has a fixed 10-power
magnification, which gives the sniper better resolution
than found with the ART series of scopes.
(1) There are three knobs located midway on the tube.
These are the focus, elevation, and windage knobs
(Figure 2-21).
Figure 2-21. Adjustment knobs.
о The focus knob is used to focus the target1s image
on the same focal plane as the reticle, thereby
reducing parallax to a minimum. The focus knob has
two extreme positions indicated by the infinity mark
and the largest of four dots. Adjustments between
2-22
these positions will focus images from less than 50
meters to infinity.
о The elevation knob is located on top of the tube.
This knob has calibrated index markings from 1 to 10.
These markings represent the elevation setting
adjustments needed at varying distances; 1 = 100,
3 » 300, 7 = 700 meters, and so on. Each click of the
elevation knob equals 1 MOA.
о The windage knob is located on the right side of
the tube. This knob is used to make lateral adjust-
ments to the scope. Turning the knob in the indicated
direction will move the point of impact in that
direction. Each click on the windage knobs equals .5
MOA.
(2) The eyepiece is adjusted by turning it in or out of
the tube until the reticle appears crisp and clear
(Figure 2-22). Focusing the eyepiece should be done
after mounting the scope. Grasp the eyepiece and back
it away from the lock ring. Do not attempt to loosen
the lock ring first; it will automatically be loose when
you back away the eyepiece (no tools are needed). Turn
the eyepiece several turns so as to move it at least
1/8 inch. It will take this much change to achieve any
measurable effect on the focus. Look through the scope
at the sky or a blank wall and check to see if the
reticle appears sharp and crisp.
о The reticle is a duplex style, mil dot reticle that
has thick outer sections and a thin center section
(Figure 2-23). Superimposed on the thin center
section is a series of dots; four on each side of
center and four above and below center. Each of these
dots are spaced one mil apart and one mil away from
both the center and the thick outer sections.
о These mil dots are used to estimate distances to
targets. To do this, the sniper must first know the
size of the target at the given distance. Once this
is known, the sniper simply compares the size of the
target's image with the spacing between the mil dots
on the reticle. The sniper then uses the mil relation
formula (see Chapter 4) to determine the distance to
the target.
2-23
LOCK RING
EYEPIECE
Figure 2-22. Eyepiece adjustment.
Figure 2-23. Reticle.
c. Scope Mount. The scope mount has a base plate with
four screws; a pair of scope rings with eight ring screws,
each with an upper and lower ring half; and two ring
mounting bolts with nuts (Figure 2-24). The base plate is
mounted to the rifle by screwing the four base plate
screws through the plate and into the top of the receiver.
Ensure that the screws do not protrude into the receiver
and interrupt the functioning of the bolt. After the base
plate is mounted, the scope rings are mounted. To mount
the scope rings, select one set of slots on the mounting
2-24
£ase and engage each ring bolt spline with the selected
slot* Next, slide the mount claw against the base and
finger tighten the mount ring nut. Then check the eye
relief* If the scope needs
ring nuts and align the ring
slots on the base and repeat
sniper is satisfied with the
then tighten the ring nuts
T-handle torque wrench.
to be adjusted, loosen the
bolts with the other set of
the process again. Once the
eye relief obtained, he will
to 65 inch-pounds using the
Figure 2-24. Scope mount.
d. Operation. When using the scope, the sniper simply
looks at the target, determines the distance to it by
using the mil dots on the reticle, and then adjusts the
elevation knob for the given range.
e. Zeroing* Zeroing the M3A scope should be done on a
known-distance range (preferably 90? meters long) with
international bull-type targets. When zeroing the
scope —
(1) Assume a good prone supported position 100 meters
away from the target.
(2) Ensure the elevation knob is lined up on the index
line marked "1*"
2-25
(3) Fire three rounds at the center of the target,
keeping the same aiming point each time,
(4) After placement of the rounds has been noted, turn
the elevation and windage knobs to make the needed
adjustments to the scope:
о Each click on the elevation knob equals one MOA.
о One MOA at 100 meters equals about 1 inch*
о Each click on the windage knob equals .5 MOA*
о *5 MOA at 100 meters equals about *5 inch*
(5) Repeat this process until a 3-round group is
centered on the target.
(6) Once the shot group is centered, loosen the hex
head screws on the elevation and windage dials. Turn
the elevation knob to the index line marked "1" (if
needed)* Turn the windage knob to the index line marked
V (if needed)*
(7) After zeroing at 100 meters, confirm this zero out
to 900 meters at 100-meter increments.
Section III. AMMUNITION
The sniper uses the 7.62-mni special ball (M118} with the
sniper weapon systems. The sniper must rezero his weapon
each time he fires a different lot number of ammunition.
This information should be maintained in the weapon's data
book. (See Appendix C.)
2-5. SPECIAL BALL
The 7.62-mm, M118 special ball cartridge consists of a
gilding metal jacket and a lead antimony slug. It is a
boat-tailed bullet (rear of bullet is tapered} and weighs
173 grains. The tip of the bullet is not colored. The base
of the cartridge is stamped with a circle that has a verti-
cal and horizontal line sectioning it in quarters along with
the year of manufacture. Its primary use is against
personnel. It has an extreme spread (accuracy standard) for
a ten-shot group of no more than 12 inches at 550 meters
(fired from an accuracy barrel in a test cradle).
2-26
2-6. BLANKS
М82, 7.62-mm blank ammunition is used during sniper field
training. This ammunition provides the muzzle blast and
flash that can be detected by trainers during the exercises
that evaluate the sniper's ability to conceal himself while
firing his weapon.
Section TV. OPTICAL OBSERVATION EQUIPMENT
The sniper's success in selecting and engaging targets
without betraying himself depends upon his powers of obser-
vation. In addition to the sniperscope, the sniper team has
an observation telescope, binoculars, night vision sight,
and night vision goggles to enhance their ability to observe
and engage targets. Team members must relieve each other
when using this equipment since prolonged use will cause eye
fatigue, significantly reducing the effectiveness of
observation. Periods of observation during daylight should
be limited to 30 minutes followed by at least 15 minutes of
rest. When using night vision devices, limit the observer's
initial period of viewing to 10 minutes followed by a
15-minute rest period. After several periods of viewing,
extend the viewing period to IS and then 20 minutes.
2-7. OBSERVATION TELESCOPE
The M49 observation telescope is a prismatic optical instru-
ment of 20-power magnification (Figure 2-25). Components of
the telescope include a removable eyepiece and objective
lens covers, an M15 tripod with canvas carrier, and a hard
case carrier for the telescope. The telescope is focused by
turning the eyepiece in or out until the image of the object
being viewed is crisp and clear to the viewer. The sniper
team carries the telescope on all missions. The observer
uses the telescope to determine wind speed and direction by
reading mirage (Chapter 3), observing the bullet trace, and
observing the bullet impact. This information is used by
the sniper to make quick and accurate adjustments for wind
conditions. The lenses are coated with a hard film of
magnesium fluoride for maximum light transmission. Its high
magnification makes observation, target detection, and
target identification possible where conditions and range
would otherwise preclude this capability. Camouflaged
targets and those in deep shadows can be more readily
distinguished. The team can observe troop movements at
greater distances and identify selective targets with ease.
2-27
REMOVABLE
EYEPIECE
COVER
Figure 2-25. M49 observation telescope*
2-B. BINOCULARS
The M19 binoculars (Figure 2-26) have 7-power magnification
with 50-mm objective lenses. The М1Э has an interpupillary
scale located on the hinge. The sniper should adjust the
binoculars until one sharp circle appears while locking
through them. After adjusting the binoculars’ interpupil-
lary distance (distance between a person's pupils), the
sniper should make a mental note of the reading on this
scale for future reference. The eyepieces are also adjust-
able. The sniper will adjust one eyepiece at a time by
turning the eyepiece with one hand while placing the palm of
the other hand over the objective lens of the other monocu-
lar. While keeping both eyes open, he will adjust the
eyepiece until he can see a crisp, clear view. After one
eyepiece is adjusted, he will repeat the procedure again
with the remaining eyepiece. The sniper should also make a
mental note of the diopter scale reading on both eyepieces
for future reference. One side of the binoculars has a
laminated reticle pattern (Figure 2-27) that consists of a
vertical and horizontal mil scale that is graduated into
10-rail increments. Using this reticle pattern aids the
sniper in determining range and adjusting indirect fires.
The sniper uses the binoculars for --
2-28
о Calling for and adjusting indirect fires.
о Observing target areas.
о Observing enemy movement and positions.
о Identifying aircraft.
о Improving low-light level viewing.
EYEPIECE INTERPUPILLARY
I SCALE
Figure 2-26. M19 binoculars.
Figure 2*27. M19 reticle.
2-29
2-9. NIGHT VISION SIGHT
The night vision sight (AN/PVS-4) is a portable, battery-
operated, electro-optical instrument that can be hand-held
for visual observation or weapon-mounted for precision fire
at night (Figure 2-28). The observer can detect and resolve
distant targets through the unique capability of the sight
to amplify reflected ambient light (moon, stars, or sky-
glow) . The sight is passive; thus, it is free from enemy
detection by visual or electronic means, This sight, with
appropriate weapons adapter bracket, may be mounted on the
M16 rifle.
Figure 2-28, AN/PVS-4 night vision sight.
a. Uses. When mounted on the M16 rifle, the AN/PVS-4 is
very effective in achieving a first-round hit out to 300
meters, depending on the light conditions. The AN/PVS-4
is mounted on the M16 because the limited range of the
night sight does not make its use practical for the sniper
weapon system. This also avoids problems that may occur
when removing and replacing the sniperscope. The night
sight provides an effective observation capability during
night combat operations. The sight does not give the
width, depth, or clarity of daylight vision; however, a
well-trained operator can see enough to analyze the tacti-
cal situation, detect enemy targets, and place effective
fire on them. The sniper team uses the AN/PVS-4 to —
о Enhance their night observation capability.
о Locate and suppress hostile fire at night.
о Deny enemy movement at night.
о Demoralize the enemy with effective first-round kills
at night.
2-30
b. Employment Factors. Since the sight requires target
illumination and does not project its own light source, it
will not function in complete darkness* The sight works
best on a bright, moonlit night* When there is no light
or the ambient light level is low (such as in heavy
vegetation), the use of artificial or infrared light will
improve its performance*
(1) Fog, smoke, dust, hail, or rain limit the range and
decrease the resolution of the instrument*
(2) The sight cannot see through objects in the field
of view. For example, the operator will experience the
same range restrictions when viewing dense woodlines as
he would when using other optical sights*
(3} Initially, an operator may experience eye fatigue
when viewing for prolonged periods. Initial exposure
should be limited to 10 minutes followed by a rest
period of 15 minutes. After several periods of viewing,
he can safely extend this time limit* To aid in
maintaining a continuous viewing capability and to
reduce eye fatigue, it is recommended that the operator
frequently alternate his viewing eyes-
с. Zeroing. The operator may zero the sight during pure
daylight or darkness; however, he may have some difficulty
in zeroing just before darkness. The light level at dusk
is too low to permit the operator to resolve his zero
target with the lens cap cover in place, but it is still
intense enough to cause the sight to automatically cut off
unless the lens cap cover is in position over the
objective lens. The sniper will normally zero the sight
for the maximum practical range that he can be expected to
observe and fire, depending on the level of light.
2-10* NIGHT VISION GOGGLES (AN/PVS-5)
These are a lightweight, passive night vision system that
gives the sniper team another means of observing an area
during darkness (Figure 2-29)* The goggles are normally
carried by the sniper because the observer has the M16
mounted with the night sight* The goggles are easier to
view with because of their design- However, the same
limitations that apply to the night sight also apply to the
goggles.
2-31
Figure 2-29* AN/PVS-5 night vision goggles*
Section V. CLOTHING AND ADDITIONAL EQUIPMENT
The sniper must use special clothing and equipment to reduce
the possibility of detection*
2-11. CAMOUFLAGE
The sniper is outfitted with the following standard camou-
flage clothing and equipment designed for tropical or
temperate zones. He may use natural or artificial materials
to modify the clothing to match his environment.
a. Ghillie Suit* The sniper constructs a ghillie suit by
modifying a set of camouflage fatigues. (See Chapter 4.}
He adds canvas to the front and elbows for protection when
crawling. He also attaches garnish to the back and
shoulders to break up his outline and to help him to blend
into the surrounding terrain.
b* Hat. The camouflaged hat is considered part of the
sniper’s ghillie suit and should be camouflaged with the
same materials. (See Chapter 4.)
c. Boots. The sniper should wear boots that are suitable
to the climate he is in. The boots need to be camouflaged
in the same manner as the ghillie suit.
2-32
d. Rucksack* At a minimum, the sniper’s rucksack will
contain a two-quart canteen, an entrenching tool, a first
aid kitf a lensatic compass, pruning shears, a sewing kit
with canvas needles and nylon thread, spare netting and
garnish, rations, and personal items as needed* The
sniper will also carry his ghillie suit in his rucksack
until the mission requires him to wear it*
2-12* ADDITIONAL EQUIPMENT
Additional equipment the sniper may use for normal or
special missions includes the following:
a. Communications Equipment* The sniper team must have a
man-portable radio that will give the team secure
communications with units involved in their mission*
(1) AN/PRC-77* The basic radio for the sniper team is
the AN/pRC-77 (Figure 2-30}* This radio is a short-
range, man-pack portable, frequency modulated receiver-
transmitter that provides two-way voice communication.
The set is capable of netting with all other infantry
and artillery FM radio sets on common frequencies. The
AN/KY-57 should be installed with the AN/PRC-77* This
allows the sniper team to communicate securely with all
units supporting or being supported by the sniper team*
Figure 2-30* AN/PRC-77 radio*
2-33
(2) AN/PRC-119. The AN/PRC-119 is currently replacing
the AN/PRC-77. This radio is a manpack portable, VHF/FM
radio that is designed for simple, quick operation using
a 16-element key pad for push-button tuning. it is
capable of short-range and long-range operation for
voice, FSK, or digital data communications. It can be
used for single-channel operation or in a jam-resistant,
frequency-hopping mode, which can be changed as needed.
This radio has a built-in self-test with a visual and
audio readback. It is compatible with the AN/KY-57 for
secure communications.
Figure 2-31. AN/PRC-119 radio.
b. Sidearms. Each member of the team should have a
sidearm, such as an M9, 9-mm Beretta or a caliber .45
pistol. A sidearm gives a sniper the needed protection
from a nearby threat while on the ground moving or while
in the confines of a sniper position.
c. Compass. Each member of the sniper team must have a
lensatic compass for land navigation. The team must have
military maps of the area they are operating in.
2-34
d. Calculator. The sniper team will need a pocket-size
calculator to calculate distances when using the mil-
relation formula. Solar-powered calculators usually work
fine, but under low light conditions, battery power may be
preferred. If a battery-powered calculator is to be used
in low light conditions, it should have a lighted display.
e. AN/GVS-5, Laser Observation Set. Depending on the
mission, snipers may use the AN/GVS-5 to determine
increased distances. The AN/GVS-5 (LR) (Figure 2-32) is
an individually operated, hand-held distance measuring
device designed for distances from 200 to 9,990 meters
(+/- 10 meters). It measures distances by firing an
infrared beam at a target and measuring the time the
reflected beam takes to return to the operator. It then
displays the target distance in meters inside the viewer.
The reticle pattern in the viewer is graduated in 10-mil
increments and has display lights to indicate low battery
and multiple target hits. If the beam hits more than one
target, the display will give a reading of the closest
target hit. The beam that is fired front the set poses a
safety hazard. Snipers planning to use this equipment
should be thoroughly trained in its safe operation. (See
TM 11-5860-201-10.)
Figure 2-32. Laser observation set.
f. AN/PVS-7A, Night Vision Goggles. The AN/PVS-7A night
vision goggles (Figure 2-33) can be used instead of the
AN/PVS-5 goggles. These goggles have a better resolution
and viewing capability than the AN/PVS-5 goggles. The
2-35
AN/PVS-7A goggles come with a head mount assembly that
allows them to be mounted in front of the face, allowing
both hands to be free. The goggles can be used without
the mount assembly for hand-held viewing. (See
TH 11-5855-262-10-1.)
Figure 2-33. Night vision goggles.
g, M22 Binoculars. The M22 binoculars (Figure 2-34) can
be used instead of the M19. These binoculars have the
same features as the M19, plus fold-down eyepiece cups for
personnel who wear glasses to reduce the distance between
the eyes and the eyepiece. It also has protective covers
for the objective and eyepiece lenses. The binoculars
have laser protection filters on the inside of the objec-
tive lenses (direct sunlight can reflect off of these
lenses). The reticle pattern is the same as in the M19
binoculars.
Figure 2-34. M22 binoculars.
2-36
ТС 23-14
CHAPTER 3
SNIPER MARKSMANSHIP
Sniper marksmanship is an extension of basic rifle marksman-
ship and focuses on the techniques needed to engage targets
at extended ranges. To successfully engage targets at these
increased distances, the sniper must be proficient in sniper
marksmanship fundamentals and a variety of other areas.
Examples of these areas are determining the effects of
weather conditions on ballistics; holding off for elevation
and windage; engaging moving targets; using and adjusting
scopes; and zeroing procedures. As with all sniper skills,
sniper marksmanship is a perishable skill that must be
practiced often.
3-1. USING THE FUNDAMENTALS OF MARKSMANSHIP
A sniper must be thoroughly trained in the fundamentals of
marksmanship. These include assuming a position, aiming,
breath control, and trigger control. These fundamentals
develop fixed and correct shooting habits for instinctive
application. Every sniper should periodically refamiliarize
himself with these fundamentals regardless of his
experience.
a. Assuming a Firing Position. The sniper should fire
from a prone supported position (Figure 3-1). Only when a
prone supported position cannot be used will the sniper
use an alternate type of position. In any type of
position, the sniper should always use artificial support
for the weapon. This can be sandbags, rucksacks, logs, or
anything that will provide a stable platform for the
rifle. This reduces movement of the weapon caused by
contact with the body. First shot accuracy is an absolute
must for the sniper's mission. There are five elements
common to a good firing position.
3-1
Figure 3-1. Firing position.
(1) Nonfiring hand. Use the nonfiring hand to support
the butt of the weapon. The sniper places his hand next
to his chest and rests the tip of the butt on it. He
balls his hand into a fist to raise the weapon's butt or
loosens the fist to lower the weapon's butt. A pre-
ferred method to do this is to hold a sock full of sand
in the nonfiring hand and place the weapon butt on the
sock. This reduces body contact with the weapon. To
raise the butt, the sniper squeezes the sock and to
lower itj he loosens his grip on the sock.
(2) Butt of the stock. Place the butt of the stock
firmly in the pocket of the shoulder. The sniper can
insert a pad on the ghillie suit where contact with the
butt is made. This reduces pulse beat and breathing
effects that can be transmitted to the weapon.
(3) Firing hand. With the firing hand, grip the small
of the stock. Using the middle through little fingers,
exert a slight rearward pull to keep the butt of the
weapon firmly in the pocket of the shoulder. Place the
thumb over the top of the small of the stock. Place the
index finger on the trigger, ensuring it does not touch
the stock of the weapon and will not disturb the lay of
the rifle when the trigger is pulled.
3-2
(4) Elbows> Find a comfortable position that provides
the greatest support.
(5) Stock weld. The sniper needs to ensure he places
his cheek in the same place on the stock with each shot.
A change in stock weld tends to cause misalignment of
sights, thus creating misplaced shots.
b. Aiming the Rifle. Begin the aiming process by
aligning the rifle with the target when assuming a firing
position. The rifle should point naturally at the desired
point. No muscular tension or movement should be neces-
sary to hold the sights on target. To check the natural
point of aim, the sniper assumes a comfortable, stable
firing position. He then places his cheek on the stock at
the correct stock weld, enters into the natural
respiratory pause, looks away from the scope by moving
only his eye, relaxes and lets the rifle drift to its
natural point of aim, and then looks back into the scope.
If the reticle is in the correct location on the target,
the natural point of aim is correct. If it is not
correct, the sniper must change his body position to bring
the sights onto the target. If muscles are used to adjust
the weapon onto the point of aim, the muscles will auto-
matically relax as the rifle fires, and the rifle will
begin to move toward its natural point of aim. Because
this movement begins just before the weapon discharges,
the rifle is moving as the bullet leaves the muzzle. This
causes displaced shots with no apparent cause (recoil
disguises the movementJ. By adjusting the weapon and body
as a single unit, rechecking, and readjusting as
necessary, the sniper achieves a true natural point of
aim. Once the position is established, the sniper will
then aim the weapon at the exact point on the target.
Aiming involves three areas; eye relief, sight alignment,
and sight picture.
(1) Eye relief. This is the distance from his firing
eye to the rear sight or the rear of the scope tube.
When using iron sights, the distance must remain con-
sistent from shot to shot in any given firing position
to preclude changing what the sniper views through the
rear sight. Relief will, however, vary from firing
position to firing position and from sniper to sniper
according to their neck length, their angle of head
approach to the stock, the depth of their shoulder
pocket, and the firing position from which they are
firing. This distance (Figure 3-2) is more rigidly
controlled with telescopic sights than with iron sights.
3-3
He must take care to prevent eye injury caused by the
scope tube striking his brow during recoil. Regardless
of the sighting system he uses, he must place his head
as upright as possible with his firing eye located
directly behind the rear portion of the sighting system.
This head placement also allows the muscles surrounding
his eye to relax. Incorrect head placement causes the
sniper to have to look out of the top or corner of his
eye, resulting in muscular strain. Such strain leads to
blurred vision and can also cause eye strain. Eye
strain can and should be avoided by not staring through
the iron or telescopic sights for extended periods. The
best aid to consistent eye relief is maintaining the
same stock weld from shot to shot.
3*
3 1/2-
Figure 3-2. Eye relief.
(2) Sight alignment. With iron sights, this is the
relationship between the ftont and rear sights as seen
by the sniper (Figure 3-3). The sniper centers the top
edge of the front sight blade horizontally and verti-
cally within the rear aperture. (The center of aperture
is easiest for the eye to locate and allows the sniper
to be consistent in blade location.) With telescopic
sights, sight alignment is the relationship between the
cross hairs (reticle) and a full field of view as seen
by the sniper. The sniper must place his head so that a
full field of view completely fills the tube, with no
dark shadows or crescents. This will cause misplaced
shots. The sniper centers the reticle in a full field
of view, ensuring the vertical cross hair is straight up
3-4
and down so t*he rifle is not canted. Again, the center
is easiest for the sniper to locate and allows for
consistent reticle placement.
SCOPE
STRIKE OF BULLET
FULL FIELD
OF VIEW
METALLIC SIGHTS
FULL FIELD
OF VIEW
Figure 3-3. Sight alignment.
{3) Sight picture. With iron sights, this is the
relationship between the rear aperture, the front blade,
and the target as seen by the sniper (Figure 3-4). The
sniper centers the top edge of the blade in the rear
aperture. He then places the top edge of the blade in
the center of the largest visible mass of the target
(disregard the head and use the center of the torso)•
With telescopic sights, sight picture is the relation-
ship between the reticle and full field of view and the
target as seen by the sniper. He centers the reticle in
a full field of view. He then places the reticle center
of the largest visible mass of the target (as in iron
sights). The center of mass of the target is easiest
for the sniper to locate, and it surrounds the intended
point of impact with a maximum amount of target area in
case of an error in the aiming process.
3-5
©фф©
©ффф
Figure 3-4, Sight picture.
(4J Aiming process error. Everyone occasionally makes
an error in the aiming process. When alignment and
picture are perfect (regardless of sighting system)t and
when everything else is done correctly, the shot will
hit center of mass on the target. However, with an
error in sight alignment, the bullet is displaced in the
direction of the error. Such an error creates an
angular displacement between the line of sight and the
line of bore. This displacement increases as range
increases. The amount of bullet displacement depends on
the size of alignment error. Close targets will show
little or no discernible error. Distant targets can
show appreciable displacement or can be missed alto-
gether with severe sight misalignment. Inexperienced
snipers are prone to make this kind of error. They are
unsure of what correctly aligned sights look like
(especially telescopic sights); they vary their head
positions (and eye relief) from shot to shot; and they
are apt to make mistakes while firing.
(5) Sight picture error- An error in sight picture is
an error in the placement of the aiming point. Such an
error causes no displacement between the line of sight
and the line of bore. The weapon is simply pointed at
the wrong spot on the target. Because no displacement
exists as range increases, close and far targets are hit
3-6
or missed depending on where the front sight or the
reticle is when the rifle fires. All snipers face this
kind of error every time they shoot. This is because,
regardless of firing position stability, the weapon will
always be moving. A supported rifle will move much less
than an unsupported one, but both will still move in
what is known as a wobble area. The sniper must adjust
his firing position so that bis wobble area is as small
a^ possible and centered on the target. With proper
adjustments, the sniper should be able to fire the shot
while the front sight blade or reticle is on the target
at, or very near, the desired aiming point. How far the
blade or reticle is from this point when the weapon
fires is the amount of sight picture error all snipers
face.
(6) Dominant eye. Some individuals may have difficulty
aiming because of interference from their dominant eye,
if this is not the eye used in the aiming process. This
may require the sniper to fire from the other side of
the weapon (right-handed firer will fire left-handed).
To determine which eye is dominant, hold an index finger
6 to 8 inches in front of your eyes. Close one eye at a
time while looking at the finger; one eye will make the
finger appear to move and the other will not. The eye
that does not make the finger appear to move is the
dominant eye.
c. Exercising Breath Control, Breath control is impor-
tant with respect to the aiming process. If the shooter
breathes while trying to aim, the rise and fall of his
chest causes the rifle to move. He must, therefore,
accomplish sight alignment during breathing and complete
the aiming process while holding his breath. To do this,
he first inhales then exhales normally and stops at the
moment of natural respiratory pause,
(1) A respiratory cycle lasts 4 to 5 seconds. Inhala-
tion and exhalation require only about 2 seconds. Thus,
between each respiratory cycle there is a pause of 2 to
3 seconds. This pause can be extended to 10 seconds
without any special effort or unpleasant sensations.
The shooter should fire during this pause when his
breathing muscles relax. This avoids strain on his
diaphragm.
(2) A shooter should assume his firing position and
breathe naturally until his hold begins to settle. Many
shooters then take a slightly deeper breath, exhale, and
3-7
pause, expecting to fire the shot during the pause. If
the hold does not settle sufficiently to allow the shot
to be fired, the shooter resumes normal breathing and
repeats the process.
(3) The respiratory pause should never feel unnatural.
If it is too long, the body suffers from oxygen defi-
ciency and sends out signals to resume breathing. These
signals produce involuntary movements in the diaphragm
and interfere with the shooter’s ability to concentrate.
Generally speaking, 8 to 10 seconds is the maximum safe
period for the respiratory pause. During multiple,
rapid engagements, the breathing cycle should be forced
through a rapid, shallow cycle between shots instead of
trying to hold the breath or breathing. Firing should
be accomplished at the forced respiratory pause.
d. Exercising Trigger Control. Trigger control is the
most important of the sniper marksmanship fundamentals.
It is defined as causing the rifle to fire when the sight
picture is at its very best, without causing the rifle to
move. Trigger squeeze, on the other hand, is defined as
the independent action of the forefinger on the trigger,
with a uniformly increasing pressure straight to the rear
until the rifle fires. Trigger control is the last task
to be accomplished before the weapon fires. It is more
difficult to apply when using a telescope ox when a firing
position becomes less stable.
(1) Proper trigger control occurs when the sniper
places his firing finger as low on the trigger as
possible and still clears the trigger guard, thereby
achieving maximum mechanical advantage. He engages the
trigger with that part of his firing finger that allows
him to pull the trigger straight to the rear. In order
to avoid transferring movement of the finger to the
entire rifle, the sniper should see daylight between the
trigger finger and the stock as he squeezes the trigger
straight to the rear. He fires the weapon when the
front blade or reticle is in a position to ensure a
well-placed shot.
(2) As the stability of a firing position decreases,
the wobble area increases. The larger the wobble area,
the harder it is to fire the shot without reacting to
it. This reaction occurs when the sniper —
(a) Anticipates recoil. The firing shoulder begins
to move forward just before the round fires.
3-8
(b) Jerks the trigger. The trigger finger moves the
trigger in a quick, choppy, spasmodic attempt to fire
the shot before the front blade or reticle can move
away from the desired point of aim,
(c) Flinches. The sniper's entire upper body (or
parts thereof) overreacts to anticipated noise or
recoil. This is usually due to being unfamiliar with
the weapon.
(d) Avoids recoil. The sniper tries to avoid recoil
or noise by moving away from the weapon, or closing
the firing eye, just before the round fires. This,
again, is caused by a lack of knowledge of the
weapon's actions upon firing.
(3) Trigger control is best handled by assuming a
stable position, adjusting on the target, and beginning
a breathing cycle. As the sniper exhales the final
breath toward a natural respiratory pause, he secures
his finger on the trigger. On the M21, he will take up
the slack in the trigger until resistance is felt. As
the front blade or reticle settles at the desired point
of aim, and the natural respiratory pause is entered, he
applies initial pressure. He increases the tension on
the trigger during the respiratory pause as long as the
front blade or reticle remains in the area of the target
that ensures a well-placed shot. If the front blade or
reticle moves away from the desired point of aim on the
target, and the pause is free of strain or tension, the
sniper stops increasing the tension on the trigger,
waits for the front blade or reticle to return to the
desired point, and then continues to squeeze the
trigger. This is trigger control. If movement is too
large for recovery or if the pause has become uncomfort-
able (extended too long), the sniper should, whenever
possible, carefully release the pressure on the trigger
and begin the respiratory cycle again.
3-2. FOLLOWING THROUGH
Applying the fundamentals increases the odds of a well-aimed
shot being fired. There are, however, additional skills
that, when mastered, make that first-round kill even more of
a certainty. One of these is to follow through.
a. This is the act of continuing to apply all the sniper
marksmanship fundamentals as the weapon fires as well as
immediately after it fires. Follow-through consists of —
3-9
о Keeping the head in firm contact with the stock
(stock weld) .
о Keeping the finger on the trigger all the way to the
rear.
о Continuing to look through the rear aperture or scope
tube*
о Ensuring that muscles stay relaxed*
о Avoiding reacting to recoil and or noise,
о Releasing the trigger only after the recoil has
stopped.
b. Good follow-through ensures
fire and recoil naturally, and
tion reacts as a single unit to
the weapon is allowed to
the sniper-rifle combina-
such actions.
3-3. CALLING THE SHOT
Calling the shot is being able to tell where the round
should impact on the target. Because live targets invari-
ably move when hit, the sniper will find it difficult, if
not impossible, to use his scope to locate the target after
the round is fired. Using iron sights, the sniper will find
that searching for a downrange hit is beyond his capabili-
ties- The sniper must be able to accurately call his shots.
Proper follow-through will aid in calling the shot. The
dominant factor in shot calling is, however, where the
reticle or post is located when the weapon discharges* This
location is called his final focus point.
a. With iron sights, the final focus point should be on
the top edge of the front sight blade. The blade is the
only part of the sight picture that is moving (in the
wobble area). Focusing on it aids in calling the shot and
detecting any errors in sight alignment or sight picture.
Of course, lining up the sights and the target initially
requires the sniper to shift his focus from the target to
the blade and back until he is satisfied that he is
properly aligned with the target. This shifting exposes
two more facts about eye focus. The eye is capable of
instantly shifting focus from near objects (the blade) to
far objects (the target). The eye cannot, however, be
focused so that two objects at greatly different ranges
(again the blade and target) are both in sharp focus.
After years of experience, many snipers find that they no
3-10
longer hold final focus on the front sight blade. Their
focus is somewhere between the blade and the target* This
act has been related to many things, from personal prefer-
ence to failing eyesight. Regardless, inexperienced
snipers are still advised to use the blade as a final
focus point*
b. The final focus is easily placed with telescopic
sights because of their optical qualities. Properly
focused, a scope should present both the field of view and
the reticle in sharp detail. Final focus should then be
on the target. While focusing on the target, if the head
is moved slightly from side to side, the reticle may seem
to move across the target face, even though the rifle and
scope are virtually motionless. This movement is paral-
lax. Parallax is present when the target image is not
correctly focused on the reticle’s focal plane. There-
fore, the target image and the reticle will appear to be
in two separate positions inside the scope, causing the
effect of reticle movement across the target. A small
amount of parallax will be unavoidable throughout the
range of the ART series of scopes. The M3A scope on the
M24 has a focus adjustment that eliminates parallax in the
scope. The sniper should adjust the focus knob until the
target's image is on the same focal plane as the reticle.
To determine if the target's image appears at the ideal
location, the sniper should move his head slightly left
and right to see if the reticle appears to move. If it
does not move, the focus is properly adjusted and no
parallax will be present.
3-4. ZEROING THE RIFLE
When a sniper fires a shot that does not strike the desired
location on the target, he must move the sights to move the
shot to that point. The zero of a rifle is that elevation
and windage setting required to place a shot or shot group
at a given point, at a given range, on a day when no wind is
blowing. Experience has shown that the best way to zero a
rifle is to shoot from the desired firing position, at the
desired range, and with the intended cadence (rate of fire)*
a. Depending on the situation, a sniper may be called
upon to deliver an effective shot at ranges up to 900
meters* This requires that he zero his rifle at most of
the ranges that he may be expected to fire. When using
the ART series of scopes, he should zero at 300 meters and
confirm the,zero at the more distant targets* When using
the M3A scope, he should zero at 100 meters and then
3-11
confirm the zero at the more distant targets. His success
depends on a one-round, one-kill philosophy. He may not
get the second shot for obvious reasons. Therefore, he
must zero his rifle so accurately that when he applies the
fundamentals, he can be assured of a definite kill.
b. Once a sniper obtains a zero, he cannot expect the
zero to remain absolutely constant. He must periodically
confirm the zero, such as after disassembly of the sniper
rifle for maintenance and cleaning, for changes in ammuni-
tion lots, for changes in altitude, or as the result of
severe weather changes. These changes in zero and the
conditions that caused them should be recorded in tne
sniper's data book (see Appendix C). The individual who
will use the rifle must zero it, Individual character-
istics such as stock weld, eye relief, firing position,
and trigger control usually result in each sniper having a
different zero with the same rifle, or a change in zero
from one firing position to another, It is important that
the sniper knows his first round zero, especially at
longer ranges. Some rifles will place the first round out
of the main group. By keeping written data over a period
of time, the sniper knows what his rifle will do when the
barrel is cold and clean, or cold and fouled. First shot
variance is more likely to occur from a cold, clean
barrel, especially if the barrel is not absolutely dry.
3-5. CONSIDERING WEATHER EFFECTS
In the case of the highly trained sniper, effects of the
weather are a primary cause of error in the strike of the
bullet. Wind, mirages, light, temperature, and humidity
affect the bullet, the sniper, or both. Some effects are
insignificant; however, sniping is often done in extremes of
weather; therefore, all effects must be considered.
a. Wind poses the biggest problem to the sniper. The
effect that wind has on the bullet increases with range.
This is due primarily to the slowing of the bullet's
velocity combined with a longer flight time. This allows
the wind to have a greater effect on the round as
distances increase. The result is a loss of stability.
Wind also has a considerable effect on the sniper. The
stronger the wind, the more difficult it is to hold the
rifle steady. This can be partially offset with training,
conditioning, and by the use of supported firing posi-
tions. (See Appendix E for a windage conversion table.)
b. Before making any sight adjustment to compensate for
wind, the sniper must determine its direction and veloc-
3-12
£ty- He may use certain indicators to accomplish this.
These are range flags, smoke, trees, grass, rain, and the
sense of feel- However, the most preferred method of
determining wind direction and velocity is reading mirage
(see paragraph 3-5e). In most cases, it is relatively
easy to determine the direction the wind is blowing simply
by observing the indicators.
(1) A common method of estimating the velocity of the
wind during training is to watch the range flag (Figure
3-5}> The sniper determines the angle between the flag
and pole, in degrees, then divides by* the constant
number 4. The result gives the approximate velocity in
miles per hour.
Figure 3-5. The flag method.
(2) If no flag is visible, the sniper holds a piece of
paper, grass, cotton, or some other light material at
shoulder level, then drops it. He then points directly
at the spot where it lands and divides the angle between
his body and arm by the constant number 4. This gives
him the approximate wind velocity in miles per hour.
(3) If for some reason these methods cannot be used,
the following information is helpful in determining
velocity. Winds under 3 miles per hour can barely be
felt, but they may be determined by smoke drifts. A 3-
to 5-mile-per-hour wind can barely be felt on the face.
With a 5- to 8-mile-per-hour wind, the leaves in the
3-13
trees are in constant motion, and with a 12- to 15-mile-
per-hour wind/ small trees begin to sway.
c. Since the sniper must know how much effect the wind
will have on the bullet, he must be able to classify the
wind. The best method is to use the clock system (Figure
3-6). With the sniper at the center of the clock and the
target at 12 o’clock, the wind is assigned three values:
full, half, and no value. Full value means that the force
of the wind will have a full effect on the flight of the
bullet. These winds come from 3 and 9 o’clock* Half
value means that a wind at the same speed, but from, 1, 2,
4, 5, 7, 8, 10, and 11 o’clock, will move the bullet only
half of the full value wind. No value means that a wind
from 6 or 12 o'clock will have little or no effect on the
flight of the bullet.
Figure 3-6. Clock system.
d. After determining wind direction and velocity, the
sniper bases the windage correction on the following
formula:
(R 100) x V
constant
number of minutes of angle for a
full value wind on a sniper rifle.
3-14
In this formula, R is the range in hundreds of meters
and V is the velocity of the wind in miles per hour *
For half value winds, divide the answer by 2*
The constant for the M118 special ball round is 20.
This constant may not remain correct if other ammunition
is used. Changes in bullet weight and velocity affect
performance characteristics.
EXAMPLE: The wind is blowing from 9 o'clock at 5 miles
per hour. The range is 800 meters; using the wind
formula, R - 8 and V = 5, and the constant 20 for 800
meters, the correction is:
e. A mirage is a reflection of the heat through layers of
air at different temperatures and density as seen on a
warm day (Figure 3-7). With the telescope, a mirage can
be seen as long as there is a difference in ground and air
temperatures. Proper reading of the mirage will enable
the sniper to estimate and make windage corrections with a
high degree of accuracy.
f. As observed through the telescope, the mirage appears
to move with the sairie velocity as the effective wind,
except when blowing straight into or away from the scope.
Then the mirage gives the appearance of moving straight up
with no lateral movement. This is termed a boiling
mirage. in general, changes in the velocity of the wind,
up to approximately 12 miles per hour, can be readily
determined by observing the mirage. Beyond that speed,
the movement of the mirage is too fast for detection of
minor changes.
Figure 3-7. Types of mirages.
BOILING
MIRAGE
3-15
g. Temperature affects the elevation setting required to
hit the center of the target (Figure 3—8)* This is
because an increase in temperature of 20 degrees Fahren-
heit increases the muzzle velocity by approximately 50
feet per second. Regardless of the range, the sniper must
change his elevation adjustments about one minute for each
20-degree change in temperature. For a drop in
temperature, he raises the elevation; for an increase in
temperature, he lowers the elevation*
Figure 3-8. Temperature effects.
3-16
Light may or may not affect the sniper’s aim; it
affects different people in different ways. Light has a
greater effect when shooting with iron sights, Telescopic
sights will be slightly affected, if at all. The general
tendency, howeverp is for the sniper to shoot high on a
dull, cloudy day and low on a bright, clear day. Extreme
light conditions from the left or the right may affect the
horizontal impact of a shot or shot group.
i, To understand the effects of humidity on the strike of
the bullet, one must realize that the higher the humidity,
the denser the air. Therefore, there is more resistance
to the flight of the bullet. Resistance tends to slow the
bullet and as a result, the sniper must raise his eleva-
tion to compensate for it. The effect of humidity at
short ranges is not as great as at long ranges. Again,
the experience of the sniper and his resultant study of
hits and groups under varied conditions of humidity will
determine the effects of humidity on his zero.
j. By not considering all of the effects of weather, some
snipers tend to overemphasize certain effects. This will
produce bad shots from time to time. As previously
mentioned, snipers normally fire for a certain period of
time under average conditions. As a result they zero
their rifle, and (with the exception of minor displace-
ments of shots and groups) they do not have difficulty
except for the wind. Yet a sniper can travel to a
different location to fire again and find a change in
zero. A thorough study of the weather effects would
indicate the change. Proper recording and study based on
experience are all-important with respect to determining
the effects of weather. Probably one of the most diffi-
cult things to impress upon a sniper is the evidence of a
probable change in his zero. If a change is indicated, it
applies at all ranges.
3-6. FIRING ONE ROUND
On ce the sniper has been taught the fundamentals, his
primary concern in ensuring the quality of his shooting is
his ability to apply this knowledge during his mission. A
very effective way to do this is to teach the sniper team
the integrated act of firing one round. Firing one round
involves the preparation of equipment, the selection of a
firing position, the detection of a target, and the sight
adjustments needed to engage the target.
3-17
a. Before leaving the preparation area, the sniper
ensures his weapon system and equipment are in working
condition. The weapon should be properly camouflaged,
zeroed with the ammunition he will use on the mission, and
have a bore that is clean and dry. The observer will
inspect the binoculars and telescope to ensure the optics
are clean and that they will not fog up on the mission.
b. The sniper team carefully selects a firing position,
ensuring it has enough room for the sniper and observer to
acquire good firing and observing positions with clear
fields of fire. The sniper should be in a prone supported
position that will allow him to fire in any direction
within the target area. Once in position, the sniper team
will conduct a search of the area while preparing a range
card to use for quick range referencing.
c. Upon detection of a target, the team determines the
distance to the target, and the sniper makes the needed
elevation adjustment. The observer determines the wind
direction and velocity and tells the sniper the needed
windage adjustment. Using good marksmanship fundamentals,
the sniper fires one round. The observer watches the
target and bullet trace to determine the exact placement
of the round and prepares to give corrections to the
sniper, if necessary.
3-7. HOLDING OFF FOR ELEVATION OR WIND
This technique is used only when the sniper does not have
time to change his sight setting. The sniper rarely
achieves pinpoint accuracy when holding off, since a minor
error in range determination or a lack of a precise aiming
point might cause the4 bullet to miss the desired point. He
uses holdoff with the sniperscope only if several targets
appear at various ranges, and time does not permit adjusting
the scope for each target.
a. Holdoff is used to hit a target at ranges other than
the range for which the rifle is presently adjusted. When
aiming directly at a target at ranges greater than the set
range, the bullet will hit below the point of aim. At
lesser ranges, the bullet will hit higher than the point
of aim. If the sniper understands this and knows about
trajectory and bullet drop, he will be able to hit the
target at ranges other than that for which the rifle was
adjusted. For example, the rifle is adjusted for a target
located 500 meters downrange and another target appears at
a range of 600 meters. The holdoff would be 25 inches;
3-1B
♦that is, the sniper should hold off 25 inches above the
center of visible mass in order to hit the center of mass
of that particular target. If another target were to
appear at 400 meters, the sniper would aim 15 inches below
the center of visible mass in order to hit the center of
mass. With the M3A scope, the vertical mil dots on the
scope’s reticle can be used as aiming points when using
elevation holdoffs. For example, if the sniper has to
engage a target at 500 meters and the scope is set at 400
meters, he would place the first mil dot 5 inches below
the vertical line on the target’s center mass. This will
give the sniper a 15-inch holdoff at 500 meters.
b. The sniper may use holdoff in the following ways to
compensate for the effect of wind:
(1} When using the horizontal stadia marks on the
ART-type scope reticle to measure the required holdoff
distance, the sniper must remember to first range-in on
the target. He then subdivides the horizontal reticle
JLine within the stadia marks (60 inches) to determine
the correct distance for holdoff. He can also use that
reference point as an aiming point or point of aim.
When using the M3A scope, the sniper uses the horizontal
rail dots on the reticle to hold off for wind. For
example, if the sniper has a target at 500 meters that
requires a 10-inch holdoff, the sniper would place the
target’s center mass halfway between the cross hair and
the first mil dot (1/2 mil).
(2) When holding off, the sniper aims into the wind.
If the wind is from the right, his point of aim is to
the right. If the wind is from the left, his point of
aim is to the left,
(3) Constant practice in wind estimation can bring
about proficiency in making sight adjustments or
learning to hold off correctly. If the sniper misses
the target and the impact of the round is observed, the
sniper notes the lateral distance of his error and
refires, holding off that distance in the opposite
direction.
3-8. ENGAGING MOVING TARGETS
Engaging moving targets not only requires the sniper to
determine the target distance and wind effects on the round,
but he must also consider the lateral speed of the target,
the round’s time of flight, and the placement of a proper
lead to compensate for both. These added variables increase
3-19
the possibility of a miss* Therefore, the sniper should
engage moving targets when it is the only option,
a. Leading, Engaging moving targets requires the sniper
to place the cross hairs ahead of the target’s movement.
The distance the cross hairs are placed in front of the
target’s movement is called a lead. There are four
factors in determining leads,
(1) Speed of the target. As a target moves faster/ it
will move a greater distance during the bullet's flight.
Therefore, the lead will increase as the target's speed
increases.
(2) Angle of movement, A target moving perpendicular
to the bullet's flight path will move a greater lateral
distance during its flight time than a target moving at
an angle away from or toward the bullet's path. There-
fore, a target moving at a 45-degree angle will have
less lateral movement than a target moving at a 90-
degree angle. As the lateral movement increases, the
lead must be increased,
(3) Range to the target. The farther away a target is,
the longer it will take for the bullet to reach it.
Therefore, the lead must be increased as the distance to
the target increases,
(4) Wind effects. The sniper must consider how the
wind will affect the trajectory of the round. A wind
blowing opposite to the target’s direction will require
more of a lead than a wind blowing in the same direction
as the target’s movement.
b. Tracking. Tracking requires the sniper to establish
an aiming point ahead of the target's movement and
maintain it as the weapon is fired. This requires the
weapon and body position to be moved while following the
target and firing.
c. Trapping. Trapping or ambushing is the sniper's
preferred method of engaging moving targets. This
requires the sniper to establish an aiming point ahead of
the target and pull the trigger when the target reaches
it. This method allows the sniper’s weapon and body
position to remain motionless, with practice, snipers can
determine exact leads and aiming points using the hori-
zontal stadia lines in the ART scopes or the mil dots in
the М3A.
3-20
d.* Preventing Errors. When engaging moving targets,
common errors are usually made because the sniper is under
greater stress than with a stationary target. There are
more considerations, such as retaining a steady position
and the correct aiming point, how fast the target is
moving, and how far away it is. The more practice a
sniper has shooting moving targets, the better he will
become. Some common mistakes are:
(1) The sniper has a tendency to watch his target
instead of his aiming point. He must force himself to
watch his lead point.
(2) The sniper may jerk or flinch at the moment his
weapon fires because he thinks he must fire right now.
This can be overcome through practice on a live-fire
range.
{3) The sniper may hurry and thus forget to apply wind
as needed. Windage must be calculated for moving
targets just as for stationary targets. Failure to do
this when acquiring a lead will result in a miss.
e. Determining the Lead. Once the required lead has been
determined, the sniper should use the mil scale in the
scope for precise holdoff. The mil scale can be mentally
sectioned into 1/4-mil increments for leads. The chosen
point on the mil scale becomes the sniper’s point of
concentration just as the cross hairs are for stationary
targets. The sniper concentrates on the lead point and
fires the weapon when the target is at this point. The
following formulas are used to determine moving target
leads:
TIME OF FLIGHT X TARGET SPEED = LEAD.
Time of flight = flight time of the round in seconds.
Target speed - speed the target is moving in feet per
second .
Lead = distance aiming point must be placed ahead of
movement in feet.
Average speed of a man during—
Slow patrol = 1 fps/0.8 mph
Fast patrol = 2 fps/1.3 mph
Slow walk = 4 fps/2.5 mph
Fast walk = 6 fps/3.7 mph
3-21
To convert leads in feet to meters:
LEAD IN РЕЕТ X 0.3048 = METERS
To convert leads in meters to mils:
LEAD IN METERS X 1,000 _ MIL LEAD
RANGE TO TARGET
3-22
ТС 23-14
CHAPTER 4
FIELD TECHNIQUES
The general mission of the sniper is to reduce selected
enemy targets with long-range precision fire. How well he
accomplishes this mission depends on his knowledge, under-
standing, and application of the various field techniques or
skills that allow him to move, hide, observe, and detect his
targets. This chapter discusses the field techniques and
skills that the sniper must learn before his employment in
support of combat operations. The sniper's application of
these skills will affect his survival on the battlefield.
4-1. CAMOUFLAGE
Camouflage is one of the basic weapons of war. It can mean
the difference between a successful or unsuccessful mission.
To the sniper, it can mean the difference between life and
death. Camouflage measures are very important since the
sniper cannot afford to be detected at any time while moving
alone, as part of another element, or while operating from a
firing position. Marksmanship training teaches the sniper
to hit a target, and a knowledge of camouflage teaches him
how to escape becoming a target himself. Paying close
attention to camouflage fundamentals is a mark of a well-
trained sniper. (See FM 5-20 for more details.)
a. To become proficient in camouflage, the sniper must
first understand target indicators. Target indicators are
anything a person does or fails to do that could result in
being detected. A sniper must know and understand target
indicators to not only move undetected, but to detect
enemy movement. Target indicators are sound, movement,
improper camouflage, disturbance of wildlife, and odors.
(1) Sound.
о Most prominent during hours of darkness.
о Caused by movement,*equipment rattling, or talking.
о Small noises may be dismissed as natural, but
talking will not.
(2) Movement.
о Most prominent during hours of daylight.
о The human eye is attracted to movement.
4-1
о Quick or jerky movement will be detected faster
than slow movement.
(3) Improper camouflage.
о Shine.
о Outline.
о Contrast with the background.
(4} Disturbance of wildlife.
о Birds suddenly flying away.
о Sudden stop of animal noises.
о Animals being spooked.
(5) Odors.
о Cooking.
о Smoking.
о Soap, lotions.
о Insect repellents.
b. There are three fundamental methods the sniper can use
to camouflage himself or his position. The sniper may use
just one of these methods or a combination of all three to
accomplish a given mission. The three methods are:
(1) Hiding Hiding is completely concealing the body
from observation by lying behind an object or thick
vegetation.
(2} Blending. Blending is achieved by skillfully
matching personal camouflage’ with the surrounding area
to a point where the sniper is indiscernible.
(3) Deceiving. Deceiving is a technique used to trick
the enemy into false conclusions about the location of
the sniper.
c. There are two types of camouflage that the sniper can
use to camouflage himself and his equipment. The two
types are:
4-2
(1) Natural, Natural camouflage is vegetation or
materials that are native to the given area. The sniper
should always augment his appearance by using some natural
camouflage.
{2) Artificial. Artificial camouflage is any material
or substance that is produced for the purpose of
coloring or covering something in order to conceal it.
Examples are:
(a) Camouflage sticks and face paint. Camouflage
sticks or face paints are used to cover all exposed
areas of skin, such as face, hands, and the back of
the neck. The parts of the face that form shadows
should be lightened and the parts that shine should be
darkened. There are three types of camouflage
patterns used by the sniper. They are:
о Striping - used when in heavily wooded areas, and
leafy vegetation is scarce,
о Blotching - used when area is thick with leafy
vegetation.
о Combination - used when moving through changing
terrain. It is normally -the best all-around
pattern.
(b) Ghillie suit. The term "ghillie suit’1 originated
in Scotland during the 1800s. Scottish game wardens
made special camouflage suits in order to catch
poachers. The ghillie suit today is a specially made
camouflage uniform that is covered with irregular
patterns of garnish or netting (Figure 4-1). Ghillie
suits can be made from BDUs or one-piece aviator type
uniforms. Turning the uniform inside out will place
the pockets inside the suit. This protects items in
the pockets from damage caused by crawling on the
ground. The front of the ghillie suit should be
covered with canvas or some type of heavy cloth to
reinforce it. The knees and elbows should be covered
with two layers of canvas since these areas are prone
to wear out more often. The garnish or netting should
cover the shoulders and reach down to the elbows on
the sleeves. The garnish applied to the back of the
suit should be long enough to cover the sides of the
sniper when he is in the prone position. A bush hat
is also covered with garnish or netting. The garnish
should be long enough to break up the outline of the
4-3
sniper’s neck, but not long enough in front to obscure
his vision or hinder movement. A veil can be made
from a net or piece of cloth covered with garnish or
netting. It is used to cover the weapon and sniper’s
head when in a firing position. The veil can be sewn
into the ghillie suit or carried separately. Remem-
ber, a ghillie suit does not make one invisible and is
only a camouflage base. Natural vegetation should be
added to help blend with the surroundings.
RUBBERIZED
CEMENT
PLACEMENT A A
OF NETTING * * !
Figure 4-1. Ghillie suit.
(c) Field expedient camouflage. The sniper may have
to use field expedient camouflage if the earlier
mentioned methods are not available. Instead of
camouflage sticks or face paint, the sniper may use
charcoal, walnut stain, mud, or whatever will work.
He will not use oil or grease because of the strong
odor that it gives off. Natural vegetation can be
attached to the body by boot bands or rubber bands, or
by cutting holes in the uniform.
4-4
(d) Equipment camouflage. The sniper must also
camouflage all equipment he will use. However, he
will ensure the camouflage does not interfere with or
hinder the operation of the equipment.
о Rifles. The sniper weapon system and the M16
should also be camouflaged to break up their out-
lines. He will not bind the scope of the M21 to a
point that it will not properly adjust or have loose
garnish that will get caught in the bolts of the
rifles. The sniper weapon system can be carried in
a "drag bag" (Figure 4-2}, which is a rifle case
made of canvas and covered with garnish similar to
the ghillie suit. However, the rifle will not be
combat ready while it is in the drag bag.
TOP VIEW BOTTOM VIEW
Figure 4-2. Drag bag.
FLAP
о Optics. Optics used by the sniper must also be
camouflaged to break up the outline and reduce the
possibility of light reflecting off the lenses.
Lenses can be covered with mesh type webbing or
nylon hose material.
о ALICE pack. If the ALICE pack is to be used
while wearing the ghillie suit, it must be camou-
flaged in the same manner
(e) Geographic camouflage,
camouflage to blend in with
as the suit.
The sniper must alter his
various changes of vegeta-
4-5
tion and terrain in different geographic areas.
Examples of such changes are:
о Snow areas. Blending of colors is more effective
than texture camouflage in snowy areas. In areas
with heavy snow or in wooded areas with trees
covered with snow, a full white camouflage suit
should be worn. In areas with snow on the ground
but not on the trees, white trousers with green and
brown tops should be worn.
о Desert areas. In sandy desert areas that have
little vegetation, the blending of tan and brown
colors is important. In these areas, the sniper
must make full use of the terrain and the vegetation
that is available to remain unnoticed.
о Jungle areas. In jungle areas, texture camou-
flage and contrasting colors must be used. Natural
vegetation must also be used.
о Urban areas. In urban areas, the sniper’s
camouflage should be a blended color {shades of gray
usually work best). Texture camouflage is not as
important in these environments.
The sniper must be camouflage conscious from the time he
departs on a mission until he returns. He must constantly
use the terrain, vegetation, and shadows to remain unde-
tected. At no other time during the mission will the
sniper have a greater tendency to be careless than during
his return to a friendly area. Fatigue and undue haste
may override caution and planning. Therefore, the sniper
needs to pay particular attention to his camouflage
discipline on his return from missions.
4-2. COVER AND CONCEALMENT
The proper understanding and application of the principles
of cover and concealment used with the proper application of
camouflage will protect the sniper from enemy observation.
a. Cover is natural or artificial protection from the
fire of enemy weapons. Natural cover (ravines, hollows,
reverse slopes) and artificial cover (fighting positions,
trenches, walls) protect the sniper from flat trajectory
fires and partially protect him from high-angle fires and
the effects of nuclear explosions. Even the smallest
depression or fold in the ground may provide some cover
4-6
when the sniper needs it most. A б-inch depression,
properly used, may provide enough cover to save his life
under fire. The sniper must always look for and take
advantage of every bit of cover the terrain offers. By
combining this habit with proper movement techniques, he
can protect himself from enemy fire. To get protection
from enemy fire when moving, he uses routes that put cover
between him and the places where the enemy is known or
thought to be. He uses natural and artificial cover to
keep the enemy from seeing and firing at him.
b- Concealment is natural or artificial protection from
enemy observation. The surroundings may provide natural
concealment that needs no change prior to use (bushes,
grass, and shadows). The sniper creates artificial
concealment from materials such as burlap and camouflage
nets, or he can move natural materials (bushes, leaves,
and grass) from their original location. The sniper must
consider the effects of the change of seasons on the
concealment provided by both natural and artificial
materials. The principles of concealment include the
following:
(1) Avoid unnecessary movement. Remain still
movement attracts attention. The sniper’s position may
be concealed when he remains still, yet easily detected
if he moves. His movement against a stationary back-
ground makes him stand out clearly. When he must change
positions, he moves carefully over a concealed route to
the new position, preferably during limited visibility.
He moves inches at a time, slowly and cautiously, always
scanning ahead for the next position.
(2) Use all available concealment.
(a) Background. Background is important; the sniper
must blend with it to prevent detection. The trees,
bushes, grass, earth, and man-made structures that
form the background vary in color and appearance.
This makes it possible for the sniper to blend with
them. He selects trees or bushes that blend with his
uniform and absorb the outline of his figure. He must
always assume that his area is under observation.
(b) Shadows. The sniper in the open stands out
clearly, but the sniper in the shadows is difficult to
see. Shadows exist under most conditions, day and
night. A sniper should never fire from the edge of a
wood line; he should fire from a position inside the
4-7
wood line (in the shade or shadows provided by the
tree tops).
(3) Stay low to observe, A low silhouette makes it
difficult for the enemy to see a sniper. Therefore, he
observes from a crouch, a squat, or a prone position-
14) Expose nothing that shines- Reflection of Light on
a shiny surface instantly attracts attention and can be
seen from great distances. The sniper uncovers his
rifle scope only when indexing and reducing a target.
He uses optics cautiously in bright sunshine because of
the reflections they cause.
(5) Avoid skylining- Figures on the skyline can be
seen from a great distance, even at night, because a
dark outline stands out against the lighter sky. The
silhouette formed by the body makes a good target,
(6) Alter familiar outlines. Military equipment and
the human body are familiar outlines to the enemy- The
sniper alters or disguises these revealing shapes by
using the ghillie suit or outer smock that is covered
with irregular patterns of garnish- The sniper must
alter his outline from his head to the soles of his
boots.
(7) Keep quiet. Noise, such as talking, can be picked
up by enemy patrols or listening posts. The sniper
silences gear before a mission so that it makes no sound
when he walks or runs.
4-3. MOVEMENT AND LAND NAVIGATION
A sniper team's mission and method of employment differ in
many ways from those of the infantry squad. One of the most
noticeable differences is the movement technique used by the
snipers. Due to the nature of their mission, movement by
snipers must not be detected or even suspected by the enemy.
Because of this, a sniper must master individual sniper
movement techniques.
a. When moving, the sniper should always remember the
following rules:
(1) Always assume your area is under enemy observation.
(2) Move slowly. A sniper counts his movement progress
by feet and inches.
4-8
(3) Do not cause the overhead movement of trees,
bushes, or tall grasses by rubbing against them,
(4} Plan every movement and move in segments of the
route at a time-
(5) Stop, look, and listen often-
(6) Move during disturbances such as gunfire, explo-
sions , aircraft noise/ wind, or anything that will
distract the enemy’s attention or conceal the sniper’s
movement.
b. The individual movement techniques used by the sniper
are designed to allow him to move with the least possi-
bility of being detected. These movement techniques are:
(1) Sniper low crawl- This technique (Figure 4-3} is
used when concealment is extremely limited, when in
close proximity to the enemy, or when occupying a firing
position. The sniper low crawl is conducted by doing
the following:
(a) Lie flat on the ground with head turned to one
side/ arms in a straight line forward of the head, and
legs together in a straight line to the rear with
heels, touching the ground.
(b) Hold the weapon by its sling and keep it in a
straight line parallel to the body.
(c) Move by pushing slowly and evenly with the toes
while pulling with the fingers, 2 to 4 inches at a
t ime.
Figure 4-3. Sniper low crawl.
(2) Medium crawl- This technique (Figure 4—4) is used
when concealment is limited and the sniper needs to move
4-9
faster than the sniper low crawl allows* The medium
crawl is similar to the infantryman’s low crawl and is
executed by doing the following;
(a) Lie flat on the ground with head turned to one
side, arms forward of the headr and legs spread apart
to the rear.
(b) Hold the weapon by the forward sling swivel and
lay it on top of the forearm*
(c) Move by pulling one leg forward and pushing while
pulling with the arms, 12 to 16 inches at a time.
Figure 4-4, Medium crawl.
(3) High crawl. This technique (Figure 4-5) is used
when concealment is limited but high enough to allow the
sniper to raise his body off the ground. The high crawl
is similar to the infantry high crawl and is executed by
doing the following:
(a)
Support the body by the elbows and knees.
(b) Cradle the weapon in the
between the chin and chest.
arms with the scope
(c) Move by alternating the knees and elbows.
Figure 4-5» High crawl.
‘4-10
(±) Hand and knees crawl, This technique (Figure 4-6)
is used when some concealment is available and the
sniper needs to move faster than the medium crawl
allows* The hand and knees crawl is conducted by doing
the following:
(a) Support the body with knees and one hand while
cradling the weapon with the other arm by placing the
scope in the armpit.
(b) Move by moving one knee at a time forward, then
moving the arm forward.
Figure 4-6. Hand and knees crawl.
(5) Walking, This technique (Figure 4-7) is used when
there is good concealment, it is not likely the enemy is
in the vicinity, and speed is necessary* The walk i$
conducted by doing the following:
(a) Crouch with upper body bent forward and knees
slightly bent.
(b) Carry the weapon on line with the body by
grasping the forward sling swivel* Keep the muzzle
pointed down.
(c) Move a step at a time* Plan the placement of
every step by choosing a spot to place your foot
before you move it from the previous spot.
4-11
Figure 4-7, Walking.
c. Snipers are employed in two-man teams consisting of
one observer and one sniper. Normally, the observer will
carry an M16/M203, the sniper will carry the sniper weapon
system, and both will have sidearms. Because of this lack
of personnel and firepower, the sniper team cannot afford
to be detected by the enemy, nor will they be able to
engage the enemy in sustained engagements.
d. Whenever possible, the sniper team should be attached
to a security element (squad/platoon). The security
element allows the team to reach its area of operations
quicker and safer than can be expected by the team opera-
ting alone. Plus, the security element provides the team
a reaction force should the team be detected. Snipers
will use the following guidelines when attached to a
security element:
(1) The security element leader is in charge of the
team while the team is attached to the element.
4-12
(2) Snipers will always appear as an integral part of
the element*
(3) Snipers will wear the same uniform as the element
members.
(4) Snipers will maintain proper intervals and posi-
tions in all formations.
(5) The sniper weapon system will be carried in line
and close to the body, hiding its outline and barrel
length.
(6) All equipment that is unique to snipers will be
concealed from view (optics, ghillie suits, and so
forth}.
e. Once in the area of operation, the sniper team will
separate from the security element and operate alone. Two
examples of sniper teams separating from security elements
are:
(1) Security element will provide security while
snipers prepare for operation.
о Snipers don their ghillie suits and camouflage
themselves and their equipment {if mission requires).
о Snipers ensure all equipment is secure and any
nonessential equipment is cached (if mission
requires).
о Once the team is prepared, it will assume a
concealed position within the area, and then the
security element will depart the area.
о Once the security element has left the area, the
team will wait in position long enough to ensure that
the team or the security element has not been compro-
mised, then move on to its tentative position*
(2) The security element conducts a short security halt
at the separation point. The sniper team members will
halt, ensuring they have good available concealment and
know each other’s location. The security element will
then proceed, leaving the sniper team in place. The
sniper team will remain in position until the security
element is well out of the area.- The team will then
organize itself as required by the mission and move on
4-13
to its tentative position. This type of separation also
works well in HOUT situations.
f. When selecting routes, the sniper team mist remember
its vulnerabilities and limitations. The following
guidelines should be used when selecting routes:
о Avoid known enemy positions and obstacles-
о Seek terrain that offers the best cover and
concealment.
о Take advantage of difficult terrain {swamps, dense
woods, and so forth).
о Avoid natural lines of drift-
о Do not use trails, roads, or footpaths.
о Avoid built-up or populated areas.
о Avoid areas of heavy enemy guerrilla activity.
о Avoid areas between opposing forces in contact with
each other.
g. When the sniper team moves, it must always assume its
area is under enemy observation. Because of this and the
size of the team with the small amount of firepower it
has, the team can use only one type of formation, the
sniper movement formation. Characteristics of the
formation are:
о The observer will be the point man, the sniper will
follow.
о The observer's sector is 9 o’clock to 3 o'clock; the
sniper’s is 3 o'clock to 9 o’clock.
о Visual contact must be maintained, even when lying on
the ground.
о An interval of no more than 20 meters is maintained.
о The sniper reacts to the point man's actions.
о The team leader designates the movement techniques
and routes used.
4-14
о Danger areas are crossed by changing movement
techniques.
h. A sniper team must never become decisively engaged
with the enemy. The team must develop a set of drills
that become a natural and immediate reaction should it
make unexpected contact with the enemy. Examples of such
actions are:
(1) Visual contact- if the sniper team sees the enemy
and the enemy does not see the sniper team, it will
freeze. If the team has time, it will do the following:
о Assume the best covered and concealed position.
о Remain in position until the enemy has passed.
о Will not initiate physical contact.
(2) Ambush. In an ambush, the sniper team’s objective
is to break contact immediately. One example of this is
as follows:
(a) The observer delivers rapid fire on the enemy.
(b) The sniper throws smoke grenades between the
observer and the enemy.
(c) The sniper then delivers well-aimed shots at the
most threatening targets until smoke covers the area.
(d) The observer then throws fragmentation grenades
and withdraws toward the sniper, ensuring not to mask
the sniper's fire.
(e) The team moves to a location where the enemy
cannot observe or place direct fire on them.
(f) If contact cannot be broken, the sniper calls for
indirect fires/security element (if attached).
(g) If team members get separated, they should return
to the next-to-last designated rally point.
(3) Indirect fire. When reacting to indirect fires,
the team must move out of the area as quickly as
possible. This sudden movement can result in the team's
exact location and direction being pinpointed. There-
fore, the team must not only react to indirect fire, but
4-15
also take actions to conceal its movement once it is out
of the impact area.
(a} The team leader will move the team out of the
impact area using the quickest route by giving the
direction and distance (clock method).
(b) Both members will move out of the impact area the
designated distance and direction.
(c) The team leader will then move the team farther
away from the impact area by using the most direct
concealed route. They will continue the mission using
an alternate route.
(d) If team members get separated, they will return
to the next-to-last designated rally point.
(4) Air attack.
о Team members assume the best available covered and
concealed positions,
о Between passes of aircraft, team members will move
to positions that offer better cover and concealment,
о Team will not engage the aircraft.
о Team members will remain in positions until
attacking aircraft depart.
о If team members get separated, they will return to
the next-to-last designated rally point.
i. To aid the sniper team members in navigation, they
should memorize the route by studying maps, aerial photos,
or sketches. Note distinctive features (hills, streams,
roads) and their location in relation to the route. Plan
an alternate route in case the primary route cannot be
used. Plan an offset to circumvent known obstacles to
movement, Ose terrain countdown, which is memorizing
terrain features from the start to the objective, to
maintain the route. During the mission, the sniper team
mentally counts each terrain feature as they cross it,
thus ensuring they are maintaining the proper route.
j. The sniper team maintains orientation at all times.
As they move, they observe the terrain carefully and
mentally check off the distinctive features noted in the
4-16
planning and study of the route. Many aids are available
to ensure orientation,
о The Location and direction of flow of principal
streams*
о Hills, valleys, roads, and other peculiar terrain
features.
о Railroad tracks, powerlines, and other man-made
objects.
4-4. SELECTION AND OCCUPATION OF SNIPER POSITIONS
Selecting the location of a position is one of the most
important tasks a sniper must accomplish during the mission
planning phase of an operation. After selecting the
location, the sniper must also determine how he will move
into the area and locate and occupy the final position.
a. Selection of Positions, Upon receiving a mission, the
sniper will locate the target area and then determine the
best location for a tentative position by using one or
more of the following sources of information: topographic
maps, aerial photographs, visual reconnaissance before the
mission, and information gained from units operating in
the area.
(1) Once on the ground, the sniper will ensure the
position provides an optimum balance between the
following considerations:
о Maximum fields of fire and observation of the
target area.
о Concealment from enemy observation.
о Covered routes into and out of the position.
о Located no closer than 300 meters from the target
area.
о A natural or man-made obstacle between the position
and the target area,
(2) A sniper must remember that a position that appears
to be in an ideal location may also appear that way to
the enemy. Therefore, the sniper will avoid choosing
locations that are —
4-17
о On a point or crest of prominent terrain features.
о Close to isolated objects.
о At bends or ends of roads, trails, or streams.
о In populated areas, unless it is required.
(3) The sniper must use his imagination and ingenuity
in choosing a good location for the given mission. He
must choose a location that not only allows him to be
effective, but it must also appear to the enemy to be
the least likely place for a sniper's position. The
following are examples of such positions:
о Under logs in a ’•dead-fall" area.
о Tunnels bored from one side of a knoll to the
other.
о Swamps.
о Deep shadows.
о Inside rubble piles.
b. Occupation of Positions. During the mission planning
phase, the sniper will also select an objective rally
point, from which the sniper team will recon the tentative
position to determine the exact location of its final
position. The location of the ORP should provide cover
and concealment from enemy fire and observation, be
located as close to the selected area as possible, and
have good routes into and out of the selected area.
(1) From the ORP, the team will move forward to a
location that allows the team to view the tentative
position area (Figure 4-8). One member will remain in
this location and cover the other member while he recons
the area to locate a final position. Once a suitable
location has been found, the covering team member will
move to the position. While conducting the recon or
moving to the position, the team will --
о Move slowly and deliberately, using the sniper low
crawl.
о Avoid unnecessary movement of trees, bushes, and
grass.
4-18
о Avoid making any noises.
о Stay in the shadows if there are any.
о Stop, look, and listen every few feet.
(2) When the sniper team members arrive at the firing
position, they will —
о Conduct a hasty and detailed search of the target
area.
о Start construction of the firing position, if
required.
о Organize equipment so that it is easily accessible.
о Establish a system of observing, eating, resting,
and latrine calls.
ORP
Figure 4-8. Tentative position areas.
4-19
4-5. CONSTRUCTION OF SNIPER POSITIONS
A sniper mission will always require the sniper to occupy
some type of position. These positions can range from a
hasty position, which a sniper may use for a few hours, to a
more permanent position, which the team could remain in for
a few days. When choosing and constructing positions, the
sniper team must use their imagination and ingenuity to
reduce the time and difficulty of position construction.
The team should always plan to build their position during
limited visibility.
a. Sniper Position Considerations. Whether a sniper will
be in a position for a few minutes or a few days, the
basic considerations in choosing a type of position will
be the same.
(1) Location:
(a) Type of terrain and soil. Digging and boring of
tunnels can be very difficult in hard soil or in fine,
loose sand. The sniper needs to take advantage of
what the terrain offers (gullies, holes, hollow tree
stumps, and so forth).
(b) Enemy location and capabilities. Enemy patrols
in the area may be close enough to the position to
hear any noises that may accidentally be made during
any construction. The sniper also needs to consider
the enemy’s night vision and detection capabilities.
(2) Times
(a) Amount of time to be occupied. If the sniper
team's mission requires it to be in position for a
long time, the team must consider construction of a
position that provides more survivability. This
allows the team to operate more effectively for a
longer time.
(b) Time needed for construction. The time needed to
build a position must be a consideration, especially
during the mission planning phase.
(3) Personnel and equipment:
(a) Equipment needed for construction. The team
needs to plan the use of any extra equipment needed
4-20
for the construction (bow saws, picks# axes, and so
forth).
(b) Personnel needed for construction. Coordination
needs to take place if the position requires more
personnel to build it or a security element to secure
the area while the position is constructed.
b. Hasty Position, A hasty position is used when the
sniper team will be in position for a short time# when
they cannot construct a position due to the Location of
the enemy, or when the team must assume a position
immediately. The hasty position is characterized by the
following;
(1) Advantages:
(a) Requires no construction. The sniper team uses
what is available for cover and concealment.
(b) Can be occupied in a short time. As soon as a
suitable position is found, the team need only prepare
loopholes, move small amounts of vegetation# or simply
back a few feet away from the vegetation that is
already there to conceal the weapon's muzzle blast.
(2) Di sadvantages:
(a) No freedom of movement. This position does not
allow the sniper team any free movement. Any movement
that is not slow and deliberate may result in the team
being compromised.
(b) Observation of large areas can be restricted.
This type of position is normally used to observe a
specific target point (intersection, passage, or
crossing) rather than large open areas that require
recons of the area to locate the best position for
viewing a large area.
(c) No protection from direct or indirect fires. The
team has no protection from indirect fires and only
available cover for protection from direct fires.
(d) Must rely heavily on personal camouflage. The
sniper's only protection against detection is his
personal camouflage and his ability to use the
available terrain.
4-21
(3) Occupation time., The team should not remain in
this type of position longer than 8 hours* Remaining in
this position longer than this will only result in loss
of effectiveness due to muscle strain or cramps combined
with eye fatigue because the position allows no freedom
of movement.
c. Expedient Position. When a sniper team is required to
remain in position for a longer time than the hasty
position can provide, an expedient position (Figure 4-9)
should be constructed. The expedient position lowers the
sniper’s silhouette as low to the ground as possible, but
still allows him to fire and observe effectively. The
expedient position is characterized by the following:
(1) Advantages:
(a) Requires little construction* This position is
constructed by digging a hole out in the ground just
large enough for the team and its equipment. Soil dug
from this position can be placed in sandbags and used
for making the firing tables.
(b) Conceals most of the body and equipment. The
optics, rifles, and heads of the sniper team are the
only items that are above ground level in this
position*
(c) Provides some protection from direct fires. This
position provides some protection from direct fires
due to its lower silhouette.
(2) Disadvantages:
(a) Little freedom of movement* The team has more
freedom of movement in this position than in the hasty
position* However, snipers will need to remember that
stretching a leg or reaching for a canteen will cause
the exposed head to move unless controlled. The
sniper can lower his head below ground level, but this
should be done very slowly to ensure a target indica-
tor is not produced.
(b) Little protection from indirect fires. This
position will not protect the team from shrapnel and
debris falling into the position.
4-22
(c) Head, weapons, and optics are exposed. The team
must rely heavily on the camouflaging of these exposed
items.
(3) Construction time: 1 to 3 hours (depending on the
situation)-
(4) Occupation time: 6 to 12 hours.
Figure 4-9. Expedient position.
d. Belly Hide. The belly hide (Figure 4-10) is similar
to the expedient position, but it has overhead cover that
not only protects the sniper from the effects of indirect
fires, but also allows more freedom of movement. This
position can be dug out under a tree, a rock, or any
available object that will provide overhead protection and
a concealed entrance and exit* The belly hide is charac-
terized by the following:
(1) Advantages:
(a) Allows some freedom of movement. The darkened
area inside this position allows snipers to move
freely. Snipers must remember to cover the entrance/
exit hole with a poncho or piece of canvas so outside
light does not highlight the team inside the position.
4-23
(b) Conceals all but the rifle barrel. All equipment
is inside the position except the rifle barrels, but
the barrels could be inside, depending on the room
available to construct the position.
(c) Provides protection from direct and indirect
fires. The team should try and choose a position that
has an object that will provide good overhead protec-
tion (rock, tracked vehicle, rubble pile, and so
forth), or prepare it in the same manner as overhead
cover for other infantry positions.
(2) Di sadvantages:
(a) Requires extra construction time. If the team
has to construct overhead cover for the position, it
will require more time.
(b) Requires extra materials and tools. Construction
of overhead cover will require saws or axes, water-
proof material, and so forth.
(c) Cramped space. The sniper team will have to lay
in the belly hide without a lot of variation in body
position due to limited space and design of the
position.
(3) Construction time: 4 to 6 hours.
(4) Occupation time: 12 to 48 hours.
Figure 4-10» Belly hide position.
4-24
e. Semipermanent Hide. The semipermanent hide (Figure
4-11) is used mostly in a defensive or outpost situation.
This position requires additional equipment and personnel
to construct, but will allow sniper teams to remain there
for extended periods or be relieved in place by other
sniper teams. Like the belly hide, this position can be
constructed by tunneling through a knoll or under natural
objects already in place. The semipermanent hide is
characterized by the following:
(1) Advantages:
(a) Total freedom of movement inside the position.
The team members are able to move about freely. They
can stand, sit, or even lie down.
(b) Protection from direct and indirect fires. The
sniper team should look for the same items as men-
tioned in the belly hide.
(c) Completely concealed. Loopholes are the only
part of the position that can be detected. Loopholes
allow for the smallest exposure possible. Yet, they
still allow the sniper and observer to view the target
area. These loopholes should have a large diameter
(10 to 14 inches) in the interior of the position and
taper down to a smaller diameter (4 to 8 inches) on
the outside of the position. A position may have more
than two loopholes if needed to cover large areas/to
see to the rear of the position. The entrance/exit to
the position must be covered to prevent light from
entering and highlighting the loopholes. Loopholes
that are not in use should be covered from the inside
with a piece of canvas or suitable material.
(d) Can be maintained for extended periods. This
position allows the team to operate effectively for a
longer period.
(2) Disadvantages;
(a) Requires extra personnel and tools to construct.
A position like this will require extensive work and
more tools. Very seldom can a position like this be
constructed in the close vicinity of the enemy, but it
should be constructed during the hours of darkness and
be completed before dawn.
(b) Using a position for several days or having teams
relieve each other in a position will always increase
4-25
the risk of the position being detected. Snipers
should never continue to fire from the same position.
(3) Construction time: 4 to 6 hours (4 personnel).
(4) Occupation time: 48 hours plus (relieved by other
teams).
Figure 4-11. Semipermanent hide position.
4-2 6
f. Routines in Sniper Positions. Although the construc-
tion of positions may differ, the routines while in
position are the same. The sniper and the observer should
have a good firing platform. This gives the sniper a
stable platform for the sniper weapon and the observer a
platform for the optics. When rotating observation
duties, the sniper weapon should remain in place, and the
optics are handed from one member to the other. Data
books, observation logs, range cards, and the radio should
be placed in between the team where both members have easy
access to them. A system of resting, eating, and latrine
calls must be arranged between the team. All latrine
calls should be done during the hours of darkness, if
possible. A hole should be dug to conceal any traces of
latrine calls.
g. Positions in Urban Terrain. Positions in urban
terrain are quite different than positions in the field.
The sniper team will normally have several places to
choose from. These can range from inside attics to street
level positions in basements. This type of terrain is
ideal for a sniper, and a sniper team can literally stop
an enemy's advance through its area of responsibility.
But, one important fact for the sniper to remember is that
in this type of terrain, the enemy will use every asset he
has to detect and eliminate a sniper. When constructing
an urban position, the sniper must —
(1) Always be aware of the outside appearance of the
structure he is in. Shooting through loopholes in
barricaded windows is preferred; but, make sure all the
other windows are also barricaded. Placing loopholes in
these other windows also provides more than one position
to fire from. When making loopholes^, make them
different shapes (not perfect squares or circles).
Dummy loopholes will also confuse the enemy. Positions
in attics are also very effective. Remove shingles and
cut out loopholes in the roof; however, make sure there
are other shingles missing from the roof so the firing
position loophole is not obvious.
(2) Not locate his position against contrasting back-
ground or in prominent buildings that automatically draw
attention. He must stay in the shadows while moving,
observing, and engaging targets.
(3) Never fire close to a loophole. Always back away
from the hole as far as possible to hide the muzzle
flash and scatter the sound of the weapon when it fires.
4-27
Some positions can be located in a different room than
the one the loophole is in by making a hole through a
wall connecting the two and firing from inside the far
room. Do not fire continually from one position, (This
is why more than one position should be constructed if
time and situation permit.} When constructing other
positions, make sure the target area can be observed.
Sniper positions should never be used by any personnel
other than snipers.
4-6. OBSERVATION AND TARGET SELECTION
Snipers must be able to detect, identify, describe, and plot
the location of enemy personnel and equipment on the battle-
field. To do this, the sniper must develop good techniques
of observation. Observation is a planned, systematic
process of viewing an area for indications of enemy presence
or activity. It is an ongoing task that must be conducted
every minute the sniper team is in position, because the
time the area is not being observed could be the only time
the enemy presents himself or a target indicator. While
observing a target area, the sniper will alternately conduct
two types of searches, a hasty search and a detailed search.
a. A hasty search is the first phase of observing a
target area and is conducted by the observer immediately
after the team occupies the firing position. A hasty
search is quick glances with binoculars at specific
points, terrain features, or other areas that could
conceal the enemy. The area closest to the sniper posi-
tion should be viewed first, because it could pose the
most immediate threat. The observer will then search
farther out until the entire target area has been
searched. Only when the observer sees or suspects he sees
a target will he use the M49 telescope which gives him a
more detailed view of the target area. The telescope
should not be used to search the area because its narrow
field of view would take him much longer to cover an area;
plus, its stronger magnification will cause eye fatigue
sooner than the binoculars will.
b. After a hasty search has been completed, the observer
will then conduct a detailed search of the area. A
detailed search is a closer, more thorough search of the
target area, using 180-degree arcs or sweeps, 50 meters in
depth, and overlapping each previous sweep at least 10
meters to ensure the entire area has been observed (Figure
4-12). Like the hasty search, the observer will begin by
searching the area closest to the sniper team position.
4-28
Figure 4-12. Detailed search.
c. This cycle of a hasty search followed by a detailed
search should initially be repeated three or four times.
This allows the sniper to become accustomed to the area;
plus, he will tend to look closer at various points with
each consecutive pass over the area. After the initial
searches, the observer should view the area using a
combination of both hasty and detailed searches. While
the observer is conducting the initial searches of the
area, the sniper should record prominent features,
reference points, and distances on a range card. The team
members should alternate the task of observing the area
about every 30 minutes.
d. The team will record any targets observed in the area
for future reference. Recording the types and location of
targets observed in the area will aid the team in deter-
mining targets to be engaged. The sniper must be able to
select the key targets that will do the greatest harm to
the enemy in the given situation. Snipers must also
consider the use of indirect fire on targets. Some
4-29
targets, due to their size or location, may be better
engaged with indirect fire* The sniper may use indirect
fires to disguise fire from his position or to help cover
his withdrawal after engaging a target. When selecting
key targets, the sniper must consider the following
factors:
{1) Threat to the sniper. The sniper must consider the
danger the target presents. This can be an immediate
threat, such as an enemy element walking upon the
sniper's position; or a future threat, such as enemy
snipers or dog tracking teams.
(2) Probability of first-round hit. The sniper must
determine the chances of hitting the target with the
first shot by considering the following:
о Distance to the target.
о Direction and velocity of the wind.
о Visibility of the target area*
о Amount of the target that is exposed.
о Amount of time the target is exposed.
о Speed and direction of target movement*
(3) Certainty of target's identity. The sniper must be
reasonably certain that the target he is considering is
indeed the key target that he wants.
(4) Target's impact on the enemy. The sniper must
consider what impact the elimination of the target will
have on the enemy's fighting ability. The sniper must
determine that the target is the one available target
that will cause the greatest harm to the enemy.
(5) Enemy's reaction to sniper fire. The sniper must
consider what the enemy will do once the shot has been
fired* The sniper must be prepared for such actions as
immediate suppression by indirect fires and enemy sweeps
of the area.
(6) Effect on the overall mission. The sniper must
consider how the engagement will affect his overall
mission. The mission may be one of intelligence gather-
ing for a certain period, and firing will not only alert
4-30
•the enemy to a sniper’s presence but may also terminate
the mission if the sniper has to move from the position
as a result of the engagement,
e. Key personnel targets can be identified by actions or
mannerisms, positions within formations, rank or insig-
nias, and or equipment being worn or carried. Key targets
can also include weapon systems and equipment. Examples
of key targets are:
(1) Snipers, Snipers are the number one target of a
sniper team. The enemy sniper not only poses a threat
to friendly forces, he is the natural enemy of "you4 the
sniper, and he can stalk you on your own terms. The
fleeting nature of a sniper is reason enough to engage
him because you may never see him again,
(2) Dog tracking teams. Dog tracking teams pose a
great threat to sniper teams and other special teams
that may be working in the area. It is very hard to
fool a trained dog's nose; therefore, the team must be
stopped. When engaging a dog tracking team, the sniper
should engage the dog's handler first. This confuses
the dog and he may not be controllable by the other
members of the team.
(3) Scouts. Scouts are keen observers and provide
valuable information about friendly units. This plus
their ability to control indirect fires make them very
dangerous on the battlefield. They must be eliminated.
(4) Officers (military and polltical). Officers are
another key target of the sniper. Losing key officers
in some forces is such a blow to their operating capa-
bility that they may not be able to make a coordinated
effort for hours.
(5) NCOs, Losing NCOS not only affects the operation
of a unit, but also affects the morale of the lower
ranking personnel,
(6) Vehicle commanders and drivers. Many vehicles are
rendered useless without a commander or driver,
(7) Communications personnel. In some forces, only
highly trained personnel know how to operate various
types of radios. Eliminating these personnel can be a
serious blow to the enemy’s communication network.
4-31
(8) Weapon crews. Eliminating weapon crews reduces the
amount of fire on friendly troops.
(9) Optics on vehicles. Personnel who are in closed
vehicles are limited to viewing through optics. The
sniper can blind a vehicle by damaging these optic
systems.
(10) Communication and radar equipment. The right shot
in the right place can completely ruin a tactically
valuable radar or communication system. Plus, only
highly trained personnel may attempt to repair these
systems in place. Eliminating these personnel may cause
a serious blow to the enemy's field repair capabilities.
(11) Weapon systerns Many high-tech weapons, espe-
cially computer-guided type systems, can be rendered
useless by one well-placed round in the guidance
controller part of the’ system.
4-7. INFORMATION RECORDS
The secondary mission of the sniper is the collection and
reporting of information. To accomplish this, the sniper
not only needs to be a keen observer, but also must be able
to accurately relay the information he has observed. To
record this information, the sniper uses range cards,
military sketches, and the observation logbook.
a. Range Cards. The range card represents the target
area, drawn as seen from above with annotations indicating
distances throughout the target area (Figure 4-13).
See Appendix G for the blank reproducible form of the
Sniper's Range Card. The range card gives the sniper
a quick range reference and a means to record target
locations since it has preprinted range rings on it.
These cards can be broken into sectors by using dashed
lines (Figure 4-14). This gives the team members a
quick reference when locating targets. Example: "The
intersection in sector A." A field expedient range
card can be prepared on any paper the team has available.
The sniper position and distances to prominent objects
and terrain features will be drawn on the card. There
is not a set maximum range on either range card because
the sniper may also label any indirect fire targets
on his range card. Information contained on both range
cards includes:
4-32
о Name and method of obtaining range.
о Left and right limits of engageable area.
о Major terrain features, roads, and structures.
о Ranges, elevation, and windage needed at various
distances.
о Distances throughout the area.
о Temperature and wind. (Cross out previous entry
whenever temperature, wind direction, or wind
velocity changes.)
о TRPs (azimuth, distance, and description).
Figure 4-13. Prepared range card.
4-33
Figure 4-14. Dashed lines on range card.
b. Military Sketch. A military sketch is used to record
information about a general area, terrain features, or
man-made structures that are not shown on a map. Military
sketches provide intelligence sections a detailed, on the
ground view of an area or object that is otherwise
unobtainable (Figure 4-15). These sketches not only let
the viewer .see the area in different perspectives but
provide detail such as type of fences, number of telephone
wires, present depth of streams, and so forth. There are
two types of military sketches as stated in FM 21-26:
road/area sketches and field sketches.
4-34
REMARKS:
MILITARY SKETCH
For use of ths form, see TC 23-14, the proponent а репсу is THADQC_
REMARKS:
»Ь£2_
name
wtfytf Pomp ♦
X?£-
MAGNETIC
AZIMUTH
SKETCH tf ^L
SCALE L
RANK.___e- T_______
----- DATE.'TIME
7^*Л /З^ГХ5в/оЯ>о
SKETCH NAME J
GRID COORDINATE-W*J±22M
WEATHER. /7У
DA FORM 578B-R, JUN 89
Figure 4-15. Military sketch.
(1) Road/Area. A road/area sketch (Figure 4-16) is a
panoramic representation of an area or object drawn to
scale as seen from the sniper's perspective. It depicts
detailed information about a specific area or a man-made
structure» The sketch includes:
о Grid coordinates of sniper's position.
о Magnetic azimuth through the center of sketch.
о Sketph name and number.
о Scale of sketch.
о Remarks section.
о Name and rank.
о Date and time.
о Weather.
4-35
DA FORM 5788-R. JUN 89
Figure 4-16. Road/axea sketch.
(2) Field sketch. A field sketch (Figure 4-17) is a
topographic representation of an area drawn to scale as
seen from above. It gives the sniper a method of
describing large areas while showing reliable distance
and azimuths between major features. This type of
sketch is useful in describing road systems, flow of
strearas/rivers, or locations of natural and man-made
obstacles. The field sketch can also be used as an
overlay on the range card. Information contained in a
field sketch includes:
о Grid coordinates of sniper’s position,
о Left and right limits with azimuths.
о Rear reference with azimuth and distance.
о Target reference points.
о Sketch name and number.
о Name and rank.
о Date and time.
о Weather and visibility.
4-36
DA FORM 578B-R. JUN 89
Figure 4-17. Field sketch.
(3) Drawing sketches. As with all drawings, artistic
skill is an asset, but satisfactory sketches can be
produced by anyone with enough practice. The following
are guidelines to be used when drawing sketches:
(a) Work from the whole to the part. The sniper must
first determine the boundaries of the sketch. He
should then sketch the larger objects such as hills,
mountains, or outlines of large buildings. Only after
drawing the large objects in the sketch should the
sniper start drawing the smaller details.
(b) Use common shapes to show common objects. The
sniper does not need to sketch each individual tree,
hedgerow, or woodline exactly. He should use common
shapes to show these types of objects. Do not
concentrate on the fine details unless they are of
tactical importance*
(c) Draw in perspective; use vanishing points. All
sketches should be drawn in perspective. To do this,
the sniper must recognize the vanishing points of the
4-37
area to be sketched* Parallel lines on the ground
that are horizontal vanish at a point on the horizon
(Figure 4-18)* Parallel lines on the ground that
slope downward, away from the observer vanish at a
point below the horizon. Parallel lines on the ground
that slope upward, away from the observer vanish at a
point above the horizon* Parallel lines that recede
to the right vanish on the right, and those that
recede to the left vanish on the left* An example of
the steps in preparing a road/area sketch are shown in
Figure 4-19.
Figure 4-18. Vanishing points.
4-38
Figure 4-19. Preparing a road/area sketch.
c. Logbook. The observation logbook (Figure 4-20} is a
written, chronological record of all activities and events
that take place in a sniper team's area. It is used in
conjunction with military sketches and range cards; this
combination not only gives commanders and intelligence
personnel information about the appearance of the area,
but it also provides an accurate record of the activity in
the area* The data in the observation logbook includes:
о Grid coordinates of sniper's position.
о Observer's name.
о Date and time of observation and visibility.
о Sheet number and number of total sheets-
о Series number, time, and grid coordinates of each
event.
о The event that has taken place.
о Action taken.
4-39
SNIPER'S OBSERVATION LOG SHEET S OF S SHEETS
Fwr u— nf <hM to rm. вва ТС 23-K. The propewaal вденет ” TRftOOC
ORIGINATOR: DATE/TIMEr LOCATION.
/ Оч_-г |&La3^7?<>^S
SERIAL TIME GRID COORDINATE EVENT ACTIONS OR REMARKS
/
2. /о
0^30 n tlE^TF»
4 of Jjo Mlg
5 f S *eTG* c.+ ЗДТ
6 ws S*J**V> <М*ИЗ> 3bi9c£. yauM
^•0 G Or’KLfrC
* /•*<> a» a* So ***<^7*5^ 6^ .
DA FORM 57B6-R. JUN 89
Figure 4-20, Prepared sheet from observation logbook,
4-8, RANGE ESTIMATION
A sniper is required to determine distance accurately in
order to properly adjust elevation on the sniper weapon
system and to prepare topographical sketches or range cards.
Because of this, the sniper has to be proficient in the
various range estimation techniques.
a. Paper Strip Method. The paper strip method (Figure
4-21) is useful when determining longer distances (1,000
meters plus)< When using this method, the sniper will
place the edge of a strip of paper on the map, ensuring it
is long enough to reach between the two points, and pencil
in a tick mark on the paper at the sniper's position and
another at the distant location. The sniper will then
place the paper on the map’s bar scale, located at the
bottom center of the map, and align the left tick mark
with the 0 on the scale. Then he reads to the right where
the second mark is and notes the corresponding distance
represented between the two marks.
4-40
Figure 4-21, Paper strip method-
b. 100-Meter-Unit-of-Measure Method- To use this method
{Figure 4-22)t the sniper must be able to visualize a
distance of 100 meters on the ground. For ranges up to
500 meters, he determines the number of 100-meter incre-
ments between the two objects he wishes to measure.
Beyond 500 meters, the sniper must select a point halfway
to the object and determine the number of 100-meter
increments to the halfway point, then double it to find
the range of the object-
4-41
800
Figure 4-22. 100-тле ter-an i t-o f-measure method-
c. Appearance-of-Object Method- This method is a means
of determining range by the size and other characteristic
details of the object, To use the appearance-of-object
method with any degree of accuracy, the sniper must be
thoroughly familiar with the characteristic details of the
objects as they appear at various ranges.
d. Bracketing Method- Using this method, the sniper
assumes that the target is no more than X meters, but no
less than Y meters away. An average of X and Y will be
the estimate of the distance to the target.
e. ART I or II scopes. The scopes on the M21 sniper
weapon system can also be used for rough range estimation.
Once the sniper is familiar with his M21 and is accustomed
to ranging out on targets, he makes a mental note of where
the power adjust ring is set at various distances.
f- Range Card Method. The sniper can also use a range
card to quickly determine ranges throughout the target
area. Once a target is seen, the sniper determines where
it is located on the card and then reads the proper range
to the target.
g. Mil-Relation Formula. The mil-relation formula is the
preferred method of range estimation. This method is
4-42
conducted by using a mil-scale reticle found in the M19
binoculars (Figure 4-23) or in the M3A sniperscope (Figure
4-24). To use this method, the sniper must know the
target’s size in inches or meters. Once the target size
is known, the sniper then compares the target's size to
the mil-scale reticle and uses the following formula:
Size of target in meters x lggflfl = Range to target
Size of object in mils in meters
{To convert inches to meters, multiply the number of
inches by .0254.)
Figure 4-23. H19 binocular reticle.
Figure 4-24. M3A sniperscope reticle.
4-43
h. Combination Method- In a combat environment, perfect
conditions rarely exist, so just one method of range
estimation may not be sufficient for your particular
mission* Terrain with a lot of dead space limits the
accuracy of the 100-meter method* Poor visibility limits
the use of the appearance-of-object method. By using the
combination of the two methods or more to determine an
unknown range, an experienced sniper should arrive at an
estimated range close to the true range.
i, Factors Affecting Range Estimation. There are three
major factors that affect range estimation.
(1) Nature of the target.
(a) An object of regular outline, such as a house,
will appear closer than one of irregular outline, such
as a clump of trees-
(bjr a target that contrasts with its background will
appear to be closer than it actually is.
(c) A partially exposed target will appear more
distant than it actually is.
(2) Nature of the terrain.
(a) As the observer’s eye follows the contour of the
terrain, he will tend to overestimate distant targets.
(b) Observing over smooth terrain, such as sand,
water, or snow, causes you to underestimate distant
targets.
(c) Looking downhill, the target will appear farther
away.
(d) Looking uphill, the target will appear closer.
(3) Light conditions.
(a) The more clearly a target can be seen, the closer
it appears.
(b) When the sun is behind the viewer, the target
appears to be closer.
(c) when the sun is behind the target, the target is
more difficult to see and appears to be farther away.
4-44
ТС 23-14
CHAPTER 5
EMPLOYMENT
The sniper delivers long-range precision fire on key targets
and collects and reports battlefield information- A sniper
team properly employed can disrupt enemy movement,
observation, and infiltration; plus, influence the enemy’s
decisions and actions. It can instill fear and cause
confusion, thus lowering the enemy's morale. When employing
snipers, employment officers and sniper team leaders should
use common sense and imagination. They must remember that a
sniper mission cannot be tied to a rigid time schedule, nor
can a sniper team be effective in positions that will
receive fires from the enemy. The team must be positioned
far enough away to avoid these fires, but close enough to
deliver precision fires at the most threatening targets.
5-1. SNIPER TEAMS
Snipers are trained as teams and should always be employed
as teams. Team members assist each other during long
periods of observation and with range estimations, adjust-
ments of rounds, and security.
a. Sniper teams should be employed directly under the
commander or the sniper employment officer- Snipers must
know the commander’s intent, scheme of maneuver, and fire
support plan. Teams must be able to choose their own
positions once they are on the ground to ensure the
position will allow clear fields of fire and observation.
Snipers cannot be used effectively in areas that do not
allow maximum fields of fire and observation. The number
of sniper teams participating in an operation will depend
on their availability, the expected duration of the
mission, and the enemy strength.
b. Snipers cannot afford to be detected, so their move-
ment is slower than other units. Therefore, they must be
employed ahead of any anticipated movement. Sniper teams
should move with a security element (squad or platoon)-
This allows the sniper team to reach positions in less
time; plus, the security element provides a reaction force
if the team is compromised.
c. Snipers are affected by the following METT-T factors:
о Mission - Type of mission team is required to
accomplish.
5-1
о Enemy * Characteristics and capabilities of the enemy
forces.
о Terrain - Type and condition of terrain, trails,
roads, or water crossings.
о Troops available - Any other teams or security
elements.
о Time - Time allowed/nceded for the mission.
5-2. OFFENSIVE EMPLOYMENT
Offensive operations are designed to carry the fight to the
enemy to destroy bis capability/will to fight. The sniper
can play a major role in offensive operations by killing
enemy targets that threaten the success of the mission.
a. During offensive operations snipers --
о Engage enemy snipers.
о Overwatch movement and fire on targets threatening
movement.
о Place precision fire on enemy crew-served weapons.
о Place precision fire on enemy leaders.
о Place precision fire into exposed apertures of
bunkers.
о Place fire on bypassed forces.
о Fire at targets threatening a counterattack or fire
at fleeing personnel.
о Provide flank protective fire at targets threatening
an exposed flank.
о Dominate key terrain.
b. When employing snipers in a movement to contact, they
can move with the lead element or be employed 24 to 4 8
hours before the units movement —
о To select positions.
о To gather information on the enemy.
5-2
о То dominate key terrain to prevent enemy surprise
attacks.
c. The rapid movement of a mounted attack limits the
sniper’s role. However, when the unit dismounts, the
sniper can be employed to support the assault-
d. During a raid, sniper teams can be employed with
either the security element or the support element —
о To cover avenues of approach and escape into and out
of the objective.
о To cover routes of friendly withdrawal to the rally
point*
о To provide long-range fires on the objective.
5-3* DEFENSIVE EMPLOYMENT
In the defense, snipers will systematically shoot the
specific targets that will cause the greatest hindrance to
the enemy's advance*
a. During defensive operations, snipers —
о Cover obstacles, minefields, and demolitions.
о Kill enemy reconnaissance elements.
о Engage enemy armored-vehicle commanders exposed in
turrets, antitank teams, and OPs.
о Shoot vehicle optics to slow movement.
о Place fire on enemy crew-served weapons*
о Place fire on enemy follow-up units.
b. In a reverse slope defense, snipers can provide
effective long-range fire from positions forward of the
topographical crest-
5-4* RETROGRADE EMPLOYMENT
During the delay and withdrawal, snipers can cause the enemy
to deploy prematurely by inflicting casualties with
accurate, long-range fire.
5-3
5”5. MOUT EMPLOYMENT
Urban environments present a variety of difficulties not
encountered on the conventional battlefield: the terrain is
mostly artificial; and streets and highways clearly define
observation areas and field of fire. The observation and
target detection capabilities combined with precision fire
gives the sniper a major role in urban operations.
a. Building interiors and underground passages are the
best routes of movement since movement through streets is
easily detected,
b. Snipers are preferably positioned in buildings of
masonry construction. These offer the best protection,
long-range fields of fire, and all-round observation.
Fields of fire are obvious to the enemy, and the sniper
should muffle the sound and conceal the muzzle flash.
о Align shots through openings in adjacent buildings.
о Fire through funnel-shaped hole in a wall with the
large end of the funnel at the room’s interior.
c. Building-to-building and street-to-street fighting
shortens expected engagement ranges for snipers.
d. Snipers in MOUT offense and defense will engage
similar targets as discussed in paragraphs 5-2 and 5-3.
5-6. COUNTERSNIPER OPERATIONS
Countersniper operations are designed to eliminate enemy
snipers. These operations must be thoroughly planned by the
sniper teams involved. This is a battle between two highly
trained elements, each knowing the capabilities and
limitations of the other.
a. Determining a Sniper Threat. The first task a sniper
must accomplish in a countersniper operation is to deter-
mine if there is indeed a sniper threat. In doing this,
the sniper identifies the following information gained
from the unit operating in the area.
(1) Unit personnel have seen enemy soldiers wearing
special camouflage uniforms.
(2J Unit personnel have seen enemy soldiers carrying
weapons that have long barrels, mounted scopes, bolt
5-4
action receiversf or are carried in weapon cases or drag
bags *
(3) The unit has had single shot reduction of key
personnel (commanders^ platoon leaders, senior NCOs, or
weapon crews).
(4) There were marked reductions in enemy patrolling
activities during the times of single-shot reductions.
(5) Unit personnel have detected reflections of light
off optical lenses.
(6) Intelligence or recon patrols have reported small
groups of enemy personnel (1 to 3 men)r through visual
sightings or tracking,
(7) There has been a finding of single expended casings
such as the 7*62 x 5 4R-mm (same round used in some light
machine guns).
b. Planning for a Countersniper Operation. Once the
sniper has determined that an enemy sniper is operating in
the area, he must determine the best method to use in
eliminating the enemy sniper. To do this he will —
(1) Gather information. He must learn the times of the
day reductions occurred. Then he finds out the loca-
tions that enemy sniper fire has been encountered and of
any enemy sniper sightings. He gathers any material
evidence of enemy snipers (casings, equipment, and so
forth).
(2) Determine any patterns. The sniper will evaluate
the information gathered to detect any patterns or
routines the enemy sniper has established. The sniper
should conduct map recons, study aerial photos, or
conduct a ground recon to determine any patterns in
travel. The sniper must place himself in the enemy's
shoes and ask, 11 How would I accomplish the mission if I
were him?"
(3) Plan actions. Once a pattern or routine is
detected, the sniper will determine the best location
and time to engage the enemy sniper. The sniper should
also request the following actions:
(a) Coordination of routes and fires with the unit in
the area.
5-5
(b) Additional pre-plotted targets (fire support).
(c) Infantry support to canalize or ambush the
sniper.
(d) Additional sniper teams for mutual supporting
fire.
(e) Someone to bait likely engagement areas to
deceive the enemy sniper into committing himself by
firing. An example of this would be to use a ghillie
suit to create a dummy sniper. Place it in an open
area to entice the enemy into engaging Lt; this will
give the sniper a chance to detect the enemy's
location.
(f) All elements be in place no later than 12 hours
before the expected engagement time.
During a countersniper operation, the sniper must ignore
the larger battle going on around him. He must concen-
trate on his one objective — the enemy sniper.
c. Passive Countersniper Actions. When an enemy sniper
is operating in a unit's area, the unit should employ
passive measures to defend against sniper fire. Examples
of these measures are:
(1) Do not stick to consistent routines, such as chow
times, ammo resupply times, assembly area procedures, or
any day-to-day activities.
(2) Conduct all meetings, briefings, or any gathering
of people under cover or during limited visibility,
(3) Cover or conceal all equipment,
(4) Remove rank from helmets and collars. Do not
salute officers. Leaders should not present authori-
tative mannerisms.
(5) Increase the unit's observation capabilities, such
as OPs.
(6) Brief patrols to look for single expended rounds,
different camouflage materials, and so forth.
(7) While performing the above actions, do not make it
apparent that you are aware of a sniper's presence.
5-6
(8) Do not overlook women, An estimated 50 percent of
snipers in many third world countries are women.
Patrols and OPs should not be misled if they see a woman
with a scoped rifle* She is a deadly opponent.
5-7
ТС 23-14
APPENDIX А
FIELD TRAINING EXERCISES
Sniper training exercises provide a sniper with practical
experience in detecting and engaging realistic targets under
field conditions on ranges comparable to a battlefield.
This training also provides a sniper with a means to prac-
tice the various sniper training fundamentals he has been
taught previously, often collectively- These exercises may
or may not be graded; however, competition is a proven
method to obtain desired results. At the end of the exer-
cises, the instructor will critique the sniper on his
performance to include observation, range estimation,
concealment, concealed movement, and rifle firing. These
exercises include;
о Zeroing and practice fire,
о Field firing,
о Observation.
о Range estimation.
о Concealment and concealed movement,
о Land navigation.
о Record exercises.
о KIM games.
A-l. TRAINING NOTES
During all field training exercises, the individual sniper
should be equipped as indicated in Chapter 2. Team equip-
ment should be available as needed,
a. A standard known-distance range, graduated in 100-
meter increments from 100 to 1,000 meters, is required for
the zeroing exercises. The target detection range
facilities and procedures should permit observation and
range determination to 800 meters.
b. The ideal field firing range should be located on
terrain that has been left primarily in its natural state.
The range should be a minimum of 800 meters in depth with
provisions along the firing line for several sniper posi-
tions within each lane to provide a slightly different
perspective of the target area. Where time precludes
A-l
construction of a separate range, it may be necessary to
superimpose this facility over an existing field firing
range. Ideally, the field firing range would have targets
emplaced the following way:
Meters Type Target
200 E-type silhouette, hit-kill mechanism.
300 Iron maiden silhouette; E-type silhouette, hit-kill mechanism; moving target mechanism.
325 E-type silhouette, hit-kill mechanism.
375 E-type silhouette, hit-kill mechanism, emplaced inside a window.
400 E-type silhouette, hit-kill mechanism, emplaced inside a bunker.
500 Iron maiden silhouette; moving target mechanism, tracked vehicle with a hit-kill mechanism in the commander's cupola.
600-1,000 Iron maiden silhouettes.
(1) Iron maidens can be made out of 3/4-inch steel
plate with a supporting frame. it should be cut out in
the form of a silhouette 20 inches wide and 40 inches
high. By painting these targets white, snipers can
easily detect where the bullet impacted on the target.
(2) Placing targets inside of window openings gives the
sniper experience engaging targets that can be found in
an urban environment. This can be done by cutting a 36-
by 48-inch hole in the center of an 8- by 16-foot
plywood wall and emplacing an E-type silhouette on a
hit-kill mechanism 2 to 4 meters behind the wall.
(3) Placing targets inside of a bunker type of position
allows the sniper to gain experience in firing into
darkened openings. This position can be built with logs
and sandbags with an E-type silhouette on a hit-kill
mechanism placed inside.
(4) Moving targets may be used between 300 and 500
meters to give the sniper practical experience and
development of proficiency in engaging a moving target.
Two targets, one moving laterally and one moving at an
oblique, will present a challenge to the sniper.
A-2
(5) Targets should be arranged to provide varying
degrees of concealment to depict enemy personnel or
situations in logical locations. The grouping of two or
more targets to indicate a crew-served weapon situation
or a small unit is acceptable. Such arrangements,
provided the targets can be marked, may require selec-
tive engagement by the sniper. The automatic target
devices provide for efficient range operation and
scoring. Figure A-l shows the target layout for one
lane.
Figure A-l. Lane layout.
A-3
c. Concealment and concealed movement areas should be in
natural terrain that allows observation of the entire area
out to 1,000 meters.
d. Observation exercises can be conducted in a 100- by
100-meter cleared area with one side bordered by a tree
line or a hill to serve as a forward limit for observing.
e* Range estimation exercises should be conducted in an
area that provides good observation out to 1,000 meters*
A-2. ZEROING AND PRACTICE FIRE
To engage targets effectively during training exercises and
in combat, the sniper must have his rifle zeroed accurately.
For this reason, the zeroing exercises are normally
conducted on a measured known-distance range to ensure
precise adjustment, recording, and practice under ideal
conditions and to eliminate variables that may detract from
achieving an effective zero» The sniper rifle is zeroed
using both the iron and scope sights» An international
bull-type target should be used for zeroing. It is
important to acquire a point-of-aim — point-of-impact zero
at 300 meters for the M21 and 100 meters for the M24. As
the distance increases, the sniper must adjust his scope to
allow for elevation and wind to ensure his rounds stay in
the center circle.
A-3. FIELD FIRE
Practical firing exercises are designed to develop sniper
proficiency in the accurate and rapid engagement of various
combat-type targets, as well as to provide practical work in
other field techniques. Sniper teams should be given
positions on the firing line and areas of the field fire
course to observe and to make range cards of the area.
a. After the range cards have been completed, the sniper
team will be required to fire the course by having one
member call the wind and adjust the other member's fire.
It is just as important to be able to call the wind as it
is to successfully engage the targets» After one member
fires the course, they switch over and repeat the fire
course.
b. When firing the course, snipers should engage the
targets in a sequence that starts at the 200-meter target,
then engage each target out to 800 meters, then engage
targets back to the 200-meter target. The course,
A-4
consisting of the engagement of 20 targets and 30 rounds
of ammunition (target can only be engaged twice), should
be scored as follows:
о 10 points for first-round hits.
о 5 points for second-round hits.
о 200 points maximum.
о 160 points needed to pass.
c. To enhance training, the field fire course should also
be fired during limited visibility with overhead illumina-
tion, such as parachute flares. This puts stress on the
sniper to determine the range and engage a target in a
short amount of time.
d. In order to provide the most realistic training
environment, range commands to commence fire and cease
fire are not used in sniper exercises. The only exception
to this is in the event of an unsafe condition. In that
case, the command CEASE FIRE should be given immediately.
Snipers must be given a thorough orientation on each
exercise (to include safety requirements) before they are
permitted to move into position. Anytime after the sniper
has assumed his firing position in the designated loca-
tion, he should be allowed to fire without further
commands. Therefore, the range must be cleared for firing
before the exercise begins. An NCO (assistant instructor)
must be with each sniper to keep score and ensure safety
is maintained during the exercise. When the sniper
completes firing, the NCO ensures the rifle is clear and
signals the range officer that the weapon is clear.
A-4. CONCEALMENT
Concealment exercises are designed to develop and test the
sniper's ability to conceal himself in an expedient firing
position to observe and engage an observer.
a. In a cleared area with a wood line approximately 100
meters away, give the snipers 10 minutes to conceal
themselves in the wood line. After the 10-minute prepara-
tion period is over, have an observer with binoculars and
an M49 telescope observe the wood line from 100 meters
away for 20 minutes. If there are more than 10 snipers in
the exercise, two observers and two walkers may be needed.
After the 20-rainute period, have a walker with a radio
A-5
move within 10 feet of a sniper who is ready to fire at an
observer.
b* The sniper should be able to identify a white 5-inch
number painted on an 8-inch by 8-inch international orange
panel that is held over a vital part of the observer’s
body and fire two blanks at him without being detected.
If the observer detects the sniper, he will radio the
walker and direct him to the sniper. The exercise should
be scored on a 1- to 10-point system, with 7 being a
passing score.
IF THE SNIPER HAS — POINT VALUE 10
Been detected in the first 2 minutes
of the exercise. 2
Been detected with the aid of optics. 3
{Walker will now find a sniper who is
able to engage an observer.)
Not been detected when walker is within
10 feet of shooter. 4
Properly identified number within
30 seconds. 5
Failed to properly identify number. 2
Fired first shot, not detected. 6
Fired second shot, not detected. 8
Stable firing position with support. 9
Weapon’s scope properly adjusted
for range and windage. 10
NOTE 1: If sniper is caught trying to identify number, he
will receive four points.
NOTE 2: If muzzle blast/flash is detected, one point will
be deducted from total score.
NOTE 3: Failing to comply with training standards and
objectives (unnecessary movement, premature fire,
outside of prescribed boundaries) will result in
termination of the exercise and a score of zero.
A-6
A-5. CONCEALED MOVEMENT
The purpose of the concealed movement exercise is to develop
and test the sniper's ability to move and occupy a firing
position undetected.
a- This exercise requires the same amount of instructors
and equipment as used in the concealment exercises. Areas
used for this exercise should be observable for 1,000
meters and have easily recognizable left and right limits»
Ideally, snipers should train in a different type of area
each time they participate in these exercises.
b. The snipers are to move 600 to 800 meters toward two
observers, occupy a firing position 100 to 200 meters
away, identify in the same manner as the concealment
exercise, and fire two blanks at the observers without
being detected any time during the exercise. If one of
the observers detects a sniper, he will radio one of the
walkers and direct him to the sniper's position. The
exercise is scored on a 1- to 10-point system, with 7
being a passing score-
IF THE SNIPER HAS — POINT VALUE 10
Been detected moving to the FFP. 2
Been detected moving in the FFP. 3
Fired first shot, not detected. 4
Not been detected when walker is
within 10 feet of shooter. 5
Properly identified number
within 30 seconds. 6
Failed to properly identify number. 3
Not been detected when walker is
within 5 feet of shooter. 7
Fired second shot, not detected. 8
Stable firing position with support. 9
Weapon's scope properly adjusted
for range and windage. 10
A-7
NOTE 1: If muzzle blast/flash is detected, one point will
be deducted from total score.
NOTE 2: Failing to comply with training standards and
objectives (unnecessary movement, premature fire,
outside of prescribed boundaries) will result in
termination of the exercise and a score of zero.
A-6. TARGET DETECTION
Target detection exercises sharpen the sniper’s eyes by
requiring him to detect, describe, and plot objects that
cannot be easily seen or described without skillful use of
optics.
a. Areas used for target detection should be partially
cleared at least 200 meters in depth and 100 meters in
width with easily definable left and right limits. The
area should have at least three target reference points
that are easily recognized and positioned in different
locations throughout the area. Ten military items are
placed in the area. These items can be radio antennae,
small-scale mock vehicles, batteries, map protractors, or
weapons. Items should be placed so that they are unde-
tectable with the naked eye, detectable but indescribable
with the binoculars, and describable only by using the M49
telescope.
b. Snipers are given 40 minutes to detect, describe, and
plot each item in the area. Snipers will,remain in the
prone position throughout the exercise. After the first
15 minutes, they will move to a different position, left
or right of the center line of observation and remain
there for the next 15 minutes. For the last 10 minutes,
they can choose a position anywhere along the line for the
remainder of the exercise. When an object is detected,
the sniper must plot its location on a prepared scorecard
(Figure A-2) by giving a mi 1 reading and direction (clock
method) from a TRP and the sniper's location on the line
of observation (left or right). Next, the sniper must
describe the object using the categories of size, shape,
color, condition, and appears to be. Snipers will receive
1/2 point for correctly plotting a target and 1/2 point
for correctly describing it. They must achieve seven
points to receive a go in this area.
A-8
Figure A-2. Target detection scorecard.
A-7. RANGE ESTIMATION
Snipers roust be able to correctly estimate distance in order
to fire their weapons effectively, make accurate range
cards, and give reliable intelligence reports. Range
estimation exercises should be conducted in an area that
allows unobstructed observation of a human-size target up to
1,000 meters away. Targets such as vehicles or personnel
should be placed at various ranges and stages of concealment
to give the sniper a challenging and realistic exercise.
The snipers should be graded on their ability to estimate
range by using the naked eye, M19 binoculars, or the rifle
scope. Snipers must correctly estimate the distance to 7 of
10 objects using their eyes (+/- 12 percent) and correctly
estimate the distance of 7 to 10 objects using optics,
binoculars (+/- 10 percent), and an M3A scope (+/- 5
percent).
A-8. LAND NAVIGATION
This exercise is designed to develop sniper team proficiency
in specific field techniques, such as movement,
navigation, and radiotelephone procedure. The team will be
A-9
required to move from a starting point to a specific
location and then report. During this exercise, the sniper
team should be equipped as indicated in Chapter 2. To
provide training under varied conditions, this team exercise
should be conducted at least two times, once during daylight
and once after nightfall.
a. This exercise can be held at the same time as the team
firing exercises. Half of the training class or group
could conduct the land navigation exercise, while the
other half conducts the firing exercise. When they
finish, they change over.
b. The sniper teams are assembled at the starting point
and given instructions indicating the mission objective,
the observation positions, and the radio call signs. They
are also given an equipment check and an exercise
briefing. This exercise requires the sniper team to move
from the starting point to the designated location in less
than two hours. They are instructed to avoid the observa-
tion positions, whijsh represent the enemy. They are
required to report their location every 15 minutes and
their arrival at the destination site. A starting team is
given a score of 100 points and the following deductions
are made for errors.
о 10 points off for each time the sniper team is seen
by someone in the observation positions.
о 5 points off for each instance of improper radio
procedure or reporting.
о 1 point off for each minute over the authorized two
hours.
о 3 points off for every 5 meters that the team misses
the designated destination.
о 100 points off for being lost and failing to complete
the exercise.
d. At the completion of this exercise, the instructor
will critique the sniper teams on their performance.
A-9. “KEEP IN MEMORY* GAMES
A sniper must have a good memory to report facts accurately
even though he may not have had the time or means to record
them at the time he saw them.
A-10
B. KIM games exercise the snipers mGmory capaclt .
requiring him to remember items he has viewed and recall
them later. This is done by placing 10 items on a table
or on the ground and covering then, with a towel, poncho
or anything suitable. '
b. The sniper is given two minutes to view the items
without touching or moving them. He will then be given
two minutes to record what he has seen by using the five
categories of size, shape, color, condition, and appears
to be. Exercises can be varied tQ give the sni
a challenge. Examples of this are to shorten the amount
of time to view/write, to create distractions while
viewing/writing, to lengthen the time between viewing and
writing, and to have the sniper conduct some type of
activity between viewing and writing. Practicing drill
and ceremony works quite well, because this requires the
sniper to concentrate on marching movements and not on
what he has viewed.
A-10. RECORD EXERCISES
The true test of the sniper or snip^r team is the successful
accomplishment of the assigned mission. Realizing that the
'employment possibilities for the sniper are broad, it is
difficult to test them in all skin requirements. Their
•most important skill is the ability to use one shot to hit
(kill) one target. The exercises outlined in the previous
paragraphs may be executed once for practice and once for
record to determine an individual's sniper qualification
score. These exercises are, Collectively, the best
practical way in peacetime to evaluate the sniper's
capability to function.
A—11
ТС 23-14
APPENDIX В
SNIPER SUSTAINMENT PROGRAM
Sniper skills are very perishable and must be exercised as
often as possible. A sniper sustainment program will
provide the individual sniper or team an opportunity to
sustain their skills in both marksmanship and fieldcraft on
a regular basis. Units should try to develop a sustainment
program that requires the sniper teams to requalify with
their sniper weapons on a quarterly basis. In conjunction
with the marksmanship training, the sniper would be required
to participate in fieldcraft training. Training should be
at least one week long. Coupled with the quarterly
refresher training, units should plan a sniper emergency
deployment readiness exercise/ which would be 24 hours long.
At a minimum, the EDRE would require the sniper to engage
targets with the sniper weapon on a field-fire range,
participate in a concealed movement exercise, and negotiate
a day/night land navigation course.
B-l. TRAINING
An example of a five-day sniper sustainment program is as
follows:
— DAY 1 —
TASK: Select sniper team routes and positions.
CONDITIONS: Given a review of selection of routes and
positions, a situational sniper mission with a target area
location that requires a minimum movement of 3,000 meters, a
military map, a protractor, a felt-tip pen, an 8-inch square
clear plastic overlay, and one sheet of letter-size paper.
STANDARDS: Select and plot a primary and alternate route,
objective rally point, and tentative sniper firing position
that provides the best cover and concealment.
1. Prepare overlay with two grid reference marks; primary
and alternate routes with arrows indicating direction of
travel; minimum of three checkpoints, numbered in order;
objective rally point; and a tentative firing position.
2. Prepare a written log of movement using the sniper
Patrol order format (paragraph IIIc(3)). Cog will contain
the from/to grid coordinates, magnetic azimuths, distance,
checkpoint number, objective rally point, and tentative
firing position.
B-l
3. Prepare overlay and written log of movement within 3$
minutes*
TASK: Move while using individual sniper movement
techniques.
CONDITIONS: Given a review of sniper movement techniques, a
sniper weapon, a ghillie suit, and a flat, open area that
allows trainers to observe movement techniques*
STANDARDS: Move correctly while using the designated
movement technique*
1* Sniper low crawl*
2* Medium crawl*
3- High crawl,
4. Hand-and-knee crawl-
s' Wa Ik i ng .
NOTE: Trainers will designate movement techniques and
critique snipers on their movement.
TASK: React to enemy contact while moving as a member of a
sniper team.
CONDITIONS: Given a review of Sniper team movement tech-
niques and reactions to enemy contact, sniper team’s basic
equipment/weapons, and an area of varying terrain with at
least one danger area.
STANDARDS: React correctly to designated situations or
danger areas.
1* Visual contact*
2. Ambush.
3. Indirect fire*
4. Air attack*
5. Danger area (linear and open area).
B-2
ЛОТЕ: Trainers will designate situations and critique
sniper teams on their movement♦
TASK: Describe target detection, selection, and observation
techniques.
CONDITIONS: Given a review of target detection, selection,
and observation techniques.
STANDARDS: Describe, orally or in writing, techniques used
to observe, detect, and select targets.
TASK: Identify Threat uniforms, equipment, and vehicles.
CONDITIONS: Given a review of pictures or slides of Threat
uniforms, equipment, and vehicles.
STANDARDS: Identify 7 of 10 Threat uniforms or rank
insignia, 7 of 10 pieces of Threat equipment, and 7 of 10
Threat vehicles.
TASK: Describe range estimation techniques.
CONDITIONS: Given a review of range estimation techniques
used by snipers.
STANDARDS: Describe, orally or in writing, range estimation
techniques used by the sniper.
1. Eye methods.
2. Use of binoculars.
3. Use of sniperscopes.
TASK: Prepare a sniper range card.
CONDITIONS: Given a review of sniper range cards, a
suitable target area, basic sniper equipment, and a sniper
range card.
STANDARDS; Prepare a sniper range card complete with —
!• Grid coordinates of position.
B-3
2. Target reference point(s) (azimuth, distance, and
description).
3. Left/right limits with azimuths.
4. Ranges throughout area.
5* Major terrain features»
6» Method of obtaining range/name.
7» Weather data.
TASK: Prepare a military sketch.
CONDITIONS: Given a review of sniper military sketching, a
suitable area or object to sketch, and a blank military
sketch sheet.
STANDARDS: Prepare a sketch complete with —
1. Grid coordinates of position.
2. Magnetic azimuth through center of sketch.
3. Sketch name and number.
4. Scale of sketch.
5. Remarks section.
6. Name/rank.
7. Date/time.
8. Weather data.
TASK: Maintain a sniper log.
CONDITIONS: Given a review of sniper logs and 20 blank
sheets stapled together as a booklet.
STANDARDS: Maintain a sniper log with chronological listing
of events that take place during the next three days and
containing the following:
1. Grid coordinates of position.
B-4
2. Observer’s name.
3. Date/time/visibility.
4. Sheet number/number of total sheets.
5. Series number/time and grid coordinate of each event.
6. Event.
7. Action taken.
NOTE: Trainers will collect the logbooks in three days.
— DAY 2 —
TASK: Describe the fundamentals of sniper marksmanship.
CONDITIONS: Given a review of sniper marksmanship
fundamentals.
STANDARDS: Describe, orally or in writing, the fundamentals
of sniper marksmanship.
1. Position.
2. Breath control.
3. Aiming.
4. Trigger control.
TASK: Describe the effects of weather on ballistics.
CONDITIONS: Given a review of the effects of weather on
ballistics.
STANDARDS: Describe, orally or in writing, the effects of
Weather on ballistics.
TASK: Describe the sniper team method of engaging targets.
CONDITIONS: Given a review of the sniper team method of
engaging targets.
B-5
STANDARDS: Describe, orally or in writing, the sniper team
method of engaging targets.
TASK; Describe methods used to engage moving targets.
CONDITIONS: Given a review of methods used to engage moving
targets.
STANDARDS: Describe, orally or in writing, methods used to
engage moving targets.
TASK: Describe methods used to engage targets at various
ranges without adjusting the scope's elevation.
CONDITIONS: Given a review of methods used to engage
targets at various ranges without adjusting the scope's
elevation.
STANDARDS: Describe, orally or in writing, the methods used
to engage targets at various ranges without adjusting the
scope’s elevation.
TASK: Zero metallic sights.
CONDITIONS: Given a sniper weapon, a suitable firing range,
and 12 rounds of 7.62-гив special ball ammunition.
STANDARDS: Zero metallic sights on a sniper weapon within
12 rounds.
TASK: Participate in a field fire exercise using metallic
sights.
CONDITIONS: Given a sniper weapon, M49 telescope, a
suitable firing range, and 20 rounds of 7.62-mm special ball
ammunition.
STANDARDS: Engage targets from 200 to 700 meters achieving
a minimum of 16 hits, using metallic sights.
— DAY 3 —
TASK: Zero rifle scope.
B-6
CONDITIONS: Given a sniper weapon, an M49 telescope, a
suitable firing range, and 12 rounds of 7.62-mm special ball
дрццип! tion-
STANDARDS: 2ero rifle scope within 12 rounds.
TASK: Engage moving targets.
CONDITIONS: Given a sniper weapon, an M49 telescope, a
suitable firing range, and 10 rounds of 7.62-mm special ball
ammunition.
STANDARDS: Engage 10 moving targets, from 300 to 500
ineters,~chieving a minimum of 8 hits.
TASK: Estimate range.
CONDITIONS: Given a sniper weapon (M24), M19 binoculars,
and 10 targets out to 800 meters.
STANDARDS: Correctly estimate range to 7 of the 10 targets
using eye estimation (+/- 12 percent), binoculars (*/- 10
percent), or the M24 sniper weapon (+/- 5 percent).
TASK: Detect targets.
CONDITIONS: Given a suitable area with 10 military, objects,
binoculars, M49 telescope, and a score sheet.
STANDARDS: Detect, plot, and describe 7 of 10 military
objects within 40 minutes.
TASK: Participate in a concealment exercise.
CONDITIONS: Given a sniper weapon, ghillie suit, two
7.62-mm blank rounds of ammunition, an area to conceal a
sniper position, and 10 minutes to prepare.
STANDARDS: Without being detected, occupy a position,
identify, and fire two blank rounds at an observer (located
100 to 200 meters away) who is equipped with binoculars and
an M49 telescope. Must score 7 of 10 points- Points are as
follows:
If the sniper — Points
Has been detected without the aid of optics
(first 2 minutes), score............................... 2
B-7
Has been detected with the aid of optics
(18 minutes), score ................................... 3
Has not been detected when walker is within
10 feet of shooter, score ................................ 4
Has properly identified number within 30
seconds, score.......................................... 5
Has failed to properly identify number, score ........... 2
Has fired first shot, not detected, score ............... 6
Has fired second shot, not detected, score .............. 7
Has stable firing position (support), score ............. 9
Has properly adjusted weapon's scope for
range and windage, score....................♦............10
NOTE 1: If sniper is caught trying to identify number, he
will receive 4 points.
NOTE 2: If muzzle blast/flash is detected, deduct 1 point
from total score.
NOTE 3: Failing to comply with training standards and
objectives (such as unnecessary movement, premature
fire, outside of prescribed boundaries) will result
in termination of the exercise and a score of zero.
— NIGHT 3 —
TASK: Engage targets during darkness.
CONDITIONS; Given a sniper weapon, suitable firing range,
four overhead flares, and 12 rounds of 7.62-mm special ball
ammunition.
STANDAtOS: Engage three targets from 200 to 500 meters
within the time the target area is illuminated.
NOTE 1: Trainers will fire overhead flares one at a time.
NOTE 2: Snipers will fire four separate times.
— DAY 4 —
TASK: Participate in a field fire exercise.
B-8
CONDITIONS: Given a sniper weapon, M49 telescope, a
suitable firing range, and 20 rounds of 7.62-mm special ball
anmun i t i on.
STANDARDS: Engage targets from 200 to 900 meters, achieving
at least 16 hits.
TASK: Participate in a concealed movement exercise*
CONDITIONS: Given a sniper weapon, ghillie suit, two
7.62-nim blank rounds of ammunition, and a suitable area
1,000 meters long that is observable.
STANDARDS: Move 600 to 800 meters; without being detected,
occupy a position, identify, and fire two blank rounds at an
observer who is equipped with binoculars and an M49
telescope within four hours. Must score 7 of 10 points.
Points are as follows:
If the sniper — Points
Has been detected moving to the FFP, score............... 2
Has been detected moving in the FFP, score.............. 3
Has fired first shot, not detected, score................ 4
Has not been detected when walker is within
10 feet of shooter, score ............................... 5
Has properly identified number (within 30
seconds) , score........................... ............ 6
Has failed to properly identify number, score .......... 3
Has not been detected when walker is within
5 feet of shooter, score ................................ 7
Has fired second shot, not detected, score .............. 8
Has stable firing position (support), score ............ 9
Has properly adjusted weapon’s scope for
range and windage, score ................................10
НОТЕ 1: If muzzle blast/flash is detected, deduct 1 point
from the total score.
B-9
NOTE 2: Failing to comply with training standards and
objectives (such as unnecessary movementr premature
fire, outside of prescribed boundaries) will result
in termination of the exercise and a score of zero»
— DAT 5 —
TASK; Call for fire.
CONDITIONS: Given a review of call for fire procedures, two
AN/PRC-77 radios, and a fire mission,
STANDARDS: Transmit the fire mission using proper radio
procedures and the elements of the call for fire mission in
sequence:
1» Observer identification.
2. Warning order,
3. Target location.
4. Target description.
5. Method of engagement (optional).
6. Method of fire and control (optional).
TASK: Locate target by grid coordinates.
CONDITIONS: Given a review of locating targets using the
grid coordinate methodr a map of the target area, binocu-
lars, compass, and a target.
STANDARDS: Determine and announce the six-digit coordinates
of the target (within a 250-meter tolerance) within 30
seconds.
TASK: Locate a target by polar plot.
CONDITIONS: Given a review of target locating using the
polar plot method, a map of the target area, binoculars, a
compass, and a target.
STANDARDS: Locate the target within 250 meters of the
actual location. Announce the target location within 30
seconds after identification. Express direction to the
B—10
nearest 10 mils and within 100 mils of actual direction.
Express distance to the nearest 100 meters.
TASK; Locate target by shift from a known point*
CONDITIONS: Civen a review of locating targets using the
shift from a known point method, a map of the target area,
binoculars, a compass, a known point, and a target.
STANDARDS: Locate the target within 250 meters of the
actual location and announce the target location within 30
seconds after identification. Express direction to the
nearest 10 mils and within 100 mils of the actual direction.
Express right or left corrections to the nearest 10 meters
and range corrections to the nearest 100 meters.
TASK: Participate in a land navigation exercise during
daylight.
CONDITIONS: Given a navigation course with at least four
legs no less than 800 meters apart.
STANDARDS: Navigate the course without being detected.
Preparing sketches, range cards, and/or logs can also be
incorporated into the exercise.
-- NIGHT 5 —
TASK: Participate in a land navigation exercise during
nightfall.
CONDITIONS: Given a navigation course with at least three
legs no less than 500 meters apart. Observers can be placed
on the course to detect any violations of noise and light
discipline and deduct points from the sniper's score for
violations.
STANDARDS: Navigate the course without being detected.
NOTE: Refer to FM 21-26 for guidance in preparing a land
navigation course and requirement sheets.
B-2. EMERGENCY DEPLOYMENT READINESS EXERCISE
An example of a battalion EDRE is as follows:
B-ll
TIMS ACTION
0400 Battalion alerts company sniper teams. 1» CQ relays uniform and packing list* 2. Sniper teams have two hours to report to company. 3. Sniper team leaders report to SEO when all of the team is accounted for. 4. Sniper team receives FRAGO from the SEO*
0600 Snipers depart company area by air, truck, or road march.
0800 Sniper teams arrive at range. 1. Sniper teams receive range/safety briefing. 2, Snipers receive issued ammunition. 3. Snipers zero weapons. 4. Sniper teams field/record on a range with targets positioned from 200 to 900 meters.
1100 Sniper teams depart range; move to con- cealed movement site by truck, road march, or tactical movement by teams.
1200 Sniper teams arrive at concealed movement site. 1. Sniper teams receive briefing. 2. Site should be 800 to 1,000 meters long. Trained observer should be positioned at one end with field table, M19 binoculars, M49 spotting scope, 8-inch by 8-inch international orange panels with white 5-inch number (1 to 9) painted on them, PRC-77 radio for him and walker.
В-12
. TIME ACTION
3. Sniper will have four hours to move
into bis PPP, 50 to 200 meters from
observer, and fire his first shot.
4. Sniper will have 30 seconds in which
to identify number,
5. Sniper will fire second shot.
6, The entire exercise will be conducted
without the sniper being detected by
the observer.
1600 Sniper teams depart for day/night land
navigation exercise,
1, Sniper teams start exercise from
concealed movement site.
2. Sniper teams will be required to move
to three different points. At each
point, they will perform one of the
following:
о Draw a military sketch.
о Draw a range card.
о Do a target detection exercise.
о Collect information/data.
NOTE: All information is to be recorded in the sniper
logbook.
3. All movement will be performed without
being detected.
2000 Night navigation exercise.
1, Sniper teams start exercise from CP.
2. They will move undetected to three
different points.
3, They will perform a detection exercise
with the use of NODs.
B-13
TIME
ACTION
4. They will record all information in
the sniper logbook.
5. After collecting necessary data, they
will move to an extraction point and
construct a sniper hide position.
They will prepare for target
reduction.
0500-0600 Target reduction.
1. Upon target reduction time, the team
will prepare for extraction.
2. At extraction time, they will return
to the company area.
3. The team will debrief the sniper
employment officer.
4. The SEO will conduct an after-action
review.
NOTE: A written test could also be given as part of the
EDRE.
B-14
ТС 23-14
APPENDIX С
SNIPER'S DATA CARD
The sniper’s data card is prepared by the sniper to record
the results and all elements that had an effect on the
firing of the weapon (Figure C-l). This can vary from
information about weather conditions to the attitude of the
fixer on that particular day* The sniper can refer to this
information in the future to understand his weapon, the
weather effects, and his shooting ability on a given day.
One of the most important items of information he will
record is the cold barrel zero of his weapon. There are
three phases in writing information on the data card* These
are before firing, during firing, and after firing.
C-l. BEFORE FIRING
Information that is written before firing is:
о Range. The distance to the target.
о Rifle and scope number. The serial numbers of the
rifle and scope.
о Date* Date of firing*
о Ammo* Type and lot number of ammunition*
о Light; Amount of light (overcast, clear, and so
forth)*
о Mirage. Can a mirage be seen (good, bad, fair, and so
forth)?
о Temp* Temperature on the range.
о Hour. Time of firing.
о Light (diagram). Draw an arrow in the direction the
light is shining*
C-l
о Wind* Draw an arrow in the direction the wind is
blowing, and record its average velocity and cardinal
direction (N, NE, S, SW, and so forth).
C-2. DURING FIRING
Information that is written while firing is:
a. Elevation. Elevation setting used and any correction
needed. Example: Target distance is 600 meters; sniper
sets elevation dial to 6. Sniper fires and round hits
target 6 inches low of center, He then adds one minute
(one click) of elevation (+1).
b. Windage. Windage setting used and any correction
needed. Example: Sniper fires at 600-meter target with
windage setting on fl; round impacts 15 inches right of
center. He will then add 2 1/2 minutes left to the
windage dial (L/2 1/2). When firing the M21, the sniper
draws the windage holdoff on the silhouette in the "HOLD*
box,
c. Shot. The column of information about a particular
shot. Example: Column 1 is for the first round, column
10 is for the tenth round.
d. Elev. Elevation used. Example: (6+1), (6), (6-1).
e. Wind. Windage used. Example: (L/2 1/2), (fl),
(R/l/2).
f. Call. Where the aiming point was when the weapon
fired.
g. Large Silhouette. The large silhouette is used to
record the exact impact of the round on the target. This
is recorded by writing the shot's number on the large
silhouette in the same place it hit the target.
C-3. AFTER FIRING
After firing, the sniper will write any
firing in the remarks section. This can be
the weapon, firing conditions (time allowed
his condition (nervous, felt bad, felt good.
comments about
comments about
for fire), or
and so forth)•
C-2
NOTE: THE REQUIRED TARGETS WILL BE DRAWN IN BY HAND TO MEET THE NEEDS OF THE
UNIT.
DA FORM 5785-R, JUN 89
Figure C-l* Prepared sniper’s data card.
C-3
ТС 23-14
APPENDIX D
MEASUREMENTS
A sniper must have a good working knowledge of the angular
measurements involved with shooting. These measurements aid
the sniper in estimating distances and adjusting for bullet
trajectories. The two most common types of measurements the
sniper uses are mils and minutes of angle.
D-l. MILS
A mil is an angular measurement that is equal to 1/1,000th
the distance to an object. For example, the apparent size
of a 1-meter target 1,000 meters away is 1 mil. At 500
meters a 1-meter target appears to be 2 mils (Figure D-l).
Mils are used mostly for range estimations (see Chapter 4),
but can also be used for elevation/wiadage holdoffs and
moving target leads when using the M3A scope (see Chapter
3).
D—2. MINUTE OF ANGLE
A minute of angle is l/60th of a degree (Figure D-2). This
equals approximately 1 inch (1.145 inches) for every 100
meters. Examples: 1 MOA » 2 inches at 200 meters; 1 MOA »
5 inches at 500 meters. Minutes of angle are used to
determine and adjust the elevation and windage needed on the
weapon’s scope.
D-l
Figure D-l. Mils»
SNIPER POSITION ------
DEGREE
750 in 1,000 m.
i i
8.6 in 11.5 in
------L.~
MOA
Figure D-2. Minutes of angle-
D-2
ТС 23-14
APPENDIX Е
REFERENCE TABLES
This appendix provides a ready reference when determining
effects of wind on ballistics, ballistic trajectories, and
estimating range.
E-l
NOTE: For ball ammunition, increase holdoff measurement by
13 percent.
Figure E-l. Wind conversion table.
E-2
2fl 11 RIGHT
left dot at
left edge
10" RIGHT
cross hair
at right
edge
15* RIGHT
target cen-
tered between
left dot and
cross hair
Figure E-2<
Holdoff for 7.62 (173 grains)
in inches (M21 system).
E-3
MJJUSTKATlNG: • HGHEST POINT OF FUGHTFADM 300 METERS TO I ЛОО METERS WWMETER
1МСЯЕМВЧТ5
• BULLET MOP FOR EACH SUCCEEDWG 100 METERS
SCALE DUE TO THE LENGTH OF THE UNE OF 9GHT
IN PROPORTION TO THE TRAJECTORY'S HEIGHT.
TWO SCALES ARE USED N THIS ILLUSTRATION.
TRAJECTORY HEIGHT: MS - 3 INCHES
UNE OF SGHT DISTANCE: 4 IJ2 INCHES - 100 METERS
Figure E-3. Trajectory chart.
E-4
tafTuf: for ь’ члм
чп'н- Jr! 41'Л 5T-VXJJ4G SlTTKMG/KNn^l.PX
1 1800
1.5 1 ! 53 БГ.6
2 1880 580
? .5 R<13 430
3 6*5 133
3. 5 571 286
5 5*0 750
4.5 144 222
r. 400 2Й0
5.5 154 132
6 133 l Г.7
b.S 3-08 154
) 286 L 4 *
7.5 26* LJ3
1 ?r.U 125
i s ? 15 118
* 222 I L J
4.5 211 18>
R 200 la-e
T4FH.E ROH 5" 6' 4ЛЧ
HFl-'.HT 34 M!r.5 ST4T 1'?П SI Г. !Mli/XK? FL14r
1 1<№B 930
1.5 i?<SB 608
2 903 4 50
2.5 ’58 3?5
I 603 38B
J.5 5 IS 25J
4 <51 225
4.5 40!| 200
5 3J»n 130
5.5 3 J7 1 Г. 4
6 13d 1 5Я
6.5 2 IT L19
? 25 J 1 2 *
8 22J 111
9 2Я0 130
i0 : »n 90
R-VVGK ЕЗТЧА'ГТЛЧ T^RLS ok Я1(,5 FOR OOJrr?';
Height ot target lyardsj x 1WB я ца?км>
Height nt target [юз Is)
Figure E-4. Range estimation tables.
E-5
ТС 23-14
APPENDIX F
SNIPER PATROL ORDERS
1. SITUATION (This describes the enemy and friendly
situation as it applies to your patrol.)
a. Enemy Forces:
(1) Weather: This is described by using the following
format:
{a) Past: Weather in past 48 hours.
(b) Present: Current weather.
(c) Predicted: Weather predicted in next 48 hours or
during your mission.
(d) Effects: How weather will affect both your
capabilities and the enemy’s.
The following data will be noted using the format below:
DATE BMNT SUN
EENT
MOON
RISE!SET
RISEj SETjPHASE
TEMP
LHJ./bo)
WIND
(DIR/VEL)
HUM
%
(2) Terrain: Explain the effects of the terrain on
your capabilities and the enemy’s using the key word
осока:
(a) Observation and fields of fire -
(b) Cover and concealment -
(c) Obstacles -
(d) Key terrain -
(e) Avenues of approach -
(3) Enemy identification: Information on enemy
uniforms, equipment, weapons, and type of unit (for
example, the enemy is the 14th Motorized Rifle
Battalion; they are armed with AK-47s, RPKs, and SVDs;
they are wearing standard camouflage uniforms; and
transportation is by BTR-60PB).
F-l
(4) Enemy location: Where they are currently located,
and whether they are patrolling in other areas.
(5) Enemy activities: What they are currently doing.
(6) Enemy strength: Their strength in numbers or
percent, and the sizes of units in specific locations.
(7) Enemy probable courses of action: What they are
expected to do within the next 24 to 48 hours.
b. Friendly Forces:
(1) Mission of the next higher unit: What is the
mission of the next higher unit to which the sniper
team(s) is attached?
(2) Location and planned actions of units on the left/
right/front/rear: Provide any information on units that
might be nearby or operating in your area of operation
while on your mission.
(3) Units providing fire support: Any unit providing
fire support to include artillery, mortar, naval gun-
fire, aircraft, and helicopter gunships.
c. Attachments and Detachments: Used if any additional
personnel are attached to the sniper team during the
mission, or when several sniper teams are on the same
mission.
2. MISSION (A brief and concise statement of what you are
to accomplish. It contains the five W's [what, where, when,
why, and who].)
3. EXECUTION
a. Concept of the Operation:
(1) Scheme of maneuver: A brief paragraph that
explains how you plan to accomplish the mission from
time of departure to time of return and debrief.
(2) Fire support: List all the sniper team’s on-call
targets and additional targets.
UNIT [CALL SIGNl FREQ TYPE SPT ] TGT NO 1 GRID [REMARKS
F-2
‘b* Mission of Subordinate elements:
(1) Teams: Used if more than one team is on the same
mission. Explain specific missions of teams.
(2) Special teams/key individuals: Special tasks
assigned to certain team members during the course of
the mission.
c. Coordinating Instructions:
(1) Time of departare/time of return/tirae of debrief:
Record these times.
(2) Departure/reentry of friendly front lines:
(a) Departure: With whom will you coordinate, what
unit, time and place for passage of FFL, location of
friendly positions, frequencies, call signs, pass-
words, pyro signals, fire support, and guides. Gain
any new information on the enemy from the front line
unit. Also, plan in case of enemy contact after or
during passage of FFL.
(b) Reentry: With whom will you coordinate, what
unit, time and place for reentry, near and far recog-
nition signals, reentry rally point (grid), plan if
under enemy pressure.
(3) Routes, primary/alternate: Use the following
format to explain:
Route, primary:
FROM (GRID) TO (GRID) MAG AZ DISTANCE CKPT NO
Route, alt FROM (GRID) :ernate; TO (GRID) MAG AZ DISTANCE CKPT NO
(4) Rally points and actions at rally points: Explain
where you are going to designate each type of rally
point (grid) and your actions at each rally point.
(a) Initial rally point (inside friendly lines).
F-3
(b) En route rally points- (How long will .you wait
there, how will they be selected?)
(c) Objective rally point-
ed) Link-up rally point (if linkup is used)-
(e) Reentry rally point {in close proximity of FFL) .
(5) Movement techniques; Type of movement techniques
used (Who is lead man and what are his responsibilities;
who is the rear man and what are his responsibilities?).
(6) Actions at the objective:
(a) Operating with a security patrol. Explain where
and when sniper team links up with the security
patrol, what unit they are from, call sign, and fre-
quencies. Explain how the security patrol will
support the sniper team {hide construction, reaction/
rescue force, and so forth) and when the sniper team
will separate from the security patrol (security
patrol leader is in charge of the team until sniper
team separates)-
(b) Actions at the ORP. Give location of ORP (grid),
team's actions in ORP, AZ and distance from ORP to
T-FFP/FFP, movement techniques, and actions on enemy
contact.
(c) Actions at T-FFP. Explain location (grid),
team's actions at the T-FFP, how you will recon and
secure it, actions on enemy contact, and what to do if
there is no suitable FFP.
(d) Movement into final firing position. Explain how
you plan to occupy and secure it. Explain how you
will conduct the initial hasty search, and what is the
code word used to inform higher headquarters that you
are in position. Also, explain actions taken upon
enemy contact.
(e) Concealed position construction. Describe type
of position to be used, how and what is needed to
construct it, who digs, who pulls security, how long
the shifts will be, where the spoil is to be put, and
how to use the security patrol if they are to assist
in construction of the position.
F-4
(f) Actions in position. Once construction is
complete, explain how you are going to p'lace and store
equipment. (Draw a diagram depicting this*) Explain
how you are going to assign duties* You must develop
a work, observe, rest, and alert plan inside the hide
position (who observes, who rests, how long).
DATE(S) ACTION TIME NAME
REMARKS
(g) Actions on enemy contact in the hide position.
Explain actions if discovered by the enemy (designate
escape routes with AZ and distances to rally points).
Tell who goes first and who covers.
(h) FFP departure. Explain how you will exit (who
goes first, who covers). Give general AZ, distance,
and time you plan to exit.
(i) Special instructions. Explain any additional
information on the patrol not covered in the above
paragraphs.
(7) Actions on enemy contact: Explain what sniper
immediate action drills you will use when faced with the
following:
(a) Air attack.
(b) Chance contact.
(c) Ambush.
(d) Indirect fire.
(e) Sniper fire.
(f) Minefield/booby traps.
(8) Action at halts: When will you conduct security
halts, how will the team be positioned, and what are
your actions?
(9) Actions at danger areas: List possible danger
areas using the following format:
F-5
LOCATION (should be in order of movement
TYPE DANGER AREA
Explain movement techniques used to cross roads, open
areas, and streams, and actions upon enemy contact while
crossing.
(10) Fire support:
(11) Rehearsals: Where and when will they take place,
and what is the uniform and equipment?
(12) Debriefing: When, where, and with whom. Turn in
all logbooks, field sketches, and notes.
(13} Annexes: When truck or aircraft support is being
used, or for linkup procedures.
4. SERVICE AND SUPPORT
a. Rations: Date and time of pickup of Class 1, how much
will be carried, and times food will be eaten during
mission.
b. Arms and Ammunition: Explain who will draw what from
where and how much, where it will be carried during
mission, and date and time for test fire and zero,
c. Special Equipment: Determine what special equipment
is needed, who will draw it, from where, and who will
carry it.
d. Uniform and Equipment Common to All: List uniform and
equipment that will be the same for each member, how it
will be worn and when (if changed since warning order).
e. Dead and Wounded Friendly Personnel: Procedures to be
used for dead and wounded friendly personnel.
5. COMMAND AND SIGNAL
a. Command: Who is in command of team, where is his
position during movement?
b. Signal:
F-6
(1) Frequencies and call signs: Use the following
format;
UNIT FREQ\ CALL SIGN
(2) Pyrotechnic signals: Explain any pyro signals
used.
(3) Arm~and-hand signals: Explain the seven arm-and-
hand signals used by sniper teams.
(4) Challenge and password: Use the following format:
DATE CHALLENGE PASSWORD RUNNING PASSWORD
F-7
ТС 23-14
APPENDIX G
REPRODUCIBLE FORMS
This appendix provides blank copies of four DA Forms;
DA Form 5785-R (Sniper's Data Card), DA Form 5786-R
(Sniper's Observation Log), DA Form 5787-R (Sniper's
Range Card), and DA Form 5788-R (Military Sketch). These
forms are not available through normal supply channels.
They may be reproduced locally on 5x7 paper.
G-l
NOTE: THE REQUIRED TARGETS WILL BE DRAWN IN BY HAND TO MEET THE NEEDS OF THE
UNIT.
DA FORM 5785 R, JUN 89
SNIPER'S OBSERVATION LOG SHEET 0F SHEETS For vm at 1hN form, «м TC 23-14: Vm proponent -вдвосу к TRAEHHC
ORIGINATOR: DATE/TIME: LOCATION:
SERIAL TIME GRID COORDINATE EVENT ACTIONS OR REMARKS
DA FORM 5786-R, JUN 89
DA FORM 5787-R, JUN 89
MILITARY SKETCH For us» of this term, see TC 23-14; the proponent agency ts TRADOC
REMARKS: REMARKS:
SKETCH NAME: . MAGNETIC; AZIMUTH SKETCH# NAME: RANK: DATETIME:
GRID COORDINATI WEATHER: E: OF
SCALE ,
DA FORM JUN 89
ТС 23-14
GLOSSARY
ALICE ART ATTN AZ all-purpose, lightweight carrying equipment auto-ranging telescope attention azimuth
BMNT beginning morning nautical twilight
CKPT CLP CP co checkpoint cleaner, lubricant, preservative command post charge of quarters
DA DIR Department of the Army direction
EDRE EENT emergency deployment readiness exercise end evening nautical twilight
FFL FFP FM FRAGO FREQ FSK friendly front lines final firing position field manual, frequency modulation fragmentary order frequency frequency shift keyed
HQ headquarters
IAW in accordance with
KIM keep in memory
LSA lubricating oil, weapons, semifluid
MAG ram MOA magnetic millimeter minute of angle
N NCO NE NO NOD north noncommissioned officer northeast number night observation device
OP OPFOR ORP observation post opposing forces objective rally point
Glossary-1
RBC rifle bore cleaner
S SEO SPT sw south sniper employment officer support southwest
T-FFP TGT TH TRADОС TRP TSFO tentative final firing point target technical manual Training and Doctrine Command target reference point training set fire observation
OS United States
VEL VHP velocity very high frequency
Glossary-2
ТС 23-14
REFERENCES
REQUIRED PUBLICATIONS
Required publications are sources that users must read in
order to understand or to comply with this publication.
Field Manuals (FMs)
5-20 Camouflage
7-7 The Mechanized Infantry Platoon and Squad (APC)
7-7J The Mechanized Infantry Platoon and Squad (Bradley)
7-8 (HTF) The Infantry Platoon and Squad (Infantry, Airborne, Air Assault, Ranger) (How to Fight)
7-10 (HTF) The Infantry Rifle Company (Infantry, Airborne, Air Assault, Ranger) (How to Fight)
21-26 Map Reading and Land Navigation
21-75 Combat Skills of the Soldier
23-9 M16A1 Rifle and Rifle Marksmanship
25-100 Training the Force
90-10 (HTF) Military Operations on Urbanized Terrain (MOOT) (How to Fight)
90-10-1 (HTF) An Infantryman’s Guide to Urban Combat (How to Fight)
Soldier’s Training Publications (STPs)
21-l-SMCT Soldier’s Manual of Common Tasks (Skill Level 1)
7-11BC HM14-SM-TG Soldier’s Manual and Trainer’s Guide MOS LIB, 11C, 11H, 11M Infantry Skill Levels 1/2/3/4
References-1
Department of the Army Forms (DA Forms)
5785-R Sniper’s Data Card
5786-R Sniper’s Observation Log
5787-R Sniper’s Range Card
5788-R Military Sketch RELATED PUBLICATIONS
Related publications are sources of additional information
They are not cation. required in order to understand this publi'
Field Manuals (FMB)
6-30 Observed Fire Procedures
7-20 The Infantry Battalion (Infantry, Airborne, and Air Assault)
7-30 Infantry, Airborne, and Air Assault Brigade Operations
21-31 Topographic Symbols
21-76 Survival
24-1 Combat Communications
25-4 How to Conduct Training Exercises
25-7 Training Ranges
26-2 Management of Stress in Array Operations
34-1 Intelligence and Electronic Warfare Operations
34-60 Counter!nte11igence
71-2 The Tank and Mechanized Infantry Battalion Task Force
90-3 (HTF) Desert Operations (How to Fight)
References-2
90-5 (HTF) Jungle Operations {How to Fight)
90-6 Mountain Operations
90-8 Counterguerilla Operations
Technical Manuals
5-200 Camouflage Materials
9-1005-223-20 Organizational Maintenance Manual (Including Repair Parts and Special Tools List) for Rifle 7.62-mm, M14 W/E (FSN 1005-589-1271), M14A1 W/E (1005-072-5011) and Bipod Rifle, М2 (1005-711-6202)
9-1005-306-10 Operator’s Manual, M24 Sniper Weapon System (SWS)
9-1240-381-10 Operator's Manual: Binocular Ml9 W/E {NSN 1240-00-930-3833)
9-6650-212-12 Operator's and Organizational Maintenance Manual: Telescope, Observation M4 9, W/E (FSN 6650-530-0960)
9-6920-210-14 Operator's, Organizational, Direct Support and General Support Maintenance Manual (Including Basic Issue Items List and Repair Parts List) for Small Arms Targets and Target Material
11-5820-667-12 Operator’s and Organizational Maintenance Manual: Radio Set, AN/PRC-77 (NSN 5820-00-930r3724) (Including Receiver- Transmitter, Radio, RT 841/PRC-77) (5820-00-930-3725)
11-5855-213-10 Operator's Manual for Night Vision Sight, Individual Served Weapon, AN/PVS-4
11-5855-262-10-1 (NSN 5855-01-228-0939) Litton Model M972/M973 (NSN 5855-01-107-5925}
11-5960-201-10 Operator’s Manual: Laser Infrared Observation Set, AN/GVS-5
43-0001-14 (C) Surveillance, Target Acquisition, Night Observation (STAND) Equipment and Systems (0)
References-3
Training Circulars (TCs)
23-11 Starlight Scope Small Hand-held or Individual Weapons Mounted, Model NO. 6960
23-18 Night Observation Device, Medium Range (NODMR)
References*4
ТС 23-14
INDEX
aiming, 3-3
ammunition
blanks, 2-27
special ball, 2-26
binoculars
M19, 2-28, 2-29 (illus)
M22, 2-36 (illus)
breath control, 3-7
call for fire, B-10
camouflage
artificial, 4-3
blending, 4-2
deceiving, 4-2
equipment, 4-5
face paint, 4-3
field expedient, 4-4
ghillie suit, 2-23, 4-3, 4-4 (illus)
hiding, 4-2
natural, 4-3
clothing (camouflaged)
boots, 2-23
ghillie suit, 2-23, 4-3
hat, 2-23
concealment, A-5 thru A-8, B-7, B-9
data card, C-l thru C-3 (Ulus), G-4 (R-form)
EDRE, B-ll thru B-l4
employment, 1-4
countersniper, 5-4 thru 5-7
defensive, 5-3
MOOT, 5-4
offensive, 5-2
retrograde, 5-^3
teams, 5-1
techniques of movement, 4-9 thru 4-17
firing one round, 3-17
Index-1
firing position, 3-1, 3-2 (illus), 3-3
belly-hide, 4-23, 4-24 (illus)
construction, 4-20
expedient, 4-22, 4-23 (illus)
hasty, 4-21
occupation, 4-18, 4-19
selection, 4-17, B-l
semipermanent hide, 4-25, 4-26 (illus)
urban terrain, 4-27
holding off, 3-18, 3-19, E-3 (illus)
information, recording, 4-32 thru 4-40, see also data card
military sketches, observation log, and range cards
KIM games, A-10
land navigation exercise, A-9, A-10, B-ll
laser observation set, AN/GVS-5, 2-35 (illus)
M14 National Match rifle, 2-1,
assembly, 2-3
bolt alignment, 2-3
bolt assembly, 2-3
care and maintenance, 2-3
disassembly, 2-2
inspection, 2-2
rear sights, 2-4
trigger assembly, 2-4
M24 sniper rifle, 2-6
bolt alignment, 2-7
bolt assembly, 2-7
care and maintenance, 2-9
disassembly, 2-10, 2-11 (illus)
inspection, 2-8
safety, 2-6 (illus)
sights, 2-12
trigger assembly, 2-8
marksmanship fundamentals, Chap 3, B-5
measurements
mils, D-l, D-2 (illus)
minute of angle, D-l, D-2 (illus)
mission, 1-3
Index-2
movement
route selection, B-l
rules, 4-8
techniques, 4-9 thru 4-17, B-2
night vision goggles
AN/PVS-5, 2-31, 2-32 (illus)
AN/PVS-7A, 2-35, 2-36 (illus)
night vision sight, AN/PVS-4, 2-30 (illus)
observation
detailed search, 4-28, 4-29 (illus)
hasty search, 4-28
logbook, 4-39, 4-40 (illus), G-4 (R-form)
techniques, B-3
observation log, 4-39, 4-40 (illus), B-4, G-5 (R-form)
orders, example, F-l thru F-7
organization, 1-4
SEO, 1-4
team leader, 1-5
teams, 1-4, 1-5
qualifications, 1-5 thru 1-7
radios
AN/PRC-77, 2-33 (illus)
AN/PRC-119, 2-34 (illus)
range
card, 4-32, 4-33 (illus), 4-34 (illus), 4-42, G-2 (R-form)
estimation, 4-40 thru 4-44
range cards, 4-32, 4-33 (illus), 4-34 (illus), A-4, B-3,
G-2 (R-form)
range estimation methods
100-meter-unit-of-measure, 4-41
appearance-of-object, 4-42
ART I or II scopes, 4-42
bracketing, 4-42
combination, 4-44
exercises, A-8
mil-relation formula, 4-42, 4-43 (illus)
paper strip, 4-40
range card, 4-42
Index-3
tables, E-5
task, B-3
rifles, see also M14 and M24
care of, 2-3, 2-9
inspection, 2-2, 2-3
rifle systems
M21, 2-1 thru 2-4
M24, 2-5 (illus} thru 2-15
shot calling
iron sights, 3-10
telescopic, sights, 3-11
sights
alignment, 3-4, 3-5 (illus)
iron, 2-12 thru 2-14
National Match, 2-4 (illus)
picture, 3-5, 3-6 (illus)
sketches, military, 4-34, 4-35 (illus), 4-36 (illus), 4-37
(illus), 4-38, 4-39 (illus), B-4, G-3 (R-form)
sniperscopes
auto-ranging telescope, 2-15, 2-16 (illus)
Leupold M3A telescope, 2-22
magnification, 2-17, 2-22
mount, 2-18, 2-24
zeroing, 2-20, 2-25
sustainment program, B-l thru B-14
target detection, A-8, A-9 (illus), B-3, B-10
target indicators
disturbance of wildlife, 4-2
improper camouflage, 4-2
movement, 4-1
odors, 4-2
sound, 4-1
targets, moving
leading, 3-20, 3-21
tracking, 3-20
trapping, 3-20
target selection
factors, 4-30
Index-4
key targets, 4-31
task, B-3
telescope, observation, 2-27, 2-28 (illus)
Threat, identify, B-3
training notes
field fire, A-4, A-5
practice fire, A-4
ranges, A-l, A-2
targets, A-2, A-3 (illus)
zeroing, A-4
trajectory chart, E-4
trigger control, 3-8, 3-9
weather effects
humidity, 3-17
light, 3-17
mirages, 3-15 (illus)
temperature, 3-16 (illus)
wind, 3-12, 3-13, 3-14, E-2, E-3
zeroing, 2-20f 2-25, 3-11, A-4
Index-5
ТС 23-14
14 JUNE 1989
By Order of the Secretary of the Army:
CARL E. VUONO
General United States Army
Chief of Staff
Official:
WILLIAM J. MEEHAN 11
Brigadier General United States Army
The Adjutant Genera!
DISTRIBUTION:
Active Army, USAS, and ARNG: To be distributed in accordance with OA Form 12-1 IE,
requirements for TC 23-14, Sniper Training and Employment (Qty rqr block no. 1335).