/


Tags: army soldier's handbook
Year: 1941


Text
FM 21-10Ф
BASIC FIELD MANUAL
SOLDIER’S HANDBOOK
Prepared under direction of the
Chief of Staff
UNITED STATES
GOVERNMENT PRINTING OFFICE
WASHINGTON : 1941
For sale by the Superintendent of I? ^uments, Washington, D. C. - Price 35 cents
WAR DEPARTMENT,
Washington, July 23, 1941.
EM 21-100, Soldier’s Handbook, is published for the infor-
mation and guidance of all concerned. Its purpose is to give
the newly enrolled member of the United States Army a con-
venient and compact source of basic military information and
thus to aid him to perform his duties more efficiently.
[A. G. 062.11 (7-23-41).]
By order of the Secretary of War:
(% t.'MABfeHALL, Г
Cnief of Staff.
Official :
E. S. ADAMS,
Major General,
Adjutant General.
Distribution :
C and H (5); X. л
(rjorjexplanatio3 of symbols^ee21-6.)
и
FOREWORD
You are now a member of the Army of the United States.
That Army is made up of free citizens chosen from among a
free people. The American people of their own will, and
through the men they have elected to represent them in Con-
gress, have determined that the free institutions of this coun-
try will continue to exist. They have declared that, if
necessary, we will defend our right to live in our own American
way and continue to enjoy the benefits and privileges which
are granted to the citizens of no other nation. It is upon you,
and the many thousands of your comrades now in the mili-
tary service, that our country has placed its confident faith
that this defense will succeed should it ever be challenged.
In the transition from civil life to the life of a soldier you
may, at first, feel somewhat confused. It is the purpose of
this handbook to help you over these rough spots as rapidly
as possible and to lay the foundations for your successful
career as a soldier.
Making good as a soldier is no different from making good
in civil life. The rule is the same and that is—know your
own job and be ready to step into the job of the man ahead
of you. Promotion is going to be very rapid in this Army.
Be ready for it. You will have little time to learn the duties
of a noncommissioned officer after you become one. You
will be expected to know those duties and show that you
know them. At a moment’s notice you may have to take
charge of your squad as a corporal—and in a critical hour.
In the same way when you are a sergeant you cannot tell
under what conditions and at what hour you may have to
take the place of your lieutenant. You want to know what
is expected of you and be ready to do it.
The things that a trained soldier must know, and the way
in which they are done, will be taught you as rapidly as you
can absorb them. The basic military information is de-
scribed and explained in this handbook so that it may be
available constantly to you during the first weeks of your
service. By mastering the contents your future progress
will be much more rapid.
in
In making yourself an efficient soldier you are helping to
build a defense for our country that nothing can destroy.
/You are repaying your obligation to the United States for
all the benefits of the past and are declaring your faith in
our future. If you will make a part of yourself the following
characteristics of the good soldier, you will be doing your
part in upholding the glorious reputation of the Army of the
United States:
Be obedient.—Obedience means to obey promptly and cheer-
fully all orders of your commissioned and noncommissioned
officers. At first you cannot be expected to know the reason
for everything you are ordered to do. As you remain longer
in the service and you understand more of the reasons for mil-
itary training you will find that everything has been figured
out as the result of experience in the past. Ways and meth-
ods which have been successful in the past are continued until
some new way proves to be better, and then the change will be
made. Cheerful obedience leads to a better performance of
your duties. It makes it easier for all of your comrades to
do their part. It means better teamwork.
Be loyal.—Loyalty means that you must stand by your or-
ganization through thick and thin. Boost your organization
at every opportunity. Be loyal and true to your officers, your
noncommissioned officers, and your comrades. In this way
you will be loyal to your country.
Be determined.—Determination means the bulldog stick-to-
it-iveness to win at all costs. During your training keep ever-
lastingly at the most difficult tasks and never give up until you
have mastered them. Determination to win means success
in battle.
Be alert.—Alertness means being always on your guard. A
good soldier may be pardoned for failure, but never for being
surprised. Should the unexpected happen, use your head and
do something, even if it is wrong, rather than “lie down.”
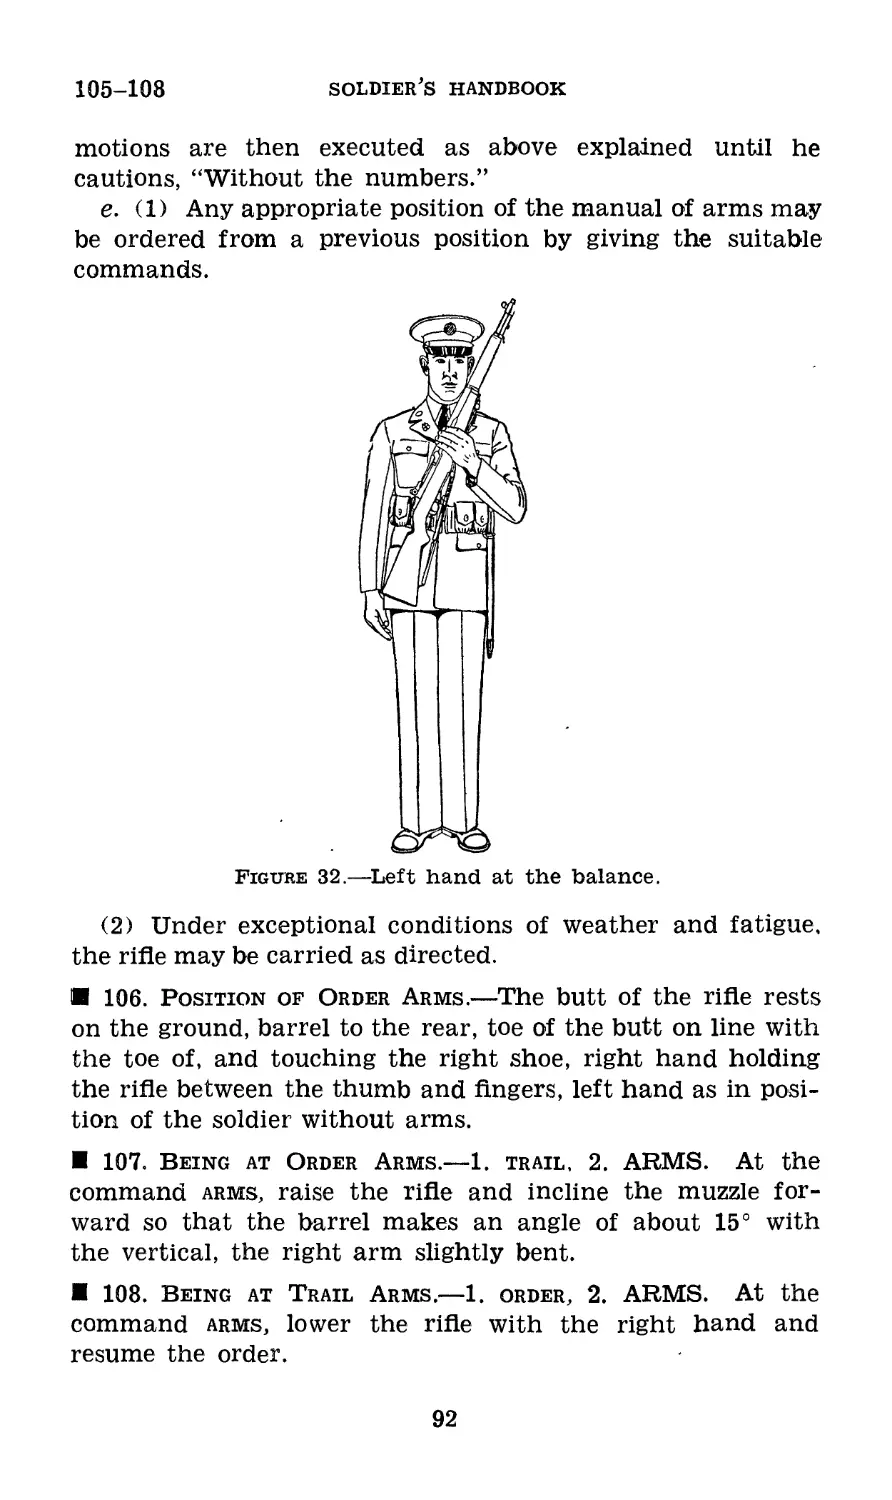
Be a member of the team.—Teamwork means that each
man in the squad, platoon, company, troop, or battery gives
everything in his power to make for the success of the whole
unit. Success in battle depends on teamwork just as much
as success in a football game depends on the pull-together
spirit of the football team. Unless you play your own special
part the team may not win.
IV
TABLE OF CONTENTS
Paragraphs Page
Foreword_______________________________________________ in
Chapter 1. General Information.
Section I. Responsibilities of group life___ 1-3 1
II. Relationship with noncommis-
sioned officers and officers__________ 4-11 2
III. Relations with civilians___________12-14 4
IV. Military obligations_______________ 15-16 4
V. The Articles of War________________ 17-19 5
VI. Post and station activities______ 20-26 6
Chapter 2. Military Discipline and Courtesy.
*4 Section I. Military discipline---------------- 27-30 9
II. Military courtesy_________________ 31-34 10
Chapter 3. Insignia.
Section I. Arms and services----------------35-41 16
II. Officers and noncommissioned offi-
cers _______________________________ 42-45 20
Chapter 4. Organization____ _ __ ------------- 46-54 22
Chapter 5. Clothing.
Section I. Allowances_________*----------— 55-56 26
II. Care of clothing___________________ 57-59 26
III. Wearing the uniform__________________ 60 29
Chapter 6. Arms and Equipment.
Section I. Responsibility for care----------- 61-63 30
II. Nomenclature and care and clean-
ing of U. S. rifle, caliber .30, Ml— 64 31
III. Nomenclature, care and cleaning,
.and safety devices of automatic
pistol, caliber .45, M1911____________ 65 41
IV. Safety precautions---------------------66 44
V. The gas mask---------------------- 67-73 45
VI? Field equipment__________________< 74-81 49
VII. The infantry pack_________________ 82-83 59
VIII. Packing individual equipment on
horse____________________________________ 84-85 71
IX. Display of equipment________________ 86 78
Chapter 7. School of the Soldier Without
Arms (Dismounted) .
Section I. Positions________________________ 87-91 80
II. Steps and marchings____________ 92-103 83
Chapter 8. School of the Soldier With Arms
(Dismounted) .
Section I. General_____________________________ 104 89
II. Manual of arms for the rifle___ 105-128 91
III. Loadings and firings____________ 129-134 103
IV. Carrying the automatic rifle_ 135 108
V. Manual of the pistol____________ 136-152 110
Chapter 9. Squad and Platoon Drill.
Section I. The squad________________________ 153-169 115
II. The platoon____________________ 170-185 127
Chapter 10. Interior Guard Duty____________ 186-194 135
VII
TABLE OF CONTENTS
Paragraphs Page
Chapter 11. Marches, Camps, and Bivouacs.
Section I. Marches----------------------- 195-199 138
II. Camps and bivouacs____________ 200-203 145
Chapter 12. Use of Compasses and Maps.
Section I. Use of the Compass____________ 204-208 151
II. Use of maps___________________ 209-217 153
Chapter 13. Security and Protection.
Section I. General-----------------------218^-221 164
II. Security of individuals_______ 222-229 165
III. Security of small units_______ 230-237 179
Chapter 14. Military Sanitation and First Aid.
Section I. Military sanitation___________ 238-253 202
II. First aid_____________________ 254-276 206
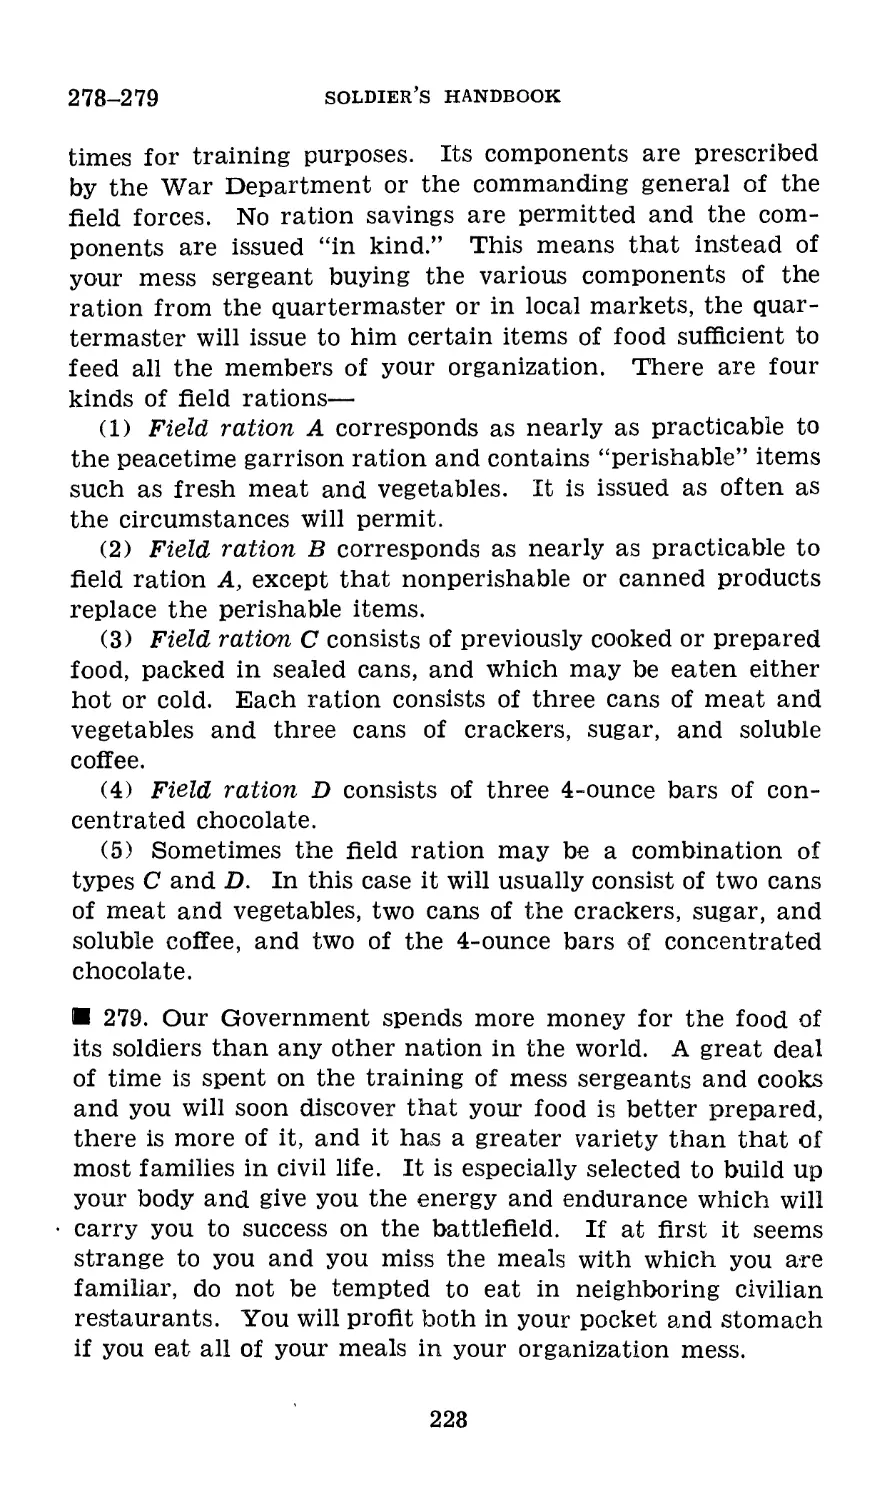
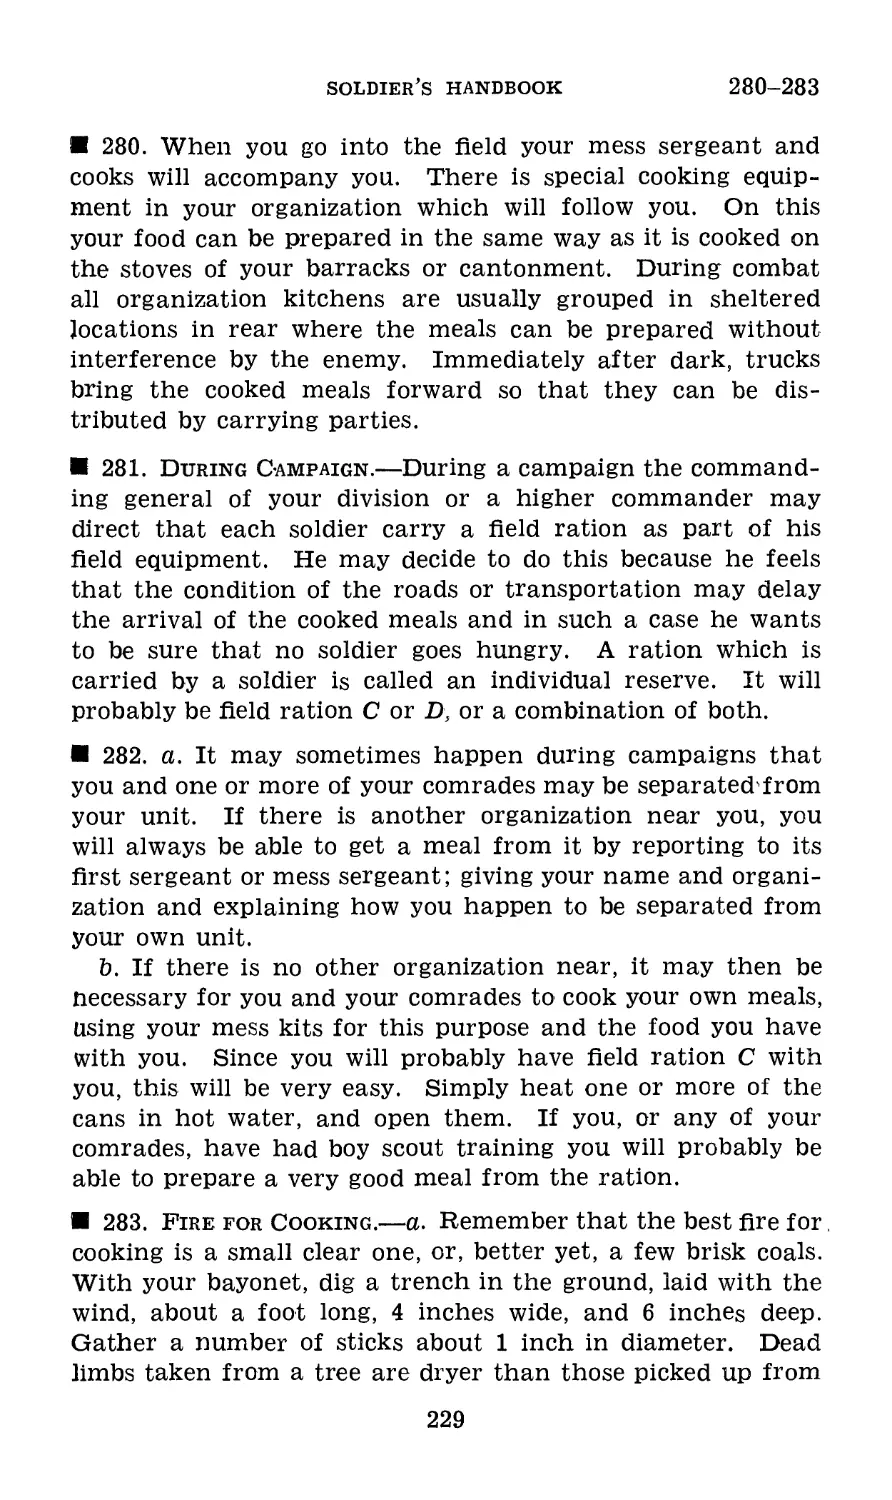
Chapter 15. The Ration_______________________ 277-283 227
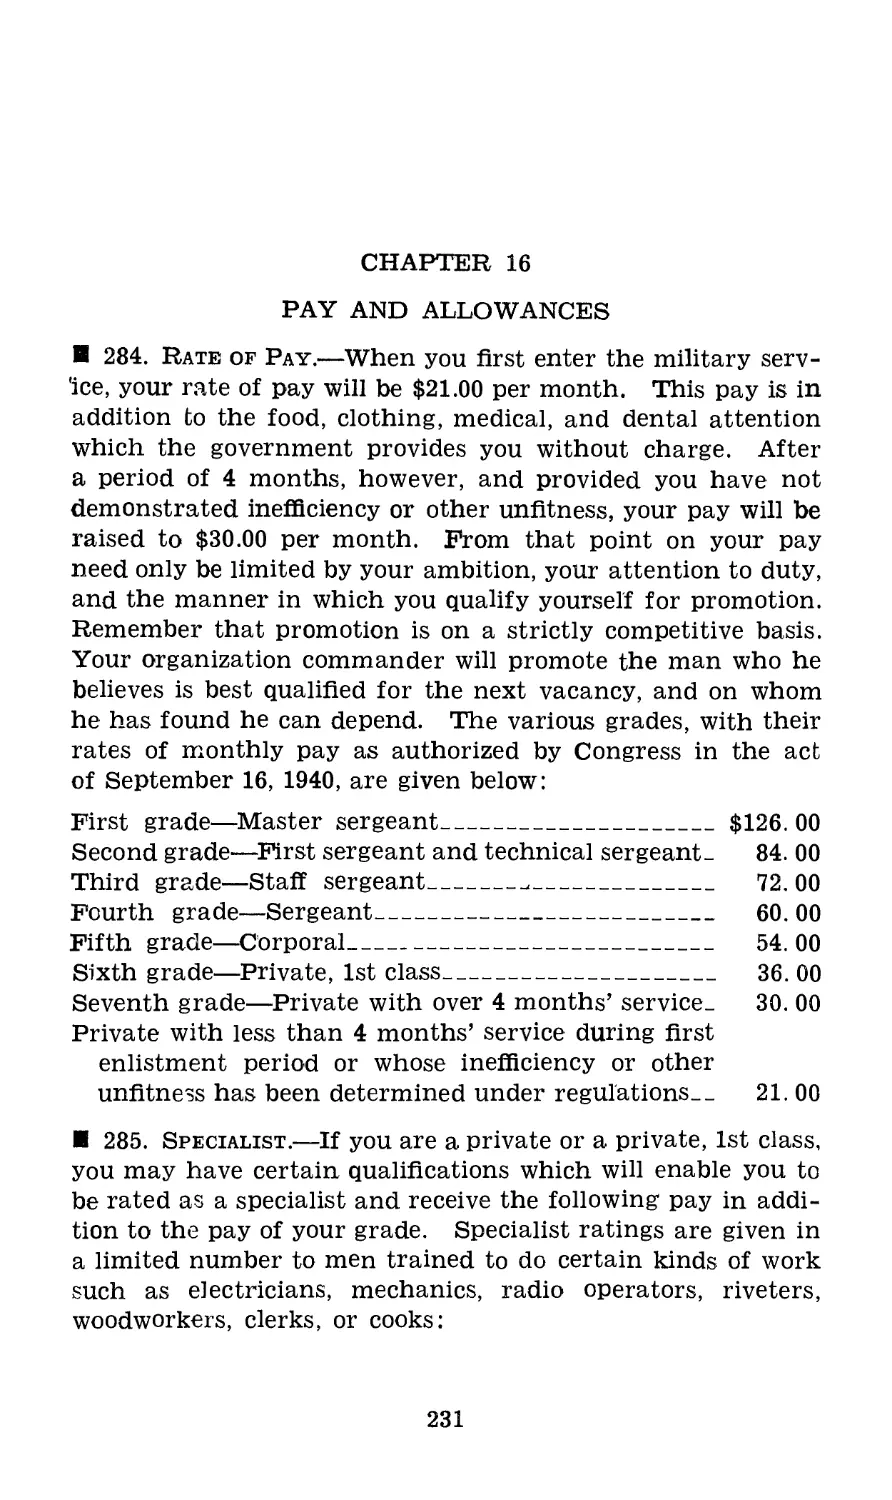
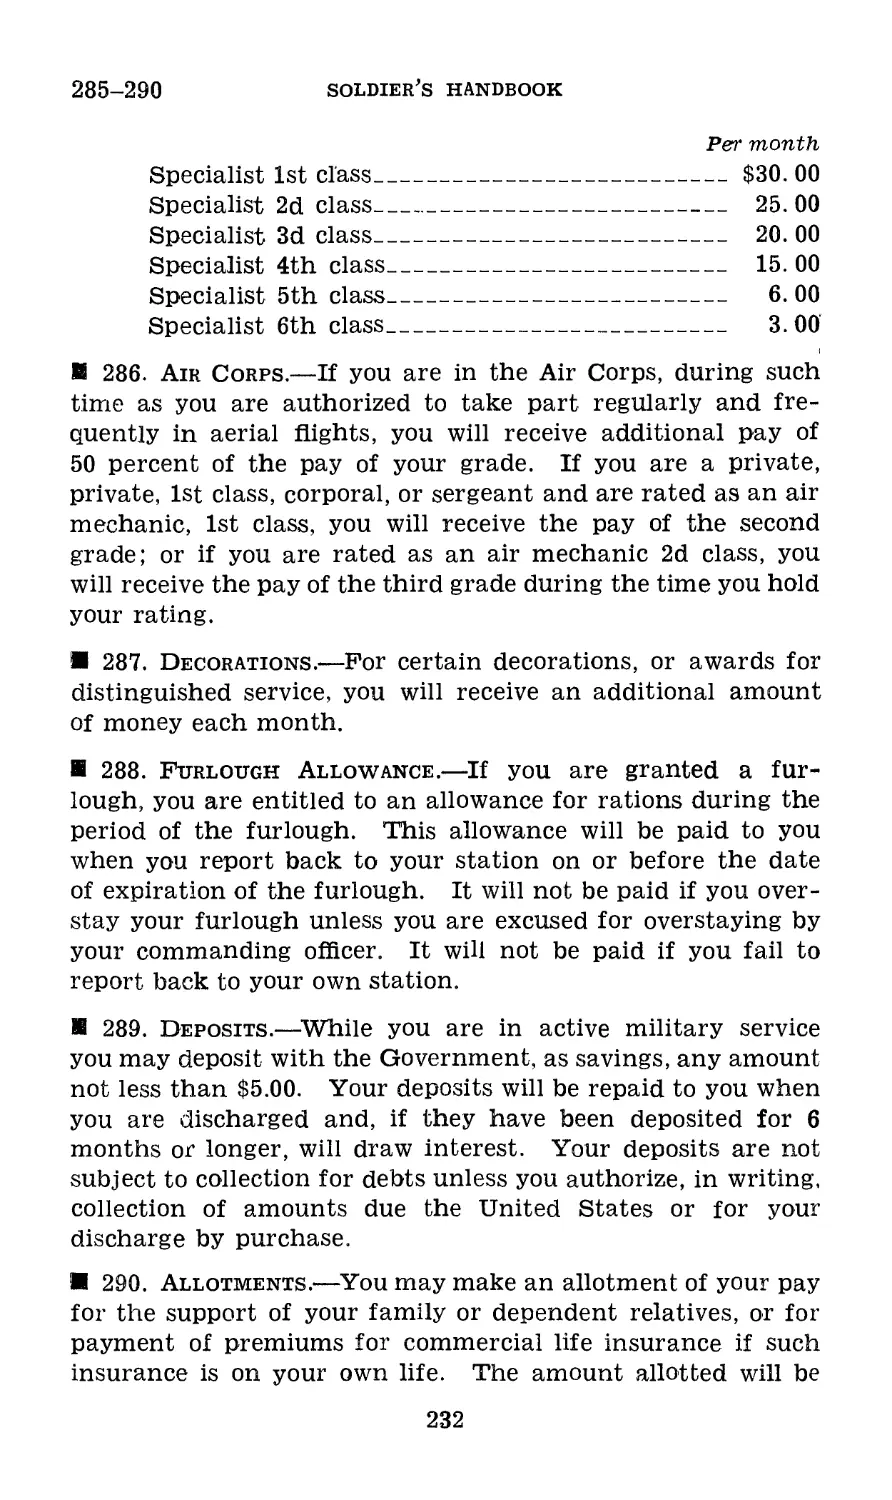
Chapter 16. Pay and Allowances_______________ 284-295 231
Chapter 17. Last Will and Testament______________ 296 234
Appendix. Glossary of Common Military Expressions._ 237
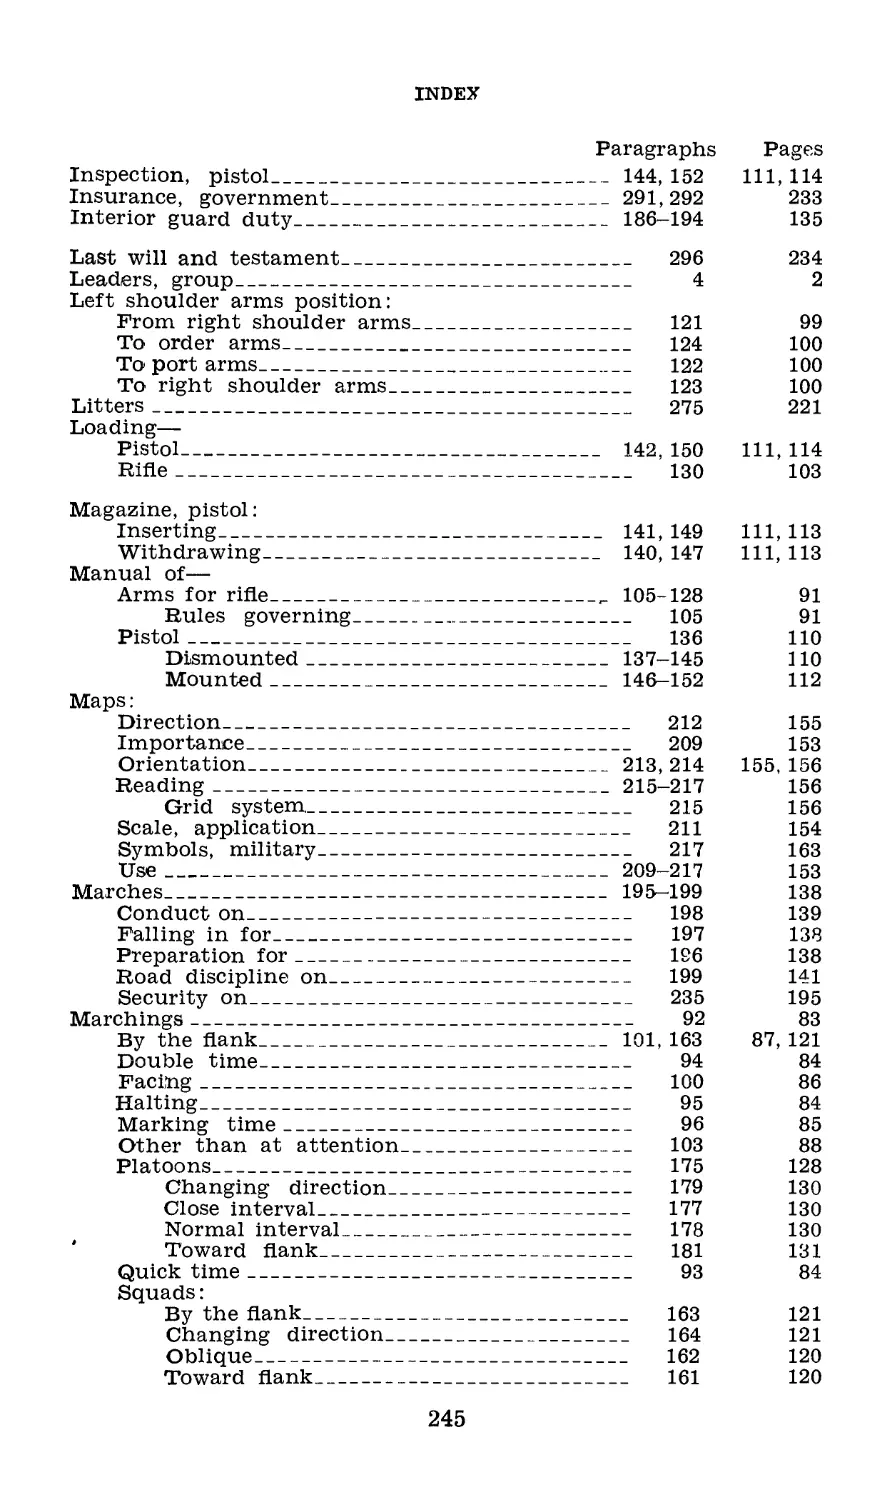
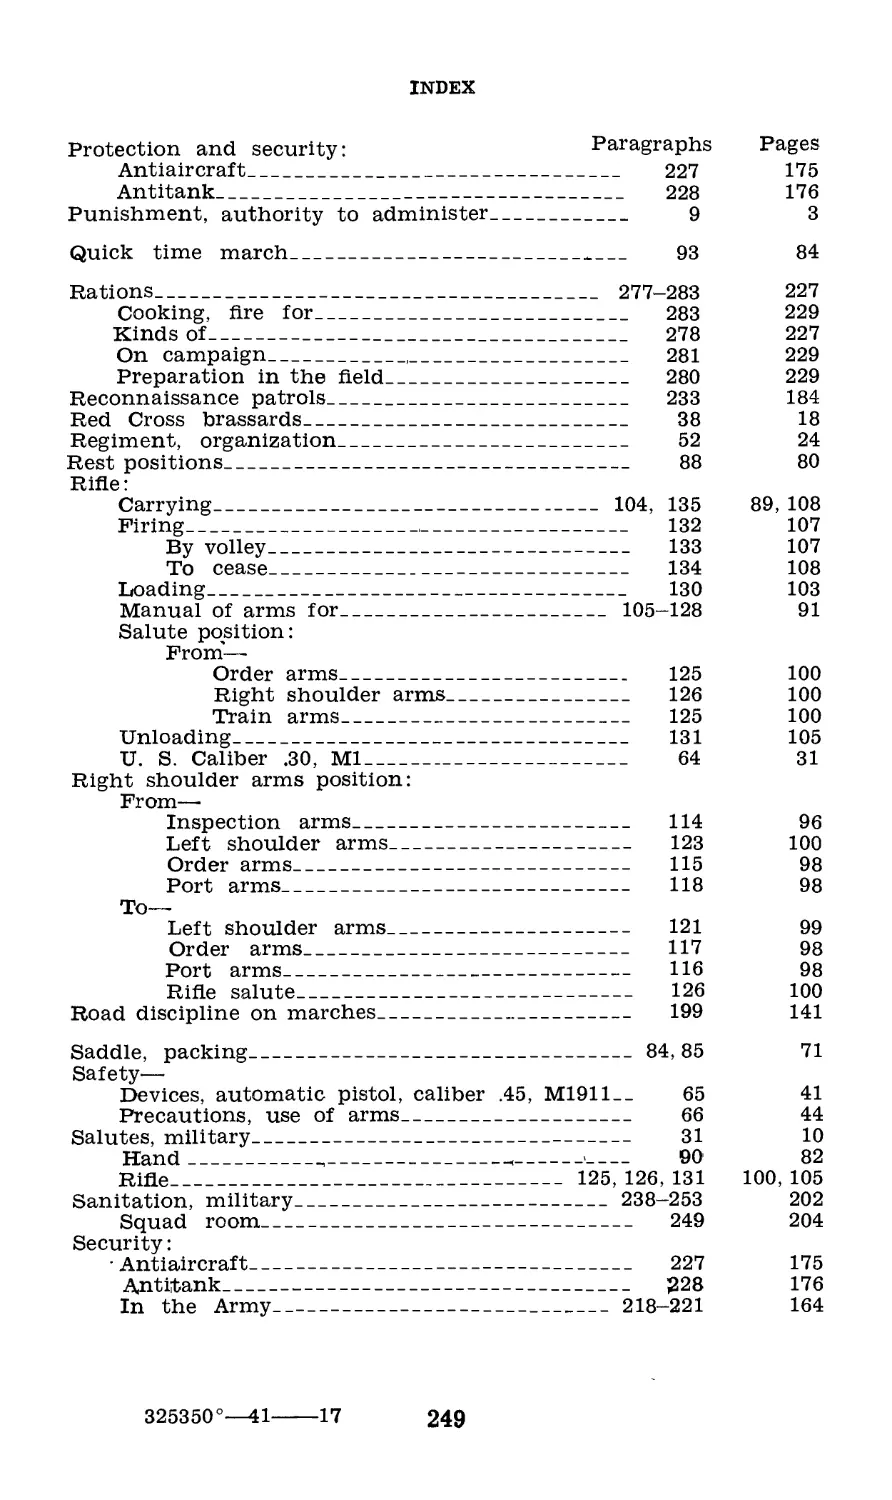
Index__________________.______________________________ 239
VIII
FM 21-l(fo
BASIC FIELD MANUAL
SOLDIER’S HANDBOOK
CHAPTER 1
GENERAL INFORMATION
Paragraphs
Section I. Responsibilities of group life____________ 1-3
II. Relationship with noncommissioned officers and
officers_____________________________________ 4—11
III. Relations with civilians________________ 12-14
IV. Military obligations_____________________ 15-16
V. The Articles of War______________________ 17-19
VI. Post and station activities_______________20-26
Section I
RESPONSIBILITIES OF GROUP LIFE
1. Before you joined the Army you were a member of a
family of closely related individuals who had many things
in common. The members of your family shared the same
dining room, the same bathroom, and the same amusements
around the house. All worked together, played together, read
the same newspaper, and were largely dependent upon each
other for comforts, pleasures, and a living.
2. You learned that to get along well with other members
of your family you must have consideration for them, do
your part of the work, and share thingsi with the rest of the
household. That was your golden rule and the primary law
of family relationship and citizenship.
3. You have the same obligations in the Army but instead
of the small family group you are one of a much larger group.
Several hundred may have to live together in one small area.
Large numbers eat in the same mess hall, use the same bath-
house or latrine, bunk together, work together, and play
together. Your bedding, your uniforms, your equipment, and
your personal possessions will frequently be exposed where
they can be removed without your knowledge. Living under
these conditions you must do your part in respecting the
1
soldier's handbook
^-1
rights and property of others. A soldier who has learned
to respect the rights of his comrades has made a big step
forward in his training as a soldier and as a citizen.
Section II
RELATIONSHIP WITH NONCOMMISSIONED OFFICERS
AND OFFICERS
4. For every business, every game, every group activity,
and in every walk of life there is a leader, a “boss,” an execu-
tive, or some directing agency. In the Army these group
leaders are the officers and the noncommissioned officers.
5. The President of the United States is the Commander
in Chief of the Army. He appoints officers, with the con-
sent of the Senate, to assist him in the details of running the
Army. He gives them certain authority and makes them
responsible for certain groups or organizations in accordance
with their grade and length of service.
6. You have a commander in charge of your company, bat-
tery, or troop, who is responsible for everything your company
does or fails to do. He must зёе that you - are properly
trained, and that you are fed, clothed, and sheltered. He
must look after your health, your comfort, and your amuse-
ments. He could not possibly attend to all these details alone.
Suppose that your company commander had to go to every
individual soldier, give him special instructions, explain what
to do and what not to do, draw rations, issue equipment, keep
all your records, and do all of the many things which you
require. You can see that many things would be neglected
and that you would suffer for lack of proper training, food,
equipment, and amusements. To assist him in all the details
of running the company he asks the regimental commander
to appoint noncommissioned officers who are given certain
authority and are made responsible for certain things. You
are thus a part of a great organization or business in which
the officers and the noncommissioned officers are the execu-
tives, the “bosses,” and the foremen.
7. The first thing to appreciate is that you are subject to
the orders of officers and noncommissioned officers placed over
you. The officers and noncommissioned officers are entitled
2
soldier's handbook 7-<l
to be, and they must be obeyed and respected by all soldiers
under them. Make it a rule that you will obey them promptly,
cheerfully, and carefully. A military order is usually sharp,
positive, and brief. If you do not understand what is wanted,
it is your duty to ask questions, but do not quibble over small
details as to your “rights.” The man who is always thinking
of his “rights,” rather than his duty, makes a poor soldier.
8. If you believe that you have been given an unlawful order
you should obey first and make a report to your commanding
officer afterward. Disobedience or failure to obey a lawful
order, which you may believe to be unlawful, may lead to
severe consequences.
9. The Articles of War, the soldier’s law, authorize your
commanding officer to impose certain punishments for minor
offenses. That is, he can withhold certain privileges, restrict
you to the area of barracks or camp for a week, or require you
to perform extra duty or hard labor for as much as a week.
However, he does not delegate this authority to his noncom-
missioned officers. A noncommissioned officer is not author-
ized to administer any form of punishment to a member of his
command. A noncommissioned officer may require you toi
sweep the barracks floor, wash the squad-room windows, and
the like, but he does this by regular detail from all the
members of your company, not as a punishment.
10. It is the duty of a noncommissioned officer at all
times and under all circumstances, whether on duty or off
duty, to check promptly all disputes, quarrels, or disorderly
conduct which might bring discredit upon the service. He
is required to enforce the orders and regulations governing
the conduct of soldiers. Tn the absence of an officer, a non-
commissioned officer may place a soldier under arrest until
he can be seen by his company commander.
11. It can be seen that officers and noncommissioned of-
ficers must be specially selected. They hold positions of
responsibility and honor, but they belong to the same mili-
tary organization- that you do. The relationship between
all military men is one of comradeship, friendliness, and
helpfulness. In no walk of life does “comradeship” mean
so much as in the military service and nowhere are obedi-
ence and respect for authority so important as in the Army.
3
U-15
SOLDIER'S HANDBOOK
As a soldier you must accept constituted authority, which is
nothing more than team play. In your relationship with
officers and noncommissioned officers you are expected to be
loyal and truthful. Always be frank but courteous. By
being courteous and respectful to constituted authority you
are exhibiting qualities oj a good soldier.
Section III
RELATIONS WITH CIVILIANS
S8 12. In his off-duty activities, whether in peace or war, the
good soldier is always careful to be courteous and consid-
erate toward civilians. You must realize that your organi-
zation and the Army will be judged by the conduct and
appearance of its members in public. Any misconduct on
your part in a public place will bring discredit not only
upon yourself but also on the military service. You must
take pains on every occasion to win the respect and con-
fidence of all with whom you come in contact.
И 13. When on duty your relations with civilians are gov-
erned primarily by the orders and instructions of your
commanding officer. Here also, whether in peace or war,
you should treat civilians with all courtesy and consideration
consistent with a strict observance of your orders and the
accomplishment of your military mission.
И 14. The American Red Cross acts as the medium of com-
munication between the Army and the civil community.
This organization has chapters or representatives in all
parts of the United States and its “foreign possessions. If
you should be concerned about the welfare of your family
or conditions in your home, explain the situation to your
company commander. He will help you in obtaining the'
assistance of the Red Cross through the Red Cross field
director at your station or serving your unit.
Section IV
MILITARY OBLIGATIONS
15. a. Every man who enters the Army of the United
States, whether through voluntary enlistment or operation
of the Selective Service Law, accepts certain solemn obliga-
4
soldier's handbook
15-17
tions. These obligations require that he bear true faith
and allegiance to the United States of America; that he
serve them faithfully against all their enemies; and that he
will obey the orders of the President of the United States
and the officers appointed over him (the soldier) according
to the rules and Articles of War.
b. Your legal status has changed from that of a civilian to
that of a soldier. You have become subject to military law
and cannot again become a civilian until you receive your
discharge by proper authority. As a civilian you could quit
your job and seek other employment at will. As a soldier
you have given up that privilege during the period of your
service. During your off-duty hours as a civilian you could
go when and where you pleased without asking permission
from anyone. As a soldier you must first get permission
before leaving your proper station.
c. The reasons for these differences in your status as a
civilian and as a soldier are important but easy to under-
stand. The military organization to which you now belong
is a team that must be constantly trained and ready for duty
in any emergency. If its members could go and come when-
ever they cared to there would be no assurance that this
military team would be on hand when needed.
16. As a soldier, then, you must keep in mind and faithfully
fulfill your obligations. If you do so you will find the service
pleasant and profitable, and will leave it as a veteran with a
clean record which will entitle you to the benefits accorded by
law to an honorably discharged ex-serviceman. Soldiers who
constantly fail to fulfill these obligations are likely, sooner or
later, to get into trouble, to lose the respect and regard of
their comrades, to suffer punishments, and perhaps, finally to
return to civil life dishonored and disqualified for any of
the benefits with which the Government rewards honorable
and faithful service.
Section V
THE ARTICLES OF WAR
17. The Articles of War are part of the military laws en-
acted by Congress to control the conduct of those in military
service of the United States. They govern the administration
5
17-20
soldier's handbook
of military justice. They define the offenses for which soldiers
may be tried by court martial, prescribe the composition and
procedure of courts martial, and fix the limits of punishment
that may be’imposed by these courts.
18. The Articles of War are read to every soldier shortly
after he enters the service and at regular intervals thereafter,
so that no one will be able to excuse himself for a violation of
any of them upon the ground of ignorance of their provisions.
19. However, as a good soldier, resolved to observe fully and
in good faith the obligations of the oath of enlistment above
discussed, you do not need to spend much time studying the
detailed provisions of the Articles of War. As a general rule,
they prohibit and penalize only such conduct as the person of
ordinary intelligence will readily recognize to be wrong. The
man who is resolved to do the right thing and carries out that
resolution at all times, is very unlikely to violate any of the
Articles of War. Should doubt ever arise in your mind as to
whether anything you plan to do is improper or a violation of
the Articles of War, don’t hesitate to take the question to
some more experienced comrade, to your first sergeant, or to
your immediate commanding officer. They will be glad to
advise you.
Section VI
POST AND STATION ACTIVITIES
20. Although you have exchanged your civilian community
for a military community, you will find many of the same
activities on your post or station that you have known in
civil life. For example, your own organization will probably
have a barber and a tailor. All soldiers are required to have
a short haircut known as a “military” haircut. This is done
for sanitary reasons and to secure uniformity. Your organi-
zation barber is approved by your organization commander,
and is required to maintain a sanitary establishment, which
is inspected regularly by the post surgeon. Your organization
tailor is prepared to clean and press your uniform and make
necessary alterations and repairs. Both of these activities
are maintained for the service and convenience of the mem-
bers of your organization. The prices are fixed by the post
commander so that they will be well within your means. You
6
soldier's handbook
2^-24
will be given credit by these activities and can pay for what-
ever service you have received at the end of each month.
21. The post exchange is the community store, owned
jointly by you and all other men on your post. It is operated
under the supervision of the commanding officer and the post
exchange officer entirely in your interests. All profits made
in this store come back to you and your comrades in the
form of recreational activities, the furnishing of your or-
ganization day room, and other similar benefits. No individual
shares in these profits, and under Army Regulations, profits
may be expended only for the welfare of the soldiers as a
whole. The post exchange will probably operate a general
store, a shoe repair shop, a barber shop, and a tailor shop.
Your organization orderly room will issue you, on credit, a
certain amount of post exchange coupons each month, which
will be accepted by all post exchange activities. The cost of
these coupons will be collected at the pay table at the end of
the month.
22. There will also be a motion picture theater on your post
operated by the United States Army Motion Picture Service,
at which will be shown one or two shows each night, or as
announced from time to time. There will also be occasional
free shows. The price of attendance for the regular shows
is small, and payment may be made in cash, post exchange
coupons, or in theater coupons. Theater coupon books may
be obtained on credit and paid for at the end of the month
in the same manner as post exchange coupon books.
23. A photograph shop will also probably be operated by
your post exchange. The photographer will make a specialty
of taking photographs of soldiers at a very small cost, for
which he will accept either cash or post exchange coupons.
At your early convenience, have your photograph taken in
your uniform, and send it home to a member of your family.
They will be glad to have it and so will you, after you have
returned to civil life.
24. You will find that suitable provision has been made for
a center of divine worship, devotions on Sunday, religious
holidays, and other allied services. In newly established or
temporary camps, you may find that the chapel is improvised
in the recreation building or tent, in other available shelter,
7
24-26
soldier's handbook
or outdoors» In any event, religious practices and allegiance
have their place in the Army as well as in civil life. The
chaplain of your organization, either through his own or
the efforts of his associates, will assist you in maintaining
your normal and regular religious practices. Meet your
chaplain early in your Army experience and make him your
confidant and advisor.
25. There are also a number of other recreational activities
on your post in which you are encouraged to participate dur-
ing your off-duty hours. These will probably include bowling
alleys, shooting galleries, ‘baseball fields, and basketball and
volley ball courts. They are provided for your enjoyment, and
you should take advantage of them at every opportunity.
Your first sergeant will be glad to explain how you can use
them and where to obtain the necessary equipment.
И 26. Your organization has a bulletin board just outside of
the orderly room or organization headquarters tent. Make
it a practice to read the contents of the bulletin board several
times each day. On it will be posted various company and
guard details as well as announcements as to the uniform
and equipment to be worn on different occasions, the time
and place where you will receive your pay, motion picture
programs, and other items of interest to you.
8
CHAPTER 2
MILITARY DISCIPLINE AND COURTESY
Paragraphs
Section I. Military discipline___________________________________27-30
II. Military courtesy____________________________________31-34
Section I
MILITARY DISCIPLINE
27. The average civilian or recruit coming into the Army,
often misunderstands the meaning of the words military dis-
cipline. He thinks of them as being connected with punish-
ments or reprimands which may result from the violation of
some military law or regulation. Actually, discipline should
not be something new to you for you have been disciplined all
of your life. You were being disciplined at home and in school
when you were taught obedience to your parents and teachers,
and respect for the rights of others. On your baseball or
other athletic team you were disciplining yourself when you
turned down the chance to be a star performer in order that
the team might win; you were acquiring discipline in the
shop, or other business, when your loyalty to your employer
and your fellow employees was greater than your desire to
secure your own advancement. All of this was merely the
spirit of team play; that is, you were putting the interests of
the “team” above your own in order that the “team” might
win.
28. The word “company,” “troop,” or “battery” is merely the
military name for a team, and military discipline is nothing
more than this same spirit of team play. It is the most im-
portant thing in the Army. In civil life lack of discipline in
a young man may result in his getting into trouble which will
cause his parents and teachers regret or sorrow; it may cause
a member of an athletic team to be “sent to the bench,” or
cause an employee to lose his job. In the Army it is far more
serious. Here lack of discipline in a soldier may not only cost
him his life and the life of his comrades, but cause a military
undertaking to fail and his team to be defeated. On the other
hand a team of a few well-disciplined soldiers is worth many
325350°—41---2 9
2^31 soldier’s handbook
times a much larger number of undisciplined individuals who
are nothing more than an armed mob. History repeatedly
shows that without discipline no body of troops can hold its
own against a well-directed and well-disciplined enemy.
M 29. In your work in the Army you may wonder why the
I officers and noncommissioned officers insist on perfection in
what appears to be minor details. Why do rifles have to be
t carried at just the same angle; why do you have to keep ac-
j curately in line; why must your bed be made in a certain
way; why must your uniform and equipment be in a pre-
scribed order at all times; why must all officers be saluted
with snap and precision? These things are part of your dis-
ciplinary training. Their purpose is to teach you obedience,
loyalty, team play, personal pride, pride in your organiza-
tion, respect for the rights of others, love of the flag, and the
will to win.
30. So you see that being disciplined does not mean you
are being punished. It means that you are learning to place
the task of your unit—your team—above your personal wel-
fare; that you are learning to obey promptly and cheerfully
the orders of your officers and noncommissioned officers so
that even when they are not present you will carry out their
orders to the very best of your ability. When you have learned
these things and prompt and cheerful obedience has become
second nature to you, then you have acquired military dis-
cipline—the kind of discipline which will save lives and win
battles.
Section II
MILITARY COURTESY
31. In your home and school you were taught to be polite
and considerate in your speech and attitude to your parents,
your teachers, and your comrades. That was courtesy. Mil-
itary courtesy is the same thing except that the military man
is so proud of his profession and has such high respect for the
men who belong to it that in the Army courtesy is more care-
fully observed than in civil life. Military courtesy is a part
of military discipline. The disciplined soldier is always cour-
teous whether on duty or off, whether to members of the
military service or to civilians. To help you in quickly be-
coming a well disciplined and efficient member of your team,
10
soldier's handbook
31
the following are some of the more common occasions on
which you may have an opportunity to demonstrate your
military courtesy. The rules are few and simple, but they
have an important bearing on your career as a soldier.
' a. The military salute is the courteous recognition between
members of the armed forces of our country. The salute is
a privilege enjoyed only by members of the military service in
good standing; prisoners do not have the right to salute.
The salute is given when you meet a person entitled to
it. Those entitled to it are all officers of our Army, Navy,
Marine Corps, and Coast Guard. It is also customary to
salute officers of friendly foreign countries when they are
in uniform.
c. The salute should be given when you can easily recog-
nize that the person is an officer and entitled to it. Usually
this is at a distance of not more than 30 and not less than
6 paces, in order that the officer may have time to recog-
nize and return it.
d. When you execute the salute turn your head so that
you observe the officer and look him straight in the eye.
The smartness with which you give it indicates the pride
you have in your profession. A careless or half-hearted
salute is discourteous. (See fig. 31.)
e. In posts, camps, or stations, the salute is always given
whenever you recognize an officer, even though one or both
of you are in civilian clothes. It is likewise given whether
or not you are wearing a head covering. For rule when out-
side post, camp, or station see paragraph 327.
/. If the officer remains in your immediate vicinity with-
out talking to you, no further salute is necessary when he
departs. If a conversation takes place however, you should
again salute when either you or he leaves.
g. (1) If you are one of a group of soldiers, not in forma-
tion, call the group to attention as soon as you recognize an
officer approaching, unless some other member of the group
has already done so. If the group is out of doors, all mem-
bers of the group salute; if indoors or in a tent, all remove
their head covering and stand at attention unless otherwise
directed.
(2) If the group is in formation out of doors, it is called
to attention by the one in charge and he alone gives the
salute.
11
31
soldier's handbook
(3) If you meet an officer on a staircase or in a hallway,
halt and stand at attention.
h. The salute is given only at a halt, or a walk. Either
mounted or dismounted, always bring your gait down to a
walk before saluting. Except in the field under campaign
conditions, always dismount before speaking to or replying
to a dismounted officer.
i. If you report to an officer in his office, first remove your
headdress, unless you are carrying your rifle or sidearms,
and enter when told to do so. March up to within two paces
of the officer’s desk, halt, salute, and state, “Sir, Pri-
vate reports to------------.” (For example, “Sir, Private
Jones reports to the Company Commander.”) After re-
porting, carry on the conversation in the first and second
person. When the conversation is ended, salute, make an
about face, and withdraw. Unless you are carrying your
rifle or sidearms, always remove your headdress when en-
tering a room where an officer is present.
7. If you are driving a motor vehicle, salute only when
the vehicle is halted. If it is an animal-drawn vehicle,
salute only when both hands are not required to control
your team. Any other soldier in the vehicle salutes whether
the vehicle is at a halt or in motion, unless there are a
number of soldiers in the vehicle in charge of an officer or
noncommissioned officer. In this case only the officer or
noncommissioned officer gives the salute.
k. When you are dismounted and not in formation and the
National Anthem is played, or “To the Colors,” sounded, at the
first note face the music, stand at attention and give the
salute. At “Escort of the Color” or “Retreat,” face toward the
color or flag. If you are in civilian clothes and wearing a
headdress, stand at attention, remove your headdress and hold
it over your left breast. If you are in civilian clothes and
not wearing a headdress, stand at attention and execute the
hand salute. Hold the salute until the last note of the music.
If you are mounted and not in formation, halt and give the
salute while mounted. Vehicles in motion will be brought
to a halt. If you are riding in a passenger vehicle or on a
motorcycle, dismount and salute. In other types of military
vehicles, as for example troop carriers, trucks, and escort
wagons, all individuals except the person in charge of the
12
soldier's handbook
31
vehicle remain seated or standing (depending on whether
they are riding seated or standing) in the vehicle at attention.
The person in charge of the vehicle, unless he is a tank com-
mander or the driver of a horse-drawn vehicle, dismounts and
renders the salute. Tank commanders salute from their
vehicles. Drivers of horse-drawn vehicles remain in their
vehicles and salute only if both hands are not required to
control their teams. Individuals leading animals or stand-
ing to horse stand at attention but do not salute. The same
respect is shown the national anthem of any other country
when it is played on special occasions.
Z. If you are passing, or being passed, by an uncased na-
tional color, render the same honors as when the National
Anthem is played.
m. Whenever you are present but not in formation while
personal honors are being rendered, salute and remain in that
position until the completion of the ruffles, flourishes, and
march.
n. (1) In garrison, if posted as a sentinel with a rifle, you
will salute by presenting arms. During the hours when chal-
lenging is prescribed, the first salute is given as soon as the
officer has been recognized and advanced.
(2) While posted as a sentinel, if you are talking to an offi-
cer, do not interrupt your conversation to salute another
officer. However, if the officer to whom you are talking
salutes his senior, you will also salute. A mounted or dis-
mounted sentinel armed with a pistol salutes by executing
the hand salute, except that when challenging you execute
“Raise pistol” and retain that position until the challenged
party has passed.
o. If you are attending a military funeral not as a member
of a formation, and whether in uniform or civilian clothes,
stand at attention, remove your headdress, and hold it over
your left breast at any time the casket is being moved by the
casket bearers and during the services at the grave, including
the firing of volleys and the sounding of taps. During the
prayers, bow your head. If the weather is cold or inclement,
keep your headdress on and give the hand salute whenever
the casket is being moved by the casket bearers, and during
the firing of volleys and sounding of taps.
13
32-33
soldier's handbook
32. The following situations will assist you in remembering
when you do not or need not salute:
a. If you are in ranks and not at attention and an officer
speaks to you, come to attention, but do not salute. The officer
or noncommissioned officer in command of your unit will give
the salute for the entire organization to the person entitled
to it.
b. If an officer enters the mess room or mess tent, you re-
main seated, “at ease,” and continue eating unless the officer
directs otherwise. If the officer speaks directly to you, remain
Seated “at attention” until the conversation is ended, unless
he directs otherwise.
c. Members of details at work do not salute. The officer
or noncommissioned officer in charge will salute for the entire
detail.
d. When actually taking part in games you do not salute.
e. When standing to horse or leading a horse do not salute.
/. In churches, theaters, or other places of public assem-
blage, or in a public conveyance, do not salute. Indoors,
salutes are not given except when reporting to an officer.
g. Do not salute when carrying articles with both hands
or when you are otherwise so occupied as to make saluting
impracticable.
h. If you are posted as a mounted or dismounted sentinel
and are armed with a pistol, do not salute a<fter challenging.
Stand at “Raise pistol” until the officer you have challenged
has passed.
i. When on a march in*campaign, or under simulated cam-
paign conditions, do not salute.
7. Off duty, and -when you are not in a post, camp, or sta-
tion, the salute is optional unless you are addressed by an
officer.
33. While officers and noncommissioned officers will usually
address you by your last name, always use their title in
addressing them. The following titles are used in the mili-
tary service:
a. All general officers are addressed as “General”; lieu-
tenant colonels are addressed as “Colonel”; and both first
and second lieutenants as “Lieutenant.”
14
soldier's handbook
33-34
b. All chaplains, regardless of grade, are officially addressed
as “Chaplain.” \
c. Warrant officers are addressed as ^“Mister/
d. Members of the Army Nurse Corps are addressed as
“Nurse.”
e. Noncommissioned officers are addressed as “Sergeant” or
“Corporal.” Master sergeants, technical sergeants, and staff
sergeants are all addressed as “Sergeant.”
34. As the result of the observance of military courtesy in
our Army for many years, certain customs have come into
existence which are recognized as our unwritten law of con-
duct. Every civilian community, school, or business has its
own customs, and a newcomer should learn them as quickly
as possible so that he will not be embarrassed. In the same
way, you will discover that your own organization probably
has its own local customs, many of which date from some
event in the organization’s history, and of which it is very
proud. You should become familiar with these customs as
early as possible. The following are a few of the general
customs which are observed throughout our Army, and which
you should know:
a. If you wish to speak to your company, battery, or troop
commander, first obtain permission from your first sergeant.
The company commander will always see you, but he may be
busy at the time or the first sergeant may be able to answer
your question.
b. If you wish to deposit some of your money on pay day,
notify your first sergeant before reporting to receive your pay.
c. When you report to your company commander for pay,
halt directly in front of him and salute. After receiving your
pay count it quickly, execute a right or left face and depart.
d. Do not salute with one hand in your pocket, while
smoking, or with your coat unbuttoned or partly unbuttoned.
e. If you should be accompanying a dismounted officer
walk on his left; if both you and the officer are mounted ride
on his left.
15
CHAPTER 3
INSIGNIA
Paragraphs
Section I.. Arms and services_________________________35-41
II. Officers and noncommissioned officers______42-45
Section I
ARMS AND SERVICES
И 35. Insignia.—Each of the various arms and services in
our Army has a particular “mark” of its own, which is worn
by all of its members. It serves to distinguish those members
from all other soldiers of the Army and is a part of the uni-
form. These various marks are called insignia and usually
consist of two types: the metal insignia which you will wear
on the lapel of your coat, and the colored hat cord which
you will wear on your service hat.
36. To assist you in becoming quickly familiar with the
various types of insignia and so that you can tell at a glance
to which arm or service a soldier may belong, they are shown
in figure 1.
37. Hat Cord.—At a distance it will be easier to recognize
the arm or service to which a soldier belongs by the color of
his hat cord. You should be familiar with the following
colors and the arm or service which they identify. Where
two colors are given, the cord is of the first color and the
acorns and keeper are the color of the piping.
a. Air Corps—Ultramarine blue piped with golden orange.
b. Cavalry—Yellow.
c. Chemical Warfare Service—Cobalt blue piped with
golden orange.
d. Coast Artillery Corps—Scarlet.
e. Corps of Engineers—Scarlet piped with white.
/. Field Artillery—Scarlet.
g. Finance Department—Silver-grey piped with golden
yellow.
h. Infantry and tanks—Blue.
i. Medical Department—Maroon piped with white.
16
soldier's handbook
37S
(B;
REGULAR ARMY &
(Nob assigned
to regiment")
ORGANIZED RESERVE /NATIONAL GUARD
(v/ito regimental (Hof assigned (With regimental
number) to regiment”) number)
AIR CORPS
CAVALRY
CHEM. WARFARE
SERVICE
COAST ART.
CORPS
CORPS OF
ENGINEERS
FIELD
ARTILLERY
FINANCE
DEPARTMENT
INFANTRY
MEDICAL
DEPARTMENT
NAT. GUARD
Bureau
ORDNANCE
DEPARTMENT
Quartermaster signal
corps
corps
DETACHED
ENLISTED MEN
Figure 1.—Collar insignia for enlisted men.
17
37-Г-41
soldier's handbook
j. Military Police—Yellow piped with green.
k. Ordnance Department—Crimson piped with yellow.
I. Quartermaster Corps—Buff.
m. Signal Corps—Orange piped with white.
M 38. Arm Band.—In addition to the identification marks de-
scribed above, sometimes you will see certain soldiers wearing
arm bands to show the particular type of work they are doing.
These arm bands are called “brassards” and are worn on the
left sleeve above the elbow. You will want to know the fol-
lowing brassards and what they mean:
a. Blue, with the letters, “MP” in white—Military Police.
b. Red, with the word “Fire” in white—Members of fire
departments.
c. White, with red cross in center—Geneva Convention Red
Cross.
d. White with green cross in center—Veterinary (Green
Cross.
39. Service Stripe.—Each enlisted man who has served
honorably in the military service for 3 years wears the service
stripe. This stripe is worn 4 inches from the end of the left
sleeve of the service coat. For each additional period of 3
years, another service stripe is worn.
И 40. Wound and war service chevrons are worn only by those
entitled to them. They are worn only on the woolen service
coat, with the wound chevrons on the right sleeve and the
service chevrons on the left sleeve. They are worn point
down. When service stripes are worn the war service chevron
is above the uppermost service stripe. (See fig., 2.)
И 41. Badge.—Soldiers are classified according to' the quali-
fications attained in the use of weapons. The different classi-
fications are: expert, sharpshooter or 1st class gunner, and
marksman or 2d class gunner. Should you attain one of
these classifications you will be entitled to wear a badge
(fig. 3) which is issued by the War Department. A bar, at-
tached to the bottom of the badge, shows the weapon with
which you have qualified. Should you qualify with more than
one weapon, you will be entitled to wear an additional bar for
each weapon.
18
soldier's handbook
41 ,
SERVICE STRIPES
WOUND CHEVRONS
OVERSEAS CHEVRONS
Figure 2.—Wearing of sleeve insignia.
EXPERT
SHARPSHOOTER
12Г CLASS GUNNER
HARKSfAAN
2/29 CLASS GUNNER
Figure 3.—Badges for qualification in use of weapons.
Other bars to be attached to basic badges are as follows:
MACHINE RIFLE
AUTO. RIFLE
SMALL BORE RIFLE
BAYONET
PISTOL-D
PISTOL-M
SMALL BORE PISTOL
MECHANIZED VEHICLE
WEAPONS
INF. HOWITZER
MACHINE GUN
SMALL BORE M. G.
SUBMACHINE GUN
GRENADE
COAST ARTY.
FIELD ARTY.
C. W. S. WEAPONS
MINES
AERIAL GUNNER
AERIAL BOMBER
ANTIAIRCRAFT WEAPONS
19
12-45
soldier's handbook
Section II
OFFICERS AND NONCOMMISSIONED OFFICERS
42. Commissioned officers and noncommissioned officers
also wear the insignia of the arm or service to which they
belong and in addition certain other distinguishing marks
which show their grade or authority in the Army. The insig-
nia of grade worn by all officers on each shoulder loop of
the coat, overcoat, or olive-drab shirt when worn without the
coat, are shown in figure 4.
Figure 4.—Insignia of rank for officers (worn on shoulder loops).
43. A general officer wears two bands of black braid just
above the lower edge of each sleeve of the overcoat.
Я 44. Officers of the General Staff Corps wear a band of
black braid 3 inches from the end of each sleeve of the
service coat. All other officers wear a similar band of brown
braid. All warrant officers and enlisted men who served hon-
orably as officers in the World War wear a similar band of
forest green braid.
H 45. Noncommissioned officers wear chevrons of olive-drab
material on a dark blue background. They are worn on the
sleeve between the elbow and the shoulder of the olive-drab
shirt, the coat, the overcoat, and the fatigue uniform. The
chevrons for the different grades are shown in figure 5.
20
soldier's handbook
45 х
MASTER -SGT TECHNICAL SGT I &T SGT STAFF SGT SERGEANT
(|si Grade) (2*1? Grade) (2"P Grade) (3SP Grade) (4™ Grade)
CORPORAL ч
(5 ТУ Grade)
PRIVATE I st CLASS
(6 th Grade) t
Figure 5.—Chevrons (insignia of grade) for noncommissioned
officers and privates, first class (worn on sleeves).
21
CHAPTER 4
ORGANIZATION
46. You are* going to hear- the word “organization” used
, constantly in your military service and it will help you to have
an early understanding of just what the word means in the
Army. If you think about it for a moment you will realize
that, actually, organization is nothing new, for ydu have
probably been familiar with its meaning for a long time in
civil life. In'your factory,’shop, or office you remember how
men were grouped according to the machine they operated or
the type of work they did. The same thing was true in school
where students were grouped by classes according to their
progress and the number that each teacher could instruct.
You are familiar with the way in which your local police and
fire departments are divided into precincts or districts located
in different parts of the city with one particular man in
charge of each station. -
47. AH of this grouping and arranging is for just one pur-
pose—to get things done in the best way possible and without
waste of time or effort. If every shop or office worker did only
the things he wanted to do, and in his own way, his business
would soon fail for he could not turn out his orders on time.
If every student studied only the things he was interested in
and only when he felt like it, we would soon be a nation of
poorly educated people. If each time a fire occurred, the fire
chief had to telephone the different firemen and tell them
what to do, there would be little chance of saving many build-
ings. So, in order to direct the business workers, students,
and firemen in their efforts, and to produce efficiency instead
' of confusion, they are divided into groups of a size which
experience has shown one man can control. In charge of
these groups are the foremen, chief clerks, teachers, or other
group leaders you remember in civil life.
48. The same arrangement exists in the Army and for the
same purpose. You have been assigned to a company, troop,
or battery of a certain regiment. In charge of your company,
troop, or battery is an officer who is responsible for feeding,
clothing, and training you and your comrades, and, finally,
22
soldier's handbook
48-.
leading you to victory on the battlefield.s Йе is your team
captain. Your company, troop, or battery has in it from 10(f
to 200 men. If it were always going to be on the drill field, or
in the barracks, the company commander could probably
control it with his voice. But your team may not always
remain in an area where the company commander can di-
rectly control it. It is training for the time when, if called
upon, it will meet and defeat’the enemy on the battlefield.
There the distances and noise will make it impossible for the
company commander to control directly more than a few
men. So, to make sure that all the members of the team are
exerting their efforts toward the same end, your company,
troop, or battery is divided into a number of smaller groups
called squads, sections, and platoons.
49. a. In the Infantry and Cavalry the squad is the largest
unit that can be effectively controlled by the voice and signals
of its leader—the corporal or sergeant. In size it will vary
from 4 to 16 members, depending upon the kind of squad
it is. It takes its name from the principal weapon within
the squad. For example, in a “rifle squad” the members are
armed with the rifle; in a “machine-gun squad” the principal
weapon is the machine gun which members of the squad
serve, and in a “mortar squad” the principal weapon is the
mortar. The squad is small enough so that the leader can
directly control air of its members.
b. In the Field Artillery and Coast Artillery Corps the
section is the smallest fighting unit. In these arms, squads
are sometimes used for purposes of drill or administration.
For combat, however, the members of the section are usually
close enough to the gun they serve so that their leader, the
sergeant, can control them.
Я 50. Next above the squad or section is the platoon, which is
commanded by a lieutenant. A platoon includes several
squads, or two sections, and has a strength of 40 or 50 soldiers.
By the time we have reached a unit of this size you can see
how difficult it would be for the lieutenant to control directly
the actions of all members of the platoon while they are
scattered over a large area in combat. He can easily control
them, however, through his orders to his section or squq$
leaders.
23
51-52
soldier's handbook
И 51. a. Finally we come to your company, troop, or battery.
It usually consists of 3 or 4 platoons and is commanded by a
captain. Because of the way your company is “organized”
it is possible for the company commander to control and
direct efficiently the company as a whole through his orders
to the platoon, section, and squad leaders and still have time
to plan for the future care and welfare of the company. It
would not be possible for him to do this if he did not have
such an “organization,” but had to spend his time con-
stantly running back and forth, issuing orders to 200
individuals.
b. The organization of your company which has been dis-
cussed above deals with it as a fighting team. But to be
able to fight effectively, it must be fed, clothed, and supplied
with the necessary equipment. To assist the company com-
mander in doing this, he has a company headquarters, whose
principal noncommissioned officers are the first sergeant, the
mess sergeant, and the supply sergeant. The first sergeant
corresponds to the executive, or chief clerk, in a civilian office.
He handles all of the administrative details of the company
and publishes the orders of the company commander. The
mess sergeant with his cooks secures and prepares the food
you eat, and the supply sergeant issues you your clothing and
equipment and exchanges it when it has become worn out
or damaged. Your company is a carefully organized business
with the various jobs so distributed that the largest possible
number of men can be made available for its principal job
of fighting.
52. The same considerations followed in the organization
of your company, troop, or battery are carried on upward
to your regiment. In the Infantry, Field Artillery, and Coast
Artillery Corps, usually 4 companies or batteries are grouped
to form a battalion, but there may be only 2 or 3. Similarly,
in the Cavalry, troops are grouped as squadrons. These
larger units, battalions or squadrons, are commanded by
a major or lieutenant colonel. The regiment is composed
of 2 or more—generally 3—battalions or squadrons and i&
commanded by a colonel. So you see how each unit from
the 4-man squad up to the 500- or 1,000-man battalion fits
into a definite place in the big regimental team. Each unit
24
soldier's handbook
52-54
is so organized that one man will be able to control and
direct it so that the full power of the team will be directed
toward a common purpose.
53. In certain arms of the Army you may find that one or
more of the various units described above are not included
in the organization for combat of that arm. In the Air
Corps you will not find the squad, section, or platoon as fight-
ing teams but only organized temporarily for drill and ad-
ministrative purposes. The unit to which you will be assigned
is a squadron, commanded by a major. The squadron, how-
ever, will be divided into sections which are named for the
duties the members of that section perform. For example,
the administrative section handles the squadron headquar-
ters, mess, and transportation; the technical section does
the engineering, supply, communication, photography, and
repairs; and the flight section operates and maintains the
aircraft of the squadron.
54. In the same way, in certain armored units the smallest
organization will be the crew of a scout car, tank, or personnel
carrier, which will consist of 4 or more men, one of whom will
be an officer or noncommissioned officer. Also certain other
units such as chemical, antitank, and military police or-
ganizations will vary in size and numbers. But you will not
be confused, in whatever organization you may be, if you
will remember the purpose for which the Army is organized
in every arm or service. It is necessary to secure the efficient
control of all members of the team for success in battle.
325350°—41----з
25
CHAPTER 5
CLOTHING
Paragraphs
Section I. Allowances____________________________________55-56
II. Care of clothing______________________________57-59
III. Wearing the uniform____________________________ 60
Section I
ALLOWANCES
55. When you enlisted or were inducted into the Army, you
made a contract with your Government. Your part of the
contract was to serve faithfully the United States of America
against all their enemies. It was an obligation you were glad
to assume in return for the many privileges you and your
family have received as citizens of a free nation. As its part
of the contract the Government agreed to pay, feed, clothe,
and give you medical care during the time you were in the
military service.
56. You will be issued, without charge, all the articles of
clothing necessary for the duties you will be required to per-
form. Whenever any item of this clothing is no longer serv-
iceable, you may turn it in to your supply sergeant, who will
replace it without charge. You must remember, however,
that these articles of clothiqg are the property of the United
States and are issued for your use while you are in the mili-
tary service. If they are lost, damaged by your neglect, or
unlawfully disposed of, the Government will require you to
pay for them.
Section II
CARE OF CLOTHING
57. Always remember that your uniform is more than a
mere suit of clothes that is worn to cover and protect your
body. It is the symbol of the honor, the tradition, and the
achievements of our Army. The civilian or soldier who is
careless in his dress and appearance is probably careless in
26
soldier's handbook
57-59
everything else. You owe it to your comrades, your organiza-
tion, and your Army to be neat and careful in your appear-
ance, for officers and men of other organizations will judge
your company by the impression you make.
< 58. By being careful of your uniform, you have many ad-
vantages over a careless soldier. Your clothing will last
longer, you will be neater and better dressed, and you will
make a better impression on your comrades and officers.
59. The following information will assist you in the care of
your clothing:
a. Whenever you wear the uniform, either on or off duty, be
sure that it is complete and that it conforms to the instruc-
tions of your post, camp, or station. Have your shirt, coat,
and overcoat buttoned throughout. Keep your uniform
clean, neat, and in good repair.
b. Dandruff, dust, or cigarette ashes on a uniform give a
bad impression. If possible, keep a whisk broom in barracks
for brushing your uniform. Promptly replace missing buttons
and insignia.
c. Keep your woolen uniforms pressed. This not only im-
proves the appearance of clothing, but actually increases its
life.
d. Clothing not in use should be hung in wall lockers when-
ever available. If there are no wall lockers, fold your clothing
carefully and put it away where it will not accumulate dust.
Uniforms that have become wet or damp should not be folded
until they are dry. It is also a good idea to inspect clothing
before putting it away. Missing buttons and rips should be
attended to as soon as you take off your clothing instead of
waiting until it is again needed.
e. Grease spots on uniforms are unsightly and unmilitary.
The sooner a grease spot is removed, the easier. Usually it
helps to place a folded clean towel under the soiled part of the
cloth during the cleaning. The cleaning should be done by
dampening a clean white cloth with a good commercial clean-
ing fluid and rubbing gently back and forth in a straight line
over a larger area than the spot until dry. This usually pre-
vents leaving a ring on the fabric. Turpentine will remove
27
59
soldier's handbook
paint spots from clothing if used promptly, before the paint
gets dry.
/. Insignia and buttons having a gold finish should be
cleaned with ammonia and water. Don’t use an abrasive, as
it will remove the gold plating. Rubber bands, manila paper,
or any material containing sulfur, if near medals, insignia, or
buttons, will tarnish them.
g. Have your woolen uniform dry-cleaned for summer
storage. Place adequate moth preventive between folds and
store during summer in locker trunk or storage space as nearly
airtight as possible.
h. (1) In cleaning your boots or shoes, first remove all dirt
or mud by scraping with a dull instrument such as a sliver of
wood. Do not use a piece of glass or a knife. Next, wash
them with a sponge saturated with a heavy lather of castile
soap. Never use hot water or allow the leather to soak in
water. Wipe off the lather with the wet sponge and rub the
leather thoroughly and vigorously with a clean cloth until
nearly dry. Drying by exposure to the sun, fire, or strong
heat will cause the leather to stiffen and crack and is forbid-
den. Stuffing the toes with crumpled paper helps in the
drying and tends to hold them in shape. After boots or
garrison or dress shoes have dried, a good polish should be
applied, provided that it has been authorized by the garrison
or unit commander. In the case of work shoes an application
of dubbing should be well rubbed in.
(2) For other articles of leather equipment, clean as de-
scribed above. In the case of unfinished leather, while it is
still moist give it a very light coat of neat’s-foot oil by rubbing
with a soft cloth moistened with the oil. Any oil not absorbed
by the leather should be wiped off. If more than a light coat
of oil is given, the leather will be greatly darkened and will
soil your clothing. If the leather is to be polished it should be
cleaned as described above and then polished with a good
grade of polish in the proper color.
28
soldier's handbook
60
Section III
WEARING THE UNIFORM
60. The manner in which your uniform should be worn is
shown in figure 6.
CD Field service. ® Garrison service, dismounted.
(D Garrison service, mounted. ® Overcoat.
Figure 6.—Uniforms for enlisted men.
29
CHAPTER 6
ARMS AND EQUIPMENT
Paragraphs
Section I. Responsibility for care________________________61-63
II. Nomenclature and care and cleaning oi U. S. rifle,
caliber .30, Ml____________________________________ 64
III. Nomenclature, care and cleaning, and safety de-
vices of automatic pistol, caliber .45, M1911______ 65'
IV. Safety precautions___„_________________________ 66
V. The gas mask___________________________________67-73
VI. Field equipment________________________________74-81
VII. The infantry pack_____________________________82-83
VIII. Packing individual equipment on horse----------84-85
IX. Display of equipment_____________________________ 86
Section I
RESPONSIBILITY FOR CARE
61. The arms and equipment which are issued to you are
the property of the United States. They are entrusted to your
care for military use during your period of service in the
Army. You are responsible for them and it is your duty to
see that they are properly cared for in the manner in which
your officers and noncommissioned officers will instruct you.
At various times you will attend inspections where your com-
pany commander, or other officers, will carefully check over
your arms and equipment to see that you are taking the
proper care of them and that they are clean and in condition
for immediate active service. You will find that a little atten-
tion each day to the care and cleaning of your arms and
equipment will save- you time and effort in preparing for these
inspections.
62. Your safety and comfort in the field will depend upon
the manner in which you keep your arms and equipment.
You must take particular care not to lose them, as you may
not be able to replace them by the time you will need them
most. Before dark, place everything where you can quickly
find it in the dark. Remember that carelessness in the pro-
tection and condition of your arms and equipment may cost
you your life or health, or that of a comrade.
И 63. Since these articles are the property of the United
States, the Government will require you to pay for them
30
soldier's handbook
63-64
should they be lost, damaged, or destroyed through your
carelessness.
Section II
NOMENCLATURE AND CARE AND CLEANING OF U. S.
RIFLE, CALIBER .30, Ml
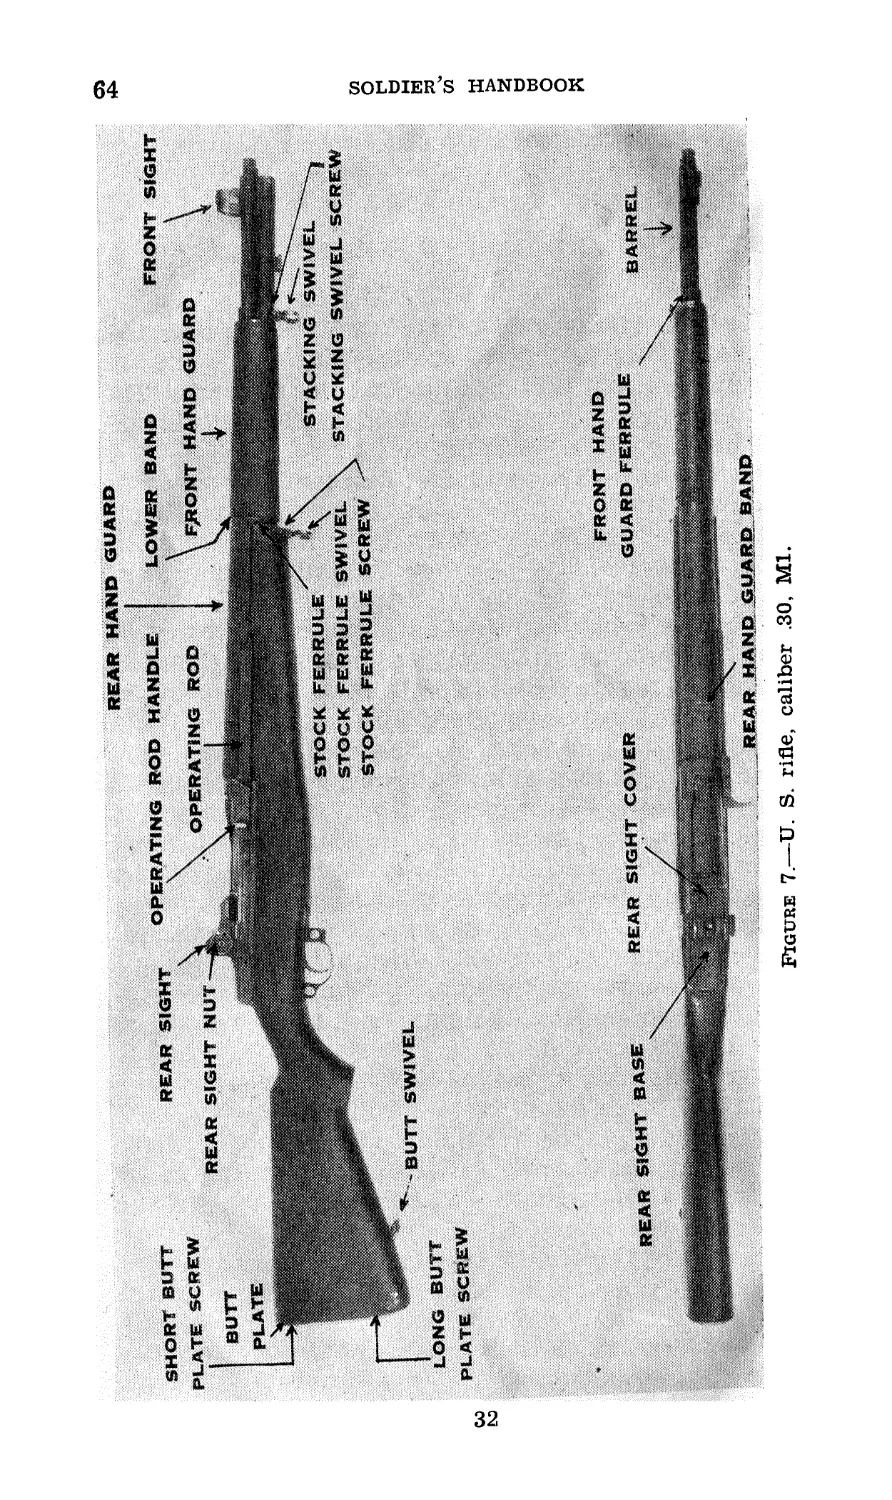
64. The United States rifle, caliber .30, Ml, is gas-operated,
clip-fed, and air-cooled. It weighs about 9 pounds and the
bayonet an additional pound. The clip holds 8 rounds. The
rifle fires each time you squeeze the trigger. The rifle is pro-
vided with a safety lock. (See fig. 7.)
a. Disassembling.—The method of disassembling your rifle
given below is sufficient for cleaning purposes. You should
learn more detailed disassembling at your first opportunity.
If you do not receive instructions as to disassembling, go to
your squad leader, who will gladly show you how.
(1) The three main groups.—Grasp the rifle with the left
hand so that the base of the trigger housing is included in
the grip of the fingers. (See fig. 8.) Place the butt of the
rifle against the left thigh. Grasp the rear portion of the
trigger guard with the thumb and forefinger of the right
hand and exert sufficient downward pressure to unlatch the
trigger guard from the trigger housing. Then swing the
trigger guard away from the trigger, housing to the extreme
opened position as shown in figure's. Pull out the trigger
housing group. Place this group on a smooth, clean surface.
Grasp the rifle over the rear sight with the left hand, muz-
zle down and barrel to your left. (See fig. 9.) Strike and
grasp the small of the stock with the right hand so as to sep-
arate the stock group from the barrel and receiver group as
shown in figure 9.
(2) Barrel and receiver group.—(a) Place the group on a
smooth surface, barrel down, and pointing to your left. Grasp
the follower rod with the left thumb and forefinger at the
knurled portion and disengage it from the follower arm by
pressure toward the muzzle. Withdraw the follower rod
(with compensating spring attached) to the right. (See fig.
10.) If necessary, remove the compensating spring from the
follower rod by grasping the compensating spring with the
left hand and twisting the follower rod toward your body with
the right hand, exerting a slight pull to the right. Withdraw
the operating rod spring.
31
REAR HAN» GUARD
Figure 7.—U. S. rifle, caliber .30, Ml.
soldier's handbook
soldier's handbook
64
Figure 9.
33
64
soldier's handbook
(b) Drift the follower arm pin from its seat by starting it
with the point of a bullet (or with the drift of the combina-
tion tool) held in the right hand and applied on the side of
the receiver farthest from your body. Pull out the pin from
the near side with the left hand. Grasp the bullet guide,
the follower arm, and the operating rod catch assembly and
pull to the left until these parts are disengaged. Lift out
and separate these three parts. Do not remove the acceler-
ator from the operating rod catch assembly, as the accelerator
Figure 10.
pin is riveted in its seat. Lift out the follower with the fol-
lower slide attached. Do not separate the follower from the
follower slide.
(c) Grasp the barrel and receiver assembly with the left
hand and the operating rod handle with the right hand as
shown in figure 11. Move the operating rod slowly to the
rear, pulling the operating rod handle upward and away
from the receiver. This will disengage the operating rod from
the bolt when the lug on the operating rod slides up into the
dismount notch of the operating rod guide groove. When the
34
soldier's handbook
64
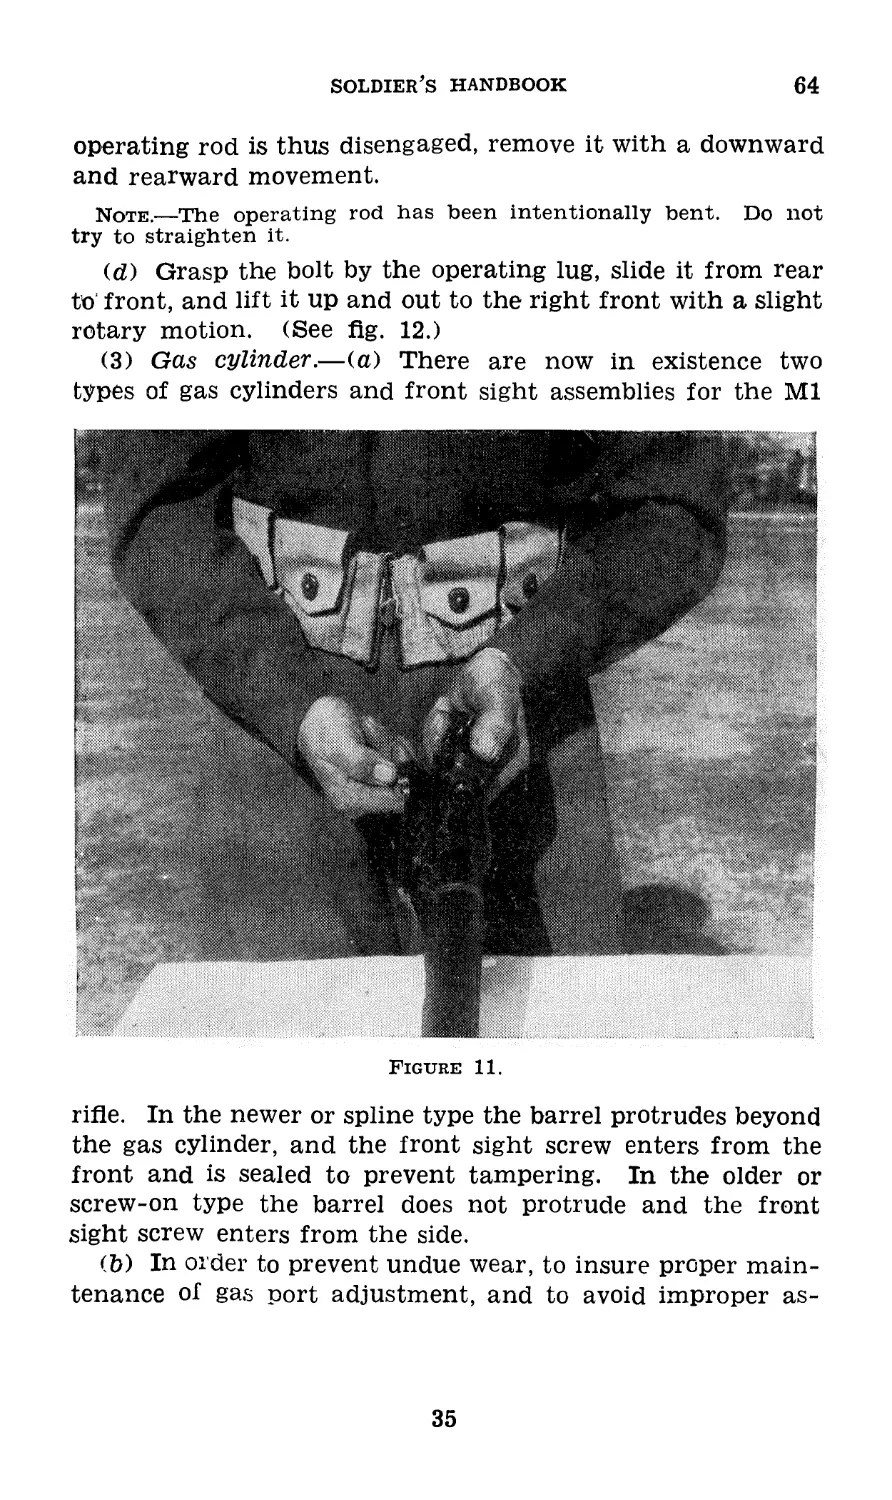
operating rod is thus disengaged, remove it with a downward
and rearward movement.
Note.—The operating rod has been intentionally bent. Do not
try to straighten it.
(d) Grasp the bolt by the operating lug, slide it from rear
to' front, and lift it up and out to the right front with a slight
rotary motion. (See fig. 12.)
(3) Gas cylinder.—(a) There are now in existence two
types of gas cylinders and front sight assemblies for the Ml
Figure 11.
rifle. In the newer or spline type the barrel protrudes beyond
the gas cylinder, and the front sight screw enters from the
front and is sealed to prevent tampering. In the older or
screw-on type the barrel does not protrude and the front
sight screw enters from the side.
(b) In order to prevent undue wear, to insure proper main-
tenance of gas port adjustment, and to avoid improper as-
35
64
soldier’s handbook
sembly, the gas cylinder assembly should not be removed
except when necessary to replace the front hand guard
assembly. Before such removal be sure the operating rod has
been removed. To remove the gas cylinder, proceed as
follows:
1. Spline type.—Unscrew gas cylinder lock screw, using
combination tool. Unscrew gas cylinder lock.
Tap gas cylinder lightly toward muzzle to re-
move it from barrel. The front sight will not
Figure 12.
be dismounted from the gas cylinder assembly.
DO not attempt to adjust the front sight.
2. Screw-on type.—Remove front sight screw and lift
out front sight. Unscrew gas cylinder assembly
from barrel.
b. Assembling.—(1) Gas cylinder.—Replace the gas cylin-
der reversing the procedure of the preceding paragraph.
(2) Barrel and receiver group.—(a) Incline the barrel and
receiver assembly at an angle of approximately 45°, sights
36
soldier's handbook
64
up, muzzle up and to the front. Hold the bolt by the right
locking lug soi that the front end of the bolt is slightly above
and to the right of its extreme forward position in the
receiver. Insert the rear end in its bearing on the bridge
of the receiver. rotating it in a counterclockwise direction
sufficiently to permit the tang of the firing pin to clear the
top of the bridge. Then guide the left locking lug of the
bolt into its groove at a point just to the rear of the lug on
the left side of the receiver, and the right locking lug onto
its bearing in the receiver, and slide the bolt back to its
extreme rear position.
~ (b) Turn the barrel and receiver assembly, in the left hand,
until the barrel is down. With the right hand, grasp the
operating rod at the handle. Hold the handle up and insert
the piston head into the gas cylinder about three-eighths of
an inch, making sure that the operating rod handle is to the
left of the receiver. Hold the barrel and receiver assembly
in the left hand and rotate it to the right until the barrel is
uppermost. With the right hand, adjust the operating rod
so that the camming recess on its rear end fits over the op-
erating lug of the bolt. Press the operating rod forward and
downward until the bolt is seated in its forward position.
(c) Place the barrel and receiver assembly on a smooth
surface, barrel down and muzzle to your left. Replace the
follower (with the follower slide attached) so that its guide
ribs fit into their grooves in the receiver, the square hole in
the follower to the right. Follower slide will rest on bottom
surface of the bolt when the follower is in position correctly.
(d) With the left hand replace the bullet guide so that the
shoulders of the bullet guide fit in their slots in the receiver
and the hole in the projecting lug is in line with the holes in
the receiver.
(e) With the left hand replace the follower arm by passing
its studded end through the slot in the bullet guide and insert-
ing the studs in their grooves in the front end of the follower.
Place the forked end of the follower arm in position astride
the projecting lug on the bullet guide with the pin holes in
alinement. Insert the rear arm of the operating rod catch
through the clearance cut in the bullet guide, making sure that
its rear end is underneath the forward stud on the clip latch
which projects into the receiver opening. Aline the holes in
37
64
soldier's handbook
the operating rod catch, the follower arm, and the bullet guide
with those in the receiver. Insert the follower arm pin in the
side of the receiver which is toward your body and press the
pin home.
(/) If separated, insert the operating rod spring into the
operating rod. Assemble the follower rod and the compen-
sating spring by grasping the spring in the left hand and in-
serting the follower rod with the right hand, twisting the two*
together so that the compensating spring is fully seated on
the follower rod. Grasp the knurled portion of the follower
rod with the thumb and forefinger of the left hand, forked
end to the right, hump down. Insert the left end of the fol-
lower rod into the operating rod spring, push to the left, and
seat the forked end against the studs on the follower arm.
The hump on the follower rod must be in the slot in the
operating rod catch.
(3) The three main groups.—(a) Insert the U-shaped
flange of the stock ferrule in its seat in the lower band.
Pivoting about this point, guide and press the barrel and re-
ceiver group into position in the stock. Insert the trigger
housing group, with the trigger guard in its open position,
into the opening in the stock. Press it into position and close
and latch the trigger guard.
(b ) Test the assembly as follows: Pull back the operating
handle to its rearmost position; press down on the follower
and allow the bolt to go fully home; set the safety in its rear-
most position; pull the trigger; hammer should not fall; set
the safety in its foremost position; pull trigger; hammer
should fall.
c. Model 1903 rifle.—This rifle is sometimes called the
Springfield rifle. It is a breech-loading magazine rifle of the
bolt type. The magazine holds 5 rounds which are ordinarily
put up in brass clips of 5 for easy loading. The rifle weighs
about 8У2 pounds and the bayonet an additional pound. If
you are equipped with this rifle, learn to disassemble the bolt
and floor plate as soon as practicable. Your squad leader
will gladly show you how.
d. Care of the rifle.—(1) General.—Your rifle is a machine.
It gives the best results when it is clean and properly lubri-
cated. A dirty, poorly lubricated rifle may have stoppages
which will make it useless in battle. Inspect your rifle daily
38
soldier's handbook
64
and see that it is clean and properly lubricated. Neglect of
your rifle may cost you your life on the battlefield.
(2) Cleaning the bore.—Powder fouling in the bore con-
tains salts. Salts rust steel. To remove these salts, run a
clean patch which has been saturated with hot water and
issue soap through the bore a number of times. Plain, clean
water, hot or cold, should be used when soap is lacking. While
still wet, the metal brush should be run through the bore
several times to loosen up any material which has not been
dissolved by the water. The bore should then be thoroughly
dried and coated with a light issue gun oil. The chamber is
included in this process, the chamber cleaning tool being
used.
(3) Cleaning gas cylinder, Ml rifle.—Carbon will accumu-
late from firing. The frequency of carbon removal is a factor
peculiar to individual rifles. Excess deposits of carbon in the
rifle show themselves by sluggishness in action and failure
to feed.
(a) Spline type.—To remove accumulated deposits of car-
bon from the gas cylinder, remove the lock screw and remove
carbon, using the screw driver blade of the combination tool.
The gas cylinder lock may be removed and the lock screw
reinserted in the gas cylinder and threaded in enough to break
loose the carbon. The inside of the gas cylinder should
be thoroughly wiped clean and oiled at the conclusion of
firing. (A few drops of oil placed between the rear gas cylin-
der lug and the operating rod, with the muzzle tipped down,
will be sufficient if firing is contemplated on the next day.
Hand operate the rod through a few cycles to distribute the
oil properly.) The exterior finish should be cleaned and
lightly oiled. The sight should be kept free from dust and
dirt.
(b) Screw-on type.—Scrape the carbon from the exposed
surface of the front of the gas cylinder and gas cylinder plug
and piston head after extensive firing. Clean the gas cylinder
plug and the. grooves in the gas cylinder to insure correct
seating of the plug. The frequency of this cleaning depends
on the amount of firing. A sharp-bladed instrument similar
to a mess kit knife should be used to remove the carbon from
the gas cylinder plug and piston head. If an abrasive cloth
is used care should be taken that the corners of the plug or
39
64
soldier's handbook
piston head are not rounded. Do not remove the gas cylinder
for cleaning. The gas cylinder is cleaned by using the clean-
ing rod and a patch in the same manner followed in cleaning
the bore.
(4) Miscellaneous.—(a) All metal parts should be cleaned
and covered with a uniform light coat of oil. The following
parts are excepted. They should be lubricated with a thin,
uniform coating of graphite cup grease issued for that
purpose.
1. Bolt lugs (locking and operating).
2. Bolt guides.
3. Cocking cam on bolt.
4. Compensating spring.
5. Contact surfaces of barrel and operating rod.
6. Operating rod cam.
7. Operating rod groove in receiver.
8. Operating rod spring.
(b) Wooden parts should be treated with a light coat of
raw linseed oil not oftener than once a month.
(c) Screw heads should be kept clean or they will collect
rust-
ed) Clips should be kept clean.
(e) Leather sling should be washed, dried with a rag, and
lightly oiled with neat’s-foot oil while still damp. You should
do this whenever the sling shows signs of stiffening or drying.
(/) To remove rust from metal parts, rub the spot with a
piece of soft wood and oil.
(5) Don'ts.—(a) Do not apply graphite cup grease to the
follower slide or under surface of the bolt. It might get into
the chamber and cause excessive pressures.
(b) Do not use sandpaper, metal polish, or other like me-
terials on your rifle. They may remove the antirust finish
on your rifle; then you have a job on your hands to keep
it free from rust.
(c) Do not put a plug in the muzzle. It will cause the bore
to rust. You may forget it is in there and fire the rifle,
causing it to blow up.
(d) Do not put off until tomorow cleaning a rifle that has
been fired. The rifle will rust overnight and your job will
be that much harder.
40
soldier's handbook
64-65
(e) Do not over-oil your rifle. Heavy coats of oil will
collect dirt.
Section III
NOMENCLATURE, CARE AND CLEANING, AND SAFETY
DEVICES OF AUTOMATIC PISTOL, CALIBER .45,
M1911
•fl 65. The automatic pistol, caliber .45, M1911, is a recoil-
operated, magazine-fed, self-loading, hand weapon. The
magazine holds 7 rounds. The pistol weighs about 2У2
pounds. (See fig. 13.)
Figure 13.—Longitudinal section of pistol, showing component
parts in assembled position.
a. The method of disassembling your pistol given below is
sufficient for cleaning purposes. You should not attempt
more detailed disassembling until you have received instruc-
tion from your officers or noncommissioned officers.
(1) Remove the magazine by pressing the magazine catch
(48).
(2) Press the plug (16) inward and turn the barrel bush-
ing (13) to the right until the plug (16) and the end of the
recoil spring (14) protrude from their seat, releasing the
tension of the spring (14). As the plug (16) is allowed to
protrude from its seat, keep your finger or thumb over it so
that it will not jump away and be lost, or strike you in the
325350°—41---4 41
65
soldier's handbook
face. Draw the slide (3) rearward until the smaller rear
recess in its lower left edge stands above the projection on
the thumbpiece of the slide stop (8); press gently against
the end of the pin of the slide stop (8) which protrudes from
the right side of the receiver (1) above the trigger guard
and remove the slide stop (8).
(3) This releases the link (11), allowing the barrel (2),
with the link (11) and the slide (3), to be drawn forward
together from the receiver (1), carrying with them the barrel
bushing (13), recoil spring (14), plug (16), and recoil-spring
guide (15).
(4) Remove these parts from the slide (3) by withdrawing
the recoil-spring guide (15) from the rear of the recoil spring
(14), and drawing the plug (16) and the recoil spring (14)
forward from the slide (3). Turn plug (16) to right to re-
move from recoil spring (14). Turn the barrel bushing (13)
to the left until it may be drawn forward from the slide (3).
This releases the barrel (2), which, with the link (11), may
be drawn forward from the slide (3), and by pushing out the
link pin (12) the link (11) is released from the barrel (2).
b. To assemble, proceed in the reverse order. When re-
placing the slide (3) and barrel (2) on the receiver (1), care
must be taken that the link (11) is tilted forward as far as
possible and that the link pin (12) is in place.
c. The pistol is provided with a number of safety devices
which you should test frequently. A safety device is a danger-
ous device if it does not work when expected. The following
tests will determine whether the safety devices are working
or not.
(1) Safety lock.—Cock the hammer and then press the
safety lock upward into the “safe” position. Grasp the stock
so that the grip safety is depressed and squeeze the trigger
three or four times. If the hammer falls, the safety lock is
not safe and must be repaired.
(2) Grip safety.—Cock the hammer and, being careful not
to depress the grip safety, point pistol downward and squeeze
the trigger three or four times. If the hammer falls,, or the
grip safety is depressed by its own weight, the grip safety is
not safe and must be repaired.
(3) Half-cock notch.—Draw back the hammer until the
sear engages the half-cock notch and squeeze the trigger. If
42
soldier's handbook
65
the hammer falls, the hammer or sear must be replaced or
repaired. Draw the hammer back nearly to full cock, and
then let it slip. It should fall only to half cock.
(4) Disconnector.—Cock the hammer. Shove the slide
one-quarter inch to the rear; hold slide in that position and
squeeze the trigger. Let the slide go forward, maintaining
the pressure on the trigger. If the hammer falls, the dis-
connector is worn on top and must be replaced. Pull the
slide all the way to the rear and engage the slide stop.
Squeeze the trigger and at the same time release the slide.
The hammer should not fall. Release the pressure on the
trigger and then squeeze it. The hammer should then fall.
The disconnector prevents the release of the hammer unless
the slide and barrel are in the forward position safely inter-
locked. It also prevents more than one shot following each
squeeze of the trigger.
d. Care of pistol.—(1) General.—To prevent wear and tear
on the working parts of your pistol, keep it clean and properly
lubricated. A dirty, dry pistol, or one which has been over-
oiled and allowed to gather dirt will have stoppages that may
make it useless in battle. A failure of your pistol in battle
may cost you your life.
(2) Cleaning the bore.—Powder fouling in the bore con-
tains salts. Salts rust steel. To remove these salts, run a
cleaning patch soaked in hot water and issue soap through
the bore a number of times. Plain, clean water, hot or cold,
should be used when soap is lacking. While still wet, the
metal brush should be run through the bore several times.
This will loosen up any material which has not been dis-
solved by the water. The bore should then be thoroughly
dried and coated with a thin, uniform coat of issue gun oil.
(3) Miscellaneous.—(a) All metal parts should be cleaned
and covered with a thin, uniform coat of oil.
(b) Screw heads should be kept clean or they will collect
rust.
(c) The magazine should be cleaned with an oily rag. If
dirt and grit have gotten into it, remove the follower and
spring and clean the inside.
(d) Remove rust spots by rubbing with a soft stick and oil.
(4) Don’ts.—(a) Do not use sandpaper, metal polish, or
like materials on your pistol. They may remove the antirust
43
65-66
soldier's handbook
finish from your pistol, then you will have a job keeping it
free from rust.
ф) Do not put a plug in the muzzle of the bore. It will
cause the bore to rust. You may forget it is in there and
fire your pistol, causing it to explode.
(c) Do not lay your pistol down where dirt can get into it.
(d) Do not fail to inspect your pistol daily in the field.
Your life may depend on its functioning at the proper
moment.
Section IV
SAFETY PRECAUTIONS
66. All weapons used in the Army are designed to kill.
Remember this and handle them with care. Observe the
following rules at all times:
a. Treat all weapons as though they were loaded until you,
yourself, have inspected them to see that they are not loaded.
b. Do not take someone else’s word that the weapon is
empty. Inspect it.
c. Each time you pick up a weapon find out if it is loaded by
inspecting it yourself.
d. Do not leave a loaded weapon around where someone
else may unknowingly pick it up.
e. When you put your weapons away, inspect them to see
that they are unloaded.
/. Do not point a weapon at anyone unless you intend to
kill him.
g. Load only when you receive orders to.
h. Learn how to use the safety locks before you ever load
a weapon.
i. When your weapon is loaded and you are not’firing, keep
the safety lock on, particularly when advancing, as you may
catch your trigger in brush and kill yourself or comrade.
j. Do not pick up shells, bombs, hand grenades, and the
like, until you have been instructed in the handling of such
ammunition and then only when you receive orders to do so.
k. Do not pick up any shell or other metal object which
you may see on the battlefield or firing range. It may be a
“dud” (an unexploded shell), which may go off when you
disturb it.
44
soldier's handbook
66-69
I. Be careful what you pick up on the battlefield. A maga-
zine, newspaper, can of food, and other apparently innocent
articles may be “bait” for a “fool’s trap,” or “booby” mine
which will explode when you pick it up.
Section V
THE GAS MASK
67. The American Army service gas mask which is issued
to you is the best all around military gas mask known. It
is the main device for protecting your face, eyes, lungs,‘and
throat from the effects of gases, smokes, fumes, dusts, and
chemical fogs, and is made to take care of all the known
chemical warfare agents. However, it will not protect against
carbon monoxide or ammonia gas and is not suitable for use
in fighting fires or in industrial accidents where ammonia gas
is present.
68. a. The gas mask consists essentially of a facepiece, a
hose, and a can containing a filter. This can, called the can-
ister, is connected by the hose to the facepiece, which fits
tightly to your face. Air is drawn in through the canister,
where the objectionable gases, vapors, fogs, dusts, or smokes
are removed, either mechanically or by chemical action. The
cleaned air then passes on to the facepiece where it is
breathed and then expelled through a valve. The drawing
(fig. 14) illustrates how your gas mask works.
Ъ. The facepiece is made of rubber or a similar fabric and
is held to your face by means of an elastic head harness.
These materials may easily be damaged by carelessness and
improper use. For example; if a facepiece is not properly
placed in the carrier, or if it is distorted, a crease might be
formed which would prevent a positive seal between the face-
piece and your face. Unless the rim of the facepiece fits
snugly to your face, gas-laden air may leak in. The elastic
straps may also become damaged by excessive stretching.
69. Inexperienced persons often make the mistake of pull-
ing up the head harnesses too tight, or of pulling up one strap
more than its mate. If you adjust the harness too tightly,
you will soon get a headache. If you adjust the head harness
45
69-71
soldier’s handbook
unevenly, a channel and consequent leak between the face-
piece and your face is often formed. (Fig. 15.) This also
often happens if you put the facepiece on carelessly.
70. The canister is the most important part of your mask,
for it is here that the air is cleaned and made safe for breath-
ing. It contains chemicals which will be damaged if water
FACE PIECE
AIR DEFLECTED
AGAINST EYEPIECES
BEFORE INHALATION-/,-
DEFLECTOR
HOSE
AIR PASSAGE
CARRIER -
CHARCOAL AND
SODA LIME
AIR EXPELLED
HERE -
CANISTER
AIR ENTERS HERE
Figure 14.—How your gas mask works.
MECHANICAL
FILTER
gets inside. You must always guard your gas mask canister
from excess moisture.
71. You should always be careful of your gas mask.
Never use it as a seat or pillow. Although it is pretty strong
and rugged, it will not stand abuse. You should never
carry anything but the gas mask and antidim can in the
46
soldier's handbook
71
О Faulty—front view.
@ Correct—front view.
Figure 15.—Mask adjustment.
47
71
soldier's handbook
@ Faulty—rear view.
Figure 15.—Mask adjustment—Continued.
48
soldier's handbook
71-74
carrier. Socks, tobacco, apples, or other objects may choke
up the mask, or otherwise injure it. Such objects also pre-
vent quick removal of the facepiece from the carrier. The
wise soldier quickly learns how to inspect his gas mask and
makes a daily inspection of it as a matter of habit.
72. Before you become accustomed to it you may find your
gas mask uncomfortable. But as you become more used to
wearing it, and as you habitually train yourself to work and
exercise with it properly adjusted, such discomfort disap-
pears. It is only by wearing the mask daily and perform-
ing some sort of work, or drill, while masked that you can
train your chest and lung muscles to the unaccustomed
extra work and strain. You also become accustomed to
your decreased ability to move and see. When adjusting
the gas mask at the command gas, care in putting it on is
more important than great speed. However, with practice,
you should be able to stop breathing for 30 seconds, and in
this time the mask can be securely and carefully adjusted
to your face.
73. An enemy will try to attack troops who are known to
be inexperienced or careless in gas mask drill and gas dis-
cipline. If he suspects that your battalion as a whole is
liable to go out without gas masks, or that it cannot do a
reasonable amount of work while masked, or that it fails to
post gas sentries, he will very likely make a gas attack.
To beat him, you should always keep your gas mask
with you, keep it in good condition, and not abuse it. You
should know how to put it on, and be able to wear it for
several hours at a stretch while fighting or working, and,
finally, you should always be on the lookout for a gas
attack.
Section VI
FIELD EQUIPMENT
74. The articles of field equipment issued to you have been
developed and manufactured after careful study and experi-
ment by the War Department. You must keep them in proper
condition for field service and not remove or change the
finish of any article. If it becomes necessary to renew any
49
74-77
soldier's handbook
worn surfaces your company, troop, or battery commander
will explain how it is to be done and supervise the work. By
following the instructions given below you will find that your
equipment will always be in first class condition for inspec-
tions and field service.
75. All cloth equipment should be well brushed frequently
with a stiff-bristled brush. A dry scrub brush will serve this
purpose. During ordinary garrison duty it should seldom be
necessary to wash the equipment. Soiled spots can usually
be removed by a light local washing. During field service,
equipment becomes soiled much more rapidly. Dirty equip-
ment should be given a thorough washing, otherwise it will
become insanitary and liable to rot.
76. A white soap is issued for the washing of cloth equip-
ment, but any good grade of white laundry soap will serve the
purpose. Strong soap, such as yellow kitchen soap, should
never be used for washing equipment because it usually con-
tains a large amount of free alkali and it will fade or bleach
the material.
a. Before being washed, the equipment should be thoroughly
brushed to remove all dust and mud.
b. Spread the belt, haversack, pack carrier, or other
article on a clean board or rock and apply the soap solution
with a scrub brush. After working up a good lather, wash off
with clear water. A bad grease spot can ordinarily be removed
by the direct application of soap with the brush, followed by
a good scrubbing.
c. Always dry washed equipment in the shade. The bleach-
ing action of the sun on damp fabric is strong. Equipment
wet from a march in the rain should also be dried in the
shade if practicable. Excessive fading of equipment can thus
be reduced.
77. Such articles as the canteen and the different parts of
the mess outfit should be kept clean. Water and food should
not be kept in them longer than necessary. Aluminumware
should be cleaned with soap and water, although a little sand
will sometimes assist in the cleaning of canteens. Some-
times small white particles will be found in canteens which
have been filled with hard water. These particles are harm-
50
soldier's handbook
77-80
less. When not actually in use, the canteen should be
emptied and the cup left off to dry.
78. The knife blade is made of tempered steel and when
put away for long periods should be covered with a light
film of oil to prevent rust.
79. Bits, curb chains, and all metal parts issued unpainted
will be oiled lightly when not in use. When in use they will
be kept clean and free from rust. Removing paint from metal
parts which are issued painted is prohibited except under
the direction of your company, troop, or battery commander.
80. a. Leather equipment is expensive, and its proper care
is important because of its value and the fact that if neg-
lected it soon becomes unserviceable.
b. Two agents are necessary to the proper care of leather
equipment—a cleaning agent and an oiling agent. The
cleaning agent issued is castile or similar type^soap; the oiling
agents are neat’s-foot oil substitute, saddle soap, and harness
soap.
c. Neat’s-foot oil is the most satisfactory oiling agent for
leather. It penetrates the pores and saturates the fibers,
making them pliable and elastic. Dry leather is brittle, but
leather oiled excessively will soil the clothing and accumu-
late dirt.
d. Leather should be treated with enough oil to make it
soft and pliable, but should not be given so much oil that
it will squeeze out.
e. When leather is washed with any soap, some of the
surface oil is always removed. This leaves the surface, after
drying, hard and liable to crack. If this surface oil is re-
placed by direct application of neat’s-foot oil, it is very dif-
ficult not to apply too much. This has led to the develop-
ment of saddle soaps, which contain a small amount of
neat’s-foot oil, so that the surface of the leather after wash-
ing is not deprived of its oil.
/. Leather equipment in use should be wiped off daily with a
damp cloth to remove mud, dust, or other dirt. Under no con-
ditions should it be cleansed by immersion in water or in run-
ning water. This daily care is necessary to maintain the ap-
pearance of the equipment, but is insufficient alone to pre-
51
80
soldier's handbook
serve it properly. At intervals of from 1 to 4 weeks, depending
upon circumstances, it is essential that the equipment be
thoroughly cleaned in accordance with the following instruc-
tions :
(1) Separate all parts, unbuckle straps, remove all buckles,
loops, etc., where possible.
(2) Wipe off all surface dust and mud with a damp (not
wet) sponge. Rinse out the sponge and make a lather by
rubbing it vigorously on white soap. The sponge must not
contain an excess of water if a thick lather is desired. When
a creamy lather is obtained, clean each piece of equipment,
taking care that no part is neglected. Each strap should be
drawn its entire length through the lathered sponge to remove
the dirt and sweat from the leather.
(3) Rinse the sponge again and make a thick lather with
saddle soap; go over each separate piece with the same care
as before.
(4) Allow the leather to become partially dry and then
rub it vigorously with a soft cloth. The equipment should
now have a neat, healthy appearance^
g. If the foregoing instructions have been carefully fol-
lowed, the leather should now be soft and pliable and no
further treatment should be necessary. At certain intervals,
however, it is necessary to apply a small amount of neat’s-
foot oil. No general rule in regard to the frequency of oiling
can be given because different conditions of climate and
service have to be taken into consideration. Experience has
shown that during the first few months of use a set of new
equipment should be given at least two applications of neat’s-
foot oil per month. Thereafter need for oiling is indicated
by the appearance and pliability of the leather. Frequent
light applications of oil are much better than infrequent
heavy applications.
h. New leather equipment should always be given a light
application of neat’s-foot oil before it is put into use; clean-
ing with soap is unnecessary because the equipment is clean.
i. Whenever leather becomes wet from any cause whatever,
it should be slowly dried in the shade. Leather should
never be dried in the sun or close to a radiator, fire, or other
heat.
52
soldier's handbook
81
81. Soon after your equipment is issued to you, you will
receive instructions from your officers and noncommissioned
officers as to how the different parts should be assembled so
that it can be carried or worn. The following table will help
you in remembering the different items of your equipment
and how they will be carried. This table includes the basic
equipment common to the greater portion of our military
service. Should special equipment be issued to you for par-
ticular conditions, or should you belong to an arm or service
which has its own special equipment, you will receive instruc-
tions as to how.iTwili be carried.
53
Field equipment, enlisted men (other than clothing worn on person)
Article Dismounted Mounted on horse (artillery drivers, see next column) Driver, horse (ar- tillery only) Driver, vehicle Men mounted in vehicle*
Bag, canvas, field, with carrying strap. Bags, feed and grain Belt, pistol, re- volver, cartridge, or magazine. Blankets, wool-. __ Canteen, cup and cover. Glasses, field. On right side, slung On right side, slung by a strap pass- ing over left shoulder to right side or in/on ve- hicle. On right side, slung by a strap passing over left shoulder to right side or in/on vehicle.
by a strap pass- ing over left shoulder to right side. On pommel under raincoat. Worn On seat of saddle, off horse, or on limber. Worn
Worn Worn Worn.
In pack carrier. Carried on back or in cargo ve- hicle. On belt, left rear-__ On right side, slung by strap passing over left shoul- der. In cantie or blanket roll. Slung from off (right) cantie ring and attached to off saddlebag. On right side, slung by strap passing over left shoul- der. ; In cantie or blanket roll. Slung from near (left) cantie ring, off horse and at- tached to saddle- bag. In pack carrier or in blanket roll. Carried on back or in/on vehicle On belt, left rear or in/on vehicle. In pack carrier or in blanket roll. Car- ried on back or in/on vehicle. On belt, left rear or in/on vehicle. On right side, slung by strap passing over left shoulder.
09
soldier's handbook
g:
Handkerchiefs Haversack _ __ _ In blanket roll On back, attached to belt. Attached to rear of Near (left) saddle bag. Near (left) saddle- bag, off horse.
Helmet, steel. Attached to near Attached to off
haversack. (left) saddlebag. (right) saddlebag, off horse.
Holster, pistol _ Attached to belt, opposite right hip. Attached to belt, opposite righthip. Attached to belt, opposite right hip.
Horseshoes, 2 extra, with nails. Intrenching tool (machete or bolo). Kit, grooming, com- plete, and saddle soap and sponge. Kit, mess, complete. Attached to rear of In off (right) sad- dlebag. In off (right) sad- dlebag, off horse.
haversack. In off (right) sad- dle bag. In near (left) sad- dlebag. In off (right) sad-
In haversack dlebag, off horse. In near (left) sad- dlebag, off horse.
Laces, shoe, extra... In haversack In near (left) sad- dlebag. In near (left) sad-
dlebag, off horse
In blanket roll, or
in saddle bag.
On back, attached
to belt.
Attached to bag,
canvas, field, near
saddlebag, or to
rear of haversack.
Attached to belt,
opposite right
hip.
In blanket roll.
On back, attached
to belt.
Attached to haver-
sack, or bag, can-
vas, field.
Attached to belt,
opposite right hip.
Attached to rear of
haversack.
In bag, canvas,
field, in haver-
sack, or in saddle-
bag.
In bag, canvas,
field, in haver-
sack, or in left
saddlebag.
In haversack or in
bag, canvas, field.
In haversack or in
bag, canvas, field.
soldier's handbook
* Alternative methods for carrying equipment of men mounted in vehicles are prescribed for the re ason that types of vehicles,
nature and lengths of march, etc., vary so greatly that the description of only one method for one vehicle will not suffice.
сл
os
Field equipment, enlisted men (other than clothing worn on person)—Continued
Article Dismounted Mounted on horse (artillery drivers, see next column) Driver, horse (ar- tillery only) Driver, vehicle Men mounted in vehicle*
Mask, gas, horse Strapped to halter under throat latch. Strapped to halter under throat latch.
Mask, gas, service.. Slung under left arm by strap passing over right shoulder. Slung under left arm by strap passing over right shoulder. Slung under left arm by strap passing over right shoulder. Slung under left arm by strap passing over right shoulder. Slung under left arm by strap passing over right shoulder.
Overcoat Attached to haver- sack. Strapped to pom- mel over feed bag. Strapped across seat of saddle, off horse. Attached to haver- sack, to bag, canvas, field, or in/on vehicle. Attached to haver- sack, to bag, can- vas, field, or in/on vehicle.
Pocket, magazine, Left front of belt . . _ Left front of belt... Left front of belt... Left front of belt Left front of belt.
web, double.
Pouch, first-aid Right rear of belt. _ Right rear of belt. _ Right rear of belt. _ Right rear of belt. _ Right rear of belt.
packet.
Raincoat In haversack Attached to pom- mel over feed bag. Strapped across seat of saddle, off horse. In haversack, in bag, canvas, field, or in/on vehicle. In haversack, in bag, canvas, field, or in/on vehicle.
Rations In haversack Distributed be- tween the two saddlebags to balance load. Distributed be- tween the two saddlebags of horse to balance load. In haversack, in bag, canvas, field, or in saddlebags. In haversack or in bag, canvas, field.
SOLDIER S HANDBOOK
325350
£
Saddlebags, pair . _ On bars of saddle 1
Scabbard, bayonet. Scabbard, rifle.. _ Attached to left side of haversack. in rear of can tie. | Attached to near
Set, toilet Socks, pair Surcingle In haversack In blanket roll (left) side of sad- dle, under skirt. In near (left) sad- dlebag. In near (left) sad- dlebag. In off (right) sad- dlebag, or over saddle blanket. Attached to belt
Suspenders
Tag, identification, with tape. Tent, shelter half, complete with pole, rope, and pins. Towel, face A round neck, under shirt. In pack carrier, carried on back, or in vehicle. In haversack Around neck, under shirt. Covering (pole, rope, and pins within) blanket roll, on cantie or in/on vehicle. In near (left) sad- dlebag.
*See note on page 55.
Across seat off saddle or on bars of saddle in rear of cantie, off horse Motorcyclists—in rear of seat. Attached to left side
— A ttached to vehicle. of haversack.
In near (left) sad- dlebag, off horse. In blanket roll or in saddlebag. In blanket roll.
In near (left) sad- dlebag, off horse. Attached, one to each saddlebag, off horse. In blanket roll or in saddlebag. In blanket roll.
Attached to belt Attached to belt-__ Attached to belt.
Around neck, Around neck, Around neck, under
under shirt. under shirt. shirt.
Covering (pole, Covering (pole, С оvering (pole,
rope, and pins rope, and pins rope, and pins
within) blanket within) blanket within) blanket
roll, carried on roll, carried in/on roll, carried on
seat of saddle, off horse or on limber. vehicle. back or in/on ve- hicle.
In near (left) sad- In haversack, in In haversack or in
dlebag, off horse. bag, canvas, field, or in saddlebag. bag, canvas, field.
soldier's handbook
00
Field equipment, enlisted men (other than clothing worn on person)—Continued oo
Article Dismounted Mounted on horse (artillery drivers, see next column) Driver, horse (ar- tillery only) Driver, vehicle Men mounted in vehicle*
Trumpet. _ Suspended on right side by strap passing over left shoulder. In blanket roll. Carried on back or in cargo ve- hicle. In leftpocket, shirt or coat. Suspended on right side by strap passing over left shoulder. In near (left) sad- d 1 e b a g , or blanket roll. In left pocket, shirt or coat. Suspended on right side by strap passing over left shoulder. In blanket roll. Carried on back or in cargo vehicle. In left pocket, shirt or coat.
СЛ 00 Underclothing Whistle (chain, hooked to left shoulder loop buttonhole). In near (left) sad- dlebag, off horse, or in blanket roll. In left pocket, shirt or coat. In blanket roll, in bag, canvas, field, or in sad- dlebag. In left pocket, shirt or coat.
♦See note on page 55.
soldier's handbook
soldier's handbook
82-83
Section VII
THE INFANTRY PACK
82. The Infantry Pack.—The normal way in which you
will carry your basic equipment is given in the table in para-
graph 81. In this section is described and illustrated the
proper way for you to assemble your pack with full field
equipment, to adjust it, and to discard the roll without
removing the remainder of the equipment from your body.
83. Method of Assembling Haversack and Pack Carrier.—
a. Belt.—(1) Pistol or revolver belt (fig. 16).—Place belt on the
ground, outer side of belt down. Insert hook end of belt
through sliding keeper, then through unattached male buckle
Figure 16.—Pistol belt.
with stud down, double belt back through sliding keeper and
secure end hook in the particular center eyelet required to
give proper length. Slide magazine pouch over attached
female buckle end and attach it to the fastener provided. The
belt is put on with male buckle on the man’s right.
(2) Cartridge or magazine belt (fig. 17).—Place adjusting
strap on the ground, eyeleted edge to the front; place pocket
sections on the ground in prolongation of adjusting strap,
pockets down, tops of pockets to the front; insert end of
adjusting strap in outer loop of metal guide from the upper
side, carry it under middle bar and up through inner loop;
engage hooks on the end of adjusting strap in eyelets provided
on inner surface of belt. The belt is adjusted to fit the
individual. It should fit loosely about the waist so that when
buckled it may rest well down over hip bones and below the
pit of the abdomen. Care should be taken that adjustments
are made equally from both ends of adjusting strap so that
center eyelet will be in the middle of belt. The proper posi-
tion of the belt is the same, whether filled or empty.
59
83
soldier's handbook
b. To attach pack carrier to haversack (figs. 18 and 19).—
Spread haversack on the ground, inner side down, outer flap
and meat can pouch to the front. Place buttonholed edge
@ Filled.
Figure 17.—Belt, cartridge, or magazine.
Figure 18.—Haversack without pack carrier.
of pack carrier, lettered side of pack carrier up, under but-
tonholed edge of haversack. Superimpose buttonholes of
60
soldier's handbook
83
SUSPENSION D RINGS
(T) Before joining (outside view).
@ After joining (outside view).
Figure 19.—Haversack and pack carrier.
61
83
soldier's handbook
haversack upon corresponding ones of pack carrier. Lace
the pack carrier to haversack by passing the ends of cou-
pling strap down through corresponding buttonholes of
haversack and pack carrier nearest the center, bringing the
ends up through next buttonholes and continuing to the
right and left, respectively, to the sides.
c. To attach haversack.—(1) To cartridge or magazine
belt.—Place haversack and pack carrier (assembled) on the
.figure 19.—Haversack and pack carrier—Continued.
ground, inner side down; place belt along the junction of
haversack and carrier, pockets down, tops toward the haver-
sack; insert hooks on rear belt suspenders in upper rear eye-
lets of each belt section so that point of hooks will be on
the outside of belt; twist from belt suspenders toward the
ends of belt and insert snap hooks in eyelets between first
and second pockets from each end of belt so that the points
62
soldier's handbook
83
of the snap hooks will be on the outside of belt and sus-
penders will be flat on the body.
(2) To pistol or revolver belt.—Proceed as with the car-
tridge belt, the hooks on the end of front belt suspenders
being inserted in the third eyelets from the buckle, and
hooks on rear belt suspenders in two of the upper eyelets
respectively to right and left of center of belt.
d. To attach bayonet scabbard.—(1) To haversack.—At-
tach scabbard by passing its lower end through loops provided
on the side of haversack body; then engage double hook at-
tachment in eyelets on outer flap of haversack, inserting hook
from the under side. Place bayonet in scabbard, ring to the
rear. (See fig. 25®.)
(2) To cartridge belt.—When the haversack is not carried,
attach scabbard to left side of cartridge belt over left hip.
Place bayonet in scabbard, ring to the front.
e. To attach intrenching tool or machete carrier to haver-
sack.—Fold outer flap of haversack over so that meat can
pouch is uppermost; pass intrenching tool carrier under-
neath meat can pouch and engage double hook attachment
in eyelets in flap provided, inserting hooks from the under
side. Secure intrenching tool to roll by means of third haver-
sack binding strap. (See fig. 25®.)
/. To make the roll (fig. 20).—Spread shelter half on the
ground and fold in triangular end so that shelter half forms
a rectangle. Make a second fold by carrying folded edge to
opposite edge. Fold the blanket twice parallel to its longer
axis so that blanket is now one-fourth its previous width, and
then fold once at the middle so as to bring the ends together.
Place blanket symmetrically in center of folded shelter half;
place underwear, socks, and handkerchief between folds of
blanket. Place tent pole on that end of the blanket from
which the rolling is to begin. Place pins as shown in figure
20®. (An alternate method is to place pins next to and par-
allel with pole.) Fold sides and then the near end of shelter
half snugly over the blanket; fold 10 inches of far end of
shelter half toward the blanket and, beginning at near end,
roll tightly into folded end of shelter half, thus making an
envelope roll.
g. To pack the haversack (fig. 21).—(1) Place equipment
on the ground, inside of haversack up, pockets of belt up.
63
83
soldier's handbook
haversack spread out, inside flap and pack carrier extended
to their full length. Place rations in the center of haversack
in front of and touching line of attachment of inside flap.
Place toilet articles in front of rations. Fold inside flap of
haversack over these articles. Fold sides of haversack over
rations and toilet articles. Pass upper two binding straps
through loop opposite point of attachment of the strap to
haversack body. Fasten each strap by passing end of strap
through the opening of its opposite buckle next to the buckle
attachment, over center bar and back through opening of
buckle away from attachment. Pull strap tight and make
fastening secure. Fold over outer flap of haversack and
fasten it by means of the lower haversack binding strap
passed through the buckle on inside of outer flap. Pull strap
toward the right, drawing outer flap snugly over filled haver-
sack. The haversack is now packed and the carrier is ready
for reception of the roll.
(2) When rations are not carried, roll toilet articles in in-
side flap so that top of toilet articles will be on line with top
of haversack body. Then fold up lower haversack strap
against the roll thus formed.
0 First step.
Figure 20.—To make the roll.
h. To assemble the pack (fig. 22).—Place roll in pack
carrier and haversack with one end against bottom of
packed haversack. Grasp lower suspension rings, one in
each hand. Place right knee against bottom of roll. Pull
carrier down and force roll up close against bottom of
packed haversack. Without removing the knee, fasten
lower pack carrier binding strap over the roll and secure it by
64
soldier's handbook
83
@ Second step.
@ Third step.
® Completed roll.
Figure 20.—To make the roll—Continued.
65
83
soldier's handbook
passing, from below, its end up through the opening of its
corresponding buckle away from the buckle attachment,
then over center bar and down through opening of the
buckle next to buckle attachment, then back underneath
the standing end of strap. In a similar manner secure
middle haversack binding strap and then upper carrier bind-
ing strap. Engage snap hooks on pack suspenders in lower
suspension rings. In order to obtain the maximum benefit
from the shoulder loops in suspending the pack on the wearer,
each pack should be so assembled that when the roll is car-
ried the length of the assembled haversack and pack carrier
is at least 27 inches. This may be done by placing clothing
or equipment ordinarily carried elsewhere in the ration
space in the haversack so that the assembled pack will be
the same length as when rations are carried. When this
method is used, the pack carrier will not be folded under.
66
soldier's handbook
83
i, To fold and attach the overcoat (figs. 23 and 24).—Turn
sleeves inside out, place overcoat on the ground, outside down,
coat smooth, collar extended, sleeves smooth and extended
toward pockets; move inside flap of tail under outside flap
about 6 inches and gather the slack in the coat thus caused in
one fold along middle seam, tapering toward the collar. Fold
bottom of front edges of coat about 12 inches toward center
seam, forming an approximate parallelogram, the side of
Figure 21.—To pack the haversack—Continued.
which across the coat will be 42 inches. Fold collar end
down about 15 inches at the top and roll smoothly and tightly
toward the tail; turn tail up to a depth of about 9 inches, and
roll entire coat into this pocket. Place the overcoat thus
rolled, open side of roll down, on top of haversack, in rear of
bayonet handle so that center back seam is over center of
top of haversack. Secure coat at the top with a shelter half
67
83
soldier's handbook
rope. Bind the ends of overcoat down and along the sides
of haversack. Lash the ends of roll to haversack with the
rope, using a half hitch near each end of overcoat and passing
the rope around haversack over outside flap.
j. To attach the raincoat.—Fold raincoat neatly into a
rectangle about 10 У2 inches long by 8У2 inches wide, with
outside of raincoat out. Place raincoat between inner and
outer haversack flaps. Secure it with lower haversack bind-
ing strap by passing the latter under bottom haversack
binding strap and fastening it tightly to the buckle on under
side of outer haversack flap.
k. To attach the helmet.—Attach and secure the helmet by
placing chin strap over meat can pouch.
I. To adjust full equipment.—Put on equipment, slipping
the arms through pack suspenders as through sleeves of a
coat. By means of adjusting buckles on belt suspenders,
68
soldier's handbook
83
raise or lower the belt until it rests well down over hip bones
and below pit of abdomen. Raise or lower it in rear until
adjusting strap lies smoothly across small of the back. By
means of adjusting straps on pack suspenders, raise or lower
the load on the back until the top of haversack is on a
level with top of shoulders, so that pack suspenders from
their point of attachment on the haversack to the shoulders
will be horizontal. The latter is essential to proper adjust-
ment of the load. (See fig. 25.)
m. To discard the roll without removing equipment from
the body.—Unsnap pack suspenders from suspension rings
© First step.
Figure 23.—To fold the overcoat.
and snap them into eyelets on top of belt and in rear of
rear pockets of right and left pocket sections. Support bot-
tom of pack with left hand, with right hand grasp coupling
strap at its middle and withdraw first one side and then the
other. Pull down on the roll with both hands and remove
it. When the roll has been removed, lace coupling strap
through buttonholes along upper edge of carrier.
69
83
soldier's handbook
® Second step.
?
® Completed fold.
Figure 23.—To fold the overcoat—Continued.
70
soldier's handbook
84-85
Section VIII
PACKING INDIVIDUAL EQUIPMENT ON HORSE
84. The method of packing your saddle is very important
in keeping your mount in top condition and able to with-
stand hard work. You must distribute the weight evenly
on your horse’s back. Pressure resulting from an uneven
distribution of arms and equipment may result in sores or
cause injury to withers and back. Consequently, balance
the weight of articles attached to one side of the saddle as
Figure 24.—Full equipment with overcoat and raincoat.
nearly as possible by the weight of articles attached to the
other si.de. Weight is carried better by the pommel than
by the cantie.
85. a. In this paragraph the method of packing individual
equipment on horse is described and illustrated.
b. To assemble and pack the cantie or blanket roll.—(1)
The shelter tent half is spread flat on the ground, buttons
up. The triangular flap is folded over shelter tent half,
71
to
soldier's handbook
soldier's handbook
85
making the latter a rectangle. The blanket is folded once
through the center, parallel to short side, and again through
the center perpendicular to short sides. The blanket is then
laid on shelter tent half, the longer folded edge parallel to
and 1 inch from long side of shelter tent half, opposite the
buttons, the shorter folded edge toward triangular flap, the
blanket equidistant from ends of shelter tent half.
(2) The tent pole, folded, is inserted in double fold of
blanket, end of pole flush with shorter folded edges, the pole
parallel to and fitting snugly into the double fold. The tent
pins are inserted in double fold of blanket, near loose edges,
placed alternately head and point and overlapping each
other so as to occupy about the same space as the tent pole,
the pins parallel to and fitting snugly into double fold of
blanket. This leaves a “break” at center of completed noli
which allows it to fit the saddle.
(3) The free ends of shelter tent half are folded over cor-
responding portions of the blanket, the ends of shelter half
throughout their length being parallel to its center line. As
a prevention- against the ends of completed roll pulling out,
the free (loop) end of tent rope is passed several times
through tent pin loops on the two opposite corners of button
side of shelter tent half, stretched fiat, and tied with a single
bowknot. The button side of roll is folded back about 6
inches (as far as second button) in order to form a pocket
when roll is completed, edge of pocket being parallel to edge
of blanket.
(4) Using the hands and knees, the blanket and shelter tent
half are rolled tightly from side opposite buttons into pocket at
button side, making a tightly bound roll. The roll is then
“broken” or curved to fit the cantie of saddle, with free edge
of pocket uppermost and to the rear, so that this edge fits
snugly against the roll and prevents entrance of rain or snow
when roll is on the saddle. It is advisable for two men to
work together in making up the roll.
c. To fold the raincoat or overcoat.—The raincoat, inside
out, with collar extended is folded once lengthwise. It is
rolled tightly from folded edge toward buttons, making length
of roll the same as full length of garment. If the overcoat
is carried, it is rolled in the same manner as the raincoat.
d. Feed and grain bag.—The grain bag, with or without
grain, is secured inside the feed bag.
325350°—41--6 73
85
soldier's handbook
e. To pack the saddle (fig. 26).—(1) The saddle, ofi the
horse, is placed on the ground or otherwise as is most con-
venient for packing. The saddlebags are placed on the cantie
and secured thereto by the attachments provided. The cantie
roll is strapped to the cantie by means of the cantie straps
which are wrapped three times around the roll. The straps
are securely buckled and the loose ends, falling to the front,
are tucked under the straps. The buckles should be far
enough to the rear to prevent injury or discomfort to the
® Near side.
Figure 26.—Saddle, packed.
trooper. The ends of the roll are pressed forward and down
toward the saddlebags. The two outside straps should pass
over the roll well down toward its ends in order to keep the
roll curved to the shape of the cantie.
(2) The feed bag and grain bag are strapped on top of the
pommel bar (under the raincoat or overcoat), regardless of
whether grain is carried. The loose ends of the straps, falling
74
soldier's handbook
85
to the rear, are tucked under the straps. The raincoat,
and/or overcoat, collar to the left, is placed on top of feed
and grain bag and strapped on by means of the pommel
straps. The ends of the roll are pressed in toward the horse’s
shoulders. All buckles should be far enough forward to
prevent injury or discomfort to the trooper.
(3) The canteen and cup, in their cover, are snapped to the
right cantie ring. The cover is fastened tight to the saddle-
bag by buckling the two rear saddlebag cover straps over the
canteen cover strap where it passes under the bottom of the
canteen cover.
(2) Off side.
Figure 26.—Saddle, packed—Continued.
(4) Attach helmet to near (left) saddlebag by buckling the
three straps of saddlebag flap through the chin strap.
(5) The rifle scabbard is secured to left side of saddle, at-
tached to the pommel ring by the upper strap of scabbard and
to cantie ring by lower strap. Both straps are so adjusted
that the scabbard will hang at an angle of 30° with the verti-
cal. The rifle is not inserted in the scabbard until after the
horse is saddled.
(6) Wherever possible, two men work together in placing
the packed saddle on the horse’s back. In case only one man
75
85
soldier’s handbook
is available, it may be found advisable to attach saddlebags,
canteen, cup and cover, and rifle scabbard after the horse has
been saddled.
/. Drivers (artillery).—(1) General.—In order to equalize
loads on the two horses, certain articles, as prescribed by
the table shown in paragraph 81 may be placed on saddle of
the off horse instead of on riding horse.
(2) To pack feed bags.—To pack feed bags, fill the grain
bags; tie mouths securely and place a filled grain bag in each
feed bag, mouths of grain bags down. Roll feed bags, securing
closed ends by means of web straps at ends of feed bags.
The snap ends of the straps are either snapped in the rings
on feed bags or tucked under turns in straps. The open ends
of the two feed bags are closely secured together to prevent
lower ends from rubbing against traces. When grain is not
carried, fold empty grain bags and place them inside feed
bags. Roll feed bags along their longer edges and secure as
above.
(3) To pack saddle.—To pack the saddle of the off horse,
the near stirrup being passed over seat of saddle, the pro-
cedure is as follows:
(a) The saddlebags are placed on cantie and secured by
attachments provided.
(b) Place surcingles under straps of saddlebag flaps above
the loops in saddlebag flaps through which the straps pass.
(c) Attach mounted canteen cover to left rear cantie ring
by the snap of canteen strap.
(d) Attach helmet to off (right) saddlebag by buckling the
three straps of saddlebag flap through the chin strap.
(e) Extend center cantie strap. Place roll on top of buckle
end of can tie strap in the center of seat of saddle so that
open edge will be down. Place the two feed bags, secured
together at their open ends, across seat of saddle in front of
roll. Bring tongue end of cantie strap to the front over
center of roll and junction of the two feed bags; take one
turn around the junction of the two feed bags; pass strap
to rear under roll, bring it forward over center of roll, and
buckle it. Each coat strap is passed under rear quarter strap
and once around feed bag about 4 inches from the lower end,
punching a throat in feed bag to prevent strap from slipping;
pass each strap to rear and once around roll about 6 inches
from end of roll; bring strap from under roll, over itself at
76
soldier's handbook
85
the interval between feed bags, roll and buckle. The ends
of roll are drawn close to ends of feed bags before being
secured. The coat straps are attached to saddlebag ^ide—
strap rings about saddlebag side straps to avoid twisting the
rings.
(/) Place overcoat, collar, to the left, across seat of saddle
in front of feed bags and secure by two pommel coat straps.
When raincoat and overcoat are both carried, place raincoat
on top of overcoat. When overcoat is not carried, raincoat
is packed as provided for overcoat. (See fig. 27.)
Figure 27.—Driver’s (artillery) off horse
(4) To pack saddle of the off horse when blanket rolls and
feed bags are carried on limber.—To pack the saddle of the off
horse, the near stirrup being passed over seat of saddle, the
procedure is as follows:
(a) Place the saddlebags on the seat of the saddle and
secure them by passing the saddlebag straps through the
cinch rings and drawing them tight.
(b) Place the overcoat on top of the saddlebags, collar to
the left; place the raincoat on top of the overcoat. Take a
couple of turns with the middle cantie strap around the two
77
85-86
soldier's handbook
coats. Then take several turns around each end of the
coats, using a coat strap on each end. Place the free end of
each strap through the cinch ring on each side and pull the’
coats down firmly against the saddle.
(c) Secure end of halter tie rope of off horse to off pommel
ring of off saddle, and that of near horse to near pommel
ring of near saddle.
Figure 28.—Display of equipment, dismounted.
Section IX
DISPLAY OF EQUIPMENT
86. a. As mentioned in paragraph 61, you will attend in-
spections at which you will be required to display your field
equipment. At these inspections your officers will check your
field equipment to see that no items are missing and that all
items are clean and in condition for immediate field service.
Figure 28 shows how your equipment should be displayed if
78
soldier's handbook •
86
you are a dismounted soldier or equipped with a haversack
and pack carrier.
b, Figure 29 shows how your equipment should be displayed
if you are a mounted soldier.
Figure 29.—Display of equipment, mounted.
79
CHAPTER 7
SCHOOL OF THE SOLDIER WITHOUT ARMS
(DISMOUNTED)
Paragraphs
Section I. Positions____________________________________ 87-91
II. Steps and marchings__________________________92-103
Section I
POSITIONS
87. Position of the Soldier, or of Attention (fig. 30).—
To take the position of attention place your heels together and
on the same line. Allow your feet to turn out equally, forming
an angle of 45° with each other. Keep your knees straight but
without stiffness. Draw your hips up under your body slightly.
Keep your chest up and your shoulders back. Do not allow
one shoulder to be higher than the other. Keep your arms
straight without stiffness, and hanging at your sides, in such
a way that your thumbs are always along the seams of your
trousers. Turn the backs of your hands out away from your
body and allow your hands and fingers to cup naturally.
Always keep your eyes straight to the front. When standing
properly the weight of your body will be divided equally be-
tween the heels and balls of both feet. When assuming the
position of attention, bring your heels together smartly and
audibly.
В 88. Rests.—Being at the halt the commands are: FALL
OUT; REST; AT EASE; and 1. parade, 2. REST.
a. At the command fall out, you may leave your position in
ranks but must remain in the immediate vicinity. At the com-
mand fall in, resume your position in ranks and stand at
attention. When on the march, you fall in at ease unless you
were at attention when the command fall out was given.
b. While at rest it is required that you keep one foot in place
in ranks. At the command rest, except for keeping one foot
in place, you may move around and talk.
c. At the command at ease, you are authorized to move
around but must keep your right foot in place in ranks. Silence
is always maintained while at ease.
80
soldier's handbook
88-89
d. parade rest is a movement that is executed in unison by
all soldiers in ranks. At the command of execution (REST)
of 1. parade, 2. REST, move your left foot smartly 12 inches
to the left of your right foot. As at attention, your knees are
kept straight without stiffness, and the weight of your body
rests equally on both feet. At the same time your foot is
moved, clasp your hands behind your back, palms to the rear,
the thumb and fingers of your right hand clasping your left
thumb. As at attention, you are required to maintain both
silence and immobility.
Figure 30.—Position of the soldier, or of attention.
e. Being at any of the rests, except fall out, you resume the
position of attention at the command of execution (ATTEN-
TION) of 1. squad, 2. ATTENTION.
89. Eyes Right or Left.—The commands are: 1. eyes, 2.
RIGHT (LEFT), 3. ready, 4. FRONT.
a. At the command right, turn your head and eyes to the
right.
81
89-91
soldier's handbook
b. At the command left, turn your head and eyes to the
left.
c. At the command front, turn your head and eyes to the
front.
90. Facings.—All facings are executed from the halt and
in the cadence of quick time. The commands are: 1. right
(left) , 2. FACE; and 1. about, 2. FACE.
a. At the command FACE of 1. right, 2. FACE, slightly
raise your left heel and your right toe; turn 90° to the right
by pivoting on the right heel. This movement is assisted by
pushing slightly with the ball of your left foot. Hold your
left leg straight without stiffness. The second part of this
movement consists in placing your left foot alongside of your
right and assuming the position of attention.
b. At the command FACE of 1. left, 2. FACE, you execute
the above movement in a corresponding manner to the left
and on your left heel.
c. At the command FACE of 1. about, 2f. FACE, place the
toe of your right foot a half-foot length in rear and slightly
to the left of your left heel. Do not move your left foot.
Keep the weight of your body mainly on your left heel. Keep
your right leg straight without stiffness. The second part
of this movement consists in turning your body 180° to the
right on your left heel and the ball of your right foot. Now
place your right heel beside your left. If you do this move-
ment properly you will find you have turned exactly 180°
and your heels come together on the same line without the
necessity of moving either foot forward or backward.
91. Salute With the Hand (fig. 31).—a. The commands
are: 1. hand, 2. SALUTE. At the command salute, raise your
right hand smartly until the tip of your forefinger (index
finger) touches the brim of your headdress, above and
slightly to the right of your right eye. If you are without
cap or hat, the tip of your forefinger touches your forehead
above and slightly to the right of your right eye. In either
case you keep your thumbs and fingers extended and joined,
palm to the left, and the hand and wrist straight. You also
keep your upper arm horizontal and the forearm inclined
82
soldier's handbook
91-92
at an angle of 45°. At the same time, you turn your head
and eyes toward the person you are saluting. The second
part of this movement consists in dropping your arm to
your side and turning your head and eyes to the front.
b. You execute the first position of the hand salute when
the person you are saluting is six paces from you or at his
nearest point of approach if more than six paces. You hold
that position until your salute has been returned or until the
person saluted has passed you if he does not return the salute.
You then execute the second movement of the hand salute.
Section II
STEPS AND MARCHINGS
92. a. All steps and marchings that are executed from the
halt, except right step, begin with the left foot.
b. Whenever necessary your instructor will indicate the
cadence to you by calling “One,” “Two,” “Three,” “Four,” as
your left and right foot, respectively, touch the ground.
c. All steps and marchings are executed at attention except
1. route step, 2. MARCH and 1. at ease, 2. MARCH.
83
93-95
soldier's handbook
93. Quick Time.—Being at the halt the commands to move
forward in quick time are: 1. forward, 2. MARCH. At the
command forward, you shift the weight of your body to the
right leg without making any noticeable movement. Do not
start to move forward. At the command march, step off
smartly with your left foot and continue to march with
30-inch steps straight to the front, at the rate of 120 steps
per minute. You do this without stiffness and without exag-
gerating any of the movements. Swing your arms easily and
in their natural arcs, 6 inches to the front and 3 inches to
the rear of your body.
94. Double Time.—a. Being at the halt, or in march in
quick time, to march in double time the commands are:
1. double time, 2. MARCH.
(1) If you are at the halt and the command double time
is given, shift your weight to your right leg without noticeable
movement just as you did at the command forward. At the
command march, step out and take up an easy running step
in the cadence of double time (180 steps, 36 inches each, per
minute). At the double time you raise your forearms to a
horizontal position at your side, close your fingers, with
knuckles out, and allow your arms to swing naturally. Re-
member to keep your lower arms (forearms) horizontal along
your waistline.
(2) If you are already marching at quick time you con-
tinue the march at the command double time. At the com-
mand march you take one more step in the cadence of quick
time and then step out at the double. You swing your arms
the same as you did in (1) above.
b. Being at the double time, to resume the cadence of quick
time the commands are: 1. quick time, 2. MARCH. At the
command march you take one step in double time and then
commence marching in the cadence of quick time. Allow
your arms to drop to your sides and then swing as they should
in the cadence of quick time.
95. To Halt.—a. The halt may be executed as eithertoot
strikes the ground. To halt when marching in quick time,
the commands are: 1. squad, 2. HALT. At the command
halt, given as either foot strikes the ground, take one step
84
soldier's handbook
95-98
in quick time and then place your rear foot alongside the
leading foot and assume the position of attention.
b. To halt when marching at the double time, the com-
mands are: 1. squad, 2. HALT. At the command halt, take
one step in double time, then one step in quick time and
then place your rear foot alongside the leading foot and
assume the position of attention.
96. To Mark Time.—Mark time may be given either while
you are marching or while you are at a halt. Mark time may
be executed either at quick time or at double time. The com-
mands are: 1. mark time, 2. MARCH.
a. If you are marching when the command march is given,
you take one more step forward and then bring up your rear
foot and plant it beside your leading foot with your heels on
the same line. You then continue the cadence by alternately
raising and planting each foot. You raise your feet 2 inches
in marking time. The command march may be given as
either foot is on the ground.
b. If you are at a halt when the command march is given,
you alternately raise and plant each foot beginning with your
left just as you did in a above.
c. You execute the halt from mark time just as you did
from quick time or from double time, except that a 2-inch
vertical step is substituted for the 30-inch forward step.
d. forward, halt, or mark time may each be executed one
from the other either in quick or double time.
97. Half Step.—a. The commands are: 1. half step, 2.
MARCH. If you are marching, when the command march
is given, you take one more 30-inch step, then begin taking
15-inch steps. The cadence does not change. The half step
is executed in quick time only.
b. If you are marching at the half step, the commands to
take up the full step will be: 1. forward, 2. MARCH.
c. If you are marking time, the same commands are given
to take up the full step, that is: 1, forward, 2. MARCH.
98. Side Step.—a. The commands to take up the side step
are: 1. right (left) step, 2. MARCH. These commands are
given only from the halt.
85
98-100
soldier's handbook
(1) 1. right step, 2. MARCH.—At the command march,
you move the right foot 12 inches to the right and plant it.
You then move the left foot and place it beside the right,
left knee straight. You now continue in the cadence of quick
time by starting again with the right foot.
(2) 1. left step, 2. MARCH.—Left step is executed in the
corresponding manner, starting with the left foot instead of
the right.
b. The side steps are used for short distances only. The
side step is never executed in double time.
c. To halt from the side step.the commands are: 1. squad,
2. HALT. The command halt is always given when the heels
are together. At the command halt you take one more 12-
inch step to the flank and then bring your feet together and
halt.
99. Back Step.—The commands to take up the back step
are: 1. backward, 2. MARCH. These commands are given
only while at the halt.
a. At the command march you take a 15-inch step straight
to the rear.
b. The back step, like the side step, is used for short dis-
tances only and is never executed at double time.
100. To Face in Marching.—The facings in marching are an
impoitant part of movements such as column right, close,
take interval, extend, etc. Facings in marching may be exe-
cuted either from the halt or while marching.
a. (1) Assume you are at a halt and are required to face
to the right and commence marching in that direction. At
the command of execution you turn to the right on the ball
of your right foot and at the same time you step off with your
left foot in the new direction. The length of this step will
vary with the movement being executed. It may be a full
step or a half step. It may be executed at either quick time
or at double time.
(2) Assume you are at the halt and are required to face
to the left and commence marching in that direction. At
the command of execution you face to the left on the ball of
the right foot and at the same tim€ step off with your left
foot in the new direction.
86
soldier's handbook
100-102
b. (1) Assume you are now marching and are required to
face to the right and continue marching in the new direction.
The command of execution will be given as your right foot
strikes the ground. At that command you advance and plant
your left foot. You then face to the right in marching and
at the same time step off in the new direction with your
right foot. Again the length of this step will depend on
whether you are marching at the half step, quick time, or
double time.
(2) Assume you are now marching and are required to
face to the left and continue marching in the new direction.
This time the command of execution will be given as your left
foot strikes the ground. At the command you advance and
plant your right foot. You then face to the left in marching
and at the same time step off in the new direction with your
left foot.
c. To face to the rear while marching the commands are:
1. to the rear, 2. MARCH. This command will be given as
your right foot strikes the ground. At the command of exe-
cution, advance and plant your left foot. You then turn to
the right about on the balls of both feet and immediately
step off in the new direction with your left foot.
101. To March by the Flank.—Being in march, the com-
mands are: 1. by the right (left) flank, 2. MARCH.
a. 1. by the right flank, 2. MARCH.—This command will
be given as your right foot strikes the ground. At the com-
mand march, advance and plant your left foot and face to the
right in marching. You then step off in the new direction
with the right foot.
b. 1. by the left flank, 2. MARCH.—This command will
be given as your left foot strikes the ground. At the com-
mand march advance and plant your right foot, face to the
left in marching, and move off in the new direction with
your left foot.
102. To Change Step.—The commands are: 1. change step,
2. MARCH. This command may be given as either foot
strikes the ground. The command is used only while
marching.
87
102-103
soldier's handbook
a. If the command of execution (MARCH) is given as your
right foot strikes the ground, you advance and plant your
left foot. You then place the toe of your right foot near the
heel of your left foot and immediately step off with your
left foot.
b. If the command of execution is given as your left foot
strikes the ground, you change step on the right foot.
103. To March Other Than at Attention.—The commands
are: 1. route step, 2. MARCH; or 1. at ease, 2. MARCH.
a. 1. route step, 2. MARCH.—At the command march you
are not required to march at attention, in cadence, or to
maintain silence.
b, 1. at ease, 2. MARCH.—At the command of execution
you are not required to march at attention or in cadence.
You are, however, required to maintain silence.
88
CHAPTER 8
SCHOOL OF THE SOLDIER WITH ARMS (DISMOUNTED)
Paragraphs
Section I. General ------------------------------------ 104
II. Manual of arms for the rifle_________________ 105-128
III. Loadings and firings________________________ 129-134
IV. Carrying the automatic rifle________________ 135
V. Manual of the pistol________________________ 136-152
Section I
GENERAL
104. Rules Governing Carrying of Rifles.—Except where
otherwise indicated, these rules will be applicable alike to the
U. S. rifle, caliber .30, M1903, and to the U. S. rifle, caliber
.30, Ml.
a. (1) The U. S. rifle, caliber .30, M1903, is not carried
with cartridges in either the chamber or the magazine except
when specifically ordered.' When so loaded or when sup-
posed to be loaded, it is habitually carried locked; that is,
with the safety lock turned to the “safe.” At all other times
it is carried unlocked with the trigger pulled. The cut-off is
kept turned off except when cartridges are actually used.
(2) Whenever troops equipped with the U. S. rifle, caliber
.30, M1903, are formed under arms, pieces are immediately
inspected at the commands: 1. inspection, 2. ARMS. A
similar inspection is made before dismissal. If cartridges are
found in the chamber or magazine they are removed and
placed in the belt.
b. (1) The U. S. rifle, caliber .30, Ml, is not carried with
cartridges in either the chamber or the receiver except when
specifically ordered. When so loaded or when supposed to
be loaded, it is habitually carried locked; that is, with the
safety in its rearmost position, inside the trigger guard.
(2) Whenever troops equipped with the U. S. rifle, caliber
.30, Ml, are formed under arms, pieces are immediately in-
spected at the commands: 1. inspection, 2. ARMS, 3. LOCK
PIECES. At the command lock pieces, each man in ranks
closes the bolt, sets the safety of his piece in its rearmost
position, and resumes port arms. Rifles are again inspected
325350°—41----7
89
104
soldier's handbook
at dismissal by the commands: 1. inspection, 2. ARMS, 3.
UNLOCK PIECES. At the command unlock pieces, each
man in ranks closes the bolt, sets the safety of his piece in
its foremost position, pulls the trigger, and resumes port
arms. If cartridges are found in the chamber or receiver,
they are removed and placed in the belt. The procedure
prescribed for these inspections is intended first, to insure
that U. S. rifles, caliber .30, Ml, in the hands of troops are
carried cocked and locked; second, to insure that hammers
are released on unloaded pieces not in use to prevent dam-
age from long continued compression of the hammer
springs.
c. The bayonet is fixed only when so ordered.
d. Fall in is executed with the rifle at the order arms.
e. (1) Before starting any movement for troops armed
with rifles, the commands, 1. right shoulder (sling), 2.
ARMS, are given before the command for movement.
(2) Movements for short distances may be executed at the
trail by prefacing the preparatory command with the words”
“at trail,” as 1. at trail, forward, 2. MARCH. The trail is
taken at the command march.
(3) Weapons such as the automatic rifle, light machine
gun, light mortar, etc., which have no manual of arms are
slung from the right shoulder at the command of execution,
ARMS, of 1. right shoulder, 2. ARMS. They are kept slung
until the command rest or at ease. In long halts at atten-
tion, the men carrying such equipment may be directed to
“unsling arms,”
/. When the facings, alinements, open and close ranks,
side step, back step, forming for shelter tents, extending and
closing are executed from the order, the weapon is brought
to the trail while in motion and the order resumed on halt-
ing. The position of trail arms is taken at the command
of execution in each case.
g. At the command halt, men armed with the rifle remain
at the position of right (left) shoulder arms until the com-
mand: 1. order, 2. ARMS, is given.
h,. In double time under arms, a disengaged hand is held
as when without arms.
90
soldier's handbook
105
Section II
MANUAL OF ARMS FOR THE RIFLE
105. Rules Governing Execution of the Manual of
Arms.—Except where otherwise indicated, these rules will be
applicable alike to’ the U. S. rifle, caliber .30, M1903, and to
the U. S. rifle, caliber .30, Ml.
a. In all positions of the left hand at the balance, the
thumb clasps the rifle; the sling is included in the grasp of
the hand (fig. 32). In describing the manual of arms, the
term “at the balance” refers to points on rifles as follows:
(1) U.S. rifle, caliber .30, M1903.—The center of the rear
sight leaf.
(2) U. S. rifle, caliber .30, Ml.—A point just forward of
the trigger housing.
b. In all positions of the rifle, diagonally across the body,
the barrel is up, butt in front of the right hip, barrel cross-
ing opposite the junction of the neck with the left shoulder.
The rifle is grasped at the balance with the left hand, palm
toward the body, wrist straight.
c. The cadence of the motions is that of quick time. Sol-
diers are first required to' give their whole attention to the
details of the motions, the cadence being gradually acquired
as they become accustomed to handling their rifles. The in-
structor may require them to count aloud in cadence with
the motions.
d. (1) The manual is not executed in marching except to
pass from right shoulder to left shoulder or port arms and
the reverse in marching at attention. These movements may
be used to add interest to the drill o!* to prevent fatigue in
long marches at attention.
(2) The manual is taught at a halt and the movements
may, for the purpose of instruction, be divided into motiops
and executed in detail. In this case, the command of exe-
cution determines the prompt execution of the first motion,
and the commands two, three, four, that of the other
motions.
(3) To execute the movement in detail, the instructor first
cautions, “By the numbers.” All movements divided into
91
105-108
soldier's handbook
motions are then executed as above explained until he
cautions, “Without the numbers.”
e. (1) Any appropriate position of the manual of arms may
be ordered from a previous position by giving the suitable
commands.
Figure 32.—Left hand at the balance.
(2) Under exceptional conditions of weather and fatigue,
the rifle may be carried as directed.
106. Position of Order Arms.—The butt of the rifle rests
on the ground, barrel to the rear, toe of the butt on line with
the toe of, and touching the right shoe, right hand holding
the rifle between the thumb and fingers, left hand as in posi-
tion of the soldier without arms.
107. Being at Order Arms.—1. trail, 2. ARMS. At the
command arms, raise the rifle and incline the muzzle for-
ward so that the barrel makes an angle of about 15° with
the vertical, the right arm slightly bent.
108. Being at Trail Arms.—1. order, 2. ARMS. At the
command arms, lower the rifle with the right hand and
resume the order.
92
soldier's handbook
108
Figure 33.—Position of order arms.
Figure 34.—Position of trail arms.
93
109-110
SOLDIER'S HANDBOOK
И 109. Being at Order Arms to Sling Arms, and Being at
Sling Arms to Unsling Arms.—a. sling arms. This move-
ment is not executed in cadence and applies to any rifle,
automatic rifle, light machine gun, light mortar, etc. Loosen
the sling, if not already loosened, and in the most convenient
manner assume the position shown in figure 35. This posi-
tion is authorized for long parades, long reviews, and for
occasions when the prolonged holding of the rifle becomes
a hardship on the troops. When used in ceremonies the
bayonet may be fixed.
b. 1. unsling, 2. ARMS, 3. adjust, 4. SLINGS. At the
command arms, pieces are unslung. At the command slings,
slings are adjusted to the drill position. This adjustment of
the slj»g will be made before precise movements of the
manual are to be executed.
110. Being at Order Arms.—1. port, 2. ARMS. At the
command arms, raise the rifle with the right hand and carry
94
soldier's handbook
110-112
it diagonally across the front of the body until the right
hand is in front of and slightly to the left of the chin (fig.
36®), so that the barrel is up, butt in front of the right hip,
barrel crossing opposite the junction of the neck with the
left shoulder. At the same time, grasp the rifle at the
balance with the left hand, palm toward the body, wrist
straight. (TWO) Carry the right hand to the small of the
stock, grasping it, palm down, holding right forearm hori-
zontal, left elbow resting against the body; the rifle in a
vertical plane parallel to the front (fig. 36®).
® First position.
(D Second position.
Figure 36.—Position of port arms.
111. Being at Order Arms.—1. present, 2. ARMS. At the
command arms, with the right hand carry the rifle in front
of the center of the body, barrel to the rear and vertical,
grasp it with the left hand at the balance, forearm hori-
zontal and resting against the body. (TWO) Grasp the
small of the stock with the right hand.
112. Being at Present or Port Arms.—1. order, 2. ARMS.
At the command arms, let go of the rifle with the right hand
and regrasp the piece between the upper sling swivel and
95
112-114
soldier's handbook
stacking swivel. (TWO) Let go of the rifle with the left
hand, lower the piece to the right so that the butt is 3 inches
from the ground, barrel to the rear, left hand with the
fingers extended and joined steadying the rifle, forearm and
wrist straight and inclining downward. (THREE) Complete
the order by lowering the rifle gently to the ground with the
right hand. Cut away the left hand smartly to the side.
Allowing the rifle to drop to the ground forcibly injures the
rifle and is prohibited.
113. Being at Order Arms.—a. U. S. rifle, caliber .30,
M1903.—1. inspection1, 2. ARMS. At the command arms,
take the position of port arms. Seize the bolt handle with
the thumb and forefinger of the right hand, turn the handle
up, draw the bolt back, lower the head and eyes sufficiently
to glance into the magazine. Having found the magazine
empty, or having emptied it, raise the head and eyes to the
front.
b. U. S. rifle, caliber .30, Ml.—1. inspection, 2. ARMS. At
the command arms, take the position of port arms. With the
fingers of the left hand closed, place the left thumb on the
operating rod handle and push it smartly to the rear until
it is caught by the operating rod catch; at the same time
lower the head and eyes sufficiently to glance into the re-
ceiver. Having found the receiver empty, or having emptied
it, raise the head and eyes to the front; at the same time
regrasp the piece with the left hand at the balance.
114. Being at Inspection Arms.—a. U. S. rifle, caliber .30,
M1903.—1. ORDER (RIGHT SHOULDER, PORT), 2. ARMS. At the
preparatory command, push the bolt forward, turn the handle
down, pull the trigger, and resume port arms. At the com-
mand arms, complete the movement ordered.
b. U. S. rifle, caliber .30, Ml.—1. lock pieces, 2. order
(RIGHT SHOULDER), 3. ARMS, ОГ 1. UNLOCK PIECES, 2. DIS-
MISSED. At the command lock (or unlock) pieces, place
the right side of the right hand against the operating rod
handle with the fingers extended and joined and the thumb
on flie follower. (TWO) Force the operating rod handle
slightly to the rear, depress the follower with the right thumb,
and permit the bolt to ride forward about 1 inch over the
follower. (THREE) Remove the thumb from the follower
96
soldier's handbook
114
Figure 37.—Execution of present arms.
Figure 38.—Next to last position of order arms.
97
114-118
soldier's handbook
and release the operating rod handle. (FOUR) Lock the
piece, or unlock the piece and pull the trigger as the case may
be (par. 104b(2)) and resume the position of port arms.
After the pieces have been locked or unlocked, as prescribed
above, order or right shoulder arms is given or the unit is
dismissed.
115. Being at Order Arms.—1. right shoulder, 2. ARMS.
At the command arms, raise and carry the rifle diagonally
across the body with the right hand as shown in figure 39, at
the same time grasp it at the balance with the left hand.
(TWO) Regrasp it with the right hand on the butt, the heel
between the first two fingers, thumb and fingers closed on
the stock. (THREE) Without changing the grasp of the
right hand, place the rifle on the right shoulder, barrel up
and inclined at an angle of about 45° from the horizontal,
trigger guard in the hollow of the shoulder, right elbow against
the side, forearm horizontal, the rifle in a vertical plane per-
pendicular to the front; carry the left hand, thumb and fin-
gers extended and joined, to the small of the stock, first joint
of the forefinger touching the cocking piece (or, for the Ml
rifle, touching the rear end of the receiver), wrist straight,
and elbowt down. (FOUR) Cut away the left hand smartly
to the side.
116. Being at Right Shoulder Arms.—1. port, 2. ARMS.
At the command arms, press the butt down quickly and
throw the rifle diagonally across the body, at the same time
turning it to the left so as to bring the barrel up, the right
hand retaining its grasp on the butt, the left grasping the
rifle at the balance. (TWO) Change the right hand to the
small of the stock.
117. Being at Right Shoulder Arms.—1. order, 2. ARMS.
At the command arms, press the butt down quickly and
throw the rifle diagonally across the body, the right hand
retaining the grasp on the butt, the left hand grasping the
rifle at the balance. Then execute order arms as described
in paragraph 112.
118. Being at Port Arms.—1. right shoulder, 2. ARMS.
At the command arms, change the right hand to the butt as
described in paragraph 115. (TWO), (THREE) Execute the
98
soldier's handbook
118-121
last two movements as in right shoulder arms from order
arms.
119. Being at Order Arms.—1. parade, 2. REST. At the
command rest, move the left foot smartly 12 inches to the
left of the right foot, keeping the legs straight, so that the
weight of the body rests equally on both feet. At the same
time incline the muzzle of the rifle to the front, the right arm
extended, right hand grasping the rifle just below the upper
band. Hold the left hand behind the body, resting in the
small of the back, palm to the rear.
Figure 39 —Execution of right shoulder arms.
120. Being at Parade Rest.—1. squad, 2. ATTENTION. At
the command attention, resume the position of order arms.
Я 121. Being at Right Shoulder Arms.—left shoulder, 2.
ARMS. At the command arms, execute port arms in two
counts as described in paragraph 116. (THREE) Let go of
the rifle with the left hand and with the right hand still
grasping the small of the stock place it on the left shoulder,
barrel up, trigger guard in the hollow of the shoulder; at
99
121-126
soldier’s handbook
the same time grasp the butt with the left hand; heel be-
tween the first and second fingers, thumb and fingers closed
on the stock, left forearm horizontal, left elbow against the
side, the rifle in a vertical plane perpendicular to the front.
(FOUR) Drop the right hand quickly to the right side.
122. Being at Left Shoulder Arms.—a. 1. port, 2. ARMS.
At the command arms, grasp the rifle with the right hand at
the small of the stock. (TWO) Let go with the left hand
and at the same time carry the piece with the right hand
to the position of port arms and then regrasp it with the
left.
b. left shoulder arms may be ordered directly from the
order, right shoulder, or present. At the command arms,
execute port arms and continue in cadence to the position
ordered.
123. Being at Left Shoulder Arms.—1. right shoulder, 2.
ARMS. At the command arms, execute port arms as de-
scribed in paragraph 122, and then right shoulder arms as
described in paragraph 118.
124. Being at Left Shoulder Arms.—1. order, 2. ARMS.
At the command arms, execute port arms , as described in
paragraph 122 and complete the movement of order arms as
described in paragraph 112.
125. Being at Order or Trail Arms.—1. rifle, 2. SALUTE.
At the command salute, carry the left hand smartly to the
right side, palm of the hand down, thumb and fingers ex-
tended and joined, forearm and wrist straight, first joint of
forefinger between the stacking swivel and the muzzle as the
conformation of the man permits, and look toward the person
saluted. (TWO) Cut away the left hand smartly to the
side; turn the head and eyes to the front.
126. Being at Right Shoulder Arms.—1. rifle, 2. SALUTE.
At the command salute, carry the left hand smartly to small
of the stock, forearm horizontal, palm of the hand down,
thumb and fingers extended and joined, first joint of the
forefinger touching end of cocking piece (or, for the Ml
rifle, touching the rear end of the receiver); look toward the
person saluted. (TWO) Cut away the left hand smartly to
the side; turn the head and eyes to the front.
100
soldier's handbook
127-128
127. Being at Order Arms.—1. fix, 2. BAYONETS. At
the command bayonets—
a. If the bayonet scabbard is carried on the belt, move
the muzzle of the rifle to the left front and grasp the rifle
below the stacking swivel with the left hand; grasp the
bayonet with the right hand, back of the hand toward the
body; pressing the spring with the forefinger, draw the
bayonet from the scabbard and fix it on the barrel, glancing
'at the muzzle; resume the order.
b. If the bayonet is carried on the haversack, draw and
fix the bayonet in the most convenient manner.
c. These movements are not executed in cadence.
Figure 40.—Position of parade rest.
128. Being at Order Arms.—1. unfix, 2. BAYONETS.
At the command bayonets—
a. If the bayonet scabbard is carried on the belt, take
the position for fixing bayonets; grasp the handle of the
bayonet with the right hand, pressing the spring, raise the
bayonet until the handle is about 12 inches above the muzzle
of the rifle; drop the point to the left, back of the hand
toward the body and, glancing at the scabbard, return the
101
128
SOLDIER'S handbook
Figure 41.—Rifle salute at right shoulder arms and at order arms.
Figure 42.—To fix bayonets.
102
soldier's handbook
128-130
bayonet, the blade passing between the left arm and the
body; regrasp the rifle with the right hand and resume the
order.
b. If the bayonet scabbard is carried on the haversack,
take the bayonet from the rifle as described above and re-
turn it to the scabbard in the most convenient manner.
c. These movements are not executed in cadence.
Section III
LOADINGS AND FIRINGS
129. General Rules.—Except where otherwise indicated,
these rules will be applicable alike to the U. S. rifle, caliber
.30, M1903, and the U. S. rifle, caliber .30, Ml.
a. For ceremonial firing, the front rank only of units
larger than a squad executes the loading and firing. A squad
is always formed in line preliminary to such firing.
b. Rifles, caliber .30, M1903, are loaded and locked before
any orders for firing are given. Rifles, caliber .30, Ml, are
loaded while locked. (See par. 104b(2).)
c. Except during firing, if rifles have been ordered loaded
and locked, they are kept loaded and locked without com-
mand until the command unload, or 1. inspection, 2. ARMS.
During firing, fresh clips will be inserted when the maga-
zine or clip is exhausted.
d. Except when used as a single loader, the U. S. rifle,
caliber .30, Ml, is habitually loaded by placing a full clip of
eight cartridges in the receiver.
130. To Load.—a. The unit being in any formation, stand-
ing at a halt, the commands are: 1. with ball (blank,
DUMMY, GUARD) CARTRIDGES, 2. LOAD.
(1) U. S. rifle, caliber .30, M1903.—At the command load,
each front rank rifleman faces half right and carries the
right foot 12 inches toi the right and to such position as will
insure the greatest firmness and steadiness of the body;
raises or lowers the rifle and drops it into the left hand at
the balance, left thumb extending along the stock, muzzle
pointed into the air at an angle of 45°, and turns the cut-
off up. With the right hand he turns up the bolt and draws
it back; takes a loaded clip and inserts the end in the clip
slots; places his thumb on the powder space of the top
103
130
soldier's handbook
cartridge, the fingers extending around the rifle and tips
resting on the magazine floor plate; forces the cartridges
into the magazine by pressing down with the thumb; re-
moves the clip; thrusts the bolt home, turning down the
handle; turns the safety lock to the “safe” and carries the
hand to the small of the stock. Automatic riflemen do not
execute the ceremonial loadings or firings.
(2) U. S. rifle, caliber .30, Ml.—At the command load,
each front rank rifleman faces half right and carries his
right foot 12 inches to the right and to such position as
will secure the greatest firmness and steadiness of the body,
raises or lowers the rifle and drops it into the left hand at
the balance, right hand at the small of the stock, muzzle in
the air at an angle of 45°. With the forefinger of the right
hand, he pulls the operating rod handle smartly to the rear
until the operating rod is caught by the operating rod catch.
With his right hand he takes a fully loaded clip and places
it on top of the follower. He places the right side of his
right hand against the operating rod handle and with his
thumb presses the clip down into the receiver until it en-
gages the clip latch. He swings his thumb to the right so as
to clear the bolt in its forward movement. He releases the
operating rod handle. He then pushes forward on the
operating rod handle with the heel of his right hand to
make certain of complete closing of the bolt and carries
his right hand to the small of the stock. Automatic rifle-
men do not execute the ceremonial loadings and firings.
b. For instruction in loading, the commands are: 1. simu-
late, 2. LOAD.
(1) U.S. rifle, caliber .30, M1903.—At the command load,
execute loading as described in a(l) above, except that the
cut-off remains “off” and the handling of the cartridge is
simulated.
(2) U. S. rifle, caliber .30, Ml.—At the command load,
execute loading as described in a(2) above except that the
handling of cartridges is simulated.
c. (1) The U. S. rifle, caliber .30, M1903, may be used as
a single loader by turning the cut-off to “off.” At the com-
mand load, the magazine may be filled in whole or in part
by pressing cartridges singly down and back until they are
in the proper place. The use of the rifle as a single loader
is, however, to be regarded as exceptional.
104
soldier's handbook
130-131
(2) To use the U. S. rifle, caliber .30, Ml, as a single
loader, at the command load, take the position of load and
open the bolt. With the right hand, place one round in
the chamber, seating it in place with the thumb. With the
side of the right hand against the operating rod handle
and the fingers extended and joined, force the operating rod
handle slightly to the rear, depress the follower with the
(right thumb, and permit the bolt to ride forward about 1
inch over the follower. Then remove the thumb from the
follower, release the operating rod handle, and push forward
on the operating rod handle with the heel of the hand to be
certain that the bolt is completely closed. Carry the right
hand to the small of the stock.
131. To Unload.—Being in any formation, the command
is: UNLOAD.
a. U. S. rifle, caliber ,30, M1903.—At the command unload,
take the position of load, turn the safety lock up, and move
the bolt alternately backward and forward until all the
cartridges are ejected. After the last cartridge is ejected,
the chamber is closed by first thrusting the bolt forward
slightly to free it from the stud holding it in place when the
chamber is opened, pressing the follower down and back
to engage it under the bolt, and then thrusting the bolt home.
The trigger is then pulled, the cartridges are picked up,
cleaned, and returned to the belt, and the rifle is brought to
the order.
b. U. S. rifle, caliber .30, Ml.—At the command unload,
take the position of load. Hook the right thumb over the
operating rod handle, pull and hold the operating rod in
the extreme rear position. Hold the rifle with the right hand,
thumb on operating rod handle, fingers around trigger guard.
Steady the rifle by pressing the stock against the right hip.
Place the left hand over the receiver and release the clip
latch with the left thumb. Catch the ejected clip in the
left hand, return the clip to the belt, return the left hand
to the balance. Place the right side of the right hand against
the operating rod handle and force the operating rod slightly
to the rear. Depress the follower with the right thumb and
permit the bolt to ride forward about 1 inch over the fol-
lower. Remove the thumb from the follower and release the
operating rod handle. Bring the rifle to the order.
325350°—41---8 105
131
soldier's handbook
ф To execute position, of load.
® To execute position of fire.
Figure 43.—Platoon in ceremonial firing.
106
soldier's handbook
132-133
132. To Fire the Rifle.—a. U. S. rifle, caliber .30, Ml903,
fully loaded with ball (blank or guard) ammunition.—Squeeze
the trigger for each shot. After each shot draw back and
thrust home the bolt with the right hand, leaving the safety
lock turned up to the “ready.”
b. U. S. rifle, caliber .30, Ml.—(1) Fully loaded with clips
of ball ammunition.—Squeeze the trigger for each shot.
When the eighth shot has been fired, the clip will be ejected
automatically and the bolt will remain open for the insertion
of a new clip.
(2) Fully loaded with clips of blank or guard ammuni-
tion.—Squeeze the trigger for each shot. After each shot,
pull the operating rod handle to the rear with the right fore-
finger and release it. Push forward on the operating rod
handle with the heel of the right hand to insure that the bolt
is fully closed.
133. To Fire by Volley.—a. Being in firing formation with
rifles loaded, the commands are: 1. front rank, 2. ready, 3.
AIM, 4. squad, 5. FIRE. (For ceremonial purposes, blank
ammunition is used and only the front rank executes the
commands.)
(1) U.S. rifle, caliber .30, M1903.—At the command ready,
take the position of load, if not already in that position, and
turn the safety lock to the “ready.” At the command aim,
raise the rifle with both hands, butt placed and held firmly
against the shoulder, left hand well under the rifle grasping
it at or in front of the balance, rifle resting in the palm
of the left hand, right elbow at the height of the shoulder,
right cheek held firmly against the stock as far forward as
it can be placed without straining. The rifle is raised 45°
from the horizontal or, if ordered, at the horizontal. The left
eye is closed, right eye looking through the notch of the rear
sight. At the command fire, the trigger is squeezed rapidly;
the rifle is then lowered to the position of load and loaded.
(2) U. S. rifle, caliber .30, Ml.—At the command ready,
take the position of load, if not already in that position. At
the command aim, raise the rifle with both hands, butt placed
and held firmly against the shoulder, left hand well under
the rifle grasping it at or in front of the balance, rifle resting
in the palm of the left hand, right elbow at the height of the
107
133-135
soldier's handbook
shoulder, right cheek held firmly against the stock as far
forward as it can be placed without straining, and press the
safety lock to its forward position with the trigger finger.
The rifle is raised 45° from the horizontal or, if ordered, at
the horizontal. The left eye is closed, right eye looking over
the rear sight. At the command fire, the trigger is squeezed
rapidly; the rifle is then lowered to the position of load and
loaded.
b. To continue the firing, the commands are: 1. aim, 2.
squad, 3. FIRE.
(1) U. S. rifle, caliber .30, M1903.—Each command is exe-
cuted as previously explained, load (from the magazine) is
executed by drawing back and thrusting home the bolt with
the right hand, leaving the safety lock turned up to the
“ready”.
(2) U. S. rifle, caliber .30, Ml.—Each command is executed
as previously explained, load (from the clip) is executed by
pulling the operating rod handle fully to the rear with the
right forefinger and releasing it, leaving the “safety” in its
forward position.
134. To Cease Firing.—The command is: CEASE FIRING.
At the command cease firing, firing stops; rifles not already
at the position of load are brought to that position.
Section IV
CARRYING THE AUTOMATIC RIFLE
135. General Rules.—a. Except as otherwise prescribed,
the automatic rifle is habitually carried slung over the right
shoulder, butt down, barrel to the rear, right hand grasping
the sling, hand in front of armpit.
b. For marches and field exercises, the automatic rifle may
be carried slung over either shoulder.
c. When troops are at ease, the automatic rifle is kept
slung unless otherwise ordered.
d. When troops are at rest, the automatic rifle may be un-
slung and the position of order arms taken.
e. Only the following movements of the manual are exe-
cuted by the automatic rifleman:
108
soldier’s handbook
135
(1) Parade rest.—If at sling arms, execute as without
arms keeping the right hand on the sling.
(2) Inspection arms.—At the command of execution,
grasp the magazine with the left hand; at the same time
press the magazine release with the right hand. Withdraw
the magazine with the left hand and place it in the belt.
Pull back the operating handle with the left hand.
(3) Being at inspection arms.—1. order (port, right
shoulder), 2. ARMS. At the command of execution, pull
Figure 44.—Position of automatic rifle slung over right shoulder.
the trigger, replace the magazine, and resume the position
of attention, the automatic rifle being kept slung.
f. Men armed with the automatic rifle execute inspection
arms when a unit is formed or dismissed at the command:
1. inspection, 2. ARMS.
g. Men armed with the automatic rifle salute with the
hand salute when not in ranks. In ranks they do not salute.
h. For instruction, ceremonies, and drill, the organization
commander may, at his discretion, substitute rifles for auto-
matic rifles.
109
136-137
soldier's handbook
Section V
MANUAL OF THE PISTOL
136. General.—a. The movements herein described differ
in purpose from the manual of arms for the rifle in that they
are not designed to be executed in exact unison. Further-
more, with only a few exceptions, there is no real necessity
for their simultaneous execution. They are not therefore
planned as a disciplinary drill to be executed in cadence with
snap and precision, but merely as simple, quick, and safe
methods of handling the pistol. Commands are prescribed
for such movements only as may be occasionally executed
simultaneously by the squad or larger unit.
b. In general movements begin and end at the position of
RAISE PISTOL.
c. Commands for firing, when required, are limited to
COMMENCE FIRING and CEASE FIRING.
d. Officers and enlisted men armed with the pistol remain
at the position of attention during the manual of arms, except
when their units are presented to their commanders or are
presented during ceremonies, at retreat, and at guard mount-
ing. In such cases they execute the hand salute at the com-
mand of execution, ARMS, of 1. present, 2. ARMS, and re-
sume the position of attention at the command of execution
of the next command.
e. Men armed with the pistol execute inspection pistol
when a unit is formed or dismissed at the command: 1.
inspection, 2. ARMS.
/. Whenever the pistol is carried mounted the lanyard will
be used. The lanyard should be of such length that the arm
may be fully Extended without constraint.
Dismounted
137. To Raise Pistol.—The commands are: 1. raise, 2. PIS-
TOL. At the command pistol, unbutton the flap of the
holster with the right hand and grasp the stock, back of the
hand outward. Draw the pistol from the holster; reverse it,
muzzle up, the thumb and last three fingers holding the stock,
the forefinger extended outside the trigger guard, the barrel
of the pistol to the rear and inclined to the front at an angle
of 30°, the hand as high as, and 6 inches in front of, the
110
soldier's handbook
137-144
point of the right shoulder. This is the position of raise
pistol.
138. To Withdraw the Magazine.—Without lowering the
right hand, turn the barrel slightly to the right; press the
magazine catch with the right thumb and with the left hand
remove the magazine. Place it in the belt or pocket.
139. To Open the Chamber.—Withdraw the magazine and
resume the position of raise pistol. Without lowering the
right hand, grasp the slide with the thumb and the first two
fingers of the left hand (thumb on left side of slide and
pointing downward); keeping the muzzle elevated, shift the
grip of the right hand so that the right thumb engages with
the slide stop. Push the slide downward to its full extent
and force the slide stop into its notch with the right thumb
Without lowering the muzzle of the pistol.
140. To Close the Chamber.—With the right thumb press
down the slide stop and let the slide go forward. Squeeze
the trigger.
141. To Insert a Magazine.—Without lowering the right
hand, turn the barrel to the right. Grasp a magazine with
the first two fingers and thumb of the left hand; withdraw it
from the belt and insert it in the pistol. Press it fully home.
142. To Load Pistol.—The commands are: 1. load, 2. PIS-
TOL. At the command pistol, if a loaded magazine is not
already in the pistol, insert one. Without lowering the right
hand, turn the barrel slightly to the left. Grasp the slide
with the thumb and fingers of the left hand (thumb on right
side of slide and pointing upward). Pull the slide downward
to its full extent. Release the slide and engage the safety
lock.
143. To Unload Pistol.—The commands are: 1. unload,
2. PISTOL. At the command pistol, withdraw the magazine.
Open the chamber as prescribed in paragraph 142. Glance
at the chamber to verify that it is empty. Close the cham-
ber. Take the position of raise pistol and squeeze the
trigger. Then insert an empty magazine.
144. To Inspect Pistol.—The commands are: 1. inspec-
tion, 2. PISTOL. At the command pistol, withdraw the
magazine. Open the chamber as prescribed in paragraph
111
344-146
soldier's handbook
139. Take the position of raise pistol. The withdrawn
magazine is held in the open left hand at the height of the
belt. After the pistol has been inspected, or at the com-
mand 1. return, 2. PISTOL, close the chamber, take the
position of raise pistol, and squeeze the trigger. Insert an
empty magazine and execute return pistol.
Figure 45.—Manual of the pistol (dismounted).
145. To Return Pistol.—The commands are: 1. return,
2. PISTOL. At the command pistol, lower the pistol to the
holster, reversing it, muzzle down, back of the hand to the
right; raise the flap of the holster with the right thumb;
insert the pistol in the holster and thrust it home; button
the flap of the holster with the right hand.
Mounted
146. General Rules.—The following movements are exe-
cuted as when dismounted: raise pistol, return pistol, close
chamber. The mounted movements may be practiced when
dismounted by first cautioning, “Mounted position.” The
112
soldier's handbook
146-149
right foot is then carried 20 inches to the right and the left
hand to the position of the bridle hand. Whenever the
pistol is lowered into the bridle hand, the movement is exe-
cuted by rotating the barrel to the right. Grasp the slide
Figure 45.—Manual of the pistol (dismounted).
in the full grip of the left hand, thumb extending along the
slide, back of the hand down, barrel down and pointing
upward and to the left front.
147. To Withdraw the Magazine.—Lower the pistol into
the bridle hand. Press the magazine catch with the fore-
finger of the right hand, palm of the hand over the base of
the magazine to prevent it from springing out; withdraw the
magazine and place it in the belt or pocket.
148. To Open the Chamber.—Withdraw the magazine.
Grasp the stock with the right hand, back of the hand down,
thrust forward and upward with the right hand, and engage
the slide stop by pressure of the right thumb.
149. To Insert a Magazine.—Lower the pistol into the
bridle hand. Extra magazines should be carried in the belt
113
149-152
soldier's handbook
with the projection on the base pointing to the left. Grasp
the magazine with the tip of the right forefinger on the pro-
jection, withdraw it from the belt, and insert it in the pistol.
Press it fully home.
И 150. To Load Pistol.—The commands are: 1. load, 2. PIS-
TOL. At the command pistol, lower the pistol into the
bridle hand. If a loaded magazine is not already in the pis-
tol, insert one. Grasp the stock with the right hand, back
of the hand down, and thrust upward and to the left front;
release the slide and engage the safety lock.
151. To Unload Pistol.—The commands are: 1. unload, 2.
PISTOL. At the command pistol, withdraw the magazine.
Open the chamber. Glance at the chamber to verify that it
is empty. Close the chamber. Take the position of raise
pistol and squeeze the trigger. Then insert an empty maga-
zine.
152. To Inspect Pistol.—The commands are: 1. inspec-
tion, 2. PISTOL. (The pistol is inspected mounted only at
mounted guard mounting. The magazine is not withdrawn.)
At the command pistol, take the position of raise pistol.
After the pistol has been inspected, or on command, it is
returned.
114
CHAPTER 9
SQUAD AND PLATOON DRILL
Paragraphs
Section* I. The squad______________________________________ 153-169
II. The platoon____________________________________ 170-185
Section I
THE SQUAD
153. General.’—a. The squad is a group of soldiers organ-
ized primarily as a combat team. It consists of one squad
leader and other personnel as authorized by appropriate
Tables of Organization. When the squad leader is absent,
he is replaced by the second in command. If the second in
command is also absent, the next senior member of the squad
acts as leader.
b. As far as practicable, the squad is kept intact. The
normal formation of the squad is a single rank or single file.
This permits variation in the number of men composing the
squad.
c. The squad in line marches to the left or to the front only
for minor changes of position.
154. To Form the Squad.—a. The command is: FALL IN.
At the command fall in, the squad forms in line as shown
in figure 48. On falling in, each man except the one on the
left extends his left arm laterally at shoulder height, palm
of the hand down, fingers extended and joined. Each man,
except the one on the right, turns his head and eyes to the
right and places himself in line so that his right shoulder
touches lightly the tips of the fingers of the man on his
right. As soon as proper intervals have been obtained, each
man drops his arm smartly to his side and turns his head to
the front.
b. To form at close intervals, the commands are: 1. at
close intervals, 2. FALL IN. At the command fall in, the
men fall in as in a above, except that close intervals are ob-
tained by placing the left hands on the hips as shown in fig-
ure 49. In this position the heel of the palm of the hand
115
154
soldier's handbook
RIFLE SQUAD IN LINE
INTERVALS BETWEEN MEN— "NORMAL" ARMS LENGTH
CLOSE"4 INCHES
s
[3]
r~l RIFLE SQUAD IN COLUMN
1--1 DISTANCE BETWEEN
MEN 40 INCHES
□
□
□
□
^1 SQUAD LEADER
N SECOND IN COMMAND
□ RIFLEMAN
[S] SCOUT
Figure 46.—Rifle squad.
116
soldier's handbook
154
RIFLE
SQUAD
AUTOMATIC
RIFLE
SQUAD
LIGHT
MACHINE
GUN
SQUAD
CO MM
MORTAR
SQUAD
s
C
c
c
A
И SQUAD LEADER
S SECOND IN COMMAND
ED SCOUT
□ RIFLEMAN
еЬ AUTOMATIC RIFLEMAN
db MACHINE RUNNER
® MORTAR GUNNER
ED ASSISTANT
(3 AMMUNITION CARRIER
Figure 47.—Details of infantry rifle company squads.
117
154-157
soldier's* handbook
rests on the hip, the fingers and thumb are extended and
joined, and the elbow is in the plane of the body.
c. The squad falls in on the squad leader. If the squad
is formed under arms, pieces are at once inspected.
155. Previous Instructions Applicable.—The squad ex-
ecutes the positions, movements, and manual of arms as pre-
scribed in chapters 7 and 8, all men executing the movements
simultaneously.
И 156. To Dismiss the Squad.—The commands are: 1. in-
spection, 2. ARMS, 3. port, 4. ARMS, 5. DISMISSED, or 3.
UNLOCK PIECES, 4. DISMISSED (if armed with the Ml
rifle).
157. To Count Off.—a. The command is: COUNT OFF.
At the command count off, each man of the squad, except
the one on the right flank, turns his head and eyes to the
right. The right flank man calls out “One.” Each man in
succession calls out, “Two,” “Three,” etc., turning his head
and eyes to the front as he gives his number.
118
soldier's handbook
157-158
b. This command may be given whenever it is desired that
the men know their relative position in the squad.
158. To Aline the Squad.—a. If in line, the commands
are: 1. dress right (left), 2. DRESS, 3. ready, 4. FRONT.
At the command dress, each man except the one on the left
extends his left arm (or if at close interval, places his left
hand upon his hip), and all aline themselves to the right.
The instructor places himself on the right flank one pace
from and in prolongation of the line and facing down the
line. From this position he verifies the alinement of the
Figure 49.—1. at close interval, 2. FALL IN.
men, ordering individual men to move forward or back as is
necessary. Having checked the alinement, he faces to the
right in marching and moves three paces forward, halts,
faces to the left and commands: 1. ready, 2. FRONT. At
the command front, arms are dropped quietly and smartly
to the side and heads turned to the front.
b. If in column the command is: COVER. At the com-
mand cover, men cover from front to rear with 40 inches
distance between men.
119
159-162
soldier's handbook
159. Being in Line at Normal Interval, to Obtain Close
Interval.—The commands are: 1. close, 2. MARCH. At the
command march, all men except the right flank man face to
the right in marching and form at close interval, as pre-
scribed in paragraph 154b.
160. Being in Line at Close Interval, to Extend to
Normal Interval.—The commands are: 1. extend, 2.
MARCH. At the command march, all men except the right
flank man face to the left in marching and form at normal
interval as prescribed in paragraph 154a.
Я 161. Being in Line, to March to the Flank.—The com-
mands are: 1. right (left), 2. FACE, 3. forward, 4. MARCH.
The movements are executed as explained in paragraphs
90a and 93, all men stepping off simultaneously.
E 162. To March to the Oblique.—a. For the instruction of
recruits, the squad being in column or correctly alined, the
instructor causes each man to face half right (left), points
out his position, and explains that it is to be maintained in
the oblique march.
b. The squad being in any formation, the commands are:
1. right (left) oblique, 2. MARCH. At the command
march, given as the right foot strikes the ground, each in-
dividual advances and plants the left foot, faces half right
in marching and steps off in a direction of 45° to the right
of his original front. He preserves his relative position,
keeping his shoulders parallel to those of the guide (man on
right front of line or column), and so regulates his step
that the ranks remain parallel to their original front.
c. The command halt is given on the left foot when halt-
ing from the right oblique and on the right foot when halt-
ing from left oblique. At the command halt, given as the
left foot strikes the ground, each individual advances and
plants the right foot, turns to the front on the ball of the
right foot, and places the left foot by the side of the right
foot.
d. To resume the original direction, the commands are: 1.
forward, 2. MARCH. At the command march, each indi-
vidual faces half left in marching and then moves straight
to the front.
120
soldier's handbook
162-165
e. If at half step or mark time while obliquing, the full
step is resumed by the command: 1. oblique, 2. MARCH.
f. To give volume to the command the word “oblique” is
pronounced to rhyme with “strike.”
163. To March Toward a Flank While in March.—a. The
commands are: 1. by the right (left) flank, 2. MARCH. At
the command march, each individual executes the movement
as prescribed in paragraph 101.
b. This movement is used when a quick movement to the
right or left for a short distance is required. Normally the
unit is halted, faced in the desired direction, and started
forward again by the commands: 1. forward, 2. MARCH.
M 164. Being in Column, to Change Direction.—The com-
mands are: 1. COLUMN RIGHT (LEFT) (HALF RIGHT) (HALF LEFT),
2. MARCH. At the command march, the leading man exe-
cutes the movement as prescribed in paragraph 100a and b.
The other men in the column execute the same movement
successively and on the same ground as the leading man.
165. Being in Line, to Take Interval and Assemble.—a. To
take interval, the commands are: 1. take interval to the
left (right) , 2. MARCH. At the command march, the right
flank man stands fast and extends his left arm at shoulder
height, palms of the hand down, fingers extended and joined
until the man on his left obtains the proper interval, then he
drops his arm. Other men face to the left in marching and
step out until they have an interval of two arms’ length from
the man on their right. Each man, except the one on the
left who raises his right arm only, extends both arms later-
ally at shoulder height. Each man, except the right flank
man, then turns his head and eyes to the right and places
himself in line so that the finger tips of his right hand touch
lightly the finger tips of the left hand of the man on his right.
As soon as each man alines himself at two arms’ length inter-
vals from the man on his right, he drops his right arm to
the side and turns his head and eyes to the front. He drops
his left arm to the side when the man on his left has obtained
his proper interval. If under arms, rifles will be slung prior
to the execution of this movement.
325350°—41---9
121
165-166
soldier's handbook
b. To assemble, the commands are: 1. assemble to the
right (LEFT). 2. MARCH. At the command march, the right
flank man stands fast. All other men face to the right in
marching and form at normal intervals as in paragraph 154a.
166. To Stack Arms.—a. Rifle squad.—The rifle squad be-
ing in line at normal or close interval, the commands are:
1. stack, 2. ARMS. Numbers 2, 5, 8, and 11 make the stacks
except when no men are on the left of these numbers. The
stack is made as follows: At the command arms, the man on
the left of the stackman regrasps his rifle with the right hand
at the balance, carrying it to the horizontal position, barrel
up, and passes his rifle to the stackman who grasps it with
his left hand between the upper sling swivel and stacking
swivel and places the butt between his feet, barrel to the
front, muzzle inclined slightly to the front, the thumb and
forefinger raising the stacking swivel. The stackman then
throws the butt of his own rifle two feet in advance of that
of his left file and 6 inches to the right of his right toe; at
the same time he allows his right hand to slip to the stack-
ing swivel and engages his rifle with that of his left file. The
man on the right of the stackman raises his rifle with his
right hand, regrasps it with his right hand at the balance,
steps to the left front keeping his right foot in place, and
carries his rifle well forward, barrel to the front; the left hand
guiding the stacking swivel engages the lower hook of the
swivel of his own rifle with the free hook of that of his left
file, and then turns the barrel outward into the angle formed
by the other two rifles and lowers the butt to the ground so
that it will form a uniform stack with the other two rifles.
He then assumes the position of attention. Other rifles of
the squad are passed toward the nearest stack and laid on
the stack by the stackman.
b. Automatic rifle squad.—The automatic rifle squad, rifle
company, being in line at normal or close interval, the com-
mands are: 1. stack, 2. ARMS. The second man from the
left makes the stack. The stack is made as follows: At
the command arms, the man on the left of the stackman
regrasps his rifle with the right hand at the balance, carry-
ing it to the horizontal position, barrel up, and passes his
122
soldier's handbook
166
♦
SEJ[A][ilE][3[4]*IZI
AUTOMATIC RIFLE SQUAD IN LINE
INTERVALS BETWEEN MEN: “NORMAL”-ARMS LENGTH
“CLOSE”—4 INCHES
LEGEND
SSQUAD LEADER
S SECOND IN COMMAND И
[fa AUTOMATIC RIFLEMAN [C]
S ASSISTANT [fa
AUTOMATIC RIFLEMAN
SO AMMUNITION CARRIER И
AUTOMATIC RIFLE SQUAD IN COLUMN
DISTANCE BETWEEN MEN:-40 INCHES
Figure 50.—Automatic rifle squad.
123
166-169
soldier's handbook
rifle to the stackman who grasps it with his left hand be-
tween the upper sling swivel and stacking swivel and places
the butt between his feet, barrel to the front, muzzle slightly
inclined to the front, the thumb and forefinger raising the
stacking swivel. The stackman then throws the butt of
his own rifle 2 feet in advance of that of his left file and
6 inches to the right of his right toe; at the same time he
allows his right hand to slip to the stacking swivel and
engages his rifle with that of his left file. The nearest rifle
on the right is then passed to the man on the right of the
stackman who raises the rifle with his right hand at the
balance, steps • to the left front keeping his right foot in
place, and carries the rifle well forward, barrel to the front;
the left hand guiding the stacking swivel engages the lower
hook of the swivel of the rifle witli the free hook of that
of the stackman, and then turns the barrel outward into
the angle formed by the other two rifles and lowers the butt
to the ground so that it will form a uniform stack with the
other two rifles. He then assumes the position of attention.
Automatic rifles and the other rifles of the squad are passed
toward the stack and laid on the stack by the stackman.
c. Rifle squad of antitank company.—The rifle squad of
the antitank company and other types of squads will stack
arms in general with the methods prescribed in a and b above.
167. To Take Arms.—The squad being in line behind the
stacks, the commands are: 1. take, 2. ARMS. At the com-
mand arms, the procedure of stacking arms is reversed. The
loose rifles are first passed back. In breaking the stack, the
stackman grasps his rifle and that of the man on his left,
so that the rifles will not fall when the man on the right
raises and disengages his rifle. Each man, as he receives his
rifle, resumes the position of order arms.
168. Column of Twos.—When marching small groups, not
at drill, the group may be marched in column of twos by
forming it in two ranks and giving the command: 1. right
(left) , 2. FACE.
169. To Form Column of Twos From Single File and
Re-form.—a. The squad being in column, at a halt, to form
124
SOLDIER'S handbook
169
column of twos, the commands are: 1. form column of
twos, 2. MARCH. At the command march, the leading man
stands fast; the second man in the squad moves by the
oblique until he is to the left of and abreast of the corporal
with normal interval, and halts; the third man moves for-
ward until behind the corporal with normal distance and
halts; the fourth man moves by the oblique until he is to
the left of and abreast of the third man with normal interval,
and halts; and so' on.
Figure 51.—To stack arms (automatic rifle squad).
b. The squad being in column of twos, in marching, to
re-form single file, the squad is first halted. The commands
are: 1. form single file from the right, 2. MARCH. At
the command march, the leading man of the right column
moves forward, the leading man of the left column steps
off to the right oblique, then executes left oblique so as to
follow the right file at normal distance. Remaining twos
follow successively in like manner.
125
169
soldier's handbook
Figure 52.—To stack arms.
126
soldier's handbook
170-172
Section II '
THE PLATOON
170. Formations of More Than One Squad.—a. The
squads form in line, one behind the other, with 40 inches
distance between ranks.
b. Squads are usually arranged to produce a three- or
four-rank formation so that by facing to the right the unit
will march in column of threes or column of fours depending
on the number of squads.
c. A two-squad unit forms in two ranks and marches in
column of twos.
d. A three-squad unit forms in three ranks and marches
in column of threes.
e. A four-squad unit forms in four ranks and marches in
column of fours.
/. A platoon composed of two sections of two squads each
forms in four ranks and marches in column of fours.
g. Movements are described herein for column of threes
or fours and may be executed by either formation.
h. When in line, the platoon is alined as prescribed for
the squad in paragraph 158. The alinement of each rank is
verified by the platoon leader.
i. The platoon being in line takes interval and assembles
as prescribed for the squad in paragraph 165. This move-
ment may be ordered after ranks are opened for the display
of field equipment or for other special purpose. It is not
utilized in forming for physical training.
171. Composition and Formation of the Platoon.—The
platoon consists of platoon headquarters and several squads.
Platoon headquarters consists of a platoon leader and one
or more assistants. For purposes of drill and ceremonies, a
three-squad or four-squad formation should be arranged
and the size of the squads equalized. Figure 53 shows how
the platoon formation applies to a rifle platoon.
172. Position of Individuals.—a. The platoon leader takes
position six paces in front of the center of his platoon when
in line. In march formation (column of threes or fours), he
marches at the head of his platoon as shown in figure 53.
127
172-175
soldier's handbook
b. The second in command of a platoon takes position on
the left of the left man of the rear rank when squads are
in line unless otherwise indicated. When squads are in col-
umn, he follows the rear man in the right squad of the unit.
The second in command observes the conduct of the unit,
sees that the proper formation is maintained, and that com-
mands are promptly and properly executed. The platoon
guide (a sergeant or other specially designated noncommis-
sioned officer) is posted on the right of the right flank man
of the front rank when in line. In column, he takes post
in front of the right flank man. He is responsible for main-
taining the proper direction and cadence of march of the
platoon.
c. Other noncommissioned officers (such as mess and sup-
ply sergeants, clerks, etc.) and privates (such as cooks, armor-
ers, etc.), when attached to the platoon, fall in on the left
when in line (or in rear when squads are in column) and
march as part of regularly organized squads.
173. To Form the Platoon.—a. The command is: FALL
IN. At the command fall in, the first squad forms in line,
as prescribed in paragraph 154a, its center opposite and
three paces from the platoon sergeant. The other squads
form in rear of the first squad and in the same manner, with
40 inches distance between ranks. Members of the rear
squads extend their arms to obtain their approximate in-
tervals but cover the corresponding members in the first
squad. The guide places himself as shown in figure 53.
b. To form with close interval, the commands are: 1. at
close interval, 2. FALL IN. At the command fall in, the
movement is executed as prescribed in a above, except that
squads form at close interval (par. 154b).
c. The platoon is ordinarily formed and dismissed by the
platoon sergeant.
174. To Dismiss the Platoon.—The commands are: 1. in-
spection, 2. ARMS, 3. port, 4. ARMS, 5. DISMISSED, or 3.
UNLOCK PIECES, 4. DISMISSED (if armed with the Ml
rifle).
175. To March the Platoon.—a. The normal formation
for marching is in column of threes (or fours) with squad
columns abreast, squad leaders at the head of their squads.
128
soldier’s handbook
175
6 PACES
INTERVAL -ARMS LENGTH DISTANCES-4O INCHES
1. RIFLE PLATOON IN LINE FACED TO THE FRONT.
□ □□□□□□□□□□□□
□ □□□□□□□□□□□□
INTERVAL -ARMS LENGTH DISTANCES-40 INCHES
2. AT THE COMMANDS: 1. RIGHT 2. FACE, THE PLATOON
FACES TO THE RIGHT. PLATOON LEADER AND GUIDE
CHANGE TO NEW POSITIONS.
AT THE COMMANDS: 1. FORWARD 2. MARCH, IT MOVES OFF.
□□□□□□□□□□□□a
□□□□□□□□□□□□a
INTERVAL -4 INCHES
DISTANCE
40 INCHES
3. AT THE COMMANDS: 1. CLOSE 2. MARCH, THE SQUAD
COLUMNS CLOSE TO THE CENTER.
LEGEND +
Й PLATOON 5E
PLATOON LEADER (S) PLATOON GUIDE О ALL OTHERS
Figure 53.—Platoon in line, marched to the right.
129
175-179
soldier's handbook
b. The platoon in line marches to the left or to the front
only for minor changes of position.
c. The platoon being in line to march to the right, the
commands are: 1. right, 2. FACE, 3. forward, 4. MARCH.
This marches the platoon in column of threes (or fours) to
the right.
176. Guide in Marching.—Except when otherwise directed,
men in ranks keep the proper distance and interval and aline
themselves on the men toward the flank on which the guide is
marching. When it is desired to guide toward the left, the
command is: GUIDE LEFT. The guide and the platoon
leader then change their relative positions.
177. Being in Column of Threes (or Fours) at Normal
Interval Between Squads, To March (or Form) at Close
Interval.—a. The commands are: 1. close, 2. MARCH. At
the command march, the squads close to the center by ob-
liquing until the interval between men is 4 inches. The center
squad (or squads) take up the half step until the dress has
been regained. The distance, 40 inches, remains unchanged.
b. If this movement is executed from the halt, the squads
close toward the center by executing right or left step until
4-inch intervals are reached. If in column of threes, the
right and left squads left and right step two steps. If in
column of fours, the right center and left center squads left
and right step one step, the right and left squads left and
right step three steps.
178. Being in Column of Threes (or Fours) at Close
Interval Between Squads, To March, (or Form) at Normal
Interval.—a. The commands are: 1. extend, 2. MARCH. At
the command march, the squads open to the right and left
from the center by obliquing until the interval between men
is one arm’s length. The center squad (or squads) will take
up the half step until the dress has been regained.
b. If this movement is executed at the halt, the squads
execute right or left step until they have secured the proper
interval by reversing the procedure outlined in paragraph
177b.
179. Being in Column of Threes (or Fours) , to Change
Direction.—The commands are: 1. column right (left) . 2.
130
soldier/s handbook
179-183
MARCH. The right flank man of the leading rank (the
guide and the platoon leader excepted) is the pivot of this
movement. At the command march, givep as the right foot
strikes the ground, the right flank man of the leading rank
faces to the right in marching as prescribed in paragraph 100a
and b, and takes up the half step until the other m'en of his
rank are abreast of him, then he resumes the full step. '• The
other men of the leading rank oblique to the right in march*
ing without changing interval, place themselves abreast of
the pivot man and conform to his step. The ranks in rear
of the leading rank execute the movement on the same
ground, and in the same manner, as the leading rank.
180. Being in Column of Threes (or Fours), to Form
Line to the Front.—The commands are: 1. column right,
2. MARCH, 3. platoon, 4. HALT, 5. left, 6. FACE. Column
right is executed as prescribed in paragraph 179. The com-
mand halt is given after the change of direction is completed.
181. Being in Any Formation in March, to March To-
ward a Flank.—The commands are: 1. by the right (left)
flank, 2. MARCH. This movement is executed as prescribed
for the squad in paragraph 163. If the platoon is in column
at close (4-inch) intervals, the squads in rear of the squad
which becomes the leading squad take up the half step until
they each reach 40 inches’ distance from the squad ahead.
This movement is used only for short distances.
182. Stack Arms.—Before stacking arms, ranks are opened.
Arms are then stacked by each squad as prescribed in para-
graph 166.
183. Being in Line, to Open and Close Ranks.—a. To open
ranks the commands are: 1. open ranks, 2. MARCH, 3. ready,
4. FRONT. At the command march, the front rank takes
three steps forward, halts, and executes dress right. The
second rank takes two steps forward, halts, and executes
dress right. The third rank takes one step forward, halts,
and executes dress right. The fourth rank, if any, executes
dress right. The platoon leader places himself on the flank
of the platoon toward which the dress is to be made, one pace
from and in prolongation of the front rank and facing down
the line. From this position he alines the front rank. The
131
183-184
soldier’s handbook
second and third ranks are alined in the same manner. In
moving from one rank to another, the platoon leader faces to
the left in marching. After verifying the alinement of the
rear rank, he faces to the right in marching, moves three
paces beyond the front rank, halts, faces to the left and
commands: 1. ready, 2. FRONT.
b. To close ranks, the commands are: 1. close ranks, 2.
MARCH. At the command march, the front rank stands
fast; the second rank takes one step forward and halts; the
third rank takes two steps forward and halts; and the fourth
rank, if any, takes three steps forward and halts. Each man
covers his file leader.
184. To Form for Shelter Tents.—The platoon being m
line the commands are: 1. form for shelter tents to the
LEFT (RIGHT), 2. MARCH, 3. DRESS RIGHT (LEFT), 4. DRESS, 5.
READY, 6. FRONT, 7. COUNT OFF.
a. At the command form for shelter tents to the left
(right), the second in command moves to a position on the
right of the guide who is on the right of the right man of
the front rank. The messenger takes position on the left
of the left man of the rear rank.
b. At the command march, all squads except the front
squad face to the left in marching and step off. Squad
leaders by giving the appropriate commands, 1. by the right
(left) flank, 2. MARCH, and 1. squad, 2. HALT, move their
squads into line abreast of the squad(s) already on line.
c. At the commands 3. dress right (left), 4. DRESS, 5.
ready, 6. FRONT, and 7. COUNT OFF, given by the platoon
leader the entire rank executes these movements as pre-
scribed in paragraphs 157 and 158.
d. On direction of the platoon leader, the odd numbers
draw their bayonets and thrust them into the ground along-
side the outside of the left heel near the instep. The bayonet
indicates the position of the front tent pole. Men not
equipped with bayonets mark the place with the left heel.
Odd and even numbers (Nos. 1 and 2; Nos. 3 and 4; etc.)
pitch tents together.
e. To assemble, the platoon is faced to the right and re-
formed from single file into column of threes (or fours) to
the right (left) as prescribed in paragraph 185c(2). The
platoon sergeant and messenger resume their normal posts.
132
soldier’s handbook
185
185. Column of Twos and Single File and Re-form.—The
platoon may be marched In column of twos or single file by
the procedure given below. This is not a precise movement.
It is practiced in drill so that when necessary the movement
may be executed smoothly and without delay. The change
of column is always made from a halt.
Figure 54.—Column of twos from column of threes.
(LEFT SQUAD MARCHING (RIGHT AND CENTER
TO ITS PLACE IN „ _ SQUADS ARE HALTED)
S'NGLEALE,
0 □ □ □ □ CENTER squad Й
О О D D П 0' I right s<auAp И
Figure 55.—Re-form column of threes from column of twos.
a. (1) The platoon being in column of threes, at a halt,
to form column of twos, the commands are: 1. column of
twos from the right (left), 2. MARCH. At the command
march, the right two squads march forward; the left squad
forms column of twos as prescribed for the squad and then
executes column half right and column half left so as to
follow in column the leading squads. Forty-inch distances
are maintained.
(2) The platoon being in column of twos, at a halt, to re-
form in column of threes, the commands are: 1. column of
threes to the left (right), 2. MARCH. At the command
march, the leading two squads stand fast. The rear squad
forms single file from the right as prescribed in paragraph
169b and moves to its normal place beside the leading
squads by executing column half left then column half
right. It is halted when its leading file is on line with the
leading rank of the platoon.
133
soldier's handbook
1B5
b. (1) The platoon being in column of fours, at a halt, to
form column of twos, the commands are: 1. column of twos
from THE RIGHT (left) , 2. MARCH. At the command march,
the right two squads march forward; the left two squads
initially stand fast, then follow the leading two squads by
executing column half right and column half left. Forty-
inch distances are maintained.
(2) The platoon being in column of twos, at a halt, to re-
form in column of fours, the commands are: 1. column of
fours to the left (right), 2. MARCH. At the command
march, the leading two squads stand fast. The two rear
squads move to their normal places by executing column
half left then column half right and are halted when the
leading files are on line with the leading rank of the platoon.
c. (1) The platoon being in column of threes (or fours),
at a halt, to form single file, the commands are: 1. column
of files from the right (left), 2. MARCH. At the com-
mand march, the right squad of the platoon moves forward.
The other squads stand fast initially and then successively
follow the leading squad by executing column half right and
column half left. Distances of 40 inches are maintained.
(2) The platoon being in single file, at a halt, to re-form
in column of threes (or fours), the commands are: 1. column
OF THREES (OR FOURS) TO THE LEFT (RIGHT), 2. MARCH. At
the command march, the leading squad stands fast. The
other squads move to their normal places by executing
column half left, then, at the proper time, column half
right and are halted when the leading file is on line with
the leading rank of the platoon.
d. Whenever commands are given involving movements of
squads in which one squad stands fast, takes up the march,
continues the march, or changes formation, the squad leader
gives the appropriate commands.
134
CHAPTER 10
INTERIOR GUARD DUTY
186. At each post, camp, or station where troops are present
guards are used to preserve order, protect property, and en-
force police regulations. The commanding officer of the camp
or post determines how large a guard is necessary for these
purposes and issues the necessary orders. When your com-
pany, troop, or battery commander decides that you have
made sufficient progress in your military training, you will
probably be detailed for guard duty. The information given
in paragraphs below will help you in understanding what this
duty will be.
Я 187. The guard consists of—
Officer of the day.
Officer of the guard (except when the guard is small).
Sergeant of the guard.
Corporals of the guard.
Buglers of the guard.
Privates of the guard.
The guard is under the supervision of the officer of the day.
H 188. The members of the guard may all come from the
same company, troop, or battery, or they may be detailed
from several different organizations. In either case, when
a soldier has served a tour of guard duty he is given credit
for it on the guard roster and does not again do guard duty
until all other men on the roster have served their tours.
И 189. The length of a tour of guard duty is 24 hours. At
the end of that time the “old guard’’ is relieved by the “new
guard” of the same size. As soon as the new guard relieves
the old guard at the guardhouse it is divided into three parts
called “reliefs.” These reliefs are rotated so that each mem-
ber of the guard has 2 hours on duty followed by 4 hours off
duty. Privates of the guard are assigned to reliefs by the
sergeant of the guard, and to posts by the corporals of their
reliefs. Privates are not changed from one relief to another
during the same tour of duty, except by proper authority.
135
190-193
soldier's handbook
И 190. While ygu are off duty do not remote ygur clothing or
equipment or leave Л^е immediate vicinity of the guardhouse
without - permission of ‘the command^' of the guard. An
emergency ftiay occur when you will be needed .at oncfe.
И 191. When you are not posted as a sentinel or dn other
duty which requires you to carry your rifle, keep it in the arms
rack in the guardhouse or in a stack.
И 192. Orders for sentinels are of two classes: general orders
and special orders. General orders apply to all sentinels.
Special orders apply to particular posts and duties. You
must know and be able to recite the general orders before
you go on guard duty. As soon as you are assigned to a
relief and a particular post you must also learn and be able
to recite the special orders for that post. Whenever the
officer of the day or the commander of the guard considers
that a sentinel does not have sufficient instruction or is
otherwise unfit for guard duty, he relieves him, sends him
back to his organization, and notifies his organization com-
mander.
193. The following are the general orders all sentinels are
required to memorize. Learn them as soon as you can.
My general orders are—
1. To take , charge of this post and all Government prop-
erty in view.
2. To walk my post in a military manner, keeping always
on the alert and observing everything that takes place within
sight or hearing.
3. To report all violations of orders I am instructed to
enforce.
4. To repeat all calls from posts more distant from the
guardhouse than my own.
5. To quit my post only when properly relieved.
6. To receive, obey, and pass on to the sentinel who relieves
me all orders from the commanding officer, officer of the
day, and officers and noncommissioned officers of the guard
only.
4. To talk to no one except in line of duty.
’ 8. To give the alarm in case of fire or disorder.
9. To call the corporal of the guard in any case not covered
by instructions.
136
soldier's handbook
193-194
10. To salute all officers and all colors and standards not
cased.
11. To be especially watchful at night and, during the time
for challenging, to challenge all persons on or near my post,
and to allow no one to pass without proper authority.
194. Guard duty is one of your most important duties.
Remember that when you are posted as a sentinel you repre-
sent the commanding officer whose orders you are required
to enforce, on and in the vicinity of your post. Upon the
manner in which you perform your duties depends not only
the enforcement of military law and orders, but also the
security of persons and property under your charge. In time
of war your responsibility as a member of the guard is greater
than ever, for then the safety of your organization depends
upon the manner in which you watch while your comrades
rest. This is so important that sleeping on post by a sentinel
or other improper performances of duty is punishable by a
very severe court-martial sentence.
325350°—41----10
137
CHAPTER 11
MARCHES, CAMPS, AND BIVOUACS
Paragraphs
Section I. Marches_______________________________ 195-199
II. Camps and bivouacs____________________ 200-203
Section I
MARCHES
195. One of your principal jobs in the field is marching.
Battles take place at indefinite intervals, but marches occur
daily. To win battles, troops must arrive on the battlefield on
time and in good physical condition. To accomplish this
they must be able to march.
196. Preparations.—a. When you learn that your organi-
zation is to make a march the next day there are certain
things you should attend to the evening before. See that your
canteen is clean and filled with fresh water as there may be
little time for this in the morning. Check your personal
equipment and see that you have all the articles necessary
for personal cleanliness, and for keeping your clothing in re-
pair. This should include towel, soap, toothbrush, pocket
comb, small mirror, needles, thread, safety pins, and spare
buttons. Check up on the adjustment of your pack straps
and belt. A poorly adjusted pack adds to the discomfort and
fatigue of a march. You should have at least two pairs of
woolen socks without holes or mends. See that your shoes or
boots fit comfortably, are in good repair, and well broken in.
Never start a march with a new pair of shoes or boots. If you
are in a mounted organization inspect your equipment care-
fully and replace any missing or doubtful parts. Nose bags
should be filled with the morning feed as soon as the animals
have finished their evening feed of grain. Grain bags should
be filled before dark. If you are on guard, you should know
where to find the cooks and when to awaken them.
b. Before dark dispose of any trash or debris that may have
collected in or around your tent area. This will save you
time and effort in the morning, especially if your organiza-
tion is to break camp before daylight. Our Army takes pride
138
soldier's handbook
196-198
in always leaving a camp site in better condition than we
found it.
c. On the morning of the march turn out promptly at the
first call for reveille, perform your toilet, and make up your
roll and pack, or pack your saddle. According to the instruc-
tions of your commanding officer you will water and feed your
animal, if mounted, eat breakfast, and wash and pack your
mess kit. After breakfast you will be allowed 10 or 15 minutes
to relieve yourself and complete your pack and roll. While
drivers warm their motors, or harness and hitch their ani-
mals, other soldiers help in packing the kitchen, taking down
the officers’ tents and picket line, and loading the forage,
filling the sink and latrines, and cleaning the camp area. In
mounted organizations, after the order to saddle, you must
take particular care to see that the blanket is free of sand or
cockleburs, and is without wrinkles. You should know your
duties and do them promptly and quietly without confusion or
noise. At assembly, fall in fully equipped for marching.
197. When you fall in to start the march, do it quietly.
One of the indications of a well-trained organization is the
absence of noise and confusion when starting a march.
When you are close to the enemy it will be necessary to main-
tain quiet for your own protection as he will be on the alert
for noises which will help him locate your position. Even
when you are at a distance from the enemy, or making a
practice march in peace, loud talking and shouting will dis-
turb civilian communities or troops camped nearby who are
trying to rest.
198. Conduct of Individuals.—a. Drinking water on a
march is largely a matter of habit. Drink plentifully before
the start of the march, but after that drink sparingly. Drink
none at all for the first 3 or 4 hours of the march. After
that, take only a few mouthfuls at the end of a rest period to
wash out the throat and mouth. A small pebble carried in the
mouth keeps it moist and reduces thirst. Do not drink or
eat unwholesome foods or beverages. Use only water ap-
proved by your commander. The eating of sweets greatly
increases thirst and should be avoided. When a cooked meal
is carried do not eat it until the proper time. Excessive
perspiration causes the loss to the body of necessary salts;
139
198
soldier's handbook
this results in fatigue and heat exhaustion. The eating of
common table salt or salt tablets, helps to relieve this condi-
tion. Cold coffee or tea will also help.
b. You will remember that in chapter 1 it was stated that
civilians will judge your organization and the Army by the
conduct and appearance of its members in public. This is
especially true of troops on the march. Avoid using pro-
fane or obscene language or making remarks to civilians.
When you do this, you are not only proving that you are
lacking in military discipline but are causing your organiza-
tion to be considered as poorly trained. This is unfair to
your comrades.
c. Halts are made at regular intervals to rest the men and
animals, to service motors, to adjust equipment, and for
other purposes. A halt of 15 minutes is usually made at the
end of the first 45 minutes of marching. After the first halt,
columns including foot or mounted troops usually halt for
10 minutes each hour. These halts are for the purpose of
permitting men and animals to relieve themselves, adjust
equipment, and inspect animals, motors, vehicles, and load-
ing. Attend to these things promptly. Do not wait until the
command is ready to march again. A mounted man always
attends to the needs of his horse and equipment before satis-
fying his own wants. You should inspect each foot of your
horse to see that no shoes have become loosened, or that no
stones have become wedged in the frog or shoe. Remove
caked mud or snow with the hoof hook. If you are the
driver of a motor vehicle, conduct the general mechanical in-
spection as you have been instructed, and report promptly
the results of your inspection to your chief of section or
other designated person.
d. After you have adjusted your own equipment and that
of your mount, or completed your vehicle inspection, rest as
much as possible during the remainder of the halt. Do not
stand or wander about. If the ground is dry, remove your
pack and stretch out at full length in as comfortable a posi-
tion as possible. The next best way is to sit down with a
good back rest against a tree, fence, or embankment. Never
sit or lie on wet ground. If you find it necessary to answer
the calls of nature, dig a small pit and immediately refill it
after use.
140
soldier's handbook
198-199
e. Do not enter private property without permission or
take fruit or vegetables from orchards and gardens. These
are seriously military offenses.
199. Road Discipline.—a. General.—(1) In marching,
troops usually keep to the right of the road, leaving the left
free for other traffic. If the left of the road has better con-
cealment from air observation, or for other reasons, troops
may be directed to march on the left of the road, keeping the
right free for traffic. On certain occasions they may march
on both sides of the road leaving the middle clear.
(2) In any event, your organization commander will an-
nounce how you will march. The important thing for you to
remember is that you must stay at all times on the side of the
road as he has directed, and not straggle back and forth
across the road or out into the middle. Before your organi-
zation starts its march, other troops, and especially motor
units, will be informed which parts of the road will be left
free for them. Acting on this information, motor vehicle
units may sometimes move as rapidly as 60 miles an hour past
your column. You can see how easily serious accidents and
traffic tie-ups may occur if you do not keep your prescribed
distance and place in the column and interfere with the
right-of-way of other traffic, both military and civilian. At
halts, immediately clear the road by moving off to the side
on which you have been marching, unless otherwise directed.
At the preparation signal for resuming the march, fall in
promptly.
(3) Every march is planned so as to bring troops to a
certain place at a definite time, and in such good condition
that they can fight immediately, if required. In order to do
this a very careful supervision is necessary so that large
numbers of troops as well as food, ammunition, and other
supplies can move forward without causing traffic jams. To
assist in this movement military police are stationed at
certain critical places and patrol the roads. They wear a blue
arm band with the letters MP in white. They know on
which roads it is safe for you to march and at what hours.
They are there to help and protect you and their instructions
and orders must be obeyed.
(4) If you are marching at night, you must make special
efforts to remain alert. Be careful not to ride or walk too
141
199
soldier's handbook
close to the man ahead of you, or to lag behind. When night
marches are made to maintain secrecy, you remain silent and
smoking and the lighting of matches or flashlights are
forbidden.
b. Foot troops.—If you become sick or unable to continue
the march, do not fall out until you receive permission from
an officer. Then wait beside the road for the medical detach-
ment, which marches at the rear of the column. If you fall
out without permission, you are subject to arrest by a police
detachment, which follows the column. Your organization
will take great pride in the fact that no one has had to fall
out. If you have made the proper preparations with respect
to your shoes and socks, and do not eat or drink too much,
you will have no difficulties with the average march.
c. Mounted troops.—(1) Do not slouch in the saddle or
ride with the weight on one buttock. The proper position in
the saddle will not only be less tiring to you but will probably
prevent your horse from having a sore back.
(2) Keep your head up and remain alert. Increase and
decrease your gait promptly at the command. Failure to do
this, or to maintain the proper gait, will result in a con-
tinual stringing out and jamming up of riders in the column.
This may not only result in injury to the horse but will soon
tire out both horse and man.
(3) Be alert to pass signals down the column, especially
warnings of obstacles in the road, such as bottles, wire, holes,
and narrow culverts. Failure to do this may result in serious
injury to someone in rear of you.
(4) Watch your horse for signs of lameness and ask for
permission to fall out if such condition is discovered. He
may have picked up a rock or a nail. If necessary, wait for
the veterinary officer.
(5) If you have to fall out, regain your position in the
column gradually by increasing the length of the trot periods
and decreasing the length of the walk periods. If you are
delayed more than 10 minutes, join another organization
temporarily and rejoin your own organization at one of the
hourly halts or in bivouac.
(6) If you are marching at night to maintain secrecy, you
should be able to inspect your horse’s feet and equipment by
feeling, and without the aid of a light.
142
soldier's handbook
199
(7) Select the best possible footing for your horse. A
smooth, level surface, even concrete, is to be preferred to
rough, sloping shoulders found along many highways.
(8) In removing side loads or equipment at the hourly
halts be sure they are placed so that they will not be dam-
aged by horses or be in the way of traffic. Horses moved to
the side of the road must be kept clear of wire fences so that
bridles or other parts of equipment do not become caught.
(9) In horse-drawn artillery units, the cannoneers usually
ride on the vehicles. When walking, they should keep to the
right of the column or in the space between vehicles. Under
no circumstances should they walk between the front and
rear vehicles of limbered vehicles.
d. Armored and motorized units.—(1) Since rapid move-
ment is one of the principal advantages of armored and motor
units, it is important that every driver and other operating
personnel with these units know not only how properly to
drive and care for a vehicle but also the fundamentals of
successful marching.
(2) Good mechanized and motorized troops can march 180
miles per day on roads at an average speed of 25 miles per
hour, or, in an emergency, they can march 450 miles in 24
hours. They can march on roads at night without lights at
speeds up to about 15 miles per hour, but marching across
country at night is very difficult, except under favorable con-
ditions. In preparing for a march, warning is usually issued
ahead of the starting hour so that crews of vehicles can care-
fully check equipment and vehicles and see to it that every-
thing is ready and in good condition.
(3) If you are the driver of a motor vehicle during the
march you must keep on the alert to maintain the ordered
speed and the proper distance on the road from the vehicle
just ahead in the column. You must also be familiar with
arm, hand, and light signals so that these signals may be
quickly passed down the column from front to rear. If this is
not done it causes vehicles to “jam up” in column, and results
in those at the tail having to travel at high speeds at times, in
order to keep up and not lose sight of vehicles ahead of them.
This often results in accidents, especially when passing
through towns, so it can be seen that bad driving on the
part of just one driver may spoil the march for an entire unit.
143
199
soldier's handbook
(4) No rule can be given for the distances which should be
kept between vehicles in the marching column on the road.
This will depend on a number of things, such as the ordered
speed of the march, the kind of vehicles in the column, the
road conditions and, perhaps most of all, on the possibility
of an enemy air attack. To lessen the danger of an air attack,
vehicles and organizations must often march at increased
distances. When marching at night, speeds are usually re-
duced and distances lessened so that contact may be main-
tained in the column.
(5) Halts are usually prescribed in the march order to come
at a certain time, and when the time arrives each vehicle
either halts in place, or closes up so that the entire unit is
closed up when the last vehicle is halted. Whether vehicles
halt in place or close up will depend on many factors, but
drivers are always told what to do about this before the
march starts. Motor vehicles will seldom close up during
daylight, because of the danger of an air attack.
(6) Before halting, vehicles always move well off the road
so as to keep the road clear. If men dismount, they also move
off the road so as not to interfere with other traffic and to
avoid accidents. Officers, noncommissioned officers, and
drivers proceed with the necessary inspections and servicing.
If roads are very narrow, men are usually stationed at the
head and tail of each unit to direct civilian traffic and see to
it that the road is kept clear.
(7) Halts usually come once every 2 hours and are for 10
minutes’ duration, unless a longer halt is made at noon for
lunch and servicing. During a march if any vehicle has
mechanical trouble, the driver pulls off the road and allows
vehicles behind to pass. If the driver or unit mechanic can
correct the trouble, he does so and resumes the march. He
does not, however, attempt to regain his place in column by
picking up high speeds, but falls in at the tail of the nearest
unit, and does not pass any vehicles until those ahead have
halted, at which time he may go forward to join his unit.
If the entire column has passed, he proceeds alone at normal
speed into camp.
(8) Every car commander or driver must know the route
of the march and where the unit is going to camp for the
night and should have a marked road map. Otherwise he
144
soldier's handbook
199-202
will not know where to go if contact with the vehicle ahead is
lost or his vehicle has to stop on account of mechanical
trouble.
Section II
CAMPS AND BIVOUACS
200. Kinds of Shelter.—In the theater of operations,
troops are sheltered in billets, bivouac, camp, or cantonment.
a. Troops are in billets when they occupy private or public
buildings.
b. When troops rest on the ground with no overhead cover,
or under shelter tents, or improvised shelter, they are in
bivouac.
c. When troops are sheltered by heavy tentage (tent camps)
they are in camp; when quartered in temporary structures,
especially constructed for military purposes, they are in
cantonment.
201. Camp Sites.—The ideal camp site should have plenty
of pure water, tough grass turf, and access to a good road. It
should be of ample size and provide concealment from enemy
airplanes. It should avoid dusty, polluted, or damp soil, stag-
nant water, and dry stream beds. In hot weather a shady
area free of underbrush is desirable. In war, battle needs
may force the use of poor camp sites.
202. Personal Care and Comfort.—a. (1) The shelter tent
is a small tent capable of providing shelter for two men.
(See fig. 56.)
(2) It may be pitched singly or two tents may be pitched
together known as a double shelter tent. (See fig. 57.) Use
of double shelter tents conserves space and, being occupied
by four men, they are warmer.
(3) (a) The platoon having been formed for shelter tent
pitching as described in paragraph 184 (platoon drill), at the
command, pitch tents, each man (if armed with the rifle)
steps off obliquely with the right foot a full pace to the right
front, lays his rifle on the ground, muzzle to the front, barrel
to the left, butt near the toe of his right foot. He then steps
back into place. All men then unsling equipment and place
their packs (or rolls) on the ground in front of them, haver-
sacks (saddle bags or field canvas bags) up and to the front,
145
о
Figure 56.—Shelter tents.
202 soldier’s handbook
Figure 57.—Double shelter tents.
soldier's handbook 202
202
soldier's handbook
the packs two paces in front of their positions. They then
open their packs and remove their shelter halves, poles, and
pins. Each odd-numbered man, when not armed with a
bayonet, places a pin in the ground on the spot which he
previously marked with his left heel. The men of each pair
spread their shelter halves on the ground which the tent is
to occupy, triangle to the rear, buttons to> the center, the
even-numbered man’s half on the left.
(b) They then button the halves together. The odd-
numbered man adjusts his pole through the eyelets in the
front of the tent and holds the pole upright in position be-
side the bayonet (or pin). The even-numbered man pins
down the front corners of the tent in line with the bayonets
(or pins). He then drives the front guy pin a rifle length
in front of the front pole. If he is not armed with the rifle,
he measures this distance with his tent rope by taking the
distance from the base of the front tent pole to one of the
front tent pins. He places the loop of the guy rope over the
front guy pin and runs the other end of the rope through
the loops of the shelter halves and ties it, making sure that
the pole is vertical when the rope is taut. The even-num-
bered man then adjusts the rear tent pole through the eye-
lets in the rear of the tent. The odd-numbered man pins
down the rear of the tent and drives the rear guy pin so
that it is a bayonet length in rear of the rear pin of the
triangle. If he is not armed with the bayonet, he drives the
rear guy pin two and a half tent pin lengths from the rear
triangle pin. He then adjusts the guy rope. The even-num-
bered man then drives the remaining pins on the left of the
shelter tent and the odd-numbered man drives them on the
right.
(c) On maneuvers and in active operations you and your
tentmate will normally pitch your tent where you will be
concealed from enemy observation. The principles of tent
pitching given in (a) and (b) above will apply, but there
may be no attempt to aline the tents of your organization.
<4) If possible, pick a dry place on high ground for your
tent. As soon as your tent is pitched, ditch it, even though
you expect to be there only one night. Dig a ditch about 3
inches deep along each side, with a drainage ditch leading
off at the lowest side. If it looks as though water may come
148
soldier's handbook
202
from higher ground, dig a ditch to divert the water before it
can reach your tent. In cold or windy weather the dirt
should be banked around the tent. If it rains, loosen the
guy ropes to prevent the tent pegs from pulling out. Be
sure your tent pegs are securely driven in. If the weather
is cold, pitch the closed end of the tent into the wind.
(5) Figures 28 and 29 show you in detail how to display
your equipment, if it is required.
b. Take time to make a good bed; it will mean better sleep-
ing. First, level the ground. Then place straw, leaves, or
branches on the ground. Place your raincoat over this bed-
ding to keep out the damp. In cold weather you need some-
thing warm under you as well as over you. A newspaper be-
tween blankets and clothing, or straw around the feet, will
help. Don’t lie down directly on wet ground. Another means
for protection against cold is to fold the blanket in such a
manner as to form a sleeping bag. Large horse-blanket safety
pins or any large safety pins are necessary to keep the folds
in position.
c. Take off any wet clothes as soon as you can after reach-
ing camp. Put on dry clothes, or, if that is impossible, dry
your clothes before a fire and then put them back on. If
you cannot do this wring them out. Dry your shoes by
placing warm, not hot, pebbles inside the shoes. Do not
place the shoes next to a fire. It is a good idea to oil the
shoes while they are dry to make them waterproof and pliable.
d. (1) As soon as possible after reaching camp wash your
feet with soap and water. Dry them carefully, especially
between the toes. Until your feet are hardened, dust them
with foot powder, which you can get from your corporal or
the noncommissioned officer in charge of your unit. Put on
a clean pair of socks and the extra pair of shoes.
(2) If blisters have appeared on your feet they should be
painted with iodine and emptied by pricking them at the
lower edge with a pin which has been passed through a flame.
Do not remove the skin. The blister should then be covered
with zinc oxide plaster which can be obtained at the aid sta-
tion. If you have serious abrasions on your feet, corns,
bunions, or ingrowing nails, have your name put on the sick
report and report to the aid station for treatment.
149
202-203
soldier's handbook
(3) See that your toenails are short and clean» Cut them
straight across and not on a curve. This prevents ingrowing
nails.
e. Before building a fire, clear away all dry leaves or grass,
leaving a bare spot. Dead branches from trees are more apt
to burn than wood gathered off the ground. Stones heated
red hot and then placed under a bucket in your tent make a
good stove. A canteen filled with hot water makes a good
hot water bottle for very cold feet.
/. Read instructions for camp sanitation in chapter 14.
H 203. Camps and Bivouacs for Mounted Organizations.—a.
In campaign your organization will probably be scattered over
a large area to take advantage of cover from ground and air.
It will often be necessary to tie horses individually to trees
or bushes. Soldiers are grouped together by squads or sec-
tions. and bivouac close to their mounts to care for them and
be able to leave at short notice, or in the dark. Provide good,
dry standing ground for your horse, clear of rocks and stub-
ble, and bed him down well. Guard against the possibility of
his becoming entangled in the halter rope or picket line.
b. In severe weather protect your horse from cold winds'
If woods with heavy undergrowth are not available, protec-
tion may be obtained by using the branches of trees. Avoid
stream beds in rainy seasons, as a freshet upstream might
cause trouble.
c. By taking the precautions mentioned above it will not
normally be necessary to use the saddle blanket as a horse
cover because the weather is severe. Horses in good condi-
tion can withstand severe weather very well. If your horse
becomes ill from exhaustion or other causes, even in hot
weather, it may be necessary to keep him warm and the
saddle blanket is useful for this purpose. You will be well
repaid for the care and attention you give your mount.
d. Vehicles should stand on hard ground and be grouped
for ease of servicing and to prevent hostile observation by
the use of natural cover or camouflage. Space is required for
turn-arounds and at least two exits from the bivouac area
are desirable.
150
CHAPTER 12
USE OF COMPASSES AND MAPS
Paragraphs
Section I. Use of the compass___________________________ 204-208
II. Use of maps__________________________________ 209-217
Section I
USE OF THE COMPASS
204. As a soldier, you must be thoroughly familiar with
the compass and know how to use it by day and by night,
205. Of the several types of compasses issued to the Army,
the prismatic compass (see figs. 58 and 59) is the one most
generally used. The compass is an instrument which, by
means of a magnetized dial-needle, indicates magnetic
north. The dial-needle b is graduated into 360 equal sub-
divisions called degrees, commencing with 0 (zero), or mag-
netic north, and reading clockwise around the entire circle
until 0 (or 360°) is reached again. You will note that with
the compass dial-needle at rest the 0 is to the north, the 90°
graduation is east, 180° is south, 270° is west. Instead of
using the directions north, east, south, and west, we may
use the terms magnetic-azimuth 0°; magnetic-azimuth 180°,
etc. The magnetic-azimuth of any object is merely the com-
pass reading, expressed in degrees, of a line extending out
from the center of the compass toward the object.
206. If a line is drawn from the center of the dial-needle
to any object in your view you can find its azimuth by de-
termining which number, or degree of graduation, this line
crosses on the compass dial. It .is done in this manner:
Raise the eyepiece a and the cover d and move the clamp at g
releasing the dial b so that it swings freely. Hold the
compass as shown in figure 58. Turn about slowly and care-
fully until the object, the azimuth of which you want, is
lined up by the slit.on eyepiece a and by the hair-line / on
the glass cover. Allow the dial-needle b to come to rest.
Then read the azimuth through the eyepiece a.
151
207-208
soldier's handbook
207. At night you may often depend on your compass
almost entirely to keep on a required direction. Assume you
are to march at night on a magnetic azimuth of 55°. By
daylight, or at night by light in a sheltered place, release the
compass box glass by unscrewing the screw at h. Move the
radiolite marker c on the movable index ring to 55, the grad-
uation halfway between the figure 5(50) and 6(60) on the
graduated circle around the outside of the compass case.
Figure 58.—Prismatic compass, showing compass open and in posi-
tion for measuring azimuth in daylight.
Then clamp the movable ring with the screw at h. Now
hold the compass horizontally and carefully turn about until
the dial-needle points to the radiolite marker c on the mov-
able index ring. The magnetic-azimuth course of 55° is now
indicated by the radiolite markers j. On a dark night it may
be necessary for another soldier to move forward to the limit
of visibility while from the rear you use the compass to direct
his movement to the right or left in the proper direction.
While still in sight of you your comrade halts, waits for you to
come abreast, and then repeats as necessary.
208. The compass may be used in a number of ways, all of
which can be practiced by you until you are thoroughly
proficient in its use.
152
soldier's handbook
209-210
Section II
USE OF MAPS
209. The ability to read a map quickly and accurately is of
great importance to you as a soldier. With this ability, and a
map in your possession, you will always be able to locate your-
self in unfamiliar country. You will be able to accomplish
your mission without wasting valuable time in searching for
Figure 59.—Prismatic compass showing compass open for measure-
ment of azimuth at night by means of radiolite marker.
your destination, and you will be able to return to your com-
mander in time for the information you have obtained to be
of value to him.
210. Map reading is not difficult. It is nothing more than
the ability to get a clear idea of what the ground looks like
from seeing a map of that ground. You will probably receive
further instruction from your officers in map reading, but if
325350°—41---11
153
210-211
SOLDIER'S HANDBOOK
you have a good grasp of the following simple facts you can
feel confident that you know how to understand and use
military maps.
Я 211. a. A map represents a part of the earth’s surface shown
on paper. Maps are drawn to scale. This means that a cer-
tain distance on a map always represents on that map a cer-
tain distance on the ground. For example, suppose the scale
of a map is 1 inch equals 1 mile. This means that if, with a
ruler, you find that on the map, the distance between two
towns, A and B, is 1 inch, you would actually travel 1 mile
if you walked in a straight line from A to В on the ground. If
the distance between towns C and D on this map is 2 inches
then we immediately know that actually these two towns are
twice as far apart on the ground as A and B.
b. Scales are usually shown on a map in one of three ways,
as follows:
(1) They may be shown by a single or double line, divided
into parts. Each part is marked with the distance which it
represents on the ground and may be expressed in feet, yards,
or miles. This is the way the scale is shown on automobile
road maps, with which you are familiar (fig. 60A).
(2) The scale may be stated in words or figures, as 3
inches=l mile. As explained above, this means that 3 inches
on the map equal 1 mile on the ground (fig. 60B).
(3) The scale may be expressed as a “representative frac-
tion” (called RF), which is merely a fraction in which the
numerator (above the line) is a certain distance on the map,
and the denominator (below the line) is the corresponding
distance on the ground. Suppose the scale of our map is 1 inch
equals 1 mile. We could write the fraction J . For con-
1 mile
venience, however, we always write RF with both the numer-
ator and denominator in the same unit. Since we know there
are 63,360 inches in a mile, we can write RF-----linch-----
63,360 inches
and, by omitting the word “inches”, we have^-—^. So when
o3,3oU
we see a map ‘with the RF —1—, or written as a ratio
63,360
1:63,360, we know that 1 inch on the map equals 1 mile on the
ground (fig. 600. In the same way, if we have a map with
154
SOLDIER'S HANDBOOK
211-213
the RF - J -, we can change the fraction to and
±и,эои Do,360
we see at once that the RF —1— is the same thing as
10,560
though it were written 6 inches equal 1 mile.
0 5 10
20
30 miles
A GRAPHIC SCALE
3 INCHES - I MILE
WORDS ft FIGURES
63^60 0R |i63*360
C REPRESENTATIVE
FRACTION (R.F.)
Figure 60.—Scales.
212. On practically all military maps which you will handle,
the north is at the top of the map. On many maps the north
is also shown by an arrow, which points in that direction.
Sometimes two arrows are used. The arrow with a full barb,
or a star at the end, points toward the north pole or true
north. The arrow with a half barb points toward what is
known as the magnetic pole which attracts the compass
needle.
213. a. Your map is said to be “oriented” when the north
and south arrow on the map points north on the ground.
155
213-215
soldier's handbook
This makes all lines on the map parallel to corresponding lines
on the ground. Your map should always be oriented when-
ever you use it. It is just as awkward to attempt to use an
unoriented map as to read a book with the pages turned upside
down or sideways.
b. There are two simple and easy ways of orienting your
map:
(1) Suppose there are two points on the ground that you
can also locate on the map. Draw a line on the map between
these two points which we will call X and Y. Stand at point
X. Sight along the line X-Y on the map and turn the map
until the line of sight points exactly at Y on the ground.
Your map is then oriented.
(2) You may also orient your map by compass. Turn the
lid back and down and place the hair-line along the mag-
netic north-and-south line of the map, the lid lying to the
north. Turn both the map and compass, keeping the hair-
line over the magnetic north-and-south line on the map, until
the compass needle points in exactly the same direction as
both lines. Your map is then oriented (fig. 61).
H 214. You are said to be oriented when you known your own
position on an oriented map and the directions on the ground.
Suppose you have been proceeding on a mission over unfa-
miliar ground and you are not now sure of your location on
the map. Orient your map. Select a feature of the terrain,
such as a hill, and from that feature draw a line on the map
toward yourself. Now do the same with reference to another
terrain feature. The point where these lines cross or inter-
sect will be your location on the map.
215. a. One of the most important features of map reading
will be your ability to determine quickly and accurately the
positions of various features on the map. A simple and easily
understood method is used in our Army which will help you
to do this. It is known as the system of rectangular coordi-
nates or the “grid system.” A series of parallel east-and-west
and north-and-south lines are placed on the map and divided
into a number of squares. This series of lines is called a
“grid.” The interval between these lines is usually 1,000 yards,
that is, each square is 1,000 yards on a side. (See fig. 62.)
b- Beginning at the lower left-hand, or southwest corner,
156
soldier's handbook
215
Figure 61.—Orientation, by compass.
157
215
soldier's handbook
the. lines of the grid are numbered. The lines running north
and south are numbered in order from left to right, that is,
from west to east. In the same way, the lines running east
and west are numbered from bottom to top, that is, from
south to north. These numbers are placed on the margins
of the map.
269
268
267
266
265
264
263
J 1 1 111 1 11 - • - • : 00
*
262
150 151 152 153 154 155 156 157
Figure 62.—Rectangular coordinates.
c. Now it is very easy to designate any square on the map
by giving the numbers of the lines which intersect at its
lower left-hand corner. For example, the square containing
the point В would be designated by giving first the north-
south line and next the east-west line, with a dash between
them and inclosed in parentheses, thus (152-267). But since,
on this particular map, all the north-south lines start with
15, and all the east-west lines with 26, we can omit the 15
and the 26 and designate the square containing the letter В
156
soldier's handbook
215-216
as (2-7). This expression (2-7) is called the rectangular
coordinate of the square containing the letter B. The prin-
cipal thing for you to remember is that you read first the
number of squares to the right of the southwest corner of
the map and next the number of squares up. A simple rule
is: Read right up.
d. But suppose we wish to designate the point В more
closely than by just giving the coordinates of the square in
which it lies. Divide the sides of the square into ten equal
parts as shown by the dots in figure 62. Now we see that
В is three subdivisions east of the line 152 and four subdivi-
sions north of the line 267. Therefore, the coordinates of В
are (152.3-267.4) or (2.3-7.4). Become familiar with the sys-
tem of reading and designating map features by means of
coordinates as rapidly as possible.
216. a. You will probably remember the maps contained
in your school geographies, as well as the common automobile
road maps. On these maps certain signs, such as dots, are
used to represent cities; other signs, such as wavy lines, repre-
sent rivers and the boundaries of states or counties. Signs of
this kind which are used to represent cities, rivers, boundaries,
mountain ranges, and similar features are known as “con-
ventional signs.” Military maps are usually of larger scale
and contain many more details than those commonly met
with in civil life. Therefore, to represent all the information
set forth on them, it is necessary to use many more con-
ventional signs than you knew in your school geography.
Some of the most common conventional signs you will find
on military maps represent roads, bridges, houses, fences,
crops, and form lines.
b. These form lines are called “contours” and represent
the variations of the earth’s surface caused by hills, ridges,
valleys, and the like. The exact shape and condition of the
ground has a great influence on all military operations. The
map, therefore, must give the person who uses it a clear
picture of the shape of the ground. Since the map is flat,
special conventional signs are necessary to show these dif-
ferent shapes. A contour line represents an imaginary line
on the ground, every part of which is at the same height
above sea level. If you walk along a contour line you neither
go uphill nor downhill but always stay on a level.
159
216
soldier’s handbook
GOOD ROADS_____________
POOR ROADS_____________
TR Al L_________________
RAI LR О AD_____________
DOUBLE TRACK R.R
NARROW GAGE R.R
TELEGRAPH AND TELEPHONE
LINES —--------------
ELECTRIC POWER
TRANSMISSION LINES
BRIDGE-
FERRIES
FORDS-
DAM___
BUILDINGS
CHURCH-
HOSPITAL
SCHOOL _
(RIVERS ANO STREAMS
ARE BLUE IN COLORED
MAPS.)
CEMETERY_____________________:- [+j OR (CEMj
GRASSLAND (GREEN IN COLORED MAPS)
MARSH (BLUE IN COLORED MAPS)_ _
WOODS. (GREEN IN COLORED MAPS)
Figure 63.—Conventional signs.
160
soldier's handbook
216
...Automatic Rifle
• ►_____Caliber .30 machine gun (arrow points
IN MAIN DIRECTION OF FIRE)
• .....Antiaircraft machine gun
AA
• —50—-Caliber .50 antitank machine gun
37-mm.....37-mm GUN
-4-81-mm____81-mm MORTAR
-^-60-mm----60-mm MORTAR
Machine gun, showing sector of fire
AND DANGER SPACE (SHADED PORTION)
Message center.
...Road block
...Gassed area (to be avoided)
A_________Observation post
.Trench and dugout
.Tank trap
Infantry unit
Armored force unit
Air corps unit
Artillery unit (field artillery and
coast artillery other than antiaircraft).
Cavalry unit.
Chemical warfare unit.
Coast artillery antiaircraft unit.
Engineer unit.
Figure 64.—Military symbols.
161
216
soldier’s handbook
И__________Military Police unit.
Medical unit.
Veterinary unit.
ПП........Ordnance unit.
И_________Quartermaster unit.
I~s]______Signal Corps unit.
ДГхИ8.......One squad, Company A, 48th Infantry.
ia[x]48.....1st Platoon, Company A, 48th Infantry.
АЙ48........Light Machine-Gun section. Company A,
•-fc- 48th Infantry.
Dl^i48......Machine-Gun Platoon, caliber .зо,
•—- Company D, 48th Infantry.
АЙ16.........Troop A, 16th Cavalry.
SpiMxlie....Special Weapons Troop, 16th Cavalry.
__________Machine-Gun Troop, caliber .so
►S-_______16th Cavalry.
a[o]il......Company A, 1st Armored Regiment (L).
ВЙ5—......... Battery В, 5тн Field Artillery.
elAlio4......Battery B, 104th Coast Artillery (A A).
еЙ69________Battery B, 68th Field Artillery(Armored).
2Й48________2d Battalion, 48th Infantry.
Й7оЬ,п ...7th Observation Squadron.
foie______6th Quartermaster Regiment.
ptjs______Command Post, 8th Field Artillery.
~F ------Medical unit in operation.
гЕЗ4®)______Area occupied by Company A, 48th Infantry.
L_______________________________________________
Figure 64.—Military symbols—Continued.
162
soldier's handbook
216-217
c. You should be able to identify at any time the conven-
tional signs shown in figure 63.
217. It often becomes necessary to put on a map either the
location of various bodies of troops, such as companies, battal-
ions, or regiments; or command posts, observation posts,
trenches, machine guns, boundaries, or other important data.
To do this a special list of conventional signs has been pre-
pared called military symbols. When put on a map, blue is
used to designate our own forces and red the enemy. A few
of the commonest are shown in figure 64.
163
CHAPTER 13
SECURITY AND PROTECTION
Paragraphs
Section I. General________________________________________218-221
II. Security of individuals______________________ 222-229
III. Security of small units______________________ 230-237
Section I
GENERAL
218. Most of the people you know in civil life probaoly
make an effort at some time or other to save money. They
may do this in various ways, such as putting it in the bank,
investing in stocks or real estate, or buying different kinds of
insurance. With money in the bank and insurance against
accident, fire, or death they are relieved of worry as to what
will happen to them or their families in case they should
lose their jobs or suffer other misfortune. Their savings, in-
vestments, or insurance are their protection against the
uncertainties of the future.
219. You are also familiar with the police and fire depart-
ments in your city or town. They are provided to protect
you and your fellow citizens from the dangers of fire or the
acts of dishonest persons. In many homes or farms that are
beyond the city limits, watch dogs serve the same purpose.
220. All of these things give you, your family, and friends
a feeling of safety. They relieve you of anxiety or worry and
make you feel secure in the knowledge that misfortune cannot
take you by surprise, for you are prepared to meet it.
Я 221. Security in the Army is exactly the same thing except
that instead of protection against fire, theft, or loss of a job,
we protect ourselves against the actions of the enemy. Each
individual soldier and each organization take measures to
prevent the enemy from taking them by surprise. No matter
how thorough these measures seem to be, however, no indi-
vidual or organization can ever afford to dismiss completely
the possibility of unforeseen action by the enemy. On the
other hand, if the security measures have been as carefully
164
soldier's handbook
221-223
planned as possible, we are relieved of a great deal of anxiety
and worry. We feel confident that we will be warned in
sufficient time to take the necessary action before the enemy
can seriously annoy us or interfere with our movements.
Thus we are able to give the greater part of our efforts to the
main job. When we can do this we are providing for our
“freedom of action.”
Section II
SECURITY OF INDIVIDUALS
222. a. The first thing for you to remember is that in a
campaign security is always necessary. This is true whether
you are resting, marching, or actually fighting. You must
always be on the alert for the movements or actions of the
enemy, for the sooner you see them and give a warning the
better chance you and your commander will have to protect
yourselves and retain your freedom of action.
b. During combat you may be required to serve as a scout,
observer, sentinel, listener, sniper, messenger, or a member of
a patrol. You may have to move about on the battlefield and
work your way close to the enemy both by daylight and by
darkness. In order to follow directions and report what you
see, you must be able to recognize and use the military terms
for different features of the terrain, such as valley, gentle
slope, ravine, cut, and others. The terms which you will use
most often are shown in figure 65.
c. Before you can be expected to help provide security for
your organization, however, you must first know how to pro-
vide for your own security and protection. There are two
ways in which you do this: the first is by learning how to
move and remain concealed, or protected, from enemy obser-
vation and fire by making use of the ground; the second way
is by the proper use of your weapons and equipment.
223. Conduct of Individuals.—a. In whatever arm or serv-
ice you may be you must have a knowledge of the proper use
of cover and concealment. You can never know when you
may find yourself in a situation where you will have to apply
this knowledge in order to save your life. In the military
sense, to be “concealed” means to be hidden from view, but
not necessarily protected from enemy fire. Concealment
affords protection only when the enemy does not know that
165
166
Figure 65.—Military features of terrain.
soldier's handbook
soldier's handbook
223
the terrain feature is occupied. “Cover,” on the other hand,
means that you are both concealed and protected against
enemy fire.
b. Concealment may be provided by bush or tall grass;
cover may be a trench, fox hole, a building, an air-raid
shelter, an armored vehicle, or the side of a hill away from
the enemy.
c. You are provided with an olive-drab uniform because
that color blends in with the colors of nature and is difficult
to see even at a short distance. If there is not sufficient
natural concealment at hand, you can still further increase
the concealment which your uniform affords you by using
leaves, grass, nets, sacking, or other material which may
be at hand. No piece of your equipment should glisten in
the sun. When the ground is covered with snow concealment
may be provided by wearing a cape or jacket of white
sheeting.
d. In observing, take the position which will most reduce
your exposure to enemy view. Whenever possible this should
be the prone position. Keep off the skyline and avoid taking
cover behind single trees and bushes which stand out against
the skyline or are in sharp contrast to the surrounding ter-
rain. When observing from woods or a building, keep back
in the shadows (figs. 66 and 67). You should look and fire
around the right side of trees or other concealment.
e. When in the open, lie motionless with your body
stretched out fiat against the ground. To observe, lift your
head slowly and steadily. Hostile eyes may see abrupt and
quick movements.
/. If you must move to a new position for better observa-
tion, select your route carefully before you start. If your
route carries you over open ground, spring up, run at top
speed with body bent low to your next cover, and remain
motionless (fig. 68).
g. If a wall or hedge is available, move behind it, keeping
well out of sight. If you have a slight rise of ground between
you and the enemy, crawl with all parts of your body close
to the ground.
h. Before starting toward a new position, pick out those
places around you where the enemy may be located and then
move as though you were being watched from these places.
167
223
soldier's handbook
FROM A DITCH OBSERVE
OVER BROKEN EDGE
WITH BACKGROUND
OF FENCE
OBSERVE OVER A CREST AT A
POINT WHERE IT IS BROKEN OR GRASSY
Figure 66.—Correct use of cover.
168
soldier's handbook
223
Observe the new position closely to see that an enemy is not
concealed there. In searching an area look first at the ground
nearest you. Look carefully at every place that may afford
an enemy concealment. Search a narrow strip close to you
from right to left parallel to your front. Then search a sec-
Figure 67.—Observing positions, showing correct occupation.
ond strip a little farther away but overlapping the first.
Keep this up until the entire area is carefully covered
(fig. 69).
i. Know where you are at all times and do not become lost
or confused as to the direction of your own troops. Remem-
ber all that you see, and report exactly what you have seen
when you rejoin your organization.
j. If your duties require you to move close to the enemy
lines at night make sure that no piece of your equipment will
325350 е—41----12
169
223
soldier's handbook
glisten in the light of a flare, or make a jingle or other telltale
noise when you move. Cover the luminous dial of your watch.
k. In movement at night it is just as important as in the
FROM A PLACE OF CONCEALMENT
THE SCOUT OBSERVES POSITION
FOR SIGNS OF HOSTILE OCCUPATION
THEN HE APPROACHES IT BY
A COVERED ROUTE
Figure 68.—Method of approaching an observing position.
daytime to keep off the skyline and make use of shadows. If
you are able to creep, crawl, and cross wire silently you will
make good progress at night, as you will be unseen. You must
learn to distinguish different types of noises such as men dig-
170
soldier’s handbook
223
ging with shovels, cutting wire, and walking. Also the sounds
made by helmets and equipment when struck by wire and
brush. Stop often and listen.
Z. If you hear the sound of a flare, drop to the ground and
remain motionless before the flare bursts. If you look at a
Figure 69.—Method of searching ground.
bursting flare you will be blinded momentarily. If possible,
inspect by day the area you will move over at night.. Select
your route out and back, and carefully note all features of the
terrain that will assist in guiding you at night. Take ad-
vantage of any sound, such as firing or wind, to cover the
171
223-224
soldier's handbook
noise of your movement and move boldly. Consider all people
or sounds beyond your own lines as hostile.
m, During combat if you should be wounded and able to
walk, report to your commander, turn over your ammunition,
and leave the battlefield alone. Unless you have been de-
tailed for that purpose, do not carry wounded men to the
rear without a written order from an officer. That duty will
be performed by medical or specially detailed personnel.
n. If you become separated from your own unit, report to
the commander of the nearest organization and fight with it
until the action is over. Then ask for a written statement
that you were present with the organization and present it to
your unit commander when you rejoin.
o. If you should be made a prisoner remember that by the
international rules of warfare you are required to give only
your name, grade, and serial number. Answer no other ques-
tions and do not allow yourself to be frightened by threats
into giving any information. Any facts about our troops or
equipment may be of great interest to the enemy and result
in defeat to the Army and death to your comrades. Do not
give false answers to questions, as they are dangerous; merely
refuse to answer.
p. Do not take into combat letters, diaries, or other written
papers. If maps or documents have been given to you, de-
stoy them if it appears that you cannot escape capture.
q. Remember that acts of violence against peaceful civilians
and the damaging or looting of property are forbidden. They
are punishable by trial before military court. Prisoners
and enemy wounded are not to be mistreated nor is their
property to be taken from them. If civilians adopt hostile
acts against you, force may be used to resist them.
224. Sentinels.—a, A sentinel may be posted by a unit to
insure its safety or readiness for action, or he may be a part
of a security detachment sent out to protect a larger body.
If you should be posted as a sentinel, you must be on the job
every minute you are on post. You should have the follow-
ing information, obtained from the person who posted you:
(1) Direction and probable route of approach of the enemy.
(2) Sector you are required to watch.
(3) Names of terrain features of military importance
within sight (villages, roads, streams).
172
soldier's handbook
224-225
(4) Location of the nearest security detachments on the
flanks and the means of communicating with them; number
and location of your own outguard or security detachment,
its support, and the routes to them.
(5) Whether patrols or other friendly troops are operating
to your front. If so, any signs or signals of recognition or
other means by which you can identify them, especially at
night.
(6) Other special signals.
(7) Instructions concerning challenging.
(8) What you will do in case of attack.
b. If practicable, you will be provided with field glasses and
a means of signaling. You should place yourself where you
can see your assigned sector at all times and not be seen by
the enemy. If possible, in the daytime you should also be
able to see the sentinels on your flanks. A position in a tree
may be just what you want. If you see signs of the enemy,
notify your commander at once. In the daytime you should
let pass only officers, noncommissioned officers, and detach-
ments that you recognize. Stop all you do not recognize and
call your commander, who will make the necessary examina-
tion of their passes. At night when persons approach your
post halt them and call your commander. When halting
anyone keep him covered. If a person fails to stop at your
third command to halt, or attempts to escape or attack you,
shoot him. If the enemy attacks or there is other great
danger, give the alarm by firing rapidly. You do not need
to challenge if you are certain you have recognized the enemy.
If deserters or a small hostile party displaying a white flag
approach, make them lay down their arms; call your com-
mander. Pass on to the sentinel who relieves you all infor-
mation and instructions relating to your post. (Fig. 70.)
225. Messengers.—At any time during active operations you
may be called upon to deliver a message. It is your duty to
deliver it in the shortest time possible. If you should delay, it
may mean the defeat or capture of your unit. Before start-
ing out repeat back the message, if it is an oral one, to the per-
son who gave it to you in order to fix it firmly in your mind.
Ask questions about any points that are not clear and be sure
that you thoroughly understand what is expected of you. Next,
locate yourself on the ground and map, if you have one, and
173
225
soldier's handbook
Figure 70.—Sentinel on duty.
soldier's handbook
225-227
select land marks to help you find your way. In order to ac-
complish your mission it will generally be necessary for you to
take full advantage of the concealment afforded by the ground,
as has been explained in paragraph 223. Be especially careful
not to make careless movements which would enable the
enemy to locate the station sending the message or the one
receiving it. By using different routes in entering and leaving
message centers and command posts you will avoid marking
out paths which can easily be seen from the air. If necessary,
ask any troops you pass the whereabouts of the person or
headquarters for whom your message is intended. If you
should be delayed or lost, show or explain your message to an
officer and ask his advice. Any information of importance
you may have obtained along your route should be reported
to the person to whom you are delivering the message. Be
sure than you explain to him what you have seen and heard
yourself and what has been told you by someone else. After
delivering your message and before returning, ask if there
are any messages or orders to be taken back. Upon your
return to the place from which you started report that you
have accomplished your mission.
226. Connecting File.—Connection between the different
parts of a marching column or between the detachments of
a unit is maintained by connecting files. In a marching
column a connecting file usually consists of two men. One
keeps in touch with the element in front, the other with
the rear. They halt only when the element in front halts or
upon signals from the rear. They repeat signal's from front
to rear. The distance between connecting files is usually
about 100 yards by day. At night, or when there is poor
visibility, the distance is decreased to the limit of visibility.
If you are a connecting file the principal thing to remember
is to regulate your movement so that you can always see the
other connecting file as well as the groups ahead or in rear
of you. You should see that the element following takes the
correct road. This will require especial care in turning off a
road in forests, towns, or villages, and in darkness or fog.
227. Antiaircraft Security and Protection.—a. As long as
the enemy has any combat aircraft which will fly, our troops
may expect to be attacked from the air. To provide security
against such attacks each ground unit establishes antiaircraft
175
227-228
soldier's handbook
lookouts to watch for enemy airplanes and warn the troops.
These lookouts are provided on the march, in shelter, and in
combat. They may remain at one post, march abreast of the
marching unit, or move from one post to another by motor
vehicles. If you are detailed on this duty you should observe in
every direction, and especially that from which attacks are to
be expected. The direction of the sun, or of hills, woods, or
other cover which might screen low-flying attacks until they
are close to your unit is particularly dangerous. Antiaircraft
lookouts usually work in pairs and relieve each other at in-
tervals of not more than 15 minutes. They are equipped with
field glasses and sun glasses and instructed as to the alarm
signal to be used. They are trained to recognize hostile as
well as friendly airplanes. The alarm is given as soon as
low-flying airplanes are seen which are not positively iden-
tified as friendly. Observers stationed at our antiaircraft
weapons and at command and observation posts will be on
the watch for signals from the antiaircraft lookouts.
b. In case of daylight air attack, never attempt to escape
by running. The airplane probably has not seen you before
but is sure to see you when you run. Your best protection is
to lie flat on the ground. At ditch, shellhole, depression, or
shadows along the road will give you good protection. When
attacked from low altitudes, unless you have received definite
orders not to fire, every soldier should fire on the enemy
airplanes with rifle, automatic rifle, and machine guns. This
will cause the enemy airplanes to keep above the range of
small arms fire.
c. Dense woods provide complete concealment from aircraft
and it is doubtful that you will be seen even in sparse woods
provided you do not move around. If you are to be in the
open for some time you can conceal yourself by pulling
branches or bushes over you, which will blend with the
landscape, and by lying still.
d. At night enemy airplanes may drop flares to light up the
ground. When a flare is first dropped, it glows for about a
second and then burns brightly. When you see that a flare
has been dropped, stop where you are and remain motion-
less until it has burned out.
228. Antitank Security and Protection.—a. To give warn-
ing of the approach of enemy tanks or armored vehicles, anti-
176
soldier's handbook
228-229
tank lookouts are provided. Sometimes the same lookouts
will watch for enemy aircraft as well as tanks and armored
vehicles. Prearranged sound and visual signals are used to
warn our troops. The approach of tanks may be suspected
by the noise of their motors and tracks or by unusual columns
of dust. When your unit is at a distance from where the
enemy is known to be, the probable approach of tanks or
armored vehicles will be over roads. When you are close to
the enemy, however, the entire area to your front, flanks, and
rear must be watched.
b. For the same reason that you should not run from an
airplane attack do not run from an attack by enemy tanks
or armored vehicles. You can’t run fast enough to get away
from them and they are sure to see you and have a much
better shot at you than if you remained still. If you are with
your unit, upon seeing or hearing the antitank warning signal,
await orders from your commander.
c. If you are alone, your best protection from vehicles of
this kind is to take advantage of natural obstacles that they
cannot cross. These are deep streams, canals, or other bodies
of water, marshes or boggy ground, deep ditches or ravines,
thick, heavy woods, stump land, and ground littered with
good-sized boulders.
d. You will also be safe from these vehicles in a trench or
“fox hole” if you get down below the surface of the ground
and allow the tank to pass over you. If you get a chance to
shoot at the tank, aim at the vision slots or other openings
but withhold your fire until the vehicle is at close range. If
the belly of the tank is exposed you have a good chance of
shooting through it with your .30 caliber armor piercing am-
munition. Hand grenades have been used to good effect
against armored vehicles, as well as bottles of gasoline which
will break on the vehicle and set it afire. Above all, remem-
ber that armored vehicles can be stopped and destroyed, so
don’t be panicky when they approach your position.
229. Protection Against Gas.—a. Gas is another weapon
which the enemy may use on the battlefield to gain surprise.
Your security against being surprised is to learn to know
when gas attacks are being made and how to use your gas
mask. If you can do this, act promptly and keep cool, you
have nothing to fear from a gas attack.
177
229
soldier's handbook
b. The enemy may use gas in one of the following ways:
(1) From candles and cylinders. You can tell these by the
hissing sound of the escaping gas and during daylight by the
cloud of gas itself.
(2) From gas projectors and artillery and mortar shells.
Projector attacks make a big explosion, a brilliant flash, and
a large cloud of smoke and dust. Artillery and mortar shells
filled with gas sound almost like duds when they explode.
Usually a thin haze or mist surrounds the burst for a few
moments.
(3) From airplanes and tanks. The airplane bomb filled
with gas also sounds like a dud when it explodes. If the gas
is sprayed from the airplane or tank it can usually be seen.
(4) From bulk containers and chemical land mines, placed
in position and exploded by electricity or by contact fuze.
c. You should remember the following rules as your
security against gas:
(1) Carry nothing in your gas mask carrier but your mask.
(2) Prevent damage to your gas mask by handling it care-
fully.
(3) Keep your gas mask. You may need it at any time,
and it may save your life.
(4) Give a gas alarm only when gas is present.
(5) Hold your breath after the gas alarm is given until
you are sure that your mask is well adjusted to your face
and that you have cleared the facepiece of gas by blowing
vigorously into it while holding the outlet valve.
(6) Keep your gas mask on until permission to remove it is
given by an officer or a gas noncommissioned officer.
(7) Do not enter a dugout during or immediately after a
gas attack.
(8) During or immediately after a gas attack keep your
mask on, even if in a gasproof dugout.
(9) Remain quiet and avoid unnecessary moving around
during a gas attack.
(10) Keep cool, and remember your protective equipment
will save you if properly used.
ill) Remember that the enemy uses many different kinds
of gases, sometimes one kind at a time, and sometimes mixed
with other chemical agents, smoke, or high explosive.
(12) Remember that clothing which has been in contact
with mustard gas should be removed as soon as possible.
178
soldier's handbook
229-231
(13) Use gloves to remove another man’s clothing or to
handle equipment that has come in contact with mustard
gas.
(14) Remember that mustard gas remains in an area for
days.
(15) Avoid all areas in which there has been mustard gas.
If your duties require you to go into such an area, remain
as short a time as possible even though you are wearing
protective clothing and a gas mask.
(16) Remember that the best conditions for a gas attack
are during a calm, in foggy or cloudy weather, a drizzling
rain, and at night. Be on the alert.
(17) Avoid drinking water or eating food that has been
subjected to a gas attack.
(18) Remember that all gas cases require first, rest; sec-
ond, warmth; third, fresh air.
(19) If gassed, do not talk, walk, or move about.
(20) Do not bandage the eyes of a gassed case. It is harm-
ful and may result in blindness.
Section III
SECURITY OF SMALL UNITS
230. For your commander to use his troops successfully he
must first know where the enemy is and what he is doing.
Without this information your commander is like a man try-
ing to feel his way in the dark. He cannot know how to plan
his attack to defeat the enemy, for he does not know where he
will meet him. Nor does he know at what moment, or from
what direction, the enemy may attack him and take him by
surprise.
231. You may be detailed as a member of a detachment sent
out to provide security for a larger body of troops. These de-
tachments have different names which indicate whether the
main body is resting, marching, or fighting and what the se-
curity detachment is doing. No matter what they are called,
always remember that the principal mission of every security
detachment is to prevent the main body from being surprised.
They do this by finding out where the enemy is and what be is
doing by giving warning of the enemy’s approach, and by
delaying him so that the main force can get ready to fight.
179
231-232
soldier's handbook
They are the eyes and ears of the commander. They get back
to him the information he needs to know so quickly that he
will have plenty of time to make or change his plans. Another
important thing to remember is, no matter how small the unit
may be it always provides for its own security even though
this security may consist of only one or two men.
232. Scouts.—a. The smallest security detachment is the
scout. The scout is a soldier whose duty it is to see what the
enemy is doing without being seen, and to hear the enemy
without being heard. The scout must be intelligent, have a
strong body, great endurance, keen eyesight, delicate hearing,
and an excellent memory.
b. As a scout your commander may use you in al] types
of combat operations. When your organization is in camp or
bivouac, scouts are sent out from the outpost to gain in-
formation of the enemy, to prevent his scouts from gaining
information of your organization, or both. When your organ-
ization is on the march, scouts perform important duties with
the advance, flank, and rear guards by discovering hostile
troops and promptly sending this information back so that
your own commander will not be surprised. In movements by
night or in dense woods, scouts serve as guides.
c. As your unit moves forward to the attack, scouts precede
it and keep the proper direction for it to follow; they investi-
gate danger areas before the unit crosses them, and select
locations where it will be protected from enemy fire. During
the progress of the attack they also protect your unit from
surprise fire or counterattack by the enemy; they select and
occupy firing positions and point out enemy targets.
d. When their organization is on the defense, scouts serve
as lookouts, observers, listeners, and snipers. They may
serve as members of patrols to enter the enemy lines, both
by day and night, to get information of the enemy. They
drive off enemy scouts and patrols who are trying to do the
same thing.
e. A trained scout will be able to see and hear things that
the average soldier does not. You must be able to pick up in-
distinct and motionless objects as well as moving ones. Long
periods of painstaking search are often required before the
position of a hostile soldier is located. As a scout you will
conceal yourself as has been described in the preceding sec-
180
soldier's handbook
232
tion, but as you will be “on your own” you will have greater
freedom of movement.
/. Scouts usually work in pairs, with each scout having the
utmost confidence in the ability of his fellow scout. Train
with your partner and make a buddy of him so that each
of you know what the other will do under any circumstances.
Scouts always work in pairs when scouting in front of their
organization in the advance. They move ahead of their or-
ganization as ordered by the commander. Here their duty
will be to cause hostile riflemen and machine gunners to open
fire and disclose their position, and to overcome resistance
from small hostile outposts and patrols (fig. 71).
g. As you scout in front of your advancing unit, pick out
probable positions that may conceal enemy machine guns
or rifle groups. When you signal that these positions are
clear your unit will advance by bounds and you should move
forward for further reconnaissance.
h. Your distance in front of your organization varies with
the ground and position of the enemy. In approaching
houses, woods, and villages, one scout of each pair covers
while one reconnoiters (fig. 72).
i. When the enemy opens fire, stop, seek cover, and deter-
mine where the fire is coming from. Scouts open fire with
tracer ammunition to show to their leader the position of the
enemy.
j. Scouts must be alert for intervals or gaps in the enemy
line. When you discover them, push in, take up a position
from which flanking fire may be brought to bear on the
hostile position, then either you or your fellow scout notify
your leader at once.
k. You can see that if you are appointed a scout a great
deal will depend upon how well you perform your duties.
You must always remember why the commander sent you
out and what he wants you to do. That is your “mission.”
Sometimes this will require a great deal of courage on your
part and you may have to try out several of different plans
until one of them works. You will be “on your own” and
often will find yourself in a situation which neither you nor
your commander could have thought of in advance. But
if you remember your “mission” at this time, and just what
information your commander is anxiously waiting to receive
from you, you will succeed.
181
232
soldier's handbook
182
SOLDIER S HANDBOOK
232
WITH PLATOON IN WOODS
SCOUTS REACH OPEN
AND SEE HOUSE AHEAD.
THEY SIGNAL HALT.
MEANING THAT THE
PLATOON SHOULD NOT
ADVANCE BEYOND THIS
POINT. RECONNAISSANCE
SHOWS HOUSE TO BE
CLEAR. SCOUTS SIGNAL
FORWARD AND PROCEED
CROSSING OPEN SPACE
SCOUT SEES POSITION
FROM WHICH MACHINE
GUN MAY SWEEP THIS
AREA. HE SIGNALS
DOUBLE TIME AND
POINTS TO THE MG
POSITION. MEANING
THIS AREA IN DANGER.
FROM THAT POINT
PLATOON SHOULD
HURRY ACROSS
SCOUT RECONNOITERS
FOR A SHORT DISTANCE
INTO WOODS. FINDING
EDGE OF WOODS TO
BE UNOCCUPIED. A
SCOUT RETURNS TO
EDGE OF WOODS AND
SIGNALS "FORWARD".
THEN BOTH ENTER
WOODS AND WAIT FOR
PLATOON TO CLOSE UP
Figure 72.—Conduct of scouts during advance.
183
233
soldier's handbook
233. Patrols.—a. General.—The squad or a part of a
squad oftens acts as a patrol. Patrols are assigned either
reconnaissance or security as their primary mission.
(1) Reconnaissance patrols are used primarily to get in-
formation, maintain contact with the enemy, or observe
points or areas. They do not fight unless they must in order
to accomplish their task. They move so as best to do their
job; they are not bound by either position or distance to the
unit from which they were sent out.
(2) Security patrols provide security for a larger force.
Their mission often will require them to -fight. They must
regulate their movements on the force or unit they are
protecting.
(3) Patrols executing missions which will probably call for
combat are given the means and the strength to enable them
to engage in combat.
b. Reconnaissance patrols.—(1) Reconnaissance patrols
are usually small, consisting of a leader and two or three
men. They avoid unnecessary combat and accomplish their
missions by stealth.
(2) The patrol leader is given the enemy situation and
our own situation insofar as he needs to know them. He is
given a definite job to do; he is told the general routes to be
followed, the friendly troops through which he will pass, the
time of return, and the place where messages are to be sent or
the patrol is to report.
(3) Before starting out, the patrol leader studies the map
and the terrain and selects a suitable route. He appoints
alternate leaders, gives the other members of the patrol care-
ful instructions about the task the patrol has to perform,
assigns individual tasks, points out the route on the map
and on the ground, arranges special signals, and designates
an assembly point if the patrol is forced to separate. He
makes sure that all members of the patrol know their jobs
and checks to see that the arms and equipment are so carried
that they will not glisten or rattle. The members of the
patrol do not carry written matter which might be of value
to the enemy if they are captured.
(4) All must clearly understand that in event of a fight
wounded comrades are not abandoned but brought in with
the patrol, whenever possible.
184
soldier’s handbook
233
(5) All patrols provide for a point, flank protection, and
a get-away man, who must always be able to return to his
commander no matter what may happen to the remainder of
the patrol. When a patrol is at a halt for any reason it
must provide itself with all around protection (fig. 73).
(6) When moving in open country near the enemy, the
patrol should pick its next stopping place before each ad-
vance. Moves should be made by one man at a time and at
top speed. Before crossing a skyline one man should go td
a point where- the skyline is broken and observe, the rest of
the patrol covering his advance. When he signals ‘‘forward”
the way is clear and the remainder of the patrol comes up
(fig. 74).
(7) Patrols should avoid enclosures and villages if possi-
ble. If it is necessary to pass through villages or to patrol
them, great care must be taken, as each house or cellar may
conceal an enemy. Watch windows, doors, and tops of houses
closely. Advance slowly and cautiously (fig. 75).
(8) If a patrol is attacked and must fight, the man who first
notes the danger calls out “Front,” “Right,” “Left,” or “Rear.”
All members face toward the man attacked. The men on
the flanks advance a short distance straight ahead and then
close on the enemy from the flanks. The patrol leader and
the men with him rush the enemy. During the combat, the
members of the patrol repeat their recognition signals. If
necessary, the leader designates a man near him to stay out
of the fight.
(9) The patrol leader decides whether information gained
will be sent back at once by messenger or reported on the
return of the patrol. He alone is authorized to talk to, or
arrest civilians or to seize telegrams and mail matter.
Patrols do not allow civilians to pass through or precede
them.
(10) An example of a message which you, as a patrol
leader, might send back is shown in figure 76. After writ-
ing the message you would point out to the messenger who
will carry it the location of the stone fence, woods, and
machine guns and tell him your intentions. The sketch
can be made quickly and requires no special ability. It con-
tains all the information that is needed but no unnecessary
information. If the commanding officer of Company A
325350°—41---13
185
233
SOLDIER'S handbook
LEFT FLANK
Figure 73.—Distribution of patrol halted in observation.
wants to know what you are going to do, he will ask the
messenger. The advantage of
should the messenger and the
enemy patrol, there is nothing
where Corporal Jones is now.
at B” invites capture.
this lies in the fact that,
message be captured by an
in the message to tell them
To write “squad will remain
186
soldier's handbook
233
Figure 74.—Method of approaching house; of crossing stream.
127
233
soldier's handbook
_________________________________________________—
Figure 75.—Formation of patrol passing through village.
188
soldier's handbook
233
(11) A soldier who is a good individual scout will ordi-
narily be a good member of a patrol. However, it must
be remembered that as a member of a patrol you must
obey the signals or commands of the designated leader in-
stantly and without fail. You are not then scouting “on
your own.”
(12) Since many night patrols are for the purpose of cap-
turing prisoners and executing tasks which may require
combat, the patrol should rehearse plans for night combat
and laying ambushes until it reaches a high state of effi-
ciency. Only through repeated rehearsals and training will
each member of the patrol learn to do his part unhesitat-
ingly and correctly, and thus gain confidence in the ability
189
233
soldier's handbook
of the patrol as a unit (fig. 77). Failure to do this will
sooner or later result in heavy losses in the patrols.
c. Security patrols.—(1) A squad or a part of a squad may
act as a point (of the advance guard or rear guard) or as
a flank patrol of a force on the march or in combat.
(2) Point of advance guard.—The point of an advance
guard is a security patrol. It moves along the route of
march and prevents an enemy on or near the route of
march from opening surprise fire on the troops in rear.
Behind the point comes the advance party. The distance
between them will vary with the kind of terrain and whether
it is day or night, but usually the point will not precede the
advance party by more than 300 yards. As a member of
the point you will find that it is so arranged as best to let
the leader control it, to make it a poor target for enemy
fire, and to permit all members to fire quickly to the front
or either flank. It frequently marches on both sides of the
road. It fires on all hostile forces within effective range.
When unable to drive off the enemy, it holds its position
and covers the action of the advance party. The presence
of a distant enemy beyond effective rifle range is reported
by signal. The point observes toward the front and flanks
but does not reconnoiter on the flanks of the route of march.
When the column halts, the point sends forward one or more
observers.
(3) Point of rear guard.—As a member of a rear point
you are assisting in protecting the rear of your marching
column. The formation of the rear point is similar to that
of the point of an advance guard. However, as a member
of a rear point you stop to fire only when the enemy
threatens to interfere with the march. No other troops
will move to your assistance, but when the enemy presses
closely, other troops will take up firing positions in rear to
cover you. When you are forced back, withdraw to a flank
so that the troops behind you can fire into the enemy.
(4) Flank patrol.—(a) A flank patrol is a security patrol.
Flank patrols operate in one of two ways; either they go
to a designated place, remain there for a specified time, and
there rejoin the column, or they march along a designated
route. They report, by signal or messenger, enemy forces
they observe.
190
soldier’s handbook
233
PAIRS OF SCOUTS ATTACK
PREVIOUSLY DESIGNATED
MEMBERS OF THE ENEMY
PATROL BY RUNNING IN
UPON THEM FROM BEHIND-
A PAIR OF MEN WITH
BROWNING AUTOMATIC RIFLES
ARE PLACED ON EACH FLANK
NEAR END OF AMBUSH SO THAT
THEY CAN COVER ITS FLANKS
Figure 77.—Night ambush.
191
233-234
soldier's handbook
(&> A flank patrol of a column on the march moves so
that it can protect the column against hostile small-arms
fire at midranges (300 to 600 yards).
(c) In combat the flank of the unit to which you belong
may become exposed. In such a situation flank security
patrols are sent out to protect the exposed flank. Not only
do these patrols report observed hostile forces and their
movements but they also report the movements of friendly
forces which they can see.
234. Security at Halt.—a. Detachments of troops detailed
to protect a body of troops at rest or not on the march are
called outposts. The general purposes of an outpost are to
get information, to observe places where the enemy might
sneak up on the main body, and to fight off enemy troops
coming toward your position. In particular the outpost must
protect the main body so the troops can rest, or work undis-
turbed, and in case of attack hold the enemy off long enough
so that the main body can get ready to fight. If you are a
sentinel on outpost duty you must be on the job every minute
you are on post, but you must avoid unnecessarily alarming
the command.
b. For an organization the size of a company, troop, or
battery the outpost need be only a few sentinels and patrols.
In a larger organization a larger and' more elaborate outpost
will be needed. On account of the presence of motorized
and armored forces in all modern armies, outposts must give
all around protection to their commands. The part of the
outpost nearest the enemy is an observation group called an
outguard. Behind the outguard are more troops in detach-
ments called supports (figs. 78 and 79).
c. If you are a member of an outguard, no fires will be
built or smoking permitted unless you are told you can do so.
You should avoid loud talking or making other noise. The
position of each outguard may be entrenched and will be
concealed. You keep your weapons at hand all the time, and
do not remove your equipment. Your duties as a sentinel
are described in the preceding section.
d. You may be called upon to perform outpost patrol duty.
Outpost patrols operate either within our lines or beyond our
lines. Some patrols operate beyond our lines to reconnoiter
in the direction of the enemy. Other patrols operate within
192
soldier's handbook
234
our lines in order to keep in touch with the parts of the
outpost and check up on the performance of duty on the line
of outguards. Outpost patrols have at least two men and
DIRECTION OF
THE ENEMY
OUTGUARD
NO. 2
a good leader who, on important tasks, may be an officer.
The patrols get information of the ground and of where the
enemy is and what he is doing. Any ground near the line
193
234
soldier’s handbook
OUTGUABD №3 <>UT£ НА ED Л°2
Figure 79.—Several outguards on duty.
soldier's handbook
234-235
of outguards that might give concealment for hostile troops
is searched frequently by patrols if the enemy could get to
it without being seen. When you are on patrol duty you
fire only in self-defense or to give the alarm. Patrols and
reliefs should not move in the open in vicinity of the out-
guards and so give away the location of the sentinels and
outguards.
e. If you have to establish a cavalry outguard, remember
that your horses must be kept as near at hand as practi-
cable. This will require careful planning so that they can
be fed and watered and still be protected from enemy ob-
servation and fire.
235. Security on the March.—a. An advance guard is a
detachment of a body of troops that goes ahead of and pro-
tects the main body on the march. The chief job of an ad-
vance guard is to protect the main body against surprise
attack and drive back small detachments of the enemy. Par-
ticularly its duties are—
(1) To guard against surprise and get information by
patrolling.
(2) To push back small detachments of the enemy and
prevent them from observing, firing on, or delaying the main
body.
(3) To remove obstacles and make repairs to the road to
help the steady advance of the column.
(4) To delay the enemy’s advance in force long enough
to let the main body get ready to fight.
(5) When the enemy is found on the defensive to take a
good position, locate his lines, and protect the main body
during its preparation for action.
b. An advance guard provides for its own security and gets
information by putting out smaller detachments to the front
and flank. The most advanced part of the advance guard is
called the point (figs. 80 and 81). The point is usually a
squad, or part of a squad. It is really a patrol with a fixed
mission.
c. Your part in an advance guard may be as a part of the
point or one of the other patrols sent out to make sure that
the enemy does not ambush the main body.
d. If the point of an advance guard is fired upon, it should
deploy and try to continue to advance fighting. This is done
195
235
soldier's handbook
in order that small enemy detachments will not succeed in
delaying the advance of the main body. Flank patrols assist
in this, and if the enemy does not fall back they try to locate
his flanks. If necessary, each part of the advance guard goes
into action to clear the way for the main body.
e. A rear guard is a detachment whose job is to protect the
main body from an attack from the rear. In a retreat it
fires on and delays in every possible way enemy pursuing
troops, so that the main body can gain distance from the
ADVANCE GUARD
FLANK
GUARD
FLANK
GUARD
DIRECTION
OF MARCH
MAIN BODY
REAR GUARD
Figure 80. —Relation, of security detachments on march to main
body.
enemy. The formation of a rear guard is like that of an
advance guard, reversed. That is, the various parts follow
the main body instead of going ahead of it. Also the rear
party follows the support, and the rear point follows the
rear party. The rear guard makes the most of opportunities
to block the road and takes up good positions from which
it can fire on the enemy and make him deploy. The fight is
not kept up so long that the rear guard will not be able to
fall back to other positions (fig. 82).
196
SOLDIER'S handbook
235
/. A flank guard is a detachment whose job is to cover the
flank of a column exposed to enemy attack. It may be placed
in position to cover the march of the main body or it may
march generally opposite the main body to protect it. The
object of the flank guard is to prevent attack of the main
body or, if this cannot be done, then to delay the enemy long
enough so that the main body can get ready to fight. The
flank guard must keep contact with the main body. A flank
guard must provide its own protection and if necessary have
I POINT
| ADVANCE PARTY
SUPPORT
DIRECTION
OF MARCH
MAIN BODY
Figure 81. —Advance guard of small force.
its own advance guard or rear guard and flank patrols
(fig. 80).
g. (1) When a march is made near the enemy, special
measures are taken during halts for protection against sur-
prise or attack. When the halt is only for a short time (less
than a half hour), the advance party and support rest along
the route of march. The point and flank patrols move to po-
sitions where they can keep a good lookout. If necessary
more patrols will be sent out from the advance party and
support. Antiaircraft and antitank lookouts are detailed to
watch out for the approach of enemy airplanes and tanks or
armored vehicles.
197
235
soldier's handbook
(2) If the halt is longer than a half hour, a march outpost
will probably be formed. Outguards are sent out to the front
and flanks, and unless friendly troops are close in the rear
they will be put out to protect the rear also. The outguards
to the front and flanks are furnished by units of the advance
guard. Outguards to the rear, when necessary, will be taken
from the rear guard. When the march is to be resumed, the
various outguards are signaled to close in, and when all are
back in their march formations the march is resumed. March
MAIN BODY
SUPPORT’
DIRECTION
OF MARCH
REAR PARTY
| REAR POINT
Figure 82.—Rear guard of small force.
outposts watch particularly roads and routes of approach
leading to the main body for the approach of enemy
mechanized and motorized detachments. March outposts
work like other outposts in protecting the main force.
h. All arms of the service follow the same general plan
for providing security for themselves. In the cavalry, ar-
mored, or motorized units, however, the distances between
the security detachments and the main body are greater than
198
soldier's handbook
235-236
with foot troops because of the greater speed which cavalry,
armored, and motorized units have. Security elements of
these rapidly moving forces sometimes advance by bounds,
much as a. scout will do in advancing toward the enemy.
That is, the point of the advance guard will move rapidly
forward to some ridge or other favorable terrain feature from
which it can observe toward the enemy and, if all looks well,
it signals for the next larger unit to come forward. The
leader of the point then selects another favorable terrain
feature and repeats his advance, taking advantage of cover.
While the point is doing this the next larger detachment in
rear is prepared to defend the point by firing on any hostile
element which might seek to stop the advance of the point.
Sometimes, however, when the advance of the main body is
very rapid, or during darkness or fog, movements by bounds
will not be made but a steady rate maintained.
H 236. Security While Defending.—a. When your organi-
zation is defending, security against a surprise attack is pro-
vided by sentinels, patrols, outguards, outposts, a warning sys-
tem, and natural and artificial obstacles. The natural obsta-
cles which provide some protection by making it difficult for
the enemy to attack are rivers, canals, lakes, marshes or
boggy ground, ravines, steep mountains, and other difficult
parts of the terrain. They can all be crossed, however, and
must be watched and defended.
b. The artificial obstacles which provide protection are
trenches and dugouts, barbed wire entanglements, road blocks,
road craters, traps, and mines. Just as with the natural
obstacles, the enemy can remove or cross artificial obstacles
if he is not interfered with. The thing to remember is that
after a natural or artificial obstacle has been selected or put
in place it should be covered with the fire of your weapons,
especially machine guns. The obstacles will slow up the en-
emy. When he attempts to remove or cross them your fire
will stop him.
c. (1) There are specially organized units in the Army to
provide protection against aircraft and armored vehicles. If
you are assigned to one of these units, you will be given special
instruction in the use of the weapons. If you are not a mem-
ber of such a unit, however, you should make every effort to
provide your own security with the weapons and other means
199
236-237
soldier's handbook
available to you. As was explained before, your best protec-
tion against low-flying aircraft is concealment, remaining
quietly in place, and firing on the airplane with all weapons
unless you have received orders not to fire.
(2) Even where natural obstacles exist, additional security
should be provided against armored vehicles by an all around
protection of artificial obstacles. Tank traps and mines can
be set out, although this will usually be done by engineers or
larger troop units. Road blocks are especially effective in
stopping armored vehicles or slowing them up and making
them go across country. These may be easily constructed by
deepening and enlarging shell holes on the road, by felling
trees or telephone poles, or by putting old automobiles or
trucks crosswise on the road where the armored vehicles can-
not get off the road because of steep banks or ditches. The
value of these obstacles is increased by covering them with
fire which will interfere with the enemy’s attempts to remove
the obstacles.
(3) You must be on the alert to prevent enemy sympa-
thizers or parachute troops which have been landed behind
our lines from removing these obstacles. If you are detailed
to guard an obstacle never allow any persons to tamper with
it or remove it unless you are sure of their authority to do
so. If there is any doubt in your mind hold them under
guard until one of your officers or noncommissioned officers
arrives. If they attempt to attack you or to escape, shoot
them.
237. Security While Attacking.—a. As your unit ap-
proaches the actual or probable location of the enemy, se-
curity is provided by covering its advance with scouts. These
scouts go in advance of the larger units and “comb” the
ground thoroughly. Their action will make the enemy dis-
close his position by opening fire before the larger elements
of your organization have come within his range. As your
unit comes closer to the enemy’s position additional security
will be provided by breaking up into smaller units known as
squad or platoon columns, or by deploying as skirmishers.
This increases the readiness for action of your unit by putting
it into formation from which it can move in any direction
and cannot be surprised by any action of the enemy. Addi-
tional security is provided by the fire of machine guns and
200
soldier's handbook
237
other weapons which keep down the enemy’s fire until your
organization can reach his position and drive him out of it.
b. If your organization halts during the attack, one or
more combat outposts are immediately sent out to the front
where they can screen and protect your organization until
it is ready to continue the attack. A combat outpost usually
operates from several alternate positions. If the enemy
advances the combat outpost opens fire at long range. Upon
close approach of the attacking troops the combat outpost
withdraws. Routes of withdrawal are used which will not
interfere with your own organization in rear firing at the
enemy.
c. If the battle is interrupted by darkness, combat outposts
will be promptly established. At night they will be closer to
your organization than in the daytime. The combat outpost
will establish listening posts to warn the front line organiza-
tions of the approach of hostile raiding or attacking parties.
It will maintain a vigorous reconnaissance during the night
in order to discover any change in the hostile dispositions,
intentions, or situation.
d. During battle it may happen that a flank of your organ-
ization may be exposed. That means that there are no
friendly troops close to that flank. Whem this happens a
flank patrol must be sent out to that flank. Its duties
are to prevent the enemy from working his way around
and attacking your exposed flank or rear, or to give due
warning of such an intention. Such a patrol regulates its
own movements on that of the unit it is protecting. It may
remain in one position or, if your organization is advancing,
it will move rapidly from one position to another. When the
patrol occupies a position each member selects two locations,
one from which he can fire to the front or flank and another
from which he can fire to the flank or rear. The patrol must
be in constant communication with the unit it is protecting.
One man is selected who must always be able to escape and
get back to your organization in case the patrol is captured.
Information of enemy activities or of friendly troops which
may appear on that flank are reported back to your com-
mander as he directs.
325350°—41----14
201
CHAPTER 14
MILITARY SANITATION AND FIRST AID
Paragraphs
Section I. Military sanitation_____________________________ 238-253
II. First aid-------------------------------------- 254-276
Section I
MILITARY SANITATION
238. Before you entered the Army, you were given a
thorough physical examination to see that you had no dis-
ease. Now that you have been accepted in the military service
it is your duty to our country and yourself to keep well and
ready for any service. If you will remember and follow the
few simple rules given below, you will find yourself repaid
many times. Following these rules, in connection with the
daily exercise of your military training, will keep you in ex-
cellent physical condition, and you will return to civil life
with a better and stronger body than when you entered the
Army.
239. If at any time you do not feel perfectly well, or be-
lieve that you have any disease, go at once to your first ser-
geant, or the noncommissioned officer in charge of quarters,
who will send you to a medical officer for examination.
Never try to treat yourself, as you may not only seriously
harm yourself, but may also become a source of danger to
your comrades. The danger of giving a disease to another
man is usually greatest when the illness is just starting, and
often before you feel really sick. If you have a cold, a head-
ache, diarrhea, sore eyes, a rash on your body, or feel fever-
ish, you must be examined by a medical officer as soon as
possible. Many contagious diseases begin with these symp-
toms, so you must not wait until you have exposed your com-
rades before seeing a medical officer. You will also usually
have a less severe illness yourself if you report for a treatment
as early as possible.
240. Stay away from any person having a disease unless
it is your duty to take care of him.
202
soldier's handbook
241-245
241. An unclean body may be the cause of disease. Take
a bath at frequent, regular intervals and at least twice a
week. Pay particular attention to your armpits, the parts
between the legs, the feet, and under the foreskin. Always
wash your hands thoroughly before eating and after using
the toilet, as you may have gotten some disease germs on your
hands which will get on the food you eat and into your sys-
tem. You are especially likely to get such germs on your
hands when going to the toilet. If bathing facilities are not
available, scrub your body frequently with a wet cloth, paying
particular attention to your armpits, crotch, and feet.
242. Have your underwear, shirts, and socks washed fre-
quently and change them at least twice a week. If water is
not available, crumple up your clothing, shake it well, and
hang it in the sunlight for at least 2 hours. Be on the lookout
for body lice and crab lice. If you have a continued itching
on your body or head, report to a medical officer at once.
243. When your clothing or shoes get wet, change them
as soon as possible. Sitting around in wet clothes or with
wet feet is almost certain to give you a cold or other serious
illness.
244. Keep your mouth clean by thoroughly brushing your
teeth at least twice a day; one brushing should always be
before going to bed. Brush your teeth on the inside and out-
side, away from the gums and toward the cutting surfaces of
the teeth. If particles of food remain between the teeth, they
should be promptly removed, care being taken not to injure
the gums. If your teeth are bad, or ache, report to the
dental officer.
245. Get into the habit of having your bowels move regu-
larly once each day at as nearly the same time as possible.
Always go to the toilet to urinate, or when your bowels move.
Using the ground for this purpose is a source of great danger
to everyone. Flies or other insects may alight where you
have relieved yourself, pick up germs, and later deposit them
on food. These germs may also be carried by rain, or
drainage, into wells or a stream which serves as a water
supply for some city or your own camp or post.
203
245-251
soldier's handbook
246. Drink plenty of water at intervals during the day but
do not drink a large amount at one time, especially when
you are overheated after exertion. Drink from your own
glass or cup, or from a bubbling fountain. Never use a cup
which is used by others, as someone may have left live germs
on it from his mouth or hands, and you may catch a disease
when drinking from it. For the same reason do not exchange
pipes, cigars, musical instruments played by the mouth,
handkerchiefs, towels, or shaving outfits.
247. Be sure to use your mosquito bar when mosquitoes are
present. See that it is well tucked in and that it has no
holes in it.
248. Flies and cockroaches frequently carry disease germs
and leave them on food and other articles over which they
walk. Get rid of flies in every way. Whenever you see a fly
in barracks, kill it. Be sure that screens in windows and
doors are kept tightly closed. Food containers and garbage
cans must be kept tightly closed. Scraps of food, fruit skins,
and manure should never be left on the ground about the
post or camp.
249. Keep your barracks and squad room clean. If you
find bedbugs in your bed, or in the barracks, report that fact
to your company commander.
250. Keep your hair cut short and your fingernails clean.
This is especially important if you are detailed as a cook,
baker, or in other positions in which you handle food.
251. a. Avoid venereal diseases. These diseases are almost
always caught by sexual intercourse with an infected woman.
If you have had sexual intercourse, report at once for “prophy-
laxis.” The prophylactic treatment must be carried out thor-
oughly and the directions followed exactly. The sooner you
report for this treatment, and at least within 2 hours after
exposure, the more certain you are of avoiding disease.
b. If you should feel that you have caught a venereal dis-
ease, report to the medical officer at once and do exactly as he
tells you. Any venereal disease can be cured much more
quickly if proper treatment is begun early. Above all, do not
try to treat yourself or go to an advertising quack doctor.
Doing either of those things may result in serious damages
204
soldier's handbook
251-252
to your body and health which will remain with you the
rest of your life.
252. While all of the rules given above are of the same im-
portance in the field as they are in your post or cantonment,
the following are of especial importance in your field service:
a. Be more careful of the water you drink. Never drink any
water from a stream, spring, well, or faucet until it has been
passed as pure by a medical officer and a sign posted that the
water is safe to drink. When orders have been issued that all
drinking water must be boiled, be sure that the water you drink
has actually been boiled for 20 minutes and not merely heated
a little. Often water will be provided for drinking which has
been purified in a sterilizing bag known as a Lyster bag. These
bags are usually placed in your company street or near the
company kitchen. When this is done drink only the water
from the bag. Do not mind the peculiar taste; it will not hurt
you in the least and comes from a powder issued by the Quar-
termaster Corps to purify the water. Water purified in this
way may make your urine sting a little but this means nothing
harmful. Let the water run from the faucet of the bag into
your own cup. Do not dip a cup into the bag and do not drink
by putting your lips to the faucet.
b. Be especially careful not to relieve yourself except in the
latrine, or the night urine can, provided in your company
street.
c. Be sure that your mess kit and knife, fork, and spoon are
thoroughly washed in hot, soapy water and rinsed in boiling
water after they are used. Unless this is done in boiling water
your mess gear may pick up disease germs from the men who
used the water before you and you may contract disease.
d, Use the mosquito bar whenever there are mosquitoes, or
when directed by your company commander.
e. Get a bath whenever possible. Watch for lice or other
vermin on your body and clothing and, if found, report im-
mediately to the medical officer.
/. Do not sit or lie directly on the damp ground. When
you are hot or perspiring, or when your clothes are damp, do
not remain where a draft can strike you. If you do, you will
get chilled and as a result may contract a cold, rheumatism,
or pneumonia.
205
252-254
soldier's handbook
g. Every day, if possible, hang your blankets and clothing
out to air in the sun and shake or beat them with a stick
Wash your shirts, underwear, and socks frequently. When-
ever possible, roll up your tent so the air and sun can get
in it. Keep it ventilated at night.
h. Ditch your tent as soon as you can after it is put up,
even if your camp is only for one night. If you do> not, a
little rain may spoil a whole night’s rest.
г. Always prepare your bed before dark. If you have no
cot, level off the ground and scrape out a little hollow for
your hips. Use some straw, dry grass, leaves, or small
branches. Sleep on your raincoat. This keeps the dampness
from coming up from the ground and chilling your body.
253. The most important thing in your marching ability as
a soldier is the care of your feet. You will find instructions
on this matter in section II, chapter 11.
Section П
FIRST AID
254. During your military service you may find yourself
in a situation where you will have to give first aid to the
injured until a member of the Medical Department arrives.
The following points are important for you to remember:
a. Do not get excited; act quickly but quietly.
b. Be gentle; do not handle a wounded man roughly; keep
bystanders away.
c. Do not try to do too much.
d. A Medical Department man should be called as soon as
possible.
e. Make the injured man sit or lie down.
/. Never move an injured man until medical help comes,
unless it is impossible to keep him warm where he is, or
unless he must be removed from the battlefield to reach help.
The less an injured man is moved right after being hurt, the
better chance he will have to recover.
g. Warmth is most important to prevent chilling and
shock, even on a warm day. Fill canteens with hot water and
place them under his armpits and between his legs, always
outside of his clothing, so as not to burn him. Wrap him in
blankets, coats, newspapers, or anything else available to keep
206
soldier's handbook
254-256
him warm. If he is conscious and not wounded in the stom-
ach, throat, or mouth, he may be given a hot drink.
h. Do not pour liquids into his mouth if he is unconscious;
they may choke him.
i. Do not try to bring an unconscious wounded man to con-
sciousness. Just let him be quiet, stop his bleeding, and keep
him warm.
j. Never touch a wound with anything unclean, such as
dirty hands, or water and bandages that are not sterile. You
may cause blood poisoning. Do not wash the wound.
k. Expose the wound by unbuttoning, unlacing, or cutting
the clothes, shoes, leggings, or boots. Open all articles of
clothing which interfere with the circulation of blood or
breathing but do it gently.
255. First-aid Packet.—Among the items of equipment is-
sued to you is a first-aid packet. It consists of a little air-
tight container and is carried in a small web pouch attached
to your belt. When you place this packet in the pouch always
have the ring down, at the bottom of the pouch, so that when
the packet is taken out of the pouch the ring will not be
caught and the packet accidentally opened. Never open the
packet until it is necessary for you to use it in the treatment
of a wound.
Я 256. Use of First-aid Packet.—The following information
will assist you in using the first-aid packet:
a. The packet contains two sterile dressings, each wrapped
in waxed paper. Each dressing consists of a gauze bandage
(4 inches wide and 84 inches long), to which is sewed in the
middle a “compress” or pad of gauze. The dressing is ar-
ranged so that the compress (folded) is on the inside and a
roll of the bandage is on each of the two outer sides. When
the rolls are pulled, the compress on the inside opens. This
packet also contains two safety pins wrapped in waxed paper.
b. To apply the first-aid packet, carefully remove the
wrapper and carefully remove the paper from one of the
packages without unfolding the compress or bandage, between
the thumb and fingers. When ready to dress the wound, open
the compress by pulling on the two rolls, being careful not to
touch the inside of the compress with the fingers or anything
else. Still holding one roll of the bandage in each hand, apply
207
256-258
soldier's handbook
the compress to the wound, then wrap the bandage around
the limb or part, and tie the ends together or fasten with
safety pins. The second compress and bandage may be ap-
plied over the first or it may be used for a sling if the arm is
Wounded, or to bind both legs together if one is injured.
c. For two wounds opposite each other, apply to one wound
an unopened compress, to the other an opened compress, and
hold both dressings in place with the bandage of the latter.
d. For two wounds not opposite each other tie a compress
over each.
e. For a wound too large to be covered by the compress,
find and break the stitch holding the compress together, un-
fold it, and apply as directed above.
/. If the contents of one packet are not large enough to
cover a wound thoroughly, use several.
g. All wounds bleed more or less. Some bleed very freely
because a large blood vessel has been wounded, and you must
know how to stop this heavy bleeding, or hemorrhage, as it
is called. Remember that while all wounds bleed a little, as
a rule, this bleeding will stop in a few minutes if the patient
is quiet, and that the firm pressure of the pads and bandage
will keep it controlled. All severe flesh wounds should be
dressed and splinted, if possible to do so, as is done for a frac-
ture. This will insure immobility and help to prevent
bleeding.
257. Hemorrhage.—a. Bleeding from the arteries is the
most dangerous because the blood flows fast and will soon
cause a man to bleed to death unless the flow of blood is
stopped. In arterial bleeding the blood squirts from the
artery with each pulsation of the heart and is bright red in
color.
b. Blood from a vein flows in a slow, steady stream, and
the color is dark red or purple.
c. Capillary bleeding is an oozing of blood from a cut sur-
face and is generally the least dangerous.
258. To Control Bleeding.—a. To control bleeding from
the arteries quickly, press upon the blood vessel between the
wound and the heart.
b. To stop bleeding from the scalp apply pressure with the
tips of the fingers in front of the ear just above where the
208
soldier's handbook
258
lower jaw can be felt working in its socket. A branch of the
artery crosses the temple on a line from the upper border
of the ear to above the eyebrow. (See fig. 83A.)
c. To stop bleeding from the neck and head press the
thumb and fingers deeply into the neck in front of the big,
plainly seen muscle which reaches from behind the ear to
the upper part of the breast bone. (See fig. 83B.)
Figure 83.—Pressure points.
d. In bleeding from wounds of the shoulder or armpit press
the thumb deeply into the hollow behind the middle of the
collar bone.
e. To stop bleeding from the arm or hand press outward
against the bone just behind the inner border of the large
muscle (biceps) of the arm. (See fig. 83C.)
/. In bleeding from the thigh, leg, or foot, press strongly
with the thumbs on the artery at the upper part of the inside
of the thigh, where the artery passes over the bone. (See
fig. 83B.)
259. Tourniquet.—a. If the bleeding from an arm or leg
continues in spite of pressure exerted by the thumb or fingers,
the bleeding must be stopped by the use of a tourniquet.
This consists of a pad, which is placed on the line of the
209
258-259
soldier's handbook
artery, and a strap or band that goes over the pad and around
the limb, so that when tightened it will press the pad down
upon the artery and interrupt the flow of blood. For the
arm and hand the tourniquet pad is applied over a point on
the inside of the arm about a hand’s breadth below the arm
pit. (See fig. 84.) For the thigh and leg the tourniquet is
applied 4 or 5 inches below the groin, and on the inside of
the thigh where the main artery passes over the bone. (See
fig. 85.)
Figure 84.—Use of tourniquet application.
b. The pad may consist of a roll or bandage or a small stone
or other hard object wrapped in something to make it less
rough; and a bandage, belt, handkerchief, or necktie may be
used for the strap. After tying the strap loosely around the
limb, the required degree of pressure can be made by passing
a stick or bayonet under the band, but directly opposite the
pad, and twisting it so that the pad is pressed down firmly
upon the blood vessel.
c. Turn the stick slowly and stop at once when the blood
ceases to flow, fixing the stick in place with another bandage.
Harm may be done if too much force is used or if pressure is
kept up too long. It is a good rule to loosen the pressure
at the end of each 20 to 30 minutes and allow the stick to
remain loose, but in place, if no bleeding appears. The
tourniquet can be tightened if bleeding begins again.
210
soldier's handbook
259-260
d. Do not make the tourniquet any tighter than necessary
to check the bleeding. At best it is painful .
e. A tourniquet should never be hidden by clothing or a
bandage so that it cannot be seen.
/. Mark the patient’s tag plainly, “Tourniquet,” with the
date and hour of application. If he is conscious, instruct
him to tell every medical officer that he has a tourniquet.
g. If a tourniquet is left on tight for as much as six hours,
the patient will probably lose his arm or leg.
Figure 85.—-Application of tourniquet to thigh.
И 260. Fractures.—The following are some of the more com-
mon injuries for which you may be required to give first aid
and the method you should use to treat them until some
member of the Medical Department arrives:
a. A fracture is a break in a bone. Fractures occur most
frequently in the arms or legs. When the long bones of the
arm or leg are broken the wounded man loses power of con-
trol over the limb and it gives way and may be crooked
instead of straight.
b. A simple fracture is one in which there is no wound ex-
tending from the broken bone through the skin. A com-
pound fracture is one in which the broken bone has pushed
211
260-261
soldier's handbook
through the skin and therefore is exposed to the dangers of
infection from the outside. A complicated fracture is one
where there is damage to adjoining large blood vessels, nerves,
or muscles from movement of the sharp and jagged edges of
the broken bone.
c. In no injury is the outcome more influenced by the
character of first-aid treatment than in fractures. Improper
handling or immediate movement may produce or increase
shock and deprive the patient of a chance for recovery. All
fractures, or suspected fracture cases, should be handled
gently. It is equally as important to know what not to do
as to know what to do.
d. Immediate movement or transportation of the patient
is usually very dangerous to him. The first-aid treatment
should be given where he lies and medical assistance should
be brought to the patient instead of carrying the patient
to the doctor.
261. Treatment of Fractures.—a. Except when the bone
has broken through the skin, if the condition of the injured
person is such that he can walk or be carried to medical assist-
ance, a broken leg or arm can be fixed in position by splints
or other available material. Many common materials will
do for temporary splints, such as shingles, pieces of board,
rifle boots, bayonet scabbards, a rain spout cut and fitted
to the limb, or bunches of twigs. It is important that the
splints be well padded on the side to be applied next to the
arm or leg and that they be securely bound by bandaging or
by tying above and below the point of fracture but not over it.
b. In fractures with wounds or hemorrhage the flow of
blood should be stopped and the wound bandaged before
splints are applied. If possible, it is best to wait for expert
medical care to apply the splints in such cases.
c. Fractures of the arm should be supported by a sling
after splinting. Arm slings can be made of bandages, or can
be improvised from clothing by using safety pins to fasten
the coat sleeve to the front of the coat in order to support
the arm. The coat flap can be used for the same purpose
by pinning it or by punching a hole through the lower edge
of the flap and buttoning this to a coat button.
d. In splinting, the limb should first be straightened out
gently and the broken bone alined by quickly but firmly pull-
212
soldier's handbook
261-262
ing upon the end of it, if necessary, and then fixed or re-
tained in position by splints.
e. For a broken upper arm apply two splints, one in front,
the other behind, if the bone is broken near the elbow; or to
the inner and outer sides if the fracture is in the middle or
near the shoulder. Support the arm by a sling.
/. For a broken forearm place the forearm across the breast,
thumb up, and apply to the inner surface a splint extending
to the tips of the fingers, and another to the outer surface,
extending to the wrist.
g. For a fracture of the collarbone bend the forearm to
a right angle in front of the body and support it by a sling.
h. For a broken thigh apply a long splint, reaching from the
armpit to beyond the foot on the outside and another from the
groin to the foot on the inside. A rifle can be used as an out-
side splint, and a rifle boot for the inner. A blanket rolled into
two rolls, to form a trough, will help to keep a broken leg firm.1
i. For a broken lower leg or ankle apply two splints, one on
the outside, the other on the inside of the limb, extending from
the knee to beyond the foot. A bayonet and scabbard are
serviceable when nothing better can be had. Support can be
given by a roll of clothing and two sticks.
j. If no better means are at hand for splinting, tie a broken
leg to the other leg or bind a broken arm to the body.
262. Poisoned Wounds.—a. Snake venom acts quickly. The
main object is to prevent the poison from passing into the
blood circulation. If the wound is on a limb, apply a tourni-
quet just above the wound to increase bleeding. A necktie,
handkerchief, or bandage can be used as a tourniquet. It
should be tight enough to prevent the blood flowing back
through the veins but not tight enough to prevent the blood
flow in the arteries. Do not leave it on longer than 1 hour.
Whether or not the bite is on a part of the body where you can
use a tourniquet, make a cut % by У2 inch, over each fang
mark and, if possible, a cut connecting the two fang punctures.
The cut must be deep enough, % to % inch, to secure free
bleeding; then get the poison out of the wound by suction.
This may be done by sucking with your mouth, or by heating
a bottle and applying its mouth tightly over the wound. The
cooling of the bottle produces the suction. Snake venom is
harmless in the mouth unless there are cracks or wounds in
213
262-264
soldier's handbook
the mouth or lips. Keep the patient quiet and secure medical
aid as quickly as you can. Do not give the patient liquor.
The best aid you can give him is to produce free bleeding
followed by suction.
. b. Bites of spiders, scorpions, and other insects should be
treated in the same manner as snake bites. The proper re-
moval of the stinger is important. This should be done by
grasping the stinger with a pair of small forceps and remov-
ing all of it. A paste made of baking soda, or a cold, moist
dressing, using a diluted solution of salt, soda, or ammonia is
helpful.
c. The first-aid treatment for animal bites is the same as
that for ordinary wounds. You should get medical advice as
soon as possible, however, even though the wound appears un-
important, since animal bites may become quickly infected
unless dressed properly.
263. Fainting.—If the patient can be made comfortable, it
is usually best to allow him to lie where he falls; lower his
head and shoulders by elevating his hips; loosen the tight
clothing. Sprinkling his face with cold water, and inhala-
tions of ammonia or smelling salts are helpful.
264. Burns.—a. Burns may be caused by dry or moist heat,
electricity, and chemicals. They are classified in degrees ac-
cording to the depth to which the tissues are injured. Shock
and infection are to be feared in dry burns.
(1) First degree—The skin is reddened but there is no
blister.
(2) Second degree—The skin is blistered.
(3) Third degree—The skin is destroyed or charred, as
from contact with flames.
b. The following general rules apply to the first-aid treat-
ment of all burns:
(1) Do not pull the clothing from the burned part; snip or
cut it off.
(2) Do not break or prick blisters if present.
(3) Treat shock early in all severe burns.
(4) When possible, protect the burn quickly with a sterile
dressing, applying medication as indicated in c to / below.
c. First-degree burns.—The treatment is directed toward
the relief of pain since the skin is unbroken and there is no
danger from infection. Any substance that will relieve the
214
soldier's handbook
264-265
pain is satisfactory. An oily substance such as petrolatum
(vaseline), olive oil, or castor oil is usable. Cold water or soda
in water is soothing when immediately applied. It must be
remembered that if the burn is at all serious, such as found in
second- or third-degree burns, oily substances are not to be
applied.
d. Second-degree burns.—Here the injury must be regarded
as an open wound; only material that is known to be clean
can be used. Remove the loose clothing, but do not try to
remove material that sticks to the skin. The application of
sterile gauze soaked in a solution of Epsom salts (2 table-
spoonfuls to a pint of boiled water) is very good. The dress-
ings should be kept moist and warm until further aid is
obtained. The best treatment is application of gauze
saturated with 2 percent picric acid solution applied securely
but not tightly. A 5 percent tannic acid solution similarly
applied is of equal value. Never apply iodine or similar sub-
stance to a burn and never apply absorbent cotton to a burned
surface. Shock is always present to some degree in every case.
e. Third-degree burns.—These are always serious and re-
quire medical attention promptly. The first-aid treatment
consists chiefly of keeping the patient warm and treating
shock. If medical attention can be obtained promptly, it is
best merely to lay a sterile dressing lightly on the wound.
If over 30 minutes will elapse before help can be obtained,
one of the dressings used for second-degree burns should be
applied.
f. Chemical burns.—Burns caused by acids or alkalies
should be washed with large quantities of water, prefer-
ably lukewarm, until the chemical is thoroughly removed.
All clothing should be cut away with scissors. Apply a salve
dressing after the chemical is completely removed, and secure
a medical officer’s services. Eye burns require careful atten-
tion. The best first-aid treatment is to flush the eye thor-
oughly with clean olive oil, mineral oil, or castor oil. If these
are not available, use water; a drinking fountain that throws
a stream is excellent for this purpose. After washing, the
eye should be covered with a moist dressing and further
medical aid secured.
265. Sunstroke.—a. Sunstroke is a very dangerous condi-
tion, usually caused by direct exposure to the rays of the sun,
215
265-267
soldier's handbook
especially when the air is moist. The symptoms are head-
ache, dizziness, oppression, and sometimes vomiting; the skin
is hot and dry, and the face flushed; the pulse is rapid and
full; the temperature is high, often ranging between 107°
and 110°. Unconsciousness usually occurs, and the body be-
comes relaxed; however, convulsions may occur.
b. Treatment.—Remove the person to a shady, cool place, if
possible, and loosen or remove the clothing. Lay the patient
on his back with shoulders elevated. Apply cold to the head
by means of wet cloths, ice bags, or ice. The brain cannot
withstand the effects of high temperatures. Cool the body by
giving cold baths for 20 minutes at a time combined with brisk
massage of the limbs and trunk. Cold wet cloths or ice bags
may be used. Wrapping the body in a sheet and pouring on
cold water every few minutes is very effective. Do not overdo
any of these procedures. Stop every few minutes to observe
the effects on the patient. If the skin again gets hot repeat
the treatment. Do not give him stimulants to drink while
unconsciousness lasts.
266. Heat Exhaustion.—This is caused by exposure to high
temperature as found in boiler rooms, foundries, bakeries, and
similar places. The first signs of heat exhaustion are dizzi-
ness, nausea, and uncertain gait. The face is pale, the body
is covered with a heavy perspiration, and the skin is cold and
clammy. Breathing is shallow, the pulse is weak, and the
temperature may be normal or somewhat elevated. Fainting
may occur, or prostration may become severe. Remove the
patient to circulating cool air; place him on his back and let
him drink freely of cool' salt water (1 teaspoonful of table
salt in a pint of water). Call a medical officer if the patient
does not recover promptly.
267. Freezing.—a. The symptoms of freezing are cold in
the part, then pain, and finally, loss of sensation. The af-
fected part becomes white or bluish white. Slowly thaw the
frozen part by using extra clothing, applying it to another
part of the body, or wrapping it in cloths soaked in cool water.
Do not expose frozen tissues to a hot stove or radiator.
Do not rub the frozen part either with the bare hands or
with snow: the tissues will be bruised and torn, and gangrene
may result. Medical attention is usually necessary after
freezing.
216
soldier's handbook
267-270
b. When a man becomes unconscious from cold, if possible
carry him into a cool room, cover him well with blankets,
and move his arms and legs gently but steadily. When con-
sciousness returns, give him warm drinks and let him lie
quietly.
268. Pain in the Abdomen.—Pain in the abdomen or what
is known as a common “stomach ache,” may be due to a num-
ber of causes, many of which may be serious. Any case where
there is nausea and vomiting, accompanying or following pain
and tenderness over all or any part of the abdomen, and with
pain and tenderness in the lower right parts of the abdomen
may mean appendicitis. Appendicitis may also occur without
nausea. If you or one of your comrades should have these
symptoms, see a medical officer at once. In the meantime no
food, no water, and especially no laxatives, should be taken
until directed by a medical officer.
269. Athlete's Foot.—Ringworm of the feet or “athlete’s
foot” is a very common skin disease. In some cases it may
become so severe as to be disabling. It consists chiefly of an
inflammation of the skin between the toes and on the soles of
the feet, but it may also appear on the hands. Usually there
is considerable itching. It is usually spread by contact of the
bare feet with the floors, mats, and benches of showers and
swimming pools; but you may also acquire it by using or
wearing the towels, slippers, shoes, or other articles of some
one who has it. The care of the feet, as described in section
II, chapter 11, is important in the prevention and control of
this disease. Keep your feet dry, and after a bath dry care-
fully the spaces between your toes before putting on your
socks and shoes. If your feet perspire a great deal, apply
the issue foot powder twice a day. Your corporal or the
noncommissioned officer in charge of your unit will issue
this powder to you when you ask for it. If you think you
have athlete’s foot you should see a medical officer as soon
as possible so that you may be cured and will not spread the
disease among other members of your organization.
S 270. Gases Used in Warfare.—The following simple general
rules will help you in giving first-aid treatment to men
suffering from gases used in warfare.
a. In handling a gassed man always wear your mask and,
325350°—41--15 217
270-273
soldier's handbook
if you have them, gloves. If you do not have gloves, rub your
hands with dry lime, or wash them with soap and water as
soon as possible after handling the man.
b. Move the man from the gassed area as soon as possible.
If possible move him from low ground or woods to a hillside
or knoll. Do not carry him into a dugout or cellar. Gas is
heavier than air and will descend and cling to the lower
levels. Do not allow a gassed man to talk or walk.
c. Remove the man’s equipment and clothing, unless un-
due exposure to the cold will result, but leave his mask on
until you are certain there is no gas in the air.
d. Remember that mustard gas from the clothing, equip-
ment, or body of a man gassed with mustard will cling to
you or your clothing. Avoid blankets, litters, or areas on
the ground occupied by such cases.
e. Prevent men gassed with mustard from rubbing their
eyes, mouths, or bodies. Do not bandage their eyes.
271. Peacetime Gases.—The chief poisonous gases encoun-
tered in civil life are illuminating gas, carbon monoxide (mo-
tor exhausts), charcoal, and mine gases. The first thing to
do in all of these gases is to get the patient into fresh air.
The fresh air of a warm room is preferable to extremely cold
air. If breathing is weak or irregular or has stopped, arti-
ficial respiration by the Schaefer method should be started
and continued until normal respiration has been established.
A medical officer should always be called, since the patient
may die even after breathing is apparently normal.
272. Artificial Respiration.—Asphyxia, suffocation, or ces-
sation of breathing occurs most frequently in drowning, elec-
trical shock, and gas poisoning. The safest and most
effective method of applying artificial respiration is the prone
pressure or Schaefer method. Oxygen respirators, which are
available at many bathing beaches and military stations, are
very efficient in trained hands, but for unskilled personnel,
are less satisfactory than the Schaefer method.
273. Drowning.—a. Being under water for over 5 minutes
is usually fatal, but an effort to revive the apparently drowned
should always be made. It is very important that artificial
respiration be started at the earliest possible moment after
the patient has been removed from the water.
218
soldier’s handbook
273
b. (1) Lay the patient face down, force his mouth open,
pull the tongue forward, and remove false teeth, juice,
vomitus, or debris from his mouth and throat.
(2) Raise him by the hips in order to drain the water from
his lungs.
(3) Lay him on his belly, preferably at a spot where his
head will be lower than his feet. One of his arms should be
extended over his head, the other bent at the elbow so that
his face can be turned on the side and rest on the hands.
(4) Kneel astride the patient’s thighs, with your knees
placed at such a distance from his hips as will allow you to
exert the pressure on his lower ribs as described below. Place
the palms of your hands on the small of his back with your
fingers on his lower ribs, your little fingers just touching his
lowest rib, with your thumbs and fingers in natural position
and the tips of your fingers out of sight just around the sides
of his chest wall. The heels of the hands should be placed as
far from the backbone as possible without slipping off.
(5) With your arms held straight, swing forward slowly so
that the weight of your body is gradually brought to bear upon
the patient. Do not bend your elbows. This operation
should take about 2 seconds. (See fig. 86.)
(6) Now immediately swing backward so as to remove all
pressure completely and suddenly. Leave the hands in place
if possible. (See fig. 87.)
(7) After about 2 seconds repeat the operation. The cycle
of compression and release should take about 4 or 5 seconds
and should be repeated at the rate of 12 to 15 times per
minute.
(8) Continue the operation without interruption until nat-
ural breathing is restored, or until the subject is unquestion-
ably dead. Remember, many patients have died because
artificial respiration has been stopped too soon. Always
continue the operation for 2 hours or longer.
(9) Aside from the resuscitation, the most valuable aid that
can be rendered is keeping the patient warm. After artificial
respiration has been started, have an assistant loosen the
clothing and wrap the patient in any clothing that is avail-
able. Use hot bricks, pads, heaters, or similar means, but be
sure the person is not burned by your treatment.
219
273
SOLDIER'S HANDBOOK
Figure 86.—Artificial respiration, first position.
Figure 87.—Artificial respiration, second position.
220
soldier's handbook
273-275
(10) When the patient revives he should be kept lying down
and not allowed to stand or sit up; this will prevent undue
strain on the heart. Stimulants such as hot tea or coffee, or
aromatic spirits of ammonia, can be given as soon as the
patient is perfectly conscious.
; (11) At times a patient, after temporary recovery of res-
piration, stops breathing again; artificial respiration should
be resumed at once.
(12) Due to the length of time this operation may be kept
up, one, two, or more operators may be necessary. A change
of operators can be made without loss of rhythm of respira-
tion. If this point is remembered no confusion will result
when the change occurs and the respiratory count will be
kept even. The great danger is stopping artificial respiration
too soon. In many cases, breathing has been established after
3 or 4 hours of artificial respiration, and there are instances
where normal breathing has been reestablished after 8 hours.
The ordinary and general tests for death should not be ac-
cepted; a medical officer should make several careful exami-
nations at various intervals before the procedure is allowed
to be stopped.
274. Electrical Shock.—The rescue of the victim from a
live wire is always dangerous. If the switch is near, turn the
current off, but lose no time in looking for the switch. Use
a dry stick, dry clothing, dry rope, or some other dry non-
conductor in removing the victim from the wire. Start arti-
ficial respiration immediately by the Schaefer method as
previously described. Do not regard early stiffening as a sign
of death; always keep up the artificial respiration for several
hours.
275. Litters.—If it becomes necessary to move an injured
man for even a short distance, it is best to use a service litter
which is furnished by the Medical Department. If a litter is
not available, one of the following means may be used to
construct one:
a. Camp cots, window shutters, doors, benches, and lad-
ders, properly padded.
b. Sacks, bags, or bedticks, by ripping the bottoms or
snipping off the corners, passing two poles through them, and
tying crosspieces to the poles to keep them apart.
221
275-276
soldier's handbook
c. A shelter half, a blanket, piece of matting, or carpet
may be fastened to poles by tacks or twine.
d. Hay, straw, or leafy twigs, over a framework of poles
and cross sticks.
e. Rope, wire, or rawhide may be woven between poles and
this network covered with a blanket.
/. The usual way is to use blankets or shelter tents, and
poles about 7 feet long. The blanket is spread on the ground.
Figure 88.—Litter improvised with blankets.
One pole is laid across the center of the blanket which is then
folded over it. The second pole is placed across the center of
the new fold and the blanket is folded over the second pole
as over the first and the free end of the blanket fixed. (See
fig. 88.)
g. A litter may also be prepared by turning two or three
blouses inside out and buttoning them up, sleeves in, then
passing poles through the sleeves; the backs of the blouses
form the bed.
276. Other Means of Transporting the Injured.—When
the condition of the injured man is such that it is not neces-
sary to carry him on a litter he may be moved for a short
distance in one of the following ways:
222
SOLDIER'S HANDBOOK
276
a. Rifle-coat seat.—A good seat may be made by running
the barrel of a rifle through each sleeve of an overcoat, turned
inside out and buttoned up, sleeves inside, so that the coat
lies back up, collar to the rear. One bearer rolls the tail
tightly around the barrels and takes his grasp over them;
the other bearer holds the rifles by the butts, trigger guards
up. (See fig. 89.)
Figure 89.—Rifle-coat seat.
b. Rifle-blanket seat.—Fold blanket once from side to side.
Lay a rifle transversely upon it across its center so that the
butt and muzzle project beyond the edges; fold one end of the
blanket upon the other end and lay a second rifle upon the
new center in the same manner as before. The free end of
the blanket is folded upon the end containing the first rifle so
223
276
soldier’s handbook
as to project a couple of inches beyond the first rifle. The
litter is raised from the ground with trigger guards up.
c. One bearer.—A single bearer may support a slightly in-
jured man or carry a patient in his arms (fig. 90) or on his
back (fig. 91) or across his shoulders (fig. 92). If the patient
is helpless, the last named is best. This is done as followst
Figure 90.—Patient carried in arms
(1) Turn the patient on his face, and step astride his body,
facing toward the patient’s head with hands under his arm-
pits, and lift him to his knees; then, clasping your hands over
his abdomen, lift him to his feet; next seize the right wrist
of the patient with your left hand and draw the arm over
your head and down upon your left shoulder; now shift your-
self in front, stoop, pass your right arm between the legs and
grasp the patient’s right wrist; with your left hand grasp
224
soldier's handbook
276
the patient’s left hand and steady it against your side when
you rise.
(2) In lowering the patient the motions are reversed.
Should the patient be wounded in such a manner as to require
these motions to be conducted from the right side instead
of left, as described above, the change is simply one of hands;
Figure 91.—Patient carried on back.
the motions proceed as directed substituting right for left and
vice versa.
d. Two bearers.—The bearers take position at patient, ore
man between the patient’s legs and one at his head, both
facing toward his feet. The rear bearer, having raised the
patient to a sitting posture, clasps him from behind around
the body under the arms, the front bearer passes his hands
from the outside under the flexed knees; both rise together.
225
276
soldier’s handbook
This method requires no effort on the part of the patient
but is not applicable to severe injuries of the extremities.
e. Horseback.—(1) The help required to mount a disabled
man will depend upon the site and nature of his injury. In
many cases he is able to help himself materially. The horse,
blindfolded if necessary, is held by an attendant.
Figure 92.—Patient carried across shoulders.
(2) Once mounted, the patient should be made as safe and
comfortable as possible. A comrade may be mounted behind
him to guide the horse; otherwise a lean-back may be pro-
vided, made of a blanket roll, a pillow, or a bag filled with
leaves or grass. If the patient is very weak, the lean-back
may be made of a sapling bent into an arch over the cantie of
the saddle, its ends securely fastened.
226
CHAPTER 15
THE RATION
277. The Ration.—A ration is the allowance of food for the
feeding of one person for one day. Each soldier is authorized
to receive one ration each day that he is on the active list of
the Army.
278. Kinds of Ration.—There are several different kinds of
rations used in the Army of the United States, but the ones
in which you will be interested are the following:
a. The garrison ration is that which the Government pre-
scribes in time of peace for all persons entitled to a ration
except under special circumstances when other rations are
prescribed. The different items such as meat, fresh vegetables
and fruit, beverages, bread, and other articles of food which
make up the ration are called “ration components.” The
number of components and the amount of each required to
give a soldier a well-balanced and nourishing daily diet have
been carefully determined by food experts. The money value
of the ration is figured each month from the wholesale costs of
food to the Government, and your organization mess account
is credited with the total amount required to feed all the men
in your unit. The meals served by your organization mess
sergeant in time of peace, and while your organization is in a
post, camp, or cantonment, will usually be prepared from the
components of the garrison ration. After the mess sergeant
has made up his menus he will buy the various articles of food
required from the money which the Government has credited
to your organization mess account. Some of these items he
may buy from the quartermaster commissary. Others he may
buy from local markets or farmers, in order to take advantage
of certain foods in season or because the commissary may not
have them in stock. Any savings which he makes are called
“ration savings” and become part of your unit mess fund, to
be expended by your organization commander on extras for
the mess on holidays or other special occasions.
b. The field ration is that prescribed for use in time of war
or other emergency. In time of peace it may be used some-
227
278-279
soldier's handbook
times for training purposes. Its components are prescribed
by the War Department or the commanding general of the
field forces. No ration savings are permitted and the com-
ponents are issued “in kind.” This means that instead of
your mess sergeant buying the various components of the
ration from the quartermaster or in local markets, the quar-
termaster will issue to him certain items of food sufficient to
feed all the members of your organization. There are four
kinds of field rations—
(1) Field ration A corresponds as nearly as practicable to
the peacetime garrison ration and contains “perishable” items
such as fresh meat and vegetables. It is issued as often as
the circumstances will permit.
(2) Field ration В corresponds as nearly as practicable to
field ration A, except that nonperishable or canned products
replace the perishable items.
(3) Field ration C consists of previously cooked or prepared
food, packed in sealed cans, and which may be eaten either
hot or cold. Each ration consists of three cans of meat and
vegetables and three cans of crackers, sugar, and soluble
coffee.
(4) Field ration D consists of three 4-ounce bars of con-
centrated chocolate.
(5) Sometimes the field ration may be a combination of
types C and D. In this case it will usually consist of two cans
of meat and vegetables, two cans of the crackers, sugar, and
soluble coffee, and two of the 4-ounce bars of concentrated
chocolate.
279. Our Government spends more money for the food of
its soldiers than any other nation in the world. A great deal
of time is spent on the training of mess sergeants and cooks
and you will soon discover that your food is better prepared,
there is more of it, and it has a greater variety than that of
most families in civil life. It is especially selected to build up
your body and give you the energy and endurance which will
carry you to success on the battlefield. If at first it seems
strange to you and you miss the meals with which you are
familiar, do not be tempted to eat in neighboring civilian
restaurants. You will profit both in your pocket and stomach
if you eat all of your meals in your organization mess.
228
soldier's handbook
280-283
280. When you go into the field your mess sergeant and
cooks will accompany you. There is special cooking equip-
ment in your organization which will follow you. On this
your food can be prepared in the same way as it is cooked on
the stoves of your barracks or cantonment. During combat
all organization kitchens are usually grouped in sheltered
locations in rear where the meals can be prepared without
interference by the enemy. Immediately after dark, trucks
bring the cooked meals forward so that they can be dis-
tributed by carrying parties.
281. During Campaign.—During a campaign the command-
ing general of your division or a higher commander may
direct that each soldier carry a field ration as part of his
field equipment. He may decide to do this because he feels
that the condition of the roads or transportation may delay
the arrival of the cooked meals and in such a case he wants
to be sure that no soldier goes hungry. A ration which is
carried by a soldier is called an individual reserve. It will
probably be field ration C or D, or a combination of both.
282. a. It may sometimes happen during campaigns that
you and one or more of your comrades may be separated from
your unit. If there is another organization near you, you
will always be able to get a meal from it by reporting to its
first sergeant or mess sergeant; giving your name and organi-
zation and explaining how you happen to be separated from
your own unit.
b, If there is no other organization near, it may then be
necessary for you and your comrades to cook your own meals,
using your mess kits for this purpose and the food you have
With you. Since you will probably have field ration C with
you, this will be very easy. Simply heat one or more of the
cans in hot water, and open them. If you, or any of your
comrades, have had boy scout training you will probably be
able to prepare a very good meal from the ration.
283. Fire for Cooking.—a. Remember that the best fire for
cooking is a small clear one, or, better yet, a few brisk coals.
With your bayonet, dig a trench in the ground, laid with the
wind, about a foot long, 4 inches wide, and 6 inches deep.
Gather a number of sticks about 1 inch in diameter. Dead
limbs taken from a tree are dryer than those picked up from
229
283
soldier’s handbook
the ground. Split some of these and shave them into kin-
dling. Start the fire in the trench gradually, piling on the
heavier wood as the fire grows. When the trench is full of
burning wood, allow it a few minutes to burn down to coals.
Then rest the meat can and cup over the trench and start the
cooking. You may support them, if necessary, with green
sticks.
b. If the ground is rocky or stony, and you cannot scrape
a trench in the soil, you may make your fire between two
small, flat stones, or with two parallel logs. These should be
placed so that the draft will pass between them. The meat
can can be placed on the stones, across the fire, and the cup
for boiling coffee at the end, away from the draft, where it
will get the most heat. Always see that the fire is completely
out before you leave.
230
CHAPTER 16
PAY AND ALLOWANCES
284. Rate of Pay.—When you first enter the military serv-
ice, your rate of pay will be $21.00 per month. This pay is in
addition to the food, clothing, medical, and dental attention
which the government provides you without charge. After
a period of 4 months, however, and provided you have not
demonstrated inefficiency or other unfitness, your pay will be
raised to $30.00 per month. From that point on your pay
need only be limited by your ambition, your attention to duty,
and the manner in which you qualify yourself for promotion.
Remember that promotion is on a strictly competitive basis.
Your organization commander will promote the man who he
believes is best qualified for the next vacancy, and on whom
he has found he can depend. The various grades, with their
rates of monthly pay as authorized by Congress in the act
of September 16, 1940, are given below:
First grade—Master sergeant_____________________$126. 00
Second grade—First sergeant and technical sergeant- 84. 00
Third grade—Staff sergeant________._____________ 72. 00
Fourth grade—Sergeant___________________________ 60. 00
Fifth grade—Corporal____________________________ 54. 00
Sixth grade—Private, 1st class__________________ 36. 00
Seventh grade—Private with over 4 months’ service- 30. 00
Private with less than 4 months’ service during first
enlistment period or whose inefficiency or other
unfitness has been determined under regulations. _ 21. 00
285. Specialist.—If you are a private or a private, 1st class,
you may have certain qualifications which will enable you to
be rated as a specialist and receive the following pay in addi-
tion to the pay of your grade. Specialist ratings are given in
a limited number to men trained to do certain kinds of work
such as electricians, mechanics, radio operators, riveters,
woodworkers, clerks, or cooks:
231
285-290
soldier's handbook
Per month
Specialist 1st class_______________________________$30. 00
Specialist 2d class________________________________ 25. 00
Specialist 3d class________________________________ 20. 00
Specialist 4th class_______________________________ 15. 00
Specialist 5th class________________________________ 6. 00
Specialist 6th class________________________________ 3. 00
И 286. Air Corps.—If you are in the Air Corps, during such
time as you are authorized to take part regularly and fre-
quently in aerial flights, you will receive additional pay of
50 percent of the pay of your grade. If you are a private,
private, 1st class, corporal, or sergeant and are rated as an air
mechanic, 1st class, you will receive the pay of the second
grade; or if you are rated as an air mechanic 2d class, you
will receive the pay of the third grade during the time you hold
your rating.
287. Decorations.—For certain decorations, or awards for
distinguished service, you will receive an additional amount
of money each month.
288. Furlough Allowance.—If you are granted a fur-
lough, you are entitled to an allowance for rations during the
period of the furlough. This allowance will be paid to you
when you report back to your station on or before the date
of expiration of the furlough. It will not be paid if you over-
stay your furlough unless you are excused for overstaying by
your commanding officer. It will not be paid if you fail to
report back to your own station.
И 289. Deposits.—While you are in active military service
you may deposit with the Government, as savings, any amount
not less than $5.00. Your deposits will be repaid to you when
you are discharged and, if they have been deposited for 6
months or longer, will draw interest. Your deposits are not
subject to collection for debts unless you authorize, in writing,
collection of amounts due the United States or for your
discharge by purchase.
290. Allotments.—You may make an allotment of your pay
for the support of your family or dependent relatives, or for
payment of premiums for commercial life insurance if such
insurance is on your own life. The amount allotted will be
232
soldier's handbook
290-295
deducted from your pay each month and paid directly to
the insurance company or person you have designated in
your allotment.
291. Government Insurance.—You may take out a policy
fpr National life insurance on your own life. The premiums
nptay be paid by you directly to the Veterans Administration in
monthly payments, or you may authorize their deduction
from your pay each month.
292. If you desire any further information regarding allot-
ments, deposits, or Government insurance, see your first
sergeant. He will be glad to help you.
293. Deductions.—Deductions will be made from your pay
if you are found responsible for loss or damage to Government
property and if you are absent without leave or absent sick,
not in line of duty. You do not lose pay for sickness or injury
in line of duty or for absence in confinement; however, the
time lost by absence in confinement, by absence without
leave, or by absence due to sickness not in line of duty has
to be made up at the end of your enlistment period. Two-
thirds of your monthly pay may be taken to satisfy any
amount which you may owe the United States or which you
may owe to the company fund, post exchange, or United
States Motion Picture Service.
294. Travel Pay.—Upon honorable discharge from the serv-
ice you will be entitled to travel pay at the rate of 5 cents per
mile for the distance from the place you are discharged to
the place you were accepted for enlistment, enrollment, or
muster into the Army, not including sea travel.
295. Burial Expenses.—The Government provides the
burial expenses for a soldier who dies while in active service.
325350 —41------16
233
CHAPTER 17
LAST WILL AND TESTAMENT
296. Certain advantages may accrue to the estate of any
person who has made a will. Hence, you should consider
carefully whether or not to make a will. You should decide
now. Do not put it off until tomorrow.
a. A will is invalid if it does not meet certain legal require-
ments established by the laws of the State where it is to be
filed for probate. These requirements vary in each State.
It is almost impossible to forecast the particular set of re-
quirements which will have to be met by a given will unless
the facts in each case are known. This is so because where
land is involved the will must ordinarily satisfy the require-
ments of the State where the land is situated, whereas in
the case of personal property (property other than land, such
as money, stocks, bonds, a business, a car), the will must
satisfy the requirements of the State in which the testator
“legally resides” or has his “permanent home” (sometimes
called “domicile”) at the time of his death. Your military
station is ordinarily not your “legal residence” or “permanent
home.” You can perceive that many difficult legal questions
may arise in connection with making a will.
b. If your property is substantial in value, or if you own
land, or if you wish to provide for two or more people as
beneficiaries, your case may be complicated. Consequently,
under ordinary circumstances you are advised to consult
competent legal counsel in the preparation of a will. Assist-
ance in the selection of counsel may be obtained by com-
municating with the nearest advisory board for registrants or
by letter to the American Bar Association, Washington, D. C.
Officers of the Judge Advocate General’s Department will
also lend assistance.
c. However, instances may arise in which you wish to make
a will, when circumstances make it difficult or impossible to
obtain legal assistance such as on the eve of battle.
d. For your assistance in such an emergency and in such
case only, the following form may be used. It is legal in form
in nearly all States and the District of Columbia. The will
must be dated, signed by you in the presence of all the wit-
nesses assembled together and by each of them at the same
time it is signed by you. This must be done with the great-
est of care. It should also be filed or kept in a safe place
or perhaps mailed to your home or to a trusted friend.
234
soldier's handbook
296
e. Above all, because the form on page 237 is intended
for use only to meet the needs of an emergency, it should be
made as a temporary will only and should be replaced by a
more carefully drawn will with assistance of legal counsel
as soon as time and circumstances permit. The form in this
manual can be completed, signed (by yourself and the three
witnesses), detached by clipping along the black line and
filed or mailed.
235
FORM OF WILL 1
I,kViWLDj_5_M_4ZA:KS___S’K___,
£") л jo n (Name of soldier) (City or town)
now in the actual military service of the
(State) .
United States and stationed at ______, hereby
revoking any and all prior wills or any part thereof, do de-
vise and bequeath all of my estate toMRS_J0J££X_jOZ.S/}^J’,A'/'
(Name of beneficiary)
my ZH-OT^zV—fori~r~ own use an^ benefit for-
(Relationship. if any) ЛЙГ
ever, and I hereby appoint my executrix without bond,
Jaw tor
with lull power to sell, mortgage, lease, or in any way dispose
of the whole or any part of my estate.
<s“ ”te c
(Signature of soldier in presence of three/
witnesses all together)
Signed, published, and declared by____________________,
(Name of soldier)
testator above named, as and for his last will and testament
in the presence of each of us, who at his request and in his
presence, in the presence of each other, at the same time,
have hereunto subscribed our names as witnesses this----
day of___________, 194__, at--------------------------
(City or town) (State)
1._________________________,_____________________
(Name of witness) (Address of witness)
2._________________________,_____________________
(Name of witness) (Address of witness)
3._________________________,_____________________
(Name of witness) (Address of witness)
1 See notes on back of this sheet for instructions for completion
of form.
237
NOTES
a. Your will must be signed by three witnesses as provided
by the form.
b. In some States a male under 21 years of age is not com-
petent to make a will. If you are under 21, make it for the
time of the emergency, but consult competent counsel at the
first opportunity thereafter.
c. Wife and children.—In every State a wife and children
have certain legal rights in the estate of the testator. A wife
generally cannot be willed less than the share to which she
is entitled by law where no will is made. In most States a
child takes the full share provided for by law, unless the will
expressly provides otherwise.
Note that the above form of will is designed for only one
beneficiary. Usually this will be a near relative or trusted
friend. If you have one or more children and wish each of
them to receive his share as provided by law, this will be the
result in most States if you add nothing to the above form.
But if you wish one or more children to receive nothing,
you must add at the end of the above form where starred (*):
“My child [ren] is to have no part of my estate.”
“My child[ren] to have no part of my estate.”
Or as may be desired in most cases, if you wish to provide
primarily for your beneficiary and to entrust the care of your
children to him or her, you may insert at the end of the above
form where starred (*): “Provision for my children is pur-
posely omitted as I have the utmost faith in my beneficiary.”
d. In the event of marriage, divorce, or birth of a child
after the will has been made or in the event of the death of
any beneficiary named in the will, the soldier should consult
competent counsel even though his will was prepared carefully
and with the assistance of counsel.
e. Soldiers residing in or having their home in Louisiana
may use the above form of will under emergency circum-
stances, Provided, they write it entirely in their own
handwriting.
f. Except for soldiers residing in or having their home in
Louisiana, the will may be either typewritten or written in
longhand by the soldier or some other person for him, or
may be made on the form provided in FM 21-100.
g. Remember that this form should be used only when
assistance of competent counsel is not possible and never if
it is available. In any event, use it only to meet a situation
of extreme emergency and even then consult competent coun-
sel as soon as possible after the emergency has passed. It is
for temporary needs only.
238
Appendix
GLOSSARY OF COMMON MILITARY EXPRESSIONS
AWOL.—Absent without authority.
Aide, or Aide-de-camp.—A personal assistant to a general
officer.
Base.—The element on which a movement is regulated.
Blind.—A money fine of a court-martial sentence.
Bob-tail—A dishonorable discharge.
Bucking for orderly.—Extra efforts for personal appearance
when competing for post of orderly to the commanding
officer.
Bust.—To reduce a noncommissioned officer to the grade of
private.
Chow.—Food.
Cits.—Civilian clothing.
CO or KO.—Commanding officer.
Distance.—Space between elements in the direction front to
rear.
Dogtags.—Identification disks.
Doughboy (dough).—An infantryman.
Dud.—An unexploded shell.
Field, in the.—Campaigning against an enemy under actual
or assumed conditions.
FzZe.—A column of men one behind the other.
Fox hole.—Pit dug by a soldier to protect his body.
GI.—Government issue; galvanized iron.
Guard house lawyer.—A person who knows little but talks
much about regulations, military law, and soldiers’ “rights.”
Hash mark.—A service stripe.
Hike.—To march.
Hitch.—An enlistment period.
IC.~Inspected and condemned.
Interval.—Space between elements in the direction parallel to
the front.
Jawbone.—Credit. To buy without money. To shoot a
weapon over a qualification course when it doesn’t count for
record.
Kick.—A dishonorable discharge.
239
soldier's handbook
KP.—Kitchen police.
Lance jack,—A temporary or acting corporal with the same
duties and authority of a regularly appointed corporal, but
without the pay of the grade.
Mess gear.—A soldier’s individual mess kit, knife, fork, spoon,
and cup.
MP.—Military police.
Mule skinner.—A teamster.
Noncom.—A noncommissioned officer.
OD.—Olive drab or officer of the day.
On the carpet.—Called before the commanding officer for
disciplinary reasons.
Over the hill.—To desert.
Pace.—A’step 30 inches long.
Piece.—The rifle or weapon.
Pup tent.—Shelter tent.
Reup or takeon.—To reenlist.
Shave tail.—A second lieutenant.
Skipper.—The company commander.
Sniper.—An expert rifle shot detailed to pick off enemy
leaders or individuals who expose themselves.
The old man.—The company commander; commanding
officer.
Top sergeant or top kick.—The first sergeant.
240
INDEX
Air Corps: Paragraphs
Pay_________________________________________ 286
Units, organization_________________________ 53
Allowances:
Clothing_____'_______________________________55,56
Furlough______________________________________ 288
Allotment of pay________________________________ 290, 292
American Red Cross_________________________________ 14
Antiaircraft security and protection______________ 227
Antitank security and protection__________________ 228
Armored units, organization________________________ 54
Arms:
Care:
Responsibility for______________________61, 63
Importance______________________________ 62
Pistol, automatic, caliber .45 M1911, nomen-
clature, care and cleaning, and safety
devices________________________________________ 65
Rifle, U. S. caliber .30 Ml, nomenclature, care
and cleaning___________________________________ 64
Safety precautions_____________________________ 66
Stacking:
Platoons__________________________________ 182
Squads____________________________________ 166
Taking---------------------------------------- 167
Arms and services, insignia______________________35-41
Officers and noncommissioned officers________42-45
Articles of War_________________________________9, 17-19
Artificial respiration---------------------------- 272
Athlete’s foot, first aid for______.------------ 269
Attack, security in_______________________________ 237
Attention positions________________________________ 87
From parade rest______________________________ 120
Azimuth determination_____________________________ 206
Automatic rifle, carrying_________________________ 135
Badges_____________________________________________ 41
Barber service_____________________________________ 20
Barracks, sanitation of___________________________ 249
Battery, organization______________________________ 51
Bivouacs:
For mounted organizations____________________ 203
Personal care and comfort in__________________ 202
Bleeding, first aid for___________________________ 258
Body sanitation___________________________________ 241
Brassards__________________________________________ 38
Bulletin boards____________________________________ 26
Burial expenses___________________________________ 295
Burns, first aid for------------------------------ 264
Campaign security:
Individual________________________________ 222, 223
Connecting file_________________________ 226
Gas protection-------------------------- 229
Pages
232
25
26
232
232,233
4
175
176
25
30
30
41
31
44
131
122
124
16
20
3, 5
218
217
200
80
199
151
108
18
6
204
24
150
151
208
203
18
8
233
214
165
175
177
241
INDEX
Campaign security—Continued.
Individual—Continued.
Lookouts:
Antiaircraft------
Antitank----------
Messengers____________
Sentinels____________
Paragraphs
227
228
225
224
Units_____________________________________ 230-237
At halt___________________________________ 234
Detachments_______________________________ 231
On march__________________________________ 235
Patrols___________________________________ 233
Scouts____________________________________ 232
While attacking--------------------------- 237
While defending___________________________ 236
Camps:
For mounted organizations--------------------- 203
Personal care and comfort in------------------ 202
Sites for_____________________________________ 201
Canister, gas mask_________________________________ 70
Chapel_____________________________________________ 24
Chaplains_______________________________________24, 33
Chevrons, war and service__________________________ 40
Civilians, relation of soldier with_____________ 12-14
Pages
175
176
173
172
179
192
179
195
184
180
200
199
150
145
145
46
7
7, 14
18
4
130
120
26
26
Close interval formation:
Platoons_________________________________ 177, 178
Squads_______________________________________ 159
Clothing:
Allowances_________________________________ 55, 56
Care______________________________________ 57-59
Sanitation_______________________________ 242, 243 203
Cockroaches, protection against_________________ 248 204
Column of twos, formation:
Platoons______________________________________ 185 133
Squads________________________________________ 168 124
From single file__________________________ 169 124
Commanders, responsibility__________________________ 6 2
Company, organization______________________________ 51 24
Compass, use__________________________________ 204-208 151
Azimuth determination_________________________ 206 151
Description___________________________________ 205 151
Night_________________________________________ 207 152
Conduct of soldier in public____________________12, 13 4
Connecting file_________________________________ 226 175
Counting off, squads______________________________ 157 118
Courtesy, military_______________________________31-34 10
Customs, military, observance______________________ 34 15
Decorations, additional pay for_____________________ 287 232
Deductions, pay_____________________________________ 293 233
Defense, security in________________________________ 236 199
Deposits, pay___________________________________ 289-292 232
Discipline:
Military______________________________________ 27-30 9
Definition___________________________________ 27 9
Importance----------------------------------- 28 9
Purpose___________________________________ 29, 30 10
Road, on the march______________________________ 199 141
242
INDEX
Paragraphs Pages
Disease, venereal, prevention_____________________ 251 204
Disobedience of orders______________________________ 9 3
Double time march__________________________________ 94 84
Drowning, first aid for___________________________ 272 218
Duty of the soldier_____________________________ 7, 8 2, 3
Electric shock, first aid for_____________________ 274 221
Equipment:
Care:
1 Importance__________________________________ 62 30
Responsibility for______________________ 61, 63 30
Display of_____________________________________ 86 78
Field:
Care and cleaning_______________________ 74-80 49
Bits___________________________________ 79 51
Canteens______________________________ 77
Chains, curb__________________________ 79
Cloth_______________________________ 75, 76 50
Knife__________________________________ 78 51
Leather________________________________ 80 51
Mess___________________________________ 77 50
Metal parts____________________________ 79 51
Carrying or wearing________________________ 81 53
Gas masks__________________________________ 67-73 45
* Individual, packing on horse_______________ 84, 85 71
Exhaustion, heat, first aid for___________________ 266 216
Expressions, military, glossary of_______________ App. 237
“Eyes right” or “eyes left”________________________ 89 81
Facing:
In marching___________________________________ 100 86
Positions______________________________________ 90 82
Falling in for march______________________________ 197 139
Feet, care________________________________________ 253 206
Field equipment_____________________——----------74-81 49
Firing, rifle_____________________________________ 132 107
By volley------------------------------------- 133 107
To cease______________________________________ 134 108
First aid------------------------------------- 254-275 206
Artificial respiration________________________ 272 218
Athlete’s foot________________________________ 269 270
Bleeding-------------------------------------- 258 208
Burns_________________________________________ 264 214
Drowning______________________________________ 273 218
Exhaustion, heat______________________________ 266 216
Fainting-------------------------------------- 263 214
Fractures_____________________________________ 260 211
Treatment________________________________ 261 212
Freezing______________________________________ 267 216
Gas___________________________________________ 270 217
Peacetime________________________________ 271 218
Hemorrhage____________________________________ 257 208
Litters_______________________________________ 275 221
Packet--------------------------------------- 255 207
Use________________________________________ 256 207
Pain, abdominal----------------------------------- 268 217
Shock, electric------------------------------- 274 221
243
INDEX
First aid—Continued. Paragraphs
Sunstroke__________________________________ 265
Wounds, poisoned----------------------------- 262
Fixing bayonets from order arms position_________ 127
Flank march, squads------------------------------ 161
Flies, precaution against________________________ 248
Formations:
Platoons_________________________________ 170-185
Squads___________________________________ 153-170
Furlough allowance------------------------------- 288
Gas:
First aid for________________________________ 270
Peacetime________________________________ 271
Protection against--------------------------- 229
Gas mask__________________________________________ 67
Adjustment____________________________________ 69
Care__________________________________________ 71
Canister_____________________________________ 70
Function______________________________________ 68
Training with------------------------------ 72, 83
Glossary of military expressions---------------- App.
Government insurance_________________________ 291,292
Grid system, map reading------------------------- 215
Group—
Commander, responsibilities____________________ 6
Leaders________________________________________ 4
Life, responsibilities in____________________ 1-3
Guard duty___________________________________ 186-194
Importance___________________________________ 194
Orders_______________________________________ 192
General__________________________________ 193
Personnel__________________________________ 187,188
Tour of______________________________________ 188
Halting_________________________________________ 95
Hat cord__________________________________________ 37
Haversack, assembly______________________________ 83
Heat exhaustion, first aid for------------------- 266
Hemorrhage, first aid for------------------------ 257
Illness, report of------------------------------- 239
Infantry pack----------------------------------82, 83
Haversack and pack carrier assembly___________ 83
Injured, transportation of--------------------- 275, 276
Insignia, arms and services--------------------35, 36
Arm bands_____________________________________ 38
Badges_______________________________________ 41
Chevrons, wound and war service_______________ 40
Hat cord______________________________________ 37
Officers______________________________________ 42
General___________________________________ 43
General Staff Corps_______________________ 44
Noncommissioned_________________________42-45
Service stripe-------------------------------- 39
Inspection arms position:
From order arms-------------------------------- 113
To order arms, port arms, or right shoulder
arms_______________________________________ 114
Pages
215
213
101
120
204
1;27
115
232
217
218
204
45
45
46
46
45
49
237
233
156
2
2
1
135
137
136
136
135
135
84
16
59
216
208
202
59
59
221, 222
16
18
18
18
16
20
20
20
20
18
96
96
244
INDEX
Paragraphs Pages
Inspection, pistol______________________________ 144, 152 111, 114
Insurance, government___________________________ 291, 292 233
Interior guard duty______________________________ 186-194 135
Last will and testament__________________________ 296 234
Leaders, group____________________________________ 4 2
Left shoulder arms position:
From right shoulder arms___________________ 121 99
To order arms________________________________ 124 100
To port arms_________________________________ 122 100
To right shoulder arms_______________________ 123 100
Litters__________________________________________ 275 221
Loading—
Pistol______________________________________ 142, 150 111, 114
Rifle_______________________________________ 130 103
Magazine, pistol:
Inserting________________________________ 141, 149 111, 113
Withdrawing______________________________ 140, 147 111, 113
Manual of—
Arms for rifle____________________________ 105-128 91
Rules governing__________________________ 105 91
Pistol_______________________________________ 136 110
Dismounted___________________________ 137-145 110
Mounted______________________________ 146-152 112
Maps :
Direction____________________________________ 212 155
Importance___________________________________ 209 153
Orientation______________________________213, 214 155, 156
Reading___________________________________215-217 156
Grid system______________________________ 215 156
Scale, application___________________________ 211 154
Symbols, military____________________________ 217 163
Use______________________________________ 209-217 153
Marches______________________________________ 195—199 138
Conduct on___________________________________ 198 139
Falling in for_______________________________ 197 138
Preparation for______________________________ 196 138
Road discipline on___________________________ 199 141
Security on__________________________________ 235 195
Marchings_________________________________________ 92 83
By the flank_____________________________ 101, 163 87, 121
Double time___________________________________ 94 84
Facing_______________________________________ 100 86
Halting_______________________________________ 95 84
Marking time__________________________________ 96 85
Other than at attention______________________ 103 88
Platoons_____________________________________ 175 128
Changing direction_______________________ 179 130
Close interval___________________________ 177 130
Normal interval__________________________ 178 130
Toward flank_____________________________ 181 131
Quick time____________________________________ 93 84
Squads:
By the flank_____________________________ 163 121
Changing direction_______________________ 164 121
Oblique__________________________________ 162 120
Toward flank_____________________________ 161 120
245
INDEX
Marchings—Continued. „ , ~
Steps: Paragraphs Pages
Back_______________________________________ 99 86
Changing---------------------------------- 102 87
Half_______________________________________ 97 85
Side_______________________________________ 98 85
Messengers, duty on campaign______________________ 225 173
Military—
Courtesy_____________________________________31-34 10
Addressing officers and nurses_____________ 32 14
Saluting_________________________________31,34 10,15
Customs, observance____________________________ 34 15
Discipline__________________________________ 27 -30 9
Expressions, glossary of_____________________ App. 237
Obligations of soldier______________________ 15, 16 4, 5
Police, brassards______________________________ 38 18
Sanitation:
Barracks and squad room________________ 249 204
Body_____________________________________ 241 203
Clothing________________________________ 242, 243 203
Feet______________________________________ 253 206
Finger nails______________________________ 250 204
Hair______________________________________ 250 204
Illness, reporting________________________ 239 202
Importance_________________________ __ - 238 202
In the field______________________________ 252 205
Mouth_______________________________ 244,246 203,204
Precautions against—
Cockroaches_______________________________ 248 204
Flies____________________________ 248 204
Mosquitoes____________________________ 247 204
Venereal disease______________________ 251 204
Toilet____________________________________ 245 203
Nomenclature:
Pistol, automatic, caliber .45, M1911__________ 65 41
Rifle, U. S. caliber .30, Ml___________________ 64 31
Noncommissioned officers:
Addressing_____________________________________ 33 14
Duty relative punishment and arrest--------- 9, 10 3
Insignia------------------------------------ 42, 45 20
Nurses, addressing_________________________________ 33 14
Obligations of the soldier---------------------- 15, 16 4, 5
Oblique march, squads----------------------------- 162 120
Officers:
Addressing----------------------------------- 33 14
Appointment_____________________________________ 5 2
Insignia____________________________________ 42-45 20
Soldier’s relation to________________________ 4-12 2
Order arms position_______________________________ 106 92
From—
Inspection arms___________________________ 114 96
Left shoulder arms________________________ 124 100
Port arms, or present arms________________ 112 95
Right shoulder arms_________t----------- 117 98
Trail arms------------------------------ 108 92
Fix bayonets______________________________ 127 101
Inspection arms--------------------------- 113 96
246
INDEX
Order arms, position—Continued.
To—Continued. Paragraphs Pages
Parade rest______________________________ 119 99
Port arms________________________________ 110 94
Present arms_____________________________ 111 95
Rifle salute_____________________________ 125 100
Right shoulder arms____________________ 115 98
Sling arms____________________________ 109 94
Trail arms______________________________ 107 92
Unfix bayonets_________________________ 128 101
Orders:
Guard duty__________________________________ 192 136
General__________________________________ 193 136
Obedience to_______________________________ 7,8 2,3
Failure of, punishment_________________ 9 * 3
Orientation, map_______________________________213, 214 155, 156
Organization, Army______________________________46-54 22
Definition____________________________________ 46 22
Purpose____________________________________ 47, 48 22
Units of______________________________________ 48 22
Air Corps_________________________________ 53 25
Armored___________________________________ 54 25
Battery___________________________________ 51 24
Company---------------------------------- 51 24
Platoon----------------------------------- 50 23
Regiment_______________________________ 52 ’ 24
Squad_____________________________________ 49 23
Troop ____________________________________ 51 24
Pack carrier assembly___________________________ 83 59
Pack infantry---------------------------------- 82, 83 . 59
Pain, abdominal, first aid for__________________ 268 217
Parade rest position:
From order arms______________________________ 119 99
To attention_________________________________ 120 99
Patrols, security, and reconnaissance____________ 233 184
Pay:
Air Corps____________________________________ 286 232
Allotments_________________________________ 290, 292 232, 233
Decoration----------------------------------- 287 232
Deductions----------------------------------- 293 233
Deposits_________________________________ 289.292 232,233
Rate of______________________________________ 284 231
Specialists--------------------------------- 285 231
Travel_____________________________________ 294 233
Pistol:
Automatic, caliber .45, M1911----------------- 65 41
Manual of------------------------------------ 136 110
Dismounted--------------------------- 137-145 110
Chamber:
Closing_________________________ 140 111
Opening------------------------- 139 111
Inspecting--------------------------- 144 111
Loading------------------------------ 142 111
, Magazine:
Inserting_______________________ 141 111
Withdrawing_____________________ 138 111
Raising______________________________ 137 110
Returning____________________________ 145 112
Unloading____________________________ 143 143
247
INDEX
Pistol—Continued
Manual of—Continued. Paragraphs
Mounted_____________________________ 146-152
Inspecting__________________________ 152
Loading_____________________________ 150
Magazine:
Inserting_______________________ 149
Withdrawing_____________________ 147
Opening chamber--------------------- 148
Unloading___________________________ 151
Platoon:
Composition_________________________________ 171
Dismissing__________________________________ 174
Formation___________________________ 170, 171, 173
Close—
Interval____________________________ 177
Ranks_________________________________ 183
Columns of twos___________________________ 185
For shelter tents_______________________ 184
Line to the front_________________________ 180
Normal interval___________________________ 178
Open ranks________________________________ 183
Single file_______________________________ 184
Individuals, position of______________________ 172
Marching____________________________________ 175
Changing direction______________________ 179
Close interval____________________________ 177
Guide in__________________________________ 176
Normal interval___________________________ 178
Toward flanks_____________________________ 181
Organization_________________________________ 50
Reforming_____________________________________ 185
Stacking arms_________________________________ 182
Port arms position:
From—
Inspection arms________________________ 114
Left shoulder arms_____________________ 122
Order arms______________________________ 110
Right shoulder arms____________________ 116
Order arms______________________________ 112
Right shoulder arms____________________ 118
Positions:
Attention____________________________________ 87
“Eyes right”, or “eyes left”_________________ 89
Facing into---------------------------------- 90
Rest_________________________________________ 88
Salute, hand_________________________________ 91
Post and station activities_____________________20-26
Barber service------------------------------- 20
Bulletin board announcements of______________ 26
Exchanges____________________________________ 21
Photograph shop______________________________ 23
Recreational_________________________________ 25
Tailor service_______________________________ 20
Theaters, motion picture_____________________ 22
Present arms position:
From order arms_______________________________ Ш
To order arms_______________________________ 112
Pages
112
114
114
113
113
113
114
127
128
127,128
130
131
133
132
131
130
131
132
127
128
130
130
130
130
131
23
133
131
96
100
94
98
95
98
80
81
82
80
82
6
6
8
7
7
8
6
7
95
95
248
INDEX
Protection and security: Paragraphs Pages
Antiaircraft___________________________________ 227 175
Antitank_______________________________________ 228 176
Punishment, authority to administer--------------- 9 3
Quick time march_____________________________ 93 84
Rations________________________________________ 277-283 227
Cooking, fire for______________________________ 283 229
Kinds of_______________________________________ 278 227
On campaign__________________________________ 281 229
Preparation in the field_______________________ 280 229
Reconnaissance patrols_____________________________ 233 184
Red Cross brassards_________________________________ 38 18
Regiment, organization______________________________ 52 24
Rest positions______________________________________ 88 80
Rifle:
Carrying_________________________________ 104, 135 89, 108
Firing_________________________________________ 132 107
By volley_________________________________ 133 107
To cease__________________________________ 134 108
Loading________________________________________ 130 103
Manual of arms for------------------------- 105-128 91
Salute position:
From—
Order arms____________________________ 125 100
Right shoulder arms___________________ 126 100
Train arms____________________________ 125 100
Unloading____________________________________ 131 105
U. S. Caliber .30, Ml___________________________ 64 31
Right shoulder arms position:
From—
Inspection arms--------------------------- 114 96
Left shoulder arms________________________ 123 100
Order arms________________________________ 115 98
Port arms--------------------------------- 118 98
To-
Left shoulder arms________________________ 121 99
Order arms________________________________ 117 98
Port arms--------------------------------- 116 98
Rifle salute------------------------------ 126 100
Road discipline on marches------------------------- 199 141
Saddle, packing__________________________________84, 85
Safety—
Devices, automatic pistol, caliber .45, M1911__ 65
Precautions, use of arms------------------------ 66
Salutes, military---------------------------------- 31
Hand______________,----------------------1-- 90
Rifle__________________________________ 125,126, 131
Sanitation, military--------------------------- 238-253
Squad room_____________________________________ 249
Security:
• Antiaircraft--------------------------------- 227
Antitank______________________________________ £28
In the Army__------------------------------218-221
325350°—41----17
249
71
41
44
10
82
100, 105
202
204
175
176
164
INDEX
Security—Continued. Paragraphs Pages
On campaign:
Individual___________________________ 222, 223 165
Lookouts: 175
Antitank__________________________ 228 176
Sentinels_____________________________ 224 172
Unit__________________________________ 230-237 179
At halt_______________________________ 234 192
Detachments_______________________________ 231 179
On march______________________________ 235 195
Patrols_______________________________ 233 184
Scouts-------------------------------- 232 180
While attacking_______________________ 237 200
While defending_______________________ 236 199
Service stripes____________________________________ 39 18
Shelter tent pitching_____________________________ 202 145
Forming platoon for___________________________ 184 132
Shelters, kinds of________________________________ 200 145
Shock, electric, first aid for____________________ 274 221
Sling arms position:
From order arms_______________________________ 109 94
To unsling arms_____________________________ 109 94
Specialists, pay__________________________________ 285 231
Squads____________________________________________ 153 115
Dismissing____________________________________ 156 118
Formation______________________________________154 115
Alinement_________________________________ 158 119
Assembling________________________________ 165 121
Close interval____________________________ 159 120
Columns of twos___________________________ 168 124
From, and to, single file_____________ 169 124
Instructions for__________________________ 155 118
Taking interval___________________________ 165 121
Marching:
By the flank______________________________ 163 121
Changing direction________________________ 164 121
Oblique __1_______________________________ 162 120
Toward flank______________________________ 160 120
Organization___________________________________ 49 23
Stacking arms_________________________________ 166 122
Taking arms___________________________________ 167 124
Steps, marching____________________________________ 92 83
Back___________________________________________ 99 86
Changing______________________________________ 102 87
Double time____________________________________ 94 84
Half___________________________________________ 97 85
Mark time______________________________________ 96 85
Quick time_____________________________________ 93 84
Side___________________________________________ 98 85
Sunstroke, first aid for__________________________ 265 215
Tailor service_____________________________________ 20 6
Tents, shelter, pitching__________________________ 202 145
Platoon formation for_________________________ 184 132
Testament and last will--------------------------- 296 234
Theaters, motion picture___________________________ 22 7
Toilet sanitation_________________________________ 245 203
Tourniquet, use___________________________________ 259 210
250
INDEX
Trail arms positions: Paragraphs Pages
From order arms_______________________________ 107 92
To order arms_________________________________ 108 92
To rifle salute_______________________________ 125 100
Transportation of injured____________________ 275, 276 221, 222
Travel pay________________________________________ 294 233
Troop organization_________________________________ 51 24
Unfixing bayonets, from order arms position_____ 128 101
Uniform, wearing___________________________________ 60 29
Units of Army organization_________________________ 48 22
Air Corps____________________________________ 53 25
Armored________________________________________ 54 25
Battery________________________________________ 51 24
Company________________________________________ 51 24
Platoon________________________________________ 50 23
Regiment_______________________________________ 52 24
Squad________________________________________ 49 23
Troop__________________________________________ 51 24
Unloading—
Pistol___________________________________143, 151 111, 114
Rifle__________________________________________131 105
Unslinging rifle from sling arms position_________ 109 94
Venereal disease, prevention______________________ 251 204
Veterinary Green Cross brassards___________________ 38 18
Will, last, and testament_________________________ 296 234
Wounds, poisoned, first aid for___________________ 262 213
О
251