/


Text
by
K
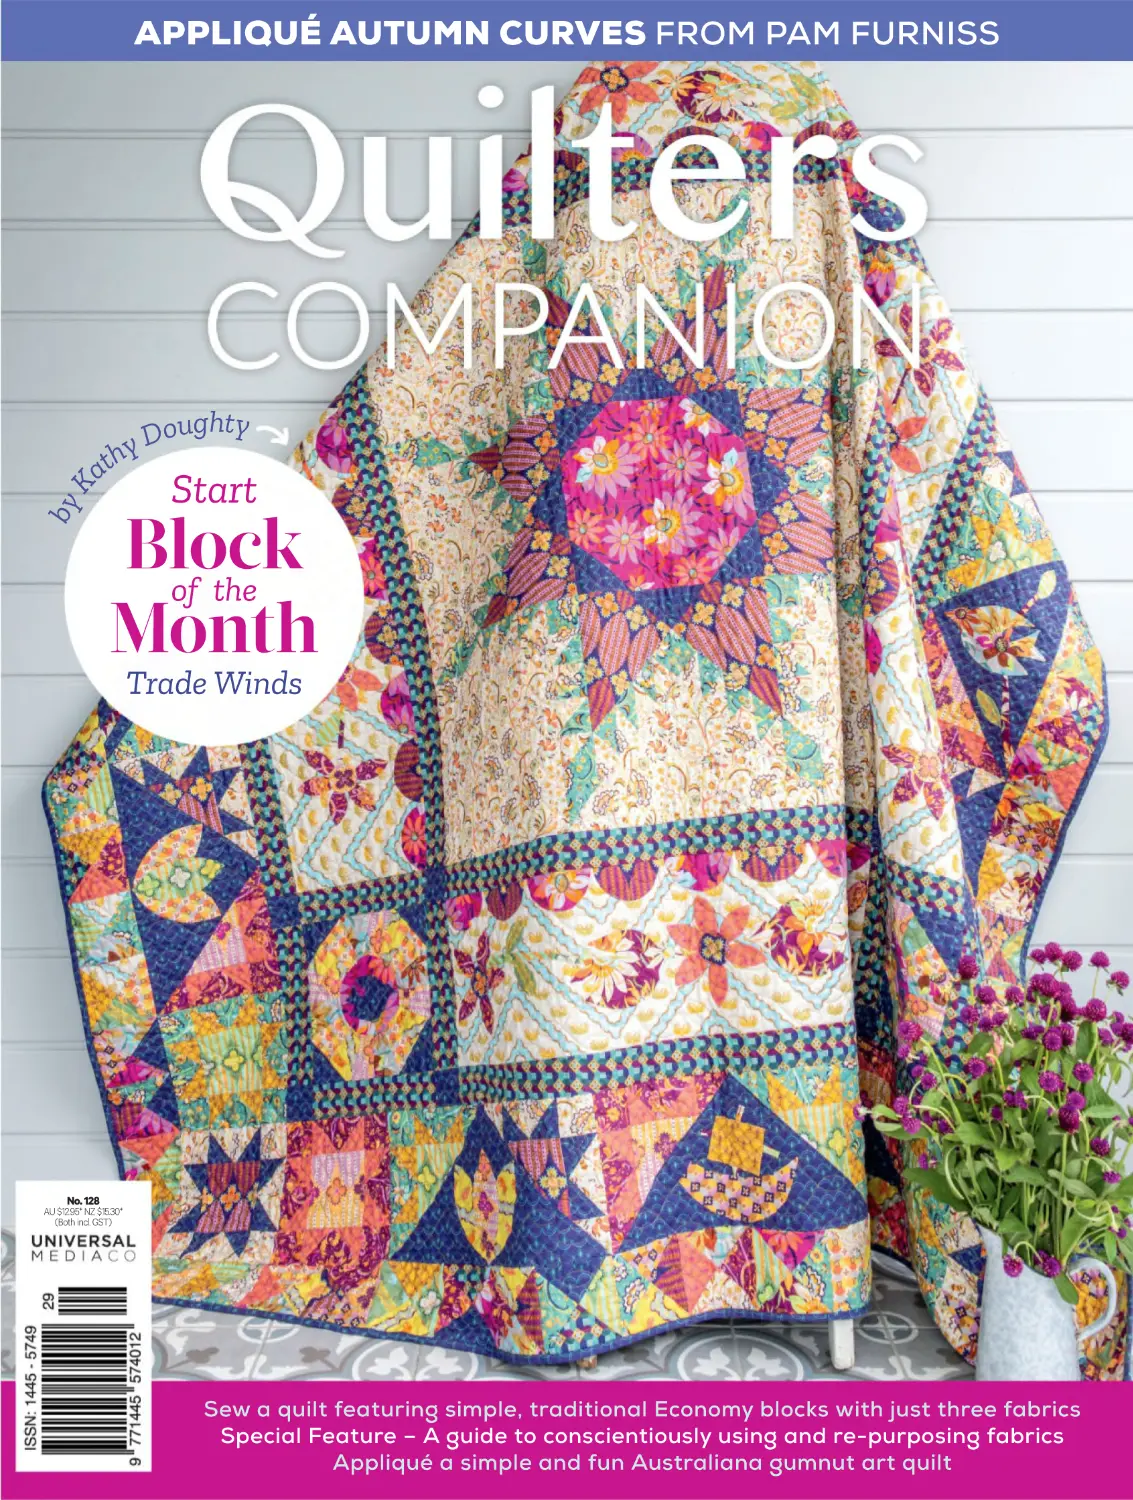
APPLIQUÉ AUTUMN CURVES FROM PAM FURNISS
oughty
D
hy
t
a
Start
Block
of the
Month
Trade Winds
No. 128
AU $12.95* NZ $15.30*
(Both incl. GST)
Sew a quilt featuring simple, traditional Economy blocks with just three fabrics
Special Feature – A guide to conscientiously using and re-purposing fabrics
Appliqué a simple and fun Australiana gumnut art quilt
SMALL SPACES.
BIG IDEAS.
NO SPACE?
NO PROBLEM!
BERNINA Q 16 Plus with
Height Adjustable Foldable Table
Sometimes your quilting dreams are bigger than the space you have.
The BERNINA Q 16 Plus with Height Adjustable Foldable Table
is the perfect solution.
It is spacious enough for your biggest projects, sturdy enough to handle all the
performance features of the Q 16 Plus Longarm and discreetly tucks away when
not in use.
Make your quilting dreams come true.
When it comes to a BERNINA Q Series Longarm Quilting Machine,
seeing isn’t believing. Trying is.
Visit an authorised BERNINA Q Series dealer today and become the longarm quilter
you’ve always wanted to be.
TTest
est D
Drive
r Now!
Scan to find your
authorised BERNINA
Q Series Dealer or call
Toll Free 1800 237 646.
40
106
64
CLICK HERE
For Pattern
sheets
July – August 2024
32
Projects
22
2024 Block of the
Month – Part 1
Trade Winds - Kathy Doughty
32
Antics in the Gum Forest
SusanClaire Mayfield
40 Flour Frolic
Cheryl Filby
48 Antionette Fleur
Fleur Maddern
56
Summer
Leanne Harvey
64
Autumn Curves
Pam Furniss
84 Playful Puppies
Cori Blunt
106 Prairie Moon
Kim Diehl
4
Features
14
Quilt Gallery
QuiltWeek Daytona
76
Domestic Machine Quilting –
Anita Ellis
Painting the Lily – Time for the detail
94
Patched Perfect
Sadia Kausar
22
48
Regulars
6
Editor’s Journal
8
Quilty Treasures
102 Off the Shelf
115
Kits
120 In the Market
130 On the Road
135
Diary Dates
136
Basics
137
Stockists
138
Next Issue
Subscribe
Check out our fantastic subscription offers on page 128.
Don’t forget that you can also find us digitally on Zinio and Apple Newsstand
5
Editor’s Journal
QC No. 128 Vol.21 No.4
JULY – AUGUST 2024
Editor Deborah Segaert
Technical Editor Megan Fisher
Contributors Anita Ellis, Megan Fisher
Pattern Artist Susan Cadzow
Designer Kate Atkinson
Photographer Ken Brass
Stylist Sandra Hinton
Advertising
Rob Jordan (02) 9887 0359, 0411 424 196
Fax (02) 9805 0714
Email rjordan@umco.com.au
Advertising Production Deeva Kalia
Associate Publisher Emma Perera
Welcome to the launch issue of the
2024 Quilters Companion Block of the
Month! Our amazing medallion-style
quilt, Trade Winds, has been designed
and made by Kathy Doughty of Material
Obsession. The first part is the centre
Feathered Star block. Join in and follow
along as Kathy weaves an imaginary
story into this stunning BOM.
I am sure that you will find at least
one quilt that inspires you to pick up
a needle and thread in this issue! You
can choose from an arty appliqué quilt
by Gourmet Quilter of New Zealand,
a simple and pretty pieced quilt using
the traditional Economy block with only
three colours and a traditional quilt by
American designer, Kim Diehl.
We welcome Leanne Harvey back as
she shares the instructions to make a
pieced bright quilt with up-sized blocks
that is quick to make and impressive
to behold. Prolific quilter Cheryl Filby
shares another of her amazing original,
detailed quilts using pale blue and
green to great effect. Plus a few other
beauties to tempt you.
This issue’s Quilt Gallery featuring
some of the winning quilts from the
QuiltWeek Daytona show held in
February. One of the winning quilts is by
an Australian quilter, Mariya Waters –
it’s a beauty!
Plus we share an article by Indian
textile practitioner, Sadia Kausar – who
says, “It is incumbent upon me to uphold
the ethos of resourcefulness, ensuring
sensible utilisation of materials while
conscientiously selecting techniques,
processes, and materials that are
environmentally friendly.”
I hope you enjoy all there is to offer in
this issue – keep your needles threaded!
How to keep in touch
Mail: The Editor, Quilters Companion, Universal Media Co.
Locked Bag 154, North Ryde NSW 1670
Email: dsegaert@umco.com.au
Facebook: https://www.facebook.com/QuiltersCompanion
Instagram: http://instagram.com/quilters_companion
Pinterest: http://www.pinterest.com/qcmag/
Don’t forget that you can also find us digitally on Zinio and Apple Newsstand.
6
Chairman/CEO
Prema Perera
Publisher
Janice Williams
Chief Financial Officer
Vicky Mahadeva
Associate Publisher
Emma Perera
Circulation Business Development Manager
Mark McTaggart
Quilters Companion No. 128 is published by Universal Magazines.
Unit 5, 6-8 Byfield Street, North Ryde NSW 2113.
Phone: (02) 9805 0399, Fax: (02) 9805 0714.
Melbourne office, Unit 4, Level 1, 150 Albert Road, South Melbourne
Vic 3205. Phone: (03) 9694 6444, Fax: (03) 9699 7890.
Printed by:
Distributed by:
NZ Distributors:
UK Distributors:
USA Distributors:
KHL Printing Co Pte Ltd, in Singapore.
Gordon and Gotch: 1300 650 666
Needlecraft: 0800 909 600
Website: www.needlecraft.co.nz
Gordon and Gotch New Zealand:
(09) 979 3018
Manor House Magazines:
+44 (0) 167 251 4288,
info@manorhousemagazines.co.uk
Brewer Quilting & Sewing Supplies
Phone: 630 820 5695 / 800 676 6543
Email: info@brewersewing.com
Subscriptions phone 1300 303 414
This book is copyright. Apart from any fair dealing for the purpose of
private study, research, criticism or review as permitted under the
Copyright Act, no part may be reproduced by any process without
written permission. Enquiries should be addressed to the publishers.
The publishers believe all the information supplied in this book to be
correct at the time of printing. They are not, however, in a position
to make a guarantee to this effect and accept no liability in the event
of any information proving inaccurate. Prices, addresses and phone
numbers were, after investigation, and to the best of our knowledge
and belief, up to date at the time of printing, but the shifting sands
of time may change them in some cases. It is not possible for the
publishers to ensure that advertisements which appear in this
publication comply with the Competition and Consumer Act 2010 (Cth)
and the Australian Consumer Law. The responsibility must therefore
be on the person, company or advertising agency submitting the
advertisements for publication. While every endeavour has been
made to ensure complete accuracy, the publishers cannot be held
responsible for any errors or omissions.
*Recommended retail price
ISSN 1445-5749
Copyright © Universal Magazines MMXXIV
ACN 003 026 944
www.umco.com.au
Please pass on or recycle this magazine.
We are a member of:
y
t
l
i
u
Q
s
e
r
u
s
Trea
Quilts made by Australians that were chosen for
Quilts=Art=Quilts 2023 included Canopy 18 Burning (left) by
Anna Brown; Echoes of Summer (top) by Judy Hooworth; and
The Writing is on the Wall (above) by Jessica Wheelahan.
Mastering their art
Four well-known Australian quiltmakers had works juried into
the 2023 Quilts=Art=Quilts exhibition in Auburn, New York. This
international exhibition is held annually at the Schweinfurth Art
Center, which has a long history of promoting quilts as a visual arts
medium. Jurors select quilts based on overall quality of design, visual
impact and originality. Sixty-nine quiltmakers were represented in
the 2023 exhibition, selected from more than 300 who submitted
entries. The four successful Australians were Judy Hooworth, Anna
Brown, Dianne Firth and Jessica Wheelahan.
8
Ice Queen Razzle Dazzle is one of
Kelly Spell’s canvas-mounted quilts.
A different finishing touch
American quiltmaker Kelly Spell typically makes bold, abstract quilts that are a
celebration of colour and shape. On her website, she provides a detailed step-bystep tutorial heavily illustrated with photos on how to mount a quilt over an artist’s
canvas. As she says, “This style of finishing can transform small works, adding an
air of sophistication and gravitas to a piece that might otherwise be mistaken for a
potholder in mixed company. It’s also a great technique for mid-size quilts.” Why not
give it a whirl with your next small project — traditional or modern? Go to
https://kellyspell.squarespace.com/blog/how-to-mount-a-quilt-on-canvas-tutorial
9
Quilty Treasures
LEFT Mariya Waters with her multi-award-winning
quilt Floral Symphony No 2 and details, showcasing
her extraordinary appliqué and machine quilting.
Let a hundred flowers bloom
Since taking out the Best of Show, Excellence in Appliqué
and First Prize in the Mainly Appliqué (Professional)
category at the 2023 Victorian Showcase quilt
exhibition, Mariya Waters’ sensational quilt entitled
Floral Symphony No 2 has travelled overseas and
garnered further accolades. It was juried into the
2023 Houston Quilt Festival and was a semi-finalist
at the 2024 Road to California Quilt Contest. It went
on to take out prizes at several of the 2024 American
Quilters’ exhibitions. To see the results of the Daytona
Beach QuiltWeek, where Mariya was the only Australian
quiltmaker to win an award, go to pages 14-20.
The quilt is Mariya’s own design based on her
extensive collection of Eastern European floral
embroidery designs. She began working on it in 2016.
After it was professionally machine quilted on a
longarm machine, Mariya decided to rework the quilt
herself. She was able to rescue and re-use about 80
per cent of the appliquéd flowers. She reassembled the
quilt in 25 panels using the quilt-as-you-go method,
which allowed her to undertake the complex quilting on
her domestic sewing machine.
10
Taped up
Here’s a fun way to wrap gifts or decorate
cards: Washi Tape printed with classic quilt
blocks. The patterns are Young Man’s Fancy,
Castle Garden, Chinese Holiday, Autumn Leaf
and Stars & Cubes. They come boxed in a set
of five; each roll is 15mm wide and 10m long.
Available from your local quilt shop.
Making a play for the Rajah
Sydney-based playwright Cate Whittaker is leading
a push to have the Rajah quilt moved from the
National Gallery in Canberra to Tasmania. To make
her argument, she’s written a play, Jane Franklin and
the Rajah Quilt, which had its world premiere last
November at Hobart’s Theatre Royal.
While Whittaker acknowledges the fragile condition of
the quilt, she said it provided a rare glimpse into the life
of women convicts. “We tend to belittle what women’s
crafts are, yet this great beauty that [the convict
women] created together — there must have been a lot
of synergy and cooperation. I think that’s the beauty of
it,” she said. “To hide it away with an excuse that it’s just
too frail — it’s like people who don’t touch books and they
drop apart by the time you open them. We can’t hide
something that’s the spirit of these women.”
A hot tip
Did you know that Oliso has — at last — produced its
Mini Project Iron M3Pro with a connection that makes
it usable in Australia and New Zealand? Yay! This
latest version of the Oliso mini iron seems to have
addressed some of the design weaknesses of the
M2Pro while also adding some new features, such as
a light on the front of the iron, which makes it easy to
see and press intricate details; an ergonomic handle,
making it comfortable to use even for extended
periods; two zones for using steam — front and rear
— that can be used independently for precision or
together for maximum pressing power; and auto off.
Its small size makes it suitable for using on a wool
pressing mat right next to your sewing machine and
for taking to workshops and retreats. These irons are
available in many local patchwork shops and come in
three yummy colours: pistachio, coral and aqua.
11
Join the experts and enjoy these great tours
Join Natalie Bird in April 2025
Murray River Cruise
and visit South Australia
Travel on the Cockle Train, visit Swan Reach
Homestead, the Woolshed Show, the Whispering
Wall, Barossa Chateau for a glorious high tea
and visit several quilting shops. We will work
on a project designed by Natalie Bird.
April 2025
Start
End
Barossa
Valley
3 NIGHTS
Blanchetown
Swan Reach
Walker Flat
Mannum
Adelaide
Younghusband
Murray Bridge
McLaren Vale
Victor Harbor
3 NIGHTS
Goolwa
Murray Cruise
4 NIGHTS
Visiting markets, yarn shops and museums, dyeing
workshops at Yamamoto Roketsu Dyeing Studio
and Shibori studio. Tour members will work on an
original project designed by Robyn.
31 Oct to 17 Nov 2024
Start
End
2 NIGHTS
Kanazwa
Join Robyn Hicks on a
Yarn tour of Japan
3 NIGHTS
Takayama
5 NIGHTS
Kyoto
3 NIGHTS
Tokyo
2 NIGHTS
Kawaguchiko
Travelrite International
E: balwyn@travelrite.com.au www.travelrite.com.au
Join Michelle Marvig on these great Quilting Tours
Brno International Textile Exhibition
Cruise on A Rosa from Passau to Vienna and Budapest
on the Danube River for 7 nights
14 Apr to 3 May 2025
Extension tour to
Dresden, Berlin and Hamburg
Hamburg
1 to 8 May 2025
Dresden
Start
End
Berlin
Prague
Visit fabric shops, textile museums, included
sightseeing tours in the cities visited, work on an
original quilting project designed by Michelle.
Cesky Krumlov
Passau
Brno
Vienna
Budapest
England and Scotland
Including the
Birmingham Festival of Quilts
27 Jul to 14 Aug 2025
Inverness
2 NIGHTS
Edinburgh
4 NIGHTS
Glasgow
3 NIGHTS
We visit the beautiful Lakes District, Edinburgh Tattoo, Highland Folk Museum, Great Tapestry
of Scotland and Abbotsford, the home of Sir Walter Scott. We undertake a dyeing workshop and
enjoy afternoon tea at the Willow Tea Rooms. We will make a project designed by Michelle Marvig.
Dundee
2 NIGHTS
Penrith
2 NIGHTS
Start
End
Birmingham
3 NIGHTS
Please call for a brochure
Toll
Free
1800 630 343
Tours only available through Travelrite International
ATAS accreditation #A10538
Gallery
QuiltWeek
Daytona Beach
AQS QuiltWeek events are held in multiple cities across
America each year. They include judged quilt shows, special
quilt exhibits from around the world, workshops and lectures
with the best instructors, and a vendor Merchant Mall.
The first of the year was held in Daytona Beach, Florida on
February 21–24. Following are a few of the prize-winning
quilts. Australian quilter, Mariya Waters’ quilt,
Floral Symphony No 2, won a major award.
Photographs supplied by AQS
14
Best of Show Award
Eyes of The Forest, 165cm x 165cm (65in x 65in)
Margaret Solomon Gunn (USA)
Artist’s statement: “Fussy cut hexie flowers and hand appliqué leaves-n-vines create
the lush floor of the forest. Look carefully and you will see creatures looking back at you.”
Techniques used: Hand appliqué, beading, embroidery and piecing;
quilting – free-motion and ruler work
15
Gallery
Best Wall Quilt Award
Buddy, 160cm x 160cm (63in x 63in)
Hiroko Miyama & Masanobu Miyama (Japan)
Artist’s statement: “Inspired by a photo of Yuri, a Golden Retriever, lying on her back.
We designed it together with Natsumi as a young child. The hydrangea in the background is
reverse appliquéd to give it the taste of Seiji Fujishiro's shadow pictures.”
Techniques used: Fused appliqué, hand dyeing, machine piecing, free-motion quilting
16
Best Hand Workmanship Award
Peacock, 203cm x 208cm (80in x 82in)
Naomi Otomo (Japan)
Artist’s statement: “I like the colour of the peacock's feathers. This
quilt was created with the image of a peacock spreading its wings.”
Techniques used: Appliqué – hand and reverse, bias work,
hand piecing, hand quilting, trapunto
17
Gallery
Best Stationary Machine Workmanship Award
Floral Symphony No. 2, 233.5cm x 231cm (92in x 91in)
Mariya Waters (Australia)
Artist’s statement: “Inspired by vintage floral embroideries of Hungary, Poland and Russia. It was
remade following a disaster during the quilting process. 80% of the floral appliqué was reused.”
Techniques used: Hand appliqué, embroidery – digitised and hand, trapunto, quilt as you go,
machine piecing, quilting – matchstick, free-motion, ruler work, template and walking foot
18
Best Traditional Design Award
My Blancket Tweetment, 190.5cm x 190.5cm (75in x 75in)
Christine Wickert (USA)
Artist’s statement: “This all-silk quilt was made as part of a block of the month program
offered by The Quilt Show. Its title is a play on words of Irene Blanck, the designer, and
the inclusion of over a dozen images of Tweety Bird, which I cut from a silk tie.”
Techniques used: Hand appliqué, beading, hand embroidery, hand piecing, hand quilting
19
Gallery
Wall Quilts: Stationary Machine Quilted – First
Introspección, 175cm x 101cm (69in x 40in)
Isabel Muñoz (Spain)
Artist’s statement: “This quilt is inspired by the sensations and feelings that people
have to feel when they are forced to leave their home for different reasons and go to a
place unknown to them. Feelings of loneliness, closed windows and doors ...”
Techniques used: Appliqué – hand and machine, free-motion quilting
20
W W W. L EG I T K I T S .C O M . AU
artistic, crystal clear, foundation paper pieced patterns
“A revolutionary block approach to foundation paper piecing
breaks large, complex appearing quilts into manageable pieces.”
AUS TR AL IAN & NE W Z E AL AND ST OC KI STS
I n sp ired Em broi de ry & Se win g
Mackay Needleworx
Si ng l eto n, N SW
Mackay, QLD
N el s F abr ic Pl ace
Whispers of the Valley
T emo ra , N S W
Winwill, QLD
Textile Transitions
Kad in a Cr aft & S ewi ng Cen tre
Ho l t , ACT
Kadina, SA
T he S ew ing Sh opp e
A roh a Qui lts
Fyshwick, ACT
Te Aroha, NZ
SCAN HERE
to become a stockist
Trade Winds
Part 1
Welcome to Part 1 of the 2024 Quilters Companion Block of the Month!
Trade Winds is designed by quilt-store owner,
book author, fabric designer and quilt designer Kathy Doughty.
Kathy designed the Trade Winds range of fabrics to capture the vibrant
energy of an exotic market square, inspired by the chintz prints of India,
Middle Eastern mosaics and Asian floral motifs.
You can find stockists of the BOM fabric kits on page 31.
In this first part you will make the centre Feathered Star block featuring
fussy cutting and intricate piecing.
Proudly brought to you by Quilters Companion
and Lloyd Curzon Fabrics
Designed and sewn by Kathy Doughty
Machine quilted by Sew Rowles, Sue's Top Finish, @suestopfinish
kathy@materialobsession.com.au
22
@matobsgirl
www.materialobsession.com.au
g
te cutting and piecin
ra
cu
ac
s
ire
qu
re
ilt
Note: This qu
nd the
er fits precisely arou
rd
bo
ch
ea
at
th
re
to ensu
page
ials listed on the next
er
at
M
.
ilt
qu
e
th
of
edge
are based
oject. Requirements
are for the entire pr
e backing
n) wide, except for th
on fabric 107cm (42i
e
8in) wide. Refer to th
(10
m
5c
27
is
ch
hi
w
fabric,
in her
ific fabrics Kathy used
ec
sp
e
th
r
fo
y
Ke
ic
Fabr
al to hers.
create a quilt identic
project if you wish to
ld on
use of your fabrics. Ho
Be economical in the
ed
rts as they may be us
pa
er
rli
ea
m
fro
s
ut
to offc
e used
allowances of ¼in ar
am
Se
s.
rt
pa
r
te
la
in
ecing.
throughout for the pi
23
Finished size: 225cm (88½in) square
This Block of the Month project is being published over six
issues of Quilters Companion, from issue #128 to issue #133.
The materials required to make the complete quilt appear
here in this issue. Contact our subscriptions department to
order a subscription, or log on to Zinio or the Apple/Google
Play newsstands to get the issues digitally.
24
A
B
C
D
Love Dove – Mustard
(90861-55)
Love Dove – Moss
(90861-70)
Love Dove – Ivory
(90861-12)
Chintz – Burgundy
(90860-28)
E
F
G
H
Chintz – Ivory
(90860-12)
Chintz – Seaglass
(90860-62)
Treasure Flower – Dusk
(90864-91)
Treasure Flower – Fuchsia
(90864-22)
I
J
K
Treasure Flower –
Burgundy (90864-28)
Tides – Coral (90865-56)
Tides – Ink (90865-49)
Tides – Curry (90865-55)
M
N
O
P
Mosaic – Citrus
(90863-52)
Mosaic – Seaglass
(90863-64)
Mosaic – Caramel
(90863-55)
Magic Carpet – Spice
(90862-28)
Q
R
Magic Carpet – Coriander
(90862-72)
Magic Carpet – Mango
(90862-54)
L
Our fabrics
This quilt uses a large variety of
print fabrics from the Trade Winds
collection designed by Kathy Doughty
for Figo Fabrics. They are distributed in
Australia by Lloyd Curzon Textiles.
25
Materials
• 40cm (½yd) Love Dove – Mustard
(90861-55)
• 75cm (7⁄8yd) Love Dove – Moss
(90861-70)
• 1.25m (1⅜yd) Love Dove – Ivory
(90861-12)
• 80cm (7⁄8yd) Chintz – Burgundy
(90860-28)
• 1.6m (1¾yd) Chintz – Ivory (90860-12)
• 85cm (1yd) Chintz – Seaglass
(90860-62)
• 1m (11⁄8yd) Treasure Flower – Dusk
(90864-91)
• 70cm (¾yd) Treasure Flower –
Fuchsia (90864-22)
• 70cm (¾yd) Treasure Flower –
Burgundy (90864-28)
• 55cm (5⁄8yd) Tides – Coral (90865-56)
• 2.4m (2¾yd) Tides – Ink (90865-49)
• 65cm (¾yd) Tides – Curry (90865-55)
• 45cm (½yd) Mosaic – Citrus (9086352)
• 1.15m (13⁄8yd) Mosaic – Seaglass
(90863-64)
• 35cm (3⁄8yd) Mosaic – Caramel
(90863-55)
• 1.2m (1⅜yd) Magic Carpet – Spice
(90862-28)
• 1m (11⁄8yd) Magic Carpet – Coriander
(90862-72)
• 1m (1⅛yd) Magic Carpet – Mango
(90862-54)
• 2.5m (2¾yd) extra wide
(275cm/108in) backing fabric
• Batting at least 245cm (96in) square
• Sewing threads: Kathy recommends
50-weight Wonderfil Konfetti for
piecing and 60-weight Wonderfil
Efina for appliqué
• Needles for hand appliqué; Kathy
recommends size 10 or 11 John
James needles
• Mylar
• Semi water-soluble fusible appliqué
paper
• Fabric glue stick
• Best Press or spray starch
• Rotary cutter, quilter’s ruler and mat
• Sewing machine with ¼in foot
• General sewing supplies
Optional extras
• Eppiflex Mylar pack, which includes
acrylic templates for the kite/
diamond and the wedge and Mylar
templates for the scallops and all the
appliqué shapes
• 22½-degree wedge ruler
• Perfect Circles by Karen Kay Buckley
– large and small
26
Feathered Star Block
PART 1 –
FEATHERED STAR
The Feathered Star block in the centre of
this quilt is considered a rite of passage
for quiltmakers honing their skills.
Preparation and cutting
1
If you’re not using the Eppiflex
Mylar template pack, trace shape
1 from the Pattern Sheet onto Mylar.
Then trace the internal lines to create
shape 2. Label the two shapes. Cut the
Mylar on the outer lines of shape 1.
Use shape 1 to fussy cut eight
shapes from Fabric P, referring to
Kathy’s Tips for Fussy Cutting on page
29.
From Fabric E, cut:
• one strip, 2⅞in x width of fabric.
Cross cut it to yield eight squares,
2⅞in. Cut each square once on the
diagonal to yield 16 half-square
triangles
• two strips, 3in x width of fabric. Cross
cut them to yield 24 squares, 3in
• one strip, 17¾in x width of fabric.
Cross cut it to yield one square,
17¾in. Cut the square twice on the
diagonals to yield four quartersquare triangles (side triangles).
Trim the remainder of this strip to
12½in high, and from it cross cut one
square, 12½in
• one strip, 12½in x width of fabric.
Cross cut it to yield three more
squares, 12½in (corners)
These side triangles and corner
squares have been cut oversize and
will be trimmed back after the block
has been assembled.
From Fabric F, cut:
• one strip, 2½in x width of fabric. Cross
cut it to yield eight squares, 2½in
• two strips, 3in x width of fabric. Cross
cut them to yield 24 squares, 3in
• one strip, 2⅝in x width of fabric
2
Preparation and cutting – Step 2
3
Position the 1+2 template on one
end of the 2⅝in strip of Fabric
F and cut the first angled edge. Then
match the internal line for Shape 2
with the cut edge and cut the opposite
angled edge to yield one diamond
shape. Slide the template along the
strip and cut a total of eight diamonds.
From Fabric H, cut:
• one strip, 11½in x width of fabric.
Cross cut it to yield one square, 11½in.
Put the remainder of this strip aside
to use in Part 3
From Fabric K, cut:
• two squares, 4⅞in. Cut each of them
twice on the diagonals to yield a total
of eight quarter-square triangles
• four squares, 3¾in
Block centre
1
2
Rule a diagonal line from corner to
corner on the wrong side of the four
3¾in Fabric K squares.
Pin a square in each corner of the
11½in square of Fabric H.
Preparation and cutting – Step 3
Block centre – Step 2
Block centre – Step 3
3
Sew on the lines. Trim the corners
¼in outside the stitching. Flip the
K triangles over and press. Your centre
Snowball block should measure 11½in
square from raw edge to raw edge.
Feathers
1
Rule a diagonal line from corner to
corner on the wrong side of all of
the 3in Fabric E squares. Match each of
them, right sides together, with a Fabric
F 3in square and sew ¼in either side of
the marked line. Cut along the line.
Open the squares and press
the seam towards the Fabric F.
Trim each square to precisely 2½in
by placing a quilter’s square ruler
on it with the 45-degree line on the
diagonal seam and trimming the
edges. See Diagram 1.
2
27
7
Sew a Fabric K quarter-square
triangle to four of the fussy cut
Fabric P kite shapes, as shown in
Diagram 5.
Sew a fussy cut Fabric P kite
shape to each of the Step 3 strips,
as shown in Diagram 6. Then sew the
units from Step 7 to the Step 4 strips.
Sew a fabric F diamond to one end
of all the strips remaining from
Steps 3 and 4, as shown in Diagram 7.
Sew each Step 4+diamond strip to
the right edge of a Fabric E corner
square, as shown in Diagram 8. Then
sew each Step 3+diamond strip to the
top edge of a Fabric E corner square.
8
Diagram 6
45°
9
10
Assembly
Diagram 7
45°
2½in
2
Diagram 1
Diagram 2 – make 8
Diagram 3 – make 8
Diagram 8
3
Lay out three half-square triangles
units from Step 2, one Fabric E
half-square triangle and one Fabric
F 2½in square as shown in Diagram
2. Sew them together. Press seams
towards the Fabric F triangles. Repeat
to make a total of eight strips like this.
Lay out three half-square
triangles units from Step 2 and
one Fabric E half-square triangle,
as shown in Diagram 3. Sew them
together. Press seams towards the
Fabric F triangles. Repeat to make a
total of eight strips like this.
Lay one strip from Step 3 and one
strip from Step 4 on the angled
edges of each Fabric E quarter-square
triangle, as shown in Diagram 4.
Sew the Step 4 strip to the triangle,
starting at the 90-degree corner
of the triangle. Only sew a partial seam:
stop stitching when you reach the last
triangle of the strip. Then sew the Step 3
strip to the adjacent edge of the triangle
in the same manner.
4
Diagram 4
5
6
Diagram 5
28
1
Lay out the Snowball block, the
feathered side triangles and the
feathered corners in three rows of
three units, referring to the Feathered
Star Block Assembly Diagram.
Assemble the block in rows.
Start by sewing the top left
corner unit to the left edge of
the top feathered side triangle unit.
You won’t be stitching the large
triangle in this first seam. To complete
the partial seam sewn earlier, fold
the two units, right sides together,
so that the raw edge of the large
triangle matches the raw edge of the
small half-square triangles and the
diamond. Sew this seam.
Repeat the process described in
Step 2 to sew two seams to join the
top right corner unit to the right edge of
the top feathered side triangle unit.
Then repeat Steps 2 and 3 to
join the units in the bottom row
of the block.
Sew the straight edges of the
feathered side triangle units to the
centre Snowball block.
Sew the top and centre rows of the
block together. Again, you won’t be
stitching the large triangles in this seam.
To complete the partial seam sewn
earlier, fold the two rows right sides
together so that the raw edge of the
large triangle matches the raw edge of
the small half-square triangles and the
diamond. Sew this seam on the left and
right units in the rows.
Repeat Step 6 to join the bottom row
to the block, referring to Diagram 9.
Trim your block to measure 37½in square,
from raw edge to raw edge, taking care
to keep the star centred.
3
4
5
6
7
Part 2 of this Block of the Month project,
will incude four appliqué panels that
form part of Border 2.
Feathered Star Block Assembly Diagram
Diagram 9
KATHY’S TIPS FOR FUSSY CUTTING
To fussy cut a set of matching shapes
so that the same printed motif
appears in each of them, start by
laying the template on the fabric
and moving it round until you find a
part of the printed design that you
wish to feature. You can do this on
the right or the wrong side of the
fabric – it’s important that you can
clearly see the pattern printed on the
fabric and that you can trace around
the template with a pencil or pen
that will show up on the fabric.
The templates for this project
include seam allowances. Bear that in
mind when choosing where to trace
and cut the fabric as ¼in of the design
will be lost in the seam allowance on
each edge of the shape.
Once you’ve chosen the design
you wish to feature in your patches,
use a fine pencil or erasable pen
to trace some of the design lines
onto the template. Then, without
moving the template, trace around
its outer edge.
Position the template on another
motif, exactly matching the lines
you’ve traced on the template with
the printed design on the fabric. Trace
around the outer edge of the template.
Continue in this manner to trace the
appropriate number of shapes onto
the fabric, each with exactly the same
motif in their centre. Cut the fabric out
on the traced lines.
If you wish to use the template to
fussy cut a different fabric, use an
eraser to remove the pencil or pen lines.
29
Block of the month
Proudly presented by
Available in
complete kits
Lloyd Curzon Textiles
Ph: (08) 8331 3691
W: https://www.lcurzon.com.au/
Contact a sto
ckist
closest to you
.
Limited suppli
es.
Book now!
Stockists
NSW
QL D
VIC
Down Patchwork Lane
Penrith
(02) 4732 3469
info@downpatchworklane.com
www.facebook.com/
DownPatchworkLane
Material Obsession
Drummoyne
(02) 9819 6455
info@materialobsession.com.au
www.materialobsession.com.au
Picklemouse Corner
Leura
(02) 4784-2854
pammydavis@bigpond.com
www.picklemousecorner.com
Sew Can I
Werrington County
(02) 9623 4570
sewcani@yahoo.com.au
www.sewcani.com.au
Thorpe & Co
Boolaroo
(02) 4929 4456
info@thorpeandco.com.au
www.thorpeandco.com.au
Whatever Where-ever Crafts
Howlong
(02) 6026 5489
info@whateverwhereever.com.au
www.whateverwhereever.com.au
Ace Drapers (QLD)
Roma
(07) 4622 5277
acedrapers@bigpond.com
www.facebook.com/people/AceDrapers/100057309945963
Dewdrop Inn Patchwork & Crafts
Pialba
(07) 4124 9320
Linda@Dewdropinn.Com.Au
www.dewdropinn.com.au
Just Country Crafts
Gulliver
07 4775 2228
justcountrycrafts@gmail.com
www.facebook.com/
justcountrycrafts.tsv/
The Quilter’s Shack
Walkervale
07 4154 4486
ken_4_sue@hotmail.com
The Quilter’s Patch
Ormond
(03) 9555 0010
mail@thequilterspatch.com.au
www.shop.thequilterspatch.com.au
Port Fairy Textiles
Port Fairy
0493 289 375
contact@portfairytextiles.com.au
www.portfairytextiles.com.au
SA
Kookaburra Quilts
Burra
0439 247 700
kookaburraquilts@gmail.com
www.kookaburraquilts.com.au
LLOYD CURZON TEXTILES
Magill
(08) 8362 2451
tmyers@lcurzon.com.au
www.lcurzon.com.au
TAS
The Village Sampler
Lilydale
0439 951 158
deb@villagesampler.au
WA
Wattle Moon
Pinjarra
0412 893 810
helenrhodes@bigpond.com
Antics in the
Gum Forest
As the design is quite large, SusanClaire suggests making up the
whole background, basting with batting and backing and quilting
the top before doing the appliqué.
This quilt has been quilted with wiggly vertical lines. Once the quilting is
done, fuse all the appliqué. The stitching around the shapes can be done
through all the layers — this provides stability for free-motion stitching or
your preferred method of appliqué stitching. The sample has been
free-motion straight stitched close to the edge of the appliqué shapes.
This means that when the appliqué is stitched, the quilt is almost finished.
Finished size: 152.5cm x 132cm (60in x 52in)
Designer: SusanClaire Mayfield — Gourmet Quilter
www.gourmetquilter.com
32
GourmetQuilter
GourmetQuilter
Appliqué
33
34
Materials
Preparation and cutting
Quilting
• Assorted light-value print fabrics to
total about 2.6m (2⅞yd). Light-value
Jelly Roll strips are ideal
• Assorted red, green and brown
tone-on-tone print fabrics (appliqué).
SusanClaire recommends batik
fabrics to reduce the amount of
fraying in the finished quilt
• 20cm (¼yd) brown tone-on-tone
print fabric (stem)
• 40cm (½yd) red tone-on-tone print
fabric (binding)
• 3.1m (3⅜yd) backing fabric
• Batting about 170cm x 150cm
(66in x 58in)
• Fusible web
• Machine sewing threads to match the
appliqué fabrics
• Rotary cutter, ruler and mat
• Sewing machine with ¼in, opentoed embroidery and free-motion
quilting feet
• General sewing supplies
From the assorted light-value print
fabrics, cut:
• 40 strips, 2½in x width of fabric
From the red tone-on-tone print
fabric, cut:
• six strips, 2½in x width of fabric
(binding)
1
Background
1
2
3
4
Join the 40 strips of light-value print
fabrics together, end to end, to make
one (very!) long strip. Press seams open.
Cut the strip to yield 26 strips,
2½in x 60½in.
Lay the strips out, side by side,
and swap them around until you
have an array that you like.
Join the strips down their long
edges in pairs. Press. Then join
the pairs. Continue joining larger and
larger panels until all the strips have
been assembled to create the quilt
background. Press it well.
Cut the backing fabric into two equal
lengths, remove the selvedges and
sew the two pieces together side by side
with a ½in seam. Press the seam open.
The assembled background,
backing and batting are ready
for a long-arm quilting machine as
they are. If you’re doing the quilting
by hand or on a domestic sewing
machine, follow the instructions for
Preparing the Quilt Sandwich in the
free downloadable Basics Guide* to
pin or baste the quilt top, batting and
backing together.
Quilt as desired. SusanClaire
attached a free-motion foot to
her machine and worked vertical wiggly
lines spaced about 1in apart down the
length of the quilt.
2
3
Appliqué
1
Trace the appliqué shapes from
the Pattern Sheet on to the
35
Diagram 1
paper side of the fusible web, leaving
about ½in between them. To replicate
SusanClaire’s design, you need to trace:
• eight stamens
• eight flower caps
• four small gum nuts
• four small gum nut inners
• four large gum nuts
• four large gum nut inners
• eight ants
• four A leaves
• eight B leaves
• two C leaves
Cut the shapes out about ¼in outside
the traced lines.
With the shapes for the leaves
and flower caps, you may wish
to cut away the fusible web about
¼in inside the traced line, as shown
in Diagram 1. This will reduce the
stiffness of the appliquéd shapes in
your wallhanging.
Fuse the shapes to the wrong side
of the fabrics you have chosen for
them. Cut all the shapes out of fabric
on the lines.
Fuse fusible web to the wrong
side of the fabric you have chosen
for the stems — across the full width of
the fabric. Just butt pieces of fusible
web up against each other to cover the
entire piece of fabric.
Cut an assortment of strips across
the width of the fabric in a variety
of widths: ½in, ⅜in and ¼in wide.
Use the ½in strips for the main
stem. Remove the backing paper
from each strip in turn and then
audition it on the quilted background
of your quilt, referring to the photo
of SusanClaire’s quilt as a guide and
2
3
4
5
6
36
curving the strips as required. To join
two strips, simply overlap them by
about ⅜in. Pin the strips in place.
Now use the narrower strips to
add more stems in the same way,
tucking their ends under other stems
as appropriate.
Once you have an arrangement
that you like, fuse the strips to the
background.
Thread your sewing machine
with thread that matches the
stem fabric and attach the open-toe
embroidery foot. Straight stitch close to
each edge of the stems.
Audition the placement of
the remaining shapes on your
background panel. Once you have an
arrangement that you like, peel the
backing paper from each shape as it
is needed. Fuse the shapes in place;
7
8
9
10
for the gumnuts and flowers, fuse the
gumnut inners and stamens before
overlapping them with the gumnuts
and flower caps. Repeat Step 9 to
appliqué them in place.
Complete the stitching by working
straight stitch for the ants’ legs and
antennae using a dark coloured thread.
11
Finishing
1
2
Trim the excess backing fabric and
batting ¼in outside the edges of
the quilt.
Follow the instructions in Binding
the Quilt in The Basics Guide* to
bind the quilt using the six 2½in strips
cut from the red print fabric.
* The free Basics Guide is available as
a download online from https://www.
cosyproject.com/blog/quilting-guide
37
S to c k i s
t fo r
I N DS
W
E
D
A
TR
M
O
2 0 24 B
Tradewinds
Quilter’s Companion new Block
of the Month available now!
Contact us for more information.
FREE
POSTAGE
ON ORDERS
OVER $150
AUSTRALIA ONLY
Woof
Finished size 50” x 60”
Kit Price $250.00 (including free postage).
Kit includes: All fabric for quilt top,
binding and pattern
26 Fairway Close, Howlong NSW 2643
p. 02 6026 5489 | m. 0428 577 957
e. info@whateverwhereever.com.au
www.whateverwhereever.com.au
This eye-catching quilt features
feedsack fabrics and Cheryl’s original
designed blocks. Uneven Nine-patches
and chequerboard blocks combine to
make a fresh, light quilt.
Finished size: 214.5cm (84½in) square
Designer: Cheryl Filby
fimch2@gmail.com
40
@cherylfilby
Original
Design
41
42
Materials
• 3.2m (3½yd) white tone-on-tone
print fabric #1
• 1m (1⅛yd) white tone-on-tone print
fabric #2
• 85cm (⅞yd) yellow print fabric #1
• 70cm (¾yd) yellow print fabric #2
• 70cm (¾yd) yellow print fabric #3
• 85cm (⅞yd) blue print fabric #1
• 70cm (¾yd) blue print fabric #2
• 85cm (⅞yd) green print fabric #1
• 60cm (⅝yd) green print fabric #2
• 60cm (⅝yd) green print fabric #3
• 2.4m (2¾yd) extra-wide
(275cm/108in) backing fabric
• Batting at least 240cm (92in) square
• Rotary cutter, ruler and mat
• Sewing machine with ¼in foot
• General sewing supplies
Cutting
From white tone-on-tone print fabric
#1, cut:
• 14 strips, 2½in x width of fabric. Cross
cut them to yield 24 strips, 2½in x
20½in (sashing) and 16 strips, 2½in x
4½in (sashing)
• another eight strips, 2½in x width of
fabric (Border 1)
• two strips, 4½in x width of fabric.
Cross cut them to yield 56 strips,
1½in x 4½in
• two strips, 5½in x width of fabric. Cross
cut them to yield 40 strips, 1½in x 5½in.
Trim four of these strips to 1½in x 4½in
and put them with the other 56 strips
this length, leaving you with 36 strips,
1½in x 5½in. Cut the remainder of the
second 5½in strip into three horizontal
strips 1½in wide x about 28in. Cross cut
these strips to yield 54 squares, 1½in
• 13 strips, 1½in x width of fabric.
Cross cut them to yield another 354
squares, 1½in
• 10 strips, 2½in x width of fabric. Cross
cut them to yield 256 rectangles,
1½in x 2½in
From white tone-on-tone print fabric
#2, cut:
• three strips, 2in x width of fabric.
Cross cut them to yield 36 squares,
2in and 36 rectangles, 1½in x 2in
• one strip, 10½in x width of fabric.
Cross cut it to yield 18 strips, 1½in x
10½in. Cut the remainder of the strip
into seven horizontal strips, 1½in x
about 14in. Cross cut these strips to
yield 63 squares, 1½in
• one strip, 8½in x width of fabric.
Cross cut it to yield 18 strips, 1½in x
8½in. Cut the remainder of the strip
into five horizontal strips, 1½in x
about 14in. Cross cut these strips to
yield 45 squares, 1½in
• one strip, 1½in x width of fabric. Cross
cut it to yield another nine squares,
1½in — you should now have 117
squares, 1½in in all
From yellow print fabric #1, cut:
• 11 strips, 2½in x width of fabric. Cross
cut them to yield 50 rectangles, 2½in
x 3½in and 91 squares, 2½in
From yellow print fabric #2, cut:
• nine strips, 2½in x width of fabric.
Cross cut them to yield 40 rectangles,
2½in x 3½in and 81 squares, 2½in
From yellow print fabric #3, cut:
• nine strips, 2½in x width of fabric
(binding)
From blue print fabric #1, cut:
• 11 strips, 2½in x width of fabric. Cross
cut them to yield 50 rectangles, 2½in
x 3½in and 91 squares, 2½in
From blue print fabric #2, cut:
• nine strips, 2½in x width of fabric.
Cross cut them to yield 40 rectangles,
2½in x 3½in and 81 squares, 2½in
From green print fabric #1, cut:
• five strips, 2½in x width of fabric. Cross
cut them to yield 80 squares, 2½in
• 10 strips, 1½in x width of fabric. Cross
cut them to yield 256 squares, 1½in
From green print fabric #2, cut:
• four strips, 2½in x width of fabric.
Cross cut them to yield 24 rectangles,
2½in x 5½in
• six strips, 1½in x width of fabric. Cross
cut them to yield 60 rectangles, 1½in
x 2in and 60 squares, 1½in
From green print fabric #3, cut:
• four strips, 2½in x width of fabric.
Cross cut them to yield 24 rectangles,
2½in x 5½in
• five strips, 1½in x width of fabric.
Cross cut them to yield 48 rectangles,
1½in x 2in and 48 squares, 1½in
Uneven Nine-patch blocks
1
To make one Uneven Nine-patch
block you need:
• four white print #1 rectangles, 1½in
x 2½in
• four green print #1 squares, 1½in
• one green print #1 square, 2½in.
Lay out the patches in three rows,
referring to the Uneven Ninepatch Block Layout Diagram.
Sew the patches in each row
together. Press the seams
towards the green squares. Then sew
the rows together, carefully matching
seams. Your Uneven Nine-patch block
should measure 4½in square from
raw edge to raw edge.
2
3
43
Diagram 3
Uneven Nine-patch Block Layout Diagram
4
Rule a diagonal line on the
wrong side of each of the white
squares. Pin them to each corner of
the panel as shown in Diagram 2.
Stitch on the lines, trim the corners
¼in outside the stitching, turn the
white triangles over so they are right
side facing up and press.
Sew a 1½in x 4½in rectangle of
white print fabric #1 to the left and
right edges of the panel. Press seams
outwards. Then sew an Uneven Ninepatch block to the left and right edges
of the panel, as shown in Diagram 3.
Press seams inwards. Your completed
Panel should measure 4½in x 20½in
from raw edge to raw edge.
Repeat Steps 1–5 to make a total
of 12 Panels.
5
Diagram 1
6
Courtyard A blocks
Diagram 2
Diagram 4
2
Courtyard A block
Uneven Nine-Patch block
4
Repeat Steps 1–3 to make a total
of 64 Uneven Nine-patch blocks.
Panels
1
To make a Panel, you need:
• two rectangles, 2½in x 5½in of
green print fabric #2
• two rectangles, 2½in x 5½in of green
print fabric #3
• four squares, 1½in of white print
fabric #1
• two rectangles, 1½in x 4½in of white
print fabric #1
• two Uneven Nine-patch blocks.
Lay out the green rectangles in
two rows, as shown in Diagram 1.
Sew them together in pairs, then
join the pairs, carefully matching
seams. Press seams towards the darker
fabric. This unit should measure 4½in x
10½in from raw edge to raw edge.
2
3
Courtyard A Block Layout Diagram
44
1
To make one Courtyard A block,
you need:
• 12 rectangles, 1½in x 2in of green
print fabric #2
• 12 squares, 1½in of green print
fabric #2
• eight rectangles, 1½in x 2in of white
print fabric #2
• four squares, 2in of white print
fabric #2
• 13 squares, 1½in of white print
fabric #2
• two strips, 1½in x 8½in of white print
fabric #2
• two strips, 1½in x 10½in of white print
fabric #2.
Lay out the patches in seven
rows of seven patches each,
referring to the Courtyard A Block
Layout Diagram.
Sew the patches in each row
together. Press seams towards the
green fabric. Then sew the rows together,
carefully matching seams. Press. Your
block should measure 8½in square from
raw edge to raw edge at this stage.
Sew the 1½in x 8½in white strips
to the left and right edges of the
block. Press seams outwards.
Sew the 1½in x 10½in white strips
to the top and bottom edges
of the block. Press seams outwards.
Your block should now measure 10½in
square from raw edge to raw edge.
3
4
5
Fence #1A blocks
1
To make a Fence #1A block,
you need:
• two 2½in squares of yellow print
fabric #1
• three 2½in x 3½in rectangles of
yellow print fabric #1
have blue squares. See the Fence #1A
Block Layout Diagram.
Sew the units together. Press.
5
6
Fence block
Fence #1A Block Layout Diagram
— make 10
• three 2½in squares of blue print
fabric #1
• two 2½in x 3½in rectangles of blue
print fabric #1
• 10 squares, 1½in of white print
fabric #1.
Sew each yellow rectangle to a
blue square and sew each blue
rectangle to a yellow square. Press
seams towards the blue fabric.
Rule a diagonal line on the
wrong side of each of the white
squares. Pin them to the corners of
the rectangle, in turn, as shown in
Diagram 4. Stitch on the lines, trim the
corners ¼in outside the stitching, turn
the white triangles over so they are
right side facing up and press.
Lay out the units from Step 3 in a
row, alternating the colours and
beginning and ending with units that
2
Fence #2A Block Layout Diagram
— make 10
Diagram 5
Repeat Steps 1–5 to make 10
Fence #1A blocks.
Fence #2A blocks
1
To make a Fence #2A block, you
need:
• three 2½in squares of yellow print
fabric #1
• two 2½in x 3½in rectangles of yellow
print fabric #1
• two 2½in squares of blue print
fabric #1
• three 2½in x 3½in rectangles of blue
print fabric #1
• 10 squares, 1½in of white print
fabric #1.
The process for making Fence #2
blocks is exactly the same as for
Fence #1 blocks. The only difference
is that these blocks have three units
with yellow squares, and they are
assembled with those units at the
beginning and end of the row. See the
Fence #2A Block Layout Diagram.
Repeat Steps 1 and 2 to make a
total of 10 Fence #2A blocks.
3
2
4
3
Super A blocks
1
You now need to combine the blocks
you’ve made into five ‘super’ A blocks.
To make one super A block, you need:
• one Courtyard A block
• two Fence #1A blocks
• two Fence #2A blocks
• four Uneven Nine-patch blocks
• four 1½in x 4½in rectangles of white
print fabric #1
• four 1½in x 5½in rectangles of white
print fabric #1.
Start by sewing a white 1½in x
4½in rectangle to one edge of
each of the Uneven Nine-patch blocks.
Press seams outwards.
Then sew a white 1½in x 5½in
rectangle to an adjacent edge, as
shown in Diagram 5. Press.
Lay out the Uneven Nine-patch
blocks, the Fence A blocks and the
Courtyard A block in three rows of three
blocks each as shown in the Super A
Block Layout Diagram. Check that the
Uneven Nine-patch blocks are oriented
correctly. Check that the Fence #1 and
#2 blocks are in the correct position.
Sew the blocks in each row
together. Press seams outwards.
Then sew the rows together, carefully
matching seams. Press. Your Super A
block should measure 20½in square
from raw edge to raw edge.
2
3
4
5
Super A Block Layout Diagram
45
Edge Row Layout Diagram — make 2
Sashing Row Layout Diagram
6
Repeat Steps 1–5 to make a total
of five Super A blocks.
Super B blocks
1
Super B blocks are made in exactly
the same way as the Super A
blocks — just with different fabrics:
• for the Courtyard B blocks, use
squares and rectangles cut from
green print fabric #3 (instead of
green print fabric #2)
• for all the Fence blocks, use squares
and rectangles cut from yellow print
fabric #2 and blue print fabric #2
(instead of yellow print fabric #1 and
blue print fabric #1).
• all the other fabrics used are the
same as for the Super A blocks. Make
four Courtyard B blocks, eight Fence
1B blocks and eight Fence 2B blocks.
Make a total of four Super B
blocks.
2
Assembly
1
Lay out the Super blocks in three
rows of three, alternating the A and B
blocks and leaving a little space between
them. Rotate the blocks so that the
patches in the Fence blocks in one Super
block are the ‘opposite’ colour to those in
the adjacent Super block — that is, blue
patches are facing yellow patches in the
neighbouring blocks. Refer to the photo
of Cheryl’s quilt as a guide.
Add a Panel at each end of
each row — again leaving space
between them and the Super blocks.
Add a 2½in x 20½in strip of
white print fabric #1 between the
blocks/panels in each row.
Sew the blocks/panels and sashing
strips in each row together. Press
seams towards the sashing strips.
To make a row for the top edge of
the quilt top, you need:
• three Panels
• two Uneven Nine-patch blocks
• four rectangles, 2½in x 4½in of white
print fabric #1.
Lay out these units as shown in
the Edge Row Layout Diagram.
Sew the units together. Press the
seams towards the 2½in strips of
white print fabric.
Repeat Steps 5 and 6 to make
another row exactly the same.
Add them to your layout as the top
2
3
4
5
6
7
8
46
and bottom rows, leaving space
between them and the other rows in
the quilt centre.
You now need to make four
horizontal sashing strips. To
make one, you need:
• three 2½in x 20½in strips of white
print fabric #1
• two 2½in x 4½in strips of white print
fabric #1
• four 2½in squares of green print
fabric #1.
Lay out these patches, end to
end, as shown in the Sashing Row
Layout Diagram. Sew them together.
Press seams towards the green squares.
Repeat Steps 9 and 10 to make
four sashing rows exactly the
same. Add them to your layout
between the rows.
Sew all the rows of your quilt
top together, carefully matching
seams. Press seams towards the
sashing strips. Your quilt top should
measure 76½in square from raw edge
to raw edge.
9
10
11
12
Borders
1
Join the eight 2½in strips of white
print fabric #1 cut for Border 1
together, end to end, to make one
long strip.
From this long strip, cut:
• two strips, 2½in x 76½in
• two strips, 2½in x 80½in.
Sew the shorter strips to the left
and right edges of the quilt top.
Press seams outwards.
Sew the longer strips to the top
and bottom edges of the quilt top.
Press seams outwards. Your quilt top
should measure 80½in square from
raw edge to raw edge.
To make a Border 2 strip for the
left and right edges, you need 10
squares, 2½in of each of yellow print
fabric #1, blue print fabric #1, yellow
print fabric #2 and blue print fabric #2.
Lay out the squares, alternating
them. Sew the squares together.
Press. Your border strip should
measure 2½in x 80½in from raw edge
to raw edge. Repeat to make another
strip exactly the same.
Sew these strips to the left and
right edges of the quilt top. Press
seams inwards.
2
3
4
5
6
7
8
To make the two Border 2 strips for
the top and bottom edges, lay out
all the remaining 2½in squares of these
four fabrics in two rows of 42 squares
each. Sew the squares in each row
together. They should measure 2½in x
84½in from raw edge to raw edge.
Sew these strips to the top and
bottom edges the quilt top. Press
seams inwards.
9
Finishing
1
The quilt top, extra-wide backing
and batting are ready for a longarm quilting machine as they are. If
you’re doing the quilting by hand or
on a domestic sewing machine, follow
the instructions for Preparing the Quilt
Sandwich in the free downloadable
Basics Guide* to pin or baste the quilt
top, batting and backing together.
Quilt as desired. Cheryl machine
quilted a large meander on her
quilt.
Trim the excess backing fabric and
batting ¼in outside the edge of
the quilt top.
Follow the instructions in Binding
the Quilt in The Basics Guide* to
bind the quilt using the nine 2½in strips
of yellow print fabric #3.
2
3
4
* The free Basics Guide is available as
a download online from https://www.
cosyproject.com/blog/quilting-guide
1
2
3
4
1
1. We
Weekender
k
Bag
3. All Stars Symphony White
Size 46cm wide x 23cm deep x 56cm high
One of our faves in a bright mix of
Tula Pink fabrics, a great carry all.Kit
contains all fabric, button and magnets
Kit $79.95. Pattern $19.95.
Size 140cm x 178cm
A simple but effective quilt using 9
Tula Pink fat quarters. Kit contains all
fabric for top, binding & pattern
Kit $135.00. Pattern $15.00.
2. All Stars Symphony Black
4. Kates Besties Quilt
Size 140cm x 178cm
A simple but effective quilt using 9
Tula Pink fat quarters. Kit contains all
fabric for top, binding & pattern
Kit $135.00. Pattern $15.00.
Size approx 150cm x 175cm
A “scrappy” bright and happy quilt,
in Tula Pink Besties fabrics. Kit contains
all fabric for top, binding & pattern
Kit $185.00. Pattern $15.00.
All kits contain fabrics for top and binding and pattern, plus postage. We deliver to your door Australia wide!
42 Liverpool Street, Port Lincoln SA 5606 p: 08 8682 3636
e: rubyandkate@me.com Open Mon to Fri 9am-5pm, Sat 9am-12pm
www.rubyandkate.com.au
This simple and subtle quilt is made with Economy blocks — eight with
light corners and eight with dark corners. The blocks are alternated
across the quilt layout creating a charming effect.
Finished size: 123cm (48½in) square
Finished block size: 12in square
Designer: Fleur Maddern, Little Desert Quilts
littledesertquilts@skymesh.com.au
48
@littledesertquilts
Economy
Block
49
50
Materials
• 40cm (½yd) each of two feature print
fabrics. Fleur used a taupe on cream
print and a cream on taupe print
• 50cm (⅝yd) light salmon print fabric #1
• 65cm (¾yd) light salmon print
fabric #2
• 85cm (1yd) each of a dark taupe
and a light taupe print fabric (block
corners)
• 40cm (½yd) medium-value taupe
tone-on-tone print fabric (binding)
• 2.2m (2⅜yd) backing fabric
• Batting at least 135cm (54in) square
• Rotary cutter, ruler and mat
• Sewing machine with ¼in foot
• General sewing supplies
Cutting
From each of the two feature print
fabrics, cut:
• two strips, 6½in x width of fabric.
Cross cut them to yield eight squares,
6½in of each fabric (block centres)
From light salmon print fabric #1, cut:
• three strips, 5¾in x width of fabric.
Cross cut them to yield 16 squares,
5¾in. Cut each square once across
the diagonal to yield 32 half-square
triangles
From light salmon print fabric #2, cut:
• three strips, 5¾in x width of fabric.
Cross cut them to yield 16 squares,
5¾in. Cut each square once across
the diagonal to yield 32 halfsquare triangles
• five strips, ¾in x width of fabric
(flange on the binding)
From each of the dark taupe and light
taupe print fabrics, cut:
• four strips, 7½in x width of fabric.
Cross cut them to yield 16 squares,
7½in of each fabric. Cut each square
once across the diagonal to yield 32
half-square triangles of each fabric
From the medium-value taupe toneon-tone print fabric, cut:
• five strips, 2½in x width of fabric
(binding)
• four half-square triangles of dark
taupe print fabric.
Fold the 6½in square in half
horizontally and vertically and
finger press creases in the edges to
mark their centre.
Fold each of the light salmon
triangles in half and finger press
a crease in their longest edge.
2
3
4
Sew a light salmon triangle to
opposite edges of the square
— right sides together and centre
creases and raw edges matching.
Press seams outwards.
Then sew the remaining two light
salmon triangles to the other two
edges of the square, and press seams
outwards. See Diagram 1.
5
Economy blocks
1
To make an Economy block with
dark corners, you need:
• one 6½in square of taupe on cream
print fabric
• four half-square triangles of light
salmon print fabric #1
51
Diagram 1
Diagram 2
Finishing
1
Diagram 4
Cut a 56in length from the backing
fabric, remove the selvedges and
cut it in half down the length to make
two rectangles about 21in x 56in. From
the remainder, cut two strips, 16in
across the width of the fabric. Join
them on one short edge with a ½in
seam and press it open. Trim the joined
strip to measure 56in x 16in.
Referring to Diagram 3, sew a
56in x 21in strip to either side of
the joined strip using ½in seams and
press them open to make a backing
about 56in square.
The quilt top, backing and batting
are ready for a long-arm quilting
machine as they are. If you’re doing
the quilting by hand or on a domestic
sewing machine, follow the instructions
for Preparing the Quilt Sandwich in the
free downloadable Basics Guide* to
pin or baste the quilt top, batting and
backing together.
Quilt as desired. Fleur’s quilt
was machine quilted by Sheree
Mackintosh of Yarra Valley Quilting with
a variety of intricate patterns: feathers
in the block centres, a swag design in
the light salmon triangles and fleursde-lis in the corners.
Trim the excess backing fabric and
batting ¼in outside the edge of
the quilt top.
Join the five ¾in strips of light
salmon print fabric #2 together,
end to end, to make one long strip.
Measure the width of your quilt top
through the centre. Trim two strips
this length from the long strip. Fold
2
Diagram 3
each of these strips in half, wrong sides
together and long edges matching. Press.
Pin them to the top and bottom
edges of the quilt: the raw edges
of the flange strips should match the
raw edges of the quilt, with the flange
strip lying on top of the quilt blocks.
Set your sewing machine to
work long stitches — a stitch
length of 5 on most machines. Stitch
the flange strips to the quilt using a
seam allowance of less than ¼in — it
doesn’t matter what it is precisely,
as long as it is less than ¼in so these
stitches aren’t visible once the binding
is added to the quilt.
Measure the length of your quilt
top through the centre. Trim two
strips this length from the remainder of
the long strip of light salmon print fabric
#2. Repeat Step 8 to pin them to the
left and right edges of the quilt. They will
overlap the first two flange strips at the
corners. Baste them in place.
Follow the instructions in Binding
the Quilt in The Basics Guide* to
bind the quilt using the five 2½in strips
of medium-value taupe tone-on-tone
print fabric. When you sew the binding to
the front of the quilt you will be stitching
through the binding, the underlying
flange strips and the quilt. When you turn
the binding over to the back of your quilt,
the flange will lie flat on the front of the
quilt and add another narrow frame — an
accent of colour next to the binding.
8
9
6
7
8
3
10
9
4
11
Trim the block ¼in outside the
corners of the centre square.
Fold each of the dark taupe
triangles in half and finger press
a crease in their longest edge.
Sew a dark taupe triangle to
opposite edges of the block —
right sides together and with the centre
crease aligned with the corners of the
centre square. Press seams outwards.
Then sew the remaining two dark
taupe triangles to the other two
edges of the block, and press seams
outwards. See Diagram 2. Trim the
block ¼in outside the corners of the
light salmon square.
Repeat Steps 1–9 to make a total
of eight Economy blocks with
dark corners — all exactly the same.
To make an Economy block with
light corners, you need:
• one 6½in square of cream on taupe
print fabric
• four half-square triangles of light
salmon print fabric #2
• four half-square triangles of light
taupe print fabric.
Use the processes described in
Steps 2–9 to make the block,
which is shown in Diagram 3. Then
repeat them to make a total of eight
Economy blocks with light corners.
10
11
12
Assembly
1
2
3
Lay out the blocks in four rows of
four, alternating the blocks with
light and dark corners.
Sew the blocks in each row
together. Press seams towards
the blocks with dark corners.
Then sew the rows together,
carefully matching seams.
52
5
6
7
* The free Basics Guide is available as
a download online from https://www.
cosyproject.com/blog/quilting-guide
Little Desert Quilts
Quilt Shop
Order from us on Facebook @littledesertquilts
‘2023 Temperature Quilt’
To make this quilt purchase the ‘Kaniva Block’ Template set for $35.
‘Road Tested’ by Michelle Marvig in Quilters Companion #100
22 FABRIC OPTION – MODA GRUNGE
43 FABRIC OPTION – MODA GRUNGE
When you purchase the ‘Kaniva Block’ template set, you will have full access to our ‘Kaniva Block Users’ Facebook group where you will have access to all our ‘How-To’ and
‘Skill Builder’ videos, such as: how to organise pieces; how to press seams; how to pin blocks together; how to put in the ‘rain indicators’; temperature record charts, information
on where to / how to record your maximum and minimum temperatures for each day, colour to temperature assignment charts, monthly day placement charts (the pattern).
2023 TEMPERATURE QUILT
– FABRIC STARTER PACKS
Grunge Starter Pack – 1 strip of each colour.
Fabrics will be number labelled for easy re-ordering.
OPTION 1: Large Quilt – 43 fabrics $123.75
OPTION 2: Large Quilt – 22 fabrics $63.50
OPTION 3: Small Quilt – 43 fabrics $96.75
OPTION 4: Small Quilt – 22 fabrics $50.00
Mystique Starter Pack – 1 strip of each colour.
Fabrics will be number labelled for easy re-ordering.
OPTION 5: Large Quilt – 19 fabrics $33.00
OPTION 6: Small Quilt – 19 fabrics $26.00
(Large uses 4.5” strips & C template piece.
Small uses 3.5” strips & B template piece.)
TOOLS
(recommended)
Template Piece
28mm Rotary Cutter
Sewline Trio Marker
Finger Presser
Rotating Cutting Mat
Red & Orange triangles are
the maximum temps and
the Purple & Blue are the
minimum temps for the 2 days
shown in this picture)
Working on making
the temperature quilt
Everyone who makes this quilt will have their own unique fabric requirements decided by the temperature at their locations. To cater for this customers can re-order individual fabric
strips in the size they are using (4.5” x 3.5”) as they are needed. We encourage participants to post photos of their quilt for Kavina Block Facebook Users to see all the variations!
Phone 0458 327 577 | Email littledesertquilts@skymesh.com.au
Find us on Facebook
@littledesertquilts
Check out
full collection
including Summer,
Autumn, Winter
and Spring on our
website NOW
This collection
is divided into
four seasonal
colour stories.
The designs are
perfect to use as
individual colour
stories and can
also be mixed
and matched for
scrappy charm.
www.lynsfineneedlework.com.au
Unit 2, No. 9 Seven Hills Rd Baulkham Hills NSW 2153 (Next to the Bull & Bush Hotel)
EMAIL: sales@lynsfineneedlework.com.au PHONE: 02 9686 2325 FACEBOOK/INSTAGRAM: @lynsfineneedlework
Kit includes
pattern and
all fabrics
to complete
quilt top.
6RQLD0HOYLOOH
6R
6
RRQ
QLD
LD0
0HOY
0 Y
Craftbasket
&UDIWEDVNHW32%R[
2UERVW9LFWRULD
7HOHSKRQH
www.thecraftbasket.com.au
burinstx S76cinrcha. pKits$285
Sun
sures 76
Mea
Prices exclude postage
/
/
/
/
/
/
/
/
/
/
/
/
/
&
)
/
)
)
/
/
/
&
/
/
/
/
0DUHH6W&ODLU4XLOWV
0DUHH6W&ODLU4XLOWV
6YCSJEHF4USFFU 4USBUIèFMETBZF 0O(PPHMF.BQT
01&/#:"110*/5.&/556&4%":504"563%":
1-&"4&5&9550#00,*/"5-&"45)063413*03
/05"7"*-"#-&46/%":
(SPVQTXFMDPNF
5&95
&NBJMJOGP!NBSFFTUDMBJSRVJMUTDPNBV
)OLMBIJMNI=EżìF;LAĔL;HAĔI@L?JLI>O=NCIř@;<LC=żNBL?;>ż
HINCIHż;HčQĔG;HO@;=NOLĔIřMCNĔìıFŐL;HAĔI@
";Hč*C?=CHĴ;Hč HAFCMĽ*;J?L*C?=CHĴJLI>O=Nż
P?LSNBCHĴQĔB;PĔCżIřNBĔQ?úCNĔQQQ G;L??MN=F;CLKOCFNż =Iŕ ;Ƈ
+DYH\RXYLVLWHGRXU<RX7XEH&KDQQHO"
<RXFDQILQG)5((YLGHRWXWRULDOVRIGLIIHUHQWDSSOLTXH
WHFKQLTXHVDVZHOODV,QVWUXFWLRQDO9LGHRVRIRXU4XLOWLQJ
7HPSODWH6HWV
8FNBLFBMBSHFSBOHFPGUFNQMBUFTGPS5SBEJUJPOBM#MPDLT
̷
Up-sized Wheel of Fortune blocks featuring clear bright colours will
get you in the mood for the summer months to come — or warm you
up for the cooler months. Four rows of four 20in blocks, two in each
combination of fabric colours, make up this large bed quilt.
Finished quilt size: 203cm (80in) square
Finished block size: 20in square
Designer: Leanne Harvey, Mount Vincent Quilts
mtvincentquilts@yahoo.com
56
0422 537 080
Up-sized
Blocks
57
58
Materials
• 30cm (⅜yd) each of eight tone-ontone print fabrics (star points)
• Fat quarter each of 16 print fabrics
— you need two fabrics to coordinate
with each of the tone-on-tone print
fabrics (star centres and block corners)
• 90cm (1yd) solid white fabric
• 2.8m (3⅛yd) solid light grey fabric
• 65cm (¾yd) multi-coloured stripe
print fabric (binding)
• 2.4m (2¾yd) extra-wide
(275cm/108in wide) backing fabric
• Batting at least 220cm (88in) square
• Rotary cutter, quilter’s ruler and mat
• Sewing machine with ¼in foot
• General sewing supplies
Cutting
From each of the eight tone-on-tone
print fabrics, cut:
• one strip, 6¼in x width of fabric.
Cross cut it to yield four squares,
6¼in. Cut each square twice on the
diagonals to yield 16 quarter-square
triangles. Cut the remainder of the
strip horizontally to yield two strips,
3in x about 16in. Cross cut them to
yield 10 squares, 3in
• one strip, 3in x width of fabric. Cross
cut it to yield another six squares, 3in
From each of the 16 coordinating print
fabrics, cut:
• one square, 10½in
• two squares, 6¼in
From the solid white fabric, cut:
• three strips, 6¼in x width of fabric.
Cross cut them to yield 16 squares,
6¼in. Cut each square twice on
the diagonals to yield 64 quartersquare triangles. Cut the remainder
of each strip horizontally to yield two
strips, 3in. Cross cut them to yield 14
squares, 3in
• four strips, 3in x width of fabric.
Cross cut them to yield another 50
squares, 3in
From the solid grey fabric, cut:
• eight strips, 6¼in x width of fabric.
Cross cut them to yield 48 squares,
6¼in. Put 32 squares aside. Cross
cut the remaining 16 squares twice
on the diagonals to yield 64 quartersquare triangles
• 10 strips, 5½in x width of fabric.
Cross cut them to yield 128
rectangles, 3in x 5½in
From the mulitcoloured stripe print
fabric, cut:
• nine strips, 2½in x width of fabric
(binding)
2
To make one block, you need:
• eight squares, 3in and eight
quarter-square triangles of the solid
fabric (star points)
• one 10½in square of print fabric #1
(star centre)
• two squares, 6¼in of print fabric #2
(block corners)
• four 3in squares and four quartersquare triangles of white fabric
• two squares, 6¼in; eight rectangles,
3in x 5½in; and four quarter-square
triangles of grey fabric.
Draw a diagonal line from corner
to corner on the wrong side of the
four white 3in squares. Pin a square
in each corner of the 10½in square of
print fabric, as shown in Diagram 1.
Sew on the lines. Trim the corners
¼in outside the stitching, flip the
white triangles over and press.
Draw a diagonal line from corner
to corner on the wrong side of
3
Wheel of Fortune blocks
1
Start by choosing three fabrics for
your block: one print fabric, which
will feature in the centre of the star,
one tone-on-tone print fabric to go
with it (star points) and another print
fabric (block corners).
4
5
59
each of the grey 6¼in squares. Pin each
of them, right sides together, to a 6¼in
square of print fabric. Sew a ¼in on
either side of the line.
Cut on the drawn line. Press the
seam towards the print fabric.
Trim each pieced square to measure
5½in square, keeping the diagonal
seam centred on each unit. See
Diagram 2.
Draw a diagonal line from corner
to corner on the wrong side of all
eight 3in tone-on-tone print squares.
Pin each square, right sides together,
to one end of a grey rectangle: pin
four squares with the line angled one
way and four squares with the line
angled in the opposite way, as shown
in Diagram 3.
Sew on the lines. Trim the corners
¼in outside the stitching, flip the
coloured triangles over and press.
Lay out two tone-on-tone print
triangles, one white triangle and
one grey triangle as shown in Diagram
4. The tone-on-tone print triangle must
always be on the left of the pair.
Sew the triangles together in
pairs along one short edge.
Press towards the tone-on-tone print
triangle. Then sew the pairs together,
matching the centre seam. Press. This
hourglass unit should measure 5½in
square from raw edge to raw edge.
Repeat Steps 9 and 10 to make four
hourglass units exactly the same.
Sew two of the units from Step
7 to each hourglass unit. To do
this, you need one of each kind of Step
7 unit, as shown in Diagram 5. Check
that the white triangle in the hourglass
unit is at the base of the hourglass unit
before stitching.
Assemble the block by laying
out the units you’ve made in
three rows, as shown in the Wheel of
Fortune Block Layout Diagram. The
snowball unit you made in Step 4 goes
in the centre; the half-square triangle
units you made in Step 6 go in the
corners; and the units you made in
Step 12 go around the edges.
Check that each unit is rotated
correctly. Then sew the units in
each row together. Press seams away
from the Step 12 units.
Then sew the rows together,
carefully matching seams.
Your Wheel of Fortune block should
measure 20½in square from raw edge
to raw edge.
Repeat Steps 1–15 to make a
total of 16 blocks — two in each
combination of fabrics.
6
Diagram 1
1
Lay out the blocks in four rows
of four blocks each. Swap them
around until you have an array of
colours and prints that you like.
Join the blocks in each row
together. Press. Then join the
rows, carefully matching seams.
2
Finishing
7
1
8
9
2
3
4
10
45°
Assembly
Press your quilt top well. The quilt
top, backing and batting are ready
for a long-arm quilting machine as they
are. If you’re doing the quilting by hand
or on a domestic sewing machine, follow
the instructions for Preparing the Quilt
Sandwich in the free downloadable
Basics Guide* to pin or baste the quilt
top, batting and backing together.
Quilt as desired. This quilt was
machine quilted in an edge-toedge spiral design.
Trim the excess backing fabric and
batting ¼in outside the edge of
the quilt top.
Follow the instructions in Binding
the Quilt in The Basics Guide* to
bind the quilt using the nine 2½in strips
of stripe print fabric.
* The free Basics Guide is available as
a download online from https://www.
cosyproject.com/blog/quilting-guide
11
12
45°
5½in
Diagram 2
13
Diagram 3
Diagram 5
14
15
Diagram 4
60
16
Wheel of Fortune Block Layout Diagram
61
Official distributor for
Olympus Thread products
including sashiko, kogin,
crochet & embroidery
Wholesale enquiries
welcome
Sashiko
Embroidery
Yarn Dyed Fabrics
Kogin
Boro
Crochet
Patterns & Kits
Shop online & in the studio
NEW to BeBe Bold is Olympus Thread’s latest sashiko thread collection. Delve into a fresh
range of contemporary colours, pastels and bold variegated colour ways, or find your
favourites now in 100m skeins. Give your sashiko, boro and everyday stitching projects what
they deserve with Olympus Thread’s rich, long lasting, 100% cotton threads made in Japan.
Tues-Fri 9am-5pm
02 6621 9188
contact@bebebold.com
www.bebebold.com
KOOKABURRA QUILTS
Kookaburra Quilts is located in the historic town Burra, South Australia.
We stock an ever-growing range of beautiful 100% Cotton quilting fabric,
haberdashery, cosmo threads, books, precuts and sewing supplies.
We have recently expanded into the shop next door, where we have a
lovely bright new classroom and another shop dedicated to the fabric.
WE ARE OPEN
7 DAYS A
WEEK
LARGE
RANGE OF
DISCOUNTED
FABRICS AT
ALL TIMES!
Quality quilting
fabric and sewing
supplies at
affordable prices!
P 0439 247 700 | A 1 Young St, Burra North, SA 5417 | E kookaburraquilts@gmail.com
www.kookaburraquilts.com.au
AUSTRALIAN FABRICS
Bring a little of Australia inside, with these lovely digitally printed fabrics
ALL DIGITALLY PRINTED AND AVAILABLE NOW
18 Alford Street, Kingaroy Qld 4610 Telephone: (07) 4162 2040 Open Monday to Saturday (occasional Sundays)
www.somethingscountry.com.au
Somethings Country - My Quilting Shop
Autumn
Curves
This pattern grew out of Pam’s love for appliqué and it’s an experience in
both style and technique. It is quilted and appliquéd as you stitch on your
sewing machine, and is completed in a quilt-as-you-go method.
Finished size: 142cm (56¼in) square
Designer: Pam Furniss
pamot@netspace.net.au
64
QAYG
65
66
Materials
• 4m (4½yd) solid black fabric
• 80cm (1yd) orange tone-on-tone
print (appliqué and outer border)
• 10cm (⅛yd) dark orange tone-ontone print fabric (appliqué)
• 40cm (½yd) yellow tone-on-tone
print fabric (appliqué)
• 20cm (¼yd) dark yellow tone-ontone print fabric (appliqué and
outer border)
• 10cm (⅛yd) green tone-on-tone print
fabric (appliqué)
• 50cm (⅝yd) blue print fabric
(sashing)
• 4.2m (4⅝yd) backing fabric
• Batting about 200cm (80in) square
• Fusible web
• Template plastic and fine
permanent-marking pen
• White dressmaker’s carbon paper
• Chalk pencil
• Quilt basting spray
• Machine embroidery tear-away
stabiliser
• Machine sewing threads to match
or contrast with the appliqué fabrics
and green (vines)
• Lightbox (optional)
• Rotary cutter, ruler and mat
• Sewing machine with ¼in, open-toed
embroidery, free-motion quilting and
walking feet
• General sewing supplies
Preparation and cutting
From the solid black fabric, cut:
• one strip, 22in x width of fabric. Cross
cut it to yield one square, 22in (centre
square) and one square 16in (corner
triangle)
• one strip, 20in x width of fabric.
Cross cut it to yield one square, 20in
(appliqué panel corners) and one
square, 16in (corner triangle)
• four strips, 10in x width of fabric. Trim
them to measure 10in x 32in (side
appliqué panels)
• six strips, 2½in x width of fabric
(binding)
• five strips, 8in down the length of the
remaining fabric (final border). Cross
cut one of the strips to yield four
squares, 8in (final border corners).
From the remaining part of this strip,
cut eight strips, 1⅛in x 6in (sashings
for final border corners)
From the blue print fabric, cut:
• 12 strips, 1⅛in x width of fabric (front
sashing strips)
From the backing fabric, cut:
• one square, 22in
• two squares, 16in (corner triangles)
• four strips, 10in x width of fabric. Trim
them to measure 10in x 32in (side
appliqué panels)
• one square, 20in (appliqué panel
corners)
• 13 strips, 1¾in x width of fabric (back
sashing strips)
• five strips, 8in down the length of the
remaining fabric (final border). Cross
cut one of the strips to yield four
squares, 8in (final border corners)
From the batting, cut:
• one square, 22in (centre square)
• two squares, 16in (corner triangles)
• four strips, 10in x width of fabric. Trim
them to measure 10in x 32in (side
appliqué panels)
• one square, 20in (appliqué panel
corners)
• four strips, 8in x 46¼ (final border)
• four squares, 8in (final border
corners)
From the tear-away stabiliser, cut:
• one square, 15in
• four strips, 10in x 32in
Centre Block
Centre block
1
Trace the appliqué shapes for
the centre block from the Pattern
Sheet on to the paper side of the
fusible web, leaving about ½in between
the shapes. You need to trace four of
each of the four shapes needed for the
flowers, four small circles, one larger
circle, eight ‘oval’ leaves and four lobed
67
leaves. Cut them out roughly, about ¼in
outside the traced lines.
Fuse the shapes, glue side down,
to the wrong side of the fabrics
you have chosen for them. Cut all the
shapes out accurately on the lines.
Trace the vine lines from the Pattern
Sheet onto a sheet of paper.
Fold the 22in square of black
fabric in half horizontally and
vertically and press lightly to crease it.
Unfold. Place it on a hard flat surface.
Position the design traced on the
paper on top of it, aligning it with
the centre point of the square and
one of the creases. Without moving
the paper or the fabric, slide white
dressmaker’s carbon paper between
the two layers. Trace over the design
lines with a pen or fine stylus to
transfer them to the black fabric.
Rotate the design and the carbon
paper by 90 degrees. Align them
with the centre point and the next
crease. Trace over the design lines.
Repeat twice more to trace the complete
vine design onto the centre square.
Centre the square of stabiliser
on the wrong side of the centre
square fabric and pin it in place. Attach
the open-toed embroidery foot to
your sewing machine and thread the
machine with thread for the vines. Pam
used a green rayon thread.
Starting in the centre of the black
square, straight stitch on one of
the lines to its end. Pivot the fabric and
work back over the stitched line using a
small satin stitch. Pam set her machine
to 1.5 to work the straight stitch; and
worked the satin stitch with a length of
0.3 and a width of 4.3.
Repeat Step 8 to stitch all the
vines. Carefully remove the
stabiliser. Press.
Use a chalk pencil and quilter’s
ruler to draw a 1in grid in both
directions on the centre square.
Lay the 22in square of backing
fabric on a flat surface, right side
facing down. Use quilt basting spray
to spray one side of the 22in square of
batting and lay it (sprayed side down)
on the backing fabric. Smooth out the
fabric and batting.
Lightly spray the other surface
of the batting, then lay the
embroidered black centre square on
it, right side facing up. Smooth out the
fabric. Press.
Attach a walking foot to your
machine and quilt the centre
square. Pam began by stitching close
2
to each vine using the same thread that
she used to embroider them. She then
switched to black thread and quilted
the grid lines except in the four ‘melon’
shapes in the centre of the design.
Peel the backing paper from the
appliqué shapes and arrange
them on the centre block, referring to
the photo of Pam’s quilt as a guide to
placement. Layer the four shapes for the
flowers in numerical order. When you’re
happy with the arrangement, use a hot
iron to fuse all the shapes in place.
Using the open-toed embroidery
foot and your choice of thread,
blanket stitch around the raw edges
of each shape. Pam used a dark
blue rayon thread to appliqué all
of the shapes. She begins stitching
with five or six small straight stitches
immediately next to the appliqué
shape. To end, she switches from
blanket stitch back to straight stitch
and stitches along the edge of the
blanket stitch, past her starting point.
Trim the centre block to 20in
square, keeping the design
centred.
3
4
14
5
15
6
7
16
Corner triangles
1
Repeat Steps 11 and 12 above to
layer and baste the 16in squares
cut from solid black fabric, batting and
backing fabric.
Draw a diagonal chalk line from
corner to corner on each of the
squares.
Decide on a quilting pattern for
the squares and quilt them. Pam
worked a series of scallops on her
squares in black thread.
Press the squares, then cut them
in half on the diagonal line to yield
four quilted half-square triangles.
Trace four of the appliqué shapes
for the corner triangles from the
Pattern Sheet on to the paper side
8
2
3
9
10
11
4
5
12
13
68
of the fusible web, leaving about ½in
between them. Cut them out roughly,
about ¼in outside the traced lines.
Fuse the shapes, glue side down,
to the wrong side of the fabrics
you have chosen for them. Cut the
shapes out accurately on the lines.
Fold each quilted triangle in half,
and press lightly to crease. Peel
the backing paper from each appliqué
shape in turn and centre it on a triangle.
Use a hot iron to fuse the shape in place.
Using the open-toed embroidery foot
and your choice of thread, blanket stitch
around the raw edges of each shape.
Trim each triangle so that the
short edges measure 14in. The
long edge will measure close to 19¾in.
To join the corner triangles to the
centre block you need two strips,
1⅛in of blue print fabric and two strips,
1¾in of backing fabric. Cut each blue
print strip to yield one strip 20in long
and one strip 20½in long. Repeat with
the strips of backing fabric.
Fold the backing fabric strips in
half, wrong sides together and
long edges matching. Press.
Pin a blue 20in strip to two
opposite edges of the centre block,
right sides together and raw edges
matching. Turn the centre block over.
Now pin the raw edges of the 20in strips
of backing fabric to the same edges of
the centre block, raw edges matching.
Attach a walking foot to your
machine and stitch the two
edges that you’ve pinned the sashings
to using a ¼in seam. You will be
stitching through the blue sashing strip,
the three layers of the centre block that
have been quilted together and the
folded backing fabric strip. Backstitch
at the beginning and end of the seam.
Press the blue sashing strips
away from the centre block.
Pin the other long raw edge of
each blue sashing strip to the long
edge of a corner triangle, right sides
together and raw edges matching. Pin
the folded backing fabric sashing strip
out of the way on the back of the work
so that it isn’t caught in the seam when
you stitch. Sew the sashing strip and the
quilted corner triangle together. Press
seams towards the sashing strip.
On the back of the quilt, pin each
folded strip so that it lies over the
seam you sewed in Step 14. Hand stitch
it in place. Work these stitches through
the sashing, backing fabric and batting
only so that they are not visible on the
front of the quilt.
6
7
8
9
10
11
12
13
14
15
Corner Triangle
Side appliqué panels
16
Repeat Steps 11–15 using the
20½in sashing strips to sew the
remaining two corner triangles to the
centre block. Your quilt top should now
measure 28¼in square from raw edge
to raw edge.
3
Side appliqué panels
1
Use the same methods that you
adopted for the centre block to
quilt, embroider and appliqué four side
panels. When you trace the design line
for the vine, turn the paper over and
trace the lines on the back of the paper
too. Then, when you go to trace it onto
the background fabric you just need to
flip the paper pattern over to mirror
reverse the design for the left and right
halves of each panel.
Pam quilted her side panels
with a 1in grid as she did for the
centre block.
2
Trim each panel to measure 8in x
28¼in from raw edge to raw edge.
Appliqué panel corners
1
Appliqué panel corners
Use the same methods that you
adopted for the centre block to
quilt and appliqué the 20in square
cut for the appliqué panel corners.
Start by drawing a horizontal and
vertical chalk line through the centre
of the square to mark four 10in
squares and appliqué one corner
shape in each quadrant.
Pam quilted her square with
a meander pattern worked in
black thread.
2
69
22⅛in to the left and right of this
centre line and draw another vertical
line – these lines mark the final length
of the border and help with the
placement of the appliquéd triangles.
Use the same methods that you
adopted for the centre block to quilt
these strips for the final border.
Use the same methods to layer,
baste and quilt the four 8in
squares cut for the final border corners.
Trace the appliqué shapes
for the final border from the
Pattern Sheet on to the paper side
of the fusible web, leaving about ½in
between the shapes. You need to trace
four large triangles, 32 small triangles
and 28 squares. Cut them out roughly,
about ¼in outside the traced lines.
Fuse the shapes, glue side down,
to the wrong side of the fabrics
you have chosen for them. Cut all the
shapes out accurately on the lines.
Peel the backing paper from the
appliqué shapes and arrange
them on each border strip in turn.
Start by centring a square ‘on point’
over the vertical centre line with
its lowest corner on the horizontal
line 3in down from the horizontal
centre. Position a medium triangle
on either side of it, overlapping the
edges of the square by ¼in. Continue
positioning the medium triangles
along the length of the strip on the
line 3in below the centre line. Then
slip the remaining squares under the
edges of adjacent triangles.
When the shapes are evenly
spaced along the strips and you’re
happy with the arrangement, use a hot
iron to fuse all of them in place except
the left-most and right-most triangles
on each strip.
Using the open-toed embroidery
foot and your choice of thread,
blanket stitch around the raw edges of
each shape, there's no need to stitch
the base of the orange triangles.
Trim each strip to measure 6in
x 44¼in: trim the same amount
from each short end of the strip so
that the row of triangles and squares
remains centred. Trim one long edge
of the strip even with the base edges
of the triangles. Measure 6in up from
that edge and trim the other long edge
(which should be the line you draw 3in
above the centre).
To appliqué the four corner
squares, position a large triangle
near one corner and stitch the centre
3
4
3
Cut the square in half horizontally
and vertically to yield four
appliquéd squares. Then trim each of
them to measure 8in square, keeping
the appliqué centred.
Attaching the appliqué
panels
1
To join an appliquéd side panel to
the left and right edges of the quilt,
you need two strips, 1⅛in of blue print
fabric and two strips, 1¾in of backing
fabric. Trim all four strips to measure
28¼in long.
Fold the backing fabric strips in
half, wrong sides together and
long edges matching. Press.
Pin a blue 28¼in strip to the
left and right edges of the quilt,
right sides together and raw edges
matching. Turn the quilt over. Now pin
the raw edges of the folded 28¼in
strips of backing fabric to the same
edges of the quilt, raw edges matching.
Attach a walking foot to your
machine and stitch the two edges
that you’ve pinned the sashings to
using a ¼in seam. You will be stitching
through the blue sashing strip, the
three layers of the centre block that
have been quilted together and the
folded backing fabric sashing strip.
Press the blue sashing strips away
from the quilt.
Pin the other long raw edge of
each blue sashing strip to the long
edge of an appliquéd side panel that
the flowers are closer to, right sides
together and raw edges matching. Pin
the folded backing fabric sashing strip
out of the way on the back of the work
so that it isn’t caught in the seam when
2
3
4
5
6
70
you stitch. Sew the sashing strip and
the side panel. Press seams towards
the sashing strip.
On the back of the quilt, pin each
folded strip so that it lies over the
seam you sewed in Step 6. Hand stitch
it in place. Work these stitches through
the sashing, backing fabric and batting
only so that they are not visible on the
front of the quilt.
To join the remaining two appliquéd
side panels and the four appliqué
corner squares to the quilt, you need
three strips, 1⅛in of blue print fabric and
three strips, 1¾in of backing fabric. Join
the three blue strips together, end to end,
to make one long strip. Repeat to join
the three backing fabric strips together.
From each of these long strips, cut four
strips, 8in and two strips, 44¼in.
Repeat the process described in
Steps 2–7 with the 8in sashing
strips to join a corner square to each
end of the remaining two appliquéd
side panels.
Then repeat the process to join
these side panels to the top and
bottom edges of your quilt. It should
now measure 44¼in square from raw
edge to raw edge.
7
8
9
10
Final border
1
Trim each of the 8in strips of black
and backing fabric to measure 8in
x 46¼in. Draw a horizontal chalk line
through the centre of the strips, and
then another line 3in above this centre
one and 3in below it. The upper and
lower lines show the final width of the
finished border.
Draw a vertical line down the
centre of the strip. Measure out
2
5
6
7
8
9
10
the fabric to the quilted square. Leave
about 2in at each end unfused and
unstitched at this stage.
Trim each square even with the
two raw edges of the triangle.
Then trim the remaining two edges of
the squares to make them 6in square.
Join five blue print 1⅛in strips
together, end to end, to make
one long strip. Join six backing fabric
1¾in strips together, end to end, to
make one longer strip. Repeat the
process described above for joining
the appliquéd panels to the quilt to join
two of the final borders to the left and
11
12
right edges of the quilt. Use sashing
strips cut to 44¼in, cut from the long
strips of each sashing fabric.
Join a corner square to each end
of the remaining two final border
strips. This time, use 1⅛in x 6in strips
of black fabric for the sashing strips on
the front of the quilt, instead of blue
print sashing strips.
Use blue print sashing strips
cut to 1⅛in x 44¾in. Sew a 1⅛in
x 6in strip of black fabric to each end
of these strips, then use them as the
sashing strips to join border strips to
the top and bottom edges of the quilt.
13
14
15
Return to the appliqué to fuse,
then stitch in place the left-most
and right-most triangles in each border
strip and the ends of the large triangles
in the corner blocks – they will now lie
over the black sashing strips.
Follow the instructions in
Binding the Quilt in The Basics
Guide* to bind the quilt using the seven
2½in strips of solid black fabric cut for
the binding.
16
* The free Basics Guide is available as
a download online from https://www.
cosyproject.com/blog/quilting-guide
71
CRA FT PAT T E RNS A ND CL AS S ES DE L IV E R ED S T RA I G HT TO YOU R IN BOX
Bird Walk Cushion
Come Fly With Me
Photo Album Cover
cosyproject.com
c
cosy
Baby Bear Doll
QU
UILT IN G | S EW IN G
EM B
R O ID E RY | KN I T T ING
BR
CR
OC
RO
CHE T IN G | T UTO RIA L S
8/1064-1066 Old Port Rd,
Albert Park SA 5014
PH: 08 7120 6788 or 0408 060 796
karen@sewfocus.com.au
www.sewfocus.com.au
MACHINES • ACCESSORIES • PATTERNS • QUILT FABRICS • CLASSES
Sew Focus is on Tour around Australia
Subscribe to our You Tube Channel and follow our journey @sewfocusontour
Or visit our website for more information
Lots of prizes to be given away to our subscribers !
We are passionate about sewing,
quilting and embroidery,
and look forward to assisting you
with your creative journey
Follow us on Facebook and Instagram
for inspiration and fun
@sewfocus
PATCHWORK &
NEEDLECRAFT
At Onpoint Patchwork and Needlecraft you will find a pleasing
array of Reproduction fabrics, including the 30’s era. There are
some beautiful border prints as seen in the burgundy colour way
from the Fernshaw range. It is also available in teal and purple.
For further information contact:
Cath and Pat Guilfoyle, Onpoint Patchwork & Needlecraft, 61a Station St, Waratah NSW 2298
Telephone: 02 4968 0094 Email: onpatch61@yahoo.com
Onpoint Patchwork and Needlecraft
NEW PANELS IN STOCK NOW!
E
R
O
M
Y
N
A
M
IN STORE!
CONTACT MARION FOR DETAILS
81 Prince St, Rosedale VIC 3847
Prompt mail outs are our priority
P: 03 5199 2777 E: billmarion@bigpond.com
Machine Quilting
MACHINE QUILTING
with Anita Ellis
Painting the Lily
Time for the detail … stitching
The piece has been drawn and painted; now it’s time to add the
quilted detail. I know I kept telling you not to worry too much
about the details as the project was being stitched. Now you
have that canvas to embellish.
Anita Ellis
76
www.hillsidequilting.com.au
LEFT The final piece
BELOW LEFT Bag of threads
What you will need
• The painted piece
• A fat quarter for the backing
• A fat quarter of batting. Be sure to
read the section about batting so
that you pick the type most suited
• Spray baste to sandwich the layers
• Practice sandwich to practise and try
out thread combinations
• Quilting needles. I love the Janome
Purple Tip needles that work in all
domestic sewing machines
• A selection of thread. Read below
about how to choose the threads for
projects like this
• Quilting gloves
• Slippy mat for smooth quilting
• Sewing machine with a free-motion
foot or ruler foot. My preference
is to use a ruler foot, as I find the
hopping movement of a freemotion foot distracting
Choosing threads
I like to keep my threads in colour
families for art quilting rather than
thread type. This means that when
you need a green thread for a leaf, you
will have a bag (or drawer, depending
on how much of a thread collector you
are) of different greens. The fact that
they are different thicknesses and
types is a bonus.
The shiny, lighter threads can be
used to add sparkle and the denser,
more matt threads can be used as a
base for the threads you want to shine.
If all your threads shine, none of them
shines — there is no difference to see.
It is the highlights that add the texture
and dimension to your work. In art
quilting you will use a lot of threads
of similar or contrasting colours.
Generally, the bobbin thread can stay
the same blending mid-tone to work
with the different top threads. Just
keep an eye on your tension.
Batting types
For a small project up to A3 size, I like
to use foam batting. It gives great
dimension to the work and sits flat on a
wall. But anything bigger than A3 can
be tricky to handle as the sandwich
cannot be gathered up and is very stiff
under the machine. For bigger projects
I would use poly or wool/poly mix
batting to give loft but still have a soft
handle for ease of quilting.
77
Machine Quilting
RIGHT Threads for shadows
and shading
Finishing the piece
Do think about how you want to finish
the piece. if you want to stretch it
around a frame, be sure to leave
enough fabric to do this. On this one,
I am going to use a narrow binding to
finish off, so I am trimming off a little
of the excess fabric to make it smaller
under the machine.
There are many ways to finish the
work; facing is another choice. Just
think about it at this stage so that you
have options when it is finished.
Setting up for quilting
Before you go straight into quilting the
project, it is a good idea to get your
free-motion rhythm in on a practice
sandwich. It is also great to have
that sandwich to try out your thread
combinations before they get used in
the final piece.
Set up your machine how you like
to quilt. I have written several articles
about this for Quilters Companion so
maybe go through your back issues if
you need a refresher.
Use your source material
The photo you based this project on
should never leave your side. You will
refer to it for colour choices, details,
direction of quilting lines and many
more things. That does not mean your
work must be a direct replica of the
image, but it is a very good starting
point. If your shapes do not look quite
right after you have painted them, now
is the time you can change that with
quilting stitches. I know one of my petals
is a bit off, so I will need to adjust that
when I am stitching.
Some do’s and don’ts
• Do look for shapes and lines that
are present, not what you think they
should be.
• Do look at your image and work from
all directions. This really helps with
the point made above. For example,
the brain can trick you into thinking
that you know what a flower is like
so you do that, but all shapes and
flowers are different.
• Don’t think you need to outline every
shape. This may restrict you to certain
shapes that may not be the best
representation of your image.
• Do use many thread colours for
shading.
78
• Don’t be afraid to add pops of bright
colours — they can really enhance
your work.
• Think about the patchwork principles
of light, medium and dark. Contrast
is very important. Think back to when
I first painted the background … the
first time it was way too light and
provided minimal contrast, but after
another darkening coat there was
much better contrast.
• Don’t worry about burying all the ends
in as it is a wall piece with lots of thread
and unlikely to unravel. Just finish the
threads either off the edge of the work
or with a few small stitches.
• Do think about which parts of the
design you want to pop; in my case
it’s the lily pads and flowers. Quilt the
areas behind them more densely to
allow for this.
• Do draw on your quilting lines if it
helps to keep on track.
• Don’t start right in the middle on the
most obvious motif. Save that for when
you have got your quilting groove on.
• Do think about working on the
adjacent motif to give an edge to the
current one you are working on. Much
better than just outlining the shape.
In my example I will be working the
edges of the grey up to the lily pads,
not the other way around.
• Do travel back and forth over your
lines, for two reasons: more definition
of stitching and fewer stops and starts.
Get stitching
Consider how much time you want to
spend adding this additional surface
quilting to your project. Close quilting
equals a lot of time spent.
1
2
3
4
Just like traditional custom quilting
methods, start by identifying the areas
you want to quilt with different designs,
maybe by stitching some movement
lines, then go back to each of these
areas and add mid-density quilting.
Finally, add denser quilting shapes
and designs. Stand back often and
look at your project. There will come a
time when you are satisfied with the
overall result. If you start with a very
dense design, then you are stuck with
that for the whole piece. Completing
the quilting in stages allows you to
review it at each stage.
Choose the colours
Go to your thread collection, be it small
or large, and pick out the colours you
think you will use. You may change your
mind as you go on, but it is a great
starting point.
Remember you need colours for
shadows and shading as well as the
more obvious choices.
Work into some of the less dense
areas. Here I have started working on
the lily pad and their veins. The pop will
come when the background is worked.
Now to work on some of the stems
and buds. Keep moving around your
piece so that one area does not get
puffy. This prevents any puckers.
You are thread painting, bringing
in suggestions of the shading, not
necessarily an exact replica. As well
as straight stitch moving around the
shapes, use a long zigzag free-motion
stitch for a variety of fill.
It is helpful to mark some areas
lightly with a marking pencil such
as a ceramic Sewline pencil. I used
this technique on the undergrowth
in the corner of this image. Once this
section is stitched, you can see the
effect of working on the undergrowth
to add pop to the petals, rather than
outlining the petals.
As you are working, use the thread
you have on your machine for several
areas. There are fewer thread changes
that way. Think of your thread as a
painting colour palette.
The background is next, with some
dark and some silvery threads showing
the motion of the water. I will probably
go back to this area once the flowers
are done. Sometimes it can be hard
to know when to stop. I once did a
painting class and asked just that
question, “When is it finished?” The
answer I got was, “About half an hour
before you actually stop!”
1) Working the lily pads
2) Marking the undergrowth
3) Stitching the undergrowth
4) The dampened background
5) Fixed lily pad
5
At this point I was not happy with the
central lily pad and ripped out some of
the stitching. To fix the holes that are
left behind on the painted surface, use
a dampened soft toothbrush to rub
gently. Depending on the colour, you
may need to add a little more paint and
heat set it again before stitching out
the lines you wanted in the first place.
Everything is fixable. I am very happy I
took the time to change it up.
I am going to do the flowers last so
that I can use the adjoining edges of
the background and lily pads to create
the definition. Add the shading with
blue-grey colours as the petals are not
just white. If you see them as just white,
79
Machine Quilting
Finished piece
it is your brain tricking you. Try painting
them upside down.
The stamens will be worked last as
well as some detail to separate the
lily pads. Note that I did not use just a
straight line, I added an uneven detail
to the edges to make it more realistic.
Displaying the piece
Once you are happy that the stitching
is complete and you have stepped
back and added any additional
80
highlights, it is time to decide how to
mount the work.
I am just adding a very thin binding
and mounting it with corner pins on my
wall. It is very light and small, so this is
the easiest. A false back can be added
if you do not like the look of the threads
on the back. Of course, a rod pocket
could be added by hand or the piece
can be stretched onto a frame.
I really hope you have enjoyed this
series of articles and have come along
for the ride. I have aimed to break it
down step by step to demystify the
process and provide encouragement
that everyone can give art quilting
a go — you do not need to be artist.
Show quilt, probably not, but heaps of
joy for anyone.
Have fun with it.
Anita
Kit $289.40
including postage.
Paern $19.00
including postage.
Panel available
separately $37.00
plus postage.
We'll Always Have Paris Quilt Kit
6RIWDQGSUHWW\FODVVLF3DULVSDQHOZLWKVRIWFRORXUVLQ
WKHHDV\À\LQJJHHVHERUGHUVDQGPDWFKLQJERUGHUV
WR¿QLVK.LWLQFOXGHVDOOIDEULFVWRPDNHWKHTXLOWSOXV
EDFNLQJDQGELQGLQJ/LPLWHGTXDQWLW\DYDLODEOH
63 Princes Highway, Trafalgar | Phone 03 5633 2311 | Email sales@littlepatch.com.au | www.littlepatch.com.au
SUPPORTING
Australian & New
Zealand designers
The Carlie Edwards Collection.
This beautiful collection of panels
and all over prints is by Australian
watercolour and pencil artist
Carlie Edwards Collection
consists of three different panels
of native birds sized suitable for
cushions, a panel comprising
all images and two all over
native flora prints.
$28 per metre. Available now.
Visit www.creaturecrafts.net.au
and search for Carlie Edwards.
FREE
POSTAGE WITH
ALL ORDERS
OVER $150
Purchase online at
www.creaturecrafts.net.au
or for a more personal
experience why not come and
see us at our brand new bricks
and mortar shop. Located at
4/68 Myrtle St, Myrtleford
Victoria. Look out for the flag
with the lady bug on it.
www.creaturecrafts.net.au
4/68 Myrtle St, Myrtleford, Vic 3737 EMAIL: creaturecrafts@bigpond.com PHONE: 03 5752 1494
Dzǯdz ǫ
Packs of 13 different coordinating fabrics ~ each 25cm x 55cm (9¾” x 21½”) $36 + Postage
Lemon Delight $36 + Postage
Mixed Lollies $36 + Postage
Licorice Allsorts $36 + Postage
Sherbet $36 + Postage
Full Bloom $36 + Postage
Baby Pink $36 + Postage
Fragrant Roses $36 + Postage
Deluxe Baker’s Dozens:
Rose & Violet $49 + Postage.
(Also available in Blue)
ǯ Dzdzǣ
ǡǡ ǡ Ǥ
ǯ ̱
Ǩ
Please Note: ǡ
ǡ Ǥ
Faeries in My Garden,
Ͳǡ ǡͶͲͳ
ȋͲȌ͵ͺͻͲͺͲͺ
www.faeriesinmygarden.com.au
“Meadow Rose” Collection $36 + Postage
̷Ǥ
Playful
Puppies
Is there anything cuter, sweeter, more heart-melting than a frisky
little puppy at play? The fresh combination of orange, white and blue
and simple squares, rectangles and triangles, as well as delightful
appliqués, make this an easy quilt to complete.
Finished size: 189cm x 154cm (74½in x 60½in)
Designer: Cori Blunt, Chitter Chatter Designs
www.chitterchatterdesigns.com
84
cori@chitterchatterdesigns.com
Homespu
n
Favourite
85
86
Materials
• 1.8m (2yd) white tone-on-tone print
fabric (patchwork background)
• 70cm (⅞yd) orange dot print fabric
(Border 3 and blocks)
• 40cm (½yd) orange geometric print
fabric (blocks)
• Fat quarter orange tone-on-tone
print fabric (appliqué in blocks)
• 13cm (5in) square of solid orange
fabric (puppies’ collars)
• 40cm (½yd) light grey tone-on-tone
print fabric (blocks)
• Fat quarter dark grey tone-on-tone
print fabric (puppy appliqué)
• Scrap of black tone-on-tone print
fabric (puppies’ noses)
• 1.6m (1¾yd) solid white fabric
(appliqué and Border 1)
• 1.3m (1½yd) solid grey fabric (Borders
2 and 4, word appliqué and binding)
• Fat eighth solid blue fabric (ball
appliqué)
• 3.2m (3½yd) backing fabric
• Batting at least 205cm x 170cm
(80in x 66in)
• Stranded embroidery cottons to
match your appliqué fabrics. Cori
used Cosmo Stranded Embroidery
Cotton in White (100), Black (600)
and Dark Grey (894)
• Appliqué needles
• Fusible web
• Freezer paper
• Fray check (optional)
• Fabric appliqué glue (optional)
• Thin cardboard
• Spray starch
• Water-erasable fabric-marking pen
• Rotary cutter, ruler and mat
• Sewing machine with ¼in and freemotion/darning feet
• General sewing supplies
Stitches used: French knot, running
stitch, satin stitch, stem stitch
Preparation and cutting
From the white tone-on-tone print
fabric, cut:
• three strips, 1⅜in x width of fabric.
Cross cut them to yield 72 squares,
1⅜in (C) (Block 2)
• six strips, 2¼in x width of fabric. Cross
cut them to yield 176 rectangles, 1⅜in
x 2¼in (A) (Blocks 1 and 2)
• nine strips, 4in x width of fabric. Cross
cut them to yield 140 rectangles,
2¼in x 4in (E) (Blocks 1 and 2) and 36
rectangles, 1⅜in x 4in (F) (Block 2)
From the orange dot print fabric, cut:
• two strips, 2¼in x width of fabric.
Cross cut them to yield 35 squares,
2¼in (B) (Blocks 1 and 2)
Diagram 1
• eight strips, 2½in x width of fabric. Sew
them together, end to end, in pairs, to
make four long strips (Border 3)
From the orange geometric print fabric,
cut:
• three strips, 2⅝in x width of fabric.
Cross cut them to yield 34 squares,
2⅝in (D) (Block 1)
• three strips, 1⅜in x width of fabric.
Cross cut them to yield 72 squares,
1⅜in (C) (Block 2)
From the light grey tone-on-tone print
fabric, cut:
• three strips, 1⅜in x width of fabric.
Cross cut them to yield 68 squares,
1⅜in (C)
• three strips, 2⅝in x width of fabric.
Cross cut them to yield 34 squares,
2⅝in (D)
From the solid white fabric, cut:
• four strips, 9in down the length of the
fabric (Border 1)
From the solid grey fabric, cut:
• 16 strips, 1½in x width of fabric. Sew
them together, end to end, in pairs
to make eight long strips (Borders
2 and 4)
• seven strips, 2½in x width of the
fabric (binding)
Trace the small, medium, large
and extra large circles from the
Pattern Sheet on to paper. Cut them
out roughly, then glue them to thin
cardboard. Once the glue has dried,
cut the shapes out accurately on the
traced lines and label them.
Use the cardboard template
for the medium circle to trace
17 circles on the wrong side of the
remaining solid white fabric, leaving
at least ½in between them. Cut the
circles out of fabric ¼in by eye outside
the traced lines. Work running stitch
close to the outer edge of each fabric
circle. Centre the cardboard template
on the wrong side of a fabric circle
and pull up the threads, gathering
the fabric around the template. See
Diagram 1. Spray the fabric with
starch and press with the iron until
it is dry. Gently remove the template
and press again. Repeat to prepare
all 17 medium white circles.
Repeat the process described in
Step 2 to trace, cut and prepare
72 small circles from the solid orange
Block 1
1
2
3
C
A
C
A
B
A
C
A
C
Diagram 2
fabric (Block 2), 18 large circles from
the remaining solid white fabric (Block
2) and six extra large circles from the
solid blue fabric (appliquéd border).
Block 1
1
To make one block, you need:
• four white tone-on-tone A rectangles
• four white tone-on-tone E rectangles
• one orange dot print B square
• four light grey tone-on-tone print C
squares
• two orange geometric print D squares
• two light grey tone-on-tone print D
squares.
Lay out the A, B and C patches in
three rows, referring to Diagram
2. Sew the patches in each row
together, then sew the rows together,
carefully matching seams.
2
87
Diagram 3
E
E
E
E
3
3
4
5
4
Draw a light diagonal line from
corner to corner on the wrong side
of each of the light grey D squares. Match
each of them with an orange geometric
print D square, right sides together. Sew
¼in on either side of the line.
Cut along the drawn line and press
the squares open to make halfsquare triangle units. Refer to Diagram 3.
Lay out the centre unit from Step
2, the half-square triangle units
from Step 4 and the white E rectangles
in three rows, as shown in the Block 1
Assembly Diagram. Sew the patches in
each row together, then sew the rows
together, carefully matching seams.
Your block should measure 7½in square
from raw edge to raw edge.
Centre one of the medium white
circles you prepared earlier in the
centre of the orange dot B square. Use
a tiny dab of fabric appliqué glue or
pins to hold it in place. Work tiny blind
stitches in white thread to appliqué it
in place. Press.
Repeat Steps 1–6 to make a total
of 17 Block 1.
6
7
Block 1 Assembly Diagram
Block 2
1
To make one block, you need:
• six white tone-on-tone A rectangles
• four white tone-on-tone E rectangles
• four white tone-on-tone F rectangles
• four white tone-on-tone C squares
• one orange dot print B square
• four orange geometric print C squares.
Begin by sewing a white A
rectangle to the left and right
edges of the orange dot print B square.
Press. Then join a white F rectangle to
the top and bottom edges, as shown in
Diagram 4. Press again. This centre unit
should measure 4in square from raw
edge to raw edge.
2
Make a corner unit for the block
by joining an orange C square to
a white C square. Press. Then sew a
white A rectangle to them, as shown in
Diagram 5. Repeat to make a total of
four corner units. They should measure
2¼in square from raw edge to raw edge.
Lay out the centre unit from Step
2, the four corner units from
Step 3 and the white E rectangles in
three rows, as shown in the Block 2
Assembly Diagram. Sew the patches in
each row together, then sew the rows
together, carefully matching seams.
Your block should measure 7½in
square from raw edge to raw edge.
Centre one of the large white
circles you prepared earlier on
the orange dot B square. Use a tiny
dab of fabric appliqué glue or pins
to hold it in place. Work tiny blind
stitches in white thread to appliqué it
in place. Press.
In the same manner, centre a
small orange circle you prepared
earlier over the seam line between the
A and E white rectangles, as shown in
Diagram 6, and stitch them in place.
Repeat Steps 1–6 to make a total
of 18 Block 2.
5
6
7
Assembly
1
Lay out the patchwork blocks in
seven rows of five blocks each,
alternating Blocks 1 and 2. The top,
third, fifth and seventh rows begin and
end with Block 2. The second, fourth and
sixth rows begin and end with Block 1.
Refer to the Quilt Assembly Diagram.
Sew the blocks in each row
together, then join the rows,
carefully matching seams.
Measure your quilt vertically
through the centre. Trim two of
2
3
Block 2
A
F
A
B
A
C
C
F
Diagram 4
88
CORI’S
MARKING TIP
Diagram 5
Take your time to ensure that
any lines you’ve drawn on your
quilt top with a fabric-marking
pen are removed thoroughly. I
use only plain cold water as I’ve
found that if I add even a little bit
of detergent, the lines turn brown
and become virtually impossible
to remove. The only thing that
seems to help on such occasions is
to soak the quilt in white vinegar.
(Ask me how I know!)
the 9in solid white strips to this length.
Sew them to the left and right edges
of the quilt top.
Measure your quilt horizontally
through the centre. Trim the
remaining two 9in solid white strips 5
to this length. Sew them to the top and
bottom edges of the quilt top.
Repeat Steps 3 and 4 to measure
the quilt, trim the strips of solid
grey and orange dot print fabric to the
appropriate lengths, and add them to
the quilt as Borders 2, 3 and 4.
4
5
Appliqué
1
2
Trace all the shapes for the puppies
from the Pattern Sheet onto the
dull side of the freezer paper.
Cut out each shape on the traced
lines. Lightly fuse the shapes to
the right side of the fabrics you have
chosen for them. When fusing multiple
shapes to the same fabric, leave
at least ½in between them. Cut the
shapes out of the fabric about ¼in by
eye outside the edge of the templates.
Cut into the seam allowance at inner
curves and corners and, if you wish,
dab a tiny dot of fray check on the cut
to reduce fraying.
Referring to the photo of the quilt
as a guide, pin or glue the shapes
to the solid white Border 1 strips.
When you have a layout that you like,
needleturn appliqué them in place, then
carefully remove the freezer paper.
Add the blue balls that you
prepared earlier and work tiny
blind stitches in matching thread to
appliqué them in place.
Trace the letters from the Pattern
Sheet on to the matt side of the
fusible web. They have been printed in
reverse for your convenience. Fuse the
E
E
E
3
4
E
Block 2 Assembly Diagram
5
Diagram 6
CORI’S FABRIC TIP
There are two schools of thought
on pre-washing fabric: those who
do and those who don’t. I’m a paidup member of the pre-washing
fraternity. To my mind, it’s much
easier to pre-wash than to have to
battle with dye runs in a completed
quilt. When a fabric that I want
to use runs during a pre-wash, I
wash it a second time with colour
catchers and an ‘oxi-action’ stain
remover added to the load.
Quilt Assembly Diagram
89
Diagram 7
web to the wrong side of the remaining
solid light-grey fabric, then cut each
letter out accurately on the traced lines.
Peel the backing paper off each
letter, position it on Border 1 and,
when you’re happy with the layout, fuse
the letters in place with a hot, dry iron.
6
Embroidery
1
Use a ruler and the fabricmarking pen to draw straight lines
on each of the patchwork blocks, as
shown in Diagram 7.
Work running stitch along each
line in four strands of Dark Grey
(894). Cori worked her stitches so that
they were about ¼in long with about
⅛in between them.
2
3
Refer to the patterns to copy
the embroidery lines on to each
puppy. Work stem stitch and satin
stitch in Black (600) for the eyes. Use
two strands of Dark Grey (894) to
work running stitch for the wagging
tail and bark lines; stem stitch the
leg details and eyebrows; satin
stitch the nose highlight and the tag;
and add French knots for the chain.
The decorative lines on the collar
are worked in running stitch in two
strands of Black (600).
Use two strands of White (100)
to satin stitch the highlight on
each ball.
There are four lines on the
Pattern Sheet that Cori used for
4
5
the bounce of the balls. You can either
copy them by eye or, if you prefer, lay
the quilt over them and trace them on
to the fabric using the fabric-marking
pen. Repeat Step 2 to work running
stitch along each line.
Remove the fabric-marking
pen marks by sponging them
thoroughly with cold water.
6
Finishing
1
Cut the backing fabric in two equal
lengths, remove the selvedges and
sew the two pieces together side by
side. Press the seam open.
The quilt top, backing and batting
are ready for a long-arm quilting
machine as they are. If you’re doing
the quilting by hand or on a domestic
sewing machine, follow the instructions
for Preparing the Quilt Sandwich in the
free downloadable Basics Guide* to
pin or baste the quilt top, batting and
backing together.
Quilt as desired. Cori’s quilt was
machine quilted. She worked
a series of diagonal lines across the
patchwork blocks, extending them
into Border 1. The appliqué and
embroidery lines on Border 1 were
echo quilted. The letters were quilted
and appliquéd simultaneously by
using a free-motion/darning foot to
work straight stitch just inside their
raw edges in thread to match the
light-grey fabric. Borders 2, 3 and 4
were quilted in the ditch.
Trim the excess backing fabric and
batting ¼in outside the edge of
the quilt top.
Follow the instructions in Binding
the Quilt in The Basics Guide* to
bind the quilt using the seven 2½in
strips of grey fabric.
2
3
4
5
* The free Basics Guide is available as
a download online from https://www.
cosyproject.com/blog/quilting-guide
90
DRAGONFLY FABRICS
P&H l
iona
addit
NORTHCOTT FABRICS STALLIONS
TILDA
"JULIBEE"
AND
TULA PINK
"ROAR"
SPIRIT OF THE BUSH - 108IN OR 2.8M WIDE BACKING
DEVONSTONE NORA'S NATIVES
Dragonfly Fabrics
ONLY AT
DARWIN’S EXCLUSIVE PATCHWORK & QUILTING SHOP
www.dragonfabric.com.au
Shops 2 & 3, 53 Alawa Cres. ALAWA NT 0810 p. (08) 8948 0691 e. dragonfabric@bigpond.com
WE DELIVER TO YOUR DOOR AUSTRALIA WIDE
ONLINE
STORE
FEATURING
,
Tilda, Riley Blake
,
Robert Kaufman
lia
Batik Austra
& many more
NOW
WITH TWO
COMPUTERISED
MACHINES
Two Handi Quilter Computerised
Longarm Machines. Edge to edge
and custom quilting available.
100’s of patterns to choose
from starting at the low price of
$3.50 per square foot.
Free return shipping Australia wide.
Quality Matildas
Own wadding and backings
available or use your own.
Very fast turnaround, see
website for details.
www.stitchesbythesea.net
www
stitc
E. infostitchesbythesea@gmail.com | P. 0412 355 438
FREE SHIPPING on orders
over $150 - Australia wide!
The completed
quilt measures
64" square.
Pattern $50
plus postage.
Introducing our NEW pattern Another Blooming
oming Quilt
Quilt.
This pattern is a scaled down version of our very popular That Blooming Quilt pattern but with a couple of
changes. This 36 page spiral bound pattern book includes all applique designs and piecing instructions plus
a colour image. The quilt top is constructed using machinedpiecing and needleturndapplique methods.
The Quilt Shop 2/38 Bridge Street, Eltham VIC 3095 | Ph 0468 336 146 | E sales@thequiltshop.com.au
Facebook The Quilt Shop | Instagram @thequiltshop | www.thequiltshop.com.au
Stash Building Club
$40 + postage each month.
You receive 1.5 metres of fabric each month. Plus four times a year you receive
a bonus product at no extra charge, eg. pattern, thread and notion.
Contact Cynthia in store and online at www.cynthiasark.com.au.
7 Wasleys Rd Mallala SA 5502 Ph 08 8527 2120
Feature
Patched Perfect
Words by Sadia Kausar
Images by Mahmood Ali
A
s a practitioner in textiles, I have
been instilled with the principle
of respect towards all materials.
In the execution of my craft, it is
incumbent upon me to uphold the
ethos of resourcefulness, ensuring
sensible utilisation of materials while
conscientiously selecting techniques,
processes, and materials that are
environmentally friendly. Central to
my ethos is the imperative to minimise
waste, ensuring that no fibre or
fabric is needlessly discarded. As an
educator, I find it obligatory upon
myself to emphasise the importance
of these principles, yet recognise
that there remains a collective
imperative for further action. In the
contemporary context of fast fashion
cycles, the incessant pace often hinders
reflective examination of the profound
94
ecological repercussions inherent in
our engagement with this paradigm.
The escalating volume of textile waste
inundating landfills predicts dire
consequences for the environment.
The observation of growing landfills
evokes uneasiness within me,
prompting apprehensions regarding
the trajectory of our future. Should
our current pace of resource depletion
persist unmitigated, what fate awaits
subsequent generations? What ethical
principles are we imparting to posterity,
and what legacy do we pass on to them
if we fail to prioritise sustainability?
However, despite this prevailing
reality, it is heartening to meet
individuals who persist in their
adherence to sustainability principles,
however modest their efforts may be,
thereby integrating them into their daily
OPPOSITE PAGE
Natural dyed and block printed
quilt: left – 127cm x 203cm (50in x
80in), right – 127cm x 203cm (50in
x 80in). Cotton fabric, cotton thread,
natural dyes, block printing, organic
dyeing, running stitch, appliqué,
patchwork. Hanging tassel 5.5cm x
203cm (2in x 80in).
ABOVE
Natural dyed and block printed
quilt, 63.5cm x 203cm (25in x 80in).
Cotton fabric, cotton thread, natural
dyes, block printing, organic dyeing,
running stitch, appliqué, patchwork.
95
Feature
LEFT Ornamented tassels, 5.5cm x
203cm (2in x 80in). Cotton fabric,
cotton thread, natural dyes, wooden
and pearl beads, tassel making,
knotting, running stitch.
OPPOSITE PAGE TOP Material and
sample study – natural dyes, dyed
cotton hanks.
OPPOSITE PAGE BOTTOM Wooden
block and sample prints.
lives. Encountering a small community
distanced from the harsh realities of
fast fashion was invigorating, as they
were steadfastly engaged in practices
intrinsic to their village existence.
Situated in the Matiari district of
Sindh, Pakistan, this artisan enclave
is comprised of skilled craftsmen and
women whose livelihood revolves
around the craft of Ajrak. This traditional
practice involves the natural dyeing of
locally woven cotton fabric, embellished
with block-printed motifs inspired by
their surroundings. However, Ajrak
is not the only craft they engage in.
The community also possesses a
longstanding tradition of crafting Rillis,
or quilts, a skill passed down through
generations within familial lineages.
The emergence of Rillis was conceived
in response to climatic exigencies and
economic constraints, serving as both
an environmentally conscientious
and culturally significant endeavour.
The artisans innovating upon this
conventional practice are creatively
introducing subtle deviations from the
customary colorful quilts characteristics
The fabrication process of these
distinctive bedcovers is meticulous and
time-intensive. Beginning with locally
sourced cotton, the fabric undergoes
natural dyeing obtained from turmeric,
onion peels and indigo, with the hues
meticulously calibrated and set through
natural mordants. Subsequently, it
proceeds with block printing with motifs
resonant of the artisans' surroundings.
Symbolising specific regional affiliations,
motifs and patterns represent a rich
cultural heritage.
The design ethos, predominantly
envisioned by craftswomen,
demonstrates an adept command
of colour harmonisation, design
arrangement and intricate stitching
techniques. Executed over months,
the quilts epitomise a labour-intensive
process characterised by the layering
of multiple fabrics, meticulously
stitched together using traditional
96
97
Feature
RIGHT Detail of a natural dyed and block
printed quilt. Cotton fabric, cotton thread,
natural dyes, block printing, organic dyeing,
running stitch, appliqué, patchwork.
running stitches. Every remnant of
fabric is meticulously repurposed
within the crafting process. Whether
through appliqué techniques,
incorporation into patchwork
designs, or utilisation for edging and
hemming, even the smallest swatches
contribute to the construction of the
quilts. Additionally, smaller fabrics
are employed in the creation of
ornamental embellishments, further
enhancing the aesthetic richness of
the quilts.
Distinguished by their expansive
designs and utilisation of natural
dyes, these quilts, while similar in
technique to their vibrant counterparts,
embody a distinct identity owing
to their craftsmanship and cultural
significance. The symbolic resonance
of these artifacts extends beyond
their aesthetic appeal, encapsulating
a profound connection to the artisans'
heritage and community.
Moreover, the crafting of Rillis
underscores a holistic approach to
sustainability, integrating environmental
consciousness with socio-cultural
values. In an era marked by rapid
industrialisation and commodification
of traditional crafts, the resilience of
this artisan community serves as a
poignant reminder of the enduring value
inherent in heritage practices. Beyond
their utilitarian function as bedcovers,
Rillis serve as tangible embodiments of
cultural identity and heritage, fostering
a sense of belonging and continuity
amidst a rapidly changing world.
The significance of Rillis transcends
their materiality, encapsulating a
narrative of resilience, ingenuity and
community cohesion. This craftsmanship
exemplifies communities collaborating
to produce textile quilts, which are
subsequently employed in ceremonial
occasions like the birth of their offspring
or offered as dowry for their daughters,
who also contribute to their creation. As
repositories of cultural knowledge and
craftsmanship they affirm the enduring
relevance of traditional crafts in modern
contexts. By embracing sustainability as
a guiding principle, the artisans of Matiari
exemplify a harmonious coexistence,
fostering a model of responsible
stewardship for future generations.
98
99
Book reviews
Off the Shelf
Enjoy this selection of new and recently released books on
patchwork and quilting topics and techniques.
3-D Illusion Quilts Simplified:
Sensational Designs Using Color, Value &
Geometric Shapes; 12 Projects
Ruth Ann Berry
Take your quilting journey to the next level! Tackle
these 12 captivating projects, from wallhangings
to king-size quilts, and discover how to swap out
identical triangles for strips, making piecing easy.
Unleash your inner quilt designer with a section on
creating your own 3-D quilt, equipped with isometric
graph paper for sketching your unique patterns.
This book seamlessly connects the projects to design
lessons, allowing your project to come to life. From tools
and fabric to design and colour, this book prepares
you for a quilt-making adventure like no other. Create
12 projects featuring a variety of colour schemes and
designs, including stars, hearts, lattices and other
continuous/repeating patterns. Bring your ideas to life
and sketch your quilt design using the included isometric
graph paper. Resize your projects from a wall hanging
to a king-size quilt by changing the width of the starting
strip, allowing for a personalised quilting experience.
Published by C&T Publishing
100
Cloth Stories:
Capturing Domestic Life in Textile Art
Ali Ferguson
Ali Ferguson’s exquisite work focuses on the world of
the home, taking inspiration from domestic life and the
objects that surround and comfort us. But it is far from
mundane: vintage fabric and hand-embroidered text
are beautifully paired to create evocative, nostalgic
pieces that are imbued with the magic of everyday
existence. In this wonderful book, Ali reveals the
secrets of her work and shares her ingenious methods
for finding inspiration within the home.
Beautifully illustrated with the author’s own work
and that of other leading textile artists who draw
inspiration from the home, this book revels in cloth and
the joy that it brings to every textile artist. It is the ideal
book for any artist or embroiderer who wants to explore
new sources of inspiration on their very doorstep.
Published by Batsford
Art Quilts
Made Easy:
12 NatureInspired
Projects with
Appliqué
Techniques and
Patterns
Susan
Kruszynski
This book is an
approachable
project guide that will walk you through everything
you need to know to be successful in the craft of
art quilting. Opening with sections on how to plan
and map out your quilt, design rules and guidelines,
basic tools and the entire art quilting process from
start to finish, you’ll feel ready to get started.
Go on to discover 12 landscape art quilt designs
and step-by-step projects that capture gorgeous
botanicals and animals with ease, from a fancy
quilted rooster to a bright poppy arrangement. Also
included are helpful illustrations and diagrams, quilt
patterns and templates, easy-to-follow guidance
and an inspirational gallery of completed quilts.
Published by Landauer Publishing
Radiant Blocks
for Endless
Quilts:
Designing with
New York Beauties
Linda Hahn
With just a few
simple block
variations, this book
will show you just
how versatile a New York Beauty block can be. A
compact but hardworking guide that will inspire you
to use New York Beauty blocks in new, modern ways
for endless possibilities, this book features 13 stunning
quilt designs using just three to four versatile New York
Beauty blocks. With quilt projects that are smaller in
size, but which also use brighter colours and fewer
batiks, this is a fresh, modern guide that quilters of any
skill level will enjoy.
This guide also includes opening overviews on
tools and quilting basics, including foundation paper
piecing, for a helpful refresher.
Published by Landauer Publishing
BOOKS & GIFTS
FOR EVERY QUILTER
3-D
MAGIC!
Simple Blocks,
The Ultimate Guide to
FREE-MOTION
Striking Quilts
QUILTING
with Angela Walters
TIPS, TECHNIQUES
& 104 DESIGNS
MARCI BAKER and SARA NEPHEW
ISBN: 9780645076004
ISBN: 9781617459412
ISBN: 9781644035238
Prey & Playful
ÂËÈÇ¥ÈÇź»¾ÅÌ
¿ÈËÊÎÂÅÍÌÆÈ˾
x½¾ÌÂÀÇÌ
çâ¼èæçâàÜíØ
¾àÕØßßÜæÛêÜçÛ
ÌçÜçÖÛÜáÚ¼âßâåÜáÚ
ÉÔÜáçÜáÚ
»¾¼ÄÒÀÈŽÌÆÂÍÁ
ÅÂǽºÃ¾ÇÄÂÇÌ
âÙÉÜØÖØÈā¼ÔÞؽØæÜÚáæ
ISBN: 9781644035375
UPC: 734817205456
ctpub.com
ISBN: 9781644034774
UPC: 734817205302
Available from Search Press Australia.
Please go to searchpress.com.au for details.
email: sales@searchpress.com.au or
call at Tel: 02 47228323
Carol Doak’s Simply
Sensational 9-Patch Stars
Carol Doak
Bestselling author Carol Doak breaks her 50
original star blocks into easy steps that any
quilter can complete quickly and accurately with
simple paper-piecing (foundation) shown stepby-step in colour photos.
The quilts show the range of options available
from star positions and choice of prints and solid
colours: circling stars, floating stars, crossed stars,
big and little stars, kaleidoscopes etc. Ideas for
mixing and matching units to make original designs
are also included.
Published by C&T Publishing
101
6(:
0$1<
67,7&+(6
ALL AT COMPETITIVE PRICES
FREE LESSONS
,QVWRUH&ODVVHVIRUSDWFKZRUNLQJSLHFLQJTXLOWLQJ
NEW RANGE
order online or instore
-DQRPH'& -DQRPH'&
:HKDYHDODUJHUDQJH
RISDWFKZRUN TXLOWLQJ
IDEULFHYHU\WKLQJ\RX
QHHGWRJLYH\RXUSURMHFW
DSHUIHFW¿QLVK
%URWKHU$
0$&+,1($&&(6625,(6_6(:,1*0$&+,1(6_6&$11&87_)$%5,&6_7+5($'6_+$%(5'$6+(5<
_4XHHQ6W&DPSEHOOWRZQ16:_VHZPDQ\VWLWFKHVFRPDX
The Quilters Shack is a family
owned quilters paradise since 1996. Located in
beautiful Bundaberg, just
4 hours from Brisbane. Whether
you’re a hobbyist or a professional, The
Quilters Shack stocks everything for yourr
sewing
and quilting needs.
We are a JANOME, PFAFF,
HUSQVARNA, SINGER & HANDY
QUILTER stockist. We have regular
classes by experienced teachers, on site
machine servicing and repairs, patterns,
books, kits & fabrics GALORE.
Keep up with us on Facebook & Instagram.
Our website is coming soon.
PFAFF
JANOME
HUSQARVANA VIKING
HANDIQUILTER
ACCUQUILT CUTTING MACHINE
77 Boundary St, Bundaberg QLD 4670 | (07) 4154 4486
www.bundabergpatchwork.com | thequiltersshack@patchworkandcupcakes.com | @TheQuiltersShack
Looking for something different?
WE’VE GOT
YOU
COVERED
FABRIC THAT STANDS OUT
CLASSES | FABRICS | NOTIONS
thecraftypeacock.com.au
17 Bradwardine Rd, Bathurst NSW | 02 6331 6975
Open Tue - Sat
$YLVLWWRVSHFLDOLVWHPEURLGHU\ TXLOWLQJVKRS6WLWFK:LWFKHVLV\RXURSSRUWXQLW\WREHLQVSLUHG
Stitch Witches – Suzanne, Donna & Sue –
are experienced embroiderers who provide top
quality supplies to anyone who loves picking up a
needle and thread. And because they’re stitchers
too, you know they know what they’re talking about.
,IWKH\GRQ¶WKDYHZKDW\RXZDQWMXVWDVN
DQGWKH\¶OOGRWKHLUEHVWWRJHWLWIRU\RX
1193
93 Hanover Street, Dunedin • P 03 473 7188
Open
O
pen Tuesday-Friday 10-5; Saturday 10-4.
Fi
ind us on Facebook:
Find
#VWLWFKZLWFKHVQ]
9LHZRXUH[WHQVLYHSURGXFWUDQJHDW
ZZZVWLWFKZLWFKHVFRQ]
9LHZ
9
&RQWDFWXVIRU
PDFKLQHVDOHV
VHUYLFLQJ
UHSDLUV
21 Doulton Crescent, Modbury Heights SA 5092
Shop open: Wednesdays and 2nd & 4th Tuesdays: 11am to 4.30pm
0411 417 087 | www.thequiltingroom.com.au
olt’s
Featuring Lori H
nge
Autumn fabric ra
W
D A SCARECRO
HOW TO BUIL
ng
Lori Holt Stitch-alo
12 month BOM
us P&H
$45 per month pl
Join Lori
build a scarecrow?
Would you like to
May 2024.
th
20
g
commencin
Holt’s Stitch-along
a Scarecrow
the How to Build
Your kit includes
mn fabric
by Lori Holt, Autu
Sew Along Guide
ple
w Simp
Se
p,
lt for the quilt to
range by Lori Ho
g.
Trim & bindin
Shapes, Vintage
87”
x
”
Quilt Size 74
ARECROW
THE QUILTEDltSC
Designed by Lori
Ho
P&H
0 per month plus
6 month BOM $6
x 85½”
Quilt Size 80½”
AUTUMN BY LORI HOLT
FOR RILEY BLAKE DESIGNS
Large-scale Snowball blocks are fun and fast to stitch and a zigzag
border is the perfect finishing touch. Best of all, this quilt includes
an unexpected surprise — you can save and repurpose your trimmed
patchwork scraps into two sweet bonus projects*!
Finished size: 153.5cm (60½in) square
Finished block size: 8in square
Designer: Kim Diehl
@kim_diehl_quilts
106
A Snap
to
Stitch
107
108
strips, 2½in x about 16in. Cross cut
them to yield 12 squares, 2½in — a
total of 72 squares in all (Snowball
block). Then cut one square, 1½in
from the remainder (Border 1)
• one strip, 4½in x width of fabric. Cross
cut it to yield eight squares, 4½in — 48
squares in all (Signature block)
Snowball blocks
1
Draw a diagonal pencil line from
corner to corner on the wrong side
of all of the navy, assorted print and
cream print 2½in squares.
Choose four assorted cream print
2½in squares. Pin one in each
corner of the navy print 8½in square.
Sew on the lines. Fold the cream triangle
over and press, aligning its edges with
those of the underlying navy fabric.
Then refold the cream fabric and
trim the corner ¼in outside the
seams. Fold the cream triangle out
2
3
Materials
• 1.3m (1⅜yd) navy print fabric
(patchwork, Borders 1 and 3 and
binding)
• 17 fat quarters of assorted print
fabrics
• 40cm (½yd) each of six assorted
cream print fabrics
• 3.5m (3¾yd) backing fabric
• Batting at least 170cm (68in) square
• Rotary cutter, ruler and mat
• Sewing machine with ¼in foot
• General sewing supplies
Cutting
From the navy print fabric, cut:
• one square, 8½in (Snowball block)
• four squares, 2½in (Snowball block)
• 13 strips, 1½in x width of fabric
(Borders 1 and 3). Put 12 of them
aside; cross cut the remaining strip
to yield eight rectangles, 1½in x 4½in
(Border 2)
• seven strips, 2½in x width of fabric
(binding)
From each of the 17 fat quarters of
assorted print fabrics, cut:
• one square, 8½in (Snowball block)
• four squares, 2½in (Snowball block)
• six squares, 3½in (Signature block)
From the remainder of four of the 17 fat
quarters, cut:
• one square, 4½in (Border 2 corners)
From each of the six assorted cream
print fabrics, cut:
• one strip, 8½in x width of fabric.
Cross cut it to yield three squares,
8½in — a total of 18 squares in all
(Snowball block). Cut the remainder
of the strip horizontally into three
We are delighted to share a quilt
from the recently re-released book,
Simple Patchwork: Stunning Quilts
that are a Snap to Stitch, by Kim
Diehl. The book includes 16 easyto-piece projects, from wall quilts
to table toppers and bed quilts,
with supersized blocks and even a
charming mini sampler quilt, all in
Kim's sought-after style.
* You will find the two bonus
projects in the book.
The book is published by C&T
Publishing, and the pattern
appears here with their
permission. The pattern has been
edited to Quilters Companion
editorial style.
109
Diagram 1
again and press. See Diagram 1. Your
Snowball block should measure 8½in
square from corner to corner.
Repeat Steps 2 and 3 with the
17 squares, 8½in of assorted
print fabrics to make a total of 18 dark
Snowball blocks.
Then repeat Steps 2 and 3 using
the assorted 8½in cream squares
and a mix of the navy and assorted print
2½in squares to make 18 light Snowball
blocks, as shown in Diagram 2.
4
5
Quilt centre assembly
1
Diagram 2
Referring to the Quilt Centre
Assembly Diagram, lay out three
dark and three light Snowball blocks
in a row, alternating them. Join the
blocks together, carefully matching
seams. Press. Your block row should
measure 8½in x 48½in from raw edge
to raw edge.
Repeat Step 1 to make a total of
six rows of Snowball block rows.
Lay out the rows. Rotate every
second row by 180 degrees. Swap
the rows around until you have an
array of colours and prints that you like.
Join the rows, carefully matching
seams. The quilt centre panel
should measure 48½in square from
raw edge to raw edge.
2
3
4
Border 1
Quilt Centre Assembly Diagram
1
Join five navy print 1½in strips
together, end to end, to make
one long strip. From it cut four strips,
1½in x 48½in.
Sew a strip to the left and right
edges of the quilt centre. Press
seams outwards.
Choose four of the assorted
cream 1½in squares. (There will
be two squares left over. They are not
used in this project.)
Sew a square to each end of the
remaining two navy strips, then
sew these strips to the top and bottom
edges of the quilt centre. Your quilt top
should now measure 50½in square,
from raw edge to raw edge.
2
3
iinn
½
½
Diagram 3
4
Signature blocks
1
To make one Signature block, you
need two 3½in squares cut from the
same print fabric and one 4½in square
of a cream print fabric.
Draw a diagonal pencil line from
corner to corner on the wrong side
of the 3½in print squares. Then draw a
second diagonal line ½in closer to the
corner. See Diagram 3.
2
Diagram 4
110
3
4
Pin a marked print square in one
corner of the cream 4½in square.
Sew on both of the lines.
Fold the print triangle over and
press, aligning its edges with
those of the underlying cream square.
Then refold the print triangle and trim
the fabric ¼in outside the longer of the
two seams you sewed (that is, midway
between the two seams). Fold the print
triangle out again and press.
In addition to joining a triangle
to the cream square, you’ve
also sewn a bonus half-square
triangle unit. Press it open, pressing
the seam allowance away from the
cream fabric. This unit is not used in
5
KIM'S
PINNING TIPS
For accurate patchwork seams
and intersections, especially when
joining units with diagonal seams,
I’m a firm believer in pinning.
To help me achieve good results
for the Signature block border
units in this quilt, I layered the
blocks right sides together, and
then pinched them firmly between
my thumb and fingers at the
position where the diagonal cream
seams met. While continuing to
pinch the pieces together, I used
my other hand to fold open the
fabric edges at the point I was
pinching to ensure the seams were
perfectly aligned; for any that were
a bit off, I tweaked the placement.
Once I was pleased with
the fit, I pinned the layers in
place (taking care not to shift
them) and checked the result
one last time to ensure nothing
had moved out of alignment. I
worked from that pinned position
outward to each opposite edge
to complete the pinning.
If there was a slight difference
at the unit edges after matching
up the diagonal cream seams, I
didn’t let this worry me, because I
knew they would be absorbed into
the seam allowances when the
pieced unit was joined to the quilt
top. Pinning the units at the seams
that are the focal point first, and
then working outward, is a great
way to achieve accuracy.
Diagram 6
Diagram 5
this project, but it will be a wonderful
starting point for another scrappy
project in your future.
Repeat Steps 3–5 to sew the
other marked print triangle in
the diagonally opposite corner. See
Diagram 4. (Note that this diagram
doesn’t show the stitching required to
make the bonus half-square triangle
unit.) Your completed Signature block
should measure 4½in square, from raw
edge to raw edge.
Repeat Steps 1–6 to make a total
of 48 Signature blocks. (You will
have three pairs of 3½in squares of
print fabrics left over. They are not
used in this project.)
6
7
Border 2
1
Referring to Kim’s pinning tips, join
the Signature blocks in pairs, as
shown in Diagram 5. These units should
measure 4½in x 8½in from raw edge to
raw edge. Press the seam allowance
to whichever side produces the most
closely aligned seams.
Lay out six border units end to
end. Swap their position around
until you have an array of colours and
prints that you like. Then sew the units
together. Again, press the seams in
whichever direction produces the most
closely aligned seams. Your border
strip should measure 4½in x 48½in,
from raw edge to raw edge.
Repeat Step 2 to make four
border strips. Then sew a 1½in
x 4½in rectangle of navy print fabric
to each end of the strips, as shown in
Diagram 6. Press seams towards the
navy rectangles. The border strips
should now measure 4½in x 50½in,
from raw edge to raw edge.
Sew a border strip to the left
and right edges of the quilt top,
referring to Diagram 7 for the correct
orientation. Press seams inwards.
Sew a 4½in square of print fabric
to each end of the remaining two
border strips. Then sew them to the
top and bottom edges of the quilt top.
Press seams inwards.
2
3
4
5
Diagram 7
Border 3
1
2
Sew the remaining 1½in strips of
navy print fabric together, end to
end, to make one long strip.
Measure your quilt top vertically
through the centre. Cut two strips
this length from the long strip. Sew
them to the left and right edges of the
quilt top. Press seams outwards.
Measure your quilt top horizontally
through the centre. Cut two strips
this length from the remainder of the
long strip. Sew them to the top and
bottom edges of the quilt top. Press
seams inwards.
3
Finishing
1
Remove the selvedges from the
backing fabric and cut it into two
equal lengths. Sew the pieces together
side by side with a ½in seam and press
the seam open.
The quilt top, backing and batting
are ready for a long-arm quilting
machine as they are. If you’re doing
the quilting by hand or on a domestic
sewing machine, follow the instructions
for Preparing the Quilt Sandwich in the
2
free downloadable Basics Guide* to
pin or baste the quilt top, batting and
backing together.
Quilt as desired. Kim’s quilt was
machine quilted by Rebecca
Silbaugh. She quilted an Orange
Peel design radiating out from the
centre of each Snowball block; each
Orange Peel shape was filled with
feathers. The block corners and the
open spaces between the Orange
Peels were quilted with a diagonal
crosshatch. The dark triangles in
Border 2 were quilted with a dahlia
design and repeating straight lines
were worked in the cream centre
strips of the Signature blocks.
Trim the excess backing fabric and
batting ¼in outside the edge of
the quilt top.
Follow the instructions in Binding
the Quilt in The Basics Guide* to
bind the quilt using the seven 2½in
strips of navy print fabric.
3
4
5
* The free Basics Guide is available as
a download online from https://www.
cosyproject.com/blog/quilting-guide
111
Level up your crafting skills with these
Special Quilting Books
Quilted Workshop for
Beginners Bookazine
($12)
With the beginner in mind,
each quilt block in this bookk
is a different technique
and the entire quilt making
g
process is covered, from
choosing fabrics to binding
g
your quilt.
Quilted Gifts ($12)
From cushions to patchwork
bags, Santa wall hangers
and quilt designs for
children, there’s a design
available in this book for you
to create and give out as
gifts for your loved ones on
their most special days.
Visit www.universalshop.com.au/Books/craft-books
or call 1300 303 414 to order your copies today.
Creative Stash & Scrap
Quilts ($12)
Feeling guilty about how
much money you have
spent on fabric, or how
much fabric you have lying
around? This book offers
you 21 gorgeous projects
designed to work through
d
tthe fabrics that you have
already purchased.
a
Vintage Quilts ($19.95)
Check out theull range of the
most stunning quilts in this
superb Quilters Companion
publication. This perfect
read is full of your favourite
designs and quilt patterns,
bringing a new meaning to
the word “vintage”.
Tranquility
CRAFTS ‘N SUPPLIES
37 Holmes Rd, Moonee Ponds 3039
Telephone: 03 9375 3575
q
y
Email: tranquilitycrafts@bigpond.com.au
POSY
New 7 part Block of the
Month designed by Sharon
Burgess. A combination of
embroidery, English Paper
Piecing and applique is used
to complete this quilt.
Each month receive a
pre-printed embroidery
panel. stabilizer, acrylic
templates, enough papers to
complete the block and Tilda
Hibernation fabrics.
Cost: Month 1: $120-00
(plus postage) and months
2 - 7 $60-00 each
(plus postage)
Sign up for
the Block of
the Month
2024
Limited spaces
available
www.foxscottage.co.nz
Quilting and Wool
Shop 5, Southern Cross Complex
State Highway One, Foxton 4814
cnr Purcell St & S.H.1
(06) 363 5880
shop@foxscottage.co.nz
Block Of
The Month
& kits
Welcome to our new block of the month and kits section
where each issue we will bring you a diverse selection of block
of the month programs and kits for purchase. These product
cover a variety of styles, colours and techniques.
Kits and block of the month programs are popular choices for quilters for a number
of reasons. How many times has a quilt caught your eye and you think “Wow I would
love to make that exact same quilt with the same fabrics and colours”? When you buy
a kit for a quilt you see you can do just that – make it exactly in the colours and fabrics
you see. Kits also take the often difficult job of select fabrics and colours out of the
equation. The hard part is done for you so you can just enjoy the sewing.
cosyproject.com
ALPHABITS
Alphabits by Michael Miller is
a bright alphabet panel with
animals featured on the letters.
Matching all over and stripe
fabric available. 60cm panel
$28.25 plus postage. Use the
link below to order from the
website. Shop Online – A Little
Patch of Country
Pharaoh
Fashion Bag
63 Princes Highway, Trafalgar
Phone 03 5633 2311 | Email sales@littlepatch.com.au
www.littlepatch.com.au
Handmade by Margott
The
Fairytale
Cottages
The “Big Bear”
Boho Quilt Kit
Full kit $183.50
Includes pattern,
kit and postage.
end linen quilt
A gorgeous on tr
or little ones.
ideal for a throw
d all fabric for
an
Contains pattern
top and binding
m
Size 145cm x 145c
Kit $80
e
Available in stor
and online.
All kits and patterns plus postage
Available in store and online
We deliver to your door Australia wide
42 Liverpool Street, Port Lincoln SA 5606
Phone: 08 8682 3636 | Email: rubyandkate@me.com
www.rubyandkate.com.au
STAR CLUSTER
QUILT KIT BY
TULA ZPINK
Measures 75” × 75” completed
Kit includes 17.5 metres of fabric
from the Everglow and
True Colors ranges for
the top and binding.
Cost $550
Please phone for orders: 0403 883 347
15 Brooking Street, South Guildford, WA 6055
SUNSHINE &
LOLLIPOPS
Complete Kit including
stitching panel, fabric
(including backing) $399
Quilt top, binding and
stitching panel $299
Cosmo Thread kit $18
Free Postage Australia
Sh
Shops
2 & 3, 53 Alawa Cres. ALAWA NT 0810
p. (08) 8948 0691 e. dragonfabric@bigpond.com
www.dragonfabric.com.au
Wide
18 Alford Street, Kingaroy Qld 4610 p. (07) 4162 2040
www.somethingscountry.com.au
The Patchy Affair
Your Easy & Affordable Online Quilting Shop
Great Customer Service
With an extensive fabric range available online it’s easy to search
& find that special one. Ranges include Tilda, Reproductions,
Japanese & Liberty Cotton just to name a few. Check out the range of
patterns available – By Annie Designs, Hugs n Kisses,
Natalie Bird, Sue Allen & Arabesque Scissors.
Pre-Cuts,
Yardage and
Patterns
available now
Introducing 3 Sisters Favorites Vintage
Linens collection from Moda.
You will find etched floral toiles, dainty vines,
or
ornamental
flourishes, charming ditsies, and playful
polka dots — all in faded, tea-stained hues. Use these
po
linen-inspired prints to make bags and home decor
lin
pprojects, or incorporate them into your quilts and
ppillows when you need sophisticated low volumes.
www.littlepatchofheaven.com.au
linda@littlepatchofheaven.com.au
0447 244452 @lpoheaven
FREE
POSTAGE
ON ALL
ONLINE
ORDERS
1972 Maitland Rd, Cunningham SA 5571 (4km from Ardrossan)
Studio hours: Mon-Sun 10am to 4pm by appointment | Contact: Julie 0418 891 601
Groups are welcome by prior arrangement.
thepatchyaffair.com.au
^ƉĞĐŝĂůŝƐŝŶŐŝŶŵŽĚĞƌŶ
ĚĞƐŝŐŶĞƌĨĂďƌŝĐ͘
ůŽŶŐǁŝƚŚƐƚƵŶŶŝŶŐĨĂďƌŝĐLJŽƵ͛ůůĮŶĚŵŽĚĞƌŶƋƵŝůƚ͕ďĂŐ
ΘƐĞǁŝŶŐƉĂƩĞƌŶƐ͕ƐĞǁŝŶŐŶŽƟŽŶƐ͕ďĞƐƉŽŬĞǁŽƌŬƐŚŽƉƐ͕
ƚŚƌĞĂĚƐ͕dĞdžLJĂƌŶƐΘ:ƵŬŝƐĞǁŝŶŐŵĂĐŚŝŶĞƐ͘
WůƵƐǁĞŽīĞƌĐƵƐƚŽŵĐƵƌĂƚĞĚDLJ&ĂďŵŽŶƚŚůLJĐůƵďƐ͕
ůŽǀŝŶŐůLJĐƌĞĂƚĞĚďLJƵƐũƵƐƚĨŽƌLJŽƵ͊
^ŚŽƉŽŶůŝŶĞ͕ũŽŝŶĂĐůƵďŽƌŬĂĐůĂƐƐ
www.myfabricology.com.au
sŝƐŝƚƵƐĂƚ
hŶŝƚϯϯ͕ϰtŝĐŬƐ^ƚ
ĂLJƐǁĂƚĞƌ͕tĞƐƚĞƌŶƵƐƚƌĂůŝĂ
dƵĞƐĚĂLJƚŽ&ƌŝĚĂLJϵ͘ϯϬĂŵͲϰƉŵ
^ĂƚƵƌĚĂLJϵ͘ϯϬĂŵͲϯƉŵ
Shop 10, Boronia Village
159 Boronia Road
Boronia VIC 3155
+61-3 9761 2088
www.lillypatches.com.au
&ŽůůŽǁƵƐ
ΛŵLJĨĂďƌŝĐŽůŽŐLJ
/ŶƐƚĂŐƌĂŵΘ&ĂĐĞŬ
PROFESSIONAL LONGARM
QUILTING SERVICE
Phone: 0403 883 347
Email: bizzybeepatchwork@yahoo.com
Ezy Quiltz can turn ordinary into extraordinary, iin as little
as 7 days*. Free return postage, drop off/pick up also
available. We also stock Moda, Benartex, Blank Quilting,
Studio E, Batiks Australia, batting plus much more.
www.ezyquiltzandstitching.com.au
232 Bookmark Ave, Renmark SA 5341
P. 0427 282 047 | ezyquiltz@gmail.com
*7 days for E2E only, custom will be longer
Find fabrics online and in store.
Michelle, Kylie and El
specialise in modern, batiks
and reproduction fabrics.
They are the Port Macquarie
Dealership for Bernina, Janome,
Pfaff, Baby Lock and Handy Quilter.
Machines are serviced and repaired
locally by Adam at Prosew.
The shop has two workshop areas
where social sewing groups meet
and classes are held by local and
well-known visiting tutors.
Under the one roof is Sue
of SuziQ Quilting with her longarm quilting machine to complete
your masterpiece.
Their mission is to promote
and develop patchwork, quilting
and textile art in a fun environment.
02 6581 3338
Unit 18, 14 Acacia Ave
Port Macquarie, NSW 2444
www.stitchednframed.com.au
Bizzy Bee Patchwork is
renowned for its extensive range
of Japanese Yarn-Dyed Fabric.
There are 9 colourways available
in red, pink, brown, charcoal, blue,
grey, yellow, green and cream.
1/16th packs (5 different fabrics)
also available for $17 each in all
colourways that work beautifully
with appliqué, EPP and piecing.
Please ring to order.
Presenting our greatest educational institutions to parents
looking for the right school for their child.
This valuable publication features articles about choosing the right
secondary school for your child, as well as other important issues in
education, including the welfare and health of your child, curricular and
learning opportunities, exchange programs and much more. Comprehensive
sive
listings of every secondary school in the state (NSW or VIC) also meanss
that finding the right school for your child – whether public, independent,
nt,
Catholic, regional or boarding – is a less daunting task, as the most current
rrent
and accurate information is presented.
Separate NSW and VIC versions available
ONLY
$9.95
each
Covers: Brigidine College Randwick (NSW)
and Yarra Valley Grammar (VIC)
Grab the latest copy at universalshop.com.au/Books/choosing-a-school-nsw
and universalshop.com.au/Books/choosing-a-school-vic or call 1300 303 414 today
In the Market
Have a look through the next few pages to discover what fantastic
new products, ideas and designs are In The Market to inspire you.
Horizon Memory Craft
Have you seen the latest HORIZON model? The Horizon
Memory Craft 9410QC has a trendy pink copper accent
panel and the standard horizon range workspace of 11in
| 280mm. An improved ergonomic design has the screen
angled towards the user for easier viewing and access,
the machine body above the needle has been reshaped
giving a clear line of vision of the needle area.
120
For more information or a demonstration, visit an
authorised Janome Retailer http://janome.com.au/
find-a-dealer
JANOME AUSTRALIA
Phone: 1300 JANOME (1300 526 663)
Email: enquiries@janome.com.au
Website: www.janome.com.au
Wildflower Inspired Prints
Susan Felicity Design fabrics are digitally designed in
Western Australia from local wildflower inspiration
and delivered only online via a web store. Orders are
posted within ten business days Australia-wide via
Australia Post.
Designs are printed on 100% quilters’ weight
cotton in South Korea in the high quality Ecotex
standard.
The Bluebells and Orchid Patch collections offer
a variety of 40 different designs in modern bright
colourways, with coordinating and blender fabrics to
accompany the hero patterns.
SUSAN FELICITY DESIGN AND FABRICS
Phone: 0459 961 016
Email: susan@susanfelicitydesign.com
Website: www.susanfelicitydesign.com
Designer Digital Prints
eQuilter has the largest online selection of highquality quilt fabrics and related products, including
exceptionally detailed Designer Digital Prints by the
Rubin Design Studio, created exclusively for eQuilter.
2% of all purchases are donated to international nonprofits, totaling US$1.9 million so far. Sign up for the
weekly e-newsletters and try the Free Pattern designer.
50% discount on international shipping for orders
over US$100.
eQuilter
Phone: USA 303-527-0856
Email: service@equilter.com
Website: www.equilter.com
Sunny Boulevard
Like a stroll down a sunny boulevard, this gorgeous
pieced quilt is filled with pretty fabrics and happy
vibes. Pattern $20 + $4 p&h, Kit $149 + $16 p&h.
FAERIES IN MY GARDEN
Phone: (07) 3869 0808
Email: shopatfaeries@bigpond.com
Website: www.faeriesinmygarden.com.au
Moda Canvas Maker Buckets
Perfect for storing your quilting and crafting supplies,
works in progress or going to a sew day. Quilters
find the colours perfect for storing fabric scraps in
organised colour buckets.
Size 11in x 12in and are made with 100% cotton
canvas.
Buckets can be purchased individually or as a full
set of six so you get all of the colours!
LITTLE PATCH OF HEAVEN
Phone: 0447 244 452
Email: linda@littlepatchofheaven.com.au
Website: www.littlepatchofheaven.com.au
121
In the Market
Special
Interest
Tours
Berry Parfait
Berry Parfait is a Thimbles & Needles design which we
have available as a fabric pack and separate pattern.
The fabric pack consists of 26 low-volume background
fabrics and 18 contrast fabrics to complete the quilt
top. Fabric Pack $179, Pattern Only $16.
THE QUILT SHOP
Phone: 0468 336 146
Email: sales@thequiltshop.com.au
Website: www.thequiltshop.com.au
We are a travel
business, which
sells holiday
travel and
special interest
tours. We have
been selling
Quilting and
Yarn tour led
by well-known
teachers for
24 years. Our
tours have
travelled to the
USA, France,
Germany, Denmark, Switzerland, Holland, UK, Holland,
Canada, Asia and all over Australia. We also offer very
well priced cruises on www.cruiseoffers.com.au
TRAVELRITE INTERNATIONAL
Phone: 1800 630 6868, (03) 8803 6868
Email: balwyn@travelrite.com.au
Website: www.travelrite.com.au
Lowery Workstands
Our Lowery Workstands, first made in North
Lincolnshire in 1986, have definitely lasted the test
of time. These metal frames are not only strong
and sturdy but come in amazing funky fun colours,
that will suit any decor. There are a multitude
of accessories to make this stand adjust to your
embroidery needs. We are the only NZ stockist.
Contact us today – you won’t regret it!
STITCH WITCHES
Phone: NZ 0064 3 471 7388
Email: stitchwitchesnz@gmail.com
Website: www.stitchwitches.co.nz
122
Fossil Fern Fabric Range
With over 100 colours on the shelf, A Little Patch of
Country is one of the few shops in Australia stocking
the Fossil Fern fabric range. With colours ranging
from pastels to brights there is sure to be just the
fabric you need. Browse our website to order or ring
the shop if you prefer.
A LITTLE PATCH OF COUNTRY
Phone: (03) 5633 2311
Email: sales@littlepatch.com.au
Website: www.littlepatch.com.au
Applifix
Sewing Machine Feet
Please scan the QR code to visit You Tube @
sewfocusontour and watch the free video about a
variety of sewing machine feet. I would love you to tell
me what other feet you would like to see.
SEW FOCUS
Phone: (08) 7120 6788 or 0408 060 796
Email: karen@sewfocus.com.au
Website: www.sewfocus.com.au
Do you enjoy
raw-edge
applique? Are
you tired of
the backing
paper coming
away from
your fusible
webbing
before you
want it to?
Do you want
to support
an Australian
company?
Then why not
give Applifix a
try. Available
in large sheets
0.5m X 1.5m or
in packs of A4 size that can safely be put through an
inject printer. 16pk A4 $29.95. 3m packs $35.95
CREATURE CRAFTS
Phone: (03) 5752 1494
Email: creaturecrafts@bigpond.com
Website: www.creaturecrafts.net.au
Open by Appointment
We are a patchwork and quilting shop in Central Victoria.
We are now open by appointment. It’s easy! Send a text
message to the mobile 0429 393 757 with your preferred
date and time and we will respond promptly confirming
your appointment. Please allow 24 hours.
Website is open 24/7 and orders are sent promptly.
MAREE ST CLAIR QUILTS
Phone: 0429 393 757
Email: maree@mareestclairquilts.com.au
Website: www.mareestclairquilts.com.au
123
In the Market
Quality Always
Legit Kits Australia
Legit Kits are NOW AVAILABLE here in
Australia. Looking for something a little different
in your foundation piecing patterns? Innovative
patterns and easy to construct design IS LEGIT.
LEGIT KITS AUSTRALIA
Phone: 0412 488 018
Email: info@legitkits.com.au
Website: legitkits.com.au
Autumn Quilt Seeds Patterns
Grow your own pumpkin patch with the Autumn
Quilt Seeds Patterns by Lori Holt of Bee in my
Bonnet. Each seed packet has instructions to make
one traditional pieced block. Each block finishes at
18in x 20in. The series collection of nine patterns and
individual kits are available now from The Quilting
Room. Pattern: $17 or Kit: $45 (includes pattern).
THE QUILTING ROOM
Phone: 0411 417 087
Email: thequiltingroom@aapt.net.au
Website: www.thequiltingroom.com.au
124
Australian Wool Wadding.
MiniJumbuk Nu-Wool
wadding is made to high
and exacting standards in
Adelaide, South Australia.
Buying Nu-Wool supports
Australian jobs and Australian farmers. This wool
batting is simply the best there is and provides great
drape as well as providing natural temperature
regulation. Available from all good craft stores.
QUALITY ALWAYS
Phone: (08) 8349 0200
Email: reception@qualityalways.com
Website: www.minijumbuk.com.au/wadding
Tea in the Garden
Tea in the Garden is a very cute design by Leanne of
Petal and patches. The embroidery is highlighted on
the large outside pocket of this drawstring bag which
is a perfect size for taking your mug to class but would
also make a very practical bag for a small project.
Pattern only $14.50 or a full kit is available now for
$26.50 plus postage.
TRANQUILITY CRAFTS ‘N SUPPLIES
Phone: (03) 9375 3575
Email: tranquilitycrafts@bigpond.com
Christmas with Joy
Celebrate a beautifully traditional
Christmas with Joy, the gorgeous
new range from Edyta Sitar of
Laundry Basket Quilts for Andover
Fabrics! A spectacular cheater
cloth print is complemented by lush
florals, stripes and sweet ditsies in
an elegant colour palette, perfect for
seasonal stitching or use it yearround for beautiful creations with a
touch of antique style.
Contact Two Green Zebras for
stockists.
TWO GREEN ZEBRAS
Phone: (07) 3132 8990
Email: sales@twogreenzebras.com
Website: www.twogreenzebras.com
Amanda Murphy Rulers
Looking at enhancing your quilting
projects? Rulers offer interesting
patterns and shapes that inspire
playful and imaginative quilting.
BERNINA carry a large range
of Amanda Murphy Rulers that
will add a touch of creativity
and enjoyment to your quilting
projects. All of Amanda’s rulers
are suitable for all BERNINA
sewing machines and work in
conjunction with the Adjustable
Ruler Foot #72, 72S.
BERNINA AUSTRALIA
Phone: (02) 9899 1188
Email: support@bernina.com.au
Website: www.bernina.com.au
125
In the Market
Fabric Cutting Dies
Daisy (Hinagiku) Cushion Cover
Enjoy making the Daisy (Hinagiku) Cushion Cover
designed by Jane MacDonald. The daisy sashiko
pattern is lots of fun to stitch, and the finished cushion
cover is a wonderful statement piece for your home.
BEBE BOLD
Phone: (02) 66219188
Email: contact@bebebold.com
Website: www.bebebold.com
Blue Wren fabric cutting dies, proudly Australianmade, are compatible with most fabric cutters, from
compact to large roller cutters. Whether you’re a
beginner or an expert quilter, these dies handle simple
and intricate shapes. Each die includes its own mat.
The smaller 6in x12in dies even feature a clear lid.
Crafted with top-quality materials, they guarantee
precision. Cut up to six layers of 100% cotton at once.
A1 CRAFT AND QUILTING
Phone: 0438 877 664
Email: admin@a1craftandquilting.com.au
Website: www.a1craftandquilting.com.au
Kookaburra
Quilts
Sweet Gingham Lavender Quilt Kit
Take a trip down memory lane with this adorable
quilt. A simple quilt to make using panels and piecing.
Finished size 511/2in x 601/2in. Kit includes all fabrics
to complete the quilt top and the binding and the
pattern. Kit $160.00
WHATEVER WHERE-EVER CRAFT
Phone: (02) 6026 5489
Email: info@whateverwhereever.com.au
Website: www.whateverwhereever.com.au
126
Kookaburra Quilts
is located in the
historic town
Burra, South
Australia. We
stock an evergrowing range of
beautiful 100% cotton quilting fabric, haberdashery,
Cosmo threads, books, precuts and sewing supplies.
We have recently expanded into the shop next door,
where we have a lovely bright new classroom and
another shop dedicated to the fabric. We are opened
six days a week. Friday by appointment.
KOOKABURRA QUILTS
Phone: 0439 247 700
Email: kookaburraquilts@gmail.com
Website: www.kookaburraquilts.com.au
Wacky Jacky’s Retreats
Our retreat with one of the Australian QAYG
masters has completely sold out, and we needed to
open a new slot!
Wacky Jacky’s retreats are highly personalised,
as we curate the most unique Bali experience for
like-minded ladies who are in love with textiles,
quilting and adventure. You’ll fully immerse yourself
in the island’s textile history and strong cultural
influences while enjoying its natural beauty. With
Jacky hosting and skilled international tutors, it’s a
unique lifetime experience!
WACKY JACKY’S TEXTILES
Email: jacky@wackyjackys.com.au
Website: www.wackyjackys.com/bali-retreats
by Annie
Come into Lilly Patches for a wide range of patterns
and notions by Annie. With lots of different
projects to complete that are practical and useful,
Annie’s patterns will appeal to all. There are
over 200 patterns for quilts, fashion accessories,
organisational items and more, whether you are a
beginner or more experienced at sewing.
LILLY PATCHES
Phone: (03) 9761 2088
Email: info@lillypatches.com.au
Website: www.lillypatches.com.au
Quilting Automation is
Powerfully Simple
Quilter’s Creative Touch gives you
control over the style and design of
your patterns and then takes care of
the actual stitching with the push of a
button. This gives you the freedom to
focus on your creativity and achieve
fantastic results. Let your machine do
the quilting for you – the QuiltMotion
QCT6 is a computer automated
quilting system that lets you create
your masterpieces in steps as simple as
select, place, and sew. There are three
versions available QCT6, QCT6 Plus
and QCT6 Pro.
KNOW-HOW SEWING ESSENTIALS
Phone: (02) 4871 3936
Email: mail@knowhowsewing.com.au
Website: www.knowhowsewing.com.au
127
Did you love part 1 of our very special BOM Trade Winds?
Subscribe Now
to receive every issue needed to complete
the BOM and many other projects!
issues!
5
ing
m
co
e
th
er
ov
d
se
lea
re
be
ll
wi
rts
The next pa
r
u
o
d
e
d
12 ISSUES
n
e
t
x
e
We ’veest price offer! Quilters Companion magazine
low
PLUS 2 BONUS SPECIAL EDITION ISSUES
RRP $155.40
Great Australian Quilts
RRP $25.90
For Only $110
(SAVE $71.30)
SUBSCRIBE NOW
To receive this offer, call 1300 303 414 and quote the code: QC128. HURRY! Offer ends 5th September, 2024
Subscription Offer
6 issues of Quilters Companion magazine
+ 1 issue of Great Australian Quilts
FOR ONLY $69
(SAVE $21.65)
12 issues of Quilters Companion magazine
+ 2 issues of Great Australian Quilts
FOR ONLY $110
(SAVE $71.30)
My Personal Details
*Mr/Mrs/Miss/Ms First name:
*Surname:
*Address:
*Suburb:
*State:
*Postcode:
*Daytime telephone: (
)
*Email:
Gift Subscription To
Mr/Mrs/Miss/Ms First name:
Surname:
Address:
Suburb:
2024
BLOCK OF
THE MONTH
State:
Postcode:
Daytime telephone: (
)
Email:
Payment Options
Cheque/money order for AU$
(Please make cheques payable to Universal Magazines Pty Ltd)
Please charge my:
Trade Winds
Our 2024 Block of the Month quilt, Trade
Winds, is designed by quilt-store owner,
book author, fabric designer and quilt designer
Kathy Doughty. Kathy designed the Trade
Winds range of fabrics to capture the vibrant
energy of an exotic market square, inspired
by the chintz prints of India, Middle Eastern
mosaics and Asian floral motifs.
American Express
Card number:
Diners
MasterCard
Visa
Expiry date:
(must be included)
Cardholder’s name:
Cardholder’s signature:
Subscribing Made Easy
1300 303 414
SEND COUPON
and quote the code QC128
Subscriptions Department,
Reply Paid 75687,
North Ryde NSW 1670
universalshop.com.au
and enter code QC128
(02) 9805 0714
mailorder@umco.com.au
This offer is only available while stocks last, or until expiration date.
T&Cs: Subscriptions will commence with the first available issue. Existing subscriptions will simply be extended. Free gifts
arrive separately to the magazine subscription and are sent as soon as possible. Free gift offers do not apply to subscribers
currently on the Easy Payment Plan. Offer open to Australian residents only. By subscribing you acknowledge that you
understand that ‘tip-ons’ and gifts or bonus issues that may be available with non-subscriber copies of this magazine may
not be provided to subscribers and is at the discretion of Universal Magazines Pty Ltd. The Promoter shall not be liable for
any loss or damage which is suffered or sustained (including but not limited to, indirect or consequential loss) or for personal
injury which is suffered or sustained as a result of taking part in this or any other gift offer. By subscribing, you consent
to receive any direct marketing material including emails which inform the recipient of the Promoter’s other publications,
products, services or events and to receive promotional material from third parties. Please tick the box if you do NOT wish us
to use this information for the purposes stated above . This offer is only available while stocks last, or until expiration date.
On the Road
ON THE
AUSTRALIA AND NEW ZEALAND GUIDE TO
CRAFT, SEWING AND PATCHWORK SHOPS
130
Stitched ‘n Framed
14 Acacia Avenue,
Port Macquarie 2444
Ph: (02) 6581 3338
info@stitchednframed.com.au
www.stitchednframed.com.au
Open: Mon–Fri 9.30am–4pm,
Sat 9.30am–2pm
Stitches by the Sea
10 Gundagai Street,
Coffs Harbour 2450
Ph: 0412 355 438
infostitchesbythesea@gmail.com
www.stitchesbythesea.net
Tue–Fri 9.30am–4.30pm,
Sat 10am–1pm
Lyn’s Fine Needlework
2/9 Seven Hills Road,
Baulkham Hills, 2153
Ph: (02) 9686 2325
lynsneedlework@aol.com
www.lynsfineneedlework.com.au
Open: Mon–Fri 9am–5pm,
Sat 9am–4pm
Nel’s Fabric Place
188 Hoskins Street, Temora 2666
Ph: (02) 6977 1760
nelstoyandbookhaven@bigpond.com
www.188nelsfabrics.wixsite.com/temora
Open: Mon–Fri 9am–5pm,
Sat 9am–12 noon
Sew Fab
111 East Street, Narrandera 2700
Ph: (02) 6959 9819
leanne@sewfab.com.au
www.sewfab.com.au
Open: Tues–Fri 9am–4:30pm,
Sat 9am–12:30pm,
Mon by appointment only
The Cotton Merchants
37 Wynyard Street, Tumut 2720
Ph: (02) 6947 1175
thecottonmerchants@gmail.com
www.thecottonmerchants.com.au
Open: Mon–Fri 9.30am–4.30pm,
Sat–Sun 10am–1 pm
The Fabric Farm
36 Kurrajong Avenue, Leeton 2705
Ph: (02) 6953 7718
sales@thefabricfarm.com.au
Open: Wed–Fri 10am–5pm,
Sat 10am–1pm
Whatever Where-ever Crafts
26 Fairway Close, Howlong 2643
Ph: (02) 6026 5489
info@whateverwhereever.com.au
www.whateverwhereever.com.au
Open: Wed–Fri 10am–5pm,
Sat 9am–1pm
NEPEAN/BLUE MOUNTAINS
MID NORTH COAST
CENTRAL WEST
Cowra Patchwork
Shop 2/119 Kendal Street, Cowra 2794
Ph: (02) 6342 3854
www.cowra-patchwork.business.site
Open: Mon–Fri 8.30am–5pm,
Sat 8.30am–12.30pm
Post Office Patchwork
33 Ross Street, Glenbrook 2773
Ph: (02) 4739 9555
pop@postofficepatchwork.net.au
www.postofficepatchwork.com.au
Open: Mon–Fri 10am–5pm,
Sat 10am–3pm
Sew Can I
3/21 Lavin Crescent,
Werrington County 2747
Ph: (02) 9623 4570
sewcani@yahoo.com.au
https://www.sewcani.com.au
Open: Mon 9am–4.30pm,
Tue 9am–9pm, Wed–Sat 9am–4.30pm
Sunday by appointment
Connie’s Fabrics
1 Verge Street, Kempsey 2440
Ph: (02) 6562 7792
conniesfabrics@outlook.com
Facebook: Connie’s Fabrics
Open: Mon–Fri 9am–5pm,
Sat 9am–12.30pm
Country Pickin’s Sewing Centre
Unit 2, 1a Blackbutt Road,
Port Macquarie 2444
Ph: 0448 306 589
info@countrypickins.com.au
www.countrypickins.com.au
Open: Mon–Fri 9.30am–5pm
Sat 9.30am–2pm
Country Pickin’s Sewing Centre
29 Pulteney Street,
Taree 2430
Ph: (02) 6552 2092
info@countrypickins.com.au
www.countrypickins.com.au
Open: Mon–Fri 9.30am–5pm
Sat 9.30am–2pm
Hanging by a Thread
Wallace Street,
Macksville 2447
Ph: (02) 5509 1664,
0483 804 032
admin@hangingbyathread.com.au
www.hangingbyathread.com.au
Open: Tue–Fri 9.30am–5pm,
Sat 9am–1pm
Hobbysew Orange
221 Peisley Street,
Orange 2800
Ph: (02) 6361 7420
patriciajcole@gmail.com
Open: Mon–Fri 9.30am–5pm,
Sat 10am–2pm
The Crafty Peacock
17 Bradwardine Road,
Bathurst 2795
Ph: (02) 6331 6975
info@thecraftypeacock.com.au
www.thecraftypeacock.com.au
Open: Tue–Fri 9.30am–5pm,
Sat 9.30am–3.30pm
ACT
The Sewing Shoppe
6/51 Tennant Street,
Fyshwick 2609
Ph: (02) 6239 1214
sales@sewingshoppe.com.au
www.sewingshoppe.com.au
Open: Wed–Sun 10am–4pm
NSW
SYDNEY
RIVERINA
Coleambally Stitch in Time
13 Brolga Place, Coleambally 2707
Ph: (02) 6954 4242
coleamballystitchintime@allthingsquilting.
com.au, www.coleamballystitchintime.
allthingsquilting.com.au
Open: Mon–Fri 9am–5pm,
Sat 9am–12 noon
HAWKESBURY
True Blue Stitches
5/3 Terrace Road,
North Richmond 2754
Ph: (02) 4508 4052
enquiries@truebluestitches.com.au
www.truebluestitches.com.au
Open: Mon–Fri 9am–5pm,
Sat 9am–1pm
SOUTH WEST
Hen Tea Craft Store
28 Sladen Street,
Henty 2658
Ph: 0414 581 620
cpayne2@live.com
www.etsy.com/au/shop/braidcraft
Open: By appointment
NORTH WEST
Stitch2340
230 Peel Street,
Tamworth 2340
Ph: 0413 556 369
stitchtbt2340@gmail.com
stitchbetweenthebridges.com.au
Open: Tue–Fri 9.30am–4.30pm,
Sat 9am–4pm
Ursh’s Sewing
1 Cunningham Close,
Narrabri 2390
Ph: 0419 492 370
FB: urshs-sewing
Open: Mon–Wed 9am–5pm,
Fri 9am–5pm, Sat 11am–1pm
131
On the Road
NORTHERN NSW
Handa Crafts and Curtains
149 Canterbury Street,
Casino 2470
Ph: 0484 899 472
hello@handacraftsandcurtains.com.au,
www.handacraftsandcurtains.com.au
Open: Mon–Fri 9am–5pm,
Sat 9am–12 noon
Rainbow Patchwork
75 Union Street,
South Lismore 2480
Ph: 0432 417 228
www.rainbowpatchwork.com.au
Open: Tue–Fri 10am–5pm,
Sat 9am–12 noon
The Quilt Shop
2/38 Bridge Street, Eltham 3095
Ph: (03) 8418 6770
sales@thequiltshop.com.au
www.thequiltshop.com.au
Open: Mon–Sat 9.30am–4pm
Tranquility Crafts ‘N’ Supplies
37 Holmes Road,
Moonee Ponds 3039
Ph: (03) 9375 3575
tranquilitycrafts@bigpond.com.au
www.tranquilitycrafts.allthings
quilting.com.au
Open: Tue–Fri 10am–5.30pm,
Sat 9.30am–1pm
NORTH CENTRAL
NEWCASTLE
Morisset Fabrics and Crafts
47 Dora Street, Morisset 2264
Ph: (02) 4973 3837
jendi@aapt.net.au
www.facebook.com/morissetfabrics
Open: Mon–Fri 9am–5pm,
Sat 9am–1pm
SOUTHERN HIGHLANDS
Know How Sewing Essentials
Unit 2, 3–7 Frankland Street,
Mittagong 2575
Ph: (02) 4871 3936
mail@knowhowsewing.com.au
www.knowhowsewing.com.au
Open: Mon–Fri 9am–3pm
Maree St Clair Quilts
Ph: 0429 393 757
maree@mareestclairquilts.com.au
www.mareestclairquilts.com.au
Open: By Appointment Only
NORTH EAST
Little Patch of Heaven
7 Pickering Place, Wodonga 3690
Ph: 0447 244 452
lpoheaven@bigpond.com
www.littlepatchofheaven.com.au
Open: By appointment only
Creature Crafts
Shop 4, 68 Myrtle Street,
Myrtleford 3737
Ph: 0428 503 951
creaturecrafts@bigpond.com
www.creaturecrafts.net.au
Open: Mon–Fri 9.30am–3pm,
Sat 10am–2pm
SOUTH EAST
VIC
MELBOURNE
Lilly Patches
Shop 10 Boronia Village,
159 Boronia Road,
Boronia 3155
Ph: (03) 9761 2088
info@lillypatches.com.au
www.lillypatches.com.au
Open: Tue–Sat 9.30am–5pm,
Thu open until 6pm
Palm Beach Quilting
Unit 7/2 Industry Boulevard,
Carrum Downs 3201
Ph: (03) 9775 1601
sales@palmbeachquilting.com.au
www.palmbeachquilting.com.au
Open: Mon–Fri 10am–4pm,
Sat 9am–12 noon
132
A Little Patch of Country
63 Princes Highway,
Trafalgar 3824
Ph: (03) 5633 2311
www.littlepatch.com.au
sales@littlepatch.com.au
Open: Mon–Fri 9am–5pm
Mrs Martins Quilt Shop
133 Emerald Monbulk Road,
Emerald 3782
Ph: (03) 5968 3360
www. mrsmartinsquiltshop.com
Open: Tue–Thu 9am–3pm
The Sewing Bee Cafe
80 Baxter-Tooradin Road,
Baxter 3911
Ph: (03) 5971 5737
thesewingbeecafe@gmail.com
www.sewingbeecafe.com.au
Open: Mon–Fri 9.30am–4pm,
Sat 9am–12 noon
Port Fairy Textiles
Shop 1, 54 Sackville Street,
Port Fairy 3284
Ph: 0493 289 375
hello@portfairytextiles.com.au
www.portfairytextiles.com.au
Open: 7 days, from 10am
Updates on Instagram/FB @
portfairytextiles
EAST
The Craft Basket
110A Nicholson Street,
Orbost 3888
Ph: (03) 5154 1151
soniamelville_craftbasket@hotmail.com
www.thecraftbasket.com.au
Open: Tue-Fri 9am-3pm,
Sat 9am-12 noon
Lily Lane Patchwork
26 Prince Street,
Rosedale 3847
Ph: (03) 5199 2777
jennifer@lilylane.com.au
www.lilylane.com.au
Open: Mon, Wed, Thu,
Fri 9.30am–4pm,
Sat 10am–2pm
WEST
Cobden Sewing Machines
31 Curdie Street,
Cobden 3266
Ph: 0408 104 912
cobdensewing@bigpond.com
www.cobdensewingmachines.com.au
Open: Tue–Fri 9.30am–4pm,
Sat 9am–12 noon
Heights Sewing Centre
176 Pakington Street,
Geelong West 3218
Ph: (03) 5229 3558
heightsewing@bigpond.com
www.heightsewing.com.au
Open: Mon–Fri 9am–5.30pm,
Sat 9am–1pm
Little Desert Quilts
2204 Kaniva–Edenhope Road,
Kaniva 3419
Ph: (03) 5392 2234
littledesertquilts@skymesh.com.au
FB: Little Desert Quilts
Open: by appointment
Michelle’s Patchwork
230 Moffats Road, Dereel 3352
Ph: 0439 005 301
mde17978@hotmail.com
www.michellespatchwork.com
Open: Mon–Fri 9am–5pm,
Sat 10am–4pm
WEST GIPPSLAND
SOUTH WEST
Molly Bear Designs
208 Diproses Road, Bulart 3314
Ph: 0488 136 961
mollybeardesigns@hotmail.com
www.etsy.com/au/shop/Mollybeardesigns
Open: by appointment
Patchwork Maze
21 Coastview Lane,
Glen Alvie 3979
Ph: (03) 5674 9292
ptchmaze@bigpond.com
www.patchworkmaze.com.au
Open: Wed–Sat 10am–3pm
SUNSHINE COAST
QLD
CENTRAL COAST
Just Country Crafts
72 Perroux Street, Gulliver 4814
Ph: (07) 4795 7414
justcountrycrafts@gmail.com
Facebook @ Just Country Crafts
Open: Mon–Fri 9am–3pm,
Sat 8.30am–1.30pm
Somethings Country
18 Alford Street, Kingaroy 4610
Ph: (07) 4162 2040
somethingscountry@bigpond.com
www.somethingscountry.com
Open: Mon–Fri 9am–5pm,
Sat 9.30am–12.30pm
CENTRAL HIGHLANDS
Emerald Fabric Boutique
Shop 3, 107 Clermont Street,
Emerald 4720
Ph: (07) 4982 4286
emfabcq@outlook.com
www.emfab.com.au
Open: Mon–Fri 9am–5pm,
Sat 9am–12 noon
TOOWOOMBA
The Sewing Room
16b Prescott Street, Toowoomba 4350
Ph: (07) 4638 8288
info@thesewingroom.net.au
www.thesewingroom.net.au
Open: Mon–Fri 9am–3:30pm,
Sat 9am–1pm
BUNDABERG
The Quilter’s Shack
77 Boundary Street, Bundaberg 4670
Ph: (07) 4154 4486
thequiltersshack@
patchworkandcupcakes.com
www.bundabergpatchwork.com
Open: Mon–Fri 9am–4pm
Sat 9am–12.30pm
NORTH
Janome Townsville
Olive Branch Quilts
Shop A/263 Charters
Towers Road, Mysterton 4812
Ph: (07) 4755 2336
shop@janometsv.com.au
www.olivebranchquilts.com.au
Open: Mon-Wed 9am–5pm,
Thu 9am–4.30pm,
Fri 8.30am–4.30pm, Sat 9am–1pm
KIMZ Sewing and Patchwork
1/5 Main Drive, Warana 4575
Ph: (07) 5493 4977
kimzsewing@bigpond.com
kimzsewing.com
Open: Mon–Fri 9am–4pm,
Sat 9am–1pm
Sand Salt SEW
1/53 Gateway Drive,
Noosaville 4566
0411 688 142
sandsaltsew@icloud.com
Open: Tue–Fri 9.30am–4pm,
Sat 9am–1pm
SA
ADELAIDE
Patchwork by the Sea
186 Main South Road,
Morphett Vale 5162
Ph: (08) 8384 8881
pbysea@bigpond.com
www.patchworkbysea.com.au
Open: Mon–Sat 9.30am–4.30pm
Sew Focus
8/1064–1066 Old Port Road,
Albert Park 5014
Ph: (08) 7120 6788
karen@sewfocus.com.au
www.sewfocus.com.au
Open: Mon–Fri 9am–5pm,
Sat 9am–3pm
Widebacks Australia
22 Farrow Circuit, Seaford 5169
Ph: (08) 8370 7546
brenda@widebacks.com.au
www.widebacks.com.au
Open: Mon–Fri 9.30am–3pm,
Sat 9.30am–12.30pm
Creatively Sewn
1 Anthony Street,
Mount Gambier 5290
Ph: (08) 8725 4933
kerry@ringwood-designs.com
www.creativelysewn.com.au
Open: Mon–Fri 9.30am–4.30pm,
Sat 9.30am–12.30pm
Habit Patch
31b George Street,
Millicent 5280
Ph: (08) 8733 1155
info@habitpatch.com.au
www.habitpatch.com.au
Open: Mon–Fri 9am–4.30pm
The Rural Stitch Co
40 Bool Lagoon West Road,
Bool Lagoon 5271
Ph: 0417 408 796
sales@theruralstitchco.com.au
www.theruralstitchco.com.au
Open: Sat–Sun 10am–4pm,
Weekdays by appointment
NORTH EAST
Ezy Quiltz & Stitching
232 Bookmark Avenue,
Renmark 5341
Ph: 0427 282 047
ezyquiltz@gmail.com
www.ezyquiltzandstitching.com.au
Open: Online 24/7
YORKE PENINSULA
Heart ‘n Soul Patchwork
1/59 Main Street,
Minlaton 5575
Ph: (08) 8813 9710
heartnsoulpatchwork@gmail.com
gostitch.com.au/business/
heart-n-soul-patchwork
Open: Tue–Fri 10am–4pm,
Sat 10am–12 noon
The Patchy Affair
1972 Maitland Road,
Cunningham 5571
Ph: 0418 891 601
thepatchyaffair@bigpond.com
www.thepatchyaffair.com.au
Open: By appointment only,
7 days a week 10am–4pm
BAROSSA
Cynthia’s Ark
7 Wasleys Road, Mallala 5502
Ph: (08) 8527 2120
cyn@cynthiasark.com.au
www.cynthiasark.com.au
Open: Thu 12.30pm–3pm,
Fri–Sat 9.30am–3pm,
Sun 10am–3pm
EYRE PENINSULA
ruby & kate
42 Liverpool Street,
Port Lincoln 5606
Ph: (08) 8682 3636
rubyandkate@me.com
www.rubyandkate.com.au
Open: Mon–Fri 9am–5pm,
Sat 9am–12.30pm
SOUTH EAST
Clair’s Fabrics
22 Gough Street.
Kingston 5275
Ph: 0439 220 779
clair@clairsfabrics.com
www.clairsfabrics.com
Open: By appointment only
MID NORTH
Brook Fabrics
33 Bowman Street,
Crystal Brook 5523
Ph: (08) 8636 2685
FB: Brook Fabrics
Open: Mon–Fri 9.30am–4.30pm
133
On the Road
Charlene’s
80 Ayr Street, Jamestown 5491
Ph: (08) 8664 1511
Open: Mon–Fri 10am–5pm,
Sat 9am–11.30
Kookaburra Quilts
1 Young Street, Burra North 5417
Ph: (04) 3924 7700
kookaburraquilts@gmail.com
www. kookaburraquilts.com.au
Open: Mon–Fri 9.30am–5pm,
Sat 9am–4pm, Sun 10am–4pm
NZ
NORTH ISLAND
WA
Susan
Felicity
Design
and Fabrics
Ph: 0459 961 016
susan@susanfelicitydesign.com
www.susanfelicitydesign.com
24/7 Online Orders Only
PERTH
NT
Dragonfly Fabrics
Shops 2 and 3, 53 Alawa Crescent,
Alawa 0810
Ph: (08) 8948 0691
dragonfabric@bigpond.com
www.dragonfabric.com.au
Open: Mon–Fri 9am–5pm,
Sat 9am–4pm
JR’s Fabrics
8 Simmental Place, Oakford 6121
Ph: (08) 9526 2113
admin@jrsfabrics.com
www.jrsfabrics.com
Open: Mon–Fri 8am–11.30am,
other times by appointment
My Fabricology
33/4 Wicks Street, Bayswater 6053
Ph: 0493 063 224
orders@myfabricology.com.au
www.myfabricology.com.au
Open: Tue–Fri 9.30am–4pm,
Sat 9.30am–3pm
Southlands Fabric
& Sewing Centre
26 Yampi Way, Willetton 6155
Ph: (08) 9259 4844
helen@sewingperth.com.au
www.sewingperth.com.au
Open: Mon–Fri 9am–4.30pm,
Sat 9am–3pm, Sun 10am–3pm
BUNBURY
TAS
Patchwork Plus
14 Anne Street, George Town 7253
Ph: (03) 6382 3999
www.patchworksplus.com.au
Open: Tue–Fri 9.30am–4.30pm,
Sat 9.30am–12.30pm
BALI
Wacky Jacky’s Textiles
Jalan Raya Candidasa,
Candidasa, Bali
Ph: +62 812 3880 0277
jacky@wackyjackys.com.au
Open: 7am-4pm 7 days a week
134
Craft Collections
1/13 Mummery Crescent, Bunbury 6230
Ph: 0419 616 714
stuffnbears@westnet.com.au
craftcollections.com.au
Open: Mon–Fri 9am–4.30pm,
Sat 9am–12 noon
MANDURAH
Classic Stitches
1/18 Galbraith Loop, Erskine 6210
Ph: (08) 9582 7567
info@classicstitches.com.au
www.classicstitches.com.au
Open: Mon–Fri 10am–4pm,
Sat by Appointment
ALBANY
The Empty Bobbin
319–331 Albany Highway,
Mount Melville 6330
Ph: 0437 888 030
theemptybobbin@outlook.com
www.theemptybobbin.com.au
Open: Mon 9am–4pm, Tue 9am–2pm,
Wed–Fri 9am–4pm, Sat 9am–2 pm
Cottage Flair
1129 Eruera Street,
Rotorua 3010
Ph: +64 07 357 5955
info@cottagefair.co.nz
cottageflair.co.nz
Open: Mon–Fri 9.30am–4.30pm,
Sat 9.30am–3 pm
Fox’s Cottage
1 Purcell Street,
Foxton 4814
Ph: +64 06 363 5880
shop@foxscottage.co.nz
www.foxscottage.co.nz
Open: Mon–Fri 9am–5pm
House of Patchwork
16 Porter Crescent,
Helensville,
Auckland 0800
Ph: +64 09 420 6355
houseofpatchworkltd@gmail.com
www.facebook.com/House-of-Patchwork
Open: Tue–Sat 10am–4pm
SOUTH ISLAND
Handzon
1 Alfred Street,
Rangiora
Ph: +64 03 423 3544
helpinghand@handzon.co.nz
www.handzon.co.nz
Open: Mon–Sat 9.30am–5.30pm,
Sun 10am–3pm
Stitch Witches
193 Hanover Street,
Dunedin 9016
Ph: +64 03 471 7388
stitchwitchesnz@gmail.com
www.stitchwitches.co.nz
Open: Tue–Fri 10am–5pm,
Sat 10am–4pm
The Quilter’s Barn
The Vines Village,
193 Rapaura Road,
Blenheim
Ph: +64 03 572 7240
info@thequiltersbarn.co.nz
www.thequiltersbarn.co.nz
Open: Mon–Fri 9.30am–4.30pm,
Sat–Sun 10am–4pm
USA
eQuilter.com
6201 Spine Road, Boulder,
Colorado 80301
Ph: +0011 1 303 527 0856
service@equilter.com
Open: Mon–Fri 7:30am–5pm
NSW
Qunsland
July 12–13
September 16–22
Novocastrian Quilters’
40th Anniversary Ruby
Quilt Exhibition
Callaghan College,
Jesmond Senior Campus,
Janet Street, Jesmond
More information: 0481 350 121
novocastrianquilters@gmail.com
Toowoomba Quilt Show
Toowoomba Community
Baptist Church
100 Glenvale Road, Glenvale
More information:
Janice 0409 634 272
July 19–21
Eastwood Patchwork Quilters’
Quilt Exhibition
Roselea Community Centre
645–671 Pennant Hills Road,
Beecroft
More information: www.
eastwoodpatchworkquilters.com
August 2–4
Hunters Hill Quilters’ Show
Hunters Hill Town Hall,
22 Alexandra Street, Hunters Hill
More information:
www.huntershillquilters.org
August 2–4
Camden Country Quilters’
32nd Quilt Exhibition
Gledswood Homestead & Winery,
900 Camden Valley Way,
Gledswood Hills
More information:
secretarycamdencqg@gmail.com
August 23–25
Wangi Quilters’ Club
Biennial Quilt Show
Wangi District Workers’ Club
11–19 Market Street, Wangi Wangi
More information:
wangiquilters@gmail.com
September 29
Maleny Arts and Crafts
Biennial Quilt Show
12 Maleny Stanley River
Road, Maleny
More information:
0414 556 379
Victoria
October 11–12
Bulli Corner Quilters’ Quilt Show
Corner of Princes Highway and
Point Street, Bulli
More information:
lmk1703@yahoo.com.au
0413 963 070
New Zealand
July 24–27
August 17–18
Victorian Quilters’ Members’
Quilt Showcase
Melbourne Exhibition Centre,
1 Convention Centre Place,
South Wharf, Melbourne
More information:
www.victorianquilters.org/
event/melbourne-craft-quiltfair
Hibiscus Coast Quilters’ Show
Orewa Community Hall,
Orewa Square
368 Hibiscus Coast
Highway, Orewa
More information:
monteast@xtra.co.nz
September 9 –
October 14
One Step Further
The Old Auction House,
52–56 Mollison Street,
Kyneton
More information: www.
victorianquilters.org/event/
one-step-further-2024
September 19–22
Sydney Quilt Show
Rosehill Gardens Racecourse
James Ruse Drive, Rosehill
More information:
www.quiltnsw.com
Diary dates
October 2–6
Waikato Quilt Symposium
Cambridge High School,
25 Swayne Road, Cambridge
More information:
info@quiltsymposium.co.nz
England
August 1–4
Northern Territory
Festival of Quilts
National Exhibition Centre,
Birmingham
More information:
www.thefestivalofquilts.co.uk
October 5–12
Territory Quilts Exhibition
Witchetty’s Gallery, Araluen,
Alice Springs
More information: Bronwyn
exhibitions.asqc@gmail.com
Join Michelle Marvig and Deborah
Segaert on Quilters Companion
Quilters’ Tours to major quilt shows
around the world! Turn to pages
12-13 for more information.
135
The Basics Guide provides information and explanations about
tools and techniques required to make a quilt. Many of the
items needed are general sewing supplies, and the specialist
quilting tools can be found at your favourite patchwork shop.
The Basics Guide is available as a free downloadable document
that you can refer to as required.
You can download it and save it to your computer
and/or print it out for easy reference.
You will find your Free Basics Guide here: www.cosyproject.com/blog/quilting-guide
136
Stockists & Contacts
Stockists & Contacts
A1 Craft and Quilting
Ph: 0438 877 664,
website: www.a1craftandquilting.com.au
Lilly Patches
Ph: (03) 9761 2088,
website: www.lillypatches.com.au
Stitched ‘n’ Framed
Ph: (02) 6581 3338,
website: www.stitchednframed.com.au
A Little Patch of Country
Ph: (03) 5633 2311,
website: www.littlepatch.com.au
Lily Lane
Ph: (03) 5199 2777,
website: www.lilylane.com.au
Stitches by the Sea
Ph: 0412 355 438,
website: www.stitchesbythesea.net
BeBe Bold
Ph: 0416 219 107,
website: www.bebebold.com
Little Desert Quilts
Ph: 0458 327 577,
Facebook: littledesertquilts
Bernina Australia
Ph: (02) 9899 1188,
website: www.bernina.com/en-AU
Little Patch of Heaven
Ph: 0447 244 452,
website: www.littlepatchofheaven.com.au
Susan Felicity
Design and Fabrics
Ph: 0459 961 016,
website: www.susanfelicitydesign.com
Bizzy Bee Patchwork
Ph: 0403 883 347,
Facebook: Bizzy Bee Patchwork
Lyn’s Fine Needlework
Ph: (02) 9686 2325,
website: www.lynsfineneedlework.com.au
Creature Crafts
Ph: (03) 5752 1494,
website: www.creaturecrafts.net.au
Maree St Clair Quilts
Ph: 0429 393 757,
website: www.mareestclairquilts.com.au
Cynthia’s Ark
Ph: (08) 8527 2120,
website: www.cynthiasark.com.au
My Fabricology
Ph: 0416 048 324,
website: www.myfabricology.com.au
Dragonfly Fabrics
Ph: (08) 8948 0691,
email: dragonfabric@bigpond.com
On Point Patchwork
and Needlecraft
Ph: (02) 4968 0094, website:
www.onpointpatchworkandneedlecraft.com
The Quilting Room
Ph: 0411 417 087,
website: www.thequiltingroom.com.au
Quality Always
Email: reception@qualityalways.com,
website: www.minijumbuk.com.au
The Quilt Shop
Ph: (03) 8418 6770,
website: www.thequiltshop.com.au
ruby & kate
Ph: (08) 8682 3636,
website: www.rubyandkate.com.au
The Strawberry Thief
Ph: (08) 6114 9653,
website: www.thestrawberrythief.com.au
Sew Focus
Ph: (08) 7120 6788,
website: www.sewfocus.com.au
Tranquility
Crafts ‘N Supplies
Ph: (03) 9375 3575,
Facebook: TranquilityCraftsnSupplies
eQuilter
Email: equiltfairy@gmail.com
website: www.equilter.com
Ezy Quiltz & Stitching
Ph: 0427 282 047,
www.ezyquiltzandstitching.com.au
Faeries in My Garden
Ph: (07) 3869 0808,
website: www.faeriesinmygarden.com.au
Fox’s Cottage Quilt and Wool
Ph: +64 6 363 5880
website: www.foxscottage.co.nz
Handzon
Ph: +64 3 423 3544
website: www.handzon.co.nz
Janome
Ph: Toll-free 1300 JANOME;
website: www.janome.com.au
Kookaburra Quilts
Ph: 0439 247 700,
website: www.kookaburraquilts.com.au
Sew Many Stitches
Ph: (02) 4628 4437,
email: sewstitches@bigpond.com
Somethings Country
Ph: (07) 4162 2040,
email: somethingscountry@bigpond.com
Stitch Witches
Ph: +64 3 471 7388,
website: www.stitchwitches.co.nz
The Craft Basket
Ph: (03) 5154 1151,
website: www.thecraftbasket.com.au
The Patchy Affair
Ph: 0418 891 601,
website: www.thepatchyaffair.com.au
The Quilters Shack
Ph: (07) 4154 4486,
Facebook: The Quilters Shack
The Quilting Patch
Ph: 0412 448 018,
Facebook: The Quilting Patch
Travelrite International
Ph: (03) 9836 2522,
website: www.travelrite.com.au
Wacky Jacky’s
Email: jacky@wackyjackys.com.au,
website: www.wackyjackys.com.au
Whatever Where-Ever Crafts
Ph: (02) 6026 5489,
email: whateverwhereever@bigpond.com
137
On sale September 2024
Helen Draper
shares A Nod to Lil
– traditional hand
piecing
Butterfly Kisses
by Wendy
Whellum – paper
foundation
piecing
138
Sew Midnight
Whimsey by
Cheyl Filby
See Argentinian quilter Cecilia Koppman’s amazing quilt,
FishEye, and read about her inspiration and the techniques
she used to make it.
Master a free-form sewing technique, with Terase Munnerley’s quilt
— Free Falling Leaves.
See winning quilts from an international quilt show.
More tips and techniques for domestic machine quilting.
And lots more!
bĪǺȑ
0ȀȠŖȮșǘȳƥȞ
WEEK 2
11 Aug – 24 Aug 2025
WEEK 4
b~þăиġ
25 Aug – 7 Sep 2025
ĪƎș
ŖǘȢȕȫȾǎ
2025
ĪƎș
§ǘĪȞȮȑDžȔ
ŖǘȢȕȫȾ
MAY
19 May – 28 May 2025
JUNE
19 Jun – 28 Jun 2025
qȁȣȾŖDžȩ
ǠșƎȤ
ŖǘȢȕȫȾ
with Pauline
Rogers
5 May – 16 May 2025
sĪǘȥȢȫȶRƚȔŸȱȟ&ȁȯŸȞȱ
ĪƚȔ§ȲșŇȹȢŸȕȾDžȯĪȤ
with Shuji and Alison Yamazaki
2 Jun – 13 Jun 2025
±ŖȀȤșȶȯDžȤŸȸÒșǺȳȔøƥȶȟȿDž
with Caroline Sharkey
30 Jun – 11 Jul 2025
qĪňȘșȸȯqĪūșȓùȯȭƥDžȑȤȳɀŖ
with Deb Louie
14 Jul – 25 Jul 2025
0ĪǎȤqȕȯȾǎČŖȣȾĕȥǎȳƥȞ
with Helen Godden
28 Jul – 8 Aug 2025