/


Author: Bird N.
Tags: sewing handicrafts patchwork sewing techniques handicrafts and creativity


Text
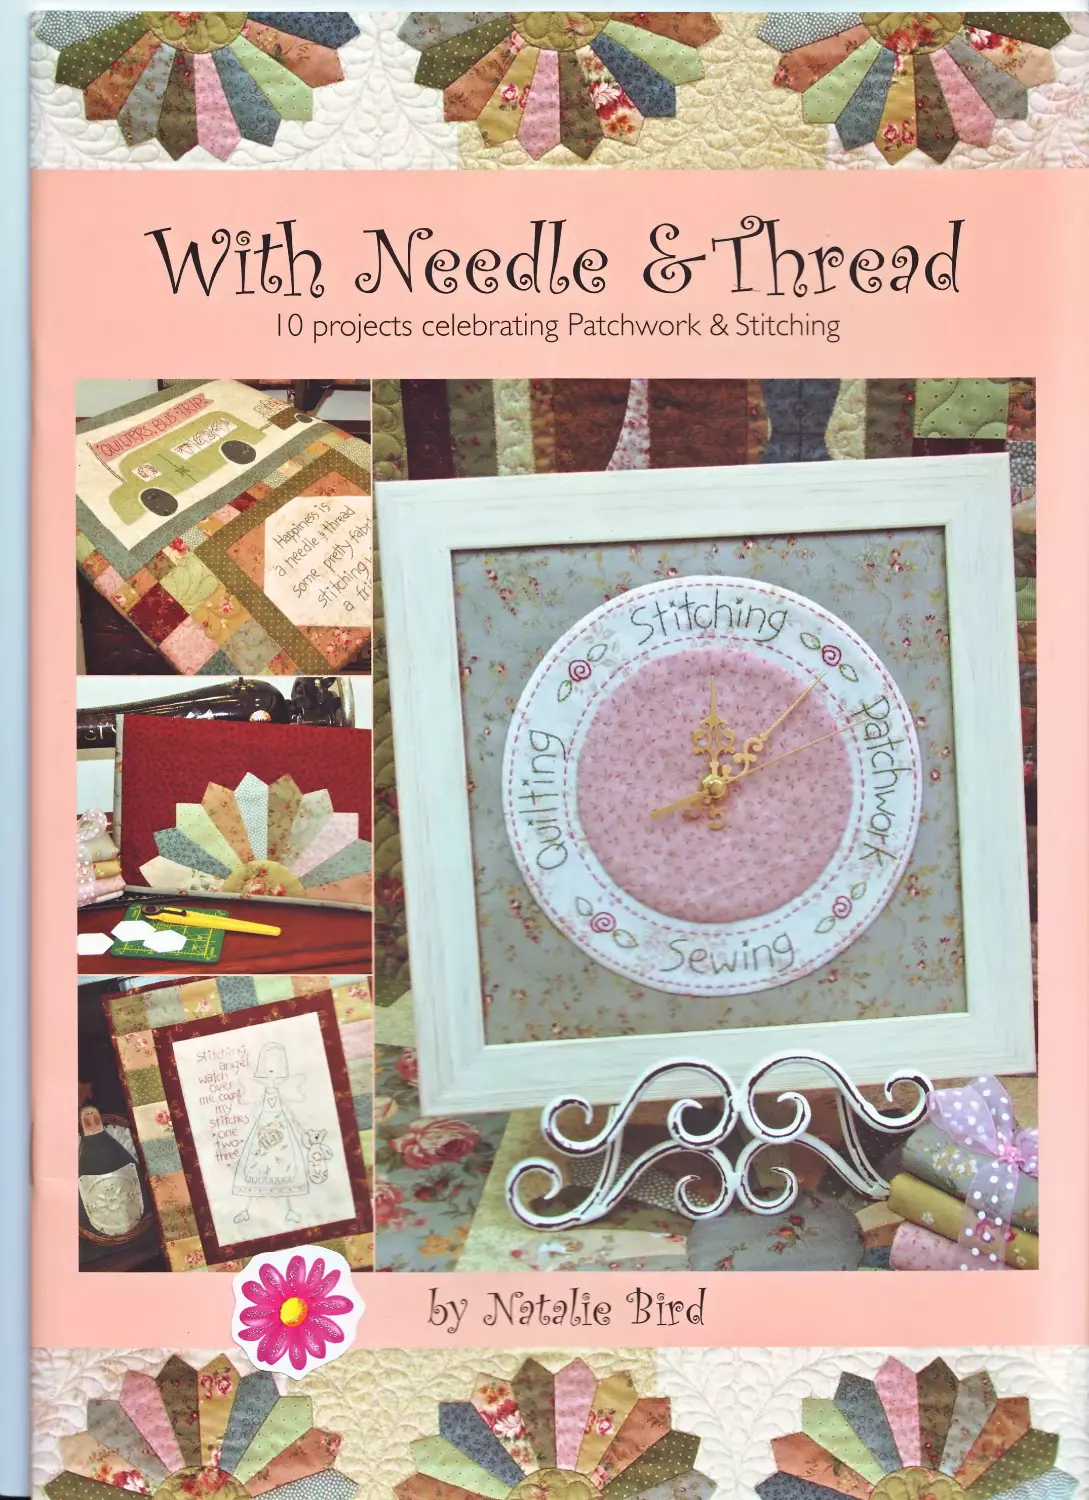
                    "With ЛвЫй
10 projects celebrating Patchwork & Stitching
I have spent many happy hours with needle and thread.
More than just a hobby, stitching has become a large part of my life. I have
shared joy, laughter and sorrow, stitching with friends, my mother and my
daughters. With Needle &Thread, is a celebration of this passion which
brings friends and family together. I hope you enjoy it.
With Xeedle & Thread Quilt
Quilt Size: 43"x51"
’•'a- . r алкз co Care Noth ng for helping out with her beautiful stitching,
тс Geneveve jac<son for creating another quilting masterpiece.
to Garm Snotbolt and Landa Mahoney for looking after‘everything else’,
and to rr  e.-er-s^opocc.e husband revor. & girls, lemma. E ie &Georgia.
sfifcWm
Ж.Соог^
two;
МФ
Contents
General Instructions
With Needle & Thread Quilt
Sewing Machine Chair Pad
Dresden TableRunner
My Stitching Bag
Stitched Clock
Stitching Angel Wallhanging
Scissor Keep
Needlebook
Pincushion
Patchwork Caddy
2
4
17
20
22
25
27
30
31
32
33
CONTE\~
Stitches Used
Crnml Infractions
Fabric & Seams
Pre-wash and iron all fabric to prevent colours bleeding and
fabric shrinkage.
Fabric requirements and measurements quoted are based on
I I Ocm (42”) wide fabric.
All seams should be %” unless otherwise specified. Iron seams
toward darker colours, or for least bulk, after each step.
Background Fabric
In all of the projects, I have used light tone-on-tone fabrics for
the applique and stitchery backgrounds.
Always trim the background fabric to the correct size, after
you have finished the stitching, as the fabric can fray and
shrink a little through the stitching process.
Needleturn Applique
There are a number of methods for needleturn applique.
I have outlined the method which I use myself, but you may
prefer to use your favourite method.
Trace the applique shapes onto the right side of your chosen
fabrics using a white chalk pencil for darker fabrics and a blue,
water-erasable marker for lighter colours. Use a light box, or
back-lit window if possible.
Cut out the shapes a scant %” outside the lines.
Place the background fabric on top of the design and lightly
trace some of the key elements to help with positioning your
applique shapes.
I find it helpful to fingerpress each applique piece around the
traced line before positioning it on the background fabric.
Place the applique shapes which sit underneath other areas,
first. Use applique pins to hold in position.
Use your needle, to turn under the edge to the traced line
and slip-stitch the edge using cotton thread to match each
applique fabric. Make small neat stitches, quite close together
Clip inside curves as you go.
page 2 General Instructions
Some elements of the quilt block designs are to be stitched
on the background fabric. For these areas, and for each of the
stitchery projects, trace the design onto the background fabric
using a tan pigment marker; or HB pencil. For elements which
are stitched in lazy daisy stitch, mark with a small dot, rather
than tracing the loops onto the fabric.
I like to use some lightweight iron-on interfacing behind the
areas to be stitched.This gives extra stability to the fabric and
helps to hide thread shadows.
Most of the stitchery design is worked using 2 strands of
embroidery thread, unless otherwise specified. DMC
embroidery thread colours are listed for each design.
Use the diagrams at left, as a guide for each of the stitches
used in the stitchery designs.
Equipment
Equipment you will require for each project include: rotary
cutter; cutting mat, patchwork rule (various sizes), sewing
machine, cotton thread, embroidery needles, DMC stranded
embroidery threads, pins, fabric and embroidery scissors.
Specific equipment requirements are also listed for individual
projects.
Stitchery words for
My Stitching Bag project
page 22
General Instructions page 3
I
I
With ЛвЫй <irQuilt
Fabric
5 Fat Quarters of Cream &
Light Beige fabric for
backgrounds
12 Fat Quarters of various
colours, small florals, spots
and plains
70cm (28”) of Green floral
fabric for main border
20cm (8”) of Red print
fabric for inner border
Fat Eighth of Brown print
fabric for hair and wardrobe
20cm x 10cm (8”x4”) of 2nd
Brown print for hair
20cm x 10cm (8”x4”) of
skin-tone fabric for faces
20cm x 10cm (8”x4”) of grey
fabric for wheels & other
1.2m x 1.4m (47”x55”) of
thin wadding
1.2m x 1.4m (47”x55”) of
backing fabric
40cm (16”) of binding fabric
*(Fat Quarter = 21 ”x 19X”)
*(Fat Eighth = IOX”xl9X”)
Other
Template plastic, thin card-
board, dresden wedge rule,
lightbox, white chalk pencil,
blue water-erasable marker
stranded embroidery thread
Size 43”x5l”
Cutting
Dresden Plates
From each of the I 2 fat quarters of various coloured fabrics,
cut a 4” strip across the fat quarter
Block Borders
In addition to the 4” strips, cut the following border strips
from the various fabrics:
Stitching Friends	2- 1	X’x I2X”	and 2 - IX” x	1 IX”
Sewing Room	2- 1	X”x 1IX”	and 2 - IX” x	1 OX”
Quilter's Bus Trip	2- 1	X"x I4X”	and 2 - IX” x	9X”
Happiness Is	2- 1	X’ x 7X"	and 2 - IX” x	9X”
Sewing Machine	2- 1	X’x 8X”	and 2 - IX” x	1 OX”
Stitching Angel 2 - 1 Squares for Piecing		X’x 1 IX”	and 2 - IX” x	9X”
From the same fat quarters, cut a total of 2, 4X” squares; 80,
2X” squares; 82, IX” squares. Use remaining fabric for applique.
Background Fabric
From the Cream & Light Beige fabrics, cut background pieces
for the applique blocks. Exact cutting sizes are quoted in each
block layout. Use remaining fabric for dresden backgrounds.
Applique
Follow the needleturn applique method instructions on the
General Instructions, pages 2 & 3. Use the colour pictures as a
guide when choosing fabrics for the applique.
Extra fabric is required for hair; skin, wardrobe and wheels.
Trace the stitchery elements onto the background fabrics and
follow the Stitch Guides for colours and stitches used.
Block Borders
Trim the completed applique blocks to the trim sizes quoted
with the relevant instructions.
Sew the border strips as listed above, to the longest edges
first. For example, if the block measures 1OX” x 12X”, sew
border strips to the 12X” edges first, iron seams, then sew
remaining strips to the remaining edges.
page 4 With Needle & Thread Quilt
Inner Border
From red print fabric, cut two IX”x34>f' strips and two
1И"х3614” strips. Sew the shorter strips to the top and
bottom of the quilt. Sew the longer strips to the remaining
sides of the quilt.
Dresden Plates
From the remaining cream & light beige fabrics, cut pieces 6"
wide x random lengths. Join the pieces, end to end. to make
two pieces 36Я" long.These are your backgrounds for the
dresden plates. Do not sew these to the top and bottom of
the quilt yet.
Use the 4” wide strips of the 12 coloured fabrics to cut a
total of 60 dresden wedges. You can use a dresden wedge
rule, or trace the template from page 6, mark the lines to cut
onto the fabric and use a patchwork rule to cut.
Fold a wedge in half, right sides together; and sew across the
top edge. Clip the inside corner and turn out.
Use a blunt pencil to poke into the point. Iron the seam
centred flat at the back. Make all 60 wedges.
Choose 10 wedges for each half-plate. Place 2 wedges, right
sides together Start %” down and reverse to the top, then
continue sewing down the edge.This way, the ends of the
thread will be hidden.
Sew all 10 wedges together to make a half circle. Iron the
seams in the same direction. Make six of these.
Position the plates, evenly space, 3 across each of the
background pieces.The raw edge of the plates, should sit on
the raw edge of the background.
Slip-stitch the plates in position with neutral coloured thread.
Trace the circle template from page 6, onto thin cardboard
and cut out.
From the green floral border fabric, cut 3 circles arger than
the cardboard circle, all the way around.
Sew a gathering stitch around the edge of a fabric circle, with
the cardboard circle in the centre. Pull on the thread ends to
gather around the circle.Tie tightly.
Iron the circle with the cardboard still in it to hold the shape.
Remove the cardboard and iron the fabric circle again. Make 3.
Cut each circle in half and position at the centre of each of
the dresden half-plates, with the raw edge sitting on the raw
edge of the background. Slip-stitch around the edge of the
half-circles with matching thread.
Sew a background piece to the top & bottom of the quilt.
With Needle & Thread page 5
Wedge Template
for Dresden Plate
Outer Border
Measure your quilt width, through the centre. Adjust the
following measurement to match your quilt width, if necessary.
From the green floral fabric, cut two 2X”x36ff” strips. Sew
these to the top and bottom of the quilt.
Measure your quilt length, through the centre. Adjust the
following measurement to match your quilt length, if
necessary. Cut four 4” strips from the green floral fabric. Sew
2 strips end to end. Make 2. From these, cut two 4”x5 IX”
strips. Sew these to the sides of the quilt.
Sandwich the three layers - backing, wadding & quilt top.
Baste the layers with cotton thread, pins, or your favourite
method.
Quilting is a very personal choice. You can choose to quilt by
machine, or by hand.
My quilt has been professionally quilted with feathers and
loops in the applique blocks to help them sit flat.
If you would like to have your quilt professionally quilted, you
will need to leave a minimum of 4" of wadding and backing
fabric outside the edge of the quilt top.
From your chosen binding
fabric, cut six 2X” strips. Sew the binding
strips together end to end. See
diagram.
Fold the binding in half, wrong sides
together; along the length and iron.
On the front of the quilt, align the
double raw edge of the binding with
the raw edge of the quilt.
Sew %” from the raw edge all the
way around.Turn inside %” at the start
and tuck the end of the binding inside
itself when you get back to the start.
Fold the binding around the edge of the
quilt to the back.
Pm to hold and slip-stitch the binding by hand
with matching coloured thread.
Circle Template
for Dresden Plate
Centres
page 6 With Needle & Thread
Block I
Stitching Friends
Applique
Trace the stitchery elements onto the background fabric, and
a few of the applique areas to help with placement
Position the applique elements on your background fabric and
stitch applique in position.
For areas of the applique which have stitching on them, trace
the stitchery elements onto the applique fabrics before you
applique them in position, ie. trace the words 'craft show' onto
the red fabric before you applique the bag in position.
*Use 2 strands of thread, unless otherwise indicated in (brackets)
arms & legs	backstitch	3864 skin
eyes	french knots (* 1 strand)	801 brown
lips	satin stitch	221 red
shoe heels	backstitch	match fabric
scissors	backstitch	3768 blue
button jar	backstitch	926 blue
buttons	backstitch & french knots	221 red/223 pink
thread skeins	backstitch	3768 blue/223 pink
		3721 dark pink
skein wrappers	backstitch	433 brown
cutter wheel	backstitch	3371 dark brown
pocket trim	backstitch	match fabric
bag straps	backstitch	3864 skin
words on bag	backstitch	224 light pink
box 1	backstitch	3768 blue
box 2	backstitch	370 grey green
fabric bundle	backstitch	926 pale Wue
bow	backstitch	223 pink
tape measure	backstitch	370 grey green
increments	single stitches (* 1 strand)	3371 dark brown
numbers	backstitch (*l strand)	3371 dark brown
hanger	backstitch	801 brown
verse	backstitch & satin stitch	221 red
Block Layout
Piecing the Block
Trim the background fabric to the trim size quoted in the
layout diagram at right. *This is the exact cutting' size.
Sew the IX” x 12.И” previously cut border strips to the sides
and then sew the IX” x I IX” strips to the top and bottom.
Choose from the previously cut 2X” and IX” squares to sew
the block together; following the layout diagram.
With Needle & Thread page 7

Block 2
Sewing Room
Applique
Use the same method as for the I st block, to trace and stitch
the applique. Follow the chart below for the stitchery areas.
Stitch Chart
roses	backstitch	224 light pink
leaves	lazy daisy stitch	301 1 green
words ‘Fabric1	backstitch	3721 dark pink
bag strap	backstitch	223 pink
hinges	backstitch	801 brown
door handles	backstitch	3371 dark brown
bust stand
801 brown
backstitch
detail on bust backstitch
801 brown
Block Layout
Piecing the Block
Trim the background fabric to the trim size quoted in the
layout diagram at right.
Sew the \/” x I IX" previously cut border strips to the sides
and then sew the IX” x IOX” strips to the top and bottom.
Choose from the previously cut 2X" and IX’ squares to sew
the block together; following the layout diagram.
When this block is complete, sew to the bottom of Block I.
i

With Needle &Thi
page 10 With Needle & Thread
Block 3
Quilter’s Bus Trip
Applique
Use the same method as for the previous
blocks, to trace and stitch the applique.
Follow the chart below for the stitchery
areas.
Piecing the Block
Trim the background fabric to the trim size
quoted in the layout diagram at right.
Sew the \/" x 14X” previously cut border
strips to the top and bottom, and then
sew the IX” x 9X” strips to the sides.
Choose from the 2X” and IX” squares to
sew the block together; following the
layout diagram.
Stitch Chai t *Use 2 strands of thread, unless otherwise indicated in (brackets)
flag pole	backstitch	433 brown
words on flag	backstitch	3721 dark pink
crosses	single stitches	3721 dark pink
door handles	backstitch	301 1 green
line on doors	backstitch	301 1 green
faces	backstitch	3864 skin
hair	backstitch	433 & 801 browns
eyes	french knots (*l strand)	801 brown
trailer connection	backstitch & running stitch 801 brown
bag 1	backstitch	301 1 green
bag 2	backstitch	3721 dark pink
bag 3	backstitch	223 pink
bag 4	backstitch	3768 blue
box 1	backstitch & single stitches 926 blue
box 2	backstitch & single stitches 301 1 green
box 3	backstitch & french knots	223 pink
	(*single strand for knots)
With Needle & Thread page I 1

Block 4
Happiness Is
Stitchery
Trace the verse onto your background
fabric and stitch using 2 strands of DMC
936 Green to stitch the design.
Piecing the Block
F Happiness 15
3 needle 3 thread
Some prdhy fabric,
stifchm with
к a friend A
Trim the background fabric to the trim size
quoted in the layout diagram at right.
From left over fabric, cut four 3" squares.
Rule a line diagonally on the back 1—71—r
of each square. Position a square in J
each corner of the trimmed
stitchery, as shown. Sew on the \j
ruled line. Fold back and iron.Trim away
the bottom layer at the corners.
Sew the IX” x 7X” previously cut border
strips to the top and bottom, and then
sew the IX” x 9X” strips to the sides.
Choose from the 2X” and IX” squares
and use the 4X” squares to sew the
block together following the layout
diagram.
Happiness

Sew the completed block to
the bottom of Block 3.
3
With Needle & Thread page 13
224 light pink
301 I green
3371 dark brown
Piecing the Block
Trim the background fabric to the trim size quoted in the
layout diagram at left.
Sew the \'A" x 8A" previously cut border strips to the top and
bottom, then sew the I И” x 10A" strips to the sides.
Choose from the 2Z” and
\A" squares to sew the block
together; following the layout
diagram.
Block 5
Sewing Machine
Applique
Use the same method as for the previous blocks, to trace and
stitch the applique. Follow the chart below for stitchery areas.
Stitch Chart *Use 2 strands of thread, unless otherwise indicated in (brackets)
roses	backstitch
leaves	lazy daisy stitch
needle, lever guides backstitch
Block
Layout
Block 6
Stitching Angel
Applique
Use the same method as for the previous blocks, to trace and
stitch the applique. Follow the chart below for the stitchery
areas.
Stitch Chart
*Use 2 strands of thread, un ess otherwise ndicatec n brackets
eyes	french knots	3371 dark brown
lips	satin stitch	3721 dark pink
teddy	backstitch & single stitches	433 brown
teddy eyes	french knot & single stitches	3371 dark brown
teddy nose	satin stitch	3371 dark brown
patches	backstitch & french knots	3721 dark pink
patch stitches	single stitches (* 1 strand)	3371 dark brown
arms/legs	backstitch	3864 skin
needlebook	backstitch	3721 dark pink
words	backstitch (* 1 strand)	3371 dark brown
Block Layout

Piecing the Block
Trim the background fabric to the trim size quoted in the
layout diagram at right.
Sew the IX” x I IX” previously cut border strips to the sides,
then sew the IX” x 9X” strips to the top and bottom.
Choose from the 2X” and IX” squares to sew the block
together; following the layout diagram.
Finishing
When the block is complete, sew this to the right o* Bock 5.
Then sew these to the bottom of Block 4.
Finally, sew the two halves of the quilt together
Refer to page 5 & 6 for border; quilting and binding
instructions to complete the quilt.
stitching
angel
7’/2”xll72”
With Needle &Thread page 15

Machine
CCir 1Ы
Stitchery
Trace the Sewing Machine design from page ! 9. onto the
cream spot fabric. Use a tan fine-point pigment marker or
HB pencil.
Refer to the following Stitch Chart for thread colours and
stitches used. Use 2 strands of DMC embroidery thread.
When the stitchery is finished, trim the cream fabric to 8"
square.
Stitch Chart
sewing machine roses leaves spool thread on spool heart oval needle, lever guides	backstitch & running stitch backstitch lazy daisy stitch backstitch & single stitches backstitch backstitch backstitch backstitch		3768 blue 223 pink 301 1 green 167 pale brown1 301 1 green 221 red 167 pale brown 3371 dark brown
Cutting From the large floral fabric, cut		one one	14/’ square 12/’ square
From the small floral fabric, cut		two 9/’x 14/' one 12/' square eight l/’xl4/' four 3"x8/'
From the iron-on	pellon, cut	one one two	14/’ square 12/’ square 3”x8/'
Quilting
Place the 14/’ square of iron-on pellon behind the 14/'
square of large floral fabric. Iron to adhere. Do the same with
the 12/’ squares of iron-on pellon and large floral fabric.
Mark a 2” diagonal grid in both directions on the front of
both pieces using a blue water-erasable marker
Sew on these marked lines with matching coloured thread, to
quilt both pieces.
Fabric
40cm (16") Large Floral
Print Fabric
65cm (26”) Small Floral
Print Fabric
25cm x 25cm (10”x 10”)
Cream Spot Fabric
Other
80cm (32") Large Ric-Rac
DMC Threads
221 red
223 pink
301 I green
167 pale brown
3768 blue
3371 dark brown
40cm (16”) Iron-on Pellon
Size 14 Cushion Insert
Blue Water-Erasable Marker
Size 14” cushion
Sewing Machine Chair Pad page 17
Diagram С
Straps & Ties
To make the straps which sit over the top of the chain place
two 3”x8X” blue pieces, right sides together Place a 3”x8X”
piece of iron-on pellon behind and iron to adhere.
Sew along both sides, X" from the raw edge to make a tube.
Turn the tube right way out and iron flat.
Quilt the strap with lines of stitching. Make 2 straps.
To make the ties, fold a IX"xl4X” strip in half, right sides
together along the length. Sew along the raw edge and across
one end.Turn right way out and iron flat. Make 8 ties.
Decorative Flap
Turn under a X’ hem on all sides of the trimmed stitchery.
Iron to hold.
Position this in the centre of the 12X” quilted panel.
Cut four pieces of ric-rac, 7Z” long. Position these under the
edge of the stitchery. Pin the stitchery and the ric-rac to hold,
then stitch around the edge of the stitchery with matching
coloured thread, catching the ric-rac.
Position the 2 straps, on top of the quilted panel, aligning the
raw end of each strap just above the top edge of the panel,
and X' in from each side. See diagram A.
Position 2 ties at the sides, I ” from the top and another 2 ties
3X” from the bottom edge. See diagram A.
Place the 12X” square of small print floral, right sides together
with the quilted panel. Pin around the edges to hold
everything in position.
Sew around the edges, leaving a 4” gap in the bottom edge.
Go back over the straps and ties for extra strength.
Clip across the corners and turn out through the gap in the
bottom edge. Stitch the opening closed. Iron flat and top-stitch
around the edge.
Cushion Cover
Place the 14X” quilted panel for the cushion front, right side
up. Position 2 ties at the sides, 2X" from the top edge, and
another 2 ties, 4X” from the bottom edge. See diagram B.
Position the raw ends of the straps (with the attached
decorative flap), just above the top edge and IX" in from each
side. See diagram B. Pin to hold.
To make the cushion back, turn under a double rolled, X” hem,
along one of the 14X" edges, on both of the 14X”x9X” small
floral pieces. See diagram C.
page 18 Sewing Machine Chair Pad
Position the 2 cushion back pieces, right sides together with
the cushion front, with the hemmed edges overlapping at the
centre.Tuck the flap up within the cushion, so that it is out of
the way for sewing. See diagram D.
Sew around all the edges, leaving no gaps, and going back and
forth over the straps and ties for extra strength.
Turn out through the back of the cushion cover
Insert a size 14 cushion into the cushion cover place the
cushion on the front of your chair back and the decorative
flap at the back.Tie at the sides with the fabric ties.
Г
Sewing Machine Chair Pad page 19
Fabric
35cm (14”) Beige Print
Background Fabric
35cm (14”) Blue Small Floral
Print Fabric
Scraps of fabric for Dresden
Plate wedges, or 12cm (5”)
strips of 4 or 5 fabrics
Other
1.35m x 45cm (52”xl 8”) of
Thin Wadding
1.35m x 45cm (52”x 18”) of
backing fabric
Template Plastic
Cardboard
Size 5i”xi7”
Dresden Т^ЫеВдппег
Dresden Plates
Cut a total of 60 dresden wedges from various coloured
fabrics.You can use a dresden wedge rule (4” in length), or
make a template from the wedge pattern on page 6, trace
onto the fabric and cut out.
Fold a wedge in half, right sides together; and sew across the
top edge. Clip the inside corner and turn out.
Use a blunt pencil to poke into the point. Iron the seam
centred flat at the back. Make all 60 wedges.
Choose 20 wedges for each plate. Place 2 wedges, right sides
together Start Г’ down and reverse to the top, then continue
sewing down the edge.This way, the ends of the thread will
be hidden.
Sew 2 lots of 10 wedges together to make 2 half circles.Then
sew these together to make a plate.
Iron the seams in the same direction. Make 3 of these.
From the beige background fabric, cut three I2Z” squares.
Position the plates, centred, on each square. Slip-stitch the
plates in position with neutral coloured thread.
Trace the circle template from page 6, onto thin cardboard
and cut out.
From the small print floral fabric, cut 3 circles %” larger than
the cardboard circle, all the way around.
Sew a gathering stitch around the edge of a fabric circle, with
the cardboard circle in the centre. Pull on the thread ends to
gather around the circle.Tie tightly.
Iron the circle with the cardboard still in it, to hold the shape.
Remove the cardboard and iron the fabric circle again. Make 3.
Position at the centre of each of the dresden plates. Slip-stitch
around the edge of the circles with matching thread.
page 20 Dresden TableRunner
Piecing the top
From the large floral print, cut two I 3" squares.
Cut the squares in half diagonally to make four triangles.
Sew the triangles to the sides of the dresden plate squares as
shown in the diagram below.
Sew the three pieces together to complete the top.
Quilting
Sandwich the three layers - backing, wadding & top.
Baste the layers with cotton thread, pins, or your favourite
method.
Quilt as desired. I have quilted around the edge of the
dresden plates, around the centre circles, and stipple-quilted in
the floral triangles.
Binding
From the remaining small floral fabric, cut three 2/f” strips.
Sew the binding strips together end to end. See diagram.
Fold the binding in half, wrong sides together along the length
and iron.
On the front of the tablerunner top, align the double raw
edge of the binding with the raw edge of the top.
Sew %” from the raw edge all the way around.Tum inside C
at the start and tuck the end of the binding inside itself when
you get back to the start.
Fold the binding around the edge of the tablerunner to
the back.
Pin to hold and slip-stitch the binding by hand with matching
coloured thread.
Dresden TableRunner page 21
My eTitchtog
Cutting
From the red floral fabric, cut
From the green floral fabric, cut
From the pink fabric, cut
From the iron-on pellon, cut
Stitchery
one 1414” square
one I4f4’xl614”
one I414”x414”
two 4”x34” strips
one IO>f’x6X”
one 1014”x814”
two 14>£”x I 624”
one 1014”x214”
two 2”x30” strips
two 414”x6”
two 1434”x 16X”
two 2”x34” strips
Trace the words from page 3, onto the cream spot fabric.
Fabric
40cm (16”) Red Floral Fabric
56cm (22”) Green Floral
70cm (28”) Pink Fabric
scraps of various other
fabrics for pockets
25cm x 20 cm (IO”x8”)
Floral for Needlebook
6cm x 13cm (214”x 5”) of
Cream Wool
Other
50cm (20”) of medium-
weight Iron-on Pelion
20cm (8”) of lightweight
iron-on pellon for pockets
20cm (8”) lightweight
interfacing
DMC22I Red
Template Plastic
3 press studs
3 buttons
Size 14”xl 6” + straps
Use 2 strands of Red DMC 221 embroidery thread to stitch
the words in backstitch. Make a french knot for the dots.
Piecing the Bag Front
Cut a piece of lightweight interfacing roughly 18”x4”.Trace the
curved line onto one side of the interfacing. Place the
interfacing on top of the stitched words, right sides together;
so that the curve sits just above the words.
Sew along the traced curve. Cut 14” outside the stitched line.
Clip the curve, then turn the interfacing over so that it is
behind the stitching, giving you a nice neat curved top edge.
Iron flat.Trim the width to 1414”.
Position the cream curve on top of the
I414”x414” green floral piece. Align 2” down
from the top edge of the green fabric, at the
sides. Slip-stitch the curved edge to the
green fabric with matching coloured thread.
Use the same interfacing method to make a
curved top edge on the 1414” red square.
Keep the curve as close to the top edge of
the red fabric as possible. Approx. %”.
Position this below the stitched words, aligning the bottom of
the curve, 5” from the top edge of the green fabric.
Slip-stitch the edge with matching red cotton.
Measure the length of the bag front. It should measure 1614".
Trim from the bottom edge if necessary.
page 22 My Stitching Bag
Quilting the bag front
Iran the iron-on pellon to the back of the bag
front, and to the other 14>f'x I6/4” red piece
(bag back). Stitch along the curved edges to
quilt the bag front.
Pockets
To make the back pocket, sew the I 0J4”x2X”
pink strip to the top of the I O/4”x6/4” green
floral.
Cut a piece of lightweight iron-on pellon
I ОИ”х8/4”, and iron to the back of the pocket
piece.
Place this piece, right sides together; with the
I O/4''x8f4” green floral piece. Sew around all
sides, leaving a 4” gap in the bottom edge.
Clip across the corners, then turn out
through the opening. Stitch the opening
closed and iron flat.
Top stitch across the top edge with matching
pink thread.
Position the pocket, centred, on the bag back
piece. Pin to hold, then sew the sides and
bottom edge of the pocket to attach it to the
bag back.
To make the front centre pocket, place the
two 4Я”х6” pink pieces right sides together
Cut a piece of lightweight iron-on pellon
4X"x6” and iron to the back of one of the
pieces. Sew around all sides, leaving a 2” gap
in one side.
Clip across the corners and turn out through
the gap. Stitch the opening closed. Iron flat.
To make the pocket flaps, scissor pocket and
needlebook, trace the template shapes from
the following page onto template plastic and
cut out.
Trace each template onto doubled fabric
(right sides together). Iron some lightweight
iron-on pellon behind each one.
Sew on the traced lines, around all sides,
leaving a small gap in one side on each piece.
Clip across comers and turn out through the
gaps. Stitch openings closed and iron flat.
Position the pockets and flaps on the bag
front. Pin to hold.
Top stitch around the curved edge of the
flaps and the edge of the needlebook.
The dotted lines on the needlebook template
are fold lines. Place the sewn needlebook
piece on top of the template and fold at
these marks. Iron to crease the folds.
Cut a piece of cream wool 2И”х5”, Place this,
centred on the crease. Sew along the crease,
and through the wool to secure in the
needlebook.
Position the needlebook on the bag front. Pin
to hold.
Sew in a square, inside the needlebook to
secure it to the bag front. Sew just inside the
2 crease lines and across the top and bottom
edge of the needlebook.
Sew the pockets to the bag front at the sides
and bottom edges.
Position the flaps above the pockets and
stitch them to the bag front also.
Stitch on press studs to keep the pockets and
needlebook closed. Cover the stitches with a
button.
Frill
On each of the 2”x30” strips, fold under a
small hem on both ends and sew to hold.
Fold a strip in half, wrong sides together along
the length.
Using a large stitch length on your sewing
machine, sew a gathering stitch along the
doubled raw edge, %” from the edge.
Pull the thread ends to gather in the frill to
14” long. Make 2 frills.
Align the raw edge of a frill along the top
edge of the bag front, starting and finishing /4”
in from each side. Do the same on the bag
back with the other frill.
My Stitching Bag page 23
Bag Straps
Fold a 4”x34” strip in half, right sides together,
along the length. Iron a 2”x34” strip of iron-
on pellon on one side.
Sew %” in from the doubled raw edge along
the strap.
Turn strap out, iron flat and quilt with lines of
stitching in matching coloured thread. Make 2.
Sewing the Bag
Place the bag front and back, right sides
together Sew down the sides and across the
bottom edge.
To create a flat bottom in the bag, fold the
bag flat at the corners, aligning the side seam
with the bottom seam.
Measure IA' along the
seam line and rule a line at
right angles. Pin to hold.
Sew across the corner on
this line. See diagram.
Turn bag outer; right way out.
In the same way, sew the pink 14>f’x 16'A"
pieces to make the bag lining. Leave a 4” gap
in the bottom edge of the lining. Sew across
the corners to create a flat bottom also.
Don’t turn out the lining.
To sew all the components together; position
the straps (one at the front and one at the
back) with the right side against the outside
of the bag outer and the raw ends extending
just above the top edge of the bag. Pin to
hold.
Slide everything down into the inside-out bag
lining. Align the side seams of the two bags.
Pin everything together around the top edge
and then sew. Go back and forth a couple of
times at the straps for extra strength.
Turn the bag out through the gap in the
bottom of the lining. Hand stitch the gap
closed and push the lining down into the bag.
Top-stitch around the top edge of the bag.
page 24 My Stitching Bag
Wtched Clock
Stitchery
Trace the Clock Face design from page 26, onto the cream
print fabric. Use a tan fine-point pigment marker or
HB pencil.
Refer to the following Stitch Chart for thread colours and
stitches used. Use 2 strands of DMC embroidery thread.
Stitch Chart
words	backstitch	301 1 green
roses	backstitch	3721 dark pink
leaves	backstitch	3012 green
circles	running stitch	223 pink
Method
Trace the outer circle template and the inner circle template,
separately, onto thin cardboard and cut out.
Position the large cardboard circle behind the stitched design.
Cut T” outside the circle. Sew a gathering stitch around the
outer edge of the fabric circle. Pull on the thread ends, to
gather around the cardboard circle and tie tightly. Iron.
Remove the cardboard and iron the circle again.
Make a smaller fabric circle from pink fabric in the same way,
using the smaller cardboard circle.
Cut a piece of floral fabric 14” square.
Remove the back of the frame. Cut a piece of thin wadding
to the same size as this.
Place the floral fabric over the back of the frame and thin
wadding. Use strong thread to lace back and forth in one
direction first, then in the other direction. Pull reasonably
firmly, so as to be taut, but not so much that it distorts.
Position the stitched cream circle in the centre of the frame.
Pin it position, then slip-stitch around the edge of the circle to
attach it to the floral fabric. Hide the thread ends underneath.
Position the pink circle in the centre of the cream circle and
stitch with matching pink thread.
Use embroidery scissors to cut a small hole at the centre of
both circles, the size of the clock shaft. Stitch around the raw
edge of the hole, like a button hole, to stop fraying.
Drill a hole through the back of the frame and follow the manu-
facturer’s instructions to insert the clock mechanism and hands.
Fabric
35cm (14”) square of Floral
Print Fabric
25cm (10”) square of
Cream Background Fabric
20cm (8”) square of Pink
Fabric
Other
Clock Mechanism & Hands
Square Frame (9” inside)
DMC Embroidery Threads
3721 dark pink
301 I green
3012 green
223 pink
Cardboard
Size-9”
Stitched Clock page 25
(МШР9
page 26 Stitched Clock
backstitch	3721 dark pink
backstitch	3768 blue	|
backstitch & running stitch	223 pink
backstitch & french knot	3721 dark pink
lazy daisy stitch	301 1 green
backstitch	926 blue
backstitch & running stitch	223 pink
backstitch	3768 blue
backstitch	3864 skin
french knots	801 brown
satin stitch	3721 dark pink
backstitch	801 brown
backstitch & single stitches	433 brown
french knot & single stitches	3371 dark brown
satin stitch	3371 dark brown
backstitch	3721 dark pink
single stitches (* 1)	3371 dark brown
backstitch	301 1 green
backstitch (*l)	801 brown
Trace the Stitching Angel design from page 28, onto the
cream print fabric. Use a tan fine-point pigment marker or
HB pencil.
Refer to the following Stitch Chart for thread colours and
stitches used.
Stitch Chart *Use 2 strands, unless otherwise indicated in (brackets)
words + heart
dress/collar
dress trim
flowers (* I)
I eaves (* I)
apron
wings
shoes
face/arms/legs
eyes (* I)
lips
hair
teddy
teddy eyes (* I)
teddy nose
patches
patch stitches
needlebook
‘pins & needles’
Method
Trim the completed stitchery to 8Z”xl2Z”.
From the red floral fabric, cut two 1 A"x 12A" and two
IZ”xl0Z”. Sew the longer strips to the sides of the stitchery.
Then sew the remaining strips to the top and bottom.
Cut 28, 2Z” squares of various coloured fabrics. Sew together
to make four rows of 7 squares.
Sew a row to each side of the stitchery. Then sew a row to
the top and bottom.
Quilting & Binding
Sandwich the completed top, wadding and backing fabric.
Baste, and quilt as desired. I have stitched in the seams.
Cut two 2'A" wide binding strips. Refer to the Quilt
Instructions on page 6 for binding instructions.
V •
Fabric
25cm (10”) of Red Floral
25cm x 35cm (IO”xl4”) of
Cream Background Print
Various fabric scraps -
minimum 2X" squares
(28 in total)
Other
40cm x 50cm (16”x20”) of
Backing Fabric
40cm x 50cm (I 6”x20”) of
Thin Wadding
DMC EmbroideryThreads
3721 dark pink
301 I green, 801 brown
223 pink, 3768 blue,
433 brown, 926 blue
3371 dark brown
3864 skin
Size I4”xi8”
Stitching Angel Wallhanging page 27

Sewing Set page 29
Setrtog, Set
Stitcheries
Trace the designs from page 29, onto the homespun. Leave at
least IX”-2” between each design. Use a tan fine-point
pigment marker or HB pencil.
Refer to the following Stitch Chart for thread colours and
stitches used.
Fabric
Fat Quarter of Floral Fabric
Fat Eighth of Green Spot
20cm x 20cm of another
floral fabric
10cm x 15cm (4”x 6”) of
Beige Wool or Felt
20cm (8”) of Seeded
Homespun or Calico
Other
20cm x 15cm (8”x6”) of
thin wadding
15cm (6”) square of iron-on
pellon
DMC Threads
167 pale brown
3721 dark pink
535 grey blue
301 I green
801 brown
924 blue
407 skin pink
3346 green
Template plastic
Polyester stuffing
Stitch Chart *Use 2 strands, unless otherwise indicated in (brackets)
Needlebook spool	backstitch	167 pale brown
thread on spool	satin stitch	3721 dark pink
sewing machine	backstitch	535 grey blue
heart	satin stitch	3721 dark pink
words	backstitch	301 1 green
Scissor Keep girl 1 hair	backstitch	167 pale brown
girl 2 hair	backstitch	801 brown
faces	backstitch	407 skin pink
girl 1 top/collar	backstitch	924 blue
girl 2 top/collar	backstitch	3721 dark pink
eyes	french knots (* 1 strand)	801 brown
lips	single stitches (*l strand)	3721 dark pink
words	backstitch	301 1 green
Pincushion as above, for Scissor Keep and Needlebook, + scissors	backstitch		535 grey blue
jar	backstitch	167 pale brown
jar lid	backstitch	3721 dark pink
spools	backstitch	167 pale brown
thread on spools	satin stitch	3721 dark pink
buttons	backstitch (*l strand)	3346 green 3721 dark pink
pins & needles	& french knots backstitch & french knots	3346 green 3371 dark brown
mouse	backstitch	407 skin pink
mouse nose	french knot (* 1 strand)	3371 dark brown
mouse ears	lazy daisy stitch	407 skin pink
Scissor Keep
Trace 2 each of the scissor-keep back, scissor-keep front, and
circle, onto template plastic and cut out.
Iron some thin iron-on pellon to the back of the stitchery
calico. Place one of the scissor-keep front templates on the
back of the completed stitchery. Position the stitchery, centred
on the template.
Cut the calico approx. /2” outside the edge of the template.
page 30 Sewing Set
Wrap the calico around the template and sew
a gathering stitch to pull the calico firmly
around the template.Tie off.
Do the same with the other scissor-keep front
template and the floral fabric. Iron some iron-
on pellon to the fabric first.
Place these two completed pieces, wrong
sides together and slip stitch around the edges
to make the scissor-keep front.
Use the same method to make the scissor-
keep back with the main fabric and the two
back templates. Clip the inside curve of the
heart to help follow the shape.
Place the scissor-keep back and front together;
aligning at the bottom edge. Slip-stitch around
the sides using one strand of matching DMC
thread.
To attach the circle trim
Use the same method to make the circle trim.
Place a little iron-on pellon under the fabric to
slightly pad the circle trim. Don't stitch the
two covered circles together just yet.
Pull out all 6 strands of matching coloured
DMC thread, approximately 2 metres long.
Cut. Fold this in half, leaving a loop at one end.
Have someone hold the loop end for you,
then start twisting the other end around and
around and around. Keep twisting until it is
twisted nice and tight.
Find the centre and grab hold of the twisted
thread. Keep hold of both ends, but bring
them up to meet togetherThen let go of the
centre.
The thread should twist around itself creating
a lovely rope effect.Tie a knot in the end.
Place the end inside the two circle pieces. Slip
stitch around the circles with I strand of
matching DMC thread, catching the end of
the rope inside.
Stitch the loop end of the rope to the side of
the scissor-keep.
Make a tassel for the
circle trim by looping
the DMC thread
around 3 fingers
about 20 times.
Fold the loops flat
and cut through the loops at one end. At the
other end, wrap another length of thread
around and around about %” from the loop
end.Thread the end of this, into a needle.
Tie a couple of knots close to the tassel, then
pull the knots into the midst to hide the knots.
Trim the end evenly.
Stitch this to the opposite side of the rope.
Tie the rope to your scissors by making a
loop, threading this through the scissor and
putting the circle through the loop.
Needlebook
Cutting
Trim the completed stitchery to 2/2” x 3”
From the outer fabric, cut one 7/2” x 5”
From lining fabric, cut one 7/2” x 5”
From thin wadding, cut one 7)6” x 5”
From binding fabric, cut one 2”x 28”
From wool or felt, cut one З/2” x 6”
From another fabric, cut four 3”x З/2” for
pockets
To make the pockets
Place two of the 3”x 3/6” pieces right sides
together and sew around all sides, leaving al”
gap in one side for turning out.
Cut diagonally across the corners, outside the
stitching.
Turn out through the gap and iron flat. Make
two of these.
Place the pockets on the lining fabric, allowing
approximately I” between them in the
centre.
Slip-stitch around the sides and bottom edge
to secure the pockets to the lining fabric.
Sewing Set page 31
To make the
needlebook
Sandwich the wadding
between the lining and
outer fabrics. Pin to
hold together
Fold the binding strip in
half, wrong sides to-
gether; along the length.
Position the doubled
raw edge of the
binding along the
bottom edge of the
outer fabric.
Start stitching about I ” from the beginning of
the binding. Stitch the binding all the way
around. When you get back to the beginning,
cut off the excess binding, leaving enough to
tuck inside the other end of the binding.
Fold in the raw end, then tuck other end in-
side and finish stitching the binding.
Fold the binding over the raw edge of the
needlecase to the back. Slip-stitch the binding.
Centre the wool or felt on the inside of the
needlecase. Place a pin toward the ends of
the wool/felt to hold in position.
Turn the needlecase over and use a patch-
work rule to find the centre of the needlecase
and rule a line using chalk pencil.
Sew along the line using matching coloured
thread, catching the wool/felt on the inside.
Fold the needlecase in half and position the
stitchery on the front. Slip-stitch the stitchery
in place using matching thread.
Pincushion
Trim the completed stitcheries to 2%” wide x
3” long.
Trace the circle template onto template
plastic and cut out. Also cut a piece 9”xlM”.
Cut a piece of thin wadding the same. Place
these on the templates.
From the main fabric, cut /2” larger than the
template pieces.
For the circle, sew large gathering stitches
around the edge of the fabric and pull in
around the template.Tie off.
For the rectangle, lace back and forth across
the shortest width with a couple of strands of
DMC thread, tuck in the ends and stitch
down, at the back.
Overlap the ends of the covered rectangle to
make a ring.This is the side of your pincushion.
Use the covered circle base as a guide to
make sure the ring is the same size as the base.
Stitch the end of the rectangle to hold.
On the trimmed stitcheries, turn under a small
hem at the sides only.
Space the stitcheries apart evenly around the
pincushion side. Slip stitch at the sides of the
stitcheries to hold. Lace the top and bottom
of the stitcheries on the inside.
Now you can stitch in the base. Slip-stitch
using matching coloured thread, hiding the
ends of the thread on the inside.
Place some stuffing inside the pincushion.
Cut a circle of main fabric to the size of the
large circle template.
Sew large gathering stitches around the edge
of the circle about %” in from the edge.
Pull in a little to form a cup. Stuff this very
firmly with polyester stuffing.Then pull in as
tight as you can and tie off.
Push this down into the pincushion base and
slip-stitch with matching thread around the
top edge of the sides of the pincushion.
page 32 Sewing Set
tMchwrt CWcfy
Cutting
From red print fabric, cut	one	12X"xl4Z”
From floral fabric, cut	one	I2Z”xI4Z"
	one	12Z”x8Z”
	two 2Z' strips
From iron-on pellon cut Dresden Plate	two	l2Z’xl4Z"
Follow the instructions on page 5 to make one half dresden
plate. Use scraps of fabric for the wedges & half circle.
Method
Place the iron-on pellon behind the red print and floral fabric
12Z"x I4Z" pieces. Iron to adhere.
Quilt both pieces as desired. I have quilted vertical lines at 2”
intervals.
Position the dresden plate on one of the 12Я” edges of the
quilted red panel. Stitch in position.
Fold the 12Z”x8Z” floral piece in half, wrong sides together; to
make the inner pocket. It should measure 12Z"x4X", folded.
Position the pocket, at the bottom edge of the quilted floral
piece. Pin to hold.
Rule a vertical line 5Z” in from each side on the pocket. Use
matching coloured thread to stitch on the lines.
Place the inner and outer pieces, wrong sides together
Measure half way along the 14Я” edge to find the centre. Rule
a line through the centre and sew.This is the fold.
Cut a piece of heavy card 6%”xl 3%". Place this between the
inner and outer pieces, on the bottom half of the caddy. Hold
in position with a couple of pins at the side.
Position the magnetic clasps on the inner piece, approximately
IX”-2” from the sides. At the bottom edge, the magnetic
clasps will be attached to the pocket. Place a small amount of
interfacing where the clasps will go for extra strength. Ensure
that the top and bottom clasps will line up when the caddy is
folded closed.
Snip a small slit for the prongs to go through and place the
backings behind. Bend the prongs to hold the clasps.
Sew the two binding strips together end to end. Refer to the
Quilt Instructions on page 6 for binding instructions.
Fabric
35cm x 40cm (14”x 16") of
Red Print
I/2m (20") of Floral Fabric
Various fabric scraps -
minimum 4" x 3"
(10 in total)
13cm (5”) square of fabric
for dresden plate centre
Other
40cm (16") Iron-On Pellon
2 small pieces of interfacing
35cm x 20cm of Heavy
Weight Cardboard
2 small Magnetic Clasps
Size 14"x8" (closed)
Patchwork Caddy page 33