/


Text
FOR ALL MACS & MACBOOKS
‘ The Complete
macOS
Ventura
Manual
Master your Mac & MacBook with
expert step-by-step guides
www.pclpublications.com <0 PoperCUt 100% INDEPENDENT
Save a whopping
25% Off!
Apple Tech Manuals
with 3 Popercut
rhe ultimate guide to getting the
best from Apple s NEW iPhones.
. The 1
iPhone
Manual
’9s
Manual
The^^L9UiCie to ^n9
best from Apples NEW OS!
Manual
Я Pod©reut
Getting
Started
Wl
SIP 2022 Е01ТЮЧ
Popercut
The Complete Manual Senes
insider
Secrets
FOR USE WITH Ail MACBOOKS
The Complete
MacBook
User Manual
essential step-by-step manual tc mastering
your MacBook and macOS Ventura
Guidebook
The
y The Complete
iPad
SiPadOS*
User Manual
°—Л
850
IHpmacOS
Ventura
. MANUAL
FREE
SB •
WRAfW WATCH 4 watches^
The Complete
в S
Not only can you learn new skills and master your
Apple tech, but you can now SAVE 25% off all of our tech
digital and print publications!
Simply use the following exclusive code at checkout
NYHF23CN
www.pclpublications.com
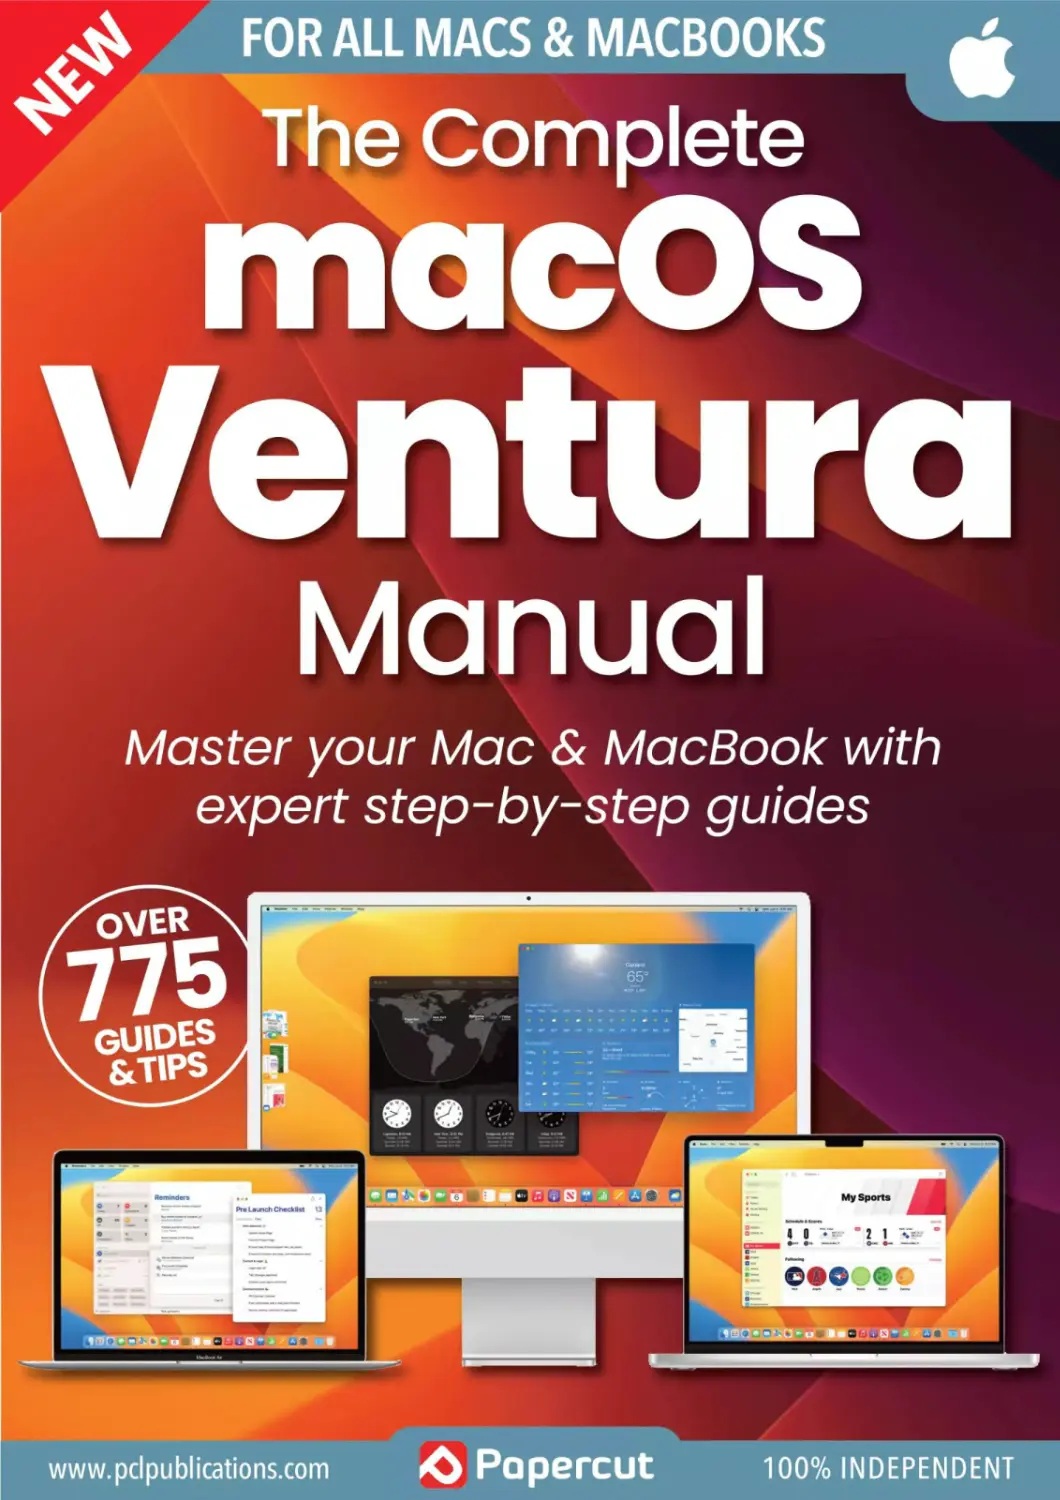
The Complete
macOS
Ventura
Manual
macOS Ventura has some awesome features,
and we're here to tell you all about them.
Our plain-English guides and fully illustrated tutorials help you
get the most from your Mac. For the beginners, we show you
how to set up, get online and use its key features such as
Finder, Spotlight, gestures and the Dock. We show you how to
use Ventura's key apps, including full guides to the new
applications that joined the Mac with the new operating
system, namely Weather, Clock and Stocks. And then we
move on to Ventura's more advanced features. Look out for
guides to the new System Settings, Passkeys, Stage Manager,
Continuity Camera and more. If things go wrong, check out
our Maintenance and Troubleshooting guide.
Read on and learn how to master your Mac!
Э Papercut
www.pclpublications.com
Contents
Contents
The macOS Ventura Manual >
6 The Ten Most Common
Questions About macOS Ventura
6 How Do I Install macOS Ventura?
7 What do I need to run macOS Ventura?
8 First Steps with macOS Ventura
10 Set Up Your Mac - For the First Time
14 Using Touch ID - On the Latest Macs
16 Welcome to the macOS Ventura Desktop
18 Customising the macOS Ventura Desktop
19 Auto-changing Wallpaper
20 Gesture Controls-On Your Trackpad
21 Turn Off Force Click
22 Dark Mode And Night Shift
23 Desktop Stacks For Organisation
24 Getting Online - With Wi-Fi or Ethernet
26 Ventura’s Menus - A Key Mac Feature
28 Using Finder - Files, Folders & Apps
34 Ventura's Dock - For Most-used Apps
36 Notifications - See What’s Going On
38 Working with Ventura's Widgets
40 The Spotlight Feature - Search Your Mac
41 New in Ventura
48 macOS Ventura’s Key Apps
50 Safari - Your Web Browser
51 Browser Translations
58 Mail-Send & Receive Email
59 The Column Layout
65 Home - For the Smart Home
66 Music-Play Your Tunes
67 Importing Your CDs into Music
68 Signing Up for Apple Music
70 News - Stories and Features
71 My Sports
72 Photos-Manage Your Images
74 The Editing Tools
77 Editing Photo Information
78 Contacts - Your Address Book
79 Sharing Contacts
80 Calendar - Plan Your Events
81 Creating an Event
84 Reminders-Never Forget Again
85 Creating and Using Reminders
86 Messages - For On-screen Chats
89 Shared with You
90 Books - Buy & Read eBooks
91 Buying Books in the Books App
42 Launching Apps - And Quitting Them
44 Setting Up Email - For the Mail App
46 Installing New Apps - Including Third Party
Q
4 | www.pclpublications.com
94 FaceTime - Video & Audio Calls
96 Group FaceTime Calls
97 More FaceTime Features
98 Maps - Plan Your Routes
99 Route Planning Explained
101 Viewing Maps in 3D
102 TV app - Watch on Your Mac
104 Notes-Store Your Jottings
106 Advanced Notes Features
108 Quick Note - Speedy Jottings
110 Find My - Find Your Gear
111 Find My Online
112 Weather-Will it Rain?
114 Stocks-Watch Your Shares
116 Clock - Time and More
116 World Clock & Alarm
117 Stopwatch & Timer
118 Freeform - For Collaboration
120 App Store - Buy More Software
121 Redeem/Add Funds
122 Going Further with macOS Ventura
124 macOS Ventura's System Settings
130 Passkeys - A Password Replacement?
132 Split View Screens - macOS Multitasking
134 Managing Your Desktop
136 Stage Manager-A New Feature
138 Continuity Feature - On Apple Devices
142 Universal Control On Macs and iPads
144 Sidecar With Your iPad
146 Continuity Camera - Use Your iPhone
148 Using iCloud - For Storage & Syncing
152 Upgrade Your iCloud Drive
154 iCloud Desktop - Documents & Folders
155 The App Switcher - Speed Your Workflow
156 The Siri Feature - Your Digital PA
158 Shortcuts on Your Mac
160 Live Text-Pics to Words
162 Focus - Fewer Distractions
164 iPad Apps on an M1 Mac
166 The Time Machine - Back Up & Restore
168 External Hard Drives Advice
170 The Keyboard - Customised Shortcuts
172 Update macOS - To Latest Version
174 Maintenance and Troubleshooting
www.pclpublications.com | 5
Tke Ten 'Questions
UleGekAfaukntacOS Ventura
Wham's V&rh^ra all aboyi~? I/Ve «ansu/er 'Aen of уоцт rvos'k-asked
c^esiions aio^t the Mac's latest operating system.
Ufafis o<acOS l/etcfmM
iffhu Mm
to games developers and more.
Is tvwcOS Ventura safe to use?
Mac operating systems are always safe and secure,
and none more so than Ventura. With the new
version of macOS, security updates offered
by Apple can be applied automatically at any
time; you don't have to wait for a regular
update, and there's no need to restart your
Mac afterwards. Gatekeeper, which prevents
unauthorised code from running on your
Mac, has been enhanced. Passkeys is more
secure than logging in with passwords, and
more security tools have been made available for
developers and system administrators to use.
a w^cam?
The best Apple camera you have is the
one in your pocket, not the one above
the screen on your Mac. With Ventura,
you can take advantage of your
iPhone's extra power by using it with
your laptop or desktop as an alternative
webcam. Harnessing the power of your
iPhone, in a FaceTime call you can use
Studio Lighting to brighten your face
-Uourdo-I 'ML
It's simple enough. If your Mac is compatible,
your System Settings icon is badged. Open
System Settings from the Dock, Apple menu
or Launcher, and navigate to General >
Software Update. From there, simply follow
the on-screen instructions.
and darken the background. Desk View
shows your workspace in front of the
Mac on the screen as well as your face.
You can use Continuity Camera with
other video chat apps such as Zoom,
Teams, Webex and more. It's wireless,
so there’s nothing to plug in - you don't
even have to unlock your iPhone.
6 | www.pclpublications.com
-
ut mac
=S==g=2SS£
,— • Nor can they be le’ )eave
\ —-Xi—» I sen/erViaCk passteysworkfor
I I vnur device. Pass у
-ssr your websites. and
appsasweiia A (e
. are shared between-
devices usmgiCtoud hey
You certainly can! If you spnrio * '
made a mistake or forgot to add and notice You've
have ten seconds in wSh° attachment, you
the composition
screen, where you
can correct your
mistakes before
sending it again. It's
an amazing feature
which saves a lot
°f frustration.
B*-wn Heung
TT Does Vadura luate
jg|
I Apple claims it does. The new operating system offers a new
’ version of Metal, Apple's application programming interface
(API) for graphics processing in apps such as games. Metal 3
offers impressive programming tools such as MetalFX Upscaling,
! which renders rich, complex scenes even faster than before.
Game loading has been improved
too, with a new fast resource-loading
API. At the keynote where Metal 3
was announced, two games which
are coming to the Mac later in the
year were shown; No Man’s Sky and
Resident Evil Village. These aren't
recent games on other platforms, but it
will be great to see them on the Mac.
I use Messages more then Mail these
days. Can I unsend a messaae too?
Yes, but there are a few limitations. You can unsend and edit
a message up to 15 minutes after it’s been sent, but only if
it went as an iMessage, that is, to another Apple device as a
'blue bubble’ message. If it was sent as a regular SMS (in a
green bubble), it won't work. You can also mark a message
as unread, recover recently deleted messages and use
Messages with SharePlay too.
Ah. time to chill! J.
There's a new one. I’m a sucker for dinos, as
you know
ГDnh, sounds amazing Can you share?
I which episode are you on?
VJhut is Ventura anyway? Another
pUce in California?
•Of course. As is usual for recent versions of macOS,
Ventura is named after a Californian location. Founded
by Spain in 1782, Ventura is located on the central
coast, and it has a very long pier.
Мо/'Ж’/ Плк
To install Ventura, you need one of the following Macs.
MacBook: 2017 or later
MacBook Air: 2018 or later
MacBook Pro: 2017 or later
Mac mini: 2018 or later
If you're not sure what you have,
click on the Apple icon in the
top-right of the screen, and
select About This Mac. A pop-
up window appears. Your Mac's
model and year is shown here.
iMac: 2019 or later
iMac Pro: all models
Mac Pro: 2013 or later
Mac Studio: all models
www.pclpublications.com | 7
First Steps
with macOS
Ventura
If you're new to the Mac, this is a great
place to start. We show you how to set
up your Mac out of the box, including
getting started with your Face ID and
Apple ID. We guide you through the
process of taking your Mac online, and
how to set up your email accounts in
the Mail app. We also take you through
the Mac's basics, such as gesture
controls, the Mac desktop, using the
Finder and more.
Learn more >
Brother P-touch Editor
Burr
8 | www.pclpublications.com
First Steps with macOS Ventura
www.pclpublications.com | 9
First Steps with macOS Ventura
Set Up Your Mac
'^0 For the First Time
If you have a new Mac but have not yet set it up, follow this guide. It's
nothing to be afraid of; follow the guide and the on-screen instructions, and
step by step, you get to set your Mac's language, take it onto the Internet
with your Wi-Fi network, sign in with your all-important Apple ID and more.
1
First, you might see this window, inviting you to choose
the language you use to set up your Mac. The most
popular languages are at the top of the list, but if you want to
use an alternative one, scroll up until you find it, click on it and
then click the arrow (bottom right).
2
Now you must choose your territory, that is, where you
live and will be using your Mac. You can scroll the list of
countries up and down to find your own, or start to type it to
get there quicker. Click your country to highlight your choice,
then click Continue.
3
Now select your Mac's language and input source. The
default ones for your chosen territory are offered, but if
you want to change them, click Customise Settings and set
the language your Mac uses and the keyboard layout to best
suit your needs.
4
If you have a disability that makes it harder to use a
computer, the Mac's Accessibility tools could be of
interest. If you want to set up your Accessibility settings now,
click one of the buttons. If not, click Not Now - you can do it
later in Settings.
10 | www.pclpublications.com
Set Up Your Mac
5
Next comes the Data & Privacy screen. You're shown an
icon that appears when an Apple feature collects
information, and needs your permission. There's nothing you
need to do on this screen, just read it for reference and move
on once more.
6
You're invited to transfer information from a Mac or Time
Machine backup, a Windows PC or not at all. To transfer
data from your old computer, choose the correct option and
follow the on screen instructions. Otherwise, choose the last
option to start afresh.
О Now it’s time to sign in with your Apple ID. If you already
have an Apple ID, sign in now with your password. If you
don’t, click the Create New Apple ID link and follow the
on-screen instructions. There's also a link for if you've
forgotten your Apple ID.
8
You’re shown a screen of Terms and Conditions, which
you can read by scrolling if you wish. When you're ready,
click the checkbox labelled 'I have read and agreed to the
iCloud terms and conditions', then click the Agree button in the
bottom-right corner of the window.
9
Your account name is based on your Apple ID name but
your password, which unlocks the computer, should be
chosen now. Choose something you can remember and enter
a hint in case you forget. Click the small picture to choose a
different one, or take a photo using the Mac's camera.
10
You can also change your avatar now, if you wish. Simply
click on the one you have at the moment - the image in
the circle to the right of your full name and account name -
and you're given the chance to change it to a Memoji, Emoji,
monogram, a photo and more.
www.pclpublications.com | 11
Q First Steps with macOS Ventura
11
Now you decide whether to Enable Location Services or
not. It's up to you, but there’s a lot of Mac features that
depend on being able to tell where you are to work, for
example, finding your location in Maps. Click the box if you
want to enable it, and then click Continue.
For the date and the clock, choose the time zone in
which you'll be using your Mac. If you enabled location
services in the previous step, the time zone you're in at the
moment is offered by default. Stick with this or find a new
one, and then click the Continue button.
13
You can now choose whether you allow analytic
information to be sent to Apple and/or third-party
software developers so they can improve their products. If
you're concerned about privacy, you can decline, but it's helpful
if you agree to share.
14
You now decide whether or not you want to set up
Screen Time. Click Continue to have Screen Time give
you updates on how you're using your Mac, or the Set Up Later
link at the top to leave it be for now. You can activate it later in
macOS Ventura's System Settings.
15
It's time to set up Siri, and decide whether or not you
want Apple's own digital personal assistant to activate
when you say, 'Hey Siri.’ Click the checkbox in the middle of the
window if you wish to do so, then click Continue and follow the
on-screen instructions.
16
Do you wish to send information to Apple for it to use in
improving the Siri and Dictation features? These
recordings are shared with privacy in mind, and Apple never
knows who sent which recording. Click Share Audio
Recordings or Not Now.
12 | www.pclpublications.com
Set Up Your Mac
17
Choose how your Mac will look when in use. You can
go for the default light look, with white as the
predominant background colour, or dark, with black
backgrounds. Auto switches between light and dark
depending on the ambient light
18
Your Mac soon boots into macOS Ventura, the latest
version of the Mac's operating system. If you open
System Settings (from the Apple menu, Dock or Applications
folder), you can change its appearance and wallpaper, should
you not like it as it is.
Reset to Factory Conditions
If you acquired your Mac second hand, you might want to wipe it clean and start again. Just follow this guide.
First, restart your Mac whilst holding down cmd-Shift-Alt-R (Intel
Mac) or by pressing and holding the power button (Apple Silicon
Mac). The Mac continues to boot, but instead of the regular
desktop, a window appears showing four options as seen here.
From the window, select Disk Utility (the bottom of the four
options) and click Continue. Select your startup disk (called
Macintosh HD by default) and in the toolbar at the top of the
Disk Utilities window, click the Erase icon to wipe it clean.
On the next screen, the Format pull-down menu should read
APFS if it's available or Mac OS Extended (Journaled) if it isn't.
Select the appropriate option and click Erase to wipe your boot
drive. When its finished, click Done, then quit Disk Utility (cmd-Q).
Now choose to install macOS and continue. When invited to install
the operating system, do so; you might have to click on the Wi-Fi
icon in the menu bar and rejoin your wireless network. Agree to
T&Cs, select your main drive and click Install to start afresh.
www.pclpublications.com | 13
П First Steps with macOS Ventura
Using Touch ID
On the Latest Macs
Touch ID has long been a stalwart on the iPhone and iPad, but it recently
came to the Mac, with the latest notebook and iMac releases; look for a
Touch ID sensor on the keyboard. You can use Touch ID to unlock your Mac,
input passwords and make purchases, all by using your fingerprint.
Setting Up Touch ID
First of all, open the System Settings window. Click on
Touch ID & Password. If this option isn't there, your Mac
doesn't have the Touch ID feature.
To get started, click on the + icon captioned 'Add
Fingerprint’. You can add more than one print to Touch ID
if you wish; here, this is our second.
3
Type your admin password when asked, the one you use
to unlock your Mac. As instructed, you must now place
the finger you intend to register on the Touch ID sensor, on the
top-right of the keyboard.
Keep raising and lifting your finger. As you can see, the
grey fingerprint in the window gradually turns red, as
Touch ID reads, analyses and records your fingerprint. Keep
doing this until the centre section is full.
14 | www.pclpublications.com
Using Touch ID
Purchases & Passwords
Touch ID now needs to cover the edges of your finger.
Continue lifting and placing your finger, but concentrate on
having the edges of that fingerprint on the Touch ID sensor.
The edges gradually go red. Eventually, all the fingerprint
area is red, and the registration is complete. Click the
Done button in the bottom-right corner.
Unlocking Your Mac
With Touch ID, you can place your finger on the sensor to
unlock your Mac, without your admin password. You still
need the password after it restarts.
Making Purchases
You can use your Touch ID to make App Store purchases
and enter login details. Instead of typing a password to
complete the purchase or log in, use Touch ID.
И There's a list of things you can do with your Touch ID
instead of typing your admin password. Take a look and
uncheck any that you don't wish to use.
Fast User Switching
If two people have accounts on your Mac, and you've
enabled Fast User Switching from the menu bar, you can
use your Touch ID to switch between users too.
www.pclpublications.com | 15
П First Steps with macOS Ventura
Welcome to the
Ventura Desktop
The desktop is at the heart of your Mac. Everything you do takes place on
the desktop, including opening apps, interacting with files and folders and
using the Dock. Here we show you how to use your desktop, app and folder
windows, the top bar menu, Trash and more.
1
From the Apple menu you can
log out, shut down, restart or
put the computer into sleep mode,
get comprehensive information on
the computer's hardware and
software, access the System
Settings and open items you've
recently closed.
2
The menu bar running along
the top of the desktop gives
access to functions and controls for
the app you currently have open at
the time. The app currently in use is
shown to the right of the Apple icon.
In this case it's Finder. Open or click
on an app and its name is shown
here instead; and its menus are listed
in the menu bar.
3
□
5
The Command Centre is where
you can access Bluetooth,
Wi-Fi settings, display brightness,
volume, Stage Manager, Screen
Mirroring and much more.
Application windows come in
all shapes, sizes and designs.
Your Mac's applications can be
launched from the Launchpad, the
Dock, from Spotlight or using
Applications window in Finder.
This is a Finder Window. The
Finder utility is the central
point for navigation and file
manipulation. You can browse and
navigate applications, documents,
external drives and even access
other computers; as long as they're
connected to the same network
(cabled or wireless).
6
This is your Mac's Desktop.
Click on it to access the
Finder controls in the menu bar. You
can change the picture (or
wallpaper) used for the Desktop in
System Settings > Wallpaper. The
one we have here is the standard
macOS 13: Ventura desktop, but
there are plenty of others to choose
from, including wallpapers from older
versions of macOS.
In macOS, folders work just like
their real-world counterparts.
You can use them to store files, data
and even other folders. You can call
them anything you like; click on a
folder's name and type in a new one.
8
The Dock offers quick and
easy access to your favourite
applications, documents, folders
and even the Bin. It’s easily edited
and customised to make the most
of the way you work. Apps you
currently have open are always
shown in the Dock.
9
You can also put folders in the
Dock, as shown here. Click on
a folder to open it within the dock,
and then click on something inside
the folder to open or launch it.
10
__J
The Bin, formerly called the
Trash. To delete a file, folder or
application, drag it into here, then
right-click on it and choose 'Empty
Bin' from the menu.
16 | www.pclpublications.com
The Ventura Desktop I*
Siri
Siri is Apple’s
personal digital
assistant and you
can use it on your
Mac. Just click on
this icon and a Siri
window opens. See
the Siri tutorial for
more information
on how to use
this feature.
Date, Time,
Notifications &
Widgets
Click on the time here and to open
the Notifications and Widgets
sidebar. If you go into System
Settings > Control Centre and
click the Clock Options button,
you can set how the date and time
are displayed here.
www.pclpublications.com | 17
First Steps with macOS Ventura
a Customising the
Ventura Desktop
Although macOS Ventura's default desktop image is very attractive, if
you'd prefer something different, you can personalise your experience by
customising your Ventura Desktop. You can choose a new wallpaper for
the desktop image, and even set up a slideshow of your favourite pictures.
Choose New Wallpaper
Click the Apple menu, select System Settings and select
the Wallpaper option. Use the pull-down to set a Light,
Dark or Automatic paper. Automatic' changes between light and
dark according to the time of day.
Choose the image you'd like to use for your wallpaper and
click on it. If there’s a cloud in the corner, click on it first to
download the image. The desktop is updated immediately. Keep
it or choose another one.
Use an Image from Your Photos Library
Open the Wallpaper options: Apple menu > System
Settings > Wallpaper. Available pictures from your Photos
app are shown at the foot of the window. Scroll them left
and right, or click Show All to display them all.
Explore your photo images, and then choose one by clicking
on it If it has a cloud in the corner, click this first to download
the photo from iCloud. The photo is then used for the
desktop. Keep it or choose again.
18 | www.pclpublications.conn
Customising the Ventura Desktop
Add a Folder to Folders List
Auto-changing Wallpaper
1
Open System Settings and click on the Wallpaper option
in the sidebar. Scroll the window up to see the folders that
are already associated with the Wallpaper options, found at the
bottom of the available pictures.
2
Click the Add Folder button at the foot of the screen to show
a Finder window. Navigate to a folder on your Mac that
contains pictures you'd like to use for desktop images, select it and
then press the Choose button.
3
The required folder and its contents should now be visible
at the foot of the screen. Click on Show All and you can
see all the pictures in that folder as thumbnails. Click on one to
set it as your wallpaper.
If you're using an image from a folder of pictures, you can
have it change automatically after a period of time. In the
System Settings' Wallpaper window, find the folder of pics
you want to use, and click Auto Rotate.
When using an auto-rotating wallpaper, take note of the
controls here. Use the pull-down to set how often the
wallpaper changes, and check the 'Randomly' box to have
them randomly chosen instead of being used in order.
More Wallpaper Tips
If you'd prefer the pictures were used in a random order,
check the box at the foot of the screen. The pull-down
above the pictures lets you choose how the images will fill
the desktop space.
www.pclpublications.com | 19
О First Steps with macOS Ventura
яояиооояив
Gesture Controls
л On Your Trackpad
You can navigate your Mac using gesture controls, just like you do on
your iPhone or iPad. These gesture controls can be performed on a Mac
notebook's trackpad or on the Apple Magic Trackpad, which is available for
desktop Macs. You can even do a few of them on a Magic Mouse.
One of the things that makes the Mac such a pleasure to use is its large and responsive MacBook multi-touch
trackpad or the desktop Mac's Magic Trackpad. You can use the trackpad in much the same way as you would use
the touchscreen of an iPhone or iPad: to quickly and easily access menus, sort through stacks of pictures or
documents, scroll through documents and to zoom in and out of displayed images. Once you get used to it, you'll
find that it's a very easy and intuitive way of controlling your Mac and that it can do far more than just scrolling.
a Secondary Clicking.
Some people like to use a two-button
~ mouse with their Mac, and this can be handy
for quick access to shortcut menus by
| secondary clicking or right-clicking. To set up
two-finger secondary clicking using the
Я trackpad, select Secondary Click in the Point
t & Click pane of Trackpad preferences. To set
В up a one finger secondary click zone in the
Я bottom left or right corner of the trackpad or
r mouse, select Secondary Click in the Point &
Click pane of Trackpad preferences, and choose
an option from the pop-up menu.
Multi-touch Gestures.
The MacBooks advanced trackpad supports the
Multi-touch gestures. They might seem a bit complicated at
first but once you get used to them and have had a bit of
time to practise, they quickly become second nature. Before
long you'll wonder how you ever managed without them.
The trick to using the trackpad properly is to practise using
more than one finger at once. Some gestures use two
fingers, whilst others use three. You need to apply light, firm
pressure and move your fingers smoothly and evenly, all at
the same time. Like we said, it takes a little practice but you
quickly become proficient at it To enable Multi-touch
gestures, view instructional videos of the gestures and set
up various other trackpad options, choose Apple > System
Settings and then click Trackpad in the left-hand sidebar.
bbbbbbbbbbbbbh
MDDBDBBDBBBBBB
аввввоивввввп
ввшввооповвв^и
Single Click
Unlike most other trackpads, the entire MacBook trackpad
works the same as the mouse button; and you can click
anywhere on the track pad to activate apps and select icons.
Scroll Vertically
Place two fingers together on the trackpad, then move them up
or down. This will scroll vertically up or down the document or
web page you’re currently viewing.
20 | www.pclpublications.com
Gesture Controls
Zoom In and Out
Two-finger pinching lets you zoom in or out on PDFs, images,
photos, and other large visual documents or web pages. Place
two fingers on the trackpad, then move them apart to zoom in,
or together to zoom out. The quicker you move your fingers,
the more you'll zoom.
Rotating Images
You can rotate images by placing two fingers on the trackpad
and then turning your hand so that your fingers both move in a
curve. It can be a little awkward on the wrist at first but you’ll
soon get used to it. It's a very handy gesture if you're laying out a
page in a desktop publishing app.
ВВВВВВВВВВВВВИ
MBQBBBDDBOBBBB
ПВВВВВВВВВВВВ
9S9IS
Access Mission Control
You can access the macOS Mission Control at any time, even if
you've got a full-screen app open. Simply place three fingers at
the bottom of the trackpad and move them quickly upwards and
Mission Control appears.
Switching Between Full-screen Apps
If you've got several apps open full screen at once, you can
quickly flip between them using a gesture. Place three fingers on
the trackpad and quickly slide them to the left or right. This will
scoot the current app aside, revealing the next in line.
Force Click
The very latest Apple notebooks feature Force Touch
trackpads, which can tell a soft tap from a hard tap. A hard
tap, or Force Click, can be used to preview a file, drop a pin
in Maps, preview a Safari link, rename a file or folder and
more. It’s a concept that should prove very familiar to
those who have used the latest iPhone models.
Turn Off Force Click
If you dislike the Force Click gesture, and find it gets in the
way of your workflow, it's easy to turn it off. Open System
Settings (under the Apple menu in the top left corner), and
click Trackpad in the left sidebar. Look for the option
'Force Click and haptic feedback’. There's a switch to its
right; use it to turn the Force Click option on and off.
www.pclpublications.com | 21
First Steps with macOS Ventura
Dark Mode
And Night Shift
If your screen's too bright, there's a couple of great desktop features that
help. Dark Mode inverts the Mac's colour scheme, making it much darker,
and Night Shift Mode changes the colour hue, reducing blue light that can
keep you awake if you use your Mac before going to bed.
Dark Mode
Night Shift Mode
1
From the Apple menu, open System Settings. In the
left-hand column, click on Appearance, the second option
in the list. At the top of the right-hand section are the Light, Dark,
and Auto buttons. Dark and Light buttons switch to those
modes, and Auto lets you schedule the changes.
1
From the Apple menu, open System Preferences. Click on
the Displays pane and then on the Night Shift button.
From here you can schedule Night Shift Mode to run from
sunrise to sunset or during custom times; or you can simply turn
it on by checking the Manual box.
2
With Dark Mode on, the colours are subdued or
reversed in Finder, windows, the Mac's built-in apps and
more. Third-party apps can be built to take advantage of Dark
Mode too. If you find it more comfortable to work on a darker
screen, this is excellent news.
2
With Night Shift Mode enabled, the colour spectrum
shifts from blue to yellow. If you use your Mac late at
night, too much blue light can interfere with sleep patterns, so
using Night Shift Mode when on your Mac close to bedtime
can prevent this from happening.
22 | www.pclpublications.com
Dark Mode & Desktop Stacks
Desktop Stacks
For Organisation
If your Mac's desktop regularly gets cluttered with folders, file icons and
other such material that you're currently working on, there's a solution at
hand in macOS. With a click of your mouse or trackpad, you can organise
them into stacks, grouped according to their file type. Here’s how to do it.
1
From the Apple menu, open System Settings. Click
'Displays' on the left and then on the Night Shift button.
From here you can schedule Night Shift Mode to run from
sunrise to sunset or during custom times; or you can simply
turn it on using the 'Turn on until tomorrow' switch.
2
From the View menu, select the Use Stacks option. Your
files are stacked on the right-hand side of your desktop,
according to their type. For example, images are stacked
together, as are documents. To turn this off again go to View
and click Use Stacks.
3
To open a stack on your desktop, click on it. The items
contained in that stack are revealed, allowing you to
access and open individual files. To close a stack again, click
on the down-pointing triangle icon that replaced the stack
when you clicked to open it.
□ You can choose how you group your stacks. In View, go
to Group Stacks By and then pick an option. If you use
finder tags (see later in this book) to identify files from the
same project, for example, grouping by Tags keeps them
together and easier to find.
www.pclpublications.com | 23
First Steps with macOS Ventura
ъ Getting Online
M With Wi-Fi or Ethernet
As is the case with any modern computer, access to the Internet is a vital
component for upgrading and getting hold of new apps that will help you
get the most from your Mac. Getting online in Ventura is remarkably easy
and here's how to do it both wirelessly and with a cabled connection.
Connecting with Wi-Fi
1
Make sure that your Mac is within range of your wireless
router’s Wi-Fi signal, then click on the Wi-Fi icon in the top
menu bar. You'll see a list of Wi-Fi networks. If your Wi-Fi is off
click the switch to turn it on.
2
You'll see a list of Wi-Fi networks available in your area. A
lock to the right shows a password is required to join it.
Click on the network you wish to join, whether it's your own
router or a public Wi-Fi in a cafe or bar.
Using Public
Wi-Fi
Some high street locations
such as libraries, bars and
restaurants offer free Wi-Fi
to their customers. There
are many different ways
you can access public
Wi-Fi. Some locations may
have an unsecured
connection, some require
you to ask for their Wi-Fi
password, and for others you have to register via their
pop-up website; just open Safari while in such a Wi-Fi
zone and then follow the on-screen instructions that
appear when your Mac connects to the network.
3
If a password is required (it probably is), a window appears.
Enter the password here. If you're setting up at home, the
password is probably supplied with your router. Your Mac then
joins the network, and remembers it so you don't have to add the
password every time you go online.
24 | www.pclpublications.com
Getting ОпНпеУ@ДД|
Configuring Your Wi-Fi
Going Online with Ethernet
If you prefer the stability and speed offered by a
cabled, Ethernet connection, here's how to set this up.
Click on the Wi-Fi icon in the top bar, and in the menu that
is shown, click Wi-Fi Settings at the bottom. The System
Settings window appears, with Wi-Fi already open. Click the
Advanced button.
Once you've set up your router according to the instructions
supplied with the device, getting online using Ethernet is
relatively easy. First of all, you need a cable that looks like
this. There should be at least one supplied with your router.
You can see a list of all the Wi-Fi networks your Mac has
connected to, in order of preference. Where two
networks are available, the higher one is used. If you want to
change this order, simply drag and drop them.
Plug one end of the cable into your Mac and the other end
into one of the router's Ethernet ports: it doesn't matter which
one. If your Mac doesn't have an Ethernet port, you need an
adapter. You can get one online or from an Apple Store.
1
2
Click Details next to your current network and then the
TCP/IP button. You can see what IP address your Wi-Fi
router has allocated to your Mac. Advanced users can then edit
these settings and create your own, static IP address.
3
If your router isn’t close
enough to your Mac to
support a cabled
connection, consider
using Home Plug AV
instead. This uses your
household electrical
wiring to send data.
Ask at your local
computer store about a
Home Plug AV starter
kit. There are many
different brands of
HomePlug AV devices
to choose from, and as
HomePlug AV is an
industry standard,
they're all compatible
with each other.
www.pclpublications.com | 25
П First Steps with macOS Ventura
a Ventura's Menus
A Key Mac Feature
Whether it's a pull-down menu accessed by clicking on the top bar of your
desktop or a contextual menu found by right-clicking or Ctrl-clicking on a
file or folder, you need to know how to use your menus if you are to get the
most out of your Mac and Ventura. Here's a guide to your Mac's menus.
The Apple Menu
1
The Apple menu is
always found in the
top-left corner of Ventura’s
desktop. To open it, click on
the Apple icon once, then
choose an option. This
menu is always there,
whatever it is that you’re
doing on your Mac.
2
Choose About This Mac
for a window showing
you technical information about
your computer Clicking More
Info... lets you delve further
looking at its Display, Storage
and more; and you can get a
full System Report by clicking
the System Report button too.
3
The System Settings
option opens the Mac’s
System Settings, which we
discuss later in this book.
4
This option opens the
App Store. If updates
are available for your Mac or
any of its apps.
5
Hover your pointer over
the Recent Items option
to see the sub-menu showing
apps, documents and servers
you’ve recently used. You can
click on one of these items
and open it, offering a
convenient way of accessing
things you recently closed.
26 | www.pclpublications.com
Ventura’s Menus
6
Click here for the Force
Quit window. This
window lists all currently open
applications and notes if any
of them are unresponsive,
that is, they’ve crashed. You
can force a crashed app to
quit from here.
Click here to put your
Mac into Sleep Mode.
This saves energy and
password-protects your Mac
while you’re away from your
keyboard for any time.
8
Click here to restart
your Mac. This is useful
if you’ve installed new
software or your Mac isn’t
behaving as it should.
9
Click to shut down your
Mac, that is, switch it off.
10
Lock screen brings up
your password screen.
You have to enter your
password to continue to use
your Mac. It’s useful if you’re
leaving your Mac for a while.
11
Click here to log
yourself out but not
shut down your Mac. This is
useful if you have more than
one user account on your
Mac. You can then log out so
another user can log in.
By hovering over the
Recent Items option,
you get this sub-menu. This is
a list of the applications
you’ve recently used. Click on
one of them to open it again
rather than use the Dock.
12
13
These are the
documents you’ve
recently used. If you need to
open one again, this menu is a
quick and easy way to do so.
14
Servers you’ve recently
accessed on your
wireless or Ethernet network
appear here. To open one
again, simply click on it.
15
Click here to completely
clear the entire Recent
Items sub-menu.
Contextual Menu
Files and folders have a Contextual Menu that you can access
by right-clicking or ctrl-clicking on the item, or clicking with two
fingers on a trackpad. This menu gives a range of options, which
change according to what it was you clicked on. There's usually
a Share and a Move to Bin option in there, and the Get Info
option brings up an information window.
Application Menus
Each application has its own unique set of menus located next
to the Apple menu. They will change when an application is
active and will revert back to the Finder menu when no apps
are active. Each is clearly labelled to make it easier. We'll add
specific details for application menus when we look into the
applications themselves later.
Right-clicking and ctrl-clicking.
Mac mice and trackpads only have one button, so how do you make a right-click? It's actually easier than you think.
1
Your Magic Mouse or Trackpad doesn’t have two buttons,
but you can still secondary-click by holding the Control
(Ctrl) key and clicking your mouse or trackpad. Alternatively,
enable right-clicking. Go to Apple menu > System Settings >
Mouse/Trackpad, depending on which you’re using.
2
Use the pull-down to choose an option for Secondary
Click. With Secondary Click activated, clicking using
your chosen option is the equivalent of right-clicking on a
two button mouse. You can change the tracking speed and
click strength here too, and more.
www.pclpublications.com | 27
П First Steps with macOS Ventura
. . Using Finder
Files, Folders & Apps
Finder is the main app that underpins everything you do in macOS, so
it's worth taking the time to discover its features and functions. On these
pages you'll see how Finder works and how you can use the Finder window;
including its navigation controls, viewing tabs and many more useful options.
1
Window Control Options: Use the gumdrops to
close or minimise the window or open it in full-screen
mode. We’ll cover this on the next page.
□ Item Arrangement List: Click on the button shown
here to order the contents of the window; according to
date, alphabetically and more.
2
Navigation Controls: The chevron buttons in the
top left corner of the window take you forwards or
backwards through your navigation history.
3
View Options: These four buttons let you set-up
how you view the files and folders in the Finder window;
whether as icons, a list, in columns or as a cover flow which
gives you a much larger visual preview.
5
Perform Tasks: The Perform Tasks icon enables you
to perform certain tasks within the folder or highlighted file,
such as create a New Folder, Move to Bin, Duplicate and more.
6
Share Button: Share Button: The Share button is
found in many places throughout macOS. Here you can
highlight a file or folder and click the button to send it by email,
AirDrop and Messages, add it to Notes and more.
28 | www.pclpublications.com
Using the Finder
Tags Button: You can tag a file or folder to make it
easier to spot or group it with other documents and
folders. An item can have more than one tag. Click on a tag in
the sidebar to show items labelled with that particular tag.
8
9
Search Field: If you’re looking for a specific item, type
its name or contents into the Search field and press Enter.
Sidebar: There are various options on the Finder
window’s sidebar You can open specific folders like
Documents or Downloads, access external or network drives
and more. To hide and show the sidebar, use the View menu or
enter ctrl-cmd-S.
Displaying a Finder Window
There are several ways of opening a new Finder window
on your Mac's desktop. Let’s take a look at each in turn.
• Finder File Edit View Go Window Help
Using Menus
Click a clear space on the desktop once, open the File menu
and select New Finder Window. A window then appears.
Shortcut Keys
Click a clear space on the desktop once to make sure you're
in Finder, then press cmd-N together. A new Finder window
appears on the desktop.
Using the Dock
If it isn't already displayed, move your mouse cursor to the
bottom of the screen to open the Dock. Click the Finder Window
to create a new window.
10
File/Folder View: This shows the files and folders
contained in the currently open folder. They’re shown
in the format chosen in the View Options (see Item 3). Here,
as you can see, we’ve gone for the icon view.
11
Preview: This is a preview of the currently selected file
in the main window. It shows the title, file size and various
details about it. There are also options at the foot of the
Preview sidebar, such as rotating or marking up a graphic or
creating a PDF from a document. The preview sidebar is
optional; you can close it in the View menu or by pressing
Shift-cmd-P on your keyboard.
How to Relaunch Finder
If the Finder has crashed or isn't behaving as it should,
follow this tip to close it like a crashed app and relaunch it.
If the Finder crashes, you can relaunch it like you would with any
other crashed app. The easiest way to do this is to click on the
desktop to make sure you're in Finder, hold down the Shift key
and click on the Apple menu. The Force Quit option has
become Force Quit Finder. Incidentally, you can use this method
to quit any running app. Just click on one of its windows to bring
it to the fore, hold Shift and click on the Apple menu.
Window Controls Options.
The coloured buttons, or gumdrops, are found in the top left
corner. Hover over them and a symbol appears in each of them.
Navigation Controls.
These simple controls allow you to retrace your steps
backwards and forwards through Finder.
Close
Click once on the red button containing
a cross. This will work with the majority
of windows and applications.
Minimise
Click the orange button containing a
sign. Again this will work with almost
all windows and apps.
Full Screen
Click the green button with two
triangles. This will full-screen most
Finder and app windows.
Back/Forward
Back/Forward
Navigate to a
Previous Page
Click the left hand arrow. To
continue stepping backwards,
repeat step one as many times
as necessary.
The Forward Control
If you’ve moved to a previous
page, this button offers
step-by-step navigation to your
original starting point. Simply
click the right-hand arrow as
many times as needed.
www.pclpublications.com | 29
П First Steps with macOS Ventura
View Options
View Window Contents as Icons
To display your files and folders as a collection of icons, first
open a Finder window then click the first button on the toolbar,
showing a group of four squares.
View Window Contents as Lists
With an open Finder window, click the second button on the
toolbar to use a simple but effective list display.
View Window Contents as Columns
Click the third button on the toolbar to view your files as a series
of columns. It’s great for quick navigation and easy visual
identification using a handy image preview column.
View Window Contents as Gallery View
The Gallery View gives a large preview of the file or folder that's
currently selected and a scrollable strip of everything else. Click on
one of the files in the strip to see a larger version of its thumbnail.
Change the Way Items
are Arranged
As well as changing the way the items are displayed, you
can also change the way they are arranged.
Name: Alphabetical. Displays numbers first, then A-Z.
Kind: This groups each type of item together.
Application: Groups together items according to the
application in which they were created or are opened.
Date Last Opened: Groups according to time and
date they were opened.
Date Added: Displays items in order of when they
were added to the folder.
Date Modified: Displays items in the order they were
last modified or edited.
Date Created: Displays the items according to when
they were created.
Size: Arrange the files according to their size.
Tags: Files are arranged according to tags you've added.
30 | www.pclpublications.com
Using the Finder
More Sidebar Functions
If your sidebar is getting cluttered, you can show or hide its
listed items by hovering over the title (Favourites, Locations,
iCloud, Tags) and clicking the small down-facing chevron or
right-facing chevron - the right-facing chevron appears when
the title is hidden, and the down-facing chevron when they're
expended. You can also eject external drives, CDs and disk
images from the sidebar; by clicking the eject icon next to the
device or image you wish to remove.
Perform Tasks Within the Finder
Highlight an item within your Finder window, and click on the
three-dots-in-a-circle icon for a drop-down menu. Here you
can do a range of operations, from opening a highlighted file in a
specific application to checking the file size via the Get Info option.
You can also clean up the entire Finder Window,
automatically tidying up and or reorganising the order of
the files according to various criteria such as their name
(alphabetically), date, size and more.
The Finder's Preview Panel
Finder windows have a right-hand sidebar that shows a
preview of the currently selected file from the window. You
can turn this sidebar on or off in the View menu (Hide/Show
Preview) or press Shift-cmd-P on the keyboard.
At the foot of the preview sidebar are a set of new options.
These vary according to the type of file you're previewing in
the main window. For example, an image can be rotated,
annotated or converted into a PDF.
www.pclpublications.com | 31
П First Steps with macOS Ventura
Full-screen Mode
If you want to view the Finder window better or any other window for that matter, then you can always opt to view it in
full-screen mode. Full-screen removes distractions and makes everything a little easier to read. Here's how it works.
1
You can view a Finder window and indeed an application
window, in full-screen mode. Click on the green gumdrop
in the upper left corner of the window and fills the entire screen.
Alternatively, use the View pull-down menu or press ctrl-cmd-F.
Hovering over the gumdrop gives this menu.
2
In full-screen mode, the menus usually found at the top of
the Mac desktop are still there but they're hidden away
until you need them. To see them, move the mouse cursor to
the top of the screen and the menu bar slides into view and
disappears when the cursor is moved away.
3
To exit from full-screen mode back to the usual window
view, bring up the Menu bar and then simply click on the
green button again. The window shrinks to its previous size and
no longer takes up the entire desktop.
4
You can also take a window out of full screen mode using
the View pull-down menu at the top of the screen or by
pressing ctrl-cmd-F. You can still close a full-screen window with
the red button (top left).
32-Bit Apps No Longer Run
Apple has phased out support for applications built for 32-bit architecture. These will no longer run in macOS.
In Monterey and Ventura, you can no longer open applications
made for older 32-bit processors (modern processors are 64-bit).
If you have such an app on your Mac, it appears in the Applications
window, or Launchpad, with a crossed-out icon atop it.
Try to open a 32-bit app and you get a message saying it's
not compatible with this version of macOS. Check with its
developer whether the app has since been updated to 64-bit,
but if it hasn’t by now, it might well have been abandoned.
32 | www.pclpublications.com
Using the Finder
Changing the Finder Window's
Accessing iCloud Drive
Background Colour or Image iCloud Drive can store and share files across Mac or iOS
picture. To begin, with the Finder window in question open, select
Show View Options from the View menu or press cmd-J.
see the iCloud Drive folder is organised according to apps.
You can create your own folders here too.
2
The window's Info window opens. Towards the bottom, you
can see options listed under the header Background'. Select
'Colour' and click on the white square. You can now use the various
options to change the background colour.
3
Select 'Picture' and then drag an image into the box to the
right of the background options to get a pictorial
background. Alternatively, click on the box and then navigate to
the picture you want to use through the Finder.
Files and folders found here are synced using iCloud Drive,
so they're available online at www.icloud.com and also on
other devices linked to the same iCloud account.
Here we've opened the Pages iOS app on an iPad. As you
can see, the documents in the Mac's Pages iCloud Drive
folder are also available to open and edit here.
www.pclpublications.com | 33
First Steps with macOS Ventura
Ventura's Dock
• " For Most-used Apps
The macOS Dock is a feature that greatly speeds your workflow. It's
perfect for gaining quick access to the most relevant and frequently used
applications, documents and folders. It's customisable too, which means
you'll come to personalise your Dock to best fit your own unique needs.
Accessing Your Applications from the Dock
Add or Remove an Application
To add an app, first click the icon filled with multicoloured boxes
on the left-hand side of the Dock to bring up Launchpad. Then,
click and drag the item you want onto the Dock. To remove it,
just drag it out.
Move an Application
To move an item to a new location in the Dock, click and drag
to the required position. As you move the item the adjacent
applications will move aside to allow you to drop the icon into
its intended place.
Open an Application
To open an application that’s in your Dock, simply move the
mouse pointer onto the Dock and click on its icon. Notice
that the app icon slightly bounces as the application opens
before the main app opens.
Recently Used Applications
Applications you've recently used are shown in their own
section in the right-hand side of the Dock, from where they can
be used like any other Dock app. A divider separates permanent
and recent apps.
34 | www.pclpublications.com
Ventura’s Dock
Adding and Removing Stacks
You can add, remove and move folders in your Dock, in the
same way you do with apps. These sit to the right of the
Dock’s second divider and are called Stacks.
The Bin
The Bin icon is located at the far right of the Dock and
can be filled and emptied just like a real rubbish bin.
You can delete a file, folder or app by dragging it into the
Bin on the right-hand side of the Dock. Alternatively,
right-click or Ctrl-click on it and select Move to Bin from
the contextual menu that appears.
Accessing Stacks
To access the files and folders within a Stack, click on it to
display the contents. Clicking on a document or image opens
it with an appropriate application and clicking on a folder
opens it in Finder.
Viewing Options
Right-click or ctrl-click on a Stack for a pop-up menu with a
range of options. You can show your files as a Stack (a pile of
files) or as a folder. You can also choose how they're displayed
when you click the Stack.
To retrieve a file from Bin, click on the Bin icon in the Dock to
open it in Finder, then drag the file out of the Bin window. To
empty Bin, right-click on it and choose 'Empty Bin’, or in the
Bin window, click on the Empty button (top right).
Customising the Dock
You can customise your Dock in System Settings from the
Apple menu and selecting Desktop & Dock. From here, you
can place the Dock on the right, left or bottom of the
screen, opt to show and hide it, change its size, change its
magnification, choose a minimisation effect and more.
www.pclpublications.com | 35
П First Steps with macOS Ventura
Notifications
See What's Going On
Apps and functions on your Mac can send you notifications, which let you
know what's going on. When you receive a message or an email, for example,
you can be notified that it's arrived. You can customise them too.
И
If you came to
Ventura from a
pre-Big Sur version of
macOS, you might
look for the
Notification Centre
icon in the top-right
corner of the screen.
However, it’s not
there. Instead, Apple
has integrated
Notifications into the
Date/Time and
Widgets zone.
Moving notifications to the Date and Time and combining them with
widgets is a clever move on the part of Apple. All you need to do to
view your notifications is to click on the Date and Time in the
top-right of the desktop. If there are any, they appear at the top of
the slide-in area that appears from the right-side of the screen.
Notifications are grouped together depending on the app
they're coming from. For example, the News app displays
notifications based on what news channels you've decided can
send alerts to you. If you click on a notification in the group, the
rest expand so you can see all the available notifications of that
group. And clicking on a notification, whether it's from Messages,
News and so on, opens up the corresponding app.
This makes viewing notifications a much more efficient
process, since there's a minimal need for mouse clicks, and
it's easy to see which notification belongs to which app. If
you're on the lookout for an important news flash report, for
example, you can quickly get the information you need when it
appears on your screen.
at the Kia Forum
Travelodge
Your Stay at Ludlow
Hello Ian Osborne, We hope you enjoyed
your recent stay. We'd love to he
your experience with us — it will Options
Stay European 15m ago
When fantasy crashes into reality
Liz Truss has only been in office for three
исиаэчагт uovit, пюптэ itiviujtcuu errrvr
more pay tribute to the late Taylor Hawkins
Hover over a notification for an expansion chevron in the
upper-right comer. Click it and the notification expands to display
more information. In addition, by moving the mouse pointer over
the notification bubble you'll also see an 'X' in the opposite top
corner, for dismissing the notification.
36 | www. pci pu bl ications.com
Notifications
Creating and Removing Notifications
1
Adding and removing app notifications is as simple as
navigating to System Settings > Notifications. It’s the 'Bell'
icon in the left-hand sidebar of the System Settings window.
In the Notifications panel on the right, there's a few options at
the top followed by a long list of the applications you have
installed on your Mac. Scroll through the list and find the app for
which you want to set the notifications. Click the app in question.
2
When you've found the app you want to set the
Notification for, click on the 'Allow Notifications' slider
button to activate and deactivate notifications from that
particular application.
Within the Notifications window, you can set a number of
options for how you want to review any Notifications from
the app you’ve activated. For example, the Alert Style can be
adjusted to None, Banners (the default, and the one that most
folk will use), and Alerts. You can also opt to display Notifications
on the lock screen - although this is considered a security risk if
you leave your Mac unattended. There's also options to play a
sound when a Notification comes in and you can set the
Notification Grouping to Automatic, By App or Off.
□ As you continue to use your Mac, the number of
Notifications you’ll generate over the course of a week or
even a day increases. Open the Notifications window, and click
the oval button marked 'X more Notifications' to show all the
notifications currently available. The chevron next to the words,
'Notification Centre' closes them again.
www.pclpublications.com | 37
П First Steps with macOS Ventura
Ventura's Widgets
And How They Work
Widgets are a useful way of getting quick and easy access to an app's
functionality, without having to open the app itself. You can, for example,
see today's calendar events or weather, or check the latest news stories
from the Apple News app. You can edit your widgets to suit your needs too.
First Steps with Widgets
1
To access your widgets, click on the clock and date in the
top-right corner of the screen. The widgets are found
underneath the notifications. You can scroll the notifications and
widgets up and down with two fingers on a trackpad.
2
Click on a widget to open the app that created it, or in some
cases, the website from where its information is drawn.
Here we clicked on a story taken from the News app, which
opened that story in the application itself.
3
You can drag widgets out of their current position and
drop them into a new place, just like you do with app icons
in Launchpad. Reorder them to suit; maybe move the most used
widgets to the top of the column.
4
Right-click on a widget for a contextual menu that lets you
resize the widget, remove it or access the option for
editing widgets. You can do all this through the Edit screen, of
course, but this is a quick and easy alternative.
38 | www.pclpublications.com
Ventura’s Widgets
Editing Widgets
1
There are two ways to access the Edit Widgets option.
You can either scroll the widgets column all the way up
and click the Edit Widgets button at the bottom, or right-click a
widget and choose Edit Widgets from the menu.
2
When in Edit Widgets mode, the widgets in your sidebar
have a minus sign in the top-left corner. If you want to
delete a widget, click on this minus sign and it disappears. You can
add it again later if you want it back.
3
Click an app on the left-hand side of the screen to see the
widgets associated with that app in the centre column. To
install a widget, drag it from this centre column into your widgets
on the right-hand side of the screen.
4
Some widgets are available in Small, Medium and Large
versions. Click on the circles labelled S, M and L
underneath a widget to see what each size looks like, and when
you've chosen a size, drag it into your column.
5
Some third-party apps have widgets. Sometimes an
unused third-party widget is blank until you open its
associated app. If you're interested in that widget, just open the
app and return to the Edit Widgets feature.
6
Third-party widgets won't update unless the app to which
they refer are open, but if this is a problem for you, simply
set up that app to open whenever you log in, and leave it open in
the background. The widget then stays up to date.
www.pclpublications.com | 39
П First Steps with macOS Ventura
®TheSpotlight Feature
Search Your Mac
Spotlight Search is Apple's unique and ultra-powerful search system that
can find almost anything on your Mac. There's a raft of great features,
making it a really powerful and useful tool, and it's gained a couple of new
features in Ventura, namely Quick Look and Quick Actions in Spotlight.
Using Spotlight's Features
1
Press cmd-space bar or click the magnifying glass in the
top menu to open Spotlight. You can drag this window to
wherever you want on the screen. Type your search query into
Spotlight and answers appear, with suggestions based on the
contents of your computer as well as other sources.
Spotlight can do conversions. To convert from imperial to
metric (or vice versa) type in the number and a type of unit,
such as kilograms or pounds and then click the chevron next to
the top result. Spotlight offers other commonly used units. It
works in a similar way with distances and lengths.
3
To do currency conversions, type in a number and
currency unit, such as dollars or pounds, click the chevron
and Spotlight gives you the equivalent value in a range of
currencies at the current market value.
For more conventional searches, Spotlight pulls its
information from a wide range of sources, such as
Wikipedia and documents it finds on your Mac. Double-click on a
result to open a document or glean more information.
40 | www.pclpublications.com
5
If you’re looking for local businesses or sites of interest,
simply type its name into Spotlight and you'll quickly find
what you're looking for, complete with a link to the Maps app and
the option of travel directions from your current location. Again,
click on the result to open.
6
You can find people with Spotlight too. Start typing the
name of someone you know, and Spotlight quickly finds
that person in your Contacts list and displays their contact
details in the results window. Things like chat threads, Facebook
comments and emails are also listed.
О Spotlight is also closely integrated into the core macOS
apps, such as Photos. Start typing in your search term,
like the title of a particular image or photo album in your Photos
app, and Spotlight quickly locates it and takes you straight to it.
8
Spotlight can find music by searching through your Music
collection to find albums, tracks and artists. Type a band
name, a track name or even the name of a band member.
Recordings with that name or by that band or person are shown.
New in Ventura
A new Spotlight feature in Ventura is Quick Look integration.
After doing a spotlight search, single-click on a search result to
highlight it, then press the space bar to get a Quick Look preview.
While previewing, move up and down the list with the arrow keys.
A second new feature is Quick Actions. These let you instantly begin
a process, such as starting a timer, running a shortcut, turning on a
Focus and more. To start a timer, for example, type 'Clock* find the
Start Timer option and click it for an in-Spotlight timer.
www.pclpublications.com | 41
П First Steps with macOS Ventura
Launching Apps
And Quitting Them
There are several ways of launching an app on your Mac. You can: use the
Launchpad, which is found in the Dock; you can open a Finder window and
navigate your way to the application you wish to use; or you can click on the
Spotlight feature and simply type its name. Here's how to do it.
Using Launchpad
1
To open the Launchpad, go to the Dock and click on it, or
place four fingers on your trackpad and bring them
together. The screen darkens and your apps are shown as
icons. To launch an app from this screen, click on it. To close
Launchpad, press Esc or click on the desktop.
2
If you have more than one page of apps, move between
them by swiping left and right with two fingers or hold
cmd and use the arrow keys. Click and hold on an app and an 'X'
appears in the top left corner; click 'X' to delete. Not all apps can
be deleted in this way.
3
You can arrange your apps into folders on Launchpad too,
just like on an iOS and iPadOS Home screen. Just drag
one app onto another and a folder is created. You can click on
the name if you wish to change it and to remove an app from
that folder, drag it off the grey folder area.
Open and close folders by clicking on and off the folder
icon on the Launchpad screen. You can add new apps
into the folder by simply dragging them onto the folder. You can
also drag apps around the Launchpad window to change the
order in which they're arranged.
42 | www.pclpublications.com
Launching Apps В if
Using Spotlight
1
To launch an app using the Spotlight feature, first click on
the magnifying glass found in the top right corner of the
screen. A window saying 'Spotlight Search’ pops up. If it's
inconveniently located, you can drag it around the desktop and
move it to wherever you like.
2
Begin to type the name of the app you want to launch and
Spotlight tries to complete it for you. When you see the
name of the app you want, scroll down to it and press Enter and
it launches. To close the Spotlight search window without
launching anything, just click anywhere on the screen.
Using the Finder
Using the Dock
You can also launch an app using the Finder. Open a new
Finder window (or use one that's already open) and click on
Applications in the sidebar. All of your Mac’s apps are shown.
Scroll to find the one you want to use and then double click
on the icon to launch.
You can launch an app from the Dock. If your Dock is hidden,
move your pointer to the foot of the screen to reveal it and
click on the app you wish to use. To find out more about the
Dock and how to customise it with your favourite apps, see our
tutorial later in the book.
Quitting Apps
Open apps are shown in the Dock. On the app's Dock icon, you
can click using the right-hand side of a Magic Mouse or trackpad
(right-click), hold the Control key and click anywhere (ctrl-click) or
click and hold, then click on Quit in the pop-up window.
Alternatively, with the app to the fore in Finder, click on its name in
the top left comer and select Quit [app name] from the menu; or
hold the Command key and press 'Q'. Just make sure the app is
open on your desktop or you might quit the wrong application.
www.pclpublications.com | 43
First Steps with macOS Ventura
Setting Up Email
For the Mail App
With email, you can send mails and attachments anywhere in the world, at
the push of a button. Here we take a look at what email is, how you can get
yourself an email address and how you can use your email accounts on
your Mac, with Apple's bundled email client, the Mail app.
Setting Up Your iCloud Email
If you set up your Apple ID during your Mac's initial
setup, or if you signed in with an existing Apple ID, your
iCloud email account is already in place. But if not, or if you
want to add another iCloud email account to your Mail client,
follow these instructions.
Open the Mail application from the Dock and then under
the Mail drop-down menu found in the left of the menu
bar, click on the Add Account... link. From the pop-up menu that
appears, select the iCloud link and then click on the Continue
button to go to the next step.
Now enter the Apple ID for the iCloud email account you
want to add to your Mail app, and then the password.
When you have confirmed your details you can then click on the
Sign In button to take you to the next step.
On the next screen, click on Add Account and your iCloud
account is added to the Mail app, for you to use on your
Mac. Your iCloud email can be your sole email account or you
can use it in Mail or alongside others if you wish.
44 | www.pclpublications.com
Setting Up Email
Setting Up Other Emails
To configure your Mac to access your email account from
your Internet service provider, you need your email address,
your password to access your email account and POP or IMAP
(incoming) and SMTP (outgoing) server addresses.
2
macOS Ventura includes a sophisticated email program,
simply called Mail. You can find it on the Dock, as it's there by
default The Mail App's icon shows the back of an envelope on a
blue background. Click on this icon to open the Mail app.
When you first open Mail you're prompted to set up your
first email account. If you've previously used Mail or set up
another account, you can add further new accounts by going to
the Mail menu and selecting Add Account.
4
If it’s another web-based email service you're adding, you
must now enter your full name (this appears in your own,
and other people’s, contact lists), your email address and your
password. Do this, and your account is added.
5
If you’re adding an account from your Internet Service
Provider, select Other Mail Provider from the screen in
Step 3. Enter details such as username, password and server
information provided by your ISP. The server information should
also be on the ISP's website.
The information required depends on the ISP, but typically
includes mail server addresses, your username, and your
password. Click on Sign In to finish. You can change your settings
later, in System Settings > Internet Accounts, or click the Mail
menu and click Accounts to go straight there.
www.pclpublications.com | 45
First Steps with macOS Ventura
0 Installing New Apps
Including Third Party
As you get to grips with your Mac, it's likely you'll want to install more
software, or 'apps'. There are two ways to do this. You can use the Mac App
Store, just like you do on the iPhone or iPad, or you can download an app
from the Internet and install it manually. Here we show you how to do both.
From The App Store
1
Downloading new apps from the Mac App Store is the
easiest way to get new software for your Mac. First open
the App Store app; you can use the Apple menu to open this
particular app, or the Dock, Launchpad or Apps folder.
2
You can use the Search field to look for an app by its
name, what it does and more, or simply navigate the App
Store using the categories in the left-hand sidebar. Note the
filters, opened by clicking the chevron in the top right too.
3
Scroll up and down for more apps. If button to the right
displays a price, that’s how much it costs. If it says 'Get', it’s
free, but might offer in-app purchases. A cloud symbol means you
already bought it but it isn't on your Mac; download it again for free.
If it says 'Open', you already have it Click the button to open it.
Click on an app title for more information on that app. Click
its button to download it. If it’s a paid-for app, follow the
on-screen instructions to make a purchase. If it's free, just click
'Install'. You might have to sign in with your Apple ID. When it's
downloaded, you can open it just like any other app on your Mac.
46 | www.pclpublications.com
Installing New Apps
From Other Sources
1
Not every app is found in the App Store. If there’s one you
want to install that isn't, first find its home page on the web,
and go to the Downloads section. Make sure you're downloading
the correct version for your Mac. Here we're downloading
Handbrake, the popular open source video transcoder.
2
Click the download link, and the app downloads. If you're
using the Safari web browser, click the down-pointing arrow
icon to open a pop-up window showing how much has downloaded
so far. It may take a long time if it's a big app. When it's done, the app
is found in your Downloads folder in the Dock or Finder.
3
The app usually downloads as a .dmg image, that is, a virtual
disk. Double-click on it to open. The window here shows
what's inside the downloaded file; the app and a folder containing
documentation. Double-click on the app to open it. Because it's not
from the App Store, you're asked if you want to open it.
4
Opt to open it and the app opens; you can now use it on
your Mac. If you want to use the app more than once, it's a
good idea to drag it out of the disk image window and into the
Applications folder as shown, which is found in the sidebar of
most Finder windows. After that, you can bin the .dmg file.
5
If you get a warning like this one, saying the developer
could not be verified, it’s still possible to open the app.
Open System Settings and go to Privacy & Security. Scroll the
window up until you see the Security section, and click the Open
Anyway button. You do so at your own risk, of course. Be careful.
Using Installers and
Downloaders
Larger apps might download an installer, which installs the
app automatically to your Applications folder, or a
downloader, a small program that downloads the app from
the Internet before installing it. If this is the case, simply
follow the on-screen instructions as they appear. There's
nothing difficult about it.
www.pclpublications.com | 47
macOS
Ventura's
Key Apps
The apps bundled with macOS Ventura
are one of the best things about your
Mac. Here we take a look at the Safari
web browser, the Mail email client,
productivity apps such as Calendar,
Notes and Reminders, entertainment
apps like Apple TV, Music and books,
and more, as well as Ventura's new Mac
apps, Weather, Stocks and Clock.
Learn more >
48 | www.pclpublications.com
macOS Ventura’s Key Apps
□
www.pclpublications.com | 49
П macOS Ventura’s Key Apps
Safari
Your Web Browser
Safari is your Mac's web browser. You can explore the worldwide web,
enjoy your social media accounts, do shopping and more. With macOS
Ventura, Safari gets new features like
in-browser translations, shared Group Tabs.
This icon opens and closes the
sidebar on the left.
Here you see how many tabs you
currently have open in Safari. A
chevron to the right shows and hides all
those tabs in a list here in the sidebar.
2
This icon gives you a menu that
lets you make a Tab Group of
the tabs you currently have open, or
start a new, empty Tab Group to which
you can add tabs manually.
3
These two chevrons are your
navigation controls, which let
you move forward and backward
through your browsing history.
5
These icons are for Safari
Extensions you've added.
A lot of websites use trackers to
track your browsing and to target
advertising. The Shield icon lets you
see what trackers have attempted to
track you, and lets you Turn On Private
Relay (iCloud+ required).
6
7
Click the Page icon to show and
hide the site's Reader view.
The URL Bar. Enter the website
address or a search term that
you wish to look up into this bar, then
tap Return.
8
The first icon lets you translate
the website you're looking at into
another language. The second reloads
the website, perhaps if its stuck or might
have been updated.
9
Safari
Q 5 Tabs
14
16
18
□ Bookmarks
OO Reading List
Shared with You
О iCloud Tabs
Click here for a list of items
you've recently downloaded.
When you're currently downloading in
Safari, progress is shown here too.
10
Click on the Sharing icon to see
your options for sharing the page
you're viewing; adding it to Notes,
making a Quick Note and options for
Add Bookmark and Add to Reading List.
11
Click the + icon to open a new,
blank tab. You can then go to a
new website without closing the one
you're currently viewing.
12
This takes you to the Tab
Overview, showing all your
open tabs as thumbnails in the main
window. Click on one to open it.
13
These are sites that you've pinned
to your tab bar, where they remain.
Click on one to open that tabbed site.
O Amazon Echo tabs
|w The 60 Most Useful...
u Brilliant Alexa Easter...
§ Voice - Bluesound
Q History of All the Am„.
3 Lavazza A Modo Мю ...
Q 10 best smart plugs t.-
— Contact us | Lavazza
G biggest amazon fire t...
C Best Amazon Alexa ..
3 Alexa Skills I Amazon...
W Alexa - Wikrpedia
H Secret Origins of Am...
A Short History of Vo...
W Wikipedia
W Show - Wikipedia
в The Real Story of Ho...
© Devon Trip
(Q The Cats
Q Social Media
' iindow Help
14
These are your currently open
tabs. Click on one to open it,
hover over the tab and click the 'X'
on the left-hand side of the tab to
close it, and click the'+’ icon (Item
12) to open a new one.
15
Your Tab Groups. Click a group
to close the tabs you currently
have open, and open the group of tabs
you selected. To return to the tabs you
had open before, click the 'X Tabs’
option above it (Item 2).
16
50 | www.pclpublications.com
Safari
This is where the web page
you're viewing is displayed. You
can then scroll up and down by using
the scroll function on your mouse or
trackpad, and navigate to new pages
by clicking on links, which can be
menus, buttons, text or images.
Here you can open your
Bookmarks or Reading List, see
websites shared with you in Messages
and tabs open on your other Apple
devices, shared through iCloud.
17
18
Browser
Translations
If you’re looking at a foreign-
language website, click the
Translate icon in the URL
field and you can translate it
into your own language. You
can also open the Settings
options for preferred
languages from here.
www.pclpublications.com | 51
macOS Ventura’s Key Apps
Set New Home Page
Accessing Websites
1
Open a new Safari window and navigate to the web page
that you want Safari to load each time you launch the app.
Click the Safari menu (top left comer), then select Settings to
display Safari's preferences dialog box.
1
To access a new website in the Safari browser, first
double-click in the URL bar, highlighting the text within it,
then type a new URL in this bar. A URL is the website's address,
which starts ‘www*. Press return at the end to go there.
2
Ensure the General tab is selected and press the Set to
Current Page button. The required page address now
appears in the text box above. It's now your default home page.
The Home menu in the toolbar will take you there.
2
If you want to search for something on the web, instead of
typing a URL in the URL bar, type what it is you're
searching for, then hit Return. Your search results show relevant
sites. Scroll up and down the list and click one to go to it.
Using Links
You navigate the Internet in Safari using hyperlinks, or simply
'links'. A link can be a piece of underlined text, a picture, a
button or simply an area of the screen. To open a link you’ll
need to move the mouse pointer over it and click. When the
pointer is over a link, its replaced by a hand.
Clicking a link takes you to a new page or opens a new window
based on what you’ve just clicked. If you don’t want to navigate
away from the page that you're currently on, right-click or
Ctrl-click on the link and from the pop-up menu, choose Open
in New Tab or Open in New Window.
52 | www.pclpublications.com
Safari у)
Add Tools to the Toolbar
Pinned Sites
1
Right-click or Ctrl-click on the toolbar and select
Customise Toolbar; or click the View menu and select the
option from there. A window slides down. To add a button to the
toolbar, simply drag it from the selection in the window onto the
Toolbar within the Flexible Space sections.
If your tab bar isn't showing, go to the View menu and
select the Always Show Tab Bar option near the top. Now
open the site you intend to pin and right or ctrl-click on its
tab. From the pop-up menu, select the Pin Tab option.
Repeat this with as many tools as you need. When you’re
finished, click Done. To remove a tool from the toolbar,
simply drag it out of the toolbar, release and it vanishes. To
reset the tools to how they were originally displayed, drag the
default set of tools onto the Toolbar.
Status, Favourite & Tab Bars
The site gets a small tab in the left-hand side of the tabs
bar. This is always in place, ready for you to click on it and
open the site. You can pin multiple sites in this way. They
all appear as small tabs, showing a symbol or letter.
You can show or hide the Tab, Favourites and/or Status Bar (a
strip along the bottom of the window showing the full URL) by
clicking the View option in the menu bar atop the screen, and
selecting the option in question.
To remove a site's pinned tab, right-click or Ctrl-click on it
and from the pop-up menu, select Unpin Tab. The previously
pinned tab then becomes a regular tab. You can reorder
your pinned tabs by dragging them within the tabs bar.
www.pclpublications.com | 53
П macOS Ventura’s Key Apps
Bookmarks and Reading List
; about trie computer brand For the raincoat, see Mackintosh For the hurt, see McIntosh (apple) For other uses see Масс
A request that this article title be changed to Mac is under discusser Ptease do not move this article until tt
Macintosh until 1999) is a tamity of personal computers designed and ou«rt by Apple Macs are known for their ease ot
Ave aluminium, minimalist
jp includes the MacBook Ai
i run the macOS operating i
e
nator transitions from Moto
and from Intel to Apple silk»
I power efficiency has been
Macintosh - W kipadia
X. from PowerPC to Intel
Contents fh«la|
You can save a website you're likely to return to often as a
Bookmark. A site you’re interested in but don't have time
to read can be put on your Reading List. Both options are
available from the Share icon in the toolbar.
When adding a bookmark, a pop-up window appears. You
can add a custom title for the website you're saving, plus
there's an optional description field and a pull-down menu that
lets you add your site one of your bookmark folders.
3
To access your Bookmarks and Reading List, open the
sidebar and click on the option, found at the foot of the bar.
Click a site to open it. In the Bookmarks sidebar, as shown, you can
right/Ctrl click and add a new folder if you wish.
In the Reading List, drag a site left to save it for offline
reading or to delete it. The right/Ctrl click menu has an
option to remove/delete a site from either list. Click the small
chevron, top left, to return to the regular sidebar.
The Start Page
Q G * «/fQQ<Q
D В * 4 S •- Э P В 2
••QS"QQ i ПО? И £2
о ft В = В t®к КЙО
bbd • ^-B nsa^B
• d BOO
Start Page gives you a window full of useful shortcuts to your
most frequently visited sites alongside its default choices. Click
on the URL field at the top of the browser or in the Bookmarks
menu. Select Show Start Page to access a window showing a
grid view of website icons, along with those you’ve visited most
recently and the default links to other sites.
To add a site, click the URL field to open the Start Page and
drag the URL into it. You can drag sites and folders into this
window from your Bookmarks too. Drag icons around the Start
Page to reorder them, or drag out of it to remove them. Click a
Show More/Less link to expand/contract lists. Use the icon
(bottom-right) to include or exclude Start Page categories.
54 | www. pci pu bl ications.com
Tab Groups
Safari lets you save groups of tabs. You can then open a
group of tabs, temporarily closing what's open at the
moment. Open the sidebar, then tap the New Tab Group icon in
the top-right of the sidebar for a menu.
From the menu, you can make a group from all the tabs
you currently have open, or start a new, empty group and
then add tabs to it. We'll do the former here. Either way, you get
to name the new tab group. Press Return when done.
3
With your new tab group open (see the highlight in the
sidebar), tap the + icon (top right) to open a new tab, then
navigate to the site you wish to save in the tab group. Do this as
many times as you like to fill your tab group.
4
Use the sidebar to switch between tab groups and the
tabs you have open on your Mac. Tap a tab group and
then tap the chevron to its right for a list of tabs. Tap the icon in
the top-right corner to see tabs as thumbnails.
Shared Tab Groups
In macOS Ventura, you can share a group of tabs. Just the
thing for when working on a group project. To do so, hover the
pointer over the tab group in the sidebar, click the three-dots
icon and select Share Tab Group.
Tab Groups Start Pages
Each tab group can now have its own Start page, which
you can customise. Click on a tab group and click the +
icon to give it a Start page. Click the bottom-right icon
and you can customise this Start page.
www.pclpublications.com | 55
□
macOS Ventura’s Key Apps
Safari's Shield
1
Click the Shield icon which is found to the left of the URL
field for a report on what trackers Safari has prevented
from following you. Click the chevron to list them, and the T icon
for more information about site tracking and why websites do it
2
If you have a paid-for iCloud subscription you can turn on
Private Relay, which prevents websites from viewing your
IP address. To turn it on and off, go to System Settings > Apple
ID > iCloud and under Private Relay, click the Options button.
Tailor Site Settings
:yclopedia
? technology company
« en.wikipedia.org C
When visiting en.wikipedia.org: ar« Sexy Technology News
Use Reader when available
Q Enable content blockers
lead View source
Page Zoon Allow All Auto-Play
V Stop Media with Sound
Pop-up Window Never Aut0.P|ay
Camera: Ask
Microphone; Ask
Screen Sharing: Ask
Location: Ask 'disambiguation) § В
multinational technology company that specializes in consumer electronics, software and onlint
Cupertino, California, United States. Apple is the largest technology company by revenue (total
1
There's a number of useful tools for tailoring your
experience on a per-site basis. Open the website and in
the Safari menu, select Settings for [the website]. You can enable
or disable content blockers, go straight to Reader View, change
the page zoom, stop auto-playing videos and more.
2
Page Zoom and Auto-Play are set with pull-down menus that
appear when you click their current values. By default the
Auto-Play function stops videos with sound automatically playing
but you can override this using the Auto-Play menu. These settings
are applied whenever you load that site.
The Reader View
Tabs Audio Indicator
If a Page icon appears in the left of the URL bar, that site can be
viewed in Reader View. Click it to toggle Reader View on and off.
Right-click on this icon for a settings window, that allows you to
set some sites to automatically open in the Reader View.
If a tab is playing audio, it has a speaker icon on its right. Click
this to toggle the sound on and off without having to open the
tab. Right-click on the icon for an options window, which lets
you mute more than one tab at once, or use Picture-in-Picture.
56 | www.pclpublications.com
Safari
Getting More from Safari
Private Browsing
Private Browsing lets you browse the Internet without adding
tracking cookies or recording where you've been in your history.
Activate Privacy Mode by selecting New Private Window in the
File menu. In a private window, the URL field is darkened.
Clear Browsing History
In the Safari menu, there’s an option Clear History which erases your
browsing history and website data. Hold Alt while you select it to
delete your browsing history, but not website data. In the pop-up,
choose whether to delete all or recent history with the pull-down.
< Back to Tmcoxom
Sign in to your account New to Tesco? Register for an account
Email address
ian.osbome@dsl.pipex.com
Password
m9|-vafko2-woctiV Hide
I've forgotten my password
Sign in
Suggested Passwords
When setting up a log-in account in Safari, the app suggests a
strong password for you. If you choose to use it, you can edit it
in case it doesn’t fulfil the site's specific requirements. You can
review all of your web passwords by opening Settings in the
Safari menu, and clicking on Passwords in the toolbar.
Change Your Search Engine
To change the search engine Safari uses by default, select
Settings from the Safari menu. Click on the Search tab and
from the pull-down select the search engine you want to use.
The sites on offer are Google, Yahoo, Bing, DuckDuckGo and
Ecosia. Choose whichever you want.
Integrated Spotlight Search
Spotlight search is a tightly integrated feature of macOS,
including Safari. From the search bar you can find links to web
pages, bookmarks and browsing history; simply by typing a
search term. Click on one of the responses to open that
particular website in your browser.
Safari Extensions
To extensions to Safari to expand its functionality, open Safari's
Settings window (Safari > Settings) and select Extensions. Click
More Extensions to access the App Store’s extensions page,
from where they can be installed. Your extensions are synced
across your Apple devices through iCloud.
www.pclpublications.com | 57
П macOS Ventura’s Key Apps
Mail
Send & Receive Email
Ventura has a great bundled email application, so sending and receiving
emails is as easy as typing a message and clicking a button. Here's howto
get the most from the Mail app.
This is the sidebar, which lets you select
mailboxes, see emails from VIP senders
or those which you've flagged, and more. You
can resize and even close this sidebar by
clicking and dragging the divider between this
and your emails list.
1
The list of emails contained in the
currently selected mailbox, in this case,
All Mailboxes. The number of emails in the
box, and the number of unread emails, are
shown. You can resize this column by clicking
and dragging its left or right edge.
3
Click this circular icon to toggle
between showing all emails and only
« Mail
Message
Window
2
3
All Inboxes
16,430 messages, 7 ur
P Flagged
> В All Drafts
SAYSKY
Sassafras Woodlar
To: lan Osborne
Customer ser^^^F. In... Yesterday
Re: Ask for Help - | X2 iPhone gamepad |...
Dear Customer, Thank you so much for
contacting GameSir Service Team. We fee...
Job alerts from Go... in... 08/10/2022
2 new jobs for ‘media, communications...
Media, communications or writing jobsNear
Newton Abbot Digital Content Writer Ven...
I
unread emails.
4
This button downloads new emails. You
can set your Mail app to check
automatically but this button does so manually.
5
When you want to write a new email
from scratch, click on this button to
open a blank one.
6
This button archives the selected
message. Very useful if you want to
make sure you don't delete it.
7
If you want to throw away the currently
selected email, click here to send it to
the Trash folder.
8
This button moves the selected email to
your junk mail folder. Use it to help the
Mail app identify 'spam', which is junk emails.
This button lets you reply to the
currently selected email, with the reply
going to its sender only.
9
v @ All Inboxes
Q Exchange
Q Talktalk
63 Pipex email
63 iCloud
VIPs
> All Sent
24
0 Drafts
Sent
W Junk
0 Bin
EJ Archive
В Drafts
Sent
® Junk
a Bin
В Drafts
5? Sent
@ Junk
a Bin
В Drafts
63 Inbox
E3 Conversation History
£3 Inbox
В SavedlMs
63 Inbox
S Archive
63 Inbox
4 Sent
SAYSKY Inbox - Pipex email Yesterday
Sassafras Woodlands
New collection I.----Ui-g October 13th
18
Duolingo Inbox - Pipex em... 08/10/2022
Hi lan Osborne! Got 5 minutes? Time for...
Practice every day to stay on track to your
goals
Amazon.co.uk Inbox Pi... 08/10/2022
Kindle Deal of the Day: Taste by Stanley...
Your Amazon Today's Deals Amazon App
Ian Osborne, Browse today's Kindle Dally...
Nintendo Inbox - iCloud 08/10/2022
О Mario and the Rabbids are back!
Pre-order Mario ♦ Rabbids: Sparks of Hope
now for an extra in-game bonus View in b...
Windows Insider P... In. .. 08/10/2022
We'd like to learn more about you
Enhance your experience with the Windows
Insider Programme | View as webpage Hi-
DxOTeam Inbox - Pipex e . 08/10/2022
NEW! DxO Viewpoint 4 brings you geom...
Tweak perspective and eliminate angles
that disrupt the balance of your images. .
Withings Inbox - Pipex em.. 08/10/2022
Get Body Comp before everyone else
Delivery times are getting longer, but you
can still be one of the first. Watches Scale-
Claim now Inbox - Pipex e. 08/10/2022
Check if you can claim the tax back
To view the HTML version of this email,
please click here CLAIMED PPI IN THE BE...
Duolingo Inbox - Pipex em.. 08/10/2022
< Good job this week, lan Osborne! Yo...
Hey lan Osborne, check out your progress
so far this week. —
first direct Inbox - Pipex e... 07/10/2022
M,
58 | www.pclpublications.com
Mail
The two left-pointing
arrows here is the
Reply All icon. Use this button
to reply to the sender of the
currently selected email, but
also to everyone else that
received it.
10
The single arrow curling
to the right is the
Forward button. If you want to
forward an email to a third
party, that is, not the person
who sent it to you, use this.
11
Click the flag to mark
the currently open
email with a flag of this
colour. Click the chevron next
to the flag for a pull-down
menu that lets you select a
different flag.
Use this button to
silence notifications
on threads that are sending
you too many alerts. The
emails still arrive, but they
don't send notifications.
12
13
This pull-down menu
is another way of
moving an email into another
mailbox or folder.
14
Information about what
mailbox the open email
is in, what time it was received
and the paper clip shows it
has attachment.
15
16
__J
To search for a specific
subject, person or word/
phrase use the field here.
These are email
inboxes and as you
can see, we have four email
accounts set up in Mail;
however, you can have more
or fewer if you prefer.
17
Your emails appear
here. Unread emails are
shown with a blue dot to the
left. Click on an email to open
it in the main window.
18
19
___J
If you have a picture of
the email’s sender in
1L’8X9d,^iJ2i13.
2oTi
a Move to...
В Inbox - Pipex email Yesterday at 5 00 am
15
Contacts, it appears here. If
not, it’s a grey circle with
initials. To the right is info about
who sent and received the
open email, and its subject.
Hover over the top of the
open email and icons
from the toolbar are repeated.
They function is the same
20
If the open email has
attachments, click here
for a pull-down listing them all.
You can select and open them.
21
If you've identified
senders as VIPs, they're
listed here. Click 'VIPs’ to open
and close this section, and click
on a VIP name to see emails
from that person.
22
Here you can access
emails you've flagged,
or those you have sent from
your email accounts.
23
Various other mailboxes
associated with the
accounts you’ve set up in Mail.
24
When new emails are
downloading or
sending, it says so here.
25
Sassafras Woodlands - launching October
13th, at 10.00 CEST.
The Column Layout
MacBook
To use the old-school,
column-based layout, in
the View menu, select
Use Column Layout.
Repeat this step to revert
to the modern layout.
0 Q ®
771 #2*
&
www.pclpublications.com | 59
П macOS Ventura’s Key Apps
Sending a New Email
Inbox - Pipex email 2:06 pm
L hit up your favourite hero a...
GAMES ACCESSORIES
REE FOR EVERYONE Overwat...
Inbox - Pipex email 1:59 pm
;fully cancelled an order
uyer know that you cancelled
?nko_the_sane_1968. Ian, you...
eX box
Baron Noise, hit up yo
To: Ian Osborne,
Reply-То: Xbox
This message is from a mai
1
Here we show you how to open a new, blank email, write a
message and send it to a given email address using the
Mac's Mail app. To open a new email, first click on the Compose
New Message icon in the toolbar on top of the window; the one
that looks like a pen writing on paper.
2
To send someone an email, type their email address into
the box marked To:. To also send it to someone else, add
their email address in the Cc: box. Add multiple email addresses
in either box, separated by commas, to send the same message
to a group of people.
3
It's always a good idea to put something in the subject
line, even if it’s just 'Hello!'. Type the body of your
message in the large space below An email can be as long
as you like and you can use different fonts, colours and sizes
if you really feel the need.
4
Once you've finished typing your letter, click the Send
button in the top left corner of the email panel to send it
on its way. Email is usually sent very quickly, and your addressee
should receive it within a couple of minutes, as long as there are
no issues with their connection or provider.
Customising Mail
You can customise your Mail app by opening it and, in the
Mail pull-down menu, selecting Settings. Under the General
tab, you can set an interval to check for new messages,
decide where downloaded attachments go and more.
The Fonts & Colours tab lets you change the fonts and text
size used with incoming emails and change the colours of
quoted text. Explore the Mail settings and set up how you
choose, but be careful with the server settings.
60 | www. pci pu bl ications.com
Mail
Receiving Email
When you receive an email in your inbox, this is how
you open and read it using the macOS Mail app.
Once you've set up your email account, you can send and
receive email. As soon as you launch Mail, it connects to
your email service and collect any email that is waiting for
you. These messages are shown as a list in your Inbox.
Click on one and it's displayed on the right.
While Mail is running, it periodically checks the server
for new messages. You can also prompt Mail to look at
the server immediately by clicking the button in the top
left of the screen that looks like an envelope.
Replying to & Forwarding Email
If someone you know sends you an email, you’ll probably want
to reply to them. Simply click on the email so you are viewing the
text of it, then at the top of the screen you'll find a row of three
buttons, as you can see here.
The leftmost one has a single left-pointing arrow on it. This is
the Reply button. If you click on this you’ll see a window pop
up that looks a lot like the window for a new email, but it will have the
responder's email address already in the To: box.
<(->4 Next to the Reply button is a similar button with two left
arrows on it. This is the Reply All button; use this with
extreme care. If you have been sent an email that has also been
sent to a number of other recipients, hitting Reply All will send
your reply to everyone who received the original mail. Obviously
if your reply was meant to be private this is a very bad idea, and
has got many people into trouble.
The rightmost button of these three is the Forward button,
which is used to send an email you’ve received to another
recipient Forwarding emails is another thing that requires care;
make sure that you don’t accidentally send private information to
someone who was not meant to receive it.
Adding Attachments
Almost any type of file can be attached and sent over the Internet along with your email.
To add an attachment, first start an email (or reply to one
you received), and then click on the button bearing the
picture of a paperclip, at the top right of the email panel.
This will open a Finder window, allowing you to navigate to
the file or files that you want to send. Select the ones you
want, then click Choose File to attach them.
Pictures you've added as attachments are shown in the body
of the email. If you don't want to display it as an attachment,
right-click on it and from the contextual menu, choose View
as Icon. It can still be opened by the recipient. If your email
suggests you’re sending an attachment but you forget to
add it, you get a reminder when you try to send the message.
www.pclpublications.com | 61
П macOS Ventura’s Key Apps
The Mail Markup Feature
1
The Markup feature lets you add notes and scribbles to
pictures that are attached to an email before you send it
Write an email and attach it to the email. Click on the image, then
click the chevron in the upper right comer of the photo. Select the
Markup option to open the Mail app's Markup feature.
2
Now use the interface to add text, drawings, or a range
of shapes and symbols directly onto the photo, in the
email environment. When you're finished, click the Done button
and either mark up more pictures or send your email as
normal. You can also use certain third-party apps to edit
photos this way.
Remind Me
Move to...
Highlight or open an email. In the top-right corner
there's a pull-down menu marked 'Move to...' in the
toolbar. If your Mail window is small, you might have to
click on a chevron and select it from a menu. This lets
you move it to one of your folders including Trash,
Junk, and folders you've set up yourself.
Show Only Unread Messages
You can hide emails you've already read by clicking this
icon. Now only unread messages are shown. Click it again
to show all your emails once more. It's great for finding
emails that you received a while ago but haven't seen yet.
ale
Inbox -
luck would hav
Review, after a
Open
Reply
Reply All
Forward
a ...ED.doc
Gale
Forward as Attachment
Karl & Martin
^hique(ish)
I add the High
Remind Me
Mark as Unread
Move to Junk
>r opinions presented are solely those of the author and de
Remind Me in 1 Hour
Remind Me Tonight
Remind Me Tomorrow
and Wales No 04308513. V
। Osborne <jjosborne@it
Flagging an Email
To mark an email with a flag, highlighting it for later
reference, click on the Flag pull-down and choose a colour.
You can add more than one flag to a single email. To
remove them again, choose Clear Flag. The 'Flagged'
option in the side bar shows emails you’ve marked.
Russell inbc
) use the down
»moment it is I
(https://bdmp<
Mute
Delete
Flag:
Remind Me Later.-
3.31.31.png>
ale Inbox i
of Employmen
James Gale
Re: My reviews
To: Ian Osborne
Archive
Move to
Cnnvtn
> Siri Found a Phone Number
James Gale
If an important email arrives but you don't have time to reply,
use Remind Me to select a date and time for it to jog your
memory. Right-click the email in the middle column, and select
Remind Me. You can be reminded in an hour, tonight, tomorrow
or 'later', which lets you set a custom time and date.
62 | www. pci pu bl ications.com
Mail
Mail Drop
If you need to send large attachments via email,
the Mail Drop feature is very useful.
If an attachment you wish to email is too large for a
regular email, it's stored on Apple's server and offered
as a download instead. Depending on whether the
recipient is using Mail, the attachment could appear
as a download link or as thumbnails.
Here, we received huge photos, which are displayed as
thumbnails. You can download them all by hovering over the
email and clicking on the paperclip as shown. They're kept
on Apple's server for a month from the date they were sent.
Searching Your Emails
1
Click the magnifying glass icon and type your search term
into the search field. Suggestions are offered for items
such as people, subjects and attachments; emails that meet
your search requirements are shown in the email list.
2
After clicking on one of the suggested items, you can
adjust your search by clicking the first word in the field
and choosing a new option, as shown here, or even adding a
second search term for more advanced searches.
Scheduling Emails
In Ventura, you can schedule when your pre-prepared emails are sent, choosing a date and time.
You can now prepare an email now, but send it some time
in the future. First write the email in the usual way, and
then click the small, down-pointing chevron between the
Send and To Fields buttons as shown.
Choose to send the email in an hour, tonight, tomorrow or
'later'. Choose this last option and you get a window in which
you can set a custom date and time. Use the buttons, or click
on a number and type over it. When finished, click Schedule.
www.pclpublications.com | 63
macOS Ventura’s Key Apps
Using Mail Signatures
You can add a signature to your emails, that is, a short
piece of text that's at the foot of every email you send.
Unsend an Email
Ever sent an email and spotted a mistake in it just as you
pressed Send? You can now recall it, if you're quick.
A signature is a piece of text that you can add to the foot
of your email automatically. To set one or more up, open
Mail Preferences (from the Mail menu), click on Signatures
in the top bar and then on the account to which you wish
to add a signature in the accounts on the left. Click on the
'+' button under the middle column to add a signature.
You can click on the name of it in the middle column and
change it to anything you like, and write your chosen
signature in the right-hand column. It can be anything
you want. Now, when writing, forwarding, or replying to
an email, you can add or remove your signature using the
pull-down menu to the right of the From field.
First of all, make sure you have the sidebar open. The
sidebar is the one on the left, next to the incoming emails
list. If it's not there, select Show Sidebar in the View menu, or
press ctrl-cmd-S. The sidebar will then appear.
Sent
Junk
Bin
SavedlMs
Inbox
Drafts
@ Undo Send
EJ lan Osborne, we’ve just added a doc
Serial killer Jeffrey Dahmer confesses tc
gruesome crimes in unguarded interviev
eBay inbox - Pipex email 12 09
New offer received: £35.00 for GameSir
Hurry, this offer expires: 11-Oct 12:09:4
BST Good news - you've got an offer fo
eBay Inbox - Pipex email 11:1C
clckr Stand & Grip C... has been listed
Check our selling tips to increase your
selling success, lan, your listing is live cl
A
Sent
When you send the email, a link labelled 'Undo Send'
appears at the foot of the sidebar. You have ten seconds
to click this link; when you do, the email reappears so you can
edit it. If it's not there, it's too late to recall.
Accessing Emojis
Unsubscribe
The Mail app has an emoji picker to use when writing an
email. Click on the smiley face in the toolbar and you get
a choice of emoji to add to your email. To add it, just click
on the one you want. Scroll up and down, or click the
icons at the bottom for more choices.
E3 0 wove to...
©MicrosoftStore ejinbox pipe* 944a
Be in with a chance of winning £125 to spend at Microsoft Store
To: lan Osborne
This message is from a mailing list. J I Unsubscribe
S" Microsoft
If an incoming email is from a mailing list, the Unsubscribe link now
appears right at the top of the email. Click the Unsubscribe link to
stop this mailing list from sending you emails in the future.
64 | www. pci pu bl ications.com
Mail and Home App
E
Home
For the Smart Home
Apple's HomeKit gave developers the means to control compatible household
gadgets from devices such as the Mac, iPhone, iPad and iPod touch. Your
connected home gear can be controlled under one application. You can set up
automations too, so multiple devices can be activated with a single instruction.
1
Before you can make use of the Home app, you have to
add HomeKit compatible devices. You can only do this
from an iOS device, you can’t use your Mac. There's a list of
HomeKit compatible devices online at www.apple.co/2MFjhb3.
2
After adding some devices using your iOS device, you
can access them through Home on the Mac. Right-click
a device's window and click the cog (bottom-right) for the
Settings, and you can change the room they're assigned to.
3
Click Automation in the sidebar and you can set timers,
actions and more What they do depends on what kit you've
incorporated into your Home app. Click the + icon to add
automations or groups of automations (scenes).
4
For example, you can use the Home app to control and
configure speakers that are compatible with HomeKit.
Naturally, Apple's own HomePod, pictured here, fits the bill but
there are plenty more.
www.pclpublications.com | 65
П macOS Ventura’s Key Apps
JO
Music
Play Your Tunes
The Music app is great for enjoying all your sounds on the Mac. If you
subscribe to the Apple Music service, you can stream from over 90 million
tracks and numerous online radio stations. You can rip your CDs and store
them on your Mac, and you can also compile your own playlists.
In macOS Ventura, there are
new music notifications, and
recommendations that keep
you in touch with bands, artists
and genres you're interested in
are improved.
1
When you're using the Music
app, the top bar gives you
pull-down menus offering controls and
options. It's worthwhile familiarising
yourself with them.
2
Completion suggestions are
offered as you type, and results
can be limited to Apple Music, or your
on-Mac library, as you wish. Results
include artists, songs, albums and more.
3
□
These are, in turn, Shuffle Tracks,
Previous track, Play/Pause, Next
track, Repeat Play.
When you're playing music, the
album art, artist and title are
shown here. Click on the album art to
switch to the mini player, which shows
the album art and controls only and
takes up much less space on the
screen. The line under the track name
lets you scrub through the song.
5
Click and drag the dot, and move it
left and right to change the volume.
6
These three icons, in turn are;
wirelessly transmit your music to
Bluetooth headphones or speakers;
open a sidebar showing the lyrics to
the track that's currently playing; show
a sidebar giving both a list of what's
playing next and your history; that is,
what you've played.
66 I www.pclpub1ications.com
Music Q
Importing Your CDs into Music
Insert the CD into your Mac's CD drive if
it has one. If not use an external optical
drive like Apple's USB SuperDrive. A message
pops up asking you if you want to import the
album into your iTunes library; click Yes.
1
You see the track listing of the album
appear. The spinning circle indicates
which track is currently being copied, while
a green tick next to a track tells you it has
already been copied successfully.
2
Once you've successfully
imported your album, don't
forget to click on the Eject button in
the sidebar or the top-right so you
can store your CD away.
3
If you have an Apple Music
account, Listen Now is the main
page, offering suggestions of music you
might like and showing what you played
recently. Browse is great for finding new
music, and Radio gives access to
streaming stations.
7
This is the Listen Now page, your
gateway to the Apple Music
streaming service.
8
Click here for your profile, and also
the Apple Music social network
where you can find out what sounds your
friends are listening to, and discover and
enjoy new music together.
9
These are the options for your
Library, that is, music you've
installed on your Mac. It can be arranged
into Artists, Albums, or Songs, and there
are sections for music you've recently
added and music videos.
10
At the top of the Listen Now page
is Top Picks, a series of playlists made
up of tracks chosen for you based on
previous plays, tunes you play a lot, themed
playlists, etc. Scroll left and right for more.
These are your playlists. The top
ones are Smart Playlists, which
add songs automatically according to
rules, and the lower ones are playlists
you build yourself.
This is a round-up of music you've
recently streamed. Scroll this page
up for more suggestions, again based on
previous listens.
11
12
13
14
Hover over the row and click the
chevron for more music options.
www.pclpublications.com | 67
П macOS Ventura’s Key Apps
Signing Up for Apple Music
1
With an Apple Music account, you can stream from 90
million songs for a set monthly fee. To sign up for an account,
click on Listen Now in the left-hand sidebar. You can then click Try it
For Free to learn about and sign up to the service.
A pop-up window appears inviting you to subscribe as an
individual, for £10.99/$ 10.99/10.99 € after your free trial.
Click Try it For Free to do so, or See All Plans to choose a Family
or Student account
3
You must then sign using to your Apple ID. Enter your
Apple ID's email address, then your password, and then
click Sign In to proceed to the next step. If you’ve forgotten
your details, click the Forgot Apple ID or Password? link.
D If you have other Apple devices logged into the same
Apple ID, you're sent a verification code. Enter it, then
follow the on-screen instructions regarding what kind of music
you like. When done, you're ready to start.
Changing or Cancelling Your Subscription
1
If you want to cancel your Apple Music subscription, first
of all, click Account in the top bar and select Account
Settings. You're taken to your account page. Scroll down to
Subscriptions (under Settings) and click the Manage link.
You're shown your active subscriptions. Click on Apple
Music's or Apple One’s Edit link. On the next page, you
can change your subscription to a different one (individual, family
or yearly, Apple One or just Music) or cancel it altogether.
68 | www. pci pu bl ications.com
Music Q
Using Apple Music
1
Browse or search for the artist, album, or track to which you
want to listen. Here we're looking at an album. Click Play to
play it in its entirety, or Shuffle to play the tracks in a random order.
Tracks marked with an E in a box have explicit lyrics.
2
Music controls such as Play and Pause are found at the top of
the window. To identify tracks on an album you especially like,
hover the pointer to the left of a track, and click the heart that
appears. To cancel this, click on the heart a second time.
3
Click the three-dots icon on the right above the tracks for
a menu. Here you can add the album to a playlist or create
a new one, share it with your friends, like or dislike the album as a
whole, or create a station based on its artist.
4
Each individual song also has a three-dots icon, offering a
similar menu that applies to that track alone. You can also
play the track by clicking the Play icon that appears when you
hover the mouse/trackpad pointer over it.
5
Apple Music is all about helping you to find music you enjoy
listening to. When viewing an album, you can scroll up and
other titles by the artist in question are shown. Click on one to
open it in the main window, click the chevron to see more.
6
The Browse section offers tracks, artists, albums, and
playlists based on Apple Music editors’ choices and new
releases. It also offers current charts for various countries. The
Radio section lets you listen by station or genre, and more.
www.pclpublications.com | 69
П macOS Ventura’s Key Apps
News
Stories and Features
The News app is great for getting the important headlines as they break,
from news sources around the world. If you subscribe to Apple News+ you
can read a huge range of magazines and news publications on your Mac,
and the app is customisable too, so you'll always be up to date.
1
When you first open the News app, you see a sidebar and
a main window. The sidebar's Today option is selected,
giving you a range of the day's top stories. Click on a story to
open it and read it in full.
2
When you open a news story, if it has a video it can be
watched within the News app. In the File menu, there's an
option to open the story in Safari. This takes you to the web page
from which the story was drawn.
3
The Special Coverage section gives you a selection of
features chosen by Apple's editors. If you find a story you
particularly like or dislike, use the thumbs up/down icons in the
top-right comer to improve future suggestions.
In the sidebar section titled 'Suggested by Siri’, you see
various subjects the News app thinks might interest you.
The stories work just like in the other sections; click one to open
it, click the chevron in the top-left to go back a page.
70 | www.pclpublications.com
News X
5
In the File menu is an option called Discover Channels &
Topics. Click it for a range of news sources and subjects
for you to choose from. Click the plus sign in the corner of any
you especially like.
6
Scroll down the window for more channels and topics.
Select as many or as few as you like. When you're finished,
click the Done button at the bottom. Your new sources have been
added to your sidebar.
7
Enter a search term for a subject or source you're interested
in for a list of relevant stories and channels. Click the plus
sign to add that channel or topic to your sidebar. To remove a
channel or topic, right-click on it and then select Unfollow.
8
To save a story for later reading, select Save Story in the
File menu. Click Saved Stories in the sidebar to see the
pages you've saved. To go back to a story you've previously
read, click the History option in the sidebar.
My Sports
Click on the Today entry in the sidebar and scroll up
for a new section introduced with macOS Ventura; My
Sports. Click Get Started and you can choose teams
and categories to follow in the News app.
Shared with You
You can share News articles using the macOS Share icon.
If someone shares a story with you using Messages, it
appears in a sidebar category called Shared with You. The
person who shared it is indicated under each story.
www.pclpublications.com | 71
П macOS Ventura’s Key Apps
Photos
Manage Your Images
The Photos app has had some minor
updates in macOS Ventura. You can merge
duplicate photos, copy and paste edits and
sort the People album alphabetically. The
Hidden and Recently Deleted albums in the
Photos app are now locked as well.
Use this button to toggle
between regular thumbnails of
your photos, as seen here, and
square-shaped images that leave
little border.
This slider increases and
decreases the size of your
preview images.
2
Use these buttons to view your
photos arranged according to
the year, month, or day in which they
were taken.
3
Click here to see all your
photographs in the Photos app,
arranged as thumbnails. Double-click
on a thumbnail to
open a photo.
Select or open a photo and
then click the T for the
information window. Here you can
review and edit where and when it
was taken, add captions and more.
5
The Share button lets you add
the picture to shared albums,
send it using Mail, AirDrop, Messages
and more, add it to Notes or Reminders
and even set a desktop picture.
6
Choose a photo and click the
heart to identify a picture as
one of your favourites.
My Albums
14
16
17
Projects
> Q My Projects
15
Rotate the image 90%
anti-clockwise. Hold Alt to turn
it clockwise instead. Useful if a
picture that's been imported is not
the right way up.
8
f—
© Library
<E) Memories
Shared with You
The search field. Thanks to the
Photo app's machine learning,
you can search for terms like 'birthday',
'holiday', 'Christmas' and more, to find
photos taken on these occasions.
9
©
X
People
Places
Favourites
Filter to display all pictures,
favourites, those you've edited,
only photos, only videos and
according to keywords.
10
0
©
8
Recents
Imports
Duplicates
Recently Delet...
Devices
These sidebar options
represent different ways of
viewing photos found in your library.
Photos shows all your photos,
Memories arranges them into groups,
Favourites shows your best pics, and
Places groups them according to
where they were taken. Recents,
Imports and Recently Deleted are
self-explanatory.
Photos
11
Albums
> Q Media Types
><□
>□
Shared Albums
These are the dates between
which the currently visible
pictures were taken and the locations.
12
The heart seen in the corner
here shows you've identified
this photo as a favourite. Click the
heart to unfavourite it again.
13
72 | www.pclpublications.com
Photos
14
___J
Click here to arrange
and view your media
according to type, such as
Videos, Selfies, Live Photos,
Screenshots and more,
depending on what media you
have in your Photos app. This
doesn't remove them from the
main Library; it's simply a way
of arranging its contents so
you can better find your media.
Click the chevron to
expand the Shared
Albums category. Photos
you've shared on iCloud are
listed in Activity and Shared
Albums shows the albums in
which they were shared.
Hover over Shared Albums
and click the plus sign that
appears to the right to start a
new, shared album.
15
These are your albums,
whether created by
yourself or put together
automatically by the app. Click
'Shared Albums then the plus
sign to open a new one, which
you can then share with others.
Projects is for creating
photo books and more
using third-party apps.
16
17
Your pictures, arranged
as thumbnails. Click on
one to open it, after which you
can swipe through them or
choose one from the preview
bar under an open photo.
At the foot of the screen
you're shown how many
photos and videos you have in
the currently selected album.
18
19
www.pclpublications.com | 73
□
macOS Ventura’s Key Apps
The Editing Tools
Edit With
1
Open a photo and click Edit. Use the Wand tool to
automatically enhance your pic or click the Edit button to
make manual adjustments. In Editing Mode, the Edit button
changes to 'Done'. Click this when you've finished your edits.
Right-click on an open photo and you get a
sub-menu. Hover over Edit With and, if you have
third-party photo editors on your Mac, you can open
the photo in one of them and then edit it using that
app. Edits are carried over into the Photos app.
> О Colour
> Э Black & White___________
v & Retouch t> ©
Q Size 105.04
> «? Red-Eye
> И White Balance
v 0 Curves CZH?) О
Red 0
2
Click a triangle in the sidebar to open a tool. The Light,
Colour and Black & White tools give you sliders to
increase or reduce the brightness and saturation or switch to
a monochrome image. Click the Options triangles for more
advanced editing tools.
3
Retouch removes unwanted objects from a picture.
Click the brush, then click and drag to paint over the
object. Let go and it's removed. Red Eye lets you paint out
red pupils caused by camera flash. You can adjust the brush
size with both tools.
4
In White Balance, select the feature to adjust with the
pull-down and use the slider to change it. Levels take time
to master. Hover your pointer over the graph and drag the dots
at the foot of the vertical lines to adjust.
5
In Curves, drag the diagonal line or the dots under the
right and left ends. A useful trick is to click on the left
dropper and click something black, then the right dropper and
click on something white. The Definition tool is another slider.
74 | www.pclpublications.com
Photos >
6
Selective Colour and Noise Reduction are sliders. The
former lets you make adjustments to one colour at a time,
using the pickers and sliders and Noise Reduction is for smoothing
out speckles and other such imperfections in the photo.
The Sharpen tool lets you sharpen pictures that are out of
focus. You can sharpen the edges, adjust the intensity and
more. The Vignette option lets you add an adjustable shadow to
the edges of the photograph, as you can see we've done here.
8
Select the Filters tab and you can automatically add an
effect to your photo. Here we've gone for Vivid Warm
but you can also set it cooler, make it monotone and more.
Choosing another filter overrides the last one. Choose
Original to remove all filters.
9
You can the Crop tab to rotate your photo if it isn't
looking straight and also to crop it by dragging the
corners into the photo. The Flip option in the sidebar mirrors
the pic and Aspect lets you resize the photo according to an
aspect ratio of your choice.
10
Edits made in the Photos app are non-destructive, so your
edits can be reversed. If you don't like your edits, click Reset
Adjustments in the bottom right comer to reverse the last edit, or
Revert to Original in the top left to erase all the edits.
Universal Tools
All the options in Edit Mode have these three tools,
which appear when you hover over or open one of
the settings tools. The curly arrow reverses the last
adjustment you made. Auto makes an automatic
enhancement with that tool only and the tick in a
circle toggles the last edit you did on and off, so you
can see the difference it has made.
www.pclpublications.com | 75
П macOS Ventura’s Key Apps
Projects
Copy & Paste Edits
Choose the pictures you want to use (hold cmd and click on
them one by one), then click'+’ next to Projects and select one.
If no apps are listed here, choose App Store and download one.
Using your chosen app, follow the on-screen instructions to
create a project like prints, cards, books and calendars.
If you have a series of photos you wish to edit in the same
way, you can now copy these edits and apply them to the
next picture. After making your edits, right-click on the picture
and choose Copy Edits. Then open the next photograph you
wish to edit, and then right-click and select Paste Edits.
Adding People
1
Open a photo containing people and click the T button
for the information window, and click the Add Faces
link. If Photos recognises faces in the picture, they're circled.
Click the tag under a circle to add that person's name. Click
the Plus sign again to add further tags, which you can drag
into place as needed.
2
Click 'People' in the sidebar to see photos you’ve
identified by name. Click on a person to see all the
photos you have of them. If a photo doesn't contain that
person, right-click on it and select the option 'X is not in this
photo' to remove it. Scroll down and click Confirm Additional
Photos to check pics the app thinks are of that person.
Memories
1
Click on Memories in the sidebar to show photos
grouped according to various factors, including time and
content. For example, a series of pictures taken over a week in
a certain location might be identified as a holiday. Photos also
picks your best shots too.
2
Right-click on a memory and you can delete it or add it
to your favourites. Open a memory and hover over the
picture at the top to see a Play/Pause button. Hover over the
slideshow for more controls. Click the Music icon to change
the background music.
76 | www. pd pu bl ications.com
Photos w
Making New Albums
1
Cmd-click the pictures you want to make into an album,
then hover over My Albums in the sidebar. Click the plus
sign and choose whether to make a regular album, a smart
album or a folder. If you choose a smart album, you can set the
album's rules to anything you like.
2
Set its title in this window too. In the future, all photos
that meet the rules will automatically be added. The new
album appears in your sidebar; click the triangle next to My
Albums to see them all. You can drag photos onto a new album
to add them to that album.
Editing Photo Information
1
Open a photo and click on the T icon in the top bar to
open the information window. You can add a title, caption,
key words and more here. You can also click on the date and
time that it was taken to open a second window.
2
You can now close the information window. In the new Adjust
date and time' window, you can change the recorded date
and time it was taken and the location, by clicking another point on
the map. Click the Adjust button when done.
Merge Duplicates
If you have a lot of duplicate photographs in your
Photos app, there's an easy way to merge them. In the
sidebar, select Duplicates. All your duplicated pics are
shown. To merge them, simply click on the link 'Merge
X Items’ above each collection of duplicated pics. Do
this on a per-picture basis.
Deleted & Hidden Photos
To delete or hide a photo, right-click on it and select the
option you want. The Recently Deleted album is in the
sidebar. In the View menu, choose Show Hidden Photos
Album to add this one. Click on one of them, and you can
open it with your password or biometrics. Right-click
one for options to unhide or recover it.
www.pclpublications.com | 77
П macOS Ventura’s Key Apps
Contacts
Your Address Book
Contacts is your digital address book, in which you can store details for
friends, family, workmates, professional associates and more. You can add
addresses, telephone numbers, social media accounts and other such
information, and store your contacts in user-defined categories.
Managing and Maintaining Contacts
This guide shows you to how to add new contacts to
your Contacts address book, edit existing ones and
share a completed contact card with other people. To create a
new contact card, click on the plus button in the bottom left of
the current card. Select New Contact from the window that
pops up and you're given a blank card to fill in.
To add details, click on the field and then type in the
information. After entering a phone number or address,
another blank is offered, in case you want to add a second one.
Click on the name of the detail (in blue) for a pop-up window that
lets you change it. When you're finished, click Done. To change or
add information to a card you’ve completed, click Edit
+ Л Q S Л *
* U M 9 V *
® @ w 5J
V И A W V U
Й ! ® Y • В
МУв
с*» ВЕЗВ
3
To add a photo to a contact card, which is then displayed
against messages, incoming calls and emails from that
contact, drag a picture onto the grey circle then crop and resize
it to your requirements. You can also click on this circle or the
Picture tab and navigate to a photo or default image or even
take a new one using the Camera option.
4
If you need a piece of information in a contact card that
doesn't currently have a blank field, open the Card
menu from the top bar and go to Add Field. You can then
choose one of the options on offer, such as: Maiden Name,
Nickname or Twitter name. This new field is then added to the
card, for you to fill in.
78 | www.pclpublications.com
Contacts
of
5
You can organise your contact cards into groups. To
show and hide the Lists panel, click on the View menu
and select Show/Hide Lists. To add a contact to a group,
simply drag it from the middle panel onto the group in
question. A card can be in more than one group at a time,
without being duplicated.
6
Smart Lists are groups with a set of rules. They
automatically include every card that satisfies the
parameters of chosen rules. Go to File > New Smart List to
open one. Here we're making a Smart List for every contact
that says 'Xmas card' in the notes. Great for sending out
greetings cards at Christmas!
7
To set up a card from a company rather than an
individual or display a contact according to the person's
employer instead of his or her name, check the box marked
Company at the top of the card. This reverses the name and
company details of the contact and indexes them according to
the company name.
8
If you get an email, a message or other communication
with contact details in them, you can add them directly to
Contacts. Click on the details in question, and a pop-up window
lets you start a new Contacts card with those details already in
place. If you want to add the details to an existing card, click
Contacts and click on it in the new sidebar.
Sharing Contacts
If you want to share a contact card with someone else, click the
icon showing a box with an up-pointing arrow and choose a
sharing option. You can send the contact as a v-card by
AirDrop, Mail, Messages and more. The person receiving it then
double-clicks the v-card to add it to their own address book.
Using Contacts on iCloud
You can also access your contacts using a web browser on any
computer, tablet or smartphone that’s connected to the Internet
Just go to www.icloud.com, enter your details and then click on
Contacts. Only cards stored under iCloud in your Contacts app
appear here, so bear this in mind when adding cards.
www.pclpublications.com | 79
П macOS Ventura’s Key Apps
nu Calendar
'' Plan Your Events
The Calendar app, as you'd expect, is there to help you organise your life.
With it you can add events, set reminders and synchronise your calendars
with your iPad or iPhone. Birthdays and anniversaries can be stored and
you're able to set annually reoccurring events, as well as scheduled alerts.
Changing the View
There are several different ways to view your calendars.
To move between Day, Week, Month and Year views,
you can use the corresponding buttons that appear in the
top bar of the Calendar application.
2
The Year view shows you a complete year in a single
window. Clicking on the title bar for any month takes you to
its Month view. Double-click a specific day in either Year, Week or
Month view to open its page in the Day view.
3
Click the Calendars button (top left) to open and close the
sidebar, as shown here. This sidebar is visible regardless
of whether you're in Day, Week, Month or Year view and lets you
mute or reveal individual calendars and more.
Click the Today button in the top right comer to get to the
Day, Week, Month or Year (depending on view) with the
current day in it The arrows either side take you forward or back
one year, month, week or day at a time; depending on the display.
80 | www.pclpublications.conn
Calendar
17
Creating an Event
Searching Calendar
In Day and Week views, to add an event double-click
the time slot, then drag and/or expand/contract it into
place. The hours are divided into quarter-hour sections for
adding events. For all-day events, click the top bar.
Make your events more easily searchable by labelling them
clearly and adding details in the notes section. The search
function scans both event names and notes for keywords, so the
more details you put in, the easier they are to find.
location, alerts, notes, URLs and more. The pull-down
menu in the top right of this window lets you change
which calendar it's stored in.
2
Type any keywords into the search field to the right of the
top bar of the Calendar window. All results appear instantly
in a pane at the bottom of the main window. The more keywords
you type in, the more unwanted results are filtered out
3
Clicking the'+' button in the toolbar lets you create a
quick event Type in a title or brief description, day and or
time and Calendar intelligently enters it at the appropriate place.
For example, type 'Dentist, 10th May, 11 am' and it's added.
Creating a Backup
You can manually create a complete backup of all the
calendars in your Calendars app. Open the File menu,
choose Export and select Calendar Archive. You can
rename the file and select a location to save it to. To load
it again, use the Import option.
New Event
New Calendar
New Calendar Subscription..
New Holiday Calendar..
Import...
Export > Export
Close 14IW-!IJ.UW
Print...
Q Birthdays
Q Calendar
Q Notes
□ Gigs
Q All's Hours ®
| Q Ian's Holidays
January 2023
Mon
Boxing Dev Christmas Bank h<
• Aston Villa L,. e Elton John totally <
ffi B«n Mtarim t 4
A Ekaterina Wine's 4
www.pclpublications.com | 81
H macOS Ventura’s Key Apps
Adding and Viewing Additional Calendars
Calendar File Edit View Window
New Event
New Calendar
New Calendar Subscription...
New Holiday Calendar...
Import..
Export
Close
Print...
у 2023
Mon
26
iCloud
Q
8
Q
S
To do
Birthdays
January 2023
Mon
Calendar
Notes
26
Boxing Day
Aston Villa - Liverpool
TU
8
Q
Gigs
Ali’s Hours
Boxing Day Christmas В
Aston Villa - Live... з pm Elton John t<
®Ben Timber
ffi Ekaterina W
2;
8
Ian's Holidays
Christmas Bank Holiday
Elton John totally copied RE
8
Bank Holidays
Лтти'с noarilim
2
1
The flexible, versatile Calendar app lets you add as many
different calendars as you want and use them for different
things. To add a new calendar, open the File menu and select
New Calendar. A box appears, prompting you to enter a name
for your new calendar.
2
To see a complete list of all the calendars you've created in
the Calendars app, click the calendars button on the left side
of the top bar of the Calendar window, shown as a calendar icon. A
sidebar on the left of the window is revealed, showing all the
calendars you currently have set up.
• Sports day
Estimate for new kitchen
Add Location or Video Call
11 Jan 2023 4 pm to 5 pm
Add Notes, URL or Attachments
>/ To do
Birthdays
Calendar
т ф Georgina Corish's 54tt
Notes
Gigs
Ali’s Hours
Ian's Holidays
Bank Holidays
Ozzy's Deadlines
Apple and Industry Dates
- Leeds Uni.
Southampton - Aston...
3
To select which calendars you want to appear active in the
main view, check or uncheck the boxes as appropriate Each
calendar is colour-coded, as are their events Unchecked calendars
aren't erased: you can check them again later if you wish.
4
To change the calendar under which an event is listed,
double-click the event to edit it then select a different calendar
from the drop-down menu. Alternatively, right or ctrl-click the event,
go to Calendar on the pop-up menu and select a new one.
Calendar Settings
To open the Calendar Settings, use the Calendar menu as shown.
Under the General tab, you can change the way the app presents
itself, set when a day starts and ends, change the default calendar
and even switch to a Chinese, Hebrew or Islamic calendar.
Under the Accounts tab, you can disable calendars you don't wish
to be active on the Mac in question, and also choose how each
calendar account refreshes. The Alerts tab lets you set default alert
settings, and under 'Advanced' you can make more customisations.
82 | www. pci pu bl ications.com
Calendar
17
Sending Invitations
iCloud Calendar
Double-click an event you created. In the pop-up window
that appears, click Add Invitees and begin typing the name
of a person in your Contacts whom you'd like to invite; or if the
person isn't in your contacts, enter their email address instead.
First of all, open System Settings from the Apple menu in
the top-left corner of the screen. Click on Apple ID, found
in the top left, and then, in the next window, click on iCloud in
the sidebar. Make sure the Calendar checkbox is ticked.
2
When you've finished adding all the people you intend to
invite to your Calendar event, click on the Send button
and an invitation is sent to everyone on the list. You'll get
notifications of responses. You can cancel invitations or send
them to more of your contacts later if you wish.
2
To activate iCloud syncing on an iPadOS or iOS device,
open Settings, tap your name at the top and then tap
iCloud. Make sure the Calendars switch is on. If it isn't, switch
it on to sync your calendars between the device in question
and all other Macs and iOS devices with syncing on.
3
Your calendar entry shows who you’ve invited, and
whether they've replied. If your invitee has an iCloud email,
the event is automatically added to their Calendar app and
updated whenever you make edits.
3
Now, when you return to your Calendar app, all the
entries you made on your iOS devices are also shown
on your Mac and vice versa. It's a great way of keeping your
computer and your tablet or smartphone calendars in sync.
www.pclpublications.com | 83
macOS Ventura’s Key Apps
• Reminders
* Never Forget Again
If you want to make a shopping list, set up a regular reminder or schedule
an alert, you need the Reminders app. It syncs across your Apple devices
using iCloud; add a reminder on your Mac and get an alert on your iPhone.
1
This is your search field.
Use it to search
throughout your reminders.
2
This is the Reminders
app's front page,
showing smart lists as well as
the lists you've created
yourself. A list is a group of
reminders you’ve set up and
can be titled anything you like.
3
Click the plus sign to
add a reminder to the
open list. Call it anything you
like. It appears in that list until
you mark it as done.
□ These are smart lists.
Click one to open it.
Today' is reminders scheduled
for that day. This list is divided
into Morning, Afternoon and
Tonight 'Scheduled' shows
reminders due in the future. This
is now organised into months,
and days for those due this
week. All lists all your reminders
and 'Flagged' shows those that
you've flagged. 'Completed' is a
new smart list showing
reminders marked as done.
5
The currently selected list
or smart list is displayed
in the main Reminders window.
As 'All' is selected, this column
shows all your reminders,
wherever they're stored.
In Ventura, you can add
text formatting options
such as bullets, underlined
text, bold text, italics and
strikethrough for notes
you've added to a reminder.
6
7
Your lists can be called
anything you like.
Choose a useful name and
an eye-catching icon. Click
one to open it and see the
individual reminders you've
added to that list, mark
reminders for tasks you've
done as complete and also
add new reminders.
8
Click on a reminder and
then on its information
icon (the T in a circle) and you
can add notes and tags, have
the app remind you about it
on a day, at a location or when
messaging a person, set a
priority, assign it to a person
or add a URL and or images.
9
To mark a reminder as
done, click the circle
next to it and it disappears.
To get it back, click Show (top
right), and then click a filled
circle to clear it.
10
The numbers on the
right of each list show
how many outstanding
reminders it contains. When
you mark one as done, it's
removed from the list.
11
___J
To mark a reminder as
done, click the circle next
to it and it disappears from the
list If you want to get it back,
click Show (top right), and then
click a filled circle to clear it
12
Right click on a reminder
list for an options list.
You can pin the list to the top
of the sidebar show its info,
open the list in a new window
and more.
13
To add a tag, put a word
preceded by a hashtag
(#) in the Notes section. The
hashtag appears here as a
button. Click it to see all the
reminders you've flagged with
this hashtag.
Click here to create a
new list, which appears
14
___J
in the My Usts section of the
Reminders home page. You
can then add reminders to it.
84 | www.pclpub1ications.com
Reminders
Creating and Using Reminders
1
To create a new list, click the Add List link in the bottom
left. Add a title, choose a colour and click on the smiley
or the three lines to add an emoticon or an icon. Check the
'Make into Smart List box’, if you want to create a Smart List
based on tags or filters.
2
To add a reminder to a list click the Plus button (top right).
Add a name and, if you wish, tap the T icon next to it to: add
notes, a URL or a flag or tag, set a priority as low, medium or high
and more. When you’ve carried out the task, tap the circle to its left
to check and dismiss it
Click a reminder then the 'i' icon and you can turn on
reminders. You can add an alarm, set a date and time and
set it to repeat, if necessary. Click the Add Image link near the
bottom of the Details window and you can add a photo, take a
new one or scan a document. Add notes or URLs too.
4
To share a list with another Mac or iOS user, hover over
the list in the sidebar, then click on the Silhouette icon
that appears. Choose a method of inviting people. Reminders
created in Ventura are compatible with macOS Catalina but
not earlier than that.
Templates
In macOS Ventura, you can save out a list as a template,
which can then be reused for a new reminders list later in the
day. To do so, in the File menu, choose Save as Template. To
reuse a template, again in File, choose View Templates, and in
the window that opens, click on one and then Create List to
make a new reminders list based on that template.
Using Tags
If you have a lot of reminders you’d like to group but
they’re distributed throughout your lists, use Tags. Tap a
reminder's T icon, and either type a new tag, or choose
an existing one from the list that appears. You can then
click on one of your tags at the foot of the sidebar to see
all the reminders on which you've used that tag.
www.pclpublications.com | 85
П macOS Ventura’s Key Apps
Messages
For On-screen Chats
Messages is one of the most popular apps in macOS. You can exchange
short text messages with friends, family and colleagues, attach photos,
web links and more and brighten up your messages with emoticons and
emojis. If you're sending to another Apple device, they're free too.
Setting Up Messages
When you first open Messages, you might need to sign in
with your Apple ID's email and password. If you're not
asked to do so, you’re already signed in. Select Settings from
the Messages menu in the top bar, or press cmd-comma on
your keyboard. The Settings window appears.
Click the iMessage tab and ensure the email address
associated with your Apple ID is enabled. Set more than
one email address and phone number, so messages sent to
them appear on your Mac. Check the Enable Messages in the
iCloud box, to sync Messages with your other Apple gear.
3
Once you're signed in, click back to the General tab and
click on the Set up Name and Photo Sharing button. This
opens a setup wizard that guides you through the process of
setting up personalised messages with a name and photo. It's not
essential, but it's a useful thing to do.
You can change your Messages image, which appears
on outgoing messages, to any picture on your Mac, as
well as the Memoji that are available through macOS Ventura.
You're also able to create your own unique Memoji via the new
Memoji Editor.
86 | www.pclpublications.com
Messages
Start a Conversation
1
To message someone you're already chatting with, click
their name on the left. To start a new message, click on the
pencil and paper icon for a blank message. Type the email
address, phone number or name (if they're in your Contacts app)
of the person you want to message in the To field.
2
Type your message into the text field at the bottom of the
window. Click the wave form icon in the right of the text
field to send a voice message instead of text. Record your
message then click the Stop icon. Click on the smiling face on
the right-hand side of the text field to add an emoticon.
О #images
♦ Memoji Stickers
Message Effects
3
Click on the button to the left of the text entry box for a
pop-up box where you can opt to add a Memoji, add a
photo, Message Effect or the #lmage option for pictures and
memes. When you've finished making your message, click the
up-pointing arrow in the text field or tap return to send it.
4
When conversing, messages you’ve sent are shown on
the right-hand side of the conversation window, and
replies are shown in grey on the left. Under your last message,
you’re shown when it was read. While your contact is typing, a
three-dots speech bubble is shown.
5
Paste a web link into a message, and a site preview is
shown. Paste a link to a video and it can be played within
Messages or clicked on to go to the site. You can drag photos
onto the conversation and send them as an attachment too. Click
on the icon above the pics to see their thumbnails.
6
Type more than one person's details into the To field and
you can start a group conversation. Your outgoing
messages are sent to everyone in the group, and their replies in
grey show the picture and the name of the person who sent it;
so you can see who said what.
www.pclpublications.com | 87
П macOS Ventura’s Key Apps
More Messages Tips
Pinned Conversations
You can pin up to nine conversations, so they’re always at the
top of the list. To pin a conversation, right-click on it and select
'Pin' from the menu; it appears as a circle atop the list. To unpin,
right-click it again and select ‘Unpin’. Incoming messages from
pinned chats are shown on the pin.
Blue or Green?
Messages sent by you appear as blue or green speech bubbles.
If the bubble is blue, your message is being sent to an Apple
device. These messages are free, as they're sent over the
Internet. If the bubbles are green, they're sent to a non-Apple
device and might incur SMS charges.
The Details Window
In a conversation, click the T in the top right comer for a details
window on that person. This window shows their location (if
they're sharing it) and buttons to contact them by phone, video,
email and more. Scroll up to see photos, links and other
attachments you've shared with each other.
FaceTime Calls
Click the video camera icon in the top-right of the window to
initiate a FaceTime call to the person you're messaging with. The
pop-up window that appears lets you make a FaceTime video or
audio call. This icon only appears when the person you're
messaging with also has an Apple device.
Deleting and Muting
If you want to delete an individual speech bubble, right-click on it
and select Delete from the contextual menu. To delete an entire
conversation, swipe it left in the left-hand panel and click the
dustbin icon. The bell icon mutes notifications from that
conversation. Repeat to unmute it.
Photo Stacks
If someone sends you several photos at once, they appear
in the Messages conversation as a stack of fanned
thumbnails. Double-click on this stack to open them in
Preview. Above the stack is an icon and an indication of
how many photos are stacked. Click this for thumbnails.
88 | www. pci pu bl ications.com
Messages
Shared with You
Photos, Podcasts, web links, Apple News and Apple TV
shared in Messages are now shown in their respective
apps too. If you don't want this, you can disable it on a per-app
basis by opening Messages preferences, clicking Shared with You
at the top and unchecking apps.
Items shared with you in Messages then appear in their
native apps. For example, in News, Safari, Podcasts and
Photos, there's a Shared with You option in the sidebar. In the
Apple TV app, it's under the Watch Now tab.
Undo Send
Mark Unread
If you regret sending a message, or notice a mistake,
right-click the message and select Undo Send or Edit. You
can do this for up to 15 minutes after sending. It’s only
available in blue-bubble messages, and both parties must be
on Ventura or iOS/iPadOS 16.
If you've read a message but want to mark the conversation
as unread again, maybe to remind you to look at it again later,
either right-click it in the sidebar and select Mark as Unread,
or swipe it to the right and click the Speech icon. Repeat to
mark as read again.
Recover Deleted Messages
SharePlay
In the View menu, select the Recently Deleted option to see
messages you've deleted within the last 30 days (after that,
they're gone for good). To recover one, click on the
conversation in the sidebar, and click the Recover button. The
Delete button erases it forever.
If you want to share activities such as movies, music,
workouts, games and more, so you're enjoying them at the
same time as your friends, share them in Messages as well as
FaceTime. Third party apps such as TikTok, NBA and Twitch
are SharePlay compatible too.
www.pclpublications.com | 89
macOS Ventura’s Key Apps
□ Books
Buy & Read eBooks
The Books app is much more than being a way to view your collection of
digital literature. You can browse a huge library of titles, buy new eBooks,
sample content and organise your ever-growing collection, and even add
PDFs to your Books app; all of which syncs between your Apple gear.
First Steps with Books
1
The Books app's sidebar is divided into three sections;
Apple Books shows what you're reading now and offers
two shop options; Library lets you view your book collection; In
My Collections, you can organise them into categories.
3
Click on a cloud, or the three-dots icon next to it, for
options to download a book to your Mac, delete it from
your Mac (it remains on iCloud, so you can download it again
later) or add it to Library categories like Want to Read.
2
If you're already a Books user on your iPad or iPhone, you
can access your books by clicking the All option under
Library. Here you can see your book collection. Books not
currently on your Mac have a cloud under the cover.
when you got them, their author or manually by dragging them into
place. You can also switch between a Grid and List view.
90 | www. pci pu bl ications.com
Books
Buying Books in the Books App
1
If you know what you're looking for, use the Search bar in
the top-left. Otherwise, click Book Store in the sidebar to
go to the Apple Book Store. Click Browse Sections (top right) to
browse according to genre and other categories.
2
When you've found a book you like, click on it to be taken
to its page. As well as buying it (or downloading it for free
in some cases), you can use this page to add it to your Want to
Read list, and/or download a free sample.
3
When you're ready to make a purchase (or download for
free), click the price button (or Get for free books). A sign-in
might be required; if so, use your Apple ID. It works the same way
as buying apps or iTunes media for your Mac.
When the book or sample has downloaded, you can open
and read it. It's also placed in your book library, which is
synced between your Apple devices using iCloud. You can
download it on an iPad or iPhone without paying again.
Adding PDFs to Books
You can copy PDF documents onto your Mac and into the Books app and sync them using your iCloud account.
In the Books app's File menu, select the Import option at
the bottom. In the window that pops up, navigate to the PDF
file on your Mac, and click on it.
Now click the Import button in the bottom right corner of
this window. The PDF is imported into your Books app, and
can be opened and read from your Library.
www.pclpublications.com | 91
□
macOS Ventura’s Key Apps
Viewing Titles in Books
1
To open a book, go to your Library and click on it. It
automatically opens at the start of the book or at the last
page you read to, if you've already started it The control icons
are revealed by dragging the pointer over the book.
Click the right or left chevron to turn the page, or using
the slider at the bottom of the screen. To go to the table
of contents, hover over the top of the screen and click first icon
in the top left. Return to reading by clicking Done (top right).
sekeeper's voice
worry, I’ll deal
’t have time.’
looking glass. Л
uess her nerve-
when he put on
linutes.’
handed her the
om the drawing
ers on the new
! short flight of
er’s song. ‘Let’s
uary air nibbled
пр-lights tinged
years spent on a
le felt a strange
! water, rippling
ane. A London
'Miss Savemake! Sorry to bother you on a Sunday evening!’ He
sounded young, eager, and utterly unapologetic. ’My name is—'
‘I know who you are.’
’But we haven't been introduced.’ Unruly strands of fair hair
sneaked from und yeltow
throat couldn’t dis Greer
fresh, scrubbed feal “ue
‘Jacob Flint, a re
Pv'ple
never speak to the | Undedioe
ompous clearing of the
twenty-four, he had the
lappen to be-’
. You must know that I
'I’ve done my ho
do know is that it's
prowls the London
0 Remove Highlight
3 Add Note
o left and right. ‘What 1
out while a brutal killer
'Perhaps I'm not
His eyes fastened и her hat. 'You look every
inch—’
‘Appearances can
He leaned towai led of coal-tar soap. ’If
you're not really a 1«~,, е«~~а for you to take care.’
‘It is unwise to threaten me. Mr Flint.’
He took a step back. 'I’m desperate to talk to you. You recall the
note I left with your housekeeper?'
3
Click and drag your pointer over a portion of text to select
it, then right-click on the selected text. This brings up an
options window where you can add a note, highlight the text,
remove a highlight, copy or share it and more.
To view your notes and highlights, click on the third icon in
the top-left of the toolbar. Your notes and highlights are
shown on the left. Click on one of these notes or highlights to be
taken directly to that place in the book.
she said. Tm not
impulse to panic.’
г offence, my dear. I
- reminder that it is
adviser to a younger
r as you will find in
ul draughtsmanship
npeccable. You may
о pressing need for
under the terms of
ance on my twenty-
ith. ‘I was alarmed
ink with your father
a sheltered life...’
‘Perish the thought’
*1 was also distressed to lean
equity holdings. Forgive my b11
young woman, however con fid
become wise to the ways of the
'Are men really more reli
Darjeeling. ‘Every morning I re;
swallow cyanide or be thrown ii
’Your father knew his own
'Though I dare not speculate w
taste for investing in all th
supposed works of art*
He glared at a Sicken with
pink. A voluptuous courtesan,
gilt-framed mirror.
*Given the calamities befall
i that you have liquidated your
nrnacc hnr k гэ1н»ч time for a
l0* minded, to
Gfpen
ptm< ther sip of
xkbroker to
Underline
tri Add Note murmured.
< about your
ture, and...
0 Search Seecten
k. gold, and
9w»_ flection in a
Speech >
ing the markets, h
i. It’s as isolated as
is claws. 'We live in
impressed by my eye for a good investment. The pleasure I derive
from Ruhlmann’s designs and the artists’ insight into human
nature is an agreeable dividend.’ Rachel waved a slim hand at the
«эеота
3 page) left In thrt chapter
When looking at a note added to your book, there's a
coloured square in the margin next to the highlighted text.
Click on it to open a pop-up page showing a snippet of the text
and the entire note, which you can add to here if you wish.
Right/Ctrl click anywhere on the page and you can use the
pop-up menu to have the text spoken to you via the Mac's
own speech software. Simply select Speech > Start Speaking, then
Speech > Stop Speaking to stop again.
92 | www. pci pu bl ications.com
Books
•J Iowan
I’ahtino
San Francisco
Ш AA Q. □
± aA Q 0
Athelu
Chapter 17
Search Completed
Pubiico
Srrivek
CaneU
desperate economic times. Should our govemmen
as to desen the Gold Standard... suffice to say tha
to discuss your intentions, 1 could have suggested :
and rewarding havens for your fortune.’
Rachel bared her teeth. 'After last night’s event!
you’d called to congratulate me on my foresight.'
The wizened features crinkled. ‘Really, my dear
remains in the best hands, despite the... tragic
chairman. Vincent and 1 happen to be members oi
the other directors are equally well-versed in matte
chairman's death will not provoke a run on the ba
Pardoe’s are a select band, shrewd enough to re
impulse to panic.’
‘Perish the thought.*
‘I was also distressed to leam that you have i*4u>«mucu yv«
equity holdings. Forgive my bluntness, but it takes time for a
young woman, however confident and independently minded, to
become wise to the ways of the world.’
‘Are men really more reliable?’ She took another sip of
Darjeeling. 'Every morning 1 read news of the latest stockbroker to
D Click on the 'aA' icon (top right) for a window that lets you
increase or decrease the font size (the small and large A'
at the top), change the background colour to beige, grey or
black and change the font to one of the others available.
Chapter 2
desperate economic times. Should our governmer
as to desen the Gold Standard... suffice to say ths 1
to discuss your intentions, I could have suggested
and rewarding havens for your fortune.’
Rachel bared her teeth. ‘After last night's event
you’d called to congratulate me on my foresight.’
The wizened features crinkled. 'Really, my deal
remains in the best hands, despite the... tragi
chairman. Vincent and I happen to be members c
the other directors are equally well-versed in matt»
chairman's death will not provoke a run on the Ы
Pardoe's are a select band, shrewd enough to n
impulse to panic."
‘ftrish the thought.’
‘1 was also distressed to leam that you have liquidated your
equity holdings. Forgive my bluntness, but it takes time for a
young woman, however confident and independently minded, to )
become wise to the ways of the world.'
'Are men really more reliable?’ She took another sip of
Darjeeling. ‘Every morning I read news of the latest stockbroker to
swallow cyanide or be thrown into Bentonville.’
'Your father knew his own mind too,' Hannaway murmured.
8
Also in the top-right is the Search option (the magnifying
glass icon). Click it and type a word or phrase, and all
occurrences of that search term in the book are listed. Click on
one to go to that page; the search term is highlighted.
Mirt I R
desperate economic times. Should our government be so feckless
as to desert the Gold Standard... suffice to say that, had you cared
to discuss your intentions, I could have suggested suitably discreet
and rewarding havens for your fortune.'
Rachel bared her teeth. 'After last night’s events, 1 wondered if
you’d called to congratulate me on my foresight.’
The wizened features crinkled. ‘Really, my dear! Pardoe’s Bank
remains in the best hands, despite the... tragic demise of its
chairman. Vincent and I happen to be members of the board, and
the other directors are equally well-versed in matters financial. The
chairman’s death will not provoke a run on the bank. Investors in
Pardoe’s are a select band, shrewd enough to resist any foolish
impulse to panic.'
'Perish the thought.’
'I was also distressed to leam that you have liquidated your
.__pnnitv holdings____Fnrpivp mv hhinrnpss. hnr it rakes time fnr a____________
9
The final top-right icon is Bookmark (the ribbon). Click it to
place a bookmark on the current page. To see your
bookmarks, click on the middle icon in the top-left to see them
listed (you can have more than one). Click on one to go there.
10
Some books have integrated content such as images and
videos presented within their pages. These are viewed by
following the specific instructions given by the book title in
question, such as pressing the Play button on video clips.
Sharing eBooks and Using the
Books Wish List
When you find a title in the Apple Books Store that you wish
to share with a friend, or if you are a little short on funds and
want to add the title to your Wish List to remind you at a later
date, you can use the following features. When you are on a
title's home page, click on the button marked 'Want to Read'
to add it to your Want to Read list, accessed in the sidebar. To
remove a book from Want to Read, click the three-dots icon
to its right and select Remove from Want to Read.
Also on the book's home page is the Share icon, the
square with the up-pointing arrow. Click on this and you can
add a note or a reminder about the book, or use the Mail or
Messages app to send an email or a message to your friends
and family to recommend it, or not.
www.pclpublications.com | 93
□
macOS Ventura’s Key Apps
FaceTime
Video & Audio Calls
With FaceTime, you can make both video and audio calls directly from your
Mac. As well as one-to-one conversations, you can make group calls. You
can even initiate a call with a Windows or Android device, and if you have an
Apple Silicon Mac, you can have the speech appear as subtitles too.
Using FaceTime
1
Click on the FaceTime app to launch the program. It
should start straight away, and you'll see your own face on
the screen, as well as a panel inviting you to log in with your
Apple ID. Type in your Apple ID password and click OK.
2
Before you make a video call, it's a good idea to make sure
they can see you properly. Using the camera view shown
here, make sure there are no distracting bright lights behind you
and your face is well lit.
3
Before you make a video call, it’s a good idea to make sure
they can see you properly. Using the camera view shown
here, make sure there are no distracting bright lights behind you
and your face is well lit. You don't need to light up like a movie
studio, but turning on a desk light could help.
When you receive a call, the app automatically opens and
you're given several options. These are Accept or Decline
the call, and under the chevron, Remind me in five minutes, 15
minutes or an hour, or Reply with Message. You also see your
camera view in a small inset window.
94 | www. pci pu bl ications.com
FaceTime
Mute the mic by hovering your pointer over the picture and
clicking the icon that appears at the bottom. Hover over
the inset video feed of yourself and you can toggle between
landscape and portrait modes. Take a Live Photo with the button
at the bottom left. To end the call click on the red button.
Hover over the FaceTime window and click the green
gumdrop in the top left corner to go full-screen with your
video chat. If the other person's chat is shown in portrait mode,
it's because they're holding an iOS device in that orientation.
Ask them to turn it to landscape mode for a bigger picture.
You can use FaceTime to make and receive regular phone
calls on your Mac, as long as it's signed into the same
Apple ID as your iPhone, and your phone is nearby and on Wi-Fi.
Click the FaceTime menu and select Preferences. In the window
that appears, check the box marked Calls From iPhone.
Live Captions
If you’re lucky enough to have an iPhone 11 or later, an
iPad with an A12 processor or later, or a Mac with an
Apple Silicon CPU, you can have your FaceTime calls
captioned. Just open System Settings, Click on
Accessibility, and in the Hearing section, click Live
Captions. Turn them on.
FaceTime Audio Calls
It’s also possible to make audio only FaceTime calls. From
the Contacts app, find the person you want to call and
right-click on the telephone receiver icon at the top. Choose
the option for a FaceTime Audio call. Alternatively, in the
FaceTime app, right-click on a previous video conversation
found in the left-hand sidebar, and select FaceTime Audio. If
the entry shows a telephone receiver icon, it was already an
audio conversation, so you can just click it to repeat the call.
Naturally, you can enter an email or phone number in the top
field and as long as the other person has registered that
email or number with their FaceTime account, you can make
the FaceTime call. Because they're made over the Internet,
FaceTime calls, audio and video, are free.
www.pclpublications.com | 95
П macOS Ventura’s Key Apps
Group FaceTime Calls
1
To add another person to a FaceTime chat, drag the
pointer onto the FaceTime window and open the
sidebar. Click Add People and then enter their details, followed
by Add. That person then gets a call and can join the chat,
alongside the person you're already chatting with.
2
To launch a Group FaceTime Chat, click the New
FaceTime button, and then add as many people as you
like in the New FaceTime window, either from the suggestions or
using their name, email or number. Tap FaceTime to send a text
message inviting them to the chat.
3
To invite people to a chat that's to take place in the future, on
the FaceBook window, click the button marked Create Link.
You can send this link with a range of apps, or copy it to distribute
another way. This link can be used to join a Group Chat, immediately
or at an agreed time.
Up to 32 people can join a Group FaceTime chat. To leave,
click on the red button marked with an 'X'. The rest of the
group is unaffected. During a Group Chat, the tile of the person
who's speaking automatically becomes larger, but you can turn
this off in FaceTime Preferences.
5
Providing your operating systems are up to date, you can mix
Macs, iPhones, iPads and iPod touches, and even Android
and Windows devices in Group Chats. They all work fine.
6
You can even Group FaceTime from an Apple Watch or a
HomePod speaker, though as these devices don't have
built-in cameras, you are limited to audio chat only.
96 | www.pclpublications.com
More FaceTime Features
Grid View
macOS Ventura brings a host of improvements and new
features to the FaceTime app. In a Group Chat, toggle the
floating tiles and have a regular grid that gives everyone the
same space by clicking the Grid button in the top-right. Click it
again to go back to the default view.
FaceTime Handoff
You can use FaceTime with Handoff, which means you can transfer
the call between your Apple gear just by moving them close
together, as long as they're running iOS 16, iPadOS 16 and macOS
Ventura. If you answer a call on your iPhone, for example, then get
home you can continue on your Mac with its bigger screen. To use
Handoff, move the devices close together, tap the FaceTime icon
in the comer of the screen (mobile devices) or click on it in the
menu bar (Mac) then tap/click the Switch button that appears.
Collaboration
When you're collaborating on a document in Files, the Finder,
Keynote, Numbers, Pages, Notes, Reminders, Safari and
supported third-party apps, you can start a FaceTime call with
the people with whom you’re collaborating with a single click.
Just click the collaboration icon - for example, the circle with a
silhouette in the Notes toolbar - and click on the FaceTime
Audio or Video icon in the window that appears.
Windows & Android
You can take a FaceTime video call initiated on a device
running macOS Ventura, iOS 15 or later, or iPadOS 15 or later,
on a Windows or Android device. The Apple user sends a link,
and the Windows/Android user opens it in a Google Chrome or
Microsoft Edge web browser.
New Mic Modes
You can use three different mic modes in FaceTime calls.
Open Control Centre and click on Mic Modes to switch
between Standard, Voice Isolation (which only picks up your
voice), and Wide Spectrum Mode (picks up every sound
going on around you).
SharePlay
The SharePlay feature, coming with a future Ventura
update, lets you play your movies, TV shows and music
with your friends over a FaceTime chat. Your media is
played in sync, so you can chat about it as you enjoy it.
To share movies and TV shows during a FaceTime chat,
open the TV app or a compatible third-party TV app and
press Play. For audio, open Apple Music, find a track or
album and press Play. Everyone can add and queue songs.
www.pclpublications.com | 97
П macOS Ventura’s Key Apps
Maps
Plan Your Routes
With the Maps app, you can plan a route on your Mac, then when you're
ready to go, send it to your iPhone or iPad. In macOS Ventura you can plan
a route with multiple stops along the way, and in some territories, calculate
how much a route would cost you in fares. It has great 3D features too.
Finding Places with Maps
1
To focus the view on your current location, click the arrow
icon in the toolbar. The map zooms to your current
whereabouts. To search for a specific location, type the address,
postcode/zip code or road name into the search field. Possible
matches are shown as you type.
2
You can search for a business by entering the business
name or type, for example 'Fast Food', into the search
field. Icons appear on the map indicating all matching
businesses in the area. To get more information, click on an icon,
then on any relevant information that accompanies it.
Getting and Using
Traffic Information
When on a road journey, there's nothing
worse than getting caught up in a traffic
jam or running into major roadworks.
Luckily, Maps covers that one too. You can
add or remove real-time traffic
information in the View menu at the top of
the screen. Just select Show/Hide Traffic.
When traffic information is turned on,
closed roads are shown as no-entry
signs, roadworks as road men and
accidents as a red sign. Click on one of
these indicators for more details,
including possible length of delays and
for how long the works is likely to
continue. Where traffic is heavier than
usual, an orange line is added on the road.
If it's very heavy, a red line is used.
98 | www. pci pu bl ications.com
Maps о
Route Planning Explained
1
For directions, click the Directions button (arrow in a
circle), and enter your start (if it's not your current
location), and finish points. Alternatively, search for your
destination and click Directions in the pop-up. Choose your
transport method with the four buttons in the window.
2
Maps calculates the best route, based on your chosen
transport. Its displayed on the map as a blue line. The
distance and travel time are also offered. If alternative routes are
available, they’re shown as lighter blue lines. You can switch
between routes by clicking on a light blue line.
When you've chosen a route, click on the right-facing
chevron next to the route in the window to expand the
details. You can view a step-by-step breakdown of the journey. Click
on any of these points to be taken to that stage on the route.
If there are alternative branches leading off your chosen
route, they're displayed as lighter blue lines once more.
Again, you can opt to follow these alternative routes by clicking
on them, causing Maps to change your route.
5
You can add up to 15 mid-journey stops by clicking Add
Stop in the floating window, and typing where it is you
want to stop. Also in this window click the Now tab if you’re likely
to leave now or the Plan tab if you want to plan a date and time
to leave or arrive.
Drop a Pin
To add a pin to your map, right-click and choose Drop
Pin. A pin is placed where you clicked, giving access to
an information box like the one shown here. To remove
the pin, right-click on it and choose Remove Pin.
www.pclpublications.com | 99
macOS Ventura’s Key Apps
Customising the Maps App
Location Aware
If Maps isn't authorised to access your location, you get a message.
Several of the options covered in this tutorial won’t work unless you
authorise the Location Services function. Open System Settings (in
the Apple menu), and go to Privacy & Security > Location Services
and make sure Maps is switched on.
Adding and Removing Favourites
To bookmark a location, click on its icon or right-click to Drop a
Pin if there isn't one. In the information window, click the three
horizontal dots. From the pop-up menu, select Add to
Favourites. Once a Favourite is added, it appears in the
left-panel; click the T then Remove Favourite to delete it.
Sharing Routes
Having planned your choice, you can share it via social media or
email or send directly to other Apple devices (including your own).
The recipient receives a message with a link which, when
accessed, opens the Maps app to display the route.
Using Maps Favourites
Your Favourites are located in the left-pane, click the 'i' next to
one of them for more information. You can create a Type: Work,
Home, School and rename it to something more meaningful if
you want to find it again easily.
Changing the View
Click on the icon that looks like a folded-out map in the toolbar to access the different viewing options available in the
Maps app. There are four types of map available, ranging from a regular line drawing to a satellite view taken from above.
Explore: A regular map
that looks just like the ones
you buy from a shop.
Driving: Similar to
Explore, but with traffic and
roadworks info added.
Public Transport: Here
bus and rail information is
conveniently displayed.
Satellite: A view made up
of photographs. Zoom in
and out for detail.
100 | www.pclpublications.com
Maps
о
Viewing Maps in 3D
1
To get the best effect when viewing the maps in 3D,
switch to Satellite view. You can show or hide the labels
such as the street names and feature locations using the View
top-bar menu or the checkboxes under the map options.
3
Zoom in and the 3D aspect begins to unfold. While not
everything on the planet is rendered in 3D, you can get
to see some of the more famous buildings and locations,
usually within major cities and with major landmarks. It’s like
you're there, minus the crowds!
2
To now switch to 3D view, click the 3D button next to the
map selection icon in the top bar. The camera angle will
shift when you do this but if you're zoomed out too far, you'll
hardly notice any difference.
4
You can use trackpad gestures such as pinch in and out
to zoom and twist to rotate the camera and see different
parts of buildings and features. You can also tilt the camera by
using the slider located next to the compass, in the bottom-right
of the map screen.
3D Flyover Tours
Some of the world's major cities offer Flyover Tours. To
start a 3D Flyover Tour search for a city by name, and on
the window that appears, click the Flyover Tour button. If
it's not there, that city doesn't offer Flyover Tours.
The 3D camera flies over major features and attractions,
showing them off in great detail. What you’re looking at is
indicated in a panel at the foot of the Maps window. To end
a Flyover Tour, click the 'x' found at the end of this panel.
www.pclpublications.com | 101
□
macOS Ventura’s Key Apps
TV App
Watch on Your Mac
The TV app has long been a popular means of buying and watching
television shows and movies on iOS, and now it's come to the Mac. If
you've already bought video media on the iTunes Store, in macOS Ventura,
you'll find it in the TV app. How does it work? Let's tune in and find out.
1
Open the TV app, and click on the Account menu in the
top bar. If you're not signed into your Apple account,
select Sign In and enter your Apple ID and Password in the fields
provided, then click the Sign In button below them.
2
Look at the tabs at the top of the window. Watch Now is
the TV app’s front page, showing movies and TV shows
you've previously bought alongside those available to buy or
rent from the app. Scroll up for more suggestions.
3
If you subscribe, watch <TV+ in the tab. Under the
Store tab you can buy and/or rent films and
programmes. TV shows can be bought individually or on a
per-series basis; scroll up for available episodes.
4
There's no separate Kids tab now, but if you select
Store then the TV Shows or Movies tab under the
toolbar, you see shows and films that are especially suitable
for children or for family viewing.
102 | vwvw.pclpublications.com
5
The Library tab takes you to your collection of movies and
shows, those you've purchased previously In the left hand
sidebar, you can view according to when you added them, films
only, TV only, or according to genre.
6
Hover the mouse pointer over a movie or TV show in your
library and you get these icons. Click on the Play icon to
play it. The cloud with the arrow on it lets you download it for
later viewing. This is essential if you watch offline.
О Click on the Three-dots icon, found by hovering over a
show, and you get a pop-up menu. This lets you
download the show, mark it as watched or unwatched, add it to
a playlist, get an interesting information window and more.
8
When looking at a movie to buy or rent, scroll up and you
might find a trailer. These, of course, can be viewed for
free. The Add To Up Next button adds them to your Up Next list,
which is found at the top of the Watch Now screen.
9
Click on a movie and there are buttons for buying or
renting it, as well as Add to Up Next, on the Watch Now
screen. Rented media is removed 30 days after renting it, or 48
hours after you start watching it, whichever is sooner.
10
When watching a show, move the mouse pointer for
controls. These include pause/play, skip forward or
backward, close the viewing window, add subtitles, and watch
the show in a small window that floats on top of the desktop.
www.pclpublications.com | 103
П macOS Ventura’s Key Apps
Notes
Store Your Jottings
The Notes app is a remarkably powerful, yet simple, virtual notepad. With
it you can jot down your thoughts and ideas or create complex notes that
are easily edited and fully searchable; and you can also sync your notes to
your iCloud account. There's more to Notes than first meets the eye.
Creating, Editing and Searching Notes
1
To create a new note, first of all, click on the
pen-and-paper symbol found in the toolbar at the top of
the Notes window. A new blank note appears. Start typing your
note. The first line of a new note is used as its title in the notes
list, so bear this in mind.
2
Your notes are listed in the left-hand pane. Click on a note
to open it. To change the font or use bold, underline or
italicise, select the text and right-click or ctrl-click for a menu;
these options are found under Font. To attach an image, simply
drag it onto the note or copy and paste it.
з e
at 4:24 pm
M>$: Used
nada-15195448
lappened yesterday
Shared Notes
Locked Notes
Notes with Checklists
К
0
Notes with Attachments
#
Notes with Tags
Notes with Drawings
Notes with Scanned Documents
Quickly find notes and attachments
Su g g e ste d Searches
A
3
To search notes, use the search icon (the magnifying glass)
in the top right. Searches cover all your notes, not just the
titles. Searches are very powerful and can recognise objects and
scenes in attached images. When you click on the search field, you
get a window that helps you focus your search.
4
To delete a note, open it and use the Delete option in the
Edit menu, the dustbin button in the toolbar or swipe it left
and click the dustbin. Deleted notes are kept in the Recently
Deleted folder for 30 days. To email a note or share it in
Messages, click on the Share button.
104 | www.pclpublications.com
Notes
Using Folders
There are several ways to create a new folder in your
sidebar. Press cmd-N, use the New Folder/New Smart
Folder in the File menu or press New Folder in the bottom-left
corner. Notes created in the iCloud section are stored on your
iCloud and can be synced with other Apple devices.
2
Highlight a folder by clicking on it to view all the notes in that
folder. Click on the All option at the top of each category to
list every note stored there, including those in individual folders.
Click on a folder and then on the three-dots icon that's revealed
when you hover over it for more folder options.
You can edit the name of a folder by clicking on it to
highlight it, then clicking on its name to turn it into a text
field. You can then type in your new name. You can also reorder
folders by dragging them up and down the folders list, and
dropping them into a new position.
4
If you're syncing your notes with iCloud, they sync with
other Macs and iOS devices logged into the same iCloud
account. In System Settings, click on Apple ID > iCloud and then
make sure Notes is ticked. This is useful if you use an iPhone, as
the note is always in your pocket
You can view your notes either as a list or as thumbnails. To
switch between the two, use the buttons at the top of the
Folders panel. Click the left-hand button, showing lines, for a list or
the right-hand button, showing four squares, for thumbnails.
Smart Folders
Create a Smart Folder using the File menu or by clicking
New Folder (bottom-left) and clicking the Make into
Smart Folder box. Set up rules using the pull-down
menus, and then any notes you create that meet these
rules are automatically shown in this Smart Folder.
www.pclpublications.com | 105
macOS Ventura’s Key Apps
Advanced Notes Features
evioui 30 Day*
Disney Classics & Annuals
29/08/2022 For Skyia
Food
20/09/2022 UWT mtlk « 2
Steve Jobs Sayings, Apple Sto...
18/09/2022 Useful Jobs quotes: ht
В * AppleUse» mogarme
& fl
cvfous 7 Day*
Que.ntjn Tqrgntjn.Q MQyfes
Work Email
04/10/2022 <0Ux>rnc«>pc
В Notes
ф Reservoir Dogs (1992)
Q Pu>P Fiction (1994)
Jackie Brown (1997)
• Kill Bill vol 1 (2003)
• Kill Bill vol 2 (2004)
Death Proof (2007)
О IfielOMTbMD BoilDfOj (2009)
Diango Unchained (2012)
The Hateful Eight (2015)
Once Upon о Time in Hollywood (2019)
To format a piece of text, highlight it then press the Aa
icon. In the pop-up window, you can make several
formatting changes. You can also highlight a word or phrase and
use cmd-l, В or U to make it Italic, Bold or Underlined.
2
You can turn any list into a handy checklist. Highlight all
the items in a list, then click on the lines-and-ticks icon.
Your list becomes a checklist. Click a circle to tick and untick it.
You can reorder lists by dragging items up and down within it.
3
Click on the grid icon for a table. You can type in each of
the table's cells. Click on a row or column, then the small
icon that appears and drag it to move. Click this icon, then the
chevron that appears for options to delete it or add another.
You can drag pictures onto your Notes from anywhere.
There's also a Photo Browser for using pics from your
Photos app. Choose Photos from the Photos icon in the toolbar
and drag photos from the browser into your notes.
5
If you have a Safari window open, you can paste a link into
a note using the Add Link icon. Click it, and you're invited
to add a link to your note, which appears as an attractive preview
instead of a regular underlined URL.
6
Click on a photo in a note and then click on the button
that appears in the top-right corner for the Markup
feature. This lets you scribble on and add text to the picture,
using the Markup drawing tools, just like those in the Mail app.
106 I www.pclpublications.com
Notes
OTo password-protect a note, click the lock icon and select
Lock Note. You can then set a password for the Notes
app. Then you can only open locked notes with that password.
Also use the lock icon to open and close all locked notes, and
remove a lock.
The Share icon lets you send a note to someone else
using Mail, Messages or AirDrop: or add it to a reminder.
You can make a note with an attachment from another app
using the Share icon in the app in question; just select Notes.
Here we did it with a website.
You can pin a note, so it always appears at the top of your list
regardless of how that list is sorted. To do this, swipe the
note right and click the Pin icon. To unpin a note, repeat this step.
You can pin as many notes this way as you like.
10
Type a word with a hash (#) at the front and it becomes a tag.
Tags you've created are listed at the foot of the left-hand
panel. Click on a tag to see all notes that share that tag. A note can
have more than one tag if you wish.
Collaborative Notes and Folders
Steve Jobs Sayings, Apple Stores, Cc
Steve Jobs Seymgs,
* »
Ada to Raiding Utt
themtelvM.
to lose- You ore already naked.
14: 'Stay hungry, stay toolxh
11: 'Details matter, It s worth waiting to get it right.'
12: 'The ceop e who are crazy enough to think they con c.
ttwv ЖЙИ H
Reminders
Q GoodLinks
invite with Link
>ughly understand
Collaborative Notes are shared with other people, and can be
edited by more than one person too. You can also make a folder
collaborative, and share notes and folders giving read-only
rights too. Open a note, or highlight a folder, and click the Share
button. Choose whether to collaborate or just send a copy.
Click the chevron next to 'Only invited people can edit', and
set the necessary permissions using the pull-downs. Choose
how you want to send the invite, and the chosen app
prepares the invite, which you can then send. Once
accepted, they can share the note or folder.
www.pcipublications.com | 107
□
macOS Ventura’s Key Apps
Quick Note
Speedy Jottings
When using your Mac, have you ever wanted to jot down a phone number,
save a website or simply scribble down a thought as soon as it comes to
you? That's where Quick Note comes in. This feature, which syncs across
your Apple devices, is perfect for speedy jottings you can review later.
Getting Started with Quick Note
You can open a Quick Note from anywhere on your Mac,
and access it in the Notes app. There are three ways of
opening a Quick Note. The easiest is to drag your pointer to the
bottom-right corner and click the white box that appears.
In the Safari app, you can highlight a piece of text,
right-click or ctrl-click on it and select New Quick Note
from the contextual menu. A Quick Note is created containing
both the text and the URL from which it came.
3
You can open your Quick Notes using a key command; Fn-Q.
However you open a Quick Note, the last one you created is
opened. If you need to start a new one, type cmd-N. A blank Quick
Note appears, which you can fill in.
You can also open and use a Quick Note on your iPad, as
long as it's running iPadOS 15 or later. Just swipe into the
screen from the bottom-right corner. Quick Notes are synced
through iCloud, so you can open it on your Mac.
108 | www.pclpublications.com
Quick Note
More About Quick Note
1
At the top of a Quick Note, you'll see the same tool icons
you get in the Notes app, such as formatting, make a
checklist, set up a table and more. You can use these in exactly
the same way as you do with regular notes.
When you open the Notes app, at the top of the folders
column on the left-hand side, you'll see a entry called 'Quick
Notes'. Click on it and you can review and edit your Quick Notes.
They open like a regular note; just double click on one.
If you'd rather change one of your Quick Notes into a
regular note, you can do that too. Right-click or Ctrl-click
on it, move the pointer down to the Move To option and from
there, navigate to a folder in your Notes app.
4
You can drag a picture onto a Quick Note, and it appears as
an attachment, just like in regular Notes. Also like in regular
notes, you can click on a picture, click on the chevron in the
top-right comer and then mark it up.
If you'd rather a new note appear when you open your
Quick Note instead of the last one you created being
opened, in the Notes app, under the Notes menu open Settings.
Uncheck the box Always resume to last Quick Note’.
Quick Notes are synced between your Apple devices, as
long as they're signed in to the same Apple ID as your Mao
You can scribble on an iPad Quick Note using an Apple Pencil, and it
appears in your handwriting on your Mac as well.
www.pclpublications.com | 109
П macOS Ventura’s Key Apps
Find My
Find Your Gear
With Find My, you can keep track of your friends' whereabouts, and they
can keep an eye on yours. You can track down a missing Mac, iPad, iPhone
or Apple Watch, find your missing AirPods and keep track of your AirTags.
Ideal if you're arranging a meeting, or finding lost or stolen Apple gear.
The People Tab
1
Click the People tab. Click on your own picture in the
left-hand sidebar, and click on the T in the window that
pops up on the map. In the next window, you can change the
device through which your location is represented, switch off
sharing, Notifications and more.
To start sharing your location with someone else, click
Share My Location in the bottom-left comer, Enter the
name, phone number or email of another Apple user in the To
field or navigate to their details using the + icon. People with
whom you've recently shared your location are listed below.
3
Decide whether to share for an hour, the rest of the day or
indefinitely, and your location is shared with that person. If
they reciprocate, you can see their whereabouts on the map in
the right-hand side of the window. Click their picture, then the 'i*
for information on them.
If someone starts sharing their location with you, you get a
notification letting you know. Using this notification - or by
opening that person's information window in the Find My app
itself - you can choose to share your location with them too; so
they can see where you are.
110 | www.pdpublications.com
Find My
The Devices and Items Tabs
1
The Devices and Items tabs work in the same way, with
Devices being for Macs, iPhones, iPads, AirPods and
Apple Watches, and Items being for gear you've protected by
attaching an Apple AirTag to it. Click on either tab to see your
property's current whereabouts.
2
If you've mislaid something in the house, click on it in the
left-hand sidebar and then click the device's T icon on
the map. In the window that pops up, click Play Sound in the
top-left and the missing device beeps, allowing you to locate it.
Just follow the sounds.
WokoraMgh ImQ
n Ian’s Apple Watch
** Hon-.r • 1 mr . ago
И Ian Osborne’s iPad Pro 0 m.
Hom* • Now
iMac
Home 1 minute ago
Alison's MacBook
No location round
Ian's iMac
No ioc*tk>n found
3
If one of your gadgets is missing, in its information
window, click Activate under Mark as Lost. You can then
(optionally) add a phone number that can be used if someone
finds your device and a message for the finder. You can then
click Activate to mark it as lost.
4
A lost device is marked by a red lock on your Find My
app. It cannot be used without your passcode, so a
thief cannot make use of your missing gadget. You can also
follow its whereabouts on the map, so you've an excellent
chance of getting it back.
5
If you think your device is lost forever, click Erase This
Device in its information window. This wipes it clean, so
your information can't be accessed from it. You can no longer
track it in the Find My app, though, so don’t use this option
unless you've given up hope of seeing it again.
Find My Online
You can find your missing Apple gear using any device
with a web browser. Go to www.icloud.com, log in with your
apple I.D. details and click Find My iPhone. Using this
online version of the app, you can find a lost or stolen
Apple device, whether or not it's actually an iPhone.
www.pclpublications.com | 111
П macOS Ventura’s Key Apps
□
Weather
Will it Rain?
The Weather app has long been a popular feature on the iPhone, and with
Ventura, it comes to the Mac too. You need never be caught outside in the
rain without your brolly. It gives hourly forecasts for the next ten days, and
minute-by-minute precipitation intensity over the next hour.
1
In this sidebar, you see
the locations you've
saved in the Weather app. Click
one to see the weather in that
particular town or city.
2
Use this icon to collapse
and open the sidebar.
3
The Search field. Use this
to find other towns, cities
and locations, which you can
add to your sidebar.
4
Here you see the current
temperature, weather
along with the high and low
forecast for the location you've
highlighted in the sidebar.
5
Your by-the-hour
forecast. Scroll it left and
right for more information.
6
Your ten-day forecast,
showing the high and low
temperature, and general weather.
A precipitation map.
Areas where it's likely to
rain are shown in blue.
8
An air pollution indicator.
At the moment, its low.
Useful information for those with
breathing problems.
Each of these boxes
(scroll up for more) offers
detailed information about an
aspect of the weather.
9
Newton Abbot
14°
The graphic at the top
of the Weather app
reflects the current
weather conditions.
As you see here,
today it's raining.
112 | www.pclpublications.com
What's what in the Weather
1
To add a new location to the sidebar on the left of the
app window, Click on the Search field and type its name.
It can be almost anywhere in the world. Click on a place in the
Search results to open its weather, and click the Add button
that appears next to the Search field to add it to the sidebar.
2
If you allow the Weather app to use your location, the top
entry in the sidebar gives the weather for where you are
now. To change this permission, open System Settings and go
to Privacy & Security > Location Services. There's a switch next
to Weather that lets you turn the permission on and off.
The long box atop the details section is your hourly
weather forecast, and the long box below it on the left is
your ten-day review. Click on either box for charts and details. In
the details pop-up box, you can scroll through a graph, click on a
date to see the summary for that day, and more.
The Precipitation box gives you a map that centres on
your current location, and shows areas where it's likely to
rain as blue patches. You can interact with this map just like you
can with the Maps app; use the + and - icons to move in or out,
click and drag it to scroll around and more.
5
The Air Quality box gives you an idea of how clean the air
currently is. Click on it for more details, such as health
information and details of the atmosphere's primary pollutant.
It's very useful for those with breathing issues. Information here
is provided by BreezoMeter, and covers most of the world.
6
There are eight boxes at the foot of a location's weather
screen. These provide information such as wind strength
and direction, UV index, air pressure, humidity, wind chill and
more. As always, if you click on one of these boxes, you get
access to even more detailed information in a pop-up.
www.pclpublications.com | 113
□
macOS Ventura’s Key Apps
Stocks
Watch Your Shares
A long-time stalwart on the iPhone and iPad, the Stocks app comes to the
Mac with Ventura, and it's had an overhaul. It's for more than just checking
your share prices. You can get all sorts of business news and information,
you can organise your stocks into watch lists, and more. Here's how.
1
This is the front page of the Stocks app, that is, what you
see when you open it for the first time. If you've already
saved some stocks using the iPhone or iPad version of the
Stocks app, they're synced in iCloud and shown in the sidebar.
2
To find a company and see its current share price, type
either its name or its ‘ticker1 - a four-letter abbreviation of
the company's name used by the stock market - in the Search
bar. Click the company in the search results.
3
As well as seeing the company’s current share price (top
right), you also get a graph showing the fluctuating stock
value over time. Drag your mouse over the graph to find the
price at a certain time on a certain date.
4
Both on the front page and on a company's page, you see
news items in the main window. Click on one to open it in the
Stocks app. This information is gleaned from Apple News; click the
bookmark icon to save it in the News app.
114 | www.pdpublications.com
Stocks
My Symbols
AMP 273.67
Ameripriw Financial, Inc. ’
''FTAS
UK FTSE All Share
3,976.66
ЯЕП2
Click to dose this t«b; Option-dick to close all
tabs except this one
Stocks
19 September
You can use tabs in the Stocks app, just like in Finder and
Safari. In the View menu, select Show Tab Bar to open it,
then tap the plus sign near the top-right corner to add a tab,
which you can then use to open another stock or story.
Hover over the tabs to reveal an *x’ icon in the left corner.
Click it to close the tab you're currently hovering over,
regardless of whether it's currently open or not. Hold the Alt
button and click it to close all tabs except for that one.
5
A? • 9 n • л @ 4 :: л
^CNBC
Top WM Street erwysts му fey App* A Mvk* CNBC
s top analysts bet on these
sonomic uncertainty increases
~ Notts
Reminders
@ Paraiels Access
Q Goodinks
<$> Copy Link
□ Save to Apple Neers
CD Report a Concern
E> Extensions
Click on the Sharing icon, which is found in both stories
and stocks, to share it with others. This works just like the
Sharing facilities elsewhere in macOS. Click on a button at the
top or a listed app to choose how to share.
You can now save your tickers in groups. First of all, in
the File menu, select New Watchlist (or press
Alt-CMD-N). A pop-up appears, asking you to choose a name
for your new watchlist. Do so, then click on the Save button.
8
The name of your currently open watchlist is displayed in
the sidebar. Click on it to switch between the watchlists
you've set up. You can also set up a new watch list or manage the
watchlists from this pull-down menu.
To add a stock to your watchlist, find it using the search
field. Choose a watchlist using the pulldown menu, and
then click the'+' icon next to the stock. Alternatively, click the
tick (top right) and choose which lists to add it to.
10
9
www.pclpublications.com | 115
П macOS Ventura’s Key Apps
The Clock App
On Your Mac
Another app that Ventura brings to the Mac from iOS and iPadOS, the Clock
app does far more than simply tell the time. There's a World Clock option,
where you can see the time in cities across the world, a stopwatch, an alarm
and a countdown timer. Here's how to get the most from the Clock app.
World Clock
1
The first tab is World Clock. The time for your current
location is already there. To add cities and towns from
across the world, click the'+' icon (top right) and type the name
of the location you want to add in the Search field.
2
You can add a number of locations, which are shown on the
world map above the clocks, and the time difference and
other details are shown below them. To delete a location, hover
the pointer over it and click the 'X' in the corner.
Alarm
1
Click on the Alarm tab to switch the Clock app to the
Alarm page. To add an alarm, first click theicon, top
right. You can then set a time and a day or days it's to go off,
choose the sound it plays, give it a title and more.
2
Alarms are shown as thumbnails. You can add more alarms, or
click on an existing one to edit it. To delete one, hover over it
with your pointer, and click the У (top left). Alarms are not synced
through iCloud with your mobile gear.
116 I www.pclpublications.com
Clock ["]
Stopwatch
Timer
1
Click on the third tab to open the Stopwatch. Click the
Start button to start the tinner. The Start button is then
labelled Stop. Click Stop to end the session, or click Lap to
record the time without stopping the timer from running.
1
Click the last tab to access the Clock app’s countdown
timer. To set a timer, click on the hours, minutes and
seconds in turn and type the values you wish to use. You can set
a maximum of 23 hours, 59 minutes and 59 seconds.
2
When using the lap timer, you can still click on Stop at any
time. This stops the timer, but the lap times are still
displayed. After stopping the timer, click on Reset (previously
marked 'Lap') to get back to the start screen.
2
Click the pull-down menu to set a sound to play when
the timer ends. Choose one, and it plays for you as a
preview. At the foot of the menu is the Classic option, which
brings up a sub-menu offering classic Mac sounds.
3
You can choose between an analogue and digital
stopwatch. In the View menu, which can also be used to
switch between the Clock app's key functions, simply choose
between the Analogue and Digital options.
3
There's a 'Stop Playing' option at the foot of the pulldown.
Choose this, and you can play music or radio shows as
you go to sleep in Apple and third-party apps, having it switch
off automatically when the timer runs out.
www.pclpublications.com | 117
macOS Ventura’s Key Apps
Freeform
For Collaboration
Meetings are so much easier when you can sketch ideas on the
whiteboard. With Freeform, that whiteboard comes to video meetings.
As it's a collaborative app, everyone can draw, make notes and more, and
whatever they do is synced with everyone else sharing the Freeform board.
Setting Up and Using Freeform
First of all, make sure Freeform in iCloud is switched on.
Open System Settings and go to [Your Name] > iCloud,
and if the Freeform option at the bottom isn’t switched on, click
on the switch to the right of its name.
2
Click on the pen-and-paper icon to open a new Freeform
board. To share this board so you can collaborate on it,
with all edits and additions appearing for everyone using the
shared board, first tap the Share icon atop the board.
3
Tap 'Only invited people can edit' for pull-down menus that
let you choose who can make edits, who can access the
board and whether people you invite can also invite others. Set up
the board's permissions on these menus.
When you're set up, invite people to collaborate on your
Freeform board by sending invites or a link from the Share
sheet in the usual way. To rename the board, tap Untitled in the
top-left then type a new name.
118 | www.pdpublications.com
Freeform
5
To manage the board, tap the circle with the silhouette in
the top-right. In the pop-up window, you can start a
Messages, telephone or FaceTime conversation, which appears
atop the Freeform board.
In this window, tap Manage Shared Board for another
pop-up, from where you can change the share options, copy
a link to the board or stop sharing. Click on a person to change
permissions for the person in question.
DThe first two toolbar tools are for stickies and shapes. Tap.
the stickie icon to open one, tap it to add text, use the
handles to resize. Tap the shapes icon to choose a sticker,
geometrical shape or arrow. Tap it for controls.
8
Click the text icon to add a text box, then double tap it to
type. Tap the photos icon and you can choose to add a
photo from the Photos app or take a new one. You can also add a
URL using this menu, or insert from a folder.
9
Click on the folder icon and you can navigate your storage
drives, and choose a file to add to the board in this way.
These attachments can include photos, video, audio, documents,
PDFs, web links and more.
10
Click on an item and drag it around the board, and pinch/
spread to zoom in and out If you need more space, drag the
board with two fingers. Close the board with the chevron (top left)
and see the boards you’ve worked on.
www.pclpublications.com | 119
□
macOS Ventura’s Key Apps
App Store
Buy More Software
The App Store is the best place to download applications for your Mac.
It's quick and secure, and has an easy-to-use interface so you can find all
those obscure apps and utilities you've been wondering about. There's
some great software out there to discover, purchase and download.
• Finder File Edit View Go Window Help
About This Mac
System Settings...
App Store...
Recent Items >
Force Quit Finder
To open the App Store,
click the Apple menu and
select App Store.
Alternatively, you can use
the Ventura Launchpad
or the App Store icon
found in the Dock.
If you know the name of the application
you're looking for, type it in the Search Bar
to go straight to it. Suggestions are offered as
you type, so click on one to select it. You can
search for developers here too.
1
Ever wanted to write your own software?
The Develop section is where they list
the apps for developers, including art and
drawing tools, as well as coding.
7
Click on Discover for the App Store's
main page, where you can see
Apple's picks of the best and most essential
apps for your Mac.
2
Click on the Categories link for a list of
genres such as Business, Entertainment,
Finance, Music and more. It’s another easy way
to navigate the App Store.
8
For a monthly fee, Apple's all-you-
can-eat Arcade gaming subscription
service lets you play as many games as you
want, for as long as you want
3
Click Create to look for apps designed for
creativity, such as image editing, music
making, photography, video editing, desktop
publishing and more.
4
If any apps on your Mac have been
updated, the Updates page is badged in
the sidebar, as it is here. Click on this page to
update these apps and see the ones that have
been recently updated.
Featured Apps are chosen by Apple's
editors, and are shown at the top of each
of the pages listed in the sidebar. Here we're
showing the Discover page.
Click here for your account details,
including a list of apps you've already
purchased. You can download those that
aren't on your Mac by clicking the cloud
symbol next to the app.
9
10
Under Work you'll find the App Store's
productivity apps, such as note taking
apps, software for getting things done, apps to
organise your life and more.
5
11
Unsurprisingly, the Play section is for
video games. The number and quality
of games on the Mac has increased
dramatically over the last few years, and this is
where you get them.
6
12
___4
Underneath the featured apps are lists
showing the top paid-for, top free and
editor's choice apps in the category in question.
Click See All for the full list.
120 | www.pclpublications.com
App Store H
Install Applications.
When you've found an app you want
to install, click on its icon to open the
details page. To install the app, simply
click the price button under the app’s
title (or 'Get' for free apps), followed
by the Install button that replaces it,
then input your Apple ID.
Redeem/Add Funds.
In the App Store, if you scroll all the way
to the bottom of the page, you see two
buttons: Redeem and Add Funds to
Apple ID. The Redeem button is for
adding the value of an iTunes gift card to
your account. Add Funds to Apple ID lets
you pay money in by other means.
Auto App Updates.
You can update your apps in the
background, removing the need to
check for app updates manually. To
activate this very useful addition, open
the App Store preferences from the
App Store menu and ensure that the
Automatic Updates option is selected.
MacBook Pro
www.pclpublications.com | 121
Going Further
with macOS
Ventura
There's lots more to learn about the Mac
and the macOS Ventura operating
system. Here we look at Passkeys, a new
secure password-free way to log on;
Continuity Camera, that lets you use your
iPhone as a webcam; Stage Manager, a
new way to organise your desktop; and
lots more features that make your Mac
easier to use.
Learn more >
122 | www.pclpublications.com
VILLACORTA MAGAZ NE
ISSUE 13 —SUMMER 2022
villacoHamag.com
CLOSER
TOME
A child’s journey to self-discovery
is always a winding road.
here are moments where everything seems to change in i
instant. A great reorientation—a disorientation. Later, uj
reflection, we recognize these instances as the cresting of
long-building waves. We wonder why we were surprised at al
how we could have been caught off-guard, but, of course, that
not the way life works. Our children provide us with plenty ol
these moments. We get caught up in the endless procession c
days, a string of quarterly reviews, rushed Wednesday dinnei
early-morning practices, and are only every' so often snapped
www.pclpublications.com | 123
П Going Further with macOS Ventura
macOS Ventura's
System Settings
With macOS Ventura, the Mac's system preferences have been renamed
System Settings. It's a good idea to familiarise yourself with the System
Settings, to see how you can configure your Mac to best suit your needs.
There's all sorts of things you can do in this often-overlooked app.
Accessing the System
Settings in Ventura
As long as you read up on what you're adjusting before
making any changes, delving into System Settings is
not a scary experience, and it can make using your Mac
a lot more enjoyable. There are several ways to open
the System Settings interface. You can click on the
Apple icon in the top left corner of the screen and
select System Settings, click on the Dock icon showing
cogs on a silver square or open it from the Launchpad
or Applications folder. Opening System Settings reveals
a window with a list of categories in a left-hand sidebar,
each representing a different area of options you can
configure. Wherever you are in System Settings, this
sidebar remains in place so you can open another
System Settings page with a single click.
Apple ID : Edit the Photo
In System Settings, click Apple ID, found at the top of the
sidebar under the Search field. You’re shown the settings
associated with your Apple ID. To add a photo, click on the circle
showing your initials and choose a memoji, emoji, a monogram
or a photo from your Photos app or taken through the webcam.
Apple ID: First Section
In the first section of your Apple ID settings, you can edit your
details such as your name, phone number, email and more. You
can also change your password and manage things like
Account Recovery, Legacy Contact and more. Under Payment
& Shipping, change your credit card details and address.
124 | www.pclpublications.com
System Settings |(Q)|
Apple ID: Second Section Apple ID: Third Section
The second section of the Apple ID settings is for iCloud, Media & At the bottom of the Apple ID section you see a list of all the
Purchases and Family Sharing. Under iCloud, manage iCloud
Drive storage, change settings for iCloud services and more.
Media & Purchases lets you see what you've bought and
subscribed to, and you can set up Family Sharing here too.
devices you have signed into your Apple ID. Click on one for
details, and the opportunity to remove it from your account. At
the foot of this window you see buttons that let you sign out of
your Apple ID and see details about your Apple ID and privacy.
Wi-Fi
Click Wi-Fi in the sidebar and you see which local network
you’re connected to. Click the Details button and you can
manage it or remove it from the list of networks you
automatically connect to. Other Wi-Fi options include seeing
other networks within range, set whether you need to ask
before joining and more.
Bluetooth
Using this System Setting, you can turn Bluetooth on and off.
You also see a list of all the devices currently connected to your
Mac using Bluetooth; hover over one for a Disconnect button,
and click its T icon for information. Nearby Devices lists
Bluetooth devices that are in Pairing Mode, and are therefore
available to pair with your Mac.
Network
In the Network settings, you can you can see your Wi-Fi
connection, and other local networks. You can also see
configured VPN (Virtual Private Networks) and turn them on and
off. You can also turn the computer's firewall on and off, and see
other networking options. Click the pull-down for setup options.
VPN
VPN stands for Virtual Private Network, and it improves security
by disguising where your computer is located. If you add a VPN
configuration to your computer, you can manage it from this
section of the Settings panel. You can also switch it on and off,
and remove configurations you no longer need.
www.pclpublications.com | 125
П Going Further with macOS Ventura
Notifications
When do you want to see notifications from your various apps?
How do you want them to appear? The Notifications section is
where you manage these things. Click on an app and you can
set up whether you want notifications from it, and if so, how they
arrive. You can set them up differently for each app.
Sound
In the Sound settings, you can set the sound effect for alerts
and which sound device they're sent from. You can also adjust
the volumes, and the stereo balance, that is, whether the sound
favours one speaker over another or is transmitted at an equal
volume from each. Manage your mic settings too.
Focus
It’s here you can manage your Focus settings. There are some
already configured, such as Do Not Disturb, Sleep, Personal and
Driving, and you can click the Add Focus button to design one of
your own. Click on a focus to set it to turn on according to a
schedule, set what you want to let through and more.
Screen Time
Screen Time lets you see how much time you're spending on
your Mac, and what you're doing on it. The feature’s settings let
you turn it on and off, share it across devices, see which apps
you've used the most and more. If you think you’re spending too
much time online, you can set up downtime here too.
General
The General page is arguably the most important section in the
System Settings. Click About for information on your Mac, such
as the model, processor, memory and more. At the bottom of
this page, click System Report for even more information.
Software Update lets you update macOS or set it to update
automatically, and Storage shows you how much hard drive
space you’re using and what space each app is taking up. You
can configure AirDrop & Handoff, and sort out which apps open
automatically when you log in using Login Items. There are
settings for your Mac's language, region, date and time, and for
the experienced user, Sharing options are offered. Look out to
for Time Machine backup settings, facilities for transferring
your data to a new Mac or wiping it clean and resetting it and
you can change your Mac's Startup Disk too.
126 | www.pclpublications.com
Appearance
How does your Mac look? In this section, you can switch
between Light and Dark Mode, or have it change automatically.
See the blue box around the word Appearance? You can change
this under Accent Settings. Use the pull-downs to change the
Highlight Colour and Sidebar Icon Size, and lots more.
Accessibility
If you have a disability that makes it difficult to use your Mac, the
solution might be found here. It's divided into sections dealing
with disabilities related to Vision Hearing or Motor skills, and each
individual setting gives options designed to help you use your
Mac and macOS. Explore them, and use as many as you like.
Control Centre
You see the Menu Bar icon showing two switches? Click it for the
Control Centre, and use the Control Centre settings to customise
it. You can remove modules found in the Control Centre from the
Menu Bar, add other modules to the Control Centre and modify a
wide range of clock options. Use the pulldowns.
Siri & Spotlight
Here you can turn Siri on and off, and set whether it listens for the
words, 'Hey Siri’. You can change Sin's voice and accent, and check
its history too. You can also set up Spotlight so some things don't
turn up in search results, and using the Spotlight Privacy button at
the bottom, exclude certain locations.
Privacy & Security
Which applications do you want to allow access to other
applications? Your installed apps and features like the camera
and microphone are listed here; click one and you can see what
apps are allowed to use or share information with it. Use the
switches on that app or feature's page to turn access on and off.
Desktop & Dock
Did you know you can change the size and magnification of your
Dock, place it on a different edge of your screen and more? You
can also make minor configurations of your Menu Bar, make
changes to the way windows and apps behave, turn on and
customise the Stage Manager feature and more.
www.pclpublications.com | 127
П Going Further with macOS Ventura
Displays
Manage and customise your screen, both in-built and external. If
you have more than one, choose which you designate your main
screen, and change their arrangement so the mouse pointer
moves seamlessly from one to the other. You can also set the
brightness, text size, colour profile and more.
Wallpaper
Want to customise your desktop? Change the wallpaper, on both
internal and external screens. If you have more than one display,
click one of them at the top of the window and then choose one
of the new wallpaper options below, then click the other and do
so again. You can even use your own photos.
Screen Saver
The Mac's Screen Saver is what activates when the computer
goes to sleep. Here you get to choose one. Click on the Screen
Saver you want to try out, and then click the Preview button to
take a look at what it does. Tap any key or use the mouse or
trackpad to get back to your Mac. Show the clock too if you wish.
Energy Saver
This is mostly for notebooks, to save battery life, but there are
settings here that are relevant to desktop Macs too. You can
choose to put the hard drives to sleep whenever possible, so they
don't waste energy by spinning, and also have your computer
wake for network access. Take a look at what's on offer.
the screen you see before you click on your name and type your
password to unlock your Mac when it first boots up. Configure
Mac, and the Touch ID feature, if your Mac supports it Change your
login password, set up Touch ID, add fingers, delete fingerprints
what the Lock Screen shows, how soon before the Mac requires
you’ve already registered, set up what Touch ID is used for, set
your password after it goes to sleep and more.
whether your Apple Watch can unlock your Mac and more.
128 | www.pclpublications.com
System Settings |(^)|
Users & Groups
If more than one person uses your Mac, you can set up
permissions here. Click the T icon next to an account name to set
whether that person can administer the Mac, reset the password
or delete the account altogether. You can also turn Guest Access
on and off, and set a few restrictions for guests if you wish.
Passwords
The Passwords page is locked until you open it with your admin
password or Touch ID. When you do this, you can review
passwords saved on your Mac, delete those you no longer use,
choose whether or not passwords autofill, review any logins that
have been compromised in a data leak and more.
Internet Accounts
Your Internet Accounts include iCloud, your ISP's email, Google
and more. Click on one to manage it, including whether you
sync Mail, Contacts, Calendars, Notes and so on created in
those accounts with your Mac. You can also delete an account
you no longer use, and change its description too.
Game Center
Do you have a gaming nickname? How about an icon? Do you
want to show them to others, or place restrictions on who can
see them? You can do all this and more in Game Center. You can
also use the Show Apps... button to see which apps request
access to Game Center, set your Profile Privacy and more.
Wallet & Apple Pay
This is where your credit and debit card information are stored.
Click the button and you can add a new card to your Wallet. Also,
you can edit your shipping address or add a new one, add an
email and phone number to your shipping details, make a few
configuration changes to the service and more.
Hardware Section
At the foot of the left-hand sidebar is a section for hardware items
you might have connected, such as an Apple keyboard, a Magic
Mouse or Trackpad, an optical drive and more. Using the settings
you find here, you can configure them to suit your own
requirements. Explore, and find out what's on offer.
www.pclpublications.com | 129
П Going Further with macOS Ventura
Passkeys
A Password Replacement?
Passkeys are the passwords of the future. Instead of typing in a user name
and a password, passkeys uses your device's biometrics such as a Mac
Touch ID or an Apple mobile device's Face ID to verify your identity. It's
easy to use as there are no passwords to remember, and it's much more
secure too. Here's how it works.
Having to log into websites and apps can be annoying, but
with Passkeys, the procedure is greatly simplified. A feature
arriving with macOS 13: Ventura, iOS 16 and iPadOS 16,
Passkeys is a new authentication method that uses Touch ID or
Face ID to sign in. Passkeys are synced through iCloud, and you
can even use them on non-Apple devices using a QR code
Passkeys can only be used on websites that have made them
available. On Passkeys-compatible websites, you can log on using
your Face ID, Touch ID or mobile device's passcode, without
having to enter your username and password. This has a number
of advantages. As your Passkey never leaves your device,
phishing attacks - whereby a user is conned into giving away his
or her login details - are almost impossible. And because the
Passkey information is never kept on an external server, it can’t be
leaked after a hacking attack on the website either. All in all, its
more secure than using a username and a password to log in.
A Passkey digital key is unique to the site for which it was
created. You have to create Passkeys on a per-site basis, but
this isn’t any great problem. Once it's been made, it can be
used on that site as often as you like. Passkeys are designed to
work in apps as well as on the web, but again, the developer
has to make them available. Because they're cross platform,
you can use your Passkeys on a Mac, iPad and Apple TV as
well as on your iPhone, though these devices must be running
macOS Ventura/iPadOS 16/iOS 16 too.
Passkeys can be used on non-Apple devices, as long as you
have your iPhone with you. You can sign in on these devices using
your iPhone, by scanning in a QR code, and then unlocking with
Face ID or Touch ID. It’s simple.
Apple hopes Passkeys will eventually take over from
passwords completely over time, but at the moment they're
only available on a limited number of sites, including BestBy,
Nestcafe, Namecheap, Cloudflare, GitHub, Bitwarden, AOL,
Dropbox, Facebook, GoDaddy, Google, ID.me, Twitter,
WordPress and more. Naturally, further websites - and apps -
will be added over time.
130 I www.pclpublications.com
Passkeys
Using Passkeys
1
Not too many websites use passkeys at the moment,
but it's popularity will spread with time. When you come
across one, to open a new account fill in your requested details
but instead of a password, choose a biometric option.
2
You're offered a QR code, which you must scan with your
iPhone to continue. Do so and you’re asked whether you
want to save a passkey for your account, and given a little
information. On your phone, tap Continue to carry on.
3
Your iPhone reads your Face ID or, if it's a model with a
Home button, asks for your Touch ID. When you've logged
in using either of these methods, it tells you passwordless sign-in
is enabled. Go back to your Mac for the next step.
Back on the website, we now see the passwordless
sign-in option has a tick in it, showing that you've
registered a passkey for this account on this site. Click on the
Register button to complete the setup of your new account.
5
To log in on your Mac, you simply have to click the
'fingerprint' button and scan the QR code using your
iPhone. You then use Face ID or Touch ID to log in using your
iPhone. You don't even have to type your username.
6
If your Mac has Touch ID, you don't need to use your
iPhone - you can use a passkey directly from your Mac.
You can add a passkey login to sites where you already have
an account. Look in the security preferences for the option.
www.pclpublications.com | 131
П Going Further with macOS Ventura
Split View Screens
macOS Multitasking
Split View Screens is a feature of macOS that allows you to view two
applications in full-screen mode on a single display. It enables efficient
workflow and is superb for researching something in Safari, while using the
Notes app or reading about a venue and looking it up via Maps.
1
To use Split View mode, first open an app you want to use
as a split-screen app. Here we've chosen Safari but any
app that's compatible will do. Just open the app window; there’s
no need to open it as a full screen.
2
Click on the window's top bar and drag it upwards, onto the
menu bar. A strip appears, offering the current desktop
image and a receptacle for the app you're dragging. Drop the
window onto the plus sign to make it a full screen app.
3
Go back to the desktop and open the second app you
wish to use as a full-screen app in Split View mode. Here
we’re using Apple's own Pages word processor app, though
once again, you can use almost any app on your Mac.
4
Drag the window for this second app upwards, onto the menu
bar, as you did with the first one. The strip appears again. Drop
the second app onto the desktop you created earlier showing the
first app, which is represented by an icon on this strip.
132 | vwvw.pclpublications.com
Split View Screens
5
The two apps now offer a combined icon, which you can
see here, labelled 'Safari & Pages'. This is a single desktop,
in which both those apps are running, in split view To open them,
click on the icon in the usual way.
6
In Split View mode, you can make full use of the two apps,
just as if they were each running singly in full-screen
mode. If you wish to allocate one app more space than the
other, click and drag the black line that divides them.
Edit View History Bookmarks Window Help
7
Another way of setting up is by using the green window
expand/decrease size button (located in the upper left of any
open window). With an open app, move the mouse pointer over to
the green icon. A sub-menu will appear with options. Choose to
either Tile the window to the left or right of the display.
8
Once the window has been Tiled to the side of the screen
you wanted, simply click on the remaining open app which is
now displayed in the other half of the screen. This will expand the
app to fill the other half of the screen. Again, you can adjust the split
by dragging the divider left or right.
• ш * < > о
SO Replace Tiled Window Home
® Move Window to Desktop ’CSS
Make Window Full Screen
Helping the homeless
pets of South Devon
When pets’ lives fall apart,
we're here to pick up the pieces
and give them happy new lives
animalsindistress.uk.com
9
To take an app out of full Split View mode, move the pointer to
the top of the screen and click on the green gumdrop. Click
and hold it to replace the tiled app with a different one, or move the
window to the desktop to take it out of full screen mode
10
A useful trick with split view apps is to open two Finder
windows, allowing you to manually compare and copy
between two folders. To copy an item (instead of simply moving
it) hold alt while you drag an item from one to another.
www.pclpublications.com | 133
П Going Further with macOS Ventura
Managing
Your Desktop
The macOS desktop has evolved considerably over the last decade. With
cutting-edge features such as Mission Control and Expose, you're able
to make Ventura not just a personalised workspace but also one that's
efficient and helps you get the job done. Here are some helpful tips.
1
To activate Mission Control, swipe upwards with three fingers
on a trackpad or tap the F3 key on your keyboard. This is
unchanged from previous versions of the Mac's operating system,
unless you've modified the gesture settings yourself.
2
Unlike older versions of Mission Control, open windows
are presented in a single layer instead of being stacked
according to which application produced them. Click on a
window to bring its app to the fore.
3
You can open a document or app in full screen from
Mission Control simply by dragging its window upwards,
onto the strip showing the desktops. You can also create a
new desktop space by clicking the plus sign, whether this
Spaces bar is open or not.
You can still use the Expose buttons, just like in previous
versions of macOS. F3 takes you straight to Mission
Control. You can clear the Desktop with Fn-F11 too. Or
alternatively, place four fingers on the trackpad and move them
away from each other.
134 | www.pclpublications.com
Managing Your Desktop I
5
To return your apps to the desktop, either click on the
edge of the app, as seen in the margins of the desktop
while in the Expose view, or place four fingers on your
trackpad and move them towards each other, instead of away
from each other or use the Expose button.
6
You can quickly cycle through the currently open apps on
your desktop in macOS by holding the Command key and
pressing the Tab key You can also press ‘Q’ to quit any of the
applications or 'H* to minimise them. This is called the App
Switcher, and it’s a much underused feature of macOS.
О Regardless of whether you've set your Dock to
automatically show and hide, you can quickly open and
close it by pressing cmd-alt-D. If it's open, this hides it. If it's
closed, the key combination opens it.
8
You can group multiple files into a single folder by
highlighting them, right-clicking and selecting ‘New Folder
with Selection' from the menu. This creates a new folder
containing the files. You can then name the folder.
If you’re after something a little alternative, then try this.
You can add the Apple icon to any file or folder name or
even enter it into Notes or any other app. For example, create a
new folder on the desktop and when you're ready to name it
press Alt-Shift-K to create the Apple icon.
10
You can take a screenshot of your desktop by pressing
cmd-Shift-3 but if you want a more specific area to
screenshot, then try cmd-Shift-4. This will change the cursor
into a crosshair, for you to drag a box around the actual area
you want instead of the whole screen.
www.pclpublications.com | 135
П Going Further with macOS Ventura
Stage Manager
Organise Your Desktop
Having a lot of windows open at once on your Mac can be messy and
confusing. Stage Manager is a new way of organising those windows.
Activate it and all your windows are arranged at the side of your desktop,
leaving the one you're currently using open and central.
1
To open Stage Manager for the first time, click the Control
Centre icon in the menu bar (the one that looks like two
switches), and in the Control Centre window that appears, click the
box titled 'Stage Manager.'
You're now shown a screen that explains the new feature
of Stage Manager, and invites you to switch it on. Click
Turn on Stage Manager to open it, and you see all your open
windows move to a space on the left of the desktop.
3
Click on a window on the left, and it's brought to the fore.
Click on an app icon in the Dock and it opens. If a window
is too close to the left side of the desktop to allow Stage
Manager to be seen, drag your mouse pointer there to reveal it.
Click on a window on the left, and it’s brought to the fore.
Click on an app icon in the Dock and it opens. If a window
is too close to the left side of the desktop to allow Stage
Manager to be seen, drag your mouse pointer there to reveal it.
136 | www.pclpublications.com
If you have more than one window open for an app,
clicking on the window pile on the left opens the top
one. Click that app's pile again to open further windows, and
click the yellow gumdrop to collapse those you don't need.
6
To open a new app window from the Stage Manager
column without collapsing the current one back into it,
simply hold the Shift key when you click on it. This way, both the
applications' windows are available on the Desktop.
И If you have two or more applications' windows open, when
you click on something else when the open windows
collapse into Stage Manager they’re grouped. Here we used
Safari, Notes and Maps, which are now in their own pile.
8
If you need to get at your desktop files while using Stage
Manager, click on the desktop. You see all your files, which
you can import into an application by dragging it in. To turn off
Stage Manager, use the Control Centre or Menu Bar item.
Customising Stage Manager
Customise Stage Manager at Settings > Desktop & Dock; here
you can turn it on and off. Click the Options button and you
can change a few parameters, like having desktop icons
always visible or show and hide the Stage Manager bar.
If you intend to use Stage Manager regularly, you might want
to access it directly from the menu bar. Go to System
Settings > Control Centre > Stage Manager, and using the
pulldown, set it to Show in Menu Bar.
www.pclpublications.com | 137
П Going Further with macOS Ventura
Continuity Feature
On Apple Devices
With a Mac running OS X10.10 or later, and a mobile device with iPadOS or
iOS 8 or later, your Apple gear works together seamlessly. You can make and
receive calls on your Mac, send and receive messages on your devices, or
share files between your Mac, iPad, and iOS devices with AirDrop.
Wi-Fi Instant Hotspot
1
Instant Hotspot's system requirements are stringent. A
Mac must be mid-2012 or newer and running Yosemite or
later. To find out when your Mac was made, click on the Apple
icon in the top left and select About This Mac. An iOS device
must be an iPhone 5 or later, iPad (4th gen) or later, an iPod
touch (5th gen) or later or any iPad mini.
2
Make sure your Mac and all the devices you want to use
with Instant Hotspot are signed into the same iCloud
account. On an iPadOS or iOS device, open the Settings app
and check your Apple ID atop the screen. On a Mac, open the
System Settings (it’s in the Apple menu, left hand side of the
menu bar), and check at the top of the sidebar.
Make sure your iPhone
has a cellular connection
to the Internet. You should see
a 3G or 4G symbol at the top of
the screen. Make sure Personal
Hotspot is switched on too. To
do this open the Settings app
and then open the Mobile Data
link. Look for the Personal
Hotspot option, and if it isn't on
already, switch it on.
12:40 .i 4G G3
< Settings Personal Hotspot
Personal Hotspot on your iPhone can provide internet
access to other devices signed m to your iCloud
account without requiring you to enter the password.
Allow Others to Join €D
- Wi-Fi Password____________3n.3ss1Q3klfi?A .
3
4
To access your Instant Hotspot Internet connection, on a
Mac, click on the Wi-Fi menulet in the top right of the screen
and select your iPhone from the list On an iOS device, do the
same through Settings > Wi-Fi. An indicator on the top of the
iPhone's screen shows a connection. If this fails, check your
mobile phone carrier supports personal hotspots.
138 | www.pclpublications.com
Continuity Feature I
Phone Calls
1
All Macs and iOS devices you wish to use for Continuity
phone calls must be logged into the same iCloud
account, and also on the same Wi-Fi network. On your Mac,
click the Wi-Fi menulet in the top right end of the menu bar at
the top of the desktop. On an iPadOS or iOS device, open
Settings and look at what's listed under Wi-Fi.
2
All devices must be signed into FaceTime with the same
iCloud account. On a Mac, launch FaceTime and sign in. If
already signed in with a different account, from the FaceTime
pull-down menu, open Preferences and sign out. On an iOS device,
go to Settings > FaceTime and sign in. On your iPhone, FaceTime
and iPhone Mobile Calls must be on.
Alison Willis
To answer a call on your Mac, wait for the notification to
appear. You can then click on one of the options.
Answering the call on your Mac means using its built-in mic and
speakers, so be careful about taking a private call in a public
place. To make a call on your Mac, click a phone number in
Contacts, Calendar or Safari.
□ To initiate a call using
an iPad or iOS device
other than an iPhone, tap on
a number in Contacts,
Calendar or Safari. To
answer an incoming call on
this device, use Slide to
Answer, as instructed on the
screen. With your Mac and
your iOS devices set up to
use Continuity Phone Calls,
all your devices ring when
there's an incoming call.
5
To switch Continuity Phone Calls on one or more of your
Apple devices on or off, on a Mac or iPad, open
FaceTime's settings and uncheck the box marked 'Calls From
iPhone'. On an iPhone, go to Settings > Phone > Calls on Other
Devices and toggle them on and off. You can in this way choose
which devices accept Continuity Phone Calls.
Calling from a Mac
You can place a call from your Mac too. Wherever you see
a phone number, you can click on it and get a menu. From
this menu, select the 'call from your iPhone’ option and
the call is placed. It works in most Apple apps, such as
Safari (as seen here), Notes and Messages.
Contact Us
BDM Extras
(+44) 01803446068
enquiries@bdmpublic
Advertise
Licensing
Privacy Policy
sbies
jnt
iback
'shop
Website Terms of Use
www.pclpublications.com | 139
П Going Further with macOS Ventura
SMS and MMS Messaging
1
To send or receive an SMS (Short Message Service) or
MMS (Multimedia Messaging Service), from your Mac you
must be running Yosemite or later. You also need an iPhone
running iOS 8.1 or later. Text messaging from an iPad or iPod
touch also demands they be using iOS 8.1 or later.
3
Finally, on your iPhone,
you must go to Settings >
Messages and turn on Text
Message Forwarding. Tap on
this option, and you're shown a
list of devices logged into the
same iCloud account. Switch
on all the ones with which you
want to share your text
messages. Each device
displays a verification code you
must type on your iPhone.
2
On a Mac, open Messages and in the Messages menu,
open Preferences. Click on iMessage, then on Settings and
make sure the required numbers and email addresses are
enabled. On an iOS device, go to Settings > Messages > Send &
Receive and again enter your Apple ID if necessary.
All your SMS and MMS messages now appear on your
Mac and/or iOS devices, regardless of whether the
person who sent them uses an iPhone. If the sender is using a
non-Apple device, the speech bubbles you send are green
instead of the blue that’s used for iMessages, that is, messages
sent between Apple devices.
5
Sending text messages through your Mac is incredibly
convenient, especially for long messages. It’s great for
replying too - you can just use whichever device is nearest. If
you're working on your Mac, you get to read and reply to your
text messages without even reaching for your phone.
6
You can initiate a text message chat regardless of whether
the other person uses an Apple device by clicking a
phone number or Message icon in Safari, Contacts or Calendar.
Here, in Contacts, click on the icon and select a number from
the pop-up. A message window soon appears.
140 | www.pclpublications.com
Continuity Feature I
Universal Clipboard
Handoff
Joe's Cafe,
23 Fore
Street
Joe’s Cafe cooks the best breakfasts in
Anytown. With succulent sausages,
beautiful bacon, tantalising tomatoes
and marvellous mushrooms, it really sets
unit tin fnr я hard Няи'я. work---------------
1
You can copy and paste text and images from one
device to another if they’re signed into the same iCloud
account On a Mac, copy it to your clipboard by highlighting
the text or image in question, then pressing either cmd-X to
cut or cmd-C to copy.
1
On your Mac, open the document you wish to import a
photo into, or start a new one. Right-click where you want
it to appear, select Import from iPhone or iPad, then Take Photo
on whichever device you're using. Devices only appear here if
they're on the same Apple ID as your Mac.
2
Now, on your iPhone, iPad or another Mac, double tap or
click on the place where you want to paste the text you cut
or copied on your Mac. From the mobile device's pop-up menu,
select Paste: or on a Mac, press CMD-V. It appears. There might be
a slight lag while the text uploaded to iCloud.
Switch to the device you chose to take the photo from. The
Camera app should already be open, so take a photo. You
get fewer options in the Camera app than usual. When you've
taken your snap, you can discard it or use it make your choice
from the links at the bottom of the screen.
3
You can copy text from your device running iPadOS, or
iOS 10 or later, and paste it on your Mac using cmd-V. It
works for images and video too. We copied this photo from
Safari on our iPad and pasted it into TextEdit on our Mac.
3
The photo appears on your Mac, in the app. Edit and use it
like you would any other photo. The pic isn't retained on
your mobile device though, so if you want it there too, you might
be better off taking a photo in the traditional manner.
www.pclpublications.com | 141
•I Going Further with macOS Ventura
Universal Control
On Macs and iPads
Universal Control is a new Continuity feature that lets you use a Mac and an
iPad side by side; using your Mac's keyboard and mouse/trackpad. You can
control up to three computers and tablets with one set of input devices.
Universal Control is available with compatible Macs and iPads
running macOS Ventura and iPadOS 16 respectively. They have to
be signed into the same iCloud account, and both must have Wi-Fi
and Bluetooth switched on.
Here's howto set up and use Universal Control.
MacBook A*
When using Universal Control, you can drag your Mac's pointer off
the Mac's screen and onto the iPad's screen, and then operate the
iPad with the keyboard and mouse/trackpad from your Mac. Unlike
Sidecar, Apple's earlier Continuity feature that let you use your iPad
as a second screen for your Mac, Universal Control lets you use your
iPad's own apps and features, and even drag files between your
computer and your tablet.
On Your Mac
Open System Settings from the Apple menu (top left),
and go to General > AirDrop & Handoff.
Switch on Allow Handoff between this Mac and your
iCloud devices’ by clicking the box next to this option.
142 | vwvw.pclpublications.com
Universal Control □
Using Universal Control
Having set up Universal Control, place your iPad next to
your Mac. With your Mac's mouse or trackpad (on a
desktop or notebook Mac), move your pointer off the
screen. A bar appears showing a connection with your iPad
has been made. Continue moving your pointer until it
appears on your iPad. You can then use your pointer to
open and close apps, click links, drag files between your
iPad to your Mac and more; while your keyboard can type
in text fields on your iPad. To return control to your Mac,
just move your pointer back onto the Mac’s screen again. It
works with up to three devices, so add another if you wish.
On your Mac, you can
hover the pointer over
a green gumdrop for
the option to move the
window to your iPad.
System Requirements
• Macs
MacBook Pro (2016 and later)
MacBook (2016 and later)
MacBook Air (2018 and later)
iMac (2017 and later)
iMac (5K Retina 27-inch, Late 2015)
iMac Pro
Mac mini (2018 and later)
Mac Pro (2019)
Mac Studio (2022 and later)
•iPads
iPad Pro
iPad Air (3rd generation and later)
iPad (6th generation and later)
iPad mini (5th generation and later)
On Your iPad
• Go to Settings > General > AirPlay &
Handoff, and switch on Handoff.
• Turn on the Cursor and Keyboard
option underneath it.
www.pclpublications.com | 143
П Going Further with macOS Ventura
Sidecar:
With Your iPad
If your Mac and iPad are recent enough, you can use your iPad as a second
screen for your Mac; expanding your desktop space. This is especially
good news if you also use an Apple Pencil. You can draw on your iPad,
using it as a high-resolution input device for your Mac. Perfect for artists.
Q Wi-Fi
Q Bluetooth
(J Network
0 VPN
Q Notifications
Q2 Sound
3 Focus
Q Screen Time
fc) General
0 Appearance
GJ) Accessibility
Q Control Centre
Q sin л Spotlit
Q Privacy & Security
Э Desktoc & Dock
Displays
Wallpaper
Displays
1
To use Sidecar on your Mac and iPad, first of all, open System
Settings on your Mac then click on the Displays sidebar
option. In the pull-down marked'+’ in the upper right, select your
iPad. If it isn't there, your Mac's too old to use Sidecar.
2
Make sure your iPad is switched on and placed where you
want it Click the Arrange button and you can drag the small
display desktop, which represents your iPad as an external screen,
into any position you like regarding your main Mac display.
3
There’s a brief flash, and your Apple devices connect
sharing screen space between your Mac and your iPad.
Your iPad can now be used as an input device or second - or even
third or fourth - screen for lots more desktop space.
4
You can drag and drop windows and files between your
Mac's screen and your iPad. If you need to access your
iPad as a tablet, swipe up from the foot of the screen. You can
relaunch Sidecar by tapping the Sidecar icon in the Dock.
144 | www.pclpublications.com
Using the iPad as an Input Device
With Sidecar, you can also use your iPad as a graphics tablet. According to Apple, any Mac app that supports stylus input
works in this way, but the company has also come up with a preliminary list of apps that you can use with the Mac, iPad,
and Apple Pencil:
Adobe Illustrator
Affinity Designer
Affinity Photo
Cinema 4D
CorelDRAW
DaVinci Resolve
Final Cut Pro
Maya
Motion
Painter
Principle
Sketch
Substance Designer
Substance Painter
ZBrush
System Requirements
To use Sidecar, your Mac must meet the following requirements;
MacBook Pro (2016 or later)
MacBook (2016 or later)
MacBook Air (2018 or later)
iMac (2017 or later)
iMac (Retina 5K, 27-inch, Late 2015)
iMac Pro
Mac mini (2018 or later)
Mac Pro (2019 or later)
Mac Studio (2022 or later)
IBBBBB
bbsi
www.pclpublications.com | 145
•I Going Further with macOS Ventura
Continuity Camera
with Your iPhone
The Mac's webcam has come on in leaps and bounds, but it's still not as
good as your iPhone's camera. Using this guide, you can use your iPhone as
a webcam, using a wireless connection.
Continuity Camera is
macOS Ventura's and iOS
16's new feature that lets
you use your iPhone as a
webcam, connecting
wirelessly with your Mac
and giving access to the
iPhone camera's great
features such as Centre
Stage, Portrait mode and
Studio Light which
illuminates a user's face
while dimming the
background. If your iPhone
has an Ultra Wide camera,
you can enable Desk View,
which simultaneously
shows your face and an
overhead view of your
desk. To set up and use
Continuity Camera, use
these simple steps.
1: On the iPhone, open the Settings
app and go to General > AirPlay &
Handoff, and tap the switch marked
Continuity Camera Webcam. Close
the Settings app.
2: On the Mac, open whichever
video app you intend to use, such as
FaceTime, Zoom, QuickTime and
more. Select the iPhone as the
app's camera. How to do this
depends on the app; on FaceTime,
for example, you simply select
'iPhone' in the Video menu.
3: In the FaceTime app on your Mac,
the video feed now comes from
your iPhone's rear camera. A control
window on the iPhone allows you to
pause or disconnect the stream.
4: To turn on Portrait Mode, Centre
Stage (iPhone 11 or later required)
which keeps the person speaking
in the middle of the picture, or
Studio Light (iPhone 12 or later
required), on your Mac, open
Control Centre from the Menu Bar,
click on Video Effects and select
the required effect.
5: Also under the Mac’s Video menu is
the option to change the microphone
to your iPhones, if you wish.
146 | www.pclpublications.com
Continuity Camera |
What You Need
To use your iPhone as a webcam with Continuity Camera, your Apple
gear must meet the following standards:
• A Mac running macOS 13: Ventura
• An iPhone XR or iPhone 8 or later
• iPhone must be on iOS 16
• Wi-Fi and Bluetooth enabled on both devices
• Both devices must be logged onto the same Apple ID
A camera mount to attach your phone to your computer is optional.
To use Centre Stage and Desk View, you need an iPhone 11 or later.
To use Studio Light, you need an iPhone 12 or later.
Desk View
MacBook Pro
Desk View utilises the iPhone's (iPhone 11 or later required) wide-
angled lens to show your desktop as well as your face; just the thing for
instructional videos or when you need to show a sketch or model while
you're talking.
To turn on Desk View, open the Control Centre and click on Video
Effects. Select Desk View, and when instructed, use the on-screen
controls to align your desktop within the frame shown. Click Start Desk
View and a second window is displayed, showing your desktop.
To turn off Desk View, simply close that second window.
This is what it looks like when the person you're talking to is using Desk View. Use the slider
between the two pictures to set their respective sizes.
www.pclpublications.com | 147
П Going Further with macOS Ventura
Using iCloud
For Storage & Syncing
With Apple's iCloud service, you can store documents and data on a 'cloud
server', that is, a storage facility accessed over the Internet. Files stored on
iCloud can be worked on using any device with a browser anywhere in the
world, and you can sync settings and information over iCloud too.
Storing Your Documents in iCloud
Select Startup Disk
0 Recants
В Documents
Q Desktop
® Downloads
Home
Q Computer
R AirDrop
® Network
Д Applications
X Utilities
Й- Keep It
Recent Folders
Go to Folder...
Connect to Server...
1
Click on your desktop to open Finder, then open iCloud
Drive from the Go menu. You may need to log into iCloud
using your Apple ID. You'll see a Finder window showing the
contents of your iCloud drive folder, with folders for some apps
that store output in iCloud.
To save files of any type into your iCloud Drive folder,
simply drag them from their current location (in this
screenshot, that's the desktop) and drop them in the open
iCloud window. They are now stored remotely and accessible
from any connected Apple device.
3
You can organise your iCloud folder like any other
folder, including creating new folders within it. To move
files into a new folder in your iCloud Drive, just drag and drop
them to where you want them, just like you would with any
other Finder folder.
4
To move files out of iCloud storage and back to your
hard drive, drag them out of the iCloud folder and onto
your desktop or into a folder that isn't in your iCloud Drive.
Confirm the move when you're asked to and the files are
removed from your iCloud storage.
148 | vwvw.pclpublications.com
iCloud
□
iCloud Photos
1
To enable iCloud Photo Library on your Mac, first of all,
open the Photos app and in the Photos pull-down menu,
select Settings as shown, to get the Settings window
2
In the Settings window, click on iCloud and then check the
box labelled iCloud Photos. Your photos are uploaded to
your iCloud. This may take some time.
You can choose between 'Download Originals to this
Mac', to keep a backup copy of your library on your Mac
and 'Optimise Mac Storage' to leave it all on the cloud.
Now do the same on any other Macs you have. Any
duplicates should be resolved by iCloud as you go.
Naturally, you only need a backup of your library on one Mac.
5
To sync your iPhone or iPad's Photos app with your iCloud
Photo Library, first open the Settings app from the Home
screen or the Dock. It looks like a machine cog.
Click your name at the top of the left column, then iCloud
in the right. Click Photos and switch on Sync This iPad to
enable syncing and upload your device's photos to iCloud.
www.pclpublications.com | 149
П Going Further with macOS Ventura
7
All your photos are shown as thumbnails and you can
select and import them. Here you can see a collection
of photos imported to our Mac using iCloud Photo Library.
iCloud Shared Photo Library
Syncing Apps in iCloud
You can sync apps such as Mail, Contacts and Notes in
iCloud, so edits made on one device also appear on others.
Open System Settings, through the Apple menu, the Dock
or the Applications Folder. Go to Internet Accounts >
iCloud to see which apps are currently set to sync.
1
You can set up a shared library where up to five people
can collaborate. In the sidebar, and click on For Your
Make sure apps you want to sync are switched on. These
apps are now synced with all your Apple devices, as long
as they're switched on to sync on that device too.
Shared Library. Now click Start Setup to choose people to
collaborate with. All participants can add, edit or delete pictures.
Sharing in iCloud
2
You can drag photos into the new library, or choose
what to include according to people in the photo, start
and end date and more. You can also get smart suggestions
for adding photos to the shared library, found in the sidebar.
In your iCloud Drive, when you click on a file or folder and then
click the Share icon, you can choose whether to send a copy or
collaborate on that file or folder. Choose from the pull-down and
then send it in the usual way.
150 | www.pclpublications.com
iCloud
Safari in iCloud
iCloud Keychain
To let iCloud share your information from Safari across
your devices, first of all, open System Settings and click on
the Apple ID option atop the sidebar. Now click on iCloud in
the left-hand panel.
DWhen you sign up for an account on a website in Safari,
maybe to join a forum or register for a newsletter, Safari
suggests a password to use. You can use that password at
the click of a button.
Л iCloud Drive
Q ICloud Mail
Do you want to merge your
bookmarks and Reading List with
iCloud?
Your information on this Mac will be
uploaded and merged with the
bookmarks and Reading List stored in
iCloud.
Reminders
OK
Make sure Safari is on. You can now access your bookmarks
and reading list on your other Apple devices, as long as
they’re linked to the same iCloud account and also have Safari
ticked. Click OK to merge information, should the box appear.
It’s then saved to your iCloud Keychain and synced
across your Apple devices. If you ever need to see your
password, open the Keychain Access app (it's in the
Applications > Utilities folder).
If you have tabs open in Safari on another Apple device,
you can access them on your Mac via the cloud. In Safari,
click the URL bar to see the Start Page icons, and scroll it
up to see the sites you have open on other devices.
Find and double-click on the account you wish to
view, then in the pop-up window, click the Show
Password box. Type your admin password in the next
window and the password is shown.
wvvw.pcipublications.com | 151
П Going Further with macOS Ventura
Messages in iCloud
Upgrade Your iCloud Drive.
1
Messages can be synced over iCloud, so your
conversations are displayed on all your Apple devices. To
activate this on your Mac, open Messages. Under the Messages
menu, select Settings.
To upgrade your iCloud storage, go to System Settings >
Apple ID > iCloud. Click the Manage button (top right).
From the next screen, you can delete documents and data
from your iCloud if you wish.
Q Buetooth
QMet
a-
Qic
□ n
□ '
a
a ou
V
iCloud*
Upgrade Options
50 GB
200 GB
2 TB
£0.79 per month
£2.49 per month
£6.99 per month
Pncw include VAT (where applicable)
Change Apple One Plan
In the Settings window, click on the 'iMessage tab at the
top of the window. Make sure Enable Messages in iCloud
is checked. You can sync your messages from here by pressing
the Sync Now button.
3
On an iPad or iPhone, go to Settings > [Your name] >
iCloud > Show All > Messages, and make sure Sync this
iPad is switched on. Your messages are now stored on iCloud
and synced between all your Macs and iOS devices.
Click Change Storage Plan, in the top right. On the next screen,
you’re shown your current plan and options to upgrade for a
higher monthly fee. Click on one to choose and click Next
If you decide you have more storage space than you need
and want to downgrade to a cheaper plan, click the
Downgrade Options button in the bottom-left. You can then
choose a cheaper plan, and will see a warning if you're
currently using more space than is in the new plan.
152 | www.pclpublications.com
iCloud
Apple's iCloud+ Service
1
iCloud* is a new service offering new iCloud features for
subscribers to iCloud. You can't get it with the free 5GB
you have with your Apple account, but if you pay for more space
- at whatever level - the iCloud* features are yours.
iCloud Private Relay routes your web-browsing traffic
through a relay to hide your IP address (Internet Protocol,
the identifier on your networked devices), your location and
your browsing habits. It encrypts your data too.
To activate it, go to System Settings > Apple ID and, under
Private Relay, tick the checkbox to its left and click the
Options button to its right. From there, you can turn the Private
Relay on and off, and read about the feature.
4
Hide my email is also in System Settings > Apple ID. It
generates a random email address connected to your
own email account. Use it for mail subscriptions and
competitions, and if you’re getting too much spam - delete it.
5
Click Options, then the'+' icon on the left of the new
window to create a new random email address, which you
can use to sign up to newsletters, register for accounts and
more. You can manage your generated emails here too.
6
With iCloud+, you can use up to five custom domains to
send and receive email with iCloud Mail. Go to www.icloud.
com, click Account Settings and under Custom Email Domain, click
the Manage button. Follow the on-screen instructions.
www.pclpublications.com | 153
П Going Further with macOS Ventura
iCloud Desktop
Documents & Folders
With macOS and iOS, you can not only store your documents on your
iCloud but also files and folders that are found on your desktop. It's done
automatically, so a file on your Mac's desktop is accessible from your iOS
device and other Macs. Here's how to use the iCloud Desktop.
1
To switch on iCloud Desktop Documents and Folders,
open System Settings and click Apple ID > iCloud > iCloud
Drive. Click on the Options button, then check the Desktop &
Documents Folders box. It may take time to set up.
2
On an iPhone or an iPad, first of all open the Files app.
Go to the left-hand sidebar, under Locations (tap the
chevron to its right to open it if necessary). Tap on iCloud, and
then tap the Desktop folder.
3
Files on your Mac's desktop can be accessed in this
way through the iCloud Drive folder of any Mac or iOS/
iPadOS device signed into the same Apple ID. All Macs must
be running High Sierra or later, and all mobile devices must
have iOS 10 or later.
4
You can also access your Desktop documents and
folders using the website. Just point your browser at www.
icloud.com and sign in. Open the iCloud Drive and the Desktop
folder is there. You can do this on any Internet-capable device
with a web browser.
154 | www.pclpublications.com
iCloud Desktop & App Switcher
The App Switcher
^5^ Speed Your Workflow
With App Switcher you can toggle between apps that are currently open
and running on your Mac without taking your hands off the keyboard. It's a
really great feature that significantly speeds your workflow if you use it on a
regular basis. If you don't use the App Switcher already you should try it out.
1
The App Switcher is easy to use. Hold the cmd key and press Tab. A window showing the icons of all your open apps is
displayed in a floating panel in the centre of your desktop. If you release the keys, they disappear again.
2
You can toggle through these apps by repeatedly pressing the Tab key and releasing cmd when you've highlighted the app
you want. This app is then brought to the front of your Mac, so you can make use of it straight away.
3
You can move forwards or backwards through the list of open apps using the arrow keys at the bottom right of your keyboard,
or to the left of the numeric keypad on a large keyboard. Alternatively, just click on one with your pointer.
4
If you see an icon on the left with a badge in the corner, it means you have that app open on another Apple device. Click it to
open it on your Mac too, showing the same document, page or site as it does on your mobile device.
www.pclpublications.com | 155
П Going Further with macOS Ventura
The Siri Feature
Your Digital PA
Apple's digital personal assistant lets you communicate with your computer
by speaking, just like you do with the iPad and iPhone. Siri can organise your
day, access your apps and even share a joke. Here's a look at what the Siri
digital assistant can do for you and your Mac, and howto make the most of it.
Setting Up Siri
1
____J
You might have activated Siri during the set up
procedure. If not, under the Apple menu, select System
Settings. Click on Siri in the sidebar. If it isn’t already on, click
on Ask Sih's switch. You can also set whether you use 'Hey
Siri' to wake it, and other Siri options.
shortcut for Siri if you wish.
3
To launch Siri, click on the icon in the Dock, click on the
menu bar icon if you've opted for one or press the
keyboard shortcut, again if you have one set up. A Siri window
appears in the top right corner of the screen.
2
You can change the language that Siri understands and
also speaks in using the pull-down menu. You can also
change the English language voice from a British male to a
female voice and a different accent, and set up a keyboard
Using Siri requires an Internet connection, so your Mac
can send your voice message to Apple’s servers to be
analysed. If you don’t currently have an Internet connection, you
cannot use Siri until you take your Mac back online again.
156 | vwvw.pclpublications.com
Using Siri
Check Appointments: Siri is great for checking your
appointments. You can ask what appointments you have coming
up for the rest of the week or month, what's coming up between
two dates, and more. Just ask Siri a question in regular English and
it will probably understand you perfectly.
Send a Message: You can send a message using Siri,
instead of looking up the person in Contacts and then typing
the message itself. Just say, "Send a message to X”, and Siri will
find the person and ask what you want to say. Speak your
message and you can then check and send it.
Conversions: You can use Siri to do conversions between
weights, length, time, currencies and more. Just ask, for example,
'What is 12 kilometres in miles?, and Siri tells you. Its great for
currency conversions when shopping online.
Open Apps: You can open an app with Siri. Just say, 'Open
the [X] app', with 'X' being replaced by the name of the app in
question. The app is then opened, without your having to use
Launchpad. You can't close an app with Siri, though.
Siri Dictation Commands.
Siri also understands dictation as well as words, so if you are dictating an email, for instance, this useful list of dictation commands
that Siri recognises prove very useful. Just "speak the word" and the action or punctuation is added.
"New line" lowercase ' "Apostrophe" - "Dash" ° "Degree sign"
Move to the next line "No caps on ... no caps I "Exclamation mark" - "Hyphen" A "Caret"
"New paragraph" off" ? "Question mark" - "Em dash" @ "At sign
Start a new paragraph Make sure part of & "Ampersand" % "Percent sign" # "Pound sign"
"All caps" what you say is all * "Asterisk" > "Greater than sign"
Make the next word lowercase
( "Open parenthesis" © "Copyright sign" < "Less than sign"
all uppercase "Space bar"
"All caps on ... all caps Prevent a hyphen ) "Close ® "Registered sign" / "Forward slash”
off" from appearing in a parenthesis" § "Section sign" \ "Back slash”
Make part of what normally hyphenated [ "Open bracket" $ "Dollar sign” I "Vertical bar"
you say uppercase word ] "Close bracket" Ф "Cent sign" :-) "Smiley"
"No caps" . "Period” { "Open brace” £ "Pound Sterling :-( "Frownyface"
Make the next word , "Comma" } "Close brace" sign" ;-) "Wink"
www.pclpublications.com | 157
П Going Further with macOS Ventura
Shortcuts
On Your Mac
Shortcuts was first released on the iPhone and iPad, but with the previous
release of macOS Monterey, it came to the Mac as well. Shortcuts group
instructions on your Mac, meaning you can execute a series of functions
with a single command. You can use pre-built shortcuts, or design your own.
Getting Started with Shortcuts
1
The Shortcuts app comes preinstalled with recent
releases of macOS. It's found in Applications > Other. You
can open it through a Finder window, by using the Launchpad or
simply by typing 'Shortcuts' into the spotlight search.
2
The Shortcuts app is compatible with, and syncs with,
Shortcuts on your iPhone or iPad, so if you've already
created Shortcuts on those devices, they're seen here, along
with some 'Starter Shortcuts’ which are prebuilt by Apple.
3
In the left-hand sidebar, click on the Gallery option at the top.
Here you see a range of pre-built shortcuts which you can
download by clicking on the + icon in their top-right corners. They
then appear with your own Shortcuts.
4
Drag a shortcut from your own collection in the My
Shortcuts section (not from the Gallery), into the Menu Bar
folder and you can launch them from the Shortcuts icon in the
Menu Bar. It's great for getting quick access.
158 | vwvw.pclpublications.com
Shortcuts n
Going Further with Shortcuts
1
To build a new Shortcut, click the + icon in the toolbar. The
editor window will then open. Click on 'Shortcut Name' in
the top bar and type a name for the Shortcut, then click the icon
to its left and choose a colour and symbol for it.
2
Shortcuts are built up by adding chained commands
from the right-hand sidebar. Here, for example, we added
a ‘Find Places' option from Maps to search for coffee shops
within a mile of the current location.
3
When the Maps app has found the coffee shops, we want
to be shown where they are, so we added the 'Open in
Maps' action. Add an action by dragging it into place or clicking
on it and then clicking the T icon on its right for a window.
D Click the Play icon in the toolbar at the top of the editing
screen to test it out. The app shows what it's doing step by
step. Here, it successfully searches for nearby coffee shops,
opens the Maps app and displays the results.
5
It takes time and practice to get the most from the Shortcuts
app. A good way to learn about it is to download a
complicated Shortcut from the Gallery, and open it in the editor by
double-clicking on it You can then inspect its functions.
Launch Using Siri.
Shortcuts are built to be launched by Siri, using the
shortcuts' name as a command. We called our
shortcut 'I Need a Coffee', so if we open Siri and use
that phrase, the shortcut is executed and we're
shown the local cafes.
www.pclpublications.com | 159
П Going Further with macOS Ventura
Live Text
Pics to Words
Live Text lets you take writing and numbers from photographs or using
your Mac's webcam, and convert it into editable text. You can, for example,
photograph a phone number and paste it into your Contacts application.
It's a great new feature that's a real boon for Mac users of all types.
1
First of all, open a photo containing the text you wish to
copy. Here we’ve opened the photograph in the Preview
app, but you can use Photos instead if you like. Click and drag to
select the text you wish to copy and paste.
To copy the text from the photo, type cmd-C on the
keyboard or in the Edit menu in whichever app you're
using, choose the Copy option. Again, this works in the Photos
app as well as Previews. The text is saved to your clipboard.
3
Now open an app into which you can paste the text. Here
we're using Pages, but you could as easily paste it into an
email in Mail, a note in Notes, a TextEdit document and more. To
paste, type cmd-V or use the Paste option in the Edit menu.
When you've pasted the text into an editable document
like those listed in the previous step, you can edit and
reformat them at will. Sometimes a little formatting is necessary
due to misplaced returns or misreads on the text.
160 | vwvw.pclpublications.com
Live Text ЕЭ
5
If you click on a phone number that's contained within a
photograph, a chevron appears beside it. Click this for
options to add that number to your Contacts app, and call or
message to it using FaceTime (iPhone connection required).
6
If you highlight a date and then right-click or ctrl-click it,
you can add it to the Calendar app as an event, or the
Reminders app as a new reminder; then add alerts and choose
a list for it to go in.
D Click on a web address (also known as a URL) in a
photograph and it opens in the Safari app. Right-click on it
for a menu, from which you can Quick Look the link (giving you a
preview of the website), or open it in Safari.
8
You can also translate highlighted text, both into and out of
your native language. Use the Translate button, bottom
right, or highlight the text right or ctrl-click on it and select
Translate. Choose a language using the pull-down.
9
Click the Copy Translation button at the foot of the pop-up
window and you can copy the translation of the in-photo text
and paste it as editable text into another app, where you can once
more reformat and edit it at will.
10
You can copy and paste text in Live Text regardless of what
font it's written in, and you can even take a photo of
handwriting and turn it into editable text Again, though, you might
have to make edits and corrections after pasting.
www.pclpublications.com | 161
П Going Further with macOS Ventura
Q Focus
Reduce Distractions
Focus takes Do Not Disturb to the next level, with customisable categories
that let you concentrate on what's important at the time. For example, a
Work focus can block social media and leisure apps, but let through things
that might be relevant to your job. You can set up multiple categories, or
'focuses', and choose to have them activate automatically if you wish.
@6mnl
И Control Centre
О & SpotBght
Q Privecv & Security
В Desktop & Dock
Q Displays
Q Bluetooth
E3 Network
v₽N
O Onvng
Q Notif>c»tions
□ Seep
1
Open System Settings (use the Apple menu, or the Dock
icon). Some categories are already offered, namely Do Not
Disturb, Driving, Personal, Sleep and Work. Turn on Share Across
Devices to sync your settings across your Apple gear.
Tap the Add Focus button to choose a new focus to add.
You can choose a focus designed to help when you’re
Gaming, for Mindfulness, for when Reading. If none of these are a
fit, choose a Custom focus and call it whatever you like.
3
If you're making a Custom focus, the first thing you must
do is give it a name, choose an icon from the range on
offer (scroll up for more) and choose a colour for that icon. It’s
simple enough to do. When you've finished, press OK.
Under Allowed Notifications', click Allowed People then
the + sign, and add the names of people you would like
to get through even when this focus is active. Then click Apps,
and do the same for applications you also wish to let through.
162 | www.pclpublications.com
Focus
5
Click Add Schedule and you can schedule the focus to
turn on and off automatically. You can set it to be active at
certain times, or at a specific location. You can also activate it
when an app is running, so your TV or radio isn't interrupted.
Click the Add Filter button and you can change the way
certain key apps behave while the focus is active. For
example, Safari can display specified Tab Groups, and Mail and
Messages can filter conversations.
7
To manually activate a focus when you've set it up, click the
Control Centre icon in the menu bar at the top of the
screen, and on the Control Centre window, click Focus. You can
now click on the focus you wish to activate in the list.
8
Now decide whether you want it on for an hour or until that
evening. Choose, and the focus is active. Incoming calls and
notifications are silenced, with the exception of the ones specifically
excluded when you set it up; those get through as normal.
9
To manually turn off a focus, click the Control Centre icon in
the menu bar (the one that looks like two switches), and click
the box showing the active focus. Then click on the active focus in
the list that pops up, and it switches off again.
10
When a focus is active, its menu appears in the Menu Bar
atop the screen. To edit a focus, in the Focus Preferences
click on the focus you want to edit. To remove a focus altogether,
right-click on it and click the Delete Focus button in the pop-up.
www.pclpublications.com | 163
П Going Further with macOS Ventura
iPad Apps
W On an M1 Mac
The newest Macs and the top-of-the-range iPad Pro use the same
processor, an ARM-based chip from Apple Silicon rather than Intel. Other
iPads currently on sale also use Apple Silicon processors, such as the A13,
A14 and A15. As a result, you can use iPad apps on your Apple Silicon Mac!
1
First of all, check you have an Apple Silicon Mac. Under
the Apple menu in the top-left corner, select About this
Mac. Look for the Chip listing. If it says Apple M Г or later, you
can run iPad apps.
2
Open the App Store on your Mac. Click on your account
in the bottom left corner of the App Store window to
take you to a list of your purchased apps. Click
on 'iPhone & iPad apps'.
3
Scroll up and down and you'll see a complete list of all the
apps you've bought and/or downloaded on your Apple
mobile devices. A cloud under the description means you can
download it to your Mac.
4
If an app doesn't have a cloud, it's either no longer on
the App Store or it's too old to run on your Mac. Either
way, it cannot be downloaded. Click on it to open its page and
you're told as much.
164 | www.pclpublications.com
iPad Apps
5
'Designed for iPad. Not verified for macOS' means it’s not
been tested on a Mac. It might well still run, but the user
experience might be poor. For example, touch controls might
not translate well to the Mac.
6
Some apps have a three-dots icon under them. Click on
this for a contextual menu offering the chance to copy
its App Store link, send it via Mail, Messages or AirDrop, make a
new Note or Reminder of it and more.
DWhen you've found a mobile app you'd like to have on
your Mac, click the small cloud underneath it to download
it. As you'd expect, a circle gradually fills around a Stop icon.
When complete, it’s downloaded.
9
When you've launched an iOS or iPadOS app on your
Mac, you can use it just like any other app. A mouse click
replaces a tap, trackpad gestures replace on-screen gestures.
The experience might not be perfect, as the interface was
designed with touchscreen mobile devices in mind, but it
should work just fine.
8
When an app has downloaded, you can click the Open
button in the App Store to launch it. Otherwise, you can
open it in Launchpad, the Applications folder or the Spotlight
feature; just like any other app on your Mac.
Search for an App
If you want to download a mobile app to your Mac which
you don't own on your iPad or iPhone, you can search for it
in the App Store, and click the iPhone & iPad Apps button
to see mobile apps answering that search query. Then you
can buy and download them as you would a Mac app.
www.pclpublications.com | 165
П Going Further with macOS Ventura
Time Machine
Back Up & Restore
It's always a good idea to back up your data to guard against disk failure and
accidental deletion. macOS Ventura has a built-in backup system called
Time Machine. With it, you can retrieve files that have been lost or corrupted,
and even reinstall an entire system after a major drive problem.
Getting started
1
Connect an external hard drive, via USB, FireWire or
Thunderbolt, to your Mac. It should be at least the size of
your Mac's hard drive. The larger the drive, the further back in
time you will be able to store backups. 'Open System Settings,
click General in the side bar then click Time Machine.
Click the Add Backup Disk button and you're presented
with a window listing your connected drives. Select the
drive on which you would like to store your backups. If your
external drive isn't already formatted as 'Mac OS Extended
(Journaled)’, Time Machine invites you to erase and reformat it.
3
You're invited to add a password to encrypt your backups.
This is optional - click the Encrypt Backup switch if you
don't want your drive encrypted. If you do encrypt it, make sure
you remember the password. If you forget it, all backup data on
the Time Machine drive is lost and irretrievable.
When you're done, the backup drive appears in your
Time Machine settings page. Click'+' to add another
backup drive, or highlight one and clickto remove it. During a
backup, you can monitor its progress on this page. The first
one takes a long time, but after that, only new things change.
166 | www.pclpublications.com
Time Machine [©]
Backing Up to Time Machine
On System Settings > General > Time Machine, click on
your backup drive in the right-hand panel and then click
the Options button. To set how often your data is backed up,
use the pulldown menu next to Backup Frequency Set it to
back up manually only, or automatically, with no intervention
from yourself, every hour, day or week.
2
By default, Time Machine backs up all the data on the
hard drive set up in the 'Getting Started' section of this
tutorial. Click the Options button and add locations not to be
backed up by pressing the'+' icon under Exclude from Backups
to reveal the file browser. Browse to the file or folder you don't
want included in your backups and click the Exclude button.
3
To remove an item from the list, click it once to highlight it
and then click theicon. The item you removed is
dropped from the list and is once more backed up with your next
Time Machine backup. Remember, this list is of items and
containers that are NOT backed up with Time Machine.
In the menu bar atop the screen is an icon for Time
Machine - it's the clock with the circular arrow around it.
Click this icon and you can start a manual backup, find out when
the last backup was made, open your Time Machine settings in
the System Settings and browse your Time Machine backups.
5
To retrieve a file from Time Machine, Choose Enter Time
Machine in the Time Machine menu and then navigate to
the file you want. You can get hold of an older version of a
current file or one you've deleted. When you've found it,
highlight it and press Restore.
It’s important that you keep your Time Machine backups
separate to your data files. Never, for example, partition a
hard drive and keep data on one partition and Time Machine
backups on the other. If you do, both your data and your backups
are lost if the hard drive fails.
www.pclpublications.com | 167
• Going Further with macOS Ventura
Restoring a Mac from a
Time Machine Backup
If something has gone very wrong with your Mac, and
you want to wipe your hard drive clean and reinstall
from a Time Machine backup, this is what you should do.
Naturally, to restore from a backup you need to actually
have a backup, and anything you’ve done on your Mac
between the last time you ran Time Machine and the
time when you restore to your last backup, will be lost.
That's why you should back up on a regular basis.
• First of all, make sure a notebook Mac is powered using
the power adapter, and regardless of what Mac you have,
make sure your Time Machine backup drive is connected.
• Power down your Mac, count to ten. For an Apple Silicon
Mac, press and hold the power button until you’re shown
the 'Loading startup options'. Click 'options’, then
Continue. Follow the on-screen instructions until you get
to the Recovery screen. If you have an Intel Mac, press the
Mac's power button then immediately press cmd-R. Hold
these keys until the Apple logo appears on the screen.
Again, follow the on-screen instructions until you get to
the Recovery screen.
• Your Mac boots up into Recovery Mode. Click on your
name in the macOS Recovery window, then click Next.
Enter your administrator's password, and click Next again.
External Hard Drives Advice
A word to the wise about external Time Machine hard drives.
It's tempting to get a huge drive and partition it, with your data
on one side and your Time Machine backups on the other.
This is a really bad idea. If your external drive fails, you lose
not only your data, but also your backups of that data. It's
best to make sure everything - your boot drive and any data
drives you use - is backed up, but do it on a different drive.
• The system is restored, and you’re invited to restart
Once you do, your Mac should be up and running again.
• After a screen of information on what restoring a Time
Machine backup will do, click Continue if you're sure you
want to proceed with it.
• The drive is scanned for Time Machine backups. Choose
the most recent backup made before your problems
started; click on it and then click Continue.
• You must now select the drive containing your Time
Machine backups. Click on your Time Machine drive - and
if it isn’t there, make sure it's plugged in - then click the
Continue button.
• Now select the drive you want to install the Time Machine
backup on. This is presumably your hard drive, but you
could install it on a secondary drive if you wanted. If you
have FileVault turned on, you have to enter your password
again to unlock the disk.
• On the next screen, you're offered four options; Restore
from Time Machine, Reinstall macOS Ventura, Safari and
Disk Utility. If you think reinstalling macOS over the top of
your current install, keeping your files and folders as they
are will work, do this. But if you've tried this, or you're sure
your system is beyond help, go for Restore from Time
Machine. Click Continue.
| www.pclpublication
Time Machine
©
Which Backup?
When restoring a Time Machine backup, you don’t have to
use the most recent one. If your Mac started giving you grief
last Tuesday, for example, you might prefer to use the last
backup on Monday evening, and see if that solves the
problem. Any documents created or edited after this
backup won't be carried over, of course, but you can always
delve back into Time Machine and recover individual files.
Migration Assistant
Setting Up a New Mac from a
Time Machine Backup
If you've bought a new Mac and want to set it up using a Time
Machine backup from your old one, follow the First-Time
Setup guide until you get to this step, the Migration Assistant.
Click on the first option, which includes transferring from a
Time Machine backup, then Continue. Follow the on-screen
instructions to have your files, folders and settings
transferred to your new Mac from Time Machine.
www.pclpublications.com | 169
П Going Further with macOS Ventura
The Keyboard
Customised Shortcuts
While Apple's interface is great for pretty much everything, you can make
using your Mac even more efficient by memorising a few simple keyboard
shortcuts. macOS has dozens of pre-configured keyboard shortcuts. Here
are some of the most useful and most used shortcuts on your Mac.
Finder Shortcuts
These shortcuts are available when you're using
Ventura's Finder features, like windows and folders.
Command+ [............Go to the previous folder
Command+ ]............Go to the next folder
Command + t...........Navigate up one level
Command + I...........Navigate down one level
Option + Double click.Open the selected folder in a new
window and close the current
window
Command + Double click . . Open selected folder in a new tab
Command + Tab.........Cycle forward through your opened
applications
Command + Shift + Tab. . . . Cycle backward through your
opened applications
Space.................Launch Quick Look
Command + A...........Select all items in Finder
Command + Option + A. . . . Deselect any selected items
Command+ N............Open new Finder window
Command + Shift + К...Open Network window
Command +1............Get info on an item
Command + J...........Show view options
Command + Option + Esc. . Force quit an application
Command + Delete......Move the selected item to Trash
Common Application Shortcuts
Not every application supports every one of these
shortcuts, but where they do, they come in very useful.
Command + '...........Cycle through open App windows
Command+ H............Hide the current window
Command + Option + H..Hide all open windows
Command + M...........Minimise the current window
Command + Option + M . . . .Minimise all windows
Command + W...........Close the selected window
Command + Option+ W . . . .Close all windows
Function + F3.........Launch/Quit Mission Control
File and Folder Shortcuts
You can cut, copy, paste, duplicate, open files and folders
directly from the keyboard, using these handy shortcuts.
Command + Shift + Delete . .EmptyTrash
Command + drag file/folder . Move the selected item to another
location
Option + drag file/folder. . . .Copy item to another location
Command + L............Make alias of selected items
Command + D............Duplicate the selected item
Command+ C.............Copy the selected item
Command+ X.............Cut the selected item
Command+ V.............Paste copied/cut item
Command+ Z.............Undo action
Command + Shift + N....Create new folder
Command + Option + N...Create new Smart folder
Command + 0............Open the selected item
Shift + Command + /....Show the Help menu
Command + .............Open App Preferencer
Desktop Shortcuts
With these shortcuts, you can access Mission Control,
your application windows and hide/show the Dock.
Function + F10 ......See all Application windows
Function + F11 -.....Show the Desktop
Option + Command + D.Toggle Dock On/Off
Control + <-.........Move to space on left
Mission Control Shortcuts
When you're in Mission Control, these shortcuts help you
navigate your way around your desktop and apps.
Control + -»..................Move to space on right
Control + #.................Switch to a specific numbered (#)
desktop
170 | www.pclpublications.com
Keyboard Shortcuts |^|
Screenshots
There are plenty of reasons why you might want to take a
screenshot on your Mac. This is how you do it.
Snap selected area....Cmd-Shift-4 and drag over an
area while dragging, hold the
space bar to move the selected
area, hold Shift to change size in
one direction only or Option to
start selecting from the centre
Snap a window.........Cmd-Shift-4, press space bar and
click on the window
Snap entire screen....Cmd-Shift-3
New screenshots options. . .cmd-Shift-5
Display and Accessibility
Shortcuts
These shortcuts control your display, and also features
associated with Apple’s Accessibility options.
F1......................Decrease screen brightness
F2......................Increase screen brightness
Command + F5............VoiceOver on/off
Option + Command + F5. . . .Display Accessibility controls
Command + Option + 8....Zoom On/Off
Command + Option + +....Zoom in
Command + Option + -....Zoom out
Document Shortcuts
These shortcuts come in very handy when you’re creating
or editing a document, and they work in most apps.
Command +1..................Italicise the selected text, or turn
italics on or off
Command + U.................Underline the selected text, or turn
underlining on or off
Command+T...................Show or hide the Fonts pane
Command + D.................When saving a document, this
selects the Desktop folder
Command + Control + D.......Highlighta word and this shortcut
shows its definition
Command + Shift +:..........Display the Spelling and Grammar
pane
Command+;...................Spellcheckthe document
Option + Delete.............Delete the word to the left of the
cursor
Control + H.................Delete the character to the left of the
insertion point Or use Shift+Delete
Control + D.................Delete the character to the right of
the cursor
Fn + Delete.................Forward delete on keyboards without
a Forward Delete key
Control + К.................Delete the text between the cursor
and the end of the line or paragraph
Fn +Up Arrow................Scroll up one page
Fn + Down Arrow.............Scroll down one page
Fn + Left Arrow.............Move to the beginning of a document
Fn + Right Arrow............Move to the end of a document
Command + Up Arrow..........Move the cursor to the beginning of
the document
Command + Down Arrow........Move the cursor to the end of the
document
Command + Left Arrow........Move the cursorto the beginning of
the current line
Command + Right Arrow.......Move the cursorto the end of the
current line
Boot, Sleep and Shutdown Shortcuts.
These are not strictly speaking keyboard shortcuts, but are used when starting or shutting down your Mac to access
various options. Some of these options are especially useful if you have a problem with your Mac.
Power Button (CD)
Shutting Down
Press once................
Press again...............
Hold......................
Command + Control + (D. . . .
While Starting
Option (hold).............
Shift (hold)..............
Left Shift (hold).........
C (hold)..................
T(hold)...................
N (hold)..................
X(hold)...................
Command + R (hold)........
Hold Power Button.........
— (hold)..................
Put Mac to sleep
Wake Mac up
Force Mac shutdown
Force Mac to restart
Display bootable volumes
Start in Safe Mode
Bypass automatic login
Boot from other media
Start in FireWire target disk mode
Start from NetBoot server
Force Mac startup
Start in Recovery Mode (Intel Macs)
Start in Recovery Mode (Apple Silicon Macs)
Eject discs
Control + —..........................Show restart/sleep/
shutdown
Command + Option + Control + ^. . . . Quit all of your opened
applications
Shift + Control + ..................Put displays to sleep
Command + Shift + Q..................Log out
Command + Shift + Option + Q.........Log out (immediately)
G
www.pclpublications.com | 171
П Going Further with macOS Ventura
Update macOS
To Ventura
You can also use these tips
to upgrade to future macOS
releases, whenever they are
made available.
If your Mac is running an older version of the operating system, you're
probably keen to upgrade to the latest release of macOS Ventura. It's
completely free of charge, and as long as your Mac meets the minimum
system requirements, it's very easy to do. To update to macOS Ventura,
you need an Internet connection, and it's best to plug in your charger too.
1
When an update to your current version of macOS - or a
new release entirely - is available. Software Update is
badged in System Preferences. In the Apple menu, there's an
update listed in System Preferences too.
2
Open System Preferences from the Apple menu, the Dock
or LaunchPad (it doesn't matter which), and click on the
badged Software Update icon. It checks for an update, then tells
you what it is. Click the Upgrade Now button.
Minimum Requirements
For macOS Ventura
Apple can’t support older Macs forever, and in the step up to
macOS Ventura, a few models have been left behind. If you're
running macOS Monterey on a 2015 or 2016 iMac, or a MacBook
Air released between 2015 to 2017, for example, you're out of luck
But if you have one of the models listed below, you can upgrade to
the latest version of macOS right now. If you're unsure which
model of Mac you have, click on the Apple icon in the menu bar
(top left), and select About This Mac.
Make a Backup
Before You Start
Upgrading the macOS operating system is a big step, so as always,
before making any major change to your computer, its a good idea
to make a backup of your data using Time Machine. The upgrade is
a very safe process and won't damage your files by itself, but
there's always the unexpected risk of a drive failure or a power cut
during the installation process, which could leave your Mac
crippled. In the unlikely event of this happening, you can simply
restore your Time Machine backup to your Mac and try again.
iMac
Mac Pro
iMac Pro
Mac Studio
Mac mini
MacBook Air
MacBook
MacBook Pro
2017 and later
2019 and later
2017
2022
2018 and later
2018 and later
2017 and later
2017 and later
172 | www.pclpublications.com
Update macOS
System Preferences
5У
.... Software Update Is trying to authenticate
Software Update
to allow this.
Cancel
Automatically keep my Mac up to date
Advanced...
Uss of this software is subject to the original license agreement that
accompanied the software berng updated.
3
There next follows a licence agreement for macOS Ventura,
the terms of which you must accept if you're to proceed
with the update. Read it all if you wish, but it’s not very interesting.
Click Agree to accept the terms and conditions, you're
asked for your administrator’s password. It's the one you
use to unlock your Mac. Type it, and click the OK button.
Your Mac now downloads the macOS Ventura update. Its
6.37GB large, so it will take quite a while to download,
especially if you have a slow Internet connection.
6
When the operating system has downloaded, it's installed.
You see a black screen with the Apple logo and a progress
bar. In fact, several progress bars might be filled.
О Your computer eventually reboots into the new macOS
Ventura operating system, with its distinctive yellow,
orange and blue desktop. You can change this later.
8
To customise the appearance of your new OS, open
System Settings (Apple menu) and use the Appearance
and Wallpaper options, depending on what you want to do.
www.pclpublications.com | 173
П Going Further with macOS Ventura
Maintenance and
Troubleshooting
Macs are well known for their stability and reliability, but things can and do
occasionally go wrong. Don't panic though, we've put together a guide to
solving some common issues you might have on your desktop or notebook
Mac. So if you're having trouble, take a look at these tips and guides. They
might solve your problem and save you a trip to the Apple Store.
Modem computers like the Mac are amongst
the most complicated machines ever designed.
It’s an amazing testament to the quality of both
the Mac hardware and software that they’re
usually so stable and reliable. However, no
machine can ever be 100 percent perfect. If
your Mac stops working, the screen freezes up,
there’s a battery problem or other such issues,
you don’t always need to call the Genius Bar to
get it fixed. There are a number of things you
can try for yourself that might help and could
save you the cost of a service call.
i ” “ ’ * I
Clearing a Frozen Screen
If an app doesn't respond for a while, select its
name and click Force Quit
to Canary Mail
o Mall
Q Messages
О Messenger
О Numbers
to Preview
1
Press cmd+OPT+Esc or choose Apple menu > Force Quit
from the menu bar. The Force Quit window appears. If the
app is identified as 'not responding', select it and click Force Quit.
The app quits. If you still have problems, try restarting your Mac.
Under the Apple menu, choose Restart. Your open windows
reopen if you check the box in the pop-up.
2
If the problem occurs only when you use a particular
application, try updating it. Open the App Store and check
for updates or use the option in the app's menu on the top bar,
found next to the Apple menu. If you still have problems with
that app, try reinstalling it. Drag it into the trash, empty the trash
then reinstall the app.
174 | vwvw.pclpublications.com
Maintenance and Troubleshooting
If Your Mac Won't Start
If your Mac fails to start or it won't finish booting up, try these simple fixes to get you back up and running once more.
Make sure the power cable or adapter is plugged into
your Mac and a mains power outlet and make sure your
mains electricity is working. This sounds silly but you'd be
surprised how many people call computer service centres
during a power cut.
For notebooks, check whether the battery needs to be
charged. Plug it into the mains. If the light on the power
adapter glows amber, it's charging. Let it charge up for about 30
minutes and then try starting it up again. You should only use the
charger that came with your Mac.
3
Again for notebooks, if the charger fails to start charging
or simply stops charging, and you don’t see the indicator
light on the power adapter turn on when you plug in the power
cord, try unplugging and replugging the power cord to reseat
the USB-C or MagSafe plug.
Dlf the problem persists and you can find no way of fixing
it, book a Genius Bar appointment at your local Apple
Store. Here Apple’s team of experts can talk you through the
problem and if they can't solve it, they can advise as to
whether a repair is needed.
Using the Recovery Drive
If your Mac won't boot up, help is at hand. Recent versions of macOS have their own Recovery Drive.
If your Mac won’t start up, try rebooting from the Recovery Drive.
On an Intel Mac, press the power button to turn it off, then turn it on
again whilst holding cmd-R. Release when you see the Apple logo.
On an Apple Silicon Mac, turn it off, then press and hold the power
button and choose 'Options'. Follow on-screen instructions.
Whichever type of Mac you have, it then boots using its
Recovery Partition. Enter your admin password when asked to
do so. You can then use Disk Utility, or research a problem in the
Recovery Partition's Safari app. Use the Apple menu to restart
your Mac, and it should boot normally.
www.pclpublications.com | 175
П Going Further with macOS Ventura
Problems with Wi-Fi
Wi-Fi is usually reliable, but sometimes problems occur. If
you're having issues, here's howto troubleshoot it.
Use Disk Utility
The Mac's Disk Utility application can do much to
diagnose and even repair problems with drives.
1
First make sure the router you're trying to connect to is
switched on and has a wireless access point. Usually
there are indicator lights on the front that tell you this, so check
in the manual. If there seems to be a problem, restart your router
by switching it off and on again.
1
You can find your Disk Utility app in the Utilities folder
within the Applications folder. Or just open Launchpad,
the Dock icon with the nine coloured squares, and launch Disk
Utility from there. On the Launchpad screen, Disk Utility is found
in the folder marked 'Other'.
2
Check the Wi-Fi status icon in the menu bar. It can have
up to three bars indicating signal strength. If signal
strength is low, try moving closer to the router. Remember, the
signal can be blocked by thick walls or other obstructions, so
moving around in the room might help.
2
Click on the drive you wish to check and then press the
First Aid button. Disk Utility's First Aid feature then
checks your disk for errors and if necessary, repairs and
corrects them. This process might take some time if you
haven't run First Aid recently.
When you're done, click the triangle next to Show Details
to see what was repaired. Please note that you can also
run First Aid from the Recovery HD. This might be necessary if
you’re having difficulties booting your Mac.
a--
U*—•
If you're still having problems, go to the Apple menu and
open System Settings. Click on Network and select your
Wi-Fi connection. From here you can turn Wi-Fi off and on,
choose another network and also Advanced options if you know
what you're doing.
176 | www.pclpublications.com
Maintenance and Troubleshooting [^)j
Boot into Safe Mode: Booting into Safe Mode, sometimes
called a 'safe boot', runs an automatic startup check and can repair
problems. Restart your Mac whilst holding the Shift key. Enter your
password and the Mac checks your disks (it might take a while).
When it's done, reboot your Mac.
Ejecting an Optical Disk: If you have an older Mac that
still has a CD/DVD drive and a disc gets stuck, shut down your
Mac. Boot it up again with the mouse button or trackpad button
held down. This forces the optical drive to eject a stuck disc
during the startup sequence.
Reset NVRAM
Resetting the NVRAM, also called PRAM, can solve a range of problems if your Mac is misbehaving. Just follow these steps.
NVRAM stores information such as speaker volume, screen
resolution, startup disk solution and more. If you're having
problems with any of these things, try resetting your NVRAM.
First of all, you must shut down your Mac in the usual way.
Turn on your Mac and as soon as you hear the startup chime,
press and hold the cmd+OPT+P+R keys. The computer restarts
once more and you hear a second startup chime. At this point,
release the keys and let your computer restart as normal.
Reset the SMC.
Your Mac's SMC (System Management Controller) deals with hardware issues. Here's how to reset it.
If your Mac is displaying minor hardware
issues such as fans running at high speed
or expansion ports not working, try
resetting the SMC. For a desktop
computer, turn it off and unplug it from
the mains. Wait 15 seconds, then plug it
in and power it up again.
For a notebook Mac, unplug its charger and
power it off. Plug the charger back in again,
then press and hold Shift+Control+Option
on the left side of the notebook's keyboard
and also the power button. Release all the
buttons and then press power again to start
up your MacBook.
www.pclpublications.com | 177
UPDATED FOR IPHONE 15 MODELS
The Complete
Manual Series
Mac. Hook and macOS Sonoma
Readly
A vailable on
FOR USE WITH All MACBOOKS
895
DESKTOP PC. LAPTOP» SURFACE
FOR ANDROID, APPLE, PC* MAC
BEAT HACKERS, VIRUSES S MALWARE Q
FOR ALL iPADS & iPadOS 17 £
mastering yw .name геглчх* ano sma7 tjences
2 Popercut
ffl
Networking
Manual
Computing
Manual
&iOS -
User Manual
FOR APPLE WATCH & wafchOS 10
The Complete
Apple
Watch
watchOS 10 Manual
r The Complete
MacBook
User Manual
UPDATED FOR macOS SONOMA
The Complete
Mac
User Manual
у The Complete
iPad
& iPadOS E
User Manual
885
bl**
FOR SMARTPHONES & TABLETS
The Complete
Windows 11
User Manual
The essential step-by-step manual
to mastering Microsoft's Windows II
r The Complete
Samsung
Galaxy
Manual "
FOR ALL COMPUTERS A MOBILES
FOR ALL CHROMEBOOK MODELS
MASTER PYTHON PROGRAMMING </>
The Complete
JUwTi
Coding Manual
The essential рг&ушшмпд manual
to improve your РуТпЛ coding skills
The Complete
Instagram
User Manual
INUX, PYTHON A
Coding Manual
Pie essential sfep-O>»-slep
The Complete
The Complete
Google
User Manual
c-cbontnrl Gtop-hy-Ktop плгктст. to /гютпрглд
cmuyte* шпа&тд ffett upps
The Complete
Chromebook
User Manual
Master your Chromebook and
Google's Chrome OS
.+ FOR ANDROID, APPLE. PC Л MAC
r The Complete
WhatsApp
Manual
LEARN PYTHON & C++ CODING
The Complete
& Python
Manual
I Internet w
Security | д
i/s-\ Manual to m
B^Eaasa
еввпйя
ф PROGRAM UNUX. PYTHON 8 C < + </>
The Complete
jjk RASPBERRY Pi 5, Pi 4,400 ЯРКО
r The Complete
Master programming and
improve your Python,
Linux & C++ skills
FOR PC. MAC « MOBILE DEVICES
The Complete
Windows 10
User Manual
The essential step-by-step guide
to mastering Microsoft's Windows Ю
operating system
(890
Home
The Complete
Cloud
For a full list of titles available please visit
www.pclpublications.com
Get Your Exclusive
FREE Gift Worth
£9.99 Here!
Download
Your FREE
2g££Software.' Great Games! Essential Hardware!
TECHiPj
«3
Tech Shopper
Magazine
*IQO amazing
«^•GADGETS,
APPS & GAMES INSIDE!
Head over to your web
browser and follow these
simple instructions...
b
'«my WJ
Home Security
Inside & Out!
1/ Enter the following URL: www.pclpublications.com/exclusives
2/ Sign up/in and from the listings of our exclusive customer
downloads, highlight the Tech Shopper Magazine option.
3/ Enter your unique download code (Listed below) in the "Enter
download code" bar.
4/ Click the Download Now! Button and your file will automatically
download.
5/ Your file is a high resolution PDF file, which is compatible with
the majority of customer devices/platforms.
Exclusive Download Code: pcl37862re
NOTE: This is a limited reader offer running from 1st March to 1st July 2024.
Terms and conditions apply and can be found at www.pclpublications.com
Want to master your Mac?
I Then don't miss our Mac & MacBook
magazine on Readlij now!
^FREE
SPECIAL BONUS
‘„sue Eight I Deceit» 20231EOOMMBEPEHOENT
Master Your Mac ,+MacBook
macOS
Sonoma
Mastered!
The Essential User Guide
for the Mac Owner!
NEW Bumper
USER
SHOPPER
»it Time to Ditch
Your Old Mac?
Have You Upgraded to
macOS Sonoma?
Learn What's New and
Improved in Apple's Apps.
Amazing Apps from
Apple Themselves!
Click our handy link to read now: https://bit.ly/3tPJHdl
The Complete Manual Series:
macOS Ventura
5 | ISBN: 978-1-914404-79-5
Published by: Papercut Limited
Digital distribution by: Readly, Zinio & Pocketmags
© 2024 Papercut Limited All rights reserved. No part of this
publication may be reproduced in any form, stored in a retrieval
system or integrated into any other publication, database or
commercial programs without the express written permission of
the publisher. Under no circumstances should this publication and
its contents be resold, loaned out or used in any form by way of
trade without the publisher's written permission. While we pride
ourselves on the quality of the information we provide, Papercut
Limited reserves the right not to be held responsible for any
mistakes or inaccuracies found within the text of this publication.
Due to the nature of the tech industry, the publisher cannot
guarantee that all apps and software will work on every version of
device. It remains the purchaser’s sole responsibility to determine
the suitability of this book and its content for whatever purpose.
We advise all potential buyers to check listing prior to purchase
for confirmation of actual content. All editorial opinion herein is
that of the reviewer - as an individual - and is not representative of
the publisher or any of its affiliates. Therefore the publisher holds
no responsibility in regard to editorial opinion and content.
This is an independent publication and as such does not
necessarily reflect the views or opinions of the producers of apps
or products contained within. This publication is not endorsed or
associated in any way with Apple Inc. or any associate or affiliate
company. All copyrights, trademarks and registered trademarks
for the respective computer software and hardware companies
are acknowledged. macOS Ventura, Mac, MacBook, iMac. iMac
Pro, Mac Pro, Mac mini, iPhone & iPad are trademarks of Apple
Inc., registered in the US and other countries. macOS Ventura,
Mac, MacBook. iPhone, iPad © 2023-2024 Apple Inc.
Relevant graphic imagery reproduced with courtesy of Apple.
Additional images contained within this publication are
reproduced under licence from Shutterstock.
Any images reproduced on the front cover are solely for design
purposes and are not representative of content.
Prices, international availability, ratings, titles and content are
subject to change. All information was correct at time of
publication. Some content may have been previously published
in other volumes or titles.
Э Papercut Limited
Registered in England & Wales No: 04308513
ADVERTISING - For our latest media packs please contact:
Brad Francis - brad@papercutltd.co.uk
Web - www.pclpublications.com
INTERNATIONAL LICENSING - Papercut Limited has many great
publications and all are available for licensing worldwide.
For more information email: jgale@pclpublications.com