/


Similar


Text
5
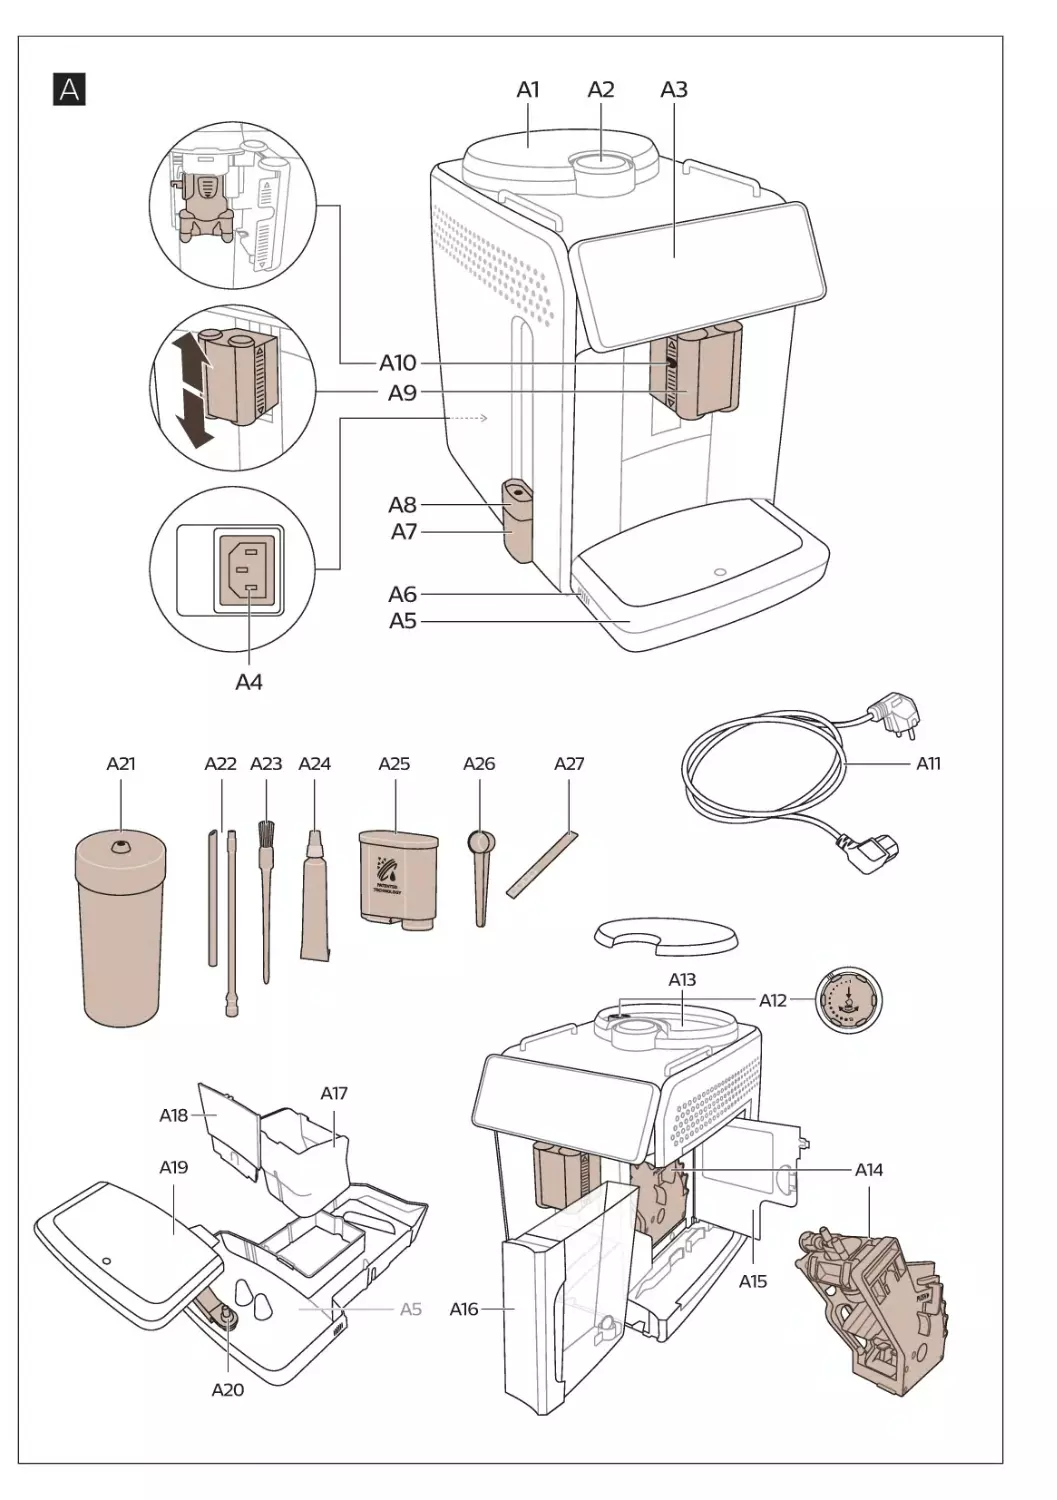
Machine overview (Fig. A)
Accessories
A1 Lid of bean hopper
A2 Lid of pre-ground coffee
compartment
A3 Control panel
A4 Socket for cord
A5 Drip tray
A6 Drip tray release grip
A7 HygieSteam container
A8 HygieSteam cover with milk tube
holder
A9 Height-adjustable coffee and milk
dispensing spout
A10 Internal cappuccinatore
A11 Power cord with plug
A12 Grind setting knob (to learn more,
visit www.saeco.com/care)
A13 Bean hopper
A14 Brew group (to learn more, visit
www.saeco.com/care)
A15 Service door
A16 Water tank
A17 Coffee grounds container
A18 Front panel of coffee grounds
container
A19 Drip tray cover
A20 'Drip tray full' indicator
A21 Milk container
A22 Milk tube
A23 Cleaning brush
A24 Grease tube
A25 AquaClean filter
A26 Measuring spoon
A27 Water hardness test strip
Control panel
Refer to figure B for an overview of all icons. Below you can find the descriptions.
B5 Machine settings
B1 On/off icon
B6 Status menu
B2 Drinks
B7 Shop
B3 Drinks menu
B8 Start/stop
icon
B4 Personal profiles
Introduction
Congratulations on your purchase of a Saeco full-automatic coffee machine!
To fully benefit from the online support that Saeco offers, you can use the
control panel to register your machine via the built-in Wi-Fi connection, or go
to www.saeco.com/MyCoffeeMachine and register your product there.
Read the separate safety booklet carefully before you use the machine for the
first time and save it for future reference.
Your Saeco full-automatic coffee machine allows you to connect with your Wi-Fi
network to enhance your coffee experience.
By connecting your machine to your Wi-Fi network, you will be able to:
-
enjoy regular software updates to enhance your user experience
-
you can link your machine to your Amazon account for accessory
replenishment, if this option is available in your country
-
make use of the shop functionality, if available in your country
6
-
connect to your Alexa home device to make use of voice control, if available
in your country
Note: This machine has been tested with coffee. Although it has been carefully
cleaned, there may be some coffee residues left. We guarantee, however, that
the machine is absolutely new.
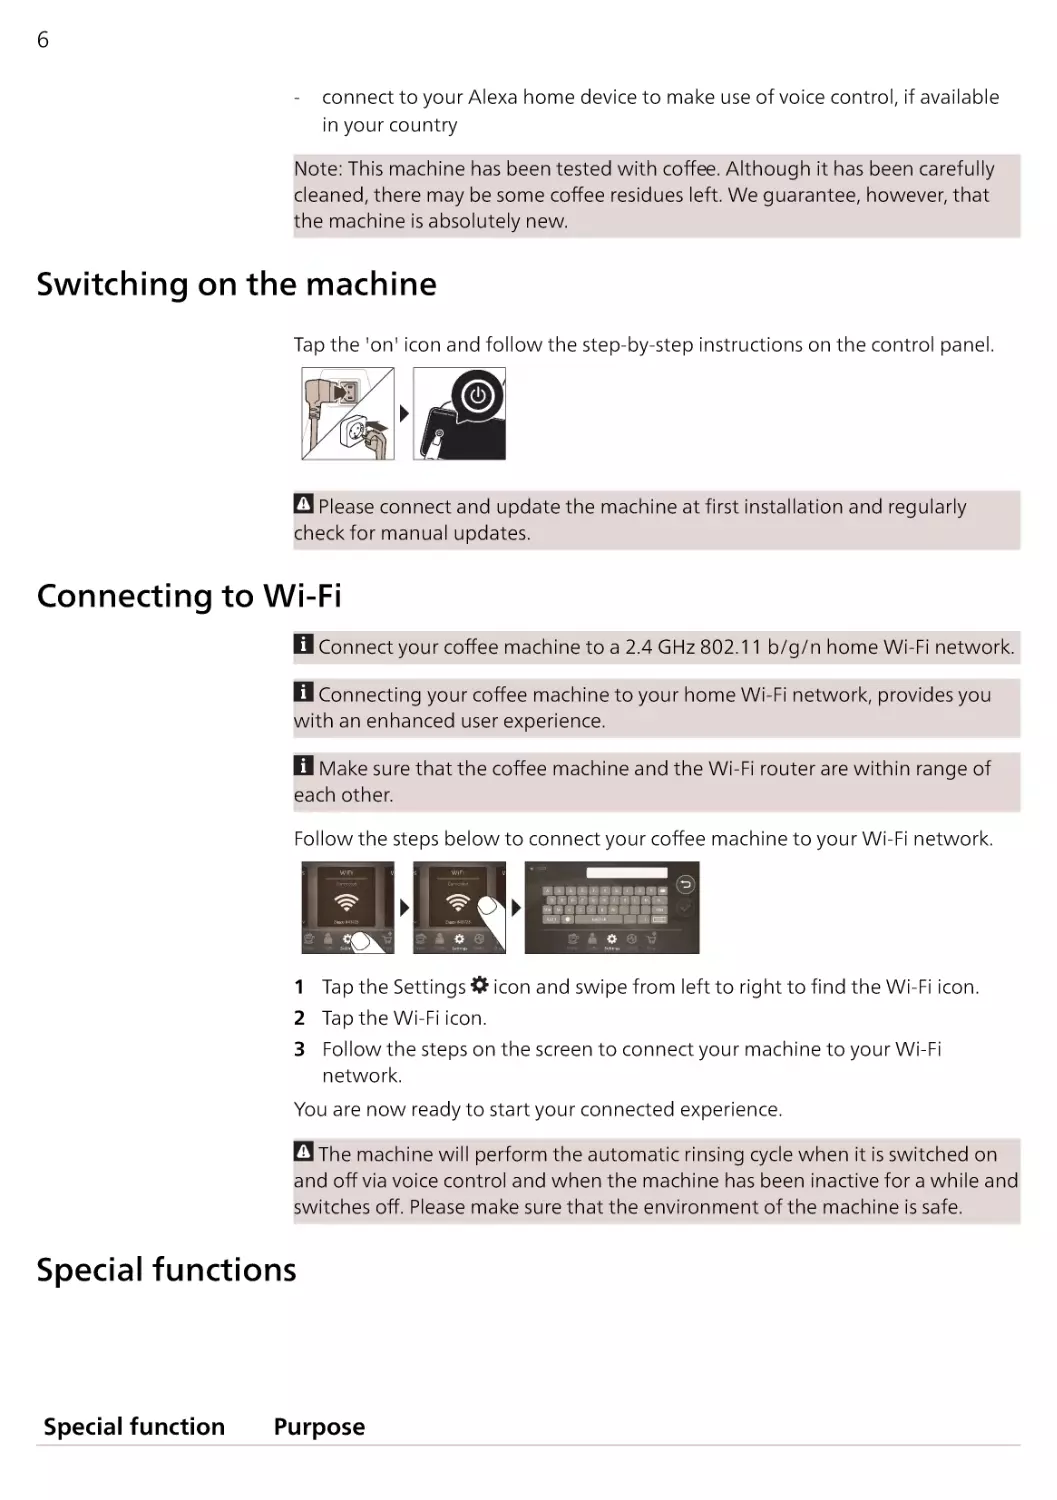
Switching on the machine
Tap the 'on' icon and follow the step-by-step instructions on the control panel.
Please connect and update the machine at first installation and regularly
check for manual updates.
Connecting to Wi-Fi
Connect your coffee machine to a 2.4 GHz 802.11 b/g/n home Wi-Fi network.
Connecting your coffee machine to your home Wi-Fi network, provides you
with an enhanced user experience.
Make sure that the coffee machine and the Wi-Fi router are within range of
each other.
Follow the steps below to connect your coffee machine to your Wi-Fi network.
1 Tap the Settings
2 Tap the Wi-Fi icon.
icon and swipe from left to right to find the Wi-Fi icon.
3 Follow the steps on the screen to connect your machine to your Wi-Fi
network.
You are now ready to start your connected experience.
The machine will perform the automatic rinsing cycle when it is switched on
and off via voice control and when the machine has been inactive for a while and
switches off. Please make sure that the environment of the machine is safe.
Special functions
Special function
Purpose
7
With CoffeeMaestro you can personalize your coffee by selecting a pre-set taste
profile (Delicato, Intenso, Forte) for your beverage instead of changing the settings
yourself.
HygieSteam function automatically cleans the milk system, removing
microorganisms: use it after brewing cappuccino or other milk-based drinks.
Our durable grinder is made from 100% ceramic to be exceptionally hard and
precise. It can be adjusted to your taste with 12-step levels.
The Maintenance Dashboard gives you a helpful overview and notifies you with
status information on things like that the AquaClean is running low.
Brewing drinks
General steps
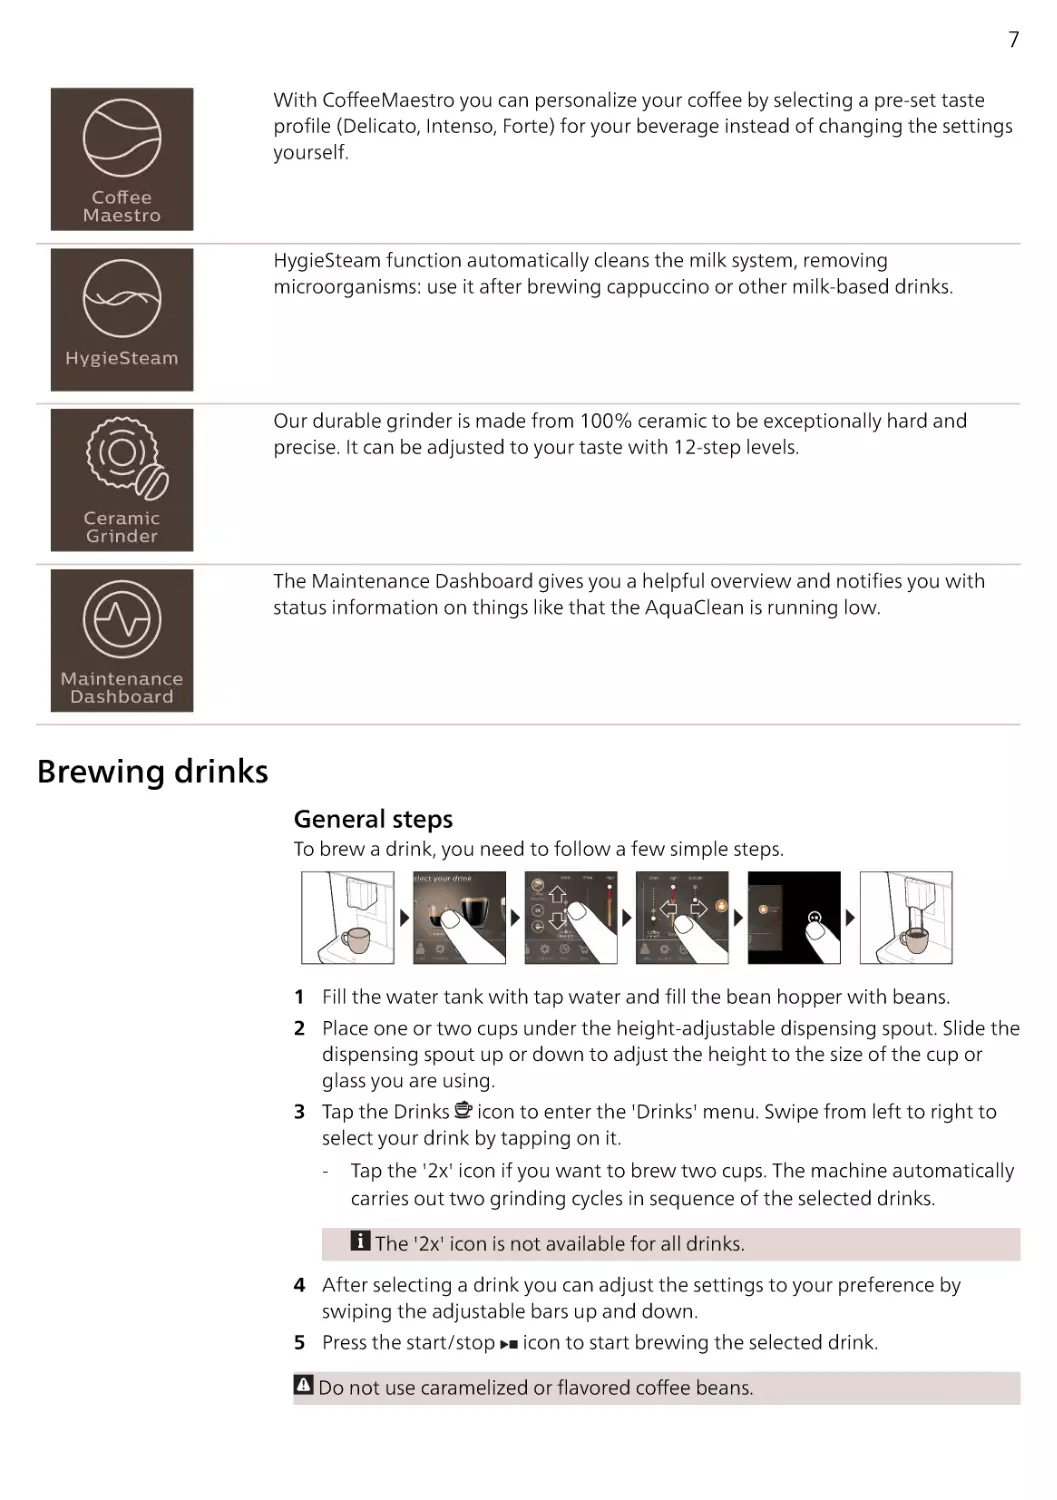
To brew a drink, you need to follow a few simple steps.
1 Fill the water tank with tap water and fill the bean hopper with beans.
2 Place one or two cups under the height-adjustable dispensing spout. Slide the
dispensing spout up or down to adjust the height to the size of the cup or
glass you are using.
3 Tap the Drinks icon to enter the 'Drinks' menu. Swipe from left to right to
select your drink by tapping on it.
-
Tap the '2x' icon if you want to brew two cups. The machine automatically
carries out two grinding cycles in sequence of the selected drinks.
The '2x' icon is not available for all drinks.
4 After selecting a drink you can adjust the settings to your preference by
swiping the adjustable bars up and down.
5 Press the start/stop
icon to start brewing the selected drink.
Do not use caramelized or flavored coffee beans.
8
Support on drink parameters
To get additional information about a specific drink parameter, press and hold an
item for 3 seconds.
Brewing milk-based drinks
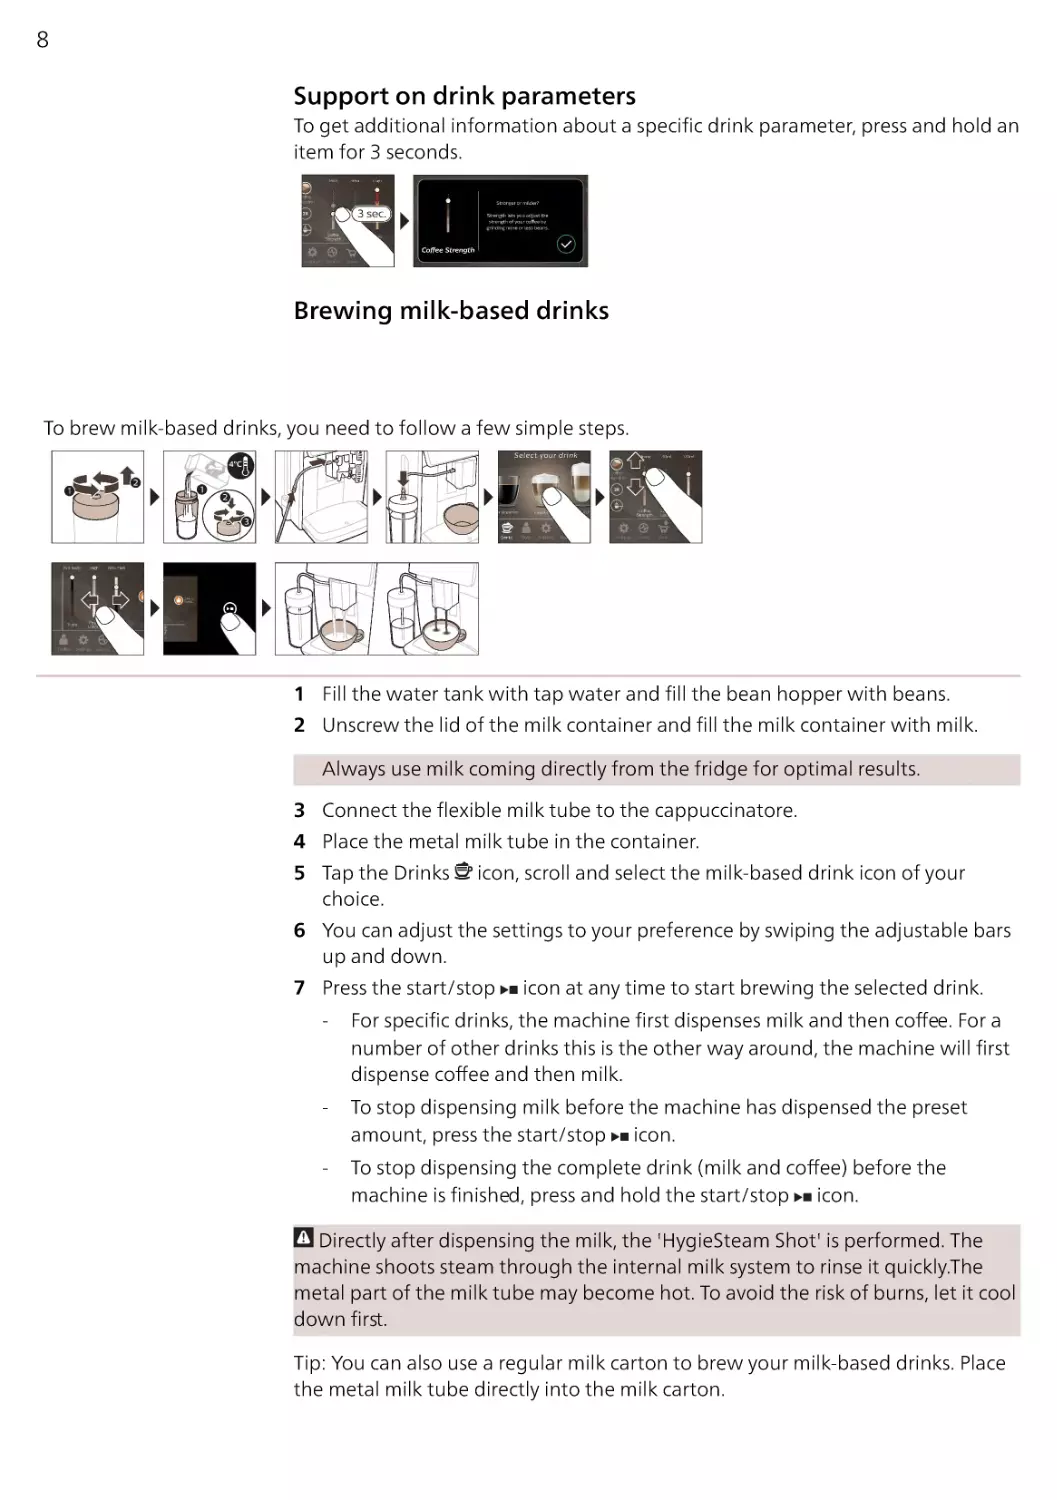
To brew milk-based drinks, you need to follow a few simple steps.
1 Fill the water tank with tap water and fill the bean hopper with beans.
2 Unscrew the lid of the milk container and fill the milk container with milk.
Always use milk coming directly from the fridge for optimal results.
3 Connect the flexible milk tube to the cappuccinatore.
4 Place the metal milk tube in the container.
5 Tap the Drinks
choice.
icon, scroll and select the milk-based drink icon of your
6 You can adjust the settings to your preference by swiping the adjustable bars
up and down.
7 Press the start/stop
-
-
icon at any time to start brewing the selected drink.
For specific drinks, the machine first dispenses milk and then coffee. For a
number of other drinks this is the other way around, the machine will first
dispense coffee and then milk.
To stop dispensing milk before the machine has dispensed the preset
amount, press the start/stop icon.
To stop dispensing the complete drink (milk and coffee) before the
machine is finished, press and hold the start/stop icon.
Directly after dispensing the milk, the 'HygieSteam Shot' is performed. The
machine shoots steam through the internal milk system to rinse it quickly.The
metal part of the milk tube may become hot. To avoid the risk of burns, let it cool
down first.
Tip: You can also use a regular milk carton to brew your milk-based drinks. Place
the metal milk tube directly into the milk carton.
9
Brewing coffee with pre-ground coffee
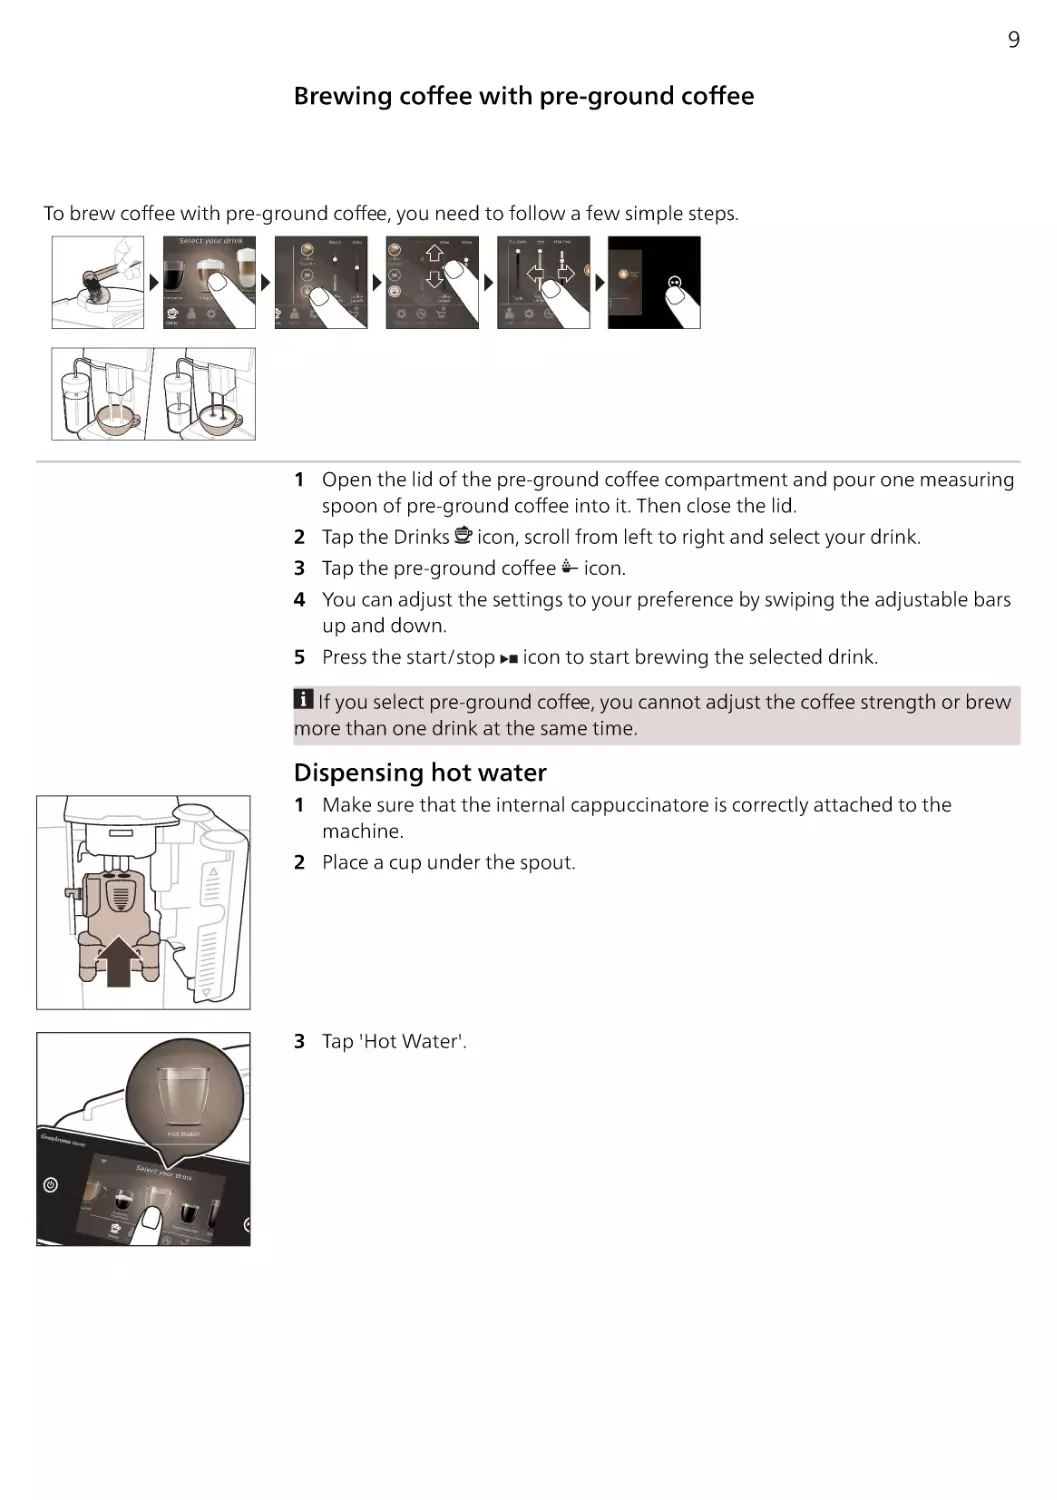
To brew coffee with pre-ground coffee, you need to follow a few simple steps.
1 Open the lid of the pre-ground coffee compartment and pour one measuring
spoon of pre-ground coffee into it. Then close the lid.
2 Tap the Drinks
icon, scroll from left to right and select your drink.
3 Tap the pre-ground coffee
icon.
4 You can adjust the settings to your preference by swiping the adjustable bars
up and down.
5 Press the start/stop
icon to start brewing the selected drink.
If you select pre-ground coffee, you cannot adjust the coffee strength or brew
more than one drink at the same time.
Dispensing hot water
1 Make sure that the internal cappuccinatore is correctly attached to the
machine.
2 Place a cup under the spout.
3 Tap 'Hot Water'.
10
4 Slide the adjustable bars up and down to adjust the hot water quantity or
temperature to your preference.
5 Press the start/stop
icon.
6 To stop dispensing hot water before the machine is finished, press the start/
stop icon again.
Personalization
The machine allows you to adjust the settings of a drink to your own preference
and to store the adjusted drink in a personal profile. You can choose your own
icon and your own profile name.
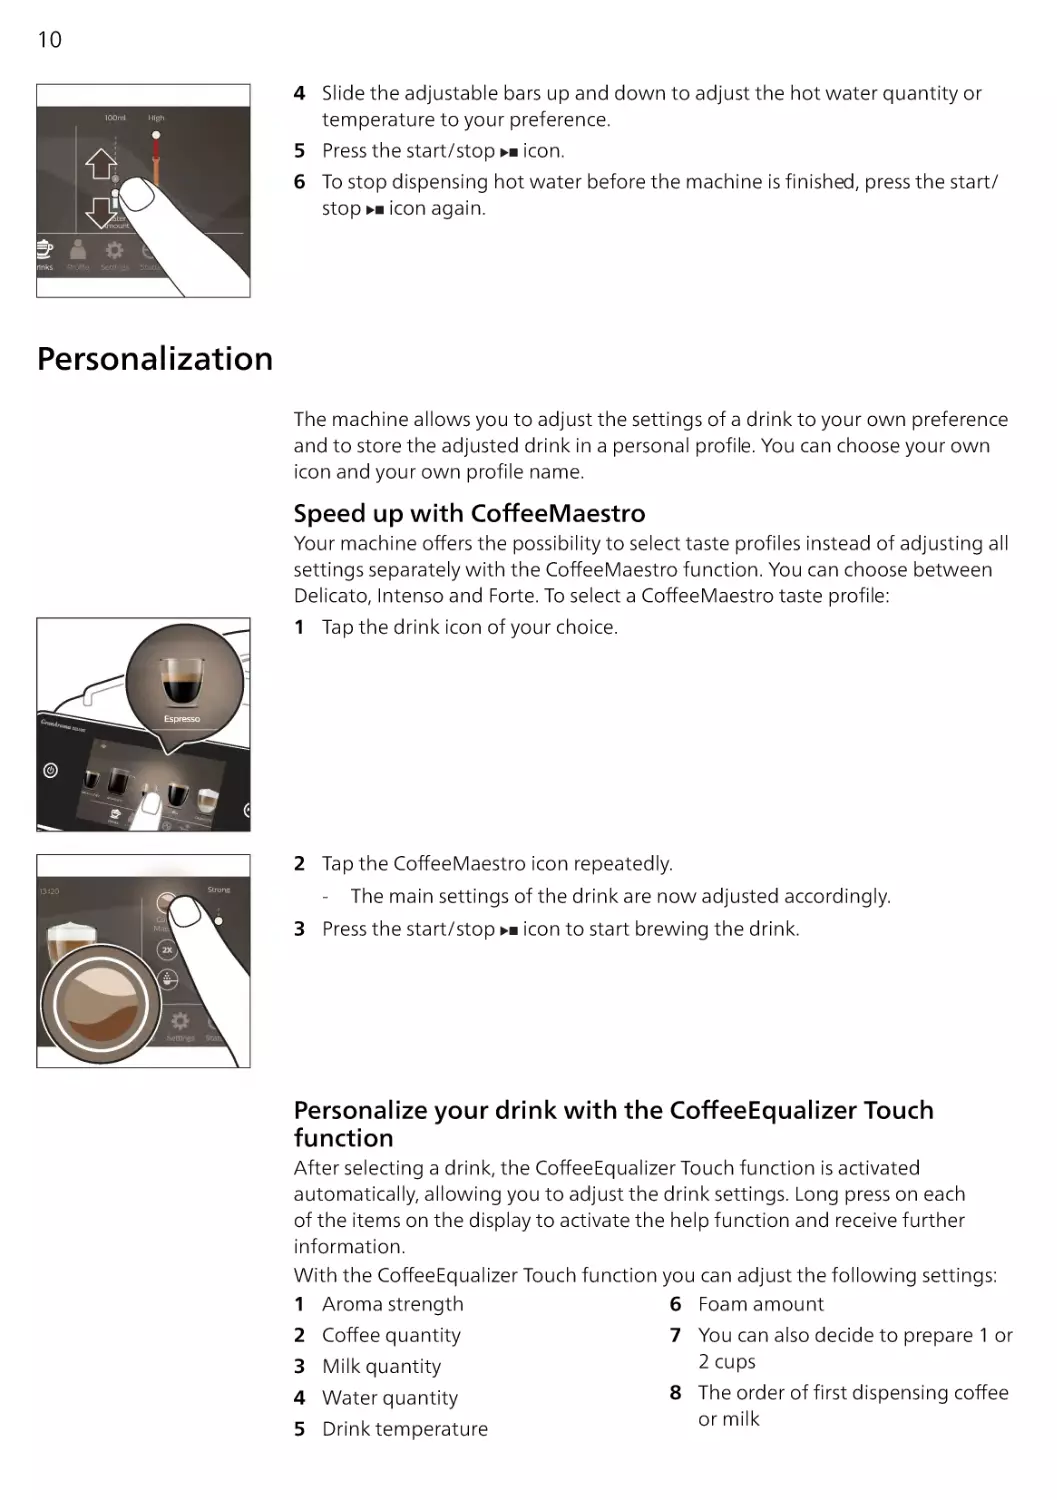
Speed up with CoffeeMaestro
Your machine offers the possibility to select taste profiles instead of adjusting all
settings separately with the CoffeeMaestro function. You can choose between
Delicato, Intenso and Forte. To select a CoffeeMaestro taste profile:
1 Tap the drink icon of your choice.
2 Tap the CoffeeMaestro icon repeatedly.
-
The main settings of the drink are now adjusted accordingly.
3 Press the start/stop
icon to start brewing the drink.
Personalize your drink with the CoffeeEqualizer Touch
function
After selecting a drink, the CoffeeEqualizer Touch function is activated
automatically, allowing you to adjust the drink settings. Long press on each
of the items on the display to activate the help function and receive further
information.
With the CoffeeEqualizer Touch function you can adjust the following settings:
1 Aroma strength
6 Foam amount
2 Coffee quantity
3 Milk quantity
4 Water quantity
5 Drink temperature
7 You can also decide to prepare 1 or
2 cups
8 The order of first dispensing coffee
or milk
11
Note: It depends on the drink you choose which settings you can adjust.
Save your favorite drinks in a profile
The machine allows you to adjust the settings of a drink to your own preference
and to store the adjusted drink in a personal profile. You can select a profile and
store a recipe using the profiles.
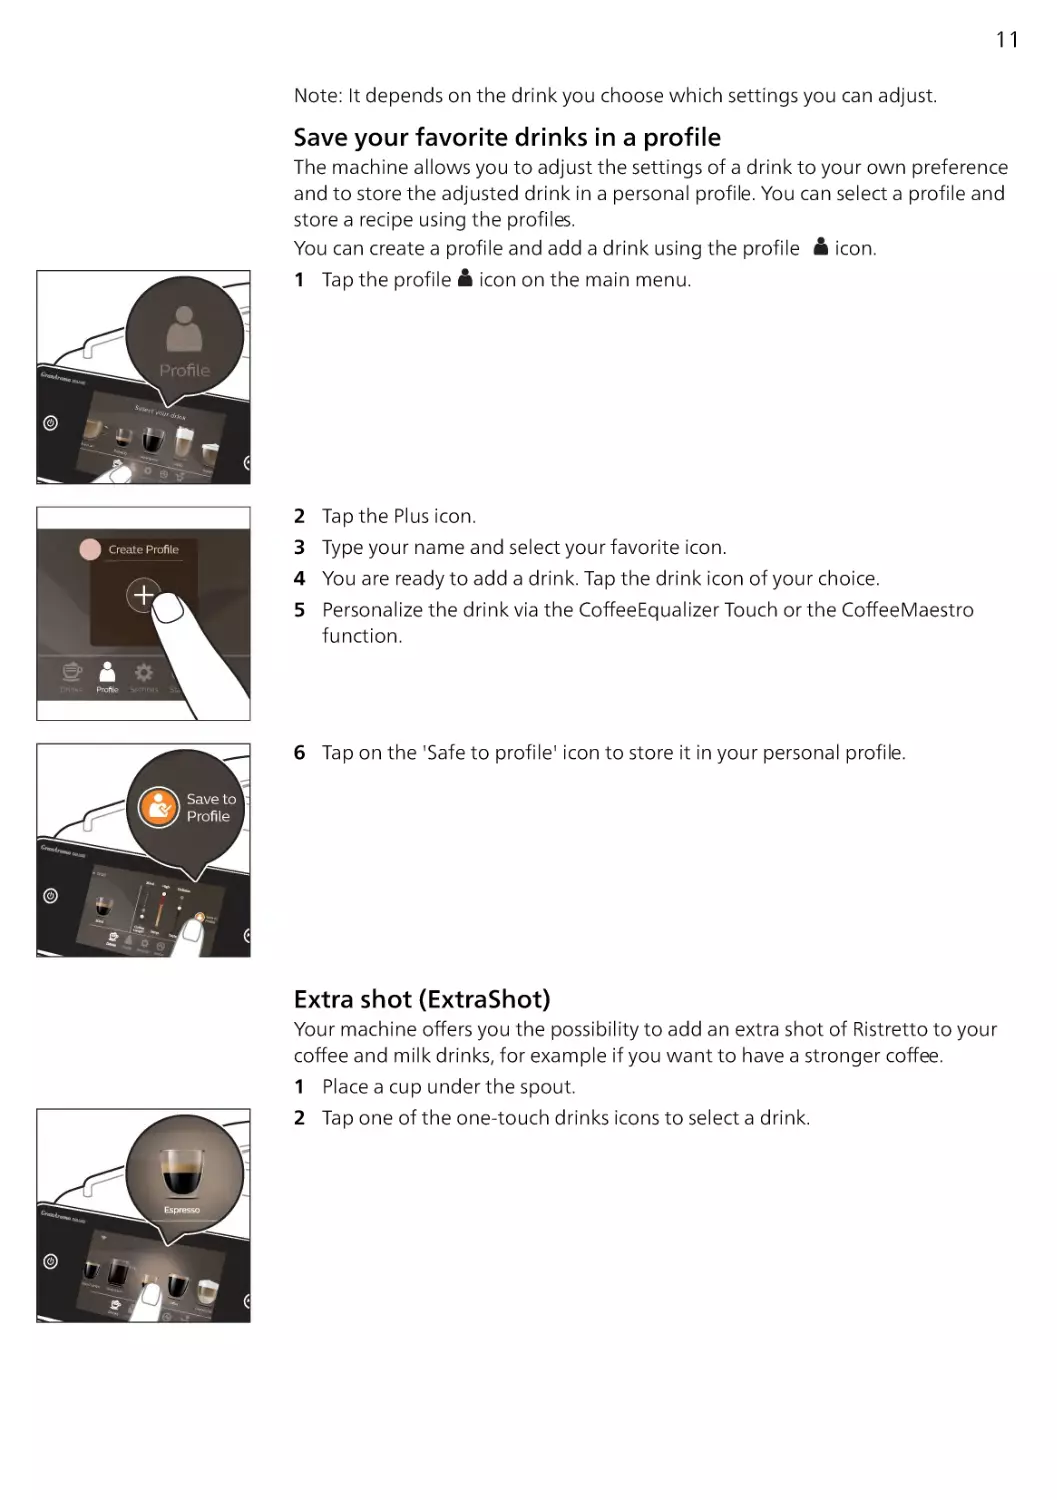
You can create a profile and add a drink using the profile
icon.
1 Tap the profile
icon on the main menu.
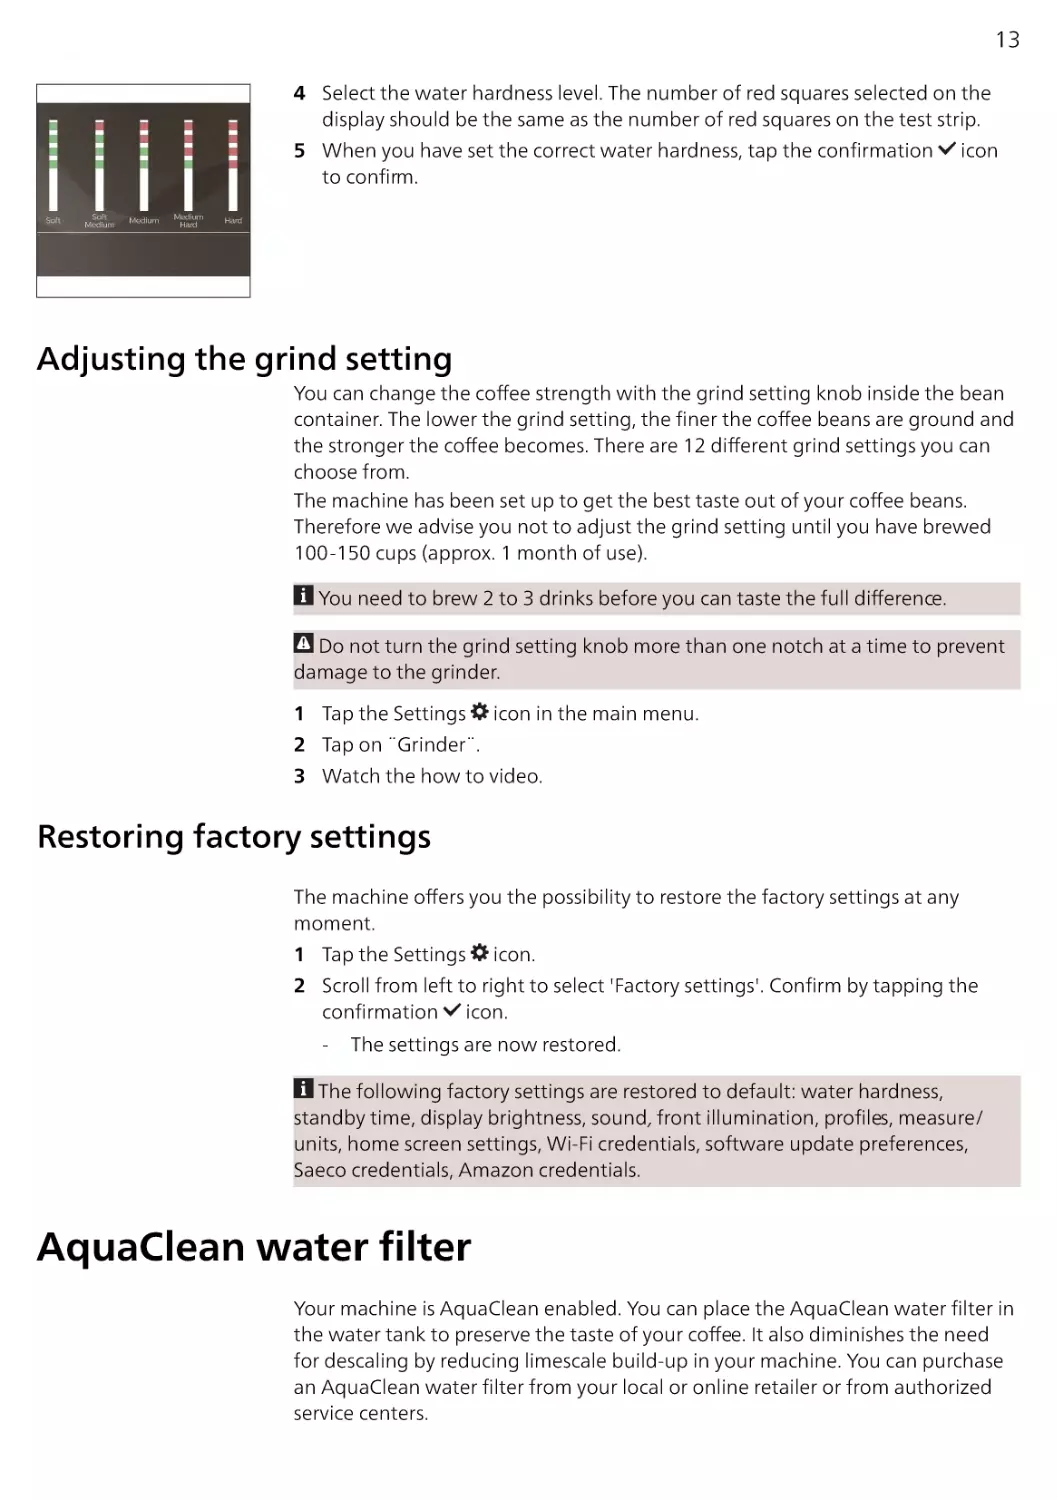
2 Tap the Plus icon.
3 Type your name and select your favorite icon.
4 You are ready to add a drink. Tap the drink icon of your choice.
5 Personalize the drink via the CoffeeEqualizer Touch or the CoffeeMaestro
function.
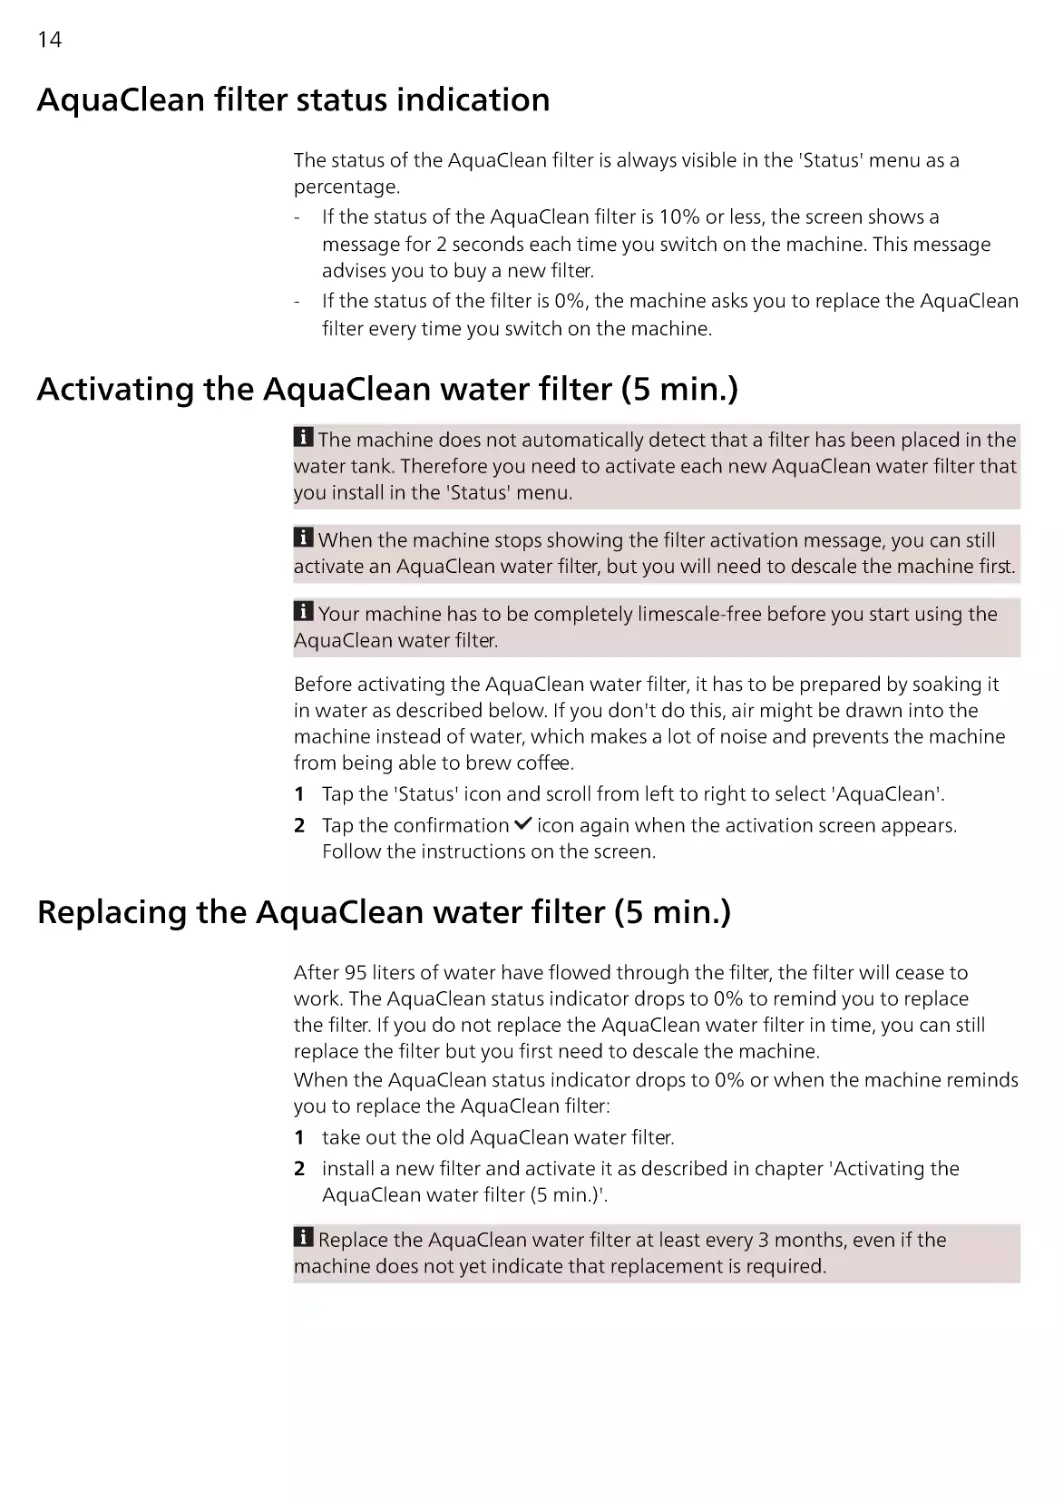
6 Tap on the 'Safe to profile' icon to store it in your personal profile.
Extra shot (ExtraShot)
Your machine offers you the possibility to add an extra shot of Ristretto to your
coffee and milk drinks, for example if you want to have a stronger coffee.
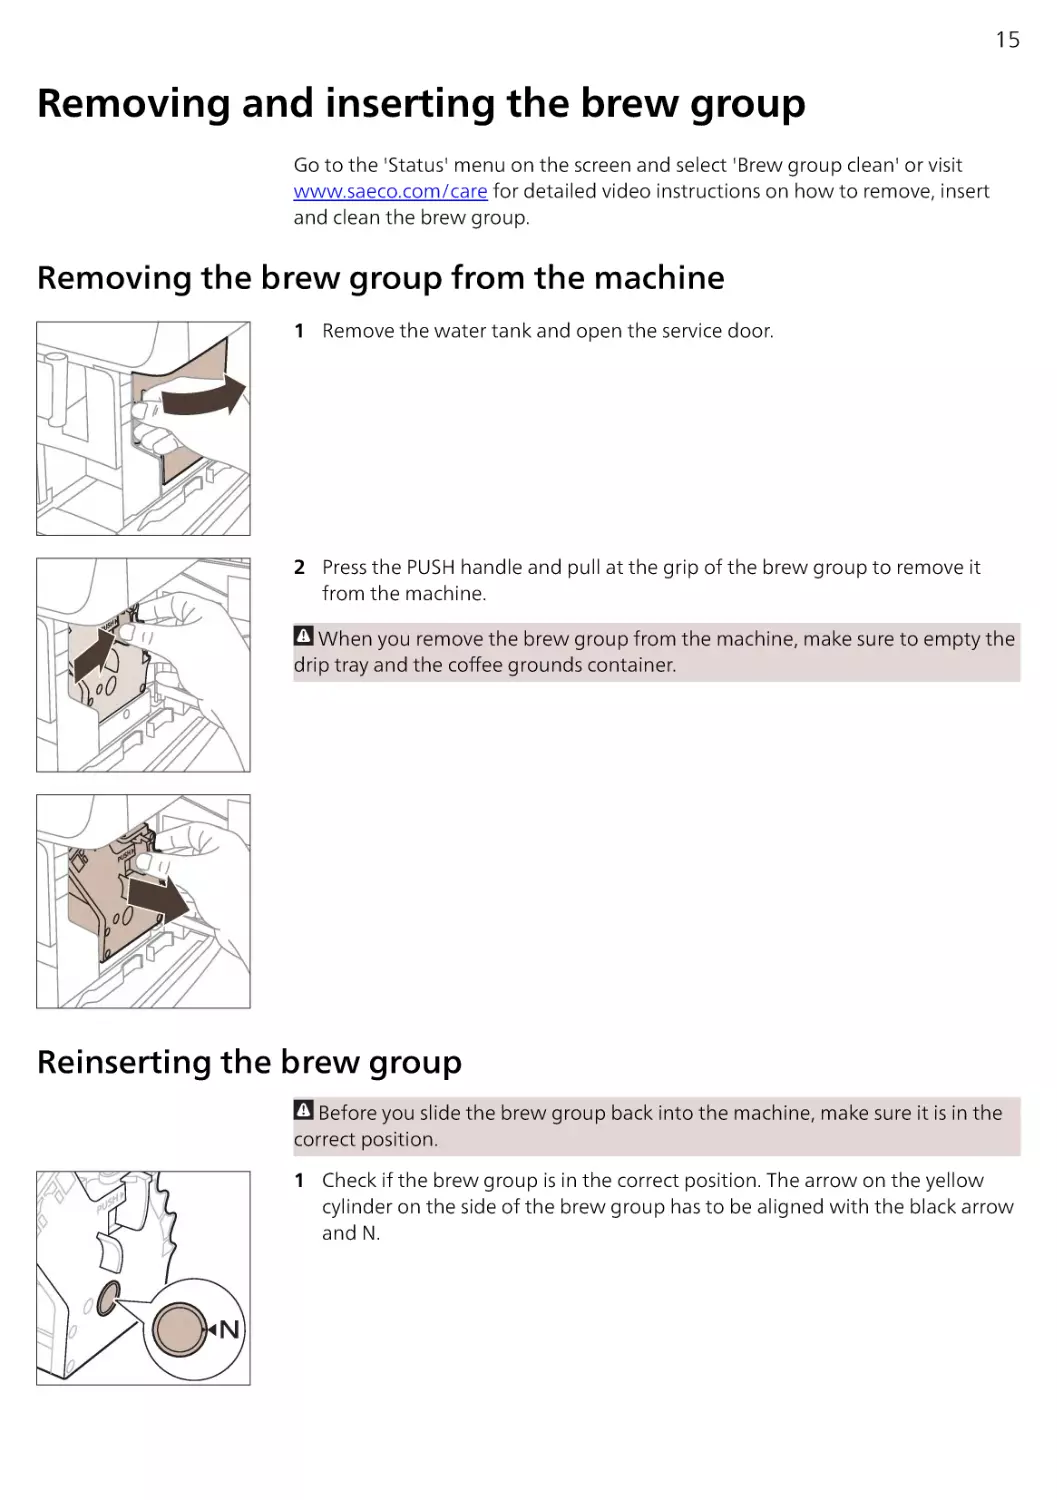
1 Place a cup under the spout.
2 Tap one of the one-touch drinks icons to select a drink.
12
3 Slide the adjustable bar up to set the strength to the top level and select the
ExtraShot function.
4 Then press the start/stop
icon to start brewing the drink.
5 To stop dispensing the drink before the machine has finished, press the start/
stop icon again.
When you have selected the ExtraShot function, you can only brew one coffee
at the time.
The extra shot function is not available for all drinks.
Adjusting machine settings
You can adjust most machine settings by tapping the Settings icon and follow
the steps on the screen.
For online support (frequently asked questions, movies etc.), scan the QR code on
the cover of this booklet or visit www.saeco.com/care
Setting the water hardness
We advise you to adjust the water hardness setting to the water hardness
level in your region for optimal performance and a longer lifetime of the
machine. This also prevents you from having to descale the machine too often.
The default water hardness setting is 4: hard water.
Use the water hardness test strip supplied in the box to
determine the water hardness in your region:
1 Immerse the water hardness test strip in tap water or hold it under the tap for
1 second.
2 Wait 1 minute. The number of squares on the test strip that turn red indicate
the water hardness.
Set the machine to the correct water hardness:
3 Tap the Settings
icon and scroll from left to right to select 'Water hardness'.
13
4 Select the water hardness level. The number of red squares selected on the
display should be the same as the number of red squares on the test strip.
5 When you have set the correct water hardness, tap the confirmation
to confirm.
icon
Adjusting the grind setting
You can change the coffee strength with the grind setting knob inside the bean
container. The lower the grind setting, the finer the coffee beans are ground and
the stronger the coffee becomes. There are 12 different grind settings you can
choose from.
The machine has been set up to get the best taste out of your coffee beans.
Therefore we advise you not to adjust the grind setting until you have brewed
100-150 cups (approx. 1 month of use).
You need to brew 2 to 3 drinks before you can taste the full difference.
Do not turn the grind setting knob more than one notch at a time to prevent
damage to the grinder.
1 Tap the Settings
2 Tap on ¨Grinder¨.
icon in the main menu.
3 Watch the how to video.
Restoring factory settings
The machine offers you the possibility to restore the factory settings at any
moment.
1 Tap the Settings
icon.
2 Scroll from left to right to select 'Factory settings'. Confirm by tapping the
confirmation icon.
-
The settings are now restored.
The following factory settings are restored to default: water hardness,
standby time, display brightness, sound, front illumination, profiles, measure/
units, home screen settings, Wi-Fi credentials, software update preferences,
Saeco credentials, Amazon credentials.
AquaClean water filter
Your machine is AquaClean enabled. You can place the AquaClean water filter in
the water tank to preserve the taste of your coffee. It also diminishes the need
for descaling by reducing limescale build-up in your machine. You can purchase
an AquaClean water filter from your local or online retailer or from authorized
service centers.
14
AquaClean filter status indication
The status of the AquaClean filter is always visible in the 'Status' menu as a
percentage.
- If the status of the AquaClean filter is 10% or less, the screen shows a
message for 2 seconds each time you switch on the machine. This message
advises you to buy a new filter.
- If the status of the filter is 0%, the machine asks you to replace the AquaClean
filter every time you switch on the machine.
Activating the AquaClean water filter (5 min.)
The machine does not automatically detect that a filter has been placed in the
water tank. Therefore you need to activate each new AquaClean water filter that
you install in the 'Status' menu.
When the machine stops showing the filter activation message, you can still
activate an AquaClean water filter, but you will need to descale the machine first.
Your machine has to be completely limescale-free before you start using the
AquaClean water filter.
Before activating the AquaClean water filter, it has to be prepared by soaking it
in water as described below. If you don't do this, air might be drawn into the
machine instead of water, which makes a lot of noise and prevents the machine
from being able to brew coffee.
1 Tap the 'Status' icon and scroll from left to right to select 'AquaClean'.
2 Tap the confirmation icon again when the activation screen appears.
Follow the instructions on the screen.
Replacing the AquaClean water filter (5 min.)
After 95 liters of water have flowed through the filter, the filter will cease to
work. The AquaClean status indicator drops to 0% to remind you to replace
the filter. If you do not replace the AquaClean water filter in time, you can still
replace the filter but you first need to descale the machine.
When the AquaClean status indicator drops to 0% or when the machine reminds
you to replace the AquaClean filter:
1 take out the old AquaClean water filter.
2 install a new filter and activate it as described in chapter 'Activating the
AquaClean water filter (5 min.)'.
Replace the AquaClean water filter at least every 3 months, even if the
machine does not yet indicate that replacement is required.
15
Removing and inserting the brew group
Go to the 'Status' menu on the screen and select 'Brew group clean' or visit
www.saeco.com/care for detailed video instructions on how to remove, insert
and clean the brew group.
Removing the brew group from the machine
1 Remove the water tank and open the service door.
2 Press the PUSH handle and pull at the grip of the brew group to remove it
from the machine.
When you remove the brew group from the machine, make sure to empty the
drip tray and the coffee grounds container.
Reinserting the brew group
Before you slide the brew group back into the machine, make sure it is in the
correct position.
1 Check if the brew group is in the correct position. The arrow on the yellow
cylinder on the side of the brew group has to be aligned with the black arrow
and N.
16
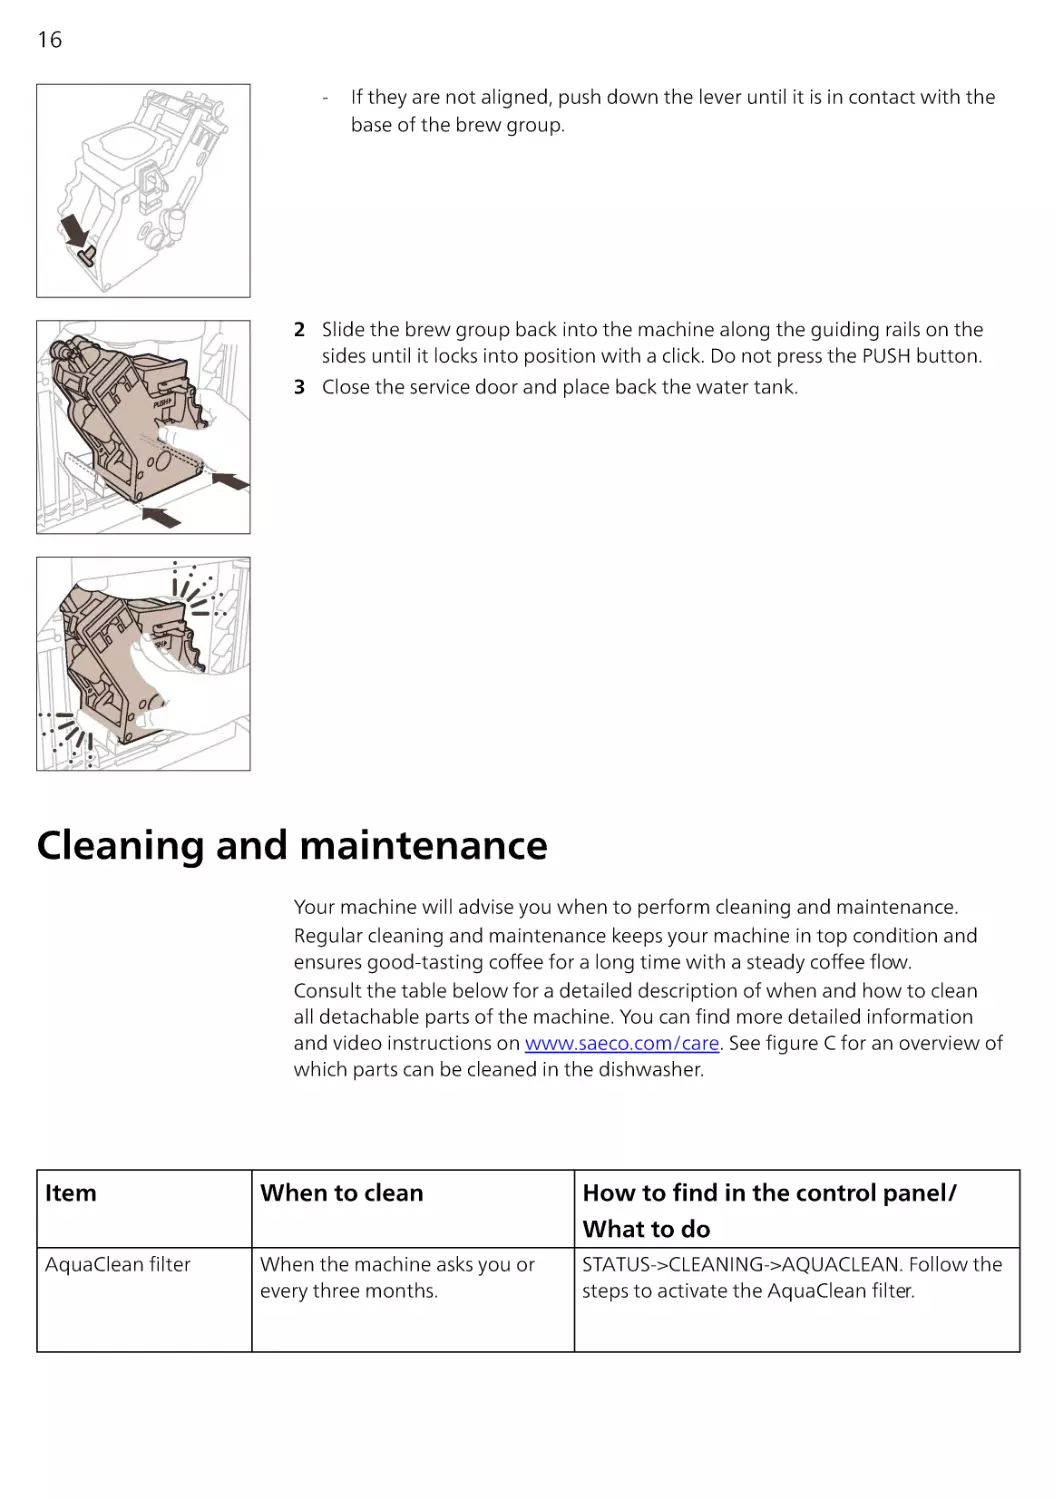
-
If they are not aligned, push down the lever until it is in contact with the
base of the brew group.
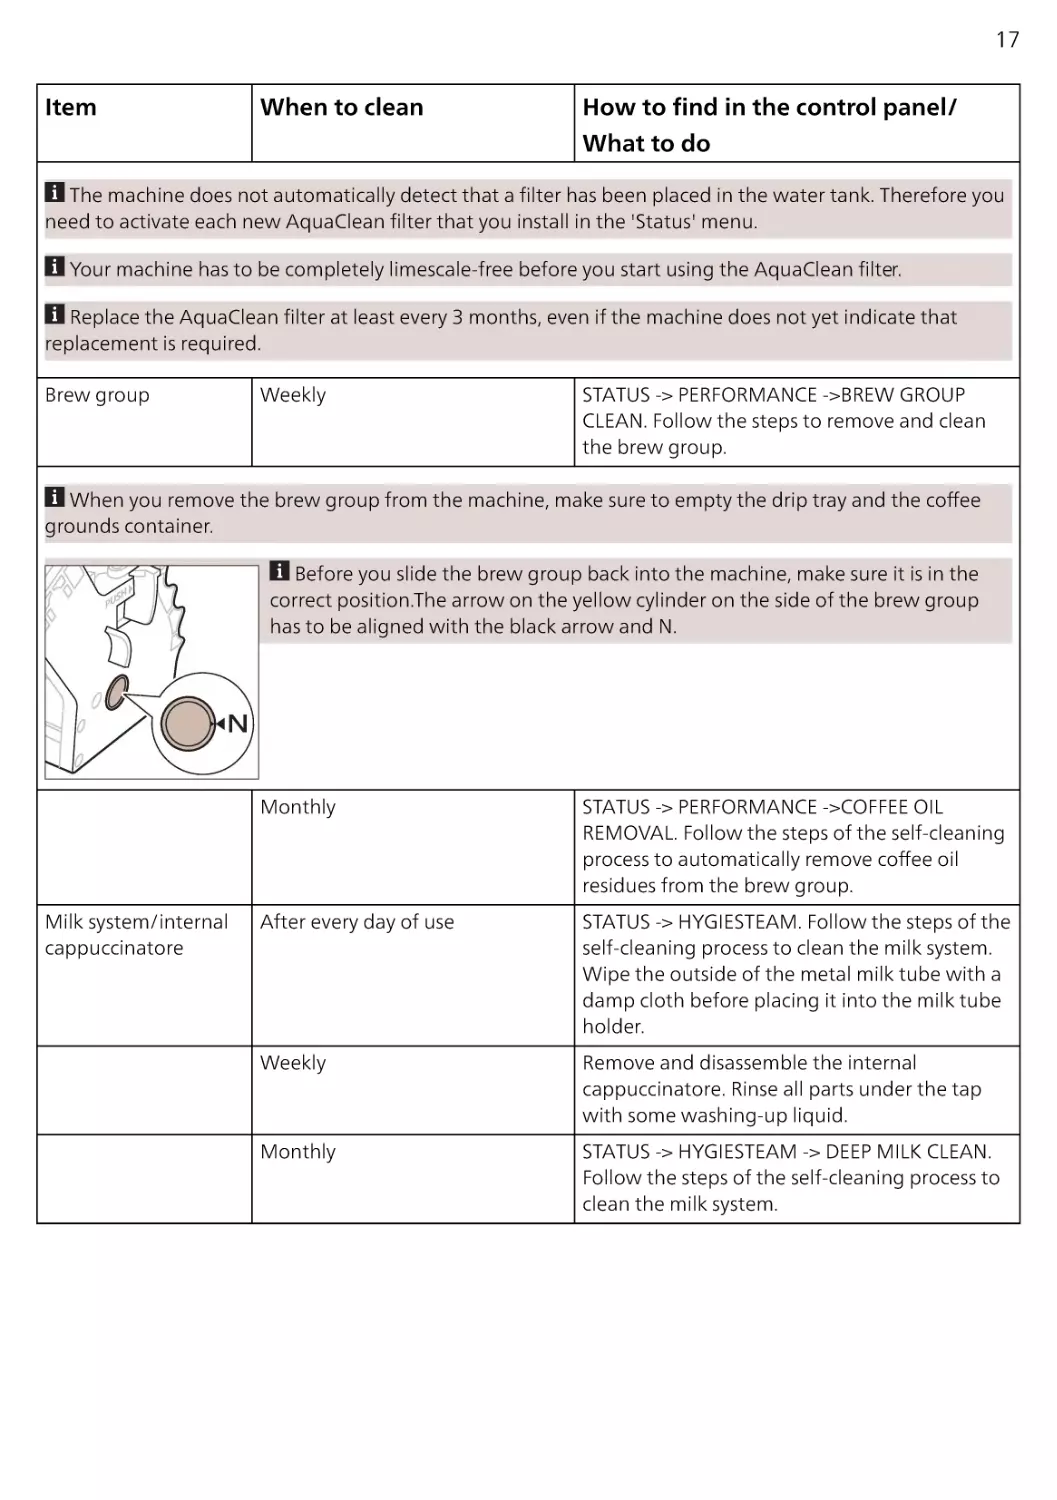
2 Slide the brew group back into the machine along the guiding rails on the
sides until it locks into position with a click. Do not press the PUSH button.
3 Close the service door and place back the water tank.
Cleaning and maintenance
Your machine will advise you when to perform cleaning and maintenance.
Regular cleaning and maintenance keeps your machine in top condition and
ensures good-tasting coffee for a long time with a steady coffee flow.
Consult the table below for a detailed description of when and how to clean
all detachable parts of the machine. You can find more detailed information
and video instructions on www.saeco.com/care. See figure C for an overview of
which parts can be cleaned in the dishwasher.
Item
When to clean
How to find in the control panel/
AquaClean filter
When the machine asks you or
every three months.
STATUS->CLEANING->AQUACLEAN. Follow the
steps to activate the AquaClean filter.
What to do
17
Item
When to clean
How to find in the control panel/
What to do
The machine does not automatically detect that a filter has been placed in the water tank. Therefore you
need to activate each new AquaClean filter that you install in the 'Status' menu.
Your machine has to be completely limescale-free before you start using the AquaClean filter.
Replace the AquaClean filter at least every 3 months, even if the machine does not yet indicate that
replacement is required.
Brew group
Weekly
STATUS -> PERFORMANCE ->BREW GROUP
CLEAN. Follow the steps to remove and clean
the brew group.
When you remove the brew group from the machine, make sure to empty the drip tray and the coffee
grounds container.
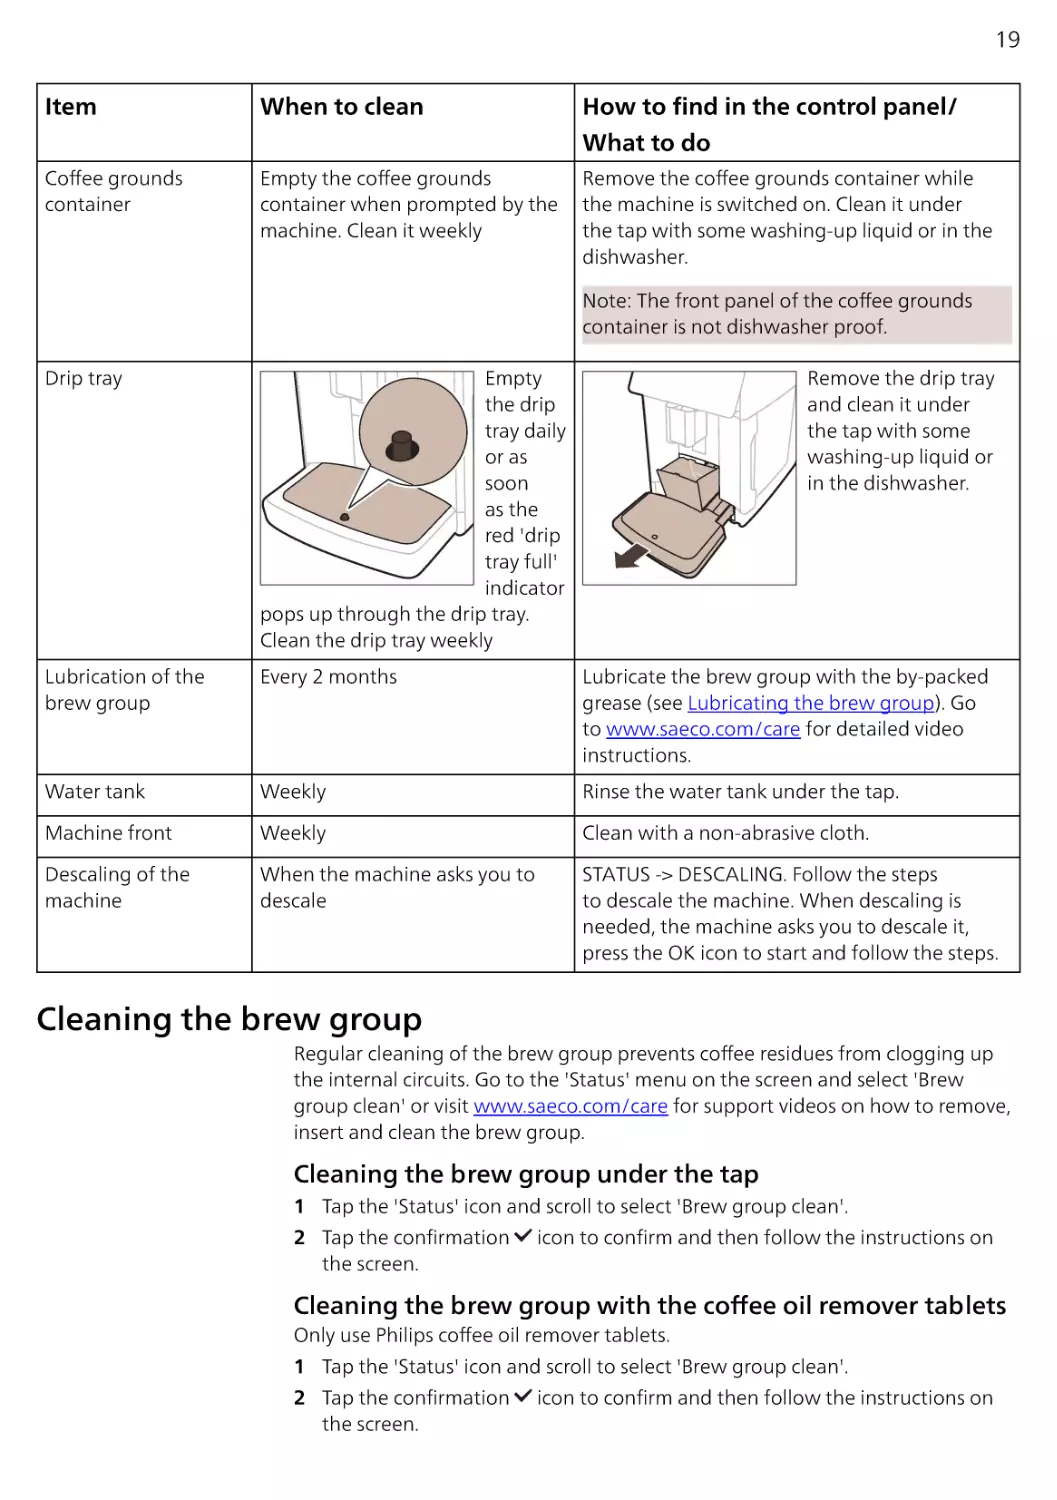
Before you slide the brew group back into the machine, make sure it is in the
correct position.The arrow on the yellow cylinder on the side of the brew group
has to be aligned with the black arrow and N.
Milk system/internal
cappuccinatore
Monthly
STATUS -> PERFORMANCE ->COFFEE OIL
REMOVAL. Follow the steps of the self-cleaning
process to automatically remove coffee oil
residues from the brew group.
After every day of use
STATUS -> HYGIESTEAM. Follow the steps of the
self-cleaning process to clean the milk system.
Wipe the outside of the metal milk tube with a
damp cloth before placing it into the milk tube
holder.
Weekly
Remove and disassemble the internal
cappuccinatore. Rinse all parts under the tap
with some washing-up liquid.
Monthly
STATUS -> HYGIESTEAM -> DEEP MILK CLEAN.
Follow the steps of the self-cleaning process to
clean the milk system.
18
Item
When to clean
Milk container
Weekly
HygieSteam container Weekly or when the machine
(milk tube holder)
reminds you
Pre-ground coffee
compartment
Check the pre-ground coffee
compartment weekly to see if it
is clogged
How to find in the control panel/
What to do
Disassemble the milk
container and push
out the ball using the
pin of the milk tube.
Clean all parts of the
milk container under
the tap or in the
dishwasher.
Remove the
HygieSteam container
from the machine and
remove the
HygieSteam cover.
Clean the HygieSteam
container and cover
under the tap or in the
dishwasher. Let the
container and cover
air-dry and place them
back into the machine.
Unplug the machine
and remove the brew
group. Open the lid
of the pre-ground
coffee compartment
and insert the spoon
handle into it. Move
the handle up and
down until the
clogged ground coffee falls down. Go
to www.saeco.com/care for detailed video
instructions.
19
Item
When to clean
How to find in the control panel/
Coffee grounds
container
Empty the coffee grounds
container when prompted by the
machine. Clean it weekly
What to do
Remove the coffee grounds container while
the machine is switched on. Clean it under
the tap with some washing-up liquid or in the
dishwasher.
Note: The front panel of the coffee grounds
container is not dishwasher proof.
Drip tray
Empty
the drip
tray daily
or as
soon
as the
red 'drip
tray full'
indicator
pops up through the drip tray.
Clean the drip tray weekly
Remove the drip tray
and clean it under
the tap with some
washing-up liquid or
in the dishwasher.
Lubrication of the
brew group
Every 2 months
Lubricate the brew group with the by-packed
grease (see Lubricating the brew group). Go
to www.saeco.com/care for detailed video
instructions.
Water tank
Weekly
Rinse the water tank under the tap.
Machine front
Weekly
Clean with a non-abrasive cloth.
Descaling of the
machine
When the machine asks you to
descale
STATUS -> DESCALING. Follow the steps
to descale the machine. When descaling is
needed, the machine asks you to descale it,
press the OK icon to start and follow the steps.
Cleaning the brew group
Regular cleaning of the brew group prevents coffee residues from clogging up
the internal circuits. Go to the 'Status' menu on the screen and select 'Brew
group clean' or visit www.saeco.com/care for support videos on how to remove,
insert and clean the brew group.
Cleaning the brew group under the tap
1 Tap the 'Status' icon and scroll to select 'Brew group clean'.
2 Tap the confirmation
the screen.
icon to confirm and then follow the instructions on
Cleaning the brew group with the coffee oil remover tablets
Only use Philips coffee oil remover tablets.
1 Tap the 'Status' icon and scroll to select 'Brew group clean'.
2 Tap the confirmation
the screen.
icon to confirm and then follow the instructions on
20
Lubricating the brew group
To improve your machine's performance, we suggest that you lubricate the
brew group every 2 months, to ensure that the moving parts continue to move
smoothly.
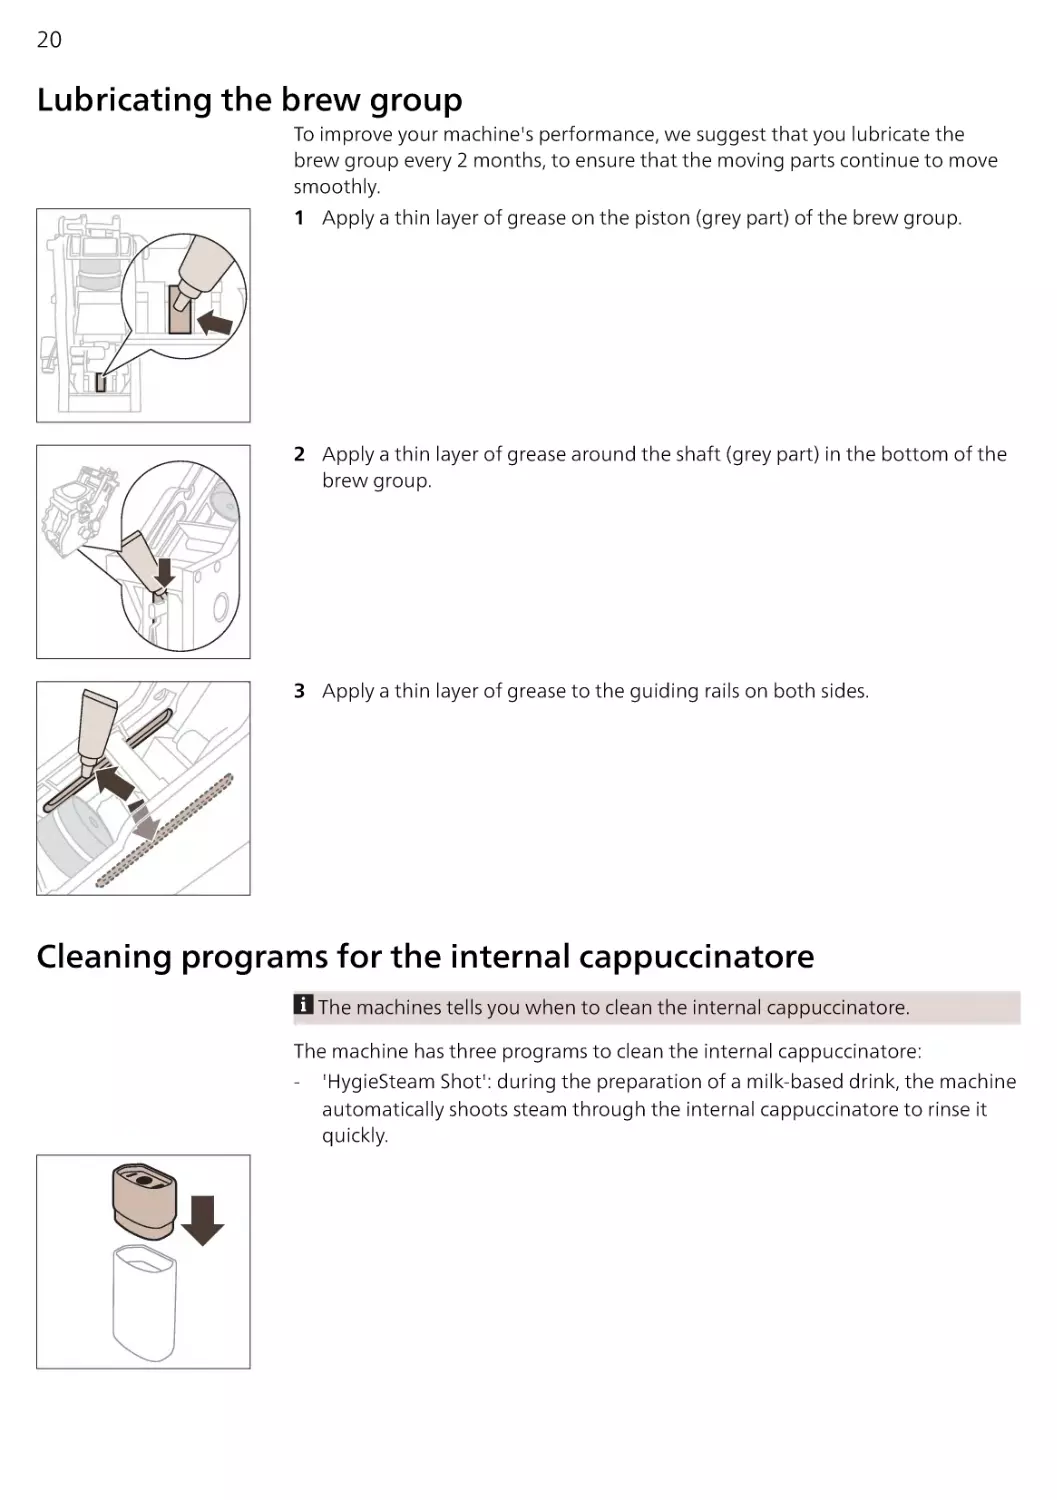
1 Apply a thin layer of grease on the piston (grey part) of the brew group.
2 Apply a thin layer of grease around the shaft (grey part) in the bottom of the
brew group.
3 Apply a thin layer of grease to the guiding rails on both sides.
Cleaning programs for the internal cappuccinatore
The machines tells you when to clean the internal cappuccinatore.
The machine has three programs to clean the internal cappuccinatore:
- 'HygieSteam Shot': during the preparation of a milk-based drink, the machine
automatically shoots steam through the internal cappuccinatore to rinse it
quickly.
21
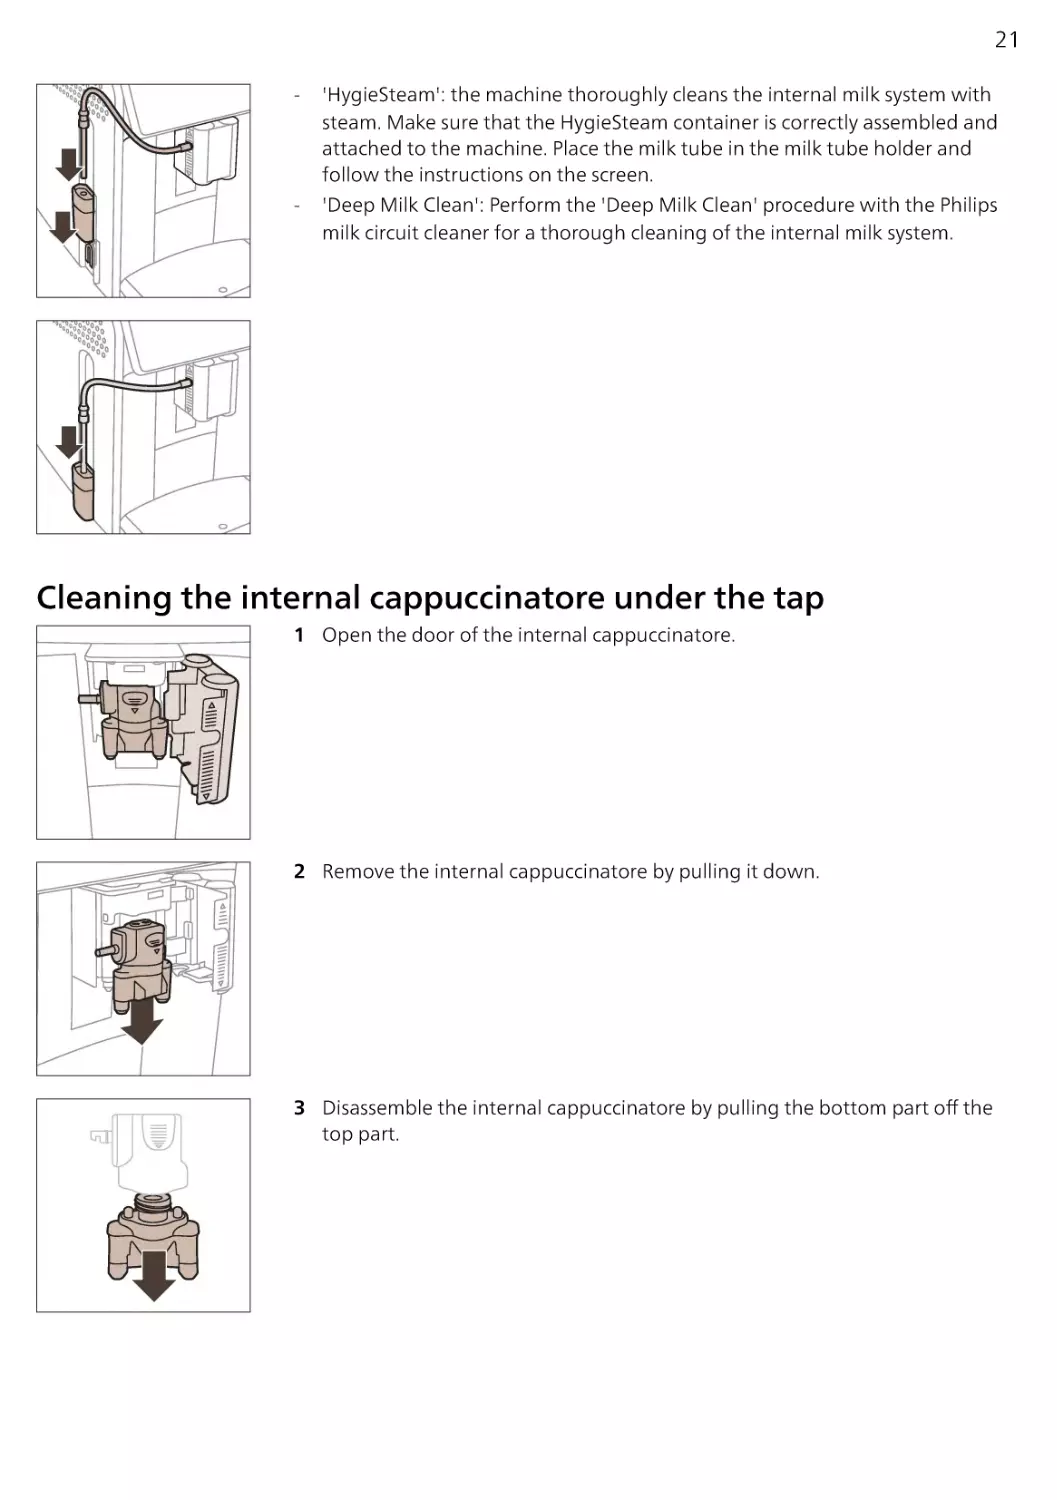
-
-
'HygieSteam': the machine thoroughly cleans the internal milk system with
steam. Make sure that the HygieSteam container is correctly assembled and
attached to the machine. Place the milk tube in the milk tube holder and
follow the instructions on the screen.
'Deep Milk Clean': Perform the 'Deep Milk Clean' procedure with the Philips
milk circuit cleaner for a thorough cleaning of the internal milk system.
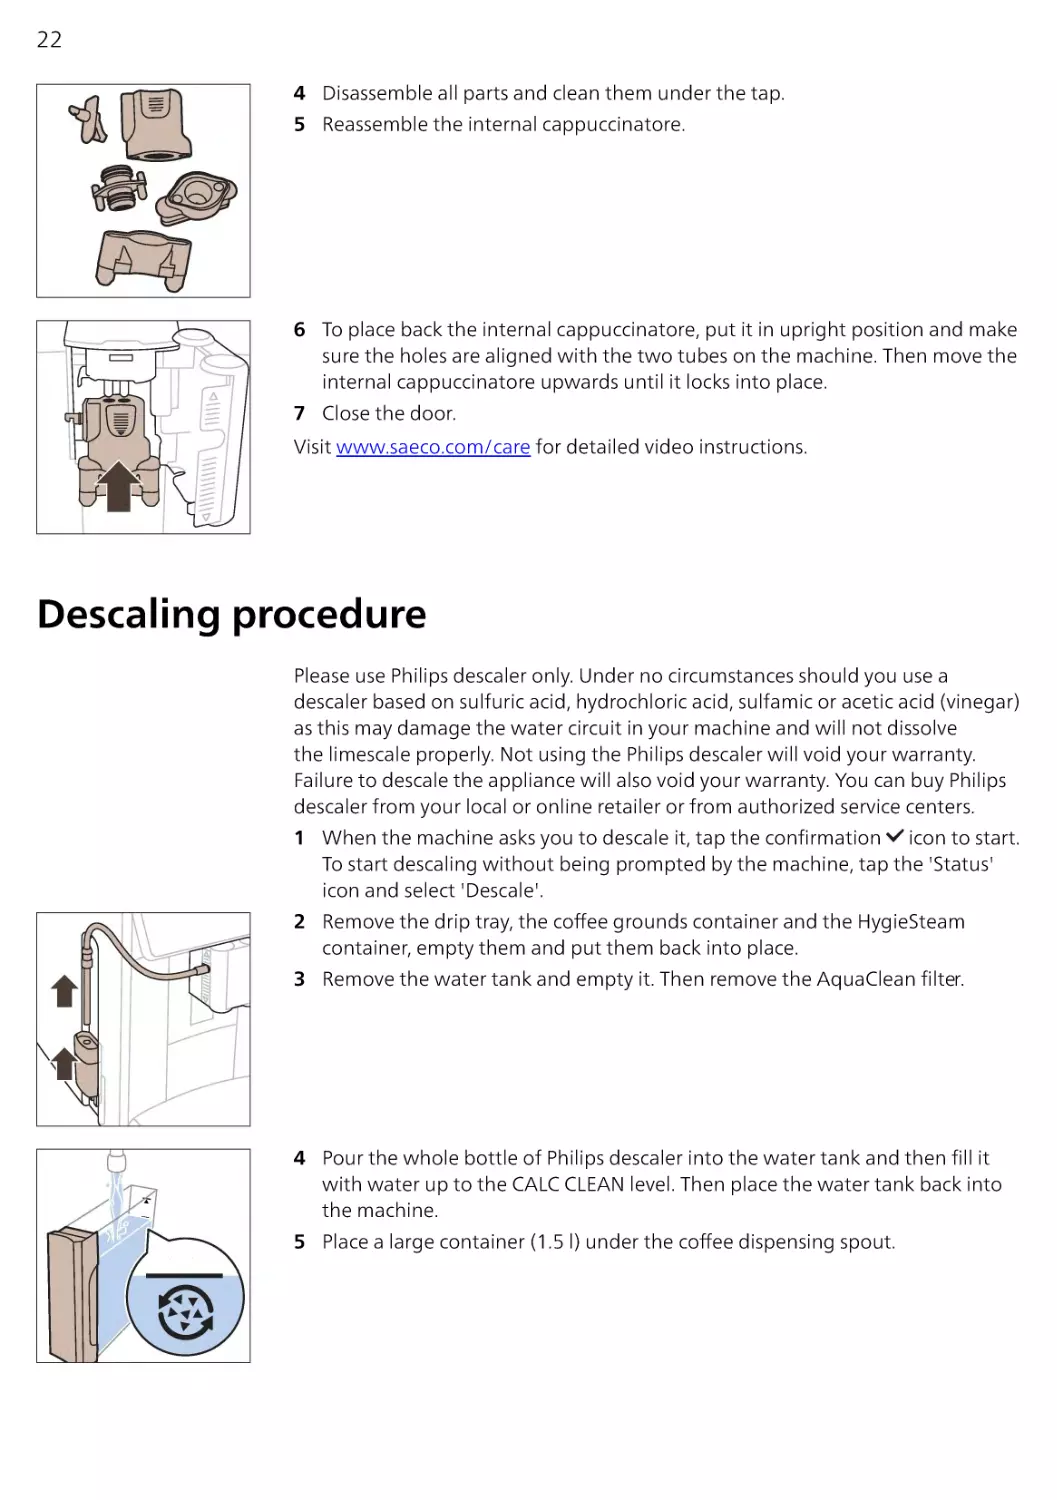
Cleaning the internal cappuccinatore under the tap
1 Open the door of the internal cappuccinatore.
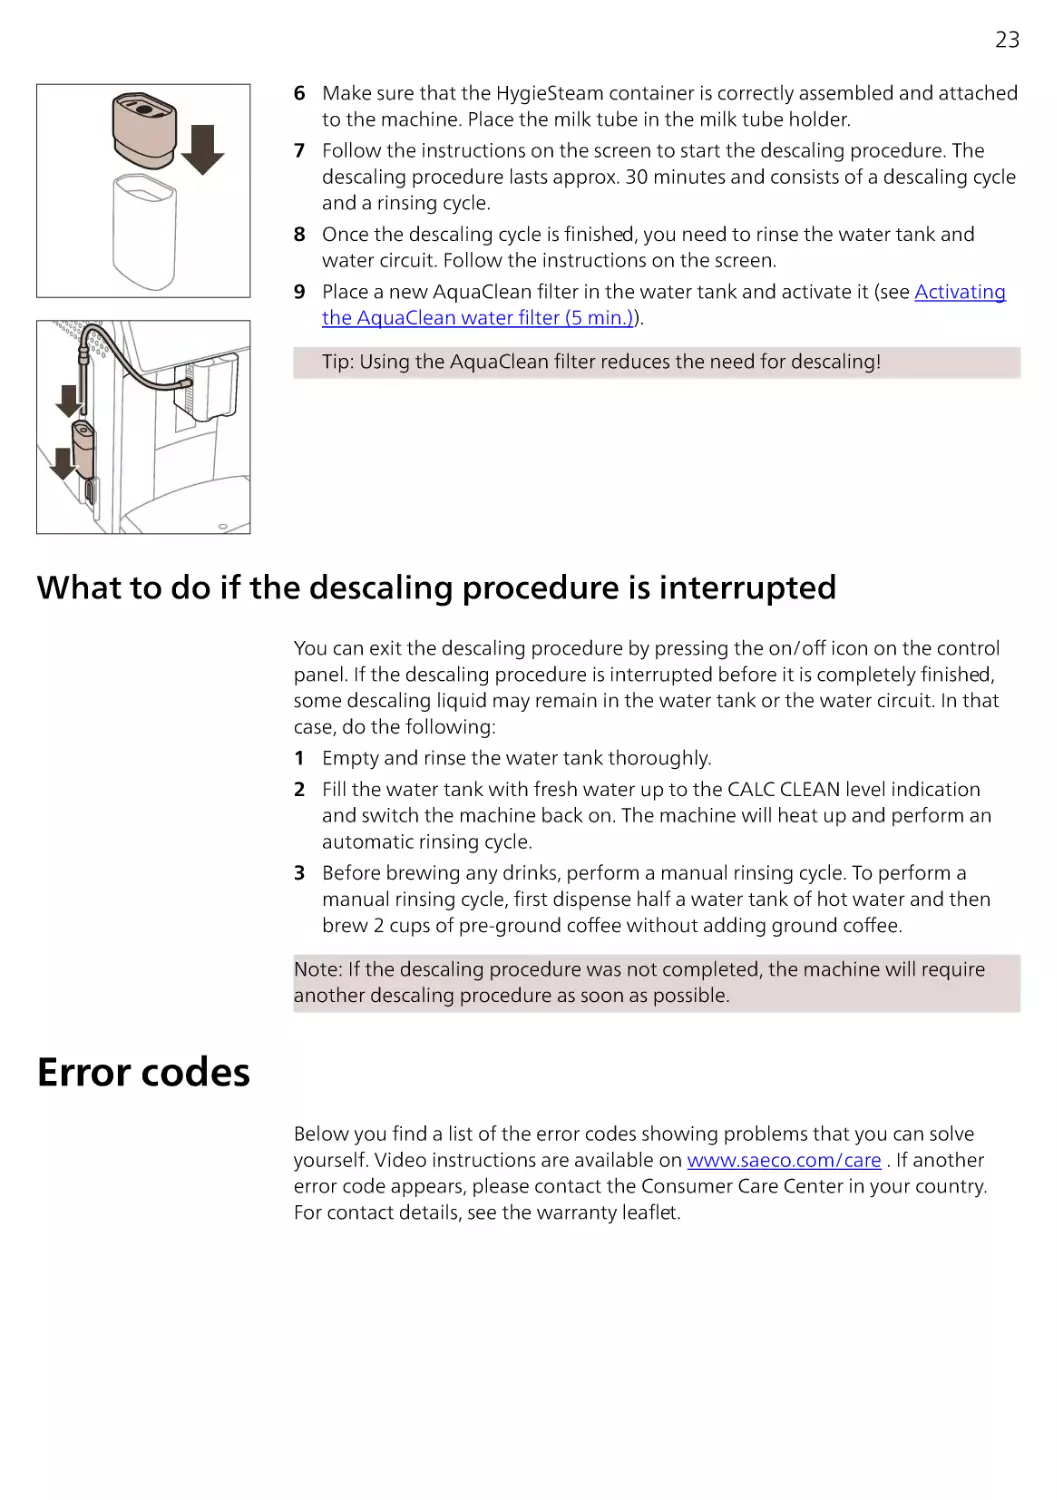
2 Remove the internal cappuccinatore by pulling it down.
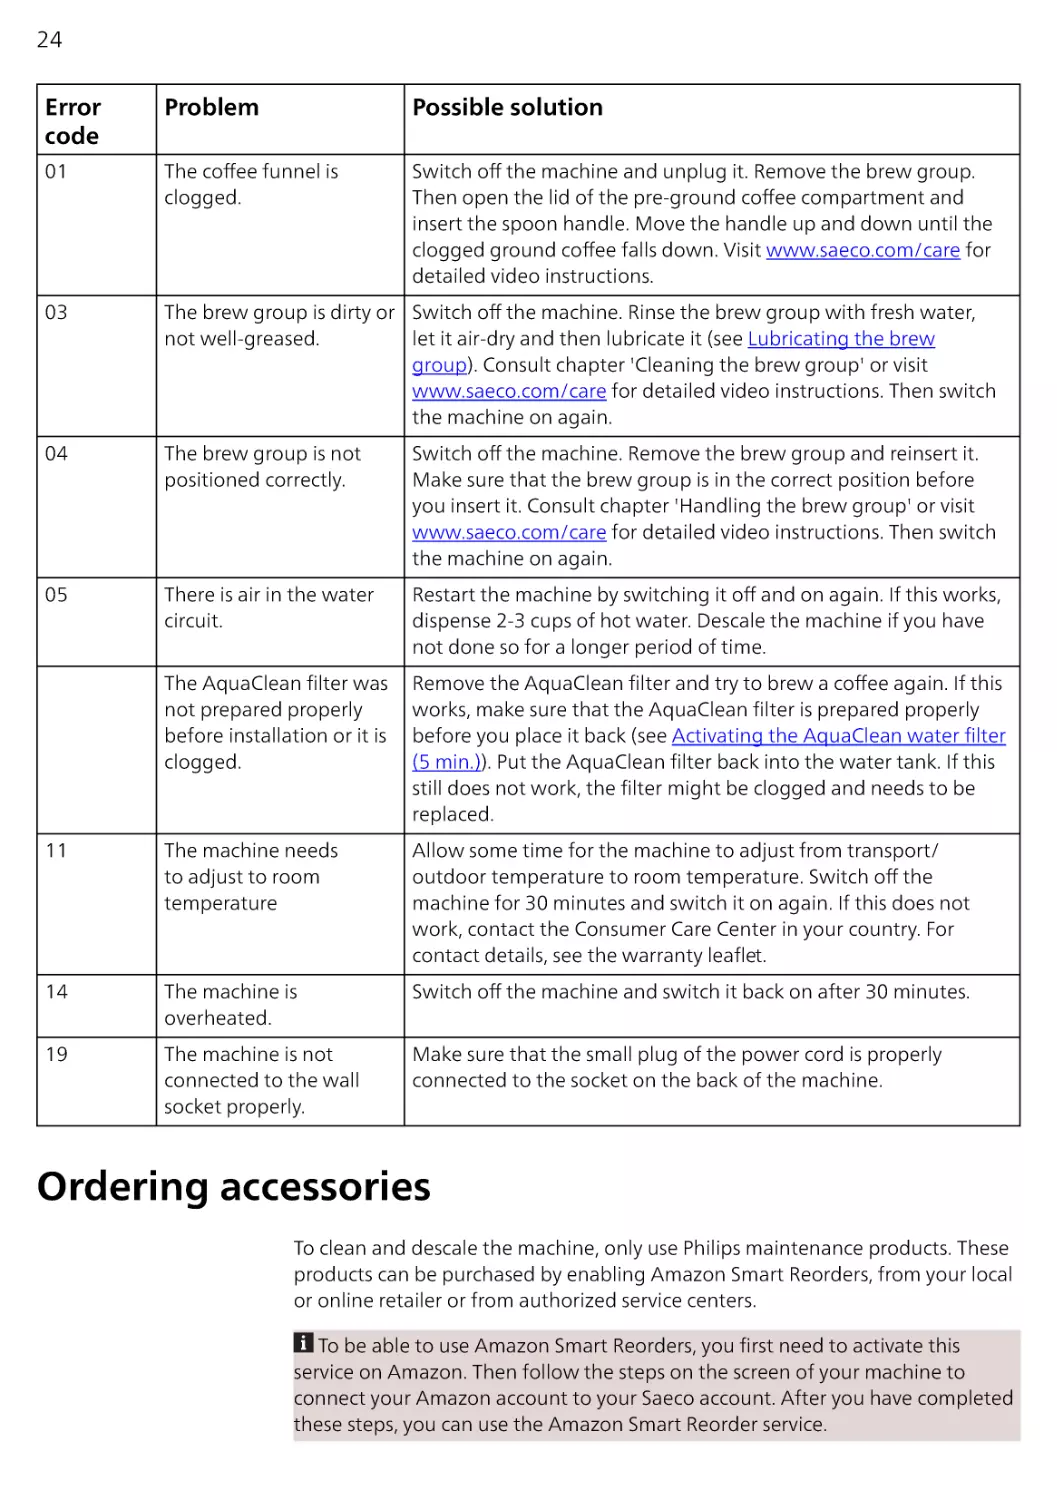
3 Disassemble the internal cappuccinatore by pulling the bottom part off the
top part.
22
4 Disassemble all parts and clean them under the tap.
5 Reassemble the internal cappuccinatore.
6 To place back the internal cappuccinatore, put it in upright position and make
sure the holes are aligned with the two tubes on the machine. Then move the
internal cappuccinatore upwards until it locks into place.
7 Close the door.
Visit www.saeco.com/care for detailed video instructions.
Descaling procedure
Please use Philips descaler only. Under no circumstances should you use a
descaler based on sulfuric acid, hydrochloric acid, sulfamic or acetic acid (vinegar)
as this may damage the water circuit in your machine and will not dissolve
the limescale properly. Not using the Philips descaler will void your warranty.
Failure to descale the appliance will also void your warranty. You can buy Philips
descaler from your local or online retailer or from authorized service centers.
1 When the machine asks you to descale it, tap the confirmation icon to start.
To start descaling without being prompted by the machine, tap the 'Status'
icon and select 'Descale'.
2 Remove the drip tray, the coffee grounds container and the HygieSteam
container, empty them and put them back into place.
3 Remove the water tank and empty it. Then remove the AquaClean filter.
4 Pour the whole bottle of Philips descaler into the water tank and then fill it
with water up to the CALC CLEAN level. Then place the water tank back into
the machine.
5 Place a large container (1.5 l) under the coffee dispensing spout.
23
6 Make sure that the HygieSteam container is correctly assembled and attached
to the machine. Place the milk tube in the milk tube holder.
7 Follow the instructions on the screen to start the descaling procedure. The
descaling procedure lasts approx. 30 minutes and consists of a descaling cycle
and a rinsing cycle.
8 Once the descaling cycle is finished, you need to rinse the water tank and
water circuit. Follow the instructions on the screen.
9 Place a new AquaClean filter in the water tank and activate it (see Activating
the AquaClean water filter (5 min.)).
Tip: Using the AquaClean filter reduces the need for descaling!
What to do if the descaling procedure is interrupted
You can exit the descaling procedure by pressing the on/off icon on the control
panel. If the descaling procedure is interrupted before it is completely finished,
some descaling liquid may remain in the water tank or the water circuit. In that
case, do the following:
1 Empty and rinse the water tank thoroughly.
2 Fill the water tank with fresh water up to the CALC CLEAN level indication
and switch the machine back on. The machine will heat up and perform an
automatic rinsing cycle.
3 Before brewing any drinks, perform a manual rinsing cycle. To perform a
manual rinsing cycle, first dispense half a water tank of hot water and then
brew 2 cups of pre-ground coffee without adding ground coffee.
Note: If the descaling procedure was not completed, the machine will require
another descaling procedure as soon as possible.
Error codes
Below you find a list of the error codes showing problems that you can solve
yourself. Video instructions are available on www.saeco.com/care . If another
error code appears, please contact the Consumer Care Center in your country.
For contact details, see the warranty leaflet.
24
Error
code
Problem
Possible solution
01
The coffee funnel is
clogged.
Switch off the machine and unplug it. Remove the brew group.
Then open the lid of the pre-ground coffee compartment and
insert the spoon handle. Move the handle up and down until the
clogged ground coffee falls down. Visit www.saeco.com/care for
detailed video instructions.
03
The brew group is dirty or Switch off the machine. Rinse the brew group with fresh water,
not well-greased.
let it air-dry and then lubricate it (see Lubricating the brew
group). Consult chapter 'Cleaning the brew group' or visit
www.saeco.com/care for detailed video instructions. Then switch
the machine on again.
04
The brew group is not
positioned correctly.
Switch off the machine. Remove the brew group and reinsert it.
Make sure that the brew group is in the correct position before
you insert it. Consult chapter 'Handling the brew group' or visit
www.saeco.com/care for detailed video instructions. Then switch
the machine on again.
05
There is air in the water
circuit.
Restart the machine by switching it off and on again. If this works,
dispense 2-3 cups of hot water. Descale the machine if you have
not done so for a longer period of time.
The AquaClean filter was
not prepared properly
before installation or it is
clogged.
Remove the AquaClean filter and try to brew a coffee again. If this
works, make sure that the AquaClean filter is prepared properly
before you place it back (see Activating the AquaClean water filter
(5 min.)). Put the AquaClean filter back into the water tank. If this
still does not work, the filter might be clogged and needs to be
replaced.
11
The machine needs
to adjust to room
temperature
Allow some time for the machine to adjust from transport/
outdoor temperature to room temperature. Switch off the
machine for 30 minutes and switch it on again. If this does not
work, contact the Consumer Care Center in your country. For
contact details, see the warranty leaflet.
14
The machine is
overheated.
Switch off the machine and switch it back on after 30 minutes.
19
The machine is not
connected to the wall
socket properly.
Make sure that the small plug of the power cord is properly
connected to the socket on the back of the machine.
Ordering accessories
To clean and descale the machine, only use Philips maintenance products. These
products can be purchased by enabling Amazon Smart Reorders, from your local
or online retailer or from authorized service centers.
To be able to use Amazon Smart Reorders, you first need to activate this
service on Amazon. Then follow the steps on the screen of your machine to
connect your Amazon account to your Saeco account. After you have completed
these steps, you can use the Amazon Smart Reorder service.
25
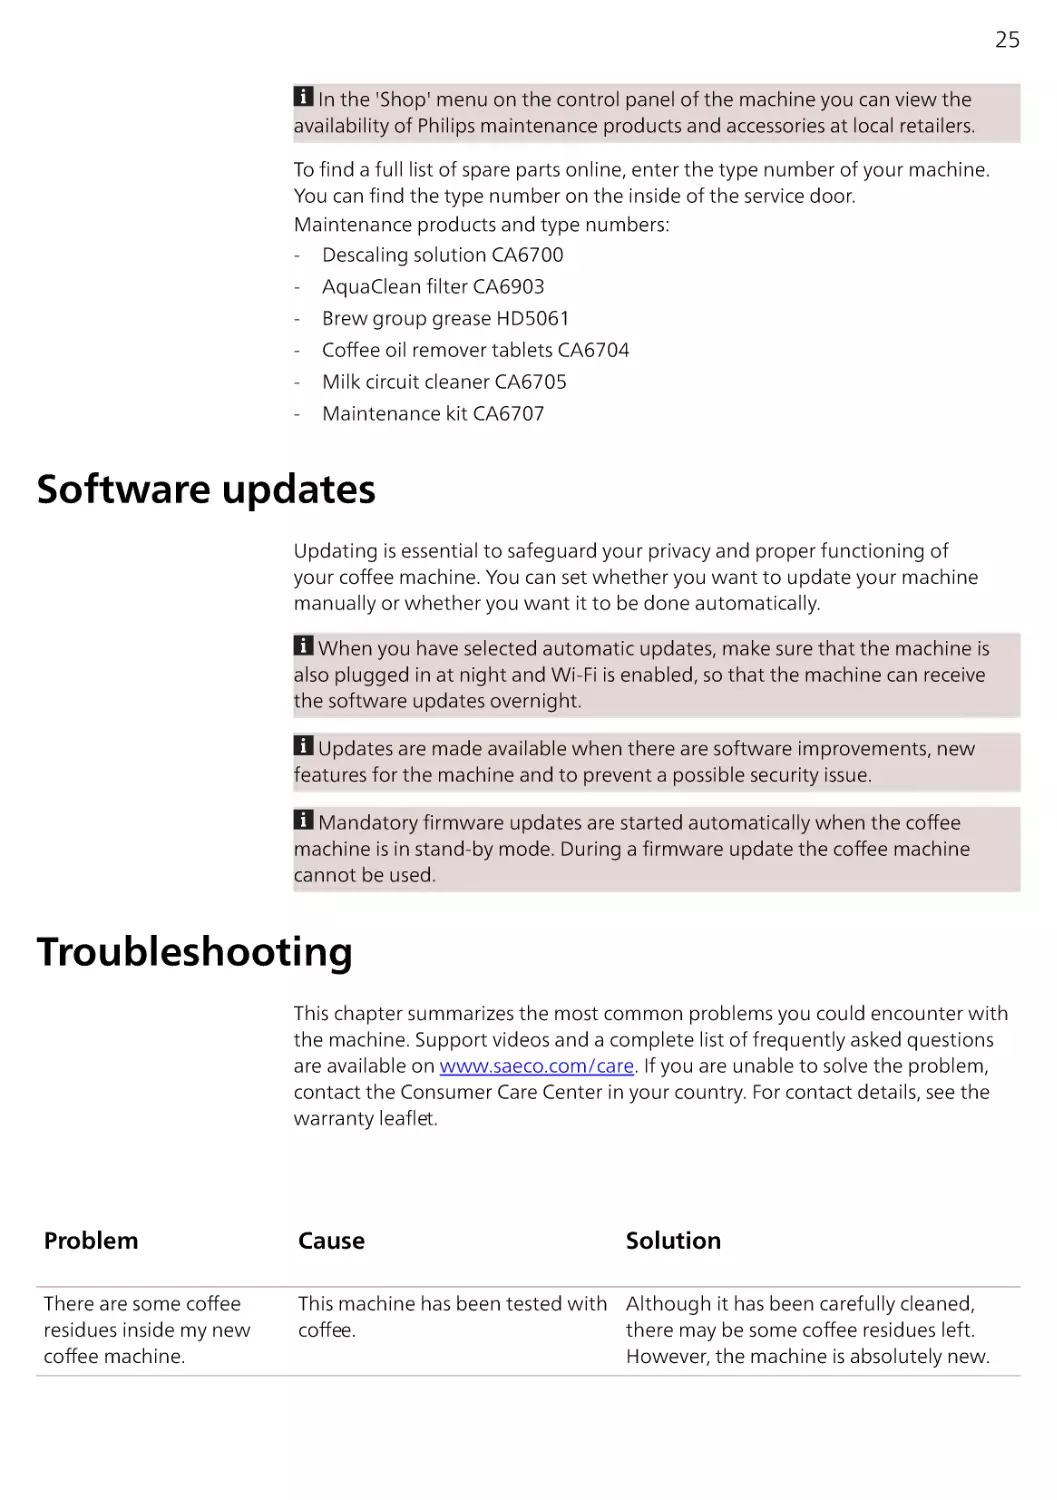
In the 'Shop' menu on the control panel of the machine you can view the
availability of Philips maintenance products and accessories at local retailers.
To find a full list of spare parts online, enter the type number of your machine.
You can find the type number on the inside of the service door.
Maintenance products and type numbers:
-
Descaling solution CA6700
-
Brew group grease HD5061
-
AquaClean filter CA6903
Coffee oil remover tablets CA6704
Milk circuit cleaner CA6705
Maintenance kit CA6707
Software updates
Updating is essential to safeguard your privacy and proper functioning of
your coffee machine. You can set whether you want to update your machine
manually or whether you want it to be done automatically.
When you have selected automatic updates, make sure that the machine is
also plugged in at night and Wi-Fi is enabled, so that the machine can receive
the software updates overnight.
Updates are made available when there are software improvements, new
features for the machine and to prevent a possible security issue.
Mandatory firmware updates are started automatically when the coffee
machine is in stand-by mode. During a firmware update the coffee machine
cannot be used.
Troubleshooting
This chapter summarizes the most common problems you could encounter with
the machine. Support videos and a complete list of frequently asked questions
are available on www.saeco.com/care. If you are unable to solve the problem,
contact the Consumer Care Center in your country. For contact details, see the
warranty leaflet.
Problem
Cause
Solution
There are some coffee
residues inside my new
coffee machine.
This machine has been tested with Although it has been carefully cleaned,
coffee.
there may be some coffee residues left.
However, the machine is absolutely new.
26
Problem
Cause
Solution
The machine is in DEMO
mode.
You pressed the standby icon for
more than 8 seconds.
Switch the machine on and off by
unplugging the power cord and then
plugging it in again.
The drip tray fills up
quickly / there is always
some water in the drip
tray.
This is normal. The machine uses
water to rinse the internal circuit
and brew group. Some water
flows through the internal system
directly into the drip tray.
Empty the drip tray daily or as soon as
the red 'drip tray full' indicator pops up
through the drip tray cover. Tip: place a
cup under the dispensing spout to collect
rinsing water that comes out of it.
The 'empty coffee grounds You emptied the coffee grounds
container' icon remains
container while the machine was
on.
unplugged from the wall socket,
or you placed it back too fast.
Remove the coffee grounds container, wait
at least 5 seconds and then insert it again.
The machine prompts to
empty the coffee grounds
container even though
the container is not full.
Always wait approx. 5 seconds when you
place back the coffee grounds container.
In this way, the coffee pucks counter will
be reset to zero and the number of coffee
pucks is counted correctly.
The machine did not reset the
counter the last time you emptied
the coffee grounds container.
The coffee grounds
You removed the drip tray without
container is too full and
emptying the coffee grounds
the 'empty coffee grounds container.
container' icon did not
appear on the display.
When you remove the drip tray, also empty
the coffee grounds container even if it
contains only a few coffee pucks. This
ensures that the coffee pucks counter is
reset to zero and that the number of coffee
pucks is counted correctly.
I cannot remove the brew
group.
The brew group is not in the
correct position.
Reset the machine in the following way:
close the service door and place back the
water tank. Switch the machine off and
back on again and wait for the lights in the
drink icons to come on. Try to remove the
brew group again. See chapter 'Removing
and inserting the brew group' for step-bystep instructions.
I cannot insert the brew
group.
The brew group is not in the
correct position.
Reset the machine in the following way:
close the service door and place back the
water tank. Leave the brew group out.
Switch off the machine and unplug it. Wait
for 30 seconds and then plug the machine
back in, switch it on and wait for the lights
in the drink icons to come on. Then put
the brew group in the correct position and
reinsert it into the machine. See chapter
'Removing and inserting the brew group'
for step- by-step instructions.
The coffee is watery.
The brew group is dirty or needs to Remove the brew group, rinse it under
be lubricated.
the tap and leave it to dry. Then lubricate
the moving parts (see Lubricating the brew
group).
27
Problem
The coffee is not hot
enough.
Coffee does not come
out or coffee comes out
slowly.
Cause
Solution
The machine is performing its
self-adjustment procedure. This
procedure is started automatically
when you use the machine for the
first time, when you change to
another type of coffee beans or
after a long period of non-use.
Brew 5 cups of coffee initially to allow the
machine to complete its self-adjustment
procedure.
The grinder is set to a too coarse
setting.
Set the grinder to a finer (lower) setting.
Brew 2 to 3 drinks to be able to taste the
full difference.
The temperature is set too low.
Set the
temperature to
the maximum
setting.
A cold cup reduces the
temperature of the drink.
Preheat the cups by rinsing them with hot
water.
Adding milk reduces the
temperature of the drink.
Regardless of whether you add hot or
cold milk, adding milk always reduces the
temperature of the coffee. Preheat the
cups by rinsing them with hot water.
The AquaClean water filter
was not prepared properly for
installation.
Remove the AquaClean filter and dispense
some hot water. If this works, the
AquaClean filter was not installed properly.
Reinstall and activate the AquaClean filter
and follow all steps in chapter 'AquaClean
water filter'.
After a long period of non-use, you need
to prepare the AquaClean water filter for
use again and dispense 2-3 cups of hot
water.
The AquaClean water filter is
clogged.
Replace the AquaClean water filter every 3
months. A filter that is older than 3 months
can become clogged.
The grinder is set to a too fine
setting.
Set the grinder to a coarser (higher)
setting. Note that this will impact the
coffee taste.
The brew group is dirty.
Remove the brew group and rinse it under
the tap (see Cleaning the brew group
under the tap).
28
Problem
The milk does not froth.
The milk is splashing.
Cause
Solution
The coffee dispensing spout is
dirty.
Clean the coffee dispensing spout and its
holes with a pipe cleaner or needle.
The pre-ground coffee
compartment is clogged
Switch off the
machine and
remove the brew
group. Open the
lid of the preground coffee
compartment
and insert the
spoon handle
into it. Move the handle up and down until
the clogged ground coffee falls down.
The machine circuit is blocked by
limescale.
Descale the machine with Philips descaler
(see Descaling procedure). Always descale
when the machine prompts you.
The internal cappuccinatore is
dirty or not inserted correctly.
Clean the internal cappuccinatore and
make sure that you position and insert
it correctly (see Cleaning the internal
cappuccinatore under the tap).
The type of milk used is not
suitable for frothing.
Different types of milk result in different
amounts of froth and different froth
qualities.
The milk you use is not cold
enough.
Make sure you use cold milk coming
directly from the fridge.
The flexible milk tube is not
connected properly.
Open the door of
the coffee
dispensing spout
and check if the
flexible milk tube
is fully connected
to the
cappuccinatore.
Note that the
cappuccinatore
and milk tubes
may be hot. Let
the
cappuccinatore
and the tubes
cool down before
you touch them.
29
Problem
Cause
Solution
The cappuccinatore and milk
tubes are not clean.
Remove and disassemble the internal
cappuccinatore (see Cleaning the internal
cappuccinatore under the tap). Rinse
all parts under the tap. For thorough
cleaning, use Philips milk circuit
cleaner and perform the Deep Milk
Clean procedure via the 'Status' and
'Hygiesteam' menu. Note that if the parts
have been cleaned in the dishwasher,
they may have become clogged by food
particles or detergent residues. A visual
check that they are not obstructed is also
recommended.
We advise you to perform the HygieSteam
program every day: 1) Press 'Status' on the
control panel. 2) Select 'HygieSteam'. 3)
Then confirm all steps on the display.
The machine seems to be
leaking.
The milk tubes are clogged.
Always store the milk container without
the milk tubes in the refrigerator. Leftover
milk could accumulate inside the milk
tubes and block the flow of milk through
the tubes. Rinse the milk tubes before
storage.
The machine uses water to rinse
the internal circuit and brew
group. This water flows through
the internal system directly into
the drip tray. This is normal.
Empty the drip tray every day or as soon
as the 'drip tray full' indicator pops up
through the drip tray cover. Tip: Place a
cup under the dispensing spout to collect
rinsing water and reduce the amount of
water in the drip tray.
The drip tray is too full and has
overflowed which makes it look
like the machine is leaking.
Empty the drip tray every day or as soon
as the 'drip tray full' indicator pops up
through the drip tray cover.
The water tank is not fully
Make sure the water tank is in the correct
inserted, some water is leaking out position: remove it and reinsert it into the
of the water tank and air is drawn machine as far as possible.
into the machine.
The brew group is dirty/clogged.
Rinse the brew group.
The machine is not placed on a
horizontal surface.
Place the machine on a horizontal surface
so that the drip tray does not overflow and
the 'drip tray full' indicator works properly.
30
Problem
Cause
Solution
I cannot activate the
AquaClean water filter
and the machine asks for
descaling.
The filter has not been installed or
replaced in time after the screen
showed the AquaClean reminder.
This means your machine is
not completely free of limescale
anymore.
Descale your machine first and then install
the AquaClean water filter.
The new water filter does
not fit.
You are trying to install another
filter than the AquaClean water
filter.
Only the AquaClean water filter fits into
the machine.
The rubber ring on the AquaClean
water filter is not in place.
Place back the rubber ring on the
AquaClean water filter.
It is normal that your machine
makes some noise during use.
If the machine starts to make a different
kind of noise, clean the brew group and
lubricate it (see Lubricating the brew
group).
The AquaClean water filter was
not prepared properly and air is
now drawn into the machine.
Remove the AquaClean water filter from
the water tank and prepare it for use
properly before you place it back. See
chapter 'AquaClean water filter' for stepby-step instructions.
The machine is making a
loud noise.
The water tank is not fully inserted Make sure the water tank is in the correct
and air is drawn into the machine. position: remove it and reinsert it by
pushing it into the machine as far as
possible.
When I try to connect
Your Wi-Fi name and password are Check your Wi-Fi name and password.
the machine to Wi-Fi for
not correct.
the first time, the machine
cannot connect to the WiFi network.
The machine is not able
to find the home Wi-Fi
network.
The coffee machine and the WiFi router are not within range of
each other.
Ensure that the coffee machine and the
Wi-Fi router are within range of each
other.or use a Wi-Fi repeater.
The Wi-Fi router is not working
properly.
Please make sure that the Wi-Fi router is
working properly and is connected to the
internet.
The machine is not within range of Make sure the machine is within range of
the router.
the router. You can also use a Wi-Fi signal
repeater.
The router your coffee machine is
trying to connect to is 5 GHz dualband and your coffee machine is
not trying to connect to a 2.4 GHz
network.
5 GHz networks are not
supported.Temporarily switch off the
5 GHz band in your router and try to
pair your coffee machine again to another
band of the same router (2.4 GHz). Switch
on your 5 GHz band again after successful
pairing
31
Problem
Cause
Solution
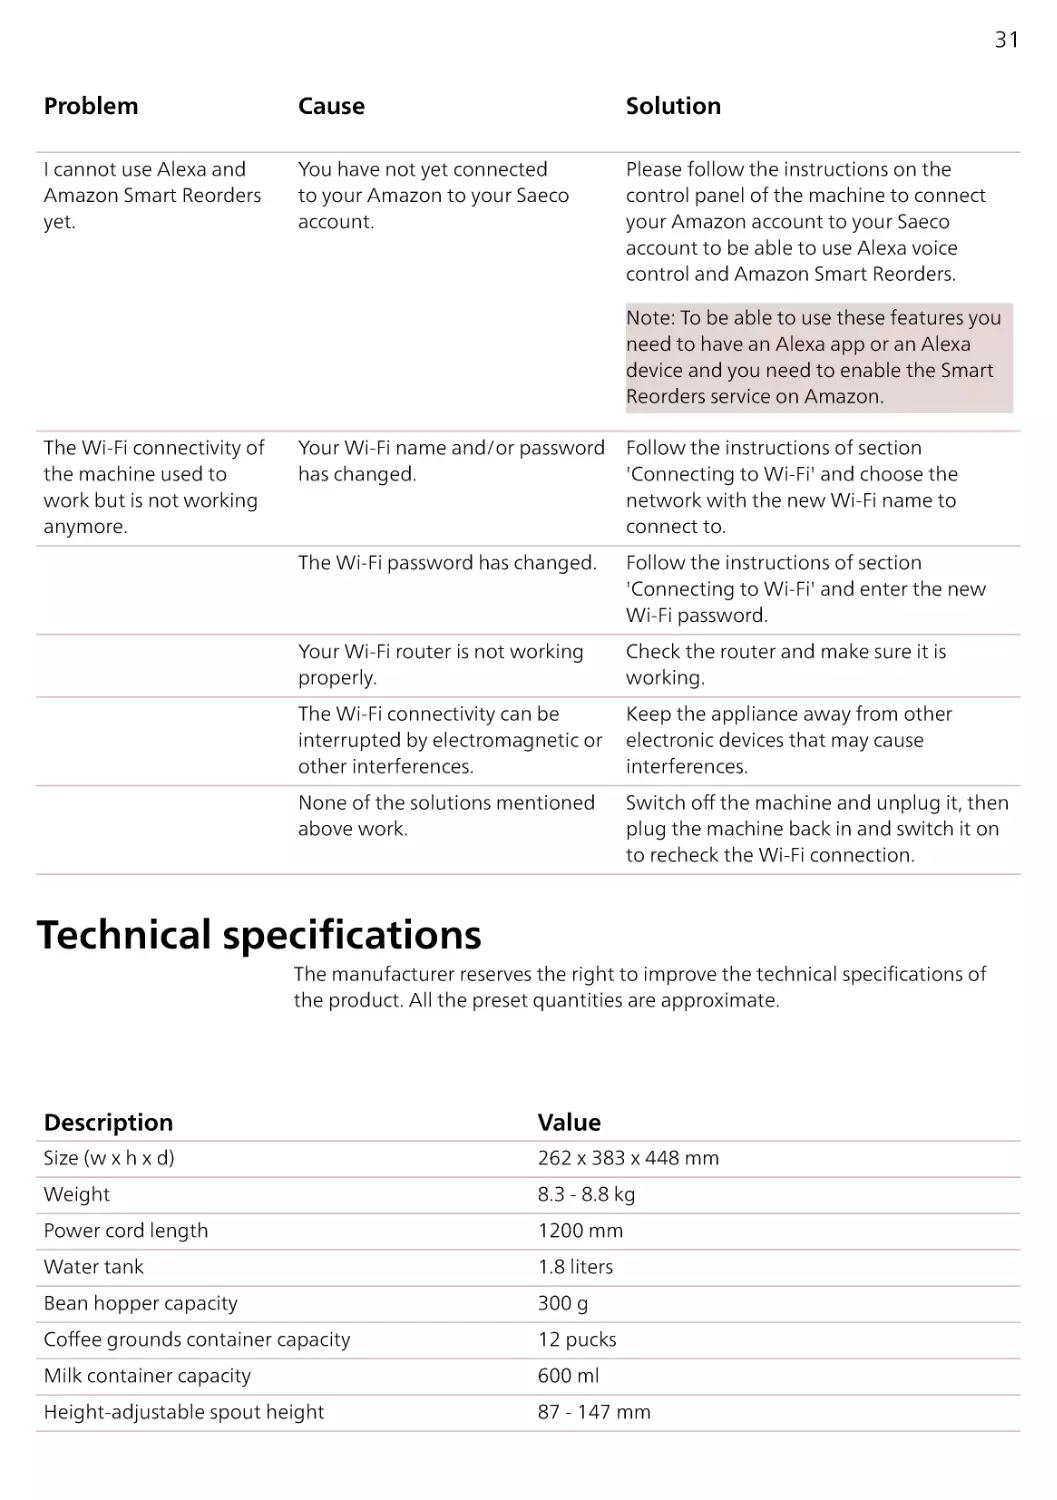
I cannot use Alexa and
Amazon Smart Reorders
yet.
You have not yet connected
to your Amazon to your Saeco
account.
Please follow the instructions on the
control panel of the machine to connect
your Amazon account to your Saeco
account to be able to use Alexa voice
control and Amazon Smart Reorders.
Note: To be able to use these features you
need to have an Alexa app or an Alexa
device and you need to enable the Smart
Reorders service on Amazon.
The Wi-Fi connectivity of
the machine used to
work but is not working
anymore.
Your Wi-Fi name and/or password
has changed.
Follow the instructions of section
'Connecting to Wi-Fi' and choose the
network with the new Wi-Fi name to
connect to.
The Wi-Fi password has changed.
Follow the instructions of section
'Connecting to Wi-Fi' and enter the new
Wi-Fi password.
Your Wi-Fi router is not working
properly.
Check the router and make sure it is
working.
The Wi-Fi connectivity can be
interrupted by electromagnetic or
other interferences.
Keep the appliance away from other
electronic devices that may cause
interferences.
None of the solutions mentioned
above work.
Switch off the machine and unplug it, then
plug the machine back in and switch it on
to recheck the Wi-Fi connection.
Technical specifications
The manufacturer reserves the right to improve the technical specifications of
the product. All the preset quantities are approximate.
Description
Value
Weight
8.3 - 8.8 kg
Power cord length
1200 mm
Water tank
1.8 liters
Bean hopper capacity
300 g
Coffee grounds container capacity
12 pucks
Milk container capacity
600 ml
Height-adjustable spout height
87 - 147 mm
Size (w x h x d)
262 x 383 x 448 mm
32
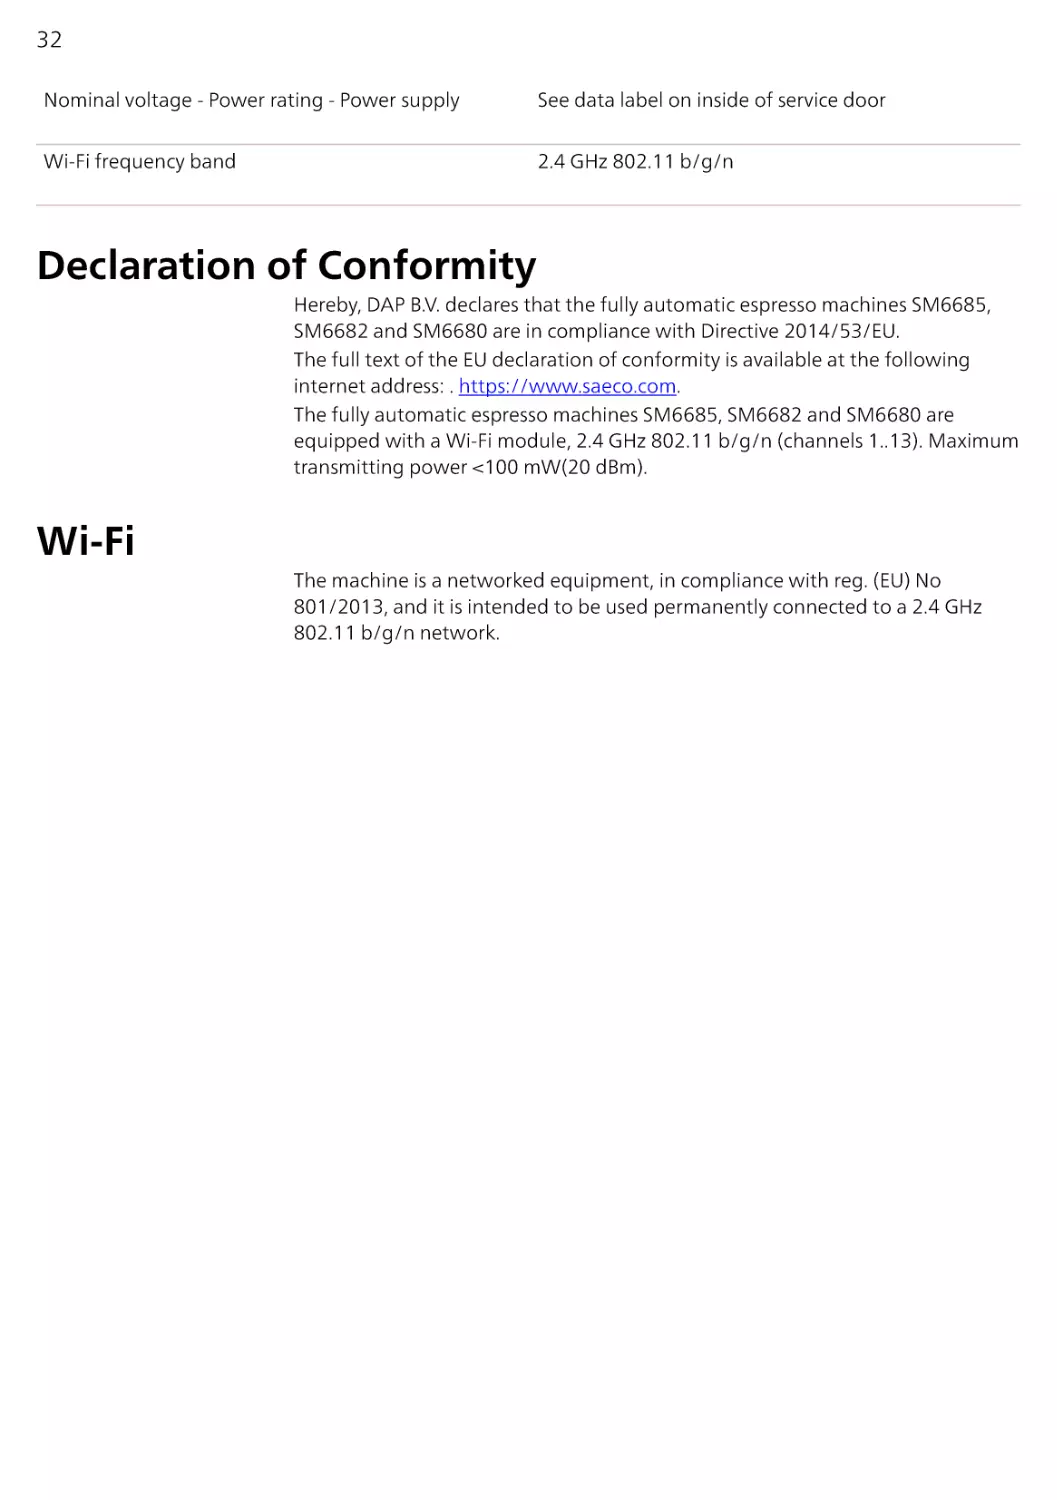
Nominal voltage - Power rating - Power supply
See data label on inside of service door
Wi-Fi frequency band
2.4 GHz 802.11 b/g/n
Declaration of Conformity
Hereby, DAP B.V. declares that the fully automatic espresso machines SM6685,
SM6682 and SM6680 are in compliance with Directive 2014/53/EU.
The full text of the EU declaration of conformity is available at the following
internet address: . https://www.saeco.com.
The fully automatic espresso machines SM6685, SM6682 and SM6680 are
equipped with a Wi-Fi module, 2.4 GHz 802.11 b/g/n (channels 1..13). Maximum
transmitting power <100 mW(20 dBm).
Wi-Fi
The machine is a networked equipment, in compliance with reg. (EU) No
801/2013, and it is intended to be used permanently connected to a 2.4 GHz
802.11 b/g/n network.