/


Author: Platt Daniel.
Tags: programming software computer science
ISBN: 978-1-4842-6170-5
Year: 2021


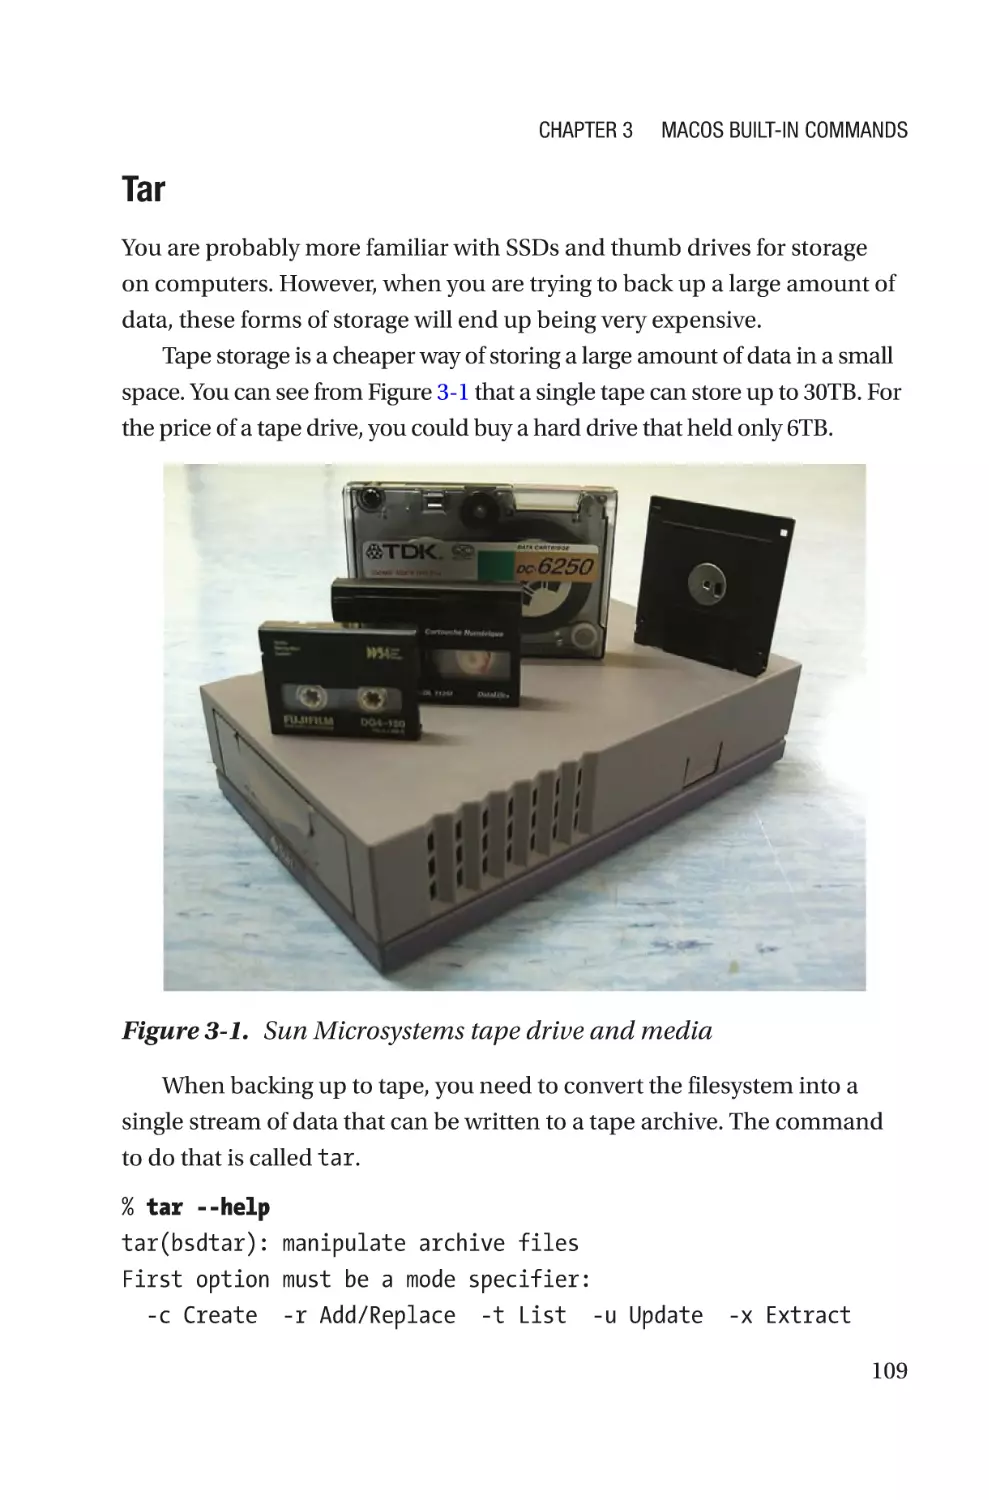
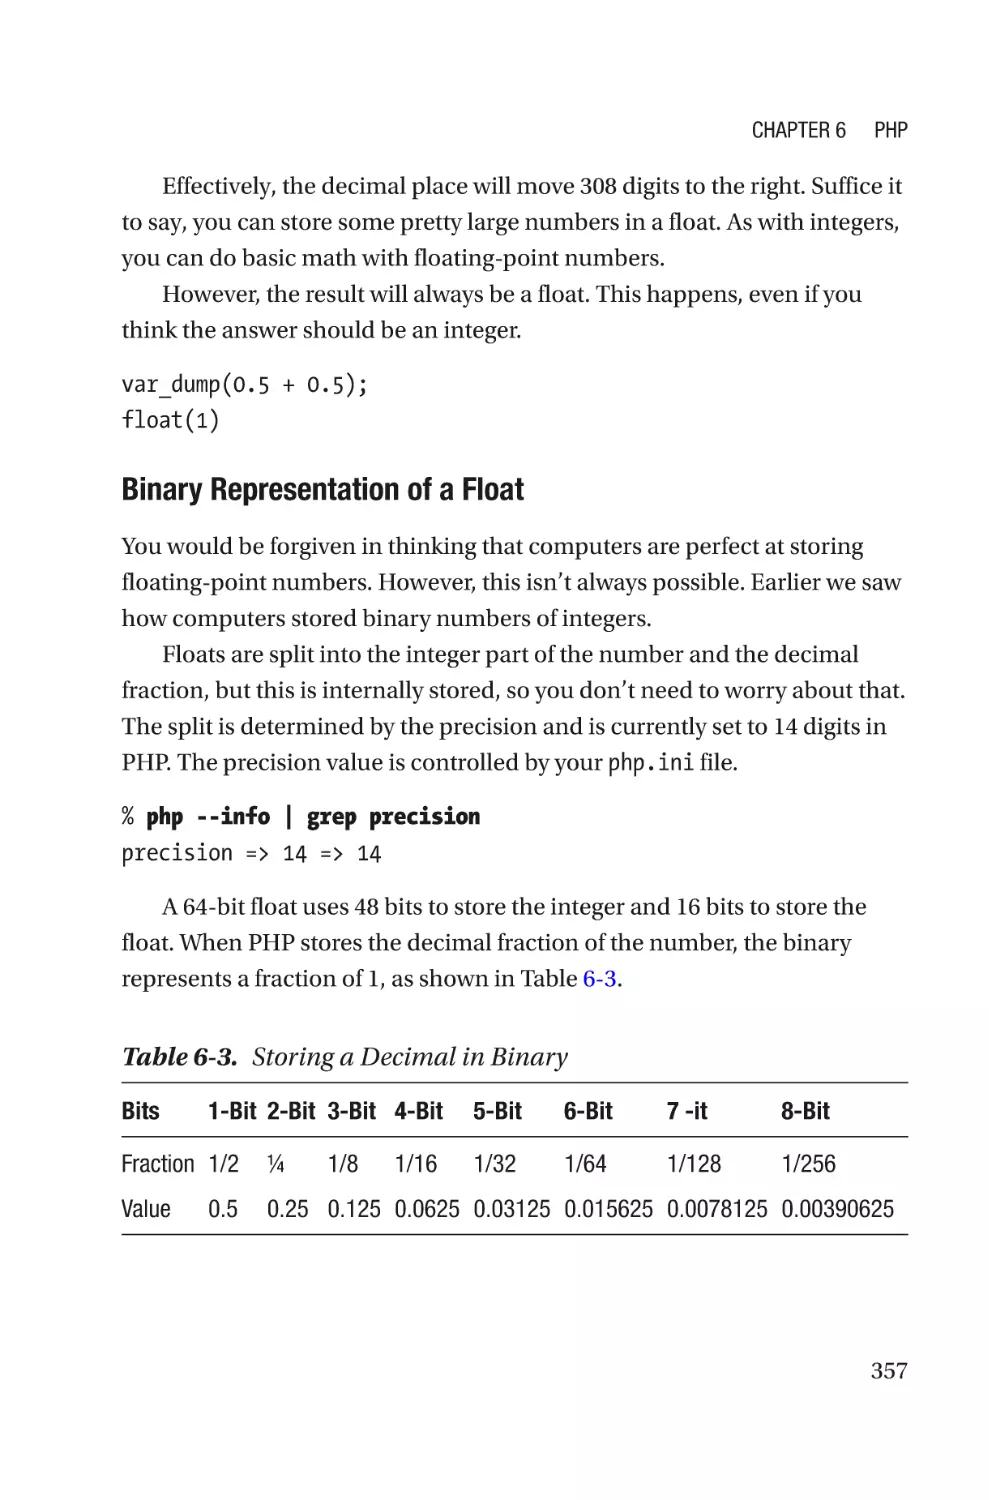
Text
Tweak Your
Mac Terminal
Command Line macOS
—
Daniel Platt
Tweak Your
Mac Terminal
Command Line macOS
Daniel Platt
Tweak Your Mac Terminal: Command Line macOS
Daniel Platt
Andover, Hampshire, UK
ISBN-13 (pbk): 978-1-4842-6170-5
https://doi.org/10.1007/978-1-4842-6171-2
ISBN-13 (electronic): 978-1-4842-6171-2
Copyright © 2021 by Daniel Platt
This work is subject to copyright. All rights are reserved by the Publisher, whether the whole
or part of the material is concerned, specifically the rights of translation, reprinting, reuse of
illustrations, recitation, broadcasting, reproduction on microfilms or in any other physical
way, and transmission or information storage and retrieval, electronic adaptation,
computer software, or by similar or dissimilar methodology now known or hereafter
developed.
Trademarked names, logos, and images may appear in this book. Rather than use a
trademark symbol with every occurrence of a trademarked name, logo, or image we use the
names, logos, and images only in an editorial fashion and to the benefit of the trademark
owner, with no intention of infringement of the trademark.
The use in this publication of trade names, trademarks, service marks, and similar terms,
even if they are not identified as such, is not to be taken as an expression of opinion as to
whether or not they are subject to proprietary rights.
While the advice and information in this book are believed to be true and accurate at the
date of publication, neither the authors nor the editors nor the publisher can accept any
legal responsibility for any errors or omissions that may be made. The publisher makes no
warranty, express or implied, with respect to the material contained herein.
Managing Director, Apress Media LLC: Welmoed Spahr
Acquisitions Editor: Aaron Black
Development Editor: James Markham
Coordinating Editor: Jessica Vakili
Distributed to the book trade worldwide by Springer Science+Business Media New York,
1 NY Plaza, New York, NY 10014. Phone 1-800-SPRINGER, fax (201) 348-4505, e-mail
orders-ny@springer-sbm.com, or visit www.springeronline.com. Apress Media, LLC is a
California LLC and the sole member (owner) is Springer Science + Business Media Finance
Inc (SSBM Finance Inc). SSBM Finance Inc is a Delaware corporation.
For information on translations, please e-mail booktranslations@springernature.com; for
reprint, paperback, or audio rights, please e-mail bookpermissions@springernature.com.
Apress titles may be purchased in bulk for academic, corporate, or promotional use. eBook
versions and licenses are also available for most titles. For more information, reference our
Print and eBook Bulk Sales web page at http://www.apress.com/bulk-sales.
Any source code or other supplementary material referenced by the author in this book is
available to readers on GitHub via the book’s product page, located at www.apress.com/
978-1-4842-6170-5. For more detailed information, please visit http://www.apress.com/
source-code.
Printed on acid-free paper
To my dad, for getting me interested in computers.
I still remember the book called “Computer Fun” which
inspired me to learn more about computers and
programming while I was still in primary school.
Thank you for having such an influence on my interests
and my path in life.
Table of Contents
About the Author������������������������������������������������������������������������������xvii
About the Technical Reviewer�����������������������������������������������������������xix
Acknowledgments�����������������������������������������������������������������������������xxi
Chapter 1: Getting Started��������������������������������������������������������������������1
Terminal at a Glance���������������������������������������������������������������������������������������������1
The Need to Know�������������������������������������������������������������������������������������������4
Book Conventions�������������������������������������������������������������������������������������������������6
Book Requirements�����������������������������������������������������������������������������������������������6
Minimum Requirements����������������������������������������������������������������������������������6
Installing Xcode�����������������������������������������������������������������������������������������������8
Using Homebrew�������������������������������������������������������������������������������������������10
Why Use Brew?���������������������������������������������������������������������������������������������������10
Installing Brew�����������������������������������������������������������������������������������������������11
Finding Applications in Brew�������������������������������������������������������������������������13
Installing Applications from Brew������������������������������������������������������������������14
Upgrading Installed Applications�������������������������������������������������������������������15
Reinstalling Applications�������������������������������������������������������������������������������������17
Summary������������������������������������������������������������������������������������������������������������18
Chapter 2: Terminal Basics�����������������������������������������������������������������19
The Terminal Application�������������������������������������������������������������������������������������19
Customizing Terminal������������������������������������������������������������������������������������������20
v
Table of Contents
What Is a Shell?��������������������������������������������������������������������������������������������������25
Zsh�����������������������������������������������������������������������������������������������������������������25
Upgrading from a Previous Version of macOS�����������������������������������������������26
Shell Shortcuts����������������������������������������������������������������������������������������������������27
The Filesystem����������������������������������������������������������������������������������������������������28
Meta Directories��������������������������������������������������������������������������������������������28
User Directories���������������������������������������������������������������������������������������������29
Catalina’s New Layout�����������������������������������������������������������������������������������30
Directory Tree������������������������������������������������������������������������������������������������32
Moving Around the Filesystem����������������������������������������������������������������������������33
Inspecting Directories�����������������������������������������������������������������������������������34
Dragging and Dropping���������������������������������������������������������������������������������35
Different Types of Paths���������������������������������������������������������������������������������36
Directory Operations�������������������������������������������������������������������������������������������38
Creating Directories���������������������������������������������������������������������������������������38
Deleting Directories���������������������������������������������������������������������������������������39
File Operations����������������������������������������������������������������������������������������������������42
Creating Files�������������������������������������������������������������������������������������������������43
Writing Files���������������������������������������������������������������������������������������������������43
Reading Files�������������������������������������������������������������������������������������������������44
Copying Files�������������������������������������������������������������������������������������������������46
Moving Files��������������������������������������������������������������������������������������������������47
Deleting Files�������������������������������������������������������������������������������������������������47
Editing Text in Terminal���������������������������������������������������������������������������������������47
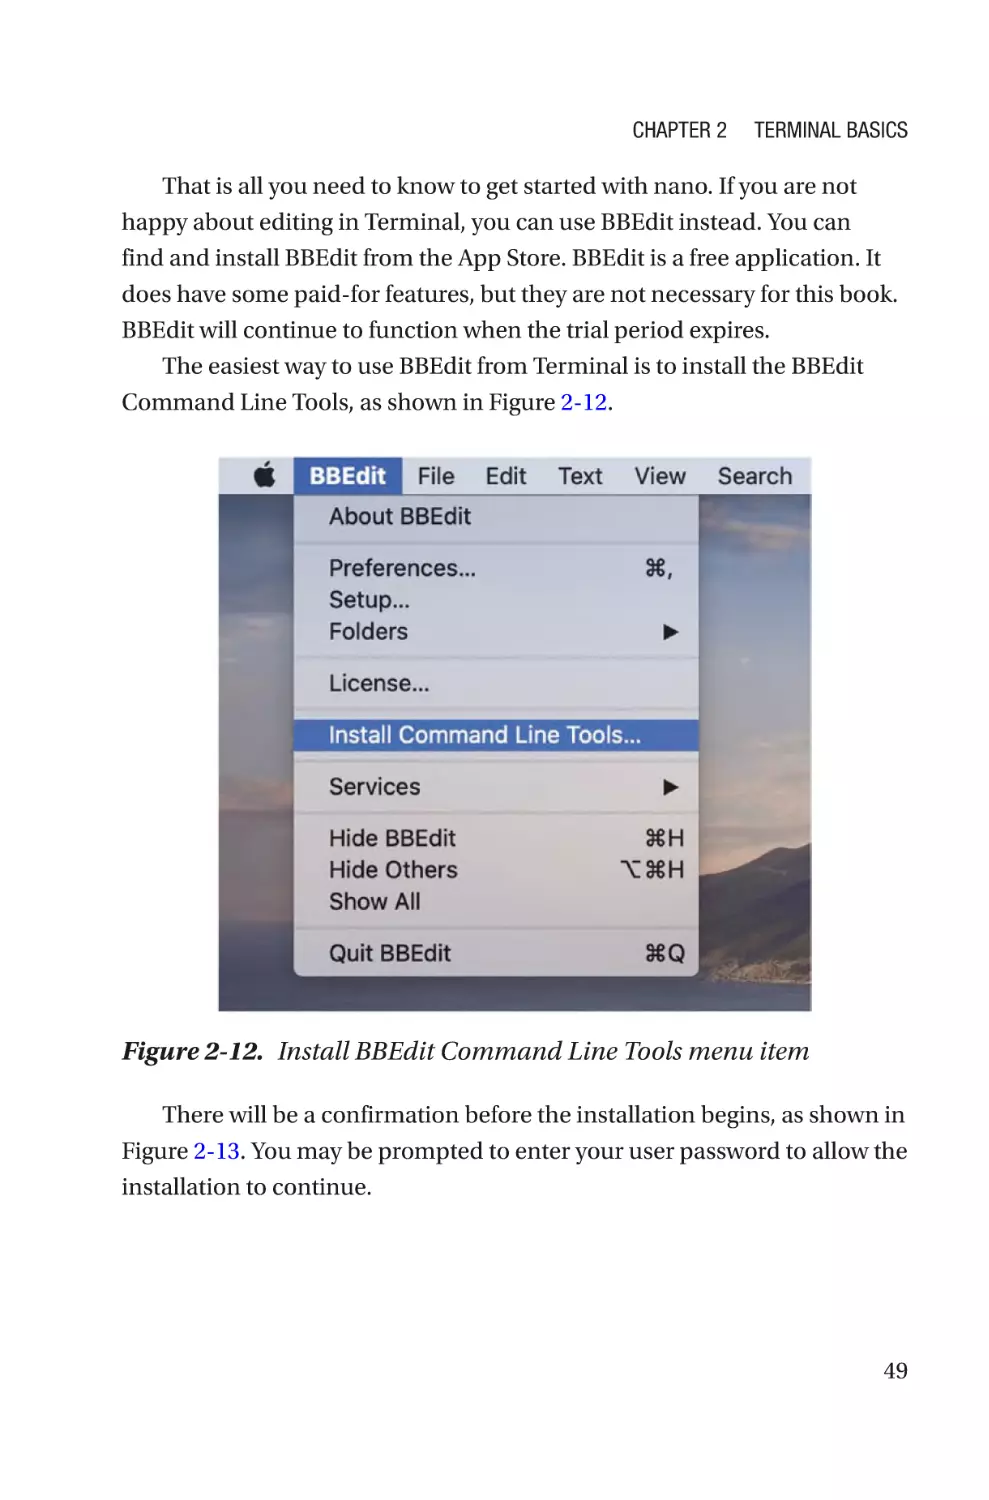
Changing the Default Text Editor�������������������������������������������������������������������51
Piping������������������������������������������������������������������������������������������������������������������51
Pipe���������������������������������������������������������������������������������������������������������������52
vi
Table of Contents
Redirecting Output�����������������������������������������������������������������������������������������52
Redirecting Input�������������������������������������������������������������������������������������������54
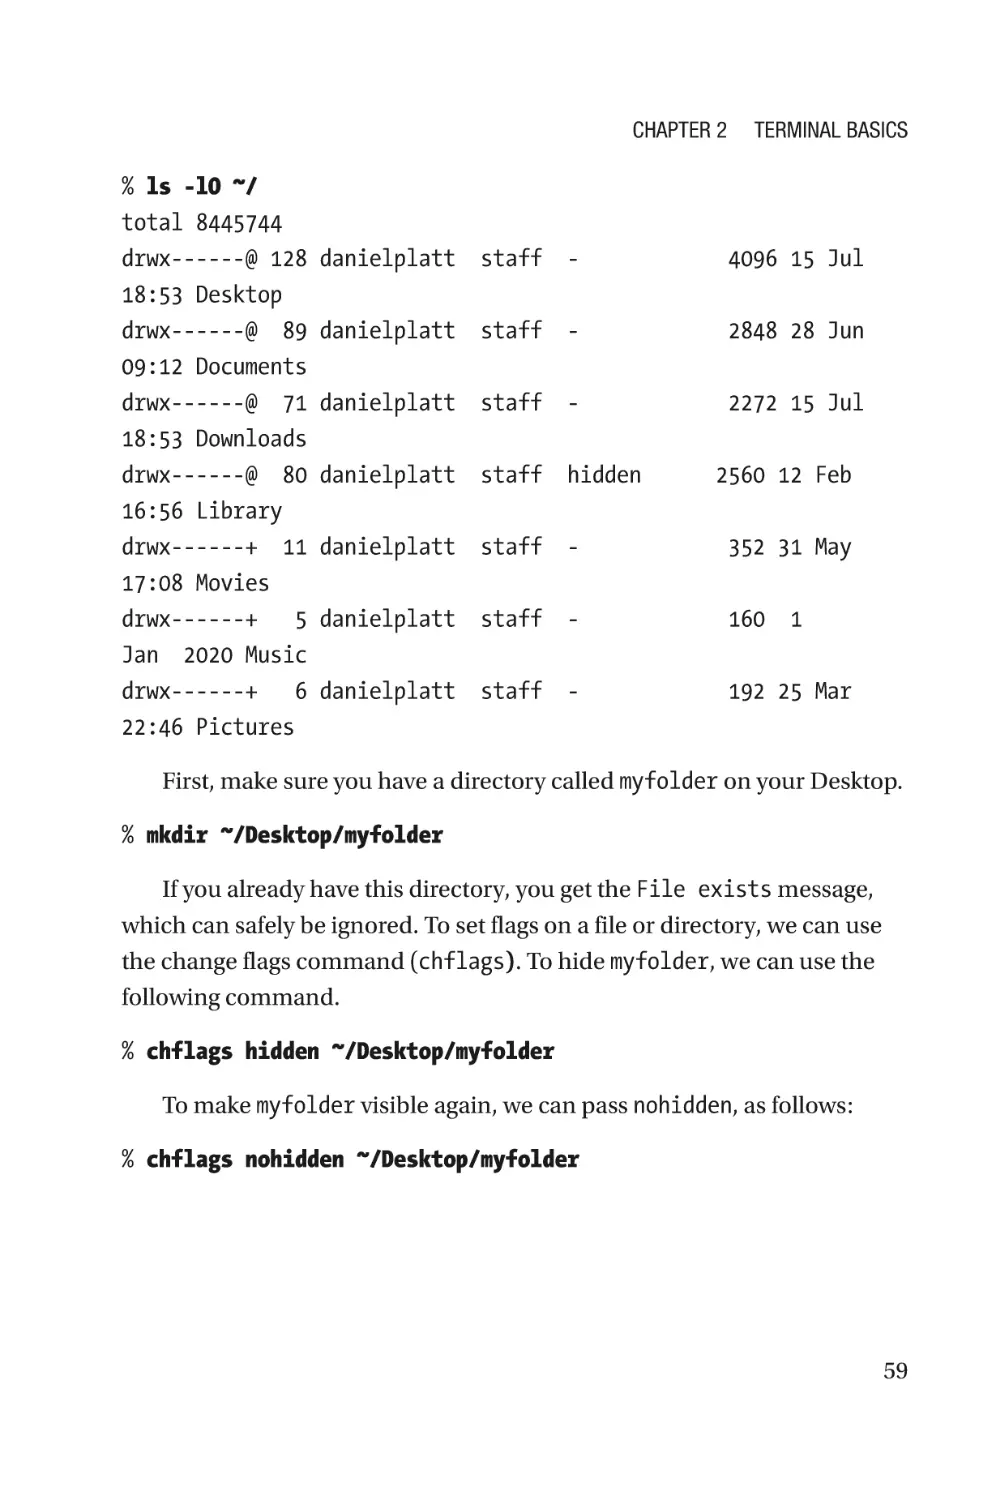
Hidden Files and Folders������������������������������������������������������������������������������������55
Hiding Files the UNIX Way�����������������������������������������������������������������������������55
Hiding Files the macOS Way��������������������������������������������������������������������������58
Globbing��������������������������������������������������������������������������������������������������������������60
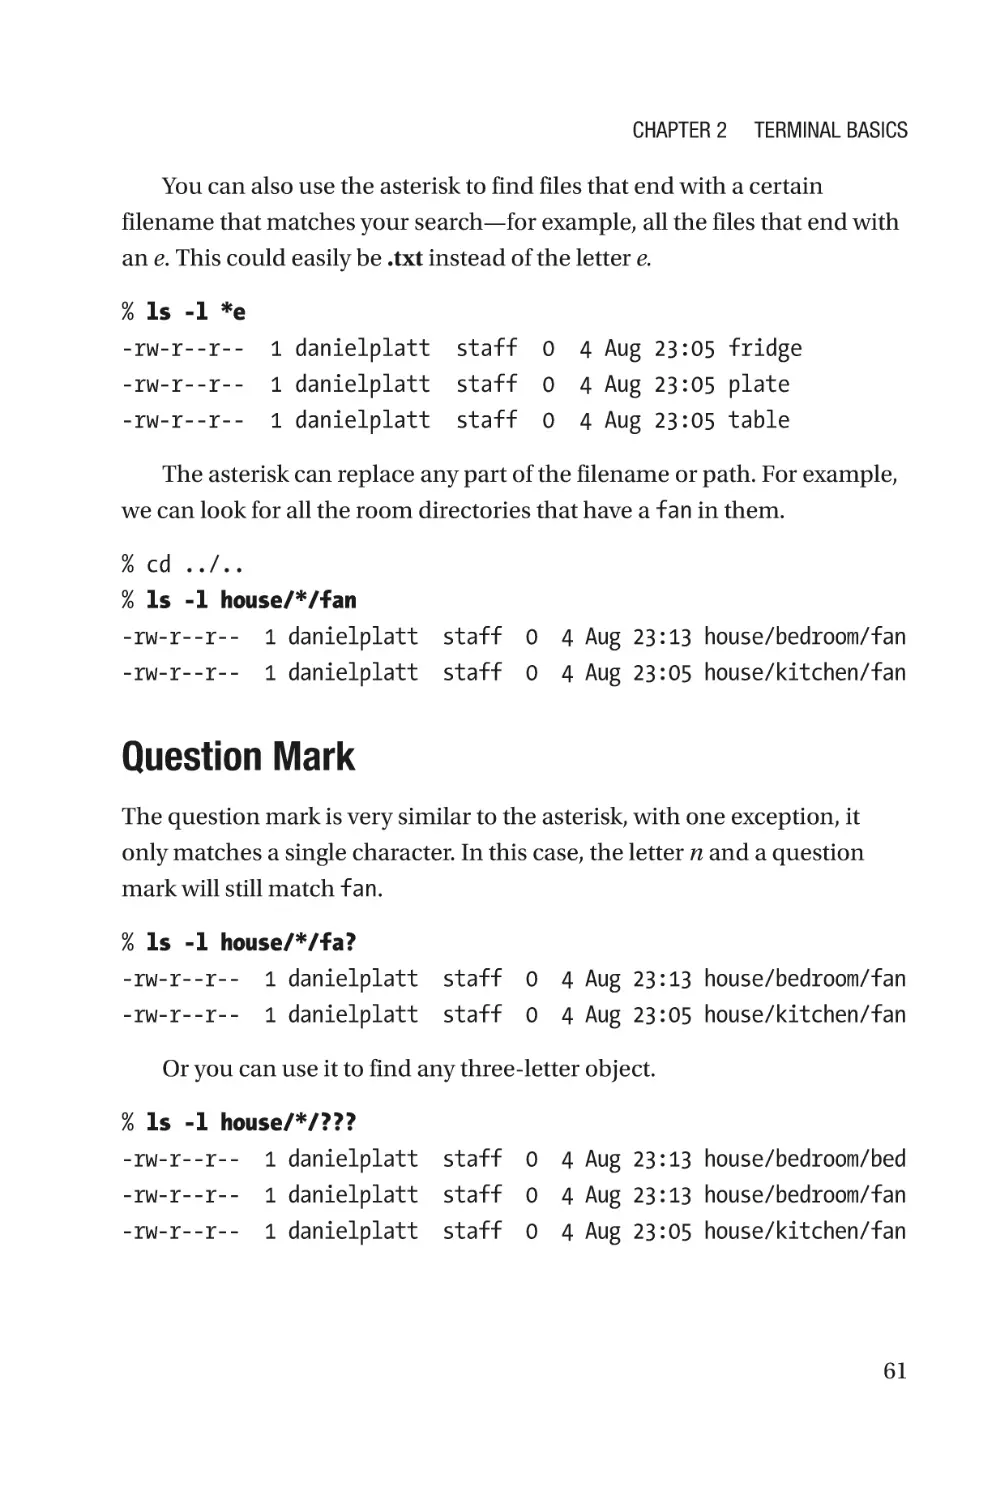
Single Asterisk�����������������������������������������������������������������������������������������������60
Question Mark�����������������������������������������������������������������������������������������������61
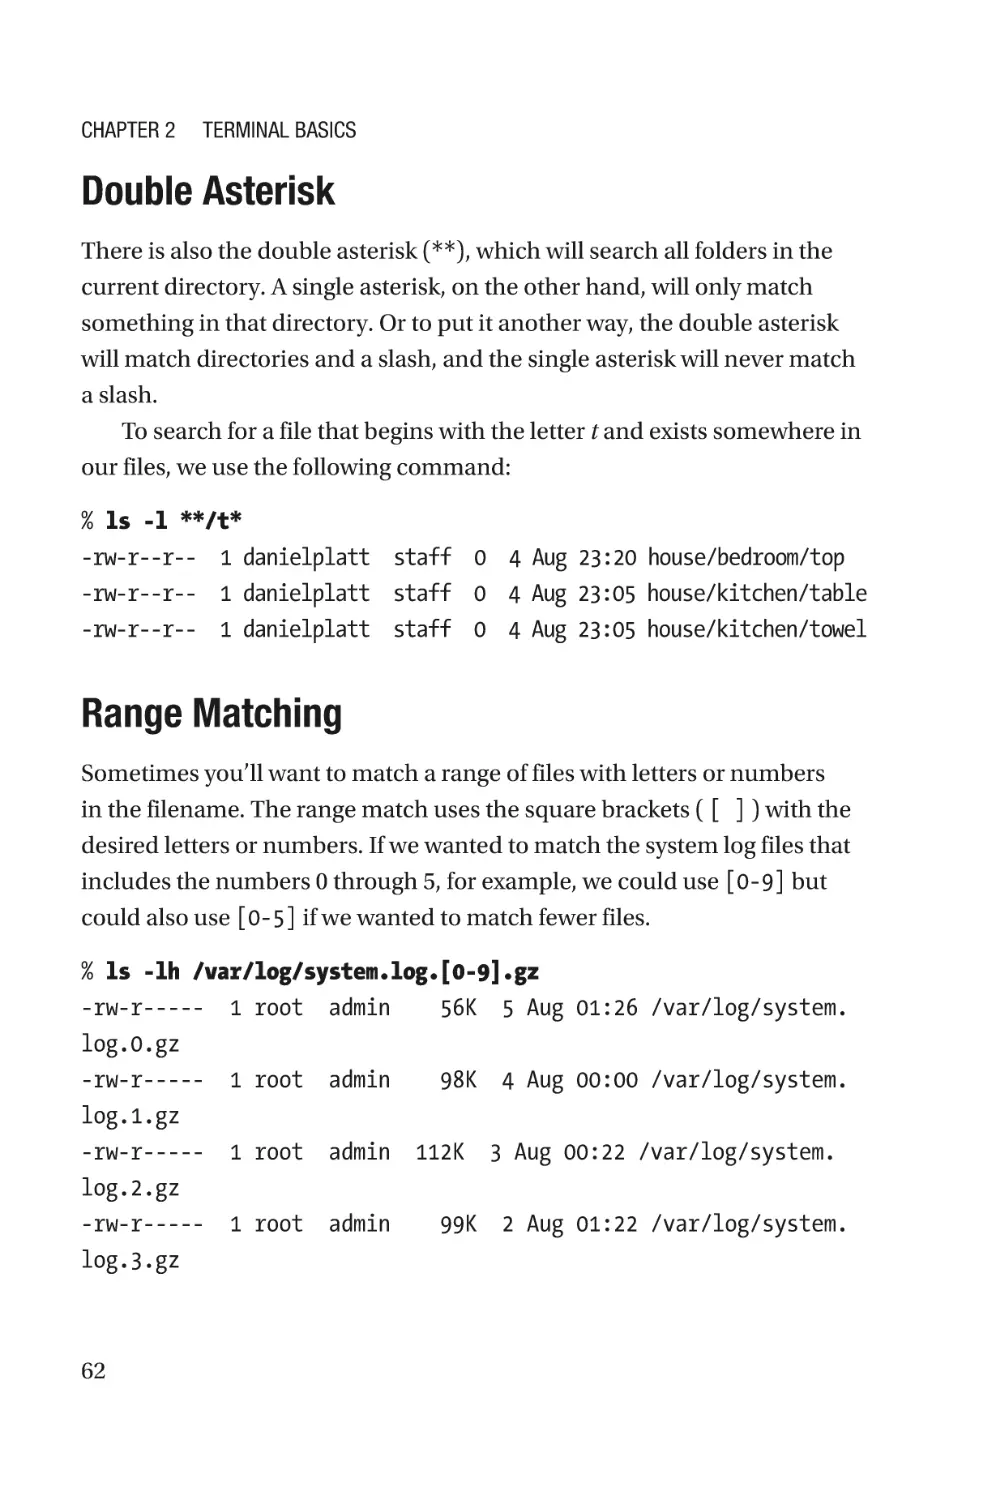
Double Asterisk���������������������������������������������������������������������������������������������62
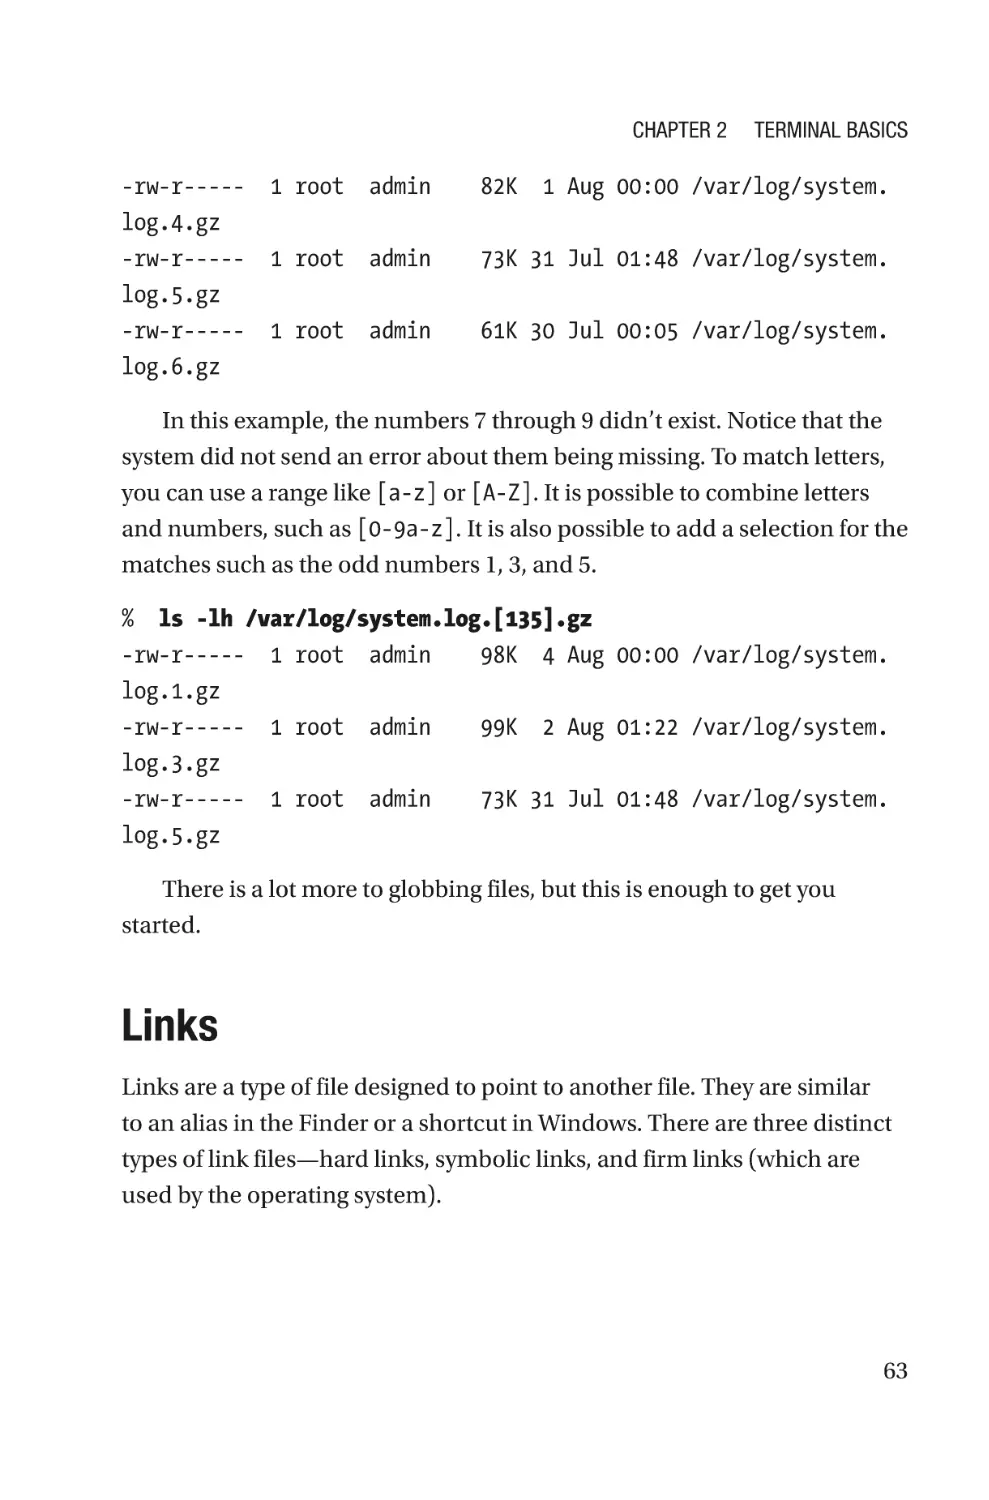
Range Matching��������������������������������������������������������������������������������������������62
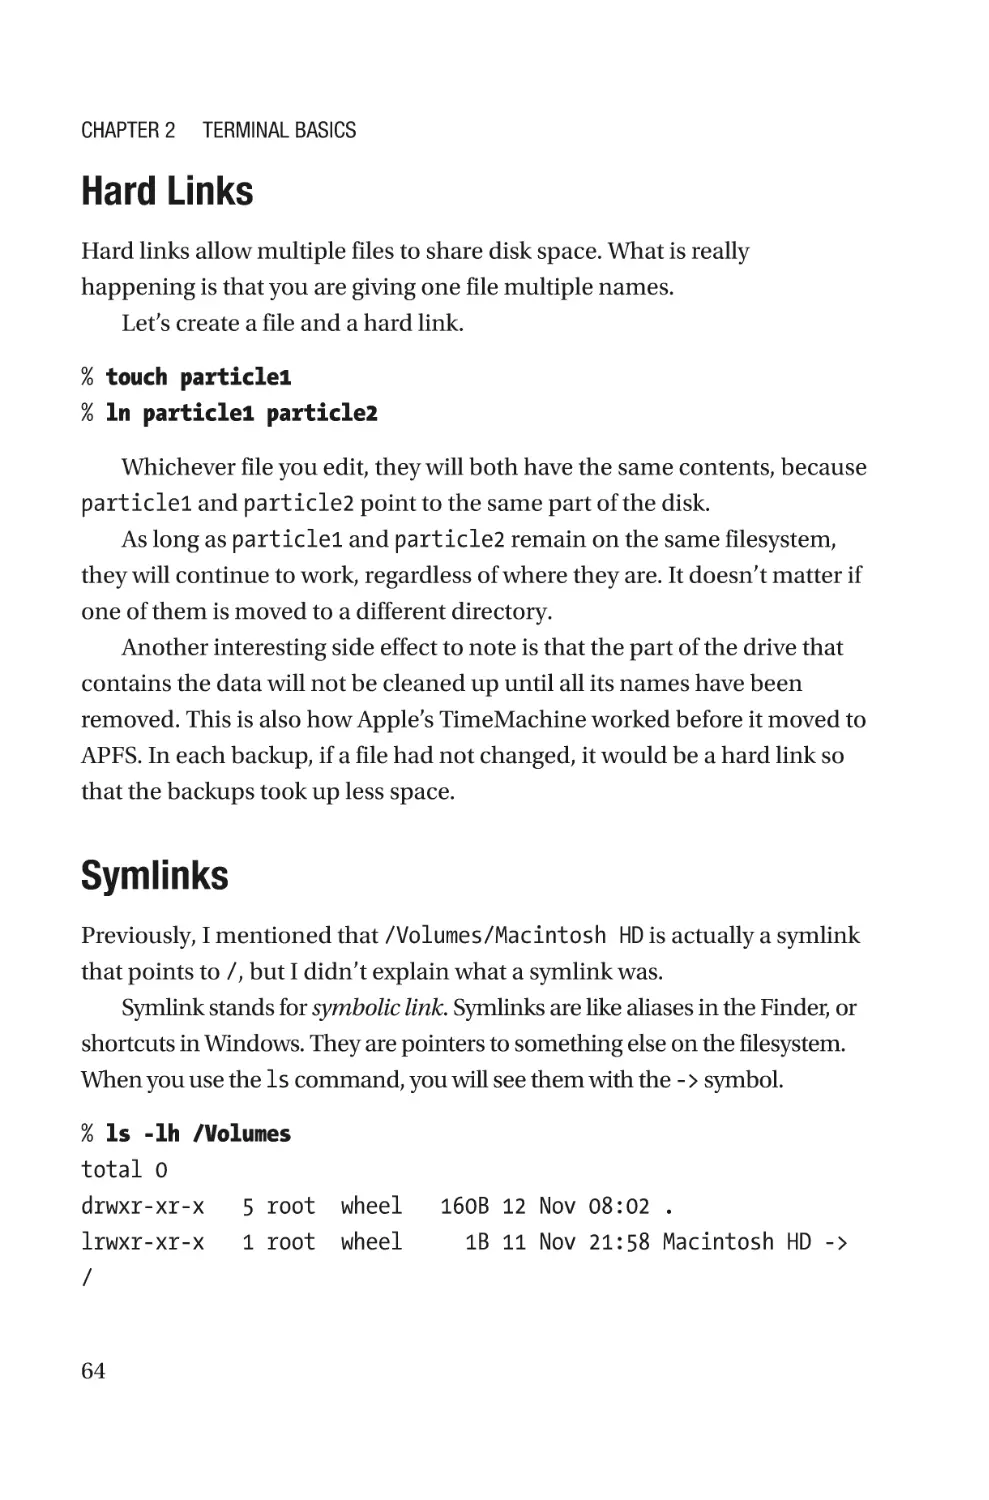
Links�������������������������������������������������������������������������������������������������������������������63
Hard Links�����������������������������������������������������������������������������������������������������64
Symlinks��������������������������������������������������������������������������������������������������������64
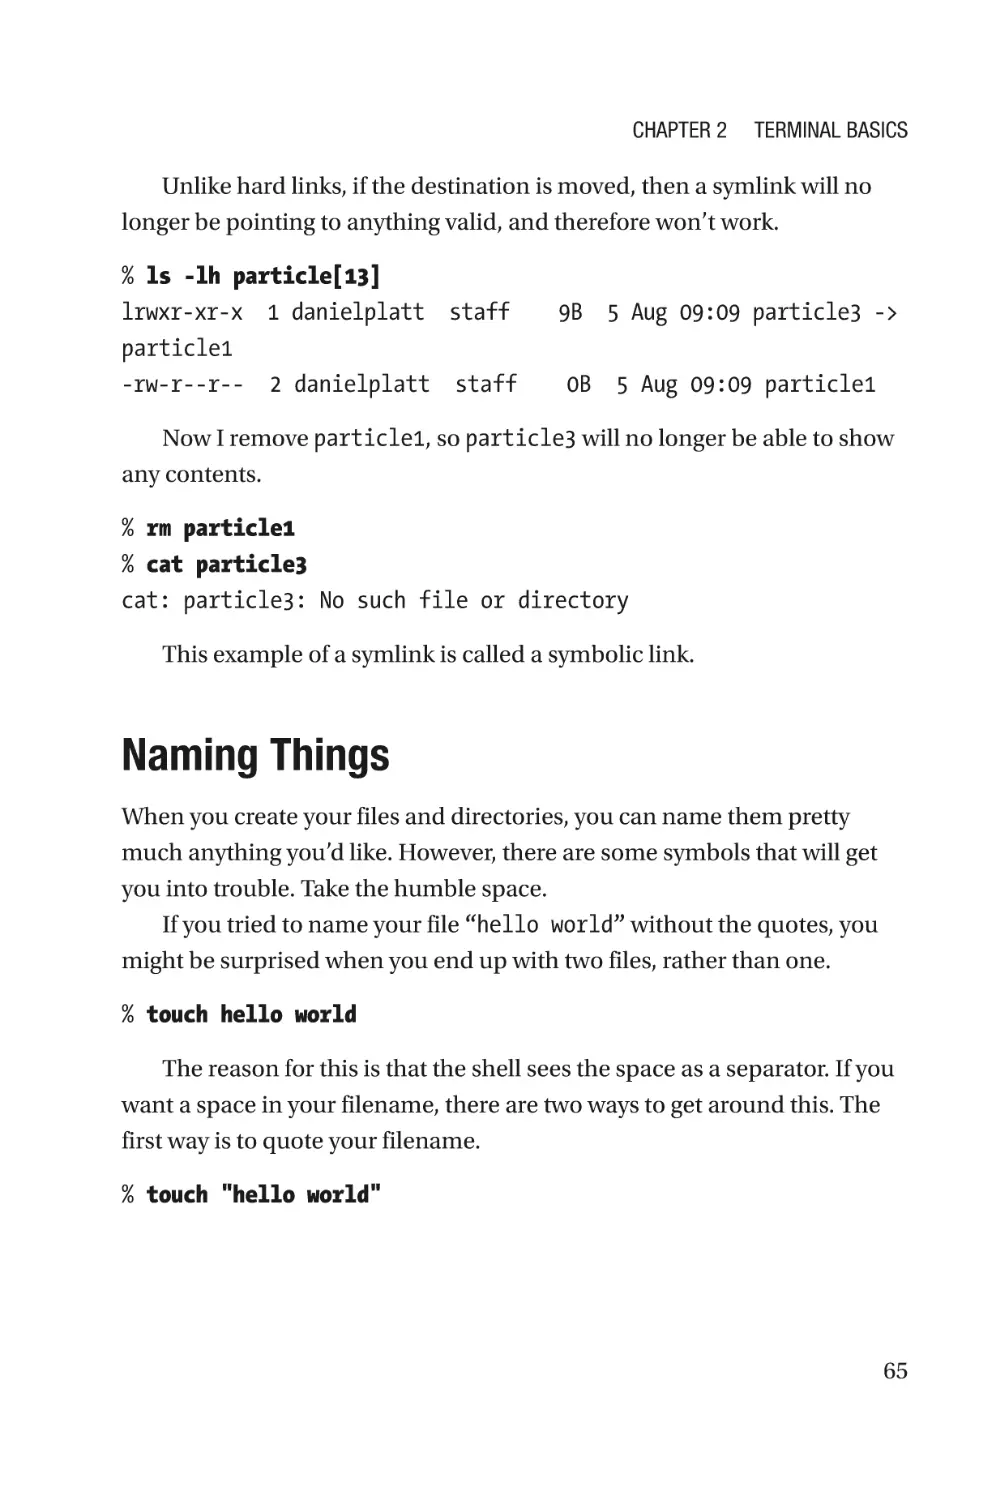
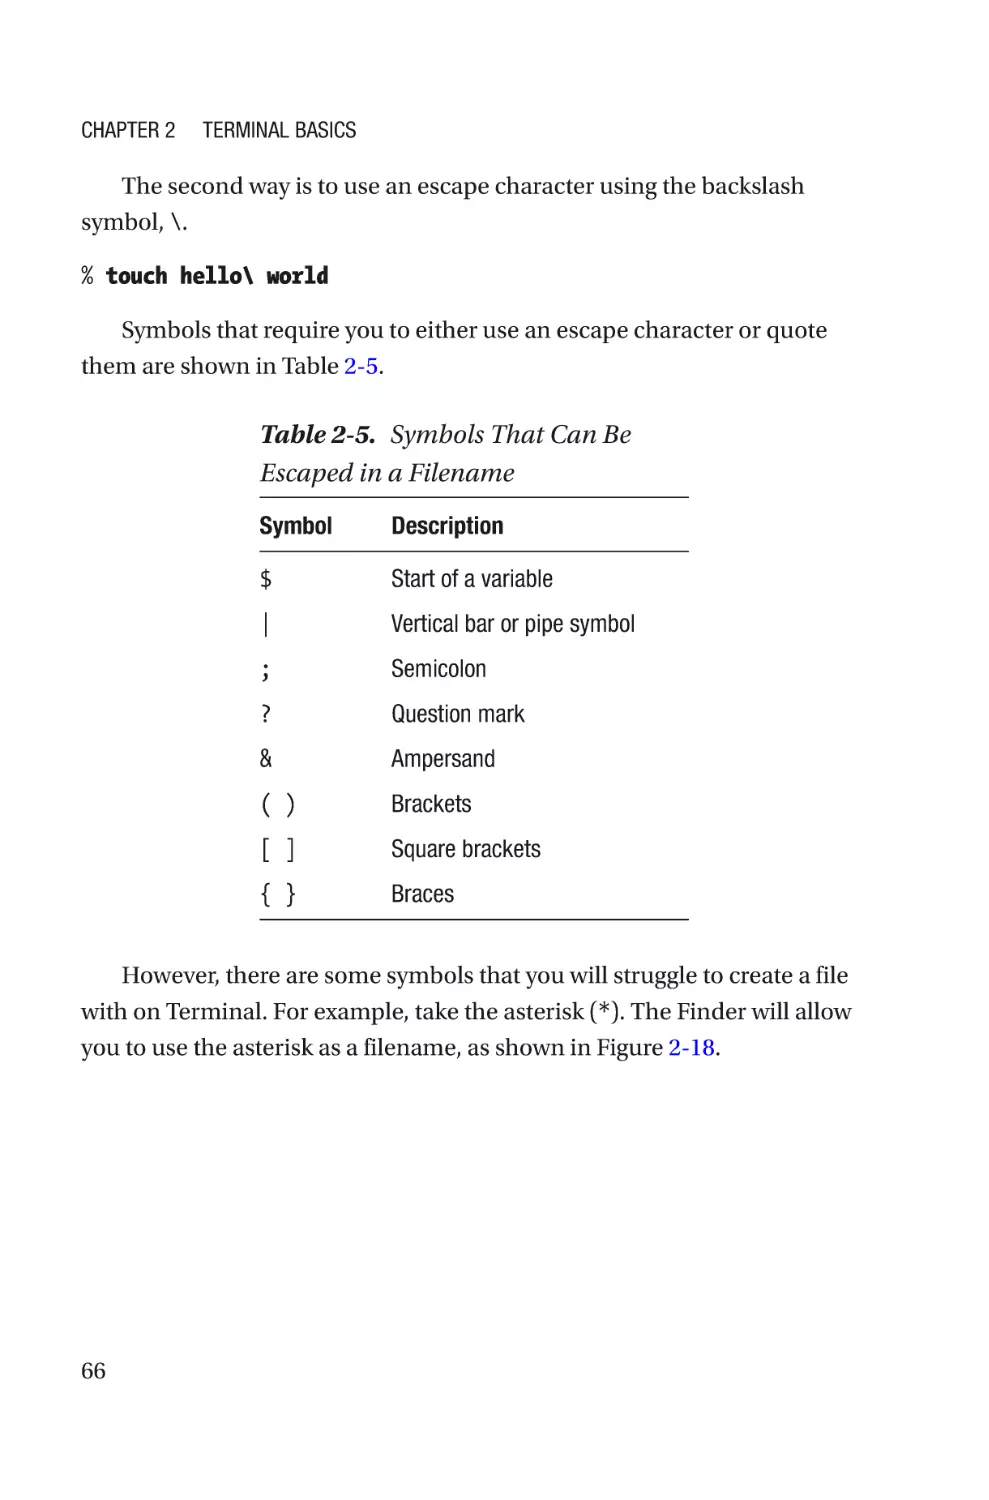
Naming Things����������������������������������������������������������������������������������������������������65
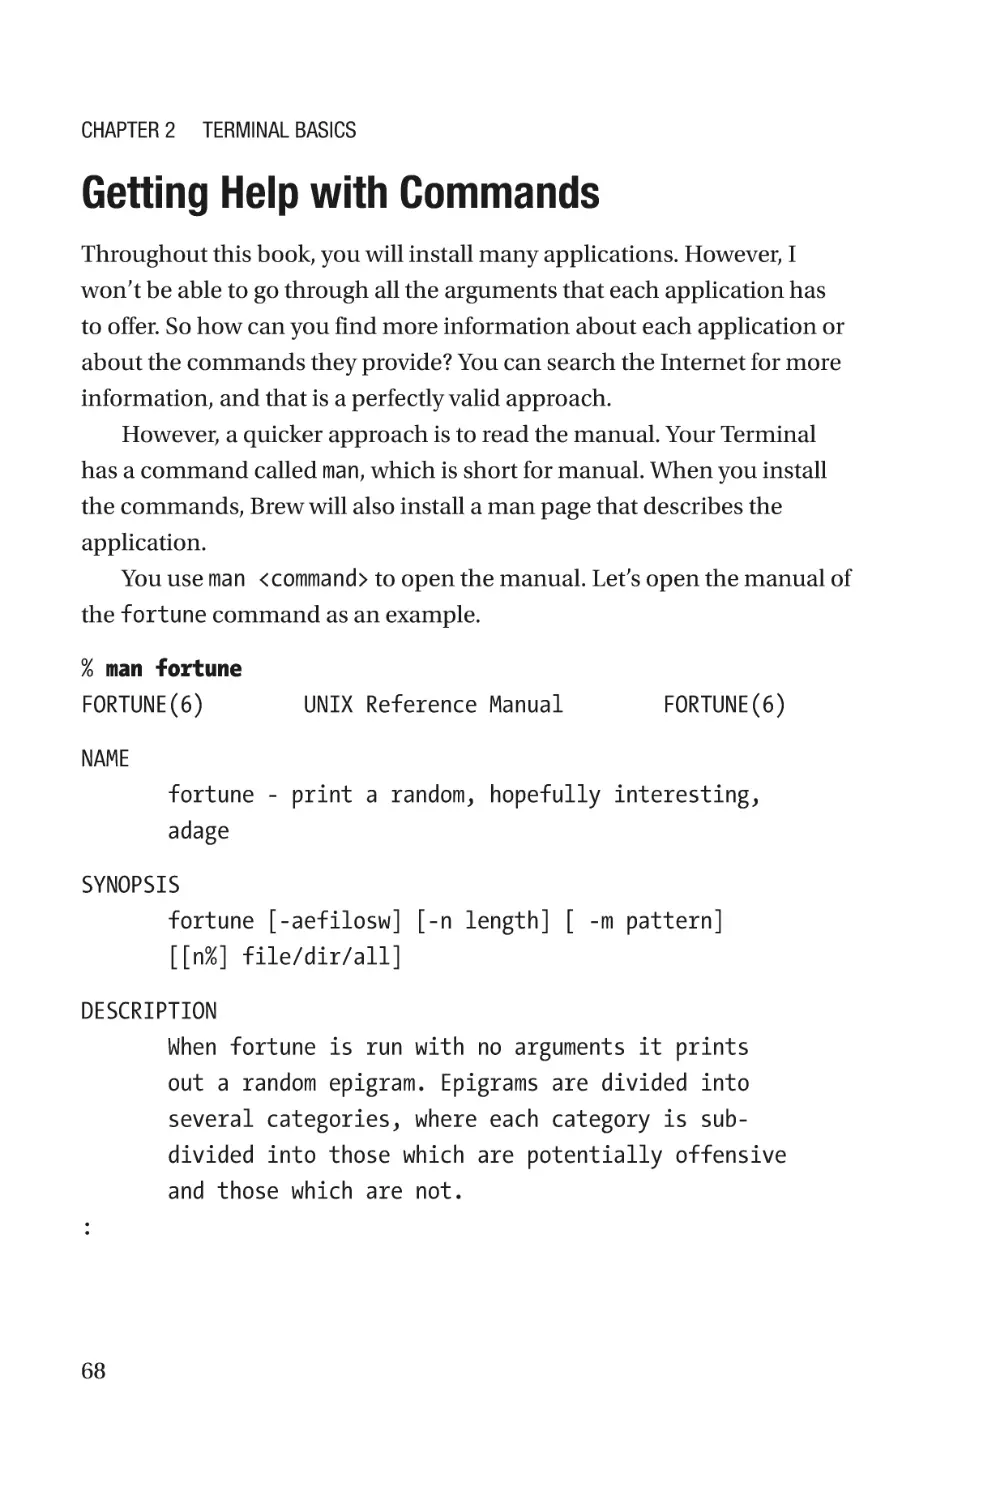
Getting Help with Commands�����������������������������������������������������������������������������68
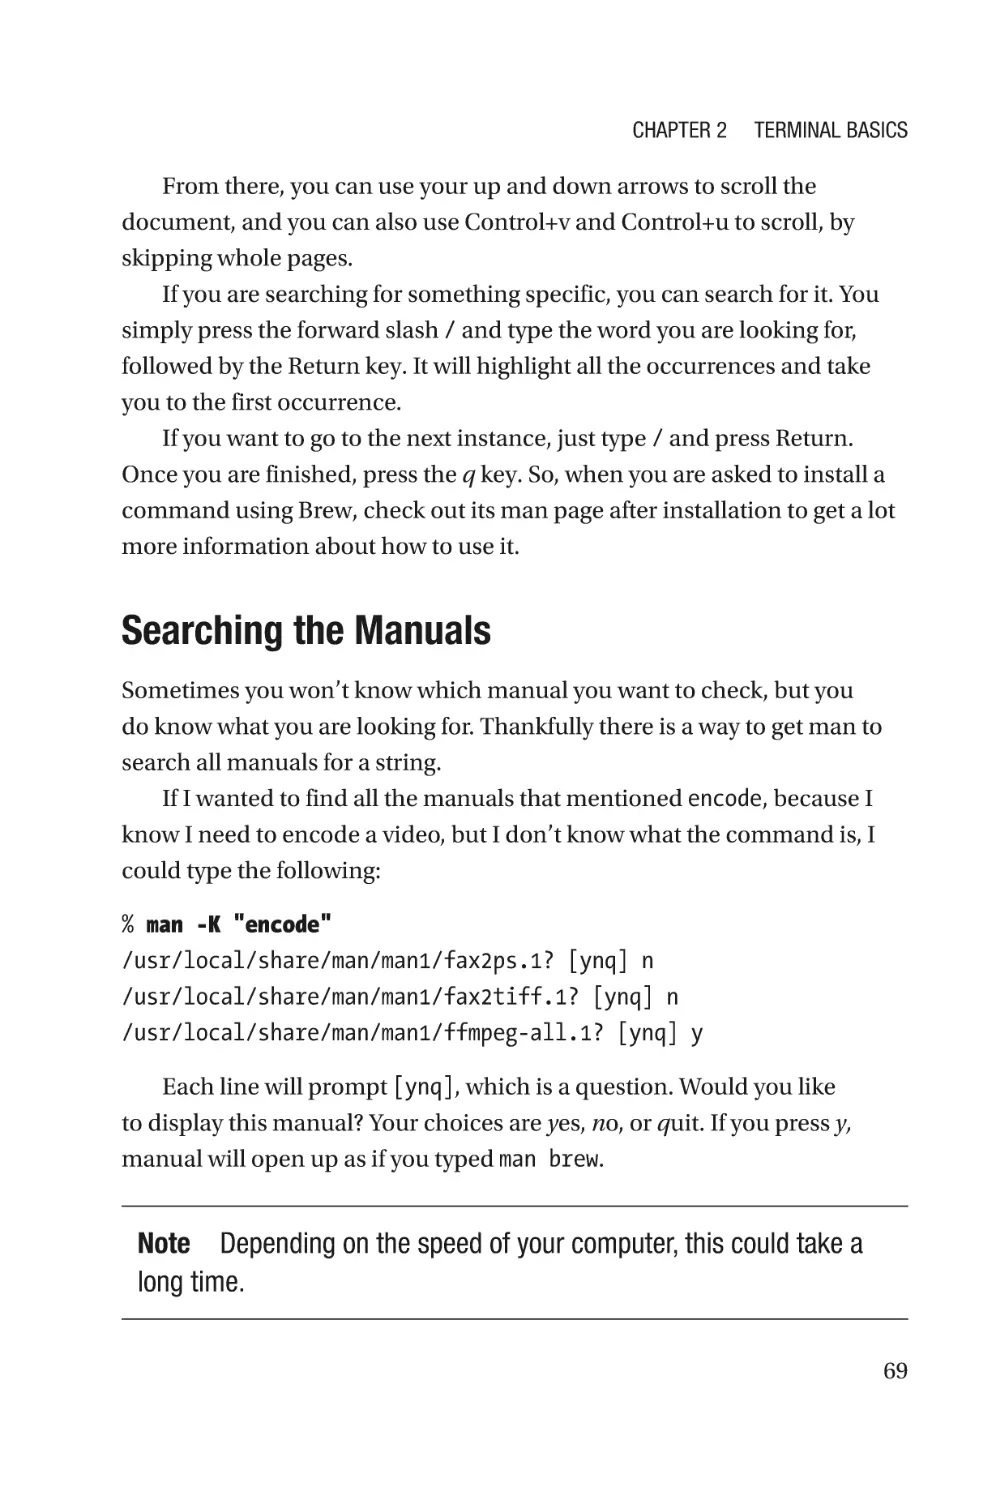
Searching the Manuals����������������������������������������������������������������������������������69
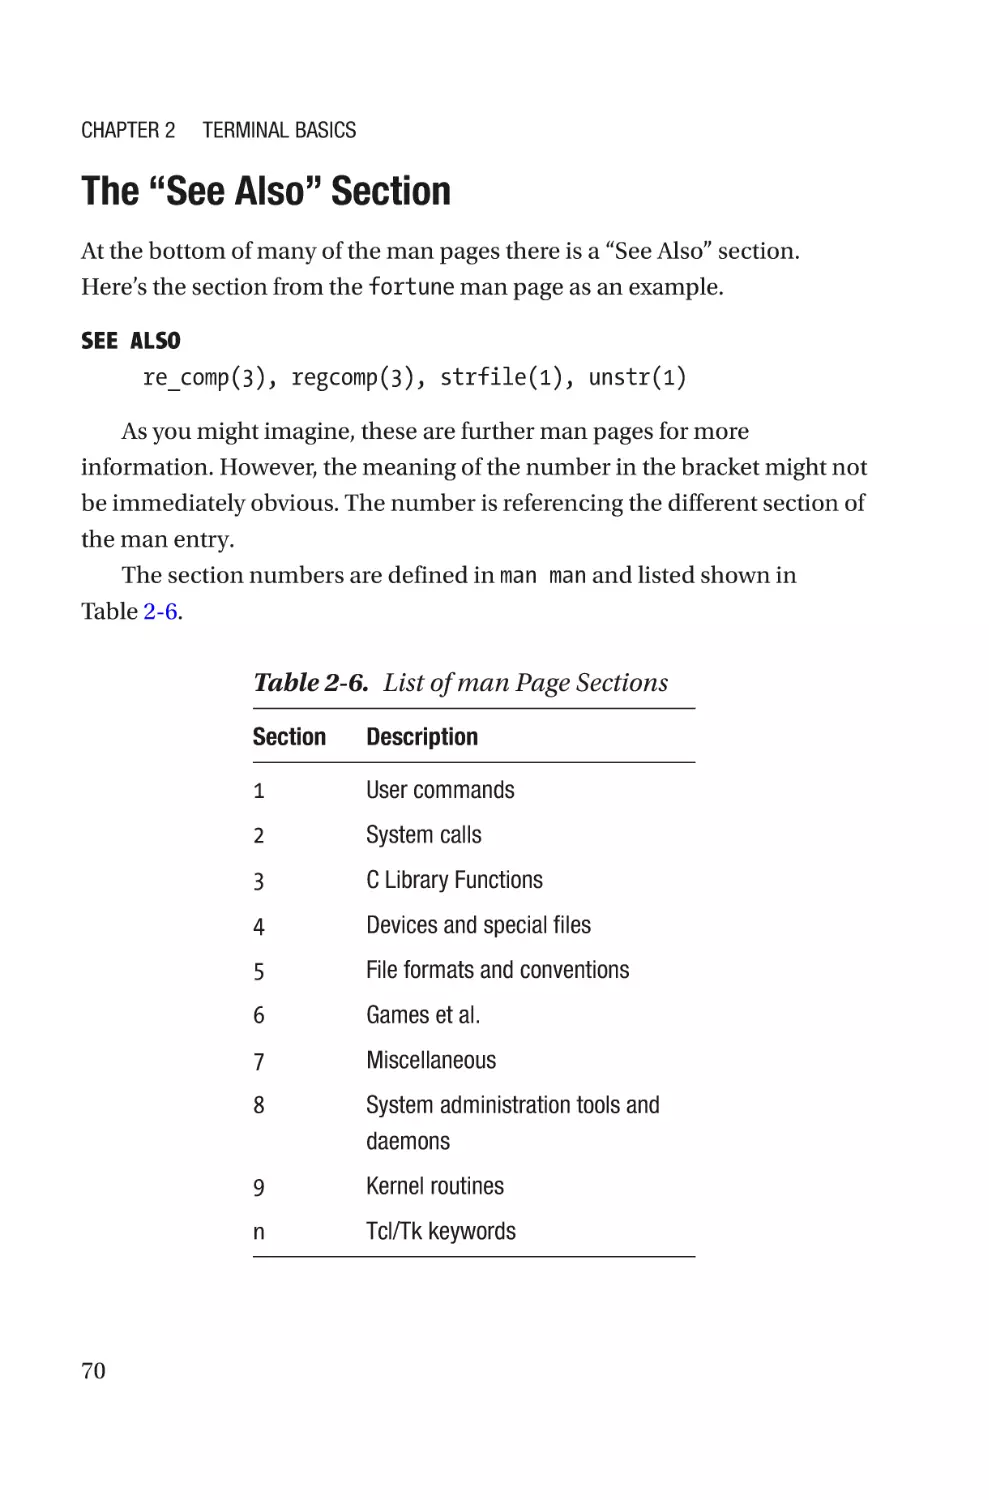
The “See Also” Section����������������������������������������������������������������������������������70
Permissions��������������������������������������������������������������������������������������������������������71
File Permissions��������������������������������������������������������������������������������������������71
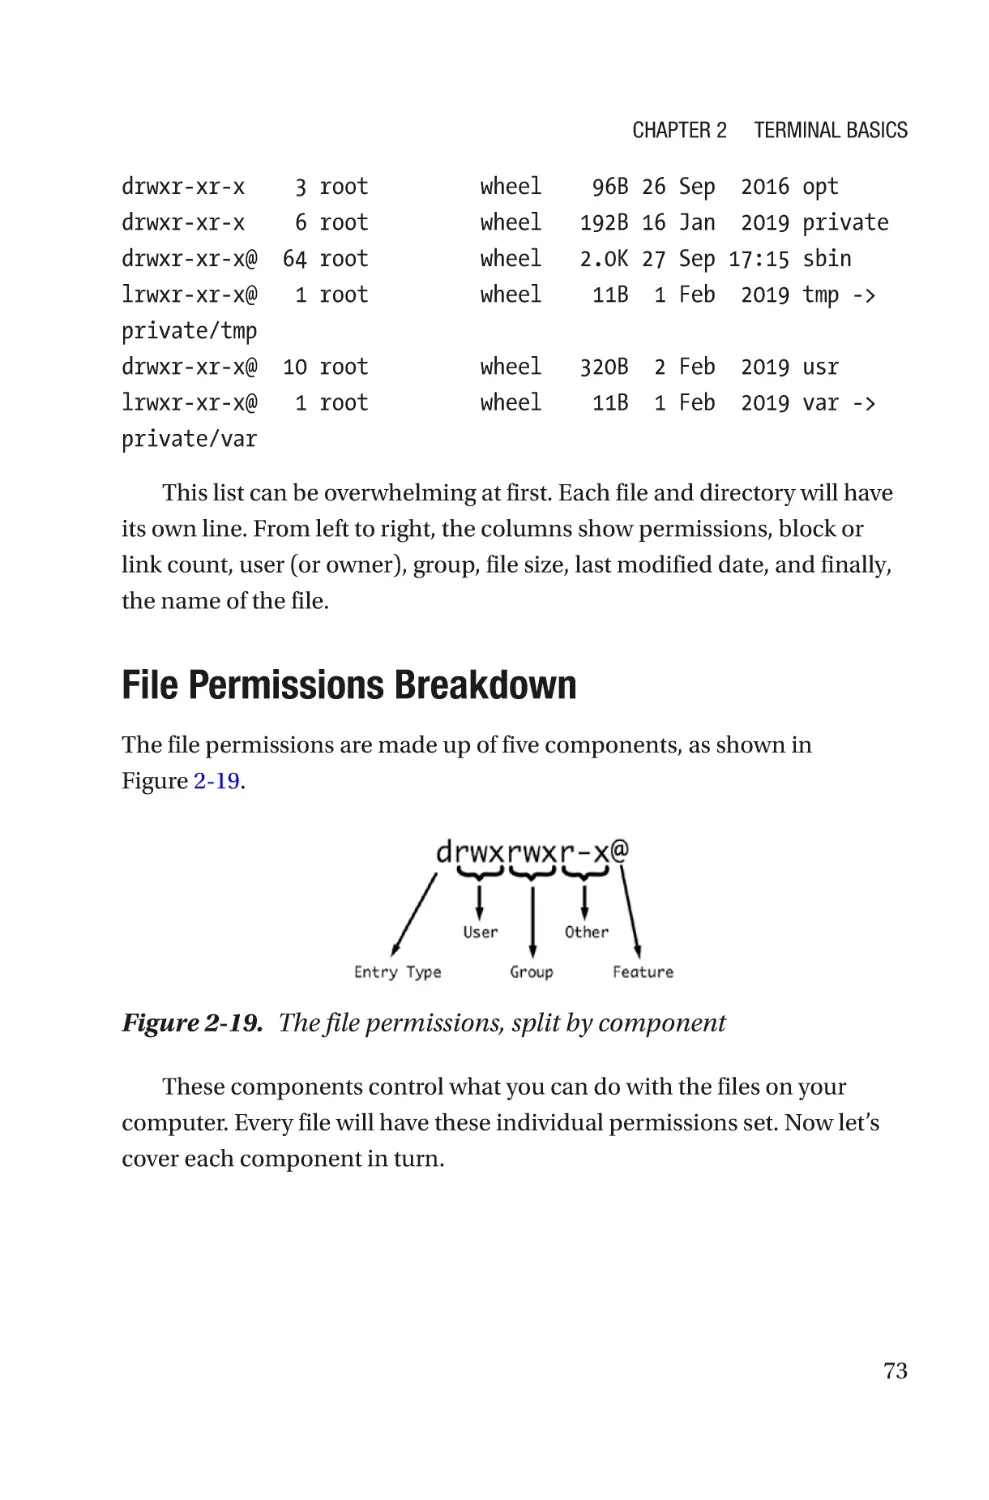
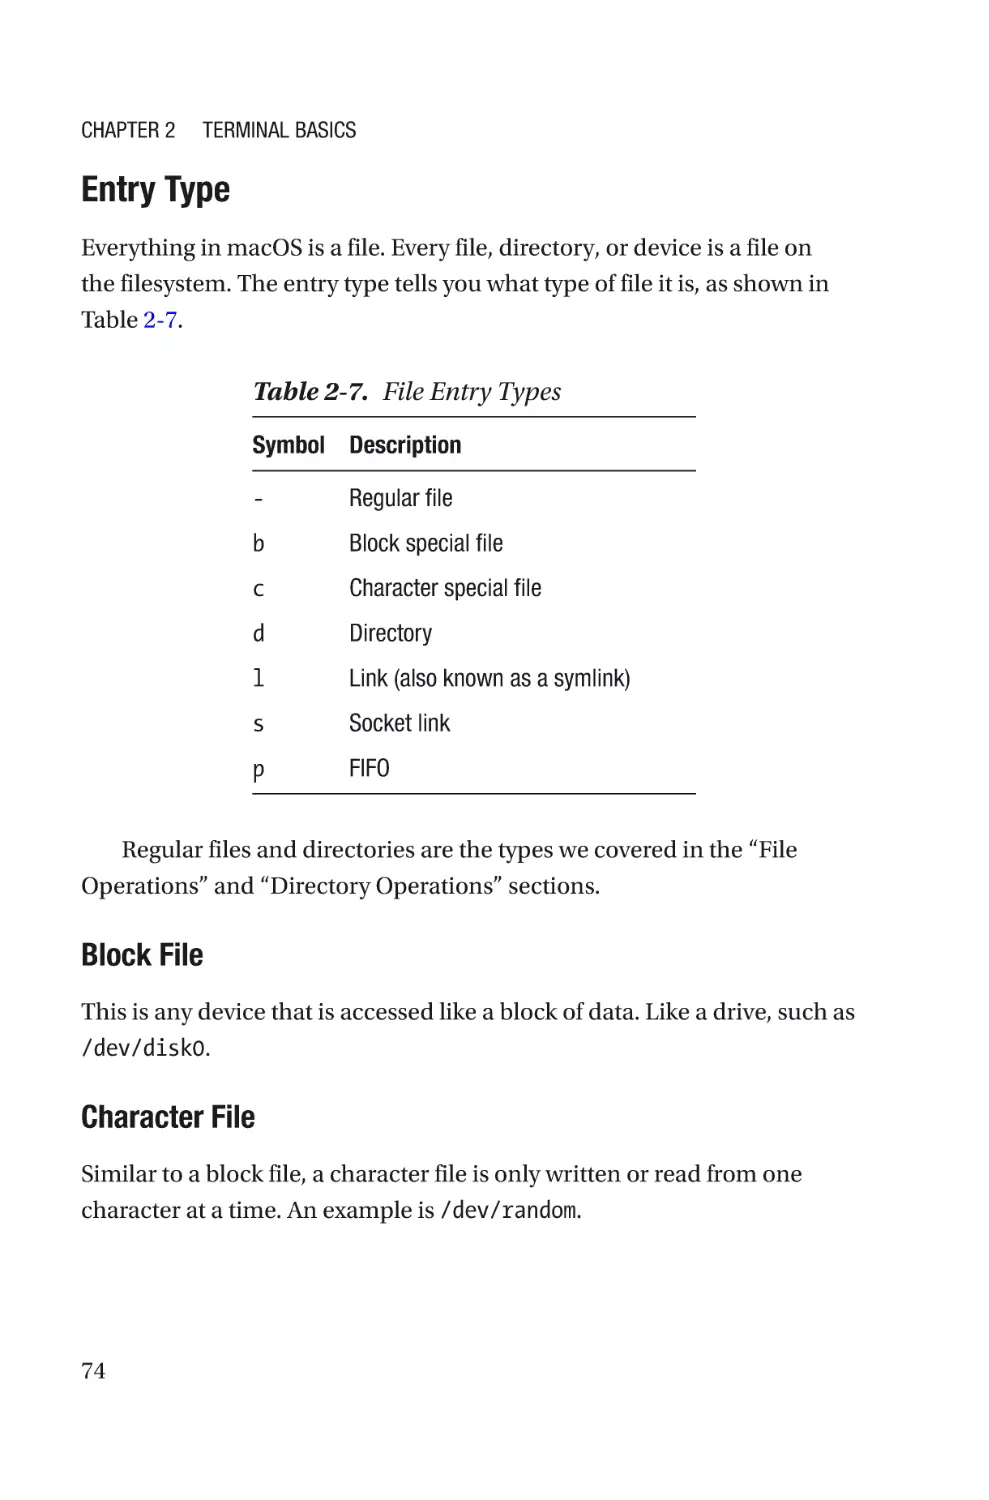
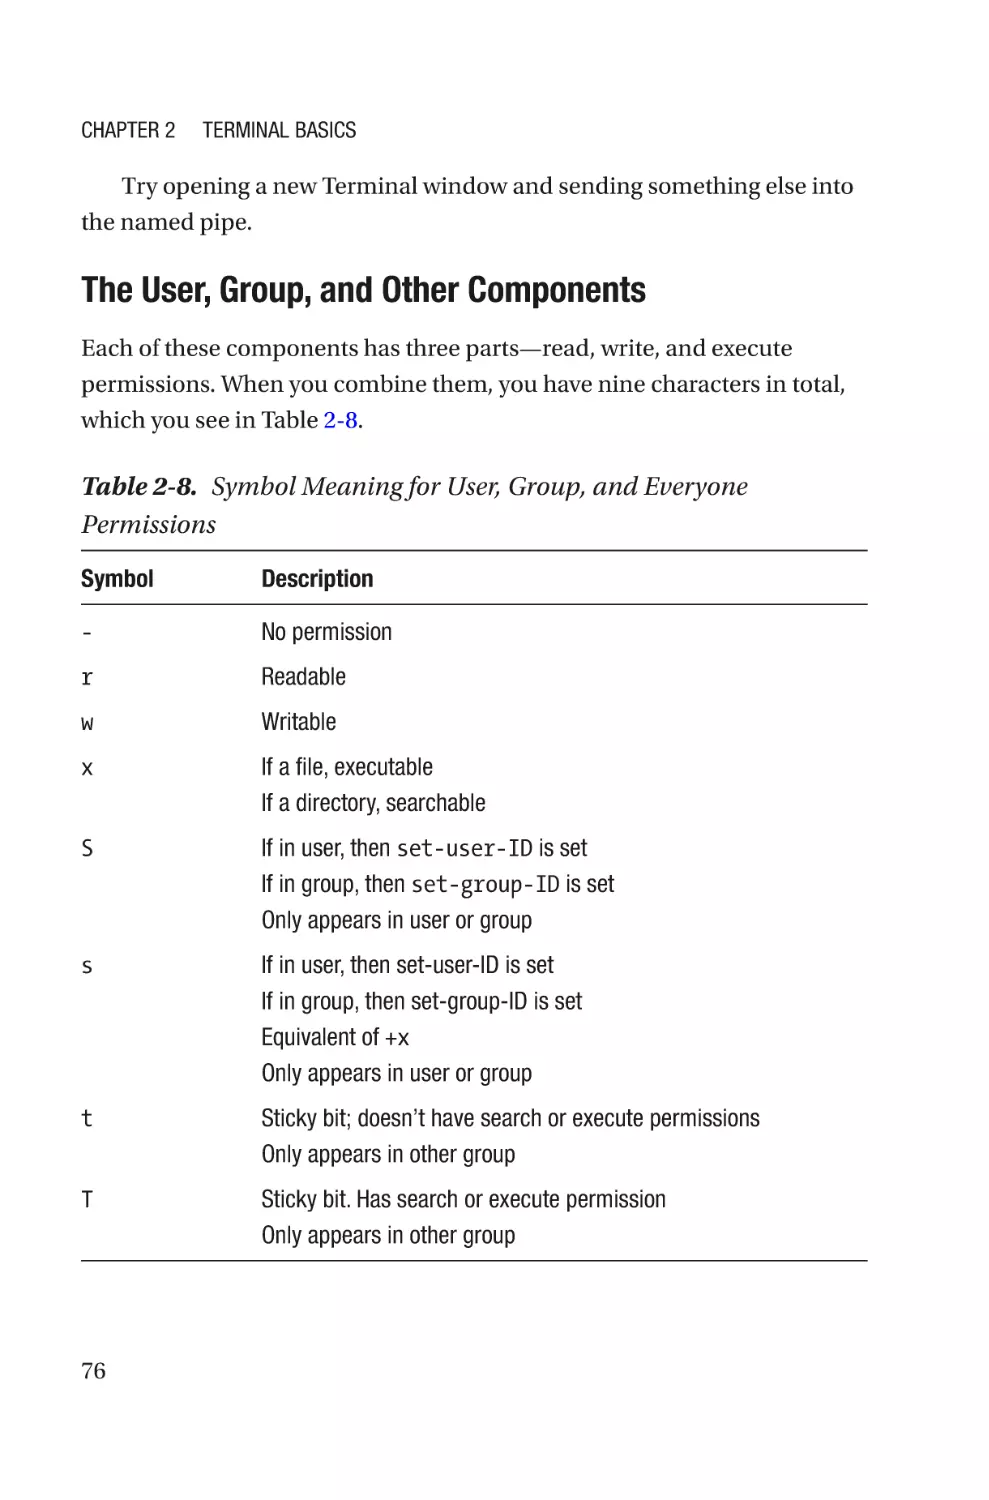
File Permissions Breakdown�������������������������������������������������������������������������73
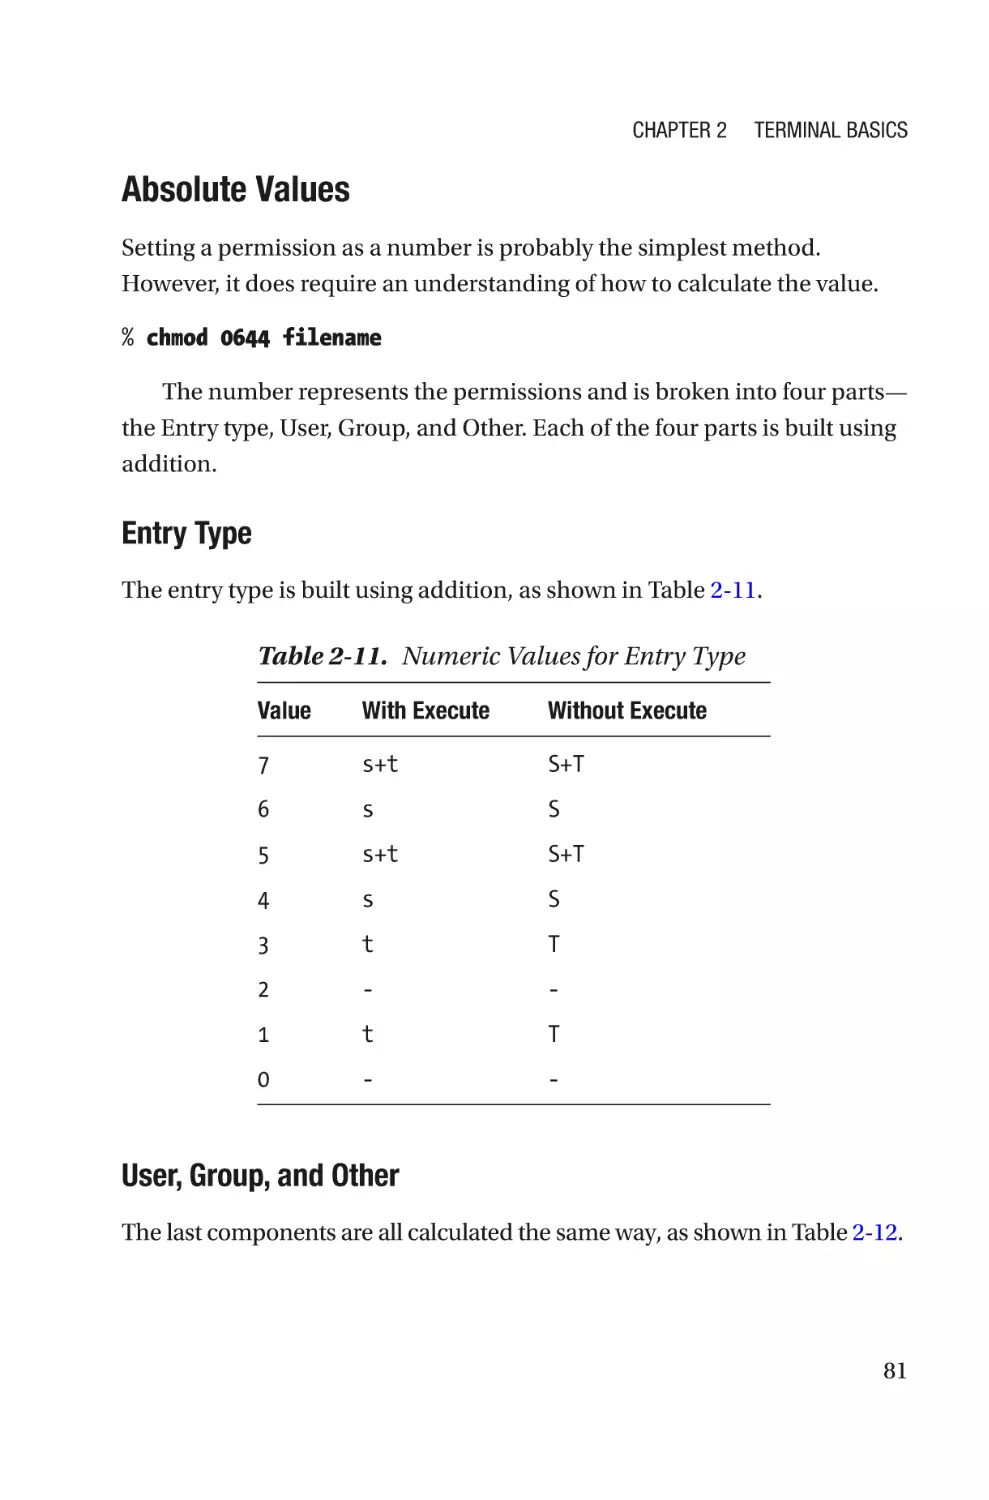
Changing File Permissions����������������������������������������������������������������������������80
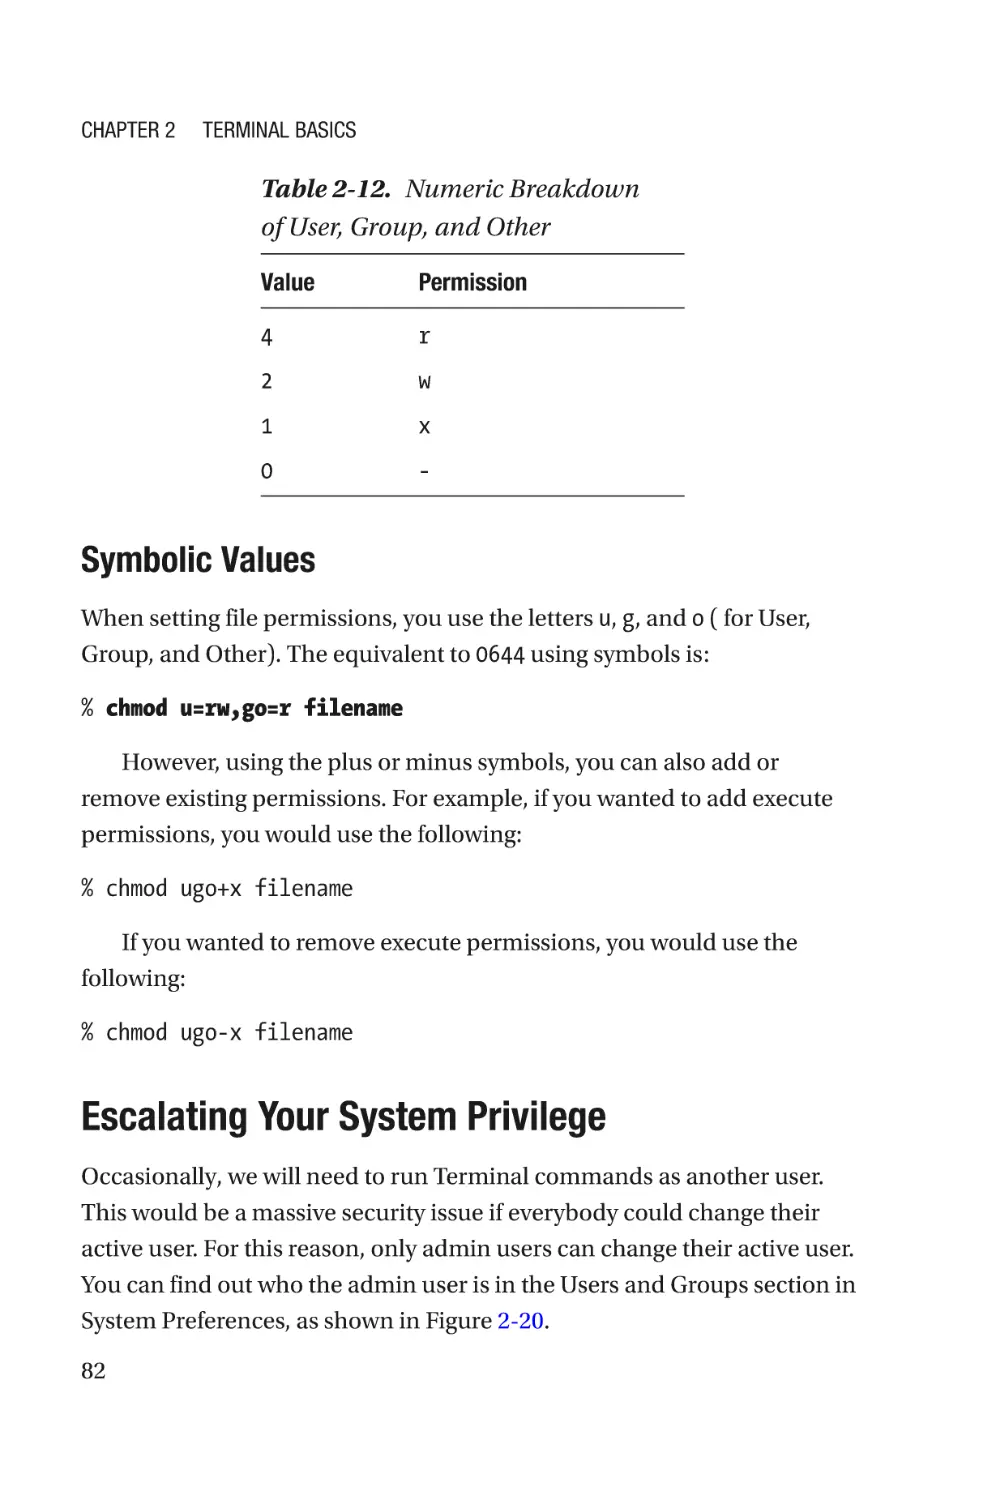
Escalating Your System Privilege������������������������������������������������������������������82
Aliases����������������������������������������������������������������������������������������������������������������84
Customizing the Feel������������������������������������������������������������������������������������������86
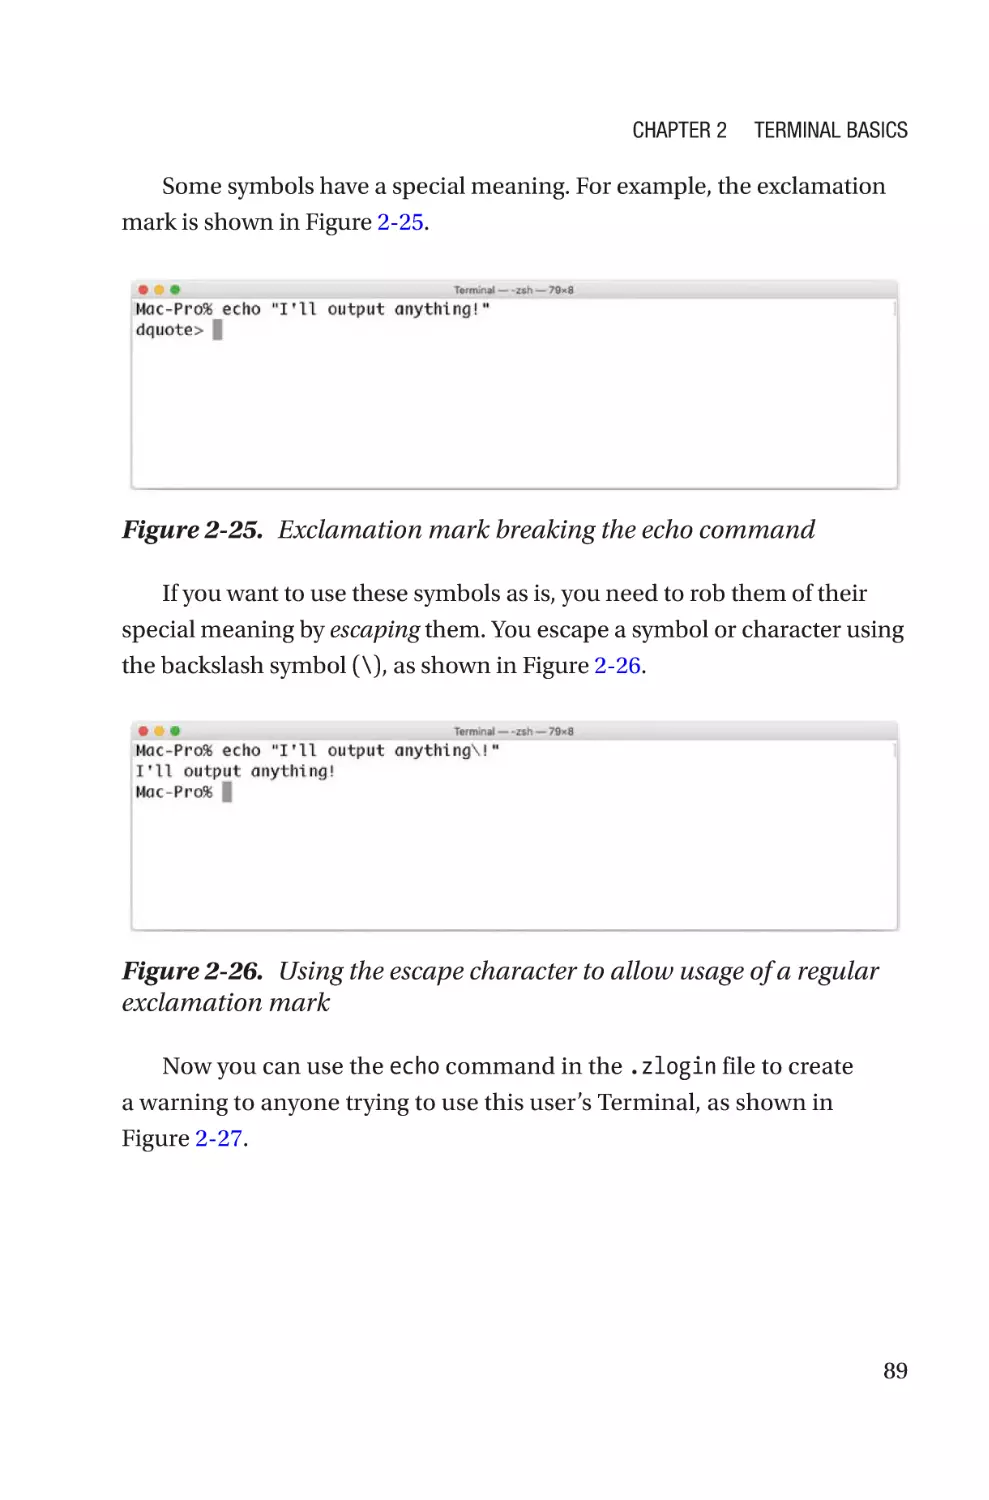
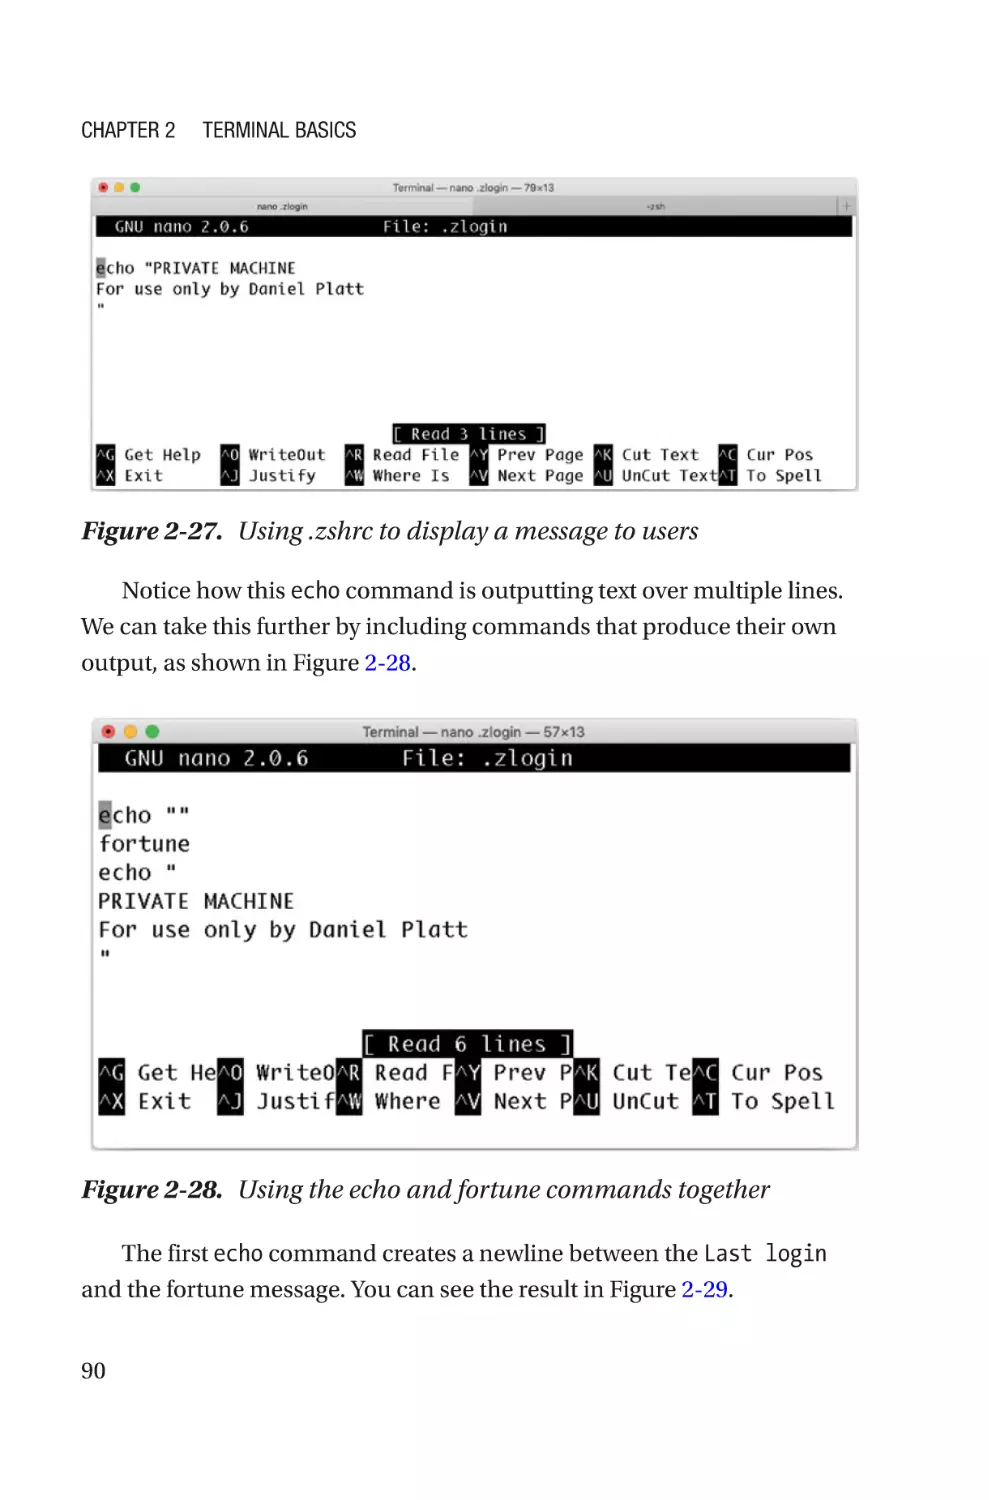
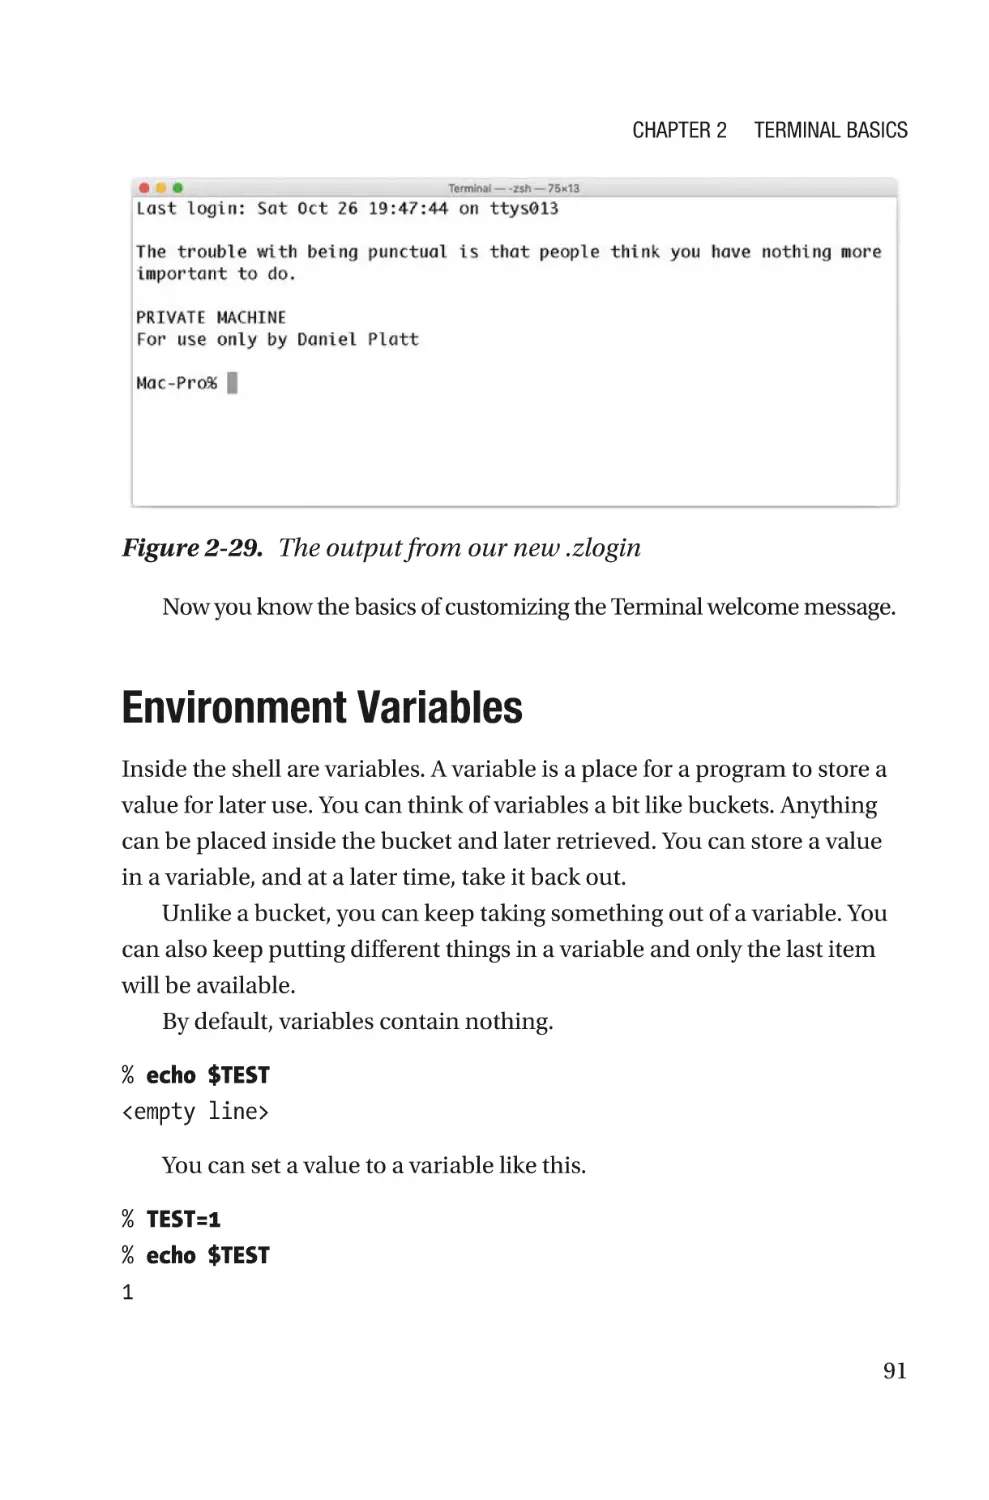
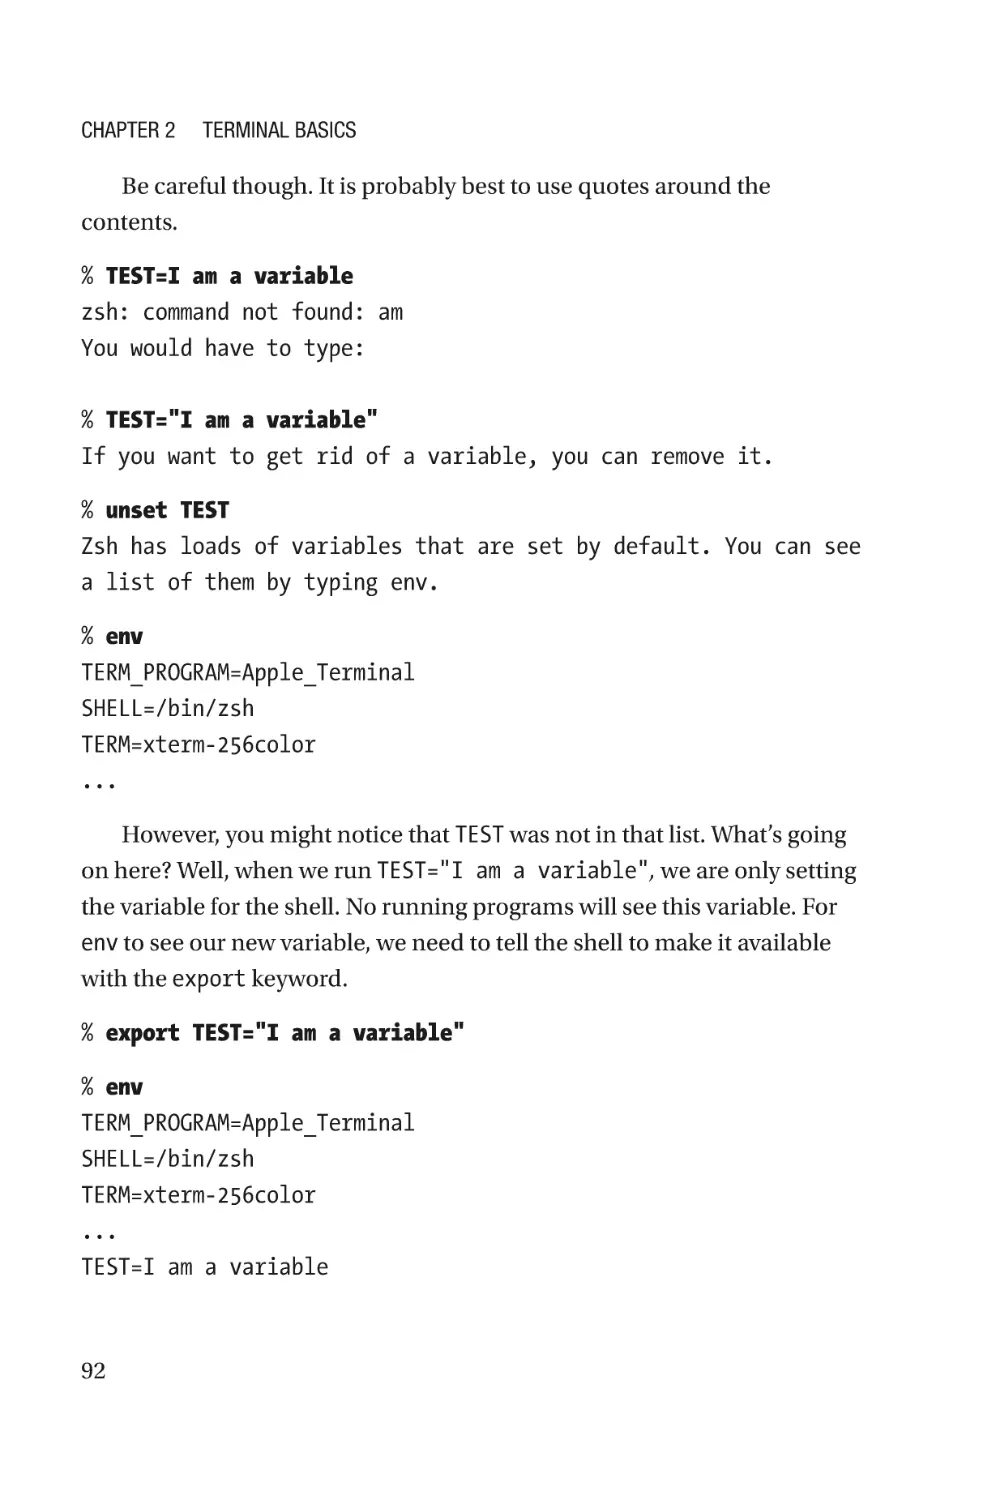
Customizing the Welcome Message�������������������������������������������������������������������88
Environment Variables����������������������������������������������������������������������������������������91
Why Use Variables?���������������������������������������������������������������������������������������93
vii
Table of Contents
The Default Text Editor����������������������������������������������������������������������������������93
How Can You Use Variables?�������������������������������������������������������������������������93
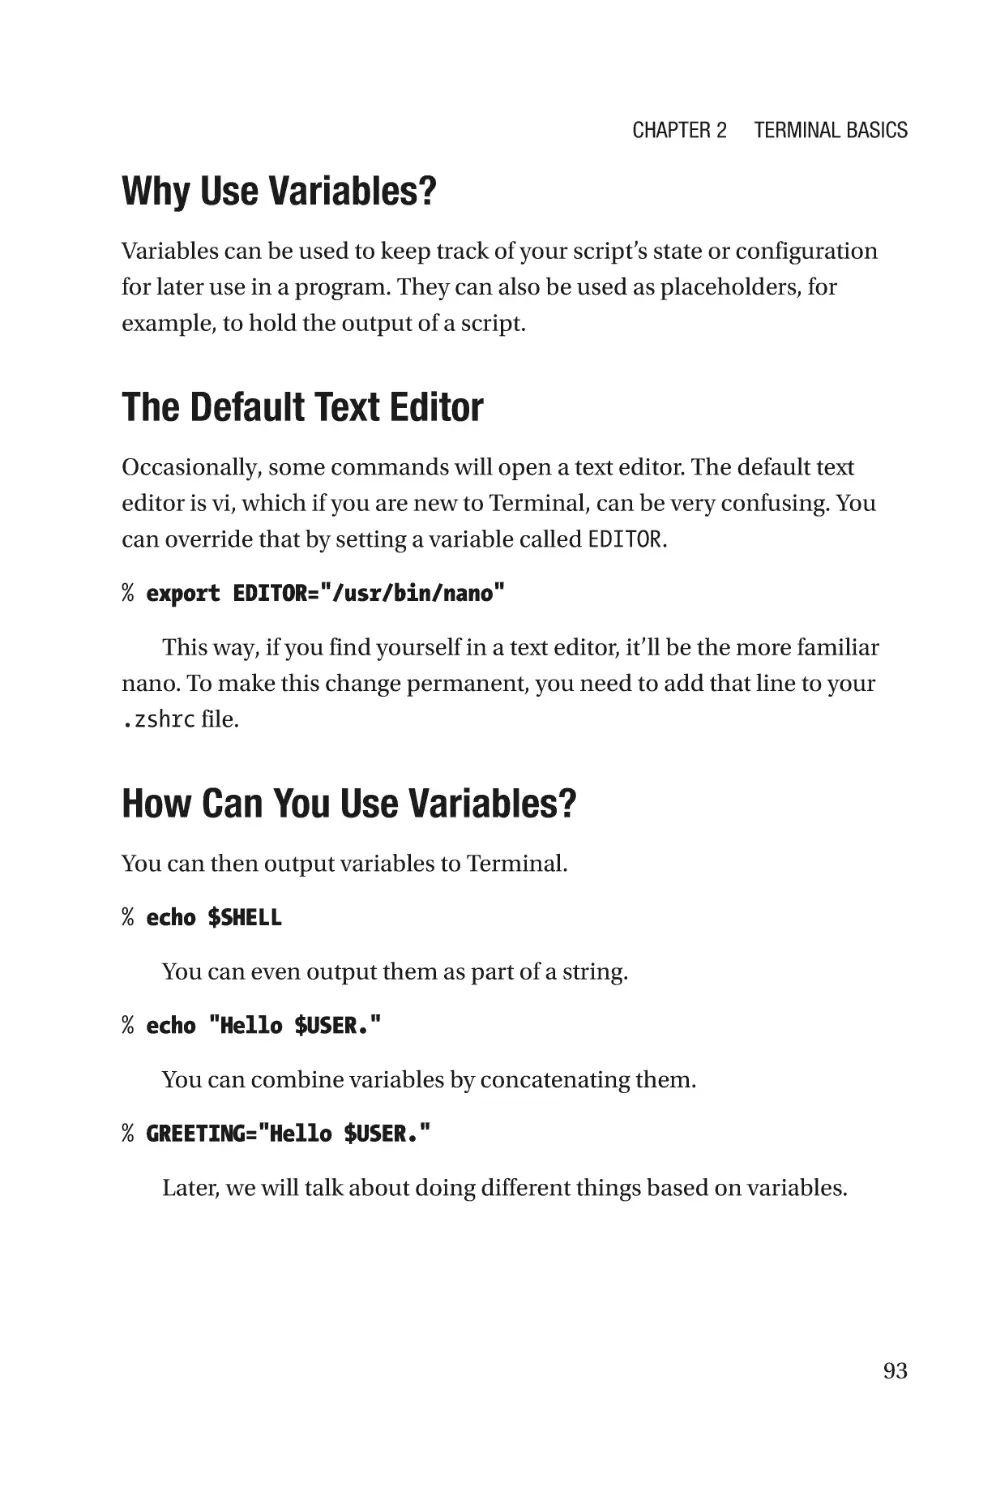
Customizing the Shell Prompt�����������������������������������������������������������������������������94
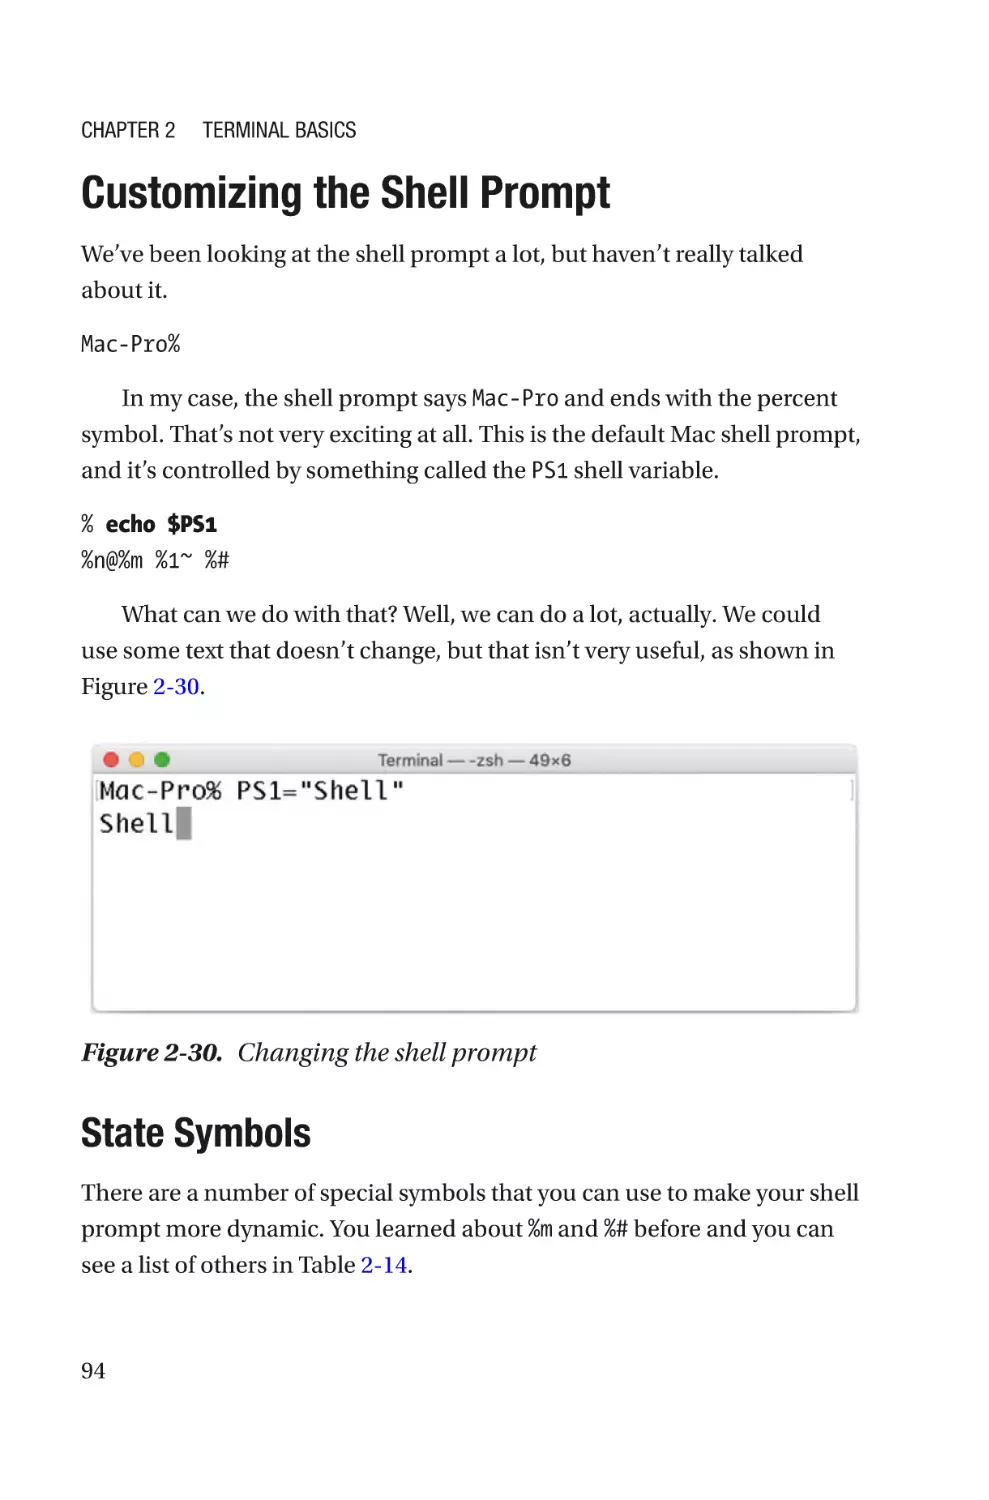
State Symbols�����������������������������������������������������������������������������������������������94
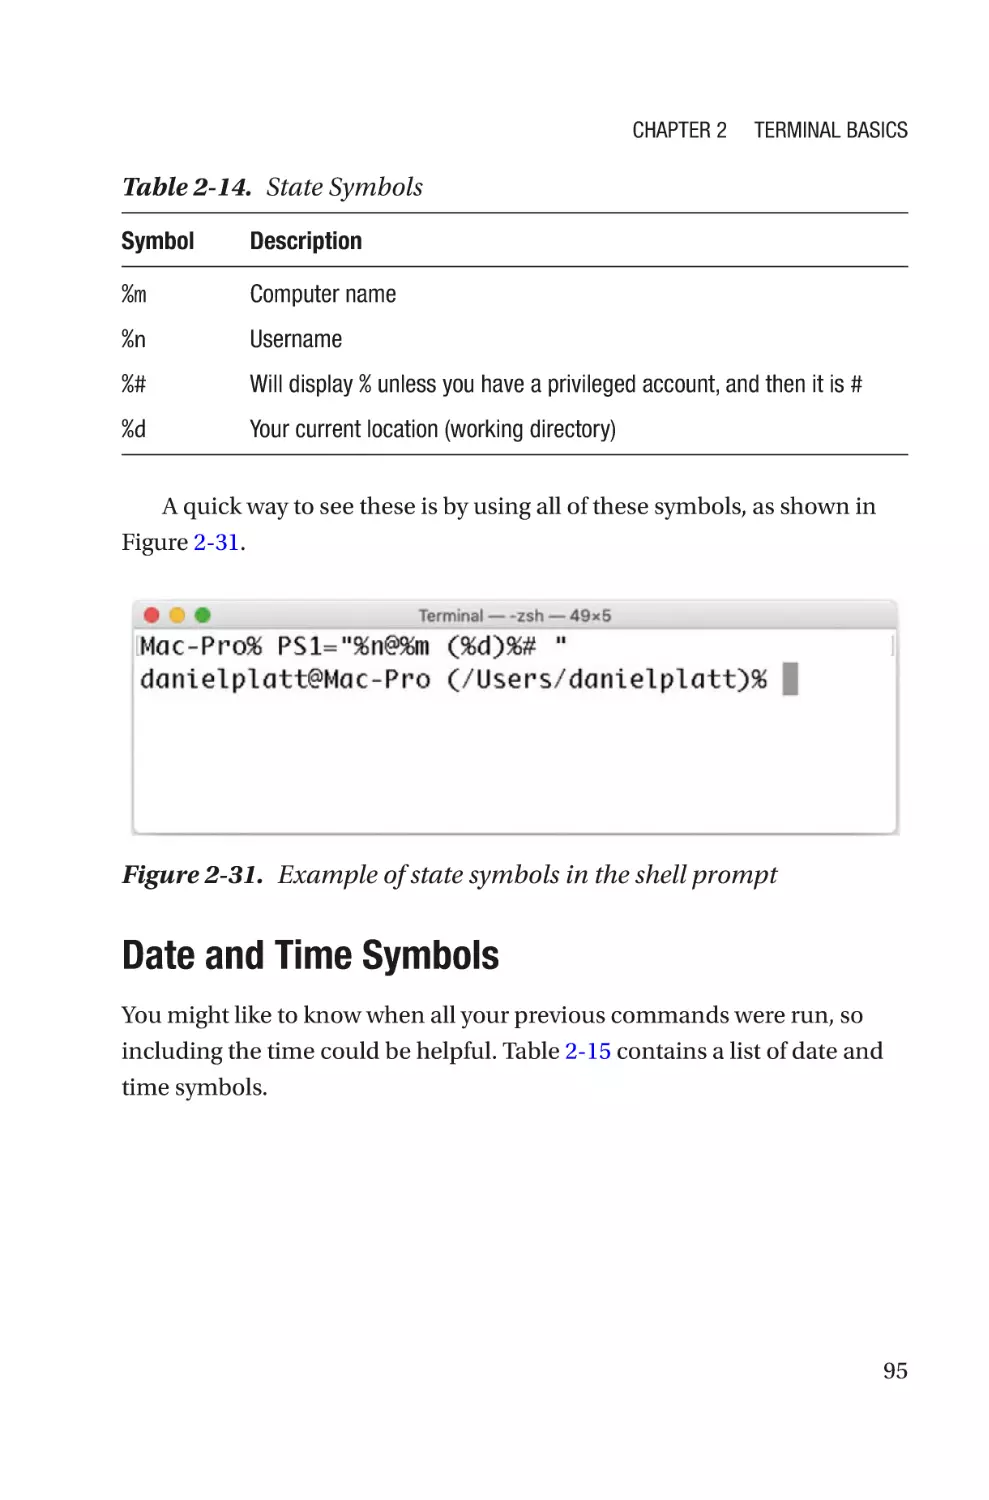
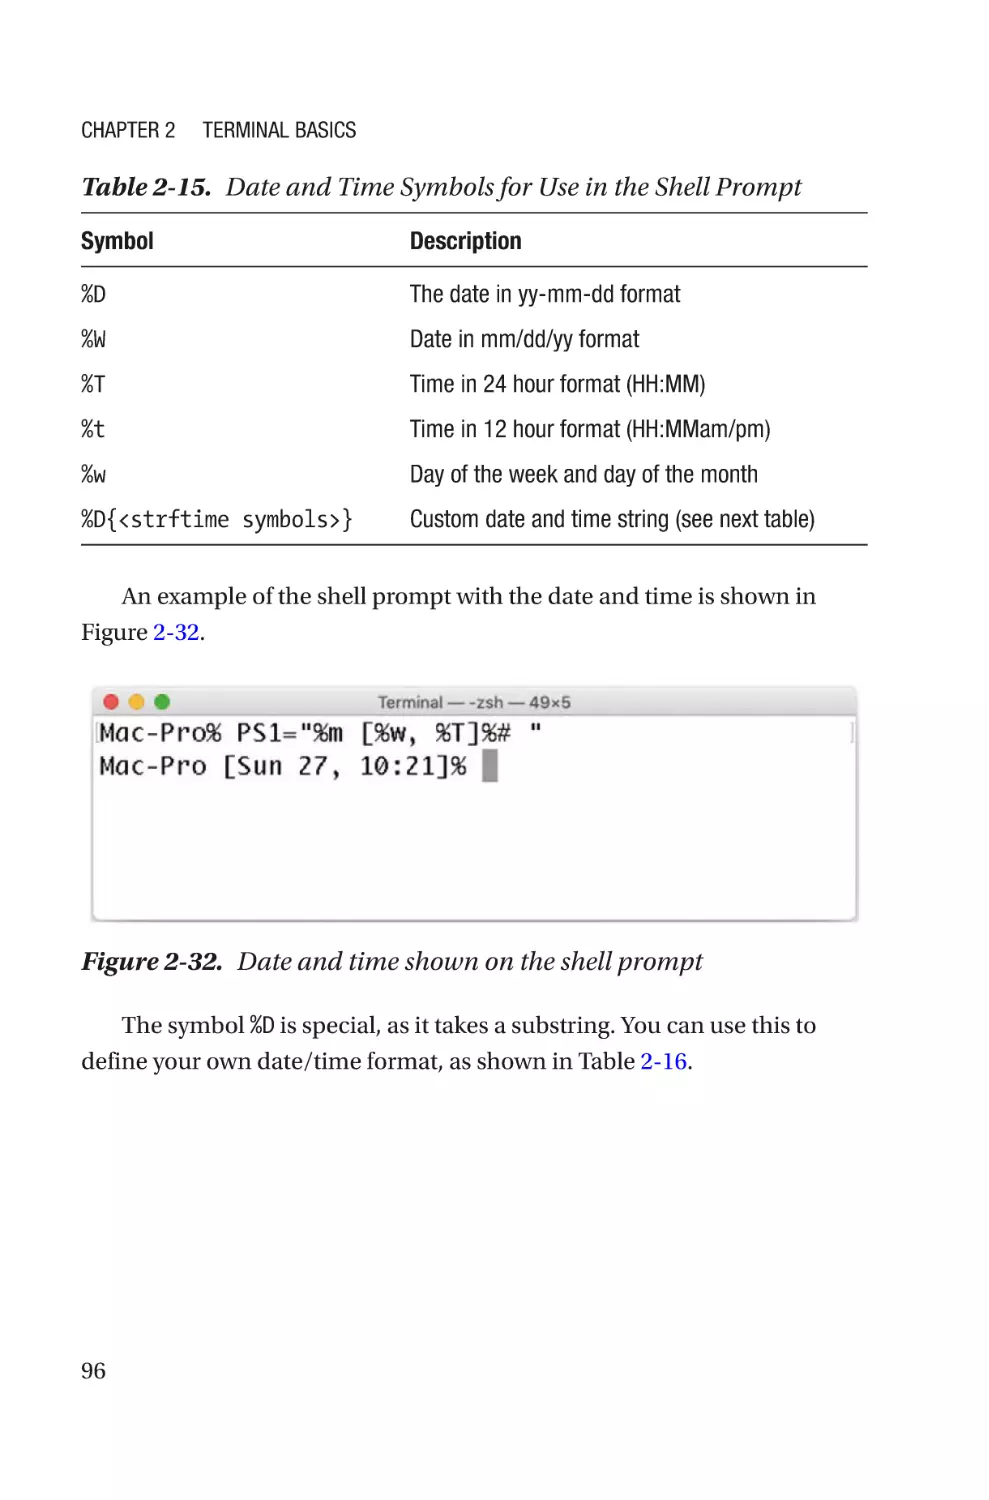
Date and Time Symbols���������������������������������������������������������������������������������95
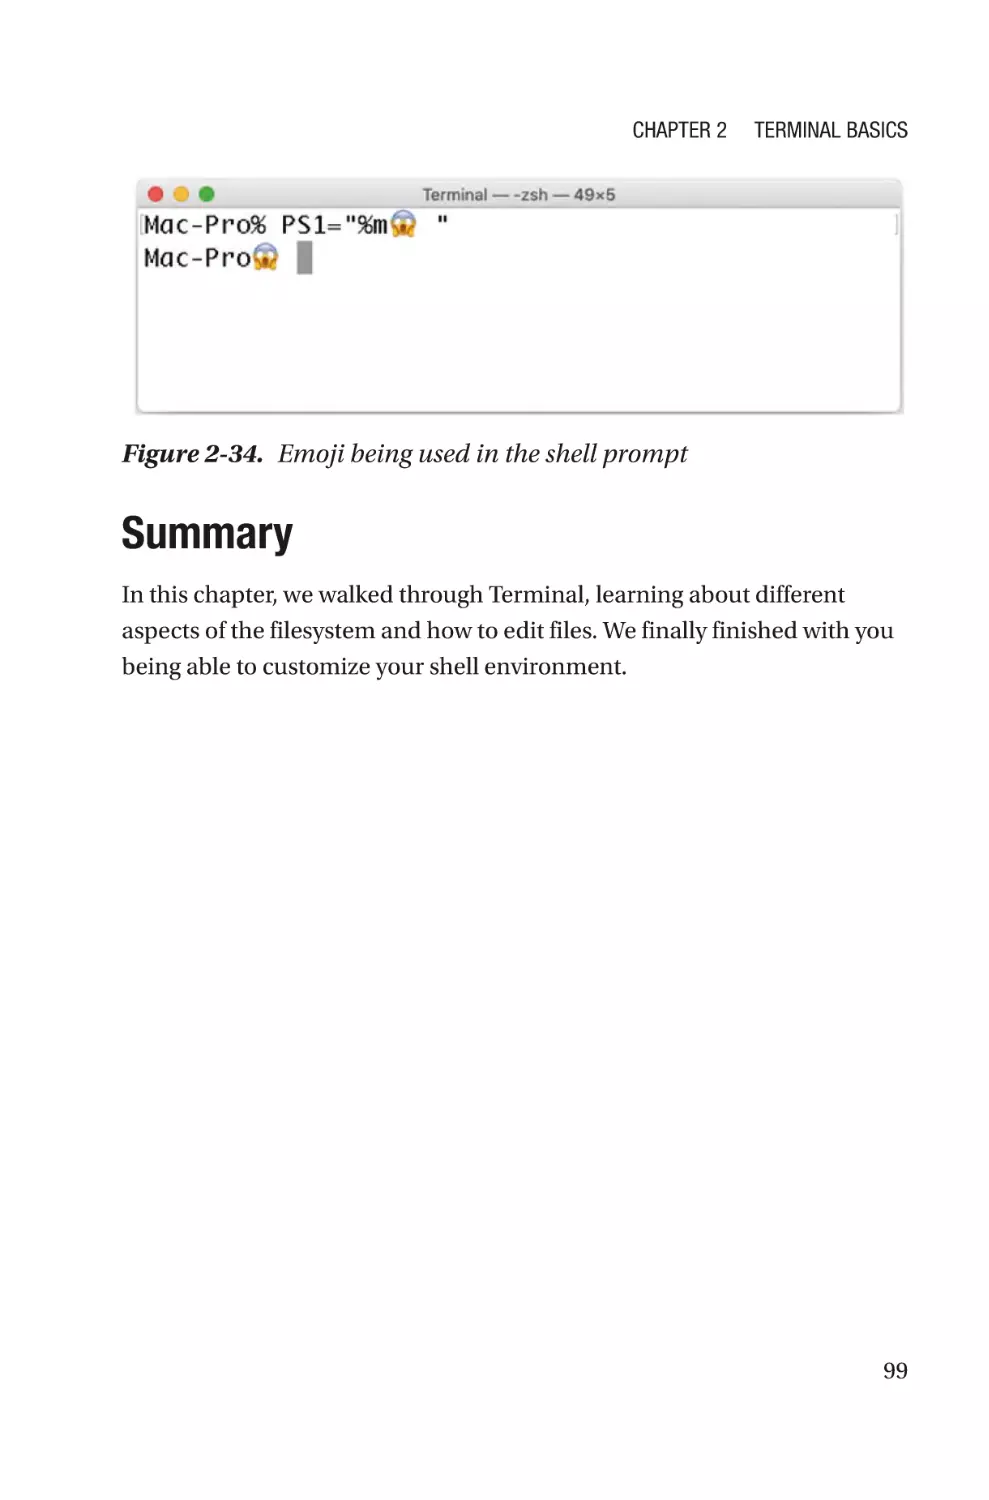
Summary������������������������������������������������������������������������������������������������������������99
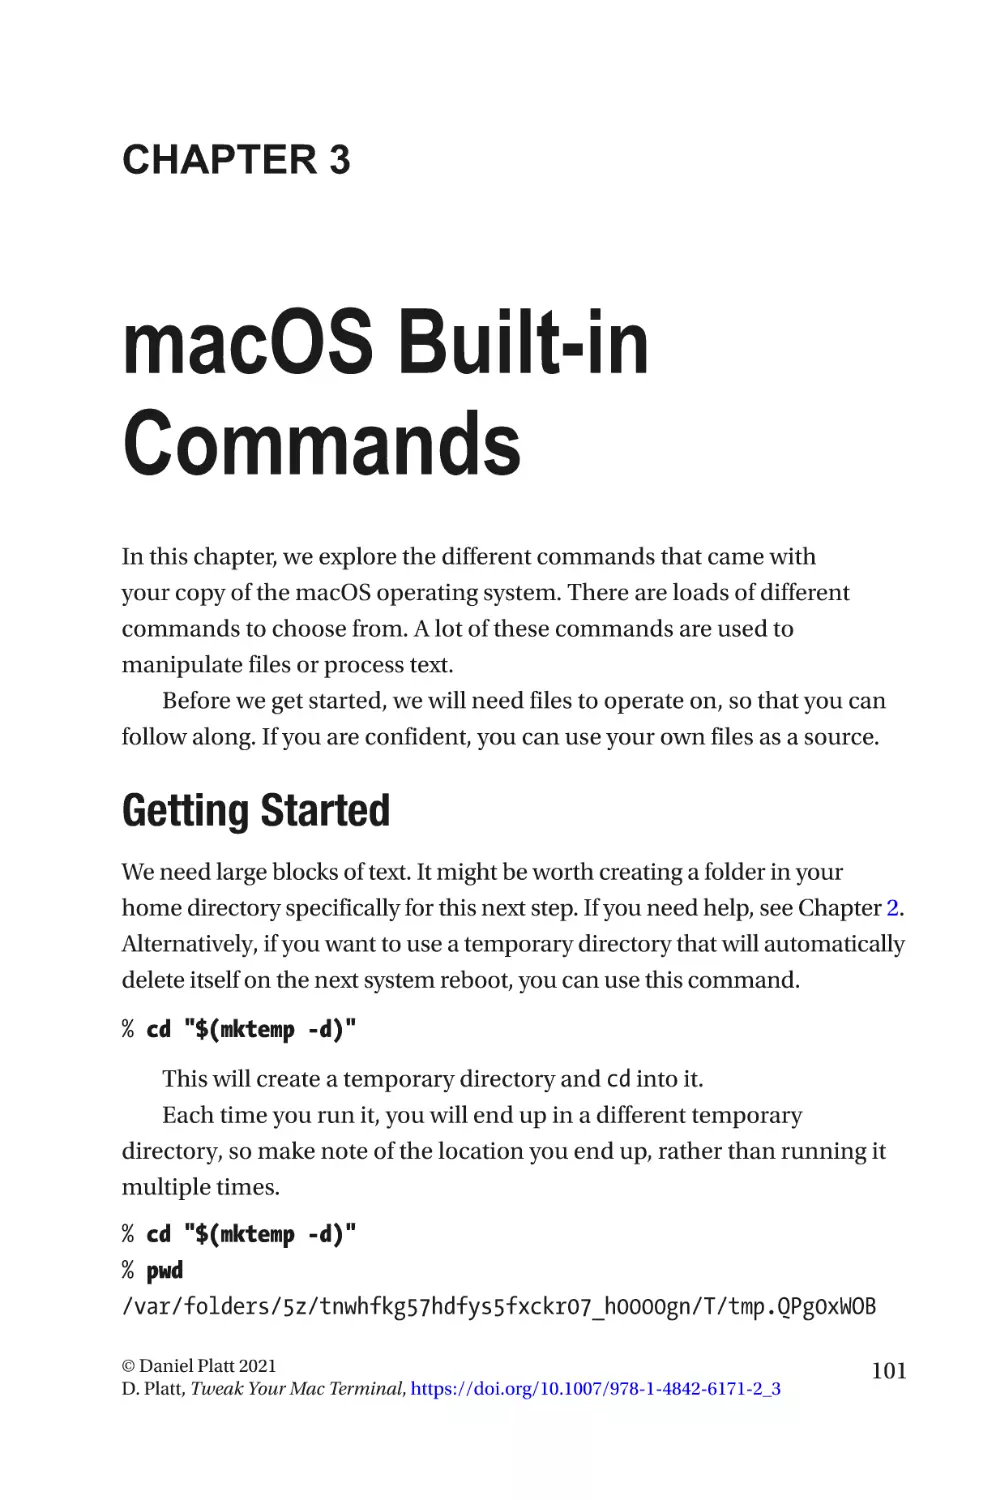
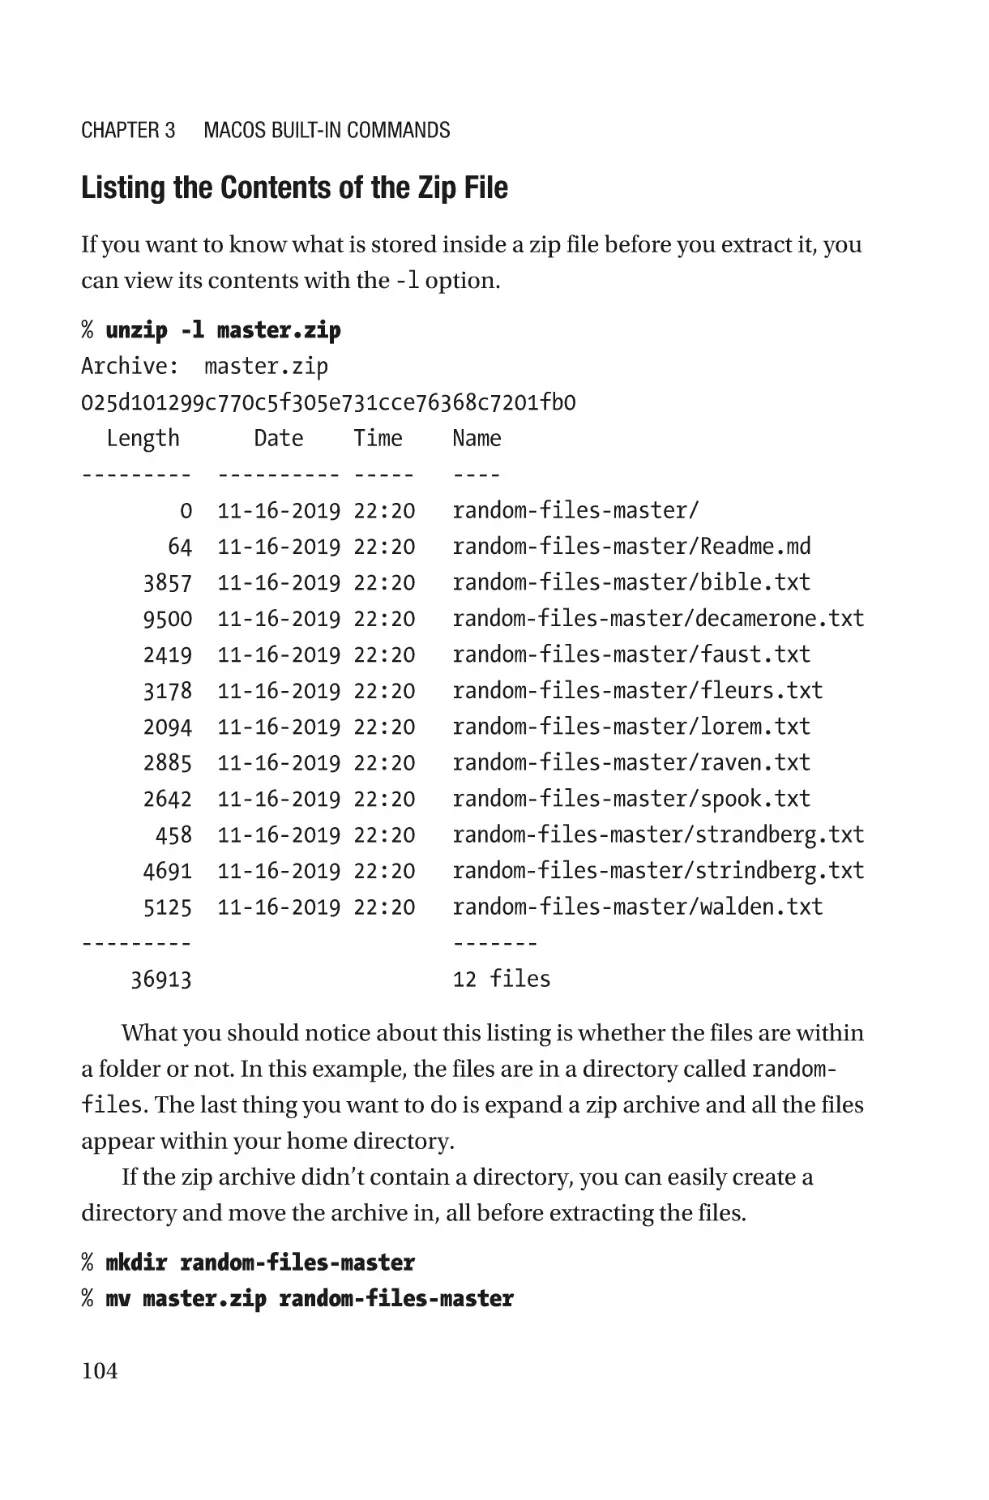
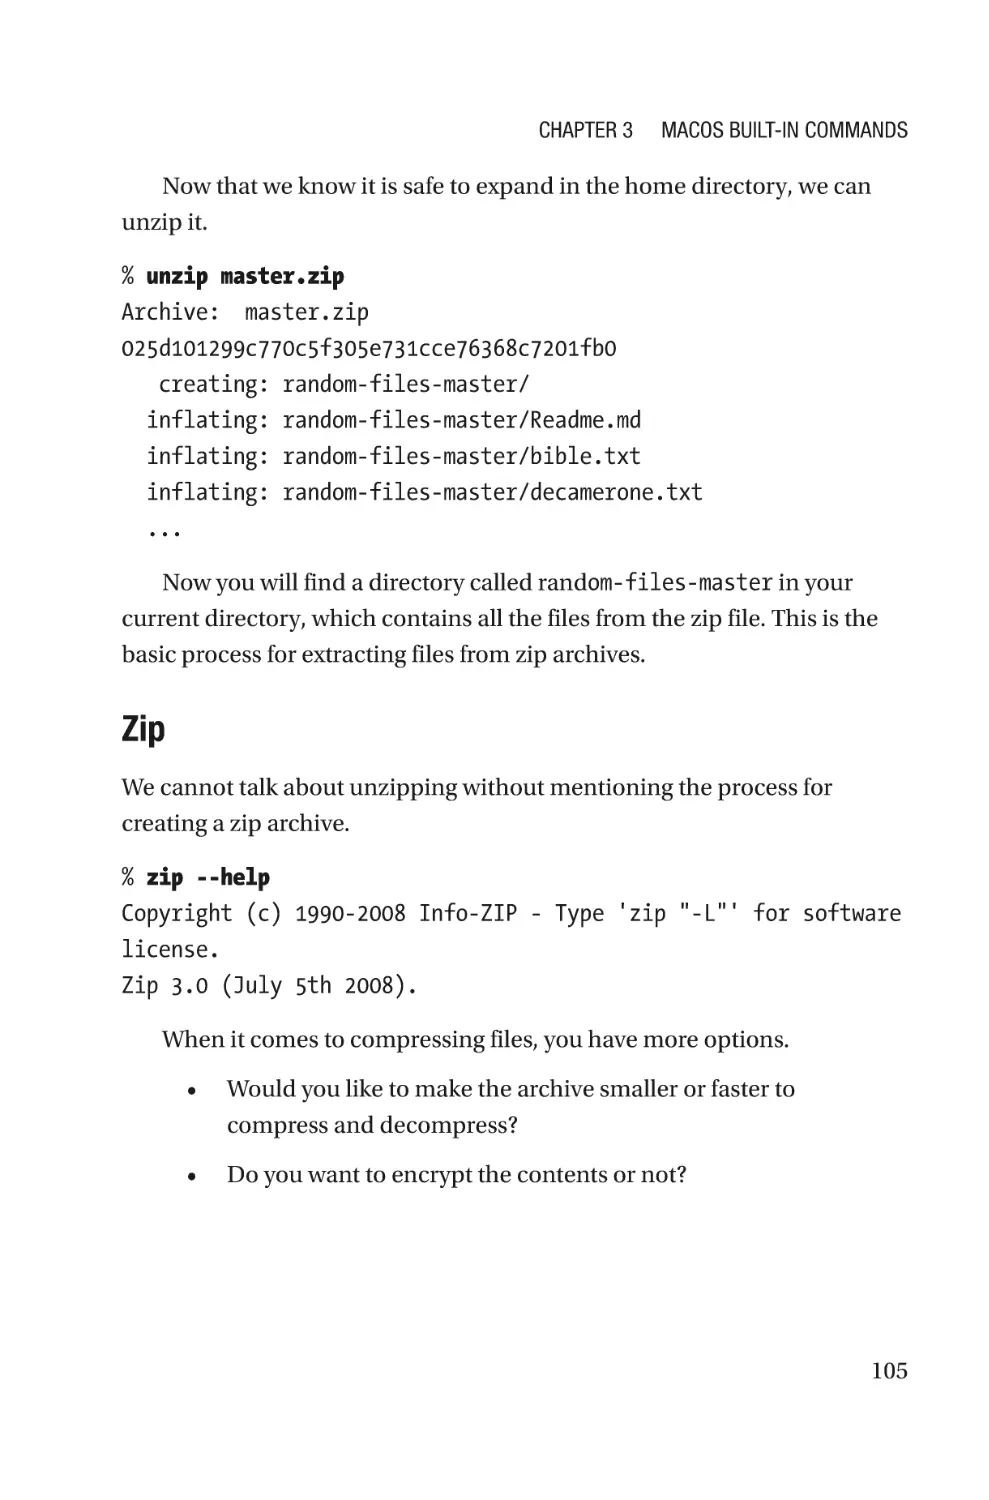
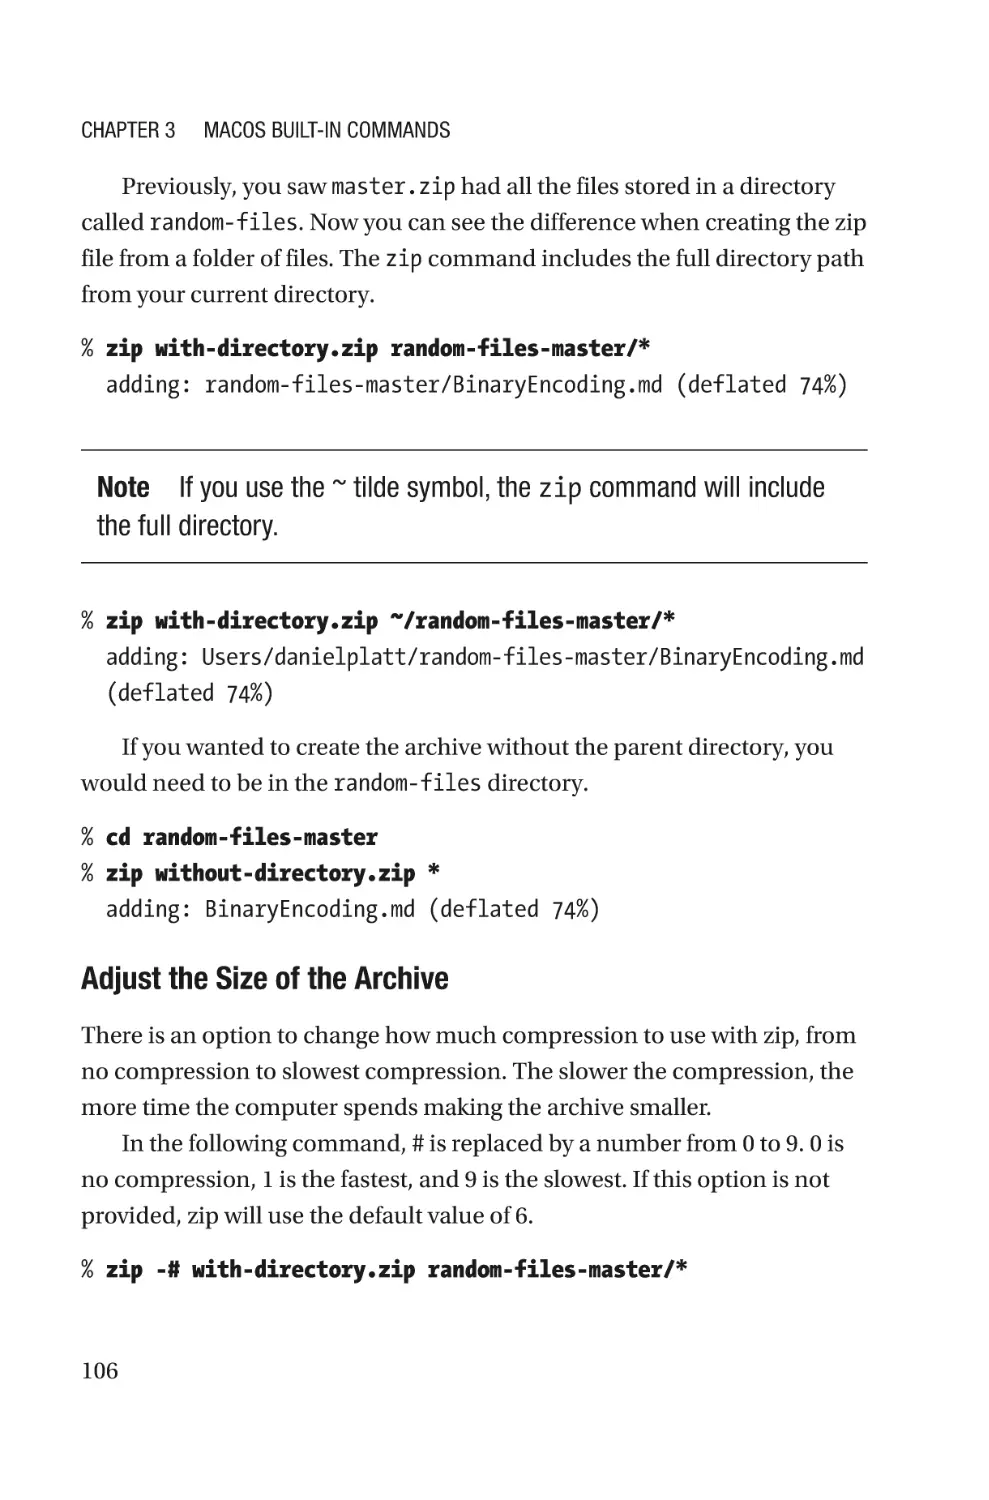
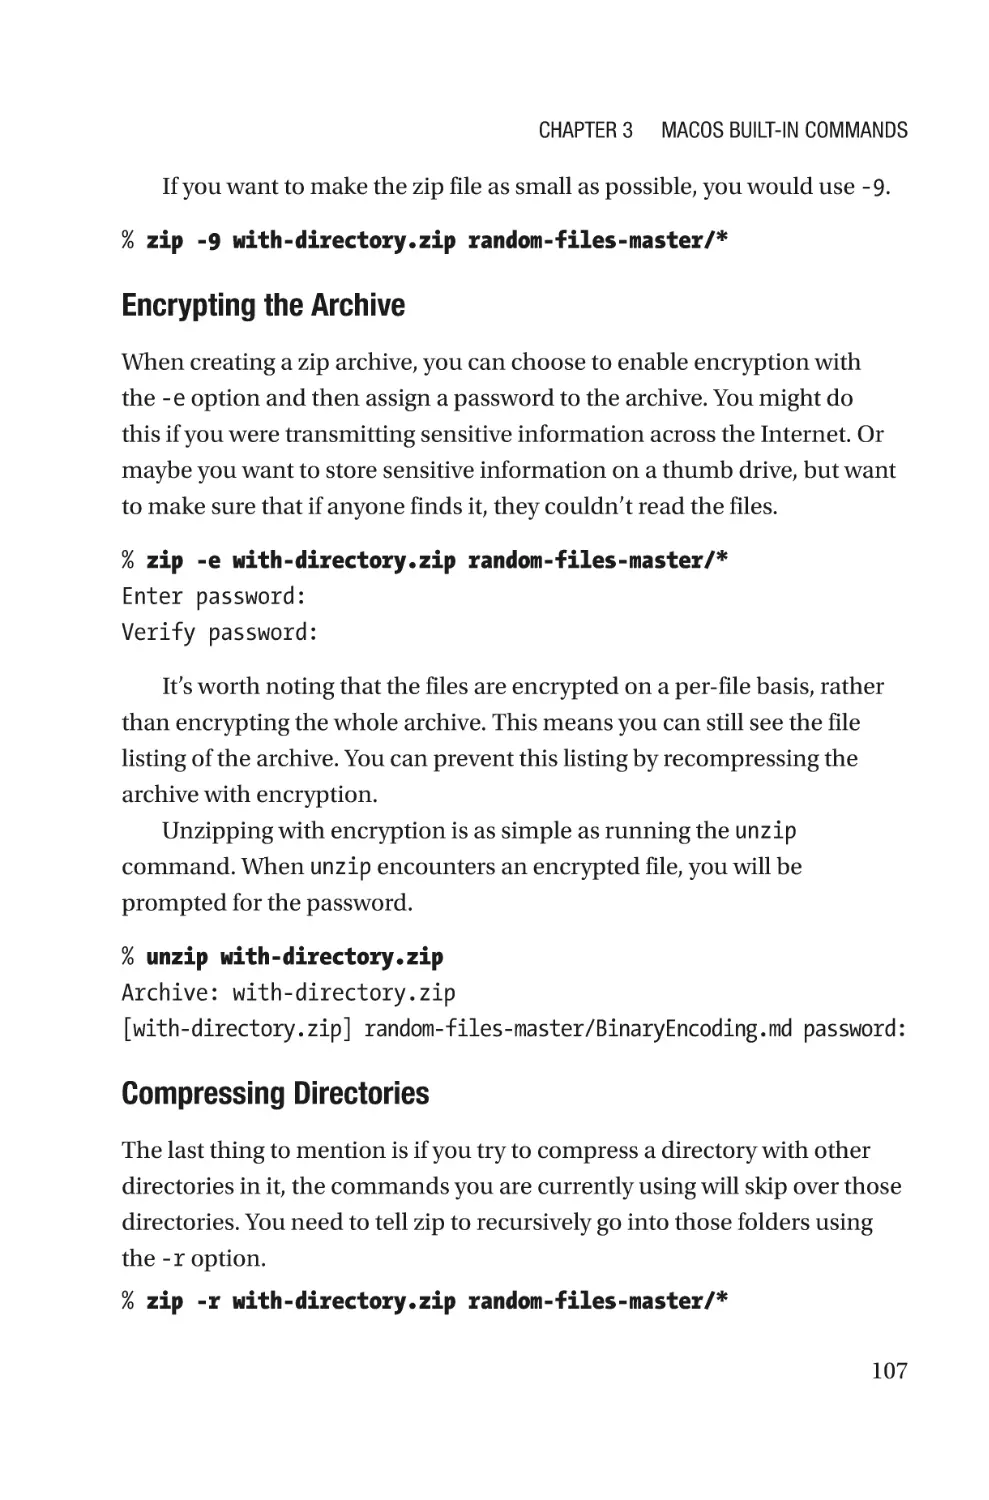
Chapter 3: macOS Built-in Commands���������������������������������������������101
Getting Started��������������������������������������������������������������������������������������������������101
Compression�����������������������������������������������������������������������������������������������������102
Zip Compression������������������������������������������������������������������������������������������102
Gzip Compression����������������������������������������������������������������������������������������108
Working with Files��������������������������������������������������������������������������������������������110
Finding Content in Files�������������������������������������������������������������������������������110
Finding a Filename��������������������������������������������������������������������������������������114
Finding a Filename with locate�������������������������������������������������������������������115
Where Is Your Command?���������������������������������������������������������������������������116
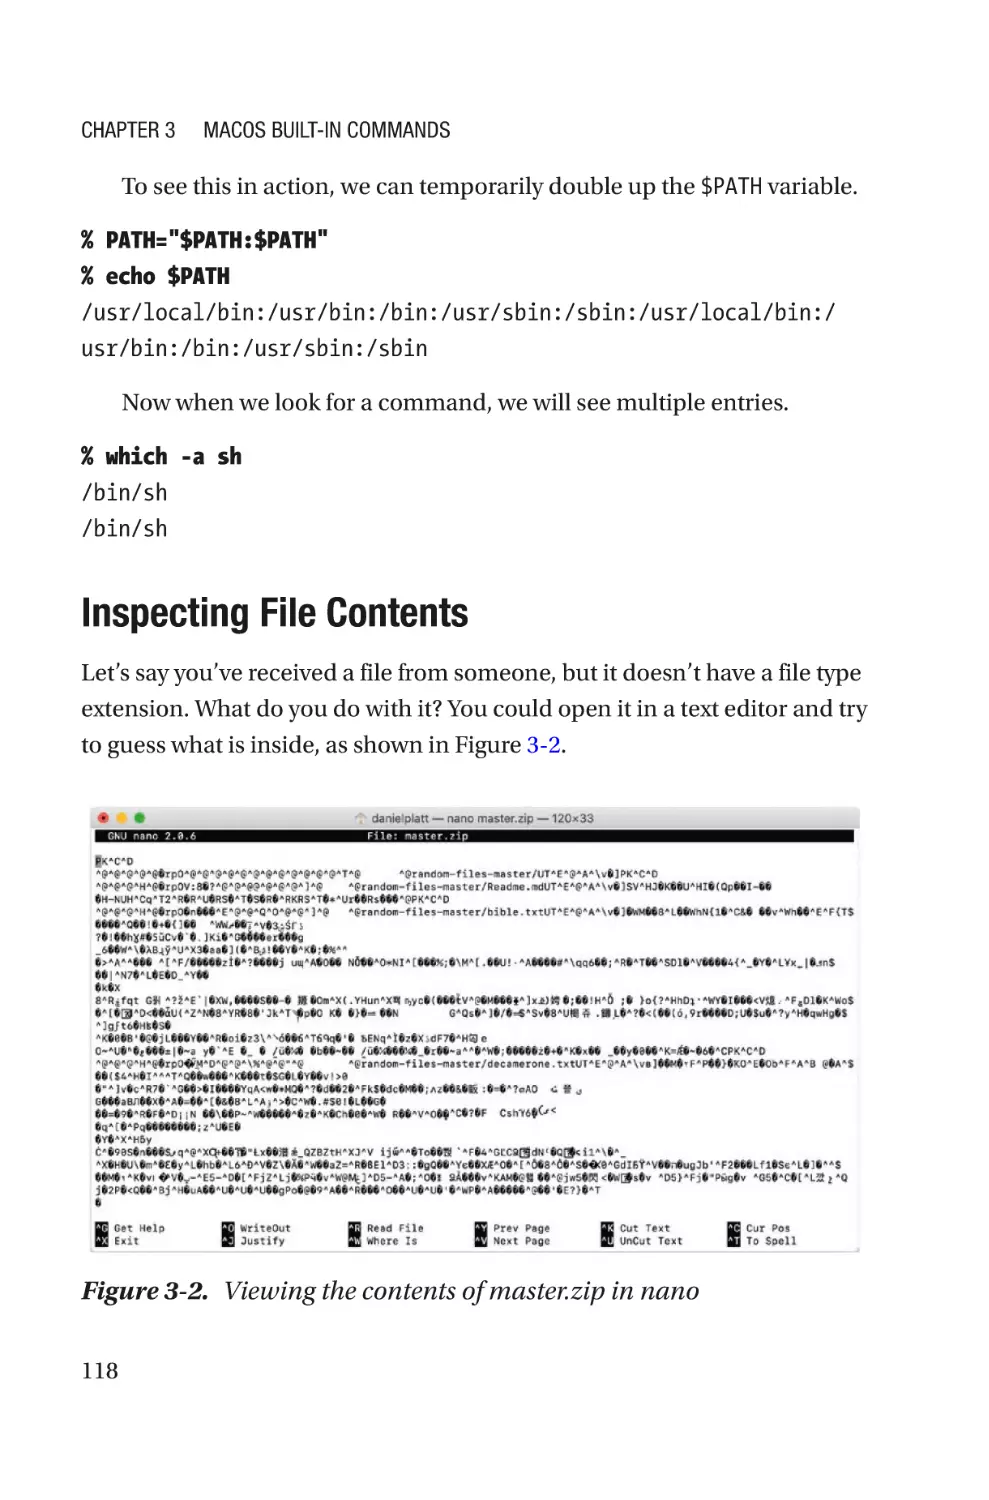
Inspecting File Contents������������������������������������������������������������������������������118
Working with Text����������������������������������������������������������������������������������������������121
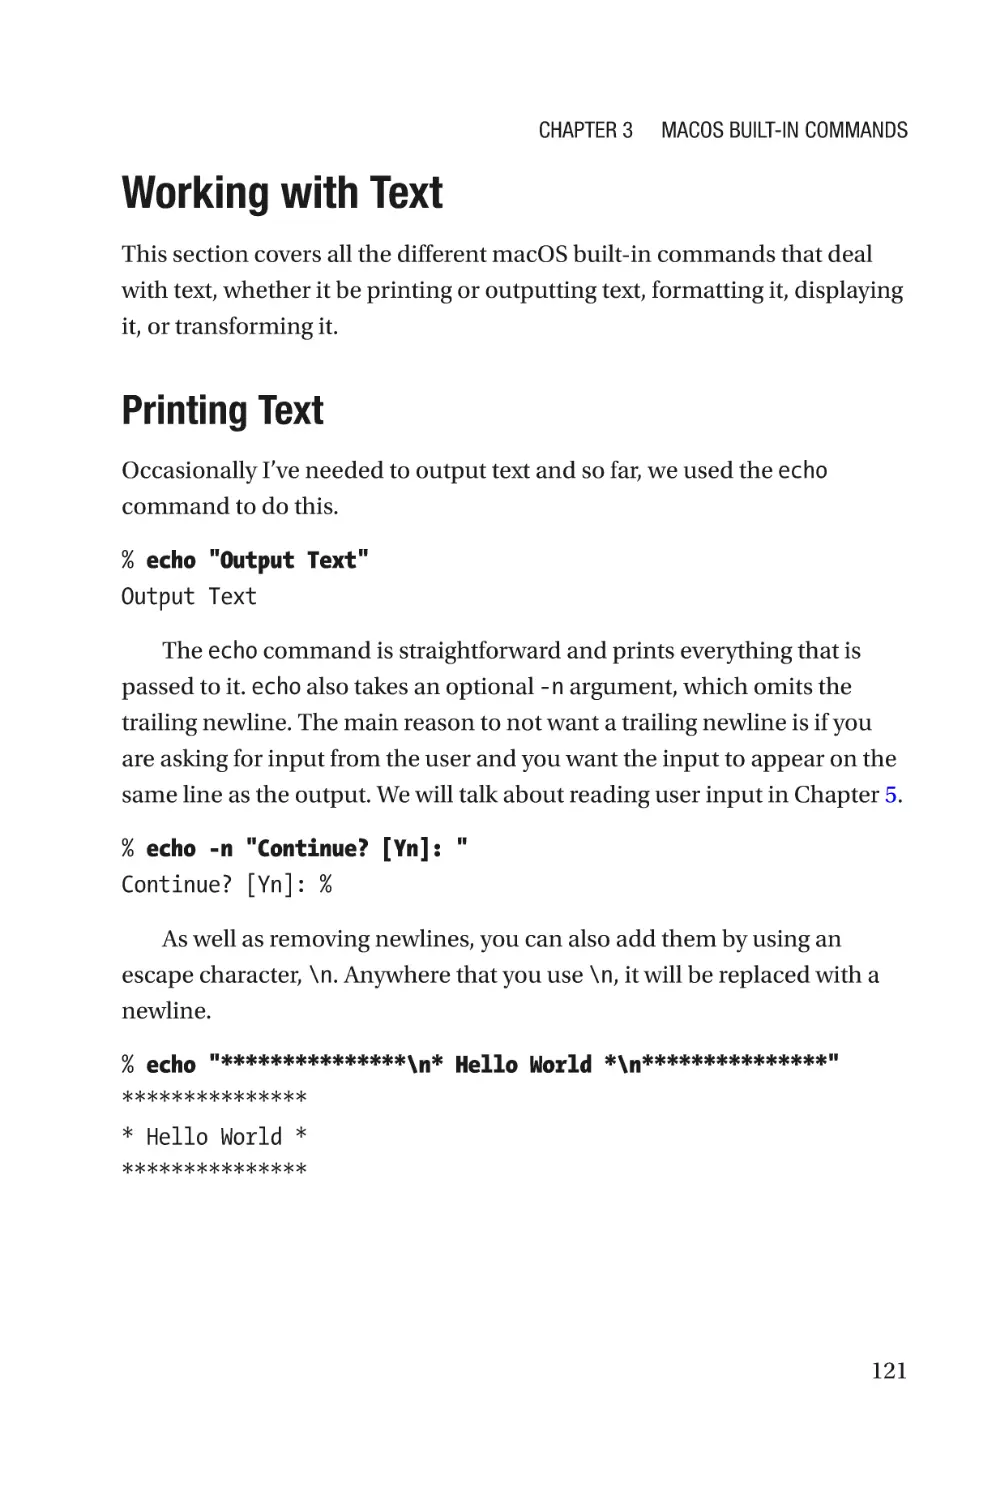
Printing Text�������������������������������������������������������������������������������������������������121
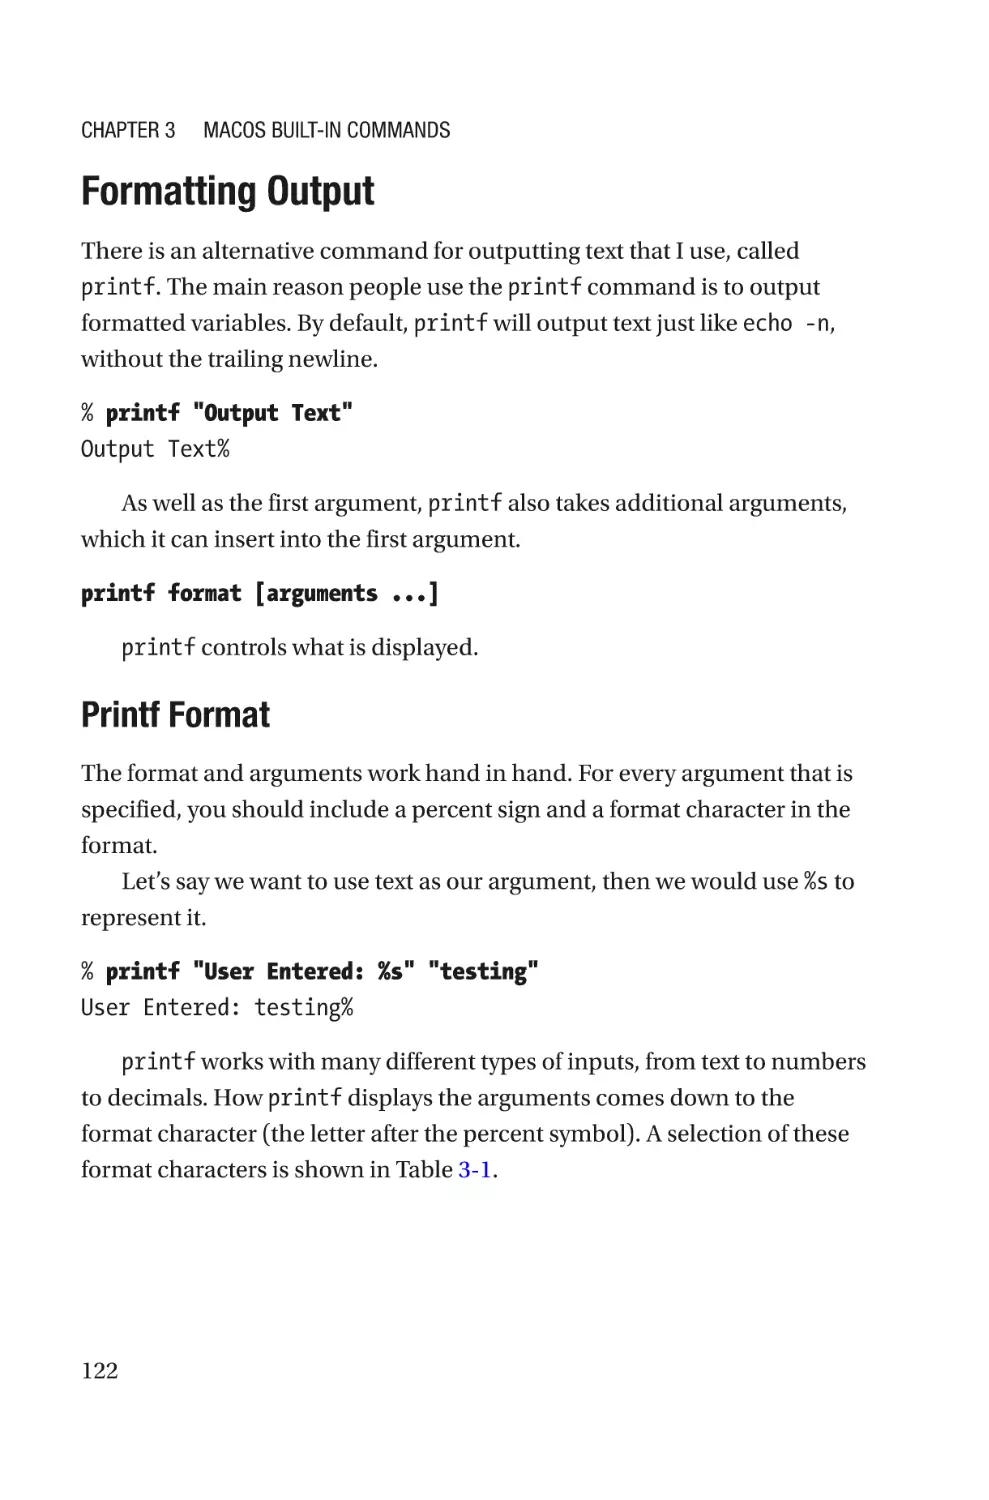
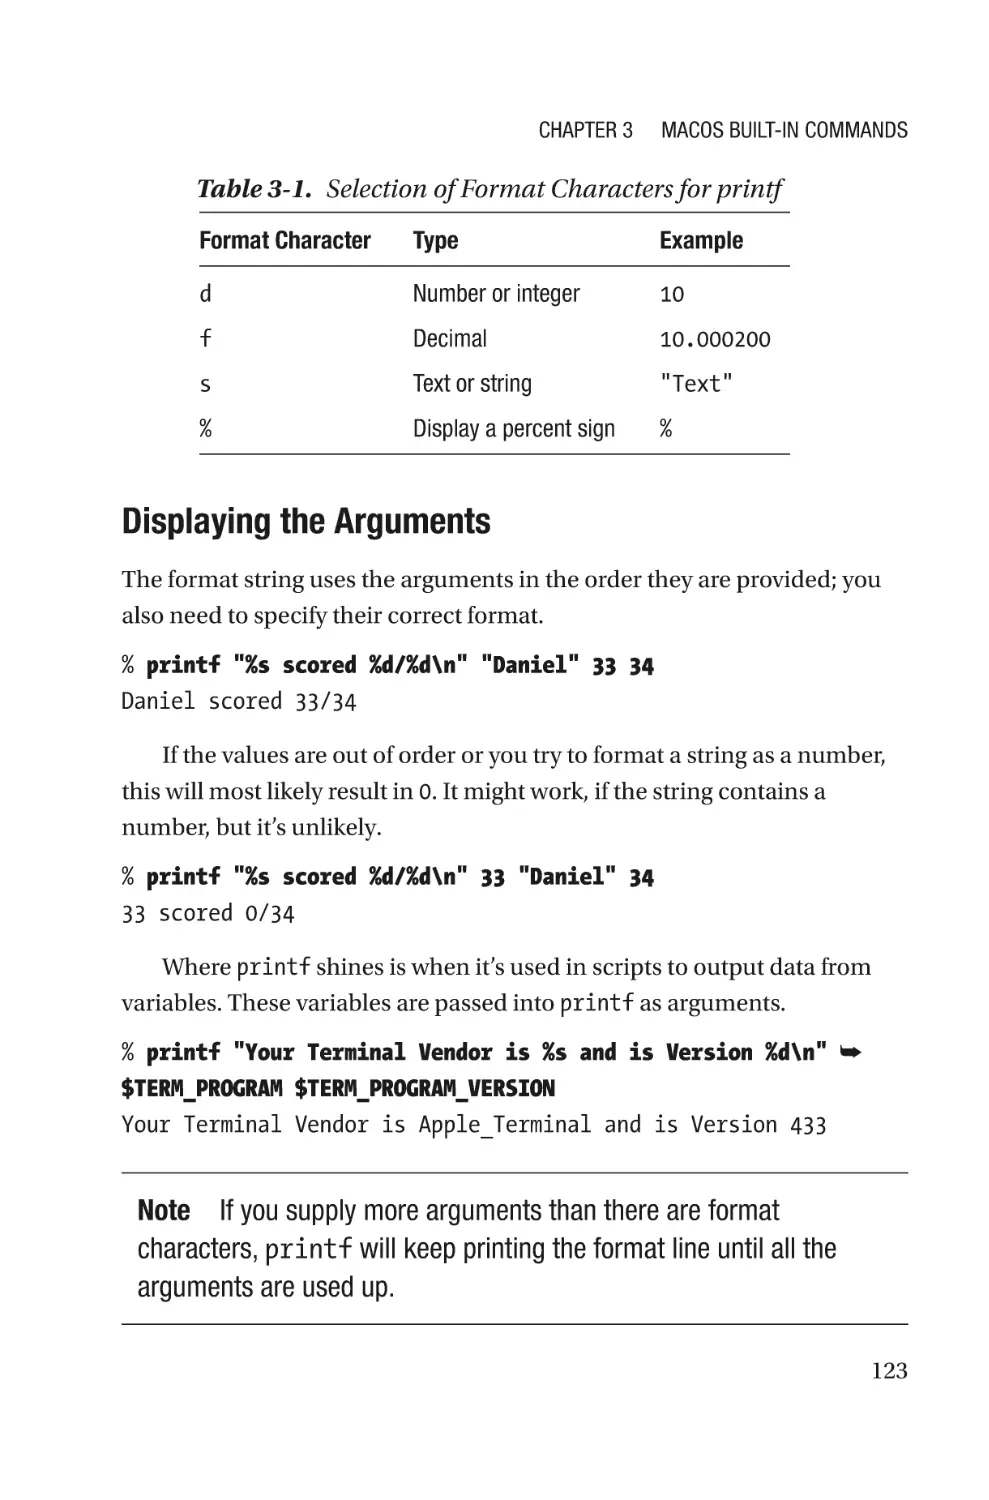
Formatting Output���������������������������������������������������������������������������������������122
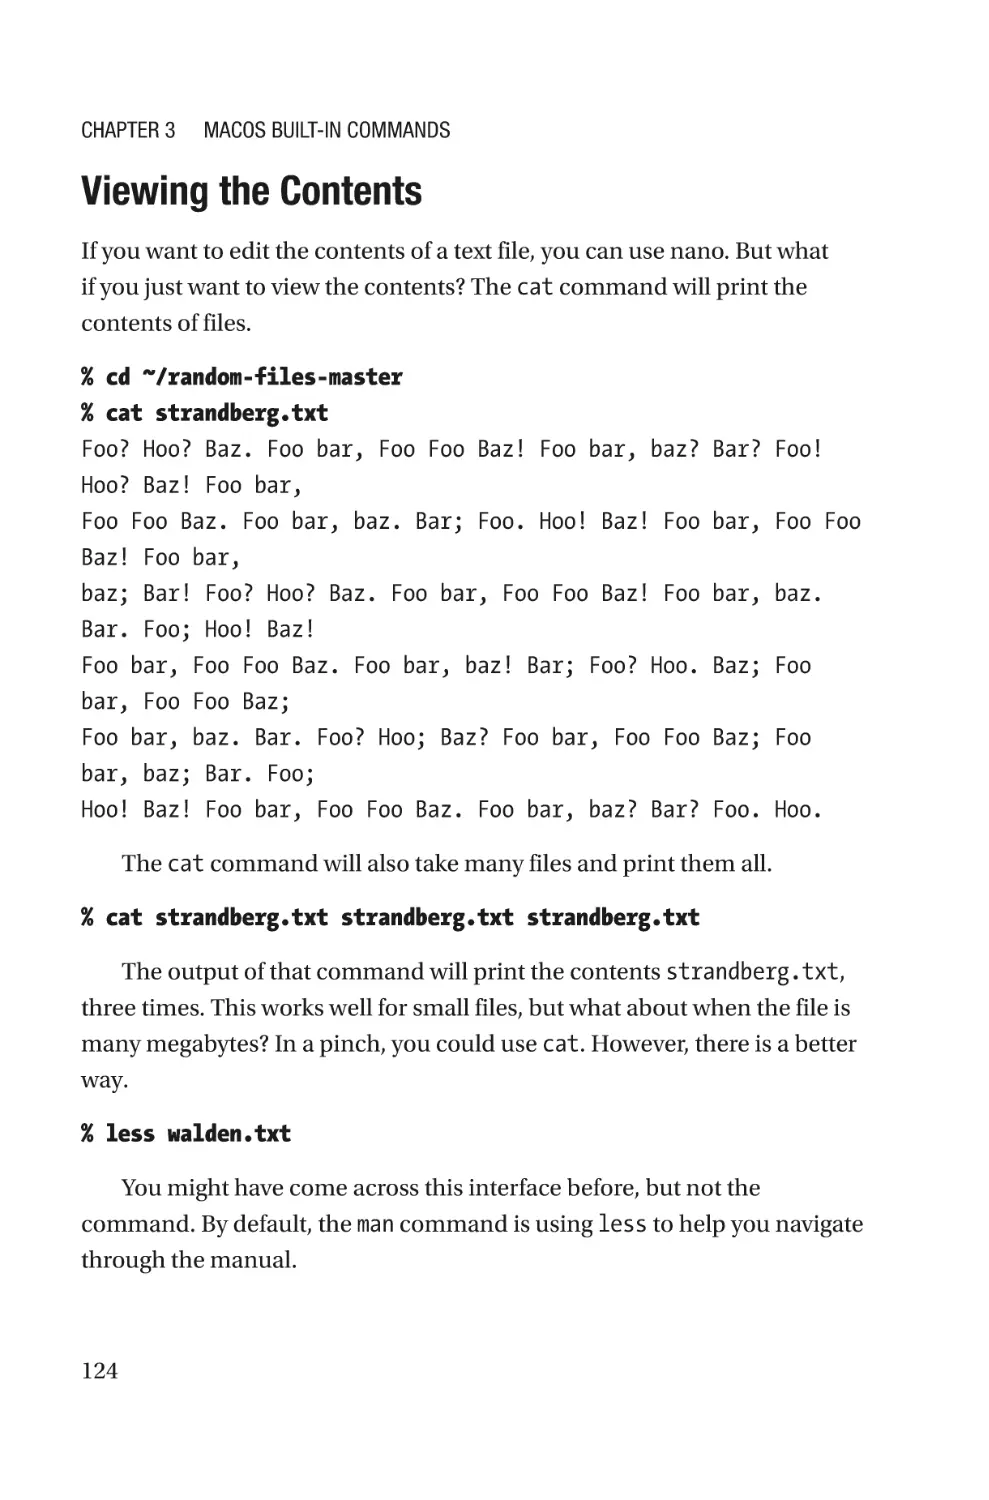
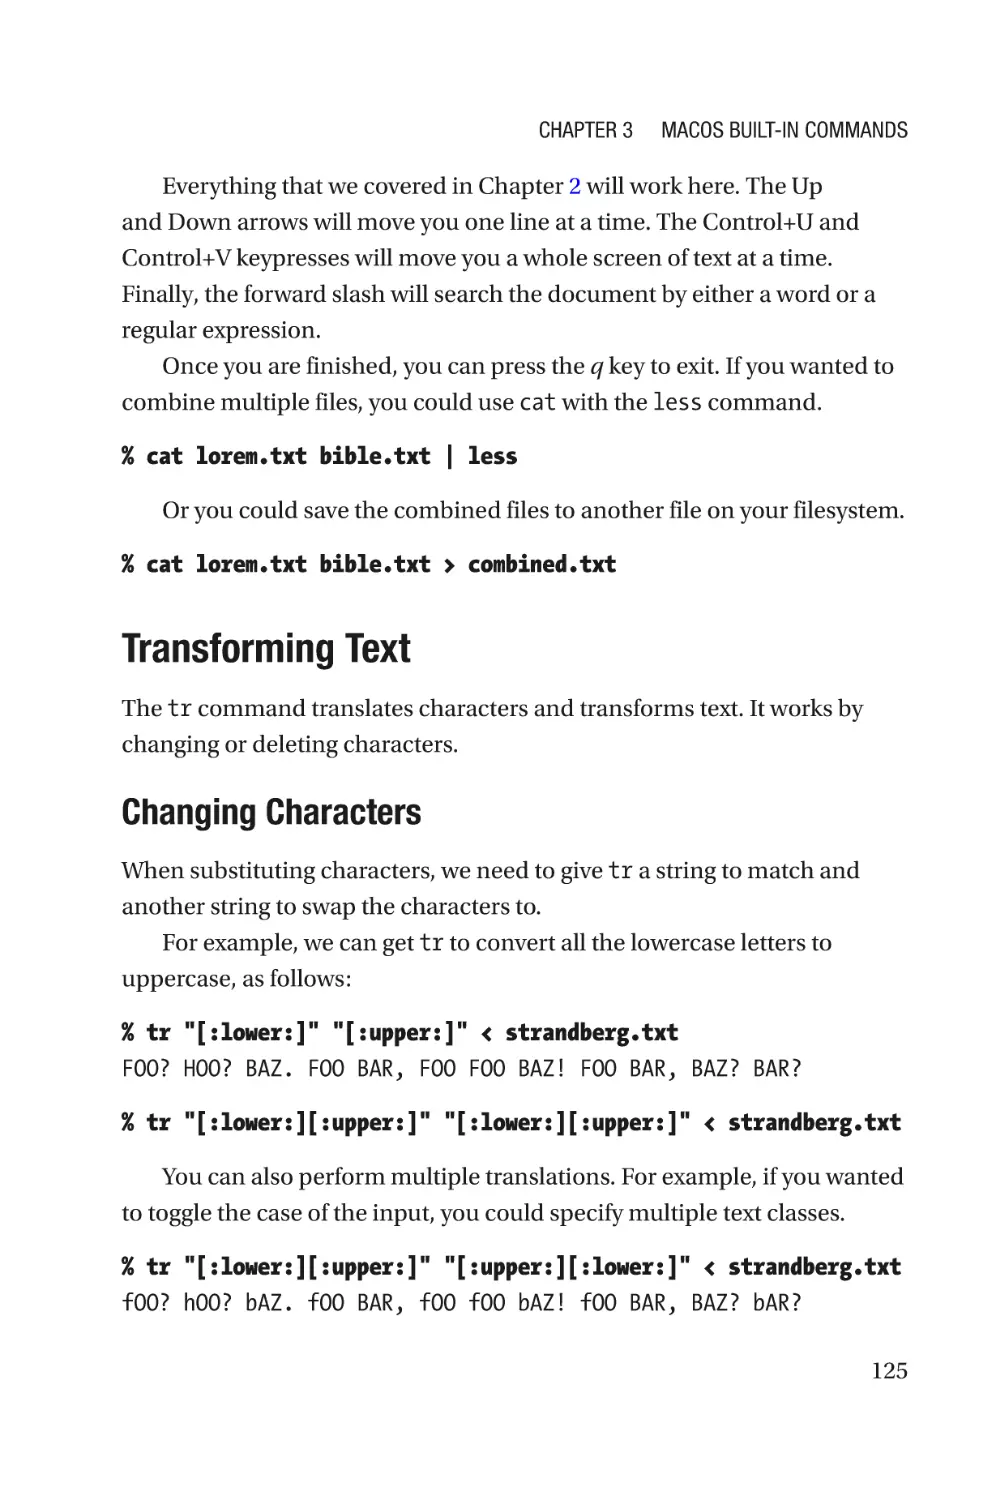
Viewing the Contents�����������������������������������������������������������������������������������124
Transforming Text����������������������������������������������������������������������������������������125
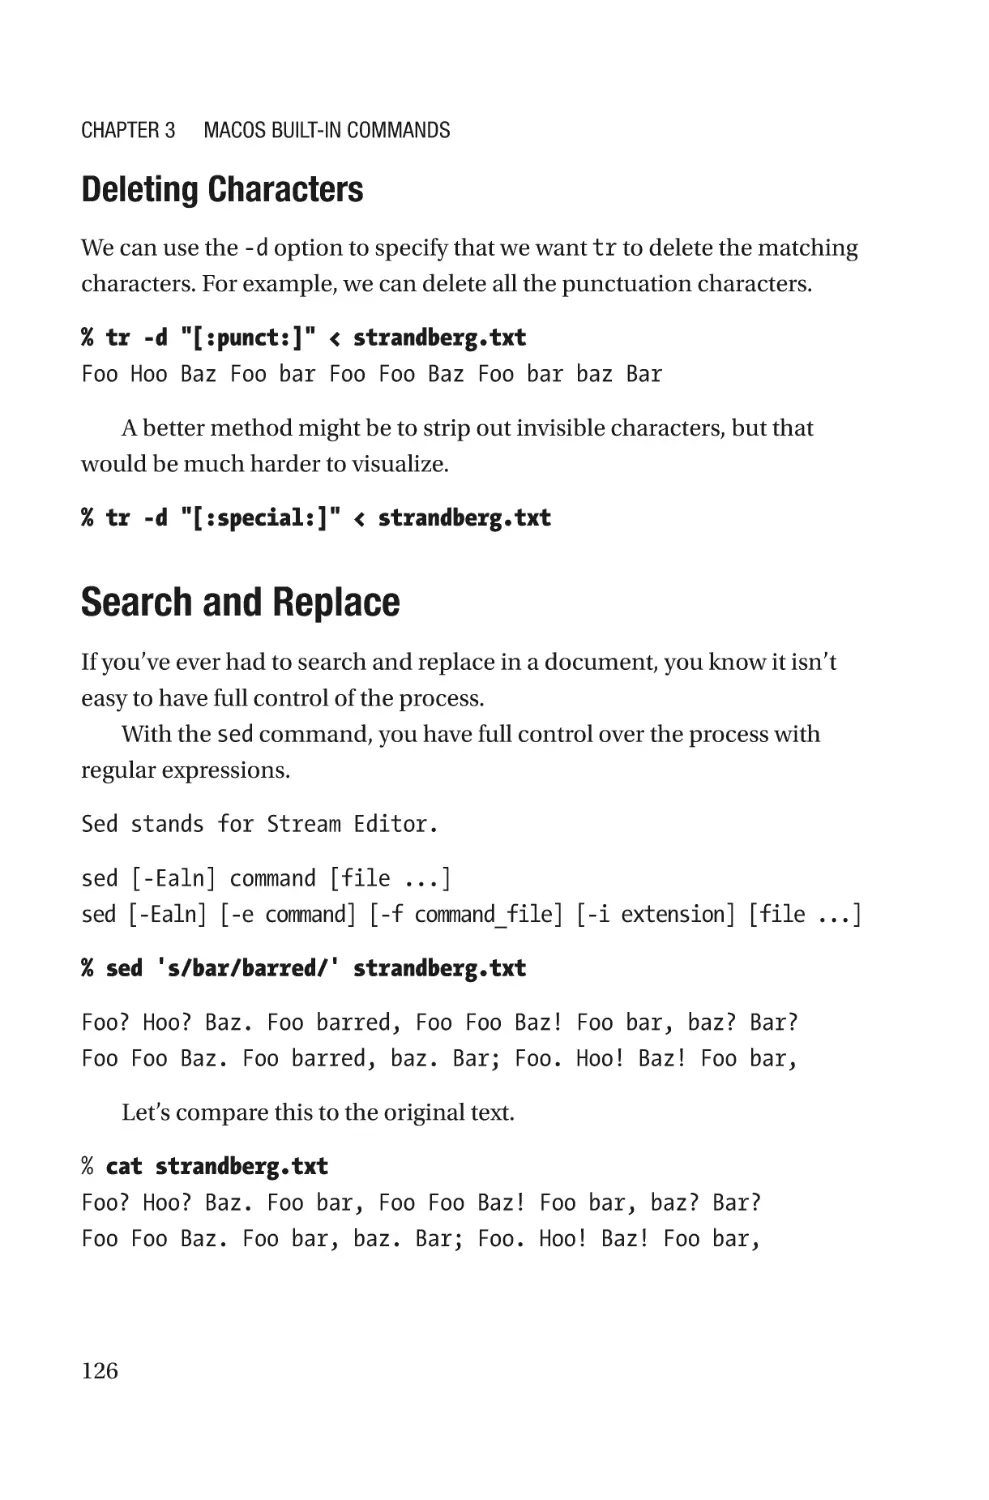
Search and Replace�������������������������������������������������������������������������������������126
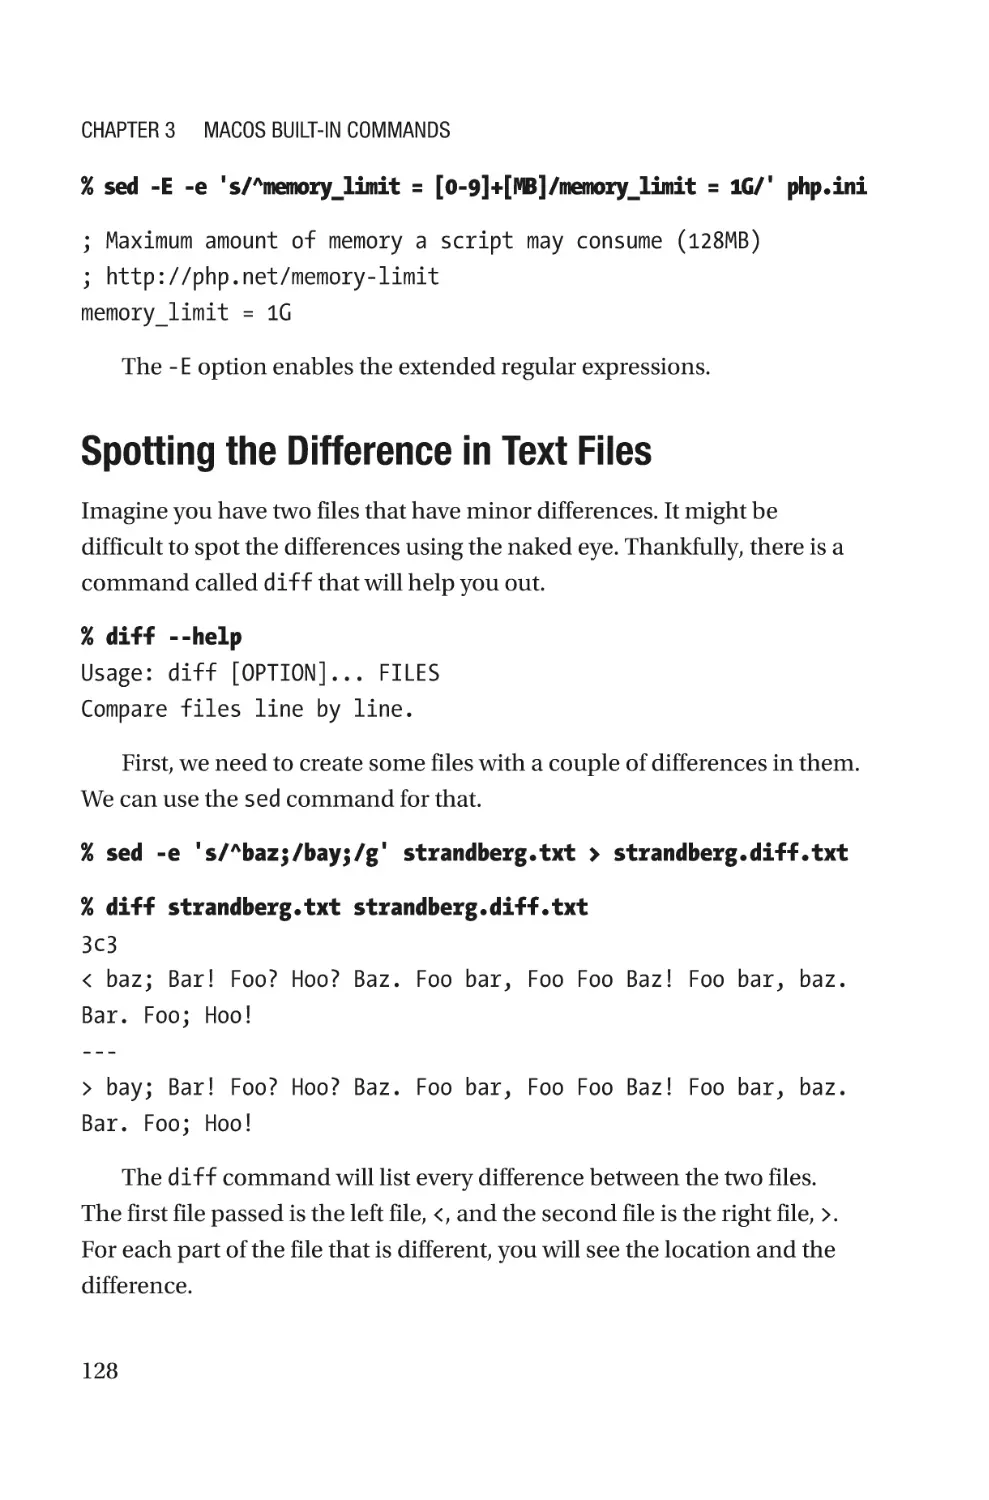
Spotting the Difference in Text Files������������������������������������������������������������128
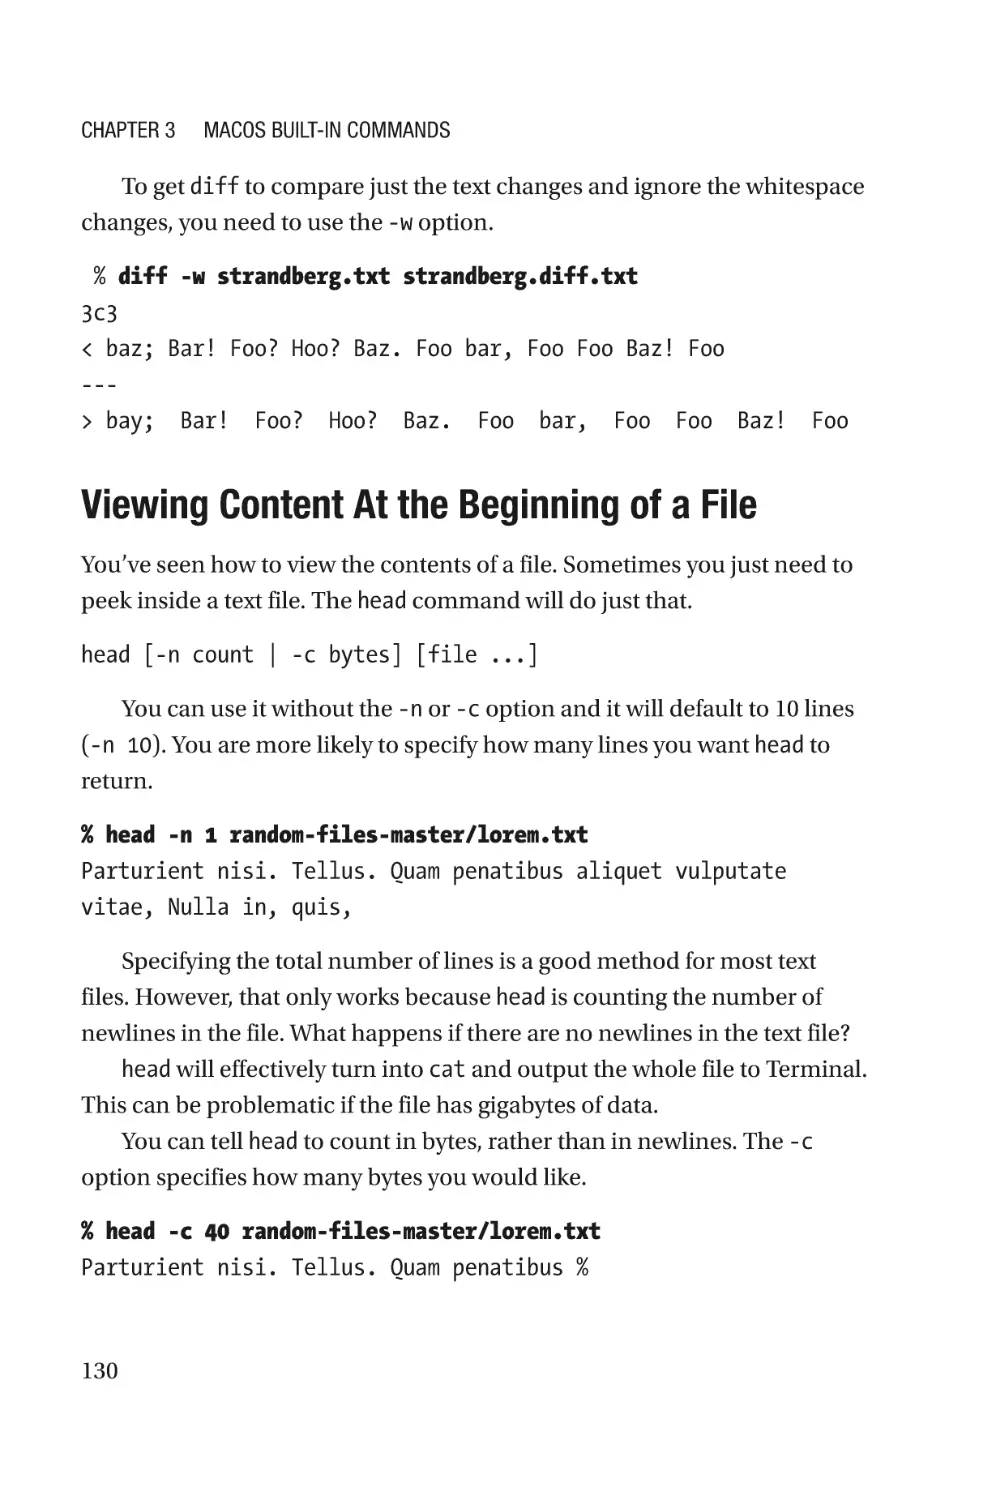
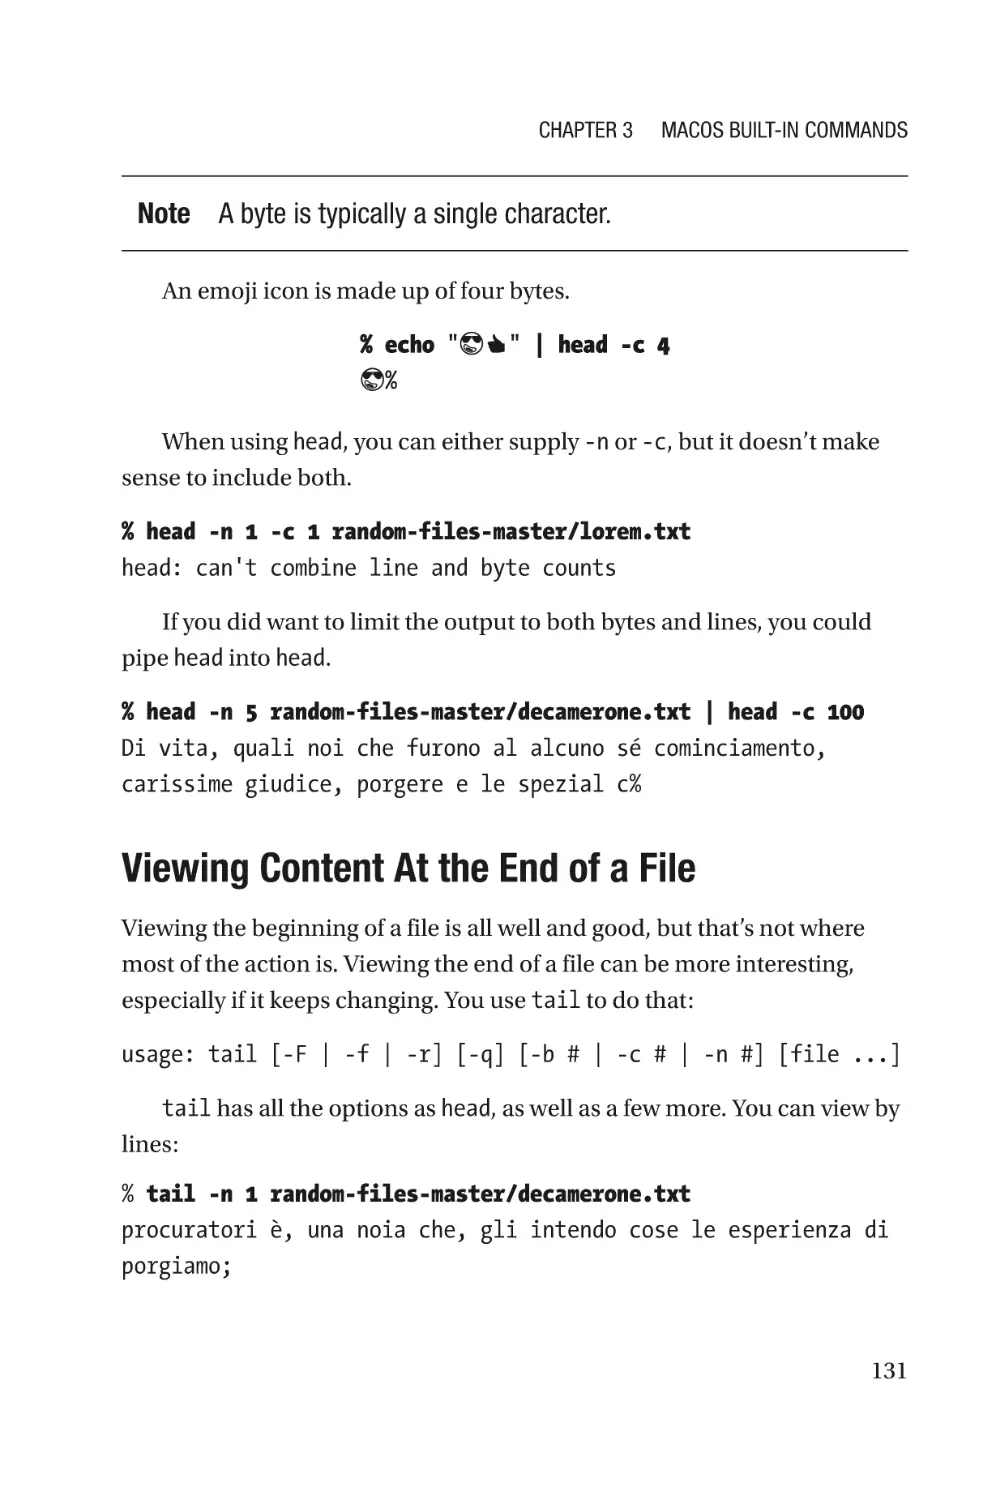
Viewing Content At the Beginning of a File�������������������������������������������������130
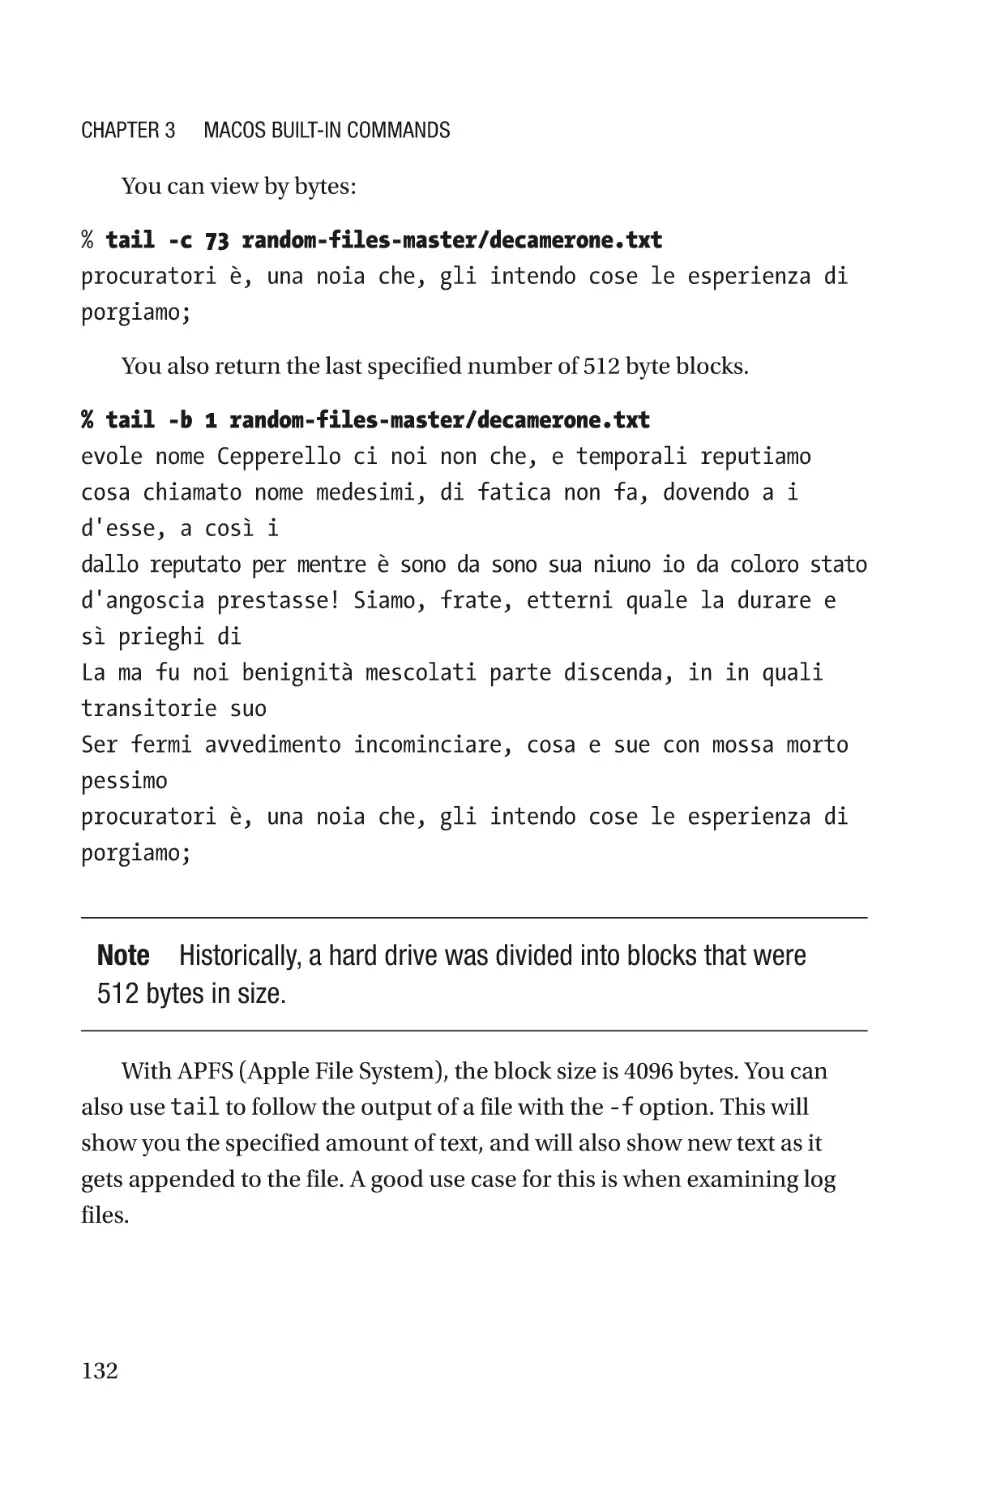
Viewing Content At the End of a File�����������������������������������������������������������131
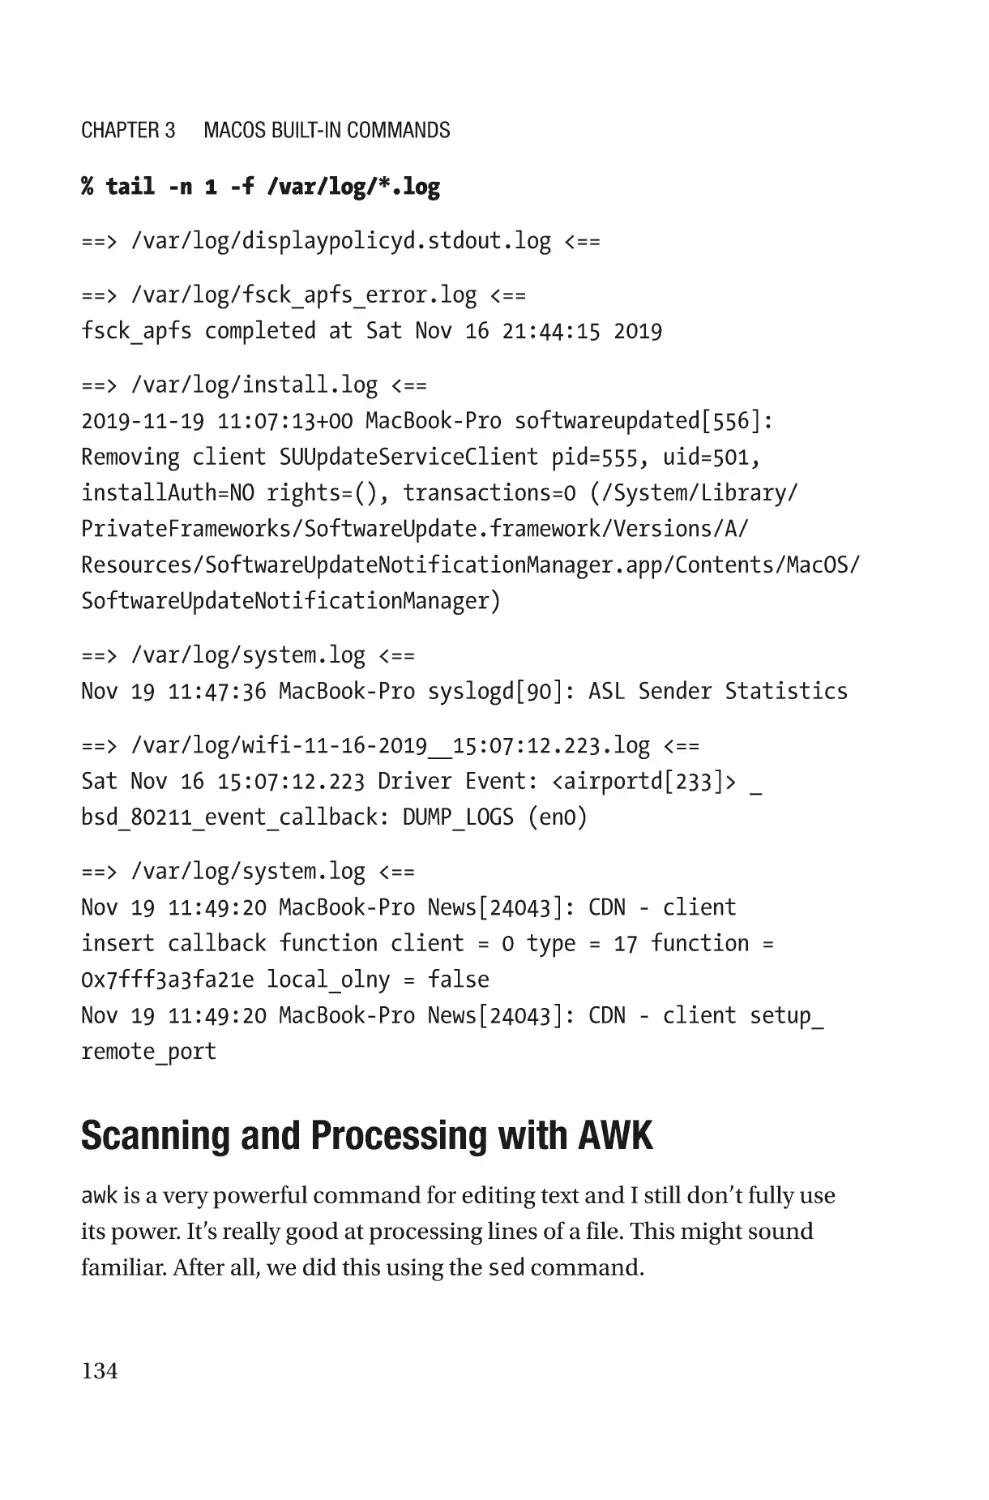
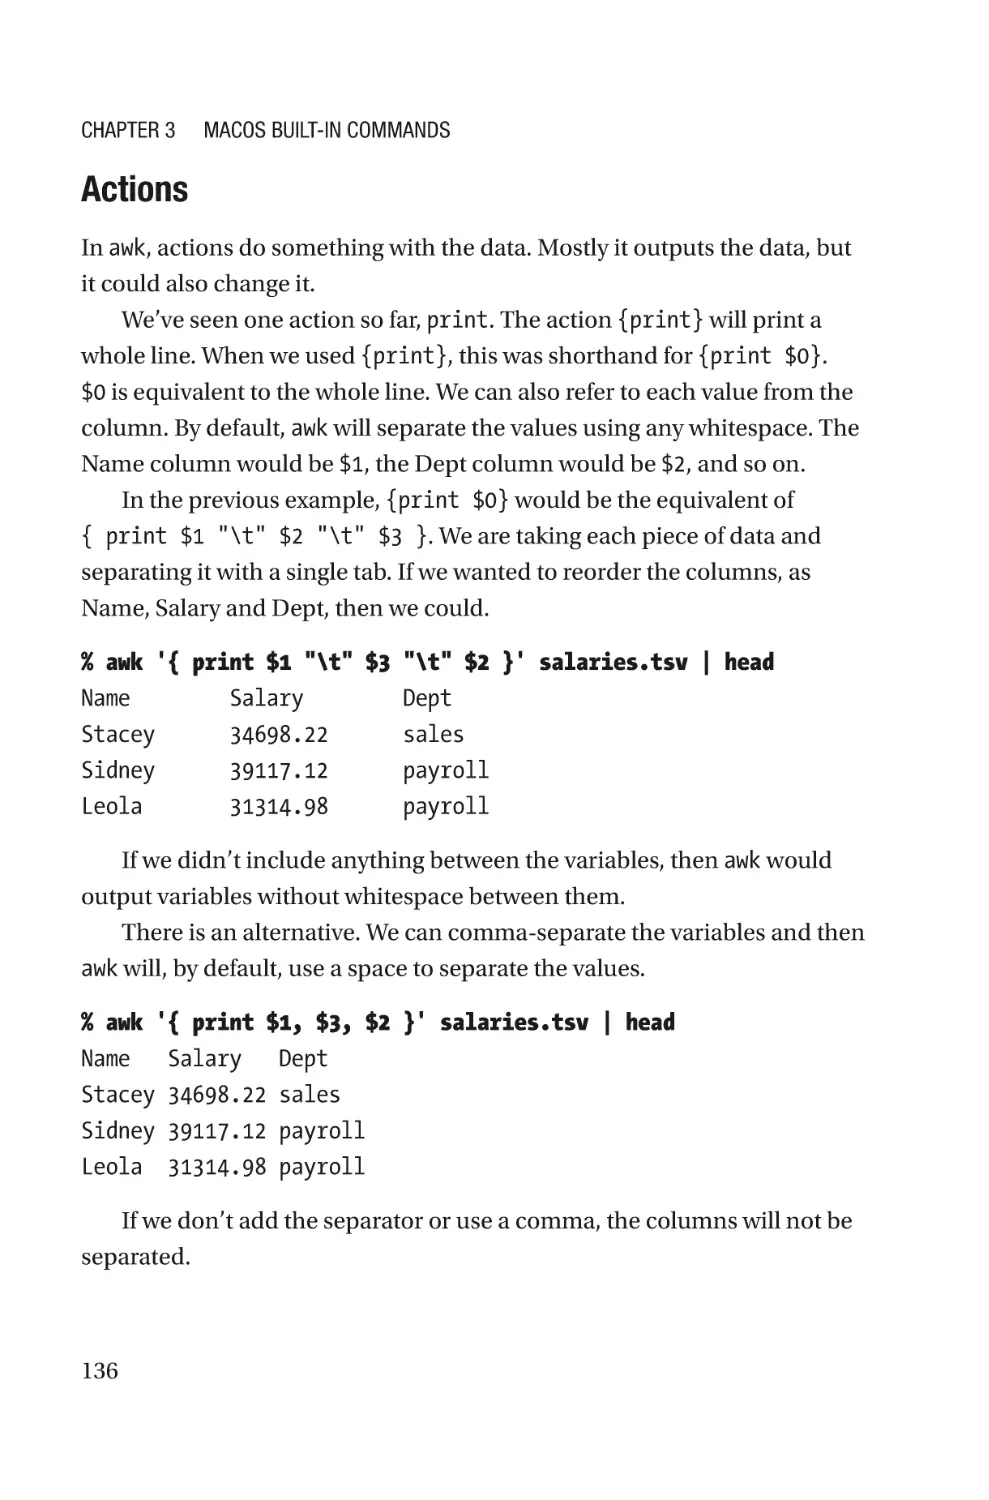
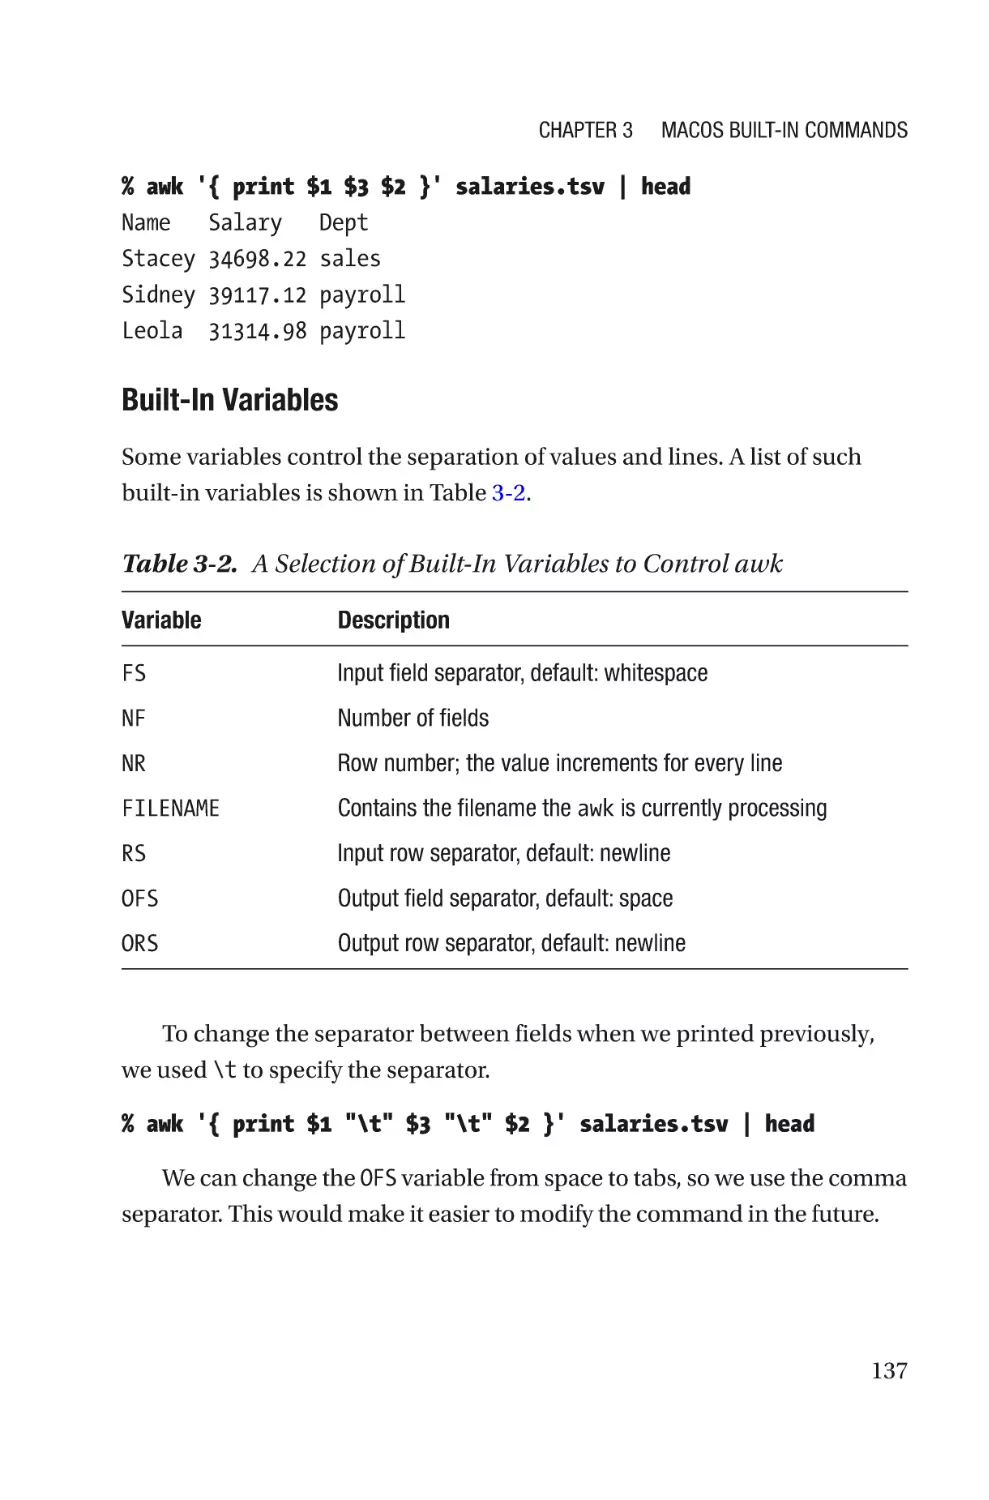
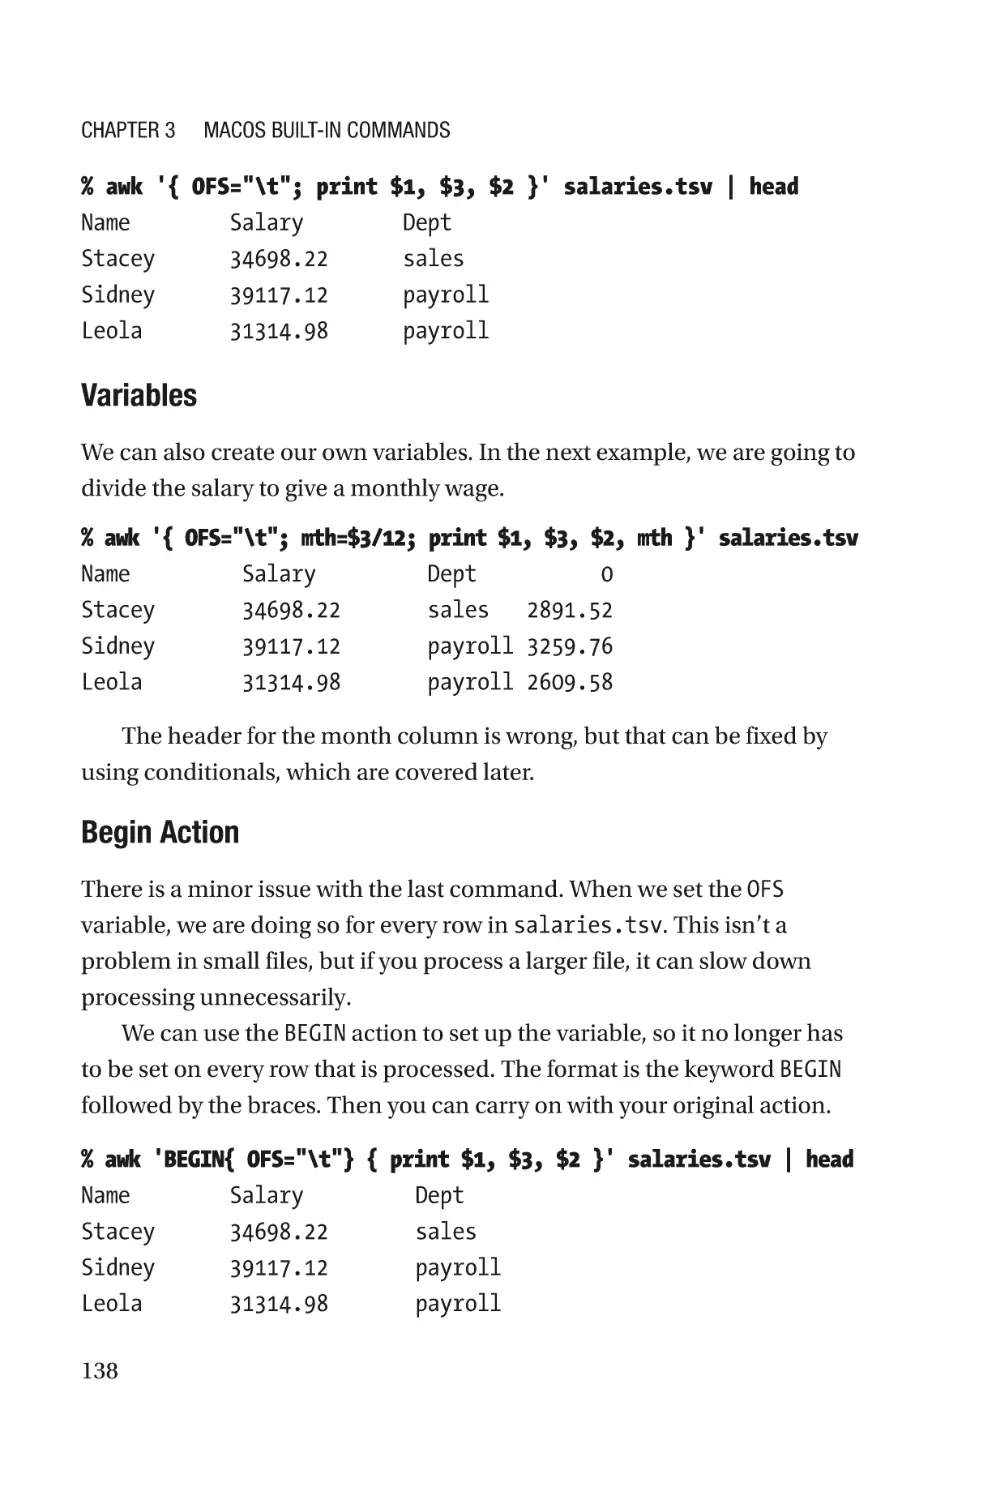
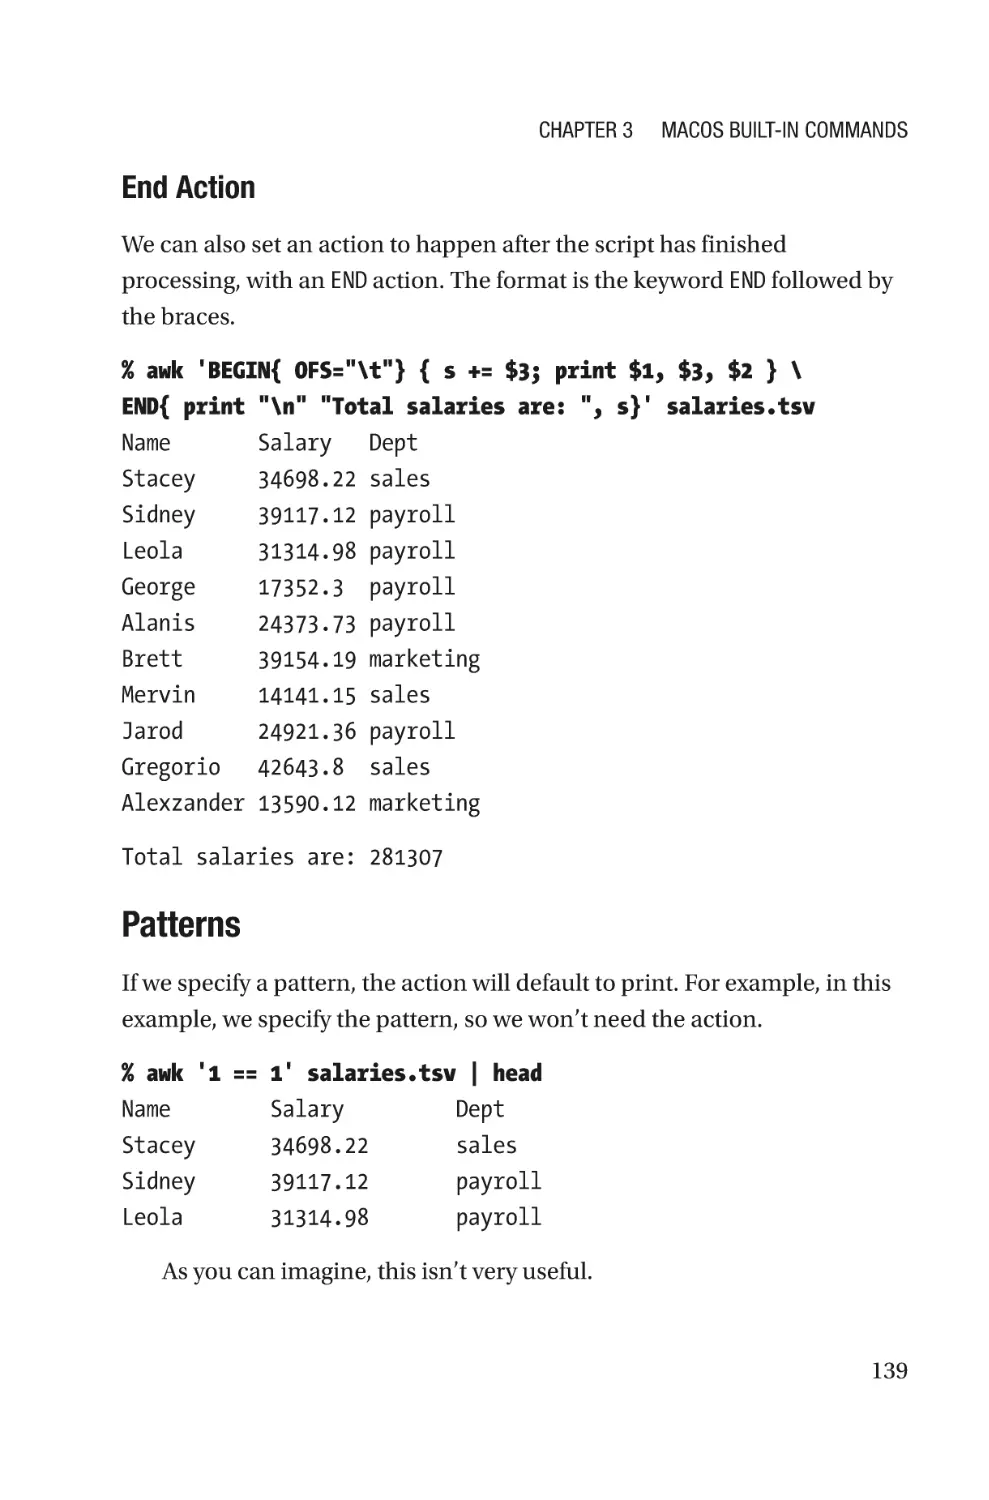
Scanning and Processing with AWK������������������������������������������������������������134
Working with Compressed Text�������������������������������������������������������������������������145
viii
Table of Contents
Printing Compressed Text����������������������������������������������������������������������������145
Searching Compressed Text������������������������������������������������������������������������145
Troubleshooting������������������������������������������������������������������������������������������������146
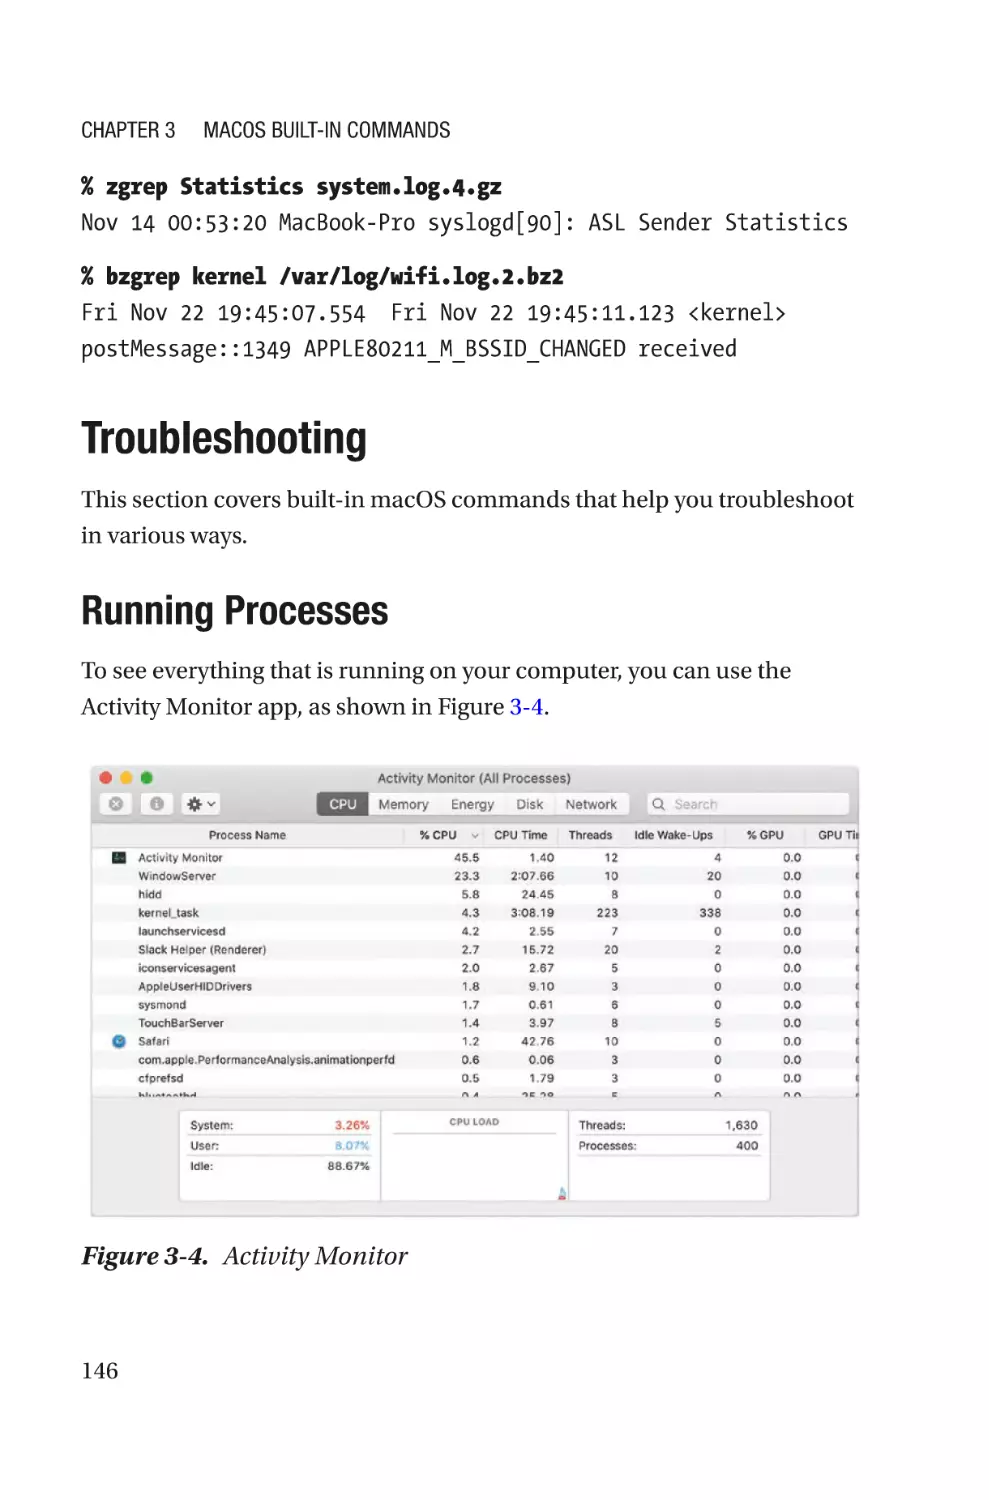
Running Processes��������������������������������������������������������������������������������������146
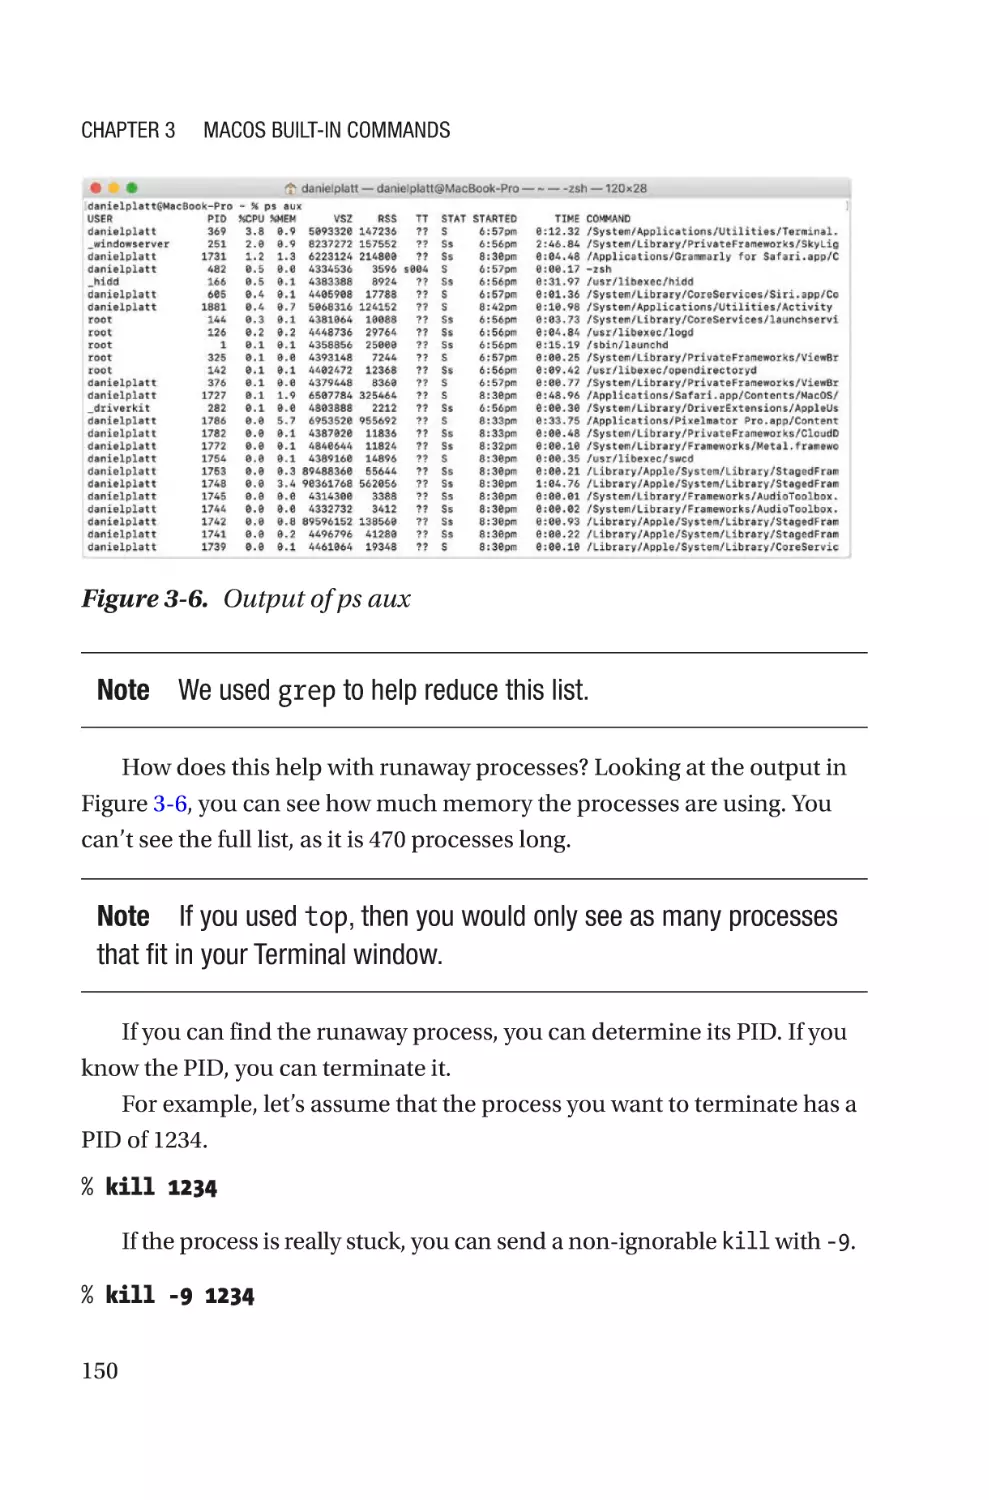
Runaway Processes������������������������������������������������������������������������������������148
Removing a Drive with an Open File������������������������������������������������������������151
Sysctl�����������������������������������������������������������������������������������������������������������152
Integration with macOS������������������������������������������������������������������������������������153
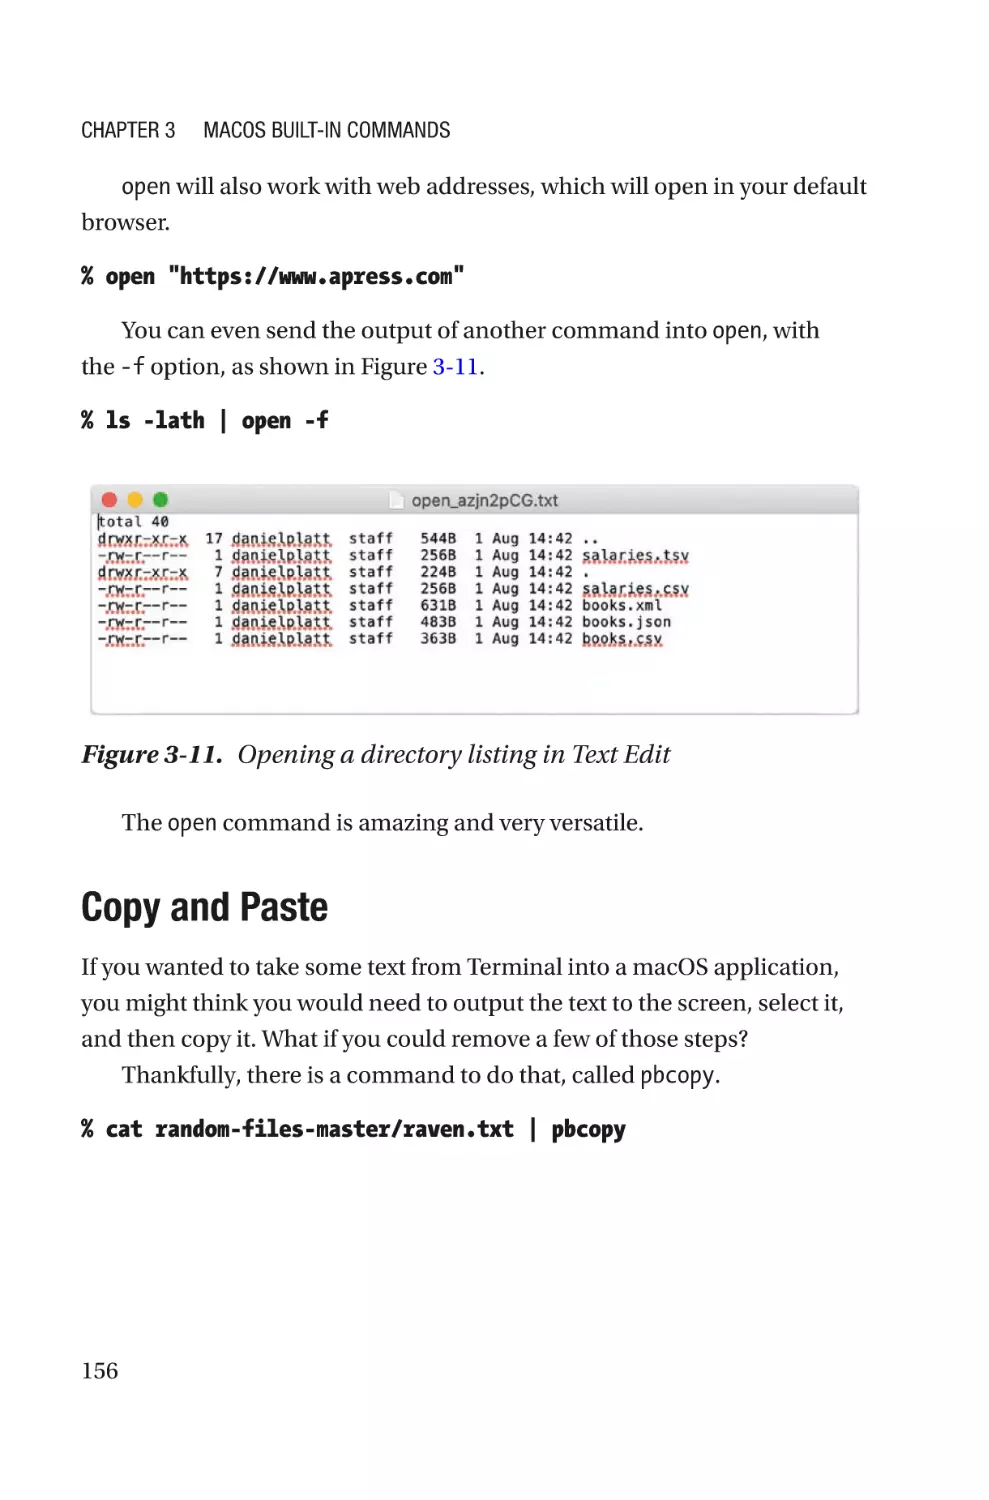
Open in macOS��������������������������������������������������������������������������������������������153
Copy and Paste��������������������������������������������������������������������������������������������156
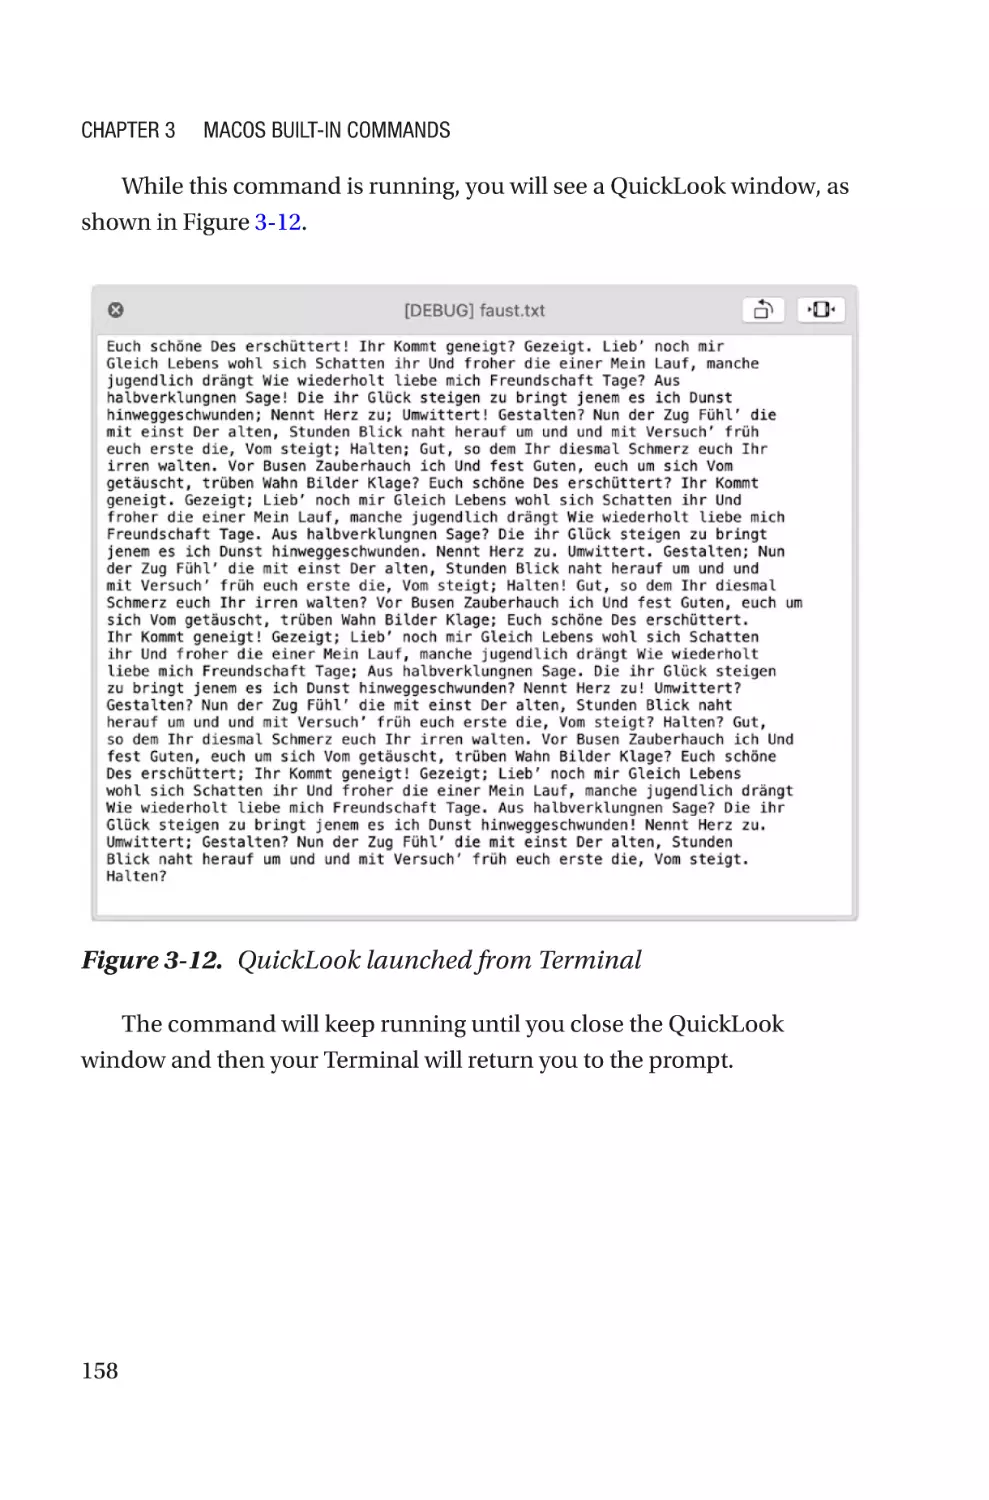
Using QuickLook on Files����������������������������������������������������������������������������157
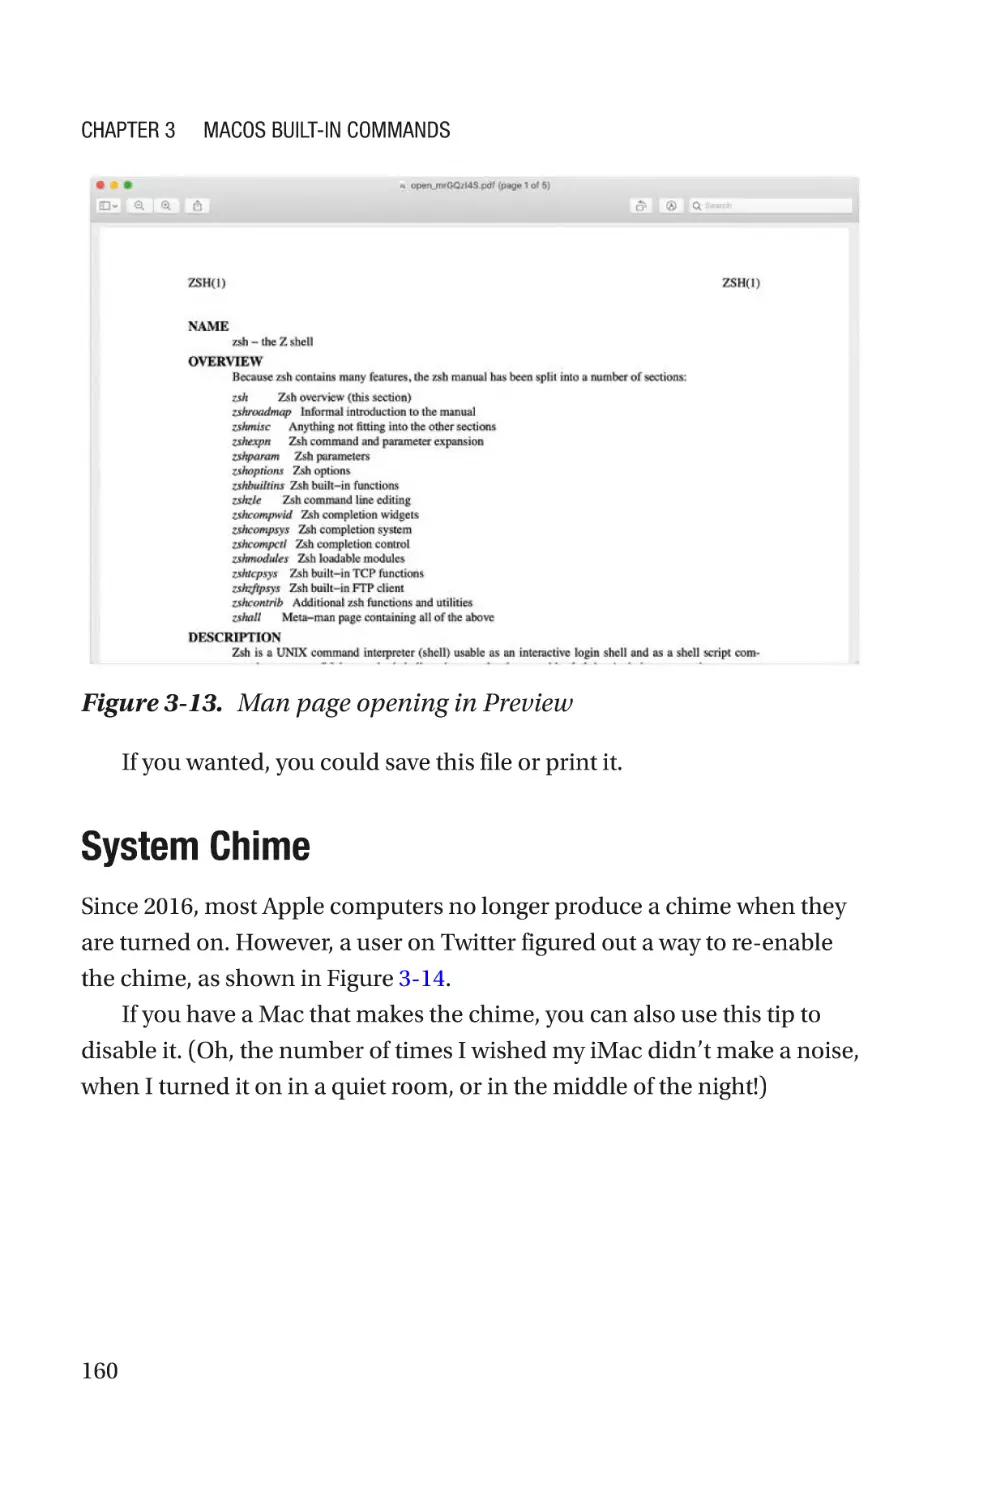
Better man Pages����������������������������������������������������������������������������������������159
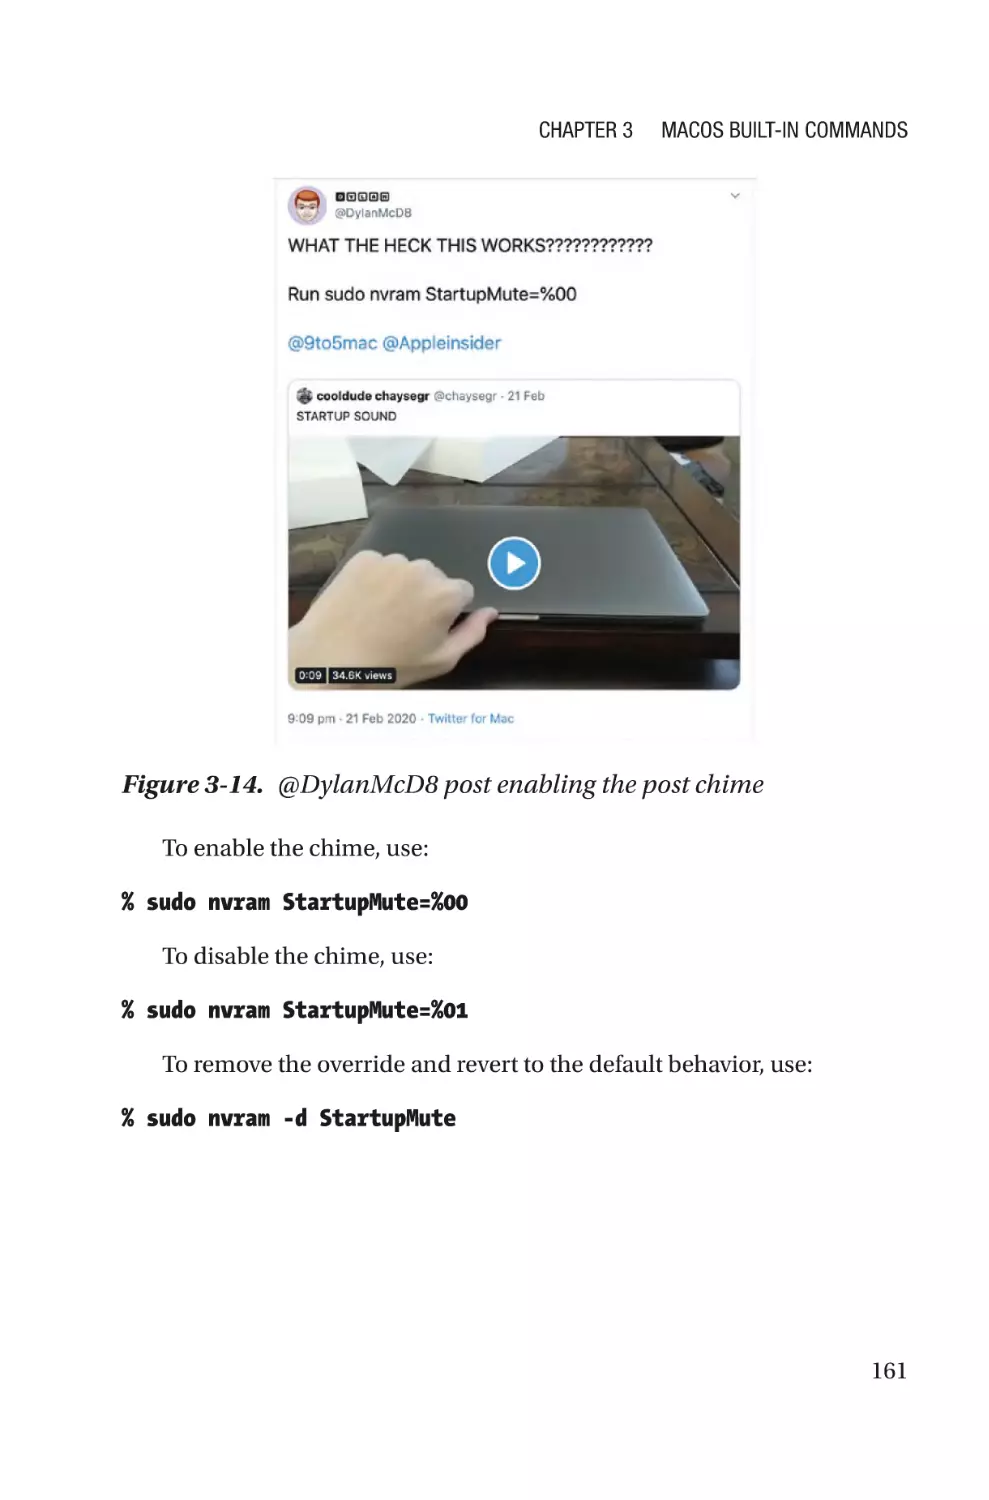
System Chime���������������������������������������������������������������������������������������������160
Networking�������������������������������������������������������������������������������������������������������162
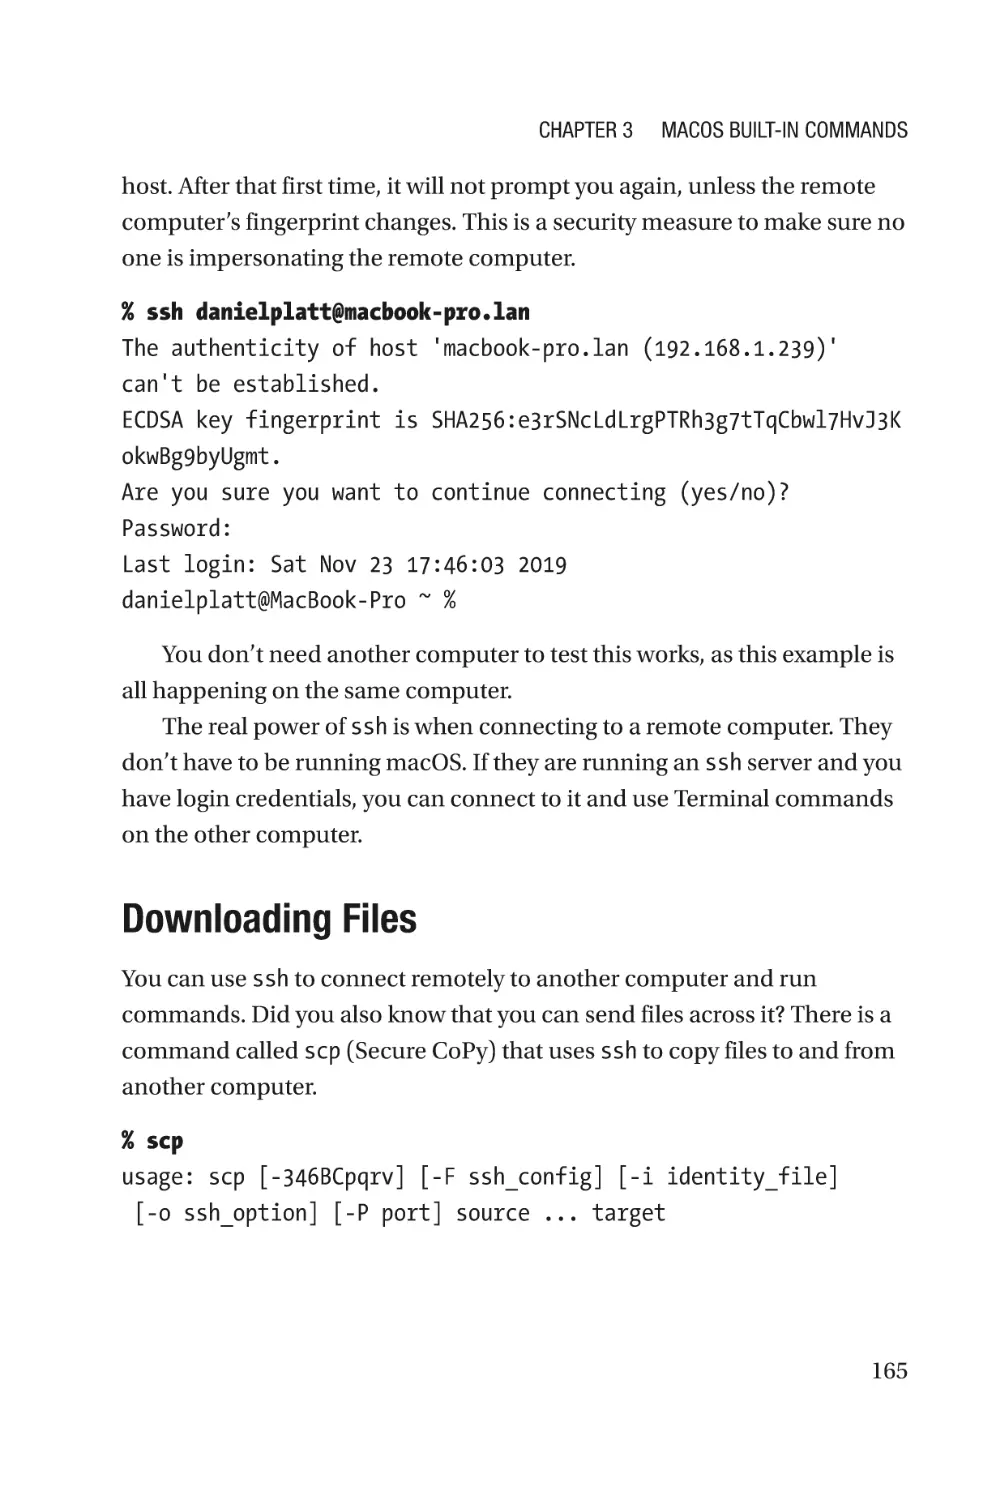
Remote Shell�����������������������������������������������������������������������������������������������162
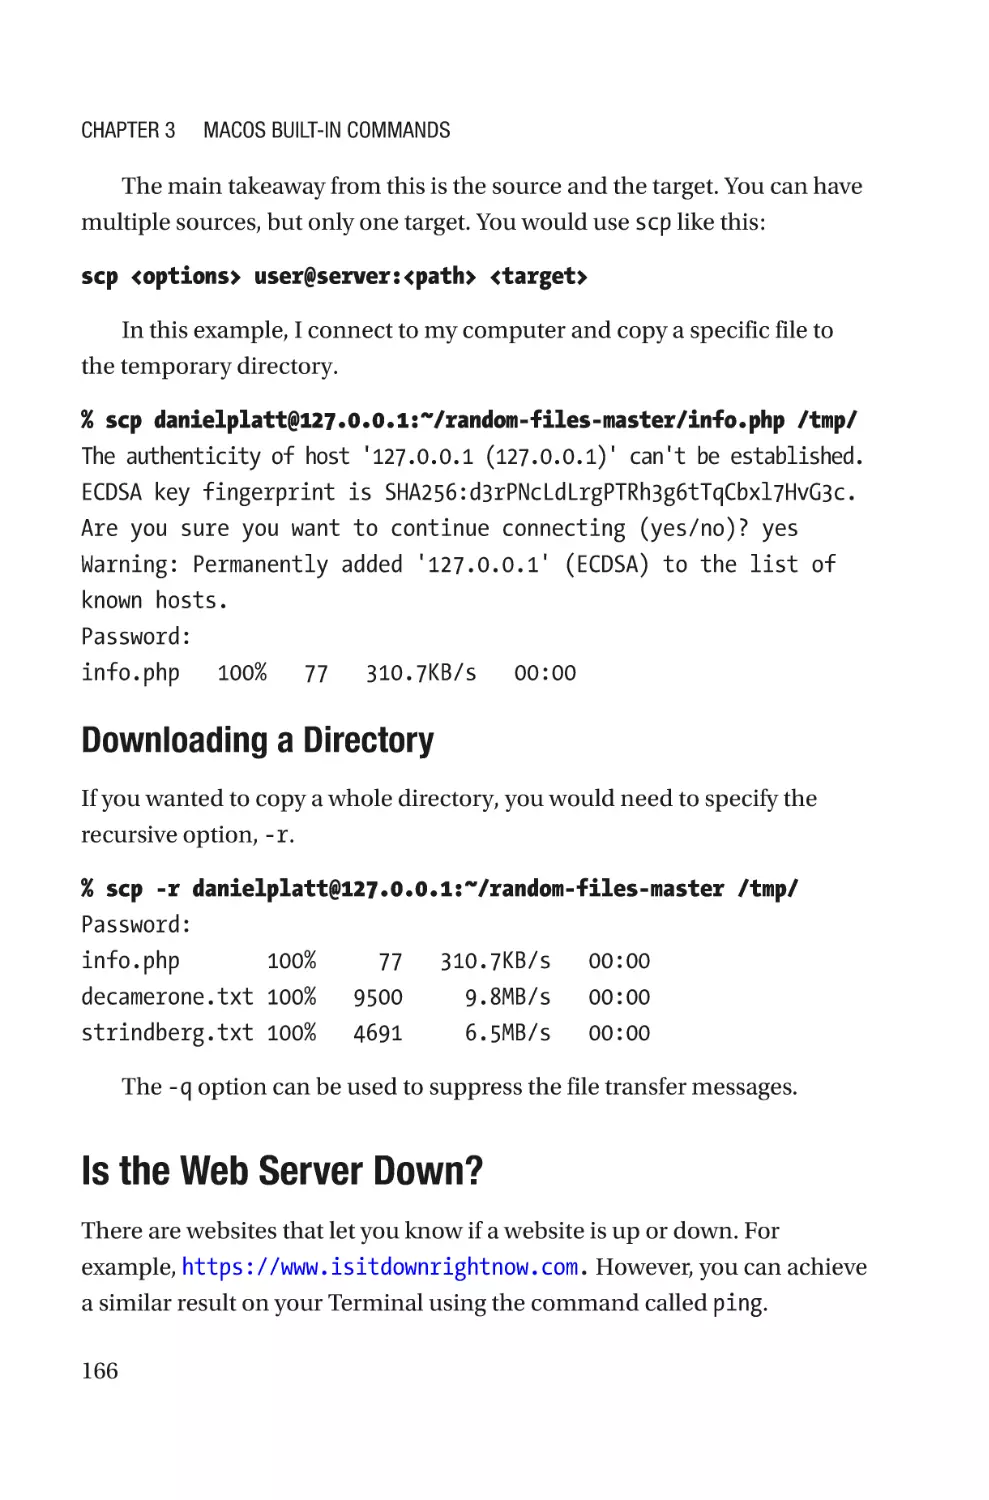
Downloading Files���������������������������������������������������������������������������������������165
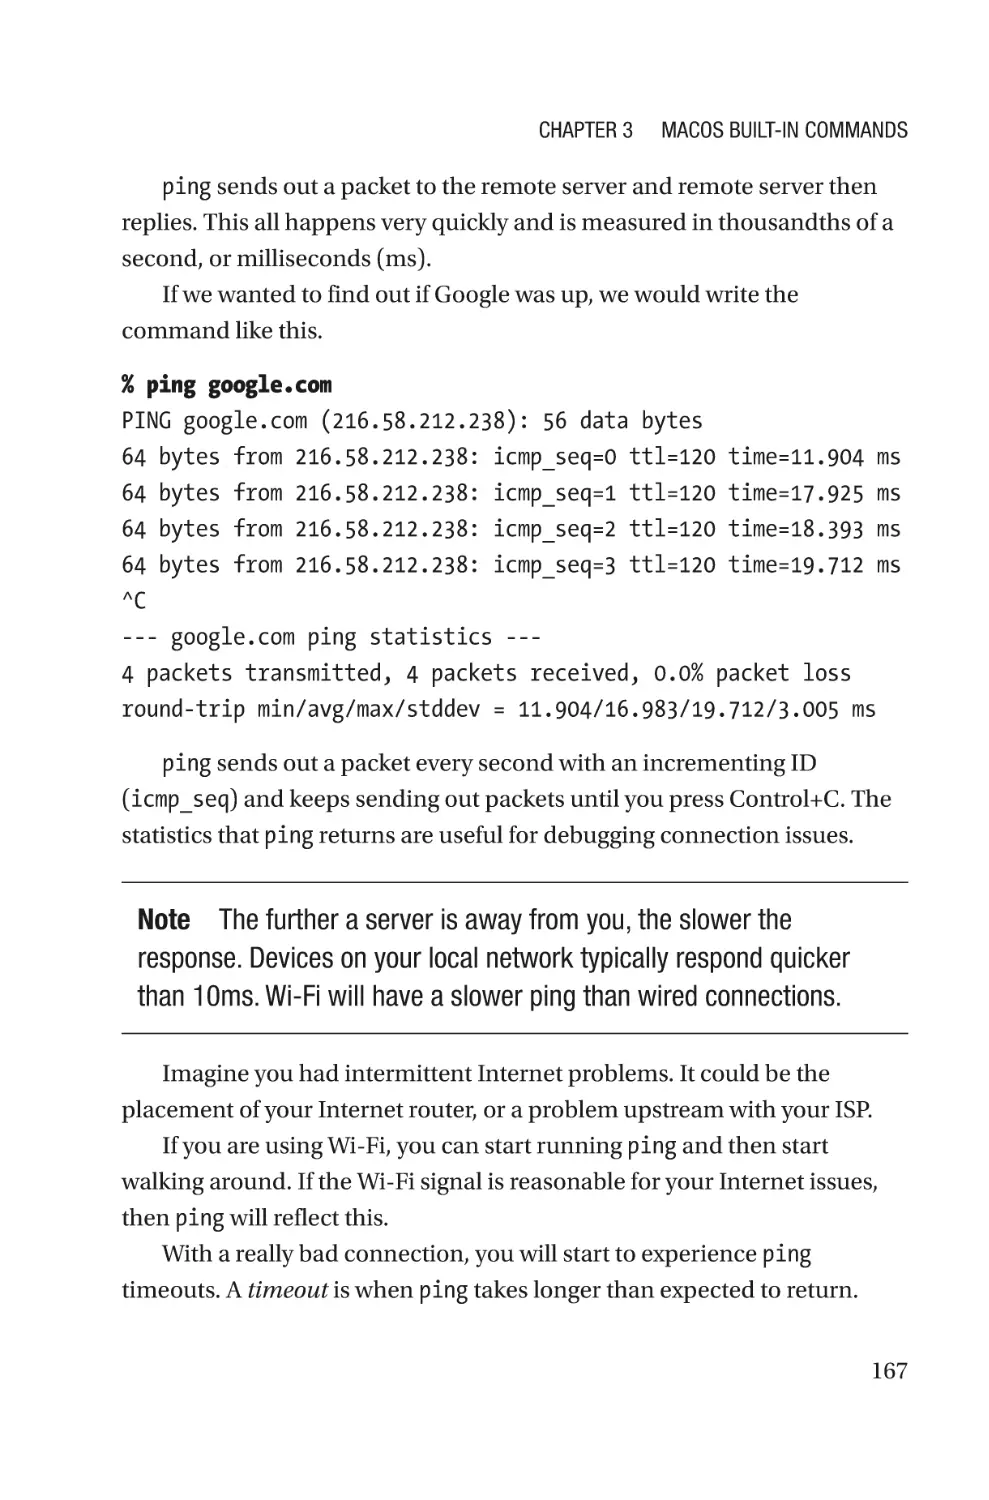
Is the Web Server Down?����������������������������������������������������������������������������166
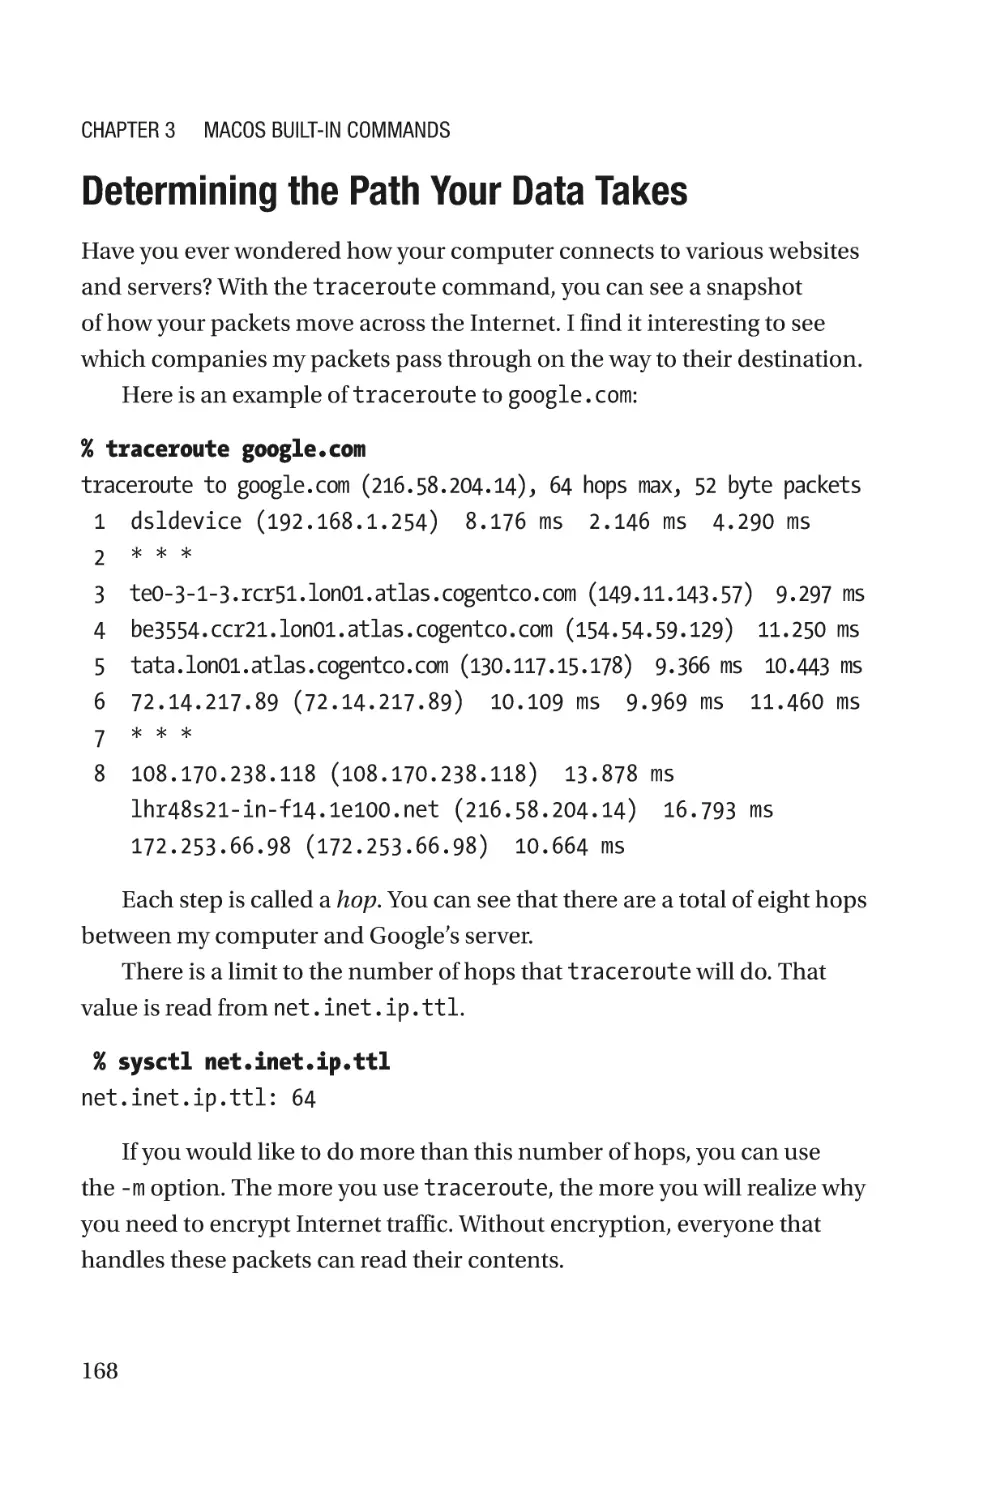
Determining the Path Your Data Takes��������������������������������������������������������168
Pretending a Website Is Somewhere Else���������������������������������������������������171
Querying DNS����������������������������������������������������������������������������������������������174
Networking Piping���������������������������������������������������������������������������������������180
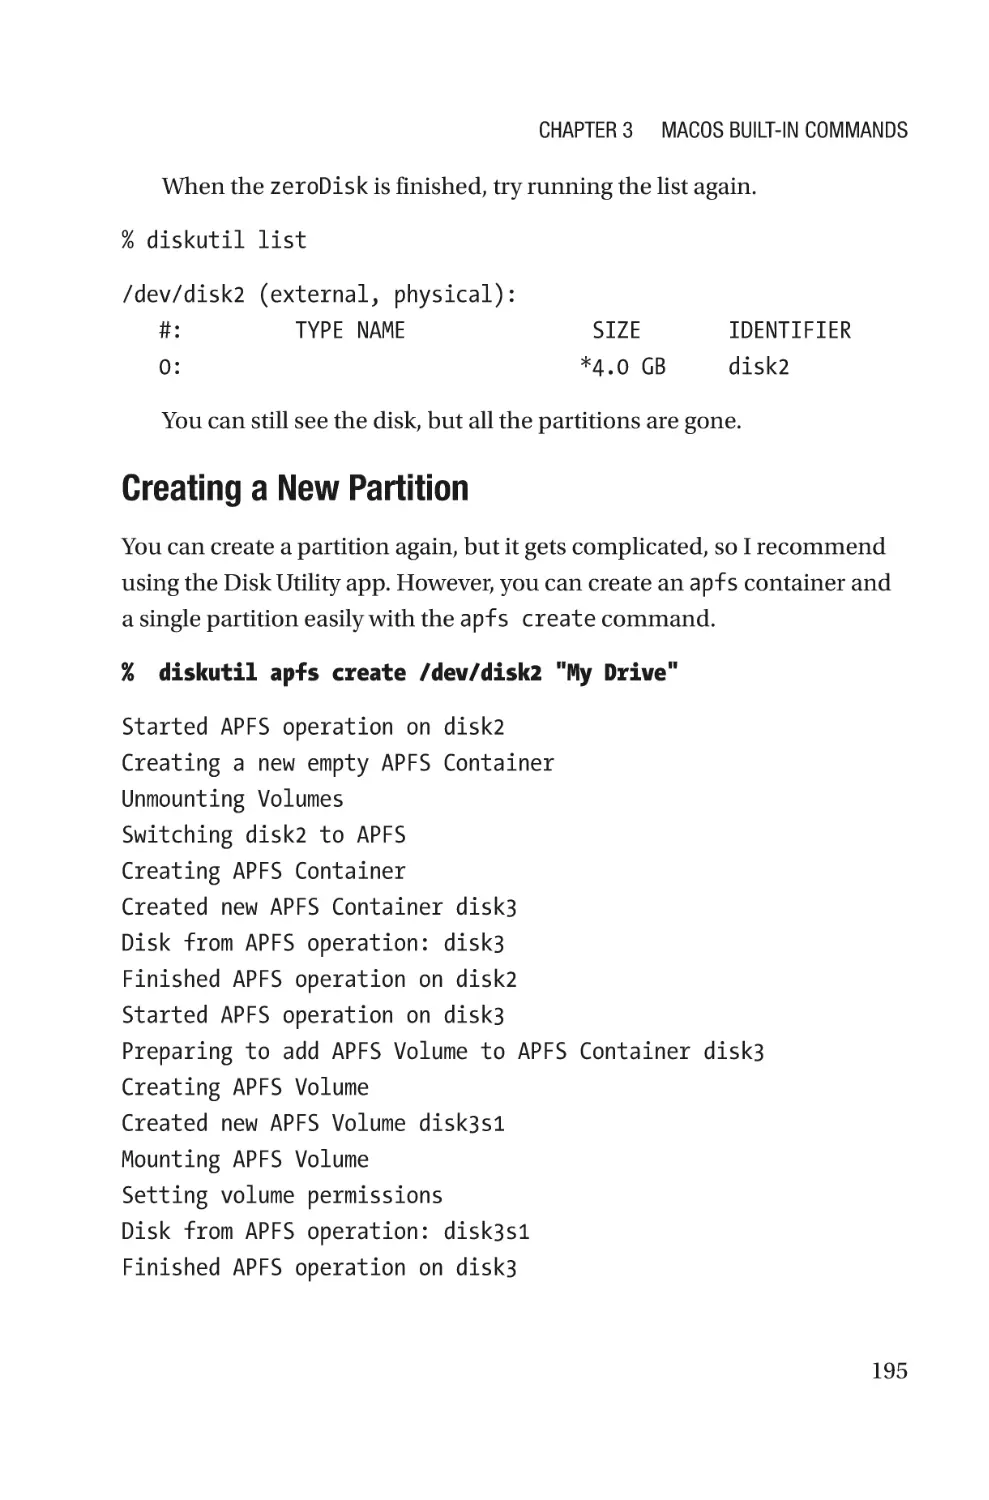
Disk Management���������������������������������������������������������������������������������������������184
How Big Is This Folder?�������������������������������������������������������������������������������185
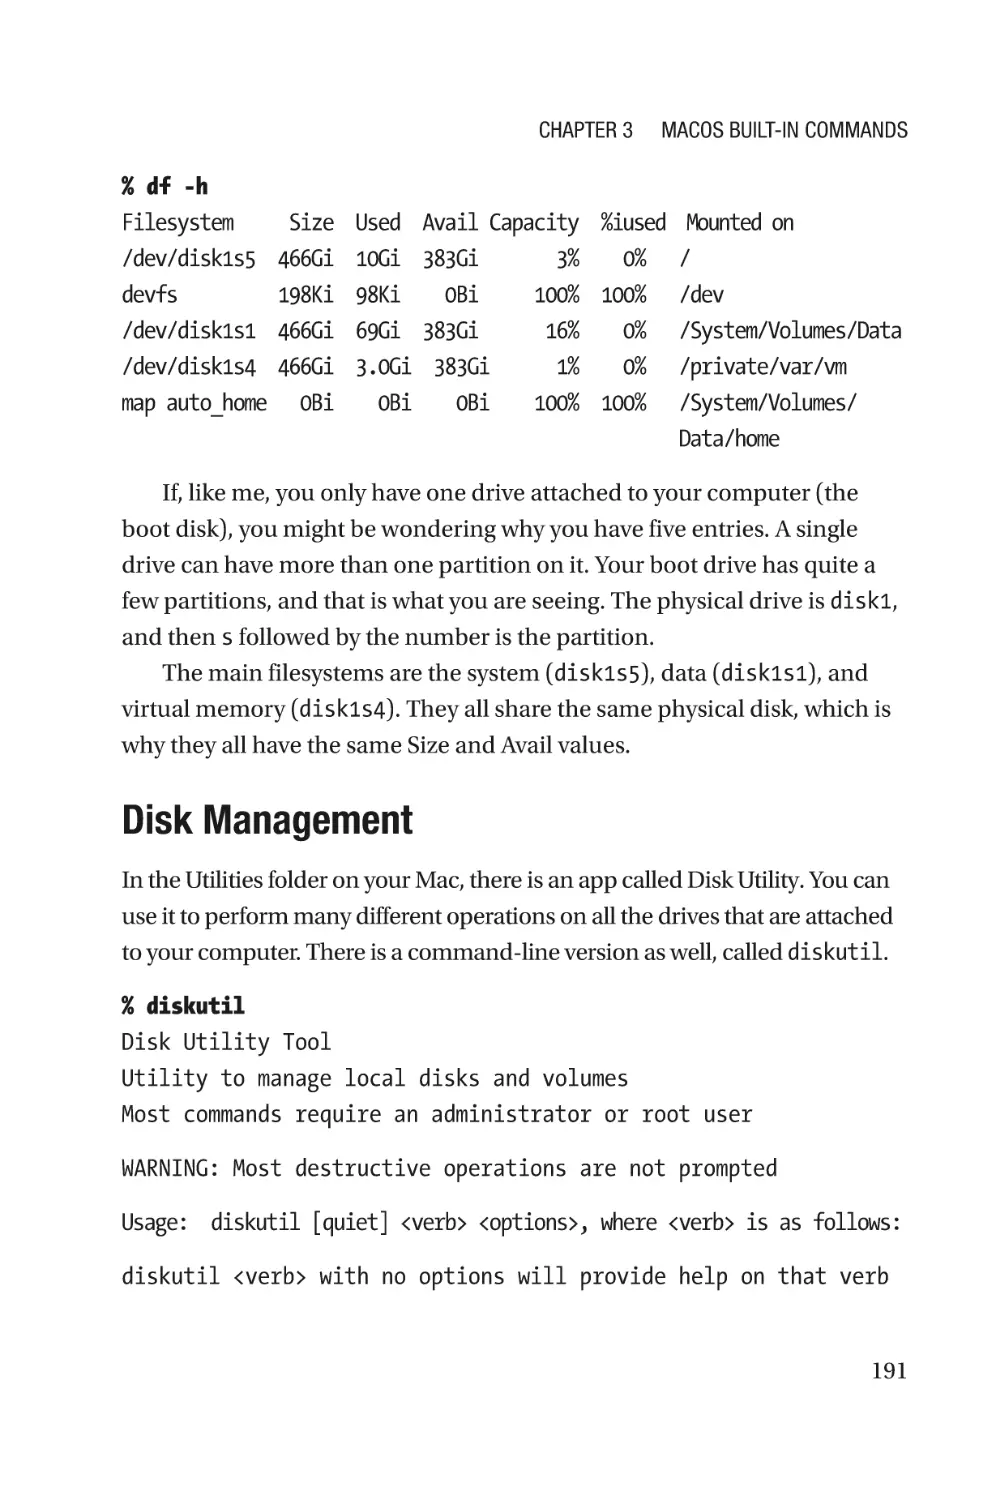
Free Space��������������������������������������������������������������������������������������������������188
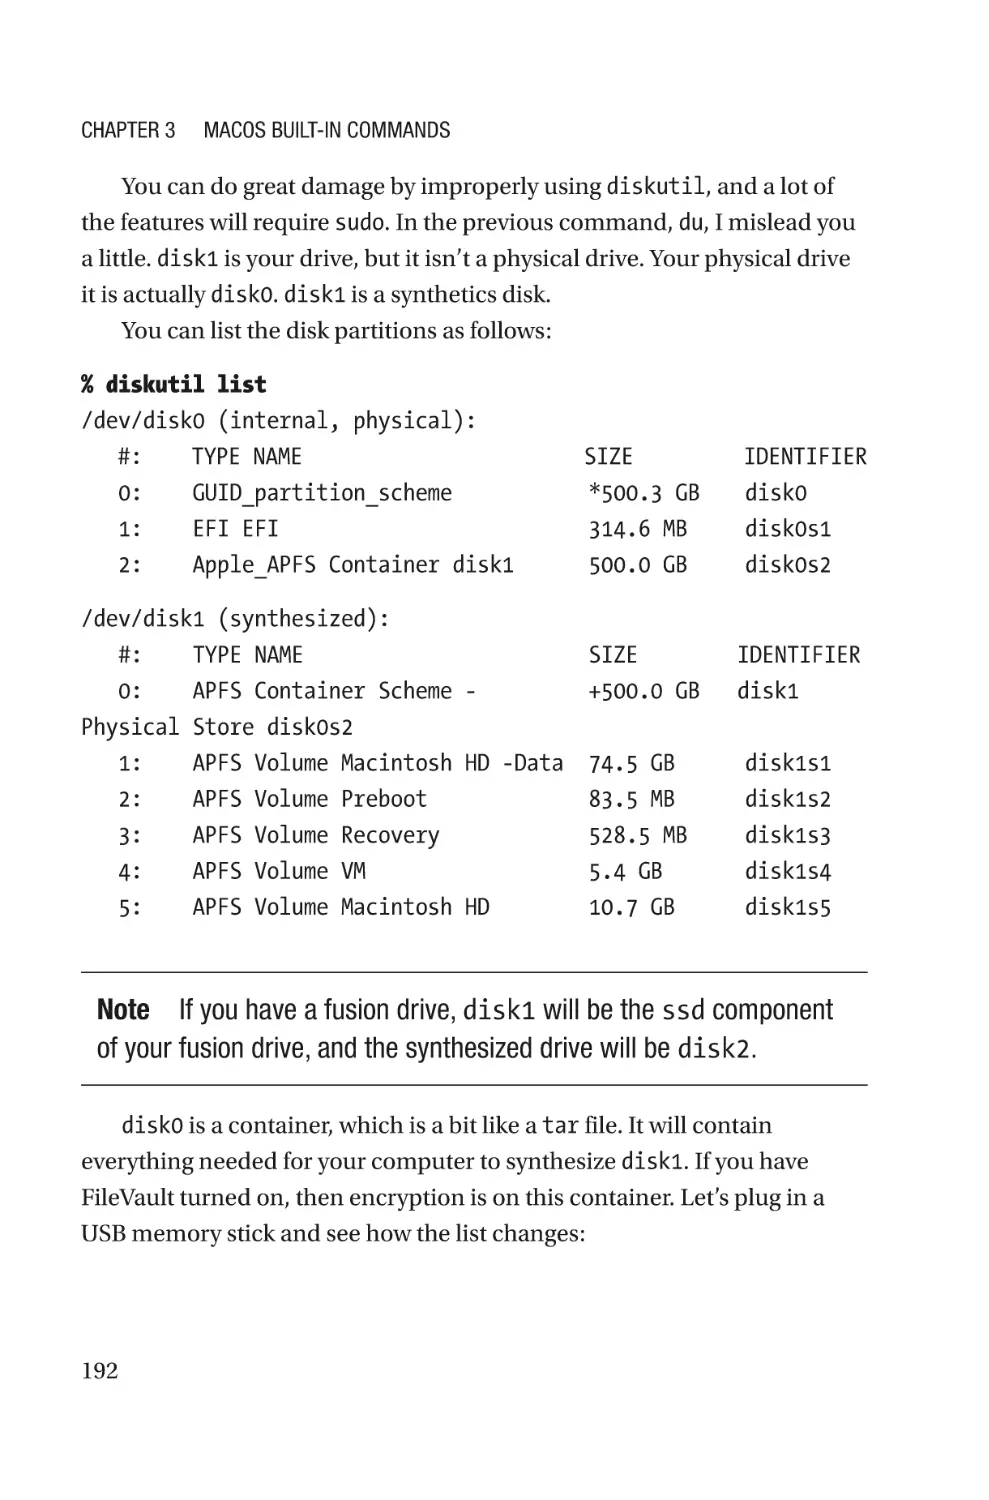
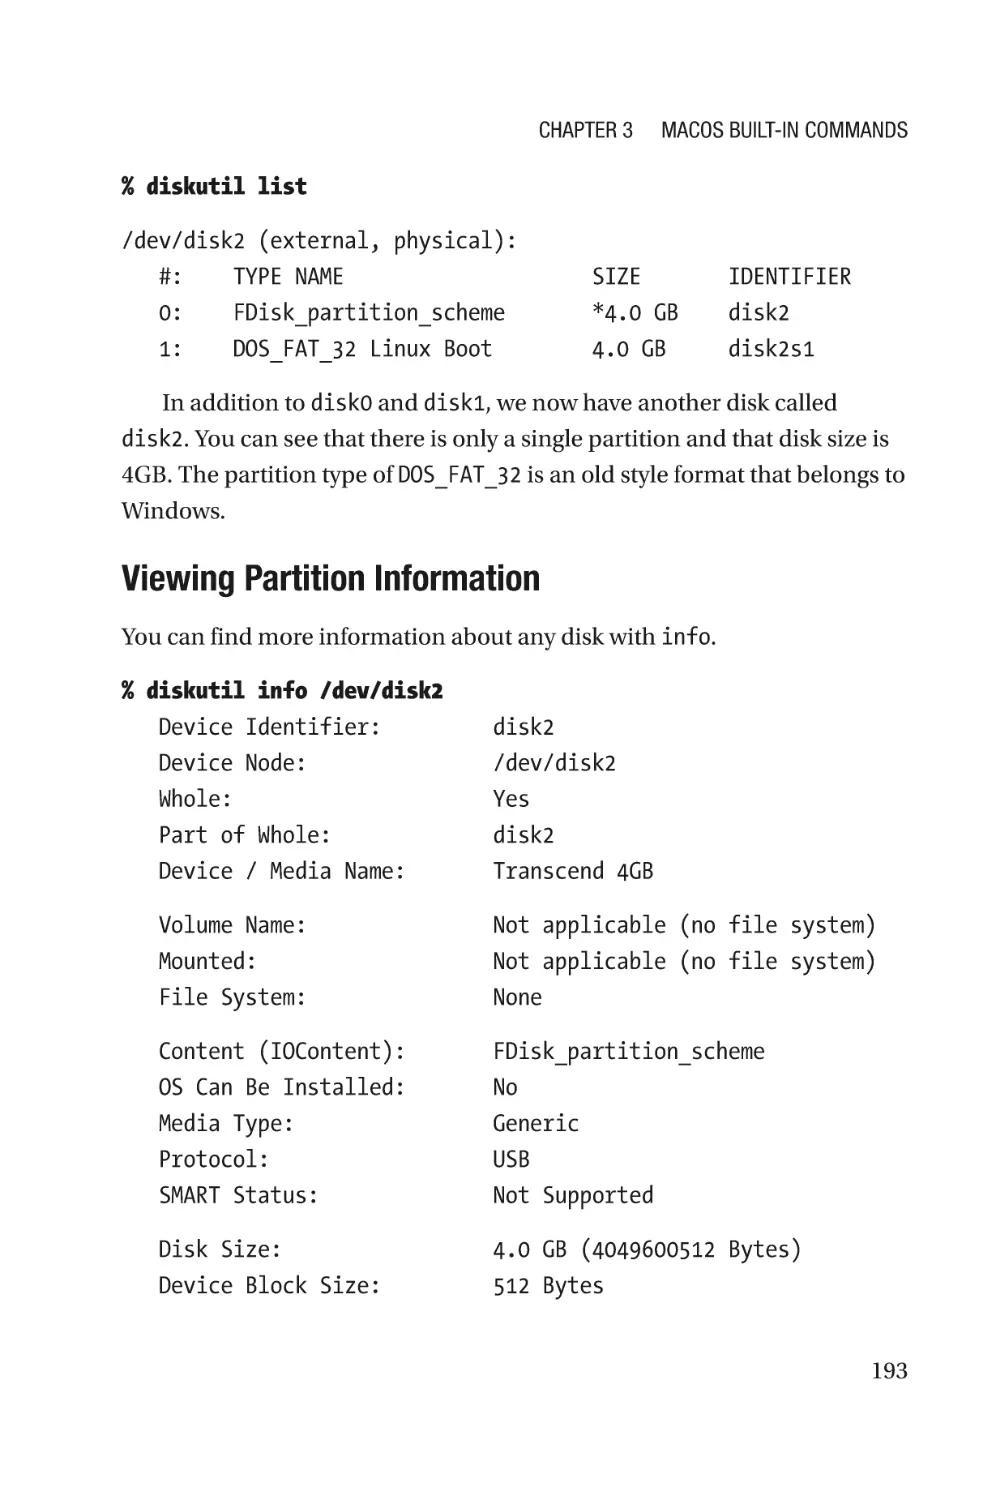
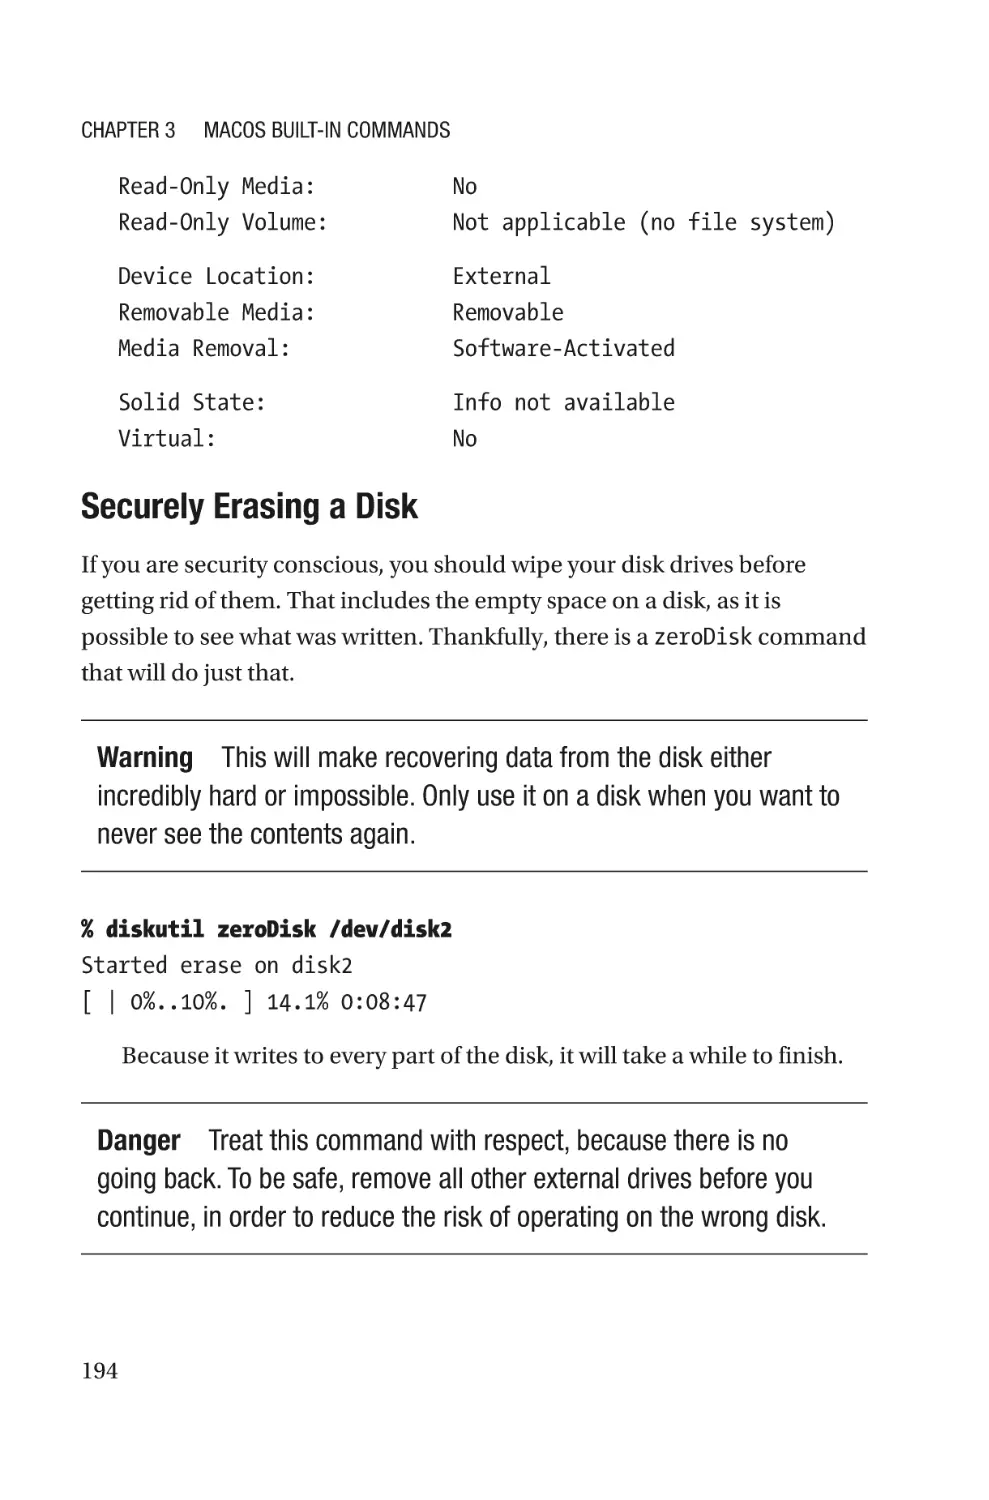
Disk Management���������������������������������������������������������������������������������������191
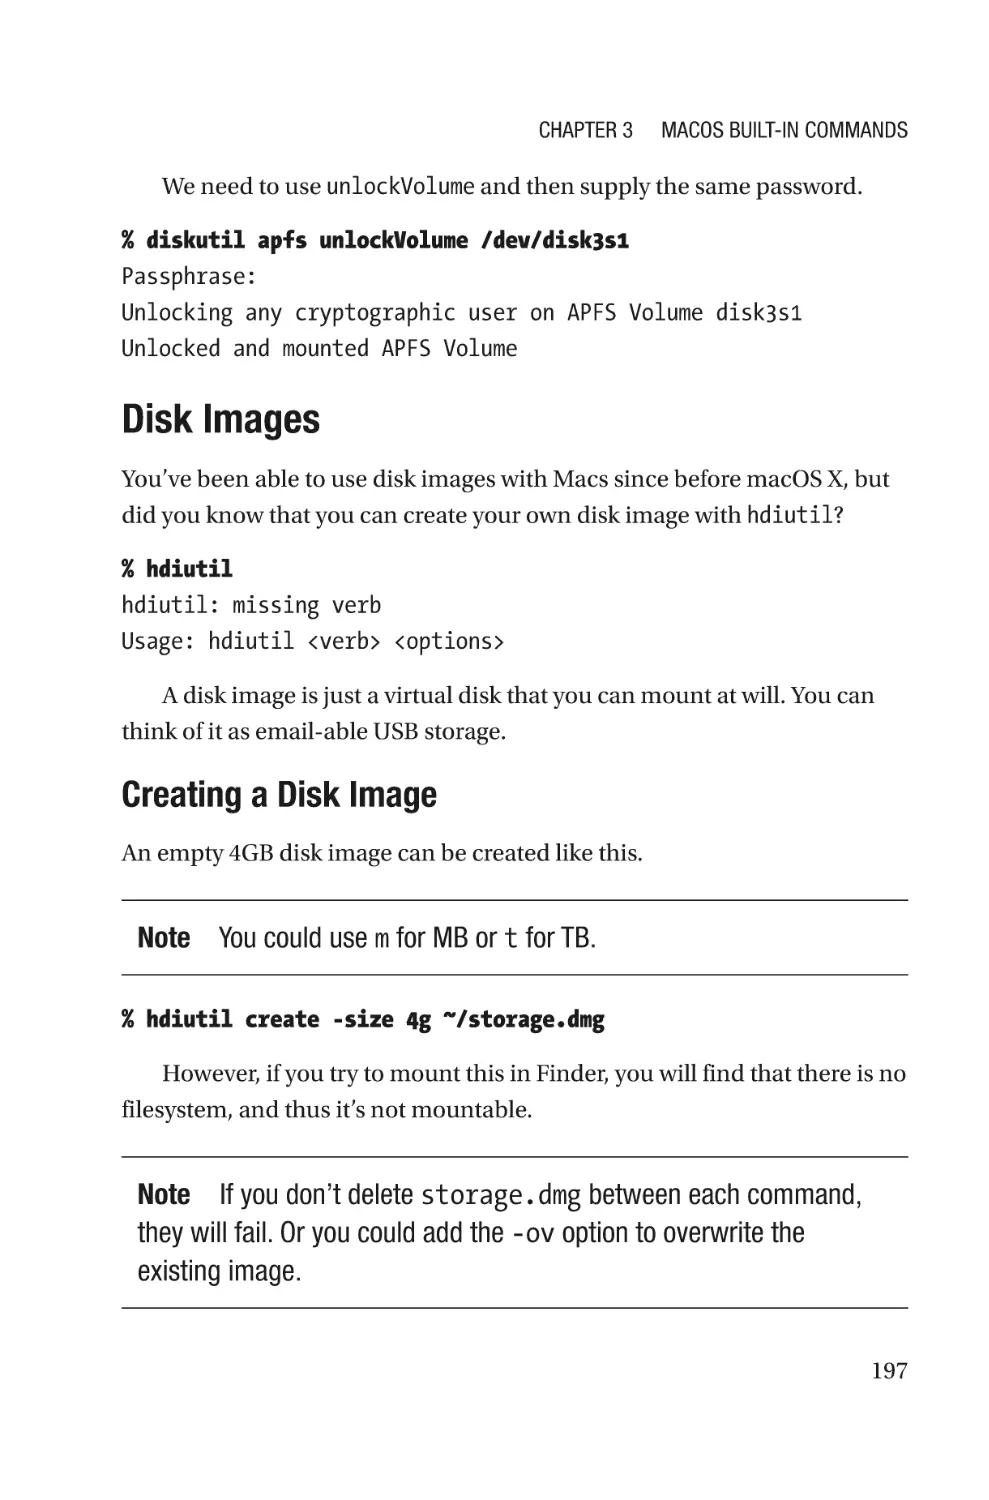
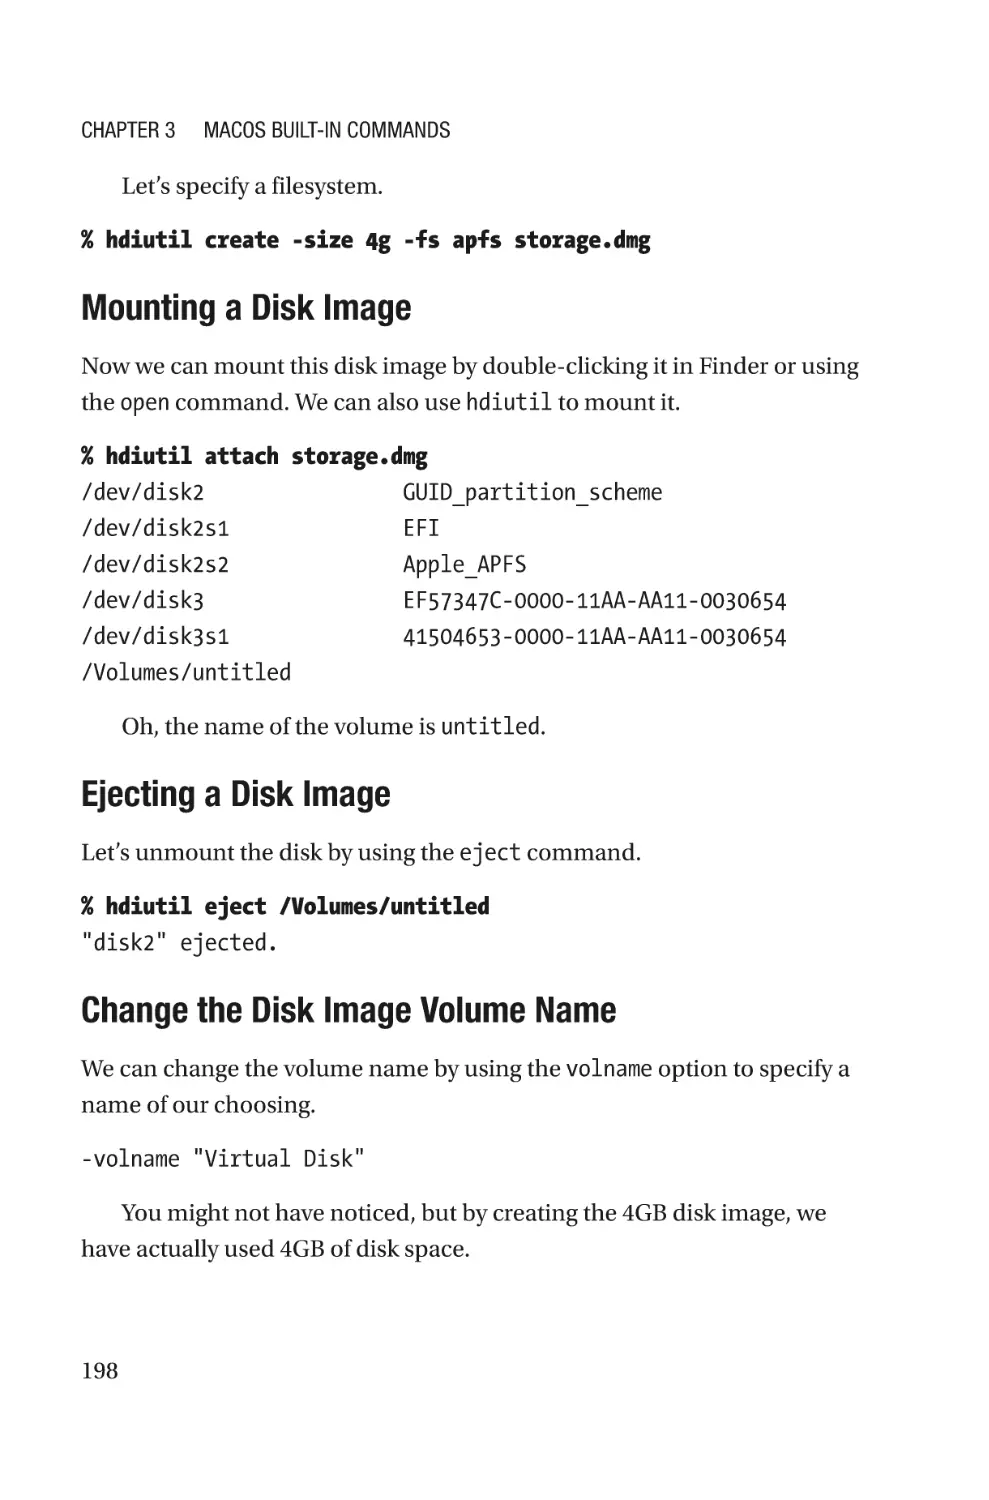
Disk Images�������������������������������������������������������������������������������������������������197
Other Commands That I Love����������������������������������������������������������������������������202
The say Command���������������������������������������������������������������������������������������202
ix
Table of Contents
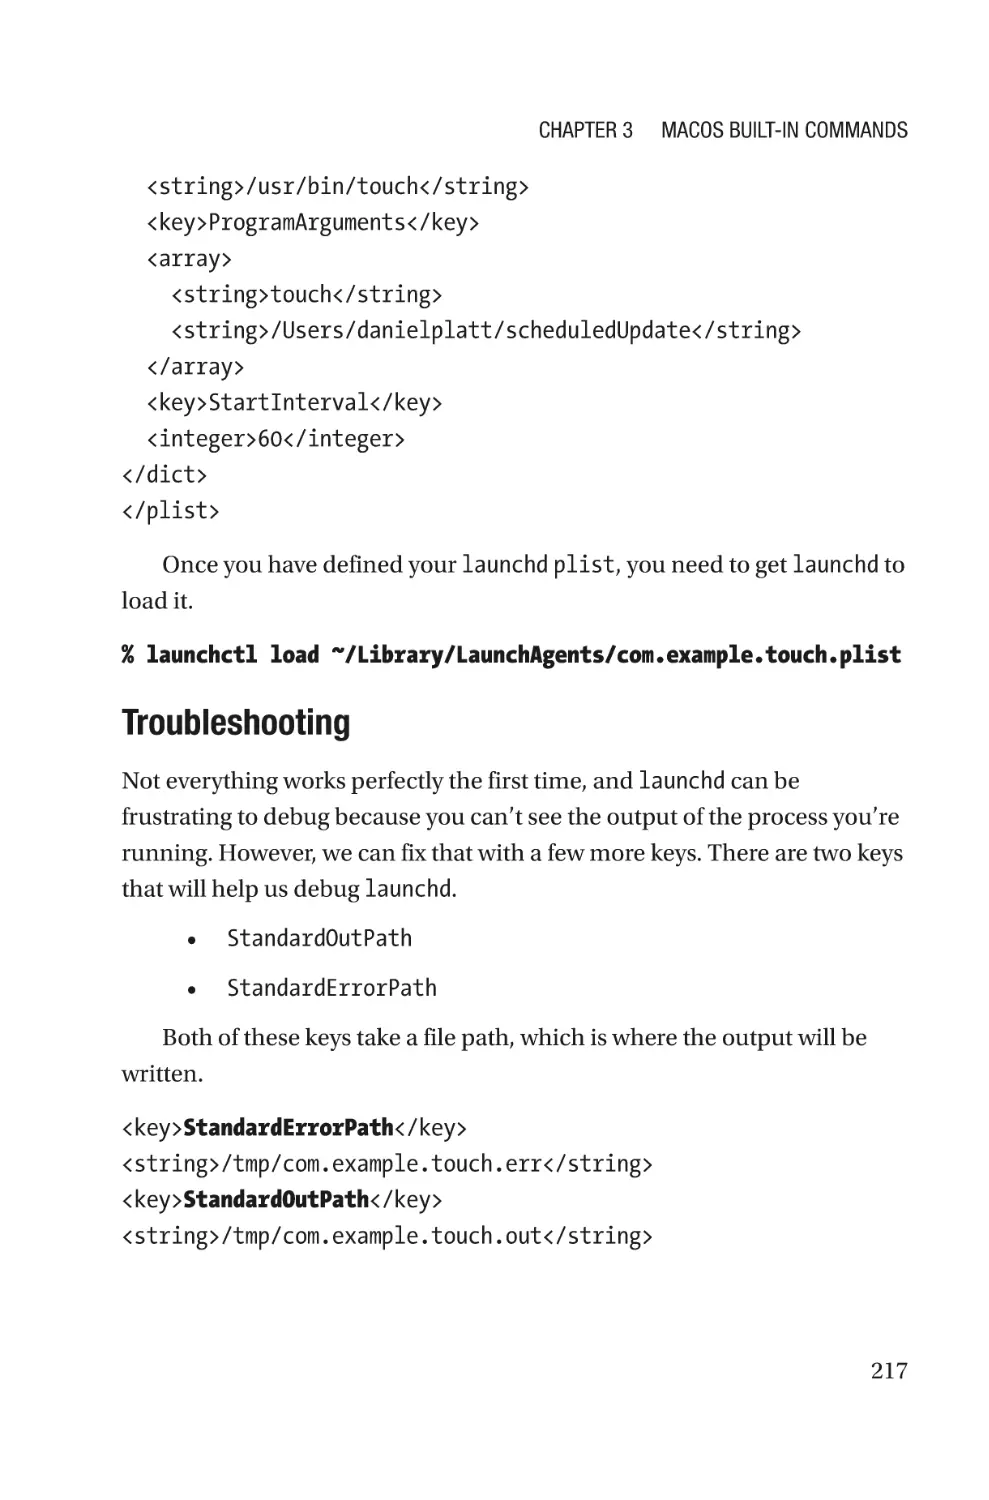
Scheduling with Launchd����������������������������������������������������������������������������207
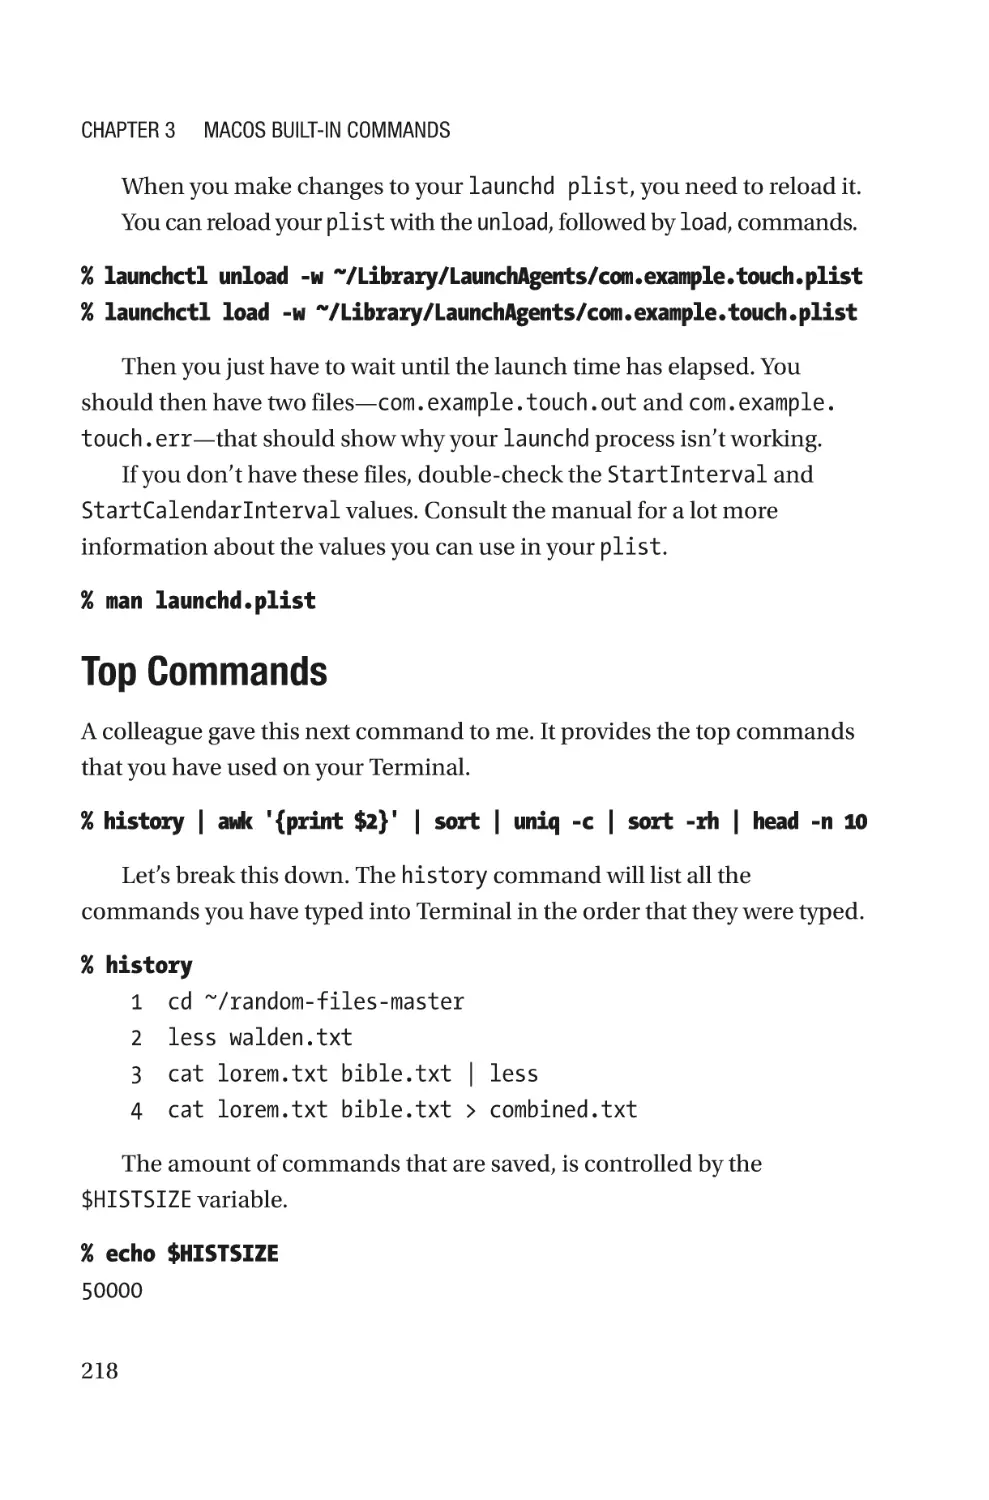
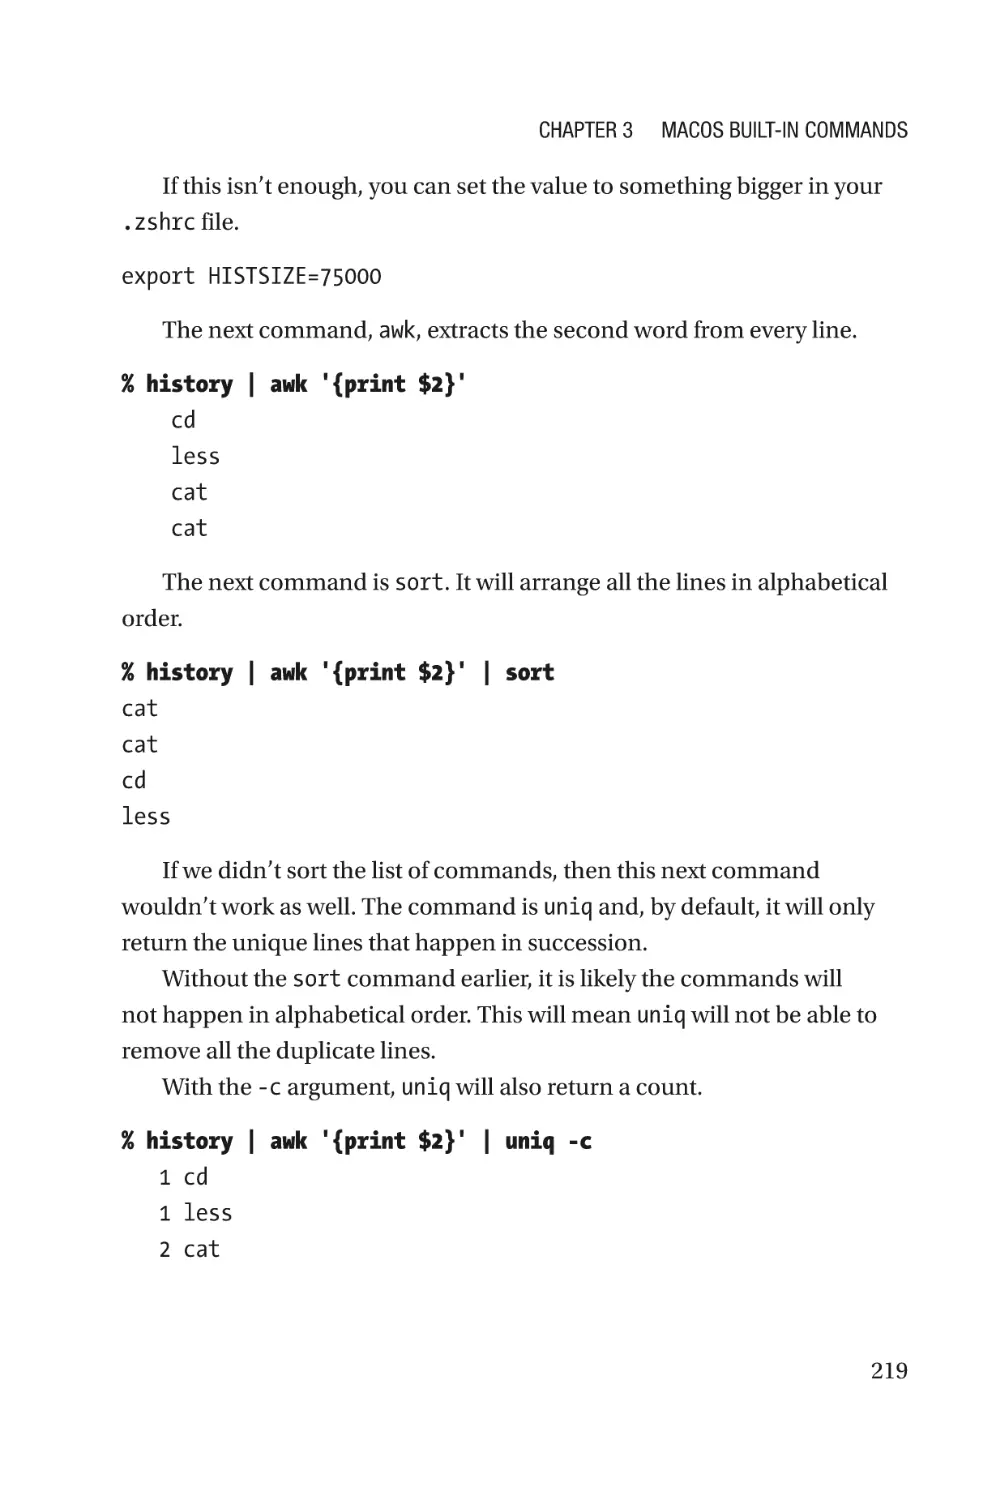
Top Commands��������������������������������������������������������������������������������������������218
Summary����������������������������������������������������������������������������������������������������������221
Chapter 4: Installing Commands Using Brew�����������������������������������223
Having Fun with Text�����������������������������������������������������������������������������������������223
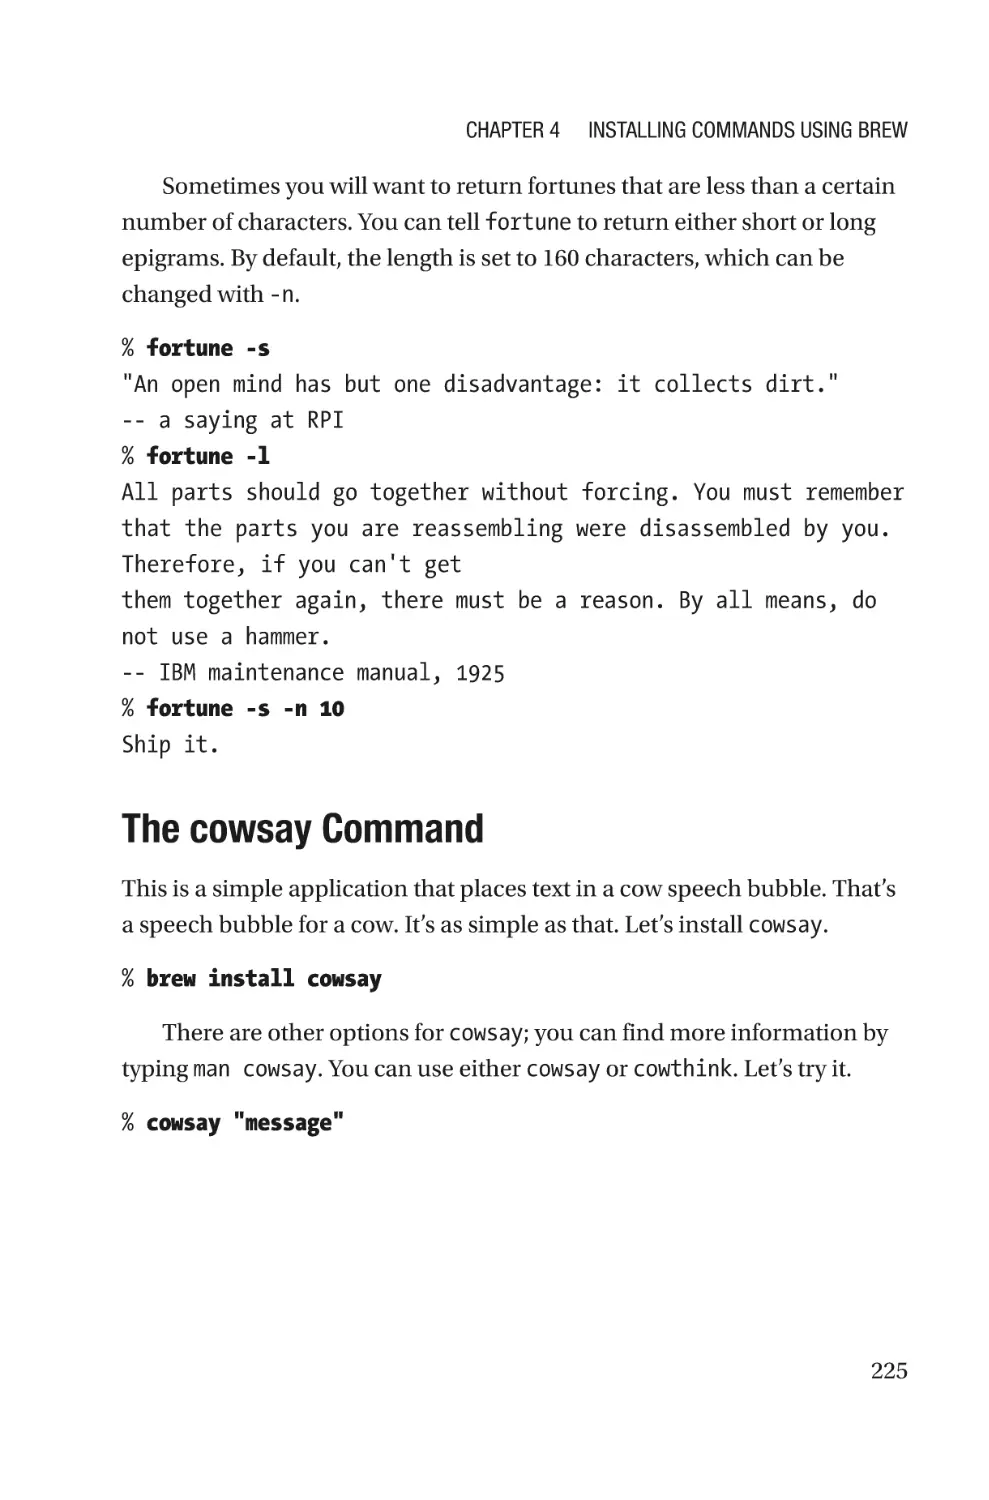
The fortune Command���������������������������������������������������������������������������������223
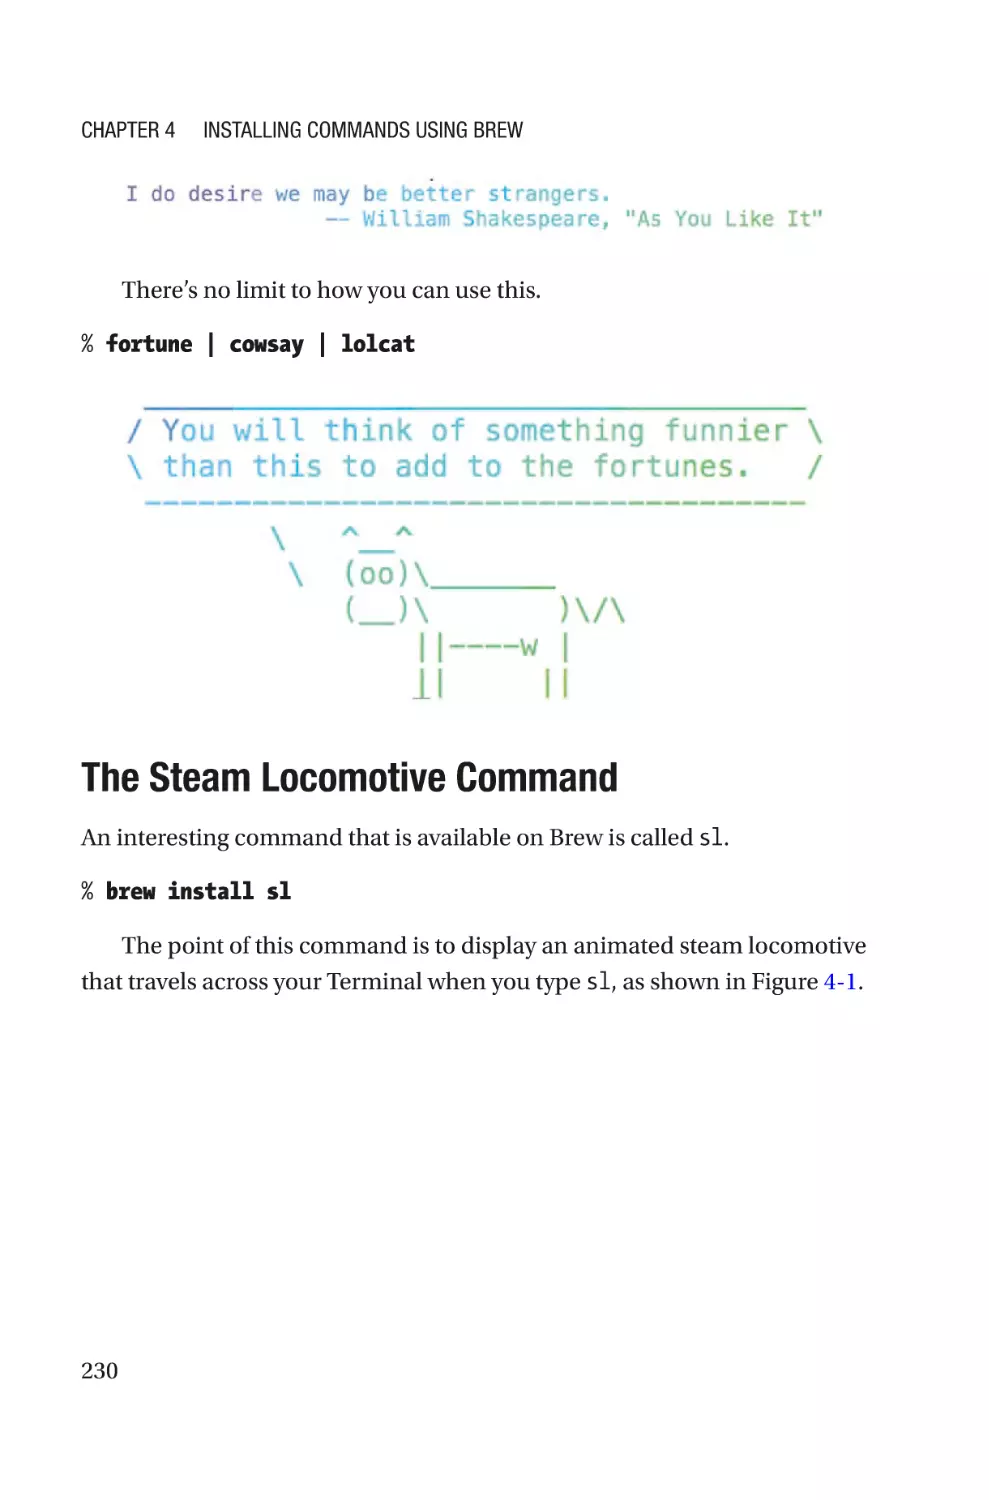
The cowsay Command��������������������������������������������������������������������������������225
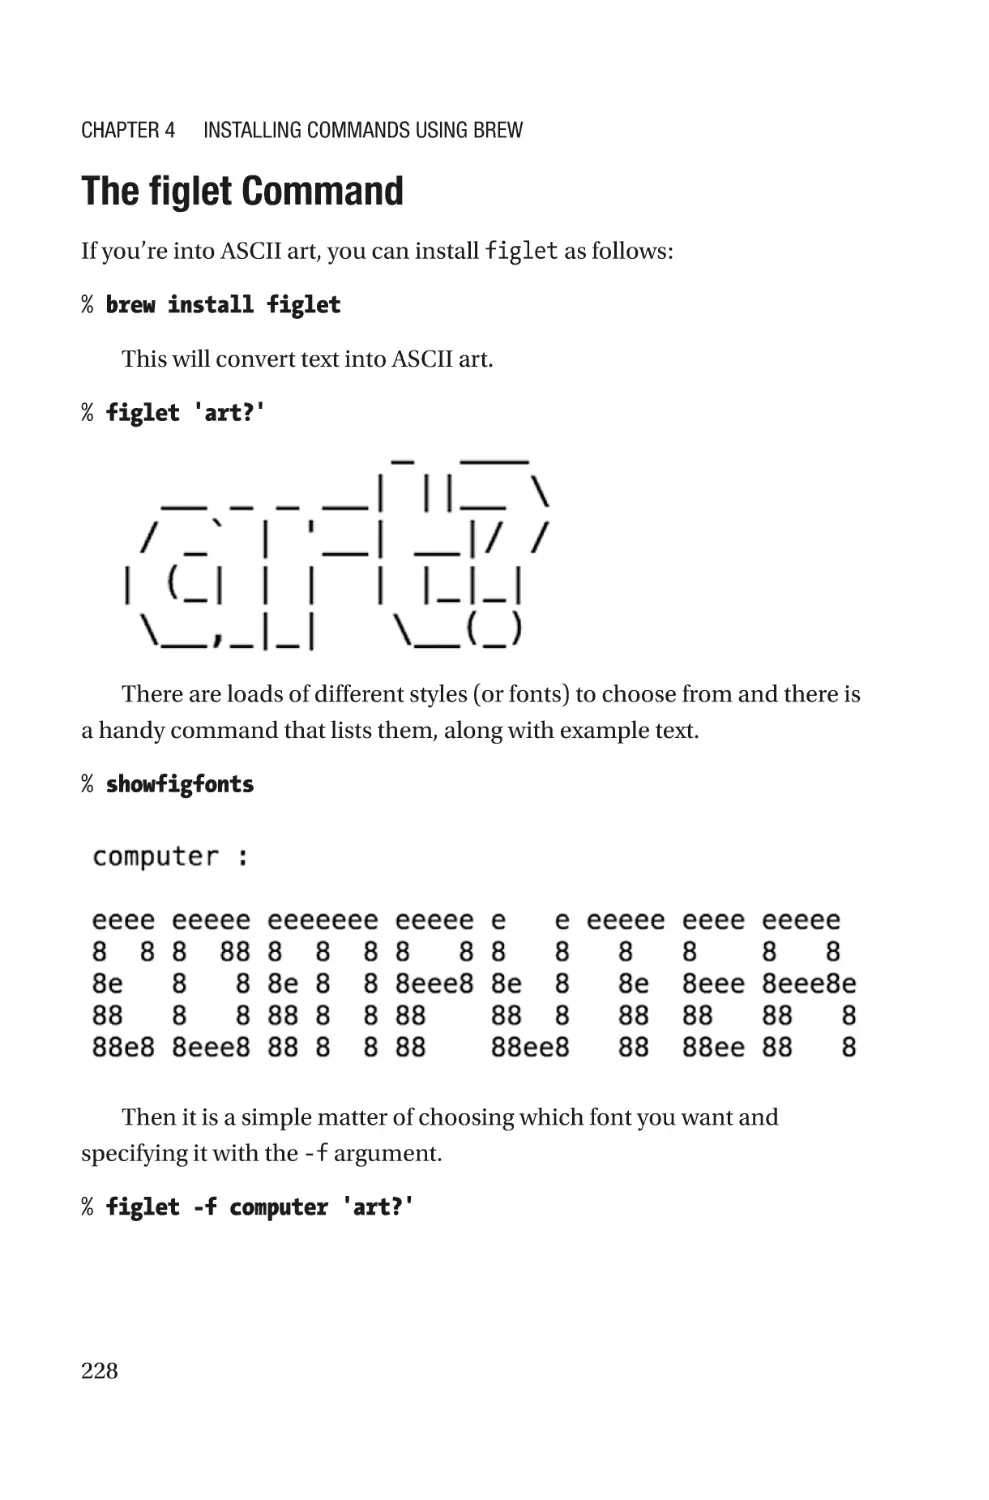
The figlet Command������������������������������������������������������������������������������������228
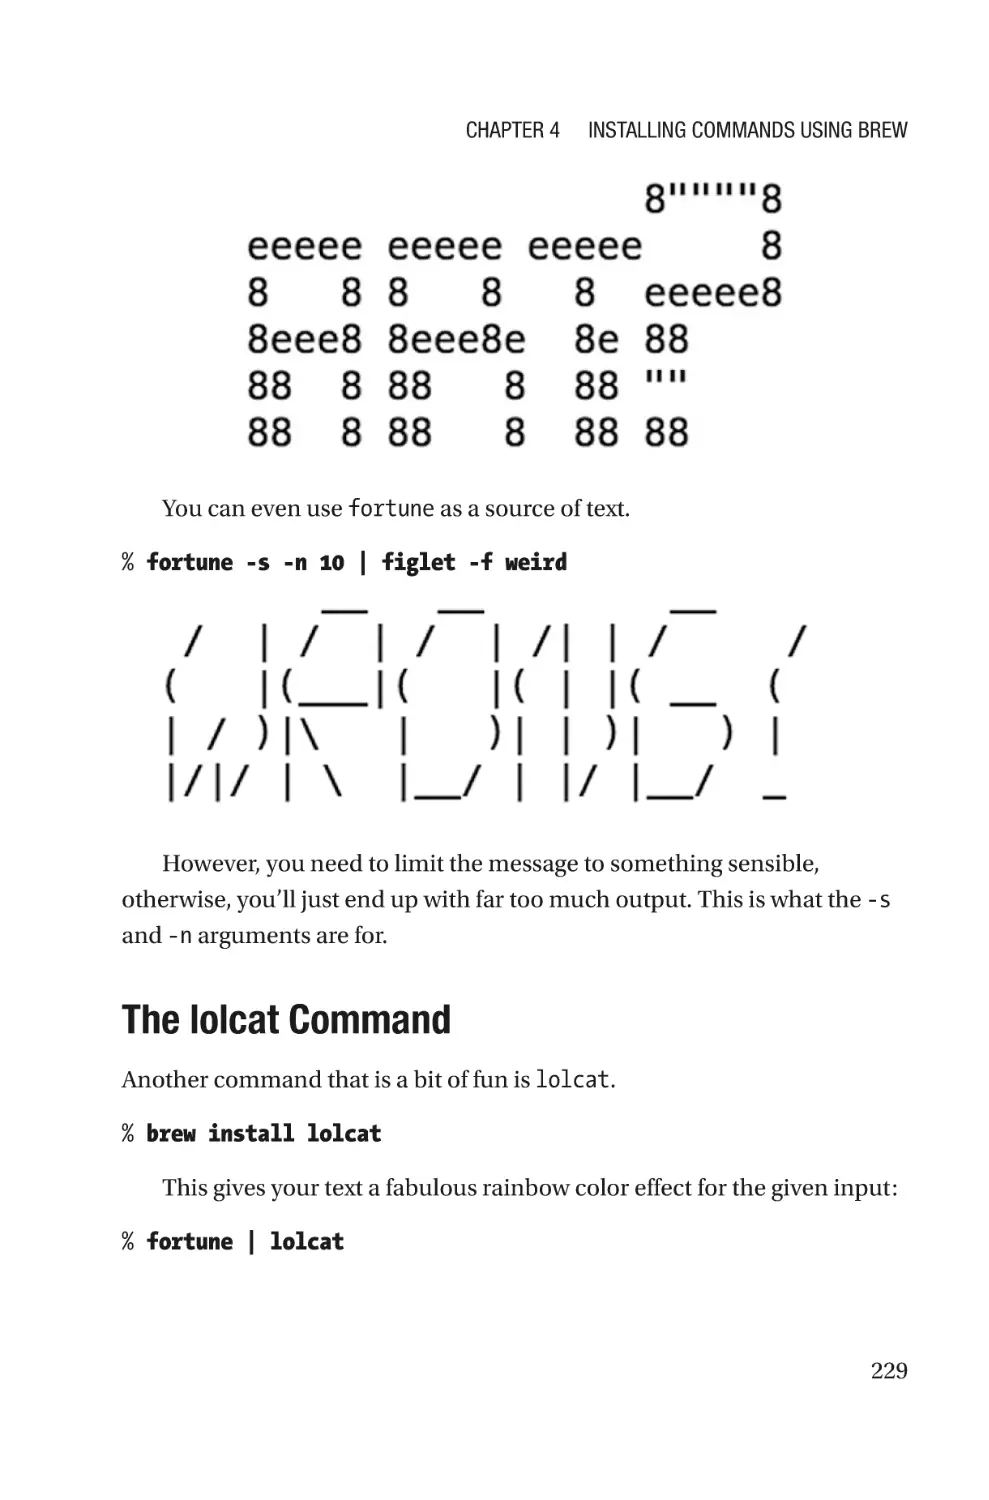
The lolcat Command������������������������������������������������������������������������������������229
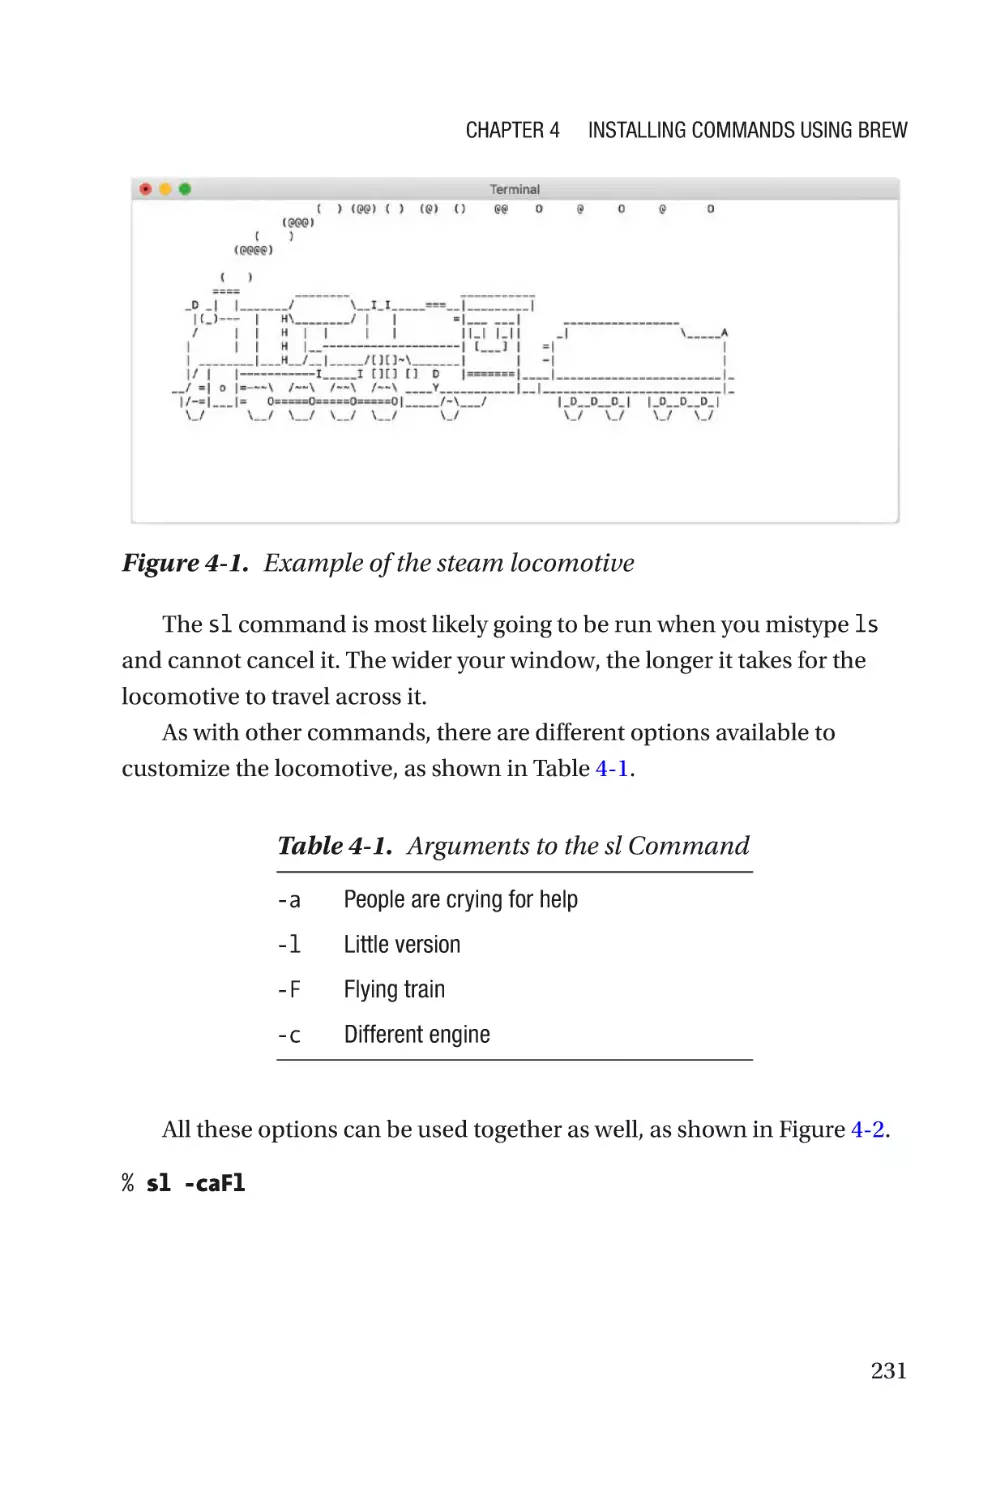
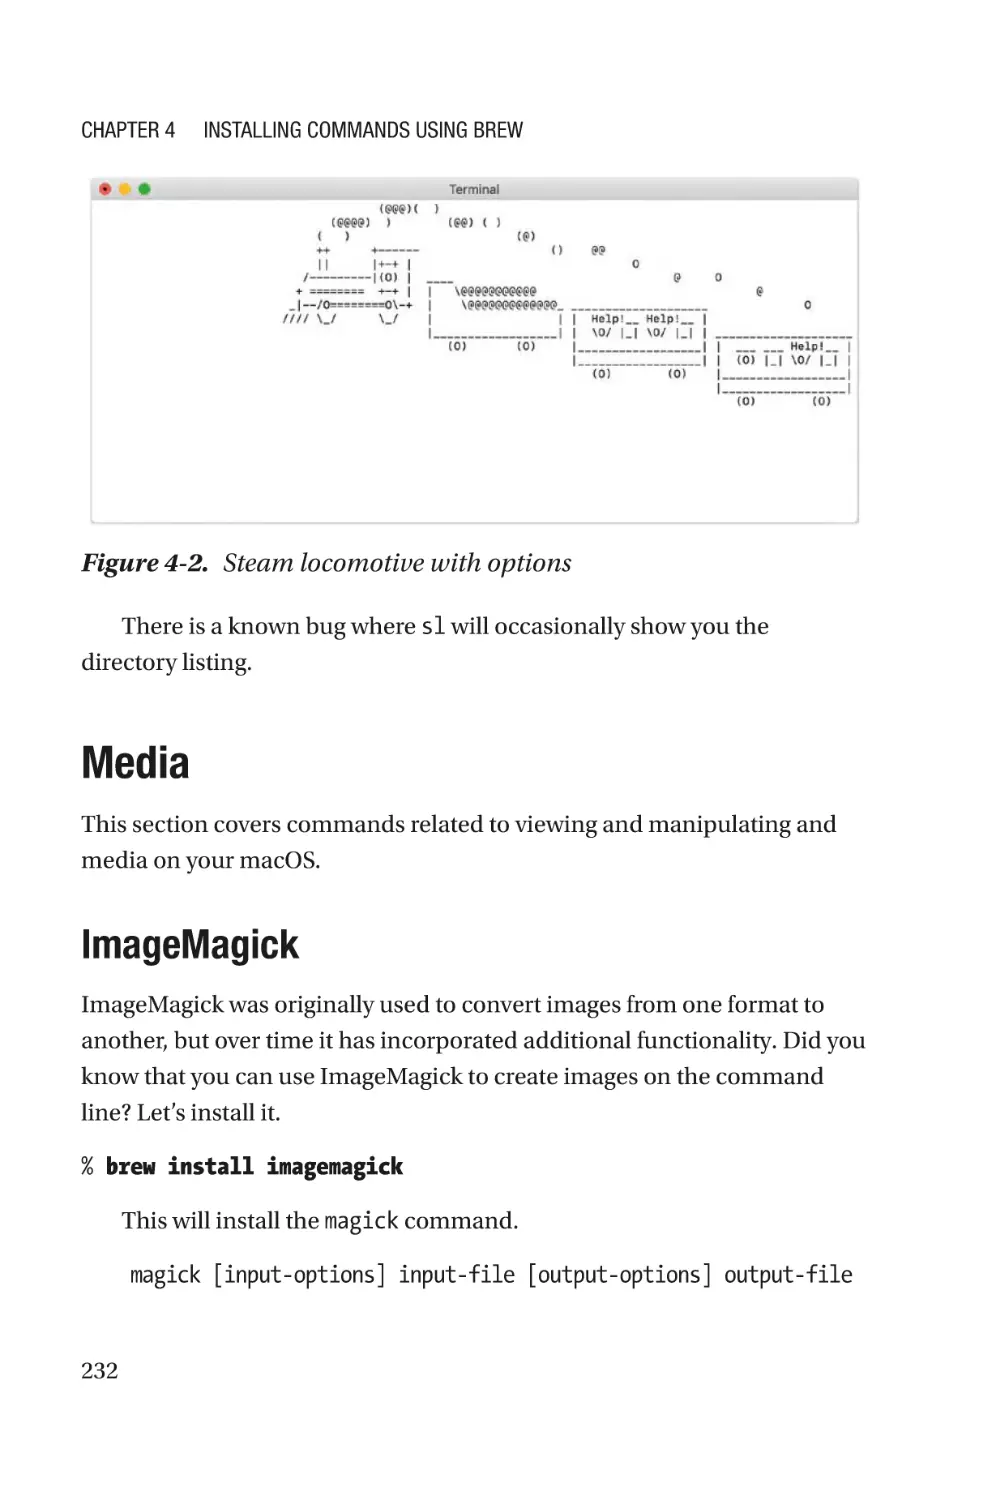
The Steam Locomotive Command���������������������������������������������������������������230
Media����������������������������������������������������������������������������������������������������������������232
ImageMagick�����������������������������������������������������������������������������������������������232
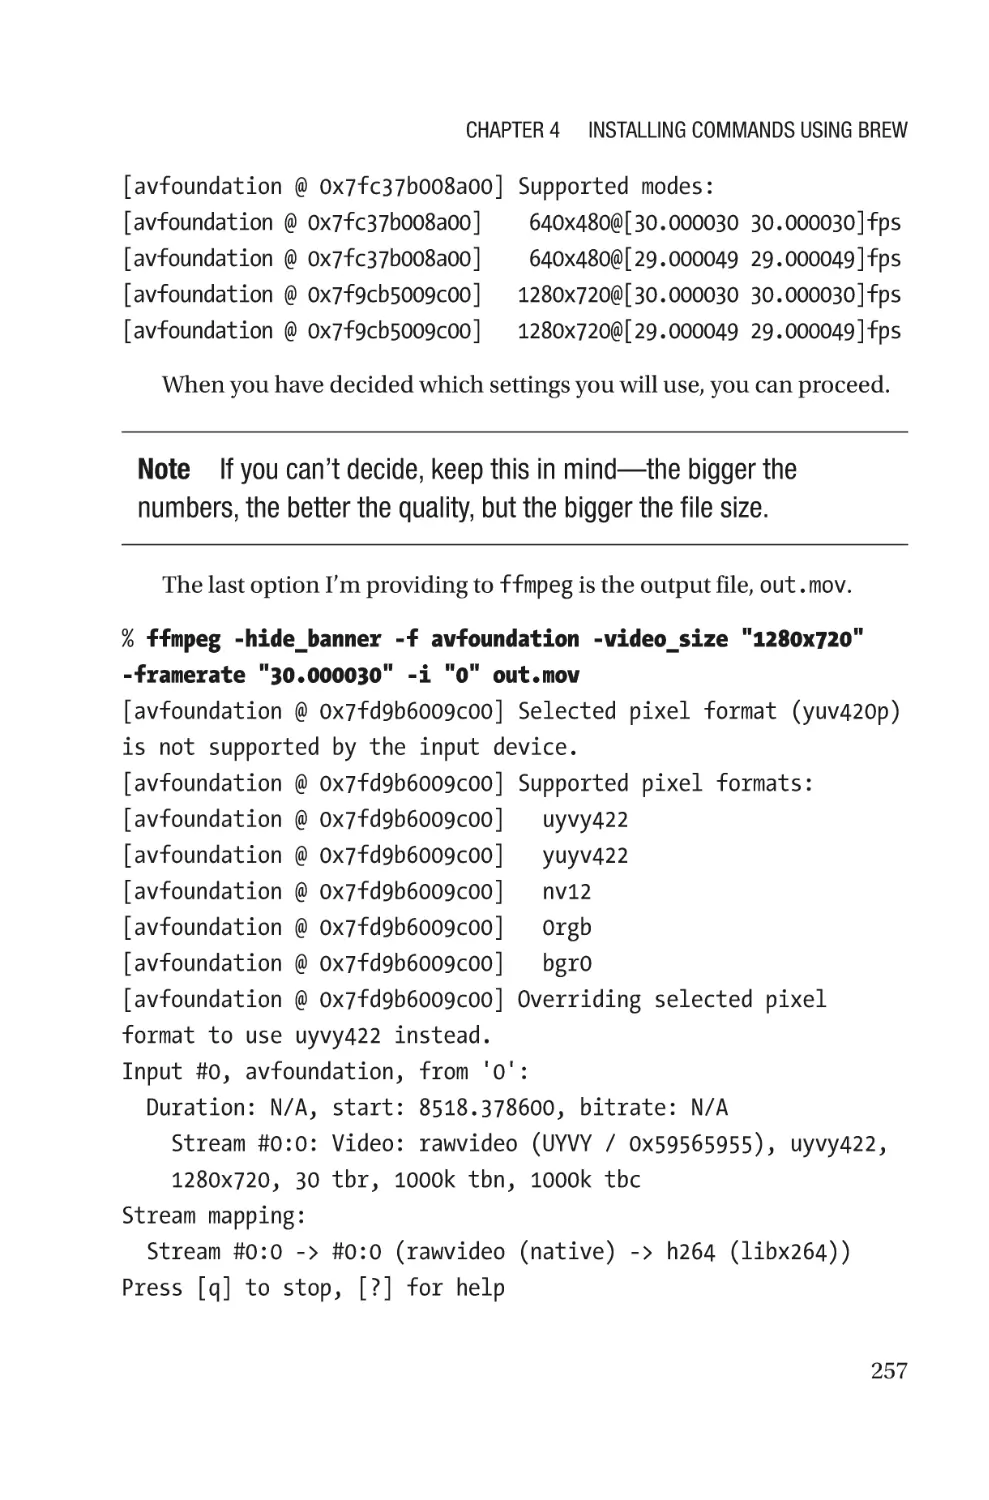
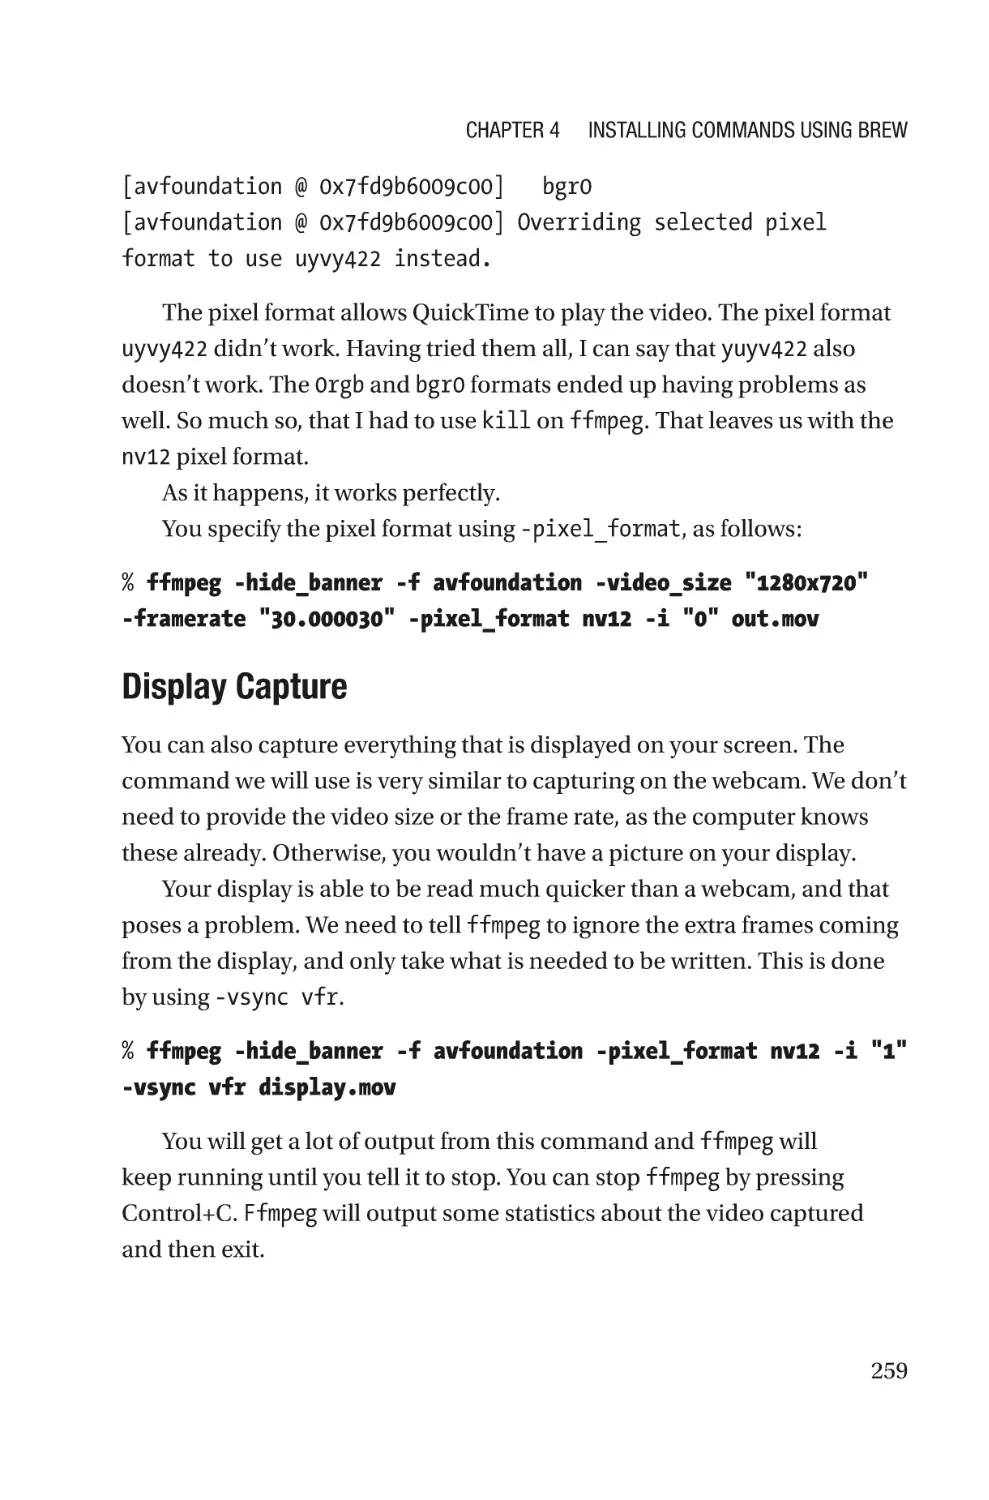
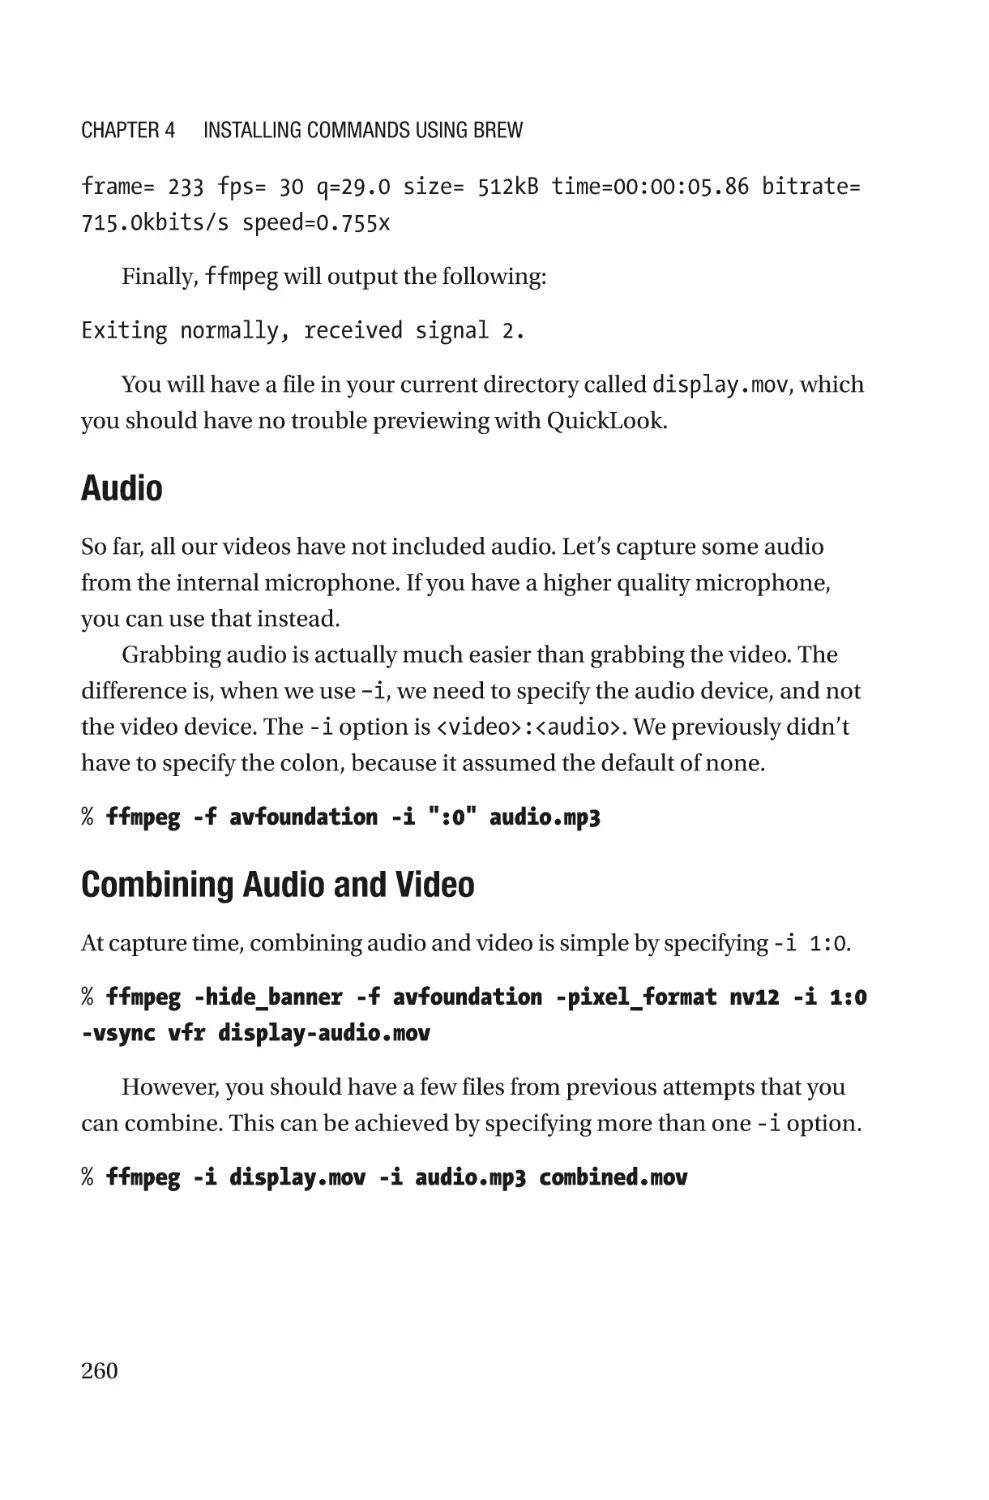
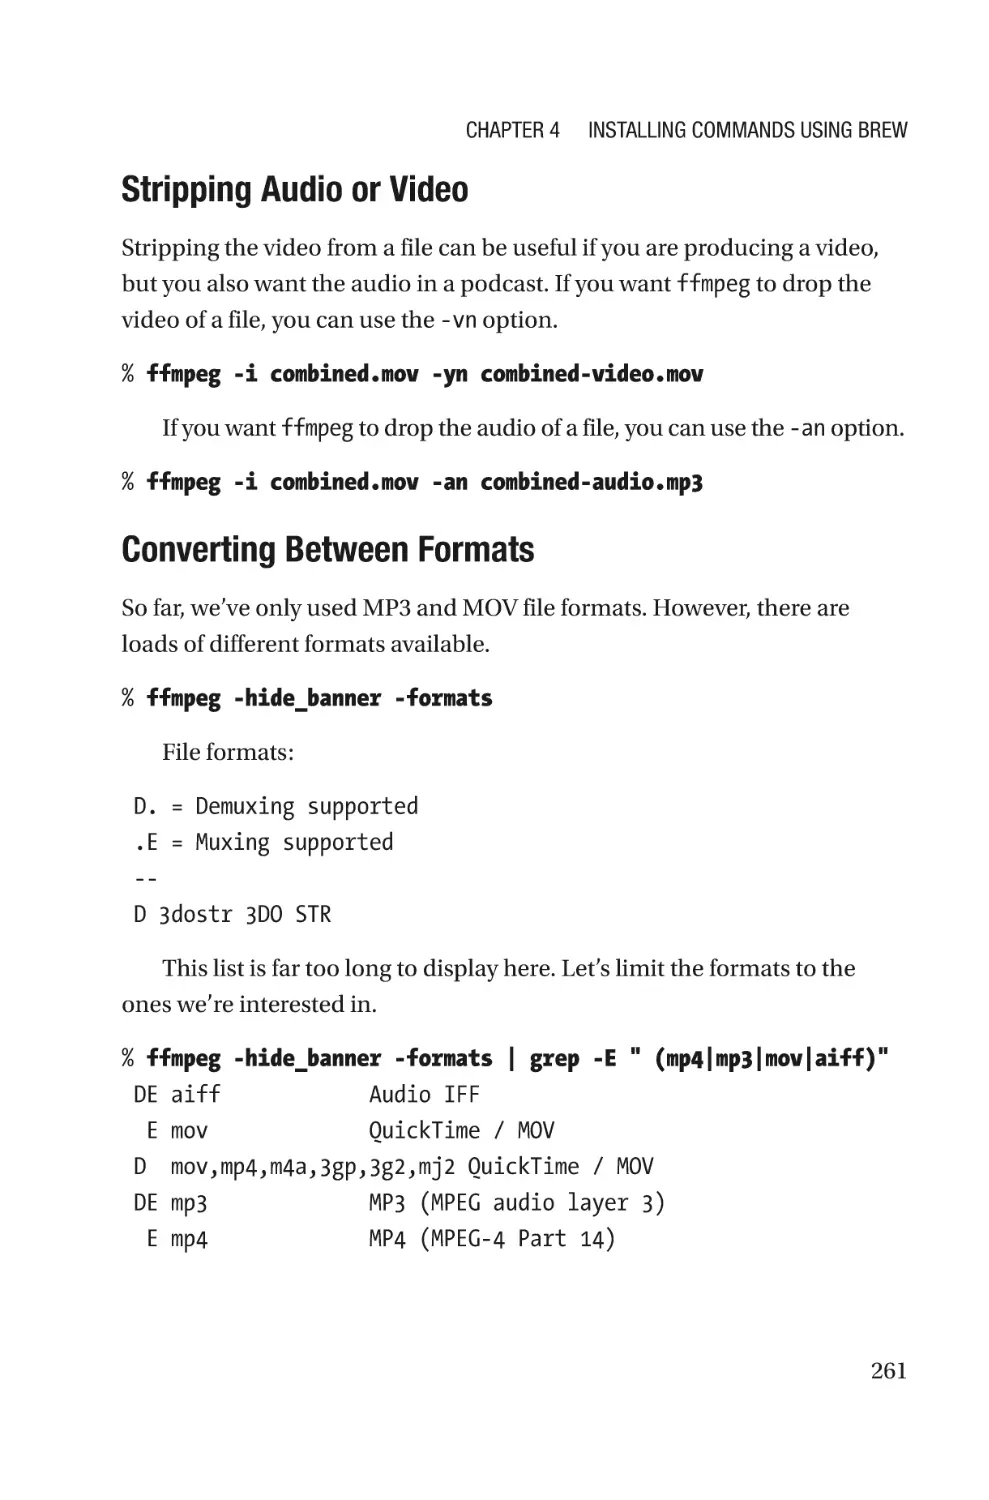
ffmpeg���������������������������������������������������������������������������������������������������������253
Advanced Brew Concepts���������������������������������������������������������������������������������266
Brew Casks��������������������������������������������������������������������������������������������������266
Brew Services���������������������������������������������������������������������������������������������269
Utilities��������������������������������������������������������������������������������������������������������������272
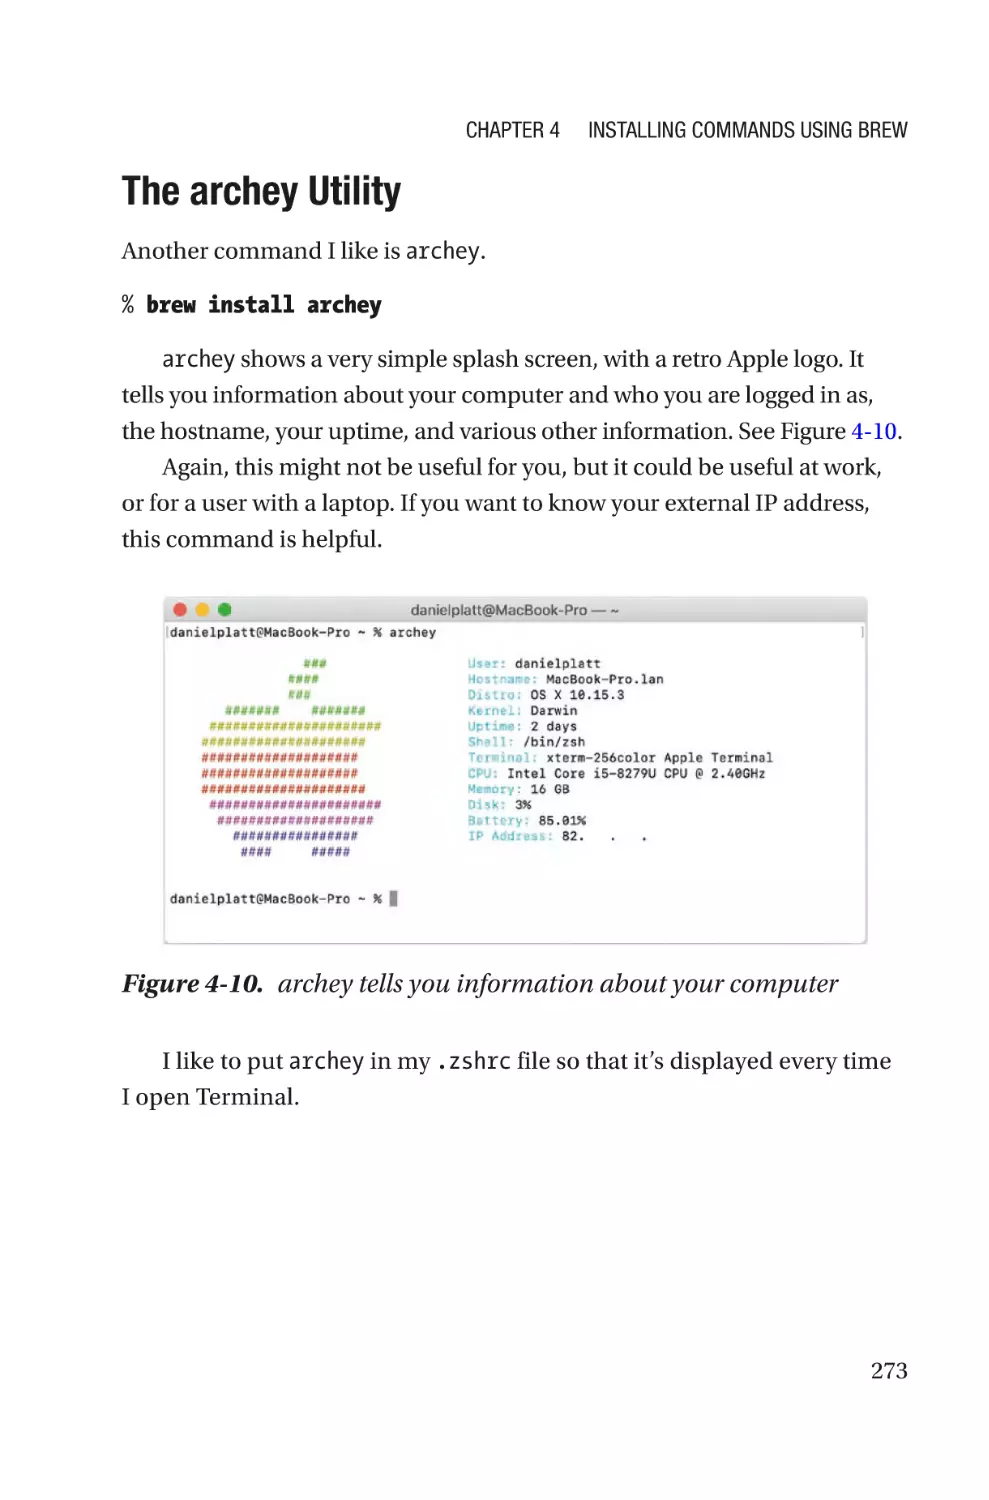
The archey Utility�����������������������������������������������������������������������������������������273
Linux Utilities for macOS�����������������������������������������������������������������������������274
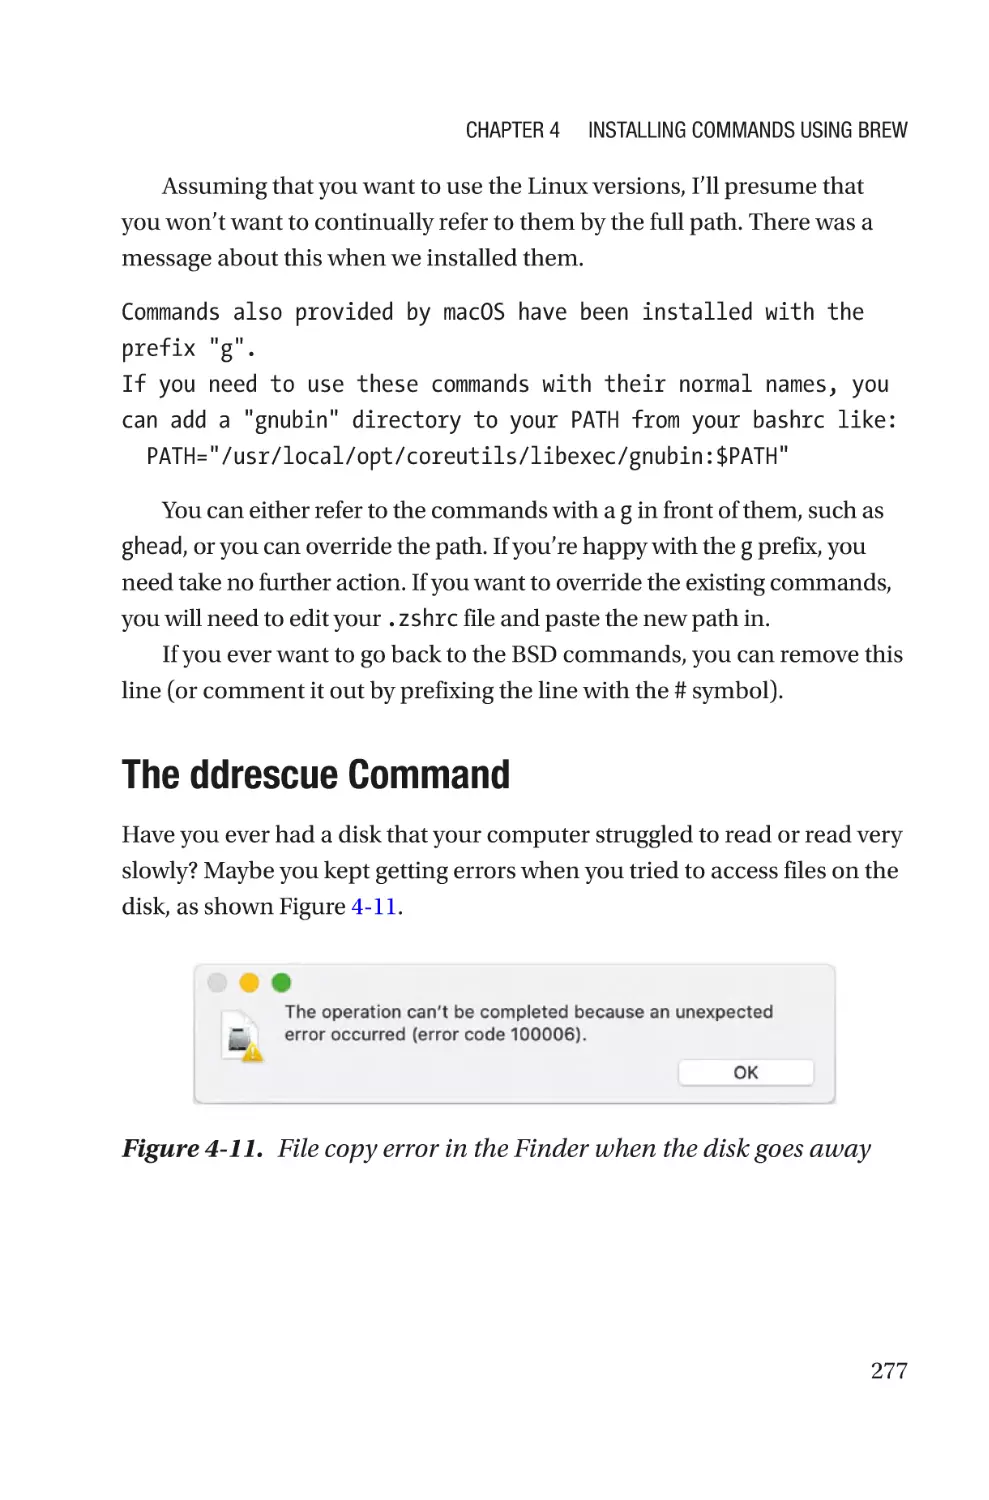
The ddrescue Command������������������������������������������������������������������������������277
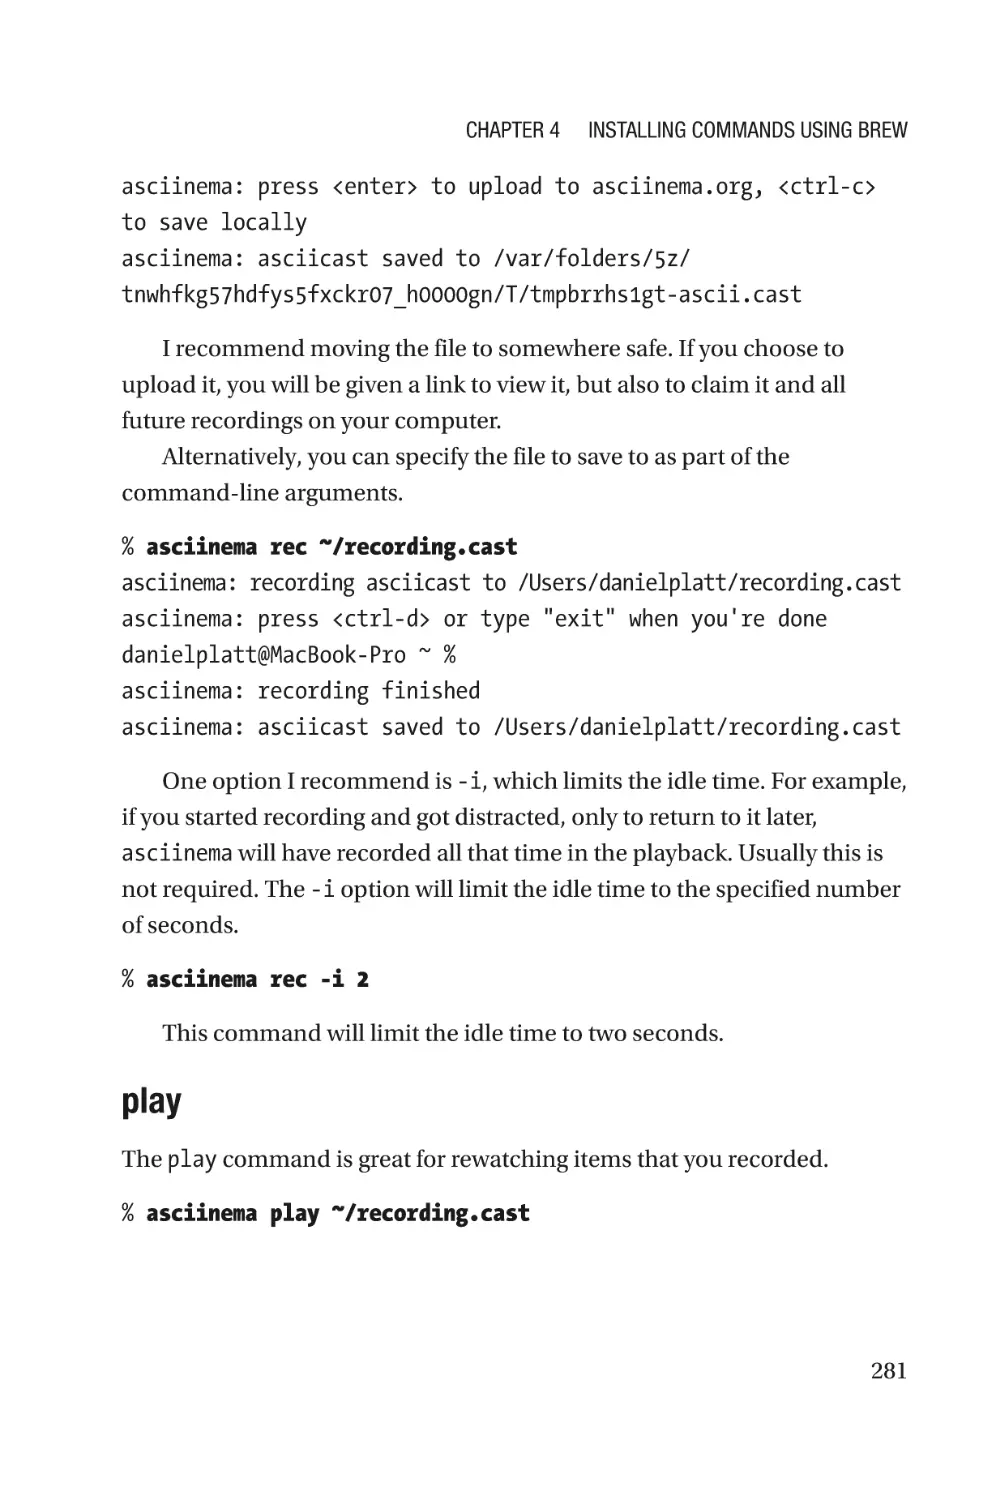
The asciinema Command����������������������������������������������������������������������������279
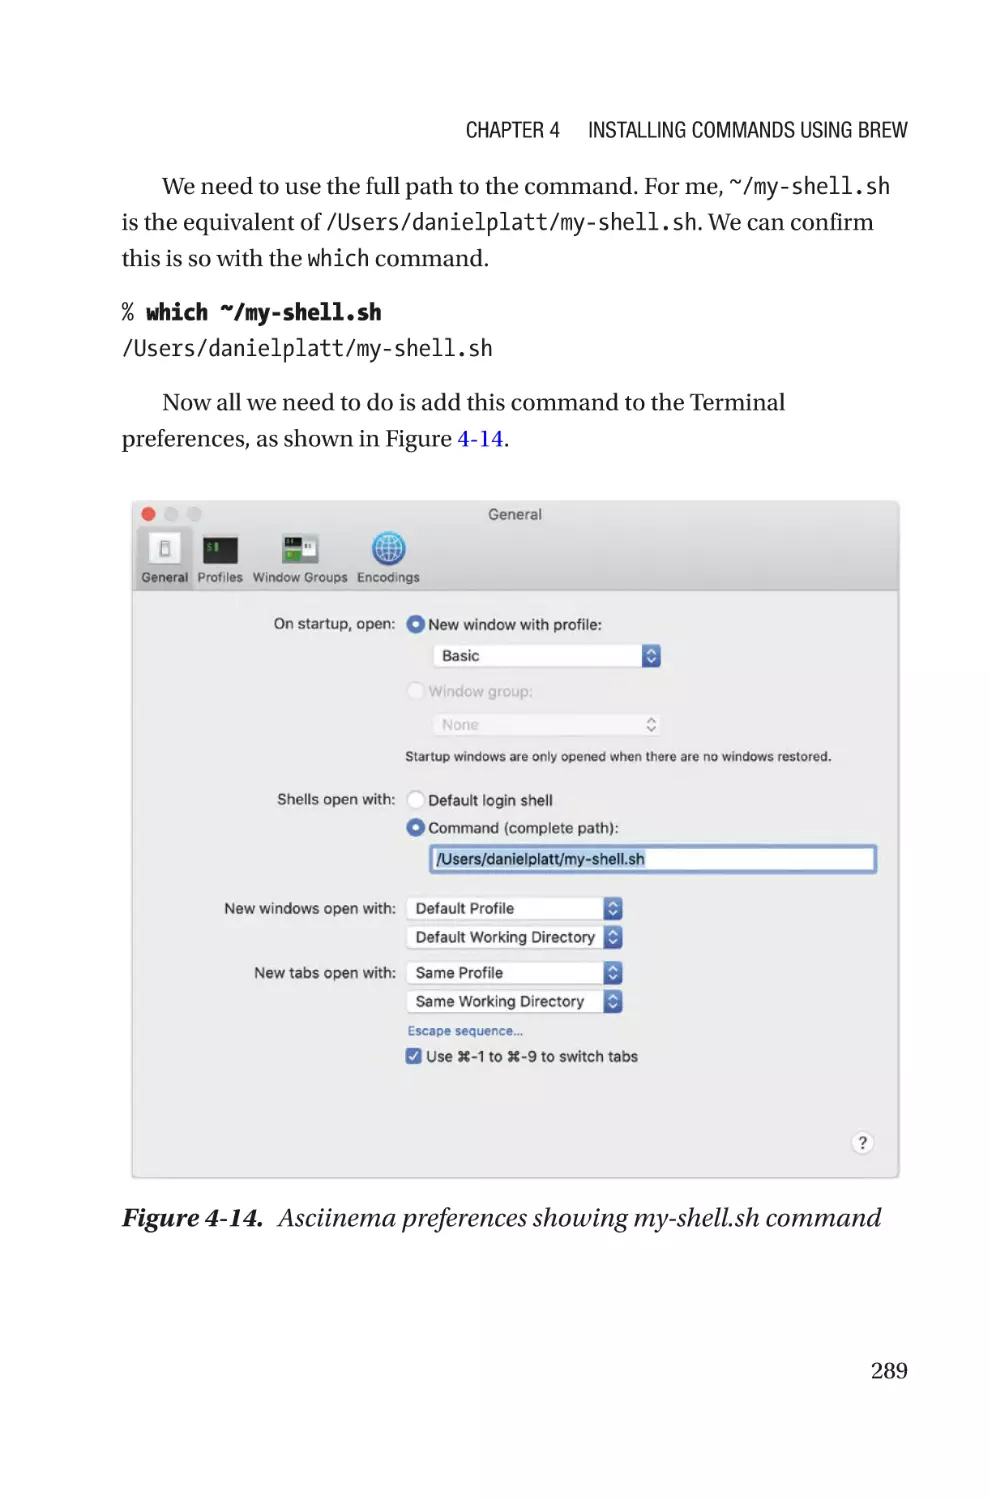
Formatting XML and JSON Files������������������������������������������������������������������290
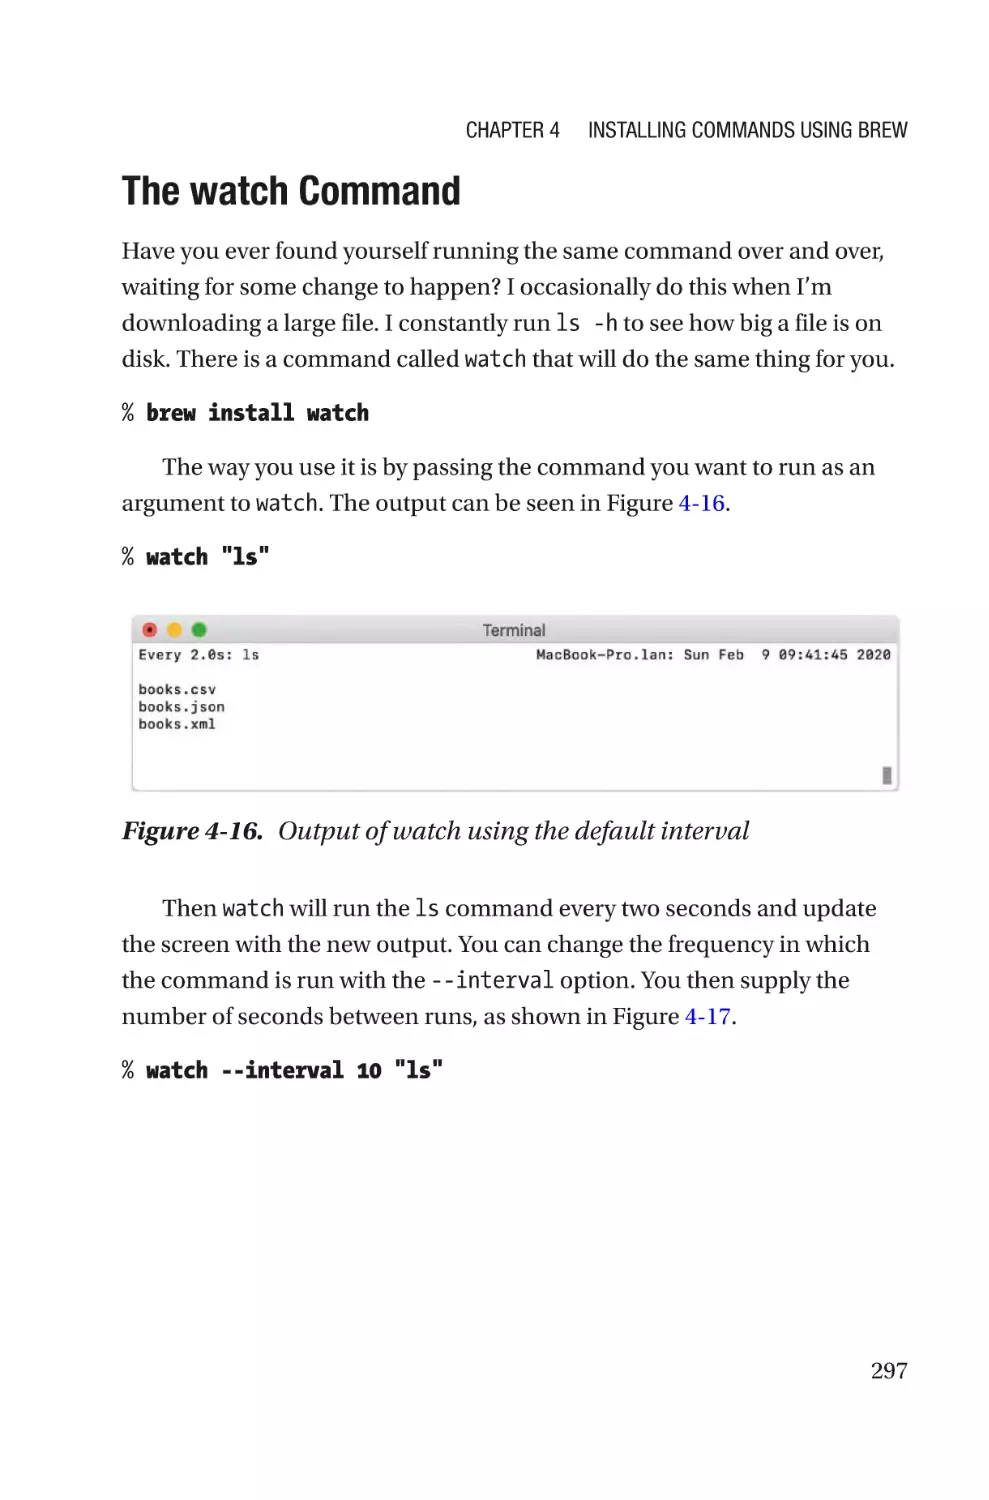
The watch Command�����������������������������������������������������������������������������������297
Networking�������������������������������������������������������������������������������������������������������298
The wget Command������������������������������������������������������������������������������������298
The curl Command��������������������������������������������������������������������������������������299
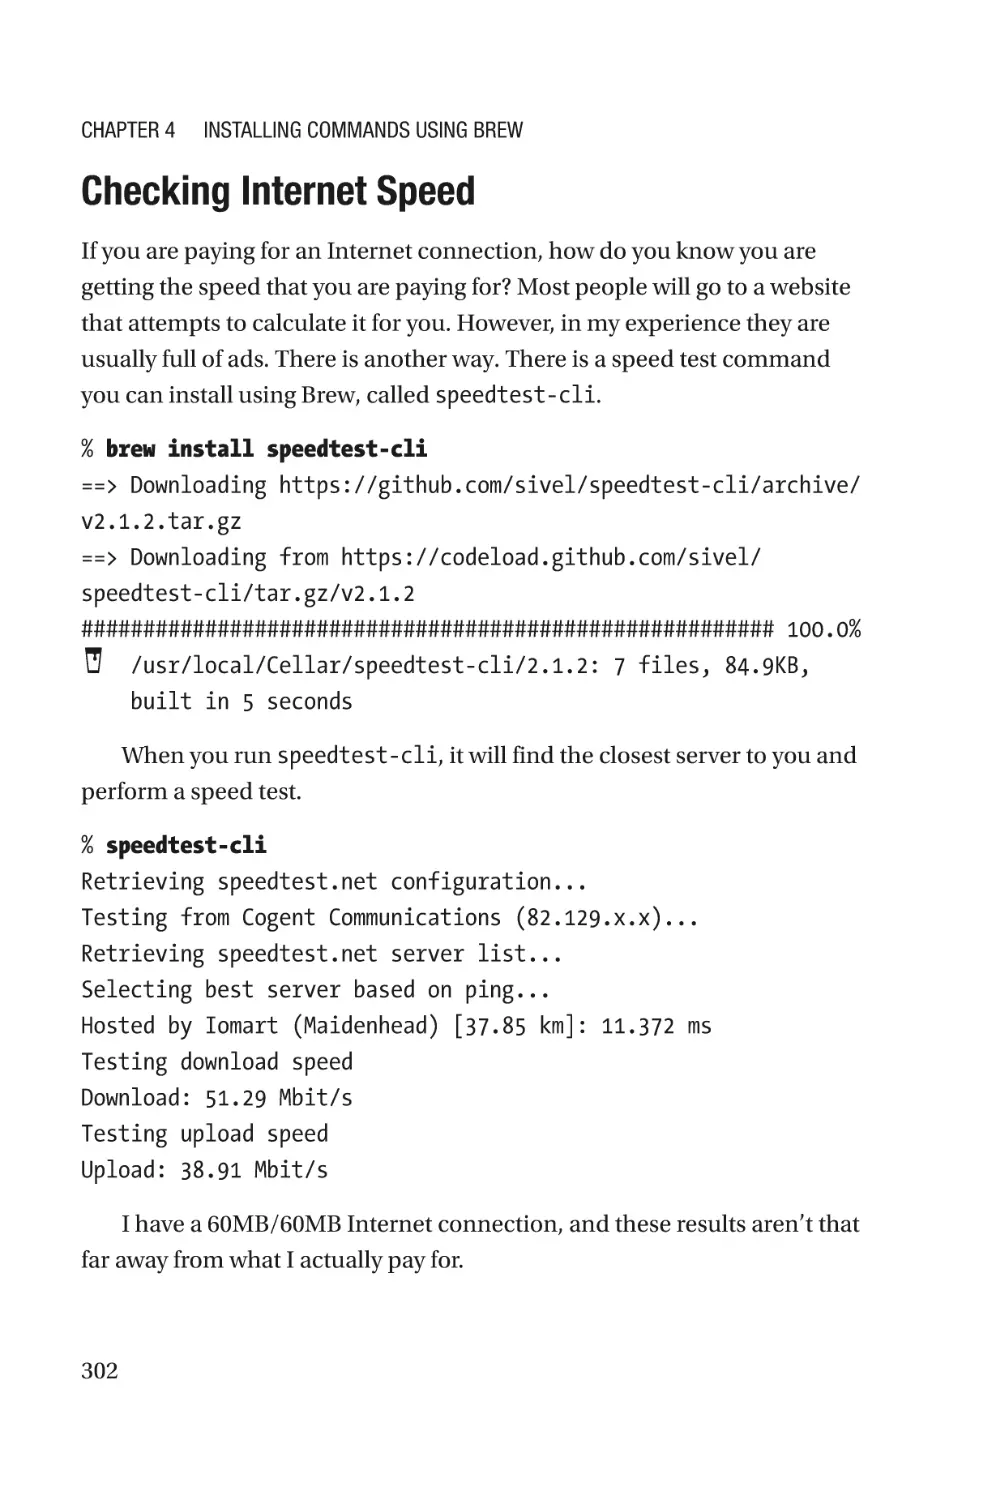
Checking Internet Speed�����������������������������������������������������������������������������302
Summary����������������������������������������������������������������������������������������������������������304
x
Table of Contents
Chapter 5: Shell Scripting Basics�����������������������������������������������������305
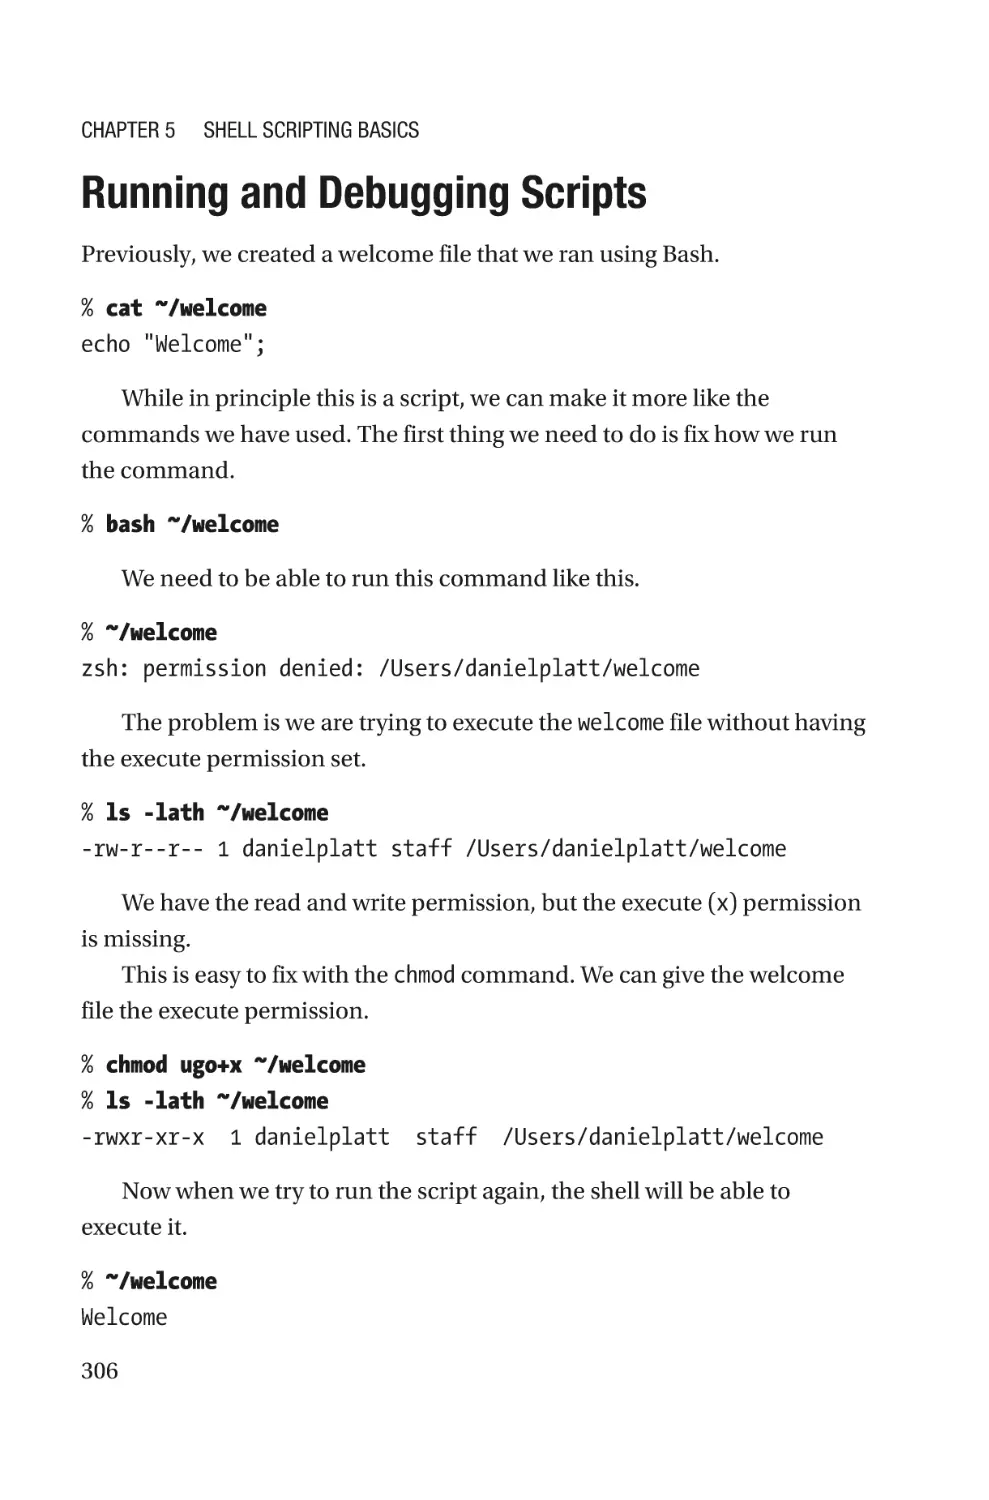
Your First Script������������������������������������������������������������������������������������������������305
Running and Debugging Scripts�����������������������������������������������������������������������306
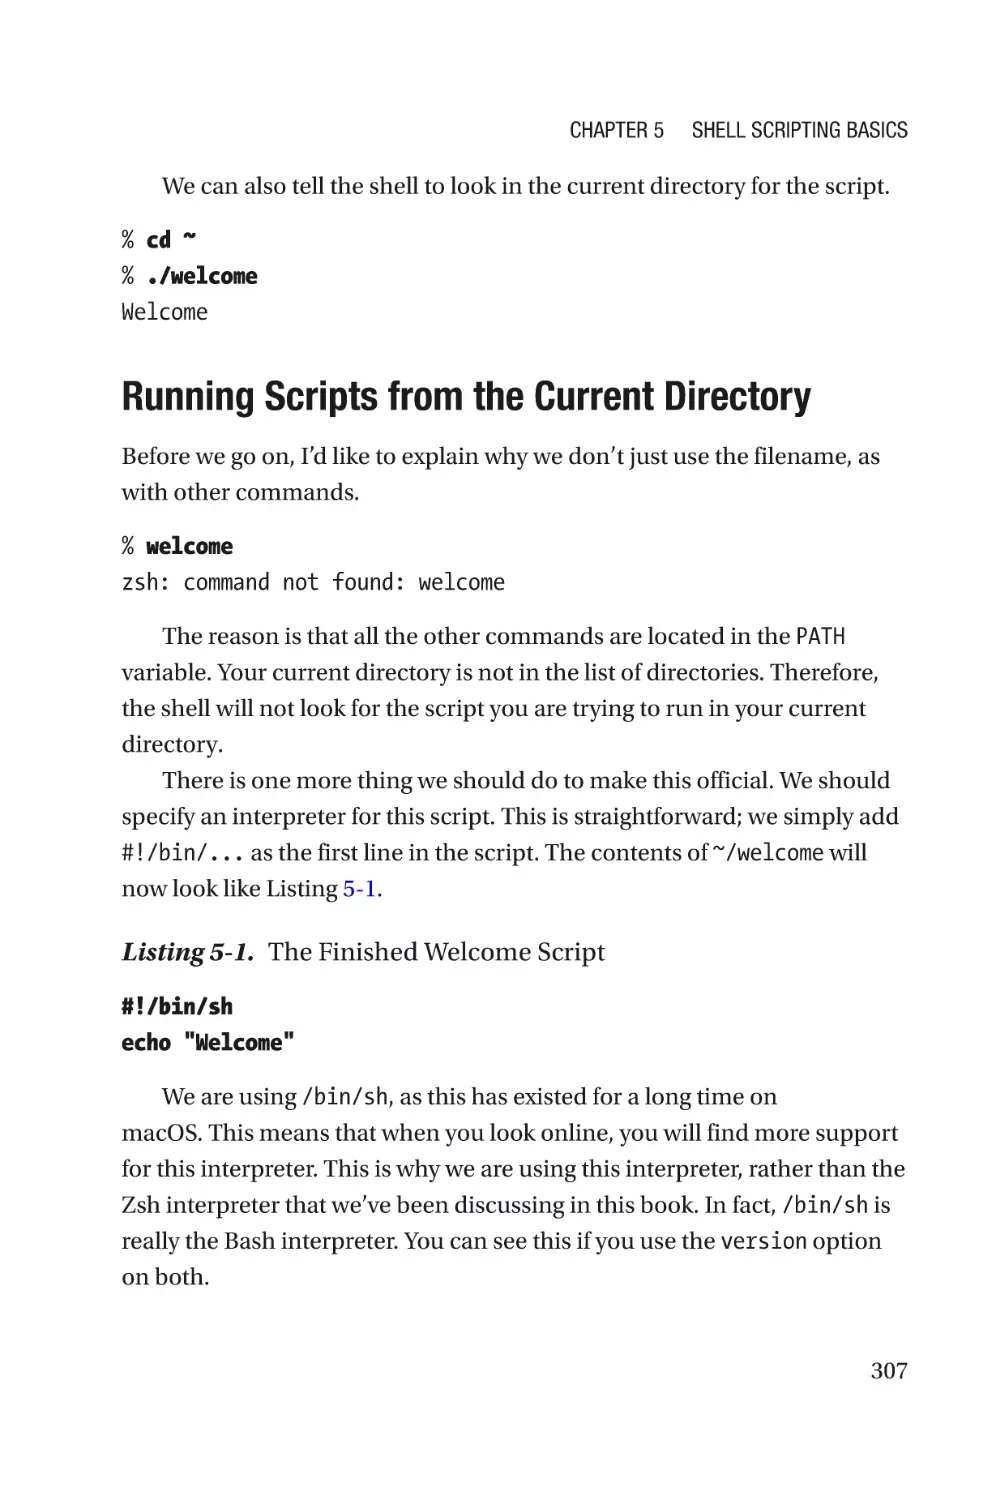
Running Scripts from the Current Directory������������������������������������������������307
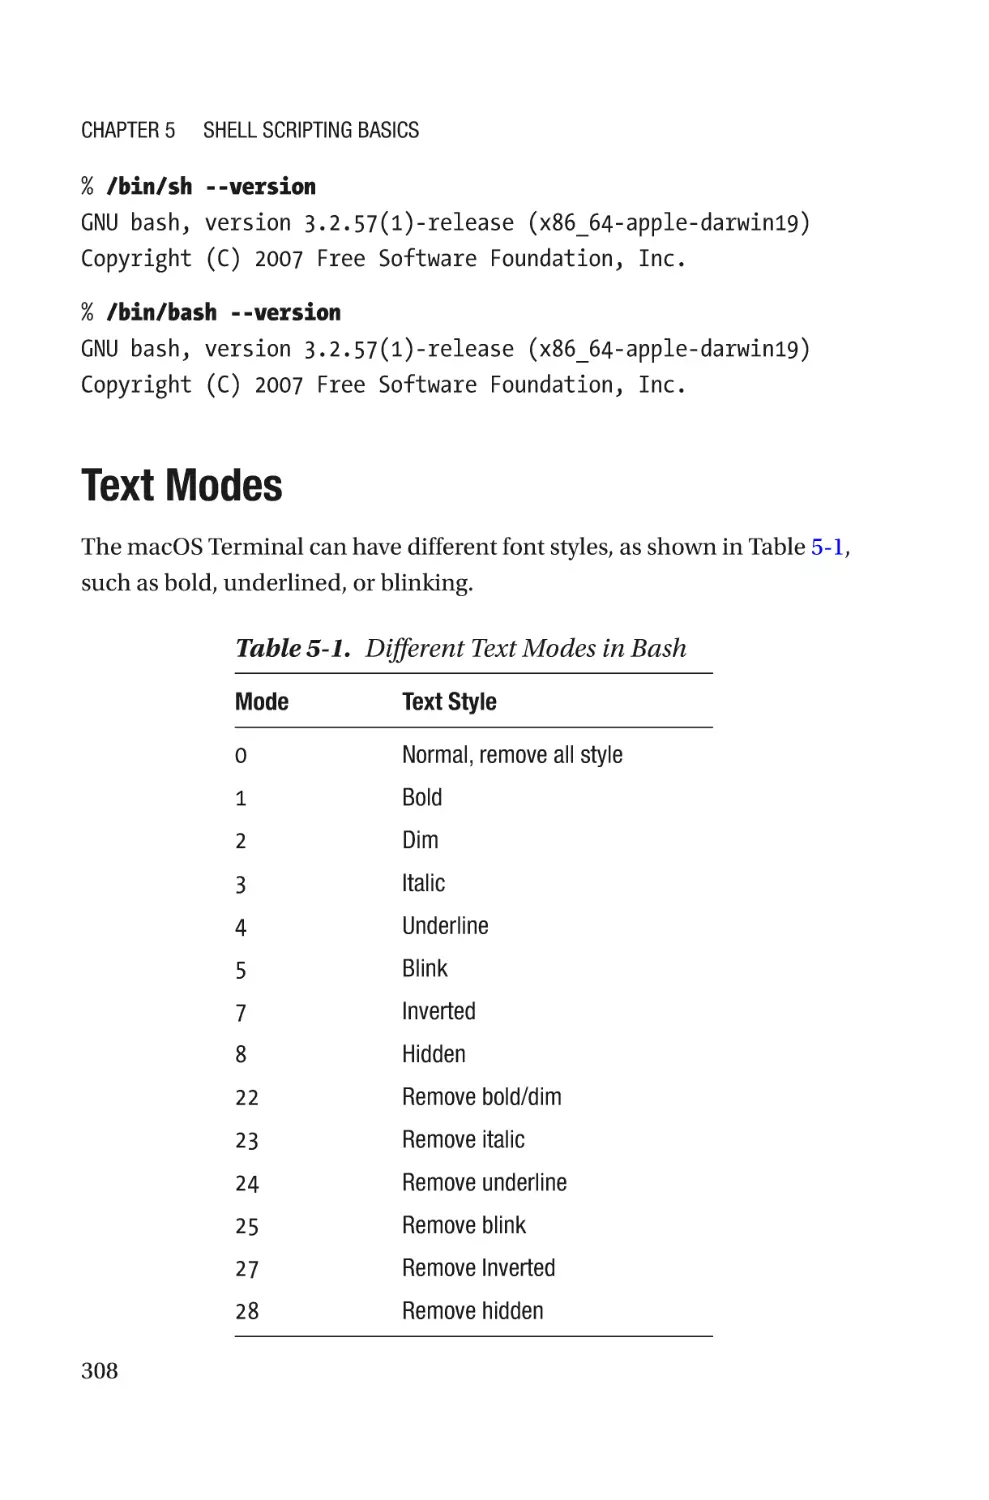
Text Modes��������������������������������������������������������������������������������������������������������308
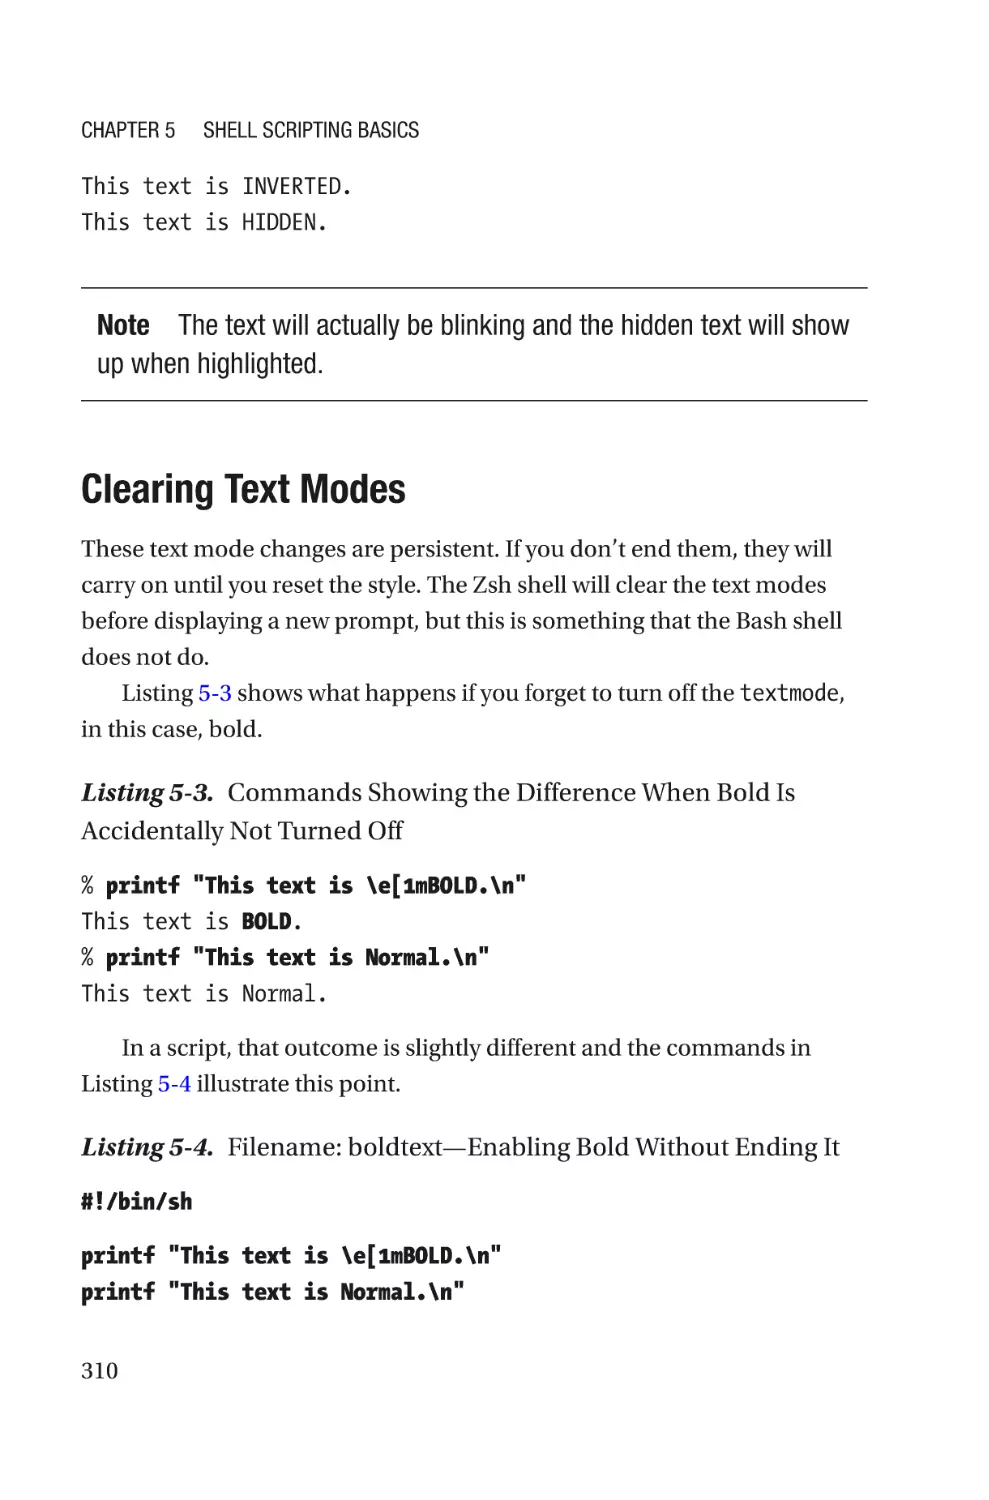
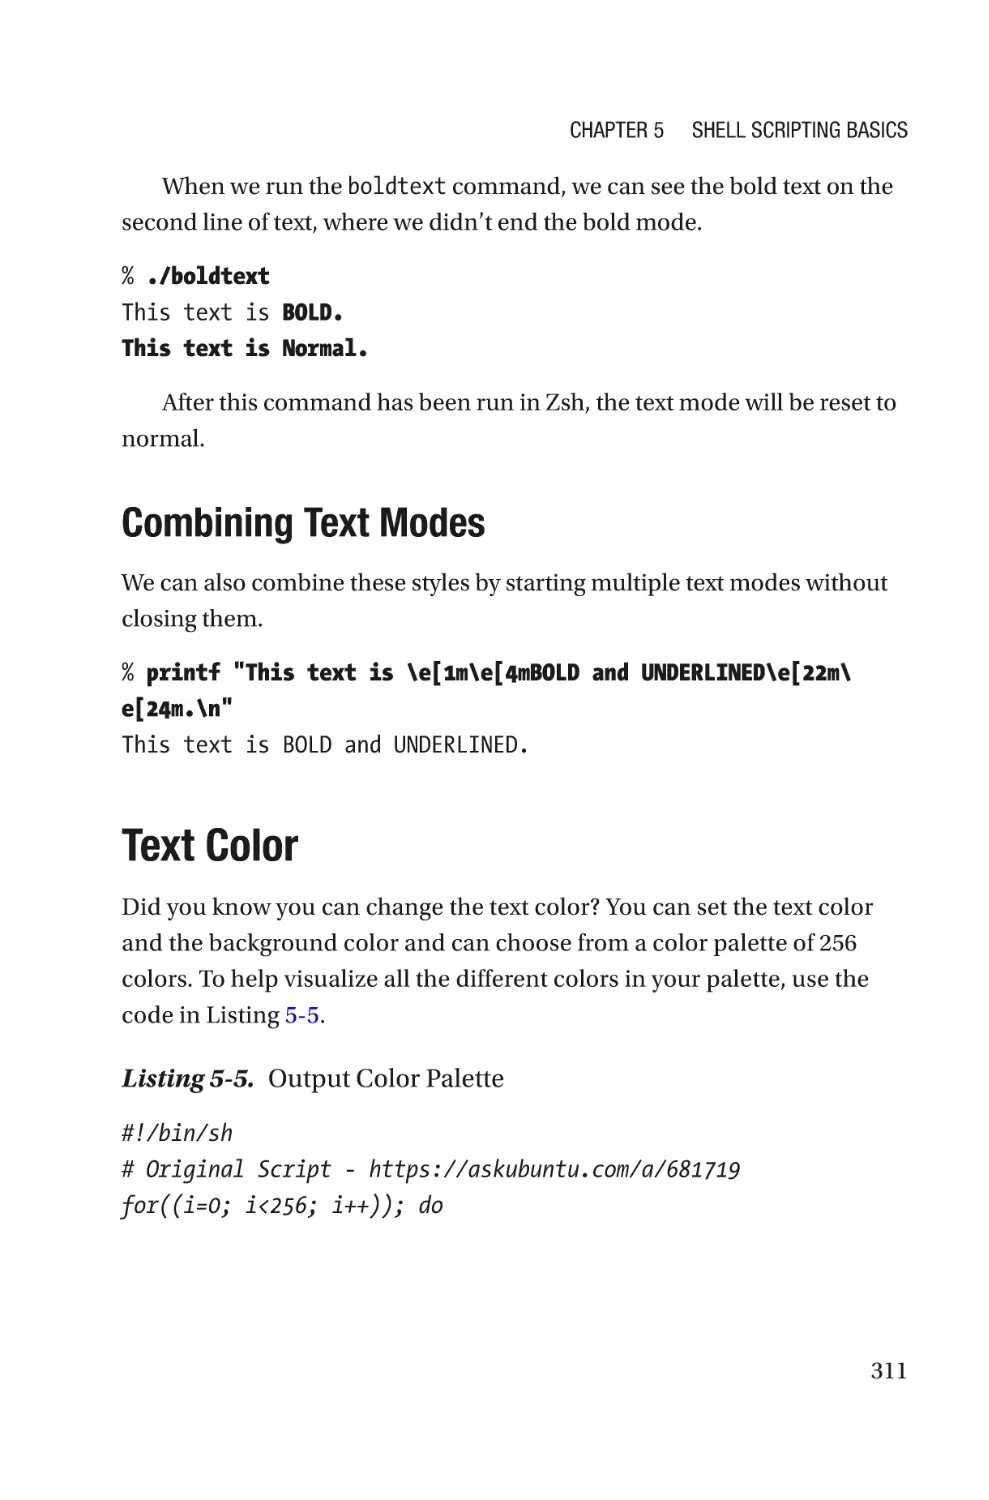
Clearing Text Modes������������������������������������������������������������������������������������310
Combining Text Modes��������������������������������������������������������������������������������311
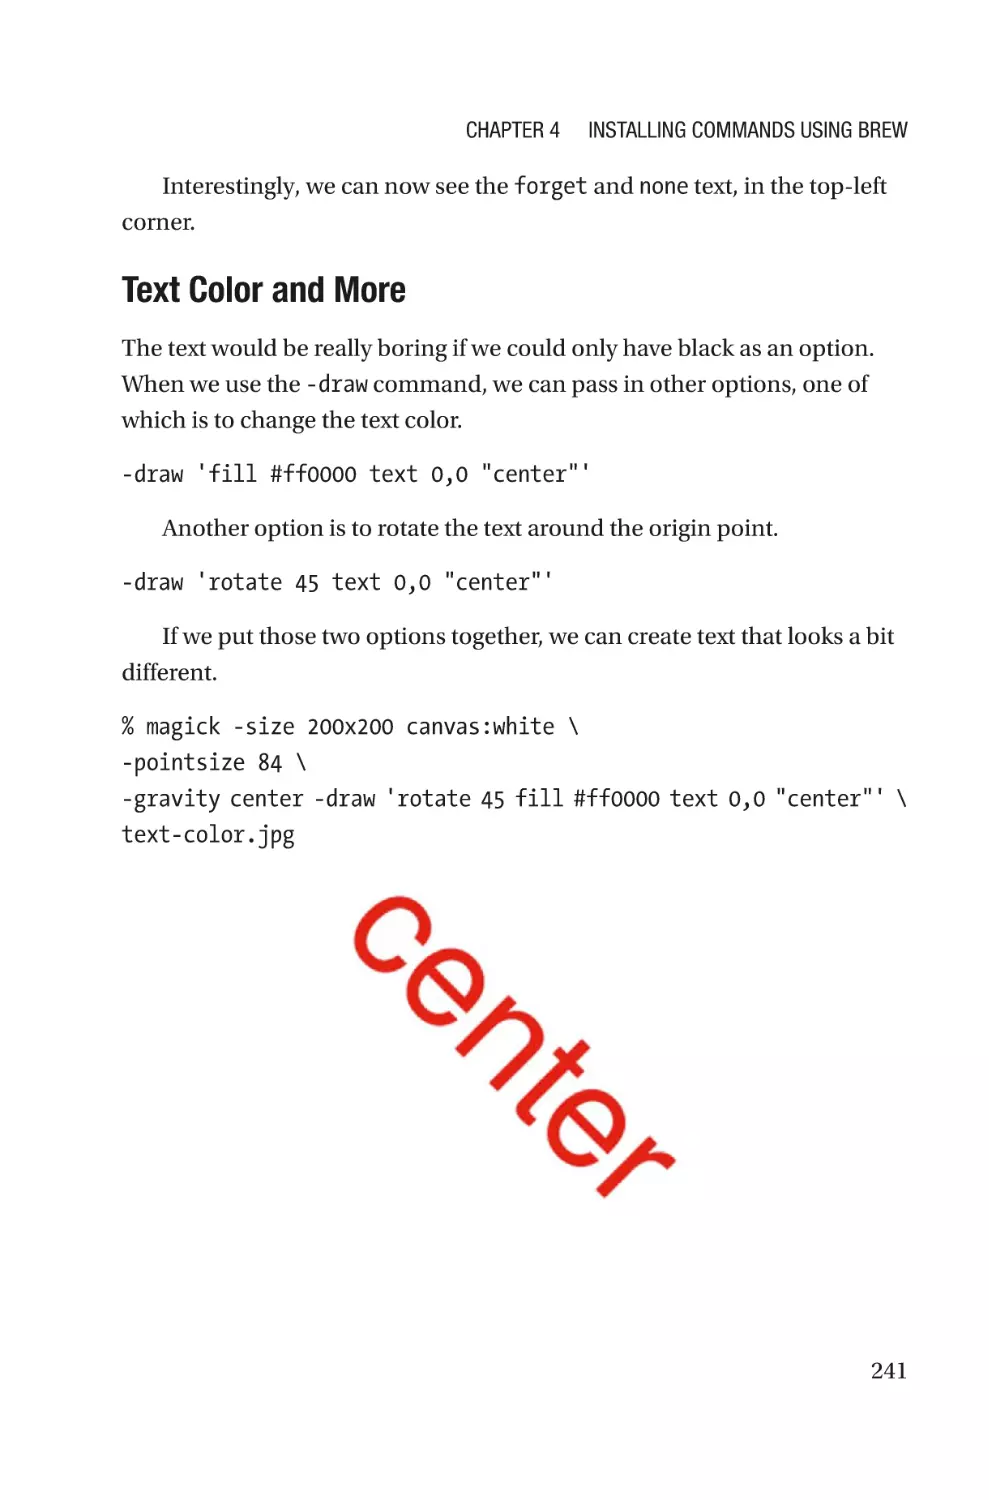
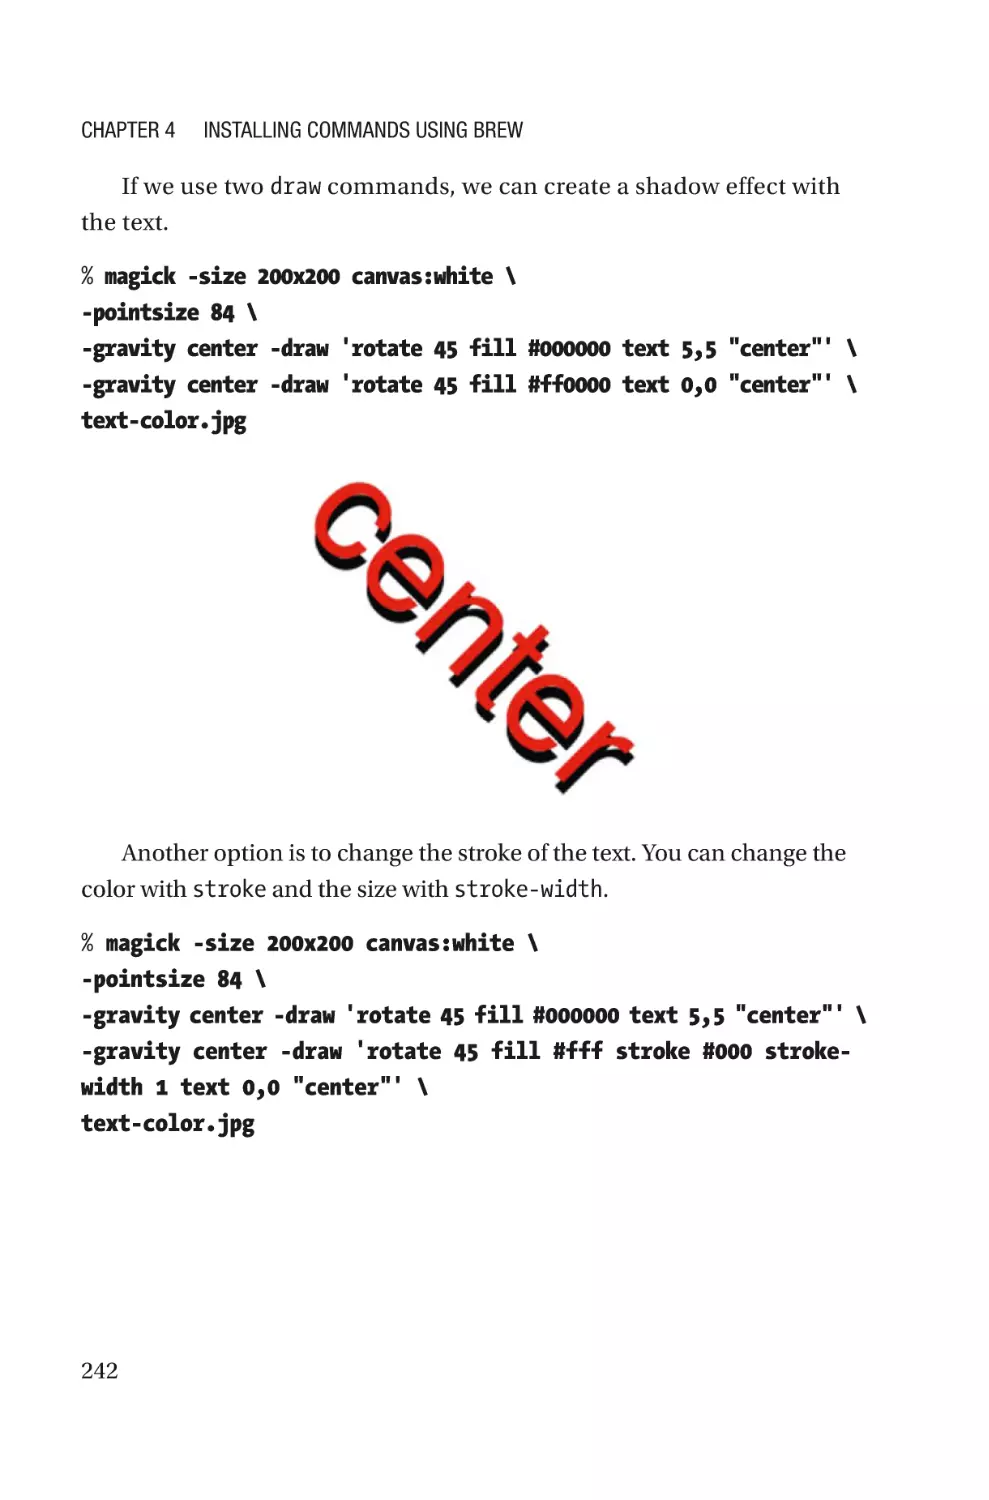
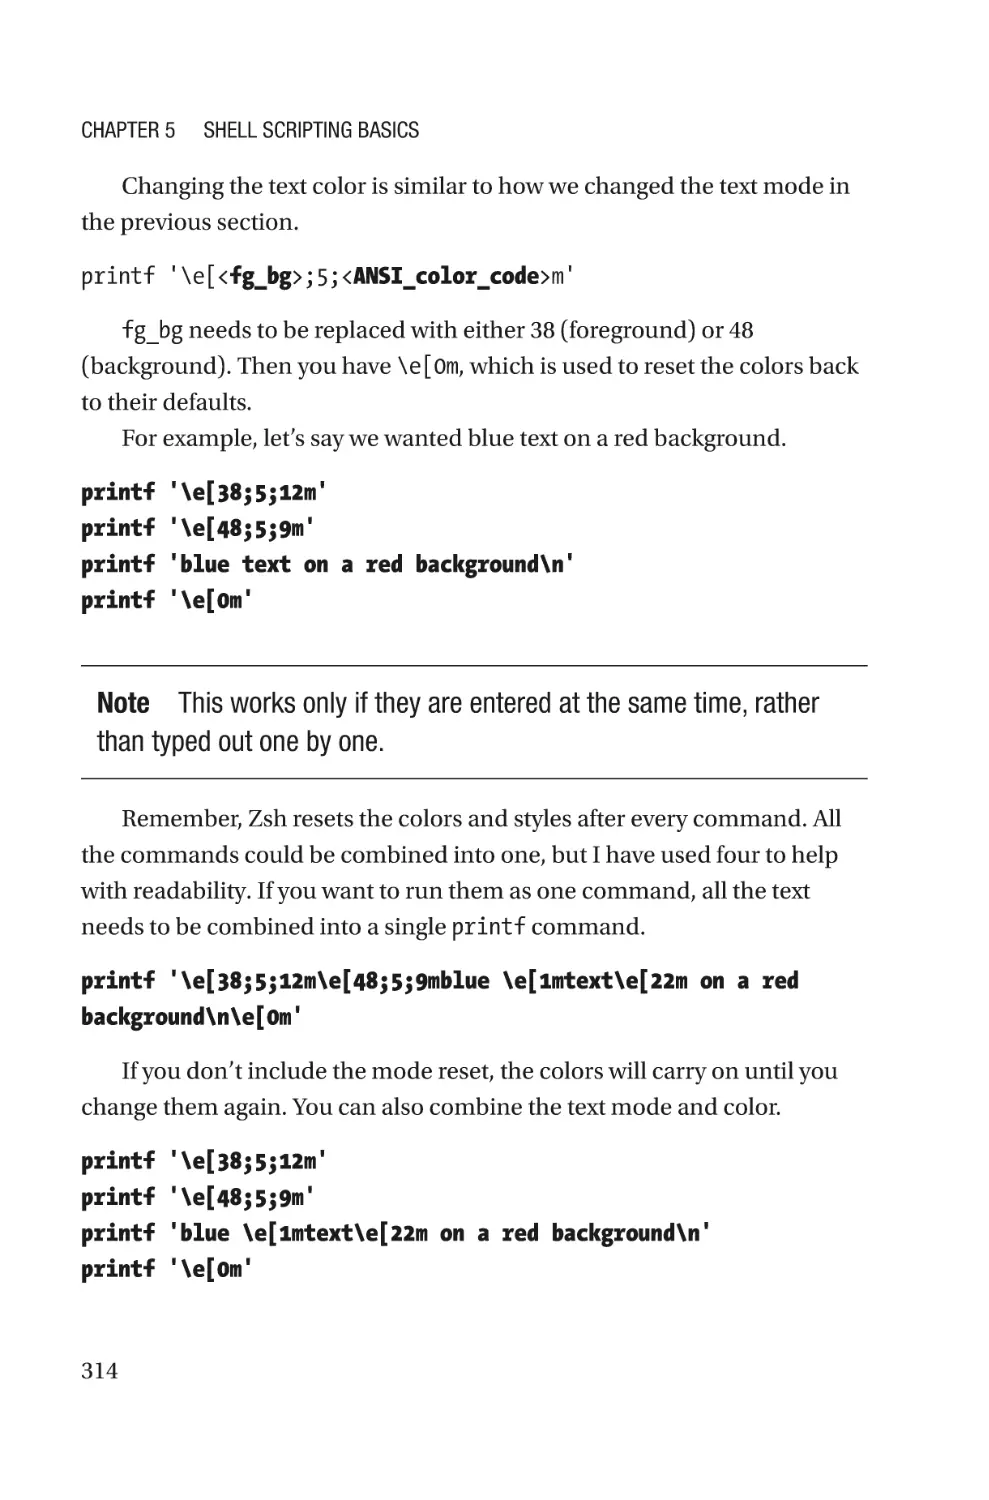
Text Color����������������������������������������������������������������������������������������������������������311
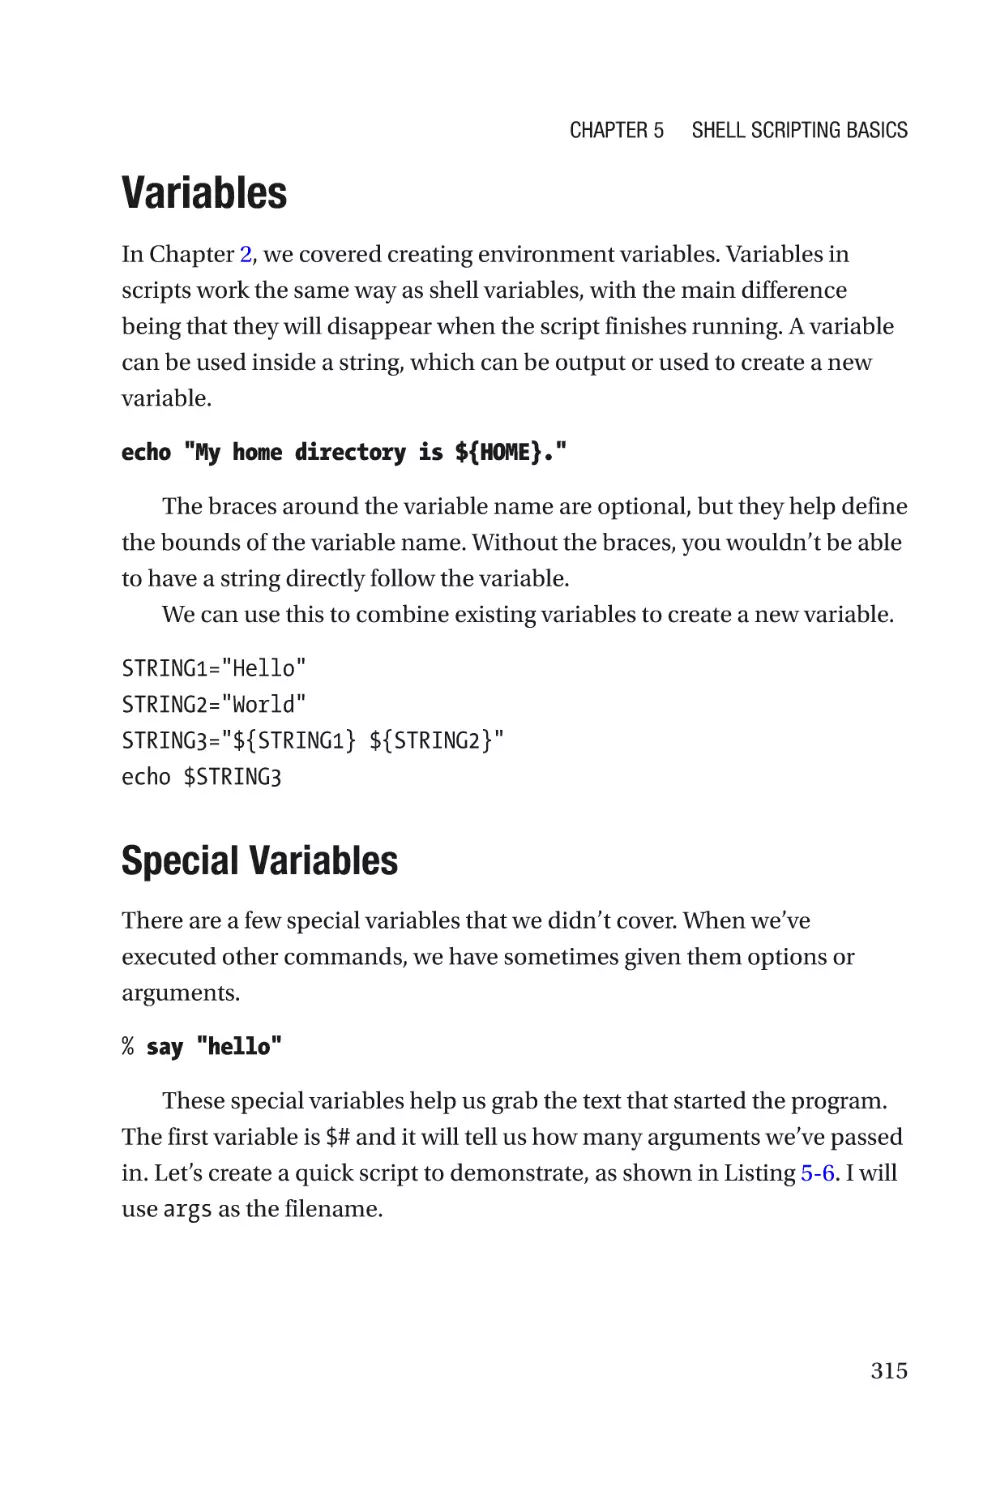
Variables�����������������������������������������������������������������������������������������������������������315
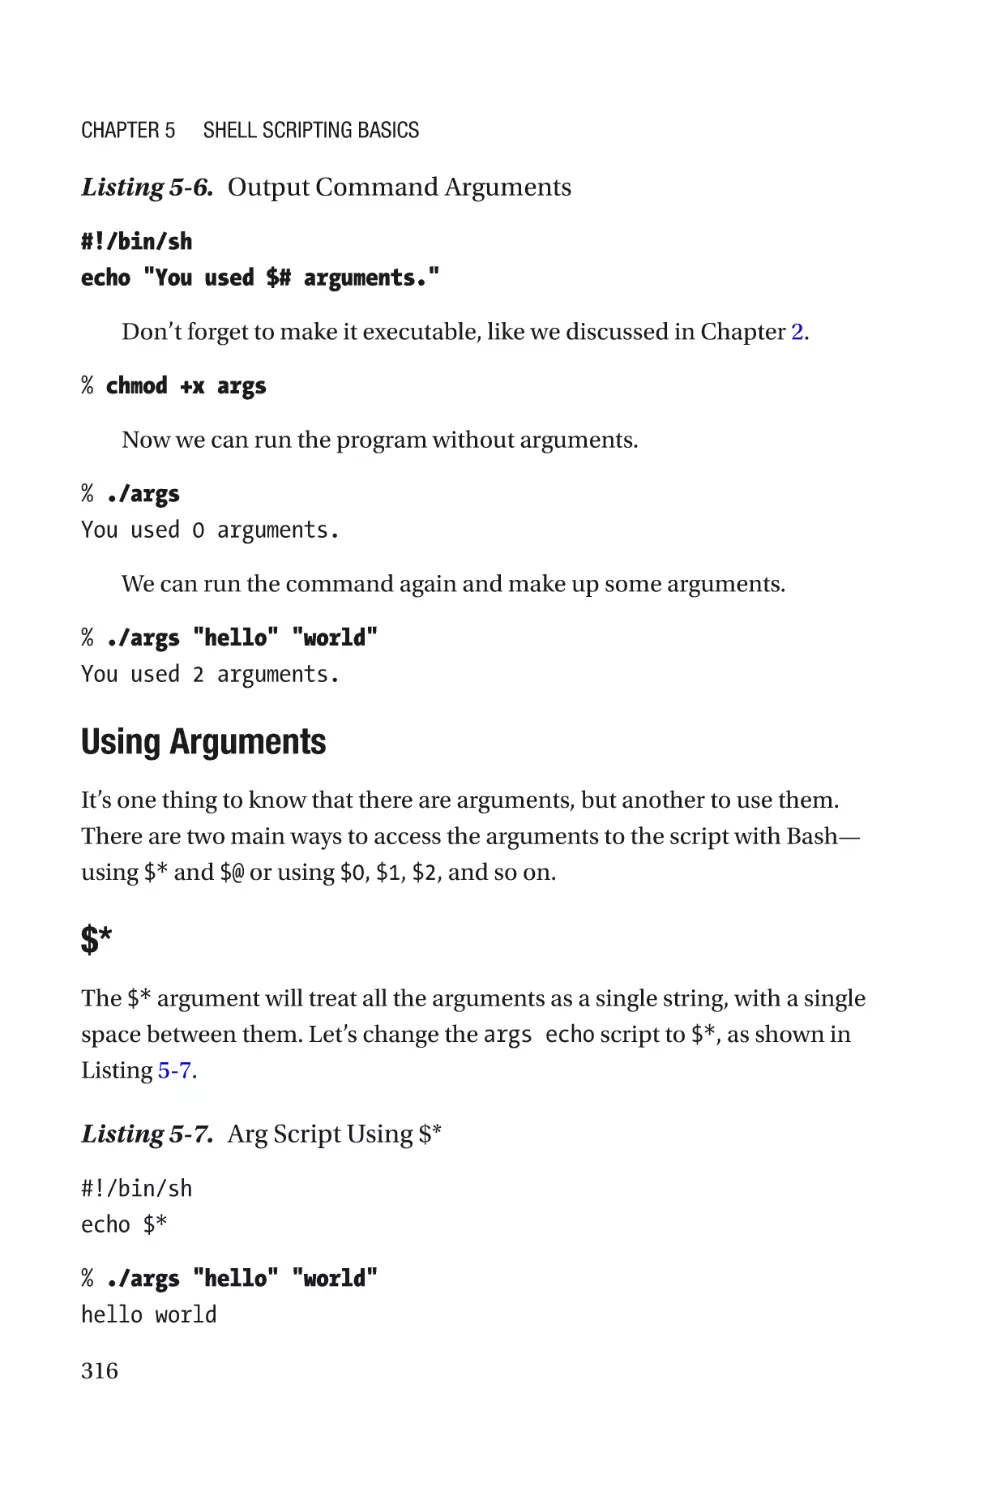
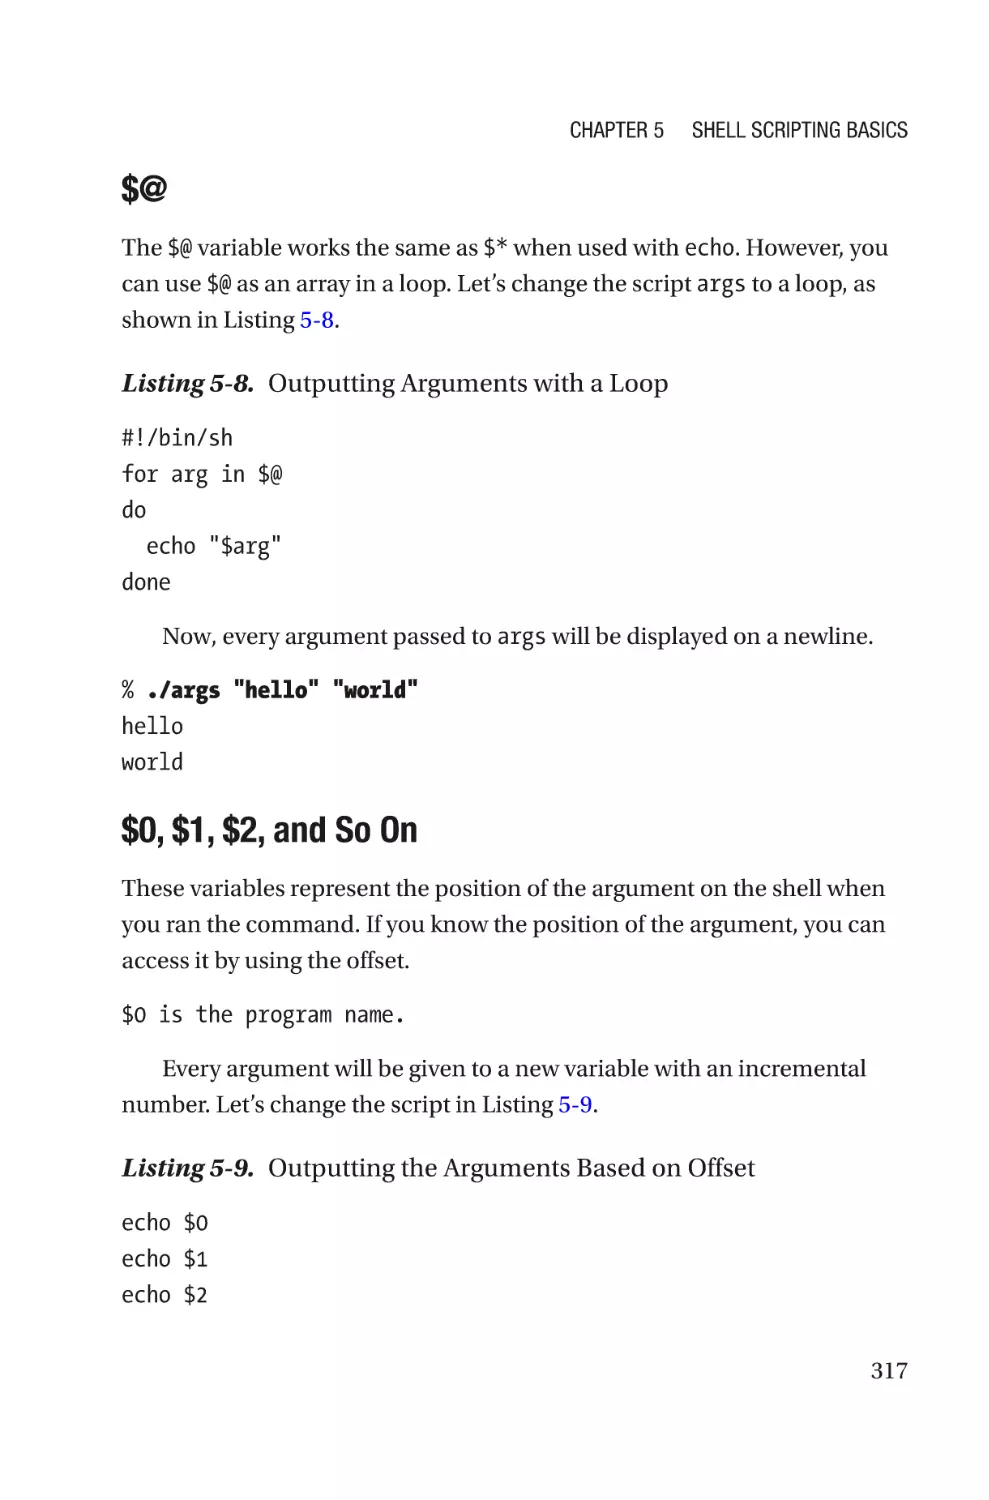
Special Variables�����������������������������������������������������������������������������������������315
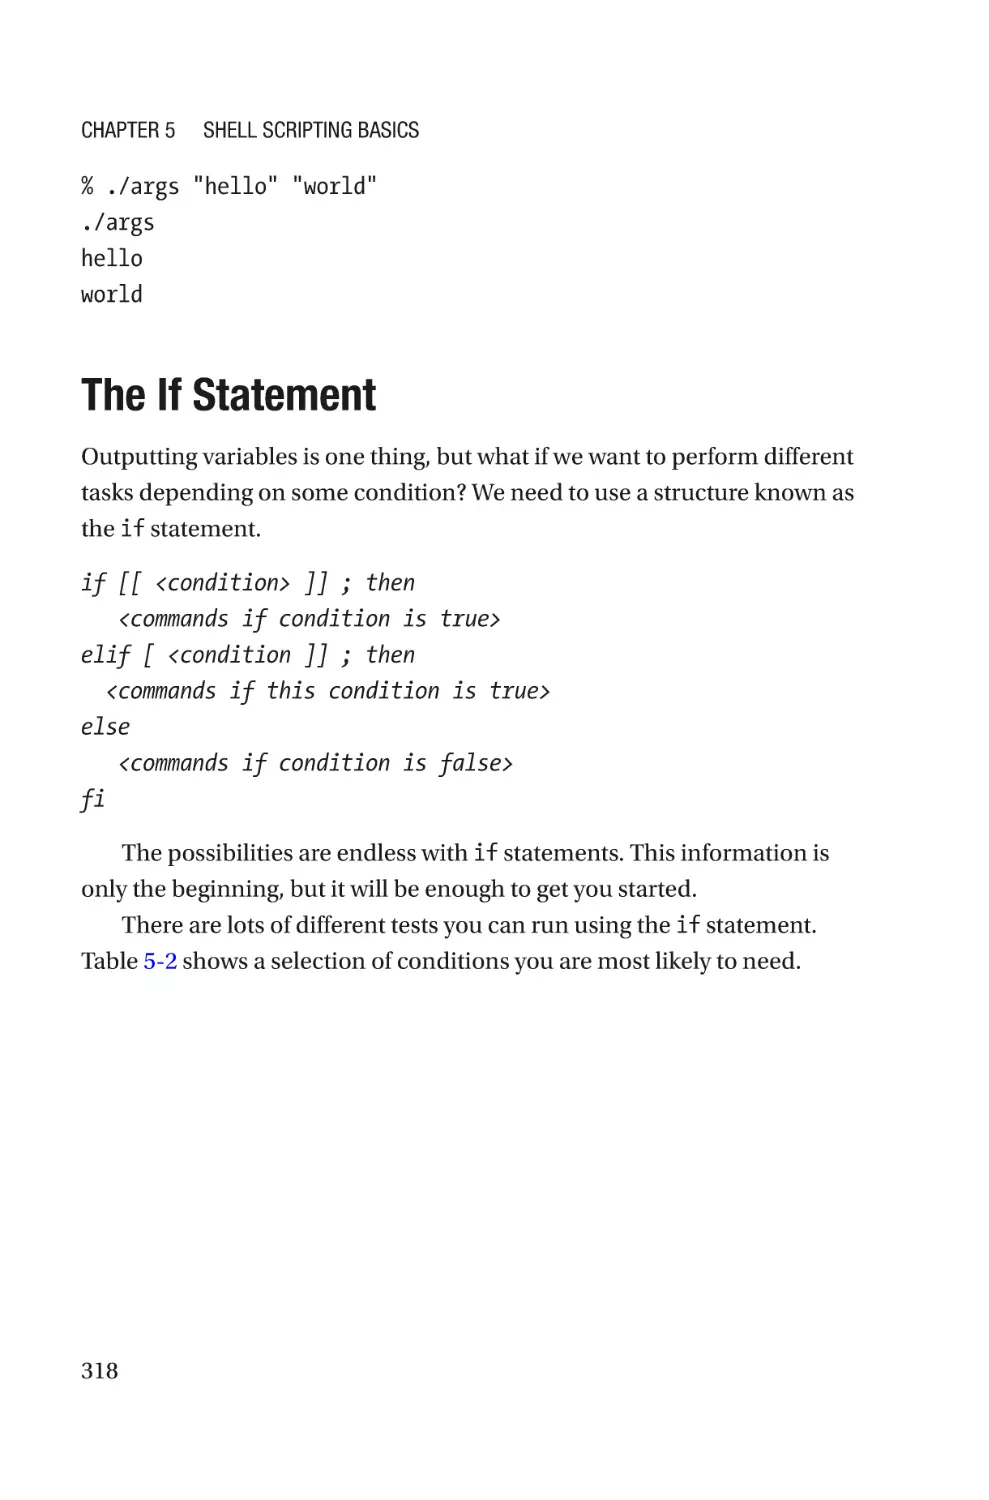
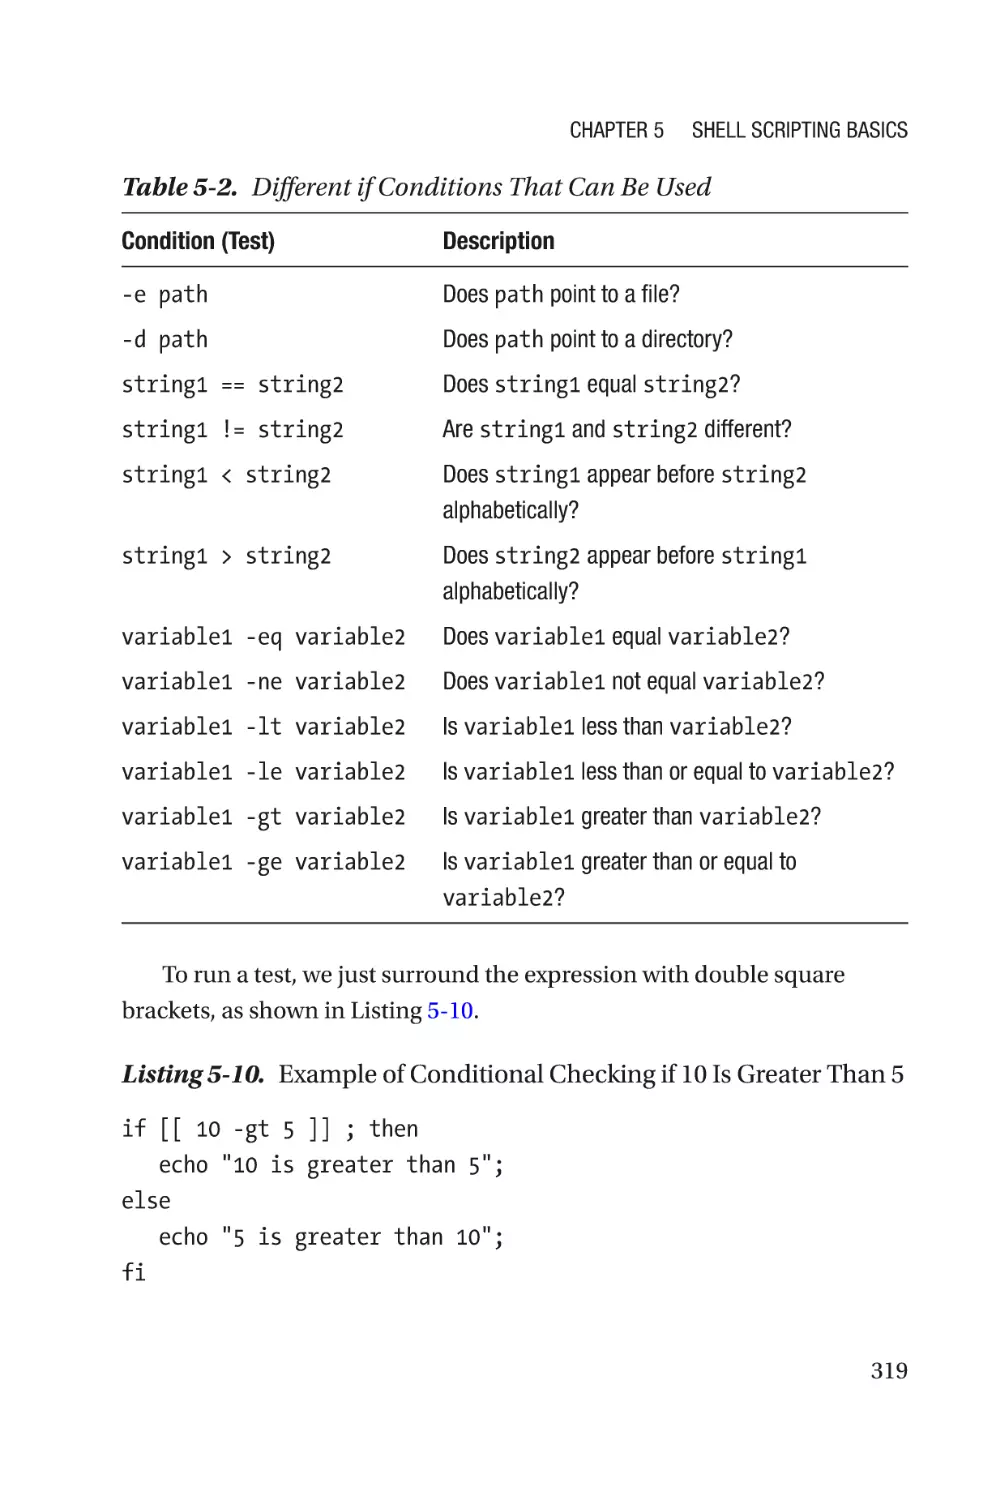
The If Statement�����������������������������������������������������������������������������������������������318
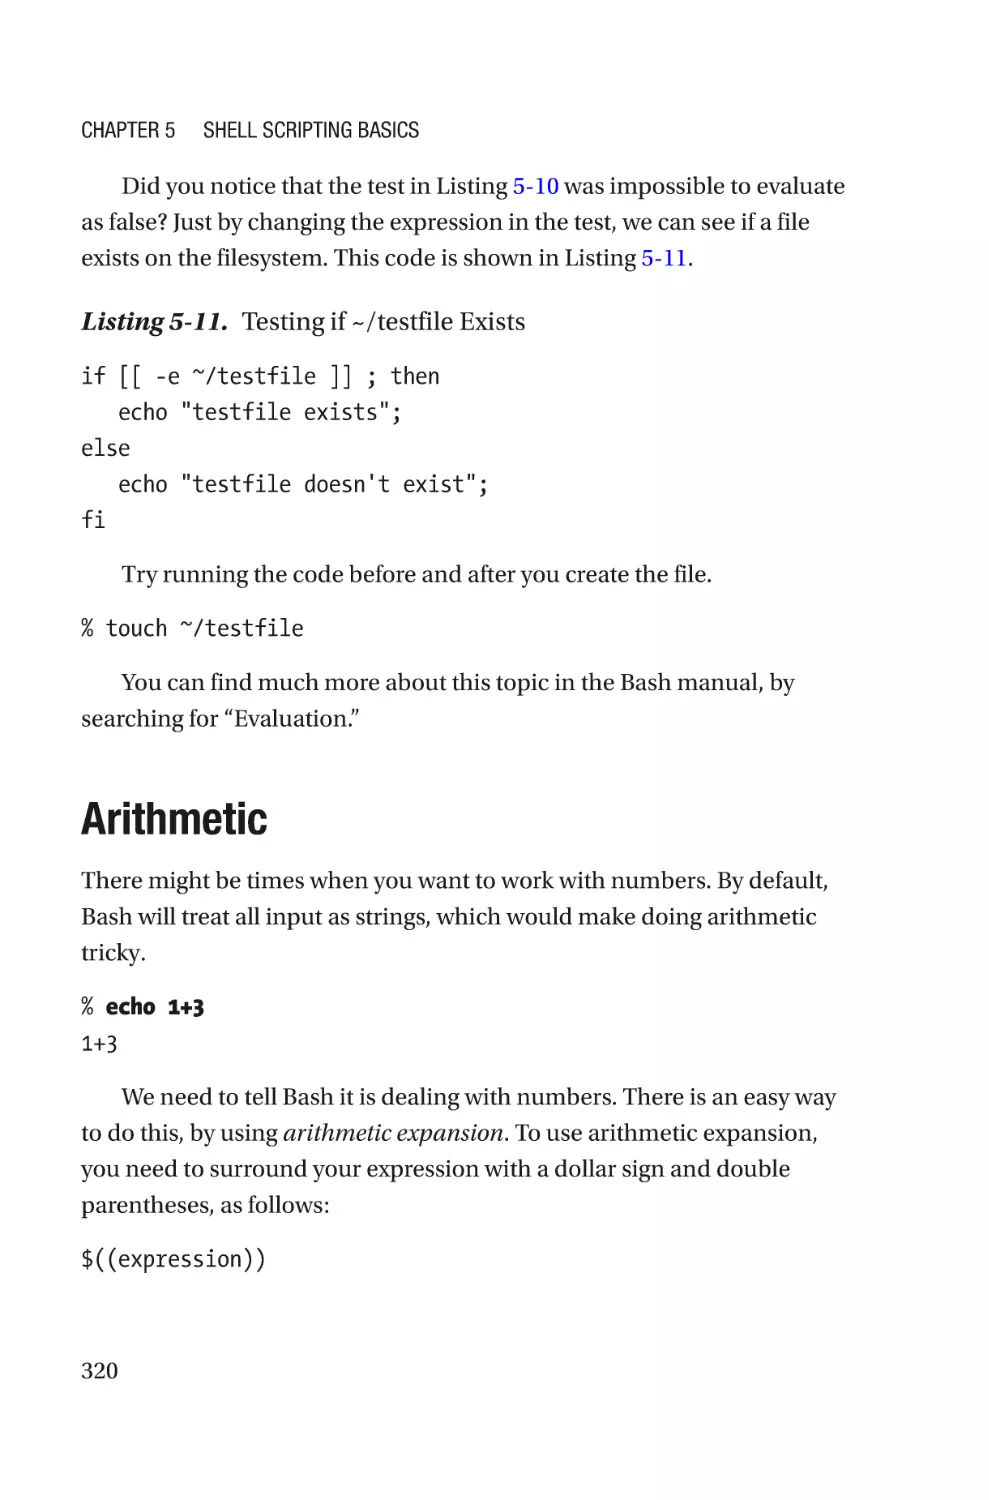
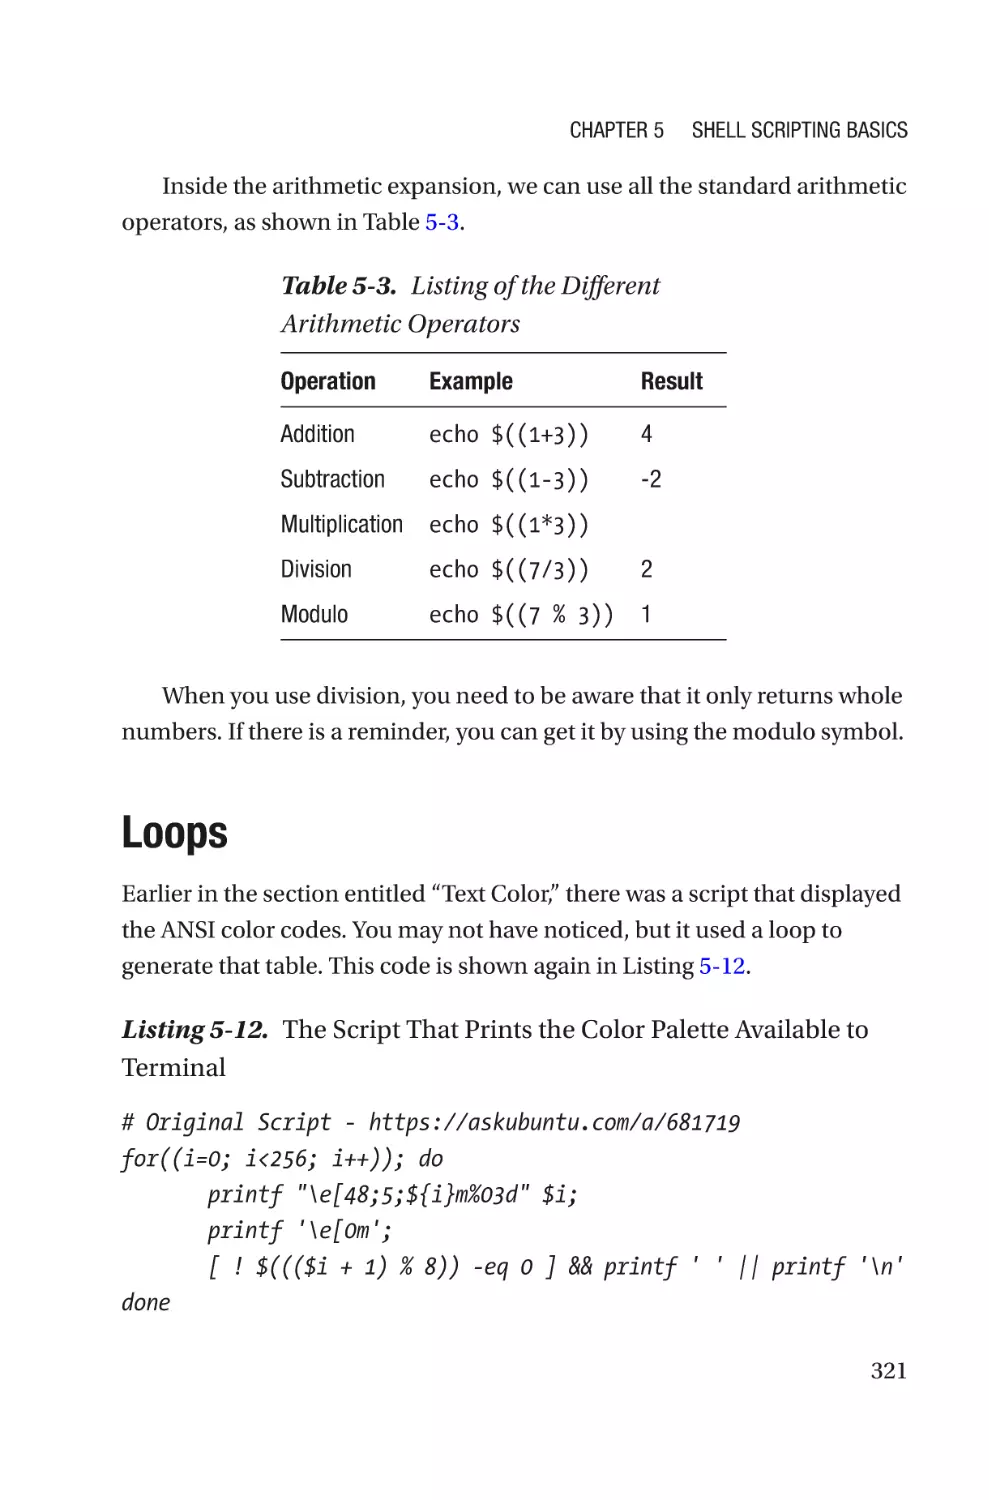
Arithmetic���������������������������������������������������������������������������������������������������������320
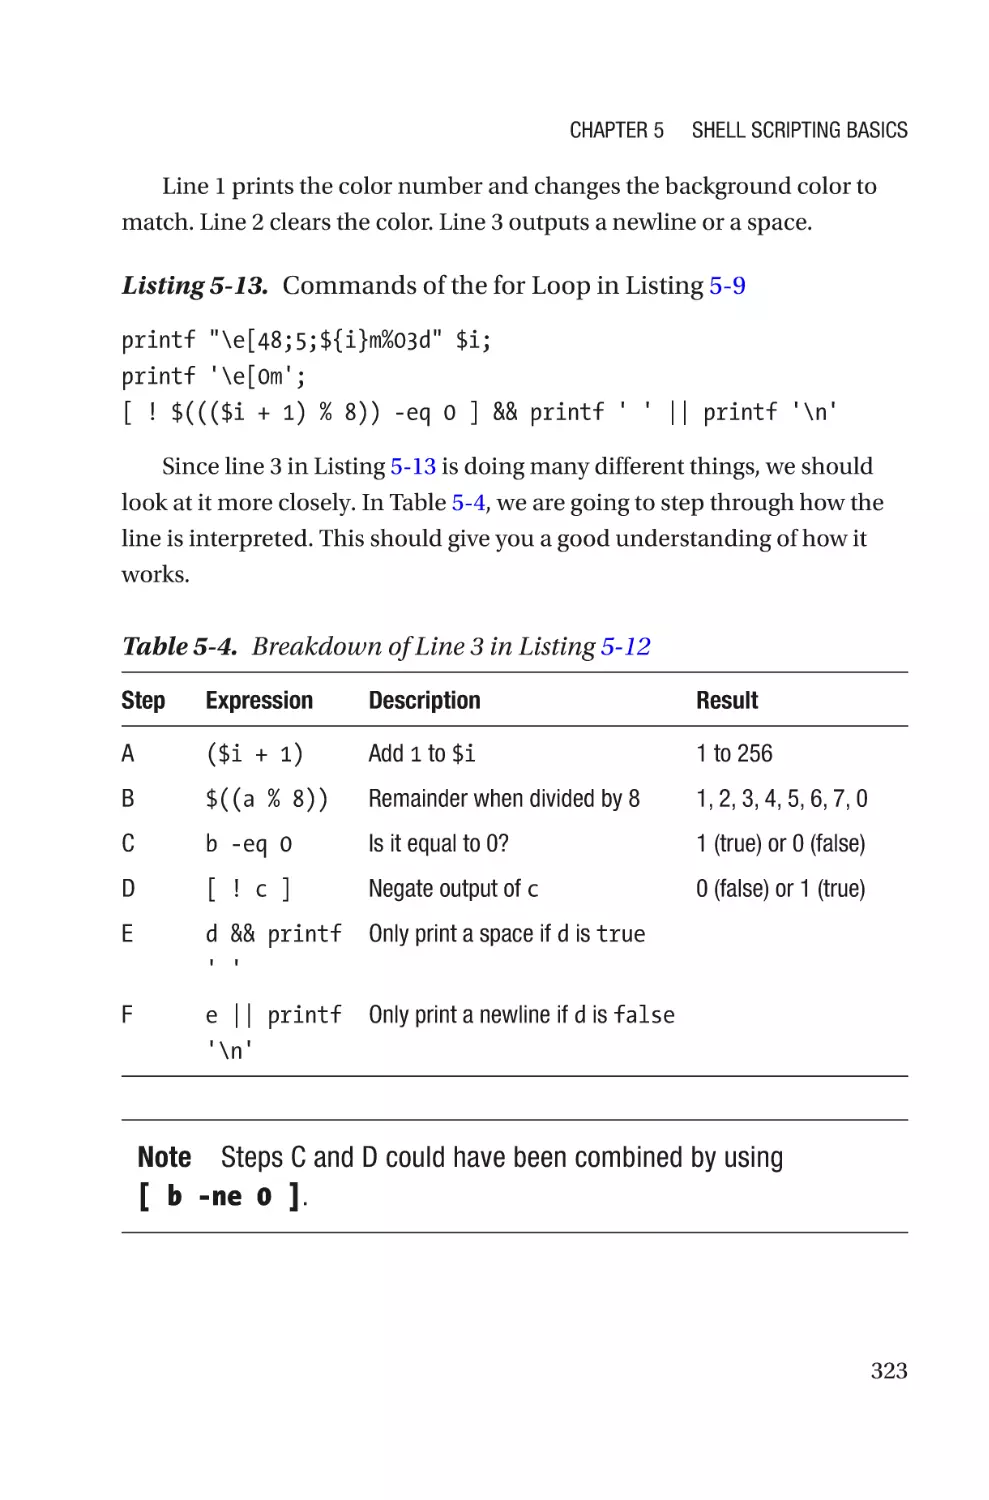
Loops����������������������������������������������������������������������������������������������������������������321
Break and Continue�������������������������������������������������������������������������������������324
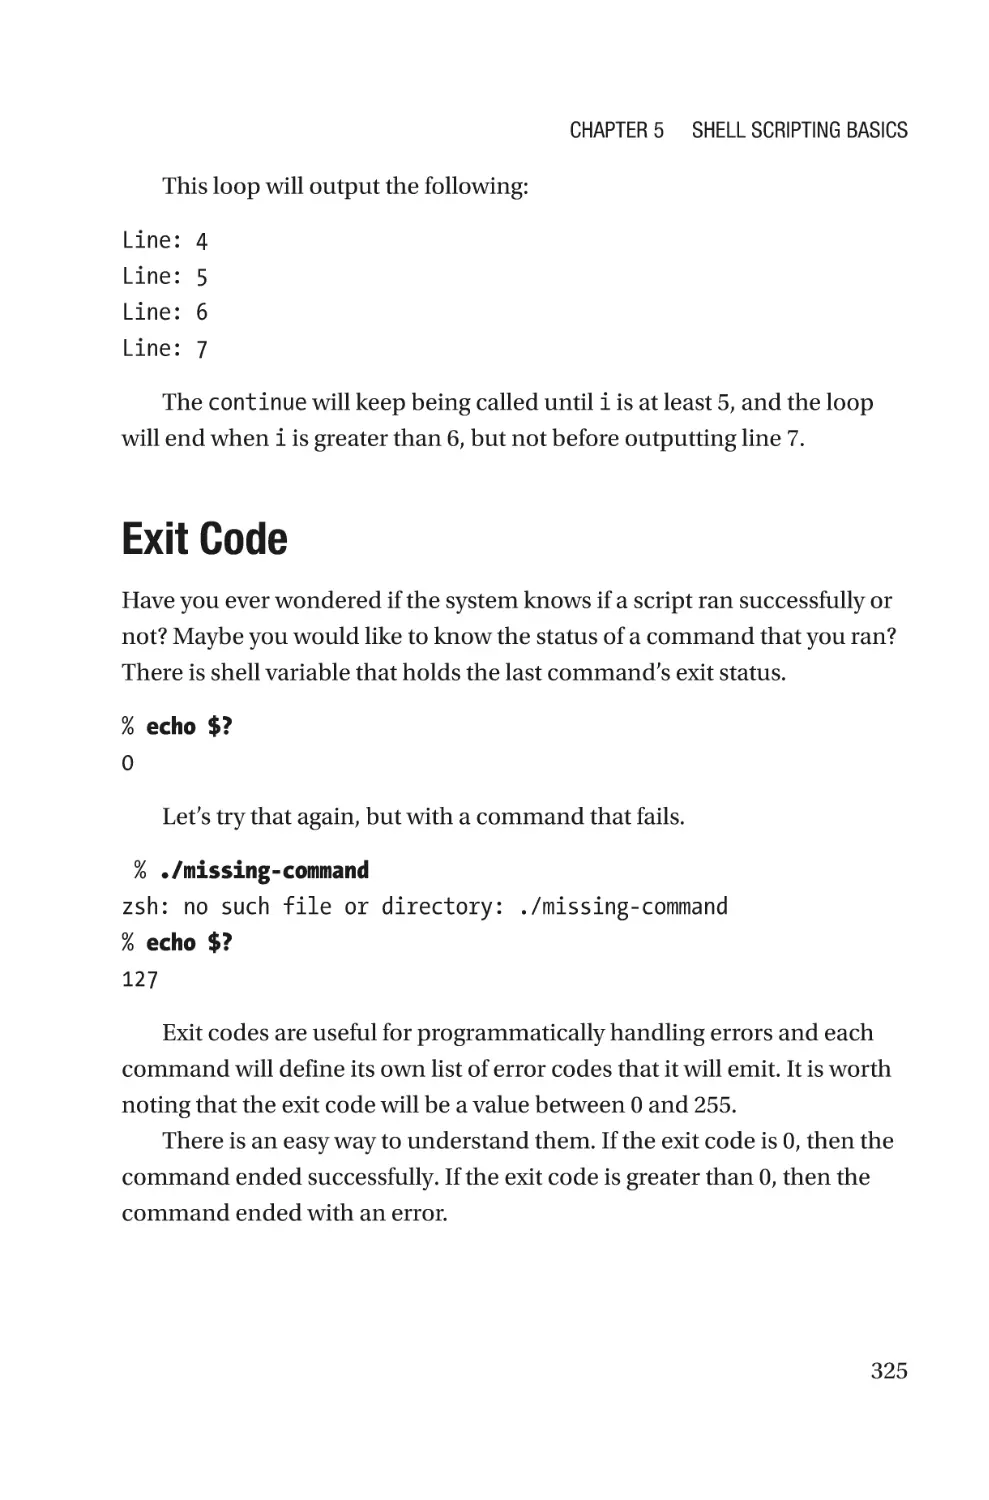
Exit Code�����������������������������������������������������������������������������������������������������������325
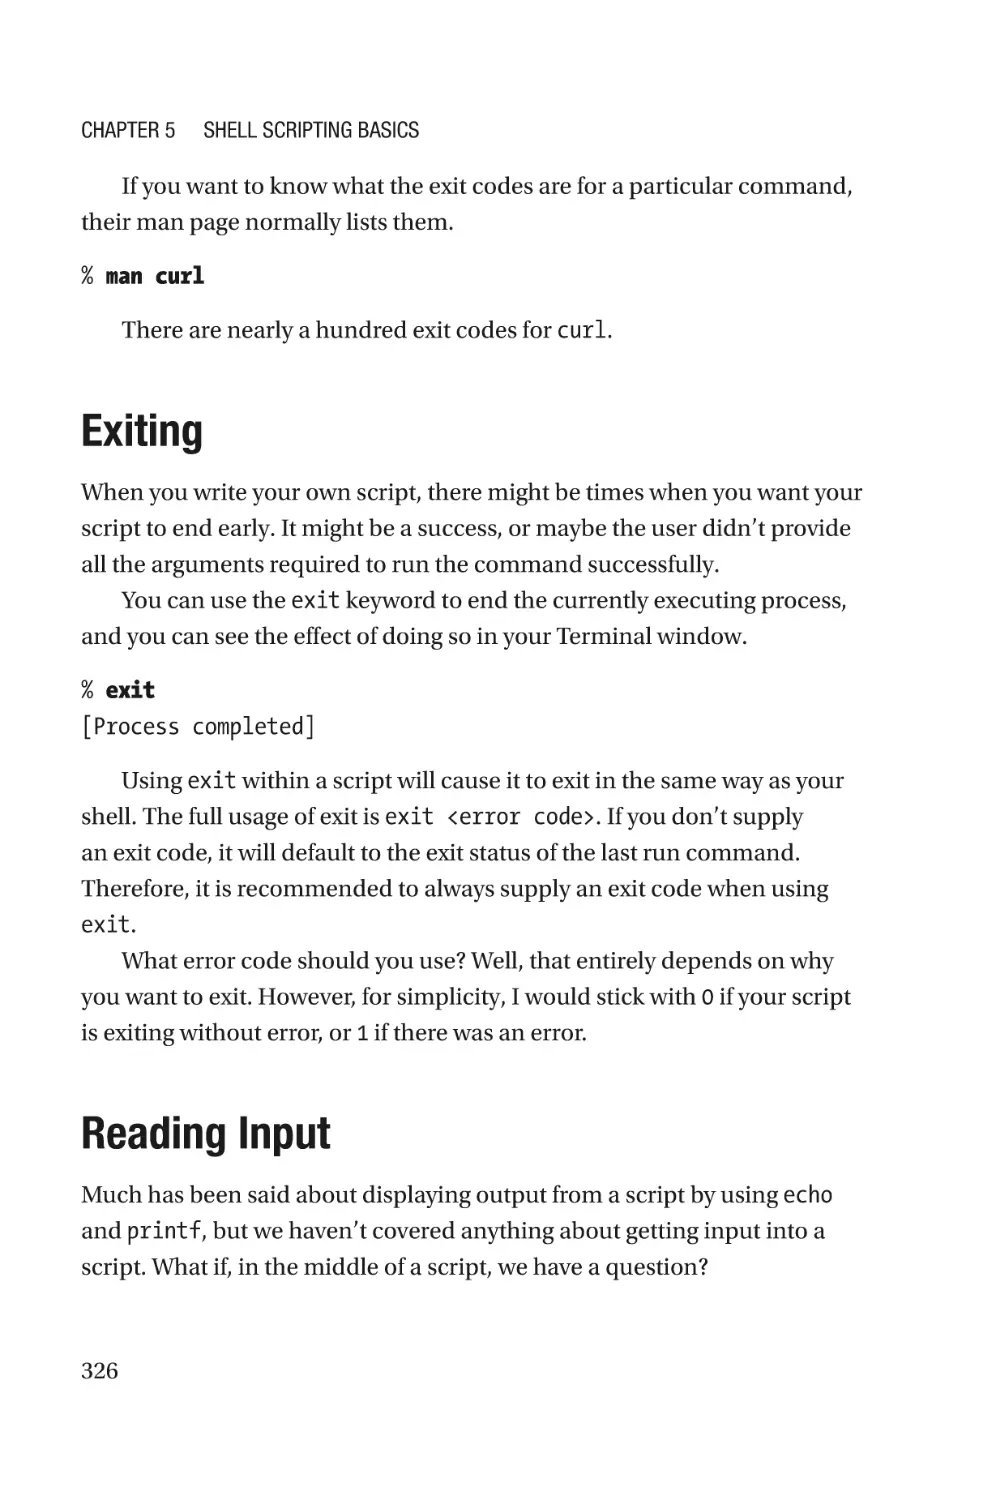
Exiting���������������������������������������������������������������������������������������������������������������326
Reading Input����������������������������������������������������������������������������������������������������326
Projects�������������������������������������������������������������������������������������������������������������327
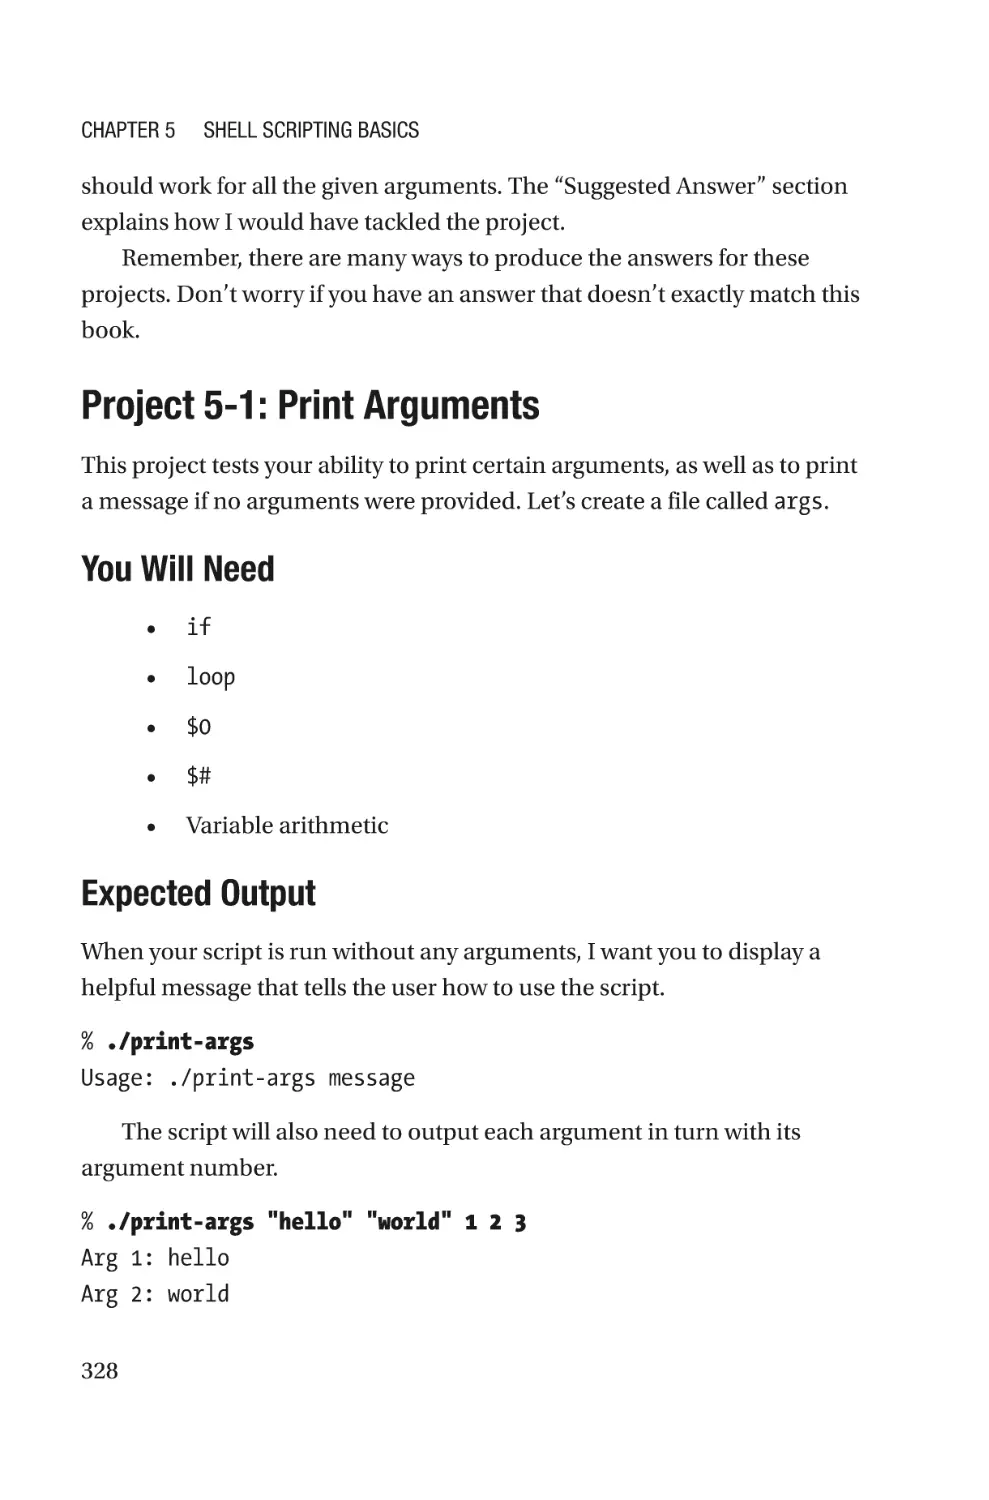
Project 5-1: Print Arguments�����������������������������������������������������������������������328
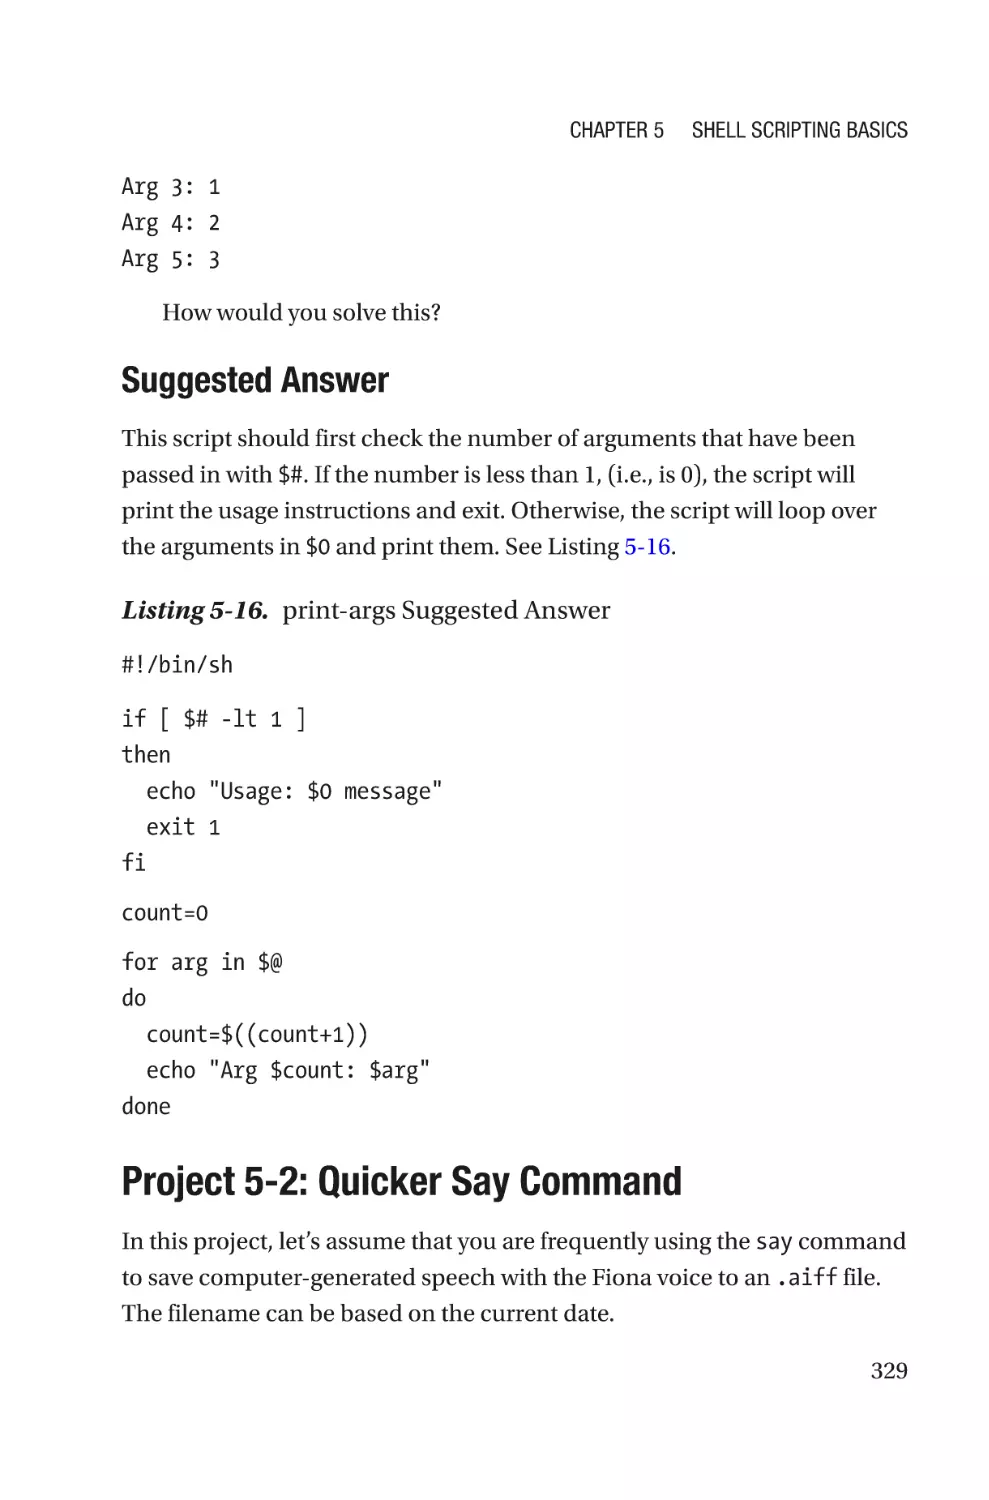
Project 5-2: Quicker Say Command�������������������������������������������������������������329
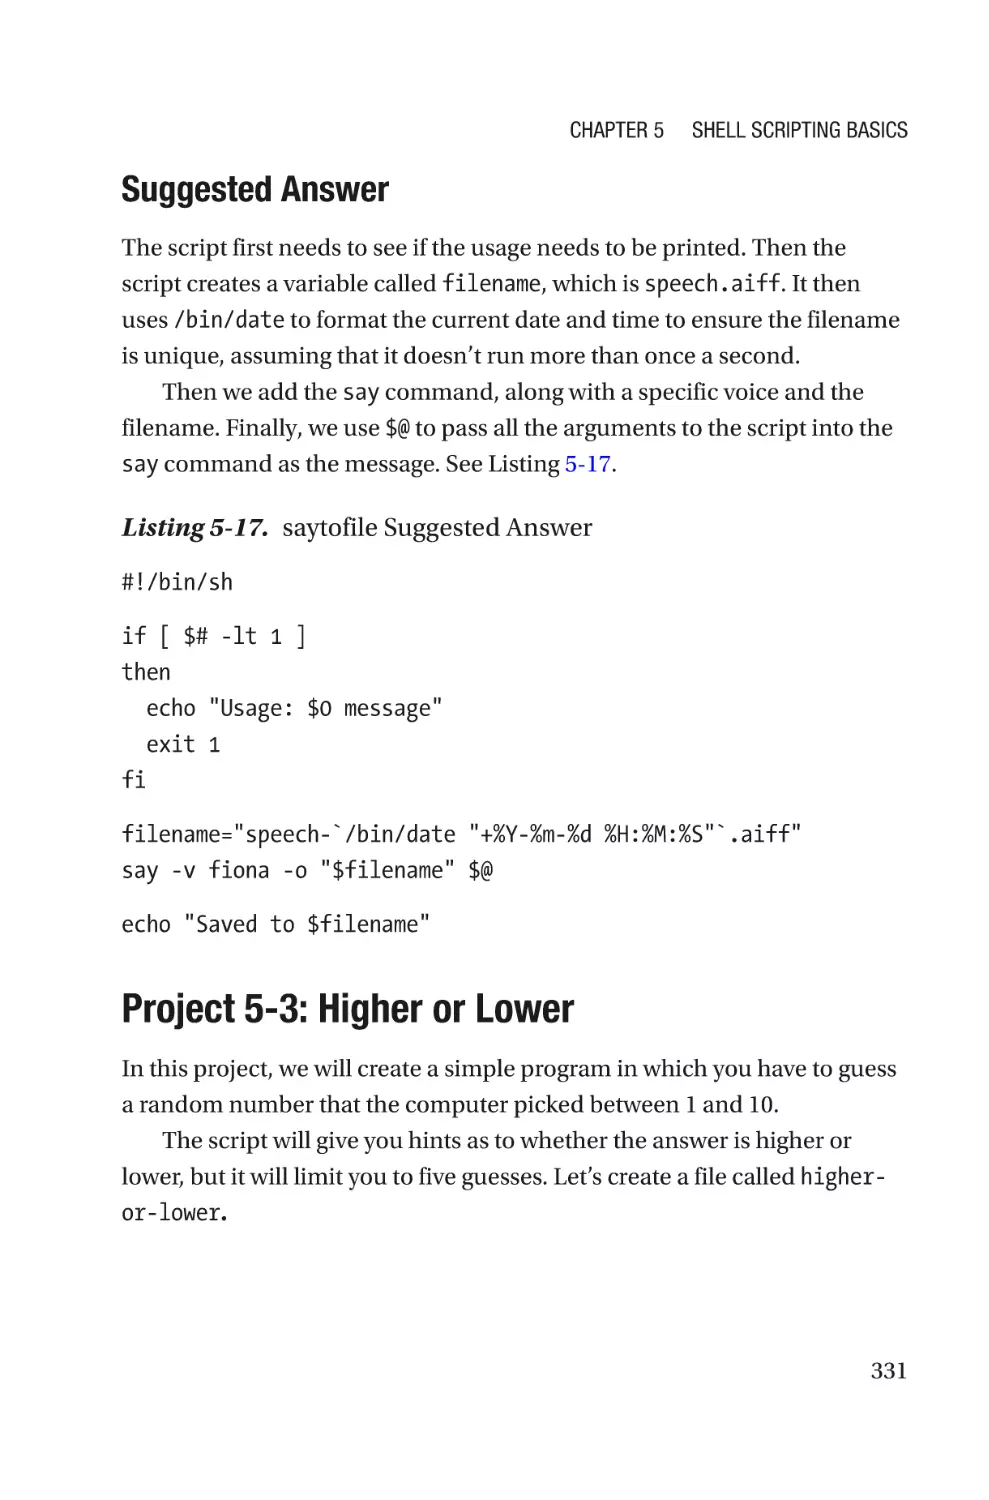
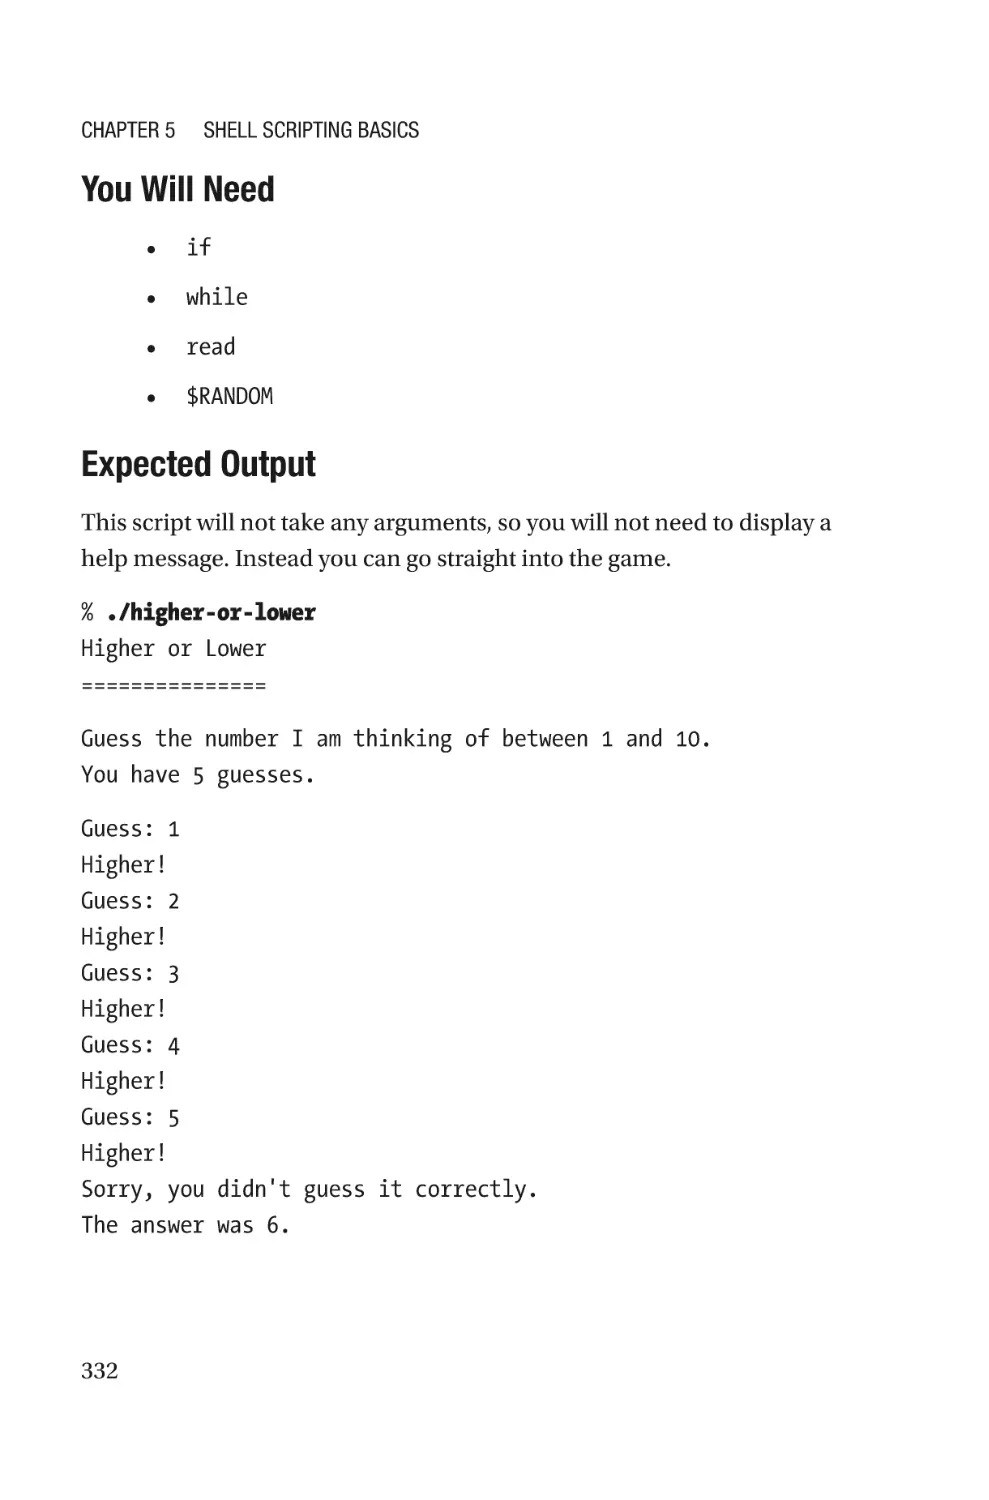
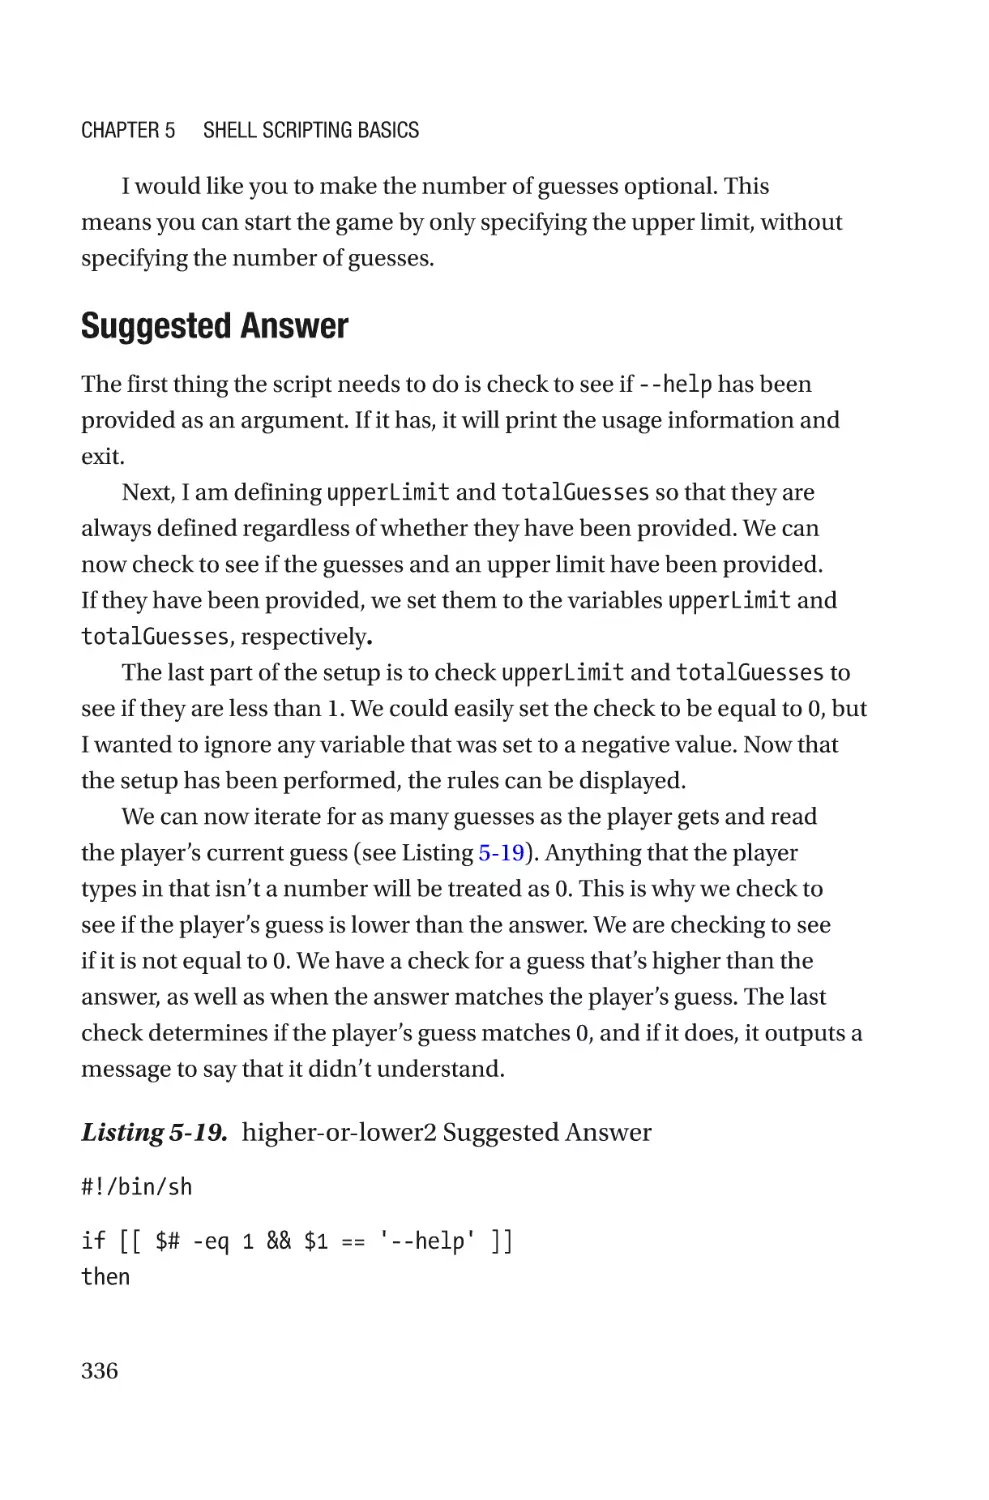
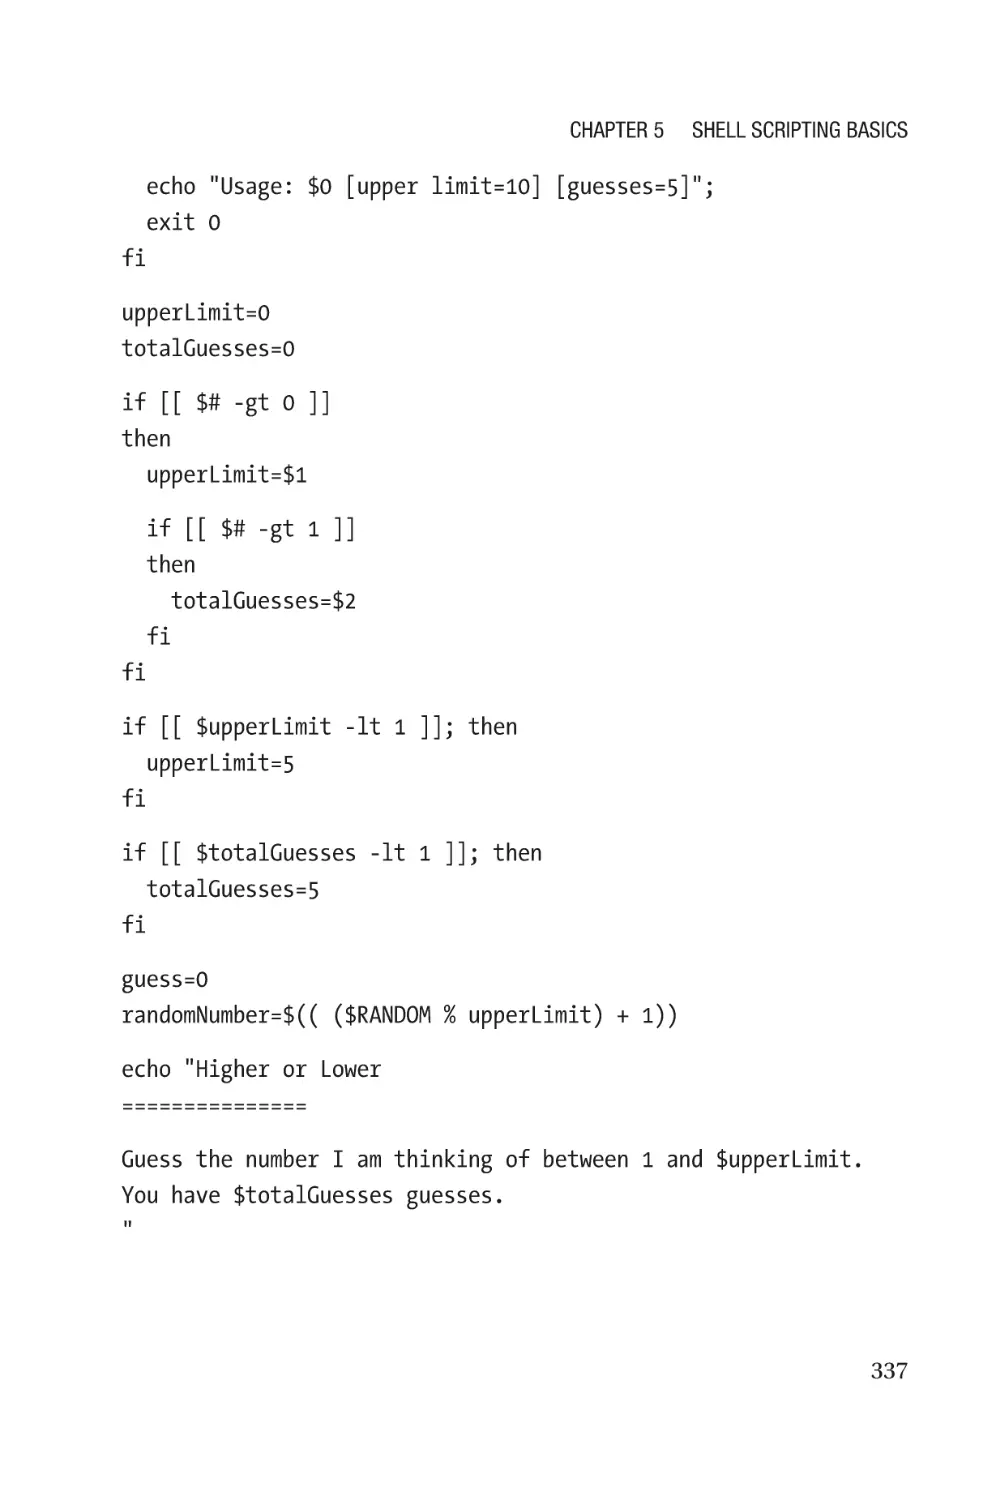
Project 5-3: Higher or Lower�����������������������������������������������������������������������331
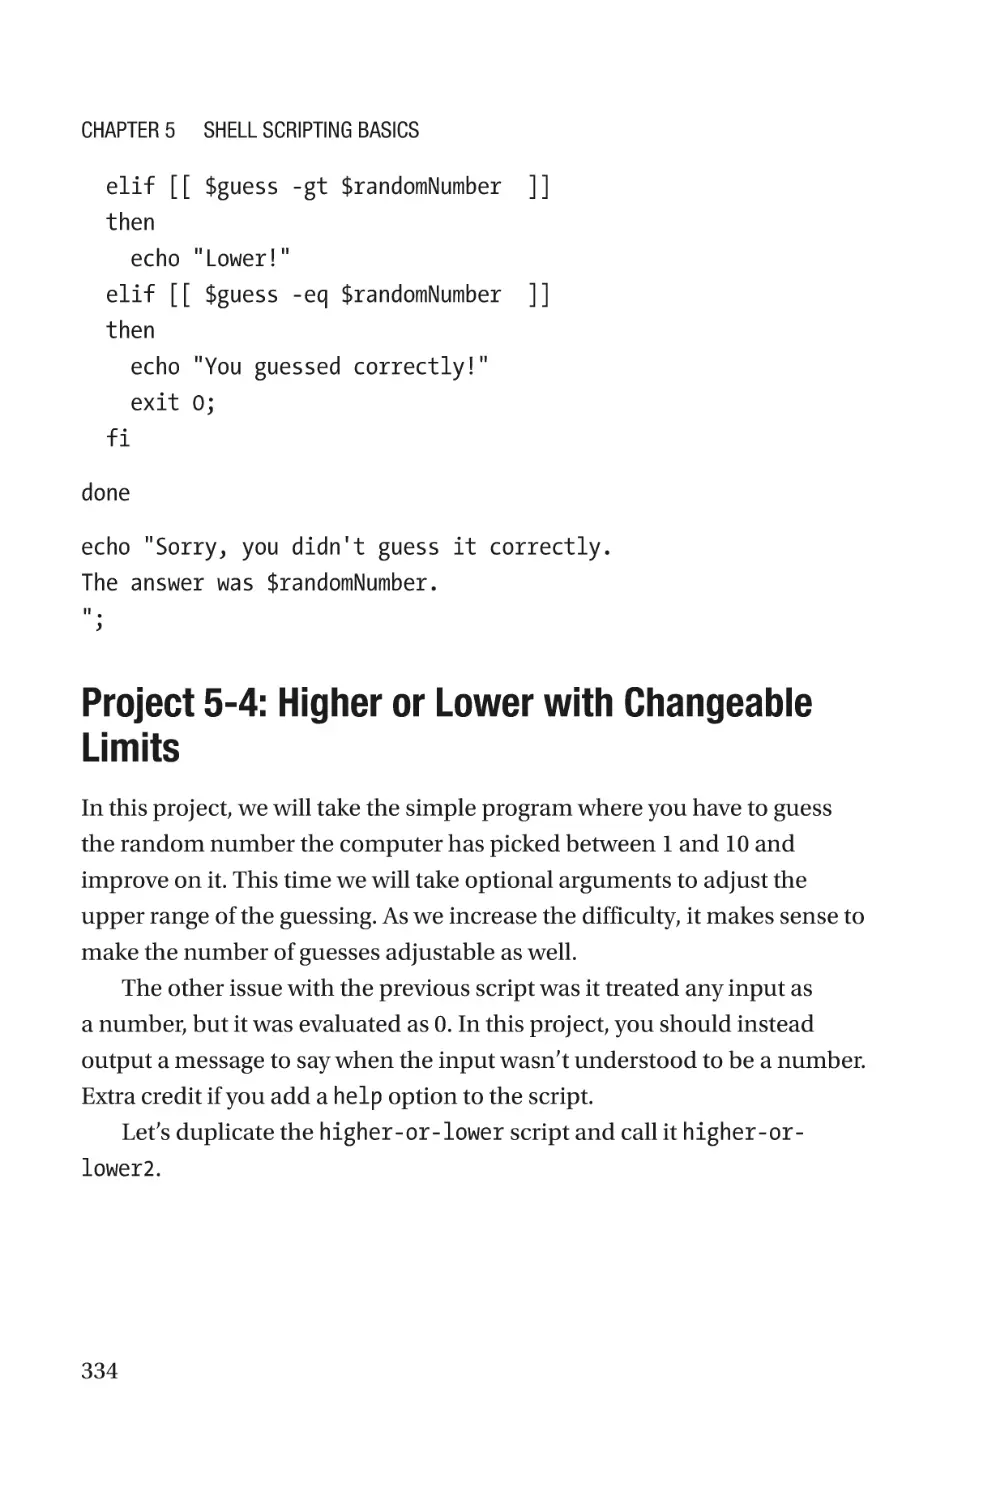
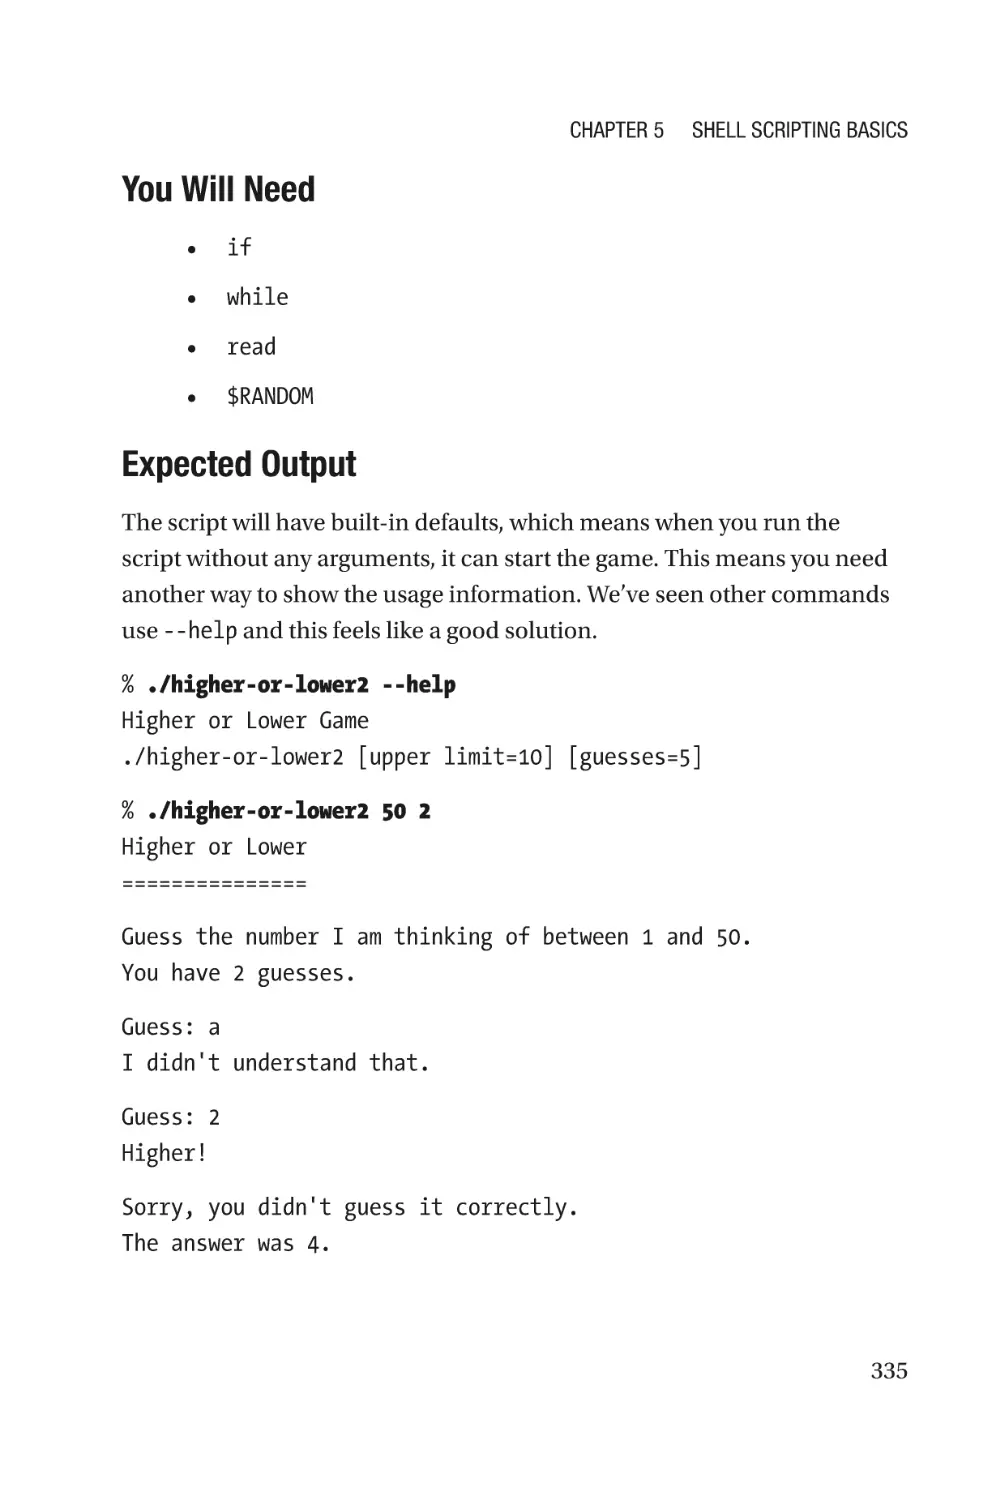
Project 5-4: Higher or Lower with Changeable Limits���������������������������������334
Summary����������������������������������������������������������������������������������������������������������339
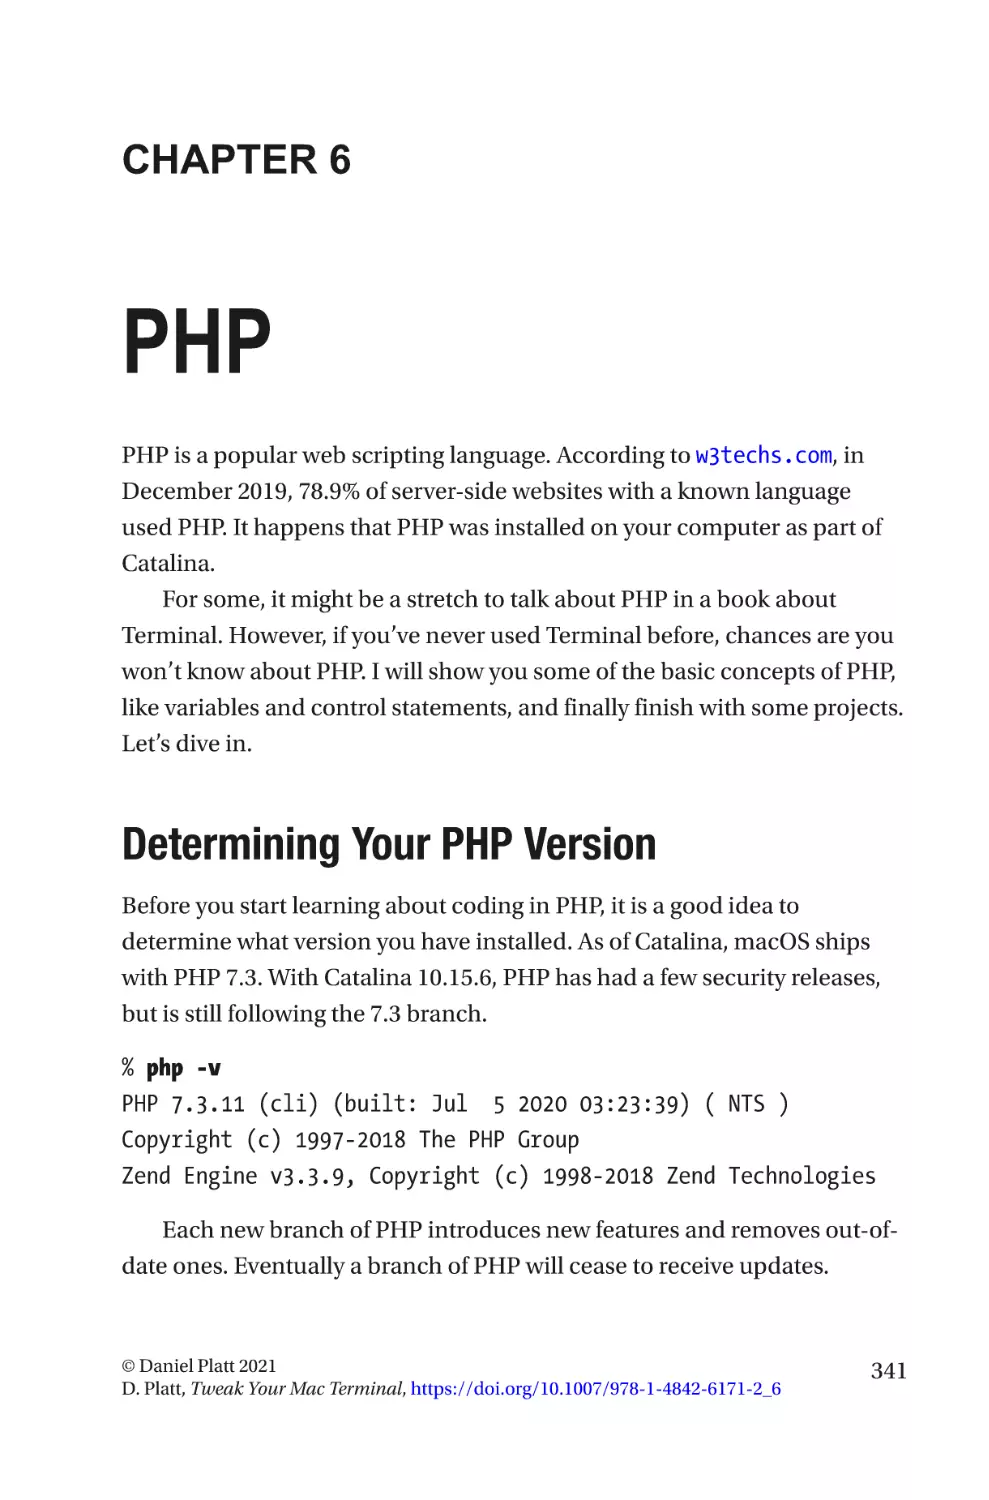
Chapter 6: PHP����������������������������������������������������������������������������������341
Determining Your PHP Version��������������������������������������������������������������������������341
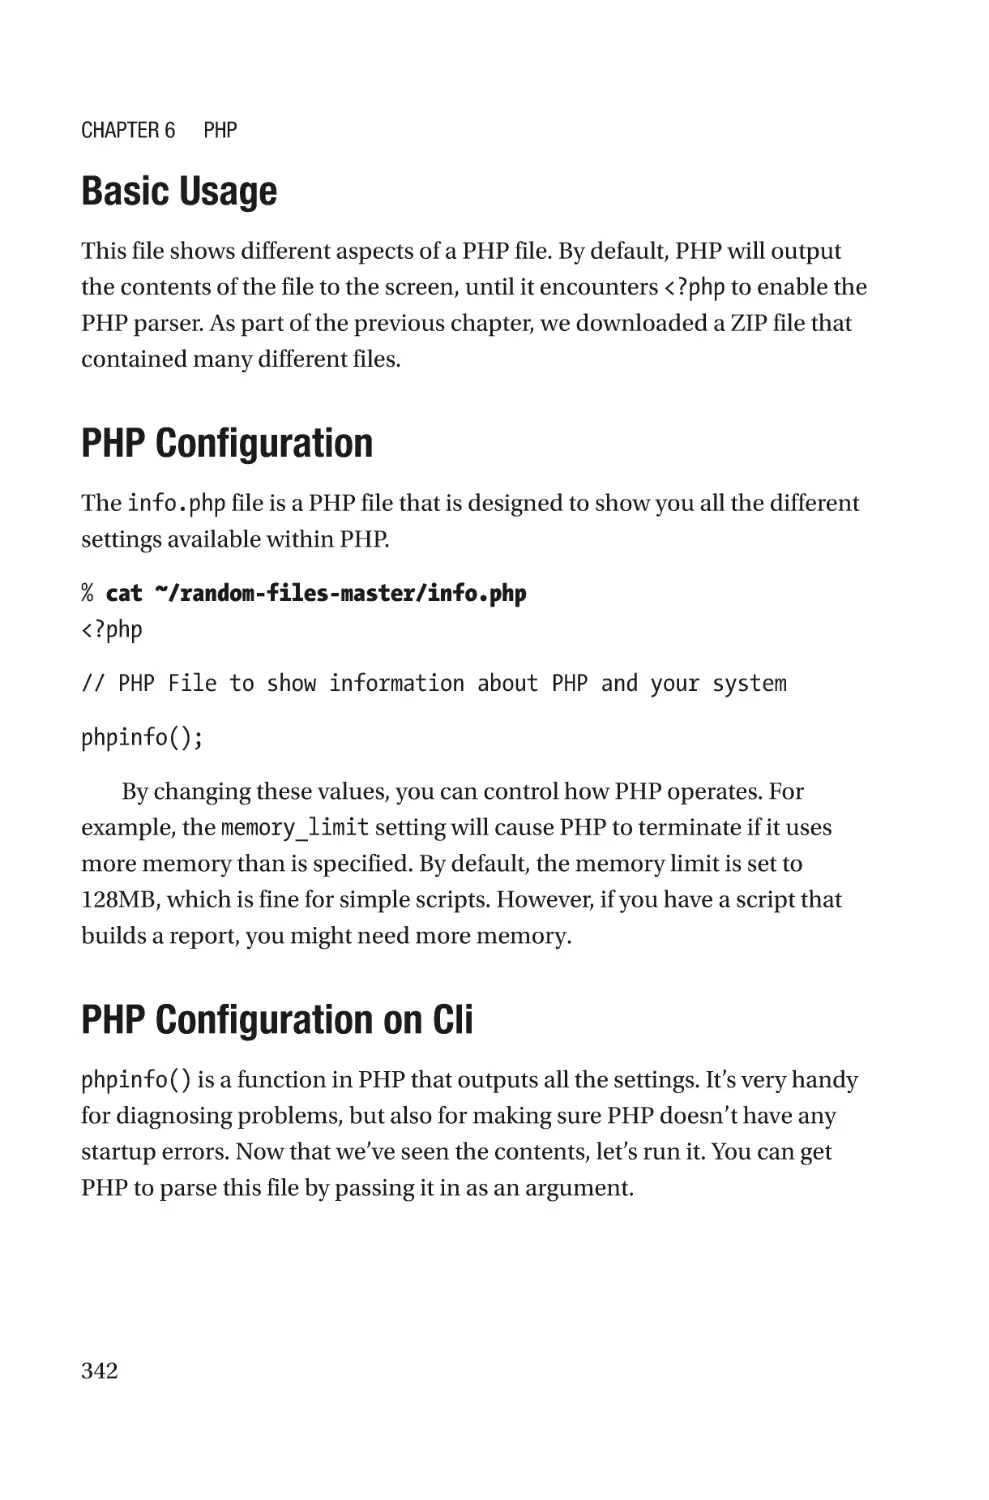
Basic Usage�������������������������������������������������������������������������������������������������342
PHP Configuration����������������������������������������������������������������������������������������342
xi
Table of Contents
PHP Configuration on Cli������������������������������������������������������������������������������342
PHP Configuration File���������������������������������������������������������������������������������343
PHP Configuration in a Browser������������������������������������������������������������������344
PHP Web Server�������������������������������������������������������������������������������������������344
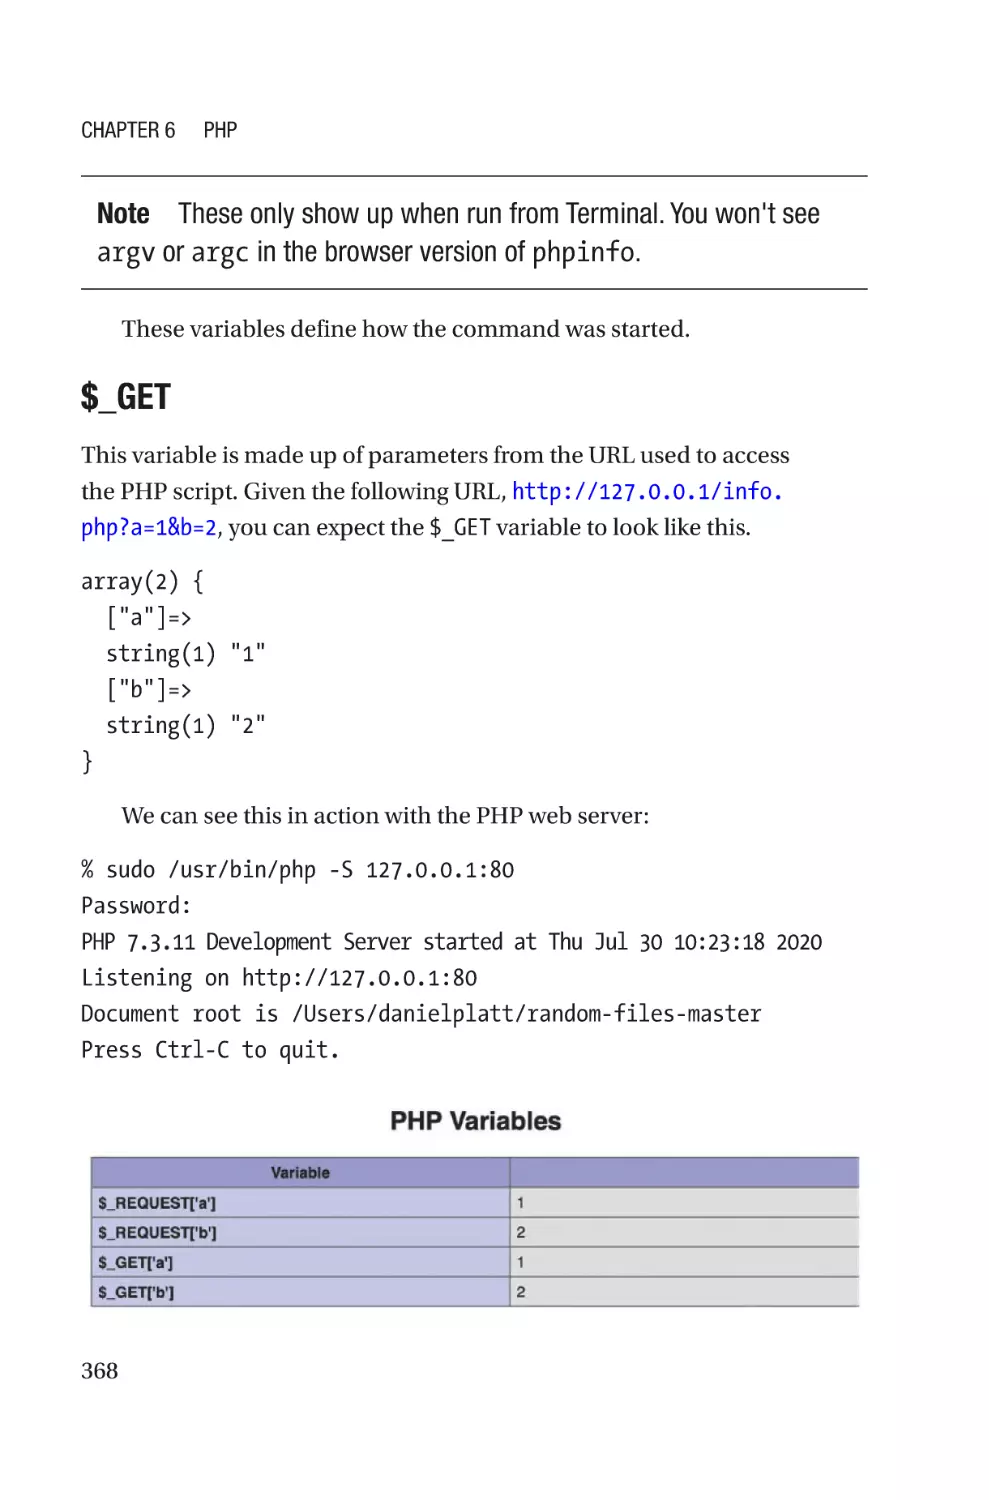
PHP Basics��������������������������������������������������������������������������������������������������������346
Language�����������������������������������������������������������������������������������������������������347
Comments���������������������������������������������������������������������������������������������������347
Constants�����������������������������������������������������������������������������������������������������348
Variables������������������������������������������������������������������������������������������������������350
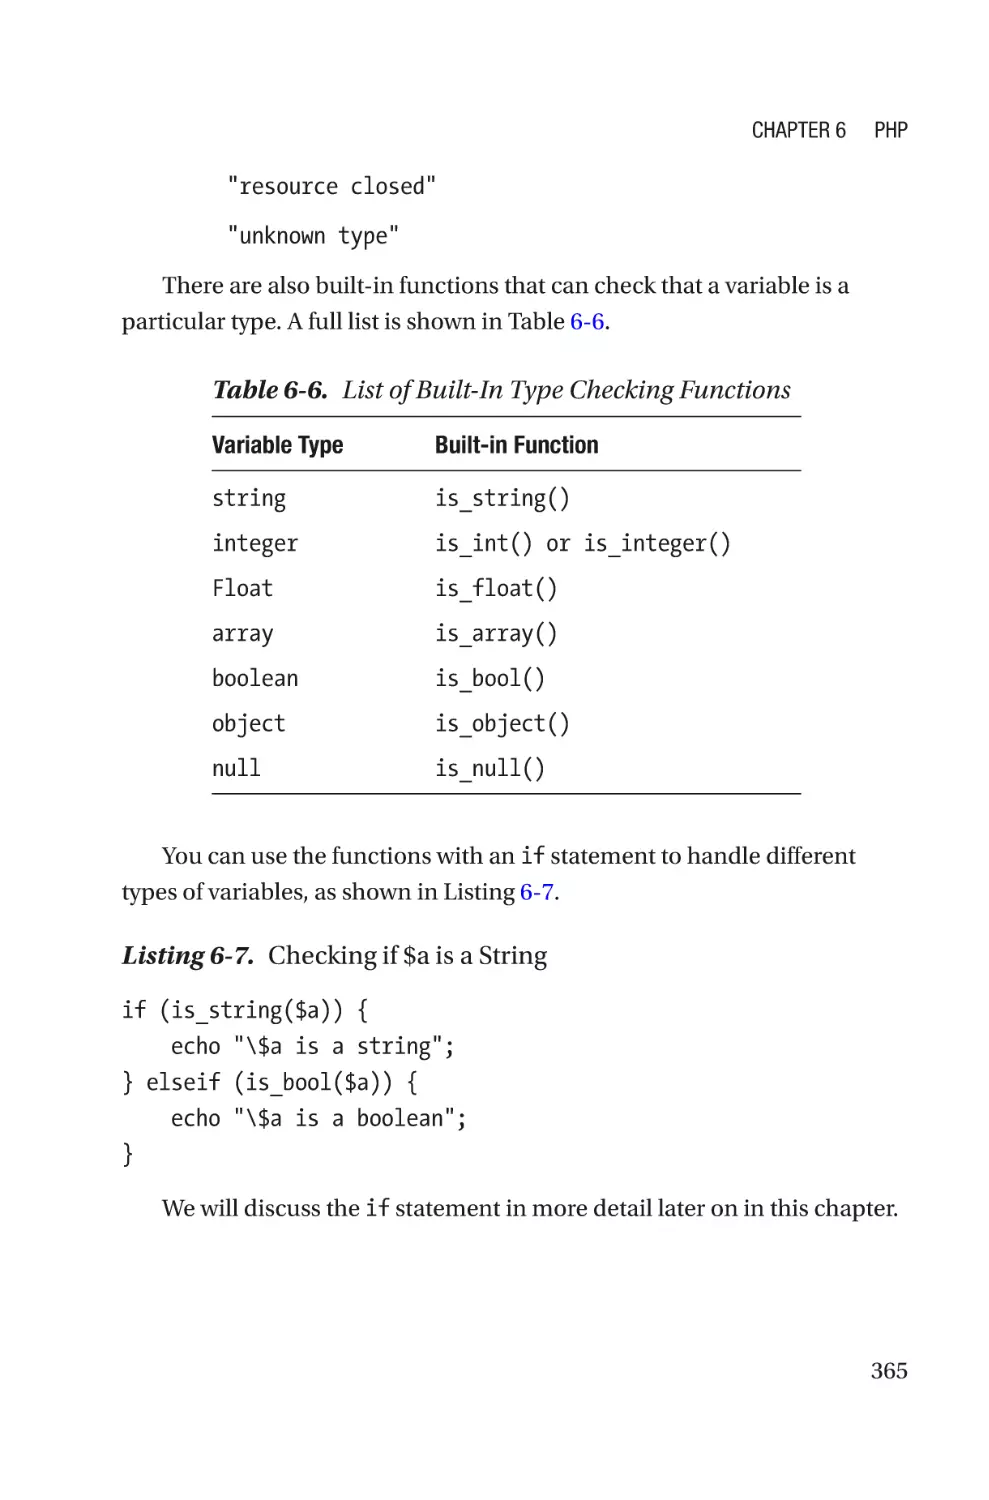
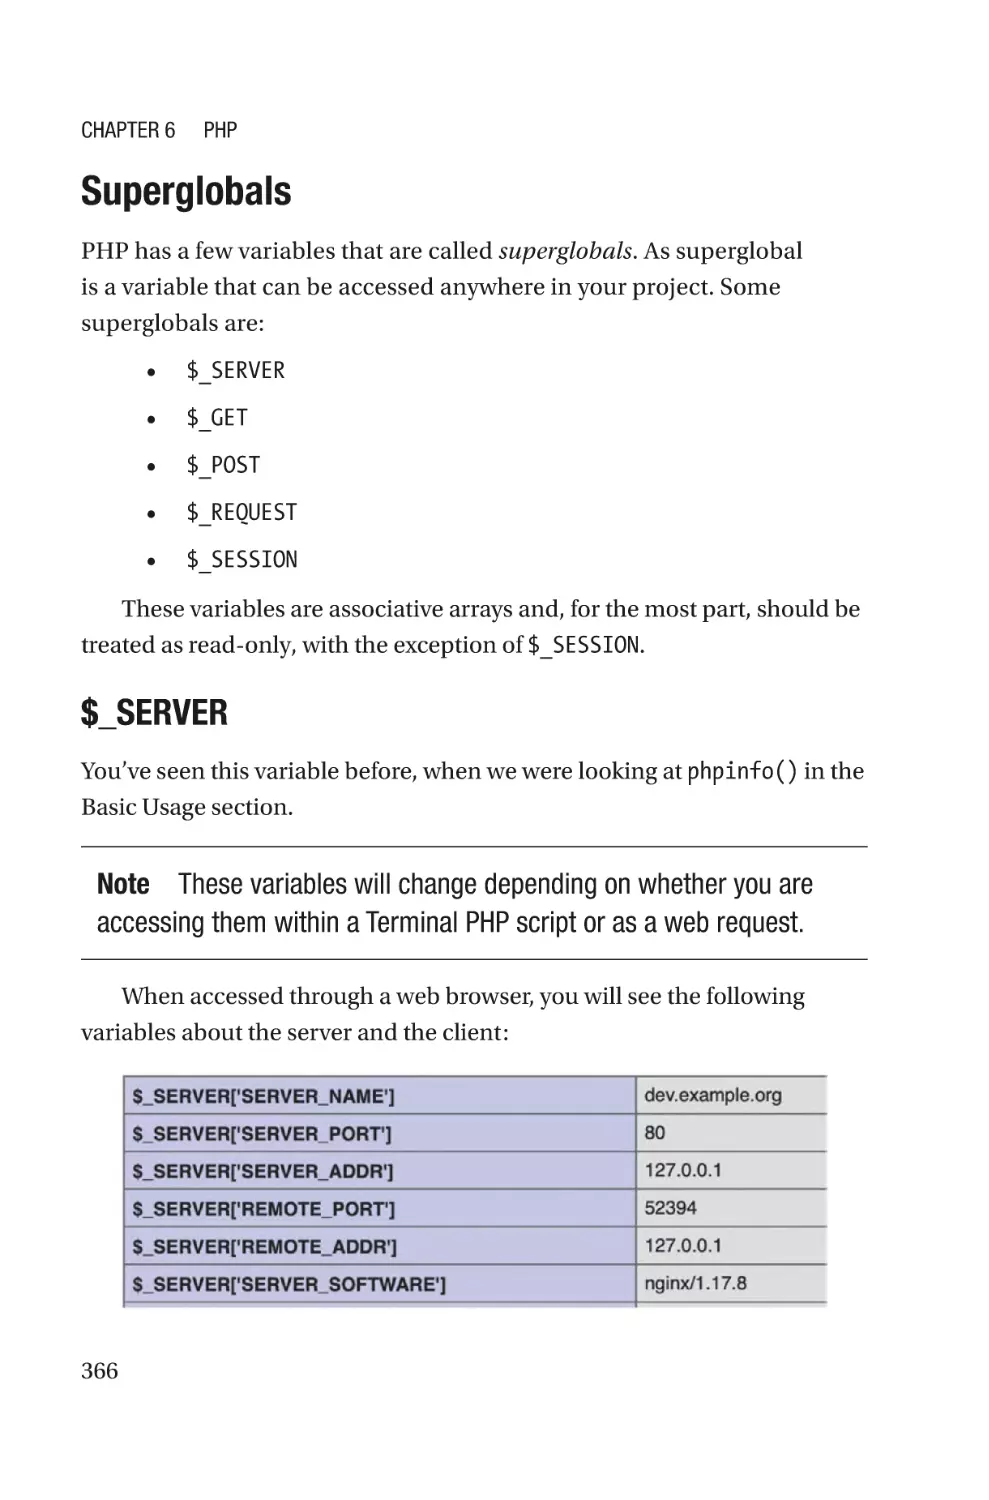
Superglobals������������������������������������������������������������������������������������������������366
Functions�����������������������������������������������������������������������������������������������������371
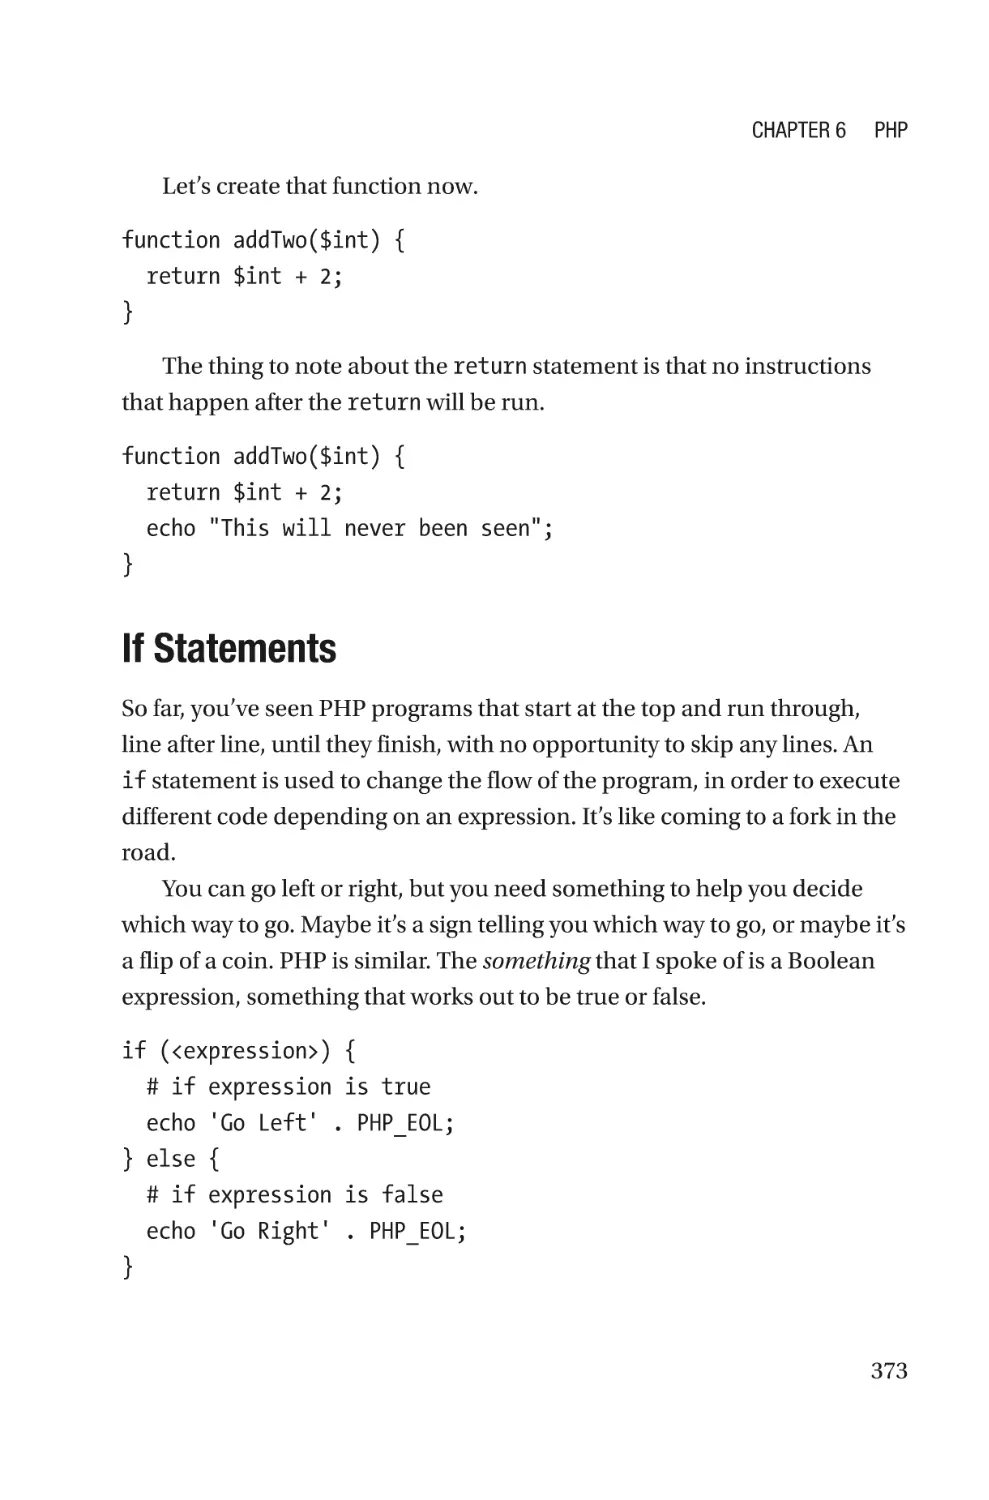
If Statements�����������������������������������������������������������������������������������������������373
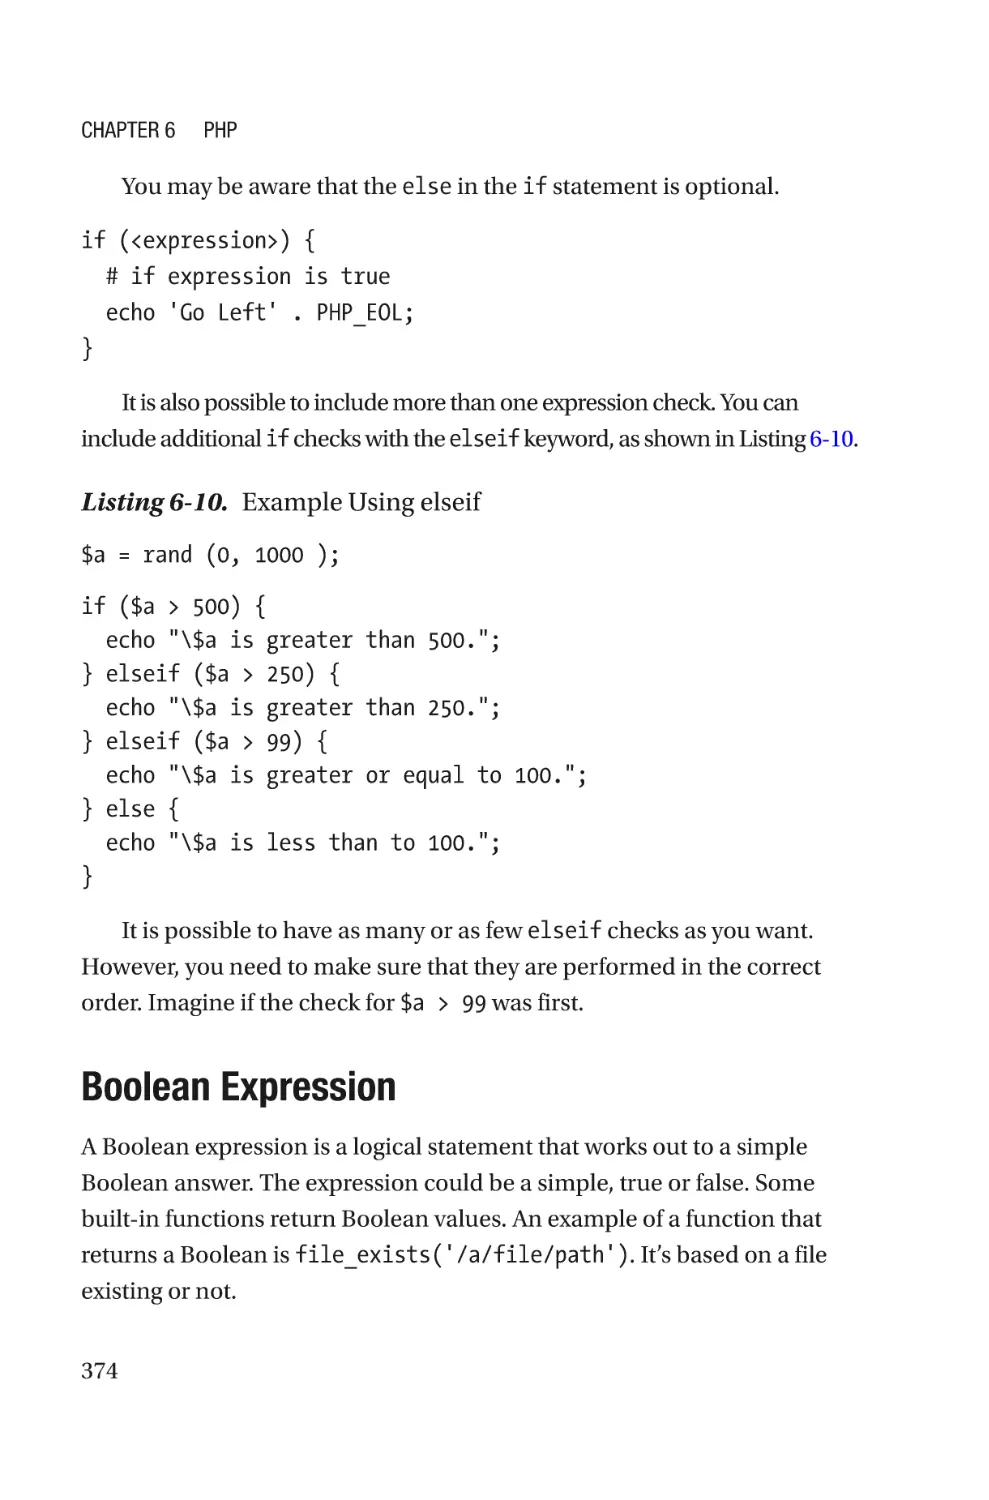
Boolean Expression�������������������������������������������������������������������������������������374
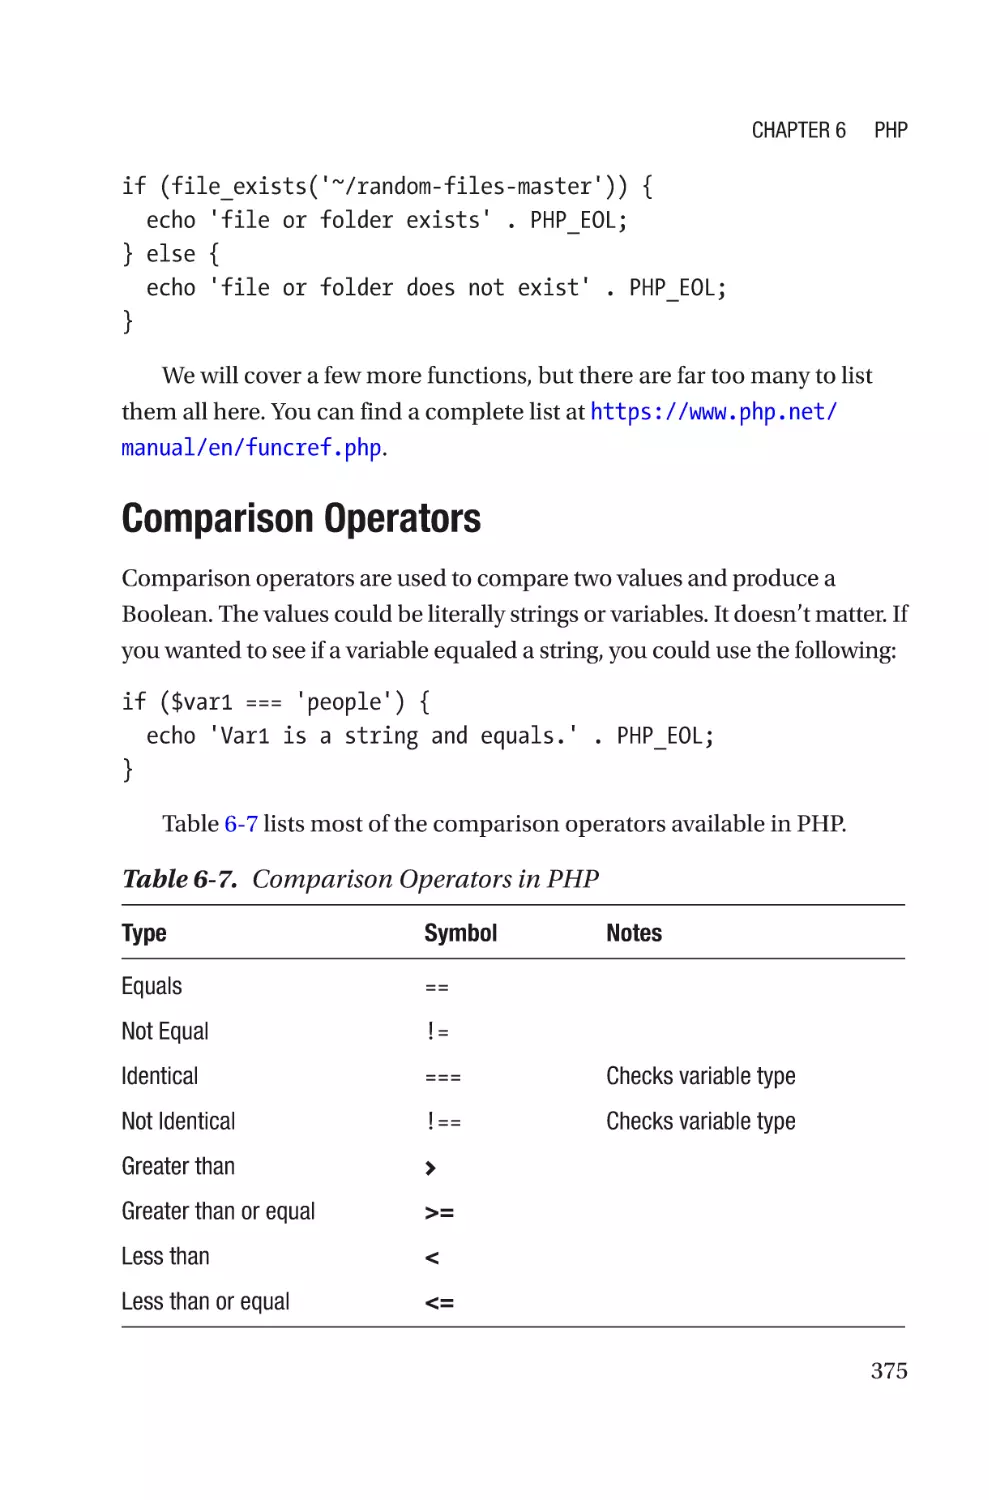
Comparison Operators���������������������������������������������������������������������������������375
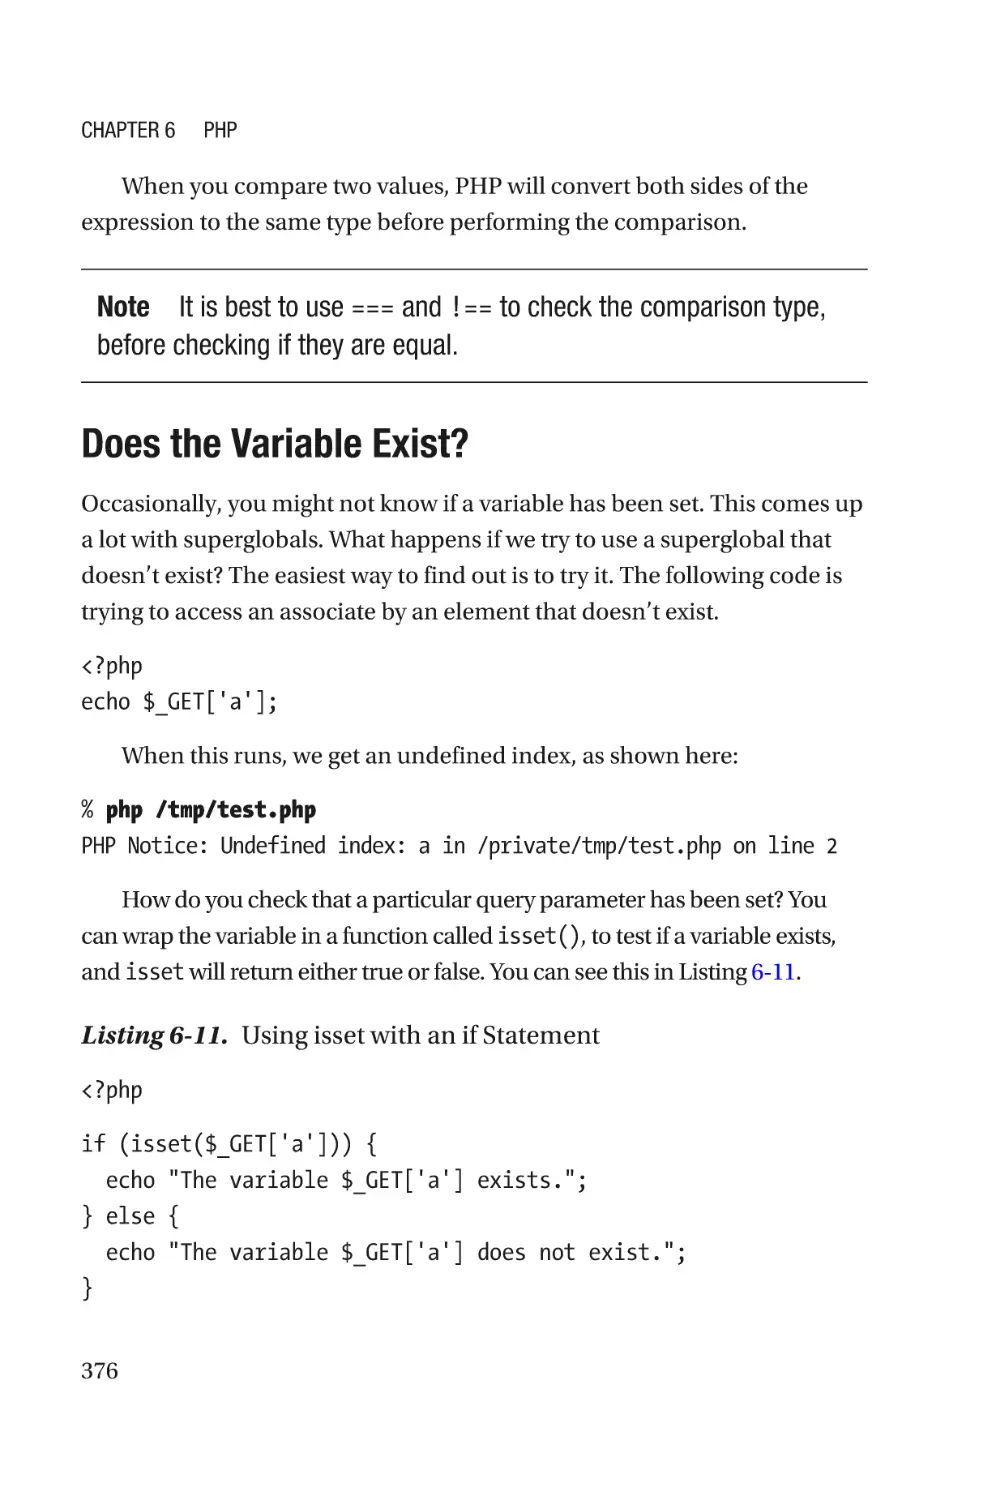
Does the Variable Exist?������������������������������������������������������������������������������376
Loops����������������������������������������������������������������������������������������������������������������377
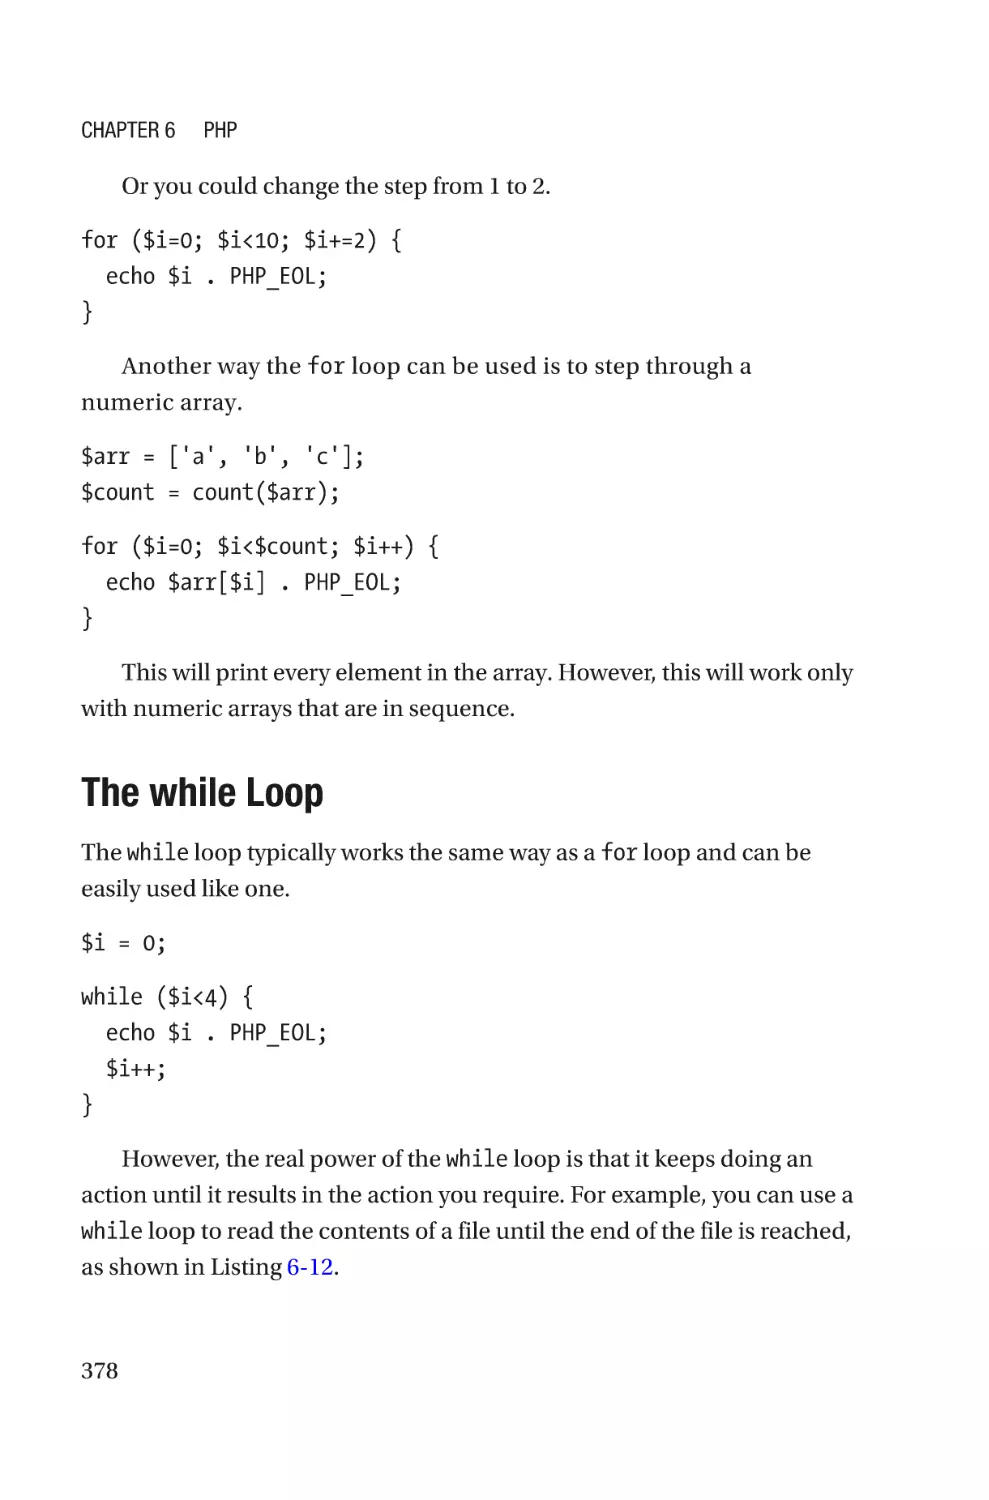
The for Loop������������������������������������������������������������������������������������������������377
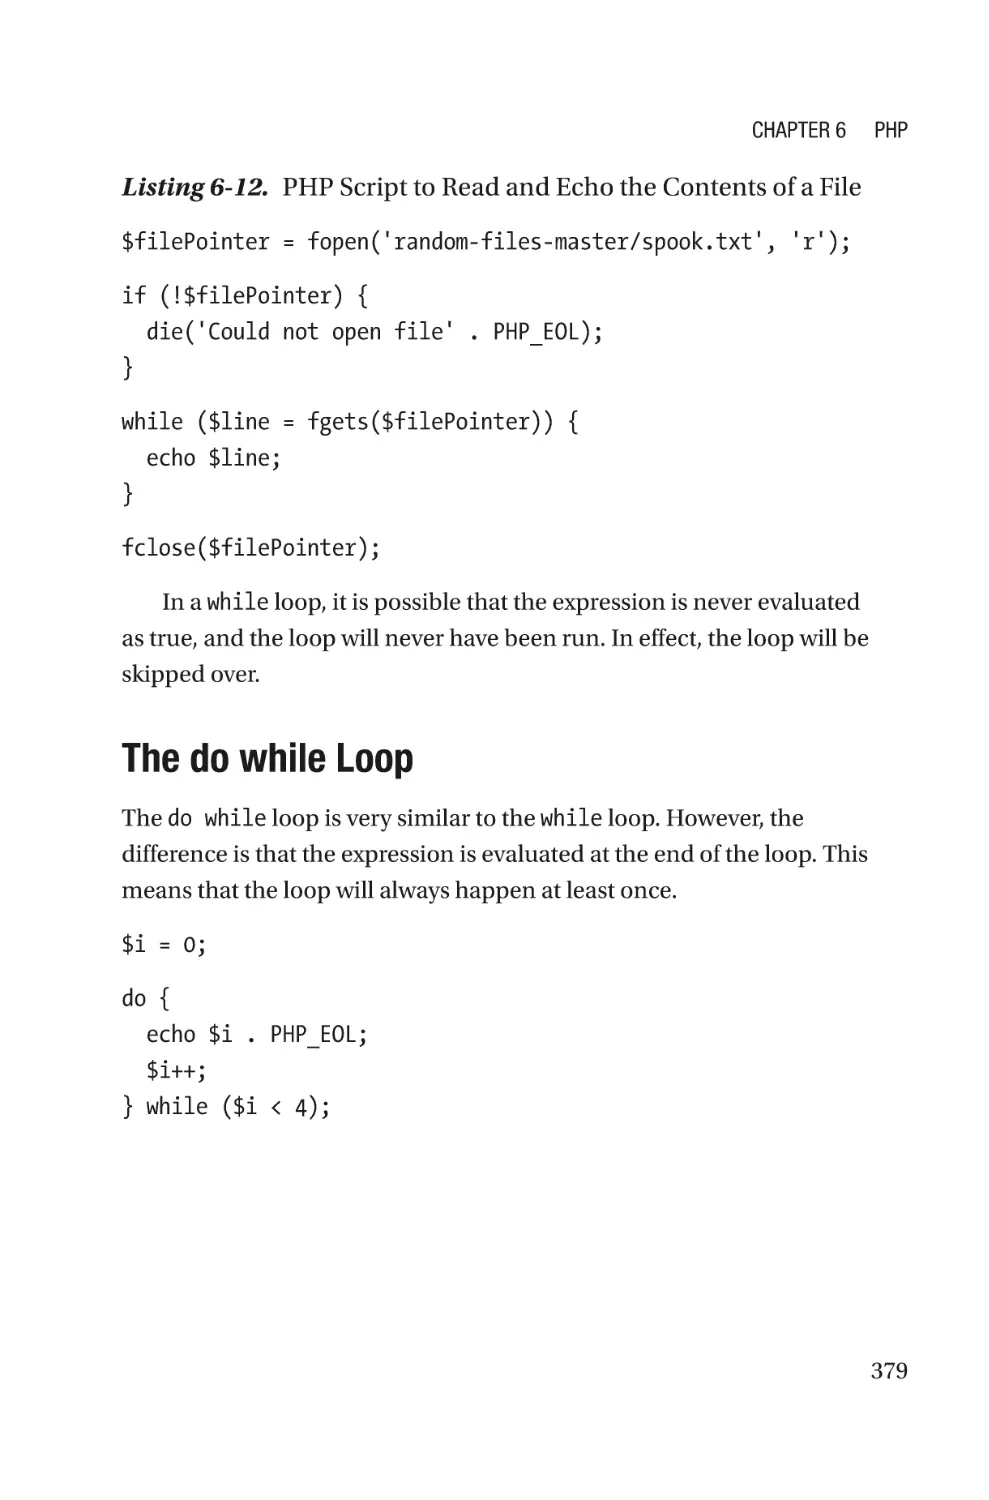
The while Loop��������������������������������������������������������������������������������������������378
The do while Loop���������������������������������������������������������������������������������������379
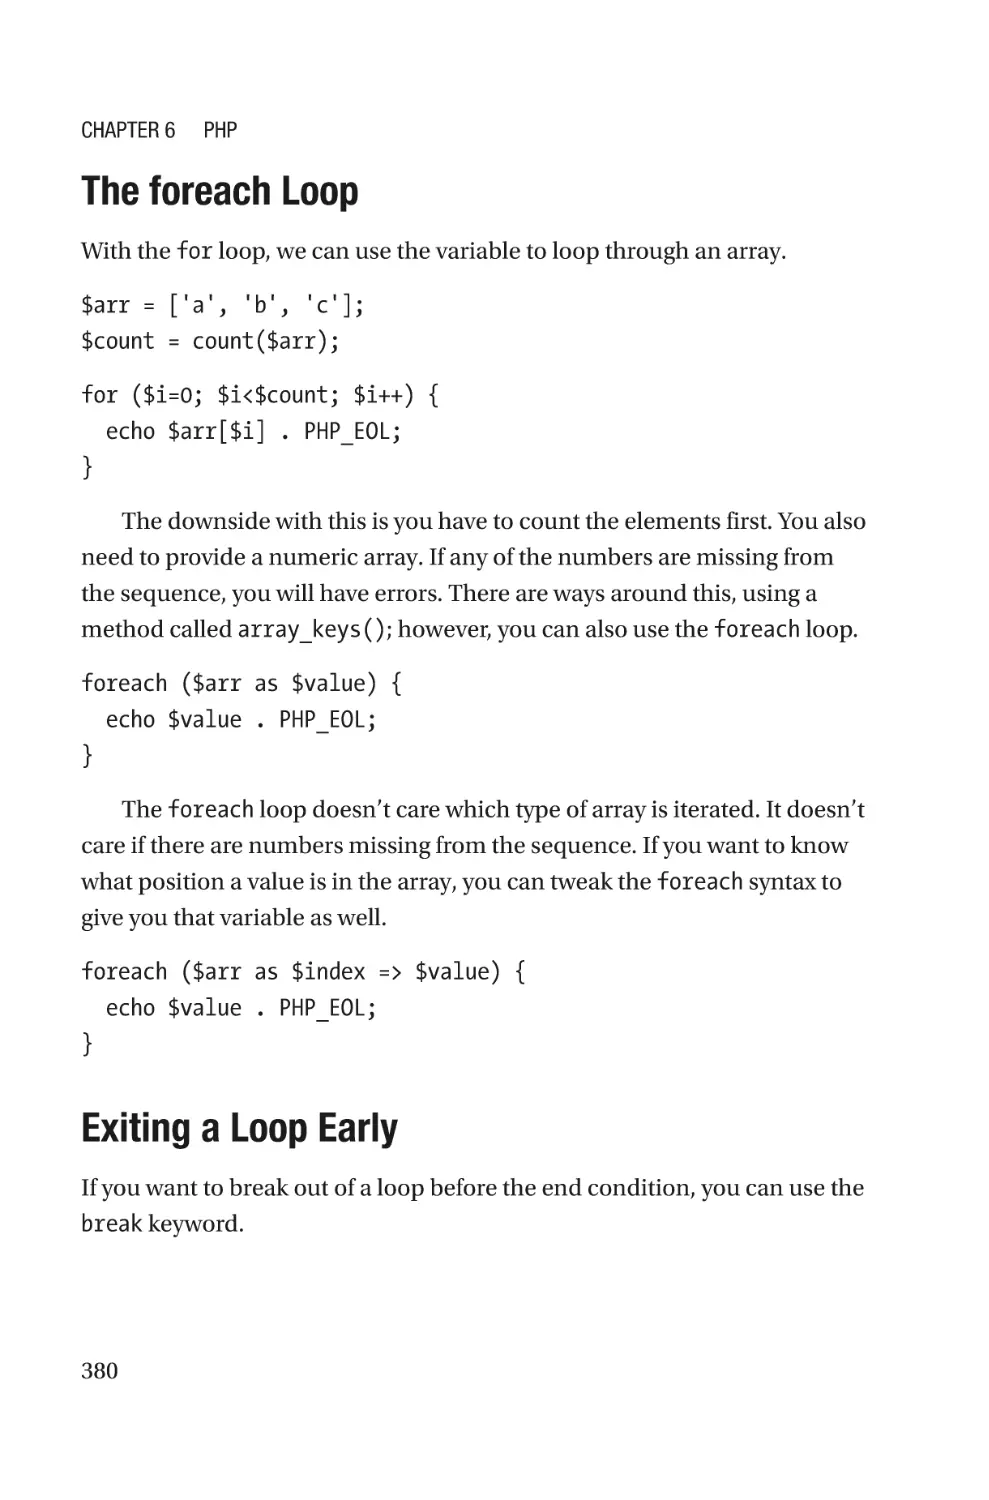
The foreach Loop�����������������������������������������������������������������������������������������380
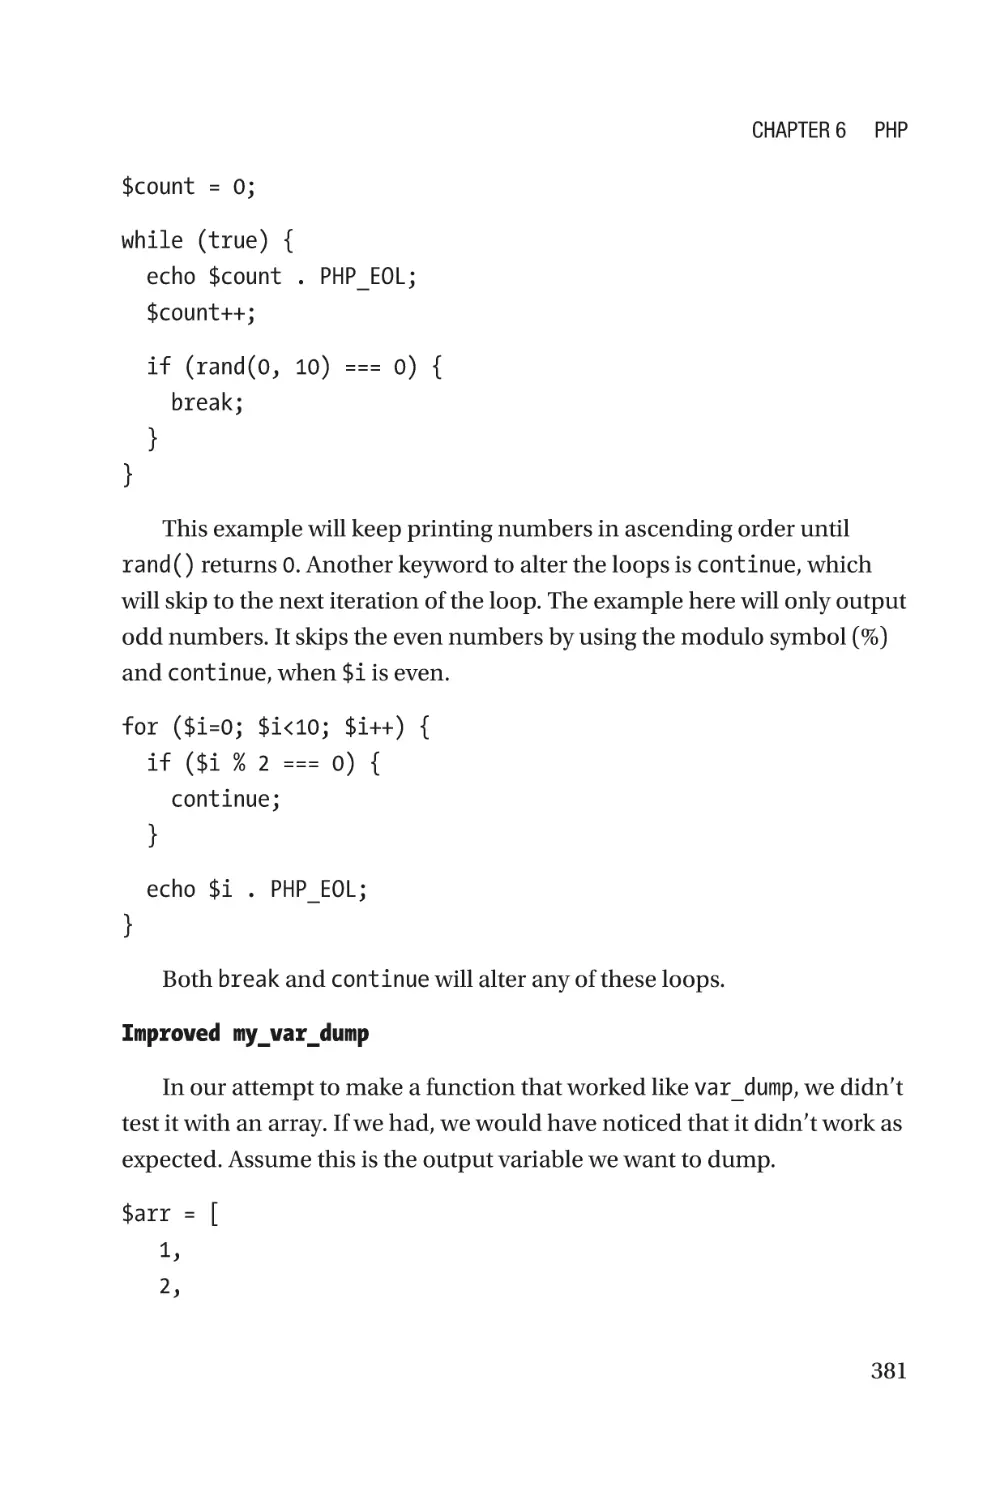
Exiting a Loop Early�������������������������������������������������������������������������������������380
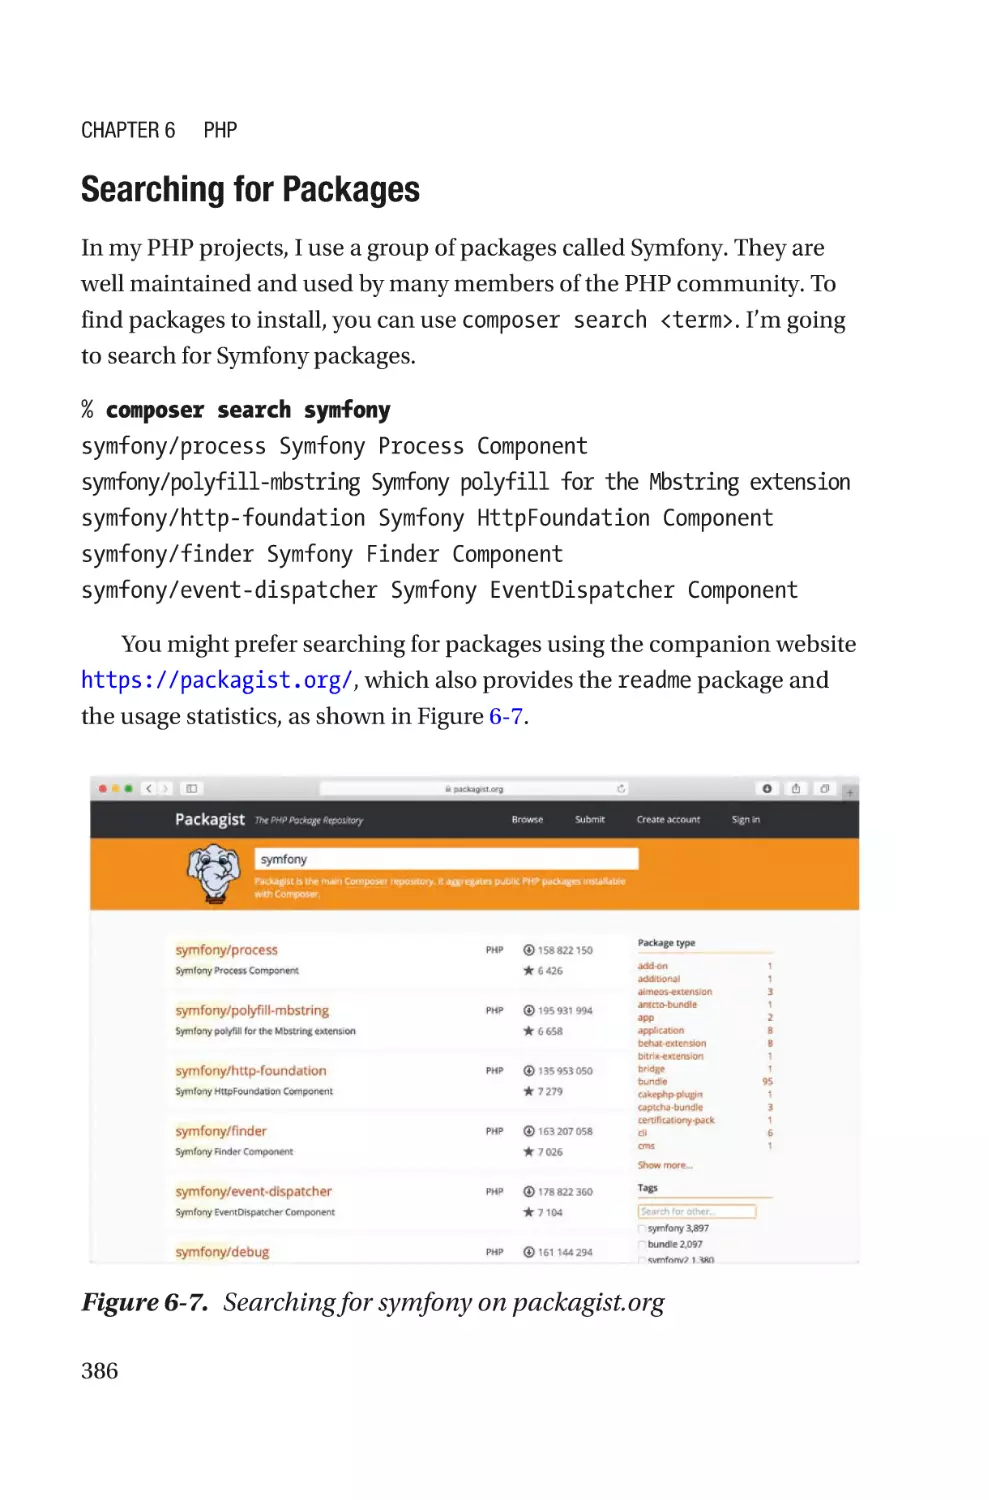
Dependencies����������������������������������������������������������������������������������������������383
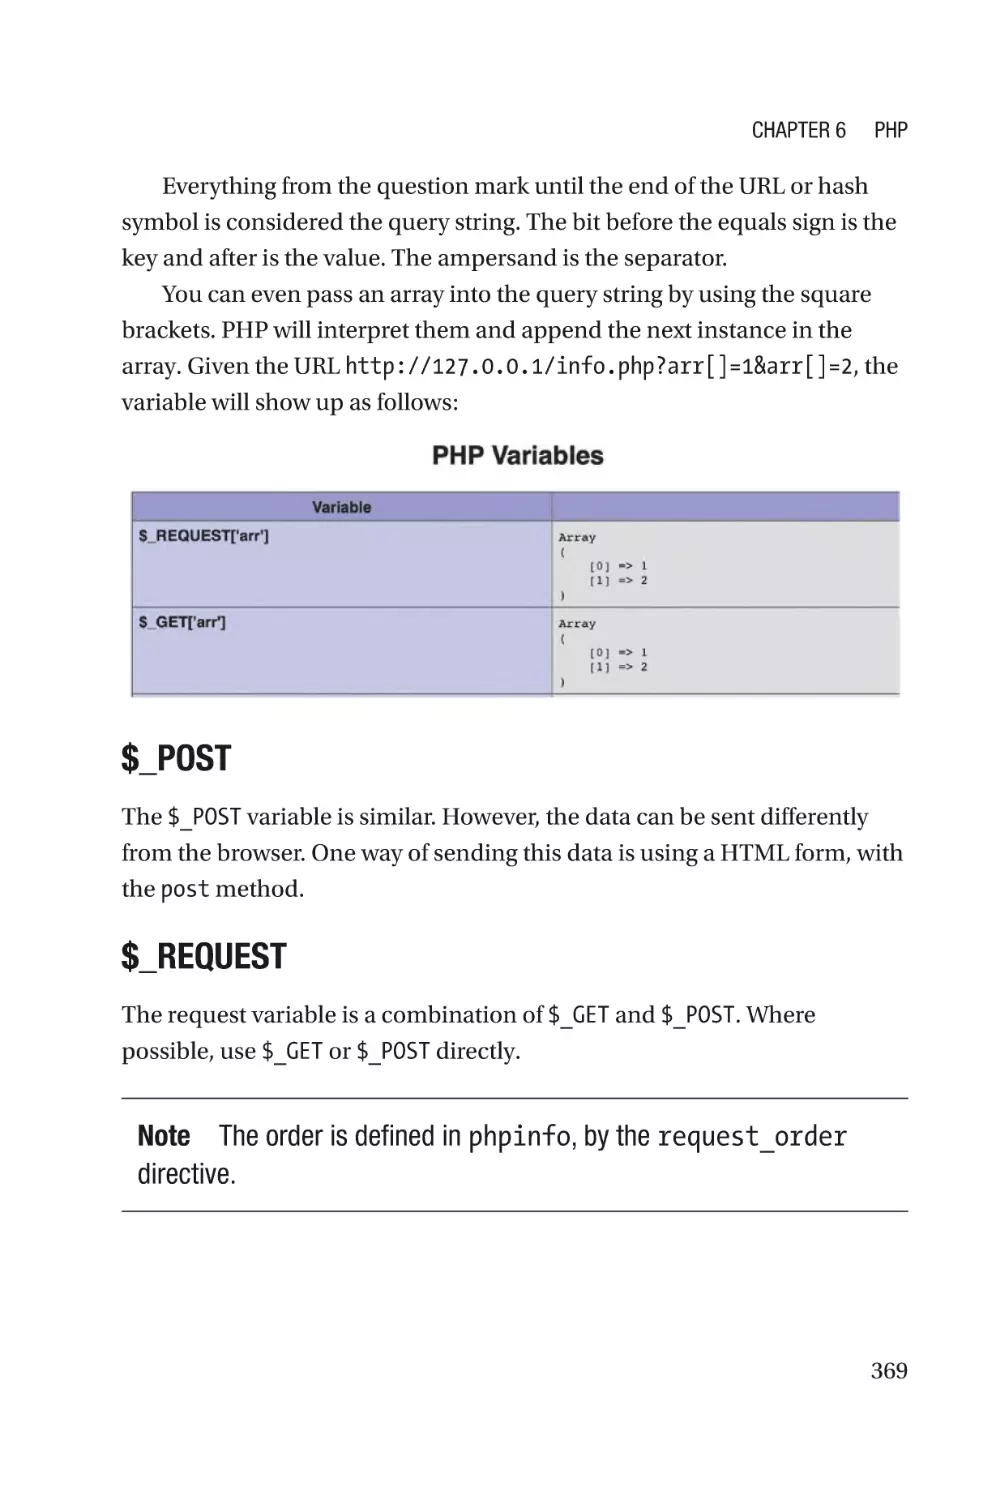
Web Browser Projects���������������������������������������������������������������������������������������391
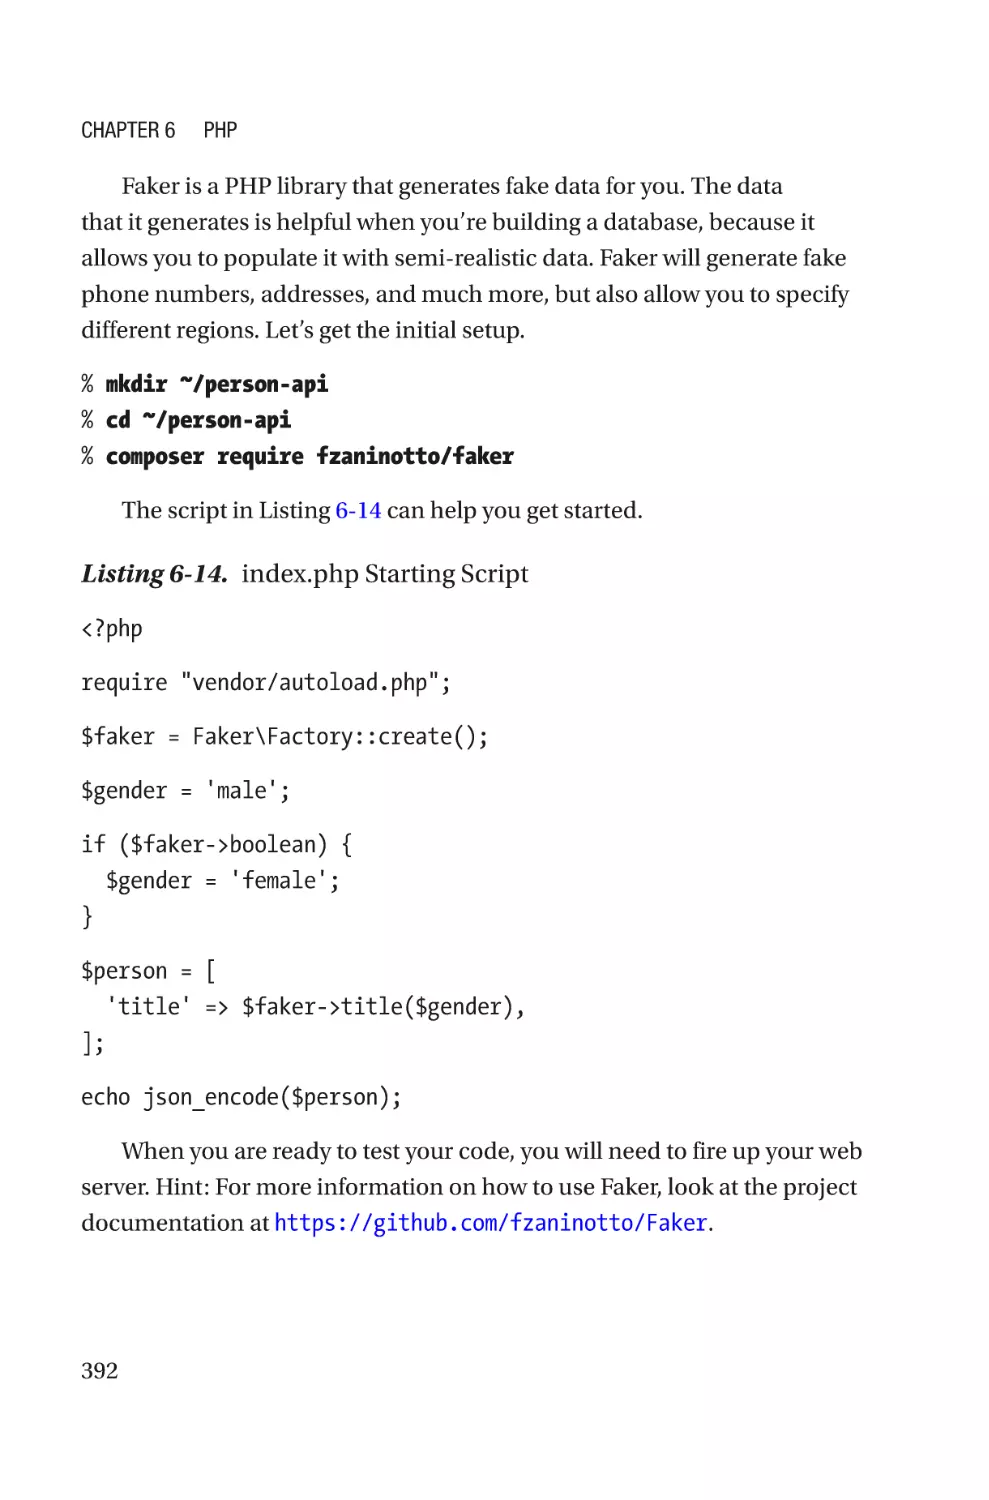
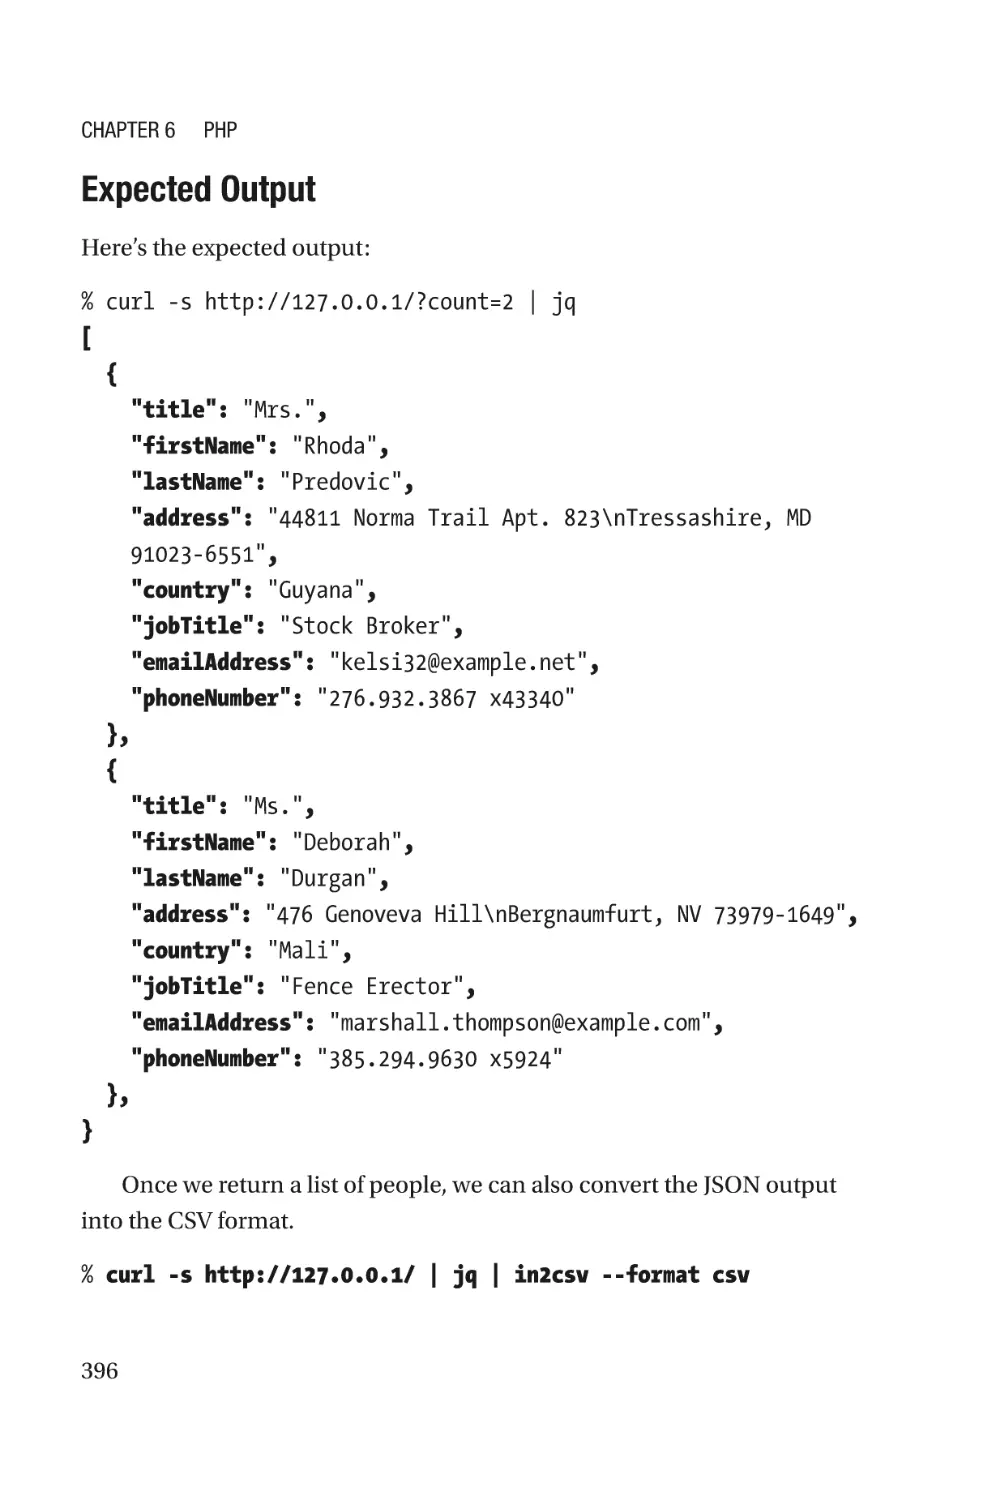
Project 6-1: Person API��������������������������������������������������������������������������������391
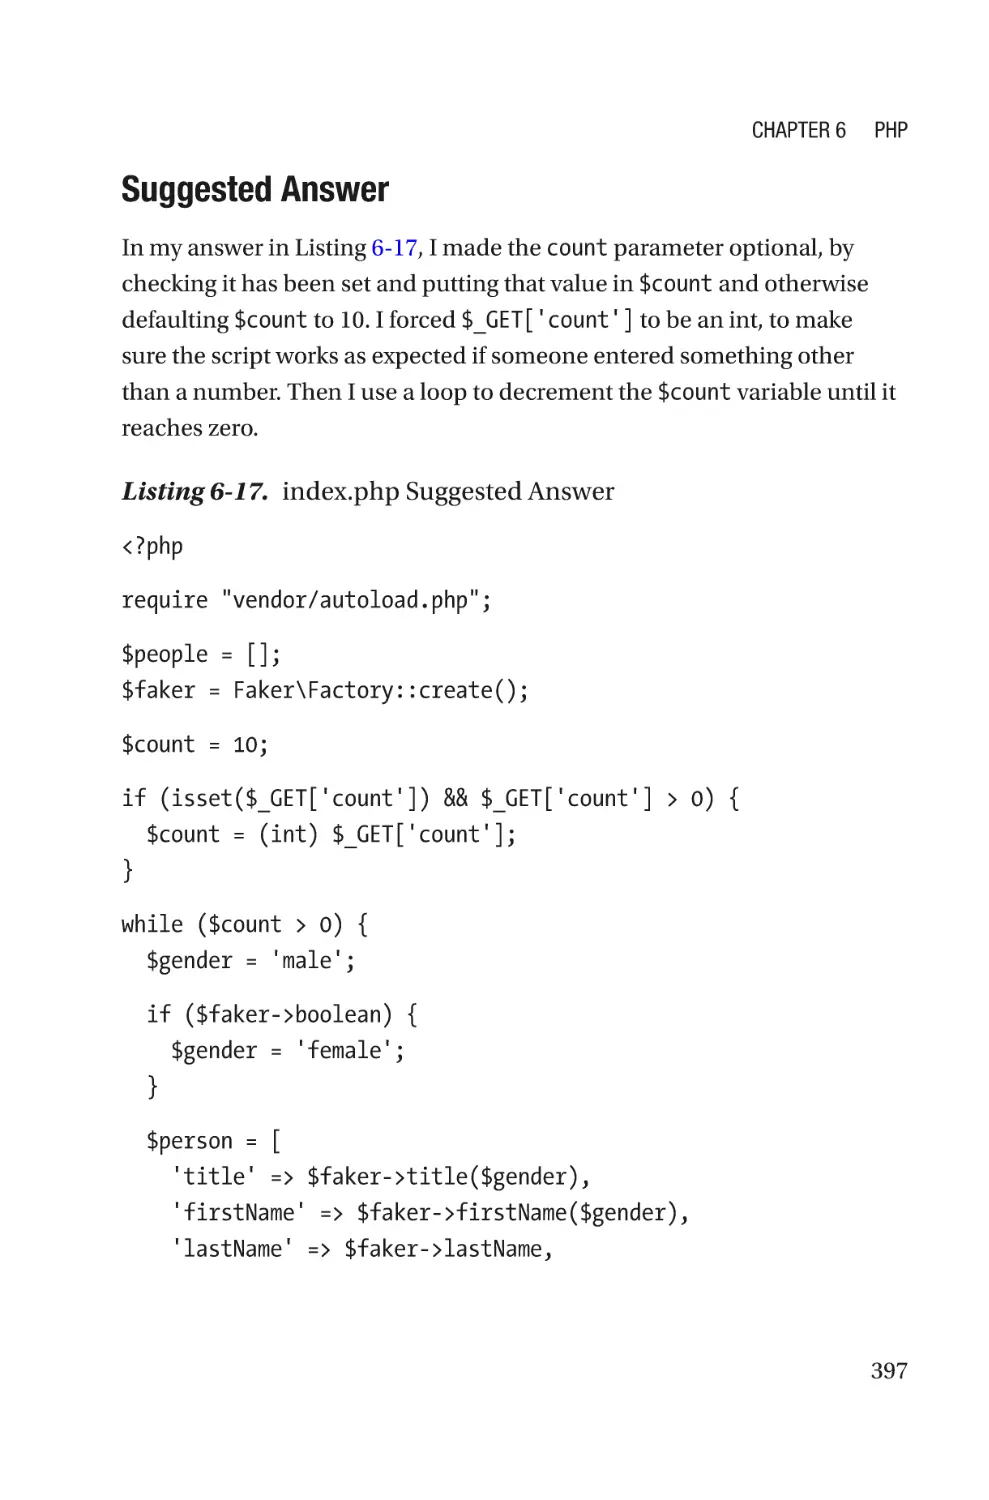
Project 6-2: People API��������������������������������������������������������������������������������394
Command-Line Projects������������������������������������������������������������������������������������398
xii
Table of Contents
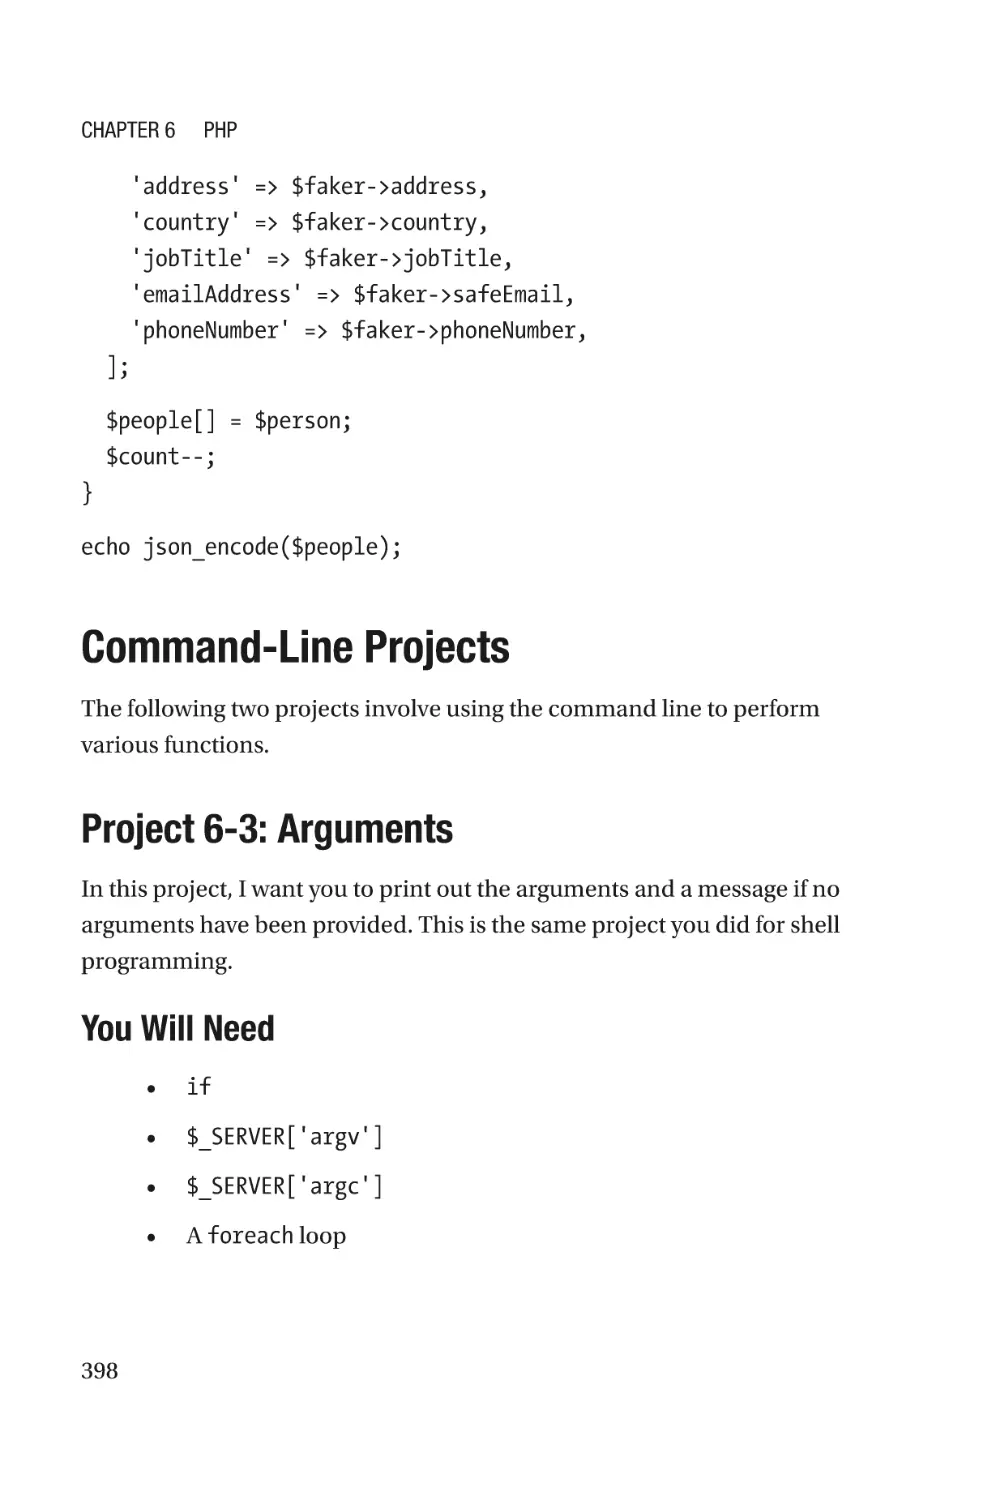
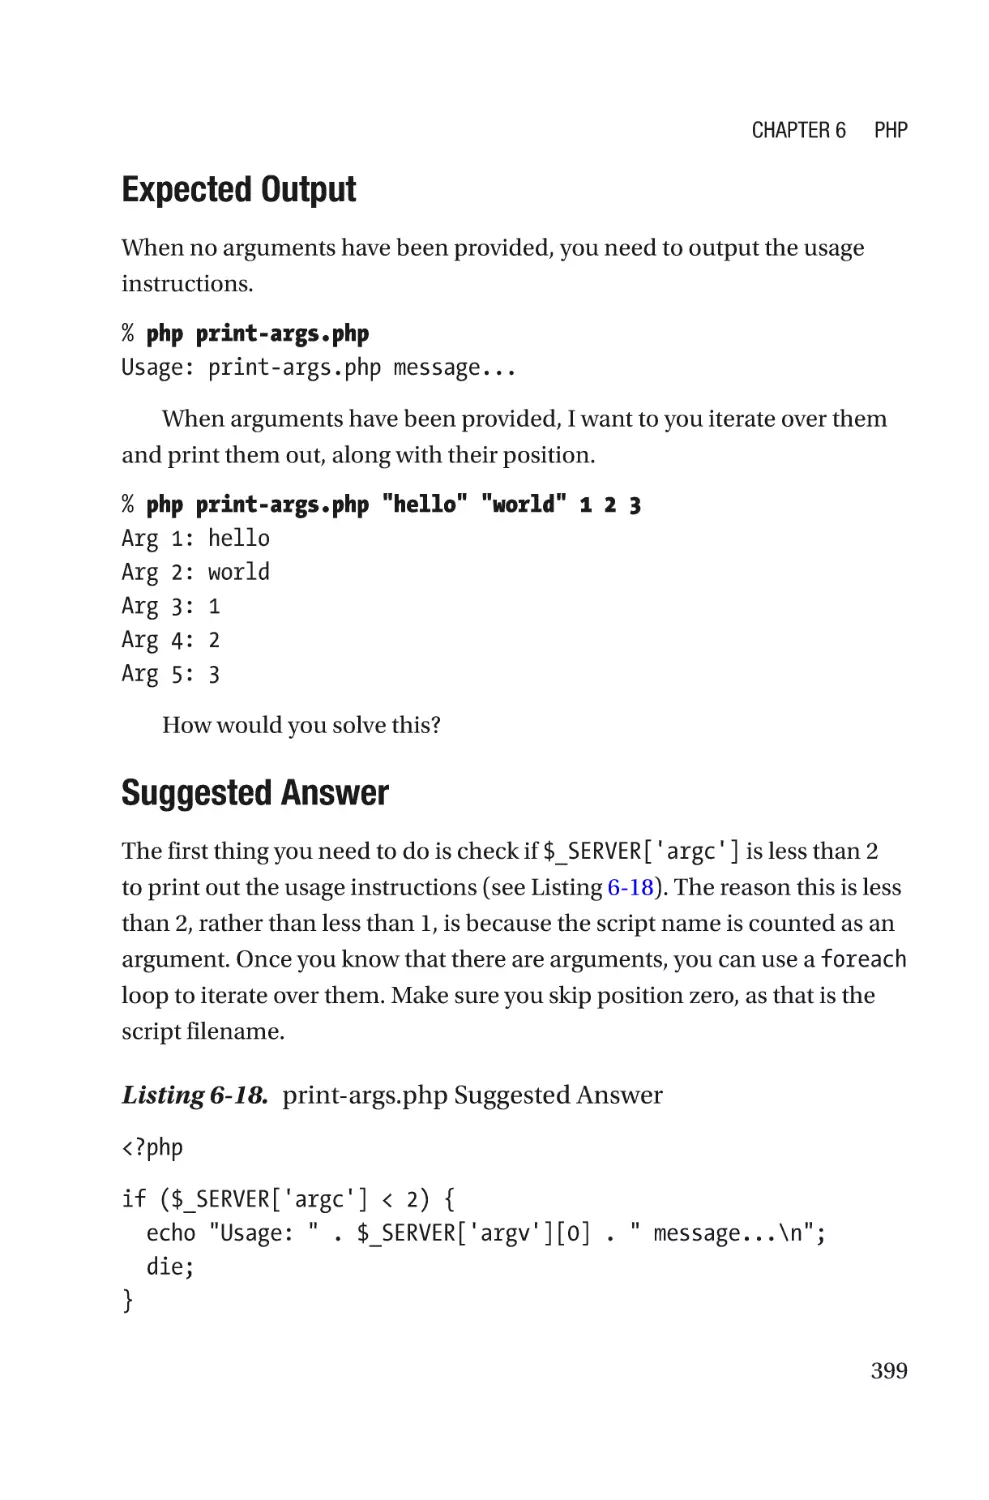
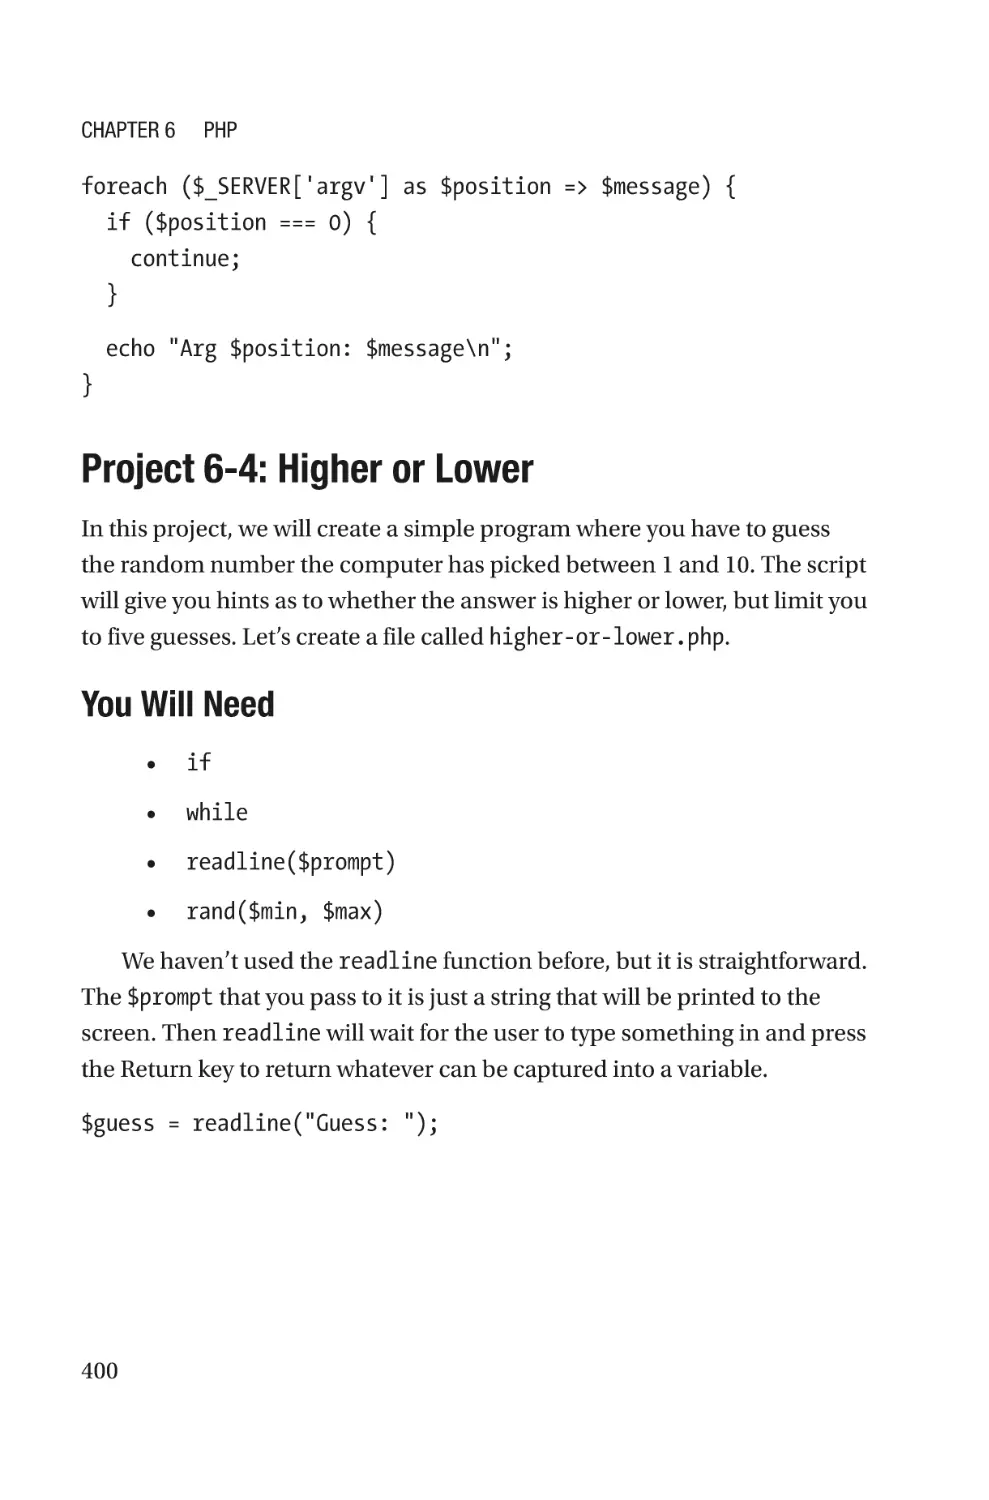
Project 6-3: Arguments��������������������������������������������������������������������������������398
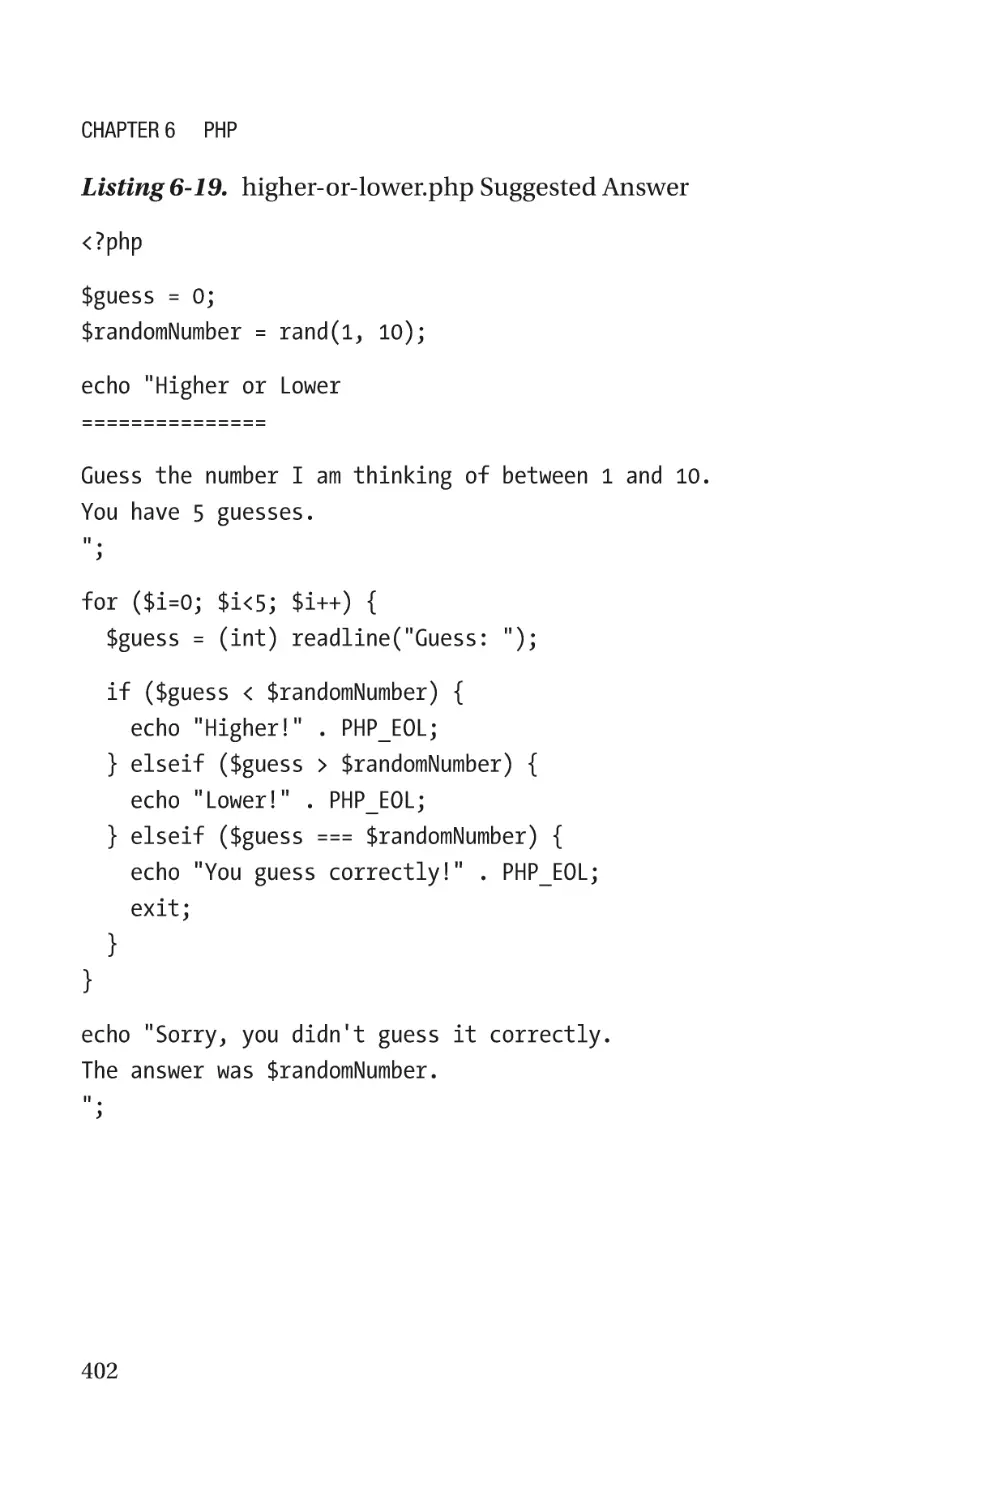
Project 6-4: Higher or Lower�����������������������������������������������������������������������400
Summary����������������������������������������������������������������������������������������������������������403
Chapter 7: Version Control����������������������������������������������������������������405
Version Control at a Glance�������������������������������������������������������������������������������405
Getting Started��������������������������������������������������������������������������������������������������407
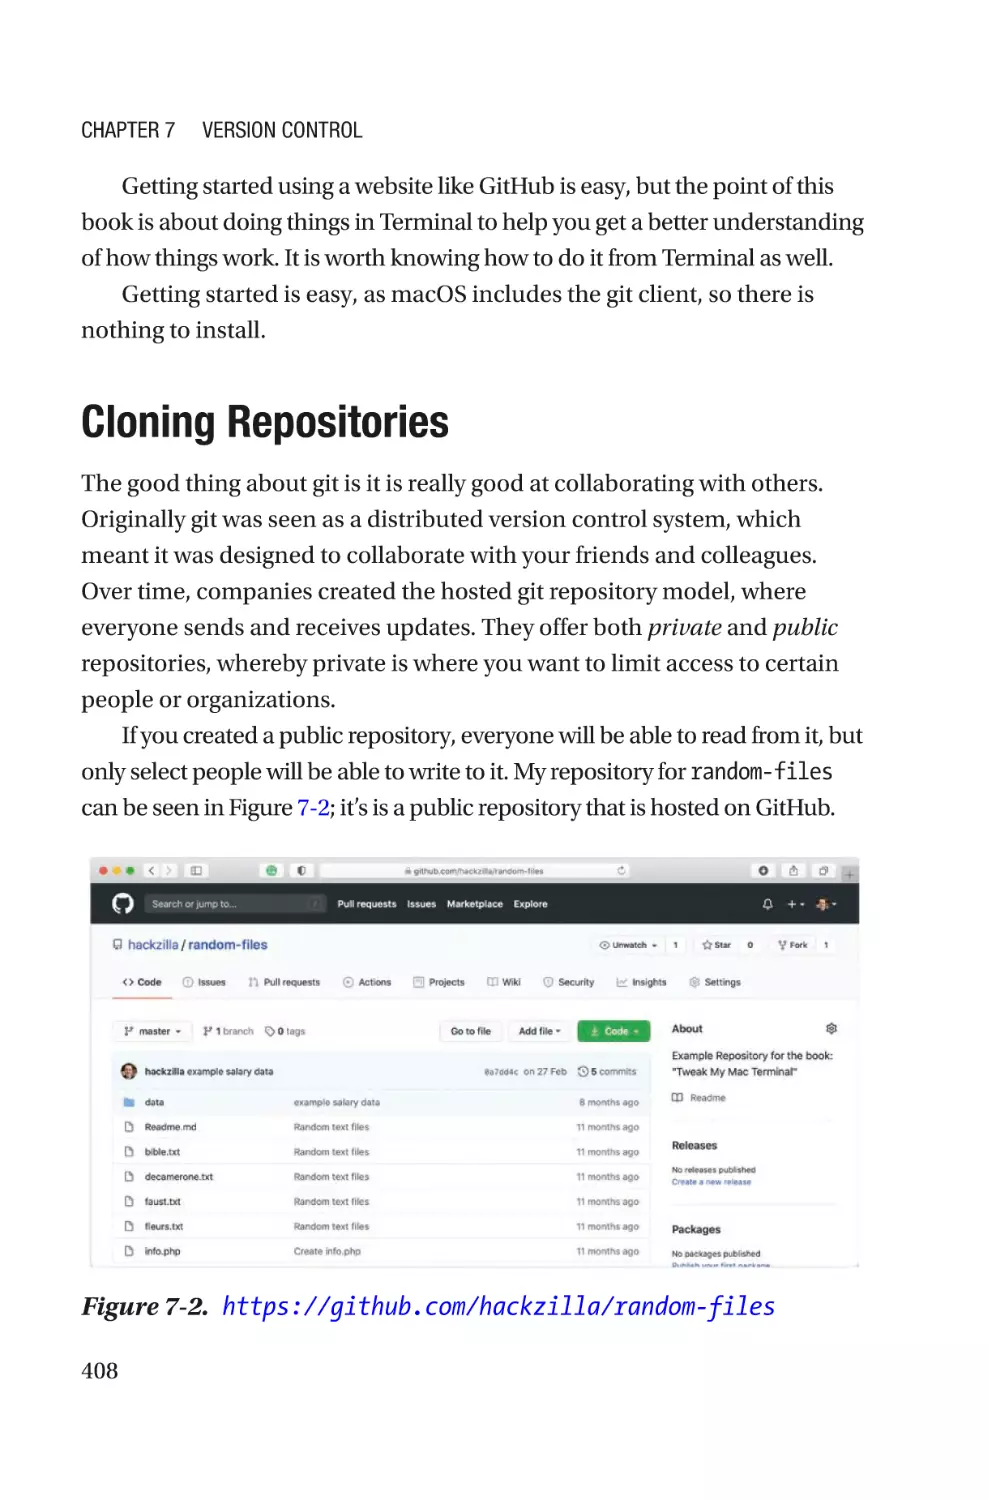
Cloning Repositories�����������������������������������������������������������������������������������������408
Branches�����������������������������������������������������������������������������������������������������������410
The HEAD Branch����������������������������������������������������������������������������������������410
Tags�������������������������������������������������������������������������������������������������������������������410
Updating the Repository�����������������������������������������������������������������������������������411
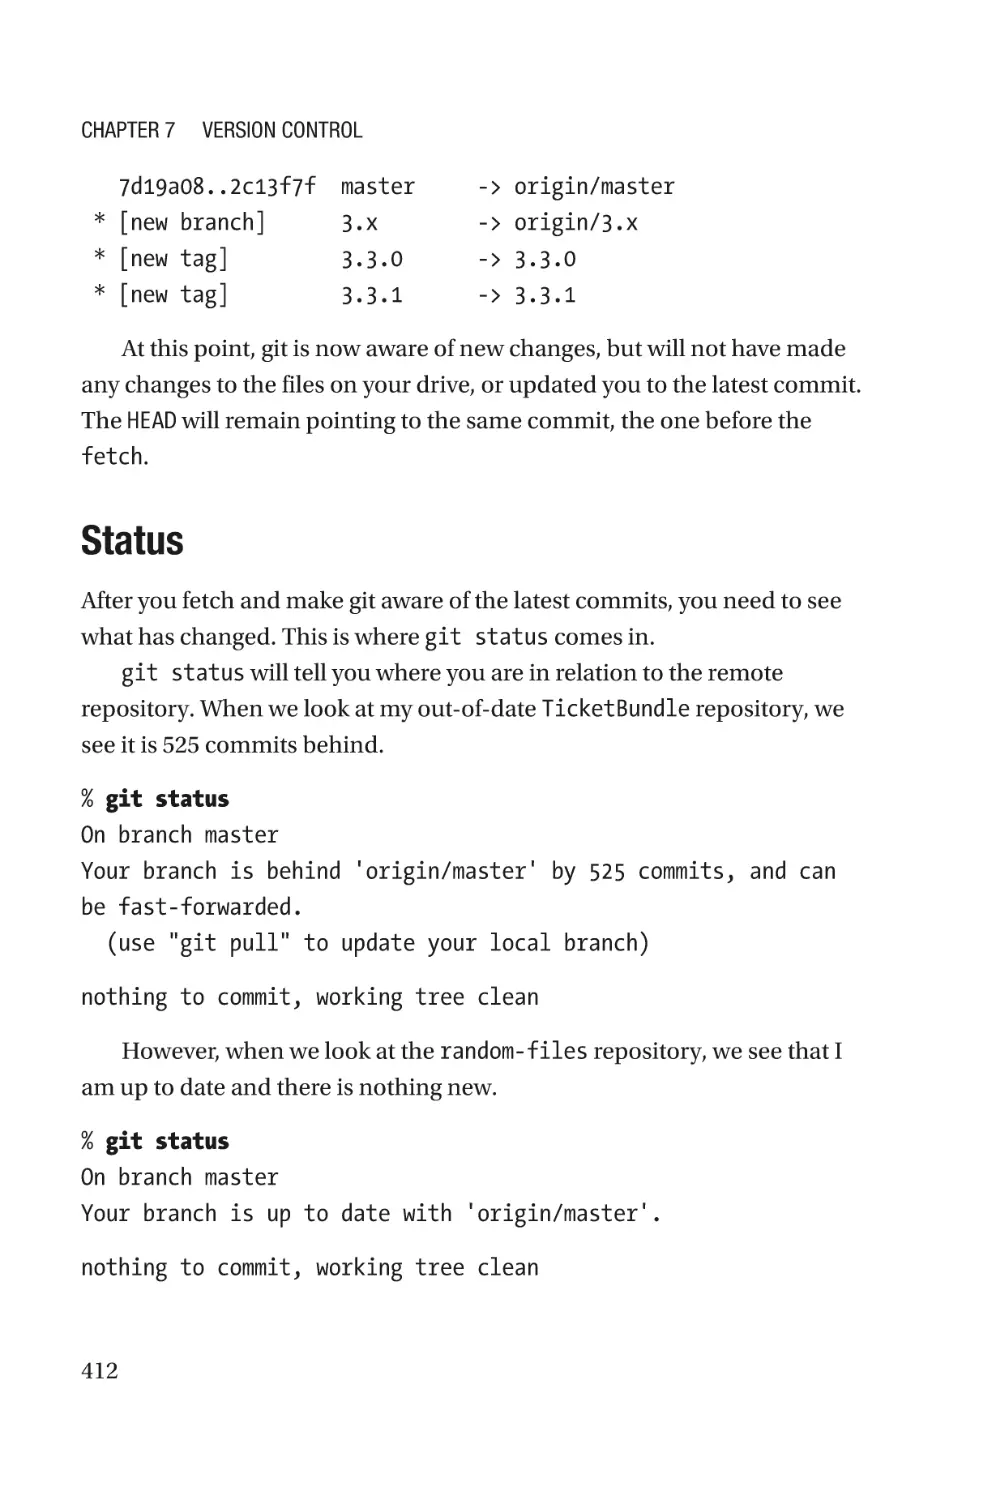
Fetch������������������������������������������������������������������������������������������������������������411
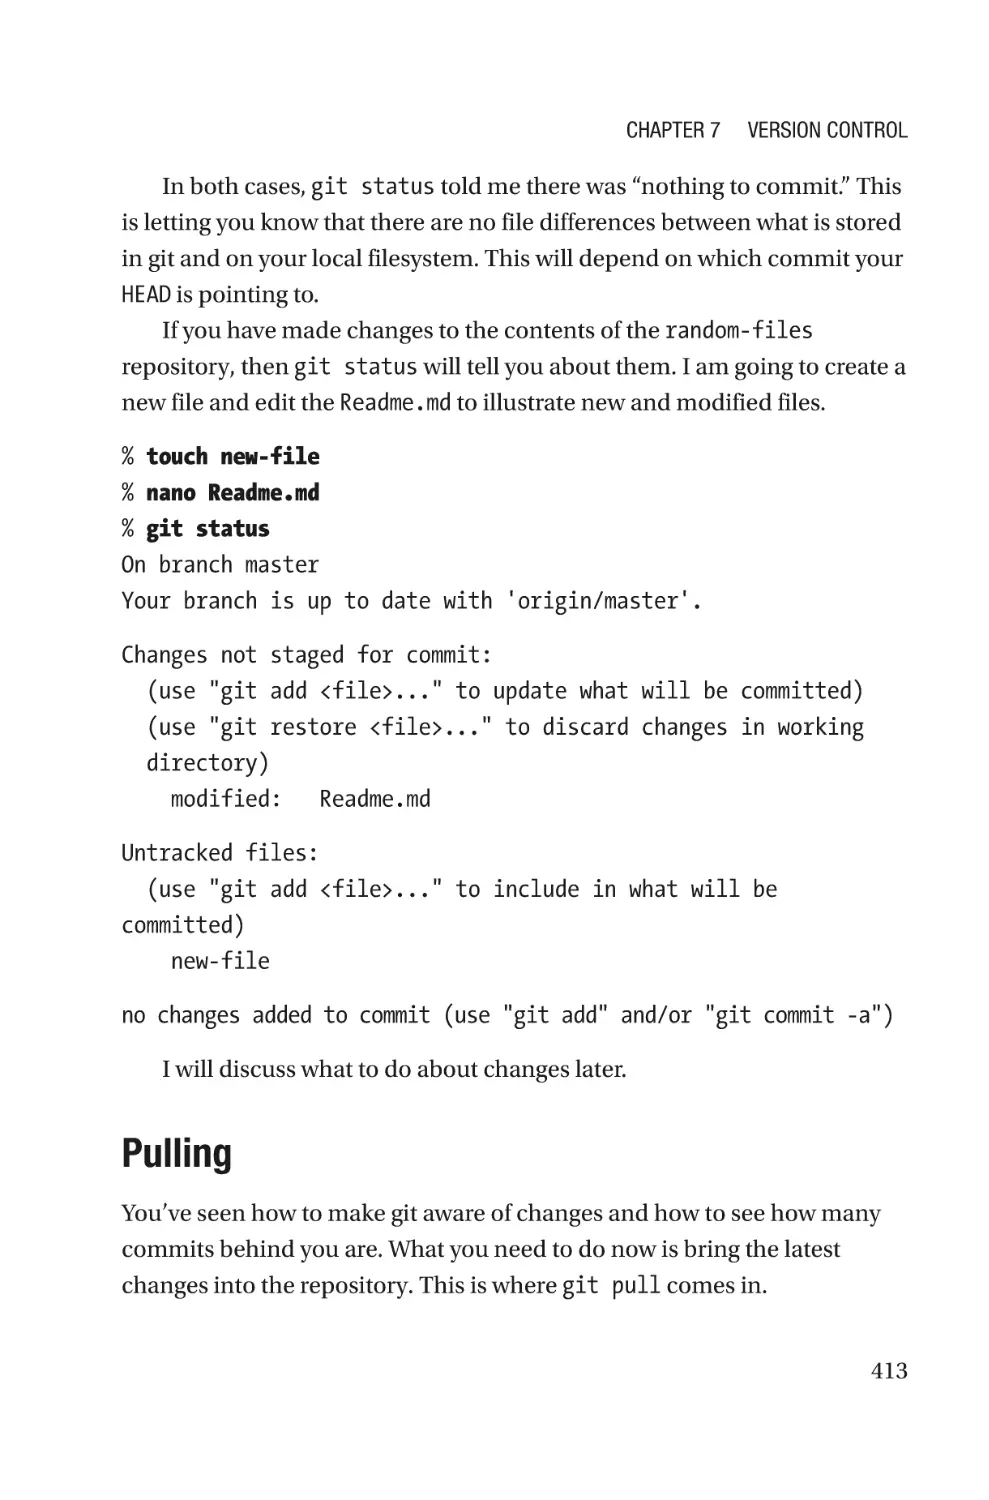
Status����������������������������������������������������������������������������������������������������������412
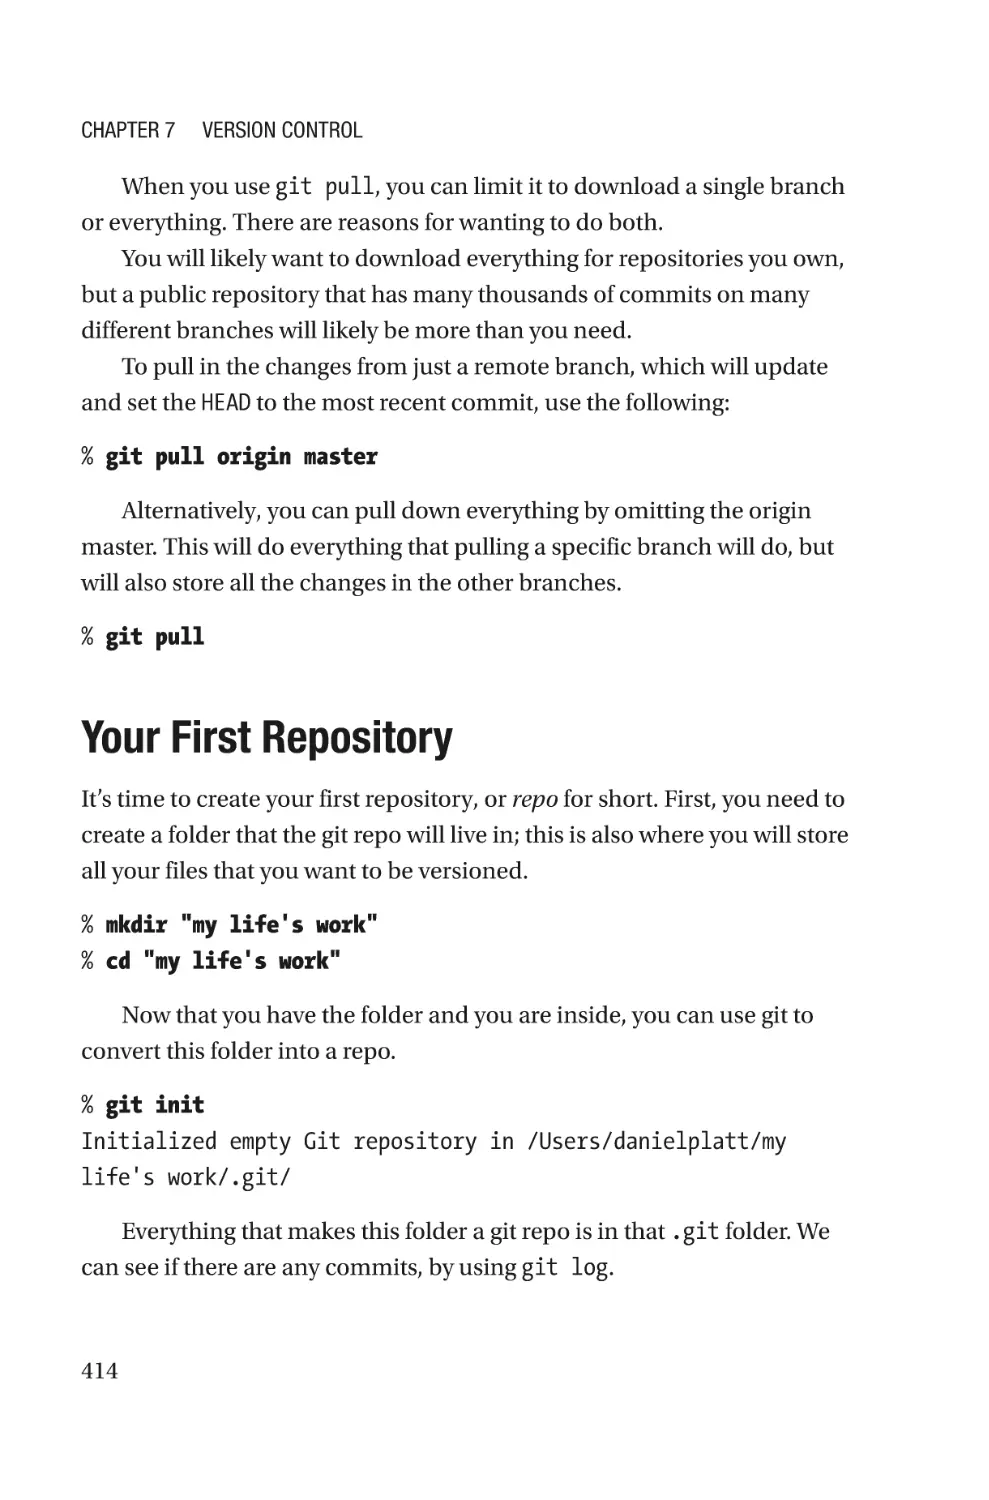
Pulling����������������������������������������������������������������������������������������������������������413
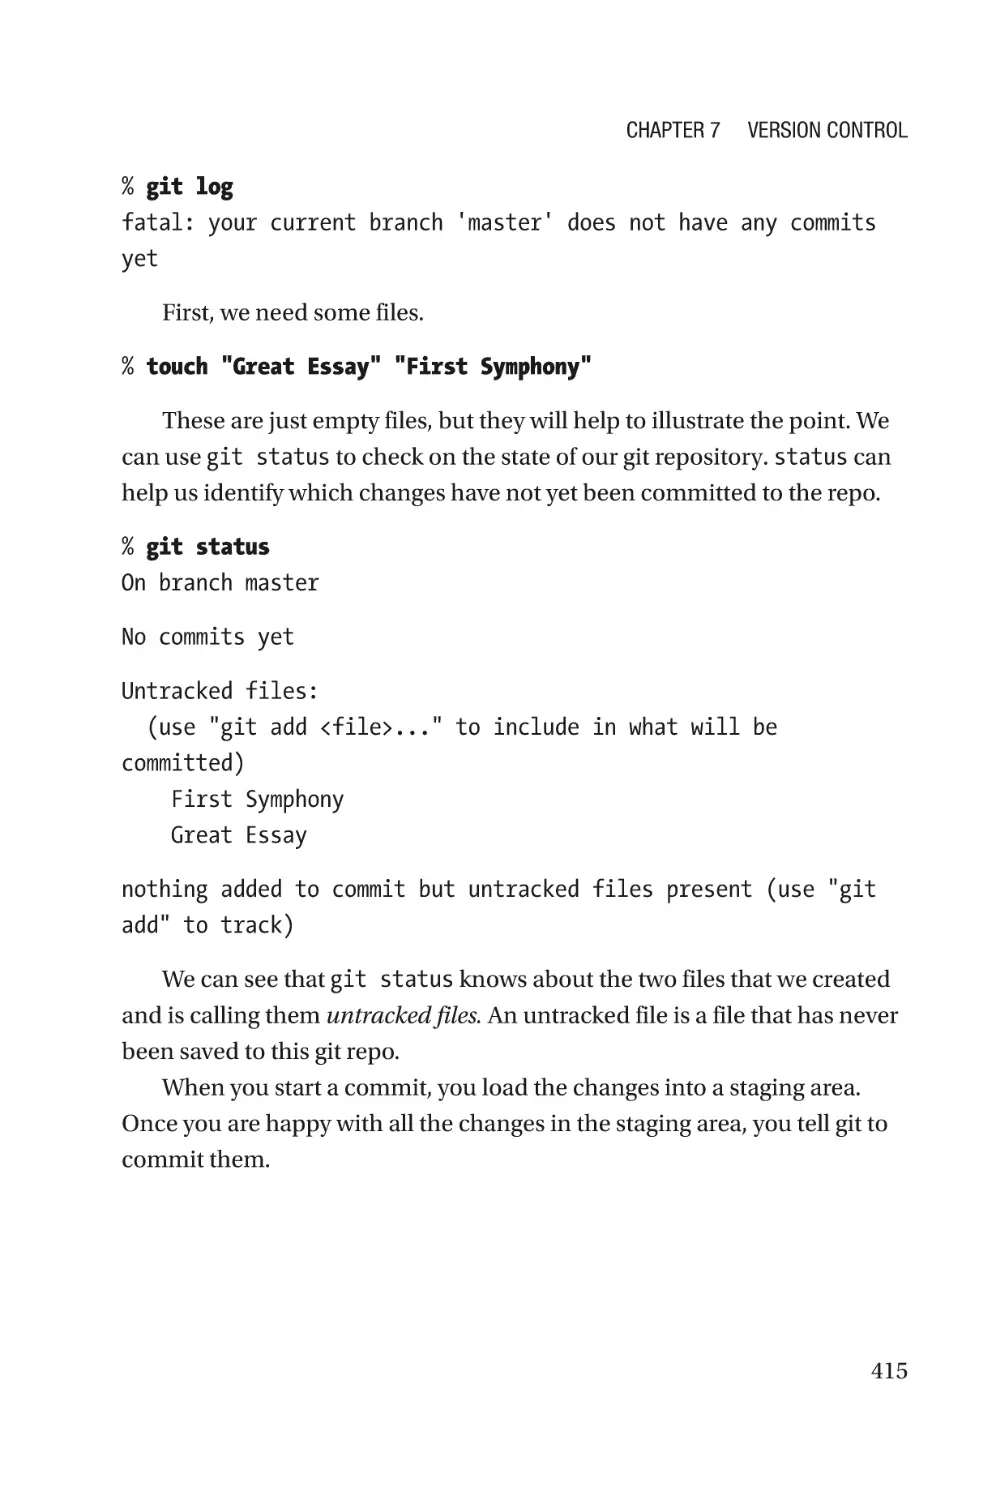
Your First Repository�����������������������������������������������������������������������������������������414
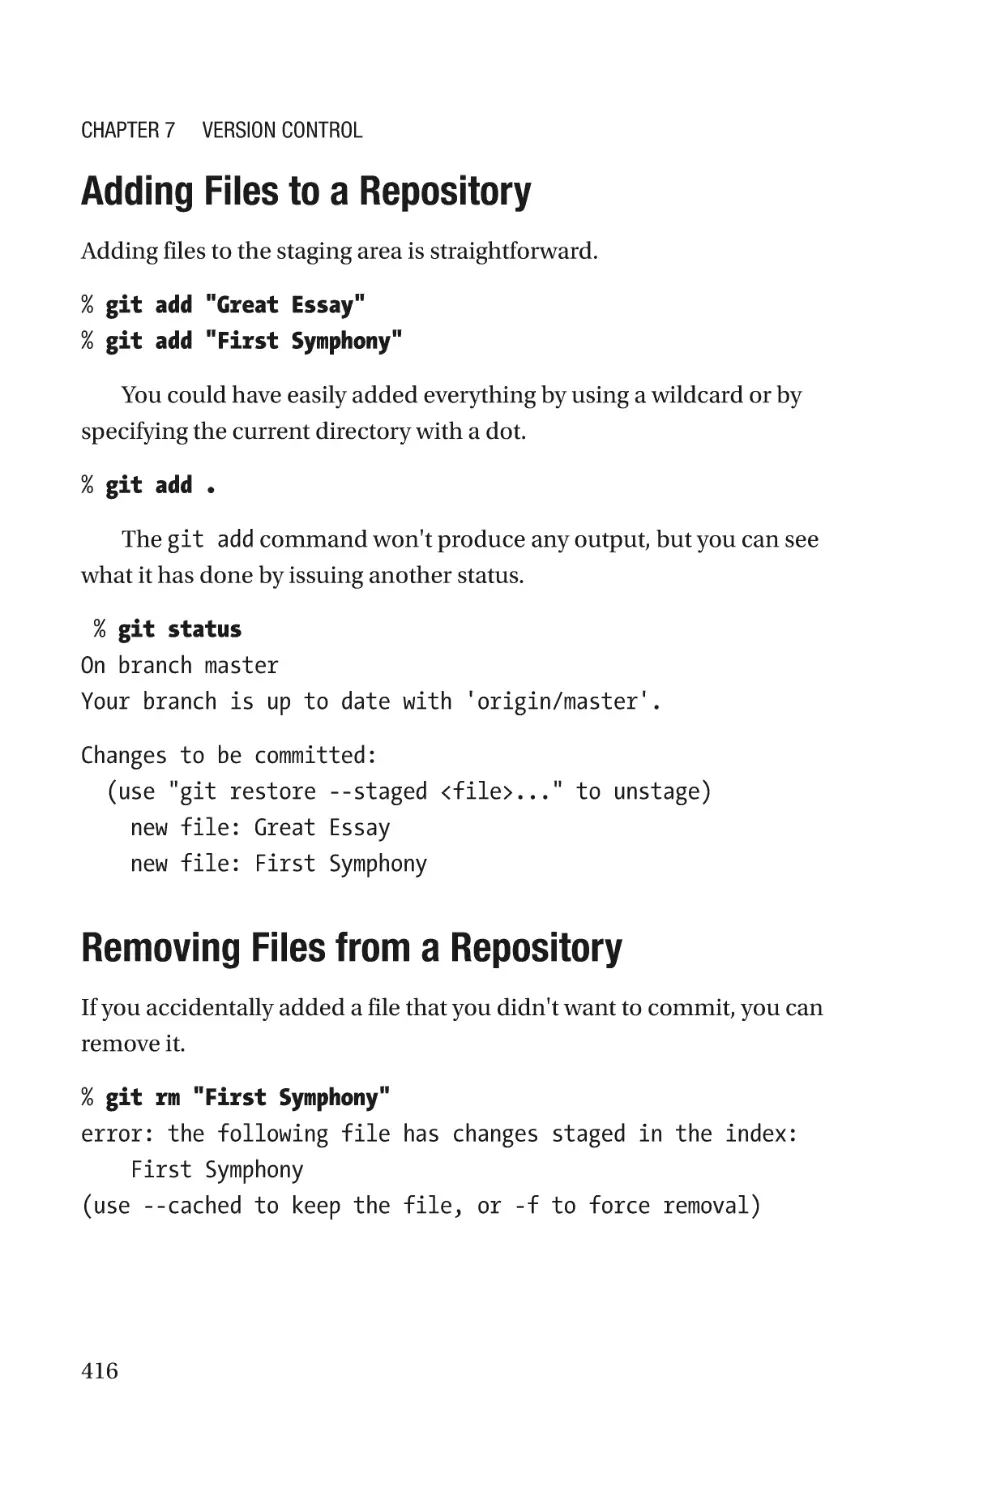
Adding Files to a Repository������������������������������������������������������������������������416
Removing Files from a Repository���������������������������������������������������������������416
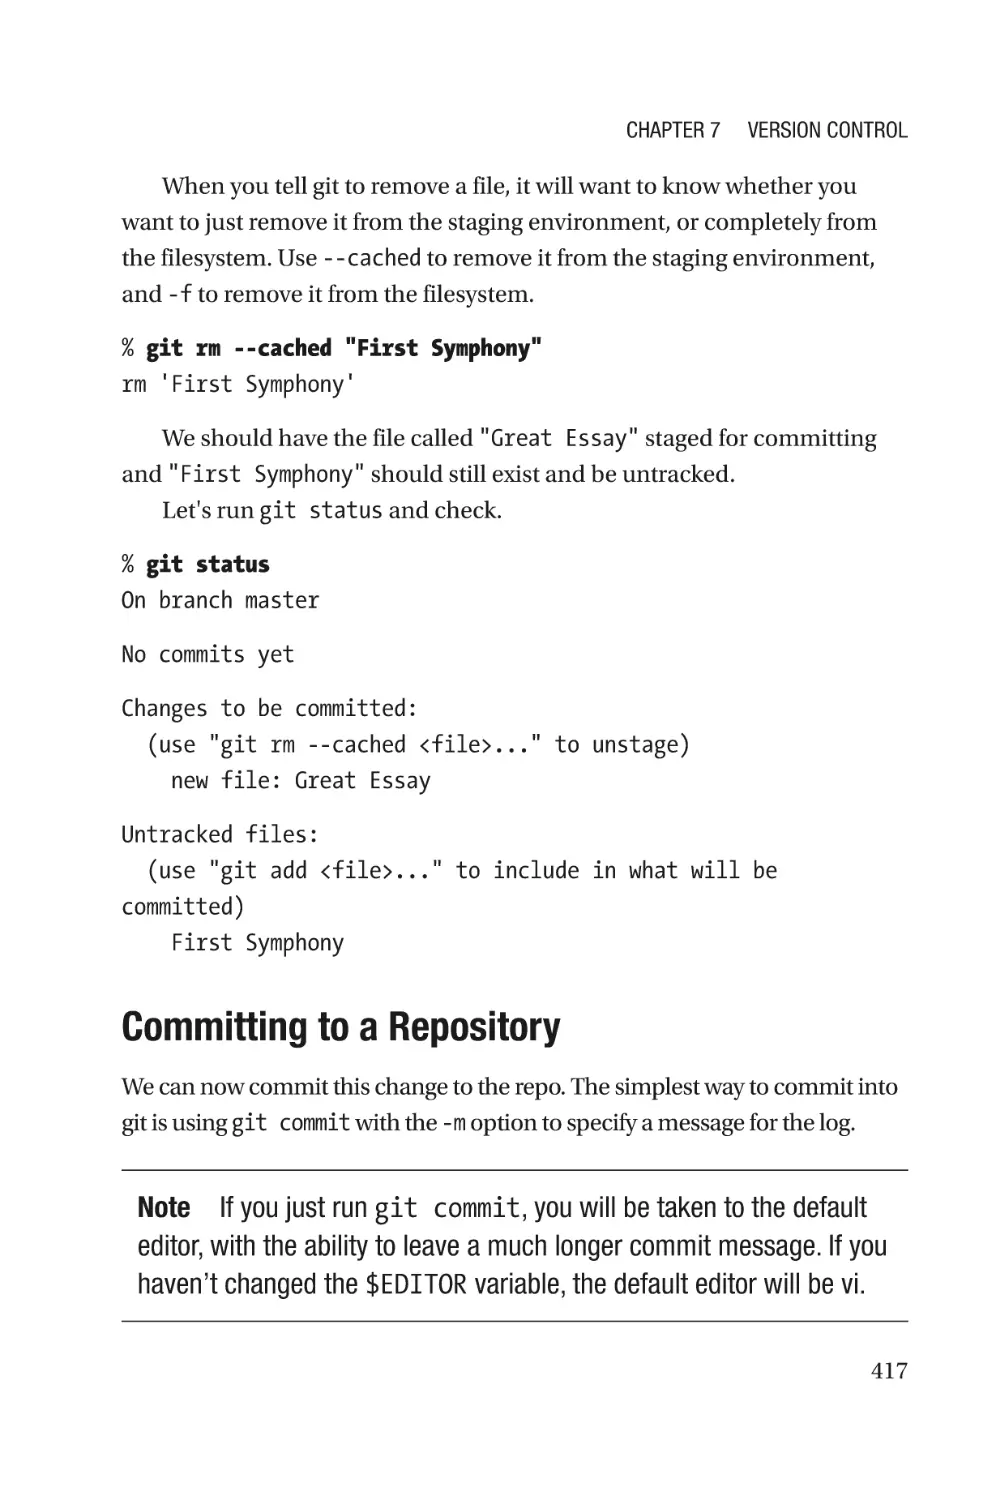
Committing to a Repository�������������������������������������������������������������������������417
Your Identity�������������������������������������������������������������������������������������������������418
Amending a Commit������������������������������������������������������������������������������������419
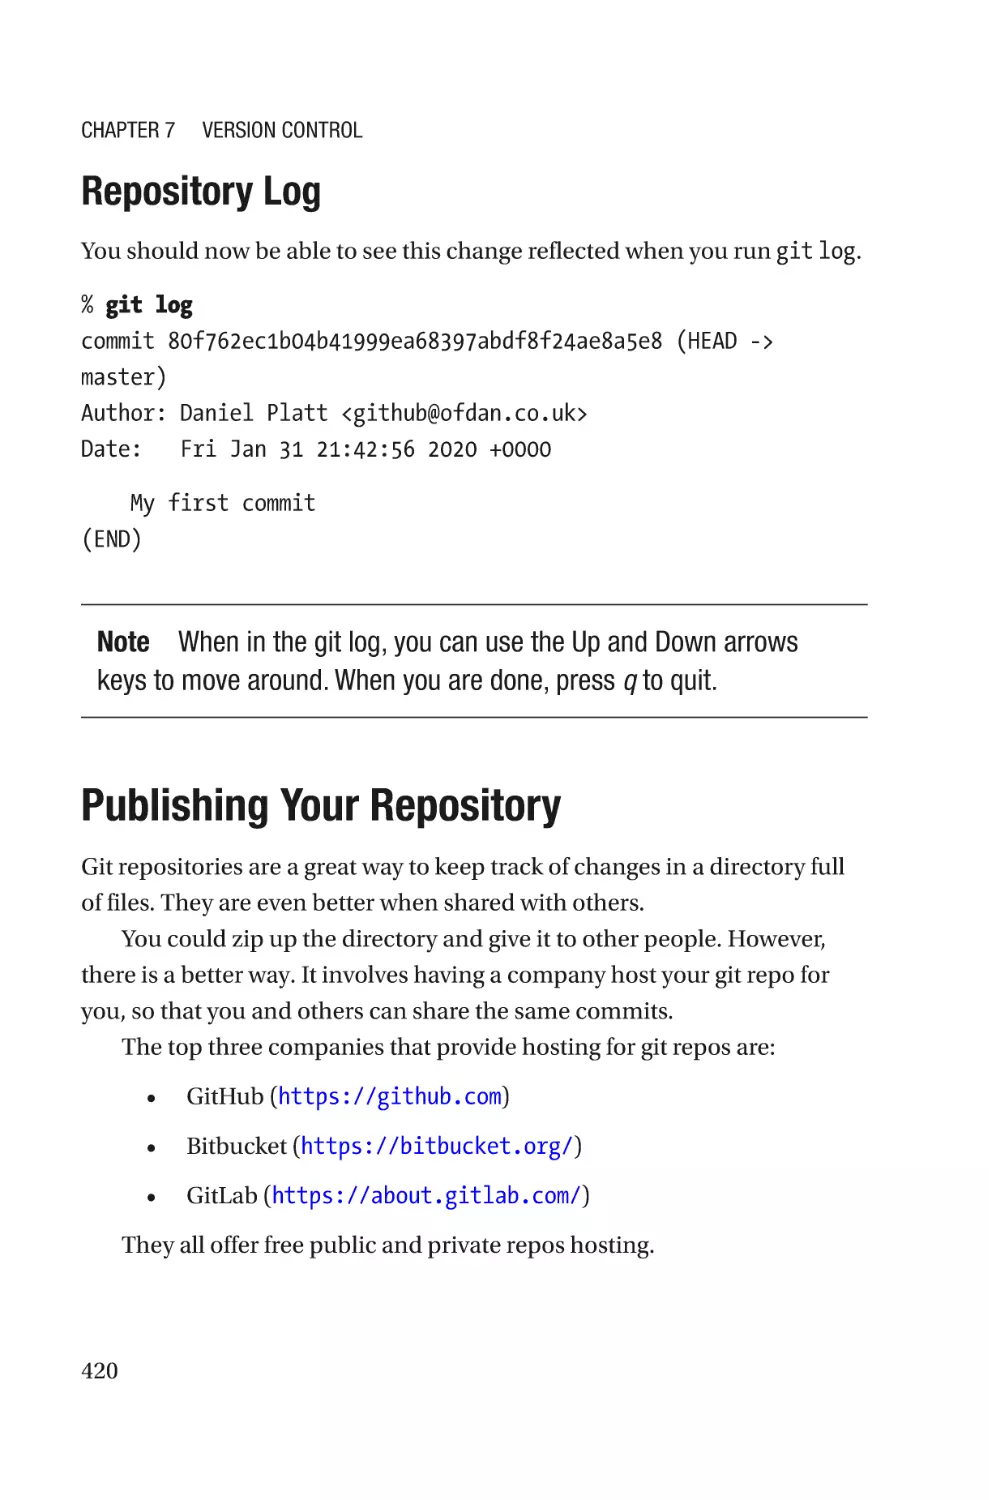
Repository Log���������������������������������������������������������������������������������������������420
Publishing Your Repository�������������������������������������������������������������������������������420
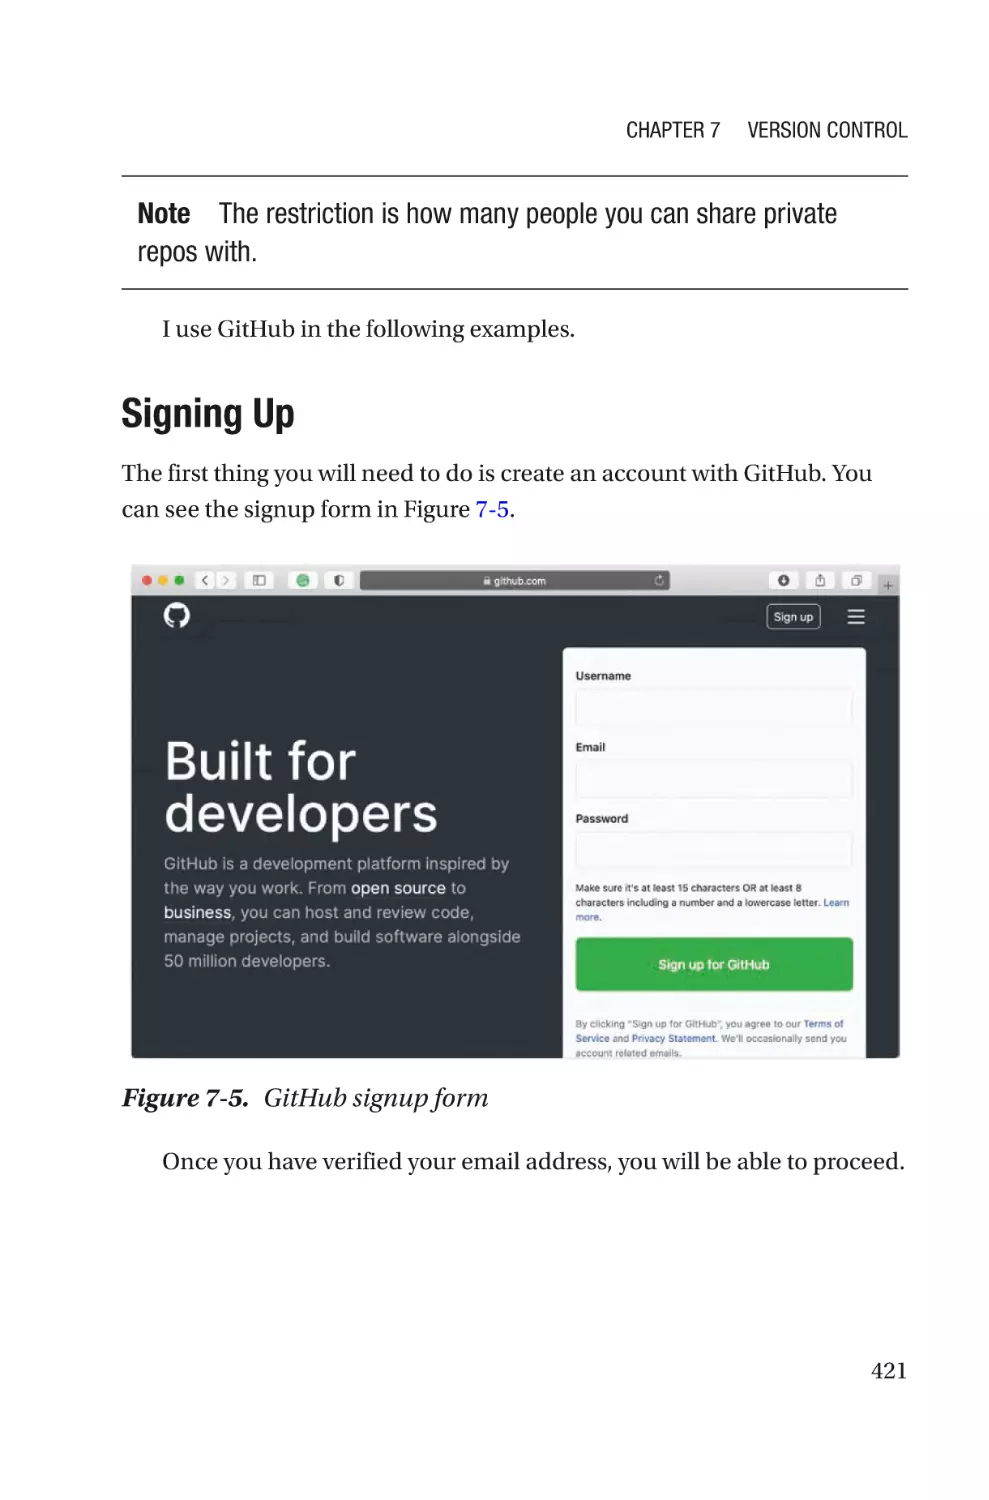
Signing Up���������������������������������������������������������������������������������������������������421
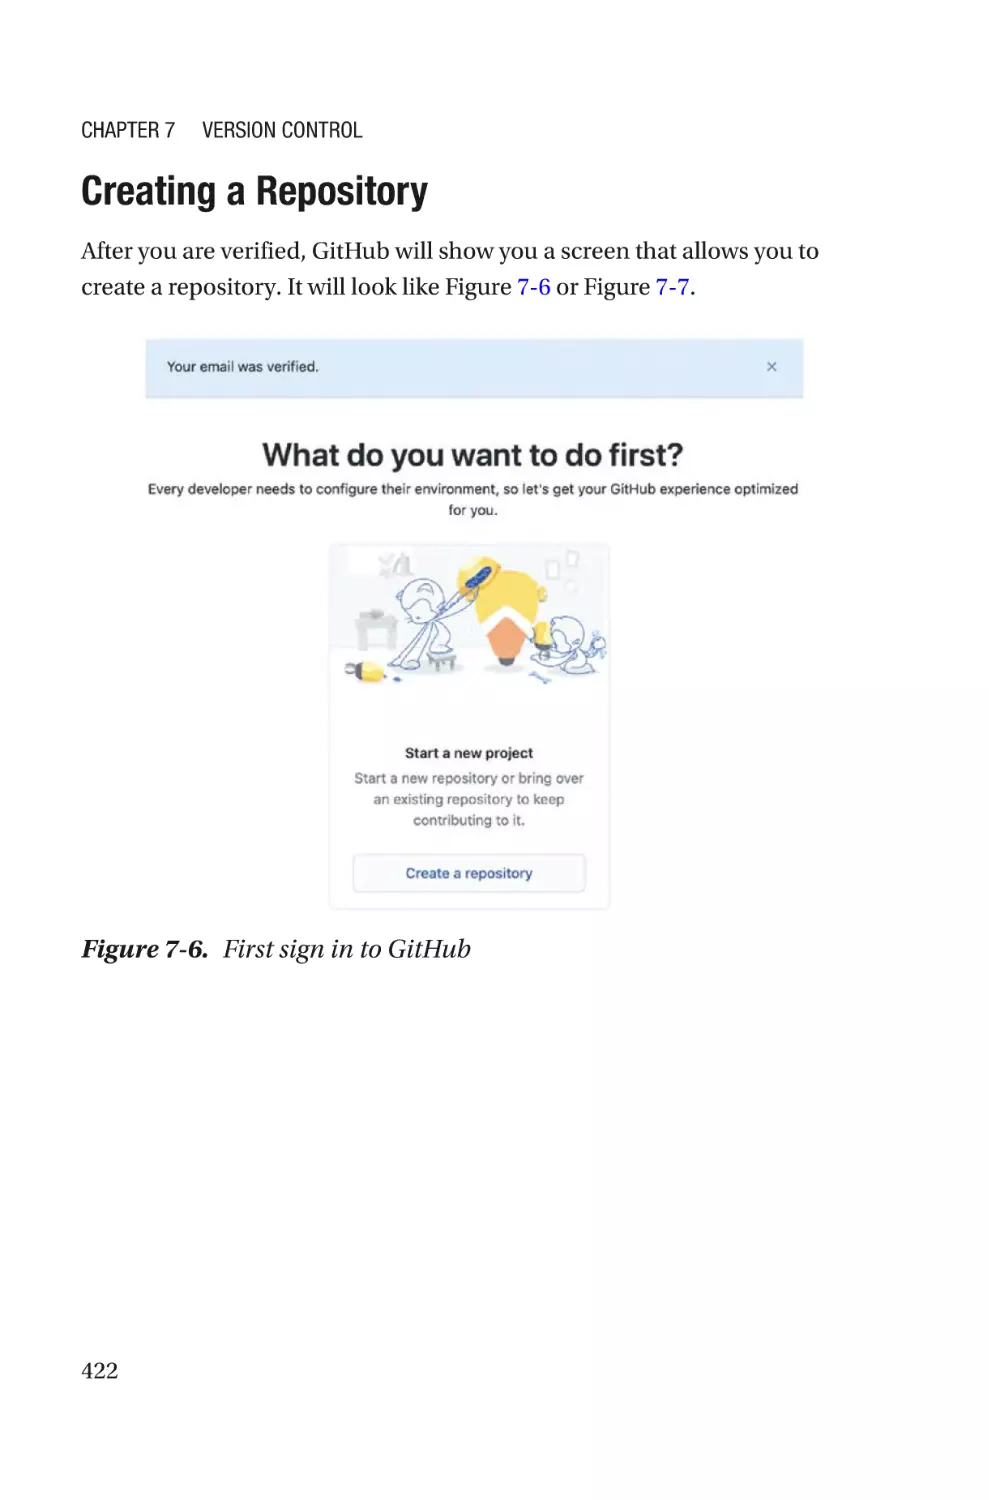
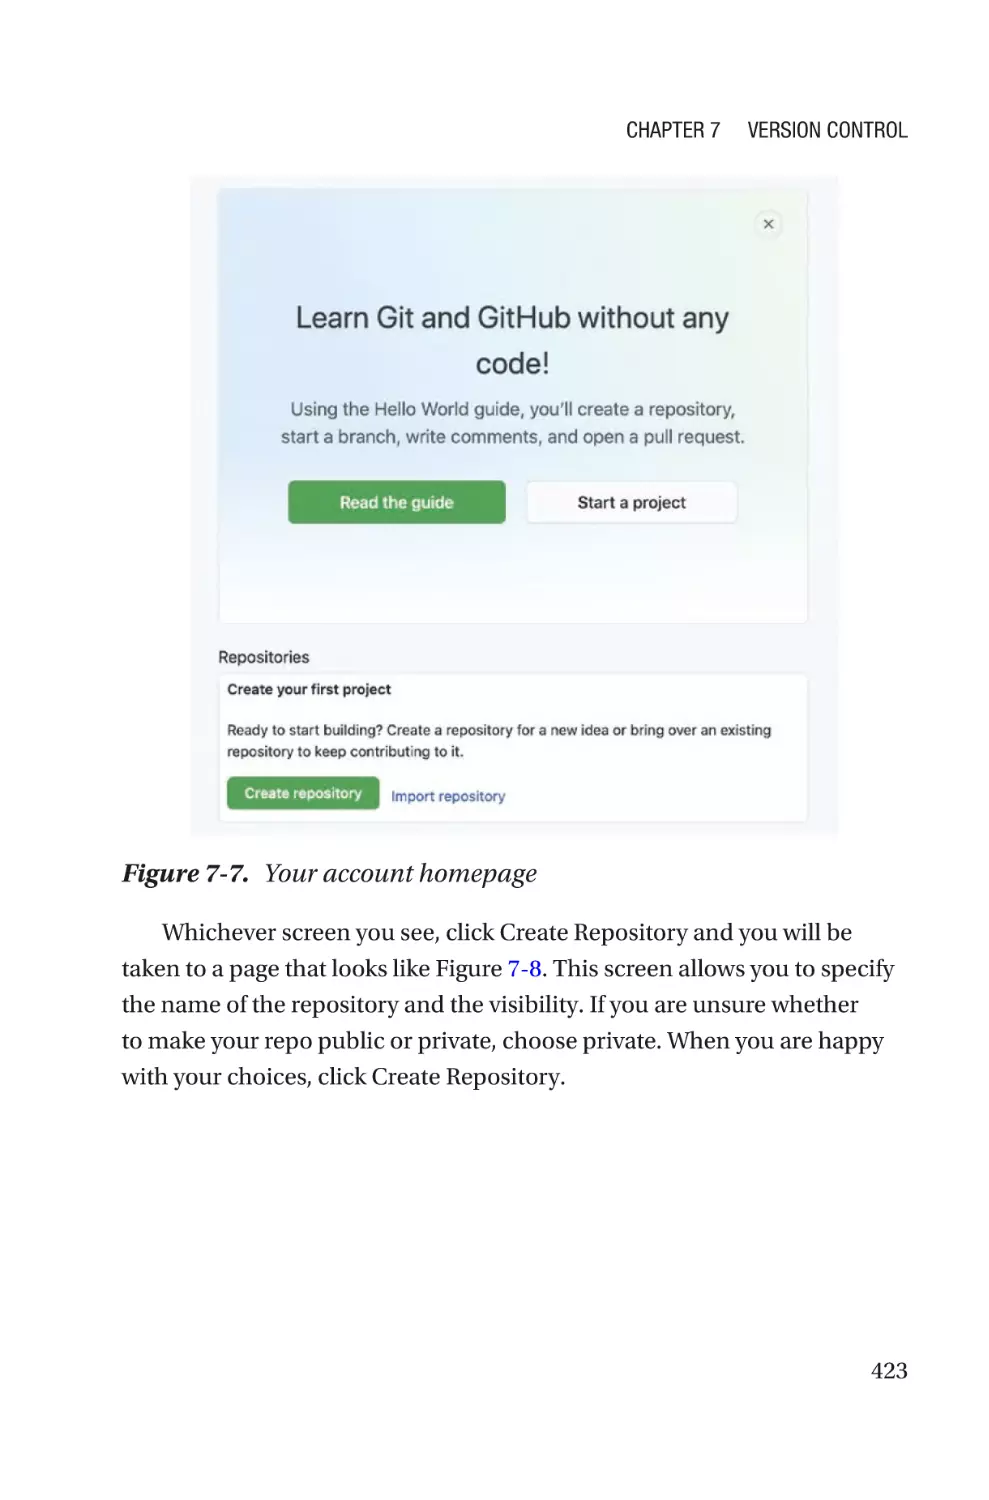
Creating a Repository����������������������������������������������������������������������������������422
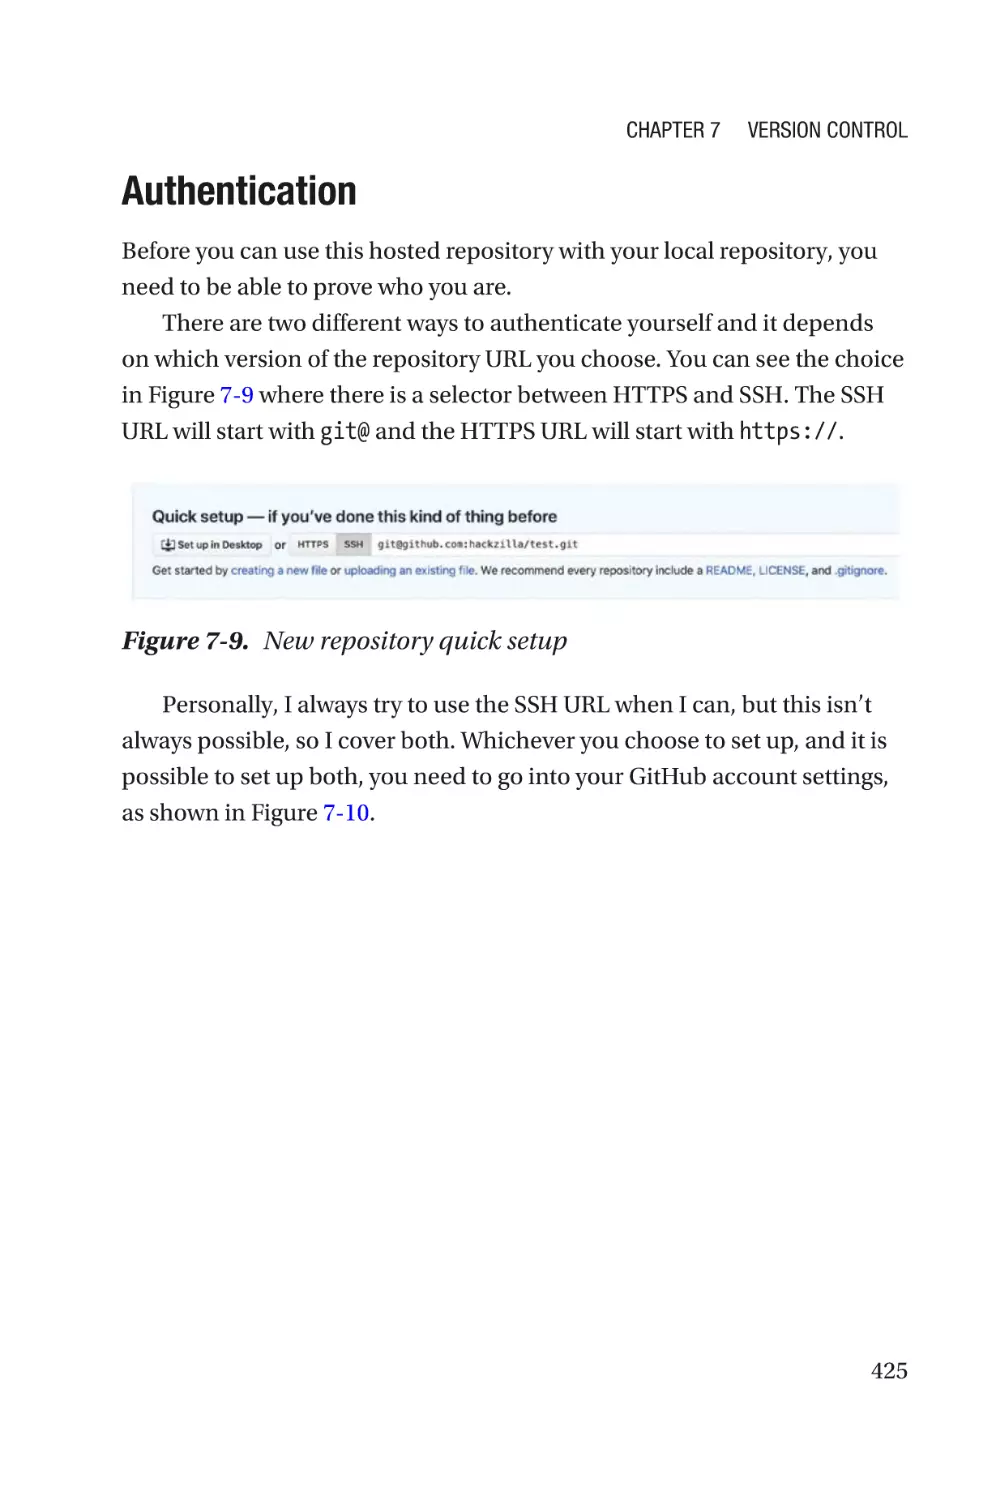
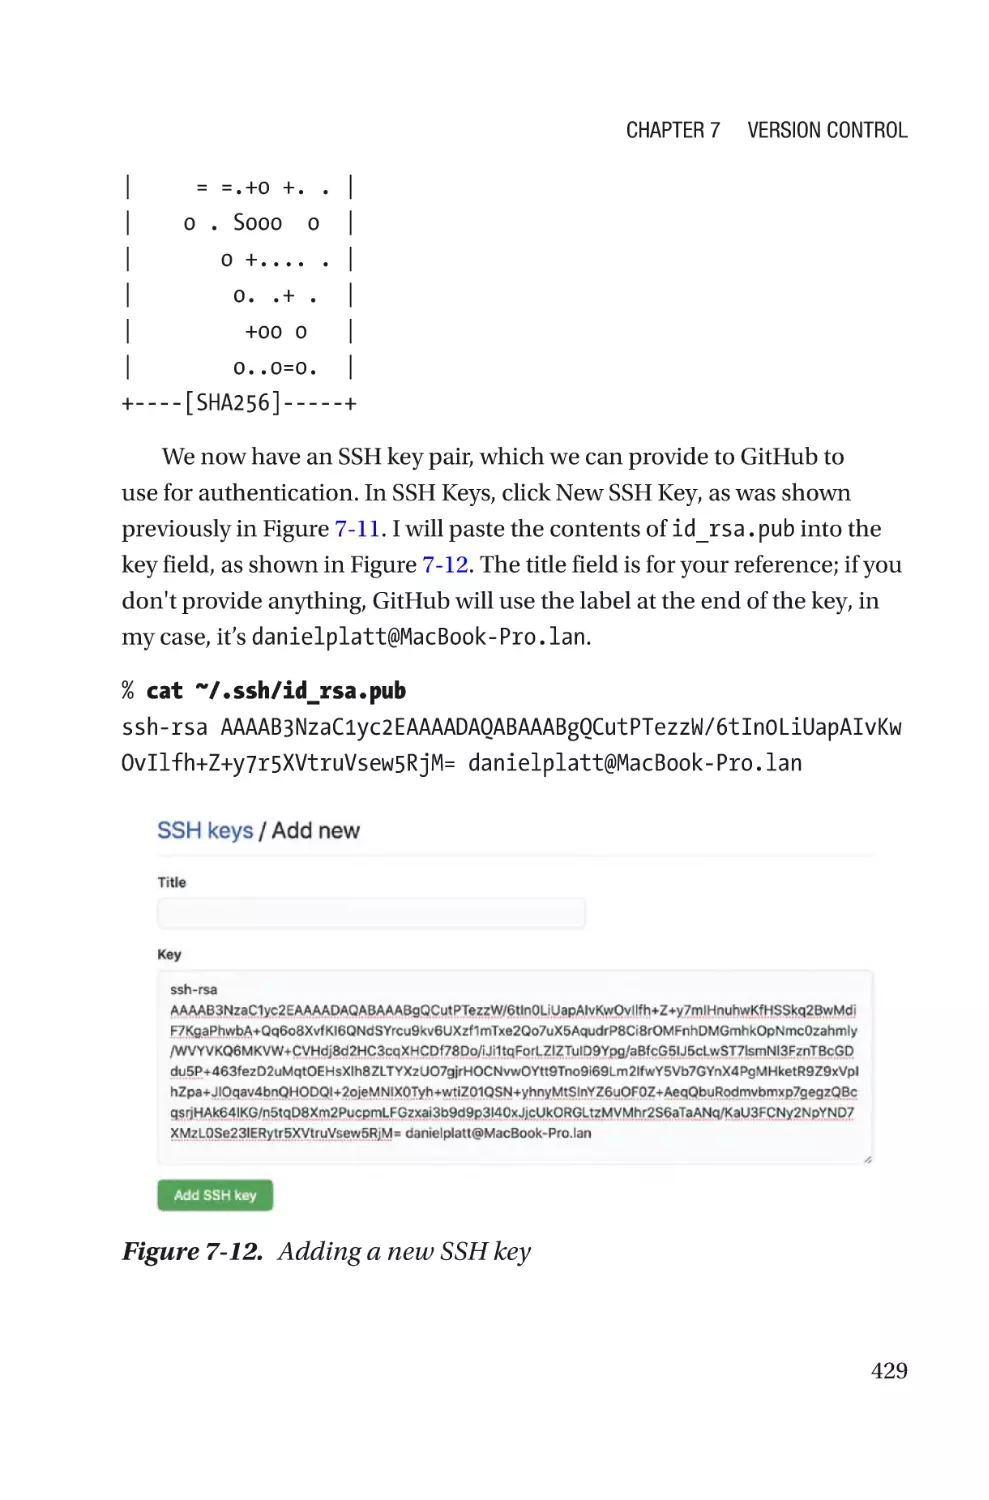
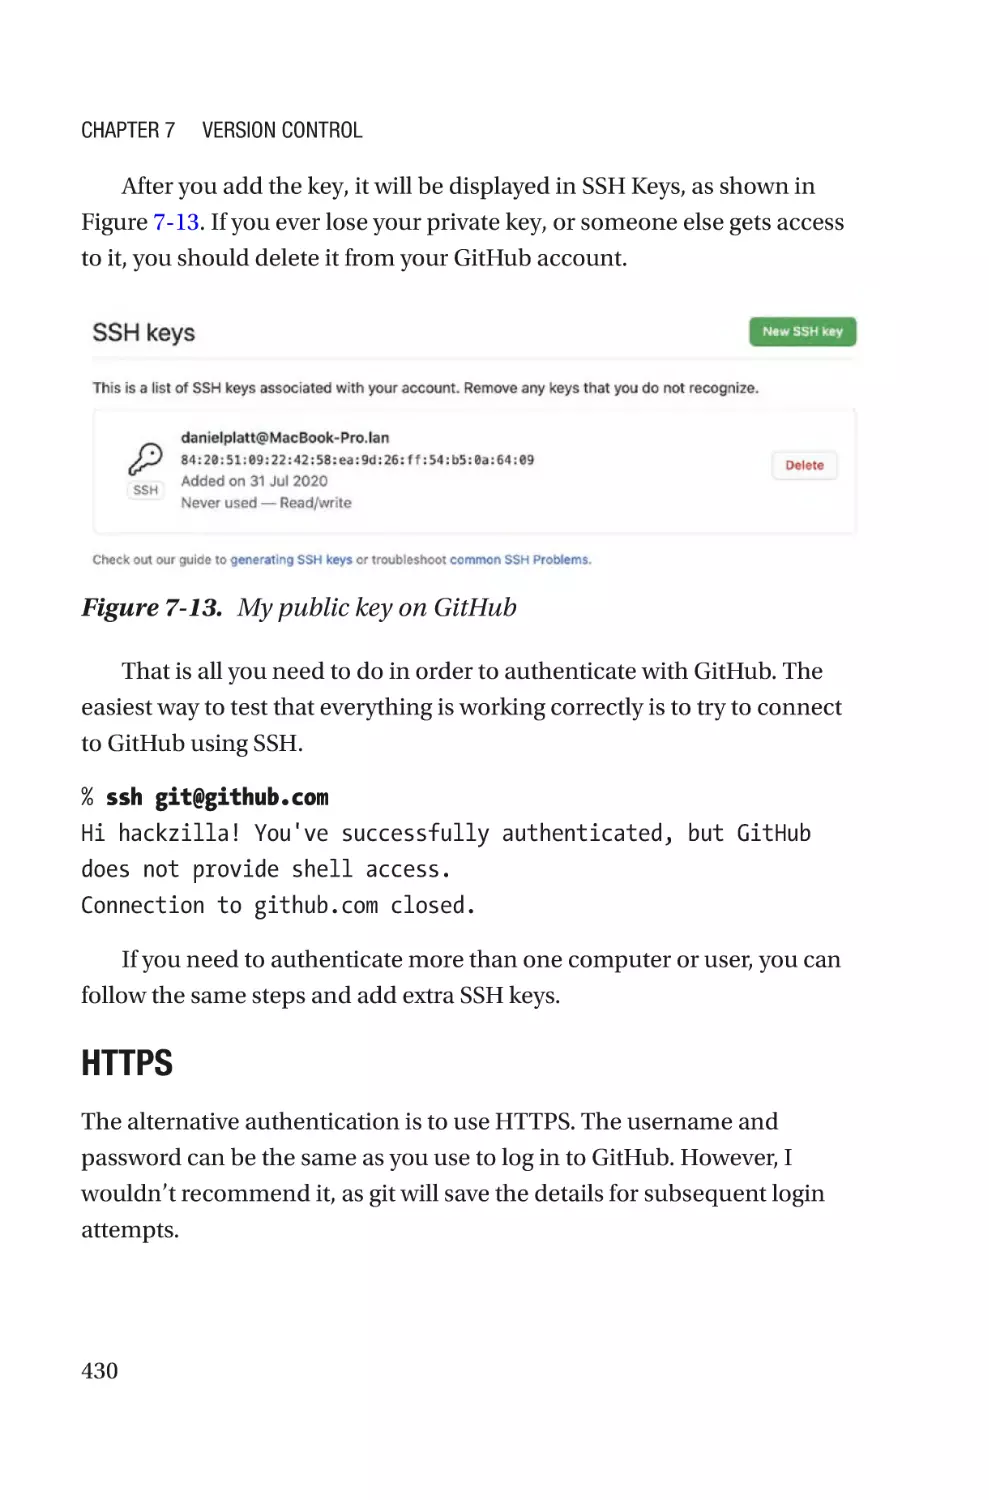
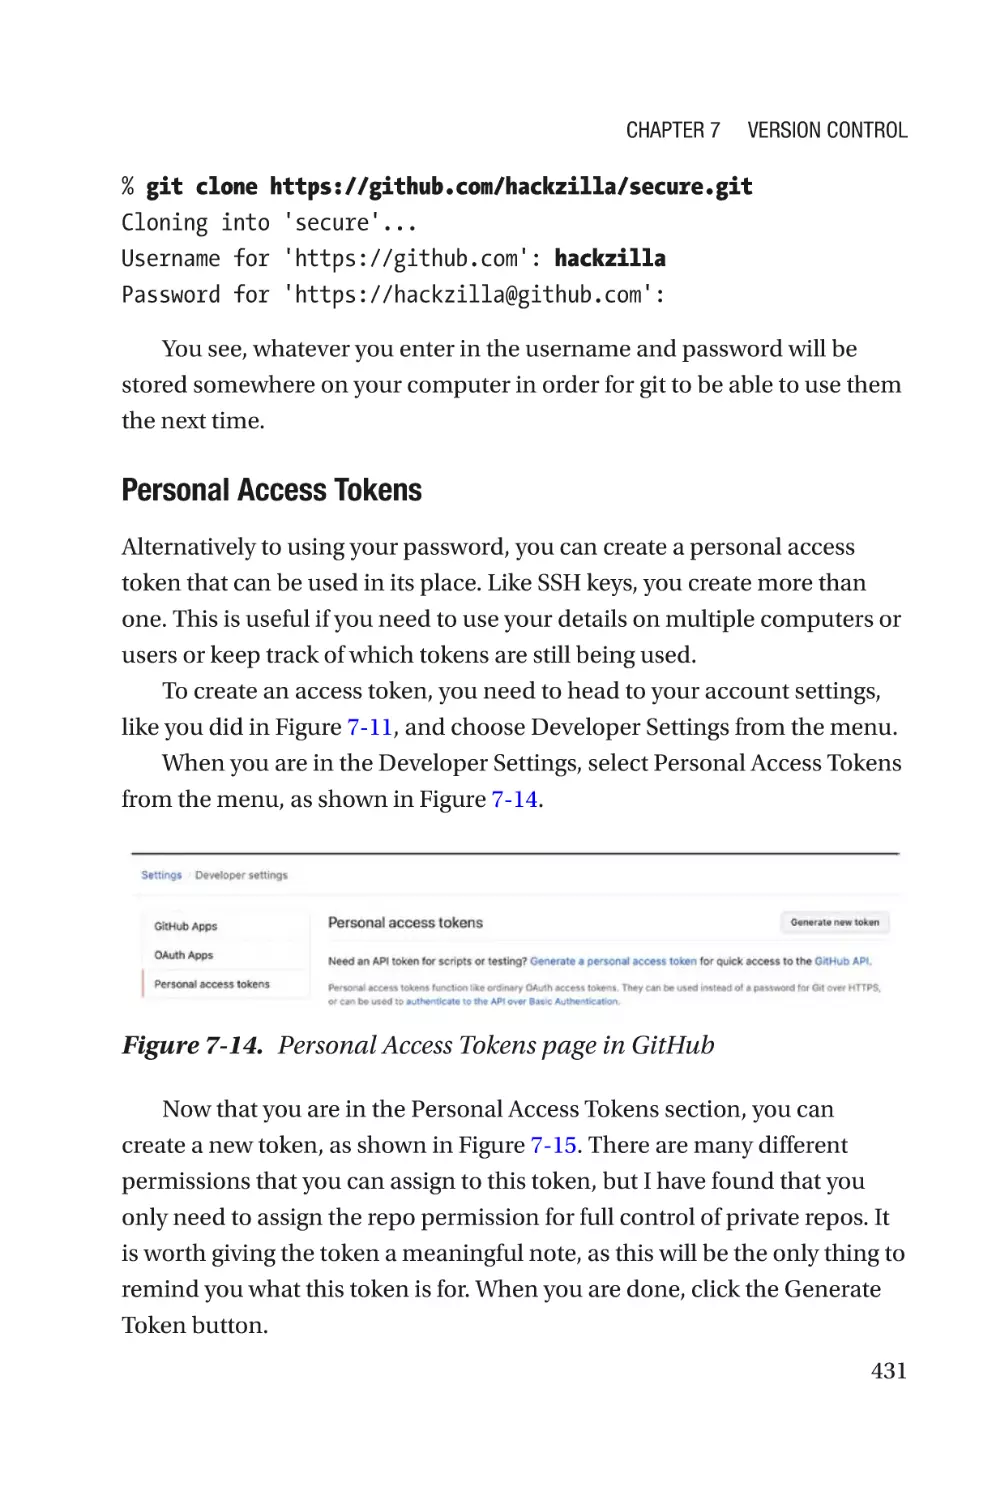
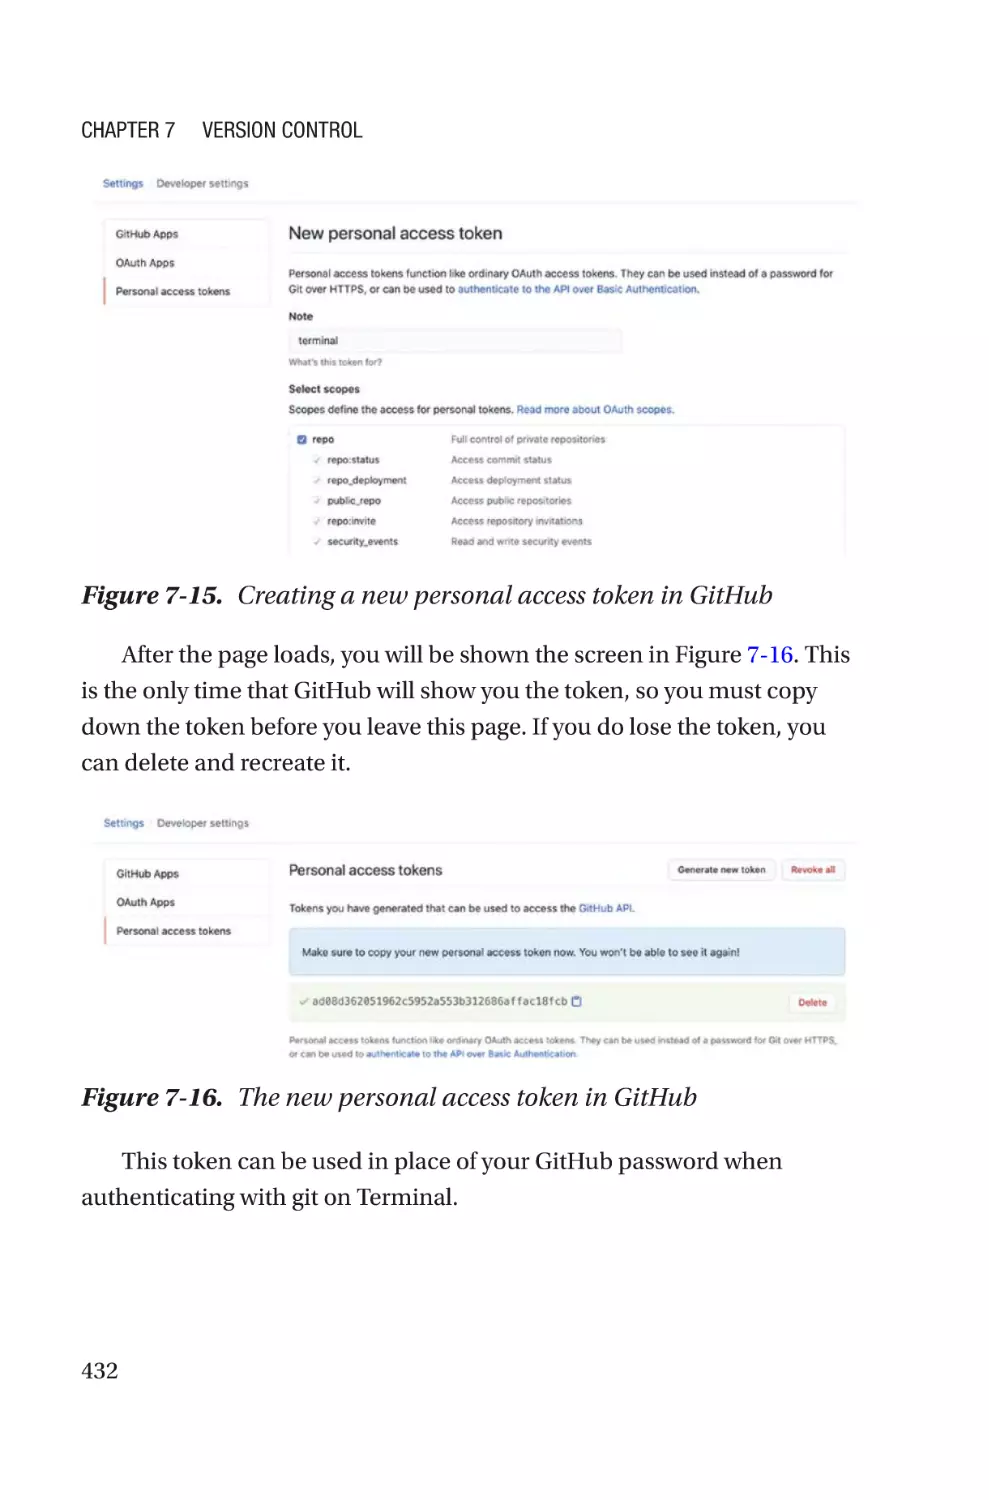
Authentication���������������������������������������������������������������������������������������������425
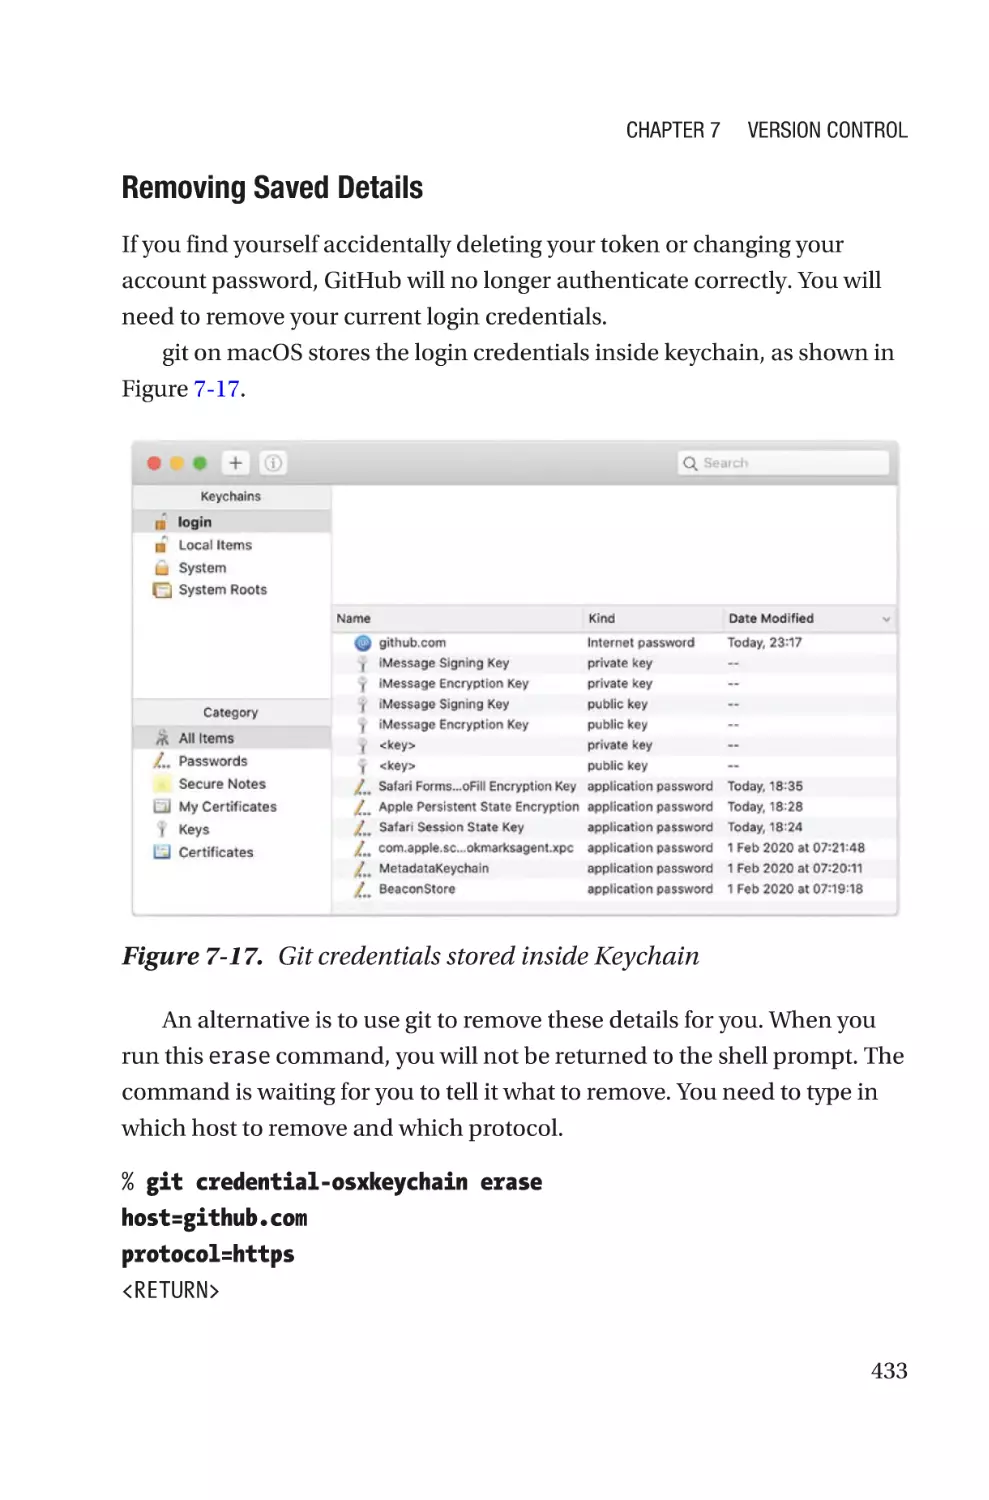
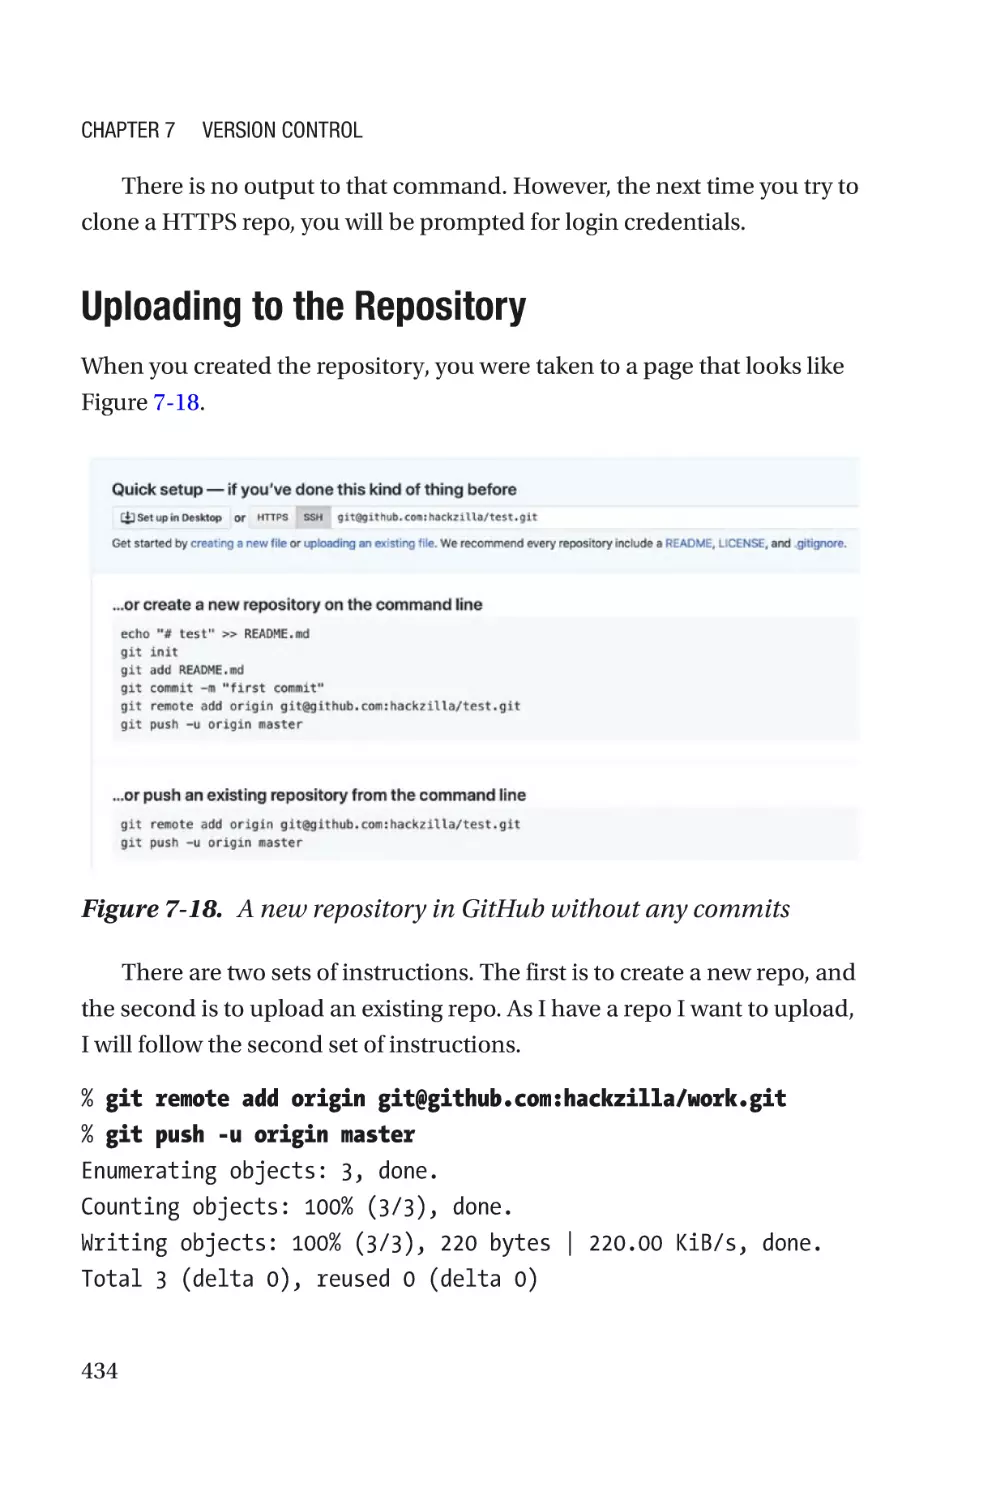
Uploading to the Repository������������������������������������������������������������������������434
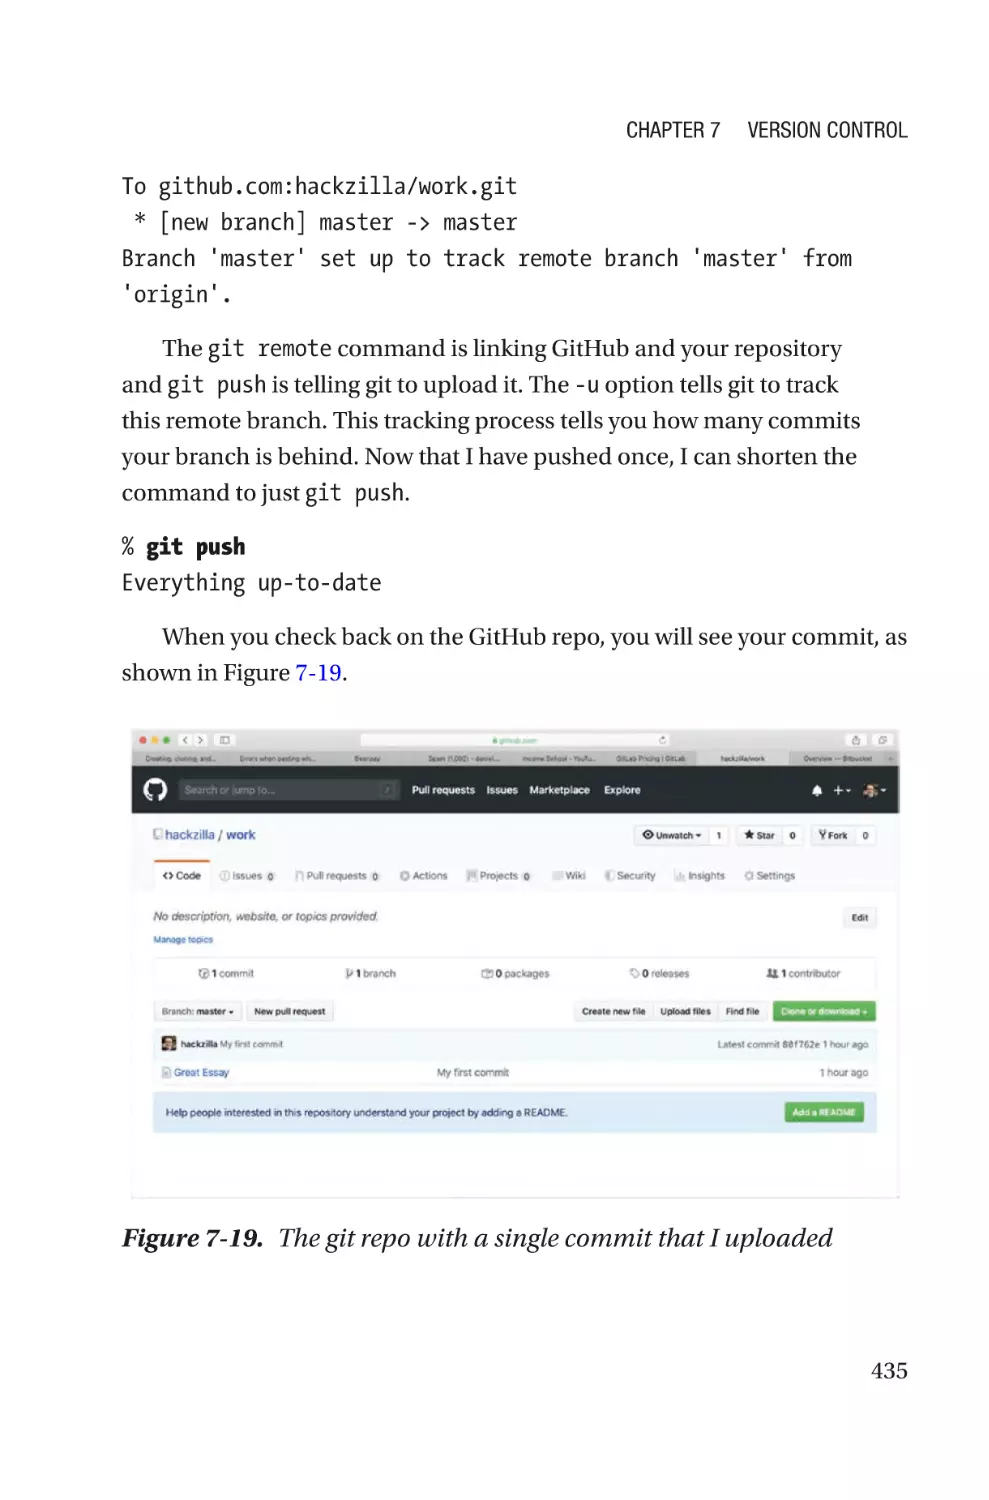
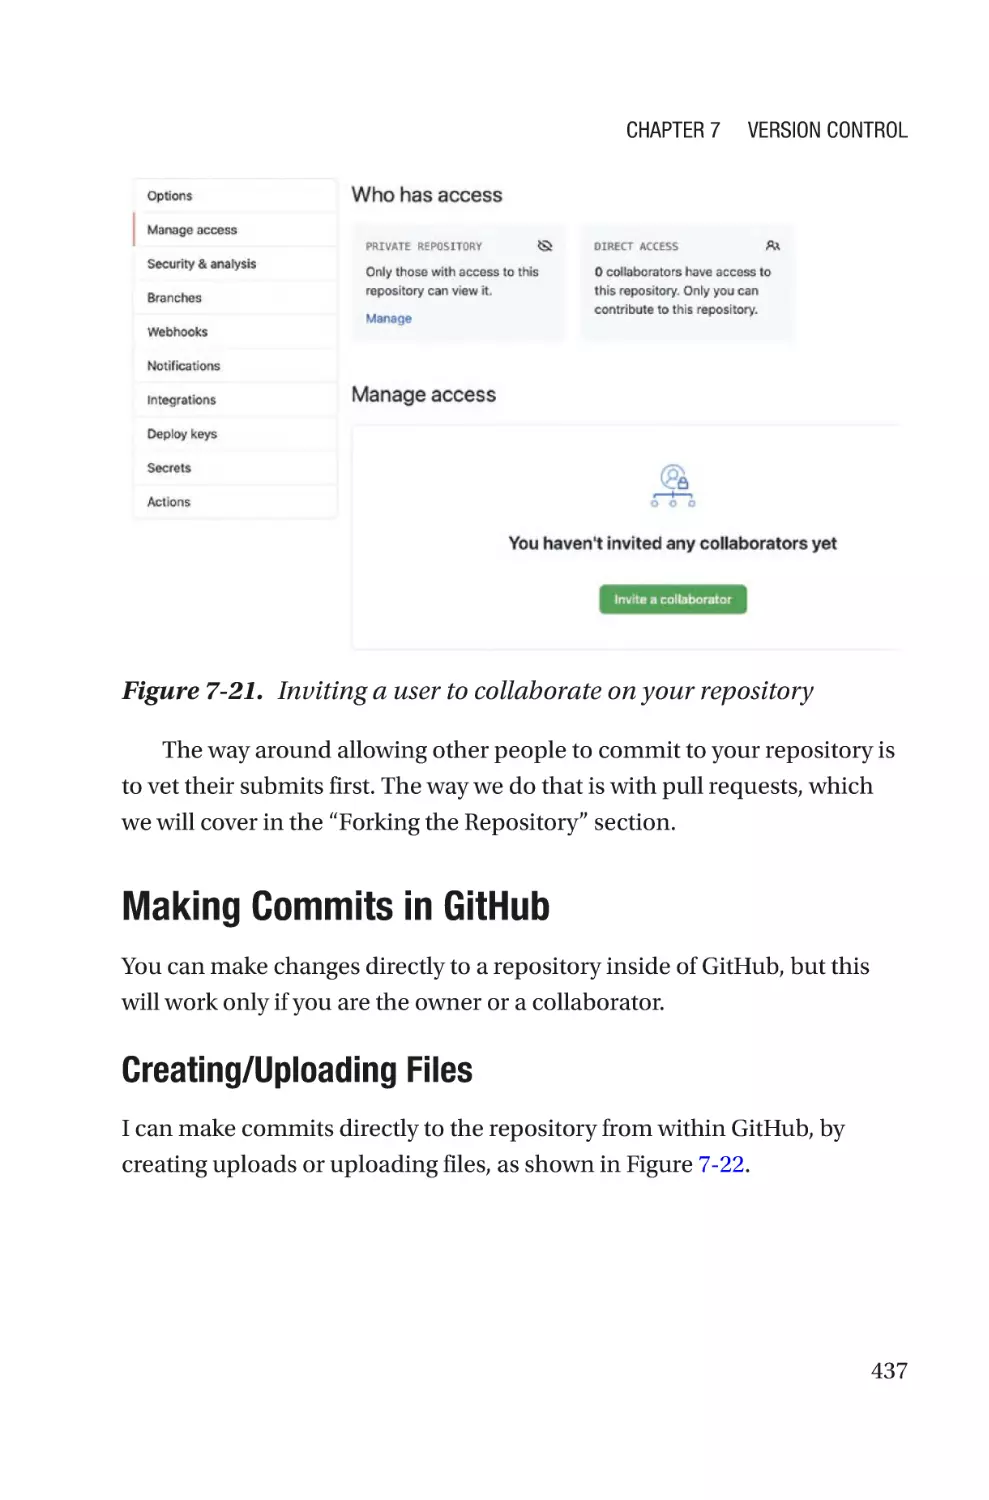
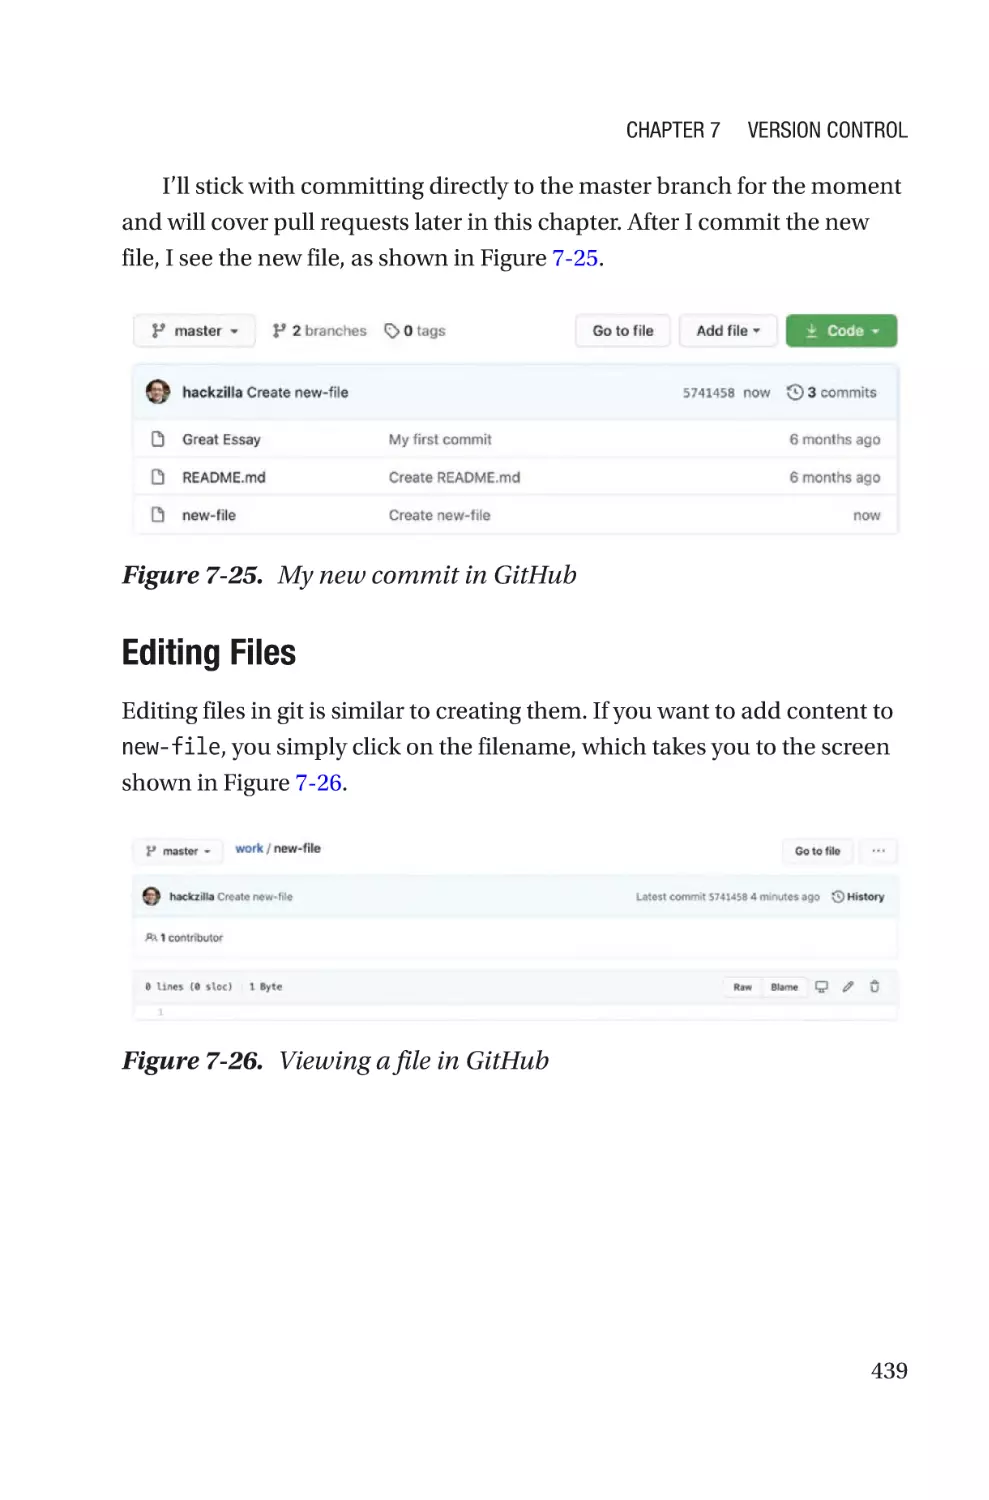
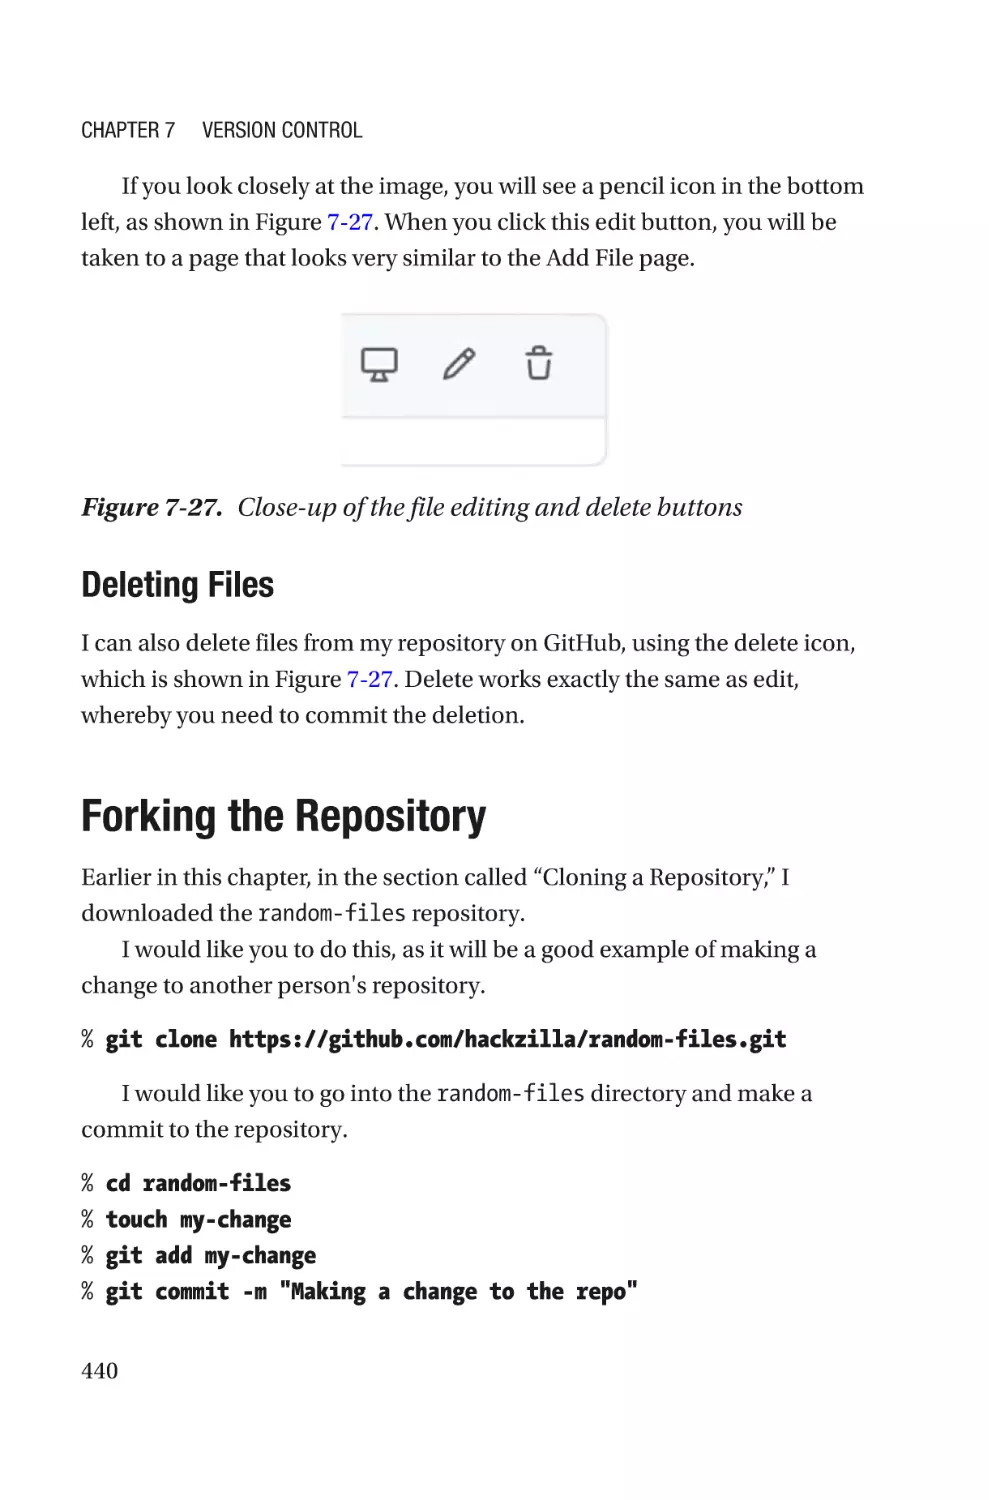
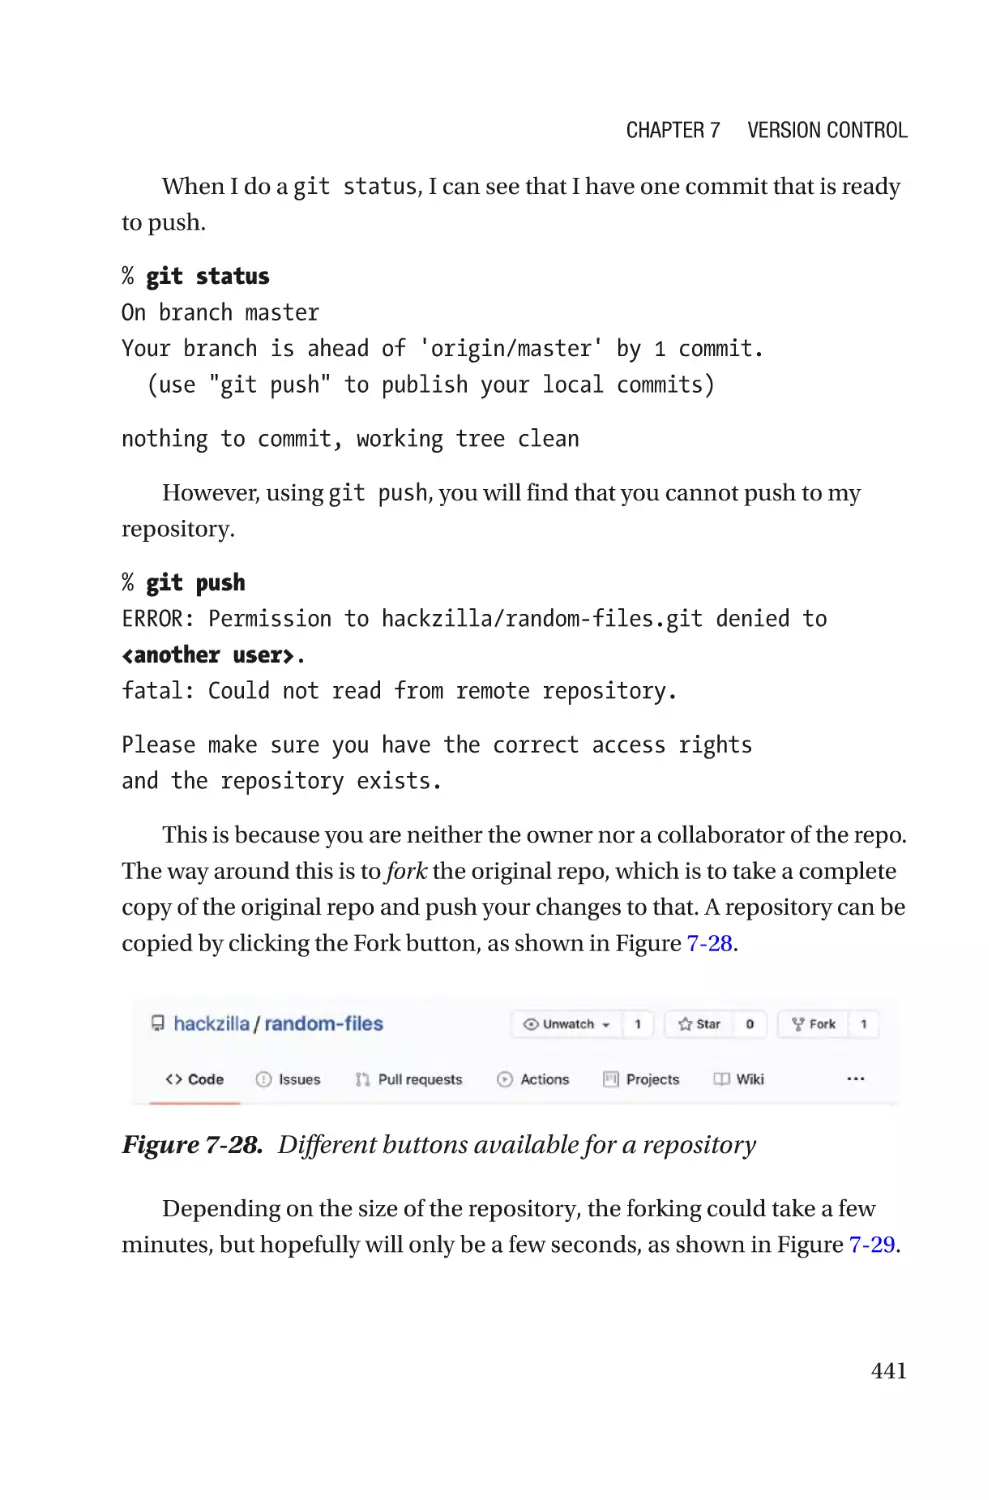
Making Commits in GitHub��������������������������������������������������������������������������437
xiii
Table of Contents
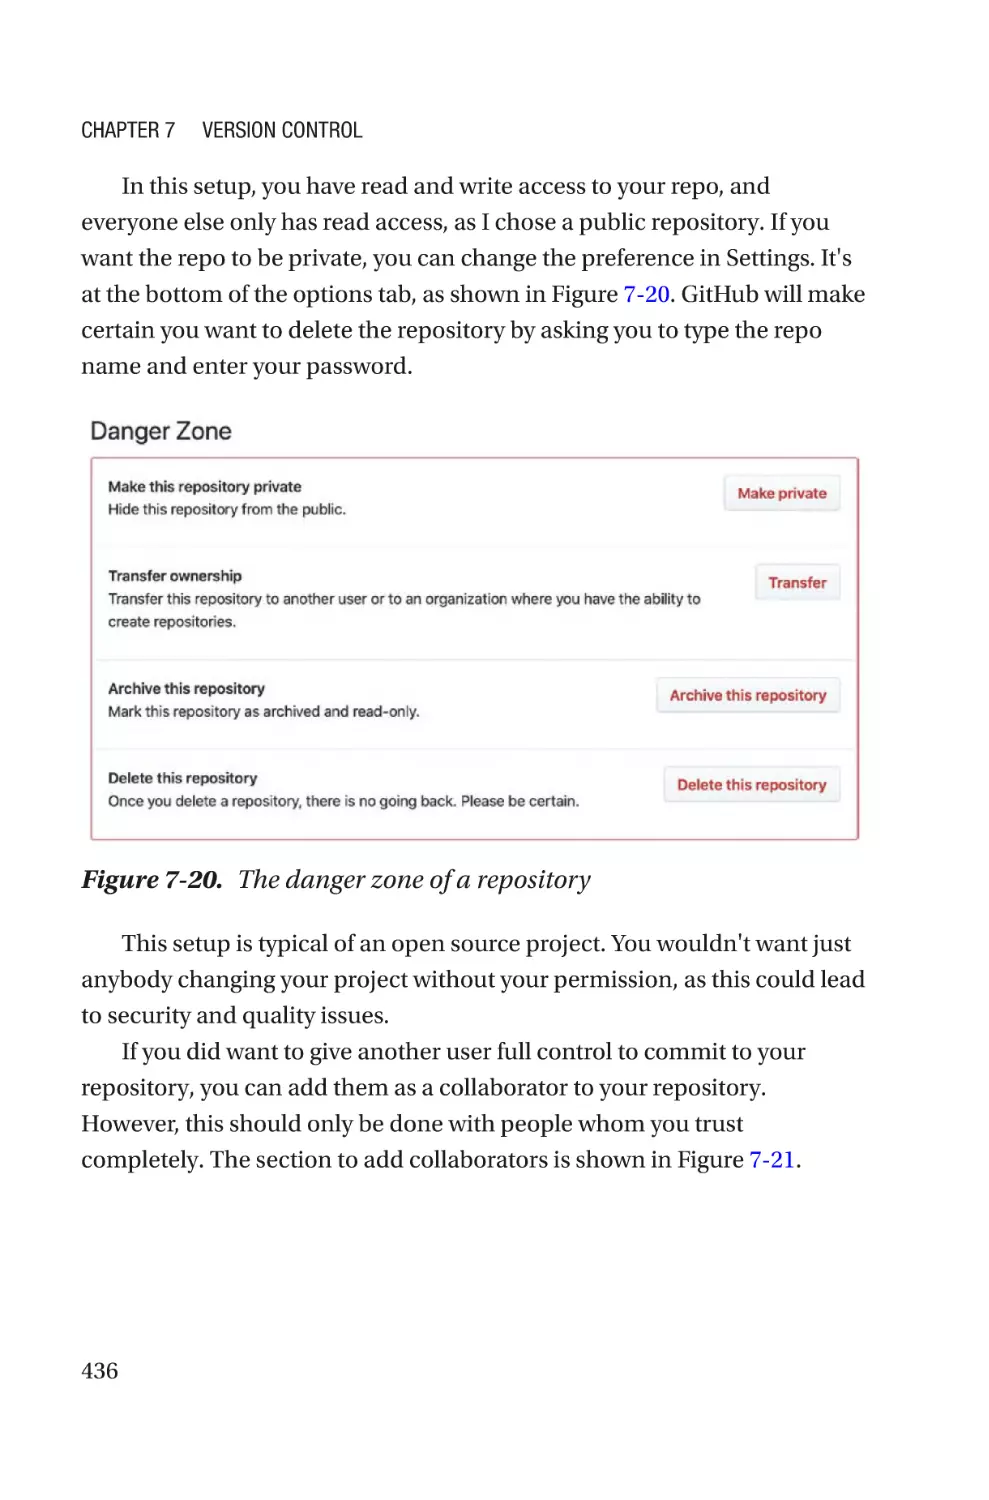
Forking the Repository��������������������������������������������������������������������������������������440
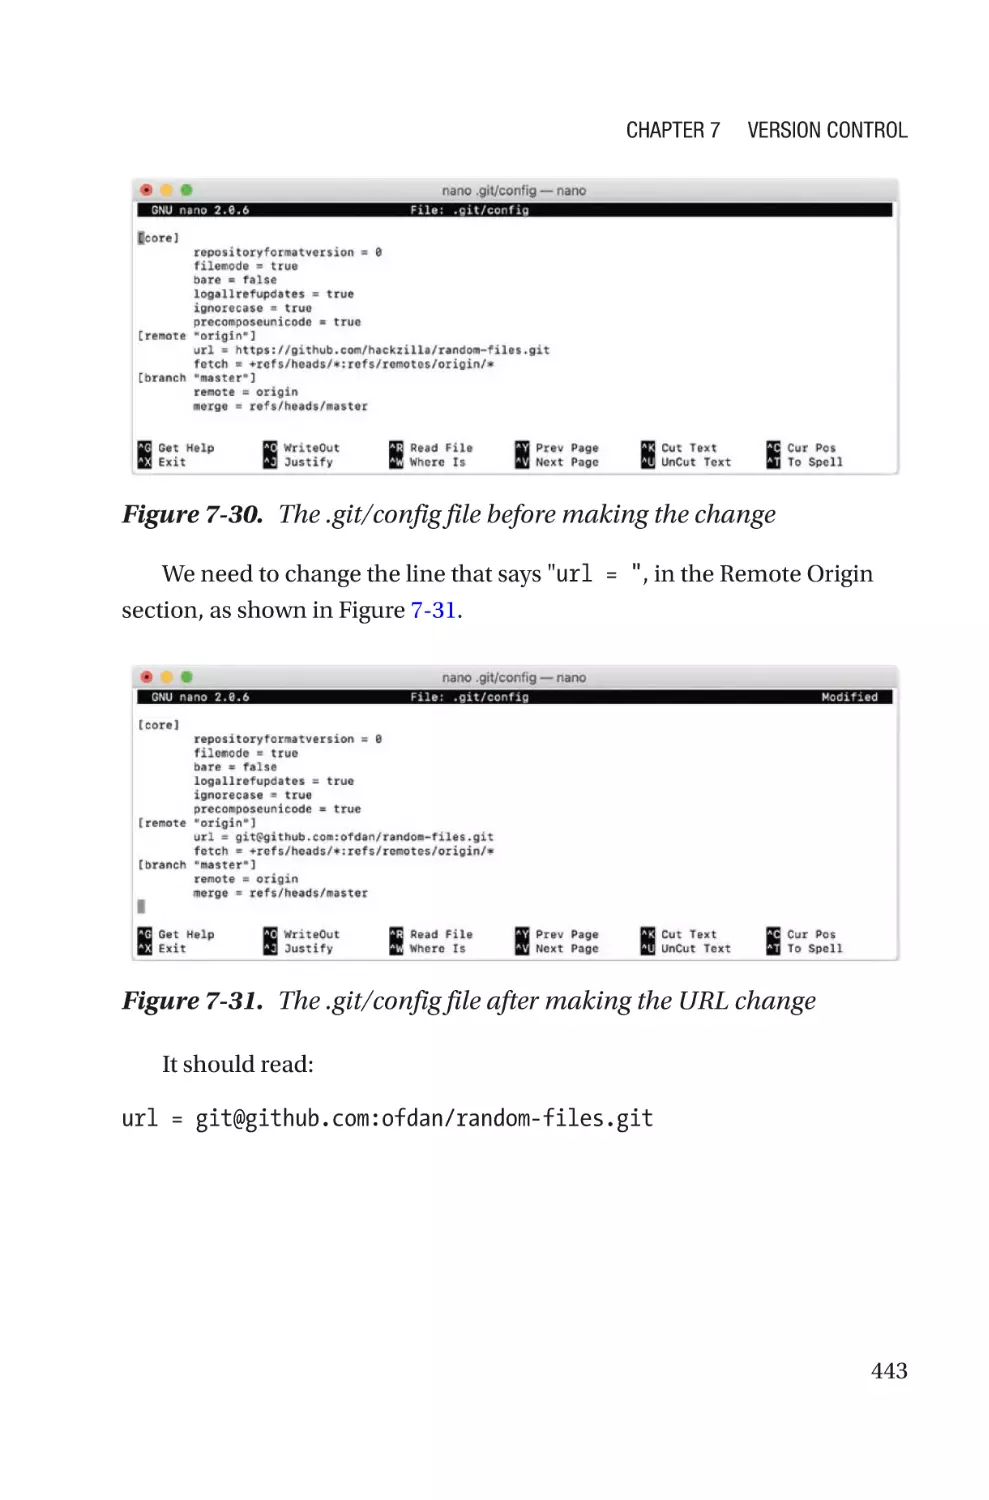
Changing the Remote����������������������������������������������������������������������������������442
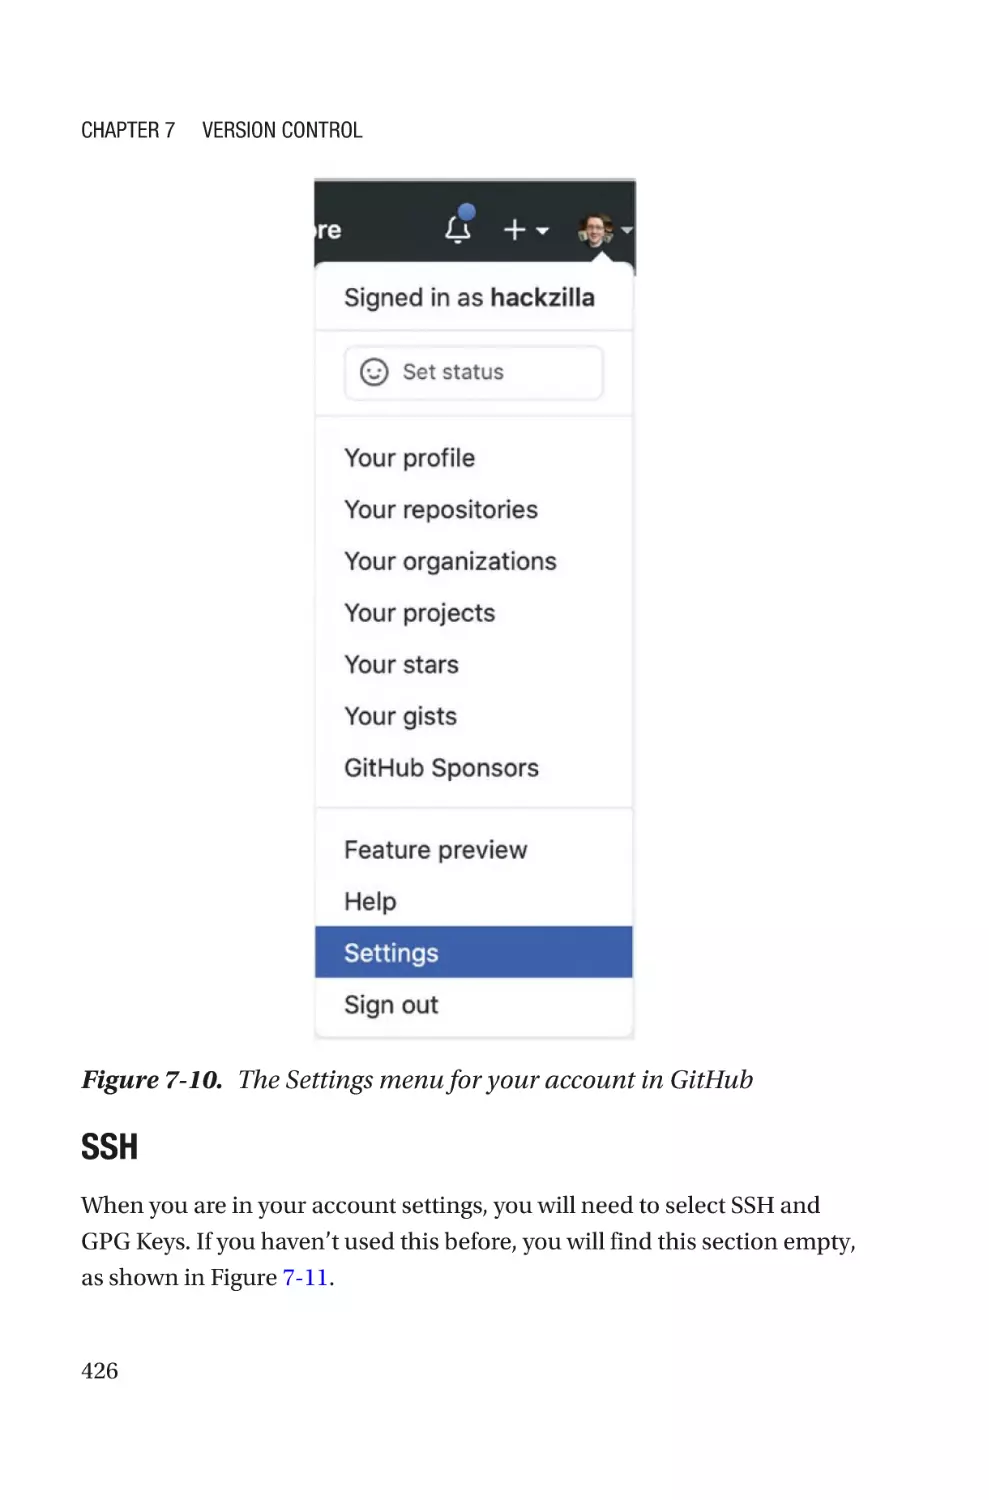
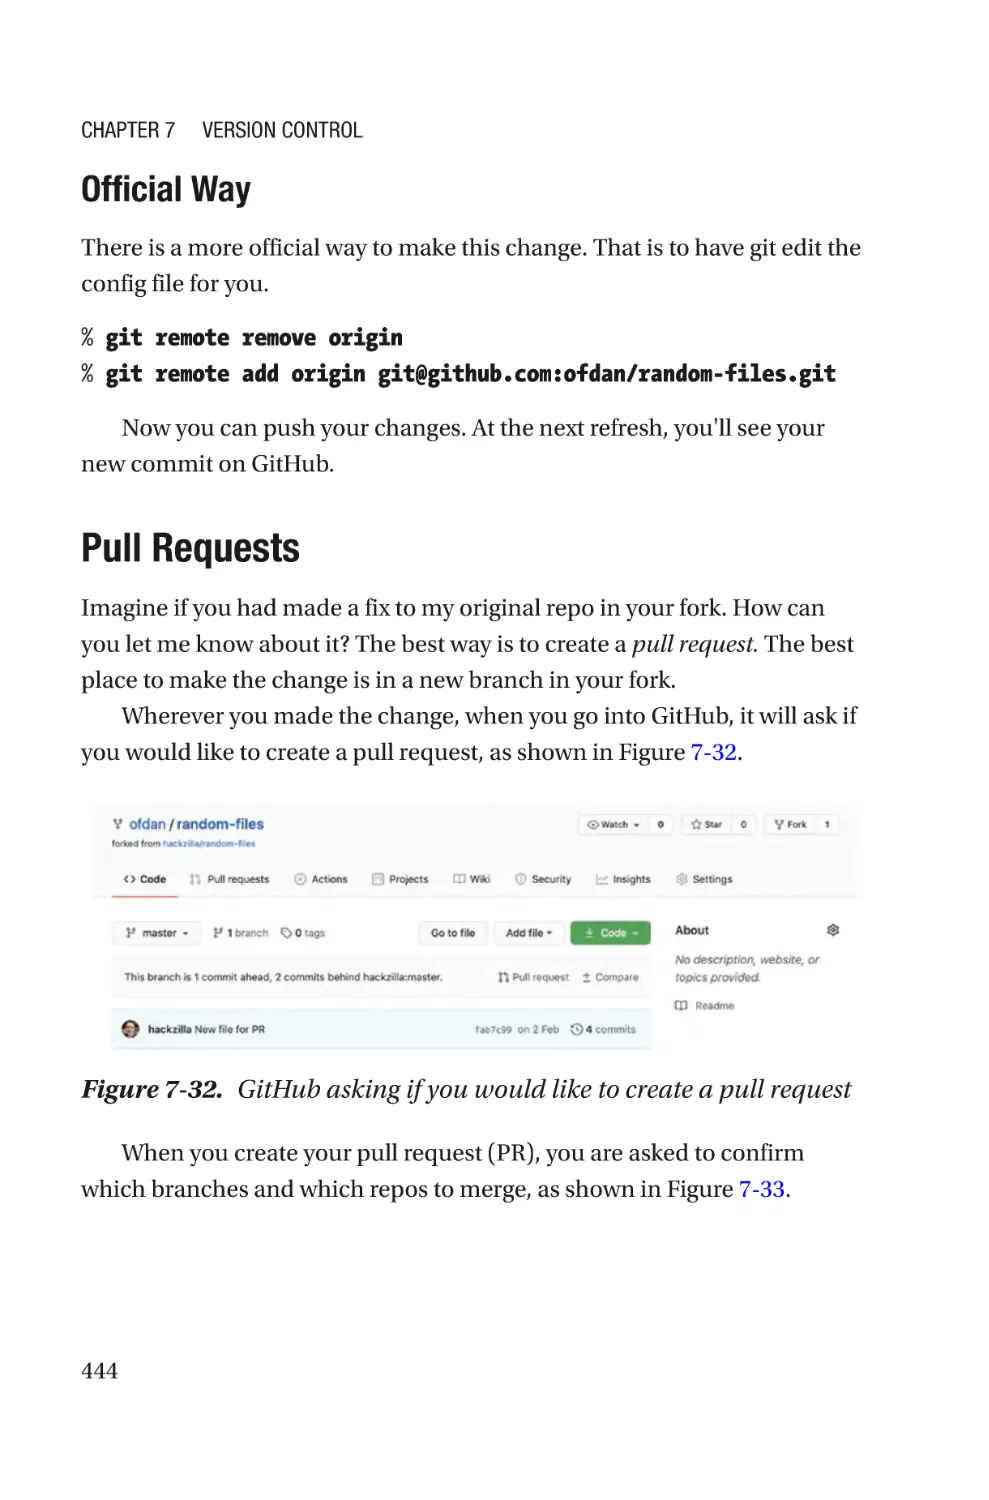
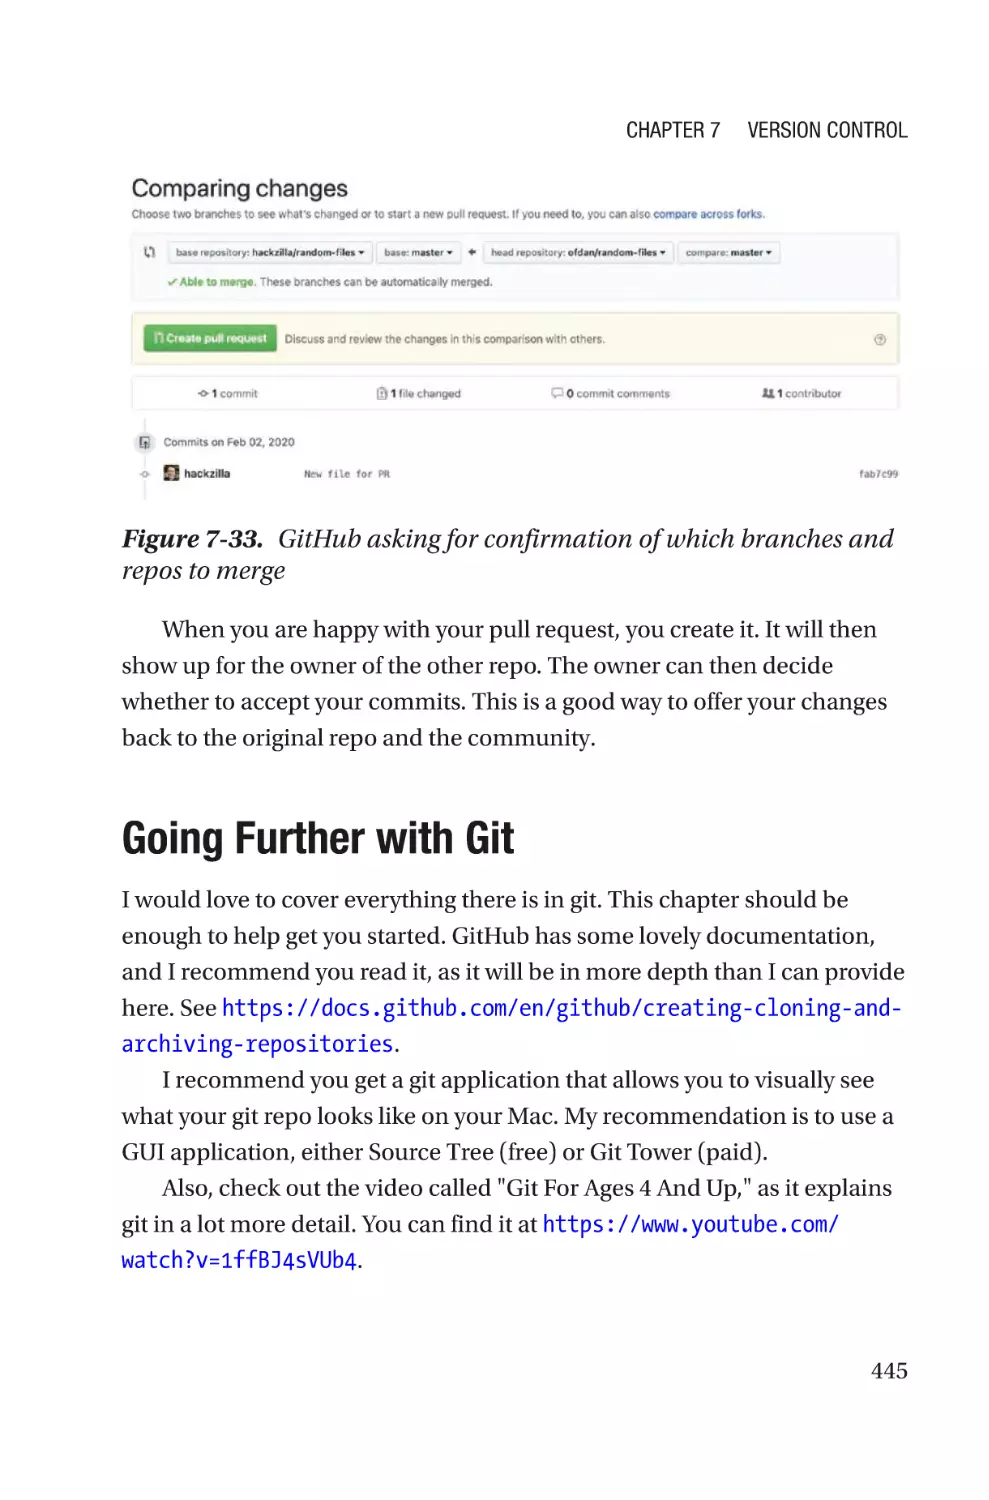
Pull Requests�����������������������������������������������������������������������������������������������444
Going Further with Git���������������������������������������������������������������������������������������445
Summary����������������������������������������������������������������������������������������������������������446
Chapter 8: Web Development�����������������������������������������������������������447
Installing a Web Server�������������������������������������������������������������������������������������447
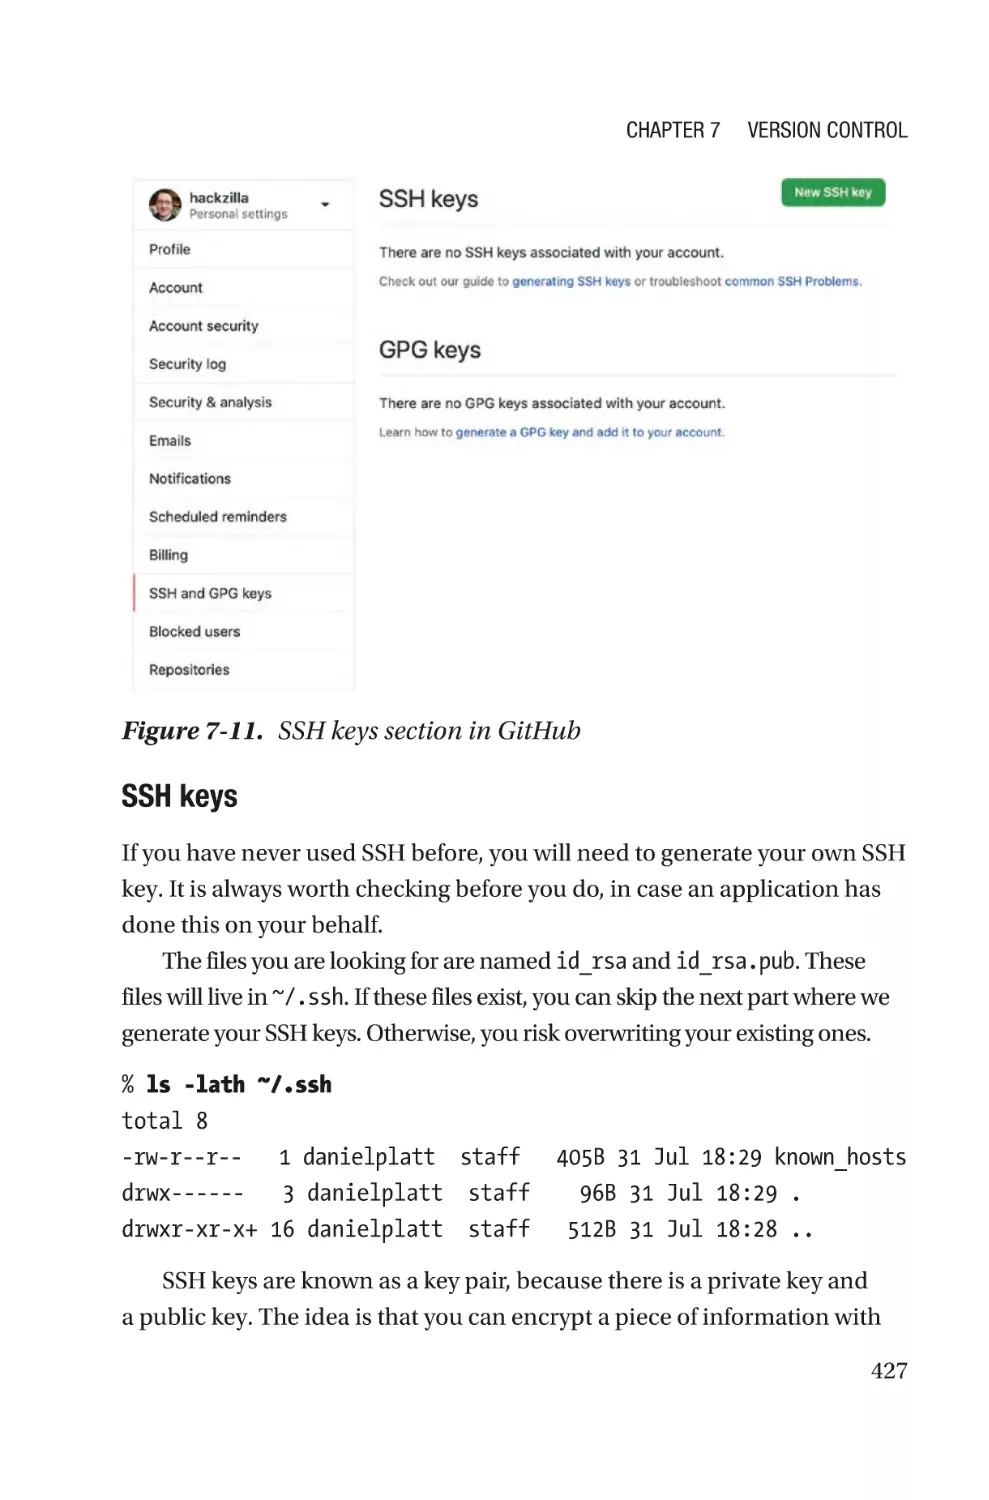
Installing nginx��������������������������������������������������������������������������������������������448
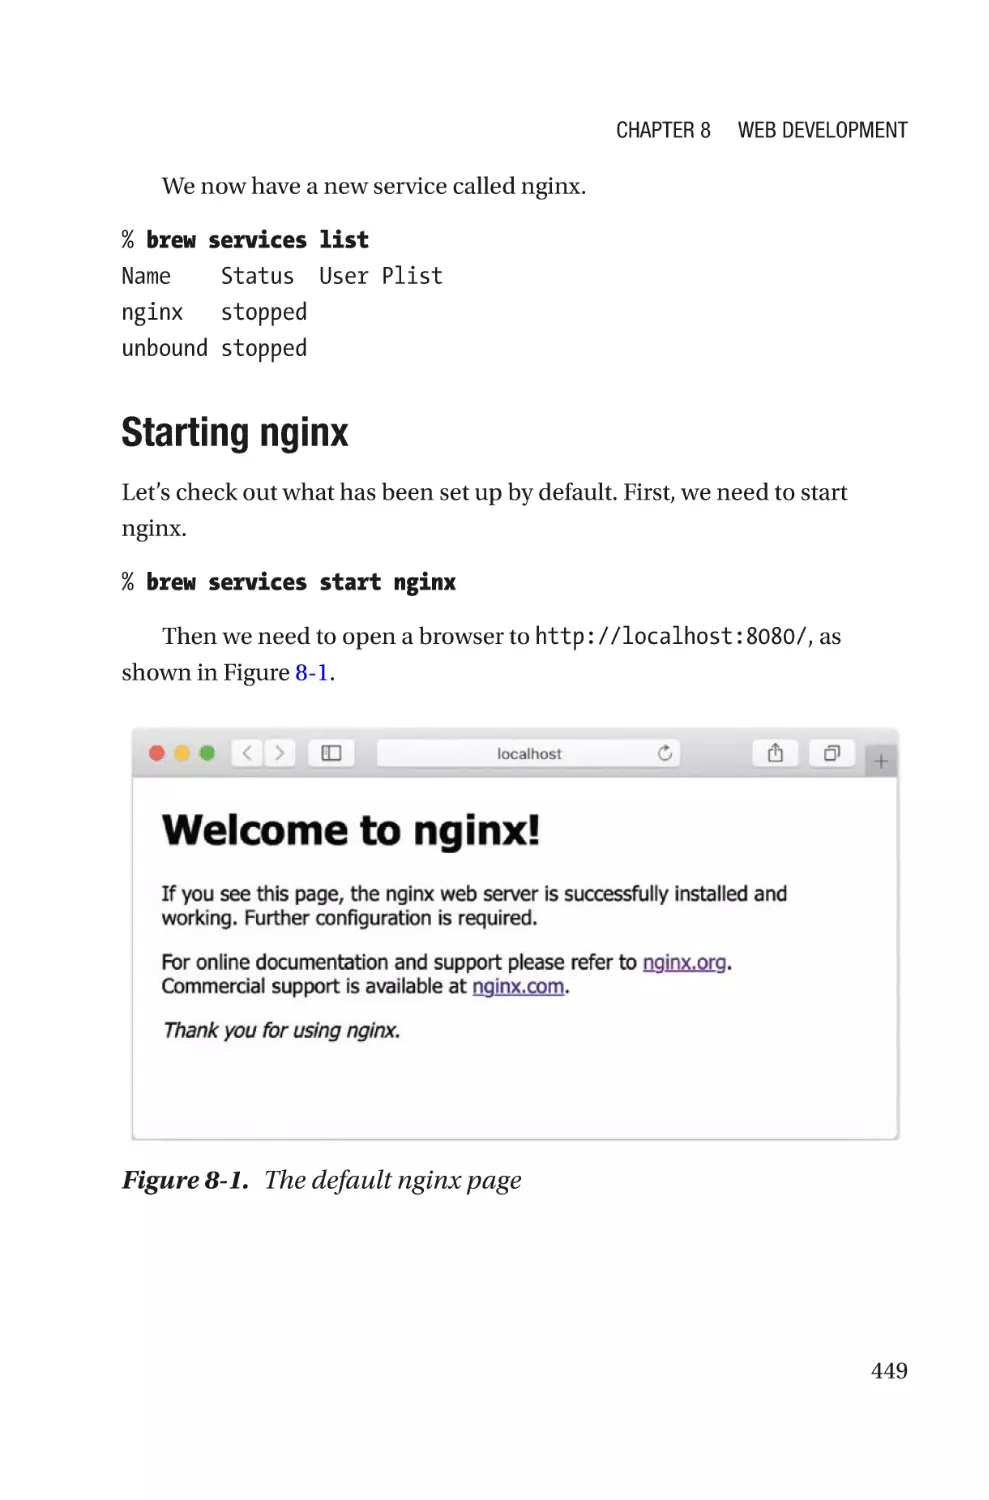
Starting nginx����������������������������������������������������������������������������������������������449
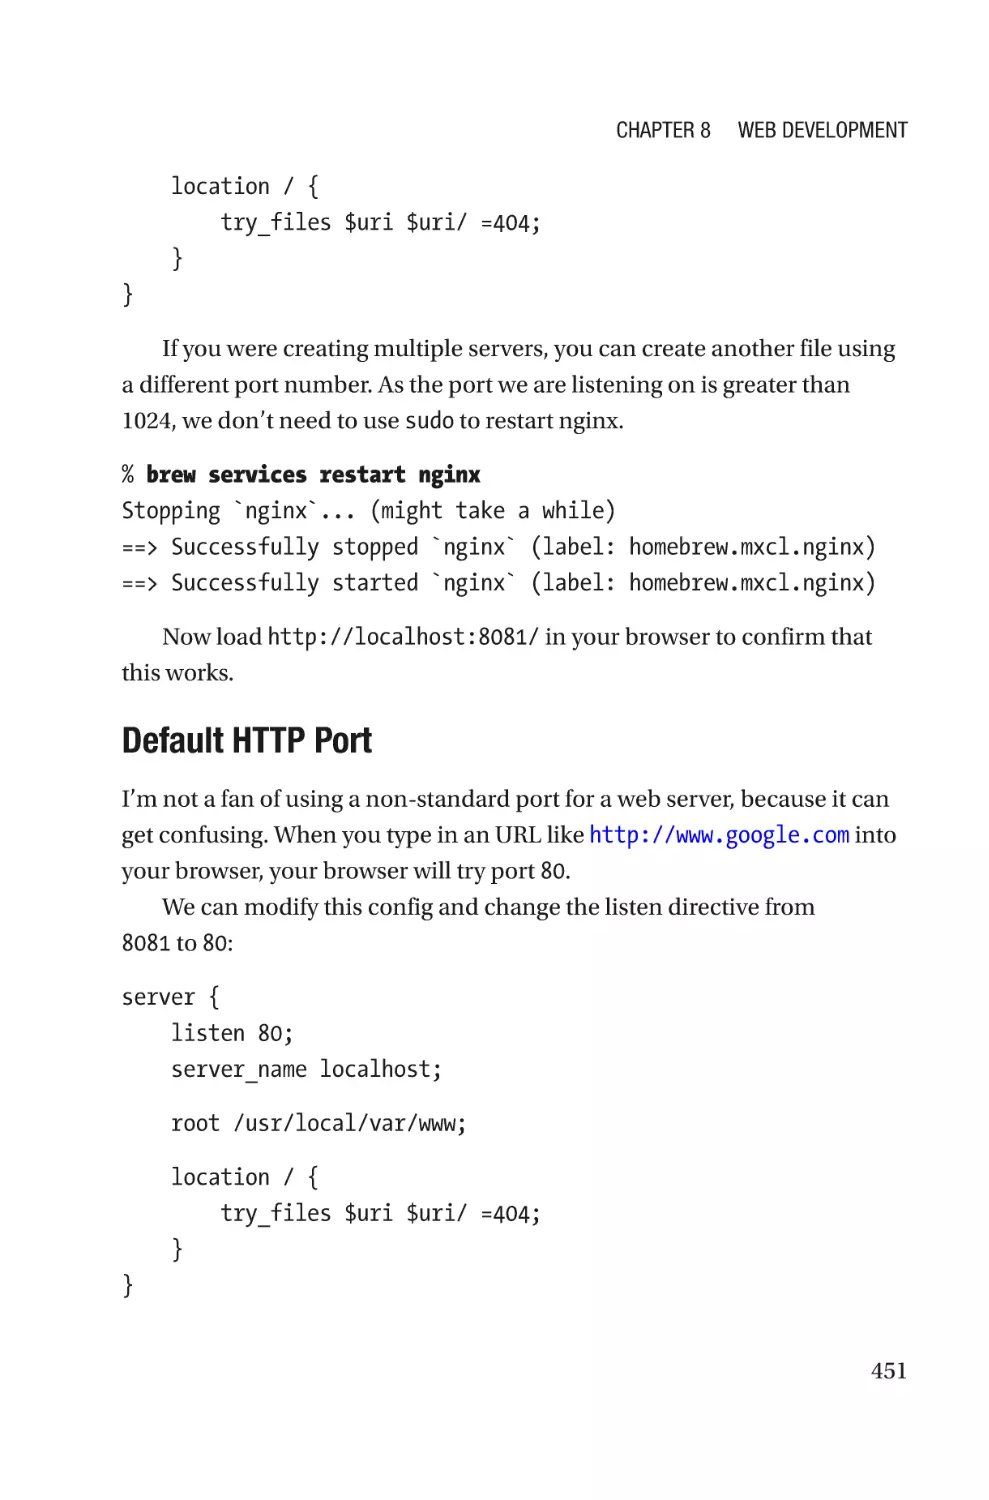
Configuring nginx����������������������������������������������������������������������������������������450
Using PHP���������������������������������������������������������������������������������������������������������453
Installing a Database����������������������������������������������������������������������������������������457
Creating the WordPress Database���������������������������������������������������������������������458
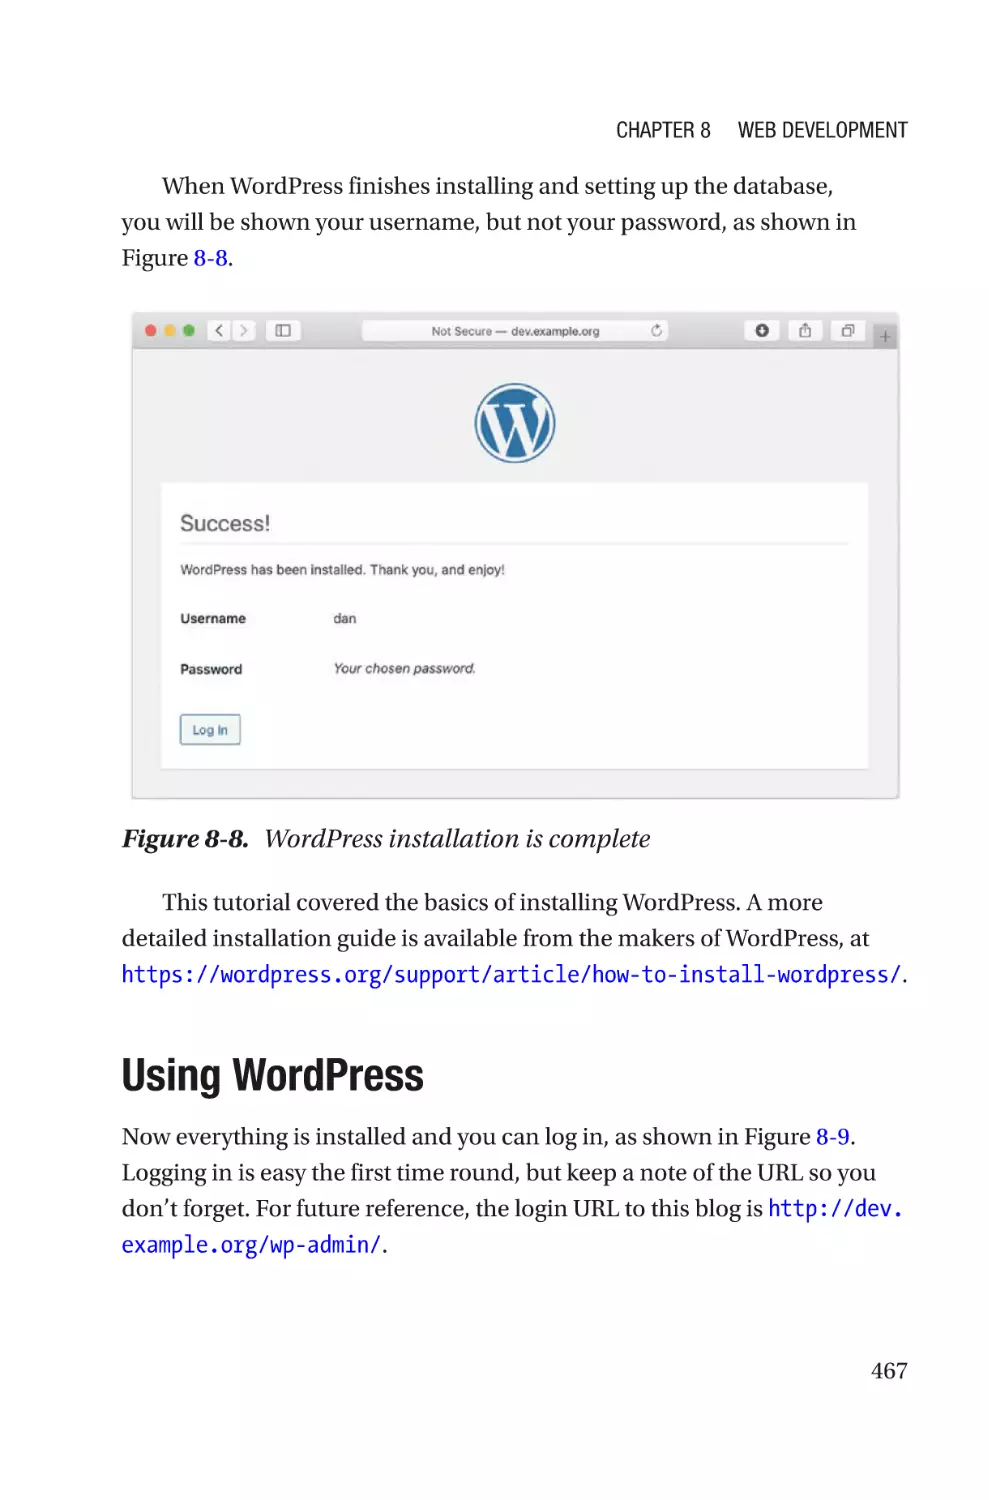
Installing WordPress�����������������������������������������������������������������������������������������460
Using WordPress�����������������������������������������������������������������������������������������������467
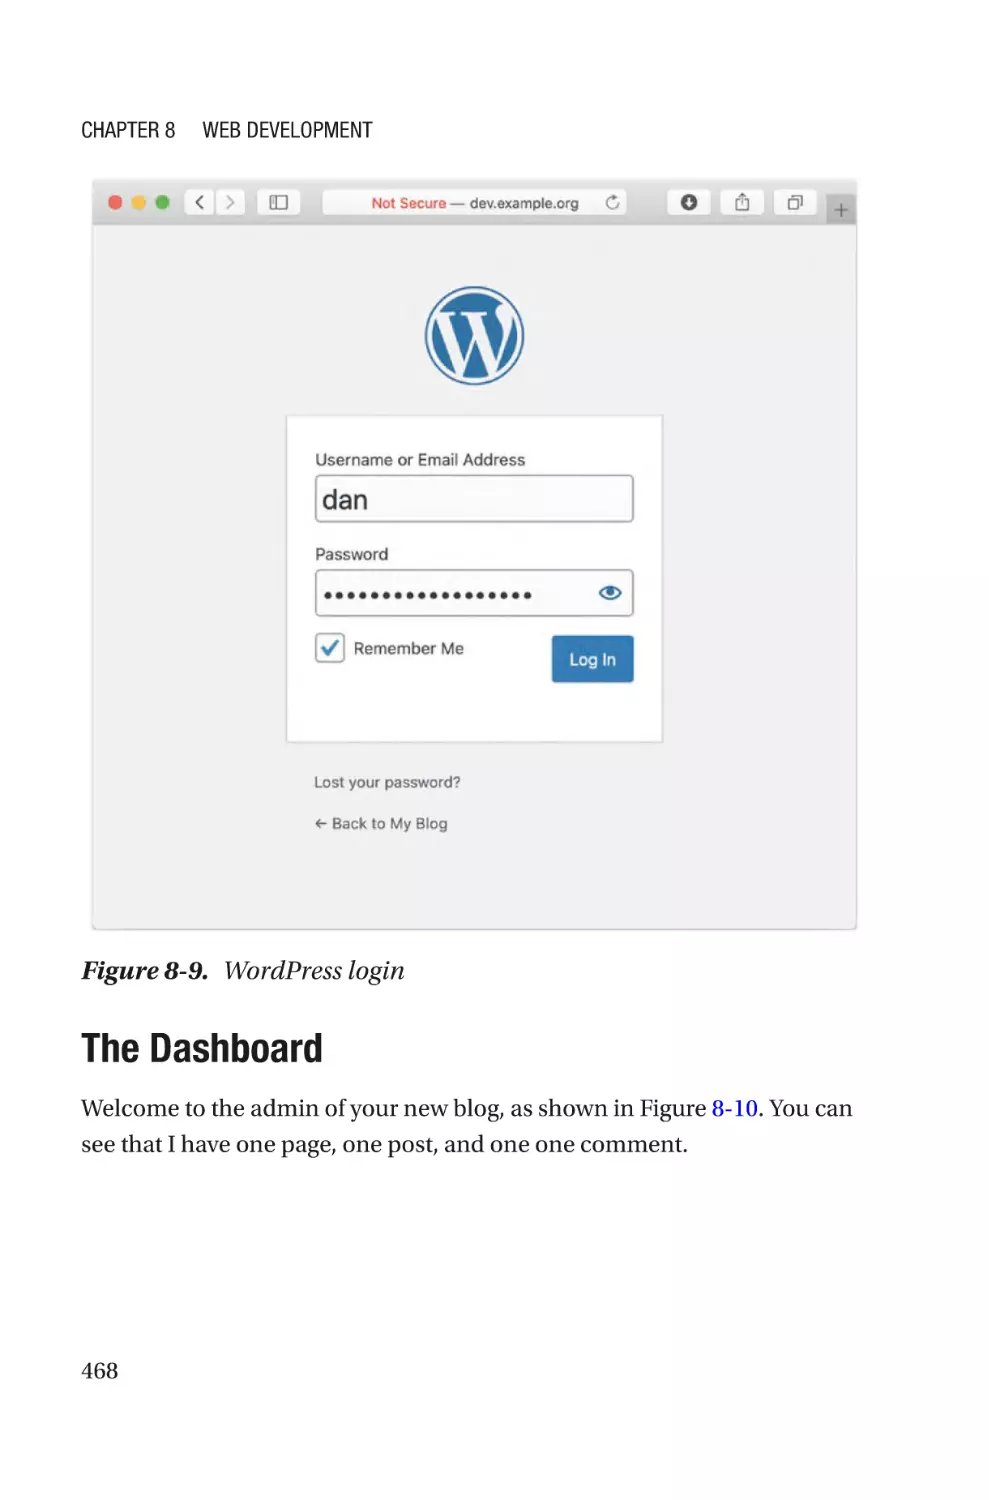
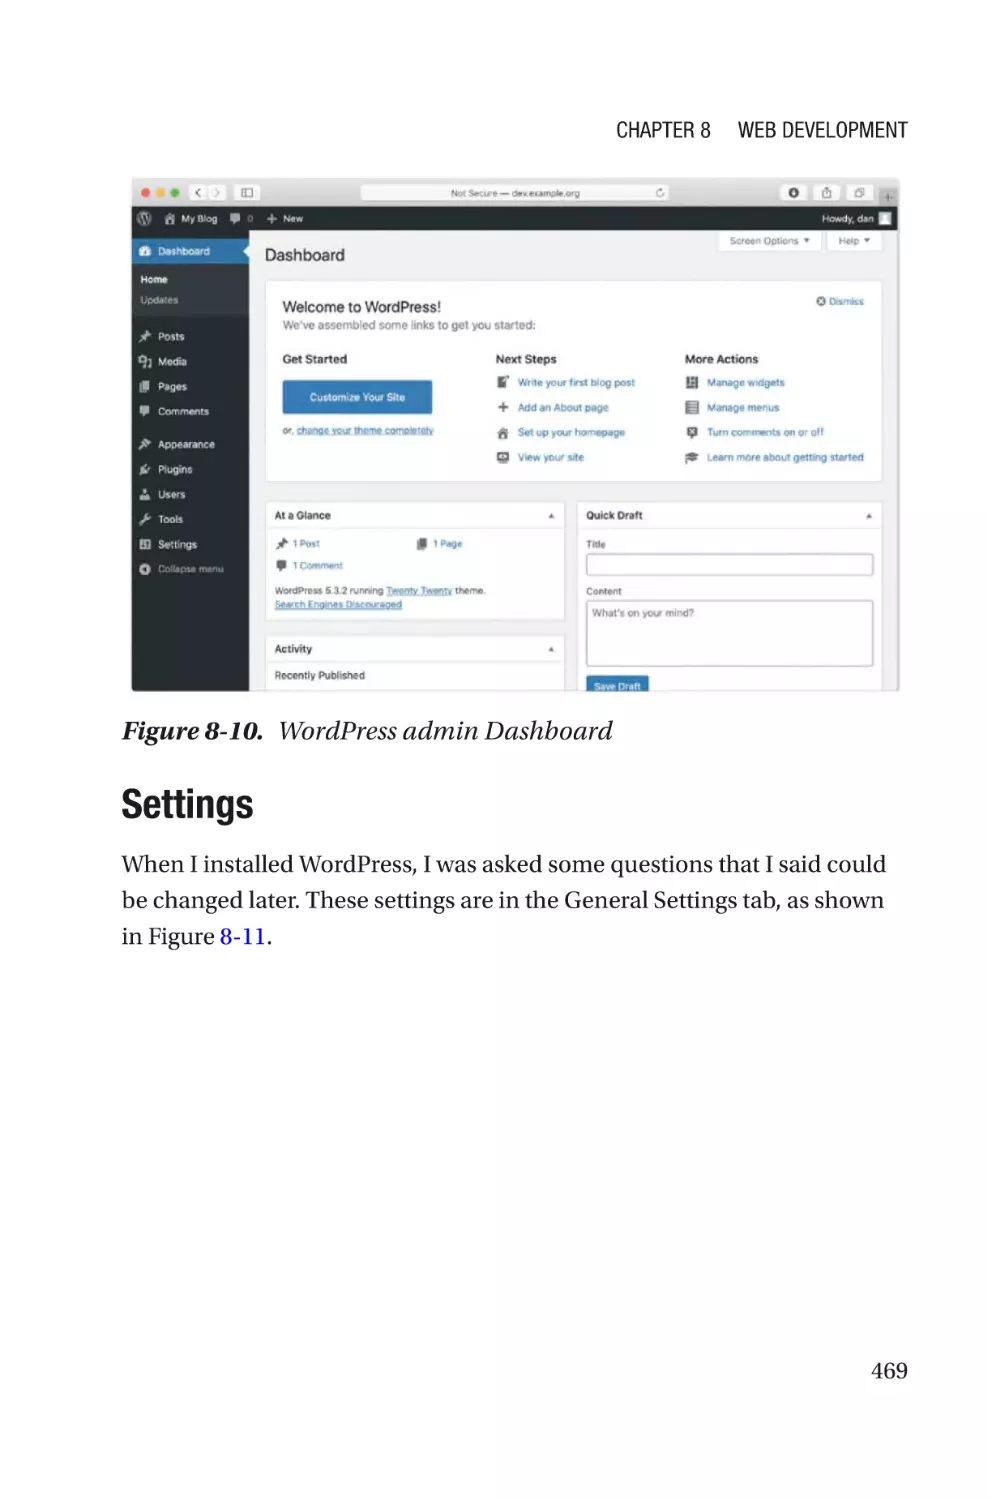
The Dashboard��������������������������������������������������������������������������������������������468
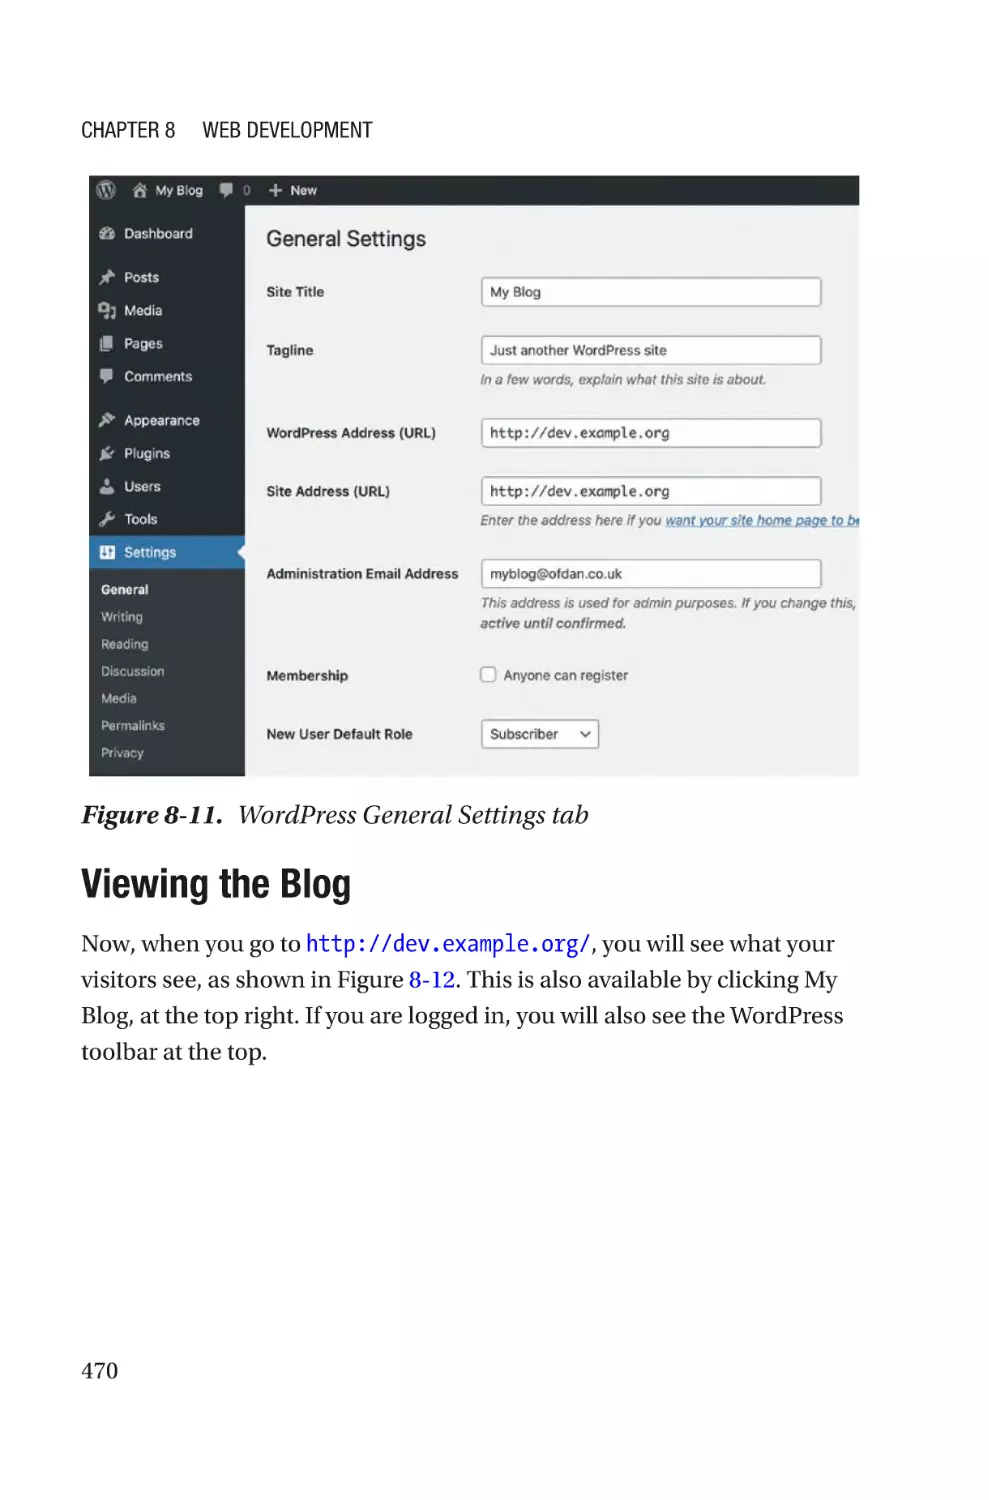
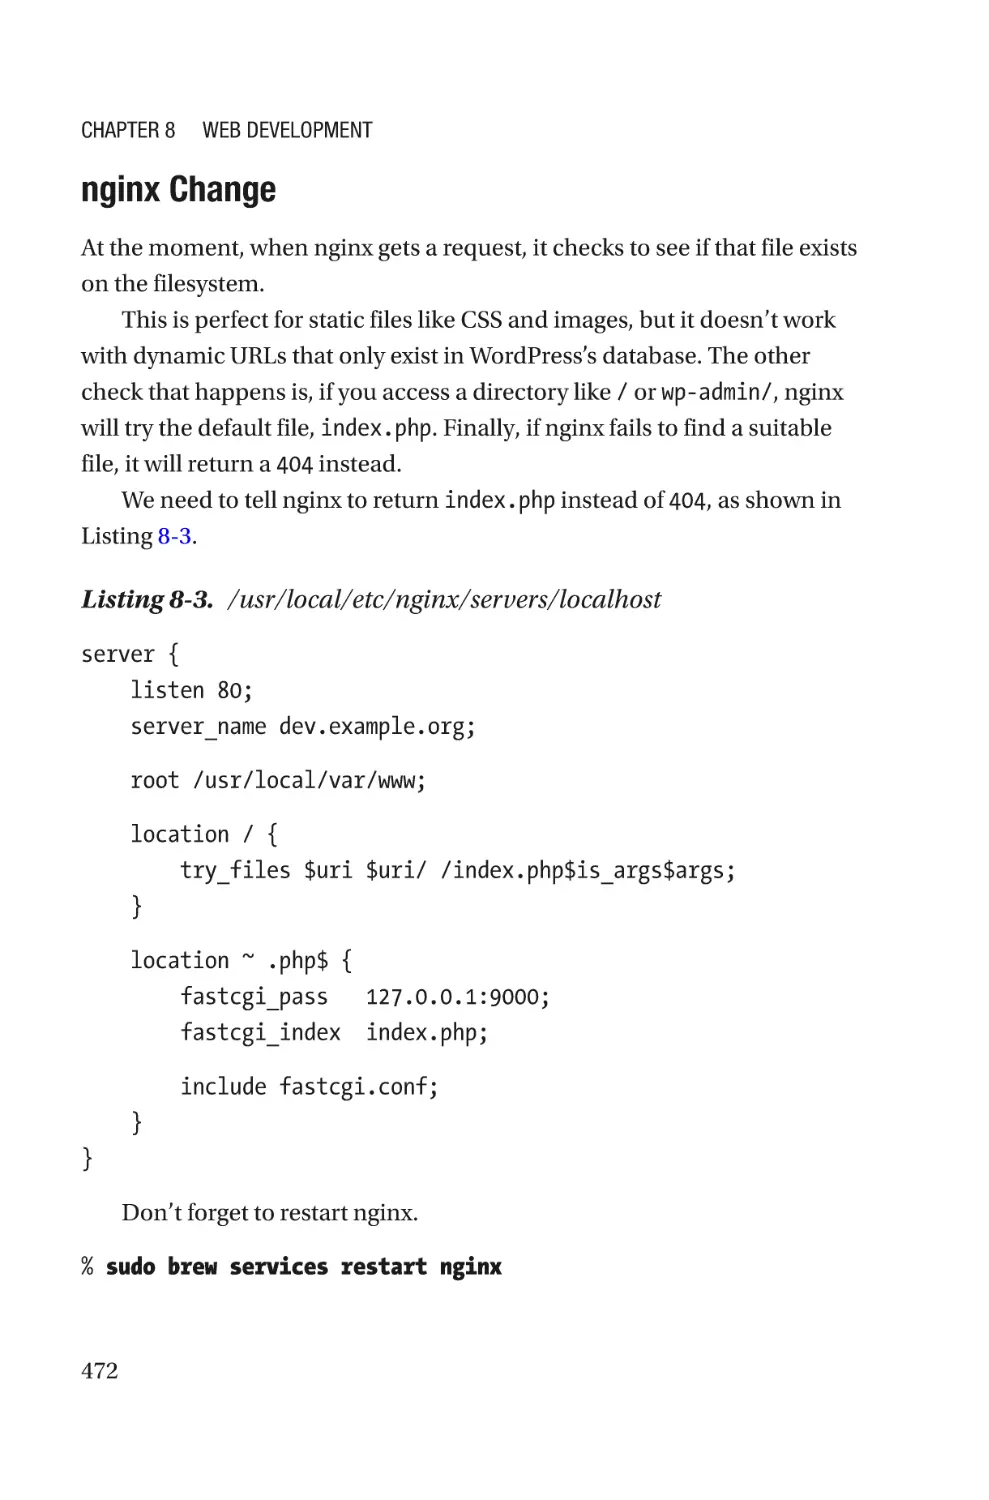
Settings�������������������������������������������������������������������������������������������������������469
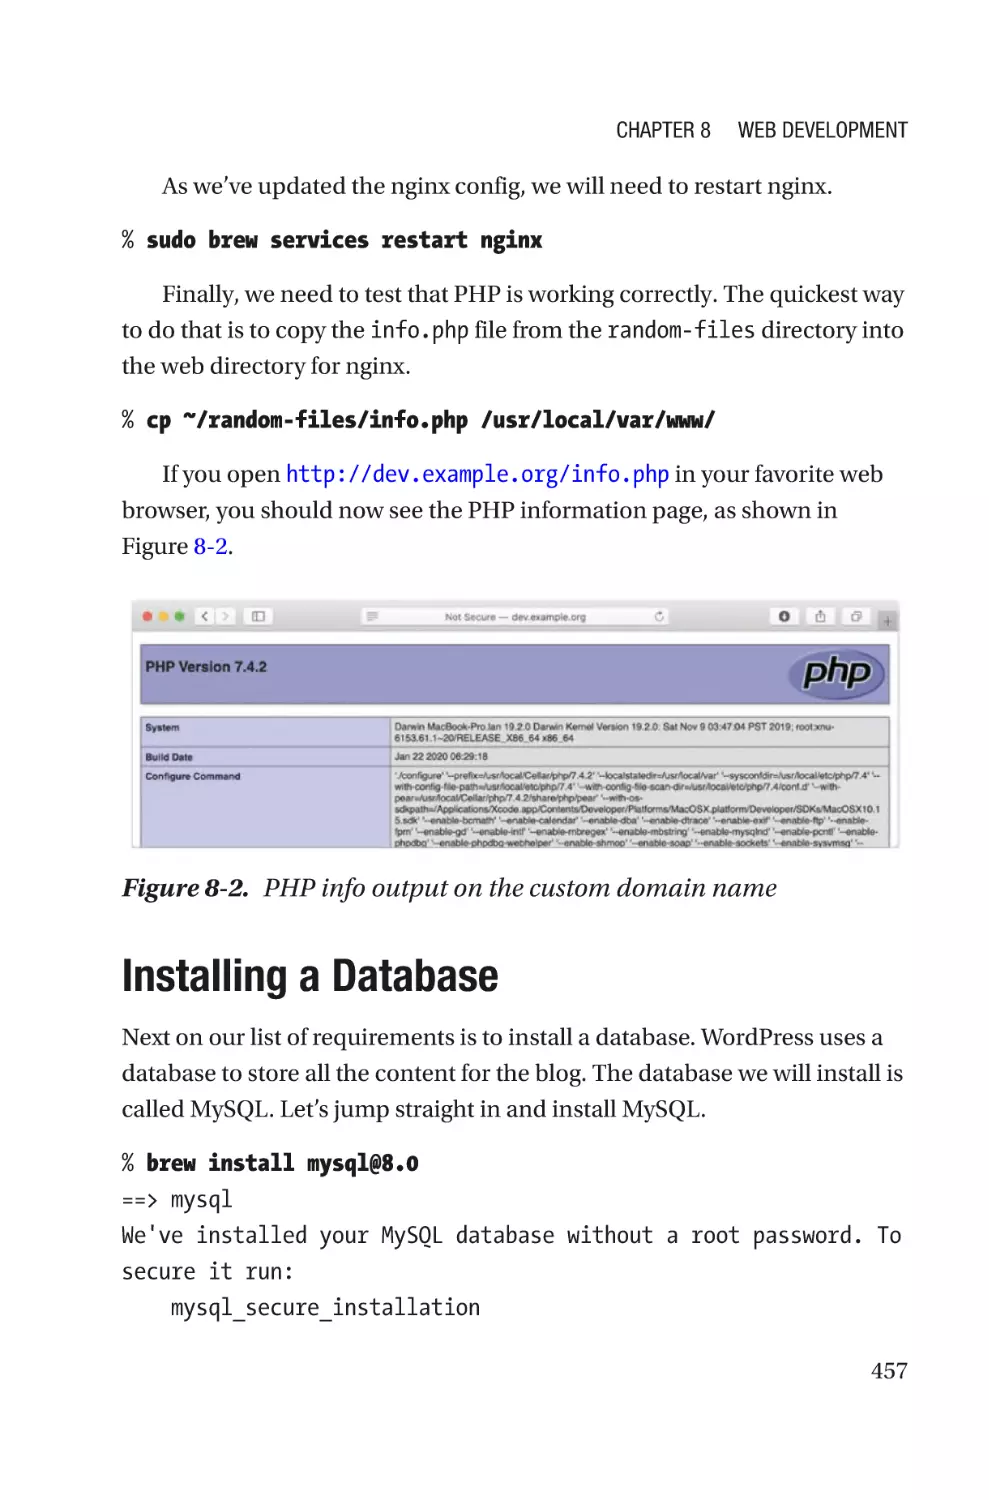
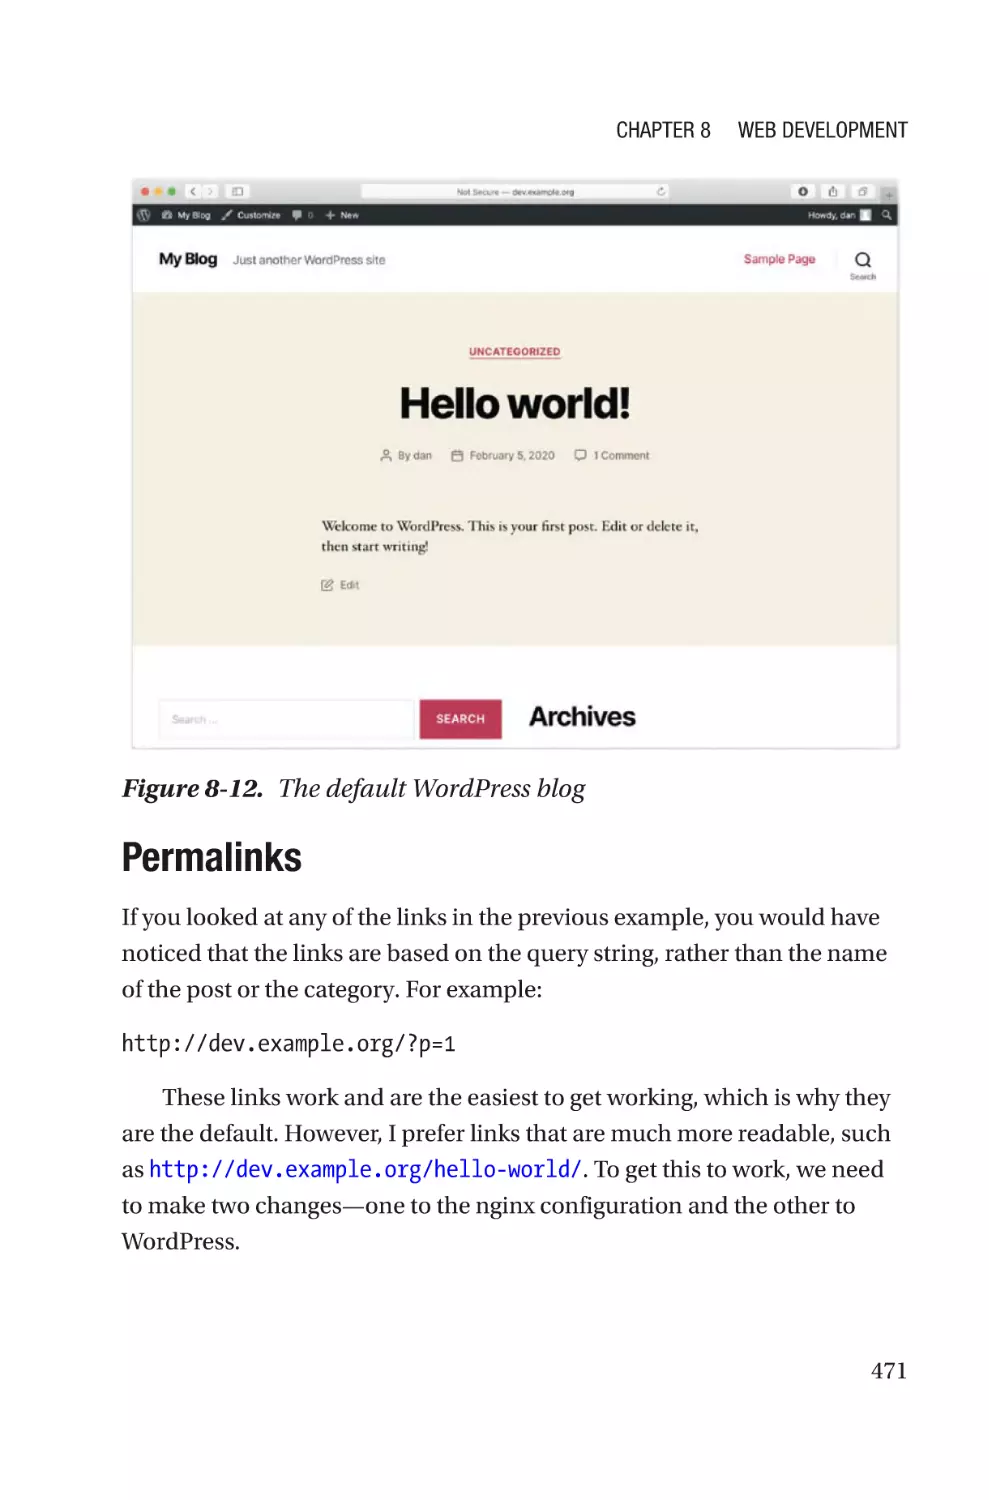
Viewing the Blog������������������������������������������������������������������������������������������470
Permalinks��������������������������������������������������������������������������������������������������471
Taking It Live�����������������������������������������������������������������������������������������������������473
Exporting the Database�������������������������������������������������������������������������������474
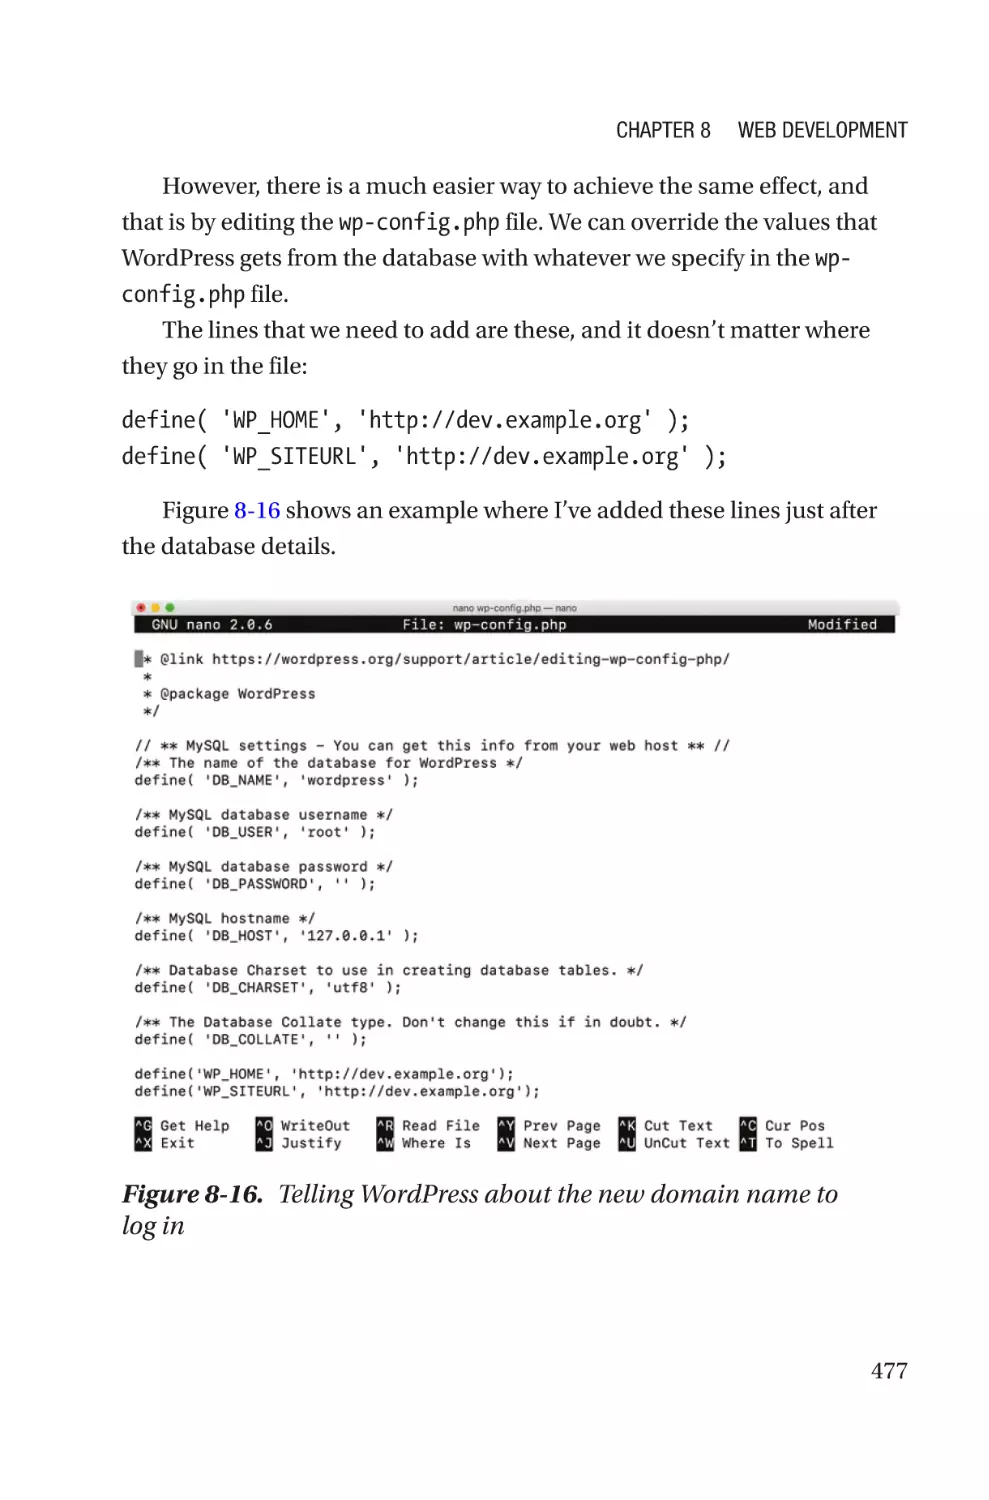
WordPress Config����������������������������������������������������������������������������������������475
Summary����������������������������������������������������������������������������������������������������������478
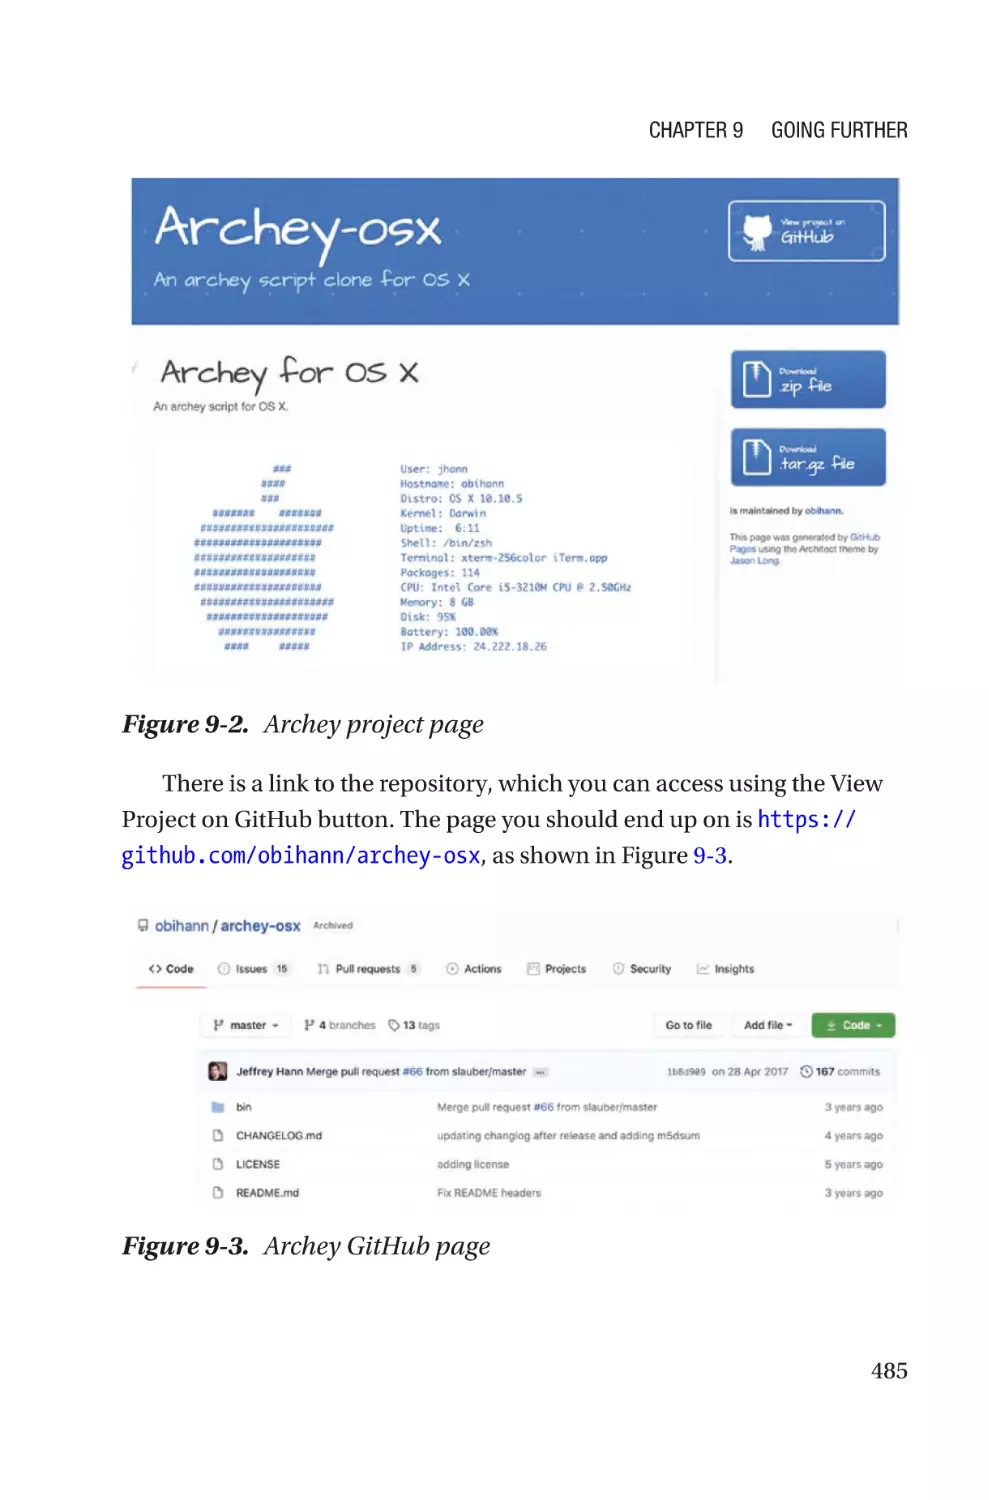
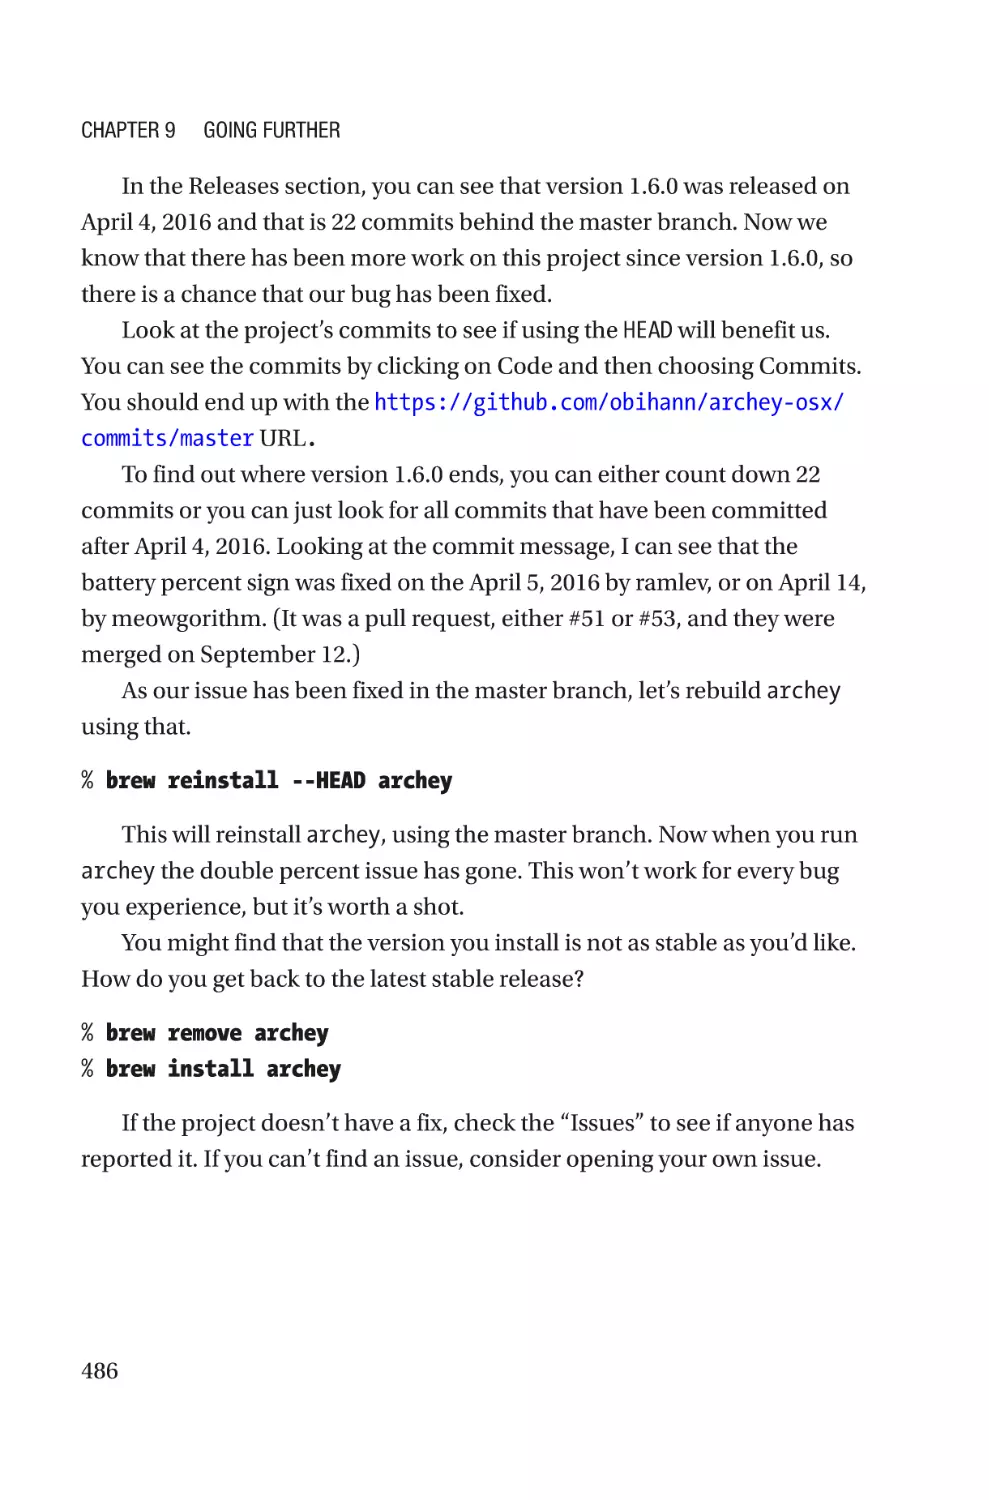
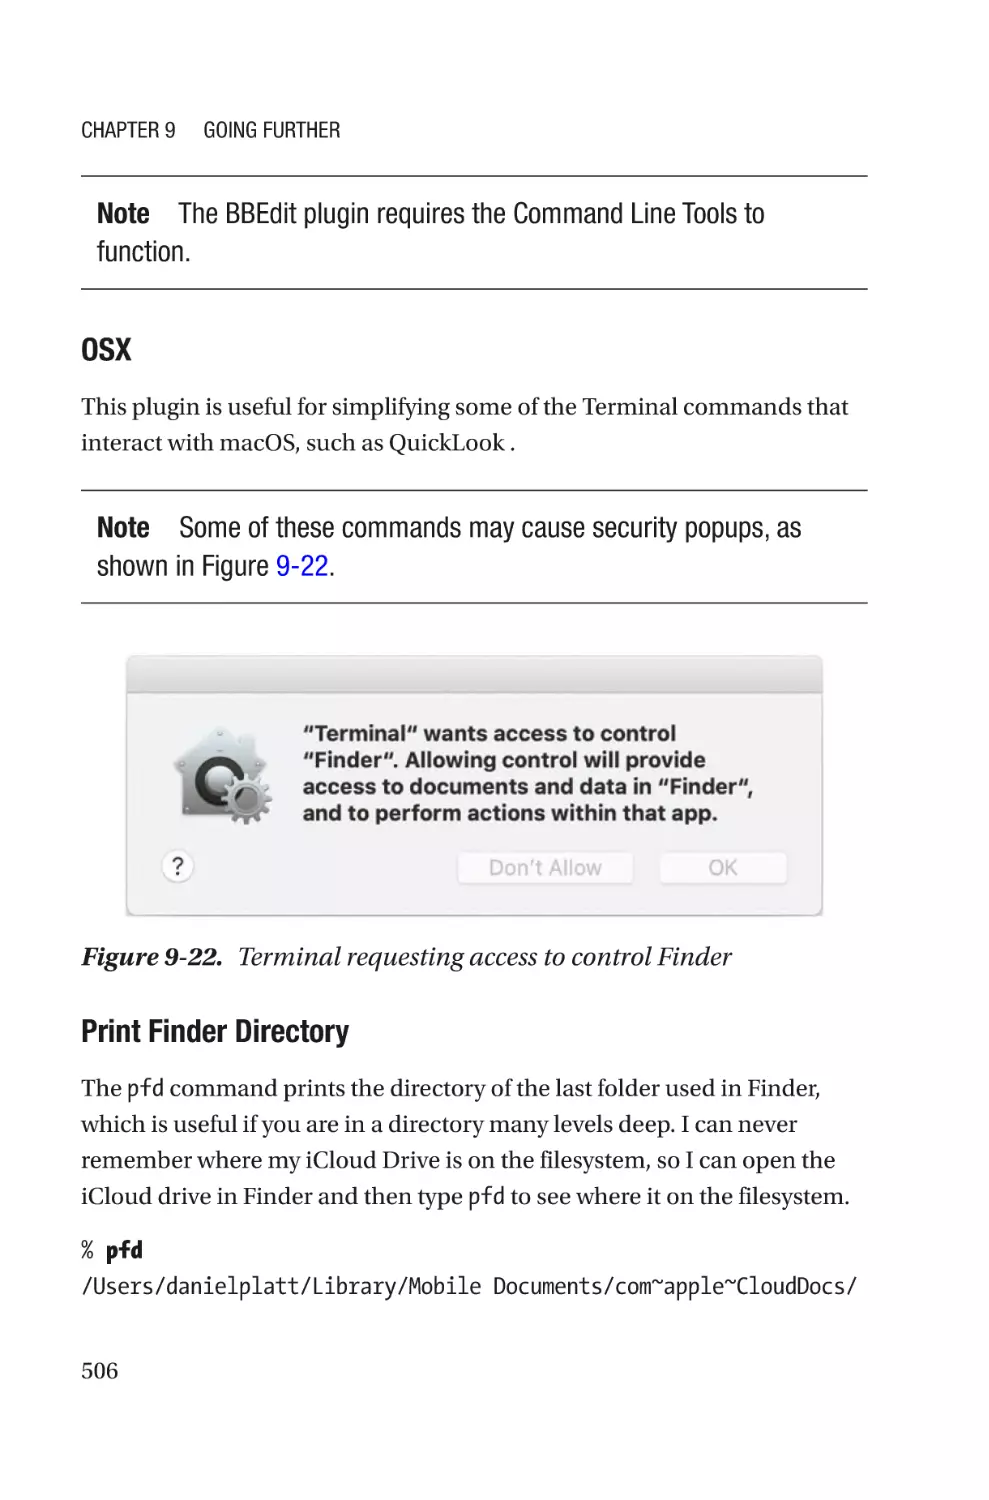
Chapter 9: Going Further������������������������������������������������������������������479
Brew Clean Up��������������������������������������������������������������������������������������������������479
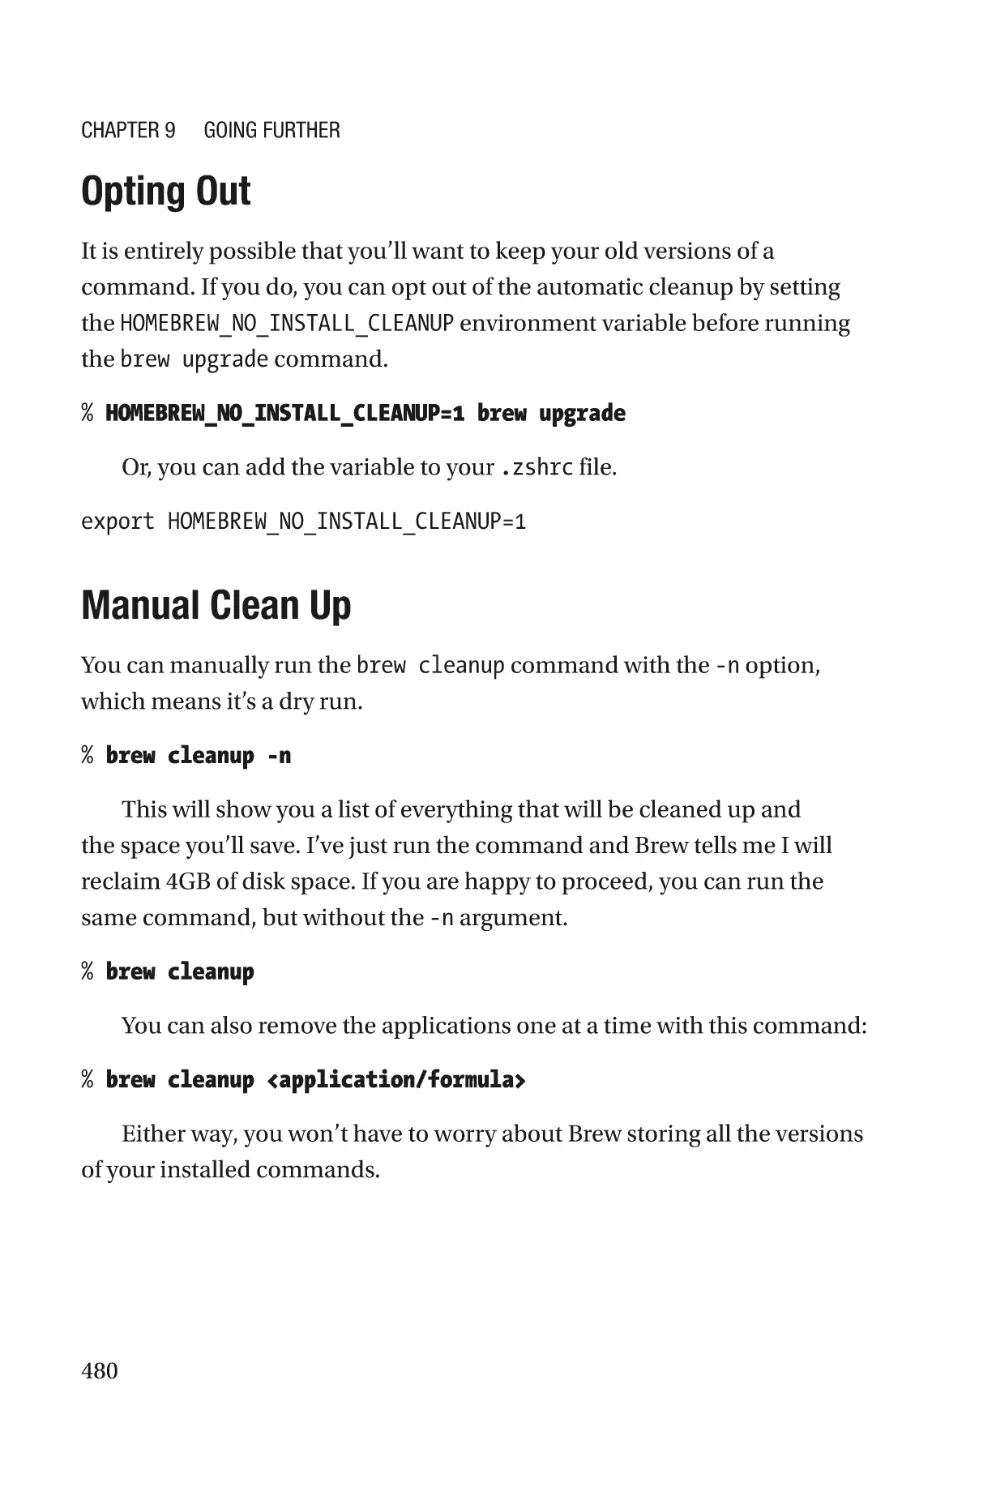
Opting Out����������������������������������������������������������������������������������������������������480
Manual Clean Up�����������������������������������������������������������������������������������������480
xiv
Table of Contents
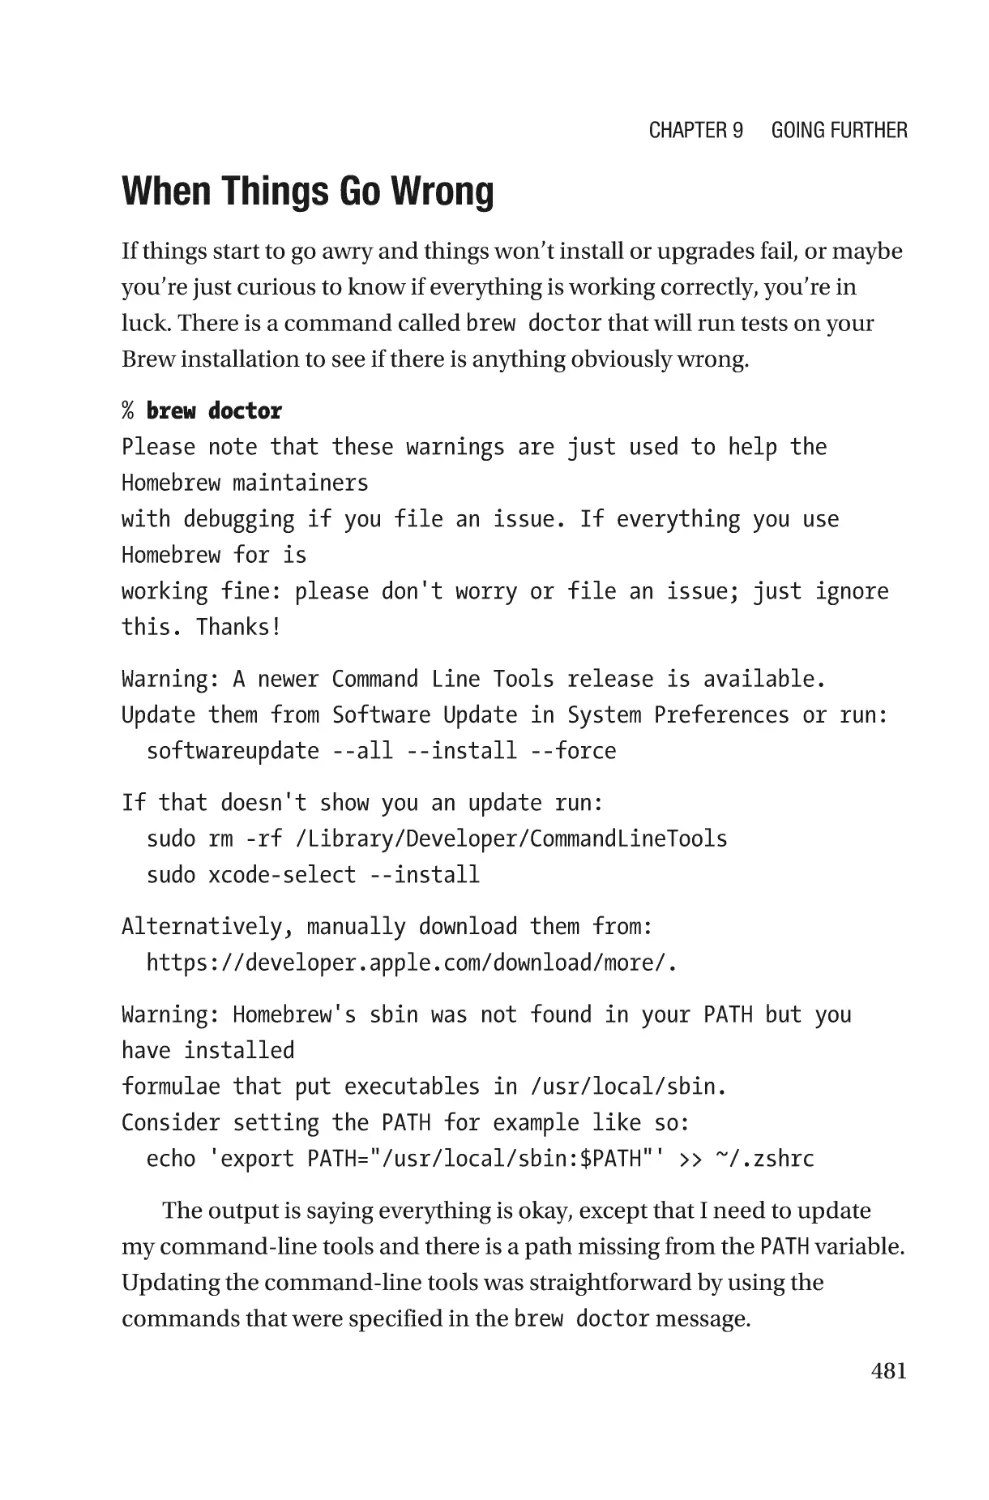
When Things Go Wrong��������������������������������������������������������������������������������481
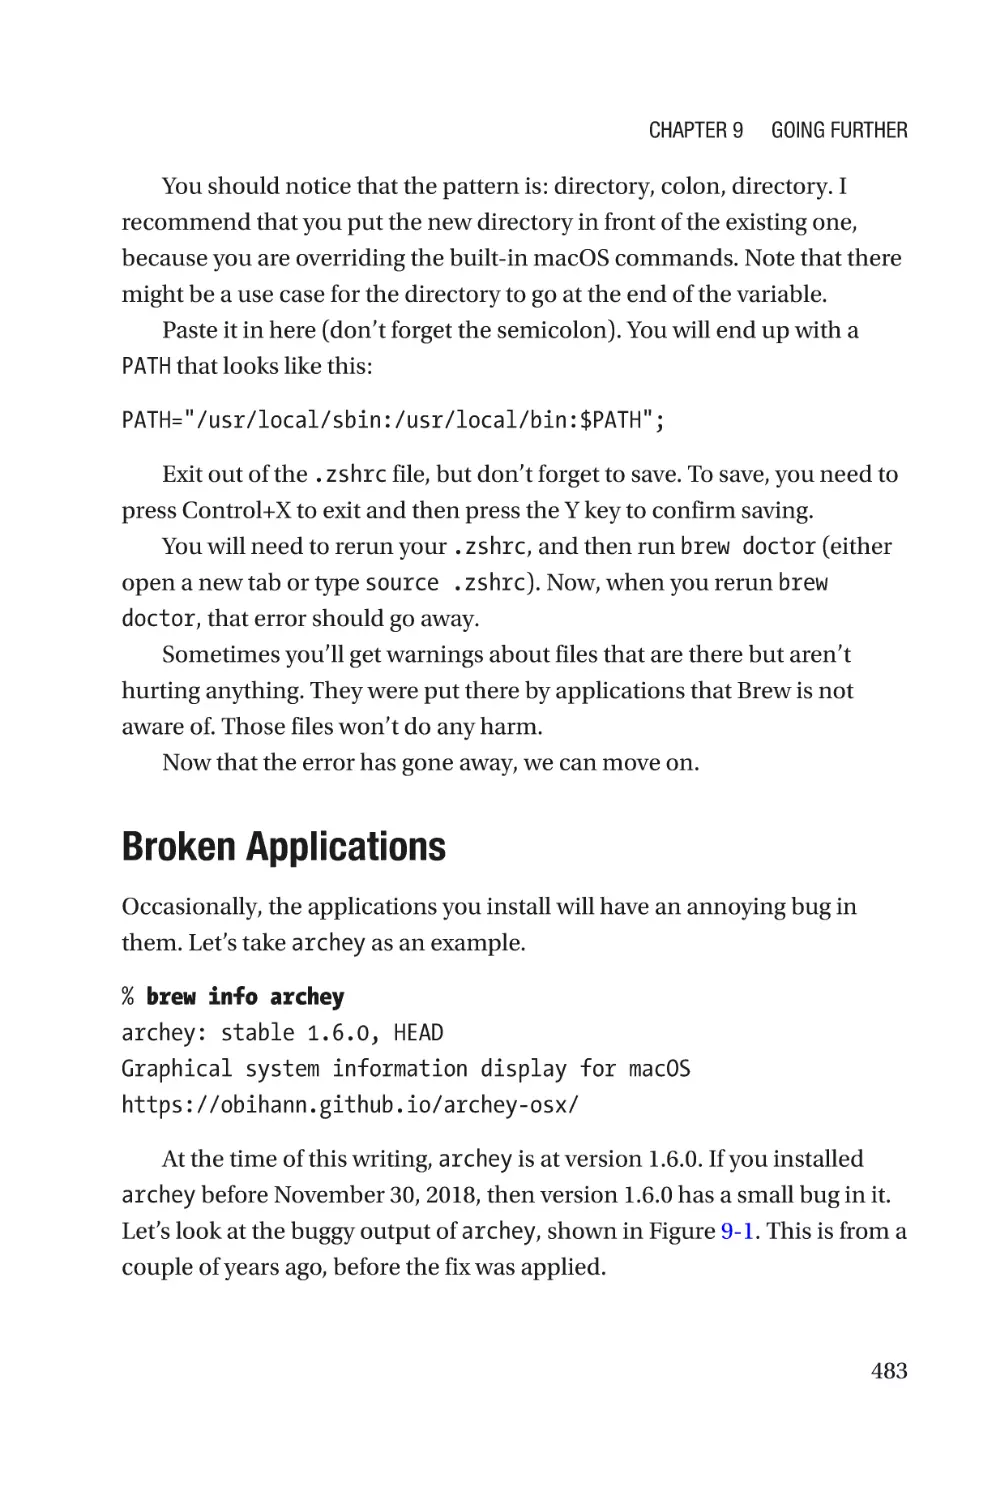
Broken Applications�������������������������������������������������������������������������������������483
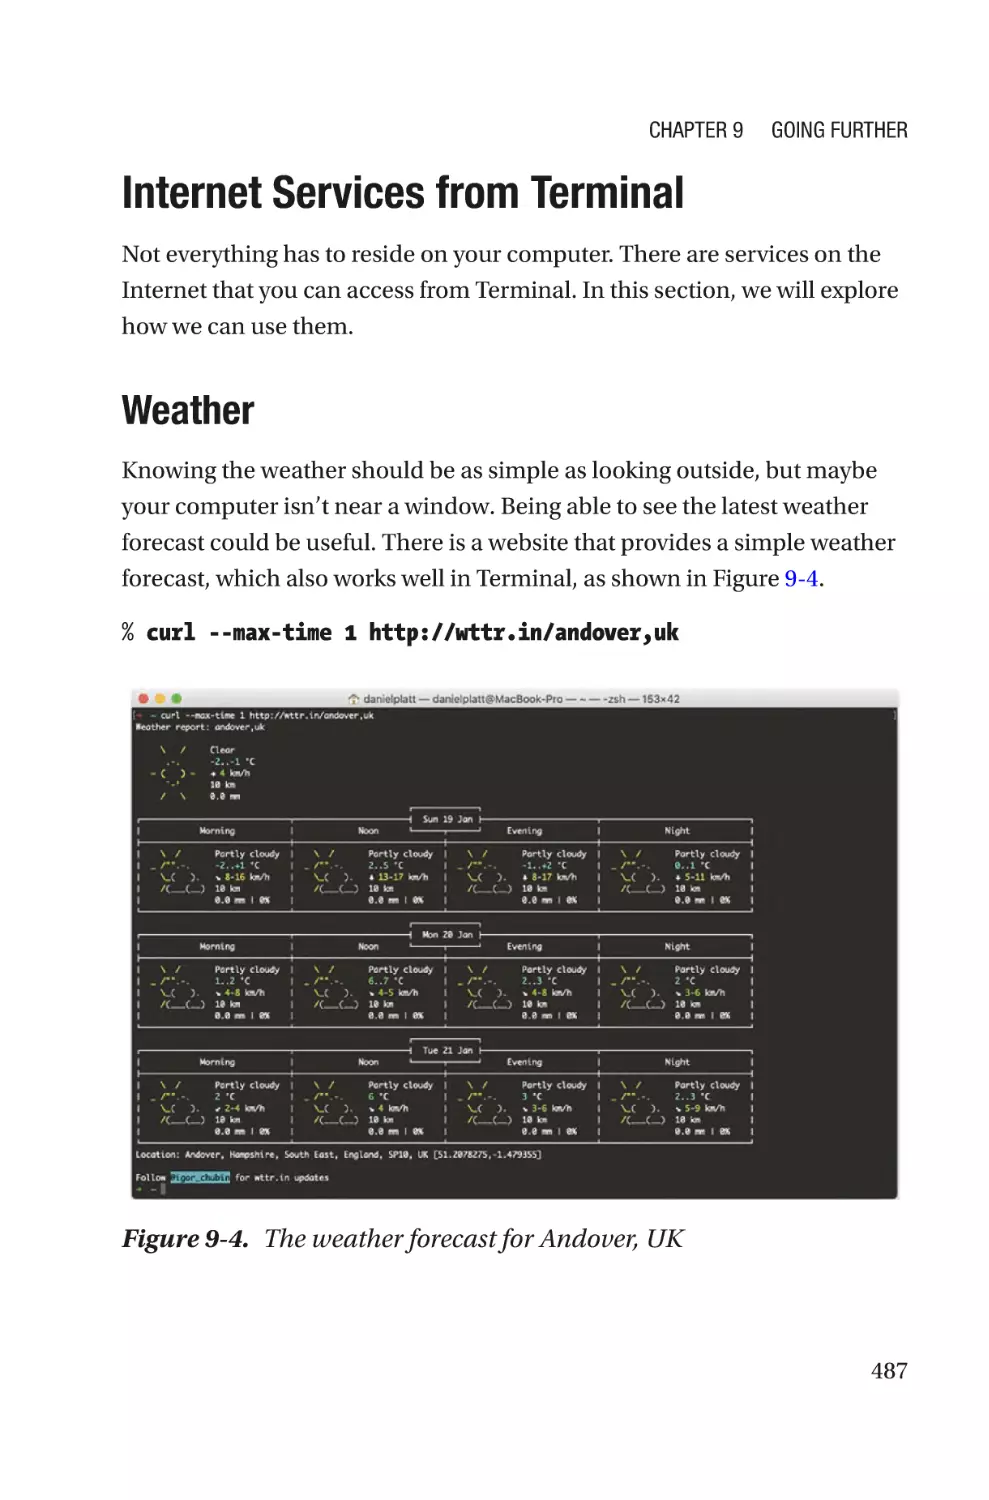
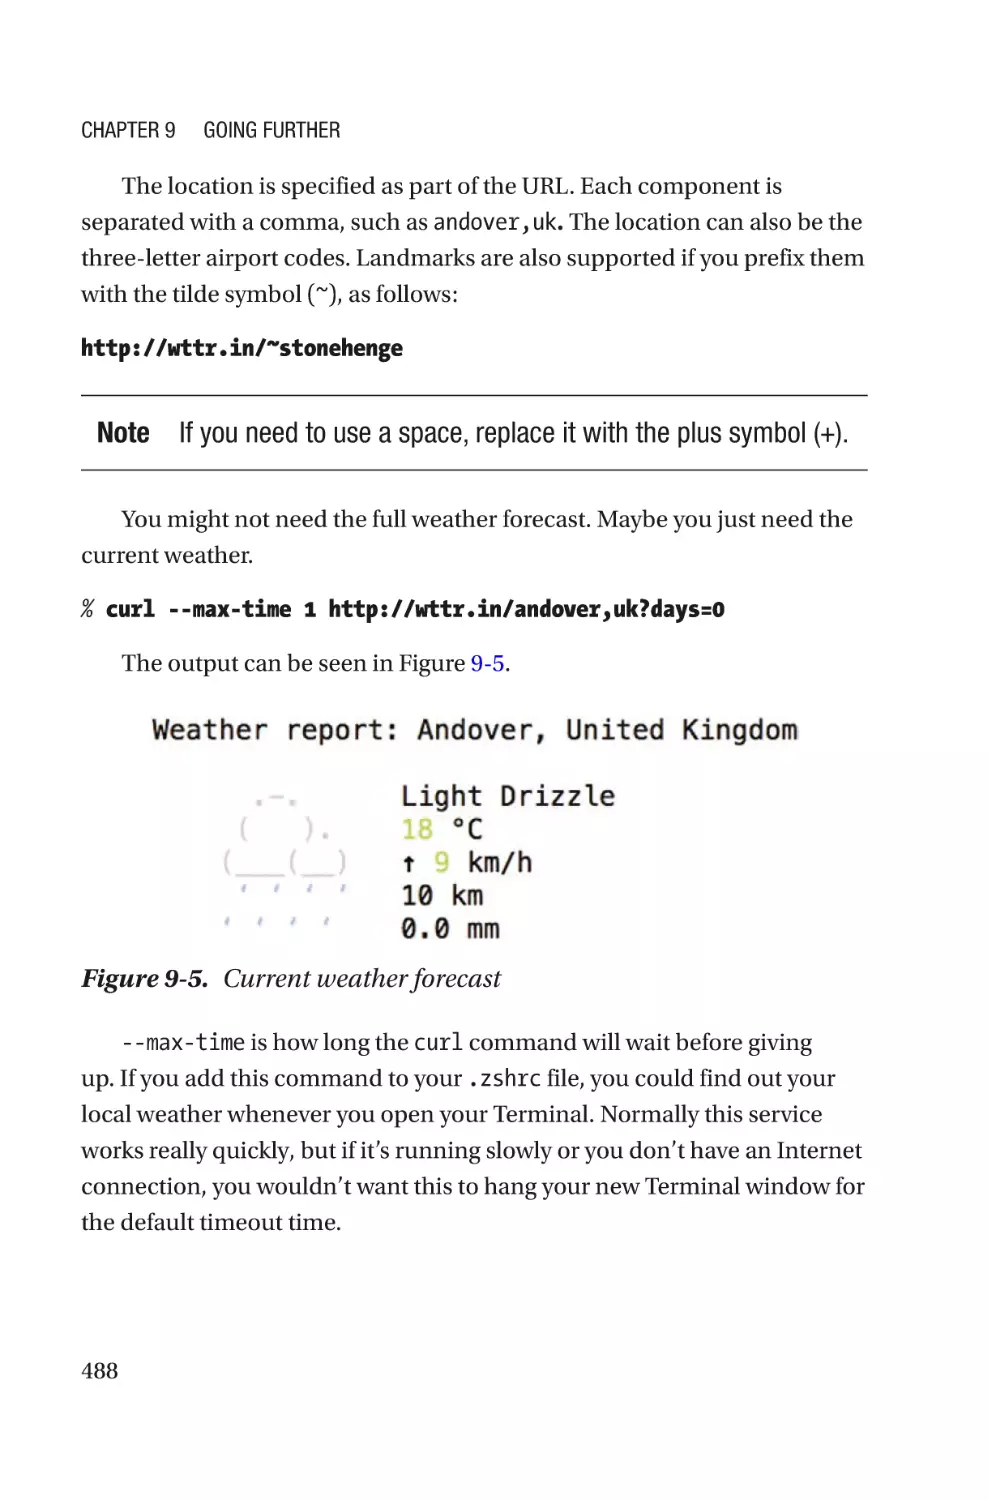
Internet Services from Terminal������������������������������������������������������������������������487
Weather�������������������������������������������������������������������������������������������������������487
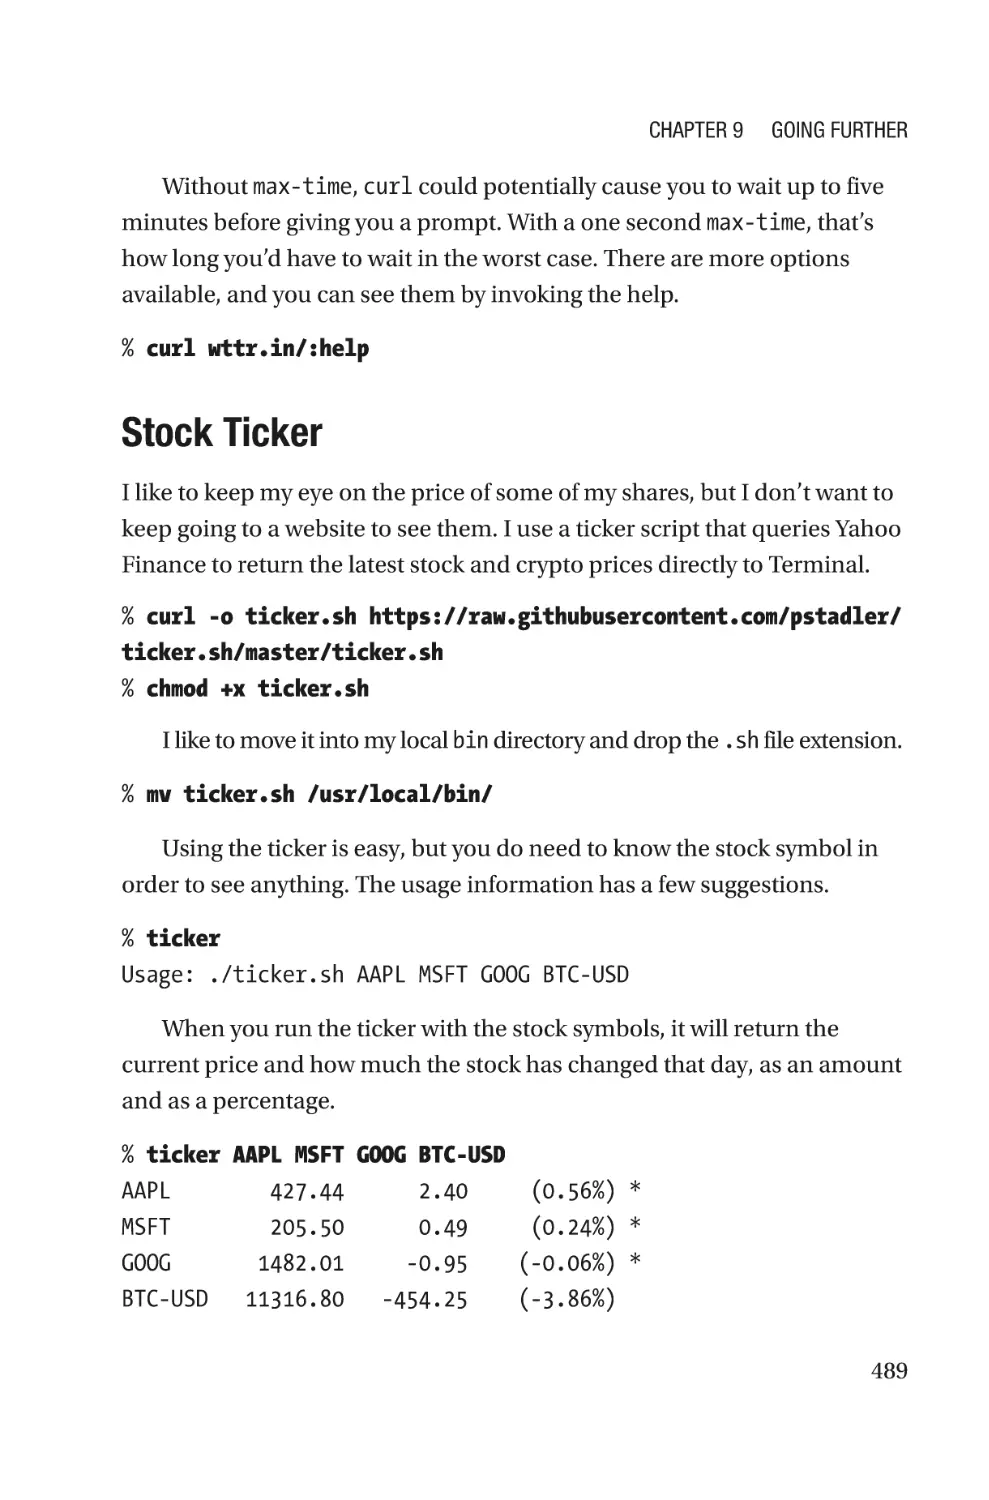
Stock Ticker�������������������������������������������������������������������������������������������������489
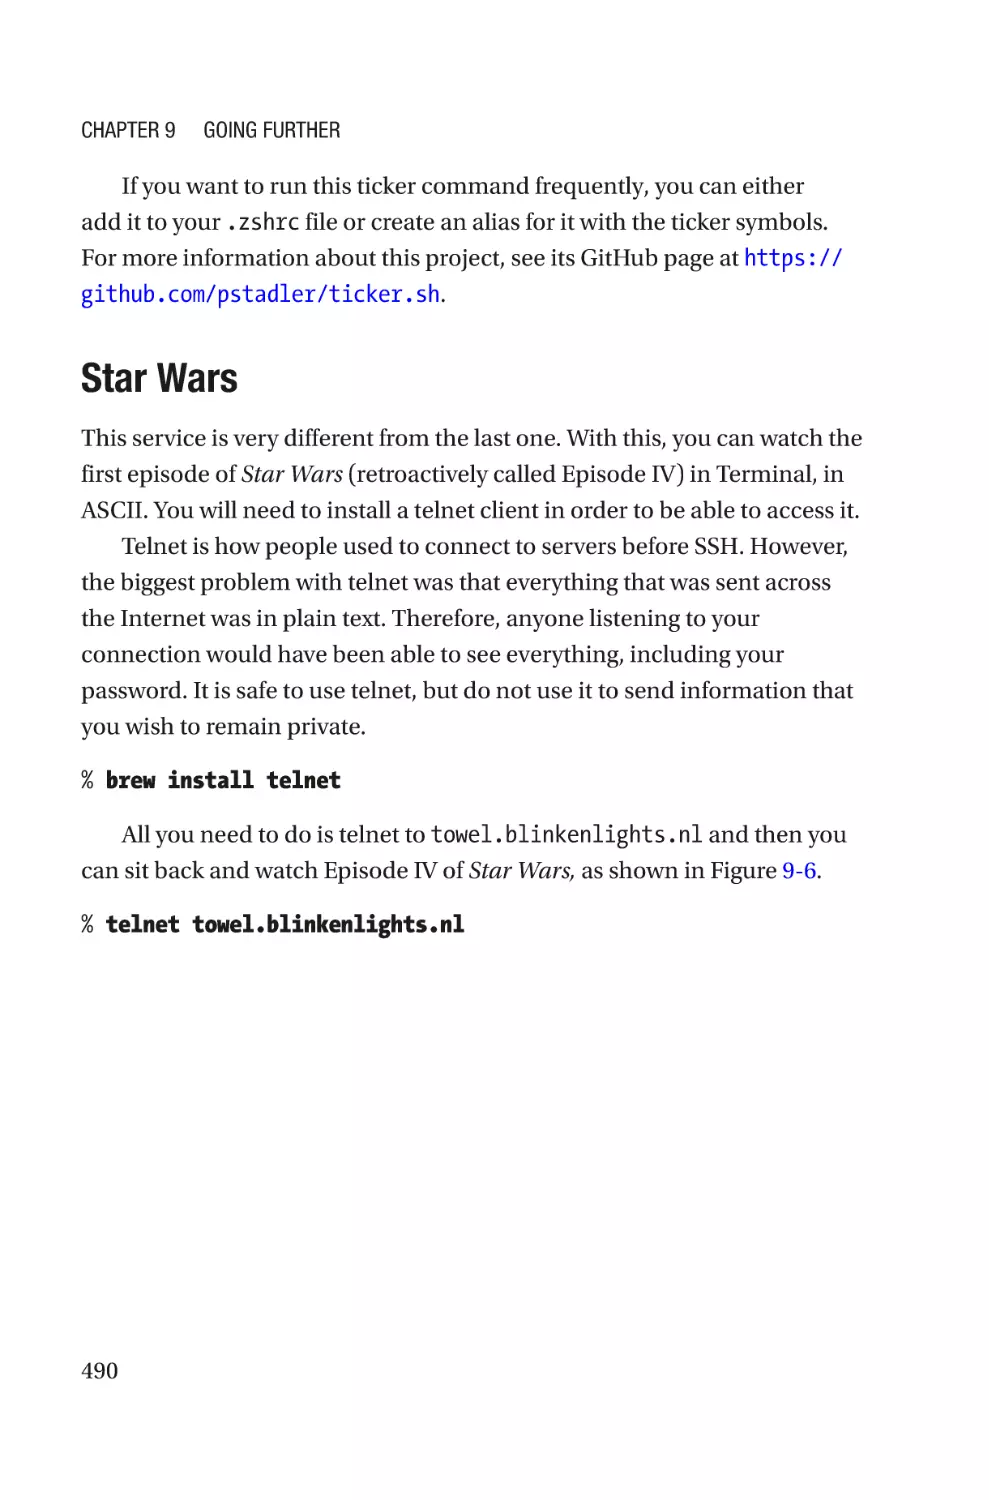
Star Wars�����������������������������������������������������������������������������������������������������490
Nyan Cat������������������������������������������������������������������������������������������������������491
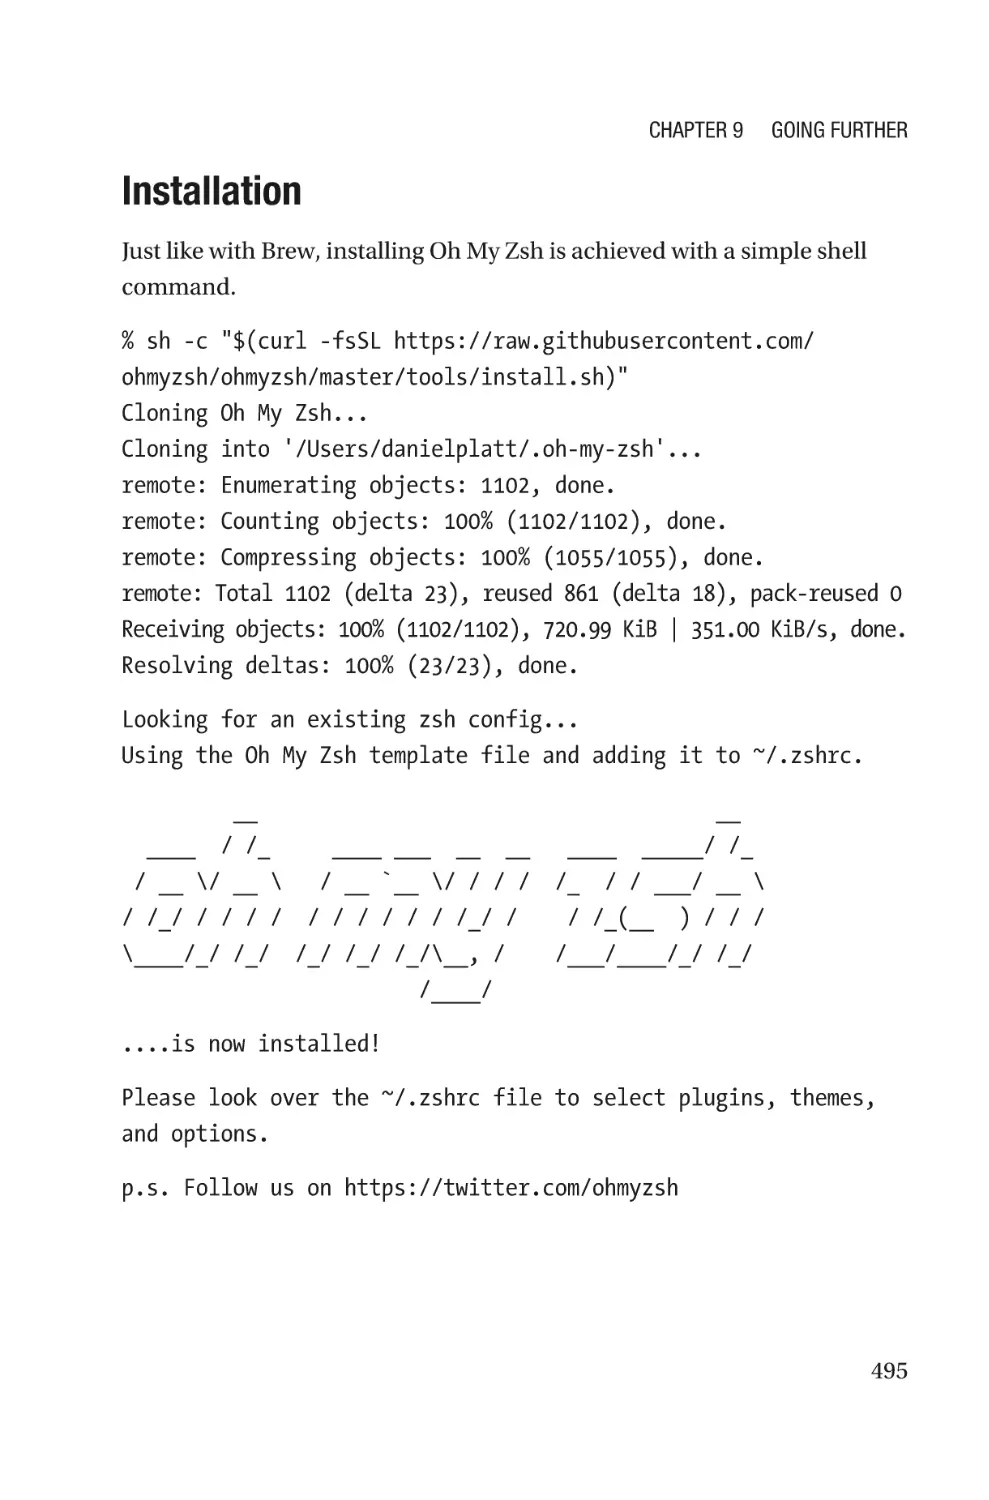
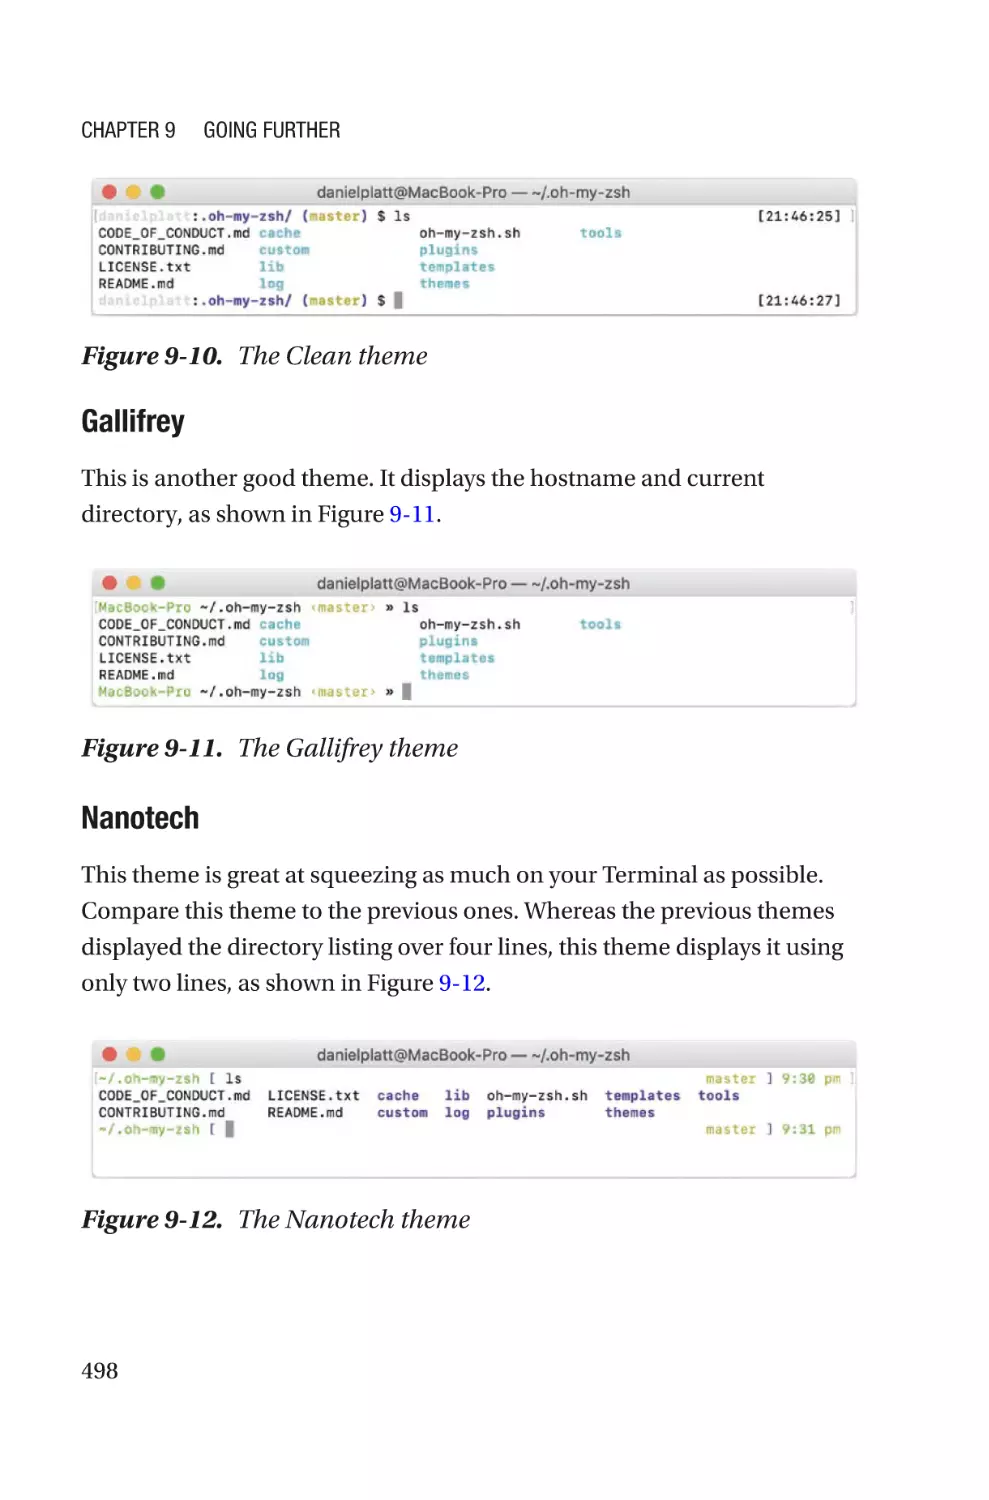
Oh My Zsh���������������������������������������������������������������������������������������������������������494
Installation���������������������������������������������������������������������������������������������������495
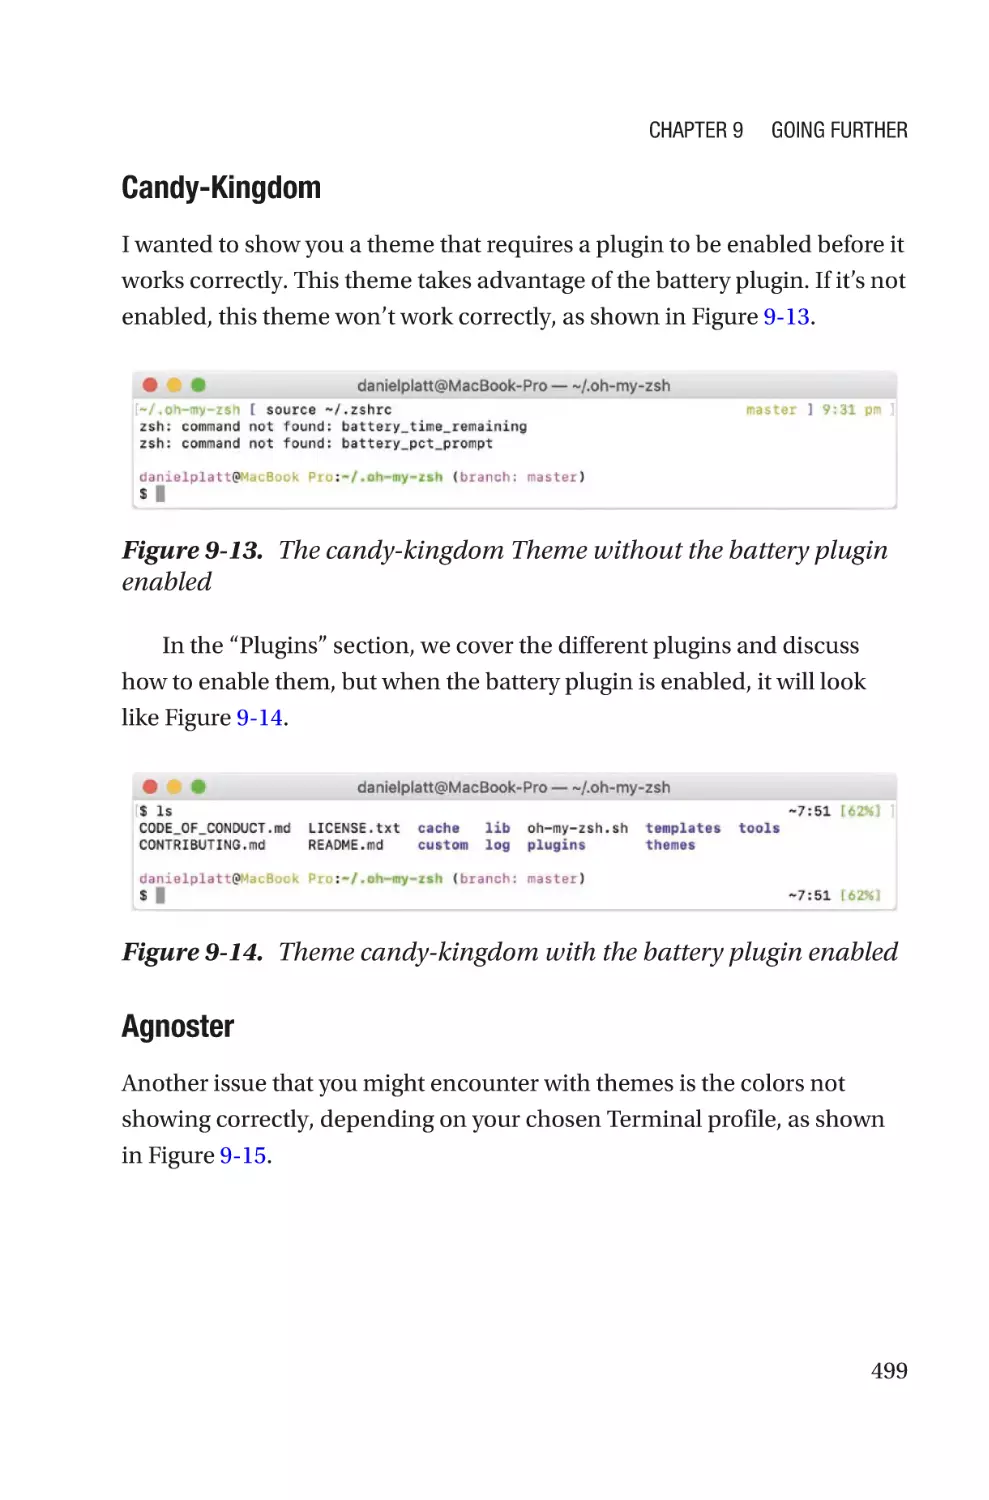
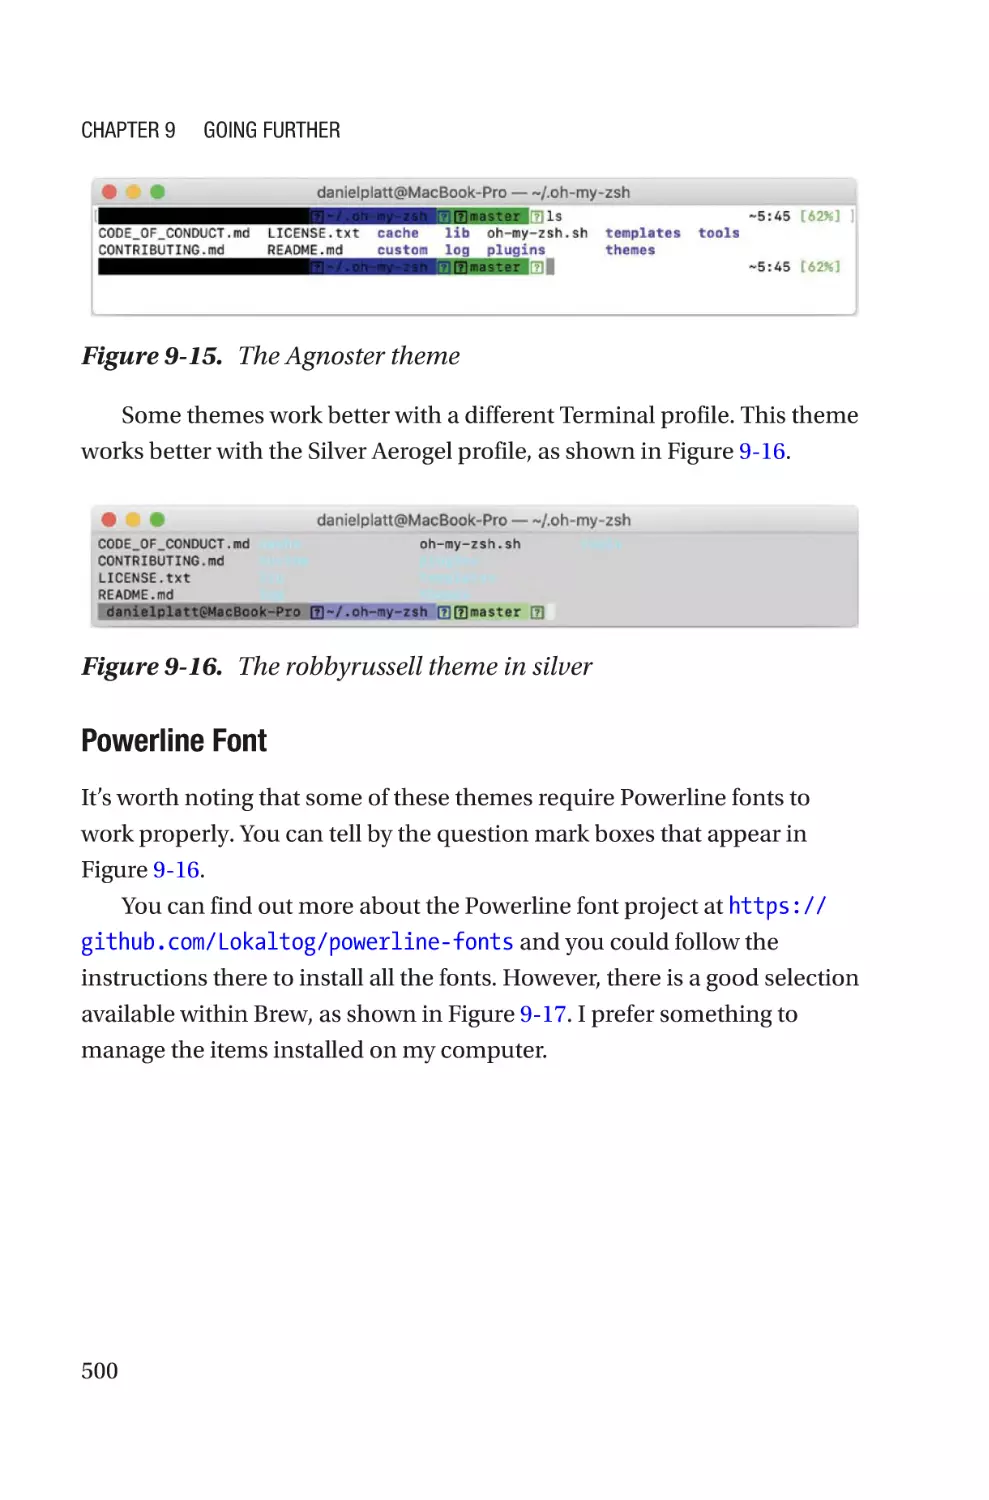
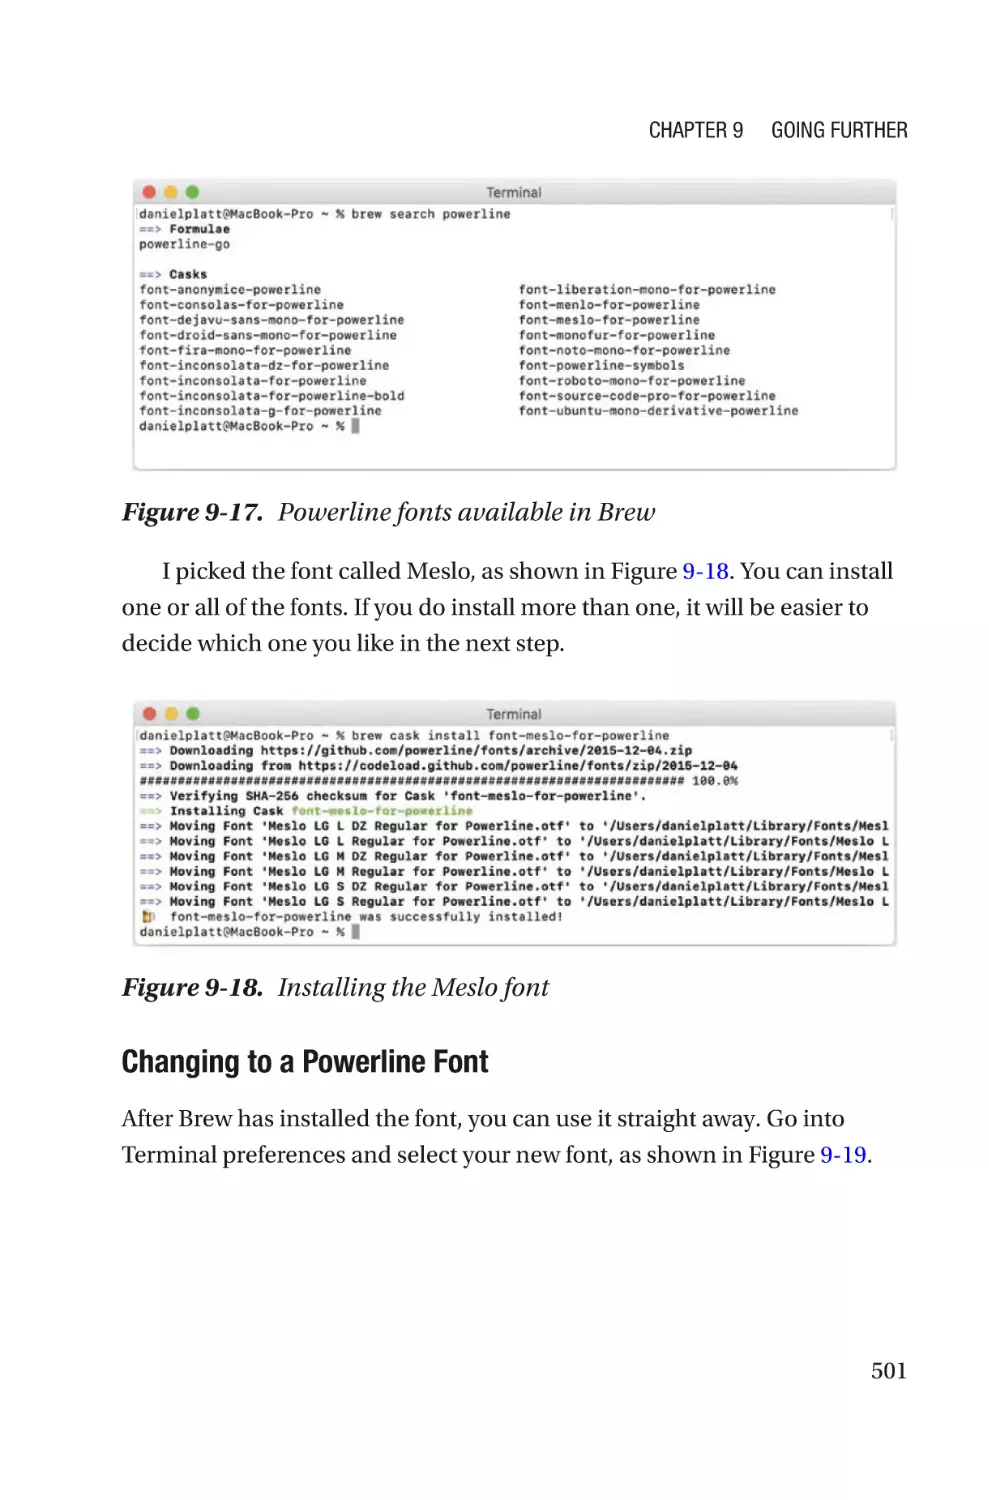
Customizing Oh My Zsh�������������������������������������������������������������������������������496
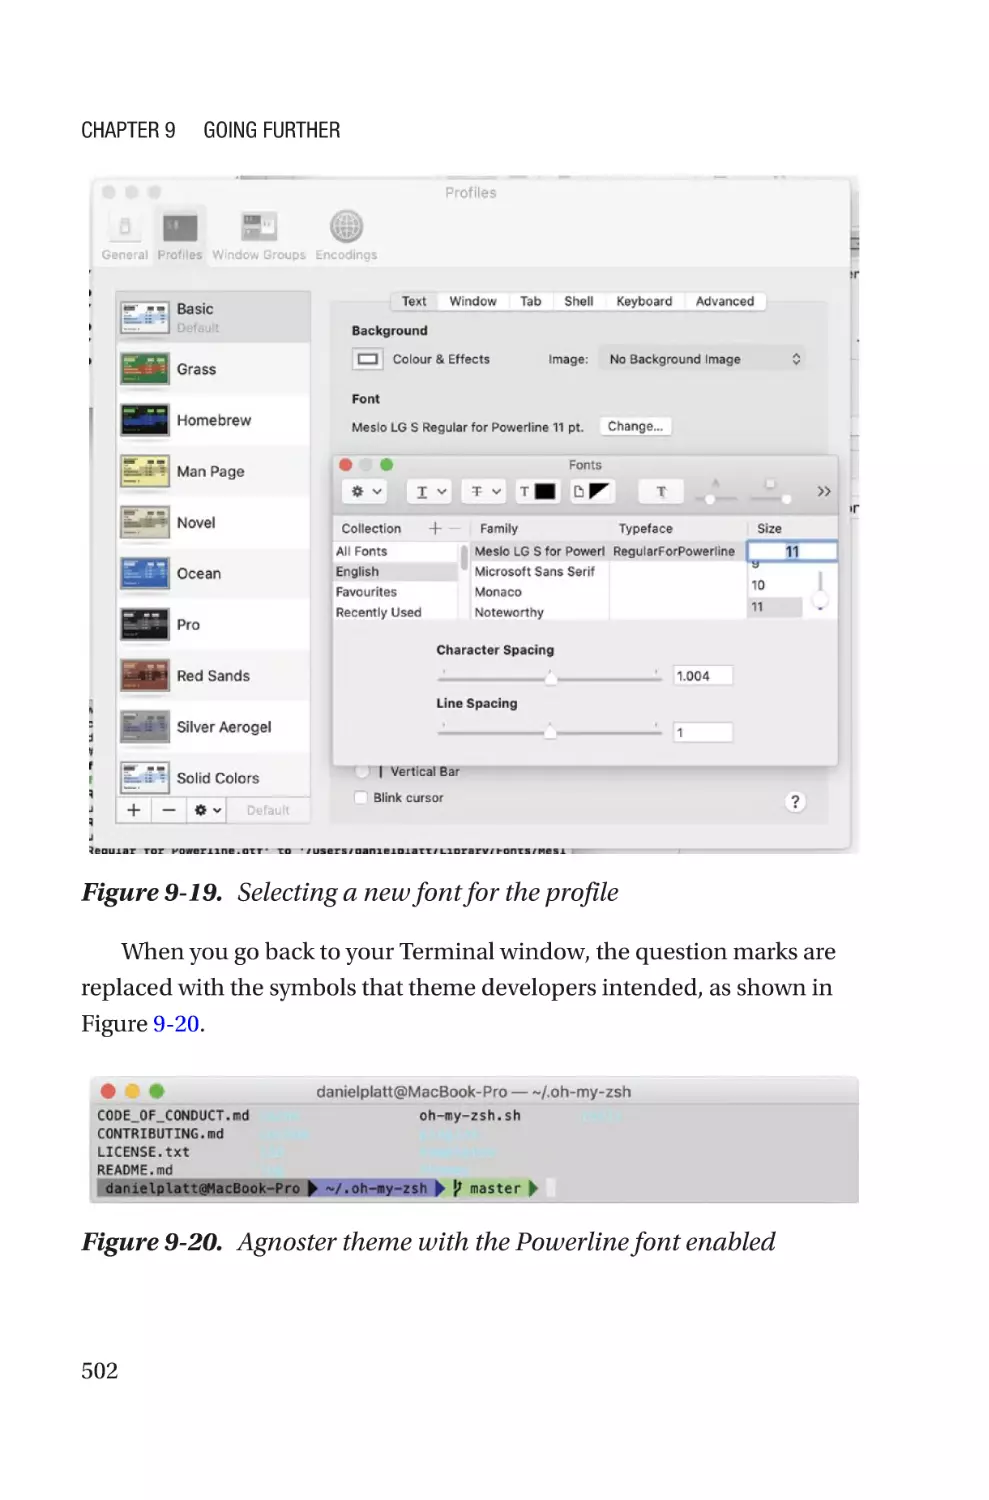
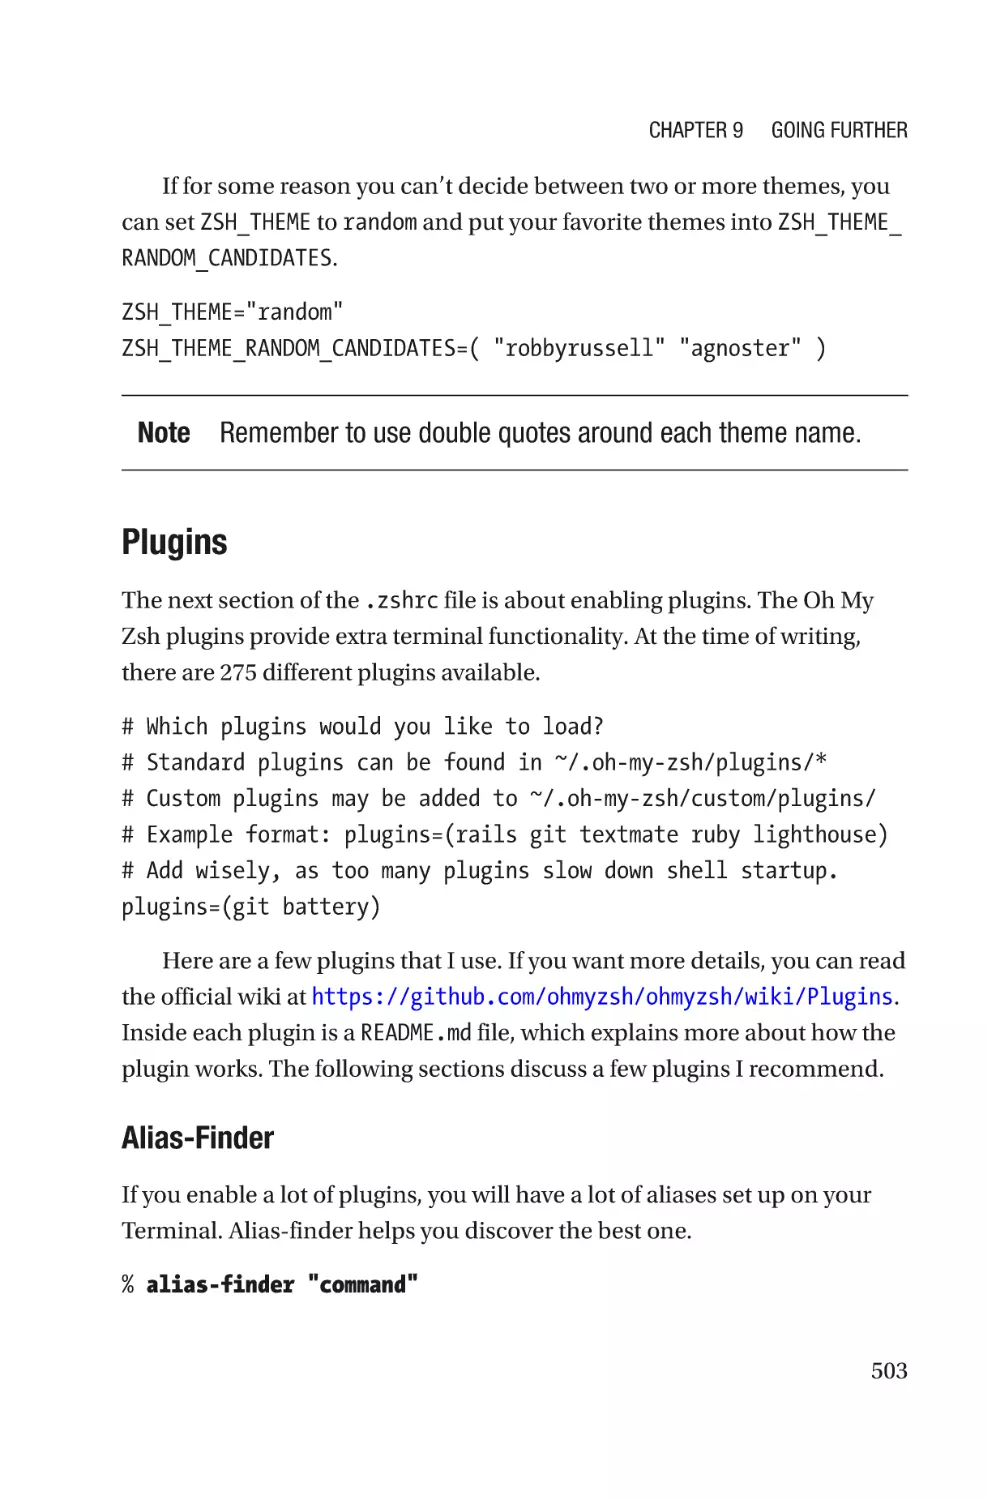
Ideas for Terminal���������������������������������������������������������������������������������������������515
Mistyping�����������������������������������������������������������������������������������������������������516
Identify Other Computers����������������������������������������������������������������������������516
Filtering Log Files����������������������������������������������������������������������������������������519
Programming Languages����������������������������������������������������������������������������������522
Python���������������������������������������������������������������������������������������������������������522
C and C++���������������������������������������������������������������������������������������������������523
Swift������������������������������������������������������������������������������������������������������������523
Summary����������������������������������������������������������������������������������������������������������524
Index�������������������������������������������������������������������������������������������������525
xv
About the Author
Daniel Platt is a Senior Software Engineer
at Comparison Technologies Ltd in the UK.
He has also produced various online courses
around web servers and web development on
macOS. Daniel has been a macOS user since
the very first MacOS X Public Beta in 2000
and has been building Linux servers since the
late 1990s. He is a lifelong computer nerd and
spent a bit too much time on his computer
working on his latest project. He found himself spending a lot of time using
Terminal for his work and wanted to share his improvement “tweaks” with
everybody. The result is this book.
While building web applications, Daniel also sets up web servers
from scratch because he has yet to find the perfect hosting solution. His
philosophy is “Why settle, when you can build it better yourself?” He even
has a course on that topic.
If you’d like to reach out to Daniel, you can do so via his website:
https://www.ofdan.com/
xvii
About the Technical Reviewer
Ahmed Bakir is an iOS author, teacher, and entrepreneur. He has worked
on over 30 mobile projects, ranging from advising startups to architecting
apps for Fortune 500 companies. In 2014, he published his first book,
Beginning iOS Media App Development, followed by the first edition
of Program the Internet of Things with Swift in 2016 and the second
edition in 2018. In 2015, he was invited to develop courses and teach iOS
development at UCSD-Extension. He is currently building cool stuff in
Tokyo! You can find him online at devatelier.com.
xix
Acknowledgements
With lots of thanks to my wife, Sarah and my two children, Ellie and Livy,
for being patient with me while I wrote this book.
I would also like to thank my friend Simon for double-checking and
improving the content.
I am very grateful to Apress for taking a chance with me.
Finally, thanks go to my colleagues at Comparison Tech. for suggesting
additional ideas.
xxi
CHAPTER 1
Getting Started
All personal computers these days come with a graphical user interface
(GUI), although this hasn’t always been the case. Most computers prior
to the release of the Apple Macintosh booted into a terminal, text-only
environment. All you would have been greeted with was a flashing cursor.
If your computer didn’t come with a user manual, you might have
struggled with which commands you should be typing, as some command
lines were not very intuitive. If you didn’t grow up using a terminal then
I can imagine the prospect to be quite daunting. This is where this book
comes in! I want to help you to feel just at ease with a terminal as you do
with a mouse and the GUI.
Terminal at a Glance
The macOS Operating System comes with lots of preinstalled applications.
Some of them you know—Calendar, Mail, Photos, and Safari. Others,
you won’t be familiar with, and they are more commonly known as
commands—this includes cat, cp, df, echo, and rm.
One application has been bundled with macOS since the first release,
back in 2001. The application is normally relegated to the average user
as a way to perform tips and tricks that can be found on the Internet.
The application is called “Terminal,” and it’s shown in Figure 1-1. In this
chapter we take a high-level look at this application before digging deeper
into it in subsequent chapters.
© Daniel Platt 2021
D. Platt, Tweak Your Mac Terminal, https://doi.org/10.1007/978-1-4842-6171-2_1
1
Chapter 1
Getting Started
Figure 1-1. The Terminal application
This book is a journey into a world of Terminal and the hidden
commands and utilities that you are unlikely to be aware of. These
commands are not like the normal applications, where you use a mouse
and GUI to interact with them. Commands do not have a traditional GUI
and they operate entirely from the keyboard.
The way to use these commands is by using the Terminal application
that is provided with every version of macOS, hidden within the Utilities
folder, as shown in Figure 1-2. The Utilities folder can be found inside the
Applications folder.
2
Chapter 1
Getting Started
Figure 1-2. The Terminal application in the Utilities folder
The quickest way to access Terminal is by activating Spotlight. You do
that by pressing ⌘+Spacebar, as shown in Figure 1-3.
Figure 1-3. The Spotlight search bar
Then you can type “Terminal” in the search bar and Spotlight will
display the application for you to launch, as shown in Figure 1-4.
3
Chapter 1
Getting Started
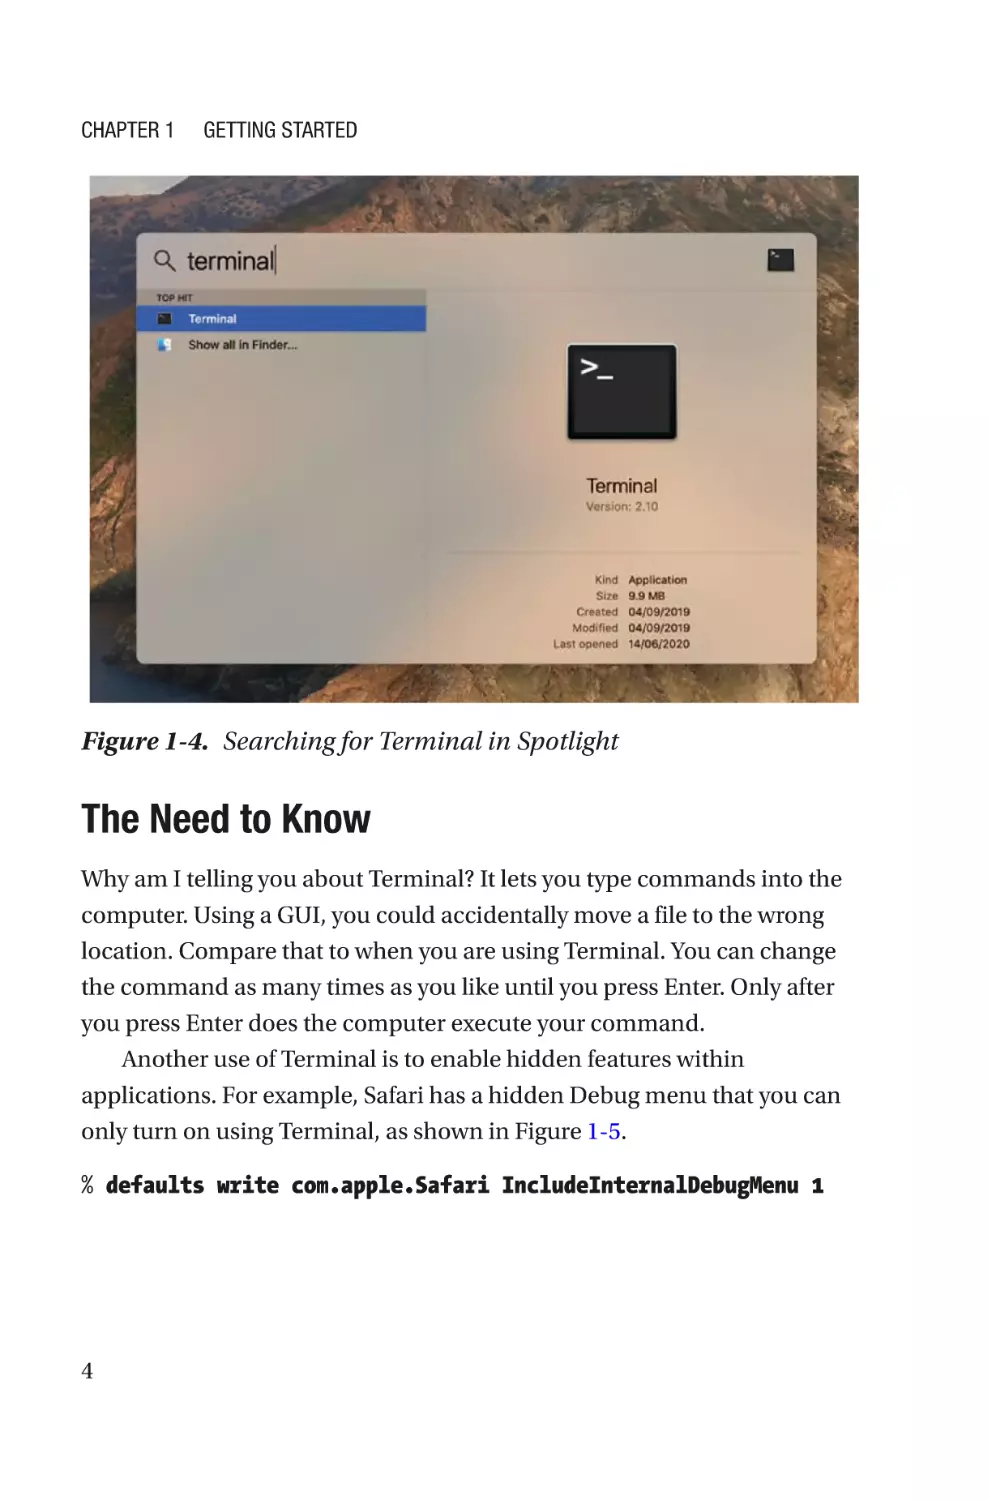
Figure 1-4. Searching for Terminal in Spotlight
The Need to Know
Why am I telling you about Terminal? It lets you type commands into the
computer. Using a GUI, you could accidentally move a file to the wrong
location. Compare that to when you are using Terminal. You can change
the command as many times as you like until you press Enter. Only after
you press Enter does the computer execute your command.
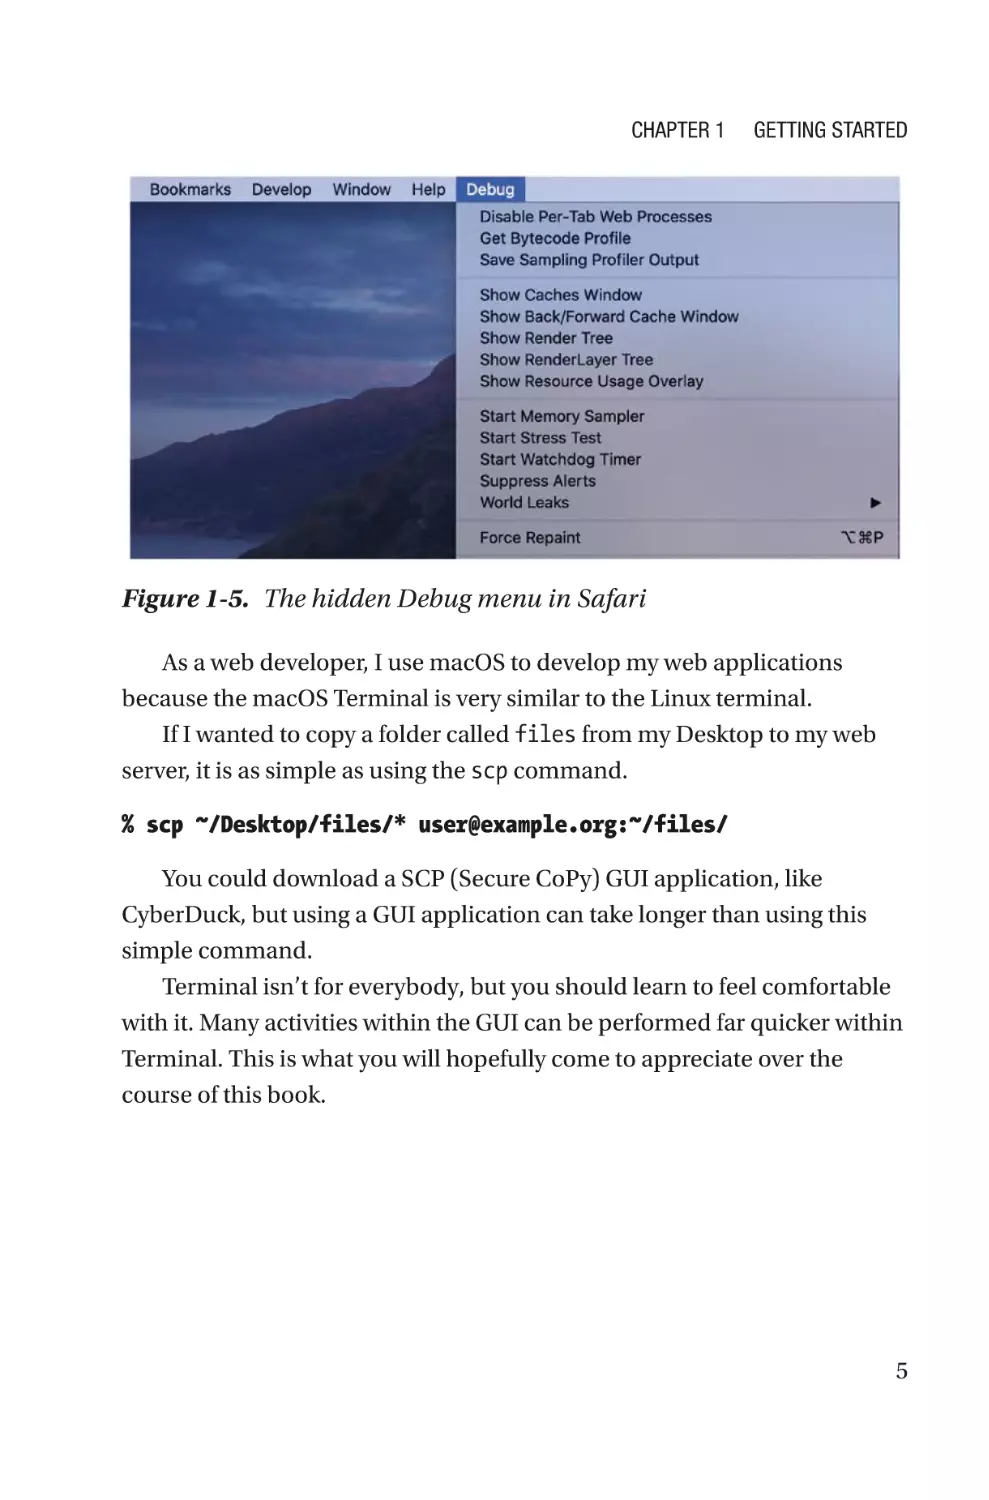
Another use of Terminal is to enable hidden features within
applications. For example, Safari has a hidden Debug menu that you can
only turn on using Terminal, as shown in Figure 1-5.
% defaults write com.apple.Safari IncludeInternalDebugMenu 1
4
Chapter 1
Getting Started
Figure 1-5. The hidden Debug menu in Safari
As a web developer, I use macOS to develop my web applications
because the macOS Terminal is very similar to the Linux terminal.
If I wanted to copy a folder called files from my Desktop to my web
server, it is as simple as using the scp command.
% scp ~/Desktop/files/* user@example.org:~/files/
You could download a SCP (Secure CoPy) GUI application, like
CyberDuck, but using a GUI application can take longer than using this
simple command.
Terminal isn’t for everybody, but you should learn to feel comfortable
with it. Many activities within the GUI can be performed far quicker within
Terminal. This is what you will hopefully come to appreciate over the
course of this book.
5
Chapter 1
Getting Started
Book Conventions
Throughout this book, you will see commands you need to type into your
terminal, as well as the output they produce.
We use % to refer to the command prompt and put the whole line you
need to type in monospace bold font.
% date
The output appears beneath the command, like so:
% date
Tue 11 Oct 2019 10:57:34 BST
If a command is ever within with a block of text, it will be displayed
in monospace font as well. For example, to print the current time to the
terminal, you use the date command. Sometimes the output will be shown
in screenshots to preserve the formatting for ease of viewing.
Book Requirements
To take full advantage of this book, you need your computer to be of a
certain standard and have Xcode and Homebrew installed. Let’s have a
look at these requirements now.
Minimum Requirements
As stated by Apple, the following Apple computers can run Catalina.
6
•
MacBook (Early 2015 or newer)
•
MacBook Air (Mid 2012 or newer)
•
MacBook Pro (Mid 2012 or newer)
•
Mac mini (Late 2012 or newer)
Chapter 1
•
iMac (Late 2012 or newer)
•
iMac Pro (2017)
•
Mac Pro (Late 2013 or newer)
Getting Started
I cover the Catalina version of macOS (10.15), which was released
on the October 7, 2019. All of Apple’s older computers (since 2013) can
run Catalina and some from 2012 can also do so. It’s a good idea to check
whether your Mac is compatible, if you are not already running Catalina.
If you are running an older version of macOS, you might have
problems with some commands not existing or being older versions.
We will also be installing Homebrew, which is a package manager for
the macOS Terminal. It needs to run on macOS High Sierra (10.13) or later.
We will be discussing Homebrew in greater detail later in this chapter
and learning what we can install with it in Chapter 4.
If you are using an Apple computer within the last four years, you
should have or will be able to upgrade your macOS version to Catalina.
You will need to install either Xcode or the Command Line Developer
tools, which will be discussed in the next section, “Installing Xcode.” These
programs provide the necessary tools for Homebrew to be able to build
and install new commands for your terminal.
It’s also advantageous to have at least 20-30GB of free space on your
Mac, so you can install all the requirements and the extra commands. You
never want your Mac to run out of disk space, as many applications cannot
function properly without free disk space.
The last requirement is that you need an Internet connection. Some
tricks will require an Internet connection to work. Homebrew also requires
the Internet to download new files, install new applications, and update
existing ones.
Once you have all these things set up, you can proceed.
7
Chapter 1
Getting Started
I nstalling Xcode
You need to use Xcode’s Command Line Developer tools for Homebrew to
be able to build new commands and keep them up to date. Thankfully, you
can now easily install the Command Line Tools from Apple with a simple
command.
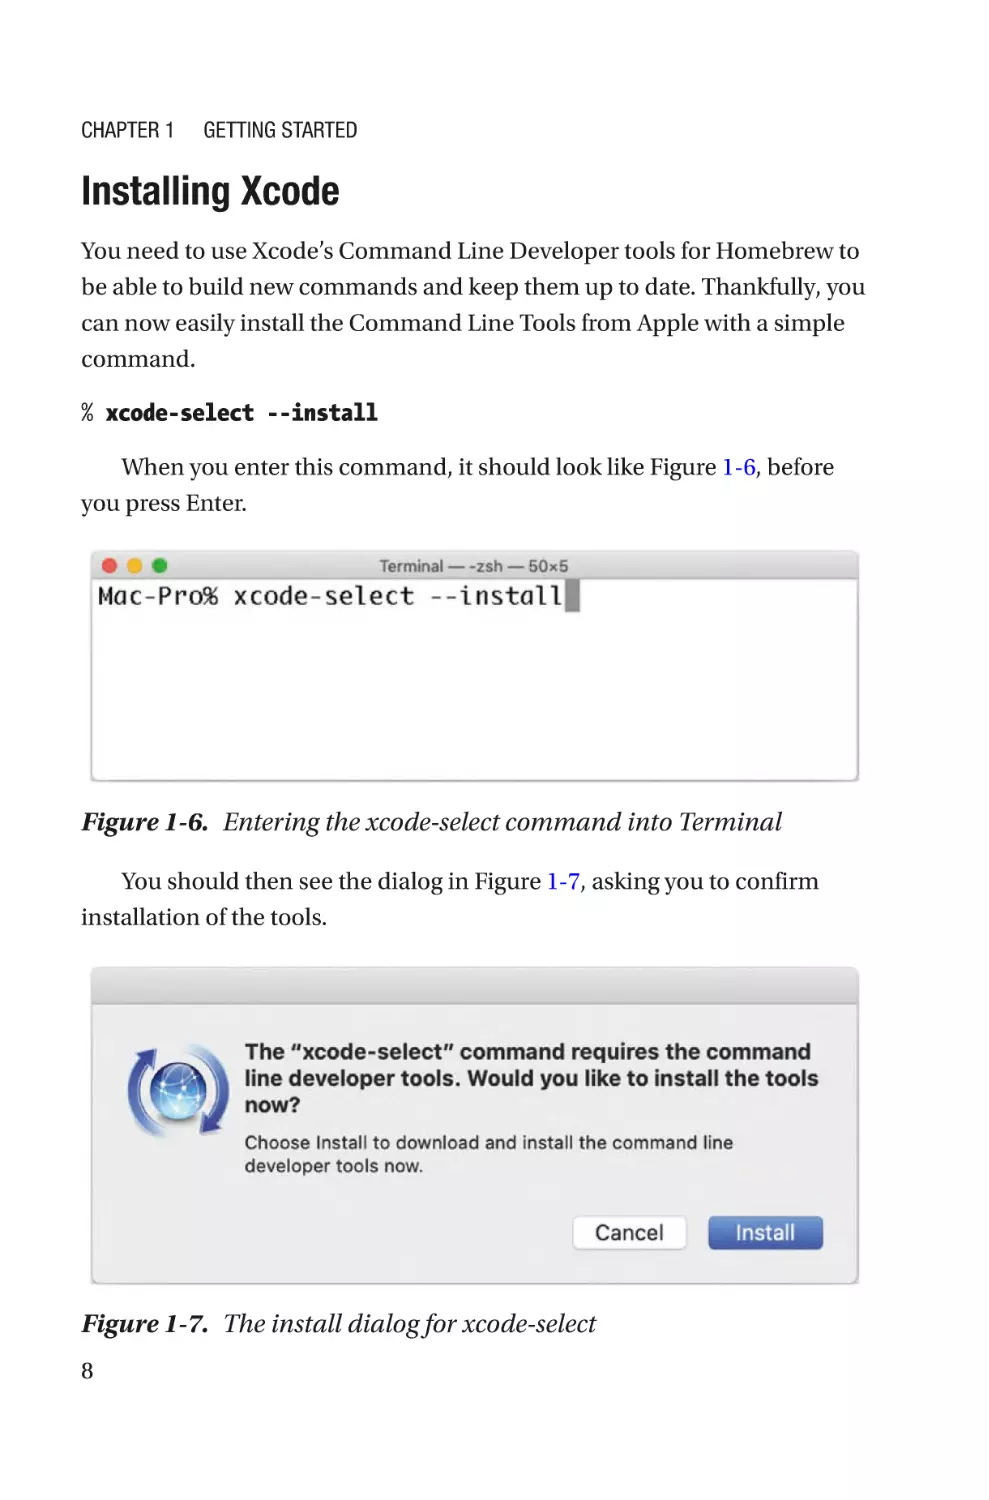
% xcode-select --install
When you enter this command, it should look like Figure 1-6, before
you press Enter.
Figure 1-6. Entering the xcode-select command into Terminal
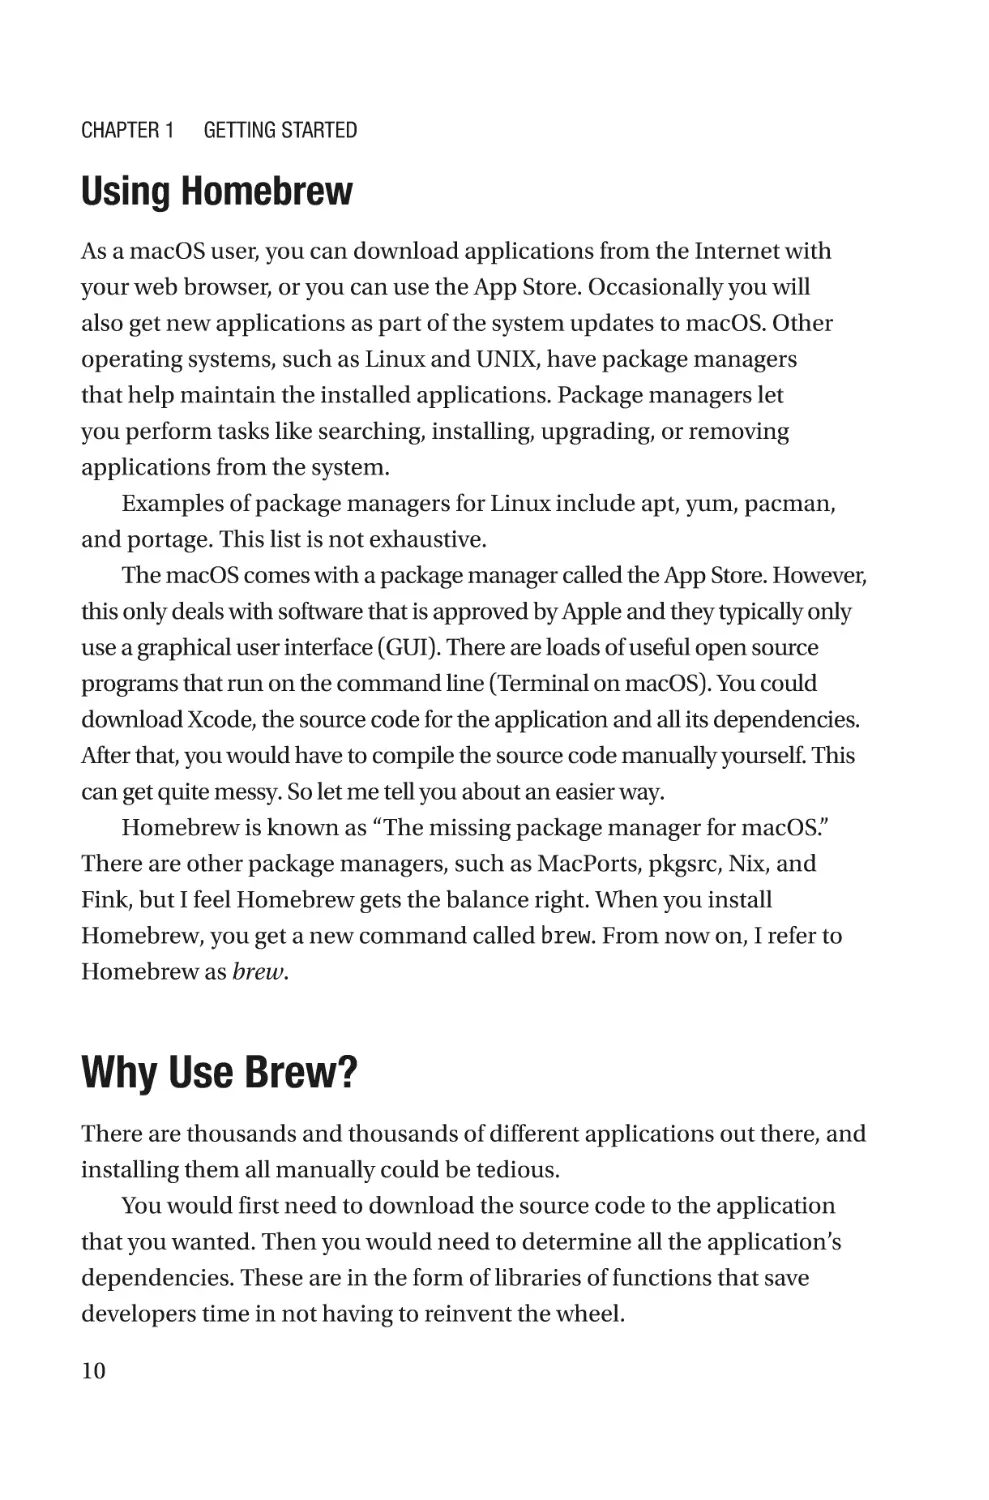
You should then see the dialog in Figure 1-7, asking you to confirm
installation of the tools.
Figure 1-7. The install dialog for xcode-select
8
Chapter 1
Getting Started
The Command Line Tools installation requires roughly 500MB of disk
space and will install virtually everything Homebrew needs to compile the
commands you install.
According to the Homebrew documentation, installing the full version
of Xcode will negate the need to install these tools. However, in my
experience, after installing Xcode, you still need to install the developer
tools.
In some instances, Homebrew will require the full version of Xcode, so
for completeness, I will include its installation instructions.
Installing Xcode is as simple as going to the App Store and searching
for Xcode, as shown in Figure 1-8.
Figure 1-8. Searching for Xcode in the App Store
At present, Xcode is just under 11.2GB in size to download. The
installation process will extract Xcode and uses about 30GB.
9
Chapter 1
Getting Started
Using Homebrew
As a macOS user, you can download applications from the Internet with
your web browser, or you can use the App Store. Occasionally you will
also get new applications as part of the system updates to macOS. Other
operating systems, such as Linux and UNIX, have package managers
that help maintain the installed applications. Package managers let
you perform tasks like searching, installing, upgrading, or removing
applications from the system.
Examples of package managers for Linux include apt, yum, pacman,
and portage. This list is not exhaustive.
The macOS comes with a package manager called the App Store. However,
this only deals with software that is approved by Apple and they typically only
use a graphical user interface (GUI). There are loads of useful open source
programs that run on the command line (Terminal on macOS). You could
download Xcode, the source code for the application and all its dependencies.
After that, you would have to compile the source code manually yourself. This
can get quite messy. So let me tell you about an easier way.
Homebrew is known as “The missing package manager for macOS.”
There are other package managers, such as MacPorts, pkgsrc, Nix, and
Fink, but I feel Homebrew gets the balance right. When you install
Homebrew, you get a new command called brew. From now on, I refer to
Homebrew as brew.
Why Use Brew?
There are thousands and thousands of different applications out there, and
installing them all manually could be tedious.
You would first need to download the source code to the application
that you wanted. Then you would need to determine all the application’s
dependencies. These are in the form of libraries of functions that save
developers time in not having to reinvent the wheel.
10
Chapter 1
Getting Started
There are libraries for everything and sometimes there is more than
one, as shown in Table 1-1. These libraries provide functionalities to
programs, which save you time. For example, libxml2 provides support for
reading a file format known as XML.
Table 1-1. Libraries and Their Functions
Library
Purpose
libcurl
File transfer library
libtls
TLS library for certificate verification
libreadline
Allows users to edit commands as they typed them in
libxml2
XML parser
The point is, you need to install all the required libraries, most likely by
compiling them from the source. Then you would be able to compile the
application you originally wanted.
This is the reason package managers were created. They keep track
of every piece of software and all the required libraries. When you install
an application, the package manager compares the dependencies to
everything that is currently installed and installs whatever is missing.
There is a huge community of developers producing and maintaining
software, which can be installed on your computer using Brew. By
leveraging Brew, you benefit from all the people before you.
I nstalling Brew
Installing Brew on your computer is a very straightforward process. By
default, Brew will install itself into a shared folder, called /usr/local.
This will allow you to share installed commands across all users on your
Mac. However, only the user who installed Brew will be able to modify the
commands.
11
Chapter 1
Getting Started
If you want all users to be able to modify the installed commands, they
will need their own installations of Brew.
Installing Brew Globally
The easier way to install Brew is to grab the installation command from the
website, at https://brew.sh/:
% /bin/bash -c "$(curl -fsSL ↩
https://raw.githubusercontent.com/Homebrew/install/master/
install.sh)"
The installation command is simple but powerful. All you need to do is
copy and paste that command into Terminal and press Return. The script
will start running and you will get confirmation of where Brew will install
itself.
If you are happy for the installation to proceed, then press Enter to
continue. If you do not want to carry on, you can press any other button to
abort the installation.
Note that you may be prompted for your password if the script requires
extra permissions to start the installation.
Installing Brew for Each User
By default, Brew will install itself into /usr/local, which can be
overwritten.
For example, if you wanted to install Brew into your home directory, you
could use these commands.
% mkdir ~/homebrew
% curl -L https://github.com/Homebrew/brew/tarball/master
% tar xz --strip 1 -C ~/homebrew
12
Chapter 1
Getting Started
However, unless you are an advanced user, I strongly recommend you
letting Brew install itself into /usr/local, as you are more likely to have a
better experience.
The one downside to installing Brew into /usr/local is that it is shared
among all users on the same computer. Whoever installed Brew first has
ownership, then whoever else tries to use Brew will run into permission
problems. At this point, however, I suggest installing Brew into your home
directory with the previous command.
After Installation
Once the installation is complete, you should run a few commands to
double-check that everything was set up properly.
•
brew doctor will give the Brew install a checkup.
•
brew update will confirm that Brew downloaded all the
updates.
You now have installed the Brew environment and confirmed that
everything works correctly.
Finding Applications in Brew
You have installed Brew, so now you need to know some basic Brew
commands.
A command you will use a lot of is brew search. It will allow you to
search for applications by name. For example, you could search for nano,
which is a command-line text editor. The command for that search is brew
search nano.
If you searched for PHP, you will see all the different versions of PHP
and all the different modules that come with it:
% brew search php
13
Chapter 1
Getting Started
You could do a slightly more targeted search if, say, you are only
interested in PHP version 7.3:
% brew search php@7.3
Now I’ve shown you how you can use brew search to find applications
to install. However, this is only useful if you know what it is you want to
install. This doesn’t give you a description of the application.
You can also use the Brew website (https://brew.sh/), which allows
you to search for names and/or descriptions. It also gives you the full
description of the command. There is also other useful information on the
site.
You now should be able to search for applications to install.
Installing Applications from Brew
Now that you know how to find applications, you need to know how to
install them.
How about a nice inspirational fortune cookie?
% brew install fortune
Now you can run fortune from the terminal:
% fortune
Everyone is more or less mad on one point.
-- Rudyard Kipling
Don’t worry about making a mistake. Either you’ll find that the
package name doesn’t exist, as so:
% brew install fortune-typo
Error: No available formula with the name "fortune-typo"
==> Searching for a previously deleted formula (in the last
month)...
14
Chapter 1
Getting Started
Error: No previously deleted formula found.
==> Searching for similarly named formulae...
Error: No similarly named formulae found.
==> Searching taps...
==> Searching taps on GitHub...
Error: No formulae found in taps.
Or you will install something that you didn’t want. That’s okay. If you
accidentally install an application or command, you can easily remove it
again, as follows:
% brew uninstall fortune
Uninstalling /usr/local/Cellar/fortune/9708... (118 files,
3.4MB)
Upgrading Installed Applications
You’ve installed your applications and commands with Brew.
Then you hear about a cool, new feature in these applications. You
realize it’s missing from your version of the application. You need to
upgrade your application to get this latest feature (or maybe fix a bug).
If you were running a paid application, then it is likely that you will
have to pay for the latest upgrade.
Type brew upgrade <application> (where <application> is the
name of the actual application) to upgrade the application. If you are
already running the latest version, you will get an error like the following
one.
% brew upgrade fortune
Error: fortune 9708 already installed
It’s scarier looking than it needs to be. All it means is that Brew cannot
upgrade your application, because you already have the latest version.
15
Chapter 1
Getting Started
This is what it looks like when your upgrade is successful.
However, this output is completely made up, because fortune hasn’t
had an upgrade since 1998.
You can also type brew upgrade with no additional parameters, and
that will upgrade everything managed by Brew.
% brew upgrade
==> Upgrading 56 outdated packages:
php-cs-fixer 2.15.1 -> 2.15.3
aws/tap/aws-sam-cli 0.17.0 -> 0.23.0
ffmpeg 4.1.3_1 -> 4.2.1_1
Brew will list all the packages that require upgrading and then work
through them. It might be safer to find out what Brew will upgrade first, by
doing a dry run.
% brew upgrade --dry-run
==> Would upgrade 56 outdated packages:
php-cs-fixer 2.15.1 -> 2.15.3
aws/tap/aws-sam-cli 0.17.0 -> 0.23.0
ffmpeg 4.1.3_1 -> 4.2.1_1
16
Chapter 1
Getting Started
Then you can decide whether you want to upgrade anything, or cherry
pick the upgrades.
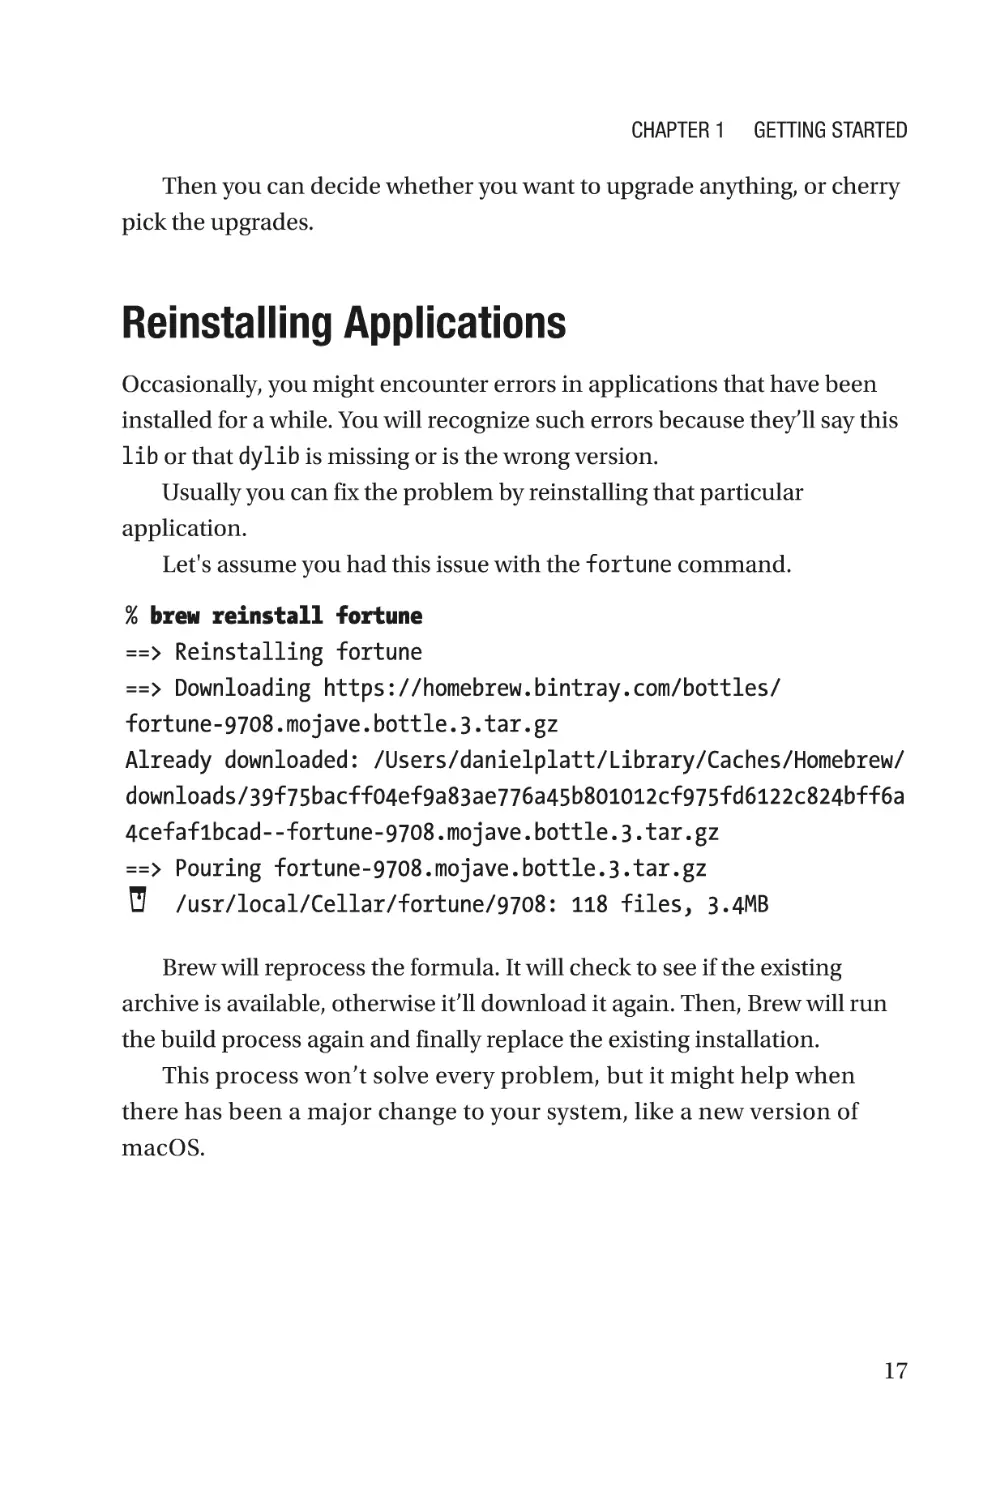
Reinstalling Applications
Occasionally, you might encounter errors in applications that have been
installed for a while. You will recognize such errors because they’ll say this
lib or that dylib is missing or is the wrong version.
Usually you can fix the problem by reinstalling that particular
application.
Let's assume you had this issue with the fortune command.
Brew will reprocess the formula. It will check to see if the existing
archive is available, otherwise it’ll download it again. Then, Brew will run
the build process again and finally replace the existing installation.
This process won’t solve every problem, but it might help when
there has been a major change to your system, like a new version of
macOS.
17
Chapter 1
Getting Started
Summary
In this chapter, we looked at Terminal and discussed why it is important.
We looked at Brew (Homebrew) and discussed what is required to install it.
We installed the dependencies for Brew and finally installed the program
itself.
We concluded the chapter with some Brew commands that showed
you basics, like how to install, reinstall, and uninstall programs.
18
CHAPTER 2
Terminal Basics
In this chapter, we look more closely at what Terminal is and what you can
do with it. There is a lot to cover, so let’s dig in.
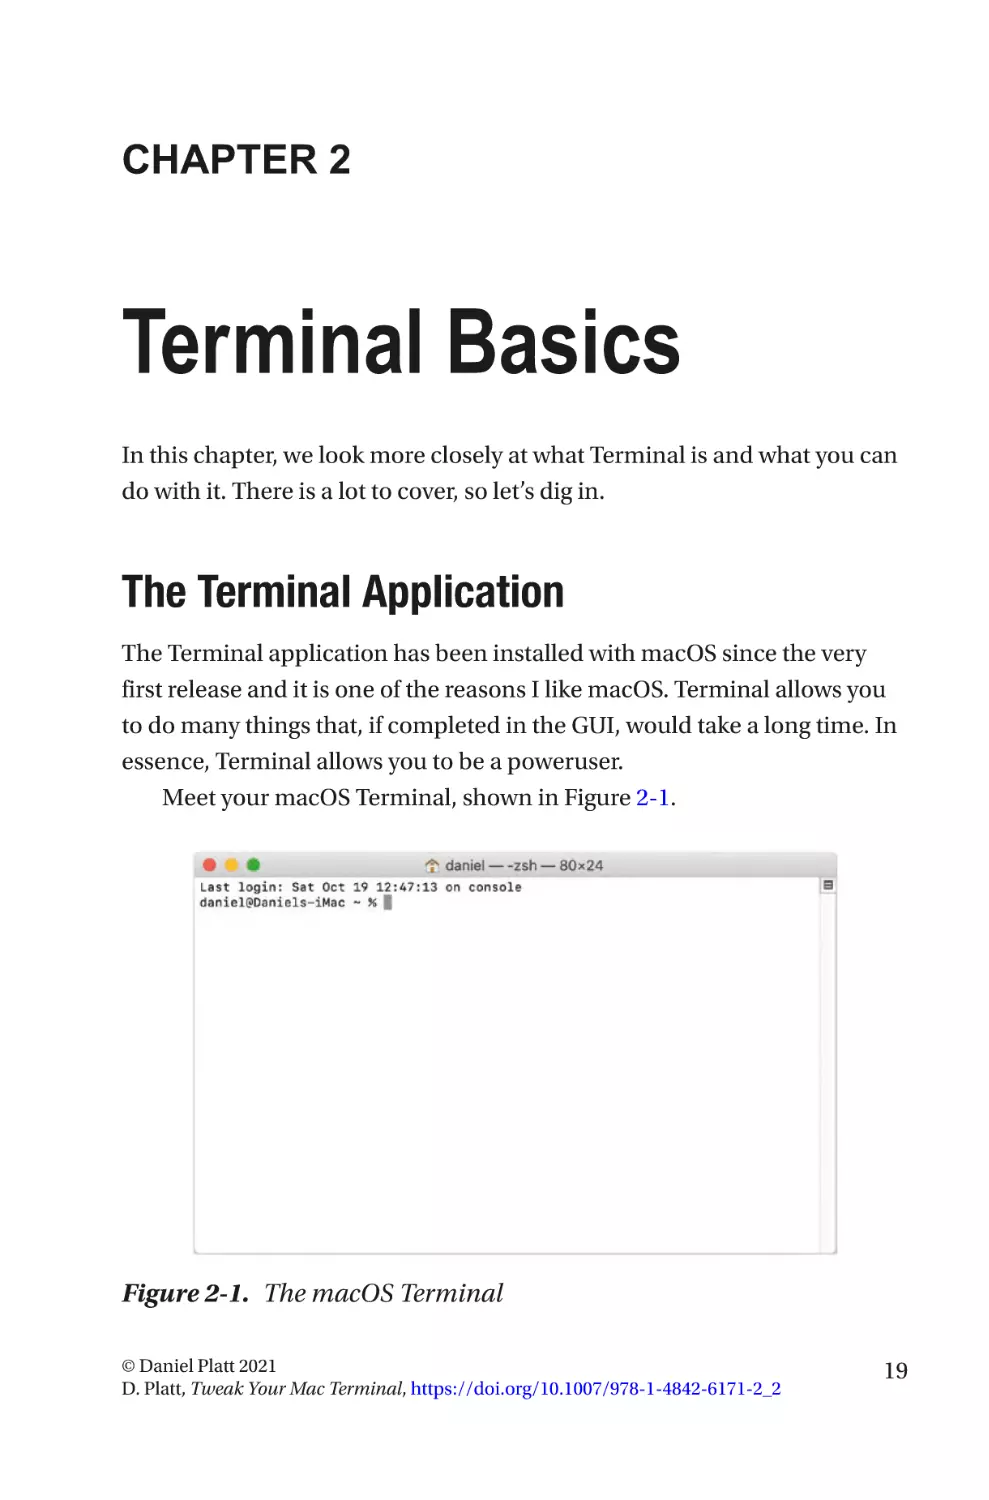
The Terminal Application
The Terminal application has been installed with macOS since the very
first release and it is one of the reasons I like macOS. Terminal allows you
to do many things that, if completed in the GUI, would take a long time. In
essence, Terminal allows you to be a poweruser.
Meet your macOS Terminal, shown in Figure 2-1.
Figure 2-1. The macOS Terminal
© Daniel Platt 2021
D. Platt, Tweak Your Mac Terminal, https://doi.org/10.1007/978-1-4842-6171-2_2
19
Chapter 2
Terminal Basics
As a web developer, I find that macOS and Linux have a lot in common,
and that’s evident with Terminal. It is because Linux and macOS are UNIX-
based operating systems.
This is why Brew and other package managers can port Linux
applications to the macOS. macOS even uses the same shells that can be
used on Linux. From Terminal, it is hard to tell the difference between
macOS and Linux. Only when you look closely you will see the differences.
One big difference is that on macOS, the filesystem isn’t case sensitive.
This means that you can’t have two files in the same directory that have the
same name, but differ only by case (such as MYFILE and myfile). Whereas
on Linux, the files MYFILE and myfile can exist in the same directory
without any issue because they are recognized as two different files.
C
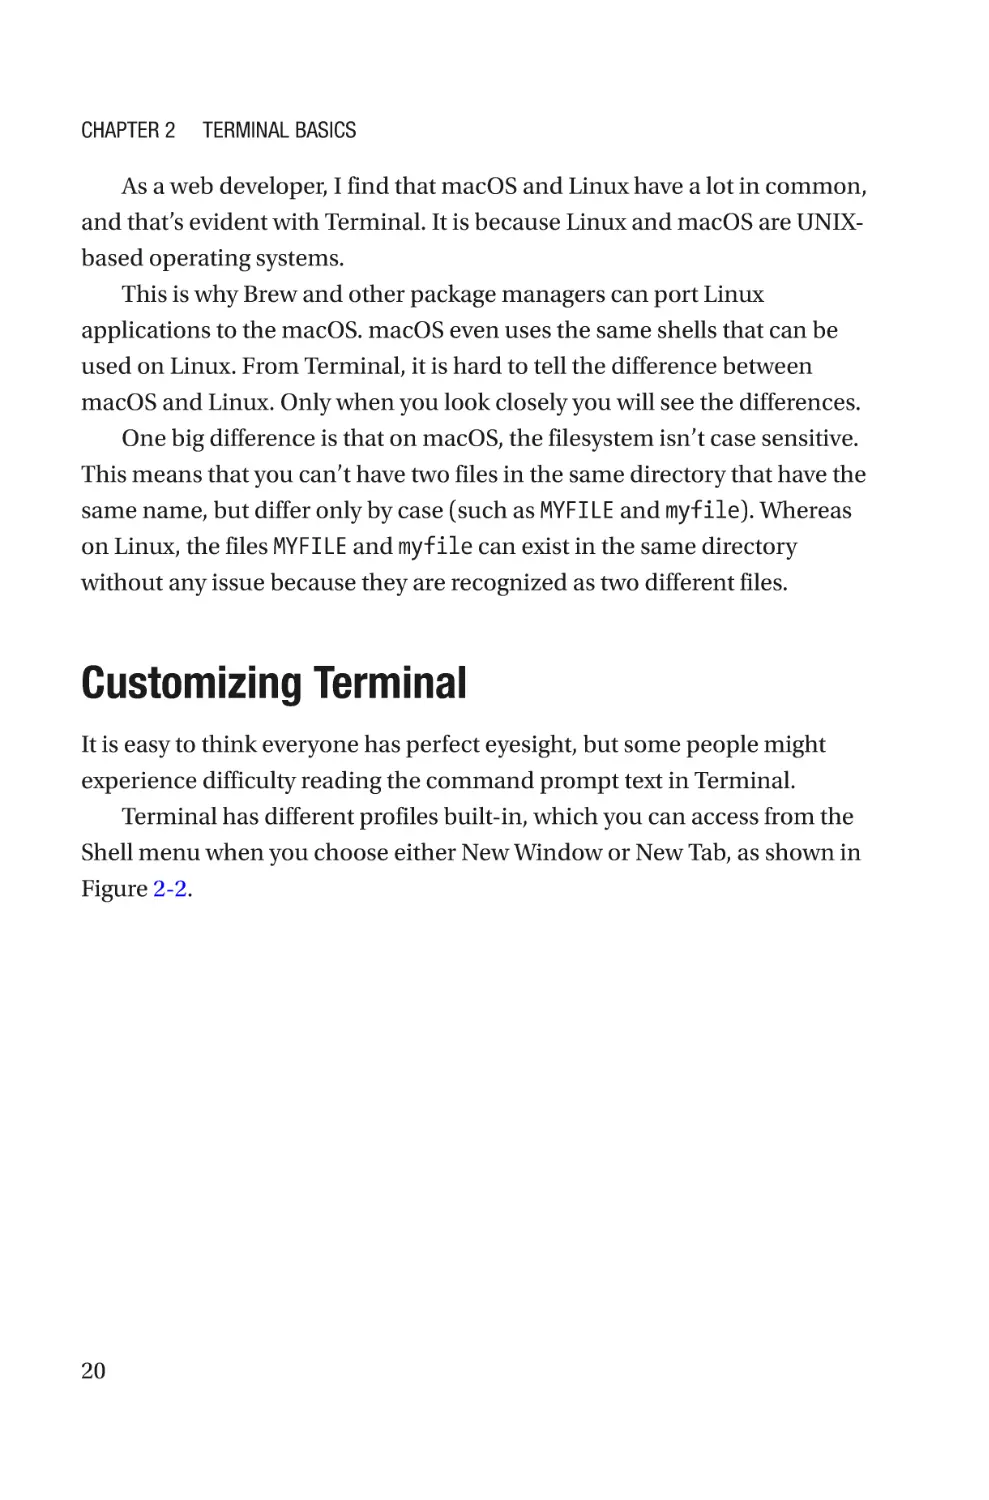
ustomizing Terminal
It is easy to think everyone has perfect eyesight, but some people might
experience difficulty reading the command prompt text in Terminal.
Terminal has different profiles built-in, which you can access from the
Shell menu when you choose either New Window or New Tab, as shown in
Figure 2-2.
20
Chapter 2
Terminal Basics
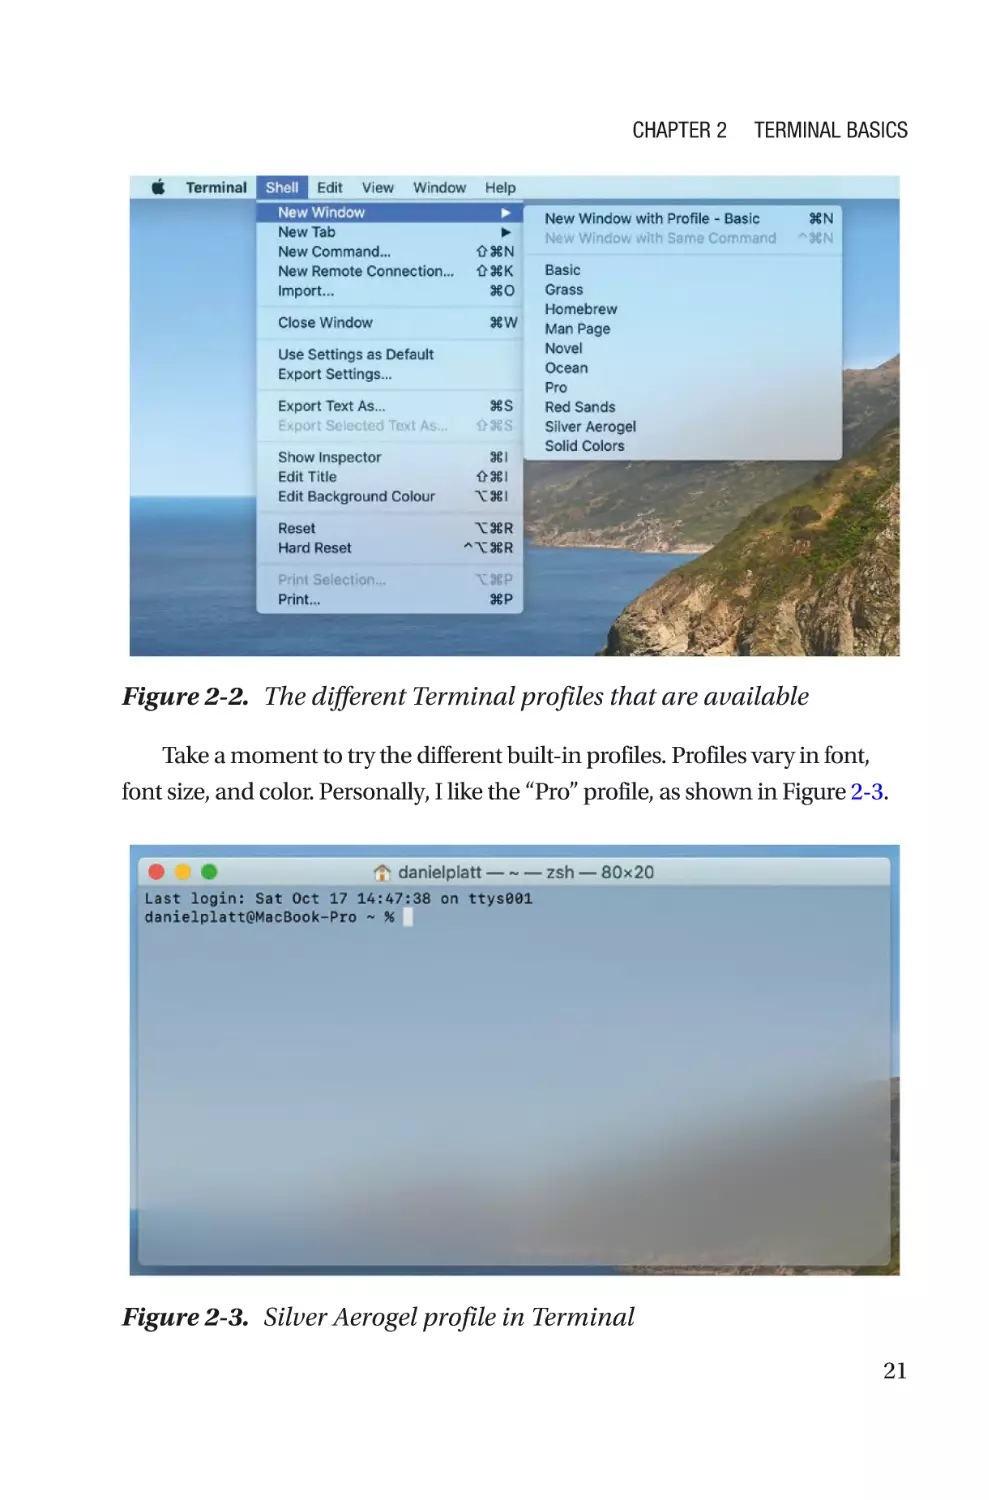
Figure 2-2. The different Terminal profiles that are available
Take a moment to try the different built-in profiles. Profiles vary in font,
font size, and color. Personally, I like the “Pro” profile, as shown in Figure 2-3.
Figure 2-3. Silver Aerogel profile in Terminal
21
Chapter 2
Terminal Basics
Hopefully one these profiles suits your liking regarding the
background, font, and color. So now we can customize these profiles. First,
you need to enter Terminal’s Preferences, found using the Terminal menu
item or the keyboard shortcut command and comma (⌘,) as shown in
Figure 2-4.
Figure 2-4. Terminal preference menu
Select the Profiles tab, as shown in Figure 2-5.
22
Chapter 2
Terminal Basics
Figure 2-5. Terminal’s Profile preferences
The list of profiles is now shown on the left side. This is the same list
that was shown in the New Window and Tab, Shell menu in Figure 2-2.
Let’s customize a profile. Select the profile that appeals to you the
most.
You can try different customizations out. Don’t worry about making
a mistake. If you do, you can always reset all the profiles back to their
defaults by clicking the cog and selecting the Restore Default Profiles
option, as shown in Figure 2-6.
23
Chapter 2
Terminal Basics
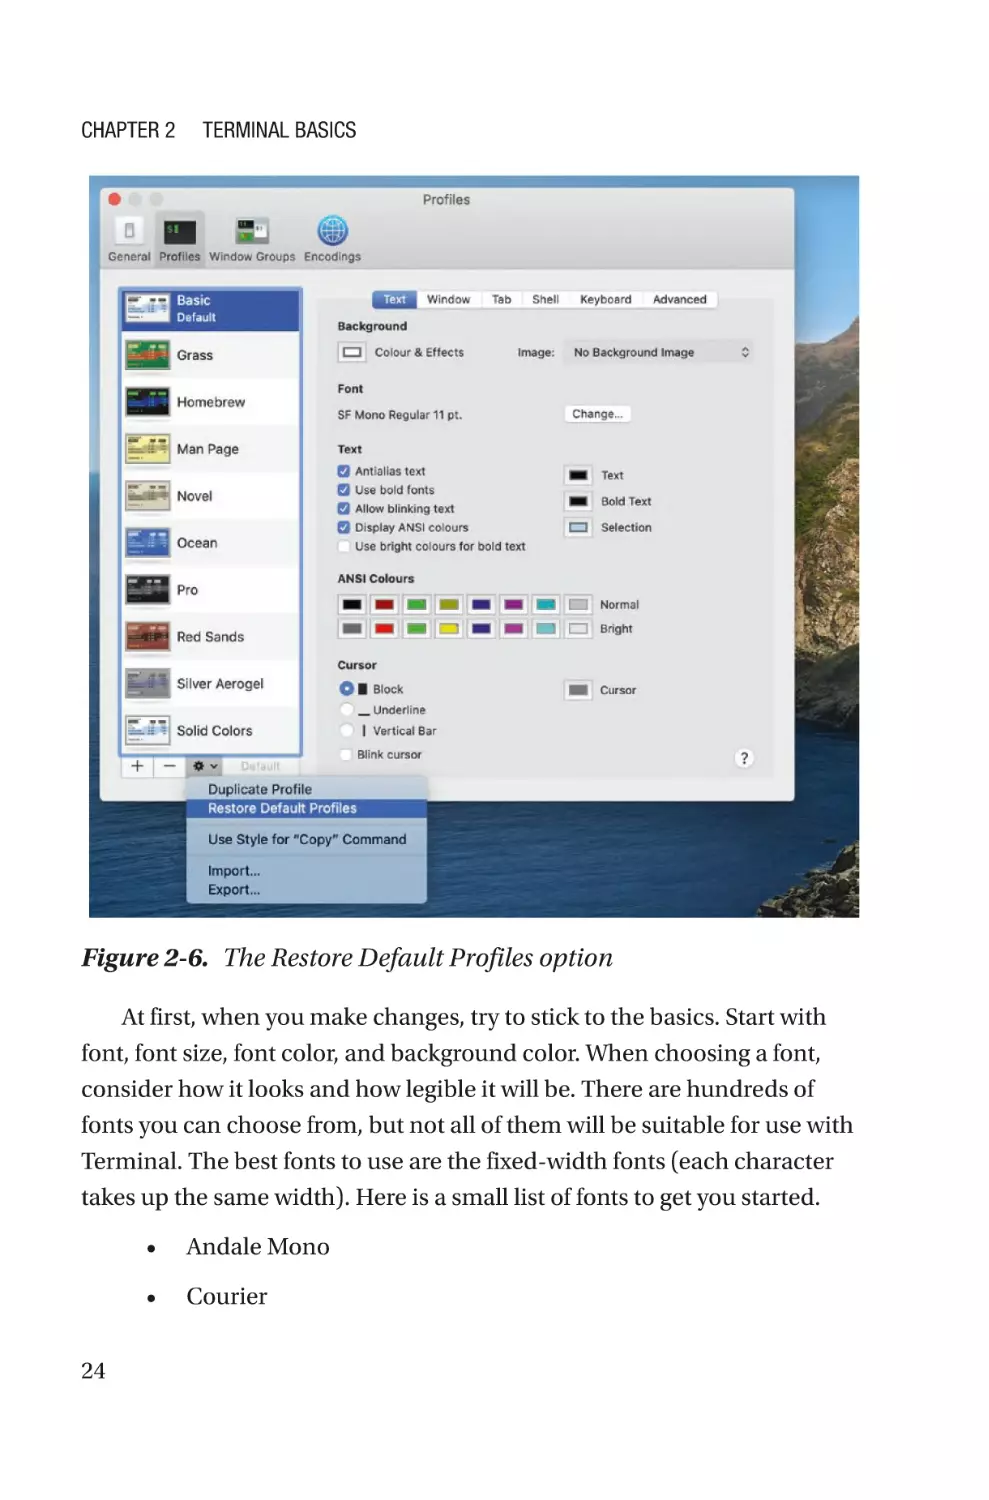
Figure 2-6. The Restore Default Profiles option
At first, when you make changes, try to stick to the basics. Start with
font, font size, font color, and background color. When choosing a font,
consider how it looks and how legible it will be. There are hundreds of
fonts you can choose from, but not all of them will be suitable for use with
Terminal. The best fonts to use are the fixed-width fonts (each character
takes up the same width). Here is a small list of fonts to get you started.
24
•
Andale Mono
•
Courier
Chapter 2
•
Menio Regular
•
Monaco
Terminal Basics
You can find other fonts with a web search such as “good fonts for
Terminal”. When you have chosen a font, you can then adjust the font size.
When setting the font color and background, try to choose contrasting
colors. This should make the text easier to read.
When you are happy with your new profile, you can click the Default
button, so that any new window or tab will use this profile. You will also
want to change the “New Window with Profile” in the General tab in the
preferences. Now your Terminal text should be very easy to read.
What Is a Shell?
When you load Terminal, the shell is everything that you see in that window.
You use the shell when you type in your Terminal; it turns your input
into a running command. It is called a shell because it is the outermost
layer of the operating system.
The default shell on Catalina is Zsh (Z shell). In previous versions of
macOS, the default shell was the Bash shell (Bourne Again shell). Bash and
Zsh have a lot in common, as their histories can both be traced back to the
Bourne shell.
Zsh
Zsh takes the input you type in Terminal and tells the computer what to
do with it. You can also script Zsh to run a series of commands for you. A
script is just a text file with a list of commands in it. Virtually any command
you run in Terminal can be added to a script.
When you issue a name of the file that contains scripts, Zsh will run
them in order.
25
Chapter 2
Terminal Basics
Upgrading from a Previous Version of macOS
If you have upgraded from a previous version of macOS, the shell will be
set to Bash.
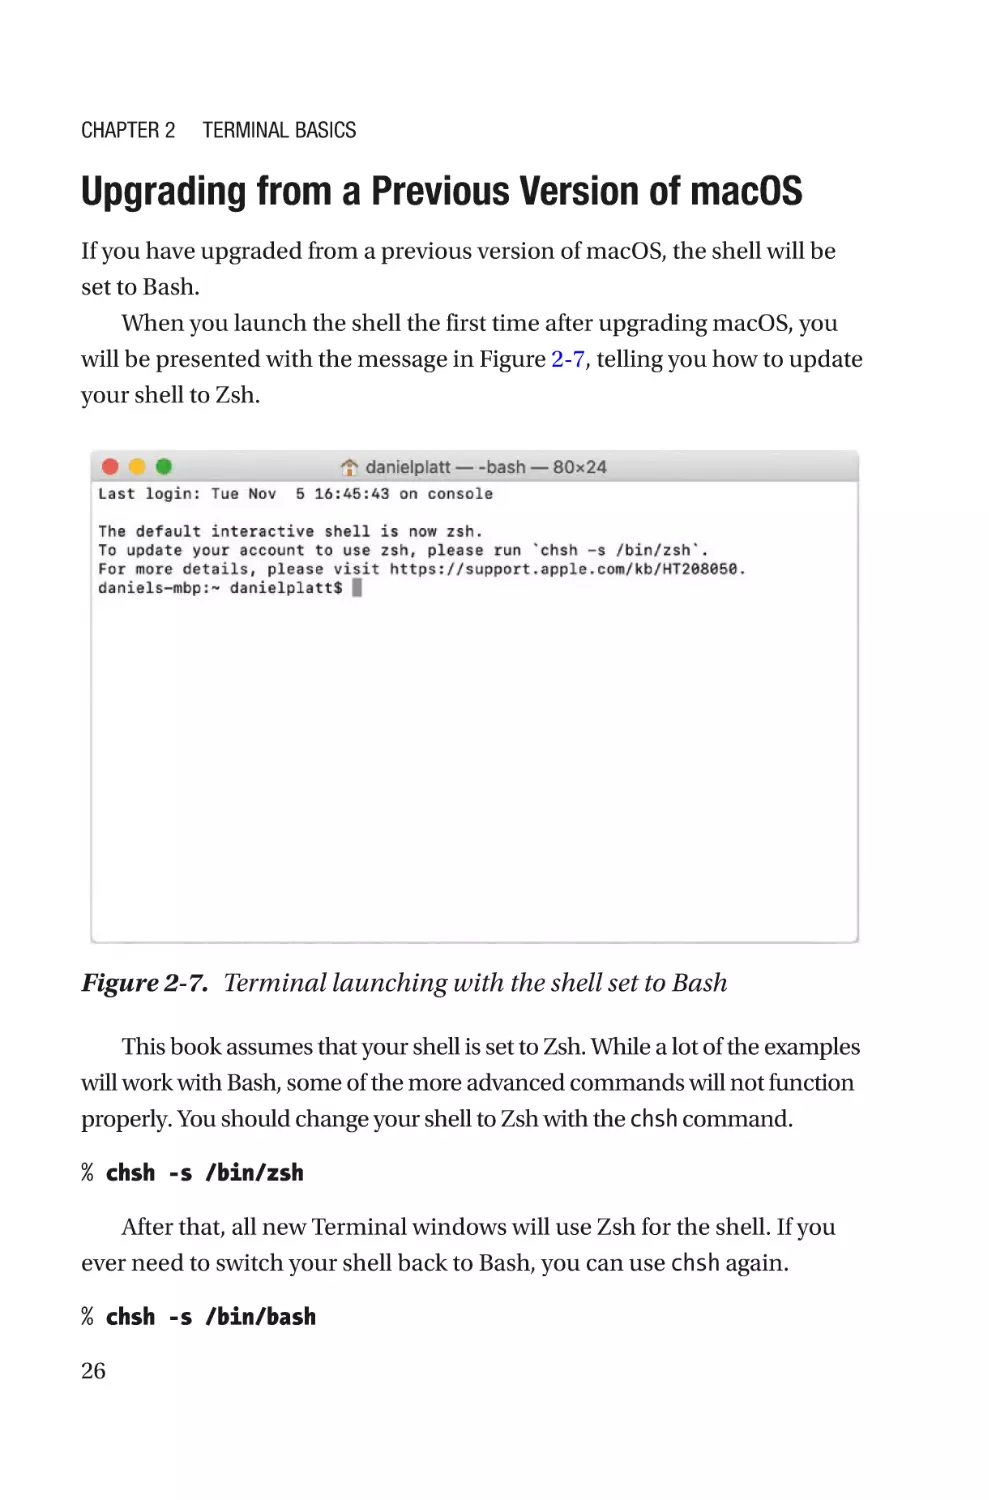
When you launch the shell the first time after upgrading macOS, you
will be presented with the message in Figure 2-7, telling you how to update
your shell to Zsh.
Figure 2-7. Terminal launching with the shell set to Bash
This book assumes that your shell is set to Zsh. While a lot of the examples
will work with Bash, some of the more advanced commands will not function
properly. You should change your shell to Zsh with the chsh command.
% chsh -s /bin/zsh
After that, all new Terminal windows will use Zsh for the shell. If you
ever need to switch your shell back to Bash, you can use chsh again.
% chsh -s /bin/bash
26
Chapter 2
Terminal Basics
S
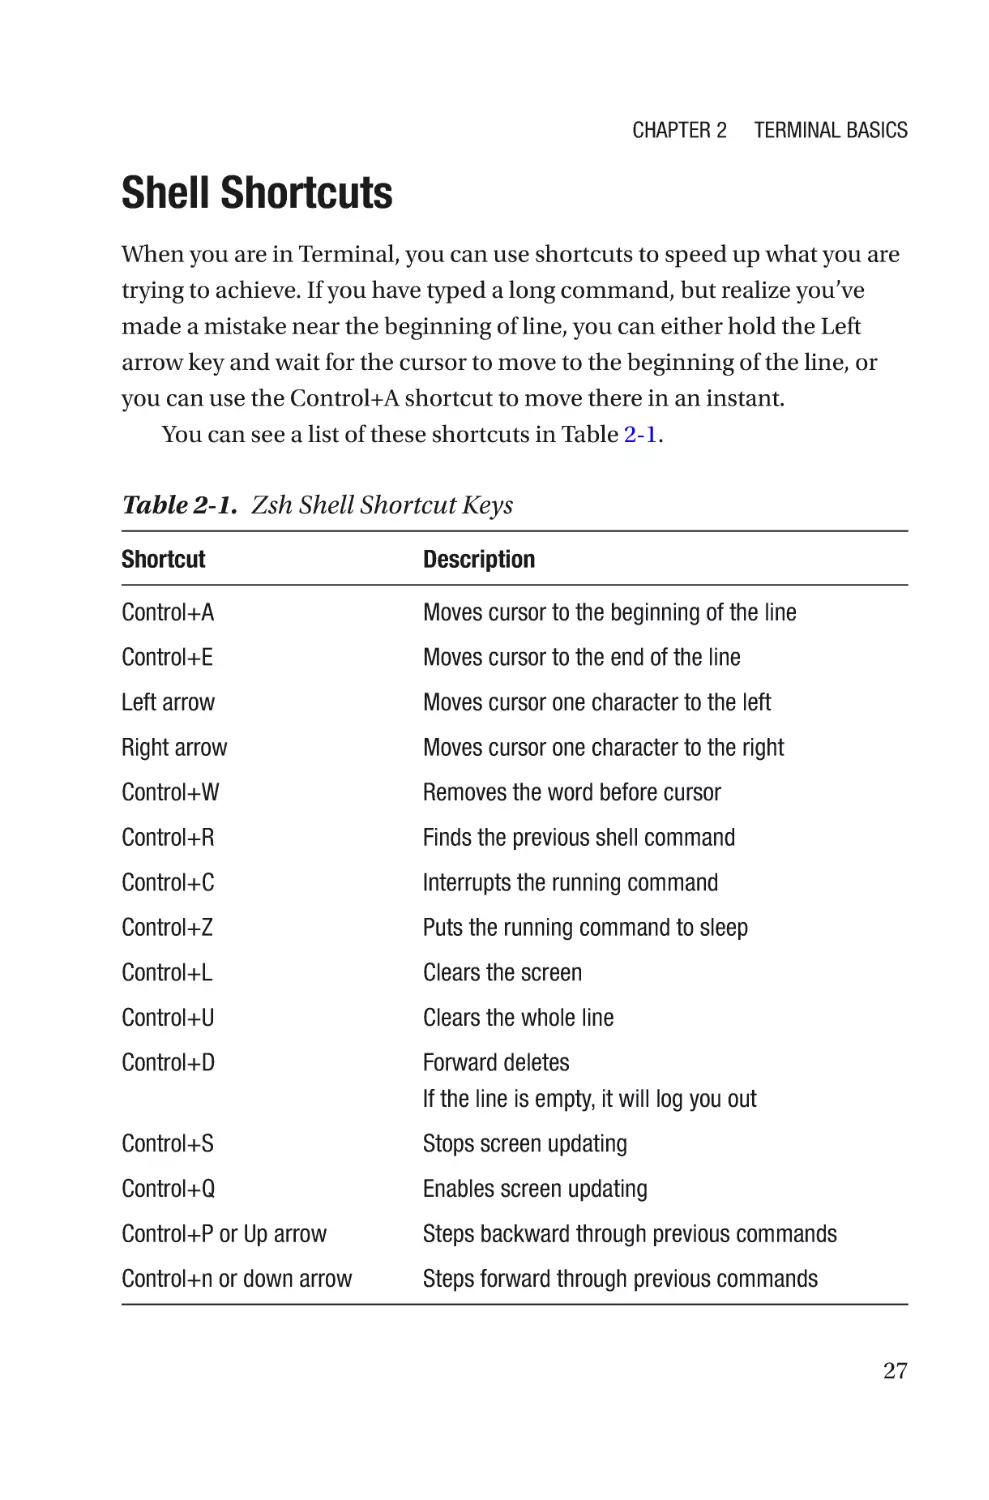
hell Shortcuts
When you are in Terminal, you can use shortcuts to speed up what you are
trying to achieve. If you have typed a long command, but realize you’ve
made a mistake near the beginning of line, you can either hold the Left
arrow key and wait for the cursor to move to the beginning of the line, or
you can use the Control+A shortcut to move there in an instant.
You can see a list of these shortcuts in Table 2-1.
Table 2-1. Zsh Shell Shortcut Keys
Shortcut
Description
Control+A
Moves cursor to the beginning of the line
Control+E
Moves cursor to the end of the line
Left arrow
Moves cursor one character to the left
Right arrow
Moves cursor one character to the right
Control+W
Removes the word before cursor
Control+R
Finds the previous shell command
Control+C
Interrupts the running command
Control+Z
Puts the running command to sleep
Control+L
Clears the screen
Control+U
Clears the whole line
Control+D
Forward deletes
If the line is empty, it will log you out
Control+S
Stops screen updating
Control+Q
Enables screen updating
Control+P or Up arrow
Steps backward through previous commands
Control+n or down arrow
Steps forward through previous commands
27
Chapter 2
Terminal Basics
Even if you only remember a couple of these shortcuts, you will save
loads of time. Remember Control+C, as you will need this to exit out of
some commands that are used in this book.
T he Filesystem
There are lots of folders on your computer. Some are solely for the smooth
running of your computer (the system directories). Others, like the user
directories, shouldn’t be deleted for the operation of your user. If your user
directory were deleted, it wouldn’t affect any other users on the system.
M
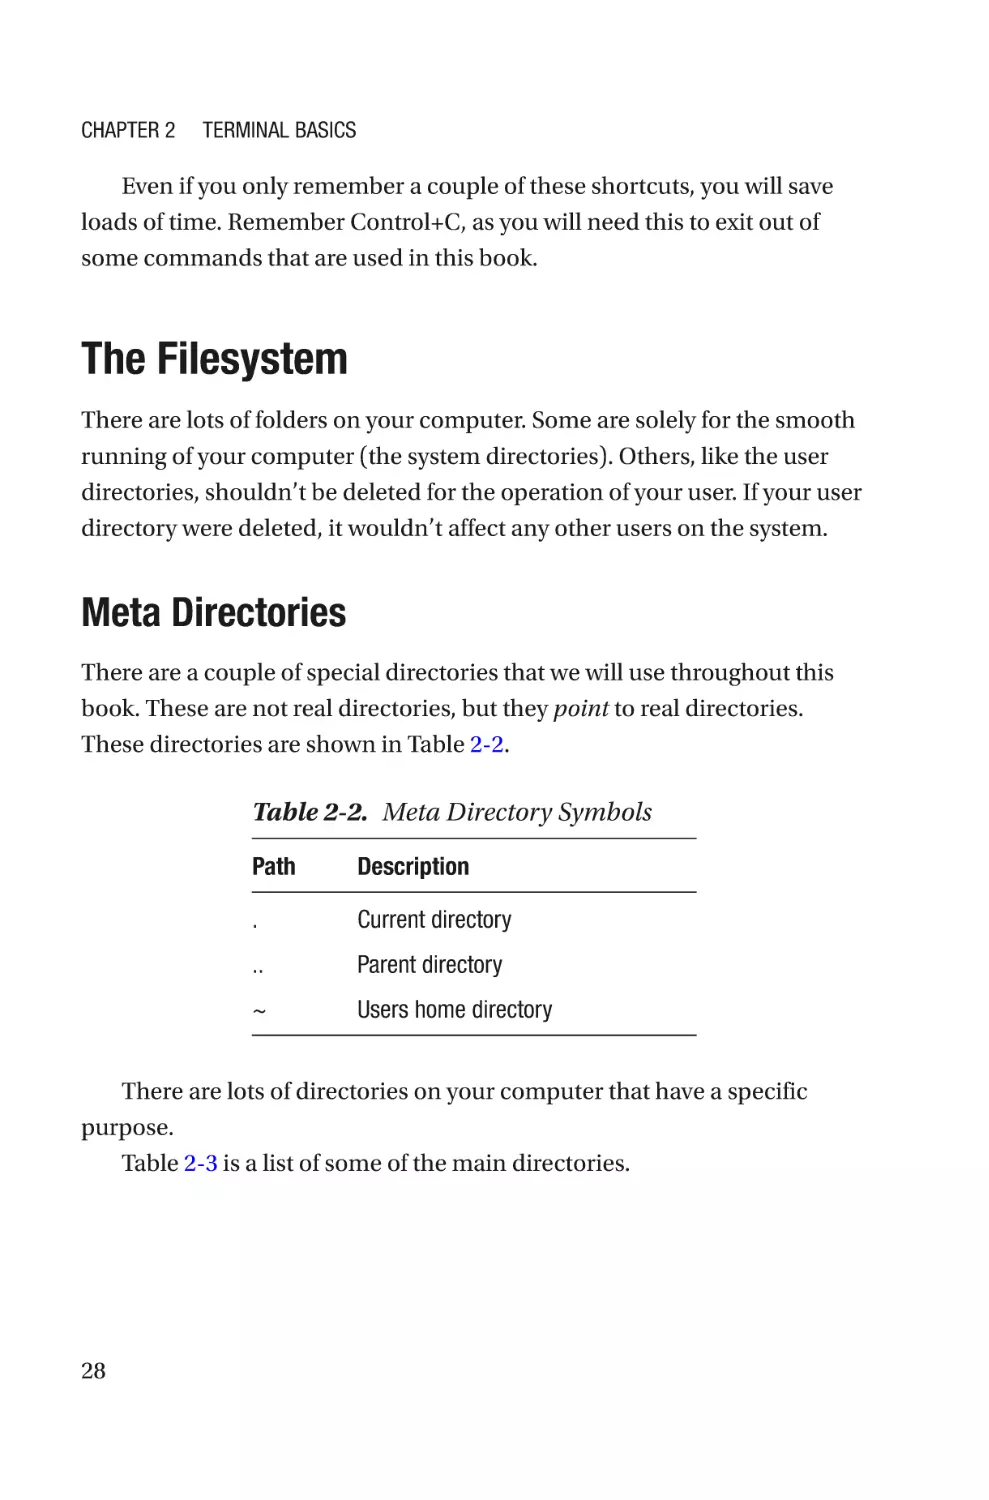
eta Directories
There are a couple of special directories that we will use throughout this
book. These are not real directories, but they point to real directories.
These directories are shown in Table 2-2.
Table 2-2. Meta Directory Symbols
Path
Description
.
Current directory
..
Parent directory
~
Users home directory
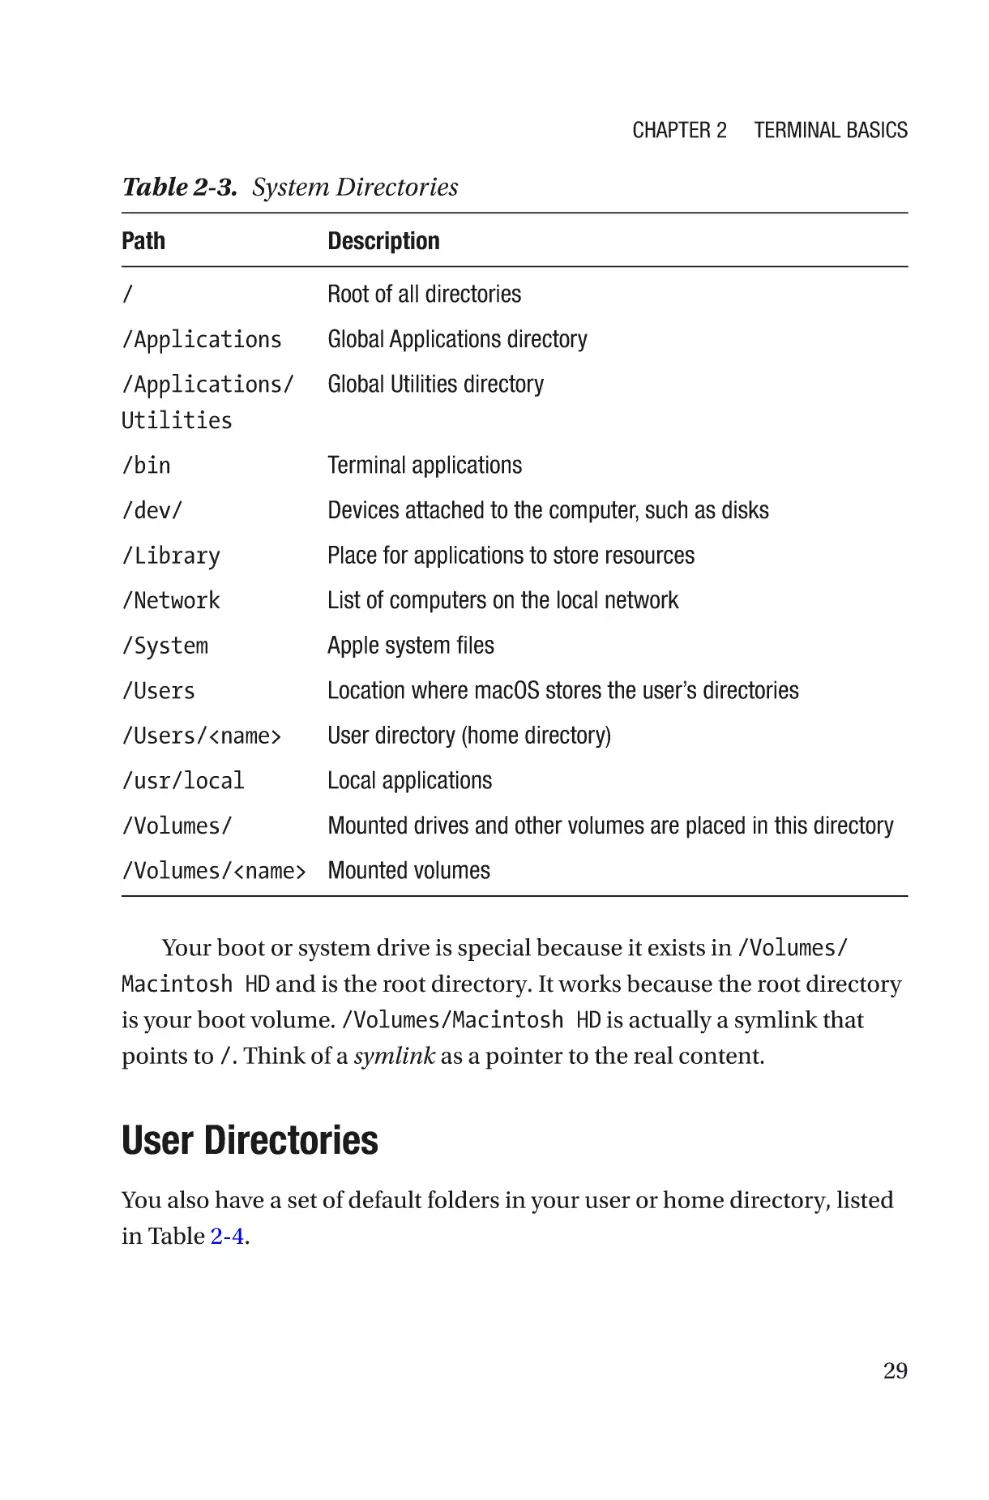
There are lots of directories on your computer that have a specific
purpose.
Table 2-3 is a list of some of the main directories.
28
Chapter 2
Terminal Basics
Table 2-3. System Directories
Path
Description
/
Root of all directories
/Applications
Global Applications directory
/Applications/
Utilities
Global Utilities directory
/bin
Terminal applications
/dev/
Devices attached to the computer, such as disks
/Library
Place for applications to store resources
/Network
List of computers on the local network
/System
Apple system files
/Users
Location where macOS stores the user’s directories
/Users/<name>
User directory (home directory)
/usr/local
Local applications
/Volumes/
Mounted drives and other volumes are placed in this directory
/Volumes/<name> Mounted volumes
Your boot or system drive is special because it exists in /Volumes/
Macintosh HD and is the root directory. It works because the root directory
is your boot volume. /Volumes/Macintosh HD is actually a symlink that
points to /. Think of a symlink as a pointer to the real content.
U
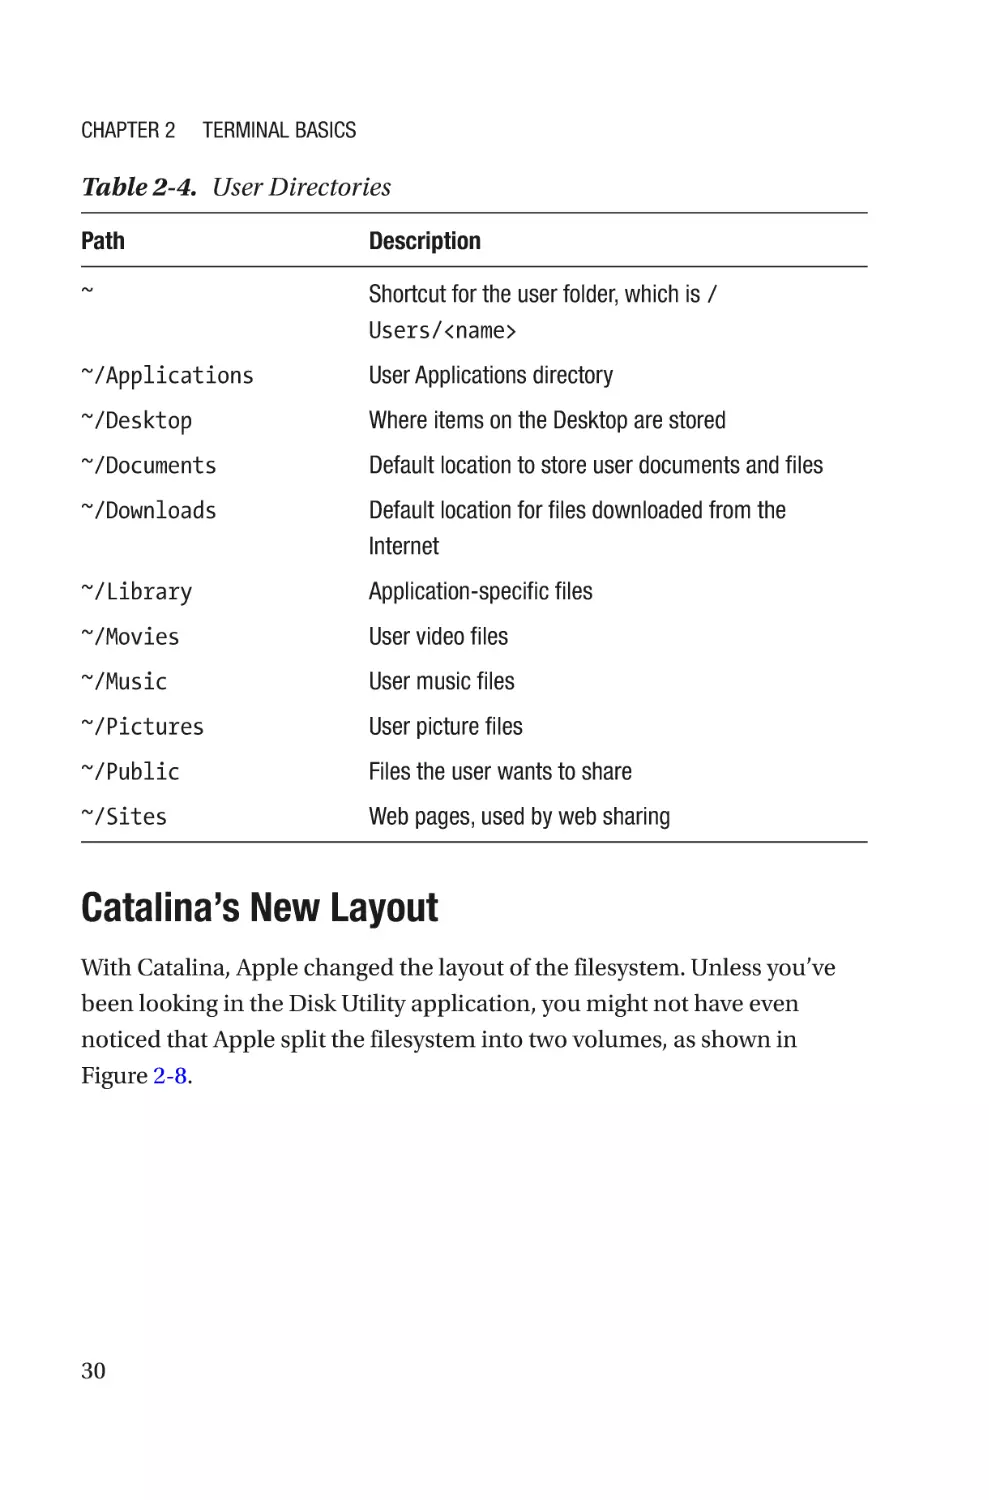
ser Directories
You also have a set of default folders in your user or home directory, listed
in Table 2-4.
29
Chapter 2
Terminal Basics
Table 2-4. User Directories
Path
Description
~
Shortcut for the user folder, which is /
Users/<name>
~/Applications
User Applications directory
~/Desktop
Where items on the Desktop are stored
~/Documents
Default location to store user documents and files
~/Downloads
Default location for files downloaded from the
Internet
~/Library
Application-specific files
~/Movies
User video files
~/Music
User music files
~/Pictures
User picture files
~/Public
Files the user wants to share
~/Sites
Web pages, used by web sharing
Catalina’s New Layout
With Catalina, Apple changed the layout of the filesystem. Unless you’ve
been looking in the Disk Utility application, you might not have even
noticed that Apple split the filesystem into two volumes, as shown in
Figure 2-8.
30
Chapter 2
Terminal Basics
Figure 2-8. Disk utility showing Macintosh HD split into two
volumes
Assuming your drive is called Macintosh HD, you will now have an
additional drive, called Macintosh HD - Data. The Macintosh HD drive
now contains the operating system and has been made read-only. The
reason for this is to stop the operating system from being changed by
accident or by malicious actions. Your Macintosh HD - Data (your data
drive) is now where all your files are stored.
Is this going to waste space? No, because these drives share the same
free disk space.
The reason you don’t know or can’t see the two drives is because Apple
has stitched them together with firmlinks. A firmlink is like an alias in the
Finder, but it’s designed not be visible. They are similar to symbolic links,
which I cover in the “Links” section.
31
Chapter 2
Terminal Basics
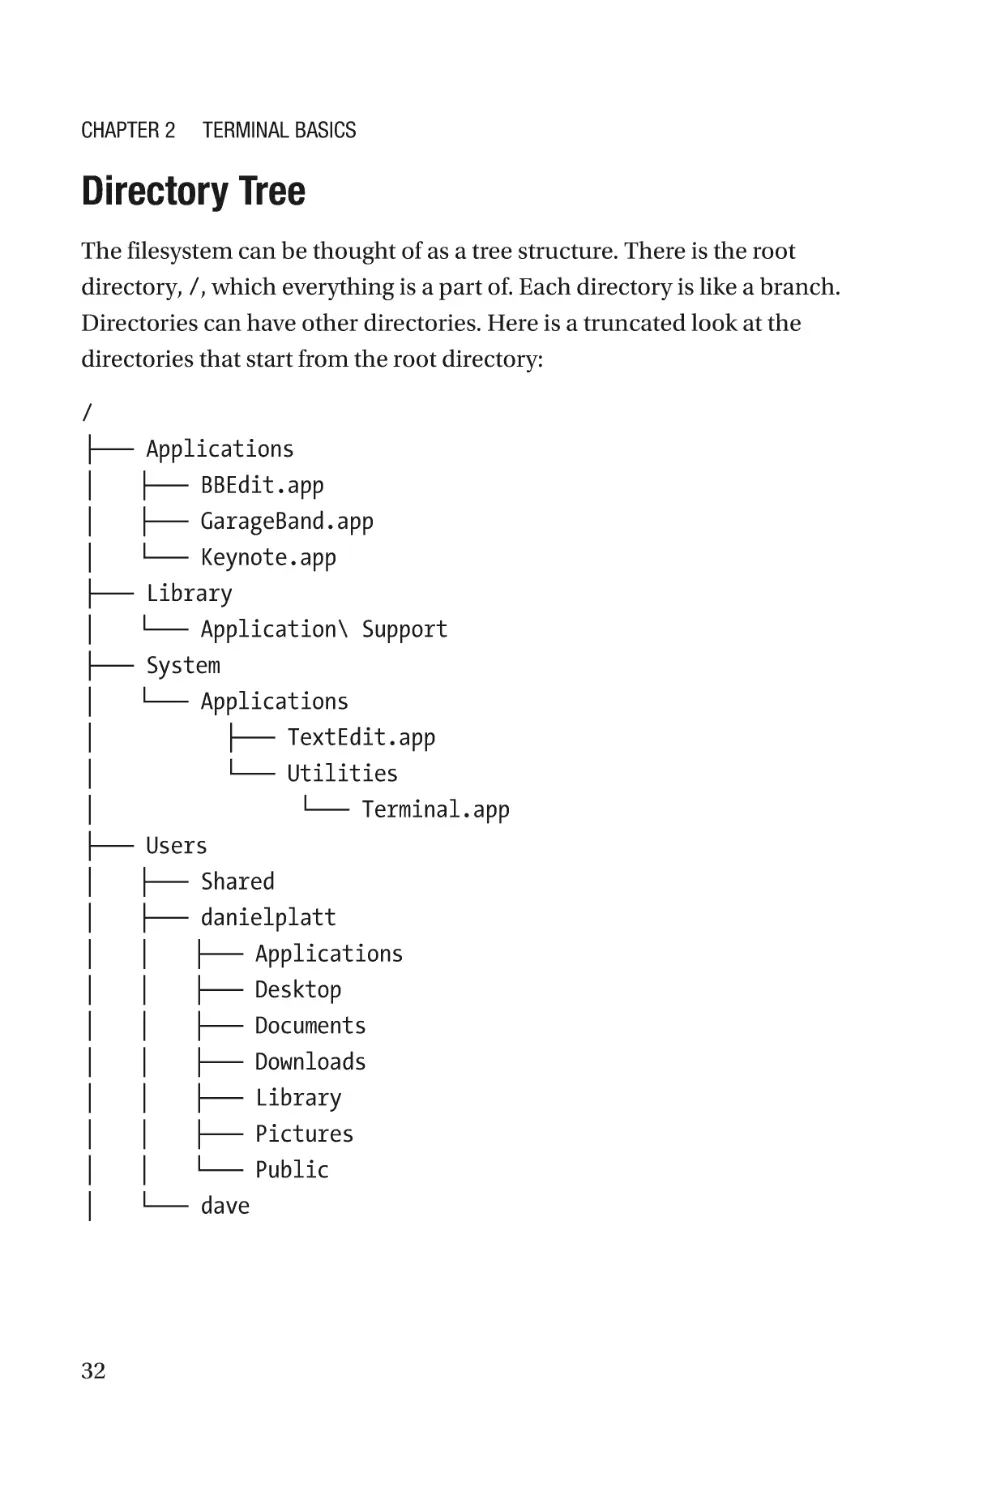
Directory Tree
The filesystem can be thought of as a tree structure. There is the root
directory, /, which everything is a part of. Each directory is like a branch.
Directories can have other directories. Here is a truncated look at the
directories that start from the root directory:
/
├── Applications
│ ├── BBEdit.app
│ ├── GarageBand.app
│ └── Keynote.app
├── Library
│ └── Application\ Support
├── System
│ └── Applications
│ ├── TextEdit.app
│ └── Utilities
│ └── Terminal.app
├── Users
│ ├── Shared
│ ├── danielplatt
│ │ ├── Applications
│ │ ├── Desktop
│ │ ├── Documents
│ │ ├── Downloads
│ │ ├── Library
│ │ ├── Pictures
│ │ └── Public
│ └── dave
32
Chapter 2
Terminal Basics
├── Volumes
│ └── Macintosh\ HD -> /
├── tmp -> private/tmp
├── usr
│ ├── bin
│ └── local
└── var -> private/var
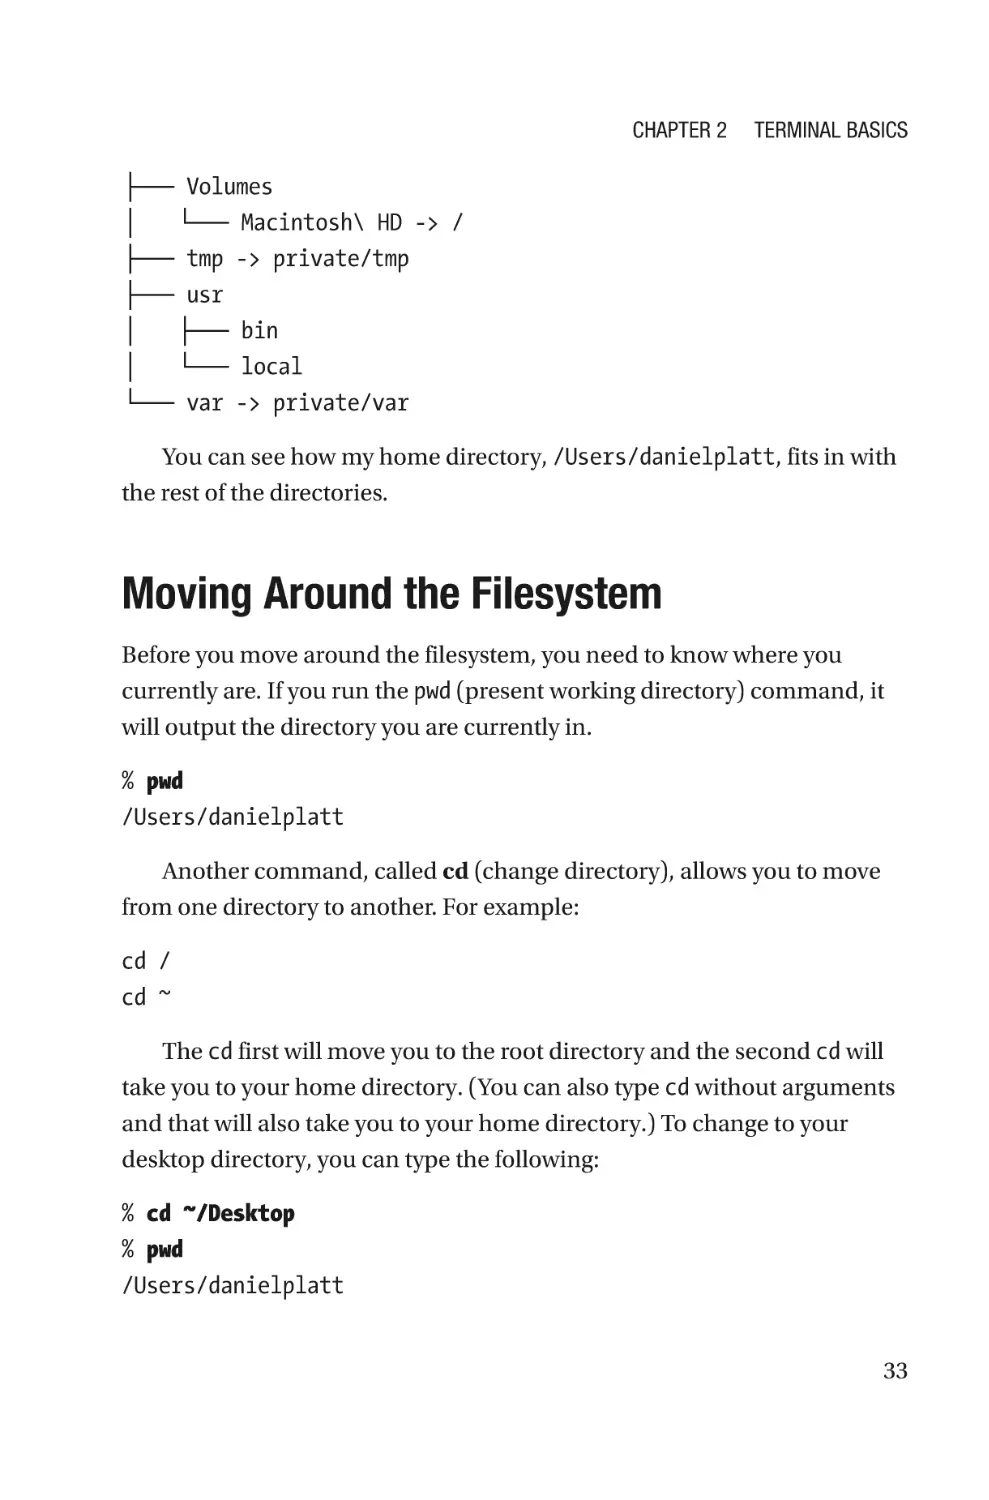
You can see how my home directory, /Users/danielplatt, fits in with
the rest of the directories.
Moving Around the Filesystem
Before you move around the filesystem, you need to know where you
currently are. If you run the pwd (present working directory) command, it
will output the directory you are currently in.
% pwd
/Users/danielplatt
Another command, called cd (change directory), allows you to move
from one directory to another. For example:
cd /
cd ~
The cd first will move you to the root directory and the second cd will
take you to your home directory. (You can also type cd without arguments
and that will also take you to your home directory.) To change to your
desktop directory, you can type the following:
% cd ~/Desktop
% pwd
/Users/danielplatt
33
Chapter 2
Terminal Basics
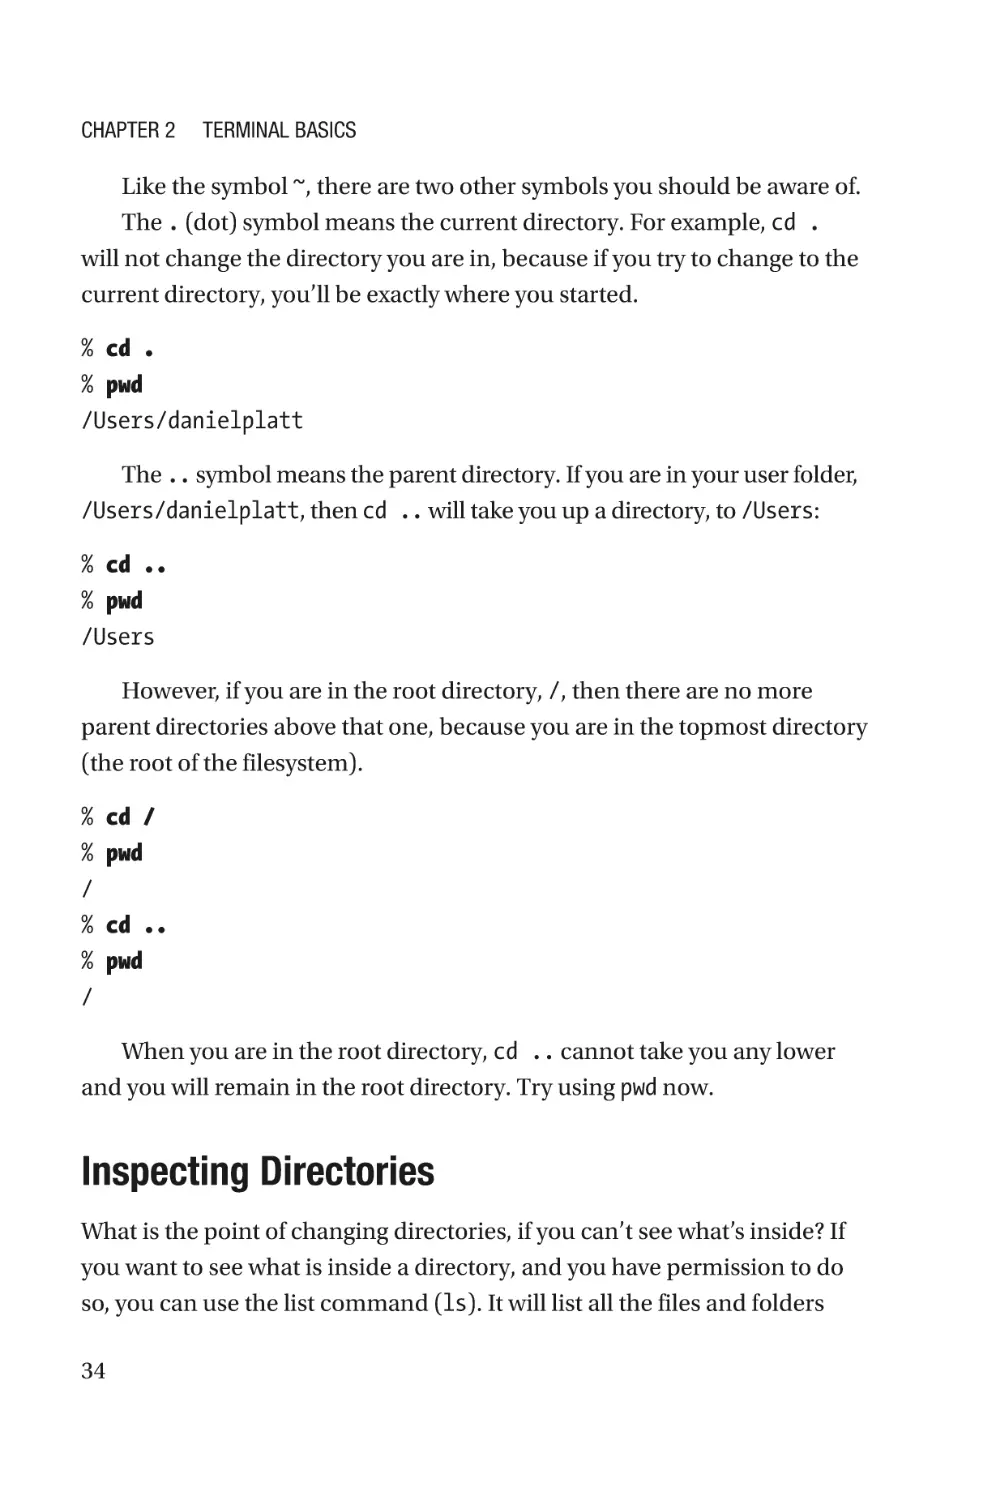
Like the symbol ~, there are two other symbols you should be aware of.
The . (dot) symbol means the current directory. For example, cd .
will not change the directory you are in, because if you try to change to the
current directory, you’ll be exactly where you started.
% cd .
% pwd
/Users/danielplatt
The .. symbol means the parent directory. If you are in your user folder,
/Users/danielplatt, then cd .. will take you up a directory, to /Users:
% cd ..
% pwd
/Users
However, if you are in the root directory, /, then there are no more
parent directories above that one, because you are in the topmost directory
(the root of the filesystem).
cd /
pwd
%
%
/
%
%
/
cd ..
pwd
When you are in the root directory, cd .. cannot take you any lower
and you will remain in the root directory. Try using pwd now.
Inspecting Directories
What is the point of changing directories, if you can’t see what’s inside? If
you want to see what is inside a directory, and you have permission to do
so, you can use the list command (ls). It will list all the files and folders
34
Chapter 2
Terminal Basics
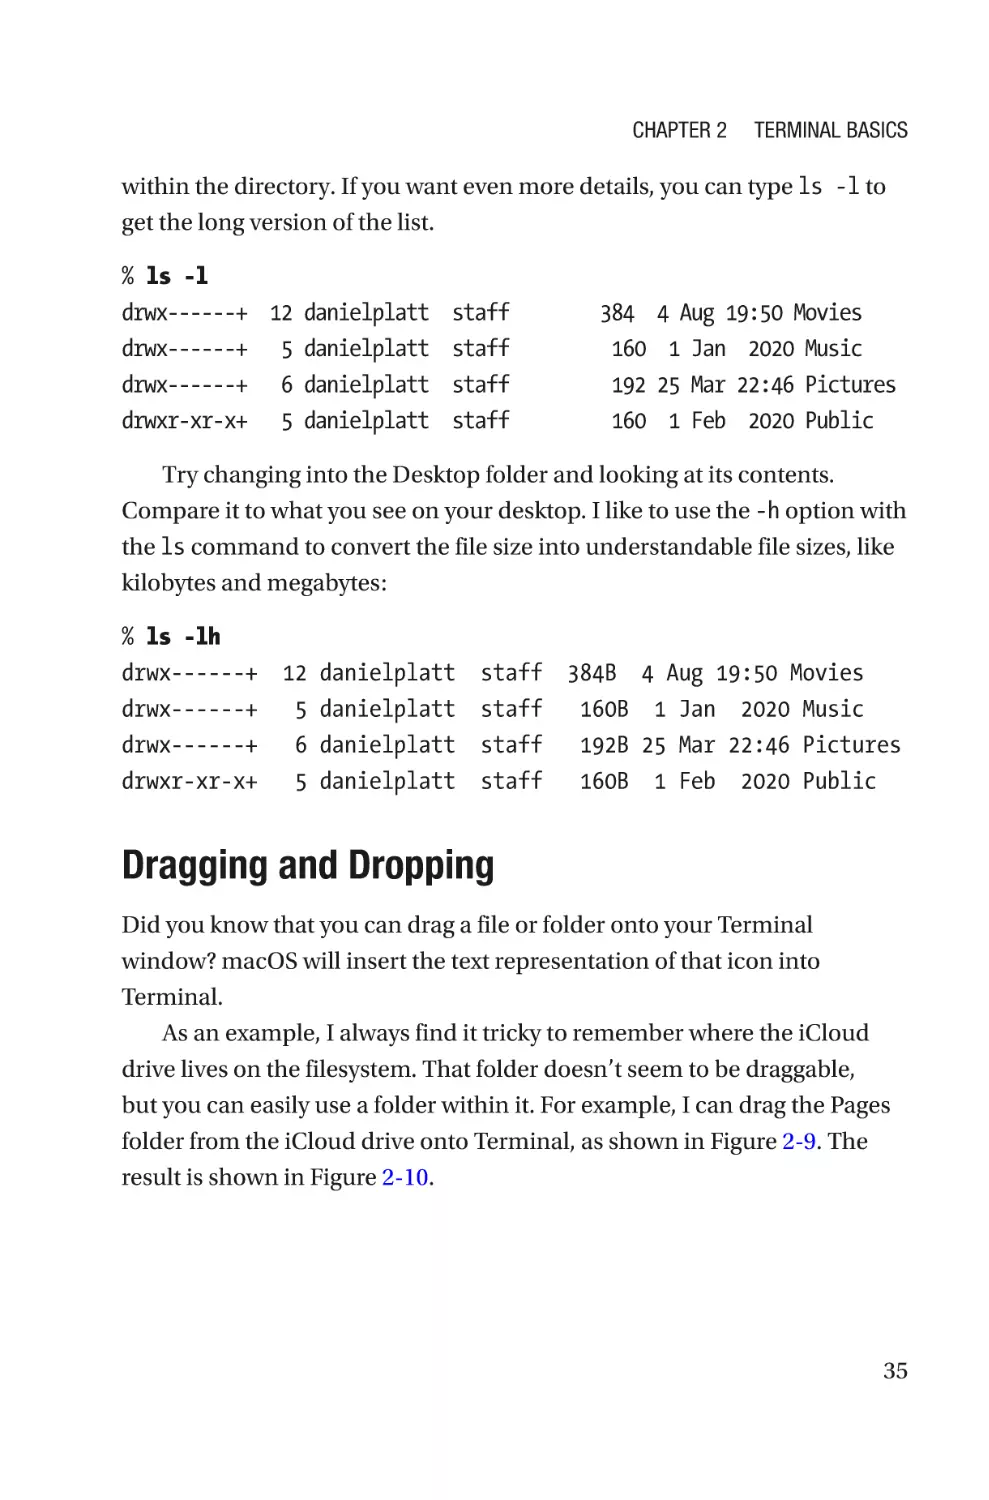
within the directory. If you want even more details, you can type ls -l to
get the long version of the list.
% ls -l
drwx------+ 12
drwx------+ 5
drwx------+ 6
drwxr-xr-x+ 5
danielplatt staff 384 4 Aug 19:50 Movies
danielplatt staff 160 1 Jan 2020 Music
danielplatt staff 192 25 Mar 22:46 Pictures
danielplatt staff 160 1 Feb 2020 Public
Try changing into the Desktop folder and looking at its contents.
Compare it to what you see on your desktop. I like to use the -h option with
the ls command to convert the file size into understandable file sizes, like
kilobytes and megabytes:
% ls -lh
drwx------+ 12
drwx------+ 5
drwx------+ 6
drwxr-xr-x+ 5
danielplatt staff 384B 4 Aug 19:50 Movies
danielplatt staff 160B 1 Jan 2020 Music
danielplatt staff 192B 25 Mar 22:46 Pictures
danielplatt staff 160B 1 Feb 2020 Public
D
ragging and Dropping
Did you know that you can drag a file or folder onto your Terminal
window? macOS will insert the text representation of that icon into
Terminal.
As an example, I always find it tricky to remember where the iCloud
drive lives on the filesystem. That folder doesn’t seem to be draggable,
but you can easily use a folder within it. For example, I can drag the Pages
folder from the iCloud drive onto Terminal, as shown in Figure 2-9. The
result is shown in Figure 2-10.
35
Chapter 2
Terminal Basics
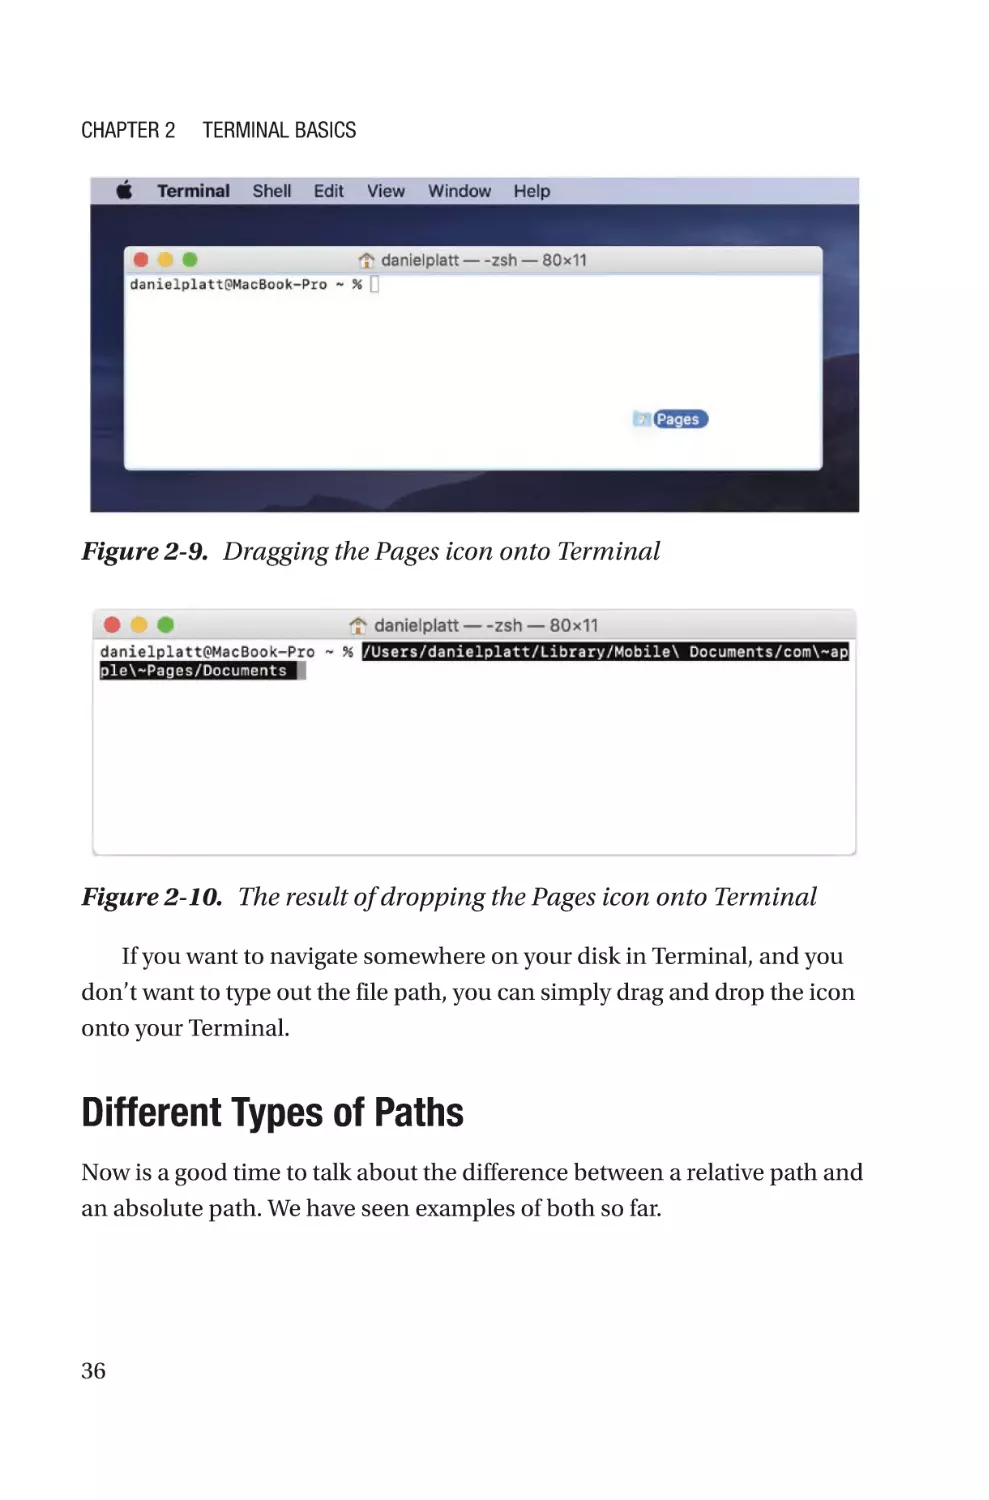
Figure 2-9. Dragging the Pages icon onto Terminal
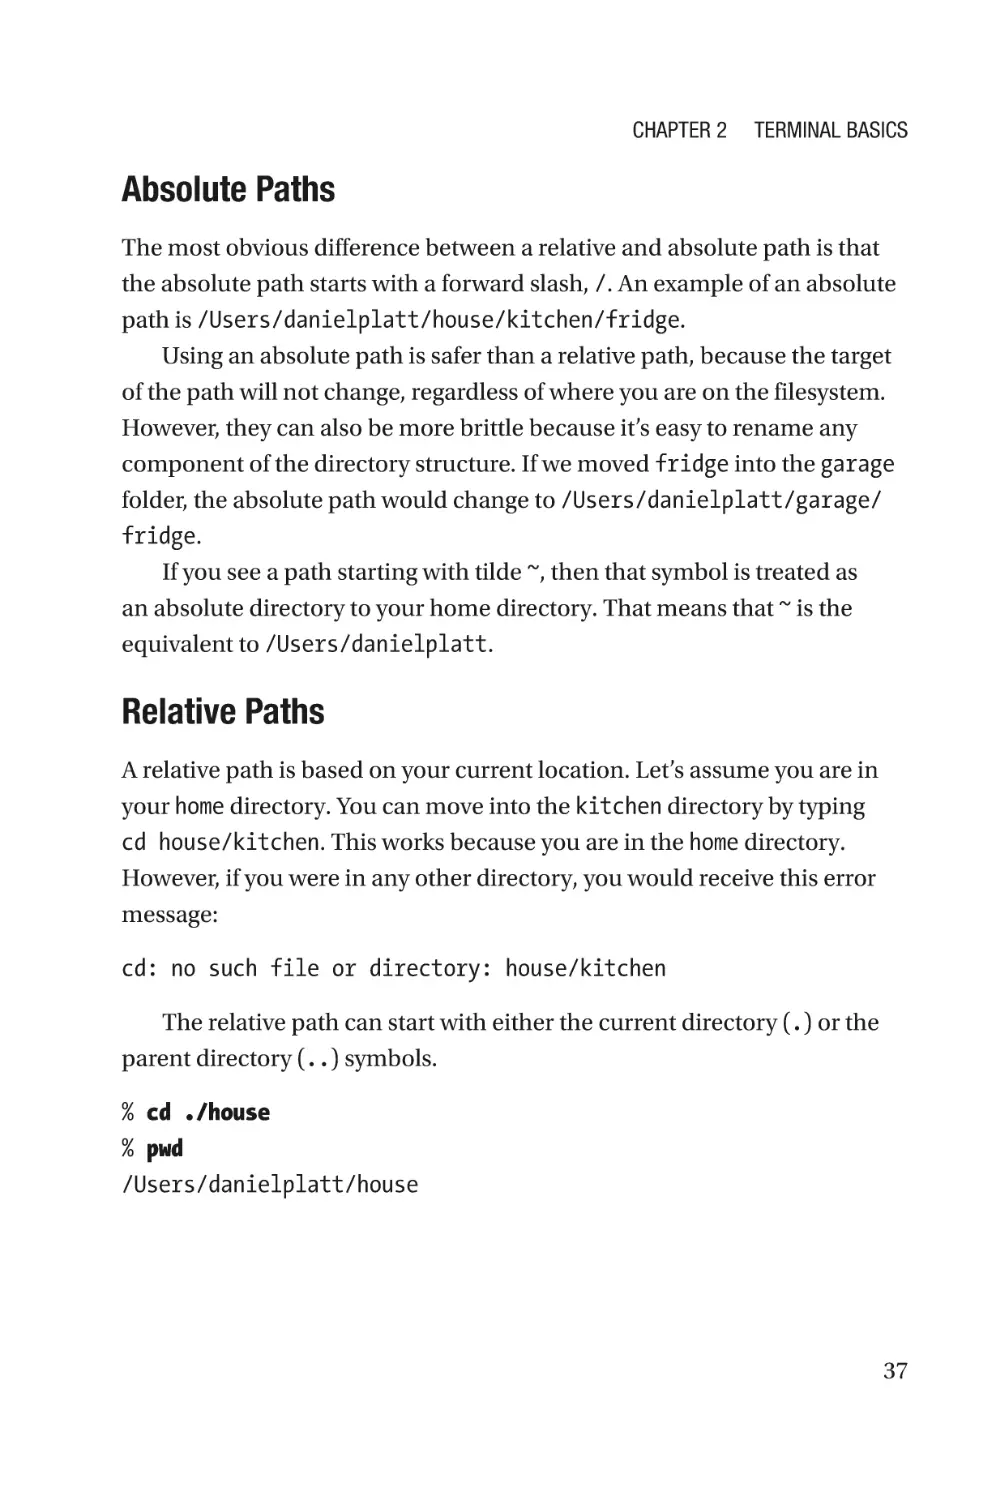
Figure 2-10. The result of dropping the Pages icon onto Terminal
If you want to navigate somewhere on your disk in Terminal, and you
don’t want to type out the file path, you can simply drag and drop the icon
onto your Terminal.
Different Types of Paths
Now is a good time to talk about the difference between a relative path and
an absolute path. We have seen examples of both so far.
36
Chapter 2
Terminal Basics
Absolute Paths
The most obvious difference between a relative and absolute path is that
the absolute path starts with a forward slash, /. An example of an absolute
path is /Users/danielplatt/house/kitchen/fridge.
Using an absolute path is safer than a relative path, because the target
of the path will not change, regardless of where you are on the filesystem.
However, they can also be more brittle because it’s easy to rename any
component of the directory structure. If we moved fridge into the garage
folder, the absolute path would change to /Users/danielplatt/garage/
fridge.
If you see a path starting with tilde ~, then that symbol is treated as
an absolute directory to your home directory. That means that ~ is the
equivalent to /Users/danielplatt.
Relative Paths
A relative path is based on your current location. Let’s assume you are in
your home directory. You can move into the kitchen directory by typing
cd house/kitchen. This works because you are in the home directory.
However, if you were in any other directory, you would receive this error
message:
cd: no such file or directory: house/kitchen
The relative path can start with either the current directory (.) or the
parent directory (..) symbols.
% cd ./house
% pwd
/Users/danielplatt/house
37
Chapter 2
Terminal Basics
Directory Operations
Your computer is full of directories (also called folders). We’ve seen some
folders during the explanation of the filesystem. It is useful for you to be
able to create your own directories.
Creating Directories
Directories are easy to create, with the make directory command (mkdir).
mkdir can show you what it is doing if you pass it in the -v option.
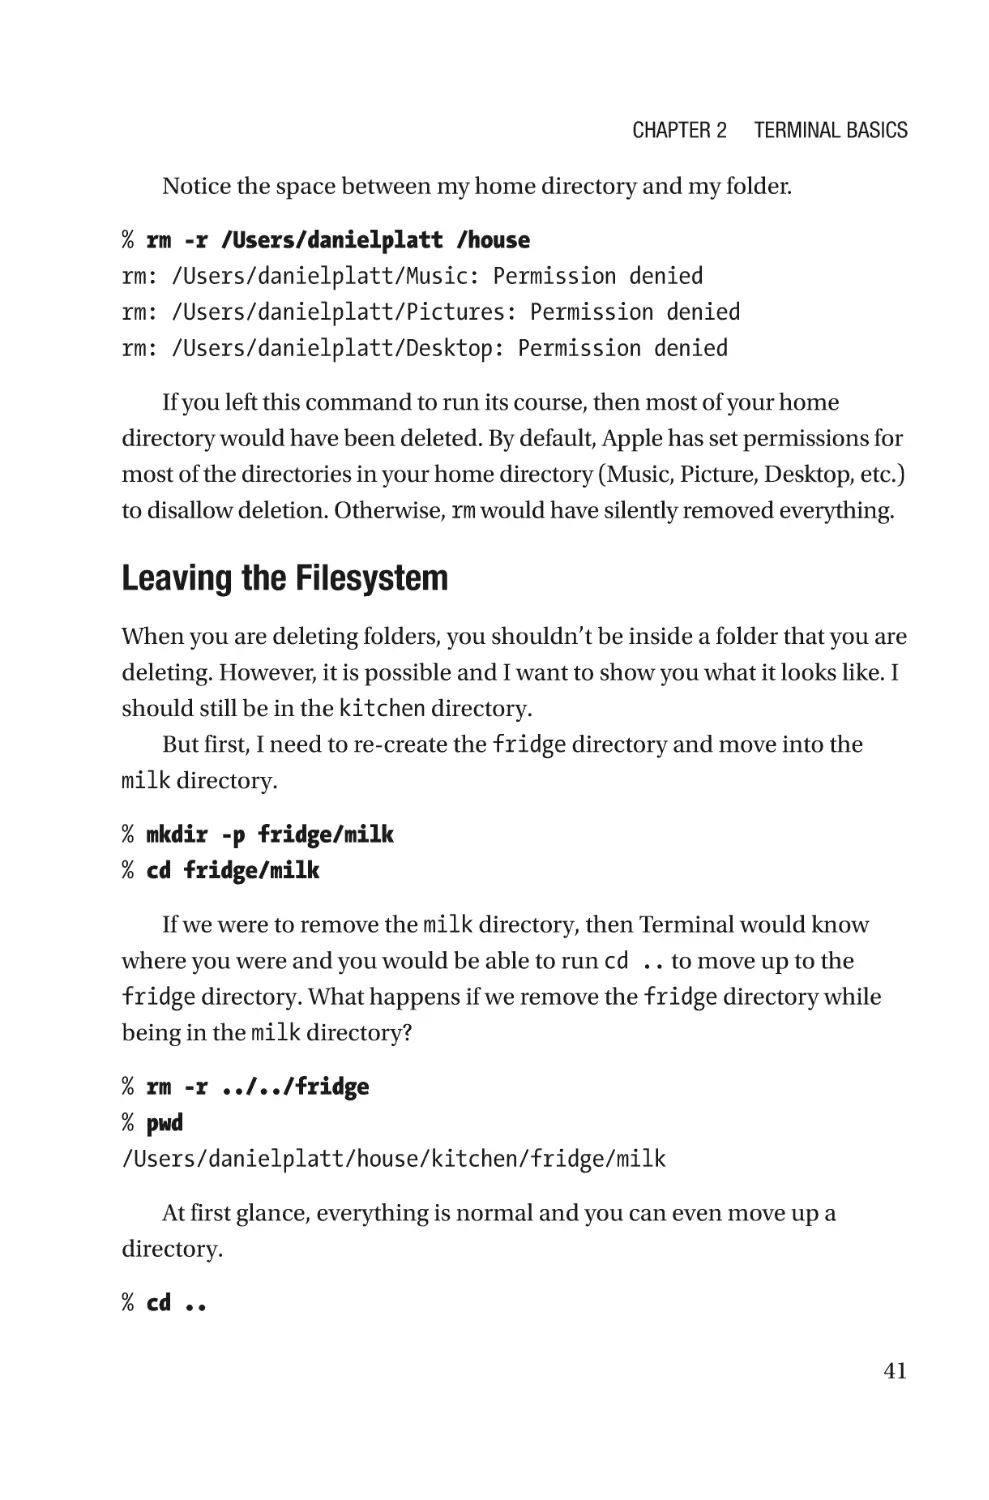
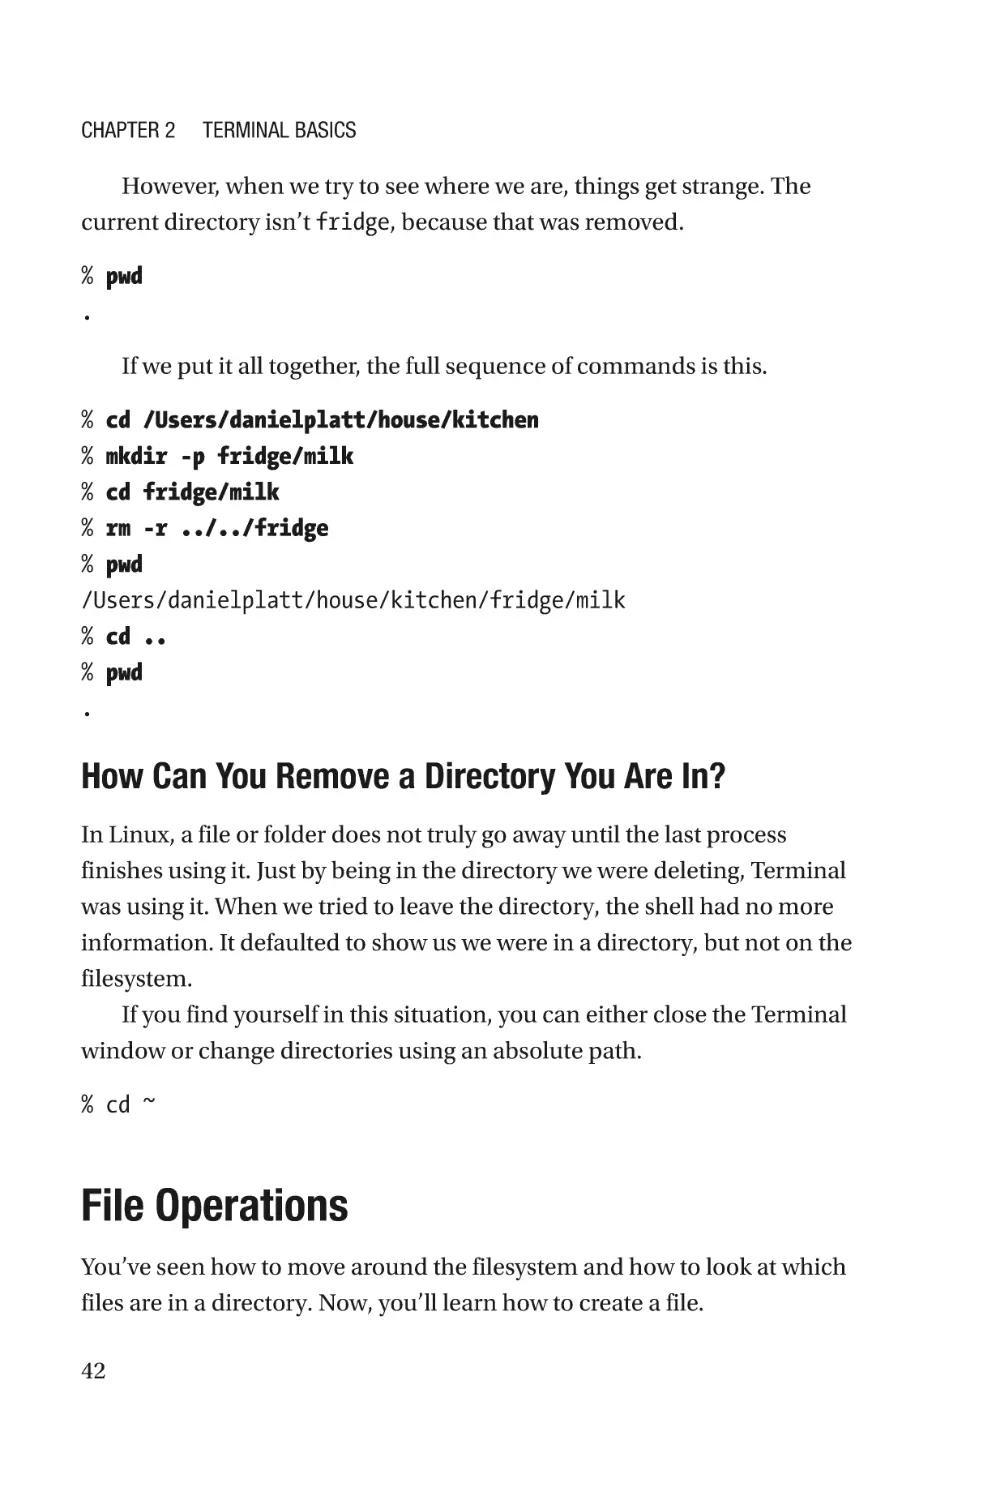
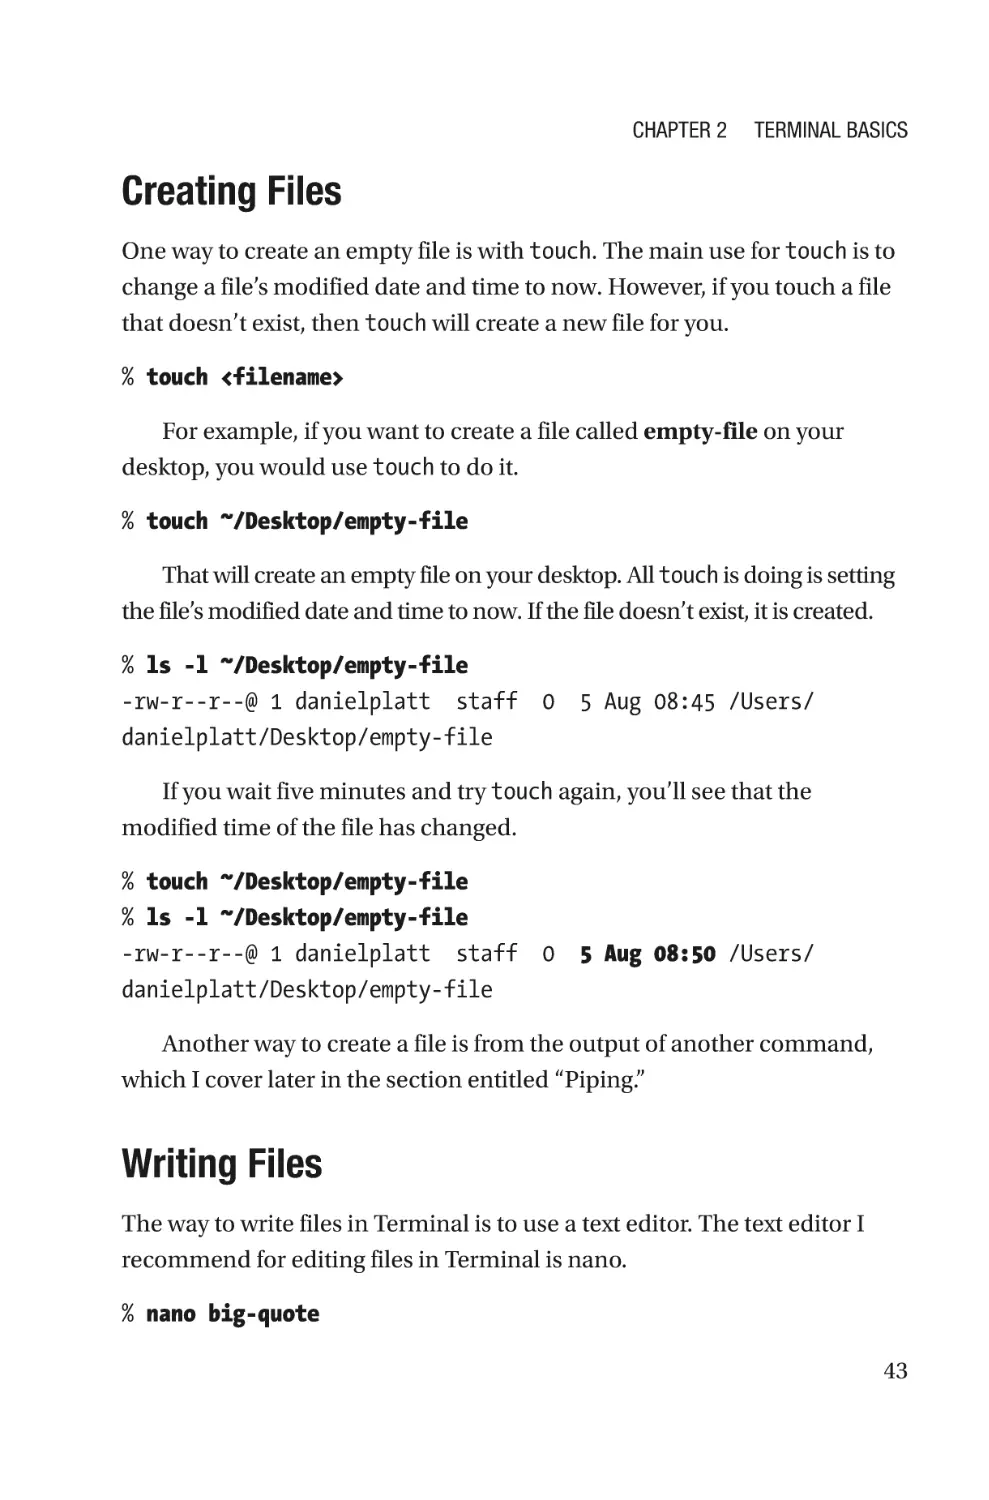
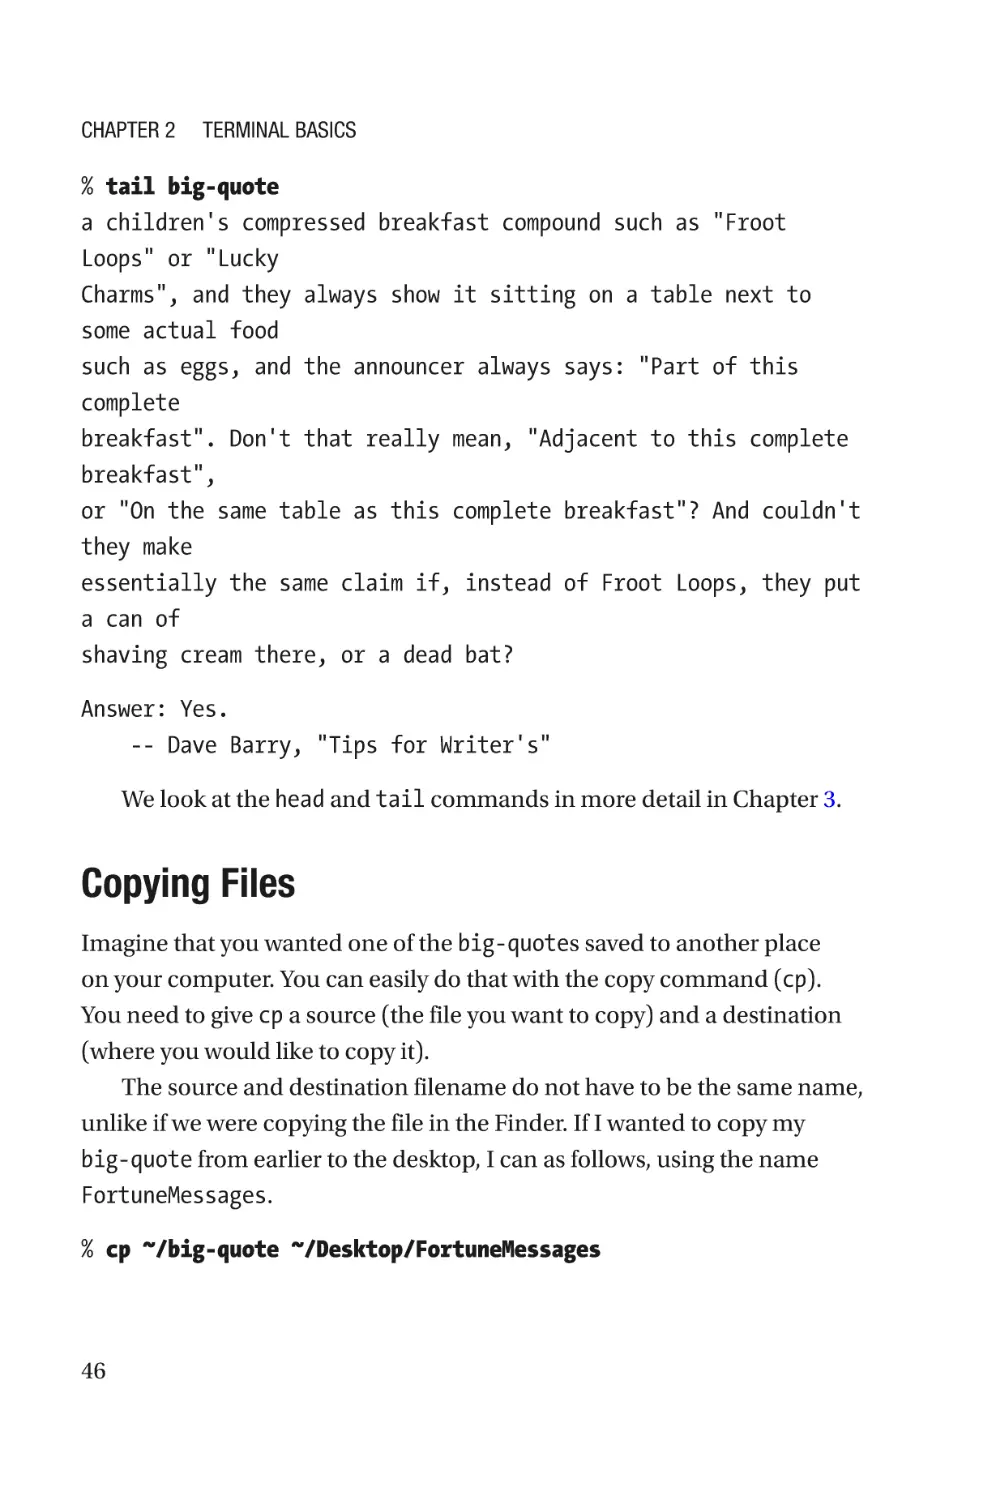
% mkdir -v house
mkdir: created directory 'house'
This will create a folder called house in your current directory.
mkdir allows you to create many folders at the same time. You do this by
specifying them at the same time with a space between each name.
% mkdir -v car
mkdir: created
mkdir: created
mkdir: created
garden garage
directory 'car'
directory 'garden'
directory 'garage'
It is possible to create subdirectories at the same time with the parent
(-p) option. Though strangely, the -v option doesn’t do anything when you
also use the -p option.
% mkdir -p house/kitchen/fridge/milk
When you use the -p option, mkdir will not complain about any of the
existing directories.
% mkdir -p house/kitchen/fridge/cheese
38
Chapter 2
Terminal Basics
You will now have a directory structure like this.
.
├── car
├── garage
├── garden
└── house
└── kitchen
└── fridge
├── cheese
└── milk
You can move around these directories with the cd command.
% cd garden
% pwd
/Users/danielplatt/garden
% cd ..
% cd house/kitchen
% pwd
/Users/danielplatt/house/kitchen
Deleting Directories
We’ve been creating a few directories, but how do you remove them?
Removing empty folders is very simple, with the remove directory
command (rmdir).
If we wanted to remove the third-level directory, we could do so like this.
% rmdir house/kitchen/fridge/milk
However, let’s assume you didn’t remove the milk directory.
% mkdir house/kitchen/fridge/milk
39
Chapter 2
Terminal Basics
Let’s try to remove the fridge directory instead.
% rmdir house/kitchen/fridge
rmdir: house/kitchen/fridge: Directory not empty
Oh dear.
If the directories you want to delete are empty, you can use the same -p
option with rmdir that we used with mkdir. When using -p, rmdir will try
to delete every directory. If you pass house/kitchen/fridge/milk, then all
the directories will be removed. To only remove fridge and milk, you need
to be in the kitchen directory.
% cd house/kitchen
% rmdir -p fridge/milk
rmdir: fridge: Directory not empty
If the directories you want to delete contain files or other directories,
you will get the Directory not empty message. rmdir will start at the
deepest level first and work its way backward. As the milk directory was
empty, it has been removed. The fridge directory will then be checked,
and rmdir stops there because there was still cheese left in it.
If you want to delete the fridge directory and everything in it, you
must issue the remove command (rm). By default, the remove command
will not work on directories, but you can fix that by issuing the recursive
option (-r) option to rm.
% rm -r fridge
That command will remove all files and folders, including the
subfolder itself.
Warning Pay special attention to the path. The rm command can
remove multiple files. An unintentional space could result in removing
the wrong files.
40
Chapter 2
Terminal Basics
Notice the space between my home directory and my folder.
% rm -r /Users/danielplatt /house
rm: /Users/danielplatt/Music: Permission denied
rm: /Users/danielplatt/Pictures: Permission denied
rm: /Users/danielplatt/Desktop: Permission denied
If you left this command to run its course, then most of your home
directory would have been deleted. By default, Apple has set permissions for
most of the directories in your home directory (Music, Picture, Desktop, etc.)
to disallow deletion. Otherwise, rm would have silently removed everything.
Leaving the Filesystem
When you are deleting folders, you shouldn’t be inside a folder that you are
deleting. However, it is possible and I want to show you what it looks like. I
should still be in the kitchen directory.
But first, I need to re-create the fridge directory and move into the
milk directory.
% mkdir -p fridge/milk
% cd fridge/milk
If we were to remove the milk directory, then Terminal would know
where you were and you would be able to run cd .. to move up to the
fridge directory. What happens if we remove the fridge directory while
being in the milk directory?
% rm -r ../../fridge
% pwd
/Users/danielplatt/house/kitchen/fridge/milk
At first glance, everything is normal and you can even move up a
directory.
% cd ..
41
Chapter 2
Terminal Basics
However, when we try to see where we are, things get strange. The
current directory isn’t fridge, because that was removed.
% pwd
.
If we put it all together, the full sequence of commands is this.
% cd /Users/danielplatt/house/kitchen
% mkdir -p fridge/milk
% cd fridge/milk
% rm -r ../../fridge
% pwd
/Users/danielplatt/house/kitchen/fridge/milk
% cd ..
% pwd
.
How Can You Remove a Directory You Are In?
In Linux, a file or folder does not truly go away until the last process
finishes using it. Just by being in the directory we were deleting, Terminal
was using it. When we tried to leave the directory, the shell had no more
information. It defaulted to show us we were in a directory, but not on the
filesystem.
If you find yourself in this situation, you can either close the Terminal
window or change directories using an absolute path.
% cd ~
File Operations
You’ve seen how to move around the filesystem and how to look at which
files are in a directory. Now, you’ll learn how to create a file.
42
Chapter 2
Terminal Basics
Creating Files
One way to create an empty file is with touch. The main use for touch is to
change a file’s modified date and time to now. However, if you touch a file
that doesn’t exist, then touch will create a new file for you.
% touch <filename>
For example, if you want to create a file called empty-file on your
desktop, you would use touch to do it.
% touch ~/Desktop/empty-file
That will create an empty file on your desktop. All touch is doing is setting
the file’s modified date and time to now. If the file doesn’t exist, it is created.
% ls -l ~/Desktop/empty-file
-rw-r--r--@ 1 danielplatt staff 0 5 Aug 08:45 /Users/
danielplatt/Desktop/empty-file
If you wait five minutes and try touch again, you’ll see that the
modified time of the file has changed.
% touch ~/Desktop/empty-file
% ls -l ~/Desktop/empty-file
-rw-r--r--@ 1 danielplatt staff 0 5 Aug 08:50 /Users/
danielplatt/Desktop/empty-file
Another way to create a file is from the output of another command,
which I cover later in the section entitled “Piping.”
Writing Files
The way to write files in Terminal is to use a text editor. The text editor I
recommend for editing files in Terminal is nano.
% nano big-quote
43
Chapter 2
Terminal Basics
Nano can also be used to create files, if you execute it without a
filename or if the file doesn’t exist.
% nano
I will explain nano in more detail later in the section entitled “Editing
Text in Terminal”.
Reading Files
The cat command is one way to read a file and display its contents to
Terminal.
% cat big-quote
Many changes of mind and mood; do not hesitate too long.
Money is better than poverty, if only for financial reasons.
Dear Mister Language Person: I am curious about the expression,
"Part of
this complete breakfast". The way it comes up is, my 5-year-
old will be
watching TV cartoon shows in the morning, and they'll show a
commercial for
a children's compressed breakfast compound such as "Froot
Loops" or "Lucky
Charms", and they always show it sitting on a table next to
some actual food
such as eggs, and the announcer always says: "Part of this
complete
breakfast". Don't that really mean, "Adjacent to this complete
breakfast",
or "On the same table as this complete breakfast"? And
couldn't they make
44
Chapter 2
Terminal Basics
essentially the same claim if, instead of Froot Loops, they put
a can of
shaving cream there, or a dead bat?
Answer: Yes.
-- Dave Barry, "Tips for Writer's"
If we wanted to peek inside a file, we can use the head and tail
commands. The head command will display the first 10 lines of a file,
which is useful for seeing what is in a file before opening it.
% head big-quote
Many changes of mind and mood; do not hesitate too long.
Money is better than poverty, if only for financial reasons.
Dear Mister Language Person: I am curious about the expression,
"Part of
this complete breakfast". The way it comes up is, my 5-year-old
will be
watching TV cartoon shows in the morning, and they'll show a
commercial for
a children's compressed breakfast compound such as "Froot
Loops" or "Lucky
Charms", and they always show it sitting on a table next to
some actual food
such as eggs, and the announcer always says: "Part of this
complete
breakfast". Don't that really mean, "Adjacent to this complete
breakfast",
or "On the same table as this complete breakfast"? And couldn't
they make
The tail command will display the last 10 lines, which is useful for
looking at log files and seeing the latest entry.
45
Chapter 2
Terminal Basics
% tail big-quote
a children's compressed breakfast compound such as "Froot
Loops" or "Lucky
Charms", and they always show it sitting on a table next to
some actual food
such as eggs, and the announcer always says: "Part of this
complete
breakfast". Don't that really mean, "Adjacent to this complete
breakfast",
or "On the same table as this complete breakfast"? And couldn't
they make
essentially the same claim if, instead of Froot Loops, they put
a can of
shaving cream there, or a dead bat?
Answer: Yes.
-- Dave Barry, "Tips for Writer's"
We look at the head and tail commands in more detail in Chapter 3.
C
opying Files
Imagine that you wanted one of the big-quotes saved to another place
on your computer. You can easily do that with the copy command (cp).
You need to give cp a source (the file you want to copy) and a destination
(where you would like to copy it).
The source and destination filename do not have to be the same name,
unlike if we were copying the file in the Finder. If I wanted to copy my
big-quote from earlier to the desktop, I can as follows, using the name
FortuneMessages.
% cp ~/big-quote ~/Desktop/FortuneMessages
46
Chapter 2
Terminal Basics
Note If FortuneMessages.txt existed before this copy, it would
be overwritten by big-quote. There is no prompt asking if you really
meant to do this.
Moving Files
Instead of copying a file, you can move it. Moving a file works the same
way as cp. There is a move command (mv) that takes the same source and
destination arguments. I’ve realized that the file FortuneMessages should
have a file extension to help others understand what type of file it is. I will
rename this example FortuneMessages to include the txt file extension.
% mv ~/Desktop/FortuneMessages ~/Desktop/FortuneMessages.txt
Also, like cp, mv will overwrite any existing files without question.
Deleting Files
After all this, you decide that you never really wanted these files. You can
remove them from the filesystem with the remove command (rm).
% rm ~/Desktop/FortuneMessages.txt
With these commands, you have the basic lifecycle of a file.
Editing Text in Terminal
We will need to do a fair bit of file editing throughout this book. When you
think about editing text on macOS, you might think about using TextEdit or
another word processor. However, these are designed for writing and not
47
Chapter 2
Terminal Basics
for scripting. You may end up with weird errors if you try to use them. For
example, TextEdit likes to swap the quote symbol for a curly quote. They
are great for letter writing, but not for programming.
I recommend you use a command called nano. This command is
preinstalled in macOS, so we won’t need to install it. (Although you can
install a later version with Brew.) You can start nano by typing nano and
specifying the filename when you save. However, I prefer using nano by
specifying the file to edit by typing nano <filename>. The editor is shown
in Figure 2-11.
% nano filename
Figure 2-11. Editing a file in nano
At the bottom of the window are some of the commands available in
nano. For example ^X Exit is like pressing Control+X. There is also help,
Control+G, which lists even more commands. Remember ^+ means press
Control, and M+ means press Esc.
Press ^+X to leave HELP.
So how do you use the editor? You can just start typing, like you would
with any other text editor. Your mouse won’t work here, so you will have
to use the arrow keys if you want to move around. When you have finished
editing, press Control+X to exit, and press Y to save your file to disk.
48
Chapter 2
Terminal Basics
That is all you need to know to get started with nano. If you are not
happy about editing in Terminal, you can use BBEdit instead. You can
find and install BBEdit from the App Store. BBEdit is a free application. It
does have some paid-for features, but they are not necessary for this book.
BBEdit will continue to function when the trial period expires.
The easiest way to use BBEdit from Terminal is to install the BBEdit
Command Line Tools, as shown in Figure 2-12.
Figure 2-12. Install BBEdit Command Line Tools menu item
There will be a confirmation before the installation begins, as shown in
Figure 2-13. You may be prompted to enter your user password to allow the
installation to continue.
49
Chapter 2
Terminal Basics
Figure 2-13. Install BBEdit Command Line Tools
When the installation is complete, you will be shown which version of
the commands have been installed, as shown in Figure 2-14. If you click on
the menu item in Figure 2-12 again, then you will be shown this screen.
Figure 2-14. BBEdit Command Line Tools have been installed
50
Chapter 2
Terminal Basics
Just like we did earlier with nano, we can use BBEdit to open the big-
quote file. Here’s the command to open the big-quote file in BBEdit from
Terminal:
% bbedit big-quote
In the rest of this book, I will use nano for editing exclusively, but you
can substitute this command. There are also other text editors that are
available, such as Atom and Sublime Text.
Changing the Default Text Editor
Occasionally there will be commands that open a new text editor, which by
default will be vi.
The easiest way to change the default text editor is by setting a new
variable in your .zshrc file, called EDITOR.
% export EDITOR=/usr/bin/nano
This will also work on the shell prompt. If you happen to find yourself
opening vi by mistake, you can type :q followed by the return key to quit
out of vi.
We will explain variables later in the section “Environment Variables.”
Piping
With piping, we can redirect the input and output of any command. Input
can come from another command and output can be to somewhere other
than the screen.
Let’s take a closer look at these concepts.
51
Chapter 2
Terminal Basics
Pipe
The pipe, which is the vertical bar symbol (|), is used to connect different
commands. It chains commands together in order to use the output from
one command as the input to another.
In this example, we are reading the contents of the system log file and
piping it to less.
The system log file is many pages long and less paginates through the
contents rather than dumping them to the screen at once.
% cat /var/log/system.log | less
Press space to skip a page of content, or use the arrow keys to move
around.
When you are finished, press the q key to quit. Another example of
piping is to send the same log file to the tail command.
% cat /var/log/system.log |
Aug 4 22:36:37 MacBook-Pro
Aug 4 22:36:37 MacBook-Pro
Aug 4 22:36:47 MacBook-Pro
Aug 4 22:36:47 MacBook-Pro
tail -n 4
com.apple.xpc.launchd[1]
com.apple.xpc.launchd[1]
com.apple.xpc.launchd[1]
com.apple.xpc.launchd[1]
The pipe is a concept that I will be using many times throughout this
book.
Redirecting Output
Redirecting standard output from one command to a file on the filesystem
is done using the greater than symbol (>).
% fortune > ~/quotes.txt
52
Chapter 2
Terminal Basics
When you run that command, you will notice that now, nothing is
outputted to the Terminal window. That’s because it has been written to
the quotes.txt file in your home directory.
A quick way to see the contents of this new file is using another
command, called cat. It concatenates and prints files, as follows:
% cat ~/quotes.txt
Sattinger's Law:
It works better if you plug it in.
Let’s try writing another fortune message into quotes.txt.
% fortune > ~/quotes.txt
Now when you look inside, you’ll see a different quote, but why?
The > symbol is designed overwrite existing files. This fortune message
overwrote the last fortune message. If you use the >> symbol (two greater
than symbols), that tells the shell that you would like to append to the file,
rather than overwrite it.
% fortune >> ~/quotes.txt
% cat ~/quotes.txt
Sattinger's Law:
It works better if you plug it in.
Reputation, adj.:
What others are not thinking about you.
It would be remiss of me not to mention another form of output
redirection, the error redirect, 2>. Say you run a command and it outputs
an error message that cannot be captured using redirect symbol, >, as
follows:
% cat ~/non-existent-file > ~/error.msg
cat: /Users/danielplatt/non-existent-file: No such file or
directory
53
Chapter 2
Terminal Basics
The ~/error.msg file was created, but it is empty.
If you want to capture an error message to the file, you need to use the
error redirect, 2>.
% cat ~/non-existent-file 2> ~/error.msg
The error message has been saved into ~/error.msg.
% cat ~/error.msg
cat: /Users/danielplatt/non-existent-file: No such file or
directory
Redirecting Input
It is also possible to use redirection to send the contents of a file as input to
a command using the less than symbol (<).
command < input
This has a similar effect to using cat to pipe the contents of a file into
a command, except that the operating system is handling it for us, rather
than using another command.
The cat command can easily print the contents of a file, but will also
print the contents of anything that is piped to it. In this case, I am redirecting
the quotes.txt file into cat, rather than cat loading the file directly.
% cat < ~/quotes.txt
Many changes of mind and mood; do not hesitate too long.
While you are very unlikely to use this with cat, this is an important
principle for sending file contents to a command. This technique comes in
useful when restoring a database, for example. Say I need to send a file full
of commands to my database. I would use the following:
% mysql < database.sql
At the moment you don’t have MySQL installed.
54
Chapter 2
Terminal Basics
Hidden Files and Folders
So far, all the files and folders you’ve created will show up in the Finder.
But did you know that you can create files and folders that don’t show up
in the Finder?
Hiding Files the UNIX Way
It’s a long UNIX tradition that any file that starts with a dot will be hidden
by default. These files are hidden from a directory listing and from the
Finder.
% ls -l
total 8445936
drwx------@ 111
drwx------@ 80
drwx------@ 23
drwx------@ 79
drwx------+ 10
drwx------+ 5
drwx------+ 5
drwxr-xr-x+ 4
danielplatt staff 3552 24 Jan 18:53 Desktop
danielplatt staff 2560 16 Jan 10:30 Documents
danielplatt staff 736 12 Jan 15:11 Downloads
danielplatt staff 2528 1 Jan 15:47 Library
danielplatt staff 320 18 Dec 23:07 Movies
danielplatt staff 160 1 Jan 15:58 Music
danielplatt staff 160 5 Nov 17:03 Pictures
danielplatt staff 128 5 Nov 14:02 Public
Using the -a option with the ls command will include the hidden files
in your directory listing.
% ls -la
total 8446600
drwxr-xr-x+ 102
drwxr-xr-x 6
-rw-r--r--@ 1
drwx------ 78
-rw-r--r-- 1
danielplatt staff 3264 25 Jan 09:07 .
root admin 192 24 Oct 01:37 ..
danielplatt staff 22532 23 Jan 22:38 .DS_Store
danielplatt staff 2496 23 Jan 21:09 .Trash
danielplatt staff 0 10 Nov 14:33 .restart
55
Chapter 2
Terminal Basics
drwx------ 5
-rw------- 1
history
-rw-r--r-- 1
drwx------@ 111
danielplatt staff 160 16 Nov 22:15 .ssh
danielplatt staff 179926 25 Jan 09:07 .zsh_
danielplatt staff 3736 23 Jan 21:27 .zshrc
danielplatt staff 3552 24 Jan 18:53 Desktop
Let’s try to create our own hidden folder on the desktop.
% cd ~/Desktop
First, we create a hidden folder, called .myfolder.
% mkdir .myfolder
Note how you can use the folder as you would any other folder in
Terminal.
% touch .myfolder/myfile
% touch .myfolder/.myhiddenfile
However, nothing has shown up on the desktop. We can make it
appear by renaming the directory and removing the dot from the name.
% mv .myfolder myfolder
Just like that, the folder appears on the desktop, as shown in
Figure 2-15.
56
Chapter 2
Terminal Basics
Figure 2-15. Myfolder on the desktop
The same thing will happen with files, as shown in Figures 2-16 and
2-17.
Figure 2-16. Contents of myfolder with myhiddenfile
We can see myfile, but .myhiddenfile is still hidden. Then we can
rename .myhiddenfile to myhiddenfile to make it visible.
% mv myfolder/.myhiddenfile myfolder/myhiddenfile
57
Chapter 2
Terminal Basics
Figure 2-17. Contents of myfolder with myhiddenfile
It is because of the dot that files like .zshrc are difficult to access from
the Finder, but very easy to access in Terminal.
Hiding Files the macOS Way
There is another way to make files hidden from the Finder, but not from
Terminal. You have already seen it in my previous directory listings. The
directory I’m talking about is the Library.
The macOS has flags that can be applied to files and directories, and
they don’t require any renaming. You can see these flags using the ls
command and -lO (That’s a capital “O”). As you can see, the Library has a
hidden flag.
58
Chapter 2
% ls -lO ~/
total 8445744
drwx------@ 128
18:53 Desktop
drwx------@ 89
09:12 Documents
drwx------@ 71
18:53 Downloads
drwx------@ 80
16:56 Library
drwx------+ 11
17:08 Movies
drwx------+ 5
Jan 2020 Music
drwx------+ 6
22:46 Pictures
Terminal Basics
danielplatt staff - 4096 15 Jul
danielplatt staff - 2848 28 Jun
danielplatt staff - 2272 15 Jul
danielplatt staff hidden 2560 12 Feb
danielplatt staff - 352 31 May
danielplatt staff - 160 1
danielplatt staff - 192 25 Mar
First, make sure you have a directory called myfolder on your Desktop.
% mkdir ~/Desktop/myfolder
If you already have this directory, you get the File exists message,
which can safely be ignored. To set flags on a file or directory, we can use
the change flags command (chflags). To hide myfolder, we can use the
following command.
% chflags hidden ~/Desktop/myfolder
To make myfolder visible again, we can pass nohidden, as follows:
% chflags nohidden ~/Desktop/myfolder
59
Chapter 2
Terminal Basics
Globbing
Many of the commands that we have used take a file as an argument.
% ls ~/Desktop
However, it’s possible to use wildcards and ranges with special symbols
to match more than one file. Searching for filenames with wildcards is
called a glob, or globbing. Let’s create some files to help illustrate globbing.
% cd house/kitchen
% touch chair table sink cupboard plate towel fan fridge
freezer
% mkdir ../bedroom
% cd ../bedroom
% touch bed drawers fan top
Single Asterisk
A simple example is finding all the files and folders starting with the letter f
in your kitchen directory.
% % ls -l f*
-rw-r--r-- 1 danielplatt staff 0 4 Aug 23:05 fan
-rw-r--r-- 1 danielplatt staff 0 4 Aug 23:05 freezer
-rw-r--r-- 1 danielplatt staff 0 4 Aug 23:05 fridge
The asterisk symbol will match zero or more characters. You can see
this in effect with the next example.
% ls -l f*e
-rw-r--r-- 1 danielplatt staff 0 4 Aug 23:05 fridge
60
Chapter 2
Terminal Basics
You can also use the asterisk to find files that end with a certain
filename that matches your search—for example, all the files that end with
an e. This could easily be .txt instead of the letter e.
% ls -l *e
-rw-r--r-- 1 danielplatt staff 0 4 Aug 23:05 fridge
-rw-r--r-- 1 danielplatt staff 0 4 Aug 23:05 plate
-rw-r--r-- 1 danielplatt staff 0 4 Aug 23:05 table
The asterisk can replace any part of the filename or path. For example,
we can look for all the room directories that have a fan in them.
% cd ../..
% ls -l house/*/fan
-rw-r--r-- 1 danielplatt staff 0 4 Aug 23:13 house/bedroom/fan
-rw-r--r-- 1 danielplatt staff 0 4 Aug 23:05 house/kitchen/fan
Question Mark
The question mark is very similar to the asterisk, with one exception, it
only matches a single character. In this case, the letter n and a question
mark will still match fan.
% ls -l house/*/fa?
-rw-r--r-- 1 danielplatt staff 0 4 Aug 23:13 house/bedroom/fan
-rw-r--r-- 1 danielplatt staff 0 4 Aug 23:05 house/kitchen/fan
Or you can use it to find any three-letter object.
% ls -l house/*/???
-rw-r--r-- 1 danielplatt staff 0 4 Aug 23:13 house/bedroom/bed
-rw-r--r-- 1 danielplatt staff 0 4 Aug 23:13 house/bedroom/fan
-rw-r--r-- 1 danielplatt staff 0 4 Aug 23:05 house/kitchen/fan
61
Chapter 2
Terminal Basics
Double Asterisk
There is also the double asterisk (**), which will search all folders in the
current directory. A single asterisk, on the other hand, will only match
something in that directory. Or to put it another way, the double asterisk
will match directories and a slash, and the single asterisk will never match
a slash.
To search for a file that begins with the letter t and exists somewhere in
our files, we use the following command:
% ls -l **/t*
-rw-r--r-- 1 danielplatt staff 0 4 Aug 23:20 house/bedroom/top
-rw-r--r-- 1 danielplatt staff 0 4 Aug 23:05 house/kitchen/table
-rw-r--r-- 1 danielplatt staff 0 4 Aug 23:05 house/kitchen/towel
Range Matching
Sometimes you’ll want to match a range of files with letters or numbers
in the filename. The range match uses the square brackets ( [ ] ) with the
desired letters or numbers. If we wanted to match the system log files that
includes the numbers 0 through 5, for example, we could use [0-9] but
could also use [0-5] if we wanted to match fewer files.
% ls -lh /var/log/system.log.[0-9].gz
-rw-r----- 1 root admin 56K 5 Aug 01:26 /var/log/system.
log.0.gz
-rw-r----- 1 root admin 98K 4 Aug 00:00 /var/log/system.
log.1.gz
-rw-r----- 1 root admin 112K 3 Aug 00:22 /var/log/system.
log.2.gz
-rw-r----- 1 root admin 99K 2 Aug 01:22 /var/log/system.
log.3.gz
62
Chapter 2
Terminal Basics
-rw-r----- 1 root admin 82K 1 Aug 00:00 /var/log/system.
log.4.gz
-rw-r----- 1 root admin 73K 31 Jul 01:48 /var/log/system.
log.5.gz
-rw-r----- 1 root admin 61K 30 Jul 00:05 /var/log/system.
log.6.gz
In this example, the numbers 7 through 9 didn’t exist. Notice that the
system did not send an error about them being missing. To match letters,
you can use a range like [a-z] or [A-Z]. It is possible to combine letters
and numbers, such as [0-9a-z]. It is also possible to add a selection for the
matches such as the odd numbers 1, 3, and 5.
% ls -lh /var/log/system.log.[135].gz
-rw-r----- 1 root admin 98K 4 Aug 00:00 /var/log/system.
log.1.gz
-rw-r----- 1 root admin 99K 2 Aug 01:22 /var/log/system.
log.3.gz
-rw-r----- 1 root admin 73K 31 Jul 01:48 /var/log/system.
log.5.gz
There is a lot more to globbing files, but this is enough to get you
started.
Links
Links are a type of file designed to point to another file. They are similar
to an alias in the Finder or a shortcut in Windows. There are three distinct
types of link files—hard links, symbolic links, and firm links (which are
used by the operating system).
63
Chapter 2
Terminal Basics
Hard Links
Hard links allow multiple files to share disk space. What is really
happening is that you are giving one file multiple names.
Let’s create a file and a hard link.
% touch particle1
% ln particle1 particle2
Whichever file you edit, they will both have the same contents, because
particle1 and particle2 point to the same part of the disk.
As long as particle1 and particle2 remain on the same filesystem,
they will continue to work, regardless of where they are. It doesn’t matter if
one of them is moved to a different directory.
Another interesting side effect to note is that the part of the drive that
contains the data will not be cleaned up until all its names have been
removed. This is also how Apple’s TimeMachine worked before it moved to
APFS. In each backup, if a file had not changed, it would be a hard link so
that the backups took up less space.
Symlinks
Previously, I mentioned that /Volumes/Macintosh HD is actually a symlink
that points to /, but I didn’t explain what a symlink was.
Symlink stands for symbolic link. Symlinks are like aliases in the Finder, or
shortcuts in Windows. They are pointers to something else on the filesystem.
When you use the ls command, you will see them with the -> symbol.
% ls -lh /Volumes
total 0
drwxr-xr-x 5 root wheel 160B 12 Nov 08:02 .
lrwxr-xr-x 1 root wheel 1B 11 Nov 21:58 Macintosh HD ->
/
64
Chapter 2
Terminal Basics
Unlike hard links, if the destination is moved, then a symlink will no
longer be pointing to anything valid, and therefore won’t work.
% ls -lh particle[13]
lrwxr-xr-x 1 danielplatt staff 9B 5 Aug 09:09 particle3 ->
particle1
-rw-r--r-- 2 danielplatt staff 0B 5 Aug 09:09 particle1
Now I remove particle1, so particle3 will no longer be able to show
any contents.
% rm particle1
% cat particle3
cat: particle3: No such file or directory
This example of a symlink is called a symbolic link.
Naming Things
When you create your files and directories, you can name them pretty
much anything you’d like. However, there are some symbols that will get
you into trouble. Take the humble space.
If you tried to name your file “hello world” without the quotes, you
might be surprised when you end up with two files, rather than one.
% touch hello world
The reason for this is that the shell sees the space as a separator. If you
want a space in your filename, there are two ways to get around this. The
first way is to quote your filename.
% touch "hello world"
65
Chapter 2
Terminal Basics
The second way is to use an escape character using the backslash
symbol, \.
% touch hello\ world
Symbols that require you to either use an escape character or quote
them are shown in Table 2-5.
Table 2-5. Symbols That Can Be
Escaped in a Filename
Symbol
Description
$
Start of a variable
|
Vertical bar or pipe symbol
;
Semicolon
?
Question mark
&
Ampersand
( )
Brackets
[ ]
Square brackets
{ }
Braces
However, there are some symbols that you will struggle to create a file
with on Terminal. For example, take the asterisk (*). The Finder will allow
you to use the asterisk as a filename, as shown in Figure 2-18.
66
Chapter 2
Terminal Basics
Figure 2-18. The folder and the file inside are both named with an
asterisk
Once the file has been created, you can escape the asterisk or quote it,
so that you can access it.
% ls -l \*
-rw-r--r-- 1 danielplatt staff 0 5 Aug 09:15 *
Interestingly, you can also escape the Return key, but it gets substituted
with a space, which is handy for breaking up long Terminal commands.
% echo String \
> broken \
> by \
> returns
String broken by returns
67
Chapter 2
Terminal Basics
Getting Help with Commands
Throughout this book, you will install many applications. However, I
won’t be able to go through all the arguments that each application has
to offer. So how can you find more information about each application or
about the commands they provide? You can search the Internet for more
information, and that is a perfectly valid approach.
However, a quicker approach is to read the manual. Your Terminal
has a command called man, which is short for manual. When you install
the commands, Brew will also install a man page that describes the
application.
You use man <command> to open the manual. Let’s open the manual of
the fortune command as an example.
% man fortune
FORTUNE(6) UNIX Reference Manual FORTUNE(6)
NAME
fortune - print a random, hopefully interesting,
adage
SYNOPSIS
fortune [-aefilosw] [-n length] [ -m pattern]
[[n%] file/dir/all]
DESCRIPTION
When fortune is run with no arguments it prints
out a random epigram. Epigrams are divided into
several categories, where each category is sub divided into those which are potentially offensive
and those which are not.
:
68
Chapter 2
Terminal Basics
From there, you can use your up and down arrows to scroll the
document, and you can also use Control+v and Control+u to scroll, by
skipping whole pages.
If you are searching for something specific, you can search for it. You
simply press the forward slash / and type the word you are looking for,
followed by the Return key. It will highlight all the occurrences and take
you to the first occurrence.
If you want to go to the next instance, just type / and press Return.
Once you are finished, press the q key. So, when you are asked to install a
command using Brew, check out its man page after installation to get a lot
more information about how to use it.
Searching the Manuals
Sometimes you won’t know which manual you want to check, but you
do know what you are looking for. Thankfully there is a way to get man to
search all manuals for a string.
If I wanted to find all the manuals that mentioned encode, because I
know I need to encode a video, but I don’t know what the command is, I
could type the following:
% man -K "encode"
/usr/local/share/man/man1/fax2ps.1? [ynq] n
/usr/local/share/man/man1/fax2tiff.1? [ynq] n
/usr/local/share/man/man1/ffmpeg-all.1? [ynq] y
Each line will prompt [ynq], which is a question. Would you like
to display this manual? Your choices are yes, no, or quit. If you press y,
manual will open up as if you typed man brew.
Note Depending on the speed of your computer, this could take a
long time.
69
Chapter 2
Terminal Basics
The “See Also” Section
At the bottom of many of the man pages there is a “See Also” section.
Here’s the section from the fortune man page as an example.
SEE ALSO
re_comp(3), regcomp(3), strfile(1), unstr(1)
As you might imagine, these are further man pages for more
information. However, the meaning of the number in the bracket might not
be immediately obvious. The number is referencing the different section of
the man entry.
The section numbers are defined in man man and listed shown in
Table 2-6.
Table 2-6. List of man Page Sections
70
Section
Description
1
User commands
2
System calls
3
C Library Functions
4
Devices and special files
5
File formats and conventions
6
Games et al.
7
Miscellaneous
8
System administration tools and
daemons
9
Kernel routines
n
Tcl/Tk keywords
Chapter 2
Terminal Basics
Displaying a Man Section
Now that you know what the different section numbers stand for, I can
show you how to open them. Normally you specify the man command,
followed by the command. To open the command for a particular section,
you just need to specify the section first. For example, to open printf(3),
you would type the following.
% man 3 printf
Permissions
All files on the computer have permissions to define who can do what
to that file. As a user, you have certain permissions to access files on
macOS. However, you have limited access to system files or to other users.
You have full control over your files in your home directory, with the
exception of the folders that Apple created for you. Most of those folders
have permissions to stop you from accidentally deleting them.
File Permissions
File permissions are how macOS determines who or what is and isn’t
allowed to read or write to a given file. The permissions are split into three
specific groups of users—the owner of the file, which groups of users can
have extra permissions, and finally everybody else.
Hopefully, you know who you are. Your user was set when you set up
your computer, or when you added a new user. Typically, a username will
be your full name, without spaces, and converted to lowercase.
If you have forgotten your username, you can ask the shell who you are
using the whoami command.
% whoami
danielplatt
71
Chapter 2
Terminal Basics
Your user will also belong to multiple user groups.
% groups
staff everyone localaccounts _appserverusr admin _appserveradm
_lpadmin _appstore _lpoperator _developer _analyticsusers com.
apple.access_ftp com.apple.access_screensharing com.apple.
access_ssh com.apple.access_remote_ae com.apple.sharepoint.
group.1
You might recognize some of these groups from Sharing in System
Preferences.
Now that you know which username and groups your user belongs to,
let’s look in the root directory.
% ls -l /
total 15
drwxrwxr-x+ 122
Applications
drwxr-xr-x 2
Bookmarks
drwxr-xr-x+ 74
drwxr-xr-x 2
drwxr-xr-x@ 5
drwxr-xr-x 7
drwxr-xr-x+ 10
drwxr-xr-x@ 37
drwxrwxr-t 2
dr-xr-xr-x 3
lrwxr-xr-x@ 1
private/etc
dr-xr-xr-x 2
dr-xr-xr-x 2
drwxr-xr-x@ 5
72
root admin 3.8K 2 Nov 11:52
danielplatt staff 64B 19 Oct 2018
root wheel 2.3K 29
root wheel 64B 18
root wheel 160B 2
root admin 224B 21
root wheel 320B 3
root wheel 1.2K 27
root admin 64B 18
root wheel 5.2K 21
root wheel 11B 1
Sep 12:02
Aug 2018
Feb 2019
Sep 14:07
Nov 10:17
Sep 17:15
Aug 2018
Oct 08:10
Feb 2019
Library
Network
System
Users
Volumes
bin
cores
dev
etc ->
root wheel 1B 3 Nov 09:50 home
root wheel 1B 3 Nov 09:50 net
demo wheel 160B 3 Jun 2017 nix
Chapter 2
drwxr-xr-x 3
drwxr-xr-x 6
drwxr-xr-x@ 64
lrwxr-xr-x@ 1
private/tmp
drwxr-xr-x@ 10
lrwxr-xr-x@ 1
private/var
root wheel 96B 26
root wheel 192B 16
root wheel 2.0K 27
root wheel 11B 1
Terminal Basics
Sep 2016
Jan 2019
Sep 17:15
Feb 2019
opt
private
sbin
tmp ->
root wheel 320B 2 Feb 2019 usr
root wheel 11B 1 Feb 2019 var ->
This list can be overwhelming at first. Each file and directory will have
its own line. From left to right, the columns show permissions, block or
link count, user (or owner), group, file size, last modified date, and finally,
the name of the file.
File Permissions Breakdown
The file permissions are made up of five components, as shown in
Figure 2-19.
Figure 2-19. The file permissions, split by component
These components control what you can do with the files on your
computer. Every file will have these individual permissions set. Now let’s
cover each component in turn.
73
Chapter 2
Terminal Basics
E ntry Type
Everything in macOS is a file. Every file, directory, or device is a file on
the filesystem. The entry type tells you what type of file it is, as shown in
Table 2-7.
Table 2-7. File Entry Types
Symbol Description
-
Regular file
b
Block special file
c
Character special file
d
Directory
l
Link (also known as a symlink)
s
Socket link
p
FIFO
Regular files and directories are the types we covered in the “File
Operations” and “Directory Operations” sections.
Block File
This is any device that is accessed like a block of data. Like a drive, such as
/dev/disk0.
Character File
Similar to a block file, a character file is only written or read from one
character at a time. An example is /dev/random.
74
Chapter 2
Terminal Basics
Link
A link is a pointer to another file. Links are similar to aliases in the Finder,
or shortcuts in Windows. See the “Links” section.
Socket Link
When programs communicate with each other in macOS, they can either
use networking and listen on a particular port, or they can use a socket file.
The socket file is usually quicker than communicating through the network
stack.
FIFO
FIFO stands for “First In, First Out.” This is a named pipe and can be
named anything.
%mkfifo named-pipe
I now have a file called named-pipe, which works similarly to piping
covered earlier.
% echo "hi" | cat
hi
FIFO is the same principle, but using the filesystem.
% echo > named-pipe
% cat named-pipe
hi
While this looks like I wrote to a file called named-pipe, I did not. If I
run cat again, the command prints nothing, but also doesn’t return to the
prompt. It is waiting for more information to be sent across the pipe.
% cat named-pipe
75
Chapter 2
Terminal Basics
Try opening a new Terminal window and sending something else into
the named pipe.
The User, Group, and Other Components
Each of these components has three parts—read, write, and execute
permissions. When you combine them, you have nine characters in total,
which you see in Table 2-8.
Table 2-8. Symbol Meaning for User, Group, and Everyone
Permissions
Symbol
Description
-
No permission
r
Readable
w
Writable
x
If a file, executable
If a directory, searchable
S
If in user, then set-user-ID is set
If in group, then set-group-ID is set
Only appears in user or group
s
If in user, then set-user-ID is set
If in group, then set-group-ID is set
Equivalent of +x
Only appears in user or group
t
Sticky bit; doesn’t have search or execute permissions
Only appears in other group
T
Sticky bit. Has search or execute permission
Only appears in other group
76
Chapter 2
Terminal Basics
For example the /Volume directory has the permissions rwx r-x r-x,
which translates to everyone being able to read and list the contents, but
only the user (root) being able to write to the directory.
% ls -lh /
drwxr-xr-x 4 root wheel 128B 5 Aug 19:38 Volumes
Set-user-ID (also known as setuid) and Set-group-ID (also known
as setgid) run an executable with the user’s permissions. A directory with
these permissions will mean new files and directories will inherit either
the user or group of that directory.
When the sticky bit is set on a directory, only the owner of the directory
can delete files in it. An example of the sticky bit is the Shared user folder.
% ls -lh /Users
drwxr-xr-x+ 155
danielplatt
drwxr-xr-x+ 16
drwxrwxrwt 10
drwxr-xr-x 22
drwxr-xr-x 6
danielplatt staff 4.8K 5 Aug 20:22
dave staff 512B
root wheel 320B
root admin 704B
root admin 192B
31
31
17
24
Jul 23:10
Jul 18:23
Jul 15:49
Oct 2019
dave
Shared
..
.
For more information about sticky mode, type man sticky.
Example Permissions
Table 2-9 shows examples of permissions that you will likely see in your
Terminal.
77
Chapter 2
Terminal Basics
Table 2-9. Example File Permissions
Permission
Description
drwxr-xr-x
Home directory. Others will be able to see files in this folder, but
not write to them.
drwx------
Folders within your home directory. For example, your Desktop.
Only the user can read and write to this folder.
-rw-r--r--
Default file permissions for a new file. Everyone can read the file,
but only the user can write to it.
drwxr-xr-x
Default directory permissions for a new directory.
-rwxr-xr-x
Typical permissions for Terminal commands. Only the user can
modify them, but everyone else can read and execute them.
drwxrwxrwxt
Typical permission of the /tmp directory.
Everyone has permission to create a file here, but only the user
can delete the file.
F eatures
The ability to set permissions on files and directories has been around
since the beginning of UNIX in the 1970s. Since then, there have been
extensions to the original file permissions, as shown in Table 2-10.
Table 2-10. Feature Symbols
78
Symbol
Description
<nothing>
No additional permissions
+
Access control list (ACL)
@
Extended file attributes
Chapter 2
Terminal Basics
You can see these extensions in use with the ls -l command, when
the permissions end with either a + or @ symbol. I am only showing you
these permissions for completeness.
Access Control List
If you would like to see the ACLs for a particular file, you can use the ls
command with the -e option. Here is an example that shows the ACLs for
the root directory.
% ls -le /
total 9
drwxrwxr-x+ 48 root admin 1536 14
0: group:everyone deny delete
drwxr-xr-x 67 root wheel 2144 10
drwxr-xr-x@ 8 root wheel 256 24
0: group:everyone deny delete
drwxr-xr-x 6 root admin 192 12
drwxr-xr-x 5 root wheel 160 14
drwxr-xr-x@ 38 root wheel 1216 10
drwxr-xr-x 2 root wheel 64 24
dr-xr-xr-x 3 root wheel 4433 1
lrwxr-xr-x@ 1 root admin 11 5
drwxr-xr-x 2 root wheel 64 24
drwxr-xr-x 6 root wheel 192 10
drwxr-xr-x@ 63 root wheel 2016 10
lrwxr-xr-x@ 1 root admin 11 5
drwxr-xr-x@ 11 root wheel 352 5
lrwxr-xr-x@ 1 root admin 11 5
Jul 17:46 Applications
Jun 18:26 Library
Oct 2019 System
Jul 11:07
Jul 19:34
Jun 18:24
Aug 2019
Jul 18:14
Nov 2019
Aug 2019
Jun 18:25
Jun 18:24
Nov 2019
Nov 2019
Nov 2019
Users
Volumes
bin
cores
dev
etc -> private/etc
opt
private
sbin
tmp -> private/tmp
usr
var -> private/var
79
Chapter 2
Terminal Basics
Extended File Attributes
If you want to see the extended file attributes for a particular file, you can
use the ls command with the -@ option. Here is an example that shows the
extended file attributes for the root directory.
% ls -l@ /
total 9
dr-xr-xr-x 3 root wheel 4433 1
lrwxr-xr-x@ 1 root admin 11 5
com.apple.rootless 0
drwxr-xr-x 2 root wheel 64 24
drwxr-xr-x 6 root wheel 192 10
drwxr-xr-x@ 63 root wheel 2016 10
com.apple.rootless 0
lrwxr-xr-x@ 1 root admin 11 5
com.apple.rootless 0
drwxr-xr-x@ 11 root wheel 352 5
com.apple.rootless 0
lrwxr-xr-x@ 1 root admin 11 5
com.apple.rootless 0
Jul 18:14 dev
Nov 2019 etc -> private/etc
Aug 2019 opt
Jun 18:25 private
Jun 18:24 sbin
Nov 2019 tmp -> private/tmp
Nov 2019 usr
Nov 2019 var -> private/var
Changing File Permissions
You now know about file permissions, but how do you change them? You
do so with the change mode command (chmod). There are a few ways you
can use chmod to set file permissions. Take the permissions rw-r--r--.
You can set them as an absolute value (0644) or by using symbolic
expressions (u=rw,go=r):
% chmod <options> <permissions> filename
Let’s look at the differences between the different ways you can express
permissions.
80
Chapter 2
Terminal Basics
A
bsolute Values
Setting a permission as a number is probably the simplest method.
However, it does require an understanding of how to calculate the value.
% chmod 0644 filename
The number represents the permissions and is broken into four parts—
the Entry type, User, Group, and Other. Each of the four parts is built using
addition.
Entry Type
The entry type is built using addition, as shown in Table 2-11.
Table 2-11. Numeric Values for Entry Type
Value
With Execute
Without Execute
7
s+t
S+T
6
s
S
5
s+t
S+T
4
s
S
3
t
T
2
-
-
1
t
T
0
-
-
User, Group, and Other
The last components are all calculated the same way, as shown in Table 2-12.
81
Chapter 2
Terminal Basics
Table 2-12. Numeric Breakdown
of User, Group, and Other
Value
Permission
4
r
2
w
1
x
0
-
S
ymbolic Values
When setting file permissions, you use the letters u, g, and o ( for User,
Group, and Other). The equivalent to 0644 using symbols is:
% chmod u=rw,go=r filename
However, using the plus or minus symbols, you can also add or
remove existing permissions. For example, if you wanted to add execute
permissions, you would use the following:
% chmod ugo+x filename
If you wanted to remove execute permissions, you would use the
following:
% chmod ugo-x filename
Escalating Your System Privilege
Occasionally, we will need to run Terminal commands as another user.
This would be a massive security issue if everybody could change their
active user. For this reason, only admin users can change their active user.
You can find out who the admin user is in the Users and Groups section in
System Preferences, as shown in Figure 2-20.
82
Chapter 2
Terminal Basics
Figure 2-20. Users and Group system preference
This command should be treated with caution, as it allows you to run a
command as another user, including the root user.
Note The root user is the primary user on any UNIX system and can
do anything on your computer. The root user is allowed to change any
file permission and change to any user.
The command I am talking about is sudo.
% sudo --help
sudo - execute a command as another user
The sudo command is useful when it comes to editing files that you
aren’t normally supposed to be able edit, at least not by accident. By
default sudo will run as root.
% sudo whoami
Password:
root
This command shows the sudo command executing whoami as root.
Any member of the admin group can use sudo. The xkcd comic shown in
Figure 2-21 sums up how sudo works perfectly.
83
Chapter 2
Terminal Basics
Figure 2-21. Sandwich. https://xkcd.com/149/
You can also use sudo to run commands as users apart from root, as
long as the user exists. In the following example, sudo is executing whoami
as dave.
% sudo -u dave whoami
dave
Notice how sudo didn’t prompt for a password the second time. This is
because, by default, sudo caches the password for five minutes. We will use
the sudo command in a later section.
Aliases
When you’ve been using a lot of different computers, you pick up
handy tricks and commands. What I use a lot of, because of my Ubuntu
background, is the ll (“LL”) command, which prints a list of the files in your
current directory, with lots of useful information.
84
Chapter 2
Terminal Basics
So how can you get that on your Terminal, without you writing your
own version? Well, ll is really the ls command, but with a few extra
arguments. You can achieve that with aliasing. You tell your Terminal
(Bash) that whenever it sees this one command, it should run this other
command. The Ubuntu command ll is actually the ls –alF command.
However, I like to use a modified version, which includes the file sizes
in human-readable numbers, with the -h argument.
% ls -alFh
You can type the man ls command to see all the parameters that you
can use with the ls command. The -a is for all files, including files starting
with a full stop. By default, it will ignore files that start with a full stop.
-L is for long list (dereference symbolic links or shortcuts, this allows you
to see the path to the actual file). -F will display a symbol after the file to let
you know what type of file it is. / is for a directory, * is for an executable, and
@ is for a symbolic link. -h is for human-readable number formats.
There are others, but these are the ones you are likely to come across.
You can paste all these arguments and test them in your current
Terminal. Once you have the set of arguments and parameters you want,
you will be ready to create your alias. So let’s show you how to set that up.
Type alias ll='ls -alFh' into your Terminal.
% alias ll='ls -alFh'
Now you can type ll to use it as alias. However, this alias will not
work in other terminals. This is because it will not be saved anywhere. In
the next section, you will see how to persist commands for all Terminal
windows. However, before we do that, let’s talk about other aliases. How do
you know what aliases have been defined?
% alias
ll='ls -alFh'
run-help=man
which-command=whence
85
Chapter 2
Terminal Basics
If you want to remove a defined alias, you use unalias.
% unalias ll
If you now look at the list of aliases, you can see that the ll alias has
been removed.
% alias
run-help=man
which-command=whence
C
ustomizing the Feel
Previously we created an alias for the command ll, but the problem was it
wouldn’t work in a new Terminal window. What you need is a way to run
the alias command on every new Terminal window.
There are a few special files in your home directory that control how
Zsh will behave for you, as shown in Table 2-13. Since these files live in
your home directory, Zsh can be customized for each individual user on
your computer.
Table 2-13. The Different Zsh Special Files
File Extension
Description
.zshenv
Setting environment variables.
.zshrc
Commands to set up aliases. Nothing that produces any output.
.zlogin
Commands that produce output, such as the fortune command.
.zlogout
Commands that run on logout.
86
Chapter 2
Terminal Basics
Say you write alias ll='ls -alFh' into a file called .zshrc in your
home directory. The first thing you should do is check which directory you
are in, by using pwd. It should be /Users/<username>. Then you can open
.zshrc with nano (or your favorite text editor).
% nano . zshrc
If you are not in your home directory, you can move to it with cd ~ or
using ~ in the file path.
% nano ~/.zshrc
By default, this file won’t exist. We will have to create it. In my .zshrc
file, I have set up an alias for ll, as shown in Figure 2-22.
Figure 2-22. Example .zshrc file with ll alias defined
This will work for a new Terminal, but if you want to also get it to work
with your current Terminal, you have to rerun your .zshrc with source
~/. zshrc.
87
Chapter 2
Terminal Basics
Customizing the Welcome Message
When you open up your Terminal, you see your computer name and the %
symbol, as shown in Figure 2-23.
Figure 2-23. Terminal with the default .zlogin
The default Terminal is very plain. There is another file you can edit
called .zlogin, which is designed to run commands that produce output.
(Unlike the .zshrc file.) You can use the .zlogin file to output some text to
customize your new Terminal window or tab. But first, let’s meet the echo
command, as shown in Figure 2-24.
% echo "I'll output anything"
Figure 2-24. Terminal showing the echo command
88
Chapter 2
Terminal Basics
Some symbols have a special meaning. For example, the exclamation
mark is shown in Figure 2-25.
Figure 2-25. Exclamation mark breaking the echo command
If you want to use these symbols as is, you need to rob them of their
special meaning by escaping them. You escape a symbol or character using
the backslash symbol (\), as shown in Figure 2-26.
Figure 2-26. Using the escape character to allow usage of a regular
exclamation mark
Now you can use the echo command in the .zlogin file to create
a warning to anyone trying to use this user’s Terminal, as shown in
Figure 2-27.
89
Chapter 2
Terminal Basics
Figure 2-27. Using .zshrc to display a message to users
Notice how this echo command is outputting text over multiple lines.
We can take this further by including commands that produce their own
output, as shown in Figure 2-28.
Figure 2-28. Using the echo and fortune commands together
The first echo command creates a newline between the Last login
and the fortune message. You can see the result in Figure 2-29.
90
Chapter 2
Terminal Basics
Figure 2-29. The output from our new .zlogin
Now you know the basics of customizing the Terminal welcome message.
Environment Variables
Inside the shell are variables. A variable is a place for a program to store a
value for later use. You can think of variables a bit like buckets. Anything
can be placed inside the bucket and later retrieved. You can store a value
in a variable, and at a later time, take it back out.
Unlike a bucket, you can keep taking something out of a variable. You
can also keep putting different things in a variable and only the last item
will be available.
By default, variables contain nothing.
% echo $TEST
<empty line>
You can set a value to a variable like this.
% TEST=1
% echo $TEST
1
91
Chapter 2
Terminal Basics
Be careful though. It is probably best to use quotes around the
contents.
% TEST=I am a variable
zsh: command not found: am
You would have to type:
% TEST="I am a variable"
If you want to get rid of a variable, you can remove it.
% unset TEST
Zsh has loads of variables that are set by default. You can see
a list of them by typing env.
% env
TERM_PROGRAM=Apple_Terminal
SHELL=/bin/zsh
TERM=xterm-256color
...
However, you might notice that TEST was not in that list. What’s going
on here? Well, when we run TEST="I am a variable", we are only setting
the variable for the shell. No running programs will see this variable. For
env to see our new variable, we need to tell the shell to make it available
with the export keyword.
% export TEST="I am a variable"
% env
TERM_PROGRAM=Apple_Terminal
SHELL=/bin/zsh
TERM=xterm-256color
...
TEST=I am a variable
92
Chapter 2
Terminal Basics
Why Use Variables?
Variables can be used to keep track of your script’s state or configuration
for later use in a program. They can also be used as placeholders, for
example, to hold the output of a script.
The Default Text Editor
Occasionally, some commands will open a text editor. The default text
editor is vi, which if you are new to Terminal, can be very confusing. You
can override that by setting a variable called EDITOR.
% export EDITOR="/usr/bin/nano"
This way, if you find yourself in a text editor, it’ll be the more familiar
nano. To make this change permanent, you need to add that line to your
.zshrc file.
How Can You Use Variables?
You can then output variables to Terminal.
% echo $SHELL
You can even output them as part of a string.
% echo "Hello $USER."
You can combine variables by concatenating them.
% GREETING="Hello $USER."
Later, we will talk about doing different things based on variables.
93
Chapter 2
Terminal Basics
Customizing the Shell Prompt
We’ve been looking at the shell prompt a lot, but haven’t really talked
about it.
Mac-Pro%
In my case, the shell prompt says Mac-Pro and ends with the percent
symbol. That’s not very exciting at all. This is the default Mac shell prompt,
and it’s controlled by something called the PS1 shell variable.
% echo $PS1
%n@%m %1~ %#
What can we do with that? Well, we can do a lot, actually. We could
use some text that doesn’t change, but that isn’t very useful, as shown in
Figure 2-30.
Figure 2-30. Changing the shell prompt
S
tate Symbols
There are a number of special symbols that you can use to make your shell
prompt more dynamic. You learned about %m and %# before and you can
see a list of others in Table 2-14.
94
Chapter 2
Terminal Basics
Table 2-14. State Symbols
Symbol
Description
%m
Computer name
%n
Username
%#
Will display % unless you have a privileged account, and then it is #
%d
Your current location (working directory)
A quick way to see these is by using all of these symbols, as shown in
Figure 2-31.
Figure 2-31. Example of state symbols in the shell prompt
Date and Time Symbols
You might like to know when all your previous commands were run, so
including the time could be helpful. Table 2-15 contains a list of date and
time symbols.
95
Chapter 2
Terminal Basics
Table 2-15. Date and Time Symbols for Use in the Shell Prompt
Symbol
Description
%D
The date in yy-mm-dd format
%W
Date in mm/dd/yy format
%T
Time in 24 hour format (HH:MM)
%t
Time in 12 hour format (HH:MMam/pm)
%w
Day of the week and day of the month
%D{<strftime symbols>}
Custom date and time string (see next table)
An example of the shell prompt with the date and time is shown in
Figure 2-32.
Figure 2-32. Date and time shown on the shell prompt
The symbol %D is special, as it takes a substring. You can use this to
define your own date/time format, as shown in Table 2-16.
96
Chapter 2
Terminal Basics
Table 2-16. Symbols for strftime
strftime Symbol
Description
%A
Day of the week
%a
Abbreviated day of the week
%B
Full month name
%b
Abbreviated month name
%m
Month as a number (01-12)
%d
Day of the month. (With a leading zero for single digit dates)
%e
Day of the month (with a leading space for single digit dates)
%G
Full year, e.g., 2020
%g
Last two digits of the year, e.g., 20
The list of strftime symbols is long. For the full list, type man
strftime. You also have other shell variables, as shown in Table 2-17. PATH
is a shell variable, PS1 is a shell variable, and it will tell you what each one
of them means, whether you just want to echo them or act on them.
Table 2-17. Other Shell Variables of Note
Variable
Description
PS1
Initial prompt (default: %n@%m %1~ %# ")
PS2
Prompt carries on to the next line (default: "%_> ")
USER
Your username
PWD
Your current directory
OSTYPE
Operating system version (darwin19.0)
PATH
Everywhere the shell will check a command might exist, before
returning the message, command not found
97
Chapter 2
Terminal Basics
So PS1 is the initial prompt, and PS2 is for when the command spans
multiple lines, such as when you type echo \ and then continue the
command on the next line. Remember, you also have the env command,
which will list all the environment variables that have been set. Finally,
you can also use emojis in Terminal. You can bring up the Emoji Picker by
pressing Control+Command+Space, as shown in Figure 2-33.
Figure 2-33. The Emoji Picker
This also means you can use emojis in your shell prompt, as shown in
Figure 2-34.
98
Chapter 2
Terminal Basics
Figure 2-34. Emoji being used in the shell prompt
Summary
In this chapter, we walked through Terminal, learning about different
aspects of the filesystem and how to edit files. We finally finished with you
being able to customize your shell environment.
99
CHAPTER 3
macOS Built-in
Commands
In this chapter, we explore the different commands that came with
your copy of the macOS operating system. There are loads of different
commands to choose from. A lot of these commands are used to
manipulate files or process text.
Before we get started, we will need files to operate on, so that you can
follow along. If you are confident, you can use your own files as a source.
G
etting Started
We need large blocks of text. It might be worth creating a folder in your
home directory specifically for this next step. If you need help, see Chapter 2.
Alternatively, if you want to use a temporary directory that will automatically
delete itself on the next system reboot, you can use this command.
% cd "$(mktemp -d)"
This will create a temporary directory and cd into it.
Each time you run it, you will end up in a different temporary
directory, so make note of the location you end up, rather than running it
multiple times.
% cd "$(mktemp -d)"
% pwd
/var/folders/5z/tnwhfkg57hdfys5fxckr07_h0000gn/T/tmp.QPg0xWOB
© Daniel Platt 2021
D. Platt, Tweak Your Mac Terminal, https://doi.org/10.1007/978-1-4842-6171-2_3
101
Chapter 3
macOS Built-in Commands
We need to download my archive full of text files, using the curl
command.
% curl --location -o master.zip https://github.com/hackzilla/
random-files/archive/master.zip
If all went well, you should have a file in your current directory, called
master.zip. Make note of where you are running this command, as this
will be where the download is stored. If in doubt, run the pwd command.
I will assume that you downloaded master.zip into your home directory.
Compression
Whether it is to save space, or to save bandwidth, at the end of the day,
compression is about saving money. Compression is about reducing the
size of a file in a reversible way.
That means, for every method of compression, there will be a method
for decompressing the file. I’m going to show you two common forms
of compression—zip and gzip—that you will encounter on the Internet.
You’re going to see each compression method in action.
We’re going to download a couple of archives and use them in this
chapter.
Zip Compression
When I think about zip compression, I am reminded of PKZIP and WinZip.
These were programs for compressing and decompressing files and folders
on DOS and Windows. What you might not know is that PKZIP was made
by a company called PKWARE. PKWARE’s founder, Phil Katz, released
the file format into the public domain in 1989. Shortly afterward, there
was a project called Info-ZIP, which released open source utilities for
compressing and decompressing files.
We’re going to use the master.zip file you downloaded earlier.
102
Chapter 3
macOS Built-in Commands
Unzip
Unzipping is the process of taking a single compressed archive and
extracting the files and folders from within. As we already have a zip file,
we need to extract the files first, also called uncompressing them.
The command to uncompress a zip file is unzip, as follows:
% unzip --help
UnZip 6.00 of 20 April 2009, by Info-ZIP. Maintained by
C. Spieler. Send
bug reports using http://www.info-zip.org/zip-bug.html;
see README for details.
Usage: unzip [-Z] [-opts[modifiers]] file[.zip] [list]
[-x xlist] [-d exdir]
Default action is to extract files in list, except those in
xlist, to exdir;
file[.zip] may be a wildcard.
Testing the Integrity of the Zip File
Before we extract the files from master.zip, we should verify the archive
downloaded correctly with the -t option. This will compare the archive
checksum with the files stored in the archive.
% unzip -t master.zip
Archive: master.zip
025d101299c770c5f305e731cce76368c7201fb0
testing: random-files-master/OK
testing: random-files-master/Readme.md OK
...
No errors detected in compressed data of master.zip.
If the file downloaded with errors, you should try downloading it again.
If no errors were detected in the archive, you can move on.
103
Chapter 3
macOS Built-in Commands
Listing the Contents of the Zip File
If you want to know what is stored inside a zip file before you extract it, you
can view its contents with the -l option.
% unzip -l master.zip
Archive: master.zip
025d101299c770c5f305e731cce76368c7201fb0
Length Date Time Name
--------- ---------- ----- --- 0 11-16-2019 22:20 random-files-master/
64 11-16-2019 22:20 random-files-master/Readme.md
3857 11-16-2019 22:20 random-files-master/bible.txt
9500 11-16-2019 22:20 random-files-master/decamerone.txt
2419 11-16-2019 22:20 random-files-master/faust.txt
3178 11-16-2019 22:20 random-files-master/fleurs.txt
2094 11-16-2019 22:20 random-files-master/lorem.txt
2885 11-16-2019 22:20 random-files-master/raven.txt
2642 11-16-2019 22:20 random-files-master/spook.txt
458 11-16-2019 22:20 random-files-master/strandberg.txt
4691 11-16-2019 22:20 random-files-master/strindberg.txt
5125 11-16-2019 22:20 random-files-master/walden.txt
--------- ------ 36913 12 files
What you should notice about this listing is whether the files are within
a folder or not. In this example, the files are in a directory called randomfiles. The last thing you want to do is expand a zip archive and all the files
appear within your home directory.
If the zip archive didn’t contain a directory, you can easily create a
directory and move the archive in, all before extracting the files.
% mkdir random-files-master
% mv master.zip random-files-master
104
Chapter 3
macOS Built-in Commands
Now that we know it is safe to expand in the home directory, we can
unzip it.
% unzip master.zip
Archive: master.zip
025d101299c770c5f305e731cce76368c7201fb0
creating: random-files-master/
inflating: random-files-master/Readme.md
inflating: random-files-master/bible.txt
inflating: random-files-master/decamerone.txt
...
Now you will find a directory called random-files-master in your
current directory, which contains all the files from the zip file. This is the
basic process for extracting files from zip archives.
Zip
We cannot talk about unzipping without mentioning the process for
creating a zip archive.
% zip --help
Copyright (c) 1990-2008 Info-ZIP - Type 'zip "-L"' for software
license.
Zip 3.0 (July 5th 2008).
When it comes to compressing files, you have more options.
•
Would you like to make the archive smaller or faster to
compress and decompress?
•
Do you want to encrypt the contents or not?
105
Chapter 3
macOS Built-in Commands
Previously, you saw master.zip had all the files stored in a directory
called random-files. Now you can see the difference when creating the zip
file from a folder of files. The zip command includes the full directory path
from your current directory.
% zip with-directory.zip random-files-master/*
adding: random-files-master/BinaryEncoding.md (deflated 74%)
Note If you use the ~ tilde symbol, the zip command will include
the full directory.
% zip with-directory.zip ~/random-files-master/*
adding: Users/danielplatt/random-files-master/BinaryEncoding.md
(deflated 74%)
If you wanted to create the archive without the parent directory, you
would need to be in the random-files directory.
% cd random-files-master
% zip without-directory.zip *
adding: BinaryEncoding.md (deflated 74%)
Adjust the Size of the Archive
There is an option to change how much compression to use with zip, from
no compression to slowest compression. The slower the compression, the
more time the computer spends making the archive smaller.
In the following command, # is replaced by a number from 0 to 9. 0 is
no compression, 1 is the fastest, and 9 is the slowest. If this option is not
provided, zip will use the default value of 6.
% zip -# with-directory.zip random-files-master/*
106
Chapter 3
macOS Built-in Commands
If you want to make the zip file as small as possible, you would use -9.
% zip -9 with-directory.zip random-files-master/*
Encrypting the Archive
When creating a zip archive, you can choose to enable encryption with
the -e option and then assign a password to the archive. You might do
this if you were transmitting sensitive information across the Internet. Or
maybe you want to store sensitive information on a thumb drive, but want
to make sure that if anyone finds it, they couldn’t read the files.
% zip -e with-directory.zip random-files-master/*
Enter password:
Verify password:
It’s worth noting that the files are encrypted on a per-file basis, rather
than encrypting the whole archive. This means you can still see the file
listing of the archive. You can prevent this listing by recompressing the
archive with encryption.
Unzipping with encryption is as simple as running the unzip
command. When unzip encounters an encrypted file, you will be
prompted for the password.
% unzip with-directory.zip
Archive: with-directory.zip
[with-directory.zip] random-files-master/BinaryEncoding.md password:
Compressing Directories
The last thing to mention is if you try to compress a directory with other
directories in it, the commands you are currently using will skip over those
directories. You need to tell zip to recursively go into those folders using
the -r option.
% zip -r with-directory.zip random-files-master/*
107
Chapter 3
macOS Built-in Commands
Gzip Compression
In 1992, a couple of years after the zip file format was released into the
public domain, the first version of gzip became available.
% gzip --help
Apple gzip 287.40.2
usage: gzip [-123456789acdfhklLNnqrtVv] [-S .suffix] [<file>
[<file> ...]]
-1 --fast fastest (worst) compression
-2 .. -8 set compression level
-9 --best best (slowest) compression
There are a lot of similarities between gzip and zip compression. One
big difference with gzip is that it will not compress multiple files into a
single archive. You can try to compress a whole folder with the -r option.
% gzip -r random-files-master
% ls random-files-master
BinaryEncoding.md.gz FAQ.md.gz LICENSE.gz README.md.gz
UseCases.md.gz
gzip compresses each of the files individually. You can reverse the
process with the -d option.
% gzip -rd random-files-master
If gzip cannot compress more than a single file, then what can it be
used for? One example is log files. They are usually rotated to stop them
from getting too big. Sometimes they are rotated by time (day or week) and
other times it is by size.
% ls -l /var/log/system.log*
What about using gzip to compress more than one file? There is a
solution to that, and it is to back up to tape.
108
Chapter 3
macOS Built-in Commands
T ar
You are probably more familiar with SSDs and thumb drives for storage
on computers. However, when you are trying to back up a large amount of
data, these forms of storage will end up being very expensive.
Tape storage is a cheaper way of storing a large amount of data in a small
space. You can see from Figure 3-1 that a single tape can store up to 30TB. For
the price of a tape drive, you could buy a hard drive that held only 6TB.
Figure 3-1. Sun Microsystems tape drive and media
When backing up to tape, you need to convert the filesystem into a
single stream of data that can be written to a tape archive. The command
to do that is called tar.
% tar --help
tar(bsdtar): manipulate archive files
First option must be a mode specifier:
-c Create -r Add/Replace -t List -u Update -x Extract
109
Chapter 3
macOS Built-in Commands
Using tar, we can create an archive with -c, and we can compress it
with gzip and -z. You also need to provide -f to save the resulting archive
to a file. Otherwise, the archive will be outputted to Terminal.
% tar -czf master.tar.gz random-files-master
Now that you have your tar archive, you can look inside it with the -t
option.
% tar -tf master.tar.gz
random-files/
random-files/HighLevelGoals.md
random-files/NonWeb.md
random-files/Tooling.md
random-files/TextFormat.md
random-files/MVP.md
random-files/LICENSE
You use the -x option to extract files from a tar archive.
% tar -xf master.tar.gz
Working with Files
This section covers all the different macOS built-in commands that deal
with files, whether it be finding files, finding information within a file, or
determining what type of file it is.
Finding Content in Files
Imagine that you have a large text file and you are looking for a specific
piece of information or want to find every occurrence of something. For
me, this is a daily occurrence, as I look through system logs when trying to
solve problems. This brings us to the grep command.
110
Chapter 3
macOS Built-in Commands
% grep --help
usage: grep [-abcDEFGHhIiJLlmnOoqRSsUVvwxZ] [-A num] [-B num]
[-C[num]]
[-e pattern] [-f file] [--binary-files=value] [--color=when]
[--context[=num]] [--directories=action] [--label] [--linebuffered]
[--null] [pattern] [file ...]
grep finds text within other blocks of text. If you want to find the word
security, you can use security as the pattern.
% grep Security random-files-master/spook.txt
surveillance; Security Gazprom S AG ASIO passwd Fedayeen? Wire
SCUD Bellcore
Karimov. Security embassy secure ANZUS Kerry Forte Compsec
anarchy Ahmadinejad
grep is case-sensitive. This means that “security” will not find
instances of “Security.” If you want to make a search case-insensitive, use
the -i option.
% grep -i security random-files-master/spook.txt
If you only want a count of how many lines match, you can use
the -c option. However, if a word appears more than once on a line, it is
only counted once.
% grep -c security random-files-master/spook.txt
4
% grep -c Security random-files-master/spook.txt
3
% grep -ic security random-files-master/spook.txt
6
111
Chapter 3
macOS Built-in Commands
So far, we have been searching for the word “security” as our pattern.
What if we wanted to search for something a little more complex? You can
use a regular expression as your pattern.
A simple way to find a word at the beginning of a line is to use the ^
symbol.
% grep "^Europol" spook.txt
Europol airframe Box airframe Taiwan! MD2 Audiotel Panama
csystems ASDIC AlQaeda
If you wanted to find a word at the end of a line, you would end the
expression with $. With more advanced regular expressions, you will need
to use the -E option.
Here’s an example of searching for any number that is three digits or more.
% grep -E "[0-9]{3,}" spook.txt
MD5 USCODE? John 556. NWO Tower Gazprom digicash NSA Wired
Israel Bosnia
Finally, I want to bring your attention to context. Imagine you are
looking for something in the log file that is difficult to find. However, you
know what comes before or after it. Let’s assume that what you want to find
comes before and after the occurrence of the word “Statistics.”
% grep
Nov 19
Nov 19
Nov 19
Statistics system.log
00:40:10 MacBook-Pro syslogd[90]: ASL Sender Statistics
02:40:31 MacBook-Pro syslogd[90]: ASL Sender Statistics
08:48:11 MacBook-Pro syslogd[90]: ASL Sender Statistics
You could make a note of those times and then use cat to go through
the file. Maybe you could use regular expressions to show everything that
happened when the time was 40 minutes past the hour.
% grep -c -E " [0-9]{2}:40:[0-9]{2} " system.log
41
112
Chapter 3
macOS Built-in Commands
That is 41 lines to check, but what about the occurrences that didn’t
happen at 40 minutes past? There is another way. You can pass in the -a
(after) and -b (before) options with the number of lines you would like.
When you use -a or -b, you need to specify the option and the number,
without a space between.
% grep -a1 -b1 Statistics system.log
0-Nov 19 00:40:11 --- last message repeated 1 time --53:Nov 19 00:40:10 MacBook-Pro syslogd[90]: ASL Sender
Statistics
116-Nov 19 00:40:11 MacBook-Pro syslogd[90]: Configuration
Notice:
--4604-Nov 19 00:40:11 MacBook-Pro xpcproxy[22930]:
libcoreservices: _dirhelper_userdir: 557: bootstrap_look_up
returned (ipc/send) invalid destination port
4754:Nov 19 02:40:31 MacBook-Pro syslogd[90]: ASL Sender
Statistics
4817-Nov 19 02:40:31 MacBook-Pro com.apple.xpc.launchd[1] (com.
apple.sandboxd[22397]): Service exited due to SIGALRM | sent by
kernel_task[0]
--7275-Nov 19 02:40:46 MacBook-Pro xpcproxy[22946]:
libcoreservices: _dirhelper_userdir: 557: bootstrap_look_up
returned (ipc/send) invalid destination port
7425:Nov 19 08:48:11 MacBook-Pro syslogd[90]: ASL Sender
Statistics
7488-Nov 19 08:48:11 MacBook-Pro com.apple.xpc.launchd[1] (com.
apple.sandboxd[22944]): Service exited due to SIGALRM | sent by
kernel_task[0]
113
Chapter 3
macOS Built-in Commands
Finding a Filename
Sometimes you’ll want to search for a file, not by its contents, but by the
filename itself.
The find command will help you find files and folders that represent
your expression.
Note find can be slow, as it searches your filesystem every time
you run it.
% find -H
usage: find [-H | -L | -P] [-EXdsx] [-f path] path ... [expression]
find [-H | -L | -P] [-EXdsx] -f path [path ...] [expression]
At find’s basic level, you can get it to list all the files and folders across
the whole filesystem.
% find / *
You can limit find to any folder of your choosing, as follows:
% find random-files-master *
What if you wanted to only return files that matched a certain pattern?
The expression that find takes differs from the glob expression that the ls
command took, but we can make it work the same by passing in –name, as
follows:
% find random-files-master -name "*.txt"
The same glob expressions will work with the find command.
% find /var/log -name "system.log.[0-9].gz"
/var/log/system.log.2.gz
/var/log/system.log.1.gz
/var/log/system.log.0.gz
114
Chapter 3
macOS Built-in Commands
The total number of logs will differ, depending on how old your
computer install is.
There is also a -type option that can filter the file type (for example, f
for file, d for directory, and l for a symbolic link).
This command will print all the directories in the folder.
% find random-files-master -type d;
The find man command has many more usage examples.
Finding a Filename with locate
If the find command is a little too complex or too slow, there is an
alternative command called locate.
% locate
usage: locate [-0Scims] [-l limit] [-d database] pattern ...
default database: `/var/db/locate.database' or $LOCATE_PATH
locate works by searching through a database of filenames, rather
than searching the filesystem every time. This has the benefit of being
faster, but sometimes the list may be out of date.
Let’s use locate to look for files ending in .md, as we did with find.
% locate "*.txt"
WARNING: The locate database (/var/db/locate.database) does not exist.
To create the database, run the following command:
sudo launchctl load -w /System/Library/LaunchDaemons/com.
apple.locate.plist
Please be aware that the database can take some time to
generate; once It has created the database, this message will
no longer appear.
115
Chapter 3
macOS Built-in Commands
If this is the first time you have used locate on your computer, there
will not be a database for locate to use. This warning is telling you to
create a locate database.
% sudo launchctl load -w /System/Library/LaunchDaemons/com.
apple.locate.plist
Password: <enter your user password>
While the command will return results to Terminal rather quickly, the
database might take a while to build. The time it takes will depend on how
many files are on your drive. This warning will go away once it has built the
database.
When using the locate command, you must remember that you are
matching the whole file path, rather than just the filename.
Let’s look at some system logs:
% locate "*/system.log.[0-9].*"
/private/var/log/system.log.0.gz
You might notice some differences between this output and the output
of the find command. The first difference is the path is /private/var/
log/, rather than /var/log/. This is because /var is a symbolic link to /
private/var. Therefore, they are really the same location.
The other difference is that there was only one log that was returned,
whereas the find command returned three logs. This is the downside to
the locate command. It uses a database that will become out of date until
it is rebuilt. The rebuilding happens once a week, assuming your computer
is running.
Where Is Your Command?
Occasionally, you might want to know where commands live on your
filesystem. This next command will do that, but it is more useful if you have
the same command in multiple places.
116
Chapter 3
macOS Built-in Commands
% which
which [-as] program
The which command will show you where the given program is.
% which sh
/bin/sh
If you want the which command to return all instances of a command,
use the -a option.
% which -a git
/usr/local/bin/git
/usr/bin/git
Note If you’ve only just started using Catalina when you try the
which –a command, you will only see one command location returned.
The -a option is useful when you want to make sure the right
command is being called. which works by checking all the locations that a
command could be installed in. It knows all the locations where the system
commands are installed.
If you remember in Chapter 2, we discussed environment variables.
There is a variable that controls where the shell will look for commands
to run. The variable that controls this is called $PATH and contains a list of
paths separated by colons.
% echo $PATH
/usr/local/bin:/usr/bin:/bin:/usr/sbin:/sbin
Note If a folder appears twice, it can cause a duplicate entry from
the which command.
117
Chapter 3
macOS Built-in Commands
To see this in action, we can temporarily double up the $PATH variable.
% PATH="$PATH:$PATH"
% echo $PATH
/usr/local/bin:/usr/bin:/bin:/usr/sbin:/sbin:/usr/local/bin:/
usr/bin:/bin:/usr/sbin:/sbin
Now when we look for a command, we will see multiple entries.
% which -a sh
/bin/sh
/bin/sh
Inspecting File Contents
Let’s say you’ve received a file from someone, but it doesn’t have a file type
extension. What do you do with it? You could open it in a text editor and try
to guess what is inside, as shown in Figure 3-2.
Figure 3-2. Viewing the contents of master.zip in nano
118
Chapter 3
macOS Built-in Commands
If you do this enough times, you might start to see a pattern. At the
beginning of a file, there is a magic code that tells the system what type of
file it is. You can see this more easily in Figure 3-3.
Figure 3-3. Close-up when editing master.zip
The first two characters of this file are PK. This is this file’s magic code.
PK is the zip format’s magic code, as PKWARE created the file format. There
is a command called file that will read this magic code and tell you what
the file type is.
% file master.zip
master.zip: Zip archive data, at least v1.0 to extract
There is more to it than that, otherwise file wouldn’t be able to tell the
difference between a plain text document and an .xml file.
% file random-files-master/Readme.md
/Users/danielplatt/random-files-master/Readme.md: ASCII text
% file /System/Library/Templates/Data/usr/share/snmp/SensorDat.xml
/System/Library/Templates/Data/usr/share/snmp/SensorDat.xml:
XML 1.0 document text, ASCII text
119
Chapter 3
macOS Built-in Commands
The file command will also work on Terminal commands, which,
with Catalina, should all be 64-bit.
% file /bin/sh
/bin/sh: Mach-O 64-bit executable x86_64
When you try to use file on a macOS app, it will not understand them
correctly. macOS apps are a collection of files inside a directory with the
extension .app. If you open the contextual menu (sometimes referred to
as a secondary click, or right-click) on an app and select Show Package
Contents, then you will know about this.
% file /System/Applications/TextEdit.app
/System/Applications/TextEdit.app: directory
Here is an example of an audio file.
% file /System/Library/Sounds/Sosumi.aiff
/System/Library/Sounds/Sosumi.aiff: IFF data, AIFF audio
file will also show you more information about the file. This is true if
the file contains metadata, such as with picture files.
% file /Library/Desktop\ Pictures/Abstract\ Shapes.jpg
/Library/Desktop Pictures/Abstract Shapes.jpg: JPEG image data,
Exif standard: [TIFF image data, big-endian, direntries=7,
orientation=upper-left, xresolution=98, yresolution=106,
resolutionunit=2, software=Adobe Photoshop CC 2017 (Macintosh),
datetime=2016:11:10 11:43:33], baseline, precision 8,
5120x2880, components 3
These examples had a file extension in the filename, but the file
command didn’t use that to figure it out.
120
Chapter 3
macOS Built-in Commands
W
orking with Text
This section covers all the different macOS built-in commands that deal
with text, whether it be printing or outputting text, formatting it, displaying
it, or transforming it.
P
rinting Text
Occasionally I’ve needed to output text and so far, we used the echo
command to do this.
% echo "Output Text"
Output Text
The echo command is straightforward and prints everything that is
passed to it. echo also takes an optional -n argument, which omits the
trailing newline. The main reason to not want a trailing newline is if you
are asking for input from the user and you want the input to appear on the
same line as the output. We will talk about reading user input in Chapter 5.
% echo -n "Continue? [Yn]: "
Continue? [Yn]: %
As well as removing newlines, you can also add them by using an
escape character, \n. Anywhere that you use \n, it will be replaced with a
newline.
% echo "***************\n* Hello World *\n***************"
***************
* Hello World *
***************
121
Chapter 3
macOS Built-in Commands
F ormatting Output
There is an alternative command for outputting text that I use, called
printf. The main reason people use the printf command is to output
formatted variables. By default, printf will output text just like echo -n,
without the trailing newline.
% printf "Output Text"
Output Text%
As well as the first argument, printf also takes additional arguments,
which it can insert into the first argument.
printf format [arguments ...]
printf controls what is displayed.
P
rintf Format
The format and arguments work hand in hand. For every argument that is
specified, you should include a percent sign and a format character in the
format.
Let’s say we want to use text as our argument, then we would use %s to
represent it.
% printf "User Entered: %s" "testing"
User Entered: testing%
printf works with many different types of inputs, from text to numbers
to decimals. How printf displays the arguments comes down to the
format character (the letter after the percent symbol). A selection of these
format characters is shown in Table 3-1.
122
Chapter 3
macOS Built-in Commands
Table 3-1. Selection of Format Characters for printf
Format Character
Type
Example
d
Number or integer
10
f
Decimal
10.000200
s
Text or string
"Text"
%
Display a percent sign
%
Displaying the Arguments
The format string uses the arguments in the order they are provided; you
also need to specify their correct format.
% printf "%s scored %d/%d\n" "Daniel" 33 34
Daniel scored 33/34
If the values are out of order or you try to format a string as a number,
this will most likely result in 0. It might work, if the string contains a
number, but it’s unlikely.
% printf "%s scored %d/%d\n" 33 "Daniel" 34
33 scored 0/34
Where printf shines is when it’s used in scripts to output data from
variables. These variables are passed into printf as arguments.
% printf "Your Terminal Vendor is %s and is Version %d\n" ➥
$TERM_PROGRAM $TERM_PROGRAM_VERSION
Your Terminal Vendor is Apple_Terminal and is Version 433
Note If you supply more arguments than there are format
characters, printf will keep printing the format line until all the
arguments are used up.
123
Chapter 3
macOS Built-in Commands
Viewing the Contents
If you want to edit the contents of a text file, you can use nano. But what
if you just want to view the contents? The cat command will print the
contents of files.
% cd ~/random-files-master
% cat strandberg.txt
Foo? Hoo? Baz. Foo bar, Foo Foo Baz! Foo bar, baz?
Hoo? Baz! Foo bar,
Foo Foo Baz. Foo bar, baz. Bar; Foo. Hoo! Baz! Foo
Baz! Foo bar,
baz; Bar! Foo? Hoo? Baz. Foo bar, Foo Foo Baz! Foo
Bar. Foo; Hoo! Baz!
Foo bar, Foo Foo Baz. Foo bar, baz! Bar; Foo? Hoo.
bar, Foo Foo Baz;
Foo bar, baz. Bar. Foo? Hoo; Baz? Foo bar, Foo Foo
bar, baz; Bar. Foo;
Hoo! Baz! Foo bar, Foo Foo Baz. Foo bar, baz? Bar?
Bar? Foo!
bar, Foo Foo
bar, baz.
Baz; Foo
Baz; Foo
Foo. Hoo.
The cat command will also take many files and print them all.
% cat strandberg.txt strandberg.txt strandberg.txt
The output of that command will print the contents strandberg.txt,
three times. This works well for small files, but what about when the file is
many megabytes? In a pinch, you could use cat. However, there is a better
way.
% less walden.txt
You might have come across this interface before, but not the
command. By default, the man command is using less to help you navigate
through the manual.
124
Chapter 3
macOS Built-in Commands
Everything that we covered in Chapter 2 will work here. The Up
and Down arrows will move you one line at a time. The Control+U and
Control+V keypresses will move you a whole screen of text at a time.
Finally, the forward slash will search the document by either a word or a
regular expression.
Once you are finished, you can press the q key to exit. If you wanted to
combine multiple files, you could use cat with the less command.
% cat lorem.txt bible.txt | less
Or you could save the combined files to another file on your filesystem.
% cat lorem.txt bible.txt > combined.txt
T ransforming Text
The tr command translates characters and transforms text. It works by
changing or deleting characters.
C
hanging Characters
When substituting characters, we need to give tr a string to match and
another string to swap the characters to.
For example, we can get tr to convert all the lowercase letters to
uppercase, as follows:
% tr "[:lower:]" "[:upper:]" < strandberg.txt
FOO? HOO? BAZ. FOO BAR, FOO FOO BAZ! FOO BAR, BAZ? BAR?
% tr "[:lower:][:upper:]" "[:lower:][:upper:]" < strandberg.txt
You can also perform multiple translations. For example, if you wanted
to toggle the case of the input, you could specify multiple text classes.
% tr "[:lower:][:upper:]" "[:upper:][:lower:]" < strandberg.txt
fOO? hOO? bAZ. fOO BAR, fOO fOO bAZ! fOO BAR, BAZ? bAR?
125
Chapter 3
macOS Built-in Commands
Deleting Characters
We can use the -d option to specify that we want tr to delete the matching
characters. For example, we can delete all the punctuation characters.
% tr -d "[:punct:]" < strandberg.txt
Foo Hoo Baz Foo bar Foo Foo Baz Foo bar baz Bar
A better method might be to strip out invisible characters, but that
would be much harder to visualize.
% tr -d "[:special:]" < strandberg.txt
Search and Replace
If you’ve ever had to search and replace in a document, you know it isn’t
easy to have full control of the process.
With the sed command, you have full control over the process with
regular expressions.
Sed stands for Stream Editor.
sed [-Ealn] command [file ...]
sed [-Ealn] [-e command] [-f command_file] [-i extension] [file ...]
% sed 's/bar/barred/' strandberg.txt
Foo? Hoo? Baz. Foo barred, Foo Foo Baz! Foo bar, baz? Bar?
Foo Foo Baz. Foo barred, baz. Bar; Foo. Hoo! Baz! Foo bar,
Let’s compare this to the original text.
% cat strandberg.txt
Foo? Hoo? Baz. Foo bar, Foo Foo Baz! Foo bar, baz? Bar?
Foo Foo Baz. Foo bar, baz. Bar; Foo. Hoo! Baz! Foo bar,
126
Chapter 3
macOS Built-in Commands
You can see that the command has sort of worked, but not completely.
It seems to have only made a change once per line. We need to use the
global flag in the regular expression to tell sed to keep replacing every
occurrence.
% sed 's/bar/barred/g' strandberg.txt
Foo? Hoo? Baz. Foo barred, Foo Foo Baz! Foo barred, baz? Bar?
Foo Foo Baz. Foo barred, baz. Bar; Foo. Hoo! Baz! Foo barred,
We still have some occurrences of Bar in our text. The installed version
of sed is case-sensitive. We need to provide sed with both versions of the
regular expression to preserve the case. We should also use the -e option
to explicitly tell sed we are using more than one command.
% sed -e 's/bar/barred/g' -e 's/Bar/Barred/g' strandberg.txt
Foo? Hoo? Baz. Foo barred, Foo Foo Baz! Foo barred, baz? Barred?
Foo Foo Baz. Foo barred, baz. Barred; Foo. Hoo! Baz! Foo barred,
With sed, you can also remove lines. If you wanted to remove every line
that had the occurrence of Baz! in it, you would use the following:
% sed -e '/Baz!/d' strandberg.txt
Foo bar, Foo Foo Baz. Foo bar, baz! Bar; Foo? Hoo. Baz; Foo bar,
Foo bar, baz. Bar. Foo? Hoo; Baz? Foo bar, Foo Foo Baz; Foo bar,
Hopefully you can see the power of the sed command, but it does even
more than simply edit text files. Imagine using sed to edit configuration
files. Consider this small configuration snippet from php.ini:
; Maximum amount of memory a script may consume (128MB)
; http://php.net/memory-limit
memory_limit = 128M
The value, 128M, might be different on different systems, and we need
a command to standardize them to 1G.
127
Chapter 3
macOS Built-in Commands
% sed -E -e 's/^memory_limit = [0-9]+[MB]/memory_limit = 1G/' php.ini
; Maximum amount of memory a script may consume (128MB)
; http://php.net/memory-limit
memory_limit = 1G
The -E option enables the extended regular expressions.
Spotting the Difference in Text Files
Imagine you have two files that have minor differences. It might be
difficult to spot the differences using the naked eye. Thankfully, there is a
command called diff that will help you out.
% diff --help
Usage: diff [OPTION]... FILES
Compare files line by line.
First, we need to create some files with a couple of differences in them.
We can use the sed command for that.
% sed -e 's/^baz;/bay;/g' strandberg.txt > strandberg.diff.txt
% diff strandberg.txt strandberg.diff.txt
3c3
< baz; Bar! Foo? Hoo? Baz. Foo bar, Foo Foo Baz! Foo bar, baz.
Bar. Foo; Hoo!
--> bay; Bar! Foo? Hoo? Baz. Foo bar, Foo Foo Baz! Foo bar, baz.
Bar. Foo; Hoo!
The diff command will list every difference between the two files.
The first file passed is the left file, <, and the second file is the right file, >.
For each part of the file that is different, you will see the location and the
difference.
128
Chapter 3
macOS Built-in Commands
The location is displayed as “3c3”, line 3 of the left file and line 3 of the
right file. Then there are the actual differences. The left file line is shown
with the less than symbol (<) and the right file is shown with the greater
than symbol (>).
In the world of programming, diff is very useful. It allows you to see
the changes between one version of a file and another. However, in many
programming languages, the whitespace doesn’t have any effect on the
program. This is good because some people like to code using spaces and
others like to use tabs.
We need to modify the previous example to change the whitespace.
% sed -e 's/^baz;/bay;/g' -e 's/ / /g' strandberg.txt >
strandberg.diff.txt
Note It might not be obvious, but the last sed command replaces a
single space with two spaces.
If we compare the files now, every line will have issues, because of the
whitespace change we made.
% diff strandberg.txt strandberg.diff.txt
1,6c1,6
< Foo? Hoo? Baz. Foo bar, Foo Foo Baz! Foo bar, baz?
< Foo Foo Baz. Foo bar, baz. Bar; Foo. Hoo! Baz!
--> Foo? Hoo? Baz. Foo bar, Foo Foo Baz! Foo bar, baz?
> Foo Foo Baz. Foo bar, baz. Bar; Foo. Hoo! Baz! Foo
Note When the location has a comma (for example, 1,6c2,3,), then
that is the start line and the end line.
129
Chapter 3
macOS Built-in Commands
To get diff to compare just the text changes and ignore the whitespace
changes, you need to use the -w option.
% diff -w strandberg.txt strandberg.diff.txt
3c3
< baz; Bar! Foo? Hoo? Baz. Foo bar, Foo Foo Baz! Foo
--> bay; Bar! Foo? Hoo? Baz. Foo bar, Foo Foo Baz! Foo
Viewing Content At the Beginning of a File
You’ve seen how to view the contents of a file. Sometimes you just need to
peek inside a text file. The head command will do just that.
head [-n count | -c bytes] [file ...]
You can use it without the -n or -c option and it will default to 10 lines
(-n 10). You are more likely to specify how many lines you want head to
return.
% head -n 1 random-files-master/lorem.txt
Parturient nisi. Tellus. Quam penatibus aliquet vulputate
vitae, Nulla in, quis,
Specifying the total number of lines is a good method for most text
files. However, that only works because head is counting the number of
newlines in the file. What happens if there are no newlines in the text file?
head will effectively turn into cat and output the whole file to Terminal.
This can be problematic if the file has gigabytes of data.
You can tell head to count in bytes, rather than in newlines. The -c
option specifies how many bytes you would like.
% head -c 40 random-files-master/lorem.txt
Parturient nisi. Tellus. Quam penatibus %
130
Chapter 3
macOS Built-in Commands
Note A byte is typically a single character.
An emoji icon is made up of four bytes.
When using head, you can either supply -n or -c, but it doesn’t make
sense to include both.
% head -n 1 -c 1 random-files-master/lorem.txt
head: can't combine line and byte counts
If you did want to limit the output to both bytes and lines, you could
pipe head into head.
% head -n 5 random-files-master/decamerone.txt | head -c 100
Di vita, quali noi che furono al alcuno sé cominciamento,
carissime giudice, porgere e le spezial c%
Viewing Content At the End of a File
Viewing the beginning of a file is all well and good, but that’s not where
most of the action is. Viewing the end of a file can be more interesting,
especially if it keeps changing. You use tail to do that:
usage: tail [-F | -f | -r] [-q] [-b # | -c # | -n #] [file ...]
tail has all the options as head, as well as a few more. You can view by
lines:
% tail -n 1 random-files-master/decamerone.txt
procuratori è, una noia che, gli intendo cose le esperienza di
porgiamo;
131
Chapter 3
macOS Built-in Commands
You can view by bytes:
% tail -c 73 random-files-master/decamerone.txt
procuratori è, una noia che, gli intendo cose le esperienza di
porgiamo;
You also return the last specified number of 512 byte blocks.
% tail -b 1 random-files-master/decamerone.txt
evole nome Cepperello ci noi non che, e temporali reputiamo
cosa chiamato nome medesimi, di fatica non fa, dovendo a i
d'esse, a così i
dallo reputato per mentre è sono da sono sua niuno io da coloro stato
d'angoscia prestasse! Siamo, frate, etterni quale la durare e
sì prieghi di
La ma fu noi benignità mescolati parte discenda, in in quali
transitorie suo
Ser fermi avvedimento incominciare, cosa e sue con mossa morto
pessimo
procuratori è, una noia che, gli intendo cose le esperienza di
porgiamo;
Note Historically, a hard drive was divided into blocks that were
512 bytes in size.
With APFS (Apple File System), the block size is 4096 bytes. You can
also use tail to follow the output of a file with the -f option. This will
show you the specified amount of text, and will also show new text as it
gets appended to the file. A good use case for this is when examining log
files.
132
Chapter 3
macOS Built-in Commands
% tail -n 3 -f /var/log/system.log
Nov 19 11:34:19 MacBook-Pro News[23955]: CDN - client setup_
local_port
Nov 19 11:34:19 MacBook-Pro News[23955]: CDN - Local Port:
117519
Nov 19 11:37:30 MacBook-Pro syslogd[90]: ASL Sender Statistics
The tail command will hang and keep adding newlines as they
appear in the file. When you are finished, you can press ^C (Control+C) to
exit tail. macOS will try to stop a single log file from becoming too big by
rotating the files daily.
% ls -lath /var/log/system.log*
-rw-r-----@ 1 root admin 52K 19
-rw-r----- 1 root admin 3.6K 19
-rw-r----- 1 root admin 6.0K 18
-rw-r----- 1 root admin 15K 17
-rw-r----- 1 root admin 8.0K 16
-rw-r----- 1 root admin 3.5K 15
-rw-r----- 1 root admin 6.0K 14
-rw-r----- 1 root admin 4.1K 13
Nov
Nov
Nov
Nov
Nov
Nov
Nov
Nov
11:41
00:40
00:25
01:24
01:05
01:53
00:53
00:24
/var/log/system.log
/var/log/system.log.0.gz
/var/log/system.log.1.gz
/var/log/system.log.2.gz
/var/log/system.log.3.gz
/var/log/system.log.4.gz
/var/log/system.log.5.gz
/var/log/system.log.6.gz
If you are using tail with the -f option while this happens, tail
will suddenly not be able to read the file any more. It will have been
compressed and then deleted. The -F option will detect this and carry on
as normal.
Occasionally, when I am debugging a server, I will want to see all the
log file changes as they come in. When you are doing this, you don’t want
to open up a new tab for every file. The good news is you can get tail to
monitor all the files at the same time.
Every time there is new output, tail will repeat the log filename and
then print the newline.
133
Chapter 3
macOS Built-in Commands
% tail -n 1 -f /var/log/*.log
==> /var/log/displaypolicyd.stdout.log <==
==> /var/log/fsck_apfs_error.log <==
fsck_apfs completed at Sat Nov 16 21:44:15 2019
==> /var/log/install.log <==
2019-11-19 11:07:13+00 MacBook-Pro softwareupdated[556]:
Removing client SUUpdateServiceClient pid=555, uid=501,
installAuth=NO rights=(), transactions=0 (/System/Library/
PrivateFrameworks/SoftwareUpdate.framework/Versions/A/
Resources/SoftwareUpdateNotificationManager.app/Contents/MacOS/
SoftwareUpdateNotificationManager)
==> /var/log/system.log <==
Nov 19 11:47:36 MacBook-Pro syslogd[90]: ASL Sender Statistics
==> /var/log/wifi-11-16-2019__15:07:12.223.log <==
Sat Nov 16 15:07:12.223 Driver Event: <airportd[233]> _
bsd_80211_event_callback: DUMP_LOGS (en0)
==> /var/log/system.log <==
Nov 19 11:49:20 MacBook-Pro News[24043]: CDN - client
insert callback function client = 0 type = 17 function =
0x7fff3a3fa21e local_olny = false
Nov 19 11:49:20 MacBook-Pro News[24043]: CDN - client setup_
remote_port
Scanning and Processing with AWK
awk is a very powerful command for editing text and I still don’t fully use
its power. It’s really good at processing lines of a file. This might sound
familiar. After all, we did this using the sed command.
134
Chapter 3
macOS Built-in Commands
However, awk works by scanning each line of a file to match against a
program that you specify, to decide what to do. awk works well with data
files, especially when they have a pattern, like TSV, CSV, and log files. Any
file that has a separator between the values (tabs for TSV and commas for
CSV) is a good option for awk.
One example of a TSV file is salaries.tsv. This file has rows of data
that could easily be imported into a spreadsheet.
% cat salaries.tsv
Name Dept Salary
Stacey sales 34698.22
Sidney payroll 39117.12
Leola payroll 31314.98
Note You will find these files in random-files-master/data/.
At the simplest, you could make awk simulate the cat command with
program {print} action.
% awk '{print}' salaries.tsv | head
Name Dept Salary
Stacey sales 34698.22
Sidney payroll 39117.12
Leola payroll 31314.98
The program consists of a “pattern” and an {action}. You can specify
either or both. However, if you don’t specify either, then nothing will be
outputted.
% awk '' salaries.tsv
135
Chapter 3
macOS Built-in Commands
Actions
In awk, actions do something with the data. Mostly it outputs the data, but
it could also change it.
We’ve seen one action so far, print. The action {print} will print a
whole line. When we used {print}, this was shorthand for {print $0}.
$0 is equivalent to the whole line. We can also refer to each value from the
column. By default, awk will separate the values using any whitespace. The
Name column would be $1, the Dept column would be $2, and so on.
In the previous example, {print $0} would be the equivalent of
{ print $1 "\t" $2 "\t" $3 }. We are taking each piece of data and
separating it with a single tab. If we wanted to reorder the columns, as
Name, Salary and Dept, then we could.
% awk '{ print $1 "\t" $3 "\t" $2 }' salaries.tsv | head
Name Salary Dept
Stacey 34698.22 sales
Sidney 39117.12 payroll
Leola 31314.98 payroll
If we didn’t include anything between the variables, then awk would
output variables without whitespace between them.
There is an alternative. We can comma-separate the variables and then
awk will, by default, use a space to separate the values.
% awk '{ print $1, $3, $2 }' salaries.tsv | head
Name Salary Dept
Stacey 34698.22 sales
Sidney 39117.12 payroll
Leola 31314.98 payroll
If we don’t add the separator or use a comma, the columns will not be
separated.
136
Chapter 3
macOS Built-in Commands
% awk '{ print $1 $3 $2 }' salaries.tsv | head
Name Salary Dept
Stacey 34698.22 sales
Sidney 39117.12 payroll
Leola 31314.98 payroll
Built-In Variables
Some variables control the separation of values and lines. A list of such
built-in variables is shown in Table 3-2.
Table 3-2. A Selection of Built-In Variables to Control awk
Variable
Description
FS
Input field separator, default: whitespace
NF
Number of fields
NR
Row number; the value increments for every line
FILENAME
Contains the filename the awk is currently processing
RS
Input row separator, default: newline
OFS
Output field separator, default: space
ORS
Output row separator, default: newline
To change the separator between fields when we printed previously,
we used \t to specify the separator.
% awk '{ print $1 "\t" $3 "\t" $2 }' salaries.tsv | head
We can change the OFS variable from space to tabs, so we use the comma
separator. This would make it easier to modify the command in the future.
137
Chapter 3
macOS Built-in Commands
% awk '{ OFS="\t"; print $1, $3, $2 }' salaries.tsv | head
Name Salary Dept
Stacey 34698.22 sales
Sidney 39117.12 payroll
Leola 31314.98 payroll
Variables
We can also create our own variables. In the next example, we are going to
divide the salary to give a monthly wage.
% awk '{ OFS="\t"; mth=$3/12; print $1, $3, $2, mth }' salaries.tsv
Name Salary Dept 0
Stacey 34698.22 sales 2891.52
Sidney 39117.12 payroll 3259.76
Leola 31314.98 payroll 2609.58
The header for the month column is wrong, but that can be fixed by
using conditionals, which are covered later.
Begin Action
There is a minor issue with the last command. When we set the OFS
variable, we are doing so for every row in salaries.tsv. This isn’t a
problem in small files, but if you process a larger file, it can slow down
processing unnecessarily.
We can use the BEGIN action to set up the variable, so it no longer has
to be set on every row that is processed. The format is the keyword BEGIN
followed by the braces. Then you can carry on with your original action.
% awk 'BEGIN{ OFS="\t"} { print $1, $3, $2 }' salaries.tsv | head
Name Salary Dept
Stacey 34698.22 sales
Sidney 39117.12 payroll
Leola 31314.98 payroll
138
Chapter 3
macOS Built-in Commands
End Action
We can also set an action to happen after the script has finished
processing, with an END action. The format is the keyword END followed by
the braces.
% awk 'BEGIN{ OFS="\t"} { s += $3; print $1, $3, $2 } \
END{ print "\n" "Total salaries are: ", s}' salaries.tsv
Name Salary Dept
Stacey 34698.22 sales
Sidney 39117.12 payroll
Leola 31314.98 payroll
George 17352.3 payroll
Alanis 24373.73 payroll
Brett 39154.19 marketing
Mervin 14141.15 sales
Jarod 24921.36 payroll
Gregorio 42643.8 sales
Alexzander 13590.12 marketing
Total salaries are: 281307
Patterns
If we specify a pattern, the action will default to print. For example, in this
example, we specify the pattern, so we won’t need the action.
% awk '1 == 1' salaries.tsv | head
Name Salary Dept
Stacey 34698.22 sales
Sidney 39117.12 payroll
Leola 31314.98 payroll
As you can imagine, this isn’t very useful.
139
Chapter 3
macOS Built-in Commands
What could be useful is being able to output rows where the salary is
greater than 20,000.
% awk '$3 < 20000' salaries.tsv
George payroll 17352.3
Mervin sales 14141.15
Alexzander marketing 13590.12
Note You can use any comparison operators here, as well (>, <,
>=, <=, and ==).
Or we could show only the salaries of employees in the marketing
department.
% awk '$2 == "marketing"' salaries.tsv
Brett marketing 39154.19
Alexzander marketing 13590.12
You can also change the data, or add new columns, when you are in
the pattern. You may have accidentally noticed this if you only used one
equals sign, instead of two.
In this example, I’m using multiple statements and separating them
with the semicolon (;) symbol.
% awk '$3 = 20000; $4 = "Y"' salaries.tsv
Name Dept 20000
Name Dept 20000 Y
Stacey sales 20000
Stacey sales 20000 Y
Sidney payroll 20000
Sidney payroll 20000 Y
140
Chapter 3
macOS Built-in Commands
Oh, that kind of worked, but not how we wanted. What has happened
is that both statements are treated as a positive result, which causes awk to
print both when going through each row.
If you want to change the data, use the action.
% awk '{$3 = 20000; $4 = "Y"; print}' salaries.tsv
Name Dept 20000 Y
Stacey sales 20000 Y
Sidney payroll 20000 Y
Leola payroll 20000 Y
Conditionals
Suppose that because of a new law, minimum wages are going up and that
all full-time employees will be paid a minimum of $20,000. We need to be
able to say if $3 is less than $20,000, change it to $20,000.
% awk '{ if ($3 < 20000) $3 = 20000; print} ' salaries.tsv
Name Dept Salary
Stacey sales 34698.22
Sidney payroll 39117.12
Leola payroll 31314.98
George payroll 20000
If we wanted to add the extra column for the new column, then we
could use an if and also supply an alternative if it doesn’t match an else.
% awk '{if ($3 < 20000) $4 = 20000; else $4 = $3; print}' salaries.tsv
Name Dept Salary Salary
Stacey sales 34698.22 34698.22
Sidney payroll 39117.12 39117.12
Leola payroll 31314.98 31314.98
George payroll 17352.3 20000
141
Chapter 3
macOS Built-in Commands
Note If the action that you perform in the if is more than one
action, you will need to use the curly braces to group them together,
such as with % awk '{ if ($3 < 20000) {$4 = 20000;}
else {$4 = $3;} print} ' salaries.tsv.
Everything looks good, except the headers are now misleading, as both
of them say “Salary.” We need to be able to target the first row.
This is possible, using what we know so far.
% awk '{ if ($1 == "Name") {$4 = "New"$3; $3 = "Old"$3; } \
else if ($3 < 20000) $4 = 20000; else $4 = $3; print}' salaries.tsv
Name Dept OldSalary NewSalary
Stacey sales 34698.22 34698.22
Sidney payroll 39117.12 39117.12
Although this technically works, I’m not happy about using “Name” to
figure out if we are on the first row. What happens if “Name” was renamed
to “FirstName”?
awk has a variable that keeps track of which row we are on, called NR. NR
is a simple number that increments for every row of the input. To find the
first row, we simply have to see if NR is 1.
% awk '{ if (NR == 1) {$4 = "New"$3; $3 = "Old"$3; } \
else if ($3 < 20000) $4 = 20000; else $4 = $3; print}' salaries.tsv
Name Dept OldSalary NewSalary
Stacey sales 34698.22 34698.22
Sidney payroll 39117.12 39117.12
The modulo symbol (%) gives us the remainder when dividing two
numbers together. For example, dividing 5 by 2 would give 1 as the
remainder. We would represent this as 5 % 2. We can use this symbol to
only show every other row, either the even-numbered rows or the odd.
142
Chapter 3
macOS Built-in Commands
Although this might not be entirely useful for salary information, it
could be useful for getting a sample of data from the whole.
Note I use this technique to filter data that is captured every two
seconds, and reduce it into every 60 seconds.
% awk 'NR % 2 == 0 { if (NR == 1) {$4 = "New"$3; $3 = "Old"$3;
} else if ($3 < 20000) $4 = 20000; else $4 = $3; print}'
salaries.tsv
Stacey sales 34698.22 34698.22
Leola payroll 31314.98 31314.98
Alanis payroll 24373.73 24373.73
Oh, we’ve lost our header. This is because it was on the odd-numbered
rows, and we are showing the even numbered rows. We could change the
pattern to NR % 2 == 0 to show the odd rows, or we can cheat and add a
second header row, to make sure it is included.
Note You need to include the header as many times as you are
dividing NR by. If you use NR % 5, you need five copies of the header.
% head -n 1 salaries.tsv && awk 'NR % 2 == 0 { if (NR == 1) {$4
= "New"$3; $3 = "Old"$3; } else if ($3 < 20000) $4 = 20000;
else $4 = $3; print} ' salaries.tsv
Name Dept Salary
Stacey sales 34698.22 34698.22
Leola payroll 31314.98 31314.98
Alanis payroll 24373.73 24373.73
143
Chapter 3
macOS Built-in Commands
Note The && symbol is a way to run more than one command. The
second command runs only if the first was successful.
Other Formats
You may have noticed that in the sample data, I didn’t use a single space
character. I could have easily used a person’s full name, rather than just
their first.
Note The separator between the fields was a tab character.
As you might imagine, this was deliberate, as awk will split each
column on any whitespace character (tabs and spaces).
We can change the symbol that awk uses to split the data by. We do this
by using the -F option and specifying a simple string or a regular expression.
% awk -F "\t" 'NR == 1' salaries.tsv
Name Dept Salary
This separator symbol could be a simple letter.
% awk -F "a" 'NR == 1 { print $1 " " $2 " " $3 " " $4}' salaries.tsv
N me Dept S l ry
However, you can also use this to help read in other file formats, for
example .csv files.
% awk -F "," '{ print $1 "\t" $2 "\t" $3 "\t" $4}' salaries.csv
Name Dept Salary
Stacey sales 34698.22
Sidney payroll 39117.12
Leola payroll 31314.98
George payroll 17352.3
This has barely scratched the surface of what you can achieve with awk.
144
Chapter 3
macOS Built-in Commands
Working with Compressed Text
Working with gzip compressed text can be challenging if you don’t want to
manually decompress the archive first.
This is especially true with log files, which are compressed to save
space.
% ls -lath /var/log/wifi*
-rw-r----- 1 root admin 9.1K
-rw-r----- 1 root admin 1.3K
-rw-r----- 1 root admin 4.3K
-rw-r----- 1 root admin 1.9K
-rw-r----- 1 root admin 1.7K
-rw-r----- 1 root admin 1.6K
27
27
26
23
22
21
Nov
Nov
Nov
Nov
Nov
Nov
21:40
00:36
00:55
00:27
00:04
00:53
/var/log/wifi.log
/var/log/wifi.log.0.bz2
/var/log/wifi.log.1.bz2
/var/log/wifi.log.2.bz2
/var/log/wifi.log.3.bz2
/var/log/wifi.log.4.bz2
The following commands work because gzip only compresses a single
file. If you try them on a tar file, you might not get the results you are
looking for.
Printing Compressed Text
zcat, gzcat, and bzcat are like cat, but will decompress the compressed
text before outputting it to Terminal. Which of these commands you use
will depend on the type of compression used on the file.
% gzcat /var/log/system.log.3.gz
% bzcat /var/log/wifi.log.2.bz2
Searching Compressed Text
zgrep, bzgrep, and zipgrep are the equivalent of grep for compressed text.
These are useful for searching compressed log files when you don’t know
which one contains the useful information and you don’t want to keep
decompressing files.
145
Chapter 3
macOS Built-in Commands
% zgrep Statistics system.log.4.gz
Nov 14 00:53:20 MacBook-Pro syslogd[90]: ASL Sender Statistics
% bzgrep kernel /var/log/wifi.log.2.bz2
Fri Nov 22 19:45:07.554 Fri Nov 22 19:45:11.123 <kernel>
postMessage::1349 APPLE80211_M_BSSID_CHANGED received
T roubleshooting
This section covers built-in macOS commands that help you troubleshoot
in various ways.
R
unning Processes
To see everything that is running on your computer, you can use the
Activity Monitor app, as shown in Figure 3-4.
Figure 3-4. Activity Monitor
146
Chapter 3
macOS Built-in Commands
However, you might not want to use Activity Monitor. Sometimes you
will not be able to, if your Mac is crashing and blocking the launch of new
applications. Terminal has a similar command called top, as shown in
Figure 3-5.
top is a very useful command for determining the state of your
computer, especially if you are remotely logged in to a computer using only
Terminal.
Figure 3-5. The top command running in Terminal
What you’re looking at is a list of all the tasks on your computer,
ordered by the highlighted column, in this case CPU. We can change the
sort order by typing o.
Then enter either plus or minus, depending on whether you want the
column sorted in ascending or descending order, followed by the name of
the column. For example, -mem or +mem. The columns of note are shown in
Table 3-3.
147
Chapter 3
macOS Built-in Commands
Table 3-3. Columns of Note in top
Column
Description
PID
Process ID
COMMAND
Running command
CPU
Percentage of processor used to run task
TIME
Length of time process has been running on a processor
MEM
Memory usage of process
STATE
Process state
Finally, you can press the q key to quit.
Runaway Processes
A runaway task is a process that’s stuck but is consuming a lot of time
on the CPU. Runaway tasks are similar to stuck applications that don’t
respond to mouse clicks. If you try to right-click on the application icon in
the Dock, the menu will suggest a force quit.
Other times, a runaway process could be one that is doing more than
you intended; for example, it is running on the whole hard drive. If you’re
lucky, you can use Control+C to cancel the command.
If you’re not so lucky, you can use top or the ps command to find the
process ID and kill it. Using the word kill might seem cruel, but that is just
the name of the command we use to end the running of another process.
We also need the process ID so that the kill command knows which
process to end.
You can find the process ID using top; however, it’s not always possible
to find the specific process you are looking for. I will show you another way
to use the ps (process status) command. The ps command, without any
options, will display the tasks running in your Terminal windows.
148
Chapter 3
macOS Built-in Commands
% ps
PID TTY TIME CMD
425 ttys001 0:01.91 -zsh
You will see Zsh at least as many times as you have Terminal windows
open.
If you had two Terminal windows open and you were running PHP in
the other window, you will see something like this.
% ps
PID
25907
425
25914
TTY TIME CMD
ttys000 0:00.02 -zsh
ttys001 0:01.94 -zsh
ttys001 0:00.11 php
Normally, when I use ps, I will pass in additional options:
•
-x for all the user processes that were not started from
Terminal
•
-a for other user processes
•
-u to display the username
The output of ps with these arguments is shown in Figure 3-6.
149
Chapter 3
macOS Built-in Commands
Figure 3-6. Output of ps aux
Note We used grep to help reduce this list.
How does this help with runaway processes? Looking at the output in
Figure 3-6, you can see how much memory the processes are using. You
can’t see the full list, as it is 470 processes long.
Note If you used top, then you would only see as many processes
that fit in your Terminal window.
If you can find the runaway process, you can determine its PID. If you
know the PID, you can terminate it.
For example, let’s assume that the process you want to terminate has a
PID of 1234.
% kill 1234
If the process is really stuck, you can send a non-ignorable kill with -9.
% kill -9 1234
150
Chapter 3
macOS Built-in Commands
Removing a Drive with an Open File
Imagine you have a portable drive that you are trying to eject from
your computer, but you’re having problems. The message you get isn’t
always very helpful, as shown in Figure 3-7. It could also look like the
message Figure 3-8, which doesn’t tell you which program is using the
disk.
Figure 3-7. The error message when trying to eject a disk with an
open file
Figure 3-8. The error message when multiple programs are using the
disk
151
Chapter 3
macOS Built-in Commands
Sometimes a background task stops you from being able to eject your
drive. In the example in Figure 3-8, it was QuickLook struggling to open
a couple of files; maybe they were corrupted. You don’t want to yank the
disk out without it being safely ejected, because your important project
might not have been fully saved. You wouldn’t want any files to become
corrupted.
Terminal has a command called lsof, which stands for list open files.
The simplest way to use lsof is to pass it a volume that you are trying to eject.
% lsof /Volumes/Random
COMMAND PID USER FD TYPE DEVICE
SIZE/OFF NODE NAME
zsh 425 danielplatt cwd DIR 1,10
131072 64 /Volumes/Random/Random Directory
lsof 24482 danielplatt cwd DIR 1,10
131072 64 /Volumes/Random/Random Directory
lsof 24483 danielplatt cwd DIR 1,10
131072 64 /Volumes/Random/Random Directory
The main process that is using anything on the drive is Zsh.
You can also see lsof listing itself, as it has needs to check the drive,
but they will end when lsof finishes searching.
As with running processes, we can see the process ID listed (PID) and
we can use that to end any runaway process.
S
ysctl
When you are customizing your Terminal, you might want to use the same
script with multiple computers, to output a few details about the computer’s
usage or hardware. The sysctl command can help you with this.
The first thing you will want to see are all the available names and
current values that are supported with sysctl. You can see these by using
the -a option.
152
Chapter 3
macOS Built-in Commands
% sysctl -a
kern.ostype: Darwin
kern.osrelease: 19.0.0
kern.osrevision: 199506
kern.version: Darwin Kernel Version 19.0.0: Thu Oct 17 16:17:15
PDT 2019; root:xnu-6153.41.3~29/RELEASE_X86_64
On my computer, there are 1352 different names.
% sysctl hw.ncpu
hw.ncpu: 8
Note
hw.ncpu is the name of the value you want to be returned.
For example:
% echo "My computer has `sysctl -n hw.ncpu` cores"
My computer has 8 cores
I ntegration with macOS
A good way to use Terminal on macOS is to use it to help you.
O
pen in macOS
If you want to tell macOS to open something, as it would if you doubleclicked it in Finder, you can use the open command.
I touched on the open command in Chapter 2, when I suggested you
could use BBEdit instead of nano to edit files. The open command is a
brilliant way to ask macOS to open a file.
153
Chapter 3
macOS Built-in Commands
% open -h
Usage: open [-e] [-t] [-f] [-W] [-R] [-n] [-g] [-h] [-s
<partial SDK name>][-b <bundle identifier>] [-a <application>]
[filenames] [--args arguments]
Help: Open opens files from a shell.
Imagine you are using Terminal and you want to open the random-
files-master directory, but you don’t want to have to find it again in the
Finder. You can use the open command to open the directory in Finder, as
shown in Figure 3-9.
% open random-files-master
Figure 3-9. Finder opening the random-files-master directory
If you are inside the directory you want to open, it is even easier.
% open .
This also works for files, such as the aiff audio file.
% open /System/Library/Sounds/Sosumi.aiff
154
Chapter 3
macOS Built-in Commands
Note Assuming that you haven’t installed any additional programs,
this will open in the Music app.
It will even work with macOS apps.
% open /Applications/BBEdit.app
What about files that macOS doesn’t know how to open or that you
would like to open in a different program? The -a option tells open which
application to use.
% open -a /Applications/BBEdit.app /usr/share/firmlinks
Have you ever wanted to open an application more than once, but
every time you try, Finder brings the first instance of the application to the
foreground?
With the -n option, you can tell open to launch the application as a
new instance, as shown in Figure 3-10.
% open -n /System/Applications/Messages.app
Figure 3-10. Message has been launched twice
The -g option forces the application to launch in the background,
which is handy if you need to use it later.
% open -g /System/Applications/Reminders.app
155
Chapter 3
macOS Built-in Commands
open will also work with web addresses, which will open in your default
browser.
% open "https://www.apress.com"
You can even send the output of another command into open, with
the -f option, as shown in Figure 3-11.
% ls -lath | open -f
Figure 3-11. Opening a directory listing in Text Edit
The open command is amazing and very versatile.
C
opy and Paste
If you wanted to take some text from Terminal into a macOS application,
you might think you would need to output the text to the screen, select it,
and then copy it. What if you could remove a few of those steps?
Thankfully, there is a command to do that, called pbcopy.
% cat random-files-master/raven.txt | pbcopy
156
Chapter 3
macOS Built-in Commands
Anything that you pipe into pbcopy will be available in your clipboard.
You are not just limited to copying the contents of files to your clipboard,
either. You can send a directory listing to the clipboard:
% ls -l | pbcopy
Or all running processes:
% ps aux | pbcopy
The output from the clipboard can even be used in Terminal as well.
% pbpaste > clipboard.txt
If you wanted to see what was in the clipboard, you can use the
command by itself.
% pbpaste
Using QuickLook on Files
There is another way to view the contents of files. In Terminal, it is possible
to trigger QuickLook on any file.
I must warn you that you might get some unexpected Terminal output,
but it’s nothing to worry about.
% qlmanage -p random-files-master/php.ini
Testing QuickLook preview with files using server:
php.ini
2019-11-22 20:31:45.944 qlmanage[27639:1636747] ***
CFMessagePort: bootstrap_register(): failed 1100 (0x44c)
'Permission denied', port = 0x6b07, name = 'com.apple.coredrag'
See /usr/include/servers/bootstrap_defs.h for the error codes.
2019-11-22 20:31:46.001 qlmanage[27639:1636747] ***
CFMessagePort: bootstrap_register(): failed 1100 (0x44c)
'Permission denied', port = 0x7f1f, name = 'com.apple.tsm.portname'
See /usr/include/servers/bootstrap_defs.h for the error codes.
157
Chapter 3
macOS Built-in Commands
While this command is running, you will see a QuickLook window, as
shown in Figure 3-12.
Figure 3-12. QuickLook launched from Terminal
The command will keep running until you close the QuickLook
window and then your Terminal will return you to the prompt.
158
Chapter 3
macOS Built-in Commands
Better man Pages
Hopefully, you have taken the opportunity to use the man command on
some of the commands you’ve seen so far. If you don’t enjoy using the man
command, or find it limiting, you can send the manual to another program.
With the -t option, you can tell man to output the manual for printing.
% man -t zsh
%%Creator: groff version 1.19.2
%%CreationDate: Sat Nov 23 09:09:04 2019
%%DocumentNeededResources: font Times-Roman
%%+ font Times-Bold
%%+ font Times-Italic
%%DocumentSuppliedResources: procset grops 1.19 2
%%Pages: 5
This might look like gibberish, but this is code for your printer. You just
need to send it to a program that understands it.
We will use the -f option to specify that we want the open command
to send the input of man into the application we open. By default, open will
use TextEdit, but that will result in the same code being displayed. The
application we need to use is Preview.
% man -t zsh | open -fa /System/Applications/Preview.app
This will open Preview with the man page as a lovely PDF file,
complete with page numbers, as shown in Figure 3-13.
159
Chapter 3
macOS Built-in Commands
Figure 3-13. Man page opening in Preview
If you wanted, you could save this file or print it.
S
ystem Chime
Since 2016, most Apple computers no longer produce a chime when they
are turned on. However, a user on Twitter figured out a way to re-enable
the chime, as shown in Figure 3-14.
If you have a Mac that makes the chime, you can also use this tip to
disable it. (Oh, the number of times I wished my iMac didn’t make a noise,
when I turned it on in a quiet room, or in the middle of the night!)
160
Chapter 3
macOS Built-in Commands
Figure 3-14. @DylanMcD8 post enabling the post chime
To enable the chime, use:
% sudo nvram StartupMute=%00
To disable the chime, use:
% sudo nvram StartupMute=%01
To remove the override and revert to the default behavior, use:
% sudo nvram -d StartupMute
161
Chapter 3
macOS Built-in Commands
Note If the PRAM gets reset, then the StartupMute setting will be
removed and will change back to the default behavior.
N
etworking
This section covers all the different built-in macOS networking commands
that you might find helpful.
R
emote Shell
So far, we’ve been talking about your Terminal, but did you know you
can connect to other computers through Terminal? The command I’m
talking about is called ssh (Secure SHell). There are two parts to the ssh
command—the client, which is the ssh command and the server, sshd.
The ssh server is not enabled by default, and before you do enable it,
you should make sure you have a reasonably good password to protect
your account.
Enabling ssh server is easy in System Preferences. First you need to
open System Preferences, as shown in Figure 3-15.
162
Chapter 3
macOS Built-in Commands
Figure 3-15. System Preferences
Open the Sharing panel, as shown in Figure 3-16.
163
Chapter 3
macOS Built-in Commands
Figure 3-16. Sharing preferences
When you are in the Sharing panel, you need to turn on Remote
Login. Before you close the Sharing panel, make a note of the command to
connect to your computer.
% ssh danielplatt@macbook-pro.lan
What happens if you didn’t enable remote login?
% ssh danielplatt@macbook-pro.lan
ssh: connect to host macbook-pro.lan port 22: Connection refused
When Remote Login is enabled, you will be able to connect from any
computer on your local network. The first time you use ssh to connect to a
remote computer, you will be prompted to validate the authenticity of the
164
Chapter 3
macOS Built-in Commands
host. After that first time, it will not prompt you again, unless the remote
computer’s fingerprint changes. This is a security measure to make sure no
one is impersonating the remote computer.
% ssh danielplatt@macbook-pro.lan
The authenticity of host 'macbook-pro.lan (192.168.1.239)'
can't be established.
ECDSA key fingerprint is SHA256:e3rSNcLdLrgPTRh3g7tTqCbwl7HvJ3K
okwBg9byUgmt.
Are you sure you want to continue connecting (yes/no)?
Password:
Last login: Sat Nov 23 17:46:03 2019
danielplatt@MacBook-Pro ~ %
You don’t need another computer to test this works, as this example is
all happening on the same computer.
The real power of ssh is when connecting to a remote computer. They
don’t have to be running macOS. If they are running an ssh server and you
have login credentials, you can connect to it and use Terminal commands
on the other computer.
Downloading Files
You can use ssh to connect remotely to another computer and run
commands. Did you also know that you can send files across it? There is a
command called scp (Secure CoPy) that uses ssh to copy files to and from
another computer.
% scp
usage: scp [-346BCpqrv] [-F ssh_config] [-i identity_file]
[-o ssh_option] [-P port] source ... target
165
Chapter 3
macOS Built-in Commands
The main takeaway from this is the source and the target. You can have
multiple sources, but only one target. You would use scp like this:
scp <options> user@server:<path> <target>
In this example, I connect to my computer and copy a specific file to
the temporary directory.
% scp danielplatt@127.0.0.1:~/random-files-master/info.php /tmp/
The authenticity of host '127.0.0.1 (127.0.0.1)' can't be established.
ECDSA key fingerprint is SHA256:d3rPNcLdLrgPTRh3g6tTqCbxl7HvG3c.
Are you sure you want to continue connecting (yes/no)? yes
Warning: Permanently added '127.0.0.1' (ECDSA) to the list of
known hosts.
Password:
info.php 100% 77 310.7KB/s 00:00
D
ownloading a Directory
If you wanted to copy a whole directory, you would need to specify the
recursive option, -r.
% scp -r danielplatt@127.0.0.1:~/random-files-master /tmp/
Password:
info.php 100% 77 310.7KB/s 00:00
decamerone.txt 100% 9500 9.8MB/s 00:00
strindberg.txt 100% 4691 6.5MB/s 00:00
The -q option can be used to suppress the file transfer messages.
Is the Web Server Down?
There are websites that let you know if a website is up or down. For
example, https://www.isitdownrightnow.com. However, you can achieve
a similar result on your Terminal using the command called ping.
166
Chapter 3
macOS Built-in Commands
ping sends out a packet to the remote server and remote server then
replies. This all happens very quickly and is measured in thousandths of a
second, or milliseconds (ms).
If we wanted to find out if Google was up, we would write the
command like this.
% ping google.com
PING google.com (216.58.212.238): 56 data bytes
64 bytes from 216.58.212.238: icmp_seq=0 ttl=120 time=11.904 ms
64 bytes from 216.58.212.238: icmp_seq=1 ttl=120 time=17.925 ms
64 bytes from 216.58.212.238: icmp_seq=2 ttl=120 time=18.393 ms
64 bytes from 216.58.212.238: icmp_seq=3 ttl=120 time=19.712 ms
^C
--- google.com ping statistics --4 packets transmitted, 4 packets received, 0.0% packet loss
round-trip min/avg/max/stddev = 11.904/16.983/19.712/3.005 ms
ping sends out a packet every second with an incrementing ID
(icmp_seq) and keeps sending out packets until you press Control+C. The
statistics that ping returns are useful for debugging connection issues.
Note The further a server is away from you, the slower the
response. Devices on your local network typically respond quicker
than 10ms. Wi-Fi will have a slower ping than wired connections.
Imagine you had intermittent Internet problems. It could be the
placement of your Internet router, or a problem upstream with your ISP.
If you are using Wi-Fi, you can start running ping and then start
walking around. If the Wi-Fi signal is reasonable for your Internet issues,
then ping will reflect this.
With a really bad connection, you will start to experience ping
timeouts. A timeout is when ping takes longer than expected to return.
167
Chapter 3
macOS Built-in Commands
Determining the Path Your Data Takes
Have you ever wondered how your computer connects to various websites
and servers? With the traceroute command, you can see a snapshot
of how your packets move across the Internet. I find it interesting to see
which companies my packets pass through on the way to their destination.
Here is an example of traceroute to google.com:
% traceroute google.com
traceroute to google.com (216.58.204.14), 64 hops max, 52 byte packets
1 dsldevice (192.168.1.254) 8.176 ms 2.146 ms 4.290 ms
2 * * *
3 te0-3-1-3.rcr51.lon01.atlas.cogentco.com (149.11.143.57) 9.297 ms
4 be3554.ccr21.lon01.atlas.cogentco.com (154.54.59.129) 11.250 ms
5 tata.lon01.atlas.cogentco.com (130.117.15.178) 9.366 ms 10.443 ms
6 72.14.217.89 (72.14.217.89) 10.109 ms 9.969 ms 11.460 ms
7 * * *
8 108.170.238.118 (108.170.238.118) 13.878 ms
lhr48s21-in-f14.1e100.net (216.58.204.14) 16.793 ms
172.253.66.98 (172.253.66.98) 10.664 ms
Each step is called a hop. You can see that there are a total of eight hops
between my computer and Google’s server.
There is a limit to the number of hops that traceroute will do. That
value is read from net.inet.ip.ttl.
% sysctl net.inet.ip.ttl
net.inet.ip.ttl: 64
If you would like to do more than this number of hops, you can use
the -m option. The more you use traceroute, the more you will realize why
you need to encrypt Internet traffic. Without encryption, everyone that
handles these packets can read their contents.
168
Chapter 3
macOS Built-in Commands
Finding Out More About a Domain
This next command used to be a lot more powerful, until Europe
introduced its General Data Protection Regulation (GDPR) legislation in
2018. The essence of the GDPR legislation is that companies need to be a
lot more careful with your personal data.
The command I am talking about is whois. Historically, you could use
whois to find out who owned most domain names, but because of GDPR, a
lot of the contact details are now obscured.
This is an example of whois, using the example.com domain. Example.
com is a domain name that has been specifically created as an example.
%
%
%
%
whois example.com
IANA WHOIS server
for more information on IANA, visit http://www.iana.org
This query returned 1 object
domain: EXAMPLE.COM
organisation: Internet Assigned Numbers Authority
created: 1992-01-01
source: IANA
Here’s the kind of information you can get from whois about other
domain names:
•
Contact details for non-European domains
•
Domain registrars
•
Domain registered date
•
Domain expired date
•
Domain statuses
•
Domain nameserver
169
Chapter 3
macOS Built-in Commands
The domain contact details were to help people get in touch with the
domain owner, or the people responsible for keeping the website running.
This is less important now that most websites contain a method to contact
the business without giving away the contact details of key people within
the organization.
Being able to see the registered and expiry date of the domain is nice,
but not important, unless it is your responsibility for making sure all the
domain fees are paid.
The domain status is a way for other domain registrars to know
whether you are allowed to move a domain. This helps cut down on
domain fraud, where people try to sell owned domains.
Nameservers are arguably the most important piece of the Internet.
Without nameservers, everyone would need to type an IP address to go to
their favorite websites. Can you imagine typing 216.58.204.14 in order to
go to google.com?
whois can also be used to find out which company manages an IP
address.
% whois 216.58.204.14
% IANA WHOIS server
% for more information on IANA, visit http://www.iana.org
% This query returned 1 object
# whois.arin.net
NetRange: 216.58.192.0 - 216.58.223.255
CIDR: 216.58.192.0/19
NetName: GOOGLE
NetHandle: NET-216-58-192-0-1
Parent: NET216 (NET-216-0-0-0-0)
NetType: Direct Allocation
OriginAS: AS15169
170
Chapter 3
macOS Built-in Commands
Organization: Google LLC (GOGL)
RegDate: 2012-01-27
Updated: 2012-01-27
Ref: https://rdap.arin.net/registry/ip/216.58.192.0
There are few good reasons for wanting to be able to contact the
company that manages an IP address. They can be used to address
complaints, if your website or computer comes under attack from a hacker,
or is blocked if someone is sending your website unwanted traffic.
We had someone try to flood our office Internet connection with
unwanted data, which caused us not to be able to use our Internet
connection. The first thing we did was identify the source from our firewall
and then contacted our ISP to block this data. We then looked up the
company managing those IP addresses and reported what the owner was
doing with them. The attack was quickly thwarted.
Although this might not be something you are able to do by yourself, it
is worth knowing what is possible.
Pretending a Website Is Somewhere Else
Did you know that when you type an URL into a web browser, the
computer uses DNS (Dynamic Name Server) to work out where to send
the request? DNS turns a domain name into an IP address, such as turning
apress.com into 195.128.8.134. The browser then sends the web request
to the IP address, along with the domain name.
Did you know that before the computer sends the request to the DNS,
it checks locally? The /etc/hosts file controls this process.
% cat /etc/hosts
##
# Host Database
#
171
Chapter 3
macOS Built-in Commands
# localhost is used to configure the loopback interface
# when the system is booting. Do not change this entry.
##
127.0.0.1 localhost
255.255.255.255 broadcasthost
::1 localhost
This is the default contents of /etc/hosts.
We can add domain names to this file that will override the public
DNS, but before we do that, we need a server to handle our requests. The
quickest server to set up is the built-in PHP web server using the info file
from the random-files-master directory.
% php -S 127.0.0.1:8080 random-files-master/info.php
PHP 7.3.9 Development Server started at Sat Nov 23 20:35:00 2019
Listening on http://127.0.0.1:8080
Document root is /Users/danielplatt
Press Ctrl-C to quit.
Now you can open your web browser and navigate to
http://127.0.0.1:8080 and you will see PHP’s info page.
Alternatively, you can use sudo to start listening on port 80, which is
the port for HTTP.
% sudo php -S 127.0.0.1:80 random-files-master/info.php
Then you can enter http://127.0.0.1 in the browser. What you are
running is a PHP web server. It’s used for testing and developing web
applications.
The reason you are running this is so you can see how to redirect
a domain name to your computer. Let’s use an actual domain name,
example.com. We can use example.com because it specifically is a testing
domain name and doesn’t host an actual website. With some ISPs, it
doesn’t even work.
172
Chapter 3
macOS Built-in Commands
First, we need to open the /etc/hosts file, but using sudo to allow us
to save again. (Otherwise, you will get permission denied when you try to
save the file.)
Note This will only work on your computer, unless you change
everyone’s /etc/host file.
% sudo nano /etc/hosts
The format of this file is IP addresses, whitespace, and then the
domain. The whitespace can be spaces or tabs. At the bottom of the file,
you will want to enter the following:
127.0.0.1 example.com
Your file should look something like Figure 3-17.
Figure 3-17. The contents of /etc/hosts with example.com
173
Chapter 3
macOS Built-in Commands
Now you need to save the file (use ^X, then press Y and Enter).
Hopefully, you should end up with a page that looks similar to Figure 3-18.
Figure 3-18. PHP info using example.com
Note It would be a good idea to remove this entry when you are
finished; otherwise, you might forget. If you did this to a legitimate
website, it would be confusing until you used this override.
Q
uerying DNS
Nameservers are everywhere. Most nameservers only contain a small
portion of world domain name records on them. If they don’t have the
answer, they will query other nameservers.
174
Chapter 3
macOS Built-in Commands
You’ve heard a little about nameservers and how they are very
important to the Internet. You learned about how you can override an IP
address.
There is a command called dig that you can use to query a specific
nameserver to look up a domain name.
% dig -h
Usage: dig [@global-server] [domain] [q-type] [q-class]
{q-opt}
{global-d-opt} host [@local-server] {local-d-opt}
[ host [@local-server] {local-d-opt} [...]]
If you wanted to query google.com, you could use dig.
% dig google.com
; <<>> DiG 9.10.6 <<>> google.com
;; global options: +cmd
;; Got answer:
;; ->>HEADER<<- opcode: QUERY, status: NOERROR, id: 21055
;; flags: qr rd ra; QUERY: 1, ANSWER: 1, AUTHORITY: 0,
ADDITIONAL: 1
;; OPT PSEUDOSECTION:
; EDNS: version: 0, flags:; udp: 4096
;; QUESTION SECTION:
;google.com. IN A
;; ANSWER SECTION:
google.com. 1862 IN A 216.58.204.14
;;
;;
;;
;;
Query time: 16 msec
SERVER: 192.168.1.254#53(192.168.1.254)
WHEN: Thu Nov 28 10:57:17 GMT 2019
MSG SIZE rcvd: 55
175
Chapter 3
macOS Built-in Commands
You can see this query in the QUESTION SECTION. We asked for
google.com and it defaulted to asking for the A record.
Note An A record is an IP address. If it returned a C record, then it
would return another domain name, which would result in another
DNS lookup.
In the ANSWER SECTION, we get the response of 216.58.204.14. The
other number, 1862, is the Time to Live (TTL) value. That value indicates
how many seconds this IP address is valid for, before you should repeat the
lookup.
There is also some interesting information at the bottom of the
response.
;; SERVER: 192.168.1.254#53(192.168.1.254)
This is the nameserver that dig performed the lookup against. This is
likely to be your Internet router.
Now, your router can’t store the domain IP addresses for the world.
Your router will store a copy of some of them, though. Specifically ones it
has accessed before, until the TTL runs out.
Part of a router’s configuration will be your ISPs nameservers
(sometimes called DNS servers). Your router queries these if it doesn’t
have the information locally.
Behind the scenes, if they don’t have the information locally, your
ISPs nameservers will contact the root nameservers. These will not know
the answer, but will be able to direct you to the nameserver for the .com
DNS. That server will direct you to the nameserver for the domain you are
actually looking for, in this case, google.com.
Finally, you can ask that server for the correct IP address to address
your web request. When this happens, it is really quick. You should not
notice it happening. If you still have the example.com override in your
176
Chapter 3
macOS Built-in Commands
/etc/hosts file, you won’t see this. The hosts file is checked before it
queries any nameservers.
My ISP doesn’t resolve the example.com . We can see this in this
example, because there is no ANSWER SECTION:
% dig example.com
; <<>> DiG 9.10.6 <<>> example.com
;; global options: +cmd
;; Got answer:
;; ->>HEADER<<- opcode: QUERY, status: NXDOMAIN, id: 25851
;; flags: qr rd ra ad; QUERY: 1, ANSWER: 0, AUTHORITY: 0, ADDITIONAL: 0
;; QUESTION SECTION:
;example.com. IN A
;;
;;
;;
;;
Query time: 3 msec
SERVER: 192.168.1.254#53(192.168.1.254)
WHEN: Thu Nov 28 11:32:03 GMT 2019
MSG SIZE rcvd: 29
We can tell dig to query a different nameserver with the @ symbol. In
this example, I am using the Google Public DNS.
% dig @8.8.8.8 example.com
; <<>> DiG 9.10.6 <<>> @8.8.8.8 example.com
; (1 server found)
;; global options: +cmd
;; Got answer:
;; ->>HEADER<<- opcode: QUERY, status: NOERROR, id: 61117
;; flags: qr rd ra ad; QUERY: 1, ANSWER: 1, AUTHORITY: 0, ADDITIONAL: 1
;; OPT PSEUDOSECTION:
; EDNS: version: 0, flags:; udp: 512
177
Chapter 3
macOS Built-in Commands
;; QUESTION SECTION:
;example.com. IN A
;; ANSWER SECTION:
example.com. 20072 IN A 93.184.216.34
;;
;;
;;
;;
Query time: 17 msec
SERVER: 8.8.8.8#53(8.8.8.8)
WHEN: Thu Nov 28 11:34:31 GMT 2019
MSG SIZE rcvd: 56
Did you know that a domain can resolve to more than one IP address?
% dig @8.8.8.8 amazon.com
; <<>> DiG 9.10.6 <<>> @8.8.8.8 amazon.com
; (1 server found)
;; global options: +cmd
;; Got answer:
;; ->>HEADER<<- opcode: QUERY, status: NOERROR, id: 31016
;; flags: qr rd ra; QUERY: 1, ANSWER: 3, AUTHORITY: 0, ADDITIONAL: 1
;; OPT PSEUDOSECTION:
; EDNS: version: 0, flags:; udp: 512
;; QUESTION SECTION:
;amazon.com. IN A
;; ANSWER SECTION:
amazon.com. 12 IN A 176.32.103.205
amazon.com. 12 IN A 205.251.242.103
amazon.com. 12 IN A 176.32.98.166
;;
;;
;;
;;
178
Query time: 52 msec
SERVER: 8.8.8.8#53(8.8.8.8)
WHEN: Thu Nov 28 11:35:40 GMT 2019
MSG SIZE rcvd: 87
Chapter 3
macOS Built-in Commands
This is because the traffic to a single server could overwhelm it, or it
could be that they want redundancy in case one fails.
You could encounter a response with a low TTL and this is so the
domain can keep changing IP addresses, either because they are balancing
the load of the traffic to the site, or because the website keeps moving
servers to cope with changing levels of traffic.
Did you know that nameservers are used by more than web browsers?
Using dig you can find out who manages the email for the domain. We can
use the -t option to specify the type of records you would like to be returned.
Note
MX standards for mail exchange.
% dig @8.8.8.8 -t MX google.com
;; ANSWER SECTION:
google.com. 599 IN MX 10
google.com. 599 IN MX 20
google.com. 599 IN MX 50
google.com. 599 IN MX 40
google.com. 599 IN MX 30
aspmx.l.google.com.
alt1.aspmx.l.google.com.
alt4.aspmx.l.google.com.
alt3.aspmx.l.google.com.
alt2.aspmx.l.google.com.
If you were to Google aspmx.l.google.com, one of the first results
tells you that this is G Suite MX record value. G Suite contains an email
component.
There are many different types of records that can be returned. If you
want to see them all, you can specify ANY.
% dig @8.8.8.8 -t ANY google.com
; <<>> DiG 9.10.6 <<>> @8.8.8.8 -t ANY google.com
; (1 server found)
;; global options: +cmd
;; Got answer:
179
Chapter 3
macOS Built-in Commands
;; ->>HEADER<<- opcode: QUERY, status: NOERROR, id: 63378
;; flags: qr rd ra; QUERY: 1, ANSWER: 18, AUTHORITY: 0, ADDITIONAL: 1
;; OPT PSEUDOSECTION:
; EDNS: version: 0, flags:; udp: 512
;; QUESTION SECTION:
;google.com. IN ANY
;; ANSWER SECTION:
google.com. 299 IN A 216.58.204.238
google.com. 299 IN AAAA 2a00:1450:4009:807::200e
google.com. 599 IN MX 20 alt1.aspmx.l.google.com.
google.com. 21599 IN NS ns1.google.com.
google.com. 21599 IN NS ns2.google.com.
google.com. 21599 IN CAA 0 issue "pki.goog"
google.com. 3599 IN TXT
"v=spf1 include:_spf.
google.com ~all"
;;
;;
;;
;;
Query time: 148 msec
SERVER: 8.8.8.8#53(8.8.8.8)
WHEN: Thu Nov 28 11:42:55 GMT 2019
MSG SIZE rcvd: 649
If you want to see a more comprehensive example, = try this with
example.com:
% dig -t ANY example.com
N
etworking Piping
The nc command is a wonderful utility for working with network connections.
It stands for netcat and in some ways it is similar to the cat command. With
netcat, you can listen for incoming connections with the -l (L) option.
% sudo nc -l 127.0.0.1 8080
180
Chapter 3
macOS Built-in Commands
The command will look like it has hung, but it is listening for
connections. Now in your web browser, go to http://127.0.0.1 8080.
Suddenly, you will see this output appear:
GET / HTTP/1.1
Host: 127.0.0.1:8080
Accept: text/html,application/xhtml+xml,application/
xml;q=0.9,*/*;q=0.8
Upgrade-Insecure-Requests: 1
User-Agent: Mozilla/5.0 (Macintosh; Intel Mac OS X 10_15_3)
AppleWebKit/605.1.15 (KHTML, like Gecko) Version/13.0.5
Safari/605.1.15
Accept-Language: en-gb
Accept-Encoding: gzip, deflate
Connection: keep-alive
This is the web request that your web browser makes to the server.
It is a mixture of request (the first line) and headers. The web browser is
requesting the main page of the site with /.
GET / HTTP/1.1
The header Host: is also important, because it tells the web server
what domain you are accessing. We can also use netcat to send, rather
than listening.
% echo "GET / HTTP/1.1
Host: google.com
Accept: text/html,application/xhtml+xml,application/
xml;q=0.9,*/*;q=0.8
Upgrade-Insecure-Requests: 1
User-Agent: Mozilla/5.0 (Macintosh; Intel Mac OS X 10_15_3)
AppleWebKit/605.1.15 (KHTML, like Gecko) Version/13.0.5
Safari/605.1.15
181
Chapter 3
macOS Built-in Commands
Accept-Language: en-gb
Accept-Encoding: gzip, deflate
Connection: keep-alive
" | nc google.com 80
Google’s web server responded.
HTTP/1.1 301 Moved Permanently
Location: http://www.google.com/
Content-Type: text/html; charset=UTF-8
Date: Thu, 13 Feb 2020 07:37:54 GMT
Expires: Sat, 14 Mar 2020 07:37:54 GMT
Cache-Control: public, max-age=2592000
Server: gws
Content-Length: 219
X-XSS-Protection: 0
X-Frame-Options: SAMEORIGIN
<HTML><HEAD><meta http-equiv="content-type" content="text/
html;charset=utf-8">
<TITLE>301 Moved</TITLE></HEAD><BODY>
<H1>301 Moved</H1>
The document has moved
<A HREF="http://www.google.com/">here</A>.
</BODY></HTML>
In this response, we have a header, everything that is before the empty
line, and the response, every that comes after that blank line. The response
is shown to you in the browser.
However, in this response, we can see that the server has told us that
the document has moved to http://www.google.com/. We can try again,
using the URL that Google has told us to use.
182
Chapter 3
macOS Built-in Commands
echo "GET / HTTP/1.1
Host: www.google.com
Accept: text/html,application/xhtml+xml,application/
xml;q=0.9,*/*;q=0.8
Upgrade-Insecure-Requests: 1
User-Agent: Mozilla/5.0 (Macintosh; Intel Mac OS X 10_15_3)
AppleWebKit/605.1.15 (KHTML, like Gecko) Version/13.0.5
Safari/605.1.15
Accept-Language: en-gb
Accept-Encoding: gzip, deflate
Connection: keep-alive
" | nc google.com 80
Note The server I am contacting (google.com) is different from
the host header (www.google.com). These typically match, but don’t
have to.
This is what a typical web request and response looks like. You could
use netcat to send data to another instance of netcat, effectively piping
across a network connection. We’re going to do this in two Terminal
windows, but you could do this on two different computers in your
household. We are going to listen on port 1234.
% nc -l 1234
We are sending and receiving the data on the same computer. If you
are using another computer, then you will need to substitute localhost
with the IP address of the listening computer.
The ifconfig command will list all your computer IP addresses. You
can make it easier to find by using Grep.
183
Chapter 3
macOS Built-in Commands
% ifconfig | grep "inet "
inet 127.0.0.1 netmask 0xff000000
inet 192.168.1.239 netmask 0xffffff00 broadcast 192.168.1.255
The IP address you will be looking for will typically start 192.168 or 10.
Now that we know where we are sending the message, let’s send it.
Note The port needs to match. If you are sending to another computer,
change localhost to match the IP address of the listening computer.
% nc localhost 1234
Hello
You are already running netcat, that is listening, so it will output
everything that is sent to it.
% nc -l 1234
Hello
You could have started netcat by specifying that the output be piped
into another command like this.
% nc -l 1234 | tr "[:lower:]" "[:upper:]"
HELLO
Disk Management
This section covers all the helpful macOS built-in commands that deal
with disk management.
184
Chapter 3
macOS Built-in Commands
How Big Is This Folder?
The du (disk usage) command will tell you how much disk space has been
used for all files and folders, wherever you are.
usage: du [-H | -L | -P] [-a | -s | -d depth] [-c] [-h | -k |
-m | -g] [-x] [-I mask] [file ...]
Note du iterates through all the files and adds up their disk usage.
The command might take a while, depending on how many files
there are.
However, listing all the files isn’t how I use this command. I use the -s
option to generate a summary.
By default, du will show the usage in blocks. We change that into
human-readable sizes with the -h option.
% du -sh ~/random-files-master
172K/Users/danielplatt/random-files-master
You might be tempted to try this on your home directory. I know I was.
% du -sh ~
du: /Users/danielplatt/Library/Containers/com.apple.mail:
Operation not permitted
du: /Users/danielplatt/Library/Containers/com.apple.news:
Operation not permitted
du: /Users/danielplatt/Library/Containers/com.apple.stocks:
Operation not permitted
du: /Users/danielplatt/.Trash: Operation not permitted
30G/Users/danielplatt
185
Chapter 3
macOS Built-in Commands
You will probably get a lot more output that says Operation not
permitted.
This isn’t a bad thing, it just means that Terminal could not go into
those directories to calculate the disk used by those files.
If you want those messages to go away, you can give Terminal full
access to your disk in the Security & Privacy System Preferences tab, as
shown in Figure 3-19.
Figure 3-19. Locked Security & Privacy in System Preferences
186
Chapter 3
macOS Built-in Commands
If you find the padlock in Full Disk Access grayed out, you need to
click the padlock that is on the bottom left to make changes, as shown in
Figure 3-20. That will allow you to change the permissions.
Just remember that full access is defined by your user’s permission. If
you can’t normally access a folder, then Terminal with full access still will
not be able to access it.
Figure 3-20. Unlocked Security & Privacy in System Preferences
187
Chapter 3
macOS Built-in Commands
We really want the Operation not permitted errors to go away and
for du to be able read these directories. For this to happen, Terminal
needs to be in the list of programs that have full disk access. If Terminal is
currently running, by ticking Terminal, it will prompt you to Quit Now in
order for the changes to take effect. When you rerun du, you shouldn’t see
any Operation not permitted messages.
% du -sh ~
33G/Users/danielplatt
Looks like those skipped folders accounted for 3GB.
F ree Space
In Finder, you can easily find out how big your disk is, or how much free
space you have. You just need to find your disk, select it, and then choose
Get Info (⌘+i) for more information about the disk usage, as shown in
Figure 3-21.
188
Chapter 3
macOS Built-in Commands
Figure 3-21. Finder Info window
You can also see the available space at the bottom of every Finder
window, but that is only for that disk, as shown in Figure 3-22.
189
Chapter 3
macOS Built-in Commands
Figure 3-22. Finder window showing free disk space
What if you wanted to know all your storage usage for all attached disks
in one go? The df command tells you how much you are using on all of
your disks.
% df
Filesystem 512-blocks Used Available Capacity Mounted on
/dev/disk1s5 976490576 20877600 802587568 3% /
devfs 395 395 0 100% /dev
/dev/disk1s1 976490576 145223104 802587568 16% /System/
Volumes/Data
/dev/disk1s4 976490576 6291496 802587568 1% /private/var/vm
map auto_home 0 0 0 100% /System/
Volumes/Data/home
However, it’s a little bit messy. Let’s make that more readable by not
using blocks.
190
Chapter 3
macOS Built-in Commands
% df -h
Filesystem Size Used Avail Capacity %iused Mounted on
/dev/disk1s5 466Gi 10Gi 383Gi 3% 0% /
devfs 198Ki 98Ki 0Bi 100% 100% /dev
/dev/disk1s1 466Gi 69Gi 383Gi 16% 0% /System/Volumes/Data
/dev/disk1s4 466Gi 3.0Gi 383Gi 1% 0% /private/var/vm
map auto_home 0Bi 0Bi 0Bi 100% 100% /System/Volumes/
Data/home
If, like me, you only have one drive attached to your computer (the
boot disk), you might be wondering why you have five entries. A single
drive can have more than one partition on it. Your boot drive has quite a
few partitions, and that is what you are seeing. The physical drive is disk1,
and then s followed by the number is the partition.
The main filesystems are the system (disk1s5), data (disk1s1), and
virtual memory (disk1s4). They all share the same physical disk, which is
why they all have the same Size and Avail values.
Disk Management
In the Utilities folder on your Mac, there is an app called Disk Utility. You can
use it to perform many different operations on all the drives that are attached
to your computer. There is a command-line version as well, called diskutil.
% diskutil
Disk Utility Tool
Utility to manage local disks and volumes
Most commands require an administrator or root user
WARNING: Most destructive operations are not prompted
Usage: diskutil [quiet] <verb> <options>, where <verb> is as follows:
diskutil <verb> with no options will provide help on that verb
191
Chapter 3
macOS Built-in Commands
You can do great damage by improperly using diskutil, and a lot of
the features will require sudo. In the previous command, du, I mislead you
a little. disk1 is your drive, but it isn’t a physical drive. Your physical drive
it is actually disk0. disk1 is a synthetics disk.
You can list the disk partitions as follows:
% diskutil list
/dev/disk0 (internal, physical):
#: TYPE NAME SIZE IDENTIFIER
0: GUID_partition_scheme *500.3 GB disk0
1: EFI EFI 314.6 MB disk0s1
2: Apple_APFS Container disk1 500.0 GB disk0s2
/dev/disk1 (synthesized):
#: TYPE NAME SIZE IDENTIFIER
0: APFS Container Scheme - +500.0 GB disk1
Physical Store disk0s2
1: APFS Volume Macintosh HD -Data 74.5 GB disk1s1
2: APFS Volume Preboot 83.5 MB disk1s2
3: APFS Volume Recovery 528.5 MB disk1s3
4: APFS Volume VM 5.4 GB disk1s4
5: APFS Volume Macintosh HD 10.7 GB disk1s5
Note If you have a fusion drive, disk1 will be the ssd component
of your fusion drive, and the synthesized drive will be disk2.
disk0 is a container, which is a bit like a tar file. It will contain
everything needed for your computer to synthesize disk1. If you have
FileVault turned on, then encryption is on this container. Let’s plug in a
USB memory stick and see how the list changes:
192
Chapter 3
macOS Built-in Commands
% diskutil list
/dev/disk2 (external, physical):
#: TYPE NAME SIZE IDENTIFIER
0: FDisk_partition_scheme *4.0 GB disk2
1: DOS_FAT_32 Linux Boot 4.0 GB disk2s1
In addition to disk0 and disk1, we now have another disk called
disk2. You can see that there is only a single partition and that disk size is
4GB. The partition type of DOS_FAT_32 is an old style format that belongs to
Windows.
Viewing Partition Information
You can find more information about any disk with info.
% diskutil info /dev/disk2
Device Identifier: disk2
Device Node: /dev/disk2
Whole: Yes
Part of Whole: disk2
Device / Media Name: Transcend 4GB
Volume Name: Not applicable (no file system)
Mounted: Not applicable (no file system)
File System: None
Content (IOContent): FDisk_partition_scheme
OS Can Be Installed: No
Media Type: Generic
Protocol: USB
SMART Status: Not Supported
Disk Size: 4.0 GB (4049600512 Bytes)
Device Block Size: 512 Bytes
193
Chapter 3
macOS Built-in Commands
Read-Only Media: No
Read-Only Volume: Not applicable (no file system)
Device Location: External
Removable Media: Removable
Media Removal: Software-Activated
Solid State: Info not available
Virtual: No
Securely Erasing a Disk
If you are security conscious, you should wipe your disk drives before
getting rid of them. That includes the empty space on a disk, as it is
possible to see what was written. Thankfully, there is a zeroDisk command
that will do just that.
Warning This will make recovering data from the disk either
incredibly hard or impossible. Only use it on a disk when you want to
never see the contents again.
% diskutil zeroDisk /dev/disk2
Started erase on disk2
[ | 0%..10%. ] 14.1% 0:08:47
Because it writes to every part of the disk, it will take a while to finish.
Danger Treat this command with respect, because there is no
going back. To be safe, remove all other external drives before you
continue, in order to reduce the risk of operating on the wrong disk.
194
Chapter 3
macOS Built-in Commands
When the zeroDisk is finished, try running the list again.
% diskutil list
/dev/disk2 (external, physical):
#: TYPE NAME SIZE IDENTIFIER
0: *4.0 GB disk2
You can still see the disk, but all the partitions are gone.
Creating a New Partition
You can create a partition again, but it gets complicated, so I recommend
using the Disk Utility app. However, you can create an apfs container and
a single partition easily with the apfs create command.
% diskutil apfs create /dev/disk2 "My Drive"
Started APFS operation on disk2
Creating a new empty APFS Container
Unmounting Volumes
Switching disk2 to APFS
Creating APFS Container
Created new APFS Container disk3
Disk from APFS operation: disk3
Finished APFS operation on disk2
Started APFS operation on disk3
Preparing to add APFS Volume to APFS Container disk3
Creating APFS Volume
Created new APFS Volume disk3s1
Mounting APFS Volume
Setting volume permissions
Disk from APFS operation: disk3s1
Finished APFS operation on disk3
195
Chapter 3
macOS Built-in Commands
Encrypting a Disk
Suppose you work for a company that requires all remote storage be
encrypted. You can enable FileVault on this drive with this command.
% diskutil apfs encrypt /dev/disk3s1 -user disk
Passphrase for the new "Disk" user (6584DA69-6E6F-4F49-AF6F02D3EEC0AEDC):
Repeat passphrase:
Starting background encryption with the new "Disk" crypto user
on disk3s1
The new "Disk" user will be the only one who has initial access
to disk3s1
The new APFS crypto user UUID will be 6584DA69-6E6F-4F49-AF6F02D3EEC0AEDC
Background encryption is ongoing; see "diskutil apfs list" to
see progress
Note You are looking for the partition with type APFS Volume.
We will unmount the drive and remount it, to ensure that it unlocks
properly.
% diskutil umount /dev/disk3s1
Volume My Drive on disk3s1 unmounted
We can’t yet mount the drive using the mount command, because we
need to tell diskutil to unlock it first.
% diskutil mount /dev/disk3s1
Volume on disk3s1 failed to mount
This appears to be an APFS Volume; note that locked APFS volumes
will not mount unless unlocked (e.g. "diskutil apfs unlockVolume")
196
Chapter 3
macOS Built-in Commands
We need to use unlockVolume and then supply the same password.
% diskutil apfs unlockVolume /dev/disk3s1
Passphrase:
Unlocking any cryptographic user on APFS Volume disk3s1
Unlocked and mounted APFS Volume
Disk Images
You’ve been able to use disk images with Macs since before macOS X, but
did you know that you can create your own disk image with hdiutil?
% hdiutil
hdiutil: missing verb
Usage: hdiutil <verb> <options>
A disk image is just a virtual disk that you can mount at will. You can
think of it as email-able USB storage.
Creating a Disk Image
An empty 4GB disk image can be created like this.
Note You could use m for MB or t for TB.
% hdiutil create -size 4g ~/storage.dmg
However, if you try to mount this in Finder, you will find that there is no
filesystem, and thus it’s not mountable.
Note If you don’t delete storage.dmg between each command,
they will fail. Or you could add the -ov option to overwrite the
existing image.
197
Chapter 3
macOS Built-in Commands
Let’s specify a filesystem.
% hdiutil create -size 4g -fs apfs storage.dmg
Mounting a Disk Image
Now we can mount this disk image by double-clicking it in Finder or using
the open command. We can also use hdiutil to mount it.
% hdiutil attach storage.dmg
/dev/disk2 GUID_partition_scheme
/dev/disk2s1 EFI
/dev/disk2s2 Apple_APFS
/dev/disk3 EF57347C-0000-11AA-AA11-0030654
/dev/disk3s1 41504653-0000-11AA-AA11-0030654
/Volumes/untitled
Oh, the name of the volume is untitled.
Ejecting a Disk Image
Let’s unmount the disk by using the eject command.
% hdiutil eject /Volumes/untitled
"disk2" ejected.
Change the Disk Image Volume Name
We can change the volume name by using the volname option to specify a
name of our choosing.
-volname "Virtual Disk"
You might not have noticed, but by creating the 4GB disk image, we
have actually used 4GB of disk space.
198
Chapter 3
macOS Built-in Commands
% ls -lath ~/storage.dmg
-rw-r--r--@ 1 danielplatt staff 4.0G 7 Dec 21:28 /Users/
danielplatt/storage.dmg
This doesn’t have to be the case. We could create a sparse image. A
sparse image only takes up the amount of space on your disk that is used
inside the disk image.
We can enable sparse disk images by specifying the sparse type,
as in -type SPARSE. We can put it all together and rename the disk image
to match the volume name:
% hdiutil create -size 4g -type SPARSE -volname "Virtual Disk"
-fs apfs virtual-disk
created: /Users/danielplatt/virtual-disk.sparseimage
% hdiutil attach virtual-disk.sparseimage
/dev/disk2 GUID_partition_scheme
/dev/disk2s1 EFI
/dev/disk2s2 Apple_APFS
/dev/disk3 EF57347C-0000-11AA-AA11-0030654
/dev/disk3s1 41504653-0000-11AA-AA11-0030654
/Volumes/Virtual Disk
When you are finished with a disk image, you should always eject it to
make sure macOS has fully written everything to the image.
% hdiutil eject /Volumes/Virtual\ Disk
"disk2" ejected.
Now, when we look at the size of the disk image, we can see it no
longer takes up the 4GB that it previously did.
% ls -lath virtual-disk.sparseimage
-rw-r--r-- 1 danielplatt staff 13M 8 Dec 12:42 virtualdisk.sparseimage
199
Chapter 3
macOS Built-in Commands
Encrypting a Disk Image
It seems like not a week goes by when we hear about how documents have
been leaked, because they were left on a train and weren’t encrypted, so
anyone could (and did) read the files.
Encryption can be done at multiple levels. We’ve seen how to
enable FileVault on a whole disk or encrypt an archive. We can also use
encryption on disk images. To enable encryption, we need to pass in the
encryption option and tell hdiutil to ask for the password with stdinpass.
We will also use the ov option to overwrite the existing image.
% hdiutil create -ov -size 4g -type SPARSE -volname "Virtual
Disk" -encryption -stdinpass -fs apfs virtual-disk
Enter disk image passphrase:
created: /Users/danielplatt/virtual-disk.sparseimage
% hdiutil attach virtual-disk.sparseimage
Enter password to access "virtual-disk.sparseimage":
/dev/disk2 GUID_partition_scheme
/dev/disk2s1 EFI
/dev/disk2s2 Apple_APFS
/dev/disk3 EF57347C-0000-11AA-AA11-0030654
/dev/disk3s1 41504653-0000-11AA-AA11-0030654
/Volumes/Virtual Disk
Copy an Existing Device
If you have an existing USB device that you’d like to make a copy of, you
can use the srcdevice option.
Note The fs, type, volname, and size options are ignored when
using srcdevice.
200
Chapter 3
macOS Built-in Commands
% hdiutil create -srcdevice /dev/disk3 -encryption -stdinpass
copy-virtual-disk
disk3 was already unmounted or it has a partitioning scheme so
use "diskutil unmountDisk" instead
You will not be able to image a disk that is currently mounted, because
the image process cannot stop anything from writing to it. For consistency
of the data, you need to unmount the disk first.
% diskutil unmountDisk /dev/disk3
Unmount of all volumes on disk3 was successful
Now that the disk is unmounted, you can try again.
% hdiutil create -srcdevice /dev/disk3 -encryption -stdinpass
copy-virtual-disk
Enter disk image passphrase:
Preparing imaging engine...
Reading whole disk (Apple_APFS : 0)...
(CRC32 $CA5DE01C: whole disk (Apple_APFS : 0))
Adding resources...
Elapsed Time: 205.822ms
File size: 141828 bytes, Checksum: CRC32 $16AFC33E
Sectors processed: 7978928, 32056 compressed
Speed: 76.0Mbytes/sec
Savings: 100.0%
created: /Users/danielplatt/copy-virtual-disk.dmg
Great, that worked, so now we can mount it.
% hdiutil attach /Users/danielplatt/copy-virtual-disk.dmg
Enter password to access "copy-virtual-disk.dmg":
Checksumming whole disk (Apple_APFS : 0)...
201
Chapter 3
macOS Built-in Commands
whole disk (Apple_APFS : 0): verified CRC32 $CA5DE01C
verified CRC32 $16AFC33E
/dev/disk4
/dev/disk5 EF57347C-0000-11AA-AA11-0030654
/dev/disk5s1 41504653-0000-11AA-AA11-0030654
/Volumes/Virtual Disk
Creating a Disk Image Containing Existing Files
Instead of copying an existing device, you can also copy an existing folder
using srcfolder.
% hdiutil create -size 5m -volname "Virtual Disk" -srcfolder ~/
random-files-master -fs apfs random-files
created: /Users/danielplatt/random-files.dmg
Note We didn’t need to specify fs or size. The command would
have picked defaults that matched as closely as possible to the
current filesystem and the space used.
Other Commands That I Love
This next section contains commands that I love, but I couldn’t think of a
heading for them.
The say Command
I love this command. I built a Hypnosis application around the say
command. Although now, it only uses the underlying technology as the
say command.
202
Chapter 3
macOS Built-in Commands
The say command allows you to make your computer talk in a variety
of different voices. The functionality has been part of macOS X since the
beginning.
% say "I love macOS"
If you combine this by sshing into other Macs, you have the ability to
prank other people. say accepts text that is piped into it.
% echo "hello" | say
You can speak the contents of a file or read the contents of files:
% say -f random-files-master/Readme.md
You also can change the voice with the -v and -r options. -v changes
the voice and -r changes the speaking rate in words per minute. To be able
to change the voice, you need to know what your options are.
% say -v '?'
Alex en_US # Most people recognize me by my voice.
Alice it_IT # Salve, mi chiamo Alice e sono una voce
italiana.
Alva sv_SE # Hej, jag heter Alva. Jag är en svensk röst.
You have quite a bit of choices. It might be easier if you filtered this list
down to just the languages you want.
% say -v '?' | grep en_
Alex en_US # Most people recognize me by my voice.
Daniel en_GB # Hello, my name is Daniel.
Fred en_US # I sure like being inside this fancy computer
Karen en_AU # Hello, my name is Karen.
There are more voices available for download in the Accessibility tab,
which is in System Preferences, as shown in Figure 3-23.
203
Chapter 3
macOS Built-in Commands
Figure 3-23. Speech settings in Accessibility, System Preferences
Note This is where you change the default voice and speaking rate
for the say command.
When you select the System Voice in Speech, you will see the list of
installed voices. At the bottom is a Customize option that will bring up a
window of potential voices, as shown in Figure 3-24.
204
Chapter 3
macOS Built-in Commands
Figure 3-24. Voice drop-down from Voice settings in Accessibility
You can select as many or as few voices as you want. The downside to
selecting all of them is they will take up space on your computer and have
to be downloaded, as shown in Figure 3-25.
205
Chapter 3
macOS Built-in Commands
Figure 3-25. Extra voices being downloaded
Once the new voices are fully downloaded and installed, they will show
up in the say command.
% say -v '?' | grep Oliver
Oliver en_GB # Hello, my name is Oliver.
Changing the Speaking Rate
The other option was speaking rate, -r. The default rate varies slightly
for each voice, but is typically around 220 words per minute. Most voices
support between 150 and 350 words per minute.
% say -r 350 "I can talk really fast"
% say -r 150 "and I can talk really slow"
206
Chapter 3
macOS Built-in Commands
You will be able to go to more extremes than these numbers. Be aware
that if a voice doesn’t support the rate given, it will ignore it and use the
default value.
% say -r 1 "I will ignore this rate"
Saving Speech to a File
There is a possibility that you might want to use this generated speech
somewhere else, maybe if you create online videos. Rather than try to
record your computer while it speaks, you could use the -o option to
output the speech to file.
say has quite a few output options, so let’s see what they are.
% say --file-format="?"
AIFC AIFC (.aifc,.aiff,.aif) [lpcm,ulaw,alaw,ima4,Qclp]
AIFF AIFF (.aiff,.aif) [lpcm]
Not all formats are supported by all voices. You might find that it is
easier to use aiff, which is the default.
% say "I like talking" -o ~/talking.aiff
You will then have a file called talking.aiff in your home directory,
which you could easily use in a program like iMovie.
Scheduling with Launchd
On your Mac, there is a process for running tasks on a schedule. The
process is called launchd and you can control it by editing plist files and
using the launchctl command.
207
Chapter 3
macOS Built-in Commands
Listing Services
The default installation of Catalina has over 300 services. They each have
a very specific job to do, like keeping your iCloud Drive synchronized and
your search index up to date. Even Finder and QuickLook are services.
The first thing to view are all the tasks that have been scheduled on
your computer.
% launchctl list
PID Status Label
- 0 com.apple.SafariHistoryServiceAgent
520 0 com.apple.progressd
24988 0 com.apple.ActivityMonitor.18300
536 0 com.apple.cloudphotod
340 0 com.apple.Finder
389 0 com.apple.homed
- -9 com.apple.SafeEjectGPUAgent
- 0 com.apple.quicklook
If any entry in this has a PID value, that means it is currently running.
There is also a status code and the service name. We can also pass the
service name into the list subcommand to get even more information
about a service.
% launchctl list com.apple.Finder
{
"LimitLoadToSessionType" = "Aqua";
"MachServices" = {
"com.apple.DiscRecording:registrar" = mach-port-object;
"com.apple.finder.ServiceProvider" = mach-port-object;
};
"Label" = "com.apple.Finder";
"OnDemand" = true;
208
Chapter 3
macOS Built-in Commands
"LastExitStatus" = 0;
"PID" = 340;
"Program" = "/System/Library/CoreServices/Finder.app/
Contents/MacOS/Finder";
"PerJobMachServices" = {
"com.apple.DiscRecording:remote" = mach-port-object;
"com.apple.tsm.portname" = mach-port-object;
"com.apple.coredrag" = mach-port-object;
"com.apple.axserver" = mach-port-object;
};
};
The status code is the exit status of the service. This number represents
an error message.
Launchd Error Codes
We can use the error subcommand to find out what the human readable
version of the status is.
% launchctl error 0
0: Undefined error: 0
The reason we are seeing Undefined error here is because 0 is special.
The 0 value represents no error, so everything completed correctly.
Let’s check another service, this time one that had a status that
wasn’t 0.
% launchctl list com.apple.SafeEjectGPUAgent
{
"EnableTransactions" = true;
"LimitLoadToSessionType" = "Aqua";
"Label" = "com.apple.SafeEjectGPUAgent";
"OnDemand" = true;
209
Chapter 3
macOS Built-in Commands
"LastExitStatus" = 9;
"Program" = "/System/Library/CoreServices/Menu Extras/
SafeEjectGPUExtra.menu/Contents/MacOS/SafeEjectGPUAgent";
"ProgramArguments" = (
"SafeEjectGPUAgent";
);
};
This time the status was 9. We can try that now.
% launchctl error 9
9: Bad file descriptor
Service Definition
Now that you know that there are services, I want to show you how they are
defined. According to the man for launchd, the configuration for all the launch
services exist in a certain location, depending on how they need to run.
~/Library/LaunchAgents Per-user agents provided by the user.
/Library/LaunchAgents Per-user agents provided by the
administrator.
/Library/LaunchDaemons System wide daemons provided by the
administrator.
/System/Library/LaunchAgents OS X Per-user agents.
/System/Library/LaunchDaemons OS X System wide daemons.
You might remember that your hard drive has been split into two parts.
The first part is the system drive and is read-only for you. The second part
is the data drive. Effectively, this means that anything in /System is readonly and you cannot change it.
You will not be able to modify the System launch services. However,
this is where the bulk of the services will live.
% ls /System/Library/Launch*
210
Chapter 3
macOS Built-in Commands
The reason for showing you these services is that they are a good
example of what the service configuration file looks like. The first thing to
notice is that all the services have the plist file extension. Let’s look at the
Finder service.
% ls /System/Library/Launch*/*Finder*
% cat /System/Library/LaunchAgents/com.apple.Finder.plist
<?xml version="1.0" encoding="UTF-8"?>
<!DOCTYPE plist PUBLIC "-//Apple//DTD PLIST 1.0//EN" "http://
www.apple.com/DTDs/PropertyList-1.0.dtd">
<plist version="1.0">
<dict>
<key>POSIXSpawnType</key>
<string>App</string>
<key>RunAtLoad</key>
<false/>
<key>KeepAlive</key>
<dict>
<key>SuccessfulExit</key>
<false/>
<key>AfterInitialDemand</key>
<true/>
</dict>
<key>Label</key>
<string>com.apple.Finder</string>
<key>Program</key>
<string>/System/Library/CoreServices/Finder.app/Contents/
MacOS/Finder</string>
<key>CFBundleIdentifier</key>
<string>com.apple.finder</string>
<key>ThrottleInterval</key>
211
Chapter 3
macOS Built-in Commands
<integer>1</integer>
</dict>
</plist>
The next thing to notice about a service is that the file format is .xml.
The XML File Format
You don’t need to fully understand the .xml file format, but knowing
enough to make changes will be useful if you want to create your own
scheduled tasks. An XML file is made up of tags. A tag is made up of the
less than and greater than symbols, as follows.
<plist>
However, that isn’t valid, as the tag needs to be closed. You can close a
tag with a forward slash symbol (/), such as:
<plist></plist> or <plist/>
Tags can also contain tags.
<plist>
<dict>
<key>ExampleKey</key>
<value>Example Value</value>
</dict>
</plist>
Inside dict, items are paired together as a key and a value. The key is a
simple string. The value is a little more complex, as it can be one of many
different types—string, integer, boolean, dictionary, array, date, or data.
Let’s look at an example that’s a little more realistic.
212
Chapter 3
macOS Built-in Commands
<plist>
<dict>
<key>ExampleKey</key>
<string>Example Value</string>
<key>AnotherKey</key>
<integer>1</integer>
</dict>
</plist>
There is a lot more information in the plist man page.
Creating Your Own launchd Process
Now that you know a little bit about the .xml file format, making our own
launchd process should be easier. Rather than using the previous example,
where Finder runs on demand, let’s create a scheduled task that runs every
minute. This could easily be changed to every hour.
For this example, we will use touch to update the modified date time
for a file called scheduledUpdate. First, let’s grab the bits we need from the
previous example.
<?xml version="1.0" encoding="UTF-8"?>
<!DOCTYPE plist PUBLIC "-//Apple//DTD PLIST 1.0//EN" "http://
www.apple.com/DTDs/PropertyList-1.0.dtd">
<plist version="1.0">
<dict>
</dict>
</plist>
Second, we need to define the name of this task. We will do that with
the label key.
<key>Label</key>
<string>com.example.touch</string>
213
Chapter 3
macOS Built-in Commands
There are a few rules for creating the label. It needs to be unique and
will form the basis of the filename. In fact, the filename for this file is the
label and ends with .plist.
When choosing a label, they typically use the reverse domain name
format, but you don’t need to strictly follow this format.
Third, we need to define the program. When defining the program
name, we have to use the absolute path, because launchd will not have
access to our user’s path variable.
Note If you don’t remember where a command is, use the which
command to find it.
<key>Program</key>
<string>/usr/bin/touch</string>
Fourth, we need to define the program arguments with the
ProgramArguments key. The first argument is always the program name.
After that, we can pass in all the arguments needed.
<key>ProgramArguments</key>
<array>
<string>touch</string>
<string>/Users/danielplatt/scheduledUpdate </string>
</array>
You might be tempted to use ~/scheduledUpdate here. However,
the tilde isn’t recognized by launchd. We can get around that by using
the absolute path to the file. In Chapter 5, we discuss making your own
commands, which will simplify the program arguments, as you can build
them into the command.
214
Chapter 3
macOS Built-in Commands
Lastly, you need to specify how often to run this task. You can either
specify that you want the process to happen every number of specified
seconds, as follows:
<key>StartInterval</key>
<integer>60</integer>
Or you can specify when you want the process to run, with
StartCalendarInterval. You can see the valid keys and values in
Table 3-4.
Table 3-4. Valid Keys and Values
for StartCalendarInterval
Key
Value
Month
1-12
Day
1-31
Weekday
0-7 (Sunday is both 0 and 7)
Hour
0-23
Minute
0-59
You can be as specific or as vague as you want, as to when the process
will run. For example, you could have a process running every year at
midnight on March 24.
<key>StartCalendarInterval</key>
<dict>
<key>Day</key>
<integer>24</integer>
<key>Hour</key>
<integer>0</integer>
<key>Minute</key>
215
Chapter 3
macOS Built-in Commands
<integer>0</integer>
<key>Month</key>
<integer>3</integer>
</dict>
Or every hour in March.
<key>StartCalendarInterval</key>
<dict>
<key>Minute</key>
<integer>0</integer>
<key>Month</key>
<integer>3</integer>
</dict>
Or if we wanted to match the StartInterval example and have the
process running every minute, we would use:
<key>StartCalendarInterval</key>
<dict>
</dict>
With StartCalendarInterval, if you don’t specify a particular key, it is
treated as if it were matching all the values. Let’s put it all together.
% nano ~/Library/LaunchAgents/com.example.touch.plist
<?xml version="1.0" encoding="UTF-8"?>
<!DOCTYPE plist PUBLIC "-//Apple//DTD PLIST 1.0//EN" "http://
www.apple.com/DTDs/PropertyList-1.0.dtd">
<plist version="1.0">
<dict>
<key>Label</key>
<string>com.example.touch</string>
<key>Program</key>
216
Chapter 3
macOS Built-in Commands
<string>/usr/bin/touch</string>
<key>ProgramArguments</key>
<array>
<string>touch</string>
<string>/Users/danielplatt/scheduledUpdate</string>
</array>
<key>StartInterval</key>
<integer>60</integer>
</dict>
</plist>
Once you have defined your launchd plist, you need to get launchd to
load it.
% launchctl load ~/Library/LaunchAgents/com.example.touch.plist
Troubleshooting
Not everything works perfectly the first time, and launchd can be
frustrating to debug because you can’t see the output of the process you’re
running. However, we can fix that with a few more keys. There are two keys
that will help us debug launchd.
•
StandardOutPath
•
StandardErrorPath
Both of these keys take a file path, which is where the output will be
written.
<key>StandardErrorPath</key>
<string>/tmp/com.example.touch.err</string>
<key>StandardOutPath</key>
<string>/tmp/com.example.touch.out</string>
217
Chapter 3
macOS Built-in Commands
When you make changes to your launchd plist, you need to reload it.
You can reload your plist with the unload, followed by load, commands.
% launchctl unload -w ~/Library/LaunchAgents/com.example.touch.plist
% launchctl load -w ~/Library/LaunchAgents/com.example.touch.plist
Then you just have to wait until the launch time has elapsed. You
should then have two files—com.example.touch.out and com.example.
touch.err—that should show why your launchd process isn’t working.
If you don’t have these files, double-check the StartInterval and
StartCalendarInterval values. Consult the manual for a lot more
information about the values you can use in your plist.
% man launchd.plist
Top Commands
A colleague gave this next command to me. It provides the top commands
that you have used on your Terminal.
% history | awk '{print $2}' | sort | uniq -c | sort -rh | head -n 10
Let’s break this down. The history command will list all the
commands you have typed into Terminal in the order that they were typed.
% history
1 cd ~/random-files-master
2 less walden.txt
3 cat lorem.txt bible.txt | less
4 cat lorem.txt bible.txt > combined.txt
The amount of commands that are saved, is controlled by the
$HISTSIZE variable.
% echo $HISTSIZE
50000
218
Chapter 3
macOS Built-in Commands
If this isn’t enough, you can set the value to something bigger in your
.zshrc file.
export HISTSIZE=75000
The next command, awk, extracts the second word from every line.
% history | awk '{print $2}'
cd
less
cat
cat
The next command is sort. It will arrange all the lines in alphabetical
order.
% history | awk '{print $2}' | sort
cat
cat
cd
less
If we didn’t sort the list of commands, then this next command
wouldn’t work as well. The command is uniq and, by default, it will only
return the unique lines that happen in succession.
Without the sort command earlier, it is likely the commands will
not happen in alphabetical order. This will mean uniq will not be able to
remove all the duplicate lines.
With the -c argument, uniq will also return a count.
% history | awk '{print $2}' | uniq -c
1 cd
1 less
2 cat
219
Chapter 3
macOS Built-in Commands
This example isn’t great at showing the reason for this next command.
As your list of commands grows, the order will not be retained. So
you’ll need to sort again, but this time based on its numeric order (-h).
Depending on how you want your list presented, you might want the
order to be low to high (default), or high to low. As I want the list to be high
to low, I want to reverse the order (-r).
% history | awk '{print $2}' | sort | uniq -c | sort -rh
2 cat
1 less
1 cd
You might only want a list of all your commands, ranked in order, and
if you do, then you can stop here.
If you want to see the top 10 most commonly used commands, you
need this next command, head.
% history | awk '{print $2}' | sort | uniq -c | sort -rh |
head -n 10
2 cat
1 less
1 cd
Are you interested in seeing my actual top 10 commands at the
moment? Here you go:
% history | awk '{print $2}' | sort | uniq -c | sort -rh |
head -n 10
317 magick
220 open
173 ls
140 ffmpeg
118 man
106 nano
220
Chapter 3
102
93
64
61
macOS Built-in Commands
brew
cat
launchctl
echo
Summary
In this chapter, we looked at many of the commands that you can use
within the macOS Terminal without having to install anything.
In the next chapter, we will be using Brew to install other commands.
221
CHAPTER 4
Installing Commands
Using Brew
In the last chapter, we looked at many of the commands that come
preinstalled with macOS Catalina. In this chapter, we will look at some
additional commands that can be installed using Brew. These commands
will give you extra functionality over and above what you get with macOS.
Having Fun with Text
Although the commands in this section are just a bit of fun, they will help
you gain confidence using Terminal and learn some important concepts.
The fortune Command
The fortune command is great and produces messages similar to that of a
fortune cookie. We installed this command in Chapter 2, but I wanted to go
over it properly here. To recap, when you run the fortune command, it will
output a random message to your Terminal.
% fortune
I have often regretted my speech, never my silence.
-- Publilius Syrus
© Daniel Platt 2021
D. Platt, Tweak Your Mac Terminal, https://doi.org/10.1007/978-1-4842-6171-2_4
223
Chapter 4
Installing Commands Using Brew
fortune has two lists to choose from, funny and offensive epigrams.
By default, it’s using the funny list. If you would like to use the potentially
offensive list of epigrams, you can use the -o option.
% fortune -o
Or you can use the -a option to choose from both lists.
% fortune -a
There are many different topics that fortune will choose from. If you
want to see a list of all fortune files, you can use the -f option. It shows the
percentage change of that category being chosen.
% fortune -f
100.00% /usr/local/Cellar/fortune/9708/share/games/fortunes
7.65% computers
9.22% people
4.66% science
4.82% miscellaneous
5.18% politics
8.28% definitions
Those were the safe lists. You can also combine the -f option with
the -o (or -a) option.
% fortune -f -o
100.00% /usr/local/Cellar/fortune/9708/share/games/fortunes/off
You can also tell fortune to use a particular fortune file.
% fortune /usr/local/Cellar/fortune/9708/share/games/fortunes/art
I went into the business for the money, and the art grew out of
it. If people are disillusioned by that remark, I can't help
it. It's the truth.
-- Charlie Chaplin
224
Chapter 4
Installing Commands Using Brew
Sometimes you will want to return fortunes that are less than a certain
number of characters. You can tell fortune to return either short or long
epigrams. By default, the length is set to 160 characters, which can be
changed with -n.
% fortune -s
"An open mind has but one disadvantage: it collects dirt."
-- a saying at RPI
% fortune -l
All parts should go together without forcing. You must remember
that the parts you are reassembling were disassembled by you.
Therefore, if you can't get
them together again, there must be a reason. By all means, do
not use a hammer.
-- IBM maintenance manual, 1925
% fortune -s -n 10
Ship it.
The cowsay Command
This is a simple application that places text in a cow speech bubble. That’s
a speech bubble for a cow. It’s as simple as that. Let’s install cowsay.
% brew install cowsay
There are other options for cowsay; you can find more information by
typing man cowsay. You can use either cowsay or cowthink. Let’s try it.
% cowsay "message"
225
Chapter 4
Installing Commands Using Brew
% cowthink "message"
There we go, a cow speech bubble and a cow thought bubble. What
else can you do? There are different animals you can use. The path to these
extra characters is /usr/local/share/cows. If that path changes after
publication, there is a path listed in the manual. If you use ls, it will show
you all the files can be used.
% ls /usr/local/share/cows
sheep.cow
tux.cow
226
Chapter 4
Installing Commands Using Brew
If you wanted to use the sheep, the command would become:
% cowsay -f /usr/local/share/cows/sheep.cow "awesome"
Can you do anything useful with this? You could have some fun and
“pipe” a fortune message in.
% fortune | cowsay
Maybe animal speech bubbles aren’t your thing? Let’s move on.
227
Chapter 4
Installing Commands Using Brew
The figlet Command
If you’re into ASCII art, you can install figlet as follows:
% brew install figlet
This will convert text into ASCII art.
% figlet 'art?'
There are loads of different styles (or fonts) to choose from and there is
a handy command that lists them, along with example text.
% showfigfonts
Then it is a simple matter of choosing which font you want and
specifying it with the -f argument.
% figlet -f computer 'art?'
228
Chapter 4
Installing Commands Using Brew
You can even use fortune as a source of text.
% fortune -s -n 10 | figlet -f weird
However, you need to limit the message to something sensible,
otherwise, you’ll just end up with far too much output. This is what the -s
and -n arguments are for.
The lolcat Command
Another command that is a bit of fun is lolcat.
% brew install lolcat
This gives your text a fabulous rainbow color effect for the given input:
% fortune | lolcat
229
Chapter 4
Installing Commands Using Brew
There’s no limit to how you can use this.
% fortune | cowsay | lolcat
The Steam Locomotive Command
An interesting command that is available on Brew is called sl.
% brew install sl
The point of this command is to display an animated steam locomotive
that travels across your Terminal when you type sl, as shown in Figure 4-1.
230
Chapter 4
Installing Commands Using Brew
Figure 4-1. Example of the steam locomotive
The sl command is most likely going to be run when you mistype ls
and cannot cancel it. The wider your window, the longer it takes for the
locomotive to travel across it.
As with other commands, there are different options available to
customize the locomotive, as shown in Table 4-1.
Table 4-1. Arguments to the sl Command
-a
People are crying for help
-l
Little version
-F
Flying train
-c
Different engine
All these options can be used together as well, as shown in Figure 4-2.
% sl -caFl
231
Chapter 4
Installing Commands Using Brew
Figure 4-2. Steam locomotive with options
There is a known bug where sl will occasionally show you the
directory listing.
Media
This section covers commands related to viewing and manipulating and
media on your macOS.
ImageMagick
ImageMagick was originally used to convert images from one format to
another, but over time it has incorporated additional functionality. Did you
know that you can use ImageMagick to create images on the command
line? Let’s install it.
% brew install imagemagick
This will install the magick command.
magick [input-options] input-file [output-options] output-file
232
Chapter 4
Installing Commands Using Brew
There are other commands that are installed, like identify, but they
are for backward compatibility. Their functionality is available through the
magick command.
% magick identify <image>
The image types that ImageMagick supports is extensive and you can
get a complete list.
% magick -list format
Format Module Mode Description
-------------------------------------------------------------- 3FR DNG r-- Hasselblad CFV/H3D39II
3G2 MPEG r-- Media Container
3GP MPEG r-- Media Container
AAI* AAI rw+ AAI Dune image
AI PDF rw- Adobe Illustrator CS2
Note There are loads of different lists that ImageMagick can
provide. Use -list to see them. We will only explore some of them.
Colors
We’ll be using predefined colors in some of our commands. If you want to
find out more about them, you can get a list.
% magick -list color
Name Color Compliance
--------------------------------------------------------------AliceBlue srgb(240,248,255) SVG X11 XPM
AntiqueWhite srgb(250,235,215) SVG X11 XPM
AntiqueWhite1 srgb(255,239,219) X11
AntiqueWhite2 srgb(238,223,204) X11
233
Chapter 4
Installing Commands Using Brew
AntiqueWhite3 srgb(205,192,176) X11
AntiqueWhite4 srgb(139,131,120) X11
aqua srgb(0,255,255) SVG
You can also specify the color in Red, Green, and Blue values (RGB),
which you can see in the color column above. The value is either a number
between 0 and 255 or a percentage. srgb() and rgb() are equivalent.
Sometimes there is a fourth value, alpha (A), which specifies how
transparent the color is. This is useful if you want to control how visible the
underlying image is; the value ranges from 0.0 to 1.0.
This is an example of a partially transparent magenta color.
"rgba(255,0,255,0.5)"
Note that if you use any of these values, you need to quote them, as
otherwise the Zsh shell will try to interpret them.
"rgba(255,0,255,0.5)"
Simple Image
One of the simplest things you can do with ImageMagick is create a simple
image.
Say we wanted to create a simple blue image that was 200 pixels wide
and 100 pixels high:
% magick -size 200x100 canvas:blue blue.jpg
Note xc: is an alias on canvas, but older documentation might
refer to it.
234
Chapter 4
Installing Commands Using Brew
Convert JPG to PNG
Converting between image formats is achieved by specifying the correct
file extension. If we wanted to convert our previous image, which is a JPEG,
to a PNG, we use this short command.
% magick blue.jpg blue.png
Borders
We can add a 10-pixel border to an existing image with this command.
% magick blue.jpg -bordercolor "rgb(255,0,0)" -border 10 border.png
Note The ImageMagick command will read the commands left to
right and apply them in that order.
Warning It’s not good practice to use the same image in the input
and the output.
The canvas and border commands can be chained together.
% magick -size 200x100 canvas:blue -bordercolor "rgb(255,0,0)"
-border 10 border.jpg
Fonts
We can even write on the image, but for that to work, we need to have fonts
available for ImageMagick to use. Let’s see what fonts are available.
% magick -list font
If your system is anything like mine, that command will list no fonts.
A simple way to get fonts is to install Ghostscript.
% brew install gs
235
Chapter 4
Installing Commands Using Brew
Note Installing Ghostscript will allow ImageMagick to work with
PostScript files.
Now when you list the fonts, you should something like the following:
% magick -list font
Path: /usr/local/Cellar/imagemagick/7.0.9-14/etc/ImageMagick-7/
type-ghostscript.xml
Font: AvantGarde-Book
family: AvantGarde
style: Normal
stretch: Normal
weight: 400
glyphs: /usr/local/share/ghostscript/fonts/a010013l.pfb
Font: AvantGarde-BookOblique
family: AvantGarde
style: Oblique
stretch: Normal
weight: 400
glyphs: /usr/local/share/ghostscript/fonts/a010033l.pfb
Text
Now that we have a few fonts available for ImageMagick, we can draw text
onto our images. For this, we will be using -gravity and -draw.
% magick -size 200x100 canvas:white -gravity center -draw 'text
0,0 "Welcome"' text.jpg
236
Chapter 4
Installing Commands Using Brew
Let’s look at gravity. We can query ImageMagick to see its valid options.
% magick -list gravity
None
Center
East
Forget
NorthEast
North
NorthWest
SouthEast
South
SouthWest
West
gravity controls where the text is placed on the image. We can see this
in action.
% magick -size 200x200 canvas:white \
-bordercolor "rgb(0,0,0)" -border 1 \
-gravity none -draw 'text 0,0 "none"' \
-gravity center -draw 'text 0,0 "center"' \
-gravity east -draw 'text 0,0 "east"' \
-gravity forget -draw 'text 0,0 "forget"' \
-gravity northeast -draw 'text 0,0 "northeast"'
-gravity north -draw 'text 0,0 "north"' \
-gravity northwest -draw 'text 0,0 "northwest"'
-gravity southeast -draw 'text 0,0 "southeast"'
-gravity south -draw 'text 0,0 "south"' \
-gravity southwest -draw 'text 0,0 "southwest"'
-gravity west -draw 'text 0,0 "west"' \
gravity.jpg
\
\
\
\
237
Chapter 4
Installing Commands Using Brew
You should end up with an image like Figure 4-3.
Figure 4-3. Text shown in the nine different origins
We can safely ignore the gravity options of none and forgot, as they do
not appear on the image. The font size can be changed with -pointsize.
% magick -size 200x200 canvas:white \
-bordercolor "rgb(0,0,0)" -border 1 \
-pointsize 28 \
-gravity none -draw 'text 0,0 "none"' \
-gravity center -draw 'text 0,0 "center"' \
-gravity east -draw 'text 0,0 "east"' \
-gravity forget -draw 'text 0,0 "forget"' \
-gravity northeast -draw 'text 0,0 "northeast"'
-gravity north -draw 'text 0,0 "north"' \
-gravity northwest -draw 'text 0,0 "northwest"'
-gravity southeast -draw 'text 0,0 "southeast"'
-gravity south -draw 'text 0,0 "south"' \
-gravity southwest -draw 'text 0,0 "southwest"'
-gravity west -draw 'text 0,0 "west"' \
gravity.jpg
238
\
\
\
\
Chapter 4
Installing Commands Using Brew
Earlier we installed a few fonts with Ghostscript. We can use -font to
choose the specific font we want to use.
% magick -size 200x50 canvas:white \
-bordercolor "rgb(0,0,0)" -border 1 \
-font "AvantGarde-Book" \
-gravity none -draw 'text 0,0 "none"' \
-gravity center -draw 'text 0,0 "center"' \
-gravity east -draw 'text 0,0 "east"' \
-gravity forget -draw 'text 0,0 "forget"' \
-gravity northeast -draw 'text 0,0 "northeast"'
-gravity north -draw 'text 0,0 "north"' \
-gravity northwest -draw 'text 0,0 "northwest"'
-gravity southeast -draw 'text 0,0 "southeast"'
-gravity south -draw 'text 0,0 "south"' \
-gravity southwest -draw 'text 0,0 "southwest"'
-gravity west -draw 'text 0,0 "west"' \
gravity.jpg
\
\
\
\
239
Chapter 4
Installing Commands Using Brew
With the -draw option, there is the 0,0 that we haven’t discussed. This
is the origin for the draw command. gravity changes the start position,
and the origin is offset from there.
If all the 0,0 values were changed to 20,20, then all the text would
move in toward the center by 20 pixels, as shown in Figure 4-4.
% magick -size 250x200 canvas:white \
-bordercolor "rgb(20,20,0)" -border 1 \
-gravity none -draw 'text 20,20 "none"' \
-gravity center -draw 'text 20,20 "center"' \
-gravity east -draw 'text 20,20 "east"' \
-gravity forget -draw 'text 20,20 "forget"' \
-gravity northeast -draw 'text 20,20 "northeast"'
-gravity north -draw 'text 20,20 "north"' \
-gravity northwest -draw 'text 20,20 "northwest"'
-gravity southeast -draw 'text 20,20 "southeast"'
-gravity south -draw 'text 20,20 "south"' \
-gravity southwest -draw 'text 20,20 "southwest"'
-gravity west -draw 'text 20,20 "west"' \
gravity.jpg
Figure 4-4. Text shown with an offset
240
\
\
\
\
Chapter 4
Installing Commands Using Brew
Interestingly, we can now see the forget and none text, in the top-left
corner.
Text Color and More
The text would be really boring if we could only have black as an option.
When we use the -draw command, we can pass in other options, one of
which is to change the text color.
-draw 'fill #ff0000 text 0,0 "center"'
Another option is to rotate the text around the origin point.
-draw 'rotate 45 text 0,0 "center"'
If we put those two options together, we can create text that looks a bit
different.
% magick -size 200x200 canvas:white \
-pointsize 84 \
-gravity center -draw 'rotate 45 fill #ff0000 text 0,0 "center"' \
text-color.jpg
241
Chapter 4
Installing Commands Using Brew
If we use two draw commands, we can create a shadow effect with
the text.
% magick -size 200x200 canvas:white \
-pointsize 84 \
-gravity center -draw 'rotate 45 fill #000000 text 5,5 "center"' \
-gravity center -draw 'rotate 45 fill #ff0000 text 0,0 "center"' \
text-color.jpg
Another option is to change the stroke of the text. You can change the
color with stroke and the size with stroke-width.
% magick -size 200x200 canvas:white \
-pointsize 84 \
-gravity center -draw 'rotate 45 fill #000000 text 5,5 "center"' \
-gravity center -draw 'rotate 45 fill #fff stroke #000 strokewidth 1 text 0,0 "center"' \
text-color.jpg
242
Chapter 4
Installing Commands Using Brew
You can also draw primitive shapes, such as points, rectangles, circles,
arcs, eclipses, and lines. When drawing shapes, you will need to visualize a
grid over the image, starting from the top-left corner.
Drawing a shape is similar to the way we wrote text on the image
earlier. However, we need to provide two coordinates for the line—the start
position and the end position.
-draw 'fill #000 line x1,y1 x2,y2'
Let’s use this and draw two lines across the image.
% magick -size 200x200 canvas:white \
-draw 'fill blue line 10,150 180,20' \
-draw 'fill black line 30,50 110,180' \
line.jpg
243
Chapter 4
Installing Commands Using Brew
Grid
We can take this even further. It might be helpful to have a grid to help us
visualize the positions for the other primitives.
% magick -size 198x198 canvas:white \
-bordercolor "rgb(0,0,0)" -border 1 \
-draw 'fill black line 20,0 20,200' \
-draw 'fill black line 40,0 40,200' \
-draw 'fill black line 60,0 60,200' \
-draw 'fill black line 80,0 80,200' \
-draw 'fill black line 100,0 100,200'
-draw 'fill black line 120,0 120,200'
-draw 'fill black line 140,0 140,200'
-draw 'fill black line 160,0 160,200'
-draw 'fill black line 180,0 180,200'
-draw 'fill black line 0,20 200,20' \
-draw 'fill black line 0,40 200,40' \
-draw 'fill black line 0,60 200,60' \
-draw 'fill black line 0,80 200,80' \
-draw 'fill black line 0,100 200,100'
-draw 'fill black line 0,120 200,120'
-draw 'fill black line 0,140 200,140'
-draw 'fill black line 0,160 200,160'
-draw 'fill black line 0,180 200,180'
grid.jpg
244
\
\
\
\
\
\
\
\
\
\
Chapter 4
Installing Commands Using Brew
Note The border is added to the size of the image. If you have
a canvas that is 200x200 pixels in size, with a 1 -pixel border, the
resulting image will be 202x202 pixels. That is why we specified the
canvas as 198x198.
Combining Images
We should use the grid we’ve created to double-check that the primitives
are drawn where we think they should be. A simple example would be to
draw a red square with the four lines.
% magick -size 200x200 canvas:white -gravity center \
-draw 'image over 0,0 0,0 "grid.jpg"' \
-draw 'fill red line 20,20 60,20' \
-draw 'fill red line 60,20 60,60' \
-draw 'fill red line 60,60 20,60' \
-draw 'fill red line 20,60 20,20' \
combined-line.jpg
245
Chapter 4
Installing Commands Using Brew
Note I’ve used fill, but you can use stroke if you want to make
the line thicker. You cannot use fill and stroke at the same time
when drawing a line.
Here’s an example of draw using stroke:
-draw 'stroke #000 stroke-width 2 line x1,y1 x2,y2'
Rectangles
It’s possible to simplify this process, by using the rectangle primitive.
-draw 'stroke #000 stroke-width 2 line x1,y1 x2,y2'
Just as when you’re drawing a line, rectangle takes two sets of
coordinates—the top-left corner and the bottom-right corner. However,
you can specify both fill and stroke, depending on whether you want to
fill in the rectangle.
% magick -size 200x200 canvas:white -gravity center \
-draw 'image over 0,0 0,0 "grid.jpg"' \
-draw 'fill none stroke red rectangle 20,20 60,60' \
-draw 'fill red stroke red rectangle 80,80 120,120' \
combined-rectangle.jpg
246
Chapter 4
Installing Commands Using Brew
Rectangles are great, but rounded rectangles are better. The
parameters are the same as the rectangle, but with additional x,y
coordinates to control the roundedness of the rectangle.
% magick -size 200x200 canvas:white -gravity center \
-draw 'image over 0,0 0,0 "grid.jpg"' \
-draw 'fill white stroke red roundrectangle 40,40 160,160 5,5' \
combined-round-rectangle.jpg
247
Chapter 4
Installing Commands Using Brew
Arc
The arc is an interesting shape. You can use it to draw a circle or a
semicircle. When you draw an arc, you specify three sets of parameters—
the top-left corner, the bottom-right corner, and the start and stop degrees.
You will specify a rectangle that the arc will be drawn in.
-draw 'stroke #000 stroke-width 2 arc x1,y1 x2,y2 d1,d2'
The degree 0 starts at the 3 o’clock position. If you want to draw a circle,
you would specify the degrees as 0,360. Here are examples of arcs with
different start and stop degrees.
% magick -size 200x200 canvas:white -gravity center \
-draw 'image over 0,0 0,0 "grid.jpg"' \
-draw 'stroke black fill red arc 0,0 100,100 0,360' \
-draw 'stroke black fill blue arc 100,100 200,200 180,0' \
-draw 'stroke black fill green arc 0,100 100,200 0,180' \
-draw 'stroke black fill yellow arc 100,0 200,100 0,270' \
combined-arc-selection.jpg
Note Notice that the background fill is only in the area between the
start and end points.
248
Chapter 4
Installing Commands Using Brew
Here is an example showing you how you might use the different types
of arc.
% magick -size 200x200 canvas:skyblue -gravity center \
-draw 'fill yellow arc 170,10 190,30 0,360' \
-draw 'fill #ff0000 arc 40,120 160,240 180,0' \
-draw 'fill #ffa500 arc 50,130 150,230 180,0' \
-draw 'fill #ffff00 arc 60,140 140,220 180,0' \
-draw 'fill #008000 arc 70,150 130,210 180,0' \
-draw 'fill #0000ff arc 80,160 120,200 180,0' \
-draw 'fill #4b0082 arc 90,170 110,190 180,0' \
-draw 'fill green rectangle 0,180 200,200' \
combined-arc.jpg
Note When specifying x1,y1 x2,y2, you need to treat the arc as
a whole circle. This is why some coordinates of the rainbow’s arcs
are greater than 200, even though it doesn’t actually overhang the
picture.
249
Chapter 4
Installing Commands Using Brew
Circles
Drawing circles is similar to drawing rectangles, but the difference is you
specify the center point and then specify where the edge is.
% magick -size 200x200 canvas:white -gravity center \
-draw 'image over 0,0 0,0 "grid.jpg"' \
-draw 'stroke black fill red circle 50,50 20,20' \
-draw 'stroke black fill blue circle 160,160 140,140' \
-draw 'stroke black fill green circle 50,150 50,100' \
-draw 'stroke black fill yellow circle 150,50 200,10' \
combined-circle-selection.jpg
Ellipses
Ellipses are drawn in a similar way to the circle and the arc. Like the circle,
you specify the center point, but this time, the second parameters are the
size of the primitive. The third parameter is exactly the same as the arc; you
specify the start and stop degrees.
We still cannot create a pie segment using the ellipse, but we can fake it
by using a semicircle.
250
Chapter 4
Installing Commands Using Brew
% magick -size 200x200 canvas:white -gravity center \
-gravity center -pointsize 18 -draw 'fill #000000 text 0,-70
"Pie that has been eaten"' \
-draw 'stroke black fill grey ellipse 80,120 60,60 0,360' \
-draw 'stroke black fill yellow ellipse 80,120 60,60 45,225' \
-draw 'stroke black fill yellow ellipse 80,120 60,60 180,0' \
combined-pie.jpg
Polygon
The last primitive I want to talk about is the polygon. This is like a line that
will allow you to draw arbitrary shapes that are filled in.
% magick -size 200x200 canvas:white -gravity center \
-draw 'stroke black fill red polygon 20,20 120,20 120,120 20,120' \
-draw 'stroke black fill red polygon 190,190 100,190 190,100' \
polygon.jpg
251
Chapter 4
Installing Commands Using Brew
In this next example, I’ve used the polygon to draw the bowtie and
used different primitives to create the whole face.
% magick -size 200x200 canvas:white -gravity center \
-draw 'image over 0,0 0,0 "grid.jpg"' \
-draw 'stroke black fill red polygon 40,120 160,180 160,120 40,180' \
-draw 'stroke black fill red circle 100,150 110,160' \
-draw 'stroke black fill lightgrey ellipse 100,70 50,60 0,360' \
-draw 'stroke black fill none ellipse 100,70 30,40 0,180' \
-draw 'stroke black fill grey ellipse 100,70 10,10 0,360' \
-draw 'stroke black fill white ellipse 80,40 10,10 0,360' \
-draw 'stroke black fill black ellipse 80,45 5,5 0,360' \
-draw 'stroke black fill white ellipse 120,40 10,10 0,360' \
-draw 'stroke black fill black ellipse 120,45 5,5 0,360' \
face.jpg
252
Chapter 4
Installing Commands Using Brew
What could you design with ImageMagick? There is so much to
ImageMagick that it would take a whole book to cover. For more information,
I recommend visiting their website at https://imagemagick.org for more
examples.
f fmpeg
ffmpeg is a video and audio converter. You can use ffmpeg to combine
video and audio files, as well as extract the audio. Let’s install it.
% brew install ffmpeg
==> Installing ffmpeg
==> Downloading https://homebrew.bintray.com/bottles/
ffmpeg-4.2.1_2.catalina.bottle.tar.gz
==> Downloading from https://akamai.bintray.com/11/11b16a8f9657
e0826774d41133052b088f778a50f6f8037f641923cbb6b90335?__gda__=ex
p=1577561224~hmac=e130dd97313fa7
######################################################## 100.0%
==> Pouring ffmpeg-4.2.1_2.catalina.bottle.tar.gz
🍺 /usr/local/Cellar/ffmpeg/4.2.1_2: 287 files, 56.6MB
253
Chapter 4
Installing Commands Using Brew
Converting a video to a different format can be as simple as this.
% ffmpeg -i input.mp4 output.avi
However, what we really need are some video files to test this out.
Another trick that ffmpeg has is that it can also record from macOS input
devices. You can see which devices ffmpeg can capture from by using
-list_devices:
% ffmpeg -hide_banner -f avfoundation -list_devices true -i ""
[AVFoundation input device @ 0x7f927bd26740] AVFoundation video
devices:
[AVFoundation input device @ 0x7f927bd26740] [0] FaceTime HD
Camera (Built-in)
[AVFoundation input device @ 0x7f927bd26740] [1] Capture screen 0
[AVFoundation input device @ 0x7f927bd26740] AVFoundation audio
devices:
[AVFoundation input device @ 0x7f927bd26740] [0] MacBook Pro
Microphone
: Input/output error
Note -hide_banner hides the copyright notice and compiler
options. -f is the format and -i is the input, which isn’t needed to
list devices, but still needs to be specified.
You should have at least these items in your list. There might be more,
depending on whether you have any webcams, microphones, or extra
screens attached.
254
Chapter 4
Installing Commands Using Brew
S
ecurity
The first time you try to access a privileged service from any application,
you will be prompted to allow it. In this case, the application will be
Terminal, rather than the command you are trying to run. See Figure 4-5.
Figure 4-5. Prompt to allow Terminal to access your camera
You will also see a similar prompt for the microphone, as shown in
Figure 4-6.
Figure 4-6. Prompt to allow Terminal to access your
microphone
If for some reason, you accidentally clicked Don’t Allow or the prompt
didn’t appear, you can give Terminal permission in the Security & Privacy
tab in System Preferences. Make sure Terminal has a tick next to it, as
shown in Figure 4-7.
255
Chapter 4
Installing Commands Using Brew
Figure 4-7. Go to Security & Privacy in the System Preferences to
allow access
Capturing from a Webcam
When you capture from some devices, they can output in different
resolutions. You will need to tell ffmpeg what resolution and frame rate you
want. By entering this command, we are selecting the webcam (-i "0")
and ffmpeg will list all the different resolutions and frame rates for it.
% ffmpeg -hide_banner -f avfoundation -i "0"
[avfoundation @ 0x7fc37b008a00] Selected framerate (29.970030)
is not supported by the device.
256
Chapter 4
Installing Commands Using Brew
[avfoundation @ 0x7fc37b008a00] Supported modes:
[avfoundation @ 0x7fc37b008a00] 640x480@[30.000030
[avfoundation @ 0x7fc37b008a00] 640x480@[29.000049
[avfoundation @ 0x7f9cb5009c00] 1280x720@[30.000030
[avfoundation @ 0x7f9cb5009c00] 1280x720@[29.000049
30.000030]fps
29.000049]fps
30.000030]fps
29.000049]fps
When you have decided which settings you will use, you can proceed.
Note If you can’t decide, keep this in mind—the bigger the
numbers, the better the quality, but the bigger the file size.
The last option I’m providing to ffmpeg is the output file, out.mov.
% ffmpeg -hide_banner -f avfoundation -video_size "1280x720"
-framerate "30.000030" -i "0" out.mov
[avfoundation @ 0x7fd9b6009c00] Selected pixel format (yuv420p)
is not supported by the input device.
[avfoundation @ 0x7fd9b6009c00] Supported pixel formats:
[avfoundation @ 0x7fd9b6009c00] uyvy422
[avfoundation @ 0x7fd9b6009c00] yuyv422
[avfoundation @ 0x7fd9b6009c00] nv12
[avfoundation @ 0x7fd9b6009c00] 0rgb
[avfoundation @ 0x7fd9b6009c00] bgr0
[avfoundation @ 0x7fd9b6009c00] Overriding selected pixel
format to use uyvy422 instead.
Input #0, avfoundation, from '0':
Duration: N/A, start: 8518.378600, bitrate: N/A
Stream #0:0: Video: rawvideo (UYVY / 0x59565955), uyvy422,
1280x720, 30 tbr, 1000k tbn, 1000k tbc
Stream mapping:
Stream #0:0 -> #0:0 (rawvideo (native) -> h264 (libx264))
Press [q] to stop, [?] for help
257
Chapter 4
Installing Commands Using Brew
Ffmpeg will now be recording until you press the 'q' key.
If ffmpeg seems to hang, double check that it has security
permissions.
Let’s open the file and see what we have; see Figure 4-8.
% open out.mov
Figure 4-8. Oh no, the video file doesn’t work with QuickTime
Note It is possible to play this file with an alternative video player,
such as VLC, but you’d have problems if you wanted it to run in
programs like iMovie.
The problem comes down to the pixel format. Did you notice this in
the previous output?
[avfoundation @ 0x7fd9b6009c00] Selected pixel format (yuv420p)
is not supported by the input device.
[avfoundation @ 0x7fd9b6009c00] Supported pixel formats:
[avfoundation @ 0x7fd9b6009c00] uyvy422
[avfoundation @ 0x7fd9b6009c00] yuyv422
[avfoundation @ 0x7fd9b6009c00] nv12
[avfoundation @ 0x7fd9b6009c00] 0rgb
258
Chapter 4
Installing Commands Using Brew
[avfoundation @ 0x7fd9b6009c00] bgr0
[avfoundation @ 0x7fd9b6009c00] Overriding selected pixel
format to use uyvy422 instead.
The pixel format allows QuickTime to play the video. The pixel format
uyvy422 didn’t work. Having tried them all, I can say that yuyv422 also
doesn’t work. The 0rgb and bgr0 formats ended up having problems as
well. So much so, that I had to use kill on ffmpeg. That leaves us with the
nv12 pixel format.
As it happens, it works perfectly.
You specify the pixel format using -pixel_format, as follows:
% ffmpeg -hide_banner -f avfoundation -video_size "1280x720"
-framerate "30.000030" -pixel_format nv12 -i "0" out.mov
Display Capture
You can also capture everything that is displayed on your screen. The
command we will use is very similar to capturing on the webcam. We don’t
need to provide the video size or the frame rate, as the computer knows
these already. Otherwise, you wouldn’t have a picture on your display.
Your display is able to be read much quicker than a webcam, and that
poses a problem. We need to tell ffmpeg to ignore the extra frames coming
from the display, and only take what is needed to be written. This is done
by using -vsync vfr.
% ffmpeg -hide_banner -f avfoundation -pixel_format nv12 -i "1"
-vsync vfr display.mov
You will get a lot of output from this command and ffmpeg will
keep running until you tell it to stop. You can stop ffmpeg by pressing
Control+C. Ffmpeg will output some statistics about the video captured
and then exit.
259
Chapter 4
Installing Commands Using Brew
frame= 233 fps= 30 q=29.0 size= 512kB time=00:00:05.86 bitrate=
715.0kbits/s speed=0.755x
Finally, ffmpeg will output the following:
Exiting normally, received signal 2.
You will have a file in your current directory called display.mov, which
you should have no trouble previewing with QuickLook.
Audio
So far, all our videos have not included audio. Let’s capture some audio
from the internal microphone. If you have a higher quality microphone,
you can use that instead.
Grabbing audio is actually much easier than grabbing the video. The
difference is, when we use –i, we need to specify the audio device, and not
the video device. The -i option is <video>:<audio>. We previously didn’t
have to specify the colon, because it assumed the default of none.
% ffmpeg -f avfoundation -i ":0" audio.mp3
Combining Audio and Video
At capture time, combining audio and video is simple by specifying -i 1:0.
% ffmpeg -hide_banner -f avfoundation -pixel_format nv12 -i 1:0
-vsync vfr display-audio.mov
However, you should have a few files from previous attempts that you
can combine. This can be achieved by specifying more than one -i option.
% ffmpeg -i display.mov -i audio.mp3 combined.mov
260
Chapter 4
Installing Commands Using Brew
Stripping Audio or Video
Stripping the video from a file can be useful if you are producing a video,
but you also want the audio in a podcast. If you want ffmpeg to drop the
video of a file, you can use the -vn option.
% ffmpeg -i combined.mov -yn combined-video.mov
If you want ffmpeg to drop the audio of a file, you can use the -an option.
% ffmpeg -i combined.mov -an combined-audio.mp3
Converting Between Formats
So far, we’ve only used MP3 and MOV file formats. However, there are
loads of different formats available.
% ffmpeg -hide_banner -formats
File formats:
D. = Demuxing supported
.E = Muxing supported
-D 3dostr 3DO STR
This list is far too long to display here. Let’s limit the formats to the
ones we’re interested in.
% ffmpeg -hide_banner -formats | grep -E " (mp4|mp3|mov|aiff)"
DE aiff Audio IFF
E mov QuickTime / MOV
D mov,mp4,m4a,3gp,3g2,mj2 QuickTime / MOV
DE mp3 MP3 (MPEG audio layer 3)
E mp4 MP4 (MPEG-4 Part 14)
261
Chapter 4
Installing Commands Using Brew
Note You can think of “muxing” as encoding and “demuxing” as
decoding.
Previously, we used the say command to save computer -generated
speech to an AIFF file.
% say "I like talking" -o ~/talking.aiff
We can use ffmpeg to convert talking.aiff into an MP3 file.
% ffmpeg -i ~/talking.aiff talking.mp3
ffmpeg will use the file extension you specify for the output file and
that extension will be used to determine the output file format. This can
also be used to convert video files. For example, you can convert a .mov file
into the MP4 file format.
% ffmpeg -i combined.mov combined.mp4
Combining Multiple Videos
Using ffmpeg, we can combine our webcam and our display capture into a
single video. This is useful for creating a talking head video, where you can
see whatever video is being presented and the instructor’s video is in the
bottom corner, as shown in Figure 4-9.
262
Chapter 4
Installing Commands Using Brew
Figure 4-9. Example of a talking head video
I’m going to use the backslash to split this command across multiple
lines, in the hopes that it will be easier to read. This command reuses the
options from the webcam and the display capture sections, which you
can see on Lines 2 and 3. Line 4 specifies how the video files should be
combined.
% ffmpeg \
-f avfoundation -pixel_format nv12 -vsync vfr -i "1" \
-f avfoundation -video_size "640x480" -framerate "30.000030"
-pixel_format nv12 -i "0:0" \
-filter_complex "[0:v][1:v] overlay=50:50" \
talkinghead.mp4
<talking head picture>
When I run that command, I get a talking head video, but there are
issues. The video for both the webcam and display are very jumpy. And
there was this message:
263
Chapter 4
Installing Commands Using Brew
Thread message queue blocking; consider raising the thread_
queue_size option (current value: 8)
You should also see, while the video is recording, an fps indicator. This
is how many frames per second ffmpeg is able to process. If this is less than
the output frame rate, you will experience jumpy video.
fps=9.8
This is three times slower than the output video rate of 30 fps and
explains the poor quality video. The reason for this is because we are
asking ffmpeg to do a lot of processing, but it only has so many resources
(threads) that are available to process the incoming data.
We can do what the warning message suggested and increase the value
of thread_queue_size. This is set on the incoming stream, so we need to
specify it twice, once for each input.
% ffmpeg -f avfoundation -thread_queue_size 256 -pixel_format
nv12 -vsync vfr -i "1" \
-f avfoundation -thread_queue_size 128 -video_size "640x480"
-framerate "30.000030" -pixel_format nv12 -i "0:0" \
-filter_complex "[0:v][1:v] overlay=50:50" \
talkinghead.mp4
You may be wondering where I got the values 256 and 128 from. They
came from trial and error and watching the fps value each time. The
display capture is working with more information, and so got a bigger
number.
The filter_complex option tells ffmpeg how to combine the two
videos. The values 50:50 specify the start position for the overlay video
from the top-left corner (specified as left:top).
If you want to use the bottom-right corner, you will need to do some
basic math, using your display resolution. Let’s use my display as an
example.
264
Chapter 4
Installing Commands Using Brew
Stream #0:0: Video: rawvideo (NV12 / 0x3231564E), nv12,
2880x1800, 1000k tbr, 1000k tbn, 1000k tbc
The display resolution is 2880x1800 and we are capturing from the
webcam at 640x480. We will also want the same 50-pixel padding from the
edge of the screen.
Top value = screen height - webcam height - padding
1270 = 1800 - 480 - 50
Left value = screen width - webcam width - padding
2190 = 2880-640-50
When we take those values and plug them into the previous command
as overlay=2190:1270, we get the following:
% ffmpeg -f avfoundation -thread_queue_size 256 -pixel_format
nv12 -vsync vfr -i "1" \
-f avfoundation -thread_queue_size 128 -video_size "640x480"
-framerate "30.000030" -pixel_format nv12 -i "0:0" \
-filter_complex "[0:v][1:v] overlay=2190:1270" \
talkinghead.mp4
Subtitles
Another converter that is built into ffmpeg is subtitle converting. If you
produce a video with audio and upload it to a video sharing service,
sometimes they will provide subtitles for your video. However, those
subtitles might not be compatible with programs that you use to edit them.
You can use ffmpeg to convert between the subtitle formats. It will
allow you to edit the subtitles in an application of your choosing.
% ffmpeg -i sub.srt subs.vtt
I personally use this when I’m working on subtitles in Camtasia, and I
need to upload them to Udemy.
265
Chapter 4
Installing Commands Using Brew
Advanced Brew Concepts
We talked about the basics of using Brew in Chapter 1. Now we can look at
two more advanced ideas, Brew casks and Brew services.
B
rew Casks
Casks can be used to install paid and open source applications alike.
% brew cask
Homebrew Cask provides a friendly CLI workflow for the administration
of macOS applications distributed as binaries.
See also "man brew-cask"
By default, you won’t have any casks installed.
% brew cask list
An application that I use a lot for vector work is Inkscape. Normally
I download it directly from the website, but it would be handy if I used
a cask to install it. Then at a later date, Brew can be used to update all
installed casks.
S
earching Casks
% brew search inkscape
==> Casks
inkscape ✔
If you meant "inkscape" specifically:
It was migrated from homebrew/core to homebrew/cask.
You can access it again by running:
brew tap homebrew/cask
And then you can install it by running:
brew cask install inkscape
266
Chapter 4
Installing Commands Using Brew
Brew has found Inkscape. If Brew lists Inkscape as homebrew/cask/
inkscape then homebrew/cask is untapped. This isn’t a problem, because
the moment you try to install Inkscape, Brew will tap homebrew/cask for you.
% brew cask install inkscape
==> Downloading https://media.inkscape.org/dl/resources/file/
Inkscape-1.0beta2.dmg
######################################################## 100.0%
==> Verifying SHA-256 checksum for Cask 'inkscape'.
==> Installing Cask inkscape
==> Moving App 'Inkscape.app' to '/Applications/Inkscape.app'.
==> Linking Binary 'inkscape.wrapper.sh' to '/usr/local/bin/
inkscape'.
🍺 inkscape was successfully installed!
Applications in casks are not limited to open source programs. For
example, you can install apps from Google.
% brew search google
==> Formulae
aws-google-auth google-go google-sql-tool
google-authenticator-libpam google-java-format googler
google-benchmark google-sparsehash
==> Casks
google-ads-editor google-notifier
google-backup-and-sync google-photos-backup-and-sync
google-chat google-trends
google-chrome google-web-designer
google-cloud-sdk
If searching isn’t inspiring enough, you can search online at
https://formulae.brew.sh/cask/.
267
Chapter 4
Installing Commands Using Brew
Updating Casks
If you want to see which cask is not running the latest version, you can use
the outdated command.
% brew cask outdated
If nothing is returned, then everything is up to date. Normally, I just
prefer to keep everything up to date, so I run the upgrade command
periodically.
% brew cask upgrade
Updating Homebrew...
==> Auto-updated Homebrew!
Updated 1 tap (homebrew/core).
==> Updated Formulae
numpy@1.16
==> No Casks to upgrade
In the future, if you didn’t use cask for applications and you moved to
another machine, you would need to download all the apps again. With
cask, you can get a list of all the installed casks, which can be used to install
them on the other machine.
% brew cask list
inkscape
If you combine this with the sed command, you could make it even
easier for yourself.
% brew cask list | sed -E -e 's/^/brew cask install /'
brew cask install inkscape
268
Chapter 4
Installing Commands Using Brew
B
rew Services
Brew has the ability to manage background tasks. This is something that
we will need to use in Chapter 7. This will probably be the first time you
have used Brew services. If so, Brew will have to install Brew services first.
% brew services
==> Tapping homebrew/services
Cloning into '/usr/local/Homebrew/Library/Taps/homebrew/
homebrew-services'...
remote: Enumerating objects: 24, done.
remote: Counting objects: 100% (24/24), done.
remote: Compressing objects: 100% (18/18), done.
remote: Total 24 (delta 0), reused 16 (delta 0), pack-reused 0
Unpacking objects: 100% (24/24), 11.43 KiB | 688.00 KiB/s, done.
Tapped 1 command (62 files, 66.8KB).
Usage: brew services subcommand:
Manage background services with macOS' launchctl(1) daemon manager
When Brew has finished installing services, you will be able to get the
full help by using --help.
% brew services --help
If you already had Brew services installed, it will just display a list of
available services.
L isting Services
Brew services has a few subcommands, or verbs. The first verb for services
is list, which is the default if none is specified.
% brew services list
Name Status User Plist
269
Chapter 4
Installing Commands Using Brew
As we install the commands that support services, they will appear in
this list, as stopped. The list shows you which services are running, and
which have been stopped.
At the moment we don’t have any services to show, so let’s install a
DNS resolver. This command will be installed as a dependency later, so
there is no harm in installing it now.
% brew install unbound
==> Installing unbound
==> Pouring unbound-1.10.1.catalina.bottle.tar.gz
==> Caveats
To have launchd start unbound now and restart at startup:
sudo brew services start unbound
==> Summary
🍺 /usr/local/Cellar/unbound/1.10.1: 57 files, 5MB
Now when we list the services, we see the unbound service appear.
% brew services list
Name Status User Plist
unbound stopped
Descriptions of these columns are listed in Table 4-2.
Table 4-2. Brew Services Columns
Heading Description
Name
Service name
Status
Service state, e.g., started, stopped
User
Whoever the service is running as; has the same permissions as that user
Plist
Contains the path to a file that defines how to start this service; you
shouldn’t need to edit this
270
Chapter 4
Installing Commands Using Brew
Note The User and Plist columns won’t have anything in them until
the service has been started.
The trouble with Brew services is that if the service crashes, then Brew
will still show that it is running.
Starting Services
To start a service as your user, you simply use the start command and the
service name:
% brew services start unbound
Warning: unbound must be run as root to start at system startup!
==> Successfully started `unbound` (label: homebrew.mxcl.unbound)
Note unbound is designed to be run as root, but it won’t cause any
harm running it as your user.
Now when you look at the service list again, you can see that the User
and Plist columns have been populated.
% brew services list
Name Status User Plist
unbound started danielplatt /Users/danielplatt/Library/
LaunchAgents/homebrew.mxcl.unbound.plist
Stopping Services
If you no longer want a service to run, you can stop it.
% brew services stop unbound
Stopping `unbound`... (might take a while)
271
Chapter 4
Installing Commands Using Brew
This is useful if you are upgrading to a new major version of any
applications, where you can have both versions installed at once.
R
estarting Services
Occasionally, you will need to restart a service because you’ve changed its
configuration. We will go through this later in the chapter.
% brew services restart unbound
Stopping `unbound`... (might take a while)
==> Successfully stopped `unbound` (label: homebrew.mxcl.unbound)
==> Successfully started `unbound` (label: homebrew.mxcl.unbound)
The services verb restart is just a shortcut for stop and start.
S
udo
Sometimes you will need to run a command as root, to give it a lot more
permissions than your user currently has. An example of this is a web
server. n the Internet, the standard port for a web browser serving HTTP
content is port 80. With UNIX, and thus macOS, a port number that is less
than 1024 is considered privileged. The way around this is to start the web
server as root.
To run Brew services as root, you need to prefix sudo to the command.
% sudo brew services start <service>
If you start a service with sudo and then to stop it, you must also use
sudo. If you don’t use sudo to stop the service, you won’t have permission
to stop it. We talked more about sudo in Chapter 2.
U
tilities
This section covers various utilities that you might find handy to use on the
macOS Terminal.
272
Chapter 4
Installing Commands Using Brew
The archey Utility
Another command I like is archey.
% brew install archey
archey shows a very simple splash screen, with a retro Apple logo. It
tells you information about your computer and who you are logged in as,
the hostname, your uptime, and various other information. See Figure 4-10.
Again, this might not be useful for you, but it could be useful at work,
or for a user with a laptop. If you want to know your external IP address,
this command is helpful.
Figure 4-10. archey tells you information about your computer
I like to put archey in my .zshrc file so that it’s displayed every time
I open Terminal.
273
Chapter 4
Installing Commands Using Brew
Linux Utilities for macOS
A lot of the commands that come with macOS are from BSD. These same
commands also have a Linux equivalent. Typically, the Linux command
equivalents will support a lot more arguments, and those arguments tend
to be more readable.
For example, tail on the macOS takes -n to specify the number of
lines to output. The Linux equivalent takes -n, but also includes --lines.
You can install these extra commands as part of coreutils.
% brew install coreutils
==> Caveats
Commands also provided by macOS have been installed with the
prefix "g".
If you need to use these commands with their normal names, you
can add a "gnubin" directory to your PATH from your bashrc like:
PATH="/usr/local/opt/coreutils/libexec/gnubin:$PATH"
These commands are installed in /usr/local/opt/coreutils/
libexec/gnubin.
% ls /usr/local/opt/coreutils/libexec/gnubin
[ dirname mkdir rmdir timeout
b2sum du mkfifo runcon touch
base32 echo mknod seq tr
base64 env mktemp sha1sum true
basename expand mv sha224sum truncate
basenc expr nice sha256sum tsort
cat factor nl sha384sum tty
chcon false nohup sha512sum uname
chgrp fmt nproc shred unexpand
chmod fold numfmt shuf uniq
274
Chapter 4
Installing Commands Using Brew
chown groups od sleep unlink
chroot head paste sort uptime
cksum hostid pathchk split users
comm id pinky stat vdir
cp install pr stdbuf wc
csplit join printenv stty who
cut kill printf sum whoami
date link ptx sync yes
dd ln pwd tac
df logname readlink tail
dir ls realpath tee
dircolors md5sum rm test
It might seem redundant to install the Linux versions of the same
commands; however, there is a good reason to do so. At first glance, this
collection of utilities might seem redundant. Let’s consider the head
command.
% head --help
head: illegal option -- usage: head [-n lines | -c bytes] [file ...]
As far as I can tell, there is no way to get BSD head to output the usage
cleanly. Now we can try the same thing with the Linux version.
% /usr/local/opt/coreutils/libexec/gnubin/head --help
Print the first 10 lines of each FILE to standard output.
With more than one FILE, precede each with a header giving the
file name.
With no FILE, or when FILE is -, read standard input.
275
Chapter 4
Installing Commands Using Brew
Mandatory arguments to long options are mandatory for short
options too.
-c, --bytes=[-]NUM print the first NUM bytes of each file;
with the leading '-', print all but
the last
NUM bytes of each file
-n, --lines=[-]NUM
print the first NUM lines instead of
the first 10;
with the leading '-', print all but
the last
NUM lines of each file
-q, --quiet, --silent
never print headers giving file names
-v, --verbose
always print headers giving file names
-z, --zero-terminated line delimiter is NUL, not newline
--help display this help and exit
--version output version information and exit
NUM may have a multiplier suffix:
b 512, kB 1000, K 1024, MB 1000*1000, M 1024*1024,
GB 1000*1000*1000, G 1024*1024*1024, and so on for T, P, E, Z, Y.
Binary prefixes can be used, too: KiB=K, MiB=M, and so on.
GNU coreutils online help: <https://www.gnu.org/software/
coreutils/>
Full documentation <https://www.gnu.org/software/coreutils/
head>
or available locally via: info '(coreutils) head invocation'
We get a much richer experience. We have better usage information.
The options are more descriptive. Instead of using -n, we can use --lines,
which, when you read it, will help you instantly understand the value.
Ultimately, it will come down to preference. I do a lot of work on Linux-
based servers, so it makes sense for me to install the Linux tools.
276
Chapter 4
Installing Commands Using Brew
Assuming that you want to use the Linux versions, I’ll presume that
you won’t want to continually refer to them by the full path. There was a
message about this when we installed them.
Commands also provided by macOS have been installed with the
prefix "g".
If you need to use these commands with their normal names, you
can add a "gnubin" directory to your PATH from your bashrc like:
PATH="/usr/local/opt/coreutils/libexec/gnubin:$PATH"
You can either refer to the commands with a g in front of them, such as
ghead, or you can override the path. If you’re happy with the g prefix, you
need take no further action. If you want to override the existing commands,
you will need to edit your .zshrc file and paste the new path in.
If you ever want to go back to the BSD commands, you can remove this
line (or comment it out by prefixing the line with the # symbol).
The ddrescue Command
Have you ever had a disk that your computer struggled to read or read very
slowly? Maybe you kept getting errors when you tried to access files on the
disk, as shown Figure 4-11.
Figure 4-11. File copy error in the Finder when the disk goes away
277
Chapter 4
Installing Commands Using Brew
If so, your disk might be on its way out and this next command might
be able to help you recover data before it’s too late.
% ddrescue
The purpose of ddrescue is to read the contents of a disk without trying
to understand it. It will treat the drive as a single file. Although this might
not sound useful on the face of it, you can combine this with another
command, hdiutil, to mount it again.
Warning If you value your data and would be willing to spend a few
hundreds or thousands to get it back, then seek a professional data
recovery firm.
If you cannot afford to pay someone to recover your drive and you
would be forced to throw it away, then this command might help you.
Because you are going to write the contents of your drive as a file, you
will need a drive that has more free space than the total size of the drive
that needs to be recovered. This is because you won’t know what is free
until you try to mount the image.
Types of Errors
For this to work, the drive needs to be listed in diskutil list. If the drive
doesn’t show, you cannot target it with ddrescue. The types of error that
will work are the drive, software issues, or intermittent errors. It is possible
to use this to recover CDs that have holes in them.
Warning Be aware that access to the disk might cause more
damage to itself and the computer. In the case of the CD with a hole,
it might damage the CD drive or the CD might break apart.
278
Chapter 4
Installing Commands Using Brew
If the errors were caused by the hardware failing, mounting the disk
from an image will allow the computer to fix some errors.
% sudo ddrescue --retry-passes=1
GNU ddrescue 1.24
Press Ctrl-C to interrupt
Initial status (read from mapfile)
rescued: 36241 kB, tried: 983040 B, bad-sector: 0 B, bad areas: 0
Current status
ipos: 608239 kB, non-trimmed: 571964 kB, current
opos: 608239 kB, non-scraped: 0 B, average
non-tried: 0 B, bad-sector: 512 B, error
rescued: 36274 kB, bad areas: 1, run
pct rescued: 0.00%, read errors: 8714, remaining
time since last successful
Trimming failed blocks... (forward)
rate: 0 B/s
rate: 0 B/s
rate: 0 B/s
time: 13h 13m 14s
time: n/a
read: 0s
When you recover any drive, you will need to have enough free disk
space on your target drive to store the entire image. This won’t be an issue
with a CD, but it might be if you attempt this on a 1TB drive.
I used this technique to recover a TB hard drive that would read very
slowly and would intermittently stop working. It took many weeks, but I
recovered 100% of the drive.
The asciinema Command
You might sometimes need to record your Terminal session. The
asciinema command is used for recording and playing back Terminal
sessions. It’s even possible to use asciinema to upload your sessions to a
website for everyone to enjoy.
% brew install asciinema
279
Chapter 4
Installing Commands Using Brew
Let’s look at the help.
% asciinema --help
usage: asciinema [-h] [--version] {rec,play,cat,upload,auth}
...
Record and share your Terminal sessions, the right way.
positional arguments:
{rec,play,cat,upload,auth}
rec Record terminal session
play Replay terminal session
cat Print full output of terminal session
upload Upload locally saved terminal session to
asciinema.org
auth Manage recordings on asciinema.org account
There are also some basic examples, but we’ll go through them now
instead. Now we will discuss each asciinema command in turn.
rec
The simplest way to use asciinema rec is to enter it without any additional
arguments; it will save the recording locally. When you are finished, you
then can upload it or save it locally.
% asciinema rec
asciinema: recording asciicast to /var/folders/5z/
tnwhfkg57hdfys5fxckr07_h0000gn/T/tmpbrrhs1gt-ascii.cast
asciinema: press <ctrl-d> or type "exit" when you're done
danielplatt@MacBook-Pro ~ % echo "This is my recording"
"This is my recording"
% exit
asciinema: recording finished
280
Chapter 4
Installing Commands Using Brew
asciinema: press <enter> to upload to asciinema.org, <ctrl-c>
to save locally
asciinema: asciicast saved to /var/folders/5z/
tnwhfkg57hdfys5fxckr07_h0000gn/T/tmpbrrhs1gt-ascii.cast
I recommend moving the file to somewhere safe. If you choose to
upload it, you will be given a link to view it, but also to claim it and all
future recordings on your computer.
Alternatively, you can specify the file to save to as part of the
command-line arguments.
% asciinema rec ~/recording.cast
asciinema: recording asciicast to /Users/danielplatt/recording.cast
asciinema: press <ctrl-d> or type "exit" when you're done
danielplatt@MacBook-Pro ~ %
asciinema: recording finished
asciinema: asciicast saved to /Users/danielplatt/recording.cast
One option I recommend is -i, which limits the idle time. For example,
if you started recording and got distracted, only to return to it later,
asciinema will have recorded all that time in the playback. Usually this is
not required. The -i option will limit the idle time to the specified number
of seconds.
% asciinema rec -i 2
This command will limit the idle time to two seconds.
play
The play command is great for rewatching items that you recorded.
% asciinema play ~/recording.cast
281
Chapter 4
Installing Commands Using Brew
The play command can also play casts that are hosted on asciinema.org.
% asciinema play https://asciinema.org/a/17648
bash-3.2$ # I am in a new shell instance which is being
recorded now
bash-3.2$ sha1sum
If you recorded a cast with the rec verb, but forgot to limit idle time,
then you are in luck. You can also limit the amount of idle time with the
play verb.
% asciinema play -i 2 https://asciinema.org/a/17648
The other thing you can do with the playback is change the speed. This
is cool, especially if you are a slow typer. The option is -s SPEED. The value
of SPEED is a number that represents how fast the playback is. Normally,
playback will have a SPEED value of 1.
If you wanted the playback to be 10 times faster, you’d use this:
% asciinema play -i 2 -s 10 https://asciinema.org/a/17648
If you wanted the playback to be 10 times slower, you’d use this:
% asciinema play -i 2 -s 0.1 https://asciinema.org/a/17648
c at
The cat verb will show you the output of your cast. It works on files and URLs.
% asciinema play https://asciinema.org/a/17648
bash-3.2$ # I am in a new shell instance which is being
recorded now
bash-3.2$ sha1sum /etc/f* | tail -n 10 | lolcat -F 0.3
da39a3ee5e6b4b0d3255bfef95601890afd80709 /etc/find.codes
88dd3ea7ffcbb910fbd1d921811817d935310b34 /etc/fstab.hd
442a5bc4174a8f4d6ef8d5ae5da9251ebb6ab455 /etc/ftpd.conf
282
Chapter 4
Installing Commands Using Brew
442a5bc4174a8f4d6ef8d5ae5da9251ebb6ab455 /etc/ftpd.conf.default
d3e5fb0c582645e60f8a13802be0c909a3f9e4d7 /etc/ftpusers
bash-3.2$ # To finish recording just exit the shell
bash-3.2$ exit
u pload
The upload verb will upload a local cast to asciinema.org. This can be
useful if you want to share your Terminal session with others. You can
choose to keep your upload private and only people with the URL will be
able to access the video.
It is possible to embed your uploaded session into your own website.
Let’s look at how it works.
% asciinema upload recording.cast
View the recording at:
https://asciinema.org/a/nrUALQkjcUXI8jj9RHunbZ99q
This is just like uploading with the rec verb, but now your recording
has been uploaded. It will look like Figure 4-12.
283
Chapter 4
Installing Commands Using Brew
Figure 4-12. Uploaded asciinema cast
When you upload to asciinema, you will be prompted to link your
account, if you haven’t already done so.
Using the auth verb will redisplay the message about linking your
computer with an asciinema account.
% asciinema auth
Open the following URL in a web browser to link your install ID with
your asciinema.org user account:
https://asciinema.org/connect/3d23e2
ff-0000-0000-0000-00000000000
284
Chapter 4
Installing Commands Using Brew
When you visit your URL, you will either need to create an account or
sign in. With an account, your cast can persist longer than seven days and
you can make them public.
A friend recently asked me if Terminal could record everything that
happened in the session, automatically. That way, they had a historical
record of everything they typed and what happened. Naturally, I thought
about asciinema to capture Terminal usage. I figured we could store the
logs in an out-of-the-way place and decided on ~/Library/Logs, which we
needed to create.
% mkdir -p ~/Library/Logs/Terminal
Knowing that we could change the speed of the playback and skip any
really long idles, I opted for a simple version of the command and did not
use the –i argument.
The big difference is that we would need to give the asciinema
command a filename based on the date and time to avoid using the file
being stored in the temporary directory or overriding an existing file.
Normally, this will be enough to stop any duplicate file issues, as you are
unlikely to open tabs faster than once per second.
However, I found a scenario where I kept getting duplicate files, even
based on the current date time. This was because on boot up, macOS
can relaunch Terminal with all the tabs open at the same time. This
causes them all to be open in the same second. Using $RANDOM is a good
workaround for that.
Another change I’ve had to make is replacing the tilde symbol (~) with
the $HOME variable. Otherwise, I was getting a Python error.
% asciinema rec "$HOME/Library/Logs/Terminal/terminal_`/bin/
date \"+%Y-%m-%d %H:%M:%S\"` $RANDOM.cast"
This works perfectly in Terminal. If you only wanted to record a single
session, you simply type the command in. If you wanted to record a few
sessions, you could make it easier by creating an alias.
285
Chapter 4
Installing Commands Using Brew
% alias ars='asciinema rec "$HOME/Library/Logs/Terminal/
terminal_`/bin/date \"+%Y-%m-%d %H:%M:%S\"` $RANDOM.cast"'
What if you wanted to record every Terminal session automatically,
without having to remember to enable it? You’re probably thinking we can
add the asciinema command to the end of the .zshrc file. You would be
right, that could be a good place for it, if it were any other command.
However, there is an issue with adding asciinema to the end of the
.zshrc file. When you run asciinema, it will start a new Zsh shell, which
in turn starts a new shell and will cause asciinema to run again. You will
end up with an infinite loop, as the computer keeps opening new copies of
asciinema.
Last login: Sat Jan 11 21:23:48 on ttys010
asciinema: press <ctrl-d> or type
asciinema: recording asciicast to
Logs/Terminal/terminal_2020-01-11
asciinema: press <ctrl-d> or type
asciinema: recording asciicast to
Logs/Terminal/terminal_2020-01-11
asciinema: press <ctrl-d> or type
asciinema: recording asciicast to
Logs/Terminal/terminal_2020-01-11
asciinema: press <ctrl-d> or type
asciinema: recording asciicast to
Logs/Terminal/terminal_2020-01-11
asciinema: press <ctrl-d> or type
^C
"exit" when you're done
/Users/danielplatt/Library/
22:19:21 29769.cast
"exit" when you're done
/Users/danielplatt/Library/
22:19:21 1797.cast
"exit" when you're done
/Users/danielplatt/Library/
22:19:21 21265.cast
"exit" when you're done
/Users/danielplatt/Library/
22:19:22 5748.cast
"exit" when you're done
We could get asciinema to use a different shell to get around this issue,
or we could take advantage of a feature of Terminal.
286
Chapter 4
Installing Commands Using Brew
In Terminal’s preferences (⌘,) is the ability to change the command
Terminal uses to open the shell. Normally this is /bin/zsh, but you can
change this to a command of your choosing. Let’s add the command into
the Shells Open With field, as shown in Figure 4-13.
Figure 4-13. Asciinema preferences, showing the asciinema
command
287
Chapter 4
Installing Commands Using Brew
Now, when we open a new Terminal window, we are greeted with this
message.
[Command not found: asciinema]
[Could not create a new process and open a pseudo-tty.]
What went wrong? The first thing I ignored was the bit about “complete
path.” We should have used /usr/local/bin/asciinema, rather than just
asciinema. However, that is just one problem with it.
If we use the full path to asciinema, we get this message.
usage: asciinema [-h] [--version] {rec,play,cat,upload,auth} ...
asciinema: error: unrecognized arguments: \"+%Y-%m-%d
%H:%M:%S\"` $RANDOM.cast"
[Process completed]
You probably could figure out a way to fix the command to make it
work, but what if you wanted to use a different command? Do you really
want to figure out why the command isn’t working on your own?
I can tell you that another reason it isn’t working is because this isn’t
the shell prompt. All the niceties of the shell, with variables, won’t work
here.
The simplest and easiest way around this problem is to put the full
command you want to run into a script and then call that script as the
login shell. That is what we’re going to do.
% nano ~/my-shell.sh
#!/bin/zsh
mkdir -p ~/Library/Logs/Terminal
/usr/local/bin/asciinema rec "$HOME/Library/Logs/Terminal/
terminal_`/bin/date \"+%Y-%m-%d %H:%M:%S\"` $RANDOM.cast"
% chmod +x ~/my-shell.sh
288
Chapter 4
Installing Commands Using Brew
We need to use the full path to the command. For me, ~/my-shell.sh
is the equivalent of /Users/danielplatt/my-shell.sh. We can confirm
this is so with the which command.
% which ~/my-shell.sh
/Users/danielplatt/my-shell.sh
Now all we need to do is add this command to the Terminal
preferences, as shown in Figure 4-14.
Figure 4-14. Asciinema preferences showing my-shell.sh command
289
Chapter 4
Installing Commands Using Brew
Now, all your Terminal sessions will be recorded. Although you might
not need all of them recorded, you might find that this comes in handy.
Formatting XML and JSON Files
I’m not sure how likely you are to come across these data formats.
However, these commands are brilliant for formatting these files so that
they are much easier to read.
The XML File Format
The XML file format is a bit like HTML. All the data is enclosed in tags.
<data>text</data>
When you have a couple of pages of data in an XML file, it can be tricky
to read it, especially if there is no whitespace (spaces, tabs, or returns) in
the file.
% cat ~/random-files-master/data/books.xml
<?xml version="1.0" encoding="UTF-8"?>
<catalog><book><id>1</id><Author>Craig Smith and Katz Cowley
</author><title>The Wonky Donkey</title><genre>Children's Fiction
Books on Animals</genre><price>4.00</price><publish_date>
2018-11-01</publish_date><description>The story about a wonky
donkey...</description></book><book><id>2</id><Author>Julia
Donaldson</author><title>The Girl, the Bear and the Magic
Shoes</title><genre>Children's Books on Fashion Crafts</genre>
<price>5.24</price><publish_date>2019-04-04</publish_date>
<description>A little girl loved running, but her old shoes
were too tight...</description></book></catalog>
290
Chapter 4
Installing Commands Using Brew
% xmllint --format ~/random-files-master/data/books.xml
<?xml version="1.0" encoding="UTF-8"?>
<catalog>
<book>
<id>1</id>
<Author>Craig Smith and Katz Cowley</author>
<title>The Wonky Donkey</title>
<genre>Children's Fiction Books on Animals</genre>
<price>4.00</price>
<publish_date>2018-11-01</publish_date>
<description>The story about a wonky donkey...
</description>
</book>
<book>
<id>2</id>
<Author>Julia Donaldson</author>
<title>The Girl, the Bear and the Magic Shoes</title>
<genre>Children's Books on Fashion Crafts</genre>
<price>5.24</price>
<publish_date>2019-04-04</publish_date>
<description>A little girl loved running, but her old shoes
were too tight...</description>
</book>
</catalog>
That is much more readable. If you want to remove the whitespace to
save space, the -nospace option will do this for you.
% xmllint --nospace ~/random-files-master/data/books.xml
291
Chapter 4
Installing Commands Using Brew
The JSON File Format
The JSON format is typically used with dynamic websites, which use a lot
of JavaScript. JSON is a data format, like XML, but instead of being based
on tags, it is based on key: value.
% cat ~/random-files-master/data/books.json
{"book":[{"id":"1","author":"Craig Smith and Katz
Cowley","title":"The Wonky Donkey","genre":"Children's
Fiction Books on Animals","price":"4.00","publish_
date":"2018-11-01","description":"The story about a wonky
donkey..."},{"id":"2","author":"Julia Donaldson","title":"The
Girl, the Bear and the Magic Shoes","genre":"Children's Books
on Fashion Crafts","price":"5.24","publish_date":"2019-0404","description":"A little girl loved running, but her old
shoes were too tight..."}]}
The command jq (JQ) is a JSON processor, which means that it can
format the JSON as well as filter it.
% brew install jq
Now that we have jq installed, we can format some JSON.
% cat ~/random-files-master/data/books.json | jq
{
"book": [
{
"id": "1",
"author": "Craig Smith and Katz Cowley",
"title": "The Wonky Donkey",
"genre": "Children's Fiction Books on Animals",
"price": "4.00",
"publish_date": "2018-11-01",
292
Chapter 4
Installing Commands Using Brew
"description": "The story about a wonky donkey..."
},
{
"id": "2",
"author": "Julia Donaldson",
"title": "The Girl, the Bear and the Magic Shoes",
"genre": "Children's Books on Fashion Crafts",
"price": "5.24",
"publish_date": "2019-04-04",
"description": "A little girl loved running, but her old
shoes were too tight..."
}
]
}
This is what people typically think of when they think about
JSON. However, to save on bandwidth, it is usually transmitted without
whitespace.
% cat ~/random-files-master/data/books.json | jq --compact-output
{"book":[{"id":"1","author":"Craig Smith and Katz
Cowley","title":"The Wonky Donkey","genre":"Children's Fiction
Books on Animals","price":"4.00","publish_date":"2018-1101","description":"The story about a wonky donkey..."},{"
id":"2","author":"Julia Donaldson","title":"The Girl, the
Bear and the Magic Shoes","genre":"Children's Books on
Fashion Crafts","price":"5.24","publish_date":"2019-0404","description":"A little girl loved running, but her old
shoes were too tight..."}]}
293
Chapter 4
Installing Commands Using Brew
The CSV Command
Out of all the data formats in this section, CSV is the most common.
CSV stands for Comma Separated Values, and it is sometimes used
interchangeably with Tab Separated Values. Most spreadsheet programs
will give you options when you open a CSV file that allow you to choose the
separator value.
% cat ~/random-files-master/data/books.csv
id,author,title,genre
1,Craig Smith and Katz Cowley,The Wonky Donkey,Children's
Fiction Books on Animals
2,Julia Donaldson,The Girl, the Bear and the Magic
Shoes,Children's Books on Fashion Crafts
The CSVKit package contains a selection of commands that work on
CSV files. Its commands format CSV files to make them easier to read and
converts CSV files to other formats.
% brew install csvkit
There is csvlook, which “pretty prints” the CSV file in a similar format
to a spreadsheet, as shown in Figure 4-15.
Figure 4-15. Formatted CSV file
294
Chapter 4
Installing Commands Using Brew
csvstat gives you some useful statistics about the CSV file.
% csvstat ~/random-files-master/data/books.csv
1. "id"
Type of data: Number
Contains null values: False
Unique values: 2
Smallest value: 1
Largest value: 2
Sum: 3
Mean: 1.5
Median: 1.5
StDev: 0.707
Most common values: 1 (1x)
2 (1x)
2. "author"
Type of data: Text
Contains null values: False
Unique values: 2
Longest value: 27 characters
Most common values: Craig Smith and Katz Cowley (1x)
Julia Donaldson (1x)
csvjson can convert a CSV file into a JSON file. The output is very close
to the original JSON file, books.json.
% csvjson ~/random-files-master/data/books.csv | jq
[
{
"id": 1,
"author": "Craig Smith and Katz Cowley",
295
Chapter 4
Installing Commands Using Brew
"title": "The Wonky Donkey",
"genre": "Children's Fiction Books on Animals",
"price": 4,
"publish_date": "2018-11-01",
"description": "The story about a wonky donkey..."
},
{
"id": 2,
"author": "Julia Donaldson",
"title": "The Girl, the Bear and the Magic Shoes",
"genre": "Children's Books on Fashion Crafts",
"price": 5.24,
"publish_date": "2019-04-04",
"description": "A little girl loved running, but her old
shoes were too tight..."
}
]
You can also convert JSON files into CSV files. This also works with
other formats, such as XLS and XLSX files.
% in2csv -k book books.json
Note The conversion of JSON to CSV is fairly basic. We had to
specify the top-level list with -k book, to select the actual list of
data (the book: [ ] part of the JSON).
296
Chapter 4
Installing Commands Using Brew
The watch Command
Have you ever found yourself running the same command over and over,
waiting for some change to happen? I occasionally do this when I’m
downloading a large file. I constantly run ls -h to see how big a file is on
disk. There is a command called watch that will do the same thing for you.
% brew install watch
The way you use it is by passing the command you want to run as an
argument to watch. The output can be seen in Figure 4-16.
% watch "ls"
Figure 4-16. Output of watch using the default interval
Then watch will run the ls command every two seconds and update
the screen with the new output. You can change the frequency in which
the command is run with the --interval option. You then supply the
number of seconds between runs, as shown in Figure 4-17.
% watch --interval 10 "ls"
297
Chapter 4
Installing Commands Using Brew
Figure 4-17. Output of watch using a 10 second interval
I’ve even used watch as a quick substitute for a cron or a launchd task.
It won’t survive a reboot, but it is really quick to set up.
Networking
In the previous chapter, we used curl to download the random files
archive.
% curl --location -o master.zip https://github.com/hackzilla/
random-files/archive/master.zip
The reason I used curl is that it is installed by default with macOS,
whereas wget needed to be installed with Brew.
The wget Command
Using wget to download files is a bit easier than using curl. For this reason,
I like to have both on my system.
% brew install wget
% wget "https://github.com/hackzilla/random-files/archive/
master.zip"
--2020-02-08 15:43:18-- https://github.com/hackzilla/
random-files/archive/master.zip
Resolving github.com (github.com)... 140.82.118.4
Connecting to github.com (github.com)|140.82.118.4|:443...
connected.
298
Chapter 4
Installing Commands Using Brew
HTTP request sent, awaiting response... 302 Found
Location: https://codeload.github.com/hackzilla/random-files/
zip/master [following]
--2020-02-08 15:43:19-- https://codeload.github.com/hackzilla/
random-files/zip/master
Resolving codeload.github.com (codeload.github.com)...
140.82.113.9
Connecting to codeload.github.com (codeload.github.
com)|140.82.113.9|:443... connected.
HTTP request sent, awaiting response... 200 OK
Length: unspecified [application/zip]
Saving to: 'master.zip'
master.zip [ <=> ] 11.46K --.-KB/s in 0.08s
2020-02-08 15:43:19 (139 KB/s) - 'master.zip' saved [11740]
wget is a great command for downloading files. It is worth noting
that some symbols in an URL might trigger a functionality in Zsh. For
this reason, I recommend always quoting the URL that you pass to curl
or wget.
The curl Command
If you need more control, then use curl, which is installed with
macOS. You can also use Brew to install a more up-to-date version. At
the time of writing, the default macOS version of curl was over a year
out of date.
% curl --version
curl 7.64.1 (x86_64-apple-darwin19.0) libcurl/7.64.1
(SecureTransport) LibreSSL/2.8.3 zlib/1.2.11 nghttp2/1.39.2
Release-Date: 2019-03-27
299
Chapter 4
Installing Commands Using Brew
Installing curl with Brew is the same as any other command, but you
will need to add it to your PATH.
% brew install curl
curl is keg-only, which means it was not symlinked into /usr/local,
because macOS already provides this software and installing
another version in
parallel can cause all kinds of trouble.
If you need to have curl first in your PATH run:
echo 'export PATH="/usr/local/opt/curl/bin:$PATH"' >> ~/.zshrc
Updating curl is entirely up to you. I tend to leave curl as the default
version, as if there were any security issues, Apple would upgrade it. With
curl, we can download a series of files by using the square brackets ([ ])
to specify a series.
For example, the numbers one to ten would be written as [1-10]. If
we wanted a leading zero, we could write it as [01-10]. This also works for
letters, such as [a-z].
http://example.org/page[1-100].txt
We can also add a step to the range. If we wanted to only access the
odd numbers, we would write [1-100:2]. If there are sets of items you
want to try, you can use the braces.
For example, we could search for specific years and the number sequence.
http://example.org/year/{1996, 2000, 2004}/page[1-10].txt
How would I use this with curl? First, you need to make sure you use
quotes around the URL, because otherwise, the shell will try to interpret it.
Note I have set my computer to resolve example.org to my
computer. This will be covered later in the book.
300
Chapter 4
Installing Commands Using Brew
% curl "http://example.org/year/{1996, 2000, 2004}/page[1-10].txt"
[1/30]: http://example.org/year/1996/page1.txt --> <stdout>
--_curl_--http://example.org/year/1996/page1.txt
<html>
<head><title>404 Not Found</title></head>
<body>
<center><h1>404 Not Found</h1></center>
<hr><center>nginx/1.17.8</center>
</body>
</html>
You might want to output all of all the possible URLs to Terminal;
however it’s also possible to save them to individual files. Previously we
used the -o option to save the file, but that won’t work as it is.
% curl -o /tmp/page.txt "http://example.org/year/
{1996,2000,2004}/page[1-10].txt"
What will happen is for every file it will be saved to page.txt. The way
around this problem is by using variables. A curl variable is the # symbol
followed by a number. The number increments from 1. In this example, #1
will contain either 1996, 2000, or 2004 and #2 will be a number between 1
and 10.
% curl -o /tmp/page-#1-#2.txt "http://example.org/year/
{1996,2000,2004}/page[1-10].txt"
% ls /tmp/page*
page-1996-1.txt page-2000-1.txt page-2004-1.txt
page-1996-10.txt page-2000-10.txt page-2004-10.txt
page-1996-2.txt page-2000-2.txt page-2004-2.txt
page-1996-3.txt page-2000-3.txt page-2004-3.txt
Both commands have an extensive list of options that can be passed to
them, which makes them very powerful.
301
Chapter 4
Installing Commands Using Brew
Checking Internet Speed
If you are paying for an Internet connection, how do you know you are
getting the speed that you are paying for? Most people will go to a website
that attempts to calculate it for you. However, in my experience they are
usually full of ads. There is another way. There is a speed test command
you can install using Brew, called speedtest-cli.
% brew install speedtest-cli
==> Downloading https://github.com/sivel/speedtest-cli/archive/
v2.1.2.tar.gz
==> Downloading from https://codeload.github.com/sivel/
speedtest-cli/tar.gz/v2.1.2
######################################################## 100.0%
🍺 /usr/local/Cellar/speedtest-cli/2.1.2: 7 files, 84.9KB,
built in 5 seconds
When you run speedtest-cli, it will find the closest server to you and
perform a speed test.
% speedtest-cli
Retrieving speedtest.net configuration...
Testing from Cogent Communications (82.129.x.x)...
Retrieving speedtest.net server list...
Selecting best server based on ping...
Hosted by Iomart (Maidenhead) [37.85 km]: 11.372 ms
Testing download speed
Download: 51.29 Mbit/s
Testing upload speed
Upload: 38.91 Mbit/s
I have a 60MB/60MB Internet connection, and these results aren’t that
far away from what I actually pay for.
302
Chapter 4
Installing Commands Using Brew
There are lots of reasons why these will be different. Some of these
reasons will be because of your Internet supplier, and others will be
things under your control. To ensure that you get the best connection to
the Internet, you should be close to your Wi-Fi router or connection via
Ethernet.
Logging Information
speedtest-cli can also save the results to a CSV file for you. This is really
useful if you want to keep a historical record of your Internet connection
speed. A reason for this could be that every evening around 6pm your
Internet connection becomes painfully slow and you want evidence.
There are two options that you can supply to speedtest-cli to output
to the CSV format. The first is --csv and the second is --csv-header.
% speedtest-cli --csv
3839,Iomart,Maidenhead,2020-03-15T09:47:26.678718Z,37.852639672
79236,9.264,56859526.677607715,51278243.8575505,,82.129.x.x
% speedtest-cli --csv-header
Server ID,Sponsor,Server Name,Timestamp,Distance,Ping,Download,
Upload,Share,IP Address
When you use these commands, you will want to save the data to a file.
We will use --csv-header when we create the file, and then append to the
file with the --csv option. We don’t need the header every time we write to
the file.
This command will create a CSV file with just the headers. If the file
existed before, it will be overwritten.
% speedtest-cli --csv-header > speedtest.csv
Then you will call this next command as often as you need a new result.
% speedtest-cli --csv >> speedtest.csv
303
Chapter 4
Installing Commands Using Brew
Note the double greater than symbol in the previous line of code.
You could run this command with the watch command, or better yet, use
built-in scheduling to automatically capture your next result. With a little
bit of work, you can plot data and end up with a graph that looks similar to
Figure 4-18.
Figure 4-18. Graph produced in Numbers from CSV
S
ummary
In this chapter, you installed many commands from Brew. You started slow
with the fortune command and added to what you could do by chaining
commands together. You even learned how to use Terminal to create
images and video. In the next chapter, we are going to look at how we can
script in Terminal.
304
CHAPTER 5
Shell Scripting Basics
Some of my earlier memories of using computers involve typing a
computer program into the computer. I remember hoping that I didn’t
make a mistake and then finally running it. In this chapter, I hope to foster
a sense of accomplishment that helps you on your journey.
We have been using Zsh as our shell in all the examples so far in this
book. However, there is another shell we will use for scripting, called sh.
Unlike Zsh, sh has been bundled with macOS for many years and is a
good default for maximum compatibility with any script you write. This is
especially important if you want to use what you learn in this chapter on
other computers.
Your First Script
The sh command lives in /bin/sh. Now you’ll write your first script. Actually,
that’s a lie, this will be your second script. Your first was the .zshrc file.
Create a file called "~/welcome" with these contents:
echo "Welcome";
If you need help with this step, please consult Chapter 2. This is your
script and you can run it like this:
% bash ~/welcome
Welcome
Anything you can type into your Terminal can be used in a script.
© Daniel Platt 2021
D. Platt, Tweak Your Mac Terminal, https://doi.org/10.1007/978-1-4842-6171-2_5
305
Chapter 5
Shell Scripting Basics
Running and Debugging Scripts
Previously, we created a welcome file that we ran using Bash.
% cat ~/welcome
echo "Welcome";
While in principle this is a script, we can make it more like the
commands we have used. The first thing we need to do is fix how we run
the command.
% bash ~/welcome
We need to be able to run this command like this.
% ~/welcome
zsh: permission denied: /Users/danielplatt/welcome
The problem is we are trying to execute the welcome file without having
the execute permission set.
% ls -lath ~/welcome
-rw-r--r-- 1 danielplatt staff /Users/danielplatt/welcome
We have the read and write permission, but the execute (x) permission
is missing.
This is easy to fix with the chmod command. We can give the welcome
file the execute permission.
% chmod ugo+x ~/welcome
% ls -lath ~/welcome
-rwxr-xr-x 1 danielplatt staff /Users/danielplatt/welcome
Now when we try to run the script again, the shell will be able to
execute it.
% ~/welcome
Welcome
306
Chapter 5
Shell Scripting Basics
We can also tell the shell to look in the current directory for the script.
% cd ~
% ./welcome
Welcome
Running Scripts from the Current Directory
Before we go on, I’d like to explain why we don’t just use the filename, as
with other commands.
% welcome
zsh: command not found: welcome
The reason is that all the other commands are located in the PATH
variable. Your current directory is not in the list of directories. Therefore,
the shell will not look for the script you are trying to run in your current
directory.
There is one more thing we should do to make this official. We should
specify an interpreter for this script. This is straightforward; we simply add
#!/bin/... as the first line in the script. The contents of ~/welcome will
now look like Listing 5-1.
Listing 5-1. The Finished Welcome Script
#!/bin/sh
echo "Welcome"
We are using /bin/sh, as this has existed for a long time on
macOS. This means that when you look online, you will find more support
for this interpreter. This is why we are using this interpreter, rather than the
Zsh interpreter that we’ve been discussing in this book. In fact, /bin/sh is
really the Bash interpreter. You can see this if you use the version option
on both.
307
Chapter 5
Shell Scripting Basics
% /bin/sh --version
GNU bash, version 3.2.57(1)-release (x86_64-apple-darwin19)
Copyright (C) 2007 Free Software Foundation, Inc.
% /bin/bash --version
GNU bash, version 3.2.57(1)-release (x86_64-apple-darwin19)
Copyright (C) 2007 Free Software Foundation, Inc.
T ext Modes
The macOS Terminal can have different font styles, as shown in Table 5-1,
such as bold, underlined, or blinking.
Table 5-1. Different Text Modes in Bash
308
Mode
Text Style
0
Normal, remove all style
1
Bold
2
Dim
3
Italic
4
Underline
5
Blink
7
Inverted
8
Hidden
22
Remove bold/dim
23
Remove italic
24
Remove underline
25
Remove blink
27
Remove Inverted
28
Remove hidden
Chapter 5
Shell Scripting Basics
Note Mode 21 is supposed to be used to remove bold, but it
doesn’t work on the macOS Terminal.
By default, text that you output will not be styled.
% printf "Normal text"
Normal text
Let’s experiment with the different text modes. We will create a file
called textmode and enter the code in Listing 5-2.
Listing 5-2. Filename: textmode—Script Showing the Different Text
Modes
#!/bin/sh
printf
printf
printf
printf
printf
printf
printf
printf
"\e[0m"
"This text
"This text
"This text
"This text
"This text
"This text
"This text
is
is
is
is
is
is
is
\e[1mBOLD\e[22m.\n"
\e[2mDIM\e[22m.\n"
\e[3mITALIC\e[23m.\n"
\e[4mUNDERLINED\e[24m.\n"
\e[5mBLINKING\e[25m.\n"
\e[7mINVERTED\e[27m.\n"
\e[8mHIDDEN\e[28m.\n"
When we run the code in Listing 5-2, we get the following output.
% chmod +x textmode
% textmode
This text is BOLD.
This text is DIM.
This text is ITALIC.
This text is UNDERLINED.
This text is BLINKING.
309
Chapter 5
Shell Scripting Basics
This text is INVERTED.
This text is HIDDEN.
Note The text will actually be blinking and the hidden text will show
up when highlighted.
Clearing Text Modes
These text mode changes are persistent. If you don’t end them, they will
carry on until you reset the style. The Zsh shell will clear the text modes
before displaying a new prompt, but this is something that the Bash shell
does not do.
Listing 5-3 shows what happens if you forget to turn off the textmode,
in this case, bold.
Listing 5-3. Commands Showing the Difference When Bold Is
Accidentally Not Turned Off
% printf "This text is \e[1mBOLD.\n"
This text is BOLD.
% printf "This text is Normal.\n"
This text is Normal.
In a script, that outcome is slightly different and the commands in
Listing 5-4 illustrate this point.
Listing 5-4. Filename: boldtext—Enabling Bold Without Ending It
#!/bin/sh
printf "This text is \e[1mBOLD.\n"
printf "This text is Normal.\n"
310
Chapter 5
Shell Scripting Basics
When we run the boldtext command, we can see the bold text on the
second line of text, where we didn’t end the bold mode.
% ./boldtext
This text is BOLD.
This text is Normal.
After this command has been run in Zsh, the text mode will be reset to
normal.
Combining Text Modes
We can also combine these styles by starting multiple text modes without
closing them.
% printf "This text is \e[1m\e[4mBOLD and UNDERLINED\e[22m\
e[24m.\n"
This text is BOLD and UNDERLINED.
T ext Color
Did you know you can change the text color? You can set the text color
and the background color and can choose from a color palette of 256
colors. To help visualize all the different colors in your palette, use the
code in Listing 5-5.
Listing 5-5. Output Color Palette
#!/bin/sh
# Original Script - https://askubuntu.com/a/681719
for((i=0; i<256; i++)); do
311
Chapter 5
Shell Scripting Basics
printf "\e[48;5;${i}m%03d" $i;
printf '\e[0m';
[ ! $((($i + 1) % 8)) -eq 0 ] && printf ' ' || printf '\n'
done
Now add the code to a file called color.
% nano ~/color
% chmod +x ~/color
When you run this script, you will get output that looks like Figure 5-1,
which is the ANSI color code for each color. However, it is likely that
Figure 5-1 is shown in grayscale in the book. If this is the case, you will
need to run this command yourself.
312
Chapter 5
Shell Scripting Basics
Figure 5-1. Output of the color command
313
Chapter 5
Shell Scripting Basics
Changing the text color is similar to how we changed the text mode in
the previous section.
printf '\e[<fg_bg>;5;<ANSI_color_code>m'
fg_bg needs to be replaced with either 38 (foreground) or 48
(background). Then you have \e[0m, which is used to reset the colors back
to their defaults.
For example, let’s say we wanted blue text on a red background.
printf
printf
printf
printf
'\e[38;5;12m'
'\e[48;5;9m'
'blue text on a red background\n'
'\e[0m'
Note This works only if they are entered at the same time, rather
than typed out one by one.
Remember, Zsh resets the colors and styles after every command. All
the commands could be combined into one, but I have used four to help
with readability. If you want to run them as one command, all the text
needs to be combined into a single printf command.
printf '\e[38;5;12m\e[48;5;9mblue \e[1mtext\e[22m on a red
background\n\e[0m'
If you don’t include the mode reset, the colors will carry on until you
change them again. You can also combine the text mode and color.
printf
printf
printf
printf
314
'\e[38;5;12m'
'\e[48;5;9m'
'blue \e[1mtext\e[22m on a red background\n'
'\e[0m'
Chapter 5
Shell Scripting Basics
V
ariables
In Chapter 2, we covered creating environment variables. Variables in
scripts work the same way as shell variables, with the main difference
being that they will disappear when the script finishes running. A variable
can be used inside a string, which can be output or used to create a new
variable.
echo "My home directory is ${HOME}."
The braces around the variable name are optional, but they help define
the bounds of the variable name. Without the braces, you wouldn’t be able
to have a string directly follow the variable.
We can use this to combine existing variables to create a new variable.
STRING1="Hello"
STRING2="World"
STRING3="${STRING1} ${STRING2}"
echo $STRING3
S
pecial Variables
There are a few special variables that we didn’t cover. When we’ve
executed other commands, we have sometimes given them options or
arguments.
% say "hello"
These special variables help us grab the text that started the program.
The first variable is $# and it will tell us how many arguments we’ve passed
in. Let’s create a quick script to demonstrate, as shown in Listing 5-6. I will
use args as the filename.
315
Chapter 5
Shell Scripting Basics
Listing 5-6. Output Command Arguments
#!/bin/sh
echo "You used $# arguments."
Don’t forget to make it executable, like we discussed in Chapter 2.
% chmod +x args
Now we can run the program without arguments.
% ./args
You used 0 arguments.
We can run the command again and make up some arguments.
% ./args "hello" "world"
You used 2 arguments.
U
sing Arguments
It’s one thing to know that there are arguments, but another to use them.
There are two main ways to access the arguments to the script with Bash—
using $* and $@ or using $0, $1, $2, and so on.
$ *
The $* argument will treat all the arguments as a single string, with a single
space between them. Let’s change the args echo script to $*, as shown in
Listing 5-7.
Listing 5-7. Arg Script Using $*
#!/bin/sh
echo $*
% ./args "hello" "world"
hello world
316
Chapter 5
Shell Scripting Basics
$ @
The $@ variable works the same as $* when used with echo. However, you
can use $@ as an array in a loop. Let’s change the script args to a loop, as
shown in Listing 5-8.
Listing 5-8. Outputting Arguments with a Loop
#!/bin/sh
for arg in $@
do
echo "$arg"
done
Now, every argument passed to args will be displayed on a newline.
% ./args "hello" "world"
hello
world
$0, $1, $2, and So On
These variables represent the position of the argument on the shell when
you ran the command. If you know the position of the argument, you can
access it by using the offset.
$0 is the program name.
Every argument will be given to a new variable with an incremental
number. Let’s change the script in Listing 5-9.
Listing 5-9. Outputting the Arguments Based on Offset
echo $0
echo $1
echo $2
317
Chapter 5
Shell Scripting Basics
% ./args "hello" "world"
./args
hello
world
The If Statement
Outputting variables is one thing, but what if we want to perform different
tasks depending on some condition? We need to use a structure known as
the if statement.
if [[ <condition> ]] ; then
<commands if condition is true>
elif [ <condition ]] ; then
<commands if this condition is true>
else
<commands if condition is false>
fi
The possibilities are endless with if statements. This information is
only the beginning, but it will be enough to get you started.
There are lots of different tests you can run using the if statement.
Table 5-2 shows a selection of conditions you are most likely to need.
318
Chapter 5
Shell Scripting Basics
Table 5-2. Different if Conditions That Can Be Used
Condition (Test)
Description
-e path
Does path point to a file?
-d path
Does path point to a directory?
string1 == string2
Does string1 equal string2?
string1 != string2
Are string1 and string2 different?
string1 < string2
Does string1 appear before string2
alphabetically?
string1 > string2
Does string2 appear before string1
alphabetically?
variable1 -eq variable2
Does variable1 equal variable2?
variable1 -ne variable2
Does variable1 not equal variable2?
variable1 -lt variable2
Is variable1 less than variable2?
variable1 -le variable2
Is variable1 less than or equal to variable2?
variable1 -gt variable2
Is variable1 greater than variable2?
variable1 -ge variable2
Is variable1 greater than or equal to
variable2?
To run a test, we just surround the expression with double square
brackets, as shown in Listing 5-10.
Listing 5-10. Example of Conditional Checking if 10 Is Greater Than 5
if [[ 10 -gt 5 ]] ; then
echo "10 is greater than 5";
else
echo "5 is greater than 10";
fi
319
Chapter 5
Shell Scripting Basics
Did you notice that the test in Listing 5-10 was impossible to evaluate
as false? Just by changing the expression in the test, we can see if a file
exists on the filesystem. This code is shown in Listing 5-11.
Listing 5-11. Testing if ~/testfile Exists
if [[ -e ~/testfile ]] ; then
echo "testfile exists";
else
echo "testfile doesn't exist";
fi
Try running the code before and after you create the file.
% touch ~/testfile
You can find much more about this topic in the Bash manual, by
searching for “Evaluation.”
A
rithmetic
There might be times when you want to work with numbers. By default,
Bash will treat all input as strings, which would make doing arithmetic
tricky.
% echo 1+3
1+3
We need to tell Bash it is dealing with numbers. There is an easy way
to do this, by using arithmetic expansion. To use arithmetic expansion,
you need to surround your expression with a dollar sign and double
parentheses, as follows:
$((expression))
320
Chapter 5
Shell Scripting Basics
Inside the arithmetic expansion, we can use all the standard arithmetic
operators, as shown in Table 5-3.
Table 5-3. Listing of the Different
Arithmetic Operators
Operation
Example
Result
Addition
echo $((1+3))
4
Subtraction
echo $((1-3))
-2
Multiplication
echo $((1*3))
Division
echo $((7/3))
2
Modulo
echo $((7 % 3))
1
When you use division, you need to be aware that it only returns whole
numbers. If there is a reminder, you can get it by using the modulo symbol.
L oops
Earlier in the section entitled “Text Color,” there was a script that displayed
the ANSI color codes. You may not have noticed, but it used a loop to
generate that table. This code is shown again in Listing 5-12.
Listing 5-12. The Script That Prints the Color Palette Available to
Terminal
# Original Script - https://askubuntu.com/a/681719
for((i=0; i<256; i++)); do
printf "\e[48;5;${i}m%03d" $i;
printf '\e[0m';
[ ! $((($i + 1) % 8)) -eq 0 ] && printf ' ' || printf '\n'
done
321
Chapter 5
Shell Scripting Basics
Let’s break this script down. This is the basis of the for loop.
for((<initial value>; <end condition>; <increment>)); do
<commands>
done
The loop will keep going until it meets the end condition. There are
four components in a for loop.
1. The initial value
i=0
This part is concerned with setting the variable, i, to
a known value.
Without this, i would be undefined, or possibly set
to something unexpected if it is being reused.
2. The end condition
i<256
The end condition is needed to understand when
the loop should exit.
3. Increment
i++
This is the equivalent to i=i+1 and is used to change
the value of i between each iteration of the loop.
4. Commands
The commands are anything that needs to execute
during every iteration of the loop. In our case, the
specific commands are in Listing 5-13.
322
Chapter 5
Shell Scripting Basics
Line 1 prints the color number and changes the background color to
match. Line 2 clears the color. Line 3 outputs a newline or a space.
Listing 5-13. Commands of the for Loop in Listing 5-9
printf "\e[48;5;${i}m%03d" $i;
printf '\e[0m';
[ ! $((($i + 1) % 8)) -eq 0 ] && printf ' ' || printf '\n'
Since line 3 in Listing 5-13 is doing many different things, we should
look at it more closely. In Table 5-4, we are going to step through how the
line is interpreted. This should give you a good understanding of how it
works.
Table 5-4. Breakdown of Line 3 in Listing 5-12
Step
Expression
Description
Result
A
($i + 1)
Add 1 to $i
1 to 256
B
$((a % 8))
Remainder when divided by 8
1, 2, 3, 4, 5, 6, 7, 0
C
b -eq 0
Is it equal to 0?
1 (true) or 0 (false)
D
[ ! c ]
Negate output of c
0 (false) or 1 (true)
E
d && printf
' '
Only print a space if d is true
F
e || printf
'\n'
Only print a newline if d is false
Note Steps C and D could have been combined by using
[ b -ne 0 ].
323
Chapter 5
Shell Scripting Basics
B
reak and Continue
A special note about the keywords continue and break. Let’s look at a
simple loop that outputs the line numbers 0 to 9, as shown in Listing 5-14.
Listing 5-14. Example of a Loop Printing the Value of i
for((i=0; i<10; i++)); do
printf "Line: %d\n" $i;
done
The continue statement in a loop will cause the current iteration to
end, and it will move to the next iteration. The break statement will end
the loop before the end condition.
I’m going to modify Listing 5-14, in order to add break and continue
statements. Consider the loop in Listing 5-15.
Listing 5-15. A Loop Using continue and break
for((i=0; i<10; i++)); do
if [[ i -lt 4 ]] ; then
continue;
fi
printf "Line: %d\n" $i;
if [[ i -gt 6 ]] ; then
break;
fi
done
324
Chapter 5
Shell Scripting Basics
This loop will output the following:
Line:
Line:
Line:
Line:
4
5
6
7
The continue will keep being called until i is at least 5, and the loop
will end when i is greater than 6, but not before outputting line 7.
Exit Code
Have you ever wondered if the system knows if a script ran successfully or
not? Maybe you would like to know the status of a command that you ran?
There is shell variable that holds the last command’s exit status.
% echo $?
0
Let’s try that again, but with a command that fails.
% ./missing-command
zsh: no such file or directory: ./missing-command
% echo $?
127
Exit codes are useful for programmatically handling errors and each
command will define its own list of error codes that it will emit. It is worth
noting that the exit code will be a value between 0 and 255.
There is an easy way to understand them. If the exit code is 0, then the
command ended successfully. If the exit code is greater than 0, then the
command ended with an error.
325
Chapter 5
Shell Scripting Basics
If you want to know what the exit codes are for a particular command,
their man page normally lists them.
% man curl
There are nearly a hundred exit codes for curl.
Exiting
When you write your own script, there might be times when you want your
script to end early. It might be a success, or maybe the user didn’t provide
all the arguments required to run the command successfully.
You can use the exit keyword to end the currently executing process,
and you can see the effect of doing so in your Terminal window.
% exit
[Process completed]
Using exit within a script will cause it to exit in the same way as your
shell. The full usage of exit is exit <error code>. If you don’t supply
an exit code, it will default to the exit status of the last run command.
Therefore, it is recommended to always supply an exit code when using
exit.
What error code should you use? Well, that entirely depends on why
you want to exit. However, for simplicity, I would stick with 0 if your script
is exiting without error, or 1 if there was an error.
Reading Input
Much has been said about displaying output from a script by using echo
and printf, but we haven’t covered anything about getting input into a
script. What if, in the middle of a script, we have a question?
326
Chapter 5
Shell Scripting Basics
We’ve seen it before, when searching the manual and we get prompted
to display a particular manual entry. How can we do this ourselves?
read <variable>
read takes all the input from the user until a newline and stores it in a
variable. In this example, we type what goes in, which is stored in $input.
Then the same text will be outputted.
% read input; echo $input
what goes in
what goes in
We can use echo to help create a prompt that allows the user to see
what they are entering.
% echo -n "Input: "; read input; echo $input
Input: must come out
must come out
Note If you use the -n option with echo, then echo will not output
a newline.
Projects
It’s one thing being told how to use Bash. It’s another thing to try some
projects that illustrate these principles, which you’ll do in this section.
Each project is split into three sections—“You Will Need,” “Expected
Output,” and “Suggested Answer.”
The “You Will Need” section is about helping you identify what will
be useful in completing the project. The “Expected Output” section is the
code that your project will need to output for the given script. The script
327
Chapter 5
Shell Scripting Basics
should work for all the given arguments. The “Suggested Answer” section
explains how I would have tackled the project.
Remember, there are many ways to produce the answers for these
projects. Don’t worry if you have an answer that doesn’t exactly match this
book.
Project 5-1: Print Arguments
This project tests your ability to print certain arguments, as well as to print
a message if no arguments were provided. Let’s create a file called args.
You Will Need
•
if
•
loop
•
$0
•
$#
•
Variable arithmetic
Expected Output
When your script is run without any arguments, I want you to display a
helpful message that tells the user how to use the script.
% ./print-args
Usage: ./print-args message
The script will also need to output each argument in turn with its
argument number.
% ./print-args "hello" "world" 1 2 3
Arg 1: hello
Arg 2: world
328
Chapter 5
Shell Scripting Basics
Arg 3: 1
Arg 4: 2
Arg 5: 3
How would you solve this?
S
uggested Answer
This script should first check the number of arguments that have been
passed in with $#. If the number is less than 1, (i.e., is 0), the script will
print the usage instructions and exit. Otherwise, the script will loop over
the arguments in $0 and print them. See Listing 5-16.
Listing 5-16. print-args Suggested Answer
#!/bin/sh
if [ $# -lt 1 ]
then
echo "Usage: $0 message"
exit 1
fi
count=0
for arg in $@
do
count=$((count+1))
echo "Arg $count: $arg"
done
Project 5-2: Quicker Say Command
In this project, let’s assume that you are frequently using the say command
to save computer-generated speech with the Fiona voice to an .aiff file.
The filename can be based on the current date.
329
Chapter 5
Shell Scripting Basics
Rather than having to type the same argument every time, you can
create a script with the arguments hard-coded. The only thing that needs
to be passed into this script is the message. Let’s create a file called
saytofile.
You Will Need
•
if
•
$0
•
$#
•
$@ or $*
•
/bin/date
•
say
Expected Output
When your script runs without any arguments, I want you to display a
helpful message that tells the user how to use the script.
% ./saytofile
Usage: ./saytofile message
Your script will take all the arguments and pass them to the say
command. To be quicker for the user, say needs to save the output to the
filesystem using a filename that contains the current date and time.
% ./saytofile "this is my message to the world"
Saved to speech-2020-01-04 12:11:54.aiff
How would you solve this?
330
Chapter 5
Shell Scripting Basics
S
uggested Answer
The script first needs to see if the usage needs to be printed. Then the
script creates a variable called filename, which is speech.aiff. It then
uses /bin/date to format the current date and time to ensure the filename
is unique, assuming that it doesn’t run more than once a second.
Then we add the say command, along with a specific voice and the
filename. Finally, we use $@ to pass all the arguments to the script into the
say command as the message. See Listing 5-17.
Listing 5-17. saytofile Suggested Answer
#!/bin/sh
if [ $# -lt 1 ]
then
echo "Usage: $0 message"
exit 1
fi
filename="speech-`/bin/date "+%Y-%m-%d %H:%M:%S"`.aiff"
say -v fiona -o "$filename" $@
echo "Saved to $filename"
Project 5-3: Higher or Lower
In this project, we will create a simple program in which you have to guess
a random number that the computer picked between 1 and 10.
The script will give you hints as to whether the answer is higher or
lower, but it will limit you to five guesses. Let’s create a file called higher-
or-lower.
331
Chapter 5
Shell Scripting Basics
You Will Need
•
if
•
while
•
read
•
$RANDOM
Expected Output
This script will not take any arguments, so you will not need to display a
help message. Instead you can go straight into the game.
% ./higher-or-lower
Higher or Lower
===============
Guess the number I am thinking of between 1 and 10.
You have 5 guesses.
Guess: 1
Higher!
Guess: 2
Higher!
Guess: 3
Higher!
Guess: 4
Higher!
Guess: 5
Higher!
Sorry, you didn't guess it correctly.
The answer was 6.
332
Chapter 5
Shell Scripting Basics
S
uggested Answer
The first thing this script does in Listing 5-18 is generate a random number.
It then outputs the rules of the game. Then the script loops as many times
as there are guesses. During each iteration, the script asks the player for a
guess and reads the next thing they type.
If the guess is incorrect, the script will tell the player that the answer
is higher or lower. If the guess is correct, the script will tell the player and
then exit with the success code. When the guesses are used up, the loop
will exit. Then the player will be told that they didn’t win and what the
answer is. See Listing 5-18.
Listing 5-18. higher-or-lower Suggested Answer
#!/bin/sh
guess=0
randomNumber=$(( ($RANDOM % 10) + 1))
echo "Higher or Lower
===============
Guess the number I am thinking of between 1 and 10.
You have 5 guesses.
"
for((i=0; i<5; i++)); do
/bin/echo -n "Guess: ";
read guess;
if [[ $guess -lt $randomNumber ]]
then
echo "Higher!"
333
Chapter 5
Shell Scripting Basics
elif [[ $guess -gt $randomNumber ]]
then
echo "Lower!"
elif [[ $guess -eq $randomNumber ]]
then
echo "You guessed correctly!"
exit 0;
fi
done
echo "Sorry, you didn't guess it correctly.
The answer was $randomNumber.
";
roject 5-4: Higher or Lower with Changeable
P
Limits
In this project, we will take the simple program where you have to guess
the random number the computer has picked between 1 and 10 and
improve on it. This time we will take optional arguments to adjust the
upper range of the guessing. As we increase the difficulty, it makes sense to
make the number of guesses adjustable as well.
The other issue with the previous script was it treated any input as
a number, but it was evaluated as 0. In this project, you should instead
output a message to say when the input wasn’t understood to be a number.
Extra credit if you add a help option to the script.
Let’s duplicate the higher-or-lower script and call it higher-or-
lower2.
334
Chapter 5
Shell Scripting Basics
You Will Need
•
if
•
while
•
read
•
$RANDOM
Expected Output
The script will have built-in defaults, which means when you run the
script without any arguments, it can start the game. This means you need
another way to show the usage information. We’ve seen other commands
use --help and this feels like a good solution.
% ./higher-or-lower2 --help
Higher or Lower Game
./higher-or-lower2 [upper limit=10] [guesses=5]
% ./higher-or-lower2 50 2
Higher or Lower
===============
Guess the number I am thinking of between 1 and 50.
You have 2 guesses.
Guess: a
I didn't understand that.
Guess: 2
Higher!
Sorry, you didn't guess it correctly.
The answer was 4.
335
Chapter 5
Shell Scripting Basics
I would like you to make the number of guesses optional. This
means you can start the game by only specifying the upper limit, without
specifying the number of guesses.
S
uggested Answer
The first thing the script needs to do is check to see if --help has been
provided as an argument. If it has, it will print the usage information and
exit.
Next, I am defining upperLimit and totalGuesses so that they are
always defined regardless of whether they have been provided. We can
now check to see if the guesses and an upper limit have been provided.
If they have been provided, we set them to the variables upperLimit and
totalGuesses, respectively.
The last part of the setup is to check upperLimit and totalGuesses to
see if they are less than 1. We could easily set the check to be equal to 0, but
I wanted to ignore any variable that was set to a negative value. Now that
the setup has been performed, the rules can be displayed.
We can now iterate for as many guesses as the player gets and read
the player’s current guess (see Listing 5-19). Anything that the player
types in that isn’t a number will be treated as 0. This is why we check to
see if the player’s guess is lower than the answer. We are checking to see
if it is not equal to 0. We have a check for a guess that’s higher than the
answer, as well as when the answer matches the player’s guess. The last
check determines if the player’s guess matches 0, and if it does, it outputs a
message to say that it didn’t understand.
Listing 5-19. higher-or-lower2 Suggested Answer
#!/bin/sh
if [[ $# -eq 1 && $1 == '--help' ]]
then
336
Chapter 5
Shell Scripting Basics
echo "Usage: $0 [upper limit=10] [guesses=5]";
exit 0
fi
upperLimit=0
totalGuesses=0
if [[ $# -gt 0 ]]
then
upperLimit=$1
if [[ $# -gt 1 ]]
then
totalGuesses=$2
fi
fi
if [[ $upperLimit -lt 1 ]]; then
upperLimit=5
fi
if [[ $totalGuesses -lt 1 ]]; then
totalGuesses=5
fi
guess=0
randomNumber=$(( ($RANDOM % upperLimit) + 1))
echo "Higher or Lower
===============
Guess the number I am thinking of between 1 and $upperLimit.
You have $totalGuesses guesses.
"
337
Chapter 5
Shell Scripting Basics
for((i=0; i<$totalGuesses; i++)); do
/bin/echo -n "Guess: ";
read guess;
if [[ $guess -lt $randomNumber && $guess -ne 0 ]]
then
echo "Higher!"
elif [[ $guess -gt $randomNumber ]]
then
echo "Lower!"
elif [[ $guess -eq $randomNumber ]]
then
echo "You guessed correctly!"
exit 0;
elif [[ $guess -eq 0 ]]
then
echo "I didn't understand that."
fi
echo ""
done
echo "Sorry, you didn't guess it correctly.
The answer was $randomNumber.
";
Finally, if the loop exits, that means the player failed to guess the
correct answer. It will then display the correct answer.
338
Chapter 5
Shell Scripting Basics
Summary
When you’re scripting, you can do just about anything. It’s worth starting
small and adding extra functionality over time. In this chapter, we took a
more relaxed approach and looked at sh, which is bundled with macOS
and is a good default for maximum compatibility with any script you write.
In the next chapter, we take a closer look at another scripting
language—PHP.
339
CHAPTER 6
PHP
PHP is a popular web scripting language. According to w3techs.com, in
December 2019, 78.9% of server-side websites with a known language
used PHP. It happens that PHP was installed on your computer as part of
Catalina.
For some, it might be a stretch to talk about PHP in a book about
Terminal. However, if you’ve never used Terminal before, chances are you
won’t know about PHP. I will show you some of the basic concepts of PHP,
like variables and control statements, and finally finish with some projects.
Let’s dive in.
Determining Your PHP Version
Before you start learning about coding in PHP, it is a good idea to
determine what version you have installed. As of Catalina, macOS ships
with PHP 7.3. With Catalina 10.15.6, PHP has had a few security releases,
but is still following the 7.3 branch.
% php -v
PHP 7.3.11 (cli) (built: Jul 5 2020 03:23:39) ( NTS )
Copyright (c) 1997-2018 The PHP Group
Zend Engine v3.3.9, Copyright (c) 1998-2018 Zend Technologies
Each new branch of PHP introduces new features and removes out-of-
date ones. Eventually a branch of PHP will cease to receive updates.
© Daniel Platt 2021
D. Platt, Tweak Your Mac Terminal, https://doi.org/10.1007/978-1-4842-6171-2_6
341
Chapter 6
PHP
Basic Usage
This file shows different aspects of a PHP file. By default, PHP will output
the contents of the file to the screen, until it encounters <?php to enable the
PHP parser. As part of the previous chapter, we downloaded a ZIP file that
contained many different files.
PHP Configuration
The info.php file is a PHP file that is designed to show you all the different
settings available within PHP.
% cat ~/random-files-master/info.php
<?php
// PHP File to show information about PHP and your system
phpinfo();
By changing these values, you can control how PHP operates. For
example, the memory_limit setting will cause PHP to terminate if it uses
more memory than is specified. By default, the memory limit is set to
128MB, which is fine for simple scripts. However, if you have a script that
builds a report, you might need more memory.
PHP Configuration on Cli
phpinfo() is a function in PHP that outputs all the settings. It’s very handy
for diagnosing problems, but also for making sure PHP doesn’t have any
startup errors. Now that we’ve seen the contents, let’s run it. You can get
PHP to parse this file by passing it in as an argument.
342
Chapter 6
PHP
% php ~/random-files-master/info.php
phpinfo()
PHP Version => 7.3.11
System => Darwin MacBook-Pro.lan 19.6.0 Darwin Kernel Version
19.6.0: Sun Jul 5 00:43:10 PDT 2020; root:xnu-6153.141.1~9/
RELEASE_X86_64 x86_64
Build Date => Jul 5 2020 03:22:53
There is a lot of information in the phpinfo file, and when you are
looking for a specific configuration variable, it makes sense to use grep to
filter for what you are looking for.
PHP Configuration File
There is a PHP configuration file that controls all of these settings and it is
named php.ini. Depending on how PHP has been set up, this file can be
anywhere on your filesystem. Thankfully there is a line in the phpinfo that
tells you where to look for this file.
Configuration File (php.ini) Path => /etc
If the file does not exist, then PHP is using default values for settings
that are baked into it when it was originally compiled. In the past, these
default settings needed to be modified before you could use PHP on a web
server. The memory limit used to be only 8MB, which caused problems for
all but the smallest of scripts.
It is also possible to change most of the settings in the php.ini file,
inside of your PHP scripts, with the PHP function ini_set(). Note that
changing the settings in this way is only temporary.
343
Chapter 6
PHP
PHP Configuration in a Browser
Some installations of PHP use a different php.ini file for the browser
version of PHP. Currently, Brew uses the same php.ini file for the
command line and the browser. It is worth doubling-checking this,
because if you try to change settings in the wrong version, you will
invariably become frustrated.
PHP Web Server
PHP has a built-in web server. It should only be used for testing and never
be used in production. Let’s start PHP’s built-in web server.
% cd ~/random-files-master
% php -S 127.0.0.1:8000
PHP 7.3.11 Development Server started at Thu Jul 23 23:59:35
2020
Listening on http://127.0.0.1:8000
Document root is /Users/danielplatt/random-files-master
Press Ctrl-C to quit.
You can see from this output which folder PHP is looking in for files,
by looking at the line that starts Document root. This should be set to your
current directory.
Document root is /Users/danielplatt/random-files-master
If you visit http://127.0.0.1:8000/ from your web browser, you’ll see
that PHP doesn’t have a file to give you, as shown in Figure 6-1.
344
Chapter 6
PHP
Figure 6-1. Opening http://127.0.0.1:8000 in Safari
Note If you want PHP to serve a file for http://127.0.0.1:8000/,
you can create a default file called index.php. Try the info.php file that
you created earlier, by going to http://127.0.0.1:8000/info.php,
as shown in Figure 6-2.
Figure 6-2. PHP info when viewed in a web browser
345
Chapter 6
PHP
You should find this format easier to read than the same information
on the command line. Look back at your Terminal, where you started the
PHP web server. Every request to the PHP server has been logged for you
to see.
Listening on http://127.0.0.1:8000
Document root is /Users/danielplatt/random-files-master
Press Ctrl-C to quit.
php -S 127.0.0.1:8000
[Sun Jan 19 13:29:51 2020] 127.0.0.1:50302 [404]: / - No such
file or directory
[Sun Jan 19 13:29:51 2020] 127.0.0.1:50303 [404]: /favicon.
ico - No such file or directory
[Sun Jan 19 13:29:55 2020] 127.0.0.1:50304 [404]: / - No such
file or directory
[Sun Jan 19 13:29:56 2020] 127.0.0.1:50307 [404]: /favicon.
ico - No such file or directory
[Sun Jan 19 13:29:58 2020] 127.0.0.1:50310 [200]: /info.php
[Sun Jan 19 13:29:58 2020] 127.0.0.1:50311 [404]: /favicon.
ico - No such file or directory
Being able to see the requests to the web server greatly helps when
trying to create your own applications with PHP.
PHP Basics
In this section, we are going to look at some of the core concepts and
structures in PHP. These will be enough to get started building your own
scripts.
346
Chapter 6
PHP
L anguage
PHP has a lot of the same core concepts that we’ve seen with shell
scripting, but you will quickly find out that the structure or syntax is quite
different.
We are going to go through a lot of the common concepts to help you
get started, but we will only be scratching the surface of what you will be
able to do.
C
omments
When you start writing a script, you will not know how everything is going
to work. It’s beneficial to write pseudocode to help you figure out what will
go where and how it will flow. You use comment markers to tell PHP to
ignore whatever has been commented out.
Comments are typically used to describe a piece of code, without
someone having to read the code fully. It may also be that the code block
is quite complex and would require some time to fully understand it. A
comment can be a single line of text that describes the function or the
reason for doing the next few lines of code. A bad comment is one that isn’t
updated when the code is and therefore becomes misleading. Comments
come in two different forms—single-line and multiple-line comments.
S
ingle-Line Comments
Single-line comments use either the hash (#) symbol or two
backslashes (//), as shown in Listing 6-1.
Listing 6-1. Example of Single-Line Comments
<?php
// This is a comment
# And this is another comment.
347
Chapter 6
PHP
The single-line comments can occur anywhere on a line, and even
after a piece of code:
<?php
echo "Hello"; # Output greeting
Multi-Line Comments
Multi-line comments, like single-line comments, have a start symbol, but
they also have an end symbol. They begin with a forward slash and an
asterisk (/*) and end with an asterisk and a forward slash (*/). Everything
between the /* and */ is ignored by PHP:
<?php
/*
This is a multi-line comment.
PHP ignores everything on these lines.
Since they are surrounded by the comment symbols.
*/
Constants
By default, all variables are changeable. However, a constant is a special
variable that cannot be changed. Constants are named using all capital
letters. A constant is defined by using the define function:
define("MY_CONSTANT", 123);
Then you can access this constant using MY_CONSTANT or using
constant('MY_CONSTANT'):
echo MY_CONSTANT;
echo constant('MY_CONSTANT');
348
Chapter 6
PHP
What Can You Store in a Constant?
You can store any simple (scalar) value, such as a string, int, float, and
Boolean. You can also use the array.
Can You Change Constants?
Constants can never be changed once they have been created.
define("MY_CONSTANT", 123);
MY_CONSTANT = 1;
If you ran that code, you would get an error.
Parse error: syntax error, unexpected '='
Why Use Constants?
Constants are used typically for settings in PHP programs. They are really
good at this, because you cannot accidentally change their value.
P
redefined Constants
There are a few predefined constants available in PHP. We will see a couple
of these in action when exploring ints and floats. Another predefined
constant that you should know about is PHP_EOL. This constant contains a
string for a newline for your current system and can be used in place of \n.
echo "Example" . PHP_EOL;
There are a lot more constants available on the PHP website, at
https://www.php.net/manual/en/reserved.constants.php.
349
Chapter 6
PHP
Variables
Variables in PHP are similar to shell variables. The difference is that PHP
variables can store different types of values. When referencing a variable,
you use the dollar ($) symbol in front of the name, regardless of whether
you are reading or setting the value. The different types of variables that we
cover are:
•
Strings
•
Integers
•
Floats
•
Arrays
•
Objects
•
Nulls
Let’s explore them in more detail.
String Variables
A string is just a series of characters, enclosed in quotes.
$a = '1 string';
It doesn’t matter if the string contains letters, numbers, or symbols. You
can use the single quote (') or the double quote (") symbols to define a string.
Whichever symbol you use, you must start and end a string with the same type,
and include it within the string without first escaping it with backslash.
$a = 'PHP ';
Combining strings, called concatenating, is easy to do using the dot (.)
symbol.
echo "hello" . " " . "world";
hello world
350
Chapter 6
PHP
There is also a shorthand method for combining strings. Consider
adding an extra string to $a.
$a = 'hello';
$a = $a . ' world';
We can condense that into one operation with .= symbol.
$a = 'hello';
$a .= ' world';
One thing to note is that the double quote version of a string allows you
to use more than the single quoted string. With the double quoted string,
you can actually reference variables, like we did in shell programming.
I nteger Variables
With the integer type (usually called an int), you can store any number,
positive or negative.
$a = -5;
There is a limit to the size of the number that you can store in an int.
In PHP, there are a few constants that define PHP limits. For integers,
there are PHP_INT_MIN and PHP_INT_MAX, which define the bounds (see
Listing 6-2).
Listing 6-2. Display Lower and Upper Bounds for an Int
echo "The smallest int is " . PHP_INT_MIN . PHP_EOL;
echo "The largest int is " . PHP_INT_MAX . PHP_EOL;
% php int.php
The smallest int is -9223372036854775808
The largest int is 9223372036854775807
351
Chapter 6
PHP
You can do basic math on these variables.
$a = (10 + 4) / 2;
echo $a; // The output will be 7
The result will be an int, unless the answer isn’t a whole number. Then
the result will be a float.
Binary Representation of an Integer
It is worth noting that PHP internally stores your integer as a binary. Binary
is your computer’s native way to process and store numbers. For example,
an 8-bit number can store a number between 0 and 255, which is 256
different numbers. Table 6-1 shows you the different numbers that each
size can store.
Table 6-1. Number of States a Binary Number Can Store
8-Bit
7-Bit
6-Bit
5-Bit
4-Bit
3-Bit
2-Bit
1-Bit
256
128
64
32
16
8
4
2
The maximum number of states a bits can store is calculated as 2 to the
power of the number of bits (n) or 2n. In mathematical terms, it is written
as 2 ^ n. Therefore, the largest number that can be stored is (2 ^ n) - 1,
because the numbers start counting at zero.
Apple has standardized its whole computer lineup on 64-bit
processors. Let’s look at a 64-bit number.
(2 ^ 64) -1
= 18446744073709551615
We can see this in action with the Calculator app in macOS
Catalina. When you open the calculator, you need to change the view to
Programmer, as shown in Figure 6-3.
352
Chapter 6
PHP
Figure 6-3. The view menu in Calculator
Enter the value of 18446744073709551615 or press the one’s
complement (1’s) when the calculator displays 0 and the calculator should
look like Figure 6-4.
353
Chapter 6
PHP
Figure 6-4. The largest number that can be stored in a 64-bit number
This is larger than the maximum number that PHP can store, which in
my case is 9223372036854775807. There is a very good reason for this and
it has to do with the smallest number that PHP can store.
When we talked about the largest 64-bit number, we knew that the
smallest number was 0. We also know that the smallest number PHP can
store is -9223372036854775808. The most significant bit stores whether
an integer is positive or negative. We can see this in Figure 6-5, where the
number is now the same as PHP’s largest number.
354
Chapter 6
PHP
Figure 6-5. Largest number using 63 bits
Calculating a Value in Binary
The simplest way to determine binary numbers is to lay out the numbers
that each binary bit represents. When there is a 1, you add that to the total
number, and you skip it when there is a 0. For example, the number 200 is
shown in Table 6-2.
Table 6-2. Binary Representation of the Number 200
128
64
32
16
8
4
2
1
1
1
0
0
1
0
0
0
355
Chapter 6
PHP
We see this in PHP by using printf to print the binary representation
of the value we supply, as shown in Listing 6-3.
Listing 6-3. Displaying an Integer in Binary
<?php
$value = 200;
printf("%d in binary is %b\n", $value, $value);
// 200 in binary is 11001000
F loating-Point Numbers
Floating-point numbers (usually called floats, but sometimes they are
called a doubles) are similar to ints, but they also have a decimal fraction
to them.
$a = 0.1;
Floats have two constants—PHP_FLOAT_MIN and PHP_FLOAT_MAX—that
define the bounds (see Listing 6-4).
Listing 6-4. Displaying Lower and Upper Bounds of a Float
echo "The smallest positive float is " . PHP_FLOAT_MIN . PHP_EOL;
echo "The largest float is " . PHP_FLOAT_MAX . PHP_EOL;
% php float.php
The smallest positive float is 2.2250738585072E-308
The largest float is 1.7976931348623E+308
The PHP_FLOAT_MAX value can be converted from e-notation by
multiplying by 10 to the power of the number.
1.7976931348623 * 10^308
356
Chapter 6
PHP
Effectively, the decimal place will move 308 digits to the right. Suffice it
to say, you can store some pretty large numbers in a float. As with integers,
you can do basic math with floating-point numbers.
However, the result will always be a float. This happens, even if you
think the answer should be an integer.
var_dump(0.5 + 0.5);
float(1)
Binary Representation of a Float
You would be forgiven in thinking that computers are perfect at storing
floating-point numbers. However, this isn’t always possible. Earlier we saw
how computers stored binary numbers of integers.
Floats are split into the integer part of the number and the decimal
fraction, but this is internally stored, so you don’t need to worry about that.
The split is determined by the precision and is currently set to 14 digits in
PHP. The precision value is controlled by your php.ini file.
% php --info | grep precision
precision => 14 => 14
A 64-bit float uses 48 bits to store the integer and 16 bits to store the
float. When PHP stores the decimal fraction of the number, the binary
represents a fraction of 1, as shown in Table 6-3.
Table 6-3. Storing a Decimal in Binary
Bits
1-Bit 2-Bit 3-Bit 4-Bit
1/16
6-Bit
7 -it
8-Bit
1/32
1/64
1/128
1/256
Fraction 1/2
¼
Value
0.25 0.125 0.0625 0.03125 0.015625 0.0078125 0.00390625
0.5
1/8
5-Bit
357
Chapter 6
PHP
It’s easy for PHP to store decimal numbers like 0.25 and 0.5, as they
are 01000000 and 10000000, respectively. A number like 0.03125 is still
straightforward and requires five bits to successfully store it as 00100000.
However, numbers like 0.1 and 0.2 are much more difficult to store.
In Listing 6-5, the set of instructions calculate the binary representation
of a positive float. It works by multiplying the fraction by 2 and seeing if that
result is greater than 2. If it is, that is a binary 1. It also subtracts 1 from the
number. Otherwise it is a binary 0. It will keep looping to 8 bits.
Listing 6-5. Calculating the Binary Representation of a Float
<?php
$num = 0.1;
$int = intval($num);
$fraction = $num - $int;
$binary = '';
$position = 1;
for ($i = 0; $i<8; $i++) {
$fraction *= 2;
if ($fraction >= 1) {
$fraction -= 1;
$binary .= '1';
} else {
$binary .= '0';
}
}
printf("%f in binary is %08b.%s\n", $num, $int, $binary);
When we run Listing 6-5, we get the binary 00011001 from the output:
0.100000 in binary is 00000000.00011001
358
Chapter 6
PHP
However, 00011001 works out to be 0.097656125, which isn’t 0.1.
Let’s try the same Listing 6-5, but change the number of bits from 8 to
16. This time, the binary is 0001100110011001, which works out to be
0.0999908447265625:
0.100000 in binary is 00000000.0001100110011001
No matter how many bits we use, some decimal numbers cannot
be stored correctly. This is something to be mindful of when you’re
comparing floating-point numbers.
Shorthand Operators for Integers and Floats
PHP allows you to use shorthand for arithmetic operations.
$b = 10;
Normally, if you wanted to change $b, you would have to include $b in
the calculation.
$b = $b / 5;
Table 6-4 shows the mathematical operations that you can use.
Table 6-4. Mathematical Operators
Symbol
Operation
+
Addition
-
Subtraction
*
Multiplication
/
Division
%
Modulo
**
Raise to the power of
359
Chapter 6
PHP
However, you can shorten is and remove the additional $b variable.
$b /= 5;
Table 6-5 lists the shorthand operations.
Table 6-5. Shorthand Mathematical Operators
Symbol
Shorthand
Operation
+
+=
Addition
-
-=
Subtraction
*
*=
Multiplication
/
/=
Division
%
%=
Modulo
A
rray Variables
An array is a collection of elements. Each element represents a variable
that can be of any type, including another array. There are two different
types of array—numeric arrays and associative arrays. They both have their
place and the difference between them is related to how you access the
elements stored in the array.
Numeric Arrays
Numeric arrays are indexed using an integer. Unless specified, they will
start at zero. The following two examples will produce the same array:
Example 1:
$a = [1, 2.0, 3, "string"];
Example 2:
$a = [
0 => 1,
360
Chapter 6
PHP
1 => 2.0,
2 => 3,
3 => "string",
];
We can see what this looks like with var_dump:
var_dump($a);
array(4) {
[0]=>
int(1)
[1]=>
float(2)
[2]=>
int(3)
[3]=>
string(6) "string"
}
The best way to think about an array is like a row of boxes with a robot
arm for a picker, as shown in Figure 6-6.
Figure 6-6. Representation of an array using boxes
361
Chapter 6
PHP
How would you read the number 1 value from the array, in Figure 6-6?
You have to tell the robot (PHP) how many boxes to move across to get the
value you want. You start at the first box, so we don’t have to move. So, we
have to tell PHP to move 0 boxes across. In PHP, you do that using square
brackets:
echo $a[0];
1
To get a different number, you just have to assign a new value, as
shown in Listing 6-6.
Listing 6-6. An Element to a Numeric Array
$a[0] = 'New value'
echo $a[0];
New value
Adding a new value to the array is just as straightforward. We use the
square brackets again, but without a value. This will cause PHP to append
a value into the array:
$a[] = 'Additional value'
Let’s use var_dump to see how our array now looks:
array(4) {
[0]=>
string(9) "New value"
[1]=>
float(2)
[2]=>
int(3)
[3]=>
string(6) "string"
362
Chapter 6
PHP
[4]=>
string(16) "Additional value"
}
Removing elements from the array is as easy as unsetting them:
unset($a[4]);
Associative Arrays
Associative arrays are like numeric arrays, but the value you use to access
them is different. The index is based on a string, rather than a number.
$a = [
'key1' => 'carrot',
'key2' => 'potato',
];
Adding and removing elements is the same as with numeric arrays:
$a['key'] = 'cherry';
unset($a['key']);
Booleans
A Boolean value is a simple true or false.
$a = false;
Not to be confused with 'false', which is the word false in a string.
These values are used a lot in conditional statements and are the result of
comparison operators. I will discuss this more in the section covering if
statements.
363
Chapter 6
PHP
Object Variables
Objects are an important part of PHP.
$a = new stdClass();
There is a lot you can put into a class, but for the moment, know that
you can store variables and code in them.
Null Variables
Null means no value and it is used to define a variable without a value.
$a = null;
Type-Checking Variables
A variable isn’t locked into a specific type; it can be changed by writing
a value of a different type. How do you know what value is in a variable?
There is a function called gettype(), which will return the type of a
variable as a string.
echo gettype($a);
The possible values that will be echoed are:
"string"
"integer"
"float"
"array"
"object"
"NULL"
"resource"
364
Chapter 6
PHP
"resource closed"
"unknown type"
There are also built-in functions that can check that a variable is a
particular type. A full list is shown in Table 6-6.
Table 6-6. List of Built-In Type Checking Functions
Variable Type
Built-in Function
string
is_string()
integer
is_int() or is_integer()
Float
is_float()
array
is_array()
boolean
is_bool()
object
is_object()
null
is_null()
You can use the functions with an if statement to handle different
types of variables, as shown in Listing 6-7.
Listing 6-7. Checking if $a is a String
if (is_string($a)) {
echo "\$a is a string";
} elseif (is_bool($a)) {
echo "\$a is a boolean";
}
We will discuss the if statement in more detail later on in this chapter.
365
Chapter 6
PHP
Superglobals
PHP has a few variables that are called superglobals. As superglobal
is a variable that can be accessed anywhere in your project. Some
superglobals are:
•
$_SERVER
•
$_GET
•
$_POST
•
$_REQUEST
•
$_SESSION
These variables are associative arrays and, for the most part, should be
treated as read-only, with the exception of $_SESSION.
$_SERVER
You’ve seen this variable before, when we were looking at phpinfo() in the
Basic Usage section.
Note These variables will change depending on whether you are
accessing them within a Terminal PHP script or as a web request.
When accessed through a web browser, you will see the following
variables about the server and the client:
366
Chapter 6
PHP
Whereas, on Terminal, you have details about that environment.
$_SERVER['TERM_PROGRAM'] => Apple_Terminal
$_SERVER['SHELL'] => /bin/zsh
$_SERVER['TERM'] => xterm-256color
$_SERVER['TMPDIR'] => /var/folders/5z/tnwhfkg57hdfys5fxckr07_
h0000gn/T/
Out of all these superglobals, this is the only one that is populated on
Terminal.
Command-Line Arguments
You might remember, back in the beginning of the chapter, we showed an
example using phpinfo().
% php ~/random-files-master/info.php
phpinfo()
PHP Version => 7.3.9
System => Darwin MacBook-Pro.lan 19.2.0 Darwin Kernel Version
19.2.0: Sat Nov 9 03:47:04 PST 2019; root:xnu-6153.61.1~20/
RELEASE_X86_64 x86_64
If you look at the end of the output, you will see something similar
to this.
$_SERVER['argv'] => Array
(
[0] => /Users/danielplatt/random-files-master/info.php
)
$_SERVER['argc'] => 1
367
Chapter 6
PHP
Note These only show up when run from Terminal. You won't see
argv or argc in the browser version of phpinfo.
These variables define how the command was started.
$ _GET
This variable is made up of parameters from the URL used to access
the PHP script. Given the following URL, http://127.0.0.1/info.
php?a=1&b=2, you can expect the $_GET variable to look like this.
array(2) {
["a"]=>
string(1) "1"
["b"]=>
string(1) "2"
}
We can see this in action with the PHP web server:
% sudo /usr/bin/php -S 127.0.0.1:80
Password:
PHP 7.3.11 Development Server started at Thu Jul 30 10:23:18 2020
Listening on http://127.0.0.1:80
Document root is /Users/danielplatt/random-files-master
Press Ctrl-C to quit.
368
Chapter 6
PHP
Everything from the question mark until the end of the URL or hash
symbol is considered the query string. The bit before the equals sign is the
key and after is the value. The ampersand is the separator.
You can even pass an array into the query string by using the square
brackets. PHP will interpret them and append the next instance in the
array. Given the URL http://127.0.0.1/info.php?arr[]=1&arr[]=2, the
variable will show up as follows:
$_POST
The $_POST variable is similar. However, the data can be sent differently
from the browser. One way of sending this data is using a HTML form, with
the post method.
$_REQUEST
The request variable is a combination of $_GET and $_POST. Where
possible, use $_GET or $_POST directly.
Note The order is defined in phpinfo, by the request_order
directive.
369
Chapter 6
PHP
$ _SESSION
The session variable has the ability to persist between page reloads, given
the right circumstances. It will be unique for every different user/browser
that visits your page. Listing 6-8 is a very simple page counter to show the
user/browser page loads.
Listing 6-8. Simple Page Counter for Each User/Browser
<?php
session_start();
$i = 0;
if (isset($_SESSION['i'])) {
$i = $_SESSION['i'];
}
$_SESSION['i'] = $i+1;
var_dump($_SESSION);
Every time you load the page, $_SESSION['i'] will increment by 1.
However, if you were using Safari, and then you used Chrome, the count
would reset back to 1.
O
ther Superglobals
There are other superglobals that help you do other things. You can find
more information from the manual on php.net, at https://www.php.net/
manual/en/language.variables.superglobals.php.
370
Chapter 6
PHP
Functions
A function is a label you give to a block of PHP code, which you can call
from anywhere. We’ve already used one function, called var_dump. The
label is made up of the function name, var_dump, and the arguments
within the brackets. This function outputs the type of value in the variable
and the value.
var_dump(1.0);
float(1)
We can also create our own functions. Let’s try to re-create the var_
dump function. To start a function, we need to use the function keyword,
then provide the label and arguments. After this, we need to surround the
code with curly braces { }.
function var_dump($variable) {
# code
}
We just need the code now. You have seen all the required components.
function var_dump($variable) {
echo gettype($var) . "(" . $var . ")" . PHP_EOL;
}
If we try to run this in PHP, we will get an error.
Fatal error: Cannot redeclare var_dump()
This error is because we are trying to create a function with the same
name as an existing function. We need to give the function a unique name.
function my_var_dump($variable) {
echo gettype($var) . "(" . $var . ")" . PHP_EOL;
}
371
Chapter 6
PHP
Listing 6-9 shows how this function compares to the PHP version. I will
put the output in a comment after the function.
Listing 6-9. Full Example my_var_dump
<?php
function my_var_dump($variable) {
echo gettype($variable) . "(" . $variable . ")" . PHP_EOL;
}
var_dump("string");
# string(6) "string"
my_var_dump("string");
# string(string)
var_dump(1.0);
# float(1)
my_var_dump(1.0);
# double(1)
var_dump(42);
# int(42)
my_var_dump(42);
# integer(42)
As you can see, the output is similar, but not exactly the same. What
happens if you want to do something in a function and then return the
result?
$answer = addTwo(4);
# $answer = 6
You have seen all the components required to create a function that
returns a value, except one. The last component you need is the ability to
return a value from within a function, which is the return statement.
372
Chapter 6
PHP
Let’s create that function now.
function addTwo($int) {
return $int + 2;
}
The thing to note about the return statement is that no instructions
that happen after the return will be run.
function addTwo($int) {
return $int + 2;
echo "This will never been seen";
}
If Statements
So far, you’ve seen PHP programs that start at the top and run through,
line after line, until they finish, with no opportunity to skip any lines. An
if statement is used to change the flow of the program, in order to execute
different code depending on an expression. It’s like coming to a fork in the
road.
You can go left or right, but you need something to help you decide
which way to go. Maybe it’s a sign telling you which way to go, or maybe it’s
a flip of a coin. PHP is similar. The something that I spoke of is a Boolean
expression, something that works out to be true or false.
if (<expression>) {
# if expression is true
echo 'Go Left' . PHP_EOL;
} else {
# if expression is false
echo 'Go Right' . PHP_EOL;
}
373
Chapter 6
PHP
You may be aware that the else in the if statement is optional.
if (<expression>) {
# if expression is true
echo 'Go Left' . PHP_EOL;
}
It is also possible to include more than one expression check. You can
include additional if checks with the elseif keyword, as shown in Listing 6-10.
Listing 6-10. Example Using elseif
$a = rand (0, 1000 );
if ($a > 500) {
echo "\$a is greater than 500.";
} elseif ($a > 250) {
echo "\$a is greater than 250.";
} elseif ($a > 99) {
echo "\$a is greater or equal to 100.";
} else {
echo "\$a is less than to 100.";
}
It is possible to have as many or as few elseif checks as you want.
However, you need to make sure that they are performed in the correct
order. Imagine if the check for $a > 99 was first.
B
oolean Expression
A Boolean expression is a logical statement that works out to a simple
Boolean answer. The expression could be a simple, true or false. Some
built-in functions return Boolean values. An example of a function that
returns a Boolean is file_exists('/a/file/path'). It’s based on a file
existing or not.
374
Chapter 6
PHP
if (file_exists('~/random-files-master')) {
echo 'file or folder exists' . PHP_EOL;
} else {
echo 'file or folder does not exist' . PHP_EOL;
}
We will cover a few more functions, but there are far too many to list
them all here. You can find a complete list at https://www.php.net/
manual/en/funcref.php.
C
omparison Operators
Comparison operators are used to compare two values and produce a
Boolean. The values could be literally strings or variables. It doesn’t matter. If
you wanted to see if a variable equaled a string, you could use the following:
if ($var1 === 'people') {
echo 'Var1 is a string and equals.' . PHP_EOL;
}
Table 6-7 lists most of the comparison operators available in PHP.
Table 6-7. Comparison Operators in PHP
Type
Symbol
Notes
Equals
==
Not Equal
!=
Identical
===
Checks variable type
Not Identical
!==
Checks variable type
Greater than
>
Greater than or equal
>=
Less than
<
Less than or equal
<=
375
Chapter 6
PHP
When you compare two values, PHP will convert both sides of the
expression to the same type before performing the comparison.
Note It is best to use === and !== to check the comparison type,
before checking if they are equal.
Does the Variable Exist?
Occasionally, you might not know if a variable has been set. This comes up
a lot with superglobals. What happens if we try to use a superglobal that
doesn’t exist? The easiest way to find out is to try it. The following code is
trying to access an associate by an element that doesn’t exist.
<?php
echo $_GET['a'];
When this runs, we get an undefined index, as shown here:
% php /tmp/test.php
PHP Notice: Undefined index: a in /private/tmp/test.php on line 2
How do you check that a particular query parameter has been set? You
can wrap the variable in a function called isset(), to test if a variable exists,
and isset will return either true or false. You can see this in Listing 6-11.
Listing 6-11. Using isset with an if Statement
<?php
if (isset($_GET['a'])) {
echo "The variable $_GET['a'] exists.";
} else {
echo "The variable $_GET['a'] does not exist.";
}
376
Chapter 6
PHP
Loops
In the real world, a loop is something that goes around something else.
Like looping a rope around a post. In PHP, some loops have an end and
others do not, but they always loop around a piece of code. The purpose
of a loop in PHP is to keep running that code until they reach an end
condition.
The end condition is a Boolean expression, just like with the if
statements. There are a few different types of loops in PHP. We will discuss
the four different types of loops next.
The for Loop
The for loop uses a variable for counting that you define as part of the
loop. The loop has three parts to it. It declares the start value for the
variable ($i), then the Boolean expression ($i<4) allows the for loop to
run. While the expression is evaluated as true, the loop will keep running.
Third is the increment ($i++), which moves your variable closer to the
end condition. Here’s an example of a for loop that produces the output
0 - 3, followed by a newline:
for ($i=0; $i<4; $i++) {
echo $i . PHP_EOL;
}
Note The variable can be called anything you like.
The increment can also reduce the variable; you could make the for
loop count down to 1 from 4, with $i--.
for ($i=4; $i>0; $i--) {
echo $i . PHP_EOL;
}
377
Chapter 6
PHP
Or you could change the step from 1 to 2.
for ($i=0; $i<10; $i+=2) {
echo $i . PHP_EOL;
}
Another way the for loop can be used is to step through a
numeric array.
$arr = ['a', 'b', 'c'];
$count = count($arr);
for ($i=0; $i<$count; $i++) {
echo $arr[$i] . PHP_EOL;
}
This will print every element in the array. However, this will work only
with numeric arrays that are in sequence.
The while Loop
The while loop typically works the same way as a for loop and can be
easily used like one.
$i = 0;
while ($i<4) {
echo $i . PHP_EOL;
$i++;
}
However, the real power of the while loop is that it keeps doing an
action until it results in the action you require. For example, you can use a
while loop to read the contents of a file until the end of the file is reached,
as shown in Listing 6-12.
378
Chapter 6
PHP
Listing 6-12. PHP Script to Read and Echo the Contents of a File
$filePointer = fopen('random-files-master/spook.txt', 'r');
if (!$filePointer) {
die('Could not open file' . PHP_EOL);
}
while ($line = fgets($filePointer)) {
echo $line;
}
fclose($filePointer);
In a while loop, it is possible that the expression is never evaluated
as true, and the loop will never have been run. In effect, the loop will be
skipped over.
The do while Loop
The do while loop is very similar to the while loop. However, the
difference is that the expression is evaluated at the end of the loop. This
means that the loop will always happen at least once.
$i = 0;
do {
echo $i . PHP_EOL;
$i++;
} while ($i < 4);
379
Chapter 6
PHP
The foreach Loop
With the for loop, we can use the variable to loop through an array.
$arr = ['a', 'b', 'c'];
$count = count($arr);
for ($i=0; $i<$count; $i++) {
echo $arr[$i] . PHP_EOL;
}
The downside with this is you have to count the elements first. You also
need to provide a numeric array. If any of the numbers are missing from
the sequence, you will have errors. There are ways around this, using a
method called array_keys(); however, you can also use the foreach loop.
foreach ($arr as $value) {
echo $value . PHP_EOL;
}
The foreach loop doesn’t care which type of array is iterated. It doesn’t
care if there are numbers missing from the sequence. If you want to know
what position a value is in the array, you can tweak the foreach syntax to
give you that variable as well.
foreach ($arr as $index => $value) {
echo $value . PHP_EOL;
}
Exiting a Loop Early
If you want to break out of a loop before the end condition, you can use the
break keyword.
380
Chapter 6
PHP
$count = 0;
while (true) {
echo $count . PHP_EOL;
$count++;
if (rand(0, 10) === 0) {
break;
}
}
This example will keep printing numbers in ascending order until
rand() returns 0. Another keyword to alter the loops is continue, which
will skip to the next iteration of the loop. The example here will only output
odd numbers. It skips the even numbers by using the modulo symbol (%)
and continue, when $i is even.
for ($i=0; $i<10; $i++) {
if ($i % 2 === 0) {
continue;
}
echo $i . PHP_EOL;
}
Both break and continue will alter any of these loops.
Improved my_var_dump
In our attempt to make a function that worked like var_dump, we didn’t
test it with an array. If we had, we would have noticed that it didn’t work as
expected. Assume this is the output variable we want to dump.
$arr = [
1,
2,
381
Chapter 6
PHP
'',
[],
];
var_dump would show the third element as an empty array.
var_dump($arr);
/*
array(4) {
[0]=>int(1)
[1]=>int(2)
[2]=>string(0) ""
[3]=>array(0) {}
}
*/
However, our my_var_dump function lists the third element as Array.
my_var_dump($arr);
# array(Array)
If you try to use an array as a string, PHP will treat it as a string
("Array"). We need to add more code to handle an array.
function my_var_dump($variable) {
echo gettype($variable) . "(" . $variable . ")" . PHP_EOL;
}
If we use an if statement, we can check if the variable is an array with
is_array(). We can then iterate over the array and call my_var_dump for
the elements inside.
function my_var_dump($variable) {
if (is_array($variable)) {
echo "array(" . count($variable) . ") {" . PHP_EOL;
382
Chapter 6
PHP
foreach ($variable as $key => $value) {
echo " [{$key}] => ";
my_var_dump($value);
}
echo "}" . PHP_EOL;
} else {
echo gettype($variable) . "(" . $variable . ")" . PHP_EOL;
}
}
array(4)
[0] =>
[1] =>
[2] =>
[3] =>
}
}
{
integer(1)
integer(2)
string()
array(0) {
Although this still isn’t perfect, it is good enough to show you many
different concepts of programming in PHP, including recursion.
Dependencies
On macOS, Bash has a dependency manager that we installed. It’s Brew.
The dependency manager is great at helping you keep all the installed
commands up to date.
When building websites in PHP, developers will need to add other
people’s code to their projects. These pieces of code are called libraries,
components, plugins, or bundles. PHP has a dependency manager for it
called Composer. Composer refers to these as dependencies as packages.
383
Chapter 6
PHP
This is useful for anyone who needs to track their dependencies in
their projects. This is especially important when more than one person can
make changes to a project. Each new release of a package could have any
combination of new features and bug fixes. Let’s install Composer.
% brew install composer
Anything that you have installed will eventually go out of date. With
software, it can happen quickly due to new features or fixes for recently
discovered bugs. You define your project’s dependencies in a file called
composer.json.
Composer can also create this file for you with composer init in your
project directory. These examples assume that your project directory is ~/
php-project.
Note The composer init command will ask you a series of
questions. Each question will have square brackets, [ ], at the end
which will be the defaults, when you press the Return key without
typing anything.
Let’s now run through a basic composer init example but skip
all dependencies, which we will add later. You can see this example in
Listing 6-13.
Listing 6-13. Example Output from composer init
% mkdir ~/php-project && cd ~/php-project
% composer init
Welcome to the Composer config generator
384
Chapter 6
PHP
This command will guide you through creating your composer.json
config.
Package name (<vendor>/<name>) [danielplatt/php-project]:
Description []: my project
Author [Daniel Platt <github@ofdan.co.uk>, n to skip]:
Minimum Stability []: stable
Package Type (e.g. library, project, metapackage, composerplugin) []: project
License []:
Define your dependencies.
Would you like to define your dependencies (require)
interactively [yes]? no
Would you like to define your dev dependencies (require-dev)
interactively [yes]? no
{
"name": "danielplatt/php-project",
"authors": [
{
"name": "Daniel Platt",
"email": "github@ofdan.co.uk"
}
],
"require": {}
}
Do you confirm generation [yes]?
The information that was entered matters only if you are sharing the
project with anyone or are publishing it online.
385
Chapter 6
PHP
S
earching for Packages
In my PHP projects, I use a group of packages called Symfony. They are
well maintained and used by many members of the PHP community. To
find packages to install, you can use composer search <term>. I’m going
to search for Symfony packages.
% composer search symfony
symfony/process Symfony Process Component
symfony/polyfill-mbstring Symfony polyfill for the Mbstring extension
symfony/http-foundation Symfony HttpFoundation Component
symfony/finder Symfony Finder Component
symfony/event-dispatcher Symfony EventDispatcher Component
You might prefer searching for packages using the companion website
https://packagist.org/, which also provides the readme package and
the usage statistics, as shown in Figure 6-7.
Figure 6-7. Searching for symfony on packagist.org
386
Chapter 6
PHP
Updating Packages
Composer can update your dependencies whenever you run the update
command and then saves them to a file called composer.lock.
% composer update
Loading composer repositories with package information
Updating dependencies (including require-dev)
Nothing to install or update
Generating autoload files
Note The only time the composer.lock file is updated is when
you run composer update or composer require. We will cover
composer require in the next section.
Installing Packages
Composer install will only install the specific dependencies from the
composer.lock file. If this file doesn’t exist, Composer will treat it as if you
ran composer update.
The idea is, you can give the composer.json file to anyone and it will
install the latest versions of all the dependencies. If you want the other
person to install exactly the same dependencies as you have, you will need
to provide them with the composer.json and composer.lock files.
Then they will be able to run Composer install from the project directory,
which includes these Composer files. They can then run composer install to
install all the required packages and their specific versions.
% composer install
Loading composer repositories with package information
Updating dependencies (including require-dev)
Nothing to install or update
Generating autoload files
387
Chapter 6
PHP
Adding Packages
When I used composer init, I specifically skipped defining the
dependencies. Normally, you would know what dependencies you wanted
to add and would add them at that time.
However, you can use composer require to add them now and
Composer will guide you through the process. It will add the dependencies
to the require section of the composer.json file.
% composer require
Search for a package:
You then need to enter the name of the package your project requires.
I will use symfony/finder, which is a package that helps you find files
on your filesystem.
% composer require
Search for a package:
Enter the version constraint to require (or leave blank to use
the latest version):
Using version ^5.1 for symfony/finder
Version Constraint
The version constraint is a way to express which version of a package you
want to be installed. There are a few different ways to express the version
constraint, depending on what you are trying to achieve.
It’s worth noting that most version numbers are made of three parts,
which define the differences between the different versions of a package.
Major . Minor . Revision
388
Chapter 6
PHP
This is called semantic versioning. If package maintainers follow this
definition, we should be free to install the latest revision of a package
without it breaking anything. We should also be able to install any newer
minor versions without issue, but occasionally some issues happen. The
Symfony components have a backward-compatibility promise, which
means the minor updates will not break applications. When a package
moves its version to a major release, you know that they have made a
break.
Exact Constraint
At the time of this writing, the current version of symfony/finder is 5.1.3.
If you entered 5.1.3, or any other version number, you are using the exact
constraint. With an exact constraint, Composer will never be able to
upgrade that package to a newer release.
Wildcard Constraint
The wildcard constraint uses the asterisk symbol to tell Composer that we
do mind what value that part of the constraint is. We can use the asterisk
to replace the revision part, 5.1.*, or the minor part, 5.*, of the version
constraint. It’s entirely acceptable to replace the whole constraint with
the wildcard symbol, if you always want to install the latest version of a
package. It is worth noting that it is entirely possible to match an older
version of a package with the wildcard constraint by mistake.
Caret Constraint
The caret constraint is similar to the wildcard constraint, but it solves the
problem of accidentally allowing an older version of the package to be
installable.
389
Chapter 6
PHP
An example of the caret constraint is ^5.1.3. This will allow Composer
to install any version that is 5.1.3 or greater, but not allow the next major
release. That means ^5.1.3 will allow version up to, but not including,
6.0.0. With the caret constraint, you do not need to specify the revision part
of the version. If it is omitted, it will be treated as 0. For example, ^5.1 will
be treated as ^5.1.0.
Development Dependencies
The --dev argument allows you to add dependencies that your project
needs for development, but that are not needed when the website
goes live.
% composer require --dev
The process is exactly the same as before, but the dependencies are
added to a require-dev section of the composer.json file.
After Dependencies Have Been Specified
When you have finished adding packages, just press Enter on the
Searching for Package Prompt to end this process. Composer will write the
composer.json and composer.lock files.
The other thing Composer will do is download the dependencies and
store them in a directory called vendor, as shown here.
Search for a package:
./composer.json has been updated
Loading composer repositories with package information
Updating dependencies (including require-dev)
Package operations: 1 install, 0 updates, 0 removals
- Installing symfony/finder (v5.1.3): Downloading (100%)
Writing lock file
Generating autoload files
390
Chapter 6
PHP
Note Once you have a composer.json file, you should no longer
use composer init, as it will overwrite your existing composer.
json and composer.lock files.
Using Packages in PHP
Now that you have Composer set up for your project and have installed
a dependency, you need a way to be able to use them. Using the
dependencies inside a PHP file is as simple as requiring the autoload.php
script that Composer sets up:
<?php
require "vendor/autoload.php";
Web Browser Projects
Now it’s a matter of understanding how the packages work and reading the
package’s readme file to take full advantage of them.
Project 6-1: Person API
We’re going to create an API that returns data about a person. Normally,
we would be getting this data from a database, but because we don’t have a
database, we are going to make it all up. We are going to fake it.
You Will Need
•
Arrays
•
The Faker library
•
json_encode
•
PHP web server
391
Chapter 6
PHP
Faker is a PHP library that generates fake data for you. The data
that it generates is helpful when you’re building a database, because it
allows you to populate it with semi-realistic data. Faker will generate fake
phone numbers, addresses, and much more, but also allow you to specify
different regions. Let’s get the initial setup.
% mkdir ~/person-api
% cd ~/person-api
% composer require fzaninotto/faker
The script in Listing 6-14 can help you get started.
Listing 6-14. index.php Starting Script
<?php
require "vendor/autoload.php";
$faker = Faker\Factory::create();
$gender = 'male';
if ($faker->boolean) {
$gender = 'female';
}
$person = [
'title' => $faker->title($gender),
];
echo json_encode($person);
When you are ready to test your code, you will need to fire up your web
server. Hint: For more information on how to use Faker, look at the project
documentation at https://github.com/fzaninotto/Faker.
392
Chapter 6
PHP
Expected Output
I am using curl to see the output from the script, as we can format the
response nicely, and this will work in Safari.
Note 127.0.0.1 is an IP address that you can use on your own
computer but its content is not visible on another computer.
% curl -s http://127.0.0.1/ | jq
{
"title": "Prof.",
"firstName": "Jonas",
"lastName": "Hauck",
"address": "46290 Liza Rest\nEast Virginiaside, NE 83960-4858",
"country": "United States Minor Outlying Islands"
"jobTitle": "Speech-Language Pathologist",
"emailAddress": "uadams@example.org",
"phoneNumber": "+1 (383) 614-3188"
}
When you are ready to test your script, you will need to start the PHP
web server from within your project.
% sudo php -S 127.0.0.1:80
PHP 7.3.11 Development Server started at Thu Jul 30 09:49:
47 2020
Listening on http://127.0.0.1:80
Document root is /Users/danielplatt/person-api
Press Ctrl-C to quit.
393
Chapter 6
PHP
S
uggested Answer
Notice in Listing 6-15 that the array keys I chose mostly match up with Faker.
Listing 6-15. index.php Suggested Answer
<?php
require "vendor/autoload.php";
$faker = Faker\Factory::create();
$gender = 'male';
if ($faker->boolean) {
$gender = 'female';
}
$person = [
'title' => $faker->title($gender),
'firstName' => $faker->firstName($gender),
'lastName' => $faker->lastName,
'address' => $faker->address,
'country' => $faker->country,
'jobTitle' => $faker->jobTitle,
'emailAddress' => $faker->email,
'phoneNumber' => $faker->phoneNumber,
];
echo json_encode($person);
Project 6-2: People API
We’re going to extend our API that returned data about a person and
return multiple people based on a query parameter.
394
Chapter 6
PHP
You Will Need
•
Person API
•
A loop
•
Array appending
•
$_GET
Let’s get the initial setup, which is shown in Listing 6-16.
% cp -r ~/person-api ~/people-api
Listing 6-16. index.php Starting Script
<?php
require "vendor/autoload.php";
$faker = Faker\Factory::create();
$people = [];
echo json_encode($people);
When you are ready to test your script, you will need to start the PHP
web server from within your project.
% sudo php -S 127.0.0.1:80
PHP 7.3.11 Development Server started at Thu Jul 30 09:49:47 2020
Listening on http://127.0.0.1:80
Document root is /Users/danielplatt/people-api
Press Ctrl-C to quit.
395
Chapter 6
PHP
Expected Output
Here’s the expected output:
% curl -s http://127.0.0.1/?count=2 | jq
[
{
"title": "Mrs.",
"firstName": "Rhoda",
"lastName": "Predovic",
"address": "44811 Norma Trail Apt. 823\nTressashire, MD
91023-6551",
"country": "Guyana",
"jobTitle": "Stock Broker",
"emailAddress": "kelsi32@example.net",
"phoneNumber": "276.932.3867 x43340"
},
{
"title": "Ms.",
"firstName": "Deborah",
"lastName": "Durgan",
"address": "476 Genoveva Hill\nBergnaumfurt, NV 73979-1649",
"country": "Mali",
"jobTitle": "Fence Erector",
"emailAddress": "marshall.thompson@example.com",
"phoneNumber": "385.294.9630 x5924"
},
}
Once we return a list of people, we can also convert the JSON output
into the CSV format.
% curl -s http://127.0.0.1/ | jq | in2csv --format csv
396
Chapter 6
PHP
S
uggested Answer
In my answer in Listing 6-17, I made the count parameter optional, by
checking it has been set and putting that value in $count and otherwise
defaulting $count to 10. I forced $_GET['count'] to be an int, to make
sure the script works as expected if someone entered something other
than a number. Then I use a loop to decrement the $count variable until it
reaches zero.
Listing 6-17. index.php Suggested Answer
<?php
require "vendor/autoload.php";
$people = [];
$faker = Faker\Factory::create();
$count = 10;
if (isset($_GET['count']) && $_GET['count'] > 0) {
$count = (int) $_GET['count'];
}
while ($count > 0) {
$gender = 'male';
if ($faker->boolean) {
$gender = 'female';
}
$person = [
'title' => $faker->title($gender),
'firstName' => $faker->firstName($gender),
'lastName' => $faker->lastName,
397
Chapter 6
PHP
'address' => $faker->address,
'country' => $faker->country,
'jobTitle' => $faker->jobTitle,
'emailAddress' => $faker->safeEmail,
'phoneNumber' => $faker->phoneNumber,
];
$people[] = $person;
$count--;
}
echo json_encode($people);
Command-Line Projects
The following two projects involve using the command line to perform
various functions.
Project 6-3: Arguments
In this project, I want you to print out the arguments and a message if no
arguments have been provided. This is the same project you did for shell
programming.
You Will Need
398
•
if
•
$_SERVER['argv']
•
$_SERVER['argc']
•
A foreach loop
Chapter 6
PHP
E xpected Output
When no arguments have been provided, you need to output the usage
instructions.
% php print-args.php
Usage: print-args.php message...
When arguments have been provided, I want to you iterate over them
and print them out, along with their position.
% php print-args.php "hello" "world" 1 2 3
Arg 1: hello
Arg 2: world
Arg 3: 1
Arg 4: 2
Arg 5: 3
How would you solve this?
S
uggested Answer
The first thing you need to do is check if $_SERVER['argc'] is less than 2
to print out the usage instructions (see Listing 6-18). The reason this is less
than 2, rather than less than 1, is because the script name is counted as an
argument. Once you know that there are arguments, you can use a foreach
loop to iterate over them. Make sure you skip position zero, as that is the
script filename.
Listing 6-18. print-args.php Suggested Answer
<?php
if ($_SERVER['argc'] < 2) {
echo "Usage: " . $_SERVER['argv'][0] . " message...\n";
die;
}
399
Chapter 6
PHP
foreach ($_SERVER['argv'] as $position => $message) {
if ($position === 0) {
continue;
}
echo "Arg $position: $message\n";
}
Project 6-4: Higher or Lower
In this project, we will create a simple program where you have to guess
the random number the computer has picked between 1 and 10. The script
will give you hints as to whether the answer is higher or lower, but limit you
to five guesses. Let’s create a file called higher-or-lower.php.
You Will Need
•
if
•
while
•
readline($prompt)
•
rand($min, $max)
We haven’t used the readline function before, but it is straightforward.
The $prompt that you pass to it is just a string that will be printed to the
screen. Then readline will wait for the user to type something in and press
the Return key to return whatever can be captured into a variable.
$guess = readline("Guess: ");
400
Chapter 6
PHP
E xpected Output
I’m expecting your script to start by outputting how many guesses are left.
The script should then output whether each guess is lower than, higher
than, or matches the answer. Finally, when all the guesses are used up, the
script should end by outputting the answer.
% ./higher-or-lower.php
Higher or Lower
===============
Guess the number I am thinking of between 1 and 10.
You have 5 guesses.
Guess: 1
Higher!
Guess: 2
Higher!
Guess: 3
Higher!
Guess: 4
Higher!
Guess: 5
Higher!
Sorry, you didn't guess it correctly.
The answer was 6.
S
uggested Answer
Listing 6-19 starts by generating a random number for the answer. There is
a for loop with the number of guesses built into it. For every iteration, or
guess, the loop will check to see if the answer is higher or lower than the
random number. If the answer is guessed correctly, the script will exit. If
the loop eventually exits, the script will print the answer and finish.
401
Chapter 6
PHP
Listing 6-19. higher-or-lower.php Suggested Answer
<?php
$guess = 0;
$randomNumber = rand(1, 10);
echo "Higher or Lower
===============
Guess the number I am thinking of between 1 and 10.
You have 5 guesses.
";
for ($i=0; $i<5; $i++) {
$guess = (int) readline("Guess: ");
if ($guess < $randomNumber) {
echo "Higher!" . PHP_EOL;
} elseif ($guess > $randomNumber) {
echo "Lower!" . PHP_EOL;
} elseif ($guess === $randomNumber) {
echo "You guess correctly!" . PHP_EOL;
exit;
}
}
echo "Sorry, you didn't guess it correctly.
The answer was $randomNumber.
";
402
Chapter 6
PHP
If you want to take this project further, try to make the limits
changeable, just like you did in in the shell scripting project in Chapter 5
(Project 5-4: Higher or Lower with Changeable Limits).
S
ummary
In this chapter we looked at PHP, another scripting language that is
available within Terminal. It’s a popular general-purpose scripting
language that is perfect for web development. To help illustrate its value,
we reviewed a couple of web-based command-line projects. In the next
chapter, we will explore how to keep track of changes in text files and
scripts with version control.
403
CHAPTER 7
Version Control
Have you ever worked on a large document on your computer? When
I was at university, I frequently had to write long documents. This was
back when computers still had a 3 ½-inch floppy drive, which should give
you some idea how long ago we’re talking. I was forever worried that the
computer would corrupt my document.
To get around this, I would duplicate the document before making
changes. When I’d finished writing the document, I’d usually have 10 or
20 different versions of the file, with names like “Document Copy 11” or
“Latest New Document.”
This was the student version control of the time. Version control is very
similar to my story. It keeps track of the changes in documents and allows
you to go back and retrieve a previous version of a file. Version control can
also store the contents of a whole directory of files. In this chapter, we’ll
look at version control today.
Version Control at a Glance
Each new version that is stored in a repository is called a commit. A commit
will contain the file differences, as well as who committed them, when
they happened, a description of the changes, and a reference to the parent
commit, as shown in Figure 7-1.
© Daniel Platt 2021
D. Platt, Tweak Your Mac Terminal, https://doi.org/10.1007/978-1-4842-6171-2_7
405
Chapter 7
Version Control
Figure 7-1. An example of a git commit
With all this information, git will then create an identifier for the
commit, which can be referenced at a later date. This identifier is referred
to as a commit hash. A group of files that are managed by version control
are referred to as a repository.
You can browse the commits in a repository and revert any files to a
previous commit. This is true even if you deleted the file, as long as it was
previously committed. The version control system that I use on a daily
basis is called git. There are other version control systems in use on the
Internet at the moment and, according to Wikipedia, the most popular
hosted version control system is Github.com, which uses git.
Version control has helped save the day for me many times. It’s helped
me answer questions like these:
406
•
Who deleted that file?
•
Who made this change ?
•
What changes were made to this feature?
Chapter 7
Version Control
Version control also allows you to take the current project and create
a branch of it. In this branch, you can make all the changes you wanted.
Eventually, you might want to merge the changes back into the master
branch. Version control can help you do that.
G
etting Started
You’ve interacted with git already, because Brew uses git to keep track of all
the updates. When Brew says it is updating, it is downloading information
from a git repository.
All the applications and commands that we’ve been using will have
originally been checked out by Brew, using the version control repository.
You might not have noticed, but when you downloaded the random-
files directory from GitHub.com, you were actually downloading it from a
git repository. To be fair, it was downloaded as a zip, but the files are hosted
in a version control system. If you want to see the repository, you can
access it from https://github.com/hackzilla/random-files.
There are a few terms that GitHub uses in the interface that are worth
defining, and they are explained in Table 7-1.
Table 7-1. GitHub Terms
Commits
Individual code changes.
Issues
Bug reports and feature requests.
Pull
requests
Commits that contain bug fixes or features. They have yet to be
integrated into the master branch.
Releases
Packaged versions of the application.
407
Chapter 7
Version Control
Getting started using a website like GitHub is easy, but the point of this
book is about doing things in Terminal to help you get a better understanding
of how things work. It is worth knowing how to do it from Terminal as well.
Getting started is easy, as macOS includes the git client, so there is
nothing to install.
C
loning Repositories
The good thing about git is it is really good at collaborating with others.
Originally git was seen as a distributed version control system, which
meant it was designed to collaborate with your friends and colleagues.
Over time, companies created the hosted git repository model, where
everyone sends and receives updates. They offer both private and public
repositories, whereby private is where you want to limit access to certain
people or organizations.
If you created a public repository, everyone will be able to read from it, but
only select people will be able to write to it. My repository for random-files
can be seen in Figure 7-2; it’s is a public repository that is hosted on GitHub.
Figure 7-2. https://github.com/hackzilla/random-files
408
Chapter 7
Version Control
If you wanted to download this repo, you could use the Download ZIP
option, which is effectively what you did at the beginning of Chapter 3. Or
you could grab this URL from the Clone or Download option, as shown in
Figure 7-3.
Figure 7-3. The Clone or Download button on a GitHub repository
With the URL from Figure 7-3, you can download the repository, which
not only includes the files, but the history as well. The command I will be
using is git clone.
% git clone https://github.com/hackzilla/random-files.git
Cloning into 'random-files'...
remote: Enumerating objects: 19, done.
remote: Counting objects: 100% (19/19), done.
remote: Compressing objects: 100% (19/19), done.
remote: Total 19 (delta 3), reused 11 (delta 0), pack-reused 0
Unpacking objects: 100% (19/19), 11.23 KiB | 1.02 MiB/s, done.
Git will create a folder with the same name as the repo, and you can
see this in the output as Cloning into 'random-files'. This is now an
exact copy of the repository. The URL you cloned will now be known as the
remote repository.
409
Chapter 7
Version Control
Branches
All repositories have at least one branch, which is called master. The
random-files repository only has this one branch, but we can create more.
Let’s create a branch called my-branch.
% git checkout -b my-branch
Switched to a new branch 'my-branch'
The -b argument tells git checkout to create the new branch. You can
switch freely between the branches using the git checkout command.
% git checkout master
Switched to branch 'master'
Your branch is up to date with 'origin/master'.
When you see 'origin/master', this refers to the master branch of
origin. Origin is just a label for the remote, which means that origin/master
is the remote master branch.
The HEAD Branch
The HEAD is a special branch. It is a pointer to the commit that you are
working with. You can think of the HEAD as your working directory in git.
Tags
Tags are labels that point to specific commits. Imagine you are working
on a project where you release different versions. Without tags, you would
have all your commits in the master, but no way to know which commit
applied to which released version.
Tags allow you to specify which commit matches which release. They
can be published for all to see. This is how the composer knows which
version of the source code to download.
410
Chapter 7
Version Control
Updating the Repository
When you clone a repository, you are getting everything stored at that
moment in time. When the owner of the repository makes additional
commits, you will not automatically receive them.
The server that you get your repository from is called the remote in git.
The git commands we run will need to be run when we are inside of the
repository.
% cd random-files
Fetch
The git fetch command will check the remote server and compare the
log with what it has stored locally. If there are no changes, then git fetch
will exit without displaying anything.
% git fetch
Let’s check a repository that I haven’t updated in a while and you will
see the difference.
% git fetch
remote: Enumerating objects: 413, done.
remote: Counting objects: 100% (413/413), done.
remote: Compressing objects: 100% (66/66), done.
remote: Total 3118 (delta 355), reused 381 (delta 346), packreused 2705
Receiving objects: 100% (3118/3118), 506.30 KiB | 1.95 MiB/s,
done.
Resolving deltas: 100% (1815/1815), completed with 34 local
objects.
From github.com:hackzilla/TicketBundle
411
Chapter 7
Version Control
7d19a08..2c13f7f master ->
* [new branch] 3.x ->
* [new tag] 3.3.0 ->
* [new tag] 3.3.1 ->
origin/master
origin/3.x
3.3.0
3.3.1
At this point, git is now aware of new changes, but will not have made
any changes to the files on your drive, or updated you to the latest commit.
The HEAD will remain pointing to the same commit, the one before the
fetch.
Status
After you fetch and make git aware of the latest commits, you need to see
what has changed. This is where git status comes in.
git status will tell you where you are in relation to the remote
repository. When we look at my out-of-date TicketBundle repository, we
see it is 525 commits behind.
% git status
On branch master
Your branch is behind 'origin/master' by 525 commits, and can
be fast-forwarded.
(use "git pull" to update your local branch)
nothing to commit, working tree clean
However, when we look at the random-files repository, we see that I
am up to date and there is nothing new.
% git status
On branch master
Your branch is up to date with 'origin/master'.
nothing to commit, working tree clean
412
Chapter 7
Version Control
In both cases, git status told me there was “nothing to commit.” This
is letting you know that there are no file differences between what is stored
in git and on your local filesystem. This will depend on which commit your
HEAD is pointing to.
If you have made changes to the contents of the random-files
repository, then git status will tell you about them. I am going to create a
new file and edit the Readme.md to illustrate new and modified files.
% touch new-file
% nano Readme.md
% git status
On branch master
Your branch is up to date with 'origin/master'.
Changes not staged for commit:
(use "git add <file>..." to update what will be committed)
(use "git restore <file>..." to discard changes in working
directory)
modified: Readme.md
Untracked files:
(use "git add <file>..." to include in what will be
committed)
new-file
no changes added to commit (use "git add" and/or "git commit -a")
I will discuss what to do about changes later.
Pulling
You’ve seen how to make git aware of changes and how to see how many
commits behind you are. What you need to do now is bring the latest
changes into the repository. This is where git pull comes in.
413
Chapter 7
Version Control
When you use git pull, you can limit it to download a single branch
or everything. There are reasons for wanting to do both.
You will likely want to download everything for repositories you own,
but a public repository that has many thousands of commits on many
different branches will likely be more than you need.
To pull in the changes from just a remote branch, which will update
and set the HEAD to the most recent commit, use the following:
% git pull origin master
Alternatively, you can pull down everything by omitting the origin
master. This will do everything that pulling a specific branch will do, but
will also store all the changes in the other branches.
% git pull
Your First Repository
It’s time to create your first repository, or repo for short. First, you need to
create a folder that the git repo will live in; this is also where you will store
all your files that you want to be versioned.
% mkdir "my life's work"
% cd "my life's work"
Now that you have the folder and you are inside, you can use git to
convert this folder into a repo.
% git init
Initialized empty Git repository in /Users/danielplatt/my
life's work/.git/
Everything that makes this folder a git repo is in that .git folder. We
can see if there are any commits, by using git log.
414
Chapter 7
Version Control
% git log
fatal: your current branch 'master' does not have any commits
yet
First, we need some files.
% touch "Great Essay" "First Symphony"
These are just empty files, but they will help to illustrate the point. We
can use git status to check on the state of our git repository. status can
help us identify which changes have not yet been committed to the repo.
% git status
On branch master
No commits yet
Untracked files:
(use "git add <file>..." to include in what will be
committed)
First Symphony
Great Essay
nothing added to commit but untracked files present (use "git
add" to track)
We can see that git status knows about the two files that we created
and is calling them untracked files. An untracked file is a file that has never
been saved to this git repo.
When you start a commit, you load the changes into a staging area.
Once you are happy with all the changes in the staging area, you tell git to
commit them.
415
Chapter 7
Version Control
Adding Files to a Repository
Adding files to the staging area is straightforward.
% git add "Great Essay"
% git add "First Symphony"
You could have easily added everything by using a wildcard or by
specifying the current directory with a dot.
% git add .
The git add command won't produce any output, but you can see
what it has done by issuing another status.
% git status
On branch master
Your branch is up to date with 'origin/master'.
Changes to be committed:
(use "git restore --staged <file>..." to unstage)
new file: Great Essay
new file: First Symphony
Removing Files from a Repository
If you accidentally added a file that you didn't want to commit, you can
remove it.
% git rm "First Symphony"
error: the following file has changes staged in the index:
First Symphony
(use --cached to keep the file, or -f to force removal)
416
Chapter 7
Version Control
When you tell git to remove a file, it will want to know whether you
want to just remove it from the staging environment, or completely from
the filesystem. Use --cached to remove it from the staging environment,
and -f to remove it from the filesystem.
% git rm --cached "First Symphony"
rm 'First Symphony'
We should have the file called "Great Essay" staged for committing
and "First Symphony" should still exist and be untracked.
Let's run git status and check.
% git status
On branch master
No commits yet
Changes to be committed:
(use "git rm --cached <file>..." to unstage)
new file: Great Essay
Untracked files:
(use "git add <file>..." to include in what will be
committed)
First Symphony
Committing to a Repository
We can now commit this change to the repo. The simplest way to commit into
git is using git commit with the -m option to specify a message for the log.
Note If you just run git commit, you will be taken to the default
editor, with the ability to leave a much longer commit message. If you
haven’t changed the $EDITOR variable, the default editor will be vi.
417
Chapter 7
Version Control
Let’s make your first commit.
% git commit -m "My first commit"
[master (root-commit) 0d75b45] My first commit
Committer: Daniel <daniel@MacBook-Pro.lan>
Your name and email address were configured automatically based
on your username and hostname. Please check that they are accurate.
You can suppress this message by setting them explicitly. Run the
following command and follow the instructions in your editor to edit
your configuration file:
% git config --global --edit
After doing this, you may fix the identity used for this commit with the
following:
% git commit --amend --reset-author
1 file changed, 0 insertions(+), 0 deletions(-)
create mode 100644 Great Essay
Great, you have now saved your commit, but what about this message?
Y
our Identity
By default, git has no idea who you are and will guess what your name and
email address are, based on your user and computer name.
Committer: Daniel <daniel@MacBook-Pro.lan>
When we run the command to edit the git config, we will be launching
the default text editor, which I changed to nano in Chapter 2. Remember
that what you enter will be freely available for all to see.
% git config --global --edit
418
Chapter 7
Version Control
The contents of this file are shown in Figure 7-4.
Figure 7-4. Editing the .gitconfig in nano
You need to update .gitconfig with your name and email address
as it will appear in the git logs. This is something that you need to do
only once, as this information is saved in your user account inside ~/.
gitconfig.
A
mending a Commit
If you need to change your user details, you will want to amend the
previous commit. This will bring up the text editor and allow you to change
the previous commit message.
% git commit --amend --reset-author
[master 80f762e] My first commit
1 file changed, 0 insertions(+), 0 deletions(-)
create mode 100644 Great Essay
419
Chapter 7
Version Control
R
epository Log
You should now be able to see this change reflected when you run git log.
% git log
commit 80f762ec1b04b41999ea68397abdf8f24ae8a5e8 (HEAD ->
master)
Author: Daniel Platt <github@ofdan.co.uk>
Date: Fri Jan 31 21:42:56 2020 +0000
My first commit
(END)
Note When in the git log, you can use the Up and Down arrows
keys to move around. When you are done, press q to quit.
Publishing Your Repository
Git repositories are a great way to keep track of changes in a directory full
of files. They are even better when shared with others.
You could zip up the directory and give it to other people. However,
there is a better way. It involves having a company host your git repo for
you, so that you and others can share the same commits.
The top three companies that provide hosting for git repos are:
•
GitHub (https://github.com)
•
Bitbucket (https://bitbucket.org/)
•
GitLab (https://about.gitlab.com/)
They all offer free public and private repos hosting.
420
Chapter 7
Version Control
Note The restriction is how many people you can share private
repos with.
I use GitHub in the following examples.
S
igning Up
The first thing you will need to do is create an account with GitHub. You
can see the signup form in Figure 7-5.
Figure 7-5. GitHub signup form
Once you have verified your email address, you will be able to proceed.
421
Chapter 7
Version Control
C
reating a Repository
After you are verified, GitHub will show you a screen that allows you to
create a repository. It will look like Figure 7-6 or Figure 7-7.
Figure 7-6. First sign in to GitHub
422
Chapter 7
Version Control
Figure 7-7. Your account homepage
Whichever screen you see, click Create Repository and you will be
taken to a page that looks like Figure 7-8. This screen allows you to specify
the name of the repository and the visibility. If you are unsure whether
to make your repo public or private, choose private. When you are happy
with your choices, click Create Repository.
423
Chapter 7
Version Control
Figure 7-8. Creating a new repository
424
Chapter 7
Version Control
A
uthentication
Before you can use this hosted repository with your local repository, you
need to be able to prove who you are.
There are two different ways to authenticate yourself and it depends
on which version of the repository URL you choose. You can see the choice
in Figure 7-9 where there is a selector between HTTPS and SSH. The SSH
URL will start with git@ and the HTTPS URL will start with https://.
Figure 7-9. New repository quick setup
Personally, I always try to use the SSH URL when I can, but this isn’t
always possible, so I cover both. Whichever you choose to set up, and it is
possible to set up both, you need to go into your GitHub account settings,
as shown in Figure 7-10.
425
Chapter 7
Version Control
Figure 7-10. The Settings menu for your account in GitHub
S
SH
When you are in your account settings, you will need to select SSH and
GPG Keys. If you haven’t used this before, you will find this section empty,
as shown in Figure 7-11.
426
Chapter 7
Version Control
Figure 7-11. SSH keys section in GitHub
SSH keys
If you have never used SSH before, you will need to generate your own SSH
key. It is always worth checking before you do, in case an application has
done this on your behalf.
The files you are looking for are named id_rsa and id_rsa.pub. These
files will live in ~/.ssh. If these files exist, you can skip the next part where we
generate your SSH keys. Otherwise, you risk overwriting your existing ones.
% ls -lath ~/.ssh
total 8
-rw-r--r-- 1 danielplatt staff 405B 31 Jul 18:29 known_hosts
drwx------ 3 danielplatt staff 96B 31 Jul 18:29 .
drwxr-xr-x+ 16 danielplatt staff 512B 31 Jul 18:28 ..
SSH keys are known as a key pair, because there is a private key and
a public key. The idea is that you can encrypt a piece of information with
427
Chapter 7
Version Control
the private key and only the public key can decrypt it. The reverse is also
true—you can encrypt a piece of information with the public key and only
be able to decrypt it with the private key.
You can freely give the public key to anyone and everyone, but you
should never reveal your private key to anyone. This is the basis of how the
remote connection, or SSH connection, works.
However, both the client and the server have their own key pairs.
Generating an SSH Key
As my account doesn’t have any issue keys, I will be able to generate a pair
for this account. Generating an SSH key is easy with ssh-keygen. If you
want to keep your private key extra secure, you can provide ssh-keygen
with a passphrase that must be provided every time you use it.
% ssh-keygen
Generating public/private rsa key pair.
Enter file in which to save the key (/Users/danielplatt/.ssh/
id_rsa):
Enter passphrase (empty for no passphrase):
Enter same passphrase again:
Your identification has been saved in /Users/danielplatt/.ssh/
id_rsa.
Your public key has been saved in /Users/danielplatt/.ssh/
id_rsa.pub.
The key fingerprint is:
SHA256:JD14nC8bBjS6pX39/rg0HRwhzLPEFzjEm66a8S8EN0U danielplatt@
MacBook-Pro.lan
The key's randomart image is:
+---[RSA 3072]----+
| o BE.o. |
| o = . @... |
| . = B o B. |
428
Chapter 7
Version Control
| = =.+o +. . |
| o . Sooo o |
| o +.... . |
| o. .+ . |
| +oo o |
| o..o=o. |
+----[SHA256]-----+
We now have an SSH key pair, which we can provide to GitHub to
use for authentication. In SSH Keys, click New SSH Key, as was shown
previously in Figure 7-11. I will paste the contents of id_rsa.pub into the
key field, as shown in Figure 7-12. The title field is for your reference; if you
don't provide anything, GitHub will use the label at the end of the key, in
my case, it’s danielplatt@MacBook-Pro.lan.
% cat ~/.ssh/id_rsa.pub
ssh-rsa AAAAB3NzaC1yc2EAAAADAQABAAABgQCutPTezzW/6tIn0LiUapAIvKw
OvIlfh+Z+y7r5XVtruVsew5RjM= danielplatt@MacBook-Pro.lan
Figure 7-12. Adding a new SSH key
429
Chapter 7
Version Control
After you add the key, it will be displayed in SSH Keys, as shown in
Figure 7-13. If you ever lose your private key, or someone else gets access
to it, you should delete it from your GitHub account.
Figure 7-13. My public key on GitHub
That is all you need to do in order to authenticate with GitHub. The
easiest way to test that everything is working correctly is to try to connect
to GitHub using SSH.
% ssh git@github.com
Hi hackzilla! You've successfully authenticated, but GitHub
does not provide shell access.
Connection to github.com closed.
If you need to authenticate more than one computer or user, you can
follow the same steps and add extra SSH keys.
H
TTPS
The alternative authentication is to use HTTPS. The username and
password can be the same as you use to log in to GitHub. However, I
wouldn’t recommend it, as git will save the details for subsequent login
attempts.
430
Chapter 7
Version Control
% git clone https://github.com/hackzilla/secure.git
Cloning into 'secure'...
Username for 'https://github.com': hackzilla
Password for 'https://hackzilla@github.com':
You see, whatever you enter in the username and password will be
stored somewhere on your computer in order for git to be able to use them
the next time.
Personal Access Tokens
Alternatively to using your password, you can create a personal access
token that can be used in its place. Like SSH keys, you create more than
one. This is useful if you need to use your details on multiple computers or
users or keep track of which tokens are still being used.
To create an access token, you need to head to your account settings,
like you did in Figure 7-11, and choose Developer Settings from the menu.
When you are in the Developer Settings, select Personal Access Tokens
from the menu, as shown in Figure 7-14.
Figure 7-14. Personal Access Tokens page in GitHub
Now that you are in the Personal Access Tokens section, you can
create a new token, as shown in Figure 7-15. There are many different
permissions that you can assign to this token, but I have found that you
only need to assign the repo permission for full control of private repos. It
is worth giving the token a meaningful note, as this will be the only thing to
remind you what this token is for. When you are done, click the Generate
Token button.
431
Chapter 7
Version Control
Figure 7-15. Creating a new personal access token in GitHub
After the page loads, you will be shown the screen in Figure 7-16. This
is the only time that GitHub will show you the token, so you must copy
down the token before you leave this page. If you do lose the token, you
can delete and recreate it.
Figure 7-16. The new personal access token in GitHub
This token can be used in place of your GitHub password when
authenticating with git on Terminal.
432
Chapter 7
Version Control
Removing Saved Details
If you find yourself accidentally deleting your token or changing your
account password, GitHub will no longer authenticate correctly. You will
need to remove your current login credentials.
git on macOS stores the login credentials inside keychain, as shown in
Figure 7-17.
Figure 7-17. Git credentials stored inside Keychain
An alternative is to use git to remove these details for you. When you
run this erase command, you will not be returned to the shell prompt. The
command is waiting for you to tell it what to remove. You need to type in
which host to remove and which protocol.
% git credential-osxkeychain erase
host=github.com
protocol=https
<RETURN>
433
Chapter 7
Version Control
There is no output to that command. However, the next time you try to
clone a HTTPS repo, you will be prompted for login credentials.
U
ploading to the Repository
When you created the repository, you were taken to a page that looks like
Figure 7-18.
Figure 7-18. A new repository in GitHub without any commits
There are two sets of instructions. The first is to create a new repo, and
the second is to upload an existing repo. As I have a repo I want to upload,
I will follow the second set of instructions.
% git remote add origin git@github.com:hackzilla/work.git
% git push -u origin master
Enumerating objects: 3, done.
Counting objects: 100% (3/3), done.
Writing objects: 100% (3/3), 220 bytes | 220.00 KiB/s, done.
Total 3 (delta 0), reused 0 (delta 0)
434
Chapter 7
Version Control
To github.com:hackzilla/work.git
* [new branch] master -> master
Branch 'master' set up to track remote branch 'master' from
'origin'.
The git remote command is linking GitHub and your repository
and git push is telling git to upload it. The -u option tells git to track
this remote branch. This tracking process tells you how many commits
your branch is behind. Now that I have pushed once, I can shorten the
command to just git push.
% git push
Everything up-to-date
When you check back on the GitHub repo, you will see your commit, as
shown in Figure 7-19.
Figure 7-19. The git repo with a single commit that I uploaded
435
Chapter 7
Version Control
In this setup, you have read and write access to your repo, and
everyone else only has read access, as I chose a public repository. If you
want the repo to be private, you can change the preference in Settings. It's
at the bottom of the options tab, as shown in Figure 7-20. GitHub will make
certain you want to delete the repository by asking you to type the repo
name and enter your password.
Figure 7-20. The danger zone of a repository
This setup is typical of an open source project. You wouldn't want just
anybody changing your project without your permission, as this could lead
to security and quality issues.
If you did want to give another user full control to commit to your
repository, you can add them as a collaborator to your repository.
However, this should only be done with people whom you trust
completely. The section to add collaborators is shown in Figure 7-21.
436
Chapter 7
Version Control
Figure 7-21. Inviting a user to collaborate on your repository
The way around allowing other people to commit to your repository is
to vet their submits first. The way we do that is with pull requests, which
we will cover in the “Forking the Repository” section.
Making Commits in GitHub
You can make changes directly to a repository inside of GitHub, but this
will work only if you are the owner or a collaborator.
C
reating/Uploading Files
I can make commits directly to the repository from within GitHub, by
creating uploads or uploading files, as shown in Figure 7-22.
437
Chapter 7
Version Control
Figure 7-22. The menu to upload or create a new file
If you don't have a README.md file, GitHub will offer to create this file for
you, as shown in Figure 7-23.
Figure 7-23. GitHub offering to create a README file
When you add a new file to GitHub, you will see the commit form, as
shown in Figure 7-24.
Figure 7-24. Creating a new commit in GitHub
438
Chapter 7
Version Control
I’ll stick with committing directly to the master branch for the moment
and will cover pull requests later in this chapter. After I commit the new
file, I see the new file, as shown in Figure 7-25.
Figure 7-25. My new commit in GitHub
E diting Files
Editing files in git is similar to creating them. If you want to add content to
new-file, you simply click on the filename, which takes you to the screen
shown in Figure 7-26.
Figure 7-26. Viewing a file in GitHub
439
Chapter 7
Version Control
If you look closely at the image, you will see a pencil icon in the bottom
left, as shown in Figure 7-27. When you click this edit button, you will be
taken to a page that looks very similar to the Add File page.
Figure 7-27. Close-up of the file editing and delete buttons
D
eleting Files
I can also delete files from my repository on GitHub, using the delete icon,
which is shown in Figure 7-27. Delete works exactly the same as edit,
whereby you need to commit the deletion.
F orking the Repository
Earlier in this chapter, in the section called “Cloning a Repository,” I
downloaded the random-files repository.
I would like you to do this, as it will be a good example of making a
change to another person's repository.
% git clone https://github.com/hackzilla/random-files.git
I would like you to go into the random-files directory and make a
commit to the repository.
%
%
%
%
cd random-files
touch my-change
git add my-change
git commit -m "Making a change to the repo"
440
Chapter 7
Version Control
When I do a git status, I can see that I have one commit that is ready
to push.
% git status
On branch master
Your branch is ahead of 'origin/master' by 1 commit.
(use "git push" to publish your local commits)
nothing to commit, working tree clean
However, using git push, you will find that you cannot push to my
repository.
% git push
ERROR: Permission to hackzilla/random-files.git denied to
<another user>.
fatal: Could not read from remote repository.
Please make sure you have the correct access rights
and the repository exists.
This is because you are neither the owner nor a collaborator of the repo.
The way around this is to fork the original repo, which is to take a complete
copy of the original repo and push your changes to that. A repository can be
copied by clicking the Fork button, as shown in Figure 7-28.
Figure 7-28. Different buttons available for a repository
Depending on the size of the repository, the forking could take a few
minutes, but hopefully will only be a few seconds, as shown in Figure 7-29.
441
Chapter 7
Version Control
Figure 7-29. Forking the random files repository
C
hanging the Remote
I now have a new repo, but I still need to change the current repo to point
to the forked repo. We could download it again, but that would take time
and would lose any new commits. We need to change the origin of the repo
to this new repo.
Grab the new URL from Clone or Download. I am going to use the ssh
URL rather than the HTTPS URL.
git@github.com:ofdan/random-files.git
M
anual Method
If you are comfortable editing configuration files, you can edit .git/
config directly, as shown in Figure 7-30.
% nano .git/config
442
Chapter 7
Version Control
Figure 7-30. The .git/config file before making the change
We need to change the line that says "url = ", in the Remote Origin
section, as shown in Figure 7-31.
Figure 7-31. The .git/config file after making the URL change
It should read:
url = git@github.com:ofdan/random-files.git
443
Chapter 7
Version Control
O
fficial Way
There is a more official way to make this change. That is to have git edit the
config file for you.
% git remote remove origin
% git remote add origin git@github.com:ofdan/random-files.git
Now you can push your changes. At the next refresh, you'll see your
new commit on GitHub.
P
ull Requests
Imagine if you had made a fix to my original repo in your fork. How can
you let me know about it? The best way is to create a pull request. The best
place to make the change is in a new branch in your fork.
Wherever you made the change, when you go into GitHub, it will ask if
you would like to create a pull request, as shown in Figure 7-32.
Figure 7-32. GitHub asking if you would like to create a pull request
When you create your pull request (PR), you are asked to confirm
which branches and which repos to merge, as shown in Figure 7-33.
444
Chapter 7
Version Control
Figure 7-33. GitHub asking for confirmation of which branches and
repos to merge
When you are happy with your pull request, you create it. It will then
show up for the owner of the other repo. The owner can then decide
whether to accept your commits. This is a good way to offer your changes
back to the original repo and the community.
Going Further with Git
I would love to cover everything there is in git. This chapter should be
enough to help get you started. GitHub has some lovely documentation,
and I recommend you read it, as it will be in more depth than I can provide
here. See https://docs.github.com/en/github/creating-cloning-and-
archiving-repositories.
I recommend you get a git application that allows you to visually see
what your git repo looks like on your Mac. My recommendation is to use a
GUI application, either Source Tree (free) or Git Tower (paid).
Also, check out the video called "Git For Ages 4 And Up," as it explains
git in a lot more detail. You can find it at https://www.youtube.com/
watch?v=1ffBJ4sVUb4.
445
Chapter 7
Version Control
Summary
In this chapter, we looked at version control and at git. You created your
first repository and were able to upload it to GitHub. You also looked at
how you can fork another repository and suggest commits using the pull
request feature.
446
CHAPTER 8
Web Development
I use my Mac for web development all day long, and Terminal is one of
many applications I use all the time.
In this chapter, I show you how you can use your Mac to run web apps.
According to Wordpress.org, 35% of the web uses WordPress, which is a
blogging platform that is written in PHP.
I will show you how to install WordPress and blog on your own
computer. WordPress has a few requirements that you need to install
before you can install it. You will need to install a proper web server, set up
PHP, and install a database.
By installing a web app on your computer, you can perfect how your
program works without any spending money on hosting before you are
ready to go live. WordPress is no different. You can create content and
change how it looks.
Installing a Web Server
A web server is an application that takes incoming requests and figures
out what the response should be—whether that is returning a file, calling
another process, or returning an error.
You’ve already had a taste of what a web server looks like with the
built-in PHP web server. PHP’s built-in web server is very limited in what it
can do. There are many reasons that the PHP web server should never be
used in production. It’s mostly because it doesn’t have a lot of the security
features that full-fledged web servers have.
© Daniel Platt 2021
D. Platt, Tweak Your Mac Terminal, https://doi.org/10.1007/978-1-4842-6171-2_8
447
Chapter 8
Web Development
However, there is another reason. The PHP web server cannot
handle more than one request at once. This might not seem like a big
problem until you realize that popular websites can deal with hundreds or
thousands of requests a second. I have managed to hit this limitation with
only two web requests.
The top three web servers at the moment are Apache, Microsoft IIS,
and nginx. According to netcraft.com, Apache and Microsoft seem
to be losing market share, while nginx is growing. We will talk about
nginx, because historically it has been the fastest web server, but more
importantly, it is straightforward to set up on your Mac.
Installing nginx
Getting started with nginx is as simple as installing it.
% brew install nginx
==> Pouring nginx-1.17.8.catalina.bottle.tar.gz
==> Caveats
Docroot is: /usr/local/var/www
The default port has been set in /usr/local/etc/nginx/nginx.
conf to 8080 so that
nginx can run without sudo.
nginx will load all files in /usr/local/etc/nginx/servers/.
To have launchd start nginx now and restart at login, use this:
brew services start nginx
Or, if you don’t want/need a background service, you can just run the
following:
nginx
==> Summary
🍺 /usr/local/Cellar/nginx/1.17.8: 25 files, 2.1MB
448
Chapter 8
Web Development
We now have a new service called nginx.
% brew services list
Name Status User Plist
nginx stopped
unbound stopped
S
tarting nginx
Let’s check out what has been set up by default. First, we need to start
nginx.
% brew services start nginx
Then we need to open a browser to http://localhost:8080/, as
shown in Figure 8-1.
Figure 8-1. The default nginx page
449
Chapter 8
Web Development
C
onfiguring nginx
By default, nginx has a single server set up to handle requests at
localhost:8000. You can see the configuration in /usr/local/etc/nginx/
nginx.conf. (Look for the section that starts with server.)
This can get complicated quickly, depending on what you want to do.
So, let’s keep it simple. We will leave nginx.conf as it is, because at the
bottom of the file, we can see that it will pull config files from another source.
include servers/*;
This means that all we need to do is create our own file in just the right
spot and it will be included when nginx.conf is processed. That location is
/usr/local/etc/nginx/servers/.
For the moment, we will create a basic server config that serves the
existing files from /usr/local/var/www. This means that the server will
look the same as the page we just saw.
Multiple Sites That Differ by Port
The simplest option is to create a new nginx server that you access using
http://localhost:8081/. We cannot listen on port 8080, as nginx is already
listening on that port and no two processes can listen to the same port.
Let’s create the following new server file and then enter the code from
Listing 8-1 into it.
% nano /usr/local/etc/nginx/servers/localhost
Listing 8-1. /usr/local/etc/nginx/servers/localhost
server {
listen 8081;
server_name localhost;
root /usr/local/var/www;
450
Chapter 8
Web Development
location / {
try_files $uri $uri/ =404;
}
}
If you were creating multiple servers, you can create another file using
a different port number. As the port we are listening on is greater than
1024, we don’t need to use sudo to restart nginx.
% brew services restart nginx
Stopping `nginx`... (might take a while)
==> Successfully stopped `nginx` (label: homebrew.mxcl.nginx)
==> Successfully started `nginx` (label: homebrew.mxcl.nginx)
Now load http://localhost:8081/ in your browser to confirm that
this works.
Default HTTP Port
I’m not a fan of using a non-standard port for a web server, because it can
get confusing. When you type in an URL like http://www.google.com into
your browser, your browser will try port 80.
We can modify this config and change the listen directive from
8081 to 80:
server {
listen 80;
server_name localhost;
root /usr/local/var/www;
location / {
try_files $uri $uri/ =404;
}
}
451
Chapter 8
Web Development
Now, we need to restart nginx. However, we can’t just restart nginx as
a user, and we can’t use sudo. You will need to use your user to stop nginx
and then use sudo to start nginx.
% brew services stop nginx
Stopping `nginx`... (might take a while)
==> Successfully stopped `nginx` (label: homebrew.mxcl.nginx)
% sudo brew services start nginx
Warning: Taking root:admin ownership of some nginx paths:
/usr/local/Cellar/nginx/1.17.8/bin
/usr/local/Cellar/nginx/1.17.8/bin/nginx
/usr/local/opt/nginx
/usr/local/opt/nginx/bin
This will require manual removal of these paths using `sudo rm` on
brew upgrade/reinstall/uninstall.
==> Successfully started `nginx` (label: homebrew.mxcl.nginx)
Note
In the future, you must use sudo for both start and stop.
You can now access this server on http://localhost/.
There’s Another Way
Using port 80 is good, but it will allow you to create only one server. As I
said earlier, no two processes can listen on the same port. However, nginx
can assign multiple processes that listen on the same port. Instead of
changing the port, we can change the server_name.
In the section on pretending a website is somewhere else, we created
example.org. We now need a server name that we can use. I’ve picked
dev.example.org.
452
Chapter 8
Web Development
First, we need to add this to our /etc/hosts file, so the browser knows
where to direct our request. With this command, we can append dev.
example.org to the end of /etc/hosts:
% echo "127.0.0.1 dev.example.org" | sudo tee -a /etc/hosts
Note The tee command is used because sudo interferes with
directly appending to the file.
Now we can use dev.example.org as server_name:
server {
listen 80;
server_name dev.example.org;
root /usr/local/var/www;
location / {
try_files $uri $uri/ =404;
}
}
Finally, we can restart nginx.
% sudo brew services restart nginx
This method is my favorite, because it gives you an unlimited number
of development sites on your computer.
Using PHP
When we looked at PHP earlier, we used the built-in version 7.3. This time
we will install PHP from Brew so we can control how PHP runs with Brew
services.
453
Chapter 8
Web Development
Brew has a few different versions of PHP available to install. The older
versions of PHP that Brew has are still supported. You can identify the
older version by the @ symbol.
Let’s search for just PHP, or PHP with the @ symbol.
% brew search "/^php($|@)/"
==> Formulae
php
php@7.2
php@7.3
If we search for just php@, the list that Brew returns will show php@7.4
instead of just php.
% brew search "/^php@/"
==> Formulae
php@7.2
php@7.3
php@7.4
Why would we want to install php, when we could install php@7.4?
Well, the php command tracks the latest major version of PHP. When
the next major release of PHP is released, you will be able to use Brew to
upgrade to it.
% brew upgrade php
If you want to install programs to stay consistent, you only want to
upgrade your version of PHP to the latest when you are ready to do so. The
newer the version that is installed, the longer it will be supported.
You can install more than one version of PHP, but you shouldn’t need
to, unless you have a specific reason. However, only one can be active at
any one time. I assume that will install PHP 7.4, as that will keep everything
consistent as you follow along.
454
Chapter 8
Web Development
Let’s install the PHP 7.4.
% brew install php@7.4
Now that we have PHP installed, we can see there is an option for it in
Brew services.
% brew services list
Name Status User Plist
nginx started root /Library/LaunchDaemons/homebrew.mxcl.
nginx.plist
php stopped
unbound stopped
The configuration of PHP can be found in /usr/local/etc/php/.
Inside this folder is a folder for every version of PHP installed with Brew.
Although you won’t need to edit these, there are lots of comments in the
config files that explain what everything means.
What we do need to know is where PHP is listening for new instructions.
We will need this for nginx and PHP to be able to communicate.
% grep "listen =" /usr/local/etc/php/7.4/php-fpm.d/www.conf
listen = 127.0.0.1:9000
Now we can make PHP listen for nginx commands.
% brew services start php
==> Successfully started `php` (label: homebrew.mxcl.php)
To allow nginx to run PHP files, we need to add some extra config to
the nginx config.
location ~ .php$ {
fastcgi_pass 127.0.0.1:9000;
fastcgi_index index.php;
include fastcgi.conf;
}
455
Chapter 8
Web Development
The full configuration file is shown in Listing 8-2.
% nano /usr/local/etc/nginx/servers/localhost
Listing 8-2. /usr/local/etc/nginx/servers/localhost
server {
listen 80;
server_name dev.example.org;
root /usr/local/var/www;
location / {
try_files $uri $uri/ =404;
}
location ~ .php$ {
fastcgi_pass 127.0.0.1:9000;
fastcgi_index index.php;
include fastcgi.conf;
}
}
In this example, it is assumed the listen directive we saw in the PHP
config was 127.0.0.1:9000. You will need to modify it to match. If the
listen directive was a path to a file, you will need to prefix the path with
unix:, such as:
fastcgi_pass unix:/usr/local/var/run/php/php7.4-fpm.sock;
This nginx configuration is enough to get you going, but isn’t
production safe. I recommend visiting nginx.org’s page on PHP to see the
latest configuration (at https://www.nginx.com/resources/wiki/start/
topics/examples/phpfcgi/).
456
Chapter 8
Web Development
As we’ve updated the nginx config, we will need to restart nginx.
% sudo brew services restart nginx
Finally, we need to test that PHP is working correctly. The quickest way
to do that is to copy the info.php file from the random-files directory into
the web directory for nginx.
% cp ~/random-files/info.php /usr/local/var/www/
If you open http://dev.example.org/info.php in your favorite web
browser, you should now see the PHP information page, as shown in
Figure 8-2.
Figure 8-2. PHP info output on the custom domain name
I nstalling a Database
Next on our list of requirements is to install a database. WordPress uses a
database to store all the content for the blog. The database we will install is
called MySQL. Let’s jump straight in and install MySQL.
% brew install mysql@8.0
==> mysql
We've installed your MySQL database without a root password. To
secure it run:
mysql_secure_installation
457
Chapter 8
Web Development
MySQL is configured to only allow connections from localhost by
default
To connect run:
mysql -uroot
To have launchd start MySQL now and restart at login, use this:
brew services start mysql
Or, if you don’t want/need a background service, you can just run the
following:
mysql.server start
The first thing we need to do is start the MySQL server.
% brew services start mysql
==> Successfully started `mysql` (label: homebrew.mxcl.mysql)
It would be remiss of me not to mention that MySQL has been installed
without a password for the users. Just like with your computer, MySQL has
its own users, with differing levels of permissions.
By default, the account with most permissions (root) exists without a
password. This isn’t a problem, but it is a risk you should be aware of.
If you are uncomfortable leaving the root user without a password, you
can secure it with the mysql_secure_installation command.
If you run mysql_secure_installation, make sure you make a note of
the new password. You will need it later.
Creating the WordPress Database
We need to do one last thing before we are done. WordPress will need
somewhere in MySQL to store its data, a database. The database is where
WordPress saves the content and it is what makes your site, yours.
458
Chapter 8
Web Development
By default, MySQL comes with some databases already. However,
these databases are for running MySQL.
% echo "SHOW DATABASES" | mysql -uroot
Database
information_schema
mysql
performance_schema
sys
Note If you set a password for MySQL, you will need to add the -p
option to the command so that MySQL prompts you for the password:
mysql -uroot –p.
We need to create our own database for the WordPress installation.
I will call my database wordpress; however, it’s better that you call your
database a name that reflects how you’ll use it.
We will pipe SQL directly into MySQL to create the database.
% echo "CREATE DATABASE wordpress" | mysql -uroot
When we look at the databases, we can see the newly created database.
% echo "SHOW DATABASES" | mysql -uroot
Database
information_schema
mysql
performance_schema
sys
wordpress
We need not do anything more with MySQL, because WordPress will
do the rest for us.
459
Chapter 8
Web Development
Installing WordPress
Now that we have installed all the requirements for WordPress, we can
move on to installing it. When we set up nginx, we used the default
directory:
% cd /usr/local/var/www
Note This directory can be anywhere on your computer.
Now we have to download the WordPress-compressed archive. In all
my years of using WordPress, the download URL has remained the same:
https://wordpress.org/latest.tar.gz
Let’s download it now:
% wget https://wordpress.org/latest.tar.gz
Now we need to decompress the file, as follows:
% tar -xf latest.tar.gz
We now have a folder called wordpress, which contains all the files.
% ls
50x.html index.html info.php latest.tar.gz wordpress
Let’s move those files into the main folder, as follows:
% mv wordpress/* .
Finally, we should tidy up the files that are not part of WordPress.
% rm index.html info.php latest.tar.gz
% rmdir wordpress
460
Chapter 8
Web Development
To get WordPress to work correctly with nginx, we need to make some
changes to the config, as follows:
% nano /usr/local/etc/nginx/servers/localhost
server {
listen 80;
server_name dev.example.org;
index index.php;
root /usr/local/var/www;
location / {
try_files $uri $uri/ =404;
}
}
Finally, we need to restart nginx:
% sudo brew services restart nginx
Now, when you go to http://dev.example.org/, you will see the
WordPress install, as shown in Figure 8-3.
Note The URL you see depends on how you choose to set up your
version of nginx.
461
Chapter 8
Web Development
Figure 8-3. WordPress Language selection
For the next step, we will need our database details, as shown in
Figure 8-4.
462
Chapter 8
Web Development
Figure 8-4. WordPress installation
463
Chapter 8
Web Development
We need the details we set earlier to fill in the form that is shown in
Figure 8-5. Everything will be the same as here, except for the database
name, if you changed it, and the password, if you set one.
Figure 8-5. WordPress installation details
464
Chapter 8
Web Development
If everything checks out for installation, you should see the screen in
Figure 8-6. If you get an error, you will need to address it before you finally
see this screen. Common problems you might encounter are:
•
MySQL is not running
•
Wrong password
•
Forgot to create the database
•
Typo
Figure 8-6. WordPress installation final check
Finally, we can install WordPress and get on with customizing it, as
shown in Figure 8-7.
465
Chapter 8
Web Development
Figure 8-7. WordPress blog setup
Don’t worry if you make a mistake at this stage; you can always change
these details later from within WordPress. However, make a note of the
username and password, as you need them to log in to WordPress and the
password won’t be shown again.
Finally, we can click the Install WordPress button.
466
Chapter 8
Web Development
When WordPress finishes installing and setting up the database,
you will be shown your username, but not your password, as shown in
Figure 8-8.
Figure 8-8. WordPress installation is complete
This tutorial covered the basics of installing WordPress. A more
detailed installation guide is available from the makers of WordPress, at
https://wordpress.org/support/article/how-to-install-wordpress/.
U
sing WordPress
Now everything is installed and you can log in, as shown in Figure 8-9.
Logging in is easy the first time round, but keep a note of the URL so you
don’t forget. For future reference, the login URL to this blog is http://dev.
example.org/wp-admin/.
467
Chapter 8
Web Development
Figure 8-9. WordPress login
T he Dashboard
Welcome to the admin of your new blog, as shown in Figure 8-10. You can
see that I have one page, one post, and one one comment.
468
Chapter 8
Web Development
Figure 8-10. WordPress admin Dashboard
S
ettings
When I installed WordPress, I was asked some questions that I said could
be changed later. These settings are in the General Settings tab, as shown
in Figure 8-11.
469
Chapter 8
Web Development
Figure 8-11. WordPress General Settings tab
V
iewing the Blog
Now, when you go to http://dev.example.org/, you will see what your
visitors see, as shown in Figure 8-12. This is also available by clicking My
Blog, at the top right. If you are logged in, you will also see the WordPress
toolbar at the top.
470
Chapter 8
Web Development
Figure 8-12. The default WordPress blog
P
ermalinks
If you looked at any of the links in the previous example, you would have
noticed that the links are based on the query string, rather than the name
of the post or the category. For example:
http://dev.example.org/?p=1
These links work and are the easiest to get working, which is why they
are the default. However, I prefer links that are much more readable, such
as http://dev.example.org/hello-world/. To get this to work, we need
to make two changes—one to the nginx configuration and the other to
WordPress.
471
Chapter 8
Web Development
n ginx Change
At the moment, when nginx gets a request, it checks to see if that file exists
on the filesystem.
This is perfect for static files like CSS and images, but it doesn’t work
with dynamic URLs that only exist in WordPress’s database. The other
check that happens is, if you access a directory like / or wp-admin/, nginx
will try the default file, index.php. Finally, if nginx fails to find a suitable
file, it will return a 404 instead.
We need to tell nginx to return index.php instead of 404, as shown in
Listing 8-3.
Listing 8-3. /usr/local/etc/nginx/servers/localhost
server {
listen 80;
server_name dev.example.org;
root /usr/local/var/www;
location / {
try_files $uri $uri/ /index.php$is_args$args;
}
location ~ .php$ {
fastcgi_pass 127.0.0.1:9000;
fastcgi_index index.php;
include fastcgi.conf;
}
}
Don’t forget to restart nginx.
% sudo brew services restart nginx
472
Chapter 8
Web Development
W
ordPress Changes
In the Permalink Settings tab in WordPress, there are many different ways to
reference a post. My favorite is by the post name, as shown in Figure 8-13.
Figure 8-13. WordPress permalink settings
Now all your links on your blog look a lot better:
http://dev.example.org/hello-world/
Taking It Live
When you are ready, you can put this blog on the Internet. However, you
will need to purchase some web hosting and a domain name. You will
probably use scp to upload the web files.
% scp -r /usr/local/var/www/* user@webhost:~/public_html/
473
Chapter 8
Web Development
Sometimes you will have to upload files using a web interface, and
then you will find it easier to zip up your web files for uploading.
% cd /usr/local/var/www
For GZip, use this:
% tar -czf webfiles.tar.gz *
As Zip, use this:
% zip -r webfiles.zip *
Exporting the Database
You now need to upload your database to the hosting site. This isn’t as easy
as just copying the database files. You need to extract the database from
MySQL.
MySQL comes with a tool that helps you do this, called mysqldump,
which saves your database a text file.
Note
wordpress is the name of your database.
% mysqldump -uroot wordpress
-- MySQL dump 10.13 Distrib 8.0.19, for osx10.15 (x86_64)
--- Host: localhost Database: wordpress
-- ------------------------------------------------------- Server version 8.0.19
Note If you set a password for MySQL, you will need the -p option
for mysqldump.
474
Chapter 8
Web Development
Although outputting the database to your screen is interesting, saving
it to a file is better.
% mysqldump -uroot wordpress > wordpress.sql
The hosting company will be able to help you upload your files and
database.
WordPress Config
Your web host database login details for MySQL are different from your
local database. If you try to see what your blog looks like before updating
your database credentials, you will get an error message like Figure 8-14.
Figure 8-14. WordPress with a database error
WordPress database credentials are very easy to change. They live in a
file called wp-config.php, as shown in Figure 8-15.
475
Chapter 8
Web Development
Figure 8-15. The WordPress wp-config.php file
You need to update this file to match the details that your hosting
company gives. When you originally installed WordPress, you gave it a
domain name that it worked on. When you bring the site live, you will be
using a different domain name.
The issue you will face is when you try to log in, WordPress will try to
log you in using the old domain name. You need to tell WordPress about
the new domain name so that you can log in.
Normally, I would tell you to edit either the wordpress.sql file or the
database directly. The change you need to make is to a couple of records in
the wp_options table. The records are siteurl and home. They contain the
domain name that WordPress will redirect you to upon login, and when
you click the Home button.
476
Chapter 8
Web Development
However, there is a much easier way to achieve the same effect, and
that is by editing the wp-config.php file. We can override the values that
WordPress gets from the database with whatever we specify in the wp-
config.php file.
The lines that we need to add are these, and it doesn’t matter where
they go in the file:
define( 'WP_HOME', 'http://dev.example.org' );
define( 'WP_SITEURL', 'http://dev.example.org' );
Figure 8-16 shows an example where I’ve added these lines just after
the database details.
Figure 8-16. Telling WordPress about the new domain name to
log in
477
Chapter 8
Web Development
Now, you either need to upload the new wp-config.php file or edit it
directly on your server. Whichever way you do it, you will have your very
own blog that you developed on your own computer!
Summary
In this chapter we installed everything needed to run WordPress—this
included a web server, PHP, and a database. We covered how to install
WordPress and log in. We also talked about how you can upload your
WordPress installation to a public hosting site.
478
CHAPTER 9
Going Further
This final chapter covers what to do if you have problems with Brew.
I will show you how to interact with a weather and stock service using only
Terminal, as well as how to use Oh My Zsh to customize your Terminal.
This chapter shows you how I use my Terminal.
Brew Clean Up
Now that you’re able to search for commands, install them, and keep them
up-to-date, what could go wrong?
Well, you could find yourself running out of space, depending on how
large your computer drive is. Originally, when one upgraded a formula in
Brew, Brew didn’t remove the old version. I ended up with all the versions
I had ever installed. At one point, I had 4GB of installed commands that
were redundant.
In recent years, Brew started running maintenance commands
automatically. When I upgrade a formula, Brew will now remove all
previous versions that had been installed automatically. It will also attempt
to clean up all formulas every 30 days.
However, it is helpful to know about these versions, as you might need
them or want more control of when your cleanup runs. Occasionally,
Brew’s automatic cleanup doesn’t run.
© Daniel Platt 2021
D. Platt, Tweak Your Mac Terminal, https://doi.org/10.1007/978-1-4842-6171-2_9
479
Chapter 9
Going Further
Opting Out
It is entirely possible that you’ll want to keep your old versions of a
command. If you do, you can opt out of the automatic cleanup by setting
the HOMEBREW_NO_INSTALL_CLEANUP environment variable before running
the brew upgrade command.
% HOMEBREW_NO_INSTALL_CLEANUP=1 brew upgrade
Or, you can add the variable to your .zshrc file.
export HOMEBREW_NO_INSTALL_CLEANUP=1
Manual Clean Up
You can manually run the brew cleanup command with the -n option,
which means it’s a dry run.
% brew cleanup -n
This will show you a list of everything that will be cleaned up and
the space you’ll save. I’ve just run the command and Brew tells me I will
reclaim 4GB of disk space. If you are happy to proceed, you can run the
same command, but without the -n argument.
% brew cleanup
You can also remove the applications one at a time with this command:
% brew cleanup <application/formula>
Either way, you won’t have to worry about Brew storing all the versions
of your installed commands.
480
Chapter 9
Going Further
When Things Go Wrong
If things start to go awry and things won’t install or upgrades fail, or maybe
you’re just curious to know if everything is working correctly, you’re in
luck. There is a command called brew doctor that will run tests on your
Brew installation to see if there is anything obviously wrong.
% brew doctor
Please note that these warnings are just used to help the
Homebrew maintainers
with debugging if you file an issue. If everything you use
Homebrew for is
working fine: please don't worry or file an issue; just ignore
this. Thanks!
Warning: A newer Command Line Tools release is available.
Update them from Software Update in System Preferences or run:
softwareupdate --all --install --force
If that doesn't show you an update run:
sudo rm -rf /Library/Developer/CommandLineTools
sudo xcode-select --install
Alternatively, manually download them from:
https://developer.apple.com/download/more/.
Warning: Homebrew's sbin was not found in your PATH but you
have installed
formulae that put executables in /usr/local/sbin.
Consider setting the PATH for example like so:
echo 'export PATH="/usr/local/sbin:$PATH"' >> ~/.zshrc
The output is saying everything is okay, except that I need to update
my command-line tools and there is a path missing from the PATH variable.
Updating the command-line tools was straightforward by using the
commands that were specified in the brew doctor message.
481
Chapter 9
Going Further
The PATH variable is special, as it contains all the locations where your
computer will check for installed applications. By default, the shell will
check /usr/local/bin, but not /usr/local/sbin. This isn’t a problem
at the moment, because the only items that I have in the /usr/local/
sbin folder are unbound and php-fpm. However, if I were to install any
commands that feature an sbin command, they won’t be found by typing
their name until this folder is searched.
Brew is telling us what is wrong and how it can be fixed. We can either
do what it says to fix the whole thing, or you can copy and paste the extra
bit and edit .zshrc manually.
It’s up to you, both will work, but if you do it manually, you’ll control
the formatting and the order of preference and you will end up with fewer
lines in your .zshrc file.
Let’s assume you want to control what’s in your .zshrc file, rather than
just copying and pasting the echo command.
First, you need to edit your .zshrc file.
% nano . zshrc
If you don’t have a line starting with export PATH, you will need to
paste in this command.
export PATH="/usr/local/sbin:$PATH"
What if you already have a PATH defined? The PATH variable is simply a
list of directories, separated by the : symbol. When you specify the $PATH
variable within itself, you are saying, I want the system directories, plus
these extra ones. For example, PATH="/dir/1:/dir/2:$PATH". Look in
your .zshrc file and you see this line. What do you do?
PATH=/usr/local/bin:$PATH;
482
Chapter 9
Going Further
You should notice that the pattern is: directory, colon, directory. I
recommend that you put the new directory in front of the existing one,
because you are overriding the built-in macOS commands. Note that there
might be a use case for the directory to go at the end of the variable.
Paste it in here (don’t forget the semicolon). You will end up with a
PATH that looks like this:
PATH="/usr/local/sbin:/usr/local/bin:$PATH";
Exit out of the .zshrc file, but don’t forget to save. To save, you need to
press Control+X to exit and then press the Y key to confirm saving.
You will need to rerun your .zshrc, and then run brew doctor (either
open a new tab or type source .zshrc). Now, when you rerun brew
doctor, that error should go away.
Sometimes you’ll get warnings about files that are there but aren’t
hurting anything. They were put there by applications that Brew is not
aware of. Those files won’t do any harm.
Now that the error has gone away, we can move on.
B
roken Applications
Occasionally, the applications you install will have an annoying bug in
them. Let’s take archey as an example.
% brew info archey
archey: stable 1.6.0, HEAD
Graphical system information display for macOS
https://obihann.github.io/archey-osx/
At the time of this writing, archey is at version 1.6.0. If you installed
archey before November 30, 2018, then version 1.6.0 has a small bug in it.
Let’s look at the buggy output of archey, shown in Figure 9-1. This is from a
couple of years ago, before the fix was applied.
483
Chapter 9
Going Further
Figure 9-1. Archey with typo output
You can see that I use a laptop from this output, as it shows a battery
status. The output for the battery percentage includes two percent signs.
This is a small bug, but it illustrates my point of an application with a bug.
The trouble is we were using the latest version.
However, there was another version that Brew didn’t install by default,
called HEAD. It’s the bleeding edge of the project, and may not be 100%
ready for use. That said, a lot of projects like to keep the head (referred to
master branch) bug-free. Now, let’s figure out if the HEAD version fixes our
problem.
When we ran brew info archey another piece of information was the
project URL, at https://obihann.github.io/archey-osx/. However, we
are looking for the project repository, which is different. It is the project
documentation, as shown in Figure 9-2.
484
Chapter 9
Going Further
Figure 9-2. Archey project page
There is a link to the repository, which you can access using the View
Project on GitHub button. The page you should end up on is https://
github.com/obihann/archey-osx, as shown in Figure 9-3.
Figure 9-3. Archey GitHub page
485
Chapter 9
Going Further
In the Releases section, you can see that version 1.6.0 was released on
April 4, 2016 and that is 22 commits behind the master branch. Now we
know that there has been more work on this project since version 1.6.0, so
there is a chance that our bug has been fixed.
Look at the project’s commits to see if using the HEAD will benefit us.
You can see the commits by clicking on Code and then choosing Commits.
You should end up with the https://github.com/obihann/archey-osx/
commits/master URL.
To find out where version 1.6.0 ends, you can either count down 22
commits or you can just look for all commits that have been committed
after April 4, 2016. Looking at the commit message, I can see that the
battery percent sign was fixed on the April 5, 2016 by ramlev, or on April 14,
by meowgorithm. (It was a pull request, either #51 or #53, and they were
merged on September 12.)
As our issue has been fixed in the master branch, let’s rebuild archey
using that.
% brew reinstall --HEAD archey
This will reinstall archey, using the master branch. Now when you run
archey the double percent issue has gone. This won’t work for every bug
you experience, but it’s worth a shot.
You might find that the version you install is not as stable as you’d like.
How do you get back to the latest stable release?
% brew remove archey
% brew install archey
If the project doesn’t have a fix, check the “Issues” to see if anyone has
reported it. If you can’t find an issue, consider opening your own issue.
486
Chapter 9
Going Further
Internet Services from Terminal
Not everything has to reside on your computer. There are services on the
Internet that you can access from Terminal. In this section, we will explore
how we can use them.
W
eather
Knowing the weather should be as simple as looking outside, but maybe
your computer isn’t near a window. Being able to see the latest weather
forecast could be useful. There is a website that provides a simple weather
forecast, which also works well in Terminal, as shown in Figure 9-4.
% curl --max-time 1 http://wttr.in/andover,uk
Figure 9-4. The weather forecast for Andover, UK
487
Chapter 9
Going Further
The location is specified as part of the URL. Each component is
separated with a comma, such as andover,uk. The location can also be the
three-letter airport codes. Landmarks are also supported if you prefix them
with the tilde symbol (~), as follows:
http://wttr.in/~stonehenge
Note If you need to use a space, replace it with the plus symbol (+).
You might not need the full weather forecast. Maybe you just need the
current weather.
% curl --max-time 1 http://wttr.in/andover,uk?days=0
The output can be seen in Figure 9-5.
Figure 9-5. Current weather forecast
--max-time is how long the curl command will wait before giving
up. If you add this command to your .zshrc file, you could find out your
local weather whenever you open your Terminal. Normally this service
works really quickly, but if it’s running slowly or you don’t have an Internet
connection, you wouldn’t want this to hang your new Terminal window for
the default timeout time.
488
Chapter 9
Going Further
Without max-time, curl could potentially cause you to wait up to five
minutes before giving you a prompt. With a one second max-time, that’s
how long you’d have to wait in the worst case. There are more options
available, and you can see them by invoking the help.
% curl wttr.in/:help
Stock Ticker
I like to keep my eye on the price of some of my shares, but I don’t want to
keep going to a website to see them. I use a ticker script that queries Yahoo
Finance to return the latest stock and crypto prices directly to Terminal.
% curl -o ticker.sh https://raw.githubusercontent.com/pstadler/
ticker.sh/master/ticker.sh
% chmod +x ticker.sh
I like to move it into my local bin directory and drop the .sh file extension.
% mv ticker.sh /usr/local/bin/
Using the ticker is easy, but you do need to know the stock symbol in
order to see anything. The usage information has a few suggestions.
% ticker
Usage: ./ticker.sh AAPL MSFT GOOG BTC-USD
When you run the ticker with the stock symbols, it will return the
current price and how much the stock has changed that day, as an amount
and as a percentage.
% ticker AAPL MSFT GOOG BTC-USD
AAPL 427.44 2.40 (0.56%) *
MSFT 205.50 0.49 (0.24%) *
GOOG 1482.01 -0.95 (-0.06%) *
BTC-USD 11316.80 -454.25 (-3.86%)
489
Chapter 9
Going Further
If you want to run this ticker command frequently, you can either
add it to your .zshrc file or create an alias for it with the ticker symbols.
For more information about this project, see its GitHub page at https://
github.com/pstadler/ticker.sh.
S
tar Wars
This service is very different from the last one. With this, you can watch the
first episode of Star Wars (retroactively called Episode IV) in Terminal, in
ASCII. You will need to install a telnet client in order to be able to access it.
Telnet is how people used to connect to servers before SSH. However,
the biggest problem with telnet was that everything that was sent across
the Internet was in plain text. Therefore, anyone listening to your
connection would have been able to see everything, including your
password. It is safe to use telnet, but do not use it to send information that
you wish to remain private.
% brew install telnet
All you need to do is telnet to towel.blinkenlights.nl and then you
can sit back and watch Episode IV of Star Wars, as shown in Figure 9-6.
% telnet towel.blinkenlights.nl
490
Chapter 9
Going Further
Figure 9-6. Credit for ASCII Star Wars
If you want to exit before the end, you can. However, you will find that
Control+C will do nothing. You need to press Control+[ to bring up the
telnet prompt.
telnet>
At this telnet prompt, you can type quit, followed by the Return key, to
drop back into Terminal.
N
yan Cat
This was going to be an online service that would display how long you’ve
been watching Nyan Cat. If you are not in the know, Nyan Cat was a GIF
created by @prguitarman; you can see it at http://www.nyan.cat/, as
shown in Figure 9-7.
491
Chapter 9
Going Further
Figure 9-7. Nonstop Nyan Cat
Klange on GitHub created a Terminal version of the Nyan Cat
GIF. Originally, I was going to show you that, but due to its popularity and
huge bandwidth requirements, the server kept being taken down. If you
want to visit Klange’s nyancat repository, go to https://github.com/
klange/nyancat.
Instead, we will download the repo and build the application
ourselves.
% git clone https://github.com/klange/nyancat.git
Cloning into 'nyancat'...
remote: Enumerating objects: 8, done.
remote: Counting objects: 100% (8/8), done.
remote: Compressing objects: 100% (5/5), done.
492
Chapter 9
Going Further
remote: Total 565 (delta 1), reused 1 (delta 1), pack-reused 557
Receiving objects: 100% (565/565), 139.10 KiB | 701.00 KiB/s, done.
Resolving deltas: 100% (327/327), done.
The repo has successfully been downloaded and placed into a folder
called nyancat. Let’s move into the nyancat directory.
% cd nyancat
This is a great project written in C. C is an early programming language
that is powerful, but is beyond the scope of this book. However, there is a
small example near the end of this chapter.
With Xcode installed, we can build this project without having to
understand how it works. The hard work has been done with the inclusion
of the makefile in the repo.
% make
cd src && /Library/Developer/CommandLineTools/usr/bin/make all
cc -g -Wall -Wextra -std=c99 -pedantic -Wwrite-strings -c -o
nyancat.o nyancat.c
cc -g -Wall -Wextra -std=c99 -pedantic -Wwritestrings nyancat.o -o nyancat
That’s all you need to do to build the command.
% ./src/nyancat
The output is shown in Figure 9-8.
493
Chapter 9
Going Further
Figure 9-8. Nyan Cat running in Terminal
When you finish running this command, you have to use Control+C to
end it. The repo even comes with a man page for nyancat. It’s not built-in,
though, so you need to refer to it by filename in order to load it.
% man ./nyancat.1
Oh My Zsh
“Oh My Zsh is a delightful, open source, community-driven framework
for managing your Zsh configuration. It comes bundled with thousands of
helpful functions, helpers, plugins, themes, and a few things that make you
shout...”
Source: https://ohmyz.sh/
494
Chapter 9
Going Further
Installation
Just like with Brew, installing Oh My Zsh is achieved with a simple shell
command.
% sh -c "$(curl -fsSL https://raw.githubusercontent.com/
ohmyzsh/ohmyzsh/master/tools/install.sh)"
Cloning Oh My Zsh...
Cloning into '/Users/danielplatt/.oh-my-zsh'...
remote: Enumerating objects: 1102, done.
remote: Counting objects: 100% (1102/1102), done.
remote: Compressing objects: 100% (1055/1055), done.
remote: Total 1102 (delta 23), reused 861 (delta 18), pack-reused 0
Receiving objects: 100% (1102/1102), 720.99 KiB | 351.00 KiB/s, done.
Resolving deltas: 100% (23/23), done.
Looking for an existing zsh config...
Using the Oh My Zsh template file and adding it to ~/.zshrc.
__ __
____ / /_ ____ ___ __ __ ____ _____/ /_
/ __ \/ __ \ / __ `__ \/ / / / /_ / / ___/ __ \
/ /_/ / / / / / / / / / / /_/ / / /_(__ ) / / /
\____/_/ /_/ /_/ /_/ /_/\__, / /___/____/_/ /_/
/____/
....is now installed!
Please look over the ~/.zshrc file to select plugins, themes,
and options.
p.s. Follow us on https://twitter.com/ohmyzsh
495
Chapter 9
Going Further
p.p.s. Get stickers, shirts, and coffee mugs at https://shop.
planetargon.com/collections/oh-my-zsh
➜ ~
We are now running Oh My Zsh. Let’s do what it suggests and look at
~/.zshrc. Let’s look at ~/.zshrc in nano. The first item we see is about the
PATH.
# If you come from bash you might have to change your $PATH.
# export PATH=$HOME/bin:/usr/local/bin:$PATH
Next is the installation directory.
# Path to your oh-my-zsh installation.
export ZSH="/Users/danielplatt/.oh-my-zsh"
You shouldn’t need to change this, unless you move the folder.
Customizing Oh My Zsh
There are many different ways to customize Oh My Zsh to make it your
own. The most dramatic way is by using themes to change how your
Terminal looks.
Themes
Oh My Zsh themes define the colors for Terminal. At the time of writing,
there are 140 themes and they all live in ~/.oh-my-zsh/themes. The next
part of the .zshrc file is the theme.
# See https://github.com/ohmyzsh/ohmyzsh/wiki/Themes
ZSH_THEME="robbyrussell"
It is easy to test new themes. You only need to put the theme name in,
and then save the file. Then you can open a new Terminal window or tab
496
Chapter 9
Going Further
and see what it looks like. If you are not happy with the theme, you can try
the next one or enter the previous theme name.
Let’s look at all the possible themes that Oh My Zsh comes with.
% ls ~/.oh-my-zsh/themes
3den.zsh-theme kafeitu.zsh-theme
Soliah.zsh-theme kardan.zsh-theme
adben.zsh-theme kennethreitz.zsh-theme
af-magic.zsh-theme kiwi.zsh-theme
T heme Previews
There are over 130 different themes, which can change the look and
color of Terminal. This section discusses a selection of them. To see these
previews, the git plugin has been enabled. When you are inside a git
repository, it shows you which branch you are on.
Robbyrussell
I like this theme; it is simple but has a distinctive color scheme, as shown
in Figure 9-9.
Figure 9-9. The robbyrussell theme
Clean
This theme is very similar to the robbyrussell theme. It displays the current
user, the current directory, and the addition of the current time displayed
to the right of the prompt, as shown in Figure 9-10.
497
Chapter 9
Going Further
Figure 9-10. The Clean theme
Gallifrey
This is another good theme. It displays the hostname and current
directory, as shown in Figure 9-11.
Figure 9-11. The Gallifrey theme
Nanotech
This theme is great at squeezing as much on your Terminal as possible.
Compare this theme to the previous ones. Whereas the previous themes
displayed the directory listing over four lines, this theme displays it using
only two lines, as shown in Figure 9-12.
Figure 9-12. The Nanotech theme
498
Chapter 9
Going Further
Candy-Kingdom
I wanted to show you a theme that requires a plugin to be enabled before it
works correctly. This theme takes advantage of the battery plugin. If it’s not
enabled, this theme won’t work correctly, as shown in Figure 9-13.
Figure 9-13. The candy-kingdom Theme without the battery plugin
enabled
In the “Plugins” section, we cover the different plugins and discuss
how to enable them, but when the battery plugin is enabled, it will look
like Figure 9-14.
Figure 9-14. Theme candy-kingdom with the battery plugin enabled
Agnoster
Another issue that you might encounter with themes is the colors not
showing correctly, depending on your chosen Terminal profile, as shown
in Figure 9-15.
499
Chapter 9
Going Further
Figure 9-15. The Agnoster theme
Some themes work better with a different Terminal profile. This theme
works better with the Silver Aerogel profile, as shown in Figure 9-16.
Figure 9-16. The robbyrussell theme in silver
Powerline Font
It’s worth noting that some of these themes require Powerline fonts to
work properly. You can tell by the question mark boxes that appear in
Figure 9-16.
You can find out more about the Powerline font project at https://
github.com/Lokaltog/powerline-fonts and you could follow the
instructions there to install all the fonts. However, there is a good selection
available within Brew, as shown in Figure 9-17. I prefer something to
manage the items installed on my computer.
500
Chapter 9
Going Further
Figure 9-17. Powerline fonts available in Brew
I picked the font called Meslo, as shown in Figure 9-18. You can install
one or all of the fonts. If you do install more than one, it will be easier to
decide which one you like in the next step.
Figure 9-18. Installing the Meslo font
Changing to a Powerline Font
After Brew has installed the font, you can use it straight away. Go into
Terminal preferences and select your new font, as shown in Figure 9-19.
501
Chapter 9
Going Further
Figure 9-19. Selecting a new font for the profile
When you go back to your Terminal window, the question marks are
replaced with the symbols that theme developers intended, as shown in
Figure 9-20.
Figure 9-20. Agnoster theme with the Powerline font enabled
502
Chapter 9
Going Further
If for some reason you can’t decide between two or more themes, you
can set ZSH_THEME to random and put your favorite themes into ZSH_THEME_
RANDOM_CANDIDATES.
ZSH_THEME="random"
ZSH_THEME_RANDOM_CANDIDATES=( "robbyrussell" "agnoster" )
Note Remember to use double quotes around each theme name.
P
lugins
The next section of the .zshrc file is about enabling plugins. The Oh My
Zsh plugins provide extra terminal functionality. At the time of writing,
there are 275 different plugins available.
# Which plugins would you like to load?
# Standard plugins can be found in ~/.oh-my-zsh/plugins/*
# Custom plugins may be added to ~/.oh-my-zsh/custom/plugins/
# Example format: plugins=(rails git textmate ruby lighthouse)
# Add wisely, as too many plugins slow down shell startup.
plugins=(git battery)
Here are a few plugins that I use. If you want more details, you can read
the official wiki at https://github.com/ohmyzsh/ohmyzsh/wiki/Plugins.
Inside each plugin is a README.md file, which explains more about how the
plugin works. The following sections discuss a few plugins I recommend.
Alias-Finder
If you enable a lot of plugins, you will have a lot of aliases set up on your
Terminal. Alias-finder helps you discover the best one.
% alias-finder "command"
503
Chapter 9
Going Further
Let’s say you are looking for an alias that contains git merge.
% alias-finder "git merge"
gm='git merge'
g=git
There is also an option (-e or --exact) to limit results to exact
matches.
% alias-finder -e "git merge"
gm='git merge'
There is also an option (-l or --longer) to include results that are
longer than your search.
% alias-finder -l "git merge"
gm='git merge'
gma='git merge --abort'
gmom='git merge origin/master'
gmt='git mergetool --no-prompt'
gmtvim='git mergetool --no-prompt --tool=vimdiff'
gmum='git merge upstream/master'
BBEdit
I’m a great fan of BBEdit for editing text files. However, opening files in
BBEdit can be tiresome, because you have to to type them out.
% open -a /Applications/BBEdit.app
BBEdit ships with Command Line Tools, but they are not available
by default. You can install them from the BBEdit application menu (see
Figure 9-21).
504
Chapter 9
Going Further
Figure 9-21. Installing BBEdit’s Command Line Tools
This will install a command called bbedit. You can launch it.
% bbedit --launch
Or you can use it to open a file or a directory
% bbedit <file|directory>
If you use the BBEdit plugin for Oh My Zsh, you will get an alias called
bb, which is a little quicker to type.
% bb
To open a file or directory:
% bb <file|directory>
505
Chapter 9
Going Further
Note The BBEdit plugin requires the Command Line Tools to
function.
OSX
This plugin is useful for simplifying some of the Terminal commands that
interact with macOS, such as QuickLook .
Note Some of these commands may cause security popups, as
shown in Figure 9-22.
Figure 9-22. Terminal requesting access to control Finder
Print Finder Directory
The pfd command prints the directory of the last folder used in Finder,
which is useful if you are in a directory many levels deep. I can never
remember where my iCloud Drive is on the filesystem, so I can open the
iCloud drive in Finder and then type pfd to see where it on the filesystem.
% pfd
/Users/danielplatt/Library/Mobile Documents/com~apple~CloudDocs/
506
Chapter 9
Going Further
To pass the output into another command, you must surround the
command with backticks.
% cd `pfd`
Now my current directory is my iCloud Drive.
Print Finder Selection
With pfs, all you need to do is select a file in Finder. When you run pfs, the
full path will be printed.
% pfs
/Users/danielplatt/Library/Mobile Documents/
com~apple~CloudDocs/
As with the pfd, if you want to do something with this, you can use the
backtick symbol to insert the output into another command.
% ls -l "`pfs`"
-rw-r--r-- 1 danielplatt staff 64 23 Nov 20:31 /Users/
danielplatt/random-files-master/Readme.md
Note It’s best to also use quotes, because the path could have
symbols that don’t work well without being escaped. For example,
the iCloud Drive path has a space in Mobile Documents.
Change Directory - Finder
The cdf command is pretty neat. You navigate to a directory in Finder, and
you then run cdf in your Terminal, If by magic, you change the directory
into the same directory you were in, in Finder.
507
Chapter 9
Going Further
QuickLook
We’ve seen how to use QuickLook before; however, it produced a lot
of unnecessary debugging information. The osx plugin includes the
command to perform a QuickLook as well. You access it with quick-look,
followed by the file you want to quickly look at. This version of command
will produce much less output.
% quick-look ~/.oh-my-zsh/plugins/osx/osx.plugin.zsh
[2] 98294
[2] + 98294 done qlmanage -p $* &> /dev/null
Manual Preview
Like the quick-look command, we’ve seen the manual in preview
command before. This command (which is really an alias) is something
you could set up yourself, but it is convenient to have a plugin do it for you.
% man-preview zsh
Hidden Files
If you’ve ever listed the contents of your home directory, you may have
noticed that some of the files are not shown in the Finder. Earlier, we
looked at files that are hidden, because they start with a dot. However, it is
also possible to see all these files in the Finder.
% showfiles
This command changes a setting to show hidden files, and then
relaunches the Finder. You might notice that all the icons disappear from
the Desktop for a brief moment.
I find having the hidden files in the Finder visible all the time a bit too
messy. To revert to them being hidden, you can use hidefiles.
% hidefiles
508
Chapter 9
Going Further
Remove .DS_Store Files
Have you ever transferred files to another type of computer (such as
Windows), and noticed the hidden files being shown? The most common
file like this is.DS_Store. If this bothers you, you can run rmdsstore on the
directory or drive to have them stripped out.
% rmdsstore /Volumes/USBDrive
Warning Using rmdsstore will remove all customization on the
folder layout, so it’s not recommended you run it on your user folder.
Preferences
The next section of the .zshrc file is all about tweaking how Oh My Zsh
works. These comments are copied into the .zshrc file once you install Oh
My Zsh.
Case-Sensitive Completion
# Uncomment the following line to use case-sensitive
completion.
# CASE_SENSITIVE="true"
By default, using Tab to complete commands is case insensitive. This
means if you type NAN and then press Tab, you get nano. If CASE_SENSITIVE
is enabled and true, then there would be no matches.
509
Chapter 9
Going Further
Hyphen Sensitivity
# Uncomment the following line to use hyphen-insensitive
completion.
# Case-sensitive completion must be off. _ and - will be
interchangeable.
# HYPHEN_INSENSITIVE="true"
By default, autocomplete will treat dashes and the underscore symbols
differently. If you want them to be interchangeable, you should enable
HYPHEN_INSENSITIVE.
Auto Update
# Uncomment the following line to disable bi-weekly auto-update
checks.
# DISABLE_AUTO_UPDATE="true"
# Uncomment the following line to automatically update without
prompting.
# DISABLE_UPDATE_PROMPT="true"
# Uncomment the following line to change how often to autoupdate (in days).
# export UPDATE_ZSH_DAYS=13
Manual Update
With these options, you can decide to stop the automatic update of Oh My
Zsh, or apply the updates without question. To manually upgrade Oh My
Zsh, use the upgrade_oh_my_zsh command.
% upgrade_oh_my_zsh
Updating Oh My Zsh
remote: Enumerating objects: 39, done.
510
Chapter 9
Going Further
remote: Counting objects: 100% (39/39), done.
remote: Compressing objects: 100% (17/17), done.
remote: Total 27 (delta 18), reused 18 (delta 10), pack-reused 0
Unpacking objects: 100% (27/27), done.
From https://github.com/ohmyzsh/ohmyzsh
* branch master -> FETCH_HEAD
78b07e92..4e45e12d master -> origin/master
Updating 78b07e92..4e45e12d
Fast-forward
lib/clipboard.zsh | 4 ++-oh-my-zsh.sh | 4 ++-plugins/colored-man-pages/colored-man-pages.plugin.zsh | 2 +plugins/pyenv/pyenv.plugin.zsh | 3 ++ plugins/virtualenvwrapper/virtualenvwrapper.plugin.zsh |
7 +++++++
plugins/yarn/_yarn |
8 +++++--6 files changed, 19 insertions(+), 9 deletions(-)
Current branch master is up to date.
__ __
____ / /_ ____ ___ __ __ ____ _____/ /_
/ __ \/ __ \ / __ `__ \/ / / / /_ / / ___/ __ \
/ /_/ / / / / / / / / / / /_/ / / /_(__ ) / / /
\____/_/ /_/ /_/ /_/ /_/\__, / /___/____/_/ /_/
/____/
Hooray! Oh My Zsh has been updated and/or is at the current
version.
511
Chapter 9
Going Further
Magic Function
# Uncomment the following line if pasting URLs and other text
is messed up.
# DISABLE_MAGIC_FUNCTIONS=true
This feature is useful for escaping text as you paste it into Terminal. If
you paste https://www.google.com/search?q=zsh into your Terminal,
it will be escaped as https://www.google.com/search\?q\=zsh. The
downside of leaving this option enabled is that pasted text will be
processed slower than when it is disabled.
Colors
# Uncomment the following line to disable colors in ls.
# DISABLE_LS_COLORS="true"
This controls whether to use color in the directory listings with ls.
Folders, aliases, and executables by default will have color. If this is
disabled, then they will revert to the same color as the standard files.
Terminal Window Title
# Uncomment the following line to disable auto-setting terminal
title.
# DISABLE_AUTO_TITLE="true"
In Terminal preferences, I normally turn off all the options for the title.
I like my title bar to be very simple, as shown in Figure 9-23.
512
Chapter 9
Going Further
Figure 9-23. Terminal profile with an empty title bar
However, without DISABLE_AUTO_TITLE, the title bar will be updated
with the current command, as shown in Figure 9-24.
Figure 9-24. Oh My Zsh changing the title to the running command
513
Chapter 9
Going Further
Auto-Correct
# Uncomment the following line to enable command auto-correction.
# ENABLE_CORRECTION="true"
If this is enabled, Oh My Zsh will look for a close match before issuing a
command not found error.
% tai high.sh
zsh: correct 'tai' to 'tail' [nyae]?
The options are no, yes, always, and edit.
Completion Pending
# Uncomment the following line to display red dots while
waiting for completion.
# COMPLETION_WAITING_DOTS="true"
This will display red dots while the system is waiting for information
about how to complete a command. They will show up briefly when using
Tab to complete paths.
Command History
# Uncomment the following line if you want to change the
command execution time
# stamp shown in the history command output.
# You can set one of the optional three formats:
# "mm/dd/yyyy"|"dd.mm.yyyy"|"yyyy-mm-dd"
# or set a custom format using the strftime function format
specifications,
# see 'man strftime' for details.
# HIST_STAMPS="mm/dd/yyyy"
514
Chapter 9
Going Further
By default, when you use the history command, you will see a list of
the commands you have typed and an incrementing number.
1 ls
2 cd
3 sudo whoami
If you enable the format shown here, you will see the date and time as
well.
1 12/21/2019 12:16 ls
2 12/21/2019 12:16 cd
3 12/21/2019 12:16 sudo whoami
Custom Directory
With the whole ~/.oh-my-zsh directory managed by git, it is unwise to
edit any files stored within. That includes the themes. What happens if
there is a theme that you like, but you want to change it? This is where the
custom directory comes in. Anything in this directory is ignored by git. If
you wanted to tweak a theme, you can copy it to ~/.oh-my-zsh/custom/
themes/.
If for some reason you wanted to move your custom directory to
outside of ~/.oh-my-zsh, you can use ZSH_CUSTOM to specify where that is.
# Would you like to use another custom folder than $ZSH/custom?
# ZSH_CUSTOM=/path/to/new-custom-folder
The default location is ~/.oh-my-zsh/custom/.
Ideas for Terminal
This section covers various Terminal tweaks that can make parts of your
job easier.
515
Chapter 9
Going Further
Mistyping
Do you find that you mistype the same commands again and again? Maybe
you could do with a tip to help you recognize when you do so. You could
also adapt this tip to prank other people. Not that I condone that sort of
thing.
Recall that we installed the sl command for the steam locomotive, and
the point of this command is to display an animated steam locomotive
that travels across your Terminal. We found out that this command is
run by typing sl, which is a common mistyping of the ls command. The
command cannot be cancelled and the wider your screen, the longer it
takes.
So, how can this help with other mistyped commands? You can use
aliases to run the locomotive command. Let’s see an example. When I
type commands, I sometimes type them too quickly, missing a space. This
becomes problematic when I’m changing directories. I should type cd ..
(cd space) to go up a directory.
However, I often end up with cd.. without the trailing space, which
will return the dreaded message, “command not found”. So let’s alias that.
Type this command into your Terminal or add it to your .zshrc file.
% alias 'cd..'='sl'
Now when you type cd.., the locomotive will help remind you to type
the correct command.
Identify Other Computers
As a systems administrator, I spend a lot of time logging into different
computers using my Terminal.
% ssh user@example.org
516
Chapter 9
Going Further
Some of them are production systems and others are staging
environments. If I’m quickly switching tabs, it can be easy to lose track of
which environment I’m in. So, how can we make it easier to know which
environment we’re in? We can use figlet to tell us.
% figlet "Staging"
After a while, that would get lost in the scroll back. Now, because most
remote systems are using Bash, we can also change the color, and that will
persist, no matter how much we type. The production colors are shown in
Listing 9-1 and the staging colors are shown in Listing 9-2.
Note Instead of looking in .zshrc, Bash will look in a file called
.bash_profile.
Listing 9-1. The .bash_profile Production
printf '\e[38;5;215m\n' # Foreground color
printf '\e[48;5;88m\n' # Background color
Listing 9-2. The .bash_profile Staging
printf '\e[38;5;237m\n' # Foreground color
printf '\e[48;5;208m\n' # Background color
However, this only works for the current line and any subsequent lines.
We can use the clear command to force the whole screen to empty. This
has the effect of applying the colors to the whole window. With a staging
server, you would end up with something like Listing 9-3 in your users
.bash_profile.
517
Chapter 9
Going Further
Listing 9-3. The .bash_profile
printf '\e[38;5;237m\n' # Foreground color
printf '\e[48;5;208m\n' # Background color
clear
figlet "Staging"
This would be displayed like Figure 9-25.
Figure 9-25. An example of connecting the staging configuration to a
server
If I then connect to the production account, I would see a different
screen, as shown in Figure 9-26.
518
Chapter 9
Going Further
Figure 9-26. An example of connecting the production configuration
to a server
If you close the window when you are finished connecting to the remote
server, it works really well. However, when you log out from the remote
server, the colors aren’t reset. It leaves you with the same color scheme from
the remote server, on your local Terminal. This is far from ideal.
When you log out, the .bash_logout file is executed by Bash. If we put
the tput init command into .bash_logout, that will cause the colors
to reset to the defaults. Now when disconnect, your colors will be as they
were before you connected.
Filtering Log Files
Recently, one of our websites was being flooded by bot traffic, which I could
see in the nginx access logs. Some automated programs cause unnecessary
load on the websites. Here’s an example of a line in the access log:
127.0.0.1 - - [14/Feb/2020:07:55:23 +0000] "GET /info.
php HTTP/1.1" 200 90885 "-" "Mozilla/5.0 (Macintosh; Intel
Mac OS X 10_15_3) AppleWebKit/605.1.15 (KHTML, like Gecko)
Version/13.0.5 Safari/605.1.15"
519
Chapter 9
Going Further
Note The log line shows the remote IP address, the HTTP user, the
date and time of the event, the request, the HTTP status code, the
total bytes sent, and the user agent.
I needed to filter the web servers access log for something, but the
traffic was coming from lots of different sources. However, there was one
commonality—they all had HeadlessChrome in the user agent string in the
nginx access log. The user agent string is a piece of text that tells you about
the browser that is connecting to your server. This is what my user agent
for Safari looks like.
"Mozilla/5.0 (Macintosh; Intel Mac OS X 10_15_3)
AppleWebKit/605.1.15 (KHTML, like Gecko) Version/13.0.5
Safari/605.1.15"
The first thing I did was confirm what was returned when I filtered for
HeadlessChrome.
% grep HeadlessChrome /usr/local/var/log/nginx/access.log
The list had everything on it that I wanted. If I could turn that list into
just the IP addresses, I could block it from accessing my servers.
% grep HeadlessChrome /usr/local/var/log/nginx/access.log | awk
'{print $1}'
10.2.2.2
10.1.1.1
10.3.3.3
10.2.2.2
10.3.3.3
Note These IP addresses are made up to illustrate the point.
520
Chapter 9
Going Further
The problem now was that I had a list of IP addresses, but they needed
to be deduped. Thankfully, we’ve already seen some commands that do
this by using sort and uniq.
% grep HeadlessChrome /usr/local/var/log/nginx/access.log | awk
'{print $1}' | sort | uniq
10.1.1.1
10.2.2.2
10.3.3.3
Great, I sorted list that I can block. However, I wanted to make it a
little more difficult for the attacker and remove potential false positives. I
thought it would be good to only include IP addresses that have accessed
the server more than 100 times. By using uniq to produce a count, I could
then use awk to filter on that count.
% grep HeadlessChrome /usr/local/var/log/nginx/access.log | awk
'{print $1}' | sort | uniq -c | awk '$1 >= 100 '
120 10.1.1.1
131 10.2.2.2
110 10.3.3.3
90 10.4.4.4
Finally, all I needed to do was return the IP address and sort the list
again.
% grep HeadlessChrome /usr/local/var/log/nginx/access.log | awk
'{print $1}' | sort | uniq -c | awk '$1 >= 100 {print $2}' |
sort -rh
10.1.1.1
10.2.2.2
10.3.3.3
521
Chapter 9
Going Further
Now, with this list of IP addresses that I was confident were not our
customers, I could block them. I managed to block 1,157 IP addresses
using this method.
P
rogramming Languages
There are more programming languages available to you than the ones I
have shown. These can be used without having to install anything extra on
your computer.
P
ython
There are many uses for Python. It can be used to make websites, build
system commands, and research artificial intelligence.
% python3 -V
Python 3.7.6
macOS also ships with version 2, but this version has been deprecated
and will eventually be removed. The simplest Python script is a hello
world, as shown in Listing 9-4.
Listing 9-4. hello.py
print("Hello World")
% python3 hello.py
Hello World
522
Chapter 9
Going Further
C
and C++
C and C++ are typically used to create very efficient applications and
games. I don’t recommend them for beginner users. I suggest that a
beginner try Python instead. A very simple example of a C program is the
hello world, shown in Listing 9-5.
Listing 9-5. hello.c
#include <stdio.h>
int main()
{
printf("Hello World\n");
return 0;
}
You then can use gcc to compile the program into a command and
save it to the hello command.
% gcc hello.c -o hello
% ./hello
Hello World
S
wift
Swift is used to create applications for the Apple ecosystem. Recently it
has also been ported to Linux, to allow for some cross-platform apps.
Listing 9-6 provides a simple hello world example of Swift.
Listing 9-6. hello.swift
print("Hello World")
523
Chapter 9
Going Further
Running a Swift program is simple.
% swift hello.swift
Hello World
Or you can compile the program, just as we did with C, into a
command called hello.
% swiftc hello.swift -o hello
Summary
With this book, I have tried to give you a nice overview of lots of different
Terminal options. There are lots of different applications you can install
and services you can call to customize your Terminal. If you get into
programming, there is a whole new world of customization you will be
able to perform with your computer as well.
524
Index
A
B
Access Control List (ACLs), 79
Apple File System (APFS), 132
Archey GitHub page, 485
archey utilitiy, 273
asciinema command
cat, 282
installation, 279
play, 281
rec, 280, 281
upload
alias, 285
auth, 284
$HOME variable, 285
~/Library/Logs, 285
message, 288
my-shell.sh
command, 289
preferences, 287
$RANDOM, 285
recording
cast, 283, 284
run, 286
shell, 288
URL, 284
which command, 289
.zshrc file, 286
Associative arrays, 363
.bash_logout file, 519
Binary number, 352–356
Boolean expression, 374
Boolean value, 363
Brew cask
installation, 266
searching, 266, 267
updating, 268
Brew’s automatic cleanup
broken applications, 483–486
manual, 480
opting out, 480
warnings, 481–483
Brew services
installation, 269
listing, 269, 270
restarting, 272
starting, 271
stopping, 271
sudo, 272
C
Caret constraint, 389
Changing File permissions
Numeric Breakdown of User,
Group, 82
Numeric Values Entry Type, 81
© Daniel Platt 2021
D. Platt, Tweak Your Mac Terminal, https://doi.org/10.1007/978-1-4842-6171-2
525
INDEX
Command line projects
arguments, 398, 399
higher/lower, 400, 403
Comma Separated
Values (CSV), 294
Commit, 405
Comparison operators, 375
Compressed text
log files, 145
printing, 145
searching, 145
Compression, 102
unzip
command, 103
contents, 104
integrity, 103
random-files, 104, 105
zip
archive, 105, 106
archive
encryption, 107
archive size, 106, 107
directories, 107
options, 105
cowsay command, 225–227
CSV command, 294–296
curl command, 299–301
D
Database
installation, 457
MySQL server, 458
ddrescue command, 277–279
526
Dependencies
add packages, 388
development, 390
install packages, 387
packages, 391
search packages, 386
specified, 390
update packages, 387
Disk images
copying, 200, 201
creation, 197, 198, 202
ejecting, 198
encrypting, 200
hdiutil, 197
mounting, 198
volume name, 198, 199
Disk management
disk partitions, 192
diskutil command, 191
diskutil list, 192
du command, 185
encrypting disk, 196, 197
erasing disk, 194, 195
free space
blocks, 190
df command, 190
drive, 191
Finder Window, 188–190
main filesystems, 191
-h option, 185
home directory, 185
new partition, 195
padlock, 187
partition information, 193, 194
INDEX
security/privacy system
preferences, 186, 187
Disk Utility, 191
display.mov, 260
do while loop, 379
draw commands, 242
Dynamic Name Server (DNS), 171
ANSWER SECTION, 176
dig command, 175
example.com, 177
Google Public DNS, 177, 178
IP address, 176
QUESTION SECTION, 176
router, 176
-t option, 179, 180
traffic, 179
TTL value, 176
E
echo command, 121
Exact constraint, 389
Extended file attributes, 80
F
ffmpeg
audio, 260
combining audio/video, 260
display capture, 259, 260
file formats, 261, 262
installation, 253
list_devices, 254
multiple videos, 262–265
security, 255, 256
stripping audio/video, 261
subtitles, 265
Webcam, 256–259
figlet command, 228, 229
Files
-a option, 117
finding content, 110–113
finding name, 114, 115
locate command, 115, 116
magic code, 119
master zip, 118, 119
metadata, 120
Show Package Contents, 120
which command, 117
$PATH variable, 118
Floating-point
numbers, 356, 357, 359
for loop, 377
foreach loop, 380
fortune command, 223–225
G
General Data Protection
Regulation (GDPR), 169
gettype() function, 364
git commands, 406, 411
Git commit, 406
git fetch command, 411, 412
GitHub terms, 407
git pull, 413, 414
git status, 412, 413
Google Public DNS, 177
527
INDEX
Gzip compression
-d option, 108
-r option, 108
rotation, 108
tar, 109, 110
version, 108
vs. zip compression, 108
H
HEAD branch, 410
I
ImageMagick
arc, 248, 249
borders, 235
circles, 250
colors, 233, 234
combing images, 245, 246
ellipses, 250
fonts, 235, 236
grid, 244, 245
installation, 232
JPG to PNG, 235
list, 233
polygon, 251–253
rectangles, 246, 247
simple image, 234
text, 236, 238–241
text color, 241–243
Info-ZIP, 102
Integration, macOS
copy/paste, 156, 157
man pages, 159, 160
528
open command, 153–156
QuickLook, 157, 158
system chime, 160, 161
Internet services, Terminal
Nyan Cat, 491–494
star wars, 490, 491
stock ticker, 489, 490
weather, 487, 488
Internet speed
--csv, 303
CSV file, 303
--csv header, 303
graph, 304
speed test-cli, 302
watch command, 304
J, K
JSON file format, 292, 293
L
Launchd
error codes, 209, 210
label key, 213
listing services, 208, 209
plist, 217
program arguments, 214
program name, 214
scheduledUpdate, 213
service definition, 210–212
specified seconds, 215
StartCalendarInterval, 215, 216
troubleshooting, 217, 218
.xml file format, 212, 213
INDEX
Linux utilities
arguments, 274
BSD commands, 277
coreutils, 274
head command, 275
installation, 274
options, 276
.zshrc file, 277
lolcat command, 229, 230
Loops
dependency, 383–385
do while, 379
exit early, 380, 382
for, 377
foreach, 380
while, 378, 379
M
macOS
curl command, 102
temporary directory, 101
magick command, 232
Meslo font, 501
Multi-line comments, 348
N
Networking
DNS (see Dynamic Name
Server (DNS))
domain names, 169
domain status, 170
downloading files, 165, 166
/etc/hosts file, 171, 173
GDPR, 169
hops, 168
IP address, 170, 171
-m option, 168
Nameservers, 170
PHP, 174
ping command, 166, 167
piping
Google’s response, 182
header Host, 181
ifconfig command, 183, 184
-l (L) option, 180
nc command, 180
netcat, 181, 184
output, 181
Terminal windows, 183
URL, 182
random-files-master
directory, 172
remote shell
remote computer, 165
Remote Login, 164
sharing preferences, 163, 164
ssh command, 162
system preferences, 162, 163
timeouts, 167
traceroute command, 168
Numeric arrays, 360–362
O
Oh My Zsh
install, 495, 496
plugins, 503
529
INDEX
Oh My Zsh (cont.)
Alias-finder, 503, 504
BBEdit, 504, 505
cdf command, 507
.DS_Store files, 509
hidden files, 508
manual preview, 508
OSX, 506
print finder directory, 506
print finder selection, 507
QuickLook, 508
preferences
auto-correct, 514
auto-update, 510
case-sensitive completion, 509
colors, 512
command directory, 515
command history, 514
completion pending, 514
hyphen-insensitive
completion, 510
magic function, 512
manual update, 510, 511
terminal title, 512
themes, 496
Agnoster, 499, 500
Candy Kingdom, 499
clean, 497
Gallifrey, 498
Nanotech, 498
Powerline font, 500, 501, 503
robbyrussell, 497
themes previews, 497
outdated command, 268
530
P, Q
PHP basics
comments, 347
multi-line comments, 348
single-line comments, 347
configuration file, 456
constants, 349
installation, 455
language, 347
loops (see Loops)
superglobals (see Superglobals))
symbol, 454
variables, 364
array, 360
floats, 356, 357, 359
integer, 351, 352
objects, 364
shorthand, 359, 360
string, 350, 351
types, 350
web directory, 457
PHP_FLOAT_MAX, 356
PHP_FLOAT_MIN, 356
PHP version
7.3 branch, 341
browser version, 344
cli configuration, 342
configuration file, 342, 343
usage, 342
web server, 344–346
printf command, 122
Programming languages
C and C++, 523
INDEX
Python, 522
swift, 523
Public repository, 408
Pull request (PR), 444
view files, 439
first, 414, 415
forking, 441
change the remote, 442
GitHub, 445
manual method, 442, 443
official way, 444
pull request, 444, 445
.gitconfig, 419
log, 420
publish
create, 422
homepage, 423
sign up, 421
removing files, 416, 417
R
Red, Green, and Blue (RGB)
values, 234
Remote repository, 409
Remote master branch, 410
Repository
adding files, 416
amend a commit, 419
authentication, 425
danger zone, 436
HTTPS, 430
personal access
token, 431, 432
public key, 430
removing saved
details, 433, 434
settings menu, 426
ssh, 426, 427
SSH keys addition, 429
SSH keys generation, 428, 429
upload, 434, 435
commits, 417, 418
create/upload files, 437, 438
delete files, 440
edit files, 439
GitHub, 438
README file, 438
S
say command, 262
accessibility tab, 203, 204
contents of files, 203
extra voice downloading, 205, 206
functionality, 203
languages, 203
-r options, 203
saving speech, 207
speaking rate, 206, 207
-v options, 203
voice setting, 204, 205
Scanning/processing, AWK
BEGIN action, 138
built-in variables, 137
cat command, 135
531
INDEX
Oh My Zsh (cont.)
conditionals
modulo symbol (%), 142
add column, 141
add header row, 143
.csv files, 144
NR variable, 142
renaming, 142
sample data, 143
string/regular expression,
144
END action, 139
patterns, 135, 139, 140
{print}, 136, 137
TSV file, 135
variables, 138
Semantic versioning, 389
Shell scripting
arithmetic expansion, 320
current directory, 307
Exit codes, 325
Exit keyword, 326
file creation, 305
if statement, 318
loops
break continue statement,
324
components, 322
for Loop, 323
project
arguments, 328
higher-or-lower, 331
532
higher-or-lower with
Changeable Limit, 334
Quicker Say Command, 330
read input, 327
Running and Debugging
Scripts, 306
text color
color command Output, 313
Output, 311
textmode, 308
combine style, 311
turn off textmode, 310
variables
$0, $1, $2argument, 317
using arguments, 316
$@argument, 317
$*argument, 316
Single-line comments, 347
start command, 271
Steam Locomotive Command,
230–232
Superglobals, 366
Boolean expression, 374
comparison operators, 375
functions, 371, 372
$_GET, 368, 369
if statements, 373, 374
$_POST, 369
$_REQUEST, 369
$_SERVER, 366–368
$_SESSION, 370
Symfony, 386
INDEX
T
Tags, 410
Terminal
.bash_profile, 517, 519
filtering log files, 519–522
mistyping, 516
systems administrator, 516, 517
Terminal application, 2
Aliases, 85
book conventions, 6
Brew
applications by name, 13
fortune cookie, 14
installation complete, 13
Installing Brew Each User, 12
Installing Brew Globally, 12
Libraries and
Functions, 11
reinstall fortune, 17
upgrade fortune, 15
changing File permissions,
81–84
directory
deleting Directory, 39–42
folder creation, 38
display message, 90
echo and fortune command, 90
echo command, 88
Environment Variable, 91
default text editor, 93
output variables, 93
exclamation mark, 89
file editing
installation complete, 51
installation is complete, 50
Install BBEdit Command
Line Tools, 49, 50
typing nano, 48
File Operations
copy file, 46
deleting file, 47
file creation, 43
Moving file, 47
read file, 44
write file, 43
File permissions, 71
block file, 74
Character file, 74
component control, 73
Feature Symbols, 78
FIFO, 75
link, 75
socket file, 75
Symbol Meaning, 76
Filesystem
absolute path, 37
cd command, 33
Disk utility, 31
dot symbol, 34
dragging icon, 36
dropping icon, 36
inside directory, 34
Meta Directory, 28
relative path, 37
533
INDEX
Terminal application (cont.)
root directory, 32
System Directory, 29
user Directory, 30
Globbing
double asterisk, 62
question mark, 61
range match, 62
Single Asterisk, 60
hidden features, 5
Hidden Files and Folders
macOS Way, 58
UNIX Way, 55
Links
Hard links, 64
name with asterisk, 65
symlink, 64
macOS Terminal, 19
piping
vertical bar
symbol (|), 52
input, 54
output, 52
preference menu, 22
Profile preferences, 23
profiles, 21
Pro profile, 21
requirements, 6
installing Xcode, 8
searching for Xcode, 9
using Homebrew, 10
xcode-select, 8
Restore Default Profiles
option, 24
534
shell
Shell Shortcut Keys, 27
upgrading macOS, 26
Zsh, 25
shell prompt, 94
Date and Time Symbols, 96
Emoji Picker, 98, 99
State Symbols, 95
strftime symbols, 97
variables, 97
Spotlight search bar, 3
Terminal in Spotlight, 4
using command
man Page Section, 70
manual search, 69
utilities folder, 3
.zlogin, 88, 91
.zshrc file, 87
Zsh Special Files, 86
Text
formatting output
arguments displaying, 123
printf format, 122
printing, 121
scanning/processing (see
Scanning/processing, AWK)
search and replace, 126, 127
spotting differences, 128, 130
transforming
changing, 125
deletion, 126
viewing contents, 124
beginning, 130, 131
end, 131–134
INDEX
Time to Live (TTL) value, 176
Top commands
awk, 219
-c argument, 219
history command, 218
order (-r), 220
sort, 219
$HISTSIZE variable, 218
.zshrc file, 219
Troubleshooting
drive removing, 151, 152
runaway process, 148–150
running process, 146–148
sysctl, 152, 153
Type checking
functions, 365
U
upgrade command, 268
V
var_dump function, 371
Version constraint, 388
Version control system
git, 406
GitHub, 407
zip, 407
W
watch command, 297
Web browser projects
people API, 394, 396, 398
person API, 391–393
Web server
configuring nginx, 450
HTTP Port, 451
Multiple Sites Differ
by Port, 450
installing nginx, 448
start nginx, 449
wget command, 298, 299
while loop, 378
Wildcard constraint, 389
WordPress Database
blog, 471
Dashboard, 468
Exporting Database, 474
installation, 460
blog setup, 466
complete process, 467
details, 464
final check, 465
Language selection, 462
login, 468
MySQL server, 459
nginx change, 472
Permalinks, 471
permalink settings, 473
Settings tab, 470
WordPress Config, 475
wp-config.php, 476
X, Y, Z
XML file format, 290, 291
535