/


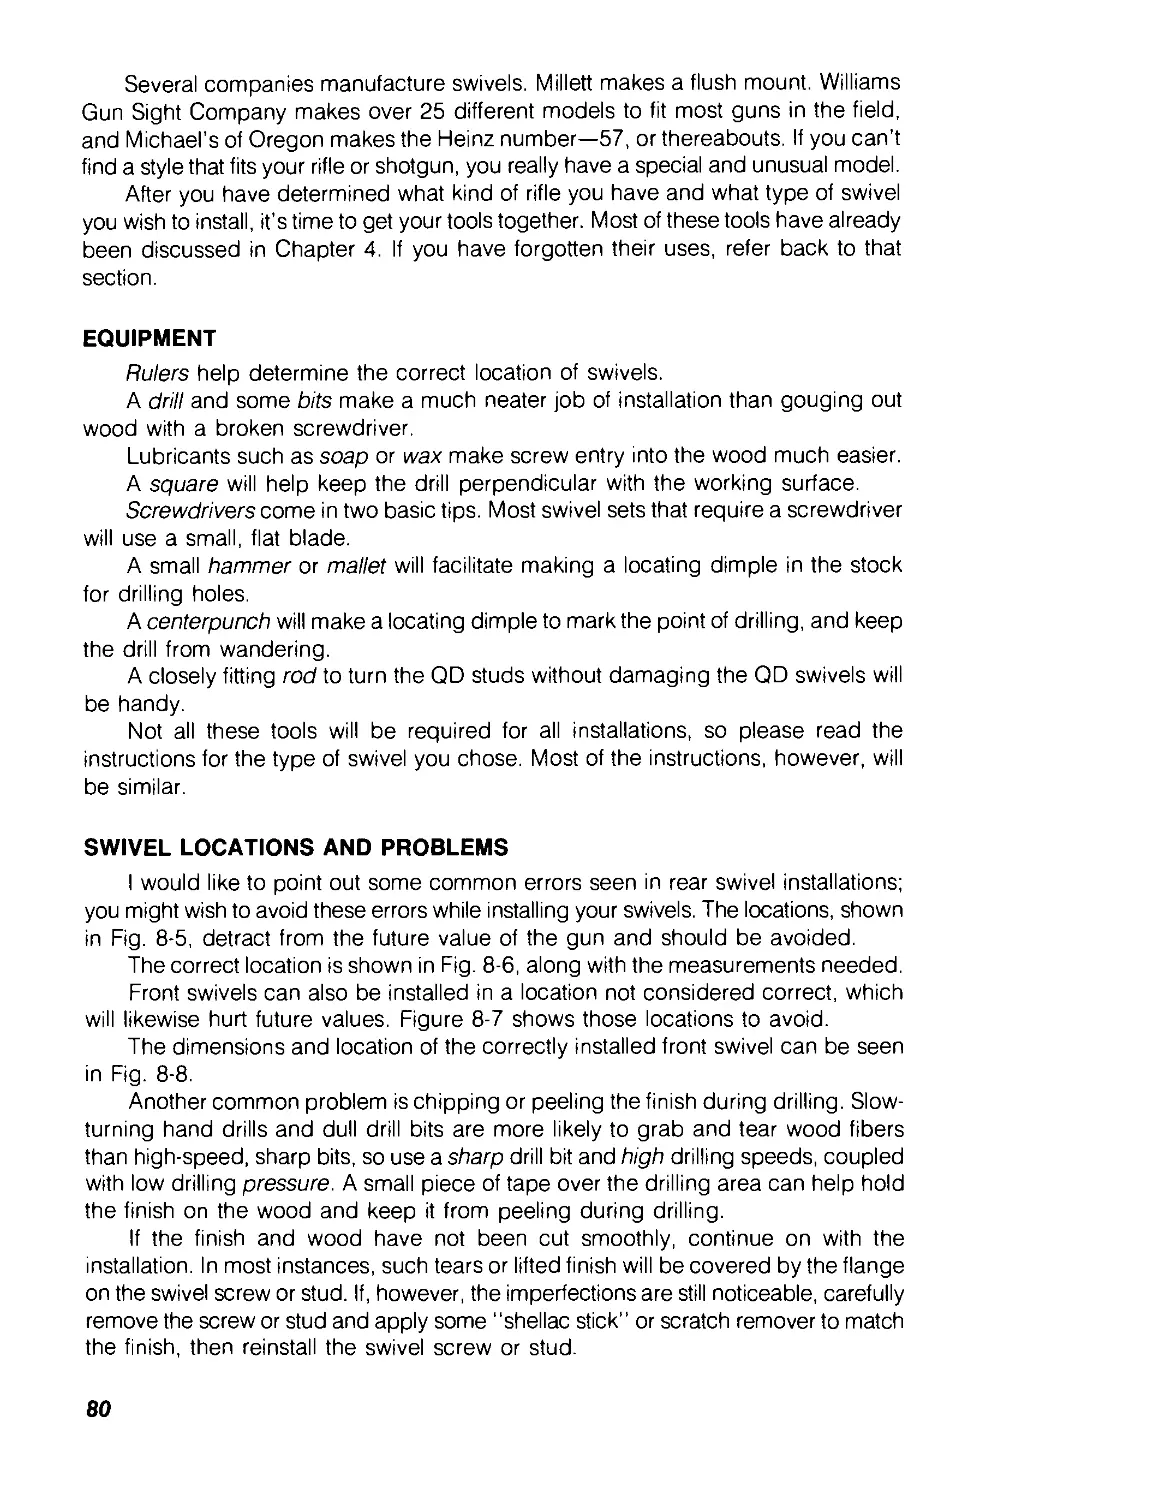
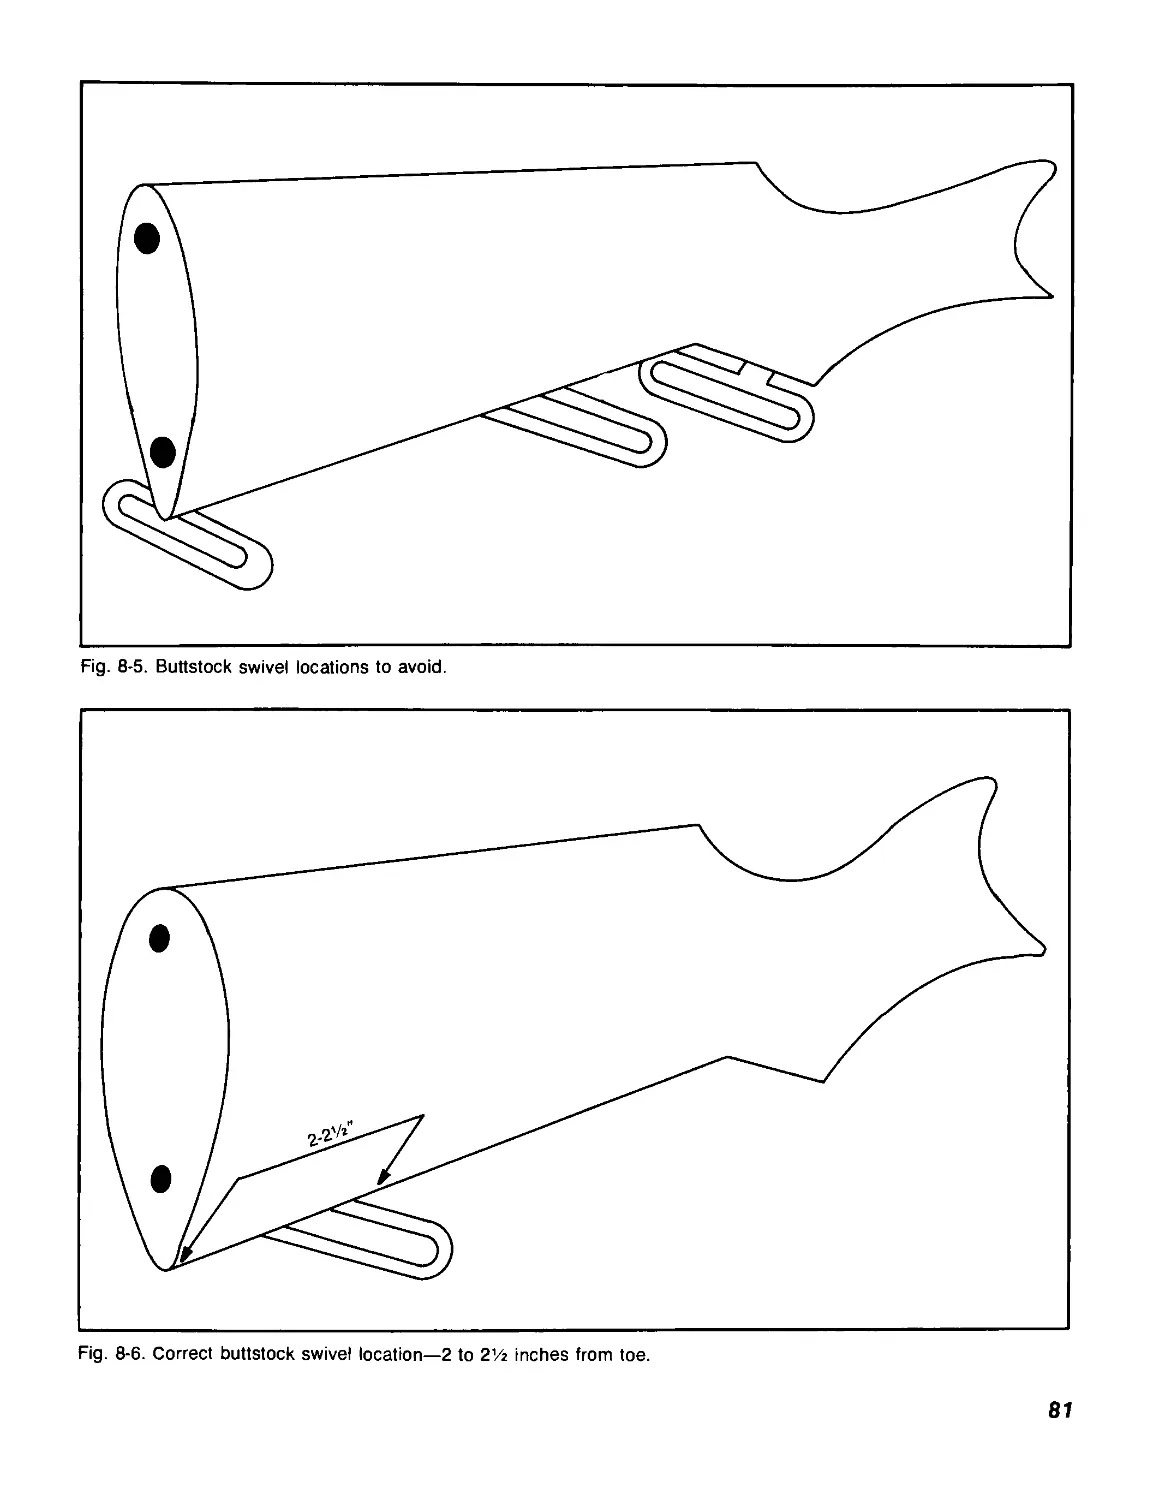
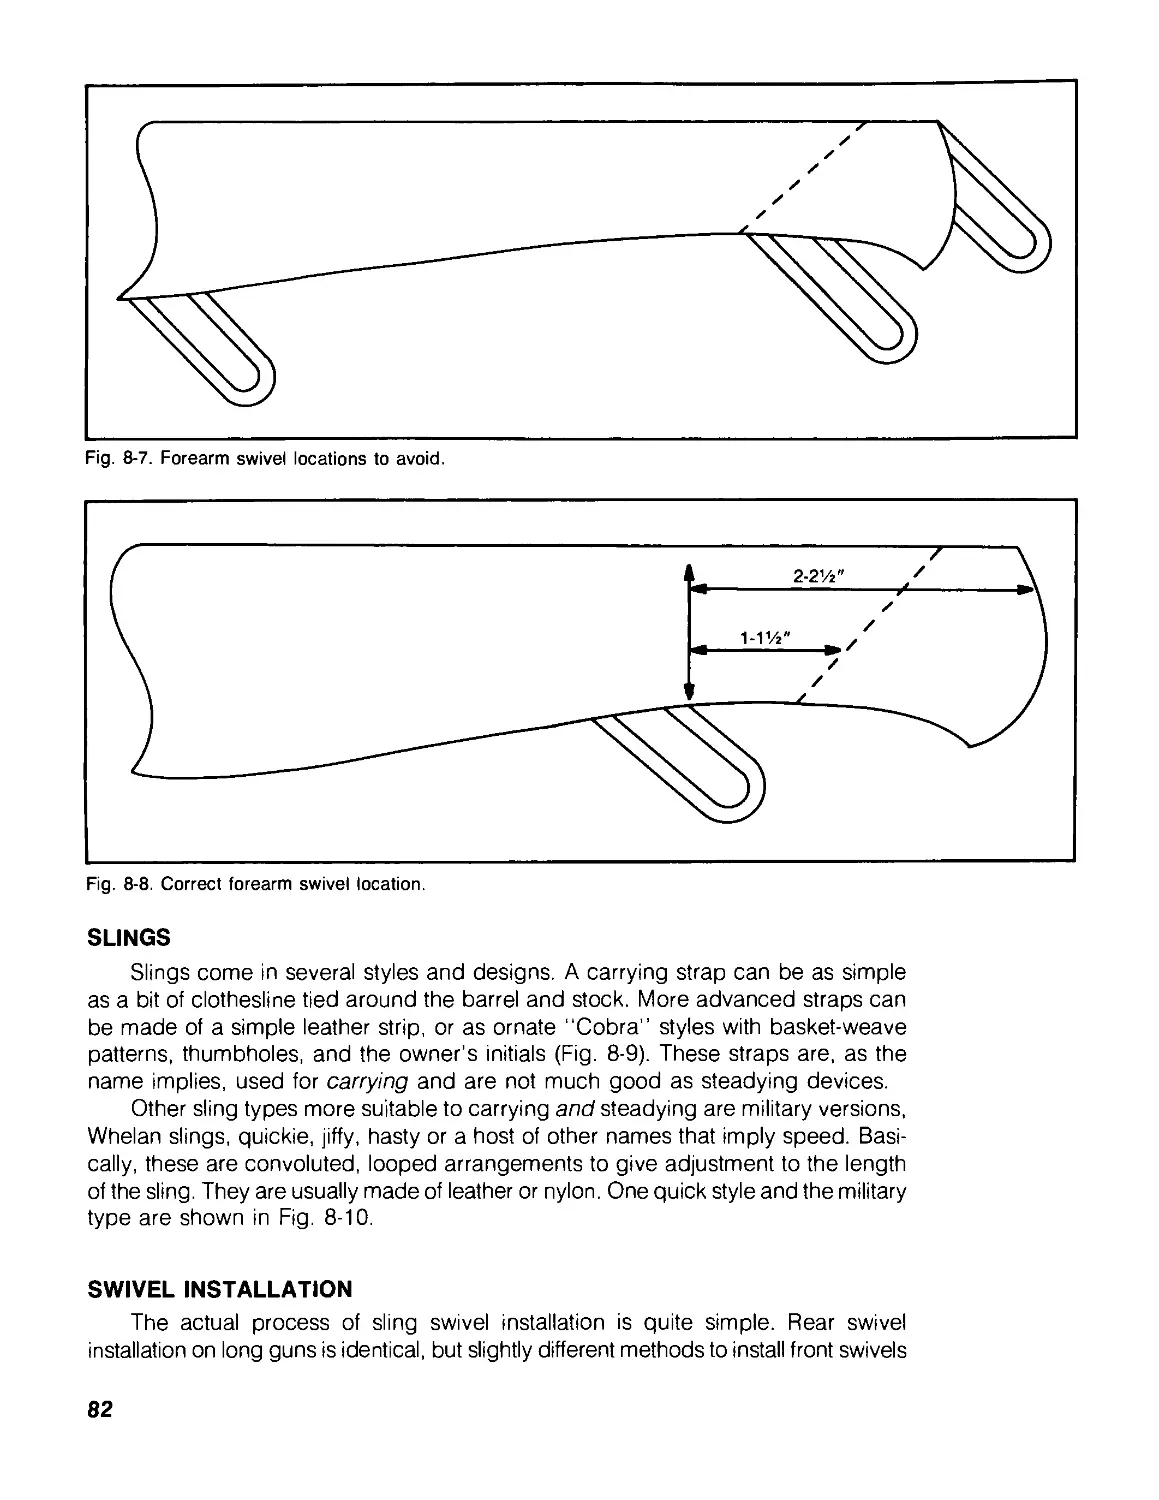
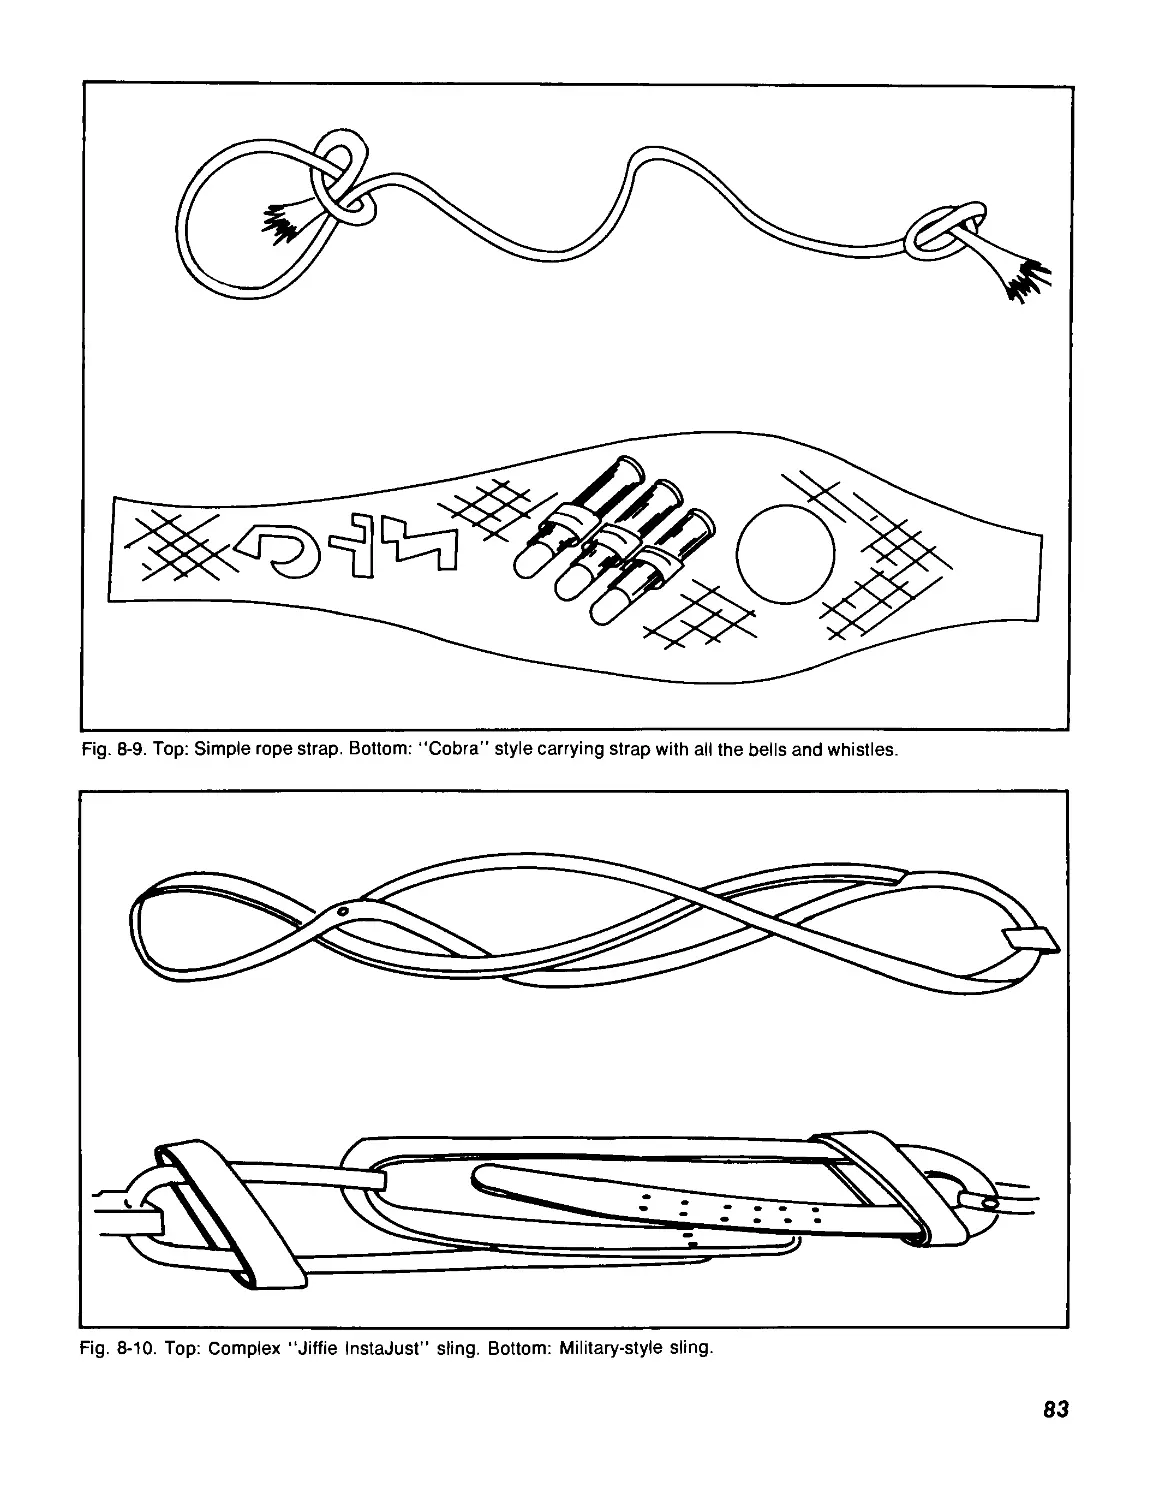


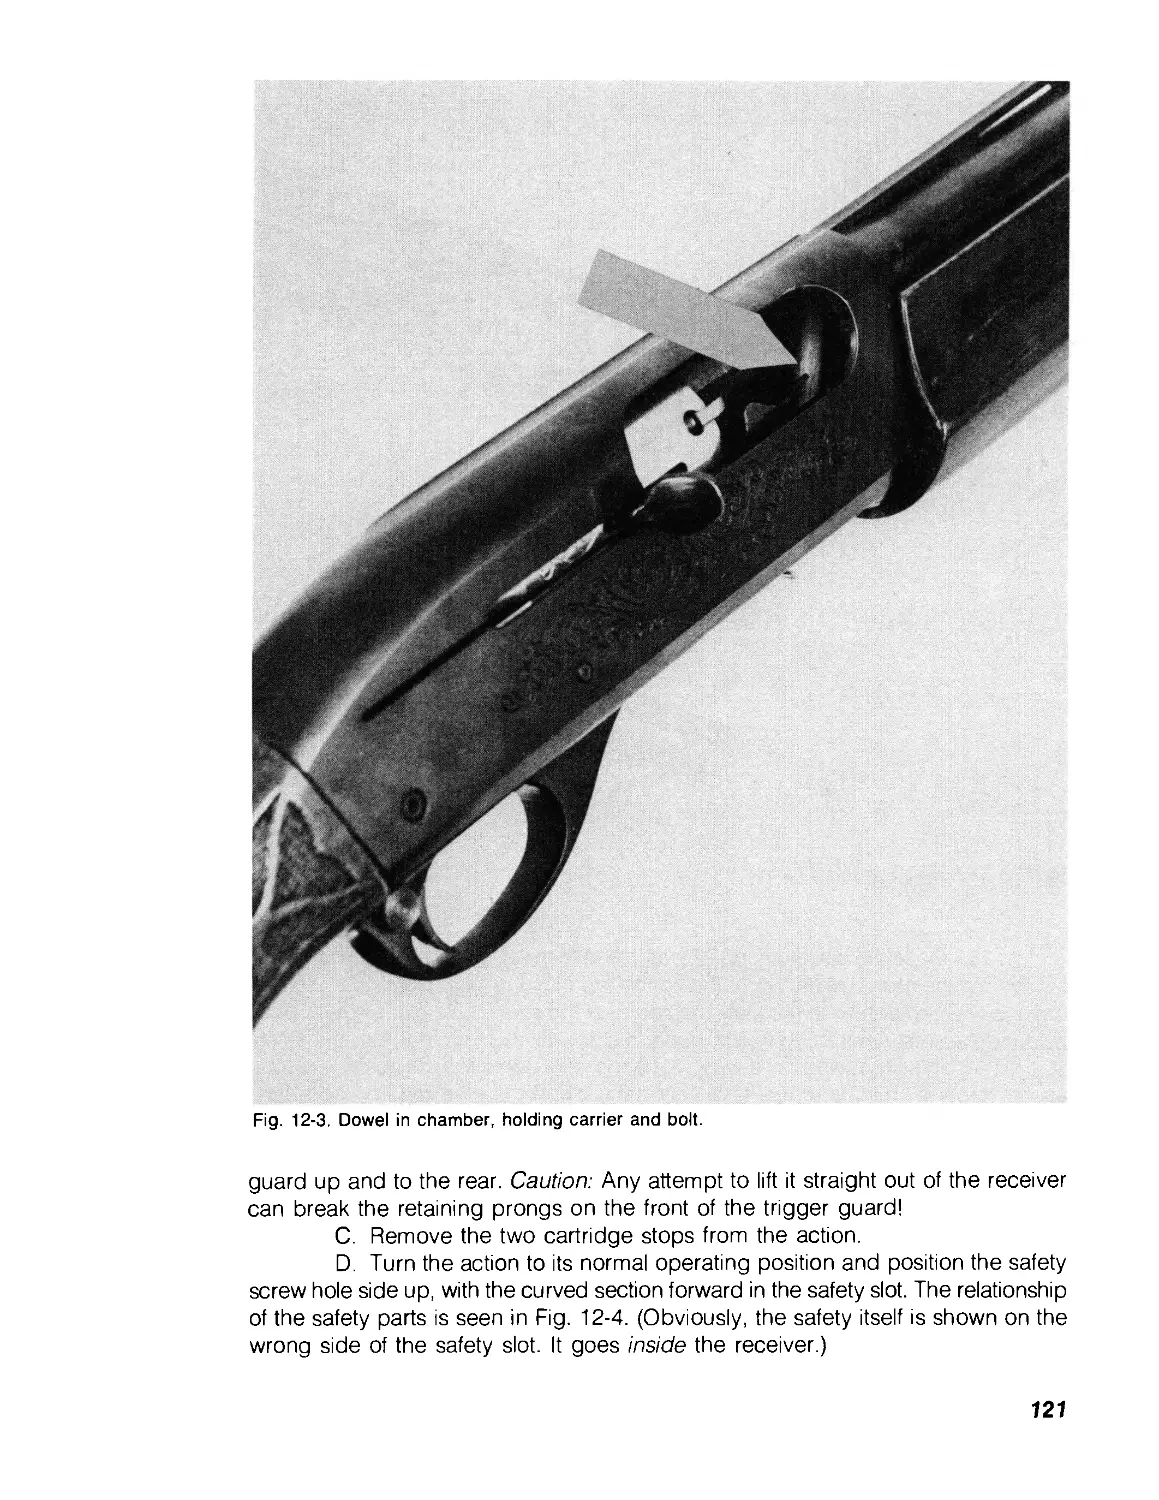


Text
GUNSMITHING
Fundamentals
A Guide for Professional Results
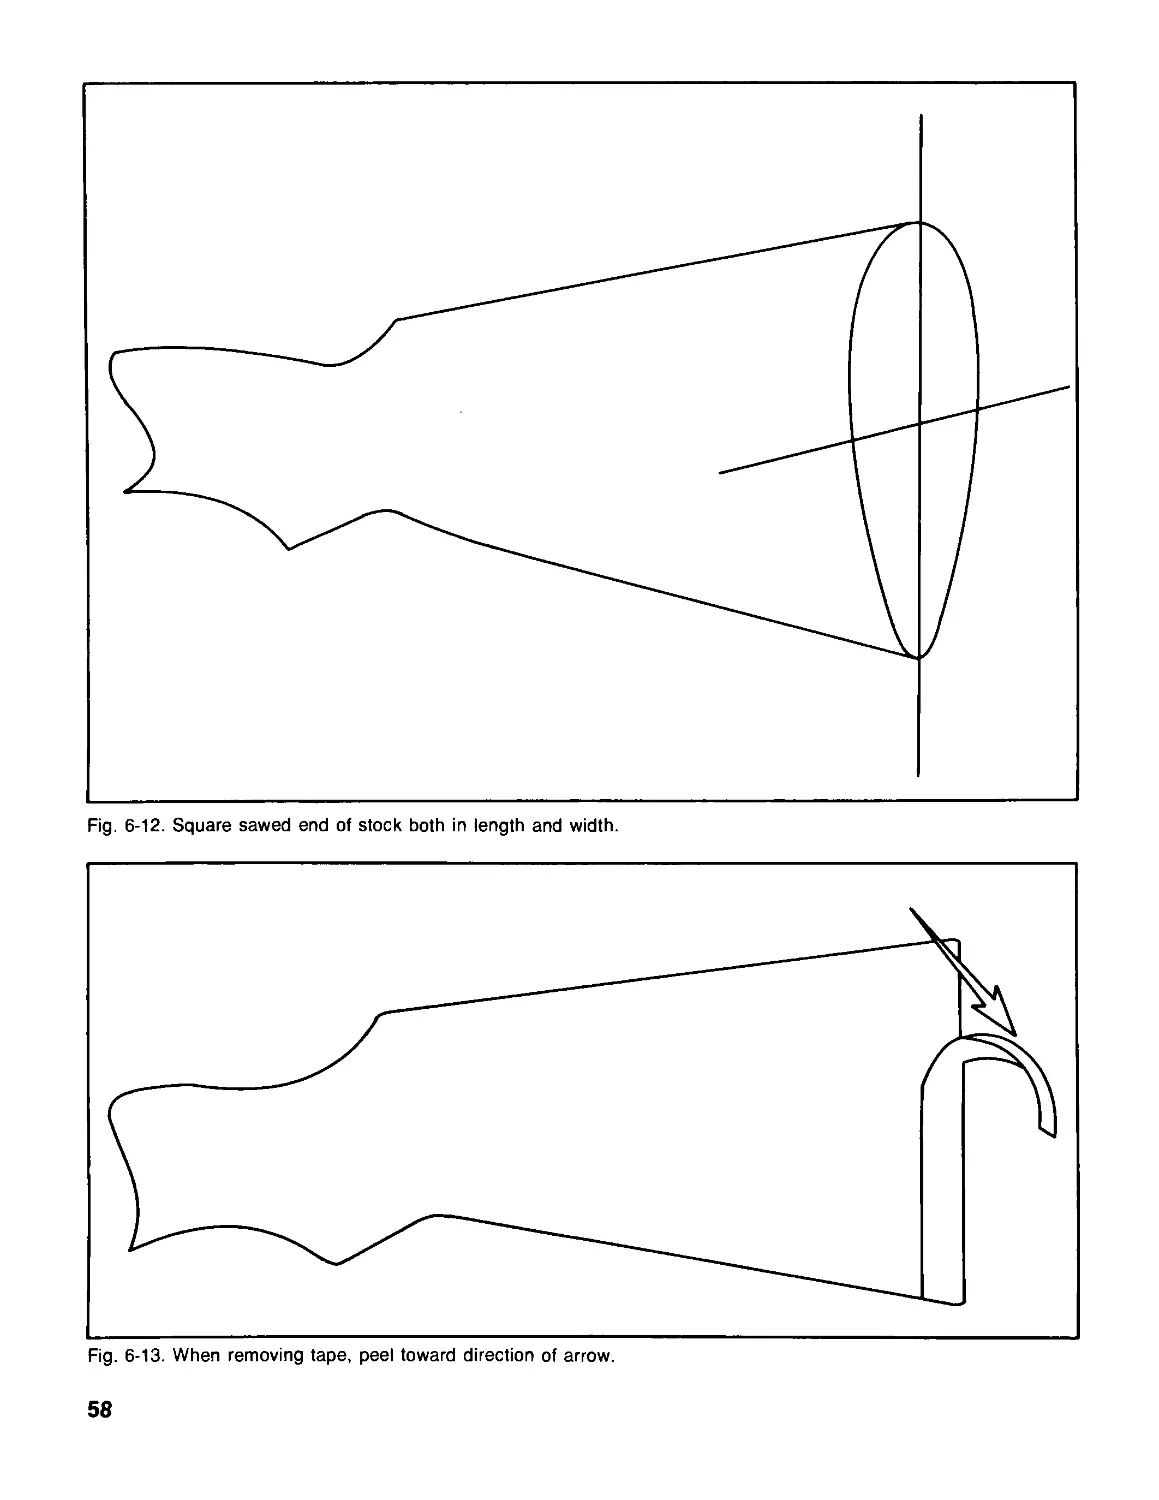
Franklin Fry
TAB
TAB BOOKS Inc.
Blue Ridge Summit, PA
To my wife, Nina, and good friend, Paula. Without their occasional
kick in the pants and continual help, this book would never have been
written. Thank you both for letting me wear your patience and under-
standing to the breaking point.
FIRST EDITION
THIRD PRINTING
© 1988 by Franklin Fry.
Published by TAB Books.
TAB Books is a division of McGraw-Hill, Inc.
Printed in the United States of America. All rights reserved. The publisher takes no
responsibility for the use of any of the materials or methods described in this book,
nor for the products thereof.
Library of Congress Cataloging-ln-Publication Data
Fry, Franklin.
Gunsmithing fundamentals.
Includes index.
1. Gunsmithing. I. Title.
TS535.F78 1988 683.4 88-2192
ISBN 0-8306-0332-8
ISBN 0-8306-2932-7 (pbk.)
TAB Books offers software for sale. For information and a catalog, please contact
TAB Software Department, Blue Ridge Summit, PA 17294-0850.
Questions regarding the content of this book should be addressed to:
Reader Inquiry Branch
TAB Books
Blue Ridge Summit, PA 17294-0850
Photographs in Figs. 4-1, 6-10, 6-11, and 6-19 were taken by Nina Fry. All
other photographs were taken, processed, and printed by Mark W. Allen.
Line Drawings by the author and Nina Fry.
Contents
Introduction v
1 A Very Short History of Firearms 1
Gunpowder—Early Locks—Flintlocks—Percussion Locks—Cartridge Arms—Smokeless Powders: The
Modern Era
2 Buying a Used Gun 9
Used Gun Caveats—Inspection—Used Gun Condition Grading—Used Gun Value
3 Tools and Work Area 19
Vital Equipment—Work Space
4 Gun Cleaning for Fun and Profit 27
General Cleaning Procedures—Storage—Rust
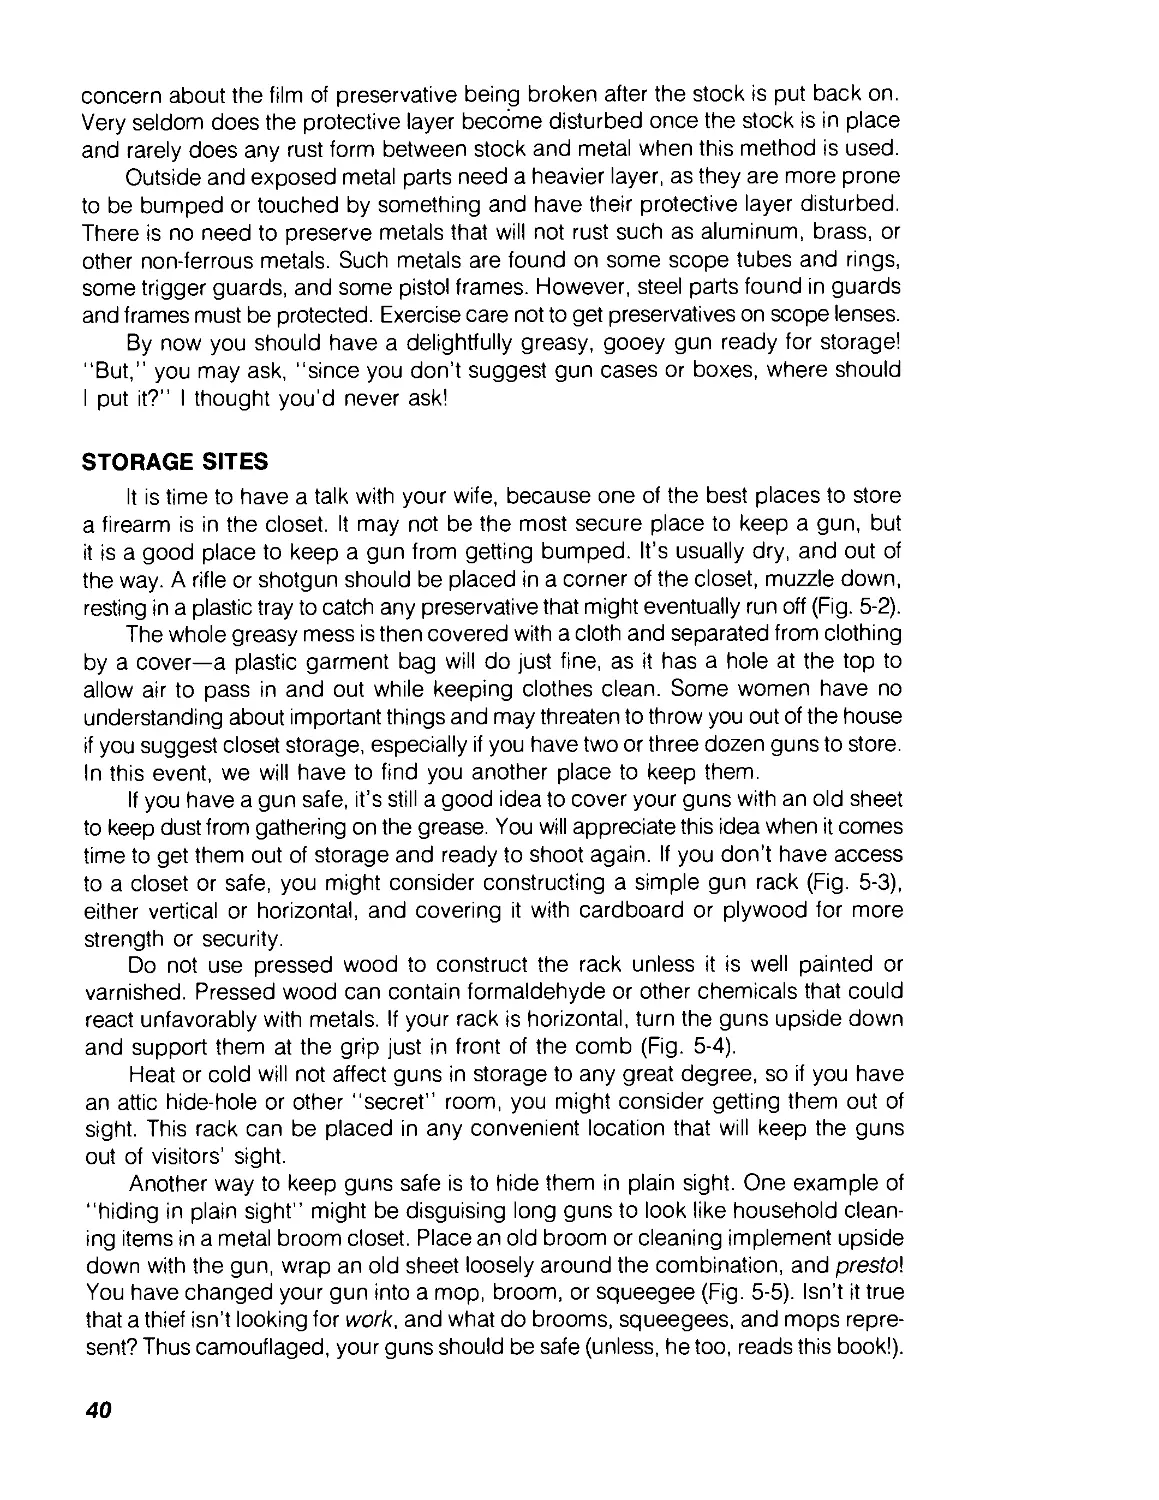
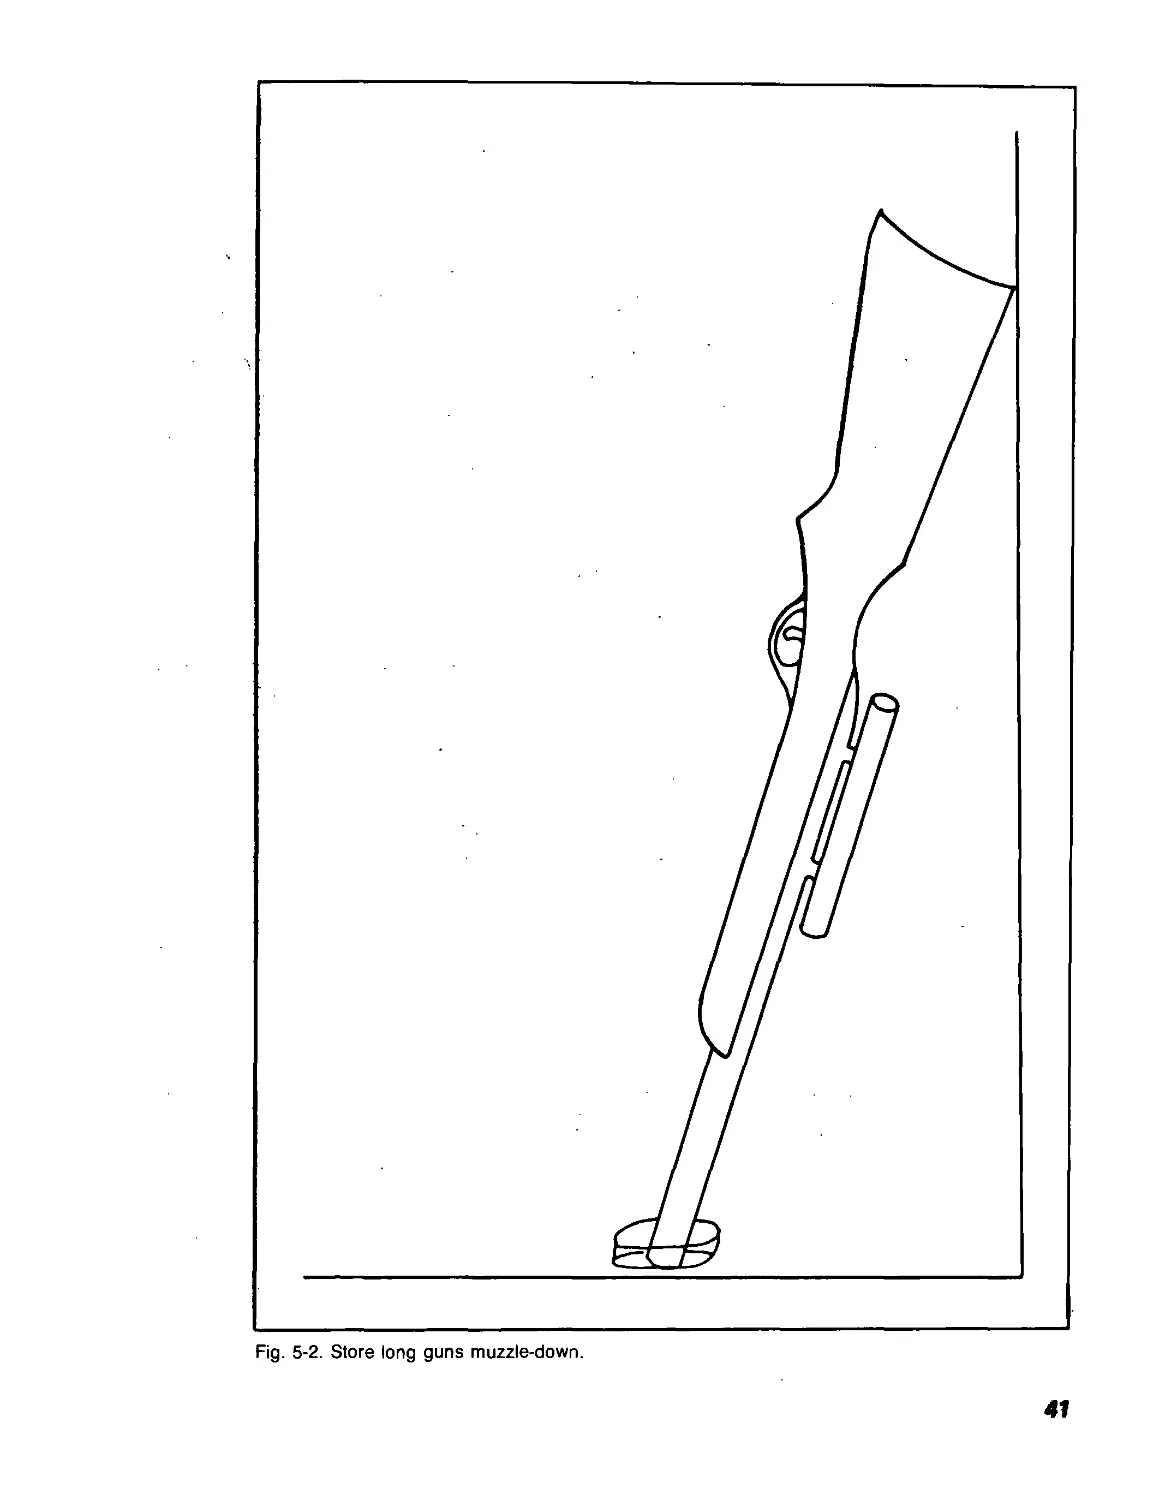
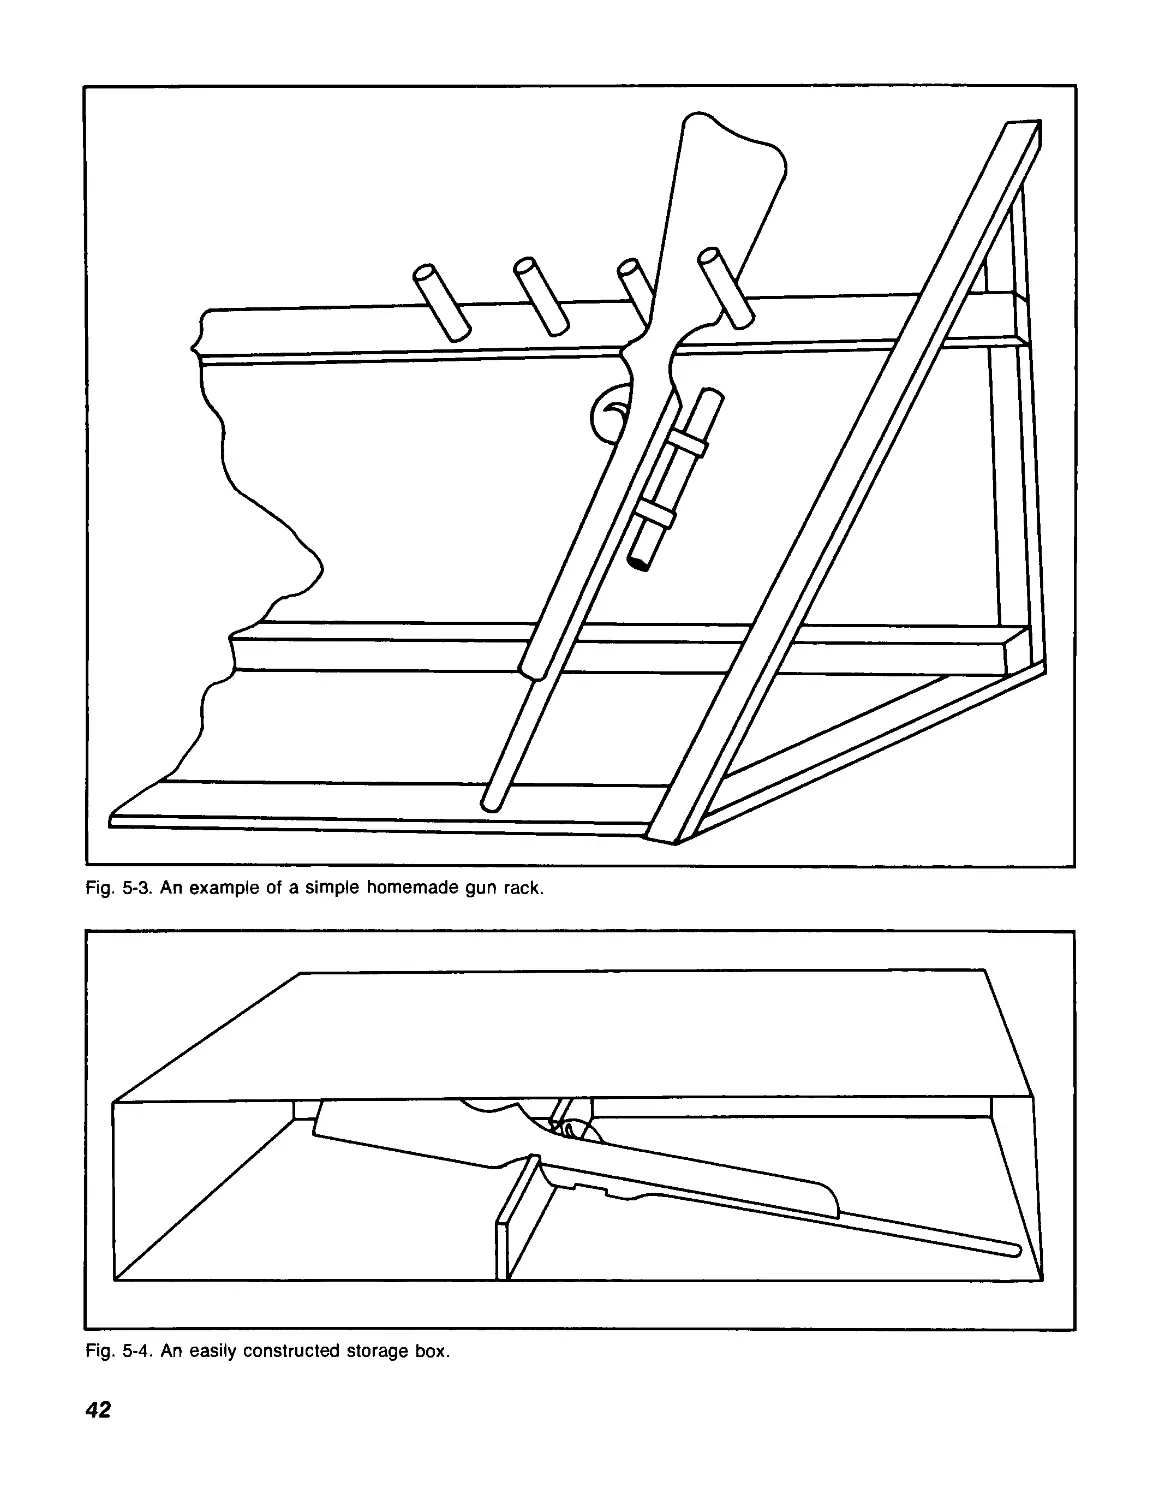
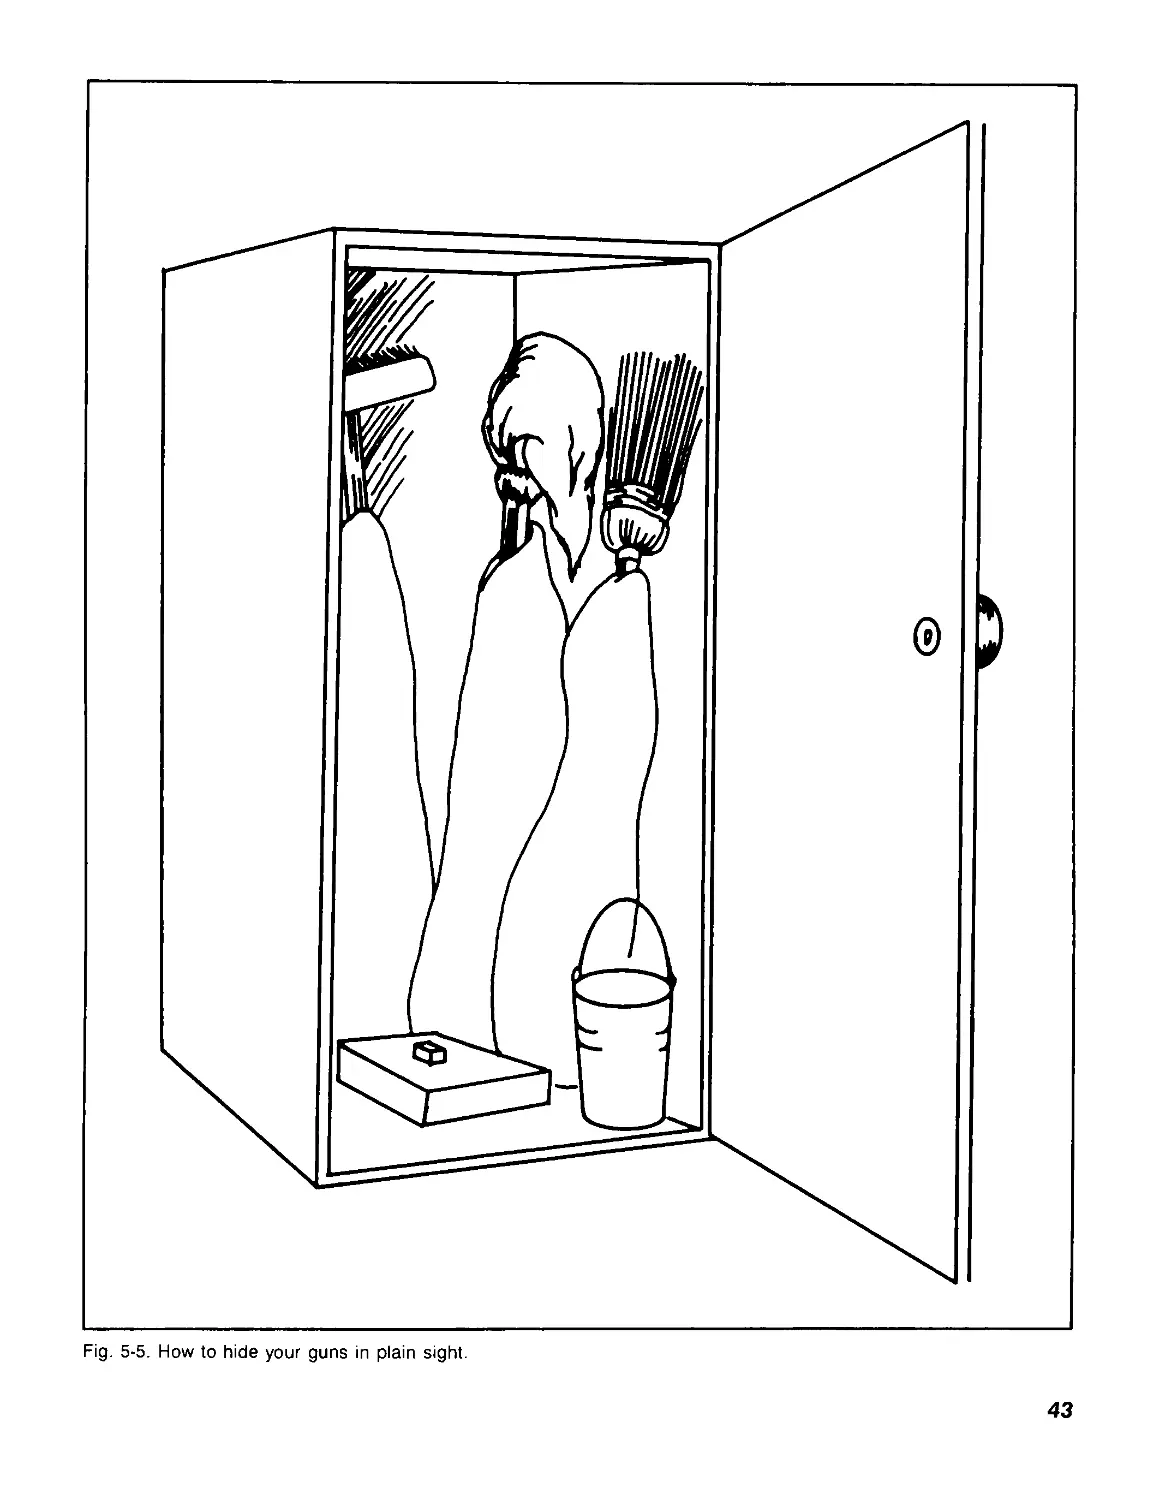
5 Gun Storage Myths Exploded 37
Gun Storage Considerations—Storage Sites—Long-Term Storage
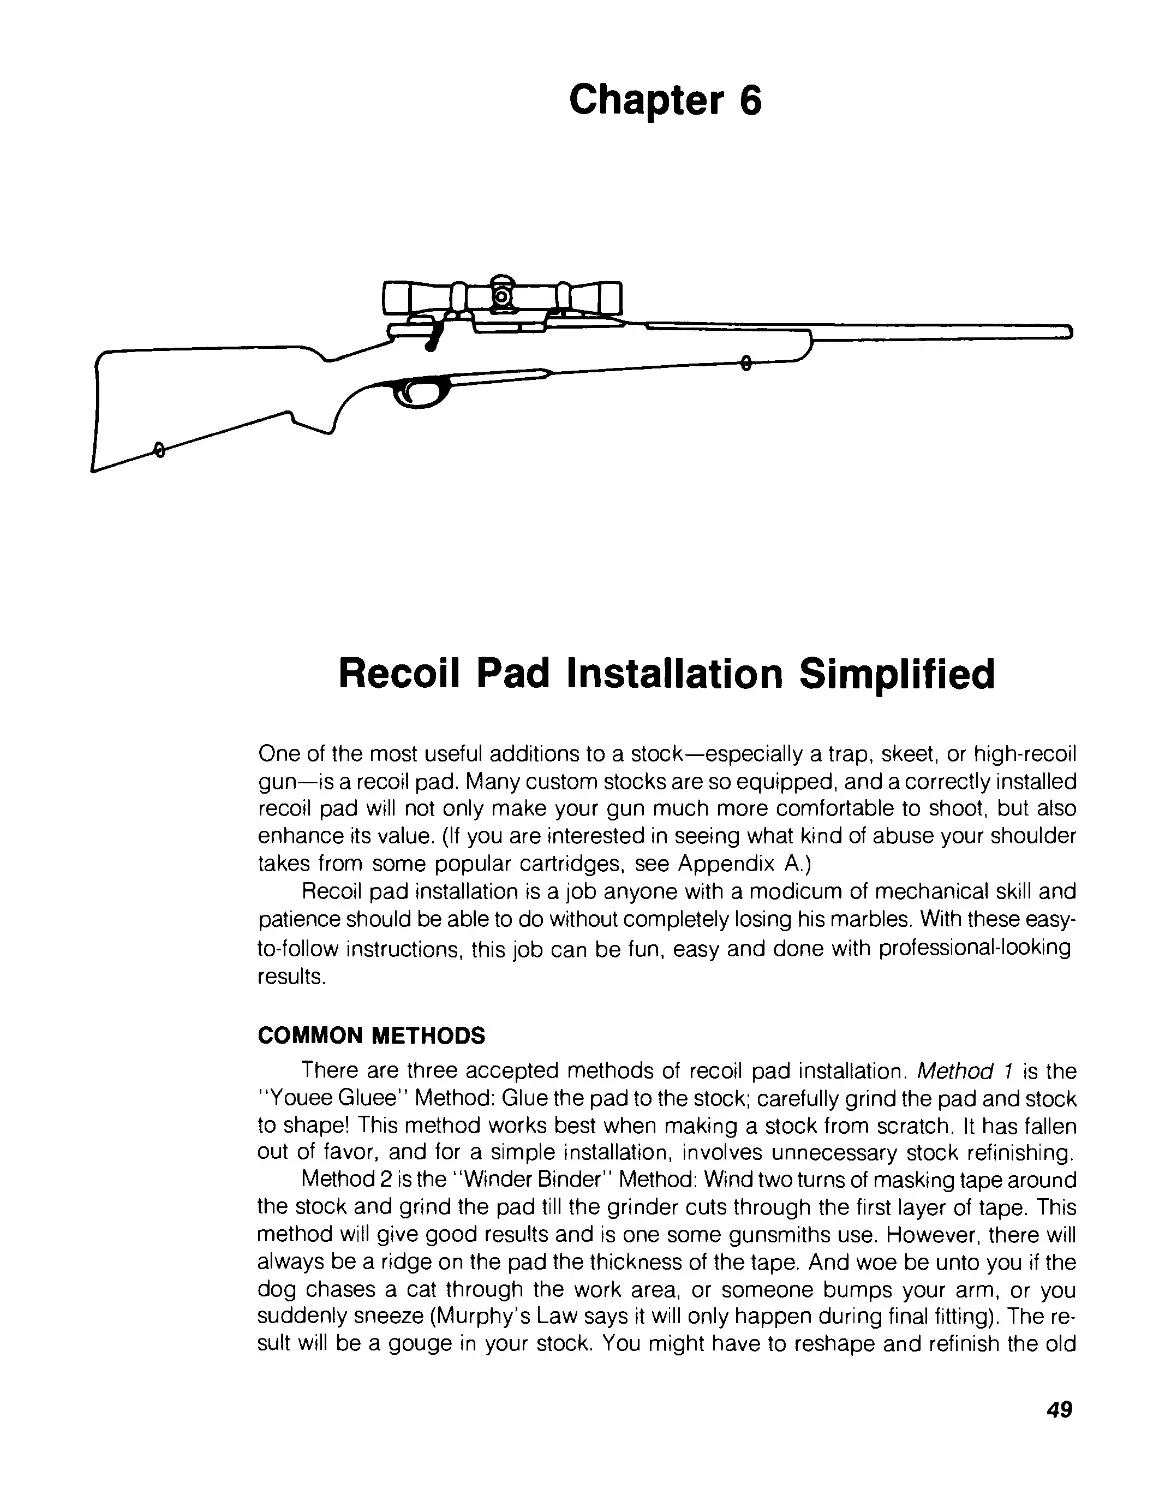
6 Recoil Pad Installation Simplified 49
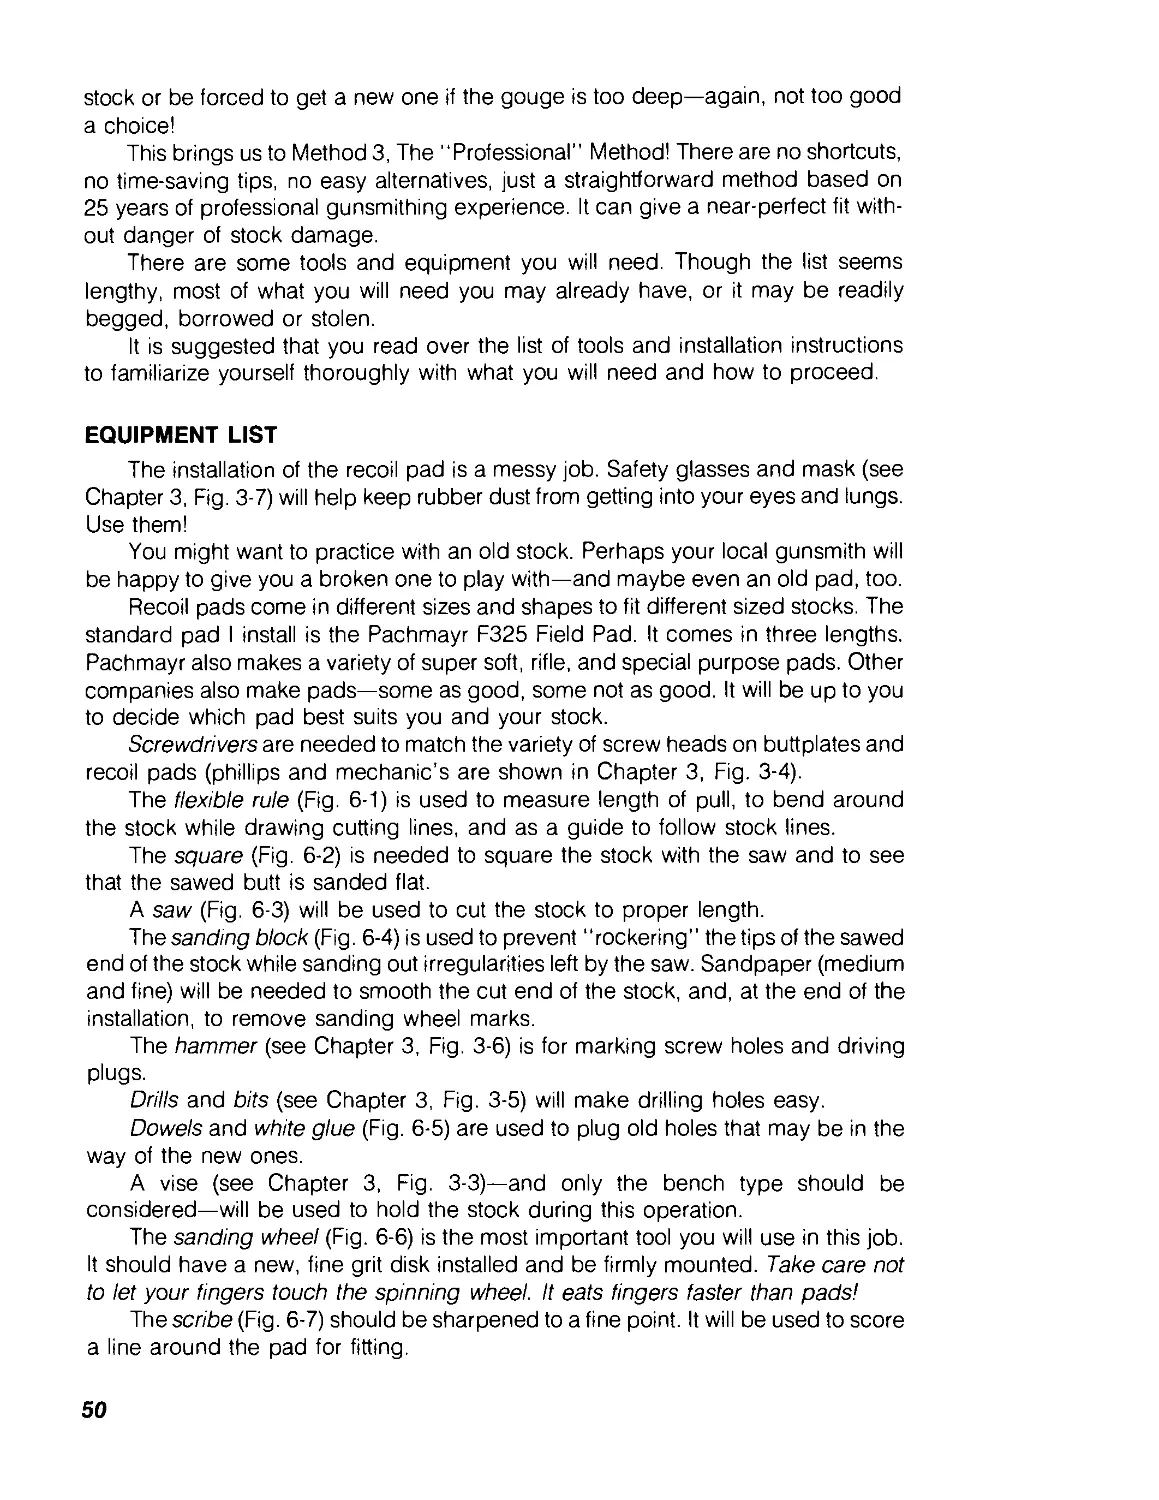
Common Methods—Equipment List—Procedure
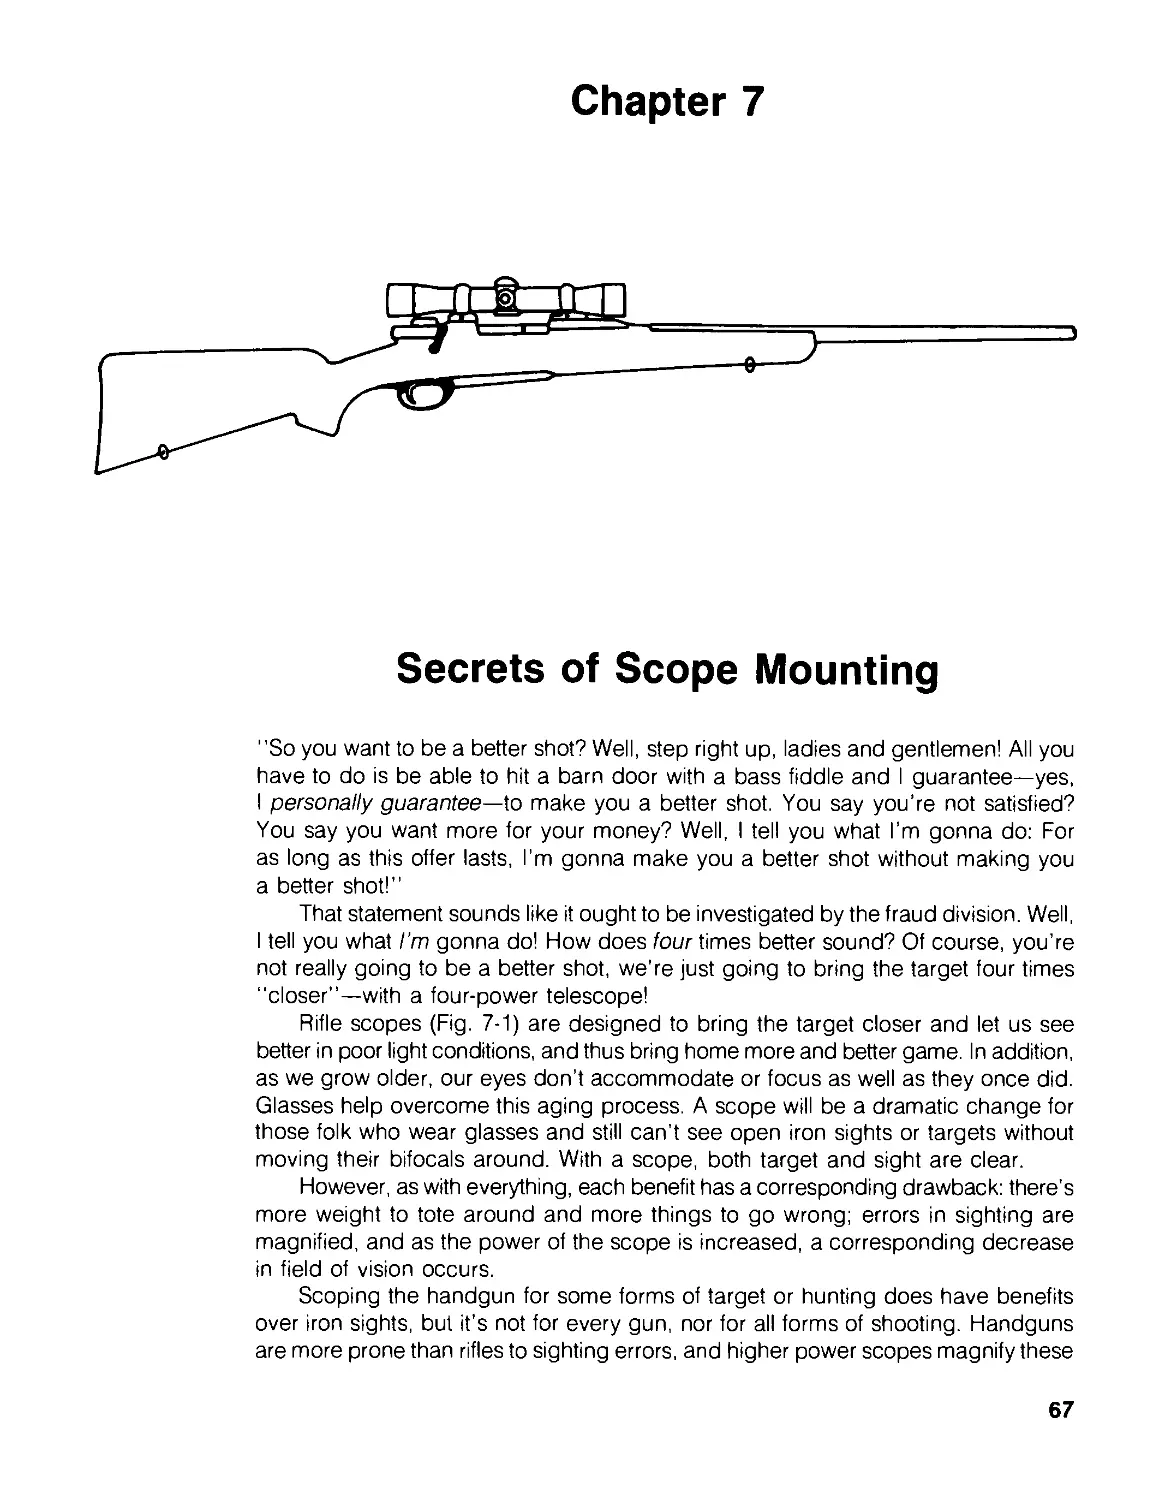
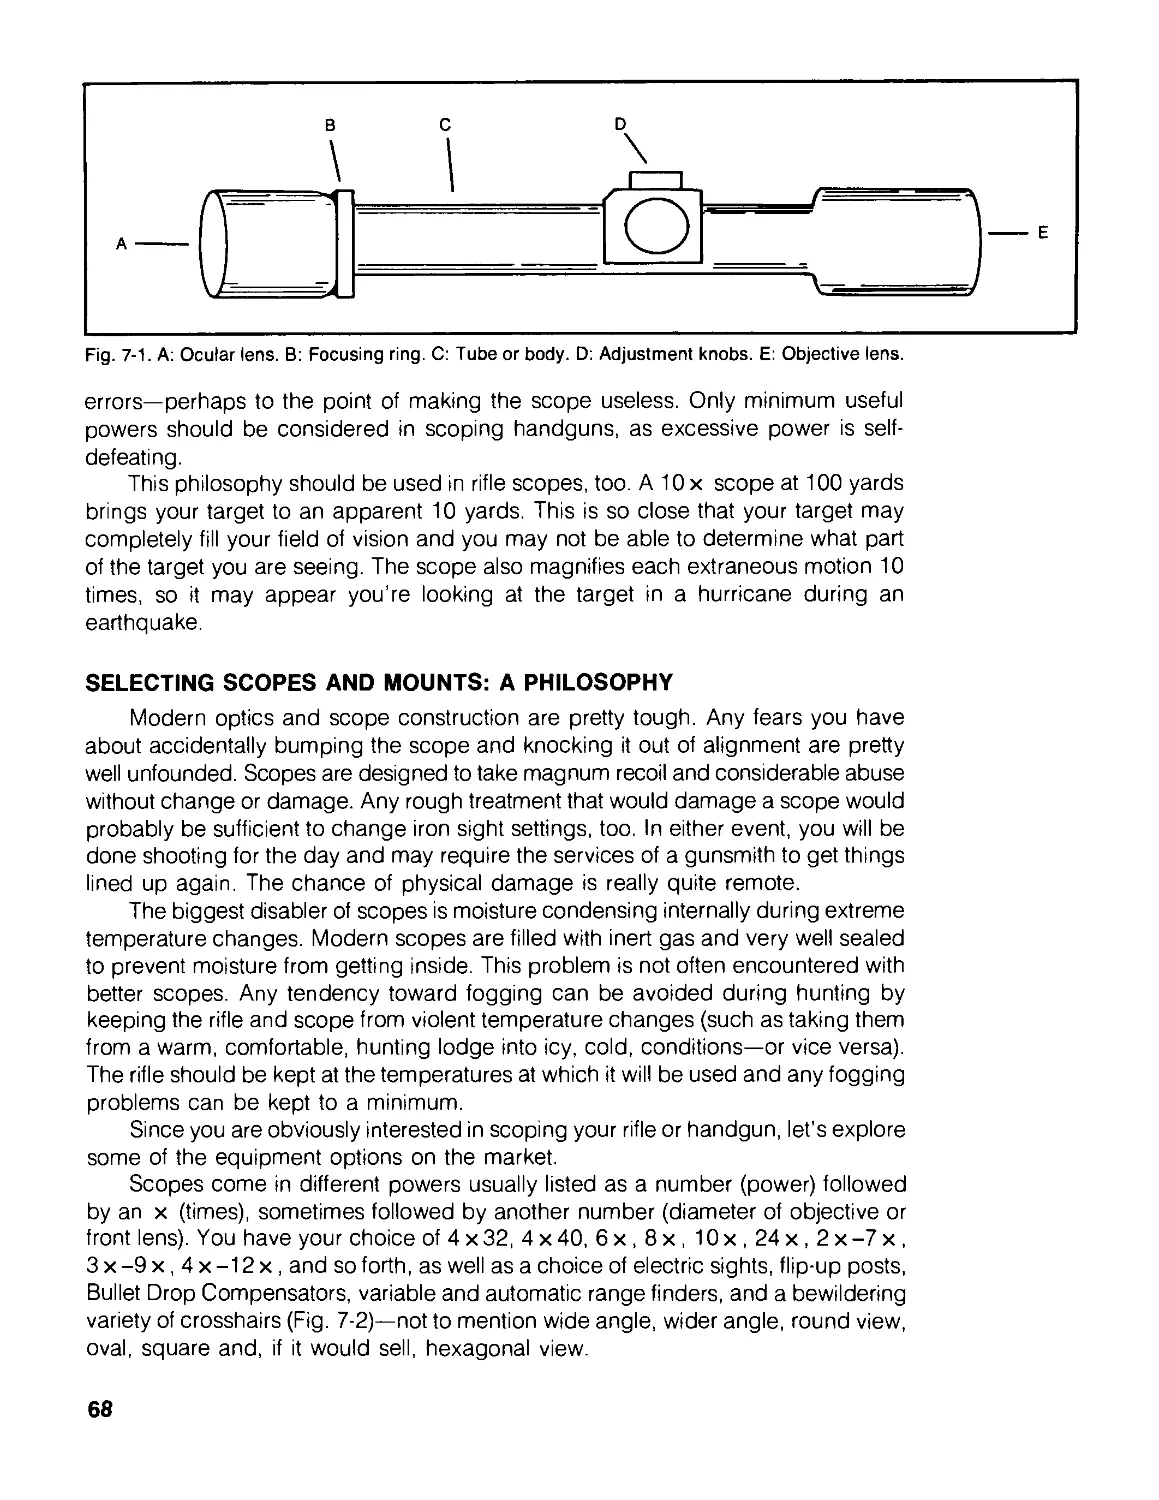
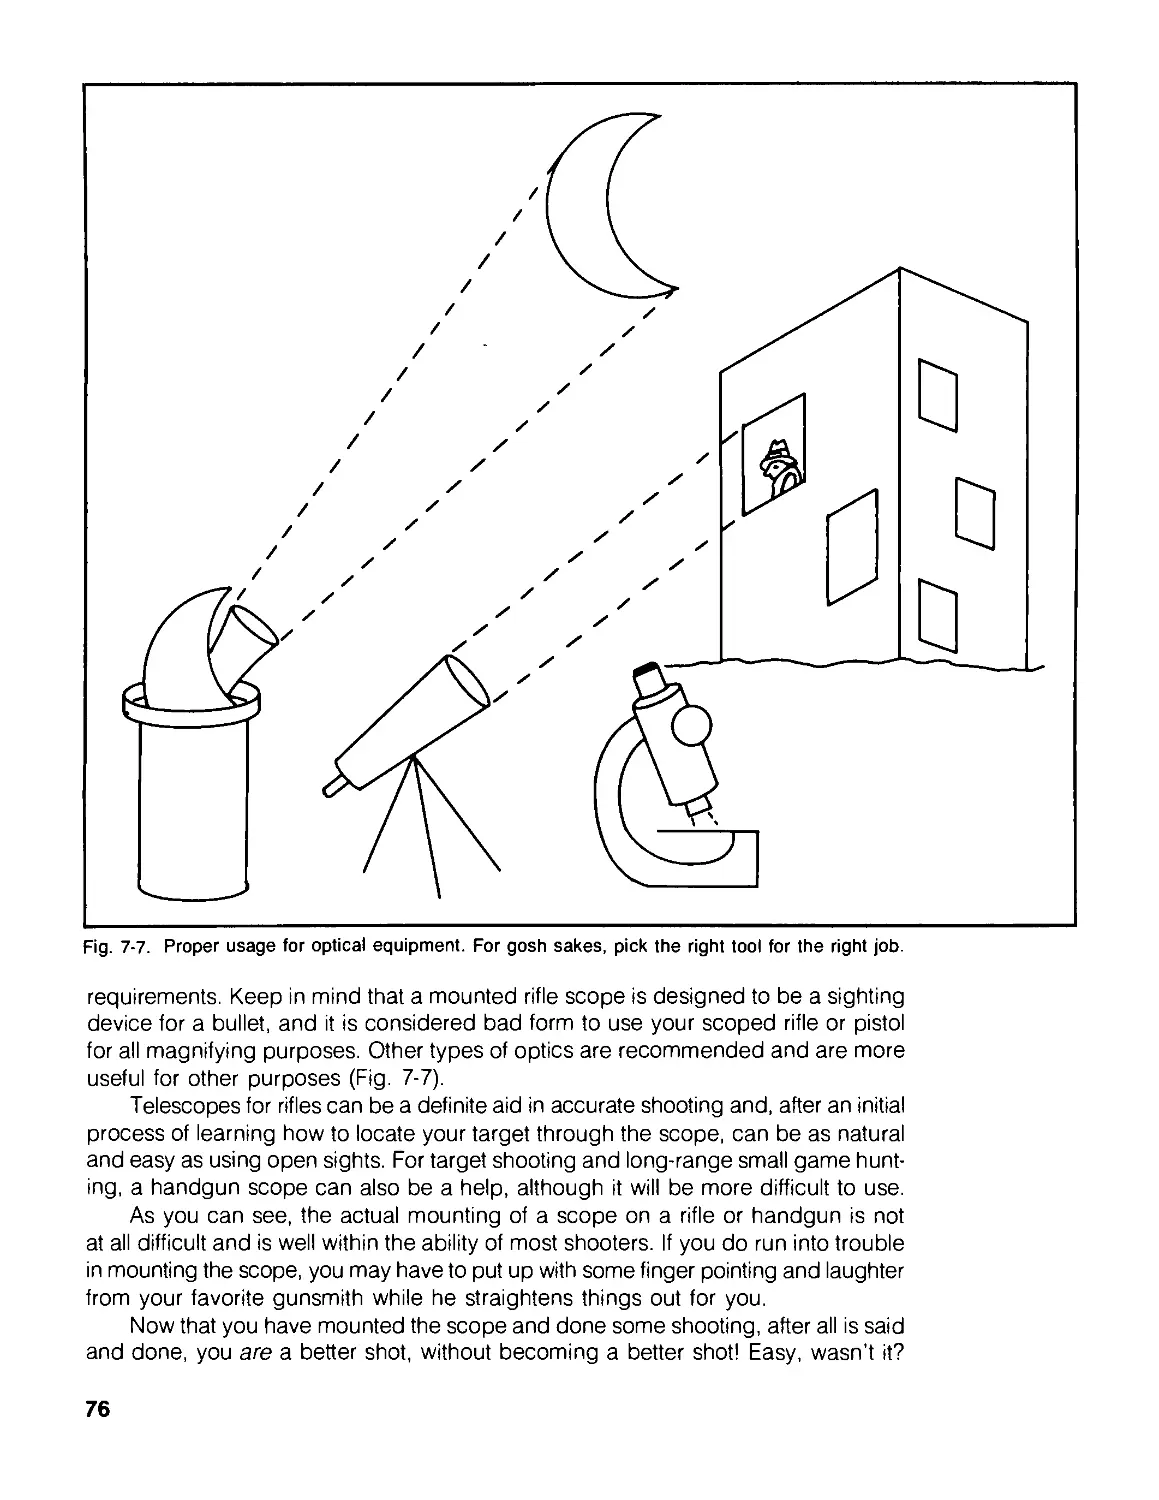
7 Secrets of Scope Mounting 67
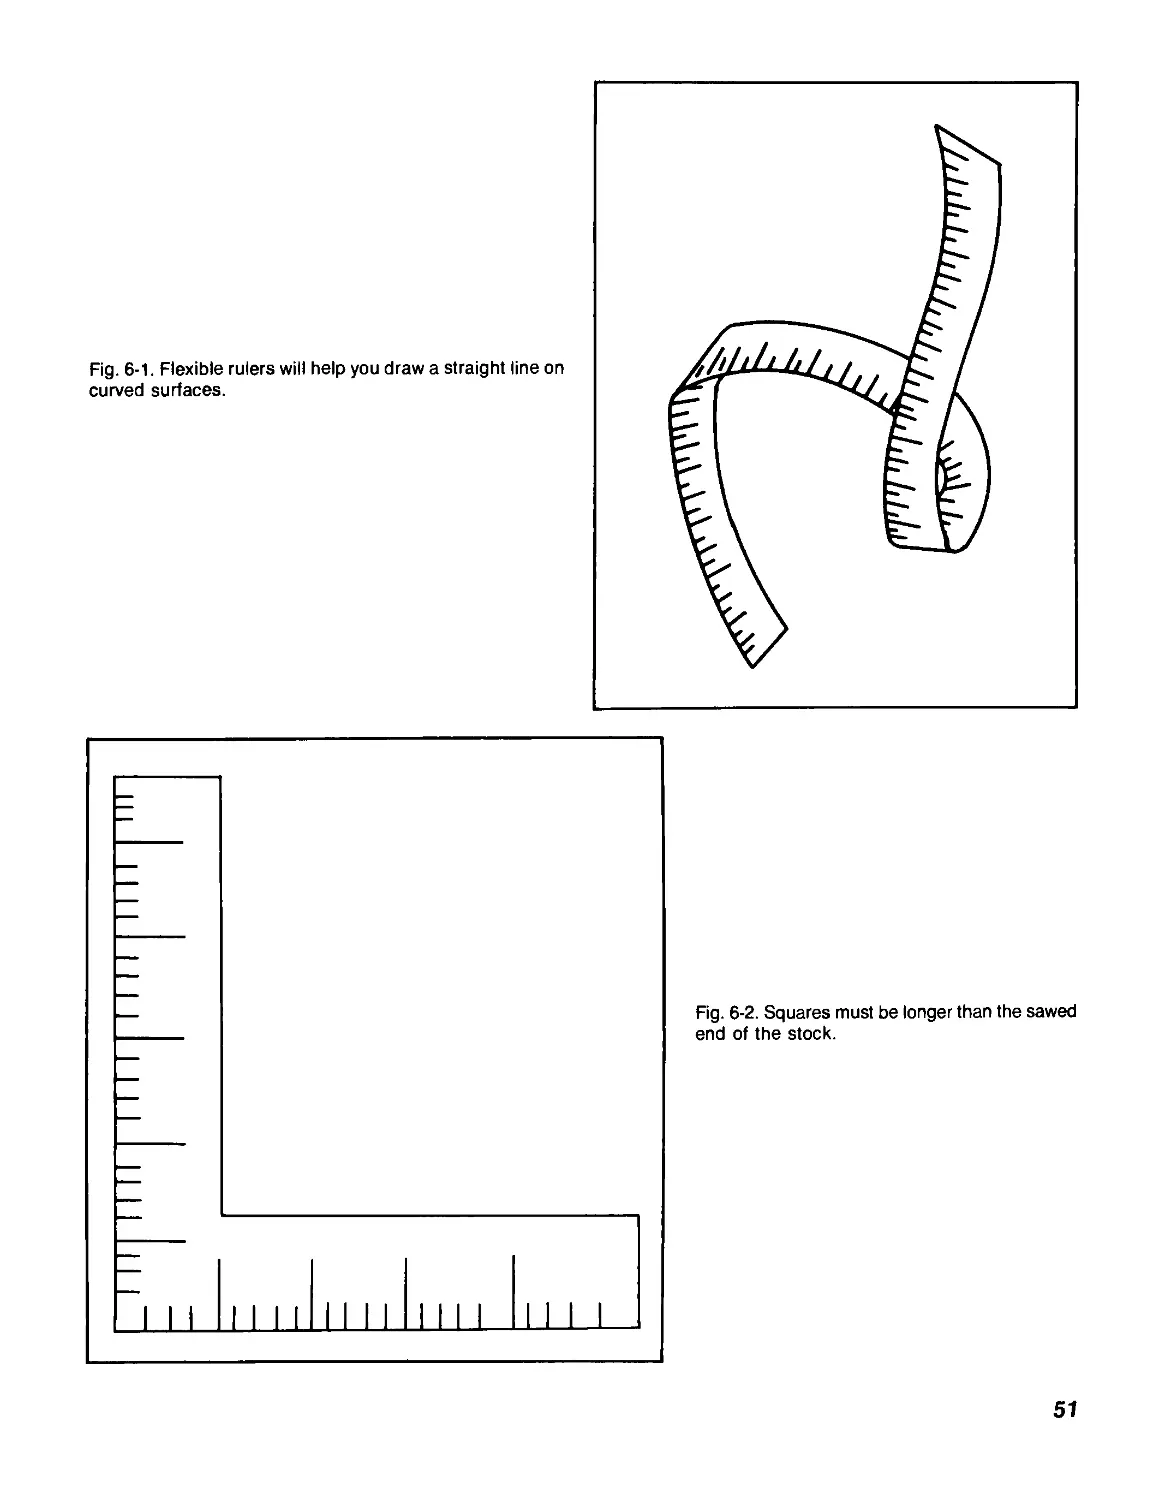
Selecting Scopes and Mounts: A Philosophy—Mounts—Rifle Mounting—Pistol Mounting—
Boresighting—Sighting-In
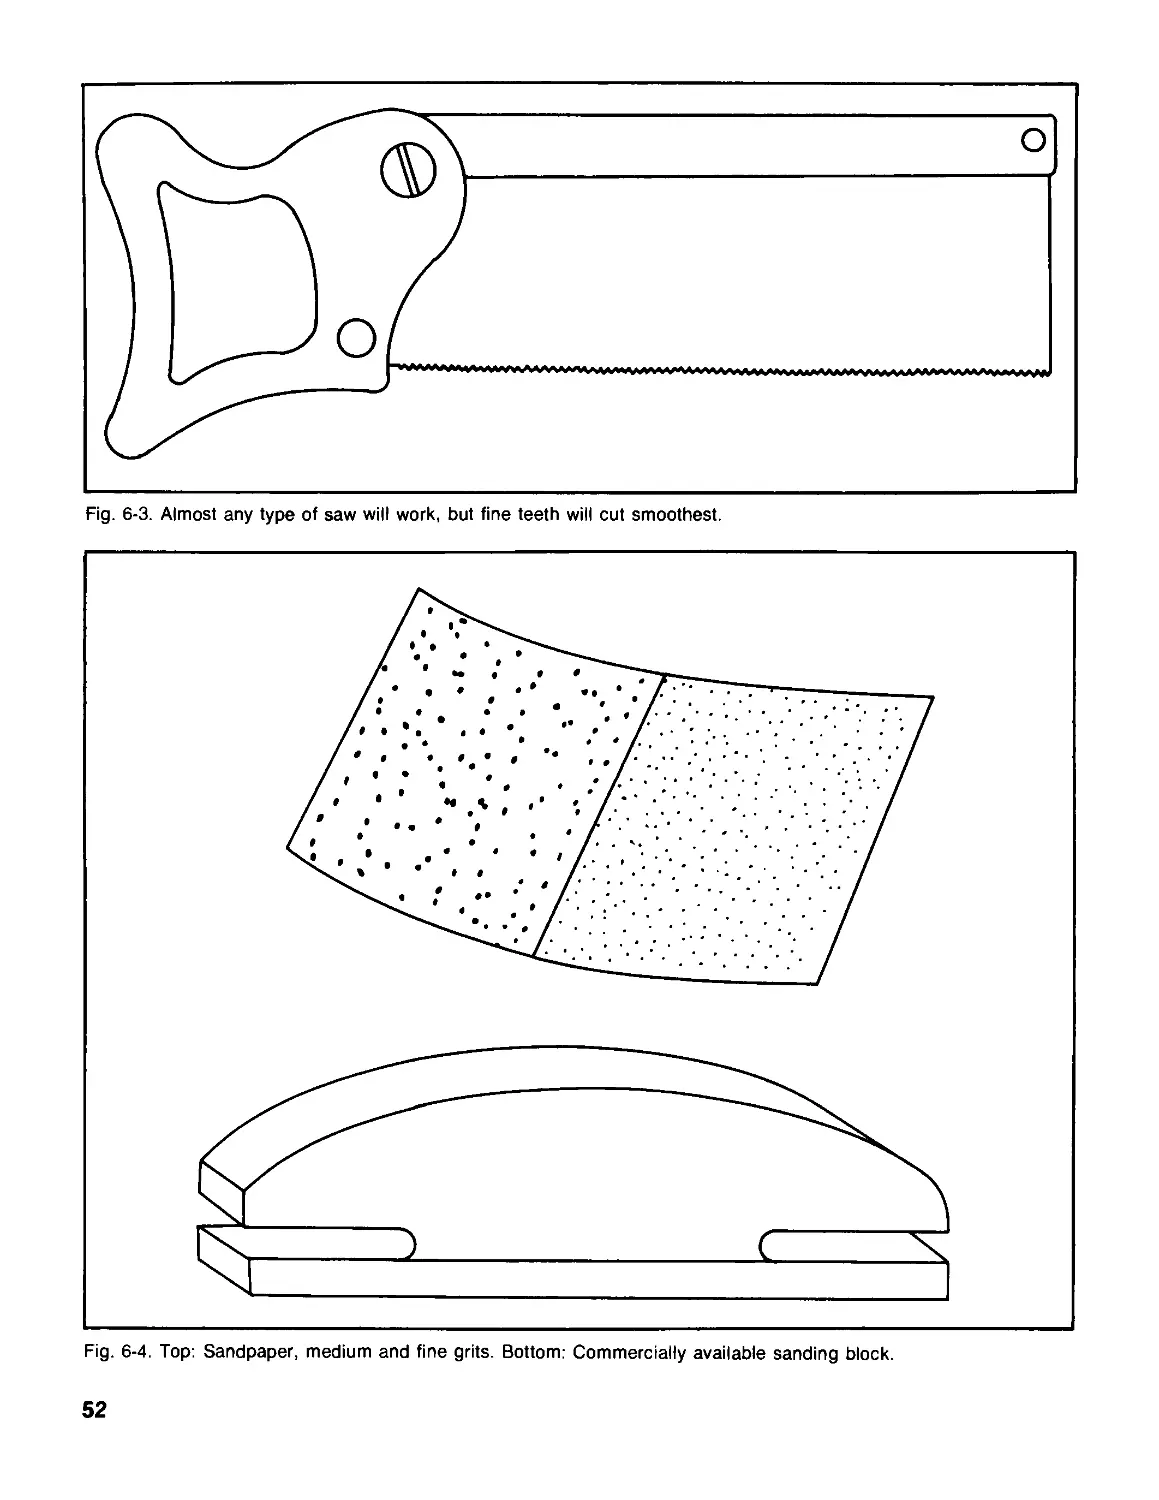
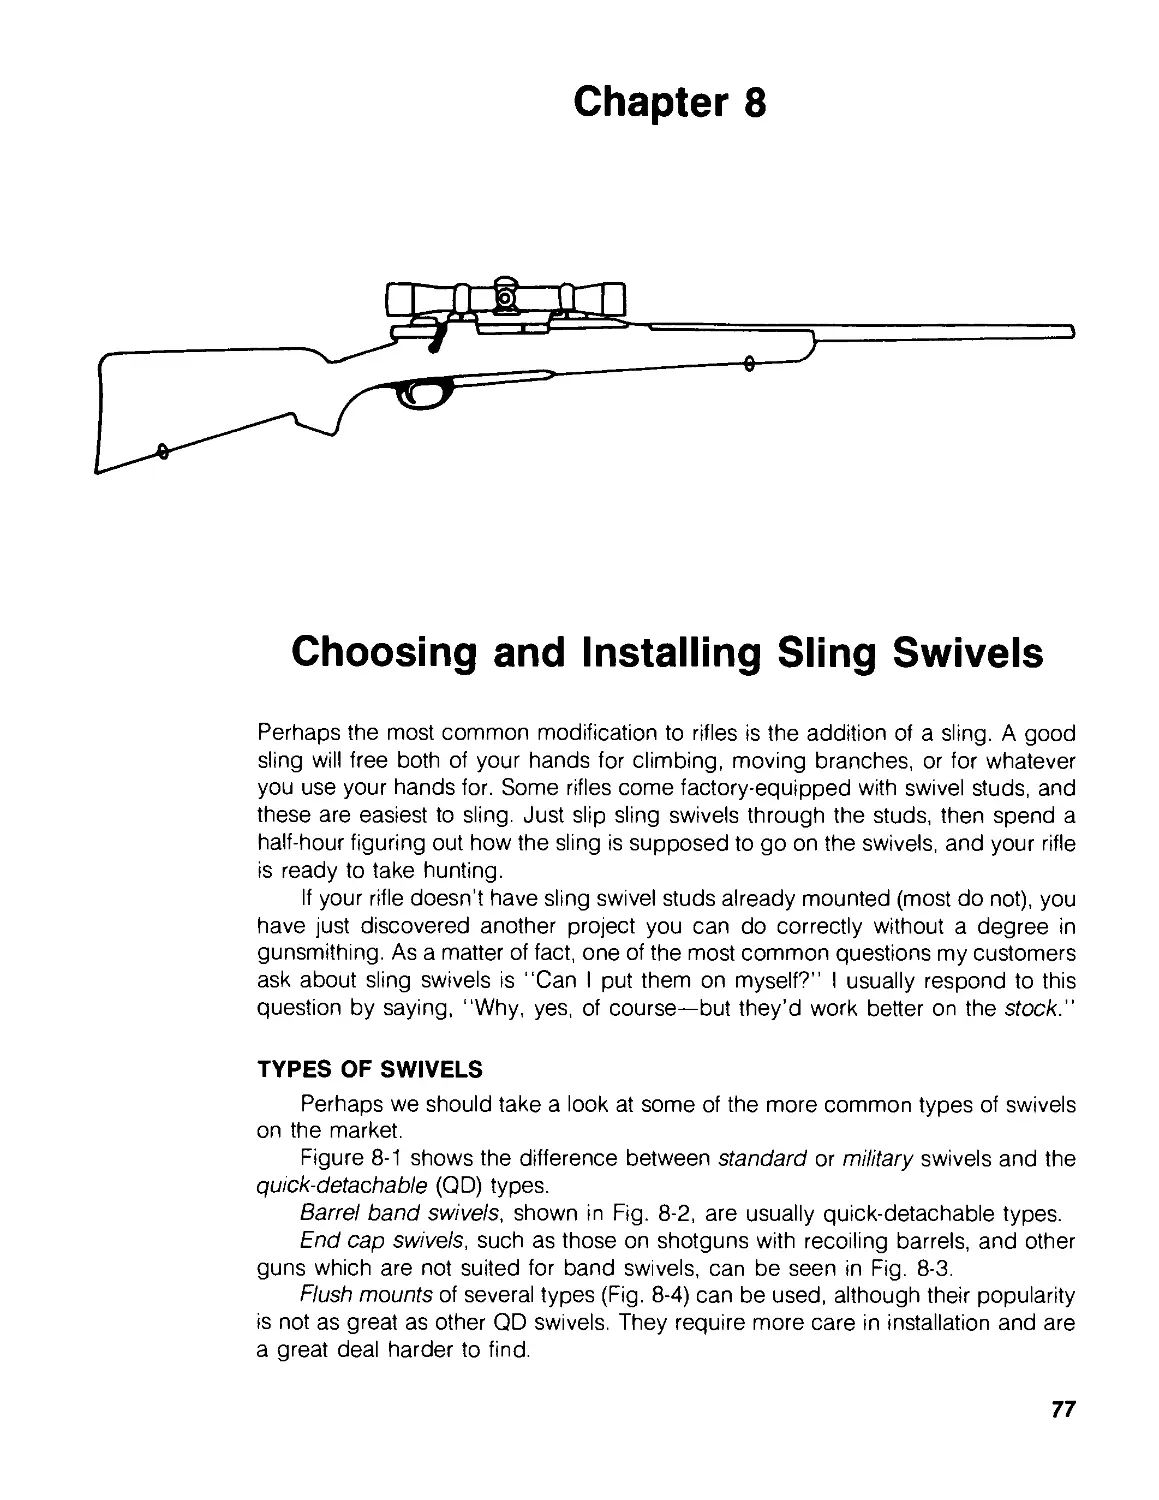
8 Choosing and Installing Sling Swivels 77
Types of Swivels—Equipment—Swivel Locations and Problems—Slings—Swivel Installation
9 Reloading, or, More Bang for the Buck 91
Is Reloading Safe?—Is Reloading Difficult?—Is Reloading Worthwhile; Will It Pay?—The Reloading
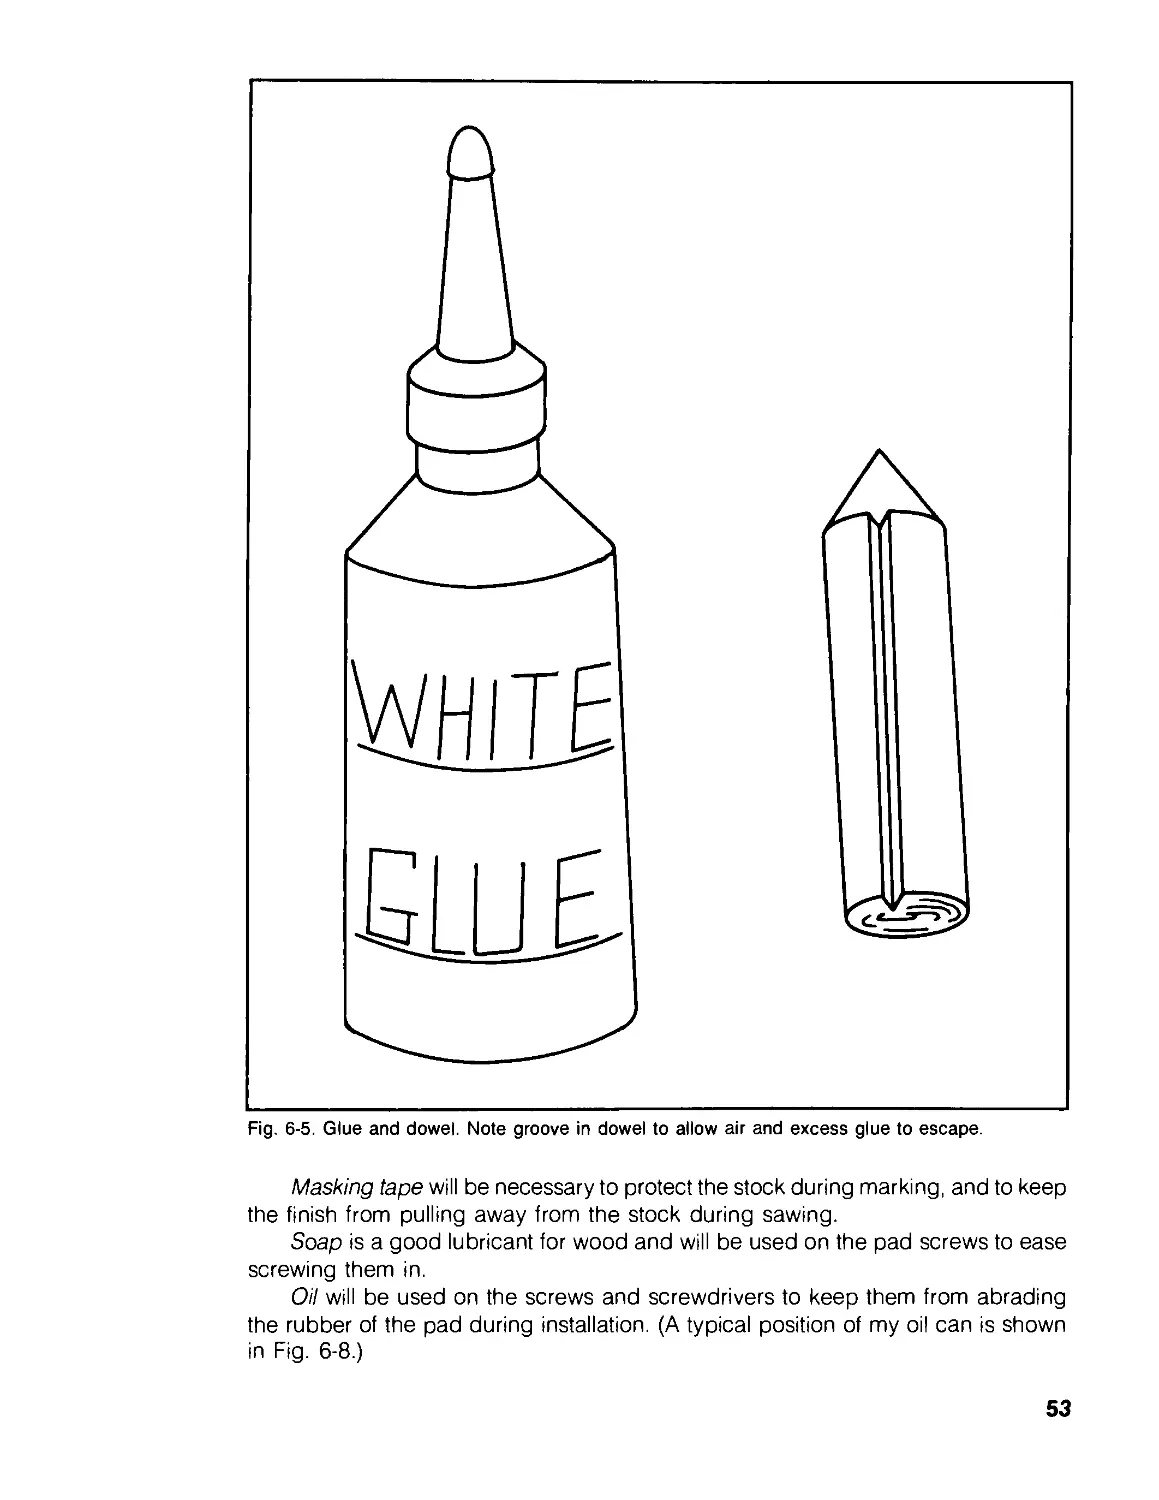
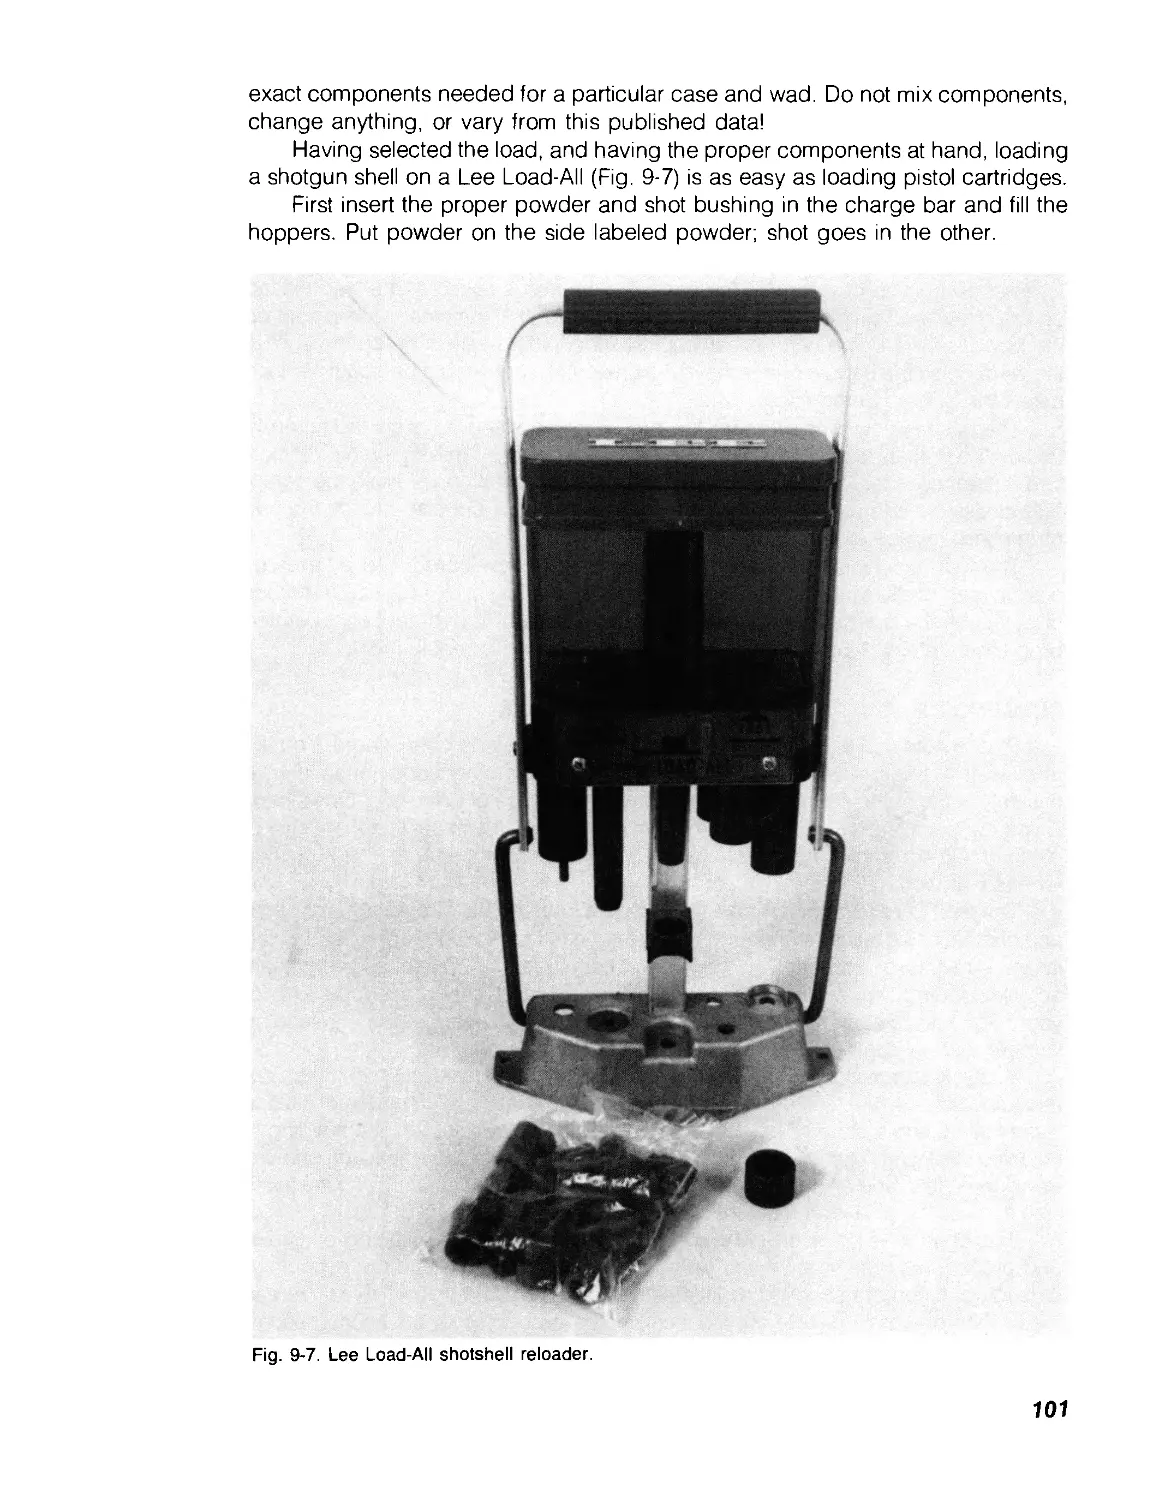
Process and Equipment—Shotshell Reloading—Summing Up
10 Refinish, Refurbish, Renew 103
Rebluing: A Job for the Pros—Tools and Equipment for Stock Refinishing—Finish Removal—Sanding-
Filling—Refinishing
11 Cutting through Cartridge Confusion 111
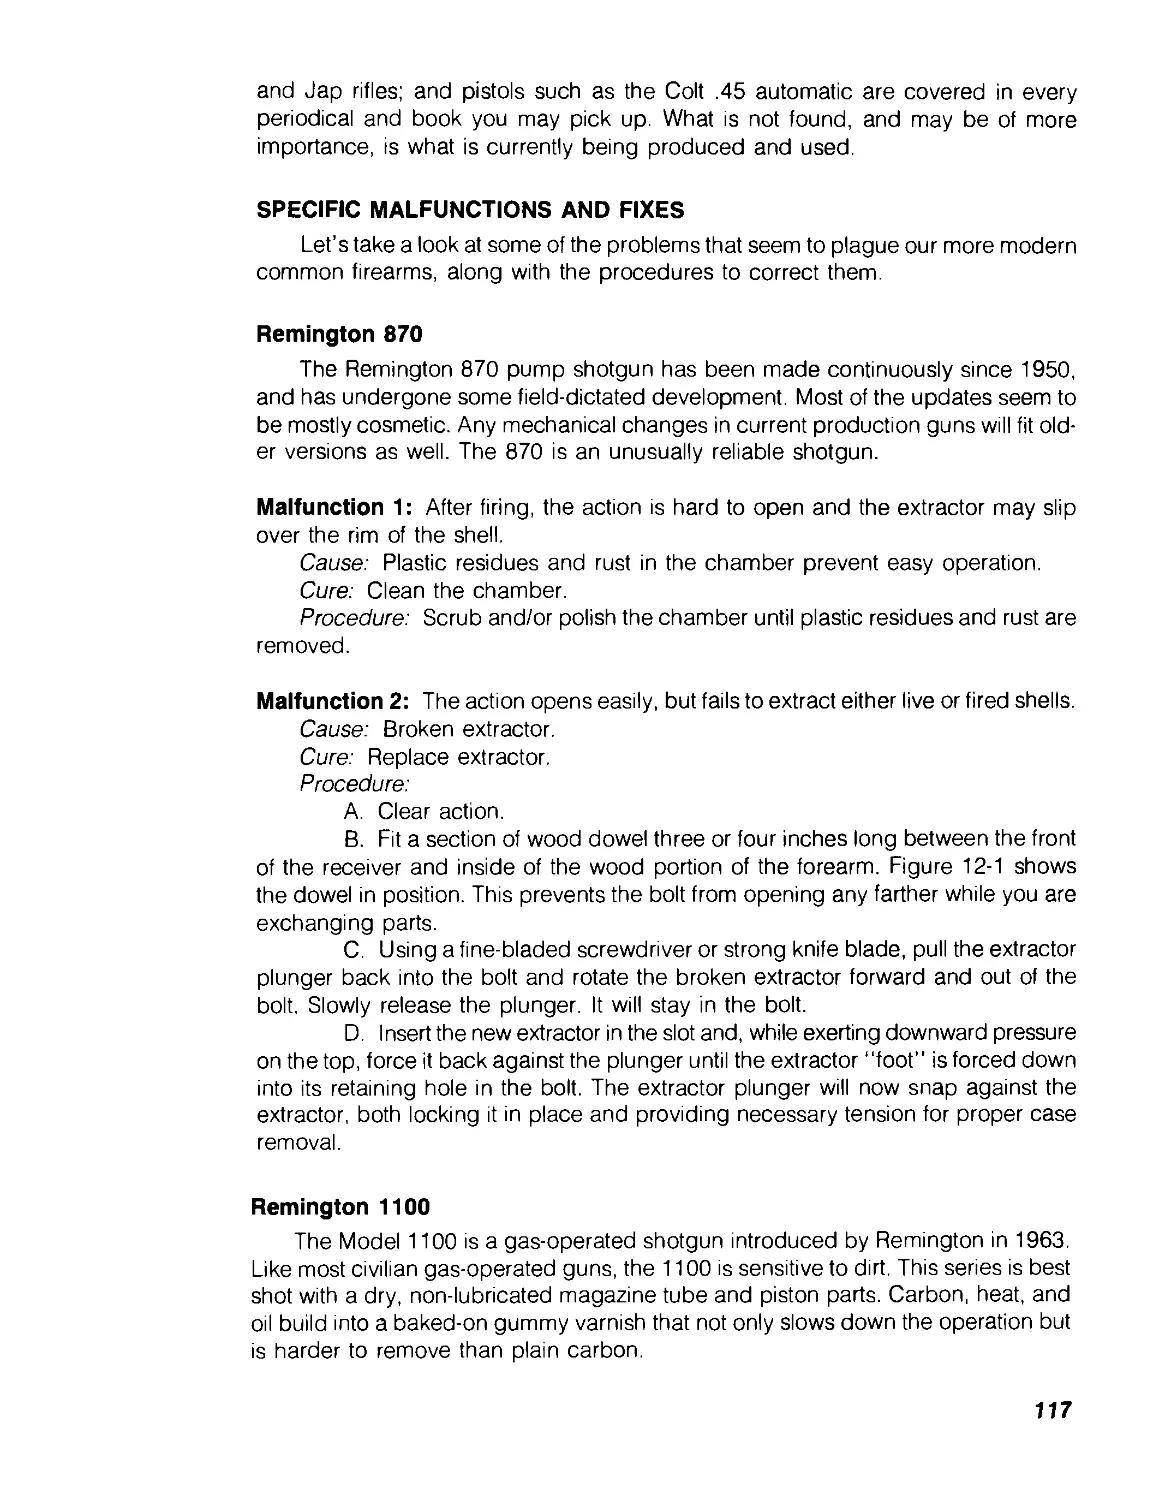
12 Malfunctions, Causes, and Cures 115
The Chain of Operation and Generic Malfunctions—Specific Malfunctions and Fixes
13 Of This and That 137
Recoil—Cartridge Collecting—Accuracy: Rifle versus Handgun—Black Powder Shooting—Cartridge
Combos: Good and Bad
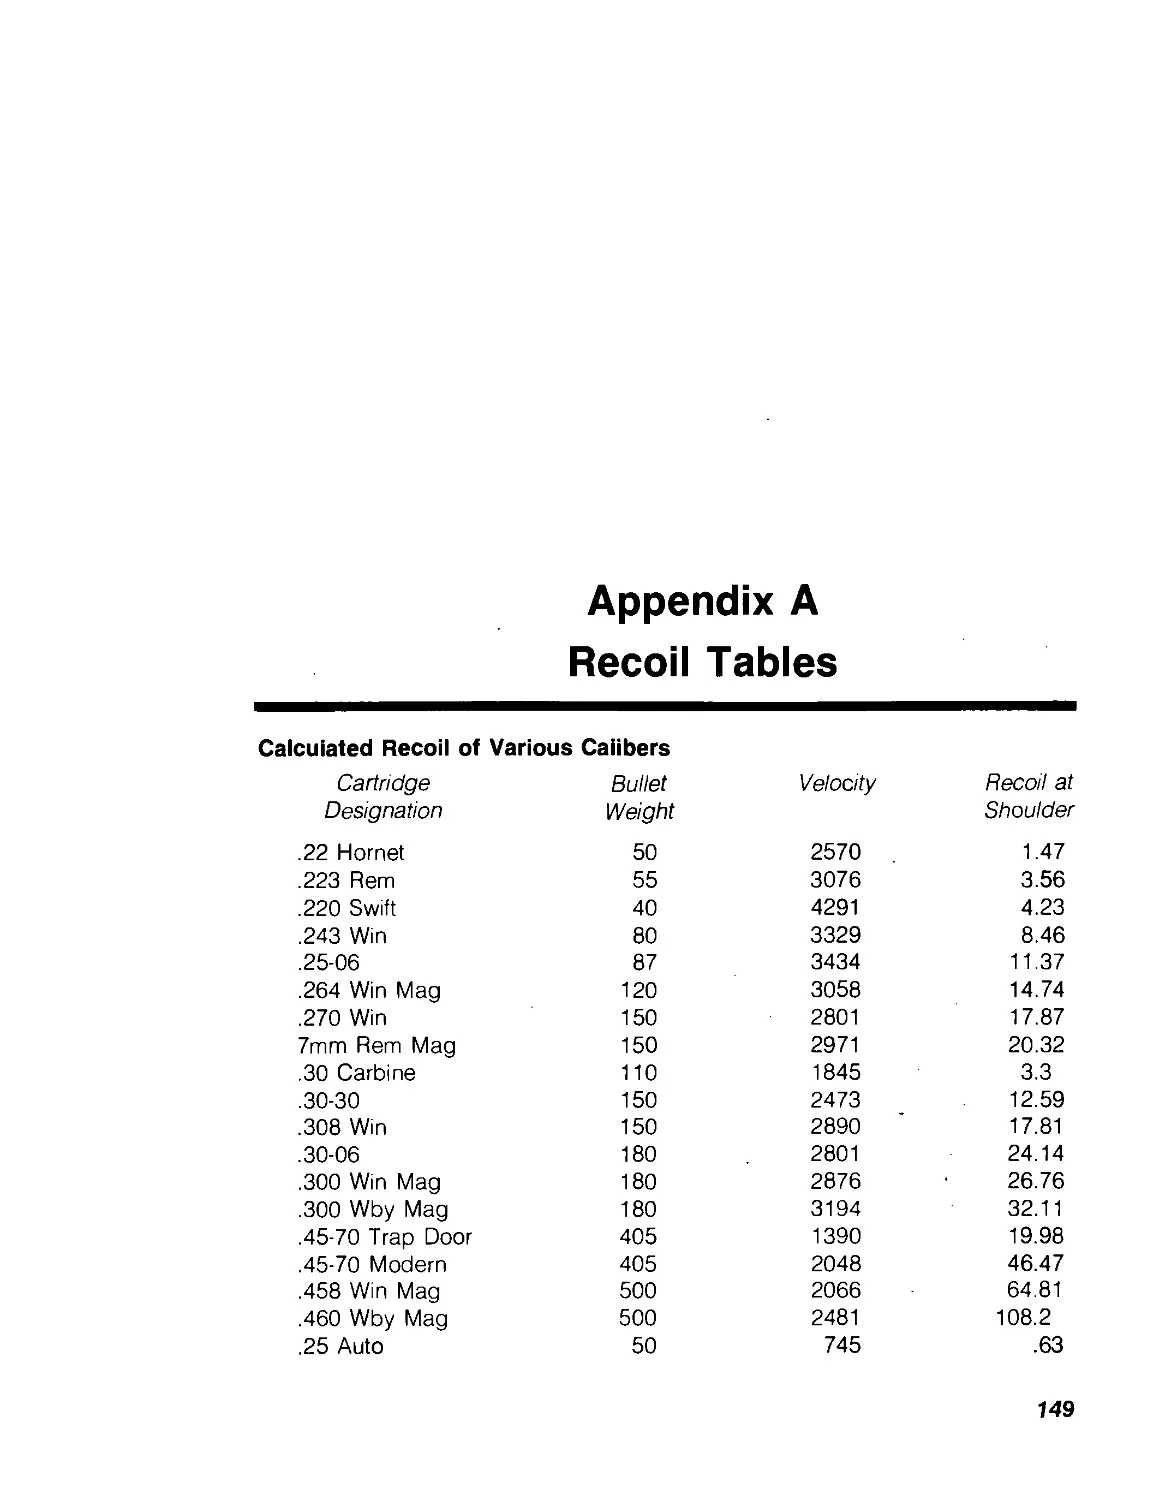
Appendix A Recoil Tables 149
Appendix В Drills and Taps 153
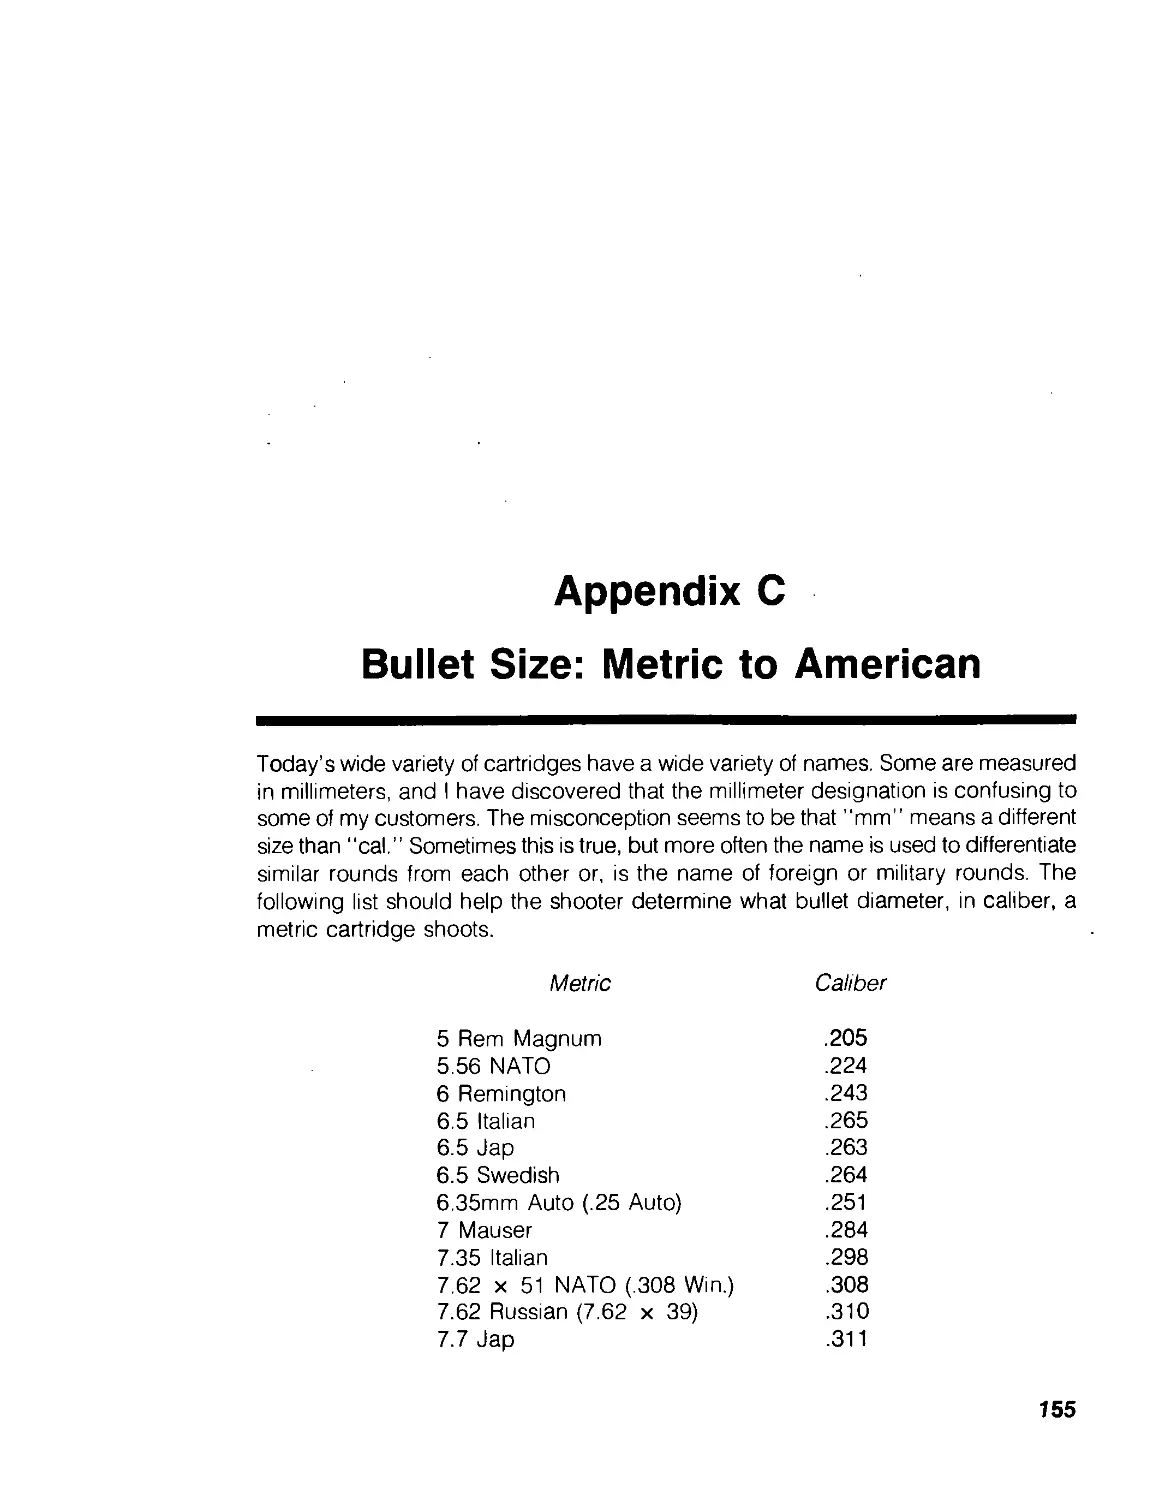
Appendix C Bullet Size: Metric to American 155
Appendix D Sources 157
Glossary 165
Index 169
Introduction
As a gun owner, or at least someone who is interested in firearms, you have proba-
bly discovered that firearms can be fun. Some of the fun is in their acquisition, some
is in their legitimate sporting use, and a lot is in just knowing about them and having
them.
There are, however, whole areas in the firearms field, beyond these few, that
can be enjoyed by the average gun owner, one of which should include taking care
of the firearms investment. This important part of ownership is often considered so
basic that some writers assume that the reader knows all about it—or just the opposite,
and assume the owner is going to keep the gun surgically clean. Neither approach
is practical. Gunsmithing Fundamentals covers the basic and necessary points of
preservation and storage without making it a chore.
Other areas that can be enjoyed by the gun owner are some gunsmithing
projects. These projects are presented with both text and artwork designed to make
them easy to understand without technical jargon and detailed blueprints. It is fun
and worthwhile to install your own recoil pad, scope, or sling swivels. Not only do
they make the gun more useful to you, but they can increase the value when it is
time to trade it in. Refinishing can also increase the value of your investment, and
following some simple rules in refinishing your stock will make the job professional-
looking.
Of course, if firearm malfunctions should occur, the gun owner will want to know
how to repair his rifle, shotgun, or handgun. This, too, can be fun. Diagnostic
procedures, takedown, and parts replacement for several modern guns are covered
v
in Chapter 12, with drawings, photographs, and text designed to make the secrets
of gunsmithing easy to grasp. These principles can be carried over to other models
that are not listed.
No hobby can be complete without knowing some background and history, and
our favorite hobby is no exception. Chapter 1 of Gunsmithing Fundamentals touches
briefly on some of the major developments from hand cannon to modern firearms.
Hours can be spent in research on any facet of the firearms field, and both this chapter
and Chapter 11, Cutting through Cartridge Confusion, are springboards to secondary
hobbies within the gun field.
Another firearm-related hobby that can save the shooter some money and
increase accuracy is reloading. Chapter 9 is not designed to make you a reloading
professional; it is intended to acquaint you with the language, procedures, and steps
used in the process. If you feel reloading has a benefit for you and want to get into
it further, I urge you to read any of the several reloading manuals on the market.
Many gun books are packed with long tables, conversion charts, and information
not often needed. Not many offer tap and drill sizes, recoil information, what cartridges
are dangerous in what chambers, and the joys of cartridge collecting. It’s all here,
along with what you really need to have in the way of tools needed for your projects.
Even in the midst of having fun with this hobby, there is always a serious side.
I cannot stress strongly enough the safety aspects of handling firearms. Use an extra
measure of care with any firearm that has a malfunction, and if you have any doubt
about what to do, take it to a competent gunsmith.
First and foremost, firearms should be fun. The projects should be fun; reading
about them should also be fun. What are you waiting for? Get on with having fun.
vl
Chapter 1
A Very Short History of Firearms
Defensive devices have been around since the time man discovered that it was easier
to do in his neighbor with a stick or rock than it was with his fist. From the time of
the rock to the beginning of the use of firearms, man developed all sorts of neat
stuff such as pikes, slings, arrows, and a variety of catapults to protect himself from—
and to attack—his friends. I'll leave these toys to someone writing about bows: long,
cross, and other. My concern is in powder burners and a very brief look at some
of the major developments that have brought us to today’s modern firearms.
History has a way of getting unimportant things—such as the date when the
first trigger guard appeared—a little on the fuzzy side. It probably isn’t too vital, at
this level anyway, to know if it was on April 16th—or was it the morning of the 17th?
Also, bear in mind that even the learned experts who write about such things don’t
agree and don't really know for sure. In the following discussion, where there has
been a conflict in experts' dates, I have averaged them, so my dates are as good
as any.
GUNPOWDER
Some authorities claim the Chinese discovered the mixture of sulfur, carbon,
and saltpeter needed to make black powder years before Europeans wore much
other than bare skin. Others claim it was the Arabs who discovered it, and some
say it was the Greeks. There is no doubt in my mind that the mixture was known
to these good people, who may have used it for New Year’s rockets and fancy
displays. Others say that Friar Bacon discovered the mixture in the 13th century and
1
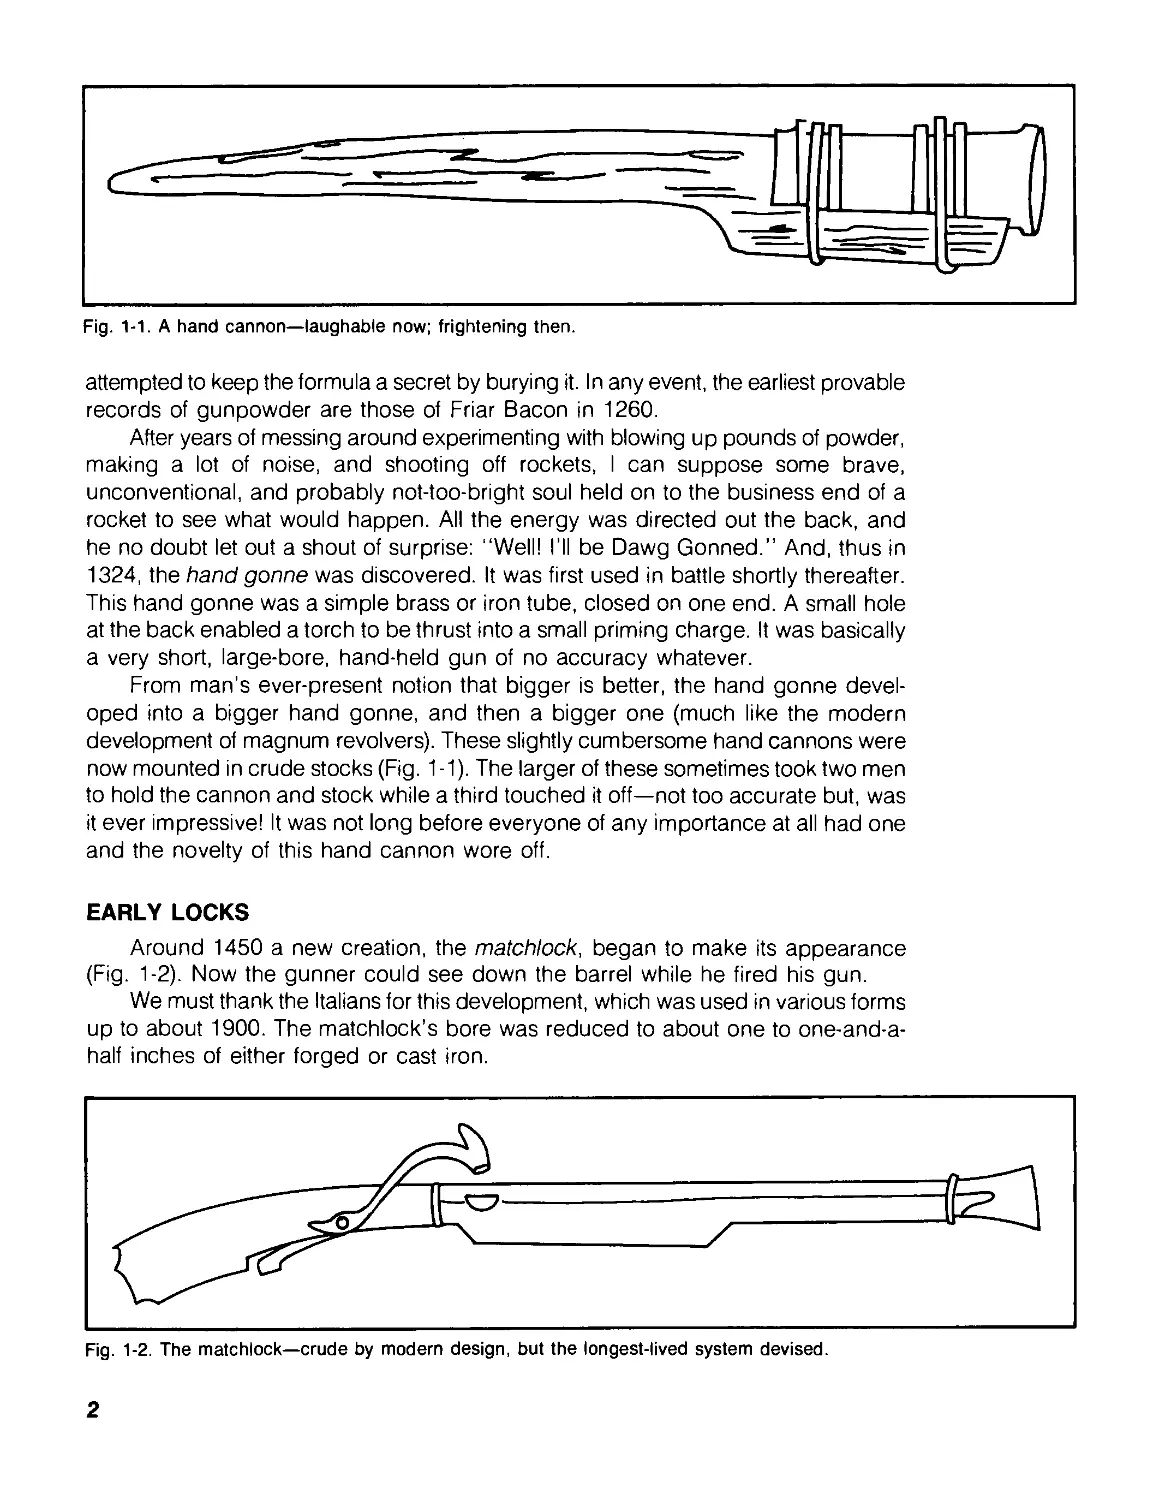
Fig. 1-1. A hand cannon—laughable now; frightening then.
attempted to keep the formula a secret by burying it. In any event, the earliest provable
records of gunpowder are those of Friar Bacon in 1260.
After years of messing around experimenting with blowing up pounds of powder,
making a lot of noise, and shooting off rockets, I can suppose some brave,
unconventional, and probably not-too-bright soul held on to the business end of a
rocket to see what would happen. All the energy was directed out the back, and
he no doubt let out a shout of surprise: ‘‘Well! I’ll be Dawg Gonned.” And, thus in
1324, the hand gonne was discovered. It was first used in battle shortly thereafter.
This hand gonne was a simple brass or iron tube, closed on one end. A small hole
at the back enabled a torch to be thrust into a small priming charge. It was basically
a very short, large-bore, hand-held gun of no accuracy whatever.
From man’s ever-present notion that bigger is better, the hand gonne devel-
oped into a bigger hand gonne, and then a bigger one (much like the modern
development of magnum revolvers). These slightly cumbersome hand cannons were
now mounted in crude stocks (Fig. 1-1). The larger of these sometimes took two men
to hold the cannon and stock while a third touched it off—not too accurate but, was
it ever impressive! It was not long before everyone of any importance at all had one
and the novelty of this hand cannon wore off.
EARLY LOCKS
Around 1450 a new creation, the matchlock, began to make its appearance
(Fig. 1-2). Now the gunner could see down the barrel while he fired his gun.
We must thank the Italians for this development, which was used in various forms
up to about 1900. The matchlock's bore was reduced to about one to one-and-a-
half inches of either forged or cast iron.
Fig. 1-2. The matchlock—crude by modern design, but the longest-lived system devised.
2
An Austrian, Gaspard Killner, has been linked with the discovery of rifling the
barrel in 1498. Records show that rifling may have been from four to 66 grooves.
The matchlock was fired by pulling a trigger, which lowered a bit of smoldering
rope (called a slow-burning match) into the touchhole. Now a single person could
hold, point, and shoot the gun unassisted. Sights began to show up, and further
refinements continued. The multiple barrels on today’s high-volume flying gun
platforms are not new; some matchlocks had them.
Many of these guns were still pretty heavy, and if you had one with a portable
rest to hold it during shooting, you owned an arquebus. These arquebuses weighed
up to 20 pounds. No wonder they were shot from a rest! Some of these pieces were
embellished and were extremely ornate.
But the matchlock still wasn’t what the military considered accurate, reliable,
rapid firepower. The match had a habit of going out just when the going got tough;
it wouldn't work worth a darn in wet weather, and the spark gave your position away
at night.
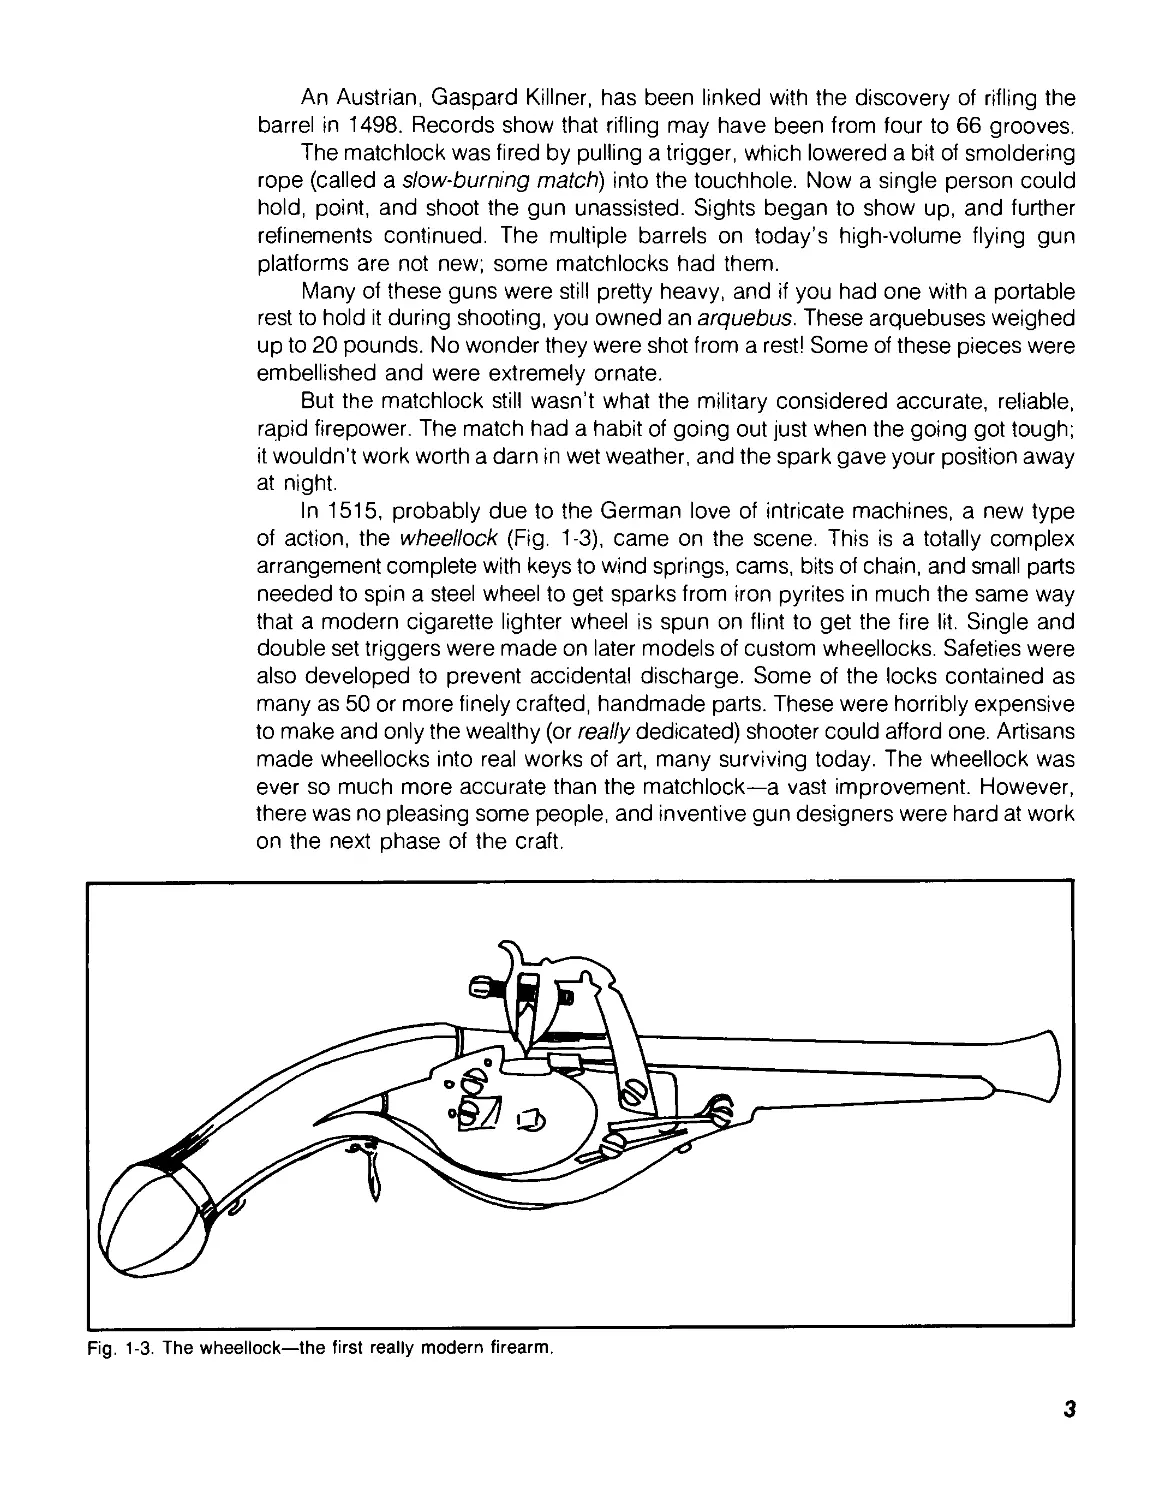
In 1515, probably due to the German love of intricate machines, a new type
of action, the wheellock (Fig. 1-3), came on the scene. This is a totally complex
arrangement complete with keys to wind springs, cams, bits of chain, and small parts
needed to spin a steel wheel to get sparks from iron pyrites in much the same way
that a modern cigarette lighter wheel is spun on flint to get the fire lit. Single and
double set triggers were made on later models of custom wheellocks. Safeties were
also developed to prevent accidental discharge. Some of the locks contained as
many as 50 or more finely crafted, handmade parts. These were horribly expensive
to make and only the wealthy (or really dedicated) shooter could afford one. Artisans
made wheellocks into real works of art, many surviving today. The wheellock was
ever so much more accurate than the matchlock—a vast improvement. However,
there was no pleasing some people, and inventive gun designers were hard at work
on the next phase of the craft.
Fig. 1-3. The wheellock—the first really modern firearm.
3
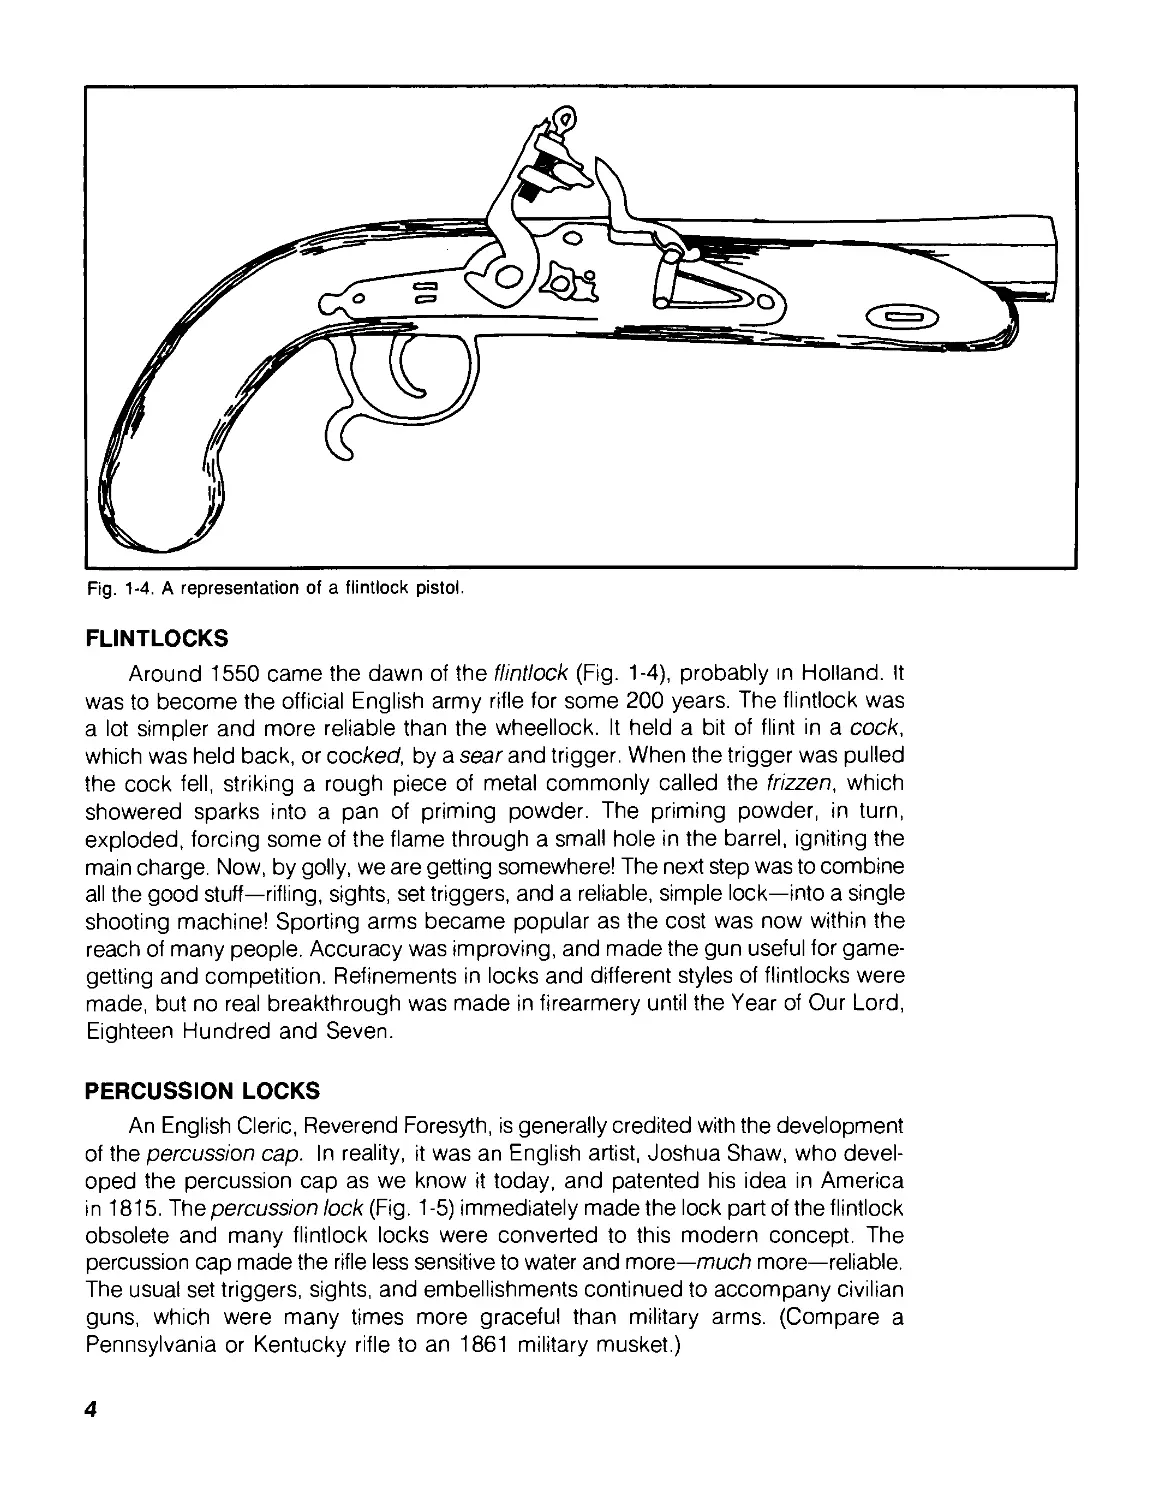
Fig. 1-4. A representation of a flintlock pistol.
FLINTLOCKS
Around 1550 came the dawn of the flintlock (Fig. 1-4), probably in Holland. It
was to become the official English army rifle for some 200 years. The flintlock was
a lot simpler and more reliable than the wheellock. It held a bit of flint in a cock,
which was held back, or cocked, by a sear and trigger. When the trigger was pulled
the cock fell, striking a rough piece of metal commonly called the frizzen, which
showered sparks into a pan of priming powder. The priming powder, in turn,
exploded, forcing some of the flame through a small hole in the barrel, igniting the
main charge. Now, by golly, we are getting somewhere! The next step was to combine
all the good stuff—rifling, sights, set triggers, and a reliable, simple lock—into a single
shooting machine! Sporting arms became popular as the cost was now within the
reach of many people. Accuracy was improving, and made the gun useful for game-
getting and competition. Refinements in locks and different styles of flintlocks were
made, but no real breakthrough was made in firearmery until the Year of Our Lord,
Eighteen Hundred and Seven.
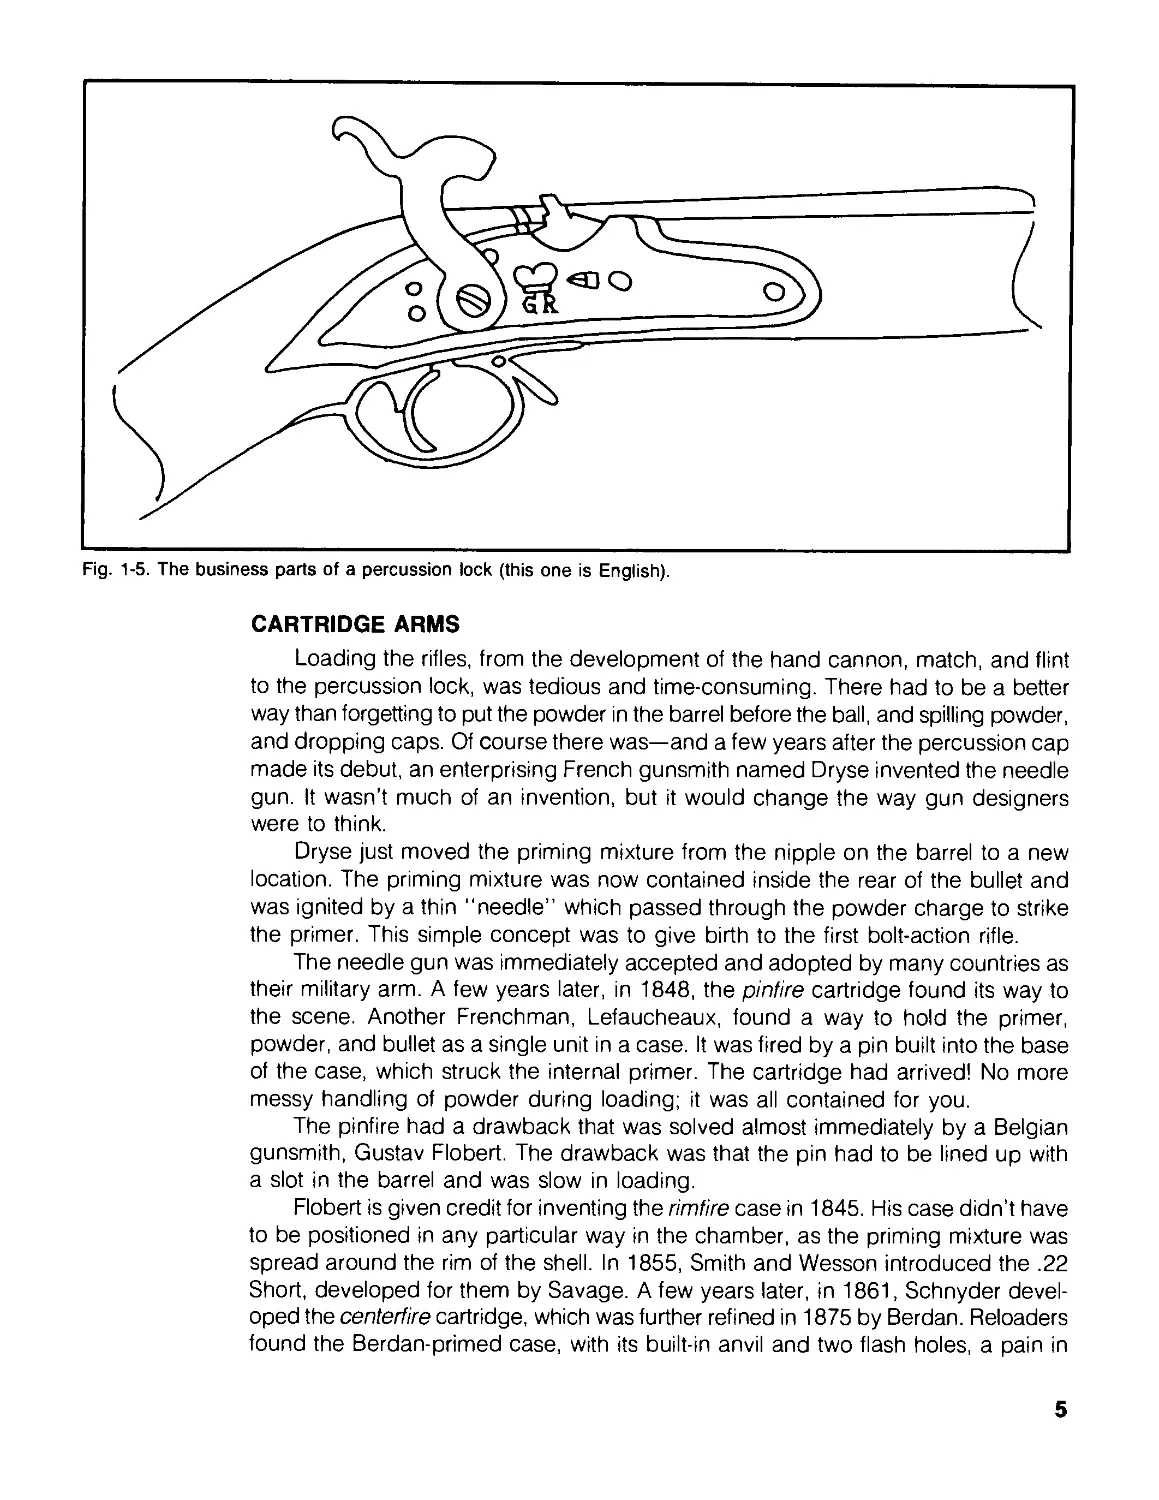
PERCUSSION LOCKS
An English Cleric, Reverend Foresyth, is generally credited with the development
of the percussion cap. In reality, it was an English artist, Joshua Shaw, who devel-
oped the percussion cap as we know it today, and patented his idea in America
in 1815. The percussion lock (Fig. 1 -5) immediately made the lock part of the flintlock
obsolete and many flintlock locks were converted to this modern concept. The
percussion cap made the rifle less sensitive to water and more—much more—reliable.
The usual set triggers, sights, and embellishments continued to accompany civilian
guns, which were many times more graceful than military arms. (Compare a
Pennsylvania or Kentucky rifle to an 1861 military musket.)
4
Fig. 1-5. The business parts of a percussion lock (this one is English).
CARTRIDGE ARMS
Loading the rifles, from the development of the hand cannon, match, and flint
to the percussion lock, was tedious and time-consuming. There had to be a better
way than forgetting to put the powder in the barrel before the ball, and spilling powder,
and dropping caps. Of course there was—and a few years after the percussion cap
made its debut, an enterprising French gunsmith named Dryse invented the needle
gun. It wasn’t much of an invention, but it would change the way gun designers
were to think.
Dryse just moved the priming mixture from the nipple on the barrel to a new
location. The priming mixture was now contained inside the rear of the bullet and
was ignited by a thin “needle” which passed through the powder charge to strike
the primer. This simple concept was to give birth to the first bolt-action rifle.
The needle gun was immediately accepted and adopted by many countries as
their military arm. A few years later, in 1848, the pinfire cartridge found its way to
the scene. Another Frenchman, Lefaucheaux, found a way to hold the primer,
powder, and bullet as a single unit in a case. It was fired by a pin built into the base
of the case, which struck the internal primer. The cartridge had arrived! No more
messy handling of powder during loading; it was all contained for you.
The pinfire had a drawback that was solved almost immediately by a Belgian
gunsmith, Gustav Flobert. The drawback was that the pin had to be lined up with
a slot in the barrel and was slow in loading.
Flobert is given credit for inventing the rimfire case in 1845. His case didn’t have
to be positioned in any particular way in the chamber, as the priming mixture was
spread around the rim of the shell. In 1855, Smith and Wesson introduced the .22
Short, developed for them by Savage. A few years later, in 1861, Schnyder devel-
oped the centerfire cartridge, which was further refined in 1875 by Berdan. Reloaders
found the Berdan-primed case, with its built-in anvil and two flash holes, a pain in
5
the rear to work with. Around 1900 the Boxer primer was patented—a primer that
contained its own anvil and case with but a single central flash hole.
Notables such as Peter Mauser (German; designer of the first modern bolt-actions
rifle), John M. Browning (American—a design genius holding more U.S. gun design
patents than any other), Benjamin Henry (American—developer of the lever-action),
Hiram Maxim (British subject—father of the machine gun and silencers), and a host
of others contributed to the development of the modern gun.
Some relatively well-known companies in the American firearm scene have long
histories. Samuel Colt started his company in Paterson, NJ, in 1836. (In the eyes
of the TV-watching public, Colt is given credit for the discovery of the revolver. I must
correct this error. Colonel Colt was a promoter, an organizer, and at one time sold
patent medicines. In 1818, Captain Artemus Wheeler, of Concord, MA, patented
the revolver. So you see, Colt didn’t invent the revolver after all—but, for that matter,
Wheeler didn’t, either! Records show that a flintlock rifle was built with a revolving
powder chamber designed like a modern revolver in 1578!) Marlin Firearms was
founded in 1881 by John Marlin, whose first rifle was a lever-action .22, variations
of which are still in production. Eliphalet Remington II formed Remington in 1816
in Ilion, NY, producing high-quality flintlock rifles. In 1850, Remington rivaled Colt
in handgun production. The name Remington Arms Company appeared in 1880.
Horace Smith and Daniel Wesson in 1857 brought out a single-action revolver
in .22 Short and in 1864 were two years behind the demand. Joshua Stevens formed
the J. Stevens Arms and Tool Company in 1864 to eventually become the largest
producer of sporting arms in America. Winchester Repeating Arms was formed by
Oliver Winchester, a shirtmaker. In 1866, after buying out the Volcanic Arms Company
and setting up the New Haven Arms Company, the name was changed to Winchester
Repeating Arms. (Of interest, Hugo Brochardt worked for Winchester. He developed
the design which was eventually to become the Luger.) Oscar Mossberg formed
0. F. Mossberg in 1880 and concentrated on making .22 rifles. Arthur Savage, a
world traveler and inventor, set up a company to make a lever-action rifle he de-
signed, and in 1893 the first Savage lever-action rifle rolled off the line.
These—and a few others—have survived. But many of the old-line companies—
Spencer, Merwin & Hulbert, L. C. Smith, Harrington and Richardson, and many others
suffered from legal problems, corporate raiders, or just plain mismanagement. They
all made their mark in history, contributed to the gun field, and passed on to the
“Great Shooting Range in the Sky.”
SMOKELESS POWDERS: THE MODERN ERA
A French chemist, Vielle, in 1886 developed the first smokeless powders. This
date marks the beginning of the modern phase of gunmaking. Since then, the known
principles have been worked on, refined, and expanded. A few new ideas have been
put forth and worked on. Some notable work was done in the 1920s and '30s to-
ward the development of a caseless cartridge. In the late 1950s, a triangular cartridge
case called a Tround was developed by David Dardick for a novel double-action,
magazine-fed revolver. The Dardick gun briefly caused a stir. These cartridges are
collector's items, as is the gun itself. The Gyrojet, another such short-lived project,
used a rocket projectile. It was made by M. B. Associates in California in the early
6
1960s. The rocket was set off by a hammer hitting the front of the projectile, driving
it back onto a firing pin that ignited the rocket. The Gyrojet was not as accurate as
the manufacturer had hoped and it, too, is a collector’s item. Daisy—yes, Daisy of
BB gun fame—continued to work with caseless ammo and eventually dropped the
program in the 1970s.
It is hard to predict what is going to come next in the way of a major breakthrough
in gun development. What we are seeing today, with magnums, automatics, and
even assault rifles is nothing more than applying known technology in the same old
way in different-looking packages.
Modern materials—plastics—are finding their way into gunmaking, and more
government safety requirements are being added. In fact, so many safety rules are
being passed that one day we may find the gun so safe that it couldn't possibly be
discharged under any circumstance.
Stay tuned. Designers are hard at work, staying up late at night, pouring
innovative designs into their computers. Surely someone will come up with something
new soon.
7
1
Chapter 2
Buying a Used Gun
"What! Me buy a used gun? Not me! I don’t want someone else’s problems! Why'd
they trade it in anyway? Wouldn’t it shoot straight?’’
Nonsense! A used gun can be an excellent investment. Unless it has seen more
ammunition than you can carry in a week, chances are it is not going to be "worn
out.” Modern guns—even old ones for that matter—do not seem to "wear out." They
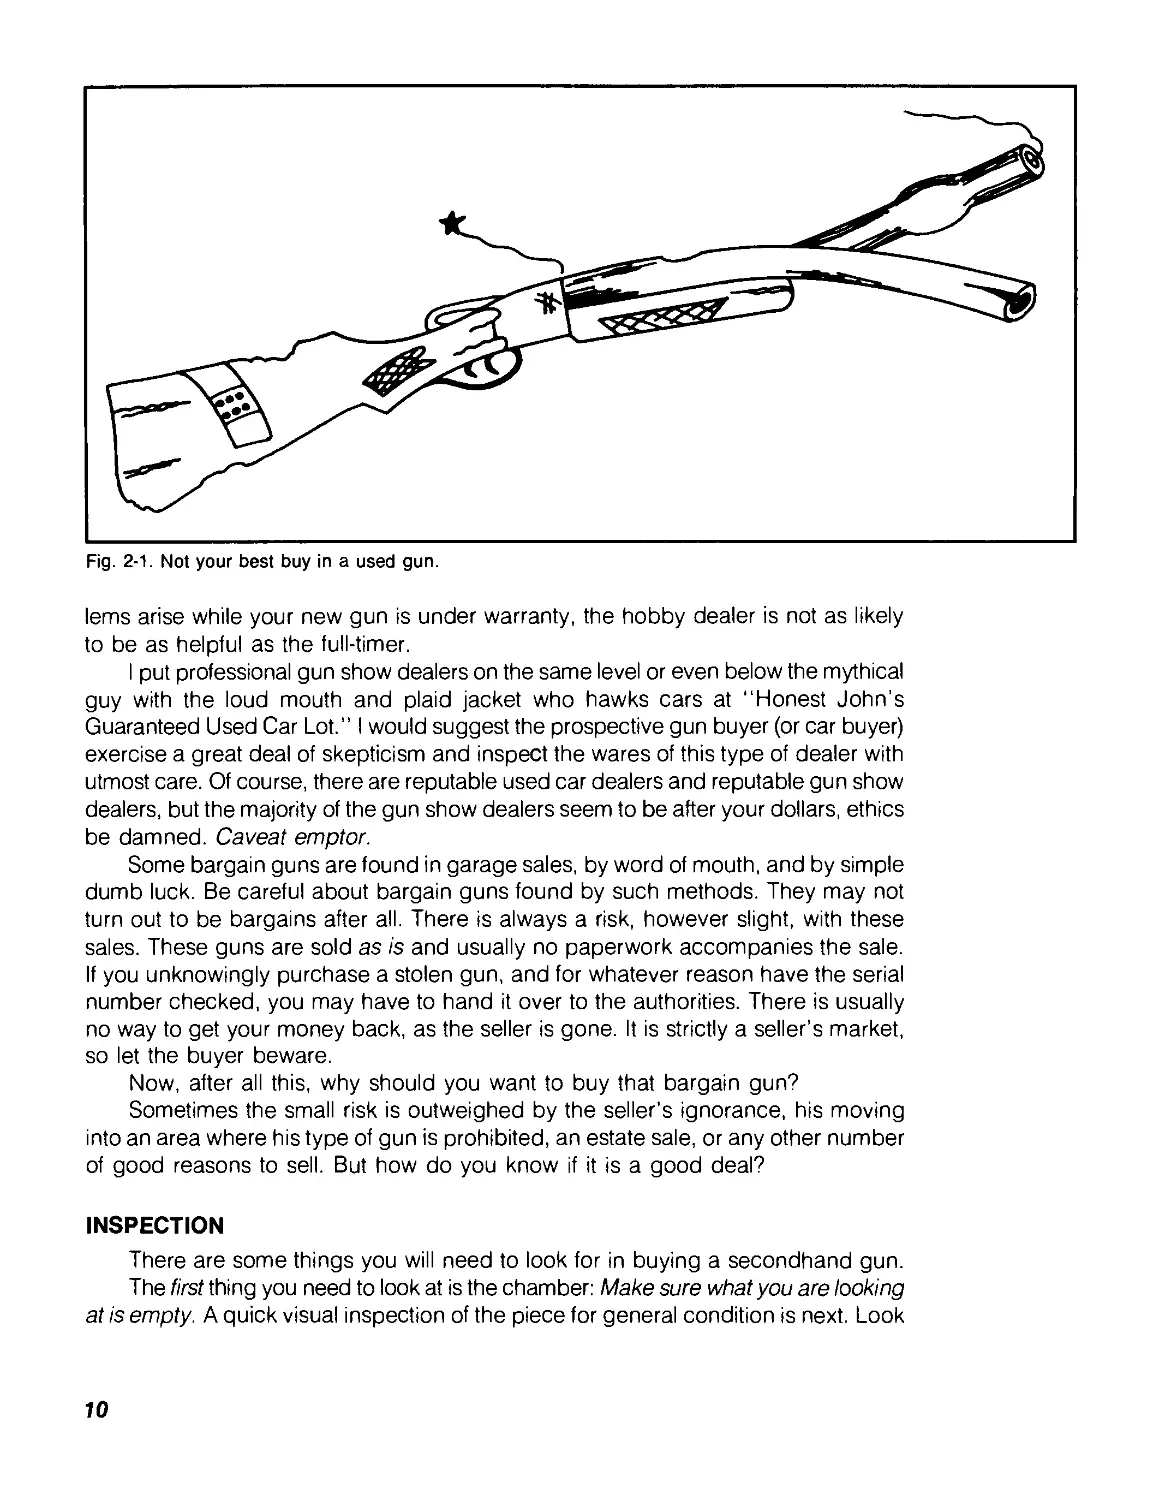
are more often damaged by neglect or misuse than by being "worn out" (Fig. 2-1).
USED GUN CAVEATS
In your search for a good used gun, don’t expect to pick up a real "bargain”
gun at your gun dealer’s. On the other hand, when dealing with a reputable dealer,
you are not likely to get stuck with a gun that has a hidden defect. If a defect appears,
such as a cracked stock, scope mounting holes that are misdrilled, or even something
as simple as a stock that doesn't fit you quite right, you are within your rights to expect
some satisfaction from someone who represents himself as a professional and offers
merchandise for sale as a dealer.
Even though most guns right out of the factory box shoot better than the shooter
can shoot them, there are some guns that will not shoot well no matter what is done
to, for, or with them. A reputable dealer depends on your good will and return visits
to purchase ammunition and accessories. He should stand behind his merchandise.
This is a factor to consider above price alone.
There are those who are "hobby gun dealers.” Some are feeling their way along
into becoming full-time dealers, while others are playing with their hobby. If any prob-
9
Fig. 2-1. Not your best buy in a used gun.
lems arise while your new gun is under warranty, the hobby dealer is not as likely
to be as helpful as the full-timer.
I put professional gun show dealers on the same level or even below the mythical
guy with the loud mouth and plaid jacket who hawks cars at ‘‘Honest John’s
Guaranteed Used Car Lot.” I would suggest the prospective gun buyer (or car buyer)
exercise a great deal of skepticism and inspect the wares of this type of dealer with
utmost care. Of course, there are reputable used car dealers and reputable gun show
dealers, but the majority of the gun show dealers seem to be after your dollars, ethics
be damned. Caveat emptor.
Some bargain guns are found in garage sales, by word of mouth, and by simple
dumb luck. Be careful about bargain guns found by such methods. They may not
turn out to be bargains after all. There is always a risk, however slight, with these
sales. These guns are sold as is and usually no paperwork accompanies the sale.
If you unknowingly purchase a stolen gun, and for whatever reason have the serial
number checked, you may have to hand it over to the authorities. There is usually
no way to get your money back, as the seller is gone. It is strictly a seller’s market,
so let the buyer beware.
Now, after all this, why should you want to buy that bargain gun?
Sometimes the small risk is outweighed by the seller’s ignorance, his moving
into an area where his type of gun is prohibited, an estate sale, or any other number
of good reasons to sell. But how do you know if it is a good deal?
INSPECTION
There are some things you will need to look for in buying a secondhand gun.
The first thing you need to look at is the chamber: Make sure what you are looking
at is empty. A quick visual inspection of the piece for general condition is next. Look
10
for neglect and misuse, which take their toll of guns. Are there any obvious cracks
or splits in the stock? If so, the cost of replacing the wood may outweigh a cheap
initial cost. Check for major dents that tear the wood grain. Torn wood is not easily
repaired during stock refinishing, and the stock will always show these areas as scars
no matter how much work goes into fixing them. Dark, oil-stained areas where wood
and metal join indicate the possibility of "dry rot" caused by petroleum products,
which soften wood and will eventually ruin the stock. The finish can be worn and
may show minor dents without affecting its shooting value.
Metal parts can also show finish wear and may have minor abrasions from normal
use. If the muzzle is dinged, dented, or badly rusted, it may be well to avoid this
gun; any one of these defects can affect accuracy adversely.
If the gun is satisfactory in overall general condition, inspect the bore from back
to front. Remove the bolt and look through the bore. While inspecting pumps,
automatics, or lever-actions, where it is impossible to look directly through the breech,
use a borescope or mirror. Bores should be clean, without pits or rust. Check the
quality of rifling by noting if the edges of the lands and grooves are sharp all the
way to the chamber. The bore should always be inspected from the breech to the
muzzle because any erosion caused (in some ultra-high velocity varmint calibers,
by burning powder and bullet friction) will occur on the rifling’s back edges. A barrel
completely worn out from shooting hundreds of rounds a week of too many really
hot loads will look like new when viewed from the front.
Rusty bores are not desirable. The rust makes cleaning harder. Shooting
accuracy may not be affected but once rust has started, its roughness scrapes off
bullet metal, fouling the bore more rapidly than non-rusty barrels. Fouled bores do
affect accuracy.
Rusty chambers cause extraction and ejection difficulties, especially in
automatics. Sometimes this rust can be removed without harm by polishing, but
sometimes it is so deep that polishing will only enlarge the chambers. Rusty chambers
in shotguns are fairly common since the advent of plastic shells, and unless the rust
is really bad, these chambers can be polished without affecting the functioning ability
of the gun.
An old trick used by unscrupulous, itinerant gun show dealers is to oil the bore
of a poor-quality barrel heavily. The oil will fill the imperfections and make rifling appear
to be perfect and look very shiny and clean. If you suspect the gun has an overly
oiled bore, run a clean patch through it. Perhaps the seller was just being overzealous
in keeping it in good condition.
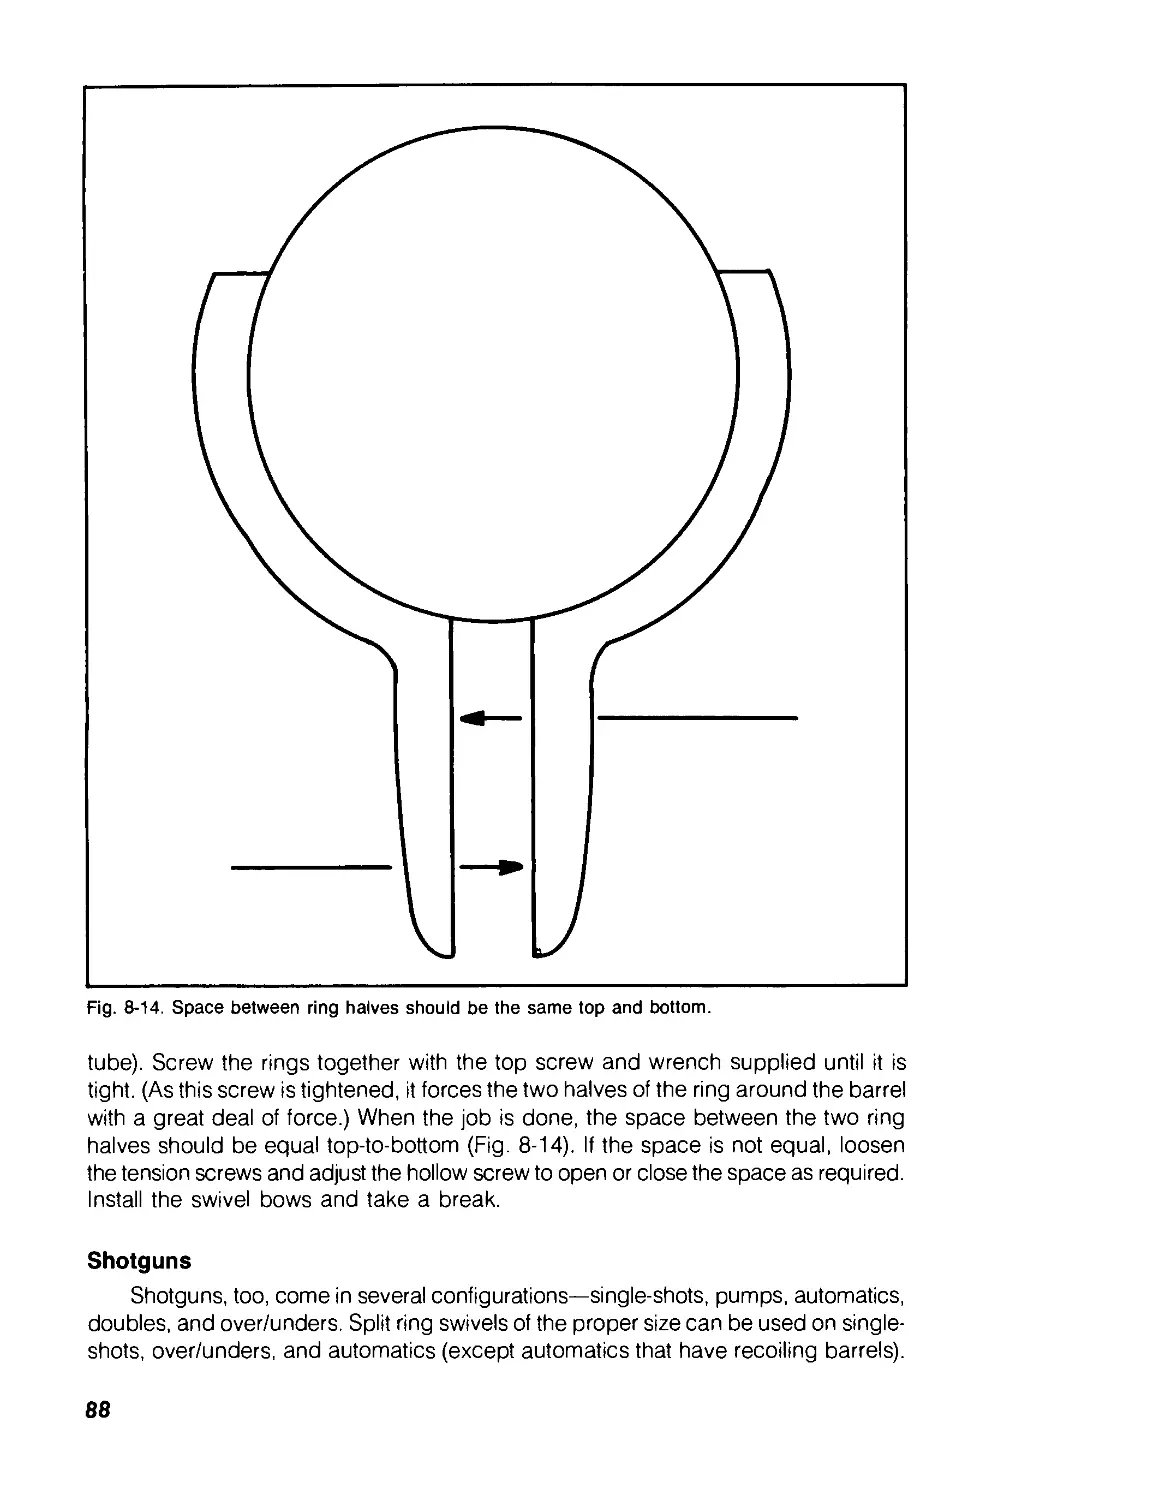
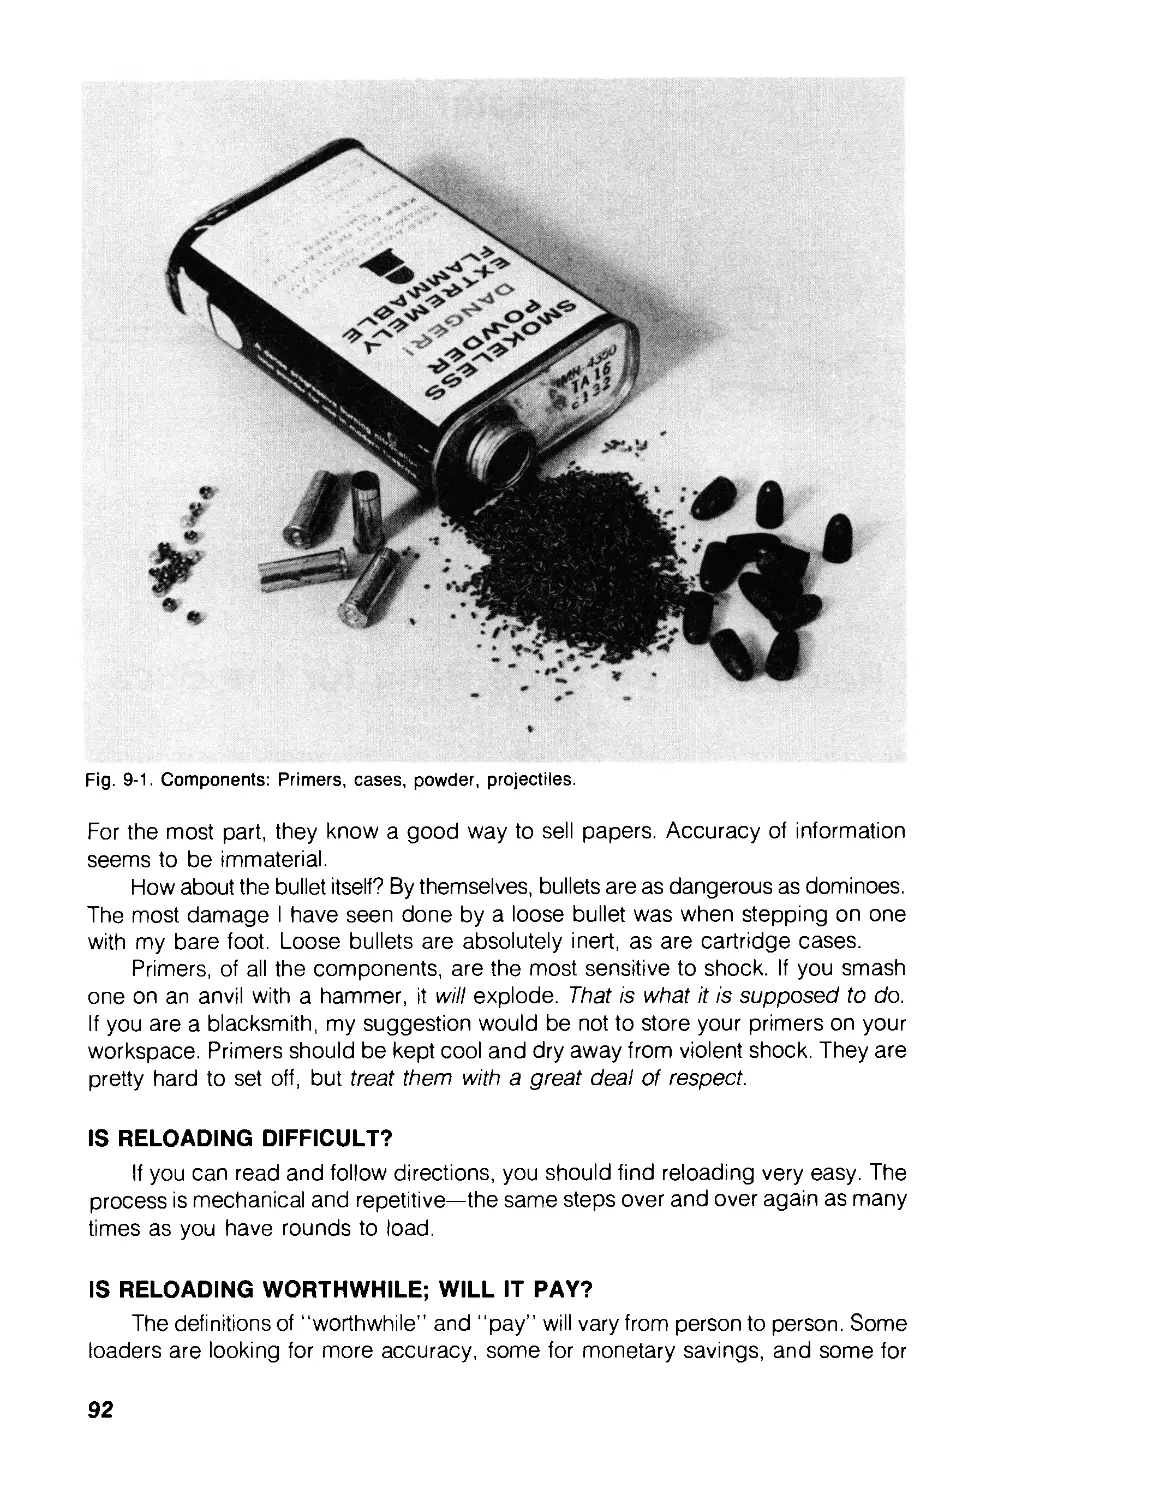
Shotguns
Shotguns appear to be more delicate than rifles, and it seems the higher the
quality of the shotgun, the more delicate and fragile it is. One major problem of used
shotguns—especially doubles—is dents in the barrel. Doubles suffer from more dents
than over/unders, perhaps because they get more use. Your visual inspection of
the barrels should be careful enough to see if bores are smooth. Minor dents, in
themselves, are probably not going to affect the shooting ability of the gun, and can
be removed with mechanical dent removers.
11
Shotguns are prone to bulges and rings, problems that don’t seem to plague
rifles. Obstructions in any bore are almost guaranteed to ring, bulge, or "jug" the
bore. Mud, snow, forgotten cleaning patches, or wads are common causes of this
problem in shotguns. Extreme cases of bore obstruction can split the barrel at the
point of obstruction. Overloads will bulge chambers or split barrels near the breech
rather than at the muzzle. Any shotgun that has an expanded chamber or bulge
near the breech should be avoided. Bulges at the muzzle can be removed by cutting
them off and recrowning the barrel. This procedure removes any choke along with
the bulge, but for riot control or close shots on dove or quail, who cares?
Sight down the outside of the barrel. Line the barrel up with a light source and
follow the reflected lines from breech to muzzle. Any rings, dents, or bulges will show
up as breaks in these lines. Running a tight patch through the bore will also help
find bulges. As the patch passes the ring or bulge, it will jump. It is a good idea
to use both methods—visual and cleaning patch—to check barrels.
Take a close look at the ribs that hold the barrels together on double-barrel and
over/under shotguns. Most of these ribs are attached to the barrels with soft solder.
Tap them with your fingernail to see if there is any looseness or vibration. If the ribs
are loose, the repair is very expensive and this bargain gun may be a loser. Ribs
may also separate when a double or over/under has been reblued. The bluing salts
attack the lead in the solder; eventually, not only do the ribs separate, but the barrels
also come apart.
To determine if a gun has been reblued, first smell the metal. "Cold-blued" metal
has a distinct "acidy" smell that is hard to mask. Hot bluing leaves no smell at all.
Look at the lettering stamped in the barrels. The edges of the letters should be sharp
and square. Polishing will round them. The same is true of any sharp corners. It might
be wise to avoid a double or over/under that has been reblued.
Revolvers should receive the same bore scrutiny as shotguns. Sight down the
cylinder, check each chamber for bulges, and make sure the barrel is not "pregnant."
Handloaders sometimes have the disconcerting habit of accidentally not charging
one case and then inadvertently adding that charge to another. A bullet in a case
with no powder will be driven into the barrel by the primer and the next shot will
drive them both out of the barrel, leaving a ring. The case with two charges will enlarge
a chamber (or worse). A cylinder with an enlarged chamber can be replaced, but
since working pressures are much higher on pistols and rifles than shotguns, there
can be hidden internal damage and stress on locking parts. Even though the cylin-
der can be replaced (and cost more to fix than the gun is worth), this extra stress
is certainly not good for the gun.
Locking
Open and close the action of the gun you are looking at several times to make
sure there are no cartridges in the chamber, and to see how smoothly it operates.
Put the safety on and try the trigger. The safety obviously should hold and keep
the trigger from being pulled. Now take the safety off and, unless the owner objects,
pull the trigger again. It should have a crisp feel as sears separate, followed
immediately by the click of the hammer striking the firing pin. Some doubles and
over/unders have recoil-operated single triggers and no matter how hard or often
72
you pull the trigger, it will not set up for the second shot. If the over/under or double
has a single trigger and only clicks once, give the center of the buttplate a smart
smack with the heel of your hand. This should simulate enough recoil to set the trigger
for the second click. Letting the gun fall several inches by its own weight to the floor
to set the trigger is a sure sign of a rank amateur in gun knowledge. It only takes
one wrong drop to chip the toe of the stock and no matter how much you cry and
plead, you will have bought a suddenly-more-expensive shotgun. Don't take the
chance of damaging someone else's gun.
Open the gun again and check to make sure the extractors and ejectors are
in place and working properly. Believe it or not, "bargain” guns are sometimes offered
at "bargain” prices because the owner has discovered what it costs to replace bro-
ken or missing parts. Actions should open and operate smoothly and cocking should
be effortless. Check the extractors on rifles visually and wiggle them with your finger
to see if there is spring tension behind them. If they are loose or broken, there are
extra costs in getting them fixed.
To test proper locking of doubles and over/unders, snap them shut. Top levers
should not come to rest left-of-center on the tang. Locking parts of over/unders and
doubles are designed so top levers will be right of center when the gun is closed.
As wear occurs, the lever will move more and more to the left until the action gets
loose, and then the gun is worn out. At this point the barrels will wiggle up and down
and side to side.
Wear at hinge pins can also be a problem. To check wear in hinge pins, close
the action, remove the forearm, and wiggle the barrels to test for looseness at the
breech. Tight forearms will temporarily hide this defect. If the barrels are loose, forget
this gun. Expensive lock repairs and replacements of hinge pins are needed. Single
shots and over/unders don’t seem to get loose as quickly as doubles, perhaps
because the recoil is being presented evenly to the standing breech, not on one
side or the other. This would also explain why doubles seem to wear faster than
over/unders. (Or perhaps it’s because there are lot more poorer quality doubles in
the field than over/unders.) In any event, watch out for loose breeches.
Locking systems of high-powered bolt-action rifles are much more positive and,
in general, don’t cause problems. However, older lever-action .30/30s, as well as
older pumps and automatics, are showing up with "headspace” problems.
Headspace is a technical term defined as "the distance from the face of a fully locked
bolt to the nearest proper supporting shoulder in the chamber.” If the gun has too
much headspace, the case is not properly supported and can rupture. It also places
extra stress on locking surfaces, inducing more headspace, which compounds the
problem. The effect of headspace can be shown by example.
I’ll bet a spent .22 case that you could stand to have your friendly neighbor gently
press his hand on your chin until he reaches 25 pounds of push. But if he is irate
because you just ran over his favorite hunting dog, and delivers that 25-pound force
all at once, the jolt is going to cause your eyes to water, not to mention breaking
your jaw. This "jolt” is what happens in a firearm with excessive headspace. Instead
of the bolt taking the energy of recoil as it is developed, it gets it in all at once.
Headspace in .22 rifles can be checked by letting the firing pin down and pushing
the bolt forward. If there is any motion, suspect headspace. It may be a good idea
73
to have the headspace on any older lever-action and any used pump or automatic
high-power rifle checked by a gunsmith. If excessive headspace is found, barrels
or bolts will have to be replaced. There is no need to tell you that this is an expensive
operation.
Automatic Pistols
The things to look for on automatic pistols, aside from general condition and
ringed barrels, are properly functioning magazines. Automatics are prone to feeding
problems that are caused, for the most part, by magazine damage. Automatics seem
to stay tight and operate for years of constant service without problems. Finding new
original manufacturer magazines for those that may be bent or missing should not
present a problem unless the automatic is obsolete or unusual. Original magazines
for obsolete or rare guns are hard to find, but substitutes may be found through
several companies that make extensive lines of replacements. (Be cautious of
Mossberg .22s. The factory has discontinued their line of .22 rifles and magazines
for them are nearly impossible to find!)
Trigger pulls should be crisp (except for Lugers, which are normally soft and
squashy.) Open the slide to check the chamber and to see if any hold-open device
is working. Let the slide snap closed—once. Hammers or strikers must not follow
the slide forward. If they do, replacement of hammers, sears or other parts must
be considered. (Only let the slide slam forward once in this test, as it is about the
most abusive thing you can do to an automatic pistol—there is no ammo feeding
up to help soak up the force. Normally close an automatic pistol by letting the slide
down by hand.)
Revolvers
Revolvers present another set of things to look for. Revolvers, of all the firearms
on the market, are most prone to wearing out. Open and close the cylinder several
times while checking to see if it is unloaded. It should swing in and out of the frame
easily. Next, check the revolver for timing, which is its ability to lock the chambers
in line with the barrel at the proper time. Slowly pull the hammer back till the trigger
sear engages. Try turning the cylinder. The locking bolt should have popped up
into its locking recess. If the locking bolt has not locked the cylinder, pull the trigger
to release the hammer and try turning the cylinder again. Some revolvers (especially
Colt Pythons, Diamondbacks, and others of these same series) will lock the cylinder
tightly when the trigger is held back. Use the same procedure both single and double-
action. If the cylinder does not lock when the hammer falls, the gun is out of time.
Try both tests twice to check all chambers thoroughly. The chambers of an out-of-
time revolver do not line the bullet with the barrel and may “spit lead" or shear off
a small part of the bullet as it is guided into the barrel. Accuracy is affected by this,
not to mention safety.
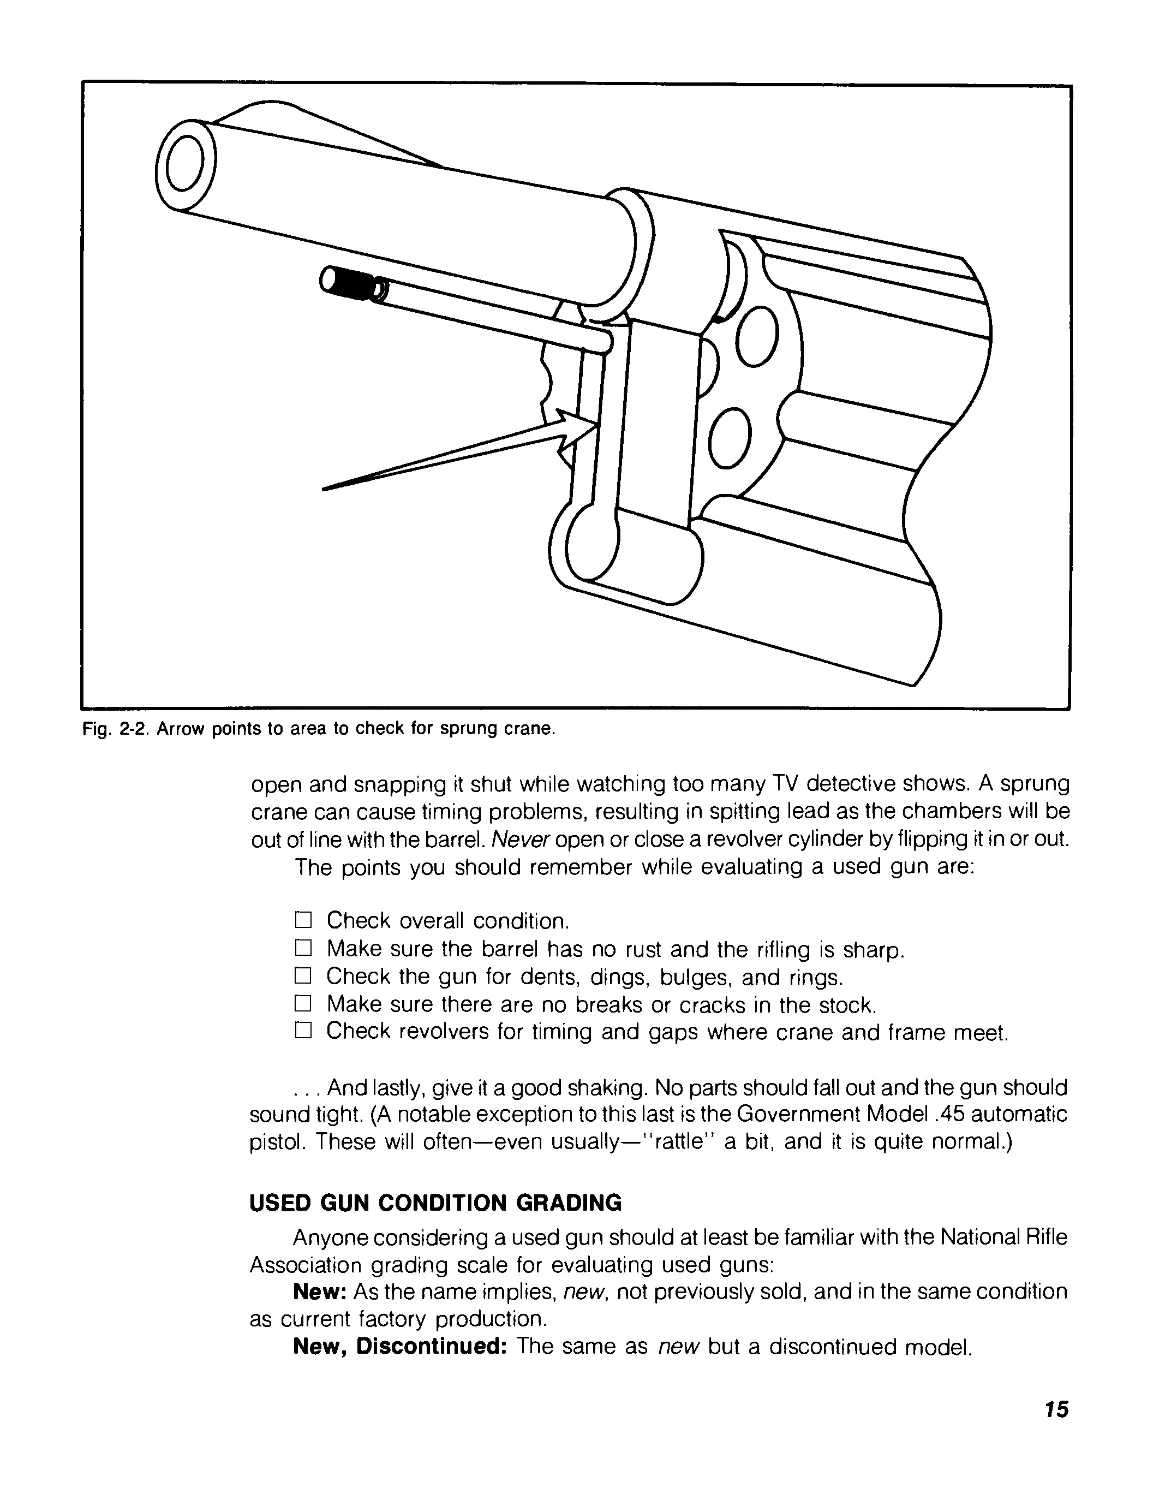
Another point to look for is looseness in the area of crane and frame. With the
cylinder closed, turn the gun upside down and inspect the joint (Fig. 2-2) under the
barrel where crane and frame meet. The joint should be smooth and no gaps noted
even when the locked cylinder is pushed from side to side. Gapping and looseness
is an indication that a previous owner has sprung the crane by flipping the cylinder
14
Fig. 2-2. Arrow points to area to check for sprung crane.
open and snapping it shut while watching too many TV detective shows. A sprung
crane can cause timing problems, resulting in spitting lead as the chambers will be
out of line with the barrel. Never open or close a revolver cylinder by flipping it in or out.
The points you should remember while evaluating a used gun are:
□ Check overall condition.
□ Make sure the barrel has no rust and the rifling is sharp.
□ Check the gun for dents, dings, bulges, and rings.
□ Make sure there are no breaks or cracks in the stock.
□ Check revolvers for timing and gaps where crane and frame meet.
. .. And lastly, give it a good shaking. No parts should fall out and the gun should
sound tight. (A notable exception to this last is the Government Model .45 automatic
pistol. These will often—even usually—"rattle” a bit, and it is quite normal.)
USED GUN CONDITION GRADING
Anyone considering a used gun should at least be familiar with the National Rifle
Association grading scale for evaluating used guns:
New: As the name implies, new, not previously sold, and in the same condition
as current factory production.
New, Discontinued: The same as new but a discontinued model.
15
These two classifications would include all factory-supplied papers, guarantees,
wrapping papers, and, of course, the original factory carton, and applies mostly to
new firearms.
Perfect: Used, but in every aspect new.
Excellent: Nearly new with little or no marring of wood. Over 80 percent of the
original finish remaining on the metal and wood.
Very Good: Having over 30 percent original finish and in perfect working or-
der. No appreciable wear noted on working parts. The finish may have very minor
dents or scratches. All letters and numbers on metal or wood sharp and clear.
Good: Minor wear on working surfaces and in safe operating condition. Minor
parts may have been replaced and may have no corrosion or rust that would interfere
with the operation of the firearm. Tasteful refinishing will be acceptable in this cate-
gory. Major letters will be legible.
Fair: Safe working condition but may be well worn with rust or corrosion that
do not interfere with the operation of the gun. Some letters may be obliterated and
the wood scratched, dented, cracked, and repaired. Major parts may have been
replaced and refinishing may have been done in a nonprofessional manner. Wood
may be scratched, broken, and repaired.
Poor: Major parts replaced (and may need more replaced); pitting is deep and
most of the letters and numbers are rusted out. The wood is broken, bruised, and
scratched deeply. May require major overhaul to be put into shootable condition.
Not desirable except as a cheap wall-hanger.
After all this, should you consider a used gun? Of course! A good used gun
can give years of reliable service and be as accurate as a new gun. These guidelines
can help you get maximum use and satisfaction from your purchase.
USED GUN VALUE
Now that you have found a bargain gun, how much should you pay for it?
In general, a dealer will ask up to two-thirds of new value. A gun that cost $300
new may be valued at $200 used. A real bargain gun will be one-half or less than
the current retail value. Published retail prices are of no value in determining these
figures, and are only a guide to indicate that this gun costs more than that one. The
real determiner of current retail for your area is what the “big boys" are selling it
for. If Octopus Discounts Unlimited is selling that same $300 gun for $200, then the
used value of this gun will be $150 and the bargain price will be about $100.
In determining and discussing the price of any gun, don’t tell the seller you can
get it cheaper or run his (or her) merchandise down to get a better price. Your dealer
is usually acutely aware of “better prices" and knows you can beat his price. Don't
make him feel any worse by rubbing his nose in it. If you feel his figure is too high,
make him a counteroffer. He will either accept or reject it. Garage sale merchandise
is often priced for immediate sale by people in distress. Use good moral judgment
by not taking advantage of their distress or ignorance by trying to lower an already
bargain price.
If you are dealing with knowledgable people, ask their price; if it is less than
what you planned to pay, so much the better. If it is not in your price range, offer
what you can afford. Some dickering is likely to take place and you may or may
76
not end up with the gun. Also, you might keep in mind that a bargain is no bargain
unless you have a use for what you are buying. I have seen people trying to peddle
a bargain gun they just bought to make a profit, only to find out that there was no
market for it.
Commemorative guns fall into a special classification and should be purchased
only when the purchaser feels comfortable with gun collecting. Gun collecting for
profit and for investment is about as risky as playing the stock market with no
background in what the market is, does, or how it does it. Gain some experience,
even if you have to pass up some advertised "good deals," and be sure of what
you are doing before investing your hard-earned coins.
In buying—or selling, for that matter—it is always a good idea to know what
that product is worth to you. Something that has no value to Harry might be just
what you need for the wall. However, I have found that when I am looking for
something, there aren’t any, the price just went up, and it is in high demand. When
I go to sell it, everyone has one, it just became obsolete, and the discounters have
it on sale.
Years ago, a wise old customer, after an extensive bit of inconclusive dickering,
gave me a good definition of "gun trading." "In general," he said, "a good gun
trade is one in which two ‘hoss thieves' each think they have gotten deeply into the
pockets of the other."
17
Chapter 3
Tools and Work Area
Now that you may have purchased a used gun, it might be time to think about doing
a little work on it. To do this to best advantage, a man needs a place to work—
preferably, a place where he can be by himself and be himself. Some thought must
be given where this place is to be.
Some wives may resent having it in the living room and will relegate it to the
garage, attic, large closet, or tin shed. No matter where, it will have to be a place
recognized as yours and held as sacred ground—a place to putter. This space need
not be elaborate, nor cluttered up with lathes, milling machines, or power buffers.
Excellent gun work can be done in very simple shops.
Even simple shops must have some type of tools to display and admire—and
perhaps to use. Some of the more common tools and equipment you should have
to start your shop, you may already have. If you are starting from scratch, you might
consider some of the tools in the following list. Specialized tools, such as flexible
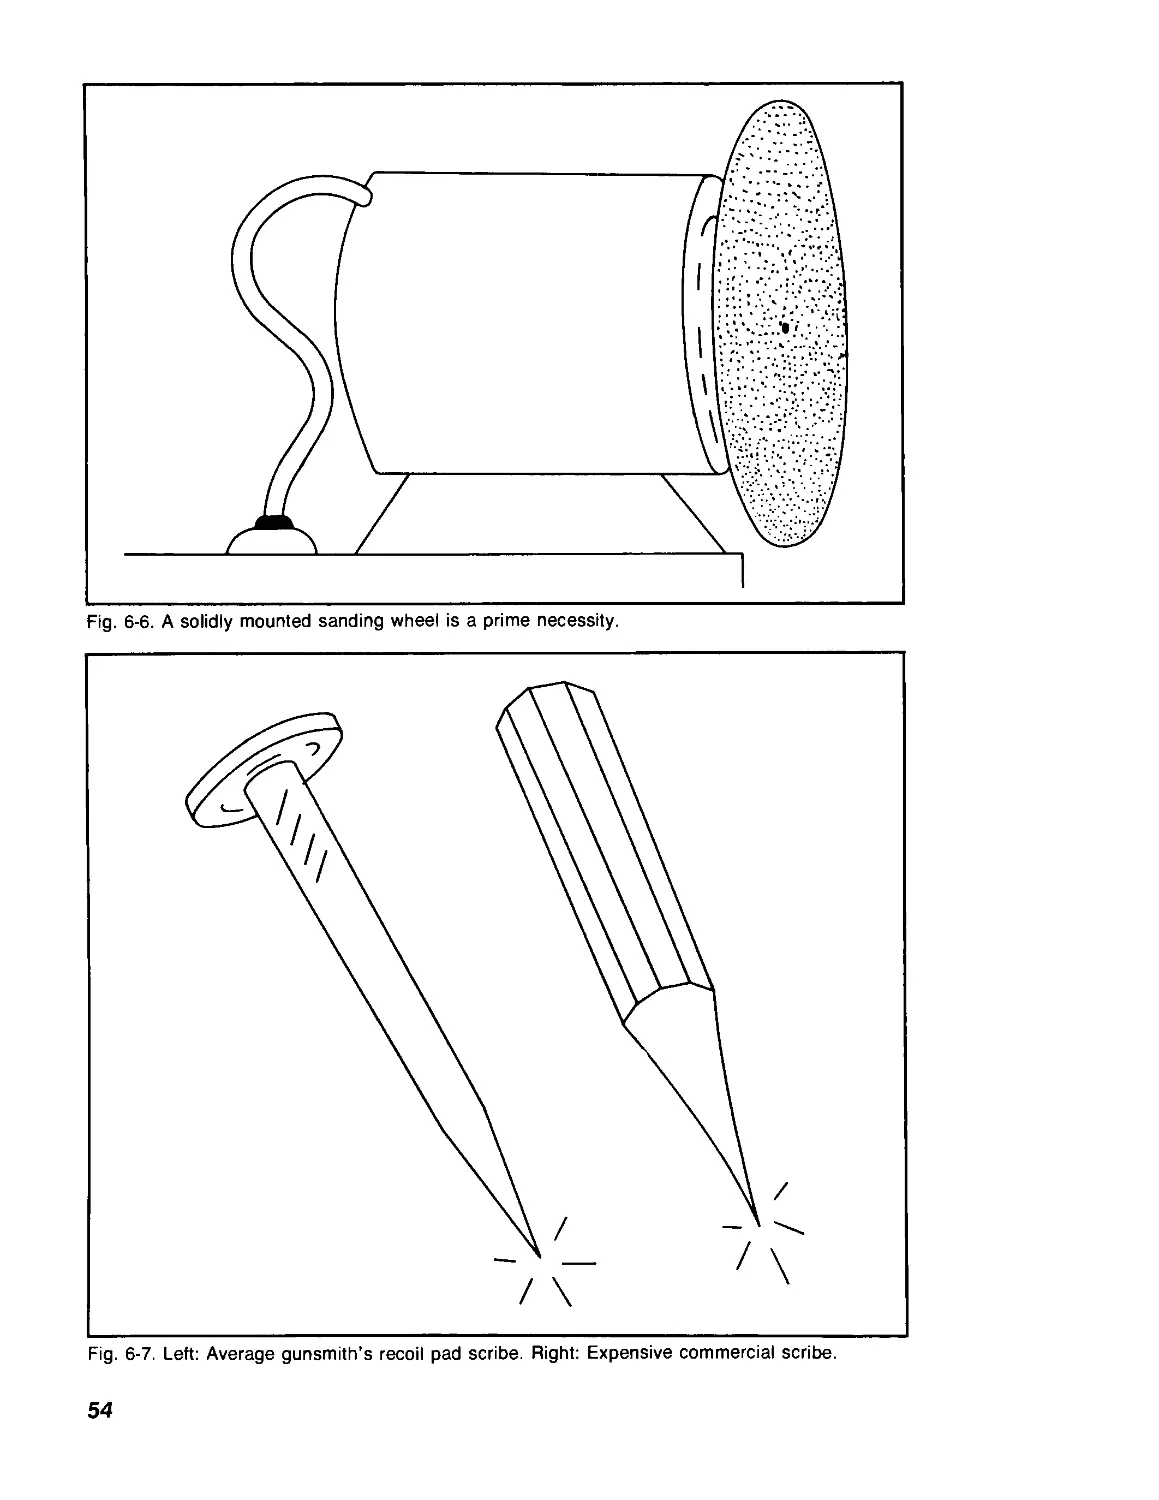
rulers or sanding wheels, will not appear in this list, but will be listed under specific
projects. There are, however, some requirements you just can’t do without.
VITAL EQUIPMENT
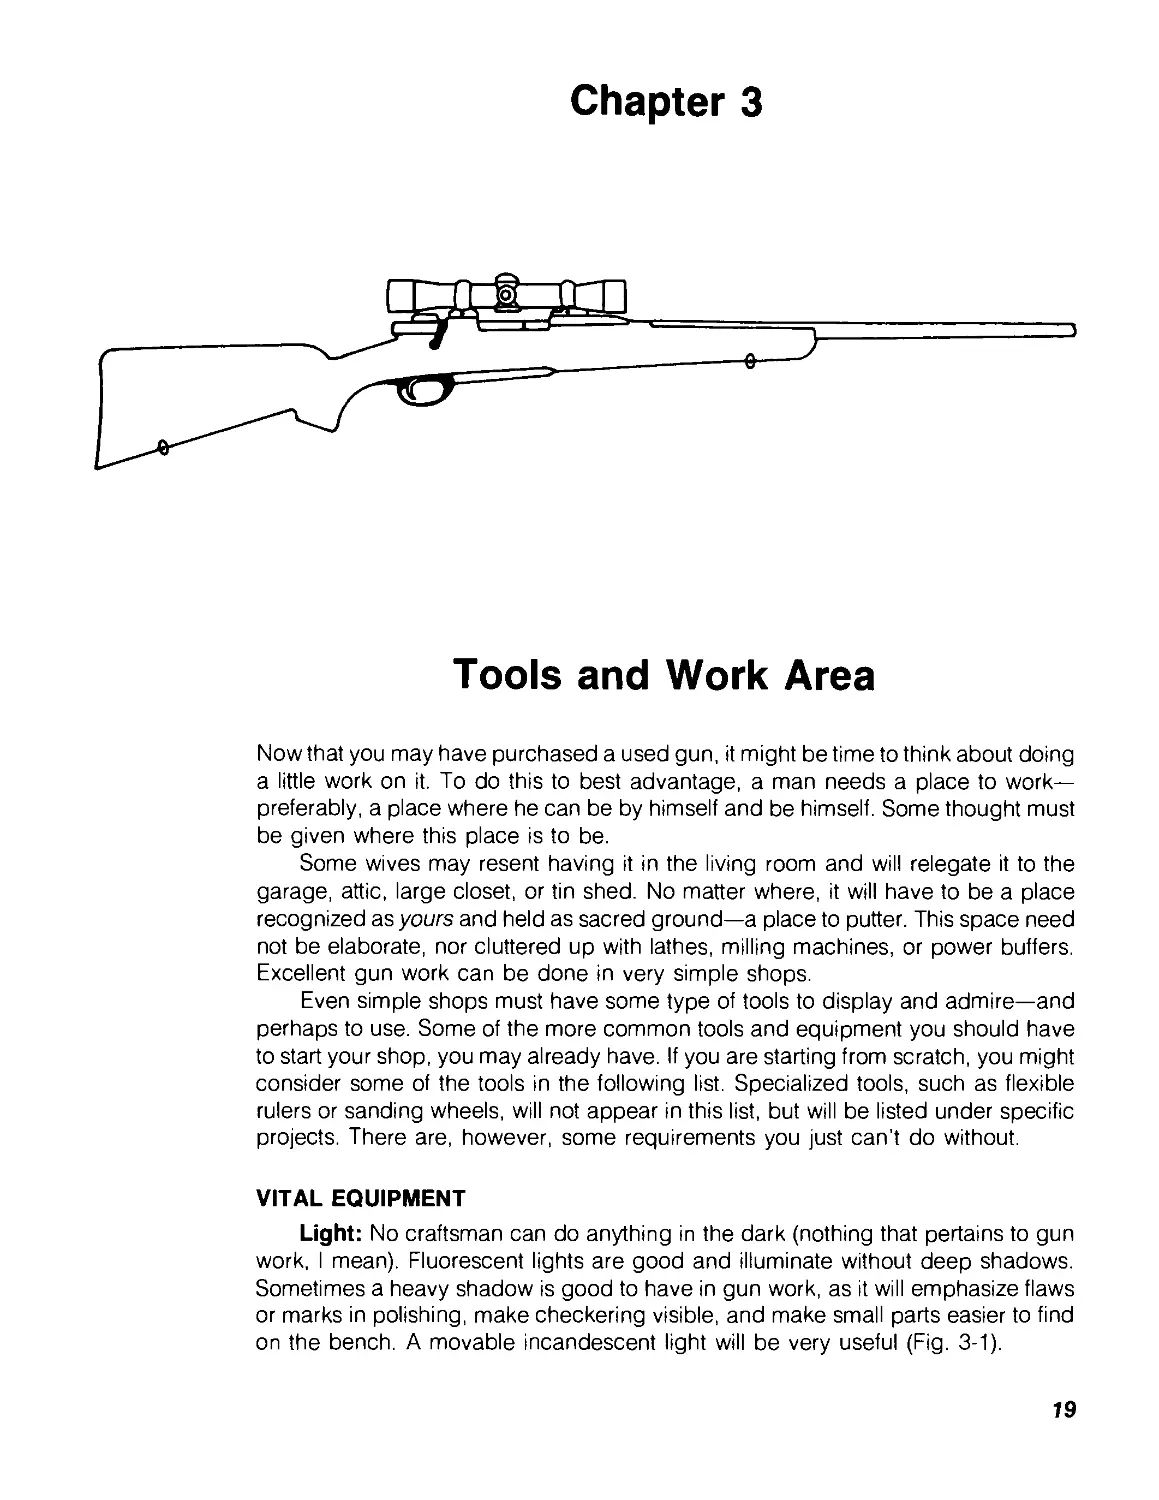
Light: No craftsman can do anything in the dark (nothing that pertains to gun
work, I mean). Fluorescent lights are good and illuminate without deep shadows.
Sometimes a heavy shadow is good to have in gun work, as it will emphasize flaws
or marks in polishing, make checkering visible, and make small parts easier to find
on the bench. A movable incandescent light will be very useful (Fig. 3-1).
79
Fig. 3-1. Lots of good light is important.
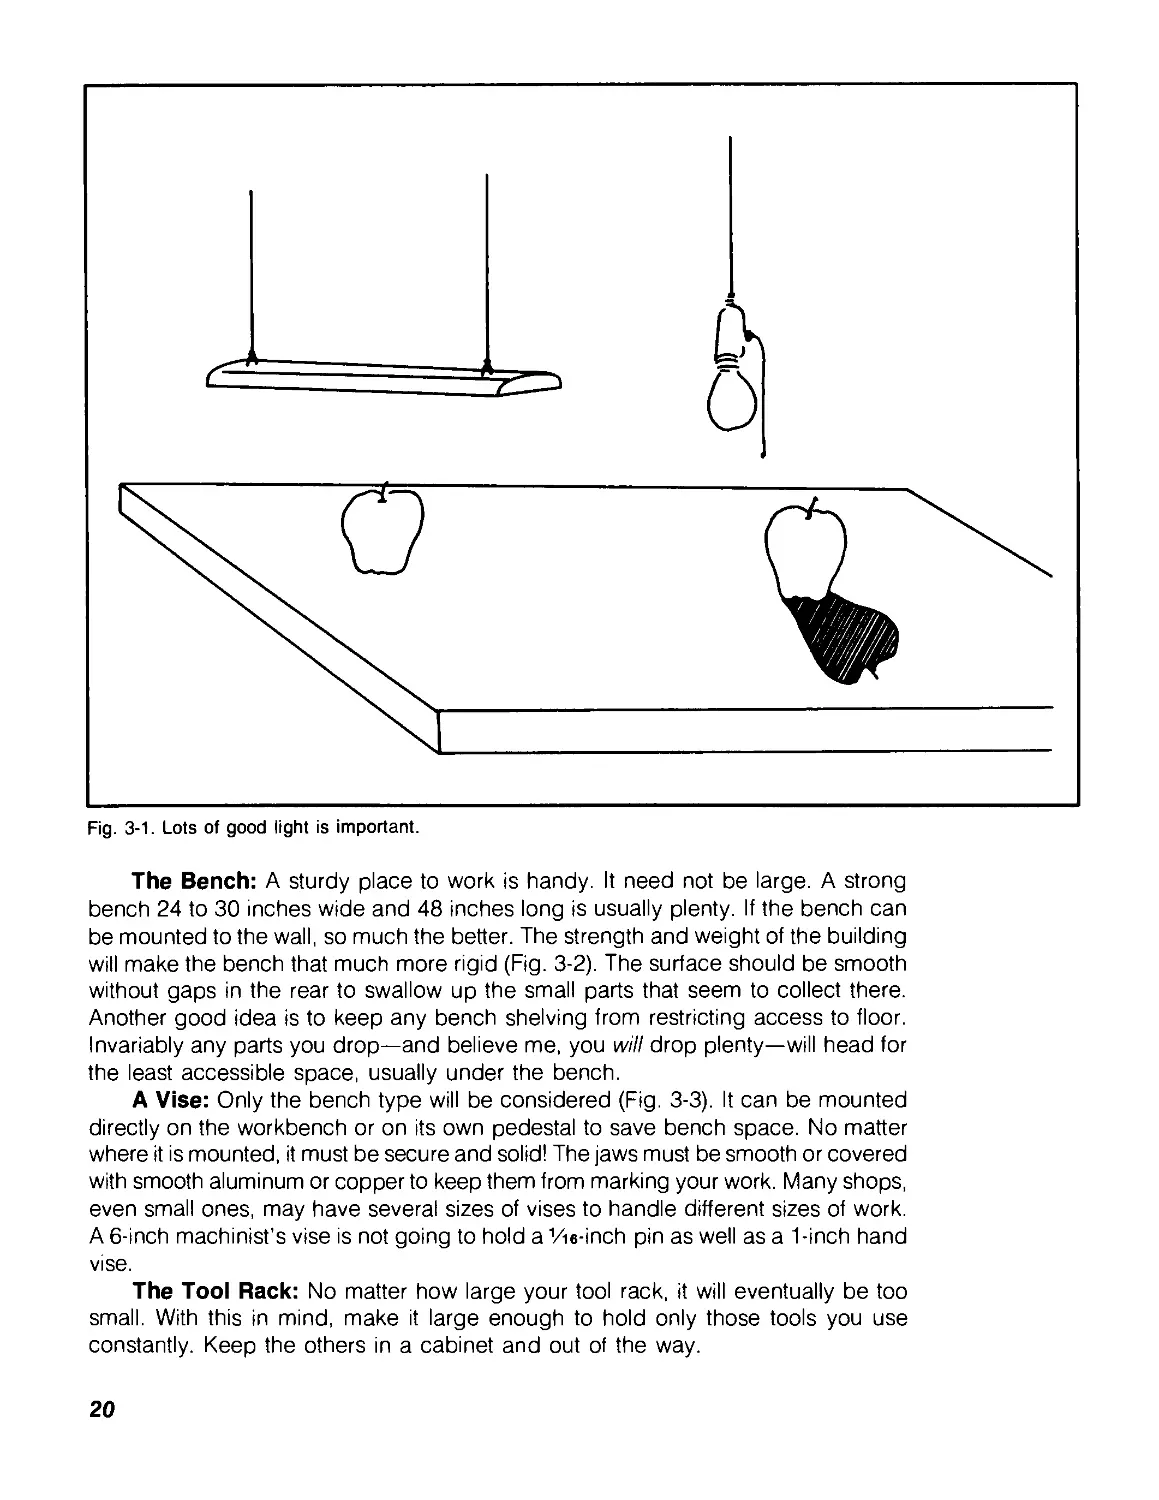
The Bench: A sturdy place to work is handy. It need not be large. A strong
bench 24 to 30 inches wide and 48 inches long is usually plenty. If the bench can
be mounted to the wall, so much the better. The strength and weight of the building
will make the bench that much more rigid (Fig. 3-2). The surface should be smooth
without gaps in the rear to swallow up the small parts that seem to collect there.
Another good idea is to keep any bench shelving from restricting access to floor.
Invariably any parts you drop—and believe me, you will drop plenty—will head for
the least accessible space, usually under the bench.
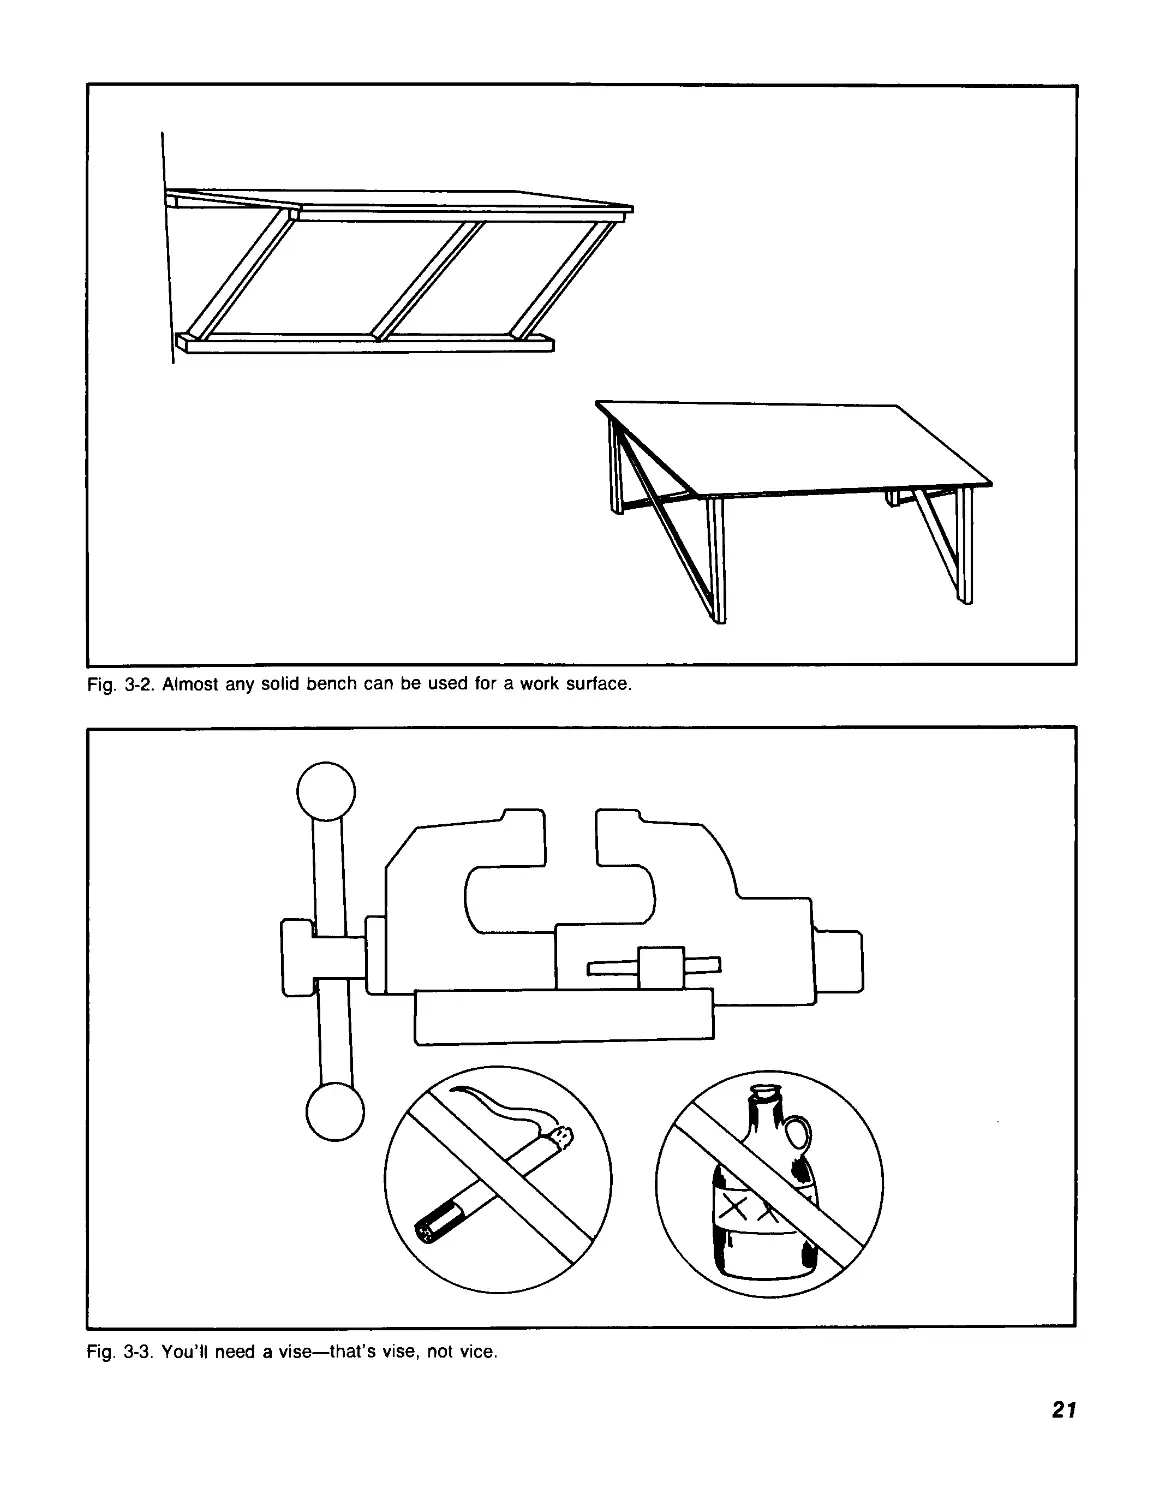
A Vise: Only the bench type will be considered (Fig. 3-3). It can be mounted
directly on the workbench or on its own pedestal to save bench space. No matter
where it is mounted, it must be secure and solid! The jaws must be smooth or covered
with smooth aluminum or copper to keep them from marking your work. Many shops,
even small ones, may have several sizes of vises to handle different sizes of work.
A 6-inch machinist's vise is not going to hold a 1/ie-inch pin as well as a 1-inch hand
vise.
The Tool Rack: No matter how large your tool rack, it will eventually be too
small. With this in mind, make it large enough to hold only those tools you use
constantly. Keep the others in a cabinet and out of the way.
20
Fig. 3-2. Almost any solid bench can be used for a work surface.
Fig. 3-3. You’ll need a vise—that’s vise, not vice.
27
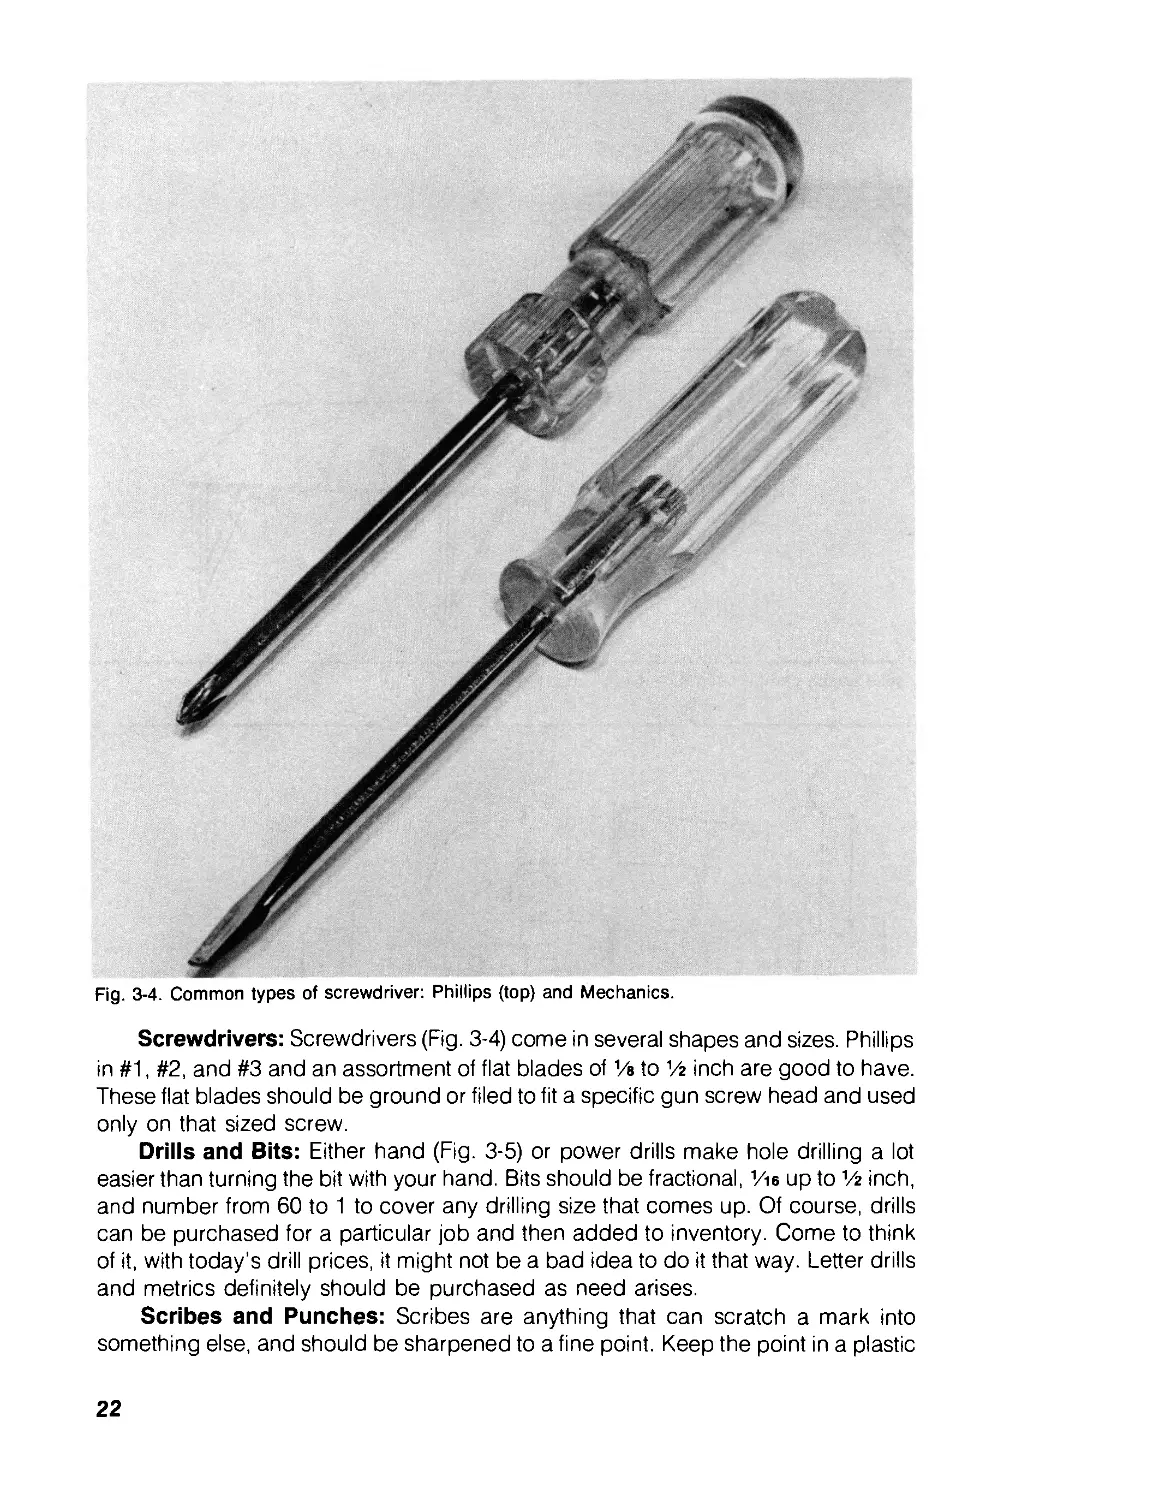
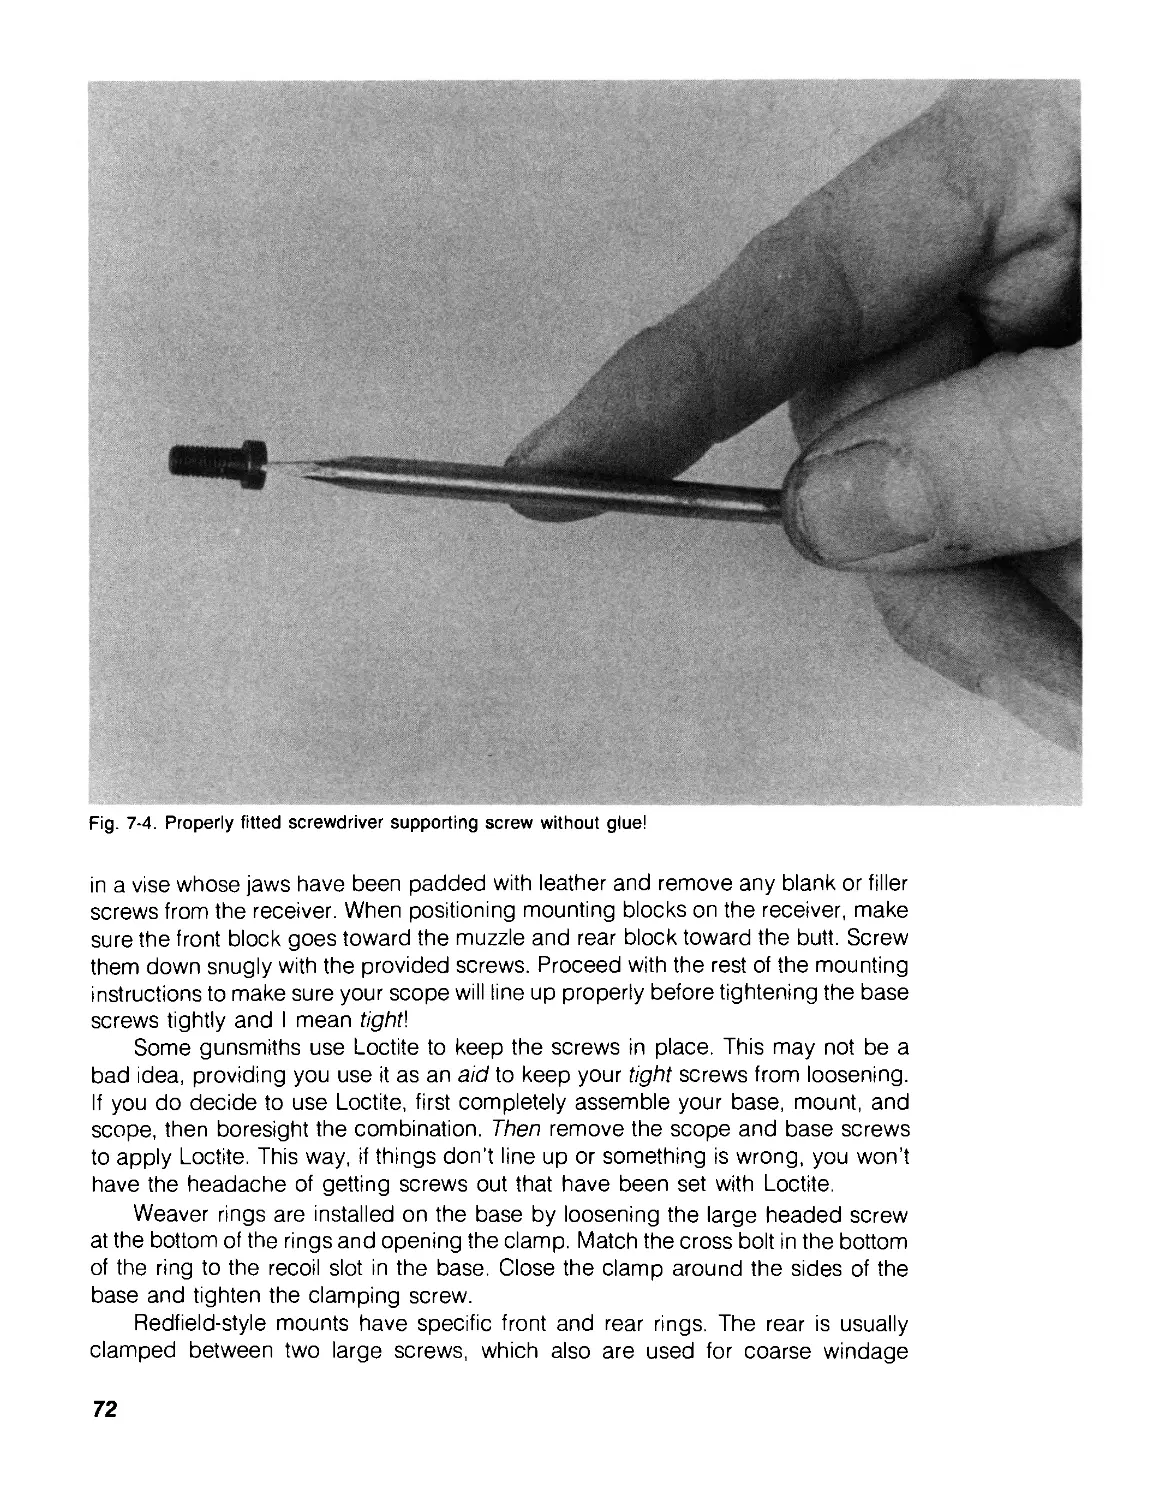
Fig. 3-4. Common types of screwdriver: Phillips (top) and Mechanics.
Screwdrivers: Screwdrivers (Fig. 3-4) come in several shapes and sizes. Phillips
in #1, #2, and #3 and an assortment of flat blades of 1/e to 1/z inch are good to have.
These flat blades should be ground or filed to fit a specific gun screw head and used
only on that sized screw.
Drills and Bits: Either hand (Fig. 3-5) or power drills make hole drilling a lot
easier than turning the bit with your hand. Bits should be fractional, 1/ie up to 1/z inch,
and number from 60 to 1 to cover any drilling size that comes up. Of course, drills
can be purchased for a particular job and then added to inventory. Come to think
of it, with today’s drill prices, it might not be a bad idea to do it that way. Letter drills
and metrics definitely should be purchased as need arises.
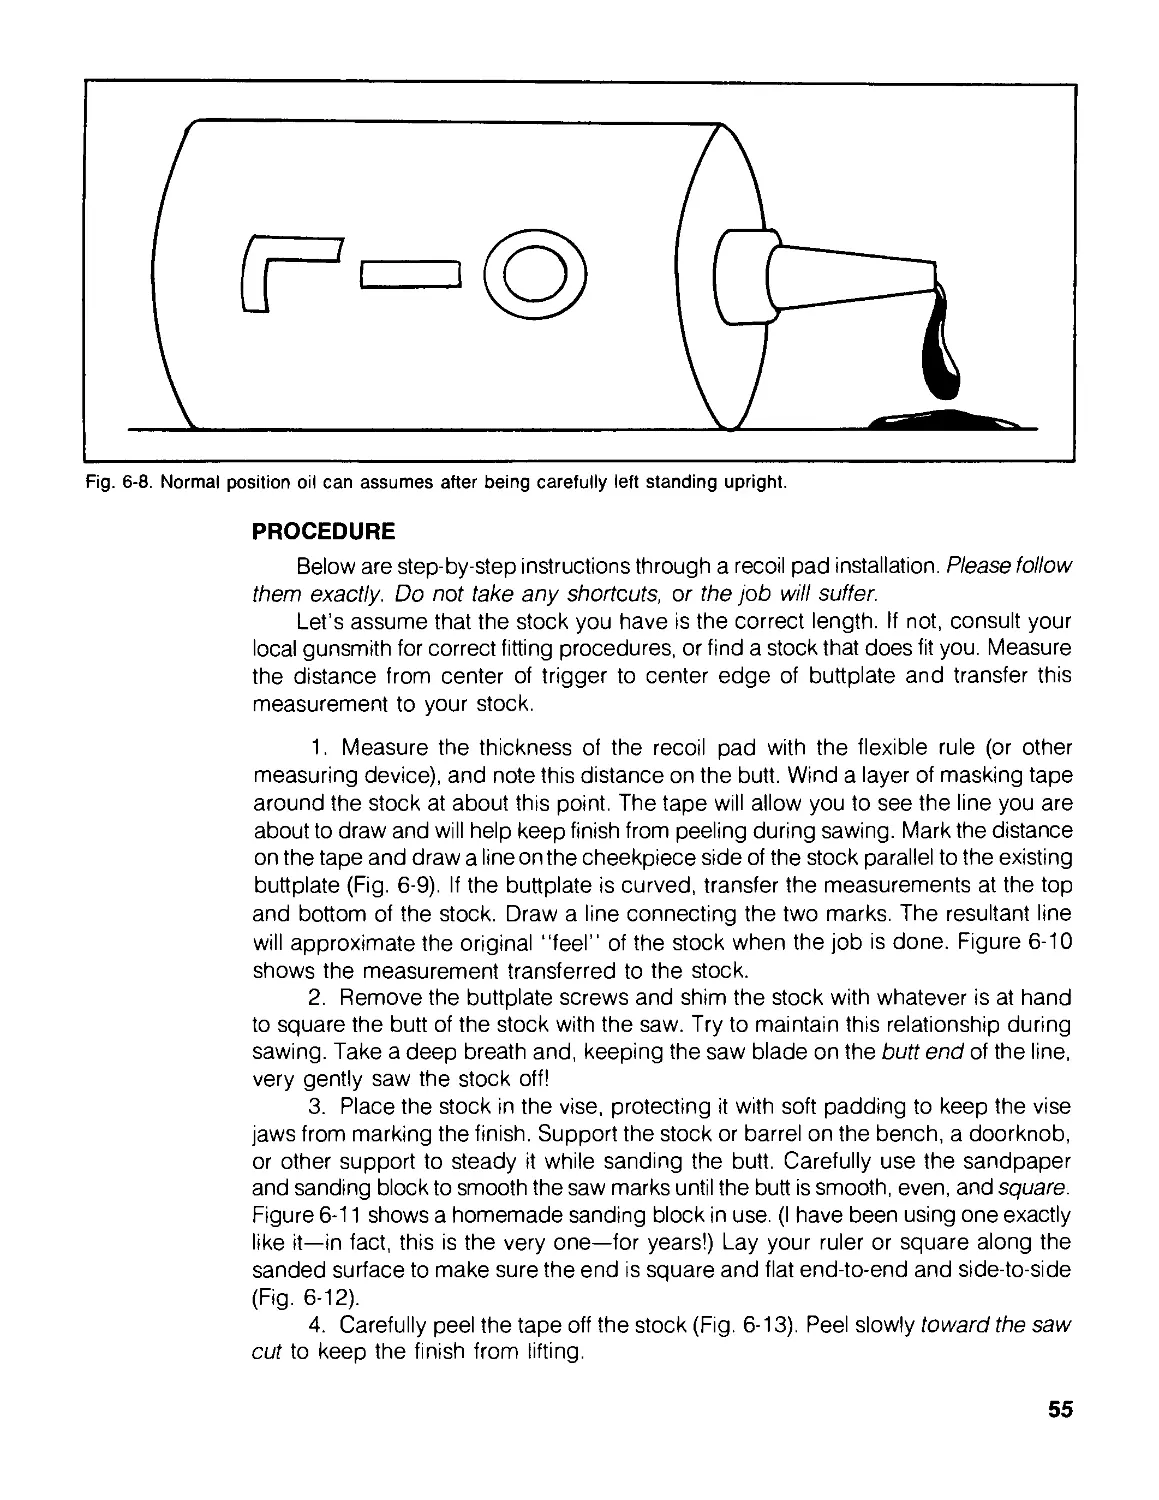
Scribes and Punches: Scribes are anything that can scratch a mark into
something else, and should be sharpened to a fine point. Keep the point in a plastic
22
Fig. 3-5. Holes are more easily drilled with correct equipment.
protector. Nothing is quite as surprising as reaching into a drawer for a center punch
and realizing that your scribe has just been stuck in the end of your finger. Hurts
like hell, too! Punches should be considered expendable—they break (even the ones
guaranteed not to). Punches must fit the holes of the pins they are to be used on.
Ill-fitting punches will damage both pins and holes. Punches should be available in
sizes from Vie to 1/e inch, and two types are needed. Starter punches are stubby
and strong to break the pin loose, and drift punches are long enough to drive the
pin clear out of the work. A center punch can be made by grinding a point on a
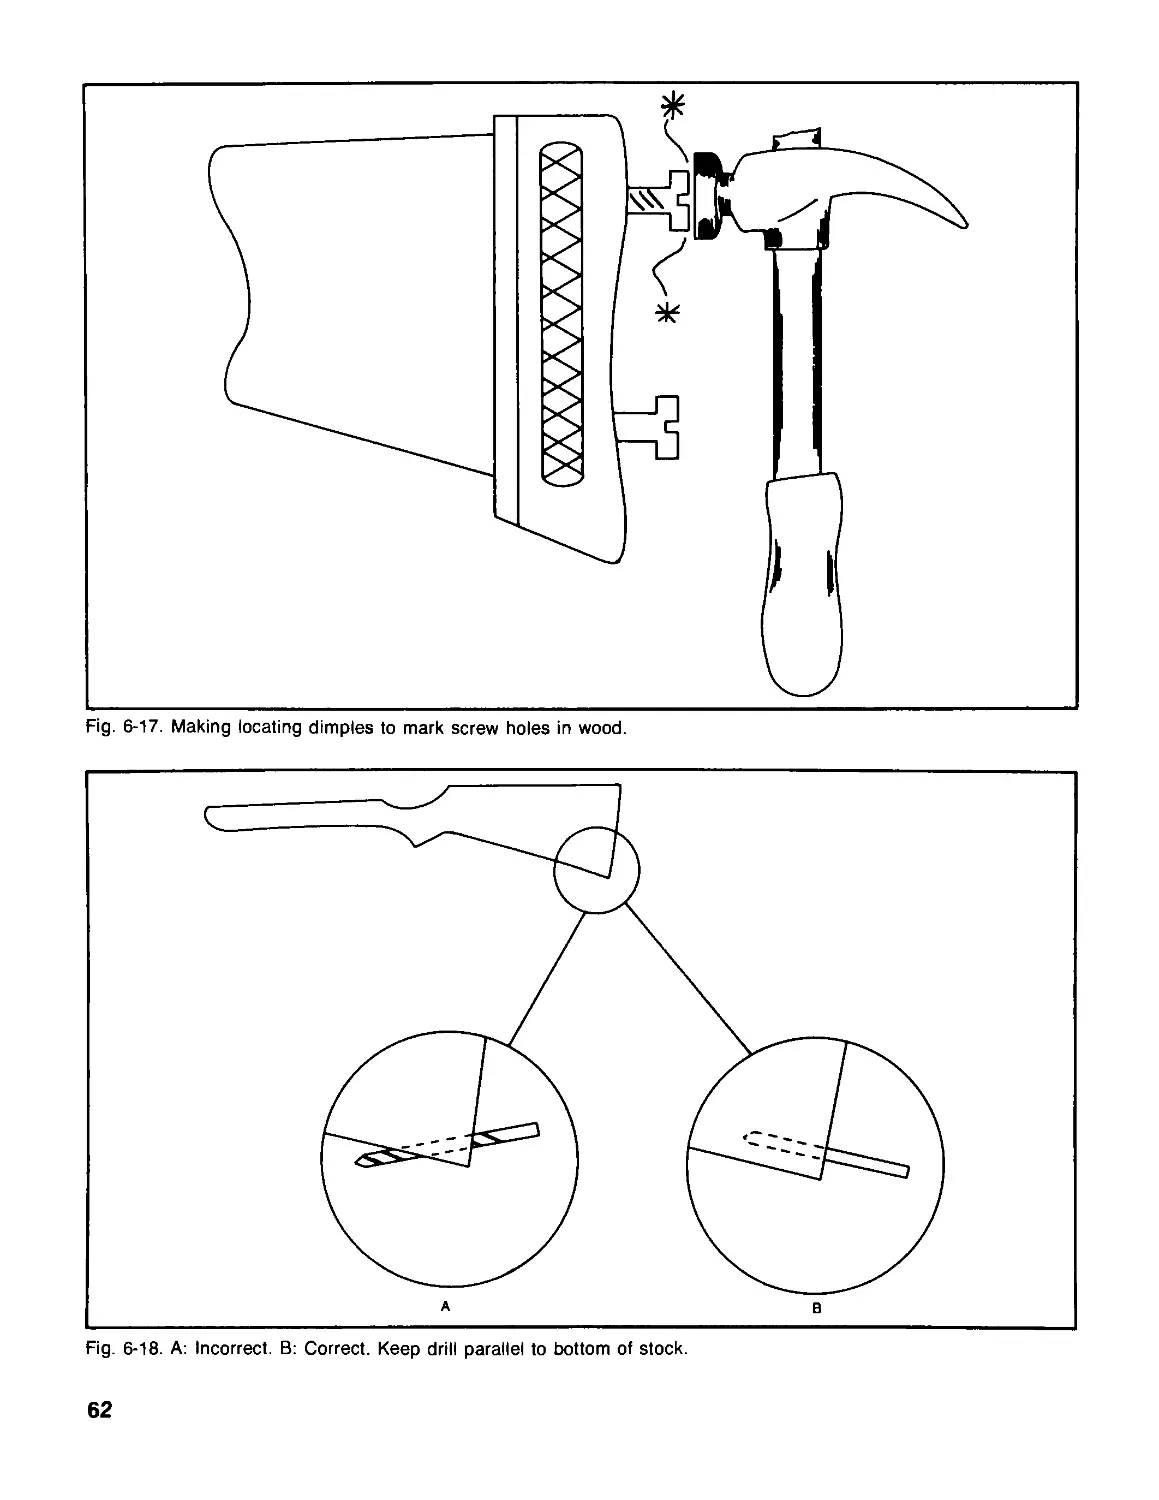
broken punch. It is used to make a dimple to locate position and hold a drill bit in
place till the hole is started. Your selection of punches will grow without your noticing
and suddenly there will be a drawer full—something like coathangers.
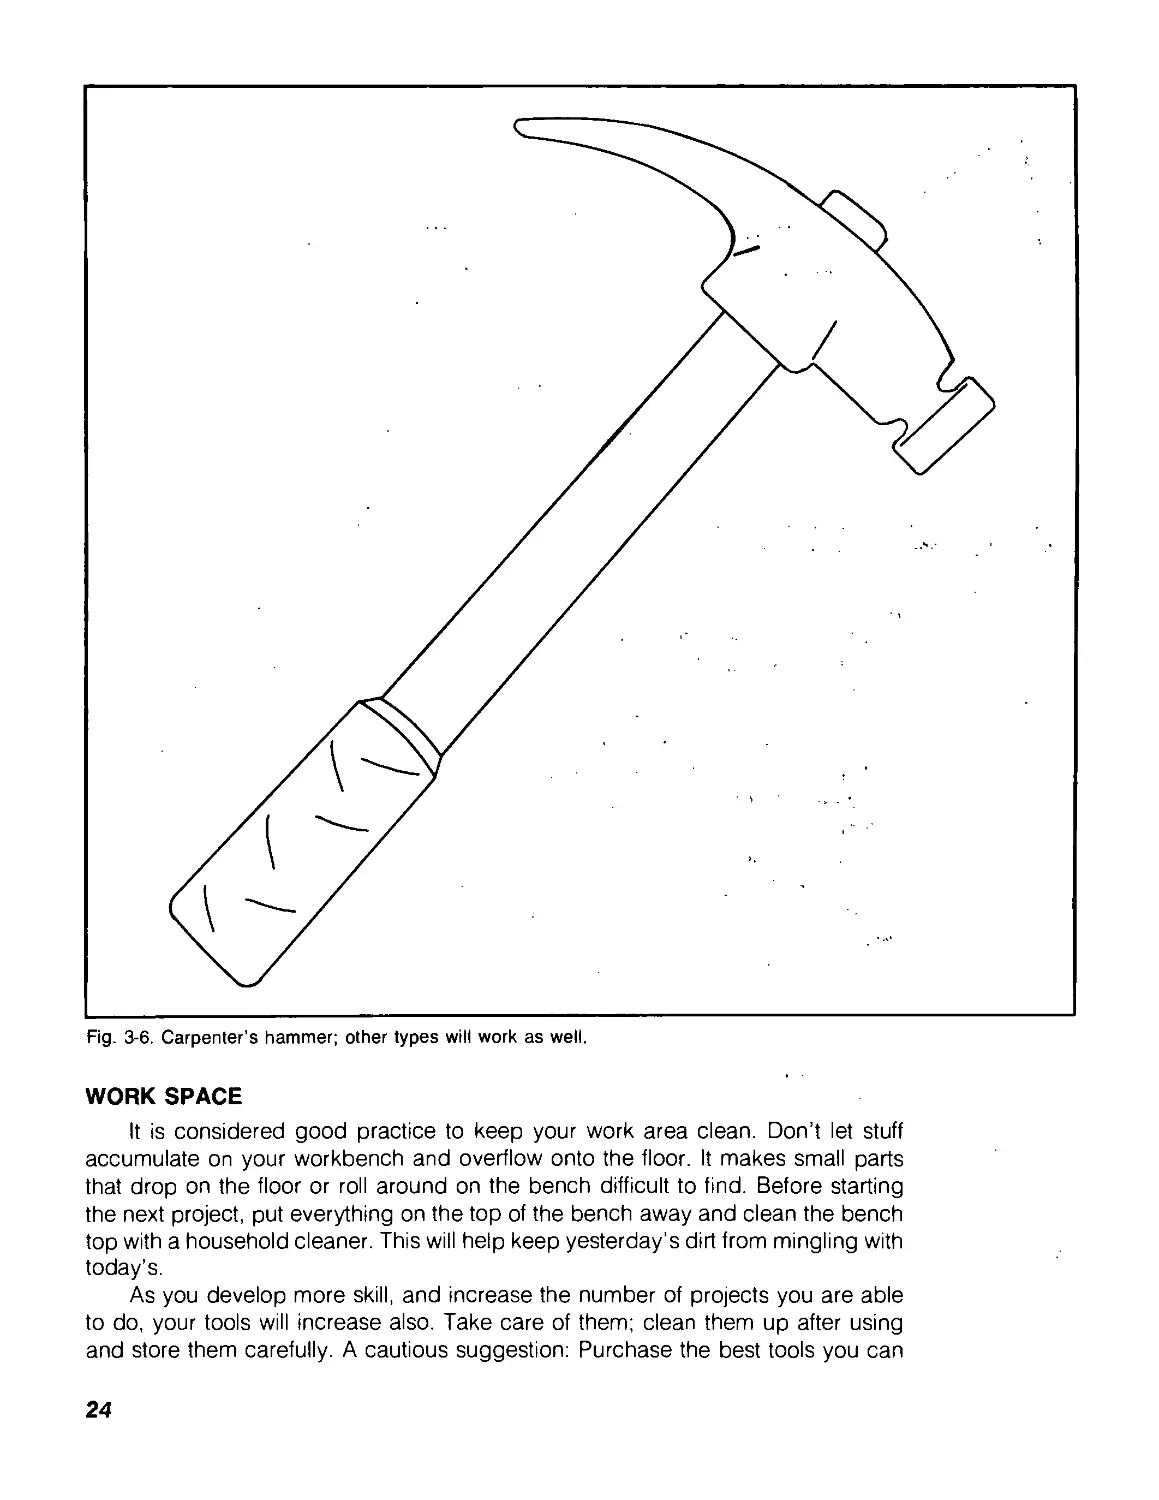
Hammers: Hammers come in several configurations—carpenter's (Fig. 3-6), ball
peen or machinist's, and tack, to name a few. The ball peen is perhaps the most
useful, but for average gun work the hammer is used mostly to drive out pins and
to drive them back in again—and to beat on the workbench to relieve a sudden fit
of uncontrollable frustration.
Files: Files also come in different shapes and sizes from needle to carpenter's
rasps. The most common types the gunman needs are 6-inch triangular files in double
extra-slim shape, and mill bastards in 4, 6, and 8-inch lengths. (There is a story going
around about the ''Little Old Lady'’ who asked a hardware salesman for a file. Trying
to be helpful, he asked her if she wanted a four-inch bastard. She shook her head
no, saying, ‘‘I just want one of them long, rough ones over there.”) In any event,
don’t throw your files in a drawer together. It will dull them. Files need to have the
metal chips cleaned out of them frequently to keep these chips from galling the work.
Brush the files with a file card; if they clog rapidly, a rubbing of chalk will help keep
the chips from packing in the teeth.
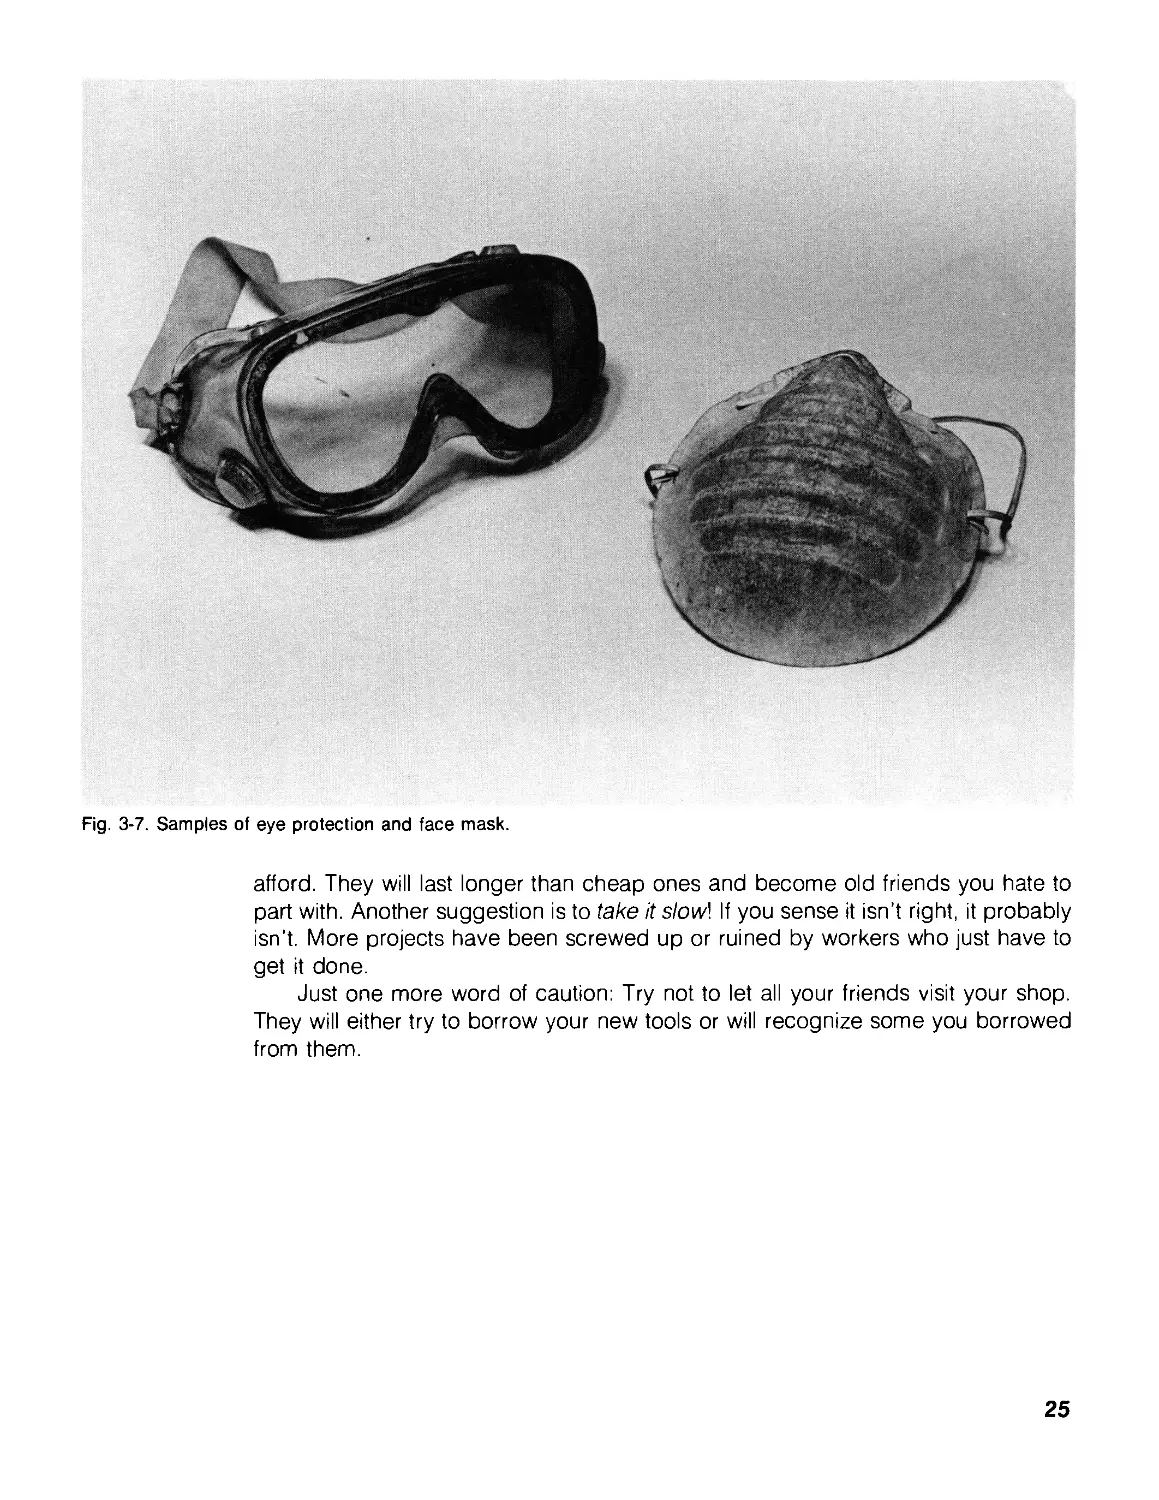
Safety Equipment: Face masks and goggles (Fig. 3-7) will save lungs from
dust, and eyes from flying stuff. You only got two of each; don’t waste 'em.
23
Fig. 3-6. Carpenter’s hammer; other types will work as well.
WORK SPACE
It is considered good practice to keep your work area clean. Don’t let stuff
accumulate on your workbench and overflow onto the floor. It makes small parts
that drop on the floor or roll around on the bench difficult to find. Before starting
the next project, put everything on the top of the bench away and clean the bench
top with a household cleaner. This will help keep yesterday’s dirt from mingling with
today’s.
As you develop more skill, and increase the number of projects you are able
to do, your tools will increase also. Take care of them; clean them up after using
and store them carefully. A cautious suggestion: Purchase the best tools you can
24
Fig. 3-7. Samples of eye protection and face mask.
afford. They will last longer than cheap ones and become old friends you hate to
part with. Another suggestion is to take it slow\ If you sense it isn’t right, it probably
isn't. More projects have been screwed up or ruined by workers who just have to
get it done.
Just one more word of caution: Try not to let all your friends visit your shop.
They will either try to borrow your new tools or will recognize some you borrowed
from them.
25
Chapter 4
Gun Cleaning for Fun and Profit
The easiest money I ever made was from a large, burly customer who thumped a
beat-up .22 automatic rifle on my counter. "My gun don’t work," he said. It was
covered with dried mud. The action was packed with gritty, solidified oil and was
nearly impossible to operate.
"When was the last time you cleaned it?" I asked, looking it over.
"Hell, man!" His voice was gravelly, loud, and menacing. He pounded the count-
er with his fist, "I buy a gun to shoot, not to clean!"
A quick blast of the garden hose got rid of the bigger sandy lumps, a sharp
probe picked out most of the solid caked oil, and a thorough dousing in the clean-
ing tank got rid of the rest of the gritty stuff. A quick oiling and voilal—it worked.
I have often wished all my jobs were as easy as this one.
Ownership of a firearm should encompass a sense of responsibility for its use
and care, including keeping it in good operating condition. From a dollar-and-cents
point, a well-cared-for firearm holds its value better than one that has been neglected.
It also functions better and more reliably, and shoots more accurately.
If you watch TV, you must realize there are lots of definitions of clean—squeaky,
toilet bowl, ring-around-the-collar, and mouthwash, to name a few. For our purposes,
we’ll use some non-technical definitions of clean:
Potato field clean: Potato field clean—Ain't!
Shoot it today, clean it tomorrow clean: Knock the larger rocks out of the
action and spray it with WD-40 (an excellent preservative for heavy machinery) and
pitch it in the back of the pickup truck. This is not too good a choice, either.
27
Functionally clean: This is where we should be for normal day-to-day shooting.
The bore should be swabbed clean, action parts checked for foreign matter, and
all metal parts lightly coated with oil. This sounds too simple to work, but in general,
this is all that is really needed for a gun in continual use. If this doesn’t seem clean
enough, you probably have a clean fetish and may belong somewhere in the next
two categories.
Long-term storage clean: A much more careful cleaning with greater attention
to detail. Disassemble your firearm into major components and soak them in solvents
such as Gunk to remove old oil and grease in preparation to coating the reassembled
piece with rust-inhibiting grease.
White Glove, Military IG, Weekend Pass clean: Forget it. You’ll never satisfy
a tough top sergeant—and while you’re at it, you might as well forget your weekend
pass too.
GENERAL CLEANING PROCEDURES
It’s time to get down to the real process of cleaning, a job a lot simpler and easier
than most gun books would have you believe.
Always check the firearm you are working on to make sure it is empty, cleared,
unloaded, and devoid of ammunition, not to mention safe. Read all the sections of
this chapter. There are hints and tricks buried along the way. Besides, it is a good
way to get you to learn something about cleaning a firearm.
It is a good idea to clean your firearms in a well-ventilated area. Some wives
or girlfriends have no appreciation of the finer fragrances of cleaning solvents, and
besides, some of them (the solvents, that is) are not good for you if you breathe too
many of the fumes.
I have become a believer in modern technology and in aerosol spray cleaners.
Traditional nitro solvents are now packaged in spray cans as well as old-fashioned
bottles of liquid. Some exotic modern chemicals are touted as being best, and there
are a large number of them. Most of them seem to work to some degree. I cannot
recommend any one being best for all jobs. I have found Hoppe’s #9, Shooter’s
Choice, and JB Bore Cleaner to be among the more popular products and they
are excellent solvents and bore cleaners.
There are many different brands of oils and preservatives which make their
selection more difficult. LPS 1 or 2, high-quality petroleum gun oils, RIG, and a host
of new products are excellent. Stainless steel requires compounds prepared
especially for this material. Rem Oil, Triflow, Break Free, and other Teflon-based
synthetic oils are better than petroleum oils. The best methods employ both traditional
elbow grease and modern technology.
Gunsmiths all over the country are going to scream "unfair,” but I’m going to
reveal some cleaning ideas that work. First of all, you are going to need some tools
and equipment:
□ Cleaning rod, brushes and patches.
П Cleaners.
□ Steel wool, 0000 grade.
□ Spray cleaners and oils.
28
□ Screwdrivers.
□ Brushes—old tooth, and stiff-bristled.
Firearms can be placed into several generic categories for the purposes of clean-
ing, and each category has a different area that should be treated with more care:
□ Revolvers.
□ Automatic pistols.
□ Single-shot, double, and over/under shotguns.
□ Pump and automatic shotguns.
□ Rifles—bolt, pump, automatic and lever.
Revolvers
Revolvers seem to have a unique problem that other firearms (except .22s)
generally don't—leading (generally pronounced as “ledding,” not “leeding”).
Deposits from high-velocity lead bullets build up in the bore, gradually filling the
groves. The result is inaccurate shooting. Occasionally leading can become so severe
that pressures are increased as the bore becomes more and more obstructed.
Leading can be seen as dull streaks in the bore—heavier at the breech and becoming
thinner at the muzzle. In some instances of heavy leading, lead strips will even extend
beyond the muzzle in sharp-looking spears.
An old method used by old gunsmiths was a chemical process of amalgamating
lead from the bore with mercury. If you read about this method in old gunsmithing
books and want to use it, DON’T! Mercury is great in thermometers but not in the
body. Don’t take a chance, however slight, of getting mercury poisoning. Besides,
there are better methods.
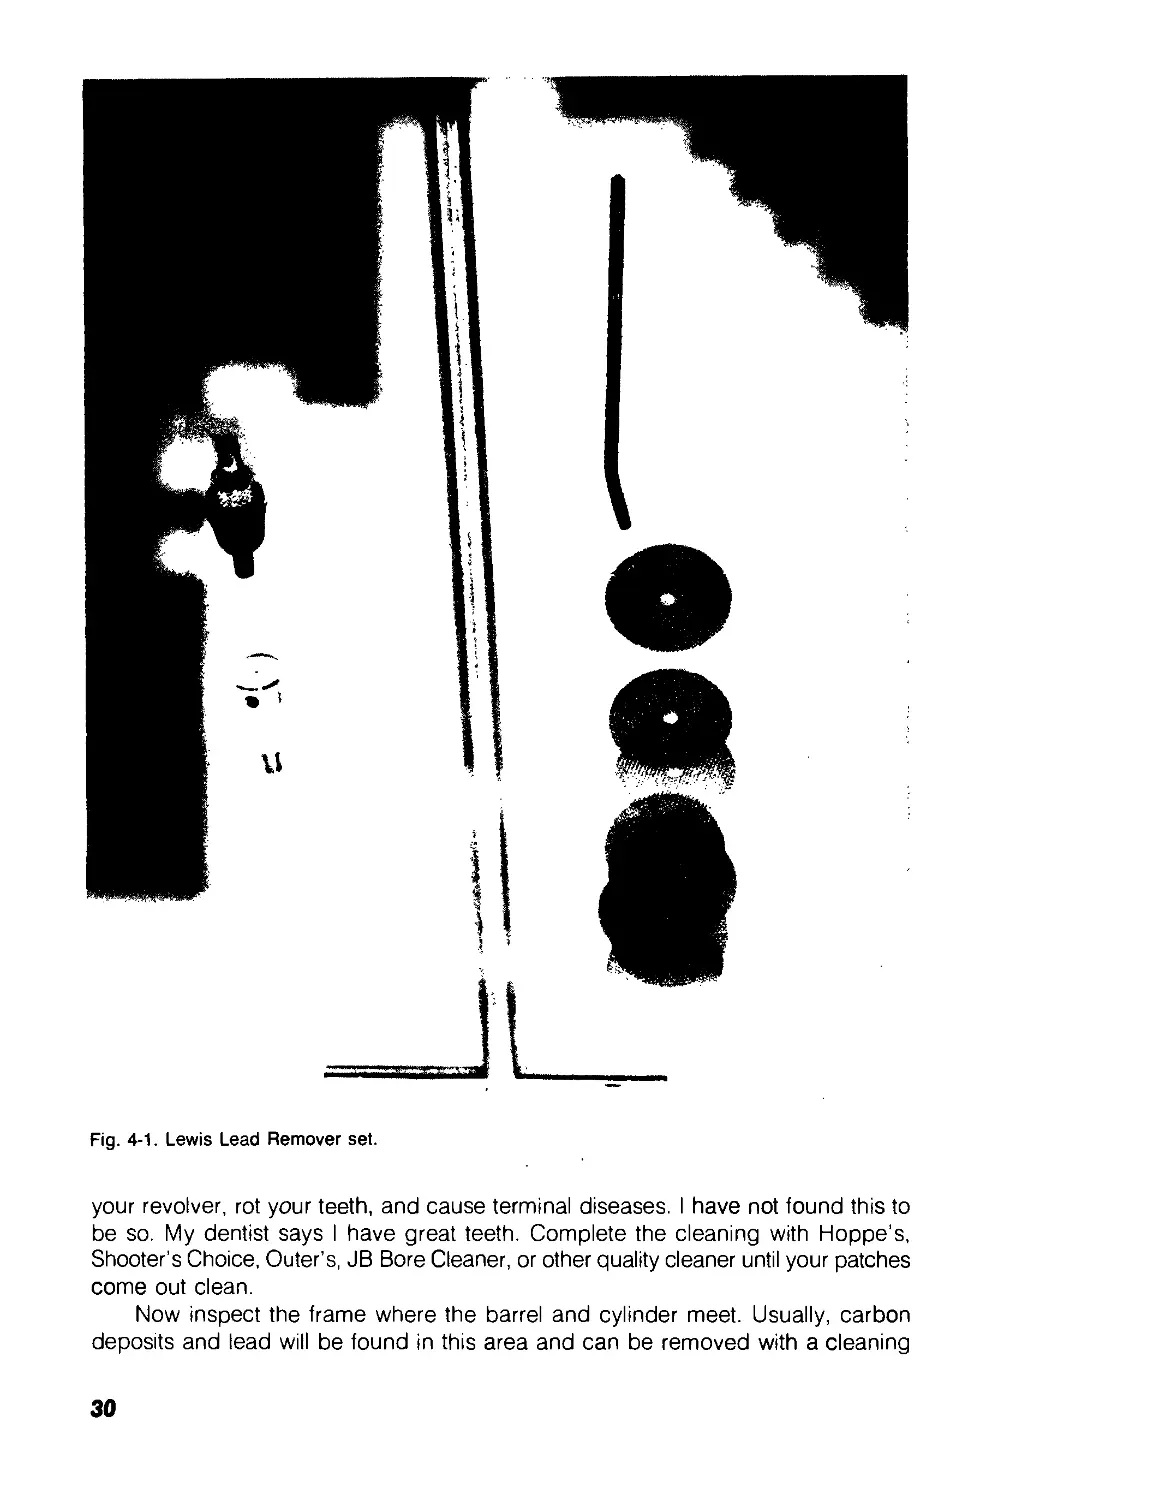
Lead removers, made by Lewis and Hoppe's, are professionally manufactured
tools designed for this problem (Fig. 4-1). A brass screen is drawn through the bore,
forced into the rifling by an expanding arbor. It actually shaves lead from the barrel.
After a great deal of shaving and scrubbing, the bore is clean again.
There is, however, a much less expensive and quicker method. An old worn-
out cleaning brush of the proper caliber is wrapped with 0000 steel wool, saturated
with Hoppe's, Shooter’s Choice, JB Bore Cleaner, or other good bore cleaner. Push
this combination through the barrel till it extends halfway out the other end. Now
pull it back through the barrel so it protrudes halfway out the other end. Do this several
times. The bristles of this worn-out brush wrapped with steel wool will be reversed
on each stroke, forcing the steel wool into the groves in the barrel. The steel wool
hooks the lead, stripping it away from the barrel. After four or five strokes, remove
the brush and run a dry patch through the bore to see how much lead remains.
Rewrap the brush with steel wool, saturate it with solvent, and continue removing
the lead. In a very few applications, the leading is gone, sometimes coming out in
long, thin slivers. The 0000 steel wool doesn't seem to damage the bore nor round
off rifling.
However, this method should be used only for lead removal, not for general
cleaning. It is so fast a lead remover, it ought to start at pole position at Indy. Some
old-timers are going to shake their heads over this method and swear that it will ruin
29
Fig. 4-1. Lewis Lead Remover set.
your revolver, rot your teeth, and cause terminal diseases. I have not found this to
be so. My dentist says I have great teeth. Complete the cleaning with Hoppe’s,
Shooter’s Choice, Outer’s, JB Bore Cleaner, or other quality cleaner until your patches
come out clean.
Now inspect the frame where the barrel and cylinder meet. Usually, carbon
deposits and lead will be found in this area and can be removed with a cleaning
30
brush and/or a lead removing cloth such as Beltown Wipe-A-Way Gun Cloths or
Outer’s Lead Wipes. The muzzle end of the cylinder should also be cleaned in the
same method. These lead-removing cloths are especially good on stainless steel,
where lead and carbon really show up against the silvery background. Any buildup
of bullet lubricant, lead, or carbon inside the chambers must be completely removed.
Spray aerosol cleaner on crane pivots, on cylinder bearings, into the action
through hammer and trigger openings, and into areas normally covered by the grips.
Let the dirty cleaner drain out. Repeat until the cleaner drains out clear. At this point,
the inside of the revolver should be clean and will now need to be protected from
rust and lubricated.
Spray preservatives (synthetic, Teflon-based, or petroleum as required) into the
action parts and frame openings. Use Sparingly! Place a drop of oil on the ejector
rod in front of the cylinder as the rod is activated. Oil the inside of the extractor itself
while the ejector rod is fully extended. Oil a patch and run it through the cylinders
and bore to coat them with oil. Use the patch to wipe the barrel and outside of the
frame to remove any excessive preservatives and to make sure all steel parts have
been covered.
Put the grips back on and the job is done.
Automatic Pistols
Automatic large-caliber pistols present an easier job; .22 automatics, however,
do need a little extra care. Big-bore automatics don’t suffer from leading because
most are shot with jacketed bullets. Unless shot a lot at one sitting (or standing), the
higher calibers don’t seem to collect a lot of “junk” in the action. On the other hand,
.22 automatics do. Powder, carbon, and bullet lubricant form a sticky base that
accumulates dirt. The very nature of .22 ammunition and automatic actions make
this buildup hard to prevent. Automatic pistols should be fired with very sparingly
used lubrication. Any wear that takes place by being under-oiled will be less than
by being fired loaded with gooey, grimy, grit-laden oil. More automatics are dam-
aged by over-oiling than by being shot dry.
Some automatic pistols are easier to take apart than others and I suggest you
consult your owner’s manual for the proper method to use with your gun.
Open the action to make sure it is unloaded, take out the magazine, and remove
the slide. If you are fearful, or just don’t want to be bothered with removing the slide,
a respectable job of cleaning can be still be done with the slide in place.
Remove the grips, usually held on with two screws per side, and lock the slide
open. If it doesn’t have a hold-open device, cut a wood dowel to hold the slide back
to facilitate cleaning.
Brush the bore with a new cleaning brush and swab it with solvent-soaked patch-
es. Dry the bore with clean patches.
Remove any carbon or darkened oil from the breech areas with solvents and
stiff-bristled brushes, completing the treatment with a spray cleaner.
Flush the receiver with cleaner and brush dirt and deposits out of the face of
the slide. Inspect the magazine for grit and spray it with cleaner.
When you are satisfied that your automatic is clean, spray lubricants or
preservatives into the slide, receiver, and magazine. Push a well-oiled patch through
37
the bore and wipe down the outside of the automatic. Reinstall the grips and this
job is done.
Single-Shot, Double, and Over/Under Shotguns
Single-shots, doubles and over/unders are usually very easy to care for and don’t
often require removal of buttstocks for normal cleaning. By their very nature, the
action parts of these types of shotgun are pretty well sealed from powder fouling
and foreign material.
Check the action to make sure the gun is empty, and remove the forearm by
pulling it down and off (it is easily done on most guns). The barrel(s) can now be
removed.
Modern shotgun shell shot sleeve wads have all but eliminated shotgun leading,
but there is a drawback to our modern plastic cases: Heat generated during firing
and oils in the chamber apparently cause a chemical reaction with plastic cases.
This reaction deposits a thin layer of gummy stuff in the chamber. In time, it builds
into a chewing-gum-like, tenacious mass that grips empty cases, causes extraction
problems, and forms an ideal media for rust to develop. It is tough to remove and
seems to thrive on most gun solvents.
The easiest cure for this buildup is the old worn-out cleaning brush and steel
wool trick. This trick will also clean any lead deposits from the bore as well. Wrap
0000 steel wool around a worn-out brush, soak it in solvent, and scrub the chamber
till it shines, looks, and feels clean.
Carefully wipe or lightly spray the inside portions of the receiver and barrel parts
with solvent. Run an oily cloth or patch through the bore. Wipe the patch over the
outside of the exposed metal and reattach the forearm to complete this job.
Pump and Automatic Shotguns
Open the action; check the chamber and magazine tube to make sure the gun
is empty. Many pumps and automatics have removable barrels, which facilitates the
cleaning operation. Those guns that have barrels permanently screwed into the re-
ceiver need a little extra effort to get them clean. Consult your owner’s manual for
the proper method of disassembling your particular shotgun. There is no need to
remove stocks on pumps and automatics to do a respectable job of cleaning.
Check the chambers for plastic deposits and the barrel for leading. Scrub any
plastic deposits out of the chambers. Clean the barrel with brushes and patches
dipped in solvent. Push tight-fitting patches through the bore to remove carbon and
any other residues left from firing that have been loosened by your solvents. Use
a brush and solvent around automatic gas ports to remove carbon buildup. You may
be surprised at how tough it is to remove baked-on carbon, but keep at it. It's got
to come clean.
Receivers and action parts of automatics seem to pick up more strange dirt than
pumps. It seems to be a function of the speed in which the action operates. This
dirt will slow down the action and cause ejection problems. Even if the action cannot
be taken apart, there is really little problem in removing this stuff. An evaporating
spray cleaner with an extension tube on the nozzle is hard to beat for this job. With
32
the bolt forward, work the extension tube behind it to give bolt parts a good flushing.
Open the action and flush the trigger parts. You will be doing most of this operation
"blind,” so you will want to do it several times until the cleaning solution drains out
of the action clean.
Sparingly spray a synthetic lubricant into the same openings. I suggest synthetics
such as LPS 1 or LPS 2. Even though some areas may not have been covered by
the spray, LPS seems to flow and spread to cover small places that the spray did
not reach. Work oily patches or cloths into those areas covered by operating rods
on pumps. Don't forget to clean and oil the magazine tube.
Mechanisms on gas-operated automatic shotguns vary in complexity and
methods of operation. All require that gas systems and parts be clean and dry. If
you are able to get gas mechanisms apart, clean them with solvents and flush with
evaporating cleaner. If your gun is complex and difficult to disassemble, it can be
cleaned by opening and locking the bolt to the rear and cleaning the now-exposed
inside of the magazine tube, where gas pistons and operating parts slide. If you are
going to shoot the gun in the very near future, spray evaporating cleaner on the
tube and parts and reassemble. If it is to be stored, spray or wipe them with light
oil. Remember to dry gas systems before shooting to keep gas and carbon from
thickening the oil and slowing your action’s operating speed.
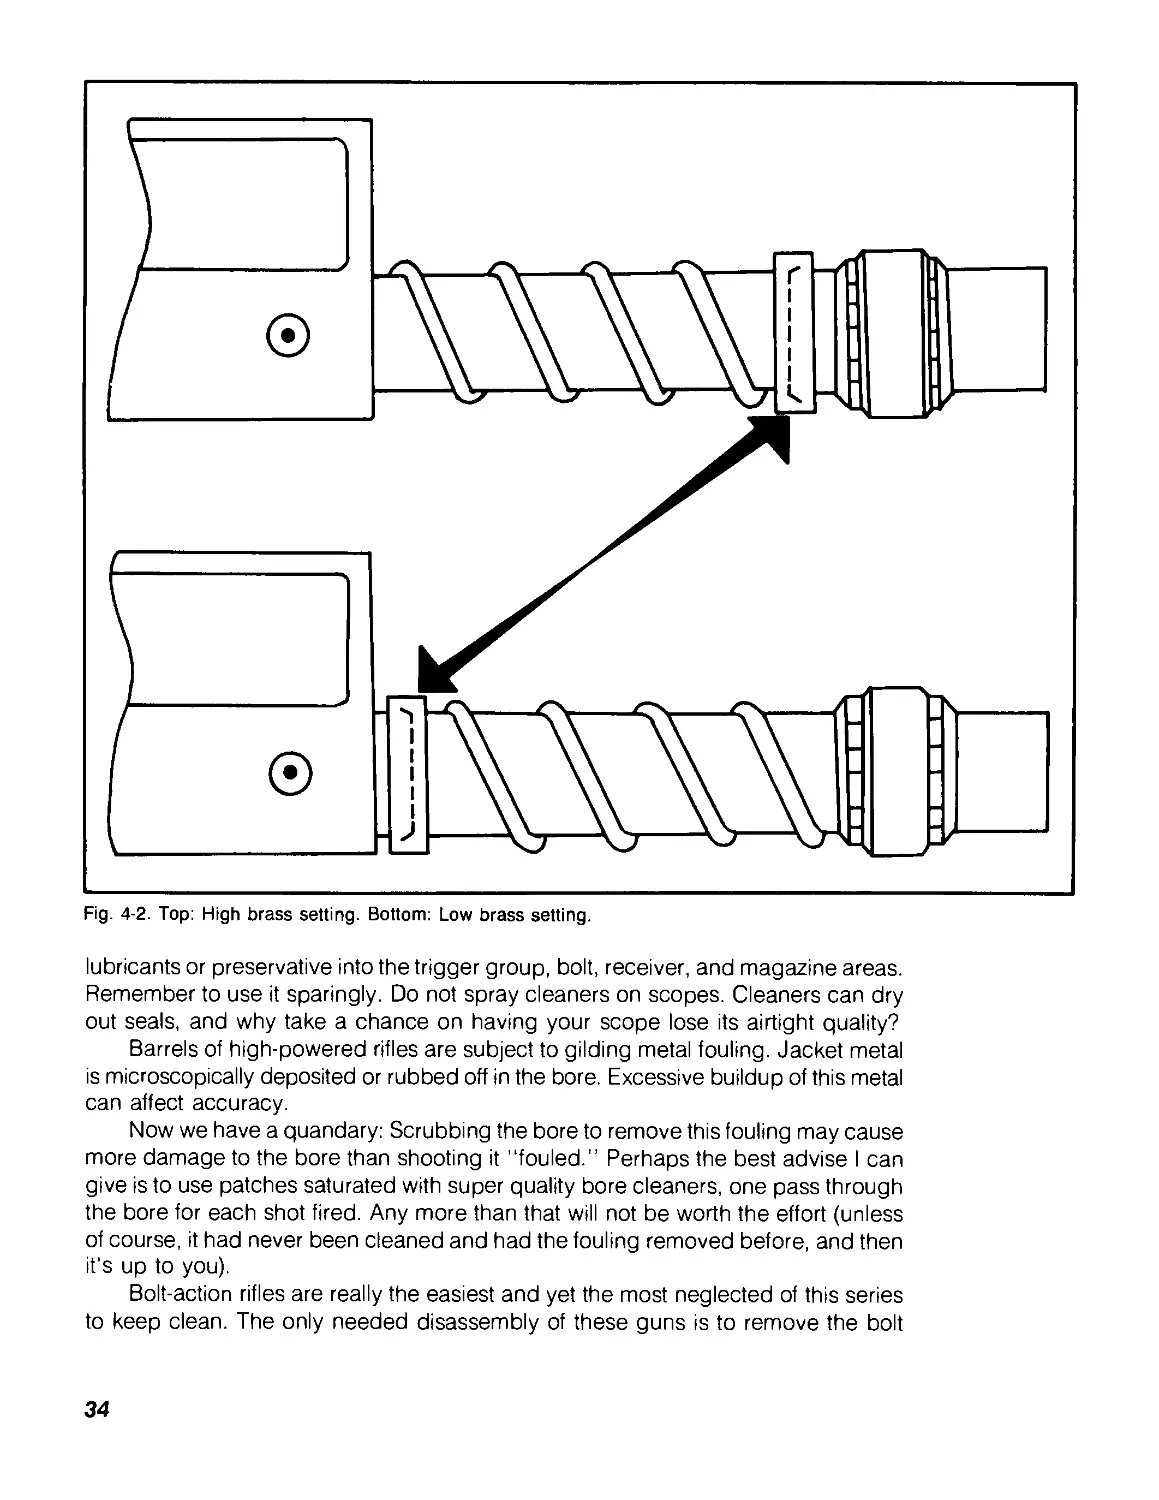
Recoil-operated shotguns such as the Browning Auto 5, Remington Model 11,
Savage, and others need to have the magazine tube well-lubricated so the sliding
parts will not gall or stick. These guns also have adjustments for high- and low-
powered shells. (Fig. 4-2).
Put the barrel and forearm back on and consider this job finished.
Rifles—Bolt, Pump, Automatics, and Levers
The usual caution applies to ensure that guns are unloaded.
Modern non-corrosive primers and nitrocellulose powders have all but eliminated
the need for immediate cleaning, but some bore preservation is still advised. A hunt-
ing rifle or plinker will not need as meticulous care as a target rifle. Professional target
shooters will have their own methods of cleaning (or will have their gunsmiths do
it). Your primary concern should be to get most of the unburnt powder and loose
stuff out of the barrel, not to make it antiseptically clean. The effort expended to be
super-clean is not worth the return. Dirty oil, sand, and assorted small green plants
should be taken out of the action with solvents or spray cleaners and these parts
then re-oiled to keep moisture off the metal. Normally, there is no compelling need
to completely disassemble your firearm during day-to-day cleaning.
If the rifle is a .22, check for lead deposits (see revolver cleaning for the meth-
od of getting the lead out.) A hint to increase the efficiency of your cleaning patch
is to push the patch almost all the way through the bore. Just before it comes through,
pull it back. It will bunch up and force itself into the rifling—neat trick!
JB Bore Cleaner is excellent for removing copper jacket fouling. Lever, pump,
and automatic rifles will be cleaned and lubricated in the same general manner as
pump and automatic shotguns, but extra care is needed to get any brass fouling
out of the barrel. Don’t be afraid to use lots of patches through the bore. Spray the
33
lubricants or preservative into the trigger group, bolt, receiver, and magazine areas.
Remember to use it sparingly. Do not spray cleaners on scopes. Cleaners can dry
out seals, and why take a chance on having your scope lose its airtight quality?
Barrels of high-powered rifles are subject to gilding metal fouling. Jacket metal
is microscopically deposited or rubbed off in the bore. Excessive buildup of this metal
can affect accuracy.
Now we have a quandary: Scrubbing the bore to remove this fouling may cause
more damage to the bore than shooting it "fouled." Perhaps the best advise I can
give is to use patches saturated with super quality bore cleaners, one pass through
the bore for each shot fired. Any more than that will not be worth the effort (unless
of course, it had never been cleaned and had the fouling removed before, and then
it's up to you).
Bolt-action rifles are really the easiest and yet the most neglected of this series
to keep clean. The only needed disassembly of these guns is to remove the bolt
34
and stock. After cleaning the barrel, flush trigger parts and bolts with cleaner and
oil lightly. Wipe all metal surfaces with a well-oiled cloth; reassemble your bolt-action
rifle into the stock, replace the bolt, and this job, too, is done.
Disassembly of pumps, automatics, and levers, for the most part, should be left
to the care of gunsmiths. Fortunately, they (the guns, not the gunsmiths) can be cared
for without being torn apart.
Stainless steel guns require special lubricants. Pores of stainless steel are larger
than the molecules of regular lubricating oil and these molecules slip into the pores
and do not lubricate. Stainless parts oiled with regular oil can rub metal to metal
and galling can occur. Synthetic oils containing Teflon are much better. Use it
sparingly. A little does a lot of lubricating and any excess will pick up dirt and grit.
Nickel plating, too, requires special care. Do not use nitro solvents on nickeled
guns! Nitro solvents help dissolve copper and brass metal fouling in the bore, and
if there is a break in the nickel finish, the solvent will busily attack the copper bond
needed to hold nickel to steel. Eventually the nickel will flake off. Better cleaners for
nickel are lead-removing cloths, which your dealer should stock. Nickel guns may
require more effort to keep them looking new, as dirt and carbon show up more
readily on silvery backgrounds.
STORAGE
Preparation of a gun for storage requires more care, more detailed disassembly,
and stronger cleaners.
Wooden stocks and forearms have an ability to absorb cleaning solutions and
preservatives. If you are preparing a gun for long-term storage, now is the time to
get the stocks off the gun to keep them free of cleaners. Your owner’s manual should
show proper methods of stock removal. Disassemble the gun into its major
components and submerse them in a strong grease solvent such as Gunk. Keep
painted parts out of these cleaners, as paint can be dissolved. Painted parts may
have to be detail-cleaned by hand.
The goal should be to remove oils and greases solidified and hardened with
powder residues, dirt, and bits of last week’s lunch. Scrub dirty parts with a brush,
flush the loosened dirt off with hot water, and wash again with Gunk. Adding some
clean oil to your Gunk (about one part oil to 10 parts Gunk) will leave a thin film of
protection on the metal as the Gunk evaporates. Allow the parts to drain and dry
for 12 hours or so before packing them with preservative grease. Gunk can be stored
and reused a great number of times and when it is too grungy for firearms, it will
still be good for the heavy, dirty machinery (try it on your car engine).
Strange as it sounds, Southwestern deserts and coastal areas share a similar
problem—excessive moisture. Moisture from desert evaporative coolers is as
damaging—perhaps more so—as coastal humidity. Firearms in these conditions
should be coated with heavier preservatives and checked on a more regular basis
than guns stored in drier conditions. Do not store them in gun cases, as rust can
develop unseen. Any climate that has a day/night temperature range that is below
the dewpoint level can condense humid air. Guns under this condition should also
be treated with heavier preservatives.
35
RUST
I think that it is time to think that if the unthinkable occurs—yes, rust—you must
think of ways to minimize the damage.
There are several degrees of rust.
Surface rust is a light reddish deposit that is easily wiped off without apparent
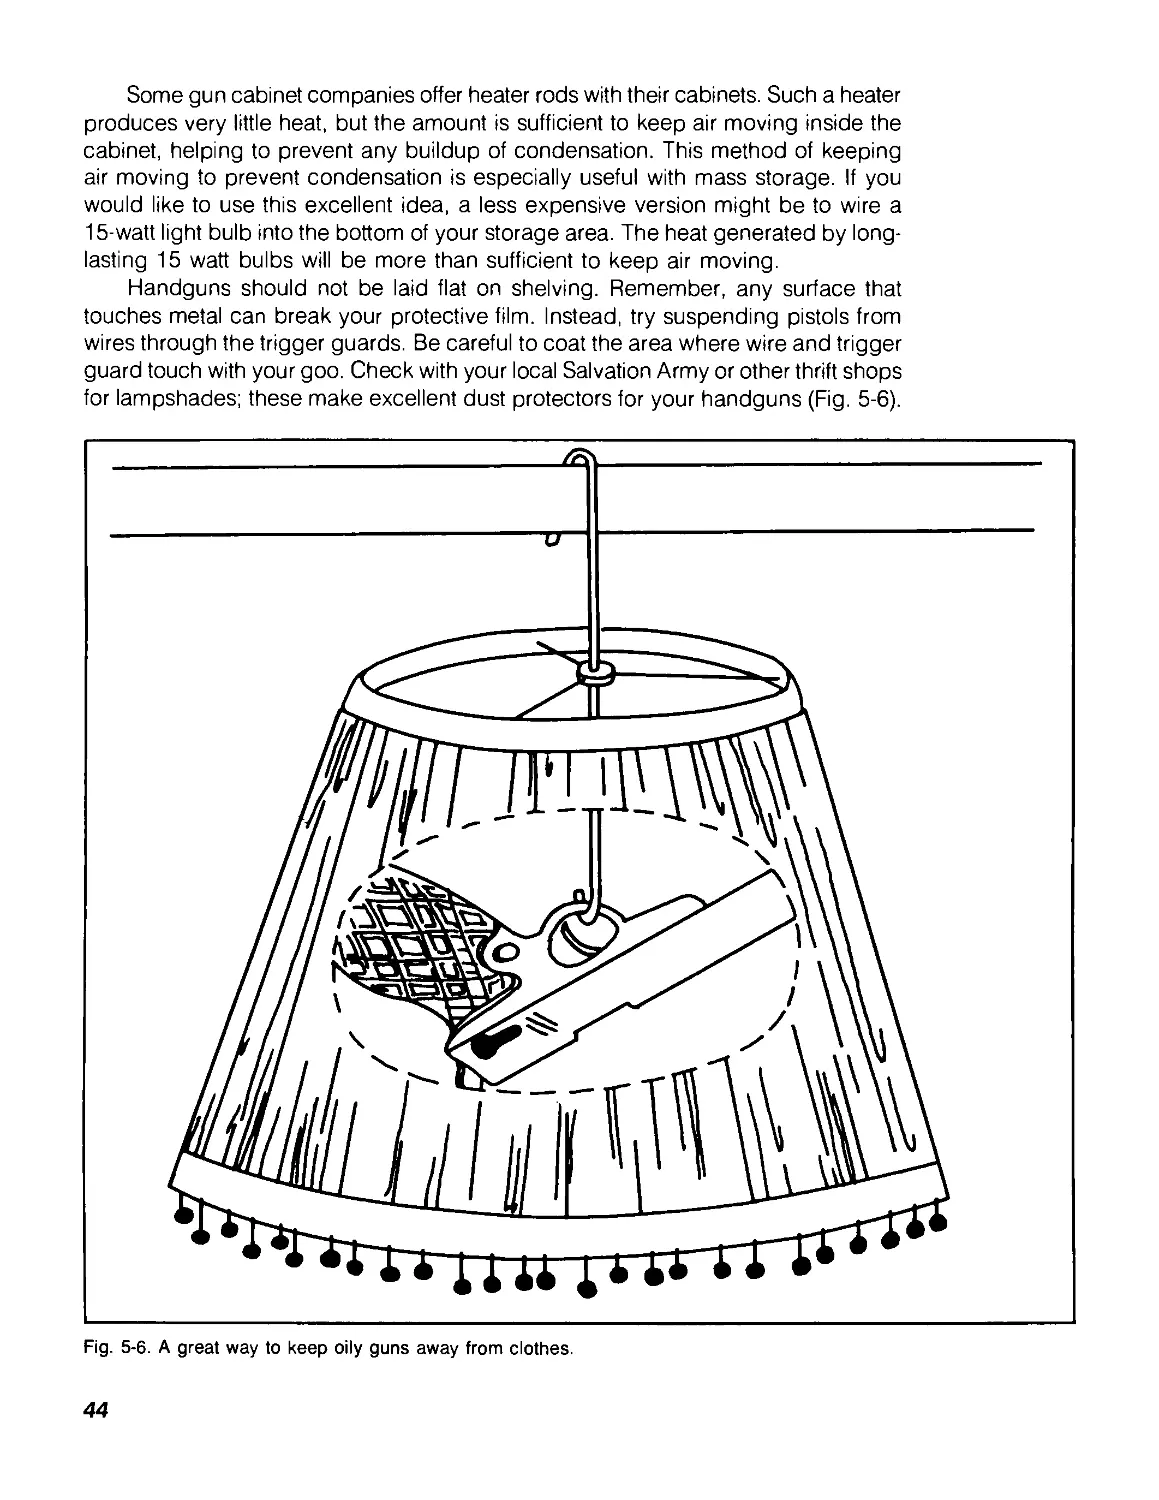
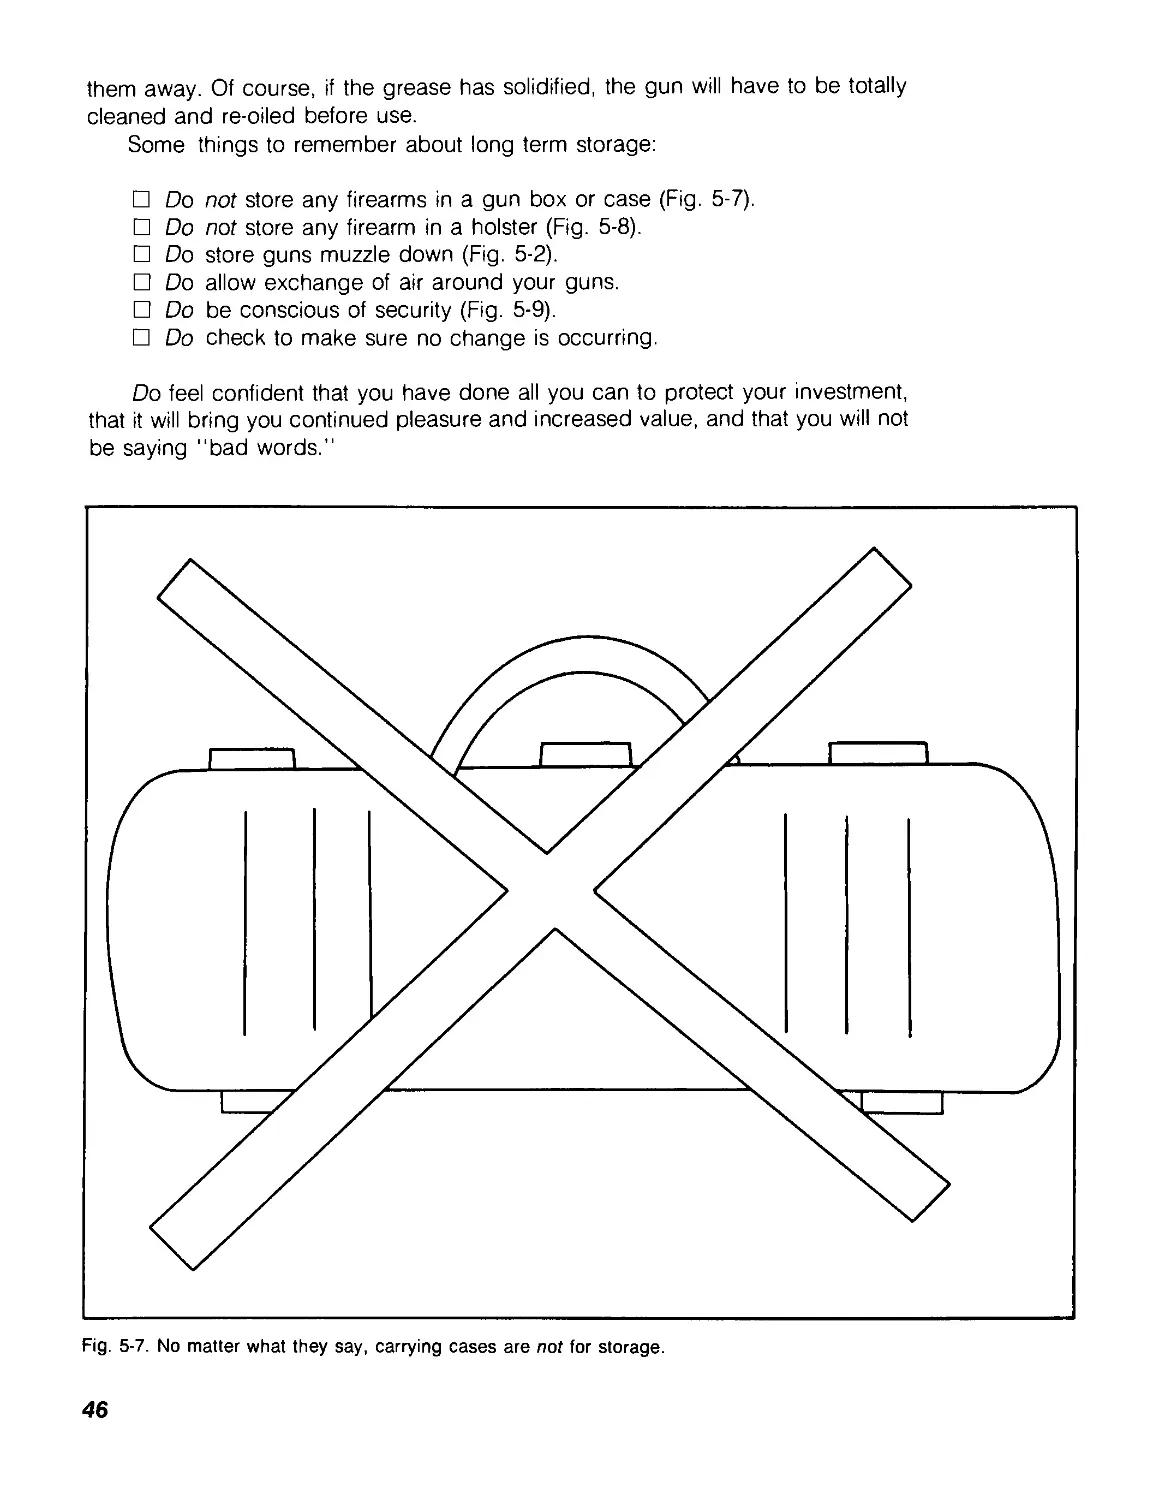
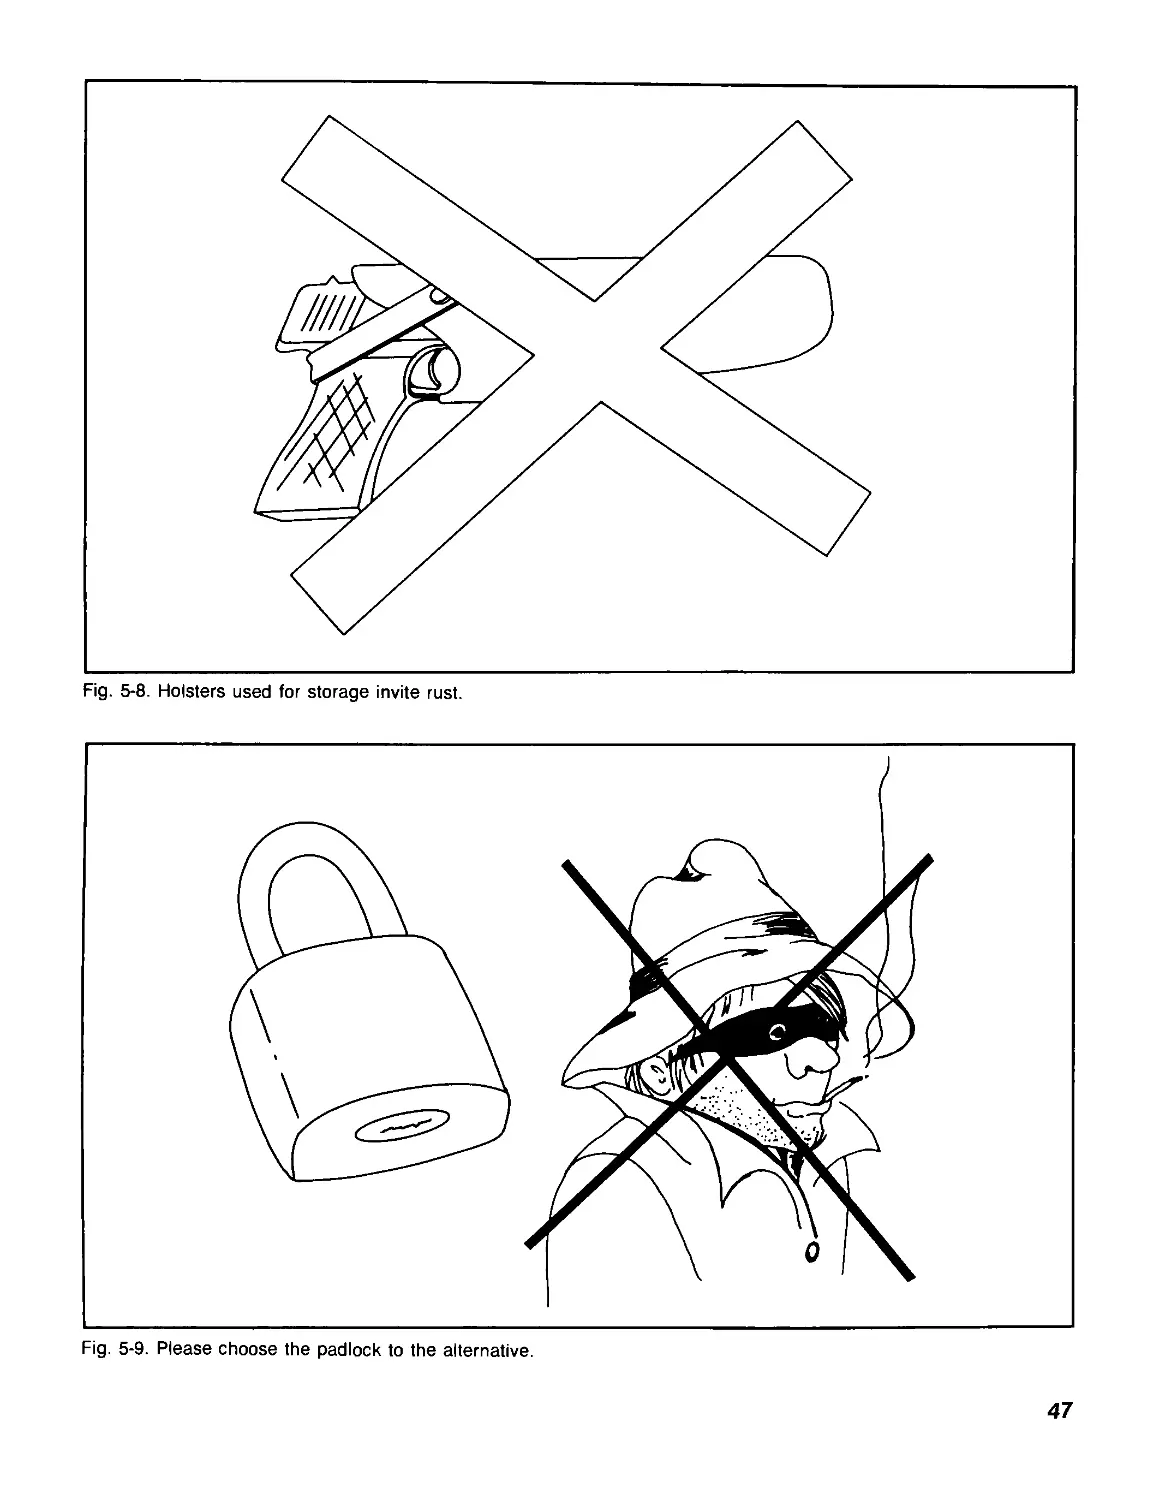
damage to gun bluing.
Slightly heavier rust will feel slightly rough to the touch and may require my fa-
vorite cleaning tool, 0000 steel wool saturated with Hoppes, to scrub it away. This
rust may be removed without apparent damage to bluing.
Rust that raises scale is harder to get rid of. It acts like a cavity in a tooth—a
small pinhole on the surface with a larger cavity underneath. This too can be re-
moved with minimal apparent damage, but extreme care has to be used to keep
sub-surface rust from starting again. When sub-surface rust pits are enlarged and
the pits join together, large patches of rust will form and flake off. Nothing you do,
short of draw-filing and rebluing the gun, will help. Prevention is lots better than cure.
Mr. Murphy seems to have a hand in all we do. Guns are no exception. My
underpaid helper, Rodney, had spent six or eight hours (of his own time, of course),
two boxes of Q-Tips, and a full bottle of #9 cleaning his favorite rifle last week. He
had completely detail-stripped and surgically cleaned every part, then hand-oiled
each part with refined yak fat. Proudly he had laid the parts out on the only clean
counter in the shop for my approval. These parts were displayed as precisely as
a draftsman's drawing. We were admiring his work when my faithful old customer,
Finestre McSIovish, came in brandishing a bulging gunny sack.
"Franklin, m’boy," he greeted us in his lilting full Scottish brogue. He walked
over to us, the bag dripping on the floor. "I’ve caught these fine catfish here especially
for you." His eyes sparkled joyfully as he hoisted his catfish-filled, sandy, slimy offering
right on top of Rod’s labor of love.
I do love catfish, but, gosh-all-mighty, I sure do hate to see a grown man cry.
36
Chapter 5
Gun Storage Myths Exploded
There once was a man from Nantucket
Who stored all his guns in a bucket.
The bucket got wet.
Did they rust? Yes, you bet!
And the man from Nantucket said bad words because he hadn’t followed
some very basic principles about gun storage.
From time to time, most of us find it necessary to put down our “shootin' irons" for
varying periods of time—such as between shooting seasons, during extended periods
while traveling abroad, or perhaps just to set the shotgun down to drink a toast to
the bride and groom. For whatever reason, proper preservation will help keep you
from saying bad words.
What you do to and for your gun will be determined by how long you will leave
it alone and in what condition. Preparing a gun for “storage" can be as simple as
spraying it with gun oil, or as complex as completely disassembling and individually
preserving each part. Short-term “storage" might mean taking the gun to and from
the range. In that case, probably a quick spray of oil is fine. But how about long-
term storage? A quick spray won’t do it.
As elementary as it sounds, preserving your gun is nothing more than preventing
moisture from reacting with bare, unprotected metal. Without moisture, there is no
rust! Simple, ain’t it? The type of preservative you use will be determined by your
local conditions and the length of time it will be in storage. Warm, humid conditions
37
require heavier preservatives than cool, dry ones; longer storage requires heavier
preservatives than short. Even though this whole paragraph may seem obvious, its
importance cannot be overstressed!
Desiccants—those little white packets of crystals that come in scope boxes or
things that need to be kept dry in transit—absorb moisture from packing boxes. I
do not suggest you use them for storage because they eventually fill up and can
absorb no more moisture. A false sense of security can develop in some folk thinking
they have done their best. This may well keep them from checking the desiccant
for renewal. Now the problem is back, worse than ever! Even though desiccants
are sold for the purpose of keeping gun storage areas dry, I am not in favor of their
use. They do play an important part in shipping or packing and in flower drying,
and I feel they should be left to these roles.
Everyone knows that a commercially made gun box or gun case is one of the
best places to store a gun, right? Not so! This is a myth'.
A waterproof gun box or vinyl gun case is one of the best places known to man
to rust a gun!
Regardless of what you were told by that smooth-talking salesman about
protecting your gun with an expensive, thick padded, locking, watertight, hardbound
gun box, he was wrong! Sure, it will afford the gun protection in transit. That was
what it was intended to do, but it was never intended for long-term storage. Humidity
in the air and moisture in the stock are trapped inside the gun case and, as
temperatures change, will condense. Thicker padding allows more humidity-laden
air to be closed up with your gun. Even though you may have thoroughly oiled the
metal parts, when the case is closed, metal comes in contact with padding and the
surface film of oil may be broken or absorbed by that padding. Trapped moisture
produces an ideal environment to attack steel as soon as the film of protection is
broken, and even in as short a time as 24 hours, rust can develop. So let's discard
the myth of storing a gun in a gun box or gun case (Fig. 5-1).
GUN STORAGE CONSIDERATIONS
There are three points to consider in placing a properly prepared gun in storage:
□ The most important point is to keep the film of protection from being broken.
□ The next point is to allow air to circulate around the gun to keep condensing
moisture to a minimum.
□ Without this last point, there may be no need to worry about the first two:
Security! Keep the guns from being stolen'.
I have seen well-oiled guns that have been sitting in wall racks so long they have
grown beards of dust, perfectly preserved because the dust had not broken the oil
boundary. However, in our modern society, I do not advise storing a gun in the open,
on the wall, or anywhere an outsider could casually see it. Too many guns just
disappear as targets of opportunity.
A firearm being prepared for long-term storage should first be cleaned,
thoroughly. Cleaning will remove debris and carbon, which may contain contaminants
that can oxidize steel. It is best to keep this debris and carbon from being covered
38
Fig. 5-1. Do not use gun cases for gun storage!
with grease, trapping it next to the metal. This would also be a good time to record
the make, model, caliber, serial number, cost, and current value of each unit if you
haven't already done so. Give a copy to your insurance carrier, and keep one in
a safe place for yourself. This is a good way to track your investment in firearms
and it is good proof to the IRS of values in the event you sell or trade.
The bore, internal parts, and of course the exposed metal parts of the gun must
be saturated with Rig, Hoppe's Gun Grease, Shooter’s Choice Grease, or another
good quality preservative containing rust inhibitors. If you have access to an air
compressor, use it to blow grease into machine cuts and internal parts that may be
hard to reach with a rag or swab. When all metal surfaces have been covered by
a layer of preservative, the gun is ready to be placed in storage. The layer of
preservative should be of sufficient consistency not to drip, ooze, or run during periods
of summer heat.
If possible, store stocks and metal parts separately. Petroleum products such
as oils and greases are not good for wood. They are absorbed by wood fibers and,
over an extended time, will cause the wood to discolor, lose its strength, and eventually
“rot.” If you are unable to store the stock and metal parts separately, wipe any excess
preservative from areas where metal and wood will touch. You should have little
39
concern about the film of preservative being broken after the stock is put back on.
Very seldom does the protective layer become disturbed once the stock is in place
and rarely does any rust form between stock and metal when this method is used.
Outside and exposed metal parts need a heavier layer, as they are more prone
to be bumped or touched by something and have their protective layer disturbed.
There is no need to preserve metals that will not rust such as aluminum, brass, or
other non-ferrous metals. Such metals are found on some scope tubes and rings,
some trigger guards, and some pistol frames. However, steel parts found in guards
and frames must be protected. Exercise care not to get preservatives on scope lenses.
By now you should have a delightfully greasy, gooey gun ready for storage!
“But,” you may ask, “since you don’t suggest gun cases or boxes, where should
I put it?” I thought you'd never ask!
STORAGE SITES
It is time to have a talk with your wife, because one of the best places to store
a firearm is in the closet. It may not be the most secure place to keep a gun, but
it is a good place to keep a gun from getting bumped. It’s usually dry, and out of
the way. A rifle or shotgun should be placed in a corner of the closet, muzzle down,
resting in a plastic tray to catch any preservative that might eventually run off (Fig. 5-2).
The whole greasy mess is then covered with a cloth and separated from clothing
by a cover—a plastic garment bag will do just fine, as it has a hole at the top to
allow air to pass in and out while keeping clothes clean. Some women have no
understanding about important things and may threaten to throw you out of the house
if you suggest closet storage, especially if you have two or three dozen guns to store.
In this event, we will have to find you another place to keep them.
If you have a gun safe, it’s still a good idea to cover your guns with an old sheet
to keep dust from gathering on the grease. You will appreciate this idea when it comes
time to get them out of storage and ready to shoot again. If you don’t have access
to a closet or safe, you might consider constructing a simple gun rack (Fig. 5-3),
either vertical or horizontal, and covering it with cardboard or plywood for more
strength or security.
Do not use pressed wood to construct the rack unless it is well painted or
varnished. Pressed wood can contain formaldehyde or other chemicals that could
react unfavorably with metals. If your rack is horizontal, turn the guns upside down
and support them at the grip just in front of the comb (Fig. 5-4).
Heat or cold will not affect guns in storage to any great degree, so if you have
an attic hide-hole or other “secret” room, you might consider getting them out of
sight. This rack can be placed in any convenient location that will keep the guns
out of visitors’ sight.
Another way to keep guns safe is to hide them in plain sight. One example of
“hiding in plain sight” might be disguising long guns to look like household clean-
ing items in a metal broom closet. Place an old broom or cleaning implement upside
down with the gun, wrap an old sheet loosely around the combination, and prestoi
You have changed your gun into a mop, broom, or squeegee (Fig. 5-5). Isn’t it true
that a thief isn’t looking for work, and what do brooms, squeegees, and mops repre-
sent? Thus camouflaged, your guns should be safe (unless, he too, reads this book!).
40
Fig. 5-2. Store long guns muzzle-down.
41
Fig. 5-3. An example of a simple homemade gun rack.
Fig. 5-4. An easily constructed storage box.
42
Fig. 5-5. How to hide your guns in plain sight.
43
Some gun cabinet companies offer heater rods with their cabinets. Such a heater
produces very little heat, but the amount is sufficient to keep air moving inside the
cabinet, helping to prevent any buildup of condensation. This method of keeping
air moving to prevent condensation is especially useful with mass storage. If you
would like to use this excellent idea, a less expensive version might be to wire a
15-watt light bulb into the bottom of your storage area. The heat generated by long-
lasting 15 watt bulbs will be more than sufficient to keep air moving.
Handguns should not be laid flat on shelving. Remember, any surface that
touches metal can break your protective film. Instead, try suspending pistols from
wires through the trigger guards. Be careful to coat the area where wire and trigger
guard touch with your goo. Check with your local Salvation Army or other thrift shops
for lampshades; these make excellent dust protectors for your handguns (Fig. 5-6).
Fig. 5-6. A great way to keep oily guns away from clothes.
44
A cloth draped over the top of the shade will keep dust from settling but still allow
air to flow. Of course, coat hangers can be bent to provide a form for the cloth.
The above methods are great if you are going to be "in house" while the guns
are stored, but what about really long-term storage?
LONG-TERM STORAGE
If you are going to be gone for extended periods and are forced to store your
guns in commercial storage facilities (such as a bonded warehouse), you will need
a different storage method.
If this is the case, I suggest you remove telescopes and wood portions of the
gun. Stocks and scopes can be stored in the same container as the metal parts as
long as they are kept separated. Now really goop the preservative on the metal parts.
When you are satisfied that no air has been left in contact with the metal and
the entire surface is heavily coated, you are ready to "wrap" up your gun. Each
unit should be wrapped in well-oiled cloth. Two or three layers of cloth will probably
provide cushioning and protection if the guns jiggle together during transportation
to the storage facility.
By this time you should have found or prepared a box that will fit your longest
gun. Your box should not be airtight; small holes can be drilled in it to allow air to
pass through. This box may be placed in a second one for more security or protection
(not airtight, please!). To keep your wrapped guns off the floor of the box, lay a grid
of dowel rod on the bottom.
You are now ready to place your sticky, wrapped, oily parcels in the box. Place
the first layer on the dowels, the next layer crossways on the first, and so forth until
all the guns are stored.
If you are storing your stock and scope in the same box, lay another set of dowel
rods on the top layer and then put your stocks, scopes, and other parts on top to
keep them away from oils and greases in the cloth, which will bleed into whatever
they come in contact with. Seal your box or boxes securely, and your guns are ready
for long-term commercial storage.
Now that you have your guns stored, how about your ammunition and reloading
components?
Fortunately, modern ammunition is very easy to care for. Primers and sealed
factory powder cans store very well. As long as loaded ammunition, primers, and
powder are protected from temperature extremes, they will keep indefinitely.
If you are able, it is a good idea to check on your guns from time to time to
make sure no oxidation, rust, or change is taking place. If your film of protection
has not been broken, then oxygen cannot react with metal and there will be no
change.
When it is time to get your guns out of storage and get back to shooting, remove
them from the closet, box, or commercial storage, and run a patch through the bore,
giving particular attention to thoroughly cleaning the chamber. Excessive oil or grease
in the chamber can increase breech pressures to dangerous levels. Firearms should
always be fired with clean dry chambers. Wipe off the outside, reassemble if needed,
and you are ready to go! Getting guns back into operation is much easier than putting
45
them away. Of course, if the grease has solidified, the gun will have to be totally
cleaned and re-oiled before use.
Some things to remember about long term storage:
□ Do not store any firearms in a gun box or case (Fig. 5-7).
□ Do not store any firearm in a holster (Fig. 5-8).
□ Do store guns muzzle down (Fig. 5-2).
□ Do allow exchange of air around your guns.
□ Do be conscious of security (Fig. 5-9).
□ Do check to make sure no change is occurring.
Do feel confident that you have done all you can to protect your investment,
that it will bring you continued pleasure and increased value, and that you will not
be saying "bad words."
46
Fig. 5-8. Holsters used for storage invite rust.
Fig. 5-9. Please choose the padlock to the alternative.
47
Chapter 6
Recoil Pad Installation Simplified
One of the most useful additions to a stock—especially a trap, skeet, or high-recoil
gun—is a recoil pad. Many custom stocks are so equipped, and a correctly installed
recoil pad will not only make your gun much more comfortable to shoot, but also
enhance its value. (If you are interested in seeing what kind of abuse your shoulder
takes from some popular cartridges, see Appendix A.)
Recoil pad installation is a job anyone with a modicum of mechanical skill and
patience should be able to do without completely losing his marbles. With these easy-
to-follow instructions, this job can be fun, easy and done with professional-looking
results.
COMMON METHODS
There are three accepted methods of recoil pad installation. Method 1 is the
"Youee Gluee” Method: Glue the pad to the stock; carefully grind the pad and stock
to shape! This method works best when making a stock from scratch. It has fallen
out of favor, and for a simple installation, involves unnecessary stock refinishing.
Method 2 is the "Winder Binder" Method: Wind two turns of masking tape around
the stock and grind the pad till the grinder cuts through the first layer of tape. This
method will give good results and is one some gunsmiths use. However, there will
always be a ridge on the pad the thickness of the tape. And woe be unto you if the
dog chases a cat through the work area, or someone bumps your arm, or you
suddenly sneeze (Murphy’s Law says it will only happen during final fitting). The re-
sult will be a gouge in your stock. You might have to reshape and refinish the old
49
stock or be forced to get a new one if the gouge is too deep—again, not too good
a choice!
This brings us to Method 3, The “Professional” Method! There are no shortcuts,
no time-saving tips, no easy alternatives, just a straightforward method based on
25 years of professional gunsmithing experience. It can give a near-perfect fit with-
out danger of stock damage.
There are some tools and equipment you will need. Though the list seems
lengthy, most of what you will need you may already have, or it may be readily
begged, borrowed or stolen.
It is suggested that you read over the list of tools and installation instructions
to familiarize yourself thoroughly with what you will need and how to proceed.
EQUIPMENT LIST
The installation of the recoil pad is a messy job. Safety glasses and mask (see
Chapter 3, Fig. 3-7) will help keep rubber dust from getting into your eyes and lungs.
Use them!
You might want to practice with an old stock. Perhaps your local gunsmith will
be happy to give you a broken one to play with—and maybe even an old pad, too.
Recoil pads come in different sizes and shapes to fit different sized stocks. The
standard pad I install is the Pachmayr F325 Field Pad. It comes in three lengths.
Pachmayr also makes a variety of super soft, rifle, and special purpose pads. Other
companies also make pads—some as good, some not as good. It will be up to you
to decide which pad best suits you and your stock.
Screwdrivers are needed to match the variety of screw heads on buttplates and
recoil pads (phillips and mechanic’s are shown in Chapter 3, Fig. 3-4).
The flexible rule (Fig. 6-1) is used to measure length of pull, to bend around
the stock while drawing cutting lines, and as a guide to follow stock lines.
The square (Fig. 6-2) is needed to square the stock with the saw and to see
that the sawed butt is sanded flat.
A saw (Fig. 6-3) will be used to cut the stock to proper length.
The sanding block (Fig. 6-4) is used to prevent "rockering” the tips of the sawed
end of the stock while sanding out irregularities left by the saw. Sandpaper (medium
and fine) will be needed to smooth the cut end of the stock, and, at the end of the
installation, to remove sanding wheel marks.
The hammer (see Chapter 3, Fig. 3-6) is for marking screw holes and driving
plugs.
Drills and bits (see Chapter 3, Fig. 3-5) will make drilling holes easy.
Dowels and white glue (Fig. 6-5) are used to plug old holes that may be in the
way of the new ones.
A vise (see Chapter 3, Fig. 3-3)—and only the bench type should be
considered—will be used to hold the stock during this operation.
The sanding wheel (Fig. 6-6) is the most important tool you will use in this job.
It should have a new, fine grit disk installed and be firmly mounted. Take care not
to let your fingers touch the spinning wheel. It eats fingers faster than pads!
The scribe (Fig. 6-7) should be sharpened to a fine point. It will be used to score
a line around the pad for fitting.
50
Fig. 6-1. Flexible rulers will help you draw a straight line on
curved surfaces.
Fig. 6-2. Squares must be longer than the sawed
end of the stock.
57
Fig. 6-4. Top: Sandpaper, medium and fine grits. Bottom: Commercially available sanding block.
52
Fig. 6-5. Glue and dowel. Note groove in dowel to allow air and excess glue to escape.
Masking tape will be necessary to protect the stock during marking, and to keep
the finish from pulling away from the stock during sawing.
Soap is a good lubricant for wood and will be used on the pad screws to ease
screwing them in.
Oil will be used on the screws and screwdrivers to keep them from abrading
the rubber of the pad during installation. (A typical position of my oil can is shown
in Fig. 6-8.)
53
Fig. 6-6. A solidly mounted sanding wheel is a prime necessity.
Fig. 6-7. Left: Average gunsmith’s recoil pad scribe. Right: Expensive commercial scribe.
54
Fig. 6-8. Normal position oil can assumes after being carefully left standing upright.
PROCEDURE
Below are step-by-step instructions through a recoil pad installation. Please follow
them exactly. Do not take any shortcuts, or the job will suffer.
Let’s assume that the stock you have is the correct length. If not, consult your
local gunsmith for correct fitting procedures, or find a stock that does fit you. Measure
the distance from center of trigger to center edge of buttplate and transfer this
measurement to your stock.
1. Measure the thickness of the recoil pad with the flexible rule (or other
measuring device), and note this distance on the butt. Wind a layer of masking tape
around the stock at about this point. The tape will allow you to see the line you are
about to draw and will help keep finish from peeling during sawing. Mark the distance
on the tape and draw a line on the cheekpiece side of the stock parallel to the existing
buttplate (Fig. 6-9). If the buttplate is curved, transfer the measurements at the top
and bottom of the stock. Draw a line connecting the two marks. The resultant line
will approximate the original "feel” of the stock when the job is done. Figure 6-10
shows the measurement transferred to the stock.
2. Remove the buttplate screws and shim the stock with whatever is at hand
to square the butt of the stock with the saw. Try to maintain this relationship during
sawing. Take a deep breath and, keeping the saw blade on the butt end of the line,
very gently saw the stock off!
3. Place the stock in the vise, protecting it with soft padding to keep the vise
jaws from marking the finish. Support the stock or barrel on the bench, a doorknob,
or other support to steady it while sanding the butt. Carefully use the sandpaper
and sanding block to smooth the saw marks until the butt is smooth, even, and square.
Figure 6-11 shows a homemade sanding block in use. (I have been using one exactly
like it—in fact, this is the very one—for years!) Lay your ruler or square along the
sanded surface to make sure the end is square and flat end-to-end and side-to-side
(Fig. 6-12).
4. Carefully peel the tape off the stock (Fig. 6-13). Peel slowly toward the saw
cut to keep the finish from lifting.
55
Fig. 6-10. Sawing line drawn on tape for visibility.
56
Fig. 6-11. Handmade sanding block removing saw marks from end of stock.
57
58
Fig. 6-14. A: Incorrect! B: Correct. Note line of stock continues through pad.
5. Position the recoil pad on the stock to make sure the lines of the stock will
be followed in the pad. Figure 6-14 gives you an idea of the correct pattern to look
for and Fig. 6-15 shows an actual installation measurement. If the pad is too small,
it is better not to have screw holes punched in it when exchanging it for the next
larger size!
6. Put a drop of oil inside each hole in the bottom of the pad to ease the scribe
through the rubber and to keep the rubber from tearing. Push the scribe to pierce
the face of the pad (Fig. 6-16). Oil the screws and push them through the face of
the pad, but leave the heads sticking out. They will be used for marking screw
positions.
7. Reposition the pad on the stock and tap the screw heads with the hammer
hard enough to mark the wood for drilling (Fig. 6-17).
8. If the new screw holes are going into the same location as the old holes,
then the old holes may have to be plugged. Use the Уд" drill to drill the stock the
depth of the old hole for a Ул" dowel. Bevel the dowel at a 30 to 45-degree angle
to match the shape of the drill bit to completely fill the newly drilled hole. Scratch
a deep air vent line on the side of the plug with the scribe. If the plug is not scored,
air trapped in the hole may push the plug out before the glue has had a chance
to set. Dip about Уд of the plug in glue, and drive it into the hole. Trim off the excess
plug and sand the butt smooth again. Now mark the position for the pad screws.
(Go back to Instruction 7.)
59
Fig. 6-15. Actual positioning of pad to ensure line does continue through pad.
9. Drill with #31 drill the depth of the recoil pad screws at the locating dimples
you made on the butt by tapping the screws with the hammer. Drill the bottom screw
hole parallel to the bottom of the stock (Fig. 6-18) to make sure the bottom hole does
not come through the bottom of the stock.
10. Oil the screwdriver blade, push the screws through the face of the pad,
and screw the pad to the stock. Remember, the sequence you use in turning the
screws, as you will want to use the same sequence every time you apply the pad
during installation (or use two screwdrivers, alternating two turns or so each until
tight). Random tightening will result in random positioning of the pad to stock and
make final fitting difficult.
11. Use the scribe to score the pad at the junction of pad and stock (Fig. 6-19).
Use a 45-degree angle to keep the scribe mark as close to the wood as possible.
Score all the way around twice to get a good scribed line.
12. Remove the pad and push the screws back through the pad to get them
out of the way. The screw points should stick out enough to act as locator guides
while measuring stock lines.
13. Put on your safety glasses and face mask. You are about to make rubber
dust and fit the pad to the stock.
60
Fig. 6-16. Top: Piercing pad with scribe. Bottom: Pushing screw through pierced hole.
14. Place the stock near the sanding wheel for convenience and start sanding
the pad top and bottom. Manually position the pad on the stock and lay your rule
along the stock to check the progress in following the line of the stock into the pad
(Fig. 6-20). Do not try to sand the pad to the scribe line at this point.
15. When the top and bottom of the pad follow the lines of the stock, use the
same procedure with the sides. Don't worry about getting close to your scribe line
(1/зг" away from the scribe line is plenty close). Instead, worry about getting the pad
parallel with the stock. Blend the remainder of the pad to meet sides, top, and bottom.
Keep measuring with your rule. Take your time. Check frequently to keep the lines
straight.
16. When the lines of the pad follow the lines of the stock all the way around,
finish the fitting job. Continue sanding till half of your scribe mark is cut away. Reattach
to the stock using your remembered screw pattern, and check to see if the pad has
’‘grown.'’ Yes, it did, didn’t it? Rescribe those "fat” areas, remove the pad, and sand
67
Fig. 6-17. Making locating dimples to mark screw holes in wood.
Fig. 6-18. A: Incorrect. B: Correct. Keep drill parallel to bottom of stock.
62
Fig. 6-19. Scribing the sanding line on the pad.
those areas some more. Fit the pad back on the stock and repeat scribing and sand-
ing till the pad fits perfectly!
17. Remove the pad once more, and with sanding block and paper, sand the
sides of the recoil pad (Fig. 6-21) till all sanding lines are parallel with the edge. This
is not necessary, but it adds the final touch of professionalism to the job. Do not
let the sanding block rock over the edge of the pad. Keep all edges square and sharp.
18. Knock the rubber dust out of the compression spaces. Clean the sides and
face of the pad with alcohol or glass cleaner and reattach the pad for the last time.
Congratulations! You have now completed the recoil pad installation and if you
have followed these instructions, you will have a professionally installed pad (Fig.
6-22), one worthy of your pride in accomplishment.
There remains only one more step: Show your shooting buddies your perfect
recoil pad installation, invite them out for a beer or coke, and bore them to death
telling them how you did it.
63
64
Fig. 6-22. The finished pad—a thing of beauty!
65
Chapter 7
Secrets of Scope Mounting
"So you want to be a better shot? Well, step right up, ladies and gentlemen! All you
have to do is be able to hit a barn door with a bass fiddle and I guarantee—yes,
I personally guarantee—to make you a better shot. You say you’re not satisfied?
You say you want more for your money? Well, I tell you what I’m gonna do: For
as long as this offer lasts, I’m gonna make you a better shot without making you
a better shot!"
That statement sounds like it ought to be investigated by the fraud division. Well,
I tell you what I'm gonna do! How does four times better sound? Of course, you’re
not really going to be a better shot, we're just going to bring the target four times
"closer"—with a four-power telescope!
Rifle scopes (Fig. 7-1) are designed to bring the target closer and let us see
better in poor light conditions, and thus bring home more and better game. In addition,
as we grow older, our eyes don’t accommodate or focus as well as they once did.
Glasses help overcome this aging process. A scope will be a dramatic change for
those folk who wear glasses and still can’t see open iron sights or targets without
moving their bifocals around. With a scope, both target and sight are clear.
However, as with everything, each benefit has a corresponding drawback: there’s
more weight to tote around and more things to go wrong; errors in sighting are
magnified, and as the power of the scope is increased, a corresponding decrease
in field of vision occurs.
Scoping the handgun for some forms of target or hunting does have benefits
over iron sights, but it's not for every gun, nor for all forms of shooting. Handguns
are more prone than rifles to sighting errors, and higher power scopes magnify these
67
Fig. 7-1. A: Ocular lens. B: Focusing ring. C: Tube or body. D: Adjustment knobs. E: Objective lens.
errors—perhaps to the point of making the scope useless. Only minimum useful
powers should be considered in scoping handguns, as excessive power is self-
defeating.
This philosophy should be used in rifle scopes, too. A 10 x scope at 100 yards
brings your target to an apparent 10 yards. This is so close that your target may
completely fill your field of vision and you may not be able to determine what part
of the target you are seeing. The scope also magnifies each extraneous motion 10
times, so it may appear you’re looking at the target in a hurricane during an
earthquake.
SELECTING SCOPES AND MOUNTS: A PHILOSOPHY
Modern optics and scope construction are pretty tough. Any fears you have
about accidentally bumping the scope and knocking it out of alignment are pretty
well unfounded. Scopes are designed to take magnum recoil and considerable abuse
without change or damage. Any rough treatment that would damage a scope would
probably be sufficient to change iron sight settings, too. In either event, you will be
done shooting for the day and may require the services of a gunsmith to get things
lined up again. The chance of physical damage is really quite remote.
The biggest disabler of scopes is moisture condensing internally during extreme
temperature changes. Modern scopes are filled with inert gas and very well sealed
to prevent moisture from getting inside. This problem is not often encountered with
better scopes. Any tendency toward fogging can be avoided during hunting by
keeping the rifle and scope from violent temperature changes (such as taking them
from a warm, comfortable, hunting lodge into icy, cold, conditions—or vice versa).
The rifle should be kept at the temperatures at which it will be used and any fogging
problems can be kept to a minimum.
Since you are obviously interested in scoping your rifle or handgun, let's explore
some of the equipment options on the market.
Scopes come in different powers usually listed as a number (power) followed
by an x (times), sometimes followed by another number (diameter of objective or
front lens). You have your choice of 4 x 32, 4 x 40, 6 x , 8 x , 10 x , 24 x , 2 x -7 x ,
3x-9x,4x-12x, and so forth, as well as a choice of electric sights, flip-up posts,
Bullet Drop Compensators, variable and automatic range finders, and a bewildering
variety of crosshairs (Fig. 7-2)—not to mention wide angle, wider angle, round view,
oval, square and, if it would sell, hexagonal view.
68
Fig. 7-2. There’s something for everyone in this scope. A: Compass. B: Shot counter. C: Rangefinder. D: Wind speed
and direction data. E: Multi-style crosshairs. F: Luminous dot. G: Distance meter. H: Pedometer. I: Flip up post. J: Date
and time. Things aren’t this wild yet, but can the day be far away?
The more useful crosshairs or reticles are seen in Fig. 7-3. The dot (A) is an
excellent choice for target shooting, where there will be no distraction or confusion
with backgrounds. The standard crosshair (B) is very common and has enjoyed more
popularity than any other. Blending the dot with crosshairs (C) is an attempt to elimi-
nate background confusion. Range-finding reticles (D) require the shooter to know
the distance from back to belly of the type of game being hunted. The game is
centered in the upper set of hairs; depending on the size of the animal and how
completely it fills the upper set of hairs, the approximate distance can be estimated.
Dual (or duplex) crosshairs (E) are an excellent choice for the average hunter. The
wide portions of the hairs eliminate any confusion of branches, while the fine center
portion of the hairs allow accurate sighting on target. In the final set (F), the taper
hairs draw the shooter's eye to the center of the scope. This system also eliminates
69
Fig. 7-3. Common reticules. A: Dot. B: Standard crosshairs. C: Dot and crosshairs. D: Rangefinder. E: Duplex. F: Tapered.
background confusion, but covers more of the target than the dual crosshair
combination.
How in the world can you make up your mind? First, forget about scope options;
just think about where, with what, and at what you shoot. A western deer hunter
needs a different scope than an eastern deer hunter, who needs a different scope
than a varmint hunter, who needs a different scope than a pistol silhouette shooter,
who needs . . . and so on.
Just for fun, let's look at a typical example of scope usage. H. Bufford Jones
III (Buffy to his friends) just bought (at the suggestion of a commission salesman)
an expensive, multipurpose, 3 x-9 x range finding, flip-up post, trajectory-correcting,
wide-angle scope with optional illuminated dot. Buffy takes to the woods on a once-
in-a-lifetime hunt. Conditions are ideal and a trophy buck saunters into the clearing.
Buffy adjusts the power, finds the range, dials in the trajectory, sets up his post, turns
on the illuminated dot, and then gets down to some serious trophy hunting. But the
clearing is empty—the buck has gone!
The moral to this story is stick to the basics] Any need to adjust equipment during
a hunt can be detrimental to your concentration and shooting. “Bells and whistles”
are great for sales, but not for game.
70
Are you still sold on scopes? Then let’s think about mounts, too. Most modern
rifles, from .22s to Weatherby Magnums, have provisions for telescopes. Even mod-
ern handguns either have provisions to mount bases directly, or the scope mount
manufacturers have figured out ways to mount them. If your rifle or handgun doesn’t
have these provisions, scope mount companies such as В-Square or S-K may have
a mount to fit. If not, call on the expert services of your local gunsmith.
MOUNTS
Common scope rings and bases follow two basic designs: those popularized
by Weaver and those of the Redfield pattern. Many companies follow these designs
and some have standardized so that their bases and rings can interchange between
manufacturers of the same style. To keep the scope as close to the bore as possible,
most mount companies make rings in several different heights (Low, Medium, High)
to allow mounting scopes with different objective lens diameters.
Swing mounts enable the shooter to "swing” the scope away from the iron sights,
giving the option of using either. Swing mounts, if not checked occasionally, have
a tendency to work loose. If this occurs, accuracy suffers.
See-through rings have been gaining in popularity while swing mounts have
faded. This type of mount is another compromise between iron and glass. See-through
rings have a tunnel or sight channel under the scope so the iron sights are visible.
However, this makes using the scope awkward because the scope is raised higher
than normal to allow you to see underneath. When using the scope, this extra height
forces you to raise your head off the stock to look through the scope, a less-than-
comfortable way to shoot. (The side mounts required on some older lever-action rifles
suffer from the same shortcoming.)
Rifle scope mounts are not nearly as confusing as scopes, since there are only
a few basic patterns on the market. When purchasing your mounts, tell your salesman
what rifle or handgun you are shooting and get both rings and bases at the same time.
RIFLE MOUNTING
While you are thinking about it, stop at your favorite hardware store and invest
in a good-quality screwdriver. Then either have the blade ground to fit the scope
base screws or file it as close to slot size as possible. By the way, a correctly fitted
screwdriver blade will fit so tightly in the screw slot that the screw will not fall off when
the screwdriver is held horizontally. The screw and screwdriver in Fig. 7-4 were not
glued together for this photograph. They are so tightly fitted that the screw will not
fall off no matter which way you turn the page.
Another hint is to file any sharp corners or edges round and smooth (except
the screwdriver tip itself). Sharp edges on screwdriver sides seem to seek out places
to scrape and scratch. Nothing looks worse than burred-up rings or bases, especially
when it could have been prevented by rounding the sides and edges of your
screwdrivers so they rub rather than scrape or cut.
If you are installing a scope on a .22 set up for tip-off mounts, loosen the lock
screws on the lower portion of the rings and slide the rings into the groove provided
on the receiver. If you are working with a high-powered rifle, or a .22 not set up for
tip-off, you will have to mount bases on the receiver. Place your rifle or handgun
71
Fig. 7-4. Properly fitted screwdriver supporting screw without glue!
in a vise whose jaws have been padded with leather and remove any blank or filler
screws from the receiver. When positioning mounting blocks on the receiver, make
sure the front block goes toward the muzzle and rear block toward the butt. Screw
them down snugly with the provided screws. Proceed with the rest of the mounting
instructions to make sure your scope will line up properly before tightening the base
screws tightly and I mean tight\
Some gunsmiths use Loctite to keep the screws in place. This may not be a
bad idea, providing you use it as an aid to keep your tight screws from loosening.
If you do decide to use Loctite, first completely assemble your base, mount, and
scope, then boresight the combination. Then remove the scope and base screws
to apply Loctite. This way, if things don't line up or something is wrong, you won’t
have the headache of getting screws out that have been set with Loctite.
Weaver rings are installed on the base by loosening the large headed screw
at the bottom of the rings and opening the clamp. Match the cross bolt in the bottom
of the ring to the recoil slot in the base. Close the clamp around the sides of the
base and tighten the clamping screw.
Redfield-style mounts have specific front and rear rings. The rear is usually
clamped between two large screws, which also are used for coarse windage
72
adjustments. The front ring is held in place by a stud that is turned into a correspond-
ing hole in the front of the base. To mount Redfield-type rings, attach the rings on
the bases and remove the top portion of the rings. Some manufacturers don’t make
their ring parts to be interchangeable, so remember which ring top goes with which
ring bottom. Set the scope in the rings. (When you look through the scope it should
magnify. If it does not, turn it around frontwards and look again.) Loosely attach the
ring tops to the bottoms.
Remove the rifle from the vise and mount it on your shoulder while wearing the
same kind of clothing you will be using while shooting. Move the scope back and
forth in the rings until you get a full field of vision. This location will give you proper
"eye relief’’ to keep recoil from banging the scope into your forehead (ouch!). Twist
the scope till the crosshairs are straight up and down and tighten the ring screws.
Usually the scope will shift during final tightening, so check again to make sure the
crosshairs are still vertical. If not, loosen, adjust, and retighten the ring screws till
they are.
If your rifle is not drilled and tapped for a scope then you might look to S-K,
В-Square, or other good mount manufacturers for no-drill, no-tap mounts. They have
a variety of non-drill bases and rings to fit most common undrilled military guns and
some handguns too. Their instructions are usually easy to follow. These mounts and
rings will win no awards for beauty, but they are strong and accurate. After all, function
and accuracy should take precedence over "pretty."
PISTOL MOUNTING
Mounting scopes on rifles, as we have seen, is usually easy because factories
expect scopes to be mounted and do the drilling and tapping for us. Handguns,
however, present a different problem. Pistol scopes are relatively new, and—with
few exceptions—factories don’t make provision for scopes.
Pistol mounts are usually designed to work around this lack of foresight by the
factories, but most require drilling of at least one hole in the frame of the pistol. This
job is best left to gunsmiths, as the location of the mount screw holes must be exact.
Some pistol mounts, however, are made to be installed without drilling and
tapping. These sets can be as easy to install as no-drill rifle mounts, although the
array of parts may be confusing. Let’s open the package of one popular no-drill mount
and take a look at it (Fig. 7-5). You may find such a pile of parts seemingly
incomprehensible, but by carefully following the manufacturer’s instructions, step-
by-step, the use of most of these parts will become clear. Any that are left over can
be used on some other project you might want to do.
BORESIGHTING
Your scope mounting job is about over—all but boresighting. You might have
your gunsmith boresight your scope with his optical collimator, or you can easily
do it in a couple of ways.
Set your rifle in a padded vise, or on a bench or table and remove the bolt.
Select a distant object such as the crossbars on a telephone pole or the ball on top
of a flagpole. Now look through the bore and wiggle your rifle around until your object
73
Fig. 7-5. Scope mounting parts and some other stuff found on my bench—everything but the kitchen sink, and I think
that’s around here someplace, too.
is centered. The farther away the object, the better. Block the rifle so your object
will stay positioned. Look through the scope and twist the adjustment knobs until
the crosshairs are centered on what is seen through the bore.
If your rifle is a lever, pump, or auto, looking through the bore is more difficult.
In this event, you can use your open sights to perform a boresighting operation. Pick
a target at the same distance the iron sights are zeroed for and again block the rifle
so the sights stay on this target. Now adjust the scope to this target. In theory, the
scope should be dead on.
Do you mean to tell me you were going to pay someone to do this for you?
Oh, well.
Some confusion seems to exist about which way to turn the knobs to get the
bullet to go where you want it. During boresighting, the crosshairs will move in the
opposite direction that you want the bullet to go—if the hairs are low, the point of
impact will be high: if the hairs are high, the impact will be low. This may seem
contradictory, but think about it for a moment. If the crosshairs are above your
boresighted object, to get them centered (without tweaking the adjustment knobs),
you would tower the scope until they are on target (Fig. 7-6). In doing this, you would
be lowering the barrel too, and is it not obvious that when the barrel is lowered, the
point of impact will also be lowered?
74
SIGHTING-IN
It is now time for final sighting-in, and this requires actual shooting. Be sure you
know from the scope instructions what the adjustment knobs do to the crosshairs.
Do they raise the crosshairs or do they raise point of impact? The way your scope
handles this adjustment may produce results opposite from what you need!
Also check for bullet movement per "click’’ at 100 yards. If each click moves
the point of impact 1/4 inch at 100 yards, and you are 21/г inches out of ‘‘zero,’’
computations can be made to determine how many clicks will be needed. In this
instance, 10 clicks should bring the point of impact to the center of your target. This
will help hold down ammunition costs during final sighting-in.
After sighting in, learn what your scope can do for you. Shoot with it. Shoot with
it some more. Shoot with both eyes open and learn how to see a target at a distance
while finding it in the scope at the same time—a neat trick that will put you seconds
ahead in accurate sight alignment.
Take a look at the large variety of scopes and mounts on the market, then analyze
the kind of shooting you do. When all things are taken into consideration, put your
money into the best quality scope and mounts that will fulfill your shooting
75
Fig. 7-7. Proper usage for optical equipment. For gosh sakes, pick the right tool for the right job.
requirements. Keep in mind that a mounted rifle scope is designed to be a sighting
device for a bullet, and it is considered bad form to use your scoped rifle or pistol
for all magnifying purposes. Other types of optics are recommended and are more
useful for other purposes (Fig. 7-7).
Telescopes for rifles can be a definite aid in accurate shooting and, after an initial
process of learning how to locate your target through the scope, can be as natural
and easy as using open sights. For target shooting and long-range small game hunt-
ing, a handgun scope can also be a help, although it will be more difficult to use.
As you can see, the actual mounting of a scope on a rifle or handgun is not
at all difficult and is well within the ability of most shooters. If you do run into trouble
in mounting the scope, you may have to put up with some finger pointing and laughter
from your favorite gunsmith while he straightens things out for you.
Now that you have mounted the scope and done some shooting, after all is said
and done, you are a better shot, without becoming a better shot! Easy, wasn't it?
76
Chapter 8
Choosing and Installing Sling Swivels
Perhaps the most common modification to rifles is the addition of a sling. A good
sling will free both of your hands for climbing, moving branches, or for whatever
you use your hands for. Some rifles come factory-equipped with swivel studs, and
these are easiest to sling. Just slip sling swivels through the studs, then spend a
half-hour figuring out how the sling is supposed to go on the swivels, and your rifle
is ready to take hunting.
If your rifle doesn’t have sling swivel studs already mounted (most do not), you
have just discovered another project you can do correctly without a degree in
gunsmithing. As a matter of fact, one of the most common questions my customers
ask about sling swivels is "Can I put them on myself?" I usually respond to this
question by saying, "Why, yes, of course—but they’d work better on the stock."
TYPES OF SWIVELS
Perhaps we should take a look at some of the more common types of swivels
on the market.
Figure 8-1 shows the difference between standard or military swivels and the
quick-detachable (QD) types.
Barrel band swivels, shown in Fig. 8-2, are usually quick-detachable types.
End cap swivels, such as those on shotguns with recoiling barrels, and other
guns which are not suited for band swivels, can be seen in Fig. 8-3.
Flush mounts of several types (Fig. 8-4) can be used, although their popularity
is not as great as other QD swivels. They require more care in installation and are
a great deal harder to find.
77
Fig. 8-1. Left: Standard or military sling swivel. Right: Quick-detachable swivel.
Fig. B-2. Full band and half-band swivels.
78
Fig. 8-3. Swivel stud mounted on shotgun barrel cap.
Fig. 8-4. Flush mount swivels: Twist to lock; push to lock.
79
Several companies manufacture swivels. Millett makes a flush mount. Williams
Gun Sight Company makes over 25 different models to fit most guns in the field,
and Michael's of Oregon makes the Heinz number—57, or thereabouts. If you can't
find a style that fits your rifle or shotgun, you really have a special and unusual model.
After you have determined what kind of rifle you have and what type of swivel
you wish to install, it's time to get your tools together. Most of these tools have already
been discussed in Chapter 4. If you have forgotten their uses, refer back to that
section.
EQUIPMENT
Rulers help determine the correct location of swivels.
A drill and some bits make a much neater job of installation than gouging out
wood with a broken screwdriver.
Lubricants such as soap or wax make screw entry into the wood much easier.
A square will help keep the drill perpendicular with the working surface.
Screwdrivers come in two basic tips. Most swivel sets that require a screwdriver
will use a small, flat blade.
A small hammer or mallet will facilitate making a locating dimple in the stock
for drilling holes.
A centerpunch will make a locating dimple to mark the point of drilling, and keep
the drill from wandering.
A closely fitting rod to turn the QD studs without damaging the QD swivels will
be handy.
Not all these tools will be required for all installations, so please read the
instructions for the type of swivel you chose. Most of the instructions, however, will
be similar.
SWIVEL LOCATIONS AND PROBLEMS
I would like to point out some common errors seen in rear swivel installations;
you might wish to avoid these errors while installing your swivels. The locations, shown
in Fig. 8-5, detract from the future value of the gun and should be avoided.
The correct location is shown in Fig. 8-6, along with the measurements needed.
Front swivels can also be installed in a location not considered correct, which
will likewise hurt future values. Figure 8-7 shows those locations to avoid.
The dimensions and location of the correctly installed front swivel can be seen
in Fig. 8-8.
Another common problem is chipping or peeling the finish during drilling. Slow-
turning hand drills and dull drill bits are more likely to grab and tear wood fibers
than high-speed, sharp bits, so use a sharp drill bit and high drilling speeds, coupled
with low drilling pressure. A small piece of tape over the drilling area can help hold
the finish on the wood and keep it from peeling during drilling.
If the finish and wood have not been cut smoothly, continue on with the
installation. In most instances, such tears or lifted finish will be covered by the flange
on the swivel screw or stud. If, however, the imperfections are still noticeable, carefully
remove the screw or stud and apply some "shellac stick” or scratch remover to match
the finish, then reinstall the swivel screw or stud.
80
Fig. 8-5. Buttstock swivel locations to avoid.
Fig. 8-6. Correct buttstock swivel location—2 to 21/z inches from toe.
87
Fig. 8-7. Forearm swivel locations to avoid.
Fig. 8-8. Correct forearm swivel location.
SLINGS
Slings come in several styles and designs. A carrying strap can be as simple
as a bit of clothesline tied around the barrel and stock. More advanced straps can
be made of a simple leather strip, or as ornate “Cobra" styles with basket-weave
patterns, thumbholes, and the owner’s initials (Fig. 8-9). These straps are, as the
name implies, used for carrying and are not much good as steadying devices.
Other sling types more suitable to carrying and steadying are military versions,
Whelan slings, quickie, jiffy, hasty or a host of other names that imply speed. Basi-
cally, these are convoluted, looped arrangements to give adjustment to the length
of the sling. They are usually made of leather or nylon. One quick style and the military
type are shown in Fig. 8-10.
SWIVEL INSTALLATION
The actual process of sling swivel installation is quite simple. Rear swivel
installation on long guns is identical, but slightly different methods to install front swivels
82
Fig. 8-9. Top: Simple rope strap. Bottom: “Cobra” style carrying strap with all the bells and whistles.
Fig. 8-10. Top: Complex “Jiffie InstaJust” sling. Bottom: Military-style sling.
83
are required so I will differentiate between bolt-action rifles; pumps, autos, and lever
rifles; and shotguns.
Holes can be drilled with either step or fractional drills. Instructions supplied by
various manufacturers will indicate what sizes to use.
Locate the rear position by measuring 2 to 21/г inches in from the toe of the
stock. One word of caution: Some stocks have long buttplate screws, and if there
is any doubt in your mind about the swivel stud hitting the plate screw, remove it
and use it as a rule to be sure the two will not meet during installation. If there is
a conflict, you can either shorten the buttplate screw or move the swivel screw farther
up the stock.
Protect the stock with tape and make a locating dimple.
Square the stock with your drill or square the drill with your stock, depending
on whether you are using a drill press or a hand drill.
This operation is more easily done with a drill press. But if you don’t have access
to a drill press, do your best to keep the hand drill from wobbling out of square.
Drill the rear hole with the recommended size drill. The drill should be turning at high
rpm to allow the bit to cut smoothly and help keep chipping to a minimum. Drill to
the length of the rear screw.
Take a look at your rear swivel screw and note it has a fatter, unthreaded portion
just below its head. Your stock needs a hole the size of this section to be countersunk
the depth of the unthreaded portion. Use care in drilling this countersink. A hand
drill can ''grab’’ and be drawn into the hole, countersinking the relief hole too far!
If the swivels you are installing are quick-detachable types, do not use the swivel
bow to tighten the screw. A punch or rod is better and keeps the locking system
of the swivel from being twisted and weakened.
Now it’s time to get on with the front swivel installation.
Bolt-Action Rifles
Remove the stock from your rifle. Usually the action is held to the stock with
two or three machine screws located at the front of the magazine, just in front of
the trigger guard, and at the rear of the trigger guard. Some of the center screws
may be covered by the magazine floorplate, and, on some models, may not be used
at all. Set the metal parts of your rifle where they will be safe, and place the stock
upside-down on your work area.
Measure back from the tip of the foreend about 2 to 21/г inches. (If the stock
has an added foreend tip, measure back 1 to 11/г inches from the joint.)
Place a strip of tape over the center of the stock at this location. Using the
centerpunch and hammer, make a dimple where the hole for the front swivel is to
be drilled. Make sure the drill is vertical both longitudinally and laterally, then at a
high drilling speed, drill through the stock into the barrel channel. Turn the stock
over. If you have kept the drill vertical, the bit will have come through in the center
of the barrel channel. If it didn’t, pretend it did. The swivel nut recess is drilled with
the recommended size bit, using this new hole as a guide.
Insert the front swivel stud in the hole to see where the end of the stud will fall.
If it sticks out into the barrel channel, that’s okay. If it doesn’t, you will have to measure
84
how far it is shy of coining through. Now add the depth of the nut to this measurement
and drill the nut recess to this depth. Of course, if the stud extends, you will only
have to make the recess the depth of the nut.
A neat trick is to use the stud as a guide to keep the threads on stud and nut
lined up. Run the nut on the stud as far as it will go and insert the stud into its recess
(Fig. 8-11). Use a plastic mallet to avoid marking the stud and gently tap the top
of the stud, driving the nut into the recess. When the nut is seated in the hole, remove
85
the stud and insert it from the bottom of the stock. Having used the stud as a guide,
you will find no problem lining up the threads and starting the stud in the nut.
Tighten the stud, but not tight enough to bend the wood. Tap the nut with a
punch from the top while tightening the stud on the bottom until the nut is fully seated
in the recess. Continue to rotate the stud with a punch or rod until the holes are
perpendicular to the stock. File off any of the stud that may protrude inside the barrel
channel. It is important that there be no metal-to-metal contact with your barrel, as
this will affect accuracy. Reassemble the rifle and really tighten down the front guard
screw. Tightness is vital—both for accuracy and to keep the stock from splitting. Attach
the swivels to the studs, and pat yourself on the back.
Pumps, Automatics, and Lever-Actions
There are two basic types of front swivels that you can use. These are barrel
bands (two styles—full band and half band), and those that replace front assembly
bolts. The barrel band style can be used on pumps, automatics, and lever-actions,
while the assembly bolt-type are only for automatics. Of course, there are exceptions
to this generality, and the particular swivel set you need must be purchased for your
specific rifle. Be sure you get the right model for your type of firearm.
The correct swivel location for this series of guns is forward of the forearm by
about 11/г to 2 inches to allow the sling and swivel parts to lay as flat as possible
during storage.
Installing assembly stud swivels is easy. Just remove the front assembly bolt
and replace it with the correct one supplied in your swivel set (Fig. 8-12).
Full band types aren’t a lot harder, unless you are trying to install them on lever-
actions. If you are putting swivels on a lever-action rifle with tubular magazine, the
full band style swivel will require disassembling your magazine tube. This can be
more complicated than it sounds, and sometimes getting the tube back on the rifle
is not as easy as getting it out, so you might want to consider half band swivels for
magazine tube installations.
86
Full band swivels for pumps and automatics may have to be opened to allow
them to slide past front sight ramps. Carefully force the ring open, spreading it just
enough to slide around the sight.
When the swivel has been positioned, the ring can be closed with a pair of pliers
whose jaws have been layered with protective tape. Squeeze the ring back together
and check to see if the holes line up. Twist the projections on the ring with the pliers
until they do. Insert the attachment screw into the hole and tighten it down. Make
sure the ring is located where you want it before tightening, because once it starts
to get snug, moving it without scratching your barrel is nearly impossible. When the
screw is tight, mount the swivel through the hole in screw and snap the lock in place.
Whoopee!
If you are using the split ring type, the job is even easier!
It is a good idea to make sure screws fit screw holes before assembling swivels.
Swivels are polished and finished after being drilled and tapped, and sometimes
polishing will close in the threads on the outside of the swivel. This is usually the
case when there is difficulty in getting screws to start. The problem can be cured
by reversing the half ring and starting the screw in from the wrong side (Fig. 8-13).
Screw the large, hollow tension screw into the threaded side of the ring and
position the rings on either side of the barrel (or, if a lever-action, on the magazine
Fig. 8-13. Start lower screw from wrong side of band.
87
Fig. 8-14. Space between ring halves should be the same top and bottom.
tube). Screw the rings together with the top screw and wrench supplied until it is
tight. (As this screw is tightened, it forces the two halves of the ring around the barrel
with a great deal of force.) When the job is done, the space between the two ring
halves should be equal top-to-bottom (Fig. 8-14). If the space is not equal, loosen
the tension screws and adjust the hollow screw to open or close the space as required.
Install the swivel bows and take a break.
Shotguns
Shotguns, too, come in several configurations—single-shots, pumps, automatics,
doubles, and over/unders. Split ring swivels of the proper size can be used on single-
shots, over/unders, and automatics (except automatics that have recoiling barrels).
88
The installation of these swivels is identical to pump, automatic, or lever rifles.
Automatic shotguns with recoiling barrels will require a hole to be drilled in the
magazine cap and the stud attached through it. Simply drill a hole large enough
to let the stud slip through and attach the nut on the inside of the cap. Be sure to
"set” the nut with Loctite or instant glue to prevent it from working loose in the field.
Some magazine caps can be tapped and threaded and the stud installed directly
in the cap. I prefer the first method, because it allows the swivel to turn with the motion
of the sling.
Barrel bands won’t work on double barrels. Instead, a metal plate is secured
to the under rib with screws. The swivel then attaches to this plate. Because the thread
size is small and the job needs to be done with some precision, it might not be a
bad idea to have someone else—your gunsmith, perhaps—do this job.
89
Chapter 9
Reloading, or, More Bang for the Buck
According to the Fire Marshal, television shows, and newspapers, reloading is next
in danger to tightrope walking over a firepit full of alligators and snakes in a hurricane
while doing the samba: "Can you imagine having explosives in the house? Don’t
they make bombs from gunpowder? Why, everyone knows that gunpowder is so
explosive it goes off by itselfl"
I am not so sure that the Fire Marshal, television, newspapers, and everyone
really know what reloading is all about.
IS RELOADING SAFE?
Safety is only what you make it. Driving a car, flying, or even baking a cake
can be safe or not depending on the doer. No matter what you do, safety is up to
you. Reloading is no exception, and with a small pinch of common sense, it is as
safe as watching TV—and a whole lot more fun!
Reloaders use three basic components (Fig. 9-1)—powder, bullets, and primers.
Modern smokeless powder is pretty easy stuff to care for. Unconfined, it is not
explosive, and this fact can be demonstrated by spilling some on a piece of cardboard
(a teaspoon full or two will do; no sense wasting it!) and igniting it with a match. You
will see there is no explosion, the windows are not blown out, and the cardboard
is barely scorched. When unconfined, modern gunpowder burns. It does not explode.
The Fire Marshal is obviously not a reloader, or he would know that smokeless powder
is safer to store and handle than lantern fuel, the fumes of which are genuinely
explosive! And you can disregard what you see on TV or read in the newspapers.
97
Fig. 9-1. Components: Primers, cases, powder, projectiles.
For the most part, they know a good way to sell papers. Accuracy of information
seems to be immaterial.
How about the bullet itself? By themselves, bullets are as dangerous as dominoes.
The most damage I have seen done by a loose bullet was when stepping on one
with my bare foot. Loose bullets are absolutely inert, as are cartridge cases.
Primers, of all the components, are the most sensitive to shock. If you smash
one on an anvil with a hammer, it will explode. That is what it is supposed to do.
If you are a blacksmith, my suggestion would be not to store your primers on your
workspace. Primers should be kept cool and dry away from violent shock. They are
pretty hard to set off, but treat them with a great deal of respect.
IS RELOADING DIFFICULT?
If you can read and follow directions, you should find reloading very easy. The
process is mechanical and repetitive—the same steps over and over again as many
times as you have rounds to load.
IS RELOADING WORTHWHILE; WILL IT PAY?
The definitions of “worthwhile" and “pay" will vary from person to person. Some
loaders are looking for more accuracy, some for monetary savings, and some for
92
both. Most reloaders start out looking for the monetary savings and suddenly discover
accuracy.
To arrive at a true dollar figure, all numbers must be converted to single units
of the same value. Bullets and primers are purchased most often in 100-packs, but
powder is sold by the pound. Grain weight is used for powder measurements; a
pound is divided into 7000 grains. To aid our figuring, divide the cost of your bullets
and primers by 100, powder by 7000 (times powder charge). This will give the unit
cost of each cartridge.
Here’s an example:
Primers—$1.50/100 = $.015
Bullets—$8.00/100 = $.08
Powder—$15.00/7000 = $.002142 (rounded off)
It is easy to see that the most expensive component per container (powder) is
really the least expensive per round. In this example, loading 7 grains of powder
in a pistol case will give a total cost of powder of $.015. Now add these numbers
together and multiply by 50 (the usual number of rounds in a box of pistol ammunition)
to arrive at the per-box cost:
Primer = $ .015
Bullet = .08
Powder = .015
Total = .11 x 50 = $5.50 per box
Current retail prices for a box of factory-loaded ammunition for this pistol cartridge
run from $12.00 to $21.00. According to these figures, a saving of up to $15.50
can be realized.
Rifle ammo costs are figured the same way, except these are sold in boxes of
20, and in this example, 50 grains of powder will be used:
Bullets $12.00/100 = .12
Primer $1.50/100 = .015
Powder $15/7000 = .002152 x 50 = .107
Add these figures together and multiply by 20. The total cost to reload this box
of rifle cartridges is $4.84, while the factory cost is $16.25—a saving of $11.85 per
box, or over $49.00 per hundred!
Equipment costs can run from just under $20.00 for a basic loading set in one
caliber to over $200.00 for a progressive loader in most calibers. A very simple
computation will show the basic press can be paid for in less than two boxes of
reloads.
Does it pay?
Don’t be silly!
Shotgun shooters are a different breed, and view shotshell loading from a different
aspect than rifle or pistol shooters. In most areas of the country, shotgun shells can
93
be purchased as "loss leaders" in discount stores the day before the season opens
for a price that make your ammunition dealer cry. The shotshell reloader can just
about match this cost. If price is the prime consideration, I would say forget shotshell
reloading. However, if you inspect these promotional shells, you may find they are
not even field loads. These loads do shoot, but are seemingly designed to relieve
you of excess dollars without regard to hunt success. The load you produce for about
the same cost will be a quality load with sufficient shot and powder to bring home
more game per shot.
THE RELOADING PROCESS AND EQUIPMENT
By now you should be sold on the idea of reloading as a money-saver and are
anxious to get into the process itself.
The loading process for all types of cases—pistol, rifle, and shotshell—follows
the same basic steps:
1. Removing the old primer prepares the case for the new primer.
2. Resizing the case back to factory dimensions is necessary to make
chambering the reloaded round possible in different sized chambers.
3. Installing the new primer, which will enable the powder charge to be ignited
on demand.
4. Charging the case with powder: Some method is needed to determine how
many grains of what powder you want to use with what weight bullet. Loading data
is produced by powder manufacturers and bullet makers. Some of it is in thin hand-
out form and some in books of loading tables and charts of various types, formulae,
and ballistic tables. All are useful, and these published loads are safe. Do not
experiment with powders and loads not listed.
Once the proper charge has been determined, a means to measure that amount
is needed. Lee Engineering produces a simple set of powder dippers which give
good loads. These are inexpensive and easy to use, but don't use them for maximum
loads because dippers have a greater margin of error than other measuring devises.
Figure 9-2 shows the reloading scale (which usually can detect weights as little as
1/70,000 of a pound by interpolation!) and the handiest automatic measure I have
seen for charging cases on a turret press. The old standby, the adjustable powder
measure, can throw any powder charge in any increment, and is used in conjunction
with a scale to set the measure to your charge. Once this measure is adjusted, every
fifth charge or so should be weighed to see if the adjustments are still accurate. Place
one charge in each case, and when all the cases have been charged, look inside
each case to make sure there are none without powder, and none that have more
than the rest.
5. Placing the projectile in the case: Unless blanks are being made, a bullet
or projectile of some kind is normally used. The bullet has to be matched with the
powder charge and seated to the correct length.
6. Crimping, or closing the case, retains the bullet or shot in the case and
completes the loading cycle.
94
Fig. 9-2. Powder scale and automatic measure.
These are the only six steps needed to reload. It sounds pretty easy, doesn’t
it? Obviously, there is a little more to it than that. You have to have the proper reloading
tools and dies for your type of case.
Three types of loading presses are commonly sold. The hand loader (Fig. 9-3)
is on the bottom of the scale in cost and in speed. It will produce very shootable
loads and is much more transportable than other types of presses. The basic single
stage bench press (Fig. 9-4) is a definite improvement in speed and ease of loading,
and completing the set is the turret press (Fig. 9-5). This press is faster than the single-
stage, and in its highest development can be a self-indexing, progressive loader that
automatically places the empty case in position, primes, charges, seats, and ejects
the loaded round.
95
Fig. 9-3. Lee handloading kit.
In addition to the loading press, dies (Fig. 9-6) are made to fit the various calibers
to be loaded. Usually straight-wall cases, which include most pistol calibers, require
a three-die set, while bottlenecked cases, more commonly found in rifle calibers,
use a two-die set.
Most reloading manuals make a big deal out of adjusting and setting dies. The
cautions and warnings sprinkled throughout their instructions, threatening the end
of the world if you don’t follow their book to the letter, are almost enough to drive
people away. These cautions are necessary to remind people who have no common
sense to use some. Setting and adjusting dies follows the same general procedures
for rifle and pistol, and for single-stage or progressive loaders.
Rifle die sets usually consist of two dies—one for depriming/resizing, the other
for seating/crimping. The process of setting and loading a typical rifle cartridge in
a single-stage loader is quite easy to follow.
96
Fig. 9-4. Lee single-stage press.
The shellholder is snapped into the ram and the ram is raised fully. The sizer
die is screwed into the press till it touches the shellholder and given about 1/e turn
more. The purpose of this extra 1/e turn is to take any play out of the press parts
so the shell will be raised as fully into the die as possible.
Lubricate the case with a very small amount of die lube, place it in the shellholder,
and raise the ram. The case will enter the die, and the primer will pop out as the
ram is raised fully and the case is full-length resized.
97
Most single-stage tools have primer seating provisions built into them. Place the
primer in the primer arm and press the arm into the slot in the ram. Lower the ram
and the primer will slide into the primer pocket. (There is no need to play Superman
with primer seating. As a matter of fact, a light touch will let you feel the primer being
98
Fig. 9-6. Pistol (left) and rifle loading dies.
seated in its pocket.) Raise the ram just enough to let the primer seater pop out of
the way, and lower the ram all the way. As the case is drawn out of the die, the
inside of the neck is expanded to the proper internal dimension to accept and hold
the bullet. Remove the case, insert another lubricated case, and repeat this process
until all the cases you want to load at this time have been resized, deprimed, and
reprimed.
Charge all the cases with powder, following the admonitions of Step 4, above.
There remains only one more step, and that is seating the bullet.
Remove sizing die from the press. Lower the ram, and after inserting a loaded
factory cartridge in the shellholder, raise the ram fully. To keep the seating stem or
bullet seater in the seating die from contacting the bullet of the sample round while
die setting, back the seating stem out to prevent contact with the bullet point. Screw
seating die down until the die contacts the case mouth. This approximates the setting
*or crimping cases, if required. Now turn the seating stem down until it touches the
99
bullet. This should set the seating die to the correct overall cartridge length. If
additional crimp is needed, turn the die very slowly down; if no crimp is required,
turn it up slightly. Very little adjustment will be needed. Tighten the lock rings and
lower the ram to remove the sample case.
Insert a primed, sized, and charged case in the shellholder and place a bullet
on top, guiding it into the seating die while raising the ram. When the ram is lowered,
magic has taken place, for there is a fully operational, loaded round in the shellholder!
Adjusting and setting pistol dies is similar, except that an additional flaring die
is used on straight-walled cases such as .38 Special, .45 ACP, or .357 Magnum.
This die is adjusted so a barely discernible funnel is made in the case mouth. This
funnel will guide the bullet into case mouth to keep the sides of the case from crumpling.
Loading pistol cases using Lee dies and turret press is quite easy. The turret
is rotated so the die with the decapping pin is centered over the shellholder and
an empty case inserted in the shellholder. (Note that lubrication is not mentioned.
Lee pistol dies are made with a carbide sizer ring and are so hard that lubrication
is not needed.) The ram is raised fully, resizing the case and removing the spent
primer. A primer is placed in the primer seater and the ram lowered while holding
the primer arm under the shellholder. When the primer has been seated, the ram
is raised slightly to let the primer seater clear, then lowered fully. Rotating the turret
one station will position the flaring die over the shellholder and the ram is raised again.
This flares the case, and, if a Lee Automatic Powder Measure has been installed
in this die, it will drop a powder charge directly in the case. If the measure has not
been installed, powder can be introduced into the case through this die after being
measured by some other means.
Lowering the ram and rotating the turret to the third station sets the press for
seating and crimping. A bullet is placed on the case mouth and the ram raised. When
the ram is lowered this final time, the loaded cartridge may be removed. Rotate the
turret to start the process over again. It will not take any great amount of time before
a nice little pile of loaded ammunition has been accumulated. Now the trick is to
keep all your friends from helping you "test” it until it is all gone.
SHOTSHELL RELOADING
Shotgun shell reloading is usually separated from metallic loading by the nature
of the components, and most reloading books do not include shotshell loading data
with metallic case information. Quality shotshell reloading requires the best quality
hulls available. Do not scrimp by using "cheap” cases. Most cheap cases were de-
signed and manufactured for one shot; it’s not really good economics to take a chance
of case failure and possible gun damage when good quality cases are available at
small additional cost.
The process of shotshell loading has one extra step that metallic cases lack.
This extra step is the insertion of a wad to keep the shot and powder from mixing
together. Ammunition manufacturers have gone to great lengths to develop efficient
gas seals and shot containers, combining them into a single-unit wad. To make
matters more confusing, the wad must be matched to the powder charge and amount
of shot so their combined length will fall exactly at the right point in the case for a
tight crimp. Your loading manual or powder company handout will show you the
100
exact components needed for a particular case and wad. Do not mix components,
change anything, or vary from this published data!
Having selected the load, and having the proper components at hand, loading
a shotgun shell on a Lee Load-All (Fig. 9-7) is as easy as loading pistol cartridges.
First insert the proper powder and shot bushing in the charge bar and fill the
hoppers. Put powder on the side labeled powder; shot goes in the other.
Fig. 9-7. Lee Load-All shotshell reloader.
101
The sizing ring is dropped over the case knurled side up, and the combination
placed on the leftmost station. Pulling the handle down all the way will remove the
old primer and resize the case. The handle is raised, and a primer placed, flat side
down, in the seating cup in the next station. Position your case on top. Pull the handle
down again. This will remove the sizing sleeve and seat the new primer. After the
handle has been raised, the case is slipped under the wad guide, and the handle
pulled down far enough to let the drop tube enter the case. The charge bar is slid
to one side to drop powder into the case. The handle is raised and a wad placed
on top of the wad guide, then the handle is lowered until the wad is felt to seat on
the powder. Sliding the charge bar back to its original position drops the shot in
the wad. Raise the handle and remove the case. The shot should be about Vie inch
below the original crimp fold.
The case is now placed under the proper crimp starter to allow the crimp to
fold on the original factory-induced lines. Start the crimp by pulling the handle until
firm resistance is felt. Placing the shell in the rightmost station will finish the crimp.
This closes the crimp, depressing it into the case to lock it. It also rounds the end
of the shell to facilitate feeding.
The load produced on a Lee Load-All will equal those produced by presses
costing many dollars more. If you are loading for a shooting club, requiring hundreds
of boxes of shells a day, perhaps you need to consider a hydraulically operated
progressive press. Most of us, however, do not have this requirement.
SUMMING UP
Please note: No loads have been given here, no loading data offered. You are
referred to loading manuals for correct information regarding loads. In the interest
of safety, I cannot stress strongly enough the importance of using only those loads
which are published by companies that have researched and verified the safety of
the load. Do not smoke, have a beer, watch TV, or let anything or anybody distract
you as you work.
The field of reloading can be as simple as I have demonstrated, or as diverse
and complex as casting, sizing, and lubricating lead bullets, or swaging lead-cored
jacketed bullets, or even making the jackets themselves. Of course, as you get into
actual reloading, you will learn your own refinements and other procedures to tailor
your reloading operation for your needs. The hobby (and economics!) of reloading
is more than enough to keep you happily busy for a long time.
A quick suggestion: When you go to your favorite dealer to purchase your
reloading set, ask him to talk you through a reloading sequence. If his demonstration
is confusing, find a store whose personnel are knowledgeable and seem willing to
help you in case you get stuck. Purchase everything—press, dies, measure, primers,
powder, bullets, and anything else you need for your particular setup—at the same
time and use this as a lever for a “package discount.’’ Most dealers will work with you.
This chapter is intended to be a brief introduction to some loading principles
and procedures to familiarize you with the loading operation, and the economics
of loading. If you are shooting as little as two boxes of ammunition a year, reread
the section on cost, borrow your kid’s calculator, and do some cost comparisons.
102
Chapter 10
Refinish, Refurbish, Renew
Aren’t you ashamed of that old, worn, scratched, shabby chunk of wood you call
a gunstock? Wouldn’t it be nice to stand your rifle in the gun rack beside a Weatherby
and have someone ask which one was yours?
If you have decided to refinish your stock, this would be as good a time as any
to thin down, reshape, and make a clubby stock more graceful. This might be a
job to consider after doing your first simple stock refinishing job. I have seen factory
stocks with lots of extra wood reshaped into classic designs and turn out looking
very much like custom stock jobs.
REBLUING: A JOB FOR THE PROS
This might also be a good time to have your gunsmith reblue the metal parts
of your firearm. Then, when things are reassembled, the gun will look like new from
top to bottom.
Let me digress a moment and talk about bluing. Professional bluing is a project
not recommended for the home workshop. It involves not only power buffers and
polishers, but also some very caustic bluing solutions heated to around 290 to 300
degrees F. Water will spatter in temperatures this hot, and hot salts can cause a bad
combination heat and chemical burn that can be disfiguring. Let the guy who gets
paid to slave over hot bluing tanks take the risk.
Now, about proper polishing for bluing: A good polish job is not obvious, but
a bad one sure is! Ask to see your gunsmith’s bluing work. Check it to see if the
103
edges of the lettering in the metal are sharp and clean, if the corners remain square,
and if the screw holes are flat and not dished out. Sight down the polished surfaces
to see if they are flat and without ripples. Polishing marks should follow the contour
of the work. On round surfaces, such as the barrel, they should go around the work,
not end to end. On flat surfaces, they should be parallel to the longest side of the
flat. A good job of polishing is a lot harder to do than most people realize, and a
bluer who takes pride in his work will go the little extra to make sure his work will
stand up in bright light.
Note-. An antique must be examined to determine what value it has, if any, in
its antique condition before it is blued. Once a rare and valuable antique has been
blued, its unique value may well be gone along with any antique value it might have
had. The same caution is true about refinishing stocks on antique guns. If this is to
be done, it may well be best left to a professional gun restorer.
Now, back to our story.
TOOLS AND EQUIPMENT FOR STOCK REFINISHING
As with any project, there are certain tools and equipment you will find useful
and necessary to do the refinishing job correctly. This is a simple list, as there really
isn’t much equipment needed for this project.
Screwdrivers must fit the screw slots tightly and are used to get stock screws
and metal parts out of the stock. They are not to be used as chisels or scrapers to
get old finish out of corners.
Paint remover: The basic way to remove old finish is with scrapers, such as the
back of a hacksaw blade, but if you want to be done before next Thursday, I’d suggest
a chemical remover.
Rubber gloves will help prevent the paint remover from removing your finish-
er, as we in the trade call it, skin.
Old cloths or paper towels: When the paint remover has done its work, cloths
and towels are used to remove the old finish.
A sanding block is necessary in stock refinishing to keep flat surfaces flat. A
stock sanded with fingers backing the sandpaper will sand unevenly and the fin-
ished project will look very amateurish when done.
Sandpaper comes in different grits and grades. I prefer open coat garnet paper
to flint as it doesn't seem to clog as quickly and seems to outlast flint two to one.
The grades most useful are 80, 120, 150, 180, and 220.
A toothbrush (preferably one you don't want to use again) is very useful to clean
old finish out of checkering. It will also apply the new finish to the bottom of the
checkering diamonds to ensure full coverage.
Masking tape: There will be areas you want to keep free of finish. Masking tape
is just the thing to do it.
A sharp pointed blade: Whether a razor, an X-Acto, or a penknife is used is
immaterial as long as it will cut masking tape to exact dimensions without leaving
a fuzzy edge.
Stock finish: There must be a dozen or more types of wood finish available.
Several are better for stock work and seem to be used more than the others. One
manufacturer used Dupont clear automobile lacquer for years, and may still do so.
104
Remington uses a finish they call RKW. Both of these finishes are hard and shiny.
They reflect light from the surface of the finish much like a mirror. Polyurethanes seem
to have been gaining ground in the stock finish arena in recent years. They are tough,
resistant to scratching, and react well to waxing.
Oil finishes, on the other hand, seem to reflect from deep within the wood and
bring a warm glow to the finish. I much prefer the effect of this type of finish. Birchwood
Casey’s Tru-Oil is one linseed oil finish commercially available for the stock refinisher.
French polish has to be made up as needed, and is perhaps the finest furniture finish
available. Oil finishes have one other advantage: If the finish becomes scratched,
an oil finish is much more easily restored and matched than a lacquer, varnish, or
other finish.
Each type of finish will be discussed during the actual application.
Steel wool: By now, you must recognize steel wool as my favorite gunsmithing
tool—0000 grade. (Is there any other kind?) There is nothing better to dull a too-
shiny finish, to clean up wood filler, or to reduce new finish used as a filler. Steel
wool in rougher grades can be helpful in getting the tougher spots of finish cleaned
off the stock.
Working area: I mention the work area because stock refinishing is a little on
the messy side. Spilling stock remover on the dining room table is not going to endear
you to the rest of the family. It is better if stock refinishing is done in a well-ventilated
area to keep people from sneezing over wood dust. (Some noses are allergic to walnut
dust. If you don’t believe me, just ask mine.)
Water is a good thirst-quencher, and if you work hard at stock refinishing you
may be thirsty, but its main function is to "whisker” the stock after sanding.
Heat: A household oven will provide enough heat to dry moisture from your stock.
Rubbing compounds—#7 Chrome Polish, pumice, rottenstone, and Dupont rub-
bing compounds—will smooth out any imperfections in the final finish and bring the
finish to your desired degree of shine.
Steam iron: A common household steam iron is ideal for raising dents in wood.
Your face mask will help keep you from breathing fine wood dust into your lungs.
Its use is recommended.
FINISH REMOVAL
Remove all metal parts and the recoil pad or buttplate from the stock to keep
the finish remover from damaging them. This includes the sling swivels and studs,
but not any inlays or metal reinforcing studs or brackets in the stock.
Take the stock, your finish remover, and protective gloves outside and follow
the directions on the container. Usually this involves laying a coat or spraying a coat
of remover on the finish. Brushing back and forth is not recommended. When the
finish bubbles, it is ready to be removed with rags or paper towels. Be careful with
the remover. It is strong stuff, and, as Grandma says, "It’ll take your breath away”
if you get a good whiff. Adequate ventilation is necessary.
Several applications of this remover may be necessary to get off all the old finish.
Remember to lay a coat of goo on the checkering and when it bubbles, scrub it
off with the toothbrush. After the checkering has been cleaned with the brush, rinse
the brush in water to keep the remover from dissolving it.
105
I would suggest a final smearing of the stock with remover and scrubbing with
cloths or towels, even after the stock looks bare, just to get any lingering, sandpaper-
filling, remaining finish off. Let any residual remover the cloths have not wiped off
evaporate. Take the stock to your finishing area. Now go back and dispose of the
rags and towels you used when you wiped the old finish off. Don't leave them laying
about; it’s not good practice.
Put the recoil pad or buttplate back on the stock and give the surface of the
stock a good inspection. Look for depressions in the surface, dents, and places where
the wood fibers have been torn. Fill the steam iron with water, turn it on, and lay
a fold or two of cloth over a depression or dent in the stock. Press the steam iron
over the cloth and give it a shot of 10 to 30 seconds or more of steam. The action
of the steam will fill the wood fibers with moisture and puff them up. This action should
be taken even when the wood fibers have been torn. Hopefully, the fibers will puff
up enough to fill the dent and come up even with the surface of the wood. Steam
the next dent, then the next, until you have steamed them all, no matter how small.
Now it is time to go on to the next step.
SANDING
Attach 80 grit paper to your sanding block, put on the face mask to protect your
lungs, and rough up the surface of the wood by sanding with the grain, taking care
not to sand any of the checkering or carving. Sanding across the grain will cut the
wood fibers and make subsequent sanding harder, as the cut fibers will have to be
sanded out or fine dark lines will show up in the finish.
When all the long, flat surfaces have been sanded, roll the sandpaper into a
cylinder to let it act as its own sanding block, and roll it with the grain in rounded
areas behind the rear of the cheekpiece. Use special care to keep the edges and
corners of the stock square when sanding under the cheekpiece and sculptured
places on the stock.
Do not get violent when sanding with 80 grit; it cuts very rapidly. The main
purpose of using this grit is not to sand the stock smooth, but to cut through wood
fibers that have been sealed by the original finish.
When the entire stock has been sanded, wash it off to get rid of the sanding
dust. Yep, just hose it off with the garden hose. The stock will turn dark, and this
will be the color of the wood when your stock finish is applied. Any areas that do
not turn dark are still sealed and more sanding is needed.
Dry the stock by warming it in the oven (300 degrees is fine) until the water has
evaporated. Inspect the wood and you may be surprised to find that some of the
dings and dents have vanished! Steaming them with the iron and warming the wood
has removed them. Give the stock another 10 to 30 second treatment with the steam
iron on those places that have not yet been brought back to the surface.
Now use the #120 grit paper and again sand with the grain. The purpose of
this grit is to remove all the marks you put in the wood with the 80 grit paper, and
to begin to sand some of the minor dents and imperfections away. Please be careful
about your checkering. In your frenzy of sanding, do not let the checkering get dam-
aged. It’s much easier to keep it original than to restore it. Removing the 80 grit marks
106
on the long surfaces will be easier than on the rounded ones. Don't give up and
don’t sand across the grain. After the stock has had all the previous sanding marks
removed, hose it off again to remove the dust and to moisten the top layer of wood
fibers.
Once again bake your stock at 300 degrees until dry. Notice that the stock seems
rougher now than when you finished the 120 grit sanding. This process is called
whiskering, and what has happened is that the surface wood fibers have absorbed
moisture and those that have been pressed down by the sandpaper have raised
up. This process is the same as using the steam iron, except the steam iron forced
the moisture deeper into the wood. Speaking of irons, it’s time to give those remaining
dents another treatment.
Drop down to grit #150 and continue your sanding as before, removing all the
#120 sanding marks. Whisker again and look at any remaining dents. If no change
is taking place, the fibers in these dents have been broken or crushed so badly that
they are not reacting with the steam treatments. If they haven’t begun to raise by
now, they probably are not going to change.
These gouges or scratched places are usually too deep to sand out without
ruining the design of the stock. There are several ways to handle this problem. One
that is used by commercial stock companies is Micro-Bed. This is a thick walnut-
colored compound used primarily for bedding metal to wood for a perfect fit. This,
of course, will fill the depression, but will it match the color of the wood? Not always.
In fact, seldom. When the stock is finished, the Micro-Bed will show up as a spot
or patch of stuff. On a utility stock meant for knock-about use, that might be okay,
but for just a little effort with white glue and sanding dust, these dings can be disguised
and become almost indistinguishable from unrepaired wood.
Make a paste of white glue and sanding dust and use this mixture to putty up
the gouge. Be sure to let the glue dry before sanding. (Wet glue and sandpaper
make an awful mess.) Smooth the filled gouges down to the surface of the wood
with your sanding block.
Shift to #180 and sand the whiskers off the stock. By this time the stock should
have had all the dents removed and all the deep gouges filled. Begin to concentrate
on making sure that the previous sanding marks have been removed, because from
here on sanding will be preparing the surface for finish, not for removing abrasions.
Once again wash off the dust and heat the stock to whisker the wood.
The #200 grit paper will cut the whiskers, but not do much to the base wood.
If any sanding marks have been left from previous grades of papers, you will have
to go back a grit and remove them, then proceed from there. Follow the same
procedure with 220. The stock should shine after being sanded with 220. It needs
to be wet and dried to raise the whiskers over and over again until the grain no longer
raises. The reason for this continued grain-raising is that the stock finish will raise
any fibers that have not been previously raised and fix them solidly in the finish as
sharp teeth ready to file your skin. When the stock is smooth after whiskering, sand
it one last time.
If the color of your stock wet is not the color you would like it to be finished,
a stain of some type can be used to make it a darker walnut, a reddish cherry, or
107
most any other color. Several companies make small lots of water stain in
concentrated containers. It’s not a bad idea to dilute the stain a little more than the
directions call for. Additional applications of stain can be used to darken the wood
to the desired color much more easily than trying to scrub it off if it is too dark.
Very lightly sand off any whiskers that can be felt, and then wipe the surface
of the stock with a rag to clean off any final sanding dust. Brush the checkering to
clean it out, too. Set the stock aside while you clean up your work area to prevent
any sanding dust from settling on the new finish you are about to put on the stock.
Wrap the recoil pad with a wind or two of masking tape. This will keep the stock
finish from yellowing white spacers in the pad. It is also time to cover the checkering
with tape to protect the diamonds from being filled with finish. Rub the tape down
on top of the checkering with your finger and press it into the border groove of the
checkering with your fingernail. Now cut through the tape in this last groove with
an X-Acto knife or other sharp blade—one that will not tear or pull the tape. Carefully
peel the excess tape away, exercising extra care at the tips of the checking pattern.
FILLING
It is time to decide how you want to fill the pores of the wood to make the finish
smooth and slick. Two methods are commonly used.
The first is quick and involves a commercial wood filler. This may leave specks
under the finish, as it sometimes does not match the wood color. Just wipe on the
filler parallel to the direction of the grain; just before it sets, wipe it off across the
grain. A light stroking with 0000 steel wool might help clean any off that the rag does
not clean off.
The second method takes longer, but brings out more of the natural beauty of
the wood. This method requires successive layers of oil finish until the pores are filled.
A heavy coat of oil finish is applied and allowed to dry at 70 to 80 degrees for 12
hours or more, then reduced back to bare wood with 0000 steel wool. A careful
inspection of the work will reveal any pores that have not been filled. If any have
not been filled (they will show up as black specks), another layer of finish is applied,
dried, and reduced to the surface. When the pores are completely filled, the stock
is ready for the final finish.
REFINISHING
No matter what finish you ultimately use, be sure you have a place to hang your
stock to dry where dust will not settle on it.
Lacquer finishes are usually sprayed on; they dry rapidly, and take a high,
lustrous polish. They chip easily and seem to be more sensitive to moisture than
some of the others. Lacquer is available in both brushing type and spray. If you can
find a paint store that carries clear brushing lacquer, use it. It will flow and blend
itself into a smooth surface without the need of expensive spray guns. Let it dry
overnight and rub it with Dupont rubbing compound to bring the final luster to the
lacquer. If a super high-gloss finish is needed, finish the polishing with #7 chrome
polish and car wax. Lacquer will be the shiniest and most mirrorlike of the finishes
with the least effort. Its major drawback is that it does chip easily.
108
Varnish and polyurethane finishes are usually brushed on; they too will flow to
give a smooth surface, although some may have thicker areas. Let them dry for 24
hours before rubbing them out with compound. Varnishes are an excellent choice;
some may impart a slight, not unattractive, yellowish tinge to the wood. Some of
the synthetics and polyurethanes go on without changing the color of the wood. It
would be an excellent idea to test these finishes on the barrel channel to see if the
finished wood color is suitable. A small spot sanded on the bottom of the channel
will do; if it is not suitable, it will not show. Both of these types of finishes tend to
be thick and heavy, absorbing the warmth of the wood, leaving it a little on the lifeless
side. Both are long-lasting, durable, and resist water very well.
Refined linseed oils, such as Tru-Oil, contain chemicals to speed up the drying
process. Be sure to get a gunstock finish at your gun store—Tru-Oil, Linspeed, G-96,
etc. Hardware store "boiled linseed oil" just won’t do. The oil should be applied
in several thin coats rather than in one goopy one. Allow eight hours between coats,
even if the directions say "dries to the touch in 30 minutes." Usually three to five
light coats is enough. This finish is soft and seems to attract more dust than others
during hardening. Steel wool (0000 grade, or course) will remove dust motes and
dull the finish if a "hunter" finish is required. If gloss is needed, rub lightly with #7
polish, chrome polish, or rottenstone.
Linseed oil is a fair moisture barrier and is not as good a protective barrier against
abrasions or scratches as polyurethane, but is much more easily restored. If the nat-
ural beauty of the wood appeals to you, this finish will let light penetrate deeply into
the wood and seem to reflect from below the surface of the finish. It is much easier
to apply than French polish and nearly as warm and lustrous.
French polish is what I consider the ultimate in furniture polish, and can be used
on your gun stock. I have used it on show guns, but don’t recommend it as highly
as the linseed oil finish for working guns. This finish is basically a shellac and oil
combination. The two will not store mixed, and should be prepared at the time of
use. One of many formulae is:
□ 4 parts White 4 cut shellac.
□ 1 part boiled linseed oil.
□ 1/e part hard paste floor or car wax.
Method 1—Dissolve the wax in shellac and add oil. The oil will separate out.
The mixture will need to be shaken before a small amount is poured in a flat container.
Fold an old T-shirt into a tight ball about the size of a silver dollar. Touch this ball
to the polish and, with a circular motion, apply to an area about three times the pad
size. The oil in the mixture will help to keep the shellac from gripping the pad. Do
not stop your polishing motion, or the shellac will grab and leave an impression of
the cloth in the final finish. This finish dries slowly, and if you handle an area just
done, your fingerprints will be permanently impressed. Allow the finish to age from
three to six days to make sure it is hard. Then you can go over it with pumice,
rottenstone and water, or #7 chrome polish to bring it to your desired luster.
Method2— Dissolve the wax in shellac and keep the oil in a separate container.
Touch the pad to the oil, then to the shellac, and follow the application instructions
in Method 1.
109
This finish brings out the beauty of the wood to best advantage. It is quite diffi-
cult to apply smoothly, and does take time. It also is not a good waterproof finish,
and will water spot. I would not recommend it for a working gun.
No matter what finish has been used, when it is dry to the touch, but still soft—at
about half the recommended drying time—the protective mask over the checkering
can be removed. Peel it from the points of the pattern toward the center, working
from all sides. Remove the tape from the recoil pad.
Now let the finish cure and fully harden. At the end of the curing period, put
the metal parts back in the stock and tighten down the stock screws—tight. Get out
the old toothbrush and brush some linseed oil (stock finish, boiled or refined) into
the checkering pattern to seal the wood. Wipe off any spatters and give the wood
surfaces a quick polish with car or paste wax to bring up the final luster.
At this point, your stock should be a showpiece worthy of display.
110
Chapter 11
Cutting through Cartridge Confusion
There seems to be a mystery about cartridge designation. I would like to correct
a little apparent misinformation and offer some handy guides to clarify this seeming
misunderstanding. It is not my intent to deliver a full-blown dissertation on the history
of ammunition, just to clear up some confusion.
In the “Old Days,” muzzle-loaders tended to name the caliber of their guns by
major diameter of the barrel, but used balls or bullets in rifles of a smaller size to
compensate for the thickness of patches, or in pistols of a larger size to fill chambers
completely. Thus a .54-caliber rifle shot a “patched” .530 diameter ball and a
.36-caliber revolver used a .375 diameter ball. This system, when understood, makes
sense, but can be somewhat confusing to the new shooter who may not realize why
there is a difference in ball size and barrel diameter.
With the advent of newfangled black powder cartridge guns, a method of naming
cartridges was needed. A cartridge designation was developed in the United States
to indicate what the round or shell actually meant. It was an easy system; three
numbers were hooked together to identify the cartridge—for example, .45-70-350.
The first number is caliber; next is the black powder charge, and lastly, bullet weight.
Thus the .45-70-450 military 1873 “Trapdoor” Springfield round meant .45 cali-
ber, 70 grains of black powder, and a bullet of 450 grains. How about .50-70-450?
.50 caliber, 70 grains of powder, and a 450 grain bullet. 44-40-200? 50-110-500?
Yep, you got it! (I have actually oversimplified the system, but in general, this was
the basic premise.) New cartridges were added and the system worked. Everyone
knew what the caliber, charge, and bullet weight were, and everyone was happy.
Ill
Gradually the bullet weight portion of cartridge designation fell into disuse, but
reloaders knew that to reload a .45-70, you needed a ,45-caliber bullet. How about
your .30-40? Sure, a ,30-caliber bullet is right. But one day a reloader asked for
.38 bullets to reload his .38-40 and found that the bullets fell through his .38-40
barrel. He discovered that a .38-40 requires a .401 diameter bullet! For the most
part, however, the bullet diameter/powder charge system continued to be followed.
The government, recognizing the need for better military arms, developed and
accepted a whole bunch of black powder military rounds, usually in larger black
powder calibers such as the .50-70-450. Then, in 1892, with the advent of smokeless
powder, the trend toward larger and larger bullets suddenly reversed with the
acceptance of the .30-40 cartridge for the Krag rifle—yes, ,30-caliber, 40 grains of
smokeless powder. But there was trouble brewing in River City!
The rimmed .30-40 round was soon replaced by what would develop into the
most popular cartridge ever developed, the .30-06. A ,30-caliber with six grains of
powder? That just doesn't seem reasonable. In the ever-mysterious ways of
government, when the new rimless military ,30-caliber round was accepted in 1903
(remember the 1903 Springfield rifle?), they changed the rules! Now it was caliber
and date that determined the name. Cartridges used in the 1903 Springfield rifle
were, of course, .30-03 Springfield—a ,30-caliber round being accepted for military
Springfield rifles in 1903.
The .30-03 was short-lived. It went back into development after cycling prob-
lems were discovered in machine guns. These problems were resolved in 1906, and
the round was redesignated .30-06. As you can see, this designation followed the
new rules.
But what about commercial ammunition manufacturers? They were still producing
rounds such as the .38-56, .32-20, .32-40, and others of the old black powder
designation system. As smokeless powder became more popular, manufacturers
began to change the way in which cartridges were named, and there seemed to
be a breakdown in the system. Cartridge names began to lose some of their
designation clarity. .38 Specials weren’t; they were .357. The .32 auto was a .309.
The .303 British wasn’t; it was .311—but the .303 Savage wasn't .311; it was .308!
Recognizing that there was a problem brewing in cartridge names, some
companies began to standardize cartridge names with bullet diameter. This practice
continues today, giving us such rounds as the .308 Norma Magnum, .223 Remington,
and .264 Magnum. Some manufacturers viewed this as heresy and continued to
follow the government's lead for using bore diameter—.300 Winchester Magnum,
.270 Winchester, .30 Remington, et al.
But then we come across references to a .22-250. Is this 250 grains of powder
propelling a .22-caliber bullet? Probably not! This cartridge doesn’t seem to fit any
accepted designation system, so we have discovered a new scheme of names.
.22-250 indicates a .22-caliber bullet mounted on a .250 Savage case. (The .250
Savage case also throws another curve into the game, as it was originally called
the .250-3000, indicating a ,25-caliber bullet being shot at 3000 feet per second.)
Quite rapidly, combination names became popular—25-06 (,25-caliber, .30-06 case),
7mm-08 (7mm bullet, .308 case). How about the .38-44? No, you guessed wrong.
112
The .38-44 designation refers to a heavy .44 Special revolver frame that was specially
fitted for the .38 Special round, as well as the heavily loaded .38 Special ammo meant
to be fired only in this large, strong gun.
Cartridge designers began to feel slighted, and eventually their ego began to
appear. If you were good enough to design a cartridge, your name could be
perpetuated in Cartridgedom—.257 Roberts, .30 Herretts, 35 Whelen.
Some years back, Remington and Winchester were both working on new fast
varmint calibers. Both hit the market at about the same time. Both featured the exact
same bullet diameter, and (with the exception of reloading pros-and-cons and
advertising hoopla) both were quite similar in performance. These were the .243
Winchester and the .244 Remington. Due to a change in bullet weight for the .244
case, Remington (apparently for marketing reasons) found it necessary to rename
the .244 the 6mm Remington.The 7mm Express and .280 Remington cartridges are
also exactly the same cases carrying different bullet weights. Both sets of cartridges
are currently being produced. Since the .244 Remington and 6mm Remington are
identical, and the 7mm Express and .280 Remington are the same, a seeming
violation of a prime safety directive exists—“Never shoot a round in a rifle that is
not specifically labeled to accept that cartridge.’’
Recently, cartridges have appeared that don't fit any known designation system.
One such is the .307 Winchester. The .307 Winchester is (more or less) a .308
Winchester with a rim, as it was developed for lever-action rifles. The “.308
Winchester” couldn’t be used as a name, since it was already in use. They had to
call it something, though one wonders why they avoided an accurate description,
such as “.308 Winchester Rimmed."
Now, armed with this quick background in cartridge designation, you should
be able to determine a great deal of information from just the name of a particular
cartridge.
Experts in cartridge collecting, however, will note that I have not mentioned the
European system of cartridge labeling. The Europeans use a strange millimeter
system which designates bullet size and case length (i.e., 8 x 57, 7.62 x 39, etc.),
and I don't think it necessary to bring any unwanted confusion to our own clear and
logical—ahem—system of cartridge designation.
113
Chapter 12
Malfunctions, Causes, and Cures
All mechanical devices suffer from breakdown, usually at the least opportune time.
Firearms are no exception. Some problems are easy to diagnose and correct, and
a good old-fashioned cleaning seems to cure a lot of ills. But when broken parts
are the cause, cleaning won't help at all except to make parts replacement less
messy—and to help keep the gun working afterward.
It is not the intent of this book to turn you into an expert diagnostician or gunsmith.
There are some common repairs, however, that can be done with some very basic
knowledge and the awareness of “which end of the hammer drives the nail.’’ For
the sake of clarity and simplicity, I am going to detail some procedures within each
family model. If the malfunction you experience is not listed under your model, I
suggest you visit your gunsmith.
Perhaps this is the place to make a disclaimer: Neither the publisher nor the
author have any control over the expertise of the reader and cannot be responsible
for any accident or the safety of any repair suggested in this book. I suggest that
you have a gunsmith check your work for your peace of mind and to make sure
your work has been done correctly.
THE CHAIN OF OPERATION AND GENERIC MALFUNCTIONS
To help determine where a problem lies, understanding why and how a firearm
works helps simplify the diagnosis and solution.
The normal operating chain of all firearms is quite simple—chambering a round,
igniting the powder, extracting the empty case and ejecting it from the action, and
115
repeating this sequence as often as required. Automatic arms perform this sequence
a lot faster than other types. The methods used to accomplish these steps vary in
complexity from maker to maker and model to model, but understanding the principle
behind a particular step will help pinpoint the problem.
Loading the chamber in single-shot firearms is done by manually placing a round
in the chamber and closing the breech. Clip-fed guns strip a round from the magazine
as the bolt is closed, pushing it into the chamber. Tubular feed guns have devices
to keep the remainder of the cartridges in the tube while one is being raised to the
chamber. The usual method is to have mechanical latches release the shell at the
proper time. This timing is done by cams located on the action bars.
It is unusual for single-shots or tubular feed guns to have feeding difficulties,
unless they are dirt-related. Clip-fed guns, however, have this problem by the barrel
full! Detachable magazines have a tendency to get banged about, and if the lips
of the magazine become damaged, feeding malfunctions will occur. The adjustment
of these lips is best left to an expert, as magazine lips are fragile and hamhanded
adjustment may damage them beyond repair.
Ignition occurs when the firing pin strikes the primer, which explodes, and in
turn sets off the main powder charge. If the gun “snaps" when the trigger is pulled
and the charge does not ignite, there can be a number of causes. Take a look at
the primer. If you find a shallow impression, the cause may be a light firing pin strike
resulting from a weakened mainspring, a worn or eroded firing pin tip, dirt or burrs
on the firing pin body, or excessive headspace. If you find no impression on the
primer, the culprit is usually a broken firing pin.
If the cartridge case remains in the chamber after firing, suspect a broken
extractor or a weak extractor spring.
If your automatic high-powered rifle will extract and eject loaded rounds, but
on firing tries to feed a live round into a chamber containing a fired case, have the
rifle checked for headspace! A shotgun with these symptoms probably has a rust-
encrusted chamber.
Rifles and pistols chambered for the .22 Long Rifle or .22 Magnum can also
exhibit the same symptoms and malfunctions. The cause, however, is quite different.
The edge of the chamber mouth of rimfire guns is easily damaged by dry firing, and
eventually the firing pin will make a dimple at the edge of the chamber, forcing a
small prong of metal into the chamber. When the case expands (or obdurates) during
firing, this prong digs into the case, preventing the extractor from pulling it out.
Ejection difficulties are quite uncommon, but if both an empty and a live round
are jammed in the action together during the firing cycle, suspect a broken ejector.
Many manufacturers use similar parts in several models or families of models.
For example, Remington 870 pump and 1100 automatic shotguns share extractors,
firing pins, and most trigger group parts. Winchester 1200s and 1400s share bolts,
bolt carriers, most trigger group parts, firing pins, and extractors. This system makes
good sense. By necessity, other parts will differ between pumps and automatics.
As you may have already guessed, the method of repair or replacing identical parts
is similar.
I am not going to discuss or offer repair suggestions for models that are being
seen less often or may be obsolete. Model 12 and 97 shotguns; Springfield, Mauser,
116
and Jap rifles; and pistols such as the Colt .45 automatic are covered in every
periodical and book you may pick up. What is not found, and may be of more
importance, is what is currently being produced and used.
SPECIFIC MALFUNCTIONS AND FIXES
Let's take a look at some of the problems that seem to plague our more modern
common firearms, along with the procedures to correct them.
Remington 870
The Remington 870 pump shotgun has been made continuously since 1950,
and has undergone some field-dictated development. Most of the updates seem to
be mostly cosmetic. Any mechanical changes in current production guns will fit old-
er versions as well. The 870 is an unusually reliable shotgun.
Malfunction 1: After firing, the action is hard to open and the extractor may slip
over the rim of the shell.
Cause: Plastic residues and rust in the chamber prevent easy operation.
Cure: Clean the chamber.
Procedure: Scrub and/or polish the chamber until plastic residues and rust are
removed.
Malfunction 2: The action opens easily, but fails to extract either live or fired shells.
Cause: Broken extractor.
Cure: Replace extractor.
Procedure:
A. Clear action.
B. Fit a section of wood dowel three or four inches long between the front
of the receiver and inside of the wood portion of the forearm. Figure 12-1 shows
the dowel in position. This prevents the bolt from opening any farther while you are
exchanging parts.
C. Using a fine-bladed screwdriver or strong knife blade, pull the extractor
plunger back into the bolt and rotate the broken extractor forward and out of the
bolt. Slowly release the plunger. It will stay in the bolt.
D. Insert the new extractor in the slot and, while exerting downward pressure
on the top, force it back against the plunger until the extractor “foot” is forced down
into its retaining hole in the bolt. The extractor plunger will now snap against the
extractor, both locking it in place and providing necessary tension for proper case
removal.
Remington 1100
The Model 1100 is a gas-operated shotgun introduced by Remington in 1963.
Like most civilian gas-operated guns, the 1100 is sensitive to dirt. This series is best
shot with a dry, non-lubricated magazine tube and piston parts. Carbon, heat, and
oil build into a baked-on gummy varnish that not only slows down the operation but
is harder to remove than plain carbon.
117
Fig. 12-1. Dowel holding forearm from opening.
Malfunction 1: Fires the first round, but will not fire the second shot. When bolt
is opened, the fired case is found in the chamber.
Cause 1: Dirty gas system parts resulting in short stroking.
Cure 1: Clean system.
Procedure 1:
A. Open and clear action.
B. Remove barrel nut, forearm, and barrel.
118
Fig. 12-2. Correct relationship of A: piston, B: piston seal, and C: O-ring.
C. Inspect barrel hanger for carbon buildup and to make sure that the gas
ports inside the hanger are open and clean.
D. Take the barrel seal (a neoprene О-ring) off the magazine tube and
inspect it for abrasions. Any roughness will require replacement. Remove the piston
and piston seal (Fig. 12-2) by sliding them off the magazine tube and inspect them
for carbon buildup. They must be clean for proper operation of the action.
E. Remove the operating or bolt handle. It is held in the bolt by spring
tension and is pulled out of the bolt with brute finger force. Usually, pliers are not
required.
F. Press up on the carrier lock and depress the long cartridge stop on the
right side of the receiver to release the bolt and operating bar assembly. While holding
the cartridge stop against the side of the receiver, slowly ease the bolt out of the
receiver by pulling forward on the operating bar. Lift the bolt off the bar and clean
the inside of the operating bar tube. When these parts are clean, do not oil them!
Leave the parts dry.
G. Reassemble in reverse order. Remember the cartridge stop needs to
be pushed into the receiver wall or the bolt will not go in. The bolt and operating
bar might have to be wiggled around a little to get the operating handle slots in each
part to line up and to get the operating handle started in. It locks both parts togeth-
er. Once the handle is started, push it in firmly. Replace the piston, piston seal, and
barrel seal. Replace barrel, foreend, and nut.
Cause 2: Firing shells of insufficient power to activate action.
Cure 2: Use correct, higher-powered ammunition.
Malfunction 2: Live or empty shells remain in the chamber when the action is
opened. Sometimes a loaded round will be found jammed against an empty case
that has been left in the chamber after firing.
119
Cause 1: Plastic residues and rust prevent the extractor from extracting shell.
Cure 1: Clean and/or polish the chamber.
Procedure 1:
A. Open and clear action.
B. Remove barrel nut and barrel.
C. Scrub/polish chamber until all foreign material is removed.
D. Reassemble barrel and nut.
Cause 2: Broken extractor.
Cure 2: Replace broken extractor.
Procedure 2:
A. Open and clear action.
B. While holding the bolt to the rear with the operating handle, release the
carrier lock. Ease the bolt forward until the carrier raises.
C. Insert a wood dowel about 3/e to Vz-inch diameter between the front of
the carrier and chamber (Fig. 12-3), and continue to ease the bolt forward. This dowel
will keep the carrier from being cammed back down to its normal position. The bolt
is prevented from closing, giving you working room.
D. Using a fine-bladed screwdriver or strong knife blade, pull the extractor
plunger back into the bolt and rotate the broken extractor forward and out of the
bolt. Slowly release the plunger. It will stay in the bolt.
E. Insert the new extractor in the slot, and while exerting downward pressure
on the top, force it back against the plunger until the extractor “foot” is forced down
into its retaining hole in the bolt. The extractor plunger will now snap into place against
the extractor, both locking it in place and providing necessary tension for proper
case removal.
F. Pull the bolt to the rear with the operating handle and remove the dowel
rod. Press the carrier release and let the bolt close.
Mossberg Pump Shotguns
The Mossberg family of pump shotguns, from the basic Model 500 to the Regal
600 series, is another line that has been around for many years and has been well-
proven. It has gone through several design changes since it first hit the market in
1961. Not all these later changes are compatible with earlier models. Most notable
of these changes is the replacement of early 12 gauge single bar operating rods
with a more reliable two-bar system. (The current 20 gauge models still use the single
bar.) The series is available in 12, 20, and 410 gauges.
Malfunction 1: Safety broken or missing. If the safety parts outside the receiver
have been lost, the safety itself may have fallen into the action. If it is not visible in
the safety slot on top of the action, this is the case, and it should be found laying
inside the receiver or jammed among the trigger group parts.
Cause: Broken safety button or lost safety parts.
Cure: Replace safety spring, ball, click plate, and safety button.
Procedure:
A. Make sure the chamber and magazine are empty and close the bolt.
B. Remove the trigger guard by pressing out the guard pin. Lift the trigger
120
Fig. 12-3. Dowel in chamber, holding carrier and bolt.
guard up and to the rear. Caution: Any attempt to lift it straight out of the receiver
can break the retaining prongs on the front of the trigger guard!
C. Remove the two cartridge stops from the action.
D. Turn the action to its normal operating position and position the safety
screw hole side up, with the curved section forward in the safety slot. The relationship
of the safety parts is seen in Fig. 12-4. (Obviously, the safety itself is shown on the
wrong side of the safety slot. It goes inside the receiver.)
121
Fig. 12-4. Mossberg 500 safety parts.
E. Place the safety spring in the hole at the rear of the safety slide button
cutout, put the click ball on top of the spring, and lay the click plate on top of the
ball with the center hole in the plate located over the screw hole of the safety. Now
balance the safety button on top of that and screw all this together with the safety
screw. (Yes, it really can be done with two hands, although three are better.) As soon
as the screw is snug, you may take your hand out of the receiver. Try the safety;
if it feels too hard to slide off and on comfortably, loosen the screw about a half-turn
and try again.
F. Replace the cartridge stops. They will only fit in their proper sides and
in their proper directions. Hold them in place with one hand.
G. Insert the trigger guard, prongs fitting in their receiver recesses, and
ease the rear into place. It should slide into position quite easily. If it does not, the
cartridge stops may be blocking its progress.
H. Replace the pin.
122
Malfunction 2: Will not eject live or spent shell and action binds or jams during
pumping.
Cause: The ejector has come loose and is out of position.
Cure: Reposition or replace ejector.
Procedure:
A. Make sure no shells are in the chamber or magazine tube.
B. Remove trigger guard as per Instructions В and C above and check
the trigger group for the ejector screw, which may have fallen into the trigger group
parts.
C. Remove the barrel from the action to give the bolt more play.
D. Locate the ejector, which will be on side opposite the ejection port (left
side). Work it forward until it can be removed. Figure 12-5 shows the ejector and
ejector screw in place. A new ejector is shown to the front of the receiver so you
can see what it looks like.
E. Open the bolt and replace the ejector. Screw it in place with a new ejector
screw. A little Loctite would help prevent a recurrence of this problem.
F. Insert the trigger guard, prongs fitting in their receiver recesses, and ease
the rear into place. It should slide into position quite easily. If it does not, the cartridge
stops may be blocking its progress.
G. Replace the pin.
Winchester Models 1200 and 1300
Winchester first brought out this model about 1964 to replace the more expensive
Model 12. This model has gone through some change, but has remained basically
the same.
Fig. 12-5. Ejector assembled in action.
123
Malfunction 1: Action will not open.
Cause: Hammer has been released without barrel in place.
Cure: Recock hammer.
Procedure:
A. Remove the trigger guard pin by pushing it out. It is not usually hard
to remove.
B. Hook a finger through the trigger guard bow and lift the guard up and out.
C. Recock the hammer by pushing it to the rear of the trigger guard
assembly until it locks back.
D. Reinstall the guard by working the locating projections on the front of
the guard into their slots in the receiver. Replace the pin.
Malfunction 2: Action will not open fully.
Cause: The bridge screw (Fig. 12-6) has broken or is missing, allowing the firing
pin and spring to jam the action.
Cure: Replace bridge screw.
Procedure:
A. Make sure the action and magazine tube are free of ammunition.
B. Remove the barrel.
C. Remove the guard (see A and В under Malfunction 1).
D. Slide the operating handle forward to bring the bolt and bridge out the
action. Remove the firing pin and spring from the receiver.
E. Inspect the firing pin and spring to make sure they have not been bent.
Inspect the bridge screw hole in the block. If the bridge screw has been broken,
the stub must be removed. Do not drill! The steel is very tough and will only peen
out, making removal impossible. In many instances, it can be removed by cutting
a slot in the stub with a fine burr on a Dremel tool and turning it out with a screwdriver.
I suggest you let your gunsmith get it out. If all fails, a new breechblock carrier will
be needed and a gunsmith should install the bolt in the carrier.
F. Drop the firing pin spring and firing pin into the rear of the bolt. Press
the firing pin into the bolt and lay the bridge on top of the bolt carrier. The firing
pin retaining projection should fit into a groove at the rear of the firing pin.
Fig. 12-6. Bridge screw holding bridge to bolt carrier.
124
G. While holding these parts together, place this assembly in the action
bars and slide the operating handle over the magazine tube. Slip the bolt and action
bar, as a unit, into the receiver, pressing down on the bridge to keep it in place.
H. Screw the bridge to the bolt with a new bridge screw.
I. Install the trigger guard, pin, and barrel.
Malfunction 3: The action is hard opening and is stiff.
Cause: Accumulated dirt in the action or chamber.
Cure: Clean action and chamber.
Procedure:
A. Remove the barrel nut, open the action about halfway, and remove the
barrel.
B. Clean and/or polish the chamber until it is clean.
C. Remove the trigger guard (see A and В under Malfunction 1).
D. A very adequate job of cleaning can be done without taking the action
apart any further. Spray liquid cleaner in the action while sliding the breech block
back and forth. This will flush out a great deal of the grit and old oil. Very lightly oil
the bolt parts with light gun oil. The spray variety seems to be easier to use in cramped
corners than a rag. Wipe the excess off the action.
E. Flush and oil the trigger guard assembly also.
F. Wipe off and lightly oil the magazine tube.
G. Reassemble the trigger guard and pin. Open the action about halfway
and slip the barrel back in the receiver. Screw on the barrel nut.
Revolvers, Double-Action
Double-action revolvers are among the most popular of all handguns and are
for the most part extremely reliable. They are subject to malfunctions caused by dirt,
and, of all types of firearms, are most sensitive to wear. Under normal circumstances,
there is no need for the average shooter (or even the experienced shooter) to open
up or disassemble his double-action revolver. (However, people being what they
are, they seem to do it whether they need to or not.)
Generic malfunction: Hard to cock single and double action.
Cause: Dirt may be holding the ejector from closing completely.
Cure: Clean affected areas.
Procedure:
A. Open and clear action.
B. Press the ejector rod to raise ejector fully. Inspect the bottom side of
ejector and ejector seat in the cylinder for dirt.
C. Wipe grit from surfaces with a patch and spray a quick-drying cleaner
(such as Birchwood Casey Gun Scrubber) over the ejector, ejector seat, and ejector
rod. This should remove any unburnt powder, sand, or other foreign matter from
the area. A toothbrush also works well in this area.
D. Lubricate lightly.
Smith and Wesson
Malfunction 1: Hammer will not cock; cylinder will not turn nor open.
125
Fig. 12-7. Smith and Wesson ejector rods. Top: Old style; right-hand thread. Bottom; New style; left-hand threads.
Cause: The ejector rod has unscrewed, forcing the ejector and rod against the
rear of the action and ejector hanger.
Cure: Screw in the ejector rod.
Procedure:
A. Treat every revolver in this condition as though it were loaded, even if
you have run a dowel through the barrel and cylinder to make sure there is no live
round in line with the barrel.
B. Look at the end of the ejector rod closest to the muzzle. The knurled
portion of the rod will determine which way the rod is threaded into the cylinder.
If the knurling has no relief cut, the threading is right hand, if there is a relief cut,
the threading is left hand (Fig. 12-7).
C. Grasp the ejector rod with your fingers or padded pliers to keep the rod
from turning with the cylinder. If the rod is contained in an ejector rod housing (such
as the Model 19, or the L or N-frame guns), press the rod into the housing to apply
the friction needed to keep the ejector rod from turning.
D. Pull the hammer back to release the cylinder lock and turn the cylinder
in the appropriate direction to screw it down over the ejector rod. If the action is
jammed so badly that the cylinder lock will not release, take it to a gunsmith. He
may have to disassemble the entire gun to get it unjammed.
E. As soon as the cylinder can be opened, turn the ejector rod down the
rest of the way by hand. With great care not to scar or bend the ejector rod, use
a padded vise or some type of holding device to snug the cylinder to the rod. Do
not use Loctite. The danger of ruining a cylinder and ejector rod during subsequent
removal far outweigh the irritation of possible accidental reloosening. Periodically
give the rod a twist to check for looseness to prevent reoccurrence.
Revolvers, Single-Actions
Single-action revolvers predate the double-action variety by many years and
seem to maintain their popularity year after year. This style of revolver is also quite
reliable—even more so since the development and production of the later Roger
126
versions. The major problem the gunsmith experiences with the Roger is getting it
back together after someone else has taken it apart!
The Colt design has been copied, in various degrees of quality, in Italy, Spain,
Japan, Brazil—and I have even seen some made in the USA. Probably every country
with a drop forge and machine shop has copied this design. These revolvers, no
matter where made, seem to experience similar problems.
Malfunction 1: The cylinder spins freely when the hammer is cocked.
Cause: Broken Broken trigger/bolt spring.
Cure: Replace the spring.
Procedure:
A. Open the loading gate and check each chamber to make sure the
revolver is empty.
B. Remove the grips (if two-piece) and remove the screws in the frame on
either side of the hammer and from the bottom front of the backstrap. (If there is
no screw on the bottom of the backstrap, the revolver has a one-piece trigger guard
and grip frame; go to Instruction E.)
C. Remove the backstrap (one-piece grips will come off with this portion)
to expose the hammer spring and screw.
D. Loosen hammer spring screw and remove the screws on either side
of the trigger and the screw in front of the trigger guard.
E. If the single-action you are working on has a single-piece trigger guard
and grip frame, lower the hammer to the fired position and remove the screw in front
of the trigger guard, then remove the two on either side of the trigger.
F. Remove the trigger/bolt spring screw, now exposed on the inside of the
frame (Fig. 12-8), and take out the broken spring.
G. Put the new spring in place and tighten the screw.
H. Operate the action a few times to make sure the trigger portion of the
spring does not bind. If it does, remove a small amount of metal from the end of
the trigger side of the spring only and test again. Repeat until the spring no longer
binds on the trigger.
I. With either one or two-piece grip frames, place the longest screws in the
holes in the trigger guard next to the trigger. If the grip frame is one-piece, slip the
hammer spring under the hammer and force the trigger guard up as you tighten
these screws. As soon as these screws are snug, install the front guard screw. The
method used with two-piece backstrap and guard units is to place the hammer spring
under the hammer and install the three lower screws as in the one-piece grip frame
reassembly. Now tighten the hammer spring screw, install the screws on either side
of the hammer, and reattach the grips.
Marlin .22 Bolt-Actions
Malfunction: The bolt will not pull live or fired round out of the chamber.
Cause 1: Dry firing has raised a burr in the chamber.
Cure 1: Have your gunsmith “iron out" the chamber and correct firing pin length
to prevent future problems.
Cause 2: Broken extractor.
Cure 2: Replace broken extractor.
127
Fig. 12-8. Single-action revolver; bolt/trigger spring assembled in action. Broken spring to right.
128
Fig. 12-9. Marlin .22 bolt with extractor.
Procedure 2:
A. Open and check action.
B. Hold the trigger to the rear and pull the bolt out of the receiver. The
extractor is the blued band of steel strapped around the front portion of the bolt (Fig.
12-9).
0. Pry the old extractor off the bolt with a screwdriver. Use care so that
the screwdriver does not jab your hand or fingers when the extractor comes free.
D. Position the new extractor on top of the bolt and with a wood dowel,
press it down into the groove. It should snap into place. If it does not, the extractor
may need to be rotated so the arms of the extractor will be positioned in their slots
in the bolt.
E. Hold the trigger to the rear and slide the bolt back into the receiver.
Mariin .22 Automatic Rifles
Marlin has used their basic .22 automatic rifle action for the complete series of
automatic rifles—clip-fed, tubular, and also on private labels. Perhaps more examples
of this action have been made than any other .22 automatic rifle. It has proven itself
over the years as a good design and recently has had minor redesign changes to
make it simpler from both the manufacturer’s and repairman’s viewpoint. These
changes will be obvious in reading takedown instructions and comparing them with
your model. If parts you must remove were never installed on your rifle, you have
the newest of the models and may skip to the next instruction.
Malfunction: Rifle will extract and eject, but will not fully chamber a new round.
Cause 1: Dirt.
Cure 1: Clean.
Cause 2: Weakened recoil spring.
Cure 2: Replace recoil spring.
729
Procedures 1 and 2:
A. Open the action to clear any rounds that may be in the magazine tube,
and remove the inside magazine tube.
B. Remove the stock by loosening the barrel band (if applicable); unscrew
the rearmost screw in the trigger guard and a large-headed screw just forward of
trigger guard. Do not remove the front screw in the trigger guard. It holds the guard
to the stock and has no function in stock removal.
C. Lift the barrel and action clear of the stock.
D. Remove the assembly post and post screw at the rear of the action, and
the two assembly screws at the front of the action. Pull the hammer/sear/feed
assembly out of the receiver.
E. Using a screwdriver blade, force the bolt back from the barrel so that
the extractors clear the barrel. Use care! The bolt is under spring tension. Ease the
bolt out of the receiver. The recoil spring, guide, and operating handle may now
be removed.
F. Thoroughly flush the receiver, bolt, and hammer/sear/feed group with
solvents until they are clean. A sharp probe or pick will be of help in cleaning
accumulated lead and crusted debris from extractor cuts in the barrel. This pick will
help clean packed oily deposits out of the receiver, too. Do not take the
hammer/sear/feed group apart. It is a real puzzle to get back together. It is possible
to clean it without tearing it apart. When the action parts are cleaned, spray a light
coating of oil on the hammer/sear/feed group and wipe the bolt with an oily cloth.
Do not oil the receiver. Oil will pick up dirt and become abrasive on the soft alloy
receiver.
G. Even if the problem was only dirt, replace the recoil spring, These springs
are prone to collapse and will need to be replaced sooner or later. Insert the main-
spring in the bolt and slip the mainspring guide into the free end of the spring. Place
the stub of the spring guide in the guide seat in the receiver and with the block at
about a 45-degree angle, hold the spring and guide straight with your fingers as
you press the block back over the spring, compressing it. When the spring guide
has entered the block, you can lower the block into the receiver so that it is held
by the lower portion of the barrel. Place the operating handle in the receiver under
its cutout in the bolt, and with your screwdriver blade, gently pry the block back
and lower it over the operating handle.
H. Place the hammer/sear/feed group into the receiver and screw the two
front screws in place. (If no screws are used, hook the retaining projections into the
receiver.) Pull the operating handle back slightly to let the rear of the group seat,
and replace the assembly post and screw.
I. Place the stock back on the barrel and replace the stock screws, barrel
band (if any), and inside magazine tube.
Savage Pump Shotguns
Savage/Stevens has made pump shotguns for nearly as long as pump shotguns
have been made. Some of its designs have been excellent, and one design of note
is the Series 67.
730
Some older Savage/Stevens pumps have seen more than their share of hot loads,
have been shot dirty, and generally have been abused more than other brands. It
is a tribute to their design that most of them have lasted as long and have given
as good service as they have.
Malfunction 1: Hammer “snaps” during firing. The shell does not fire, and no firing
pin impression is made on the primer.
Cause: Broken firing pin.
Cure: Replace firing pin.
Procedure:
A. Open and clear the action.
B. Remove the buttplate, and with a long screwdriver, unscrew the stock
bolt, which holds the stock to the receiver.
C. Unscrew and remove the trigger guard screw on the side of the receiver.
D. Drive out the trigger guard pin from left to right with a punch that fits
the pin hole closely to prevent damage to the pin.
E. Lift out the trigger guard group. Note the position of the slide lock (Fig.
12-10). It must be held manually in place on its pivot, as it falls off easily.
F. With the operating arm and bolt fully to the rear, insert a thin screwdriver
blade between operating bar and bolt. Pull the operating bar forward, freeing it from
the bolt, which may now be removed from the rear. A Y-shaped part will be seen
extending from the bottom of the slide. It may be loose. This part engages the
operating bar. Don't lose it.
G. Remove the bolt from the slide and place it in a vise. Drive out the firing
pin retaining pin (found at the rear of the bolt) and remove the old firing pin. Place
a new firing pin in the bolt; test it by pushing it forward to see if the return spring
is still in place, and line up the retaining pin cut in the firing pin with the hole in the
bolt. Drive the retaining pin back in place, and place it back on the slide.
H. Place the bolt and slide back in rear of the action and slide the assembly
forward until it stops against the ejector housing. Press down on the slide so it will
slip under the ejector housing. Now bring the operating handle back to contact the
Y-shaped stud. Force the operating bar away from the receiver with your screwdriver
to clear the stud, and pull the operating handle back slowly. The recess in the action
bar will snap over the stud. Now close the action.
I. Check to see if the slide release has fallen off the trigger guard. If it has,
place the hooked spring between the hammer and the guard side and work the hole
in the slide release over the pivot stud. Place the small wire spring under the grooved
stud on the side of the release (Fig. 12-10), and, holding the guard and release as
a unit, slide it into the receiver.
J. Replace the guard pin. One end or the other will slide into the hole and
can be pushed in at least halfway by hand. Place the trigger guard screw in place
and try the action. If it does not work, the slide release is probably incorrectly as-
sembled and you may have to take the guard out again to check the release.
K. Drive the pin flush with the receiver and screw the guard screw tight.
Reinstall the stock, making sure wood-to-metal fit is exact, and tighten the stock screw
tight. Screw on the buttplate.
131
Fig. 12-10. Top: Savage slide lock and trigger group. Bottom: Correct assembly.
Malfunction 2: Operating handle moves freely without bolt motion.
Cause: Broken operating rod.
Cure: Replace broken rod.
Procedure:
A. Follow instructions A through F on page 131 with the exception that the
bolt can be removed directly, without prying the operating bar out of the way.
B. Remove the screw that holds the magazine retainer to the barrel. Caution:
The magazine spring exerts pressure on the magazine retainer, and unless you are
prepared to hold these parts carefully during disassembly, they may fly off and
become lost. Remove the magazine retainer, magazine spring, plug, and magazine
tube. The follower is lifted out of the front of the receiver.
C. Remove the operating handle and unscrew the cap on the forward end.
132
Fig. 12-11. Magazine and operating rod parts.
Figure 12-11 shows a broken old-style operating handle. The newer style is at the
bottom of the picture. These are not interchangeable. The collars have been left off
the new style in this photo to better show the "key” that holds the rod to the tube.
Pull the foreend wood off the tube. The broken solid unit operating rod will require
replacing the whole tube/rod assembly. The newer type is repaired by pulling the
rear operating tube collar forward to clear the operating rod, which can now be re-
moved. A new rod is placed in the recess and the collar brought back down to secure
it in place.
E. Replace the wood on the operating handle tube screw and put the front
nut back on. The cutout on the front ring must match the forearm wood.
F. Place the bolt and slide back in rear of the action, and slide the assembly
forward until it stops against the ejector housing. Press down on the slide so it will
slip under the ejector housing. Now bring the operating handle back to contact the
Y-shaped stud. Force the operating bar away from the receiver with your screwdriver
to clear the stud and pull the operating handle back slowly. The recess in the action
bar will snap over the stud. Now close the action.
G. Check to see if the slide release has fallen off the trigger guard. If it has,
place the hooked spring between hammer and guard side and work the hole in the
slide release over the pivot stud. Place the small wire spring under the grooved stud
on the side of the release, and, holding the guard and release as a unit, slide it into
the receiver.
H. Replace the guard pin. One end or the other will slide into the hole and
133
can be pushed in at least halfway by hand. Place the trigger guard screw in place
and try the action. If it does not work, the slide release is probably incorrectly as-
sembled and you may have to take the guard out again to check the release.
I. Drive the pin flush with the receiver and screw the guard screw tight.
Reinstall the stock, making sure wood-to-metal fit is exact and tighten the stock screw
tight. Screw on the buttplate.
Malfunction 3: Shells will not stay in the magazine.
Cause: Cartridge stop out of place.
Cure: Reposition or replace cartridge stop.
Procedure:
A. Once again, follow A through E under Malfunction 1 to remove the trigger
guard.
B. The cartridge stop is an irregularly shaped stamping shown at the bottom
of Fig. 12-12. If it is still in the receiver, it needs to be worked forward to line up
the hole in the frame. A new cartridge stop screw and nut will be needed. A drop
of thread locker will keep the problem from reoccurring. If the stop is missing, then
a new one will have to be installed.
C. Instructions H through К under Malfunction 1 will get things back to-
gether again.
Fig. 12-12. Cartridge stop, screw, and nut.
134
Savage/Stevens Double Shotguns
Double-barreled shotguns had their beginnings years before the advent of
smokeless powder and cartridge cases. Flintlock doubles were used, and percussion
doubles were as common then as double cartridge guns are today. Even with the
large number of doubles found in the field today, the rate of breakdown is surprisingly
quite small.
Malfunction: Extractor fails to push cases out of the chamber.
Cause: The ejector is missing.
Cure: Replace missing parts.
Procedure:
A. Open and clear action.
B. Remove the forearm by pulling off the barrel. Set the remainder of the
shotgun in a safe place.
C. Remove two screws, one on the bottom of the forearm, the other on
the top of the metal bar in the forearm. This will release the metal parts or "iron”
from the wood. The ejector should be held in place with a screw found inside the iron.
D. Put a new ejector of the correct model in the slot in the iron rounded
portion facing the receiver, and hold it in place with the ejector screw.
E. Center the plate that slides in grooves in the forearm under the rear hole
in the iron, and loosely attach the bevel-headed screw. Slide the iron all the way
into its recess and screw it in place with the outside front screw. Now tighten the
rear inside screw and snap the forearm back on the shotgun.
Browning A-7, Remington Model 11, and Savage 775
These shotguns belong together, as they all share the same basic action. This
entire series is a John Browning design and is the longest continually produced
automatic shotgun on the market. This long-recoil action is more sensitive to
ammunition than gas-operated systems, and seems to absorb recoil just as well as
the newer gas-operated systems. This type of action slows down the transmission
of energy to your shoulder while the barrel is sliding into the receiver. It is reliable
and never seems to wear out.
Malfunction: Gun fires but will not eject empty, nor load live shells.
Cause 1: Low-powered shells that don’t offer enough recoil to operate the action.
Cure 1: Use correct shells.
Procedure 1: Try a higher-powered shell.
Cause 2: Recoil system set up incorrectly, and/or system dry.
Cure 2: Set up recoil system for the ammunition you are using.
Procedure 2:
A. Open and clear action.
B. Remove barrel nut, forearm, and barrel.
C. Arrange friction ring, friction piece, and spring for the load you are using.
Remember the flat side of the ring always faces the spring and the ring is beLOW
the spring for LOW-powered shells. A diagram for correct high/low base settings
is found in Chapter 4 (Fig. 4-2).
D. Oil or grease the magazine tube with good quality heavy oil or light
grease.
135
E. Reassemble barrel, forearm, and barrel nut.
Cause 3: Plastic residues and rust have built up in the chamber.
Cure 3: Clean chamber.
Procedure 3:
A. Open and lock the bolt to the rear.
B. Remove the barrel nut, forearm, and barrel.
C. Scrub or polish the chamber until all foreign material is removed, and
it is clean, smooth, and shiny.
D. Replace barrel, forearm, and barrel nut.
Ruger .22 Automatic Pistol
This pistol is another very successful design and is nearly as jam-free as anyone
could wish. The malfunction section for this pistol consists of improper assembly after
being taken apart for cleaning.
Malfunction: The slide will not pull to the rear after reassembly.
Cause: Improper reassembly.
Cure: Reassemble correctly.
Procedure:
A. Pull the takedown lever on the back of the grip frame out of the frame,
and swing the mainspring housing out of the frame. Pull down on the assembly to
remove it from the action.
B. Pull the trigger and shake to get the hammer to its fired position. The
hammer strut can be seen flopping loosely inside the mainspring housing cutout.
Let the strut rest on the inner portion of the grip closest to the magazine.
C. Insert the mainspring assembly in the cutout. Do not seat the assembly
all the way; just start the bolt stop through the hole in the bolt.
D. Turn the pistol upside down and let the hammer strut now rest on the
mainspring housing. As the housing is seated the rest of the way in the cutout, the
strut will slide into the mainspring follower. As the mainspring housing is closed, re-
sistance will be met just before the housing closes flush with the frame. If no resis-
tance is felt, the strut missed the mainspring follower. Go back to A and start over.
E. Push the mainspring housing into the frame and snap the lock back up.
Each model of gun will have its own particular weakness. Perhaps your favorite
firearm is not covered in this chapter. It has not intentionally been omitted, nor does
this mean your favorite will not have a malfunction from time to time. I have attempted
only to touch briefly on some of the more common malfunctions and cures, not to
make you accomplished gunsmiths. If your model or malfunction is not listed, I urge
you to take your firearm to your gunsmith for his evaluation.
If you want good service, don’t be like the customer I’d never seen before who
came in the evening before duck season began. I was pulling my hair out and work-
ing nights trying to keep from falling further behind.
"I’ve been to every other shop and tried every other jack-leg gyp artist in town,"
he began. "You’re my last hope! I tookmy favorite gun apart last year to clean it
and I can’t get it together." He laid a bag of parts alongside a set of badly rusted
barrels. He gave a little smile as he said, "As a special favor to an old customer,
you can do it while I wait!"
136
Chapter 13
Of This and That
Recoil is a fact of life, an inescapable part of shooting. The laws of conservation of
energy so far have kept us from making a recoil-free gun. Now don’t hand me any
guff about the military’s "recoilless rifle." We all know that this is a rocket projectile
and it does have recoil. The energy to thrust the rocket forward is exactly balanced
by the blast of gas that comes out the back. The term recoilless, in this instance,
means that the operator of the rifle doesn’t absorb this recoil directly. I would think
this piece would be a trifle expensive to shoot, and not at all what I would take to
the field for rabbit hunting.
RECOIL
Every shooter has a recoil threshold, which is the upper limit of what he can
comfortably stand. It is up to each shooter to discover what his own threshold might
be and select his guns from a list of those that do not exceed this limit. Some folk
can absorb recoil from Weatherby Magnums without blinking, even though they don’t
have the size and build of a weightlifter. Others of equal size find the .243 Winchester
much more comfortable. It is possible that the stocky, solidly built individual may
feel more recoil than a thin, slightly built person for the same reason that the wind
blows down the oak but the willow stays upright. The lighter built person can recoil
with the gun and take the energy in muscles along his back and stomach, while
the weightlifter is a more solid platform for the gun to work against; he does not move
as easily. His energy is absorbed by body tissues behind the buttplate and the
shoulder socket itself. Everybody is different and reacts to recoil differently.
137
These are not the only factors to be considered in recoil. Stock design is proba-
bly the major element in a comfortable-shooting gun. Grain of the wood, recoil pads,
length of pull, whether it is shot from a bench or standing, and other very “technical"
variables, such as having a shoulder bruised from previous shooting, weight of the
firearm and type of action, or having a toothache, all play some part in what the
shooter perceives as “recoil."
The recoil data found in Appendix A were derived from a standard recoil formula
(of which there are several) and generated by a simple BASIC computer program
for the Apple 11+ which follows the data. This program will print “Cartridge
Designation, Bullet Weight and Recoil at Shoulder." The heading “Velocity," which
appears on the screen during data input, is not produced on paper by the program.
No attempt has been made to “round off" the decimals. Even so, the comparisons
of one caliber to another will be quite close.
The figures listed are useful only in that they demonstrate computed recoil for
a standard weight factory firearm, shot with the listed bullet weight, at specified
velocity, and with powder charges from available loading data.
The apparent contradiction of a more powerful round having less recoil than
another, less powerful cartridge is usually credited to weight of the firearm.
Hopefully, I have listed enough of the popular calibers to enable you to draw
some valid conclusions about the recoil you should expect from your firearm and
they may be found in Appendix A.
If you wish to compute your own recoil data, here is one formula to use. An
example is used along with the formula:
Example .30/06 rifle; weight: 8 pounds.
Bullet weight: 150 grains.
Powder weight: 50 grains.
Velocity: 3000 feet per second.
Multiply powder weight by 1.75:
Add weight of bullet:
Multiply by velocity:
Divide by weight of gun (pounds):
Divide by 7000 (number of grains in
pound):
Square result:
Divide by 64.4:
50 x 1.75 = 87.5
87.5 + 150 = 237.5
237.5 x 3000 = 712,500
712,5000 / 8 = 89,062.5
89,062.5 / 7000 = 12.72
12.72 x 12.72 = 161.79
161.79 / 64.4 = 20.03
The figure 20.03 is recoil energy. This is a rather cumbersome way to arrive
at recoil figures but easy if you have a calculator.
If you have access to a computer, the program in Appendix A can be used to
calculate all these figures rapidly.
CARTRIDGE COLLECTING
Folks who shoot soon begin to accumulate extra cartridges. Who knows where
they come from; they just seem to show up—even cartridges that you don’t have
a gun for, and one day you have a shoebox full of them.
138
Many people begin a lifelong hobby by spilling this shoebox out on the floor
and pawing around in it to see what they have. I have such an accumulation and
have gone so far as to separate the long ones from the short ones. That’s one way
to handle collecting; however, most collectors will catalog their shells according to
type or class—rimfire, or centerfire, commercial or military, and so on.
If you are interested in starting a small cartridge collection, let’s take a look at
.22 rimfire shells. They are inexpensive, plentiful, and more than enough to keep
a beginner busy. Of course, there are rare rimfire shells that are going to be expensive.
I would advise the beginner to concentrate on the easy-to-find varieties.
□ 5mm Remington Magnum. Introduced by Remington in 1970; a short-lived
round. The speediest of the modern rimfire cartridges.
□ .22 BB Cap. Introduced in Belgium around 1845 for indoor shooting. It is
a .22-caliber BB stuck on a primed CB Cap case. Currently in production by RWS.
□ .22 Crimped Blank. Currently produced in Europe for starter guns. This
case differs from the 22 Short Blank in that the end of the case is folded into a serrated
cone. These blanks are not very loud, and are really next to worthless as starter guns
because only the nearest two or three competitors will hear the signal.
□ .22 CB Cap. CB stands for conical ball. This case is similar to the BB Cap,
but has a small powder charge. It appears to have arrived on the market around
1888 and is also loaded by RWS.
□ .22 Short. Developed in 1857 for Smith and Wesson revolvers, the .22 Short
is a highly desirable, useful round and is loaded by many companies the world over.
□ .22 Gallery Short.
□ .22 Short Hollow Point.
□ .22 Short Blank.
□ .22 Long. Some people believe this is a "compromise’’ round using the
.22 Long Rifle case and the .22 Short bullet. However, this round was developed
around 1871, perhaps 10 years before the Long Rifle!
□ .22 Long Rifle. This cartridge was developed for the J. Stevens Arms Co.
and is the .22 Long case with a heavier bullet and powder charge. It is perhaps
the world's most popular and accurate rimfire cartridge. Over the years, various
projectiles have been made for this cartridge.
□ .22 Long Rifle Hollow Point.
□ .22 Long Rifle Shot.
□ .22 Long Rifle Military Metal Jacked.
□ .22 Long Rifle Ultra High Velocity.
□ .22 Stinger. With the exception of the Stinger, I have lumped the UHV rounds
(Xpediter, Yellow Jackets, Spitfire, Viper) into one category. CCI started this series
in 1977 with the introduction of the Stinger, which differs from the standard .22 Long
Rifle in that it has a longer case and lighter bullet.
□ .22 Extra Long. Developed around 1880 and used what was to become
the .22 Long Rifle bullet. No company now loads for this long-obsolete cartridge.
□ .22 WRF (Winchester Rimfire).
□ .22 Remington Special. Introduced around 1890. The difference between
139
the WRF and RS is bullet shape. Winchester used a flat tip while the Remington was
round. The .22 WRF has been out of Production for several years, although
Winchester made a limited production run in 1986.
□ .22 Winchester Magnum Solid. Introduced in 1959 by Winchester, at which
time there were no arms chambered for it! It has become a standard round, made
by Winchester, CCI, and Remington (although Remington has discontinued
manufacture).
□ .22 Winchester Magnum Hollow Point.
□ .22 Winchester Automatic. Marketed for the Winchester 1903 automatic
rifle, the only gun ever chambered for this round. It looks similar to the .22 Long
Rifle, but is about the same diameter as the .22 WRF. Its manufacture ceased years
ago and the cartridge is getting hard to find.
□ .22 Remington Automatic. Again, a round made to fit only one gun, the
Remington Model 16 automatic. Introduced in 1914, dropped in 1928, it is of similar
dimension to the .22 Winchester Automatic.
This short list should start you off in collecting .22 rimfire cartridges. Some people
will collect all current manufacturers and styles, while others will concentrate on getting
one of each case design.
The following is a list of some other rimfires cartridges, so you can see how large
the rimfire field is. These are not as common as the ,22s, but are still plentiful enough
to keep collecting inexpensive.
□ .25 Short—Rare; discontinued 1920.
□ .25 Stevens Short—Rare; discontinued 1942.
□ .25 Stevens—Dropped in 1942.
□ .30 Short—Rare; dropped around 1919.
□ .30 Long—Discontinued around 1939.
□ .32 Extra Short—Rare; dropped 1920.
□ .32 Short—Common; dropped around 1973.
□ .32 Long—Common; dropped in the late 1970s.
□ .32 Long Rifle—Rare; discontinued in 1920.
□ .32 Extra Long—Dropped during World War I.
□ .38 Long—Discontinued around 1930.
□ .38 Extra Long—Rare; dropped around 1917.
□ .41 Short—Recently available from Navy Arms.
□ .41 Long—Obsolete since 1920.
□ .41 Swiss—A Swiss military rifle round; obsolete since 1889.
□ .44 Short—Obsolete since 1920.
□ .44 Long—Dropped 1920.
□ .44 Extra Long—Rare; dropped in 1880.
□ .44 Henry Flat—For the famed Henry Lever Rifle; made in 1861—62.
□ .50 Remington Navy—Rare; obsolete since 1870.
□ .56-46 Spencer—Loaded till 1919.
□ .56-50 Spencer—Not listed in 1920 ammunition catalogs.
□ .56-52 Spencer—Dropped in 1920.
□ .56-56 Spencer—Fairly common; Loaded until 1920.
140
This list of rimfire cartridges is not complete, but will give the budding collector
an idea of what is out there.
As soon as you have collected all of these, you might want to collect some
shotshells, so keep your eyes open for the ever-popular 14 gauge, 24 gauge, 32
gauge, and 9mm shotshells.
I am not even going to mention centerfire ammunition, which would take up
several volumes in itself!
For further cartridge study, Cartridges of the World by Frank Barnes is an
excellent place to begin.
ACCURACY: RIFLE VERSUS HANDGUN
Is a rifle more accurate than a handgun? According to barrel makers, the needed
spin to stabilize a bullet in flight is imparted to the bullet in about two inches of rifling-
two inches! Why don’t we have rifles with two-inch barrels if the bullet is stabilized?
Good question! Some pistols do have two-inch barrels. The powder they use is
formulated to give the pistol bullet a quick start. The rifle uses a slower-burning powder
and develops high pressures to give greater velocity.
The reason a shoulder-fired rifle seems to be more accurate than a pistol or
revolver lies in sight radius. Now, this high-fallootin’ term means that the longer the
distance between the sights, the smaller the deviation from the bull's-eye per given
sighting error. This can be seen quite graphically in Fig. 13-1. Note that both rifle
and handgun bullets strike the bull’s-eye when the sights are aligned.
It is unfortunate that everyone isn’t as steady as you and I; some of those poor
unfortunates actually fire the gun when the sights are not aligned. (It has been known
to happen to me on a few rare occasions!) Let’s take a look at what happens when
141
the gun fires if the sights are not exactly aligned. It can be easily seen that the same
amount of sighting error in rifles and pistols produces wildly different hits on the target.
Even though the sighting error is the same, it is this difference in sight radius
that makes handguns more difficult to shoot as accurately as rifles.
What happens when we remove the sight radius variable by mounting a tele-
scopic sight on the pistol? Does the pistol then “shoot like a rifle?’’ In many cases,
the answer is yes. In fact, the “new breed” of hunting handgun exemplified by the
bolt-action Remington XP-100 and single-shot Thompson Center Contender is
capable of shooting as well as or better than good bolt-action rifles. We are talking
here of accuracy on the order of one inch at 100 yards or better.
The occasional revolver or semiautomatic pistol, when equipped with a scope
and/or fired by a master, will do nearly as well, though such handguns are the
exception. Pistol bullets are usually much shorter and stubbier than rifle bullets, and
are not generally capable of maintaining rifle-like accuracy past 100 yards or so.
BLACK POWDER SHOOTING
The true black powder shooter is a breed apart. (Those good metallic rifle
shooters who expand their hunting seasons with a black powder gun don’t count.)
The real black powder shooter makes his life’s hobby out of this sport.
I have a feeling that many such shooters wish to return to a time when life was
simpler and time was slower. They strive for historical accuracy in attire, weaponry,
and mores. Black powder matches bow only slightly to modern convention, except
where safety is concerned. The North/South skirmish associations adhere to historical
accuracy with a passion bordering on fanaticism. The cloth their clothes are made
from has to be of the right weave, the wood in gun carriages must be correct, and
even eating utensils must be of period design to hold the food cooked from original
recipes. Black powder shooting is of a much more gregarious nature than modern
shooting. Families get involved and have a great time joining in the spirit.
The new black powder shooter must start somewhere, and not everyone jumps
into a set of buckskins or a second Dragoon dress uniform on his first morning. (Some
wait until late afternoon!)
If your temperament is easygoing, and loading between shots doesn’t bother
you, then this sport may be for you.
Modern black powder rifles come in two varieties, flint and percussion.
Percussion, or caplock, guns are much more popular. They are fired by placing
a priming-filled cap over the nipple (Fig. 13-2). The hammer strikes this cap, which
explodes, forcing fire into the main charge in the barrel. This type of ignition is quite
reliable and almost as fast as modern cartridge guns.
The flintlock is not quite as certain to fire and is slower. A small amount of fine
black powder is placed in the pan (Fig. 13-3) and the frizzen closed. When the cock
(hammer) falls, the flint in the cock strikes the frizzen and produces sparks in much
the same manner as sparks are made by spinning the wheel on a cigarette lighter.
The frizzen pops open and these sparks fall into the fine powder in the pan, which
ignites with a flash and puff of smoke. Some of this flash finds its way through the
flash hole in the barrel to the main powder charge, and the gun fires. As complicated
as this all sounds, it does work—and works pretty quickly.
142
Fig. 13-2. Major external parts of a percussion lock.
Loading a black powder single-shot is the same, percussion or flint. A correct
charge of powder for your gun is poured into the barrel through the muzzle. A bit
of greased cloth is laid over the muzzle and wrapped around the ball or bullet as
it is pushed into the barrel. Care must be exercised to make sure the ball is seated
firmly on the powder and that no air space is left between ball and powder. Air space
between powder and ball during firing acts like a piston, compressing the air. It has
no place to go, and may ring or bulge the barrel. If the ball is seated on the powder,
as the pressure begins to build, the ball starts to move without this sudden buildup
of pressure.
After several shots, black powder residues make reloading harder. A patch
moistened with soapy water or black powder solvents should be run through the
143
barrel to loosen these deposits. When the day’s shooting is done, a careful cleaning
of the gun is needed. Black powder deposits and residues attract moisture, and if
not cleaned out will rust your bore.
Cleaning is easily done with boiling water and detergents. As the hot water and
detergent is sloshed through the barrel, the barrel gets hot—the hotter, the better.
When patches come out of the bore clean, the cleaning job is done. The hot barrel
will evaporate any moisture that was not blotted up with patches. Run oily patches
in and out of the barrel to preserve the metal, then wipe off the outside and put it away.
Revolver loading is slightly different. A charge of powder is dropped into each
chamber and a ball placed .directly on top of the powder. No patch is used. The
ball is seated firmly on the powder. Self-contained loading rams on the revolver will
do this efficiently. When all the balls are seated, grease is smeared over the exposed
end of the ball. This will prevent chain firing, which can occur if the flash of the charge
being shot can find its way around a ball and into another chamber. Multiple
discharges are really hard on the gun—not to mention the shooter’s nerves! Place
a cap on each nipple and the revolver is ready to shoot.
Cleaning the revolver is the same as a rifle—lots of hot, soapy water and lots
of patches. Oil when done.
There are no hard rules about powder charges. By the way, with today’s pricing,
a black powder gun can be fired for around 10 to 20 cents per shot, and that’s pretty
cheap shooting. Black powder manuals will give safe loads, but your rifle or hand-
gun may or may not shoot accurately without some experimentation in loads, ball
size, and patch thickness. Once the proper load has been found, you can expect
surprising accuracy from these front-stuffers.
Many black powder hunters prefer calibers of .50 or larger for deer-sized game,
and .58-caliber rifles have been used with great success on animals as large as elk.
The actions of a black powder ball and a high-velocity rifle bullet differ. The modern
rifle bullet has greater penetration and is designed to expand inside the game. Black
powder has greater shock because of greater frontal area. This shock seems to be
as effective as deep penetration.
Black powder shooting is not for everyone, but is worth looking into. If you like
it, your modern, high-velocity, super-powered cartridge guns might even find
themselves gathering dust!
CARTRIDGE COMBOS: GOOD AND BAD
One of the prime safety rules in shooting is: Never shoot a round in a chamber
not specifically marked for it. This advice is only common sense, and prevents some
major shooting disasters? So why do we need to discuss it?
Because some cartridges will chamber in guns not designed for them, I am most
concerned about unsafe combinations and always urge shooters to check their
ammunition. Some combinations are absolutely unsafe. A cartridge with a bullet larger
than bore diameter can be chambered; when fired, the larger bullet is forced into
a smaller hole, and pressures exceed safe limits. Other combinations can chamber
with a smaller bullet, and the case will expand—perhaps to rupture.
Every shooter should be aware that an ammunition problem could occur. The
following list is not complete, but covers some of the more common combinations
144
that must be avoided in your firearm:
In a firearm chambered for:
.243 Winchester
.300 Savage
6mm Remington
.244 Remington
.264 Winchester Magnum
.284 Winchester
.308 Winchester
.303 British
.270 Winchester
.300 Savage
.308 Winchester
7mm Mauser
7mm Mauser
7mm Remington Magnum
.270 Winchester
.280 Remington
.35 Remington
.30-40 Krag
.30-06
.375 Winchester
Avoid:
.250 Savage
.250 Savage
.270 Winchester
.30-30 Winchester
.300 Savage
,7mm Weatherby Magnum
.303 British
,8mm Mauser
Some of these combinations will chamber and fire in rifles with a smaller bore
than the projectile in the case. I’m taking bets that if you want to try one, you will
have to buy a new rifle!
There are other combinations that have projectiles smaller than the bore and
are supported by shoulders, sides, rims, or belts in the chamber. Such combinations
will not be as dangerous as the first set, but should also be avoided. In one case,
one of my customers purchased a .30/06 rifle thinking it was a .270 Winchester. He
brought it to me because it just would not shoot any kind of group. His cases looked
exactly like .30/06 cases, but were marked .270! The .270 case expanded in the
.30/06 chamber and the bullet rattled on down the bore like a pea in a stovepipe.
Of course he got no accuracy!
Be sure the gun you want is the one you get.
Be doubly sure when you are playing shotgun shooter that you carry only the
cartridges for your gauge. Don't carry your son’s 20 gauge in the left jacket pocket,
your wife’s 16 gauge in the right, and your 12 gauge in your pants pockets. As sure
145
as rain follows a newly washed car, you will stuff a 20 gauge shell in your 12. Since
it falls through the chamber to lodge in the forcing cone, I guarantee that you will
put a 12 gauge shell on top. Bingo! You just bought a new shotgun (or worse).
Another potential error of equal importance is to shoot a longer shell than the
gun is chambered for. Sure, everybody shoots 23/i-inch 16 gauge shells in their
29/ie-inch chambers. And, boy, is this combo ever a hard hitter! Well, everybody
is getting ready for a surprise. The 23/i-inch shells will fit a 29/ie-inch chamber, as
will 3-inch shells fit in a 23/i-inch chamber. The end of the case rests at the edge
of the forcing cone, and when the case mouth opens, there is no place for this extra
thickness to go. The effect is to obstruct the barrel, and that can lead to serious prob-
lems. It is a tribute to the gunmakers that more shotguns don’t come apart when
abused with shells not intended to be used in their chambers.
Now that I have put the fear of the Lord in you, here is a list of cartridges that
do interchange. Most are black powder or foreign designations that have been
renamed and brought up to date:
Old New
.244 Remington 6mm Remington
.25 WCF .25/20 Winchester
.30 WCF .30/30 Winchester
.32 WCF .32/20 Winchester
.38 WCF .38/40 Winchester
.44 WCF .44/40 Winchester
.45/70/405 .45/70 Government (or .45-70)
.6.35mm Auto .25 ACP .25 Automatic
7.65mm Luger 7.65mm Parabellum .30 Luger
7.65mm Auto .32 ACP .32 Automatic
9mm Parabellum 9mm Luger, or 9mm x 19
9mm Kurtz .380 Automatic
9mm Corto
9mm Short
146
If there is any doubt in your mind regarding what shell goes with what gun, ask
your gunsmith.
The incidence of wrong ammunition in a firearm is a relative rare occurrence,
but the results of such an event can be disastrous. You should be aware that the
possibility of ammunition interchange does exist.
Let’s keep shooting as safe as we can.
147
Appendix A
Recoil Tables
Calculated Recoil of Various Calibers
Cartridge Bullet Velocity Recoil at
Designation Weight Shoulder
.22 Hornet 50 2570 1.47
.223 Rem 55 3076 3.56
.220 Swift 40 4291 4.23
.243 Win 80 3329 8.46
.25-06 87 3434 11.37
.264 Win Mag 120 3058 14.74
.270 Win 150 2801 17.87
7mm Rem Mag 150 2971 20.32
.30 Carbine 110 1845 3.3
.30-30 150 2473 12.59
.308 Win 150 2890 17.81
.30-06 180 2801 24.14
.300 Win Mag 180 2876 26.76
.300 Wby Mag 180 3194 32.11
.45-70 Trap Door 405 1390 19.98
.45-70 Modern 405 2048 46.47
.458 Win Mag 500 2066 64.81
.460 Wby Mag 500 2481 108.2
.25 Auto 50 745 .63
149
Cartridge Designation Bullet Weight Velocity Recoil a Shoulde
.32 Auto 71 825 .77
9mm 125 1190 2.38
.38 Special 158 761 2.91
.38 Super 130 1231 4.57
.380 Auto 90 970 2.04
.357 Magnum 158 1279 9.74
.41 Magnum 200 1277 13.37
.44 Special 240 616 7.57
.44 Magnum 240 1177 15.48
.45 Auto 230 866 6.52
.22 CB 29 725 .05
.22LR (Rifle) 29 1138 .12
.22LR (Pistol) 29 1138 .42
,10ga 31/2" Mag 214 oz. 1205 48.17
,12ga 3" Mag 15/e oz. 1275 51.51
.12ga High Base 11/2 OZ. 1260 35.84
.12ga Low Base 1 oz. 1180 13.81
,20ga 3" Mag 1 1/4 OZ. 1180 22.53
,20ga 23/4" Mag 11/8 OZ. 1175 18.01
.20ga Low Base 3/4 OZ. 1200 8.83
.410 3" 11/16 oz. 1135 7.42
.410 21/2 1/z oz. >> . 1200 4.58
The figures listed are useful only in that they demonstrate computed recoil for a standard-weight factory
firearm shot with the listed bullet weight, specified velocity, and powder charges from available loading data.
18 HOME
28 PR# 1
38 PRINT TAB( 18)'CARTRIDGE'; 7AB< 30)‘BULLET";‘ 'RECOIL AT'
48 PRINT TAB( 18)'DESIGNATION'; TAB( 30)'WEIGHT';' 'SHOULDER'
58 PRINT
68 PR# 8
78 REN : RECOIL = .R»(WR/32)»(((UB*VB)«((4700*VB)+4788*WP)«(UB*U8)+4788*UP))/(700«UR)
88 PRINT 'CARTRIDGE DESIGNATION': INPUT Cl
98 PRIfrTT 'WEIGHT OF RIFLE': INPUT UR
188 PRINT 'UIEGHT OF BULLET': INPUT UB
118 PRIhTT 'WEIGHT OF POWDER': INPUT UP . 4
128 PRINT 'NUZZLE'VELOCITY': INPUT UB
138 A = .5 * (UR / 32)
148 В = ((UB » UB) + (4788 « UP)) / (7888 * UR)
158 С = A » (В « B)
168 R = INT (C « 98) / 188
150
170
180
198
208
218
220
230
240
250
260
270
PRINT : PRINT : PRINT :
PRINT "IS THE DATA CORRCT? Y/N": INPUT M
IF M = "N" THEN 86
PR# 1
PRINT TAB( 10)C$; TAB( 30)WB;" "R
PRINT
PR# 0
PRINT “MOTHER PROBLEM?": INPUT 2$
IF 2$ = "N" THEN END
GOTO 80
END
151
Appendix В
Drills and Taps
Sooner or later, the average gun owner will find it necessary to drill and tap a hole
in one of his firearms (or in something else). It is good to know what drill is used
to make the hole you are about to tap, or what drill to use to let a screw pass through
it with standard minimum clearance. The following table will give you this information.
In general, threads that give 50 percent contact are sufficient for most
applications. You may be surprised to find that a tapped hole the depth of the tap
diameter with a 53 percent thread will, in most cases, break the bolt before the threads
will strip out! A 100 percent thread requires three times the power to tap, but is only
5 percent stronger! In this table are listed those drills which will give 50 percent
threads.
Only those taps that have application in gun work or other projects requiring
smaller taps are listed, and sizes larger than 1/д inch are left to your automobile
repairman.
Local machine shops are not likely to handle these smaller, odd-sized taps. One
source of supply is Brownell’s in Montezuma, Iowa. At the same time you are ordering
your taps, also order a tap handle and some tapping fluid.
Please remember that the smaller the tap, the less effort needed to cut threads.
Also remember that the smaller the tap, the more fragile it is, and if you value your
tap and your work, don’t continue to thread if the slightest extra resistance is felt.
It is much easier to spend 10 minutes slowly tapping a 3 x 56 hole than to have
your gunsmith spend a half hour or so trying to get a broken tap out.
153
Tap and Drill Table
Screw Size Threads per Inch 50 Percent Tap Drill Clearance Drill
0 x 80 3/б4 52
1 X 64 53 48
1 X 72 Vie 46
2 x 56 49 43
2 x 64 49 43
3 x 48 45 38
3 x 56 44 38
4 x 36 42 32
4 x 40 42 31
5 x 40 36 30
6 X 32 32 27
6 X 36 32 27
6 X 40 31 27
6 X 48 31 27
7 x 32 30 22
8 x 32 27 17
8 x 36 27 18
8 x 40 27 18
9 x 32 22 14
10 x 24 20 9
10 x 32 18 9
12 x 24 12 1
12 x 28 11 ; 1
14 x 20 4 F
x 20 3 17/64
1/4" X 28 1 17/67
154
Appendix С
Bullet Size: Metric to American
Today’s wide variety of cartridges have a wide variety of names. Some are measured
in millimeters, and I have discovered that the millimeter designation is confusing to
some of my customers. The misconception seems to be that "mm” means a different
size than “cal.” Sometimes this is true, but more often the name is used to differentiate
similar rounds from each other or, is the name of foreign or military rounds. The
following list should help the shooter determine what bullet diameter, in caliber, a
metric cartridge shoots.
Metric Caliber
5 Rem Magnum .205
5.56 NATO .224
6 Remington .243
6.5 Italian .265
6.5 Jap .263
6.5 Swedish .264
6.35mm Auto (.25 Auto) .251
7 Mauser .284
7.35 Italian .298
7.62 x 51 NATO (.308 Win.) .308
7.62 Russian (7.62 x 39) .310
7.7 Jap .311
155
Metric
Caliber
7.63 Mauser (.30 Mauser)
7.65 Luger (.30 Luger)
7.65 Auto (.32 Auto)
7.65 x 53 (7.65 Argentine)
8mm Mauser (7.9 x 57)
9mm Parabellum (9mm Luger)
9mm Kurz (.380 Auto)
.308
.308
.309
.313
.323
.355
.355
Admittedly, this list is not complete. Cartridges such as the 2.7mm Kolibri (.107
cal.) and the 12.5 x 70mm (.510 cal.) have been left out. These calibers are of more
interest to advanced cartridge collectors than to shooters. If the particular metric round
you have is not listed in this short table. Please consult a loading manual for exact
dimensions.
156
Appendix D
Sources
Every industry has its own set of manufacturers. Most of these supply their products
through distributors, who, in turn, supply the retailers. Thus it is in the firearms
business.
Sometimes your retailer will not have information on a particular company’s prod-
uct line. This does not mean that the product is not good, just that with limited
resources and space, it is impossible to stock all brands and all lines of products.
Your dealer has probably chosen what he feels is the best product for his type of
store. The partial list of manufacturers will help you develop a library of catalogs and
information you can use to become informed. Those I have listed in this section seem
to be some of the more popular ones among my distributors and fellow gun shop
owners' stock. A much more complete list can be found in publications such as the
Gun Digest.
Gun Makers and Parts Suppliers
Arcadia Machine & Tool (AMT)
536 N. Vincent Ave.
Covina, CA 91722
Arminex
7882 E Gray Rd.
Scottsdale Airpark
Scottsdale, AZ 85260
157
Auto-Ordnance Corp
West Hurly, NY 12491
Badger Shooters Supply (Parts)
106 S. Harding
Owen, Wl 54460
Browning Arms
Rt. 1
Morgan, UT 84050
Colt Firearms
Box 1868
Hartford, CT 06102
Federal Ordnance, Inc. (Parts)
1443 Potrero Ave.
So. El Monte, CA 91733
FIE (Firearms Import & Export)
Box 4866
Hialeah Lakes, FL 33014
Freedom Arms
Freedom, WY 83120
The Gun Parts Corporation (formerly Numrich) (Parts)
West Hurley, NY 12491
Jack First, Inc. (Parts)
44633 Sierra Highway
Lancaster, CA 93534
Jennings Firearms
4510 Carter Ct.
Chino, CA 91710
Lodweick, Waiter (Parts)
2816 N. E. Halsey
Portland, OR 97232
Marlin Firearms Co.
100 Kenna Dr.
New Haven, CT 06473
158
O.F. Mossberg & Son
7 Grasso St.
North Haven, CT 06473
Navy Arms
689 Bergen Blvd.
Ridgefield, NJ 07657
Raven Arms
1300 Bixby Dr.
Industry, CA 91745
Retting Inc., Martin B. (Parts)
11029 Washington Blvd.
Culver City, CA 90230
Sarco Inc. (Parts)
323 Union St.
Stirling, NJ 07980
Savage Arms
Springdale Rd.
Westfield, MA 01085
Sherwood International (Parts)
18714 Parthenia St.
Northridge, CA 91324
Smith & Wesson
2100 Roosevelt Ave.
Springfield, MA 01101
Springfield Armory
111 Exchange St.
Geneseo, IL 61254
Sturm, Ruger & Co.
Southport, CT 06490
U.S. Repeating Arms (formerly Winchester)
Box 30-3000
New Haven, CT 06511
Weatherby’s
2781 E. Firestone Blvd.
Southgate, CA 90280
159
Dan Wesson Arms
293 S. Main St.
Monson, MA 01057
Cleaning Equipment
Beiltown Inc.
Box 74, Rt. 37
Sherman, CT 06784
Birchwood Casey
7900 Fuller Rd.
Eden Prairie, MN 55344
Hoppe’s
Airport Industrial Mall
Coatsville, PA 19320
Jet-Aer Corp.
100 6th Ave.
Paterson, NJ 07524
LPS Products
4647 Hugh Howell Rd.
Tucker, GA 30048
Lewis Lead Remover
Box 31
College Park, GA 30337
Marble Arms
420 Industrial Park
Gladstone, Ml 49837
Omark Ind.
Box 856
Lewiston, ID 83501
RIG Products
87 Coney Island Rd.
Sparks, NV 89431
Reloading Equipment
С H Tool & Die Co.
106 N. Harding St.
Owen, Wl 54460
160
Hornady Mfg. Co.
Box 1848
Grand Island, NE 68802
Lee Precision Inc.
4275 Highway U
Hartford, Wl 53027
Lyman Products
Route 147
Middlefield, CY 06455
MEC (Mayville Engr. Co.)
715 South St.
Mayville, Wl 53050
Omark Ind. (Speer, CCI, et al)
Box 856
Lewiston, ID 83501
Pacific Tool
Box 2048 Ordnance Plant Rd.
Grand Island, NE 68801
RCBS
Box 1919
Oroville, CA 95965
Redding, Inc.
114 Starr Rd.
Cortland, NY 13045
Star Machine Works
418 10th Ave.
San Diego, CA 92101
Texan Reloaders
440 S. Cips St.
Watseka, IL 60970
Scopes and Mounts
Aimpoint
201 Elden St., Suite 103
Herndon, VA 22070
161
В-Square
Box 11281
Ft. Worth, TX 76109
Buehler Scope Mounts
17 Orinda Highway
Orinda, CA 94563
Burris Co.
Box 1747
Greeley, CO 80631
Bushnell Optical
2828 E. Foothill Blvd.
Pasadena, CA 91107
Kwik-Site
5555 Treadwell
Wayne, Ml 48185
Leupoid & Stevens
Box 688
Beaverton, OR 97075
Lyman Products
Route 147
Middlefield, CT 06455
Marble Arms
420 Industrial Park
Gladstone, Ml 49837
Millet Industries
16131 Gothard St.
Huntington Beach, CA 92647
Redfield Gun Sight Co. •
5800 Jewell Ave.
Denver, CO 80222
S & К Mfg.
Box 247
Pittsfield, PA 16340
Swift Instruments
952 Dorchester Ave.
Boston, MA 02125
162
Tasco Scopes
7600 N. E. 26th St.
Miami, FL 33122
Unerti Optics
3551-5 East St.
Pittsburgh, PA 15214
Williams Gun Sight Co.
7389 Lapeer Rd.
Davison, Ml 48423
Zeiss Consumer Products
Box 2010
Petersburg, VA 23803
163
Glossary
Many of these terms are used by gun owners in varying degrees of correctness. For the sake
of conformity and understanding, these definitions apply to this book and are generally accepted
by gunsmiths all over the country.
action: That part of the firearm which houses the trigger, bolt, magazine, and other moving
parts.
automatic: A term that implies multiple firing sequences with one pull of the trigger, but
commonly misused to mean semiautomatic, which means that the firearm will automatically
reload itself, ready for the next pull of the trigger.
bolt: Locks the cartridge into the breech and contains the firing pin.
bolt-action: A firearm which is operated by manually rotating the bolt and pulling it to the
rear to remove a cartridge from the breech, then pushing the bolt forward to load and rotating
it to the locked position.
boresighting: Aligning the sights with what is seen through the bore.
breech: The rearmost portion of the barrel, which accepts the cartridge.
buttplate: Protective covering of the rear of the stock to help prevent chipping the toe if the
stock is accidentally dropped.
caliber: The diameter of a bullet or barrel in hundreds of an inch, i.e., .30 is 30 caliber,
cartridge: The self-contained unit consisting of case, primer, powder, and bullet. Also called
a round.
chamber: A portion of the barrel in front of the breech cut out to accept the cartridge.
165
cheek piece: A raised plate on the side of the butt stock to help position the eye in front
of the sight.
choke: Constriction in the bore of a shotgun near the muzzle to condense the shot pattern,
clip: A device without a spring that holds cartridges together for loading into a firearm. The
term is often misused to mean magazine, See magazine.
crown: A protective recessed machine cut in the muzzle to protect the front of the rifling from
being damaged.
Damascus: The process of making a barrel by wrapping thin braided wire around a mandrel
and hammer forging it into a solid tube. Damascus barrels must not be shot with modern
ammunition. The nature of this barrel will not withstand modern smokeless pressures. (Some
will say that they have been shooting magnum loads in their Damascus barrels all their
lives. Maybe so, but when these barrels do let go, they unwind, usually right at the point
where the front hand holds the forearm. Not all Damascus barrels will fail, but is shooting
one worth the risk of losing a hand? Do not take the chance.)
double-action: A firearm in which the mainspring can be both compressed (cocked) and
released (fired) by pulling the trigger from the uncocked state.
ejector: That part which throws the cartridge or case out of the action.
extractor: Any devise that mechanically removes a cartridge or case from the chamber.
forearm: The front part of the stock supporting the barrel.
hammer: Usually, that part released by the action of the trigger and sear which strikes the
firing pin.
headspace: The distance from face of a locked bolt to the place where the chamber supports
the cartridge. Headspace is a critical measurement, with a tolerance of .0006 (six ten-
thousands of an inch!).
hinge pins: A pivot found on double-barrels, over/unders, and some single-shots, which allows
the barrels to open; usually found in the front of the action.
inletting: The act of fitting wood to metal, or the result of this fitting.
lever-action: A firearm that is operated by swinging a mechanism surrounding the trigger
to the front to remove any cartridge from the breech, then pulling back to reload.
locking lugs: A variety of mechanical devices which lock the bolt to the breech during firing.
machine gun: A firearm that will shoot more than one shot with a single pull of the trigger,
magazine: A device with a spring that holds cartridges ready for feeding into a firearm’s
chamber. Magazines can be detachable, or built into the firearm.
Monte Carlo: A raised portion of the stock, usually above the cheek, to place the head in
line with a telescope.
muzzle: The frontmost part of the barrel.
paralax: The apparent shitting of the target or crosshairs when the eye is moved while looking
through a telescope.
pump action: A type of action which is activated by pulling an operating handle to the rear
to remove any case from the breech, then pushing it forward to load another cartridge
into the chamber.
recoil: Generally accepted as the energy felt by the shooter when a firearm is discharged.
166
revolver: A hand-held firearm that contains multiple shots in a cylindrical chamber which
revolves to align each shot with the barrel.
rib: A raised portion on the top of a shotgun barrel to give the shooter a flat sighting plane
and dissipate heat.
rifling: The process and the end result of cutting spiral grooves in the bore to impart stabilizing
spin to a projectile.
round: See cartridge.
safety: Any of a number of devices to prevent a firearm from discharging until the device
is deactivated or placed in the fire position. A safety is a mechanical device that can fail,
and should never be trusted to prevent accidents.
sear: A part which prevents motion from occurring to or by other parts until such time as
that motion is needed.
single action: Any firearm that can be fired only by placing the hammer or striker manually
in the cocked position for each shot (or, in the case of semiautomatics, for the first shot)
before the trigger is pulled.
toe: The lower rear portion of the stock.
top lever: An opening mechanism found on the top rear of the action on double-barrels,
over/unders, and many single-shot shotguns.
trigger: Any device that will release the sear on demand.
167
Index
A Dardick gun, 6 hand loader press, 95
accuracy, 141 date and time scope, 69 handguns, scopes for, 67
aerosol spray cleaners, 28 dies, pistol and rifle, 99 headspace, 13
ammunition, long-term storage of, distance meter, 69 Henry, Benjamin, 6
45 drills and bits, 22 high brass setting, 34
arquebus, 3 drills and taps, 153-154 hinge pins, 13
assault rifles, 7 automatic pistols, 7 Dryse, 5 holsters, storage in, 47
cleaning, 31 E 1
used, 14 ejector problems, 116 end cap swivels, 77 ignition problems, 116
В extractor problems, 13 1
barrel band swivels, 77, 86 black powder shooting, 142 bolt-action rifles, locking systems of, problems with, 116 J Jiffie InstaJust sling, 83
13 F К
bolts, 11 files, 23 Kentucky rifle, 4
bores, 11 firearms, history of, 1-8 Killner, Gaspard, 3
boresighting, 73-75 flintlocks, 4, 142, 143
Brochardt, Hugo, 6 flip up post, 69 L
Browning, John M., 6 Flobert, Gustav, 5 lacquer finishes, 108
bullet size: metric to American, flush mount swivels, 77, 79 lead remover set, 30
155-156 Foresyth, Rev., 4 Lefaucheaux, 5
bullets, 91 C caplock guns, 142 frame, 14 French polish, 109 frizzen, 4 full and half-band swivels, 78 lighting, 19 loading problems, 116 locking, 12 long-term storage, 45
carrying strap, 82 low brass setting, 34
cartridge arms, 5 cartridge collecting, 138 cartridge designations, 111-114 cartridges combinations, 144 caseless ammo, 7 centerfire cartridge, 5 chain of operations, 115 chambers, 11 cleaners, 28 cock, 4 G generic malfunctions, 115 gun cases, storage in, 39 gun cleaning, 27-36 automatic pistols, 31 general procedures for, 28-35 revolvers, 29 rust removal during, 36 solvents and tools for, 28 storage, 35 gun rack, 42 gunpowder, 1 Gyrojet, 6 Lugers, 6 luminous dot (scope), 69 M magnums, 7 malfunction troubleshooting, 115-136 Browning A-7, 135 double action revolvers, 125
Colt, Samuel, 6 Marlin .22 automatic rifles, 129
commemorative guns, 17 Marlin .22 bolt-actions, 127
compass, 69 Mossberg pump shotguns, 120
condition grading for used guns, 15 Remington 1100, 117
crane, 14, 15 Remington 870, 117
crosshairs, 69, 70 H Remington Model 11, 135
hammers, 4, 14, 23 Ruger .22 automatic pistol, 136
D hand cannon, 2 Savage 775, 135
Daisy guns, 7 hand guns, 2 Savage pump shotguns, 130
169
Savage/Stevens double shotguns,
135
single-action revolvers, 126
Winchester Models 1200 and
1300, 123
Marlin, John, 6
matchlocks, 2
Mauser, Peter, 6
Maxim, Hiram, 6
military swivels, 77, 78
military-style sling, 83
Mossberg, Oscar, 6
multi-style crosshairs, 69
multiplex crosshairs, 70
muzzles, 11
N
needle gun, 5
nitro solvents, 28
О
oils, 28, 109
P
pedometer, 69
Pennsylvania rifle, 4
percussion lock, 4, 5, 142, 143
pinfire cartridge, 5
pistols
reloading dies for, 99
scope mounting for, 73
plastics, 7
polyurethane finishes, 109
powder, 91
powder scale, 95
presses for reloading, 95
primers, 91
Q
quick-detachable swivels, 77
R
rangefinder, 69, 70
rasps, 23
rebluing, 12, 103
recoil, 137
recoil pad installation, 49-66
common methods for, 49
equipment list for, 50-55
procedure for, 55-65
recoil pad scribe, 54
recoil tables, 149-151
Redfield scope mounts, 71
refurbishing, 103-110
reloading, 91-102
economics of, 92
handloading kit for, 96
presses for, 95
process and equipment for, 94
shotshells, 100
Remington, Eliphalet, 6
reticules, 69, 70
revolvers, 6
cleaning, 29
malfunctions and repairs for
double-action, 125
malfunctions and repairs for
single-action, 126
used, 12, 14
rifle scopes, 67
rifles
bolt, pump, automatic, and lever,
cleaning of, 33
bolt-action, sling swivels for, 84
pump, automatic, and lever-
action, sling swivels for, 86
reloading dies for, 99
scope mounting for, 71-73
scopes for, 67
rifling, 11
rimfire shells, 5, 139-141
rust, 36
S
safety equipment, 23, 25
sanding wheel, 54
Savage, Arthur, 6
scope mounting, 67-76
boresighting in, 73-75
pistol, 73
rifle, 71-73
sighting-in during, 75-76
scopes
components of, 69
mounts for, 68, 71
selection of, 68
screwdrivers, 22
scribes and punches, 22
security, 47
see-through mounts, 71
Shaw, Joshua, 4
shot counter, 69
shotguns
pump and automatic, cleaning of,
32
single-shot, double, and
over/under, cleaning of, 32
sling swivels for, 88
used, 11, 12
shotshell reloading, 100
sight radius, 141
sighting-in, 75-76
single stage bench press, 95, 97
sling swivels, 77-90
bolt-action rifles, 84
buttstock position of, 81
determining position of, 80
forearm position of, 82
installation equipment for, 80
pump, automatic, and lever-action
rifles, 86
shotguns, 88
slings for, 82
swivel stud for, 79
types of, 77
slow-burning match, 3
Smith, Horace, 6
smokeless powders, 6
sources, 157-163
standard swivel, 77, 78
Stevens, Joshua, 6
stock refinishing
actual refinishing in, 108
applying finishes in, 109
filling in, 108
finish removal for, 105
sanding for, 106
tools and equipment for, 104
stocks, 11
storage, 37-48
cleaning before, 35
considerations for, 38
gun cases as, 39
holsters for, 47
long-term, 45
sites for, 40
storage box, 42
swing mounts, 71
T
T-round cartridge, 6
tapered crosshairs, 70
timing, 14
tip-off mounts, 71
tool rack, 20
tools and work areas, 19-26
trigger pulls, 14
turret press, 95, 98
U
used guns
automatic pistols as, 14
buying of, 9-18
conditions grading for, 15
inspection of, 10
locking for, 12
revolvers as, 14
shotguns as, 11, 12
valuing of, 16
V
varnish, 109
Vielle, 6
vise, 20, 21
W
Weaver scope mounts, 71
Wesson, Daniel, 6
Wheeler, Artemus, 6
wheel lock, 3
whiskering, 107
Winchester, Oliver, 6
wind speed and direction data
(scope), 69
work space, 24
workbenches, 21
170
Edited by Sleven H. Mesner