/





Text
TETETERESA

ОМ NATUR

f l i	m

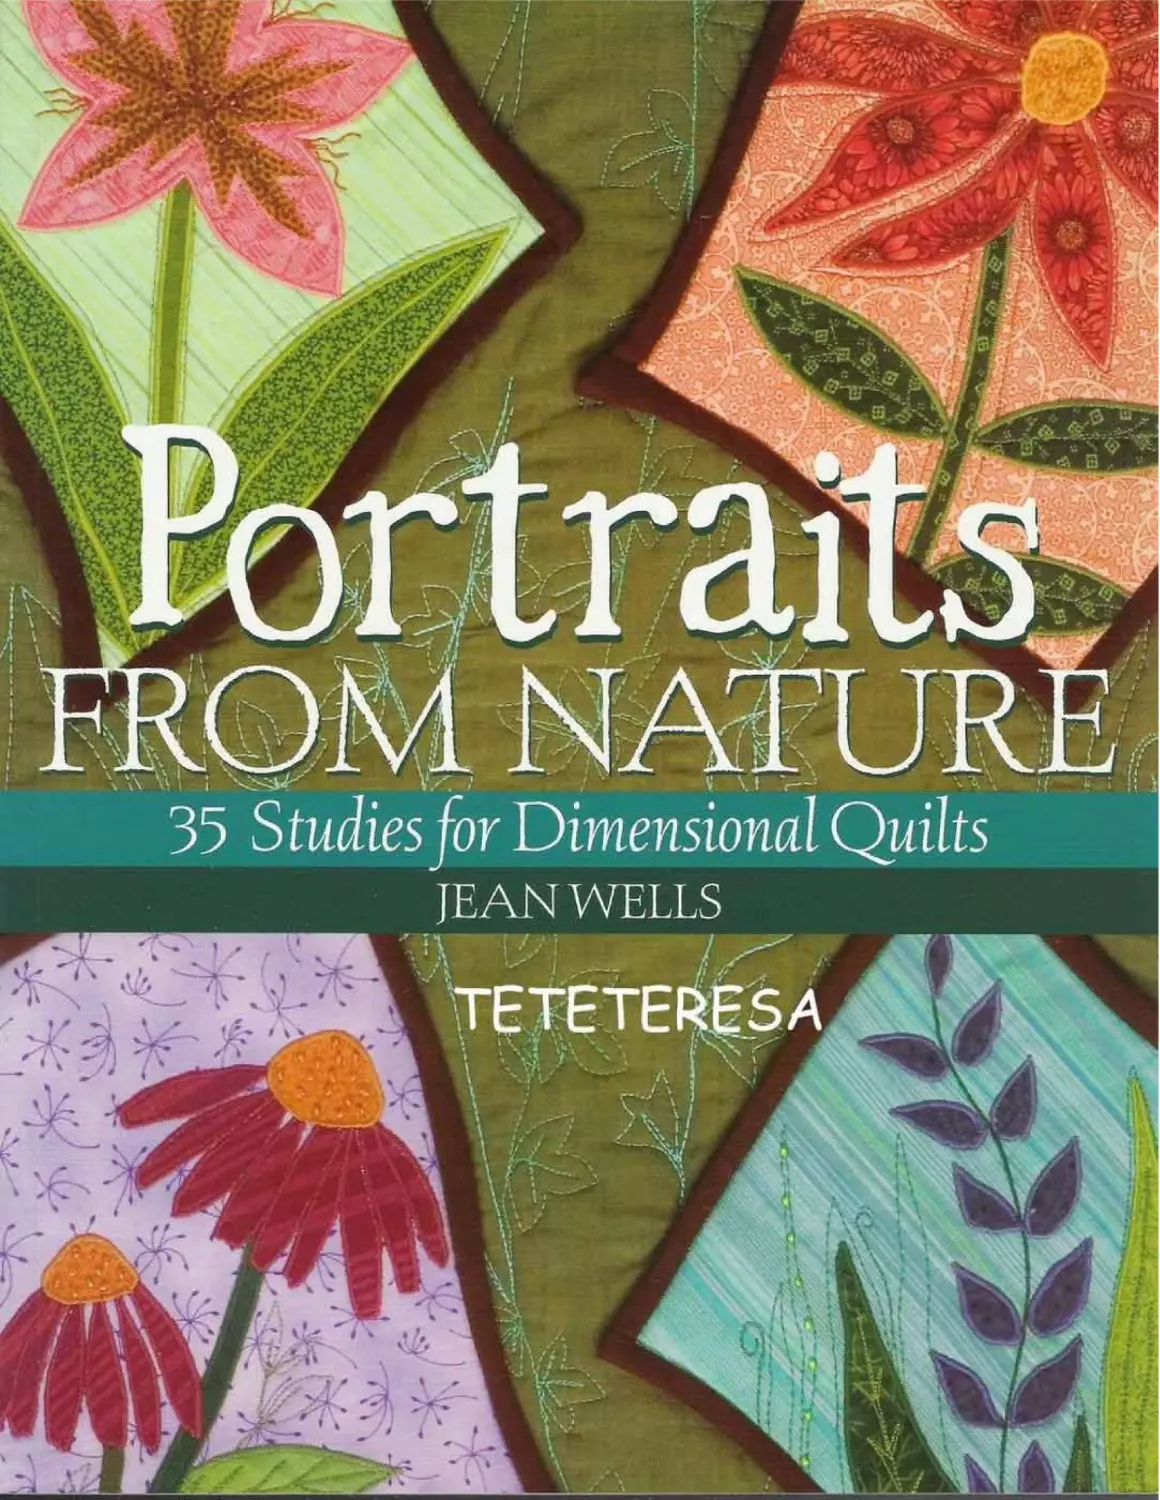
35 Studies for Dimensional Quilts

JEAN WELLS


C&T Piihljshni|». Inc,

Kirstie L.

' Assistants: KcfitG

is! у Zacharias, with her fresh eye for

hook design. I lik


Text <:. 2006 lean Wells

Artwork г 2006 C&T Publishing. Inc

Publisher: Amy Mnrstm

Editorial Director: GailetilRunge

:;?->Atqyishiqns Editor: Jan Grigsby

(Jiittjic Frankel

Editors: Elin Thomas, Deborah Dubois

Jibjr/lTooireader: Wordlinn Inc

TVsigncr; Кпчу.K. 2зд1шпду

aver; Herb Garden hy Jenn Wells

in any J. a m or repnxluecul hv .my mram- quinhic. electninir; rr inpchinici)l, mcliid-
inc phacociipying, recording, raping, or information Чотдс and .removal sysrem
without written | imission of the publisher. The copyrights on inJtyid
tern med bv rhe artists as noted in Bnwts From N’mnrc. These design*

make item> only fur pctxmal use or donation^ to nonprofit jtronps liir sale- l^ch piece
t»l fitiidied invichandisc for sale mibt cany a cntapiCiKUb label with rile-follownig:.
inform»! ion: r\:>iuiis 1 1 2006 Jean Wells from rhe book Pijirvuitr From N<ino.- from


Attention (Зору Shops: Please note the following exception—publisher and .mther
give pennisMon to photocopy pages 53 69 for personal use only

Aiicxuioti TcaditTi: C&T Publishing. Inc. vneour.igo yuu to use this hxtk as a text
for teaching. Contact us nt SOO-284-1114 or wwwxtpubxoin tor more mionnnrmn
iibulit the C&T Teachcis Pmgnim.

W* take grvat ‘".ire tn ensiitc thnr the inforuimionincluded in mir hxiL is ncc unite
and presented iri’gc>hJ faith, but no wmr.Wy i& provided nor results gmininteud.

Having :	over die choices ot materials oi pHKcJmcs имл1, neither the author

nor C&T Publishing,Inc., 5ball have unv liability to any person or entity with respect
Ui any IpSfe or Jatilagc cansixi dfrecth Ut mdtreedy by (he infomiarum ennhiined in this
bunk For yonr ccuiv&iliuiieei wyрет in up-tu'datc taring of corrections on our web
site (u ivtvxqnihxum not already noted, please contact our ciwnmivr

xervke dep;iniSaiH at-etiukiiVcTpubxuin or at EG. Box 1456, Lafayette, CA 94549.
ЙШЖЙЙкМЖ?  5
Trademark I ,s’_) :ir.<| reeistarcdjraikinark names arc used througlwui this K«4..

Rather than им. the >утЬ»К with cmy occurrence of a trademark иг registered trade-
mark name, we anf tiiihj! tl>r names only in the cd no rial hishion m.id k> the l<ncfir of
the owner, Withijb intention infringement,

l.ihran' <3>iw» Caiifecirtg-in-PubJicniioii Dam
Wells, jean

Portraits from nature : 35 studies lot dimensional quilts/ Jean

p. cm.

Includes index.

ISBN Н: 9/S 1-57Г2ОЛ557 (paper rnuh all. pafer)

ISBN JO: M7ll0355'9 (paper trade . idle paj

I. Quilung-*Pm(cni5.:l Apphqitc--Pju


TTS15.W4645 да

74fr.4W4b-4i”

book is only as good

is a superb ed tor; she underjrands my concept of the
book and brii gs it to life. ts off to Elin Thomas for
technical editing. She doc ’t miss a beat, and there is a

lot to review. i
color and desi

is a

to carry out my vision for the
у books to reflect the style of rhe

projects. As in sewing, it’s rhe Iirile details that make a
book special. Thank you to the entire editorial, design,
and production ream as well as toC&T Publishing lor
believing in the project.
table
of contents

INTRODUCTION........5

INSPIRATION.........6

CREATING

THE PORTRAITS......11

QUILTING IN MOTION. . 18

QUILT ASSEMBLY
CHECKLIST.............21

PORTRAITS
COLLECTION............22

Portraits From rhe

Garden .:..........24

Leaves..............25

Fall Fantasy ........26

Vintage French......27

Woodland Garden . . . .28

STUDENT GALLERY. ... 29

SHIRLEY POPPIES....34

OLIVIA’S GARDEN....36

HERB GARDEN........39

BUTTERFLY GARDEN. . . 42

ZINNIAS ...........44

ASPEN TREE.........46

SUNFLOWERS

OF PROVENCE........48

SHADOW BOXES.......50

Maple Leaves......50

Himalayan Poppy....51

PATTERNS...........52

INDEX..............70

SOURCES............70

ABOUT THE AUTHOR ..71

introduction

Portraits From Nature expresses my involvement with the patterns
and colors found in nature. Since childhood, I’ve been in love with
the outdoors. Cultivated gardens, wild forests, rocky mountain
streams, and sandy beaches all continue to enchant me. The sen-
sory delights go beyond what I can see; nature’s delicate balance is
expressed in gentle sounds, sweet floral perfumes, and earthy,
organic decay. When I make garden portraits, my passions for gar-
dening anti quilting come together in a perfect marriage.

Most of the quilts in this collection contain studies of the little
things in nature, from individual flowers and leaves to a butterfly.
Each element is appliqued and framed with contrasting binding to
make it appear as an individual picture. Then several of these small
portraits are grouped together against a quilted background. Two
quilts, Aspen Tree (page 46) and Sunflowers of Provence (page 48),
feature single portraits that are larger in scale but still attentive to
details. Smaller indiv idual studies are also perfect in shadow boxes.

Subject matter for these portrait quills abounds. The first chapter
discusses how to develop a sketchbook and build a collection of
photos that you can turn to for inspiration. 1 love working from
garden photographs. As you're planning your motifs, you’ll also
want to start thinking about what fabrics to use and how to pur
together effective combinations.

The next two chapters describe how to appliqud, embellish, and
bind the portraits and how to machine quilt the background. With
my construction method, the portraits appear to be standing out
from the surface of the quilt. Once you become acquainted with
these easy techniques, you'll be able to follow the Quilt Assembly
Checklist on page 21 to make any of the projects in this book. For
more ideas on how to mix and match the studies, as well as how to
introduce your own designs, be sure to visit the Student Gallery
(pages 29-33). I know you’ll enjoy ibis easy way to create pictures
of your own garden and the larger outdoor world.


ж
Photos and sketches from
my design notebook

I make drawings and sketches or rake snapshots of what
I see. Accuracy is nor important. Just capturing an
image or an impression is enough for my purposes. 1
may want to record rhe fascinating color combination
on a blooming sagebrush in August or 200m in on a
zinnia, one of my favorite flowers.

Tracing is an easy way to start sketching on your own.
Buy a pad of tracing paper and a mechanical pencil with
0.5mm lead. Starr by tracing actual natural shapes that
you find interesting—a leaf picked up from the forest
floor or a dogwood blossom plucked from a tree on your
front lawn.

When you put the tracing paper over a leaf or blossom,
you won’t be able to see every Iitrie detail. A blurred
image is perfect, however, because ir forces you to sim-
plify the shape in preparation for fabric applique. For a
mirror-image design, just rum over the tracing paper.

The design lines will show through the paper. Go over
them in pencil to make them more visible.

Assemble your photos and sketches in a notebook or a
box. Over time, you’ll build a small, personal collection
that you can turn to for design inspiration and reference.

portraits

1 got the idea for the portraits from an etching 1 had
seen in an art gallery. Small pictures were laid out, side
by side, in a boxy format. Tire design was simple: small
pictures contained within a larger box.

For my very first portraits project, I worked in a vertical
format and used graph paper to figure out the size and
sequence of shapes. It took rime to ger rhe balance
right. As a quilter, I was inclined to allow an even
margin of fabric all around, like the borders on a quilt.
But 1 soon discovered that a slightly wider margin on
the bottom made rhe entire piece look better.
Professional framers use this same trick when they cut
mats for photographs and prints.

Equal marquis

A more satisfying balance

To ensure that I have enough background fabric, I usu-
ally cut a larger piece than I think I will need, knowing
that I can trim it to the final size later. When the por-

traits are complete, I arrange them on the background,
study the composition, and make any adjustments. You
won’t have to do this for rhe quilt projects in this book,
because the portrait dimensions arc already calculated,
but if you design your own projects, this is a good tip to
keep in mind.

You can also maneuver images within the portraits. The
“safe" approach is to place whole images inside a square
or rectangle. For drama, let a shape spill off rhe edge
and then crop it with rhe binding, much as you would
use your camera’s view finder to crop in for a close-up.
Cropped images are dynamic because of the tension
they create; the eye strains to see rhe parr of the picture
that is missing. Just a few cropped images in rhe entire
quilt are all it takes to add this energetic spark. A
photocopier that enlarges and reduces is invaluable
for resizing shapes to help achieve this effect.

fabric palette

In addition to rne appliques, rhree key fabrics are needed for each project:

Your goal is to pur together combinations that create visual excitement and make the portraits
stand out. Fortunately, quilting cot tons come in a variety of styles and colors. In general, look
for solids or patterns that will be easy to “read” in the larger composition. Examples include
low-contrast textures (semisolids), hand-painted textures, monochromarics, painterly style
textures, and small prints. Once in a while, I find a large print with areas of solidlike texture
that 1 can use. If the fabric is plain, try stitching and beads to add texture to rhe applique.

Teteteresa
V

Ik

palette tips

у APPLIQUES Choose a variety of medium colors.

PORTRAITSAND BACKGROUND Choose one light fabric and one dark fabric.
Decide which fabric will be for the portraits and which will be for the background.

PORTRAITS BINDING Choose a fabric that is lighter brighter, or darker than
the portraits fabric and the background fabric. Look for interesting color or
texture contrasts.

I audition fabrics until 1 find a combination that works.
Many times, I surprise myseli! On Zinnias (page 44), I
was at a loss when it came to the portraits binding. 1 felt
I had used up all my color options in the appliques.
Then, while wandering through my fabric stash, I came
upon the plaid you sec around the edges. The colors
were perfect, and the bias-cut strips added rhythm to
the blocks. This fabric find was a happy accident.

The portrait binding for Aspen Tree (page 46) really had
me stumped. 1 kept trying to add another color to the

deeper value of the orange leaves. 1 used a hand-dyed
fabric that was ven1 splotchy. When cut up, it intro-
duced little bits of yellow here and there that picked up
on the leaves in the interior.

Portraits binding fabric from Zinnias

Portrait btTuinig fabric from Aspen Tree
Teteteresa

Butterfly Garden (раце 42) was an artistic stretch for me.
I had originally planned a melon color background, bur
when I placed the completed portraits on top of my fab-
ric, the composition just didn’t work. 1 have learned
that if I can’t come up with a solution at the moment,
the best thing is to set rhe piece—and rhe problem—
aside for a day or two until an idea rakes shape. At
rimes like this, your collection of pictures comes in
handy. Thumb through your notebook or box. You'll
usually find that a sketch or picture you have looked at
perhaps dozens of times before will suddenly jump out ar
you and give you a new idea or direction to explore.
Then go visit your fabric stash. The answer for me this
rime around was a sky fabric hand dyed by Mickey
Lawler of Skydyes.

Background fabric in Butterfly Garden

Hand-dyed fabrics work like batiks to add naturalistic texture. Last
summer, I took a sim-pnntmg class and created same fun fabrics One
of my sky prints became the portraits fabric in Shirley Poppies

Make sure you choose tightly woven fabrics,
especially for the smallest applique shapes.
Loosely woven fabrics will fray along the edges
and become difficult to handle. You can use fibers
other than cotton, as long as you can sew a satin
stitch around the edge of the appliqu^ Make a
test applique before investing time and money in
an unusual fabric.
a?®

лгл-Ла

•4v;Iw

глл’ЗгЛ

v^-у'

[П

r <-

лшгто?


tits are actually
. This chanter
1	1	1

prepare the


to frame


Fusible web allows you to use your iron to fuse
applique shapes to one another or to the portrait
|,nt*Xprefer fusible products that appear as dots
i a continuous film, which can
l^ibUgh. Punch!'e	*

<Wthe appliques do not bi
eking must be plain, without .

de fusible web. If yno choose £
ct‘that has a different, width, you may
need to adjust the yardage requirements in the
project materials lists.


•1

APPLIQUE PRESSING SHEET

Ao applique pressing sheet is a flexible silicone or

;i Tefl<shj$heet.that can withstand'.high
d when assembling and fusing
yftch the applique between two
pressing sheets dr between the layers of a folded

pressing sheet to prevent: any:abzing-fu$1ble from
damaging the surface of the ironing board or the
soleplate of

J* *** r-*J t	«*•	<£**	* «''I	t ’*I*lr*41

WASHASie GLUESTICK

Use a washable glue stick to temporarily baste the
appliques and binding in place before sewing.

LIGHTWEIGHT TEARAWAY STABILIZER

Lightweight tearaway stabilizer resembles inter-
facing. It Is sold by the yard or in packages of precut
sheets. Layer the stabilizer under the portrait fabric
to strengthen and stabilize the fabric during
machine applique. After you have finished sewing rhe
applique, tear off the excess stabilizer and discard.


making the appliques
Select the applique designs for your nature portraits
from the patterns (pages 52-69). Follow the projects
instructions or combine the designs any way you wish.
Keep in mind that the applique shapes will be reversed
when fused in place. As you gain experience, you may
want to create your own designs.

Once you have selected a design, study it to determine
how many different appliqud shapes are used. Choose a
fabric lor each shape and for the portraits background,
as described in Fabric Palette (page 8). Follow the steps
below to make each applique.

1 • Mark the fusible web. Place the fusible web, paper
side up, on the applique pattern. Use a pencil to trace
an applique shape from the pattern. Reposition the
fusible web on the pattern and trace another shape,
spacing the traced shapes at least */2" apart. Add roughly
*/4" to the edges of pieces that will underlap other pieces
in the portrait. Continue in this way until you have
made a separate tracing for each shape in the pattern.
Be sure to group together shapes that will be cur from
the same fabric.

2» Rough cut the fusible web. Cut out rhe fusible web
shapes roughly !/»" beyond the marked lines. You may
cut out shapes for rhe same fabric as a group.

3 ♦ Fuse the web pattern to the fabric. Place the fabric
for your first applique shape face down on the ironing
board. Place the partem paper side up on rhe fabric, so
the rough side of the fusible web is against the wrong
side of the fabric. Follow rhe manufacturer’s instructions
to heat the iron and fuse rhe pattern to the fabric. Let
the applique cool. Do not remove the paper backing.
Repeat for all the applique shapes, using a variety of fab-
rics. For easier handling, fuse grouped shapes as a unit.
together. Let cool. You can now pick up the applique as
a single unit.

Cut out the appliques. Using sharp scissors, cur out
each applique shape on the pencil outline.

Peel off the paper backing. If the paper doesn’t
readily release, run a pin across it to loosen it.

€). Compose the appliques. Arrange the applique
pieces on the pressing sheet. Refer to the original pat-
tern tor placement of overlapping shapes, such as petals,
leaves, and butterfly wings. Once you are satisfied with
he placement, layer a second pressing sheet on top (or
• Id rhe pressing sheer over onto itself), sandwiching
he appliqu£ in between. Press to fuse the appliques

7♦ Assemble the portrait. Place the applique on the
appropriate portrait block, right sides facing up. Fuse in
place. Let cool.

artistic stitching

Decorative machine stitching is essential for a profes-
sionally rendered applique. Stitching does more than
hold down the edges. It adds lines of color and texture.
In addition, the tactile quality of stitching gives flowers
and leaves a hint of realism. There are several stitches 1
like to use, but you may discover others on your sewing
machine.

Teteteresa
Satin Stitch

Satin stitch is a very closely spaced zigzag stitch.
Stitching done in a darker, lighter, or bolder thread
color than the adjacent fabrics will create a strong visual
outline around rhe applique shape. Stitching done in a
matching thread color will blend in. You can adjust the
width of the satin stitch from narrow to wide—narrow

for a small applique and wide for a large applique. If your
sewing machine has a movable stitch-width dial, you can
actually change the stitch width as you sew. I like to use t
this feature to sew leaf vein lines, because it lets me
taper the stitching to a sharp point. I also use it to define
the tips of pointed leaves and petals.

Sarin-stitched peuds and leaves

Stan by consulting your sewing machine manual and
selling rhe machine to a normal zigzag satin stitch. Slip
tearaway stabilizer under a piece of scrap fabric and sew
for a few inches to test your setting. Check the thread
coverage. If the thread marches the fabric, the coverage
may be fine. If you are using contrasting thread, you
may need to make the stitches closer together to pre-
vent the fabric edges from peeking through. I usually
make the stitches a little bit closer than recommended,
regardless of the thread color, so that the st itching truly
does look like smooth satin. When you find a look you
like, jot down the machine settings for future reference.

having trouble?

f f J If your machine does not sew a smooth satin
stitch, it may need a tension adjustment.The top
tension can be loosened so the upper thread
wraps through to the underside. If you are
unable to make these adjustments on your own.
take your machine and a sample of your work to
sewing machine technician and explain what
ou are trying to achieve. I have my machine

tuned up two or three times a year, as I do lots
of sewing.

To sew the appliques, place a piece of tearaway stabilizer
against the wrong side of rhe portrait fabric. Pin from
the right side. Begin stitching on a straight or slightly
curved edge. Ser rhe needle to rhe far right zigzag posi-
tion and align it with the edge ol the applique. Lower
the presser foot and begin sewing. Guide rhe fabric by
looking in front of the presser foot. If you look where
the needle goes in and out, by the time the fabric
reaches the needle, it’s ux> late to make a correction!

At an outside corner, stitch all the way to the end of
the applique, right up to rhe new edge. Stop with the
needle in rhe down position at rhe outside edge of the
applique. Lift the presser foot and pivot the fabric.
Lower the foot and resume stitching on the new edge.

Treat tips of leaves as outside corners.

On an inside corner, stitch to rhe point and stop with
the needle in the fabric. Pivot and continue stitching.
This technique creates a V shape on the applique.

Teteteresa
Inside comers on a leaf

To sew overlapping appliques, begin with rhe shapes at
the hack and work forward, following the same order as
tor fusing. Each new line of stirching will cover the ends
of rhe preceding line, leaving a clean edge.

Scalloping stitch niggests orjjcmic plant growth, especially u hen se«m in л
circle.

)verlapl>ing shapes

Alter you finish appliqueing, pull all loose threads ro
rhe back of the fabric, tie them off, and clip the ends.
Use a seam ripper ro help tear away the excess stabilizer.

Decorative Stitches

Many sewing machines have decorative stitch settings
that work well in machine applique. These stitches can
be added alongside or on top of sarin stitch. My favorites
are blanket stitch and a scalloping design. Machine
blanket stitch simulates a hand-worked blanket stitch.
The stirching proceeds along the edge of the applique
and dips in every third or fourth stitch. The scalloping
stitch creates tiny crescent shapes that join ar the ends.

Detail Stitching

Aller you sew the appliques to the portrait fabric, you
may wish to enhance the design with more stitching.
For dimension, apply a piece of thin fusible baiting to
rhe back of rhe portrait fabric. Then stitch from the
right side, either within the applique or outside on the
portrait fabric. Echo quilting in the portrait fabric will
enhance and enliven the applique shape.

Echo quilting accentuates the applique shapes.

Use a regular presser foot to sew straight lines and a free-
motion foot or embroidery foot to sew curved or irregular
lines. 1 don’t drop the feed dogs when 1 use a free-morion
foot—1 find I have more control leaving them up.

If you feel unsure about your ability ro “draw” simple
shapes with rhe sewing machine needle, place a sheet of
tracing paper over the appliqu£ ;md draw some design
lines onto it for practice. You may not realize it, but trac-
ing in this way helps you memorize the lines and shape.

Blanket stitch imitates the hairs on the stem of a poppy plant.
This simple exercise has given me the confidence to try
drawing directly with the machine needle. You can also
lightly mark with a pencil directly on the fabric.

Trace before vr)’< sew to memorise the stitching path.

Tendrils and leaf veining are machine studied U'ilh contrasting thread colors.

the portrait frame

Each portrait is framed with a I Mf-wide binding strip.
The strip is sewn to rhe right side of the portrait and
folded over the raw edge onto rhe back. Because the
back is stitched to the quilt, there’s no need to finish
the edge of rhe binding that is concealed. I use an easy-
to-sew method to miter the corners of the binding.

1 • Trim the portrait block to the exact dimensions
listed in the project instructions. Remember that close
cropping enhances the finished portrait.

2* Trim one end of rhe binding strip at a 45° angle.
Fold in rhe cur end about Vs" to the wrong side.

3. Place rhe binding strip on rhe lower edge of the
portrait, with right sides together and raw edges match-
ing. Stitch exactly W' from the edge until the needle is
exactly lZT from the corner, then backtack. Lift the
presser foot and needle, and clip the threads.

bead embellishment

»kr

Beadwork is done by hand with needle and thread. You
can use beads to depict pistils and stamens or similar
details. Beads bring sparkle and luster to the portrait
and enhance the stitching.

Yellow bugle beads add dimensional
pistils to an appliqucsd |х>р|л

next bead. Knotting after ea

A heading needle is long,
thin, and somewhat flexible.
Make sure the needle shaft
is slender enough to pass
through the bead hole. Pull
the needle up from the
fabric, slip on a bead, insert
the needle back into the
fabric, and pull it through
to the wrong side. Knot the
thread on the underside
before proceeding to the
ch stitch prevents all the

Backtack '/Г from the comer

4* Rotate rhe portrait a quarter turn on the machine
bed. Fold the binding at a right angle to rhe edge just
sewn, then bring ir down even with rhe new edge.

Portrait

Portrait

beads from working loose should one become detached.

Fold the binding up .

. . . and then down.
Э» Stitch from rhe top edge to exactly ’//'from rhe
next corner. Backtack and clip the threads as in Step 3.


Portrait

Start stitching at the edge.


€>• Repeat steps 4 and 5, continuing to sew a precise
a" scam allowance around the edge of the portrait. At
the starting point, overlap the ends of rhe binding by
/'and stitch through all layers. Clip the threads. Trim
rhe excess binding at a 45° angle.


Portrait

Make a neat fiiush.

7• Fold the binding onto the back of the portrait, cre-
ating a neat ’/C-wide frame around rhe image on the
right side. Each corner will make a neat self-miter. Press
to crease rhe edge. Use a washable glue stick to secure
rhe binding on the back.

Portrait

Each comer will self-mner

Teteteresa

'strips	 Й» ;«t?H!

Al4?i the tutilne K4{d to dw aftojge has hidou; jiri/h ;
width _

Teteteresa

Tile background functions a bit like a picture mat with
multiple openings, but rhe construction is much easier.
The portraits arc mounted on top of the background;
there is no additional cutting or piecing.

how to
a quilt

Lay the backing fabric wrong side up on a flat

surface. Place the batting on top and pat it down
without stretching it Place the oackgrounc fabric
right side up on the batting. Pm through all three
layers with straight pins or safety pins every 4'
or so. Layer smaller quilt sandwiches to use for
practice sewmg in the same way.

background quilting

The Inspiration chapter (page 6) discusses how to
choose a background fabric that shows oft the portrait

. cks. A subtler aspect of the background is the quilting.
I like to use free-motion quilting in rhe background.

Vice I start sewing, I develop a rhythm. Free-motion
••itching is fast and easy to do, and it makes the overall
q lilt more interesting. If you tried echo quilting on rhe
г rtraits blocks, you're off to a good start.

Choose a design theme that relates to the portraits. In
_ :r Jen-themed quilts, leafy shapes, floral motifs, and
v nes are almost always good choices. Continuous-line
J .signs or motifs that you can connect without breaking
i . line of stitching work best. If you are nervous about

sewing without a pattern, trace rhe quilting designs
from the patterns or scout out your own floral shapes
and leaves from garden magazines or catalogs to copy.

Tracing is an important exercise. It helps you become
familiar with the contours. When you draw design lines
on tracing paper, you are rehearsing how you will stitch
these lines and shapes later on. Some quilters like to
lightly sketch a design onto fabric with chalk or a fine
pencil, but I prefer—and encourage—a more sponta-
neous approach.

For free-motion quilting, you can use matching or con-
trasting thread, depending on the level of contrast
desired. Use a free-motion foot or embroidery foot, just
as you did for echo quilting. The feed Jogs can be up or
down—whichever works belter for you. Sewing on a
practice piece is useful, no matter how experienced you
are. Get into the habit of layering your leftover fabric
and barring into a mini quilt sandwich. Use your prac-
tice piece to try out your design ideas and to develop
your free-motion sewing skills. Whenever I sir down to
sew, I like to warm up on my practice piece before
sewing the actual quilt.

Once you begin sewing on the background fabric, keep
going until the entire surface is quilted. Try to relax and
ease into the rhythm of your design. The goal is not to
stitch every motif exactly the same but to create a har-
monious whole. Keep in mind where the portraits will be
placed and where the- frame or binding will fall; you don’t
want your best quilting work to be hidden or cur off!

Free-morion rpi/ting
to bind or to frame?

There are two ways to finish rhe outer edge ol a portrait
quilt: binding and professional framing. Binding is done
after the background is quilted but before the portrait
blocks are attached. Framing is done alter the entire
quilt is finished. Both options are included in the
project instructions.

For a bound edge, trim the quilt to rhe dimensions
given in the project instructions. Fold the quilt binding
strip in half, right side out, and press. Sew the binding
around the edge of the quill, raw edges together, using a
’ZTseam allowance. Overlap the ends for a neat finish,
as you did for the individual portraits. Fold rhe binding
onto the back of the quilt and press, allowing the cor-
ners to self-miter. With matching thread, hand sew the
folded edge of the binding to the back of the quilt.

picture perfect

Arranging and attaching rhe portrait blocks is your final
sewing step. Lay the quilted background on a flat sur-
face. Referring to the quilt diagram, measure from rhe
bound edge or the frame chalk line to place rhe por-
traits. Allow VVro ’/2"between each portrait block.
Note that the background margin at the bottom is
slightly wider than the margins at rhe top and sides.

Use a washable glue stick to “baste” the portraits in
place. A few dabs of glue on the reverse side of rhe por-
trait should be sufficient; use more glue for larger blocks.
Avoid pinning through multiple layers of batting, as this
rends to skew rhe blocks. Use monofilament to stitch
each portrait in-rhe-ditch along rhe binding seam. Use
clear monofilament for light to medium colors and
smoky monofilament for dark colors.

Professional framing is more expensive
than binding, but it gives a quilt a for-
mal art gallery look. After you quilt the
background, lightly mark the outline of
the finished quilt on it. Do not trim
the quilt in any way; rhe extra fabric
allowance is needed for proper mount-
ing in rhe frame. Attach the portrait
blocks as directed, then rake the fin-
ished quilt and ihe quill diagram to a
professional framer. The diagram will
help you and rhe framer confirm the
size of the frame and the placement of
rhe quih within it. The framer may
need anywhere from a few days to sev-
eral weeks ro complete rhe job.

Stitch in-thi-diU'h.

Teteteresa
project instruct ions, cut the fabrics as directed, and prepare rhe binding strips. Then followHie steps
Mow to assemble the quilt. Specific sizes and colors are given with each project. If you need help,

refer to the technique section referenced ar the end of each step. You can also use this checklist when
designing your own portrait quilts.

1 • Prepare the appliques. Refer to the patterns (pages
52—69). Choose one or more designs for each portrait
- <k. Cut and fuse the selected applique pieces to each
•vrtrail block. (Making the Appliques, page 12)

Z. Sew the appliques. Machine sew around the edges
c* the applique shapes in satin stitch or blanket stitch,
'•itch in details, such as leaf veins. (Artistic SritcAing,
page 13)

3 • Add beaded embellishment. Embellish the flower
tenters, edges of petals, and other areas as desired with
re ids. See the patterns and photographs for design
ccas. (Bead Embellishment, page 16)

4» Trim the portrait blocks. Use a rotary cutter and
cutting grid. Cur to ihe sizes listed in the project
instructions. Accuracy is very important for the finished
portraits to look good when grouped together in the
quilt. (The Portrait Frame, page 16)

5 ♦ Bind the portrait blocks. Bind each portrait block
using the Fabric 3 binding strip. (The Portrait Frame,
page 16)

6* Quilt the background. Layer the quilt backing, bai-
ling, and background. Work free-motion quilt ing over
the background. (I low to Layer a Quilt and Background
Quilting, page 19)

/ • Bind the edge. Trim the quill to size and bind with
the Fabric 1 binding strip. For a framed quilt, lightly
mark rhe finished size but do not trim. If you are having
rhe quilr professionally framed, first complete Step 8.
(To Bind or to Frame?, page 20)

8. Attach the portrait blocks. Arrange rhe portrait
blocks as shown in the quilt diagram. Stitch m-the-
ditch with monofilament. (Picture Perfect, page 20)

Teteteresa

Quik Assembly Checklist

21

quilt diagram

3i h"

14

Mark for framing or cut for binding

materials

	1lA yards for background, backing,
and quilt binding (Fabric 1)

	4 yard for portrait blocks (Fabric 2)

	И yard for portraits binding (Fabric 3)

•	t yard for contrasting quilt binding
(optional)

•	Assorted Vk-yard cuts or scraps for
appliques

	Assorted rocailles and bugle beads for
embellishment

	Thread to match or slightly contrast
with appliques

•	Monofilament

•	yard lightweight paper-backed
fusible web

	i yard tearaway stabilizer

	31*Л"Х 14" thin quih batting

	Lightweight fusible batting for back oi
portraits (optional)

cutting guide

Fabric 1

BACKGROUND 31’/ГХ 14"

BACKING 31‘/’"X 14"

QUILT BINDING 2’A" X 90" long; omit if quilt will be professionally
framed (How to Make a Binding Strip, page 17)

Fabric 2

PORTRAIT BLOCKS

a 5" x 5"	с 3" x 5"	e 9" x 5"

В 4"x5"	D 2*/2"x5"	f 4"x5"

Fabric 3

PORTRAITS BINDING 1‘XT X 144" long

(How to Akike a Binding Strip, page 17)

assembly

Follow steps 1-8 of the checklist on page 21.

In Step 4, trim rhe blocks to these sizes:

a 4"x4’/4" с 2’/Гх4,/4" e 8"х4'/Г
в 3l/4"x4'/4" d 1>/2"x41/4" f 3>/4"х41/4"

In Step 7, trim or mark rhe quilt ro finish at 28*/’"x 11".
Machine quilting on the background adds lots of leafy green foliage. This quill uses a dark
green mottled print for Fabric 1, a light green prim for Fabric 2, and a coral print for Fabric 3.

THE PORTRAIT BLOCK DESIGNS ARE:

A Statflower (page 53)

В Droopy Sunflower 1 (page 53);
cut size 5" x 5"; trim finished block
to ЗУ/'х 4 И»"

C Leaf (page 53)

D Bud (page 53)

E Gloxinia (page 53) and Trio
(page 54)

F Chrysanthemum (page 54); i
finished block to 2У< x 4’A"
These leaves, in assorted green fabrics, look especially fresh and vibrant against the orange
batik chosen for Fabric 2. More light green appears in rhe Fabric 3 portraits binding. Fabric i is
. black solid that shows off both the portraits and the exuberant free-motion background quilt-
ing. Note that the overall dimensions of (his quilt are slightly larger than listed in the general
instructions. Cut the background and the backing 34"x 15" to start, then finish аг ЗО'/Гх 12".

THE PORTRAIT BLOCK DESIGNS ARE:

A Leal Trio (page 55)

В Leaf Duo (page 54)

C Wide Leaf (page 54)

D Slender Leaf (page 54)

E Leafy Garden (page 55)

F Slender Leaf Trio (page 55)
fall fantasy

Fall Fantasy, 28'/Г x II . 2005. Jean Wells

Fall Fantasy was made for a
friend who loves red and via-	<Ауж

tage colors. I wanted to use dfi/
her favorite colors in a quilt Fl/V/M
that could be framed for her ш .* a
1
new home.

1 like how the free-modon quilting, Jone in black thread, shows up against the camel
background. This quilt uses a camel solid for Fabric 1, a black solid for Fabric 2, a red
solid for Fabric 3, and assorted reds, yellows, purples, and greens for the applique's.

THE PORTRAIT BLOCK DESIGNS ARE:

A Zinnia (page 56)

В Droopy Sunflower 2 (page 56)

C Leal (page 53)

D Bud (page 53)

E Lazy Daisy 1 (page 56), Bud Trio
(page 56), and Posey (page 57)

F Cornflower (page 57)

Teteteresa
Dne day, when I was visiting her quilting studio, a swatch of fabric caught my eye.
Betsy had used this fabric to recover a chair for her living room. 1 “borrowed" it when
•he wasn’t looking to develop my color palette for Vintage French: dark green mottled
• r Fabric 1, a white solid for Fabric 2, a pink stripe for Fabric 3, and assorted pinks,
el lows, reds, and greens for the appliques.

THE PORTRAIT BLOCK DESIGNS ARE:

D Slender Leaf (page 54)

E Amaryllis 2 (page 58); add leaves
to fill space

F Amaryllis 3 (page 59)

A Amaryllis 1 (page 57)

В Strawberry (page 57)

C Wildflowers (page 58)
woodland garden

Woodland Garden. 28'/Г x I Г. 2005, Jean Wells


Fall is a beautiful time in the
woods, and I often take my
camera with me when I go
for walks.


Rich red tones—some deep, some orangy—are dominant in snapshots I have taken over the
years. I looked for fabrics to capture these vibrant shades. 1 then set them against a green
ground. The background is a woven homespun stripe quilted to resemble wood grain.

THE PORTRAIT BLOCK DESIGNS ARE:

Zinnia (page 56)

Lazy Daisy 2 (page 59)

A

Wiki Berries (page 58)

E

В

Woodland Flowers (page 58)

Slender Leal (page 54)

F

Wide Leaf (page 54)


When I present my garden portrait
quilts to a quilting class, I can practi-
cally see the wheels turning in
my students’ minds. My students
bring their own perspective and inter-
ests to the work they do, and the
Southwest, 28*/’“ x 18". 2005. Nikki Cooper. Nikki attended the first Portraits From the Garden
class I ever taught. For her first project, a Hawaiuin-ihemed quilt, she fused flincers cut from a printed
fabric. For her second quilt. she designed desert and American Indian motifs tn a Southwestern theme.
The portraits van in height and width, and the entire arrangement is anchored at the base by a long
band of chili peppers.
French Connection, 30'/.’" x 12", 2005, Jeanne Seligrcn.
Jeannes country French kitchen is the perfect setting for this
bright quilt. Jeanne added a rooster and a topiary to the
/lower patterns introduced in class Th, diagonal plaid back-
ground adds a homey touch and gave Jeanne easy-to-follow
stitching lines for the machine, quilting.
Along the Riverbank, 26!/'~ x 14". 2005, Ann Richardwni. An avid
outdoorswoman who loves river rafting. Ann enjoys seeing butterflies and
dragonflies at (he water’s edge. Her applique motifs repeal in the exquisite
free-motion quilting, done in brown thread on a turquoise background
Ann was originally going for a vertical orientation. but the quilting designs
worked better when the piece was laid out horizontally. Note that the
|x>rtrait bindings an- worked in several colors, rather than just one.
LI

Halloween sewing-machine cover. 24“ x 14 2005.Joyce Boyd, seten from a Cotton
Ginny's pattern. Joyce loves pumpkins and can be counted on to give her qialting projects a
fall theme. She transformed one of my flower designs into a sun by adding radiating quilting
lines. A light green striped fabric makes a perfect leaf, especially when the stripes are placed
on the diagonal. More pumpkins and leaves are free-motion quilted
'A yard for portraits binding (Fabric 3)

Monofilament

40' x 20" chin quilt batting or lightweight fusible
batting, plus extra for portrait blocks

Thread slightly darker than background for quilting
'/: yard lightweight paper-backed fusible web
Z yard tearaway stabilizer

S assorted Л-yard cuts including yellow, for poppies
and poppy centers

‘/a yard or scrap for stems

Light yellow bugle beads for embellishment

Thread to match or slightly contrast with appliques

I;/’ yards for background and backing; add yard for
optional quilt binding (Fabric I)

/д yard for portrait blocks (Fabric 2)

I love visiting garden centers in the spring when the
Shirley poppies are in bloom. To make my appliqued
poppies as realistic as possible, I choose the same
vibrant colors seen in nature and then sew bugle
beads to the surface for the pistils. The fabric stems
are edged first in satin stitch and then in blanket
stitch to suggest surface fuzz. Last spring, I made a
point of sketching the leaves on my poppy plants to
get ideas for free-motion quilting. 1 tried to create the
illusion that the poppy plants are actually growing
out ot this quilted background. Shirley Poppies is
constructed like the quilts in the Portraits Collection
(pages 22-28), except that all rhe portraits feature
the same image and are the same size.
Teteteresa

4

assembly

vellow bugle beads.

In Step 4, trim each portrait block to 5"x 6".

Quilt Diiigrnm

In Step 7, trim or mark the quilt for 37" x 17".

Use the Poppy pattern (page 59). Make the poppy for
each portrait a different color. Applique a yellow fabric

Shirlev Poppies, 37" x 17". 2005. Jean Welk


Shirley Poppies

35
The flowers in this retro-style “lollipop" garden quilt
are circles—lots of them!—in different sizes and col-
ors. The portrait blocks arc different colors, too. 1
chose rhe palette to match rhe nursery furnishings of
my new granddaughter, Olivia Rose. Straight quilting
lines with occasional circles repeat the applique
shapes in rhe background.

I yard for background and backing (Fabric I)

Assorted А-yard cuts or scraps for portrait blocks and
appliques (Fabric 2 group)

’/?. yard for quilt and portraits binding (Fabric 3)

Assorted beads to match applique fabrics

Thread to match or slightly contrast with appliques

Monofilament

7. yard lightweight paper-backed fusible web

'A yard tearaway stabilizer

7 yard thin quilt batting or lightweight fusible batting

cutting guide

Fabric 1

BACKGROUND 38l/2"X 16"

BACKING 38l/2" X 16"

Fabric 2 Group

portrait blocks:

A 5'A"x5'A" D 2'A"x5!A"

В 472"x5'A" E 97?"x5A"

С З’/ГхЗ'Л- F4Tx5T

Fabric 3

portraits binding I J/r x 140" long (How to Make a

Binding Strip, page 17)

QUILT BINDING 2*/4" X 105" long; omit if quilt will he
professionally framed (How to Make a Binding Strip,
page 17)
Olivias Garden. 357* x 13". 2005.Jean Welk

assembly

How steps 1-8 of the checklist on page 21.

Use the Circle Flower applique patterns A-E on pages

-67. Refer to rhe block diagrams on page 38 for

: Step 4,1 rim the blocks ro the following sizes:

I */2" x 4 7/'

D

a

V/;"x4'A

E

87Гх4'А

27Гх47Г

37ГХ41//

In Step 7, trim or mark the quilt for 35*/2"x 13". Use
the 2l/4"'Wide binding strip cur from Fabric 3 to bind
the quilt.


Block A

Block D

Block E

Block F

Teteteresa
I lerbs play a big r< »le in my garden. I find inspiration in their hearty shapes. Most herbs will last out our cold witv
tens and become even >tronger rhe next year. This quilt celebrates the simple plant profiles that, pur together,
create a lush, rustic garden. The playful, irregular shapes of the blocks add to this quilts organic appeal,

I k rh ( ianlcn, 24 x 28 . 2005, Au» Wdis
I 7 yards for background and backing (Fabric I)

4 different fabrics, each at least 10" x 10", for portrait
blocks (Fabric 2 group)

7< yard for portraits binding (Fabric 3)

/4 yard for quilt binding (Fabric 4)

Assorted ’/s-yard cuts or scraps for appliques

Assorted beads for embellishment

Thread to match or slightly contrast with appliques

Monofilament

'/: yard lightweight paper-backed fusible web

7 yard tearaway stabilizer

I 7 yards thin quilt batting or lightweight fusible batting

cutting guide

Fabric 1

BACKGROUND 28" X 3171"

backing 28" x 317z"

Fabric 2 Group

Use block patterns А, В, C, and D (pages 60-61). Cut
an irregular block from each fabric.

Fabric 3

portraits BINDING 17Г x 160" long (How to Make a
Binding Strip, page 17)

Fabric 4

>uilT binding 2l * * * * * 7A"x 124" long; omir if quilt will be
professionally framed (How to Make a Binding Strip,
page 17)

assembly

Follow steps 1-8 of the checklist on page 21.

Use rhe patterns on pages 62 65 to cut the appliques for
four portrait blocks. The portrait designs arc:

A Five-Petal Flower (page 62)

В Large Nine-Petal Flower (page 65)

C Large Echinacea Pair (page 64)

D Leal Spears (make 3) and Small Leaves (make 13)
(page 63)

In Step 1, refer ro rhe photograph for applique place-
ment. For Block D, arrange rhe leaf spears first, then
add small leaves in pairs to make a climbing vine..
Machine stitch the vine stem.

Omit Step 4. In Step 5, sew a binding strip to two
opposite edges of Block A. Fold the excess binding
onto rhe wrong side, press, and glue in place. Trim
rhe ends even with the block. Bind the two remaining
edges, allowing a Tf-ze" extension ar each end. Fold to
the wrong side and glue, tucking in the ends. Several
tucks may be required. Repeat for each block.

In Step 7. trim the quilt to 24" X 28".

Butterflies and flowers are what gardens are made of.
This wallhanging incorporates both of these images in
true summer colors. The construction is similar to that

used for the Portraits Collection quilts (pages 22-28). The
background is quilted with garden foliage.

I% yards "sky” fabric for background, backing, and binding
(Fabric I)

Assorted fabrics for portrait blocks (Fabric 2 group):

!A yard for Block A

/' yard for Block В

'A yard for Block C

'A yard for Block D and Block E

A yard for portraits binding (Fabric 3)

Assorted /а-yard cuts or scraps for appliques

Assorted beads for embellishment

Butterfly Garden, 27'/'" x 212005, Jean Wells. Background fabric
dyed b\ Mickey Lawler of Skydyes.

Thread to match or slightly contrast with appliques

Monofilament

Thread slightly darker than background for quilting

/ yard lightweight paper-backed fusible web

/ yard tearaway stabilizer

30” x 24/?” thin quilt batting or lightweight fusible batting,
plus extra for portrait blocks

cutting guide

Fabric I

BACKGROUND 30" X 24^2"

BACKING 30" X 24’/2"

QUILT BINDING 2/< X 110" long; omit it quilt will
be professionally framed (How to Make a Binding
Strip, page 17)
assembly

Follow steps 1-8 of the checklist on page 21.

The portrait designs are:

A Butterfly (page 66)

В Large Echinacea 1 (page 63), Large Echinacea 2
(page 64), and Large Echinacea Pair (page 64)

C Large Nine-Petal Flower (page 65)

D Multicircle Flower (page 66)

E Multicircle Flower (page 66)

In Step 4, trim the portrait blocks to the
following sizes:

A 14" x 9"

В 14" x 5

C6‘/2"x 11

D3"x3

E 3" x 3

In Step 7. trim the quilt ro 27'/2" x 21 ’/2".

Fabric 2 Group

Cut 5 pieces for the portrait blocks:

A 15"x 10"

В 15" x 7"

C8"x 12"

D4"x4"

Fabric 3

PORTRAITS BINDING PZTX 165" long (Hou- to

Make a Binding Strip, page 1 7)

Quilt Diagram
2'1-П'ГШЗ

Zinnias last the whole summer and conic in a multitude of colors. TTicy just might be my favorite flower I made niv
ftrsi ziniua quilt fur (jurden- Inspired Quilts, а к.чМс I wrritt with uiv daughter. Valnri. Like many designers and artists,
once I Itnd a rheme 1 like. I keep exploring tt For ibis interpret• Hi£ >Hf I used little calicoes and textured prints to
create a nostalgic look. Each flower features three different lahncs. plus the gold fabric al the center The portraits
arc hound with a plaid fabric from my stash that happened to have every color in my zinnias palette a most
fortunate find!

Zinnias. ЗЗ'-Г x 34 2005. Jean Wells
21/- yards for background and backing (Fabric I)

I '/> yards for portrait blocks and quilt binding
(Fabric 2)

/8 yards for portraits binding (Fabric 3)

Three '/s-yard cuts or scraps for each flower
(9 different color groups)

'/s yard or scraps for flower centers

Assorted beads for embellishment

Thread to match or slightly contrast with appliques

Monofilament

Thread slightly darker than background for quilting
I yard lightweight paper-backed fusible web
I yard tearaway stabilizer

36 X 37' thin quilt batting or lightweight fusible
batting, plus extra for portrait blocks

cutting guide

Fabric I

36"x 37"

36" x 37"

Fabric 2 Group

Cut 9 pieces, each 9Vl" x 9*/2"

2'ZTx 140" long; omit if quilt will be
professionally framed (How to Make a Binding Strip,
page 17)

г abric 3

I ‘/4"x 355" long (Hou to Make a

Binding Strip, page 17)

assembly

Follow steps 1-8 of the checklist on page 21.

Use the Large Zinnia pattern (page 67).

In Step 4, trim each portrait block to 8*/2"Х 81/’".

In Step 7, trim the quilt to ЗЗИГх 34".

Zinnias

45
Several years ago, I planted aspen trees in
my garden. They provide shade in die
summer and beautiful colors throughout
rhe seasons—lime green in spring; true
green in summer; yellow, orange, and rust
hues in fall, and stark, skeletal beauty in
winter. This quih is my fall interpretation.
My initial plan was to cut the appliqued
tree into three separate portraits, but the
final design was.so effective, I decided to
leave it whole. I love the Asian simplicity
of this piece.

materials

I Zi yards for background and backing
(Fabric I)

/« yard background for portrait block and
quilt binding (Fabric 2)

‘/» yard for portrait binding (Fabric 3)

% yard for tree bark applique

/в yard of a multicolored fabric for leaves,
or scraps of yellow, green, orange, and rust

Thread to match or slightly contrast with
appliques

Monofilament

Thread slightly darker than background for
quilting

I yard lightweight paper-backed fusible web

I yard tearaway stabilizer

21" x 39" thin quilt batting or lightweight
fusible batting, plus 13" x 29'/?" piece for
portrait block
Fabric I

EACKGROUND 21" X 39"

EACKING 21" X 39"

Fabric 2 Group

-ORTRAIT BLOCK 1 3"X 29l/2"

; JILT BINDING 2j/4"x 120" long; omit if quill will be
professionally framed (How to Make a Binding Strip,
page 17)

Fabric 3

PORTRAITS BINDING 1 lA" X 90" long (How to Make a

Binding Strip, page 17)

assembly

Follow steps 1-8 of the checklist on page 21.

Use the Aspen Tree pattern (page 68), enlarging as
indicated.

In Step 4, trim ihc portrait block to 12" x 28f/2".

In Step 7, trim rhe quilt to 18" x 36".

18"

To get ideas far how to quilt the tree bark, all I had to do was walk out into rnj backyard. The more I
studieJ the trees, the more detail I saw. The subject matter was so familiar to me, the quilttng lines
seemed to come naturally
Over the years. I have collected numerous pictures of the sunflower fields in Provence in France. Sonicday I
hope to see them in person. This quilt is my interpretation of what they might look like. I focused on the
flowers themselves, cropping in on I he petals as if 1 had a camera with a zoom lens. The wavy edge on the
portrait block was a work-in-progress decision. I quilted more flowers, leaves, and stems in the background to
suggest endless fields. 1 purchased rhe green background fabric from a vendor at the International Quilt
Festival in I louston. I like the way the light shines through the colors.

Teteteresa
27 yards for background, backing.and binding (Fabric I)

/7 yard background for portrait block (Fabric 2)

/ yard for portrait binding (Fabric 3)

/ yard each of 4 different yellow and yellow-gold fabrics

7-yard cuts or scraps of assorted brown for flower
centers

/ yard total assorted greens for stems and leaves

Assorted beads for embellishment

Thread to match or slightly contrast with appliques

Monofilament

Thread slightly darker than background for quilting

I yard lightweight paper-backed fusible web

I yard tearaway stabilizer

43' x 36 / thin quilt batting or lightweight Risible bat-
ting, plus extra for portrait block

40

cutting guide

Fabric 1

BACKGROUND 43" X Зб’/Г

BACKING 43" X 36l/Z"

QUILT BINDING 21z4"x 155" long; omit if quilt will be
professionally framed (I lou to Make a Binding Strip,
page 17)

Fabric 2

PORTRAIT BLOCK 30" X 20"

Fabric 3

PORTRAIT BINDING 1 ТГх 125" long (How to Make a
Binding Strip, page 17)

assembly

Follow steps 1-8 of the checklist on page 21.

Use the Sunflower Petal, Sunflower Center, and
Sunflower Leaf pat terns (page 69).

In Step 1, cur 5 brown flower centers, 60-80 yellow and
yellow-gold petals, 15 green leaves, and 5 green strips
about wide for stems. Arrange a cluster of petals in a
circle on an applique pressing sheet and add a flower
center. When you are satisfied with the composition,
press to fuse. Make five sunflowers total. Arrange rhe
sunflowers, stems, and leaves on rhe portrait back-
ground, referring to rhe project photograph for place-
ment ideas. Fuse in place.

In steps 2 and 3, use stitching and beads to make each
sunflower center different.

In Step 4. use a rotary cutter to freehand cut a wavy
line along each edge of the portrait block. Crop in on
some of the sunflowers for a zoom-lens view.

In Step 5, bind each edge separately, without mitering
rhe corners. Fold the excess binding onto the reverse
side and secure with a glue stick.

In Step 7, trim the quilt to 40" x ЗЗ'Л".

Sunflowers of Provence

49
shadow boxes

iidcnv lx»x«s at Pottery Bam, 1 imiiwdiately saw rhe pdsribflines for framing Indi
к with lour hall-head straight pins. which I used to mount a label and rny
me to display dimensional items, Ino, like the poppy seed pods I saved from Inst
s seu up quickly and make unique gifts.

materials

I Г x 9" shadow box

7" x 9'' rectangle for portrait

(Fabric 2)

'/i yard for portrait binding

(Fabric 3)

% yard or scraps for appliques

Assorted rocailles and/or bugle
beads for embellishment

Thread to match or slightly
contrast with appliques

'/& yard lightweight paper-backed
fusible web

% yard tearaway stabilizer

% yard thin quilt batting or
lightweight fusible batting

Maple Leaves

I j  X 9" X I - deep. 2005, Jean Wells

I found a vibrant hand-dyed fabric for these leaf appliques--it was fun decid-
ing which part of rhe fabric ro use! Fabric 2 is a watery purple color with sub-
tle stripes. Fabric 3 is a darker, richer purple; prepare 36" of portrait binding
from this fabric.

Follow steps 1-5 of the checklist on page 21.

In Step 1, trace rhe Maple Leaf pattern (page 68) or photocopy a real leaf
and make a tracing. The leaf size and quantity don’t really matter, because
rhe appliqu6s are cropped ar rhe edges for a zoom-lens effect.

In Step 2, sew two rows of straight stitching almost on top of each other for
the leaf stems.

In Step 3, sew rocailles along sewn vein lines.

In Step 4, trim the portrait block to 6"x 8".


Himalayan Poppy

- x I Г X I" deep, 2005, Jean Wells

Tlie poppy applique has became a favorite of mine. Inspired by a photo in a seed catalog, I
chose light aqua fabric for the petals, yellow for the flower center, and green for the stern.
Fabric 2 features deep teal tones. For a sophisticated finish, I used solid black for Fabric 3; pre-
pare 30" of portrait binding from this fabric.

Follow steps 1-5 of rhe checklist on page 21.

In Step 1, use the Poppy pattern (page 59).

In Step 3, sew six yellow bugle beads to rhe flower center.

In Step 4. trim the portrait block to 5" X 6".

Shadow Boxes

51

Remember, rhe pattern'' will reverse themselves when fused in place. Sec Sketchbook on pages 6-7 for more
information on creating original designs. If you wish to reverse a design, trace ii on tracing paper with a fine-point
Sharpie pen, then turn it over. You will be able to see the black line through the tracing paper. Place rhe paper-
backed adhesive over rhe drawing and trace the shape.

Teteteresa
Wide Leaf

Slender Leaf

Chrysanthemum

Leaf Duo
Leafy Garden
Droopy Sunflower 2


Add roughly /4" beyond the
dashed line, so fabric will fit
under petals.
Herb Garden Portrait Blocks
Enlarge 200%
Block С

Teteteresa


Large Echinacea Pair

Omit this leaf on Herb Garden

Trim here for Butterfly Garden

Large Echinacea 2

о

о

Butterfly

Multicircle Flower

Teteteresa

Aspen Tree
Enlarge 275%

index

applique fabric, 9, 10

applique patterns, 52-69

background fabric, 8, 9, 10, 18, 42

batiks. 10

beads, 16

binding, 16-17

blanker stitch, 15

Boyd, Joyce, 3 3

continuous-line designs, 19

Cooper, Nikki, 30

echo quilting, 15

fabric palette, 8-10

free-motion foot, 15, 19

free-motion stitching, 19

Student Gallery

Along the Riverhank, 32-33

French Connection, 30—31

Halloween sewing-machine cover, 33

Southwest, 30-31

how to

bind a portrait, 16-17

bind a portrait quilt, 20

choose a fabric palette, 8-10

crop images, 8

embellish with beads, 16

fuse overlapping appliques, 13

layer a quilt, 19

make a binding strip, 17

make fusible appliques. 12-13

mark fusible web, 12

sew appliques, 14-16

sew free-motion designs, 15-16, 19

sew overlapping appliques, 1 5

sew portrait blocks to background, 20

sketch your own design, 7

stitch an inside corner, 14

stitch an outside corner, 14

stitch appliques, 13-16

troubleshoot, 10, 14

Lawler, Mickey, 10, 42

paper-backed fusible web, 12-13

portraits binding, 8, 9

portraits fabric, 8

portraits layout, 7-8

practice piece, 19

pressing sheet, 12, 1 3

professional framing, 20

projects to make

Aspen Tree, 46 -47

Butterfly Garden, 42-43

Ball Fantasy, 26

Herb Garden, 39-41
Himalayan Poppy. 51
Leaves, 25
Maple Leaves, 50
Olivia's Garden. 36-38
Portraits From the Garden, 24
Shirley Poppies, 34-35
Sim/lotvers of Provence, 48-49
Vintage French, 27
Woodland Garden, 28
Zinnias, 44-45

Quilt Assembly Checklist. 21
Richardson, Ann, 32
satin stitch, 14 15
scalloping stitch, 15
Sellgren, Jeanne, 31
shadow boxes. 50-51
sketchbook, 6-7
Skydyes, 10, 42
tearaway stabilizer, 12, 14
tracing, 7, 19
washable glue stick, 12

sources

The Stitchin’ Post

PO Box 280

311 West Cascade Street
Sisters, OR 97759
541-549-6061

www.sriich i npost.com
stitchin@sritchinpost.com

The Wild Hare

PO Box 280

321 West Cascade Street
Sisters, OR 97759
541-549-6061

The Cotton Patch

1025 Brown Avenue, Dept CTB

Lafayette, CA 94549

www.quilrnsa.com

cotlonpatch@quihusa.com

Cotton Ginny’s

575 W. Amber Way

Hanford, CA 93230

www.cottonginnys.com

Pottery Barn
www.potterybarn.com

Skydyes

POBox 370116

West 1 Word, CT 06137-0116
fabrics@skydyes.com
www.skydycs.com

Mickey Lawler

Teteteresa
about.

the author

Gardens and quilling have been a constant inspiration to
Jean Wells for decades. This talented quilter has written
27 books on quilling subjects, including Patchwork Quilts
Made Easy and the new Oh Sew Easy soft furnishing series,
developed in collaboration with her daughter Valori. All
of Jean’s books reflect her friendly, approachable teaching
style and her love of color and design. As co-owner with
Valori of The Stitchin’ Post in Sisters, Oregon, Jean is in
close contact with quilters of all levels, a connection she
relishes for fresh ideas and inspiration. Jean’s quilts have
been featured on television shows and in magazines, and
she has traveled the world teaching others the joy of quilt-
ing. At home, she enjoys being grandma to Braden and
Olivia Rose; helping with rhe Sisters Outdoor Quilt Show,
held annually the second Saturday in July; and simply put-
tering in her garden, coming up with more quilts to plant.

About the Author

71
 Small quilts focus on flowers, leaves, and individual
garden motifs. Feature a single favorite, or group several!

 More than 35 full-size patterns to combine
any way you like

 COMPLETE instructions for easy fusible applique,
plus decorative machine techniques!

Bring Your Favorite
Garden Plants to Life in
Lovely Quilted Portraits

Favorite author Jean is back with more
inspiration, from her garden