/


Author: Baldwin P.
Tags: software information technology computer technology computer equipment
ISBN: 978-0-470-52146-5
Year: 2010
Text
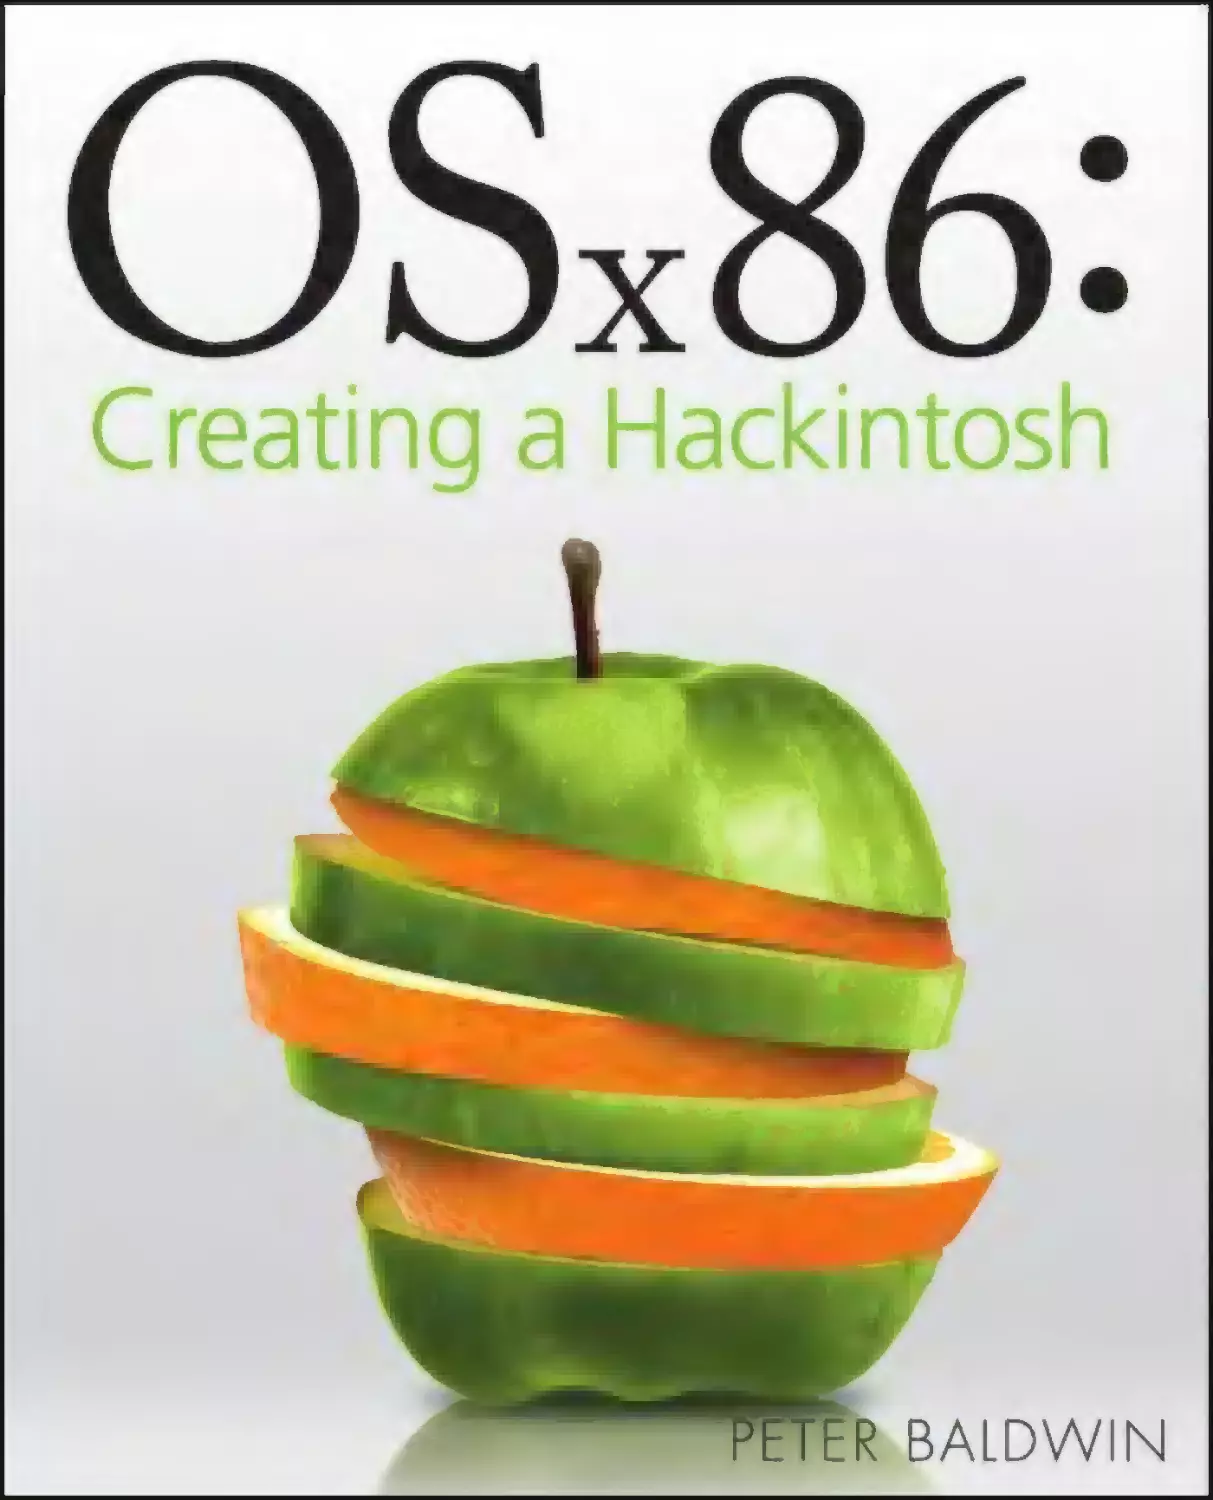
OSx86:
Creating a
Hackintosh
OSx86:
Creating a
Hackintosh
Peter Baldwin
OSx86: Creating a Hackintosh
Published by
Wiley Publishing, Inc.
10475 Crosspoint Boulevard
Indianapolis, IN 46256
www.wiley.com
Copyright © 2010 by Wiley Publishing, Inc., Indianapolis, Indiana
Published by Wiley Publishing, Inc., Indianapolis, Indiana
Published simultaneously in Canada
ISBN: 978-0-470-52146-5
Manufactured in the United States of America
10 9 8 7 6 5 4 3 2 1
No part of this publication may be reproduced, stored in a retrieval system or transmitted in any form or by any
means, electronic, mechanical, photocopying, recording, scanning or otherwise, except as permitted under Sections
107 or 108 of the 1976 United States Copyright Act, without either the prior written permission of the Publisher, or
authorization through payment of the appropriate per-copy fee to the Copyright Clearance Center, 222 Rosewood
Drive, Danvers, MA 01923, (978) 750-8400, fax (978) 646-8600. Requests to the Publisher for permission should be
addressed to the Permissions Department, John Wiley & Sons, Inc., 111 River Street, Hoboken, NJ 07030, 201-7486011, fax 201-748-6008, or online at http://www.wiley.com/go/permissions.
LIMIT OF LIABILITY/DISCLAIMER OF WARRANTY: THE PUBLISHER AND THE AUTHOR MAKE NO
REPRESENTATIONS OR WARRANTIES WITH RESPECT TO THE ACCURACY OR COMPLETENESS OF THE
CONTENTS OF THIS WORK AND SPECIFICALLY DISCLAIM ALL WARRANTIES, INCLUDING WITHOUT
LIMITATION WARRANTIES OF FITNESS FOR A PARTICULAR PURPOSE. NO WARRANTY MAY BE CREATED OR
EXTENDED BY SALES OR PROMOTIONAL MATERIALS. THE ADVICE AND STRATEGIES CONTAINED HEREIN
MAY NOT BE SUITABLE FOR EVERY SITUATION. THIS WORK IS SOLD WITH THE UNDERSTANDING THAT
THE PUBLISHER IS NOT ENGAGED IN RENDERING LEGAL, ACCOUNTING, OR OTHER PROFESSIONAL
SERVICES. IF PROFESSIONAL ASSISTANCE IS REQUIRED, THE SERVICES OF A COMPETENT PROFESSIONAL
PERSON SHOULD BE SOUGHT. NEITHER THE PUBLISHER NOR THE AUTHOR SHALL BE LIABLE FOR
DAMAGES ARISING HEREFROM. THE FACT THAT AN ORGANIZATION OR WEBSITE IS REFERRED TO IN THIS
WORK AS A CITATION AND/OR A POTENTIAL SOURCE OF FURTHER INFORMATION DOES NOT MEAN THAT
THE AUTHOR OR THE PUBLISHER ENDORSES THE INFORMATION THE ORGANIZATION OR WEBSITE MAY
PROVIDE OR RECOMMENDATIONS IT MAY MAKE. FURTHER, READERS SHOULD BE AWARE THAT INTERNET
WEBSITES LISTED IN THIS WORK MAY HAVE CHANGED OR DISAPPEARED BETWEEN WHEN THIS WORK
WAS WRITTEN AND WHEN IT IS READ.
For general information on our other products and services or to obtain technical support, please contact our
Customer Care Department within the U.S. at (877) 762-2974, outside the U.S. at (317) 572-3993 or fax (317) 572-4002.
Library of Congress Control Number: 2009942441
Trademarks: Wiley and the Wiley logo are trademarks or registered trademarks of John Wiley & Sons, Inc. and/or its
affiliates, in the United States and other countries, and may not be used without written permission. All other
trademarks are the property of their respective owners. Wiley Publishing, Inc., is not associated with any product or
vendor mentioned in this book.
Wiley also publishes its books in a variety of electronic formats. Some content that appears in print may not be
available in electronic books.
To Darrell for putting up with an obsessive author
over the last eight months!
About the Author
Peter Baldwin began programming when computers used punch cards to enter programs and
data. Since then, he’s written programs in just about every language from Applesoft BASIC on
the Apple to Ada, through Pascal, C, C++, HTML, Javascript, and others. He has written many
user manuals and spent several years teaching computing and developing training courses in
various computer topics.
He first became interested in running Leopard on his own Intel-based computer in late 2008
after reading a story on a Web site. Since then, he’s installed Leopard to a few different computers, with varying degrees of success. At present, he uses Leopard on both a desktop computer
he assembled himself and on a netbook.
Credits
Acquisitions Editor
Aaron Black
Project Coordinator
Lynsey Stanford
Executive Editor
Jody Lefevere
Graphics and Production Specialists
Joyce Haughey
Jennifer Mayberry
Ronald G. Terry
Project Editor
Martin V. Minner
Technical Editor
Jaison Lewis
Copy Editor
Gwenette Gaddis
Editorial Director
Robyn Siesky
Editorial Manager
Cricket Krengel
Business Manager
Amy Knies
Senior Marketing Manager
Sandy Smith
Vice President and Executive Group Publisher
Richard Swadley
Vice President and Executive Publisher
Barry Pruett
Quality Control Technician
Melanie Hoffman
Proofreading
Christine Sabooni
Indexing
BIM Indexing & Proofreading Services
Contents
Acknowledgments. . . . . . . . . . . . . . . . . . . . . . . . . . . . . . . . . . . . . . . . . . . . . . . . . . . . . . . . . xx
Introduction . . . . . . . . . . . . . . . . . . . . . . . . . . . . . . . . . . . . . . . . . . . . . . . . . . . . . . . . . xxi
Part I: Installing OS X 10.5 .................................................................... 1
Chapter 1: Getting Started . . . . . . . . . . . . . . . . . . . . . . . . . . . . . . . . . . . . . . . . . . . . . . 3
Determining Your Computer Hardware .............................................................................................................................3
Finding Specifications for Your Motherboard.....................................................................................................................5
Finding Your Processor Specifications................................................................................................................................6
Working with older processors .............................................................................................................................7
Using an early Pentium chip .................................................................................................................................7
Finding Specifications of Your Video Setup........................................................................................................................7
Using a separate video card ..................................................................................................................................8
Using integrated video .........................................................................................................................................8
Finding Your Audio Hardware Specifications .....................................................................................................................9
Finding the manufacturer...................................................................................................................................10
Finding the device name ....................................................................................................................................11
Finding Your Networking Hardware Specifications..........................................................................................................11
Wired networking ..............................................................................................................................................12
Wireless networking ..........................................................................................................................................13
Finding Your Other Hardware ..........................................................................................................................................14
Determining Your Hardware Compatibility .....................................................................................................................14
Finding my motherboard ...................................................................................................................................15
Finding my processor .........................................................................................................................................16
Finding my graphics card ...................................................................................................................................16
Finding my wired network .................................................................................................................................16
Finding my sound device ....................................................................................................................................16
Summary .........................................................................................................................................................................16
Chapter 2: Installing Leopard to a Separate Hard Disk . . . . . . . . . . . . . . . . . . . 17
Booting from a Boot CD ...................................................................................................................................................17
Checking your BIOS.............................................................................................................................................18
Finding a boot disk .............................................................................................................................................20
Creating your boot disk ......................................................................................................................................20
Checking that you have everything ....................................................................................................................21
Specifying the Hard Disk Identifier ..................................................................................................................................21
Specifying Boot Options ..................................................................................................................................................23
Preparing Your Hard Disk.................................................................................................................................................25
Specifying Installation Options ........................................................................................................................................30
Watching the Welcome Video .........................................................................................................................................32
Booting your computer to run Leopard ..............................................................................................................32
Watching the welcome video .............................................................................................................................34
ix
x
Contents
Entering Details About Yourself .......................................................................................................................................35
Selecting your keyboard .....................................................................................................................................35
Transferring data from another Mac ...................................................................................................................37
Entering your networking details .......................................................................................................................37
Entering your personal details ............................................................................................................................38
Setting time and date.........................................................................................................................................40
Seeing your Leopard screen for the first time .....................................................................................................41
Troubleshooting .................................................................................................................................................42
Summary .........................................................................................................................................................................42
Chapter 3: Avoiding the Need for the Boot CD . . . . . . . . . . . . . . . . . . . . . . . . . . . 43
Finding and Downloading the Relevant Software ...........................................................................................................43
Downloading the file to update Leopard ............................................................................................................43
Downloading the file to modify your boot system ..............................................................................................44
Using the Installer to Complete Your OS X Installation ....................................................................................................45
Installing the combo update ..............................................................................................................................45
Installing the boot loader ...................................................................................................................................50
Selecting the Boot Disk from the Menu ...........................................................................................................................54
Installing a Different Bootloader .....................................................................................................................................56
Summary .........................................................................................................................................................................58
Chapter 4: Installing to a Hard Disk with Windows Vista Already Installed . . . . 59
Performing a Complete Image Backup of Your Vista Hard Disk ........................................................................................59
Finding and downloading the software..............................................................................................................60
Creating a disk image .........................................................................................................................................61
Restoring your system from the disk image........................................................................................................62
Downloading Required Software to Start Vista and OS X .................................................................................................65
Downloading software to partition your Vista system disk.................................................................................65
Downloading software to modify the Vista boot loader .....................................................................................66
Downloading software to repair your Vista boot sector ......................................................................................67
Partitioning the Vista System Disk ...................................................................................................................................67
Shrinking your existing partition ........................................................................................................................68
Creating the new partitions ................................................................................................................................70
Booting the Leopard Installer ..........................................................................................................................................72
Finding a boot disk .............................................................................................................................................72
Creating your boot disk ......................................................................................................................................73
Specifying the hard disk identifier ......................................................................................................................73
Specifying boot options ......................................................................................................................................75
Formatting your disks.........................................................................................................................................78
Modifying Your Leopard Installer ....................................................................................................................................81
Forcing the installer to use your modifications ...................................................................................................84
Specifying installation options ...........................................................................................................................87
Restarting your computer...................................................................................................................................90
Using the Downloaded Software to Restore the Vista Partition .......................................................................................91
Ensuring That Vista Starts................................................................................................................................................92
Contents
xi
Starting OS X ...................................................................................................................................................................93
Using a Different Boot Loader..........................................................................................................................................93
Expanding Your Windows Partition .................................................................................................................................95
Summary .........................................................................................................................................................................96
Chapter 5: Installing to a Hard Disk with Windows XP Already Installed . . . 97
Performing a Complete Image Backup of Your XP Hard Disk ...........................................................................................97
Finding and downloading the software..............................................................................................................98
Creating a disk image .........................................................................................................................................98
Restoring your system from the disk image......................................................................................................100
Downloading Required Software to Start XP and OS X...................................................................................................102
Downloading software to partition your XP system disk ..................................................................................102
Downloading software to modify the XP boot loader .......................................................................................103
Partitioning the XP System Disk ....................................................................................................................................103
Shrinking your existing partition ......................................................................................................................104
Creating the new partitions ..............................................................................................................................107
Booting the Leopard Installer ........................................................................................................................................109
Finding a boot disk ...........................................................................................................................................109
Creating your boot disk ....................................................................................................................................110
Specifying the hard disk identifier ....................................................................................................................110
Specifying boot options ....................................................................................................................................112
Formatting your disks.......................................................................................................................................114
Modifying Your Leopard Installer ..................................................................................................................................118
Forcing the installer to use your modifications .................................................................................................121
Specifying installation options .........................................................................................................................123
Restarting your computer.................................................................................................................................126
Choosing Your Boot Loader ...........................................................................................................................................127
Using the standard Darwin boot loader ............................................................................................................127
Using the Windows XP boot loader ..................................................................................................................127
Using the Chameleon boot loader ....................................................................................................................130
Summary .......................................................................................................................................................................132
Chapter 6: Troubleshooting Your Installation . . . . . . . . . . . . . . . . . . . . . . . . . .133
Booting from the Install DVD .........................................................................................................................................133
Starting the retail Leopard DVD ........................................................................................................................133
Starting a modified installation DVD ................................................................................................................137
Booting Leopard ............................................................................................................................................................138
Restoring Your Computer from Your Backup .................................................................................................................143
Using the Vista Backup and Restore utility .......................................................................................................143
Using other backup and restore programs ........................................................................................................144
Reinstalling with Different Parameters .........................................................................................................................144
Restoring Your XP Boot Loader ......................................................................................................................................144
xii
Contents
Modifying the Apple Property Lists to Specify Future Boot Parameters .........................................................................146
Specifying boot parameters to the Darwin boot loader ....................................................................................146
Making the changes permanent .......................................................................................................................146
Fixing file permissions ......................................................................................................................................150
Testing the changes .........................................................................................................................................154
Changing other parameters..............................................................................................................................155
Summary .......................................................................................................................................................................156
Part II: Setting Up and Customizing Leopard................................... 157
Chapter 7: Comparing Leopard and Windows . . . . . . . . . . . . . . . . . . . . . . . . . .159
Using the Keyboard .......................................................................................................................................................159
Using the Single Menu Bar ............................................................................................................................................160
About This Mac .................................................................................................................................................163
Software Update ..............................................................................................................................................163
Mac OS X Software............................................................................................................................................163
System Preferences ..........................................................................................................................................164
The Dock ...........................................................................................................................................................164
Recent Items ....................................................................................................................................................164
Force Quit .........................................................................................................................................................165
Using the Dock...............................................................................................................................................................165
Adding an application to the Dock....................................................................................................................165
Displaying folders in the Dock ..........................................................................................................................166
Adding a folder to the Dock ..............................................................................................................................167
Using Application Software ...........................................................................................................................................168
Using window control buttons .........................................................................................................................169
Controlling Finder..........................................................................................................................................................172
Using the view buttons.....................................................................................................................................172
Using Quick Look ..............................................................................................................................................174
Double-clicking the title bar .............................................................................................................................174
Arranging icons ................................................................................................................................................175
Customizing Finder’s toolbar ............................................................................................................................177
Using a breadcrumbs bar ..................................................................................................................................178
Missing the Start Menu .................................................................................................................................................180
Saving frequently used applications in the Dock ..............................................................................................180
Viewing all programs .......................................................................................................................................181
Viewing user files and folders ...........................................................................................................................181
Using system controls.......................................................................................................................................181
Using Spotlight..............................................................................................................................................................181
Using Time Machine ......................................................................................................................................................186
Setting up Time Machine..................................................................................................................................187
Excluding files from Time Machine ...................................................................................................................187
Retrieving files from Time Machine ..................................................................................................................188
Troubleshooting Time Machine ........................................................................................................................190
Using TextEdit ...............................................................................................................................................................191
Contents
xiii
Using the Services Menu................................................................................................................................................191
Using the Context Menu on Text....................................................................................................................................194
Summary .......................................................................................................................................................................195
Chapter 8: Setting Up Personal System Preferences . . . . . . . . . . . . . . . . . . . . .197
Setting Up Appearance ..................................................................................................................................................197
Setting general appearance options .................................................................................................................198
Setting scrolling options...................................................................................................................................198
Setting number of recent items ........................................................................................................................199
Setting font smoothing ....................................................................................................................................199
Setting Up Desktop and Screen Saver ............................................................................................................................199
Setting up your desktop ...................................................................................................................................200
Setting up your screen saver.............................................................................................................................200
Setting up hot corners ......................................................................................................................................201
Setting Up the Dock .......................................................................................................................................................203
Setting Up Exposé and Spaces .......................................................................................................................................205
Setting Up International ................................................................................................................................................207
Setting languages ............................................................................................................................................207
Setting formats ................................................................................................................................................207
Using the input menu.......................................................................................................................................209
Setting Up Security ........................................................................................................................................................211
General security options ...................................................................................................................................211
FileVault ...........................................................................................................................................................214
Firewall ............................................................................................................................................................215
Setting Up Spotlight ......................................................................................................................................................216
Using Dashboard ...........................................................................................................................................................218
Summary .......................................................................................................................................................................220
Chapter 9: Setting Up Hardware System Preferences. . . . . . . . . . . . . . . . . . . .221
Setting Up Bluetooth .....................................................................................................................................................221
Setting up your device ......................................................................................................................................221
Browsing your mobile phone ...........................................................................................................................225
Setting Up CDs and DVDs ...............................................................................................................................................225
Setting Up Your Display .................................................................................................................................................226
Setting your screen resolution ..........................................................................................................................226
Setting up a color profile ..................................................................................................................................227
Setting Up Energy Saver ................................................................................................................................................229
Setting sleep options ........................................................................................................................................229
Setting wake and power down options ............................................................................................................230
Setting Up Keyboard and Mouse ...................................................................................................................................231
Setting up your keyboard .................................................................................................................................231
Setting up your mouse .....................................................................................................................................233
Using a Bluetooth mouse and keyboard ...........................................................................................................235
Setting keyboard shortcuts...............................................................................................................................235
Setting Up Print and Fax ................................................................................................................................................238
Setting up your printer .....................................................................................................................................238
Setting up faxing ..............................................................................................................................................239
xiv
Contents
Setting Up Sound ..........................................................................................................................................................240
Finding the correct audio drivers ......................................................................................................................240
Setting up sound in System Preferences ...........................................................................................................241
Summary .......................................................................................................................................................................243
Chapter 10: Setting Up Internet and Network Preferences . . . . . . . . . . . . . . .245
Setting Up Your Network ...............................................................................................................................................245
Using a wired connection .................................................................................................................................245
Using a wireless connection .............................................................................................................................249
Managing without networking ........................................................................................................................254
Setting Up Sharing ........................................................................................................................................................255
Setting up file sharing ......................................................................................................................................255
Setting up printer sharing ................................................................................................................................258
Setting Up MobileMe.....................................................................................................................................................260
Synchronizing with MobileMe ..........................................................................................................................261
Using your iDisk ................................................................................................................................................262
Using the Back to My Mac feature ....................................................................................................................263
Setting Up QuickTime ....................................................................................................................................................266
Summary .......................................................................................................................................................................268
Chapter 11: Setting Up System Preferences . . . . . . . . . . . . . . . . . . . . . . . . . . . .269
Setting Up User Accounts ..............................................................................................................................................269
Setting login options for your account..............................................................................................................269
Creating a new account ....................................................................................................................................271
Using fast user switching..................................................................................................................................274
Setting login items ...........................................................................................................................................275
Setting Up Date and Time..............................................................................................................................................276
Setting your time zone .....................................................................................................................................276
Setting clock options ........................................................................................................................................277
Synchronizing time with Windows ...................................................................................................................277
Running Software Update .............................................................................................................................................278
Setting Up Speech .........................................................................................................................................................280
Setting up Speech Recognition .........................................................................................................................280
Exploring Text to Speech ..................................................................................................................................282
Exploring Leopard’s voices ...............................................................................................................................284
Setting Up Startup Disk .................................................................................................................................................284
Setting Up Time Machine ..............................................................................................................................................284
Setting up a separate hard disk ........................................................................................................................285
Recovering a file using Time Machine...............................................................................................................286
Fixing the networking kernel extension setup..................................................................................................287
Setting Up Universal Access ...........................................................................................................................................287
Setting up for seeing difficulties .......................................................................................................................287
Setting up for hearing difficulties .....................................................................................................................289
Setting keyboard options for assistance ...........................................................................................................289
Setting mouse options for assistance ...............................................................................................................290
Summary .......................................................................................................................................................................290
Contents
xv
Part III: Using Your Macintosh .......................................................... 291
Chapter 12: Using the Main Macintosh Software . . . . . . . . . . . . . . . . . . . . . . . .293
Using Safari ...................................................................................................................................................................293
Starting Safari for the first time ........................................................................................................................293
Working with bookmarks .................................................................................................................................294
Setting Safari preferences ................................................................................................................................296
Surfing privately ...............................................................................................................................................302
Using Mail .....................................................................................................................................................................302
Linking to your e-mail provider ........................................................................................................................303
Setting Mail preferences...................................................................................................................................306
Using other mailboxes ......................................................................................................................................311
Using smart mailboxes .....................................................................................................................................314
Using Address Book .......................................................................................................................................................316
Setting preferences ..........................................................................................................................................316
Synchronizing with a mobile phone .................................................................................................................317
Synchronizing with Yahoo ................................................................................................................................319
Synchronizing with Google contacts.................................................................................................................320
Using iCal.......................................................................................................................................................................320
Synchronizing with a mobile phone .................................................................................................................320
Synchronizing with Google calendar ................................................................................................................321
Synchronizing with Yahoo calendar .................................................................................................................321
Using Preview................................................................................................................................................................322
Setting Preview preferences .............................................................................................................................322
Editing with Preview ........................................................................................................................................323
Using Preview with PDF files ............................................................................................................................323
Using iTunes ..................................................................................................................................................................324
Synchronizing with your iPod ...........................................................................................................................324
Playing files on your Windows disks .................................................................................................................325
Summary .......................................................................................................................................................................326
Chapter 13: Reading and Writing to Windows Disks . . . . . . . . . . . . . . . . . . . . .327
Reading and Writing to FAT Partitions ..........................................................................................................................327
Viewing hidden files .........................................................................................................................................328
Deleting hidden files ........................................................................................................................................332
Reading and Writing to NTFS Partitions ........................................................................................................................332
Installing MacFUSE ...........................................................................................................................................332
Installing NTFS-3G ............................................................................................................................................334
Installing ntfs-mac ...........................................................................................................................................334
Summary .......................................................................................................................................................................335
Chapter 14: Running Windows in OS X . . . . . . . . . . . . . . . . . . . . . . . . . . . . . . . . .337
Using Parallels Desktop .................................................................................................................................................337
Installing Parallels Desktop ..............................................................................................................................337
Creating a virtual machine ...............................................................................................................................338
xvi
Contents
Parallels modes ................................................................................................................................................341
Using snapshots ...............................................................................................................................................343
Using VMware ...............................................................................................................................................................344
Installing and creating a virtual machine .........................................................................................................344
VMware modes ................................................................................................................................................348
Measuring performance ...................................................................................................................................349
Importing other virtual machines .....................................................................................................................349
Summary .......................................................................................................................................................................351
Chapter 15: Running OS X on Windows Using VMware . . . . . . . . . . . . . . . . . .353
Creating a Virtual Snow Leopard Installation ................................................................................................................353
Creating an install disk image ..........................................................................................................................354
Sourcing the other files you need .....................................................................................................................355
Creating a VMware Virtual Machine ..............................................................................................................................356
Obtaining your VMware software.....................................................................................................................356
Booting your Snow Leopard install disk............................................................................................................356
Installing Snow Leopard ...................................................................................................................................361
Setting Up Snow Leopard ..............................................................................................................................................363
Booting for the first time ..................................................................................................................................363
Saving a snapshot ............................................................................................................................................366
Using Your Virtual Machine ...........................................................................................................................................366
Sharing your Windows files ..............................................................................................................................369
Summary .......................................................................................................................................................................374
Part IV: Enhancing Your Macintosh .................................................. 375
Chapter 16: Automating Your Work. . . . . . . . . . . . . . . . . . . . . . . . . . . . . . . . . . . .377
Getting Around in Automator ........................................................................................................................................377
Preparing to launch Automator ........................................................................................................................377
Orienting yourself to Automator.......................................................................................................................378
Running a Sample Workflow .........................................................................................................................................380
Preparing to run workflows ..............................................................................................................................380
Downloading and running the workflow..........................................................................................................380
Viewing the results and the log ........................................................................................................................383
Modifying the Sample Workflow ...................................................................................................................................384
Looping ............................................................................................................................................................385
Using variables .................................................................................................................................................387
Creating a New Workflow..............................................................................................................................................388
Using the actions library ...................................................................................................................................388
Saving a Workflow as a Plug-in .....................................................................................................................................391
Creating Finder plug-ins ...................................................................................................................................391
Using Folder Actions ......................................................................................................................................................392
Detecting files added to a folder .......................................................................................................................392
Converting graphics files to other formats........................................................................................................395
Summary .......................................................................................................................................................................396
Contents
xvii
Chapter 17: Creating and Editing AppleScript Macros . . . . . . . . . . . . . . . . . . .397
Starting with AppleScript ..............................................................................................................................................397
Starting ScriptEditor .........................................................................................................................................397
Orienting to the ScriptEditor screen ..................................................................................................................399
Using a Prepared AppleScript ........................................................................................................................................399
Finding prepared scripts ...................................................................................................................................399
Running the script ............................................................................................................................................400
Reading the AppleScript code...........................................................................................................................400
Changing the script ..........................................................................................................................................402
Creating Your Own Scripts .............................................................................................................................................403
Creating Finder scripts ......................................................................................................................................403
Saving and running scripts ...............................................................................................................................408
Using scripts in other applications ....................................................................................................................424
Summary .......................................................................................................................................................................439
Chapter 18: Modifying the Dashboard . . . . . . . . . . . . . . . . . . . . . . . . . . . . . . . . .441
Installing the Apple Developer Tools .............................................................................................................................441
Downloading the developer tools.....................................................................................................................442
Installing the developer tools ...........................................................................................................................442
Getting Around with Dashcode......................................................................................................................................443
Reviewing the Dashboard ................................................................................................................................443
Starting with Dashcode ....................................................................................................................................444
Creating a Basic Computer Gauge ..................................................................................................................................446
Testing the gauge.............................................................................................................................................448
Modifying the gauge ........................................................................................................................................448
Using the gauge ...............................................................................................................................................453
Deploying your widget for anyone to use .........................................................................................................455
Creating a Map Widget..................................................................................................................................................455
Creating your widget ........................................................................................................................................456
Creating your Google map ................................................................................................................................456
Getting your mashup code ...............................................................................................................................458
Putting it together ...........................................................................................................................................459
Creating a Countdown Timer .........................................................................................................................................460
Setting the event..............................................................................................................................................460
Changing the look of the timer .........................................................................................................................462
Adding some programming .............................................................................................................................469
Summary .......................................................................................................................................................................475
Chapter 19: Using Quartz Composer . . . . . . . . . . . . . . . . . . . . . . . . . . . . . . . . . . .477
Introducing Quartz Composer ........................................................................................................................................477
Understanding the main windows ...................................................................................................................477
Understanding patches ....................................................................................................................................478
Understanding the coordinate system..............................................................................................................480
Creating a Rotatable Picture ..........................................................................................................................................481
Preparing your picture......................................................................................................................................481
Using sprite rendering ......................................................................................................................................482
xviii
Contents
Reading mouse movements .............................................................................................................................488
Applying mathematical transforms ..................................................................................................................489
Filtering the image ...........................................................................................................................................491
Creating a Rotating Cube ...............................................................................................................................................492
Adding interpolations.......................................................................................................................................494
Creating a screen saver .....................................................................................................................................496
Using Image Effect Filters ..............................................................................................................................................499
Using Image Masks........................................................................................................................................................502
Understanding alpha channels .........................................................................................................................503
Creating an image mask ...................................................................................................................................503
Using Render in Image Macros ......................................................................................................................................507
Creating a Audio Spectrum Display................................................................................................................................513
Obtaining audio input ......................................................................................................................................513
Making a unidirectional bar..............................................................................................................................514
Continuing development of the meter .............................................................................................................515
Summary .......................................................................................................................................................................516
Chapter 20: Using Some Other Developer Tools . . . . . . . . . . . . . . . . . . . . . . . .517
Using Core Image Fun House .........................................................................................................................................517
Starting Core Image Fun House ........................................................................................................................518
Using the Effect Stack .......................................................................................................................................519
Saving your work..............................................................................................................................................520
Using Repeat After Me...................................................................................................................................................521
Starting with Repeat After Me ..........................................................................................................................521
Modifying the inflection of the voice ................................................................................................................522
Changing the voice to match your inflexion and pitch ......................................................................................523
Making other changes ......................................................................................................................................526
Playing the output in another application ........................................................................................................527
Summary .......................................................................................................................................................................528
Chapter 21: Using XCode to Create New Programs . . . . . . . . . . . . . . . . . . . . .529
Developing a Cocoa Application ....................................................................................................................................529
Understanding Cocoa .......................................................................................................................................530
Understanding Aqua ........................................................................................................................................530
Using XCode .....................................................................................................................................................531
Designing the User Interface .........................................................................................................................................531
Starting a new project ......................................................................................................................................531
Using Interface Builder .....................................................................................................................................535
Adding the Programming..............................................................................................................................................542
Understanding object-oriented programming .................................................................................................542
Creating the Converter method ........................................................................................................................545
Creating the Controller method ........................................................................................................................552
Connecting the pieces ......................................................................................................................................557
Contents
xix
Building the Application ................................................................................................................................................562
Fixing compile-time errors ...............................................................................................................................562
Fixing run-time errors ......................................................................................................................................563
Running the Application................................................................................................................................................564
Refining the Application ................................................................................................................................................564
Changing the submenus...................................................................................................................................564
Changing the application icon ..........................................................................................................................565
Summary .......................................................................................................................................................................570
Chapter 22: Some Successful Case Studies . . . . . . . . . . . . . . . . . . . . . . . . . . . . .571
Installing to a Gigabyte Motherboard ............................................................................................................................571
Overcoming difficulties.....................................................................................................................................571
Viewing a success .............................................................................................................................................572
Installing to a Dell Mini 9 ...............................................................................................................................................573
Overcoming difficulties.....................................................................................................................................573
Viewing a success .............................................................................................................................................573
Summary .......................................................................................................................................................................574
Appendix A: References . . . . . . . . . . . . . . . . . . . . . . . . . . . . . . . . . . . . . . . . . . . . . . . . . . .575
Appendix B: The Missing Theory . . . . . . . . . . . . . . . . . . . . . . . . . . . . . . . . . . . . . . . . . . .579
Appendix C: Installing Snow Leopard . . . . . . . . . . . . . . . . . . . . . . . . . . . . . . . . . . . . . .601
Glossary . . . . . . . . . . . . . . . . . . . . . . . . . . . . . . . . . . . . . . . . . . . . . . . . . . . . . . . . . . . . . . . . .607
Index . . . . . . . . . . . . . . . . . . . . . . . . . . . . . . . . . . . . . . . . . . . . . . . . . . . . . . . . . . . . . . . . . . . .613
Acknowledgments
I do not know what I may appear to the world, but to myself I seem to have been only like
a boy playing on the seashore, and diverting myself in now and then finding a smoother
pebble or a prettier shell than ordinary, whilst the great ocean of truth lay all undiscovered
before me.
~Sir Isaac Newton
S
o many people deserve credit for making this book possible. Without them putting hours
and hours of their time into smoothing the path for others, this book would be impossible. It’s not something any one person could do.
I owe a huge debt to many, many people, none of whom I’ve ever met face-to-face. As do most
people, I know them only through their online names.
In no particular order, here are my thanks to these people: ~pcwiz, dfe, munky, ramjet, macgirl,
superhai, everyone at ToH, Brazilmac, zephyroth, f41qu3, auzigog, mechdrew, bmcclure937,
bmaltais, meklort, blackosx, d00m42, UnaClocker, Type11, buddymalec, and many others. If I’ve
left your name out, please accept my apologies.
Without you talented and dedicated people, this book could never have happened.
I am extremely grateful to everyone at Wiley, particularly Marty Minner, my project editor, for
guiding me and holding my hand via e-mail through the whole project; to Gwenette Gaddis,
copy editor, for ensuring that each sentence made sense, and to Jaison Lewis, technical editor,
for many helpful comments, suggestions, and corrections. Many thanks also to Aaron Black,
acquisitions editor at Wiley, for starting the whole project and getting me involved.
Introduction
I
n June 2005, Apple unwittingly threw down the gauntlet to experimenters by announcing that
from early in 2006, Apple would replace its line of PowerPC computers with computers based
around Intel chips. Because these chips are the same as those used in the majority of computers that have run Windows, Linux, and other operating systems for several years, it seemed that at
last it might be possible to get Apple’s OS X operating system running on non-Apple computers.
Indeed it was. In February 2006, a couple of weeks after Apple released the first Intel
Macintoshes running OS X Tiger (10.4.4), a programmer managed to get Tiger running on nonApple hardware. Since then, Tiger went through revisions until Leopard (10.5) was released in
late 2007 and Snow Leopard (10.6) in late August 2009.
About This Book
Through this book, you will journey through installing OS X Leopard on your own non-Apple
computer, to explore the differences between Leopard and Windows, to getting the most out
of the Apple software applications, and finally to extending the power of OS X by creating new
applications.
My aim is to take you from wanting to know about how to install Leopard on your home computer, through setting the computer up to your own personal preferences, using the standard
Macintosh software, and finally extending the power of your system by creating new programs
to perform tasks that the base system cannot do, using the Apple Developer tools.
The book is organized into four parts:
Installing Leopard
Customizing Leopard
Using the Leopard applications
Extending the power of Leopard
Part I helps you install Leopard without having to make the commitment to purchase new Apple
hardware. It takes you through several different options for installation. You learn how to install it
on a separate USB hard disk, how to install it on a data disk inside your computer, and how to
install it on a new partition on your Windows Vista, Windows 7, or Windows XP system disk.
Part II takes you on an exploration of the differences between Leopard and Windows and then
helps you to set up the computer according to personal preference, ranging from network preferences and sound effects, to your desktop and screen saver, to printers and faxes.
In Part III, you explore the standard software applications supplied with Leopard, ranging from
mail to Web browsing. You then can integrate Leopard into the rest of your computer system
by learning to read and write to your Windows disk.
xxii
Introduction
If you really miss your Windows operating system, you can install two different products that
allow you to run your existing Windows or to install a different Windows system and run them
without ever leaving Leopard. Or if you prefer, you can even run Leopard while never leaving
your Windows system, though you miss out on most of the good parts of Leopard.
In Part IV, I introduce you to the power of scripting and programming. I show you how to create
and add new widgets to your Dashboard and how to create new applications using the Apple
Developer tools.
Who Should Read This Book?
Part I is for people who want the enjoyment of getting a computer to do something it was not
designed to do: run Apple’s Leopard system on a computer not made by Apple. It appeals
strongly to those who enjoy these challenges. It gives step-by-step instructions for several different types of installations to several different types of computer.
Part II is for people who have switched from Windows to a Macintosh or who have installed
Leopard to a non-Apple computer. This part takes you through the differences between
Windows and Leopard and guides you through setting up Leopard to your liking. It is not necessary to have installed Leopard on your own computer.
Part III is for people who want a concise guide to using the standard Leopard software, whether
they have created their own installation or are using a Macintosh. It makes an excellent guide to
using Leopard applications and to creating a bridge between Windows and Leopard using virtualization software. It also appeals to existing Macintosh users who want to find out more
about their computers.
Part IV is for people who want to extend the power of Leopard. It takes you through the programming required to create new and useful applications. For the most part, you do not need a
background in programming, simply a desire to create something new. This part appeals to
Macintosh users who want an easy-to-understand guide to creating new applications, regardless of whether they are using a Hackintosh or a genuine Apple Macintosh.
About the Future
In late August 2009, Apple released the newest version of the OS X family: Snow Leopard (OS X 10.6).
With this release, Apple finally said goodbye to the PowerPC: Snow Leopard runs only on Intel
Macintoshes. It also runs in 64-bit mode, though some applications may not be 64-bit capable.
Because of deadlines in writing this book, I could try out Snow Leopard on the Dell Mini 9 and
on my desktop computer. This was possible only because of extremely active communities dedicated to running OS X on the Dell computer and on the Gigabyte motherboard. Very active
communities exist for other computers, such as for Acer, MSI Wind, among others.
Given the early state of development of Snow Leopard on non-Apple hardware, I’d recommend
that you install Leopard first, because the methods have been around much longer and far
more help is available.
I Installing OS X 10.5
T
his is where your journey begins. You have access to several
different installation options for Leopard on a non-Apple
computer, each of them with its own good points.
Unlike Windows operating systems, Leopard doesn’t mind if it is
installed to an external disk, so you can install and run Leopard
without affecting your existing installation. Of course, you need
to select which disk to boot from, but having done that, Leopard
runs while still giving you access to your existing data.
You may want to install Leopard to your existing Windows boot
disk. You can do this also, but then you must select the operating
system from a menu when you start your computer from your
Windows disk.
Each of these possibilities is explored in depth, with hands-on
instructions and many illustrations guiding you through every
step of the process.
I
In This Part
Chapter 1
Getting Started
Chapter 2
Installing Leopard to a
Separate Hard Disk
Chapter 3
Avoiding the Need for
the Boot CD
Chapter 4
Installing to a Hard Disk
with Windows Vista
Already Installed
Chapter 5
Installing to a Hard Disk
with Windows XP
Already Installed
Chapter 6
Troubleshooting Your
Installation
Getting Started
Y
ou can take the Apple Leopard Install DVD, insert it in your
DVD drive, and start trying to install Leopard on your computer. Unless you are using a genuine Macintosh, you are
unlikely to succeed, and you won’t get the best experience of
Leopard possible.
Many people have combined their expertise and experiences so
those who follow can take a shorter path, bypassing many of the
pitfalls. Why not capitalize on this experience?
In this chapter, you learn how to find out exactly what hardware
your computer contains so you can be sure whether Leopard will
run on your computer. You complete a table showing your hardware so you can find and use the additional resources you need.
This becomes important in later chapters.
Determining Your Computer
Hardware
Before you start trying to install Leopard, you should find out what
hardware is inside your computer. The Windows Device Manager
built into Vista and XP tells you most of the information you need
to know; however, the System Information for Windows (SIW) software makes this very easy.
Although SIW shows details of all the software on your computer,
you are interested only in the hardware details.
SIW was written by Gabriel Topala and is freeware for individual
use. At the bottom of the download page is a link saying “If you like
SIW, you can buy me a coffee.” Click the link to send him a donation via PayPal.
To download and install this software, follow these steps:
1.
2.
In This Chapter
Determining your
computer hardware
Finding your processor
specifications
Finding specifications of
your video setup
Finding your audio
hardware specifications
Finding your networking
hardware specifications
Other hardware
Point your Internet browser to www.gtopala.com/.
Click Download SIW.
Hardware compatibility
4
Installing OS X 10.5
3.
When the file has downloaded, install the software.
If you use Internet Explorer, click Run; if you use Firefox, click Save.
SIW adds itself to your programs list, available through the Start menu.
Figure 1.1 shows the start screen for System Information for Windows. The left pane is a collapsible list showing Software, Hardware, and Network components. To collapse a part of the list,
click the – (minus) sign beside the major heading. To expand it again, click the + (plus) sign.
Figure 1.1
System Information for Windows—start screen
In the remaining parts of this chapter, you use SIW to find the information to complete the following table of hardware in your computer.
When you have completed Table 1.1, you will have enough information about your computer
to know whether you are likely to be able to install and run Leopard.
Chapter 1: Getting Started
5
Table 1.1 Your Computer Components
Item
Description
Motherboard
Processor
Display adapter
Network (wired)
Network (wireless)
Sound
Printer
Other peripherals
Webcam
Scanner
Others
Finding Specifications for Your
Motherboard
The most important part of your computer specification is the motherboard. This is sometimes
called the mainboard, and it’s where the processor chip plugs in. It also holds the BIOS (Basic
Input Output System) chip, which is the very lowest level of interaction between your software
and hardware.
Most motherboards also contain the sound and networking chips; some also contain the graphics chips.
You need to know details of the motherboard and the BIOS. To find the motherboard details,
follow these steps:
1.
Click the – (minus) sign beside Software.
This collapses the Software part of the list and brings you to the Hardware details.
2.
3.
4.
Click Motherboard.
Read your motherboard details from the right pane, and write them in the table.
Read your BIOS details on the next line, and write them in the table.
6
Installing OS X 10.5
When I clicked Motherboard on the computer I used to write this, I found the following:
Manufacturer
Gigabyte Technology Co., Ltd.
Model
EP45-DS3P
When I clicked the BIOS line, I found the following information:
BIOS vendor
Award Software International, Inc.
BIOS version
F8
BIOS date
09/30/2008
Now you can fill in the first line of your table. Here is my table as an example:
Motherboard
Board: Gigabyte EP45-DS3P
BIOS: Award F8 09/30/2008
Finding Your Processor Specifications
In this section, you use SIW to find your processor specifications.
1.
Using SIW, highlight the next line to find your processor specifications.
On my computer, SIW showed me the following information:
CPU full name
Intel(R) Core(TM)2 Duo CPU E8400 @ 3.00 GHz
For my computer, this would be the next entry in the table:
Processor
You can now fill in that line in your table.
Intel Core Duo E8400
Chapter 1: Getting Started
7
Working with older processors
For compatibility with older software, modern processors still have to work with instructions
from earlier processors. In order to speed up processors, Intel developed the technique of using
one instruction to operate on more than one set of data. This allows the code required to be
much smaller so that, rather than having one set of instructions for each bit of data, one instruction works with all of them at once, effectively carrying out operations in parallel—hence the
speed gain.
This technique is called Single Instruction, Multiple Data (SIMD). It is especially useful in putting
graphics on the screen because several pixels can be processed at once.
SIMD comes in several versions, the most recent being SSE2 and SSE3. SSE stands for Streaming
SIMD Extension. You don’t need to understand exactly what that means, but you do need to
know whether your processor can do it.
SSE2 was introduced in 2001, and SSE3 was introduced in 2004. Leopard cannot run on processors that don’t support at least SSE2 instructions, and preferably SSE3.
While you are still on CPU Info, look down the right pane until you come to the line called
Instructions. SIW shows you the instructions that your processor can process. This is the result
for my computer:
Instructions
MMX, SSE, SSE2, SSE3, SSSE3, SSE4.1, ET64, XD, VMX, SMX, EST
Using an early Pentium chip
Pentium chips made since the Pentium 4 released in 2001 have supported SSE2, but SSE3 was
not supported until 2004. If your chip was made before 2001, you can be almost certain that it is
not capable of running Leopard.
Chips made after 2006 can almost certainly be made to run Leopard, though the task may not
be simple. The most compatible chips are those of the Intel Core 2 family (either Core 2 Duo or
Core 2 Quad) because Apple uses these chips in its own branded computers.
Finding Specifications of Your Video Setup
After the processor and the motherboard, the most important component for Leopard is your
graphics chip. Unless it is reasonably fast and uses hardware acceleration, you can’t get the full
graphics effects of Leopard. Your graphics chip should also use its own memory, rather than
using the main computer memory. However, almost any video setup allows you to use Leopard.
Since the Intel Macs were released, Apple has used a small range of video processing chips. The
most common is the Intel GMA950 series, which has appeared in many of Apple’s laptops and
Mac Minis. Other chips that have been used are either nVidia or ATI.
8
Installing OS X 10.5
Manufacturers supply two types of video: integrated into the motherboard or a separate graphics card. Where the chip is integrated into the motherboard, it usually uses shared memory. This
means part of the main system memory is used for video.
The advantage, for the manufacturer, is that it saves on a separate video card, especially in a
laptop where space is at a premium; the disadvantage is that you are stuck with that chip’s
performance.
Using a separate video card
1.
In System Information for Windows, click Video in the left pane.
This shows the name of your display adaptor.
For my computer, SIW shows:
Display adapter
NVIDIA GeForce 7600 GS
What this doesn’t show is whether your video is generated from a separate card or if it’s on the
motherboard. If your computer is a desktop, it likely uses a separate graphics card. If your computer uses a separate video card, the card has its own memory onboard. In Windows XP, this is
the amount of graphics memory available, but in Windows Vista, the system can steal some of
the main memory as well as its own to increase the memory available to the video card.
A graphics card with its own memory is the ideal situation because it can then function as a separate entity, without you worrying about whether the processor is trying to access the motherboard memory at the same time. This means it is highly likely (but not certain) that you can use
the full power of the Leopard graphics: Quartz Extreme and Core Image.
Using integrated video
If your computer is a laptop, it almost certainly uses integrated video. If Apple has used that
chip then you will get good graphics performance. For older chips it’s a bit of a lottery: if it is
popular enough then someone will develop drivers for it.
Unfortunately, I can’t talk in certainties about graphics performance; all I can say is that most
likely you can see graphics regardless of what your graphics processor and memory are. But the
quality and speed depend completely on the exact specifications of your display adapter.
For my computer, the next line of the table is:
Display adapter
NVIDIA GeForce 7600GS
Chapter 1: Getting Started
9
Finding Your Audio Hardware
Specifications
Apart from wireless networking, sound is the most difficult area to get working. Sometimes
manufacturers even give incorrect specifications for their sound chips, which makes configuring sound even harder than it should be!
SIW gives information about your sound hardware, although it doesn’t have a separate heading. Follow these steps to find the info:
1.
2.
3.
In the left pane of SIW, click the + (plus) sign beside Devices.
Click the + (plus) sign beside Sound, video, and game controllers.
Look for the word Audio, and click it.
Figure 1.2 shows the information that SIW gave me for my computer.
Figure 1.2
System Information for Windows—audio
10
Installing OS X 10.5
Because my computer has a Bluetooth dongle for synchronizing with my mobile phone, it
shows three entries for Bluetooth audio, but we can ignore that.
My main audio is the Realtek High Definition Audio. This is a generic term, much like saying that
your car has disk brakes: That’s nice to know, but it’s not much help if you want to replace the
pads. Realtek uses many different sound chips, as do other audio output manufacturers.
When your motherboard was installed, the correct drivers for Windows were installed. These
are supplied on a CD that comes with your computer. But, sadly, that CD is useless for Leopard.
You need to dig much deeper to find drivers.
Look in the right pane to the Device ID. In this case, the Device ID line is:
Device ID
HDAUDIO\FUNC_01VEN_10ECDEV_0885SUBSYS_1458A002REV_1001
You need to divide this information into parts before you can find out exactly what your audio
system is.
Following “HDAUDIO\FUNC_01” are the letters VEN followed by four characters. This is the vendor (manufacturer) ID. In this case, the characters are 10EC, which is a hexadecimal number.
1.
Write this number in the second column of the following table in the Vendor ID row.
You can ignore the HDAUDIO\FUNC_01 part.
Vendor ID
Device ID
Immediately following the vendor ID is the device (DEV) identifier. This is another fourdigit hexadecimal number—in this case, 0885.
2.
Write this number in the following table in the Device ID row.
As an example, here is the table completed with my details:
Vendor ID
10EC
Device ID
0885
Finding the manufacturer
To find the name of the vendor and the device, search in the PCI database at www.pci
database.com.
Chapter 1: Getting Started
11
Searching for vendor 10EC shows that the vendor is Realtek, which we knew from the SIW display.
Finding the device name
Searching on 0885 shows that the device is a “7.1+2 Channel High-Performance HDA Codec
with Content Protection,” which doesn’t get you much further!
Follow these steps using the table in the online database:
1.
Click the Realtek Semiconductor link.
This lists all the devices made by that manufacturer.
2.
Look down the Device ID column to 0x0885, which shows that the device is an
ALC885.
This becomes important later when trying to find drivers.
Interestingly, in its promotional literature, Gigabyte (the motherboard manufacturer) identifies
it as an ALC889A, which is not correct. It’s hard enough installing Leopard without manufacturers giving you incorrect information!
This line in the table becomes:
Sound
Realtek ALC885
Fill in the appropriate line in your own table.
Finding Your Networking Hardware
Specifications
Now you need to find the specifications of your networking hardware. Your computer may have
both wireless and wired networking abilities, as mine does. If you are going to use only one or
the other, you can skip one part.
Using System Information for Windows again, follow these steps:
1.
2.
3.
Click the – (minus) sign to close the Sound, video, and game controllers line.
Click the – (minus) sign to close the Devices line.
Click Network Adapters.
This shows all the network adapters that have been used on your computer. Figure 1.3 shows a
display of networking hardware for my computer.
12
Installing OS X 10.5
Figure 1.3
System information—network adapters
My computer has three network adapters: one wireless and two wired. Adapter 1 is my wireless
adapter, and 2 and 3 are the adapters built in to the motherboard.
The primary network connector in use is the ASUS USB wireless adapter.
Wired networking
My motherboard has two wired network adapters, both Realtek RTL8168C. This is a common
network adapter chip and is highly likely to work with Leopard.
Adding another line to the hardware list for my computer, we now have:
Network (wired)
Realtek RTL8168C
Add the appropriate information for your own computer to your table.
Chapter 1: Getting Started
13
Wireless networking
Getting wireless networking to work is one of the most difficult parts of building a Hackintosh.
Apple uses basically the same wireless adapter, with its chip made by Broadcom, in all its computers. If you can use that, you should have no problems. But, and it’s a big but, finding what
chip your wireless adapter uses is not easy, nor is finding wireless network adapters using the
same Broadcom chip, or even finding wireless adapters that work at all, mainly because of a lack
of drivers.
After all, if almost every Mac comes with built-in wireless networking, what incentive do manufacturers have to develop drivers to make them work with a Mac?
SIW and the Windows Device Manager list my wireless adapter simply as ASUS USB Wireless
Network Adapter. You need to find out what model it is.
This should be relatively easy: Look on the box it came in or on the device itself. The box for this
adapter is labeled WL-167G. You would expect to be able to go to the manufacturer’s Web site
and download the appropriate drivers.
A Google search on WL-167G shows that it’s made by Asus. Digging deeper shows a single
driver for Mac Leopard, dated 15 September 2006, and it supports only OS X 10.3 and 10.4
(Panther and Tiger) but not Leopard.
Using the Properties panel in the same way as you did for the sound, the hardware vendor ID is
0b05 and the device ID is 1723.
Again, you need to dig a bit deeper! Several Hackintosh Web sites often (but not always) have
answers to questions about drivers. All sites have a search facility, but some work better than
others.
One way to improve your success is to use a targeted Google search. To do this, add the name
of the site at the end of what you’re searching for. This restricts the search to that site only.
Let’s search for information about the device on insanelymac.com. To do this, type
WL-167g site:insanelymac.com into Google.
You end up with lots of queries about the device from users, and maybe you will be able to get
drivers that way. The end of this chapter features a list of useful Hackintosh sites.
The next line in my table reads:
Network adapter (wireless)
Fill in the table with your own details.
ASUS WL-167G USB
14
Installing OS X 10.5
Finding Your Other Hardware
All the other hardware, if it is relatively recent, should have drivers available at the manufacturer’s Web site because the hardware can be connected to a genuine Apple Macintosh.
Nevertheless, enter the identifiers into the table.
For my computer, the table now looks like Table 1.2.
Table 1.2 Hardware for my Computer
Item
Description
Motherboard
Board: Gigabyte EP45-DS3P
BIOS: Award F3 05/29/2008
Processor
Intel Core Duo E8400
Display adapter
NVIDIA GeForce 7600GS
Network (wired)
Realtek RTL8168C
Network (wireless)
ASUS WL-167G USB
Sound
Realtek ALC885
Printer
Fuji-Xerox FX203A
Other peripherals
Webcam
HP 3-MegaPixel Webcam GX607AA
Scanner
Epson Perfection 1670
Bluetooth
Broadcom Bluetooth 2.0+EDR USB dongle
Determining Your Hardware Compatibility
Now that you have listed all the devices, it’s time to find out how compatible they are with
Leopard. Remember that this is not an exact science; it relies on other people contributing to
help the whole community because no support is available from Apple.
Although your exact hardware may be shown as compatible, almost invariably you’ll encounter
small glitches. Of course, your hardware may not even be shown in the lists.
Hardware compatibility lists (HCL) are found on the OSX86 Project Web site at http://wiki.
osx86project.org/wiki/index.php/Main_Page.
Several compatibility lists exist, but the most complete at the time of this writing is the list for
Leopard 10.5.2.
Chapter 1: Getting Started
15
If you are using a name-brand desktop or laptop, you can go straight to the appropriate table
by selecting either Portable Computers or Desktop Computers. These are listed alphabetically
by manufacturer. Figure 1.4 shows part of the list for desktop computers.
Figure 1.4
Hardware compatibility list for systems
If your exact computer is listed, you are halfway there! Click the link, and read what people have
said about installing and running Leopard on your computer.
Under the heading Graphics, “no QE/CI” means that hardware acceleration (Quartz Extreme,
Core Image) does not work, which affects the way images are displayed in Time Machine,
wDashboard, and other Mac applications, for example.
If your particular computer is not listed in the HCL for 10.5.2, check the other lists, up to 10.5.6 at
the time of this writing. If you still can’t find it, you need to look up each individual component.
Finding my motherboard
Unfortunately, I found no exact matches for my motherboard. These are close:
Compatibility List for Leopard Version
Motherboard
10.5.1
GA-EP35-DS3P, GA-EP45-DS4P
10.5.2
GA-EP45-DS3, GA-EP45-DS3L, GA-EP45-DQ6
10.5.4
GA-EP45-DS4
16
Installing OS X 10.5
After reading the user comments about each of these, I can reasonably conclude that the EP45DS3P will work, but I’ll need patching to get the audio working. In fact, this is what I found.
Finding my processor
Intel CoreDuo E8400: working with vanilla kernel. (Vanilla kernel refers to the unmodified
Leopard core operating system.)
Finding my graphics card
NVIDIA GeForce 7600GS: all resolutions work; QE/CI supported.
Finding my wired network
Realtek RTL8168C: The chip is built into the motherboard, so the motherboard entry covers it.
No mention of networking problems. This is what I found.
Finding my sound device
Realtek ALC885, although Gigabyte’s documentation says it is an ALC889A.
I posted a query on an OSX86 forum, and another user e-mailed me drivers that work perfectly.
Finally you have enough information about your computer to be able to make a good attempt
at installing a retail copy of Leopard.
Summary
By now, you have completed a table showing the complete specifications for all the hardware
in the box your computer sits in—from the motherboard and processor chip to sound, networking, and video.
From the various hardware compatibility lists, you have a good idea of how likely it is that
Leopard will run on your computer.
In addition, you have summaries of your peripheral equipment—the stuff that sits outside your
main computer box. You need this summary in the next few chapters.
Installing Leopard to a
Separate Hard Disk
I
nstalling OS X Leopard to an external hard disk that is separate
from your main hard disks is a painstaking process, and you may
have to install it a couple of times before you have it working
properly. Installing it on a separate hard disk means you don’t have
to worry about erasing your existing hard drive. After you feel comfortable about installing Leopard and getting it working to your
satisfaction, you can install it to your boot disk.
You need a retail copy of OS X Leopard, which you can buy from an
Apple store or dealer, or even from eBay or such. If you buy it from
anywhere except an authorized Apple dealer or retailer, be sure it is
shrink-wrapped in the original packaging; otherwise, it may have
been installed on another computer. You cannot use the disk that
came with a friend’s computer because it just won’t work.
In Chapter 1, you carried out the preliminary work to find out
exactly what hardware your computer contains, so you have an
excellent chance of succeeding with the installation.
CAUTION
If you feel comfortable about opening up your computer and you won’t risk voiding
any warranty on your computer, I recommend disconnecting your fixed hard disk(s).
This ensures that you don’t inadvertently overwrite your existing operating system.
Booting from a Boot CD
In this section, you learn how to boot your computer from a separate
boot CD. This is necessary because Leopard cannot boot from the
CD/DVD drive on any computer except for a genuine Apple. You
learn how to check your computer BIOS, to be sure it can start from
an external hard disk, find a suitable boot disk, and burn it to a CD.
All Windows operating systems are made to install only to a fixed
hard disk inside your computer. You cannot install and run a
Windows system from an external hard disk.
Leopard, on the other hand, installs and runs perfectly well from an
external hard disk, such as a USB hard drive. You can install Leopard
to an external disk and keep it completely separate from your
Windows system. A perfectly adequate 2.5-inch USB hard disk in an
enclosure costs around $90–100.
In This Chapter
Booting from a boot CD
Specifying the hard disk
identifier
Specifying boot options
Preparing your hard disk
Specifying installation
options
Watching the welcome
video
Entering details about
yourself
18
Installing OS X 10.5
CAUTION
If you want to install to a hard disk that already has a Windows operating system on it, you should jump to either
Chapter 4 (for Vista and Windows 7) or Chapter 4 (for XP).
Checking your BIOS
BIOS stands for Basic Input Output System. It is the part of your computer that gets control
when you first turn it on. First it checks your computer memory and then checks the other
attached hardware.
After it has finished its checks, it hands control over to the boot device; normally, that’s your
hard disk, but it can also be a CD/DVD drive, an external hard disk, or even a USB pen drive.
CROSSREF
Appendix B includes an explanation of the boot process on a Windows computer compared with booting a Macintosh
computer.
Before you start, you need to check that your computer can boot from an external hard disk, so
you need to examine your computer’s BIOS.
To do this, you press a key when the computer first starts up. Generally, the key is either F2 or
Delete, although other keys may be used. Follow these steps to look at the BIOS:
1.
2.
3.
4.
5.
Switch off your computer.
Connect your external hard drive.
Wait a few seconds, and then restart the computer.
On the screen, look for text that says something like Press Delete to Enter Setup.
Press that key, and wait a few seconds.
TIP
You may need to try these steps a few times because sometimes the information about the key to press doesn’t stay
on the screen for very long. By the time you’ve read it, it’s too late to press the key!
After you have entered the BIOS, you see a screen that looks something like that shown in
Figure 2.1.
At this point, your mouse doesn’t work, so you need to use the keyboard. Use the right arrow
key to move across to the Boot tab, and you arrive at the screen shown in Figure 2.2.
Chapter 2: Installing Leopard to a Separate Hard Disk
Figure 2.1
Typical BIOS setup screen
Figure 2.2
BIOS boot options
19
20
Installing OS X 10.5
Your USB disk should appear in the section for hard disks, although it may appear in the removable devices section.
Finding a boot disk
Because it is not a Macintosh, your computer cannot boot from your Leopard retail DVD. To
install Leopard, you need to have your computer boot the way a real Macintosh does.
TIP
Many people have created boot disks for this purpose. In essence, they contain software that bridges the gap between
your hardware and what Leopard expects to find in a genuine Apple.
Probably the most common is a boot disk created by a team called Kabyl-Bumby. Search for
it on Google. It is most likely hosted on a file-sharing site such as mediafire.com or
rapidshare.com.
NOTE
These boot disks are always supplied as an image file (.iso), which you need to burn to a CD. An image file is an exact
image of what is on a CD. Because it is a bootable image, when you burn it to CD, the CD is bootable.
Creating your boot disk
You can’t simply copy the .iso to a CD because it just ends up as a file sitting on a CD, and you
won’t be able to boot your computer. Since the .iso file is an exact image of the CD, you need to
copy that image exactly to the CD.
CAUTION
Whatever CD/DVD-burning software you are using, be sure you use the option to burn an image. A very good, free program to burn CDs and DVDs is ImgBurn, available from www.imgburn.com/.
If you are using ImgBurn, follow these steps to burn your .iso file to your CD:
1.
2.
3.
4.
Start ImgBurn running.
5.
Check the Verify box to verify that the CD contains exactly the same data as the
image file.
Insert a blank CD in your drive.
Click the “Write image file to disk” option.
Click the file finder icon (with the magnifying glass) and navigate to where
your .iso file is located.
Chapter 2: Installing Leopard to a Separate Hard Disk
6.
7.
21
Click the large button to start the burn process.
Label your disk Boot Kabyl Bumby.
Checking that you have everything
Complete the checklist in Table 2.1 to be sure you have everything you need to install Leopard.
Place a check mark in each box after you’ve verified that item.
Table 2.1 Checklist
Item
Check
Computer can boot from USB disk
Have Leopard Retail Disk
Have boot disk
Specifying the Hard Disk Identifier
This section explains how to boot the Leopard Retail DVD using your boot CD as an intermediary.
Booting from the Leopard Retail DVD is a two-step process unless you are using a Macintosh.
First, start the computer using the boot disk, and start the Leopard disk.
When your computer first starts, you see a screen that looks something like that shown in
Figure 2.3.
Figure 2.3
Boot menu
22
Installing OS X 10.5
1.
2.
3.
Insert your boot disk in the CD/DVD drive.
Restart your computer.
Press the key required to change your boot device.
Usually F12 works, but not always.
4.
5.
Select CD/DVD, and press Enter.
Wait for the boot disk to start up and finish at a prompt.
You then see the screen shown in Figure 2.4, which is where you start the next stage of
the boot process.
Figure 2.4
Darwin boot screen
At this point, the boot disk is waiting for you to boot Darwin, the Unix operating system on which Leopard is based. Of course, Darwin itself is not on that disk; it is on your
Leopard Retail DVD, so you need to tell it which disk that is and then swap disks.
6.
Press Esc.
Now the boot prompt changes to look like the screen shown in Figure 2.5.
Figure 2.5
Darwin boot selector
In this case, the boot disk has identified the boot device as 9f, the decimal number 159 in
hexadecimal.
Chapter 2: Installing Leopard to a Separate Hard Disk
23
NOTE
If you want to convert hexadecimal to decimal and vice versa, use the calculator at http://easy
calculation.com/hex-converter.php.
1.
2.
3.
Remove the boot disk from the CD drive.
Insert the Leopard Retail DVD in the CD drive.
Wait a few seconds for the drive activity to stop, and press Enter.
You see a second Darwin prompt, with the correct disk specified in the brackets.
Specifying Boot Options
This section explains how to specify boot options for the Leopard Retail DVD and the effect
of each.
At the boot prompt, you can type options that control the boot process. Table 2.2 lists the
options you can type at the Darwin boot prompt.
Table 2.2 Darwin Boot Options
Option
Meaning
-v
Verbose: all output is sent to the screen
-f
Rebuild the kext cache
-x
Safe mode: similar to Windows safe mode
-s
Single-user mode
CROSSREF
Appendix B contains explanations of various terms such as kext, kext cache, and so on.
At this point, don’t worry about specifying any options other than -v because the kext cache
can’t be rebuilt; it’s stored on the DVD, which can’t be overwritten. Safe mode and single-user
mode do not affect whether the disk boots.
1.
Type -v, and press Enter.
A few lines of text appear on the screen, and then it clears and switches to graphics mode. The
text continues down the screen.
24
Installing OS X 10.5
At this point, the text looks like gibberish, but you should see one important line as highlighted
in Figure 2.6.
Figure 2.6
Verbose boot screen
You should look for a line starting BSD root: disk1s3. The numbers you see may be different, but when you see it, you know that Leopard is at least going to boot on your computer.
NOTE
BSD root is the disk from which Darwin boots the main operating system. If Darwin can’t identify it, then it can’t boot.
After you see that line, you should see more messages scroll up the screen. The boot process
takes quite a few minutes when you boot from the DVD. Be patient!
Finally, the screen goes blue and then black with the spinning beach ball in the top-left corner,
and you see the Leopard Aurora desktop. Hooray!
Figure 2.7 shows the Leopard Aurora desktop.
If you get stuck at a blank desktop, a blue desktop, or the spinning beach ball, turn to the troubleshooting section in Chapter 6.
Chapter 2: Installing Leopard to a Separate Hard Disk
25
Figure 2.7
Leopard Aurora desktop
Preparing Your Hard Disk
This section explains how to prepare your external USB drive so Leopard can be installed to it.
You partition and format the disk, ready for use.
Right now, you have a bare-bones version of Leopard running from the DVD. The first thing you
need to do is to prepare your hard disk for the full installation of Leopard.
You need to select a language to use for the installation at the language selection screen, as
shown in Figure 2.8a.
After you have selected your language, you proceed through a few more screens, which ask you
to agree to the license conditions and then you arrive at a screen asking which disk you want to
install Leopard to. You may or may not see any other disks at this point, although you may see
your Windows disk(s) with a red exclamation mark on each one, if you haven’t disconnected
them.
This destination selection screen is shown in Figure 2.8b.
26
Installing OS X 10.5
Figure 2.8
Language selection (a); the Select a Destination screen (b)
a
b
At this point, you should see a blank area for the destination. You need to prepare your disk so
Leopard can use it. On Windows computers, this is called formatting; on Macintosh computers,
it’s called erasing. Leopard has its own disk format known as Mac OS Extended (Journaled).
NOTE
Leopard can read and write to Windows FAT disks, but it requires additional software (free) to be able to read and
write to NTFS disks. This is covered in Chapter 14.
To format your disk, you use the Leopard Disk Utility. Figure 2.9 shows how to start the disk utility from the menu bar.
1.
2.
Click Utility on the Leopard menu bar.
Select Disk Utility.
This launches the Leopard application Disk Utility. You use this to format the disk that’s ready to
load Leopard.
Chapter 2: Installing Leopard to a Separate Hard Disk
27
Figure 2.9
Start disk utility
Although the Select a Destination screen you saw a moment ago may not show any disks, Disk
Utility shows every disk attached to your computer. Figure 2.10 shows the initial screen with
two hard disks.
In the left pane of the display, Disk Utility shows the disk drives attached to your system. In this
case, I used VMware virtualization software to be able to capture screens. In your case, Disk
Utility will show different disks. If you have disconnected your fixed hard disks, you should see
only your external USB drive.
CAUTION
One of the disks shown may be your Windows system disk. Be very careful not to accidentally format it! Your Windows
disk should be the first one shown, but double-check and triple-check by looking at the bottom right of Disk Utility to
check the size.
First, you need to create a partition on the disk, as shown in Figure 2.11.
28
Installing OS X 10.5
Figure 2.10
Disk Utility select disk
Figure 2.11
Partition disk
Chapter 2: Installing Leopard to a Separate Hard Disk
1.
2.
3.
4.
29
Select your USB disk by clicking it in the left pane.
Click the Partition button at the top of Disk Utility.
Click the drop-down box under Volume Scheme, and select 1 Partition.
Type a name for the disk in the Name box on the right side.
Why not use Hackintosh?
5.
6.
Select Mac OS Extended (Journaled) in the Format box.
Click the Options button, and select GUID Partition Table from the new panel.
NOTE
The retail version of Leopard will not install a disk formatted with an MBR.
Figure 2.12a shows the drop-down sheet, with GUID Partition Table selected.
Figure 2.12
Disk partition scheme (a); the Select a Destination screen (b)
a
7.
b
Click Apply.
You have to wait while Disk Utility formats your disk, but it should be very quick.
CROSSREF
Appendix B contains explanations of various disk formatting options.
30
Installing OS X 10.5
8.
After your disk has been formatted, click Disk Utility on the menu bar, and select Close.
The Select Destination panel reappears, showing your newly formatted disk.
9.
Click that disk (Hackintosh, if you named it that).
A green arrow appears on the disk icon, as shown in Figure 2.12b.
The arrow indicates that Leopard can be installed to that disk.
10.
11.
Click Continue.
On the next screen, click Customize.
Specifying Installation Options
This section explains the Leopard installation options and how to select or deselect them. The
Leopard retail version has these options:
Printer drivers
Additional fonts
Language translations
X11, a Unix windowing system
Unless your specific printer is in the list, you need not install any printers because you can add
these later.
If you plan to always use English as your language, you can leave out the language translations.
You should include the additional fonts, unless you are very short on hard disk space.
Unless you are going to be running or developing applications that use X11, you can ignore
that. Figure 2.13 shows the customize options screen.
Follow these steps to select customize options:
Each small triangle beside a heading expands or contracts the list. If the individual box
is blue, it means that option is selected. If the heading box is blue, it means that all
options under that heading are selected.
1.
2.
Place a check mark in each option that you want to select.
Click Done to proceed to the actual installation.
Finally, you are ready to install Leopard. Figure 2.14a shows the Install Summary
screen.
Chapter 2: Installing Leopard to a Separate Hard Disk
3.
31
Click Install.
Leopard first wants to check your DVD. Because you’ve gotten this far with it and it’s
the first time you’ve used it, checking the DVD is probably pointless, so you can click
the Skip button.
Figure 2.14b shows this stage of the installation.
Figure 2.13
Customize options
Figure 2.14
The Install Summary screen (a); checking the installation (b)
a
b
32
Installing OS X 10.5
Leopard is now being installed. Normally, it takes between 20 and 60 minutes, depending on
how fast your computer and disk drives are. The progress bar at the bottom of the screen gradually moves as the installation progresses, as shown in Figure 2.15a.
Occasionally, this display stops moving, but it shows how much more time the installation will
take. Wait until all CD and hard disk activity has stopped for two or three minutes, and then
restart your computer.
Eventually, you see the screen saying Leopard has been installed, as shown in Figure 2.15b.
Figure 2.15
Installing Leopard (a); installation succeeded (b)
a
b
Watching the Welcome Video
After you have finished installing Leopard, you should watch the Leopard welcome video. This
section explains how to do that and what you’ll learn about Leopard from this video.
Booting your computer to run Leopard
Before you can watch the Leopard welcome video, you need to restart your computer and boot
from the boot CD. Follow these steps:
1.
2.
Open the CD/DVD drive, and remove the Leopard Retail DVD.
Insert the boot CD.
Chapter 2: Installing Leopard to a Separate Hard Disk
3.
4.
5.
33
Press the reset switch on your computer (or power off and power back on).
Use whatever keystrokes your BIOS uses to boot from the CD drive.
At the Darwin boot screen, press the Esc key.
This results in the boot selector screen as before, as shown in Figure 2.16.
Figure 2.16
Darwin boot selector
This time, however, you want to start from your hard disk, not the install disk.
If your USB drive is your only disk (in other words, you disconnected your fixed hard
disks), then it is disk 80 (hexadecimal for 128). If you have a single hard disk, besides
your external USB disk, then it is disk 80 and your USB disk is disk 81. If you have two
internal hard disks, your USB disk is disk 82 and so on.
6.
Type the number of your hard disk, and press Enter.
Figure 2.17 shows the boot screen for the case where the Hackintosh is the second
hard disk.
Figure 2.17
Darwin boot disk
34
Installing OS X 10.5
CAUTION
If, instead of your disk name (Hackintosh), you see something like “Foreign Operating System,” you have selected the
wrong disk. Press Esc again, and type a different number.
When you first boot your Leopard installation, you should force a rebuild of the kext
cache.
CROSSREF
Kexts and kext cache are explained in Appendix B.
7.
8.
Press F8 within a few seconds so that you can enter boot options.
Type -v -f, and press Enter
Again you see the commands roll up the screen. This time, you see many more commands
because Leopard is reading each kext and placing it in the cache. Eventually, the screen clears
and the lines roll down the screen.
At this point, you need to be sure that you see the BSD root: line again. The numbers are different, but it must be there.
CAUTION
If you don’t see the BSD root: line, go to the troubleshooting section in Chapter 6.
Watching the welcome video
Eventually, the screen turns blue and then black or gray with the spinning beach ball. If you have
the correct video kexts installed, you then see the Leopard welcome video. If you were using a real
Macintosh, you would also hear sound from the video, although the music is rather banal.
Figure 2.18a shows the start of the welcome video. Figure 2.18b shows a screen from the middle of the video. Figure 2.18c shows the start of the final sequence.
Don’t worry: The video is only a few seconds long.
CAUTION
If your screen stays stuck at the spinning beach ball or you don’t see the welcome video, you don’t have the correct
video kexts. Refer to the troubleshooting section in Chapter 6.
Chapter 2: Installing Leopard to a Separate Hard Disk
35
Figure 2.18
Welcome video 1 (a); Welcome video 2 (b); Welcome video 3 (c)
a
b
c
Entering Details About Yourself
This section walks you through the process of setting up your Leopard installation. This includes gathering information about your computer and you, and then setting up your login and home folder.
Figure 2.19 shows the Welcome to Leopard screen.
Selecting your keyboard
If Leopard doesn’t recognize your keyboard, it asks you to press a couple of keys so it can be
identified. After it has done that, it asks which country you are in so that it can use the correct
keyboard layout.
TIP
The language you set here determines the dictionary that Leopard uses. Yes, it has a built-in dictionary.
Figure 2.20 shows the keyboard selection screen, with Australian highlighted.
36
Installing OS X 10.5
Figure 2.19
Welcome to Leopard
Figure 2.20
The Select Your Keyboard screen
Chapter 2: Installing Leopard to a Separate Hard Disk
37
Transferring data from another Mac
If you already have a Mac computer, you can transfer data from it to your new installation. If you
want to transfer data, you can do so by connecting to the Mac in a few different ways. Unless
you really do want to transfer information, select Do not transfer my information now.
CROSSREF
Leopard can read and write to your Windows disks if they are formatted as FAT disks. For NTFS disks, free software is
available to enable it to read and write to them too. This is explained in Chapter 14.
Figure 2.21 shows the screen that asks if you want to transfer information from another Mac.
Figure 2.21
Already own a Mac?
Entering your networking details
Next, Leopard wants to know how you connect to the Internet.
TIP
If you are using wired networking, Leopard may have already detected that and tries to connect you to the Internet.
38
Installing OS X 10.5
If you are using wireless networking, however, Leopard probably won’t automatically detect
your network hardware, although some models of Dell computers use exactly the same chipset
as Apple, so they connect wirelessly as though you had a real Apple Airport.
Unless Leopard automatically detects your network, select My computer does not connect to
the Internet. You can set up your networking later.
Figure 2.22 shows the Internet connection screen.
Figure 2.22
How do you connect?
Entering your personal details
Now Leopard wants to know your most intimate personal details. This is used for a couple of
purposes: It is used as the first index card in your Leopard address book, and it is the information sent to Apple to register your Leopard. Figure 2.23a shows the screen used to gather your
personal information.
In this case, I gave my real name: Peter Baldwin. That is the name for my account on the computer. The other information is fake!
Apple is really nosy and wants to know where you are using the computer and what you are
using it for. This is so that they can send you targeted information if you check the box allowing
them to do just that. Figure 2.23b shows the drop-down box to select the other information.
Chapter 2: Installing Leopard to a Separate Hard Disk
39
Figure 2.23
Registration information (a); a few more questions (b)
a
b
Leopard won’t let you continue to the next screen until you select something for each box. You
can either tell the truth or invent something; the choice is yours!
Leopard is about to set up a user account for you. The name you type here is the name Leopard
uses for the account and the name of your home folder where your documents are stored. You
need to choose carefully because changing these details later is very difficult. Figure 2.24a
shows the screen gathering your user information and password.
Leopard automatically creates your home folder name from the name you type. In this case, it
has called my home folder peterbaldwin. Leopard drops the capital letters and joins the two
names together to form the name.
As always, Leopard blanks the password details. Leopard won’t let you continue to the next
screen until you have entered a password hint, nor will it let you just enter the password itself as
the hint.
Leopard now requests that you send off your registration information.
TIP
If you select Register Now and you are connected to the Internet, your registration is sent. The choice is yours.
Figure 2.24b shows the registration screen.
If you don’t wish to send the registration details (or if you can’t because you don’t have a network at this point), Leopard saves the information and places it in your home folder.
40
Installing OS X 10.5
Figure 2.24
Create your account (a); register with Apple (b)
a
b
Setting time and date
You’re in the home stretch now. Leopard wants to know where you are located so it can keep
the time display in sync with local time. The time zone setting shows a map of the world for you
to click where you are located, as shown in Figure 2.25.
Figure 2.25
Select a time zone
Chapter 2: Installing Leopard to a Separate Hard Disk
41
Leopard then allows you to set your local time and date. If you’ve been using Windows up to
now, you will find the time that Leopard reads from your computer’s hardware real-time clock is
different from the time you saw in Windows.
CROSSREF
Leopard uses a different timekeeping method from Windows, which can cause some issues with Windows time. See
Appendix B for an explanation.
Seeing your Leopard screen for the first time
After one last entreaty to register your Leopard, you finally see your first Leopard screen. Figure
2.26 shows the first Leopard screen you see.
Figure 2.26
Your first look at Leopard
Congratulations! You achieved what used to be impossible: running an Apple operating system
on non-Apple hardware.
42
Installing OS X 10.5
Troubleshooting
If your installation doesn’t start or you can’t get the Leopard Retail DVD to boot, see Chapter 6
for some suggestions on things to try.
Summary
In this chapter, you learned how to install OS X Leopard to an external hard disk. Along the way,
you learned about the insides of your computer and how it works.
If you are happy with the way Leopard runs from your external hard disk, you can go straight to
the latter part of Chapter 6 and then on to Part II of this book.
If you want to dual-boot Leopard with Windows XP, go to Chapter 5. If you want to dual boot
with either Windows Vista or Windows 7, go to Chapter 4.
Avoiding the Need
for the Boot CD
N
ow that you have installed Leopard on your external drive,
you need to start it by using the boot disk. This is not only
an inconvenience, but it also prevents you from enjoying
the full experience of Leopard.
When the separate boot disk was created, it used syslinux. Syslinux
is a boot loader originally developed to load Linux systems, but it
was modified to create rescue boot disks and other special purpose
disks, such as OS X boot disks.
In this chapter, you learn how to download some software, install it
on your Leopard disk, and use it to modify your Leopard installation so it can boot without using the boot disk. You also update
Leopard to the latest version.
Finding and Downloading the
Relevant Software
In this section, you locate the software to allow you to update your
Leopard installation and transfer it to your Leopard disk.
Don’t worry if your Leopard is not connected to the Internet
because you can download the software to a Windows disk and
then transfer it to Leopard using a USB key.
Downloading the file to update
Leopard
Before you modify your Leopard installation, you need to first
update to the latest version, because some modifications made
during the update may remove some of your customizations—for
example, sound drivers.
At the time of this writing, Leopard is up to its ninth version. Each
version is identified by a number after a second decimal point. The
first version of Leopard was OS X 10.5.0; the first update was 10.5.1.
The latest at the time of writing is 10.5.8.
You can download the latest version from Apple’s Web site. Two
versions are available: the regular update and the combo update.
In This Chapter
Finding and
downloading relevant
software
Using the installer to
complete your OS X
installation
Selecting the boot disk
from the menu
44
Installing OS X 10.5
You should use the combo update because the regular update is for use only when you have
the version immediately prior to the latest.
To go from version 10.5.5 to 10.5.6, you can use the regular update; to go from a version earlier
than 10.5.5, you must use the combo update. This section uses 10.5.6 as the example, but it
works exactly the same regardless of the update you use. Follow these steps:
CAUTION
Each combo update is around 650MB, so it may take some time to download. As always, be sure you don’t go over any
download cap from your ISP.
1.
Navigate to www.apple.com/downloads/macosx/apple/macosx_
updates/.
2.
3.
4.
Scroll down until you find the 10.5.6 combo update.
Click Download.
Save the file to your Windows hard disk or to a USB key.
TIP
A USB key is always formatted with the FAT file system, which Leopard can read, so you don’t need a special Mac
formatted key.
Downloading the file to modify your boot system
This file converts your Leopard disk so it can boot directly from your hard disk, rather than
requiring the boot CD each time.
You can do this in several ways, but the easiest by far is to use a Mac application called Universal
Installer, or UInstaller, created by a Hackintosh expert known as pcwiz. Here’s how you do it:
1.
2.
3.
4.
Navigate to pcwiz’s Web site at http://pcwizcomputer.com.
5.
Save the file to your Windows hard disk or a USB key.
Click Downloads.
Click [Mac OSx86] Universal OSx86 Installer.
Scroll down to the line: Download Universal OSx86 Installer here, and click the
link labeled here.
Chapter 3: Avoiding the Need for the Boot CD
45
Using the Installer to Complete Your OS X
Installation
In this section, you learn to update your Leopard installation to the latest version and then
install a boot loader so you are freed from using the boot disk every time you want to boot.
CAUTION
Ensure that your boot disk is still in your CD/DVD drive.
1.
Use the boot disk to boot your computer to Leopard.
Remember to type the number of the disk holding the installation, as you did in Chapter 2.
Installing the combo update
First, you need to copy the update file to your Leopard disk. Leopard can read and write to FAT
disks (such as a USB key) and can read but not write to NTFS disks. So if your file is on one of
your Windows disks, you can copy it.
Most Mac install files are supplied as .dmg files. A .dmg file is a disk image and mounts on your
Leopard in the same way that a DVD or USB key does. For all intents and purposes, Leopard sees
it as another disk drive and displays an icon on your desktop. Follow these steps:
1.
Double-click the icon for the disk that contains your Windows data or your
USB key.
2.
In the Finder window that opens, navigate to where you have stored the file
MacOSXUpdCombo10.5.6.dmg.
Figure 3.1a shows the combo update for 10.5.6 in the Finder window on my computer.
3.
Drag the file icon from the Windows disk to your desktop.
Because it is coming from a disk external to your Leopard disk, it is copied to your
desktop.
4.
Double-click the desktop icon to open the disk image.
Figure 3.1b shows the installer package for the update after double-clicking the
installer.
In OS X, a package is a bundle of files that are installed using the Mac OS X Installer.
This is very similar to a Microsoft Installer file (.msi) in Windows.
46
Installing OS X 10.5
Figure 3.1
Combo update in Finder (a); combo update package (b)
a
5.
b
Double-click the .pkg icon.
This launches the Leopard installer, in the same way that double-clicking an .msi file in
Windows opens the Windows installer.
Figure 3.2a shows the introductory screen for the updater.
6.
Click Continue.
Figure 3.2b shows the ReadMe screen giving locations where you can find out more
information about the update.
Figure 3.2
Combo update introduction screen (a); combo update readme screen (b)
a
7.
Click Continue.
b
Chapter 3: Avoiding the Need for the Boot CD
47
Leopard asks you to read and agree to the license agreement. Figure 3.3a shows the
small window (known as a sheet) that slides out of the main window.
8.
Click Agree.
Leopard asks you where you want to install the update. Naturally, you want to install it
to your Leopard disk. If you were updating a different computer on a network, you
could click Change Install Location.
Figure 3.3b shows the dialog box to change location or continue to install on the
default disk.
Figure 3.3
License agreement (a); combo update standard install (b)
a
9.
b
Click Install.
Leopard wants to be sure that you have enough privilege to carry out the installation,
so it asks for your password. Unless a user has administrator privileges, the update cannot be installed. You’ll encounter this frequently while using the Leopard computer, so
you should get used to this small pop-up.
Figure 3.4a shows the password request box.
Leopard gives you one last chance to back out of the installation, as shown in Figure 3.4b.
The installer updates your installation. Normally, this takes 5 to 10 minutes.
Figure 3.5a shows the installation screen at the start of the update.
Figure 3.5b shows the screen partway through the update.
48
Installing OS X 10.5
Figure 3.4
Combo update password request (a); combo update continue installation screen (b)
a
b
Figure 3.5
Combo update configuring installation screen (a); combo update installing (b)
a
b
Wait until the installation is complete.
Figure 3.6 shows the screen you hope to see at the end of the installation.
Many (but not all) software installations in Leopard require you to restart your computer. In the case of the update, many system files have been changed. Because most
of them are required from the very start of booting, the old ones have to be unloaded
and replaced by the new ones by rebooting.
10.
Click Restart.
Your computer now shuts down and restarts.
Chapter 3: Avoiding the Need for the Boot CD
49
Figure 3.6
Combo update installation complete screen
CAUTION
Be sure that your boot disk is still in your CD/DVD drive and that you select to boot from the CD/DVD as you did earlier.
Enter -v and -f as boot options to be sure your kext cache is rebuilt and all the new kexts are being used.
After Leopard has restarted, you should first check that you have updated successfully.
1.
2.
Click the Apple icon on the menu bar to open the Apple menu.
Click About this Mac.
You see a small display that tells you a little about your “Mac.” Check that the software version is
the same as the version you updated to.
Figure 3.7 shows the small window giving you information about your Mac.
TIP
If you click the version number shown (10.5.6), it shows you the exact internal Apple description of the version you
are using.
50
Installing OS X 10.5
Figure 3.7
About this Mac
Installing the boot loader
Now it’s time to install the boot loader so you no longer need the boot CD. You’ll also install a
couple of small niceties for your installation. First, you need to copy the loader from either your
Windows disk or your USB key drive. Follow these steps:
1.
2.
3.
Using Finder, locate the UInstaller (.zip) file you downloaded earlier.
Drag the zip file to your desktop.
Double-click the zip icon.
Leopard automatically unpacks the zip file and places a new folder on your desktop.
4.
Double-click the folder icon to open it.
Figure 3.8 shows what is contained in the folder when the zip file is unzipped.
CAUTION
You should only run UInstaller from within that folder because it contains support files required by the installer.
5.
Double-click UInstaller.
This opens the UInstaller main screen. Figure 3.9 shows the main screen for UInstaller.
Chapter 3: Avoiding the Need for the Boot CD
51
Figure 3.8
Inside UInstaller folder
Figure 3.9
UInstaller
Installer may or may not show your Leopard disk first up. They are usually listed in
alphabetical order, so if you have a disk whose name starts with a letter before the
name of your Leopard disk, that one is listed before it.
52
Installing OS X 10.5
6.
Click the drop-down box on the top line and select your install disk.
Pcwiz and other authors have developed additional packages specifically for particular
motherboards. At this point, if you are connected to the Internet, you can look for a
package for your motherboard. If not, you can always run UInstaller again later.
NOTE
If you are not connected to the Internet, skip ahead to Step 12.
7.
8.
9.
Click UInstaller on the menu bar.
Click Download more plugins….
If you see your motherboard listed, click the line with its name and then click
Download selected.
10.
11.
Close UInstaller, and restart it by double-clicking it.
12.
Place a check in the box for Apply kext package.
From the drop-down menu for Select motherboard package to install, select the
appropriate package.
If you downloaded a motherboard package, you also see an Extensions.kext file with it.
13.
Click Apply extensions.mkext if you have downloaded a motherboard package.
Setting boot timeout
When you boot your computer, the Darwin boot loader waits a certain time to give you the
chance to press a key and enter startup options. You can change the length of this timeout
using UInstaller.
1.
Enter the number of seconds you want Darwin to wait so you can press a key.
Setting native boot resolution
If you allow Leopard to boot with the graphic boot screen, it uses an image 1024 pixels wide by
768 pixels tall. If your screen uses another resolution (such as 1920x1080), you can change the
resolution of the image on the boot screen so the Apple logo is not distorted.
CAUTION
Be forewarned that this option often does not work! Leopard reads this line in the boot file, but it hasn’t yet loaded
the drivers for your graphics. Still, it’s worth trying.
1.
Enter the x and y resolutions you want your boot resolution to be.
Chapter 3: Avoiding the Need for the Boot CD
53
My monitor is 1920 pixels wide by 1080 pixels high, so I would enter 1920 and 1080 in the two boxes.
Installing PC_EFI Chameleon
This next part is really the heart of what you are doing here: installing PC_EFI v9 Chameleon.
CROSSREF
You can read more about EFI in Appendix B, but in essence it is the Macintosh equivalent of the BIOS in your non-Apple
computer, but much smarter.
EFI stands for Extensible Firmware Interface; it‘s a method of adding much more “intelligence” to
the BIOS. It stores information mostly about your hardware and has small programs that check the
state of your hardware, in the same way that your BIOS checks your keyboard and memory.
Because your computer doesn’t have a real EFI, you need to fake it. PC_EFI is a method of putting the type of information into the computer’s memory that Leopard expects to see when it
boots. When you selected Apply motherboard kexts in Step 12 and Apply Extensions.mkext in
Step 13 (in the instructions earlier), you were telling the boot loader to add them to the EFI.
1.
Check Install PC_EFI v9 Chameleon Edition 1.0.12.
Applying the Time Machine fix
On some systems, Time Machine doesn’t work correctly because of a problem with detecting
the Ethernet address of the system on which it’s running. Using UInstaller, you can correct that.
Even if you don’t need the fix for Time Machine, you can install it anyway.
1.
Check Apply Ethernet EFI String (Time Machine Fix).
Applying the EFI string for your video card
On a real Macintosh, the EFI contains lots of information about your video system. Using
UInstaller, you can add that information to your fake EFI by selecting your video card from the
drop-down box. UInstaller comes with more than 70 video cards supported, although only 8 of
them are not nVidia cards.
My video card is an nVidia 7600GS, with 256MB of memory, as explained in Chapter 1.
1.
Select your video card from the drop-down box, and check Apply EFI String for
video card.
Installing customs kexts
Finally, UInstaller allows you to install some custom kexts from your hard disk. Because you
don’t have any kexts you want to install, you can leave that box unchecked.
Figure 3.10 shows the screen when I have selected everything for my system.
54
Installing OS X 10.5
Figure 3.10
UInstaller configured
After just a couple of minutes, UInstaller has done its work and you get to the completed screen.
1.
Select Shutdown from the Apple menu.
Selecting the Boot Disk from the Menu
This section walks you through restarting Leopard without using the boot disk. If all has gone
according to plan, you can select the correct disk and have it boot directly to Leopard. Because
you are not using your primary disk to boot, you need to select the external disk in your BIOS.
After UInstaller has finished, shut down Leopard and restart your computer. Follow these steps:
1.
Select Restart from the Apple menu.
When your computer restarts, you need to tell it to boot from your Hackintosh disk.
2.
Press the key you found in Chapter 2 that controls which device your computer
boots from (usually F12).
Figure 3.11 shows the boot screen in the BIOS for VMware, showing the hard disks
available.
Chapter 3: Avoiding the Need for the Boot CD
55
Figure 3.11
Select external hard disk
Remember that I used VMware so I could capture screen shots; other than taking photographs of the screen, this is the only way. Your disks will have different identifications, with your external hard disk most likely the last on the list.
3.
Select the external disk, and press Enter.
This time, because the Darwin boot loader is loading from a hard disk, it is much faster
than when loading from the CD.
You should finish at the same Darwin prompt as you had when starting from the CD.
Figure 3.12 shows the Darwin startup options screen.
Figure 3.12
Darwin startup options screen
Again, you should start Leopard with the verbose option and to rebuild the kext cache.
56
Installing OS X 10.5
Can you remember how to do this?
4.
Press a key during the five-second pause.
This takes you to the Darwin boot options screen, as shown in Figure 3.13.
Figure 3.13
Darwin boot options screen
5.
At the Darwin prompt, enter -v -f
Option -v specifies verbose mode so you can see what is happening on the screen; -f
forces Darwin to rebuild the kexts cache (see Appendix B).
Again, you should look for the BSD root: line in the verbose boot screen.
Finally, you arrive at the Leopard screen. This time, you don’t get any dialog boxes because you
have already set up Leopard.
Now you need to start configuring Leopard to your own personal preferences. Chapter 9 walks
you through that procedure.
Installing a Different Bootloader
While PC_EFI allows you to boot from your external hard disk, it is still necessary to select the
Leopard hard disk in the BIOS as the disk to boot from. By using an alternative bootloader, you
can use either your existing Windows system disk or your Leopard disk when you boot.
CAUTION
Be warned that this modifies the boot sector of your Windows disk. To return to your normal Vista or Windows 7 bootloader, you need to boot from your Windows install disk to repair your Windows installation.
At the time of writing, the Chameleon 2 installer is at the Release Candidate 2 (RC2) version.
Although the files for RC3 are available, installing them is not as straightforward as using the
installer. If, by the time you read this, there is an installer available for RC3, use it in place of RC2.
Chapter 3: Avoiding the Need for the Boot CD
57
Follow these steps to install the Chameleon bootloader:
1.
Navigate to http://chameleon.osx86.hu/ and scroll down the page to the
heading “Chameleon 2.0-RC2 is available …”
2.
3.
4.
Click the link and then scroll down to the heading “Download information.”
Click the link “Installer package” and then click the link “here.”
Download the file and save it your Leopard drive.
NOTE
If you can’t access the Internet from your Leopard computer you can download the installer to your Windows computer
and use a USB drive to install to your Leopard disk.
5.
Double-click the “Chameleon-2.0-r431.pkg” file.
Figure 3.14 shows the installer’s greeting screen.
Figure 3.14
Chameleon installer screen
6.
7.
8.
9.
Click Continue until you get to the software license agreement screen.
Click Agree.
At the next screen, click Install and enter your password to confirm the install.
Wait while Chameleon is installed and then restart your computer.
58
Installing OS X 10.5
Now you see a graphical boot screen that shows your Leopard install disk and your Windows
disks, with a Windows symbol and a label NTFS. This is shown in Figure 3.15.
Figure 3.15
Chameleon bootloader screen
Summary
In this chapter, you learned to update your Leopard installation to the latest version, and you
made it possible to start your computer without requiring a boot disk.
If you are happy with starting either Windows or Leopard by selecting the boot disk from your
BIOS, you can go straight to Part II, “Setting Up and Customizing OS X.”
If you prefer to have both operating systems on the same disk, you should go to either Chapter
4 if you are using Windows Vista or Windows 7 or go to Chapter 5 if you are using Windows XP.
Installing to a Hard Disk
with Windows Vista
Already Installed
I
n the preceding chapters, you’ve installed OS X to a separate
hard disk. The advantage of this method is that it isolates your
Leopard disk from the rest of your system. The downside is that
it requires you to use your BIOS to choose which disk to boot from.
In this chapter, you learn how to install Leopard to a hard disk that
already contains a Windows Vista or Windows 7 installation.
First you back up your Vista installation in case of errors. Then you
create a new partition on your Vista or Windows 7 disk to allow OS
X to be installed. Then you modify your Leopard installation disk so
that it will install to a Windows disk.
After installing Leopard, you check that both operating systems
start correctly and install a boot loader so you can choose which
operating system to run at boot time.
Performing a Complete Image
Backup of Your Vista Hard Disk
In this section, you completely back up your Vista or Windows 7
installation so that if anything goes wrong, you can restore to
exactly where your system was before you started. This is essential
disaster insurance!
Most people back up their files using a file backup method. In a file
backup, your data is written to the backup medium file by file.
When you want to recover a file, you simply select it from the list
on the backup medium and copy it to where you want it.
An image backup is different from a file backup. An image backup
knows nothing about files: It simply copies every single bit of data
from the disk to the backup medium. In effect, the backup is like a
photographic snapshot of everything on your hard disk. An image
backup backs up your files, your programs, your preferences, and
even your hard disk’s boot sector.
In This Chapter
Performing a complete
image backup of your
Vista hard disk
Downloading software
required for starting
Vista and OS X
Partitioning the Vista
system disk
Modifying your OS X
install disk
Using the downloaded
software to restore the
Vista partition
Ensuring that Vista starts
Starting OS X
Modifying the Apple
property list to specify
future boot parameters
Ensuring that both
systems start successfully
60
Installing OS X 10.5
You can use a series of DVDs to do an image backup, but more likely you use an external hard disk.
CAUTION
If you restore from an image backup, you restore the entire disk, not file by file. This is important because if your user
files have changed since you last did a complete image backup, they will be overwritten by the old files when you
restore.
Finding and downloading the software
If you have the Ultimate, Business, or Enterprise version of Vista or Windows 7, you already have
image backup software on your computer. This is known as the Backup and Restore Center.
Otherwise, you need to download and purchase some image backup software. Table 4.1 shows
a selection of the best known ones.
Table 4.1 Image Backup Software
Application
URL
Macrium Reflect (Free)
www.macrium.com/reflectfree.asp
DriveImage XML (Free)
www.runtime.org/driveimage-xml.htm
Drive Backup Free
www.paragon-software.com/home/db-express/
features.html
Acronis True Image
www.acronis.com/
Norton Ghost
www.symantec.com/norton/ghost
Paragon Hard Disk Manager
www.paragon-software.com/home/hdm-personal/
O&O Disk Image 3
www.oo-software.com/home/en/products/oodiskimage/
index.html
Terabyte Image for Windows
www.terabyteunlimited.com/image-for-windows.htm
Although the first three in the list are free, I have no experience with them, but you should certainly try one of them out. Just be sure you have a restore disk to boot your computer.
My favorite is O&O Disk Image 3, but any of those will work fine. I also use the Vista Backup and
Restore Center: call me paranoid! I also use separate file backup software that I run every day.
Because I don’t store my data on the C: drive I only do an image backup once a week or so. File
backups run every day.
Choose one of these, download it, and install it.
CAUTION
Be sure that you download the image backup software’s restore disk and burn it to a CD. Without it you can’t restore
your image to your computer.
Chapter 4: Installing to a Hard Disk with Windows Vista Already Installed
61
My preference would be to test the backup software first, just to be certain that it’s going to rescue me if I make a mistake. And yes, I did manage to completely wipe my hard disk while writing this book. But I had two image backups to choose from.
Creating a disk image
Regardless of which software you use for your image backup, you need to be sure that everything is backed up. Every backup solution has an option to verify the backup. Be sure that it is
turned on. This means that once you have written every byte to the backup media it reads what
it has written and compares it with what is on the original disk.
Using Vista Ultimate, Business or Enterprise editions
Follow these steps to back up your data before installing the Mac software:
1.
2.
3.
Click the Vista Start orb.
Type Backup in the search box.
Click Backup and Restore Center when it appears in the programs section at the
top of the window.
Figure 4.1 shows the greeting screen of the Backup and Restore Center.
4.
Click Back up computer.
Figure 4.1
Backup and Restore Center
62
Installing OS X 10.5
5.
Click Continue on the User Account Control window.
Backup and Restore then searches for a suitable hard disk attached to your computer.
If you have already done an image backup and it is online, the computer finds it and
defaults to that disk. Otherwise, it shows all your disks in the drop-down box.
6.
7.
8.
Select the disk to use in the drop-down box.
Click Next.
Select the disks you want to back up by putting a check in each box.
Normally, this is simply your C: drive, which is already checked.
9.
10.
Click Next.
Click Start Backup, and wait while the backup is done.
Using other downloaded software
You need to read the documentation that comes with the product you bought. Be sure to save
your backup to a disk other than your system disk!
Restoring your system from the disk image
If the worst happens and you erase your system disk or make it unusable in some other way,
you need your recovery CD or DVD.
Using the Vista install DVD
If you used Vista Backup and Restore, you simply boot from your Vista install DVD. Figure 4.2
shows the initial display when you boot from the Vista install DVD.
Figure 4.2
Vista install DVD
Chapter 4: Installing to a Hard Disk with Windows Vista Already Installed
1.
63
Click Next.
Figure 4.3 shows the startup options screen.
Figure 4.3
Vista startup options
2.
Click Repair your computer.
The Vista installer looks for an existing copy of Vista. In Figure 4.4, you can see that it
can’t find an existing copy of Vista.
Figure 4.4
System recovery options
3.
Click Next.
In Figure 4.5, you see that Vista provides you with a few recovery options.
64
Installing OS X 10.5
Figure 4.5
Vista recovery options
4.
Click Windows Complete PC Restore.
In Figure 4.6, you can see Vista searching for a hard disk containing the image backup.
Figure 4.6
Restore your computer
In this case, because it was recorded using VMware, no disk contains the Vista backup,
but if you had a disk with the backup, it would be shown in the box.
5.
Select the backup you want to restore, and wait while Vista completes the restore.
Chapter 4: Installing to a Hard Disk with Windows Vista Already Installed
65
Using the recovery disk for the software you downloaded
Although the details and screens will be different depending on the software you are using, the
basic principles are exactly the same:
Boot from the recovery disk
Select the backup you want to restore
Select where you want to restore to
Wait while it restores
Downloading Required Software to Start
Vista and OS X
This section walks you through the process of downloading two more items of essential software you need before you can install OS X to your Vista disk:
Software to partition your system disk
Software to modify the Vista boot loader
In addition, you need to use your Vista or Windows 7 installation DVD to repair the boot sector.
If your computer came with Vista preinstalled, you likely do not have a complete installation
DVD, but rather a repair disk. If this is the case, be sure to follow the steps in the section
“Downloading software to repair your Vista boot disk,” later in this chapter.
Downloading software to partition your
Vista system disk
Vista has a built-in utility called diskpart that partitions disks. You access it through the command prompt. Diskpart can be used to expand a partition, provided you have enough free
space on the disk. It also can be used to shrink a partition, but only under certain circumstances.
During normal operation of your computer, files are not written in a neat fashion to the same
area of the disk but are scattered around the disk. This is done for performance reasons, but it
results in lots of blank areas on the disk. For example, you might expect that a 120GB disk with
60GB of free space would have a so-called high water mark at 60GB, leaving the second half of
the disk empty. But because of the way the files are written, the high water mark might be at
110GB, leaving only 10GB of space at the end of the disk. In this case, diskpart would be able to
shrink the partition only to 110GB.
What is required is software that can move the files into the same area of the disk and thus
make space for a larger partition.
66
Installing OS X 10.5
Several programs are capable of doing this. Table 4.2 shows a selection of these.
Table 4.2 Partition Management Software
Application
URL
Acronis Partition Manager
www.acronis.com/
Partition Magic
www.symantec.com/norton/partitionmagic
Paragon Partition Manager
www.paragon-software.com/home/pm-personal/
These are all commercial software programs, but an excellent partition manager is free. It is
GPartEd (pronounced “gee part ed”). It is available for download from http://gparted.
sourceforge.net/.
GPartEd is supplied as a disk image (.iso file). You need to burn it to a CD and use it to boot your
computer. Several programs can do this (Nero Burning ROM, AShampoo Burning Studio, Roxio
Creator, among others), but my particular favorite is ImgBurn, available from www.imgburn.com/.
If you already have commercial software, use that; otherwise, give ImgBurn a try. Follow these steps:
1.
2.
Download GPartEd, and save to your disk.
Use image-burning software to burn GPartEd to a CD.
Be sure to burn it as an image; don’t simply copy the iso file to the CD.
Downloading software to modify the Vista boot loader
Unfortunately, Vista and Windows 7 don’t always play nicely with other operating systems:
Windows tends to see itself as the only operating system on your computer. In order to be able
to use your computer to boot either system easily, you need to modify the Vista boot loader.
This is the small program that takes control after the ROM BIOS has finished its work. Its function is to load the first part of the operating system.
CROSSREF
Appendix B contains more discussion of the boot process for a computer.
Vista (and Windows 7) is different from earlier versions of Windows in that rather than store the
details about the boot process in a single file, it uses a Boot Configuration Database. Vista provides a utility called BCDEdit that allows you to modify the database.
Unfortunately, like diskpart, it is command line driven, and unless you type the commands
exactly, it either does not work or sets parameters that are inappropriate and may render your
computer unable to boot.
Chapter 4: Installing to a Hard Disk with Windows Vista Already Installed
67
Fortunately, a programmer named Mahmoud H. Al-Qudsi has written a utility called EasyBCD,
and it is exactly that: It makes editing the BCD easy!
Download the latest version from http://neosmart.net/ and install it. Please also consider making a donation to keep the site operating.
Downloading software to repair your Vista boot sector
If you are using an HP or Dell computer, skip straight to the third paragraph, because you definitely cannot repair your boot sector with the disks the manufacturers supply to you!
Before you download this software, insert your Vista install (or repair) disk and boot from it. If
you see screens like those shown in Figures 4.2, 4.3, and 4.4, then you can use it to repair your
boot sector. If your disk looks different or gives you different options, then you should download a disk specially created for exactly what you need to do.
On the same Web site where you downloaded EasyBCD (http://neosmart.net/blog/
2008/windows-vista-recovery-disc-download/), you find a copy of the Vista
recovery disk. Follow these steps:
1.
Go to http://neosmart.net/blog/2008/windows-vista-recoverydisc-download/, and download the .torrent file.
2.
3.
Use your bit torrent software to download the actual recovery disk.
Burn it to a CD (it’s small enough to fit on a CD).
At last you have enough software to be able to actually start installing.
Partitioning the Vista System Disk
Now that you have downloaded all the software you might need and made an image backup of
your hard drive, it’s time to tackle the hard stuff: partitioning your disk and installing Leopard.
This section explains how you partition your hard disk.
As standard, the retail Leopard installation disk will not install to a disk partitioned as MBR
(Master Boot Record). Instead it requires a disk partitioned as GPT (GUID Partition Table).
To install to an MBR disk you need to modify the installer. To do this, create an extra partition as
a temporary measure, copy the Leopard installer to that partition, and modify it. You then use
that partition to carry out the installation.
CROSSREF
Appendix B contains explanations of different disk partition types. In the screen shots, I use GPartEd and partition a
VMware drive. Details of your disk are, of course, different; likewise, if you are using different partitioning software,
your screens look different.
68
Installing OS X 10.5
Shrinking your existing partition
First, you need to shrink your existing partition to leave space for the new partition. Follow
these steps:
1.
Insert your GPartEd disk, and boot from it.
Figure 4.7 shows the startup screen from GPartEd.
Figure 4.7
GPartEd startup screen
2.
3.
Select GPartEd live CD.
Select the keyboard mapping you want.
If you want the U.S. keyboard mapping, press Enter.
4.
Select the language you want to use.
Simply press Enter if you want to use U.S. English.
A drop-down box on the right side of the screen allows you to select the disk you want
to work with. If you only have a single disk drive, it has only one entry: /dev/hda. If
you have more than one disk, the others are identified as /dev/hdb, and so on.
If your hard disk has two partitions, the first partition is identified as hda1, the second
as hda2.
Chapter 4: Installing to a Hard Disk with Windows Vista Already Installed
69
Your boot disk is always listed as /dev/hda1. You can cross-check that it’s the correct
disk because it should have the disk label (Windows 7, in this case) in the label column.
5.
Click in the part of the screen labeled /dev/hda1.
It becomes surrounded by a dotted green box, indicating it is the active partition.
6.
7.
Click Resize/Move.
In the pop-up window, move the right edge of the green box to the left until the
box labeled Free Space Following reads around 25GB or so.
If you have plenty of room on your disk, you can try larger partitions for Leopard, but
10GB is the minimum you should use.
Figure 4.8 shows the display after the partition has had the new size selected.
Figure 4.8
Select size for new partition
8.
Click Resize/Move.
To give you a second chance to be sure of what you are doing, GPartEd doesn’t
change the partition size immediately; it gives you time to double-check.
CAUTION
Be sure to check and double-check exactly what you are asking GPartEd to do: A mistake here could lose data!
70
Installing OS X 10.5
9.
Click Apply in the toolbar.
A dialog box, as shown in Figure 4.9, pops up, asking you to confirm that you really
want to resize the partition.
Figure 4.9
Confirmation dialog box for resizing partition
10.
Click Apply in the dialog box.
Resizing of the partition may take some time because GPartEd has to move all the data from the
part of the disk that no longer belongs to the partition.
Creating the new partitions
Creating the new partitions is a much quicker process than shrinking the existing partition.
Here’s how it goes:
1.
2.
Click in the gray area to the right of the shrunk partition.
In the toolbar, click New.
Enter 5GB as the partition size.
3.
4.
Ensure that the Primary Partition is selected for Create As.
Select hfs+ or FAT32 as the File System.
You can use either hfs+ or FAT32 because you will format the disk for Leopard during
installation.
Chapter 4: Installing to a Hard Disk with Windows Vista Already Installed
5.
71
Enter a label for the disk.
I suggest you call it TempPart so that you can follow the instructions given later.
Figure 4.10 shows the result of these actions.
Figure 4.10
Creating a new partition for the temporary disk
6.
7.
8.
Click Add.
On the toolbar, click Apply.
In the dialog box click Apply.
Now you need to create the partition to which you will install Leopard.
9.
10.
Click in the remaining gray area to the right of the TempPart partition.
In the toolbar, click New.
Use the whole of the remaining disk space for your Leopard installation.
11.
12.
Ensure that the Primary Partition is selected for Create As.
Select hfs+ or FAT32 as the File System.
You can use either hfs+ or FAT32 because you will format the disk for Leopard during
installation.
13.
Enter a label for the disk.
Use whatever name you choose. I used Hackintosh as the name.
72
Installing OS X 10.5
Creating the new partitions is quick because no data needs to be moved. The final outcome is shown in Figure 4.11.
Figure 4.11
New partitions created
14.
Finally, be sure that your Vista or Windows 7 partition is still marked as the boot
partition.
If it is not, use GPartEd to flag it as the boot partition.
Now you have a disk with your Windows Vista or Windows 7 in the first partition, a temporary
partition for installation and space to install Leopard in the third partition.
Booting the Leopard Installer
In this section, you boot the Leopard retail DVD, ready to modify its installation parameters so
that you can install it on your Windows disk.
Finding a boot disk
Because it is not a Macintosh, your computer cannot boot from your Leopard retail DVD. To
install Leopard, you need to have your computer boot the way a real Macintosh does.
TIP
Many people have created boot disks for this purpose. In essence, they contain software that bridges the gap between
your hardware and what Leopard expects to find in a genuine Apple.
Chapter 4: Installing to a Hard Disk with Windows Vista Already Installed
73
You can find a collection of boot disks for specific motherboards at www.insanelymac.
com/forum/lofiversion/index.php/t125438.html. Many thanks to MACinized for
collecting them together in one place. If your exact motherboard is not listed, try one from the
same manufacturer.
Failing that, try one that sounds close. Remember, this is not an exact science!
NOTE
These boot disks are always supplied as an image file (.iso), which you need to burn to a CD. An image file is an exact
image of what is on a CD. Because it is a bootable image, when you burn it to CD, the CD is bootable.
Creating your boot disk
You can’t simply copy the .iso to a CD because it just ends up as a file sitting on a CD, and you
won’t be able to boot your computer. Since the .iso file is an exact image of the CD, you need to
copy that image exactly to the CD.
CAUTION
Whatever CD/DVD-burning software you are using, be sure you use the option to burn an image. A very good, free program to burn CDs and DVDs is ImgBurn, available from www.imgburn.com/.
If you are using ImgBurn, follow these steps to burn your .iso file to your CD:
1.
2.
3.
4.
Start ImgBurn running.
5.
Check the Verify box to verify that the CD contains exactly the same data as the
image file.
6.
7.
Click the large button to start the burn process.
Insert a blank CD in your drive.
Click the Write image file to disk option.
Click the file finder icon (with the magnifying glass) and navigate to where your
.iso file is located.
Label your disk Leopard Boot.
Specifying the hard disk identifier
This section explains how to boot the Leopard retail DVD using your boot CD as an intermediary.
Booting from the Leopard retail DVD is a two-step process, unless you are using a Macintosh.
First, start the computer using the boot disk, and start the Leopard disk.
74
Installing OS X 10.5
When your computer first starts, you see a screen that looks something like that shown in
Figure 4.12. Then follow these steps:
Figure 4.12
Boot menu
1.
2.
3.
Insert your boot disk in the CD/DVD drive.
Restart your computer.
Press the key required to change your boot device.
Usually F12 works, but not always.
4.
5.
Select CD/DVD, and press Enter.
Wait for the boot disk to start up and finish at a prompt.
You then see the screen shown in Figure 4.13, which is where you start the next stage
of the boot process.
Figure 4.13
Darwin boot screen
Chapter 4: Installing to a Hard Disk with Windows Vista Already Installed
75
At this point, the boot disk is waiting for you to boot Darwin, the Unix operating system on which Leopard is based. Of course, Darwin itself is not on that disk; it is on your
Leopard retail DVD, so you need to tell it which disk that is and then swap disks.
6.
Press Esc.
Now the boot prompt changes to look like the screen shown in Figure 4.14.
Figure 4.14
Darwin boot selector
In this case, the boot disk has identified the boot device as 9f, the decimal number 159 in
hexadecimal.
NOTE
If you want to convert hexadecimal to decimal and vice versa, use the calculator at http://easy
calculation.com/hex-converter.php.
Continue with these steps:
1.
2.
3.
Remove the boot disk from the CD drive.
Insert the Leopard retail DVD in the CD drive.
Wait a few seconds for the drive activity to stop, and press Enter.
You see a second Darwin prompt, with the correct disk specified in the brackets.
Specifying boot options
This section explains how to specify boot options for the Leopard retail DVD and the effect
of each.
At the boot prompt, you can type options that control the boot process. Table 4.3 lists the
options you can type at the Darwin boot prompt.
76
Installing OS X 10.5
Table 4.3 Darwin Boot Options
Option
Meaning
-v
Verbose: all output is sent to the screen
-f
Rebuild the kext cache
-x
Safe mode: similar to Windows safe mode
-s
Single-user mode
CROSSREF
Appendix B contains explanations of various terms such as kext, kext cache, and so on.
At this point, don’t worry about specifying any options other than -v because the kext cache
can’t be rebuilt; it’s stored on the DVD, which can’t be overwritten. Safe mode and single-user
mode do not affect whether the disk boots.
Type -v, and press Enter.
A few lines of text appear on the screen, and then it clears and switches to graphics mode. The
text continues down the screen.
At this point, the text looks like gibberish, but you should see one important line as highlighted
in Figure 4.15.
Figure 4.15
Verbose boot screen
Chapter 4: Installing to a Hard Disk with Windows Vista Already Installed
77
You should look for a line starting BSD root: disk1s3. The numbers you see may be different, but when you see it, you know that Leopard is at least going to boot on your computer.
NOTE
BSD root is the disk from which Darwin boots the main operating system. If Darwin can’t identify it, then it can’t boot.
After you see that line, you should see more messages scroll up the screen. The boot process
takes quite a few minutes when you boot from the DVD. Be patient!
Finally, the screen goes blue and then black with the spinning beach ball in the top-left corner,
and you see the Leopard Aurora desktop. Hooray!
Figure 4.16 shows the Leopard Aurora desktop.
Figure 4.16
Leopard Aurora desktop
Select the language you want to use to install Leopard and then pause at the next screen.
If you get stuck at a blank desktop, a blue desktop, or the spinning beach ball, turn to the troubleshooting section in Chapter 6.
78
Installing OS X 10.5
Formatting your disks
Your computer is now running a bare-bones version of Leopard, running from the install DVD.
Note that it has the Apple menu bar at the top of the screen. You now need to format the disk
to which you want to install Leopard, as well as the temporary partition. To do that, you use
Disk Utility, as shown in Figure 4.17.
Figure 4.17
Start Disk Utility
1.
2.
Click Utilities on the Apple menu bar.
Click Disk Utility.
After some whirring from the DVD, Disk Utility starts up, showing you the disks connected to
your computer. In this example, the only disk shown is a VMware virtual disk, because I captured the screens using VMware. Your disk should show three partitions, though the numbers
on them may be different.
Chapter 4: Installing to a Hard Disk with Windows Vista Already Installed
79
Select each partition in turn to be certain which is the new Hackintosh partition, which is the
temporary partition and which is your existing Vista partition. Follow these steps to format your
disks:
CAUTION
Be very sure to select the correct partition: If you select the wrong one, you will erase your Vista or Windows 7
partition.
1.
2.
3.
4.
Select Erase at the top of the Disk Utility window.
Select the small TempPart partition.
Select Mac OS Extended (Journaled) as the Volume Format.
Type the name for the partition.
Figure 4.18 shows the small temporary partition ready to be erased and formatted.
Figure 4.18
Ready to format TempPart using Disk Utility
80
Installing OS X 10.5
5.
Click Erase.
Disk Utility then formats your disk ready for installation.
6.
7.
8.
Select the main Hackintosh partition.
Select Mac OS Extended (Journaled) as the Volume Format.
Type the name for the partition.
Why not call it Hackintosh?
At this point, Disk Utility should look something like that shown in Figure 4.19.
Figure 4.19
Disk Utility ready to format Hackintosh partition
9.
10.
Click Erase.
When the erase has finished, click the red close icon in the Disk Utility window.
You now return to the disk install select screen, as shown in Figure 4.20.
This time, your newly formatted partitions show up.
Chapter 4: Installing to a Hard Disk with Windows Vista Already Installed
81
Figure 4.20
Select install disk
Modifying Your Leopard Installer
In order to install to an MBR disk, you need to remove the code in the installer that checks that
the disk is formatted as GPT. As you would expect, while it sounds simple, you need to carry out
a number of Unix commands, and you need to get each one exactly right or it will not work.
For this method I am greatly indebted to Fredde87, llauqsd, and STLVNUB. The original article is
on the Insanely Mac Web site at www.insanelymac.com/forum/lofiversion/index.
php/t181287.html.
CAUTION
Before you press Enter after entering each line of code, be sure to check your typing. If the command cannot be carried
out, you receive an error message. If the command works, all that happens is that you get the prompt again. It works
on the principle that no news is good news: If it didn’t fail, then it must have worked!
Follow these steps to modify your installer:
1.
From the Apple menu bar, select Utilities then Terminal.
This opens a terminal window as shown in Figure 4.21.
82
Installing OS X 10.5
Figure 4.21
Terminal window in installer
2.
Type the following code:
cp –R /System/Installation/Packages/* /Volumes/TempPart
CAUTION
Be careful of spacing. There should be a space after cp, after –R, and after *. Also be careful with capitalization
because –r is not the same as –R. Be patient; copying the files takes a while.
This command copies everything in the System/Installation/Packages folder to your
temporary partition.
3.
Type
cd /Volumes/TempPart
This changes your working directory to the TempPart disk.
4.
Type
mkdir temp
This creates a new folder called temp on your TempPart disk.
5.
Type
mv OSInstall.mpkg temp/
This copies the installer to your new temp folder.
6.
Type
cd temp
This changes your working directory to the temp folder.
Chapter 4: Installing to a Hard Disk with Windows Vista Already Installed
7.
83
Type
xar –x –f OSInstall.mpkg
xar is an archiving program. In this case you are using it to extract the files from the
installer so that they can be modified.
8.
Type
cat Distribution | sed “s/eraseOptionAvailable=’true’//g”¬
> Distribution2
NOTE
The ¬ character is a line continuation character. You don’t type it in; it is just there to show you that everything in that
command should be on one line. Also, be careful of the single (‘) and double (“) quotes.
This is a classic Unix command and explains why so many people love using Unix. First,
cat reads everything in the file Distribution and writes it out to a new file
Distribution2. If the command was simply cat Distribution >
Distribution2 the two files would be identical.
But sed is a stream editor: it takes everything that is input to it, changes it, and writes
it back out. The s/…/…/g means substitute everything between the first /…/ with
whatever is in between the second /…/. The /g means globally.
So this compact command reads through everything in the file Distribution,
replaces every occurrence of eraseOptionAvailable=’true’ with a blank then
writes it out to a new file Distribution2.
9.
Type
mv Distribution2 Distribution
This command copies the new Distribution2 to overwrite the Distribution file.
10.
Type
rm –Rf OSInstall.mpkg
This removes everything in the OSInstall.mpkg file.
11.
Type
xar –c –f OSInstall.mpkg *
This repacks everything into the OSInstall.mpkg file.
12.
Type
mv OSInstall.mpkg ../
This moves OSInstall.mpkg back into the top directory on the temporary disk.
84
Installing OS X 10.5
13.
Type
cd ..
This moves your working directory back up to the top directory.
14.
Type
rm –Rf temp
This removes everything in the temp directory.
At this point your Terminal screen should look like the screen shown in Figure 4.22.
Figure 4.22
Terminal screen
Don’t close Terminal as you require it again in the next part.
All the commands up to this point have been to create a modified Leopard installer. The
remaining part of the exercise is to have the installer use your modified installer, rather than the
one that is on the DVD.
If you have access to a Macintosh, you can create a new installation DVD with the modification,
but this way is much easier if you don’t have easy access to a Mac. If you want to create a
modified DVD using a Mac, follow llauqsd’s tutorial at www.insanelymac.com/forum/
lofiversion/index.php/t116505.html.
Forcing the installer to use your modifications
Having created the new installer, you now need to be able to use it.
Follow these steps to set up your installer:
Chapter 4: Installing to a Hard Disk with Windows Vista Already Installed
1.
85
Still using Terminal, type
mount
This command shows all the disks that are mounted on your Leopard computer as
shown in Figure 4.23.
Figure 4.23
Result of mount command
As you can see at the bottom of the window, the list of disks on my computer is:
dev/disk0s1: /Volumes/Win7
dev/disk0s2: /Volumes/TempPart
dev/disk0s3: /Volumes/Hackintosh
2.
In the list of disks shown by the mount command, look for one that is shown as
/Volumes/TempPart
In my case it is /dev/disk0s2
3.
Move up one level in the folder hierarchy by typing
cd /
In other words, move to the root of the disk.
4.
Now unmount the disk by typing
umount /Volumes/TempPart
CAUTION
Although the command is used to unmount the disk, it is written as umount: without the first “n”. Also, be careful of
spacing in the command.
86
Installing OS X 10.5
5.
Type
mount –t hfs /dev/disk0s2 /System/Installation/Packages
TIP
Remember to change the disk0s2 to whatever your TempPart disk is shown as.
This command remounts the disk, calling it /System/Installation/Packages
so that when the installer looks for the packages, it finds the one on your disk, rather
than the one on the install DVD.
6.
Close Terminal.
This returns you to the part of the installation where you choose the disk to install to.
7.
8.
Click the Back arrow to return to the Choose your Language screen.
Click the arrow to go through the copyright and licensing screens and then
choose your Hackintosh disk for the installation.
Note that your TempPart disk shows as a folder because you mounted the disk as /
System/Installation/Packages which is a folder. This is shown in Figure 4.24.
Figure 4.24
Installation options showing disks and folder
Chapter 4: Installing to a Hard Disk with Windows Vista Already Installed
87
CAUTION
Be very careful that you choose your Hackintosh disk, not your Vista or Windows 7 disk!
Specifying installation options
This section explains the Leopard installation options and how to select or deselect them. The
Leopard retail version doesn’t have many installation options. You have these options:
Printer drivers
Additional fonts
Language translations
X11, a Unix windowing system
Unless your specific printer is in the list, you need not install any printers because you can add
these later.
If you plan to always use English as your language, you can leave out the language translations.
You should include the additional fonts unless you are very short on hard disk space.
Figure 4.25 shows the customize options screen.
Figure 4.25
Customize options
88
Installing OS X 10.5
Follow these steps to select customize options:
Each small triangle beside a heading expands or contracts the list. If the individual box
is blue, it means that option is selected. If the heading box is blue, it means that all
options under that heading are selected.
1.
2.
Place a check in each option that you want to select.
Click Done to proceed to the actual installation.
Finally, you are ready to install Leopard. Figure 4.26 shows the Install Summary screen.
Figure 4.26
The Install Summary screen
3.
Click Install.
Leopard first wants to check your DVD. Because you’ve got this far with it and it’s the first time
you’ve used it, checking the DVD is probably pointless, so you can click the Skip button.
Figure 4.27 shows this stage of the installation.
Leopard is now being installed. Normally, it takes between 20 and 60 minutes, depending on
how fast your computer and disk drives are. The progress bar at the bottom of the screen gradually moves as the installation progresses, as shown in Figure 4.28.
Chapter 4: Installing to a Hard Disk with Windows Vista Already Installed
Figure 4.27
Checking the installation
Figure 4.28
Installing Leopard
89
90
Installing OS X 10.5
Occasionally, this display stops moving, but it shows how much more time the installation will
take, as shown in Figure 4.28. If this happens, wait until all CD and hard disk activity has stopped
for two or three minutes, and then restart your computer.
Otherwise, you eventually see the screen saying Leopard has been installed, as shown in Figure 4.29.
Figure 4.29
Installation succeeded
Restarting your computer
Now is the moment of truth! Will your computer restart?
Press the Reset button on your computer. If all has gone according to plan, you should see the
Darwin boot prompt, but this time with three choices, as shown in Figure 4.30.
Let’s not try the OS X partition for a moment; let’s try to start Vista or Windows 7.
1.
Select Windows NTFS at the Darwin boot loader screen.
What you probably see is the screen shown in Figure 4.31.
Don’t despair! You are prepared for this.
Chapter 4: Installing to a Hard Disk with Windows Vista Already Installed
91
Figure 4.30
Restart computer
Figure 4.31
Trying to restart Vista
It is because GPartEd has made changes to the boot sector of your hard disk and has wiped out
the boot loader. In the next section, you see how to restore your Vista installation to be able to
boot again.
Using the Downloaded Software to Restore
the Vista Partition
In this section, you use the Vista Recovery Disk to repair your boot sector and hence restore the
partition.
1.
2.
3.
Boot from the Vista Recovery Disk.
At the Install Windows screen, click Next.
Click Repair your computer.
92
Installing OS X 10.5
Wait while System Recovery Options determines your operating system. After that
step is complete, the recovery disk displays System Recovery Options, as shown in
Figure 4.32.
Figure 4.32
System Recovery Options
4.
5.
Click Startup Repair.
Click Next.
Wait while Vista attempts to repair your boot sector. When the repair is complete, reboot your
computer.
Ensuring That Vista Starts
Now comes the moment of truth! You should be able to boot normally into Vista and have your
computer working as it was before you began this.
If that does not happen, try the following things.
First, repeat the steps above, because occasionally more than one problem is preventing Vista
from starting, and another pass fixes that.
In my experience, the problem has always been repaired on the first pass.
If all else fails, read the instructions on the EasyBCD Web site at http://neosmart.net/
wiki/display/EBCD/Recovering+the+Vista+Bootloader+from+the+DVD.
Chapter 4: Installing to a Hard Disk with Windows Vista Already Installed
93
TIP
Don’t forget to donate to help keep the Web site going: It provides a great set of tools for people like you.
Second, if all else has failed, you have a recovery image of your disk so you can restore and start
again. In my experience, however, that has never been necessary. The issues have always been
resolved at least one step short of that!
Starting OS X
In this section, you start Leopard for the first time. For the first boot, I always recommend doing
a verbose boot, so you can see what is happening, and rebuilding the kext caches, just in case
the installer has not updated them. Follow these steps:
1.
2.
3.
Reboot your computer and press F8 when you see the Darwin boot prompt.
This time select hd(0,3) or whatever your Hackintosh shows as.
Type -v -f, and press Enter.
In a minute or two, you should see the Leopard welcome video. Otherwise, you go straight to
the Leopard desktop: With most distributions, this is the Aurora image.
If you fail to get through to the Leopard desktop, go to Chapter 6 for some troubleshooting
advice.
Using a Different Boot Loader
During the time I’ve been writing this book, the Hackintosh scene has developed rapidly. One
big development is the Chameleon boot loader. This is a graphical boot loader that automatically detects the disk drives connected to the computer and the operating systems installed on
them and then allows you to select which to boot from.
CAUTION
If you install the Chameleon boot loader you may not be able to return to the Vista or Windows 7 boot loader you set
up using EasyBCD unless you restore from your image backup and repair the Vista boot loader.
At the time of writing, the Chameleon 2 installer is at the Release Candidate 2 (RC2) version.
Although the files for RC3 are available, installing them is not as straightforward as using the
installer.
94
Installing OS X 10.5
Follow these steps to install the Chameleon boot loader:
1.
Navigate to http://chameleon.osx86.hu/ and scroll down the page to the
heading “Chameleon 2.0-RC2 is available …”.
2.
3.
4.
Click the link and then scroll down to the heading “Download information.”
Click the link Installer package and then click the link “here.”
Download the file and save it to your Leopard drive.
NOTE
If you can’t access the Internet from your Leopard computer, you can download the installer to your Windows computer and use a USB drive to install to your Leopard disk.
5.
Double-click the Chameleon-2.0-r431.pkg file.
Figure 4.33 shows the installer’s greeting screen.
Figure 4.33
Chameleon Installer screen
6.
7.
Click Continue until you get to the software license agreement screen.
Click Agree. At the next screen, click Install and then enter your password to confirm the install.
Chapter 4: Installing to a Hard Disk with Windows Vista Already Installed
8.
95
Wait while Chameleon is installed and then restart your computer.
Now you see a graphical boot screen that shows your Leopard install disk and your
Windows disks with a Windows symbol and a label NTFS. This is shown in Figure 4.34.
Figure 4.34
Chameleon boot loader screen
9.
From the boot screen, select the disk from which you want to boot.
Expanding Your Windows Partition
After you have installed Leopard, you no longer need the partition (TempPart) that you used to
modify Leopard. You can use GPartEd to first delete the partition and then expand the Windows
partition to use the extra space.
CAUTION
Don’t try to expand your Leopard partition because GPartEd cannot create an OS X partition that is recognized by
Leopard, and you will have to repeat the install.
96
Installing OS X 10.5
Summary
In this chapter, you backed up your Vista or Windows 7 installation and moved the files already
on the disk into a smaller area so that you could create a new partition. Then you booted your
Leopard installation disk and formatted the new partition to receive Leopard.
After booting from the Leopard installation disk you chose, you modified the Leopard installation and then installed it to your hard disk after choosing appropriate customizations. After
checking that Leopard and Vista or Windows 7 booted, you modified the boot loader to give
you a choice of starting either Vista or Leopard.
Installing to a Hard Disk
with Windows XP
Already Installed
C
hapters 2 and 3 walked you through installing OS X to a separate hard disk. The advantage of this method is that it isolates your Leopard disk from the rest of your system. The
drawback, though, is that to use Leopard you have to remember to
select your Leopard hard disk through the BIOS each time you start
your computer.
In this chapter, you learn how to install Leopard to a hard disk that
already contains a Windows XP installation.
First, you back up your XP installation in case of errors. Then you
create a new partition on your XP disk to allow OS X to be installed.
Next, you install a modified version of Leopard that installs to a
Windows disk.
After installing Leopard, you check that both operating systems
start correctly, and you install a boot loader so you can choose
which operating system to run at boot time.
Performing a Complete Image
Backup of Your XP Hard Disk
In this section, you completely back up your Windows XP installation so you can restore your system to where it was before you
started, in case anything goes wrong. This is essential disaster
insurance!
Most people back up their files using a file backup method. In a file
backup, your data is written to the backup medium file by file.
When you want to recover a file, you simply select it from the list
on the backup medium and copy it to where you want it.
An image backup is different from a file backup. An image backup
knows nothing about files: It simply copies every single bit of data
from the disk to the backup medium. In effect, the backup is like a
In This Chapter
Performing a complete
image backup of your XP
hard disk
Downloading software
required to start XP
and OS X
Partitioning the XP
system disk
Modifying your OS X
install disk
Choosing your boot
loader
98
Installing OS X 10.5
photographic snapshot of everything on your hard disk. An image backup backs up your files,
your programs, your preferences, and even your hard disk’s boot sector.
You can use a series of DVDs to do an image backup, but more likely you use an external
hard disk.
CAUTION
If you restore from an image backup, you restore the entire disk, not file by file. This is important because if your user
files have changed since you last did a complete image backup, they are overwritten by the old files when you restore.
Finding and downloading the software
First, you need to download and purchase image backup software. Table 5.1 shows a selection
of the best-known ones.
Table 5.1 Image Backup Software
Application
URL
Acronis True Image
www.acronis.com/
Norton Ghost
www.symantec.com/norton/ghost
Paragon Hard Disk Manager
www.paragon-software.com/home/hdm-personal/
O&O Disk Image 3
www.oo-software.com/home/en/products/oodiskimage/
index.html
Terabyte Image for Windows
www.terabyteunlimited.com/image-for-windows.htm
I use O&O Disk Image 3, but all of these work fine. In this chapter, the screen shots are
taken using O&O Disk Image 3.
Choose one of these programs, download it, and install it.
CAUTION
Be sure that you download the image backup software’s restore disk and burn it to a CD before you start. Without it,
you can’t restore your image to your computer.
My preference is always to test the backup software first, just to be certain that it’s going to rescue me if I make a mistake. And yes, I did manage to completely wipe my hard disk while writing this book. But I had two image backups to choose from.
Creating a disk image
You need to read the documentation that comes with the product you buy. Be sure to save
your backup to a disk other than your system disk!
Chapter 5: Installing to a Hard Disk with Windows XP Already Installed
99
In my case, I used O&O Disk Image, as shown in Figure 5.1.
Figure 5.1
O&O start screen
After you click Create and select the disk you want to image, O&O Disk Image asks where you
want to save the image, as shown in Figure 5.2.
Figure 5.2
Disk image creation screen
100
Installing OS X 10.5
In this case, I’m saving the image on a removable USB hard disk, which is Drive D:. Figure 5.3
shows the screen when O&O is partway through the imaging process.
Figure 5.3
Part of the imaging process
Restoring your system from the disk image
Should the worst happen and you erase your system disk or make it unusable in some way, you
need your recovery CD or DVD. In this example, I use the recovery disk for O&O Disk Image. The
software you chose to download will have a similar process.
Figure 5.4 shows the initial display when you boot from the O&O Disk Image CD.
In this case, I click Start to get O&O to the restore image screen, as shown in Figure 5.5.
For your imaging software, the details and screens will be different, but the basic principles are
exactly the same:
1.
2.
3.
4.
Boot from the recovery disk.
Select the backup you want to restore.
Select where you want to restore to.
Wait while it restores.
O&O then restores the image to the original disk.
Chapter 5: Installing to a Hard Disk with Windows XP Already Installed
Figure 5.4
O&O Disk Image greeting screen
Figure 5.5
Image to restore
101
102
Installing OS X 10.5
Downloading Required Software to Start
XP and OS X
In this section, you download three more items of essential software you need before you can
install OS X to your XP disk:
Software to partition your system disk
Software to modify the Windows XP boot loader
Downloading software to partition your XP
system disk
Windows XP has a built-in utility to partition disks called diskpart that is accessed through the
command prompt. Diskpart can be used to expand a partition, provided you have free space on
the disk. It also can be used to shrink a partition, but only under certain circumstances.
During normal operation of your computer, files are not written in a neat fashion to the same
area of the disk, but are scattered around the disk. This is done for performance reasons, but it
results in lots of blank areas on the disk. Consider a 120GB disk that has 60GB of free space. You
might expect that the so-called high water mark of the disk would be at 60GB, leaving the second half of the disk empty. But because of the way the files are written, the high water mark
might be at 110GB, leaving only 10GB of space at the end of the disk. In this case, diskpart could
shrink the partition only to 110GB.
What you need is software that can move the files into the same area of the disk and thus make
space for a larger partition.
Several programs are capable of doing this. Table 5.2 shows a selection of these.
Table 5.2 Partition Management Software
Application
URL
Acronis Partition Manager
www.acronis.com/
Partition Magic
www.symantec.com/norton/partitionmagic
Paragon Partition Manager
www.paragon-software.com/home/pm-personal/
These are all commercial software, but an excellent partition manager is free. GPartEd (pronounced
“gee part ed”) is available for download from http://gparted.sourceforge.net/.
GPartEd is supplied as a disk image (.iso file). You need to burn it to a CD and use it to boot
your computer. Several programs are capable of doing this (Nero Burning ROM, AShampoo
Burning Studio, Roxio Creator, and others), but my favorite is ImgBurn, available from
www.imgburn.com/.
Chapter 5: Installing to a Hard Disk with Windows XP Already Installed
103
If you already have commercial software, use that; otherwise, give ImgBurn a try. Follow these
steps:
1.
2.
Download GPartEd, and save it to your disk.
Use image-burning software to burn GPartEd to a CD.
Be sure to burn it as an image; don’t simply copy the iso file to the CD.
Downloading software to modify the XP boot loader
Windows XP uses a different boot loading method from Vista and Windows 7. The boot process
is controlled by a file called boot.ini. It is a simple text file.
On my computer, it contains the following:
[boot loader]
timeout=30
default=multi(0)disk(0)rdisk(0)partition(1)\WINDOWS
[operating systems]
multi(0)disk(0)rdisk(0)partition(1)\WINDOWS=”Microsoft Windows XP
Professional” /noexecute=optin /fastdetect
Note that you must enter the last two lines as a single line: the line is only broken because the
page in this book is not wide enough.
To be able to dual boot, you need to download a file called chain0 (that’s a zero, not the letter
O). You can find several different sources for this by searching Google. It is simply a file that tells
the boot loader where to find your Leopard partition.
You can find a download location for it at http://rs279.rapidshare.com/
files/118576025/Chain0_.rar or at TinyURL http://preview.tinyurl.com/
qr68u3.
After you’ve installed Leopard, we’ll look at how to use chain0 to allow dual booting.
CROSSREF
Appendix B contains more discussion of the boot process for a computer.
Partitioning the XP System Disk
You have downloaded all the software you might need, and you have done an image backup of
your hard drive, so now it’s time to tackle the hard stuff: partitioning your disk and installing
Leopard. In this section, you partition your hard disk.
104
Installing OS X 10.5
As standard, the retail Leopard installation does not install to a disk partitioned as MBR (Master
Boot Record). Instead it requires a disk partitioned as GPT (GUID Partition Table).
To install to an MBR disk you need to modify the installer. To do this, create an extra partition as
a temporary measure, copy the Leopard installer to that partition, and modify it. You then use
that partition to carry out the installation.
CROSSREF
Appendix B contains explanations of different disk partition types. In the screen shots, I use GPartEd and partition a
VMware drive. Details of your disk are, of course, different. Likewise, if you are using different partitioning software,
your screens look different.
Shrinking your existing partition
First, you need to shrink your existing partition to leave space for the new partition. Here’s how:
1.
Insert your GPartEd disk, and boot from it.
Figure 5.6 shows the startup screen from GPartEd.
Figure 5.6
GPartEd startup screen
2.
3.
Select GPartEd live CD.
Select the keyboard mapping you want.
If you want the U.S. keyboard mapping, simply press Enter.
4.
Select the language you want to use.
Chapter 5: Installing to a Hard Disk with Windows XP Already Installed
105
Press Enter for U.S. English.
After much threshing of the CD, you eventually arrive at the main screen for GPartEd,
as shown in Figure 5.7.
Figure 5.7
GPartEd main screen
The right side of the screen contains a drop-down box that allows you to select the
disk you want to work with. If you have a single disk drive, it has only one entry: /
dev/hda. If you have more than one disk, the others will be identified as /dev/hdb
and so on.
If your hard disk has two partitions, the first partition is identified as hda1, the second
as hda2.
Your boot disk is always listed as /dev/hda1. You can cross-check that it’s the correct
disk because it should have the disk label (XP, in this case) in the label column.
5.
Click in the part of the screen labeled /dev/hda1.
It becomes surrounded by a dotted green box, indicating it is the active partition.
6.
7.
Click Resize/Move.
In the pop-up window, move the right edge of the green box to the left until the
box labeled Free Space Following reads around 25GB or so.
If you have plenty of room on your disk, you can try larger partitions for Leopard, but
10GB is around the minimum you should use.
106
Installing OS X 10.5
Figure 5.8 shows the display after the partition has had the new size selected.
Figure 5.8
Select size for new partition
8.
Click Resize/Move.
To give you a second chance to be sure of what you are doing, GPartEd doesn’t
change the partition size immediately but gives you time to double-check.
CAUTION
Be sure to check and double-check exactly what you are asking GPartEd to do: A mistake here could lose data!
9.
Click Apply in the toolbar.
A dialog box, as shown in Figure 5.9, pops up asking you to confirm that you really do
want to resize the partition.
10.
Click Apply in the dialog box.
Resizing of the partition may take some time because GPartEd has to move all the data from the
part of the disk that no longer belongs to the partition.
Chapter 5: Installing to a Hard Disk with Windows XP Already Installed
107
Figure 5.9
Confirmation dialog box for resizing partition
Creating the new partitions
Creating the new partitions is a much quicker process than shrinking the existing partition.
Follow these steps:
1.
2.
Click in the gray area to the right of the shrunken partition.
In the toolbar, click New.
Enter 5GB as the partition size.
3.
4.
Ensure that the Primary Partition is selected for Create As.
Select hfs+ or FAT32 as the File System.
You can use either hfs+ or FAT32 because you will format the disk for Leopard during
installation.
5.
Enter a label for the disk.
I suggest you call it TempPart so that you can follow the instructions given later.
Figure 5.10 shows the result of these actions.
6.
7.
Click Add.
On the toolbar, click Apply.
108
Installing OS X 10.5
8.
In the dialog box, click Apply.
Now you need to create the partition to which you will install Leopard.
Figure 5.10
Creating a new partition for the temporary disk
9.
10.
Click in the remaining gray area to the right of the TempPart partition.
In the toolbar, click New.
Use the whole of the remaining disk space for your Leopard installation.
11.
12.
Ensure that the Primary Partition is selected for Create As.
Select hfs+ or FAT32 as the File System.
You can use either hfs+ or FAT32 because you will format the disk for Leopard during
installation.
13.
Enter a label for the disk.
Use whatever name you choose. I used Hackintosh as the name.
Creating the new partitions is quick because no data needs to be moved. The final outcome is shown in Figure 5.11.
14.
Finally, be sure that your XP partition is still marked as the boot partition.
If it is not, use GPartEd to flag it as the boot partition.
Now you have a disk with your Windows XP in the first partition and space to install Leopard in
the second partition.
Chapter 5: Installing to a Hard Disk with Windows XP Already Installed
109
Figure 5.11
New partitions created
Booting the Leopard Installer
In this section, you boot the Leopard retail DVD, ready to modify its installation parameters so
that you can install it on your Windows disk.
Finding a boot disk
Because it is not a Macintosh, your computer cannot boot from your Leopard retail DVD. To
install Leopard, you need to have your computer boot the way a real Macintosh does.
TIP
Many people have created boot disks for this purpose. In essence, they contain software that bridges the gap between
your hardware and what Leopard expects to find in a genuine Apple.
You can find a collection of boot disks for specific motherboards at www.insanelymac.com/
forum/lofiversion/index.php/t125438.html. Many thanks to MACinized for collecting them together in one place. If your exact motherboard is not listed, try one from the
same manufacturer.
Failing that, try one that sounds close. Remember, this is not an exact science!
NOTE
These boot disks are always supplied as an image file (.iso), which you need to burn to a CD. An image file is an exact
image of what is on a CD. Because it is a bootable image, when you burn it to CD, the CD is bootable.
110
Installing OS X 10.5
Creating your boot disk
You can’t simply copy the .iso to a CD because it ends up as a file sitting on a CD and you won’t
be able to boot your computer. Because the .iso file is an exact image of the CD, you need to
copy that image exactly to the CD.
CAUTION
Whatever CD/DVD-burning software you are using, be sure you use the option to burn an image. A very good, free program to burn CDs and DVDs is ImgBurn, available from www.imgburn.com/.
If you are using ImgBurn, follow these steps to burn your .iso file to your CD:
1.
2.
3.
4.
Start ImgBurn running.
5.
Check the Verify box to verify that the CD contains exactly the same data as the
image file.
6.
7.
Click the large button to start the burn process.
Insert a blank CD in your drive.
Click the “Write image file to disk” option.
Click the file finder icon (with the magnifying glass) and navigate to where your
.iso file is located.
Label your disk Leopard Boot.
Specifying the hard disk identifier
This section explains how to boot the Leopard retail DVD using your boot CD as an intermediary.
Booting from the Leopard retail DVD is a two-step process, unless you are using a Macintosh.
First, start the computer using the boot disk, and start the Leopard disk.
When your computer first starts, you see a screen that looks something like that shown in
Figure 5.12.
Follow these steps to boot your computer:
1.
2.
3.
Insert your boot disk in the CD/DVD drive.
Restart your computer.
Press the key required to change your boot device.
Usually F12 works, but not always.
4.
Select CD/DVD, and press Enter.
Chapter 5: Installing to a Hard Disk with Windows XP Already Installed
111
Figure 5.12
Boot menu
5.
Wait for the boot disk to start up and finish at a prompt.
You then see the screen shown in Figure 5.13, which is where you start the next stage
of the boot process.
Figure 5.13
Darwin boot screen
At this point, the boot disk is waiting for you to boot Darwin, the Unix operating system on which Leopard is based. Of course, Darwin itself is not on that disk; it is on your
Leopard retail DVD, so you need to tell it which disk that is and then swap disks.
6.
Press Esc.
Now the boot prompt changes to look like the screen shown in Figure 5.14.
Figure 5.14
Darwin boot selector
112
Installing OS X 10.5
In this case, the boot disk has identified the boot device as 9f, the decimal number 159 in
hexadecimal.
NOTE
If you want to convert hexadecimal to decimal and vice versa, use the calculator at http://easy
calculation.com/hex-converter.php.
Follow these steps to continue the boot process:
1.
2.
3.
Remove the boot disk from the CD drive.
Insert the Leopard retail DVD in the CD drive.
Wait a few seconds for the drive activity to stop, and press Enter.
You see a second Darwin prompt, with the correct disk specified in the brackets.
Specifying boot options
This section explains how to specify boot options for the Leopard retail DVD and the effect
of each.
At the boot prompt, you can type options that control the boot process. Table 5.3 lists the
options you can type at the Darwin boot prompt.
Table 5.3 Darwin Boot Options
Option
Meaning
-v
Verbose: all output is sent to the screen
-f
Rebuild the kext cache
-x
Safe mode: similar to Windows safe mode
-s
Single-user mode
CROSSREF
Appendix B contains explanations of various terms such as kext, kext cache, and so on.
At this point, don’t worry about specifying any options other than -v because the kext cache
can’t be rebuilt; it’s stored on the DVD, which can’t be overwritten. Safe mode and single-user
mode do not affect whether the disk boots.
1.
Type -v, and press Enter.
Chapter 5: Installing to a Hard Disk with Windows XP Already Installed
113
A few lines of text appear on the screen, and then it clears and switches to graphics mode. The
text continues down the screen.
At this point, the text looks like gibberish, but you should see one important line as highlighted
in Figure 5.15.
Figure 5.15
Verbose boot screen
You should look for a line starting BSD root: disk1s3. The numbers you see may be different, but when you see it, you know that Leopard is at least going to boot on your computer.
NOTE
BSD root is the disk from which Darwin boots the main operating system. If Darwin can’t identify it, then it can’t boot.
After you see that line, you should see more messages scroll up the screen. The boot process
takes quite a few minutes when you boot from the DVD. Be patient!
Finally, the screen goes blue and then black with the spinning beach ball in the top-left corner,
and you see the Leopard Aurora desktop. Hooray!
Figure 5.16 shows the Leopard Aurora desktop.
114
Installing OS X 10.5
Figure 5.16
Leopard Aurora desktop
Select the language you want to use to install Leopard and then pause at the next screen.
If you get stuck at a blank desktop, a blue desktop, or the spinning beach ball, turn to the troubleshooting section in Chapter 6.
Formatting your disks
Your computer is now running a bare-bones version of Leopard, running from the install DVD.
Note that it has the Apple menu bar at the top of the screen. You now need to format the disk
to which you want to install Leopard, as well as the temporary partition. To do that, you use
Disk Utility, as shown in Figure 5.17.
Follow these steps to format your disks in preparation for installing Leopard:
1.
2.
Click Utilities on the Apple menu bar.
Click Disk Utility.
Chapter 5: Installing to a Hard Disk with Windows XP Already Installed
115
Figure 5.17
Start Disk Utility
After some whirring from the DVD, Disk Utility starts up, showing you the disks connected to your computer. In this example, the only disk shown is a VMware virtual disk,
because I captured the screens using VMware. Your disk should show three partitions,
though the numbers on them may be different.
Select each partition in turn to be certain which is the new Hackintosh partition, which
is the temporary partition, and which is your existing Vista partition. Follow these steps
to format your disks:
CAUTION
Be very sure to select the correct partition: If you select the wrong one, you will erase your Vista or Windows 7
partition.
3.
4.
5.
Select Erase at the top of the Disk Utility window.
Select the small TempPart partition.
Select Mac OS Extended (Journaled) as the Volume Format.
116
Installing OS X 10.5
6.
Type the name for the partition.
Figure 5.18 shows the small temporary partition ready to be erased and formatted.
Figure 5.18
Ready to format TempPart using Disk Utility
7.
Click Erase.
Disk Utility then formats your disk ready for installation.
8.
9.
10.
Select the main Hackintosh partition.
Select Mac OS Extended (Journaled) as the Volume Format.
Type the name for the partition.
Why not call it Hackintosh?
At this point, Disk Utility should look something like that shown in Figure 5.19.
11.
12.
Click Erase.
When the erase has finished, click the red close icon in the Disk Utility window.
You now return to the disk install select screen, as shown in Figure 5.20.
This time, your newly formatted partitions show up.
Chapter 5: Installing to a Hard Disk with Windows XP Already Installed
Figure 5.19
Disk Utility ready to format Hackintosh partition
Figure 5.20
Select install disk
117
118
Installing OS X 10.5
Modifying Your Leopard Installer
To install to an MBR disk, you need to remove the code in the installer that checks that the disk
is formatted as GPT. As you would expect, while it sounds simple, you need to carry out a number of Unix commands and you need to get each one exactly right or it will not work.
For this method I am greatly indebted to Fredde87, llauqsd, and STLVNUB. The original article is
on the Insanely Mac Web site at www.insanelymac.com/forum/lofiversion/index.
php/t181287.html
CAUTION
Before you press Enter after entering each line of code, be sure to check your typing. If the command cannot be carried
out, you receive an error message. If the command works, all that happens is that you get the prompt again. It works
on the principle that no news is good news: If it didn’t fail, then it must have worked!
Follow these steps to modify your installer:
1.
From the Apple menu bar, select Utilities, and then Terminal.
This opens a terminal window as shown in Figure 5.21.
Figure 5.21
Terminal window in installer
2.
Type the following code:
cp –R /System/Installation/Packages/* /Volumes/TempPart
CAUTION
Be careful of spacing: there should be a space after cp, after –R and after *. Also be careful with capitalization as –r is
not the same as –R. Be patient; it takes a while to copy the files.
This command copies everything in the System/Installation/Packages folder to your
temporary partition.
Chapter 5: Installing to a Hard Disk with Windows XP Already Installed
3.
119
Type
cd /Volumes/TempPart
This changes your working directory to the TempPart disk.
4.
Type
mkdir temp
This creates a new folder called temp on your TempPart disk.
5.
Type
mv OSInstall.mpkg temp/
This copies the installer to your new temp folder.
6.
Type
cd temp
This changes your working directory to the temp folder.
7.
Type
xar –x –f OSInstall.mpkg
xar is an archiving program. In this case you are using it to extract the files from the
installer so that they can be modified.
8.
Type
cat Distribution | sed “s/eraseOptionAvailable=’true’//g”¬
> Distribution2
NOTE
The ¬ character is a line continuation character. You don’t type it in; it is just there to show you that everything in that
command should be on one line. Also, be careful of the single (‘) and double (“) quotes.
This is a classic Unix command and explains why so many people love using Unix. First,
cat reads everything in the file Distribution and writes it out to a new file
Distribution2. If the command was simply cat Distribution >
Distribution2 the two files would be identical.
But sed is a stream editor: it takes everything that is input to it, changes it, and writes
it back out. The s/…/…/g means substitute everything between the first /…/ with
whatever is in between the second /…/. The /g means globally.
So this compact command reads through everything in the file Distribution,
replaces every occurrence of eraseOptionAvailable=’true’ with a blank then
writes it out to a new file Distribution2.
9.
Type
mv Distribution2 Distribution
120
Installing OS X 10.5
This command copies the new Distribution2 to overwrite the Distribution file.
10.
Type
rm –Rf OSInstall.mpkg
This removes everything in the OSInstall.mpkg file.
11.
Type
xar –c –f OSInstall.mpkg *
This repacks everything into the OSInstall.mpkg file.
12.
Type
mv OSInstall.mpkg ../
This moves OSInstall.mpkg back into the top directory on the temporary disk.
13.
Type
cd ..
This moves your working directory back up to the top directory.
14.
Type
rm –Rf temp
This removes everything in the temp directory.
At this point your Terminal screen should look like the screen shown in Figure 5.22.
Figure 5.22
Terminal screen
Don’t close Terminal, as you require it again in the next part.
All the commands up to this point have been to create a modified Leopard installer. The
remaining part of the exercise is to have the installer use your modified installer, rather than the
one that is on the DVD.
If you have access to a Macintosh, you can create a new installation DVD with the modification,
but this way is much easier if you don’t have easy access to a Mac. If you want to create a
Chapter 5: Installing to a Hard Disk with Windows XP Already Installed
121
modified DVD using a Mac, follow llauqsd’s tutorial at www.insanelymac.com/forum/
lofiversion/index.php/t116505.html.
Forcing the installer to use your modifications
Having created the new installer, you now need to be able to use it.
Follow these steps to set up your installer:
1.
Still using Terminal, type
mount
This command shows all the disks that are mounted on your Leopard computer as
shown in Figure 5.23.
Figure 5.23
Result of mount command
As you can see at the bottom of the window, the list of disks on my computer is:
dev/disk0s1: /Volumes/XP
dev/disk0s2: /Volumes/TempPart
dev/disk0s3: /Volumes/Hackintosh
2.
In the list of disks shown by the mount command, look for one that is shown as /
Volumes/TempPart
In my case it is /dev/disk0s2
3.
Move up one level in the folder hierarchy by typing
cd /
In other words, move to the root of the disk.
4.
Now unmount the disk by typing
umount /Volumes/TempPart
122
Installing OS X 10.5
CAUTION
Although the command is used to unmount the disk, it is written as umount: without the first “n”. Also, be careful of
spacing in the command.
5.
Type
mount –t hfs /dev/disk0s2 /System/Installation/Packages
TIP
Remember to change the disk0s2 to whatever your TempPart disk is shown as.
This command remounts the disk, calling it /System/Installation/Packages
so that when the installer looks for the packages, it finds the one on your disk, rather
than the one on the install DVD.
6.
Close Terminal.
This returns you to the part of the installation where you choose the disk to install to.
7.
8.
Click the Back arrow to return to the Choose your Language screen.
Click the arrow to go through the copyright and licensing screens and then
choose your Hackintosh disk for the installation.
Note that your TempPart disk shows as a folder because you mounted the disk as /
System/Installation/Packages which is a folder. This is shown in Figure 5.24.
Figure 5.24
Installation options showing disks and folder
Chapter 5: Installing to a Hard Disk with Windows XP Already Installed
123
CAUTION
Be very careful that you choose your Hackintosh disk, not your Vista or Windows 7 disk!
Specifying installation options
This section explains the Leopard installation options and how to select or deselect them. The
Leopard retail version doesn’t have many installation options. You have these options:
Printer drivers
Additional fonts
Language translations
X11, a Unix windowing system
Unless your specific printer is in the list, you need not install any printers because you can add
these later.
If you plan to always use English as your language, you can leave out the language translations.
You should include the additional fonts, unless you are very short on hard disk space.
Figure 5.25 shows the customize options screen.
Figure 5.25
Customize options
124
Installing OS X 10.5
Follow these steps to select customize options:
Each small triangle beside a heading expands or contracts the list. If the individual box
is blue, it means that option is selected. If the heading box is blue, it means that all
options under that heading are selected.
1.
2.
Place a check mark in each option that you want to select.
Click Done to proceed to the actual installation.
Finally, you are ready to install Leopard. Figure 5.26 shows the Install Summary screen.
Figure 5.26
The Install Summary screen
3.
Click Install.
Leopard first wants to check your DVD. Because you’ve got this far with it and it’s the first time
you’ve used it, checking the DVD is probably pointless, so you can click the Skip button.
Figure 5.27 shows this stage of the installation.
Leopard is now being installed. Normally, it takes between 20 and 60 minutes, depending on
how fast your computer and disk drives are. The progress bar at the bottom of the screen gradually moves as the installation progresses, as shown in Figure 5.28.
Occasionally, this display stops moving, but it shows how much more time the installation will
take, as shown in Figure 5.28. If this happens, wait until all CD and hard disk activity has stopped
for two or three minutes, and then restart your computer.
Chapter 5: Installing to a Hard Disk with Windows XP Already Installed
125
Figure 5.27
Checking the installation
Figure 5.28
Installing Leopard
Otherwise, you eventually see the screen saying Leopard has been installed, as shown in
Figure 5.29.
126
Installing OS X 10.5
Figure 5.29
Installation succeeded
Restarting your computer
Now is the moment of truth! Will your computer restart?
Because Leopard was installed after your Windows installation, Darwin automatically becomes
the default boot loader. So when you restart, you should see the Darwin boot prompt, this time
with two choices, as shown in Figure 5.30.
Figure 5.30
Restart computer
Chapter 5: Installing to a Hard Disk with Windows XP Already Installed
127
NOTE
If your XP disk is formatted with FAT file system rather than NTFS, your first line will read FAT instead of
Windows NTFS.
Let’s not try the OS X partition for a moment; let’s try to start XP by selecting Windows NTFS at
the Darwin boot screen.
Windows XP should load normally. If it doesn’t, check Chapter 6.
Choosing Your Boot Loader
This section covers the three ways of dual booting either Windows XP or Leopard. These are
your choices:
Using the standard Darwin boot loader
Using the Windows XP boot loader
Using Chameleon, a graphical front end for the Darwin boot loader
Using the standard Darwin boot loader
If you are happy using the Darwin boot loader, you don’t need to change anything. However,
you must remember to press F8 each time you boot; otherwise, you cannot boot to XP. By
default, Darwin simply loads Leopard.
Using the Windows XP boot loader
Because Leopard was installed last, it has set itself as the boot partition, so it is the first to boot.
You need to change this, so the XP partition is restored as the boot partition. To do this, you
need to do two things: Reset the boot partition, and install chain0.
Resetting XP as the boot partition
In order to return XP to being the boot partition, you need to restart your partition editor. In this
case, we use GPartEd.
1.
Boot from the GPartEd CD.
Note that installing Leopard has set your Leopard partition to the boot partition. You
need to set the boot partition to your XP partition.
2.
3.
Right-click the first (XP) partition.
Select Manage Flags.
128
Installing OS X 10.5
4.
5.
Select Boot.
Click Close.
Installing chain0
Now that you have set XP as the boot partition, you need to tell it how to find the Leopard partition. This requires editing your boot.ini file. Follow these steps to install chain0:
1.
Use Notepad to open the file boot.ini.
It is located in the root folder (C:\) on your XP partition. You may need to open
Windows Explorer change directory to the C:\ folder. You may need to set folder
options to show hidden files:
2.
Select Tools ➪ Folder Options ➪ View, and check Show Hidden Files and Folders.
This is shown in Figure 5.31.
Figure 5.31
Show hidden files and folders
3.
Select the C: drive in Explorer.
Windows XP tries to prevent you from messing with any of its system files, so by
default it doesn’t allow you to list the files on the system drive, as shown in Figure 5.32.
4.
5.
Click Show the contents of this folder.
Copy the file chain0 to C:\.
Chapter 5: Installing to a Hard Disk with Windows XP Already Installed
Figure 5.32
These files are hidden
Editing boot.ini
In the C:\ folder, you also find the file boot.ini, as shown in Figure 5.33.
Figure 5.33
Explorer showing boot.ini
129
130
Installing OS X 10.5
1.
Open boot.ini using Notepad.
Figure 5.34 shows the normal content of boot.ini.
Figure 5.34
Content of boot.ini
2.
At the end of the file, add the line:
C:\chain0 “Leopard”
3.
4.
5.
Save boot.ini.
Shut down XP.
Restart your computer.
This time you should boot to a screen that gives you two choices to boot: One is for Leopard,
the other for Windows XP. If the timeout is too long for you (the default is 30 seconds), you can
change it by editing this line in boot.ini:
timeout=30
Using the Chameleon boot loader
A third boot loader you might want to use is the Chameleon v2 graphical boot loader. This is
available from http://chameleon.osx86.hu/static/some-words-aboutdonation?ref=file_download/22/Chameleon-2.0-r431.pkg.zip.
To save you typing that long URL, I created a TinyURL to make it easier. This is http://
tinyurl.com/o97up5.
Chapter 5: Installing to a Hard Disk with Windows XP Already Installed
1.
2.
3.
4.
5.
6.
131
Boot into Leopard.
Download the file, saving it to your Leopard Downloads folder.
Double-click the download to extract the package from the zip file
Double-click the package file to install the boot loader.
Shut down Leopard.
Reboot your computer.
This time, instead of the regular Darwin boot loader, you see a new graphic screen, as shown in
Figure 5.35.
Figure 5.35
Chameleon 2 graphical boot loader
Your XP and Leopard disks are both shown: Your XP disk is titled Windows NTFS or FAT, and
your Leopard disk has whatever name you gave it when you installed.
132
Installing OS X 10.5
Use the arrow keys to change the selection from one to the other. If you want to enter startup
options, simply type the options. The options you enter, such as -v, are shown on the screen.
Press Enter in the usual way to start the boot process.
If you do not enter any boot options, you see the usual graphics screen, slightly modified with a
shiny Apple logo and the usual clock timer, as shown in Figure 5.36.
Figure 5.36
Leopard boot screen
Summary
In this chapter, you backed up your XP disk and created space on it to fit a Leopard installation.
After you installed Leopard, you installed a boot loader to allow you to select either operating
system at boot time.
Troubleshooting
Your Installation
R
emember, Leopard was never designed to run on your computer, unless you have a genuine Apple Macintosh, so it
rarely installs without a hiccough. Most computers will run
Leopard to some extent; the most common issues are with video,
sound, and wireless networking.
In this chapter, you find some hints on getting your Leopard installation to work, including things to try in order to get the install DVD
to start and to get your Leopard installation to start.
If you decide it’s too hard, you can find out how to restore your
computer to the state it was in before you started.
Finally, I provide a method to change the Leopard boot parameters
so you don’t have to see the Darwin boot prompt each time you
start Leopard.
Booting from the Install DVD
If you can’t get the Leopard install DVD to start up, you are not
going to get much further! In this section, you find some hints on
how to at least get to the first Leopard installation screen where
you select your installation language.
Starting the retail Leopard DVD
When you install the retail version of Leopard, you first boot from a
special boot CD, generally the Kabyl-Bumby. The function of the
boot CD is to get the Leopard install DVD to install the way it does on
a real Macintosh. When this goes wrong, the result is a kernel panic.
Recovering from a kernel panic
In Macintosh OS X parlance, a kernel panic is the name given to an
error that is completely unrecoverable, much like the infamous
Blue Screen of Death (BSOD) of Windows.
Almost invariably the cause of a kernel panic is an inconsistency
between your hardware and what the system is trying to do. For
example, if you try to install retail Leopard on an AMD computer, it
always panics.
In This Chapter
Booting from the
install DVD
Booting Leopard
Restoring your computer
from your backup
Reinstalling with
different parameters
Restoring your XP
boot loader
Modifying the Apple
Property Lists to specify
future boot parameters
134
Installing OS X 10.5
Kernel panics have many different causes, but the end result is the same: Your computer just stops.
One thing you can try is rebooting. It sounds strange, but sometimes a panic occurs the first
time, but not subsequently.
If you consistently get a kernel panic, you should use a different boot disk. Many are available,
each for a different combination of motherboard and other hardware.
One place to look is www.insanelymac.com/forum/index.php?showtopic=114834
&start=0&p=934112&#entry934112, which has boot disks for many different motherboards, thanks to a user called sonotone who collected them together.
I created a TinyURL (at http://tinyurl.com), http://tinyurl.com/r49hnx, to make
finding them easier.
Start reading from under the dotted line (- - - -). If you find your own motherboard or computer
listed there, download the file (which is most likely a .zip file), unzip it, burn it to a CD, and use it
to start your computer.
If you can’t find your exact computer or motherboard, try using one that is close.
Recovering from the “Still waiting for boot disk” error
“Still waiting for boot disk” means, obviously, that the Darwin boot loader can’t find the disk it
should boot from, even though it’s sitting in the CD/DVD drive!
If you have a single hard disk, it is identified as disk0 as far as Darwin is concerned and your CD/
DVD drive is disk1. If you have two hard disks, the second hard disk will be disk1 (disks are
always counted starting from zero) and your CD/DVD drive is disk2.
At the Darwin prompt, as well as typing -v, you should also type the number of the CD/DVD
drive, along with the partition number. (Partitions are always numbered starting with 1. Why?
Who knows! They just are!)
So if you have a single hard disk, at the Darwin prompt, type -v rd=disk1s1 and press Enter.
With luck, your CD/DVD then boots.
If your disk is formatted as GPT and not MBR, try disk1s2. This is because GPT creates a hidden 200MB partition as the first partition (disk1s1); Leopard is installed to the second partition,
disk1s2.
Modifying your computer hardware
CAUTION
Modifying your computer hardware requires that you open your computer’s system box, which may void your warranty. Unless you feel confident in doing this, don’t!
Chapter 6: Troubleshooting Your Installation
135
Sometimes, the “Still waiting for boot device” error means the CD/DVD drive is not configured
correctly.
CD/DVD drives (and hard disks) can be configured as Master or Slave. If you have a single CD/
DVD drive, it should be configured as a master. If you have two, one should be a master, the
other a slave. The reason for this is that the boot order for disks is master first, then slave. If you
have no master (in other words, your drive is configured as a slave), then the system becomes
confused and waits forever for a boot disk.
Each drive has a small panel on the back, alongside the power and data cable connections, that
allows you to select either master or slave for that drive.
Figure 6.1 shows the rear view of a CD/DVD drive with the jumper block, power connector, and
data connector.
Figure 6.1
Master-slave configuration
Rear view of CD drive showing jumpers
Data
connector
Jumper
block
Power
connector
Master
Cable select
Slave (no jumper)
Position jumper over pins as shown
On the top surface of the drive, you find a diagram showing which pins are which. In this case, the
drive is configured as a slave because there is no jumper. To configure it as a master, you need to
place the jumper over the left-most pair of pins. You should use a pair of tweezers to do this.
CAUTION
Remember that opening your computer and making changes may void your warranty.
136
Installing OS X 10.5
Enabling AHCI
One possibility that night prevent your retail install DVD from finding the correct disk drive to
boot from is not having AHCI enabled, particularly if you are installing to a system using
Windows XP.
AHCI stands for Advanced Host Controller Interface. You can find more information about this
topic in Appendix B. If your computer uses Serial ATA (SATA) disk drives, it likely implements
AHCI in the BIOS.
System Information for Windows will tell you whether you are using SATA disk drives. Figure 6.2
shows the SIW display for my computer.
Figure 6.2
SIW showing SATA drives
If you are running Windows XP, you probably don’t use AHCI because XP requires special disk
driver software that most computer manufacturers don’t supply. If you are running Windows 7
or Vista, you may or may not have AHCI enabled. Both Vista and Windows 7 install either with or
without AHCI. However, if it was installed with AHCI disabled, it can’t be used after AHCI is
enabled; it will crash with a blue screen error.
Leopard usually installs on an AHCI system if SATA drives are present.
To turn AHCI on, you need to go into your BIOS. In my BIOS, AHCI is under a top-level heading
called Integrated Peripherals. I have these choices: Disabled, AHCI, and RAID.
Use whatever key you need to press to enter your BIOS. Search under various headings until
you find one with a choice of AHCI. Enable AHCI and reboot.
Chapter 6: Troubleshooting Your Installation
137
You cannot run Windows XP with this setting; if Vista or Windows 7 was installed on a non-AHCI
system, you cannot run them either. But Leopard is likely to install.
To switch between the two operating systems, you need to either enable or disable AHCI in the
BIOS before trying to boot. Enable for Leopard; disable for Windows.
This is summarized in Table 6.1.
Table 6.1 Effect of AHCI on Dual Boot
Computer
Configuration
Installed Operating
System
AHCI Status
Outcome
Parallel ATA drives only
Windows XP, Vista, or 7
installed
Ensure jumper is set to
Master
Should boot to Leopard or a Windows
operating system
Serial ATA drives
Windows XP installed
Need to enable AHCI in
BIOS to install Leopard
Leopard boots with AHCI enabled; XP
boots with AHCI disabled
Serial ATA drives
Windows Vista or 7
installed
Need to enable AHCI in
BIOS to install Leopard
If AHCI was enabled when Vista or 7
was installed, can boot to Leopard or
Windows; otherwise need to enable
to boot Leopard
Trying another boot disk
Sometimes the DVD boots fine until it gets to the graphics screens, where it hangs with a screen
that is blue all over, gray all over, or black. In most cases, you can move the cursor, but nothing
more happens. In some cases, you also have the “Spinning Beach Ball of Death” or SBOD.
In almost every case, this occurs because the kexts that were installed from your boot disk are
not correct.
In this case, the only thing to do is to try another boot disk. One good place to start looking is
the list compiled by sonotone at http://tinyurl.com/ r49hnx.
CAUTION
As always, be careful that you don’t go over any download limits set by your ISP.
Starting a modified installation DVD
The above information applies to starting a modified installation DVD. These are the most likely
errors:
A kernel panic
Can’t find the boot device
Hangs at some point with no progress at all
138
Installing OS X 10.5
Recovering from a kernel panic
Restart your computer, and see whether the kernel panic occurs again. If it happens consistently, try specifying your boot disk CD/DVD drive using the rd=diskXsY boot option. If you
have only one hard disk, your CD/DVD drive most likely is disk1; try rd=disk1s1 and then try
rd=disk1s2.
If you have two hard disks, your CD/DVD drive most likely is disk2. So try rd=disk2s1 and
then rd=disk2s2.
Recovering from the “Still waiting for boot disk” error
“Still waiting for boot disk” means, obviously, that the Darwin boot loader can’t find the disk it
should boot from, even though it’s sitting in the CD/DVD drive!
One of the solutions in the kernel panic section should help here.
Modifying your computer hardware
CAUTION
This requires that you open your computer’s system box, which may void your warranty. Unless you feel confident in
doing this, don’t!
Sometimes, the “Still waiting for boot device” error means that the CD/DVD drive is not configured correctly. See the section “Starting the retail Leopard DVD” earlier in this chapter for help
on changing the configuration of your CD/DVD drive.
Enabling AHCI
One possibility that might prevent your install DVD from finding the correct disk drive to boot
from is not having AHCI enabled, particularly if you are installing to a system using Windows XP.
Follow the instructions in the preceding section on enabling AHCI in your BIOS.
CAUTION
Remember that these are large files and may take you over any download limits imposed by your ISP.
Booting Leopard
So you’ve installed Leopard to your computer, but you can’t get it running from the disk you
installed to. Here are a few ideas to help you get it going.
Chapter 6: Troubleshooting Your Installation
139
Dealing with a kernel panic
If you have a kernel panic when starting up your installed Leopard, it is almost certainly
because, when installing, you selected an option that is not compatible with your system.
As always, try rebooting: Sometimes a problem happens only on the first boot.
If it happens again, the only way out is to reinstall, making a note of the options you choose.
Identifying exactly what caused the kernel panic is difficult because, during the boot process,
the boot loader starts several processes in rapid succession and several seconds could pass
before the error appears on the screen, mixed in with result output from successful processes.
TIP
As always, less is more: Choose the minimum number of install options.
Dealing with the “Still waiting for boot disk” error
Normally this does not occur. If it does, you need to supply the appropriate “rd=diskXsY”
parameter on the boot loader startup.
If you have installed to your first hard disk (for example, if you are intending to dual boot with
Windows XP or Vista), you need to supply rd=disk0s2, assuming your primary partition on
disk 0 is your Windows partition and Leopard is on the second partition.
If you have installed Leopard to its own disk, then it is disk1 or disk2, depending on how many
other disks you have.
If you have installed to a USB drive, that is normally seen as disk0 because you have used the
BIOS to set it as the boot disk.
It’s a bit of a pain to have to tell Leopard where to boot from each time you do it, so later in this
chapter you find a way to make the change permanent.
Dealing with the “Spinning Beach Ball of Death”
It is hugely frustrating to have Leopard get to the point where it’s almost running, but not quite.
Almost certainly this happens because you don’t have the correct video kexts loaded.
If you can’t find kexts for your exact graphics setup on the installation DVD, do not select any
kexts at all. This usually allows you to get to the basic 1024 by 768 graphics screen.
Dealing with no welcome video
If you fail to see the Leopard welcome video, but you have normal graphics on screen, it means
that your graphics setup is not capable of supporting Quartz Extreme/Core Image (QE/CI),
which is similar to DirectX on a computer running Windows.
140
Installing OS X 10.5
This means Leopard cannot use the hardware acceleration built into your video setup. This
comes about for one of two reasons:
You don’t have the correct kext for your video setup.
Your video setup uses part of your main memory, rather than having its own memory
built in.
If your issue is the former, then you may be able to find the right kext by searching through the
various forums. A list of forums is given in Appendix B.
As an example, if your video card is an nVidia 7600GT, search Google for osx86 nvidia
7600gt kext. You should be able to find an appropriate kext for your card.
Booting using safe mode
Just like Windows, Leopard provides a safe mode for booting. Safe mode does a disk check and
then loads essential kexts, removes all font caches, disables all startup and login items, and
removes the shared cache.
Booting into safe mode takes longer than usual because of the disk check. After you are running
in safe mode, you may not have a network connection and your screen most likely runs in 1024
by 768 mode. This should get you through to a Leopard screen when all else has failed!
To start in safe mode, press F8 at the Darwin boot loader screen and type -x. I prefer to see
what is happening during the boot, so I always use -v -x to set verbose mode as well.
After you have a Leopard screen, you can locate and install kexts to allow you to take full advantage of Leopard graphics.
Installing a kext using kexthelper
If your installation disk did not have an option to install your exact video system, then you may
be able to find a kext online and install that.
To install a kext, the easiest way is to use an application called kexthelper b7. You can download
this from http://cheetha.net/. You can download it to your Leopard disk or your
Windows disk, provided that is available in your Leopard installation.
CAUTION
If you download any zip or dmg files to your Windows disk, don’t try to open them in Windows because they contain
components that are not visible to Windows.
After you have downloaded kexthelper, double-click the .zip file and place it in your
Applications folder. Then, having downloaded your kexts, place them on your desktop.
Double-click kexthelper and drag the kexts you want to install into the main window of kexthelper; then enter your password into the Password box shown in Figure 6.3.
Chapter 6: Troubleshooting Your Installation
141
Figure 6.3
Kexts in Kexthelper window
When you click Easy Install, kexthelper installs the kexts. Normally, after using kexthelper, you
reboot, but if you’ve installed a graphics kext, it is essential that you reboot.
Installing injector strings using UInstaller
One final possibility to try is UInstaller, created by a Hackintosh genius called pcwiz. You can
download it from his site at http://pcwizcomputer.com/.
1.
2.
Click Downloads.
Click [Mac OSx86] Universal OSx86 Installer.
Then just after the bullet points, you see a link to Download Universal OSx86 Installer
here (2.0MB).
3.
Click “here.”
You can download it to either your Windows or Leopard disk.
4.
5.
Place the .zip file on your Leopard desktop, and double-click it.
After the file is unzipped, open the folder and double-click UInstaller.
On the main screen of UInstaller, you find an option to select your video card, as
shown in Figure 6.4a.
UInstaller has several other options, but in this case all you’re looking for is the video
card you have.
6.
Click the drop-down box beside Apply EFI String for video card, and select your
video card, if it is listed.
Figure 6.4b shows a selection of the video cards available.
CAUTION
If your exact video card is not listed, don’t select anything. Remember that this video card selection goes into the EFI
(see Appendix B) and must exactly match your actual video card.
142
Installing OS X 10.5
Figure 6.4
UInstaller main screen (a); UInstaller video cards (b)
a
7.
8.
b
If you do find your video card, click the check box and then click Install.
Reboot your computer.
This should give you the correct video card kext and your video should work correctly.
Finding correct video kexts
Another possibility is to search for kexts for your video chip. Use a Google search string like
“osx86 ati radeon 1150” if your video card is an ATI Radeon 1150.
At the very least you find other users with the same video chip looking for the same thing you
are. You may find the correct kexts, or a work-around.
Changing your video card
While this is possibly a little extreme, if you really want to use Leopard and you are not afraid to
open your computer, you can buy a new video card for which you know there are kexts available.
Appendix B has a table that lists the graphics chips used in most Macintosh computers. If you
choose a chip type that has been used in a Mac, you can then search for a card that uses that
chip, or one very similar.
Chapter 6: Troubleshooting Your Installation
143
Restoring Your Computer from
Your Backup
In this section, you learn how to restore your hard disk using the disk image backup you made if
you tried installing Leopard on your Windows 7, XP, or Vista disk.
Using the Vista Backup and Restore utility
If you used the Windows 7 or Vista Backup and Restore utility to back up your hard disk, you need
to boot from your Vista (or Windows 7) install disk or the Vista (or Windows 7) recovery disk.
1.
2.
3.
Insert the install disk or recovery disk in your CD/DVD drive.
Restart your computer, and select to boot from the CD/DVD.
Click Repair Your Computer.
This is shown in Figure 6.5a.
After searching for backups on your computer, the recovery disk comes to a selection
screen as shown in Figure 6.5b.
Figure 6.5
The Repair your computer option (a); the System Recovery Options dialog box (b)
a
4.
Select Windows Complete PC Restore.
b
144
Installing OS X 10.5
Wait while Windows restores your computer to the point it was when you started installing
Leopard.
Using other backup and restore programs
You need the restore disk for the program you used to back up your system.
Insert the restore CD or DVD in your drive, and boot from it. Then follow the instructions to
restore your computer.
Reinstalling with Different Parameters
Assuming that none of the other troubleshooting hints fixed your installation, the only thing to
do is to reinstall using different parameters.
If installing with different parameters does not work, you can try another distribution.
CAUTION
As always, remember that the files are large and may push you over your monthly download quota.
Restoring Your XP Boot Loader
So the worst has happened: You can’t boot Windows XP after installing Leopard.
Windows XP contains a Recovery Console to allow for just such a contingency. You need your
XP install CD to be able to use it.
1.
2.
Insert your Windows XP installation CD.
Boot your computer from the CD.
After loading required files, the boot process stops with a screen asking if you want to
exit, continue to install XP, or enter the Recovery Console. Figure 6.6 shows the selection screen.
3.
Type R to enter the Recovery Console.
Figure 6.7 shows the main Recovery Console screen.
Chapter 6: Troubleshooting Your Installation
145
Figure 6.6
Enter Recovery Console screen
Figure 6.7
Recovery Console
You should see only one Windows installation listed, with the number 1.
4.
At the prompt, type 1 and press Enter.
You need to supply an administrator password if you set one up when you originally
installed XP.
5.
Enter the password if prompted.
Recovery Console is not a graphical utility: It has a command line and requires you to
type various commands. In this case, you need to use only a couple of the commands,
but if you want to view all the commands, you can type Help at any time.
First you need to repair the Master Boot Record of your Windows disk.
6.
7.
Change the current directory to C:\ by typing cd \.
Type fixmbr, and press Enter.
146
Installing OS X 10.5
8.
Confirm that you want to fix the Master Boot Record, and wait while Recovery
Console rewrites the MBR.
You should also restore the XP boot loader files using Recovery Console. In these steps,
I assume that your CD drive is the D: drive. If it is not, substitute your drive letter for d
in the following commands.
9.
10.
11.
12.
Type copy d:\i386\ntldr, and press Enter.
Respond with y at the prompt.
Type copy d:\i386\ntldr, and press Enter.
Respond with y at the prompt.
Your XP boot sector and files should now be repaired and able to boot.
Modifying the Apple Property Lists to
Specify Future Boot Parameters
In this section, you learn how to make Leopard boot with the same parameters each time, so
you no longer need to type parameters into the boot loader.
Specifying boot parameters to the Darwin boot loader
In many cases, particularly when your video card is an exact match for the kexts you installed,
Leopard boots and correctly identifies the maximum resolution of your screen. In some cases, however, that is not the case. In those cases, you can boot Leopard and tell it what resolution to use.
At the Darwin boot prompt, you type “Graphics Mode”=”1920x1080x32”.
You must include the quotes. This tells Leopard to start up with a screen resolution of 1920 x
1080 with 32-bit color.
Making the changes permanent
Needless to say, typing this each time you start Leopard is a little inconvenient. The way to
avoid this is to edit the file that controls the boot parameters.
Locating the boot parameters file
This file is called com.apple.Boot.plist, and it resides in the /Library/
Preferences/SystemConfiguration folder, as shown in Figure 6.8.
A .plist file is a property list file and is a text file of XML commands. Apple has its own document
type definition (dtd), which defines what content a property list has.
Chapter 6: Troubleshooting Your Installation
147
Figure 6.8
Boot.plist folder
1.
Using Finder, navigate to /Library/Preferences/SystemConfiguration.
Opening the boot parameters file
1.
Double-click the file com.apple.Boot.plist to open it in TextEdit, as shown
in Figure 6.9.
Figure 6.9
Boot.plist file open in TextEdit
148
Installing OS X 10.5
2.
In the File menu for TextEdit, select Save.
Saving the boot parameters file
First you need to save the file to your desktop because you don’t have permission to save the
file to the SystemConfiguration folder. Figure 6.10a shows the dialog box to save the file to your
desktop. Follow these steps:
1.
2.
3.
4.
In the Where: drop-down menu, select Desktop.
Add the extension .plist to the file; otherwise, it is saved as a .txt file.
Uncheck the box labeled If no extension is provided, use “.txt”.
Click Save.
TIP
Unlike Windows, capitalization is important in Leopard because it is based on a Unix platform. The files com.apple.
Boot.plist and com.apple.boot.plist are different files. Never change the capitalization of
system files.
If you accidentally try to save the file to the SystemConfiguration folder, you get an
error message, as shown in Figure 6.10b.
Figure 6.10
Save Boot.plist file to desktop (a); insufficient privileges to save file (b)
a
b
Editing the boot parameters file
Follow these steps to edit the boot parameters file:
1.
2.
3.
4.
Using TextEdit, move down to the start of the line </dict>.
Press enter to insert a new line and move back up to the blank line.
Insert a Tab character, and <key>Graphics Mode</key>.
On the next line, insert another Tab, and <string>1920x1080x32</string>.
Be sure to get the spelling and punctuation exactly as shown in Figure 6.11.
Chapter 6: Troubleshooting Your Installation
149
Figure 6.11
Inserting text using TextEdit
5.
6.
Save the file (File ➪ Save).
Quit TextEdit (TextEdit menu ➪ Quit).
Replacing the old boot parameters file
Follow these steps to replace the old boot parameters file:
1.
2.
Reopen the SystemConfiguration folder.
Drag the file com.apple.Boot.plist from your desktop to place it in the
folder.
Leopard gives you an error message, basically informing you that you don’t have
enough privileges to add the file to the folder, as shown in Figure 6.12a.
3.
Click Authenticate.
You receive another message asking if you want to replace the old file with the new
one, as shown in Figure 6.12b.
Figure 6.12
Insufficient privileges message (a); replace old file (b)
a
b
150
Installing OS X 10.5
Of course you want to replace the old file!
4.
Click Replace.
Now Leopard wants to be sure you can supply enough credentials to give you the privilege to
replace the file, so it asks for your username and password, as shown in Figure 6.13.
Figure 6.13
Username and password prompt
Finally Leopard replaces the file. This may all seem a little inconvenient, but it’s actually a good
thing. Files such as this are critical to the way Leopard works, so making a mistake can all too
easily render your installation completely unusable.
Fixing file permissions
Leopard is very fussy about file permissions. The permissions attached to a file define who has
permission (or privilege) to do what with the file. You can find a more extensive discussion of
file permissions in Appendix B.
Finding file permissions
Leopard provides a simple way to find file permissions, as shown in Figure 6.14a.
This shows the permissions for the file: peterbaldwin has read and write permission; admin
group has read-only permission, and the everyone group also has read-only permission.
Compare these permissions with those of another file in the same folder. Figure 6.14b shows
the file permissions for com.apple.network.identification.plist, which is System
read and write; wheel read-only; everyone read-only.
Leopard is very fussy about file permissions for system files; unless they are set exactly correctly,
Leopard assumes that they have been tampered with and doesn’t use them.
Chapter 6: Troubleshooting Your Installation
151
Figure 6.14
File permissions for Boot.plist (a); file permissions for
network.identification.plist file (b)
a
b
Using the file permissions database
Fortunately, Leopard contains a database of every system file and the correct permissions. It
also provides a repair utility called Disk Utility that is capable of setting them all back to their
correct values.
You can start an application in Leopard in several ways. In this case, we use Spotlight to search
for the file. Figure 6.15 shows a Spotlight search window for Disk Utility.
Figure 6.15
Spotlight search window for
Disk Utility
152
Installing OS X 10.5
You can type only part of the application name, and Spotlight provides a list of possible
matches. In this case, the file we want is the Top Hit.
1.
2.
3.
Click the Spotlight search magnifying glass on the top right of the screen.
Begin typing “disk utility” into the search box until you find Disk Utility listed.
Press Enter.
This starts Disk Utility, as shown in Figure 6.16.
Figure 6.16
Disk Utility
4.
Click Repair Disk Permissions.
Disk Utility starts reading the permissions database, as shown in Figure 6.17.
As the screen says, it can take some time—up to five minutes in some cases. Finally it
completes, and Disk Utility shows the files for which it has changed permissions, as
shown in Figure 6.18.
Chapter 6: Troubleshooting Your Installation
Figure 6.17
Disk Utility reading disk permissions database
Figure 6.18
Disk Utility file permissions changes
153
154
Installing OS X 10.5
In this case, the changes made to Boot.plist are shown highlighted.
5.
6.
Close Disk Utility.
Use Get Info for com.apple.Boot.plist to see the permissions as they are
now set, as shown in Figure 6.19.
Figure 6.19
File permissions for
com.apple.Boot.
plist
Testing the changes
Now comes the acid test! Does the changed Boot.plist file affect the graphics resolution?
1.
2.
Restart your computer.
Boot from the correct disk by either using the boot manager or selecting the disk
in the BIOS.
If all has gone to plan, Leopard should start up in whatever resolution you have specified in the
Boot.plist.
Chapter 6: Troubleshooting Your Installation
155
You may think that Leopard has ignored the graphics mode instructions in the file and has
started in the basic 1024 x 768 mode. In this case, Leopard has not ignored the instruction,
assuming you typed it correctly. It means, simply, that your graphics card is not capable of any
other resolution at boot time.
Even though you can get different resolutions in Windows, you may not automatically get
those same resolutions in Leopard. So much depends on your hardware and having the correct
kexts.
Changing other parameters
You can change some other parameters in Boot.plist.
Changing the boot timeout
One of the parameters in Boot.plist is the boot timeout. This is the length of time Darwin
waits at the boot prompt for a key press, before going on with the boot. Most distributions set
this to five seconds, but you can make it any length you like, including zero.
1.
2.
3.
Open com.apple.Boot.plist with TextEdit as you did before.
Save the file to the desktop.
Look for the line <key>Timeout</key>.
On the next line is the number of seconds to pause, in this case:
</string>5</string>
4.
5.
6.
7.
8.
Change the number to whatever you choose, and save the file.
Drag the file from the desktop into the SystemConfiguration folder.
Authenticate yourself.
Rerun Disk Utility to reset the file permissions.
Restart and verify that the timeout has changed.
Getting Darwin to boot from a particular hard disk
This is useful if you need to specify the boot disk in the form of rd=disk0s2 each time you boot.
Add two new lines to Boot.plist:
<key>Kernel Flags</key>
<string>rd=disk0s2</string>
Of course, replace the 0 and the 2 in the above to whatever you need.
156
Installing OS X 10.5
Removing the Darwin boot prompt
If you don’t want to see the Darwin boot prompt at all, add the following lines:
<key>Quiet Boot</key>
<string>Yes</string>
If, at some time in the future, you need to return to a Darwin prompt, press F8 quickly at
boot time.
Seeing only a graphic boot screen
If you want your Hackintosh to look like a genuine Macintosh when it boots, add the following
two lines:
<key>Boot Graphics</key>
<string>Yes</string>
Each time you make a change to Boot.plist, be sure to rerun Disk Utility to reset the file
permissions.
Summary
In this chapter, you found several troubleshooting methods to help get Leopard working on
your computer. In addition, you customized your Leopard boot process. In the event that the
installation fails, you can return your computer to the state it was in before you started trying to
install Leopard.
Again, Leopard was never built to run on your computer, and only with the help of many different experts and Apple developers can you possibly to do it. Without these experts sharing their
knowledge, there would be no Hackintoshes.
II
B
Setting Up and
Customizing
Leopard
y this stage, you are feeling a great sense of achievement:
You have successfully installed Leopard to your non-Apple
computer and got it running.
Now it’s time to explore the differences between Leopard and
other operating systems, particularly Windows. Basically, all operating systems do pretty much the same things, but how they do
things is what’s important. In Chapter 7, you explore the many
differences between the way you do things in Windows and how
you do them in Leopard.
Like Windows, Leopard gathers all your preference settings
together in one place. In Windows, it’s the Control Panel. In
Leopard, it’s in System Preferences.
In all, Leopard has 54 panels for setting preferences, and they are
divided into four major groups. Chapters 8 to 11 lead you
through each of the major choices, explaining what each setting
means and guiding you toward making the best choices for your
personal preferences.
II
In This Part
Chapter 7
Comparing Leopard and
Windows
Chapter 8
Setting Up Personal
System Preferences
Chapter 9
Setting Up Hardware
Preferences
Chapter 10
Setting Up Internet and
Network Preferences
Chapter 11
Setting Up System
Preferences
Comparing Leopard
and Windows
B
y now you have seen one of the major differences between
Windows and Leopard: installation. Windows can be installed
quite easily on many different hardware platforms, with
many different components, while Leopard is designed for a single
manufacturer’s platform, so it requires lots of effort to install on any
other computer.
It’s not just the ease of installation: Although Leopard and
Windows do basically the same things, they look and feel quite different. In most cases, it’s simply a matter of personal preference.
Each platform has its fanboys, people who are simply fanatical
about one platform or the other (or Linux!). Their favored platform
has no faults or drawbacks, while any other platform is simply the
work of the devil.
For most people, it’s a matter of what works best for them.
Macintosh gained a strong following in the graphics and publishing industries and is still dominant today. Windows gained a strong
following in the business world and is still strong there.
In this chapter, we look at the differences in the user experience
between the two platforms, assuming that you have reasonable
expertise in using Windows.
In This Chapter
Using the keyboard
Using the Keyboard
Apart from graphics, Web design, and other intensely graphical
programs, almost everything in a Windows program can be controlled from the keyboard. If you like using keystrokes (as I do),
rather than mouse movements, you may find the lack of keyboard
equivalents in Leopard quite frustrating, but it’s something you
eventually get used to.
Most of the keystrokes used in Leopard are the same or very similar
to those in Windows. Windows uses three modifier keys—Shift, Ctrl,
and Alt—to modify the function of the key pressed, but Leopard
has four modifier keys—Command (or Apple key), Control, Option,
and Shift.
Figure 7.1 shows the symbols Apple uses to represent the
modifier keys.
Using the single
menu bar
Controlling Finder
Missing the Start menu
Using Spotlight
Using Time Machine
Using TextEdit
Using the Services menu
Using highlighted text
160
Setting Up and Customizing Leopard
Figure 7.1
Apple keyboard modifier keys
Different distributions of Leopard have slightly different key combinations. Most use the keys
shown in Table 7.1.
Table 7.1 Key Mappings from Windows Keyboards to Macintosh Keyboards
Macintosh Key
Windows Key
Control
Ctrl
Command
Windows
Option
Alt
One keyboard feature that Leopard has in common is using the Command+Tab key combination to switch between running programs. In Windows, this is Alt+Tab. Figure 7.2 shows the
result of the Command+Tab combination in Leopard.
Figure 7.2
Command+Tab
As in Windows, you can release the keys when the application you want to switch to is highlighted, or you can simply use the mouse to click the icon for the application.
Using the Single Menu Bar
One of the most striking differences between Windows and Leopard is the use of the single
menu bar, which is permanently parked at the top of the screen. You can make it translucent if
your graphics card allows it, but you can never remove it.
Chapter 7: Comparing Leopard and Windows
161
Figure 7.3 shows two different Windows applications both open with overlapping windows,
each with its own menu bar.
Figure 7.3
Two menu bars in Windows
Each application has
its own menu bar
With Leopard, only one menu bar stays on the screen. It changes function depending on which
application has the focus at present.
Finder is the Leopard equivalent of Windows Explorer, and it’s always open, unlike Windows
where you can close Explorer.
Figure 7.4 shows the menu bar when Finder is the focused application.
The menu bar has two main areas: The left side shows the menu bar for the current application;
the right side shows several menulets. Officially, they are called Menu Extras by Apple, but
everyone else knows them as menulets. On a standard installation of Leopard, the menulets
shown in Figure 7.4 are usually installed, but you can install others as well. Figure 7.5 shows the
menu bars for four common applications in Leopard.
Note that a constant on the left side of the menu bar is the Apple menu. This is always available,
no matter what application is running.
162
Setting Up and Customizing Leopard
Figure 7.4
Leopard menu bar for Finder
Bluetooth
Apple menu
Speaker volume
Finder menu bar
Time Machine
Day and time
Spotlight search
CD eject
Figure 7.5
Menu bars for Finder, Safari, iCal, and Mail
Finder menu
Safari menu
iCal menu
Mail menu
Figure 7.6 shows the content of the Apple menu.
Figure 7.6
Apple menu
Chapter 7: Comparing Leopard and Windows
163
About This Mac
If you click About This Mac, it shows (naturally!) information about your computer, which it
assumes is a Macintosh. Because you are not running a genuine Apple Mac, your display may
not be quite correct, but Appendix B contains a method for putting the correct information into
your display.
Figure 7.7 shows the About This Mac display from my Dell Mini 9 running retail Leopard
updated to version 10.5.7.
Figure 7.7
About This Mac
Software Update
Software Update is similar to Microsoft Update on Windows computers, except that the default
frequency of checking for updates is weekly, rather than daily. It not only checks your operating
system for updates but also your Apple-supplied application software.
Figure 7.8 shows a display for software update from my Dell Mini Hackintosh.
Mac OS X Software
When you click Mac OS X Software, it opens the Safari Web browser and takes you to the software downloads pages on Apple’s Web site. It naturally features Apple software, but it also
includes software from third-party vendors.
164
Setting Up and Customizing Leopard
Figure 7.8
Software Update
System Preferences
System Preferences is the Leopard equivalent of the Windows Control Panel and is explored in
depth in Chapters 7 through 11.
The Dock
This is covered in depth in the next section.
Recent Items
This is exactly what you would expect and corresponds with Recent Items in Windows.
Chapter 7: Comparing Leopard and Windows
165
Force Quit
Sometimes an application hangs. Yes, even Macintoshes behave that way; it’s not restricted to
Windows! When this happens, you can invoke Force Quit to close the errant application.
This is exactly analogous to using Task Manager on a Windows computer, after pressing
Ctrl+Alt+Del.
“Sleep,” “Restart,” “Shut Down,” and “Log Out” do exactly what you would expect.
Using the Dock
At the bottom of the Leopard screen is the Dock. In essence, it works like a combination of the
taskbar and the quick launch bar in Windows.
Figure 7.9 shows the dock with magnification turned on.
Figure 7.9
Dock
Each icon in the dock represents a software application you can start by clicking it. When an
application is already running, it has a shiny dot underneath it.
You can see in Figure 7.8 that Finder, Safari, and Preview are all running. Clicking the icon for a
program that is already running brings its window to the front.
Adding an application to the Dock
You can add any application to the Dock simply by dragging its icon from the Applications
folder to the Dock. Each time you run an application, its icon appears in the Dock. If you want to
leave it there permanently, you can right-click it and click Keep in Dock, as shown in Figure 7.10.
166
Setting Up and Customizing Leopard
Figure 7.10
Keep an application
in the Dock
Displaying folders in the Dock
In a gap in the Dock’s shiny surface is a dotted line. Applications go to the left of this line; folders and minimized applications go to the right.
Not only can you add applications to the dock, but also folders. In fact, by default when you first
install Leopard it creates two folders: Documents and Downloads. These two folders form the
basis for stacks: Items in the folder appear on a spike, as shown in Figure 7.11a.
Other display possibilities exist for stacks. They were introduced with much fanfare, but in fact
they are not terribly useful because of the amount of screen real estate they occupy. A more
sensible display is as a grid.
If you right-click the Dock icon for the Downloads folder, you get the menu shown in
Figure 7.11b.
Figure 7.11
Downloads stack in the Dock (a); Dock display menu (b)
a
b
Chapter 7: Comparing Leopard and Windows
167
“Display as” refers to how the Downloads icon is displayed in the Dock—either as a folder or a
stack. “View content as” refers to how the items in the folder are displayed when you click it.
“Fan” is the normal style, but either “Grid” or “List” is generally more useful.
Figure 7.12 shows the Downloads folder displayed as a grid.
Figure 7.12
Downloads folder displayed as a grid
Adding a folder to the Dock
You can add your own applications and folders to the Dock. One very useful folder to add is
your Applications folder. Here’s how:
1.
2.
Open a Finder window, and click your Applications folder.
From the title bar, drag the small icon (called a proxy icon) to the Dock and
release it.
Your new icon appears in the Dock.
3.
Right-click your Applications folder, and select View contents as a List.
Now your applications are all easily available from the Dock, as shown in Figure 7.13.
In Chapter 8, you look in more detail at how to set up the Dock to your liking.
168
Setting Up and Customizing Leopard
Figure 7.13
Applications viewed as a list
Using Application Software
Ever since the very first Macintosh, Apple has encouraged developers to use their user interface
guidelines. As a consequence, almost all Macintosh software behaves in the same fashion.
In this section, we look at just one application: Finder, the Macintosh equivalent of Windows
Explorer. The same principles apply to most applications.
As you become more familiar with Mac software, you will like some of the differences and you
will find some of them irritating!
Finder is the Leopard equivalent of Windows Explorer. It performs all the same functions but
has a different layout and different options. One thing to notice is that Finder is always running:
You cannot easily shut it down, unlike Windows Explorer, which you can close when you no longer need it.
Chapter 7: Comparing Leopard and Windows
169
Using window control buttons
An application in Windows always has three buttons in the top-right corner: Minimize Window,
Maximize Window, and Close Window.
Figure 7.14 shows the buttons in a Notepad window.
Figure 7.14
Minimize, Maximize, and Close
Minimize Window
Close Window
Maximize Window
In a Leopard window, the three buttons in the top-left corner superficially look like the same buttons as in Windows, but they are different. Figure 7.15 shows the buttons in a Finder window.
Using the Close button
On the left side is the Close button, which works in exactly the same way as in Windows, with
one difference: In Windows, closing the window closes the application if there is only one
instance of the application running. In Leopard, closing the window closes the window but
leaves the application running.
If you have a plenty of memory, it doesn’t matter that much if several applications are running at
once. One place where it does make a difference, though, is when you use Command+Tab to switch
applications: All the inactive applications still show in the switcher, which causes some clutter.
170
Setting Up and Customizing Leopard
Figure 7.15
Finder buttons
Minimize Window
Close Window
Size Window to Fit
Using the minimize button
In the middle is the minimize button, which works in the same way as the minimize button in
Windows. The window is minimized to the Dock to the right of the divider. Snow Leopard
allows windows to be minimized to the application icon. Leopard has a couple of visual effects
you can use on the minimizing process. The default is the genie effect, where the window
appears to shrink back into the bottle like a genie! Figure 7.16 shows the genie effect as a window is minimized.
Using the zoom button
In Windows, the maximize button enlarges the window to the maximum size that the display
can handle. Leopard doesn’t have an equivalent button; instead it has the zoom button.
Clicking this expands the window to either just large enough to show everything contained in
the folder, or if Leopard can’t show everything, the window expands to fill the available space
on the desktop.
Chapter 7: Comparing Leopard and Windows
171
These same window control buttons appear in every Leopard application.
Finder is very customizable but quite different from Windows Explorer.
Figure 7.16
Genie effect
Resizing a window
One source of irritation for switchers from Windows to Macintosh is resizing a window. In
Windows, you can click and drag any of the four sides of a window to resize it. Leopard has a
single resizing handle in the bottom-right corner of the window. Figure 7.17 shows the resize
handle in a Finder window.
172
Setting Up and Customizing Leopard
Figure 7.17
Resize handle
Resize handle
Controlling Finder
Because Finder is the one application that you use every single time you use Leopard, you
should become familiar with it. It does the same job that Windows Explorer does, but you control it in different ways.
Figure 7.18 shows a Finder window, with its parts labeled.
Using the view buttons
Each Finder window can display in one of four different views, in just the same way as Windows
Explorer. Each view has its advantages, just like in Windows Explorer. The views are Icon view,
which is the default; List view, where each folder has an expansion triangle to show folders
lower in the hierarchy; and Column view, which is good for rapidly traversing from one folder to
Chapter 7: Comparing Leopard and Windows
173
another when they are both low in the hierarchy. The final view is Cover Flow view, unique to
Leopard, which looks inside a file to show its contents, where possible. This view is copied
directly from iTunes.
Figure 7.18
Finder window
Title bar
Finder proxy
View buttons
Action
Search box
Expand/Collapse
Quick View
Sidebar
Status bar
Path bar
Resize handle
Figure 7.19 shows each of the four views, going from Icon view at the back, then List view, then
Column view, and finally Cover Flow view on top.
174
Setting Up and Customizing Leopard
Figure 7.19
Four views in Finder
Using Quick Look
Quick Look can look “inside” files and show their content. It can see into a large range of files,
provided a file viewer is built into Leopard or you have software that can open the file. Figure
7.20 shows the quick view of this chapter in an early draft of this book as a Word document.
Double-clicking the title bar
This works exactly the opposite of Windows! In Windows, double-clicking the title bar maximizes the window; in Leopard, by default, it minimizes the window to the Dock. In Snow
Leopard this has changed: it is no longer the default and has to be turned on in System
Preferences (Appearance).
This works with every application, not just Finder, but it can be changed in System Preferences,
as discussed in Chapter 8.
Chapter 7: Comparing Leopard and Windows
175
Figure 7.20
Quick Look
Arranging icons
In Icon view, you can rearrange the icons by right-clicking in the blank window area. On the
pop-up menu, select Arrange By and then select how you want them arranged. The icons then
snap to the grid, in the order you want. Figure 7.21a shows the pop-up windows to allow you to
arrange icons in the window.
One trick that even many Mac users are unaware of is how to keep folders organized. “Arrange
By” is just a one-off command. When you drag a new file into the folder, it is parked wherever
you leave it, on top of other files.
If you hold down the Option key (usually the Alt key on a Windows keyboard) while you rightclick in the Finder window, instead of “Arrange By” you see “Keep Arranged By.” If you do that,
any new files you drag into the folder will snap to their position on the grid, in whatever order
you have specified. Figure 7.21b shows the pop-up windows.
176
Setting Up and Customizing Leopard
Figure 7.21
Arrange By (a); Keep Arranged By (b)
a
b
This is the default behavior in Windows Explorer folders. If you want to set all your Leopard folders to your Keep Arranged By order, right-click in a blank area of the Finder window and select
Show View Options, as shown in Figure 7.22a.
In the window that pops up, click “Use as defaults,” as shown in Figure 7.22b.
Figure 7.22
Show View Options (a); Set view as default (b)
a
b
Chapter 7: Comparing Leopard and Windows
177
Customizing Finder’s toolbar
You can add extra functions to Finder’s toolbar; here’s how:
1.
2.
Right-click anywhere in the Finder toolbar except over an icon
On the menu, click Customize Toolbar, as shown in Figure 7.23a.
Each of the icons in the panel can be dragged into the Finder toolbar. Figure 7.23b
shows the customize panel.
Figure 7.23
Customize Finder toolbar (a); Icons for customizing (b)
a
3.
b
Drag the Path icon into the toolbar, and click Done.
Figure 7.24 shows the Finder window after adding the Path icon.
When you click the Path icon, it shows a drop-down list of all the folders above the current one in the folder hierarchy, as shown in Figure 7.25.
178
Setting Up and Customizing Leopard
Figure 7.24
Finder with Path icon
Figure 7.25
Path list
Many regular Mac users don’t realize that you can achieve the same path information by rightclicking the Finder proxy (refer to Figure 7.18). The information is exactly the same as using the
Path button.
Using a breadcrumbs bar
One feature of Windows Explorer in Vista and Windows 7 (but not XP) that I like and use often is
the “breadcrumbs bar” at the top of an explorer window. Figure 7.26 shows the breadcrumbs bar.
In Finder, the equivalent is called a Path bar.
1.
2.
Open a Finder window.
On the View menu, select Show Path Bar.
At the bottom of the window, Finder adds a list of all the folders traversed to get to where you
are. This is shown in Figure 7.27.
Chapter 7: Comparing Leopard and Windows
179
Figure 7.26
Windows Explorer breadcrumbs bar
Breadcrumbs bar
Figure 7.27
Finder with Path bar enabled
In Windows, each folder has a drop-down box to select the folder you want to go to. In Finder, it
works a little differently: You double-click the folder icon.
180
Setting Up and Customizing Leopard
Missing the Start Menu
Microsoft introduced the Start Menu with Windows XP and has enhanced and carried it on
through Vista and Windows 7. The parts of the Start Menu are shown in Figure 7.28.
Figure 7.28
Components of the Vista Start menu
Frequently used
programs
Used folders
Recently used
programs
Connections
System controls
Link to All
programs
Search box
Shutdown options
Leopard has no direct counterpart, having similar functions spread among different parts of the
interface.
Saving frequently used applications in the Dock
Leopard’s Dock corresponds with the frequently used programs part of the Vista Start menu. In Vista,
you add a program to that section by “pinning” it to the Start menu. In Leopard, you start the application running, which places its icon in the Dock. Then you keep it in the Dock. Here’s how:
1.
2.
Open a Finder window, and move to Applications.
Double-click the Dictionary to start it running.
Chapter 7: Comparing Leopard and Windows
3.
181
Right-click the Dictionary icon in the Dock, and select “Keep in Dock,” as shown
in Figure 7.29.
Figure 7.29
Keep application icon in the Dock
4.
Close the Dictionary, but note that its icon stays in the Dock.
Viewing all programs
In Windows, the link to All Programs shows you every application that is installed on the computer. In any Finder window, you can get the same view by selecting Applications in the sidebar.
Viewing user files and folders
When you installed Leopard, you were given a home folder, identified by a short version of your
login name. This is identified by the little house icon in the Finder sidebar.
Using system controls
Most of the system controls for Leopard are contained in the System Preferences application,
which is given extensive coverage in Chapters 8 through 11.
Using Spotlight
Spotlight was the headline new feature for OS X 10.4 (Tiger) when it was introduced in 2006.
In essence, it works similarly to the Search box in Vista and Windows 7. Spotlight indexes filenames and their content on your disks and allows you to quickly search for a file with a particular word in either its filename or its content.
For comparison with Spotlight, Figure 7.30 shows the result of a search for “10.5.7” using Vista,
with the date of the file 9 June 2009 and the size less than 100KB.
182
Setting Up and Customizing Leopard
Figure 7.30
Vista search result
To use Spotlight, click the magnifying glass icon on the top left of the menu bar.
You also can start Spotlight using the Command+spacebar keystroke.
Figure 7.31 shows the Spotlight search box.
Figure 7.31
Spotlight search box
As you type a word into the box, Spotlight goes to work straight away looking for instances
of the word. As you type, the word becomes less ambiguous, so the selection narrows. Here’s
how it works:
1.
Open a Spotlight window, and type the word dictionary.
Figure 7.32 shows the result of a search for the word “dictionary” on my computer.
Although that view of the search is useful, the real power of Spotlight comes when
you click Show All.
2.
Click Show All.
Spotlight then opens a Finder window showing all the files found, as shown in Figure 7.33.
Chapter 7: Comparing Leopard and Windows
Figure 7.32
Spotlight search for Dictionary
Figure 7.33
Finder window showing Spotlight results
From this window, you can narrow the search.
183
184
Setting Up and Customizing Leopard
If you click your username (in this case, my username is shown as “pb”), the search is
narrowed to show only files in your home folder.
3.
In the Finder window, click your username.
By default, Spotlight shows results for the both filenames and the content of files. You
can change it so Spotlight shows only filenames or content.
4.
Click File Name to show files with the word dictionary in their filename.
In my case, there are none.
To narrow the search still further, Spotlight allows you to search by many other
attributes.
5.
Click the small + (plus) sign on the right of the window.
You can now select other attributes for your search. In the first drop-down box, you
can select from Kind, Last opened date, Last modified date, Created, Name, and
Contents.
If those selections are not enough to narrow your search, select Other and you can
choose from a whole range of attributes, as shown in Figure 7.34.
Figure 7.34
Spotlight search attributes
Chapter 7: Comparing Leopard and Windows
185
You can narrow your search even further by adding another selection line, as shown in Figure 7.35.
Figure 7.35
Two-line selection criteria
Finally, you can save your search and add it to the Finder sidebar, as shown in Figure 7.36.
Figure 7.36
Saving search selection
Anytime you want to perform the same search again, simply click the sidebar entry, as shown in
Figure 7.37.
186
Setting Up and Customizing Leopard
Figure 7.37
Search in sidebar
Using Time Machine
If Spotlight was the headline OS X application when Tiger (10.4) was introduced, Time Machine
was the headline application with the introduction of Leopard.
It has no counterpart in Windows—not in the system software that comes with Windows—nor
as yet do any third-party applications work like Time Machine.
Time Machine is brilliant in conception and very clever in execution. It saves you having to think
about backing up your files because, after you connect an external drive, it automatically backs
up your files every hour. After a day’s backup, it consolidates those into a single daily backup.
After 30 days, it consolidates your daily backups into a monthly backup. And it does all this
automatically.
So you have no excuses for not backing up your files!
CAUTION
If your Leopard installation cannot utilize Quartz Extreme/Core Image graphics, you do not get the full experience of
Time Machine because viewing the past backups requires QE/CI.
Figure 7.38 shows the System Preferences panel for Time Machine.
Chapter 7: Comparing Leopard and Windows
187
Figure 7.38
System Preferences for Time Machine
Setting up Time Machine
If you have other disk drives attached to the computer when you boot into Leopard for the first
time, Leopard asks if you want to use one for Time Machine backup. Unless you want to reformat your disk and lose any information on it, you should say “No.” If you plug an external drive
(say a USB drive) into the computer, Leopard again asks if you want to use it for Time Machine.
This time you can answer “Yes.”
That’s all there is to setting it up. If you check the box “Show Time Machine status in the menu
bar,” the menu bar gets a new icon (refer to Figure 7.4).
Clicking the Time Machine icon brings up a small menu, as shown in Figure 7.39.
Figure 7.39
The Time Machine menu
Excluding files from Time Machine
If you are using Microsoft Entourage for your e-mail, you find that it stores all your e-mails in
one large file that grows as you use it. In this case, backing up your large file every hour will
soon fill up your external hard disk.
188
Setting Up and Customizing Leopard
This also occurs with, say, Parallels Desktop or VMware, because each virtual machine is stored
in a large file. If Time Machine were to back up this file each time you quit the application, the
backup would grow very large.
TIP
Don’t forget to back up your e-mails in some other way.
Time Machine makes it possible to exclude such files from your backup. Here’s how:
1.
2.
3.
Click System Preferences in the Dock.
Click Time Machine.
Click Options.
This brings up a sheet, as shown in Figure 7.40.
Figure 7.40
File exclusion pane for Time Machine
4.
5.
Click the + (plus) sign and navigate to the files or folders you want to exclude.
Click Done.
Retrieving files from Time Machine
Time Machine’s cutest feature is the way you use it to recover files. Apple has consistently used
the metaphor of a time machine, traveling back in time, even to the extent of having the Time
Machine clock in the menu bar travel backward while it is backing up. You did notice that,
didn’t you?
Chapter 7: Comparing Leopard and Windows
189
So it’s no surprise that when you select Enter Time Machine, you go on a journey back in time.
The normal screen slides down your monitor to be replaced by a view of space seen through
the window of your own time machine.
1.
On the menu bar, click the Time Machine icon and select Enter Time Machine.
Your Leopard screen slowly slides down, to be replaced with the view shown in
Figure 7.41.
Figure 7.41
Leopard screen making way for Time Machine
2.
Use your mouse to click one of the time bars on the right of the display to go back
to that date, as shown in Figure 7.42.
TIP
Of course, if you’ve only just started Time Machine running, you can’t go back very far! Come back to this exercise after
Time Machine has saved a few backups.
190
Setting Up and Customizing Leopard
Figure 7.42
Time bars in Time Machine
3.
Use the time bars to travel back to the date you want, and then use the Finder
window to find the file you want.
4.
Click Restore in Time Machine, and the file is placed in the folder from which it
was deleted.
Simple!
Troubleshooting Time Machine
One issue that occurs sometimes with Hackintoshes is that Time Machine will not back up. It
has to do with the Ethernet setup on a Hackintosh. The fix is relatively simple and is given in
Appendix B.
Chapter 7: Comparing Leopard and Windows
191
Using TextEdit
At first glance, TextEdit seems like Windows Notepad, but in fact it’s more like a combination of
Notepad and WordPad. Like Notepad, it can create and edit plain text files, but it also can create
and edit more complex files. Figure 7.43a shows the file types it can handle.
In combination with Leopard’s text-to-speech synthesizer, it can even read to you, though the
voice gets a little monotonous after a while!
Although TextEdit can read and write Microsoft Word files, it cannot import the document styles
from Word, so its usefulness is limited. But it is capable of some quite complex operations on text
in its own right, such as kerning and creating ligatures, as shown in Figures 7.43b and 7.43c.
Figure 7.43
File types in TextEdit (a); TextEdit font menu (b); TextEdit text menu (c)
a
b
c
Using the Services Menu
This section explains the Services menu that is present in every Leopard application. It’s one that is
often overlooked, even by experienced Mac users, and has no real counterpart in Windows.
It provides some very useful features and is extendable. When you install a third-party application, quite often it adds its own services to the menu. Here’s how to get at it:
1.
2.
Start TextEdit running.
On the menu bar, click TextEdit and move your mouse down to Services.
This reveals the Services menu for TextEdit, as shown in Figure 7.44.
192
Setting Up and Customizing Leopard
Figure 7.44
Services menu
At this point, most of the options and suboptions are grayed out.
3.
Using TextEdit, enter the following text:
In combination with Leopard’s text-to-speech synthesizer
it can even read to you, though the voice gets a little
monotonous after a while!
Although TextEdit can read and write Microsoft Word
files, it cannot import the document styles from Word, so
its usefulness is limited. But it is capable of some quite
complex operations on text in its own right, such as
kerning and creating ligatures.
4.
5.
Highlight all the text in both paragraphs.
Now view the Services menu, as shown in Figure 7.45.
Note that all options are now black; hence, they are available.
6.
On the Services menu, scroll down to Mail and select Send Selection.
This opens a new Mail document with the text already pasted into the body of the
e-mail, as shown in Figure 7.46.
All you need to do is fill in the To field.
Play around with some of the other options in the Services menu. Few people find a use for the
Chinese text converter, though!
After you install a few applications, you find that your Services menu grows as each application
adds its own Services that you might want.
Chapter 7: Comparing Leopard and Windows
193
Figure 7.45
Services menu with text selected
Figure 7.46
New mail message with copied text
If you find the menu grows beyond what you consider reasonable, bearing in mind that you
might actually want some of these services, you can trim it using an application called
ServiceScrubber. You can download this from http://manytricks.com/service
scrubber/, but it can only remove services added by applications; it can’t remove built-in
Leopard services.
194
Setting Up and Customizing Leopard
Using the Context Menu on Text
In this section, you use the Context menu obtained by right-clicking a word. Follow these steps:
1.
In the same TextEdit document, right-click the word “ligatures” at the end of the
second paragraph.
This brings up the Context menu shown in Figure 7.47.
Figure 7.47
Context menu in TextEdit
2.
Click Look Up in Dictionary.
This brings up the Dictionary application with the word entered in the search box, as
shown in Figure 7.48.
Figure 7.48
Dictionary results for Lookup
Chapter 7: Comparing Leopard and Windows
195
If looking up the word in the Leopard Dictionary and Wikipedia is not enough for you, you can
also send it to a Google query. If you search in Spotlight, you get a Finder window that has all
the files containing the word.
Summary
In this chapter, you examined some of the principal differences in behavior between Windows
and Leopard.
Differences range from keyboard key assignments and how to change them to finding information about your Hackintosh. You have learned how to use the Dock to launch applications and
fix them permanently for ready access.
You explored Finder’s window layouts and ways it differs from Windows in its use of buttons,
You had an extensive tour through Finder and learned to use it effectively, and you explored
the differences between the Start menu in Windows and the Mac equivalents. You also learned
how to search for files and save your searches for reuse.
You used Time Machine to back up and recover files, and you learned the basics of TextEdit, a
combination of Windows Notepad and WordPad. In TextEdit, you were introduced to the
Services menu, and you used the Context menu to look up a word definition.
Now you are ready to start setting up your Hackintosh in the way you want it.
Setting Up Personal
System Preferences
N
ow that you have some idea of the differences between
Windows and Leopard, it’s time to start setting up Leopard
to your own satisfaction. Like Windows, no two people like
exactly the same configuration for their computer.
As you saw in the preceding chapter, System Preferences is the
Leopard equivalent of the Windows control panel. It is laid out differently from the control panel, but it performs pretty much the
same functions.
In this chapter, you explore each of the options to set up your personal preferences for the way you want Leopard to behave. In later
chapters, you set up other preferences.
System Preferences is accessed through the Dock by clicking the
icon. Figure 8.1 shows the main screen.
Figure 8.1
Main screen for System Preferences
In This Chapter
Setting up Appearance
Setting up Desktop and
Screen Saver
Setting up the Dock
Setting up Exposé and
Spaces
Setting up International
Setting up Security
Setting up Spotlight
Using Dashboard
Setting Up Appearance
In this section, you see the effect of the various choices for setting
up the appearance of your system. You can access the Appearance
settings by clicking Appearance in the top-left corner of the screen.
198
Setting Up and Customizing Leopard
Figure 8.2 shows Appearance options.
Figure 8.2
Appearance options
Setting general appearance options
Notice that Leopard has fewer customizing options than Windows does. Some may see this as a
bad thing; my view is that it looks much more professional than the multicolored Windows
setup.
You have only two options for Appearance, which governs the overall look of buttons and scroll
bars: either blue or graphite. Blue is the default. You cannot change the colors of title bars, status bars, and so on, unlike Windows. Each version of OS X has had a slightly different look: Tiger
used a brushed metal finish for the title bars of windows; Leopard has a plastic look to it.
Set the color to graphite, and see if you prefer that color.
Highlight color governs the color of text when you highlight it to cut or copy. Try different colors, and see which you prefer.
Setting scrolling options
As a Windows user, you probably won’t feel comfortable with the default behavior for scrolling.
By default, Leopard puts both up and down scroll arrows at the bottom of the window. To
change the setting so it behaves like Windows, check the “At top and bottom” button for scroll
bars.
Chapter 8: Setting Up Personal System Preferences
199
Figure 8.3 shows the position of the scroll bars if set to Together.
Figure 8.3
Scroll bars
together
Scroll bar clicking defaults to the same as Windows: Clicking in that the scroll bar moves the
scroll bar down one page at a time. If you select Jump to here, the screen jumps to that point in
the document. For example, if you click three-quarters of the way down the scroll bar, the
screen displayed is three-quarters of the way through the document.
Setting number of recent items
Number of recent items is a system-wide default that all applications implement, unlike
Windows, where the number of recent items is shown on an application-by-application basis.
“Recent servers” refers to other computers on your network: when you connect to another computer, it is considered to be a server by Leopard.
Setting font smoothing
Font smoothing works pretty much the same as Clear Type in Windows. Leopard turns it on by
default, and you have very little reason to turn it off.
If your graphics setup does not automatically detect your display, you may need to select the
particular font smoothing style for your monitor. Otherwise, leave it as Leopard sets it.
Setting Up Desktop and Screen Saver
In this section, you set up your desktop and screen saver to your preferences. Figure 8.4 shows
the setting screen for Desktop and Screen Saver.
200
Setting Up and Customizing Leopard
Figure 8.4
Desktop and Screen Saver settings
Setting up your desktop
When you first install Leopard, it defaults to using the Aurora picture from the set of desktops
called Nature. By default, desktop pictures live in a folder called /Library/Desktop
Pictures.
At the bottom is your Pictures folder. Notice that you can use any pictures you placed in that
folder. Clicking the + (plus) sign at the bottom allows you to select any folder you choose,
including your My Pictures folder on your Windows data disk, if you choose.
You can change the picture from every five seconds up to daily. You also can randomize the
pictures.
If your graphics display is capable of Quartz Extreme/Core Image (QE/CI), you can make the
menu bar translucent. I’m not exactly sure why this option is there, but I use it as a sign of
whether the display is capable of QE/CI. If you don’t want the translucency, uncheck the box.
Setting up your screen saver
In the same way you can set up your screen saver in Windows, you can do so in Leopard. To
make changes or just to see what options are available, click the Screen Saver button at the top
of the settings pane. Figure 8.5 shows the screen saver display.
As with the desktop, you can select a wide range of screen savers, both built in and external.
You can select a folder to get pictures from, and they are displayed in various ways, but oddly,
the amount of time that each slide is displayed can’t be changed.
Chapter 8: Setting Up Personal System Preferences
201
Figure 8.5
Screen saver
I don’t use a screen saver: My display blanks before a screen saver kicks in. If I’m not using the
screen, I shut it down. We look at changing energy saver preferences in Chapter 9.
Setting up hot corners
One very useful feature of Leopard that Windows doesn’t emulate is hot corners. Hot corners
allow you to mouse into a corner of the display and carry out various functions.
You can download an application that does something very similar for Vista. Download it from
http://programsforpeers.googlepages.com/hotcorners.
I find it extremely useful in Leopard; Figure 8.6 shows how I have my hot corners set up.
Figure 8.6
Hot corners setup
202
Setting Up and Customizing Leopard
Table 8.1 lists the options available for each corner and explains the meaning of each.
Table 8.1 Hot Corners and Their Descriptions
Option
Description
Start screen saver
Starts the screen saver when you move the mouse into that screen corner.
Disable screen saver
Prevents the screen saver from operating when you move the mouse into that corner.
All windows
Shows all windows presently open, regardless of the application. The F9 key also does this.
Application windows
Shows all windows open within the application that is in the foreground. The F10 key also does this.
Dashboard
Brings the Dashboard to the foreground. The F12 key also does this. Find more information about the
Dashboard later in this chapter.
Spaces
Splits the screen into the number of spaces you have set up, allowing you to choose which space you want
to work in. The F8 key also does this. Spaces is covered later in this chapter.
Sleep display
Puts the display to sleep.
Figure 8.7 shows the screen with all application windows showing.
Figure 8.7
All applications hot corner
Chapter 8: Setting Up Personal System Preferences
203
Figure 8.8 shows the screen with four spaces set up and different applications running in each
space.
Figure 8.8
Spaces view of applications
While working in Leopard, I use spaces extensively, and I find being able to view every open
window very useful, so I have my computer set up that way.
Setting Up the Dock
As you have seen earlier, the Dock is an extremely useful part of the Leopard operating system.
From the main System Preferences screen, click Dock to bring up the settings panel shown in
Figure 8.9.
Obviously, you can have the Dock as large or small as you like by moving the slider. At its largest, the Dock fills your screen. I prefer to have it occupy no more than about two-thirds of my
screen.
204
Setting Up and Customizing Leopard
Figure 8.9
Dock settings
Magnification refers to the amount that an icon is magnified as you mouse over it. Figure 8.10
shows the maximum magnification on the Dock.
Figure 8.10
Dock magnification at maximum
My preference is to have magnification turned off, because when it’s on I tend to feel almost
seasick when I mouse over it.
Although displaying the Dock at the bottom of the screen is the default behavior, you can move
it to the left or right of the screen. When it is displayed on either side of the screen, it no longer
has the shiny table look as shown in Figure 8.11.
You have already seen the genie effect when minimizing an application to the dock. Rather
than have the application funnel back into its icon, you can set it to simply shrink by selecting
scale effect.
You may have noticed that when you click a Dock icon to open an application, it bounces a couple of times before it opens. Some people don’t like that, feeling that it delays the opening of
the application. I have never noticed a delay, and the bouncing doesn’t worry me, so I leave it
turned on.
Chapter 8: Setting Up Personal System Preferences
205
Figure 8.11
Dock on the side
of the screen
As with the Windows task bar, you can hide the Dock until you actually need it. When you move
your mouse down to the bottom of the screen, the Dock pops up. On my desktop, where I have
plenty of vertical space, I leave it showing, but on my Dell Mini 9 I hide it because the screen is
only 600 pixels tall. Your choice.
Setting Up Exposé and Spaces
Exposé complements the hot corners you can set up using Screen Saver. Exposé gathers the
keyboard and mouse shortcuts to put them on the same screen. You also can set one or two of
your mouse buttons to work one or two of the Exposé functions.
The Spaces feature allows you to set up a number of virtual screens. Each screen occupies the
full area of your physical screen; in the case of my desktop, 1920 x 1080.
206
Setting Up and Customizing Leopard
Figure 8.12 shows the pane used to set up Spaces.
Figure 8.12
Setup for Spaces
One really nice feature of Spaces is that it allows you to start an application in any space you
wish. I keep my applications separated into separate spaces. For example, Safari always starts in
Space 1, Microsoft Word in Space 2, as you can see in the middle of Figure 8.12.
You can switch between spaces using various key combinations. In my case, I’ve set it so the
Option key (Alt key on a Windows keyboard) works with the arrow keys and the number keys.
Leopard’s default is to use the Command key with the arrow keys and number keys. Number
keys are not just the numeric keypad keys: This also works with the number keys on the main
keyboard.
TIP
You can move a window from one space to another by clicking and dragging the menu bar into the new space. For
example, with a window open in space 1, click and drag it offscreen to the right and it moves into space 2. Move it
down for space 3.
If you have Spaces shown in the menu bar, you can also use the mouse to switch spaces.
Chapter 8: Setting Up Personal System Preferences
207
Setting Up International
Leopard is highly multicultural. In this section, you learn how to customize Leopard for your
own location.
Setting languages
When installed, Leopard contains many different languages, as shown in Figure 8.13.
Figure 8.13
Languages available in Leopard
If, like me, you use only English, you can remove the other languages, although you get no particular benefit in doing so.
To remove a language, click Edit List and uncheck the languages you don’t want to appear on
your list. The list is shown in Figure 8.14.
Setting formats
Leopard allows you to completely customize how dates and times are displayed. In my case, I’m
located in Australia, and Leopard has set up most of the preferences automatically.
Figure 8.15 shows the time and date display options.
208
Setting Up and Customizing Leopard
Figure 8.14
Languages available
Figure 8.15
Time and date options
Chapter 8: Setting Up Personal System Preferences
209
In my case, Apple got all the information correct so I didn’t need to change anything. I assume
this is true for other countries as well.
Using the input menu
Leopard’s input menu is possibly a subject for a lifetime study! Just kidding. But it’s absolutely
crammed with features and very easy to use. The setting is shown in Figure 8.16.
Figure 8.16
Input menu
At the top of the window are check boxes for the palettes available. When you check Character
Palette, the flag for your country is placed on the menu bar. When you click the flag, you get a
new menu, allowing you to select a character palette, as shown in Figure 8.17.
Figure 8.17
Character palette selection
210
Setting Up and Customizing Leopard
If you click Show Character Palette, the character palette appears, as shown in Figure 8.18.
Figure 8.18
Character palette for Roman character sets
Leopard contains many different character sets. If you select All Characters from the drop-down
box at the top left of the screen, you can see the number available, as shown in Figure 8.19.
Pressing the Insert button in the bottom right inserts the character into your document, provided the document can receive it.
If you put a check beside Keyboard Viewer in the languages preferences, you can have a keyboard onscreen for the chosen language. Figure 8.20 shows the keyboard for the Devanagari
character set.
As you type, the onscreen keyboard shows each key as you press it. If the software you are using
can display the characters (for example, TextEdit), you see the characters of the other language.
Chapter 8: Setting Up Personal System Preferences
211
Figure 8.19
Character sets
Figure 8.20
Devanagari keyboard
Setting Up Security
In this section, you learn about the various options governing security in Leopard and set up
your computer in the way that best suits your circumstances.
General security options
Over the years, Microsoft has made significant security changes to Windows. For example, with
Vista and Windows 7, you must set up an account even for the administrator. You can give
either administrator or normal user privileges to each account.
212
Setting Up and Customizing Leopard
By default, Leopard does not insist on the user logging in before using the computer. After your
computer starts, you go straight through to the desktop without requiring any password.
Although this is very convenient for you, it means that anyone who gets physical access to your
computer also has access to all your files. This is particularly bad for a laptop used for business.
On the General tab of the System Preferences security panel, you can change some of the settings to make your computer and data more secure. Figure 8.21 shows the settings available.
Figure 8.21
General security settings
Require password to wake computer from sleep or screen saver
If your computer is in an area where other people are around and you don’t want them to
access your files, my recommendation is that you turn on the screen saver and then check the
box to require the password.
When you check this box, Leopard also suggests that you disable automatic login. I recommend
you do that.
Disable automatic login
Always check the box for Disable automatic login. That way, when you start your computer, it
requires a password before getting to the point where your files are available.
If other people use your computer, be sure to set them up with their own accounts. Don’t just
allow everyone to use the same account. Chapter 11 gives you detailed information about setting up user accounts.
Chapter 8: Setting Up Personal System Preferences
213
Require password to unlock each System Preferences pane
After you have your computer set up the way you want it, you should password-protect the
System Preferences. After all, you don’t want other people messing about with the system you
have so carefully set up.
After you have set this up, the System Preferences pane has the lock in the bottom-left corner
closed. If you click the lock, it requests your password just to be sure you actually have been
given permission to change the settings.
Logout after inactivity
This is a setting that depends on the environment in which you use the computer. My own preference is to leave it unchecked.
Use secure virtual memory
If you use lots of software that has high memory requirements, such as Photoshop, when physical memory runs low on your computer, Leopard starts to write parts of memory out to the disk
so that the memory is freed up for another operation. This is called virtual memory—memory
that your computer can use but is not installed as physical memory.
Sometimes sensitive information (such as passwords for Web sites and so forth) is written to virtual memory. If your computer is stolen, someone with the right tools can comb through the
virtual memory and retrieve the information.
If you check the Use secure virtual memory option, all the virtual memory on your disk is
encrypted so the information is almost impossible to retrieve. When you check this box,
Leopard requires you to restart before it is effective.
Figure 8.22 shows the security settings that I recommend.
Figure 8.22
Recommended security settings
214
Setting Up and Customizing Leopard
FileVault
FileVault is Leopard’s file encryption service. Each file on your hard disk is encrypted so it can’t
be read by anyone who does not know the password.
Leopard has two passwords: One is your normal password, which is used in encrypting the files;
the other is a master password, which can be used if you forget your own password.
Figure 8.23 shows the pane for FileVault security.
Figure 8.23
FileVault security pane
If you turn FileVault on, Leopard spends a while encrypting all the files in your home folders.
Depending on how many files you have, this could take quite a while. From then on, all new
files are encrypted.
CAUTION
Files are encrypted only when they are stored on your hard disk; they are not encrypted when you copy them to an
external disk.
When the FileVault is turned on, files are not written on a file-by-file basis to your hard disk; they
are written in a sparse image format. This means that you cannot recover single files; you must
recover the whole user folder structure to another hard disk using your Leopard install disk.
Figure 8.24 shows the warning message you get when you turn on FileVault.
Chapter 8: Setting Up Personal System Preferences
215
Figure 8.24
FileVault warning
Firewall
By default, Leopard is installed without a firewall. In my view, you should never use a computer
without a firewall. Even though OS X computers are hacked very rarely, that’s no reason for
complacency.
TIP
I recommend that you turn on your firewall to the setting that allows only essential services.
The screen where you set this up is shown in Figure 8.25.
Figure 8.25
Firewall with essential services switched on
216
Setting Up and Customizing Leopard
File Sharing, Printer Sharing, Remote Login (SSH), and Screen Sharing are listed in the services
because I have them turned on in the Sharing pane that you see in Chapter 10.
If you click the Advanced button, you get an extra pane that allows you to log all firewall activity
and, importantly, allows you to turn on stealth mode. This is shown in Figure 8.26.
Figure 8.26
Advanced firewall options
Logging firewall activity may be unnecessary, but I recommend you switch on stealth mode.
What that means is that if a foreign computer attempts to contact your computer in a non-standard way, your computer does not respond at all. If you have stealth mode turned off, your
computer sends a message back to the other computer saying, in effect, “I can’t do anything.”
The problem is the foreign computer knows that your computer is connected and can try some
other strategies to infiltrate your computer.
Setting Up Spotlight
With the Spotlight pane in System Preferences, you can set up where you want Spotlight to
search and the results you want it to show. By default, Spotlight searches through all the categories listed, shown in Figure 8.27.
If you don’t want Spotlight to look for fonts that match your search criteria, uncheck the box.
My own preference is to let Spotlight search everything: Preventing this doesn’t shorten a
search significantly, because it’s very quick anyway. And by letting it search everything, you’ll
be sure you haven’t missed anything.
You also can exclude certain folders on your disk by specifically excluding them from a
Spotlight search. Figure 8.28 shows two folders excluded from the Spotlight search.
TIP
My preference is to not exclude any folders from Spotlight search, but the choice is yours.
Chapter 8: Setting Up Personal System Preferences
Figure 8.27
Spotlight search places
Figure 8.28
Folders excluded from Spotlight search
217
218
Setting Up and Customizing Leopard
Using Dashboard
In a way, the Leopard Dashboard is very similar to the Vista sidebar. By default, it contains four
widgets: clock, calendar, calculator, and weather forecast. Figure 8.29 shows the default
Dashboard.
Figure 8.29
Leopard default Dashboard
By clicking the + (plus) sign in the lower left of the screen, you can show all the Dashboard widgets available. You also can download other widgets and add them to your set. And you can
write your own widgets, as you do in Chapter 19.
By default, the F12 key is used to summon the Dashboard and to put it away. You also can set a
screen corner to summon the desktop, in the Exposé and Spaces preferences pane.
Configuring widgets
When a widget is showing in the Dashboard, when you mouse over it a small “i” appears in the
bottom right, as shown in Figure 8.30a.
Chapter 8: Setting Up Personal System Preferences
219
When you click the “i,” the widget rotates through 180 degrees so you can see the reverse, as
shown in Figure 8.30b
Figure 8.30
Widget information button (a); reverse side of clock widget (b)
a
b
You can now specify the world region you want the clock to display and then the city within
that region. Obviously if your city is not listed, you should select a city in the same time zone as
you are.
Adding a widget
Adding another widget is easy. Just follow these steps:
1.
2.
Click the + (plus) sign at the bottom of the Dashboard display.
Scroll to the second page, and drag the clock icon into your Dashboard.
If your system is capable of Quartz Extreme/Core Image, you see a ripple effect as the
widget settles into place.
3.
Use the “i” symbol to configure the time you want your new clock to show.
Practice by adding a dictionary to your Dashboard, as shown in Figure 8.31.
Figure 8.31
Dictionary widget
220
Setting Up and Customizing Leopard
Some people love using widgets; others loathe them. I’m somewhere in the middle: I sometimes use them!
Summary
In this chapter, you learned about the personal preferences that are available through the
System Preferences panels.
You set Appearance options to your liking and set up your desktop and screen saver using the
options available. You configured the Dock to your liking and learned how to set up Exposé and
Spaces to make your work easier and your Leopard experience more enjoyable.
You learned how to use Leopard as a multilanguage tool to write using many different character sets. Most importantly, you set up your computer with a firewall and other important security settings. You looked at how you can encrypt files so that, should your computer fall into the
wrong hands, no one can glean your private information from it.
Finally, you saw how to configure the Spotlight search utility to give the results you need and
learned how to use widgets on the Dashboard.
Setting Up Hardware
System Preferences
S
o, you’re feeling pretty good now: You got Leopard up and
running on your computer, you set up your personal preferences using System Preferences, you feel satisfied, and you
actually enjoy using Leopard.
Now is the time things start getting hard! Unless you have a genuine Macintosh, setting up your hardware is not easy. Some of it has
been done for you because of the EFI and the kexts that other people have built.
If you’re lucky, as I am with my Dell Mini 9, other people have done
almost everything that needs to be done and it works out of the
box. All I needed to do with the Dell was install my printer driver,
though I don’t often use it.
In this chapter, you learn how to set up much of your hardware on
Leopard. Some of it is quite easy, but some is difficult.
Setting Up Bluetooth
In this section, you learn how to set up Bluetooth and how to pair it
with another device, such as a mobile phone.
In This Chapter
Setting up Bluetooth
If you don’t have a Bluetooth adapter, you can skip this section.
However, you may want to buy one, because they’re relatively
cheap and can pretty much be guaranteed to work even on a
Hackintosh.
Setting up your device
Obviously, before you can do anything, you need to set up the connection to your Bluetooth device. In this case, I go through the
steps of connecting to my mobile phone. No, it’s not an iPhone; it’s
a Nokia N95.
If you have an iPhone, its Bluetooth implementation is incomplete
and you can’t access the internal storage of your phone. If your
iPhone carrier allows tethering, you can use your iPhone as a modem
for your computer, but sadly you can’t do much else with it.
Setting up your mobile phone
After I click Bluetooth in the System Preferences pane, the settings
pane appears, as shown in Figure 9.1.
Setting up CDs and DVDs
Setting up your display
Setting up Energy Saver
Setting up keyboard and
mouse
Setting up print and fax
Setting up sound
222
Setting Up and Customizing Leopard
Figure 9.1
Setup pane for Bluetooth connection
1.
Click Set Up New Device.
Leopard’s Bluetooth Connection Assistant pops up. In Apple-speak, assistants are the
equivalent of wizards in Windows. Figure 9.2a shows the assistant pane.
2.
3.
Click Continue.
Click the radio button for the type of device you want to set up.
Figure 9.2b shows the button I clicked for setting up my mobile phone.
Figure 9.2
Bluetooth Setup Assistant pane (a); Setup Assistant for mobile phone (b)
a
b
Setup Assistant then searches for any mobile phones it can find in the area. Figure 9.3a
shows the result after finding my mobile phone.
Chapter 9: Setting Up Hardware System Preferences
223
This assumes that you have given your phone a name. If you haven’t given it a name, it
will have a MAC address like 00:29:61:88:00:00:1f:d0
4.
Click Continue.
To pair successfully with the device, Leopard generates a number that you key into the
other device. Figure 9.3b shows the phone number generated for my mobile phone,
although I’ve obscured the actual digits.
Figure 9.3
Bluetooth phone discovered (a); passkey to pair with mobile phone (b)
a
b
At this point, your phone should have received a message asking if you want to pair
with your computer.
5.
6.
Enter the passkey into your mobile phone.
Click Continue in Leopard.
Finally, Leopard asks if you’d like to use your mobile phone as a modem to access the
Internet. At the time of this writing, mobile phone companies are a little paranoid
about doing this: It’s known as tethering, and they are worried that it will overload their
capacity. Figure 9.4a shows the screen.
7.
Leave the box checked if you’re brave enough to try it!
This depends on whether or not your carrier allows tethering. In my case, data is so
much cheaper over my ADSL connection that I don’t use the phone as a modem, even
though my carrier allows tethering. When I’m away from home, I can usually get a
wireless connection.
If you place a check in the box beside Show Bluetooth status in the menu bar, you can
click the icon and have a menu, as shown in Figure 9.4b.
224
Setting Up and Customizing Leopard
Figure 9.4
Use phone for Internet connection (a); Bluetooth menu (b)
a
Setting advanced setup options
Bluetooth has some advanced settings, as shown in Figure 9.5
Figure 9.5
Advanced Bluetooth setup options
b
Chapter 9: Setting Up Hardware System Preferences
225
Each option is fairly self-explanatory. You may have encountered the first setting when you first
started your computer if you are using a Bluetooth mouse or keyboard or if for some reason
your computer doesn’t recognize your keyboard when it boots.
Sharing your Internet connection with your phone is the opposite of tethering: It uses your
computer’s Internet connection to connect your phone to the Internet.
Browsing your mobile phone
Selecting Browse Device shows the logical disk drives on my phone, as in Figure 9.6a.
From there, it’s a simple matter of opening a drive, opening folders, and finding the file you
want.
Remember, you can’t do this if you are using an iPhone.
Moving files from the computer to the phone and back is simple, as shown in Figure 9.6b.
Figure 9.6
Browse phone folders (a); file transfer menu for Bluetooth phone (b)
a
b
Setting Up CDs and DVDs
As you can see from Figure 9.7a, you have only a few options to configure with CDs and DVDs.
Options available for each type of medium inserted are shown in Figure 9.7b.
226
Setting Up and Customizing Leopard
Figure 9.7
Options for CDs and DVDs (a); selections for disk media (b)
a
b
I have never touched the default actions because they work for me.
Setting Up Your Display
In this section, you set your display to the best settings for your graphics card and monitor, as
well as for your own comfort.
Setting up a display is one of the most problematic areas of building a Hackintosh. The resolution choices for your display depend on your graphics card as well as your monitor. Thanks to
the hard work of lots of people, you can use many different graphics displays.
TIP
If you are thinking of buying a new computer to run Leopard, particularly a laptop or netbook, check very carefully
that the graphics adaptor is supported in Leopard. The hardware compatibility lists are in Chapter 1.
If you are buying a netbook, you can find a good table listing compatibility at http://
gadgets.boingboing.net/2008/12/17/osx-netbook-compatib.html or
http://tinyurl.com/4z3d9g.
Setting your screen resolution
As shown in Figure 9.8, Leopard can detect the name of my display and all the different resolutions it is capable of.
To change resolution, click the desired resolution and your screen resets to the new resolution.
Leopard doesn’t always quite get it right, and Leopard says a couple of resolutions are available,
but in fact they are not. A couple of times I’ve been left with a display setting that my monitor
can’t display, and I had a black screen! I had to restart by specifying the resolution at the boot time
using the parameter “Graphics Mode”=”1920x1080x32” as shown in earlier chapters.
Chapter 9: Setting Up Hardware System Preferences
227
Figure 9.8
Display settings
Substitute your monitor’s resolution for the 1920 and 1080; remember to include the quotes.
Appendix B contains a table of the different graphics cards used by different Macintoshes. With
the exception of nVidia displays, unless your exact graphics chip has been used in a Mac, you
are unlikely to be able to extract the most performance from your adapter.
For the most part, an unsupported graphics card displays only in 1024 x 768 pixel mode and
without any hardware acceleration. Lack of hardware acceleration means that you can’t browse
your Time Machine backups, nor can you access any of the features of Quartz Extreme/Core
Image. Chapters 20 and 21 cover topics in using QE/CI.
OSX86 Tools by pcwiz has many different kexts available for different graphics cards. I hope
yours is among them.
You can download OSX86 Tools from the Web site at http://code.google.com/p/
osx86tools/downloads/list.
Setting up a color profile
You also can set up a specific color profile for your computer. To do so, click the Color tab on
the display pane, as shown in Figure 9.9.
Unless you are working in the graphic arts industries, I recommend that you don’t touch the
color profiles! I never do.
Click Open Profile to look at your color profile.
Leopard also lets you calibrate your display, providing an assistant for you. The first screen is
shown in Figure 9.10.
228
Setting Up and Customizing Leopard
Figure 9.9
Color pane of display settings
Figure 9.10
Display Calibrator Assistant
Again, because I don’t do any work that requires exact color matching, I haven’t bothered to
calibrate the display other than to go through and look at some of the other profiles. Unless
your display is obviously showing wrong colors or you do lots of work where you need to match
colors, you can probably ignore it too.
Chapter 9: Setting Up Hardware System Preferences
229
Setting Up Energy Saver
In this section, you find out the best settings for your computer to both save energy and
enhance your Leopard experience.
Setting sleep options
As explained in Chapter 8, I don’t bother with a screen saver, either with Windows or with
Leopard. I set up my display to blank after ten minutes and put the computer to sleep after an
hour, although I change that if I’m downloading large files during my off-peak download allowance. This is shown in Figure 9.11.
Figure 9.11
Sleep options settings
Your needs and preferences will obviously differ from mine, so choose whatever suits you best.
You also can access the screen saver setup screen by clicking the Screen Saver button.
Be warned, though, that some Hackintoshes go to sleep without problems, but they do not
wake up from sleep. A bit like me, really!
You can schedule when you want the computer to start up or wake plus sleep, shutdown, or
restart by clicking the Schedule button. This is shown in Figure 9.12.
I also let my disks sleep whenever possible, by checking the “Put the disks to sleep” check box.
The only downside to this is that if I want to access a file on one of my Windows disks, it takes
around five seconds for the disk to spin up and become available.
230
Setting Up and Customizing Leopard
Figure 9.12
Schedule options
Setting wake and power down options
Clicking the Options button displays the wake and other options pane, as shown in Figure 9.13.
Figure 9.13
Wake and power down options
This pane has only two settings: Wake for Ethernet administrator access means that you can
wake your computer by sending a special Ethernet packet to the Ethernet port. It does not work
with Airport or other wireless setups.
The option called Allow power button to sleep the computer has no effect with my computer.
The power button on my keyboard brings up the dialog box shown in Figure 9.14.
Chapter 9: Setting Up Hardware System Preferences
231
Figure 9.14
Power button dialog box
Setting Up Keyboard and Mouse
In this section, you explore the options for setting up your keyboard and mouse to suit your
preferences. As shown in Figure 9.15, the preferences panel has four panes.
Figure 9.15
Keyboard and mouse settings panel
Setting up your keyboard
Use the sliders to set your desired keyboard repeat rate and the delay until repeat. The repeat
rate is the rate at which extra characters are typed: Make the rate very slow for people who have
difficulty with fast motor actions.
232
Setting Up and Customizing Leopard
Delay until repeat is the length of time it takes before the key starts repeating. If needed, you
can switch off key repeat.
Changing modifier keys
Click the Modifier Keys button to change the assignment of your Option, Control, Command,
and Caps Lock keys. Figure 9.16 illustrates the choices.
Figure 9.16
Set modifier keys
If you prefer them the same as they were when originally installed, click the Restore Defaults
button.
For most Hackintosh installations, the default key settings are shown in Table 9.1.
Table 9.1 Keyboard Equivalencies for Windows Keyboard to Leopard
Windows Keyboard Key
Leopard Keyboard Key
Ctrl
Control
Windows key
Command
Alt
Option
Changing your keyboard type
Click the Change Keyboard Type, and Leopard starts an assistant to set up your keyboard. This is
the same one that ran when you started Leopard for the first time after installation.
Used in conjunction with the International settings you explored in Chapter 8, it allows you to
connect keyboards for foreign languages and use them to enter text in that language.
Chapter 9: Setting Up Hardware System Preferences
233
You may also want to check whether any multimedia keys above your function keys work with
Leopard. The mute, volume up/down, play/pause, prev/next track, and stop keys work on mine.
Setting up your mouse
Figure 9.17 shows the settings pane for your mouse.
Figure 9.17
Mouse settings pane
These settings are very similar to the settings in Windows. Tracking speed is the amount the
mouse pointer on the screen moves in relation to the amount you move the mouse.
If the box for Zoom using scroll wheel while holding is checked, you can hold down the Ctrl key
and zoom the whole screen display to focus on a small area.
To see how it works, press and hold the Ctrl key while you move the scroll wheel on your mouse
toward the screen. Figure 9.18 shows my screen magnified to about double normal size.
If you have a mouse with a scroll wheel, try this for yourself. When you do it, note how the
screen moves as you move the mouse pointer. If this makes you seasick, set the option to Only
when the pointer reaches an edge, as shown in Figure 9.19.
234
Setting Up and Customizing Leopard
Figure 9.18
Leopard screen magnified (image blurred because of magnification)
Figure 9.19
Scroll options for magnified screen
Chapter 9: Setting Up Hardware System Preferences
235
Using a Bluetooth mouse and keyboard
Bluetooth allows you to name your mouse and keyboard and to monitor the battery charge, as
shown in Figure 9.20.
Figure 9.20
Bluetooth mouse and keyboard dialog box
Because I don’t use a Bluetooth mouse or keyboard, the illustration can’t show you what these
look like!
Setting keyboard shortcuts
Leopard allows you to change many of the standard key assignments to something of your
choice and to add your own keyboard shortcuts, as shown in Figure 9.21.
236
Setting Up and Customizing Leopard
Figure 9.21
Keyboard shortcuts
Personally, I don’t find much use for adding shortcut keys: Leopard already has all the ones I
need. But let’s create a keyboard shortcut to allow you to import text into a new sticky note.
If you haven’t used sticky notes yet, open Spotlight and type Stickies. Follow these steps:
1.
Open Spotlight by pressing Cmd+spacebar.
On your Windows keyboard, it’s probably the Windows key and the spacebar.
2.
Type Stickies and press Enter.
If this is the first time you’ve used Stickies, it displays two sticky notes explaining what
you can do with them.
3.
4.
Close both notes, saving them if you wish.
5.
Scroll to the bottom of the window, and click the + (plus) sign at the bottom.
Open System Preferences, click Mouse and Keyboard, and then click Keyboard
Shortcuts.
This pops up a new window, as shown in Figure 9.22.
Chapter 9: Setting Up Hardware System Preferences
237
Figure 9.22
Adding a keyboard shortcut for a new application
6.
7.
Click Application, scroll down until you come to Stickies, and select it.
Click in the Menu Title box, and type Import Text.
In the Stickies menu, Import Text has an ellipsis (…) following it. It may look like three full
periods, but it’s actually a character in its own right. To enter an ellipsis, use the Option+;
keystroke. In other words, hold down the Option (Alt) key while you type a semicolon.
8.
Enter the ellipsis, and tab to the next field.
This is where you enter your keystroke shortcut.
9.
Hold down the Control, Command, and Option keys (Ctrl+Windows+Alt), and
press T.
This enters the keystroke into the Keyboard Shortcut box. Figure 9.23a shows the result.
10.
11.
Click Add to add your new shortcut to the keystrokes for Stickies.
Click the File menu for Stickies, and check that your new keystroke is there.
Figure 9.23b shows the File menu with the new keystroke.
Now you need to test your new shortcut.
Figure 9.23
Set Stickies shortcut keystroke (a); Stickies File menu (b)
a
b
238
Setting Up and Customizing Leopard
12.
13.
14.
15.
Launch TextEdit, and create a new file with a couple of lines of text.
Save the file to your desktop.
Bring Stickies to the foreground using Cmd+Tab.
Press your Ctrl+Cmd+Option+T keystroke combination.
This creates a new sticky with the text you saved in the note as shown in Figure 9.24.
Figure 9.24
Text in TextEdit and Stickies
Obviously you wouldn’t go to the bother of creating a text file just to put into a sticky note, but
it’s useful to be able to add text files. Note that Stickies also show any formatting you have in
the note.
Setting Up Print and Fax
In this section, you learn how to set up your printer and fax, if you have a modem.
Setting up your printer
Before you can set up Print & Fax in System Preferences, you need to have a printer installed.
Most recent printers have drivers available for download from the manufacturer’s site.
If your printer does not have a driver available, you may still be able to use it because a CUPS
driver may be available. CUPS stands for Common Unix Printing System, and it has drivers for
many printers. Because of its Unix heritage, OS X and Leopard can use CUPS drivers. In fact, the
Chapter 9: Setting Up Hardware System Preferences
239
driver for my printer, downloaded from the manufacturer’s site, is a CUPS driver, as shown in
Figure 9.25.
Figure 9.25
Print & Fax setup
Printer drivers are normally supplied as disk image (.dmg) files, so you simply double-click the
file to start the Installer. Most printer drivers require that you reboot after installation.
Sharing the printer is simply a matter of checking the Share this printer box.
As you can see, very little can be changed here; the same is true on the Driver and Supply Levels
panes. With a genuine Macintosh, using an Apple printer, more information is shown, including
a blatant plug for buying more supplies!
Setting up faxing
If you don’t have fax modem, you won’t see any reference to it in System Preferences. But you
can still use something similar to faxing if you want to send sensitive information over the
Internet. The problem with simple e-mail is that unless you have arranged with the recipient to
encrypt the file, it is sent as plain text and can be intercepted.
To get around this, you can create a document the mimics the fax you want to send and print it to
a PDF file. This is available on the Print menu for all Leopard applications, as shown in Figure 9.26.
Then simply e-mail the PDF file to the recipient. The main advantage is that you are not sending
plain text over the Internet, so hijacking the information is much harder, though not impossible.
240
Setting Up and Customizing Leopard
Figure 9.26
Printing to a PDF file
You can password protect the PDF file, though of course you have to let the recipient know the
password. You can do this through a simple phone call.
Setting Up Sound
Apart from wireless networking, sound is generally the most difficult part of Leopard to set up
correctly. It’s definitely not something you can do on your own. In this section, you learn how to
install the correct drivers (kexts) for your computer system and how to configure System
Preferences for sound.
Finding the correct audio drivers
If you are lucky, you have installed the correct drivers when you installed Leopard. If you
installed the retail Leopard, having the correct drivers is impossible, so you need to search for
them.
Chapter 9: Setting Up Hardware System Preferences
241
CROSSREF
In Chapter 1, you created a table showing all the hardware in your computer. Now is the time to go back and find the
Vendor ID and Device ID for your sound system.
First, obviously, you want to search the Internet. A good place to start is www.insanelymac.
com/forum/index.php?showtopic=97811, which I converted to a TinyURL for you:
http://tinyurl.com/mxojbe
If you are using a well-known brand and model of computer, search for sound drivers for that
computer. Otherwise, search for your motherboard or your sound chip.
If you can’t find what you need, try some of the forums, such as insanelymac.com, osx86
project.org, pcwizcomputer.com, and osx86scene.com. Correct etiquette is that
you must do your own searches before you ask someone for help. Don’t expect to log in to the
forum and ask that someone send you the correct kexts. You are likely to get some abuse!
After you have your kexts installed, you can then use System Preferences to set up your sound.
CROSSREF
After you find the correct drivers, install them using kexthelper, as described in Chapter 6.
If, after all this, you can’t find kexts that work with your computer, you can try using a USB
sound device. These are available online, particularly through eBay. Many are less than $10 and
may or may not work. For a bit more money, you can buy something that comes with OS X drivers on CD.
Simply plug it into a spare USB slot and plug your amplifier into its sound outputs.
Setting up sound in System Preferences
As with many System Preferences, sound has three panes: Sound Effects, Output, and Input.
Setting sound output
After installing your kexts and rebooting, I suggest you start with the second pane—Output—
because you could spend time worrying that your sound isn’t working, when all that’s happening is that you are trying to set it for the wrong output. This pane is shown in Figure 9.27.
On my computer, all the outputs work, except possibly Digital Out because I don’t have
anything to test it with.
In my case, the correct output is Built-in Speaker, even though I don’t have built-in speakers!
Still, who cares? It works!
242
Setting Up and Customizing Leopard
Figure 9.27
Sound output pane
Setting sound effects
This allows you to choose the sound effects you hear when Leopard wants to get your attention, as shown in Figure 9.28.
Figure 9.28
Sound effects
All the alerts use the same sound, unlike Windows, which has dozens of sounds, including the
highly irritating (to me!) Start Navigation sound that clicks every time you search for a new Web
site or folder on your computer.
Chapter 9: Setting Up Hardware System Preferences
243
Setting sound input
Figure 9.29 shows the sound input settings. On my system, the internal microphone and webcam
both work. I’ve never tested the line in. I’m not sure how the line out can show as a line in port!
Figure 9.29
Sound inputs
Interestingly, Leopard detected my webcam as soon as I booted for the first time and offered to
take my photo for my user account.
Summary
In this chapter, you set your system preferences for most of your hardware. This included simple
devices such as Bluetooth devices, CDs and DVDs, Energy Saver, and keyboard and mouse, as
well as more complicated devices such as your display, printer, and sound.
By now, you should be getting to know your way around Leopard and feeling comfortable with
using it.
In the next chapter, you set up more of your system preferences, including networking.
Setting Up Internet and
Network Preferences
O
nce upon a time, computers weren’t connected to the
Internet! Once upon a time, they weren’t even connected
to each other, but those days are long gone.
It’s almost impossible to imagine using a stand-alone computer
that doesn’t connect to any other computer, whether on a local
area network or the Internet.
In this chapter, you go through the process of setting up your
Hackintosh to connect with the Internet and with other computers
for sharing files and hardware resources. You also set up QuickTime
on your computer.
Setting Up Your Network
In this section, you learn how to configure your networking connections. For most desktop computers, this is relatively simple, and
Leopard generally finds your wired network connections automatically. For laptops that use wireless networking, the story is not so
straightforward.
Using a wired connection
Leopard has detected and pretty much automatically set up networking on every desktop computer I’ve installed it on. This is
because only a few networking chips are used in both generic computers and Apples.
My motherboard has two Ethernet connectors, identified as
Ethernet Adaptor (en0) and Ethernet Adaptor (en1). By default,
each of them connects to the router/modem using DHCP.
DHCP stands for Dynamic Host Configuration Protocol. When you
connect a computer to the router, the router acts as a DHCP server
and assigns the computer an IP address. This happens automatically after the computer connects to the router. Addresses are in a
private range of addresses, allocated by international agreement.
Private means they are located inside a single network and cannot
be directly accessed from outside. Each computer inside the network uses Network Address Translation (NAT) to direct information
packets that come through a single IP address to the appropriate
computer.
In This Chapter
Setting up your network
Setting up sharing
Setting up MobileMe
Setting up QuickTime
246
Setting Up and Customizing Leopard
TIP
You can find out more about DHCP and private IP addresses by consulting Wikipedia.
Different router manufacturers use different ranges of private IP addresses, but most are in the
192.168.x.y range of addresses. The manual for your router will tell you the range of address
used.
Figure 10.1 shows the configuration of my desktop computer before connecting an Ethernet
cable.
Figure 10.1
Network adaptors before connection
A few seconds after the cable was plugged in, the computer was given its own IP address by the
router, as shown in Figure 10.2
Each network adaptor has an identifier known as its Media Access Control (MAC) address. Every
adaptor manufactured by every manufacturer has its own unique MAC address. If you’re interested (although I have no idea why you would be!), you can find your adaptor’s MAC address by
clicking Advanced on the network pane and then clicking Ethernet. Every computer on the
planet has a different address.
Many routers keep an internal table of network adaptor identifiers and assign the same IP
address to it each time it connects.
Chapter 10: Setting Up Internet and Network Preferences
247
Figure 10.2
Network adaptors after connection
Giving the adaptors sensible names
I always rename my adaptors. In my case, my fixed Ethernet adaptors are stacked one on top of
the other, so I named one of them Top Port and the other … yes, Bottom Port.
At the bottom of the panel showing the adaptors is a button with a cogwheel and a down
arrow on it. Click that to give your connections new names.
Figure 10.3a shows the menu for renaming the adaptors. Figure 10.3b shows the drop-down
box for entering the new name.
Figure 10.3
Menu for configuring services (a); renaming adaptor (en0) (b)
a
b
248
Setting Up and Customizing Leopard
Setting your own IP address
It may happen that your router doesn’t automatically set your IP address, so Leopard provides a
method of setting it yourself. To do it, you need to know a little bit about your network and
router. Figure 10.4 shows the menu to set your own address.
Figure 10.4
Setting IP address manually
Before you can complete the dialog box, you need to know the following:
The address of your router
The address range your router will accept
Follow these steps to set your IP address:
1.
2.
3.
Click Using DHCP to open the drop-down box.
4.
In DNS Server, enter the private IP address for your router.
Select Using DHCP with manual address.
Enter the IP address you want to use, ensuring that it is in the range for your
router.
Figure 10.5 shows this information for my computer and router.
Using the network assistant and diagnostics
If you click the Assist me… button on the Network pane, you can start either the network assistant or network diagnostics. In my experience, neither of them is at all helpful; maybe with a
real Macintosh they help, but they’ve never provided me with much help. Use them if you have
problems, but you most likely will have to look elsewhere.
Chapter 10: Setting Up Internet and Network Preferences
249
Figure 10.5
Manual DHCP configuration
Using a wireless connection
As mentioned in the earlier chapters, setting up wireless networking is one of the most difficult
parts of getting a Hackintosh up and running. The reason is simply that Apple only uses a small
number of wireless adaptor chips, and if yours is not one of them, you will have difficulties.
Some Dell computers use the same wireless adaptor as Apple uses, so they work out of the box.
Or to misquote Apple: “They just work.”
Finding network adaptors that work
After trying several different internal wireless cards for my computer and failing to get any of
them to work, I settled on a USB wireless adaptor.
I have tried several different USB adaptors, and these are the only ones that have worked for me:
Netgear WG111v2
RokAir
Asus WL-167g
I bought each of them from eBay. RokAir supplied a CD containing the Mac drivers, the Netgear
drivers came from their site, and I found the Asus drivers through insanelymac.com.
Good luck!
250
Setting Up and Customizing Leopard
Installing driver software for the wireless network
After you have inserted the USB adaptor, you need to install drivers. These can be downloaded
from the Internet normally as disk image (.dmg) files. These are installed using the standard
Leopard installer.
This sequence of steps shows the installation of the Netgear wireless adaptor. Your wireless
adaptor may be different, but the steps are essentially the same:
1.
Unzip the file you downloaded, if required.
This mounts the disk image or opens the folder containing the installer package, as
shown in Figure 10.6.
Figure 10.6
Netgear installer package
2.
Double-click the package to start the installer, as shown in Figure 10.7a.
When the installation completes, you are required to restart your computer, as shown
in Figure 10.7b.
3.
Restart your computer.
When your computer has restarted, the Netgear control application asks you to enable
the WLAN card, as shown in Figure 10.8a.
4.
Open System Preferences, and go to the Networking panel.
You may see nothing different, or you may have a new Ethernet Adaptor listed. In this
case, nothing is listed.
Chapter 10: Setting Up Internet and Network Preferences
251
Figure 10.7
Installer for Netgear wireless adaptor (a); installation completion (b)
a
5.
b
Click the + (plus) sign at the bottom of the adaptors pane.
This opens a dialog box to allow you to add the new adaptor, as shown in Figure 10.8b.
Figure 10.8
Enable WLAN Message (a); add new network adaptor dialog box (b)
a
b
6.
Click the drop-down box for FireWire interface. This shows the existing adaptors
as well as the new adaptor you just installed, as shown in Figure 10.9a.
7.
Select the new adaptor (en4 in this case).
252
Setting Up and Customizing Leopard
8.
Give it a meaningful name in the Service Name box.
In this case, I used the name Netgear WG111, as shown in Figure 10.9b.
Figure 10.9
Add new Ethernet adaptor (a); naming the adaptor (b)
a
9.
b
Click Create.
After a few seconds delay, the new adaptor appears in your Adaptors pane on the left,
and it should use DHCP to get an IP address. If it doesn’t get one automatically, assign
one manually, as in the section above.
10.
11.
12.
Click Using DHCP to open the drop-down box.
13.
14.
In DNS Server, enter the private IP address for your router.
Select Using DHCP with manual address.
Enter the IP address you want to use, ensuring that it is in the range for your
router.
Return to the Netgear application, and click Available Network.
Figure 10.10 shows the networks visible in the area around my home router.
If you haven’t already set up secure networking on your router, you should drop everything and do it now! These days, WEP encryption is pretty easy to crack, so you should
use WPA2_PSK encryption because it’s more secure.
15.
Click Connect.
Your adaptor detects the type of encryption you are using, so you now have to provide your encryption key. Figure 10.11 shows this screen.
Chapter 10: Setting Up Internet and Network Preferences
Figure 10.10
Available networks
Figure 10.11
Network security properties
253
254
Setting Up and Customizing Leopard
16.
Enter the key into the Network key field and again into the Confirm network key
field.
No, it won’t let you copy and paste!
17.
Click OK.
Hooray! At last you’re connected wirelessly. Figure 10.12 shows the Netgear connected
screen.
Figure 10.12
Netgear connected wirelessly
From now on, each time you start Leopard, this screen pops up for a second or two,
and then, if you are connected, it hides itself, though you see its icon in the Dock.
Of course, the procedure for connecting your own wireless network adaptor will be different.
The Netgear and RokAir use the same Realtek chip, so the setup is very similar. The Asus adaptor uses a Ralink chip, and the installation is not quite as smooth.
In my experience, and that of others, the Asus adaptor is a bit hit or miss. Sometimes you have
to unplug the adaptor and then plug it in again before it will work. Sigh.
Managing without networking
Can you manage without networking? Possibly, depending on what you do with your computer. For me, it would be almost impossible.
Chapter 10: Setting Up Internet and Network Preferences
255
Setting Up Sharing
In this section, you learn how to set up your Hackintosh to share files and printers with other
computers, running both Macintosh and Windows.
You can set up your Hackintosh to share CDs and DVDs, and Web sites stored on your computer, but most often you will want to share just files and printers, and occasionally control your
computer remotely. You also can set up screen sharing, but, apart from the novelty value, it’s
probably not much use to you.
Setting up file sharing
Setting up file sharing is a relatively simple process. It allows you to share files with Macintosh
and Windows computers, as well as via File Transfer Protocol (FTP). Follow these steps:
1.
Open System Preferences, and select Sharing.
Figure 10.13 shows the opening screen in the sharing panel.
Figure 10.13
Sharing panel
2.
Check the box beside File Sharing.
This switches on file sharing, but at present you’re not sharing anything.
3.
Click the + (plus) sign under Shared Folders.
256
Setting Up and Customizing Leopard
4.
In the drop-down sheet, navigate to the folder you want to share.
Figure 10.14 shows the sheet with the Public folder selected.
Figure 10.14
Folder selection sheet
5.
Click Add.
Figure 10.15 shows the panel after adding the Public folder for file sharing.
Figure 10.15
File sharing users
Chapter 10: Setting Up Internet and Network Preferences
257
Note the default permissions applied.
CROSSREF
Appendix B gives more information on file permissions.
Because this folder is in your home folder, as shown in Figure 10.16, you are the owner
of it.
Figure 10.16
Path to shared folder
Users refers other users with accounts on the computer; Everyone means anyone who
is not a user of the computer.
You can change the permission for each group of users; you can take anyone off the
list, or you can add anyone who is in your Address Book.
Permissions that are available for each group are shown in Figure 10.17a.
Write only is an interesting option. It allows you to set up the folder so you have complete control. Others can’t see what’s in the folder, but they can add their own files. In
Leopard it’s known as a Drop Box and is quite a useful option in some circumstances.
6.
Change the permissions for any group of users.
Be sure not to change your own permissions; otherwise, you may not be able to read
or write from a different computer.
258
Setting Up and Customizing Leopard
7.
Click the Options button.
Figure 10.17b shows the options available for the types of sharing.
Figure 10.17
Permissions for groups allowed to access the folder (a); type of sharing
options (b)
a
b
AFP stands for Apple Filing Protocol and is the protocol used for sharing data between
Apple computers.
FTP stands for File Transfer Protocol and is a standard protocol for sharing files
between very different types of computer systems. Every networked computer operating system can implement some form of FTP.
SMB stands for Server Message Block and is used mainly by Windows computers. No,
it’s not that Apple couldn’t bear the thought of writing Windows instead of SMB; it’s
just that it fits the same form as the other two protocols.
8.
If you are going to access your files from a Windows computer, check the SMB
box, and then click Done.
Setting up printer sharing
If you have a printer set up, it should show when you click Printer Sharing, as shown in
Figure 10.18.
To share your printer, check the box beside Printer Sharing.
Chapter 10: Setting Up Internet and Network Preferences
259
Figure 10.18
Printer sharing
To connect to the printer from another Mac, open its System Preferences to the Printers pane. Click
the + (plus) sign and add the printer from the dialog box that pops up, as shown in Figure 10.19.
It really is that simple!
Figure 10.19
Add Printer dialog box
260
Setting Up and Customizing Leopard
Setting Up MobileMe
In this section, you learn about MobileMe, Apple’s file-sharing and synchronizing service. It
allows you to synchronize your calendar, contacts, and e-mails across several different computers, as well as an iPhone or iPod Touch. You can get a free trial, use it for 60 days, and then
decide whether you want to pay for it or not.
If your network is not yet set up and operating, skip ahead to the next section. Otherwise, you
can set up your account from your Windows computer. Follow these steps:
1.
Use your Web browser to go to http://me.com and sign up for a free trial.
Figure 10.20 shows the signup screen.
Figure 10.20
MobileMe signup screen
2.
After you are signed up, open System Preferences and click MobileMe.
Figure 10.21 shows the pane for connecting to MobileMe on your computer.
3.
Log into your account by providing your username and password.
Your MobileMe status appears in the pane, as shown in Figure 10.22.
Chapter 10: Setting Up Internet and Network Preferences
261
Figure 10.21
MobileMe installer pane
Figure 10.22
MobileMe account details
Synchronizing with MobileMe
On the next pane is the MobileMe synchronization page, shown in Figure 10.23.
You can choose to sync automatically or manually, and you can choose exactly what you want
to synchronize. Place a check in each box for the items you want to sync and how often, choosing from hourly, daily, weekly, or manually.
262
Setting Up and Customizing Leopard
Figure 10.23
MobileMe synchronization frequency
Using your iDisk
Part of your subscription to MobileMe covers a 10GB backup disk. This is stored centrally on
Apple’s computers, but you can download a copy of it to all your computers. You can then
access your files from your computer, and they are synchronized with MobileMe. In this way,
you can keep the same files on all your computers in sync. This pane is shown in Figure 10.24.
Figure 10.24
iDisk properties pane
Chapter 10: Setting Up Internet and Network Preferences
263
When you connect to your iDisk, a new disk icon appears on your desktop, as shown in
Figure 10.25.
Figure 10.25
iDisk desktop
icon
You edit files in your iDisk and then synchronize them with your MobileMe account. You can
then access them from another computer (or iPhone or iPod Touch) when you synchronize that
computer.
Using the Back to My Mac feature
Back to My Mac is a very neat feature that allows you to easily connect from another Mac (or
Hackintosh!) anywhere in the world to your Mac at home, provided it is switched on, of course!
Connecting Back to My Mac from another Mac
If you have an Apple modem, which is unlikely, given that you’re reading this book, setting it up
is apparently pretty simple. If you don’t have an Apple modem, you may have to do a bit more
work, and your modem must be capable of being set up that way.
My modem-router is a Netcomm NB6Plus4W, and it worked fine straight away. On the Back to
My Mac pane of MobileMe in System Preferences, click Start. If your modem is working well, you
should see the display in Figure 10.26.
On the other Mac (or Hackintosh), you should see an entry in the sidebar allowing you to connect to your remote. In my case, I named my desktop computer PB’s iMac and then connected
to it from my Dell Mini 9. Figure 10.27 shows the folders on my desktop, with the screen shot
taken from the Dell Mini 9.
Of course, from the desktop I also can connect to the netbook. And, with a little bit of work, I
can connect to either from my Windows computer, although my desktop computer does double duty: sometimes it runs Vista, sometimes Leopard.
264
Setting Up and Customizing Leopard
Figure 10.26
Back to My Mac is turned on.
Figure 10.27
Connecting to my desktop Hackintosh from the netbook Hackintosh
Just for fun, I also turned on screen sharing and took a screen shot from my Dell Mini 9, showing
the desktop of my desktop computer. This is shown in Figure 10.28.
Chapter 10: Setting Up Internet and Network Preferences
265
Figure 10.28
Screen sharing from netbook to desktop computer
Connecting Back to My Mac from Windows
If you want to set up Back to My Mac on your Windows computer, read this online article:
http://lifehacker.com/366940/back-to-my-mac-from-a-pc.
If your modem doesn’t work straight away, you need to set up Port Forwarding on it. Consult
the manual for your router for Port Forwarding.
On my router, the setup for Port Forwarding is under Advanced. Figure 10.29 shows the screen
on my router after I set up Port Forwarding.
First, you need to know the IP address of your computer. This is shown on the System
Preferences Network pane.
You need to set up TCP forwarding on port 443 and UDP forwarding on port 4500.
266
Setting Up and Customizing Leopard
Figure 10.29
Port Forwarding setup
Setting Up QuickTime
By comparison with setting up networking, setting up QuickTime is a dream! In this section, you
learn about some of the options available and how to set them. Figure 10.30 shows the first
pane in QuickTime System Preferences.
When you first open the QuickTime settings panel, you are invited to buy QuickTime Pro. The
Pro version adds some features that are not in the standard, free version. These features include
the ability to convert formats and to capture video from webcams and other things with both
audio and video.
Go ahead and buy it if you choose, but I suggest you look around for other applications first.
On other panes, you can configure how you want your browser to handle QuickTime movies
and updating with other CODECs. CODEC means COmpress-DECompress. It is how information
in audio and video is compressed for delivery and then decompressed by the player. Figure
10.31 shows the pane that takes you to Apple’s Web site to update your CODECs.
QuickTime as a standard cannot play many different formats, such as DivX, XVid, and .wmv files.
If it tries to play a file it can’t decompress, it asks you to install the new CODEC. Unfortunately, it
doesn’t offer much guidance as to which CODEC is required.
Chapter 10: Setting Up Internet and Network Preferences
267
Figure 10.30
QuickTime settings
My advice is to install Perian (http://perian.org/). Its creators describe it as the Swiss
Army knife for QuickTime. After you install it, QuickTime plays just about everything you try to
load. I haven’t found anything yet that it can’t decode.
On the Streaming tab, you can control how long QuickTime waits until it starts playing
streamed media. Normally, you buffer media coming from the Internet so that if a packet of the
media is delayed, the file can keep playing from the buffer and the buffer fills up again when
packets start flowing in again.
You can control the size of the buffer with the slider, as shown in Figure 10.32.
Figure 10.31
Install new CODECs
268
Setting Up and Customizing Leopard
On the Advanced pane are some options for handling different media types, all of which I leave
alone!
Figure 10.32
Buffer size control
Summary
If you went through everything in this chapter, you configured all the really hard stuff, and you
have a Hackintosh that is almost completely set up. Hopefully, your choice of hardware was
such that it was possible to get everything working.
You set up your networking and sharing options so that you can connect to the Internet and
share files with other computers. You should also now be able to share your printer with other
computers.
If you signed up for a MobileMe account, you learned how to synchronize bookmarks, contacts,
and other items between your computers and an iPhone or iPod Touch, if you have one. You
learned how to connect to another computer using Back to My Mac.
Setting Up System
Preferences
Y
ou’re on the home straight toward getting your Hackintosh
set up completely, the way you want it. If you’ve been working through the book chapter by chapter, you have set up
the most difficult preferences. From now on, it’s mostly about
housekeeping.
In this chapter, you find how to set up accounts for other users, set
the date and time, and explore differences in the way time is handled between Windows and Leopard and the headaches it can
cause.
This chapter helps you set up a new account and apply parental
controls so you can control what your children do with the computer. You also set up Time Machine and the assistive technology
built in to Leopard.
Setting Up User Accounts
One big difference between Leopard and Windows 7 and Vista is
how user accounts are handled. Vista and Windows 7 force you to
create a user account with password and force you to log in to an
account when the system boots. As you’ve already seen, Leopard
forces you to create an account but then allows you to boot
directly into that account.
I don’t recommend doing that for two reasons. One is that anyone
who steals your computer can go straight to your files without
knowing your login or password. The other is that the default
account is an administrator account and has complete control over
everything on your computer.
In this section, you create a new account with normal user permissions and then set Leopard not to log in automatically.
Setting login options for your
account
Follow these steps to set your login options:
1.
Open System Preferences, and select Accounts.
Figure 11.1 shows the greeting screen for Accounts.
In This Chapter
Setting up user accounts
Setting up date and time
Setting up parental
controls
Running Software
Update
Setting up Speech
Setting up Startup Disk
Setting up Time Machine
Setting up Universal
Access
270
Setting Up and Customizing Leopard
Figure 11.1
Accounts main screen
2.
3.
Click the lock icon, and enter your account password in the pop-up window.
Click the Login Options button at the bottom of the left panel.
This opens a new dialog box, as shown in Figure 11.2.
Figure 11.2
Login options dialog box
Chapter 11: Setting Up System Preferences
271
Table 11.1 explains what each option on the screen does.
Table 11.1 Login Options
Option
Meaning
Automatic login
Each time you start the computer, it asks for a username and password before
letting you do anything.
Display login window as list of users
This lists the name of each user. Click one to allow password entry.
Display login windows as name and password
This does not display any usernames. It requires you to know a username and
password.
Show Restart, Sleep and Shut Down buttons
This one’s pretty obvious!
Show Input menu in login window
This allows you to choose a different language setting at the time of logging in.
Show password hints
Again, this one’s pretty obvious.
Use VoiceOver at login window
This speaks prompts at the user login. VoiceOver is explained later in this
chapter.
Enable fast user switching
This allows you to switch users without having to log in; your login name
appears on the right side of the menu bar.
Whether to use the other language input window and whether to use VoiceOver are personal
choices depending on the needs of other users of your computer.
Disabling the Restart and other buttons seems a little pointless, because the unauthorized user
can still turn the power off.
On my desktop computer, VoiceOver does not work at the login window, although it works on
all other occasions. It does work on my Dell Mini 9.
TIP
For greatest security, disable automatic login, display the login windows as name and password, and don’t show password hints.
Creating a new account
In this section, you create a new account with standard user permissions and with parental controls implemented. Follow these steps:
1.
2.
3.
Open System Preferences and the Users panel.
Click the lock, and enter your password in the box.
Click the + (plus) sign below the Login Options button.
272
Setting Up and Customizing Leopard
4.
5.
Select Managed with Parental Controls as the type of account.
Enter a name, password, and password hint for the account.
Obviously, you would not type the same password hint as I have, as shown in Figure 11.3.
Figure 11.3
Creating a managed account
6.
Click Create.
If automatic login is still turned on, Leopard asks whether you want to leave automatic login
switched on. Needless to say, you don’t want to leave it on if you have gone to the trouble of
creating a new user account.
Setting Finder options
Figure 11.4 shows the options available to manage the new account.
The Use Simple Finder option is suitable only for inexperienced users (not necessarily young!).
By clicking the Only allow selected applications option, you can control exactly what applications the managed user can use.
Controlling content
On the second panel, you control the type of content the managed user can access, as shown in
Figure 11.5.
Chapter 11: Setting Up System Preferences
Figure 11.4
Managed account options
Figure 11.5
Content management
273
274
Setting Up and Customizing Leopard
Controlling mail and chat
On the Mail and iChat pane, you can list the addresses the user can contact either through mail
or chatting.
Adding time limits
One very useful feature is being able to set time limits on when the user can use the computer,
Of course, you need to keep track of school vacations manually.
Gathering logs of user activity
As a concerned parent, you can see exactly what your child has been doing by viewing the logs
on the Logs panel. If you find the user has visited sites you think are inappropriate, you can add
restrictions that prevent it from happening again.
Using fast user switching
Fast user switching means that you don’t have to log out of your account to log into another
account. Your open applications keep running in the background. Here’s how to switch users:
1.
Check the box for Enable fast user switching.
Note that your name now appears on the menu bar.
2.
Click your name.
A new menu appears, as shown in Figure 11.6.
Figure 11.6
Fast user switching menu
3.
Click Login Window…
Your screen turns into a box that rotates and brings you the login window. To return
to where you were, type your username and password. Or enter another username
and password.
Chapter 11: Setting Up System Preferences
275
Setting login items
Each time you log in, Leopard can automatically start applications for you that may run in the
background. By default, Leopard starts a couple of applications, but you can add any others you
like. For example, you may want to open Mail and Safari each time you log in. You can add them
to the list of login items.
1.
2.
Open System Preferences, and click Accounts.
Click Login Items to see the applications that start up each time you log in.
Figure 11.7 shows the applications that start automatically when I log in.
Figure 11.7
Login items
3.
4.
5.
Click the + (plus) sign, and navigate to your applications folder.
Select Mail, and click Add.
Click + (plus) again, select Safari, and then select Add.
If you decide you no longer want an application to start automatically, simply highlight it in the
list and click the – (minus) button.
Use the check box beside each login item to hide it when you login. My own preference is to
open Mail but leave it hidden when I log in. Because I’m always using the Web for research, I
always open Safari.
276
Setting Up and Customizing Leopard
Setting Up Date and Time
If you are dual booting Leopard and Windows, keeping the time and date synchronized
between the two operating systems can be a big issue. Be sure to work through the second part
of this section.
Setting Date and Time is simply a matter of opening System Preferences and going to the Date
and Time panel. When you installed Leopard, you set the time and date. After you connected to
the Internet, Leopard located your nearest time server (in my case, Apple Asia) and set the date
and time automatically.
If you need to change the date or time for any reason, uncheck the box for Set date & time automatically. You then can change the date or time. This is shown in Figure 11.8.
Figure 11.8
Setting the date and time
Setting your time zone
When you installed Leopard, you set your time zone, and you have no need to change it for a
desktop. If your Hackintosh is a laptop or netbook, you need to change the time zone as you
travel.
To change it, simply click the world map somewhere near where you are located and choose
the Closest City from the drop-down box. This is shown in Figure 11.9.
In my case, the nearest city to me is Sydney, which is where I live. Snow Leopard can use geodata about your location to set your time zone automatically.
Chapter 11: Setting Up System Preferences
277
Figure 11.9
Closest city drop-down box
Setting clock options
Leopard lets you set a number of options for how you use the clock. These are shown in Figure
11.10a.
Not everyone likes it, but I like Leopard to announce the time to me every half hour. I find Alex’s
synthesized voice soothing. Maybe I’m just weird! You can set how fast “he” speaks and the volume so he doesn’t startle you. These options are shown in Figure 11.10b.
Figure 11.10
Clock options (a); customizing Leopard’s time announcements (b)
a
b
Synchronizing time with Windows
Windows uses your local time as the base for its timekeeping; Leopard (and, incidentally, every
other operating system) uses Greenwich Mean Time (GMT) as the base for its timekeeping.
What this means is that, after running Leopard and returning to your Windows system, the time
is out of sync by the difference between your local time and Greenwich Mean Time.
278
Setting Up and Customizing Leopard
Sydney, Australia, is 10 hours ahead of GMT, except during summer, when we are 11 hours ahead.
When I shut Leopard down and restart in Windows Vista or 7, the time is 10 hours (or 11 hours
in summer) behind local time in Sydney. It’s a pain to have to remember to change the time
immediately on starting Windows.
You might think that it really doesn’t matter if you set your time zone to somewhere that
removes the difference between the two systems, but if you then go to a different time zone,
you once again have the incorrect time. More importantly, in an international setting, time zone
differences are important when people are located in two different time zones.
If you search the Internet, you will find several purported fixes for this, mostly involving changing the Windows Registry. Although they may work in Windows XP and they appear to work for
a time in Windows 7 and Vista, in fact they are not permanent fixes.
I have found that the only reliable fix is that created by Zephyroth, which is available at www.
hackint0sh.org/forum/f184/68045.htm. I created a TinyURL at http://tinyurl.
com/ktvylg.
Follow these steps to fix this time discrepancy:
1.
Download the package.
Unfortunately the standard unarchive utility in Leopard can’t open it, so you need to
download another application: The Unarchiver, available for download on the Apple
site at www.apple.com/downloads/macosx/system_disk_utilities/
theunarchiver.html.
2.
3.
Download The Unarchiver from the Apple site.
4.
Right-click the Zephyroth package, and select The Unarchiver to open it.
Open your Downloads folder in Finder, and drag The Unarchiver to your
Applications folder.
Because the file is so small, it unarchives almost instantly and creates a new package
called Localtime-Toggle.pkg.
5.
Double-click the package.
This opens Leopard’s Installer to install the package.
That’s all there is to it. Now, when you shut down Leopard, your time is set back to your
Windows time. No more setting the time when you start Windows.
Running Software Update
Software Update is a service similar to Windows Update: It updates the software on your computer as new software modifications become available. In this section, you use Software Update
to update your Leopard installation.
Chapter 11: Setting Up System Preferences
279
In my experience, Software Update poses no problems if you installed the retail version of
Leopard. My desktop and netbook both have retail installs, and Software Update has never
caused me a problem. Follow these steps to get it set up:
1.
Open System Preferences, and select Software Update.
As you can see in Figure 11.11, I leave Check for updates set to Weekly, and I check the
option to Download important updates automatically.
Figure 11.11
Software Update scheduled check
2.
Set your frequency of checking to what you require.
To see the updates that have been added to your system, click the Installed Updates tab. Figure
11.12 shows the updates that have been installed to my Dell Mini 9.
Figure 11.12
Installed updates
280
Setting Up and Customizing Leopard
Setting Up Speech
Apple has done a huge amount of work on assistive technology in Leopard, from voice synthesis, voice recognition, magnified text, and keyboard assistance. You explore the other facets of
the technology in the last section of this chapter. In this section, you look at speech recognition
and speech synthesis.
Setting up Speech Recognition
To set up speech recognition, you obviously need a microphone. Many webcams have built-in
microphones, and Leopard can use them. Follow these steps to work with speech recognition:
1.
Open System Preferences, and select Speech Recognition, as shown in Figure 11.13.
Figure 11.13
Speech Recognition setup screen
2.
Select your microphone—most likely Internal microphone—from the
drop-down box.
3.
Click Calibrate….
This brings up the screen shown in Figure 11.14a.
4.
Speak into the microphone, and move the slider until the level is mostly in the
green section and going to the red at times.
5.
Say each of the phrases on the left.
When each phrase is recognized, the words flash.
Chapter 11: Setting Up System Preferences
6.
7.
281
Keep adjusting the volume slider until each phrase is recognized.
Click Speakable Items On.
A new icon appears on your desktop—the speech recognition symbol, as shown in
Figure 11.14b.
Figure 11.14
The microphone calibration screen (a); Speech Recognition On symbol (b)
a
8.
9.
10.
b
Put a check in the Speak command acknowledgment check box.
Click Commands to find the commands that Leopard recognizes.
Click Open Speakable Items Folder.
This lists all the commands that Leopard understands, as shown in Figure 11.15.
Try out some of the commands by speaking them and seeing how accurate Leopard is.
Remember to press the ESC key to make Leopard start listening.
My experience is that, after I have trained the speech recognition engine, it understands my
commands about 90 percent of the time.
Remember that speech recognition is designed to be an assistive technology to aid people with
limited motor skills. I can’t imagine what it would be like in an office with 30 people speaking
commands into their computers.
282
Setting Up and Customizing Leopard
Figure 11.15
Speakable commands
Exploring Text to Speech
Most people either love or hate Leopard’s text-to-speech capabilities. I’m somewhere in the
middle. I have it set tell me the time every 30 minutes and when alerts are displayed, which I
find useful when I’m not sitting at the computer.
1.
Open System Preferences, and then open Text to Speech.
This opens the panel as shown in Figure 11.16.
2.
Click Set Alert Options….
This opens the sheet shown in Figure 11.17a.
By default, Leopard uses the name of the application as the alert, but you can change
that.
3.
Click the drop-down box for Application name.
You then set Leopard to use a phrase from the standard list either using the next one
or one chosen at random. If you don’t like any of the standard phrases, you can enter
your own.
4.
Select Edit Phrase List….
A new window pops up, as shown in Figure 11.17b.
Chapter 11: Setting Up System Preferences
283
Figure 11.16
Text to Speech preferences
Figure 11.17
Alert options sheet (a); Alerts phrase list (b)
a
5.
b
Click Add, and enter your new phrase in the box.
You may prefer a phrase a little less imperative than what I’ve added; but it’s your
choice!
6.
Set the delay before Leopard alerts you.
284
Setting Up and Customizing Leopard
Exploring Leopard’s voices
Leopard comes with a range of voices: male, female, and “novelty,” according to Apple’s
description. Most of them are understandable, barely, but Alex sounds very much like a real person. Unfortunately, many installations leave Alex out because he takes up around 750MB on the
install disk.
If you have the retail version, you have Alex installed.
Setting Up Startup Disk
For your Hackintosh, you are not likely to have any choice but the disk you started. When using
a real Macintosh connected to a network, you may have options to start your computer from a
networked Mac. Even if you are connected to a network, your Hackintosh can be guaranteed
not to start from a disk that starts a regular Mac.
Figure 11.18 shows the setup screen for Startup Disk.
Figure 11.18
Startup Disk setup
One option you may want to explore is using your computer as a target disk for another computer. You need a FireWire port on each computer. After they’re connected in this way, your
computer’s hard disk becomes available for the other computer.
Setting Up Time Machine
As explained in Chapter 8, Time Machine is a brilliant backup system. Basically, after it’s set up,
you can forget about it, secure in the knowledge that all your files are being backed up. If you
accidentally erase a file, you can get it back using Time Machine.
Chapter 11: Setting Up System Preferences
285
In this section, you set up Time Machine and use it to recover a deleted file.
Setting up a separate hard disk
As soon as you plug a hard disk into a fresh installation of Leopard, it asks if you want to use it as
a Time Machine backup. This is shown in Figure 11.19.
Figure 11.19
Time Machine backup disk
The disk does not have to be empty, but it does have to be formatted for HFS+. If it is not formatted for HFS+, Leopard offers to format it for you. After it is set up, you need to do very little.
You can prevent Leopard from backing up some files and folders. You might use this if you have
large files that change frequently. One example is virtual machines.
If you are using Parallels or VMWare, each time you exit the application, a new file is written to the
disk. Because these files are often 1 to 2GB in size, backing up a different one each hour could be a
waste of space, particularly because both allow you to save a snapshot of the state of the system.
To exclude files or folders, click Options on the Time Machine panel. A sheet appears that allows
you to add files or folder to be excluded from backup. This is shown in Figure 11.20.
Figure 11.20
Files or folders to exclude from Time Machine
286
Setting Up and Customizing Leopard
Click the + (plus) sign and use the Finder window to search for the files or folders.
Recovering a file using Time Machine
CAUTION
If your Leopard installation does not have Quartz Extreme/Core Image working, you can’t recover files this way. If you
have a translucent menu bar, QE/CI is working.
Time Machine has one of the coolest interfaces in Macland. When you click the Time Machine
Dock icon, the whole screen slides down, and you see into the vast reaches of space! Well, not
quite. Figure 11.21 shows the screen as it’s sliding down.
Figure 11.21
Entering Time Machine
To see how to recover files using Time Machine, we do something completely artificial here, but
the principles apply regardless. Follow these steps:
1.
2.
3.
Open TextEdit, and create a new file.
Enter the text This is a test of Time Machine.
Save the file to your desktop as Lazarus.
Chapter 11: Setting Up System Preferences
4.
287
Force Time Machine to do a backup by clicking the icon in the menu bar and
selecting Back Up Now.
Time Machine should only take a few seconds to do the backup.
5.
When the backup is complete, delete the file from your desktop and empty the
Trash.
6.
7.
Select Enter Time Machine from the menu bar icon.
When you are in Time Machine, click the Finder window behind the one on top.
You should see the file you just deleted.
8.
Highlight the file, and click Restore on the bottom right of the Time Machine display.
9.
Exit Time Machine.
Lo and behold, your file is restored to the desktop.
Fixing the networking kernel extension setup
With a Hackintosh, sometimes Time Machine doesn’t like the disk you use. Typically, it accepts
the disk, but when you do your first backup, it complains with an error. I haven’t had it happen
with the retail version, but I have had trouble with other versions.
Fixing it is relatively easy, although it requires a bit of confidence and the ability to follow
instructions! But if you’ve reached this point in the book, you should be fine.
CROSSREF
See Appendix B for instructions on fixing the problem.
Setting Up Universal Access
Apple has spent lots of time setting up access for people with eyesight, hearing, and motor skill
difficulties. In this section, you explore the various assistance options and suit them to your
needs. Figure 11.22 shows the main panel for Universal Access.
Setting up for seeing difficulties
VoiceOver is the utility to give voice prompts for users who have sight difficulties. To open the
utility, click Open VoiceOver Utility….
The options are too many to go through here. Figure 11.23 shows the main screen.
288
Setting Up and Customizing Leopard
Figure 11.22
Universal Access main panel
Figure 11.23
VoiceOver setup utility
If you need to set up VoiceOver for another user, you and the user should explore the options
together.
For milder sight difficulties, you may simply turn zoom on or invert the colors on the screen.
Zoom can be turned on from the keyboard using the Command-Option-8 keystroke. That is
Windows key-Alt-8 on most Hackintoshes. To zoom in on the screen, use Command-Option-=
(equal sign); to zoom out, use Command -Option- - (minus sign).
Chapter 11: Setting Up System Preferences
289
Setting the display to invert colors may help, as well as setting the screen to use only grayscale.
You also can increase or decrease screen contrast.
One cute trick you can play the next time you go into an Apple store is to press the ControlCommand-Option-8 key combination. That’s Ctrl-Windows key-Alt-8 on most Hackintoshes. Try
it for yourself.
Setting up for hearing difficulties
Coping with hearing difficulties is easier than coping with eyesight difficulties, so you don’t
need to make many adjustments for hearing impairment. The only real option is to flash the
screen when an alert sound occurs. Some people prefer to turn the sounds off anyway and just
use the screen flash. Try it and see if you like it.
Setting keyboard options for assistance
Sticky Keys is the major way of coping with physical disabilities related to keyboard use. The
options are shown in Figure 11.24.
Figure 11.24
Assistive keyboard options
When Sticky Keys is turned on, rather than pressing a modifier key (Shift, Command, and so on)
at the same time as the alphanumeric key, you can press the modifier key first, release it, and
then press the alphanumeric key.
290
Setting Up and Customizing Leopard
Setting mouse options for assistance
If you have a vision difficulty, you can increase the size of the mouse pointer. In addition, you
can use the numeric keypad in place of the mouse. Figure 11.25 shows the options available for
changing mouse behavior.
Figure 11.25
Assistive mouse options
Summary
In this chapter, you completed setting up your Hackintosh the way you want it, taking into
account any physical limitations you may have. You set up accounts for other users. You set up
your desired date and time preferences, and added a small program to change the way time is
handled in the Macintosh so no time difference exists when you return to Windows after using
Leopard.
You saw how versatile Leopard is at setting up parental controls for other users. You set
Leopard speech options to suit your needs and updated your software. Finally, you set up Time
Machine to perform incremental backups and used assistive technology if required.
Now you are ready to start exploring the software applications that come with Leopard.
Using Your
Macintosh
III
N
ow that you have your Hackintosh set up the way you want
it, and you’re up to speed on the differences between
Windows and Leopard, it’s time to do some real work!
With guidance, you work your way through using the six main
applications that are installed with Leopard:
Safari for browsing the Web
Mail for managing e-mail
Address Book for managing contacts
iCal for managing calendars
Preview for viewing many different types of graphics
content
iTunes for managing music collections
After learning about how to make your Windows NTFS disks writable, you then explore methods of running Windows within OS X.
You install and use Parallels and VMware enabling you to use
Windows, either as a fresh installation or using your existing
installation.
To continue the virtualization theme, you finally install Leopard
on a virtual machine in Windows.
III
In This Part
Chapter 12
Using the Main
Macintosh Software
Chapter 13
Reading and Writing to
Windows Disks
Chapter 14
Running Windows
in OS X
Chapter 15
Running OS X on
Windows Using VMware
Using the Main
Macintosh Software
L
eopard comes with a good range of basic software to handle
many of the common tasks you use a computer to do, such as
Web browsing, e-mailing, keeping lists of your contacts, managing your schedule, and playing music.
Of all the applications used on a computer, the Web browser is
probably the most frequently used. Leopard comes with Safari, a
pretty capable browser. Mail for Leopard is a basic e-mail package
that allows you to send and receive messages.
Leopard’s Address Book application can store all your contact
details, while iCal is a quite sophisticated calendar application.
Preview can view many different types of files, not just graphics
files, and iTunes has become almost the default music manager,
not just on Leopard, but on Windows as well, in the same way that
the iPod has virtually become the only music player.
In this chapter, you explore how to set up each application to your
liking and how to synchronize between other software and your
faux Mac.
In This Chapter
Using Safari
At the time of this writing, Safari is at version 4.03. If you do not
have this version, you should update to the latest version using
Software Update. As vulnerabilities are discovered in every application that deals with the outside world, they are updated and
patched. So for your own peace of mind, be sure you are always
using the latest version.
In this section, you explore the Safari Web browser and learn how
to set it up to your liking.
Starting Safari for the first time
When you first start Safari, its home page is set to http://
apple.com, as shown in Figure 12.1.
Of course, you can change your home page to any site you like.
Safari also has a default set of bookmarks when you first start.
Apple has made an attempt to include the most popular sites in
the bookmarks, but you can change these too.
Using Safari
Using Mail
Using Address Book
Using iCal
Using Preview
Using iTunes
294
Using Your Macintosh
Figure 12.1
Safari top sites screen
Safari opens with the Top Sites display. This starts out with sites chosen by Apple, but as you
browse the Web, sites that you view frequently replace the defaults that Safari uses to start.
Working with bookmarks
Although Safari has a default set of bookmarks, it’s highly unlikely that they will meet all your
needs, so you should change them as you wish.
Adding new bookmarks
Follow these steps to add a new bookmark to the bookmarks bar:
1.
2.
3.
4.
Type the URL you want to bookmark into the address bar.
Wait for Safari to navigate to the page.
Drag the URL displayed in the address bar down to the bookmarks bar.
Edit the name of the bookmark.
Remember that the shorter the name, the more you can fit on the bookmarks bar.
5.
Click OK.
Chapter 12: Using the Main Macintosh Software
295
Deleting bookmarks
Deleting bookmarks is simply a matter of dragging the bookmark from the bar to anywhere else
on the desktop. The bookmark disappears with a puff of smoke.
Editing bookmarks
You can edit bookmarks in a couple of ways. You can edit each one singly or several at once, as
shown in Figure 12.2.
Edit several bookmarks at once by following these steps:
1.
Click the open book icon at the left of the bookmarks bar.
This shows all your bookmarks in two columns.
2.
3.
Click the name of the bookmark to edit it, or click the address to edit that.
When you have finished, click the open book icon to return to the site you were
viewing in that tab.
Figure 12.2
Editing bookmarks
296
Using Your Macintosh
Setting Safari preferences
Like all applications, Safari has its own preferences settings. Not all of what I would call preferences are available on that menu, however; some are set using the View menu.
Setting preferences on the View menu
Settings in the View menu are not classified as preferences, but to me they are, because they
change the way Safari looks on your screen. Figure 12.3a shows the preferences that can be set
through the View menu.
My personal preference is to always have the bookmarks bar, toolbar, and status bar visible,
except on my Dell Mini 9 because the screen is only 600 pixels tall.
Setting other preferences
Safari has many different preferences located, in the usual Leopard fashion, on a series of panes
with tabs, as shown in Figure 12.3b.
Figure 12.3
View menu (a); Preferences pane for Safari (b)
a
b
Chapter 12: Using the Main Macintosh Software
297
General preferences
On the General Preferences pane, you get to choose the page that Safari loads when it opens.
By default, the Top Sites pane is loaded, but you can choose what it starts with. Figure 12.4a
shows the menu to choose the default page when opening a new window or a new tab.
If you select Tabs for Bookmarks Bar, the new window opens with all your bookmarks as tabs.
My own preference is to open new tabs and windows with a blank page. You choose what you
want to see.
You can choose how long Safari keeps your links to visited sites and whether to automatically
remove links to downloaded files. Note that this doesn’t delete the actual files you’ve downloaded; just the links. The files stay in your download folder.
Appearance preferences
On the Appearance tab, you can choose the default fonts that Safari uses. This is almost useless
nowadays because most pages you visit specify the fonts to use. This is shown in Figure 12.4b.
Figure 12.4
Preference menu for new page or tab (a); Appearance preferences (b)
a
b
One useful switch is Display images when the page opens. If you uncheck this, Safari loads the
text on the page without loading the images. If you’re on a slow connection, this speeds up
page loading quite dramatically. Note that after you uncheck the preference, you may need to
quit Safari and restart.
Bookmarks preferences
On the Bookmarks preferences pane, you can select the bookmarks you want displayed. This is
shown in Figure 12.5a.
298
Using Your Macintosh
Top Sites is the button with the 3x3 grid of square dots in the top-left corner of the title bar.
Personally, I never use it, so I don’t have it displayed. If you check Address Book, Safari searches
through your address book and displays any links to pages it finds in there. By default, Leopard
has a page in your address book for the Apple Web site. This is displayed if you check the box.
Bonjour is Apple’s implementation of the zero configuration network protocol. If you install
iTunes in Windows, it automatically loads Bonjour. It allows your computer to easily search the
network and show any other computers on the network. My home network doesn’t have any
Web sites available, so I don’t bother with having Bonjour on the bookmarks bar.
Tabs preferences
Figure 12.5b shows the preferences on the Tabs pane.
Figure 12.5
Bookmarks preferences (a); Tabs preferences (b)
a
b
You cannot set much here. Command-click is checked to open a link in a new tab. My own preference is to use a right-click and choose Open Link in a New Tab rather than Command-click.
When you click a link, you can have it bring that link to the foreground by checking the preference for When a new tab or window opens, make it active. My preference is to have links open
in background tabs (the default behavior) because it better suits my way of working. You may
want to change this.
RSS preferences
RSS stands for Really Simple Syndication. Most Web sites these days have an RSS feed to bring
new articles to you without you having to go to sites. This preference pane allows you to set
Safari as your default RSS reader, as shown in Figure 12.6.
Chapter 12: Using the Main Macintosh Software
299
Figure 12.6
RSS preferences
By default, the other choice you get is Mail, but I prefer to use Google Reader with Safari. If you
choose to use Safari, when you visit a Web site with the RSS link in the toolbar, click it. Safari displays the newsfeed for the site.
If you want to aggregate all your newsfeeds into one tab, follow these steps:
1.
2.
3.
4.
Create a new bookmark called RSS Feeds.
Visit a site whose RSS feed you want to add to your aggregated feeds.
When the site has loaded, click the RSS button at the right end of the address bar.
When the URL says “feed:// …”, click and drag the URL into your new bookmark
folder.
Note that the bookmark folder shows the number of unread items beside the label.
5.
Click the bookmark, and select the feeds you want to see.
This is shown in Figure 12.7.
Figure 12.7
Menu showing newsfeeds
300
Using Your Macintosh
Autofill preferences
Safari can copy data from your card in Address Book to fill in forms you find on Web sites. This is
shown in Figure 12.8.
Figure 12.8
Autofill preferences pane
Maybe I’m a little paranoid, but I prefer to fill in that data myself, so I don’t use Autofill. Choose
whether or not you want to use it.
Security preferences
Security preferences allow you to make your Web surfing a little more secure. You can enable or
disable plug-ins, Java, and JavaScript, and block pop-up windows. The preferences are shown in
Figure 12.9.
My own view of secure browsing on the Web is that I restrict permissions as much as possible. If
I need to enable something to view a particular Web site, then I enable it. For example, I disable
plug-ins and Java, although I leave JavaScript on by default. Most Web sites these days require
JavaScript.
I also block cookies from third-party sites. Although cookies can be very useful for Web sites
that you visit, cookies from sites that serve advertisements for example can find out which sites
you’ve visited and when you visited.
You also can disable the ability of some Web sites to create databases on your computer. I have
never used a site that wants to create a database.
Finally, you can set Safari so that if you attempt to send a nonsecure form to a secure Web site,
it alerts you. By the way, you can tell whether a site is secure by the lock icon in the toolbar.
Advanced preferences
Surprisingly, Safari has very few advanced preferences. This is shown in Figure 12.10.
Chapter 12: Using the Main Macintosh Software
301
Figure 12.9
Security preferences pane
Figure 12.10
Advanced preferences pane
Not using font sizes smaller than a certain size and using Tab to highlight items on a Web page
are intended for accessibility. For people with eyesight difficulties, small text is hard to read; for
people who have difficulty moving the mouse, pressing the Tab key allows you to move from
link to link on the page.
302
Using Your Macintosh
Again for visual impairment, you can set your own style sheet that might have very large fonts.
This overrides the style sheet used on the Web site so it doesn’t look like it was designed to
look.
Surfing privately
One final option for Safari is the ability to surf privately. This means that it does not save your
history of Web sites you visit, it deletes references to downloaded files, it saves no information
(including passwords), and so on. Figure 12.11 shows the greeting screen for when you enable
private surfing in Safari.
Figure 12.11
Private surfing in Safari
Using Mail
In this section, you learn how to set up and use Leopard Mail.
Leopard Mail is a useful e-mail client. It enables you to set up and use several different accounts.
It can use either POP (Post Office Protocol) or IMAP (Internet Message Access Protocol).
POP is the oldest protocol and uses offline mail storage. Every so often, the mail client connects to
the post office server and downloads any new mail. All processing is done on the local computer,
and generally the mail is deleted from the post office server after it has been downloaded.
IMAP, on the other hand, is used in a pseudo online fashion where mail is downloaded from the
server to the client but is not deleted on the server, so it can be accessed from a different computer. This means that if you access your mail from your computer at home and then access it
from your computer at work, you see the same mailbox. Mail stays there until you explicitly
delete it.
Most ISPs offer POP mailboxes for free. Many also offer IMAP, but for an extra fee. Unless you
really must access your mail from several different computers, you probably don’t need to pay
extra for it.
Chapter 12: Using the Main Macintosh Software
303
Linking to your e-mail provider
Before you can start doing anything with Mail, you must have an account set up. If you have a
POP e-mail account with your ISP, you probably should set up a new mail account with a Webbased server. If you use your POP account in both Windows and Leopard, you need to be sure
that you don’t delete the mail from the server when you retrieve it into each mail client.
In this example, I choose Google mail because you can easily set up an IMAP account.
To set up your account with Mail, carry out the following steps:
1.
2.
Use Safari to go to gmail.com.
Click Create an account, and follow the prompts to create a new account.
Figure 12.12 shows the new e-mail account set up in Gmail.
Figure 12.12
New account in Gmail
3.
4.
After you have created the account, start Leopard Mail.
Select Preferences from the Mail menu.
304
Using Your Macintosh
5.
Click the Accounts button.
Figure 12.13a shows the accounts panel with no account set up.
6.
7.
Click the + (plus) sign at the bottom of the accounts pane.
Fill in the detail on the first screen of the Mail Setup Assistant.
Figure 12.13b shows the first screen.
Figure 12.13
Accounts panel before setting up an account (a); first screen of mail setup assistant (b)
a
8.
9.
b
Uncheck the box for Automatically set up account, and press Continue.
Select IMAP as the Account Type, and fill in the User Name and Password.
Figure 12.14a shows this screen.
10.
11.
Click Continue.
12.
Check the account details in the Summary screen.
Enter a description for the outgoing mail server, and reenter the User Name and
Password, as shown in Figure 12.14b.
Figure 12.15 shows this summary screen.
Chapter 12: Using the Main Macintosh Software
305
Figure 12.14
Incoming mail server setup (a) outgoing mail server setup (b)
a
b
Figure 12.15
Mail setup assistant summary screen
13.
Finally, select Get all new mail from the Mailbox menu.
Mail now shows your Inbox with the same e-mails you saw using Safari when you
created the account. This is shown in Figure 12.16.
Adding any other accounts is simply a matter of following Steps 4 through 13.
306
Using Your Macintosh
Figure 12.16
Inbox view of new mail
Setting Mail preferences
As with every Mac application, you set preferences for Mail under the Mail menu. It has nine
sheets. In this section, you work through each of the sheets to set it up to your liking.
Setting General preferences
Figure 12.17 shows the General preferences panel.
Under General preferences, you can change your e-mail handler, which defaults to Mail. You
can set how often Mail checks for new mail. If you use MobileMe as your e-mail address, it uses
push mail so your mail arrives directly in your inbox as soon as it arrives at MobileMe.
One useful action for Mail is to have it show you the count of unread messages on its Dock icon,
as shown in Figure 12.18.
If you get a meeting request via e-mail, you can choose to add it to your iCal calendar.
Chapter 12: Using the Main Macintosh Software
307
Figure 12.17
General preferences
Figure 12.18
Unread mail count
Setting Accounts preferences
As you can see from Figure 12.19a, you can use Mail to check several different e-mail addresses.
By clicking the Mailbox Behaviors tab, you control how Mail handles messages. Figure 12.19b
shows the Mailbox Behaviors pane.
308
Using Your Macintosh
Figure 12.19
Accounts preferences (a); Mailbox Behaviors pane (b)
a
b
By default, your incoming e-mail is stored on the server if you are using IMAP; my recommendation is to always use the server to store your sent messages. In the event you have to reinstall
Leopard and you don’t have a recent Time Machine (or other) backup, you don’t lose all your
sent mail if you use this option. And you never know when it might be useful legally!
On the final pane for Accounts preferences, you can set some advanced preferences. These are
shown in Figure 12.20.
My recommendation is to leave these alone. Obviously, you almost always want the account
enabled, and by keeping copies for offline viewing, you can download your mail quickly, log
out, and check your messages after you disconnect. You can write your replies and send them
the next time you connect to the Internet. Obviously, this is very useful when traveling.
Setting RSS preferences
If you choose to use Mail as your default RSS reader, you can change it here, as shown in
Figure 12.21.
This is similar to the RSS preferences tab in Safari.
Setting Junk Mail preferences
Mail has good junk-mail filtering. I have never bothered to change any of these preferences,
because I find it works perfectly for me; very rarely does any junk mail get through.
Chapter 12: Using the Main Macintosh Software
309
Figure 12.20
Accounts Advanced preferences
Figure 12.21
RSS preferences
Setting Fonts & Colors
I’m pretty happy with all the default choices of fonts for displaying my mail. These are shown in
Figure 12.22a.
One font I’m not keen on is that chosen for notes. It’s not too bad on the note itself, but it looks
garish in the inbox. This is shown in Figure 12.22b.
310
Using Your Macintosh
Figure 12.22
Fonts & Colors preferences (a); default font for Notes (b)
a
b
I changed it to Georgia 14 Italic. Nice.
Setting Viewing preferences
Viewing preferences affect the way messages are displayed in your mailboxes. Figure 12.23
shows the preferences pane.
A couple of comments are in order here. Although Mail puts a blue dot beside unread messages, most e-mail systems use a bold font to indicate unread messages. I prefer to turn that on.
The option Display remote images in HTML messages means that when you receive an HTML
message with embedded images, these are stored on a server external to your e-mail server, so
Mail has to download the images from another server. This could compromise your security
because you are letting the external images site know that your computer is there.
Personally, I leave it unchecked, but I’m very careful about how I treat e-mail, particularly mail
from someone I don’t know. Like most things, it’s a compromise between security and convenience. Make your own choice!
One option that can help you here, although it is complicated, is to view the full headers of a
suspect e-mail, but that’s beyond the scope of this book!
Setting Composing preferences
I prefer to leave the Composing preferences at their default settings.
Chapter 12: Using the Main Macintosh Software
311
Figure 12.23
Viewing preferences
Setting up signatures
A signature is the text at the end of a message identifying the sender and the organization,
often having a legal disclaimer. If you need to add these, you set them in the Signatures pane.
Using other mailboxes
Leopard Mail allows you to create new mailboxes in which to store messages. These are not the
same as new accounts; think of a new mailbox as being like a new folder in an existing e-mail
account. They are useful to keep messages sorted in ways that make sense to you. For example,
you could put all the messages from a group you belong to in the same mailbox, making them
easier to find.
First you need to create a new mailbox and then tell Mail how to select messages to go in the
mailbox.
Creating a new mailbox
To create a new mailbox, follow these steps:
1.
On the Mail menu, click Mailbox and then click New Mailbox.
Figure 12.24a shows the menu.
2.
Select where you want to create the new mailbox and what you want to call it, as
shown in Figure 12.24b.
You may or may not be able to create a new mailbox on your server. If you are using
MobileMe you can; with other e-mail providers, probably not.
312
Using Your Macintosh
Figure 12.24
Creating a new mailbox (a); naming your new mailbox (b)
a
3.
b
Create the mailbox on your “Mac.”
For this example, I used the name “MacWorld” to store messages from MacWorld.
Figure 12.25 shows the result of creating the new mailbox.
Figure 12.25
New mailbox showing in sidebar
Chapter 12: Using the Main Macintosh Software
313
Setting up rules
After you have the new mailbox set up, you need to tell Mail how to put messages into it. To do
this you create a new rule, from the Rules preferences pane, as shown in Figure 12.26.
Figure 12.26
Rules preferences pane
Before you start on the following instructions, be sure your Inbox is selected in Mail.
To set up a new rule, follow these steps:
1.
Click Add Rule.
Figure 12.27a shows the dialog box to create a new rule.
In this example, I called the rule MacWorld and told it that if the From: field of the
message contains the word “macworld,” then move the message to the MacWorld
folder.
Note that case is ignored in the Contains field.
You can add many more conditions, but for this example, we just use one condition.
2.
3.
Click OK after entering your conditions.
On the sheet that drops down, as shown in Figure 12.27b, click Apply.
Since you selected your Inbox, Mail applies the rule to messages already in the Inbox.
Mail automatically applies the rules to any new messages you receive.
314
Using Your Macintosh
Figure 12.27
Create a new rule (a); apply rules to selected mailbox (b)
a
4.
b
Select the new mailbox (MacWorld in this case) to see the messages that have
been moved from your Inbox.
This is shown in Figure 12.28.
Figure 12.28
Messages moved to new mailbox
Using smart mailboxes
Creating a new mailbox and applying rules to messages moves your messages around. Mail has
Smart Mailboxes that present a different view of your e-mails without moving them. Smart mailboxes gather messages that meet your conditions.
For example, you might create a smart folder that shows messages from your family. Go
through the following steps to create a new smart folder:
1.
From the Mailbox menu, select New Smart Mailbox.
Figure 12.29 shows the drop-down sheet.
Chapter 12: Using the Main Macintosh Software
315
Figure 12.29
Sheet for defining a smart mailbox
In this case, you want to include everyone with the same surname as you (Baldwin in
my case) but exclude yourself, so leave the condition as all.
2.
3.
Enter your surname in the first line, and then click + (plus).
In the second line, select From and Does not contain, and then select your first
name.
Figure 12.30 shows the definition sheet for my family.
Figure 12.30
Definition sheet for smart mailbox
You finish up with a new folder with a star icon in the middle.
When you view the content of the folder, it shows the messages that meet your criteria, but
they are not moved to the smart folder; they remain in their mailbox.
Smart Mailboxes can be very useful for gathering messages together that are stored in different
mailboxes but relate to a common theme.
316
Using Your Macintosh
Using Address Book
Address Book is a simple application that aims to do one job and succeeds quite well. It uses the
metaphor of cards with an index. As you select each name, the index card is displayed on the
right, as shown in Figure 12.31.
Figure 12.31
Address Book
If you want to edit a card, simply select the card and click Edit.
Setting preferences
In keeping with the simplicity of the application, the preferences also are quite simple. If the
default fields are not sufficient for your needs, you can add more fields. Figure 12.32a shows the
default fields listed in the preference pane.
Each of the double triangles leads to a pop-up menu that allows you to select a different item
name. Figure 12.32b shows the choices available for a phone number.
If you choose to, you can share your address book with other MobileMe users. Use the Sharing
pane in preferences.
Chapter 12: Using the Main Macintosh Software
317
Figure 12.32
Default fields for Address Book (a); telephone number choices (b)
a
b
Synchronizing with a mobile phone
Although Address Book can’t directly synchronize with a phone, Leopard has an application
that allows you to do so if you have Bluetooth enabled on both devices. It’s called iSync and can
synchronize between Address Book and iCal and your mobile phone. Unfortunately you can’t
sync an iPhone this way: You need to use iTunes and the USB cable. Figure 12.33a shows the
simple iSync screen.
To use iSync, you must first set up Bluetooth. Follow the instructions at the start of Chapter 9.
Your phone may require an additional driver to enable it to synchronize with your computer.
Consult your phone manufacturer’s Web site.
My phone is a Nokia N95, and I downloaded a driver to enable it to sync with iSync.
If you attempt to sync your phone before downloading the correct driver, you probably will
receive an error message saying that iSync cannot connect to the phone. After you have
installed the driver, you should receive a message saying that your device was found, as shown
in Figure 12.33b.
318
Using Your Macintosh
Figure 12.33
iSync screen (a); Device found screen (b)
a
b
Double-click the phone’s name to add it to iSync. After you have done that, you see a dropdown sheet asking what it is you want to synchronize, as shown in Figure 12.34.
Figure 12.34
Data to synchronize
Now click Synchronize, and wait while the devices are synchronized.
Chapter 12: Using the Main Macintosh Software
319
Synchronizing with Yahoo
Synchronizing your Address Book with your Yahoo contacts is easy and built into Address Book.
Follow these steps to synchronize with Yahoo contacts:
1.
2.
3.
4.
5.
6.
7.
Open Address Book.
Click Preferences on the Address Book menu.
On the Preferences pane, check the box Synchronize with Yahoo.
Click the Yahoo button, and click Accept to accept the terms of service.
Enter your Yahoo ID and password.
Start iSync.
Check the boxes for Enable syncing on this computer and Show status in menu bar.
You now find a new icon consisting of two half circles with arrows on them. This is the
Synchronize button.
8.
Click the Synchronize button, and wait while Address Book is synchronized with
your Yahoo contacts.
You should receive an alert warning you that you are about to synchronize contacts
with Yahoo, as shown in Figure 12.35.
Figure 12.35
Yahoo synchronization alert
9.
Check your Address Book and your Yahoo contacts to ensure that the synchronization worked.
320
Using Your Macintosh
Synchronizing with Google contacts
Although the help file for Address Book says it’s a simple matter of checking the Synchronize
with Google check box on the General tab in preferences, it works only for iPhone and iPod
Touch.
However there is a workaround at http://lifehacker.com/393855/enablegoogle-contact-sync-without-an-iphone-or-ipod-touch or http://
tinyurl.com/3o5pdu. It’s not for the faint-hearted. Be sure to read the comments.
Using iCal
Leopard has a calendar application called iCal. Although it is not hugely sophisticated, it is certainly worth using as a basic calendar. It is capable of synchronizing with other devices and of
viewing calendars located on other systems.
Figure 12.36 shows the default calendar view.
Figure 12.36
Default iCal view
Synchronizing with a mobile phone
Follow the instructions above on synchronizing Address Book with your phone, using iSync.
Chapter 12: Using the Main Macintosh Software
321
Synchronizing with Google calendar
Unlike Address Book, iCal is very easy to synchronize with Google calendar. In fact, I use Google
calendar as my master calendar and synchronize Outlook calendar in Window, iCal, and my
mobile phone.
Follow these steps to synchronize iCal with Google calendar:
1.
2.
3.
4.
5.
6.
Open iCal, go to the Preferences pane, and click the Accounts tab.
Click the + (plus) button to add an account.
Type Google for the description.
Type your Google username and password.
Click the triangle to open a new prompt for Server Options.
Type https://www.google.com/calendar/dav/YOUREMAIL@gmail.com/user, replacing
YOUREMAIL by your Gmail username.
Figure 12.37 show your screen at this point.
Figure 12.37
iCal new account settings
7.
Close iCal preferences.
You now see a new entry in your calendar sidebar showing your Google account.
While the calendars are synchronizing, you see the usual Leopard rotating wheel.
Synchronizing with Yahoo calendar
At the time of this writing (July 2009), you must use the new beta of Yahoo calendar. If you are
using the old calendar, log in and go to http://switch.calendar.yahoo.com to accept
the terms of service.
Follow the instructions above for Google calendar, but use your Yahoo username. For the
server, type https://caldav.calendar.yahoo.com.
322
Using Your Macintosh
Using Preview
Preview is a neat application: Not only does it preview graphics files, like Windows Picture
and Fax viewer, but it also previews many other types of files as well, especially Adobe Reader
documents. And if that’s not enough, it allows you to do simple edits, including resizing, of your
photos. Snow Leopard extends its capability even further by adding annotation tools.
For a complete list of the file types that Preview can open, go to http://en.wikipedia.
org/wiki/Preview_(software).
Setting Preview preferences
Preview has very few preferences to set. Figure 12.38 shows the main preferences pane for Preview.
Figure 12.38
Preview preferences pane
Preview’s default behavior is to open each image in a separate window, but I prefer to set it to
always use the same window and have images displayed actual size.
With those settings, as you open each new image, it gets added to the sidebar so that you can
move from one image to the next. For me, coming from Windows, there is one minor irritation:
Windows Picture and Fax Viewer moves from one image to the next just by using the arrow
keys. Preview doesn’t do that. You have to remember to select all the images you want to preview at once or be prepared to add each one individually.
Chapter 12: Using the Main Macintosh Software
323
Editing with Preview
With Preview, you can make minor edits to graphics files. The Edit menu has the usual Cut,
Copy, and Paste entries. Using the selection and moving tools on the toolbar, you can extract a
section of the image and cut it or copy and paste to a new location. You also can paste the
selection into a different image. Figure 12.39a shows the selection menu.
On the Tools menu, you find many options to change the image. This menu is shown in
Figure 12.39b.
The Adjust Color menu allows you to make many adjustments to the image, more so than
Windows Photo and Fax Viewer, although it lacks an automatic correction mode that most photo
processing packages have. Figure 12.39c shows the color adjustments possible with Preview.
Figure 12.39
Preview selection menu (a); Preview tools menu (b); Preview color adjustments (c)
a
b
c
Using Preview with PDF files
One very useful feature of Preview when used with PDF files is the ability to store notes inside
the PDF file. Figure 12.40 shows a note stored within a PDF file.
324
Using Your Macintosh
Figure 12.40
Note stored within a PDF
Using iTunes
In the same way that the iPod and iPhone have become almost ubiquitous, so iTunes has
become more or less ubiquitous for managing them. In this section, you look at using your
Windows-formatted iPod on your “Mac.”
Synchronizing with your iPod
If, like me, you set up your iPod using a Windows computer, it is formatted as a FAT volume.
Because Leopard can read from and write to FAT volumes, you can easily copy music to it from
your Leopard computer. Remember, though, that you can’t take the music from your iPod and
store it in Leopard, but you can connect it and play music from it.
Figure 12.41a shows the message I got on first connecting my Windows-formatted iPod to
Leopard.
Chapter 12: Using the Main Macintosh Software
325
After it is connected, it becomes available in just the same way as it does in Windows. The display shows that it was formatted in Windows, as shown in Figure 12.41b.
Figure 12.41
Synchronization message from iTunes (a); iPod formatted under Windows (b)
a
b
You can use iTunes in Leopard to play your iPod files created on your Windows computer.
Playing files on your Windows disks
iTunes in Leopard plays any music file that’s stored on your Windows disks. Its default behavior
is to copy the files to your music library in Leopard, which is probably not what you want. To
prevent this from happening, follow these steps:
1.
2.
3.
Open iTunes preferences.
Go to the Advanced tab.
Uncheck the box for Copy files to iTunes Music folder when adding to library.
Figure 12.42 shows the Advanced pane.
4.
To add a folder on a Windows disk, select Add to library… on the File menu, navigate to the folder you want to add, and click Open.
iTunes leaves the original files on your Windows disk, but they become part of your
iTunes music in Leopard. After all, your iTunes library is simply a file that points to
where the actual music files are stored.
5.
On the File menu, select Library, Consolidate library….
Figure 12.43 shows the warning you receive.
Now you see the selected folders on your Windows disk added to your iTunes library. You can
play any of them, provided that your Windows disk is available to Leopard.
326
Using Your Macintosh
Figure 12.42
iTunes Advanced pane
Figure 12.43
iTunes consolidate library warning
Summary
In this chapter, you explored the standard software applications that are included with Leopard.
These covered the basics of using a computer, including a very good Web browser, as well as a
good e-mail client, address book, and calendar application, all of which can be linked together
to manage your personal and business life.
In addition, you explored the Preview application that allows you to make simple manipulations
to graphics images in many different formats and you can view and add notations to PDF files.
Reading and Writing
to Windows Disks
U
p to now, you have been concentrating on what’s happening with your Leopard disk. But you need to be able to
access other disks as well. If you’re like most Windows users,
you have at least one physical hard disk and two or more partitions.
If these disks and partitions are formatted in the very old Windows
format, using a File Allocation Table (FAT), Leopard can both read
and write to them. But if you’re using disks and partitions formatted
with NTFS (New Technology File System), and you should, then it’s
not quite so easy because, by default, Leopard can read from but not
write to them.
In this chapter, you find out how to read and write both formats
and about some of the pitfalls.
Reading and Writing to FAT
Partitions
In this section, you see how to read and write to FAT partitions and
how to view hidden files in Leopard. You also learn about the functions of hidden files and why Leopard uses them.
Initially, in MS-DOS, the file allocation table consisted of 12 bits, which
limited the total capacity of a disk to 32MB. Yes, 32 MEGAbytes!
Because the majority of personal computers used only floppy disks,
this wasn’t a big issue; even hard disks at the time were no more than
20MB. My first hard disk was 10MB and cost an arm and a leg.
Pretty soon, however, 32MB became way too small, so Microsoft introduced first a 16-bit FAT, then a 32-bit FAT. Most USB keys and camera
cards use the 16-bit FAT; the 32-bit FAT is used with other disks.
The FAT system has several limitations:
Disks and partitions are limited to 2GB maximum for
16-bit FAT.
Files are limited to 4GB maximum, even with 32-bit FAT.
Time and date of a file are specified in increments of two
seconds.
In This Chapter
Reading and writing to
FAT partitions
Reading and writing to
NTFS partitions
328
Using Your Macintosh
You can’t restrict file permissions for individual users.
They’re not very fault tolerant; disk-writing errors are difficult to recover from.
All in all, FAT disks are not a very good choice for hard disks. If your Windows disks are formatted as FAT volumes, I recommend you convert them to NTFS using the convert.exe utility
from Microsoft.
Viewing hidden files
One thing you find as you begin using your Hackintosh is that each time you access a disk,
Leopard creates some hidden files. This happens regardless of whether the disk is formatted
with HFS, FAT, or NTFS.
Normally, you don’t see these files because Finder hides them from you. But you can make
them visible by carrying out the following steps:
1.
2.
Start Terminal running.
Type the following command:
defaults write com.apple.Finder AppleShowAllFiles YES
Figure 13.1 shows the Terminal window.
Figure 13.1
Terminal window with command
3.
Type the following command:
killall Finder and press Enter.
This stops Finder running and then it restarts, showing the hidden files on your desktop. Be careful to spell Finder with a capital F.
Chapter 13: Reading and Writing to Windows Disks
329
Using TinkerTool
TinkerTool is a freeware application that allows you to easily
make changes to the way Leopard behaves. It is very safe to
use because by pushing a single button, you can restore
your system to the way it was before you started the
TinkerTool session, or you can reset everything to the standard Leopard defaults.
You can download TinkerTool from www.bresink.
com/osx/TinkerTool.html.
We can’t explore the whole of TinkerTool here; you can do
that on your own. We just use it to show hidden files in
Leopard.
After downloading and installing it, start it running. The first
option on the first screen is the one you want to show hidden
files. Check the box, and click the Relaunch Finder button.
The figure shows the TinkerTool home screen.
When you want to return to hiding the hidden files, carry out Steps 1 to 3, but type this:
defaults write com.apple.Finder AppleShowAllFiles NO
TIP
If you don’t feel comfortable using Terminal to type commands, refer to the sidebar.
On your desktop, you now see two new icons: One is .DS_Store; the other is .localized,
as shown in Figure 13.2.
Not only does Leopard put hidden files on your desktop, it also puts hidden files in every folder,
including any disks formatted with other file systems to which you connect.
330
Using Your Macintosh
One file that is always present is .DS_Store. This stores attributes of a folder such as the position
of the icon, the background image, and so forth. Another common file is called .localized. It is
always 0 bytes and simply indicates that the folder name can be stored in the local language.
Figure 13.2
Hidden files on Leopard desktop
Another file you find on your FAT formatted disks after they’ve been used by Leopard is
.fseventsd. This file can be used by applications to detect changes to the file system,
such as creating a new folder. For example, if you are using iPhoto, it can detect when you
create a new folder and put files in the folder.
Appendix B contains more information about these hidden files.
Figure 13.3 shows the hidden files in the root folder of my Hackintosh.
The red “No Entry” signs on the .fseventsd and .Spotlight-V100 folders mean that
these are system folders, and normal users have no access to them at all.
Windows also hides files by default so they don’t show up. To view hidden files in Windows,
follow these steps:
1.
2.
3.
4.
5.
6.
7.
Start Windows Explorer.
Press the Tab key to show the menu.
Select Folder Options.
Click File Types.
Scroll down to the radio buttons to show hidden attributes.
Select Show hidden files, and click OK.
Navigate to the root folder of your disk.
Chapter 13: Reading and Writing to Windows Disks
331
Figure 13.3
Hidden files on Hackintosh hard disk
Provided you have written files to the disk, you see a number of hidden files. Figure 13.4 shows
the hidden files in the root folder of my Windows Vista system disk, viewed using Leopard
Finder.
Figure 13.4
Finder view of Windows hard disk hidden files
332
Using Your Macintosh
Figure 13.5 shows the Windows Explorer view of the same disk with hidden files visible.
Figure 13.5
Explorer view of hard disk
Deleting hidden files
Hidden files are kept hidden by Finder for a good reason: Unless you know exactly what you’re
doing, you can render Leopard unworkable by willy-nilly deleting hidden files on your Leopard
disks. Generally, it’s quite safe to delete them from your Windows disks if they annoy you; otherwise, leave them alone.
Reading and Writing to NTFS Partitions
As you know, by default Leopard can read from but not write to NTFS partitions. I know two
ways around this limitation, both involving additional software. One uses two freeware
applications; the other uses purchased software.
Installing MacFUSE
MacFUSE is an enabler application that installs as part of Leopard and allows you then to connect to many different file systems. On its own, all it does is provide a platform to be able to
install drivers to connect to file systems of any other operating system (such as Linux) or even
define your own file system.
Chapter 13: Reading and Writing to Windows Disks
333
In this case, we’re only interested in using it to read and write NTFS disks.
Carry out the following steps to install MacFUSE:
1.
Navigate to http://code.google.com/p/macfuse/, and click the
Download tab.
As usual, it downloads as a disk image (.dmg) file.
2.
3.
4.
When Safari opens the Finder window, double-click the MacFUSE.pkg file.
Follow the Leopard Installer prompts, and then restart your computer.
Open System Preferences, and note the new icon in the Other section.
Figure 13.6 shows the System Preferences pane with MacFUSE added.
Figure 13.6
System Preferences with MacFUSE icon added
5.
Click the MacFUSE icon in System Preferences.
Figure 13.7 shows the very sparse MacFUSE pane.
334
Using Your Macintosh
Figure 13.7
MacFUSE pane in System Preferences
Installing NTFS-3G
NTFS-3G is the other part of the solution to being able to write to NTFS disks. To install it, carry
out the following steps:
1.
2.
3.
Navigate to www.ntfs-3g.org/.
Click NTFS-3G for Mac OS X.
Scroll down to the Download: prompt, and select the latest build.
Again, it is supplied as a .dmg file.
4.
When Safari opens the disk image, double-click Install NTFS-3G and wait while it
installs.
Figure 13.8 shows System Preferences with NTFS-3G installed.
Now you can read and write to your Windows disks to your heart’s content.
Installing ntfs-mac
Another option for writing to NTFS disks is Paragon Software’s ntfs-mac. This comes with a
package that can read Macintosh HFS+ disks from Windows Vista, though I have tried only the
free trial, which doesn’t include the Windows application.
If you decide to install ntfs-mac, it’s probably a very good idea to uninstall NTFS-3G so you don’t
risk corrupting your Windows disks by using two applications to write.
Chapter 13: Reading and Writing to Windows Disks
335
Figure 13.8
System Preferences with NTFS-3G
Follow these steps to install ntfs-mac:
1.
2.
3.
4.
Use Safari to navigate to www.paragon-software.com/home/ntfs-mac/.
Click the Try Now button.
After the disk image file has downloaded, double-click the installer package.
Restart your computer.
You should now be able to write files to your Windows disk.
Summary
In this chapter, you learned about the limitations of Leopard in using Windows disks. You
learned how to view hidden files on both your Hackintosh and Windows disks. Finally,
you learned how to install software to be able to read and write to any Windows disk.
Running Windows
in OS X
U
p to now, you have been running both Leopard and
Windows, choosing which disk you want to boot from. After
you are using one operating system, getting to the other
one is difficult: It requires a reboot.
Virtualizing software provides a solution. You can run Windows
without leaving Leopard. It doesn’t run as fast as native Windows
runs, but you can have the best of both worlds with a single boot.
At present, two competing solutions are available on the Leopard
platform: Parallels and VMware. Both are available in trial versions
that can be downloaded, and both cost the same: around $80 at
the time of this writing. Both applications install and run on a
Hackintosh.
In this chapter, you install trial versions of both applications and
install virtual machines to use from your computer.
CAUTION
Virtual machine files are very large, and each time you make changes, the state of
the virtual machine changes. If you use Time Machine to back up, the files will rapidly fill your disk.
In This Chapter
Using Parallels
Using Parallels Desktop
Parallels began in 1999 and has produced a large range of virtualization solutions. In this section, you learn how to install and use
Parallels Desktop for Macintosh.
Installing Parallels Desktop
Follow these steps to download and install a trial version of
Parallels Desktop:
1.
Navigate to the Parallels Web site at www.
parallels.com/.
2.
Click Download.
You need to register and provide a valid e-mail address so
they can send you an installation key.
Using VMware
338
Using Your Macintosh
3.
After the download is complete, double-click the .dmg file to install it.
Before you can use Parallels, you need to install an operating system.
Creating a virtual machine
In this section, you create a new virtual machine from an installation disk for a Windows version.
You can use your existing Windows install disk. If your computer did not come with the complete installation disk, you can use your existing Windows installation.
CAUTION
If you use your existing installation (called your Boot Camp partition in Macintosh terminology), be aware that any
changes you make to the virtual machine also happen to your real Windows partition.
Follow these steps to create a new virtual machine:
1.
2.
Start Parallels running.
From the menu bar, click File, New Virtual Machine.
This starts the New Virtual Machine Assistant, as shown in Figure 14.1a.
3.
4.
Click Continue.
If you have your operating system on a CD or DVD, select Real CD/DVD. If your
operating system exists as an .iso file on your hard disk, select CD/DVD image
and navigate to the image file.
In this example, the image file was the release candidate for Windows 7, located on my
Windows data disk, as shown in Figure 14.1b.
Figure 14.1
New Virtual Machine Assistant (a); Operating System Detection (b)
a
b
Chapter 14: Running Windows in OS X
5.
339
Click Continue.
Parallels detected the operating system and displayed it on the next screen, as shown
in Figure 14.2a.
If you want your Hackintosh home folder to be shared with Windows, leave the box
checked. If you want Windows to be able to share user folders and desktop objects,
leave the box checked.
6.
Click Create.
Parallels creates a desktop icon to refer to the new virtual machine and then takes you
to the point where you install the operating system, as shown in Figure 14.2b.
Figure 14.2
Detected System (a); Prepare to Install Operating System (b)
a
7.
b
Click Done.
Parallels displays a window showing your newly created virtual machine, as shown in
Figure 14.3.
Before you can use your new virtual machine, you must install an operating system.
Figure 14.4 shows partway through the installation of Windows 7 Release Candidate.
After the installation has finished, you should install the Parallels Tools, which allow
better performance from peripherals attached to your computer, as well as better
video performance.
340
Using Your Macintosh
Figure 14.3
Virtual machine created
Figure 14.4
Installing Windows 7
Chapter 14: Running Windows in OS X
8.
341
From the Virtual Machines menu, select Install Parallels Tools.
Wait while the tools are installed, and then restart your virtual machine.
Figure 14.5 shows Parallels being installed.
Figure 14.5
Installing Parallels Tools
Parallels modes
A Parallels Virtual Machine can operate in one of three modes:
Windowed mode
Full-screen mode
Coherence mode
Using windowed mode
In windowed mode, your virtual machine runs in a window on your desktop, just like all your
other applications. Figure 14.6 shows Windows 7 running in a window, along with Safari.
342
Using Your Macintosh
Figure 14.6
Windows 7 and Safari running
Using full-screen mode
Full-screen mode means exactly what it says: Your virtual machine takes over your whole
screen. When it is running in full-screen mode, you cannot distinguish it from the real thing. You
need to remember the keystroke combination to get back to windowed mode: Alt-CommandReturn.
Using coherence mode
Coherence mode is when each Windows application runs in its own window on your desktop.
You can have several Windows and Macintosh applications running at the same time, each in its
own separate window, as shown in Figure 14.7.
Chapter 14: Running Windows in OS X
343
Figure 14.7
Parallels running in coherence mode
Note that each running Windows application has its own icon in the Dock, as shown in Figure 14.8.
Figure 14.8
Coherence mode icons in the Dock
Using snapshots
One useful feature of virtual machines is that you can take a snapshot of the machine at a given
point and save it to disk. You can then return to this snapshot later, to capture the state. It’s a bit
like Windows System Restore on a grand scale.
To take a snapshot, select Take Snapshot from the Virtual Machine menu in Parallels, as shown
in Figure 14.9.
To revert to a previous snapshot, select Revert to Snapshot.
344
Using Your Macintosh
Figure 14.9
Snapshot menu
Using VMware
In this section, you download, install, and use VMware. The VMware for Windows platform has
been around a little longer than Parallels; the Mac version, not quite as long.
Installing and creating a virtual machine
1.
2.
Navigate to the WMware Web site at www.vmware.com/products/fusion/.
Click Get Free Trial.
You need to register and provide a valid e-mail address so they can send you an installation key.
3.
After the download is complete, double-click the .dmg file to install it.
When you first install VMware, it wants to create a virtual machine from your Windows disk as a
Boot Camp partition, so I installed my existing Vista installation as a Boot Camp virtual machine.
Follow these steps to create your Windows disk as a virtual machine:
Chapter 14: Running Windows in OS X
1.
345
Click the right arrow in the Virtual Machine Library screen, as shown in Figure
14.10.
Figure 14.10
Virtual Machine Library
2.
Wait while VMware creates your virtual machine.
CAUTION
As with Parallels, any changes you make to your virtual machine are reflected in your Windows partition.
To create a new virtual machine, follow these steps:
1.
On the File menu, select New….
This starts the New Virtual Machine Assistant, as shown in Figure 14.11a.
2.
If you have the CD/DVD with the operating system, insert it in the drive; otherwise, click Continue without disk.
3.
If you are using an .iso image file, select it in the Choose operating system image
file box, shown in Figure 14.11b.
4.
Fill in your details in the Easy Install dialog box shown in Figure 14.12a.
Easy install fills in those details for you while the installation proceeds.
5.
Click Continue.
If you don’t enter a product key, Easy Install prompts you for one.
346
Using Your Macintosh
Figure 14.11
New Virtual Machine Assistant (a); Choose Operating System (b)
a
6.
b
In the Sharing dialog box, choose the files and folders you want to share with the
virtual machine, as shown in Figure 14.12b.
Figure 14.12
Easy Install dialog box (a); Sharing dialog box (b)
a
7.
b
Click Continue.
Now you are ready to start the installation, as shown in the summary in Figure 14.13a.
8.
Choose where you want to store your new virtual machine, and click Save, as
shown in Figure 14.13b.
Chapter 14: Running Windows in OS X
347
Figure 14.13
Finish dialog box (a); Save dialog box (b)
a
b
VMware then gets very busy creating your new machine. It boots from the image file and then
installs. Figure 14.14 shows a screenshot during the installation process.
Finally, when the installation is complete, you can log in and start using your virtual machine.
Figure 14.14
Windows 7 installation
348
Using Your Macintosh
VMware modes
Just as Parallels can run in three modes, so can VMware.
Using windowed mode
Figure 14.15 shows VMware running Windows 7 in windowed mode.
Figure 14.15
Windowed mode
Using full-screen mode
When VMware is running in full-screen mode, it fills the screen and is indistinguishable from the
real application. To leave full-screen mode, use the keys Ctrl+Cmd+s (that’s Ctrl+Windows
key+s on your PC keyboard.
Using unity mode
VMware has unity mode, corresponding with coherence mode in Parallels. As with Parallels,
applications running in the guest operating system have icons in the Dock, as shown in
Figure 14.16.
Chapter 14: Running Windows in OS X
349
Figure 14.16
WMware applications running in the Dock
Measuring performance
While processor speed, memory speed, and disk access speeds are affected slightly by virtualizing the operating system, it is in graphics speed that the most performance loss occurs.
Figures 14.17 and 14.18 show the results of measuring the Windows Experience Index on my
real computer and comparing it with the same computer using VMware. Notice the large drop
in performance on both graphics measures.
Importing other virtual machines
With both Parallels and VMware, you can import virtual machines created elsewhere. Figure
14.19 shows a virtual machine created in VMware on Windows (for Chapter 15) running on my
Hackintosh after being imported into VMware Fusion for Macintosh, running in windowed
mode.
Unfortunately, VMware won’t let you run a virtual machine inside another virtual machine!
Figure 14.17
Performance information for my virtual computer
350
Using Your Macintosh
Figure 14.18
Performance information for my real computer
Figure 14.19
Leopard virtual machine running in Leopard
Chapter 14: Running Windows in OS X
351
Summary
In this chapter, you have downloaded and installed two virtualization products that run on
Leopard that allow you to run a guest operating system such as Windows Vista or Windows 7
on your Hackintosh. You compared both products to see the strengths and weaknesses of each.
In particular, you saw the effect of virtualization on the speed of graphics. You need to determine for yourself whether the loss of performance in graphics is worth the convenience of
being able to run both operating systems, as well as others, without needing to reboot your
computer.
In the next chapter, you look at carrying out the exact opposite: Instead of running Windows in
a virtual machine in Leopard, you experiment with running Leopard as a guest operating system in Windows.
Running OS X on
Windows Using VMware
U
p to now, you have installed and used OS X running natively
on your computer, with Leopard having direct connection
with your hardware.
In the previous chapter, you downloaded and used two virtualization applications, using them to install and run Windows operating
systems. You also may have used them to install a completely different operating system such as Linux, but that is beyond the scope
of this book. You saw some of the advantages and disadvantages
of running an operating system this way.
The Macintosh platform has two virtualization hosts; Windows has
four major ones:
VMware workstation
Parallels workstation
Virtualbox
Virtual PC
In this chapter, you download and install the VMware client for
Windows and install Snow Leopard as the guest operating system.
Creating a Virtual Snow
Leopard Installation
Installing OS X natively on your computer is not an easy task, and
neither is installing it in a virtual machine. Remember: OS X is not
meant to run on anything other than Apple-labeled hardware.
On the Mac, both VMware and Parallels provide tools that increase
the speed of the virtualization, but those tools are not available if
you run Snow Leopard on a Windows computer, so you have a
pretty slow Snow Leopard, but no worse than some older
Macintosh hardware.
In this chapter you install Snow Leopard to VMware, running in
Windows. I used Vista, but it will also work with Windows 7.
In This Chapter
Creating a virtual Snow
Leopard installation
Creating a virtual
machine
Setting up Snow Leopard
Using your virtual
machine
354
Using Your Macintosh
I am extremely grateful to plastikman for developing this method and to prasys for putting it on
his blog at http://prasys.co.cc/2009/11/snow-leopard-boot-132-forvmware-workstation-7-and-vmware-player-3/. I’ve created a TinyURL for you:
http://tinyurl.com/yjpljjc.
Creating an install disk image
Before you start, you need to purchase a retail copy of Snow Leopard because you will use that
to install your virtual machine.
Although VMware is able to read a real CD or DVD, it works much better if you use a virtual disk.
In Windows a very simple way of creating an image (or iso) is to use ImgBurn. Other products
are capable of creating one, but ImgBurn is free and works nicely.
Follow these steps to create an iso of your retail Snow Leopard install disk:
1.
2.
3.
Download ImgBurn from their Web site at www.imgburn.com/.
Install it and then start running it.
Insert your Snow Leopard install disk in your DVD drive and wait for it to be recognized by ImgBurn.
Figure 15.1 shows the ImgBurn screen with my retail Snow Leopard install disk in the
drive.
Figure 15.1
ImgBurn screen
Note that ImgBurn sees the disk as a WindowsSupport disk, but it will nevertheless
copy all the Macintosh files as well as the Windows files.
Chapter 15: Running OS X on Windows Using VMware
355
4.
If you want to change where ImgBurn saves the iso, click the folder icon to select
the folder.
5.
Click the Disk to Folder icon and then wait while ImgBurn creates your iso.
Sourcing the other files you need
Plastikman, who created this method, has made your job easy for you by providing all the files
you need, except for your Snow Leopard install DVD.
Follow the links on prasys’s blog to download these files. They are archived together into a tbz2
archive file. Windows cannot unpack tbz2 files, but 7-Zip can. 7-Zip is available from the Web
site at www.7-zip.org/. This is another example of the fantastic free software available.
Be sure to make a donation at all the sites where you get free software. By donating, you ensure
that developers continue to develop free software.
Follow these steps to install 7-Zip:
1.
2.
Download and install 7-Zip from the 7-Zip site.
3.
Double-click to open and unpack it.
Start the program running and navigate to the folder where you stored the
Snowy_Vmware_files.tbz2 archive.
Figure 15.2 shows this.
Figure 15.2
Unpacking archive file with 7-Zip
356
Using Your Macintosh
Creating a VMware Virtual Machine
In this section you learn how to set up VMware ready to install Snow Leopard, boot from your
Snow Leopard install disk, and install Snow Leopard.
Obtaining your VMware software
As with VMware in Leopard, you need to download the VMware Workstation host software. This
is available from the VMware site: www.vmware.com/products/ws/.
You need a product key before you can use it. The product key is for a 15-day trial, so if you
decide you like it, you can then buy the full product. Obtain the product key by registering at
the VMware site. After you have logged in you receive an e-mail with the trial product key.
Another option is to create the virtual machine using VMware Workstation and then use
VMware Player to use it.
Booting your Snow Leopard install disk
To create a virtual machine, follow these steps:
1.
2.
Start VMware Workstation running.
On the greeting screen, select Open Existing VM or Team.
Figure 15.3 shows this screen.
You open the existing VM that plastikman created for you. This has all the correct
parameters set so that you can install Snow Leopard to your virtual machine.
3.
Navigate to the folder where you unpacked the archive and select the correct
vmx file.
CAUTION
Don’t try to install the file with a . in front of its name; that is a file that Macintoshes use, but Windows does not know
how to treat it.
4.
Click OK to go to the Virtual Machine Settings panel, shown in Figure 15.4.
Next you need to tell VMware to boot from the boot iso that plastikman has also created.
5.
Click Edit virtual machine settings.
This brings up a panel where you can change parameters. The only one you need to
change is where to find the boot disk.
Chapter 15: Running OS X on Windows Using VMware
Figure 15.3
Greeting screen for VMware
Figure 15.4
Virtual Machine Settings panel
357
358
Using Your Macintosh
6.
Double-click CD/DVD and use the Browse button to find the darwin_snow.iso file
that was included in the Snowy_vmware archive.
Figure 15.5 shows the selection screen.
Figure 15.5
Boot CD selection screen
7.
When you return to the Virtual Machine Settings panel, click Power on this virtual machine.
Within a few seconds, the virtual device starts and boots from the boot iso.
8.
Click your mouse anywhere in the virtual machine screen and press the F8 key.
This brings up the bootloader, as shown in Figure 15.6.
At this point you need to swap the bootloader for your Snow Leopard install disk. If
you were using your hardware CD/DVD drive, you would open the door and replace
the disk.
In this case you are using virtual disks, so you need to change it virtually.
9.
Press Ctrl+Alt together to release your mouse pointer from the virtual machine.
Chapter 15: Running OS X on Windows Using VMware
Figure 15.6
Snowy bootloader
10.
In the status bar at the bottom of your virtual machine, click the small
DVD symbol.
A small menu pops up with two choices: Connect and Settings.
11.
Click Settings and browse to find the Snow Leopard iso you created
earlier.
12.
13.
Click OK, then click on the DVD symbol again.
Click Connect, then click back in the main window.
You have now connected your Snow Leopard disk to the virtual machine.
14.
15.
In the main window, press C to select Boot DVD.
When the Darwin prompt appears, press F8 so that you get the boot
prompt.
359
360
Using Your Macintosh
16.
Type –v (for verbose boot) and press Enter.
You should see a screen looking like Figure 15.7 at some point during the process.
Then sit back and relax until you get to the first install screen, looking like Figure 15.8.
In my experience, the installation always gets to this point.
Figure 15.7
Boot progress screen
Chapter 15: Running OS X on Windows Using VMware
361
Figure 15.8
Snow Leopard language selection screen
Installing Snow Leopard
Not only has plastikman created all the files for you, he’s also set up a 40GB hard disk, which
should be large enough for you. So it’s now simply a matter of installing Snow Leopard to that
hard disk.
Follow these steps to install Snow Leopard:
1.
2.
Click the arrow to proceed to the next step.
Click Accept for the license details.
You arrive at the screen asking where you want to install Snow Leopard, as shown in
Figure 15.9.
362
Using Your Macintosh
Figure 15.9
Disk selection screen
3.
Click the image of the disk and click Install.
You could go through and select Customizing options, but in my opinion it’s simpler
to install the whole lot. It doesn’t take up much space.
Now it’s a matter of waiting while Snow Leopard installs. The first time I did it, the
installation crashed with a kernel panic after about 30 minutes, but in fact the installation had gone to completion.
In subsequent installations, it has gone right through to the success screen, as shown
in Figure 15.10.
Chapter 15: Running OS X on Windows Using VMware
363
Figure 15.10
Installation successful screen
At this point you can either stop your virtual machine by clicking the red button at the top or
you can wait for it to shut itself down.
Setting Up Snow Leopard
Now that you’ve installed Snow Leopard, it should be plain sailing from here. You need to go
through the normal setting up process of creating your user account and so on.
Booting for the first time
First you need to boot your new installation. As suggested by plastikman, it may be necessary
to boot several times before you get through to the first screen. In my experience it has never
taken more than four boots to get there, but plastikman suggests that it may take up to ten
boot attempts.
364
Using Your Macintosh
Follow these steps to boot your virtual Snow Leopard:
1.
Select your Snow Leopard virtual machine in WMware and click Edit virtual
machine settings.
2.
Double-click CD/DVD settings and browse to find the darwin_snow.iso file you
originally booted from.
This is needed because your virtual disk does not have a boot loader. If this was a real
machine rather than virtual this would be a nuisance, but in this case it’s not a problem.
3.
4.
Click OK and then click Start this virtual machine.
After the BIOS has signed on you get a message saying Operating system not
found.
This is because the CD/DVD drive is not active. If you look in the status bar, you will see
it’s grayed out.
5.
Click the red stop button, then click the CD/DVD symbol in the status bar and
select Connect.
6.
If you receive an error message saying the Mac OS is using the CDROM device,
click OK then shut down the virtual machine.
7.
Again, select Start this virtual machine.
This time, after the BIOS has signed on, you see a message asking you to press F8
NOW. You only have a very short time to respond so I suggest you put your finger
ready to press the F8 key!
8.
Press F8 and then enter –v –x to launch Snow Leopard in verbose, safe boot mode.
I have found using both together reduces the number of reboots. If you don’t react in
time to press the F8 key, Snow Leopard goes ahead and boots in normal mode. If this
happens, your screen display looks like that shown in Figure 15.11.
You then see the gray screen with the Apple logo and the rotating clock symbol.
On the first boot, Snow Leopard normally takes quite a while to start. On my computer,
the usual time can be up to five minutes, so be patient. Watch the little hard disk icon
in the status bar. When it gets to the point where it is only blinking briefly every ten
seconds or so, it probably indicates that the boot is not going to succeed.
9.
Repeat Steps 7 and 8 until you succeed in getting to the welcome screen.
In my experience it has never taken more than four boot attempts. Be patient.
Eventually you will be able to complete the installation.
Because your virtual machine is not capable of Quartz Extreme/Core Image graphics,
you do not see the greeting video and instead go straight to the welcome screen, as
shown in Figure 15.12.
Chapter 15: Running OS X on Windows Using VMware
Figure 15.11
Normal boot screen
Figure 15.12
Snow Leopard welcome screen
365
366
Using Your Macintosh
10.
11.
Select your country on the Welcome screen and click Continue.
Go through the remaining screens, entering your details where needed.
If you have a MobileMe membership you can enter details. Your Snow Leopard installation should be connected to the Internet at this point.
12.
Set up your account name and password, and finally you arrive at the Snow
Leopard main screen.
13.
14.
Check that everything has installed by looking at the Dock.
Open Safari and check that you can connect to the Internet.
Saving a snapshot
One really nice feature of virtual machines is that you can save snapshots. These capture the
exact state of the virtual machine and save it to disk. If you reload a snapshot you recreate your
virtual machine in exactly the same state as it was when you saved it. Trust me; it can be a real
lifesaver.
At this point, save a snapshot of your virtual machine by following these steps:
1.
Use Ctrl+Alt if you need to, to free the mouse pointer from the Snow Leopard virtual machine.
2.
3.
4.
Click VM on the VMware window.
Select Snapshot, then Take snapshot.
Call the snapshot First boot and save it.
Now, whenever you want to return to that point, simply select Snapshot, Load snapshot and select the one you want.
Using Your Virtual Machine
From this point on, your virtual Snow Leopard behaves exactly the same as the real Snow
Leopard, except that it can’t use Quartz Extreme/Core Image. It can connect to the hard disks on
your host computer.
Chapter 15: Running OS X on Windows Using VMware
367
If you click About this Mac from the menu bar, you see that it is running version 10.6 of OS X.
Figure 15.13 shows the display on my virtual Snow Leopard.
Figure 15.13
About this virtual Mac
Note that it is wrong about my processor speed. If only it really was that fast!
If you click on the More Info button on the About this Mac display, you see details about the
installation. Figure 15.14 shows the first panel of information about my computer.
368
Using Your Macintosh
Figure 15.14
More info about my Snow Leopard
If you open a Finder window, you should see your Windows host computer listed.
Figure 15.15 shows the Finder window for my installation, with the Windows host computer
(HOME) and my real Mac Mini.
Chapter 15: Running OS X on Windows Using VMware
369
Figure 15.15
The Finder window for my installation
Sharing your Windows files
Before you can connect with your virtual machine, you must share the files and folders on your
Windows computer. To do this, follow these steps on your Windows host computer:
1.
Use Windows Explorer to navigate to the folder you want to share.
In this case, I will share My Documents.
2.
3.
Right-click the folder, and select the Sharing tab, as shown in Figure 15.16.
Click Advanced Sharing, and place a check mark in Share this folder, as shown in
Figure 15.17.
370
Using Your Macintosh
Figure 15.16
Sharing tab
Figure 15.17
Advanced sharing
4.
Click OK, followed by OK after you have checked that the folder is now shared, as
shown in Figure 15.18.
My Vista computer is named HOME so the share name becomes \\HOME\My
Documents, and this becomes the server name in Leopard.
Chapter 15: Running OS X on Windows Using VMware
371
Figure 15.18
My Documents shared
5.
In your virtual machine, make sure Finder is the front application and select Go,
Connect to Server…, as shown in Figure 15.19.
Figure 15.19
Connect to server
6.
In the server box, type smb:// followed by the name of your server from the
shared folder above.
In this case, the server name is smb://home, as shown in Figure 15.20. Remember
that while Windows uses the double backslash (\\), Leopard uses the double forward
slash (//).
372
Using Your Macintosh
Figure 15.20
Connect to server dialog box
The folks at Apple can’t bring themselves to use the word “Windows,” so they refer to
the server as SMB (standing for Server Message Block)!
If your virtual Leopard can’t find your computer by its server name, try using its IP
address. In my case the server then becomes smb://192.168.1.2.
7.
In the name and password box, enter a username and password for the account
on the Windows computer and allow Leopard to save the name and password in
your keychain of passwords, as shown in Figure 15.21.
Figure 15.21
Connect to a username
8.
9.
Click Connect.
Select the name of the volume to mount.
In this case, as shown in Figure 15.22, the only shared folder is My Documents, but if
you had shared other folders, they would be shown as well.
10.
Leopard mounts the volume and opens it in your default view, as shown in
Figure 15.23.
Chapter 15: Running OS X on Windows Using VMware
373
Figure 15.22
Volume to mount
Figure 15.23
My Documents shared
Finally, so that the volume is available each time you use the virtual machine, you can save it to
your desktop as a shortcut. Follow these steps to do that:
1.
In the My Documents window, right-click the folder alias icon in the toolbar.
Remember that the folder alias icon is the little icon at the top of the toolbar, to the
left of the name of the folder.
2.
Select the highest folder in the hierarchy (Peter Baldwin’s Mac Pro, in this example), as shown in Figure 15.24.
3.
Press and hold the Command and Option keys (Windows key and Alt) while you
drag the icon to the desktop.
This places an alias to the My Documents folder on your desktop. Now whenever you
want to view files on your Windows computer, simply double-click on the desktop
alias to open the folder.
374
Using Your Macintosh
Figure 15.24
Top of folder hierarchy
4.
Save a snapshot of your system so that you don’t have to reconnect and save the
alias every time you start Leopard.
TIP
When you finish your session with Snow Leopard, you should suspend the virtual machine rather than simply shut it
down. That way, any changes you made are saved until your next session.
Summary
In this chapter, you installed a standard retail copy of Snow Leopard to create a virtual machine
using VMware. You then set it up to connect with your Windows computer and saved a snapshot of it for ease of using it at a later date.
Virtual machines are becoming more frequently used in computing, particularly in relation to
servers. Four products are available for virtualizing other operating systems on the Windows
platform, but at this time only one of them can install and run OS X. For other operating systems
running as guests, the providers of virtualizing software provide systems that can optimize the
virtual machines. Because Apple permits OS X to be installed only on Apple-labeled computers,
the manufacturers of virtualizing software for Windows do not provide optimizations, so the virtual machines suffer from low graphics performance.
IV
Enhancing Your
Macintosh
N
ow you’re on the home stretch. By the time you work
through all of this part, you will have done more than
probably 95 percent of Mac users. As with Parts II and III,
the exercises in this part can be done on a Macintosh computer.
While each chapter in this part focuses on programming your
Hackintosh to do new things, for the most part, the programming
is not particularly difficult, nor is it difficult to understand.
Before you start the exercises in these chapters, you need to
become an Apple Developer. You can do this for free and avail
yourself of many free applications and utilities, as well as access
to a whole library of information.
First you use Automator, which is designed so you can automate
tasks that you do regularly and that have a number of steps in
them. Having mastered Automator, you create some scripts in
AppleScript to link applications together.
If you find Leopard’s Dashboard useful, you will enjoy creating
your own widgets to install into Dashboard. Next you use Quartz
Composer, a very powerful graphics processing application that
allows you to manipulate graphic images in many different ways.
Finally, you develop a complete, albeit simple, stand-alone application and learn the rudiments of the Objective-C programming
language.
IV
In This Part
Chapter 16
Automating Your Work
Chapter 17
Creating and Editing
AppleScript Macros
Chapter 18
Modifying the Dashboard
Chapter 19
Using Quartz Composer
Chapter 20
Using Some Other
Developer Tools
Chapter 21
Using XCode to Create
New Programs
Chapter 22
Some Successful Case
Studies
Automating Your Work
N
ow that you’ve built your Hackintosh and got it working to
your satisfaction, what are you going to do with it? Pretty
much all the software you might have used on your
Windows computer has an equivalent on the Macintosh. In some
areas, particularly in publishing, graphic arts, and video, the Mac
has always enjoyed a reputation for being the best in the field. In
some areas, the Windows platform has caught up and even surpassed the Macintosh, but for many fields, using a Mac is still
almost de rigueur.
One feature of every Mac that does not have an exact analog in the
Windows world is Automator. This is built-in software that, as the
name suggests, can automate many tasks you undertake using the
computer. For example, if you often have to prepare a set of photographs to a specific size for publication, you can create an
Automator script to do it automatically.
In this chapter, you look at Automator, run some sample scripts,
and create your own script to back up your files.
Getting Around in Automator
In This Chapter
Automator is the Leopard application that allows you to create
scripts to carry out repetitive tasks without requiring user intervention. It takes small building blocks called Actions and links them
together to automate a task.
Getting around in
Automator
In this section, you launch Automator, orient yourself to the screen
layout, and experiment with the actions library.
Preparing to launch Automator
Before you can launch Automator, you must switch on access for
assistive devices. Follow these steps to turn it on:
1.
2.
3.
Open System Preferences.
Choose the Universal Access pane.
Check the box for Enable access for assistive devices,
as shown in Figure 16.1.
Trying out one of the
example workflows
Modifying the example
workflow
Saving a workflow as a
plug-in
Using folder actions
378
Enhancing Your Macintosh
Figure 16.1
System Preferences pane for Universal Access
Orienting yourself to Automator
When you launch Automator, the first screen you see is the main window of the application,
with a sheet overlaying it. The overlay sheet is the starting point sheet, as shown in Figure 16.2.
Figure 16.2
Automator starting point sheet
Chapter 16: Automating Your Work
379
If you choose to create a new workflow, you arrive at the main workflow menu, as shown in
Figure 16.3.
Figure 16.3
Automator workflow items
The example shown here is from my computer with Microsoft Office installed. Many applications add their own actions to the library: In this case, Office added two extra library categories—Documents and Presentations. These aren’t in your library unless you have installed
Microsoft Office.
At the top of the main screen is a selector to switch from Actions to Variables. The Variables
view is shown in Figure 16.4.
380
Enhancing Your Macintosh
Figure 16.4
Variables view
Running a Sample Workflow
In this section, you download and run a sample workflow provided by Apple. This workflow
takes some selected files and creates a new disk image containing the files.
Preparing to run workflows
Before you start on this section, copy some picture files from your Windows disk to the Pictures
folder in your home folder. Four or five pictures are plenty.
Downloading and running the workflow
To run the workflow, follow these steps:
1.
2.
Create a new folder called Workflows in your Documents folder.
3.
Unzip the file, and drag it to your Workflows folder.
Navigate to www.macosxautomation.com/automator/examples/ex06/
pkg/workflow.zip (or http://tinyurl.com/la58or), and save the downloaded file.
Chapter 16: Automating Your Work
4.
Double-click the file, and wait while Automator opens it.
Figure 16.5 shows the workflow open in Automator.
Figure 16.5
Create disk image workflow
There are four steps in the workflow:
Step 1: Open the selected files.
Step 2: Ask for the names of the disk image and the filename.
Step 3: Set the Finder view parameters.
Step 4: Open the image in a Finder window.
381
382
Enhancing Your Macintosh
Each step in a workflow takes its input from the step before it and passes its output to the step
that follows it.
In Step 1, Finder opens the selected files and passes them to Step 2. Step 2 gets a filename and
volume name as input from the user and creates a new disk image file. Step 3 sets the appropriate parameters for Finder. Finally, in Step 4, the disk image is mounted and the contents displayed in Finder.
Before you start, you need to open a folder and select two or more files. After the workflow
runs, it asks you to enter two names, one as the volume name for the disk image and the other
as the filename for the image; the two can be different. It then sets a view in Finder, creates the
disk image and the file, and finally opens the disk image.
To run the workflow and create the new disk image, follow these steps:
1.
2.
3.
Open your Pictures folder in Finder, and select a couple of items.
Run the workflow by clicking the Run button.
At the prompt, enter Test Volume as the Volume name and Test Image for Save as,
as shown in Figure 16.6.
Figure 16.6
Volume and image name
After a few seconds, a new disk image appears on your desktop. Shortly after, Image
Mounter mounts the image, as shown in Figure 16.7a.
4.
Finally, Finder opens the disk image and shows the files, as shown in Figure 16.7b.
Chapter 16: Automating Your Work
383
Figure 16.7
New disk image and volume (a); Finder view of disk image (b)
a
b
Viewing the results and the log
If you click the Results button on a step, Automator shows the results of the step. Figure 16.8
shows the result of the first step.
Figure 16.8
Step result from Automator
384
Enhancing Your Macintosh
While it is running, Automator also keeps a log of what happens in each step and how long
each step took. To view the log, click the icon in the bottom left of the Automator window.
Figure 16.9 shows the log for the run.
Figure 16.9
Log for the run of disk image with selection
Note the error message in the first line. You can ignore it. The whole process took just over six
seconds.
Modifying the Sample Workflow
A limitation of the workflow is that you must remember to select files in a folder before you
start the workflow; otherwise, you finish up with an empty volume. In this section, you modify
the workflow so it asks you which files you want to include in the workflow.
Follow these steps to modify and run the workflow:
1.
Close the original workflow without saving any changes, and reopen it in
Automator.
2.
Click the close button (located on the right of the action) on the Get Selected
Items action to remove it from the list of actions.
3.
4.
Click the Show Library button.
Select Files and Folders, select Ask for Finder Items, and drag it to the first position on the workflow, as shown in Figure 16.10.
Chapter 16: Automating Your Work
385
Figure 16.10
New workflow
5.
6.
Select Allow Multiple Selection, and set Start at: to Pictures.
7.
Save the workflow to your Workflows folder as Disk Image Prompted Selection.
Run the workflow, selecting multiple documents in the Pictures folder when
prompted.
Looping
What if the files you want to add to the disk image are from different folders? The Ask for Finder
Items action allows you to select from only one folder. To add extra files, you need to be able to
rerun the Ask for Finder Items action and add the new files to the existing list.
Automator has a loop action that allows you to accomplish exactly this.
To create a looping workflow, follow these steps:
1.
2.
Reload the Disk Image Prompted Selection workflow.
From the Library, select Utilities, Loop and drag it as the second item in the workflow, as shown in Figure 16.11.
386
Enhancing Your Macintosh
Figure 16.11
Adding the loop action
3.
Set looping to Ask to continue, and select Use the current results as input.
By using current results as input, you add the new items the second time through the
loop to those from the first time through.
4.
5.
6.
7.
8.
9.
10.
11.
Save the workflow as Looping Disk Image with Prompted Selection.
Run the workflow and select one or two files from the Pictures folder.
Click Choose.
On the loop sheet that drops down, select Continue, as shown in Figure 16.12.
Navigate to a different folder, and select one or two files from that folder.
Click Choose, and then on the drop-down sheet, select Don’t Continue.
Enter the names of the disk volume and disk image you want to create.
Wait until the workflow completes, and then examine the files included in your
disk image.
Chapter 16: Automating Your Work
387
Figure 16.12
Continue Looping
Using variables
If you want to include all the files in a particular folder, rather than ask the user to input the files
individually, you can define a variable and then use that as the input into a workflow.
Follow these steps to use variables to specify the files to include in the image:
1.
2.
Delete the Ask for Finder Items and Loop actions.
In the Library, select Variables, Locations and drag Pictures to be the first action,
ahead of New Disk Image, as shown in Figure 16.13.
Figure 16.13
Using a variable for input
388
Enhancing Your Macintosh
Remember that the output for each action is the input for the next, so by using the
variable Pictures, you find the path to that folder and use it as input to the New Disk
Image action.
3.
4.
Save the workflow as Disk Image with Variable.
Run the workflow, and see that all the items in your Pictures folder are added to
the disk image.
Creating a New Workflow
In this section, you create a new workflow from the start rather than modifying an existing
workflow.
Using the actions library
Let’s create a very simple Automator workflow to take a number of files and create an archive
(zip file) from them. Follow these steps:
1.
2.
Start Automator running.
On the starting point sheet, select Files and Folders and then select Get content
from My Mac and Search for files and folders when my workflow runs, as shown
in Figure 16.14.
Figure 16.14
New Files & Folders workflow
3.
Click Choose.
Figure 16.15 shows your Automator window at this point.
Chapter 16: Automating Your Work
389
Figure 16.15
Automator Window with Search for Finder Items
4.
5.
6.
In the Where drop-down box, choose your username (peterbaldwin in my case).
In the Whose drop-down box, choose Kind, is, and Image.
Save the workflow in your Workflows folder as Archive Images.
That completes the first part of the workflow.
7.
Run the workflow, and click Results to see the files that were found.
My results are shown in Figure 16.16.
Where did all those files come from? In my case, most of the files are images created
for this book, but some are files cached by Safari and sundry other files.
Now I add the action that creates the zip file.
8.
9.
10.
In the Library pane of Automator, select Files & Folders, then select Create
Archive, and drag it to the Actions pane, as shown in Figure 16.17.
In the Where drop-down box, select Desktop.
Save the workflow.
Now it’s time to run it.
11.
Click the Run button in the toolbar of Automator.
When the workflow completes, you see two green check icons beside Results in the
Actions pane.
12.
Open the Archive.zip file on your desktop.
390
Enhancing Your Macintosh
Figure 16.16
Image files on my computer
Figure 16.17
Create archive in Actions pane
Chapter 16: Automating Your Work
391
Saving a Workflow as a Plug-in
Automator’s real power lies in the fact that any of the workflows you create can be turned into
plug-ins for Finder or folders. Finder plug-ins are available in any folder; folder plug-ins are specific to the folder to which they are attached.
In this section, you create a Finder plug-in from the workflow you created earlier and use it in
any folder. You also create a new folder plug-in.
Creating Finder plug-ins
Previously you created a workflow to find files meeting certain criteria and create an archive file
containing those files. Now you extend this to make a Finder plug-in that can be used from any
folder.
Follow these steps to create a Finder plug-in to archive files:
1.
2.
3.
4.
Start Automator, and create a new workflow, selecting Custom as the start point.
5.
6.
Save the workflow as a Finder plug-in by selecting File, Save as Plugin. . . .
Add the Get Selected Finder Items and Create Archive actions.
Open your Pictures folder, and select a couple of pictures.
Run your workflow, and check that it creates a new file called Archive.zip in the
same folder.
Name the plug-in Make Archive, and click Save, as shown in Figure 16.18.
Figure 16.18
Save workflow as Finder plug-in
7.
8.
Remain in your Pictures folder, and move Archive.zip to Trash.
9.
Select Automator, and then select Make Archive, as shown in Figure 16.19.
Select some files, right-click anywhere in the folder blank space, and select More
on the context menu.
Your Pictures folder dims for a second or two, then returns with a new file called
Archive.zip.
392
Enhancing Your Macintosh
Figure 16.19
Context menu choice to run Finder action
Because this is now a Finder action, it can be run from any folder and creates a new zip file containing all the files you specify.
All your workflow plug-ins are saved in your Library folder. This is located at ~/Library/
Workflows/Applications/Finder. The ~ tells you to start at your home folder; that’s
the one that has your login name. In my case, my home folder is called peterbaldwin.
As you can see from the Automator library, there are many, many possibilities for creating workflows, limited only by your imagination and need.
And if you don’t want to reinvent the wheel, search the Internet for “automator sample workflows.” Places to start include http://automator.us/downloads.html, http://
automatorworld.com/, and http://automatoractions.com/.
Using Folder Actions
Folder actions are scripts (or small programs) that can be attached to a folder. Chapter 19 takes
you into more detail with scripts, even creating your own. For now, we just use scripts created
by other people.
In this section, you add folder actions to folders on your computer.
Detecting files added to a folder
Each installation of Leopard has a folder called Drop Box inside your Public folder. If you use Get
Info to examine the details about the Drop Box folder, you find it has permissions that give
everyone the ability to save files to your Drop Box, but they can’t view any files in there, as
shown in Figure 16.20.
This can be useful in large organizations where you collect files from other people for processing. But how do you know when someone leaves a file in your Drop Box? You attach a folder
action to notify you.
Chapter 16: Automating Your Work
393
Figure 16.20
Drop Box permissions
In this section, you can’t use the Drop Box because it’s unlikely you’re connected to other users.
You can, however, see how it would work.
Follow these steps to add a folder action to your Pictures folder:
1.
2.
Open your Pictures folder, using Finder.
3.
Right-click again, and select More, Attach a Folder Action, as shown in Figure
16.22.
4.
If needed, navigate to the folder /Library/Scripts/Folder Action Scripts, select add new item alert.scpt, and click Choose, as shown in Figure 16.23.
Right-click in the window, and select More, Enable Folder Actions, as shown in
Figure 16.21.
394
Enhancing Your Macintosh
Figure 16.21
Enable folder actions
Figure 16.22
Configure folder actions
Figure 16.23
Choosing a folder action script
Chapter 16: Automating Your Work
395
Test the script by dragging a new picture into the folder. You should get a pop-up window telling you a new item has been added to the folder, as shown in Figure 16.24.
Figure 16.24
New item alert
Converting graphics files to other formats
You can use folder action scripts for many other things. One use is to convert graphics files to
another format as you add them to a folder.
Follow these steps to add a new folder action to convert graphics files:
1.
Open the Pictures folder, right-click in the window, and select Configure Folder
Actions.
This opens a new window, as shown in Figure 16.25a.
The left part of the window shows the folders that have actions attached. The right
half shows the actions attached to each folder.
2.
3.
Disable the add - new item alert action by unchecking the box.
4.
5.
Click Attach, and then close the window by clicking the Close button.
Click the + (plus) sign below the right half of the window, and select Image Duplicate as .PNG script, as shown in Figure 16.25b.
Drag a new image file from your Windows My Pictures folder.
Two new folders appear: Original Images, which contains the file you dragged into the
folder, and PNG images, which contains the converted graphics file. This is shown in
Figure 16.26.
Needless to say, you can attach many other folder actions to any folder. And if you can’t find
enough built into Leopard, you can even create your own, as you see in Chapter 19.
396
Enhancing Your Macintosh
Figure 16.25
Folder actions setup window (a); actions set up with Duplicate as PNG selected (b)
a
b
Figure 16.26
New images folders
Summary
In this chapter, you saw some of the automation power of Leopard. You downloaded and modified some Automator workflows and created an Automator workflow of your own. You also
looked at the power of folder actions and how they can be used to automate workflows.
Leopard is unique because you can easily customize the system using relatively simple tools.
Doing the same things in Windows or Linux is quite a bit more complicated.
Creating and Editing
AppleScript Macros
I
n the preceding chapter, you saw how easy it is to extend the
functionality of Leopard by using Automator to create new commands to control the way Leopard behaves, and using folder
actions.
AppleScript provides the power behind Automator and folder
actions. This programming language is quite easy to read, and
more importantly, you can easily create new programs with it. Its
genealogy can be traced back to HyperTalk, the programming language for HyperCard, which appeared on the Macintosh in 1987.
In this chapter you examine some prepared scripts that come with
Leopard to understand how they work. Then you modify them and
finally create your own scripts. And if we don’t call it programming,
you might not be scared off!
Starting with AppleScript
In this section, you orient yourself to the AppleScript environment
and use ScriptEditor to run a simple script.
Starting ScriptEditor
To start working with scripts, you need to run ScriptEditor. The following steps start it running and allow you to set up your scripting
environment:
1.
Use Spotlight to start ScriptEditor by typing script
and clicking ScriptEditor.
Because this is the first time you’ve run ScriptEditor, it
starts the AppleScript Utility that displays a dialog box, as
shown in Figure 17.1.
2.
Check Enable GUI Scripting and Show Script Menu in
menu bar.
Note that a new icon appears in the menu bar. If you click
it, you get quick access to any of the scripts that are preinstalled in Leopard.
In This Chapter
Starting with AppleScripts
Using a prepared
AppleScript
Creating your own scripts
398
Enhancing Your Macintosh
Figure 17.1
AppleScript utility setup
3.
Close the dialog box to leave you at the ScriptEditor start screen, shown in
Figure 17.2.
Figure 17.2
ScriptEditor start screen
Chapter 17: Creating and Editing AppleScript Macros
399
Orienting to the ScriptEditor screen
At the top of the ScriptEditor window is the title bar, which has four main buttons:
Record: This records menu and keystrokes.
Stop: This stops recording.
Run: This runs a script.
Compile: This checks a script before running it and gets it into a form where it will run.
Bundle contents: You won’t see this active very often, but it allows you to look inside
bundles. A bundle is a directory that contains executable code and the resources it
needs.
Using a Prepared AppleScript
In this section, you open a very simple AppleScript, run it, examine the code inside the script,
and make a modification to it.
Finding prepared scripts
Leopard comes with a large number of prepared scripts that you can use and modify. To locate
them, click the scripts icon on the menu bar. Figure 17.3 shows the drop-down list of scripts.
Figure 17.3
Available prepared scripts
400
Enhancing Your Macintosh
Running the script
In this example, we use about the simplest script possible: one that hides all the open Finder
windows.
Follow these steps to open the script:
1.
2.
3.
Start ScriptEditor running.
Click File, Open, and navigate to /Library/Scripts/Finder Scripts.
Select Finder Windows - Hide All.
Figure 17.4 shows the ScriptEditor window with the script loaded.
Figure 17.4
ScriptEditor window
4.
Click the Compile button.
When the script runs, it hides any open Finder windows, minimizing them to the Dock.
Reading the AppleScript code
Each AppleScript is made up of several parts. This section explains those parts.
Chapter 17: Creating and Editing AppleScript Macros
401
Reading comments
Because AppleScripts are really programs, or applications, they can contain comments.
Comments are information for the human reader and are ignored by the computer when the
program runs.
In AppleScript, comments are enclosed between (* and *) characters. These are the standard
keyboard symbols for *, (, and ).
In this simple example, the comment is by far the major part of the script.
Reading commands
A command is an instruction to the computer to do something. In this example, the command
is tell. The command has to work on something, so the rest of the line says what the command has to work with: application “Finder”.
At the end of the command, end tell says that the command has completed.
Using if statements
In the middle of the command are three lines:
if the (count of windows) is not 0 then
set collapsed of every window to true
end if
The first line makes sure the script only executes if at least one Finder window is open. This is
called a conditional statement: It determines whether a particular condition is true.
If no Finder windows are open, then the conditional statement is false, so the next line is
skipped.
If at least one Finder window is open, then the condition becomes true, so the next line is executed.
Each window has several properties, and collapsed is one of them. The collapsed property has
only two possibilities; it can be true or false. In other words, a window is either collapsed to the Dock,
or it isn’t. So the line set collapsed of every window to true sets the collapsed property to
true for every window. The result is that every window minimizes to the Dock.
See how it works by following these steps:
1.
2.
3.
Open two or three Finder windows.
Click the Run button to start the script running.
Watch while the windows collapse, one at a time, to the Dock.
If you want to see it happen slowly, hold down the Shift key when you click Run.
Did you happen to notice the order that the windows collapsed to the Dock? It was in the order
that they appear on the screen: The topmost window collapsed first and then the other windows in order down to the bottom-most.
402
Enhancing Your Macintosh
Changing the script
It is always easier to modify a script from somewhere else rather than create your own scripts
from scratch. As Isaac Newton said, this is “standing on the shoulders of giants.”
Reversing the action
Obviously, one very easy change you can make is to reverse the action if the condition is met:
Instead of collapsing the windows, resurrect them from the Dock. If the windows shrink to the
Dock when the collapsed property is set to true, then they should return if the property is set to
false.
Edit your script so it now reads:
tell application “Finder”
if the (count of windows) is not 0 then
set collapsed of every window to false
end if
end tell
Run your script, and check that the windows rise from the Dock and resume their place on your
desktop.
Coping with errors
What if no Finder windows are open? Your AppleScript appears to do nothing, if that is the case.
So let’s test for whether any Finder windows are open.
tell application “Finder”
if the (count of windows) is 0 then
display dialog “There are no Finder windows open!”
end if
end tell
Figure 17.5 shows the dialog box you see when you run the script with no open Finder
windows.
Figure 17.5
Error dialog box
Now let’s combine the two scripts so that something happens.
Chapter 17: Creating and Editing AppleScript Macros
403
tell application “Finder”
if the (count of windows) is 0 then
display dialog “There are no Finder windows open!”
else
set collapsed of every window to true
end if
end tell
Now, if no Finder windows are open, we get the error message; if windows are open, then all
the windows are collapsed to the Dock.
If you have sound working, close all your Finder windows and try this version:
tell application “Finder”
if the (count of windows) is 0 then
say “Oops!”
display dialog “No Finder windows are open!”
else
set collapsed of every window to true
end if
end tell
Creating Your Own Scripts
So far we haven’t even remotely scratched the surface of what you can do with scripts. In this
section, we look in some more detail at Finder scripts, opening windows, setting views, and
much more.
Creating Finder scripts
Finder is one of the most used applications in Leopard; it’s hard to imagine getting through a
day without using it.
Opening a new Finder window
Let’s start by opening a new Finder window. Follow these steps:
1.
Start ScriptEditor, and enter the following code:
tell application “Finder”
activate
make new Finder window to startup disk
end tell
2.
Compile the script, and run it using the toolbar buttons.
Figure 17.6 shows the outcome on my disk.
404
Enhancing Your Macintosh
Figure 17.6
Output of script to create new Finder window
3.
Save the script as “Open Finder Window.scpt” to your Library/Scripts folder; use
the default options for now.
You will look at the other options later.
Setting the window’s target
Generally, you are not going to want to open a Finder window at the top level of your startup
disk; you want to open the window in a given folder. Let’s open the Finder window in your
Music folder. If you have more than one Finder window open, you need to specify which Finder
window you want to control. You do this by specifying the number of the window.
How do you know what number your new window is? Well, in this case it’s quite simple:
Windows are numbered from front to back on the screen. Because your new window has just
opened, it is at the front, so it’s window 1.
Follow these steps:
1.
Add an extra line so your script now looks like this:
tell application “Finder”
activate
make new Finder window to startup disk
set target of Finder window 1 to folder “Music”
end tell
Chapter 17: Creating and Editing AppleScript Macros
2.
3.
405
Save the script as “Open Music Folder.scpt” in your Library/Scripts folder.
Run the script.
Note that exactly the same window opened up as before: Finder has ignored your
instruction to set the target to your Music folder. Why is this? Finder is dumb, and it
needs to be explicitly told how to find your Music folder, so ScriptEditor displays the
error message shown in Figure 17.7a.
Not a very helpful message, is it? What you need to do is to tell Finder exactly how to
find the Music folder, starting from your startup disk. The easiest way to do this is to
use that Finder window and follow these steps.
4.
On the View menu of the Finder menu bar, select Show Path Bar.
This is shown in Figure 17.7b.
Figure 17.7
AppleScript error message (a); Show Path Bar (b)
a
b
This makes the path to the folder visible at the bottom of the window. In my case, the
Music folder is located at /Hackintosh/Users/peterbaldwin/Music.
To tell Finder how to get there, you start at the highest level, working down to the
startup disk.
5.
Change the set target line of your script to read as follows:
set target of Finder window 1 to folder “Music” of folder¬
“peterbaldwin” of folder “Users” of startup disk
Note the ¬ symbol in the line of code above. This is the line continuation character and
is used to spread a long line over two or more lines, because of the limitations of the
size of the page in this book. You don’t need to type it into ScriptEditor; it automatically recognizes the line as being a long line.
Figure 17.8 shows the result of this new command.
406
Enhancing Your Macintosh
Figure 17.8
Folder opened with correct path
Obviously, your username is not peterbaldwin, so substitute your own name.
An easier way is to use the alias home to replace “peterbaldwin” of folder
“Users” and so on. So that line becomes this:
set target of Finder window 1 to folder “Music” of home
6.
Save your script.
Setting view options
Now that you can write a script to open a particular folder in Finder, you need to tell it how to
display it onscreen. Suppose you want the new window to display with a path bar, no toolbar,
always the same size, and always in a certain place on the screen.
Follow these steps to set some view options:
1.
2.
If you don’t have your Open Music Folder script open, open it in ScriptEditor.
Add the following line just before the end tell:
set current view of Finder window 1 to icon view
3.
Run the script.
Check that the window opens up in icon view. Obviously, if you want it to open in any
other view (List, Column, or Cover flow), you use that name as the view. Cover flow is
shortened to just flow.
Chapter 17: Creating and Editing AppleScript Macros
4.
407
Add the following line after the current view line:
set bounds of Finder window 1 to {1000, 200, 1800, 700}
A window’s bounds are the screen coordinates of its corners; the first two numbers are
the x,y coordinates of the top-left corner; the second two are the x,y coordinates of the
bottom-right corner.
Simplifying the script
Right now, your script looks like
tell application “Finder”
activate
make new Finder window to startup disk
set target of Finder window 1 to folder “Music” of home
set current view of Finder window 1 to list view
set bounds of Finder window 1 to {1000, 200, 1750, 700}
end tell
We can simplify the script in a couple of ways. First, I can show you a simpler way to open a new
Finder window. Simply use the command open folder “Music” of home to replace the
third line.
All the set commands refer to the same window, so we can put them inside a new tell
command.
Follow these steps to simplify your script:
1.
Replace line 3 in your script with this line:
open folder “Music” of home
2.
Enter a new line 4:
tell Finder window 1
3.
4.
Remove the of Finder window 1 from each of the other lines.
Add the line:
end tell
Now your script should look like
tell application “Finder”
activate
open folder “Music” of home
tell Finder window 1
set current view to list view
set bounds to {1000, 200, 1750, 700}
end tell
end tell
408
Enhancing Your Macintosh
Saving and running scripts
So far, you have just saved your scripts using the default options and run them by clicking Run
in ScriptEditor.
When you save a script, you have a choice of how you save it. These choices are shown in
Figure 17.9.
Figure 17.9
Formats for saving scripts
Table 17.1 shows the properties of each of the formats.
Table 17.1 Properties of Each File Format for Scripts
Type
Extension
Editable?
Properties
Script
.scpt
Yes *
Needs ScriptEditor to run
Application
.app
No
Runs as stand-alone application
Script bundle
.scptd
Yes *
Packaged so other applications can use it
Application bundle
.app
No
Packaged so other applications can use it
Text
.applescript
Yes
Plain text; can be edited with TextEdit
* Can be made noneditable by checking the Run only box.
Of these file formats, the only ones you need to use until you become an experienced developer are the Script and Application types.
When you save the script as an Application, it becomes a standard Leopard application and can
be run simply by double-clicking it. It can even be placed in the Dock so it is always available. I
do that so I can quickly get to a particular folder without having to open a new Finder window
and navigate to where I want.
Other options in the Save dialog box are:
Startup Screen: The script displays a warning message before it starts running, as
shown in Figure 17.10.
Stay Open: After the script has run, it stays running. This is useful if you want to loop
the script and do other things.
Chapter 17: Creating and Editing AppleScript Macros
409
Figure 17.10
Startup screen for script
Getting user input
Rather than having a script that is just a one-trick pony, being able to gather user input and
make use of it can be very helpful. For example, we can make the Open Music Folder more general by asking the user to enter a folder name and then open that.
To do this, we need to allow the user to enter the folder name. AppleScript has a very simple
way of doing this using the display dialog command. If you use display dialog on its
own, it puts a box on the screen with two buttons: OK and Cancel.
If you add the command default answer, the dialog box has room for the user to enter
something. So to capture the user’s desired destination folder, you would use something like
this:
display dialog “Enter the folder name:” default answer myFolder
Notice that we have to specify a container (called a variable) myFolder to store the user’s
input.
Before we can use a variable, we have to tell AppleScript to expect it, so it needs to be defined
before it is used. This is done using the set command that you encountered earlier.
Unlike many other programming languages, AppleScript isn’t that fussy about what types of variables you use. If the application requires a sequence of characters (known as a string) and you
enter a number, AppleScript happily converts it (if possible) in a process known as coercion. This
happens behind the scenes, and you will be unaware of it, as long as the coercion makes sense.
For example, if the script requires a number and you enter “123e,” that doesn’t make sense as a
number, so the script stops with an error.
In this example, let’s set the value of myFolder to be Music. We do this using the command:
set myFolder to “Music”
Follow these steps to modify your Open Music Folder script:
1.
2.
Open your Open Music Folder script using ScriptEditor.
Enter a new first line: set myFolder to “Music”.
410
Enhancing Your Macintosh
3.
Click the Compile button.
Note that ScriptEditor puts the variable myFolder in green. This is the default color
ScriptEditor uses to display variables.
4.
On the next line, enter this:
display dialog “Enter the folder name:” default answer¬
myFolder
5.
Save the file, and then click Run.
Now your dialog box is displayed, as shown in Figure 17.11.
Figure 17.11
Dialog box to get user input
Note that the value of myFolder that you set in the first line shows as the default
answer.
6.
Click Cancel, because you haven’t finished yet.
Now you need to change the value of myFolder to whatever the user typed. To do
this, you use another set command. When the user clicks OK, whatever is in the dialog box is returned as the result.
7.
Add the line:
set myFolder to text returned of the result
Now you need to start Finder and have it carry out the main part of the script. But
rather than use Music as the folder to open, we want to open the folder corresponding
to what the user typed. To do this, we substitute the variable myFolder for Music in
the open folder command.
8.
Edit the open folder line to read:
open folder myFolder of home
Now your script should look like:
NOTE
Don’t type the line continuation character ¬ in the second line; just enter the text all as a single line.
Chapter 17: Creating and Editing AppleScript Macros
411
set myFolder to “Music”
display dialog “Enter the folder name:” default answer¬
myFolder
set myFolder to text returned of the result
tell application “Finder”
activate
open folder myFolder of home
tell Finder window 1
set current view to list view
set bounds to {1000, 200, 1750, 700}
end tell
end tell
9.
10.
Save and then run your script.
In the dialog box, type Documents and click OK.
You should see the Finder window as shown in Figure 17.12.
Figure 17.12
Documents folder in Finder
Of course, the content of your Documents folder will be different from mine.
Note that the script doesn’t care about capitalization because Finder doesn’t care.
dOcUmEnTs is treated just the same as Documents.
You can open folders that are below the level of the top folder by using a: to separate
the names. For example, to open the iTunes folder that is a subfolder of the Music
folder, you would enter Music:iTunes.
412
Enhancing Your Macintosh
One small modification you can make to the script to make it look a little more professional is to add an icon to the dialog box.
11.
Modify the display dialog command to read:
display dialog “Enter the folder name:” default answer¬
myFolder icon note
NOTE
Don’t type the line continuation character ¬ ; just enter the text all as a single line.
This time your dialog box displays with an AppleScript icon, as shown in Figure 17.13.
Figure 17.13
AppleScript icon in dialog box
Handling errors
What happens if you type a folder name that doesn’t exist at the top level of your home folder?
Find out!
Run your script but enter a folder name that you know doesn’t exist.
Note how the Dock icon for ScriptEditor bounces up and down. Check with AppleScript, and
you find that ScriptEditor is displaying an error message, as shown in Figure 17.14.
Figure 17.14
ScriptEditor error message
Obviously, you can’t depend on the user always entering valid data—even when you are the
user! So rather than have the application eventually end with a ScriptEditor error, your application should handle it and display the error message to the user.
Chapter 17: Creating and Editing AppleScript Macros
413
AppleScript uses the try and on error commands to handle errors. You can think of these as
the script trying to do something. If it succeeds, there’s no problem. If it doesn’t succeed—in
other words, on error—do something else.
What we need to do is to get the user input, activate Finder as before, and then try to open the
folder the user specified. If it succeeds, go ahead and do the rest of the script. If it doesn’t succeed, show an error message and quit.
Follow these steps to add error handling to your script:
1.
2.
Open your Open Music Folder script with ScriptEditor.
Immediately after the activate command, insert this line:
try
3.
Immediately after the first end tell, add these lines:
on error
display dialog “Oops! There is no folder with that¬
name” with icon stop buttons “Sorry!”
end try
NOTE
Don’t type the line continuation character; just enter the text all as a single line.
In this case, we’ve jollied it up a little by putting a stop icon in the dialog box, and then
naming the button “Sorry!”
Your script should now look like:
set myFolder to “Music”
display dialog “Enter the folder name:” default answer¬
myFolder with icon note
set myFolder to text returned of the result
tell application “Finder”
activate
try
open folder myFolder of home
tell Finder window 1
set current view to list view
set bounds to {1000, 200, 1750, 700}
end tell
on error
display dialog “Oops! There is no folder with that¬
name” with icon stop buttons “Sorry!”
end try
end tell
4.
Test that your application still works by leaving the default as Music.
414
Enhancing Your Macintosh
5.
Check that your error handling works by entering nonsense text in the dialog box.
You should get an error message like that shown in Figure 17.15.
Figure 17.15
Error message for nonexistent folder
To polish your script just a little more, you should tell the user why the error message
appeared. To do that, show what the user typed in the dialog box. You do this by changing the text slightly and adding the variable (myFolder) that the user typed.
You do this by showing a fixed part of the error message (Oops! There is no folder called)
and then add what the user typed to the end of it. This is called concatenation and is like
addition but for strings of characters. The symbol for concatenation is the ampersand
character (&).
6.
Change your on error dialog box line to the following:
display dialog “Oops! There is no folder called “ &¬
myFolder with icon stop buttons “Sorry!”
Now your error message should look like that shown in Figure 17.16.
Figure 17.16
Error message showing incorrect input
Making your application user proof
How can you prevent users typing the wrong thing? You can’t! But you can eliminate the need
for the user to type anything. If you could present a list of possible choices, the user can simply
choose one of the options. Then there’s no possibility of making an error.
This section is going to introduce several new concepts. First, AppleScript has a type of data
called a list. You can create a list of numbers or strings. The list is enclosed in curly brackets { }.
This is a list of numbers: {1, 2, 3}. Each item in the list is separated from the others by a comma. This is
a list of folder names: {“Documents”, “Music”, “Desktop”}. Note that strings are still enclosed in quotes.
Chapter 17: Creating and Editing AppleScript Macros
415
Here’s a way to eliminate user error: Show a list on the screen, and have the user select just one
correct item. You know it’s correct because you drew up the list!
AppleScript has a command to display a list and then have the user choose an item. It is the
choose from list command.
Follow these steps to create new script:
1.
2.
Start ScriptEditor, and create a new file.
Enter the following line:
choose from list {“Documents”, “Music”, “Downloads”}
3.
4.
Save the script as a script with the name Open User Folder.
Run the script.
You should see a selection box, as shown in Figure 17.17a.
Note that the OK button is grayed out until you select one of the options. Then you
can click OK.
Look in the bottom frame of ScriptEditor after you have selected a folder. You should
see something like Figure 17.17b.
ScriptEditor displays the selection made. Note that it displays as a list with only one
element: {“Music”}.
Figure 17.17
Folder selection box (a); result of folder selection (b)
a
b
416
Enhancing Your Macintosh
So far so good: We created a list so the user just makes a selection. Of course, the drawback is
that we have to enter the folder names manually. Aren’t computers supposed to save us that
drudgery? Of course. So let’s get the computer to tell us the names of the folders.
Follow these steps to create a script that creates and displays a list of all the folders in the top
level of the user’s home folder:
1.
2.
Delete the only line in your script because you’re starting from scratch.
Create a new empty list called listOfFolders
set listOfFolders to {}
Now you want to get Finder to trawl through the user’s home folder and get the
names of all the folders.
3.
Add these lines:
tell application “Finder”
set folderlist to every folder of home
4.
Run the script.
You should receive a lengthy error message from ScriptEditor that looks like Figure 17.18.
Figure 17.18
Error message
Unfortunately, the variable folderlist is not a string, so it can’t be coerced into a list. We
have to do that in our program.
To do this, we need to step through every item in folderlist, convert it to a string, and
add it to the end of the list of folders. This requires a repeat loop, which tells
ScriptEditor to keep repeating an operation until it can’t repeat any longer.
Chapter 17: Creating and Editing AppleScript Macros
5.
417
Add the following line to the script:
repeat with currentFolder in folderlist
set currentFolderName to (the name of currentFolder)
copy currentFolderName to the end of listOfFolders
end repeat
Note that the loop is enclosed in a repeat … end repeat pair of commands.
The loop sets a variable currentFolderName to the name of the currentFolder in the
folderlist and then adds the currentFolderName to the end of the list of folders, called
listOfFolders.
6.
Now let’s see if it has worked by adding a choose from list command:
choose from list listOfFolders
7.
Save the file, and then click Run to see what happens.
You should see a choose box like that shown in Figure 17.19.
Figure 17.19
Choose box showing folders
Hooray! We’ve achieved the first part of our aim of fool-proofing our script.
First, let’s tidy up the choose box by replacing the generic prompt with one of our
choosing.
8.
Change the choose command to read as follows:
choose from list listOfFolders with prompt “Which folder¬
do you want to open?”
9.
Give the choose box a title:
choose from list listOfFolders with title “Open a folder”¬
with prompt “Which folder do you want to open?”
418
Enhancing Your Macintosh
10.
Make the default selection the first folder in the list read as follows:
choose from list listOfFolders with title “Open a folder”¬
with prompt “Which folder do you want to open?” default¬
items item 1 of listOfFolders
11.
Change the default buttons on the choose box by adding text to the last line:
choose from list listOfFolders with title “Open a folder”¬
with prompt “Which folder do you want to open?” default¬
items item 1 of listOfFolders OK button name {“Open¬
Folder”}
NOTE
Although that line is spread over several lines in the book, it is all one line. Don’t type the ¬ characters.
This results in a choose box that looks like Figure 17.20.
Figure 17.20
Final choose box
Now you can do something with whatever the user chose from the list. If you run the script, the
user’s choice is shown in the bottom Result pane, as shown in Figure 17.21.
In this case, I chose Downloads from the list.
What remains now is to get that choice as the input to the remainder of the script. As you can
see, the value that the choose function returns is a list because it’s inside the curly brackets:
{“Downloads”}.
So we need to capture that list returned and then convert it to a string. To get the list returned
from the choose command, we just set a new variable as the result as in:
set returnValue to choose …
Chapter 17: Creating and Editing AppleScript Macros
419
Figure 17.21
User’s choice shown in Result pane
Then we need to coerce the returned list to a string value. This is very simple in AppleScript
because sometimes the conversion is automatic. In this case, though, it isn’t, so we simply tell
AppleScript to do it using as text.
Follow these steps to do this:
1.
2.
Open the Open User Folder script if it is not already open.
At the start of the choose... statement, insert the following:
set returnValue to choose from list listOfFolders…
3.
After the choose statement, add this line:
set myFolder to returnValue as text
Yes, it’s that simple! Now you simply open the folder.
4.
Just before the end tell line, insert the following line:
open folder myFolder of home
Now your complete script should look like this:
set listOfFolders to {}
tell application “Finder”
set folderlist to every folder of home
repeat with currentFolder in folderlist
set currentFolderName to (the name of currentFolder)
copy currentFolderName to the end of listOfFolders
420
Enhancing Your Macintosh
end repeat
set returnValue to choose from list listOfFolders with title¬
“Open a folder” with prompt “Which folder do you want to¬
open?” default items item 1 of listOfFolders OK button name¬
{“Open Folder”}
set myFolder to returnValue as text
open folder myFolder of home
end tell
NOTE
As always, remember not to type the continuation character; just put everything on one line. AppleScript formats it
when you compile the script.
Now you have a fool-proof script that opens a folder starting at the user’s home folder. Of
course, now the user cannot specify a folder at the next level down (such as Music/iTunes), but
that’s the price you pay for error-proofing the script.
Creating an Application
Up to now you’ve been saving your scripts as .scpt files. These are editable, but they require
ScriptEditor to run. One of the options for saving scripts is as an application, as you saw earlier.
Follow these steps to use your script as an application:
1.
2.
3.
If it’s not already open, open your Open User Folder script.
Select Save As, choose Application, and uncheck the Startup Screen box.
Open a Finder window if one is not already open, and navigate to your Library/
Scripts folder off your home folder.
Figure 17.22 shows the content of my Scripts folder; yours may be different.
Note that you see two versions of the Open User Folder script: One has the script symbol inside a document icon while the other just has the script icon. The document is
the editable script; the script icon alone indicates that it is an application.
TIP
Always save an editable script copy as well as the application so that if you need to modify the script later, it’s possible
to do it. You can’t edit an application.
4.
Double-click the application icon.
Your application runs, asking you which folder you want to open, then opens the
folder. Success!
Chapter 17: Creating and Editing AppleScript Macros
421
Figure 17.22
Scripts folder
Making the script available to other users
So far the script has been for your exclusive use because you saved it to your own Library/
Scripts folder. You can make it available to other users by putting it in the systemwide scripts
folder. That’s where the scripts that appear on the script menulet on your menu bar come from.
Follow these steps to make the script available to all users:
1.
If it’s not open already, open your Library/Scripts folder and copy the Open User
Folder script.
2.
Navigate to the folder startup disk (Hackintosh, in my case) /Library/Scripts/
Finder Scripts, and paste the script there.
This is shown in Figure 17.23.
3.
Click the Script menulet on your menu bar, select Finder Scripts, and check that
Open User Folder is listed.
This is shown in Figure 17.24.
4.
Create a new user account.
Can you remember how to do it? Hint: Open System Preferences, select Accounts, click
the Lock icon, enter your password, and click the + (plus) sign under the Accounts
pane.
5.
Log out of your account and log in to the new account.
422
Enhancing Your Macintosh
Figure 17.23
Global Finder scripts
Figure 17.24
Open user folder in Finder scripts menu
Chapter 17: Creating and Editing AppleScript Macros
6.
423
Turn on the Scripts menulet in the menu bar.
Remember how? Hint: Run the AppleScript utility, and check the box for Show Script
menu in menu bar.
7.
Open the script menu to Finder Scripts, and run the Open User Folder script.
Does the script run? It should! Which folder does it select? It should select a folder in the other
user account, not yours. Is the script editable? That depends!
When you save the script, whether it’s in your own Scripts folder or the global Scripts folder, it
has permissions; because you are the owner, you have read and write permission, but everyone
else has read-only permission. You can see this by selecting Get Info on the script file. Figure
17.25 shows the permissions for the script in my global library (Hackintosh/Library/Scripts/
Finder Scripts).
Figure 17.25
Permissions for script file
You can change permissions by clicking the lock icon and setting whatever you want for “staff”
and “everyone.”
424
Enhancing Your Macintosh
When you created the new account, if you gave the new user Admin permissions, then he can’t
write the file. But he can change permissions on the file, even to the point of locking you out! In
other words, the new user can give you read-only permission! That’s a good reason to be careful
about how you set up accounts for other users!
Using scripts in other applications
We’ve spent a lot of time with Finder scripts, so you pick up the basic concepts of scripting with
AppleScript. As you can see from the scripts menu, lots of scripts are available to you. Most
applications designed for Leopard install their own scripts when you install them.
Some of the default scripts have limited usability or duplicate what you can already do with
Preferences for each application.
In this section, you create a script that takes e-mail addresses from your Address Book and creates a message to send to all members, letting them know that you’ll be on vacation for a certain period.
Creating an e-mail list
Before you start, you should make sure that you have a few contacts with e-mail addresses in
your Address Book. They don’t need to be genuine, nor do the e-mail addresses need to be
actual addresses: You won’t be sending the message—unless you really want to!
Follow these steps to create an e-mail list from your Address Book contacts:
1.
2.
Open ScriptEditor, and create a new file.
Save it as Get Email Addresses.
Next we need a variable to store the e-mail addresses. This will be a string of zero characters. Remember that a string is always enclosed in “ “ characters; to create an empty
string, we use “”.
3.
Type set emailAddresses to “” as the first line.
Next, you’re going to work with Address Book, so tell the script the name of the application.
4.
Type tell application “Address Book”, and press Enter a couple of times
to insert some blank rows.
5.
Type end tell.
Address Book stores information such as birth date, company, name, and so on as properties of
a person, but e-mail addresses are not stored as properties. The reason for this is easy to understand: A person has only one birth date (except at parties!), only one title, but may have more
than one e-mail address, phone number, and so on.
Chapter 17: Creating and Editing AppleScript Macros
425
Because of this, we can’t just use a line like: set emailList to email of every person as
you might expect. Instead, you need to explicitly retrieve the value of the e-mail address using a
statement like: set emailList to the value of email of every person.
In this example, we ignore the fact that some people have only one e-mail address, while others
may have several. We retrieve only the first e-mail address for each person.
Follow these steps to create your script to read the e-mail addresses from Address Book:
1.
After the tell statement, enter the following:
set emailList to the value of email 1 of every person
That loads the value of all the e-mail addresses into emailList.
2.
Check the output of the script by setting the return value for the script to show
the value of emailList; add the following line just before the end tell:
emailList
The output is shown in Figure 17.26, which I ran on a fake Address Book.
Figure 17.26
Results of running e-mail script
The result is not a list but a string of four e-mail addresses plus a missing value. This
occurs because one name in the Address Book has no e-mail address.
Next we need to be able to extract a single e-mail address so we can pass it to Mail to
create the e-mail.
426
Enhancing Your Macintosh
3.
Add a new line after the end tell:
set emailAddress to (text item 1 of emailList) as text
4.
To check that we have the first e-mail address, add this line at the end, just
before the end tell:
emailAddress
This last line in effect prints the value of emailAddress to the Result window.
When I ran this on my e-mail list, I got the output shown in Figure 17.27.
Figure 17.27
Output showing first e-mail address
Creating a new e-mail using Mail
Now that we’ve got an e-mail address, the next step is to pass it to Mail and create an e-mail.
First, let’s create a script that creates a new e-mail. Follow these steps:
1.
Create a new script called Create New Email.scpt, and save it.
We’ll be working with Mail, so we need tell and end tell commands.
2.
3.
Type tell application “Mail”.
Enter two or three blank lines, and then add end tell.
Chapter 17: Creating and Editing AppleScript Macros
427
Creating a new mail message could hardly be simpler. The command is make new outgoing
message. A message has several properties, such as “subject,” “content,” “sender,” and so on.
Note that recipient is not a property of an e-mail message because it can have several values;
properties such as subject, content, sender, and so on can have only one value.
Follow these steps to create your first outgoing message:
1.
Add the following line after tell application “Mail”.
set newMessage to make new outgoing message with ¬
properties {subject:”Test email”, content:”Testing¬
1-2-3” & return & return & “Thanks”, sender:”me@my.com”}
NOTE
Remember to enter as one line; the continuation characters are only for clarity in the book.
So you can see the new message when it’s created, you need to tell Mail to make the
new message visible. How will you do this? With a tell statement, of course—this
time, directed at the new message.
2.
Add the following lines to the script:
tell newMessage
set visible to true
end tell
Now you can run the script and check that it creates a new mail message. Figure 17.28
shows what happened when I ran it.
Note that the message contains the subject line specified, the text in the body of the
e-mail, but no recipient in the To: line. What you can’t see is that the sender is identified as me@my.com.
Now we need to add a recipient. Because it’s possible to have multiple recipients, the
way to do it is to add another recipient at the end of the existing list of recipients. Of
course, at present there are no recipients, so that creates a single recipient.
3.
Still inside the tell newMessage block, add this line:
make new to recipient with properties¬
address:”joe@joe.com”}
428
Enhancing Your Macintosh
Figure 17.28
Running the create new mail message script
4.
Save and run the script.
You should get a new mail message created as before, but this time with joe@joe.com
in the To: line, as shown in Figure 17.29.
Note how Mail has looked inside your Address Book, found Joe’s e-mail address, and
put his name as the recipient, rather than just the bare e-mail address. Neat, huh?
Chapter 17: Creating and Editing AppleScript Macros
429
Figure 17.29
New e-mail with recipient
Combining the two scripts
Now we have two scripts: one to get e-mail addresses from your Address Book; the other to create a new e-mail message using Mail. We need to put them together so the output from the
Address Book script feeds the e-mail addresses into the Mail script.
Your Mail script needs to sit inside the Address Book script. Follow these steps to combine the
two scripts:
1.
Open both scripts, and copy and paste from the Mail script into the Address Book
script.
2.
Remove the joe@joe.com address, and replace it with emailAddress, the address
that your Address Book returns.
430
Enhancing Your Macintosh
After doing this, your script should look like:
set emailAddress to “”
tell application “Address Book”
set emailList to the value of email 1 of every person
set emailAddress to (text item 1 of emailList) as text
tell application “Mail”
set newMessage to make new outgoing message with¬
properties {subject:”Test email”, content:”Testing¬
1-2-3” & return & return & “Thanks”,¬
sender:”me@my.com”}
tell newMessage
set visible to true
make new to recipient with properties¬
{address:emailAddress}
end tell
end tell
end tell
This now creates an e-mail with the recipient being the first address in your list.
Creating more than one recipient
Even though you have retrieved a list of e-mail addresses from your Address Book, at the
moment you send the e-mail only to the first person in your list. You now have to cycle through
the list of addresses and add each of them as a recipient.
Up to now we’ve used the first address in the list (joe.blow@joeblow.com.zzz). The way we
selected it is text item 1 of emailList. Instead of only getting the first value, we want to
get all the values. To do this, we have to set up a loop so that as each address is retrieved, we
add it as a recipient and then get the next address.
In this case, we set up a repeat while loop.
In English, we can write this as:
Set the count to 1, and get address 1.
Add 1 to the count, and get address 2.
Keep doing this until no more addresses are left to get; in other words, while the count
is less than the number of addresses.
In AppleScript, we write this as follows:
set emailNumber to 1
repeat while emailNumber is less than or equal to totalEmails
… add the recipient …
set emailNumber to emailNumber + 1
end repeat
Chapter 17: Creating and Editing AppleScript Macros
431
It sounds more complicated than it actually is! Follow these steps to add the looping statements:
1.
As the second line of the script, insert the following:
set emailNumber to 1
2.
After the line set visible to true insert these lines:
repeat while emailNumber is less than or equal to totalEmails
set emailAddress to (text item emailNumber of emailList)¬
as text
make new to recipient at end of to recipients with¬
properties {address:emailAddress}
set emailNumber to emailNumber + 1
end repeat
Note that the third line adds a new recipient to the end of the existing list of recipients.
Let’s go through how it works. At the start, emailNumber is set to 1. The value for totalEmails is
defined earlier so the repeat line tests to see if the emailNumber is less than or equal to totalEmails. If it is less, as it is at the start, then it retrieves the text of the emailAddress corresponding
to emailNumber. In other words, if emailNumber is 2, then it retrieves the second emailAddress.
Then it creates a new recipient using the e-mail address it just retrieved and adds it to the end
of the list of recipients. Then it adds 1 to the emailNumber.
In the case here, there are five e-mail addresses so the repeat goes through five times, adding to
the e-mail recipients.
After the repeat loop has done its work, the e-mail is created and we can close the tell
newMessage loop.
At this point, your script looks like:
set emailAddress to “”
set emailNumber to 1
tell application “Address Book”
set emailList to the value of email 1 of every person
set totalEmails to count of emailList
tell application “Mail”
set newMessage to make new outgoing message with properties¬
{subject:”Test email”, content:”Testing 1-2-3” & return &¬
return & “Thanks”, sender:”me@my.com”}
tell newMessage
set visible to true
repeat while emailNumber is less than or equal to ¬
totalEmails
set emailAddress to (text item emailNumber of emailList)¬
as text
make new to recipient at end of to recipients with¬
432
Enhancing Your Macintosh
properties {address:emailAddress}
set emailNumber to emailNumber + 1
end repeat
end tell
end tell
end tell
Figure 17.30 shows what happened when I ran it on my Address Book.
Figure 17.30
E-mail with all recipients
This is looking good, except for that “missing value.” Remember, one person in my Address
Book doesn’t have an e-mail address. So we need to detect that and remove it.
Removing the missing values
We need to remove the missing values by testing to see whether emailAddress is a “missing
value.” If it is, we don’t create a new recipient.
Chapter 17: Creating and Editing AppleScript Macros
433
Follow these steps to remove the missing value:
1.
Immediately before the make new recipient… line, insert the following:
if emailAddress is not equal to “missing value” then
2.
Immediately after the make new recipient… line, insert the following:
end if
3.
Run the script.
Figure 17.31 is my output when I ran the script.
Figure 17.31
Final output with no missing value
Entering a Subject line
Now you have a script that scans through your Address Book for all your e-mail addresses, creates a message, and inserts all the e-mail addresses as recipients.
434
Enhancing Your Macintosh
One problem with this script is that, if you want to run it with a different subject line and different body, you have to edit the script. That’s not a good policy: You should always make scripts
(and in fact any type of computer program) as generic as possible.
Why not add a line to query the user for the subject of the e-mail? Follow these steps:
1.
Immediately after the line set emailNumber to 1, enter the following line:
set emailSubject to “”
2.
Immediately before the line tell application “Address Book”, insert the following
lines:
display dialog “What is the Subject of the email?”¬
default answer “”
set emailSubject to text returned of the result
Figure 17.32 shows the dialog box.
Figure 17.32
Dialog box to get subject of the e-mail
Getting the content text from a file
Using a display dialog command to get the subject line for the e-mail is fine, but it’s not suitable
for getting the body of the message, because of its complete lack of any editing functions. A
much better solution is to use TextEdit, which is designed for entering and formatting text.
So how can we get text from a file into TextEdit and then into the e-mail? Follow these steps to
do that:
1.
2.
Open TextEdit, and create a new file.
3.
4.
5.
Save it to your Scripts folder as email content.txt.
Enter some text, such as “Hi everyone, here is my new e-mail address: me@
my.com. Regards.”
Close TextEdit.
Open your combined file in ScriptEditor, if it’s not already open.
Chapter 17: Creating and Editing AppleScript Macros
6.
435
Immediately before the tell application “Address Book” line, insert the following
new lines:
tell application “TextEdit”
activate
set theFilename to choose file
set theDocument to open theFilename
set theContent to text of theDocument
close theDocument
quit
end tell
Let’s walk through this script segment step by step.
The first two lines start TextEdit running. The line set theFilename to choose
file opens a standard File Open dialog box. The choose file part returns with a
variable called theFilename, which is the name of the file you selected.
In the next line, the open command opens your file and sets a variable called
theDocument to the content of the file you just opened.
In the fourth line, the text of the file is copied to a variable called theContent.
The last two lines close the document and quit TextEdit, leaving the contents of the
document in the variable theContent.
Figure 17.33 shows the text to go in my e-mail.
Figure 17.33
E-mail message
436
Enhancing Your Macintosh
Note that I’ve included my e-mail address as a hyperlink. To insert an e-mail address as
a hyperlink in TextEdit, you select the text and use Format, Text, Link… from the
TextEdit menu. A hyperlink to mail is mailto:me@my.com.
All that remains now is to use the variable theContent in the e-mail.
7.
Inside the tell application “Mail” block, change the set newMessage line to read as
follows:
set newMessage to make new outgoing message with¬
properties {subject:emailSubject, content:theContent,¬
sender:”me@my.com”}
8.
Test the script by running it; enter a subject line, then open your file in TextEdit,
and send the text to the e-mail.
Figure 17.34 shows the e-mail created when I run the script.
Figure 17.34
Final e-mail
Note that the mail hyperlink doesn’t show up; but it does show in the message when
the other person receives it.
Chapter 17: Creating and Editing AppleScript Macros
437
Adding a little more refinement
Running your script requires you to create the file containing the body of the e-mail in advance.
In a year’s time, you’ll have forgotten that you need to do that, and unless you specifically tell
them, nobody else would have any idea that they need to do that. So why not add a prompt
asking if you’ve created the text file for the body of the e-mail?
Follow these steps to add a prompt:
1.
Immediately after the set email subject to text returned …, insert the line:
display dialog “Have you created your text file for the¬
content?” buttons {“No”, “Yes”} default button 2 with¬
icon caution with title “You need to create a text¬
file.”
If the user clicks the “Yes” button, you want to go on with the rest of the script.
2.
Enter the following as the next line:
if result is {button returned:”Yes”} then
This does the remainder of the script. If the user clicks the “No” button, the script terminates.
3.
As the very last line in the script, enter this line:
end if
Your completed script now should read:
set emailAddress to “”
set emailNumber to 1
set emailSubject to “”
display dialog “What is the Subject of the email?” default answer “” with icon
note
set emailSubject to text returned of the result
display dialog “Have you created your text file for the content?” buttons
{“No”,¬
“Yes”} default button 2 with icon caution with title “You need to create a
text¬
file.”
if result is {button returned:”Yes”} then
tell application “TextEdit”
activate
set theFilename to choose file
set theDocument to open theFilename
set theContent to text of theDocument
close theDocument
quit
end tell
tell application “Address Book”
set emailList to the value of email 1 of every person
set totalEmails to count of emailList
438
Enhancing Your Macintosh
tell application “Mail”
set newMessage to make new outgoing message with properties¬
{subject:emailSubject, content:theContent, sender:”me@my.com”}
tell newMessage
set visible to true
repeat while emailNumber is less than or equal to totalEmails
set emailAddress to (text item emailNumber of emailList) as text
if emailAddress is not equal to “missing value” then make new to¬
recipient at end of to recipients with properties¬
{address:emailAddress}
end if
set emailNumber to emailNumber + 1
end repeat
end tell
end tell
end tell
end if
Refining even further
What if you want to send the e-mail only to certain people in your address book? Say you only
want to send it to anyone with a “.com” e-mail address.
One way to do this is to show the users a list of top-level domain names such as.com, .org, .edu,
.gov, or country suffixes such as .au, .uk, .ca, and so on, and ask the user to choose which ones to
include.
The following code allows the user to select one or more top-level domain names (TLDs):
set listOfTLD to {“.com”, “.org”, “.gov”, “.edu”}
choose from list listOfTLD with title “Which domains?” with¬
prompt “Select all the TLDs:” default items item 1 of¬
listOfTLD with multiple selections allowed
Use ScriptEditor to try it out. Figure 17.35 shows the result, with two TLDs selected.
Figure 17.35
Select top-level domains
Chapter 17: Creating and Editing AppleScript Macros
439
I’ll leave it as an exercise for you to modify your code to pull all the matching e-mail addresses
from your Address Book before sending them to Mail.
You might also want to include an error-checking script to make sure that Address Book, Mail,
and TextEdit are available on the computer. It would be an unusual Macintosh that didn’t have
them, but you never can be certain.
Summary
In this chapter, you explored the basic concepts and techniques of using AppleScript to create
small utility programs that carry out a specific task. If you are an experienced programmer, you
probably picked up the concepts and techniques pretty quickly. If not, I hope you didn’t find it
too challenging and are motivated enough to try writing your own scripts.
With both sample scripts, I tried to take you from the most basic concepts through more
advanced ones and create scripts that are useful into the future. I haven’t used the e-mail script
myself, but I use a version of the Open Folder script every day to open the folder where I store
these files.
Modifying the
Dashboard
I
n Chapter 10, you looked at Leopard’s Dashboard, which in
many ways is Apple’s equivalent to the sidebar in Windows
Vista. In the same way as with the sidebar, Dashboard has widgets that you can download and add to your Dashboard.
You have already seen how to add new widgets to your own
Dashboard and use them. In this chapter, you develop some of
your own and add them to your Dashboard.
Creating new widgets from scratch is not easy, because it requires
some fairly sophisticated HTML and JavaScript programming skills.
Delving in that deeply is beyond the scope of this book, but if you
want to do it, many resources are available to help you.
Before you can start doing anything about developing for the
Dashboard, you need to first install the Apple Developer Tools. You
will use this comprehensive set of applications in this and the next
few chapters.
In this chapter, you use the developer tools to create your own
widgets to place in your Dashboard.
In This Chapter
Installing the Apple Developer
Tools
Apple makes a set of developer tools available for Leopard that
contains many different applications enabling you to develop your
own applications, not just for Leopard but for iPhone as well. Some
of the developer tools included are listed in Table 18.1.
Many different utilities are available that allow you to see what is
happening inside your applications.
Installing the Apple
Developer Tools
Getting around with
Dashcode
Creating a basic
computer gauge
Creating a map widget
Creating a countdown
timer
442
Enhancing Your Macintosh
Table 18.1 Apple Developer Tools
Tool
Use
AU Lab
Mixes digital audio
Dashcode
Develop new Dashboard widgets
Core Image Fun House
Apply many different graphics effects to images
Pixie
Magnify screen
Quartz Composer
Create many transformations of images
Interface Builder
Create an interface for an application
XCode
Build many different applications from templates
Downloading the developer tools
Apple supplies the developer tools as a downloadable disk image. Be warned: It is a big image
file, around 1GB. When it is installed on your computer, it takes up almost 4GB, so be sure you
have enough disk space.
At the time of this writing, the current version of the developer tools was 3.1.3, which is what I
used in these chapters.
Before you can download the tools, you need to become a member of the Apple Developer
Connection (ADC). Several levels of membership are available, but the free level gives you
access to the developer tools and all the documentation you could ever want! The top level
memberships cost $3,500, but the online membership is free, and until you get serious about
developing applications, it’s all you’ll need.
Follow these steps to register and download the developer tools:
1.
2.
3.
4.
Go to the Apple Developer site at http://developer.apple.com/.
Click Mac Developer Program.
Click Register, and complete the enrolment form.
After you have registered, log in and download XCode.
CAUTION
XCode is a big file, so be aware of any download limits on your Internet account.
Installing the developer tools
After the disk image has downloaded, you need to install the tools. Follow these steps to install
them:
Chapter 18: Modifying the Dashboard
1.
443
After the disk image has been mounted, double-click XcodeTools.mpkg and go
through the installer process.
All the developer tools are installed to a “Developer” folder on the startup disk. In my
case, it’s at Hackintosh/Developer.
2.
Open the folder in Finder, and drag the folder alias (remember that?) to your
Dock.
3.
Right-click the Dock icon, and set your preferences.
I set mine to Display as a Stack and View content as List, as shown in Figure 18.1.
Figure 18.1
Developer tools display in the Dock
Getting Around with Dashcode
Dashcode is the first developer tool you’ll use. As the name implies, it allows you to create code
(or programs) to take their place in the Dashboard.
Reviewing the Dashboard
Figure 18.2 is to remind you of what the Dashboard looks like. Your display will be slightly different, but the essentials are the same.
You bring the Dashboard into view by pressing the F12 key, clicking on the Dashboard icon in
the Dock, or moving the mouse to a corner of the screen if you have set up Exposé that way.
444
Enhancing Your Macintosh
Figure 18.2
Dashboard display
Each of the objects on the screen is a widget. In this view, you can see the weather forecast,
clock, calculator, and calendar widgets, but more are available by clicking the + (plus) in the
bottom-left corner. This brings up a selection bar where you can choose another widget and
simply drag it onto the display, as shown in Figure 18.3.
Starting with Dashcode
Launch Dashcode; remember that it isn’t in your Applications folder, but in your Developer
folder. If you don’t have it in the Dock, just use Spotlight to launch it.
Your first view of Dashcode is a screen allowing you to choose the type of template you want to
use, as shown in Figure 18.4.
In version 3.1, the highlighted template type is Web Application, which is used to develop
iPhone and iPod touch applications. But that’s for another book. For now, select Dashboard
Widget. This brings up a new template selection menu, this time for developing Dashboard
widgets.
Chapter 18: Modifying the Dashboard
Figure 18.3
New widgets
Figure 18.4
Dashcode template view
445
446
Enhancing Your Macintosh
Creating a Basic Computer Gauge
In this section, you develop a basic computer gauge to monitor various activities on the computer. Select from the project screen shown in Figure 18.5.
Figure 18.5
Template selection for computer gauge
Follow these steps to create your computer gauge:
1.
Click Computer Gauge, and then click Choose.
Figure 18.6 shows the gauge project window.
Chapter 18: Modifying the Dashboard
447
Figure 18.6
Gauge project window
Table 18.2 shows the various parts of the project window and explains what each part is used for.
Table 18.2 Project Window Explanation
Part
Location
Use
Toolbar
Top of the window
Runs your widget; shows buttons for the inspector and the components library
Parts outline
Top part of left side
Switches among the tools available to create the project
Workflow steps
Bottom part of left side
Shows milestones for development of a widget
Canvas
Right side
Designs the widget’s interface
To create a project, follow the workflow steps, marking each stage completed as you finish it.
From the screen display, you can see the stages in the workflow:
Provide data
Set attributes
Preview default image
Design widget icon
Test and share
448
Enhancing Your Macintosh
Some of these steps are very complex and require high levels of programming knowledge and
ability. Fortunately, you are not required to do any of that for this chapter! You work just with
the look and feel of the widgets, leaving the inner workings alone.
Testing the gauge
In this example, all the work of designing the inner workings has been done, so let’s just see
how the gauge works. Follow these steps to test the gauge:
1.
On the toolbar, click Run.
Did you note the water ripple effect when the gauge starts? Provided you have QE/CI
running, this is the normal behavior when you add a widget to your Dashboard.
2.
Watch the gauges for a few seconds.
Note that the processor dial increases and decreases in speed as your computer works,
doing things in the background.
3.
Open TextEdit to create a file, and quickly click in the Dashcode window.
You should see the processor needle increase, and some disk activity shows on the
disk activity gauge.
4.
5.
6.
Enter some text in TextEdit, and save the file.
Quickly click in the Dashcode window again to see the gauges change.
Open Safari, and quickly click in the Dashcode window.
Hopefully, the CPU, disk, and network gauges all show activity.
From this limited testing, you can see that the gauge does actually work, getting input about
the processor load, disk activity, and network activity. Later, you see how to drag the gauge to
your desktop so you can watch it in operation.
Modifying the gauge
Now that you’ve seen that the gauge actually works, you can change its look to something you
prefer. The changes are restricted to just the look because doing anything more requires programming knowledge.
Changing gauge sizes and text
Follow these steps to make changes to the gauges and the text in the widget:
1.
In the toolbar of the Dashcode window, click Inspector.
The Inspector window opens to the right of the canvas.
Chapter 18: Modifying the Dashboard
2.
449
Click the gauge.
A bounding rectangle with a blue border now surrounds the gauge. The Inspector
window shows the properties of the gauge, as show in Figure 18.7.
Figure 18.7
Inspector window for processor gauge
3.
Click the various buttons on the Inspector, while leaving the gauge selected.
Figure 18.8 shows the other settings panes for the gauge properties.
On the Style and Effects pane, the only options you can change are the opacity. On the
Metrics pane, you can change the size of the gauge and where it sits in the whole
panel. Because there is no text on the actual gauge, you cannot change any settings
on the text panel.
4.
5.
6.
Click the Metrics pane.
Change the size of the gauge to 90 pixels wide by 90 pixels high.
Change the top position to 20 pixels and the left position to −100 pixels.
This puts it in the top-left corner of the front panel.
7.
8.
Select the text PROCESSOR.
Drag the right edge of the blue bounding rectangle until the blue line marking
the center of the box aligns with the center of the needle of the gauge.
450
Enhancing Your Macintosh
Figure 18.8
Properties setting panes for gauge
a
9.
b
c
Drag the text up until it sits just below the gauge.
In my example, the settings are width: 100 pixels; height: 18 pixels; top: 110 pixels;
left: 17 pixels.
10.
11.
Change the text to Processor instead of PROCESSOR.
Set the font to Lucida Grande Bold, 11 pixels, and 25 percent gray.
Use the Leopard color selector, as shown in Figure 18.9, to set the color.
12.
Set the shadow to white with a 1-pixel offset in each direction.
This gives the text an engraved look in the final panel.
13.
Shrink the Disk Activity bar to 100 pixels by 20 pixels, and drag it up so it sits just
below the word Processor.
14.
15.
Move the DISK ACTIVITY label so it sits just below the bar.
Set the font and color properties the same as for the processor label, and change
the text to mixed case.
Chapter 18: Modifying the Dashboard
451
Figure 18.9
Leopard color selector
16.
Select the three labels and the two buttons for disk activity as a group.
Selecting by drawing a bounding box won’t work; you need to select each one while
holding down the Shift key.
17.
With the three labels and two buttons selected, move them under the disk activity gauge and set the text to the same as the other labels.
18.
Select the front image (the whole background) by clicking the resize handle in
the bottom-right corner of the bounding box.
19.
Drag the resize handle until the dimensions are around 140 pixels by 240 pixels.
Oops. The processor gauge is now partly outside the gauge background.
20.
Drag the processor gauge back inside the background.
Figure 18.10 shows my gauge at this point.
21.
Click the Run button to see your gauge working.
452
Enhancing Your Macintosh
Figure 18.10
Gauges in final positions
Changing colors and patterns
I prefer the gauge to look less shiny and something like brushed aluminum. Follow these steps
to change the look of your gauges:
1.
2.
3.
Select the Fill and Stroke panel for the background to the gauges.
4.
On the Style panel, select a gradient fill of 50 percent gray at the top, 75 percent
at the bottom, and opacity of 75 percent.
5.
Set the stroke to solid, 75 percent, and 2 pixels.
On the effects pane, deselect Glass and select Recess.
Set the recess depth to 5 pixels, shadow to 20 percent, and highlight to 50
percent.
Your gauge should now look like Figure 18.11
6.
Run your gauge again.
Chapter 18: Modifying the Dashboard
453
Figure 18.11
Finished gauge
Using the gauge
Dashcode uses the term deploy to mean adding your widget to your Dashboard.
Deploying your gauge
Now that you are happy with its design, follow these steps to add it to your Dashboard:
1.
2.
3.
Save your widget.
Select File, Deploy Widget.
Move some of your other widgets around to clear space for where you want the
gauge to sit.
Figure 18.12 shows the arrangement of my Dashboard before I added the gauge.
4.
Click Keep to keep the widget as part of your Dashboard.
454
Enhancing Your Macintosh
Figure 18.12
Dashboard showing widget being deployed
Using your gauge on your desktop
You may want to place your gauge on your desktop. Few Leopard users know this trick, but you
can drag any widget off your Dashboard and place it on your desktop. To place your gauge on
your desktop, follow these steps:
1.
2.
Start Terminal running.
Enter the following command:
defaults write com.apple.dashboard devmode YES
This puts Dashboard into developer mode.
3.
Enter the command:
killall Dock
This stops the Dock, which controls Dashboard, and restarts it. Your Dock disappears
for a second or two, and then reappears.
Chapter 18: Modifying the Dashboard
4.
455
Press F12 to show the Dashboard.
Don’t hold the F12 key down, or it opens your CD/DVD drive.
5.
On your Dashboard, click the widget you want to place on your desktop and drag
it to where you want to place it.
6.
Before you release the mouse button, press the F12 key again.
Your Dashboard disappears, but you can still drag your widget to wherever you want
to place it on your desk.
Be careful where you place it, because it will always be on top of anything that is at the
same location.
7.
Reverse developer mode by typing the following into Terminal:
defaults write com.apple.dashboard devmode NO
killall Dock
Of course, you can do this with any widget, not just your gauge. To bring the widget from your
desktop back into your Dashboard, set developer mode to on (YES) and click the widget before
you press F12. After your Dashboard has appeared, drag the widget back into the Dashboard.
Don’t forget to turn developer mode off (NO).
Deploying your widget for anyone to use
Your own widgets are all stored in your <home>/Library/Widgets folder. Systemwide widgets
that are available for anyone to use are stored in <startup disk>/Library/Widgets.
To make your widget available to all users, simply copy it from your widgets folder to the systemwide folder.
Creating a Map Widget
In this section, you create a map widget using Google maps. Before you start, you need to have
a Web site publicly available on the Web. You don’t actually need to have anything on your
Web site; you simply need a URL. Normally your ISP provides facilities to host your own Web
site: Check the ISP’s documentation.
Google made its API (Application Programming Interface) publicly available so the owner of a
Web site can create a map to show potential customers where they are located, points of interest, and so forth. You can harness that very simply using the maps widget. After you have created your widget, you can distribute it to other people.
For this example, I created a very rudimentary map with points of interest for Sydney Harbor.
456
Enhancing Your Macintosh
Creating your widget
Follow these steps to create your widget:
1.
Start Dashcode running, and select New Project, Maps.
Figure 18.13 shows the starting screen.
Figure 18.13
Map widget start screen
2.
3.
4.
Save your project as My Map 1.
Change the text Map title shows here to My First Map Widget.
Change the colors and size of the map if you wish.
I left everything at the defaults.
Creating your Google map
Before you can create your widget, you need to create a map using Google maps.
Follow these steps to create your map:
Chapter 18: Modifying the Dashboard
1.
2.
457
Use your browser to go to http://maps.google.com.
Sign into your Google account.
If you don’t already have a Google account, follow the instructions on the site to
create one.
3.
4.
In the location bar, type a search term for the place you want your map to show.
5.
6.
Click Create New Map.
7.
8.
Click Edit.
9.
10.
When the map is on the screen the way you want it, click My Maps at the top left
of the screen.
Give your map a title and description, and check the Unlisted button, unless you
want to share your map publicly.
Click the Placemark button, the one that looks like an upside-down blue teardrop.
Drag the placemark on to your map, and enter a name and some descriptive text.
When you are happy with your map, click Done.
That’s it. You’ve created your own Google map. Figure 18.14 shows my Google map.
Figure 18.14
Google map of Sydney
458
Enhancing Your Macintosh
11.
12.
To get the URL for your map, click Link on the far right of the Google map.
Copy the URL to the clipboard.
You may want to save it in a TextEdit document so you can refer to it later.
Getting your mashup code
Return to Dashcode to continue creating your widget. Follow these steps to set your map to
display in your widget:
1.
In the Workflow Steps pane, click the arrow icon to the left of the heading Maps
properties.
Figure 18.15 shows the screen at this point.
Figure 18.15
Project properties screen
2.
3.
4.
5.
In the Mashup URL box, paste the URL you copied to the clipboard.
Click Mark as Done.
Collapse the workflow step by clicking the title line Provide Map Feed.
Click Supply Maps API key.
Chapter 18: Modifying the Dashboard
6.
459
Click Maps API Signup.
This takes you to the Google maps signup page.
7.
8.
Read the terms and conditions of using the Google maps API.
Enter your Web site’s URL in the box, and click the Generate key.
On the next page, your API key is in green in the top box.
Putting it together
Now you have all the details to set up your maps widget. Follow these steps to complete it:
1.
2.
Copy the API key, and paste it into the Maps API key box in Dashcode.
3.
4.
5.
Click Mark as Done in the Supply Maps API key workflow step.
6.
Click Run.
In the Initial Address line, delete the address 1 Infinite Loop, Cupertino, CA
95014.
Click the Set Attributes box in the workflow steps.
Dashcode has created an identifier for you, and if you’re happy with that, save
your project.
Now watch as your widget starts up, bounces with ripples on the screen, and takes you to the
map you just created in Google.
Figure 18.16 shows my map widget.
Figure 18.16
Map widget showing map of Sydney
460
Enhancing Your Macintosh
If you want to look at the map I created, its URL is http://tinyurl.com/ma6opc. To
retrieve the actual URL, follow these steps:
1.
2.
Go to http://tinyurl.com.
Click Preview Feature in the left menu bar.
Check that the message says you have preview turned on.
3.
4.
In your browser address bar, type http://tinyurl.com/ma6opc.
Click Proceed to this site.
Creating a Countdown Timer
A countdown timer is provided as one of the standard Dashcode projects. It displays a countdown in days, hours, minutes, and seconds to a particular event. It can take an event from your
iCal calendar and use that as the end of the countdown. In this section, you create a countdown
timer that counts down the time until the next event in your calendar.
You can use iCal if you choose or any other calendar application that can create .ics files. I use
Google calendar as my main calendar, but you may choose another.
Setting the event
Create your countdown timer by following these steps:
1.
2.
Start Dashcode, and choose the countdown template.
Save your timer as Time Until Next Appointment.
Using iCal calendar application
If you are using iCal as your calendar application, follow these steps to connect to your countdown timer:
1.
2.
Open iCal, and select the calendar you want to use.
On the File menu, select Export… and save the calendar to your Documents
folder.
Using Google calendar
If you are using Google calendar, follow these steps:
1.
Open your calendar.
On the left side of the screen is the My Calendars box.
2.
Click the down arrow, and select calendar settings.
Chapter 18: Modifying the Dashboard
3.
4.
5.
461
Scroll down to Calendar Address.
Click the iCal button.
Copy the URL to the clipboard.
Using MobileMe calendar
Follow these steps to publish your iCal calendar and then use it in the countdown timer:
1.
2.
3.
Open iCal.
Highlight your calendar, and select Publish from the Calendar menu.
In the dialog box, select the options you want, as shown in Figure 18.17.
Figure 18.17
Publish to MobileMe dialog box
4.
5.
Click Publish.
On the dialog box that returns after publishing, copy both the webcal:// and the
http:// links.
Linking the countdown timer to the calendar
Now that you have a published calendar, either on your local computer or on the Web, you can
link it to your timer by following these steps:
1.
In Dashcode, select Widget Attributes.
Part of that screen is shown in Figure 18.18.
2.
In the Network / Disk Access section, be sure that Allow Network Access and
Allow External File Access are both checked.
462
Enhancing Your Macintosh
Figure 18.18
Countdown timer properties
3.
In the Target Kind drop-down box, select Shared Calendar and paste the address
of the .ics file.
4.
5.
Save your widget.
Run your widget.
Figure 18.19 shows my widget counting down until the next appointment in my
calendar.
Figure 18.19
First run of countdown widget
Changing the look of the timer
I don’t manage my day down to the last second, so the seconds display on the timer is of no
importance to me. Also, I don’t particularly like the look of the timer.
Removing the seconds display
To remove the seconds display on the time, follow these steps:
1.
In the Parts Outline panel, expand the display of the front of the timer until you
can see the label timer colons, as shown in Figure 18.20.
2.
3.
4.
Right-click colon3, and select Delete.
Right-click remaining-seconds, and select Delete
Expand countdown-label, and delete label-seconds.
It is important that you delete them this way, rather than simply deleting them from
the display. If you simply delete the items that appear onscreen, the widget still
expects to find them there when it runs, so it gives you an error.
Chapter 18: Modifying the Dashboard
463
Figure 18.20
Front image properties
5.
Using Command+Shift, highlight remaining-days, remaining-hours, remainingminutes, colon1, colon2, label-days, label-hours, and label-minutes.
Your screen should look like that shown in Figure 18.21.
6.
Move all these to the right side of the display.
By doing it this way, you retain the relative positions of all the elements.
7.
8.
9.
10.
Highlight timer-bg, and shrink it by dragging the left side to the right.
With timer-bg still highlighted, open the property inspector if it’s not already
open.
On the Fill and stroke pane, select Effects and then uncheck the Glass box.
Check the Recess box, and set the depth to 10 pixels, shadow to 100 percent, and
highlight to 100 percent.
These changes have the effect of making the black panel appear to be recessed in the
main widget panel. The shadow appears at the top and the highlight at the bottom,
giving the effect of light coming from overhead.
11.
Select frontimg, and uncheck the Glass box.
For this timer, we give it the look of a standard Leopard toolbar with the subtle gradient from bright at the top of the box to slightly darker at the bottom.
464
Enhancing Your Macintosh
Figure 18.21
Labels, colons, and times highlighted
12.
13.
14.
With the frontimg still highlighted, select Style in the property inspector.
In the Fill drop-down box, select Gradient.
Click the top color panel.
The standard Leopard color selection box appears, as shown in Figure 18.22.
Figure 18.22
Leopard color selection box
Chapter 18: Modifying the Dashboard
15.
465
Click the magnifying glass icon, place it over the very top of the toolbar in
Dashcode, and then click.
This gives a gray color of 77 percent.
16.
Click the lower color panel on the inspector, and then click the magnifying glass
icon.
17.
Click the magnifying glass over the bottom edge of the toolbar.
This gives a gray color of 60 percent. Now your timer has the color gradient of a
Leopard toolbar, but with a blue outline.
18.
In the inspector, select None for Stroke to remove the blue outline.
Now the event label telling you what the countdown refers to is no longer visible.
19.
20.
21.
22.
23.
Highlight event-label in the elements pane.
24.
You may need to adjust the position of the event-label for balance.
In the property inspector, select Text and Character.
Set the Style to Bold and the color to Black.
Move the event-label box so it sits just to the left of the info button.
Highlight frontimg, and drag the handle at the bottom right so the box is symmetrical around the timer panel.
Finally, because you know it’s a countdown timer, you don’t need to have the text
Countdown to in the label.
25.
26.
Select Widget Attributes, as shown in Figure 18.23.
27.
Save your widget, and then run it.
In the area shown highlighted, delete the words Countdown to, leaving just
the %s.
Figure 18.24 shows my widget running. The first appointment in my calendar is Dinner
with Michael, in 5 days’ time.
466
Enhancing Your Macintosh
Figure 18.23
Widget attributes
Figure 18.24
Countdown timer running
Adding another element
One minor difficulty with the timer as it now stands is that, while the countdown time is in a
panel recessed into the widget, the event just appears as flat text on the top surface of the
widget.
Follow these steps to make a recessed background panel for the text appear like the countdown time:
1.
2.
Highlight front in the parts outline panel.
In the right panel, drag the size handle so the image of the front is quite large.
This is just to give you some canvas to work on.
3.
In the Toolbar, click the Library button.
This opens the Library panel, as shown in Figure 18.25.
Chapter 18: Modifying the Dashboard
467
Figure 18.25
Dashcode library panel
4.
Select the rounded box and drag it into your timer box.
Note that a new element is added to the parts outline panel, as shown in Figure 18.26a.
5.
Click twice on the title “box” (but not too quickly, or it will register as a doubleclick), change the title from box to event, and expand the box.
6.
In the Library, select Rounded Rectangle Shape and drag it onto your image.
This adds another part to the parts outline.
7.
8.
9.
10.
11.
Change its name from roundedRectangleShape to event-bg.
12.
In the parts outline box, select event-label and drag it down so it sits under
event-bg, as shown in Figure 18.26b.
Expand the event-bg to slightly smaller than the event box.
In the properties inspector, select Fill and Stroke for event-bg.
Set the Fill to solid, and in the color selection box, choose black.
In the Effects panel, set the Recess to 10 pixels, 100 percent shadow, and 100 percent highlight.
468
Enhancing Your Macintosh
Figure 18.26
Parts outline (a); parts outline showing event-label moved (b)
a
b
13.
14.
Highlight event-label, and use the inspector to change the text color to white.
15.
Drag the resize handle for the front image so everything looks nicely symmetrical.
Drag it into the event background box, and then resize and move them all so
they sit under the countdown box.
One small, final touch is to make all the text the same color.
16.
In the parts outline, select all the elements that contain text (remaining days,
hours, and minutes; labels days, hours, and minutes; event label) and set the text
color to 80 percent white.
Figure 18.27 shows my final countdown timer.
Figure 18.27
Final countdown timer
Chapter 18: Modifying the Dashboard
469
Adding some programming
Programming in Dashcode looks extremely complex! The files window shows a large number of
JavaScript files. In the standard projects, these are all supplied for you and you don’t need to
modify any of them. If you are creating your own widgets from scratch, you can reuse some of
the standard code, but it requires a higher level of ability and is beyond the scope of this book.
You can, however, do a small amount of programming easily in Dashcode. In this section, you
add a button to your widget that takes you to your calendar.
Adding a button to the widget
Follow these steps to add a button to your widget:
1.
2.
Open your Time Until Next Appointment widget.
Enlarge the canvas using the resize handle.
Don’t worry about the size; you can adjust it later.
3.
Open the Library panel, and select a button, as shown in Figure 18.28.
Figure 18.28
Library panel showing button selected
470
Enhancing Your Macintosh
4.
5.
6.
7.
Drag the button to your canvas, inside the boundary of the widget.
8.
Resize the widget so the button and the panels are centered, as shown in Figure
18.29b.
Open the properties inspector with the button selected.
Select Attributes for the button.
In the ID field, enter calendarButton, and in the Key field, enter View Calendar, as
shown in Figure 18.29a.
Figure 18.29
Button Attributes (a); Final Widget View (b)
a
9.
b
Save the widget, and check that it still works by clicking Run.
Adding some code to the widget
At the moment, you have a button on the widget that doesn’t do anything: click it to check. In
this section you add some simple code to get the button to open your calendar.
Follow these steps to add the code:
1.
2.
Open the property inspector if it is not already open.
Click the icon for the Behaviors panel (the rightmost button).
Figure 18.30a shows the property inspector panel for Behaviors.
In this case, you want to add a behavior that is triggered when the button is clicked.
This is the onclick event.
Chapter 18: Modifying the Dashboard
3.
471
In the Handlers column for onclick, double-click, enter the text showCalendar, and
press Enter.
The property inspector adds the text (event) after the handler, as shown in Figure
18.30b.
Figure 18.30
Behaviors panel (a); Behaviors window (b)
a
b
It then opens the code window at the end of the main.js program, as shown in
Figure 18.31.
Figure 18.31
Code window
Now you need to add code to open the calendar. You can choose either of the code
samples to open your calendar.
472
Enhancing Your Macintosh
Adding code to open the iCal application
Follow these steps to add code to open iCal:
1.
Open the Library panel if it is not already open, and select the Code panel.
Figure 18.32 shows the library in code view.
Figure 18.32
Library panel in code view
2.
To make it a little easier to find the item you want, click the gear wheel icon in the
bottom-left corner and change the view to View Icons and Descriptions.
3.
4.
5.
Scroll down until you find Show Application.
In the code window at the bottom, highlight the code, as shown in Figure 18.33.
Copy the code (Command+C), and paste it into the code window where it says //
Insert Code Here.
Note: // indicates a comment. After the paste, your code window should look like
Figure 18.34.
Chapter 18: Modifying the Dashboard
473
Figure 18.33
Open application code highlighted
Figure 18.34
Code window after pasting code
6.
Replace the word Application in the purple text com.apple.Application with iCal
so the line should now read com.apple.iCal.
7.
8.
Save your widget, and then run it.
Click the View Calendar button.
Your iCal application should open.
474
Enhancing Your Macintosh
Adding code to open the calendar in a web browser
Follow these steps to add code to the button to open your calendar in a Web browser:
1.
2.
3.
Open the Library panel if it is not already open, and select the Code panel.
Scroll down until you find Show Website.
In the code window at the bottom, highlight the code, as shown in Figure 18.35.
Figure 18.35
Open Web site code highlighted
4.
Copy the code (Command+C), and paste it into the code window where it says //
Insert Code Here.
Note: // indicates a comment.
5.
Replace the word website for Apple with the Web address of your calendar,
replacing the purple text.
If you used Google calendar, you should use the HTML address of your calendar, not
the .ics version you used for the Target of your application.
Chapter 18: Modifying the Dashboard
6.
7.
475
Save your widget, and then run it.
Click the View Calendar button.
Your calendar should open in your Web browser.
8.
If you’re happy with your widget, deploy it.
Summary
In this chapter, you created three widgets from the templates supplied with Dashcode:
Computer gauge
Map
Countdown timer
You used the Dashcode editor to modify the look and feel of each widget and then linked them
to information on the Internet.
Although this is just a basic introduction to widget creation, it should allow you to experiment
further in creating your own widgets that don’t rely on a template.
Using Quartz Composer
Q
uartz Composer is a very powerful tool for creating threedimensional moving images. Several screen savers for the
Macintosh are Quartz Composer files with a filename extension of .qtz.
Some of Apple’s existing online documentation refers to an earlier
version of Quartz Composer, and the screen illustrations will look a
little different from the version you are using, assuming you downloaded it fairly recently.
In this chapter, you create some simple Quartz Composer compositions and learn your way around the application.
Introducing Quartz Composer
Quartz Composer is one of the Apple developer tools. Before you
can use it, you need to install the Apple Developer Tools. If you
haven’t already done this, follow the instructions in Chapter 18. In
addition, you must have Quartz Extreme/Core Image enabled on
your computer; otherwise, you will not be able to manipulate the
graphics.
In effect, Quartz Composer is a programming language but with a
very different interface. It is very complex and powerful, but it’s
much easier to understand and use than a traditional programming language carrying out the same tasks.
In This Chapter
Introducing Quartz
Composer
Creating a rotatable
picture
Understanding the main windows
Creating a rotating cube
When you start Quartz Composer running, it displays two windows:
Using image effect filters
The editor window
The viewer window
In the editor window is the canvas that you use to create your composition. Each item on the canvas is known as a patch, in an analogy with a patch panel dating from the old manual telephone
switchboard days. These days, patch panels are found behind the
scenes in any organization where there are large numbers of computers connected to a central system. Patch panels allow technicians to connect a particular wall outlet to a particular port on the
router.
Using image masks
Creating a volume meter
478
Enhancing Your Macintosh
Understanding patches
In Quartz Composer, a patch is like a cable that connects one part of the system to another. In
programming terms, a patch is like a subroutine. It takes a certain input and produces an output. What the inputs and outputs are depends on the patch itself.
There are several types of patches:
Composites that combine two or more images to produce a composite image
Controllers that take input from hardware devices such as the mouse and Apple remote
Filters that apply various visual effects to an image
Generators that generate constant colors, text, and star shine effects to add to an image
Modifiers that crop, resize, and rotate images
Numeric patches that do various numeric calculations and apply them to images
Renderers that take image inputs and output them to the screen
Many and varied tools, such as stopwatch, time, and iterators
Transitions, such as ripple, dissolve, page curl, and so on
Figure 19.1 shows the editor window with several patches applied, taken from the template
Graphic Transition.
Figure 19.1
Quartz Composer editor window
Chapter 19: Using Quartz Composer
479
Figure 19.2a shows the viewer window for the patches shown in Figure 19.1.
Note that in the viewer window, the Run button is dimmed. This is because Quartz Composer is
really based around animation. Although it’s not apparent, that window has two images. The
first image loads and then transitions into the other. At the time this image was captured, it was
running at 60 frames per second, drawing the second image 60 times every second.
Fundamental to Quartz Composer is the Patch Creator. This is a selection panel that allows you
to select a pre-prepared patch to use in your composition. Figure 19.2b shows the Patch
Creator.
Figure 19.2
Viewer window (a); Patch Creator window (b)
a
b
Each patch has a number of input ports and output ports. The exact number depends on the
patch. An image importer, for example, has no input ports and only a single output port: the
image.
Because the entire operation of Quartz Composer is graphical, each patch is represented by a
graphical element. Figure 19.3 shows a Pixellate patch. The input ports are on the left: Image,
Center (X), Center (Y), and Scale.
480
Enhancing Your Macintosh
Figure 19.3
Patch showing input and output ports
Input ports
Output ports
Understanding the coordinate system
At first, Quartz Composer can be very confusing because different patches require different
coordinates. Some require dimensions in pixels; others require dimensions in Quartz
Composer’s own coordinate system.
Before you can start using Quartz Composer, you need to understand the three-dimensional
coordinate system, because that’s the system that QC works in. Our senses perceive three
dimensions in space around us: left-right, forward-backward, and up-down. By convention, we
call the left-right direction the X axis, the forward-backward direction the Z axis, and the updown direction the Y axis.
Figure 19.4 shows this graphically.
Our computer screens are all two-dimensional; nevertheless, we can simulate movement in
three dimensions. Movement along the X axis occurs when the image moves left or right.
Movement along the Y axis occurs when the image moves up or down. Movement along the Z
axis is when the object gets closer to or farther away from our viewpoint. Obviously, this can’t
happen on a flat screen; instead, we simulate movement along the Z axis by making the object
smaller or larger. Making it smaller makes it appear to be farther away; making it larger makes it
appear closer.
Quartz Composer normalizes coordinates from −1 to +1 for the X axis so the full width of a composition is two units in the X dimension—or from −1 to +1.
In the Y dimension, the full extent of the boundaries depends on the aspect ratio of your screen
or display area. In the case of a 1024 x 768 screen, the aspect ratio is 4:3, so your maximum Y
value is +1 divided by the aspect ratio, shown as 1/(AR) in Figure 19.4. This is 1 / (4/3), which is
0.75. So the Y values range from −0.75 to +0.75. My monitor is 1920 x 1080, an aspect ratio of
16:9. So the Y values range from −0.56 to +0.56. Z axis values range from −1 to +1.
For these exercises, though, we’ll ignore the aspect ratio of the screen and use both X and Y
coordinates from −1 to +1.
Chapter 19: Using Quartz Composer
481
Figure 19.4
Three-dimensional axes
+1/(AR)
–z
–1
+1
+z
–1/(AR)
Creating a Rotatable Picture
In this section, you prepare a very simple composition consisting of a two-dimensional image
that you can rotate in two dimensions using your mouse.
Preparing your picture
Before you start, you need to have a picture that you can rotate. The simplest way to do this is
to use a picture from your Windows disk. The picture should be around 600 pixels square,
though the exact dimensions are not critical.
If you don’t have a picture of suitable size, follow these steps to create one from an image on
your Windows disk:
1.
2.
3.
Open an image on your Windows disk, using Preview.
Click the Select button, and select a rectangular portion of the image.
Copy the rectangular section (Edit, Copy).
482
Enhancing Your Macintosh
4.
5.
6.
7.
Select File, New from Clipboard.
Save the file as Image01.png.
On the Tools menu, select Adjust size.
Enter 600 pixels for the width.
Be sure that Scale proportionally and Resample image are both checked, as shown in
Figure 19.5.
Figure 19.5
Image resizing
8.
9.
Click OK.
Save as Image01.png.
Using sprite rendering
There are two major renderers in Quartz Composer: sprites and billboards. Sprites operate in all
three dimensions; billboards operate in only two dimensions. Because we want to simulate
movement in three dimensions, we use sprite rendering in this exercise.
Follow these steps to create your first Quartz composition:
Chapter 19: Using Quartz Composer
1.
2.
483
Start Quartz Composer.
On the greeting screen, shown in Figure 19.6, select Blank Composition.
Figure 19.6
Quartz Composer template screen
As you would expect, this brings up two blank windows: the editor and the viewer. The editor
window is where you place and link your patches; the viewer window is where you view the
output.
Importing an input image
Earlier you created an image to use for your first composition. Follow these steps to use this
image as input to the editor:
1.
2.
3.
In the Quartz Composer editor window, click Patch Creator.
In the search box of the Patch Creator, search for import.
Drag the result (Category: Source, Name: Image Importer) into the editor window.
Figure 19.7 shows your editor screen at this point.
484
Enhancing Your Macintosh
Figure 19.7
Editor with Image Importer patch
4.
Save your composition as Image Rotator.
Now that you have an Image Importer patch, you have to tell it which image to import.
5.
Highlight the Image Importer patch, and click Patch Inspector.
This brings up another window, shown in Figure 19.8a.
6.
In the drop-down menu box, select Settings.
Figure 19.8b shows the Settings pane.
7.
Click Import From File…, and select Image01.png, the image you prepared
earlier.
Note that nothing appears in the viewer window. That’s because you imported the
image, but you haven’t done anything with it yet.
Chapter 19: Using Quartz Composer
485
Figure 19.8
Image Importer patch properties window (a); Image importer patch settings pane (b)
a
b
Making the image visible
Now that you have an image available, you need to do something with it. In this example, you
use the Sprite renderer, which works in three dimensions. Follow these steps to make the image
visible:
1.
2.
In the Patch Creator window, search for sprite.
Drag the Sprite renderer to your editor canvas.
Your editor canvas should now look like Figure 19.9.
3.
Look at the property inspector window for the Sprite renderer.
Figure 19.10a shows the properties of the Sprite renderer.
486
Enhancing Your Macintosh
Figure 19.9
Editor canvas
4.
Save your work.
Now you have to give the Sprite renderer an image to work with.
5.
Click in the small circle on the right side of the Image Importer patch.
This is the output image port.
6.
While holding down the mouse button, drag to the small circle labeled Image in
the Sprite renderer.
This creates a line linking the two image circles. Your editor canvas should now look
like Figure 19.10b.
This is how programming is done in Quartz Composer: linking input ports and output
ports. Each patch does something to the image.
7.
If you can’t see the viewer window, click the Viewer button on the editor window.
Figure 19.11 shows my viewer window at this point.
Chapter 19: Using Quartz Composer
Figure 19.10
Sprite renderer properties (a); Image Importer linked to Sprite renderer (b)
a
Figure 19.11
Viewer window
b
487
488
Enhancing Your Macintosh
Reading mouse movements
So far, all we have is a static image in the viewer window. Now let’s get it to respond to mouse
movements. To do this, you need another patch: mouse controller.
Follow these steps to add a mouse controller to your canvas:
1.
2.
3.
If it is not already open, click Patch Creator to open the Patch Creator window.
In the search box, type mouse.
Drag the mouse controller onto your canvas.
Now you need to take the output from the mouse controller, and send it as input to
the Sprite renderer.
You might expect that you would take the mouse’s X position (its position on the leftright axis) and feed it to the X position input to the sprite. But that’s not what you
want. To make the mouse movement seem natural, you connect its X axis output to
the Y axis of the sprite. Figure 19.12 should make this clearer.
Figure 19.12
Mouse movement to shape rotation
Y axis
X axis
Z axis
Shape rotation
Mouse movement
Chapter 19: Using Quartz Composer
4.
489
Join the X Position port on the mouse controller to the Y Rotation port on the
Sprite renderer.
Your canvas should now look like Figure 19.13.
Figure 19.13
Canvas with mouse controller connected
5.
Click in the viewer window, and move the mouse from right to left.
If you look closely and move the mouse through large distances, you should see the
left and right borders of the image move slightly as it rotates.
Applying mathematical transforms
Even with large mouse movements, the image rotates only by a very small amount, so you need
to amplify the mouse movements. You do this by using a Math patch.
Adding a Math patch for left-right motion
A Math patch can carry out any mathematical operation on its input and send it to its output.
490
Enhancing Your Macintosh
Follow these steps to add a Math patch to magnify your mouse movements:
1.
2.
In the Patch Creator, search for math.
3.
Disconnect the output port for X position of the mouse controller from the Sprite
renderer, and connect it to the Initial Value port of the Math patch.
4.
Connect the Resulting Value port of the Math patch to the Y Rotation input port
of the Sprite renderer.
Drag the Math patch onto your canvas, and place it near your Mouse Controller
patch.
Figure 19.14a shows your canvas at this point.
Now you need to tell the Math patch what to do to the input value before sending it as
the output value. You want to multiply the mouse movement so it has a greater effect
on the image.
5.
6.
7.
Click the Math patch, and open the Patch Inspector if it is not already open.
In the drop-down box for operation #1, select Multiply.
In the Operand #1 box, enter 50.
Your Patch Inspector window should now look like Figure 19.14b.
Figure 19.14
Math patch added to the canvas (a); Math patch inspector (b)
a
b
Chapter 19: Using Quartz Composer
8.
491
Click in the viewer window, and move your mouse from left to right.
Now your image rotates much more. You should be able to rotate it so it reverses.
Adding a Math patch for back-forth motion
Your Mouse patch can output its Y position as well as its X position. This time, you need to connect the Y motion to rotation about the X axis.
Again, its output is not great enough to move the image very much, so you need another Math
patch. Set it up as for the X position: Set the operation #1 to Multiply and operand #1 to 50.
This time, you should be able to rotate the image around two axes. Figure 19.15a shows your
editor canvas after this step.
Figure 19.15b shows my image rotated in both directions.
Figure 19.15
Editor canvas with mouse movement linked (a); image rotated in two directions (b)
a
b
Filtering the image
Between the image importer and the renderer, we can introduce a patch that does some filtering of the image. Quartz Composer comes with almost 80 filter patches. Most of them have
other inputs besides the image to be filtered. In this example, we use a simple filter: sepia tone.
This changes the image to something that looks like an old photograph.
492
Enhancing Your Macintosh
Adding a sepia tone filter
Follow these steps to insert a sepia tone filter in the image:
1.
2.
In the Patch Creator, search for sepia and drag the filter to the canvas.
3.
Connect the right image port on the patch to the input image port on the Sprite
renderer.
4.
Make the viewer window visible to view the image in sepia tone.
Connect the output image port on the image importer to the input image port on
the left of the sepia tone patch.
Adding another filter
You can choose from many other filters. See what happens when you take the Color Invert
patch and link the image output port from the sepia tone filter to the input port of the color
inverter, and then link the output of the color inverter to the input of the renderer.
Creating a Rotating Cube
Quartz Composer has a patch for creating a rotating cube from an image. It places an input
image on all six sides of the cube. Rather than being a simple patch like the Math patch, it is
actually a macro: It contains several patches that are encapsulated into a single unit.
Follow these steps to create a rotating cube of your image:
1.
2.
3.
4.
5.
6.
7.
Create a new Quartz composition using the blank template.
Save it as Rotating Cube.
Open the Patch Creator if it is not already open.
Type importer in the search bar.
Double-click Image Importer in the Patch Creator to add it to your canvas.
Type cube into the Patch Creator search bar.
Double-click Clip: Rotating Cube to add it to your canvas.
At this point your view window shows a gray, rotating cube.
8.
Connect the output image port of the importer to the input image port of the
Rotating Cube patch.
Your canvas should look like Figure 19.16a.
Your view window now shows your image on all six faces of a cube, rotating.
Chapter 19: Using Quartz Composer
9.
10.
11.
493
Click inside the Rotating Cube patch.
Open the Patch Inspector if it’s not already open.
From the drop-down box, select Input Parameters.
Your Patch Inspector should look like Figure 19.16b.
Figure 19.16
Rotating cube canvas (a); inspector view of Rotating Cube patch (b)
a
b
Default parameters for the Rotating Cube patch are shown in Table 19.1:
Table 19.1 Default Rotating Cube Parameters
Parameter
Meaning
Default Value
Enable
Whether the patch is visible
Checked
Period
Time in seconds for the display to repeat itself
10
Size
Magnification factor used to display the image
0.75
X Position
X axis position for the center of the image
0
Y Position
Y axis position for the center of the image
0
Z Position
Z axis position for the center of the image
0
Experiment with changing the parameters. Watch the effect of each change in the viewer window.
494
Enhancing Your Macintosh
Adding interpolations
In the preceding composition, you used the mouse to control the animation. In this composition, you use a patch called Interpolation. Interpolation means inserting a value between two
fixed points. The Interpolator patch generates values between maximum and minimum values
that you specify. If you connect the output to one of the inputs for the rotating cube, you can
vary the value.
Table 19.2 describes the meaning of each of the input parameters for the Interpolator patch.
Table 19.2 Input Parameters for the Interpolator Patch
Parameter
Meaning
Default Value
Start value
First value that the interpolator creates
0
End value
Last value that the interpolator creates
1
Duration
Time of the interpolation in seconds
1
Tension
Amount of curvature to the interpolation line (ranges from −1 to +1)
0
Repeat mode
Whether and how the interpolator repeats: None, Loop, Mirrored Loop,
Mirrored Loop Once
Loop
Interpolation
The shape of the line joining the start and end values; thirteen possible
values
Linear
Interpolating the size of the cube
By adding an Interpolation patch and connecting its output to the Size input parameter of the
Rotating Cube patch, you can change the size of the cube while it is rotating.
Follow these instructions to add an Interpolation patch to your canvas and connect it to the
rotating cube:
1.
2.
3.
In the patch creator window, type interp.
Press Enter to place the patch on your canvas.
Highlight the Interpolation patch, and set the following values in the Patch
Inspector:
Start value: 0.5
End value: 1
Duration: 10
Repeat mode: mirrored loop
4.
Connect the result of the interpolation port patch to the size port of the rotating
cube.
Your rotating cube now changes in size from half (start value = 0.5) its input image size
to actual image size. Remember, the default for the Rotating Cube patch is 0.75.
Chapter 19: Using Quartz Composer
495
Interpolating other cube parameters
In the same way as you control the size of the cube using an Interpolation patch, you can control the other settings.
Follow these steps to add more interpolations to your cube:
1.
Add three more interpolation patches to your canvas.
Your canvas should look like that shown in Figure 19.17.
Figure 19.17
Canvas with four interpolation patches
2.
3.
4.
For each patch, set the start value to −0.5 and the end value to +0.5.
Set the repeat mode to Mirrored Loop for all three patches.
Set a different duration for each patch.
If you specify a prime number for the duration of each patch, the repeat cycle for the
animation becomes very long.
496
Enhancing Your Macintosh
5.
Connect the Result port of each patch to one of the X Position, Y Position, and Z
Position ports for the Cube renderer.
6.
Save your composition.
Creating a screen saver
Using your composition as a screen saver is very simple. All you need to do is to copy it to your
Library/Screen Savers folder if you want it only for you to use or to /Library/Screen Savers if you
want to make it available to every user.
Placing the composition in your screen saver folder
Follow these steps to make your composition available as a screen saver:
1.
Save your composition to your Library/Screen Savers folder, as shown in
Figure 19.18.
Figure 19.18
Saving composition to Screen Savers folder
2.
3.
Open System Preferences, and select Desktop and Screen Saver.
In the Screen Savers panel, scroll down to Other and click the expansion triangle,
as shown in Figure 19.19a.
Chapter 19: Using Quartz Composer
4.
497
Select Rotating Cube.qtz.
You immediately notice that the screen saver is behaving oddly, as shown in Figure
19.19b.
Figure 19.19
Screen Saver system preferences (a); screen saver behaving oddly (b)
a
b
Your cube is being redrawn, but the background image is not being cleared. As the screen saver
runs, it draws more and more copies of the cube, but doesn’t clear the background. Before
each frame in the composition, the screen should be cleared so each image is drawn on a fresh
background.
Fixing the screen saver
To make the screen saver redraw the background after each time it draws the cube, you need to
add a Clear patch to your composition.
Follow these steps to add a Clear patch:
1.
2.
In Quartz Composer, show the Patch Creator if it is not already visible.
Type clear in the search box, and double-click Renderer Clear to add it to your
canvas.
Figure 19.20a shows the Clear patch added to your canvas.
3.
If your view window is not showing, click the Viewer button and click Start.
Figure 19.20b shows the view when you click the Start button.
498
Enhancing Your Macintosh
Figure 19.20
Canvas with Clear patch added (a); blank viewer window (b)
a
b
Your view is black because the clear filter you added clears the display to black immediately after your rendered image is drawn. The result is that you don’t see your cube.
Up to now, you probably either have not noticed the yellow numbers in the top-right corner of
the renderer patches or have not understood their significance. Figure 19.21 shows the two renderers, showing their numbers.
Figure 19.21
Renderer patches showing layer IDs
Chapter 19: Using Quartz Composer
499
These numbers show the layer numbers of the renderers. In Quartz Composer, layers are numbered from front to back, and renderers operate in the order of their layer number. So in your
composition, the clear renderer is on layer 2, while the Cube renderer is on layer 1. To fix your
composition, you need to move the clear renderer so it executes after the Cube renderer.
Follow these steps to reverse the order of the renderers:
1.
2.
Click the number 2 in the top right of the clear renderer.
On the pop-up menu, select Layer 1.
Now your composition displays correctly, against a black background.
3.
Save your composition as a screen saver again, and test it.
It should work correctly now as a screen saver.
Using Image Effect Filters
Quartz Composer comes with a large range of image effects filters. In this section, you use some
of the filters to create special effects.
Using a single filter
Follow these steps to see some of the filter effects available in Quartz Composer:
1.
2.
3.
Create a new composition, and save it as Filters.qtz.
4.
Connect the output image port of the importer to the input image port of the
renderer.
5.
6.
7.
Use the Patch Inspector to set the width of the image to 2.
Search for the Billboard Renderer patch, and add it to your canvas.
Add an Image Importer patch, and select the image you used in the preceding
exercise.
Search for pixel, and add the Pixellate filter to your composition.
Connect the output image port of the image importer to the input image port of
the Pixellate Filter patch.
Note that the connection from the importer to the renderer stays intact. You can take
the output from a patch and send it to as many inputs as you wish, but each patch has
only one input.
8.
Connect the output image port of the Pixellate patch to the input image port of
the renderer.
500
Enhancing Your Macintosh
9.
Use the viewer window to see the effect on your image.
Figure 19.22 shows the effect of the Pixellate patch on my image.
Figure 19.22
Pixellate patch applied to image
10.
11.
12.
13.
Click the Pixellate patch in the canvas, and then open the Patch Inspector.
See what happens as you use the slider to increase and decrease the scale.
Try several of the other filter patches to see their effects.
When you have examined several of the patches, return to the Pixellate patch.
Using more than one filter
Because each filter has both an input and an output, you can connect the output of one filter to
the input of another, and then the output of the second filter to a third filter or to the renderer.
Follow these steps to see the result of linking two filters together:
1.
2.
Open your canvas with the Pixellate patch.
Find a Bloom patch, and add it to your canvas.
Chapter 19: Using Quartz Composer
501
3.
Connect the output port of the Pixellate patch to the input Image port of the
Bloom patch.
4.
Connect the output Image port of the Bloom patch to the input Image port of the
renderer.
Note what the output looks like in the viewer window.
5.
Add an Addition patch, and connect the Image Importer output Image port to the
input Image port of both the Pixellate and Bloom filters.
6.
Connect the output Image port of the Pixellate filter to the Background Image
port of the Addition patch.
7.
Connect the output Image port of the Bloom filter to the input Image port of the
Addition patch.
8.
Connect the output port of the Addition patch to the input Image port of the
Renderer.
Figure 19.23 shows your canvas at this point.
Figure 19.23
Canvas with filters
502
Enhancing Your Macintosh
9.
Compare the output of this canvas with the output of the simple daisy chain you
had before.
Figure 19.24 shows the output from my image.
Figure 19.24
Comparison of image with and without the Addition patch
a
b
Note how the output using the Addition patch is much brighter. This is because the
output of the two filters is added together, resulting in a brighter image. This may or
may not be the effect you want.
Using Image Masks
In this section, you create and use image masks to modify the way the image is displayed on the
screen.
Image masks are images that are added to another image, but in a special way. Rather than
being a simple addition of two images, dark areas in the mask image let the other image show
through; white areas in the mask prevent the underlying image from showing.
Chapter 19: Using Quartz Composer
503
Understanding alpha channels
Computer monitors use the RGB color model. This means the image is made up of three colors:
red, green, and blue. Any pixel on the screen has a value between 0 and 255 for each color.
That’s eight bits each for three colors, giving a total of 24 bits to represent the value of each
pixel on the screen.
Most operating systems these days allow a fourth channel called the alpha channel. It is sometimes referred to as a transparency layer or a mask and represents the transparency of each
pixel. When two images are overlaid, the composite image depends on the colors of the pixels
and their transparency.
An alpha of 0 means the pixel is completely opaque; in other words, zero transparency. An
alpha of 255 means the pixel is completely transparent. Because alpha has values requiring
eight bits, this means the total number of bits to represent each pixel is 32: eight bits each for
red, green, and blue, and eight bits for alpha.
Some image formats allow saving transparency information. One reason that .png graphics
have become so widespread is that the format allows transparency information to be saved in
the file. JPEG images do not allow transparency.
Your Leopard menu bar uses an alpha channel to allow it to be shown as translucent, though
you have no control over the actual alpha value.
Creating an image mask
Any image can be used as an image mask. Because the alpha channel uses only eight bits, it
appears like a black and white (monochrome) image. In this section, you use an Addition patch
to add two images together; in the next section, you create an alpha mask using the same
images.
Creating an addition image
Follow these steps to create an addition image render:
1.
Open your /Library/Desktop Pictures/Abstract, and copy the file Abstract 4.jpg to
your composition work folder.
2.
3.
4.
5.
6.
Create a new blank composition, and add two Image Importer patches.
Use the first patch to import your Image01.png image.
Add a Billboard patch to your canvas.
Use the second Image Importer patch to open the Abstract 4.jpg file.
Add an Addition patch to your canvas.
Because the two images are of different sizes, you need to resize the abstract image.
504
Enhancing Your Macintosh
7.
8.
Add an Image Resize patch to the canvas.
9.
Set the resize mode to Stretch, the resize condition to Always, and the width and
height to the same as your Image01.jpg.
Connect the output Image port of the Image Importer to the input Image port of
the Image Resize patch.
If you’ve been following the exercises, your image should be 600 x 600 pixels.
10.
Click the Resize patch, and hover over the output Resized Image circle.
A yellow box pops up with a preview of the image and details of the size of the image,
as shown in Figure 19.25a.
11.
Connect the output Image port of the first Image Importer to the input Image
port of the Addition patch.
12.
Connect the output Resized Image port of the Image Resize patch to the
Background Image port of the Addition patch.
13.
Connect the output Image port of the Addition patch to the input Image port of
the Billboard renderer.
14.
Save your composition as Image Masking.qtz.
Your canvas should look like that shown in Figure 19.25b.
15.
If it is not open, open the View window.
Figure 19.25
Image resize preview (a); Composer addition canvas (b)
a
b
Chapter 19: Using Quartz Composer
505
Creating a masked image
Follow these steps to create a masked render, using the same images as in the previous section:
1.
2.
Delete the Addition patch by clicking it and pressing the Delete key.
3.
4.
Add a Mask To Alpha patch.
5.
Hover over the input Image to the Mask patch, and compare it with the output
Image.
Connect the output Image port of the Image Importer to the input Image port of
the Billboard renderer.
Connect the output Image port of the Image Resize patch to the input Image port
of the Mask To Alpha patch.
Figure 19.26 shows the two images side by side.
Figure 19.26
Input and output of the Mask To Alpha patch
Input image
Output image
Note that the masked image output is monochrome only because it only uses eight bits.
6.
Connect the output port of the Mask To Alpha patch to the Mask Image Input
port of the renderer, as shown in Figure 19.27.
Compare the output of the masked image to the addition image you created earlier.
Where the mask image is white, it is the most opaque and lets the least amount of
color of the main image show. Where the mask is black, it is most transparent.
Figure 19.28 shows a comparison of the output from the Addition patch compared
with the mask.
506
Enhancing Your Macintosh
Figure 19.27
Canvas for Mask input to renderer
Figure 19.28
Comparison of addition versus masking
Addition
Mask
Chapter 19: Using Quartz Composer
507
Major uses of alpha channel masking are for making image cutouts.
Using Render in Image Macros
One of the most powerful features of Quartz Composer is the ability to take an image with several different patches and encapsulate them into a single macro. You can then take this macro
and add other patches. In effect, it works like a subroutine in programming. By rendering part of
the final image, you can use it in the same way as you would any other image.
Render in Image is the name of this macro. You start with your rotating cube composition,
which itself is a macro, and modify it to add another effect.
Creating the Render in Image macro
Follow these steps to create a new Render in Image macro:
1.
Open your Rotating Cube composition.
In this exercise, we use a simple rotating cube without the Interpolation patches you
applied previously.
2.
3.
Delete the four interpolation patches.
Set the Rotating Cube Input parameters to the following:
a. Period: 10
b. Size: 1
c. X Position, Y Position, and Z Position to 0
4.
5.
6.
7.
From the Patch Creator, add a Render in Image patch.
Save your canvas as Rotating Cube Render in Image.qtz.
Select all the patches except the Render in Image patch.
Cut the patches (Command+X).
Do not use Delete because you want to save these patches to the clipboard.
8.
Double-click the Render in Image patch.
This opens what appears to be a blank canvas, but in fact it is the next level down in
the patches. The line below the toolbar now shows Root Macro Patch > Render in
Image.
9.
Paste (Command+V) the patches.
Your canvas should now look like that shown in Figure 19.29.
508
Enhancing Your Macintosh
Figure 19.29
Render in Image macro
10.
On the toolbar, click Edit Parent to go to the root level.
All you see now is the Render in Image macro. You can tell the difference between a
standard patch and a macro patch because a standard patch has rounded corners
while a macro patch has square corners.
11.
12.
Add a Billboard renderer.
13.
Open the Viewer window.
Connect the image output port of the Render in Image macro to the image Input
port of the renderer, as shown in Figure 19.30.
Your rotating cube now appears. Although it filled the view window before, it now
only fills half the window. This is because the default width parameter for the Billboard
patch is 1.
14.
Change the Width parameter in the renderer to 2.
Remember that the X coordinates for Quartz Composer go from −1 to +1: That’s a
width of 2.
15.
Save your composition.
Chapter 19: Using Quartz Composer
509
Figure 19.30
Render to Billboard renderer
So far, this seems like lots of work to finish up where we started! But in fact we have created a
new patch that behaves exactly like an image you load from your disk, except that in this case it
is animated.
Using the Render in Image macro
Now that you have the rendered image available as a patch, you can add some other effects to
it. To add a pixellate effect to the rotating cube, follow these steps:
1.
2.
Add a Pixellate Filter patch to your canvas.
3.
Connect the output image port of the Pixellate filter to the input image port of
the Billboard renderer.
Connect the output image port from the Render in Image macro to the input
image port of the Pixellate filter.
Figure 19.31 shows the results. You can then add any other patches to create special
effects.
510
Enhancing Your Macintosh
Figure 19.31
Render in Image macro with Pixellate filter
Publishing a port to the macro
In your original image that is now inside the Render in Image patch, you used Clear patch to set
the background color. In this case, the color was black. But it may happen that you want to be
able to change the color when you use the macro. To do this, you need to publish the port in
the Clear patch. This then makes the port available at the top level of the macro.
Follow these steps to publish the color port of the Clear patch:
1.
Open your Rotating Cube Render in Image.qtz composition if it is not already
open.
2.
3.
4.
Double-click the Render in Image macro.
Right-click the Clear Color port of the Clear patch.
On the menu, select Published Inputs, Clear Color.
A small pop-up appears that allows you to change the name of the published port if
you wish. For now, just leave it as it is.
5.
Press Enter to accept the name Clear Color.
Now when you look at the Clear Color patch, the Clear Color label has quotes around it
and the port itself is filled in rather than the circle it was before.
Chapter 19: Using Quartz Composer
6.
511
Click Edit Parent to return to the top level of your composition.
Figure 19.32 shows the top-level view of your composition now.
Figure 19.32
Top-level view of Render in Image composition
Look closely at your Render in Image macro and note that it now has a Clear Color input port
that it did not have before. Compare Figure 19.32 with Figure 19.30. This allows you to use a different clear color for your new patch.
Changing the clear color
Rather than setting a single clear color for the macro, we add a clear color that varies over time
using a Color Mixer patch and an Interpolation patch. The Color Mixer patch allows the color to
vary between two different colors, while the Interpolation patch controls the time scale and the
variation.
Follow these steps to add a varying clear color to your composition:
1.
Add a Color Mixer patch to your composition, and connect its output port to the
Clear Color input port on your macro.
2.
Click the First color panel to set the first color.
You can choose any color you want; I set mine to yellow.
3.
Click the Second color panel to set the second color.
I set mine to blue; you choose yours. Figure 19.33 shows the color settings for my
patch.
512
Enhancing Your Macintosh
Figure 19.33
Color settings for Clear Color patch
4.
5.
6.
If it is not already open, open the Patch Inspector.
7.
8.
Set Repeat Mode to Mirrored Loop, and leave Interpolation at Linear.
Move the Mixing Point slider, and see what happens at various points.
Add an Interpolation patch, and set the Start Value to 0, End Value to 1, and
Duration to 10 (seconds).
Connect the Result port of the interpolator to the Mixing Point input of the Color
Mixer patch.
Now watch as the background color slowly cycles from yellow to blue, through gray, in
my case.
9.
Save your composition as Rotating Cube Render in Image 2.qtz.
Chapter 19: Using Quartz Composer
513
Creating a Audio Spectrum Display
For this innovative use of Quartz Composer, I am grateful to Alex Clarke, who posted a tutorial
at Machine Codex at http://machinecodex.com/codexmachina/?q=node/8. It displays the spectrum of an audio signal as a series of bars. Each bar displays the volume of a different frequency range.
Unfortunately, it’s not a trivial exercise to take the output from, say, iTunes, and use it as input
to your computer. If Apple made it easy to do that, nothing would stop you from playing some
copy-protected music and re-recording it without copy protection.
For this exercise, you need either a microphone you can plug into your audio input or some
other form of audio (maybe a DVD player) that goes to the line input on your audio device. In
this example, I use the microphone of my webcam.
Obtaining audio input
In order to get input into the composition, you need to change System Preferences to set your
audio input to either your microphone or to your line input. Figure 19.34 shows my preferences
set to my USB webcam.
Figure 19.34
System Preference for sound
514
Enhancing Your Macintosh
To start creating your meter, follow these steps:
1.
Open System Preferences, and set the input to a suitable input.
Be sure that either a microphone or some other sound source is connected. If there is
input, you should see the level on the System Preferences bar move.
2.
3.
4.
5.
Open Quartz Composer, and create a blank composition.
Place a Clear renderer and a Cube Renderer patch on your canvas.
Set the Clear renderer to layer 1.
Place an Audio Input patch on your canvas, and connect the Volume Peak port to
the Height port on the Cube renderer.
You should see a small bar in the Viewer window that fluctuates slightly in height as
the sound level varies. Because the variation in height may be small, you may need a
Math patch to amplify it.
6.
Add a Math patch to your composition, and connect its Initial Value port to the
Volume Peak port on the Audio Input patch.
7.
Use the Patch Inspector to set Operation #1 to multiply.
You need to experiment a little with the operand value so the bar fills the viewer window when it has full volume input. In my case, the multiplier is 1, but yours will be different.
8.
Set the width of the cube to 0.02, so it appears slim in the viewer, and set its
depth to 0.
9.
Save your composition as Level Meter 1.qtz
Your canvas should now look like that shown in Figure 19.35a.
In your viewer, you should see something like Figure 19.35b at a moderately high level
of input.
Making a unidirectional bar
At the moment, the movement of the bar is symmetrical about the X axis: it goes below the axis
the same distance as it goes above the axis. Conventionally, volume bars move only above the
X axis, so we need to subtract the bottom part.
To do this, we need two math operations: one to halve the length of the bar, the other to position it on the Y axis.
As an example, suppose the bar goes from +150 to −150 on the Y axis. Halving the length of the
bar makes it go from +75 to −75. If we then add 75 with the second math operation, it goes
from 0 to +150.
Chapter 19: Using Quartz Composer
515
Figure 19.35
Canvas for Level Meter 1 (a); Level Meter 1 in operation (b)
a
b
Follow these steps to create the new bar:
1.
Double-click inside the title bar of the Math patch, and enter the name Amplifier.
Eventually there will be three Math patches on your canvas, so it’s a good idea to give
each one of them a name.
2.
3.
Add two more Math patches, naming one of them Divider and the other Adder.
4.
Connect the Resulting Value port of the Divider to the Operand #1 port of the
Adder.
5.
Connect the Resulting Value port of the Adder to the Y Position port of the Cube
renderer.
Connect the Resulting Value port of the Amplifier to the Initial Value port of the
Divider.
Your canvas should now look like that shown in Figure 19.36a. Your viewer should
now look like Figure 19.36b when a high peak is reached.
Continuing development of the meter
From here the project increases in complexity. I recommend you work through the tutorial by
Alex Clarke at http://machinecodex.com/codexmachina/?q=node/8.
516
Enhancing Your Macintosh
Figure 19.36
Canvas for single-bar volume meter (a); single-bar volume meter (b)
a
b
Summary
In this chapter, you discovered the utility and power of Apple’s Quartz Composer. It allows
developers to create very powerful graphics effects and incorporate them into other programs.
You created three projects:
A two-dimensional picture that rotates in tune with mouse movements
A spinning cube with an image on each face that bounces around the screen and acts
as a screen saver
A single bar that varies in height, depending on the volume of sound input
Other resources are available on the Web for creating Quartz compositions. Remember, as
always, that Google is your friend.
Using Some Other
Developer Tools
I
n this chapter, you look at three of the smaller and less-technical
applications that come when you install the Developer Toolkit.
Each is a stand-alone program developed to demonstrate another
facet of OS X. Many of the additional tools debuted with Tiger
(OS X 10.4) and have been carried forward to Leopard.
Using Core Image Fun House
Before you can use Core Image Fun House you must download the
Apple Developer Tools, as shown in Chapter 18. You also must
have Quartz Extreme/Core Image enabled.
Core Image Fun House is an application that is designed to show
the power of core image graphics. It allows you to open an image
file and then apply what it terms image units. These are essentially
small programs written in the CIKernel language. This is a derivative of the Open GL language.
Core Image exists as a go-between, sitting between the application
software and the Open GL language. Figure 20.1 shows where CI
sits in the generation of graphics.
If application software such as QuickTime acted directly on the
graphics hardware, every different graphics card would require a
different version of QuickTime—one built specifically for that card.
Instead, the Open GL language layer communicates directly with
the graphics card. This means that every graphics card requires a
different version of the Open GL layer. This is why, during installation, you had to install specific kexts for your graphics card. If the
exact kext is not available, then your graphics card doesn’t work at
its best, or even at all in some cases.
Core Image adds another layer of abstraction to the programming
process, meaning that the programmer doesn’t need to know all
about Open GL but instead can learn Core Image and use that.
Core Image then translates instructions into what Open GL expects.
In This Chapter
Using Core Image
Fun House
Using Repeat After Me
518
Enhancing Your Macintosh
Figure 20.1
Graphics processing
Core Image Technology
Application (QuickTime)
Core Image
Open GL
Graphics hardware
In this section, you use Core Image Fun House to load an image and experiment with different
image units. An image unit is a small subprogram that manipulates pixels in the original image
to produce a new image.
Starting Core Image Fun House
Core Image Fun House is located in the Graphics Tools folder in Developer Tools. Follow these
steps to start Core Image Fun House and load an image:
1.
Start Core Image Fun House, and select an image to process.
By default, CIF starts in its own Example Images folder.
2.
Choose the Wolf.jpg image, and click Open.
CIF opens the graphic image in a window and displays the Effect Stack, shown in
Figure 20.2.
You can use an image of your own if you choose.
Figure 20.2
Effect Stack
Chapter 20: Using Some Other Developer Tools
519
Using the Effect Stack
As the name implies, the Effect Stack is a stack of different effects you can add to the image. As
each is applied, it works on the result of all the other effects. Effects in the stack are applied in
order from top to bottom.
Effects are grouped into several categories such as distortion effects, color adjustment, stylizing
effects, and so on.
Follow these steps to play with the image you opened:
1.
Click the + (plus) alongside Wolf.jpg.
We want to give the wolf a narrower, more peaked nose.
2.
In the Image Units window, select Distortion Effect and then Pinch Distortion.
In the bottom left is the center of the pinch distortion, as shown in Figure 20.3. You
can drag this around the image and place it where you like.
Figure 20.3
Image after Pinch Distortion effect was applied
520
Enhancing Your Macintosh
3.
4.
Drag the pinch distortion center to the tip of the wolf’s nose.
Adjust the pinch distortion radius to about 300 and the scale to about 0.8.
This gives the wolf a very long peaked nose.
Just to show that the wolf has no evil intent, let’s add a halo.
5.
Click the + (plus) alongside Pinch Distortion.
Remember, the effects are added from top to bottom.
6.
7.
8.
Select Generator, Lenticular Halo.
Move the center of the halo so it frames the wolf’s head.
Adjust the various parameters until you have an effect you are happy with.
Unfortunately, you can’t save your picture as a JPEG or PNG image, but you can save it
as an image that can be reopened in Fun House.
Saving your work
It’s diverting to play around with the Fun House, but it’s a pity you can’t save any of your images
directly as graphics files, though you can do it using Leopard’s built-in screen capture.
Follow these steps to save your image:
1.
2.
3.
After your image is onscreen, press and hold Shift+Command+4.
4.
Click the left mouse button.
When the crosshairs appear, press the spacebar.
Move the camera icon around until the window you want to capture is highlighted
in blue.
Leopard takes your screen shot and, by default, places it on your desktop. If you press
and hold the Control key as well (Control+Command+Shift+4), the capture is placed in
the clipboard, ready to paste into another application.
If you want to change the defaults, the simplest way is to use TinkerTool. In the General
tab, you can change the file type for saved screen shots, as shown in Figure 20.4.
Figure 20.4
Using TinkerTool to change screen capture defaults
Chapter 20: Using Some Other Developer Tools
5.
6.
Open Preview, and select File ➪ New From Clipboard.
7.
8.
Select File ➪ New From Clipboard again.
521
To remove the small bar at the top, use the Rectangle selection tool to copy the
remainder of the image.
Save the new image.
Photoshop, it isn’t! But it’s much cheaper if you just want to change one or two pictures.
Using Repeat After Me
Repeat After Me is a utility application that comes as part of the Developer Toolkit. It is a tool for
programmers who want to use a synthesized voice in their application. Although we cannot
delve that deeply into speech synthesis here, Repeat After Me gives some insights into the process. And besides, it’s a bit of fun to play with!
In this section, you use Repeat After Me to enter some text, have it converted into phonemes,
record your own voice saying the same words, and then modify the output so the synthesized
voice more closely resembles your own speech pattern.
A phoneme is a distinct unit of sound that distinguishes one word from another. Apple uses its
own representations of phonemes. Unless your installation of Leopard is customized for a nonEnglish language, the phonemes it uses are for a North American accent.
Starting with Repeat After Me
Follow these steps to start using Repeat After Me to play some speech:
1.
From the developer applications, select Utilities, Speech and Repeat After Me.
Figure 20.5 shows the start screen of Repeat After Me.
2.
3.
In the Text field, type I can’t do that Dave.
Click the “To Phonemes” button to show the phonemes representing the phrase.
You can find a list of the phonemes that Apple uses and how they sound when spoken
at http://tinyurl.com/neyvwe.
4.
5.
6.
Click the “Build Graph” button to build the waveform of the speech.
Save your file as 2001.ramd.
Play the speech using Command+/.
522
Enhancing Your Macintosh
Figure 20.5
Repeat After Me start screen
Exactly how it sounds depends on your system voice. Needless to say, it sounds best if you use
the Alex voice, but any of the others will do.
Modifying the inflection of the voice
After you have the Leopard voice speaking the text, you can modify the phonemes used. For
example, you can lengthen the “a” sound in “can’t” so it becomes longer, sounding like “car-n’t.”
To change the phonemes, follow these steps:
1.
2.
Open the Web site with the list of phonemes used by Apple.
Find the phoneme corresponding with the “a” in “can’t.
It is “AE,” which Apple says is pronounced like the “a” in “bat.”
Chapter 20: Using Some Other Developer Tools
3.
4.
523
Change the phoneme to “AA,” which is pronounced like the “a” in “father.”
Play the voice now, and listen for the difference.
Change any of the other phonemes that you choose and listen to the differences. There are no
phonemes in the Apple set that correspond with many other accents. For example, it’s impossible to render some of the sounds in Australian or the many British accents.
Changing the voice to match your inflexion and pitch
To make the voice more realistic, you can say the words yourself and then modify the way the
synthesizer speaks the text.
Follow these steps to modify the voice to be more like yours:
1.
On the Toolbar, click the Record button.
A mini-recorder appears on your screen, as shown in Figure 20.6.
Figure 20.6
Mini-recorder
2.
3.
4.
Click the Record button on the recorder, and say the text into your microphone.
Click the Stop button when you have finished.
Click Save.
Your recorded sound appears in the bottom part of the display, as shown in Figure 20.7.
5.
Click Impose Durations.
This moves the synthesized speech on the time line so it aligns with your speech.
6.
Play the sound again.
Unless you spoke very quickly or slowly, you probably won’t hear any difference.
524
Enhancing Your Macintosh
Figure 20.7
Synthesized speech with recorded voice
7.
Click Extract Pitch.
This superimposes a graph on the chart that shows the pitch changes in your voice
when you spoke the words, as shown in Figure 20.8.
Chapter 20: Using Some Other Developer Tools
525
Figure 20.8
Human voice pitch superimposed
8.
Click Impose Pitch.
Figure 20.9 shows the result of imposing the pitch.
Playing the speech now should give a sound that approximates the rhythm and pitch
of your voice when you spoke the words.
526
Enhancing Your Macintosh
Figure 20.9
Human voice pitch applied
Making other changes
You can make these changes as well:
Change the duration of the speech, thus slowing it down or speeding it up by moving
the end of the duration in the Tune bar.
If the voice doesn’t follow your pitch accurately, add more points to the graph by holding down the Shift key while placing the mouse on the line.
To move a single point while keeping the others fixed, use the Option key with the
mouse.
Chapter 20: Using Some Other Developer Tools
527
Playing the output in another application
It is possible to play the output from Repeat After Me in another application, such as TextEdit.
Follow these steps to play the speech in TextEdit:
1.
Click the Tune button on the toolbar.
Repeat After Me produces a text output that is a text representation of the speech, as
shown in Figure 20.10.
Figure 20.10
Text representation of speech
2.
Copy all the text that appears in the bottom pane.
528
Enhancing Your Macintosh
3.
Open a new TextEdit document, and paste the text.
Figure 20.11 shows the text highlighted in TextEdit.
Figure 20.11
Speech text highlighted in TextEdit
4.
Highlight the whole text, and then right-click and select Speech ➪ Start
Speaking.
Summary
In this chapter, you used two of the small developer applications that are part of the Developer
Tools. Core Image Fun House allows you to experiment with the various image filters and tools
to change graphic images. Using the Fun House and Preview is like creating a poor person’s
Photoshop.
Repeat After Me allows you to experiment with Leopard’s speech synthesizer and create new
sounds to incorporate into applications.
Using XCode to Create
New Programs
B
efore you start this chapter, you need to have installed the
Apple Developer Tools. Chapter 18 gives instructions on how
to do this.
Until now you have been using the higher level programming facilities of Leopard.
As you already know, OS X is built on a foundation of Darwin,
which handles all the low-level interfaces to the hardware. You
have used some higher level features such as Core Image, which
provides a toolkit to allow graphics manipulation without requiring
programming at the very lowest levels.
In this chapter, you use the programming language and tools that
are used to build Leopard itself. You use the XCode development
environment to create a Cocoa application, using the Objective-C
programming language that sits behind Leopard. The application
is really very simple: it has a single screen that allows you to enter a
number of inches. When you press the Convert button, it converts
that distance to centimeters.
In This Chapter
Developing a Cocoa
Application
Like any highly graphical operating system such as Windows or the
graphical layers of Linux such as Gnome or KDE, OS X uses a layered model. At the very lowest level is the kernel that interacts
directly with the hardware. At successively higher levels are the
application program interfaces (APIs) such as Quartz and
QuickTime, then the user interface level (Aqua in the case of OS X),
then finally the application environment.
This is shown graphically in Figure 21.1. Bear in mind that this is a
greatly simplified view.
Developing a Cocoa
application
Designing the user
interface
Adding the programming
Building the application
Running the application
Refining the application
530
Enhancing Your Macintosh
Figure 21.1
Application architecture of OS X
Cocoa
Aqua (user interface)
Open GL
Quartz
QuickTime
Darwin
Understanding Cocoa
Cocoa is a high-level object-oriented programming environment for OS X. It comprises a collection of frameworks and application program interfaces. Cocoa is programmed in Objective-C,
which is a derivative of the standard C programming language, modified for object orientation,
in a similar way to the language C++.
Object-oriented programming is suited to a highly graphical environment such as OS X. An
object-oriented program defines objects. An object has methods associated with it. An object,
for example, may be an input box that the user types into. A method defines what the input box
does with the text after the user has typed it.
Understanding Aqua
Aqua is the user interface to OS X. It defines details of the appearance of the standard user interface components such as dialog boxes, windows, menus, and controls. By following the Aqua
guidelines, an application can look like it was designed as part of the operating system.
Aqua defines the look of objects right down to details of how deep the shading around a text
input box should be, the placement of elements on the window for the application, and the layout of the menu choices. It even defines details, such as that the default button should be colored blue and should pulse slowly while waiting for input; that the three buttons on the top left
of the window should be red, amber, and green; and that they should show x, − and + symbols
when the mouse is placed over them.
Chapter 21: Using XCode to Create New Programs
531
To make your application give the user the best experience possible, it’s important that you
design it so that it looks and acts like other applications they have used. Nothing turns users off
faster than a design that behaves in unexpected ways.
Using XCode
Because of all the programming tools Apple makes available in the XCode package, developing
an application for Leopard is relatively easy, though by no means trivial. In the remainder of this
chapter you develop a very simple application using the interface designer and the bits of program that tie things together.
Your application is a simple, single-screen application that asks the user to input a distance in
inches. It then computes the distance in centimeters and outputs the result. While very simple
in intent, it allows you to learn the basics of developing for OS X.
Designing the User Interface
In the old days of computer programming, there was no such thing as a user interface. In fact,
users were seen as a hindrance, getting in the way of the high priests ministering to the computer. Output was either on dense lines of printout or on a screen that scrolled so fast it was
almost impossible to read.
Today, however, the user is paramount. These days, application program design starts out with
the screens that users see when using the program. Software companies spend millions of dollars on getting the design to be the optimum for the users.
Starting a new project
In this project, you use the XCode development environment with its various components.
Follow these steps to create a new project:
1.
Start XCode.
XCode greets you with its welcome screen, as shown in Figure 21.2.
You can stop the display of this screen each time you start XCode by unchecking the
box in the lower left corner.
532
Enhancing Your Macintosh
Figure 21.2
XCode welcome screen
2.
Click the text under the heading Create your first Cocoa application.
This brings up the XCode documentation set, as shown in Figure 21.3.
3.
This is much too complicated for our purposes here, so simply close both
windows.
Chapter 21: Using XCode to Create New Programs
533
Figure 21.3
XCode documentation set
4.
Click File, New Project.
XCode then asks you to choose the type of project you want to create, as shown in
Figure 21.4.
Note the wide variety of project types you can create using XCode. If you have not
installed MacFUSE for reading NTFS disks, yours will not show MacFUSE.
5.
Under Mac OS X, be sure Application is selected and then select Cocoa
Application in the right panel.
Before you click the Choose button, just watch it for a few seconds. Note that it pulses
subtly. That is a standard Aqua interface feature. Subtle, but when it’s not there in an
application, you miss it.
6.
Click Choose.
534
Enhancing Your Macintosh
Figure 21.4
Project type selection screen
7.
Name your project Distance Converter, and save it in a new folder called Distance
Converter.
After your project is saved, XCode displays the screen shown in Figure 21.5.
For the moment, ignore the complexity of the display. Much of it becomes clearer during the development of your application.
Chapter 21: Using XCode to Create New Programs
535
Figure 21.5
XCode project window
Using Interface Builder
When creating a new Cocoa application, the first step is to design the user interface. XCode provides a complete interface builder to do just that.
Creating the main window
Follow these steps to create the main window of your user interface:
1.
2.
In the project window, locate the Resources folder and click it.
Highlight MainMenu.xib, as shown in Figure 21.6.
536
Enhancing Your Macintosh
Figure 21.6
Resources folder in project window
3.
Double-click MainMenu.xib to start Interface Builder.
This opens several new windows, each showing a different aspect of building your
interface.
The windows are:
Application main window
Document window
Library window
Inspector window
We examine each window as we need it in developing the application.
Figure 21.7a shows your application’s main window. This is the view that the user sees
when running the application.
Obviously, there is more work to be done!
Your document window is shown in Figure 21.7b.
Chapter 21: Using XCode to Create New Programs
537
Figure 21.7
Application main window (a); project document window (b)
b
a
4.
Click Window in the document window.
This switches the focus of your Inspector window to the main window. The Inspector
should look like Figure 21.8a.
5.
Click inside the Title text field of the Inspector, type Distance Converter, and press
Enter.
Note that the title of your application window now has changed to Distance
Converter.
The Controls section in the Inspector determines which buttons appear on the top-left
corner of the window. These are Close, Minimize, and Resize.
6.
Because you won’t need a resize button, uncheck the box.
See how the change is reflected in your document window.
7.
Save your project.
Adding two input fields
So far you have a blank window, so you need to add a place in which the user can enter a distance and a place for the application to output the converted distance. To do this, you need to
use the Library, which is shown in Figure 21.8b.
538
Enhancing Your Macintosh
Figure 21.8
Inspector window for main window (a); Library window (b)
a
b
Follow these steps to add two input fields to your main window:
1.
2.
Be sure that Objects is selected in the Library window.
3.
4.
Select Text Field, and drag it to your application main window.
Scroll down and expand the headings through Cocoa ➪ Views & Cells ➪ Inputs
& Values, as shown in Figure 21.9a.
Place it in the top-right corner of your window, as shown in Figure 21.9b.
Chapter 21: Using XCode to Create New Programs
539
Figure 21.9
Library window with Inputs & Values selected (a); Main window with text field added (b)
b
a
Note that blue dotted guidelines appear on your main window. These are guidelines
generated by Interface Builder to ensure that you place your objects in accordance
with the Aqua user interface standards. You are not obligated to do so, but it makes
sense to have your application comply with all the Aqua interface standards.
5.
Ensure that the text field is highlighted, and in the Inspector window, enter 1 as
the Title.
This is the number that will appear in the field when the application runs. Because the
window will take only numeric values, it should be right aligned.
6.
7.
8.
9.
10.
Click the right align button in the Alignment section of the inspector.
Open the size pane by clicking the Ruler icon at the top of the Inspector window.
Set the width to 80.
Check that the field is still aligned with the Aqua guides by moving it so you see
the blue guidelines.
Drag another text field from the Library to your window.
Note that once again Aqua guidelines appear so you can align your second text field
with the first.
540
Enhancing Your Macintosh
11.
12.
Use the Inspector to set the width to the same as the input field (80).
On the Text Field Attributes pane, uncheck the Editable box in the Behavior line.
You do this so the field is used only to display the output of the conversion.
13.
Save your project.
Adding text labels
Now you need to tell the user what the text fields are for. This requires the use of labels.
Follow these steps to add labels to your project:
1.
2.
3.
4.
5.
6.
From the Library window, select Label and drag it to your window.
Use the guidelines to align the label with the top text field.
Use the Inspector to change the text to Inches: and set it to right aligned.
Move the label beside the text field it refers to.
Drag another label onto the window.
Change its text to read Centimeters:, right justify it, and move it so the colon
lines up under the Inches: label using the guidelines.
Adding a button
So far you have a window with an input field for the user to enter a distance to be converted
and a field to display the converted value. Now you need some way to start the process. In
other words, you need a button.
Follow these steps to add a button to your project:
1.
In the Library window, select Cocoa ➪ Views & Cells ➪ Buttons and drag a Push
Button to your window.
2.
3.
In the Inspector window, set the Title to Convert.
Select the Key Equiv. field, and press the Enter key on the main keyboard (not on
the numeric keypad).
This puts a return symbol in the field and makes the Convert button the default, even
though it is the only button. This means that the user can simply press Enter to start
the conversion.
4.
5.
6.
Set the width of the button to 80 characters, the same as the two text fields.
Align the button with the centers of the text fields using the guides.
Save the project.
Chapter 21: Using XCode to Create New Programs
541
Tidying up the window
At present you have all the controls crowded into the top-right corner of the window. Let’s
move them and resize the window.
Follow these steps to finish designing the application window:
1.
Ensure that the size of the two labels is just bigger than the text they contain.
Do this by selecting each label in turn and moving the left edge of the containing box
so it is up against the left edge of the label.
2.
3.
4.
Select all the controls by lassoing them.
Drag them to the top left of the window, using the guides.
Use the resize handle on the window to shrink the window so it is just large
enough to contain the fields.
Again, use the guides.
5.
Save your project.
Your application window should now look like that shown in Figure 21.10.
Figure 21.10
Final design on application window
Trying out your design
Interface Builder contains a simulator so you can check your designs as you progress.
Follow these steps to check your design using the simulator:
1.
On the Interface Builder menu, select File, Simulate Interface, or press
Command+R.
2.
Type some text into your Inches text field.
You should be able to, as shown in Figure 21.11.
542
Enhancing Your Macintosh
3.
Try to type some text into your Centimeters field.
You should not be able to. If you are able to enter text into your Centimeters field, it’s
because you forgot to uncheck the Editable box for the field.
4.
Check that the Convert button is highlighted in blue and is pulsating slowly.
If it is not highlighted, it’s because you didn’t set the Enter key as the Key Equiv.
5.
Click the Convert button.
It should darken slightly when you click it and return to the normal state after you
release the mouse.
6.
Exit the simulator by typing Command+Q or using Quit Cocoa Simulator on the
menu bar.
Figure 21.11
Using the simulator to check your design
Adding the Programming
So far we’ve got a nice window for the application, one that meets all the Apple guidelines for
developing in Cocoa. But it doesn’t do anything yet! In this section, you add the programming
code that makes it work.
Understanding object-oriented programming
Until the early 1990s, most computer programming was done in procedural languages. A procedural language is one that focuses on procedures—things that have to be done. The procedures act on various types of data structures.
Object-oriented programming (often abbreviated OOP) takes a different view. It defines objects that
have certain attributes (data structures) and methods that describe the things an object can do.
An object, however, is an instance (or example) of a more general category called a class.
This is shown diagrammatically in Figure 21.12.
Chapter 21: Using XCode to Create New Programs
543
Figure 21.12
Concepts of object-oriented programming
Attributes
Characteristics or properties of the class
Methods
Behaviors or things the class can do
Class
Inherits attributes and methods
Object
An instance created from a class
Message passed
Object
A different object
Using a concrete analogy
A lion is a class of animal. It has various characteristics or attributes, and various things it can do
or methods. Some of these are summarized in Table 21.1.
Table 21.1 Attributes and Methods of Class Lion
Class
Attributes
Methods
Lion
Four legs
Can growl
Large teeth
Can run
Long tail
Can use forelegs to hold prey
Inheritance is the process whereby an object inherits the attributes and methods of the parent
class.
544
Enhancing Your Macintosh
Leo the Circus Lion is an instance of the class lion or an object of the class lion.
Leo inherits all the attributes and methods of the lion class, but may also have additional attributes and methods of his own. For example, Leo can jump through hoops, so an additional
method is can jump through hoops.
Message passing is a very important concept in object-oriented programming. Another object,
such as the lion tamer, can pass a message to Leo saying “jump through the hoop now.”
The lion tamer is an instance (or object) of the class person, so it inherits the attributes and
methods of person, but adds an extra method: can get lions to jump through hoops.
Putting it into a programming context
So far you have created your application’s main window. The window is an object (or instance)
of a class called window. You have an input text box that is an instance of a more general text
box. It inherits the characteristics of a text box, but yours is different from the general text box
class because it has the numeral 1 in it at the start.
You can see the attributes of the application window using the Inspector, as shown in
Figure 21.13.
Figure 21.13
Application window attributes
Chapter 21: Using XCode to Create New Programs
545
Although this is very similar to the Inspector window when you started (refer to Figure 21.9),
you can see that it has one attribute of its own: Title.
Using Objective-C
Now that you have an interface with controls that have various attributes, you need to define
some methods that act on them. These are implemented using a programming language:
Objective-C, in this case.
First you need a method to convert inches to centimeters. That’s a pretty trivial conversion: simply multiply by 2.54. A method such as this is derived from a Model class.
Because of a restriction on the implementation in OS X, your converter method cannot interact
directly with the user interface but instead has to work through another method called a controller method.
Linking the parts together
Now that you have your user interface designed with its text fields and buttons, you need to
create two new methods: one to do the computation, the other to act as the interface between
your user interface and the computation method. The Convert button starts the whole process.
Figure 21.14 shows the linkages diagrammatically.
Figure 21.14
Linkages between user interface and methods
Inches
Controller
Converter
Centimeters
Reads input and
returns output
Converts inches
to centimeters
Convert button
Starts process
User interface
Creating the Converter method
In the next few sections, you are exposed to some Objective-C code. On the way, I explain what
each line does so you can follow along. You won’t learn how to become an expert Objective-C
programmer by the end of this, but hopefully you will understand the basic concepts and terminology. If you already have some background in programming, making the switch to
Objective-C should not be that difficult.
546
Enhancing Your Macintosh
First, let’s look at the converter method. It exists in two separate files: Converter.h and
Converter.m. Converter.h is the class definition file, while Converter.m is the definition of a specific instance of a class (an object). Remember that a class is the general structure (a lion), while
an object is a specific instance (Leo the lion).
Understanding the Converter header file
Here is the code for the file Converter.h:
#import <Cocoa/Cocoa.h>
@interface Converter : NSObject {
float inches;
}
@property(readwrite) float inches;
- (float) convertToCentimeters;
@end
NOTE
A semi-colon (;) is used to end each statement, though not necessarily each line.
Here is a line-by-line commentary on the code:
Line 1:
#import <Cocoa/Cocoa.h>
This is a directive that tells the compiler to include a file called Cocoa.h. This contains definitions
of the major classes in Objective-C from which our converter class is derived.
NOTE
A compiler is a program that takes the programming language file and converts it into the program code that the computer uses when it runs the program.
Line 2:
@interface Converter : NSObject { float inches; }
Although this is written over three lines in the code, it is really a single line because the braces
(curly brackets) enclose what follows. The convention is to write the opening brace at the end
of the first line, put anything inside the braces on the next line(s), and then write the closing
brace on its own on the last line.
Chapter 21: Using XCode to Create New Programs
547
@interface Converter means that it is the definition of our class called Converter. The :
(colon) indicates that it is derived from a super-class or NSObject. This particular NSObject is a
floating-point (decimal) number called “inches.”
NOTE
The NS part of the super-class name comes from NextStep, which was an operating system developed for the NeXT
computer that first went on sale in 1986. Apple bought NeXT in 1996, and parts of the operating system live on.
Line 3:
@property(readwrite) float inches;
This line defines a property of our class. It can be read and written to (in other words, changed).
It is a floating-point number called “inches.”
Line 4:
- (float) convertToCentimeters;
The - (minus) sign indicates that this is a method of our instance of a converter. It sends a floating-point number to another method called convertToCentimeters. That method is in the
method (.m) file.
Line 5:
@
Just as the @ was used at the start of the definition of the class Converter, so it is needed to end
the definition.
Creating the Converter header file
Follow these steps to create the Converter.h header file:
1.
2.
If it is not already open, open your Distance Converter project file.
In the Groups & Files pane, select Classes, as shown in Figure 21.15.
548
Enhancing Your Macintosh
Figure 21.15
Project window with classes selected
3.
From the menu bar, select File ➪ New File or press Command+N.
This opens the new file template selection window, as shown in Figure 21.16.
Chapter 21: Using XCode to Create New Programs
549
Figure 21.16
File template selection window
4.
5.
Select Objective-C class, and click Next.
Name the file Converter.m, and ensure that the Also create Converter.h box is
checked, as shown in Figure 21.17.
550
Enhancing Your Macintosh
Figure 21.17
Creating Converter.m and Converter.h
6.
Click Finish.
Your project screen should now look like that shown in Figure 21.18.
7.
Double-click Converter.h, and enter the following code:
#import <Cocoa/Cocoa.h>
@interface Converter : NSObject {
float inches;
}
@property(readwrite) float inches;
- (float) convertToCentimeters;
@end
Be sure there is only one #import and one @end line.
8.
Save the file.
Chapter 21: Using XCode to Create New Programs
Figure 21.18
Project window with new files created
Understanding the Converter method file
Here is the code for the method file, Converter.m:
#import “Converter.h”
@implementation Converter
@synthesize inches;
- (float) convertToCentimeters {
return (self.inches *2.54);
}
@end
Again, here is a line-by-line commentary on the code:
Line 1:
#import “Converter.h”
This line simply imports the class definitions you have defined in Converter.h.
Line 2:
@implementation Converter
551
552
Enhancing Your Macintosh
This line starts the definition of how the converter is implemented.
Line 3:
@synthesize inches;
This creates a variable called inches.
Line 4:
- (float) convertToCentimeters { return (self.inches *2.54); }
Although this line is written over three lines in the code, it actually behaves as a single line.
Remember the − (minus) sign from the header file? It is used to define a method. In this case,
the method is convertToCentimeters and is a floating point. The return means that it
sends back a value to whatever sent it a value. The self.inches * 2.54 is the heart of the
method. It tells the program to take the value of inches and multiply it by 2.54.
Line 5:
@end
As before, this ends the definition of the implementation of the converter.
Creating the Converter method file
Follow these steps to edit the method file:
1.
2.
Double-click the Converter.m file in the project window.
Enter the following code:
#import “Converter.h”
@implementation Converter
@synthesize inches;
- (float) convertToCentimeters {
return (self.inches *2.54);
}
@end
3.
Save the file.
Creating the Controller method
Again in this section, you get immersed in Objective-C code. The code for the Controller is more
difficult than the code for the Converter because the controller needs to interact both with the
visible parts of the application that you created with Interface Builder and with the converter
that does the actual number work.
Chapter 21: Using XCode to Create New Programs
553
Understanding the Controller header file
Here is the code for the header file Controller.h:
#import <Cocoa/Cocoa.h>
@interface Controller : NSObject {
IBOutlet NSTextField *inchesField;
IBOutlet NSTextField *centimetersField;
}
- (IBAction)convert:(id)sender;
@end
Here is a line-by-line commentary on the code:
Line 1:
#import <Cocoa/Cocoa.h>
Again, the code begins with a directive that tells the compiler to include a file called Cocoa.h
containing definitions of the major classes in Objective-C, from which our controller class is
derived.
Line 2:
@interface Controller : NSObject {
IBOutlet NSTextField *inchesField;
IBOutlet NSTextField *centimetersField;
}
Although this is written over four lines, because of the braces it is treated as just a single line.
It is a declaration of the class Controller that is made up of objects derived from the class
NSObject. The attributes of the class are derived from another object class known as
IBOutlet.
IBOutlet is a class of objects defined in Interface Builder (which is what the IB means). There
are two IBOutlet classes, each corresponding to one of the text fields you created with
Interface Builder. The class of each outlet is from a higher class called NSTextField.
Finally the name of each field is written with a * in front. The *inchesField means “the data
contained in the field called inchesField.” The same is true for centimetersField.
Translating that into English, it means: this IBOutlet is an NSTextField that contains the value of
the inchesField in the interface. Obviously, the other IBOutlet is the field that contains the value
of the centimetersField.
You will see how these names are used when you come to make the connections between the
interface and the code.
Line 3:
- (IBAction)convert:(id)sender;
554
Enhancing Your Macintosh
Finally we have an instance method. IBAction is a method from Interface Builder, and it is
attached to the Convert button. This method is defined in the Controller.m file.
Creating the Controller header file
Follow these steps to create the header file:
1.
2.
3.
4.
5.
If it is not already open, open your Distance Converter project file.
6.
7.
8.
Click Finish.
In the Groups & Files pane, select Classes.
From the menu bar, select File ➪ New File or press Command+N.
Select Objective-C class, and click Next.
Name the file Controller.m, and ensure that the Also create Controller.h box is
checked.
Double-click the Controller.h file.
Enter the following code:
#import <Cocoa/Cocoa.h>
@interface Controller : NSObject {
IBOutlet NSTextField *inchesField;
IBOutlet NSTextField *centimetersField;
}
- (IBAction)convert:(id)sender;
@end
9.
Save the file.
Understanding the Controller method file
The final part of the jigsaw is the method file for the Controller. Here is the Controller.m code:
#import “Controller.h”
#import “Converter.h”
@implementation Controller
- (IBAction) convert:(id)sender
{
Converter *converter = [[Converter alloc] init];
[converter setInches:[inchesField floatValue]];
float centimeters = [converter convertToCentimeters];
[centimetersField setStringValue:[NSString stringWithFormat:@”%.2f”,¬
centimeters]];
[inchesField selectText:self];
[converter release];
}
Chapter 21: Using XCode to Create New Programs
555
- (BOOL) applicationShouldTerminateAfterLastWindowClosed:(NSApplication¬
*) theApplication
{
return YES;
}
@end
Here is a line-by-line commentary on the code:
Line 1:
#import “Controller.h”
As before, we need to import the header file.
Line 2:
#import “Converter.h”
This time we also need to import definitions from the other header file, Converter.h.
Line 3:
@implementation Controller
This line begins the implementation of the Controller class. It ends with the last line, @end.
Line 4:
- (IBAction) convert:(id)sender
This line sets an instance method for the Interface Builder convert action sent by the Convert
button.
Lines 5–12:
{
Converter *converter = [[Converter alloc] init];
[converter setInches:[inchesField floatValue]];
float centimeters = [converter convertToCentimeters];
[centimetersField setStringValue:[NSString stringWithFormat:@”%.2f”,¬
centimeters]];
[inchesField selectText:self];
[converter release];
}
Without going into too much detail, these lines allocate the memory required for the convert
method. This is done by the keyword alloc.
InchesField is set to a floating-point (decimal) value so the math can be carried out.
556
Enhancing Your Macintosh
CentimetersField is also set to a floating-point value with two digits after the decimal
point and then converted to a string to display in the text box on the window.
Finally the memory allocated earlier is released. This is very important: If a program doesn’t
release the memory it allocated for itself, gradually memory fills up with memory that is no longer in use.
Lines 13–17:
- (BOOL) applicationShouldTerminateAfterLastWindowClosed:(NSApplication¬ *)
theApplication
{
return YES;
}
Finally the last part of the application is pretty self-explanatory. The NSApplication class
defines a method called applicationShouldTerminateAfterLastWindowClosed.
This is set to a Boolean value (BOOL), which can have two values: Yes or No (or True or False). It
is explicitly set to return a value of YES so the application terminates when the last window is
closed.
If that line is set to return NO, it means that the application keeps running, even after the last
window has closed, hence using more and more memory each time you run the application.
For an application this size it won’t make much difference, but for bigger applications with
extensive data structures the difference can be large.
Creating the Controller method file
Follow these steps to create the method file:
1.
2.
Double-click the Controller.m file.
Enter the following code:
#import “Controller.h”
#import “Converter.h”
@implementation Controller
- (IBAction) convert:(id)sender
{
Converter *converter = [[Converter alloc] init];
[converter setInches:[inchesField floatValue]];
float centimeters = [converter convertToCentimeters];
[centimetersField setStringValue:[NSString¬
stringWithFormat:@”%.2f”, centimeters]];
Chapter 21: Using XCode to Create New Programs
557
[inchesField selectText:self];
[converter release];
}
- (BOOL) applicationShouldTerminateAfterLastWindowClosed:¬
(NSApplication *)theApplication
{
return YES;
}
@end
3.
Save the file.
NOTE
Note the line continuation characters (¬). In Objective-C, it is not essential that the line doesn’t break at the end, but it
is more convenient to enter it as one line.
Connecting the pieces
Now that you have the header and method files for your application, you need to connect them
to the interface you built for the application.
Follow these steps to complete your project:
1.
2.
Open the project if it is not already open.
Open mainmenu.xib.
This opens the Interface Builder that you used to create the converter.
3.
4.
Open the Library window (Command+Shift+L) if it is not already open.
5.
6.
Drag an Object into mainmenu.xib window, as shown in Figure 21.19b.
In the Library window, select Cocoa ➪ Objects & Controllers, as shown in Figure
21.19a.
Open the Inspector if it is not already open, and go to the Information panel
(Command+6).
558
Enhancing Your Macintosh
Figure 21.19
Library window with object selected (a); object added to Mainmenu.xib window (b)
b
a
7.
In the Class field, type Controller, as shown in Figure 21.20a.
Note that the inspector automatically adds the information from your Controller.h file,
and the name of the object in the mainmenu.xib window is changed to Controller.
8.
In the mainmenu.xib window, right-click the Controller icon.
This opens a HUD window that allows you to create the connections
NOTE
A HUD is a Heads Up Display and is the name Apple gives to this type of window that appears with a black background.
Chapter 21: Using XCode to Create New Programs
559
The HUD window is shown in Figure 21.20b.
Figure 21.20
Adding controller class to Mainmenu (a); Heads Up Display of controller connections (b)
a
9.
b
Drag the circle to the right of the outlet centimetersField to the centimeters field
on your application window, as shown in Figure 21.21.
560
Enhancing Your Macintosh
Figure 21.21
Dragging the outlet to the application window
10.
Repeat Step 9 for the inchesField outlet, dragging it to the Inches field on your
application window.
11.
Connect the Convert circle in the Received Actions line to the Convert button on
your window.
By now your Controller HUD should look like Figure 21.22.
Figure 21.22
Controller HUD
12.
Click the circle beside New Referencing Outlet in your HUD, and drag it to the
File’s Owner in mainmenu.xib, as shown in Figure 21.23.
13.
When the label delegate appears above File’s Owner, click it to set it as the referencing outlet.
Now your Controller HUD should look like Figure 21.24a.
Chapter 21: Using XCode to Create New Programs
561
Figure 21.23
Setting new referencing outlet
14.
15.
Save your mainmenu.xib.
Open the Inspector window if it is not already open, and select Controller
Connections (Command+5).
Your connections should look like those shown in Figure 21.24b.
Figure 21.24
Completed controller HUD (a); Controller connections (b)
a
b
16.
If your connections do not look exactly like those shown, go through these steps
carefully.
17.
Save mainmenu.xib, and quit Interface Builder.
562
Enhancing Your Macintosh
Building the Application
Building your application means converting it into an application that can run on your computer and could hardly be easier. The XCode window has a Build & Go button. Click that button,
and the compiler starts. Assuming you made no errors, as soon as the program is compiled, it
runs as an application.
When building an application, two major types of errors can occur: compile-time errors and
run-time errors. As you’d expect, compile-time errors happen when the application is being
compiled into code that the processor can understand.
Fixing compile-time errors
Compile-time errors are the only ones that are likely in a simple application like Distance
Converter.
If you make a typo when entering the code, XCode picks it up when you compile. You cannot
miss the errors because the compiler highlights them and explains what the error is.
Figure 21.25 shows a compile-time error caused by me misspelling convertToCentimeters. I
spelled it convertToCentimetres.
Figure 21.25
Compile-time warning error
Chapter 21: Using XCode to Create New Programs
563
In this case, the error is a warning error: The compiler couldn’t find a method for convertToCentimeters. It doesn’t prevent the application from compiling, but when it runs, because it can’t
find a method to convert the inches, nothing happens when you press the Convert button.
Try it for yourself. Figure 21.26 shows a fatal compile-time error.
To create this error, I removed the closing } (brace) from the second-to-last line of Controller.m.
In case you can’t read the print, the error says error: syntax error before ‘AT_NAME’
token. That’s not terribly helpful!
The error message says something is missing just before the @end statement (or token).
Note that a warning error indicates that an @end is missing. The @end is actually there, but the
earlier error throws the compiler out.
Figure 21.26
Compile-time fatal error
Fixing run-time errors
In an application this small, you are unlikely to find any run-time errors. Run-time errors occur
when all the code for the application compiles without error, but the application crashes when
it runs. Now that’s something very familiar to Windows users and less familiar to Mac users!
564
Enhancing Your Macintosh
Running the Application
Assuming that your application compiles and builds, it will also run and you see the window
you designed onscreen, waiting for input.
In the Inches box, enter a number and click the Convert button. Check that the answer shown in
the Centimeters box is 2.54 times the number you entered.
Figure 21.27 shows the output for my Distance Converter.
Figure 21.27
Distance Converter working
Success!
Refining the Application
At present, your application compiles, runs, and even gives the correct answer! What more
could you want?
Well, if you look carefully, you’ll notice that when you click Distance Converter on the menu bar,
it shows About NewApplication, Hide NewApplication, and Quit NewApplication on the submenu. This is shown in Figure 21.28.
Changing the submenus
Changing the default submenu items could hardly be simpler. Follow these steps to change the
submenu:
1.
2.
3.
4.
5.
If it is not already open, open Distance Converter in XCode.
Open MainMenu.xib in Interface Builder.
Navigate to the menu builder.
Click the NewApplication menu.
On the drop-down menu, double-click About NewApplication.
Chapter 21: Using XCode to Create New Programs
6.
7.
8.
9.
10.
11.
565
Change the text to About Distance Converter, and press Enter.
Repeat Steps 5 and 6 for Hide NewApplication and Quit NewApplication.
Click Help on the menu.
Change NewApplication Help to Distance Converter Help.
Quit Interface Builder, and click Build & Go in XCode.
Check that your menus are correct.
Figure 21.28
Distance Converter menu bar
Changing the application icon
Did you notice that when you run the Distance Converter, its icon in the Dock is a generic application icon? Figure 21.29 shows the generic icon in the Dock, beside the XCode icon.
Figure 21.29
Generic application Dock icon
566
Enhancing Your Macintosh
Follow these steps to change your application’s icon:
1.
Find some suitable clipart.
I found a public domain image of a calculator by searching the Web using Google.
2.
3.
Copy the image from the Web site, and open Preview.
Select File, New from Clipboard.
Figure 21.30a shows the resulting image.
4.
Select Tools, Adjust Size to set the image to either 512 wide or 512 tall, depending on your image.
Figure 21.30b shows the drop-down sheet in Preview.
Be sure that the Scale proportionally and Resample image boxes are both checked.
5.
Save the image as Distance Converter.png into your XCode Distance Converter
folder.
Figure 21.30
Clipart image pasted into Preview (a); Preview resize image sheet (b)
a
6.
b
In Developer Tools Utilities, open Icon Composer.
The greeting screen of Icon Composer is shown in Figure 21.31.
Icon Composer is designed to allow you to convert ordinary images to Apple’s icon
image format files, .icns.
7.
Open a Finder window in your Distance Converter folder, and drag the Distance
Converter.png image into the large (512) window of Icon Composer.
Chapter 21: Using XCode to Create New Programs
8.
567
Select Copy to all smaller sizes, and press Import, as shown in Figure 21.32a.
Icon Composer then creates the smaller icon sizes automatically.
9.
10.
11.
12.
Save the file as Distance Converter.icns to your Distance Converter folder.
Close Icon Composer.
If XCode is not already open, launch it and open your Distance Converter project.
Drag the Distance Converter.icns file from your Finder window into the
Resources section of XCode.
On the drop-down sheet, shown in Figure 21.32b, you don’t need to check the Copy
items into destination group’s folder because the file is already there.
Figure 21.33 shows your XCode project window.
So your application icon is incorporated when you build your project, you need to add
it to the Info.plist file.
Figure 21.31
Icon Composer screen
568
Enhancing Your Macintosh
Figure 21.32
Icon Composer creating icons (a); XCode project drop-down sheet (b)
a
Figure 21.33
XCode project window
b
Chapter 21: Using XCode to Create New Programs
13.
14.
569
Highlight Info.plist in the top window.
In the lower window, move the highlight to Icon file and enter Distance
Converter, as shown in Figure 21.34.
There is no need to add the .icns extension to the file because XCode automatically
looks for a file with that extension.
15.
Save your project, and then click Build & Go.
After your project is compiled, it runs. Your new icon should appear in the Dock, as
shown in Figure 21.35a.
16.
While your application is running, select About Distance Converter.
Your new icon appears here as well, as shown in Figure 21.35b.
17.
If you choose, save the Distance Converter.app file to your Applications folder.
Figure 21.34
Icon file in XCode window
570
Enhancing Your Macintosh
Figure 21.35
New Dock icon (a); About Distance Converter (b)
a
b
Summary
For many, this chapter has been pretty heavy going! If you have programming expertise, I hope
it triggered some enthusiasm for programming in the OS X environment. If you are already
familiar with object-oriented programming, such as C++, then the jump to Objective-C is not
that high. The major differences are in the syntax.
If you do not have prior programming expertise, I hope this chapter has inspired you to try
some programming. As you have seen, OS X makes it somewhat easier to build applications
because of the many tools, such as XCode, Interface Builder, and Icon Composer to help the
process.
Apple provides a wealth of documentation to help you along your path.
Some Successful
Case Studies
B
y now you have installed and been using your Leopard installation on your non-Apple computer. In this chapter, I discuss
some installations I have carried out on different computers,
the difficulties encountered, and how I overcame them.
While writing this book, from Chapter 7 on, I have almost exclusively used Leopard with only an occasional trip back to Vista.
Installing to a Gigabyte
Motherboard
My first installation was to my trusty old bitzer (bits o’ this and bits
o’ that) computer that had been running Vista for six months or so.
It’s a computer that I’ve tinkered with, replacing the motherboard,
graphics card, hard disks, and other components over a couple of
years.
Purely by chance, I found I had a system that was a relatively easy
fit with Leopard.
It has a gigabyte EP45-DS3P motherboard with an Intel CoreDuo
E8400 processor. This combination turned out to be one of the easiest boards for getting Leopard running. From the start, I used a
retail copy of Leopard using the Boot-132 boot disk.
Graphics was also a breeze. The computer has an nVidia 7600GS
graphics card. Apple has used several different nVidia graphics
cards over the years, so I found a wealth of knowledge about using
them in Hackintoshes. The kexts used are nVkush, which is generic
for nVidia on Hackintoshes. It can automatically detect the card at
boot time and load the correct drivers. It supports Quartz Extreme/
Core Image.
Overcoming difficulties
Major difficulties were with the Wi-Fi and sound. Sound was easily
fixed by posting on a forum. Within a few hours, I had an answer
and sound kexts tailor-made for my motherboard, thanks to Gary
Malec.
In This Chapter
Installing to a gigabyte
motherboard
Installing to a Dell Mini 9
572
Enhancing Your Macintosh
Wi-Fi proved much more problematic. Wired Internet worked right from the start, but because
the ADSL modem must be in a different room, I had to get Wi-Fi working. I tried five different
wireless adaptors, including two PCI bus internal cards. The only ones to work were a Netgear
WG111 USB adaptor and a Rokair USB adaptor. The Rokair was supplied with an install disk, and
I downloaded the Netgear driver from the Web site.
The problem with most generic Wi-Fi adaptors is that their manufacturers don’t bundle the
drivers with them, simply because almost every Mac has wireless built in, so the market is very
small.
Viewing a success
Every application I have loaded, bar one, has worked with no tweaking required. That applies to
all Apple system applications as well as third-party apps. While writing this book, I used
Microsoft Word for the bulk of the writing and PowerPoint for creating some of the diagrams.
LiveQuartz, a free graphics program, did the bulk of the diagrams.
Figure 22.1 shows the About This Mac panel for the computer.
Figure 22.1
About This Mac for gigabyte/nVidia computer
Chapter 22: Some Successful Case Studies
573
Installing to a Dell Mini 9
My other computer is a Dell Mini 9 that I bought with the express purpose of running Leopard. I
bought it about two months after getting Leopard running on the desktop computer. I checked
with various Web sites and found that, at the time (March 2009), it was rated just about the easiest computer of all to run Leopard.
Gadgets.boingboing.net updated a chart roughly once a month that shows compatibility for
lots of netbooks. Find the chart at http://gadgets.boingboing.net/2008/12/17/
osx-netbook-compatib.html or http://tinyurl.com/4z3d9g. As you can see, the
Mini 9 gets a green check mark for everything.
A Web site dedicated to the Mini 9 (and other Dell minis) has a forum dedicated to OS X installation and difficulties at www.mydellmini.com/forum/mac-os-x/.
Overcoming difficulties
This may sound odd, but in fact I had almost no difficulties to overcome! The Hackintosh has
such a large fan base, especially on the My Dell Mini Web site, that all the issues have been overcome by folks more talented than I am.
I started with a retail copy of Leopard 10.5.2 and installed it from a USB key because the Mini
doesn’t have a DVD drive. Installation went smoothly, and on the second boot up, it worked fine.
Wi-Fi worked from the start: All I had to do was enter my password for my wireless network.
One item that gets broken when Leopard is updated is sound. This is easily fixed by redoing the
DellEFI custom install and is well documented on the My Dell Mini Web site.
I also updated the boot to use Chameleon v2.
Viewing a success
My install started out with the Type 11 install method. This is now a superseded method, but it
was all that was available at the time. Since then, I have upgraded through 10.5.6, 10.5.7, and
10.5.8. In every case, the upgrade has worked perfectly with nothing broken. I also have
upgraded all the software every time it becomes available on Apple’s Software Update site.
Not only does the Mini 9 make a great netbook, it also is usable as a desktop machine. I have a
wireless keyboard and mouse: I don’t like the Mini 9 keyboard, and I don’t like trackpads. I also
have an old 17-inch LCD monitor that connects through the video out slot and gives me a dual
screen. Because the menu bar is movable between the two screens, the external monitor can be
used as the main monitor.
Figure 22.2 shows the About This Mac panel for the computer.
574
Enhancing Your Macintosh
Figure 22.2
About This Mac for Dell Mini 9
Summary
I’ve shown you that after much experimenting and many failures, you can definitely run
Leopard on a wide range of hardware. Some hardware gives excellent results, while other hardware gives mediocre or poor results.
For most users, unless the computer can connect to the Internet, either wired or wireless, and
can make best use of the graphics and sound hardware, there is little point in installing
Leopard.
If you have an existing computer you want to try Leopard on, use the Hardware Compatibility
Lists to get an idea of how difficult it will be.
If you want to buy a computer specifically to run Leopard, refer to the compatibility lists at
http://wiki.osx86project.org. The fact that someone has managed to get a particular computer to run doesn’t mean it will be easy: It simply means that it’s possible!
Is it worth it? In my case, definitely. When I started this project, I had almost no Macintosh
expertise. Now I prefer to use Leopard than any Windows operating system and I’ve bought my
own genuine Macintosh.
Leopard seems easier on the hardware as well. Under Vista, my hard disk light is on for maybe
10 percent of the time. In Leopard, it flicks on only when I save a file.
References
I
n Table A.1, all the references from previous chapters are
gathered together. In addition, you find general reading
references on topics of interest to builders of Hackintoshes.
Table A.1 Web References from all Chapters
Topic
URL*
System Information for Windows
www.gtopala.com/
Find manufacturer of PCI device
www.pcidatabase.com
Hardware Compatibility Lists
http://wiki.osx86project.org/wiki/index.php/
Main_Page
Update Leopard
www.apple.com/downloads/macosx/apple/macosx_
updates/
pcwiz
http://pcwizcomputer.com
Downloads site
www.mediafire.com/
Downloads site
http://rapidshare.com/
Macrium Reflect (Free)
www.macrium.com/reflectfree.asp
DriveImage XML (Free)
www.runtime.org/driveimage-xml.htm
Drive Backup Free
www.paragon-software.com/home/db-express/
features.html
Acronis True Image
www.acronis.com/
Norton Ghost
www.symantec.com/norton/ghost
Paragon Hard Disk Manager
www.paragon-software.com/home/hdm-personal/
O&O Disk Image 3
www.oo-software.com/home/en/products/
oodiskimage/index.html
Terabyte Image for Windows
www.terabyteunlimited.com/image-for-windows.htm
Acronis Partition Manager
www.acronis.com/
Partition Magic
www.symantec.com/norton/partitionmagic
Paragon Partition Manager
www.paragon-software.com/home/pm-personal/
CD/DVD burner for Windows
www.imgburn.com/
Disk partitioning
http://gparted.sourceforge.net/
EasyBCD
http://neosmart.net/
Chain 0 to dual boot
http://rs279.rapidshare.com/files/118576025/
Chain0_.rar
continued
576
OSx86: Creating a Hackintosh
Table A.1 Continued
Topic
URL*
Leads to forum on .iso for different
motherboards
http://tinyurl.com/r49hnx
Kexthelper b7
http://cheetha.net/
UInstaller and other software
http://pcwizcomputer.com/
Remove services from Leopard
http://manytricks.com/servicescrubber/
Leads to table of netbook
compatibility on Boing Boing Gadgets
http://tinyurl.com/4z3d9g
OSX86 Tools
http://code.google.com/p/osx86tools/downloads/
list
Audio drivers
http://tinyurl.com/lqbw67
Back to my Mac from a PC
http://lifehacker.com/366940/back-to-my-macfrom-a-pc
Leads to change time Leopard to
Windows
http://tinyurl.com/ktvylg
The Unarchiver
www.apple.com/downloads/macosx/system_disk_
utilities /theunarchiver.html
Yahoo calendar in iCal
http://switch.calendar.yahoo.com
File types opened by Preview
http://en.wikipedia.org/wiki/Preview_(software)
TinkerTool
www.bresink.com/osx/TinkerTool.html
MacFuse
http://code.google.com/p/macfuse/
NTFS3G
www.ntfs-3g.org/
Ntfs-mac
www.paragon-software.com/home/ntfs-mac/
Parallels desktop
www.parallels.com/
VMware Fusion
www.vmware.com/products/fusion/
VMware workstation
www.vmware.com/products/ws/
WinRAR
www.rarlab.com/download.htm
7-Zip
www.7-zip.org/
XBench - benchmarks for OS X
www.xbench.com/
Workflow example
www.macosxautomation.com/automator/examples/
ex06/pkg/workflow.zip
Apple Developer Site
http://developer.apple.com/
Audio spectrum display
http://machinecodex.com/codexmachina/?q=node/8
Phonemes for Apple speech
http://tinyurl.com/neyvwe
Dell Mini Forum
www.mydellmini.com/forum/mac-os-x/
Boot-132 Loaders for Retail Vanilla
Leopard Install in a Disk Partition
www.insanelymac.com/forum/lofiversion/index.
php/t125438.html
Appendix A: References
Topic
577
URL*
Retail Leopard Install with Boot132-Chameleon w/ EFI-strings
Loader
www.insanelymac.com/forum/lofiversion/index.
php/t128274.html
Boot from EFI partition, zero modification installs on Intel SSE2 or
better
www.insanelymac.com/forum/lofiversion/index.
php/t127330.html
* All URLs were correct and working at 29 September, 2009.
NOTE
Where a URL is broken over two lines, there is no space in it; type it as a single line.
The Missing Theory
T
his appendix provides background material gathered in one place.
It covers some theoretical topics from the rudiments of how processors work, disk formats,
what happens when you boot your Leopard and Windows computers, kernels and kexts, and a
general history of OS X on the Macintosh.
In practical topics, it details some fixes for issues that arise during installation, as well as some
general troubleshooting advice.
Processor Instructions
In general, you do not need to know very much about processor instructions to install Leopard.
However, you should be aware of some terms that will help you understand the process of
installing Leopard.
For compatibility with older software, modern processors still have to work with instructions
from earlier processors. Intel developed the technique of using one instruction to operate on
more than one set of data. This allows the code required to be much smaller because, rather
than having one set of instructions for each bit of data, one instructions works with all of them,
effectively carrying out operations in parallel.
This technique is called Single Instruction, Multiple Data, abbreviated to SIMD. It is especially
useful in putting graphics on the screen because several pixels can be processed at once.
Table B.1 explains the meaning of each of the newer instruction types and what they do.
Table B.1 Processor Instruction Types
Instruction
Meaning
Explanation
Introduced
MMX
Multimedia Extension
Only worked on integers
1997
SSE
Streaming SIMD Extension
Added floating-point support
1999
SSE2
Second version
Adds double precision floating point
2001
SSE3
Third version
2004
SSSE3
Supplemental SSE3
Additional instructions for MMX registers
2005
SSE4
Fourth version
Instructions not specific to graphics
2006
EM64T
Intel 64
Supports 64-bit programs
2004
580
OSx86: Creating a Hackintosh
The instruction types supported by the processor are important because Leopard will not run
on instruction sets earlier than SSE2, and preferably SSE3.
Table B.2 shows the instruction sets supported by each of the Intel chips since 2001.
Table B.2 Instruction Sets Supported by Intel Processors
Chip
Year
SSE2
SSE3
Pentium 4
2001
Yes
No
Itanium 2
2002
Yes
No
Celeron 4
2002
Yes
No
Pentium 4M
2002
Yes
No
Pentium 4
2004
Yes
Yes
Celeron D
2004
Yes
Yes
Centrino
2003
Yes
No
Core Duo
2006
Yes
Yes
Core 2
2006
Yes
Yes
Atom
2008
Yes
Yes
Core i7
2008
Yes
Yes
Because Leopard will not run on any processor that does not support at least SSE2, you can see
that it will not run on any Intel chips earlier than the Pentium 4 of 2001.
Graphics Systems in Macintosh Computers
If Apple has used a particular graphics processor in a Macintosh, getting it working in a
Hackintosh is relatively easy. If your graphics card has not been used in a Mac, you are likely to
have difficulty getting it to work satisfactorily.
Quartz Extreme/Core Image is Apple technology that uses the power of modern graphics cards
to take lots of the processor load away from the central processor. It requires your graphics system to have hardware acceleration. If your graphics system does not have hardware acceleration, it is unlikely to support Quartz Extreme/Core Image.
Table B.3 shows a summary of the graphics chips that have been used in Macintoshes. The list is
by no means exhaustive, but it can be used to get an indication of how likely you are to have
the best graphics performance.
Appendix B: The Missing Theory
581
Table B.3 Graphics Chips Used in Macintoshes
Mac Model
Graphics Chip
Mac Mini Core Solo
Intel GMA950
iMac Core Duo 17”
Intel GMA950
iMac Core Duo 20”
ATI Radeon X1600
MacBook Core Duo 13”
Intel GMA 950
MacBook Pro Core Duo 15”
ATI Radeon X1600
MacBook Pro Core Duo 17”
ATI Radeon X1600
Mac Mini Core Duo
Intel GMA950; NVIDIA GeForce 9400M
iMac Core 2 Duo 17”
Intel GMA950; ATI Radeon X1600
iMac Core 2 Duo 20”
ATI Radeon X1600; ATI Radeon HD 2400 XT; ATI Radeon HD 2600 PRO; NVIDIA GeForce 9400M
iMac Core 2 Duo 24”
NVIDIA GeForce 7300GT; NVIDIA GeForce 8800 GS; NVIDIA GeForce 9400M; NVIDIA GeForce GT
120; NVIDIA GeForce GT 130
MacBook Core 2 Duo 13”
Intel GMA950; Intel GMA X3100; NVIDIA GeForce 9400M
MacBook Air Core 2 Duo 13”
Intel GMA X3100; NVIDIA GeForce 9400M
MacBook Pro Core 2 Duo 15”
ATI Radeon X1600; NVIDIA GeForce 8600M; NVIDIA GeForce 9600M GT
MacBook Pro Core 2 Duo 17”
ATI Radeon X1600; NVIDIA GeForce 9600M GT
The computers are listed roughly in order of their release date.
MacTracker is a very useful little utility to find out what’s inside any given Macintosh. It’s available at http://mactracker.dreamhosters.com/.
A Primer on Disk Formats
Hard disks are divided into cylinders and sectors. Firmware built into the disk controller generally conceals the actual number of platters, cylinders, and sectors, though this is unimportant to
the operating system: The disk controller translates what the operating system requests to the
actual layout of the disk.
Master boot record
The first sector of a hard disk used in Windows computers is known as the master boot record. It
consists of a table containing information about how the disk is divided up. The original specification developed by IBM said that a disk might contain up to four partitions, allowing up to four
operating systems to be installed on the same disk.
582
OSx86: Creating a Hackintosh
Partition table
A hard disk can be split into partitions. In Windows, each partition becomes a separate disk drive
(C:, D:, etc) and can hold operating system and application software, or only data, or a mixture.
Each partition also can carry a separate operating system and software.
An MBR disk can contain only four primary partitions: This is a limitation forced by the definition
of a partition table. Although the disk can contain only four primary partitions, it can replace up
to three of those by extended partitions. An extended partition can contain up to 24 logical partitions, though this would be very unwieldy.
Figure B.1 shows a disk divided into four partitions.
Figure B.1
Disk partitioned into four partitions
Windows drive C:
Primary partition
OS X Leopard system
Primary partition
Logical drive D:
Extended partition
Logical OS X data
As you can see, the disk has two primary partitions: one to run Windows and one to run OS X. It
also has an extended partition that is divided into two logical partitions.
Most Windows computers these days are shipped from the manufacturer with a single hard
disk with two partitions. One is the C: drive for the Windows installation; the other is the D:
drive, which contains a backup image of Windows and the relevant drivers so you can reinstall it
relatively easily, should it become corrupted.
If you want to run more than one operating system, you must have more than one partition.
Appendix B: The Missing Theory
583
Each partition on an MBR disk can have a maximum size of 2TB (2,000 gigabytes).
Active partition
One, and only one, partition must be marked as the active partition. This can be any one of the
primary partitions. It is the active partition that contains the boot loader, which in turn loads the
operating system.
If you are going to install OS X and Windows Vista on the same disk, either operating system
can be on the active partition. But you need a boot loader to allow you to choose which operating system to start.
GUID Partition Table
As you would expect, Apple takes a different approach from Microsoft. Rather than having a
disk with a master boot record, Apple uses a different partitioning scheme. This is the GUID
Partition Table (GPT). Unlike MBR, there is no limit of four primary partitions.
GUID is an acronym itself, meaning Globally Unique Identifier. A GUID is a randomly generated
number of 32 hexadecimal bytes, or 128 bits. Although it is theoretically possible to randomly
generate the same code twice, in practice it is almost impossible. Using 128 bits, there are 2128
possible identifiers, or over 3 x 1038. That’s 3 followed by 38 zeros.
A typical GUID might be {3F2504E0-4F89-11D3-9A0C-0305E82C3301}. Conventionally, GUIDs
are written in blocks: 8 digits – 4 digits – 4 digits – 4 digits – 12 digits and enclosed in braces { }.
If you have ever delved into the Windows registry you will have encountered GUIDs. Each software manufacturer creates their own GUID. Although there is no central registry of GUIDs, it is
almost impossible that two manufacturers will create the same GUID.
Each disk has its own GUID.
EFI partition
When Leopard partitions a GPT disk it creates an extra, hidden, partition of 200MB. This is the
EFI partition, and it is always the first partition and always hidden. That is why when you boot
from your Leopard disk it always uses, say, disk0s2. Disk numbers start from zero; partition numbers start from 1.
Up to now, Apple has never used the EFI partition, leaving it blank.
Protective MBR
At the start of a GPT disk is what’s known as a Protective MBR. This is a part of the disk that looks
to the computer like an MBR, but it has an unknown type so applications like disk partitioning
and formatting software for other operating systems do not accidentally change it and make it
unusable.
Table B.4 shows the ability of each Windows operating system to use a GPT disk.
584
OSx86: Creating a Hackintosh
Table B.4 Windows Operating Systems and GPT Disks
Operating System
Bits
Read
Write
Boot From
XP
32
No
No
No
XP
64
Yes
Yes
No
Vista
32
Yes
Yes
Yes, but only on EFI systems
Vista
64
Yes
Yes
Yes, but only on EFI systems
Windows 7
32
Yes
Yes
Yes, but only on EFI systems
Windows 7
64
Yes
Yes
Yes, but only on EFI systems
A retail copy of OS X can read and write MBR disks but cannot be installed to one. This creates
an issue if both operating systems are to be installed on the same disk: OS X can only be
installed on a GPT disk, but Vista cannot!
Reading and writing NTFS disks in Leopard
Leopard can both read and write to disks formatted with the File Allocation Table (FAT) method.
This is the default format for all USB thumb-drives, camera storage cards, and so on.
By default, Leopard can read from but not write to the more common method of formatting
Windows drives, the New Technology File System (NTFS). Why this is so is not immediately
clear.
Nevertheless, a free solution to the problem is available. A combination of MacFuse and
NTFS-3G allows you to read and write to NTFS disks. This is discussed in Chapter 13.
Hidden files used by Leopard
When Leopard writes to your Windows disks, it creates hidden files. In Leopard, these are hidden by the operating system, although you can view them.
Follow these steps to view hidden files on your Leopard disks:
1.
2.
3.
Run Terminal.
Type defaults write com.apple.finder AppleShowAllFiles TRUE and press Enter.
Type killall Finder and press Enter.
This is shown in Figure B.2.
At least two hidden files now appear on your desktop: .DS_Store and .localized.
To return Finder to not showing hidden files, follow the steps above, but replace TRUE with
FALSE in Step 2.
Appendix B: The Missing Theory
585
Figure B.2
Terminal commands
The .DS_Store file
This is the Desktop Services Store and is a hidden file created by OS X to store custom attributes
of a folder such as the position of icons or the choice of a background image. By default, the
Mac OS X Finder creates a .DS_Store file in every folder that it accesses, even folders on remote
systems (for example, folders shared over a Windows or Apple connection) and even if the user
has customized the appearance of the folder only by moving its Finder window.
The .localized file
In Leopard, a folder’s name is always the same, regardless of the localization. But Finder has the
ability to show some names in a localized form. When a .localized file (always 0 bytes in size) is
stored in a folder, it tells Finder that the folder is a “localizable” folder, meaning that it can be
given a local name. For example, the Documents folder is localizable to Dokumenter in Norsk.
Likewise, Library is Bibliotek and so on. If Finder sees .localized in any folder, it automatically
uses the folder name appropriate to the language being used.
Any folders you create are not localizable so you won’t find a .localized file.
On your Windows disks
In the root of your Windows disks, you probably will find .DS_Store, .TemporaryItems, and .
Trashes hidden files. These also are visible in Windows Explorer if you set it to display hidden
files.
586
OSx86: Creating a Hackintosh
Reading and writing HFS+ disks in Windows
Unfortunately, no open-source software is available for Windows to read and write Macintosh
HFS+ disks.
HFS Explorer is free and open source, but it can only read but not write to HFS+ disks. Get it
from http://hem.bredband.net/catacombae/hfsx.html.
Two commercial products can read and write HFS+ disks: Transmac (www.acutesystems.
com/) and MacDrive (www.mediafour.com/products/macdrive/). Both work, and cost
around the same. Try the trial version of each before deciding if you need it and to compare
them.
Booting Your Computer
The term “boot” comes from back in the dim, dark days of computing when the computer basically had no instructions telling it how to start. The operator had to set some switches to put the
first instructions into the computer. Only a few instructions were needed to give the computer
enough information to start loading the next part of the instructions, which may have come
from a paper tape or punched cards.
Because it appeared as though the computer was practically starting itself, it became known as
“bootstrapping” as in “lifting yourself up by your own boot straps.” The name became shortened and has stuck.
Booting a Windows computer
Here are the steps a Windows computer goes through when it starts from cold.
Power-on self-test
When you first switch on your computer, the BIOS (Basic Input Output System) takes over. It carries out what is known as the POST, or power-on self-test, that does things like checking the
hardware, especially the memory and the keyboard. If it encounters a problem, it gives a series
of beeps; you can find out what these beep codes mean by referring to the documentation for
your BIOS or at www.computerhope.com/beep.htm.
Find boot device
Next, the BIOS carries out instructions, trying to find a device that can be used to carry out the
next stage. Normally this is a hard disk, but most BIOSs allow you to set a boot priority: the order
in which it checks devices to find out which to boot from.
Assuming that your boot device is a hard disk, the BIOS then reads the first sector of the first
hard disk. This first hard disk sector is known as the Master Boot Record and is 512 bytes long,
regardless of the size of the disk. It contains the Partition Table for the disk, as well as up to 446
bytes of instructions.
Appendix B: The Missing Theory
587
Boot loader
After the BIOS has found the active partition, it loads the boot loader. In Windows XP, this is a
file called NTLDR; in Vista and Windows 7, it is called bootmgr. Figure B.3 shows the Windows
boot process.
Figure B.3
Windows boot process
Run boot loader
Read active partition
Read BCD (Vista, Windows 7)
Read boot.ini (Windows XP)
Load boot loader from disk
Find boot device
Look in MBR of specified disk
Power on self-test
Check memory, peripherals, and so on
NTLDR uses a file called boot.ini to tell it where to find the next part of the boot process. This is
normally in C:\windows. Boot.ini is a simple text file.
Bootmgr uses a boot configuration database, which is no longer a simple text file. As a consequence, you cannot edit the boot configuration with a simple editor, such as Notepad.
Finally, Windows itself gets control and loads the remainder of the operating system.
Macintosh computer
As you might expect, Apple does things a little differently from Microsoft. We will look at what
happens in the boot process of Intel Macs; this is different from what happened with earlier
generations of Apple hardware.
588
OSx86: Creating a Hackintosh
Apple uses the Extensible Firmware Interface (EFI) rather than a simple BIOS. This has much
more functionality than the Windows BIOS.
Power-on self-test
First the EFI carries out a power-on self-test, just like the BIOS. It then performs an inventory of
all the hardware devices connected and loads drivers for them. On a Windows computer, this
phase doesn’t happen until Windows itself is loading. You can see this for yourself by watching
the light on your mouse: It may turn on when you first boot, because the BIOS recognizes it, but
it switches off and comes on again only partway through the Windows startup.
OS X stores the address of the normal boot drive in nonvolatile RAM so that on booting it knows
immediately which drive to boot from.
It then initializes the graphics hardware and puts a gray background screen on the display.
Find boot file
When booting from the hard disk, rather than looking simply at the code located in the MBR, OS
X looks on the startup disk for a blessed file. This file is the main operating system file. Bless is an
OS X command that writes the name of the file and the disk into the nonvolatile RAM in the EFI
ready to be found at boot time. Figure B.4 shows this.
Figure B.4
Leopard boot process
Load OS X
OS X
Find boot disk
EFI
Initialize graphics hardware
Hardware inventory
Hardware
Power on self-test
Appendix B: The Missing Theory
589
When OS X is running on non-Apple hardware, obviously there is no EFI, so another method of
booting must be found.
The installation boot CD
When you first booted your computer to install OS X, you used a boot CD you downloaded from
the Internet. This boot disk is based on syslinux. Syslinux is an open-source project, created specifically to allow operating systems to be booted from devices such as floppy disks, USB memory sticks, and CDs.
In this case, its main function is to provide an environment from which to launch the Darwin
boot loader.
If you look at the disk’s contents in Finder, you see something like that shown in Figure B.5a.
Exactly what appears on your disk may differ slightly, but the basics are there: a BOOT file,
MBOOT.C32, an ISOLINUX folder, and a small ISOLINUX executable file.
Inside the INITRD.IMG file is where all the magic occurs. You can view the content of INITRD.IMG
by opening it with Disk Mounter and navigating to the Extra/Extensions folder. It contains several kexts, as shown in Figure B.5b.
Figure B.5
Install CD files (a); INITRD.img kexts (b)
a
b
Each of these kexts is loaded when the disk boots (while the ….. are crawling across the screen).
All these kexts together comprise a fake EFI, to have the Installer DVD install as if it’s running on
a real Macintosh. This is how it’s possible to boot and install the retail Leopard DVD.
These files are copied to the hard disk drive so the Darwin boot loader can load them first. This
then allows the rest of the retail installation to boot. Figure B.6 shows the kexts in the boot disk.
Table B.5 lists each of these kexts and what they are used for.
590
OSx86: Creating a Hackintosh
Table B.5 Kexts and Their Purpose
Kext
Purpose
ACPIPS2Nub
PC PS/2 keyboard and mouse driver
AppleAC97Audio
Realtek AC97 audio driver (but not specific to a chip)
AppleACPIPlatform
Power control, specifically computer sleep
AppleAHCIPort
Driver for SATA systems with AHCI enabled
AppleAPIC
Driver for Intel Advanced Programmable Interrupt Controller
AppleAzaliaAudio
High-definition audio driver
AppleGenericPCATA
Driver for generic ATA drives
AppleIntelIntegratedFrameBuffer
Driver for GMA900 graphics
AppleNForceATA
Driver for SATA drives on NForce motherboards
ApplePS2Controller
Controller for PS/2 keyboard and mouse
AppleSMBIOS
Fixes hardware information for system profiler
AppleVIAATA
Driver for hard disk and CD/DVD controller
Dsmos
Translates system information that may be encrypted
IntelCPUPMDisabler
Disables the Intel power management
NVkush
Autodetects nVidia graphics cards
SMBIOSEnabler
Enables the System Management BIOS
Some Hackintoshers are working on putting most of the kexts permanently into the EFI partition on the hard disk (see earlier) so booting is simply a matter of reading that.
Kernels and Kexts
For any operating system, the kernel is the very innermost core that interacts directly with BIOS
or the EFI firmware and the hardware. A kext, in Apple terms, is a kernel extension.
Kernel
Any application software (browser, word processor, etc.) interacts with the kernel, rather than
directly with the hardware.
In the retail OS X, the kernel used is called the mach kernel, which was developed at Carnegie
Mellon University. The unmodified mach kernel is known as vanilla kernel. This is important
because it means that if your computer can run the vanilla kernel, you can install all OS X
updates without breaking the installation.
Appendix B: The Missing Theory
591
Kexts
Sitting between the kernel and the application software in the Windows world are small programs called drivers. They allow your computer to send correct output to a display monitor, a
network card, or your sound card, formatted in a way that the hardware can understand.
In the Macintosh world, these drivers are called kexts—short for “kernel extensions.” When you
install OSX86 and specify drivers for your video hardware, network hardware, and so on, you are
installing kexts.
Frequently, many kexts are bundled together into a new file called an mkext. This is done for
faster loading and caching of the kexts; rather than load each individual kext, the boot loader
loads them all in one file.
Writing kexts, or even understanding how they work, is not a trivial exercise! That’s why so few
people are capable of writing them!
Installing kexts sometimes requires use of the terminal to enter commands because you have to
save the old kexts, install the new ones in the right location, and set the permissions on the new
kexts.
File Permissions in OS X
Every OS X file has an owner. The owner is generally the account that created the file.
File permissions are read, meaning the user has permission to read the file; write, meaning the
user has permission to change the file, and execute, meaning the user has permission to start
the file running as a command. These are abbreviated to rwx.
NOTE
Having write permission implies read permission as well.
In addition, there are three types of users: the owner, the group the owner belongs to, and
other users. Each file has three sets of permissions specified. In other words, each file has nine
possible permissions.
These could be written as:
Owner: r w x
Group: r w Others: r - The – means “no permission.”
More commonly, they are written on a single line as rwxrw-r--.
592
OSx86: Creating a Hackintosh
A file that is listed as -rwxr----- means the owner has read, write, and execute permission; other
members of the group have only read permission, while everyone else has no permission.
In the example above, the - in front of the rwx means that the object is a file. If it is a folder
(directory) the – is replaced by a d. For example, a user’s Documents folder is shown as:
Documents: drwxrwxr-For a folder, the meanings are slightly different: w gives write permission, which also gives permission to delete files, even if the user does not have write permission for the file! An x determines whether the user can see what is in the directory. In this case, the owner can do
everything with the folder; other members of the group can read and write to the folder, but
everyone else has read access to the folder but can’t see what’s in it! This means that if you
know the exact name of the file, you can read it, but you can’t browse the folder to find it.
Owners and groups
Ordinary users can be grouped together: for example, while working on a project so that each
member of the group has access to the same files. They could all be made members of the
ProjectX group.
Superuser
In addition to ordinary users, there is one major system user: superuser, known as root. Root has
read, write, and execute permission for every file on the computer. Needless to say, you should
not give someone root permission lightly!
Root is the only member of a group called wheel.
It is possible to change the permissions of a file (but only if you own it) by using the command
chmod.
You also can change the owner of a file, again only if you own it, using the chown command.
In OS X, you can easily find the permissions on a file by right-clicking the filename and selecting
Get Info. Figure B.6a shows the permissions for a data file owned by the user.
To change permissions, you must be the owner. In the Get Info window, click the padlock. This
changes the display to that shown in Figure B.6b.
Operating system permissions
When you do anything to Leopard’s kexts or kernel files, you must ensure that they have the
correct permissions set. Otherwise, Leopard refuses to use them.
Fortunately you don’t need to remember the permissions every file requires: Leopard keeps a
database. Disk Utility can read that database, check all your system files’ permissions, and then
correct them.
Appendix B: The Missing Theory
Figure B.6
Get Info for data file (a); change permissions (b)
a
b
Follow these steps to fix the permissions:
1.
2.
3.
4.
Start Disk Utility.
Select your system disk (Hackintosh, in my case).
On the First Aid tab, click Repair Disk Permissions.
Close Disk Utility when the repair is complete.
Figure B.7 shows Disk Utility after it has repaired my permissions.
593
594
OSx86: Creating a Hackintosh
Figure B.7
Permissions repaired
Some Apple History
Mac OS X is the tenth Macintosh operating system (X being the Roman numeral for 10). It was
released in its first version, known as Cheetah, in March 2001, running on the Mac Power PC
computer.
Version 10.1, known as Puma, was released later the same year. Other versions followed—10.2:
Jaguar and 10.3: Panther—in late 2003 and late 2004, respectively.
In January 2006, Apple introduced its first computers based on the Intel platform. This represented the second major change of chip supplier for Macintosh. The first Macs, from 1984, were
based on the Motorola 68000 series of chips and were phased out in 1994 in favor of the
PowerPC chip, some made by Motorola, others made by IBM.
Since switching to the Intel platform, all PowerPC models have been discontinued but still are
supported by operating systems up to Leopard. Snow Leopard does not run on PowerPC Macs.
Appendix B: The Missing Theory
595
OS X version 4, Tiger, released in early 2005 for the PowerPC, was the first version to run on the
Intel platform. Since then, Version 5, Leopard, was introduced in October 2007. Version 6 (Snow
Leopard) was introduced in late August 2009.
Each major version has gone through several minor versions. These are shown by an extra decimal point, so the eighth minor version of Tiger is known as 10.4.7. Numbering begins at zero.
The final version of Leopard is 10.5.8.
Each major version of OS X introduces a major new feature. For Tiger, it was Spotlight, a powerful indexing and search utility, similar to the Search feature in the Vista Start button menu. For
Leopard, the major new feature was Time Machine, a fantastic backup utility with no equivalent
on the Windows platform that comes even close to being as useful and user-friendly.
Upgrading your version from one major revision to the next requires purchase of the new version, but upgrades to minor versions are free by download from the Apple Web site.
Be warned, though, that Apple updates do not work on many of the OSX86 distributions. Back
up your files before you try it! I always create two partitions and install onto one. Then I use
Carbon Copy Cloner (find it online) to create a bit-for-bit image on the other partition.
Troubleshooting Your Installation
This is not a comprehensive guide to what can go wrong. It covers the most likely occurrences
and how to overcome them.
Still waiting for root device
If you get stuck at the Still waiting for root device line, here are a couple of things you can try.
Serial ATA
If your computer uses Serial ATA (SATA) hard disks, be sure that your DVD drive is also SATA;
otherwise, OS X cannot utilize it. System Information for Windows (as in Chapter 1) can tell you
what types of drives you have.
Master-Slave configuration
If your computer only has parallel ATA drives (not SATA), then you must be sure that your DVD
drive is configured as the Master, not the Slave. How can you tell? Unfortunately, the only way
to tell is to take the drive out of the computer and look at the jumpers, which are small pins on
the back of the drive that allow you to select whether the drive is the Master or the Slave. If
Slave is selected, swap the jumper to select Master.
Your drive has a small sticker on it, near where the cables connect. It tells you where to put the
jumper to make the drive the master.
596
OSx86: Creating a Hackintosh
If you have a hard disk connected to the same cable as your CD/DVD drive you may have to set
the hard disk to slave so you can boot the DVD, then change it back to master to boot from the
hard disk.
AHCI
AHCI stands for Advanced Host Controller Interface. If your computer has SATA drives, it almost
certainly has AHCI capability. This may or may not be enabled. If it is not enabled, it is highly
unlikely you can boot your Leopard installation disk.
AHCI is enabled through the BIOS and is unique to each motherboard. On my Gigabyte motherboard, it is under the heading Integrated Peripherals. It is called SATA RAID/AHCI Mode and has
three settings: Disabled, RAID, and AHCI.
Enter your BIOS setup, and ensure that AHCI is on.
HPET
An HPET is a High Precision Event Timer. If your motherboard allows you to enable or disable it,
you should enable it.
On my motherboard, it is under Performance Management Settings. It has two headings: HPET
support Enabled or Disabled and HPET mode 32 bit or 64 bit. I recommend you enable HPET
and set it to 64 bit.
Post-Installation Fixes for Leopard
After you have installed Leopard, you usually need to apply one or two fixes.
Leopard time versus Windows time
One issue that can drive users to the brink is the difference between how Windows measures
time and how Leopard measures it. The problem arises from the fact that Windows sets your
local time to the time your hardware clock shows.
Here in Sydney, we are 10 hours ahead of Greenwich Mean Time (GMT). If my hardware clock
shows 9 AM, Windows sets its time to 9 AM.
Leopard, however, assumes the hardware clock is showing GMT. Because I told it that I’m in
Sydney, 10 hours ahead of GMT, Leopard sets its time to 7 PM. If I get the time from Apple’s
timeserver, it sets my clock to my actual local time.
When I return to Windows, however, my hardware clock has been set back 10 hours, so
Windows thinks it’s now 1 AM. This is shown diagrammatically in Figure B.8.
If you search the Web, you can find many solutions to the problem. From experience, no solution that tries to get Windows to show the correct time works. The only solution that works is to
get Leopard to adjust its time.
Appendix B: The Missing Theory
597
Figure B.8
Leopard time versus Windows time
9 AM GMT
7 PM Sydney
Leopard
Hardware clock
9 AM
11 PM GMT
9 AM Sydney
Windows
While it may seem that the way Windows uses the clock is the better way, in fact every other
operating system uses the same method as Leopard: using GMT as the base time.
To fix it, download a file from www.one4house.com/iamges/Zephyroth_Dual_Boot_
Time_Fix.pkg.tgz and install it to Leopard. I’ve created a TinyURL for you: http://
tinyurl.com/n9cu7a.
Fixing the About This Mac display
Generally, when you install Leopard to any computer other than a genuine Apple, it doesn’t
auto-detect the details of your processor, usually displaying something like 2.83 GHz Unknown.
Although it won’t affect anything you do with your Hackintosh, most people prefer it to show
the correct display.
598
OSx86: Creating a Hackintosh
To fix this, Zephyroth has created an About This Mac Modifier. You can download it from www.
mediafire.com/?429xddziskv. Just double-click the package file to install it.
An alternative is to use ~pcwiz’s OSX86 Tools. This tool is able to make many other modifications to your installation. Figure B.9 shows the greeting screen of the tool.
Figure B.9
OSX86 Tools greeting screen
Appendix B: The Missing Theory
599
Fixing Time Machine issues
One other issue that often arises with non-Apple installations of Leopard is that Time Machine
refuses to work because it can’t identify the UUID of the system disk. The simplest fix for it is to
again use OSX86 Tools.
Follow these steps to apply the fix:
1.
2.
Run OSX86 Tools.
Click Add EFI Strings/Boot Flag.
This opens the boot editor, as shown in Figure B.10.
Figure B.10
Boot editor of OSX86Tools
3.
Click Ethernet Strings.
This opens the Ethernet Strings Creator, as shown in Figure B.11, and creates the string
you need.
600
OSx86: Creating a Hackintosh
Figure B.11
Ethernet strings creator
4.
5.
Click Import String to Boot Editor.
6.
Reboot.
At the bottom of the Boot Editor screen, click Apply changes to com.apple.Boot.
plist.
Your Time Machine should now work.
Installing Snow Leopard
A
pple released Leopard in October 2007, and a large body of expertise around installing it
on non-Apple computers is available. Although Snow Leopard did not add any new
“must have” features, it has changed many of the ways in which the operating system
interacts with the hardware.
One very simple change is that Snow Leopard now reports hard disk capacity in base-10 gigabytes, the same way disk manufacturers have measured them for several years. A more subtle
change is that file sizes for many system files in Snow Leopard show as zero length in Finder.
This is because Apple has changed the way many system files are stored.
Obviously changes such as these mean the developers of Hackintoshes have to make substantial revisions to the way things work, and it will be some time before installing Snow Leopard to
non-Apple hardware is as easy and well-defined as installing Leopard.
If you’re using a genuine Macintosh, you just insert the Snow Leopard Install Disk and upgrade.
As you’d expect, it’s not that simple if you’re using a Hackintosh.
At this time, the only installations possible are on specific computers and motherboards. Most
methods require starting with a working Leopard installation, but this can be a Hackintosh
installation.
Several people have Snow Leopard running on a Gigabyte motherboard, very similar to mine.
The Dell Mini scene has one of the more active user communities, and several people have it
running on either a Dell Mini 9 or 10v.
This appendix is a brief introduction to the installation on a Gigabyte motherboard and a Dell
Mini 9.
Installing to a Gigabyte Motherboard
A few different experts have put together guides showing how to install Snow Leopard on a
Gigabyte motherboard. The boards chosen are very similar: Gigabyte EP45-UD3P, EP45-UD3R,
and EP45-DS3L.
Three guides to installing to these motherboards are available and are shown in Table C.1.
I chose Blackosx’s guide because that is closer to my motherboard (DS3P) than the UD3P.
Because of time constraints, I didn’t create my own DSDT.aml file as recommended by Blackosx.
Everything works pretty much perfectly, except for Bonjour networking and Time Machine.
Bonjour is Apple’s zero configuration networking protocol, and because it is not running, I can’t
connect to my Dell Mini 9. Time Machine crashes with a kernel panic about three or four minutes into the first backup.
602
OSx86: Creating a Hackintosh
Table C1 Installation Guides for Gigabyte Motherboards
Motherboard
Author
URL
EP45-UD3P
Adam Pash
http://lifehacker.com/5351485/how-to-builda-hackintosh-with-snow-leopard-start-tofinish
EP45-DS3L
Blackosx
www.insanelymac.com/forum/index.
php?showtopic=180954
EP45-UD3R
d00m42
www.insanelymac.com/forum/lofiversion/
index.php/t181903-0.html
Wireless networking is a continuing problem. None of my USB adapters work in 64-bit mode.
The Netgear and the RokAir both appear to work in 32-bit mode, but they never give a network
connection. Wired Ethernet worked right from the start.
Figure C.1 shows Snow Leopard running on my desktop computer. It has been updated to version 10.6.1 with Apple Software Update.
Figure C.1
Snow Leopard on my desktop computer
Appendix C: Installing Snow Leopard
603
Installing to a Dell Mini 9
Thanks to a huge amount of work by meklort and great documentation by bmcclure937, installation to the Mini 9 is relatively pain-free and “just works,” including Wi-Fi networking, sound,
sleep, and Time Machine
To install Snow Leopard to the Dell Mini, you need a Leopard installation to create the required
files. This need not be a genuine Mac: I used my desktop running retail Leopard 10.5.8.
Complete instructions are at www.mydellmini.com/forum/os-x-snow-leopard/
12338-official-snow-leopard-mini-netbookbootmaker-method-updated.
html or http://tinyurl.com/mbrqb6.
If you have a Mini 9 or 10v, follow those instructions: They work.
Figure C.2 shows the About This Mac screen from my Mini 9.
Figure C.2
Dell Mini 9 running Snow Leopard
Figure C.3 shows my Mini 9 having its desktop shared from the Leopard retail installation on my
desktop computer.
604
OSx86: Creating a Hackintosh
Figure C.3
Dell Mini 9 desktop using Screen Sharing
Installing to Other Computers
At the time of writing, a few methods are available for installing to other computers, but so far
they are highly specific to the computer or motherboard and use only the retail copy of Snow
Leopard.
As always, Google is your friend. Simply search on Google for Snow Leopard and your computer
or motherboard. You are very likely to find something.
Psystar’s RebelEFI
In late October 2009, Psystar, the company producing Macintosh clones, released an EFI boot
disk at http://store.psystar.com/home/rebel-efi-preview.html saying that it
can be used to install Snow Leopard on a non-Apple computer. The trial download is free, and if
you decide to use it, it costs $50.
Appendix C: Installing Snow Leopard
605
I downloaded the free version of the file and burned to a CD using ImgBurn in Vista.
My computer booted fine from the boot disk, prompting me to swap to the Snow Leopard
install disk. This started fine and allowed me to format my disk and then install Snow Leopard.
Installation stopped with the progress bar at about 75 percent and saying 15 minutes to go.
Although the installation appeared to have failed, in fact it worked fine when booting from the
RebelEFI disk.
When Snow Leopard started, it led me through the usual screens, creating a new user, selecting
language, location, and so on. Finally, I arrived at the Snow Leopard home screen.
Unfortunately, the only resolution available was 1024 x 768, although QE/CI appeared to be
working as the greeting video played at first boot.
As in the instructions, I opened the CD in Snow Leopard and double-clicked to install the
RebelEFI package. This is to make the hard drive bootable without using the RebelEFI boot disk.
This appeared to install, but on restarting did not boot, giving a boot0 error. On a second
attempt it worked, and the computer booted from the hard disk.
Snow Leopard appeared to work fine, given the video limitation.
Table C.2 summarizes my experience with RebelEFI.
Table C.2 Summary of RebelEFI on EP45-DS3P / 7600GS
Item
Working?
Installation
Yes, though it appeared not to
Boot from hard disk
Yes, after second installation of RebelEFI
Video
Only 1024 x 768
QE/CI
Appears to work, but not properly tested
Wired networking
Worked fine
Audio drivers
Caused kernel panic on installation
Wi-Fi drivers
Did not work
As you can see, my trial was only partly successful. Remember that this was a very early version
of RebelEFI and was only the free version. It may be that on purchasing the full version, parts
that do not work on the free version may work.
By all means, try it. It may provide a simple, easy way of installing Snow Leopard on your system.
Glossary
.plist Apple Property list; written in XML; used to
store system properties; see XML
BIOS Basic Input Output System; lowest level of
programs that control the computer
ACPI Advanced Configuration and Power
Interface; a standard for managing power
Bluetooth Open wireless protocol for exchanging
data over short distances
AFP Apple Filing Protocol; Apple’s networking file
service
Boot Process of starting a computer from a cold
start
Alpha channel Measures the transparency of a
pixel; 0 is transparent, 1 is opaque
Boot CD CD used to load components so that the
remaining system can be loaded from another
source
AMD Advanced Micro Devices; manufacturer of
processor and graphics chips
API Application Programming Interface; defines
the way application programs interface with the
operating system
Apple menu Menu in the top-left corner of the
Leopard menu bar
AppleScript High-level scripting language for
Macintosh computers
Aqua Graphical user interface and primary visual
theme for OS X
Assistant Automated setup program used to
guide the user through an installation process
ATA Interface standard for connection of storage
devices; derived from AT (the original IBM-PC/AT)
Attachment
ATI Major supplier of graphics processing units;
now owned by AMD
Attributes (OOP) Properties of an object
Automator Apple programming system to create
automated actions
Billboard renderer Part of Quartz Composer; creates a flat 2D image from inputs
boot.ini File used by Windows XP to specify
startup options
Boot loader Program that runs as part of the boot
process and allows the user to select the desired
operating system
chain0 Small program used to pass boot control
to the Darwin operating system
Chameleon Boot loader program with graphical
interface; developed specifically for Hackintoshes
Class (OOP) A blueprint for objects of a specific
type
Cocoa Native object-oriented-programming
(OOP) environment for Macintosh
CODEC COmpressor-DECompressor for video
Combo update Apple update for OS X for updating more than one dot (.) update (say, from 10.5.1
to 10.5.8)
Concatenation Operation to join strings
together; “the”&”cat” results in “thecat”
Context Menu Menu obtained by right-clicking
an object
608
Glossary
Control Panel Application that allows users to
customize how Windows looks and behaves; compare with System Preferences in Leopard
EasyBCD Windows program for managing the
Vista (Windows 7) boot loader, using a graphical
interface
Core Image Applies filters, transforms, and other
effects to images at the pixel level
EFI Extensible Firmware Interface; Apple’s
replacement for the BIOS, it’s larger and more
complex
Darwin Underlying operating system for OS X
and iPhone OS; derived from NextStep OS
Dashboard OS X application used to host
widgets
Dashcode Programming environment for creating widgets to place in Dashboard
Device Manager Control Panel applet in
Windows that allows users to control the computer hardware
DHCP Dynamic Host Configuration Protocol;
allows computer to automatically obtain an IP
address from a router when connecting to a network
Exposé Allows users to quickly find all open windows or open windows for a given application
FAT File Allocation Table; early Windows disk allocation system
File permissions Defines which users have ability
to read, delete, and modify files
File Vault Apple’s encrypting file system
Finder Application for finding files and devices;
equivalent to Windows Explorer
FTP File Transfer Protocol; allows file transfer
between computers with different operating
systems
Disk Image (.dmg) Macintosh file containing an
exact image of a disk
GPartEd Free partition editor
Disk partitioning Dividing a hard disk into separate data storage areas, each independent of the
others
GPT (GUID Partition Table) Globally Unique
IDentifier; GPT is a disk partitioning system based
on a GUID; compare with MBR
Disk Utility Macintosh utility for managing disks
and disk images
Hardware acceleration Graphics adaptors that
have extra hardware to take graphics processing
load of the computer’s central processor
diskpart.exe Windows utility for manipulating
disk partitions
Display adapter Card to generate and output
images to a display
Dock Macintosh bar of icons that allows quick
access to application software
DSDT.aml Differentiated System Description
Table; describes the system hardware in a way that
is independent of the platform; written in ACPI
Machine Language, hence the .aml
HFS+ Hierarchical File System extended; file system developed by Apple for Mac OS (including
OS X)
HPET High Precision Event Timer; a fixed-rate
counter with up to 32 independent timers; normally built into the motherboard
HUD Heads Up Display; a type of display used in
OS X with white text on a black background
HyperCard Very early hypertext system; available
only for Mac and discontinued in 2004
Glossary
609
iCal Macintosh calendar application
Linux Operating system based on Unix
iDisk Part of MobileMe; allows files to be stored
remotely and accessed from any computer
MAC address Media Access Control; a unique
identifier given to each network adapter
Image backup Backup of a whole disk; stores
every byte without regard for file structures
MacFUSE Allows extension of OS X’s file handling
to cover other file systems
Image file (.iso) Contains a bit-by-bit image of a
disk
Mail OS X application for e-mail
Integrated video Graphics adaptor is not a
separate card but is built into the computer
motherboard
MBR Master Boot Record; the first 512-byte sector
of a hard disk for use with Windows and other
operating systems; compare with GUID Partition
Table or GPT
Intel CPU manufacturer; chosen by Apple to build
the computers to replace the PowerPC chip
Menubar The fixed menu at the top of the display
of OS X
Intel GMA950 Graphics processor chip used in
several Apple computers
Method (OOP) The abilities of an object; the
things it can do
Interface Builder Part of XCode; allows design of
user interface when developing application software for OS X
mkext Bundle of kexts combined into a single file
for faster loading and caching
Interpolation Method of constructing new data
points within a range of fixed data end-points
IP address Unique address of a computer used
for networking; written as four numbers separated
by dots; for example, 192.16.1.2
Kabyl-Bumby Boot disk for Leopard installation
Kernel Innermost part of an operating system
that interacts directly with the hardware and the
EFI or BIOS
Kernel panic Occurs when the kernel encounters
an error; cannot be recovered from
Kext Kernel extension; used to integrate hardware into the kernel without modifying the kernel
Kexthelper OSx 86 utility to allow kexts to be easily incorporated into the operating system
Leopard OS X version 5 (10.5)
MMX MultiMedia eXtensions; single instruction,
multiple data instructions introduced by Intel in
1997
MobileMe Apple’s Web-based mail, calendar, and
data sharing application
Motherboard Major component in a computer;
includes the processor; allows other devices to
connect
NAT Network Address Translation; a technique
used to hide internal IP addresses while presenting
a single IP address to the outside world
NTFS New Technology File System; file system
used by Windows
NTFS-3G Software that allows OS X to read NTFS
file systems; requires MacFUSE plug-in
ntfs-mac Commercial software to allow OS X to
read NTFS file systems
610
Glossary
Object (OOP) An example of a class; contains
data structures and methods used to manipulate
the data structures
Object-Oriented Programming (OOP) A type of
programming based on objects and methods that
act on the objects
Objective-C An OOP language used by Apple in
developing applications
Recovery console Part of Windows XP; allows
repair of a computer that will not boot; replaced
by tools on the System Recovery Options menu on
the Vista boot disk
Retail DVD Installation DVD for Leopard purchased
from Apple
RSS Feed Really Simple Syndication; allows viewing of only the frequently updated parts of a Web
site
OOP see Object-Oriented Programming
Safari Leopard’s Web browser
OSx86 A contraction of OS X and x86 referring to
x86 processors; projects designed to run OS X on
non-Apple hardware
SATA Serial ATA; interface standard based on
serial (rather than parallel) connection; see ATA
Parallels Virtualization software that allows OS X
to run Windows programs
Services menu Menu available in every OS X
application
PC_EFI A method of faking an EFI on non-Apple
hardware
SIMD Single Instruction Multiple Data; allows one
processor instruction to act on several data objects
to give a degree of parallel processing
Peer-to-peer (P2P) Method of sharing files
between computers without going through a central server
Peripheral A device connected to a computer
that expands the host’s capabilities, such as a
printer
Pixie Screen magnifying application; part of
XCode
QE/CI see Quartz Extreme and Core Image
Quartz Composer Visual programming language;
part of XCode
SMB Server Message Block; Applespeak for file
access to Windows computers
Spaces OS X application that allows use of virtual
screens to separate different applications
Spotlight OS X search facility that indexes the
entire computer system
Sprite renderer Part of Quartz Composer; creates
a pseudo 3D image that can be moved around the
screen
SSE2 Streaming SIMD extension version 2;
extends SSE; see SIMD
Quartz Extreme Utilizes the graphics processor
to draw images without using the CPU
SSE3 Streaming SIMD extension version 3
Quick look OS X feature to allow viewing the
content of a file using Finder
String A group of alphabetic, numeric, and
punctuation characters treated as a single unit
QuickTime Multimedia framework allowing
creation and playback of digital media clips
System disk Leopard disk that contains the
operating system; also known as a boot disk
Glossary
611
System Information for Windows Free software
that can determine the hardware installed in a
Windows system
WEP encryption Wired Equivalent Privacy; outdated encryption system for securing wireless networks; see WPA2 encryption
System Preferences Application that allows users
to customize how Leopard looks and behaves;
compare with Control Panel in Windows
Widget Small program that sits in the Leopard
Dashboard
TextEdit Text editing application supplied with
Leopard
Wired Network Network where computers are
connected by wires; usually Category 5 or
Category 6 Ethernet cables
Time Machine Easy-to-use backup system supplied with Leopard
Wireless Network Network where computers are
connected without using wires; also Wi-Fi
tinyurl.com Web site that allows long URLs to be
shortened
WPA2 encryption Wi-Fi Protected Access version
2; recommended encryption system for Wi-Fi networks, usually with a Pre-Shared Key (PSK) set on
the router
Universal OSx86 Installer Allows setting of many
boot parameters and install kexts for Leopard; also
known as UInstaller
Unix Multitasking operating system dating from
the 1970s but still in use today
Virtual machine A software implementation of a
computer that requires no additional hardware
VMware Virtualization software that allows OS X
to run Windows programs
X11 X Window System that provides a graphical
user interface for networked computers
XCode Application programming system for
Leopard and iPhone developers
XML eXtensible Markup Language; a set of rules
for marking up documents
Index
A
About This Mac panel, 163, 572, 574, 597–598
Abstract 4.jpg file, 503
Accounts Advanced preferences, Mail, 309
Accounts pane, System Preferences, 269
Accounts preferences panel, Mail, 304, 307–308
Accounts settings pane
creating accounts, 271–274
fast user switching, 274
login items, 275
login options, 269–271
ACPI (Advanced Configuration and Power Interface), 607
ACPIPS2Nub kext, 590
Acronis Partition Manager, 66, 102, 575
Acronis True Image, 60, 98, 575
actions library, 388–389
Actions pane, Automator, 377, 389
activate command, 413
active partition, 583
activity logs, 274
adaptors, network
finding functional, 249
naming, 247
ADC (Apple Developer Connection), 442
Add EFI Strings/Boot Flag, OSX86 Tools, 599
Add Printer dialog box, Printers pane, 259
Addition patch, Quartz Composer, 501, 503
Address Book
adding users to file sharing, 257
copying data from, 300
preferences, 316–317
steps to create e-mail list from contacts, 424
steps to create scripts to read e-mail addresses from,
425–426
synchronizing with Google contacts, 320
synchronizing with mobile phone, 317–318
synchronizing with Yahoo contacts, 319
Address Book scripts
combining two, 429–430
creating e-mail list, 424–426
creating more than one recipient, 430–432
creating new e-mail using Mail, 426–429
entering subject line, 433–434
getting content text from file, 434–436
refining, 437–439
removing missing values, 432–433
Adjust Color menu, Preview, 323
Advanced Bluetooth setup options, 224
Advanced Configuration and Power Interface (ACPI), 607
Advanced Host Controller Interface (AHCI)
modified installation DVD, 138
retail Leopard DVD, 136–137
“still waiting for root device” error, 596
Advanced Micro Devices (AMD), 607
Advanced pane
iTunes, 326
QuickTime, 268
Advanced preferences pane, Safari, 301
Advanced preferences tab, Safari, 300–302
Advanced Sharing setting, Sharing tab, 369–370
AFP (Apple Filing Protocol), 258, 607
AHCI. See Advanced Host Controller Interface
Alert options sheet, 283
Alerts phrase list, 283
All windows option, 202
alloc keyword, 555
Allow External File Access option, Network / Disk Access
section, 461
Allow Multiple Selection action, Automator, 385
Allow Network Access option, Network / Disk Access
section, 461
Allow power button, Options button, 230
alpha channels, 503, 607
alphanumeric key, 289
AMD (Advanced Micro Devices), 607
API (Application Programming Interface), 455, 529, 607
Appearance preferences tab, Safari, 297
Appearance settings pane
font smoothing, 199
general, 198
Number of Recent Items option, 199
overview, 197–198
scrolling, 198–199
Apple, history of, 594–595
Apple Developer Connection (ADC), 442
Apple Developer Tools. See also Dashcode; Quartz
Composer
Core Image Fun House, 517–521
downloading, 442–443
installing, 442–443
overview, 441–442
Repeat After Me utility application, 521–528
steps to install, 442–443
614
Index
Apple Developer Tools (continued)
steps to register and download, 442
Web site, 576
Apple Filing Protocol (AFP), 258, 607
Apple menu, 607
Apple modem, 263
Apple property lists, modifying to specify future boot
parameters
boot parameters file, 146–150
boot timeout, 155
Darwin boot loader, 146, 155–156
file permissions, 150–154
seeing only graphic boot screen, 156
testing changes, 154–155
AppleAC97Audio kext, 590
AppleACPIPlatform kext, 590
AppleAHCIPort kext, 590
AppleAPIC kext, 590
AppleAzaliaAudio kext, 590
AppleGenericPCATA kext, 590
AppleIntelIntegratedFrameBuffer kext, 590
AppleNForceATA kext, 590
ApplePS2Controller kext, 590
AppleScript. See also custom scripts
defined, 607
error message, 405
list, 414
prepared scripts, 399–403
ScriptEditor, 397–399
AppleScript Utility, 397–398
AppleSMBIOS kext, 590
AppleVIAATA kext, 590
application icons, changing, 565–570
Application Programming Interface (API), 455, 529, 607
Application type, 408
application window, designing, 541
Application windows option, 202
applicationShouldTerminateAfterLast
WindowClosed method, 556
Apply Ethernet EFI String, 53
Apply Extensions.mkext, 53
Apply kext package, 52
Aqua
defined, 607
overview, 530–531
Archive.zip file, 389, 391
as text command, 419
aspect ratio, 480
Assist me… button, Network pane, 248
Assistant program, 607
assistive devices, 377–378
Asus adaptor, 254
ASUS USB wireless network adapter, 12–13
ATA, defined, 607
ATI, defined, 607
Attach Folder Action option, Finder, 393–394
attributes (OOP), 542–544, 607
AU Lab tool, Apple Developer, 442
audio drivers, 240–241, 576
audio hardware
compatibility of, determining, 16
finding specifications, 9–11
Audio Input patch, Quartz Composer, 514
audio spectrum display
development of meter, 515–516
obtaining audio input, 513–514
unidirectional bar, 514–515
Autofill preferences pane, Safari, 300
Automatic login option, 271
Automator. See also workflows
defined, 607
folder actions, 392–396
library, 392
looping workflow, 385–386
overview, 378–380
preparing to launch, 377–378
with Search for Finder items, 389
starting point sheet, 378
step result, 383
B
Back to My Mac feature
connecting from another Mac, 263–265
connecting from Windows, 265–266
backup. See image backup
Backup and Restore utility, Windows Vista, 143–144
Basic Input Output System. See BIOS
Billboard patch, Quartz Composer, 503
billboard renderer, 607
BIOS (Basic Input Output System)
checking, 18–20
chip, 5
defined, 607
power-on self-test, 586
Bless command, 588
blessed file, 588
Bloom patch, Quartz Composer, 500
Index
Blue Screen of Death (BSOD), 133
Bluetooth
adapter, 221
defined, 607
iSync and, 317
keyboard, 235
mouse, 235
mouse and keyboard dialog box, 235
mouse or keyboard, 225
System Preferences pane, 221
Bluetooth settings pane
advanced options, 224–225
mobile phone, 221–225
Bonjour, 298, 601
bookmarks
adding, 294
deleting, 295
editing, 295
Bookmarks preferences tab, Safari, 297–298
Boolean value (BOOL), 556
boot, defined, 607
Boot Camp partition, 338
Boot Camp virtual machine, 344
boot CD
booting from, 17–21
defined, 607
installing boot loader, 50–54, 56–58
installing combo update, 45–50
overview, 589–590
required software, 43–44
selecting boot disk from menu, 54–56
steps to use, 32–34
Boot CD selection screen, 358
Boot Configuration Database, 66
boot disk
creating, 20–21, 73, 110
finding, 20, 72–73, 109
selecting from menu, 54–56
Boot Editor, 600
boot file, 52
Boot from EFI partition, 577
boot loaders
Chameleon, 130–132
Darwin, 127, 146, 155–156
default, 126
defined, 607
overview, 587
startup, 139
Windows Vista, 50–54, 56–58, 66–67
Windows XP, 93–95, 103, 127–130, 144–146
Boot menu, 21, 74, 111
boot parameters file
editing, 148–149
locating, 146–147
opening, 147–148
replacing old, 149–150
saving, 148
Boot progress screen, 360
boot sector, 56, 65, 365
boot selector screen, 33
Boot tab, 18
boot timeout
changing, 155
setting, 52
Boot-132 Loaders, 576
bootable image, 109
booting computers
boot CD, 589–590
from install DVD, 133–142
Macintosh, 587–589
Windows, 586–587
boot.ini file
defined, 607
editing, 129–130
NTLDR, 587
Windows XP, 103
bootmgr file, 586
Boot.plist file, 147, 151, 154
breadcrumbs bar, 178–179
Broadcom, 13
Browse Device, 225
browsers, opening calendar in, 474–475
BSD root: disk1s3 line, 24, 77, 113
BSOD (Blue Screen of Death), 133
Buffer size control, QuickTime, 267
Built-in Speaker setting, Sound output pane, 241
Bundle contents button, ScriptEditor, 399
C
C:\ folder, 128–129
C programming language, 530
C++ programming language, 530
Canvas, Project Window, 447
Caps Lock keys, 232
Carbon Copy Cloner, 595
615
616
Index
CDROM device, 364
CDs and DVDs settings pane, 225–226
centimetersField field, 553, 556, 559
Chain 0 to dual boot, 575
chain0
defined, 607
installing, 128–129
Chameleon
boot loader, 93–94, 126
boot loader screen, 58, 95
defined, 607
installing, 53, 57
Windows XP installation, 130–132
Chameleon 2 installer, 56
Change Install Location option, 47
Change Keyboard Type setting, 232
Character Palette, 209
character sets, 211
chmod command, 592
choose file command, 435
choose from list command, 415
choose... statement, 419
chown command, 592
CIKernel language, 517
Clarke, Alex, 514
classes (OOP), 542–544, 607
Clear Color port, Clear patch, 510, 511–512
Clear patch, Quartz Composer, 497–498, 510–512
Clear renderer, Quartz Composer, 514
clock options, 277
clock timer, 132
Close button, Notepad window, 169–170
Closest city drop-down box, 276–277
Cocoa
defined, 607
overview, 530
Code panel, Dashcode, 472, 474
Code window, 471
CODEC, 266, 607
coercion, AppleScript, 409
coherence mode, Parallels Desktop, 342–343
collapsed property, 401
Color Invert patch, Quartz Composer, 492
Color Mixer patch, Clear patch, 511–512
color profile, 227–228
Color tab, display pane, 227
Column view, Finder, 172, 173
com.apple.Boot.plist file, 147–149, 154–155
com.apple.network.identification.plist file, 150
combo update
configuring installation screen, 48
continue installation screen, 48
defined, 607
installation complete screen, 49
installing, 45–50
password request, 48
steps to use, 44
Command keys, 232
commands, reading, 401
comments, reading, 401
Common Unix Printing System (CUPS), 238–239
Compile button, ScriptEditor, 399
compile-time errors, 562–563
Composing preferences panel, Mail, 310–311
composite patch, 478
computer
hardware, 5, 14
steps to boot up, 110–111
steps to restart, 54
computer gauge
deploying, 453–455
modifying, 448–453
overview, 446–448
testing, 448
concatenation, 607
conditional statement, 400
Configure Folder Actions option, Pictures folder, 395
Confirm network key field, 254
Confirmation dialog box, for resizing partition, 70
Connection Assistant pane, Bluetooth, 222
content management, 272–273
Context menu
Automator, 392
defined, 607
in TextEdit, 194–195
continuation character, 420
Control keys, 232
Control Panel, 608
Controller class, 554
Controller Connections, Interface Builder, 561
Controller header file (Controller.h)
creating, 554
overview, 553–554
controller method
Controller header file (Controller.h), 553–554
Controller method file (Controller.m), 554–557
overview, 552
Index
Controller method file (Controller.m)
creating, 556–557
overview, 554–556
Converter header file (Converter.h)
creating, 547–551
overview, 546–547
converter method
Converter header file (Converter.h), 546–551
Converter method file (Converter.m), 551–552
overview, 545–546
convert.exe utility, 328
convertToCentimeters method, 547, 552
coordinate system, Quartz Composer, 480–481
Core Image, defined, 608
Core Image Fun House
Effect Stack, 519
overview, 442, 517–518
saving work, 519–521
starting, 518
countdown timer
adding programming, 469–475
linking to calendar, 461–462
making recessed background panel appear like, 466–468
properties, 462
removing seconds display, 462–465
using Google calendar, 460–461
using iCal, 460
using MobileMe calendar, 461
Cover Flow view, Finder, 173
Create Archive action, Automator, 391
Create New Map option, Google, 457
Cube Renderer patch, Quartz Composer, 514
CUPS (Common Unix Printing System), 238–239
curly brackets { }, 414, 418
currentFolderName variable, 417
custom scripts. See also Address Book scripts
creating application, 420–421
error handling, 412–414
Finder scripts, 403–407
saving, 408
user, 409–412, 414–424
Customize Finder toolbar, 177
customize options, Leopard, 30–31, 87–88, 123–124
D
Darwin
boot loader, 55, 131
boot options, 23, 75–76, 112
boot prompt, 126
617
boot screen, 74, 111
boot selector, 22, 33, 111
defined, 22, 608
getting to boot from particular hard disk, 155
removing boot prompt, 156
specifying boot parameters to, 146
startup options screen, 55
Windows XP installation, 127
darwin_snow.iso file, 358
Dashboard. See also countdown timer
adding widget, 219–220
Apple developer tools, 441–443
computer gauge, 446–455
configuring widgets, 218–219
Dashcode, 443–445
defined, 608
map widget, 455–460
overview, 218
Dashboard option, 202
Dashboard Widget, 444
Dashcode. See also widgets
defined, 608
reviewing Dashboard, 443–444
starting with, 444–445
Dashcode window, 448
data connector, 135
date
format for, 207–209
setting, 40–41
Date and Time settings pane
clock options, 277
synchronizing time with Windows, 277–278
time zone, 276–277
decimal (floating-point) number, 547
default answer command, 409
default permissions, 257
Dell Mini 9
installing Leopard to, 573–574
installing Snow Leopard to, 603–604
Screen Sharing, 604
web reference, 576
Deploy Widget option, 453
desktop
setting up, 200
using computer gauge on, 454–455
Desktop and Screen Saver settings pane
desktop, 200
hot corners, 201–203
overview, 199–200
screen saver, 200–201
618
Index
Desktop Services Store, 585
DEV (device) identifier, 10, 241
Devanagari keyboard, 211
developer tools, Apple, 442–443
Developer Tools Utilities, 566
/dev/hda1 boot disk, 105
device (DEV) identifier, 10, 241
Device Manager, 608
device name, audio hardware, 11
DHCP (Dynamic Host Configuration Protocol), 245, 248,
252, 608
<dict> command, 148
Dictionary application, Context menu, 194
Dictionary icon, Dock, 181
Dictionary widget, 219
Digital Out setting, Sound output pane, 241
Disable automatic login option, 212
Disable screen saver option, 202
disaster insurance, 59
Disk Activity bar, 449
disk controller, 581
disk image (.dmg) file
defined, 45, 608
installing driver software for wireless network, 250
printer drivers, 239
Windows Vista, 61–65
Windows XP, 98–101
Disk Image Prompted Selection workflow, 385
disk partitioning
defined, 608
Windows Vista, 65–72, 91–92, 95
Windows XP, 102–109
Disk selection screen, 362
Disk Utility
defined, 608
file permissions database, 151–154
formatting disks, 115–116
steps to format disk, 26
disk1s2 command, 134
diskpart utility, 65, 102
diskpart.exe file, 608
display adapter, 8, 608
Display Calibrator Assistant, 228
display dialog command, 409
Display login window as list of users option, 271
Display login windows as name and password option, 271
Display settings pane, Leopard
color profile, 227–228
screen resolution, 226–227
Distance Converter, 562, 564, 566
Distance Converter.png image, 566
Distortion Effect, Image Units window, 518
Distribution file, 83, 119
Distribution2 file, 83, 119
.dmg file. See disk image (.dmg) file
Dock
adding applications to, 165–166
adding folders to, 167–168
defined, 608
developer tools, 443
displaying folders in, 166–167
magnification, 204
saving frequently used applications in, 180–181
scale effect, 204
Dock option, 164
Dock settings pane, 203–205
document type definition (dtd), 146
Documents folder, 411
double backslash (\\), 371
double forward slash (//), 371
Drive Backup Free, 60, 575
DriveImage XML, 60, 575
Driver pane, Print & Fax, 239
drivers, 10, 240–241, 249, 591
Drop Box folder, Public folder, 257, 392–393
.DS_Store icon, 329–330
DSDT.aml, 608
Dsmos kext, 590
dtd (document type definition), 146
Duration parameter, Interpolator patch, 494
DVDs. See install DVD, booting from
Dynamic Host Configuration Protocol (DHCP), 245, 248,
252, 608
E
EasyBCD utility, 67, 92, 575, 608
Edit List, 207
Edit virtual machine settings, WMware, 364
editable script copy, 420
editor window, Quartz Composer, 477–478
Effect Stack, Core Image Fun House, 518–519
Effects panel, Dashcode, 468
EFI (Extensible Firmware Interface), 53, 588, 608
EFI partition, 583
EM64T (Intel 64), 579
e-mail. See Address Book scripts; Mail
Enable fast user switching option, Login Options, 271
Index
Enable Folder Actions option, Finder, 393–394
Enable GUI Scripting option, AppleScript Utility, 397
Enable parameter, Rotating Cube patch, 493
Enable syncing option, iSync, 319
Enable WLAN Message, 251
@end statement, 563
end tell command, 400, 419, 426
End value parameter, Interpolator patch, 494
Energy Saver settings pane
sleep options, 229–230
wake and power down options, 230–231
Enter Time Machine, 189
EP45-DS3L motherboard, 602
EP45-UD3P motherboard, 602
erasing, defined, 26
errors, code
fixing compile-time, 562–563
fixing run-time, 563
handling, 402–403, 412–414
Ethernet Adaptor, 245, 250, 252
Ethernet Strings Creator, 599
execute file permission, 591
Explorer view, 332
Exposé, 608
Exposé and Spaces settings pane, 205–206, 218
extended partitions, 582
Extensible Firmware Interface (EFI), 53, 588, 608
Extensions.kext file, 52
extensions.mkext file, 52
external hard disk, installing Leopard to
boot options, specifying, 23–25
booting computer to run Leopard, 32–34
booting from boot CD, 17–21
hard disk identifier, specifying, 21–23
installation options, specifying, 30–32
keyboard, selecting, 35–36
networking details, entering, 37–38
personal details, entering, 38–40
preparing hard disk, 25–30
time and date, setting, 40–41
transferring data from other Mac, 37
welcome video, 32–35
F
-f boot option, 23, 49, 76, 112
fast user switching, 274
FAT. See File Allocation Table
619
faxing, 239–240
File Allocation Table (FAT)
as default format, 584
defined, 608
reading and writing to partitions, 327–332
volume, 324
file backup, 59, 61–62, 97
file finder icon, 73
File Open dialog box, 435
file permissions
defined, 608
finding, 150–151
groups, 592
operating system permissions, 592–594
overview, 591–592
owners, 592
superusers, 592
using database, 151–154
file sharing
setting up, 255–258
using virtual machine, 369–374
File Sharing, Sharing pane, 216
File Transfer Protocol (FTP), 255, 608
FileVault, 214–215, 608
Fill and Stroke panel, 452
Filters.qtz file, 499
Finder
arranging icons, 175–176
breadcrumbs bar, 178–179
customizing toolbar, 177–178
defined, 608
double-clicking title bar, 174–175
menu bar, 161–162
plug-ins, 391–392
Quick Look feature, 174
scripts, 403
sidebar, 184–186
user account options, 272
view buttons, 172–174
Finder scripts
opening new Finder window, 403–404
setting view options, 406–407
setting window target, 404–406
simplifying script, 407
using in other applications, 424
Finder Scripts pane, Script menulet, 421
Finder view, 331
Finder window, 170, 173, 369, 382, 403
Finish dialog box, New Virtual Machine Assistant, 347
620
Index
firewall, 215–216
FireWire interface, 251
FireWire port, 284
fixmbr command, 145
floating-point (decimal) number, 547
flow command, 406
folder actions
converting graphics files to other formats, 395–396
detecting files added to folders, 392–395
folder selection sheet, 256
font cache, 140
font smoothing, 199
Fonts & Colors preferences panel, Mail, 309–310
Force Quit option, 165
formatting, defined, 26
formatting boot disks
Windows Vista, 78–81
Windows XP, 114–117
Free Space Following box, 69
.fseventsd file, 330
FTP (File Transfer Protocol), 255, 608
full-screen mode
Parallels Desktop, 342
VMware, 348
G
gauge, computer
deploying, 453–455
modifying, 448–453
overview, 446–448
testing, 448
General preferences panel, Mail, 306–307
General preferences tab, Safari, 297
Genie effect, 171
Get Selected Items action, Automator, 384
gigabyte motherboard
installing Leopard to, 571–572
installing Snow Leopard to, 601–602
overview, 601–602
Global Finder scripts, 422
Gmail, 303
GMT (Greenwich Mean Time), 277, 596
Gnome, 529
Google
creating maps, 456–458
setting countdown timer events, 460–461
synchronizing Address Book with, 320
synchronizing iCal with, 321
Google Reader, 299
GPartEd
defined, 608
downloading, 66
expanding Windows partition with, 95
main screen, 105
startup screen, 68, 104
steps to restart partition editor, 127–128
GPT (GUID Partition Table), 29, 67, 104, 583, 608
graphical boot screen, 58
graphics card, 226
graphics chip. See video-processing chip
graphics files, converting, 395–396
graphics systems, 580–581
Graphics Tools folder, Developer Tools, 518
Greenwich Mean Time (GMT), 277, 596
groups, 592
Groups & Files pane, Interface Builder, 547–548
GUID Partition Table (GPT), 29, 67, 104, 583, 608
H
Hackintosh disk, 122
hard disk
booting directly from, 44
partitions, 582–583
hard disk identifier, specifying, 21–23, 73–75, 110–112
hardware
audio, 9–11
compatibility of, determining, 14–16
determining, 3–5
motherboard, 5–6
networking, 11–13
processor, 6–7
video-processing (graphics) chip, 7–8
hardware acceleration, 15, 227, 608
hardware compatibility lists (HCL), 14, 575
Hardware System Preferences
Bluetooth settings pane, 221–225
CDs and DVDs settings pane, 225–226
Display settings pane, 226–228
Energy Saver settings pane, 229–231
Keyboard and Mouse settings pane, 231–238
Print and Fax settings pane, 238–240
Sound settings pane, 240–243
hardware vendor ID, 13
HCL (hardware compatibility lists), 14, 575
hda1 partition, 68, 105
hda2 partition, 68, 105
Index
header file, 554
Heads Up Display (HUD), 608
hearing difficulties, 289
Height port, Cube renderer, 514
Help command, 145
HFS+ (Hierarchical File System), 586, 608
hidden files
.DS_Store file, 585
.localized file, 585
deleting, 332
Finder view, 331
overview, 584–585
viewing, 328–332, 584
on Windows disks, 585
Hierarchical File System (HFS+), 586, 608
High Precision Event Timer (HPET), 596, 608
highlight color, 198
hot corners, 201–203
HPET (High Precision Event Timer), 596, 608
HUD (Heads Up Display), 608
HyperCard, 397, 608
HyperTalk, 397
I
IBAction method, 554
IBOutlet class, 553
iCal
adding programming to countdown timer to open,
472–473
defined, 609
setting countdown timer events, 460
synchronizing, 317, 320–321
Icon view, Finder, 173, 175
icons, arranging, 175–176
iDisk, 262–263, 609
if statements, 401
image backup
defined, 609
software, 60, 98
Windows Vista, 59–65
Windows XP, 97–101
image effect filters, Quartz Composer, 499–502
image file (.iso), 20, 73, 109, 609
Image Importer patch, Quartz Composer, 485, 487
image masks, Quartz Composer
alpha channels, 503
creating, 503–507
overview, 502
621
Image Resize patch, Quartz Composer, 504
Image Units window, 518
Image.qtz file, 510
IMAP (Internet Message Access Protocol), 302–304
ImgBurn program
burning .iso file to CD, 20–21, 73, 110
screen, 354
steps to use, 66
Inbox view, 306
inches variable, 552
inchesField field, 553, 555, 560
incoming mail server setup, 305
Initial Value port, Math patch, 514
INITRD.IMG file, 589
injector strings, installing, 141–142
input fields, adding to main window, 538–540
input menu, Leopard, 209–211
Insanely Mac Web site, 81, 118
Inspector window, 449, 538
Install dialog box, New Virtual Machine Assistant, 346
install DVD, booting from
booting Leopard, 139–142
starting modified installation DVD, 137–138
starting retail Leopard DVD, 133–137
Install Parallels Tools option, Virtual Machines menu, 341
Install Summary screen, 31, 88, 124
installation parameters, 72, 109
Installation successful screen, 363
Installed Updates tab, Software Update, 279
installer, Leopard
creating boot disk, 73, 110
finding boot disk, 72–73, 109
forcing to use modifications, 81–87, 121–123
formatting disks, 78–81
formatting your disks, 114–117
overview, 118–121
restarting computer, 90–91, 126–127
specifying boot options, 75–77, 112–114
specifying hard disk identifier, 73–75, 110–112
specifying installation options, 87–90, 123–126
installing
Apple developer tools, 442–443
boot loaders, 50–54, 56–58
combo update, 45–50
driver software for wireless networking, 250–254
injector strings using UInstaller, 141–142
kext using kexthelper, 140–141
MacFUSE, 332–334
NTFS-3G, 334
622
Index
installing (continued)
ntfs-mac, 334–335
Parallels Desktop, 337–338
VMware, 344–347
installing Leopard. See also external hard disk, installing
Leopard to; Windows Vista; Windows XP,
installing Leopard to hard disk containing
to Dell Mini 9, 573–574
to gigabyte motherboard, 571–572
instant messaging, controlling, 274
Integrated Peripherals, 136
integrated video, 609
integrated video-processing (graphics) chip, 8
Intel, 609
Intel 64 (EM64T), 579
Intel Core 2, 7
Intel CoreDuo E8400, 16
Intel GMA950, 609
Intel Processors, 580
IntelCPUPMDisabler kext, 590
Interface Builder, XCode
adding button, 540
adding text labels, 540
adding two input fields, 537–540
creating main window, 535–537
defined, 609
refining window, 541
testing, 541
@interface Converter class, 547
International settings pane
date and time, 207–209
input menu, 209–211
languages, 207
Internet and Network Preferences
MobileMe settings pane, 260–266
Network settings pane, 245–254
QuickTime settings pane, 266–268
Sharing settings pane, 255–259
Internet connection screen, 38
Internet Message Access Protocol (IMAP), 302–304
interpolation, defined, 609
Interpolation parameter, Interpolator patch, 494
Interpolation port patch, Quartz Composer, 494–495
IP address
defined, 609
setting, 248
iPhone, 221
iPod
formatted under Windows, 325
synchronizing iTunes with, 324–325
.iso (image file), 20, 73, 109, 609
ISOLINUX executable file, 589
ISOLINUX folder, 589
iSync, 317–319
iTunes
consolidate library warning, 326
opening subfolders, 411
playing files on Windows disks, 325–326
Synchronization message, 325
synchronizing with iPod, 324–325
J
Journaled (Mac OS Extended) disk format, 26
jumper block, 135
Junk Mail preferences panel, Mail, 308–309
K
Kabyl-Bumby, 20, 133, 609
Keep Arranged By order, folders, 176
kernel
defined, 609
overview, 590
kernel panic
dealing with, 139
defined, 609
recovering from, 133–134, 138
kext
defined, 609
forums, 241
installing custom, 53–54
installing using kexthelper, 140–141
overview, 591
purpose of, 590
video, finding correct, 142
kext cache, 23, 34, 55, 76, 93
kexthelper, 140–141, 241, 609
kexthelper window, 141
Key Equiv. field, 540
key mapping, 160
key press, 155
<key>Graphics Mode</key> command, 148
<key>Timeout</key> command, 155
keyboard
assistive options, 289
Bluetooth, 235
changing modifier keys, 232
changing type of, 232–233
equivalencies for Windows keyboard to Leopard, 232
Index
Leopard versus Windows, 159–160
options for assistance, 289
overview, 231–232
selecting, 35–36
shortcuts, 235–238
Keyboard and Mouse settings pane
Bluetooth, 235
keyboard, 231–238
mouse, 233–234
keyboard mapping, 104
keyboard selection screen, 35–36
Keyboard Shortcut box, 237
Keyboard Viewer, 210
keystrokes, 159
killall Finder command, 328
L
labels, adding, 540
language selection screen, 26
languages, 207
Leopard (OS X)
application software, 168–172
boot process, 588
color selection box, 464
Context menu, 194–195
defined, 609
Dock, 165–168, 180–181
Finder, 172–179
keyboard, 159–160
menu bar, 160–164
post-installation fixes, 596–600
running on Windows, 353–374
running on Windows with VMware. See Windows
running Windows in, 337–350
Services menu, 191–194
Spotlight, 181–186
steps to view hidden files, 584
TextEdit, 191
Time Machine, 186–190
virtual machine, 350
Leopard Aurora, 25, 77
Leopard Disk Utility, 26–30
Leopard Mail, 311
Leopard Retail DVD, 21–23
Library panel, Dashcode, 466–467, 469, 472, 474
Library window, Interface Builder, 538, 557
/Library/Desktop Pictures/Abstract folder, 503
/Library/DesktopPictures folder, 200
623
/Library/Preferences/SystemConfiguration folder,
146, 147
Library/Screen Savers folder, 496
Library/Scripts folder, 403, 420
license agreement, 25, 47
line continuation character, 405, 410, 414
Linux, defined, 609
List view, Finder, 173
listOfFolders variable, 417
lists, 414
LiveQuartz, 572
.localized icon, 329–330
login items, 275
login options, 269–271
Login Options button, 270–271
Login options dialog box, 270
Logout after inactivity option, 213
Logs panel, 274
looping, 385–387, 431
M
MAC (Media Access Control) address, 246, 609
Mac Developer Program option, Apple Developer, 442
Mac driver, 249
Mac OS Extended (Journaled) disk format, 26
Mac OS X Software option, 163–164
Mac Power PC, 594
MacFUSE
defined, 609
installing, 332–334
steps to install, 333
MacFUSE.pkg file, 333
mach kernel, 590
Machine Codex, 512
MACinized, 73, 109
Macintosh. See also entries beginning with Apple
graphics chips, 581
key mapping, 160
virtualization hosts, 353
Macrium Reflect, 60, 575
macros, 507–512. See also AppleScript
MacTracker, 581
magnified screen, 234
magnified text, 280
Mail
Accounts preferences panel, 307–308
Composing preferences panel, 310–311
creating new e-mail using, 426–429
624
Index
Mail (continued)
defined, 609
Fonts & Colors preferences panel, 309–310
General preferences panel, 306–307
Junk Mail preferences panel, 308–309
linking to e-mail provider, 303–306
mailboxes, 311–315
overview, 302
RSS preferences panel, 308
signatures, 311
Viewing preferences panel, 310
Mail and iChat pane, 274
mail setup assistant summary screen, 305
Mailbox Behaviors pane, Mail, 307–308
mailboxes
creating, 311–312
rules, 313–314
smart, 314–315
main window
adding input fields to, 538–540
Quartz Composer, 477
MainMenu.xib file, 535–536, 564
Mainmenu.xib window, 558
make new outgoing message command, 427
Managed with Parental Controls option, 272
manufacturer, finding, 10–11
map widget
creating, 456
creating Google map, 456–458
getting mashup code, 458–459
overview, 455
setting up, 459–460
Maps API key box, Dashcode, 459
Mashup URL box, Dashcode, 458
Mask Image Input port, Mask To Alpha patch, 505
Mask To Alpha patch, Quartz Composer, 505
Master Boot Record (MBR)
active partition, 583
BIOS and, 586
defined, 609
overview, 581
partition table, 582–583
partitioning Vista system disk, 67
partitioning XP system disk, 104
Protective MBR, 583–584
master password, 214
master-slave configuration, 135, 595–596
Math patches, Quartz Composer, 489–491, 514
mathematical transforms, Quartz Composer, 489–491
MBR. See Master Boot Record
Media Access Control (MAC) address, 246, 609
menu bar
About This Mac option, 163
defined, 609
Dock option, 164
Finder, 162
Force Quit option, 165
iCal, 162
Mac OS X Software option, 163–164
Mail, 162
overview, 160–162
Recent Items option, 164
Safari, 162
Software Update option, 163
System Preferences option, 164
Menu Extras, Apple, 161
Menu Title box, 237
methods (OOP), 542–545, 609
Metrics pane, 449
microphone calibration screen, 281
minimize button, 170
Mixing Point input, Color Mixer patch, 512
Mixing Point slider, Patch Inspector, 512
mkext, 591, 609
MMX (Multimedia Extension), 579, 609
mobile phone
browsing, 225
setting up, 221–224
synchronizing Address Book with, 317–318
synchronizing iCal with, 320
MobileMe
account details, 261
defined, 609
installer pane, 261
setting countdown timer events, 461
signup screen, 260
synchronization frequency, 262
synchronization page, 261
MobileMe dialog box, 461
MobileMe settings pane
Back to My Mac feature, 263–266
iDisk, 262–263
overview, 260–261
synchronizing, 261–262
modified installation DVD
AHCI, enabling, 138
modifying computer hardware, 138
overview, 137
Index
recovering from kernel panic, 138
recovering from “still waiting for boot disk” error, 138
modifier keys, 159, 232, 289
monitor, 226
motherboard
defined, 609
determining compatibility of, 15–16
finding specifications, 5–6
gigabyte, 571–572
mount command, 85
mouse
assistive options, 290
Bluetooth, 235
options fpr assistance, 290
setting up, 233–234
Mouse Controller patch, 488, 490
Mouse settings pane, 233
.msi file, 46
Multimedia Extension (MMX), 579, 609
multimedia keys, 233
My Dell Mini Web site, 573
My Documents, shared, 373
myFolder variable, 409–410, 414
N
NAT (Network Address Translation), 245, 609
native boot resolution, setting, 52–53
Netgear
control application, 250
driver, 249
installer package, 250
wireless adaptor installation, 251–254
network adapter, 11–12, 246–247, 251
Network Address Translation (NAT), 245, 609
network assistant, 248–249
Network key field, 254
Network pane, 248
Network settings pane
managing without networking, 254
wired networking, 245–249
wireless networking, 249–254
network.identification.plist file, 151
networking connections, 245
networking details, entering, 37–38
networking hardware, 11–13
networking kernel extension setup, 287
Networking panel, 250
New Disk Image action, 387–388
625
New Files & Folders workflow, 388
New Referencing Outlet, 560
New Technology File System (NTFS), 327, 332–335, 584, 609
New Virtual Machine Assistant, 338, 345–346
NewApplication menu, Interface Builder, 564, 566–567
newsfeeds, aggregating into one tab, 299
Norton Ghost, 60, 98
Notepad window, 169
NSApplication class, 556
NSObject class, 547, 553
NSTextField class, 553
NTFS (New Technology File System), 327, 332–335, 584, 609
NTFS-3G
defined, 609
installing, 334
ntfs-mac
defined, 609
installing, 334–335
NTLDR file, 586
Number of Recent Items option, 199
numeric keypad, 290
numeric patch, 478
NVIDIA GeForce 7600GS, 16
nVidia graphics card, 53, 571
NVkush kext, 590
O
O&O Disk Image 3
creation screen, 99
finding and downloading, 60, 98
greeting screen, 101
start screen, 99
Objective-C, 552, 610
object-oriented programming (OOP)
concrete analogy, 543–544
defined, 610
linking parts together, 545
Objective-C, 545
overview, 542–543
programming context, 544–545
on error command, 413
on error dialog box, 414
Only allow selected applications option, 272
OOP. See object-oriented programming
open command, 435
open folder command, 410
open folder “Music” of home command, 407
Open GL language, 517
626
Index
Open Link option, Safari, 298
Open Music Folder script, 409–413
Open User Folder script, 420, 423
Operating System Detection, 338
operating system permissions, 592–594
Options button, 230, 258
Options panel, Time Machine, 285
OSInstall.mpkg file, 83, 119
OSx86
defined, 610
greeting screen, 598
Project Web site, 14
web reference, 576
outgoing mail server setup, 305
owners, 592
P
P2P (Peer-to-peer), 610
Paragon Hard Disk Manager, 60, 98, 575
Paragon Partition Manager, 66, 102, 575
Parallels
defined, 610
Time Machine and, 188
Parallels Desktop
creating virtual machine, 338–441
installing, 337–338
modes, 341–343
snapshots, 343–344
Parallels workstation, 353
partition editor, 127
Partition Magic, 66, 102, 575
partition management software, 66, 102
partition table, 582–583
Parts Outline panel, 463
Parts outline, Project Window, 447
password
master, 214
request box, 47
Patch Creator, Quartz Composer, 479, 483, 488, 490–491,
507
Patch Inspector, Quartz Composer, 484, 490, 492, 499–500,
512
patches, Quartz Composer
Math patch for back-forth motion, 491
Math patch for left-right motion, 489–491
overview, 478–480
Path bar, Finder, 178
PC_EFI, 53, 610
pcwiz program, 44, 52, 141, 575
PDF files
printing to, 240
using Preview application with, 323–324
Peer-to-peer (P2P), 610
Pentium chips, 7
Performance Management Settings, 596
Period parameter, Rotating Cube patch, 493
peripherals, 610
permissions. See also file permissions
default, 257
steps to fix, 593
personal details, entering, 38–40
Personal System Preferences
Appearance settings pane, 197–199
Dashboard, 218–220
Desktop and Screen Saver settings pane, 199–203
Dock settings pane, 203–205
Exposé and Spaces settings pane, 205–206
International settings pane, 207–211
Security settings pane, 211–216
Spotlight settings pane, 216–217
phonemes
for Apple speech web reference, 576
changing, 522–523
modifying voice, 523–525
Pictures folder, 200, 393
Pinch Distortion effect, Image Units window, 518
pixel mode, 227
Pixellate Filter patch, Quartz Composer, 499, 509
Pixellate patch, Quartz Composer, 479, 500
Pixie, 442, 610
Placemark button, Google, 457
plastikman, 361
.plist extension, 148, 607
plug-ins, saving workflows as, 391–392
PNG images, 395, 503
Port Forwarding, 265–266
Post Office Protocol (POP), 302–303
Power button dialog box, 231
power connector, 135
power down options, 230–231
power-on self-test
Macintosh, 588
Windows, 586
PowerPC chip, 594
Preferences pane, Safari, 296
prepared scripts
coping with errors, 402–403
finding, 399
overview, 400
Index
reading commands, 401
reading comments, 401
reversing action, 402
running, 400
using if statements, 401
Preview application
editing with, 323
preferences, 322
using with PDF files, 323–324
Primary Partition, 70, 107
Print and Fax settings pane
faxing, 239–240
printer, 238–240
printer sharing, 216, 258–259
printers, 238–240
Printers pane, 259
private Web surfing, 302
processors
compatibility of, determining, 16
finding specifications, 6–7
instructions, 579–580
Project properties screen, 458
property inspector, 464
Protective MBR, 583–584
Provide Map Feed option, Dashcode, 458
Psystar’s RebelEFI, 604–605
Public folder, 256, 392
push mail, 306
Q
QE/CI (Quartz Extreme/Core Image), 139, 286, 364, 477, 571
Quartz Composer
audio spectrum display, 513–516
coordinate system, 480–481
defined, 610
filter patches, 491
image effect filters, 499–502
image masks, 502–507
main windows, 477
overview, 442
patches, 478–480
Render in Image macro, 507–512
rotatable pictures, 481–492
rotating cube, 492–499
Quartz Extreme, 8, 610
Quartz Extreme/Core Image (QE/CI), 139, 286, 364, 477, 571
Quick Look feature, 174, 610
QuickTime, 517, 529, 610
627
QuickTime Pro, 266
QuickTime settings pane, 266–268
Quit Cocoa Simulator, 542
R
Ralink chip, 254
RC2 (Release Candidate 2) version, 56, 93
rd=disk0s2 parameter, 139, 155
rd=disk1s1 boot option, 138
rd=disk1s2 boot option, 138
rd=disk2s1 boot option, 138
rd=disk2s2 boot option, 138
rd=diskXsY boot option, 138
read file permission, 591
ReadMe screen, 46
Really Simple Syndication (RSS), 298, 610
Realtek chips, 16, 254
Realtek High Definition Audio, 10
Realtek Semiconductor link, 11
RebelEFI, 604–605
RebelEFI package, 605
Recent Items option, 164
Record button, ScriptEditor, 399
recovering files using Time Machine, 286–287
Recovery Console, 144–145, 610
Rectangle selection tool, 521
registration screen, Leopard, 39
Release Candidate 2 (RC2) version, 56, 93
Remote Login, Sharing pane, 216
Render in Image macro
creating, 507–509
publishing port to, 510–512
using, 509–510
Render in Image patch, Quartz Composer, 507
repair disk, 65
Repeat After Me
changing voice to match inflexion and pitch, 523–526
modifying inflection of voice, 522–523
playing output in another application, 527–528
starting, 521–522
Repeat mode parameter, Interpolator patch, 494
repeat while loop, 430
Require password to unlock each System Preferences pane
option, 213
Require password to wake computer from sleep or screen
saver option, 212
Resample image check box, Quartz Composer, 482
Resize patch, Quartz Composer, 504
628
Index
Resized Image port, Image Resize patch, 504
resizing
handle, 172
partition, 107
windows, 170–172
Restore Defaults button, 232
restoring computer from backup
using other backup and restore programs, 144
using Vista Backup and Restore utility, 143–144
restoring XP boot loader, 144–146
result command, 410
Result pane, AppleScript, 418–419
Resulting Value port, Math patch, 514
Results button, Automator, 383
retail DVD
AHCI, enabling, 136–137
defined, 610
modifying computer hardware, 134–135
recovering from kernel panic, 133–134
recovering from “still waiting for boot disk” error, 134
trying another boot disk, 137
Retail Leopard Install, 577
RokAir, 254
root folder, 128
root system user, 592
rotatable pictures
filtering image, 491–492
mathematical transforms, 489–491
preparing picture, 481–482
reading mouse movements, 488–489
sprite rendering, 482–487
rotating cube
interpolations, 494–496
overview, 492–493
screen saver, 496–499
Rotating Cube Input parameters, 507
Rotating Cube patch, Quartz Composer, 492–493
Rotating Cube Render, Quartz Composer, 510, 512
Rotating Cube.qtz file, 496
RSS (Really Simple Syndication), 298, 610
RSS preferences panel, Mail, 308
RSS preferences tab, Safari, 298–299
Rules preferences pane, Mail, 313
Run button, ScriptEditor, 399
run-time errors, 563
S
-s boot option, 76, 112
Safari
Advanced preferences tab, 300–302
Appearance preferences tab, 297
Autofill preferences tab, 300
automatically opening with login, 275
bookmarks, 294–295
Bookmarks preferences tab, 297–298
defined, 610
General preferences tab, 297
RSS (Really Simple Syndication) preferences tab, 298–299
Security preferences tab, 300
setting on View menu, 296
starting, 293–294
surfing privately, 302
Tabs preferences tab, 298
top sites screen, 294
safe mode, 140, 364
SATA (Serial ATA), 136, 595, 610
SATA RAID/AHCI Mode, 596
Save dialog box
New Virtual Machine Assistant, 347
options, 408
scale effect, 204
Scale proportionally check box, Quartz Composer, 482
Schedule options, 229–230
.scpt files, 420
screen capture, 520–521
screen resolution, 226–227
screen saver
fixing, 497–499
placing composition in Screen Savers folder, 496–497
setting up, 200–201
Screen Saver button, 200, 229
Screen Savers panel, System Preferences, 205, 496–497
screen sharing, 216, 265, 604
script copy, editable, 420
Script type, 408
ScriptEditor
creating e-mail list, 424
creating new scripts, 415–418
error message, 412
screen, 399
with script loaded, 400
starting, 397–398
Index
scripts. See also AppleScript; custom scripts
adding prompts, 437
creating, 415–418
creating to read e-mail addresses from Address Book,
425–426
making available to all users, 421–423
menulet, 423
prepared, 399–403
properties of each file format for, 408
steps to use as application, 420
scrolling options, 198–199
Search feature, 595
Security preferences pane, Safari, 301
Security preferences tab, Safari, 300
Security settings pane
Disable automatic login option, 212
FileVault, 214–215
firewall, 215–216
Logout after inactivity option, 213
overview, 211–212
Require password to unlock each System Preferences
pane option, 213
Require password to wake computer from sleep or
screen saver option, 212
Use secure virtual memory option, 213
sed stream editor, 83
seeing difficulties, 287–289
Select Destination screen, 26, 27, 30
Select motherboard package, 52
separate video-processing (graphics) chip, 8
sepia tone filter, Quartz Composer, 492
Serial ATA (SATA), 136, 595, 610
Server Message Block (SMB), 258, 372, 610
Services menu, 191–194, 610
ServiceScrubber application, 193
Set Attributes box, Dashcode, 459
set collapsed of every window to true
command, 401
set command, 407, 409, 410
Set date & time automatically box, System Preferences, 276
Setup Assistant pane, Bluetooth, 222
Setup pane, Bluetooth, 222
7-Zip software
steps to install, 355
web reference, 576
Sharing dialog box, New Virtual Machine Assistant, 346
Sharing pane, MobileMe, 316
629
Sharing settings pane
file sharing, 255–258
printer sharing, 258–259
Sharing tab, My Documents, 255, 369–370
Show Bluetooth status option, 223
Show Character Palette option, 210
Show Input menu in login window option, 271
Show Library button, Automator, 384
Show password hints option, Login Options, 271
Show Path Bar option, 405
Show Restart button, Login Options, 271
Show Script Menu option, AppleScript Utility, 397
Shut Down button, Login Options, 271
signatures, 311
SIMD (Single Instruction, Multiple Data), 7, 579, 610
Simulate Interface, 541
Single Instruction, Multiple Data (SIMD), 7, 579, 610
single-bar volume meter, 516
SIW software. See System Information for Windows
Size input parameter, Rotating Cube patch, 494
Size parameter, Rotating Cube patch, 493
Sleep button, Login Options, 271
Sleep display option, 202
sleep options, 229–230
smart mailboxes, 314–315
SMB (Server Message Block), 258, 372, 610
SMBIOSEnabler kext, 590
snapshots, 343–344, 366
Snow Leopard
booting, 364
install disk image, 354–355
installing to Dell Mini 9, 603–604
installing to gigabyte motherboard, 601–602
installing to other computers, 604
language selection screen, 361
Psystar’s RebelEFI, 604–605
virtual machine, 356–360, 364, 366
welcome screen, 365
Snowy bootloader, 359
software license agreement screen, 94
Software Update, 293
scheduled check, 279
site, 573
steps to set up, 279
Software Update option, 163
Software Update settings pane, 278–279
sound effects, 242
630
Index
sound hardware, 9
sound input, 243
sound output, 241–242
Sound settings pane
audio drivers, 240–241
sound effects, 242
sound input, 243
sound output, 241–242
Spaces application, 202, 610
Speak command acknowledgment check box, Speech
Recognition, 281–282
specifications, finding
audio hardware, 9–11
motherboard, 5–6
networking hardware, 11–13
processors, 6–7
video-processing (graphics) chip, 7–8
speech recognition, 280–282
Speech settings pane
speech recognition, 280–282
text to speech, 282–283
voices, 284
speech synthesis, 280
“spinning beach ball of death”, 139
Spotlight
defined, 610
overview, 181–186
search attributes, 184
search box, 182–184
search places, 217
Stickies, 236–238
Spotlight settings pane, 216–217
.Spotlight-V100 file, 330
Sprite renderer, Quartz Composer
Image Importer linked to, 487
properties, 487
sprite rendering, Quartz Composer
defined, 610
importing input image, 483–485
making image visible, 485–487
overview, 482–483
SSE (Streaming SIMD Extension), 7, 579
SSE2 (Streaming SIMD Extension Second version), 579, 610
SSE3 (Streaming SIMD Extension Third version), 579, 610
SSE4 (Streaming SIMD Extension Fourth version), 579
SSSE3 (Supplemental SSE3), 579
Start Disk Utility, 78, 115–116
Start menu
overview, 180–181
system controls, 181
viewing all programs, 181
viewing user files and folders, 181
Start screen saver option, 202
Start value parameter, Interpolator patch, 494
Startup Disk, 284
Startup Disk settings pane, 284
Startup Screen option, Save dialog box, 408, 420
status bar, 296
Stay Open option, Save dialog box, 408
stealth mode, 216
Stickies, Spotlight
File menu, 237
shortcut keystroke, 237
steps to create keyboard shortcuts, 236–238
“still waiting for boot disk” error, 134, 138–139
“still waiting for root device” error
AHCI, 596
HPET, 596
master-slave configuration, 595–596
Serial ATA, 595
Stop button, ScriptEditor, 399
Streaming SIMD Extension Fourth version (SSE4), 579
Streaming SIMD Extension Second version (SSE2), 579, 610
Streaming SIMD Extension (SSE), 7, 579
Streaming SIMD Extension Third version (SSE3), 579, 610
Streaming tab, QuickTime, 267
string, 409, 610
<string>1920x1080x32</string> command, 148
<string>5</string> command, 155
Style and Effects pane, 449
Style panel, 452
submenus, changing, 564–565
Summary screen, Mail, 304
superusers, 592
Supplemental SSE3 (SSSE3), 579
Supply Levels pane, Print & Fax, 239
Supply Maps API key workflow, Dashcode, 459
Synchronize option, iSync, 318–319
synchronizing
Address Book, 317–320
iCal, 320–321
iTunes with iPod, 324–325
MobileMe, 261–262
time with Windows, 277–278
Index
synthesized speech, 524
syslinux boot loader, 43
syslinux project, 589
system disk, 610
System Information for Windows (SIW) software
defined, 611
start screen, 4
steps to download and install, 3–4
web reference, 575
System Preferences. See also Hardware System Preferences;
Internet and Network Preferences; Personal
System Preferences
Accounts settings pane, 269–275
Date and Time settings pane, 276–278
defined, 611
Software Update, 278–279
Speech settings pane, 280–284
Startup Disk settings pane, 284
Time Machine settings pane, 284–287
Universal Access settings pane, 287–290
System Preferences pane
Bluetooth, 221
Date and Time, 276
MacFUSE pane, 334
QuickTime, 266
Time Machine, 186–187
Universal Access, 378
System Preferences security panel, 212
System Recovery Options, 92, 143
SystemConfiguration folder, 148, 149
System/Installation/Packages folder, 82, 86, 118, 122
systemwide widgets, 455
T
Tab character, 148
Tab key, Safari, 301
Tabs pane, 298
Tabs preferences tab, Safari, 298
Take Snapshot, 343
Target Kind drop-down box, Network / Disk Access
section, 462
Task Manager, 165
tbz2 archive file, 355
TCP forwarding, 265
tell command, 400, 407, 426, 427
temp folder, 82
template selection menu, Dashboard Widget, 444
631
TempPart partition, 71, 79, 115, 122
Tension parameter, Interpolator patch, 494
Terabyte Image for Windows, 60, 98, 575
Terminal screen, 84
tethering, 223
Text Field Attributes pane, 540
text item 1 of emailList command, 430
Text to Speech, 282–283
TextEdit
defined, 611
document, 458
menu, 436
overview, 191
steps to get text from files and then into e-mails,
434–436
steps to use Repeat After Me in, 527–528
theContent variable, 435
theDocument variable, 435
theFilename variable, 435
Tiger, 186, 517
time
clock options, 277
format for, 207–209
limits, 274
post-installation fixes, 596–597
setting, 40–41
synchronizing with Windows, 277–278
Time Machine
applying fix for, 53
backup disk, 285
crashes, 601
defined, 611
excluding files from, 187–188
file exclusion pane, 188
overview, 186–187
post-installation fixes, 599–600
retrieving files from, 188–190
setting up, 187
time bars, 190
troubleshooting, 190
Time Machine settings pane
fixing networking kernel extension setup, 287
overview, 284–285
recovering files, 286–287
setting up separate hard disk, 285–286
Time Until Next Appointment widget, 460, 469
time zone setting, 40, 276–277
TinkerTool, 329, 520, 576
632
Index
TinyURL, 130, 134, 241, 278
tinyurl.com, 611
title bar, 174–175
TLDs (top-level domain names), 438
toolbar, 177–178, 296
Toolbar, Project Window, 447
Tools menu, Preview, 323
Top Sites button, Safari, 298
Topala, Gabriel, 3
top-level domain names (TLDs), 438
transferring data, 37
Transmac, 586
troubleshooting installation
booting from install DVD, 133–142
modifying Apple property lists to specify future boot
parameters, 146–156
reinstalling with different parameters, 144
restoring computer from backup, 143–144
restoring XP boot loader, 144–146
“still waiting for root device”, 595–596
try command, 413
.txt file, 148
U
UDP forwarding, 265
UInstaller
installing injector strings using, 141–142
main screen, 50–51
web reference, 576
Unarchiver, 278
unity mode, VMware, 348–349
Universal Access, 377–378
Universal Access settings pane
hearing difficulties, 289
keyboard options, 289
mouse options, 290
seeing difficulties, 287–289
Universal OSx86 Installer, 611
Unix, 611
USB hard drive, 17
USB key, 44
USB key drive, 50
USB pen drive, 18
Use secure virtual memory option, 213
Use Simple Finder option, 272
Use VoiceOver at login window option, 271
User Account Control window, 62
user accounts
creating, 271–274
fast user switching, 274
login items, 275
login options, 269–271
user interface, 535–537, 545
user switching, 274
Users panel, System Preferences, 271
V
-v boot option, 49, 76, 112, 132, 134
-v rd=disk1s1 command, 134
vanilla kernel, 16, 590
variables, 387–388, 409
Variables view, 378–379
Vendor ID, 241
Verbose, 24, 56, 76, 93, 113
Verbose option, 55
video card, 53, 141–142
video kexts, 139
video-processing chip
changing, 142
compatibility of, determining, 16
EFI string for, applying, 53
specifications, finding, 7–8
view buttons, Finder, 172–174
View Calendar button, iCal, 473
View menu, Safari, 296
Viewer window, Quartz Composer, 477, 487
Viewing preferences panel, Mail, 310–311
virtual machine
creating, 338–339, 345–346, 356
defined, 611
installing, 344
saving desktop as shortcut, 373
saving snapshot of, 366
Virtual Machine Library screen, 345
Virtual Machine menu, Parallels, 343
Virtual Machine Settings panel, 356–358
virtual machines. See Parallels Desktop; VMware
virtual memory option, 213
Virtual PC, 353
Virtualbox, 353
virtualization hosts, 353
Vista. See Windows Vista
VMware
creating virtual machine, 344–347
defined, 611
Index
importing other virtual machines, 349–350
installing, 344–347
measuring performance, 349
modes, 348–349
running Leopard on Windows using, 353–374
Workstation host software, 356
VMware Fusion, 349, 576
VMware virtual disk, 54, 67, 78, 79–80
voice recognition, 280
voice synthesis, 280
VoiceOver, 287–288
Volume Format, 116
Volume Peak port, Cube renderer, 514
Volume Scheme, 29
W
Wake for Ethernet administrator access setting, Options
button, 230
wake options, 230–231
Web references, 575–576
welcome video
overview, 32–35
when doesn’t appear, 139–140
WEP encryption, 611
wheel group, 592
widgets
adding, 219–220
adding code to, 470–471
changing gauges and text in, 448–451
computer gauge, 446–455
configuring, 218–219
countdown timer. See countdown timer
creating, 456
defined, 611
map, 455–460
window control buttons
Close button, 169–170
minimize button, 170
resizing windows, 170–172
zoom button, 170
windowed mode
Parallels Desktop, 341–342
VMware, 348
Windows
application software, 168–172
booting computers, 586–587
connecting Back to My Mac from, 265–266
keyboard, 159–160
633
menu bar, 160–161
running in Leopard, 337–350
running Leopard on, 353–374
Start menu, 180–181
synchronizing time with, 277–278
Windows 7, 90, 340, 342, 347
Windows Device Manager, 13
Windows disks
playing iTunes files on, 325–326
reading and writing to FAT partitions, 327–332
reading and writing to NTFS partitions, 332–335
Windows Experience Index, 349
Windows Keyboards, 160
Windows Operating Systems, 584
Windows Support disk, 354
Windows System Restore, 343
Windows Vista
Backup and Restore utility, 60–62, 143–144
diskpart utility, 65
installing Leopard to hard disk containing
booting installer, 72–81
ensuring that Vista starts, 92–93
image backup, 59–65
modifying installer, 81–91
partitioning Vista system disk, 67–72, 91–92, 95
required software, 65–67
starting OS X, 93
using alternative boot loader, 93–95
Recovery Disk, 67, 91
recovery options, 64
Start menu, 180, 595
startup options, 63
steps to restart, 90
Windows XP, installing Leopard to hard disk containing
boot loader, 127–132, 144–146
booting installer, 109–117
image backup, 97–101
modifying installer, 118–126
partitioning XP system disk, 103–109
required software, 102–103
wired networking
compatibility of, determining, 16
defined, 611
IP address, setting, 248
naming adaptors, 247
network assistant, 248–249
network diagnostics, 248–249
overview, 245–247
specifications, finding, 12
634
Index
wireless adaptors, 572
wireless networking
adaptors, finding functional, 249
defined, 611
installing driver software for, 250–254
specifications, finding, 13
WMware, 364
Wolf.jpg image, 518
Workflow Steps pane, Dashcode, 458
Workflow Steps, Project Window, 447
workflows
creating, 388–389
downloading, 380–383
modifying, 384–388
preparing to run, 380
running, 380–383
saving as plug-in, 391–392
steps, 381–382
steps to modify and run, 384–385
viewing results and log, 383–384
Workflows folder, Documents folder, 380
WPA2 encryption, 611
WPA2_PSK encryption, 252
write file permission, 591
X
-x boot option, 23, 76, 112
X Position parameter, Rotating Cube patch, 493
X11, 611
XCode
adding programming, 542–561
building application, 562–563
defined, 611
developing application, 529–531
project window, 568
refining application, 564–570
running application, 564
user interface, 531–542
XCode Distance Converter folder, 566
XML, 611
Y
Y Position parameter, Rotating Cube patch, 493
Yahoo!
synchronization alert, 319
synchronizing Address Book with, 319
synchronizing iCal with, 321
Z
Z Position parameter, Rotating Cube patch, 493
Zephyroth, 278
.zip file, 140, 392
zoom button, 170
Ready to take the next step?
You keep thinking about it. It’s a pretty cool idea, running Mac’s rock-solid OS X
Leopard on your netbook or other non-Apple hardware. You just haven’t been quite
ready to tackle the tricky process on your own.
Well, you’re not on your own anymore. Here’s the ultimate how-to guide for creating
your very own Hackintosh.
• Compare several different options for installation
• Follow step-by-step instructions to install Leopard® to a separate hard
disk or a Windows® hard disk
• Explore the differences between Leopard and Windows
• Set up personal, system, hardware, and network preferences
• Get complete directions for using Macintosh software—the Finder,
Safari®, iCal®, iTunes®, Preview, and others
• Build backups with Time Machine®
• Dual boot Windows and OS X
• Use Apple developer tools to create new widgets and applications
Peter Baldwin has been programming since the days of punchcards. He has worked with dozens of programming
languages and has written user manuals, developed training courses, and taught computer classes. He uses Leopard on a
netbook and on a desktop computer he assembled himself.
Visit our Web site at www.wiley.com/compbooks
Hardware / Personal Computers / Macintosh
$39.99 US/$47.99 CAN
$39.
$3
9 99 US/
S/$4
$47.
7 99 CAN
H rd
Ha
dware / Personall Co
C mputters / Ma
M ciinttosh
h