/


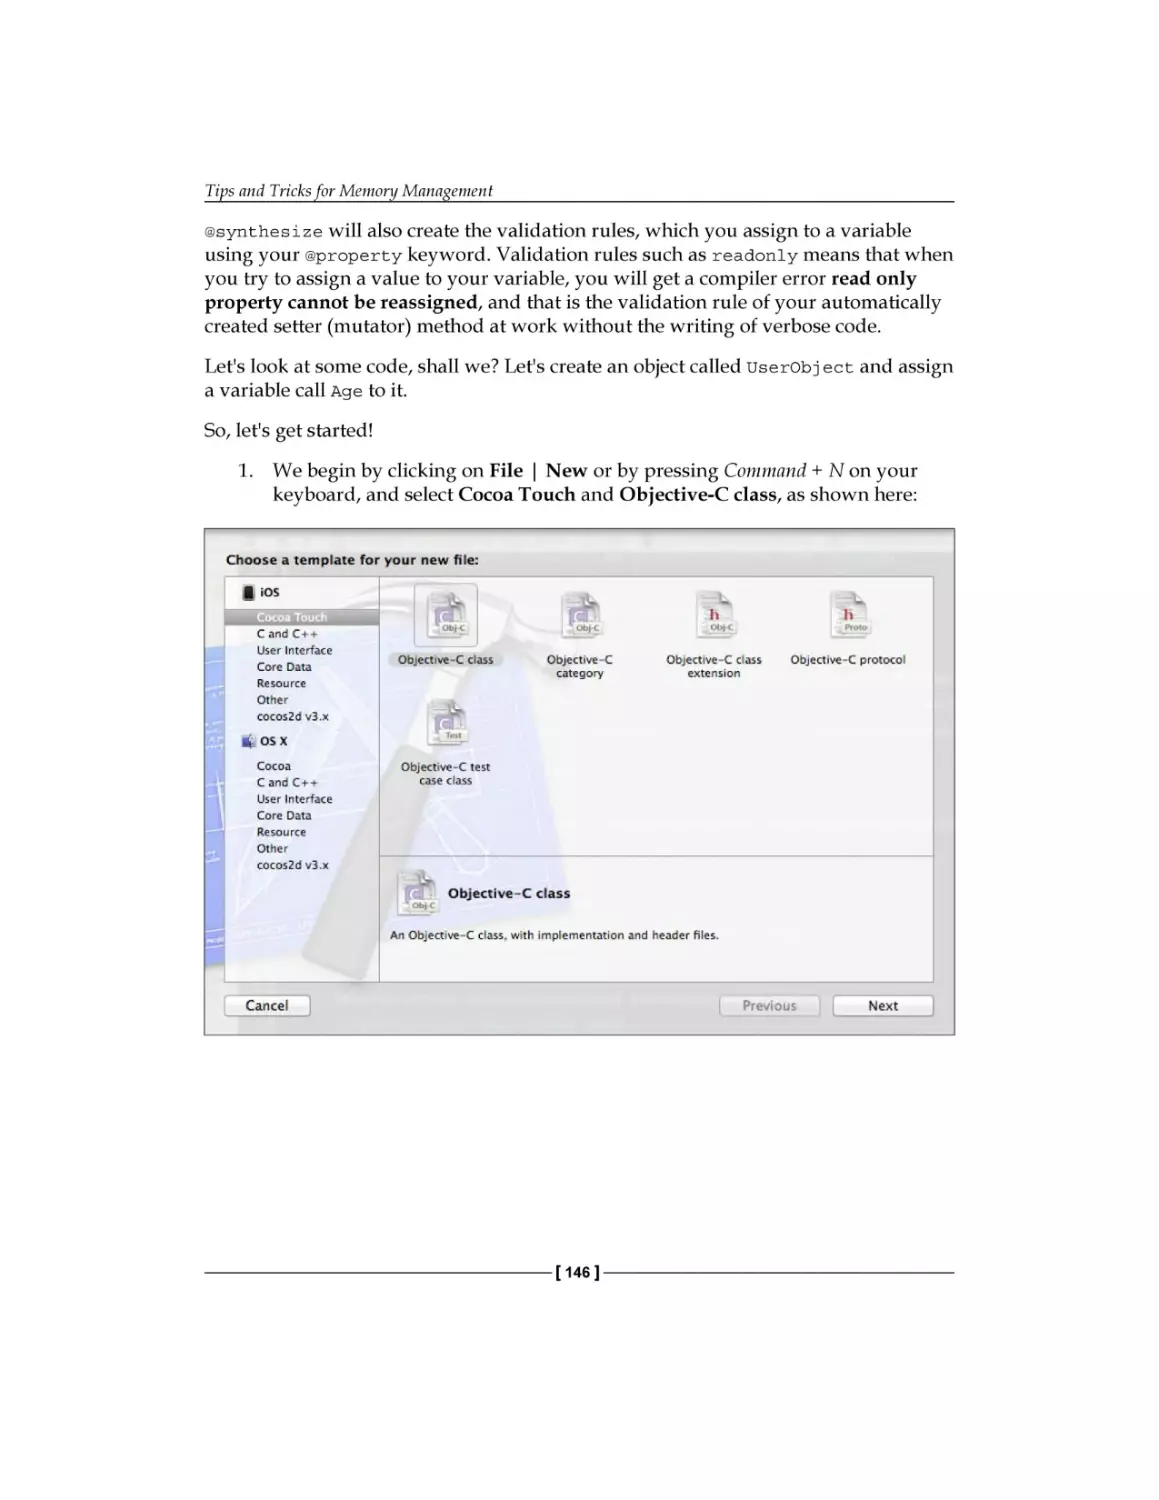
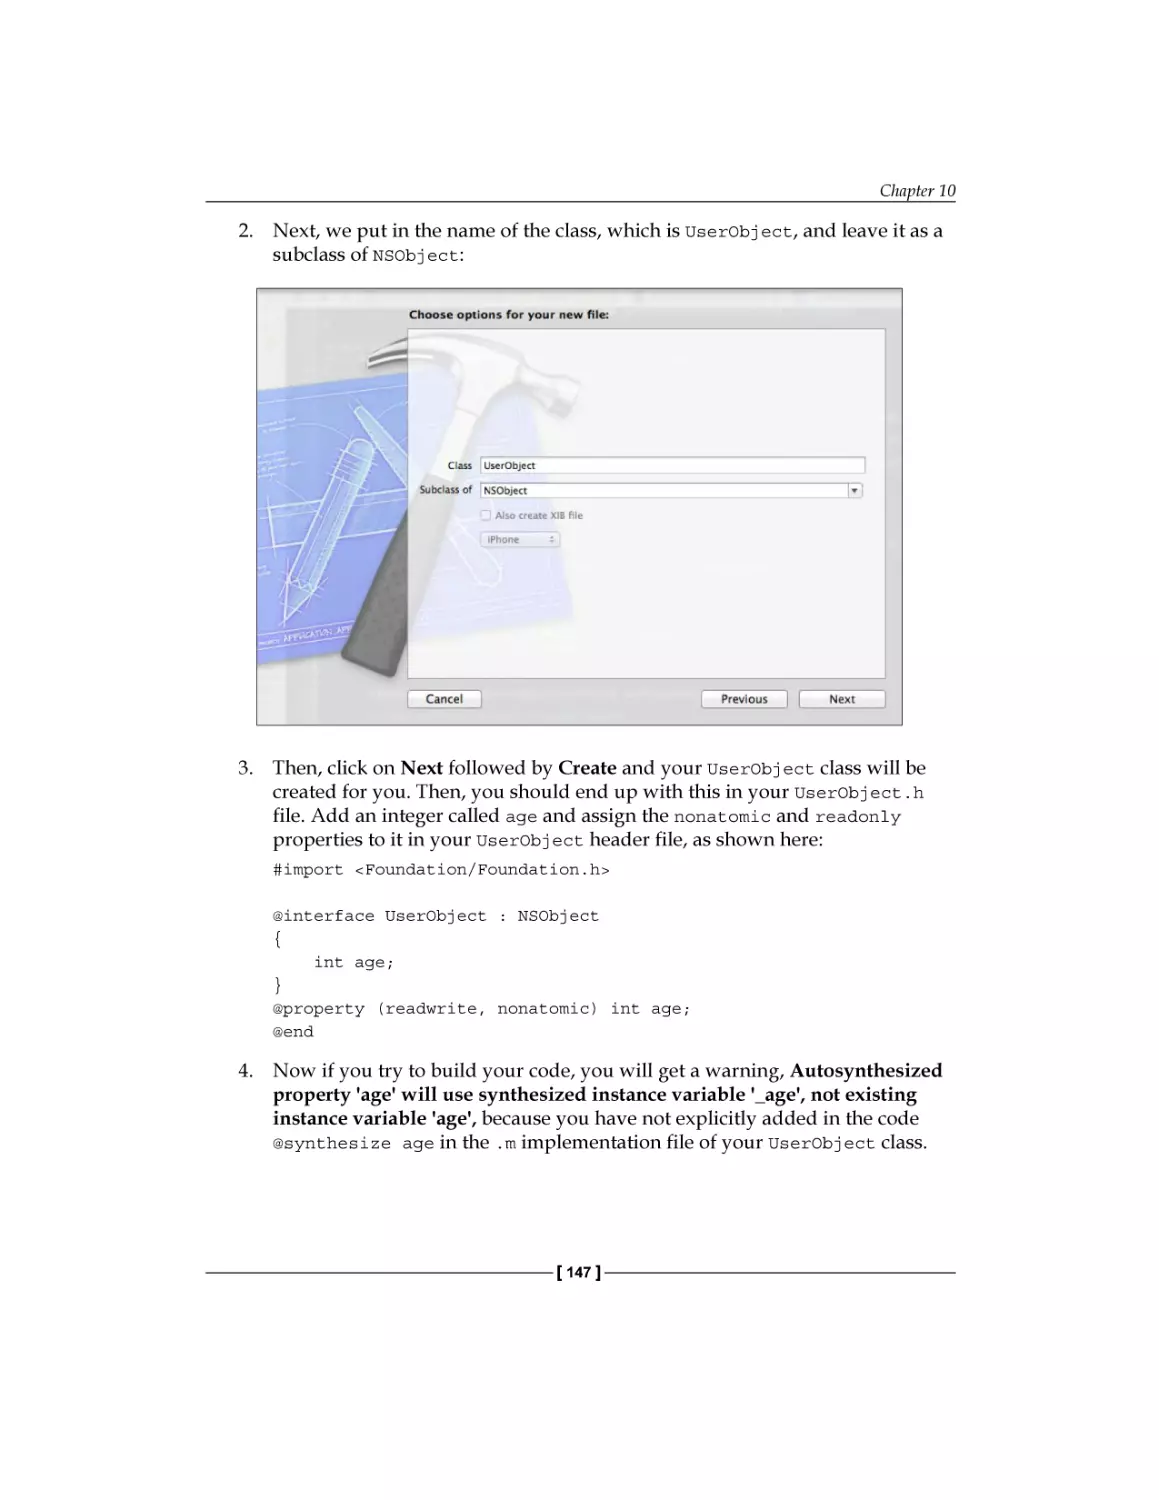


Text
Objective-C Memory
Management Essentials
Learn and put into practice various memory
management techniques in Objective-C to create
robust iOS applications
Gibson Tang
Maxim Vasilkov
BIRMINGHAM - MUMBAI
Objective-C Memory Management Essentials
Copyright © 2015 Packt Publishing
All rights reserved. No part of this book may be reproduced, stored in a retrieval
system, or transmitted in any form or by any means, without the prior written
permission of the publisher, except in the case of brief quotations embedded in
critical articles or reviews.
Every effort has been made in the preparation of this book to ensure the accuracy
of the information presented. However, the information contained in this book is
sold without warranty, either express or implied. Neither the authors, nor Packt
Publishing, and its dealers and distributors will be held liable for any damages
caused or alleged to be caused directly or indirectly by this book.
Packt Publishing has endeavored to provide trademark information about all of the
companies and products mentioned in this book by the appropriate use of capitals.
However, Packt Publishing cannot guarantee the accuracy of this information.
First published: March 2015
Production reference: 1190315
Published by Packt Publishing Ltd.
Livery Place
35 Livery Street
Birmingham B3 2PB, UK.
ISBN 978-1-84969-712-5
www.packtpub.com
Credits
Authors
Gibson Tang
Project Coordinator
Leena Purkait
Maxim Vasilkov
Proofreaders
Reviewers
Emil Atanasov
Simran Bhogal
Maria Gould
Christine M. Gerpheide
Indexer
Commissioning Editor
Hemangini Bari
James Jones
Graphics
Acquisition Editor
Sheetal Aute
James Jones
Production Coordinator
Content Development Editor
Melwyn D'sa
Amey Varangaonkar
Cover Work
Technical Editor
Vijin Boricha
Copy Editor
Janbal Dharmaraj
Melwyn D'sa
About the Authors
Gibson Tang grew up loving technology after getting his hands on an old Apple
II when he was still a young kid. Since then, he has never stopped keeping pace with
technology, and after he coded his first "Hello World" program, he has been hooked
on programming ever since.
Following his studies at Nanyang Polytechnic and Singapore Institute of
Management and serving a 6-year stint in the Republic of Singapore Navy (RSN),
he honed his development skills creating software and games for Yahoo! and other
Fortune 500 companies. In 2010, he founded Azukisoft Pte Ltd in Singapore to focus
on mobile application development. Since then, he has developed countless mobile
applications and games for start-ups and big companies both in USA and Singapore.
Apart from programming, he indulges in various hobbies such as soccer, computer
games, and jogging in order to get his regular dose of Vitamin D and to see the sun
once in a while. Occasionally, he would be on Steam or Battle.net blowing off
some steam by slaying monsters and killer robots after a day of programming.
I would like to thank the many people who have contributed to
my knowledge of programming over the years. Some honorable
mentions go out to the geeks and nerds of Hackerspace.sg as they
have kept me in stitches with their geek jokes and anime. Next, a
great thank you goes to Mugunth Kumar, who is an overflowing
fountain of knowledge of all things related to Objective-C. Also,
thanks to Subhransu Behera, the organizer of the iOS Dev Scout
meetup group in Singapore and finally, to my colleagues at
Azukisoft Pte Ltd, namely Igor and Dimitry, who have never failed
to amaze me with all their new knowledge and things they have
learned over the course of their work with me.
Maxim Vasilkov is a mobile software developer in Azukisoft Pte Ltd. He started
programming over 10 years ago. He started with iOS when the SDK was made
publicly available, and from that time onwards, he developed a passion for making
mobile apps. He is also experienced with other programming languages and has
expertise working with various team sizes, which gave him the opportunity to look
at different approaches to programming. Outside of work, he is a proud father of
beautiful triplets, Anna, Maria, and Victoria, who are now 4 years old. This has
helped him try out mobile games for kids and enables him to be an expert in mobile
games for kids.
I would like to dedicate this chapter to my lovely wife, Irina, and my
three princesses, Anna, Maria, and Victoria. Last but not least, I'd
like to thank my colleagues at Azukisoft Pte Ltd and Gibson Tang for
giving me an opportunity to work on a lot of challenging projects.
About the Reviewers
Emil Atanasov is an IT consultant who has strong experience with mobile
technologies. He is doing his MSc at RWTH Aachen University, Germany. He has
worked for several huge USA companies and has been a freelancer for years. He has
experience in software design and development, and personally, he has worked on
the improvement of many mobile apps. At the moment, he is focused on the rapidly
developing mobile sector.
As an Android team leader and senior developer, Emil was leading a team that was
developing a part of the Nook Color firmware. This was an e-magazine/e-book reader,
which supports the proprietary Barnes & Nobel and many other e-book formats.
Many of the apps that Emil has designed are using Flurry API to track different
users' statistics. Based on this experience, he is one of the people behind the Getting
Started with Flurry Analytics book.
I want to thank my family and friends for being so cool. Thank you
for supporting me even though I'm such a bizarre person, who is
investing so much of his time in the computer world. Thank you,
guys!
Christine M. Gerpheide is a software development engineer at Amazon
Web Services. She completed her master's in computer science and engineering
with honors from Eindhoven University of Technology in the Netherlands, before
which she worked in Greece as a web developer. During her career, Christine has
worked on a wide range of software, including service-oriented architectures,
model-driven engineering, and mobile development. During her free time, she hikes,
runs, and plays violin. Other books reviewed by Christine include TYPO3 Templates
by Packt Publishing, and she has presented at a number of scientific and open
source conferences.
www.PacktPub.com
Support files, eBooks, discount offers,
and more
For support files and downloads related to your book, please visit www.PacktPub.com.
Did you know that Packt offers eBook versions of every book published, with PDF and ePub
files available? You can upgrade to the eBook version at www.PacktPub.com and as a print
book customer, you are entitled to a discount on the eBook copy. Get in touch with us at
service@packtpub.com for more details.
At www.PacktPub.com, you can also read a collection of free technical articles, sign up for a
range of free newsletters and receive exclusive discounts and offers on Packt books and eBooks.
TM
https://www2.packtpub.com/books/subscription/packtlib
Do you need instant solutions to your IT questions? PacktLib is Packt's online digital book
library. Here, you can search, access, and read Packt's entire library of books.
Why subscribe?
•
Fully searchable across every book published by Packt
•
Copy and paste, print, and bookmark content
•
On demand and accessible via a web browser
Free access for Packt account holders
If you have an account with Packt at www.PacktPub.com, you can use this to access
PacktLib today and view 9 entirely free books. Simply use your login credentials for
immediate access.
Table of Contents
Preface
Chapter 1: Introduction to Objective-C Memory Management
Why do we need memory management in Objective-C?
An object's ownership and life cycle
Ownership of object and reference counting
What's a memory leak and why pay attention to it?
What is an object within Objective-C?
Summary
v
1
1
2
4
6
6
11
Chapter 2: Automatic Reference Counting
13
Chapter 3: Using Autorelease Pools
23
What is ARC and how does it work?
How ARC looks
Project settings for ARC
A memory model in Objective-C
What you need to know about ARC and weak references
Summary
Understanding the autorelease pool mechanism
Autorelease pool mechanism
Reducing peak memory footprint with autorelease pool blocks
An overview of Apple autoreleased classes
NSRunLoop
NSException
ARC and autorelease
Autorelease pool blocks and threads
Summary
[i]
13
14
18
19
21
21
23
26
27
29
29
30
31
32
33
Table of Contents
Chapter 4: Object Creation and Storage
35
Chapter 5: Managing Your Application Data
57
Chapter 6: Using Core Data for Persistence
71
Chapter 7: Key-value Programming Approaches
89
Creation and initialization of objects
What is a class?
Classes
Object immutability
Object mutability
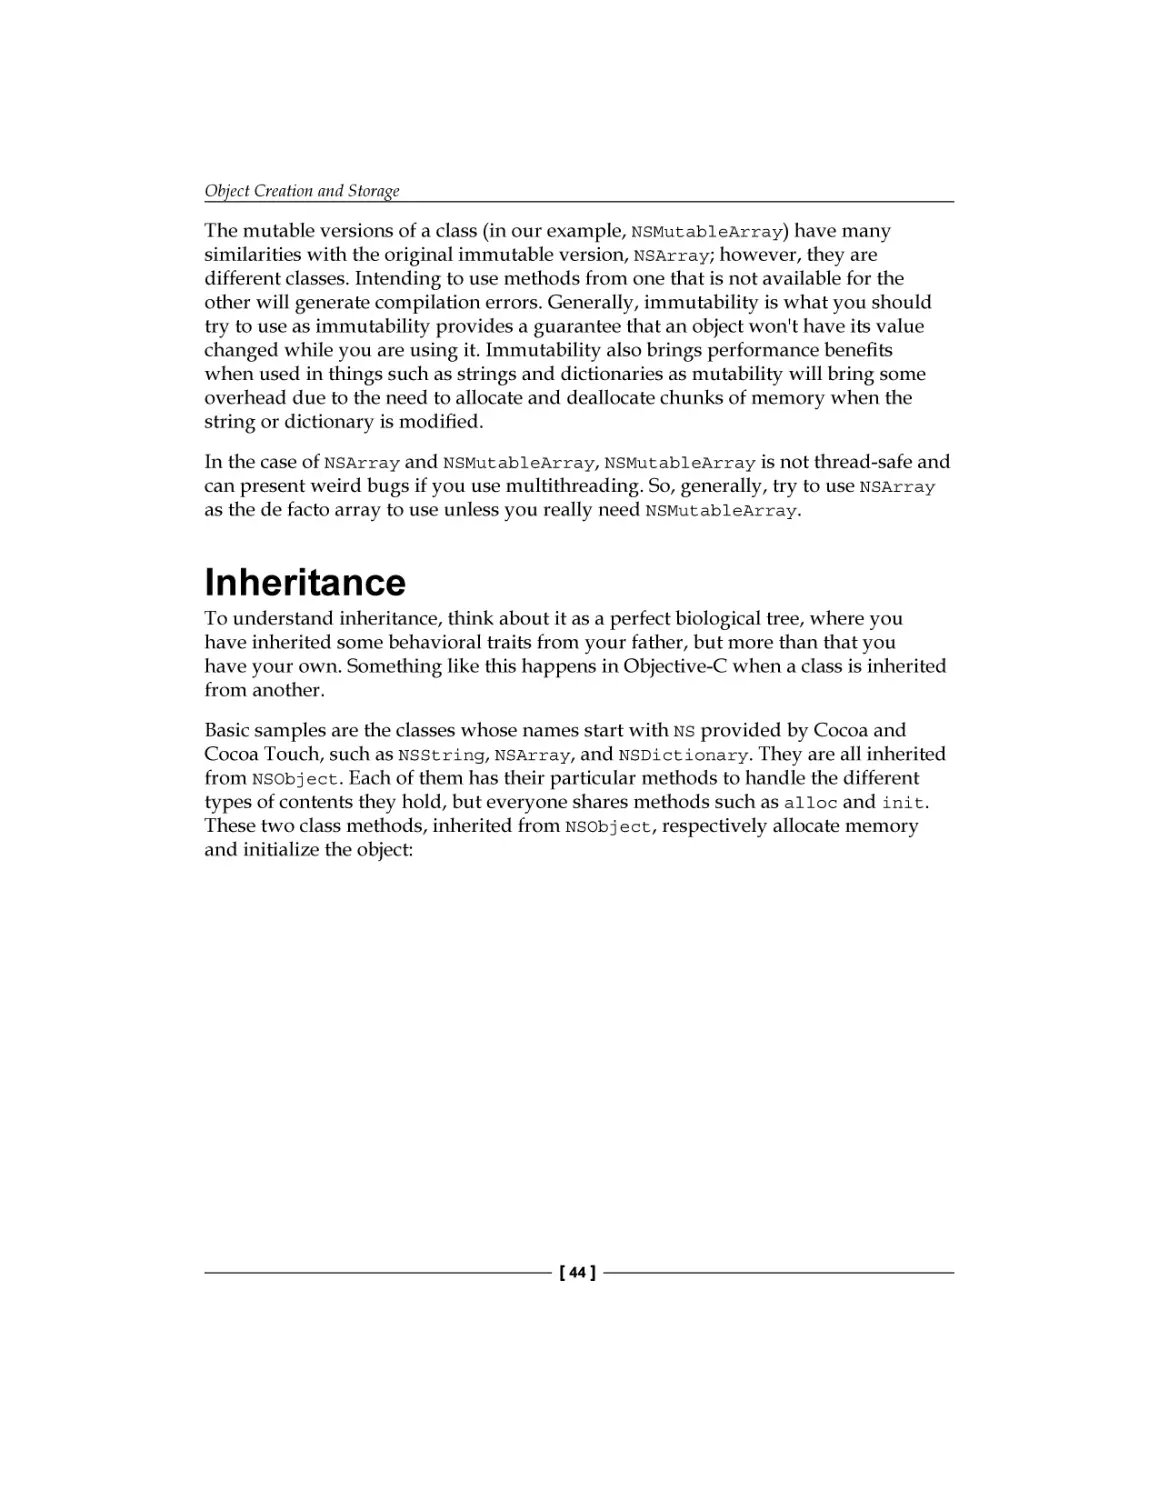
Inheritance
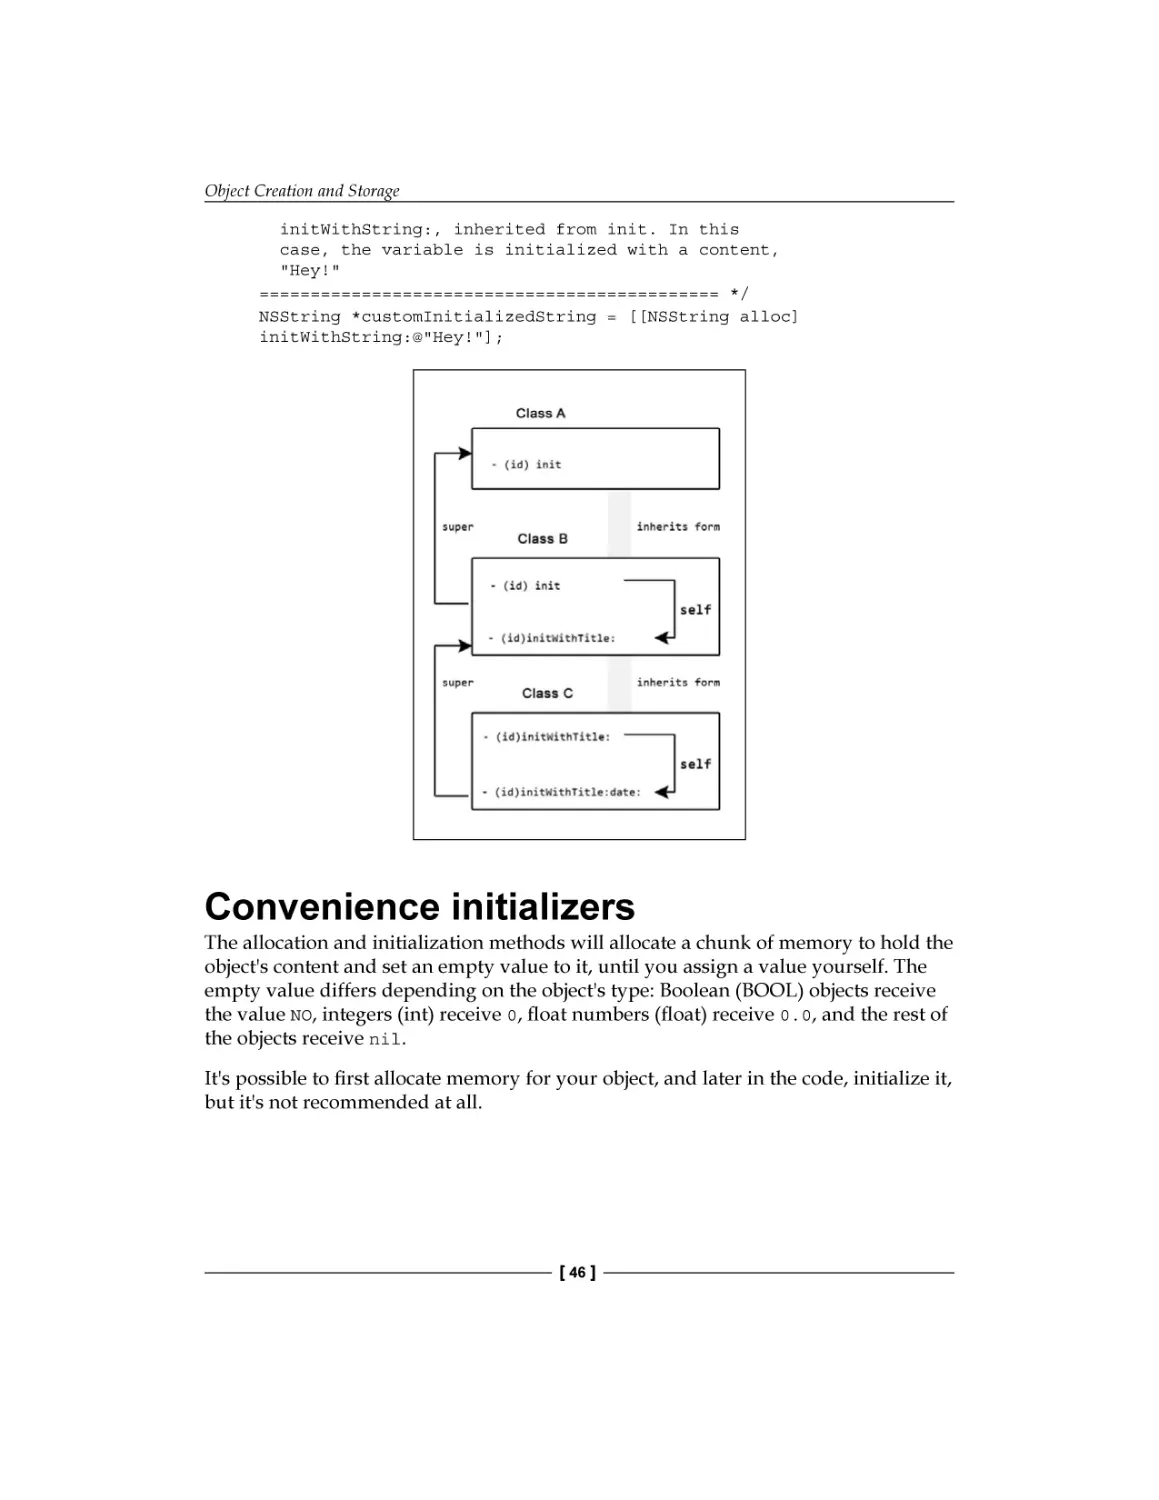
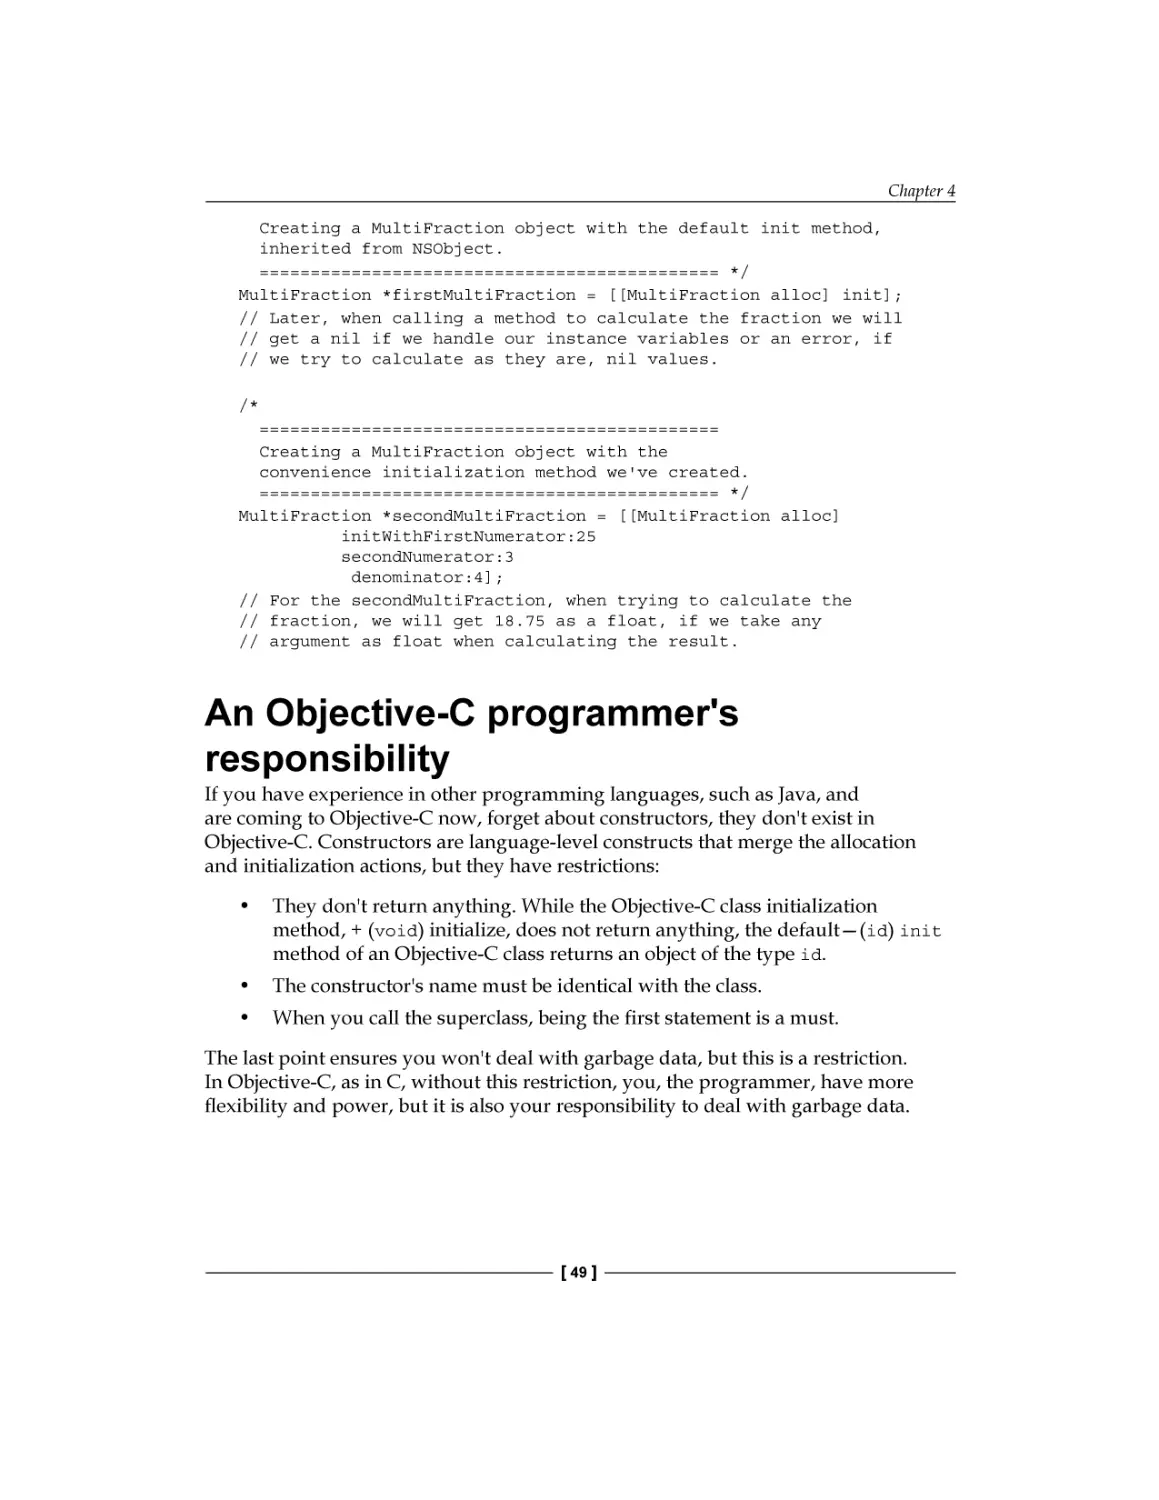
Convenience initializers
An Objective-C programmer's responsibility
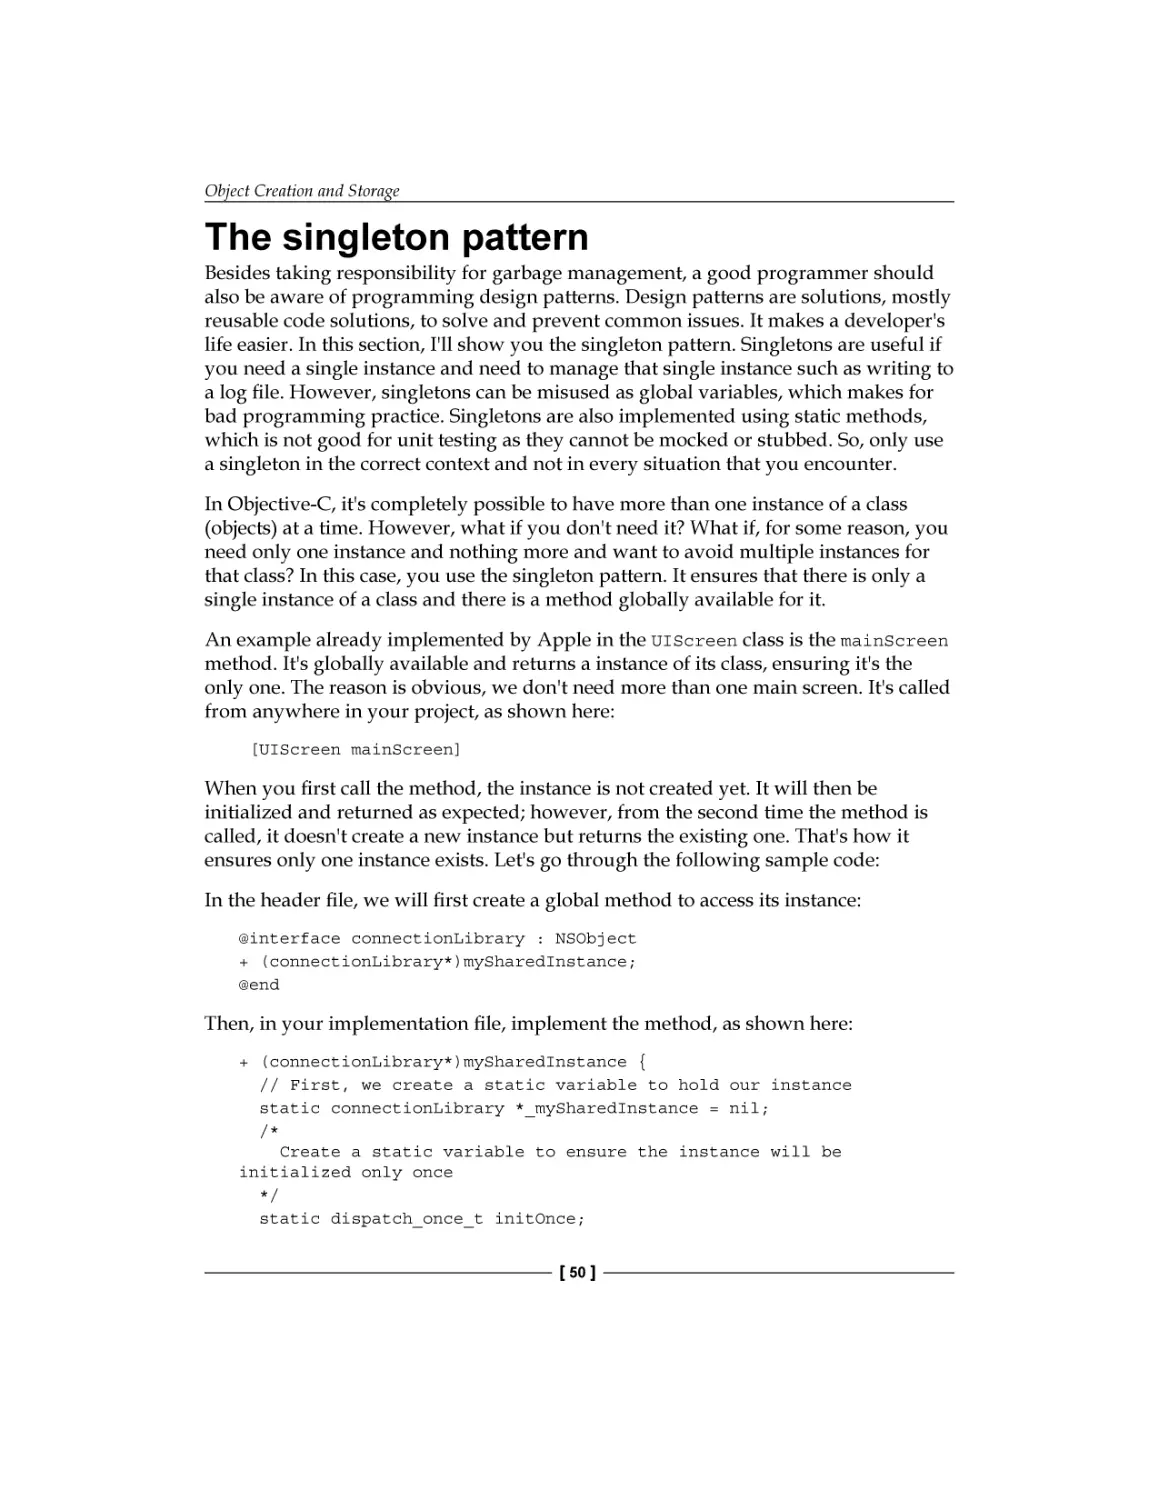
The singleton pattern
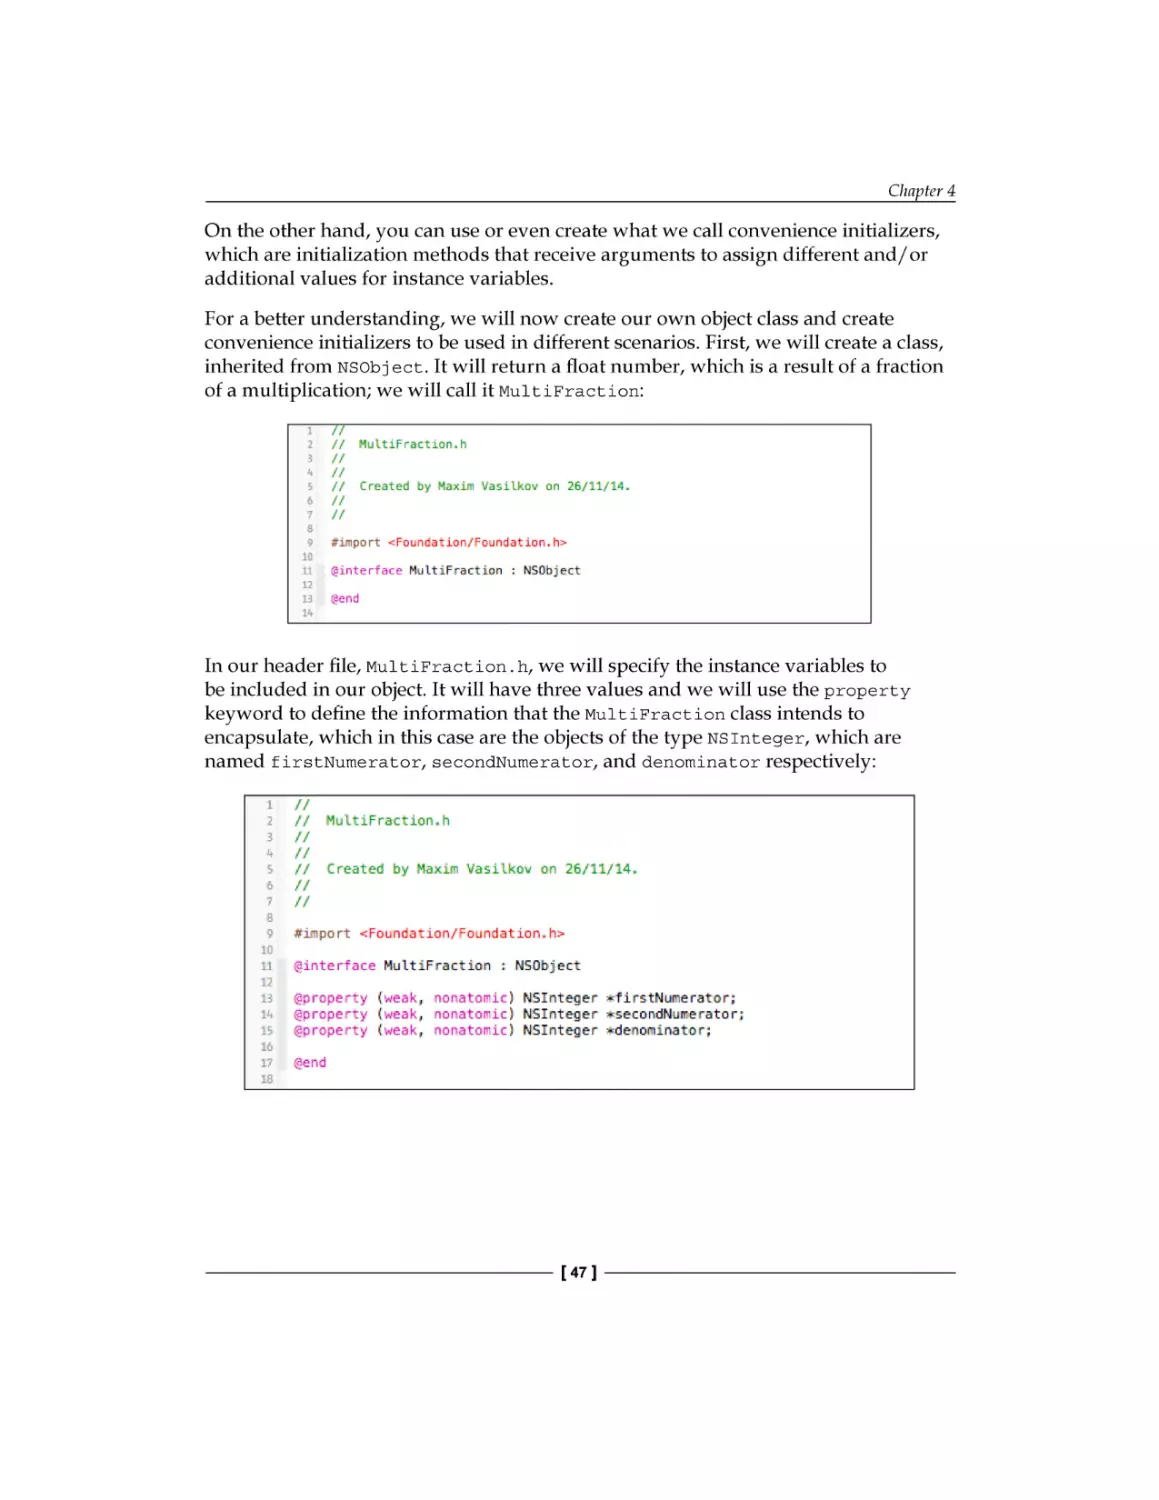
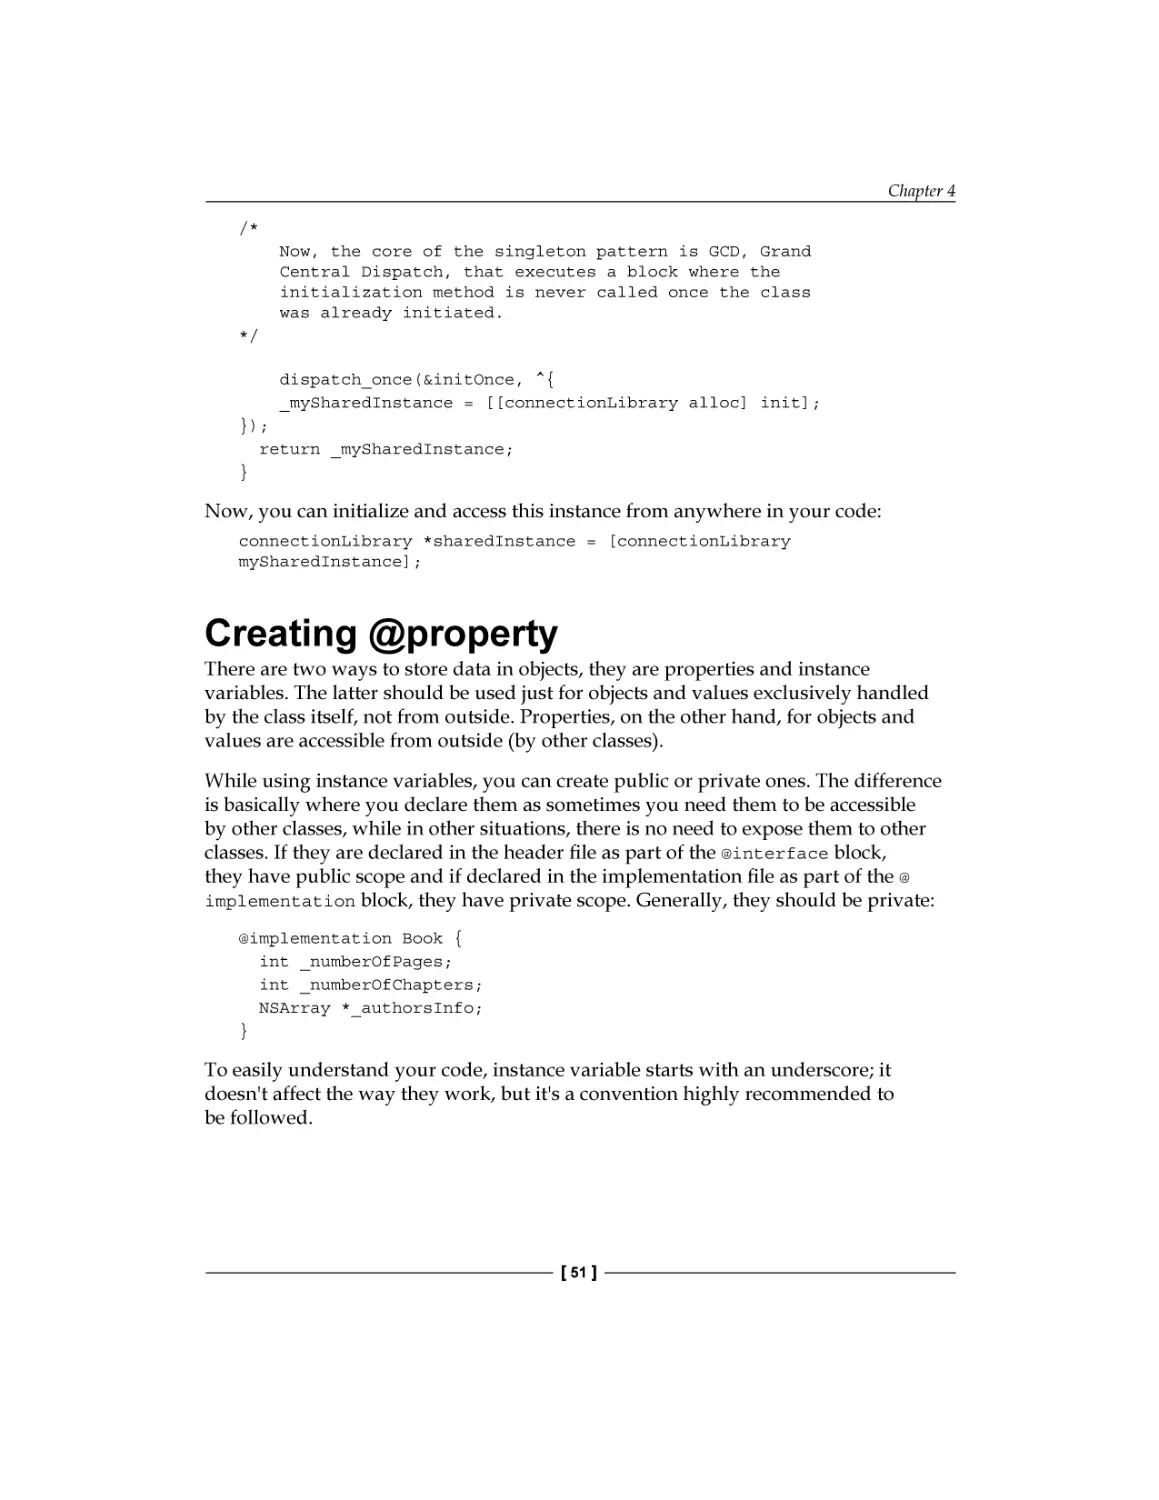
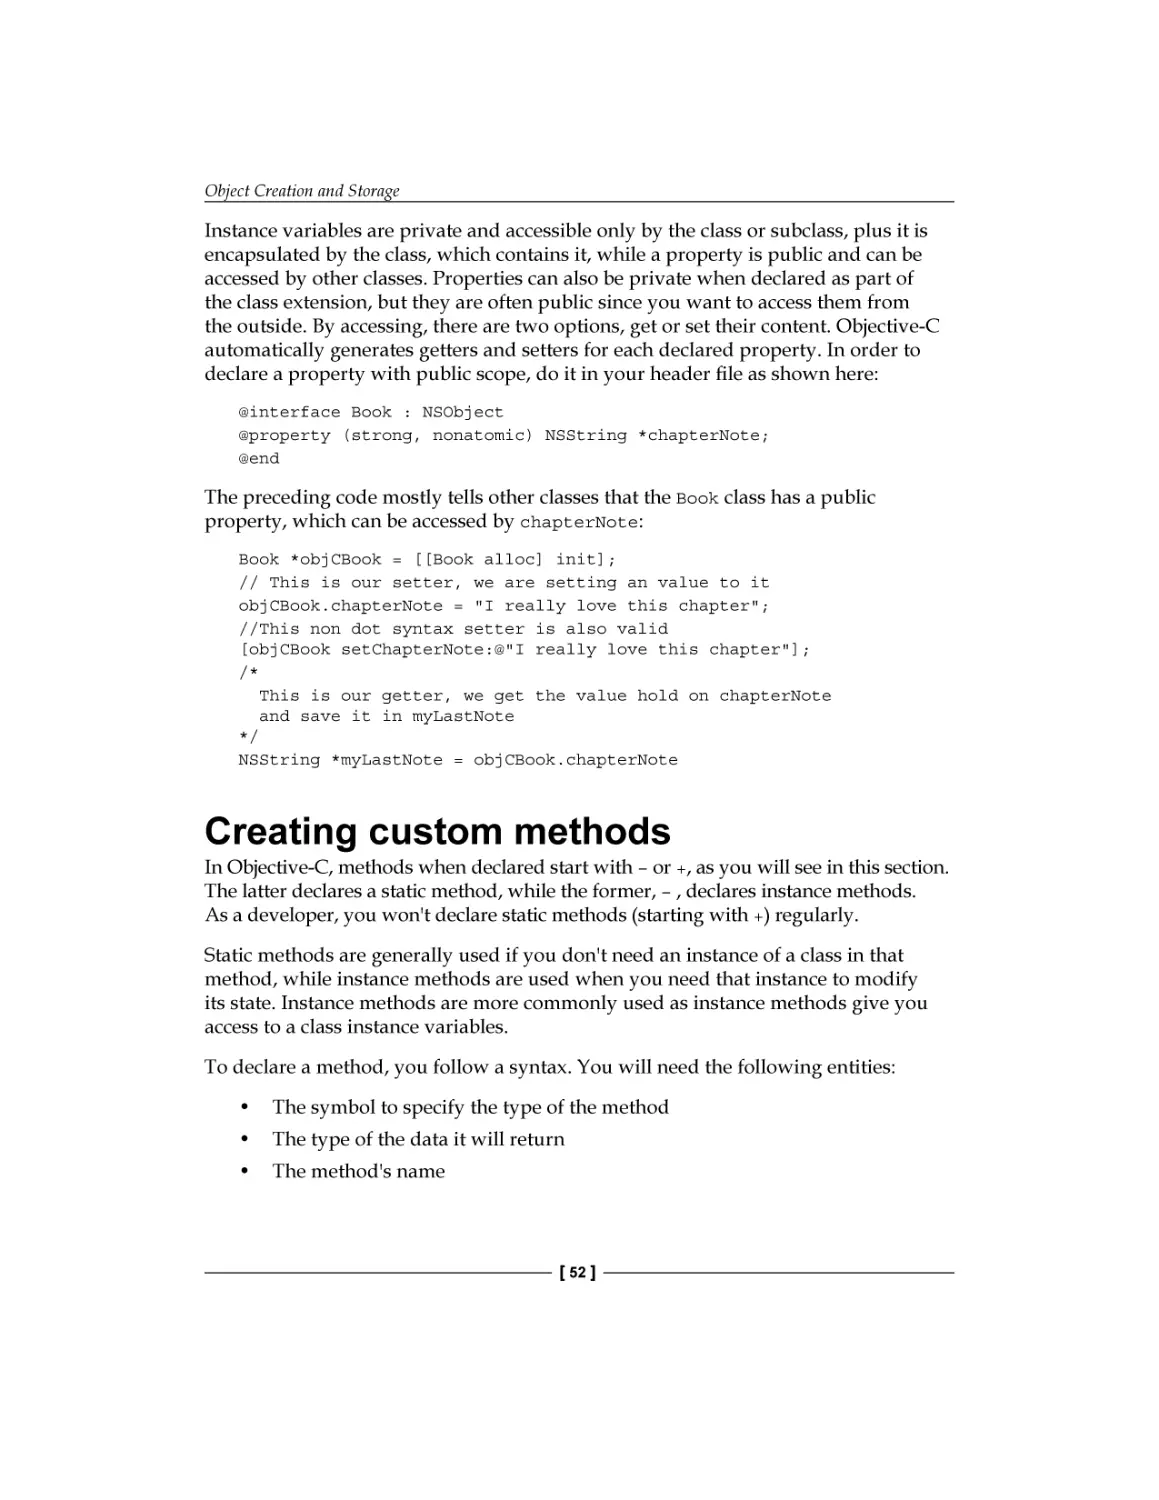
Creating @property
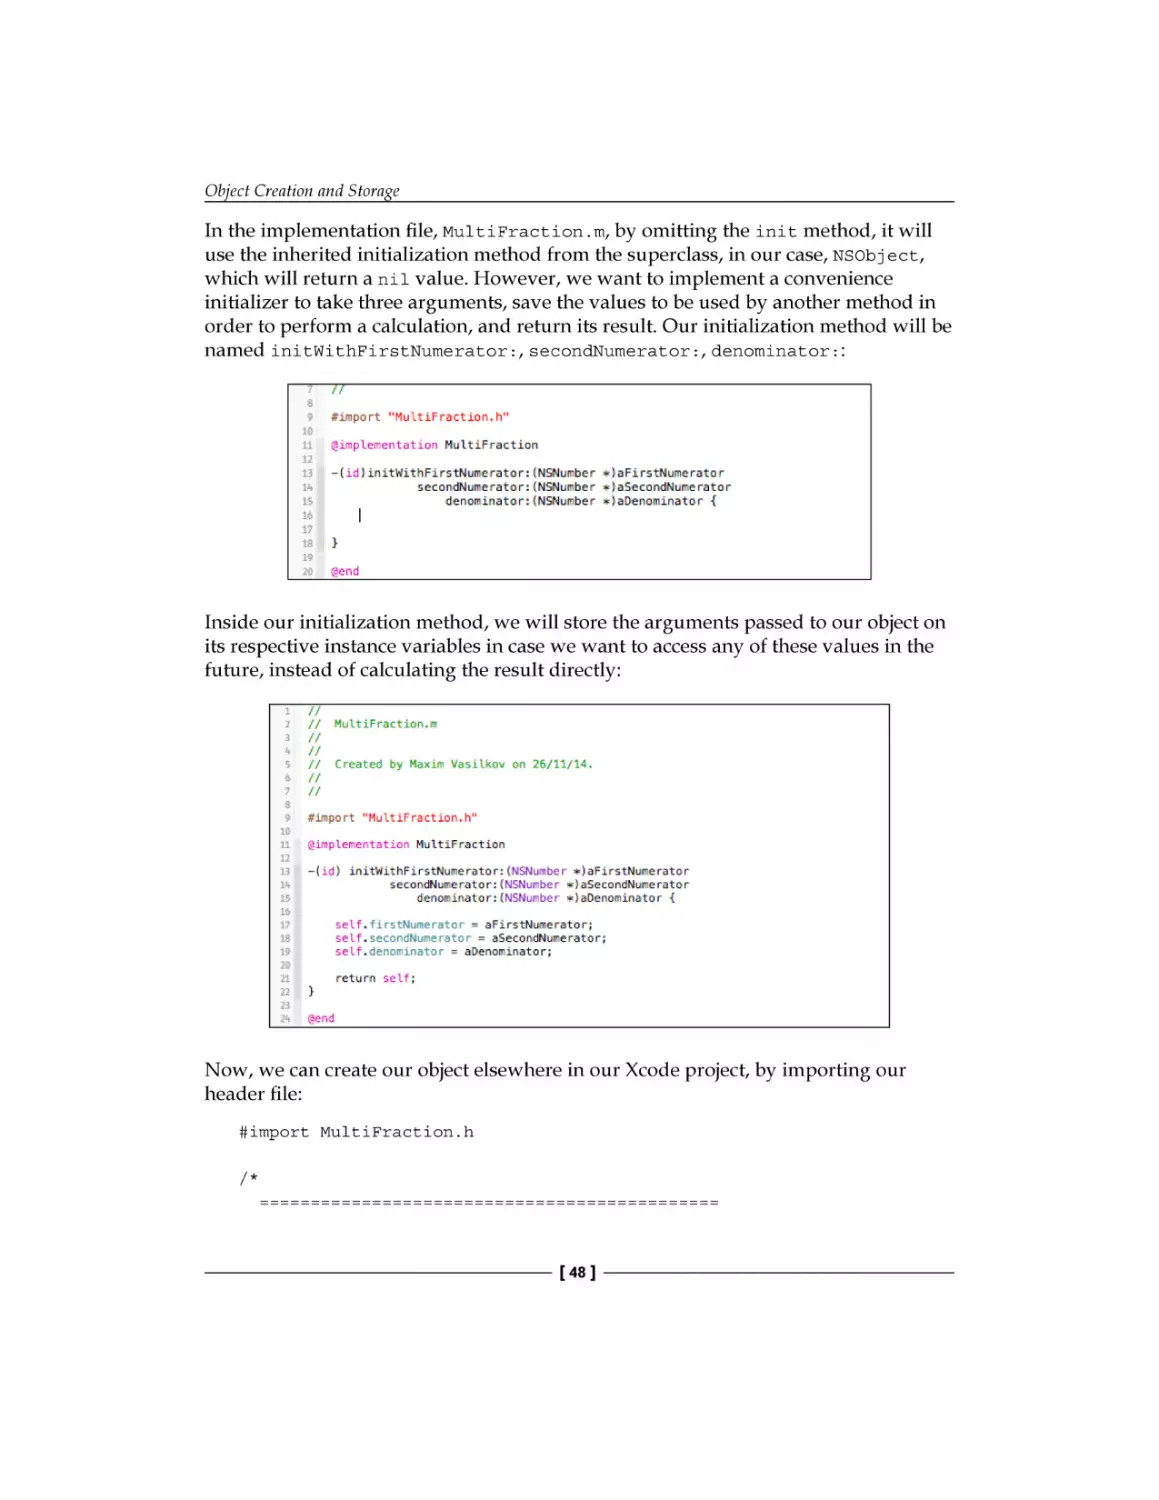
Creating custom methods
String formatting
Summary
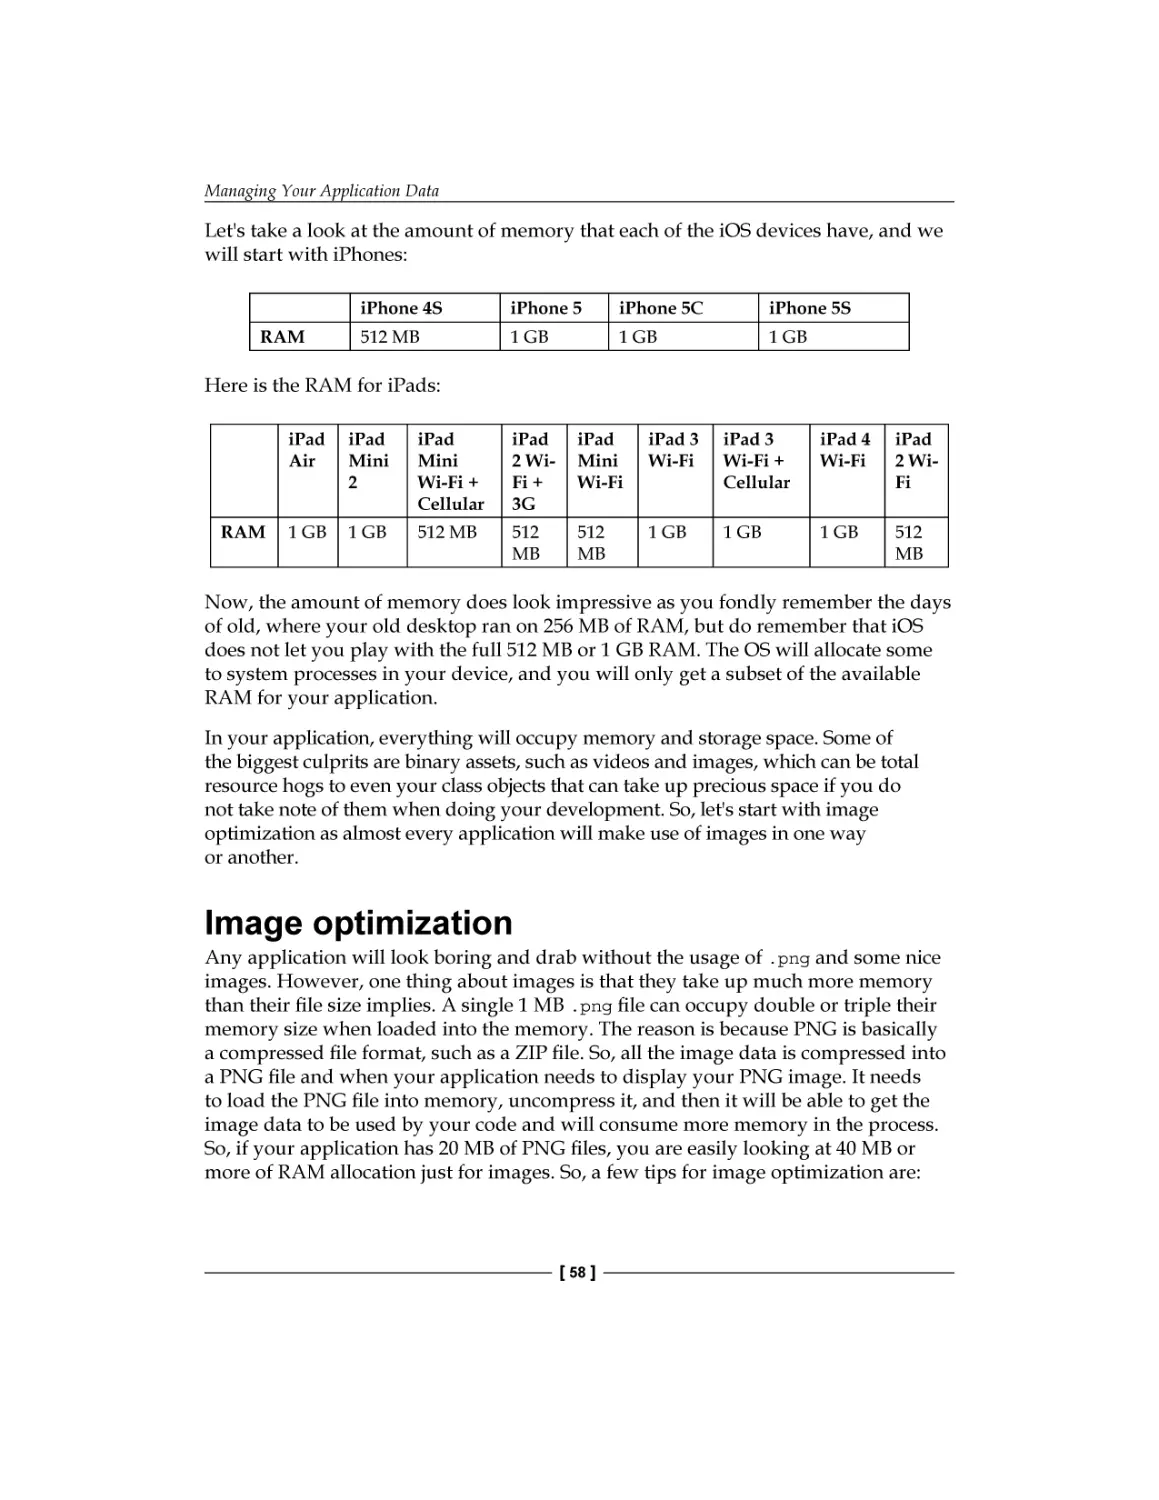
Device memory
Image optimization
Lazy loading
Control creation
Caching
SDWebImage
Object serialization
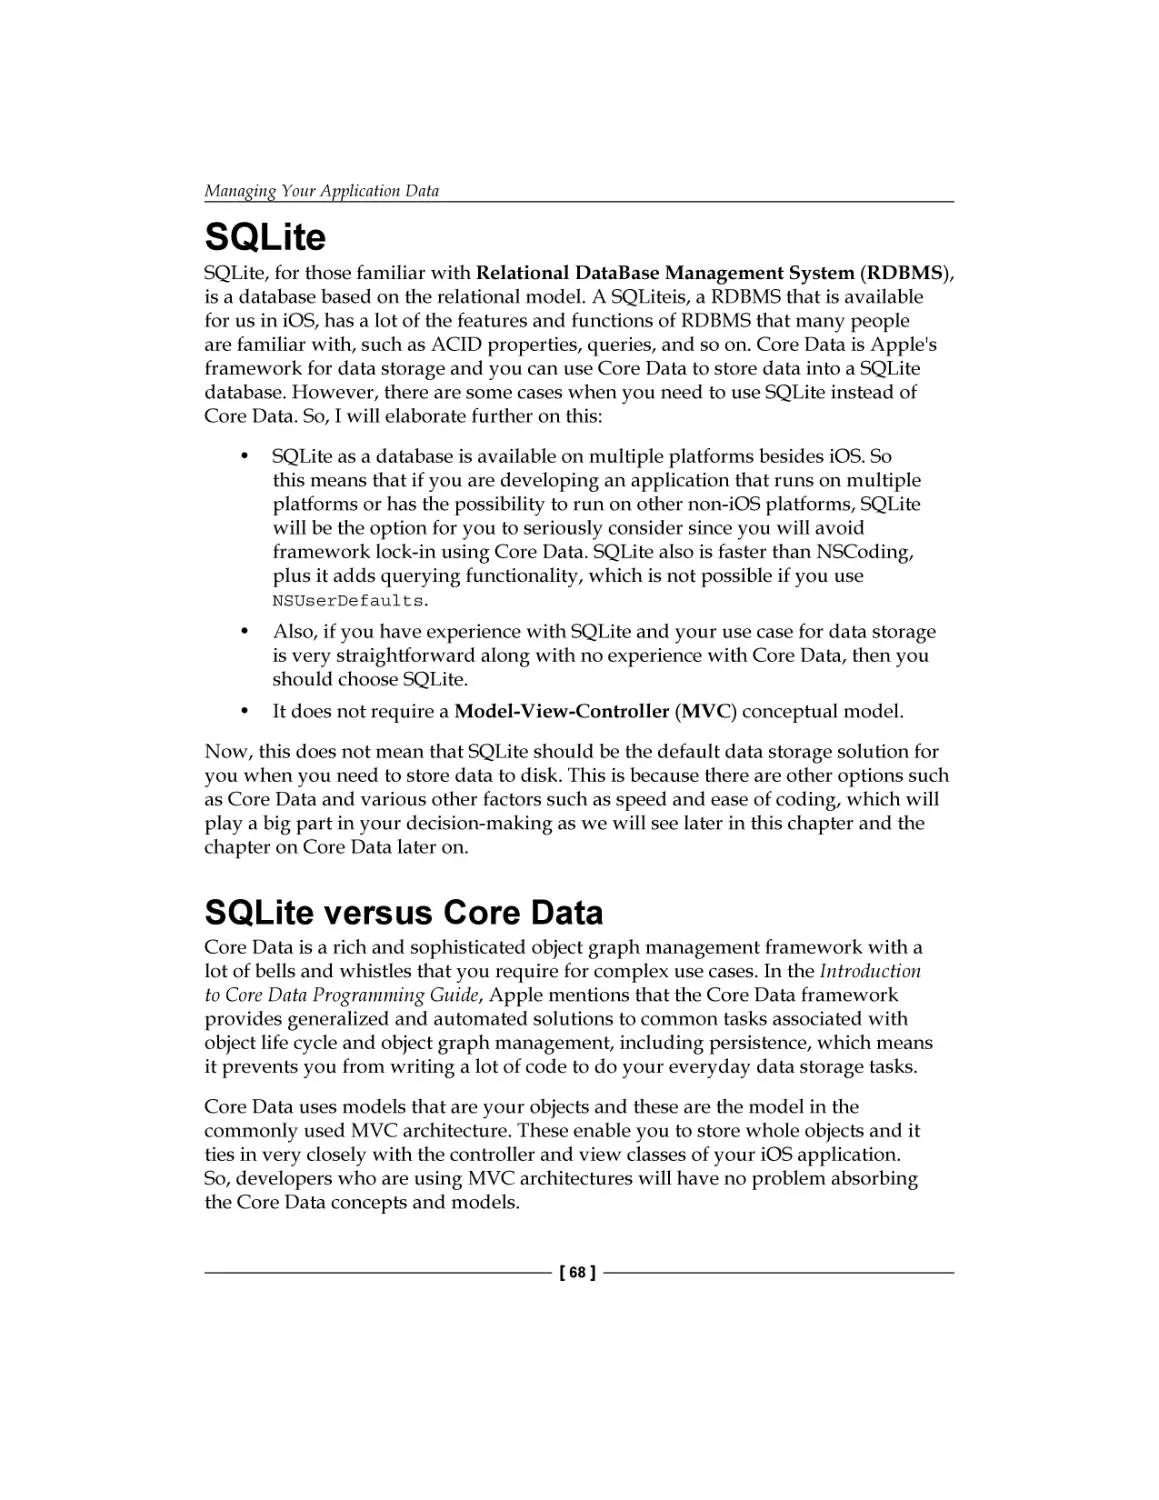
SQLite
SQLite versus Core Data
Summary
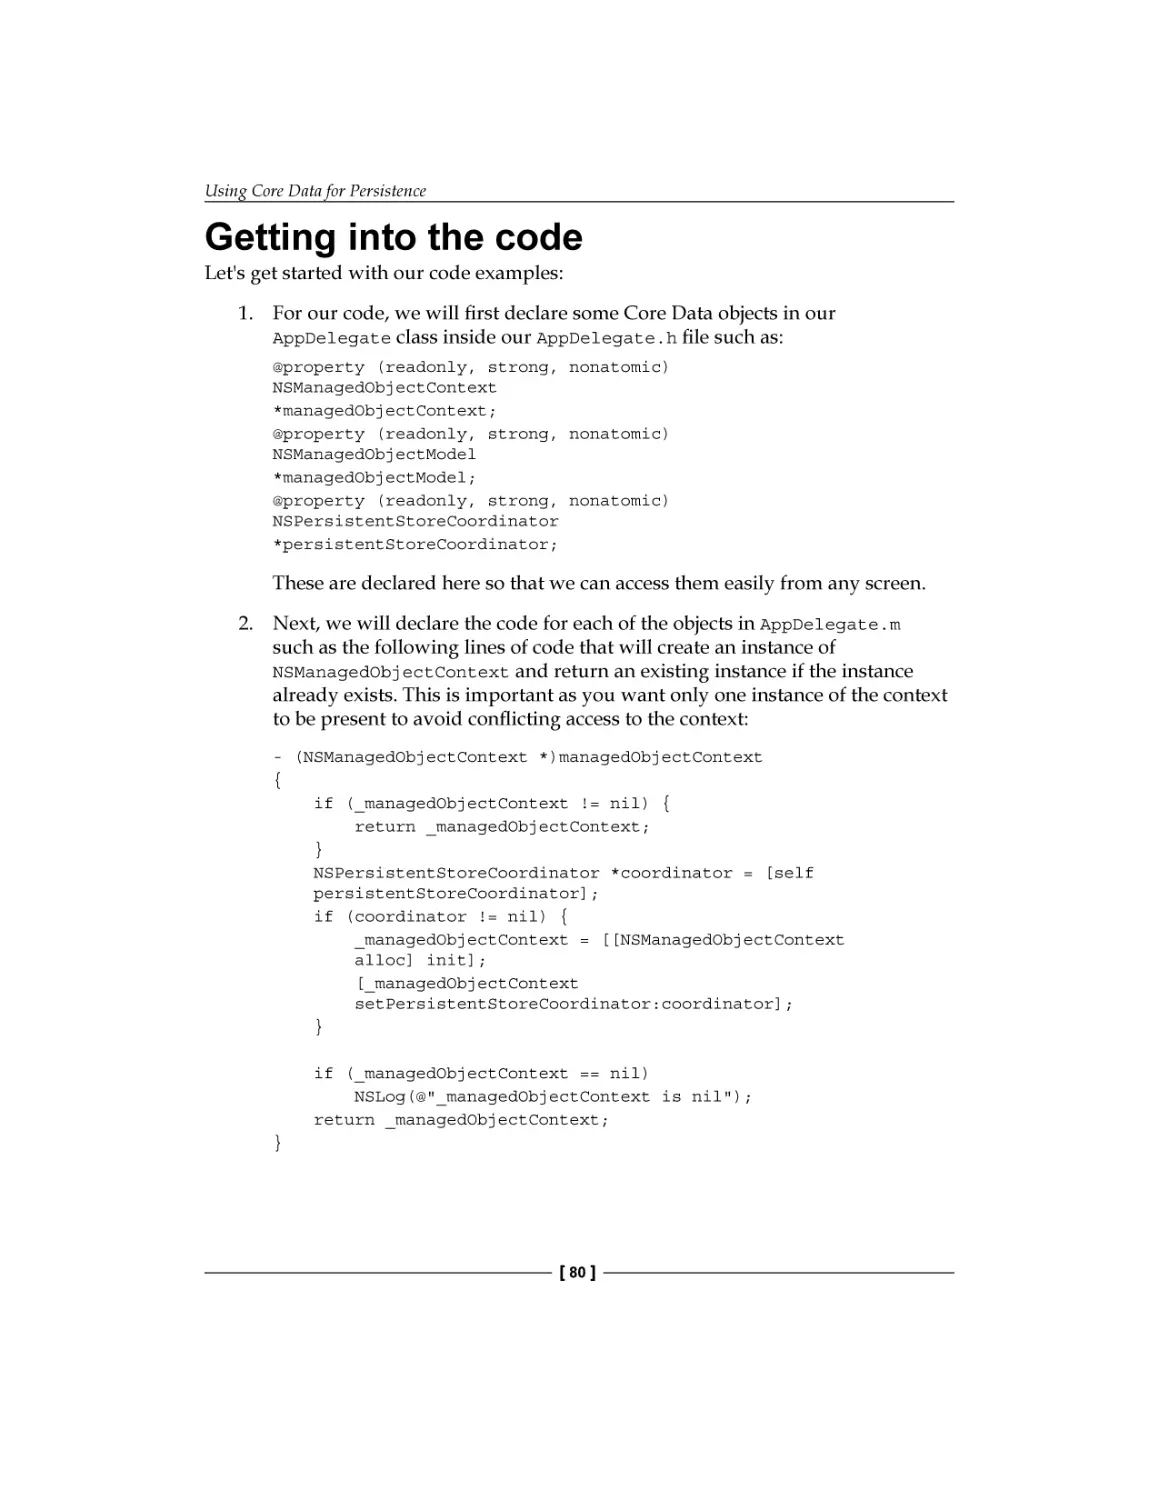
Why use Core Data?
Understanding Core Data concepts
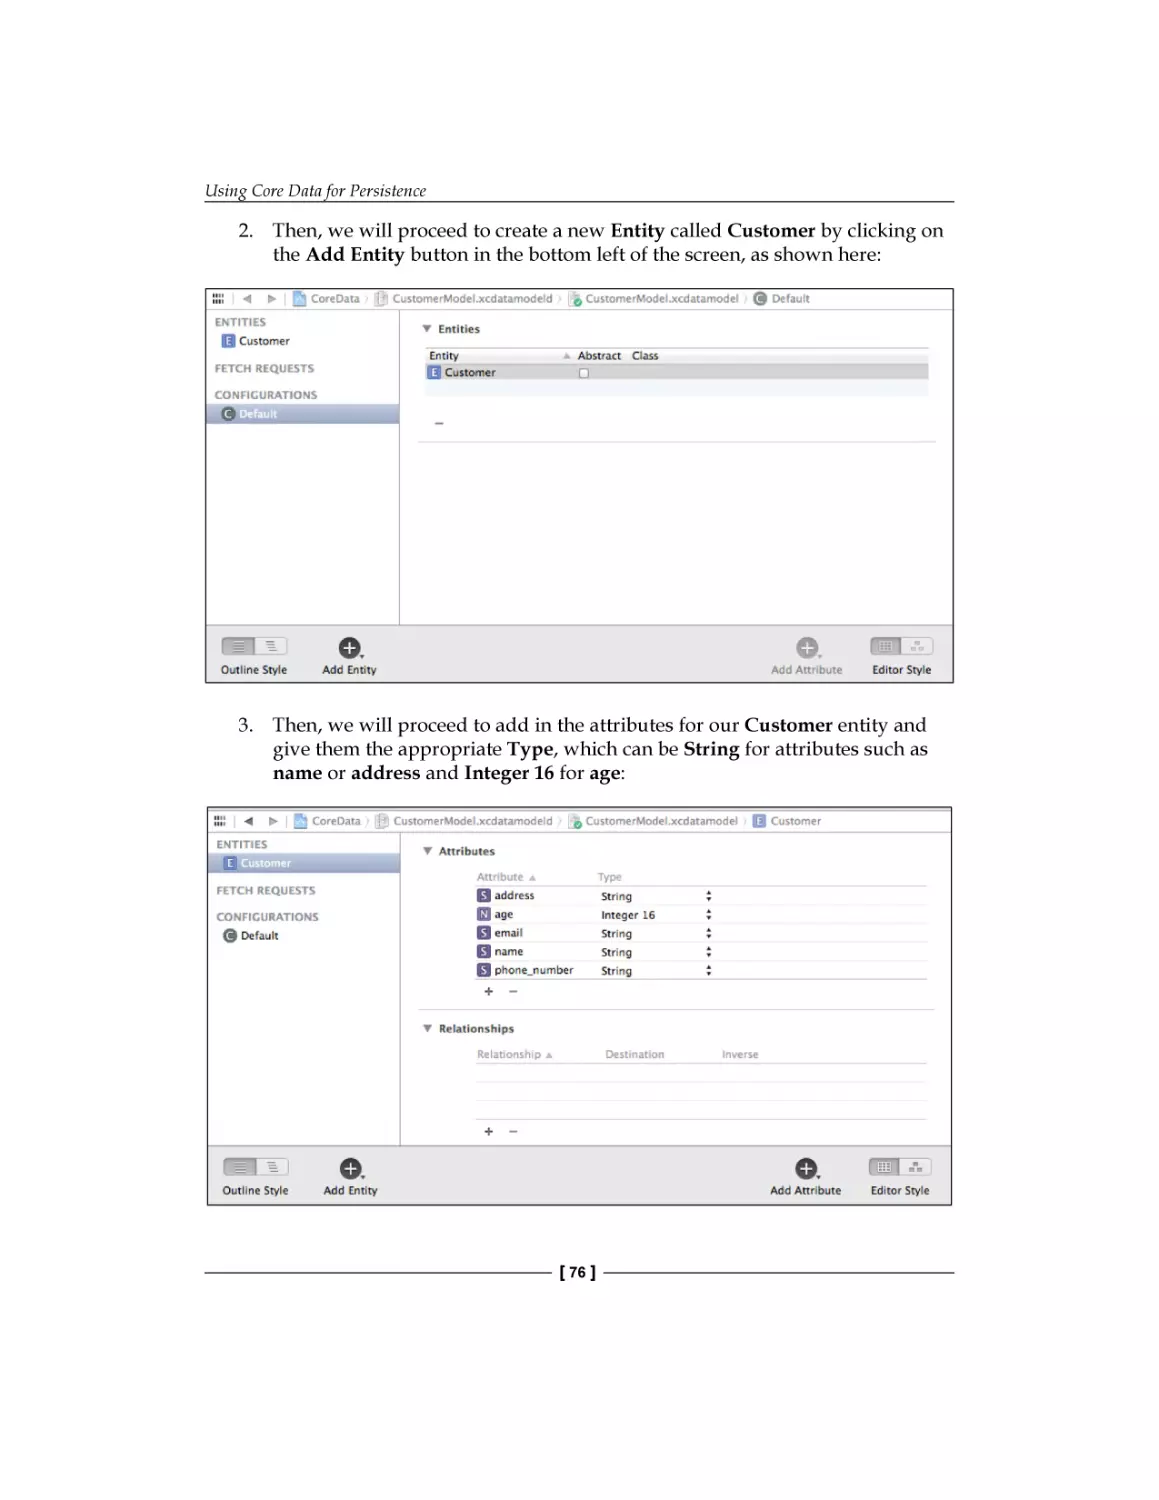
Putting it into practice
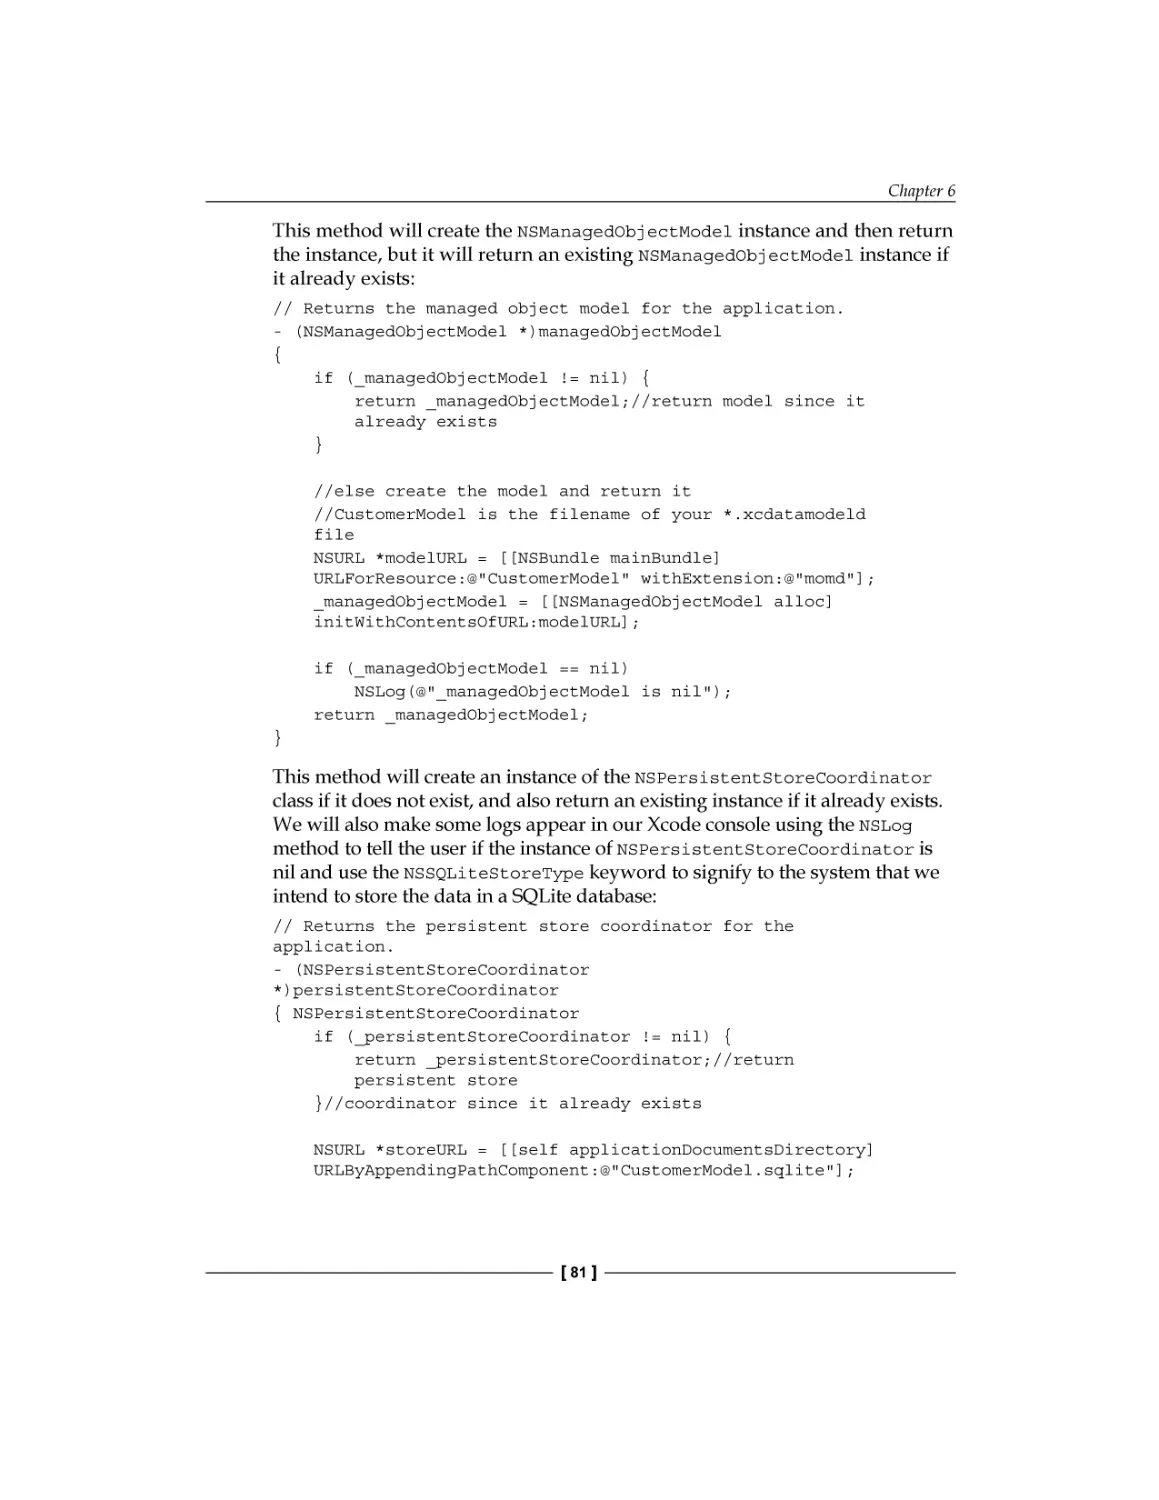
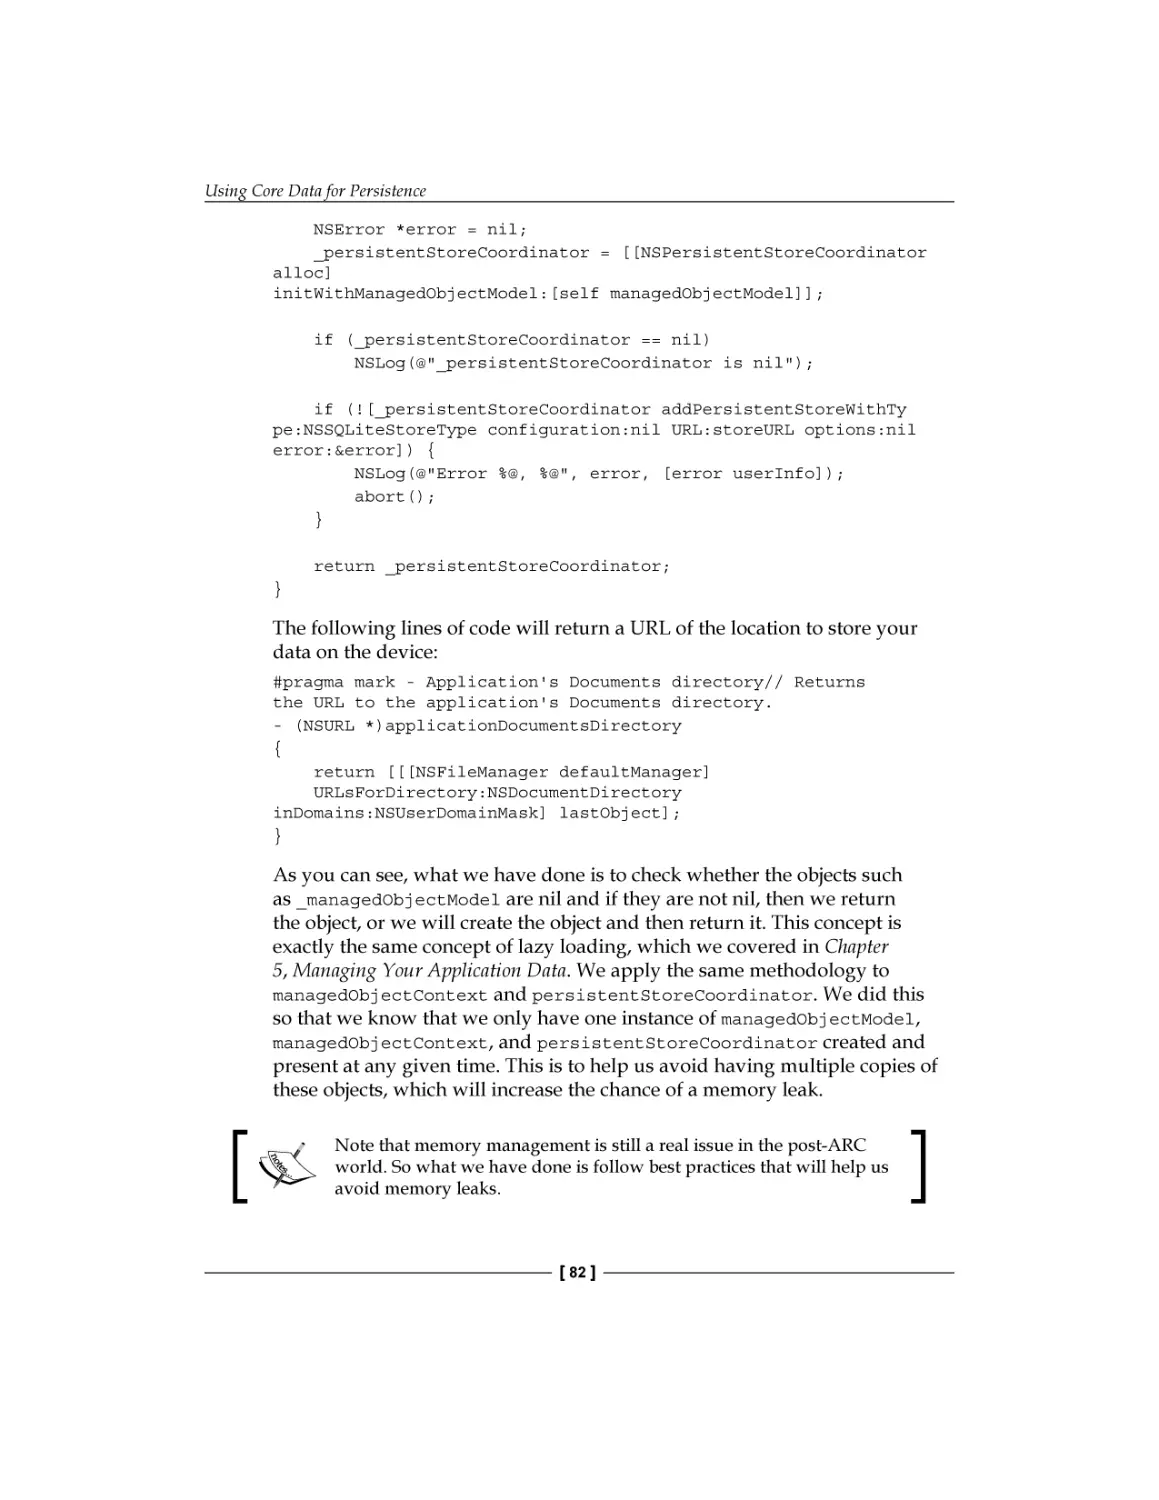
Getting into the code
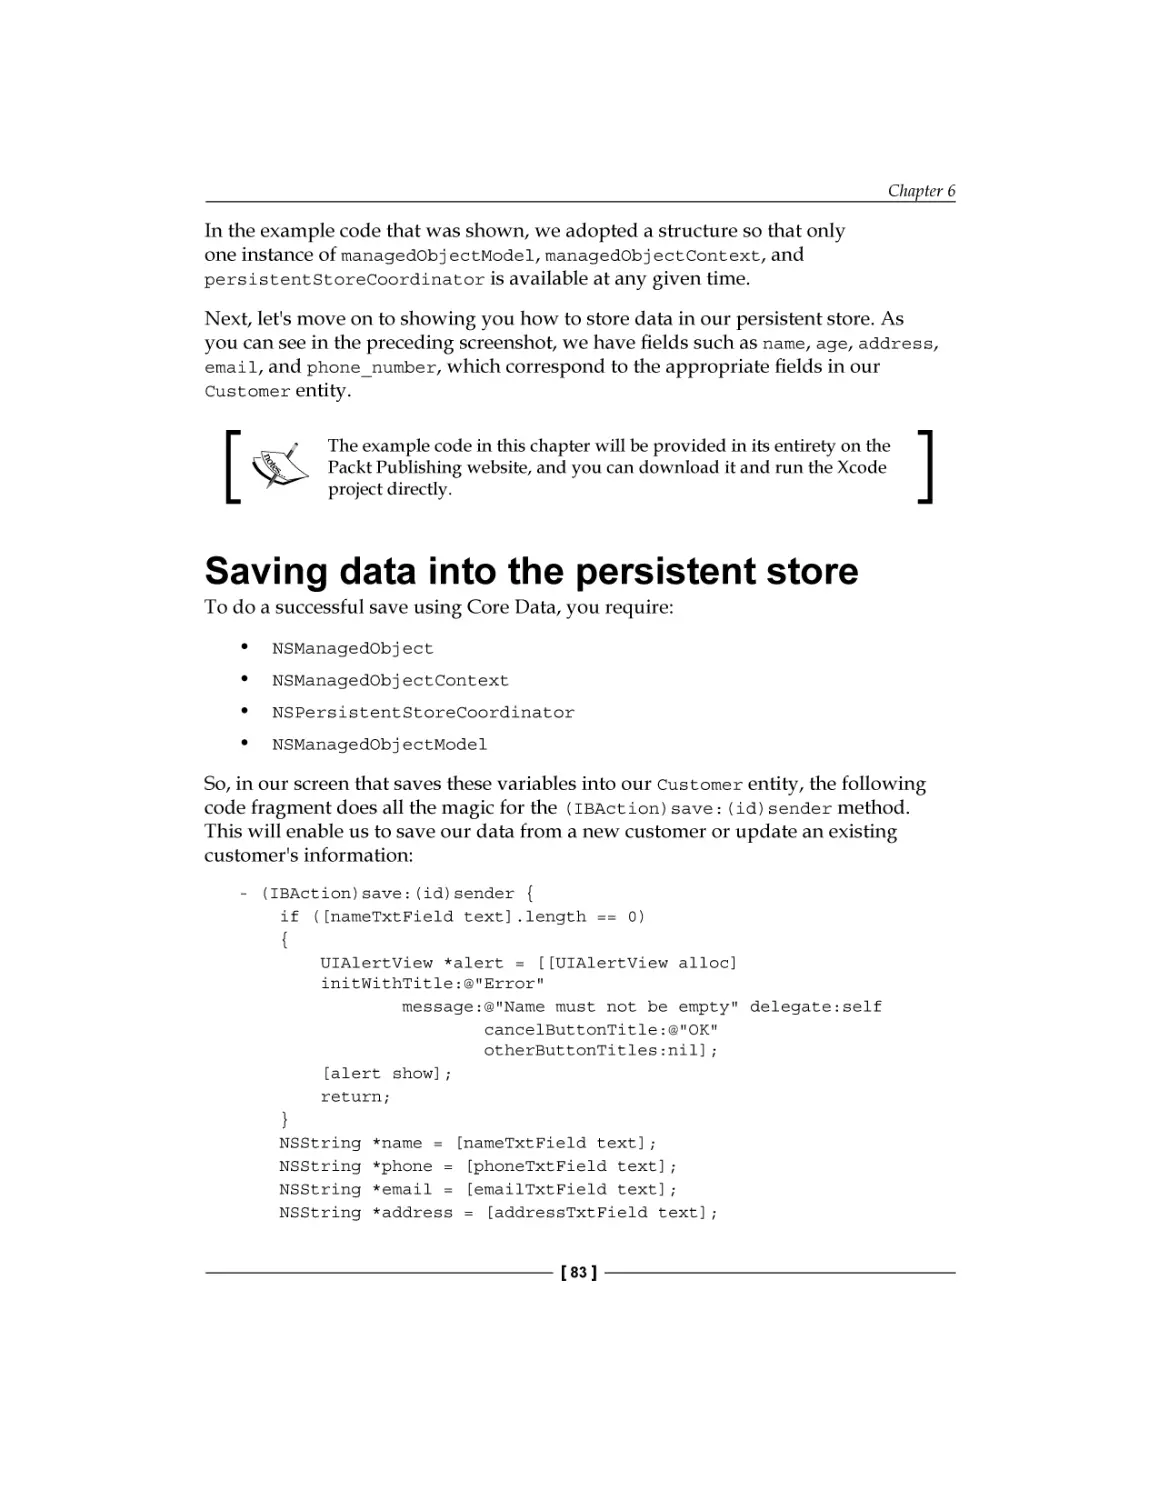
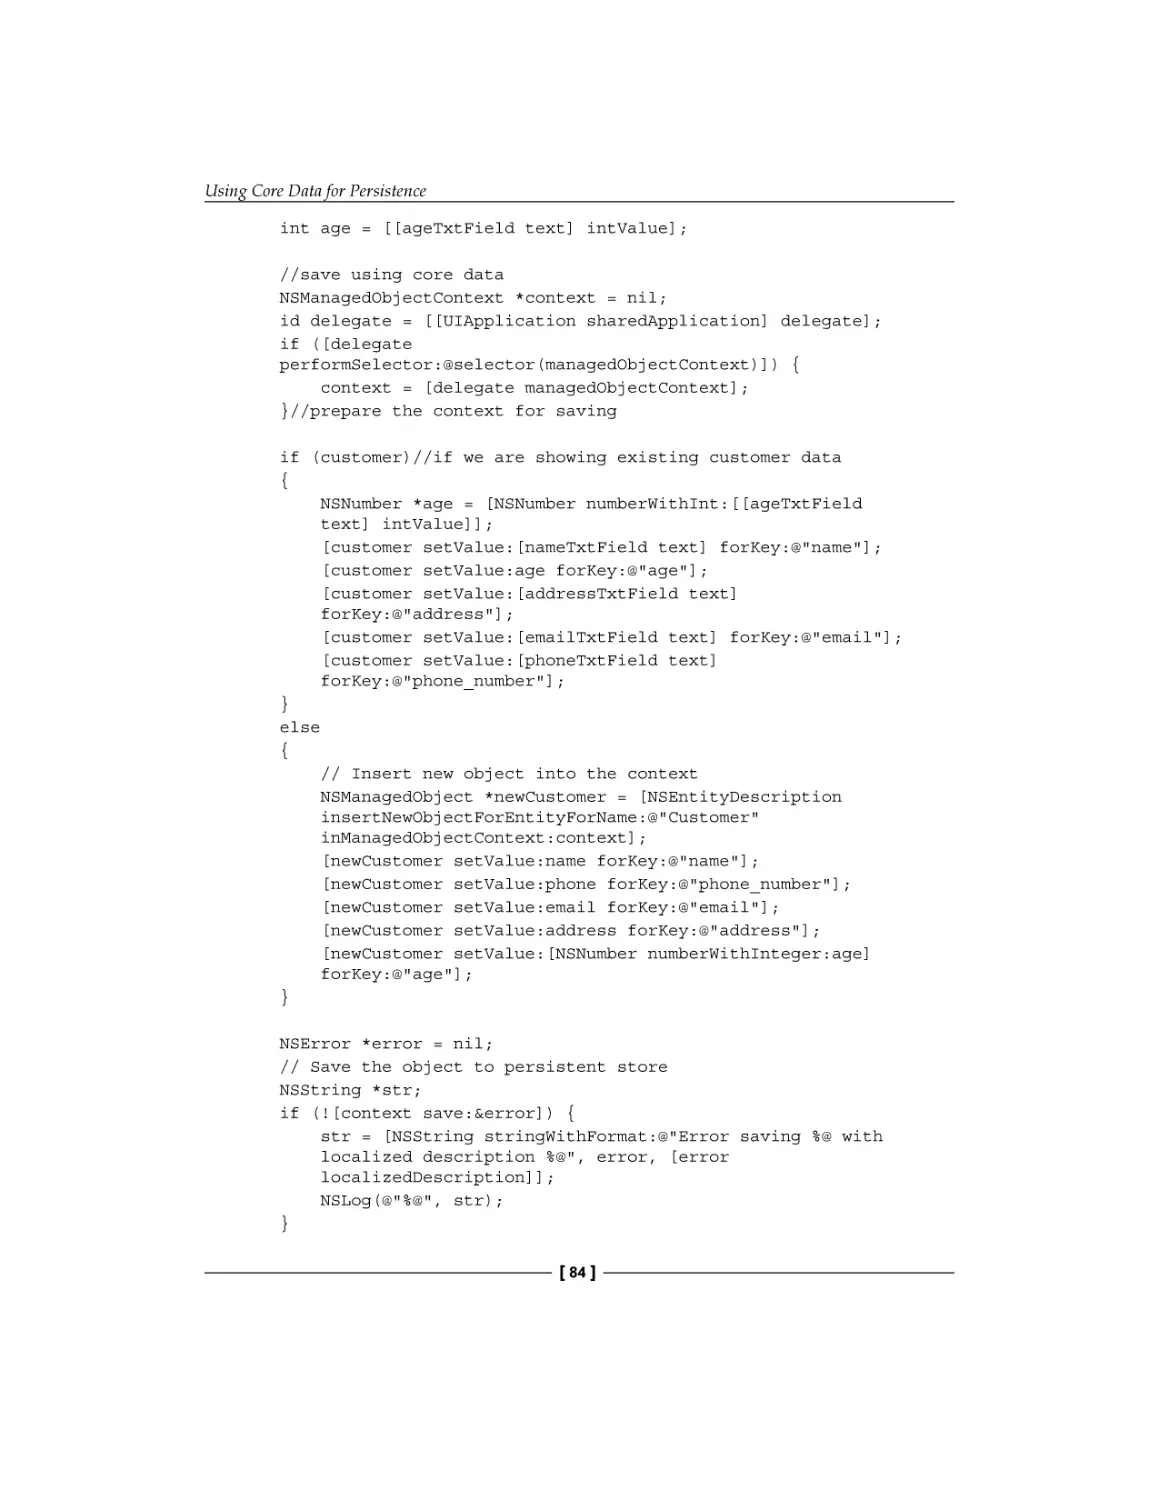
Saving data into the persistent store
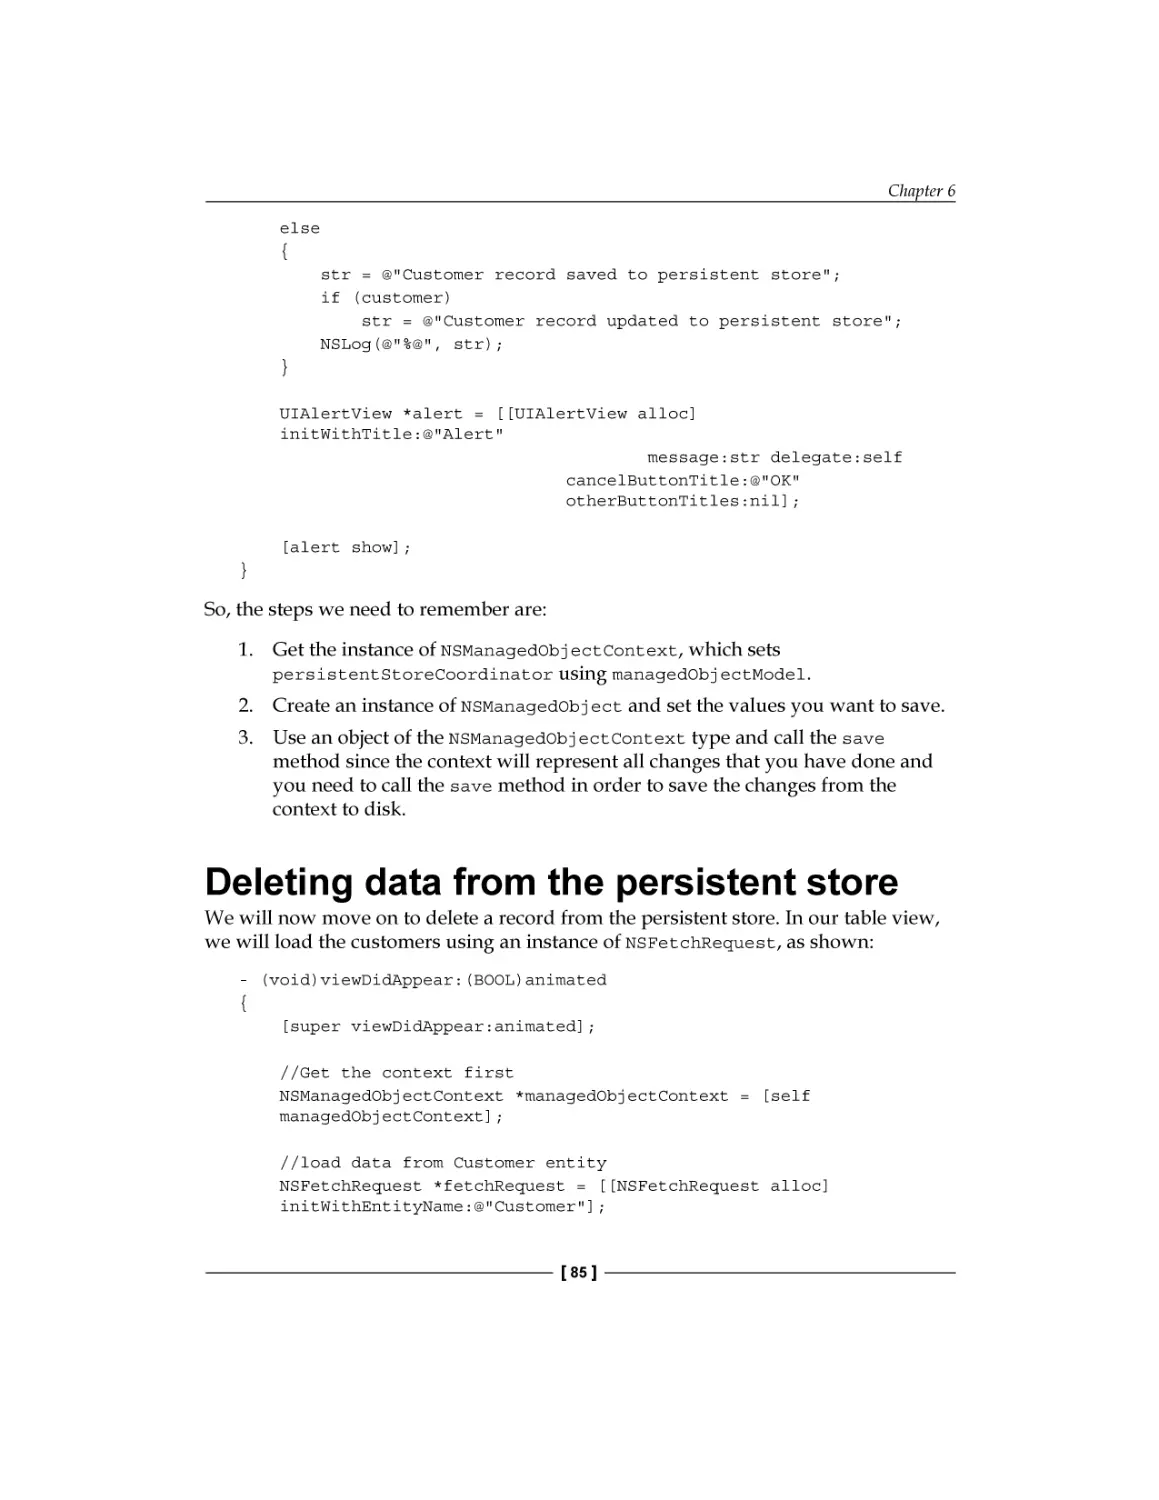
Deleting data from the persistent store
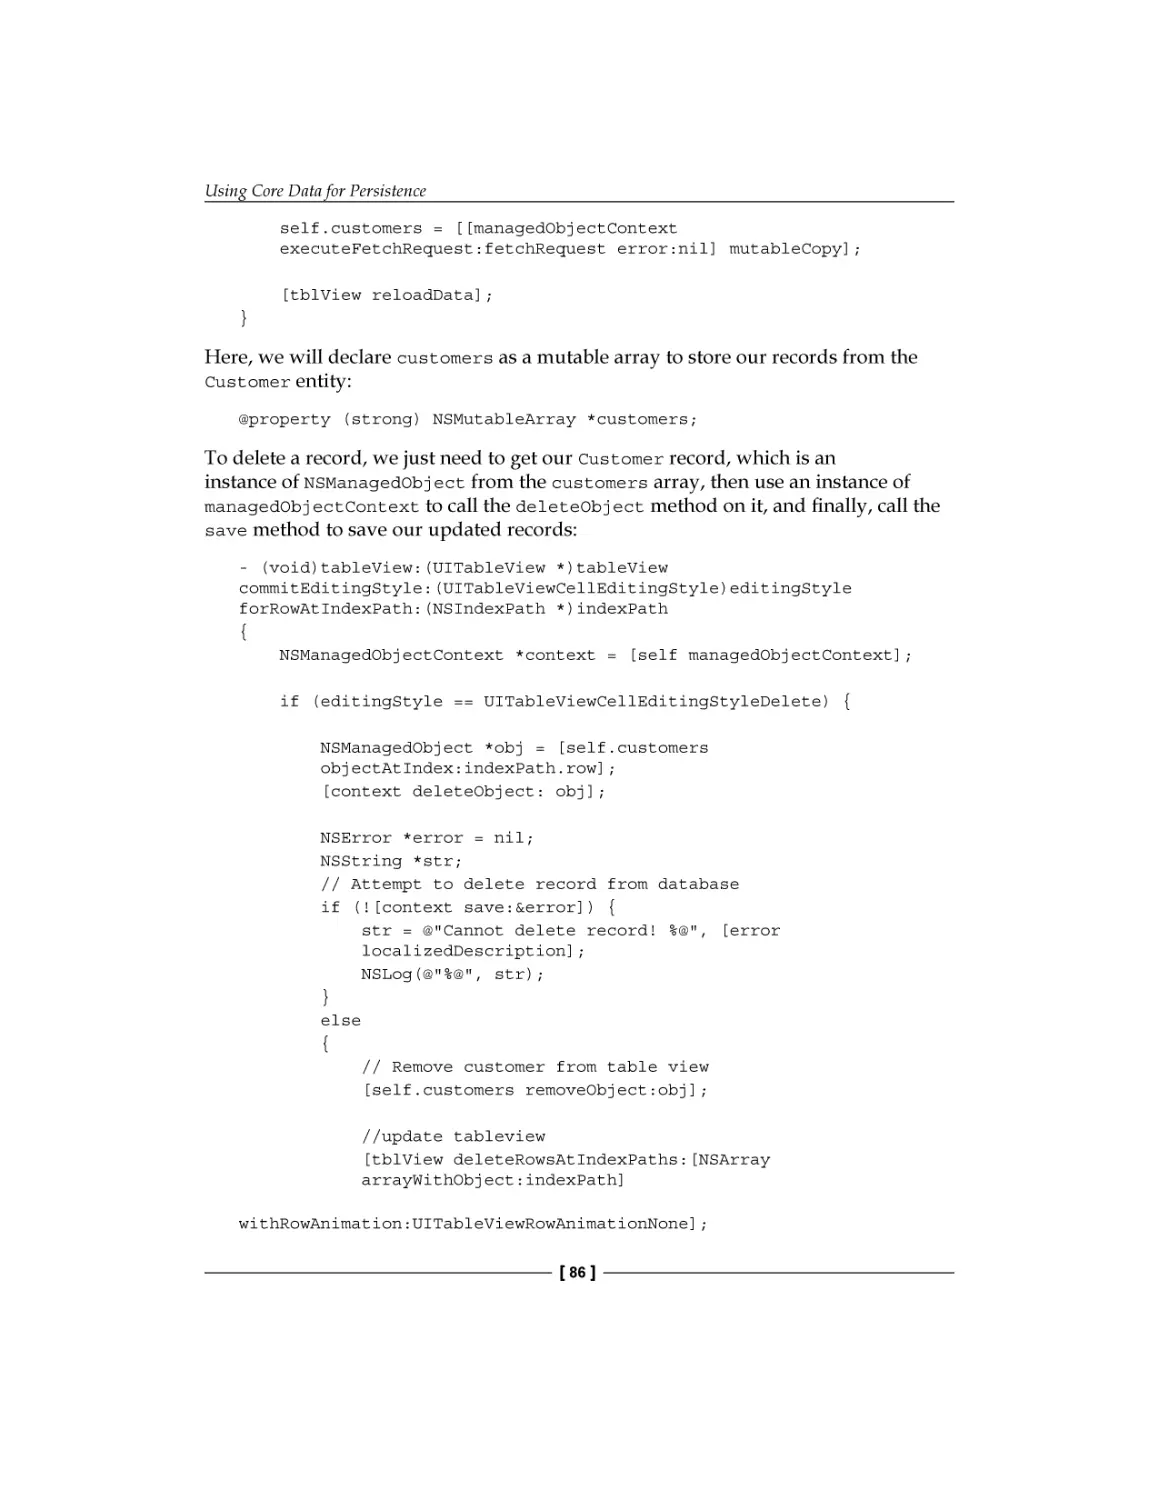
Updating data
Summary
What is key-value coding or KVC?
The NSKeyValueCoding protocol
Compliance of attributes and one-to-one relationships
Compliance of indexed one-to-many relationships
Compliance of unordered many-to-many relationships
[ ii ]
35
36
38
42
43
44
46
49
50
51
52
55
56
57
58
59
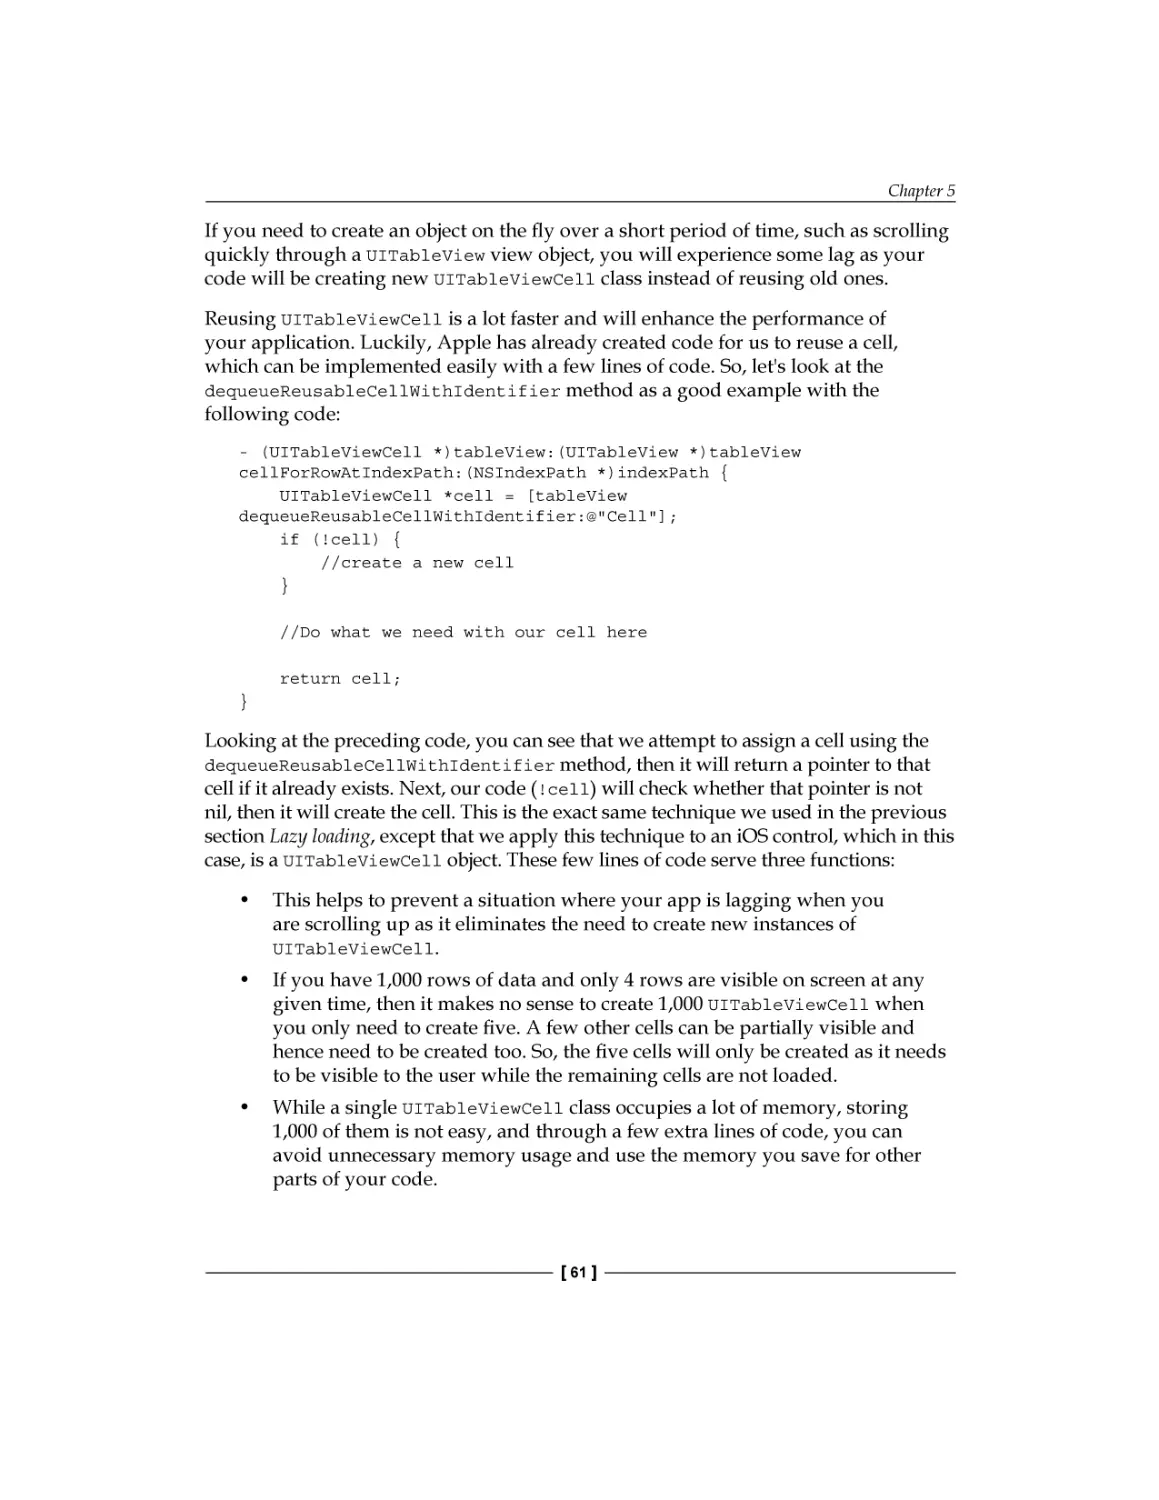
60
62
63
65
68
68
70
72
72
74
80
83
85
87
88
90
92
92
93
94
Table of Contents
Advantages of key-value coding
Disadvantages of key-value coding
Manual subsets of NSKeyValueCoding behavior
Advantages of creating your own lookup path
Disadvantages of creating your own lookup path
Associated objects
Advantages of using associated objects
Disadvantages of using associated objects
Selectors as keys
Advantages of using selectors as keys
Disadvantages of using selectors as keys
Maximum flexibility and handling unusual keys/values
Advantages of doing your own implementation
Disadvantages of doing your own implementation
Key-value observing
Implementing key-value observing
Performance considerations
Summary
95
95
95
96
96
97
97
97
97
98
98
98
100
100
100
100
103
103
Chapter 8: Introduction to Swift
105
Chapter 9: Memory Management and Debugging
123
Welcome to Swift
Basics of Swift
Variable declaration
Iterating statements
Conditional statements
Functions
Classes and structures in Swift
Closures
Memory management in Swift
Summary
Memory leaks
Strong/weak references
Retain cycles
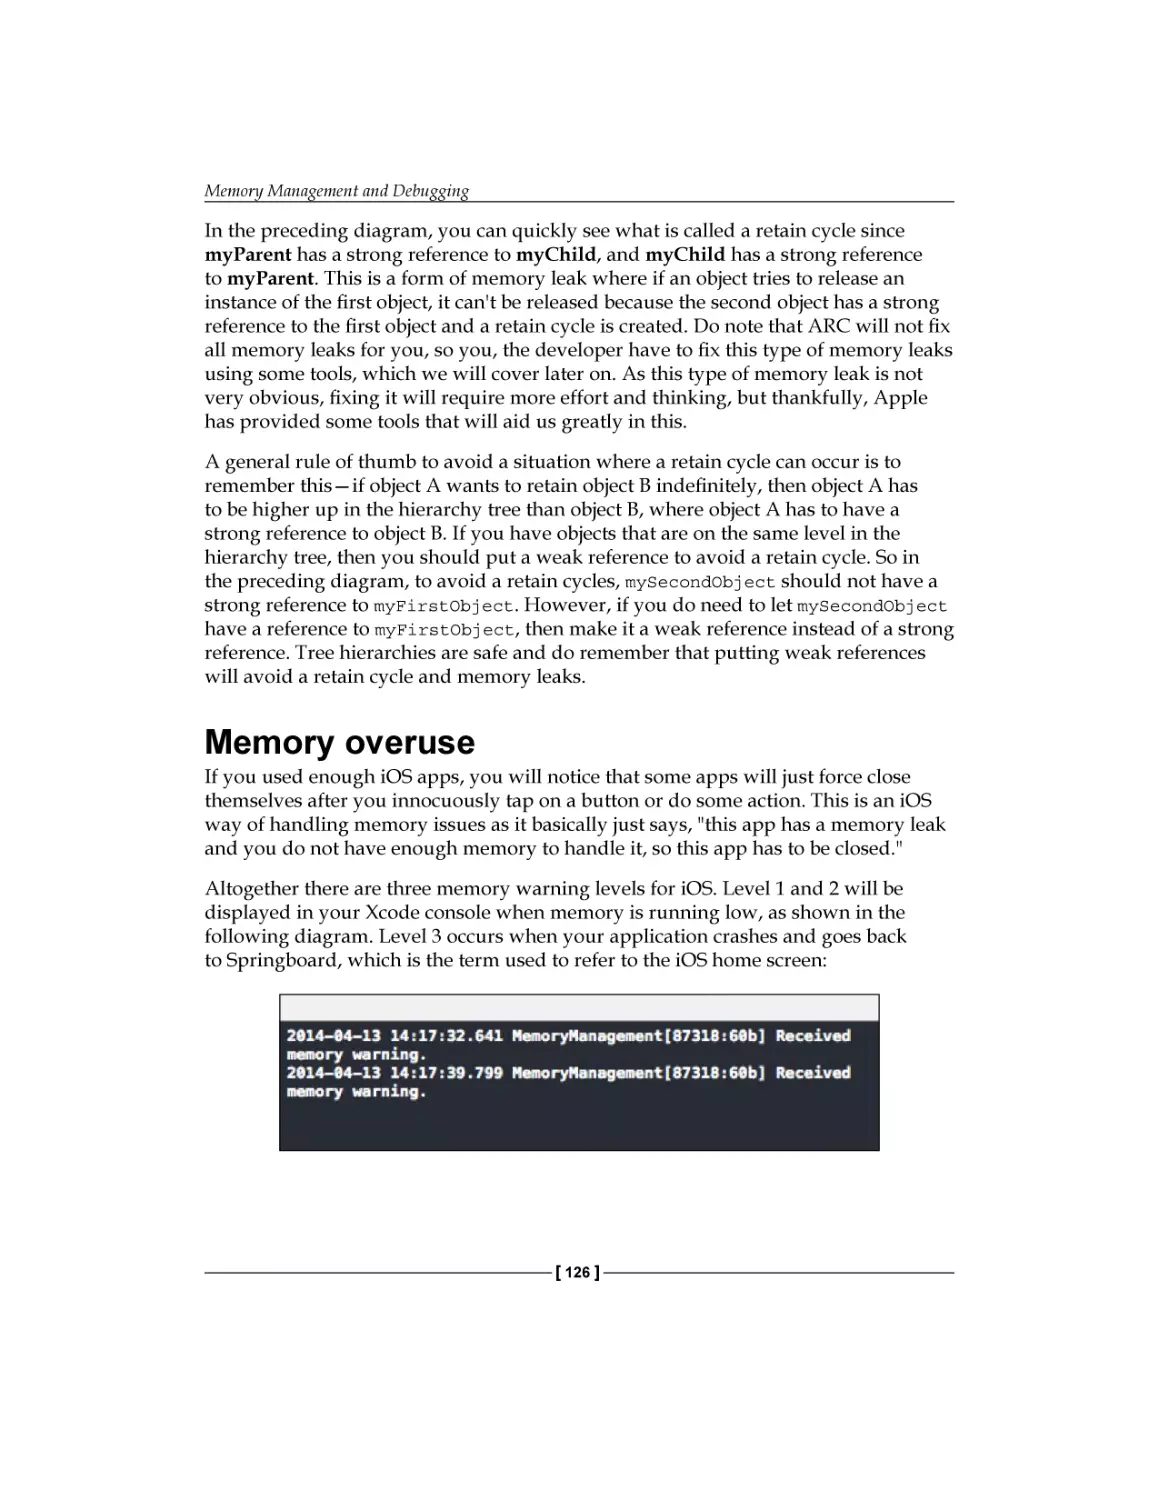
Memory overuse
Using the debugger and breakpoints
Collecting data on your app
Plumbing memory leaks
Using the LLVM / Clang Static Analyzer
Using NSZombie
Summary
[ iii ]
105
107
107
111
111
112
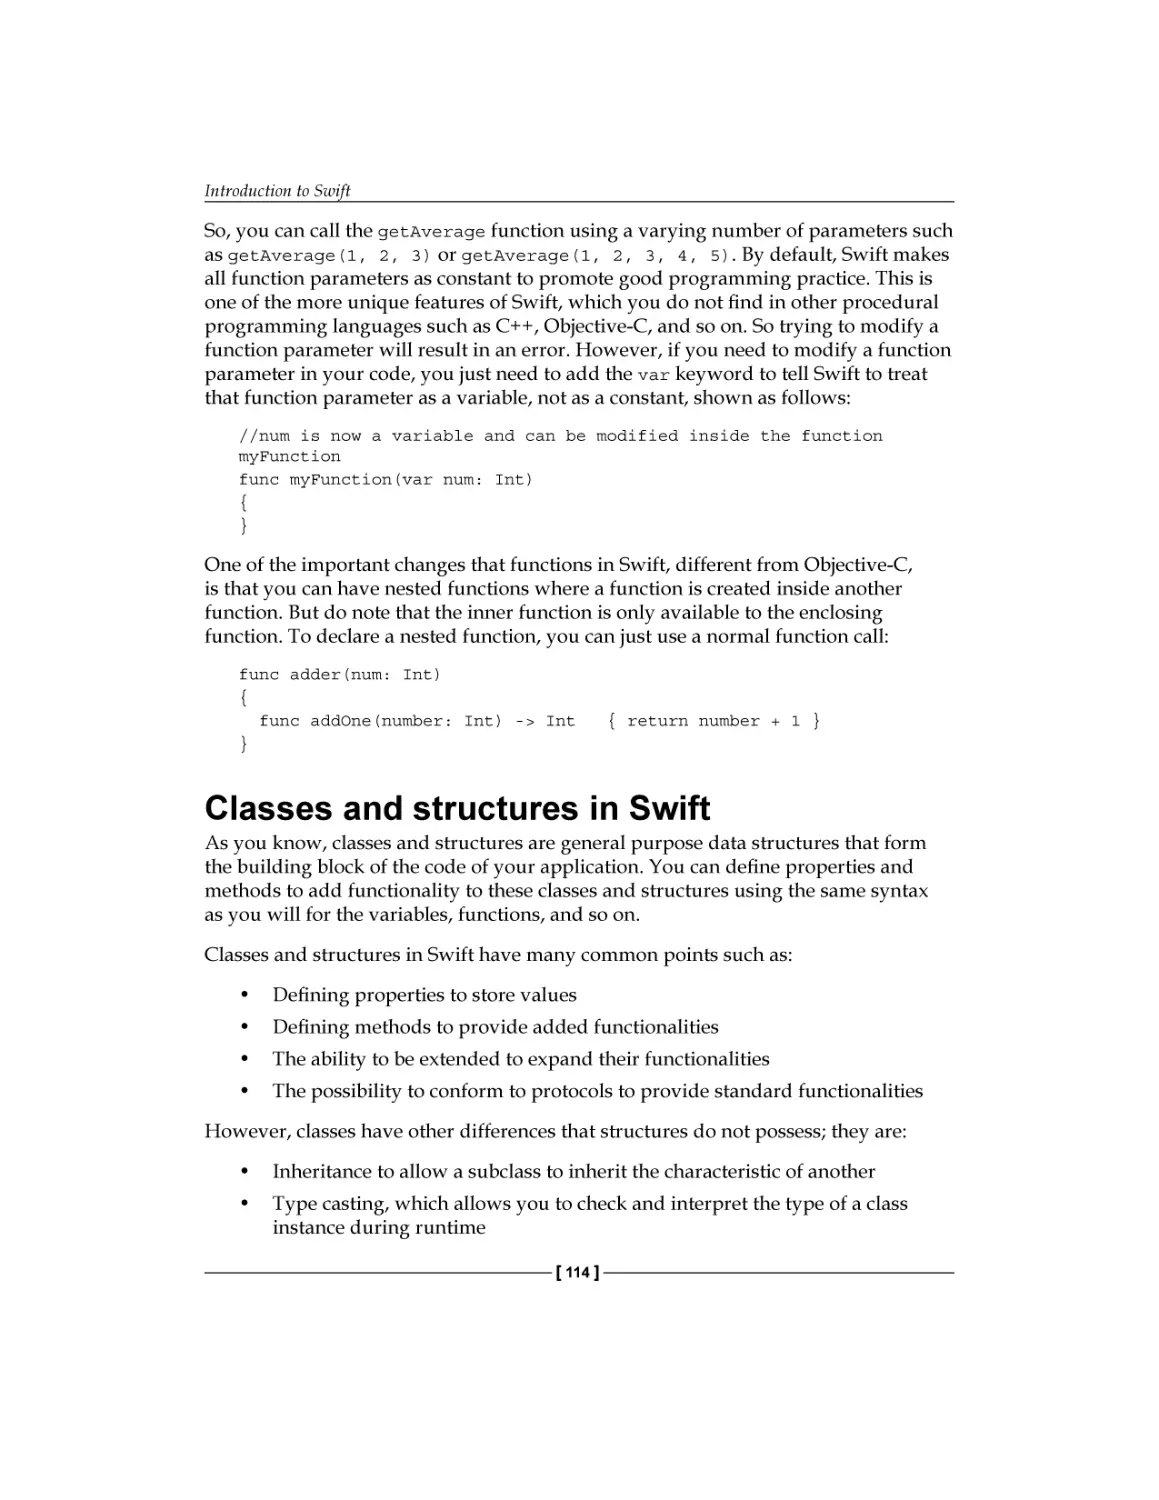
114
116
117
120
124
124
125
126
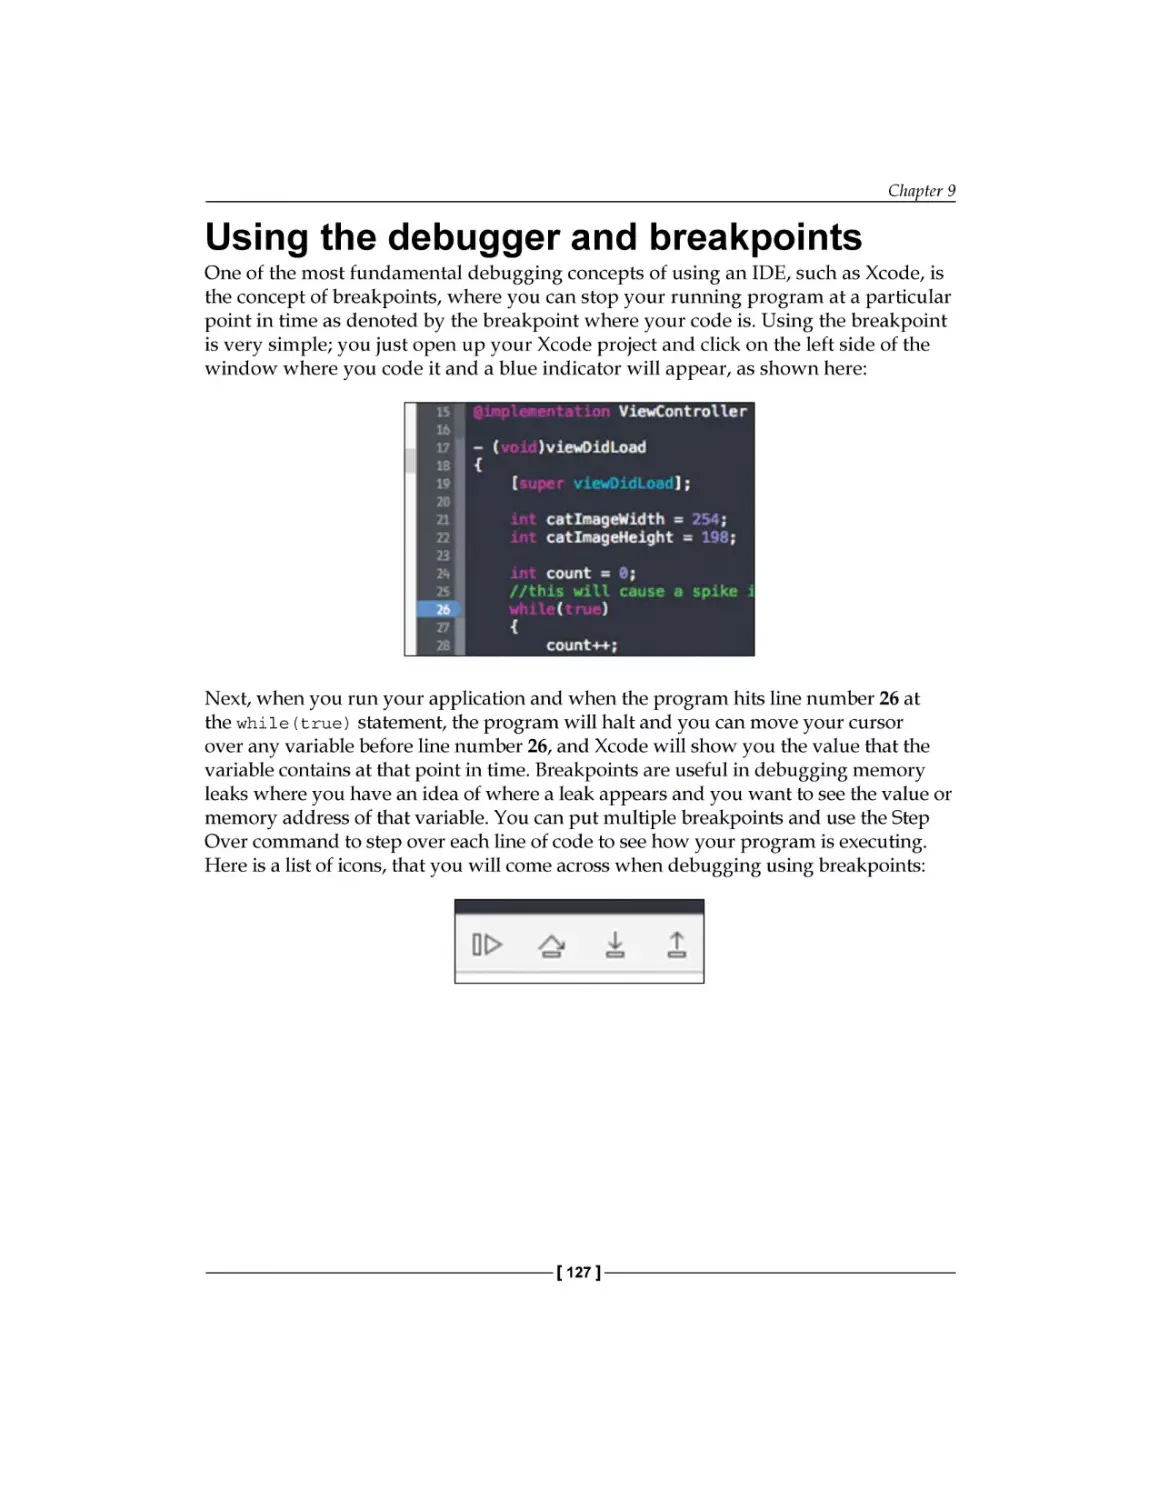
127
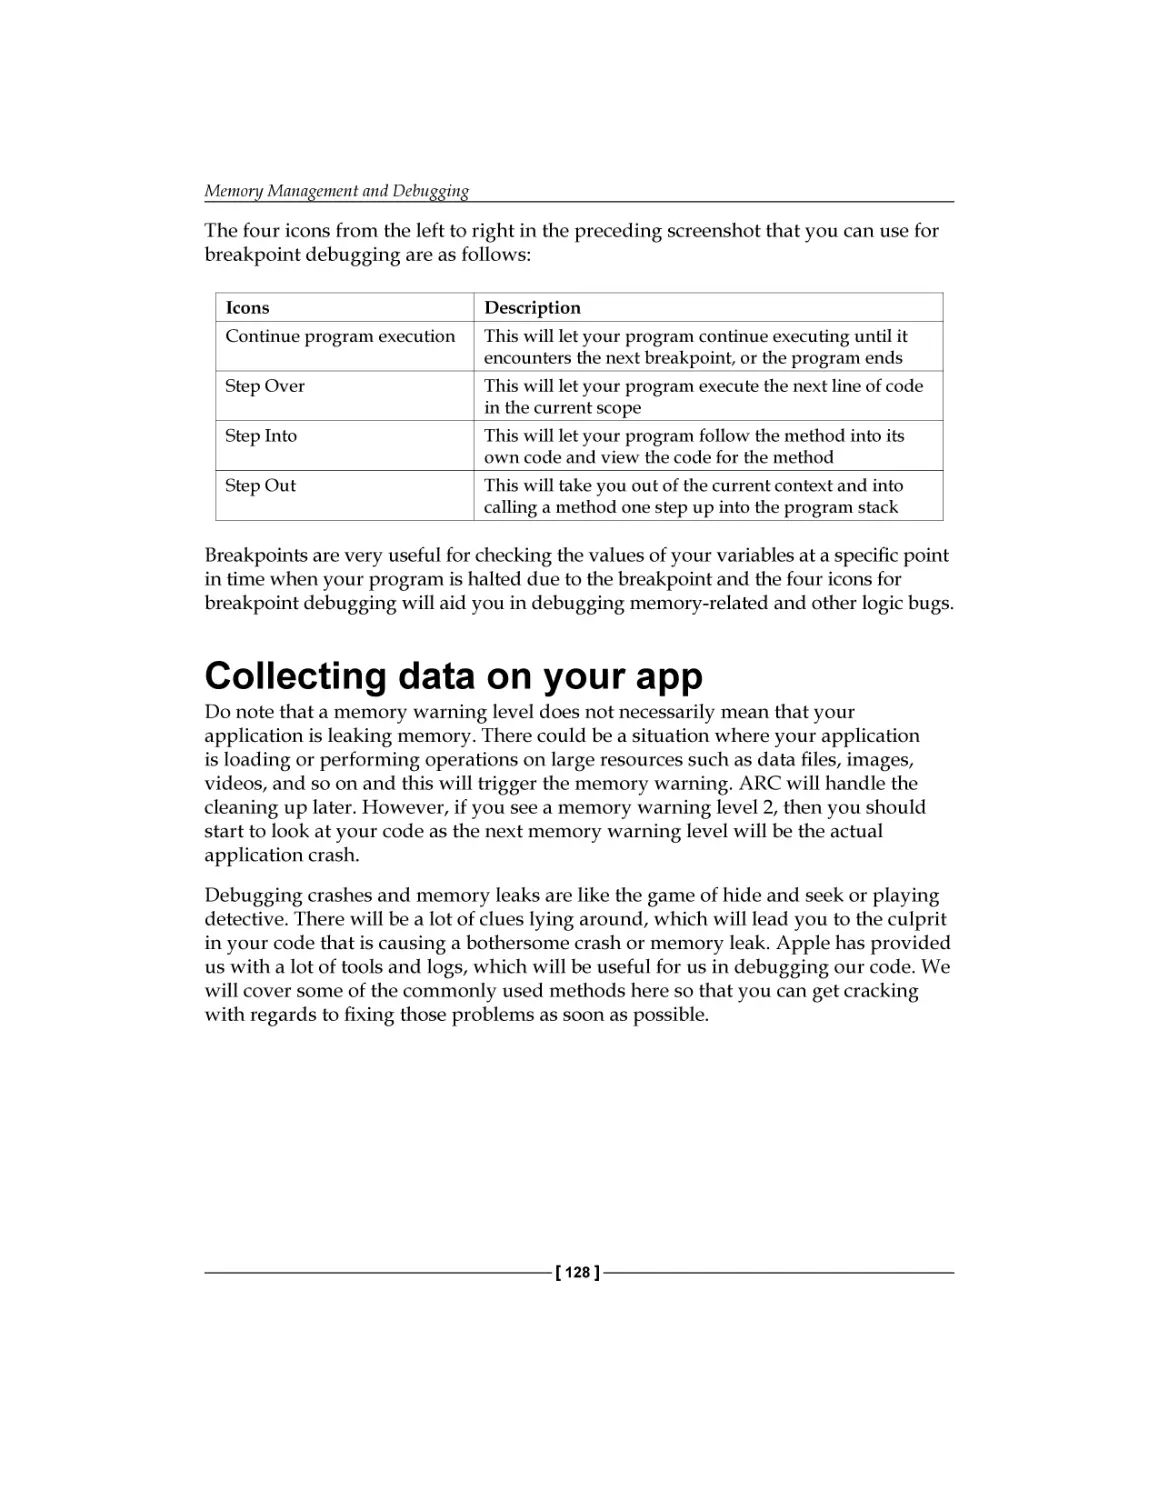
128
131
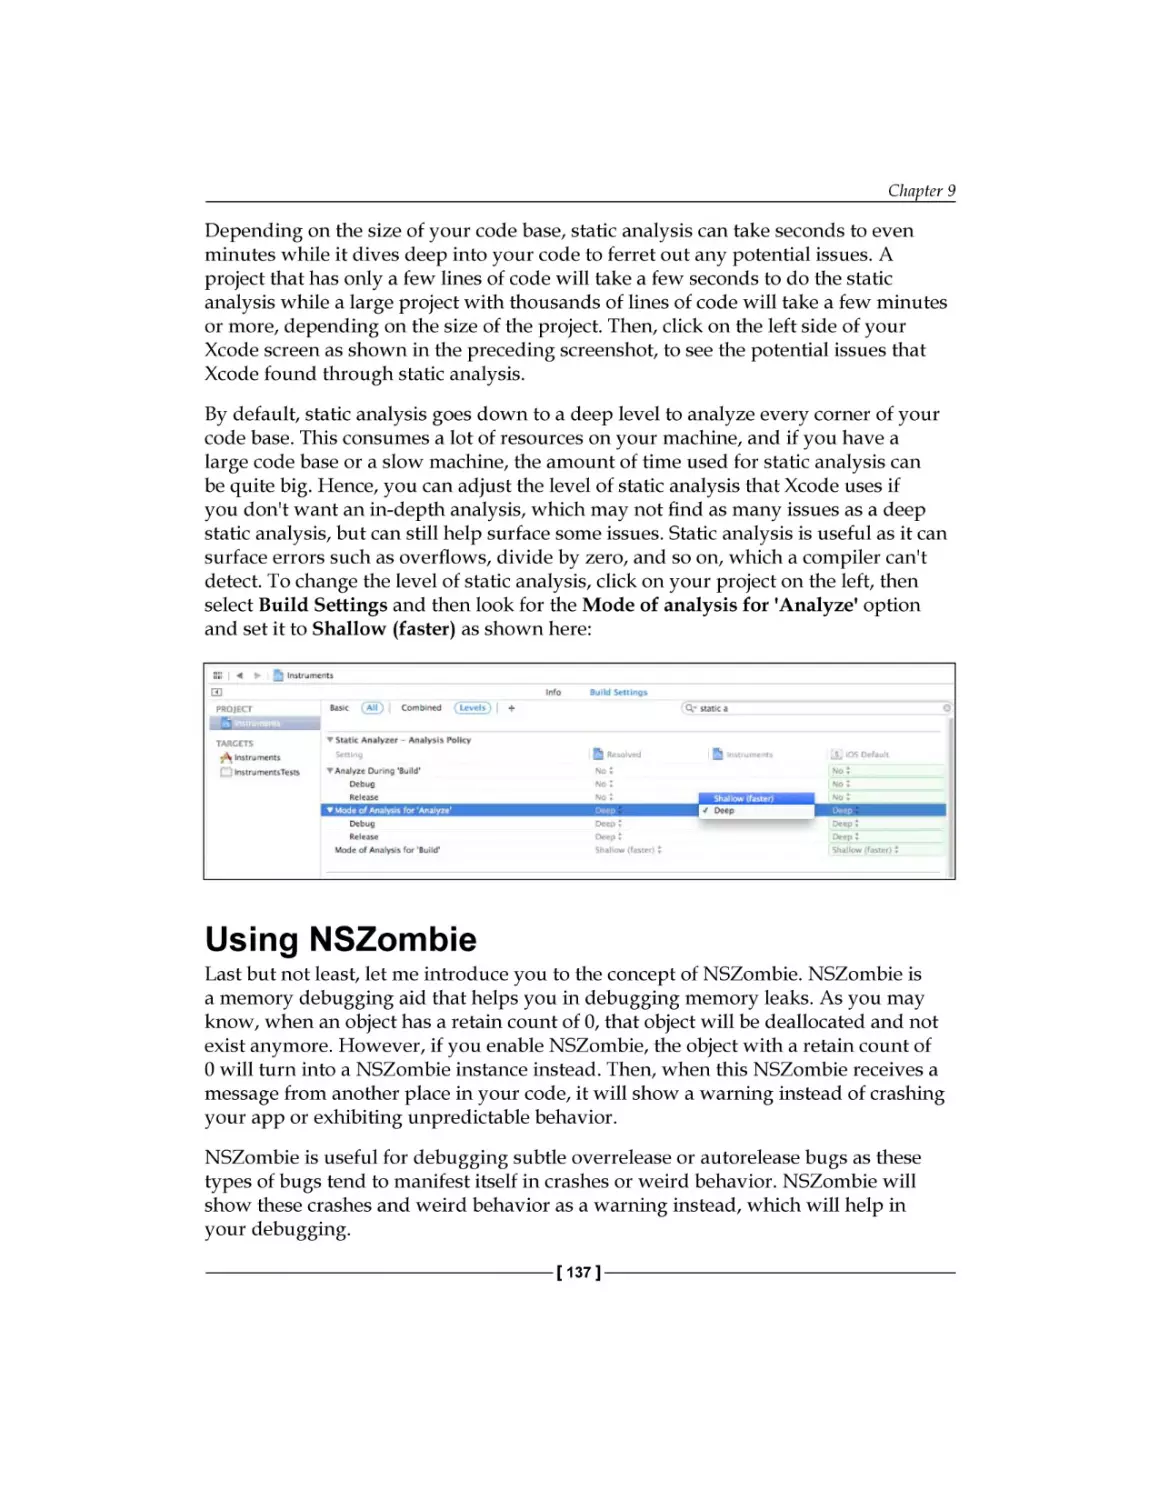
136
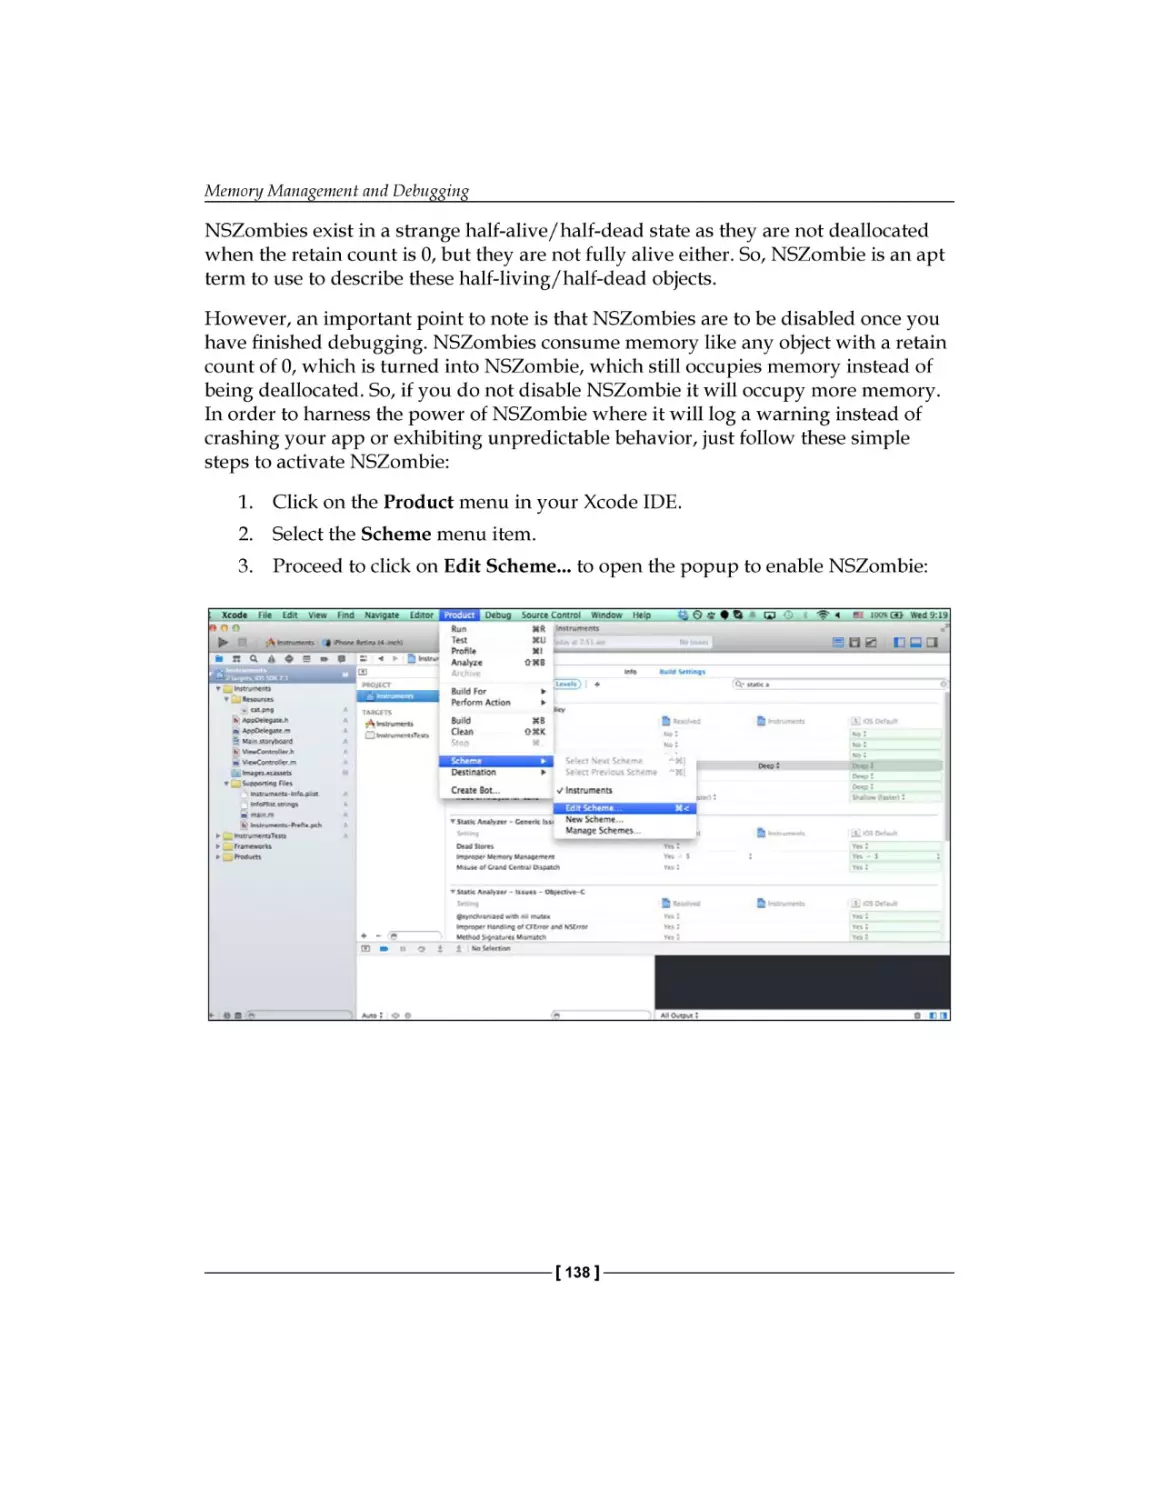
137
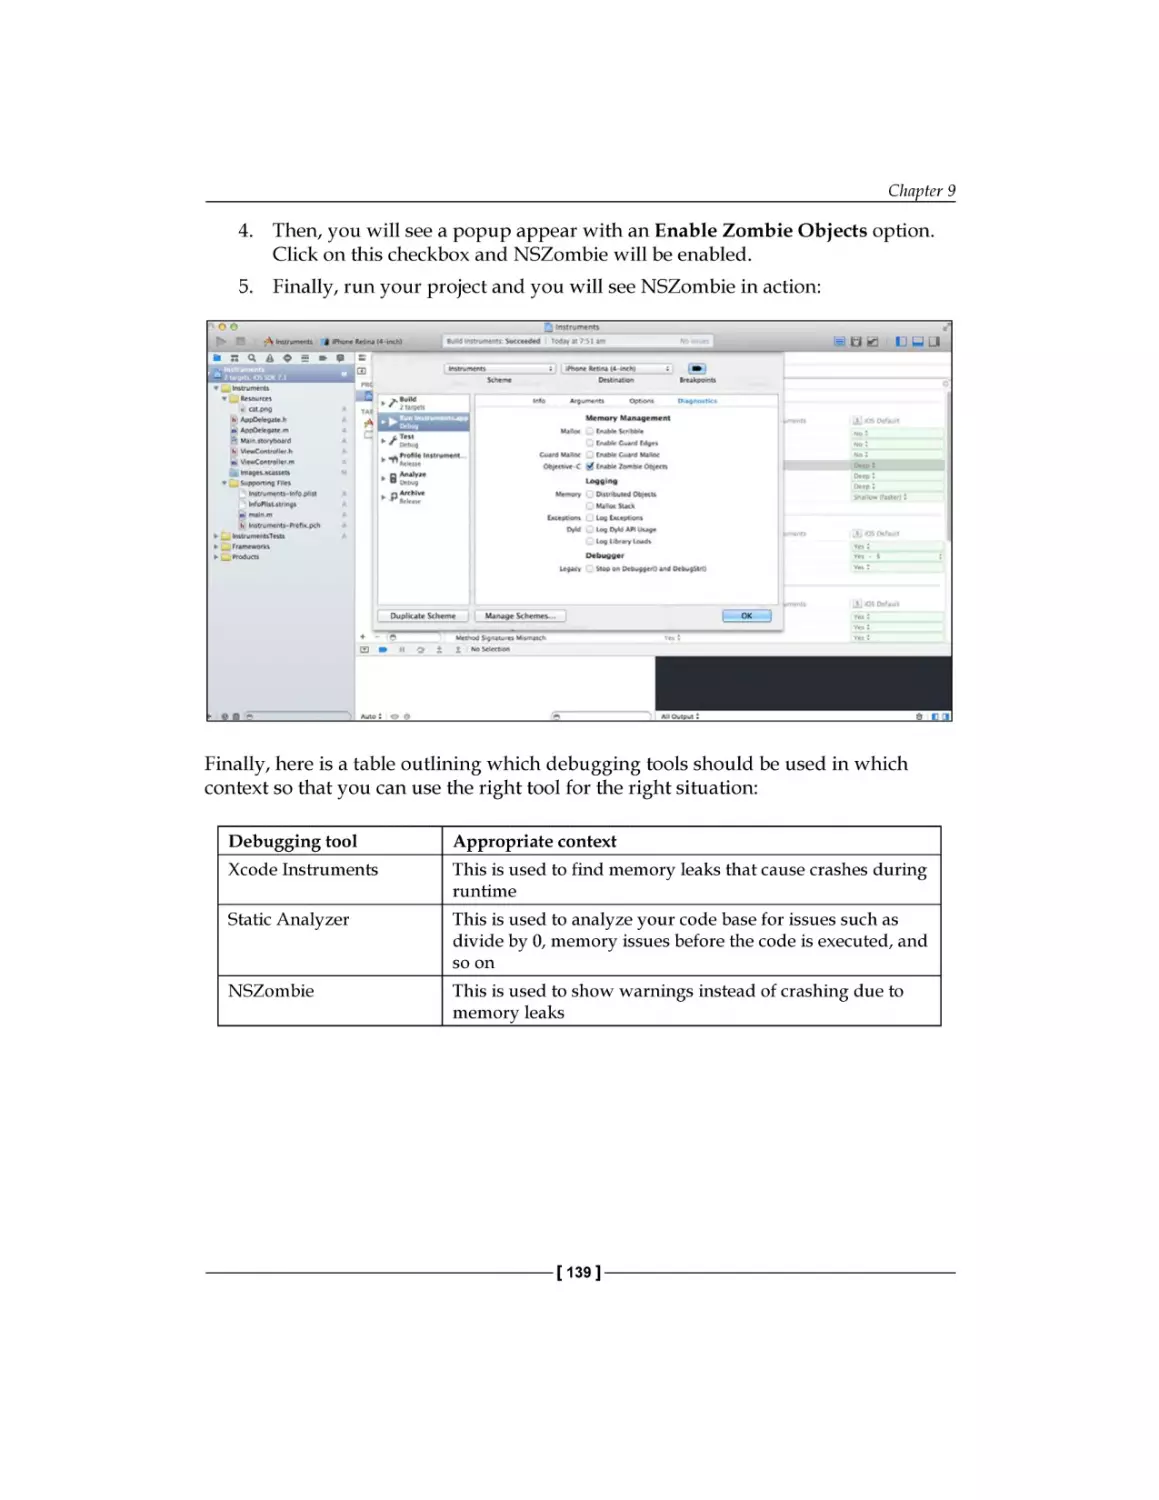
140
Table of Contents
Chapter 10: Tips and Tricks for Memory Management
141
Chapter 11: Features of Xcode 6
155
Objective-C, C, and memory management
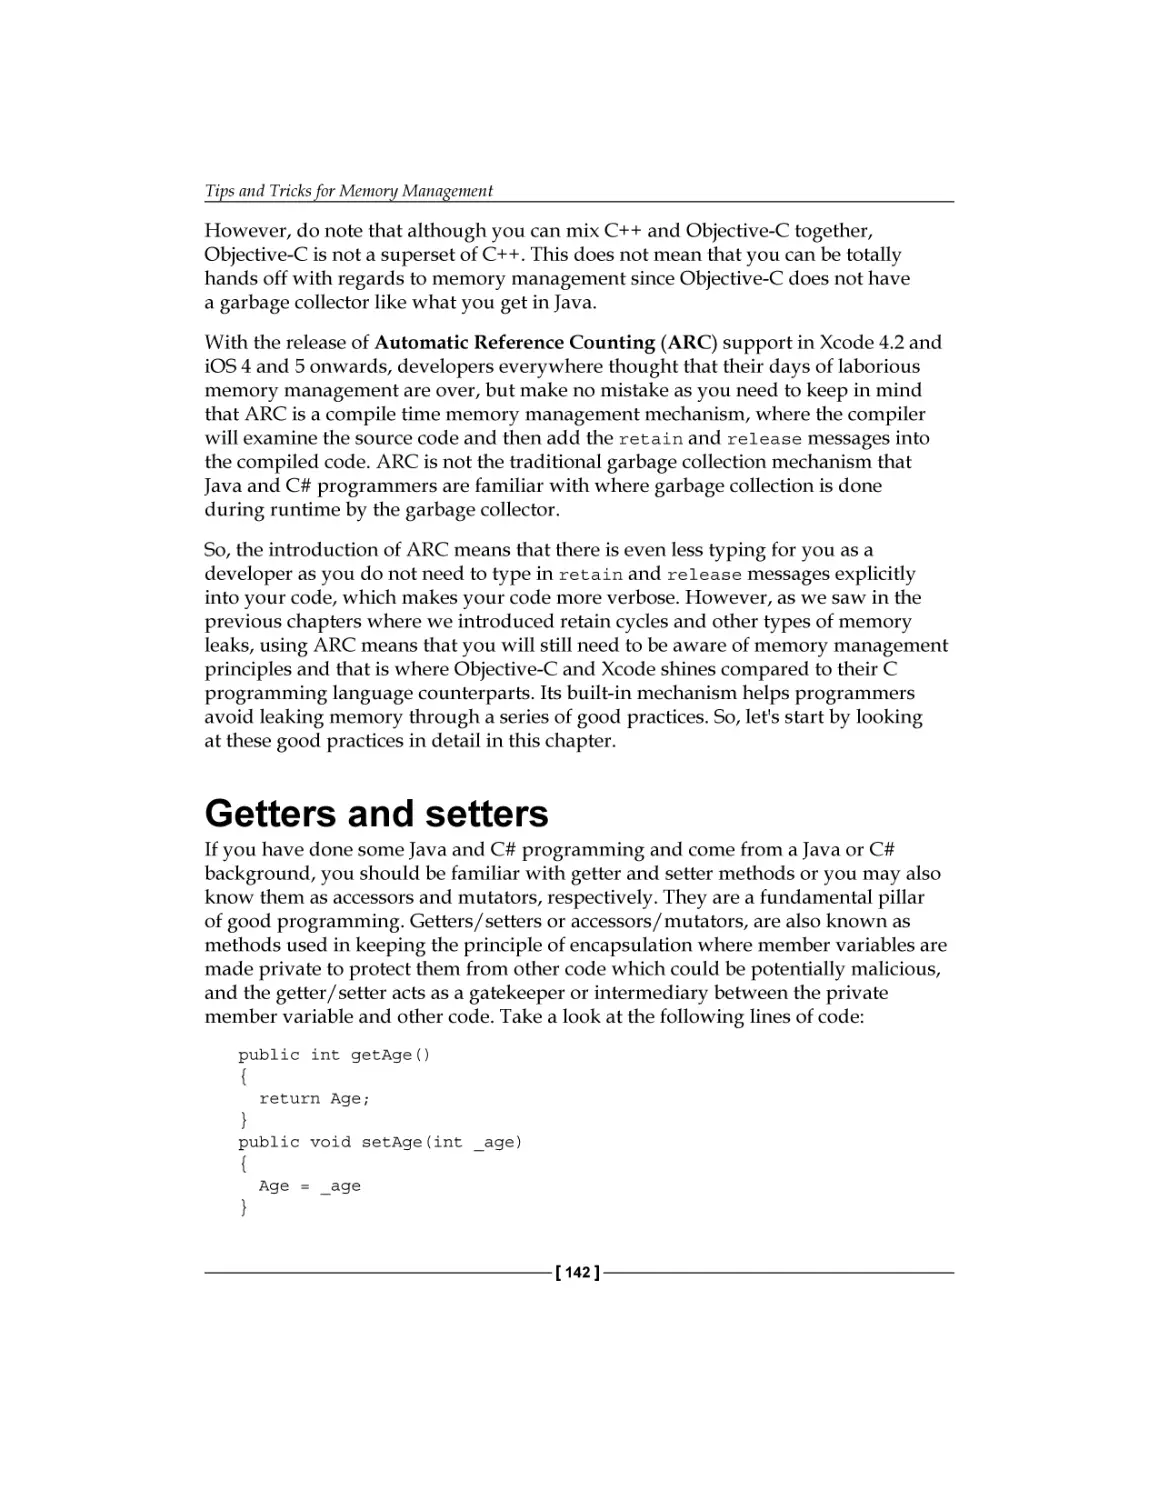
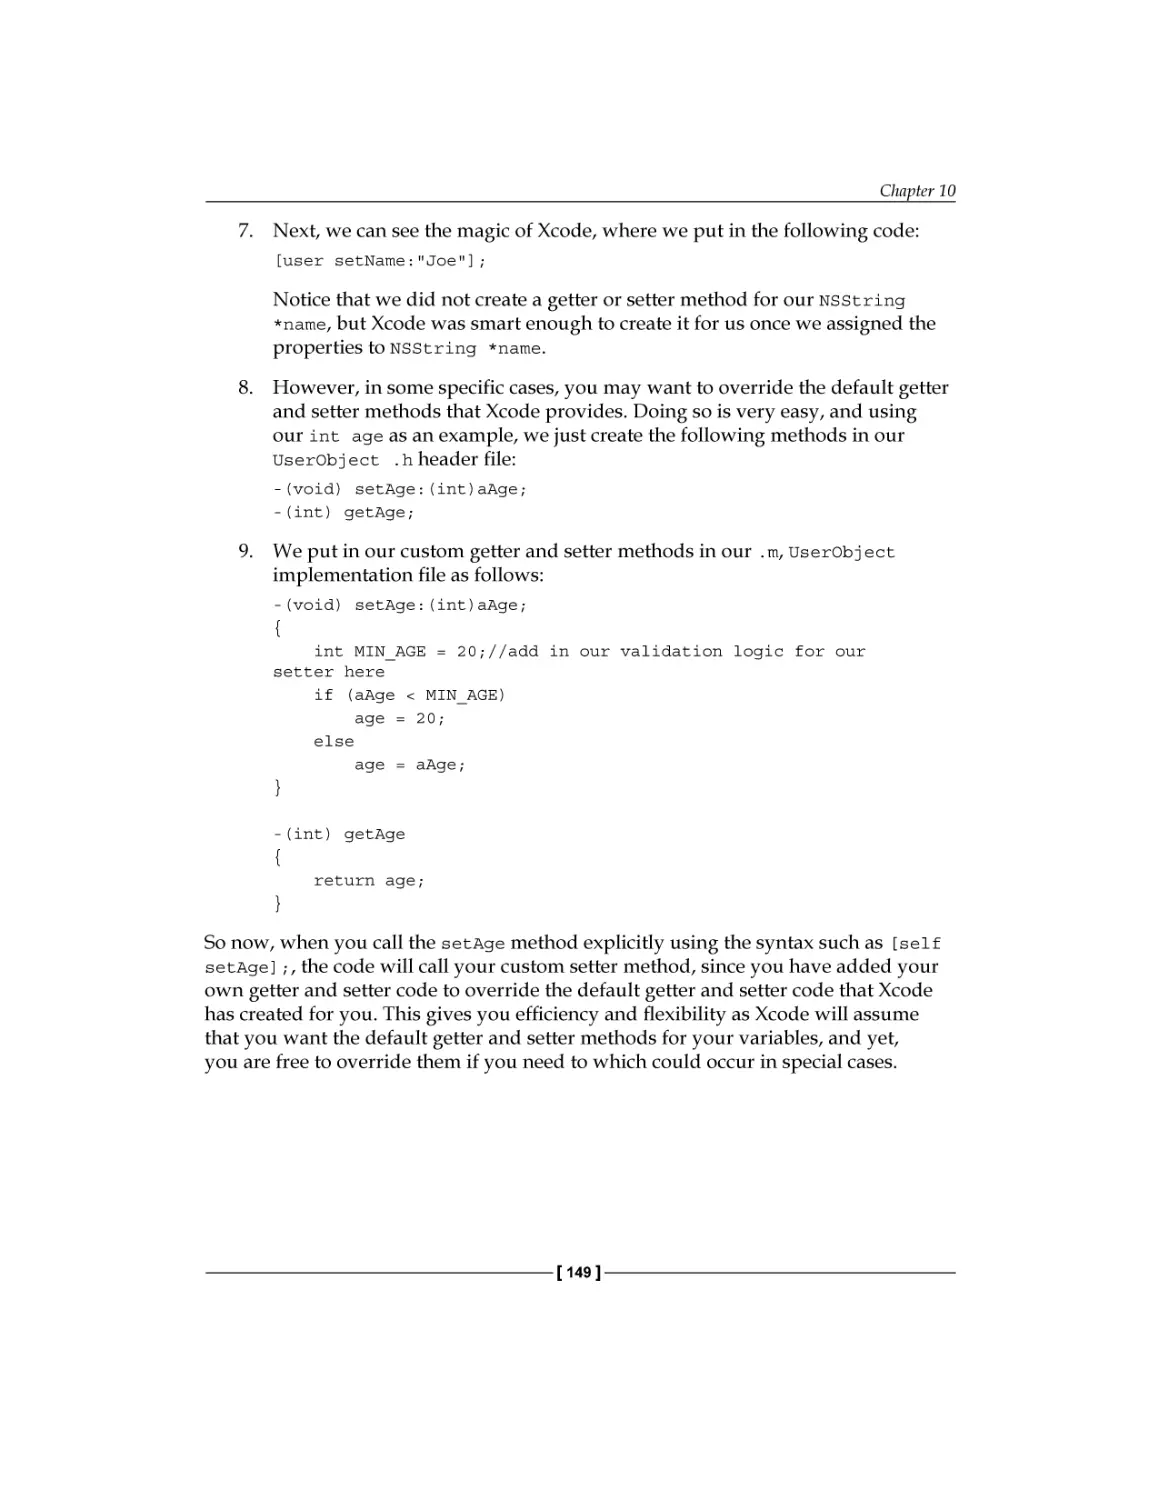
Getters and setters
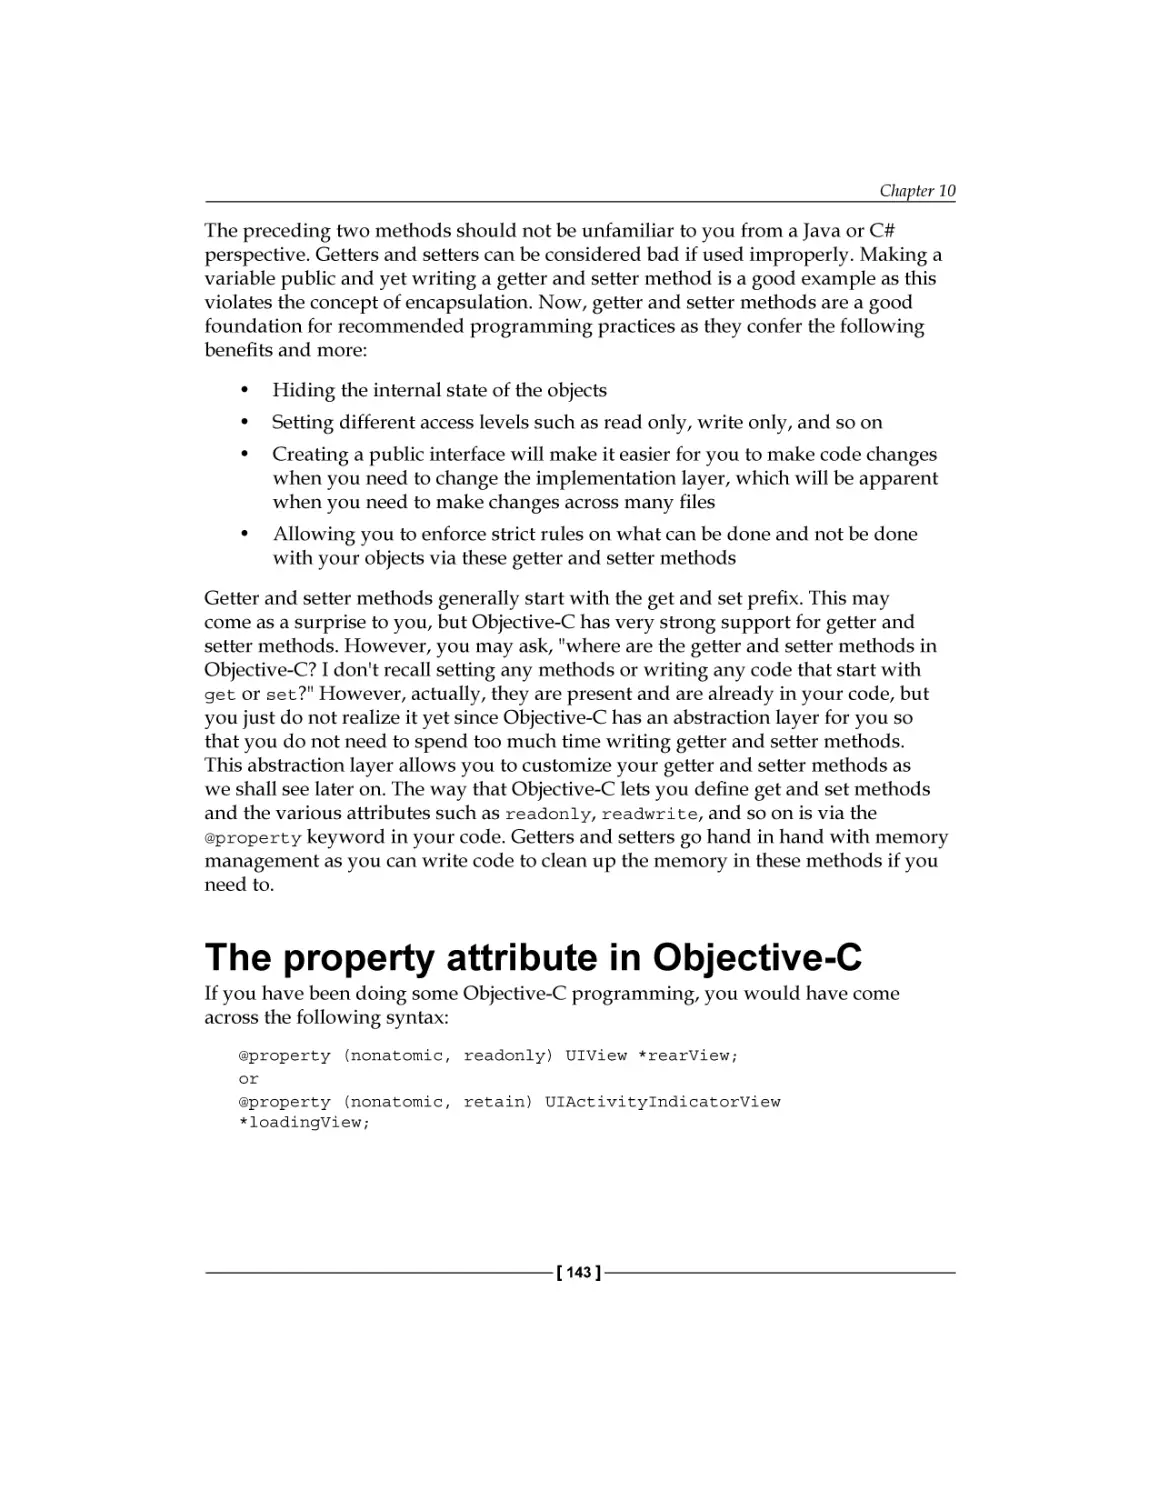
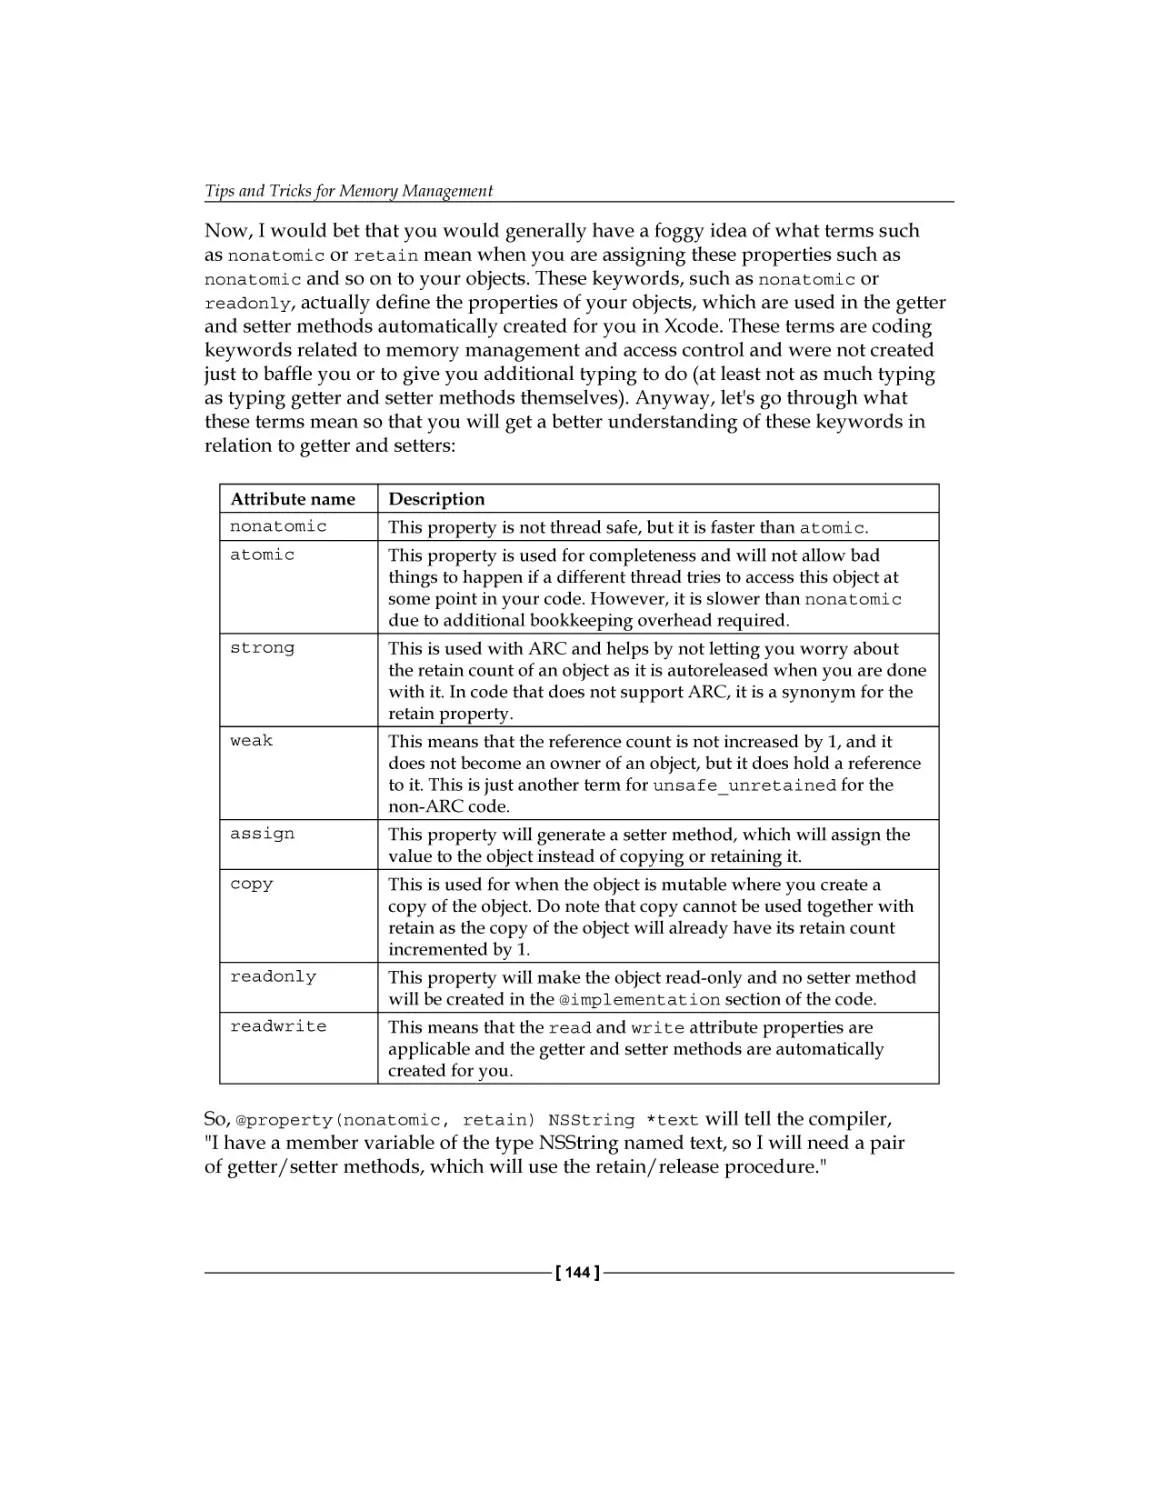
The property attribute in Objective-C
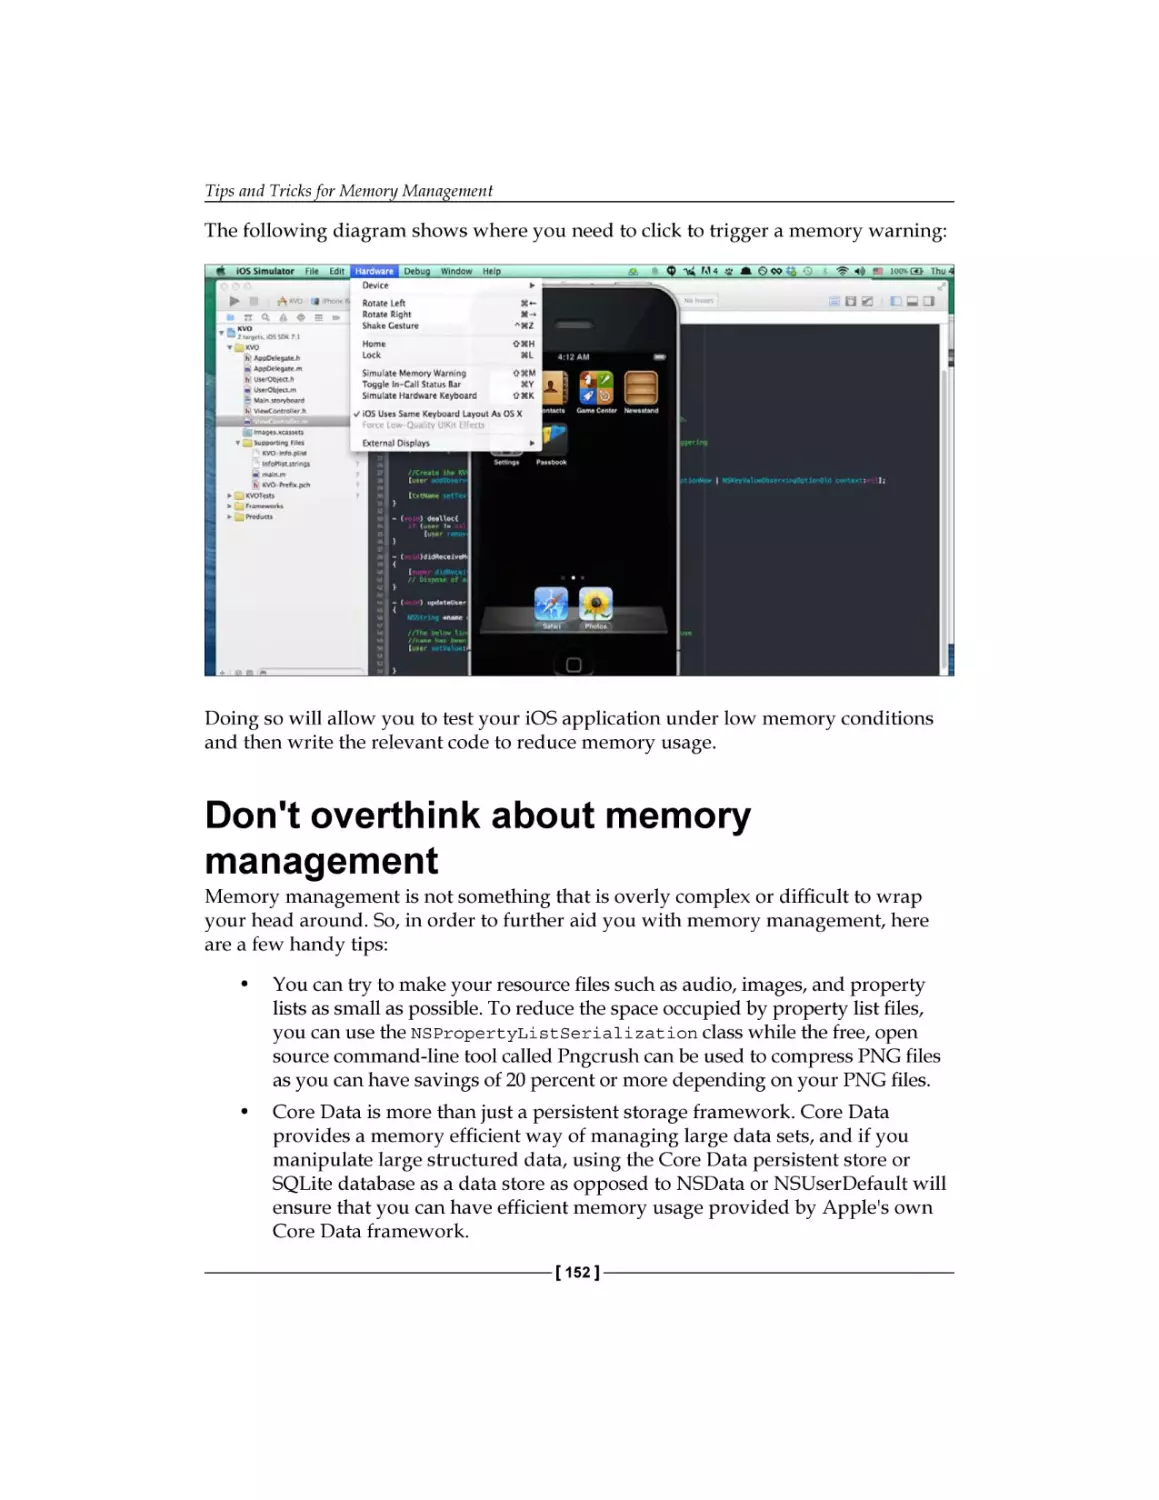
Performance guidelines
Don't overthink about memory management
When to avoid KVC and KVO
Summary
Introducing Xcode 6
What's new in storyboard
Allowing storyboard or the NIB file to replace launch images
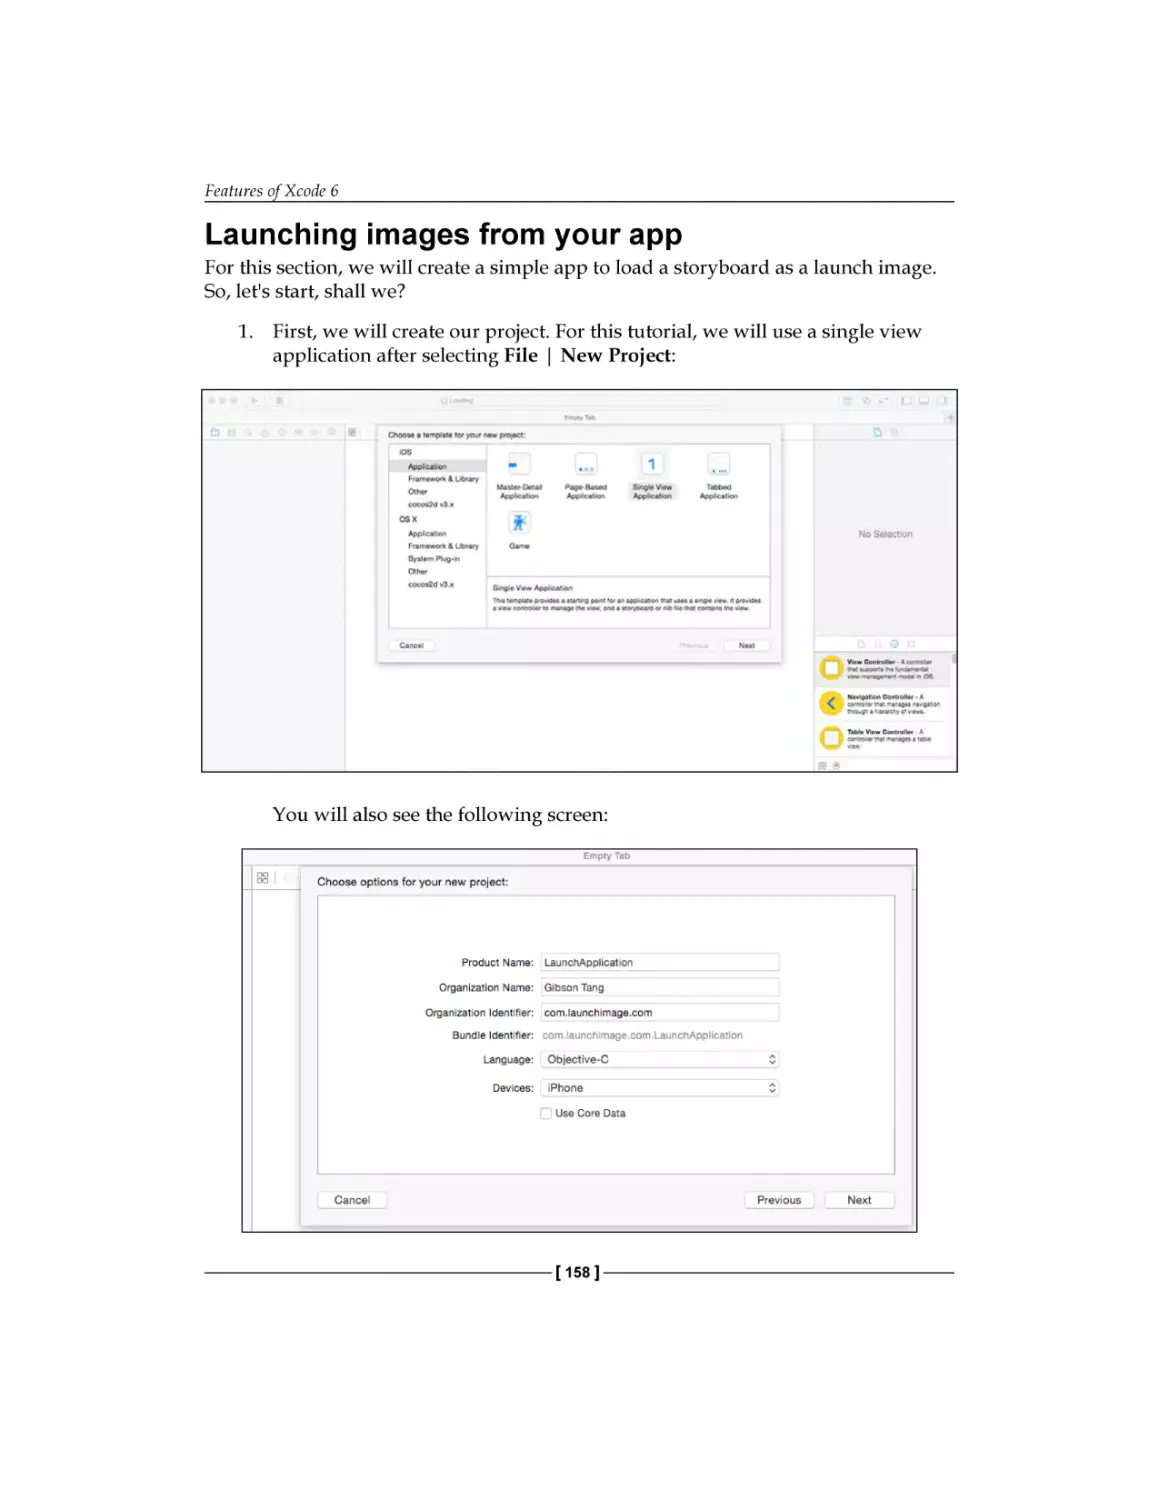
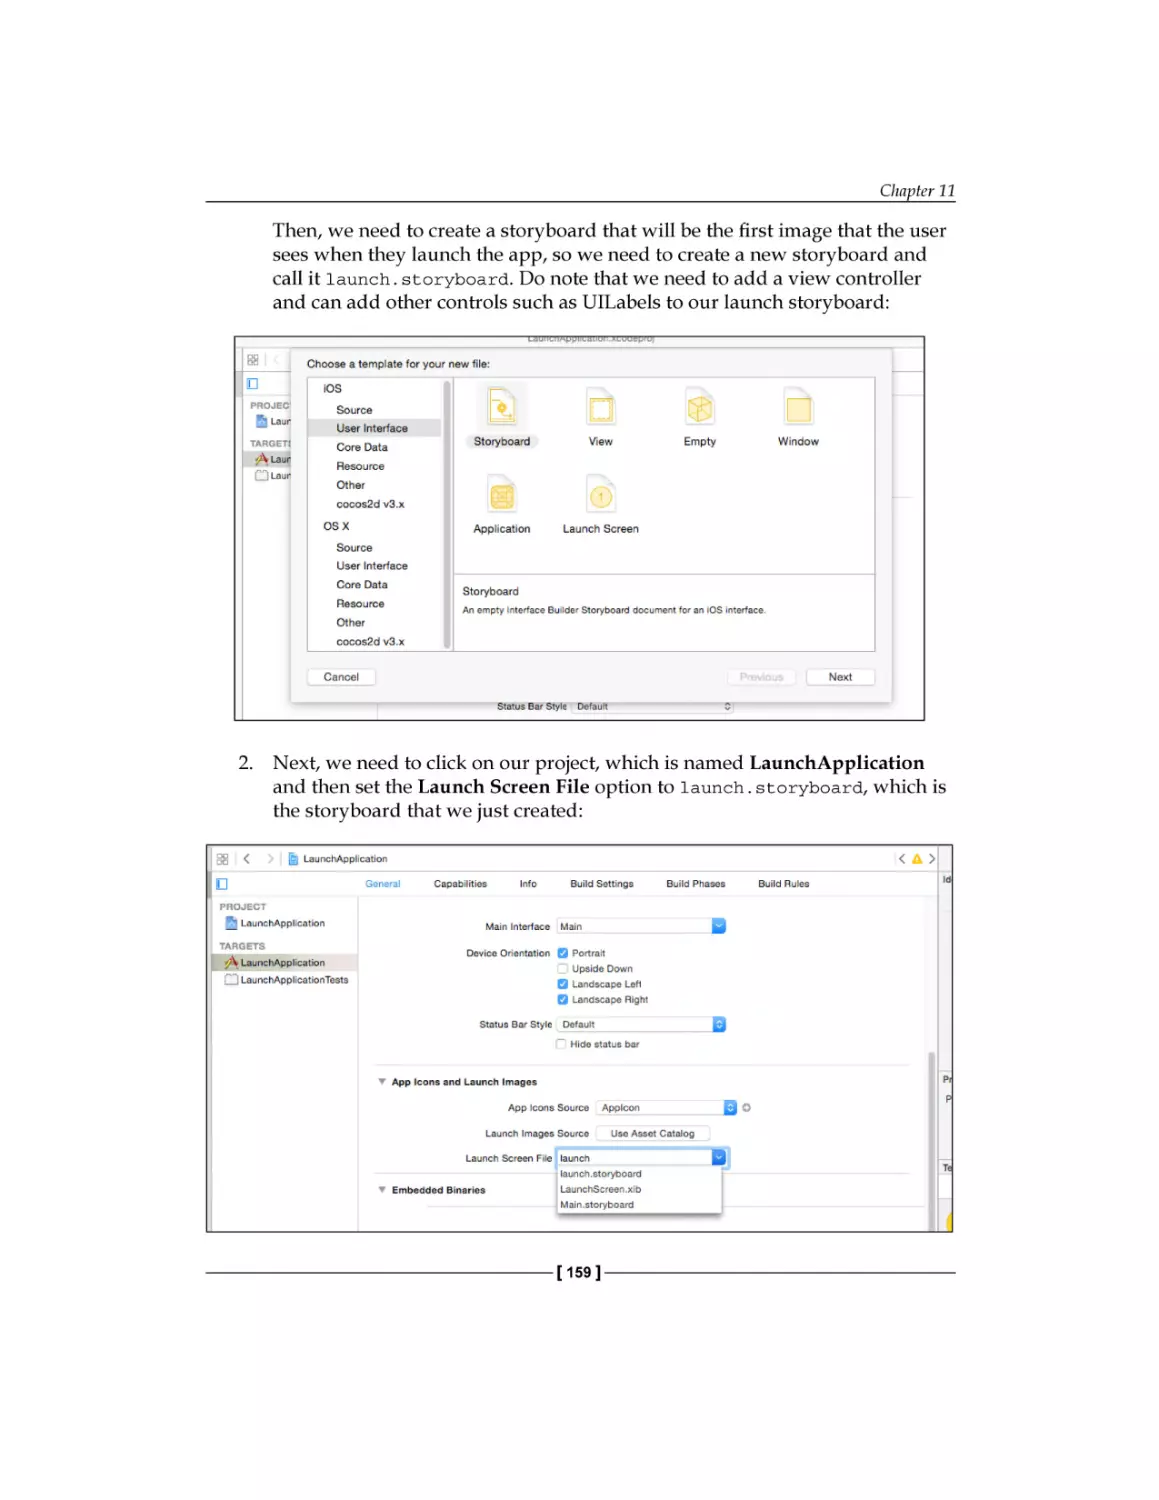
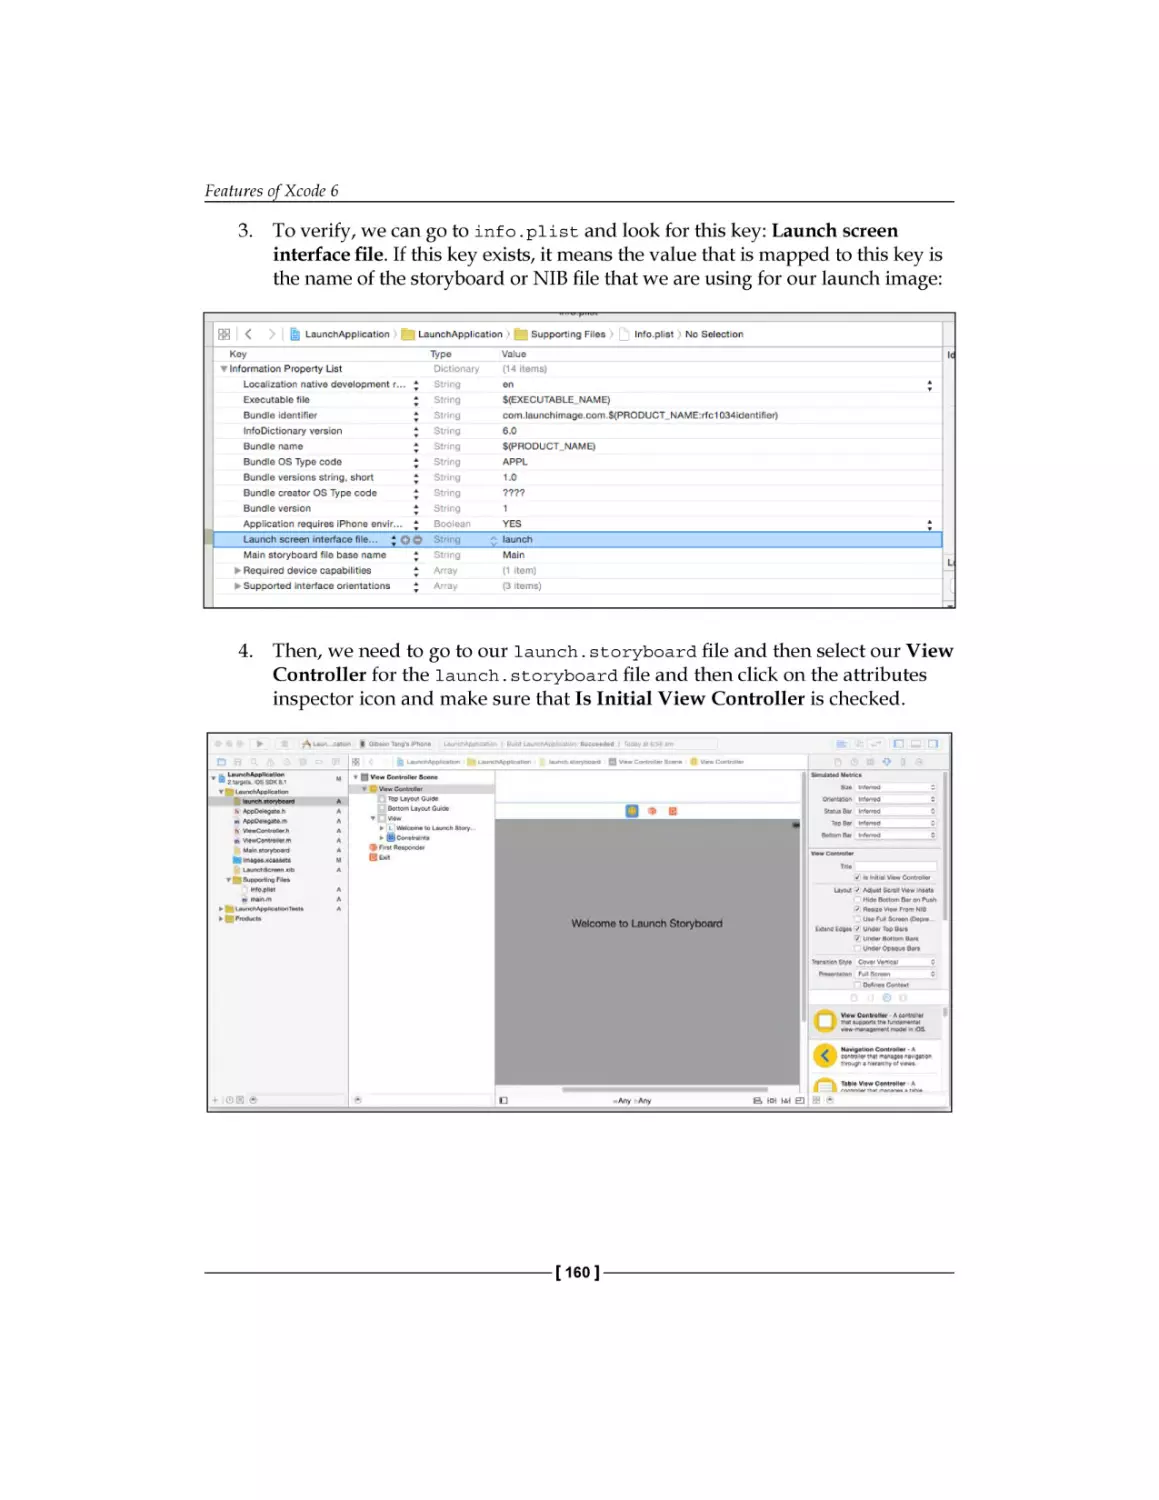
Launching images from your app
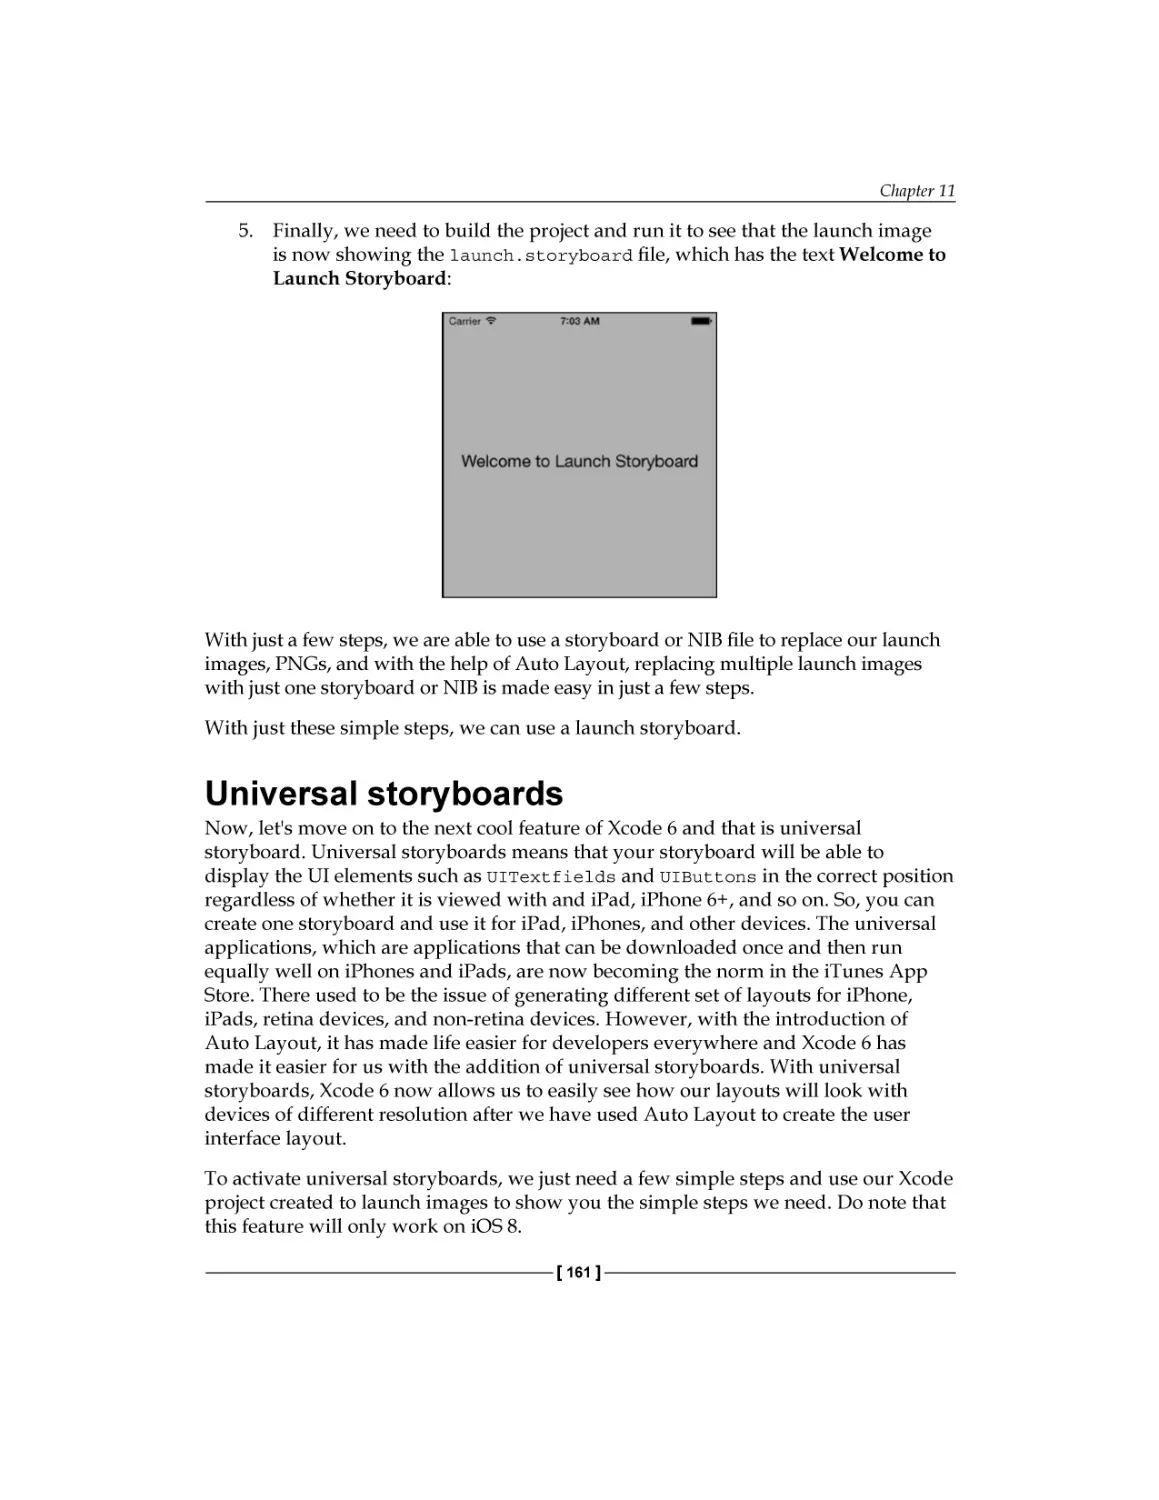
Universal storyboards
Debugging in Xcode 6
Debug gauges
What's new in Interface Builder
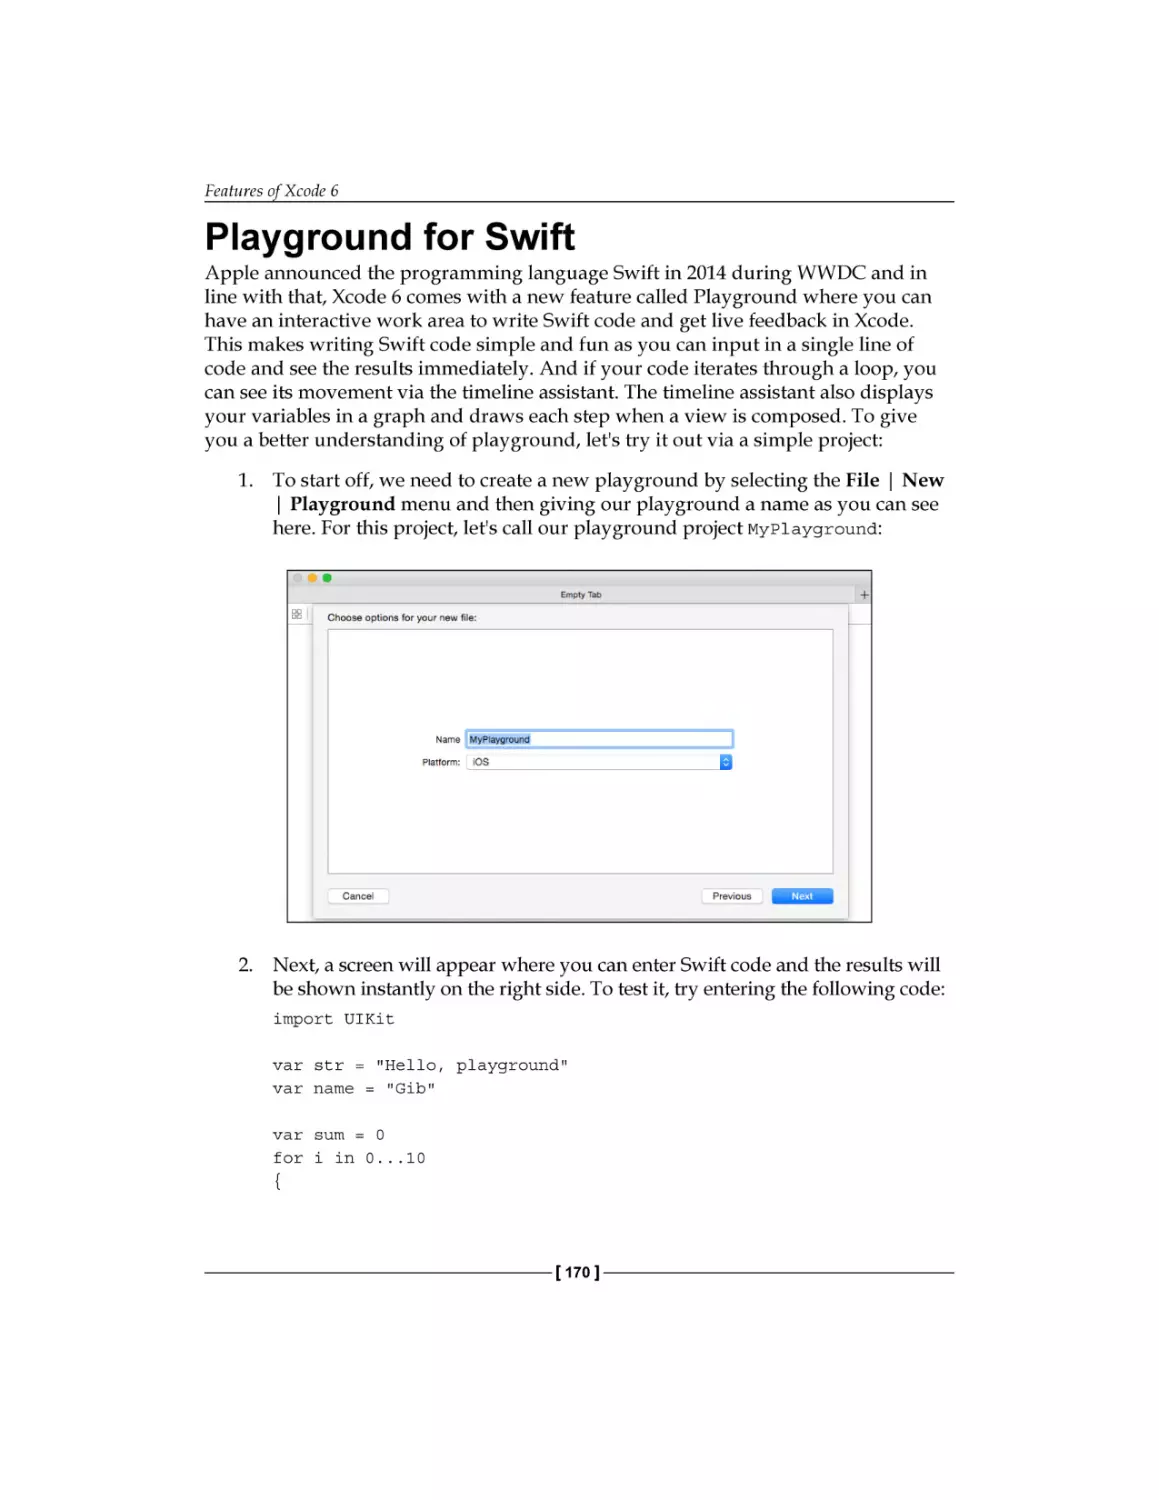
Playground for Swift
Summary
141
142
143
150
152
153
154
155
156
156
158
161
163
165
167
170
171
Index
173
[ iv ]
Preface
Managing memory is one of the toughest problems we deal with in Objective-C.
This book will provide you with the most important information about effective
memory management in your applications.
The practical element will also ensure that the programmers can actively learn key
methods and concepts of memory management in a more engaging way rather than
just simply read the book. Throughout this book, I will be giving examples of code.
These example code will demonstrate the fundamentals of programming and
memory management as well as cover some aspects of iOS development such as
Core Data. All these Xcode projects are ready to run out of the box and you do not
need any additional setup to run the code. Just make sure that you have the the latest
version of Xcode, which is version 6 at this point in time.
So, this book will help you become aware of memory management and how to
implement this correctly and effectively while being aware of the benefits at the
same time. This tutorial-based book will actively demonstrate techniques for
the implementation of memory management, showing the resultant effects on
performance and effective implementation.
I have to mention that in this book, I will speak about the most recent standard
of Objective-C and Objective-C 2.0. Apple suggests Objective-C as a main tool of
development for their platform and strives to improve the product continuously.
I must say that not all of Apple's attempts to improve Objective-C have been entirely
successful. Garbage collection is an example of ineffective memory management. It is
deprecated since OS X Version 10.8 in favor of Automatic Reference Counting (ARC)
and is scheduled to be removed in a future version of OS X.
I have been working with Objective-C for years and C++ for even longer. Hence,
memory management is not an alien concept to me as I have been debugging and
tracing memory leaks for years in the course of my work at Azukisoft Pte Ltd.
[v]
Preface
At my job at Azukisoft Pte Ltd, I work mostly with Objective-C but with the occasional
C++ thrown into the mix. And this is a very interesting combination, which will be
highlighted in this book too.
What this book covers
Chapter 1, Introduction to Objective-C Memory Management, will introduce you to
reference counting, Manual Retain Release (MRR), object ownership, sand life cycle,
and memory leaks.
Chapter 2, Automatic Reference Counting, will introduce you to ARC and how it works,
its advantages, and how to set up your projects to use ARC, memory models in
Objective-C, and UIKit with ARC.
Chapter 3, Using Autorelease Pools, introduces you to autorelease pools, autorelease
pools mechanics, Apple-autoreleased classes overview, ARC and autorelease, and
blocks and threads.
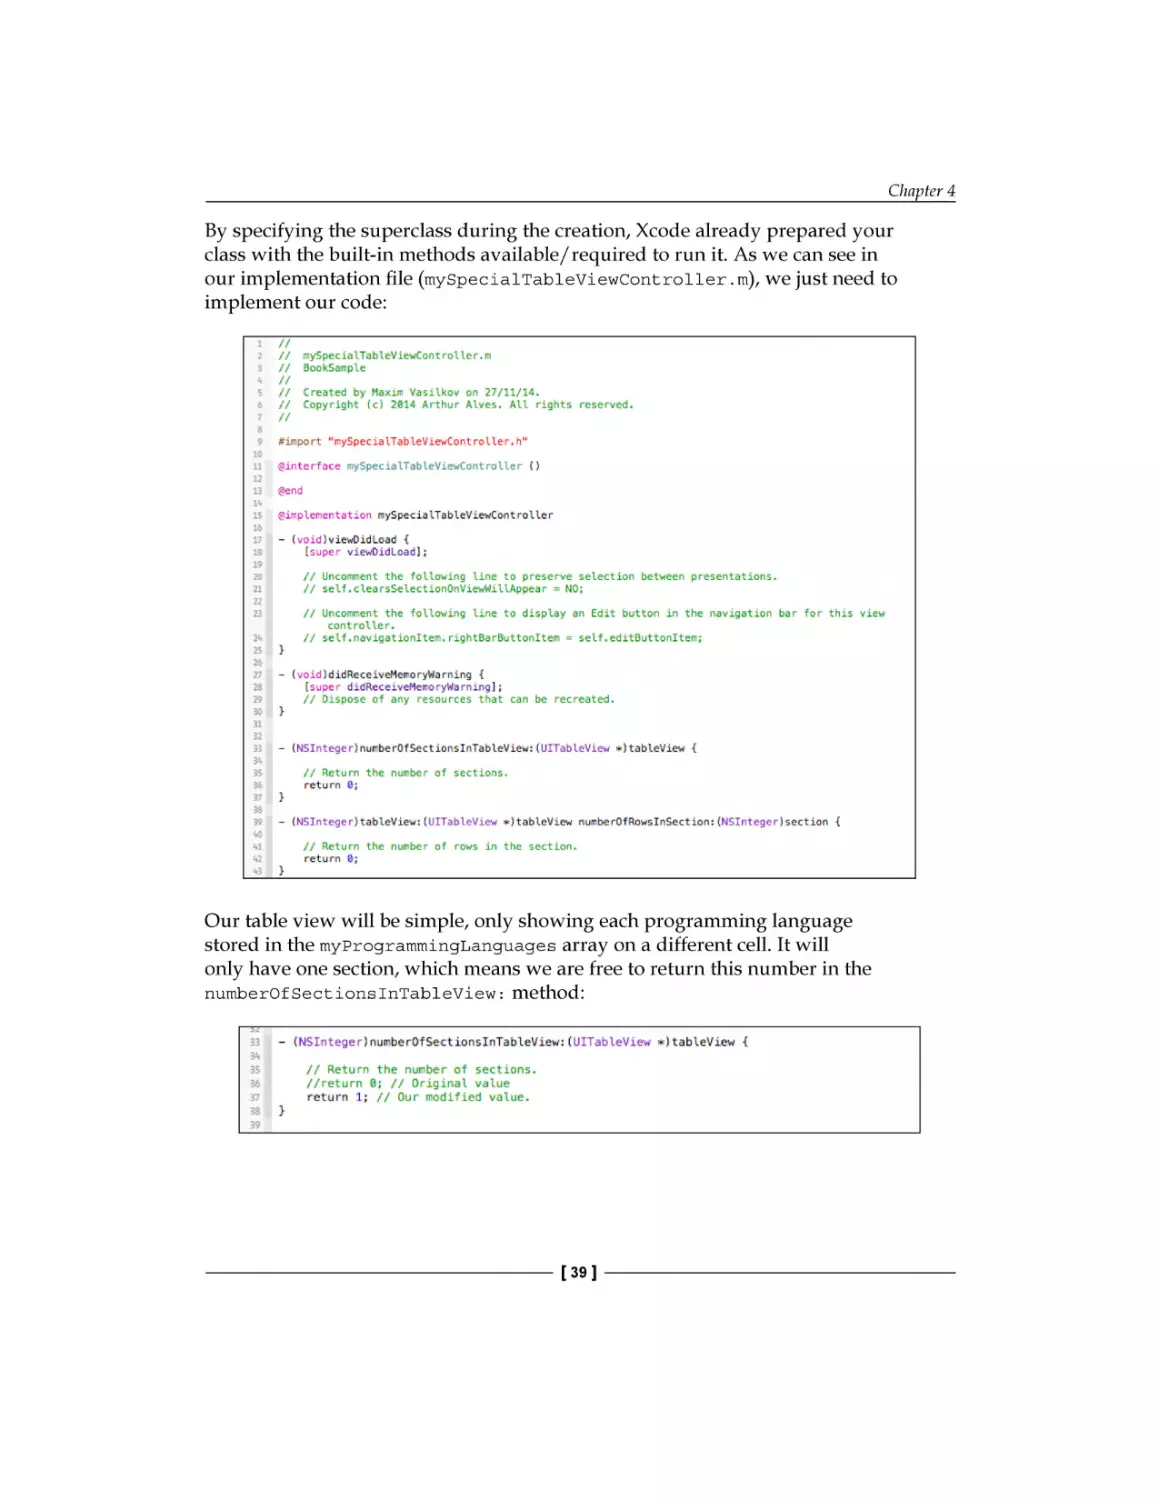
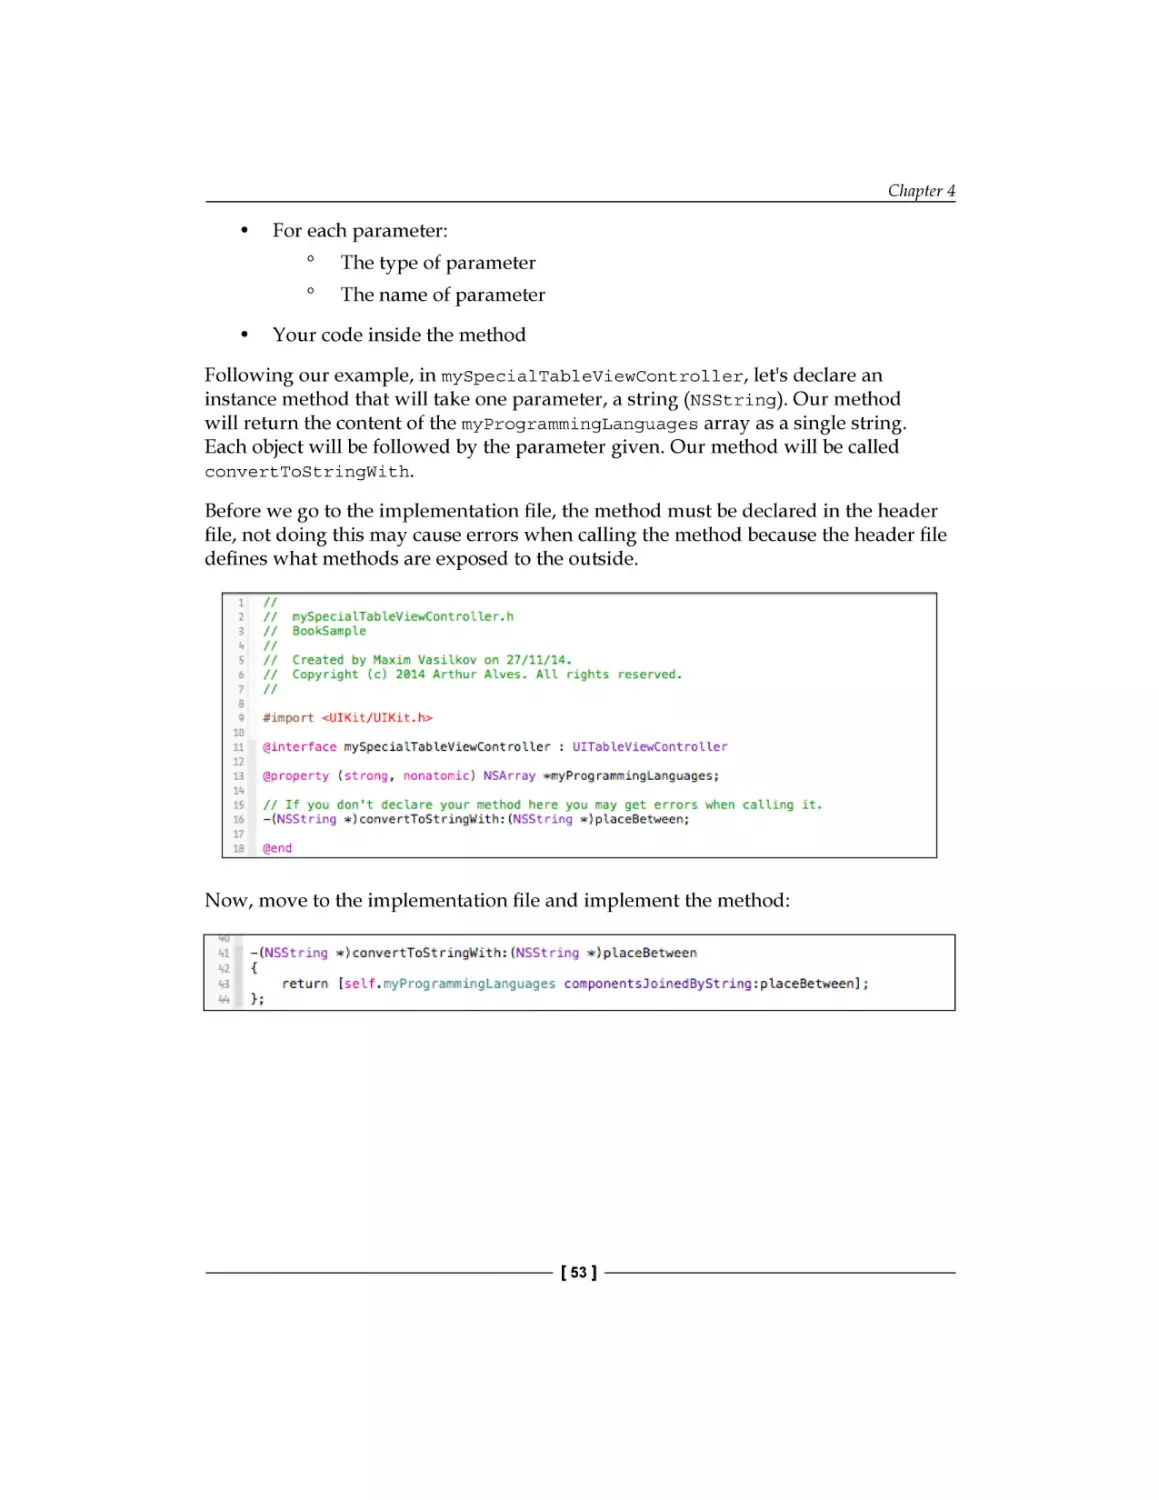
Chapter 4, Object Creation and Storage, will cover the different ways to create objects; a
comparison of different memory management options: ARC, MRC, autorelease pools,
garbage collection, memory models; and how @property makes your life easier.
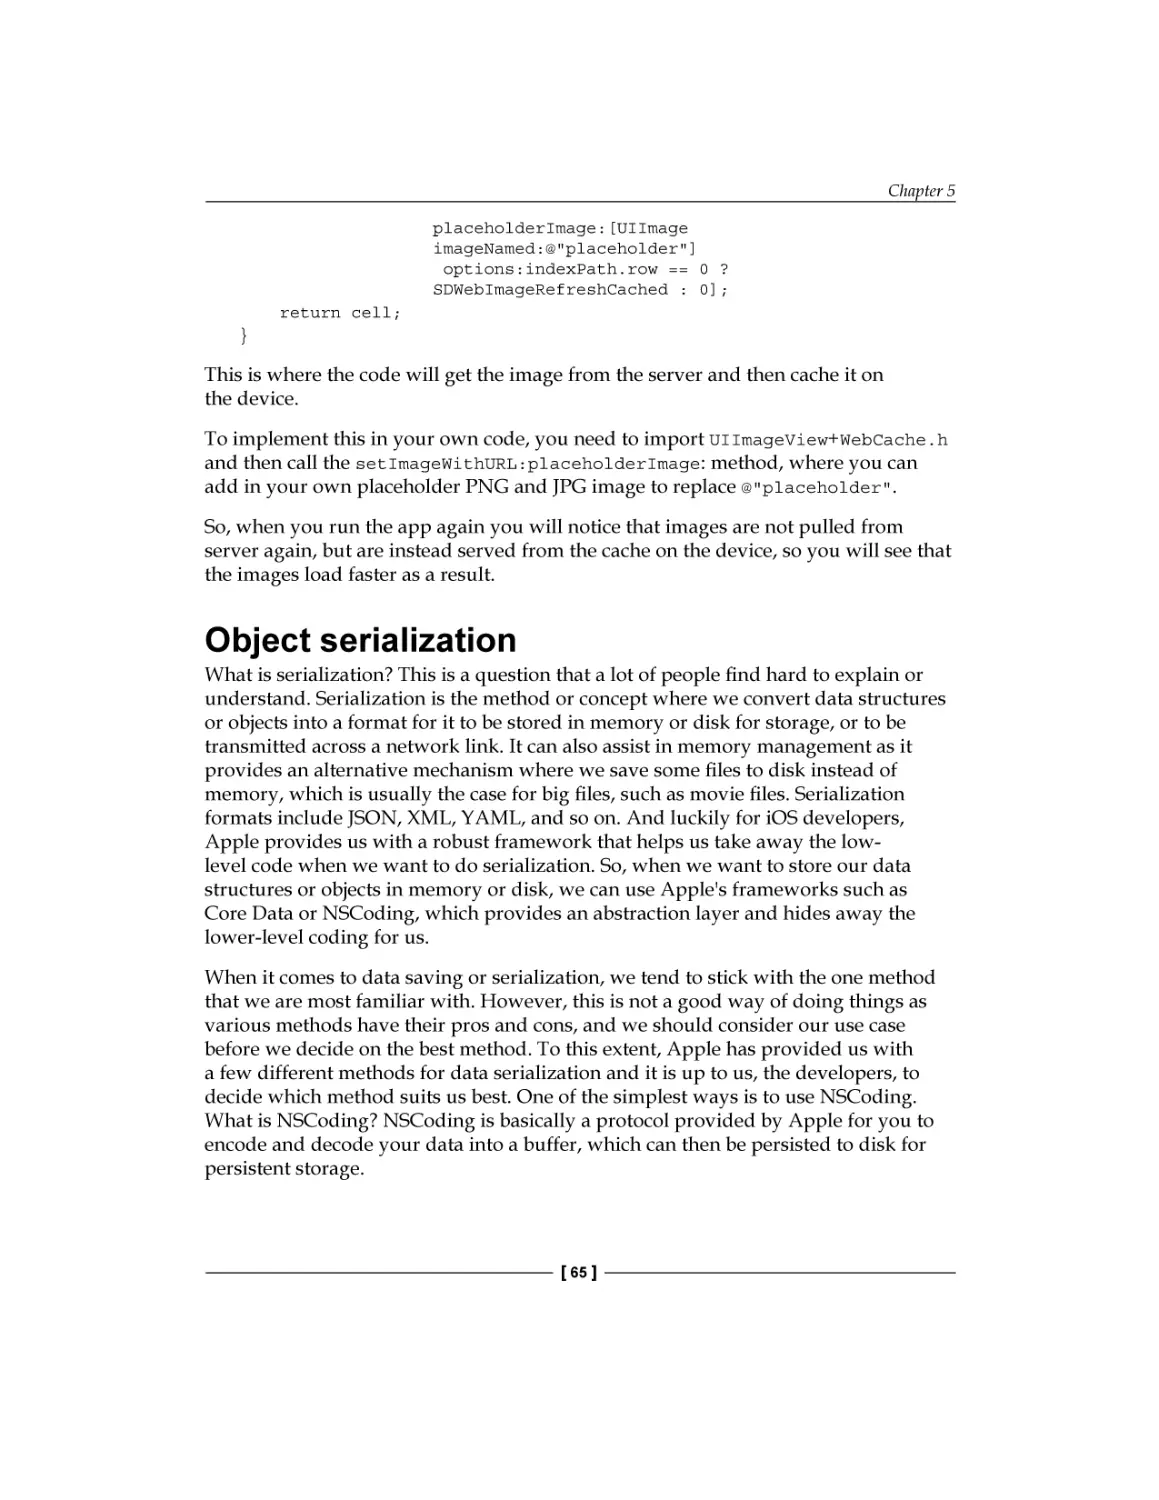
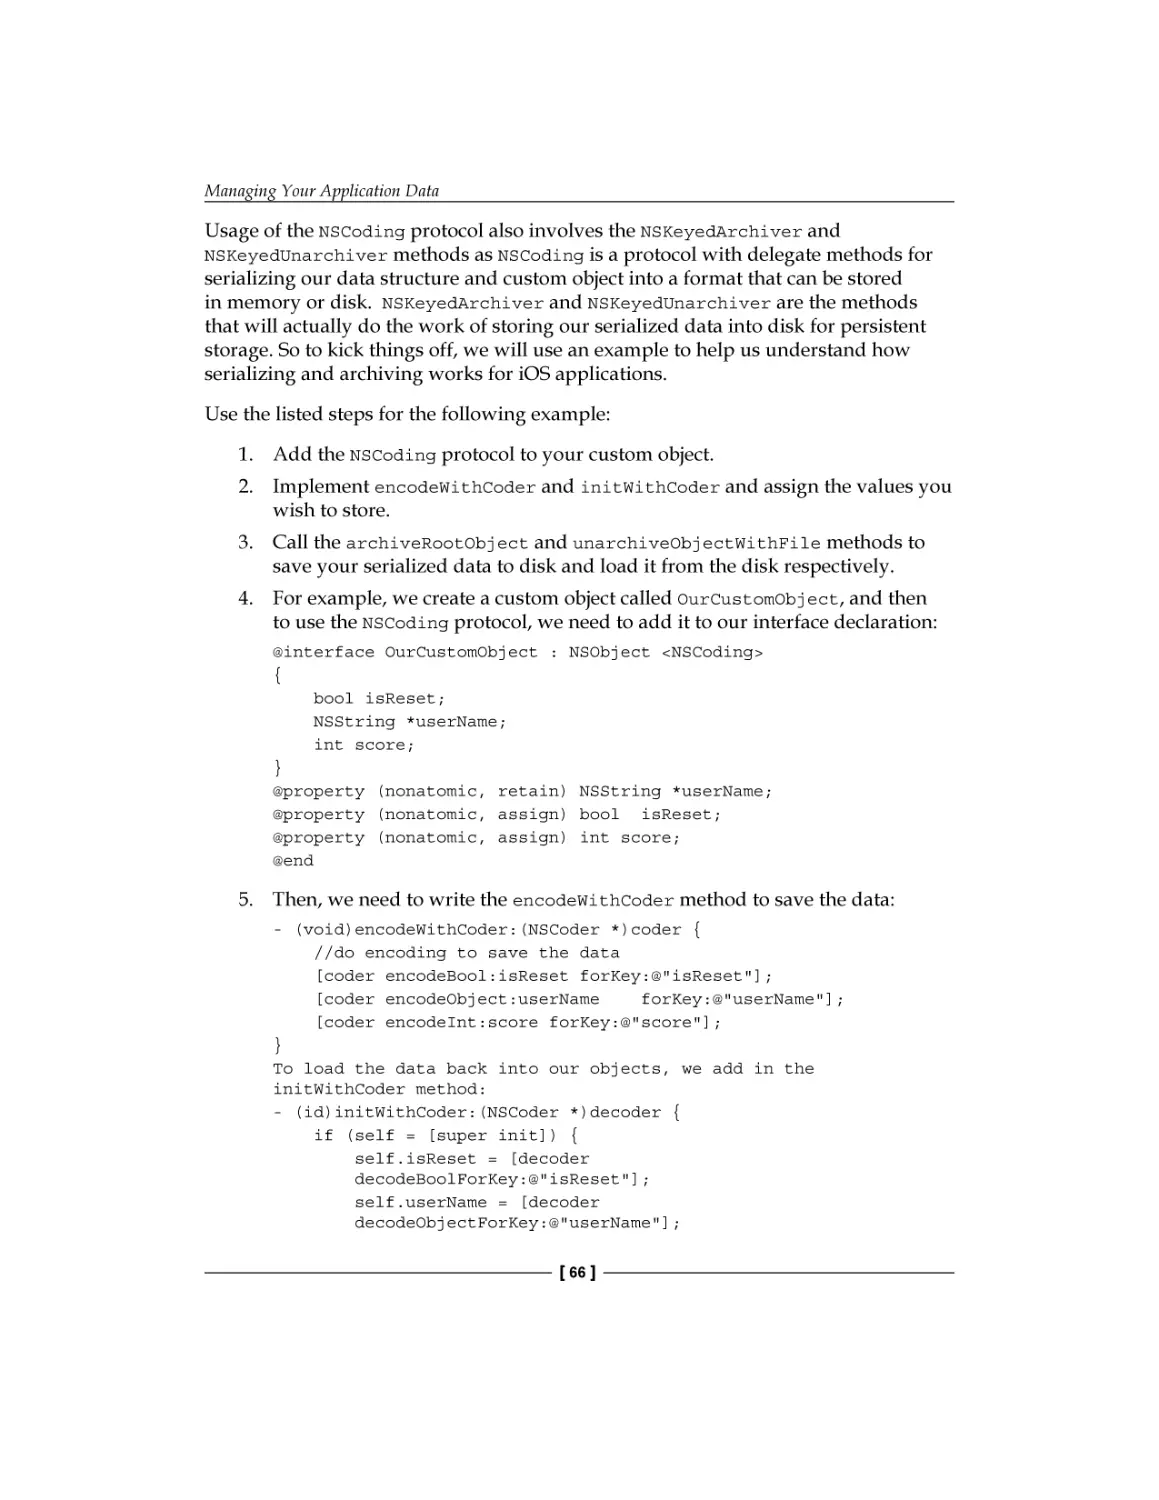
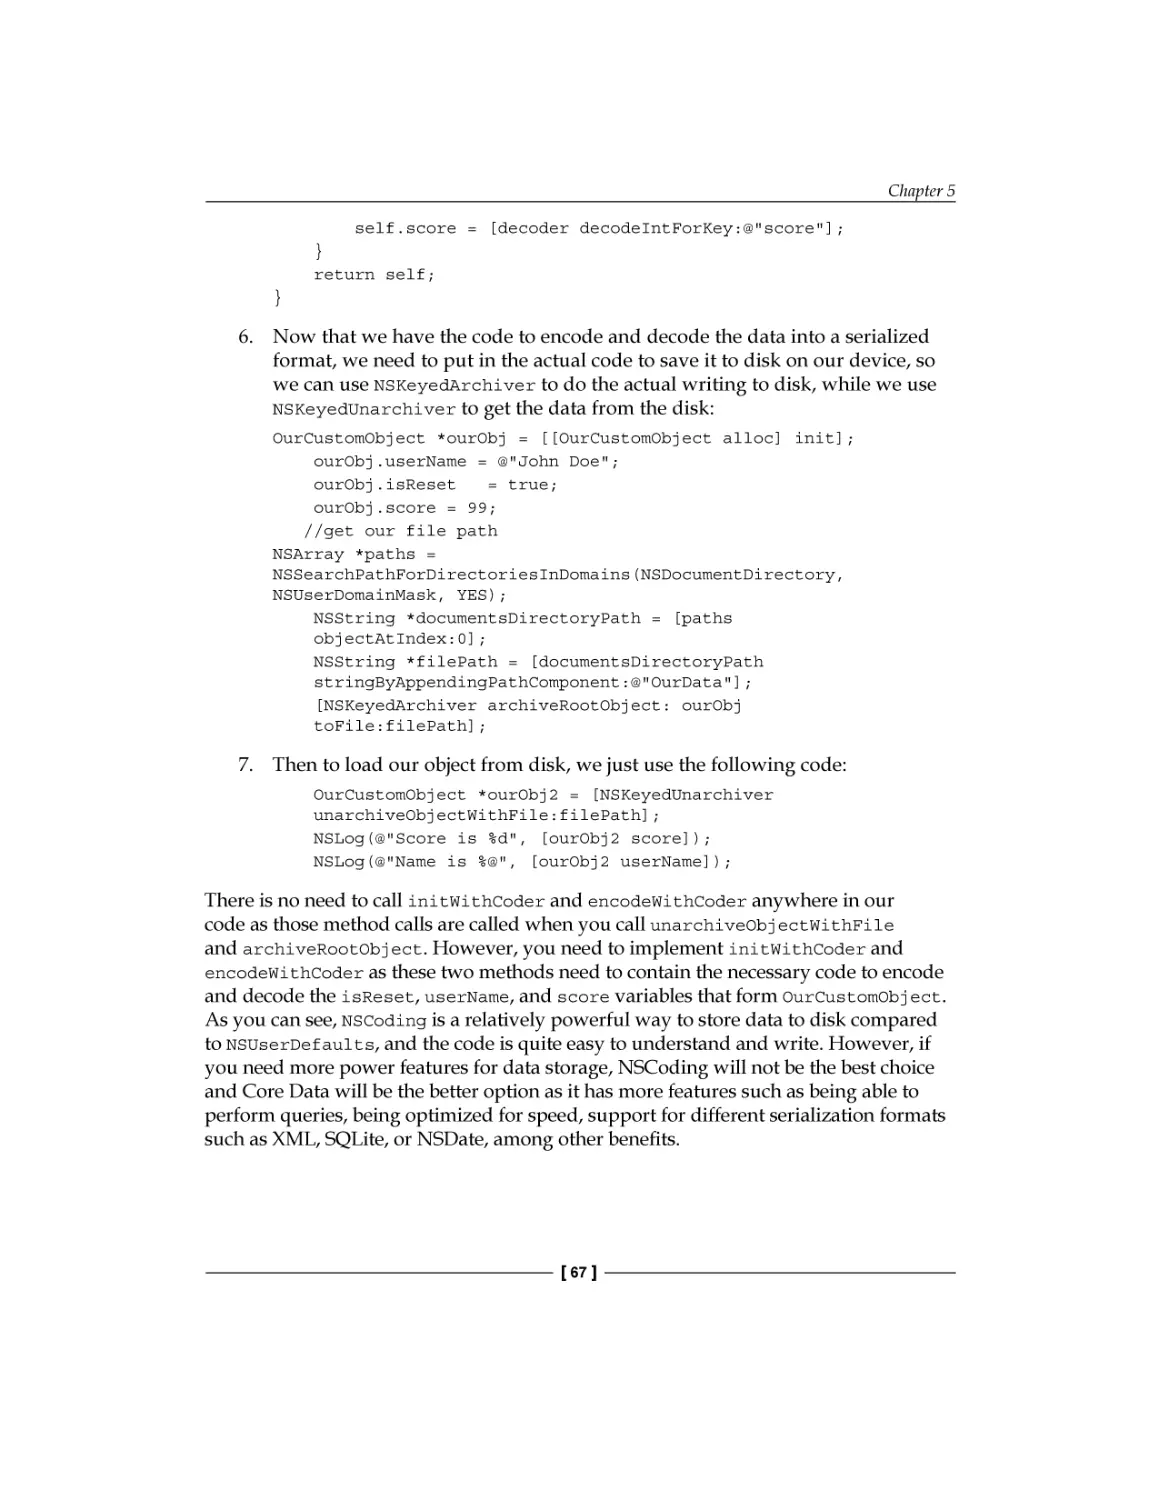
Chapter 5, Managing Your Application Data, will cover disk cache, UI techniques of
partial data display, serialization and archiving objects, methods to encode and
decode objects, cases when you need SQLite, and SQLite versus Core Data.
Chapter 6, Using Core Data for Persistence, explains what Core Data is and why
you should use it, NSManagedObject and its use in your application, memory
management when using Core Data, and the common errors.
Chapter 7, Key-value Programming Approaches, explains what key-value coding or
KVC is, the NSKeyValueCoding protocol, manual subsets of NSKeyValueCoding
behavior, associated objects, selectors as keys, maximum flexibility, and handling
keys/values.
Chapter 8, Introduction to Swift, highlights Cocoa binding in OS X, differences
between automatic and manual key-value observing, and how key-value observation
is implemented.
Chapter 9, Memory Management and Debugging, covers memory overuse, collecting
data on your app, how to use instruments in Xcode, using the LLVM/Clang Static
Analyzer, using NSZombie to help find an over-released object, and plumbing leaks.
[ vi ]
Preface
Chapter 10, Tips and Tricks for Memory Management, explains the use of accessor
methods, declaring accessors using properties, performance guidelines, and when
you should avoid KVC and KVO.
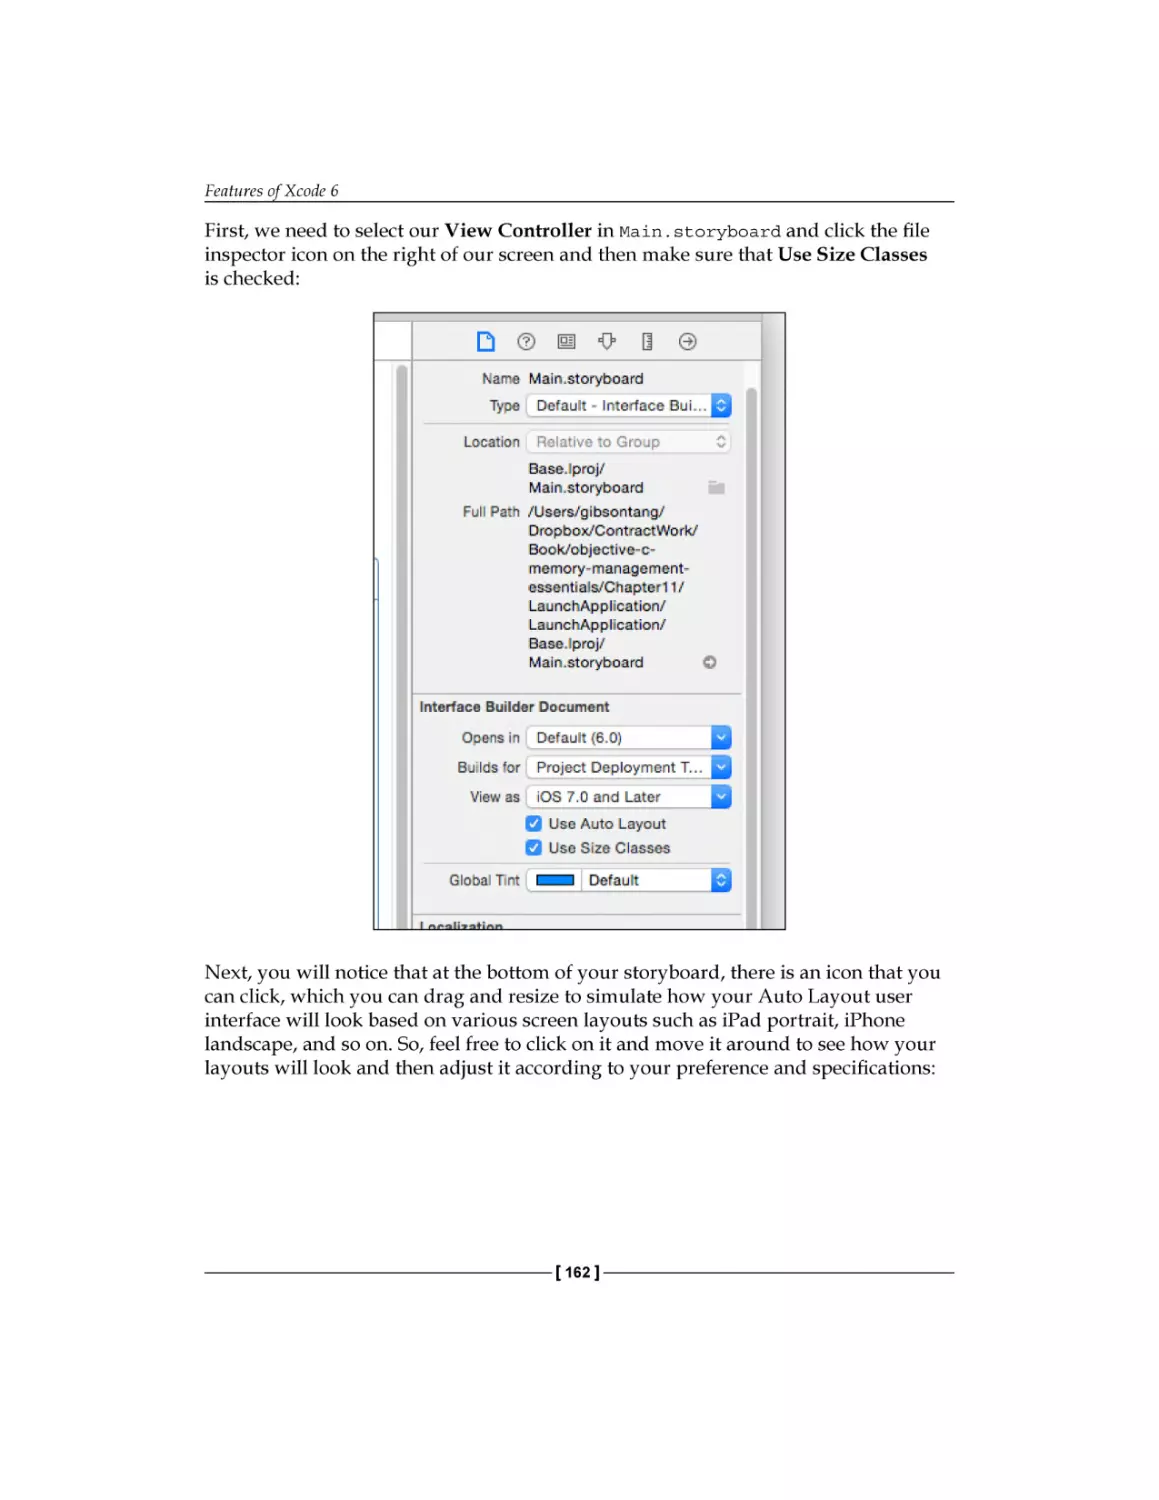
Chapter 11, Features of Xcode 6, introduces you to new tools such as view hierarchy
debugger, preview editor, and the addition of new functionalities such as allowing
storyboards and NIBs to be used as launch images for your application instead of
just static images.
What you need for this book
For this book, you will need Apple's Intel-based Macbook, iMac or Mac mini, 2010
models or higher with Xcode installed, version 4.3 or later (which is available at the
Mac Apple Store).
Who this book is for
This book is especially designed for developers with minimum experience in
Objective-C or another object-oriented programming language as well as tech
students with minimum knowledge of programming logic, object-oriented
programming, and the Apple OS X environment.
Conventions
In this book, you will find a number of text styles that distinguish between different
kinds of information. Here are some examples of these styles and an explanation of
their meaning.
Code words in text, database table names, folder names, filenames, file extensions,
pathnames, dummy URLs, user input, and Twitter handles are shown as follows:
"When you do a new, malloc, or alloc, what the operating system does is that it is
giving your program a chunk of memory on the heap."
A block of code is set as follows:
int main(int argc, char *argv[]) {
SomeObject *myOwnObject;
// myOwnObject is created in main
myOwnObject = [[SomeObject alloc] init];
// myOwnObject can be used by other objects
[anotherObject using:myOwnObject];
[ vii ]
Preface
New terms and important words are shown in bold. Words that you see on the
screen, for example, in menus or dialog boxes, appear in the text like this: "In Xcode,
go to the target Build Phases tab, open the Compile Sources group, and you will be
able to see the source file list."
Warnings or important notes appear in a box like this.
Tips and tricks appear like this.
Reader feedback
Feedback from our readers is always welcome. Let us know what you think about
this book—what you liked or disliked. Reader feedback is important for us as it helps
us develop titles that you will really get the most out of.
To send us general feedback, simply e-mail feedback@packtpub.com, and mention
the book's title in the subject of your message.
If there is a topic that you have expertise in and you are interested in either writing
or contributing to a book, see our author guide at www.packtpub.com/authors.
Customer support
Now that you are the proud owner of a Packt book, we have a number of things to
help you to get the most from your purchase.
Downloading the example code
You can download the example code files from your account at http://www.
packtpub.com for all the Packt Publishing books you have purchased. If you
purchased this book elsewhere, you can visit http://www.packtpub.com/support
and register to have the files e-mailed directly to you.
[ viii ]
Preface
Errata
Although we have taken every care to ensure the accuracy of our content, mistakes
do happen. If you find a mistake in one of our books—maybe a mistake in the text or
the code—we would be grateful if you could report this to us. By doing so, you can
save other readers from frustration and help us improve subsequent versions of this
book. If you find any errata, please report them by visiting http://www.packtpub.
com/submit-errata, selecting your book, clicking on the Errata Submission Form
link, and entering the details of your errata. Once your errata are verified, your
submission will be accepted and the errata will be uploaded to our website or added
to any list of existing errata under the Errata section of that title.
To view the previously submitted errata, go to https://www.packtpub.com/books/
content/support and enter the name of the book in the search field. The required
information will appear under the Errata section.
Piracy
Piracy of copyrighted material on the Internet is an ongoing problem across all
media. At Packt, we take the protection of our copyright and licenses very seriously.
If you come across any illegal copies of our works in any form on the Internet, please
provide us with the location address or website name immediately so that we can
pursue a remedy.
Please contact us at copyright@packtpub.com with a link to the suspected
pirated material.
We appreciate your help in protecting our authors and our ability to bring you
valuable content.
Questions
If you have a problem with any aspect of this book, you can contact us at
questions@packtpub.com, and we will do our best to address the problem.
[ ix ]
Chapter 1
Introduction to Objective-C
Memory Management
In this chapter, we will concern ourselves principally with the core issues of the
memory management problem as well as an Objective-C-based solution of it. We will
look at the ownership and life cycle of the object. This basic idea is known as manual
references counting, or Manual Retain Release (MRR), where you need to claim
and relinquish ownership of every object. It defines an object's life cycle. And finally,
we'll take a look deeper into NSObject for a better understanding of what's going on.
We will cover the following topics in this chapter:
•
Why do we need memory management in Objective-C?
•
An object's ownership and life cycle
•
The principles of reference counting
•
What's a memory leak and why pay attention to it?
Why do we need memory management
in Objective-C?
It does not matter what programming language is being used; the question of
memory management always persists. In general, it is a question of resource
management that cannot be avoided because memory is always a limited resource.
[1]
Introduction to Objective-C Memory Management
The scripting languages and Java, where memory management is handled by the
virtual machine or application (where it is hidden from the code), are not always
effective enough. While it is easier for the programmer this way, it can have a
negative impact on resources, since you don't have an absolute control of it and
there are objects still "living" when we don't need them anymore, plus these "living"
objects still occupy precious memory space, which can be used by other objects.
Additionally, depending on what you ask, another opinion is that an automatic
memory management is the only right way to go.
Such talks usually start discussions like "Which is the best programming language?"
and" What is the best way of memory management?". Let's leave that meaningless
business for blogs' and forums' "Holy-Wars". Every tool has it's use in the correct
context and Objective-C memory management concept is quite efficient in terms of
both time cost savings and resource saving.
The memory in Objective-C, is managed in a different way from some of the
widespread languages such as C/C++, Java, or C#, which are typically taught
in schools as it introduces new concepts such as object ownership. Memory
management is crucial for devices that run on a limited amount of memory such as
mobile phones, smart watches, and so on, since effective memory management will
allow you to squeeze every ounce of performance needed to run efficiently on these
small devices, where memory is scarce on these devices.
An object's ownership and life cycle
The idea of object ownership abstraction is simple—one entity is simply responsible
for another and an entity has the ability to own an object. When an entity owns an
object, the entity is responsible to free that object too.
Let's go to our code example. If an object was created and used in the main function,
then the main function is responsible for the object, as the following code listing
demonstrates:
int main(int argc, char *argv[]) {
SomeObject *myOwnObject;
// myOwnObject is created in main
myOwnObject = [[SomeObject alloc] init];
// myOwnObject can be used by other objects
[anotherObject using:myOwnObject];
// but main is responsible for releasing it
[myOwnObject release];
[2]
Chapter 1
Downloading the example code
You can download the example code files from your account at
http://www.packtpub.com for all the Packt Publishing books
you have purchased. If you purchased this book elsewhere, you can
visit http://www.packtpub.com/support and register to have
the files e-mailed directly to you.
What makes this concept a bit more complicated is that objects can be owned by
more than one entity. So, an object may be created and owned in the main function
and will also be used by another entity that will claim ownership of the object.
A common situation where you will see multiple object ownership is when you
use arrays. Arrays are indexed lists of objects, and when an object is placed into an
array, the array claims ownership of the object. So, if I create an object in the main
function and then put that object into an array, both the main function and the
array will claim ownership of the object and create a reference to it at the same time.
Ownership and reference are different as an object references another object, which it
does not own and both are responsible for cleaning up the object. The following code
demonstrates this:
int main (int argc, char *argv[]) {
SomeObject *myOwnObject;
// myOwnObject is created in main
myOwnObject = [[SomeObject alloc] init];
// myOwnObject can be used by other objects
NSMutableArray *myArray;
// add my object to myArray
myArray = [[NSMutableArray alloc] initWithObjects:myOwnObject,
nil];
// main does not need myOwnObject any more
[myOwnObject release];
// but myOwnObject still is needed inside the array
[anotherObj usingArray: myArray];
Just like objects in the real world, Objective-C objects are created; they live, and
then go away when the application is closed. This is how the object life cycle works.
Obviously, arrays have to claim the ownership on the object and prevent it to be
deleted in the release method called in the main function.
[3]
Introduction to Objective-C Memory Management
However, what is the correct way for the entity to claim its rights on an object that it
owns? Let's take a deeper look at the problem.
Ownership of object and reference
counting
To indicate the number of owners using objects, those objects are given
a reference count.
At the beginning, the reference count of the object is 1. This happens because the
function creating the object is going to use that object. When any entity needs to
claim an ownership of the object, since that entity is going to access and use that
object, it sends a retain message to it and its retain count is incremented by 1. When
an entity is finished with the object, it sends the release message to the object and its
retain count decrements by 1. As long as this object's reference count is higher than
zero, some "things" are using it. When it comes to zero, the object is no longer useful
for any of those "things", and it can be safely deallocated.
Let's return to the example with the object owned by an array. Explanations are
given in the following code comments and diagram:
int main(int argc, char *argv[]) {
SomeObject *myOwnObject;
// myOwnObject is created in main
myOwnObject = [[SomeObject alloc] init];
// myOwnObject has retain count equal to 1
// myOwnObject can be used by other objects
NSMutableArray *myArray;
// add my object to myArray
myArray = [[NSMutableArray alloc] initWithObjects:myOwnObject,
nil];
//inside myOwnObject got another retain message
//and now its retain count equal 2
// main does not need myOwnObject any more
[myOwnObject release];
// release decrements retain count
// and now myOwnObject retain count now is 2-1 = 1
// but myOwnObject still is needed inside the array
[anotherObj usingArray: myArray];
[4]
Chapter 1
[myArray release];
// on array destruction every object inside array gets release
message
//myOwnObject retain count decreases this time to 0 and
myOwnObject will be deleted together with the array
The following diagram illustrates the principle of reference counting:
Forgetting to send a release message to an object before setting a pointer to point at
something else will guarantee you a memory leak. In order to create an object before
it's initiated, a chunk of the OS memory is allocated to store it. Also, if you send a
release statement to an object, which was not previously sent, a retain statement
is sent to the object. This will be considered as a premature deallocation, where the
memory previously allocated to it is not related to it anymore. A lot of time is spent
on debugging these issues, which can easily become very complex in large projects.
If you don't follow some solid principles for memory management, you can often
forget and quickly find yourself getting stuck for hours checking every retain and
release statement. Even worse is if you're going through someone else's code, and
they mess things up. Going through to fix memory management issues in someone
else's code can take forever.
[5]
Introduction to Objective-C Memory Management
What's a memory leak and why pay
attention to it?
A memory leak is when your program loses track of a piece of memory that was
allocated and has forgotten to release it. The consequence is that the "leaked"
memory will never be freed by the program. When more memory is leaked after a
certain point in time, there will be no more free memory and this will cause your
application to crash. Usually, this tends to happen when a piece of code does new,
malloc, or alloc, but never does a corresponding "delete", "free", or "release"
respectively.
When you do new, malloc, or alloc, what the operating system does is that it is
giving your program a chunk of memory on the heap. The OS says, "Here, take this
memory address and have this block of memory on it." Thus, you need to create
a reference to that memory address (usually in the form of a pointer), depending
on the OS, such as, "I'm done with this, it's not useful anymore" (by calling "free",
"delete", or "release").
Memory leaks happen when you throw away your pointer to that memory. If your
program does not retain where your memory is allocated on the heap, how can you
even free it? The following line of code shows an example of a memory leak if you
never call the release method on it:
NSMutableString *str = [[NSMutableString alloc]
initWithString:@"Leaky"];
So why should you care? At best, you're the dissipating memory that will be freed
when the user quits your app. At worst, there could be a memory leak that happens
in every screen. It would not be a great mode to end up your program, especially
if the user lets it run for a long time. A program crash is very hard to debug as
it can crash at random moments in your application as memory leaks are very
unpredictable to replicate and creating an application that crashes often will lead to
bad reviews of your program on the App Store, or through word of mouth, which is
something that you do not want to happen.
This is why in the process of evolution, there are other methods of memory
management in Objective-C, which you will find further in this book.
What is an object within Objective-C?
How do things work inside Objective-C? NSObject is the root class of most
Objective-C class hierarchies, through it an object inherits basic methods and behaves
like an Objective-C object.
[6]
Chapter 1
This object is an instance of a class and can also be a member of a class or one of its
derivatives. So, let's take a deeper look at NSObject. In the early stage, Objective-C
had a class called Object. This had a method called +new, which wrapped malloc(),
and a method called -free. Since Objective-C objects were generally aliased and
managing object life cycles became quite complex, this was troublesome.
NSObject is used by NeXT—Steve Job's second company, founded after he was
fired from Apple in 1985—in order to provide reference counting, thus, dividing
Object pointers in two categories: pointers that own references and pointers that do
not own references. Those pointers that contribute towards the object's reference
count are owning reference pointers. If there is a certainty that a reference is going
to be held somewhere else for the duration of a variable's lifetime, a non-owning
reference pointer can be used avoiding the additional overhead of reference count
manipulation since a non-owning reference pointer does not have the added cost of
keeping track of object ownership.
Non-owning reference pointers are often used for autoreleased values. Autorelease
pools make it possible for a temporary object to receive a non-owning reference
pointer in return. An object, by receiving an -autorelease message is added to a list
that will be deallocated afterwards, with the destruction of the current autorelease
pool. You can call autorelease using the autorelease method as shown here:
[myObject autorelease];
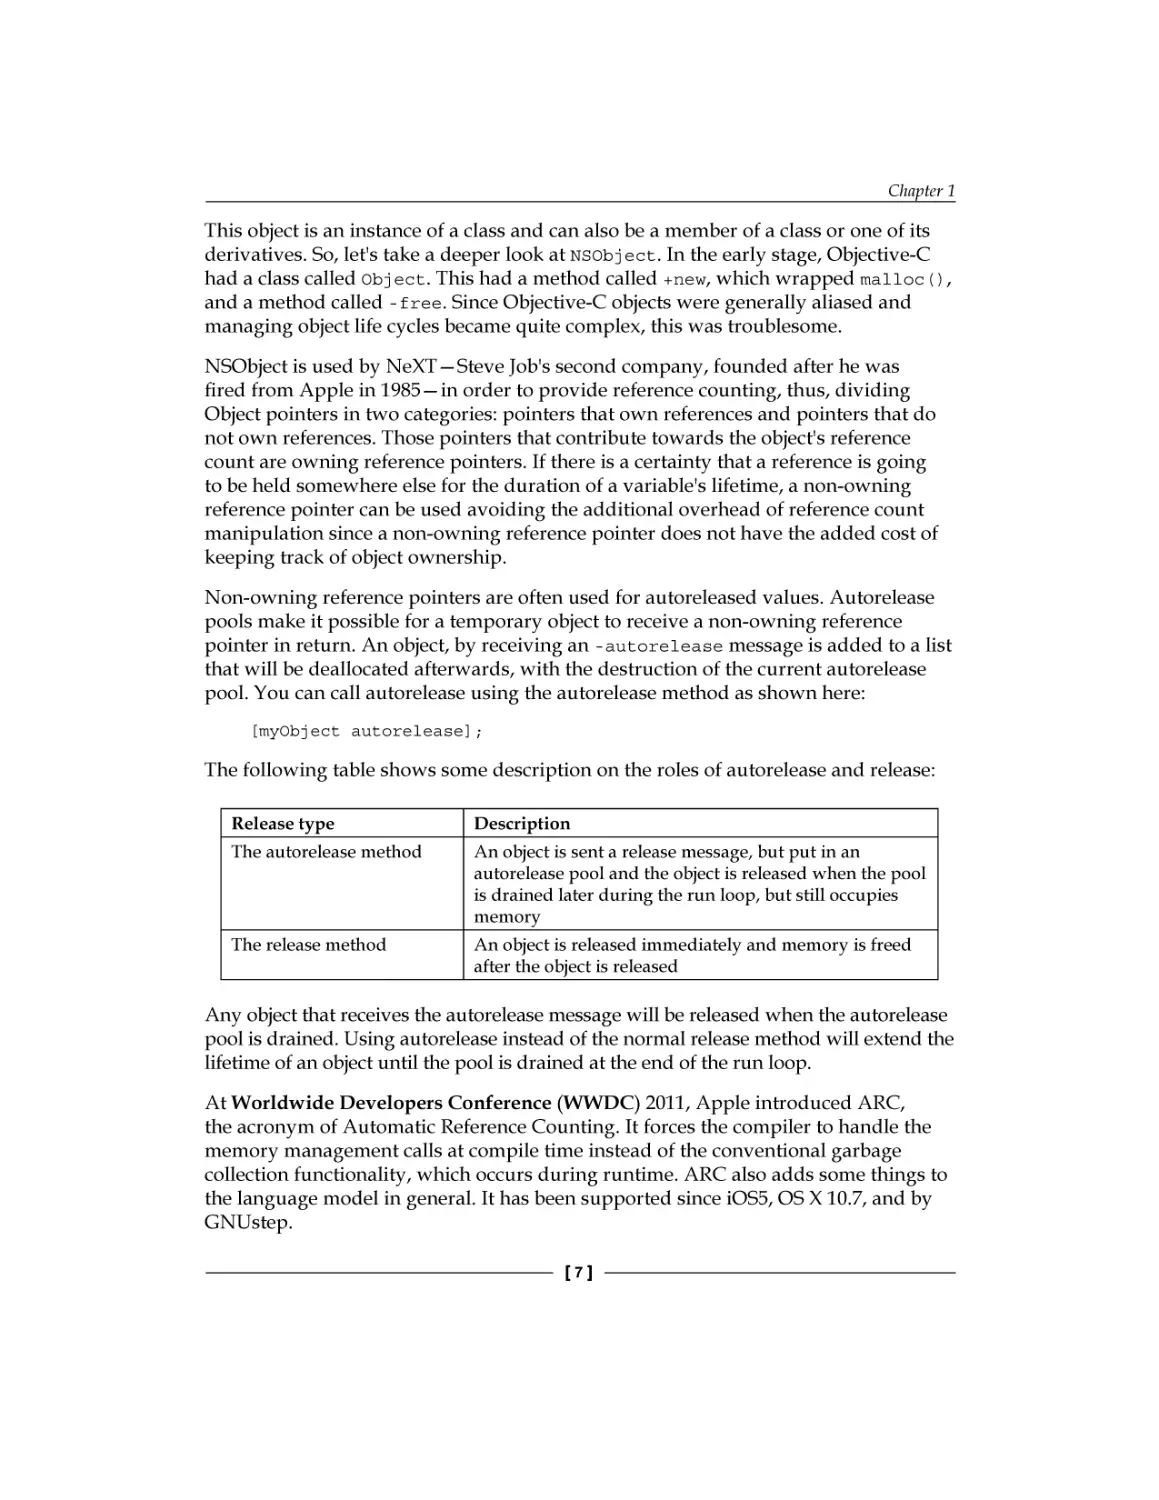
The following table shows some description on the roles of autorelease and release:
Release type
Description
The autorelease method
An object is sent a release message, but put in an
autorelease pool and the object is released when the pool
is drained later during the run loop, but still occupies
memory
The release method
An object is released immediately and memory is freed
after the object is released
Any object that receives the autorelease message will be released when the autorelease
pool is drained. Using autorelease instead of the normal release method will extend the
lifetime of an object until the pool is drained at the end of the run loop.
At Worldwide Developers Conference (WWDC) 2011, Apple introduced ARC,
the acronym of Automatic Reference Counting. It forces the compiler to handle the
memory management calls at compile time instead of the conventional garbage
collection functionality, which occurs during runtime. ARC also adds some things to
the language model in general. It has been supported since iOS5, OS X 10.7, and by
GNUstep.
[7]
Introduction to Objective-C Memory Management
First, what we will find out is that there are two NSObjects in Cocoa, a class and a
protocol. Why is this so and what is the purpose of this? Let's look into classes and
protocols.
In Objective-C, protocols define a set of behaviors that an object is expected to
conform to in certain situations at runtime. For example, a table view object is
expected to be able to communicate with a certain data source so that the table view
will know what data and information to display. Protocols and classes do not share
the same namespaces (a set of identifiers containing names, the names of classes and
protocols, thus the same name can exist in different namespaces). It's possible to have
both, which are unrelated at the language level, but have the same name. This is the
case with NSObject.
If you look at the language, there are no places where you can use either a protocol
or a class name. Using class names as the target of message sends, as type names,
and in @interface declarations is allowed. Likewise, it's possible to use protocols
names in a few identical places; however, not in the same way. Having a protocol
with the same name as a class won't result any issue.
It is impossible for root class to have a superclass as they are at the top of the
hierarchy, so there is no superclass above a root class and NSObject class is one of
them. And I give emphasis on saying one of them because in comparison to other
programming languages in Objective-C, it's perfectly possible to have the existence
of multiple root classes.
Java's single root class is named java.lang.Object, which is the parent ultimate
class of any other. For this reason, any piece of code in Java, which comes from any
object, has the basic methods added by java.lang.Object.
Cocoa can have multiple root classes. Besides NSObject, there is NSProxy and a few
others root classes; and such root classes are, in part, the reason for the existence
of the NSObject protocol. The NSObject protocol determines a specific set of basic
methods, expecting their implementation by the others root classes, consequently,
making those methods available whenever and wherever they are needed.
The NSObject class is in accordance to the NSObject protocol, which results in the
implementation of this basic method:
//for NSObject class
@interface NSObject <NSObject>
[8]
Chapter 1
Implementing the same method works for NSProxy, which is also in accordance to
the NSObject protocol:
// for NSProxy class
@interface NSProxy <NSObject>
Methods such as hash, description, isEqual, isKindOfClass, isProxy, and
others are found in the NSObject protocol. NSProxy to NSObject protocol
denotes that, implementing the basic NSObject methods, it's still possible to
count on NSProxy instances.
Subclassing NSObject would pull in a lot of baggage that may cause a problem.
NSProxy assists in order to prevent this by giving you a simpler superclass that
doesn't have so much extra stuff in it.
The fact that the NSObject protocol is useful for root classes isn't all that interesting
for most Objective-C programming, for the simple fact that we don't make use of
other root classes frequently. However, it will be very convenient when you need to
make your own protocols.
Let's say, you have the following protocol:
@protocol MyOwnProtocol
- (void)myFunction;
@end
And there is a pointer to a simple object, myOwnObject, that accords to it:
id<MyProtocol> myOwnObject;
You can tell this object to perform myFunction:
[myOwnObject myFunction];
However, you cannot ask the object for its description:
[myOwnObject description]; // no such method in the protocol
And you can't check it for equality:
[myOwnObject isEqual: anotherObject];
// no such method in the protocol
In general, you can't ask it to do any of the stuff that a normal object can do. There
are times when this doesn't have any importance, but in some circumstances, you
will wish to be able to perform this task.
[9]
Introduction to Objective-C Memory Management
As mentioned earlier, NSObject, the root class of most Objective-C class hierarchies
and through NSObjects, your Objective-C classes can inherit an interface to the
system and also gain the ability to behave as Objective-C objects. So, NSObject is
important if you want your objects to gain access to methods such as isEqual, so on,
and so forth. This is where the NSObject protocol comes into the picture. Protocols
can inherit from other protocols, which means that MyProtocol can inherit from the
NSObject protocol:
@protocol MyOwnProtocol <NSObject>
- (void)myFunction;
@end
This says that not only do objects that conform to MyOwnProtocol respond to
myFunction, but they also respond to all those common messages in the NSObject
protocol. Knowing that any object in your application directly or indirectly inherits
from the NSObject class, that it's in accordance to the NSObject protocol, there is no
imposition to any additional requirements on people implementing MyOwnProtocol,
while giving you the permission to use these basic methods on instances.
The fact that there are two different NSObjects is abnormal for the
frameworks; however, it starts to make sense when you go deeper into
it. The NSObject protocol grants the permission to all root classes
that have the same basic methods, making, also, a very easy way to
declare a protocol that also includes basic functionality expected from
any object. The NSObject class introduces it all together, since it's
in accordance to the NSObject protocol. One thing to note here is
that a custom class that's created and does not inherit NSObject can
be considered as a root class, but once you make your custom class
inherit from NSObject, then the root class won't be your custom class
anymore, and the root class will be NSObject. However, generally,
most of your custom classes should inherit from NSObjects; it will
implement NSObject's functionality such as alloc, init, release,
and so on and without inheriting from NSObject, these functionalities
need to be written and implemented by you.
[ 10 ]
Chapter 1
Summary
In this chapter, you learned what memory management in Objective-C is and how
it works. You also learned the best practices while working with Manual Retain
Release, and got an introduction to Automatic Reference Counting, Objective-C
Objects, and root classes. ARC basically can be considered as a compile time guard
against memory leaks as the compiler will automatically write the release statements
for you at compile time. So, there is no need to write verbose release statements in
your code to keep it clean and terse.
One tip to note for coding with memory management is that whenever you do alloc
and init, then write your release code after that and put it in its appropriate place in
your class, you can forget to call the release method after writing some or fixing some
bugs. So writing your object release statements after you do alloc and init will help
you to keep memory leaks to a minimum so that you won't have a situation where you
get a memory leak as you have forgotten to write your object release statement.
In the next chapter, you will learn more about ARC, how it works, its advantages,
how to set up your projects to use ARC and memory models in Objective-C and UI
Kit with ARC.
[ 11 ]
Chapter 2
Automatic Reference
Counting
Good ideas live a long life and bad ones die fast. In Objective-C, reference counting's
long life was seen as a very good idea. The next step of evolution in this is that it
became automatic, so we call it Automatic Reference Counting (ARC), which was
introduced by Apple Inc. in 2011 for application development on its desktop and
mobile OS, Mac OS X Lion, and iOS 5. It changed the name of the initial referencing
counting to Manual Reference Counting.
We will cover the following topics in this chapter:
•
ARC and how it works
•
Advantages and disadvantages of ARC
•
Project settings for ARC
•
Mixing code that doesn't support ARC with your project
•
Memory model in Objective C
•
ARC in UI kit
What is ARC and how does it work?
If you remember, the idea of reference counting covers the actual deletion of objects
from the memory. With reference counting, Objective-C takes care of the actual object
destruction. Owner objects are only responsible for releasing their claim of ownership
on the object. So, logically the idea that appeared next was to make everything
completely automatic as it was done in languages such as Java and C#. This idea
was developed in the Garbage collection branch and Automatic Reference Counting.
[ 13 ]
Automatic Reference Counting
Garbage collection is only available for Mac OS X, starting with version 10.5. Also,
note that iOS applications can't use Garbage collection; since it relies on the power of
the device, it will take some time to process, forcing the user to wait the process end,
thus producing a bad user experience. It is also deprecated since OS X Version 10.8 is
in favor of ARC and is scheduled to be removed in the forthcoming versions of OS X.
ARC is a new and innovative way that contains many of the Garbage collection's
advantages, yet different from Garbage collection. ARC does not have any process in
the background to make the object's deallocation, which gives ARC a big advantage
against Garbage collection when comparing their performance.
However, before explaining how ARC does this, it's important to understand what
ARC does not do:
•
ARC does not impose a runtime memory model as Garbage collection does.
Code compiled under ARC uses the same memory model as plain C or nonARC Objective-C code, and can be linked to the same libraries.
•
ARC only makes automatic memory management possible for Objective-C
objects, inherited from NSObject (note that in Objective-C, blocks also
happen to be objects under the covers though).
•
Memory allocated in any other way is not touched and must still be managed
manually. The same goes for other resources such as file handles and sockets,
such as streams.
How ARC looks
Start by picturing a traditional Objective-C source code file written by an expert
Cocoa programmer. The retain, release, and autorelease messages are sent
in all the right places and are in perfect balance.
Now, imagine editing the source code file, removing every instance of the retain,
release, and autorelease messages, and changing a single build setting in Xcode
that instructs the compiler to put all the suitable memory management calls back into
your program when the source code is compiled. That's ARC. It's just what the name
suggests—traditional Cocoa reference counting, being automatically done.
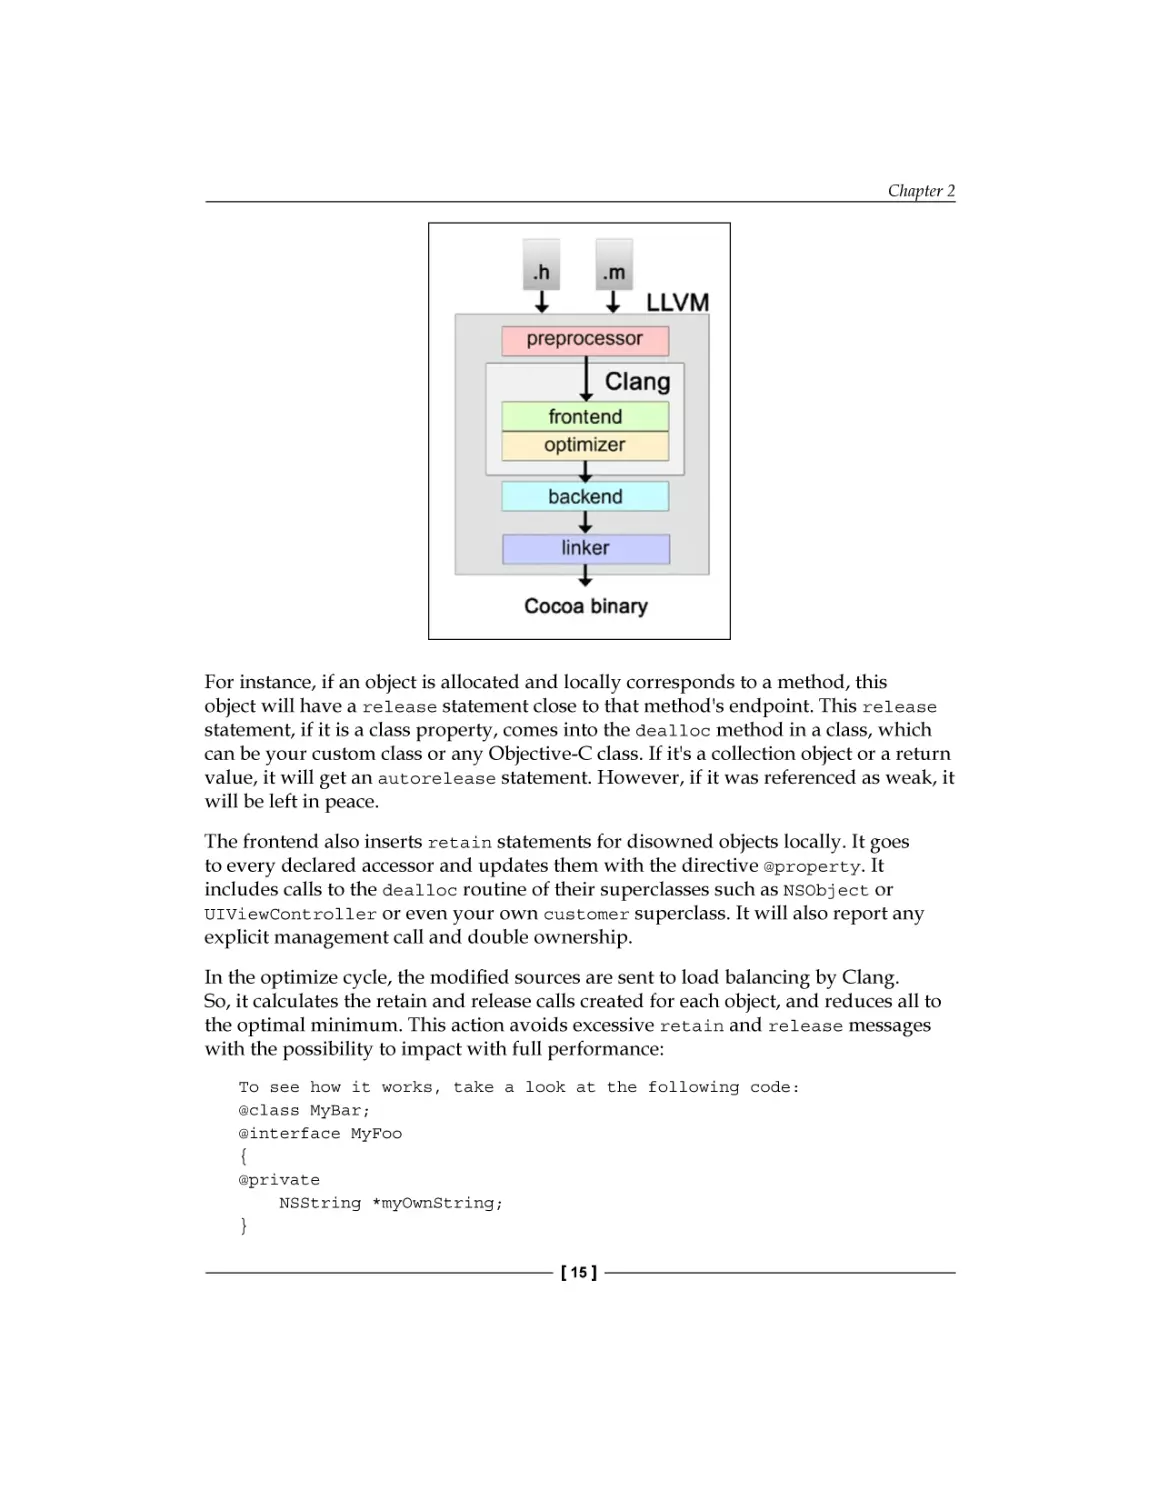
At its core, ARC is not a runtime service; it doesn't work on program execution, as
Garbage collection does. On the other hand, the new Clang, the compiler frontend
for C, C++, Objective-C, and Objective-C++, provides it as a two-part phase (we will
call these phases "cycles"). In the following diagram, you can see these two phases.
At the cycle named frontend as shown in the following diagram, Clang will analyze
every preprocessed file for properties and objects. And then, relying on a few fixed
rules, it will insert the correct statements—retain, release, and autorelease.
[ 14 ]
Chapter 2
For instance, if an object is allocated and locally corresponds to a method, this
object will have a release statement close to that method's endpoint. This release
statement, if it is a class property, comes into the dealloc method in a class, which
can be your custom class or any Objective-C class. If it's a collection object or a return
value, it will get an autorelease statement. However, if it was referenced as weak, it
will be left in peace.
The frontend also inserts retain statements for disowned objects locally. It goes
to every declared accessor and updates them with the directive @property. It
includes calls to the dealloc routine of their superclasses such as NSObject or
UIViewController or even your own customer superclass. It will also report any
explicit management call and double ownership.
In the optimize cycle, the modified sources are sent to load balancing by Clang.
So, it calculates the retain and release calls created for each object, and reduces all to
the optimal minimum. This action avoids excessive retain and release messages
with the possibility to impact with full performance:
To see how it works, take a look at the following code:
@class MyBar;
@interface MyFoo
{
@private
NSString *myOwnString;
}
[ 15 ]
Automatic Reference Counting
@property(readonly) NSString *myOwnString;
- (MyBar *)getMyBarWithString:(NSString *)myString;
- (MyBar *)getMyBar;
@end
@implementation MyFoo;
@dynamic myOwnString;
– (MyBar *)getMyBarWithString:(NSString *)myString
{
MyBar *yBar;
if (![self.myString isEqualToString:myString])
{
myOwnString = myString;
}
return [self getMyBar];
}
- (MyBar *)getMyBar
{
MyBar *yBar
return yBar;
}
@end
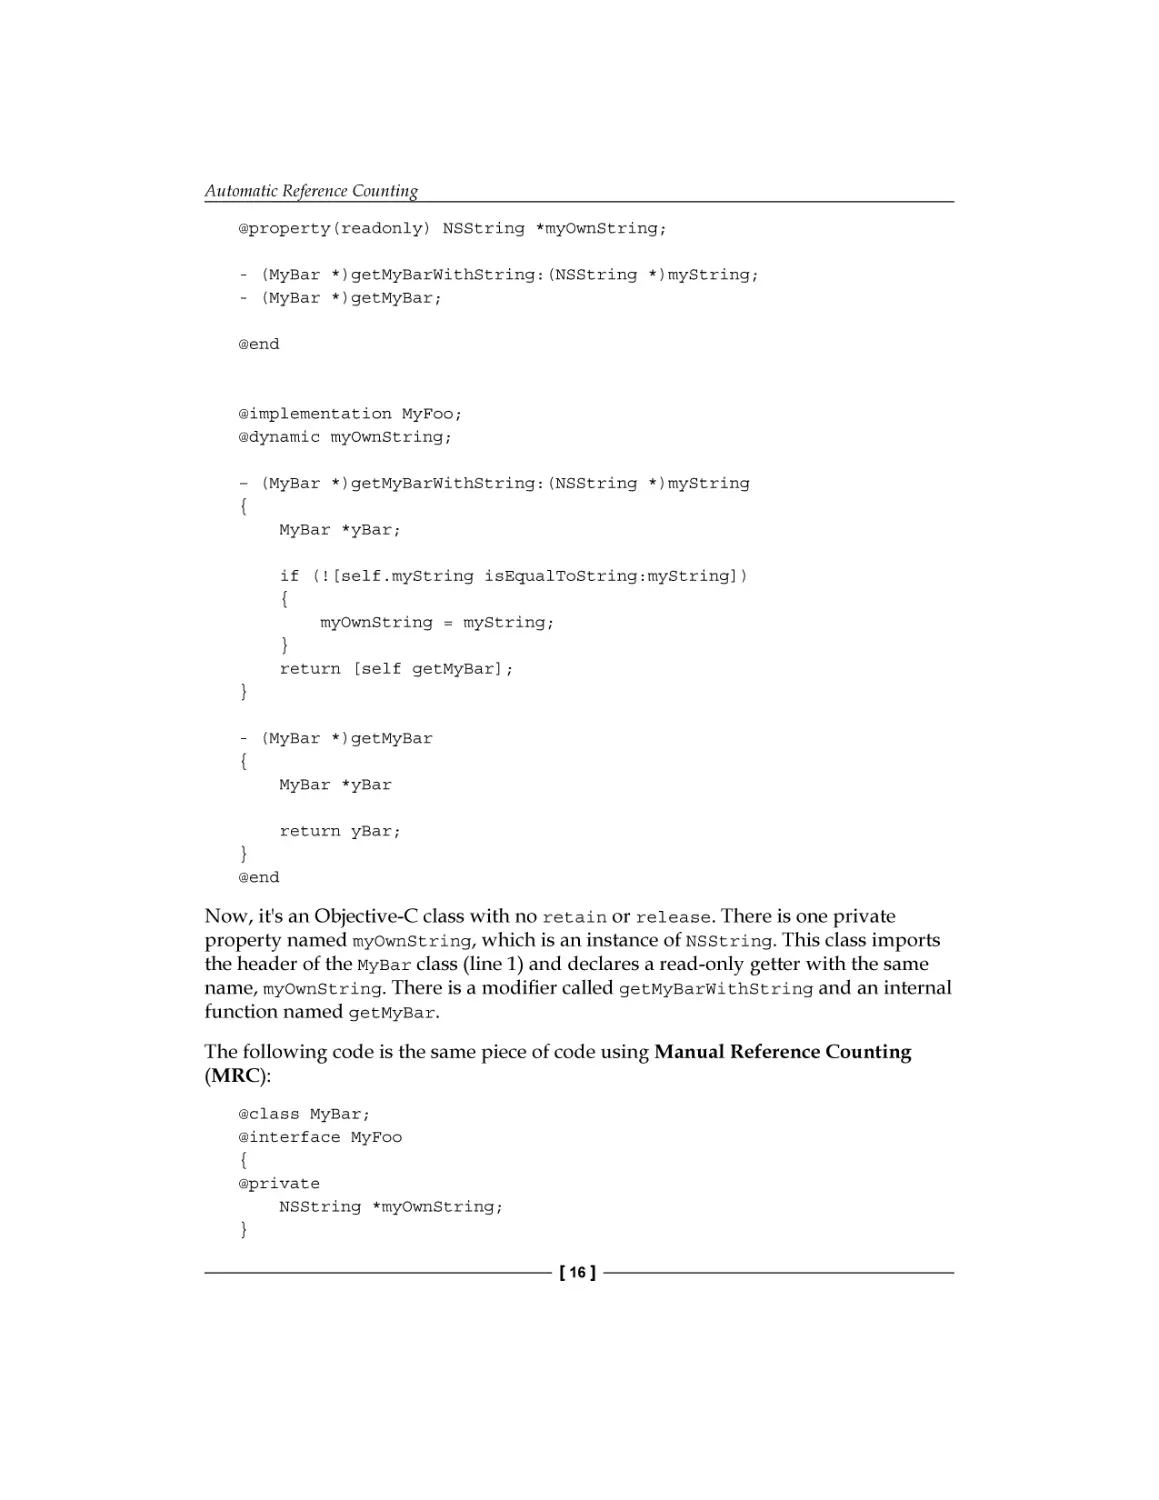
Now, it's an Objective-C class with no retain or release. There is one private
property named myOwnString, which is an instance of NSString. This class imports
the header of the MyBar class (line 1) and declares a read-only getter with the same
name, myOwnString. There is a modifier called getMyBarWithString and an internal
function named getMyBar.
The following code is the same piece of code using Manual Reference Counting
(MRC):
@class MyBar;
@interface MyFoo
{
@private
NSString *myOwnString;
}
[ 16 ]
Chapter 2
@property (readonly) NSString *myOwnString;
- (MyBar *)getMyBarWithString:(NSString *)myString;
- (MyBar *)getMyBar;
@end
@implementation MyFoo;
@dynamic myOwnString;
– (MyBar *)getMyBarWithString:(NSString *)myString
{
MyBar *yBar;
if (![self.myString isEqualToString:myString])
{
[myString retain];
[myOwnString release];
myOwnString = myString;
}
return [self getMyBar];
}
- (MyBar *)getMyBar
{
MyBar *yBar
[yBar autorelease];
return yBar;
}
- (void)dealloc
{
[myOwnString release];
[super dealloc];
}
@end
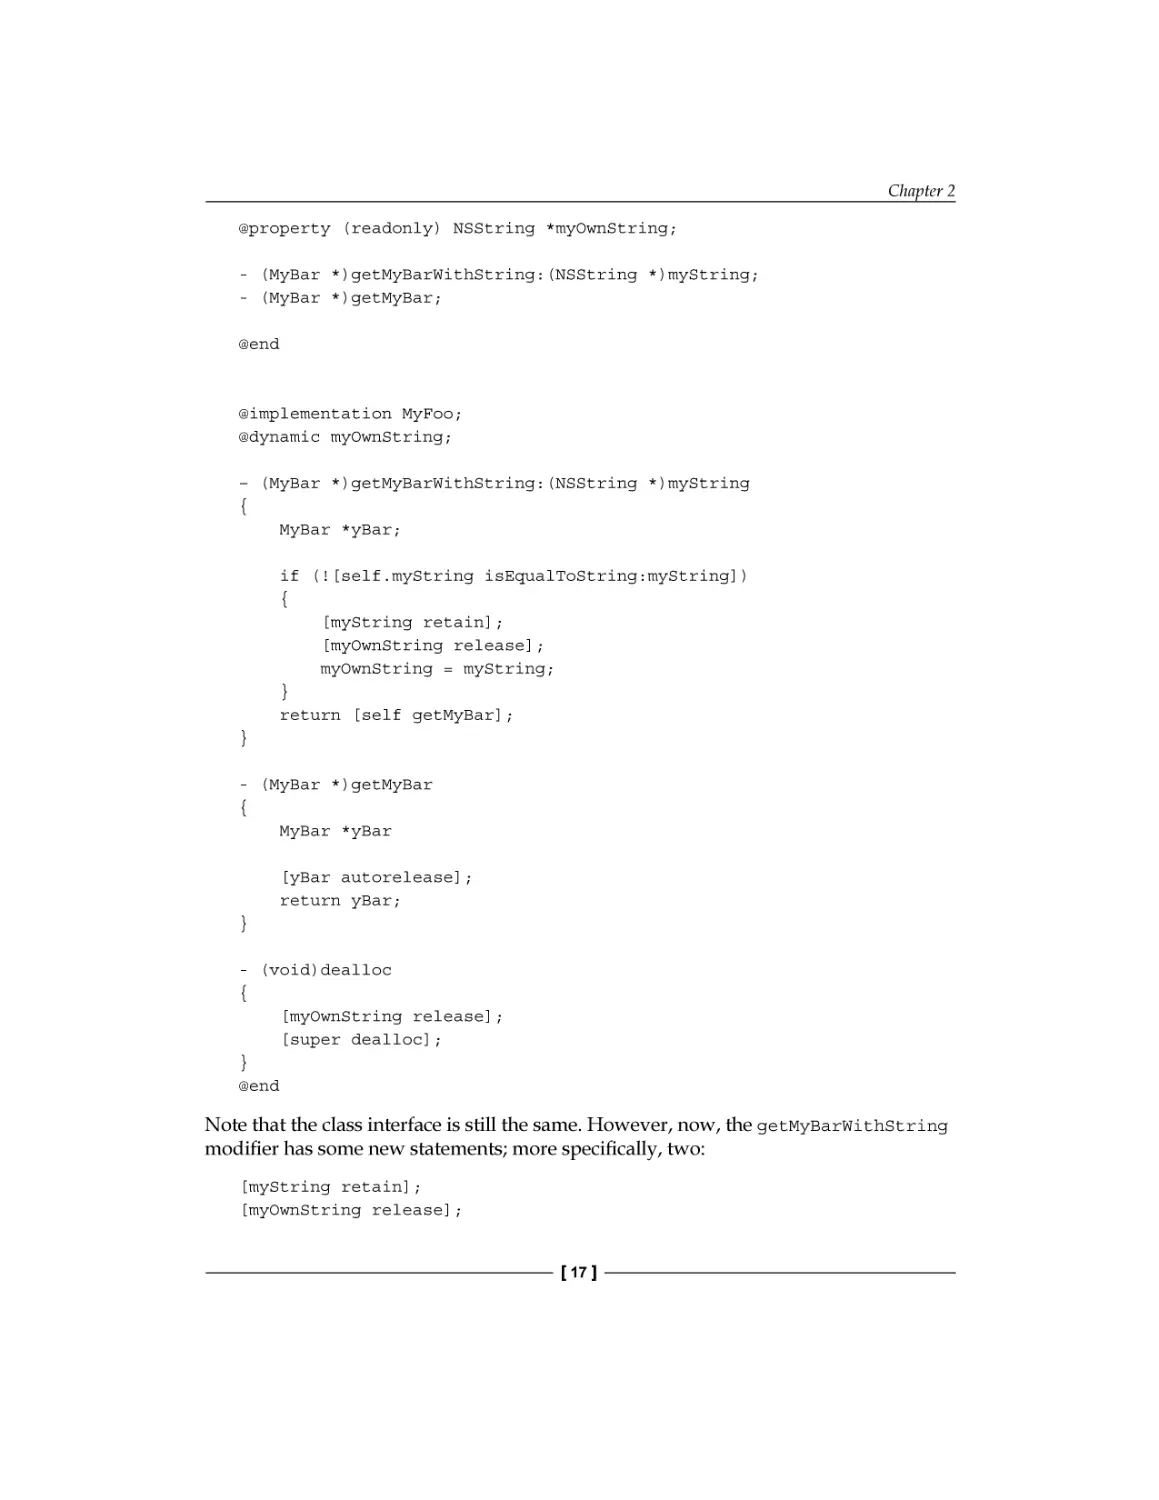
Note that the class interface is still the same. However, now, the getMyBarWithString
modifier has some new statements; more specifically, two:
[myString retain];
[myOwnString release];
[ 17 ]
Automatic Reference Counting
Sending a release statement to the myOwnString property (line 24) is the
responsibility of one of them. The other sends a retain message to the myString
argument (line 25). Before returning the last one as its result, the getMyBar function
sends locally a autorelease statement to the yBar local. Lastly, MRC supersedes
the dealloc method of that class. MRC also releases the myOwnString property (line
44) and invokes the dealloc method of its superclass (line 45); still in that method, if
there is already a dealloc method, MRC properly updates its code.
When using ARC, you don't need to explicitly insert retain and release messages,
as ARC will automatically insert them during compilation. Since ARC decides
by itself how an Objective-C object will be better managed, the time that will be
required to develop the class code is not required anymore. So, ARC avoids any
empty pointers. ARC can also be excluded on a per-file basis where you select your
target, go to Build Phases, and add the -fno-objc-arc flag in Compiler Flags.
However, the Clang compiler is built into LLVM 3.0, only available on Xcode since
version 4.2. There has been optimized runtime support for ARC ever since Mac OS X
Version 10.7 and iOS Version 5.0. It is not challenging to use ARC with binaries from
Mac OS X 10.6 and iOS 4.3, but for iOS 4.3, it's only achievable through blue code;
and for OS X 10.6, the newest version does not make use of weak pointers at all.
Some points about ARC are as follows:
•
It does not work with AppleScriptObjC or even PyObjC sources; it works
exclusively with Objective-C sources.
•
However, more or less, when there are PyObjC and AppleScriptObjC
classes being connected to Cocoa by Objective-C code, ARC will affect that
underlying code.
•
Note that for some third-party frameworks, if ARC is enabled, they might
crash while compiling. Ensure that the developer of such a framework can
and will update it.
Project settings for ARC
When a project is set to utilize ARC, the compiler flag -fobjc-arc is by default set for
every Objective-C source file. ARC can be disabled for particular classes through the
compiler flag, -fno-obj-arc. In Xcode, go to the target Build Phases tab, open
the Compile Sources group, and you will be able to see the source file list. When you
double-click on the file where you want to set it, a pop-up panel will appear. In that
panel, get in the -fno-obj-arc flag and click on Done to finish.
[ 18 ]
Chapter 2
If ARC was not enabled when the project was created, then to enable it, follow this
process:
1. Open the project.
2. Go to Edit | Refactor | Convert to Objective-C ARC.
3. If there is no problem and it's ready to convert, it will check your code.
By default, all newly created Objective-C projects in Xcode 5 are enabled with ARC.
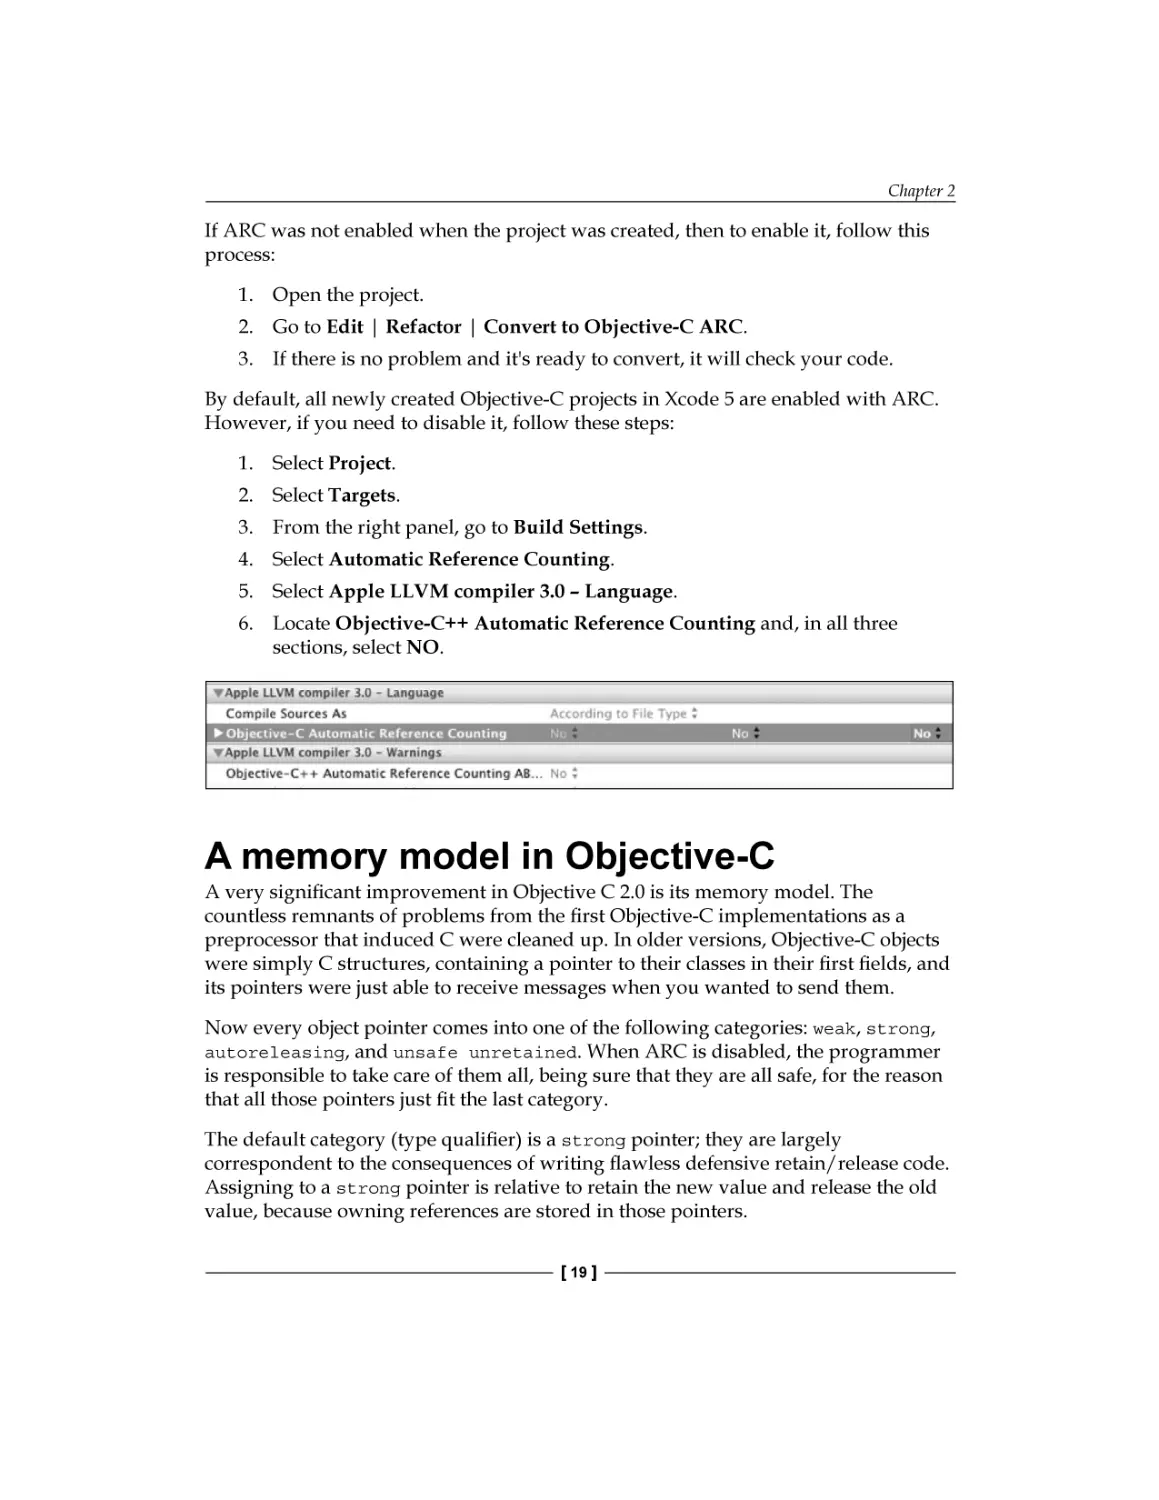
However, if you need to disable it, follow these steps:
1. Select Project.
2. Select Targets.
3. From the right panel, go to Build Settings.
4. Select Automatic Reference Counting.
5. Select Apple LLVM compiler 3.0 – Language.
6. Locate Objective-C++ Automatic Reference Counting and, in all three
sections, select NO.
A memory model in Objective-C
A very significant improvement in Objective C 2.0 is its memory model. The
countless remnants of problems from the first Objective-C implementations as a
preprocessor that induced C were cleaned up. In older versions, Objective-C objects
were simply C structures, containing a pointer to their classes in their first fields, and
its pointers were just able to receive messages when you wanted to send them.
Now every object pointer comes into one of the following categories: weak, strong,
autoreleasing, and unsafe unretained. When ARC is disabled, the programmer
is responsible to take care of them all, being sure that they are all safe, for the reason
that all those pointers just fit the last category.
The default category (type qualifier) is a strong pointer; they are largely
correspondent to the consequences of writing flawless defensive retain/release code.
Assigning to a strong pointer is relative to retain the new value and release the old
value, because owning references are stored in those pointers.
[ 19 ]
Automatic Reference Counting
You need to use autoreleasing pointers in order to store values that are
autoreleased. In Objective-C, such pointers are the most habitual form of nonowning reference pointers; they are variables on the heap storing autoreleased
values. An owning reference pointer, also known as an instance variable, will only
be autoreleased when it is stored to a non-owning reference pointer, known as an
autoreleasing variable. If you simply store an autoreleased reference pointer, you
will have a simple attribution.
In order to decrease the quantity of release and retain statements in a crucial piece
of code, it's possible to make use of _autoreleasing, one of the four ARC type
qualifiers. However, since the objects will be included in the autoreleasing pool and
ARC can commonly eliminate this, it's usually not required to use this type qualifier,
besides the fact that is can make things slower.
Weak is the last category (type qualifier) of pointer. If you used the garbage-collector
mode in Objective-C, you probably already met weak pointers by storing an object in
such a pointer. It's not seen as an owning reference pointer (for instance, a variable),
and when the object is deallocated, this point is immediately set to nil.
We can count many differences between GC and ARC mode, but the very important
one is about ARC being deterministic. It's possible to see it through weak pointers.
See the following code for an example:
id strong = [NSObject new];
__weak id weak = strong;
strong = nil;
NSLog(@"%@", weak);
Firstly, since in the garbage collection mode__weak is not granted for on-stack
variables, the preceding code won't even pass through compilation. However,
what would happen if the weak declaration is moved to somewhere it's valid?
We presume that at this point, the object's last reference is already gone. However,
the log statement will show you that the object is still there, alive. Relying on
the optimizations that the compiler is running, the collector can possibly see its
references on the heap if you run the collector by force.
This piece of code will be compiled in the ARC mode—now, weak variables are
allowed on the heap.
[ 20 ]
Chapter 2
What you need to know about ARC
and weak references
Weak references have been supported on GNUstep Objective-C runtime since
version 1.5, since version 5 of iOS, and version 10.7 of OS X. ARC works through the
compatibility library as well, but it requires modifications of many classes in order to
work with weak references.
Summary
In this chapter, we focused our attention on Automatic Reference Counter,
its advantages, how it works, and how to properly set up and integrate it into
current projects.
In the next chapter, we will talk about the autorelease pool mechanism and its classes,
blocks, and threads. We will also understand the memory model in Objective-C. I hope
this chapter has provided you with a good understanding of ARC.
[ 21 ]
Chapter 3
Using Autorelease Pools
Consider that you are returning an object you've created (and therefore own) to a
caller. If it's released inside your method, the returning object will be an invalid one.
On the other hand, there is the basic rule that you have to release the objects you
own; then, how do you release them? Simply put the object in the autorelease pool.
The object is then released when the autorelease pool is drained.
We will cover the following topics in this chapter:
•
Understanding the autorelease pool mechanism
•
How autorelease pool helps
•
Autoreleased classes
•
Autoreleased pool blocks and threads
•
Memory model in Objective-C
•
ARC with weak references
Understanding the autorelease pool
mechanism
When you first start developing for Cocoa (iOS or Mac OS) you quickly learn
to follow the standard alloc, init, and (eventually) release cycles:
// Allocate and init
NSMutableDictionary *dictionary = [[NSDictionary alloc] init];
// Do something with dictionary
// ...
// Release
[dictionary release];
[ 23 ]
Using Autorelease Pools
This is great until you discover the convenience of just doing the following:
// Allocate and init
NSMutableDictionary *dictionary = [NSDictionary dictionary];
// Do something with dictionary
// …
Let's look inside and see what actually happens:
NSMutableDictionary *dictionary = [[NSDictionary alloc] init];
return [dictionary autorelease];
This approach is called autorelease pools and they are a part of the Automated
Reference Counting (ARC) memory management model used by the Cocoa platform.
The ARC compiler will autorelease any object for you, unless it's returned from
a method that starts with new, alloc, init, copy, or mutableCopy in its name.
As before, these objects are placed into an autorelease pool, but in order to
introduce a new language construct, NSAutoreleasePool has been replaced by @
autoreleasepool, a compiler directive. Even using ARC, we are still free to use
autorelease messages to drain/create our pool at any time. It doesn't affect the
compiler when implementing retain and release messages, but provides hints
when it's safe to make autoreleased objects go out of scope.
Cocoa frameworks (Foundation Kit, Application Kit, and Core Data) have some
suitable methods to handle basic classes that inherit from NSObject, as NSString,
NSArray, NSDictionary, and many more. These methods quickly allocate, initialize,
and return the created object for you, which will also be autoreleased without you
worrying about it so much.
Note that I really meant "without worrying so much", not "without
worrying at all" because even with these handy frameworks that create
and clear the object for you, there will be cases when you want to take
more control and create additional autorelease pools yourself.
Basically, an autorelease pool stores objects and when it's drained, it just sends the
object a release message. The NSAutoreleasePool class is used to support Cocoa's
reference-counted memory management system.
[ 24 ]
Chapter 3
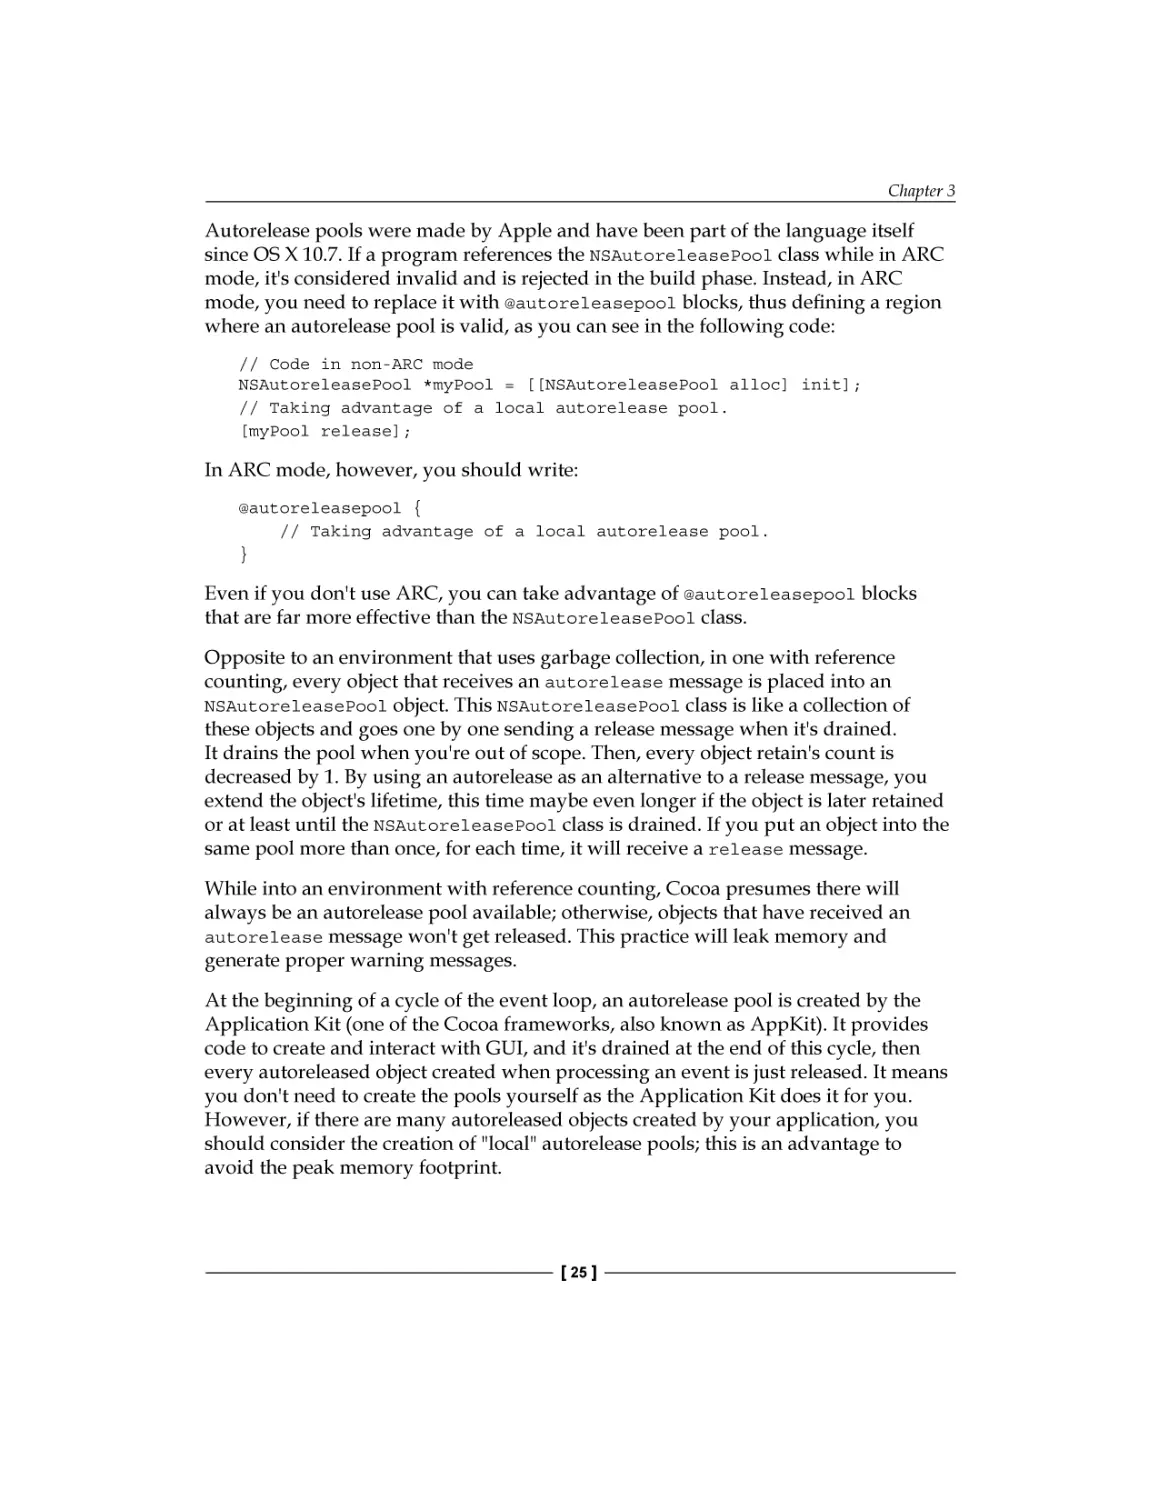
Autorelease pools were made by Apple and have been part of the language itself
since OS X 10.7. If a program references the NSAutoreleasePool class while in ARC
mode, it's considered invalid and is rejected in the build phase. Instead, in ARC
mode, you need to replace it with @autoreleasepool blocks, thus defining a region
where an autorelease pool is valid, as you can see in the following code:
// Code in non-ARC mode
NSAutoreleasePool *myPool = [[NSAutoreleasePool alloc] init];
// Taking advantage of a local autorelease pool.
[myPool release];
In ARC mode, however, you should write:
@autoreleasepool {
// Taking advantage of a local autorelease pool.
}
Even if you don't use ARC, you can take advantage of @autoreleasepool blocks
that are far more effective than the NSAutoreleasePool class.
Opposite to an environment that uses garbage collection, in one with reference
counting, every object that receives an autorelease message is placed into an
NSAutoreleasePool object. This NSAutoreleasePool class is like a collection of
these objects and goes one by one sending a release message when it's drained.
It drains the pool when you're out of scope. Then, every object retain's count is
decreased by 1. By using an autorelease as an alternative to a release message, you
extend the object's lifetime, this time maybe even longer if the object is later retained
or at least until the NSAutoreleasePool class is drained. If you put an object into the
same pool more than once, for each time, it will receive a release message.
While into an environment with reference counting, Cocoa presumes there will
always be an autorelease pool available; otherwise, objects that have received an
autorelease message won't get released. This practice will leak memory and
generate proper warning messages.
At the beginning of a cycle of the event loop, an autorelease pool is created by the
Application Kit (one of the Cocoa frameworks, also known as AppKit). It provides
code to create and interact with GUI, and it's drained at the end of this cycle, then
every autoreleased object created when processing an event is just released. It means
you don't need to create the pools yourself as the Application Kit does it for you.
However, if there are many autoreleased objects created by your application, you
should consider the creation of "local" autorelease pools; this is an advantage to
avoid the peak memory footprint.
[ 25 ]
Using Autorelease Pools
To create an NSAutoreleasePool object, you can use the regular alloc and init
methods and use drain to dismiss it. A pool cannot be retained; the consequences of
drain is like a deallocation, and it's very important to do so in the same context you
created it.
Every thread has its own stack of autorelease pools. These stacks contain
NSAutoreleasePool objects, which in turn contain autoreleased objects. Every new
autoreleased object is placed on the top of the pool and every new pool is placed
on the top of the stack. A pool is removed from a stack when it's drained. Before a
thread is finished, it drains every autorelease pool on its stack. Despite the fact that
an autorelease pool can be manually created and objects can be manually added to it,
ARC still drains the pool automatically: you're not allowed to do it yourself.
To ensure that you don't have to worry about ownership, this is what ARC does:
easily create autorelease pools, and make them temporarily handle the holding and
releasing of autoreleased objects for you.
Autorelease pool mechanism
There will be times when you need to renounce an object's ownership and a good
way to do it is by using autorelease pool blocks. Those blocks provide a mechanism
where you can renounce it and avoid any chance of the object's immediate
deallocation. Even if sometimes you will need to create your own blocks, or it will be
in your advantage to do this way, you normally don't need to create them, but there
are situations where you may need it.
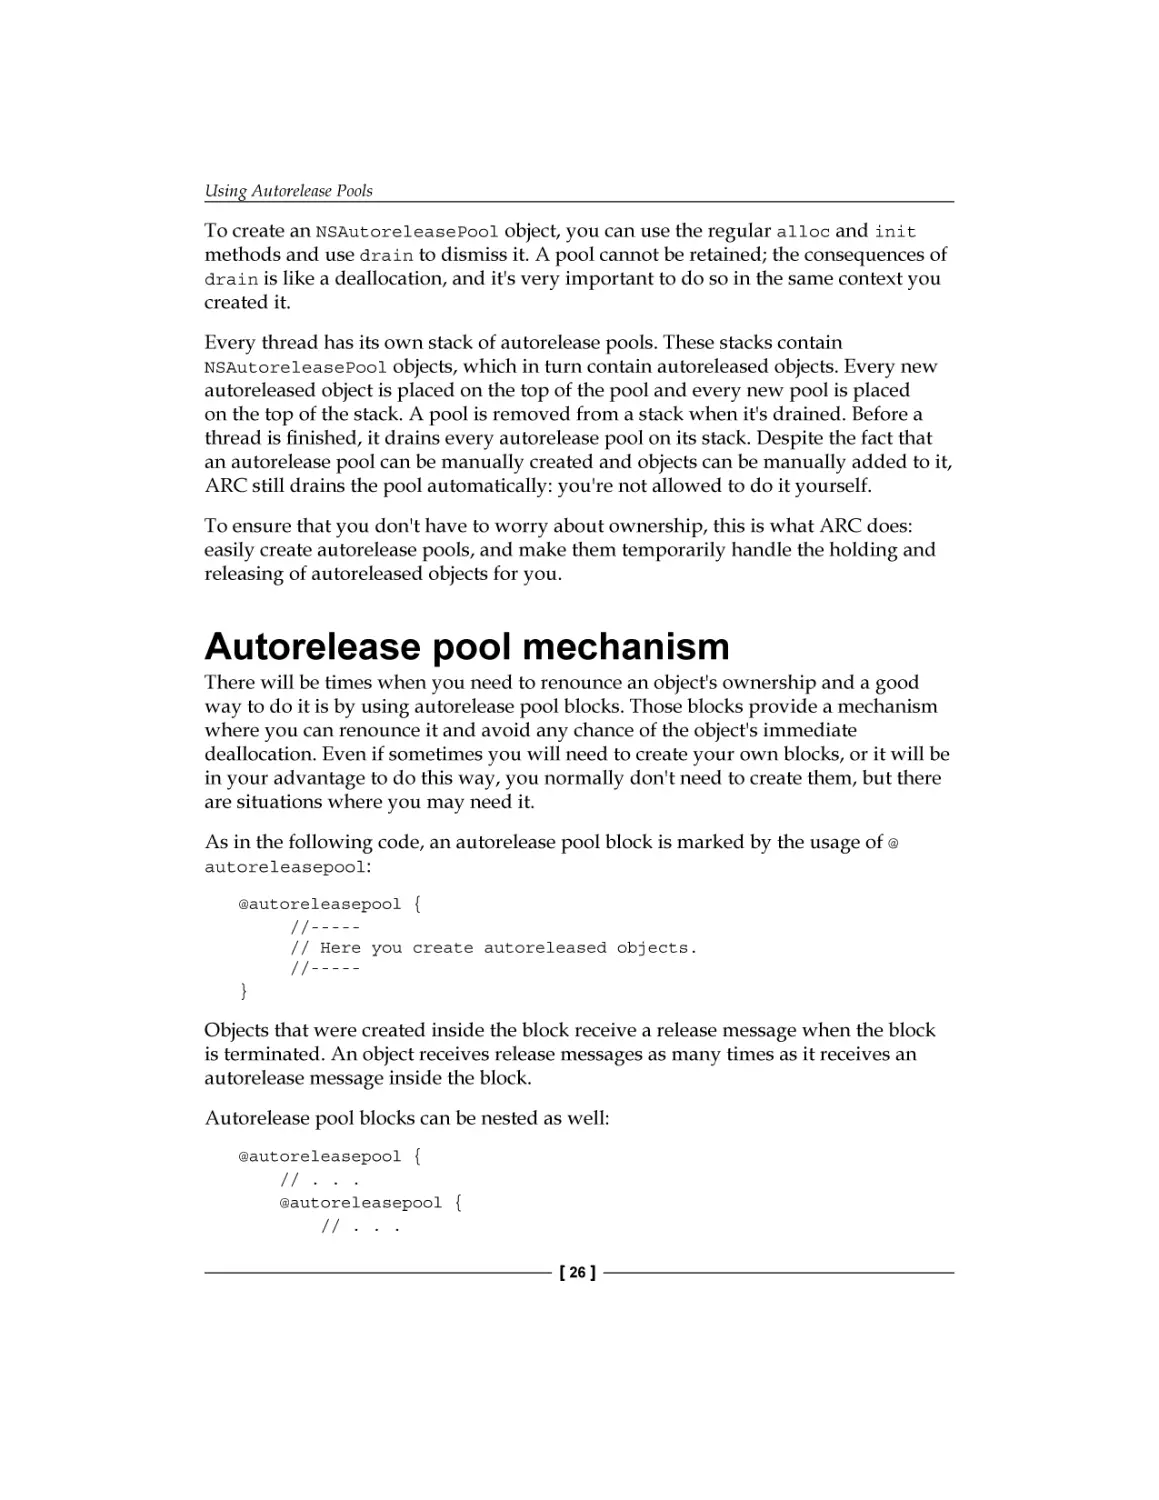
As in the following code, an autorelease pool block is marked by the usage of @
autoreleasepool:
@autoreleasepool {
//----// Here you create autoreleased objects.
//----}
Objects that were created inside the block receive a release message when the block
is terminated. An object receives release messages as many times as it receives an
autorelease message inside the block.
Autorelease pool blocks can be nested as well:
@autoreleasepool {
// . . .
@autoreleasepool {
// . . .
[ 26 ]
Chapter 3
}
//. . .
}
If an autorelease message is not sent inside the autorelease pool block, Cocoa will
return error messages and your application will leak memory. You generally don't
need to create your own autorelease pool blocks, but there are three situations where
you will be required to:
•
While creating a program that is not based on UI, such as a command-line one
•
While creating a loop that generates a large number of temporary objects
•
When a secondary thread has to be created
Reducing peak memory footprint with
autorelease pool blocks
Memory footprint is basically the primary amount of memory used by a program in
runtime. Temporary autoreleased objects are created in countless applications, and
they add to the application's memory footprint until the block is ended. Allowing this
accumulation until the current event loop finally ends, in some cases, may result in an
exorbitant overhead and you might want to quickly get rid of those temporary objects;
after all, they are highly adding to the memory footprint. In this case, the creation
of your own "local" autorelease pool blocks is a solution. In the end, all objects are
released, consequently deallocated, beneficially reducing the memory footprint.
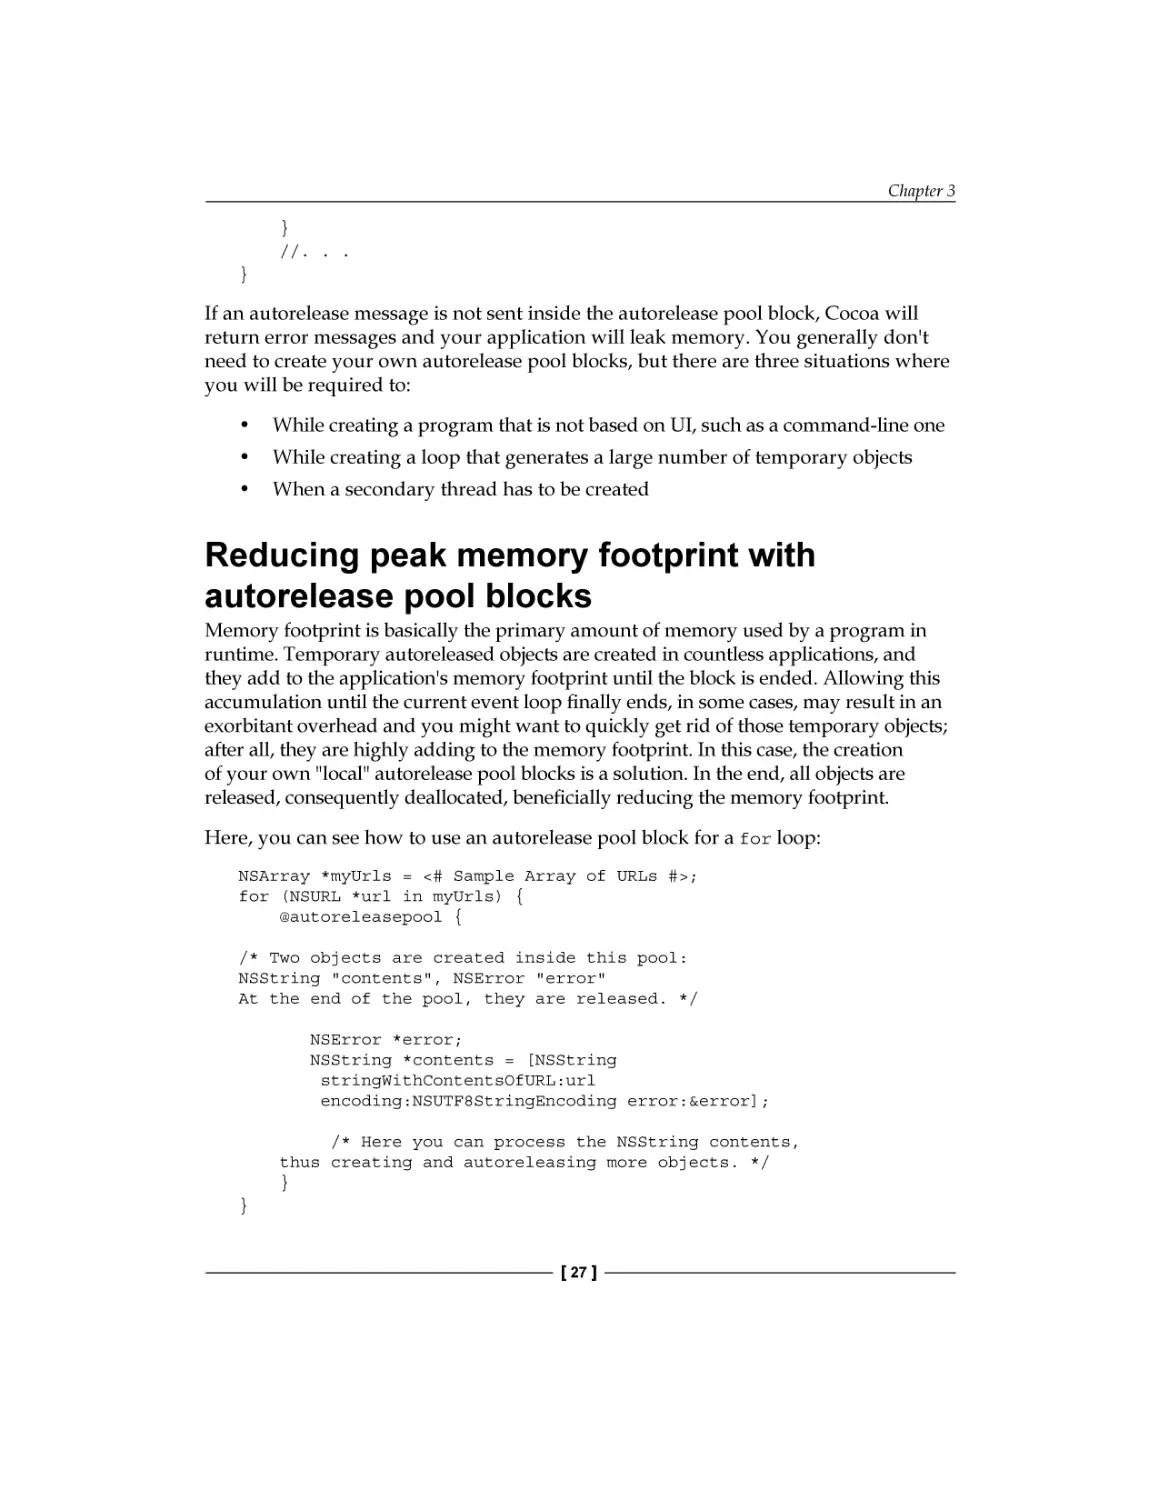
Here, you can see how to use an autorelease pool block for a for loop:
NSArray *myUrls = <# Sample Array of URLs #>;
for (NSURL *url in myUrls) {
@autoreleasepool {
/* Two objects are created inside this pool:
NSString "contents", NSError "error"
At the end of the pool, they are released. */
NSError *error;
NSString *contents = [NSString
stringWithContentsOfURL:url
encoding:NSUTF8StringEncoding error:&error];
/* Here you can process the NSString contents,
thus creating and autoreleasing more objects. */
}
}
[ 27 ]
Using Autorelease Pools
There is NSArray with many files' URLs and the loop processes one file at a time.
Every object created inside the block is released when it's ended.
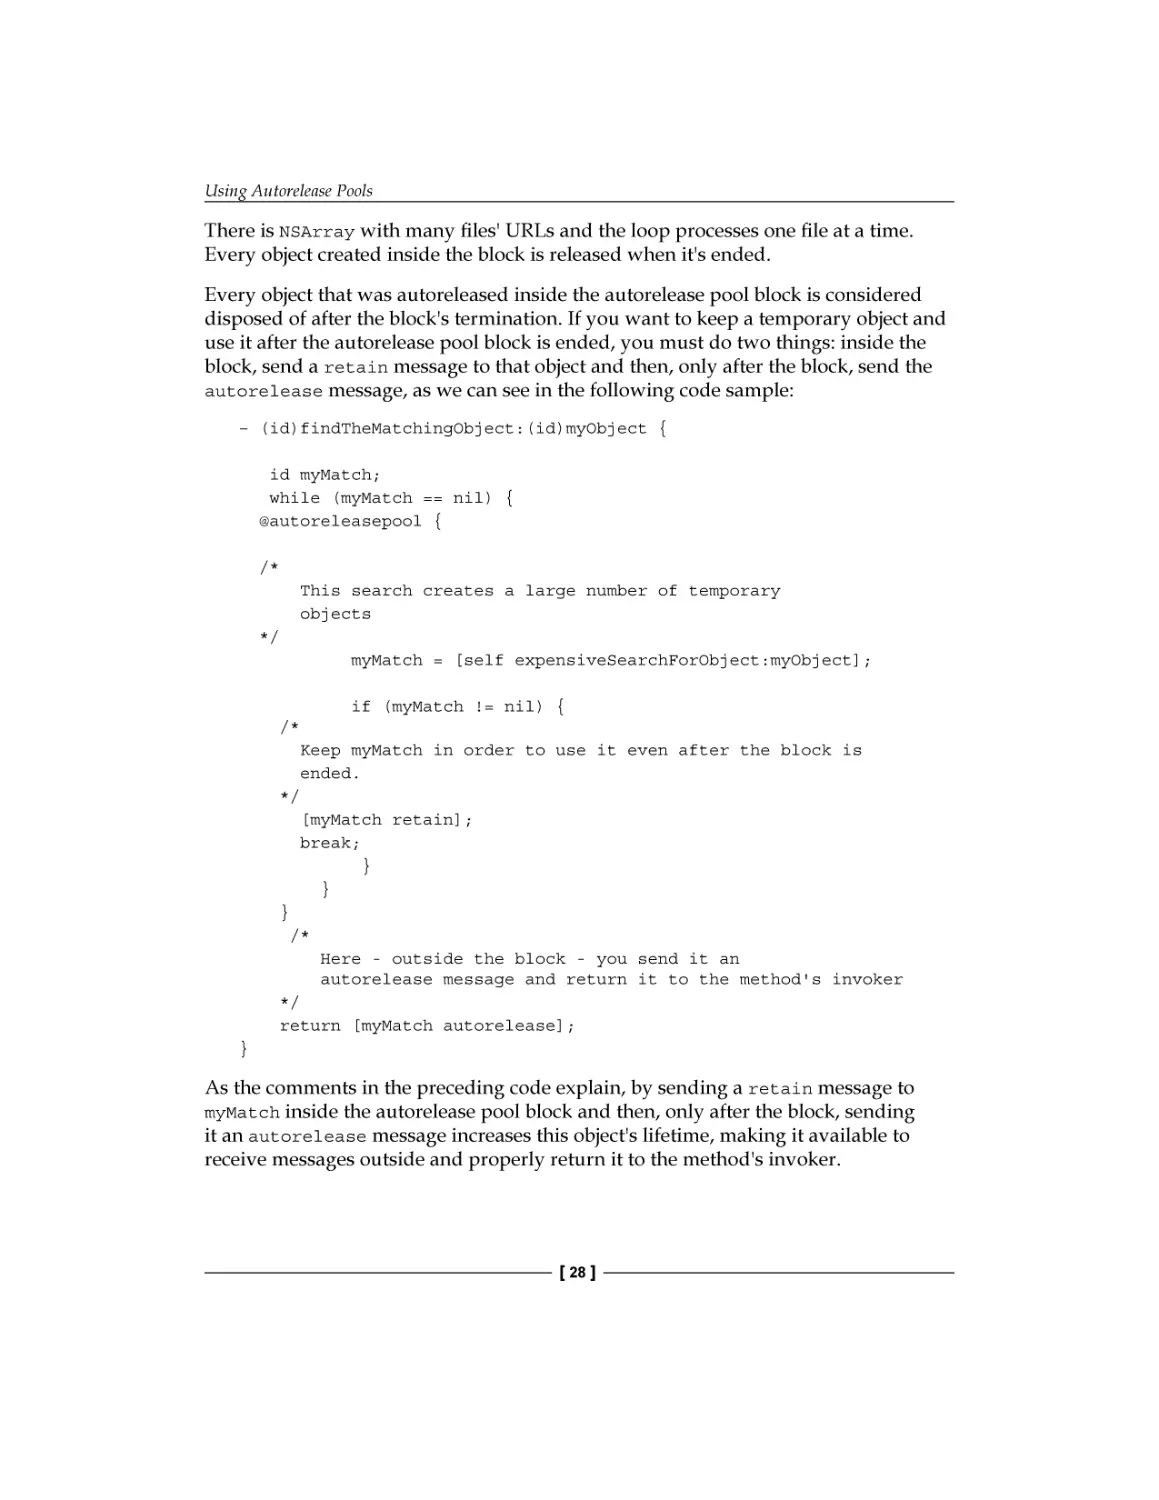
Every object that was autoreleased inside the autorelease pool block is considered
disposed of after the block's termination. If you want to keep a temporary object and
use it after the autorelease pool block is ended, you must do two things: inside the
block, send a retain message to that object and then, only after the block, send the
autorelease message, as we can see in the following code sample:
– (id)findTheMatchingObject:(id)myObject {
id myMatch;
while (myMatch == nil) {
@autoreleasepool {
/*
This search creates a large number of temporary
objects
*/
myMatch = [self expensiveSearchForObject:myObject];
if (myMatch != nil) {
/*
Keep myMatch in order to use it even after the block is
ended.
*/
[myMatch retain];
break;
}
}
}
/*
Here - outside the block - you send it an
autorelease message and return it to the method's invoker
*/
return [myMatch autorelease];
}
As the comments in the preceding code explain, by sending a retain message to
myMatch inside the autorelease pool block and then, only after the block, sending
it an autorelease message increases this object's lifetime, making it available to
receive messages outside and properly return it to the method's invoker.
[ 28 ]
Chapter 3
An overview of Apple autoreleased
classes
As it was said before, the Cocoa framework provides factory methods with
autorelease for many of the basic classes such as NSString, NSArray, NSDictionary,
NSColor, and NSDate. However, in the same time, there are some classes that
deserve special attention.
NSRunLoop
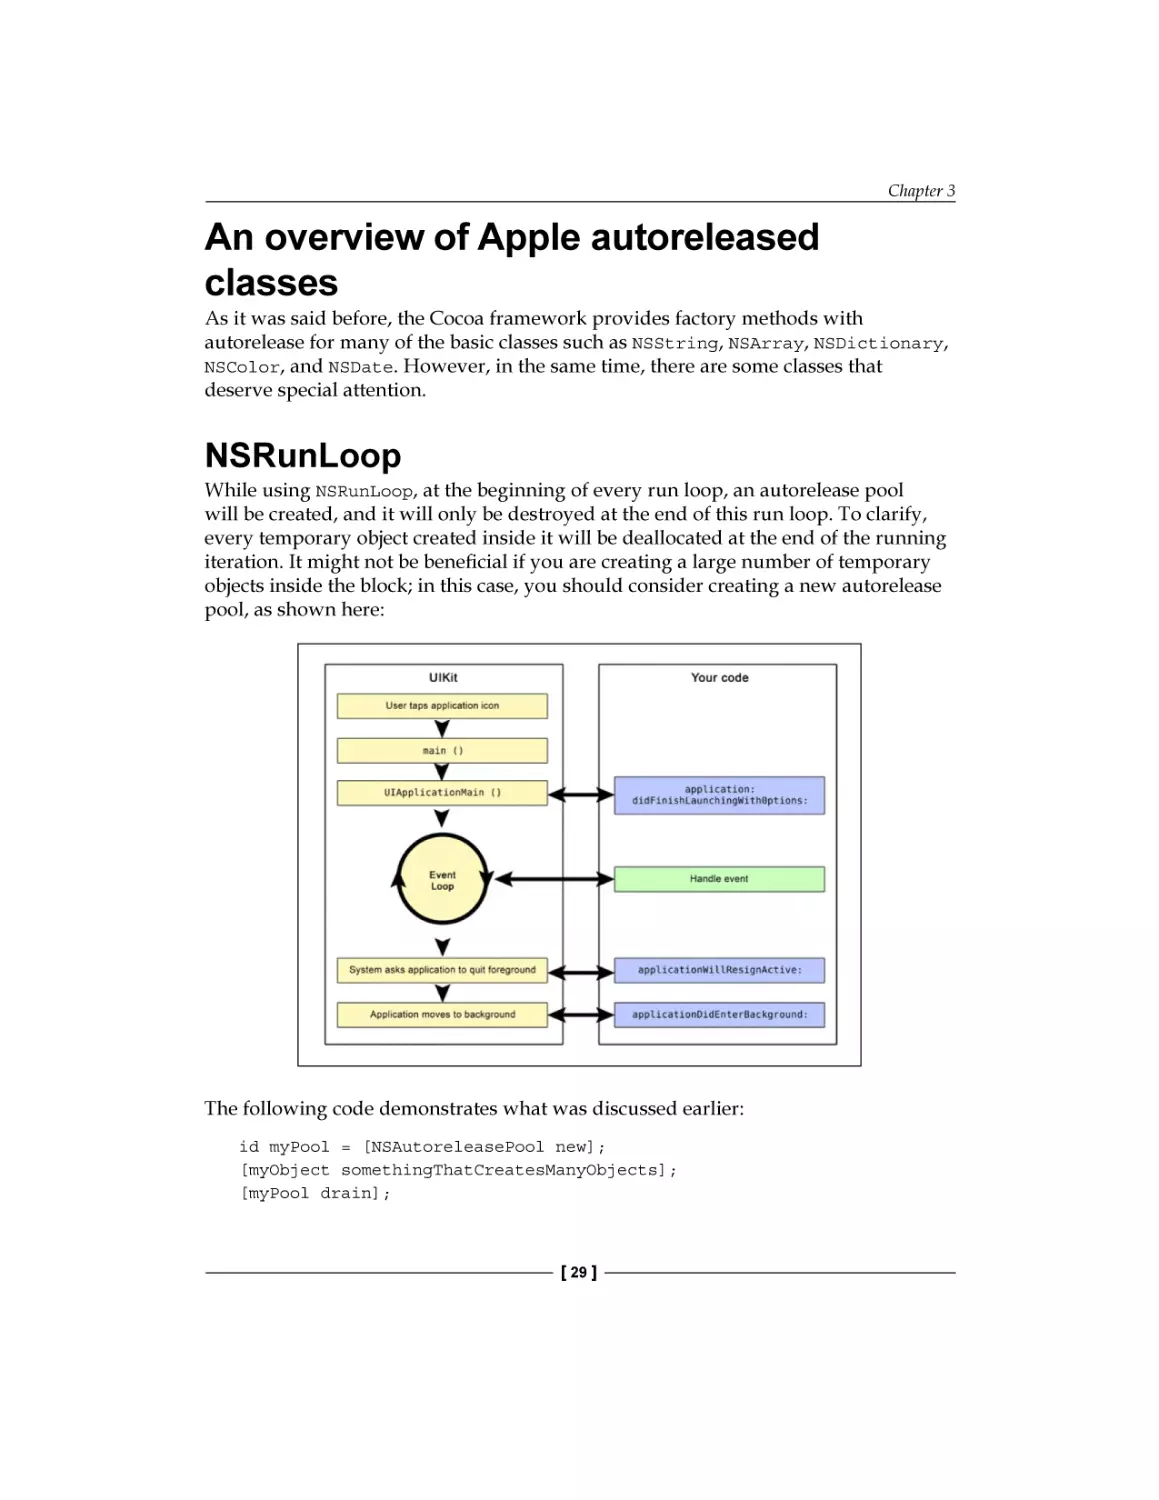
While using NSRunLoop, at the beginning of every run loop, an autorelease pool
will be created, and it will only be destroyed at the end of this run loop. To clarify,
every temporary object created inside it will be deallocated at the end of the running
iteration. It might not be beneficial if you are creating a large number of temporary
objects inside the block; in this case, you should consider creating a new autorelease
pool, as shown here:
The following code demonstrates what was discussed earlier:
id myPool = [NSAutoreleasePool new];
[myObject somethingThatCreatesManyObjects];
[myPool drain];
[ 29 ]
Using Autorelease Pools
Notice that in order to end the autorelease pool, instead of sending a release
message, we sent a drain message. It was done this way because in garbage collector
mode, Objective-C runtime will simply ignore release messages, while the drain
message won't be ignored, providing a hint to the collector; however, it doesn't
destroy the autorelease pool.
Application Kit creates an autorelease pool in the main thread at the beginning of
each iteration, event, and releases it at the end of each iteration, thus exempting all
autorelease objects created during the processing of the event.
Basically, the run loop in iOS waits for the complete execution of an event until
the application does something else. These events can be touchscreen interactions,
incoming calls, and so on.
For each iOS event handling, a new autorelease pool is created at the beginning and
released (drained) when the event's processing is completed. Theoretically, it can
be any number of nested autorelease pools, but remember they are created at the
beginning of the event's processing.
NSException
Exceptions may happen, and if they do occur, autorelease pools are automatically
cleaned up after them. Autorelease pools prove to be a handful tool in order to write
exception-safe code.
Even an exception object itself should be autoreleased:
// This exception will be autoreleased
+[NSException exceptionWithName:...]
// Or the alternative below
+[NSException raise:...]
Using one of the preceding patterns will properly free the memory if an exception
is thrown. It will free the memory in garbage collector mode as well, even if it's not
required in this GC mode:
id myObj = [[[SampleClass alloc] init] autorelease];
ThisMightThrowAnException();
id myObj = [[SampleClass alloc] init];
@try {
ThisMightThrowAnException();
} @finally {
[myObj release];
}
[ 30 ]
Chapter 3
ARC and autorelease
ARC does still use autorelease as a mechanism, but besides that, its compiled code is
created to interoperate with no problem with MRC compiled code, thus autorelease
is present.
Despite the fact that ARC does a good job handling the memory management for
us, there is still a situation when you need to use autorelease. Sometimes, we create
a large number of temporary objects and many of them are only used once. In this
case, you might want to free up the memory used by them.
In order to dealloc those objects into the autorelease pool instead of waiting
for them to be freed naturally, check out the following code sample in a
non-ARC environment:
/*
------------------------------------------------------Non-ARC Environment with Memory Leaks
*/
@autoreleasepool
{
// No autorelease call here
MyObject *obj = [[MyObject alloc] init];
/* Since MyObject is never released its
a leak even when the pool exits
*/
}
/*
------------------------------------------------------Non-ARC Environment with NO Memory Leaks
*/
@autoreleasepool
{
// Memory is freed once the block ends
MyObject *obj = [[[MyObject alloc] init] autorelease];
}
The following sample code is for an ARC environment:
/*
------------------------------------------------------ARC Environment
*/
@autoreleasepool
[ 31 ]
Using Autorelease Pools
{
MyObject *obj = [[MyObject alloc] init];
/*
No need to do anything once the obj variable
is out of scope. There are no strong pointers
so the memory will be free
*/
}
/*
------------------------------------------------------ARC Environment
*/
MyObject *obj; // Strong pointer from elsewhere in scope
@autoreleasepool
{
obj = [[MyObject alloc] init];
// Not freed still has a strong pointer
}
Autorelease pool blocks and threads
You will need to create your own autorelease pool if you are making Cocoa calls
outside the main thread of the Application Kit. It may happen that you create a
foundation-only application for example, or separate a thread.
If your application generates a large number of autoreleased objects, instead
of maintaining a single autorelease pool, you are highly advised to drain the
autorelease pool and create a new one frequently. This behavior is used by
Application Kit on the main thread. If you neglect this, your autoreleased objects
don't deallocate, growing the memory footprint. On the other hand, if your thread
doesn't make Cocoa calls, you can easily ignore this advice.
[ 32 ]
Chapter 3
Summary
In this chapter, we reviewed autorelease pools and how to properly use them.
We also highlighted the differences between NSAutoreleasePool and the
new @autoreleasepool classes and its benefits.
In the next chapter, we will talk about a few concepts related to object creation
and initialization, such as immutability, inheritance, and so on. We will delve into
design patterns such as singletons, which are commonly used in the iOS SDK, such
as the UIApplication class that has a method called sharedApplication. We will
also look into properties as a way to define the information that a class intends to
encapsulate. We will also look into custom methods and format specifiers in Chapter
4, Object Creation and Storage. We will cover a lot of materials in the next chapter, so
sit tight and hang on while we head to Chapter 4, Object Creation and Storage!
[ 33 ]
Object Creation and Storage
In this chapter, we will cover objects and classes in more depth, showing the
mechanisms behind their creation, handling, and customization.
We will cover the following topics:
•
Object creation and initialization
•
Object immutability
•
Object mutability
•
Object inheritance
•
Convenience initializers
•
The singleton pattern
•
Using @property
•
Types of classes
•
Custom methods
•
Format specifiers
Creation and initialization of objects
For a developer, building iOS and OS X applications requires a lot of time in creating
and handling objects. In Objective-C, like any other object-oriented programming
language, the object acts like a data package with predefined behaviors. We can think
about an application as an environment containing objects that connect with each
other, passing and receiving information such as how to build a graphical interface,
how to proceed with user interactions, how and where to store and take data from,
how to perform calculations, and much more. The complexity of tasks that can be
performed by an object can be very large, but it's not reflected on the complexity to
create an object.
[ 35 ]
Object Creation and Storage
Cocoa (for OS X) and Cocoa Touch (iOS) already provide a library containing an
extensive list of objects for you to use as they are or create your own objects based
on them—we call it code reuse.
One of the most important development processes is thinking about the app base
structure, when you decide which object to use, combine, customize, how they will
communicate in order to generate the expected output, and so on. Some of them are
provided by Cocoa and Cocoa Touch for immediate use such as NSString, NSArray,
NSDictionary, UIView, and UILabel, but such importance is due to others who
might need customization to act as required and/or in order to create an unique
framework—features for your application.
What is a class?
In object-oriented programming approaches, an object is an instance of a class. The
class will determine the behavior of the object, the messages (methods) it receives,
and sometimes who has access to send these messages in order to obtain a response.
A class describes the properties and behaviors of a specified object, just like the
blueprint of a house will describe the properties of the house, such as the number of
doors in the house. Similarly, for a number, an instance of a class named NSNumber,
its class provides many ways to obtain, analyze, compare, and convert the object's
internal numeric value.
Except the internal contents stored in multiple instances of a class, all the properties
and actions behave identically. Check out the following example:
/*
=============================================
Our object is created here as instance of
NSNumber.
We directly assign a float number to it;
=============================================
*/
NSNumber *sampleNumber = @(3.1415);
/*
=============================================
Now, we send the built-in message "intValue"
to convert the float value stored in it to
an integer value.
[ 36 ]
Chapter 4
=============================================
*/
NSNumber firstNumber = @([ sampleNumber intValue]);
Our numeric object, firstNumber, now has the numeric value 3, which is an integer,
after sending the message intValue, which is predefined in the NSNumber class.
The object will behave as expected by converting its value to an integer. Any object
instance of the class will act in the same way.
Objects are created to be used in different expected ways, but it's not a requirement
for you to know how the internal mechanisms of their behavior happens, which
is also known as encapsulation. Instead, the single requirement is to know how
to handle the objects in order to behave in the way you want. It means you need
to know the predefined messages to send to your object. If you have a string, an
instance of the NSString class containing six uppercase characters, and you want
them to be lowercase, all you have to know is the message to be sent:
/*
=============================================
We create our string with the uppercase
characters: "QWERTY"
=============================================
*/
NSString *sampleString = @"QWERTY";
/*
=============================================
Now, we send a message to it, requesting to
convert the uppercase characters to lowercase
=============================================
*/
sampleString = [sampleString lowercaseString];
/*
=============================================
After this process, our string has now the
characters: "qwerty"
=============================================
*/
[ 37 ]
Object Creation and Storage
To specify how an object is intended to be used, we use the class interface. It defines
a public interface to be used in other parts of your code, outside the class itself.
Classes
In order to create your own class, go to File | New in the menu bar or just click
Command + N, select iOS or OS X based on your project and select Cocoa Class
or Cocoa Touch Class. After this, you can name your class and select its super
class (from which it will inherit). Xcode will automatically create a header and an
implementation file for you, .h and .m. As in other programming languages, the
header file is kind of a summary, a quick view about the contents in the class, what
will be used, and so on.
Your public methods and properties will be declared in the header file. Here, you can
see a sample of a newly created header file (mySpecialTableViewController.h):
Our class is named mySpecialTableViewController, a subclass of
UITableViewController. It creates a UI element, as its name suggests, a table view,
which is very common in iOS applications.
Still in our header file, we will create a public property, NSArray, to receive and hold
the data that will be shown on each UITableViewCell. Our table view will show a
list of programming languages:
[ 38 ]
Chapter 4
By specifying the superclass during the creation, Xcode already prepared your
class with the built-in methods available/required to run it. As we can see in
our implementation file (mySpecialTableViewController.m), we just need to
implement our code:
Our table view will be simple, only showing each programming language
stored in the myProgrammingLanguages array on a different cell. It will
only have one section, which means we are free to return this number in the
numberOfSectionsInTableView: method:
[ 39 ]
Object Creation and Storage
The next modification is to specify the number of rows, which means the number
of cells. If it relies on a property where this number might be different, we can't
hardcode it as we did with the number of sections; instead, we return the number
of objects our array is holding:
The next step when creating a table view in Objective-C is to set the content of the
cells. We use the tableView:cellForRowAtIndexPath: method (already provided
in the implementation file). By default, it comes commented. Uncomment the
method in order to use it:
The first thing you should notice is that it creates UITableViewCell and returns
it to be seen on the table view. It is between these two steps that we will configure
our cell.
The UITableViewCell class already comes with a property called textLabel. We
will use it to show the values stored in the myProgrammingLanguages array. Once
the tableView:numberOfRowsInSection: method returns the number of elements
in the array, for each iteration, it configures and returns a cell for the respective item
in the array. The first cell is for the first item, the second cell for second item, and so
on. Inside this method, the current cell is already the correct cell for indexPath, but
in order to get the correct value set to it, we use indexPath.row to select the proper
item in the array:
[ 40 ]
Chapter 4
The preceding code sets the first item in the myProgrammingLanguages array to the
textLabel property of the first cell and so on until it reaches the number of rows in
the table view (the number of the elements in the array).
By hardcoding our array, setting the items of myProgrammingLanguages inside the
viewDidLoad method, and building our project, we are able to see a table view with
the items of the array on each cell:
Here, you can see our custom UITableViewController with three
UITableViewCell classes, the items of the myProgrammingLanguages array:
Creating a cell with [tableView:dequeueReusableCellWith
Identifier:@"anyReusableIdentifier"
forIndexPath:indexPath] sets an identifier to the cell in order to reuse
it with other content when it's no longer visible on the screen.
For example, if there is a table view with 15 elements, and in your iOS
device, there are 12 cells visible in the screen, when you scroll up to see the
other 3 elements, there will still be 12 cells visible. In this case, using reuse
identifiers, instead of creating 15 UITableViewCells, it will create at
least 13 different cells (11 fully visible cells and 2 partially visible cells), and
when a cell disappears from the screen (scroll up), it is reused to load the
newest visible element, appearing at the bottom.
[ 41 ]
Object Creation and Storage
Object immutability
Most of the classes provided by Cocoa and Cocoa Touch create objects with immutable
values. In short, an immutable object has its contents set only once, and can never
modify its values after that. These objects have their contents specified during their
creation. The object's creation might occur in the initialization process or later, but it
happens once.
Here, we can see an array that is initialized and created at the same time. Its contents
are immutable:
/*
=============================================
sampleArray is allocated, initialized and
created with the strings "Item 1" and "Item 2"
=============================================
*/
NSArray *sampleArray = [[NSArray alloc] initWithArray:@[
@"Item 1",
@"Item 2"]];
//This will throw a compile time error as NSArray is not mutable.
[sampleArray addObject:@"Item 3"];
In the preceding line of code, [sampleArray addObject:@"Item 3"]; will
show you a compile time error as sampleArray is declared as an NSArray and not
as an NSMutableArray, so sampleArray cannot have any objects added to it after
it is initialized.
Now, we create another array, firstly initializing it before its creation, which might
happen somewhere later in the code:
/*
=============================================
secondSampleArray is allocated and initialized
but not yet created.
=============================================
*/
NSArray *secondSampleArray = nil;
/*
=============================================
Later in our code, we can create it setting
contents to it, but it also happens once, the
contents won't be changed.
=============================================
*/
secondSampleArray = @[@"Item 1", @"Item 2"];
[ 42 ]
Chapter 4
You can see that we set secondSampleArray to nil, and in Objective-C, nil means
that secondSampleArray has no value or an address. It is only later that we insert
the two NSStrings "Item 1" and "Item 2" into secondSampleArray to make the
size of the array 2.
Object mutability
Cocoa and Cocoa Touch also provide some mutable versions of its immutable classes.
Once a mutable object is created, its contents can be partially or completely removed
or modified. As we saw immutable array objects—an instance of NSArray—in the
previous topic, I will now show you its mutable version, the NSMutableArray
class, from which we will create our objects as an instance, as you can see in the
following code:
/*
=============================================
We will create now a mutable version of an
array, using the class NSMutableArray.
=============================================
*/
NSMutableArray *mutableSampleArray = [[NSMutableArray alloc]
init];
/*
=============================================
Now, we assign to it the list of strings:
"String 1", "String 2", "String 3"
=============================================
*/
mutableSampleArray = @[@"String 1",
@"String 2",
@"String 3"];
/*
=============================================
Later, we change the 2nd item of the list with
the string "Replacement String", having our
array the list:
"String 1", "Replacement String", "String 3"
The indexes are 0 based and starts from 0
=============================================
*/
[mutableSampleArray replaceObjectAtIndex:1
withObject:@"Replacement String"];
[ 43 ]
Object Creation and Storage
The mutable versions of a class (in our example, NSMutableArray) have many
similarities with the original immutable version, NSArray; however, they are
different classes. Intending to use methods from one that is not available for the
other will generate compilation errors. Generally, immutability is what you should
try to use as immutability provides a guarantee that an object won't have its value
changed while you are using it. Immutability also brings performance benefits
when used in things such as strings and dictionaries as mutability will bring some
overhead due to the need to allocate and deallocate chunks of memory when the
string or dictionary is modified.
In the case of NSArray and NSMutableArray, NSMutableArray is not thread-safe and
can present weird bugs if you use multithreading. So, generally, try to use NSArray
as the de facto array to use unless you really need NSMutableArray.
Inheritance
To understand inheritance, think about it as a perfect biological tree, where you
have inherited some behavioral traits from your father, but more than that you
have your own. Something like this happens in Objective-C when a class is inherited
from another.
Basic samples are the classes whose names start with NS provided by Cocoa and
Cocoa Touch, such as NSString, NSArray, and NSDictionary. They are all inherited
from NSObject. Each of them has their particular methods to handle the different
types of contents they hold, but everyone shares methods such as alloc and init.
These two class methods, inherited from NSObject, respectively allocate memory
and initialize the object:
[ 44 ]
Chapter 4
The alloc method will rarely be overridden, performing a single task and allocating
memory to the object being created. However, another inheritance example is the
init method, which is also inherited from NSObject. It received modifications in
each child class, creating other initialization methods to quickly assign content to the
object. These new init methods are inherited from the original init method. This is
an example for NSString:
/*
=============================================
The variable is allocated and initialized but
still has no content, its value is nil.
============================================= */
NSString *simpleInitializedString = [[NSString alloc] init];
/*
=============================================
Allocated and initialized by it's custom method,
[ 45 ]
Object Creation and Storage
initWithString:, inherited from init. In this
case, the variable is initialized with a content,
"Hey!"
============================================= */
NSString *customInitializedString = [[NSString alloc]
initWithString:@"Hey!"];
Convenience initializers
The allocation and initialization methods will allocate a chunk of memory to hold the
object's content and set an empty value to it, until you assign a value yourself. The
empty value differs depending on the object's type: Boolean (BOOL) objects receive
the value NO, integers (int) receive 0, float numbers (float) receive 0.0, and the rest of
the objects receive nil.
It's possible to first allocate memory for your object, and later in the code, initialize it,
but it's not recommended at all.
[ 46 ]
Chapter 4
On the other hand, you can use or even create what we call convenience initializers,
which are initialization methods that receive arguments to assign different and/or
additional values for instance variables.
For a better understanding, we will now create our own object class and create
convenience initializers to be used in different scenarios. First, we will create a class,
inherited from NSObject. It will return a float number, which is a result of a fraction
of a multiplication; we will call it MultiFraction:
In our header file, MultiFraction.h, we will specify the instance variables to
be included in our object. It will have three values and we will use the property
keyword to define the information that the MultiFraction class intends to
encapsulate, which in this case are the objects of the type NSInteger, which are
named firstNumerator, secondNumerator, and denominator respectively:
[ 47 ]
Object Creation and Storage
In the implementation file, MultiFraction.m, by omitting the init method, it will
use the inherited initialization method from the superclass, in our case, NSObject,
which will return a nil value. However, we want to implement a convenience
initializer to take three arguments, save the values to be used by another method in
order to perform a calculation, and return its result. Our initialization method will be
named initWithFirstNumerator:, secondNumerator:, denominator::
Inside our initialization method, we will store the arguments passed to our object on
its respective instance variables in case we want to access any of these values in the
future, instead of calculating the result directly:
Now, we can create our object elsewhere in our Xcode project, by importing our
header file:
#import MultiFraction.h
/*
=============================================
[ 48 ]
Chapter 4
Creating a MultiFraction object with the default init method,
inherited from NSObject.
============================================= */
MultiFraction *firstMultiFraction = [[MultiFraction alloc] init];
// Later, when calling a method to calculate the fraction we will
// get a nil if we handle our instance variables or an error, if
// we try to calculate as they are, nil values.
/*
=============================================
Creating a MultiFraction object with the
convenience initialization method we've created.
============================================= */
MultiFraction *secondMultiFraction = [[MultiFraction alloc]
initWithFirstNumerator:25
secondNumerator:3
denominator:4];
// For the secondMultiFraction, when trying to calculate the
// fraction, we will get 18.75 as a float, if we take any
// argument as float when calculating the result.
An Objective-C programmer's
responsibility
If you have experience in other programming languages, such as Java, and
are coming to Objective-C now, forget about constructors, they don't exist in
Objective-C. Constructors are language-level constructs that merge the allocation
and initialization actions, but they have restrictions:
•
They don't return anything. While the Objective-C class initialization
method, + (void) initialize, does not return anything, the default—(id) init
method of an Objective-C class returns an object of the type id.
•
The constructor's name must be identical with the class.
•
When you call the superclass, being the first statement is a must.
The last point ensures you won't deal with garbage data, but this is a restriction.
In Objective-C, as in C, without this restriction, you, the programmer, have more
flexibility and power, but it is also your responsibility to deal with garbage data.
[ 49 ]
Object Creation and Storage
The singleton pattern
Besides taking responsibility for garbage management, a good programmer should
also be aware of programming design patterns. Design patterns are solutions, mostly
reusable code solutions, to solve and prevent common issues. It makes a developer's
life easier. In this section, I'll show you the singleton pattern. Singletons are useful if
you need a single instance and need to manage that single instance such as writing to
a log file. However, singletons can be misused as global variables, which makes for
bad programming practice. Singletons are also implemented using static methods,
which is not good for unit testing as they cannot be mocked or stubbed. So, only use
a singleton in the correct context and not in every situation that you encounter.
In Objective-C, it's completely possible to have more than one instance of a class
(objects) at a time. However, what if you don't need it? What if, for some reason, you
need only one instance and nothing more and want to avoid multiple instances for
that class? In this case, you use the singleton pattern. It ensures that there is only a
single instance of a class and there is a method globally available for it.
An example already implemented by Apple in the UIScreen class is the mainScreen
method. It's globally available and returns a instance of its class, ensuring it's the
only one. The reason is obvious, we don't need more than one main screen. It's called
from anywhere in your project, as shown here:
[UIScreen mainScreen]
When you first call the method, the instance is not created yet. It will then be
initialized and returned as expected; however, from the second time the method is
called, it doesn't create a new instance but returns the existing one. That's how it
ensures only one instance exists. Let's go through the following sample code:
In the header file, we will first create a global method to access its instance:
@interface connectionLibrary : NSObject
+ (connectionLibrary*)mySharedInstance;
@end
Then, in your implementation file, implement the method, as shown here:
+ (connectionLibrary*)mySharedInstance {
// First, we create a static variable to hold our instance
static connectionLibrary *_mySharedInstance = nil;
/*
Create a static variable to ensure the instance will be
initialized only once
*/
static dispatch_once_t initOnce;
[ 50 ]
Chapter 4
/*
Now, the core of the singleton pattern is GCD, Grand
Central Dispatch, that executes a block where the
initialization method is never called once the class
was already initiated.
*/
dispatch_once(&initOnce, ^{
_mySharedInstance = [[connectionLibrary alloc] init];
});
return _mySharedInstance;
}
Now, you can initialize and access this instance from anywhere in your code:
connectionLibrary *sharedInstance = [connectionLibrary
mySharedInstance];
Creating @property
There are two ways to store data in objects, they are properties and instance
variables. The latter should be used just for objects and values exclusively handled
by the class itself, not from outside. Properties, on the other hand, for objects and
values are accessible from outside (by other classes).
While using instance variables, you can create public or private ones. The difference
is basically where you declare them as sometimes you need them to be accessible
by other classes, while in other situations, there is no need to expose them to other
classes. If they are declared in the header file as part of the @interface block,
they have public scope and if declared in the implementation file as part of the @
implementation block, they have private scope. Generally, they should be private:
@implementation Book {
int _numberOfPages;
int _numberOfChapters;
NSArray *_authorsInfo;
}
To easily understand your code, instance variable starts with an underscore; it
doesn't affect the way they work, but it's a convention highly recommended to
be followed.
[ 51 ]
Object Creation and Storage
Instance variables are private and accessible only by the class or subclass, plus it is
encapsulated by the class, which contains it, while a property is public and can be
accessed by other classes. Properties can also be private when declared as part of
the class extension, but they are often public since you want to access them from
the outside. By accessing, there are two options, get or set their content. Objective-C
automatically generates getters and setters for each declared property. In order to
declare a property with public scope, do it in your header file as shown here:
@interface Book : NSObject
@property (strong, nonatomic) NSString *chapterNote;
@end
The preceding code mostly tells other classes that the Book class has a public
property, which can be accessed by chapterNote:
Book *objCBook = [[Book alloc] init];
// This is our setter, we are setting an value to it
objCBook.chapterNote = "I really love this chapter";
//This non dot syntax setter is also valid
[objCBook setChapterNote:@"I really love this chapter"];
/*
This is our getter, we get the value hold on chapterNote
and save it in myLastNote
*/
NSString *myLastNote = objCBook.chapterNote
Creating custom methods
In Objective-C, methods when declared start with – or +, as you will see in this section.
The latter declares a static method, while the former, – , declares instance methods.
As a developer, you won't declare static methods (starting with +) regularly.
Static methods are generally used if you don't need an instance of a class in that
method, while instance methods are used when you need that instance to modify
its state. Instance methods are more commonly used as instance methods give you
access to a class instance variables.
To declare a method, you follow a syntax. You will need the following entities:
•
The symbol to specify the type of the method
•
The type of the data it will return
•
The method's name
[ 52 ]
Chapter 4
•
•
For each parameter:
°°
The type of parameter
°°
The name of parameter
Your code inside the method
Following our example, in mySpecialTableViewController, let's declare an
instance method that will take one parameter, a string (NSString). Our method
will return the content of the myProgrammingLanguages array as a single string.
Each object will be followed by the parameter given. Our method will be called
convertToStringWith.
Before we go to the implementation file, the method must be declared in the header
file, not doing this may cause errors when calling the method because the header file
defines what methods are exposed to the outside.
Now, move to the implementation file and implement the method:
[ 53 ]
Object Creation and Storage
In this case, when calling the method, if the myProgrammingLanguages array
contains the string values: "Objective-C", "Swift", and "PHP", the result would
be a unique string with the passed parameter between the values, as shown in the
following examples:
There are occasions when you don't want to pass any parameter to a method. It's
possible; you just need the type of the data returned and the name of the method:
-(BOOL) doYouLikeThisBook
{
return true;
}
There are two special cases about the type of the data retuned by a method, when
you don't know it and when you won't return anything. In the first case, you should
use id, as shown here:
-(id) initSomethingWithoutKnowingTheType
{
self = [super class];
return self;
}
On the other hand, if you don't want to return nothing, use void.
-(void) storeUserDetails:(NSString *)userName withID(int)userID
{
self.name = userName;
self.id = userID;
}
[ 54 ]
Chapter 4
String formatting
When dealing with different types of objects, especially inserting/appending them
into a string, you need to specify their types inside the string, for which we use
format specifiers. Printing to the console, for example, requires a string to be printed;
it's the only accepted format. Let's see how to insert different objects inside it, to be
properly printed to the console:
// Here we print a message, it's already a string.
NSLog(@"I'm a message. A string");
However, if you want to print a value stored in a property or instance variable, you
should specify its type inside in order to properly replace it with the value outside:
/*
Now we print the string value stored on a property
The console will print the message:
"Hello, Mr. Gaius Julius Caesar"
*/
NSString *myStringObject = @"Gaius Julius Caesar";
NSLog(@"Hello, Mr. %@", myStringObject);
Notice %@ inside the message. It specifies that the value is a string. This is how we can
specify the object's type, using a percentage sign, %, followed by a specific keyword
(conversion specifier). Using a different conversion specifier for a string will result in
compilation error.
Mostly, specifiers support more than one data type:
The format specifier
%d
Supported object's type
%u
Integer (unsigned int), 32-bit
%x
Integer (unsigned int) as hexadecimal value, 32-bit
%o
Integer (unsigned int) as octal value, 32-bit
print "%"
%%
%f
Integer (signed int), 32-bit
Float, double (point float number), 64-bit
%e
Float, double (point float number) in scientific notation,
64-bit
%g
Float, double (point float number) as %e if the exponent
is less than –4, otherwise as %f, 64 bit
%c
Unsigned character (unsigned char), 8 bit
%S
An array of 16-bit Unicode characters, which
terminates with a null pointer
[ 55 ]
Object Creation and Storage
The format specifier
%p
Supported object's type
%a
Double (point float number) in scientific notation,
starting with 0x and one hexadecimal digit before the
decimal point using a lowercase p to introduce the
exponent, 64 bit
%F
Double (point float number) in decimal notation
%hhd
BOOL
A void pointer character (void *) in hexadecimal,
starting with 0x
Summary
In this chapter, we were able to see objects in detail, how inheritance works and how
you can use it to create even more powerful classes. You learned about an object's
mutability and immutability, how instance variables and property work, what they
are, and how to create them besides allocation, initialization, and custom methods,
and how to create your own. In the next chapter, we will cover application data
management such as resource optimization, caching, and data saving. So, see you
in the next chapter.
[ 56 ]
Chapter 5
Managing Your
Application Data
In this chapter, you will be introduced to the concept of managing your application
data to ensure that your application will perform at an optimal level during runtime.
The following topics will be covered:
•
Resource optimization
•
Disk and memory caching
•
Serialization
•
Different forms of data saving
•
Pros and cons of various data saving methods
We will also cover some common pitfalls and assumptions that people commonly
associate with the development of iOS applications. One example will be image
loading, where if the developers are not careful in planning the proper architecture
of their application, they will encounter situations where the application will lag or
run out of memory and lead to an application crash.
Device memory
As with all computing devices, iPads and iPhones have a finite amount of memory
and you may be tempted to develop applications without any concern about the
memory usage. Doing so is not ideal for development as memory optimizing and
management should always be at the top of your mind when doing any type of
development, regardless of whatever platform you will be developing on.
[ 57 ]
Managing Your Application Data
Let's take a look at the amount of memory that each of the iOS devices have, and we
will start with iPhones:
RAM
iPhone 4S
iPhone 5
iPhone 5C
iPhone 5S
512 MB
1 GB
1 GB
1 GB
Here is the RAM for iPads:
RAM
iPad
Air
iPad
Mini
2
iPad
Mini
Wi-Fi +
Cellular
iPad
2 WiFi +
3G
iPad
Mini
Wi-Fi
iPad 3
Wi-Fi
iPad 3
Wi-Fi +
Cellular
iPad 4
Wi-Fi
iPad
2 WiFi
1 GB
1 GB
512 MB
512
MB
512
MB
1 GB
1 GB
1 GB
512
MB
Now, the amount of memory does look impressive as you fondly remember the days
of old, where your old desktop ran on 256 MB of RAM, but do remember that iOS
does not let you play with the full 512 MB or 1 GB RAM. The OS will allocate some
to system processes in your device, and you will only get a subset of the available
RAM for your application.
In your application, everything will occupy memory and storage space. Some of
the biggest culprits are binary assets, such as videos and images, which can be total
resource hogs to even your class objects that can take up precious space if you do
not take note of them when doing your development. So, let's start with image
optimization as almost every application will make use of images in one way
or another.
Image optimization
Any application will look boring and drab without the usage of .png and some nice
images. However, one thing about images is that they take up much more memory
than their file size implies. A single 1 MB .png file can occupy double or triple their
memory size when loaded into the memory. The reason is because PNG is basically
a compressed file format, such as a ZIP file. So, all the image data is compressed into
a PNG file and when your application needs to display your PNG image. It needs
to load the PNG file into memory, uncompress it, and then it will be able to get the
image data to be used by your code and will consume more memory in the process.
So, if your application has 20 MB of PNG files, you are easily looking at 40 MB or
more of RAM allocation just for images. So, a few tips for image optimization are:
[ 58 ]
Chapter 5
•
Save your image as PNG-8 instead of PNG-24 as PNG-8 consumes less
RAM than their equivalent PNG-24. Only use PNG-24 if you need the alpha
channel for transparency. The difference between PNG-8 and PNG-24 is
the image quality and the number of colors that you can have. The 8 and 24
means 8-bits per pixel and 24-bits per pixel respectively. So, PNG-8 can only
support up to 256 colors while PNG-24 can support up to 16 million colors,
so PNG-24 is the best option if you need to display images with a lot of colors
such as photographs, while logos and user interface elements such as icons
can probably get by with PNG-8. PNG-24 also supports alpha transparency,
which is good for images that need to have a transparent background. So,
knowing which format to use in which situation will help you in reducing
the memory consumption of your application.
•
If you can use JPG files, then use them as they are a lossy format, and it
means that you will get a bit of image degradation, but generally the image
degradation is almost invisible to the naked eye. However, note that JPG files
do not support alpha transparency.
PNG is a lossless format, which means that there is no image degradation when you
use PNG files, but it comes at a price that it consumes more RAM when loaded into
your device compared to a JPG, which is a lossy format.
So, keep PNG files and JPG files to an absolute minimum if you can and only use
them if you have to.
Lazy loading
What is lazy loading? It is a design pattern or a way of doing things in software
design where you load a resource such as a PNG, MP3 file, and so on only at the time
when it is needed. This helps to mitigate the problem of insufficient memory instead
of loading all your resources at once. You only load it when you need it in a "lazy"
manner. There is also one more advantage, that is, it minimizes the start up time of
your application since you only load the resources on demand and this takes less
time to load. So, you gain a speed boost in terms of time.
Imagine you have multiple UIViews where each view has 10 UIImages, but only
one view can be seen at any one time. Without proper thought, you will be tempted
to write code to load all 10 UIImages for all the UIViews at once. However, upon
further reflection, the question arises as to whether there is a need to do so. It would
be better if you refactor your code to load the 10 UIImages only when that UIView
is visible to the user and then clean it up once the user is not viewing it and load the
next batch of UIImages from the next UIView, which will be visible to the user. This
will add a bit more of coding for you, but the trade-off in terms of efficient memory
usage will be worth it.
[ 59 ]
Managing Your Application Data
This is one of the simplest implementations where we just override the getter
method of a class:
- (A_Class *)aObject {
if (aObject == nil) {//Check if the object exists and if not
aObject = [[A_Class alloc] init];//then create the object
}
return aObject;//returns the object
}
You can put the preceding code in place of the normal getter method of your class.
The preceding code checks whether the object does or does not exists, and if it does
not exist, then it will create the object. However, if the object already exists, then it
will not create it again.
Control creation
Controls are part and parcel of every iOS application and they also consume memory
on your device and every instance will consume bytes and bits of memory. When
you are creating a lot of UITableViewCell class, for example, you will be looking at
a control that is consuming a lot of memory sooner or later.
Also, tasks such as loading images and getting data from a remote server are
considered as slow processes and will slow down your application. I am sure that
you have used iOS apps where when you scroll down a UITableView view object
you will see a noticeable lag as new images are loaded into the newly revealed cells.
In this world, where people are used to images loading quickly on their desktop
and mobile phones, such slowness and laggy UI are not acceptable and can mean
the difference between a user staying engaged with your application or uninstalling
your application.
The fundamental mantra is that you must not let your users wait for 1 second or
even 1 millisecond more than what is absolutely necessary. One tip to compensate
for the perceived slowness of an application is to have a simple animation such as
fading in an image after showing a spinner in order to give the user the perception
that the application is not actually very slow since there is an animation playing.
Reusing your controls is a must if you are experiencing huge memory usage, which
is impacting the usability of your iOS application. Later on, we will cover how to use
the tool called Instrument in Xcode to monitor the memory usage. Creating objects is
an expensive process and has a performance cost.
[ 60 ]
Chapter 5
If you need to create an object on the fly over a short period of time, such as scrolling
quickly through a UITableView view object, you will experience some lag as your
code will be creating new UITableViewCell class instead of reusing old ones.
Reusing UITableViewCell is a lot faster and will enhance the performance of
your application. Luckily, Apple has already created code for us to reuse a cell,
which can be implemented easily with a few lines of code. So, let's look at the
dequeueReusableCellWithIdentifier method as a good example with the
following code:
- (UITableViewCell *)tableView:(UITableView *)tableView
cellForRowAtIndexPath:(NSIndexPath *)indexPath {
UITableViewCell *cell = [tableView
dequeueReusableCellWithIdentifier:@"Cell"];
if (!cell) {
//create a new cell
}
//Do what we need with our cell here
return cell;
}
Looking at the preceding code, you can see that we attempt to assign a cell using the
dequeueReusableCellWithIdentifier method, then it will return a pointer to that
cell if it already exists. Next, our code (!cell) will check whether that pointer is not
nil, then it will create the cell. This is the exact same technique we used in the previous
section Lazy loading, except that we apply this technique to an iOS control, which in this
case, is a UITableViewCell object. These few lines of code serve three functions:
•
This helps to prevent a situation where your app is lagging when you
are scrolling up as it eliminates the need to create new instances of
UITableViewCell.
•
If you have 1,000 rows of data and only 4 rows are visible on screen at any
given time, then it makes no sense to create 1,000 UITableViewCell when
you only need to create five. A few other cells can be partially visible and
hence need to be created too. So, the five cells will only be created as it needs
to be visible to the user while the remaining cells are not loaded.
•
While a single UITableViewCell class occupies a lot of memory, storing
1,000 of them is not easy, and through a few extra lines of code, you can
avoid unnecessary memory usage and use the memory you save for other
parts of your code.
[ 61 ]
Managing Your Application Data
Caching
Caching is a concept where you store resources on disk or memory for faster access.
Caching will occupy more space, but in situations where you need to worry more
about loading speed than memory, caching can be a very good technique to use.
Consider this common scenario:
•
Downloading a large file such as an image or even a movie
•
Write the file to a disk
•
Read the files from the disk and display them
If you follow the normal method as mentioned earlier, a bottleneck that you will
face is slow loading of the file from disk. Disk access can be as slow as 10,000 or even
1,000,000 slower than memory access and it won't make a good user experience as
the user will be kept waiting while your app is loading the files from disk. Caching
will help slow this problem as your file is saved to memory where read access is
faster.
This is good from a user point of view as they do not need to wait a long time for
the file to be loaded and can help to optimize the user experience of your application
since every second wasted can lead to the user moving away from your application.
Caching on disk or memory has its pros and cons as illustrated in the following table:
Disk
Memory
Storage
Persistent, as data is
not lost when device is
switched off
Ephemeral, as data is lost when device
is switched off
Speed
Slow
Fast
Storage size
Large
Small, as memory is generally lesser
than disk storage
So as a rule of thumb, it will be best to do all caching on memory first and then
move to caching on disk only when your application is running low on memory or
you experience memory warning errors. If you are downloading large files such as
movies, you will need to store the movie file on disk since the file normally will not
be able to fit into memory.
As a sidenote, caching uses a few algorithms for implementation, such as Most
Recently Used (MRU) or Least Recently Used (LRU). MRU means the cache will
discard the most recently used items first when the cache is full, while LRU is the
reverse opposite where the least recently used items will be discarded instead.
The implementation strategy is out of the scope of this book and it is up to the
manufacturer to decide.
[ 62 ]
Chapter 5
Fortunately, we do not need to write a lot of code to implement efficient caching.
There are a few iOS caching libraries that we can use and they are available for us
to use. So, in this section, we will look at one of the most popular caching libraries.
SDWebImage
The first library we will be looking at is called SDWebImage. The source code can
be downloaded via a Git clone from https://github.com/rs/SDWebImage, and
it comes with a demo project too. So, let's look at the important parts of this demo
project. I have summarized the steps for you:
1. Open the Xcode project.
2. Open up masterviewcontroller.
3. Import UIImageView+WebCache.h.
4. Look for the cellforrowatindexpath method.
5. Call this method setImageWithURL:placeholderImage.
Now, let's look into each of these steps in detail:
Open the SDWebImage Demo.xcodeproj project and run it. You should see the
following screen, which is a list of table view cells with images and text:
[ 63 ]
Managing Your Application Data
If you tap on a table view cell, it will show this screen, which shows the larger size of
the image that you tapped on:
Next, open up MasterViewController and look for the following piece of code:
- (UITableViewCell *)tableView:(UITableView *)tableView
cellForRowAtIndexPath:(NSIndexPath *)indexPath
{
static NSString *CellIdentifier = @"Cell";
UITableViewCell *cell = [tableView
dequeueReusableCellWithIdentifier:CellIdentifier];
if (cell == nil)
{
cell = [[UITableViewCell alloc]
initWithStyle:UITableViewCellStyleDefault
reuseIdentifier:CellIdentifier];
}
cell.textLabel.text = [NSString stringWithFormat:@"Image
#%d", indexPath.row];
cell.imageView.contentMode =
UIViewContentModeScaleAspectFill;
[cell.imageView setImageWithURL:[NSURL
URLWithString:[_objects objectAtIndex:indexPath.row]]
[ 64 ]
Chapter 5
placeholderImage:[UIImage
imageNamed:@"placeholder"]
options:indexPath.row == 0 ?
SDWebImageRefreshCached : 0];
return cell;
}
This is where the code will get the image from the server and then cache it on
the device.
To implement this in your own code, you need to import UIImageView+WebCache.h
and then call the setImageWithURL:placeholderImage: method, where you can
add in your own placeholder PNG and JPG image to replace @"placeholder".
So, when you run the app again you will notice that images are not pulled from
server again, but are instead served from the cache on the device, so you will see that
the images load faster as a result.
Object serialization
What is serialization? This is a question that a lot of people find hard to explain or
understand. Serialization is the method or concept where we convert data structures
or objects into a format for it to be stored in memory or disk for storage, or to be
transmitted across a network link. It can also assist in memory management as it
provides an alternative mechanism where we save some files to disk instead of
memory, which is usually the case for big files, such as movie files. Serialization
formats include JSON, XML, YAML, and so on. And luckily for iOS developers,
Apple provides us with a robust framework that helps us take away the lowlevel code when we want to do serialization. So, when we want to store our data
structures or objects in memory or disk, we can use Apple's frameworks such as
Core Data or NSCoding, which provides an abstraction layer and hides away the
lower-level coding for us.
When it comes to data saving or serialization, we tend to stick with the one method
that we are most familiar with. However, this is not a good way of doing things as
various methods have their pros and cons, and we should consider our use case
before we decide on the best method. To this extent, Apple has provided us with
a few different methods for data serialization and it is up to us, the developers, to
decide which method suits us best. One of the simplest ways is to use NSCoding.
What is NSCoding? NSCoding is basically a protocol provided by Apple for you to
encode and decode your data into a buffer, which can then be persisted to disk for
persistent storage.
[ 65 ]
Managing Your Application Data
Usage of the NSCoding protocol also involves the NSKeyedArchiver and
NSKeyedUnarchiver methods as NSCoding is a protocol with delegate methods for
serializing our data structure and custom object into a format that can be stored
in memory or disk. NSKeyedArchiver and NSKeyedUnarchiver are the methods
that will actually do the work of storing our serialized data into disk for persistent
storage. So to kick things off, we will use an example to help us understand how
serializing and archiving works for iOS applications.
Use the listed steps for the following example:
1. Add the NSCoding protocol to your custom object.
2. Implement encodeWithCoder and initWithCoder and assign the values you
wish to store.
3. Call the archiveRootObject and unarchiveObjectWithFile methods to
save your serialized data to disk and load it from the disk respectively.
4. For example, we create a custom object called OurCustomObject, and then
to use the NSCoding protocol, we need to add it to our interface declaration:
@interface OurCustomObject : NSObject <NSCoding>
{
bool isReset;
NSString *userName;
int score;
}
@property (nonatomic, retain) NSString *userName;
@property (nonatomic, assign) bool isReset;
@property (nonatomic, assign) int score;
@end
5. Then, we need to write the encodeWithCoder method to save the data:
- (void)encodeWithCoder:(NSCoder *)coder {
//do encoding to save the data
[coder encodeBool:isReset forKey:@"isReset"];
[coder encodeObject:userName
forKey:@"userName"];
[coder encodeInt:score forKey:@"score"];
}
To load the data back into our objects, we add in the
initWithCoder method:
- (id)initWithCoder:(NSCoder *)decoder {
if (self = [super init]) {
self.isReset = [decoder
decodeBoolForKey:@"isReset"];
self.userName = [decoder
decodeObjectForKey:@"userName"];
[ 66 ]
Chapter 5
self.score = [decoder decodeIntForKey:@"score"];
}
return self;
}
6. Now that we have the code to encode and decode the data into a serialized
format, we need to put in the actual code to save it to disk on our device, so
we can use NSKeyedArchiver to do the actual writing to disk, while we use
NSKeyedUnarchiver to get the data from the disk:
OurCustomObject *ourObj = [[OurCustomObject alloc] init];
ourObj.userName = @"John Doe";
ourObj.isReset
= true;
ourObj.score = 99;
//get our file path
NSArray *paths =
NSSearchPathForDirectoriesInDomains(NSDocumentDirectory,
NSUserDomainMask, YES);
NSString *documentsDirectoryPath = [paths
objectAtIndex:0];
NSString *filePath = [documentsDirectoryPath
stringByAppendingPathComponent:@"OurData"];
[NSKeyedArchiver archiveRootObject: ourObj
toFile:filePath];
7. Then to load our object from disk, we just use the following code:
OurCustomObject *ourObj2 = [NSKeyedUnarchiver
unarchiveObjectWithFile:filePath];
NSLog(@"Score is %d", [ourObj2 score]);
NSLog(@"Name is %@", [ourObj2 userName]);
There is no need to call initWithCoder and encodeWithCoder anywhere in our
code as those method calls are called when you call unarchiveObjectWithFile
and archiveRootObject. However, you need to implement initWithCoder and
encodeWithCoder as these two methods need to contain the necessary code to encode
and decode the isReset, userName, and score variables that form OurCustomObject.
As you can see, NSCoding is a relatively powerful way to store data to disk compared
to NSUserDefaults, and the code is quite easy to understand and write. However, if
you need more power features for data storage, NSCoding will not be the best choice
and Core Data will be the better option as it has more features such as being able to
perform queries, being optimized for speed, support for different serialization formats
such as XML, SQLite, or NSDate, among other benefits.
[ 67 ]
Managing Your Application Data
SQLite
SQLite, for those familiar with Relational DataBase Management System (RDBMS),
is a database based on the relational model. A SQLiteis, a RDBMS that is available
for us in iOS, has a lot of the features and functions of RDBMS that many people
are familiar with, such as ACID properties, queries, and so on. Core Data is Apple's
framework for data storage and you can use Core Data to store data into a SQLite
database. However, there are some cases when you need to use SQLite instead of
Core Data. So, I will elaborate further on this:
•
SQLite as a database is available on multiple platforms besides iOS. So
this means that if you are developing an application that runs on multiple
platforms or has the possibility to run on other non-iOS platforms, SQLite
will be the option for you to seriously consider since you will avoid
framework lock-in using Core Data. SQLite also is faster than NSCoding,
plus it adds querying functionality, which is not possible if you use
NSUserDefaults.
•
Also, if you have experience with SQLite and your use case for data storage
is very straightforward along with no experience with Core Data, then you
should choose SQLite.
•
It does not require a Model-View-Controller (MVC) conceptual model.
Now, this does not mean that SQLite should be the default data storage solution for
you when you need to store data to disk. This is because there are other options such
as Core Data and various other factors such as speed and ease of coding, which will
play a big part in your decision-making as we will see later in this chapter and the
chapter on Core Data later on.
SQLite versus Core Data
Core Data is a rich and sophisticated object graph management framework with a
lot of bells and whistles that you require for complex use cases. In the Introduction
to Core Data Programming Guide, Apple mentions that the Core Data framework
provides generalized and automated solutions to common tasks associated with
object life cycle and object graph management, including persistence, which means
it prevents you from writing a lot of code to do your everyday data storage tasks.
Core Data uses models that are your objects and these are the model in the
commonly used MVC architecture. These enable you to store whole objects and it
ties in very closely with the controller and view classes of your iOS application.
So, developers who are using MVC architectures will have no problem absorbing
the Core Data concepts and models.
[ 68 ]
Chapter 5
The tools for development using the Core Data framework is tied in deeply into
Xcode and it enables developers to quickly write code and lay out their data models
in a fast and efficient manner, and thus, save you time, which allows you to spend it
on other parts of the project.
Core Data framework is also available for the Mac OS, and this enables reusability of
your code if you intend to create a Mac version of your application.
With Apple's iCloud storage and computing platform, you can use Core Data to
take advantage of iCloud to sync your application and user data across multiple
devices such as iPads and so on. iOS 8 has tighter integration with iCloud with
the introduction of the CloudKit framework, which has new functionality such as
allowing partial download of datasets and all this is only possible using Core Data.
SQLite is a pure RDBMS and many people confuse Core Data with SQLite. SQLite
is a RDBMS, pure and simple. So, it has a lot of the features that you will associate
with RDBMSes, such as ACID properties, queries, and so on. However, that is where
it ends. Core Data is an abstraction layer on top of a data store, which can be SQLite
or other forms of data persistence, such as XML files. So, using Core Data will still
enable you to store data in SQLite, but there will be some occasions when you prefer
to use SQLite over Core Data.
If data portability is an important feature for you, then using SQLite should be your
preferred choice as SQLite is platform-independent, while Core Data is for Apple
platforms only. So, if you use SQLite, you can be assured that your data files can be
moved and accessed on almost any platform that supports SQLite, not only Applesupported platforms.
Core Data ultimately is an abstraction layer between your code and the database.
However, sometimes you want to get down to the lower levels of your code and
avoid abstraction layers to understand how the code works. So, using SQLite will
allow you to do that, as it allows you to do low level optimization if you are working
with large datasets. Core Data can also be used to abstract the Sqlite access to save on
development time and make your code cleaner.
Ultimately, there are no hard and fast rules on when and where to use Core Data or
SQLite. On every engineering project, there are questions and decisions to be made,
which encompass factors such as amount of resources and platform scalability since
Core Data only supports Apple platforms and if you intend to support non-Apple
platforms. Core Data might not be a good choice. So, using the Core Data framework
allows you to have a rapid solution for simple applications, but it also ties you into
Apple's framework, which impedes data portability as if you create an application
where a user's data such as game data needs to be present on another non-Apple
device. You will encounter a technical lock-in if you use Core Data.
[ 69 ]
Managing Your Application Data
On the other hand, SQLite allows ease of tweaking and optimization for various
reasons. In the end, the complexity of your use case, data model, and requirements of
your platform will be the factors that will help you make a good decision on the right
option to choose.
Summary
In summary, this chapter covered the management of your application data with
regards to caching data to memory and data storage on to disk. We also covered the
pros and cons of using the various storage frameworks for various situations and did
a few code examples on using the NSCoding protocol and the SDWebImage open
source caching framework.
This chapter covers a bit of Core Data, which will help us in the next chapter as we
deep dive into Core Data along with some code examples. The next chapter will be
all about Core Data and its uses.
[ 70 ]
Chapter 6
Using Core Data
for Persistence
If you do any serious form of iOS development, data persistence is something that
you are bound to come across sooner rather than later. After all, what good is an app
when it does not save your user data and requires you to fill it in again when you
start the app again subsequently?
This is where data persistence comes into the scene. As it is, iOS developers have a
few options for data persistence ranging from property list, binary format to SQLite,
and so on.
As with these options, each has its good and bad points, and when to use each
particular method of persistence will depend on your use case. You will also have to
write specific code to handle data persistence for SQLite and binary data. Core Data
can be used to store data in plist, SQLite, and other formats, which makes it a pretty
powerful framework in itself as we will see in this chapter.
In this chapter, we will cover the following topics:
•
Why use Core Data?
•
Core Data concepts
•
Putting Core Data into practice
•
Getting into the code
•
Saving data into the persistent store
•
Deleting data from the persistent store
[ 71 ]
Using Core Data for Persistence
Why use Core Data?
You might be thinking to yourself, "Why do I have to learn another method when
there are so many ways already available to us?" So, in this section and on the
following pages, we will see why Core Data is the preferred way to store data
on iOS and the Mac OS platform.
The first thing you need to know is that Core Data is not another method of
data persistence per se; it is actually an abstraction over SQLite, plists, and so
on. This means that you can actually use Apple's Core Data API to save your data
into the persistent store just by using the Core Data API without needing to write
plist-specific or SQLite-specific code if you choose to store your data as plists or
SQLite respectively. This abstraction layer illustrates the basic concept of why
Core Data is so powerful.
Now that you have your mind blown, the abstraction layer means that you can just
use the Core Data APIs, and the abstraction layer will handle all the storage-specific
code for you as all this high-level stuff will help you get away from writing low-level
stuff, specific for each different data persistent format such as SQLite, property list,
and so on.
Core Data integrates very tightly with iCloud and provides a host of benefits related
to iCloud, such as data synching. It also allows you to do entity modeling with the
benefits of querying while making it very fast in terms of access speed plus giving
you the freedom to choose the storage type that can be SQLite, XML, or NSDate.
With all the benefits that Core Data provides, it comes with a trade-off in which
you need to write a bit more code compared to NSCoding. However, as we will see
later, the amount of code is not a lot, and the Core Data framework is not complex to
understand too.
A few more things that I would like to mention about Core Data is that since it is so
tightly integrated into the Apple platforms, you can have access to a lot of related
classes such as NSFetchedResultsController that make it easy for you to get your
entities into UITableViews. It also has a nice graphical object model editor that
allows you to easily think about your object/entity design and conceptualize it easily
using Core Data's visual tools. With all these benefits, let's dig into Core Data now.
Understanding Core Data concepts
Core Data allows you to store your data in a variety of storage types. So, if you want
to use other types of memory store, such as XML or binary store, you can use the
following store types:
[ 72 ]
Chapter 6
•
NSSQLiteStoreType: This is the option you most commonly use as it just
•
NSXMLStoreType: This will store your data in an XML file, which is slower,
•
NSBinaryStoreType: This occupies the least amount of space and also
•
NSInMemoryStoreType: This stores all data in memory and provides the
stores your database in a SQLite database.
but you can open the XML file and it will be human readable. This has the
option of helping you debug errors relating to storage of data. However, do
note that this storage type is only available for Mac OS X.
produces the fastest speed as it stores all data as a binary file, but the entire
database binary need to be able to fit into memory in order to work properly.
fastest access speed. However, the size of your database to be saved cannot
exceed the available free space in memory since the data is stored in memory.
However, do note that memory storage is ephemeral and is not stored
permanently to disk.
Next, there are two concepts that you need to know, and they are:
•
Entity
•
Attributes
Now, these terms may be foreign to you. However, for those of you who have
knowledge of databases, you will know it as tables and columns. So, to put it in an
easy-to-understand picture, think of Core Data entities as your database tables and
Core Data attributes as your database columns.
So, Core Data handles data persistence using the concepts of entity and attributes,
which are abstract data types, and actually saves the data into plists, SQLite
databases, or even XML files (applicable only to the Mac OS). Going back a bit in
time, Core Data is a descendant of Apple's Enterprise Objects Framework (EOF),
which was introduced by NeXT, Inc in 1994, and EOF is an Object-relational
mapper (ORM), but Core Data itself is not an ORM. Core Data is a framework for
managing the object graph, and one of its powerful capabilities is that it allows you
to work with extremely large datasets and object instances that normally would not
fit into memory by putting objects in and out of memory when necessary. Core Data
will map the Objective-C data type to the related data types, such as string, date, and
integer, which will be represented by NSString, NSDate, and NSNumber respectively.
So, as you can see, Core Data is not a radically new concept that you need to learn
as it is grounded in the simple database concepts that we all know. Since entity and
attributes are abstract data types, you cannot access them directly as they do not
exist in physical terms. So to access them, you need to use the Core Data classes and
methods provided by Apple.
[ 73 ]
Using Core Data for Persistence
The number of classes for Core Data is actually pretty long, and you won't be using
all of them regularly. So, here is a list of the more commonly used classes:
Class name
NSManagedObject
Example use case
NSManagedObjectContext
Fetching data and saving data
NSManagedObjectModel
Storage
NSFetchRequest
Requesting data
NSPersistentStoreCoordinator
Persisting data
NSPredicate
Data query
Accessing attributes and rows of data
Now, explore each of these classes in depth:
•
NSManagedObject: This is a record that you will use and perform operations
•
NSManagedObjectContext: This can be thought of as an intelligent scratchpad
•
NSFetchRequest: This is an operation that describes the search criteria,
•
NSPersistentStoreCoordinator: This is like the glue that associates your
•
NSPersistentStoreCoordinator: Without this, your modifications will not
•
NSPredicate: This is used to define logical conditions used in a search
or for filtering in-memory. Basically, it means that NSPredicate is used to
on and all entities will extend this class.
where temporary copies are brought into it after you fetch objects from the
persistent store. So, any modifications done in this intelligent scratchpad
are not saved until you save those changes into the persistent store,
NSManagedObjectModel. Think of this as a collection of entities or a
database schema, if you will.
which you will use to retrieve data from the persistent store, a kind of the
common SQL query that most developers are familiar with.
managed object context and persistent.
be saved to the persistent store.
specify how data is to be fetched or filtered and you can use it together with
NSFetchRequest as NSFetchRequest has a predicate property.
Putting it into practice
Now that we have covered the basics of Core Data, let's proceed with some code
examples of how to use Core Data, where we use Core Data to store customer details
in a Customer table. The information we want to store is:
[ 74 ]
Chapter 6
•
name
•
email
•
phone_number
•
address
•
age
Do note that all attribute names must be in lowercase and should
not have spaces in them. For example, we will use Core Data
to store customer details mentioned earlier as well as retrieve,
update, and delete the customer records using the Core Data
framework and methods.
1. First, we will select File | New | File and then select iOS | Core Data:
[ 75 ]
Using Core Data for Persistence
2. Then, we will proceed to create a new Entity called Customer by clicking on
the Add Entity button in the bottom left of the screen, as shown here:
3. Then, we will proceed to add in the attributes for our Customer entity and
give them the appropriate Type, which can be String for attributes such as
name or address and Integer 16 for age:
[ 76 ]
Chapter 6
4. Lastly, we need to add CoreData.framework, as shown in the
following screenshot:
5. So with this, we have created a Core Data model class consisting of a
Customer entity and some attributes. Do note that all core model classes
have the .xcdatamodeld file extension and for us, we can save our Core Data
model as Model.xcdatamodeld.
6. Next, we will create a sample application that uses Core Data in the
following ways:
°°
Saving a record
°°
Searching for a record
°°
Deleting a record
°°
Loading records
[ 77 ]
Using Core Data for Persistence
Now, I won't cover the usage of UIKit and storyboard, but instead focus on the core
code needed to give you an example of Core Data works. So, to start things off, here
are a few screenshots of the application for you to have a look at to see what we'll do:
•
This is the main screen when you start the app:
•
The screen to insert a record is shown here:
[ 78 ]
Chapter 6
•
The screen to list all records from our persistent store is as follows:
•
By deleting a record from the persistent store, you will get the
following output:
[ 79 ]
Using Core Data for Persistence
Getting into the code
Let's get started with our code examples:
1. For our code, we will first declare some Core Data objects in our
AppDelegate class inside our AppDelegate.h file such as:
@property (readonly, strong, nonatomic)
NSManagedObjectContext
*managedObjectContext;
@property (readonly, strong, nonatomic)
NSManagedObjectModel
*managedObjectModel;
@property (readonly, strong, nonatomic)
NSPersistentStoreCoordinator
*persistentStoreCoordinator;
These are declared here so that we can access them easily from any screen.
2. Next, we will declare the code for each of the objects in AppDelegate.m
such as the following lines of code that will create an instance of
NSManagedObjectContext and return an existing instance if the instance
already exists. This is important as you want only one instance of the context
to be present to avoid conflicting access to the context:
- (NSManagedObjectContext *)managedObjectContext
{
if (_managedObjectContext != nil) {
return _managedObjectContext;
}
NSPersistentStoreCoordinator *coordinator = [self
persistentStoreCoordinator];
if (coordinator != nil) {
_managedObjectContext = [[NSManagedObjectContext
alloc] init];
[_managedObjectContext
setPersistentStoreCoordinator:coordinator];
}
if (_managedObjectContext == nil)
NSLog(@"_managedObjectContext is nil");
return _managedObjectContext;
}
[ 80 ]
Chapter 6
This method will create the NSManagedObjectModel instance and then return
the instance, but it will return an existing NSManagedObjectModel instance if
it already exists:
// Returns the managed object model for the application.
- (NSManagedObjectModel *)managedObjectModel
{
if (_managedObjectModel != nil) {
return _managedObjectModel;//return model since it
already exists
}
//else create the model and return it
//CustomerModel is the filename of your *.xcdatamodeld
file
NSURL *modelURL = [[NSBundle mainBundle]
URLForResource:@"CustomerModel" withExtension:@"momd"];
_managedObjectModel = [[NSManagedObjectModel alloc]
initWithContentsOfURL:modelURL];
if (_managedObjectModel == nil)
NSLog(@"_managedObjectModel is nil");
return _managedObjectModel;
}
This method will create an instance of the NSPersistentStoreCoordinator
class if it does not exist, and also return an existing instance if it already exists.
We will also make some logs appear in our Xcode console using the NSLog
method to tell the user if the instance of NSPersistentStoreCoordinator is
nil and use the NSSQLiteStoreType keyword to signify to the system that we
intend to store the data in a SQLite database:
// Returns the persistent store coordinator for the
application.
- (NSPersistentStoreCoordinator
*)persistentStoreCoordinator
{ NSPersistentStoreCoordinator
if (_persistentStoreCoordinator != nil) {
return _persistentStoreCoordinator;//return
persistent store
}//coordinator since it already exists
NSURL *storeURL = [[self applicationDocumentsDirectory]
URLByAppendingPathComponent:@"CustomerModel.sqlite"];
[ 81 ]
Using Core Data for Persistence
NSError *error = nil;
_persistentStoreCoordinator = [[NSPersistentStoreCoordinator
alloc]
initWithManagedObjectModel:[self managedObjectModel]];
if (_persistentStoreCoordinator == nil)
NSLog(@"_persistentStoreCoordinator is nil");
if (![_persistentStoreCoordinator addPersistentStoreWithTy
pe:NSSQLiteStoreType configuration:nil URL:storeURL options:nil
error:&error]) {
NSLog(@"Error %@, %@", error, [error userInfo]);
abort();
}
return _persistentStoreCoordinator;
}
The following lines of code will return a URL of the location to store your
data on the device:
#pragma mark - Application's Documents directory// Returns
the URL to the application's Documents directory.
- (NSURL *)applicationDocumentsDirectory
{
return [[[NSFileManager defaultManager]
URLsForDirectory:NSDocumentDirectory
inDomains:NSUserDomainMask] lastObject];
}
As you can see, what we have done is to check whether the objects such
as _managedObjectModel are nil and if they are not nil, then we return
the object, or we will create the object and then return it. This concept is
exactly the same concept of lazy loading, which we covered in Chapter
5, Managing Your Application Data. We apply the same methodology to
managedObjectContext and persistentStoreCoordinator. We did this
so that we know that we only have one instance of managedObjectModel,
managedObjectContext, and persistentStoreCoordinator created and
present at any given time. This is to help us avoid having multiple copies of
these objects, which will increase the chance of a memory leak.
Note that memory management is still a real issue in the post-ARC
world. So what we have done is follow best practices that will help us
avoid memory leaks.
[ 82 ]
Chapter 6
In the example code that was shown, we adopted a structure so that only
one instance of managedObjectModel, managedObjectContext, and
persistentStoreCoordinator is available at any given time.
Next, let's move on to showing you how to store data in our persistent store. As
you can see in the preceding screenshot, we have fields such as name, age, address,
email, and phone_number, which correspond to the appropriate fields in our
Customer entity.
The example code in this chapter will be provided in its entirety on the
Packt Publishing website, and you can download it and run the Xcode
project directly.
Saving data into the persistent store
To do a successful save using Core Data, you require:
•
NSManagedObject
•
NSManagedObjectContext
•
NSPersistentStoreCoordinator
•
NSManagedObjectModel
So, in our screen that saves these variables into our Customer entity, the following
code fragment does all the magic for the (IBAction)save:(id)sender method.
This will enable us to save our data from a new customer or update an existing
customer's information:
- (IBAction)save:(id)sender {
if ([nameTxtField text].length == 0)
{
UIAlertView *alert = [[UIAlertView alloc]
initWithTitle:@"Error"
message:@"Name must not be empty" delegate:self
cancelButtonTitle:@"OK"
otherButtonTitles:nil];
[alert show];
return;
}
NSString *name = [nameTxtField text];
NSString *phone = [phoneTxtField text];
NSString *email = [emailTxtField text];
NSString *address = [addressTxtField text];
[ 83 ]
Using Core Data for Persistence
int age = [[ageTxtField text] intValue];
//save using core data
NSManagedObjectContext *context = nil;
id delegate = [[UIApplication sharedApplication] delegate];
if ([delegate
performSelector:@selector(managedObjectContext)]) {
context = [delegate managedObjectContext];
}//prepare the context for saving
if (customer)//if we are showing existing customer data
{
NSNumber *age = [NSNumber numberWithInt:[[ageTxtField
text] intValue]];
[customer setValue:[nameTxtField text] forKey:@"name"];
[customer setValue:age forKey:@"age"];
[customer setValue:[addressTxtField text]
forKey:@"address"];
[customer setValue:[emailTxtField text] forKey:@"email"];
[customer setValue:[phoneTxtField text]
forKey:@"phone_number"];
}
else
{
// Insert new object into the context
NSManagedObject *newCustomer = [NSEntityDescription
insertNewObjectForEntityForName:@"Customer"
inManagedObjectContext:context];
[newCustomer setValue:name forKey:@"name"];
[newCustomer setValue:phone forKey:@"phone_number"];
[newCustomer setValue:email forKey:@"email"];
[newCustomer setValue:address forKey:@"address"];
[newCustomer setValue:[NSNumber numberWithInteger:age]
forKey:@"age"];
}
NSError *error = nil;
// Save the object to persistent store
NSString *str;
if (![context save:&error]) {
str = [NSString stringWithFormat:@"Error saving %@ with
localized description %@", error, [error
localizedDescription]];
NSLog(@"%@", str);
}
[ 84 ]
Chapter 6
else
{
str = @"Customer record saved to persistent store";
if (customer)
str = @"Customer record updated to persistent store";
NSLog(@"%@", str);
}
UIAlertView *alert = [[UIAlertView alloc]
initWithTitle:@"Alert"
message:str delegate:self
cancelButtonTitle:@"OK"
otherButtonTitles:nil];
[alert show];
}
So, the steps we need to remember are:
1. Get the instance of NSManagedObjectContext, which sets
persistentStoreCoordinator using managedObjectModel.
2. Create an instance of NSManagedObject and set the values you want to save.
3. Use an object of the NSManagedObjectContext type and call the save
method since the context will represent all changes that you have done and
you need to call the save method in order to save the changes from the
context to disk.
Deleting data from the persistent store
We will now move on to delete a record from the persistent store. In our table view,
we will load the customers using an instance of NSFetchRequest, as shown:
- (void)viewDidAppear:(BOOL)animated
{
[super viewDidAppear:animated];
//Get the context first
NSManagedObjectContext *managedObjectContext = [self
managedObjectContext];
//load data from Customer entity
NSFetchRequest *fetchRequest = [[NSFetchRequest alloc]
initWithEntityName:@"Customer"];
[ 85 ]
Using Core Data for Persistence
self.customers = [[managedObjectContext
executeFetchRequest:fetchRequest error:nil] mutableCopy];
[tblView reloadData];
}
Here, we will declare customers as a mutable array to store our records from the
Customer entity:
@property (strong) NSMutableArray *customers;
To delete a record, we just need to get our Customer record, which is an
instance of NSManagedObject from the customers array, then use an instance of
managedObjectContext to call the deleteObject method on it, and finally, call the
save method to save our updated records:
- (void)tableView:(UITableView *)tableView
commitEditingStyle:(UITableViewCellEditingStyle)editingStyle
forRowAtIndexPath:(NSIndexPath *)indexPath
{
NSManagedObjectContext *context = [self managedObjectContext];
if (editingStyle == UITableViewCellEditingStyleDelete) {
NSManagedObject *obj = [self.customers
objectAtIndex:indexPath.row];
[context deleteObject: obj];
NSError *error = nil;
NSString *str;
// Attempt to delete record from database
if (![context save:&error]) {
str = @"Cannot delete record! %@", [error
localizedDescription];
NSLog(@"%@", str);
}
else
{
// Remove customer from table view
[self.customers removeObject:obj];
//update tableview
[tblView deleteRowsAtIndexPaths:[NSArray
arrayWithObject:indexPath]
withRowAnimation:UITableViewRowAnimationNone];
[ 86 ]
Chapter 6
str = @"Record removed";
NSLog(@"%@", str);
}
UIAlertView *alert = [[UIAlertView alloc]
initWithTitle:@"Alert"
message:str delegate:self
cancelButtonTitle:@"OK"
otherButtonTitles:nil];
[alert show];
}
}
Updating data
Finally, to update a record, it is much simpler than you think, thanks to the
abstraction layer. To update data, we just assign the values to our customer
object in the (IBAction)save:(id)sender method, which you saw earlier:
if (customer)//if we showing existing customer data
{
NSNumber *age = [NSNumber numberWithInt:[[ageTxtField
text] intValue]];
[customer setValue:[nameTxtField text] forKey:@"name"];
[customer setValue:age forKey:@"age"];
[customer setValue:[addressTxtField text]
forKey:@"address"];
[customer setValue:[emailTxtField text] forKey:@"email"];
[customer setValue:[phoneTxtField text]
forKey:@"phone_number"];
}
We will add the following code after we set the values of our customer object:
NSError *error = nil;
// Save the object to persistent store
NSString *str;
if (![context save:&error]) {
str = [NSString stringWithFormat:@"Error saving %@ with
localized description %@", error, [error
localizedDescription]];
NSLog(@"%@", str);
}
[ 87 ]
Using Core Data for Persistence
Here, customer is an instance of NSManagedObject:
@property (strong) NSManagedObject *customer;
The code for updating data is to be added after the following code fragment, inside
the – (IBAction)save:(id)sender method:
if ([delegate performSelector:@selector(managedObjectContext)]) {
context = [delegate managedObjectContext];
}//prepare the context for saving
Summary
So, to wrap it all up, Core Data is not something that is overly complex and the code to
use Core Data is pretty straightforward as we have seen in our code examples shown
earlier. The Core Data framework is a relatively easy framework to use to handle data
storage abstraction without worrying about different data storage formats.
The concepts that you have to know are the Core Data classes such as
NSManagedObject, NSManagedObjectContext, NSPersistentStoreCoordinator,
and so on and the related methods such as save and deleteObject. With these
simple lines of code, you can leverage the power of the Core Data framework to do
data persistence on a high-level abstraction without concerning yourself with the
low-level data format specifications.
In the next chapter, we will be introduced to key-value programming and how it
can be used to allow us to be notified of state changes. So, I hope you enjoyed this
chapter on Core Data!
[ 88 ]
Chapter 7
Key-value Programming
Approaches
Key-value coding is a really cool function that works well with key-value observing.
It allows you to code less and create very elegant solutions and code modules. There
are many cases in a real application when something changes and another part
of the application should be affected. The thing is that you can do anything when
a property of an instance or class changes, including but not limited to checking
whether its value is valid, sending a message to someone when something changes
to a certain value, and so on. The options are unlimited.
We will cover the following topics in this chapter:
•
What is key-value coding?
•
The NSKeyValueCoding protocol
•
Manual subsets of the NSKeyValueCoding behavior
•
Associated objects
•
Selectors as keys
•
Maximum flexibility and handling unusual keys/values
Also, do note that the NSKeyValueCoding protocol has been available since Mac OS
X 10.0 in Cocoa, and it has also made its appearance in iOS 2.0, which came out in
July 11, 2008. Generally, APIs for iOS and Mac tend to make their appearance on the
Mac platform first before making their appearance on the iOS platform.
[ 89 ]
Key-value Programming Approaches
What is key-value coding or KVC?
Key-value coding is basically a mechanism to indirectly access an object's properties,
rather than explicitly getting and setting those properties via instance variables. With
KVC, we use strings as properties keys, which act as an identifier. It is used by passing
a "key", which is a string to get or set the property related to that key. For example,
take a look at the following code sample:
@interface DogClass
@property NSString *dog_name;
@property NSInteger number_legs;
@end
DogClass *mydog = [[DogClass alloc] init];
NSString *string = [myDog valueForKey:@"dog_name"];
[mydog setValue:@4 forKey:@"number_legs"];
In the preceding code, we created DogClass with two properties of NSString and
NSInteger. Then, we used valueForKey and setValue to get the value of dog_name
and number_legs respectively using key-value coding.
If this sounds familiar to you, you may recognize the syntactical similarity when
using NSDictionary.
There is another sample code, which you can refer to for more clarification. Let's
check out the following code:
// The following line sets a property, directly.
//Example A
myObject.myProperty = myValue;
/*
While this other line sets the same property, this time using
KVC.
*/
//Example B
[myObject setValue:myValue forKey:@"myProperty"];
Some developers who were introduced to Objective-C earlier disliked this approach of
setting the property explicitly using the dot operator as seen in myObject.myProperty
= myValue, but it is essentially helpful since it separates the property involved in the
setting process from the action of setting itself. A normal setter is applicable in this
context, but writing your own setters will mean that you are writing a lot of boilerplate
code and this will make your code more verbose.
[ 90 ]
Chapter 7
Basically, your app's accessor methods will implement the methods and patterns
signatures determined by the KVC. The task of those accessor methods is to provide
a way into the property values of your application's data models. There are two
of them, set and get accessors. The set accessors—also known as setters—set
the property's value, while the get ones—also known as getters—get/return the
property's value.
Imagine a NSTableViewDataSource method to handle an edit for one of the
rows, other than the default one, without it being KVC. It should look like the
following code:
- (void)tableView:(NSTableView *)aTableView
setMyObjectValue:(NSString *)anObject
forMyTableColumn:(NSTableColumn *)aTableColumn
row:(int)rowIndex
{
if ([[aTableColumn identifier] isEqual:@"myName"])
{
[[myRecords objectAtIndex:rowIndex] setName:anObject];
}
else if ([[aTableColumn identifier] isEqual:@"myAddress"])
{
[[myRecords objectAtIndex:rowIndex] setAddress:anObject];
}
}
However, as soon as we can use KVC, the method can be like this:
- (void)tableView:(NSTableView *)aTableView
setMyObjectValue:(NSString *)anObject
forMyTableColumn:(NSTableColumn *)aTableColumn
row:(int)rowIndex
{
[[myRecords objectAtIndex:rowIndex] setValue:anObject
forKey:[aTableColumn identifier]];
}
The essence of KVC is shown here; it's a better approach because each property's
edit doesn't need to be handled as a separate condition. Another huge advantage is
its efficiency since a table with thousands of columns will be handled by the same
code, not even a line added to it. Notice that in the first example, we needed to have
two if loops to handle two different identifiers, but using KVC, we can cut down
on the verbose code and use setValue instead and achieve the same result with just
one statement.
[ 91 ]
Key-value Programming Approaches
Besides the fact that key-value coding simplifies your code, implementing
its compliant accessors is an effective design principle, and it helps the data
encapsulation and makes it easier to work with key-value observing—which we will
cover later—and other technologies such as Cocoa bindings, Core Data, and so on.
NSKeyValueCoding is an informal protocol that provides the essential methods for
KVC, while NSObject provides its default implementations. Key-value coding can
access three types of object values; they are attributes, one-to-one relationships, and
one-to-many relationships, where we can access a property indirectly using a string.
What we call attribute is just a simple value property, so it might be a NSString or
Boolean value, as well as NSNumber and other immutable object types.
When an object has properties of its own, these are known as properties, which
are assigned a one-to-one relationship between the object and property. What
is interesting about these properties is that they can change, without the object
changing itself at all. To better understand this, think of a NSView instance's
superview as a one-to-one relationship. A set of related objects make a one-to-many
relationship. We can see this in NSArray or NSSet instances, where a NSArray or
NSSet instance has a one-to-many relationship to a group of objects.
The NSKeyValueCoding protocol
The NSKeyValueCoding protocol is used in every sample code I've shown until now.
I also have been calling it a protocol, but as I said earlier, it's an informal protocol,
a NSObject category.
KVC is a mechanism that enables you to indirectly access an object's properties,
using a "key" of strings to do it. To enable KVC, NSKeyValueCoding must be
complied by your classes. Most of the time, you don't need to do anything in
order to get it done because it's complied by NSObject.
To make a key-value coding compliant class for a certain property, the methods
setValue:forKey: and valueForKey: must be implemented to work as expected.
Compliance of attributes and one-to-one
relationships
You must ensure that your class has the following specification in case the of
properties that are simply attributes or one-to-one relationships; an example would be
[myObject setValue:myValue forKey:@"myProperty"];, which we saw earlier:
[ 92 ]
Chapter 7
•
Have an instance variable called <key> or _<key>, or have an implemented
method called -<key>, which is a reference to the key in your key-value pair.
As a rule of thumb, KVC keys start with lowercase letters, but for ones, such
as URL, it's also acceptable if the first letter is uppercase.
•
If the property is a mutable one, -set<Ket>: would be also implemented.
•
The implementation of the -set<Key>: method should not include any
validation as validation is to be implemented by the method mentioned in
the next point.
•
If the validation is suitable for the key, -validate<Key>:error: must be
implemented here along with your validation code.
Compliance of indexed one-to-many
relationships
Using NSArrays or NSMutableArrays will introduce you to the concept of one
to-many relationships, where the key-value coding compliance requirements for
indexed to-many relationships you need to ensure are:
•
The implementation of a method called -<key>, returning an array
•
Besides, you might have an NSArray instance variable called <key> or
_<key> or even proceed the implementation of -countOf<Key> and one or
all of the following: -<key>AtIndexes: or -objectIn<Key>AtIndex:
•
In order to improve performance, you can also implement
-get<Key>:range: but it's not a requirement
Otherwise, if you are dealing with mutable indexed ordered one to-many
relationships, these are your requirements:
•
Get at least one of the methods implemented:
-insertObject:in<Key>AtIndex: and -insert<Key>:atIndexes:
•
Get at least one of the methods implemented:
-removeObjectFrom<Key>AtIndex: and -remove<Key>AtIndexes:
•
As an option, you can even implement one of the methods:
-replace<Key>AtIndexes:with or -replaceObjectIn<Key>AtIndex:with
Object:
[ 93 ]
Key-value Programming Approaches
Compliance of unordered many-to-many
relationships
NSSets are an example of an unordered collection and also have a many to-many
relationship, so the key-value coding compliance requirements for unordered many
to-many relationships you need to ensure are:
•
The implementation of a method called -<key>, returning an NSSet
•
Otherwise, set an instance variable called <key> or _<key>
•
Or get these methods implemented: -enumeratorOf<Key> , -countOf<Key>,
and -memberOf<Key>:
If it's a mutable unordered to-many relationship, KVC compliance will ask you to:
•
Implement at least one of the following methods: -add<Key>: or
-add<Key>Object:
•
Implement at least one of the following methods: -remove<Key>: or
-remove<Key>Object:
•
In order to improve performance, you can implement -set<Key>: and
-insert<Key>:
With NSString keys, you can set and get values using the methods
setValue:forKey: and valueForKey:. This key is a simple string that serves as an
identifier to an object's property. A key must be in accordance with the following
rules: starting with a lowercase letter, shouldn't contain white-spaces, and make
use of ASCII encoding. All these rules are applied in the following sample keys:
mySampleKey, pageNumber, and oddSum.
There are also key paths, they're basically a string with two or more keys
separated by dots, as pictures.byOwner.forYear. If you have a hard time trying
to understand, think about it as a UNIX directory relative path as shown here,
pictures/Vasilkoff/2014.
It's clear that the folder 2014 is relative to Vasilkoff, which is relative to pictures,
which in turn is relative to the user's current directory. In key paths, the first key—in
our preceding code sample: pictures—is relative to the receiver object.
For example, using the concept of address and street as you can derive a street from
the address. So, if you use the same concept, the address.street key path will
get the value of the address property from the receiving object, and then you can
determine the street property relative to the address object.
[ 94 ]
Chapter 7
Advantages of key-value coding
•
Most properties support the NSKeyValueCoding informal protocol by
default. Any object that inherits from NSObject has automatic support for
NSKeyValueCoding. So, your own custom class will not have support for
NSKeyValueCoding unless you explicitly make it inherit from NSObject.
•
KVC will automatically look for setter and getter methods and if none is
found, then it will even get or set instance variables.
•
The possibility of using key paths is really helpful while handling multiple
property objects.
•
To be notified of the state change, KVC can be easily integrated with
NSKeyValueObserving in order to implement the observer software pattern.
•
The possibility of dealing with undefined keys.
•
This provides fallbacks.
Disadvantages of key-value coding
•
The property keys must be only NSStrings, which means that the compiler
does not have any information on the type of property or any details about
its existence. So, any type of information cannot be retrieved from the return
value of ID, which as you know, is a pointer to an Objective-C object.
•
Its extended search path makes it a very slow KVC approach.
•
The class must provide a method or an instance variable matching the name
of the property, only then it will be found by NSKeyValueCoding. If there is a
typo in your key, your application will crash during runtime and not compile
time, so you must make sure that your key is spelled correctly to avoid a crash.
Manual subsets of NSKeyValueCoding
behavior
The NSKeyValueCoding protocol acts in different ways while looking up for methods
and instance variables. In the first case, it will look up for the method's selector's
name, while in the last, it will look up for the instance variable's name.
[ 95 ]
Key-value Programming Approaches
This can be done manually, as we can see in the following samples:
// Manual implementation of KVC setter for method.
NSString *mySetterString = [@"set"
stringByAppendingString:[myKeyString capitalizedString]];
[myObject performSelector:NSSelectorFromString(mySetterString)
withObject:myValue];
// Manual implementation of KVC setter for instance variable.
object_setInstanceVariable(myObject, myKeyString, myValue);
Since KVC can look up for setters and getters automatically, you might only be
required to use the preceding approach by creating your own lookup path if you
want to avoid NSKeyValueCoding to find specified or ordinary methods and
instance variables.
Advantages of creating your own lookup path
To avoid NSKeyValueCoding, looking for methods or instance variables that will
normally be found by NSKeyValueCoding and creating your own lookup path will
be the approach you require. Let's start with the advantages and follow that up with
the disadvantages:
•
It may be faster than normal NSKeyValueCoding paths.
•
It gives you more control over the path. Unlike NSKeyValueCoding paths,
it will also work for non NSObject inherited classes.
•
By doing it manually, non-object values can be used for get and set.
Disadvantages of creating your own lookup
path
•
Generally, you will spend more time working on it than just using normal
NSKeyValueCoding paths
•
It also provides less flexibility as you need to write more code to cover any
unusual key/value cases, which is normally covered by the automatic method
[ 96 ]
Chapter 7
Associated objects
In the Objective-C 2.0 runtime used by apps in iOS and 64-bit Mac OS X, you're
allowed to set an association from any object to another. The object, in this case,
without support from instance variables or methods can have a random set of extra
properties set by the key at runtime, shown as follows:
objc_setAssociatedObject(myObject, myKey, myValue,
OBJC_ASSOCIATION_RETAIN_NONATOMIC);
You can use this if you want to set a property from outside an object. If you would
be an object and your t-shirt color a property of yours, it would be like someone
changing its color from outside your house, and you wouldn't even notice it.
You should use it in similar circumstances, where you want to keep the object away
for knowing, supporting, or being involved while you set a property from other
parts of the program. Associated objects should not be the method you want to use
at the top of your head as lack of type information makes it easy for a crash to appear
due to incorrect typing.
Advantages of using associated objects
•
A key can be any pointer. In this case, OBJC_ASSOCIATION_ASSIGN can
be used.
•
It may be the fastest key-value coding approach.
•
There is no support required from the method or instance variable.
Disadvantages of using associated objects
•
It has no effect over the object itself (instance variable or method). The object
won't know about its own changes.
•
In associated objects, a key is no longer NSString, but a pointer.
Selectors as keys
Normally, KVC looks up for a property key and acts only after the property
key is found. The other approach is about acting on an object's property in the
lookup process. There is a lookup method in Objective-C core and its keys are
used as selectors.
[ 97 ]
Key-value Programming Approaches
The following line of code is how you implement this lookup method:
objc_msgSend(myObject, mySetterSelector, myValue);
This method is very similar to the manual implementation
of the instance variable's setter, but instead of using the
key to form a selector to do a look up, it uses the selector
itself as the key.
Advantages of using selectors as keys
•
It's possible to get and set non-object data.
•
From all approaches that handles methods, this is the fastest one.
Disadvantages of using selectors as keys
•
You need different selectors for get and set
•
Since selectors are not objects, it's impossible to store directly in NSArray
and NSDictionary. Instead, you can use NSValue or Core Foundation
Maximum flexibility and handling unusual
keys/values
After you learned so many ways to use key-value coding, there is still a very
important way of implementation if you are looking for more flexibility while
handling unusual keys/values. Just do it yourself. The final approach to key-value
coding is to handle the implementation yourself.
Create a getter and setter method, and inside of each method properly returning
and setting the values on a dictionary owned by the object might be the easiest way
to do it.
We can check out this approach in the following sample code:
/*
//-----------------------------We create the method called "setCollectionValue:forKey:"
//-----------------------------*/
[ 98 ]
Chapter 7
- (void)setCollectionValue:(id)value forKey:(NSString *)key
{
/*
//-----------------------------Here we set the value for key in a dictionary
owned by the object.
//-----------------------------*/
[collectionDictionary setObject:value forKey:key];
}
/*
//-----------------------------Then, we create the method called "getCollectionValueForKey:"
Note that it's a getter method, so it must return
something – (id)
//-----------------------------*/
- (id)getCollectionValueForKey:(NSString *)key
{
/*
//-----------------------------Here, we get the object from the dictionary, for the
specified key and return it.
//-----------------------------*/
return [collectionDictionary objectForKey:key];
}
In our sample code, we used NSDictionary for the value's internal storage; however,
you can use your own storage solutions, or even Cocoa key-value storage structures:
•
NSMutableDictionary
•
•
NSMapTable
CFMutableDictionaryRef
[ 99 ]
Key-value Programming Approaches
Advantages of doing your own
implementation
•
Multiple collections can be exposed by a single object
•
Any data type supported by the respective collection can be used while
getting and setting
•
Among all methods of implementation, this is the most flexible one
Disadvantages of doing your own
implementation
•
It simply does not work for random objects, only the target class
•
You're unable to use other NSKeyValueCoding concepts in addition to this
Key-value observing
Key-value observing—also known as KVO—is a way to get notified about changes
in a variable, but only if it was changed using KVC. We can highlight two things out
of this:
•
Firstly, you need KVC in order to do KVO
•
Secondly, if a variable is changed directly without key-value coding by its
default setter and getter methods, you won't get notified at all
Every variable in any key path can be observed by an object. It's useful if you
consider using KVO. As KVO is built on top of KVC, you need KVC to implement
KVO, and using KVO should be one of the reasons why you need to use KVC.
Implementing key-value observing
It is relatively easy to implement KVO, as we shall see in the following code example.
On the specified key path, you add an observer. After this, you can create a method
that will be called anytime the observer sees modifications in the variables on its
key path.
An object can be registered as an observer by using the following method from
NSKeyCodingProtocol: addObserver:forKeyPath:options:context:. Anytime a
modification is performed, the following method is called observeValueForKeyPath
:ofObject:change:context:.
[ 100 ]
Chapter 7
Firstly, go to your class and add the following method:
-(void)observeValueForKeyPath:(NSString *)keyPath
ofObject:(id)object change:(NSDictionary *)change context:(void
*)context
{
}
As you saw earlier, this method is called when any modification is performed.
However, the protocol is even more powerful than this; it gives you the possibility
to be notified about a change before it occurs and also after it's done, by using the
respective methods: willChangeValueForKey and didChangeValueForKey. You
might consider these methods if you need time-specific notifications.
Let's check out the following code where we register an object as an observer:
/*
//-----------------------------We register the object "developmentManager" as the
observer of "developer".
It will then notify you when any change will take
place for the key path "developmentStage".
//-----------------------------*/
[developer addObserver:developmentManager
forKeyPath:@"developmentStage"
options:NSKeyValueObservingOptionNew |
NSKeyValueObservingOptionOld context:nil];
If you look carefully, you will notice that we've used the options
NSKeyValueObservingOptionNew and NSKeyValueObservingOptionOld. Both are
used if we want to know the old and new values. These values will be stored in our
dictionary of changes.
In our example, let's assume that development stages are represented by levels,
NSInteger values from 0 to 10, and at every modification, we need to inform our
progress. In this case, we will create two simple methods to do it for us:
- (void)informNoProgress
{
NSLog(@"We had no progress today");
}
- (void)informRealProgress
{
NSLog(@"Our today's progress is of %@ level",
developer.developmentStage);
}
[ 101 ]
Key-value Programming Approaches
The two preceding methods are now complete; one will inform no progress if
the development stage doesn't change—we will consider that it's impossible
to decrease, in our scenario, and the other one will inform the real progress by
levels if the development stage changes. However, now, we want to call the
properly methods after comparing the values. Remember we used the options
NSKeyValueObservingOptionNew and NSKeyValueObservingOptionOld; they
will save the old and the new values after a change.
The old and new values will be handled inside the method that is called when the
observer notifies a modification, as follows:
-(void)observeValueForKeyPath:(NSString *)keyPath
ofObject:(id)object change:(NSDictionary *)change context:(void
*)context
{
if([keyPath isEqualToString:@"developmentStage"])
{
/*
//-----------------------------Here we store the old and new values for
further comparison.
//-----------------------------*/
NSInteger oldStage = [change
objectForKey:NSKeyValueChangeOldKey];
NSInteger newStage = [change
objectForKey:NSKeyValueChangeNewKey];
/*
//-----------------------------Then, we check whether the oldStage level is lower
than the newStage level
//-----------------------------*/
if(oldStage < newStage)
{
/*
//-----------------------------If the value is lower, there is progress
and we call the properly method to inform it
//-----------------------------*/
[self informRealProgress];
} else {
[ 102 ]
Chapter 7
/*
//-----------------------------However, if the old level is not lower, it
means there was no progress, we call the
method to inform it.
//-----------------------------*/
[self informNoProgress];
}
}
}
In the preceding code, we make sure that if the observed key is the one we are
actually looking for, just to be really sure—in our case, the key is developmentStage.
Then, we store the old and the new values in order to compare them. If there are
positive changes, inform the progress, if not, call the other method to inform about
the bad news.
This is a real handy tool, even more if it is used cleverly as it is really powerful since
it allows us to observe or watch a KVC key path on an object and to be notified when
the value of the object changes, which can be useful in some programming contexts.
Having control even on the change of your properties is a really powerful feature,
and I'm sure you will find great cases to use in your own projects.
Performance considerations
You must be careful while overriding KVC methods implementation as the default
implementation caches Objective-C runtime information in order to be more effective
and less erroneous, and unnecessary overriding implementations can affect the
performance of your application.
Summary
So far, we have taken a deep dive into key-value coding and other details such as
various implementation methods, their advantages and disadvantages, and also
key-value observing—a mechanism built on top of key-value coding.
We also saw some working code for key-value coding and key-value observing
with some explanation on why we prefer to use key-value coding over other similar
methods such as using a dot operator to access properties.
With this, I hope all these will help to give you an understanding of key-value
coding and key-value observing. So with this, let's move on to the next chapter
where we will wade into the brand new language by Apple called Swift.
[ 103 ]
Chapter 8
Introduction to Swift
Apple held their Worldwide Developers Conference (WWDC) for 2014 on June 2 at
Moscone West in San Francisco, which was the same venue as previous years. They
announced a slew of new APIs, technologies for games such as Metal, new operating
systems for iOS (iOS 8) and Mac (Yosemite), and the most important announcement
for iOS developers in 2014, that is, the announcement of Swift, a new programming
language, which some say is meant to replace Objective-C, as Objective-C was
introduced in 1983 and is showing its age due to its long history. Swift is meant to
be an easy and simple to learn programming language that will lower the barrier to
entry for developers who are intimidated by Objective-C. However, what is Swift
and what is good about it? How far does it differ from Objective-C, and finally, how
easy is it to learn Swift? These are the questions that we will cover in this chapter,
and to start things off, here is a list of topics we will cover:
•
Welcome to Swift
•
Swift basics
•
Memory management
Welcome to Swift
Swift is actually not a new language, as Apple started the development of Swift back
in 2010. Since programming languages such as Ruby, Python, Haskell, Rust, and
so on have surged in popularity, Swift was developed using language ideas from
these popular languages. As Apple describes Swift as Objective-C without the C, you
can consider Swift as a language that is a reimagining of Objective-C using modern
concepts and syntax borrowed from languages such as JavaScript, but still keeping
the essence and spirit of Objective-C.
[ 105 ]
Introduction to Swift
Swift does away with pointers and makes memory management opaque to the
developer through the use of ARC so that they can focus on their iOS application
creation and not worry about memory management most of the time. Swift uses
ARC and not the GC method found in Java. This means that Swift can still leak
memory if you are not careful by using cyclic strong references. Smalltalk is a
programming language released in 1972 that has heavily influenced Objective-C
in terms of architecture, such as message passing. And the Smalltalk aspect of
Objective-C, such as method calls, has been replaced with dot notation and a
namespace system that is reminiscent of Java and C#. However, Swift is not a totally
radical departure from Objective-C. Key Objective-C concepts such as protocols,
closures, and categories are still present in Swift, except that the syntax is much
cleaner and crisper.
Swift's approach to memory management is that it uses ARC, and one problem with
ARC is that a developer can unintentionally create a strong reference cycle where
instances of two different classes include a reference to the other. So, Swift provides
the weak and unowned keyboards to prevent strong reference cycles from occurring.
For a seasoned Objective-C programmer who comes from a C or C++ background,
Swift may seem like a totally new language as it does away with some aspects of
Objective-C such as verbosity. I am sure that a lot of Objective-C developers have
experienced "square brackets hell", where simple functionalities need to be wrapped
with a lot of square brackets, thus rendering the code hard to read, and which also
runs the risk of introducing bugs into your application. The goal of Swift is to let
developers harness the power of Objective-C without C. So, there are some aspects of
Swift that indeed make it easier for a developer, but conversely, there are some parts
of Swift that do not seem to be fully fleshed out yet. However, bear in mind that at
the time of writing this, Swift is still in beta and Apple may still introduce a lot of
changes in the following weeks and months. However, with Apple putting its full
weight behind Swift, now is a good time to start learning some Swift basics. As with
all new technology that Apple introduces, you will require Xcode 6 beta and higher
to run and build your Swift code as Xcode 5 does not support Swift. Your Swift code
can also run on iOS 7 and Mac OS 10.9.3. So, if you are an Apple developer, you
can download Xcode 6 beta and install it on your Mac as it will be installed side by
side with your Xcode 5 and will not override anything or break your current Xcode
projects. So, let's get cracking.
[ 106 ]
Chapter 8
Basics of Swift
Swift syntax is very different to Objective-C, while Objective-C has a lot of reliance
on C and C++ components such as pointers, strong typing, and so on. Swift is
very similar to popular scripting languages such as Python and Ruby with regards
to terseness and variable declaration. So, let's look at some basics of Swift to get
acquainted with it.
Variable declaration
Swift does away with the need to remember ints, floats, NSStrings, and so on and
consolidates all of these type of variables under one type, and that is of the type var.
If you are familiar with JavaScript, then the var keyword should not be unfamiliar
to you. Swift supports the type inference, where depending on the value that you
assign to a variable, it will infer its type:
var welcome
welcome = "Hello world"
This means that the variable, welcome, is inferred to have a string type as I assigned
the text Hello world to it. However, if you want to be specific, you can annotate a
variable like this:
var welcome: String.
Then to append two strings together in Swift, you can do the following:
welcome += " Bob"
If you were using Objective-C, you will need to type out the longer syntax:
NSString *hello = @"Hello world";
str = [str stringByAppendingString:@" Bob];
Swift also supports constants with the keyword let. So, to declare a constant,
you can just type the following syntax:
let LIFE_MEANING = 42
Note that Swift now infers that LIFE_MEANING is an integer as you have assigned
the value 42 to it. To print out a line of text for logging, which is analogous to
NSLog from Apple's Cocoa framework, you can use the println keyword, whereas
with NSLog, you need to specify the format specifier such as %d for integers, %@ for
NSStrings, or %f for float/double.
[ 107 ]
Introduction to Swift
There is no need to do this for Swift; you can just use the following syntactical
examples:
println("The text is \(welcome)") //print out the value of
variable welcome
println("The meaning of life is \(LIFE_MEANING)")//print out the
meaning of life
One thing that has not changed from Objective-C is that comments in Swift are
denoted by the // for single line comments and /* and */ for multiline comments.
Semicolons are also optional. Some of you may want to be pedantic and put a
semicolon, but personally, I don't like any additional typing than is necessary,
so I tend to omit the semicolon (;) for my Swift code.
As with all programming languages, Swift supports an array of operators for
arithmetic comparison and assignment.
All the operators such as /, *, +, and so on perform the same function as
in Objective-C except that the + operator serves a dual function as a string
concatenation operator if you need to concatenate multiple strings.
Swift introduces the concept of closed range operators, which defines a range that runs
from x to y and includes the values x and y if you use it like this (x...y). For example:
for index in 1...5 {
print("Value is \(index)")
}
This will print out the values 1, 2, 3, 4, and 5. As you may have noticed by now, this
can be used to replace the more verbose tradition for loop in Objective-C, which is
represented by these lines of code:
for (int i = 0; i <= 5, i ++)
NSLog(@"Value is %d", i);
[ 108 ]
Chapter 8
However, what if you want to do some common for loop code to loop through an
array? Then, you will need a half-closed range operator, which is similar to a closed
range operator except that there is one dot less (x..y):
let breeds = ["Pitbull", "Terrier", Bull dog", "Maltese"]
let count = breeds.count
for i in 0..count {
println("This breed is \(breeds[i])")
}
As you have seen earlier, Swift also has support for collection types such as arrays as
shown earlier and dictionaries, which we will cover in the next few pages. To start
off declaring an array, you just use the following syntax:
var catBreeds = ["Siamese", "Scottish"]
Then, there are some properties that can come in handy, among others, such as:
•
count: This returns the number of items in the array
•
isEmpty: This is a Boolean variable that returns true if the count property is 0
•
append: This property will allow you to add an item to the end of an array
Swift provides some helper code to iterating over an array instead of using a for
loop, while loop, or do-while loop. Array iteration is easier in Swift as you just need
to do this to do the iteration:
for item in catBreeds{
println(item)
}//prints out "Siamese" and "Scottish"
No longer do you need to write any verbose and unnecessary code for a for, while,
or do-while loop as you can use the item variable to access the array.
Next, we will cover dictionary. The dictionary in Swift is similar to NSDictionary in
Cocoa, in terms of functionality and usage. However, there is a major difference in
that, whereas in NSDictionary and NSMutableDictionary, you are allowed to use
any object as the key and value, which does not provide any information about the
object nature. In Swift, the type of keys and values in a dictionary are always made
explicitly clear using explicit type annotation or via type inference.
The syntax for a dictionary in Swift is quite straightforward, as shown here:
var breeds = Dictionary<String, String> = ["Breed1": "Bull Dog",
"Breed2": "Terrier"]
[ 109 ]
Introduction to Swift
The preceding code uses explicit type notation as you can see that the key and value
are explicitly defined as String and String respectively. This is very similar to how
you declare dictionaries in Javascript or Maps in Java, by running the following:
var breeds = ["Breed1": "Bull Dog", "Breed2": "Terrier"]
The preceding code uses type inference where once we assign Breed1 to the key
and Bull Dog to the value, Swift automatically infers that our dictionary will hold
two strings.
Modifying a dictionary in Swift is similar to how you access an array except that
instead of using an index, you use the key, which in our case is a String. So, if you
want to modify the value that maps to the Breed1 key, you can do it as shown here:
breeds["Breed1"] = "Dalmatian"
Alternatively, Swift allows us to update a value another way, which is the
updateValue method as demonstrated here:
breeds.updateValue("Breed2", forKey: "Bloodhound")
Both ways will allow you to update a value using the key, but I prefer the first way
as it is less verbose, yet equally easy to read and understand.
Iteration over a dictionary is similar to the iteration of an array in Swift where we can
forgo the old Objective-C for, while, or do-while loop methods. To do a dictionary
iteration in Swift, we just use the following code:
for (breed, breedname) in breeds{
println("\(breed) is \(breedname)")
}//prints Breed1 is Dalmation, Breed2 is Bloodhound
In any general purpose programming language, control flow statements are a
necessity in order to control the flow of your code and your app. So, although Swift
is a big departure from Objective-C, it still allows for control flow constructs of C-like
languages such as C++.
Here is a list of control flow constructs available for you to use in Swift:
•
The for loop
•
The for-in loop
•
The while loop
•
The do-while loop
•
The if statement
•
The switch statement
[ 110 ]
Chapter 8
These control flow statements serve the same purpose as they will in Objective-C,
but there are a few improvements to them, which I will explain briefly.
Iterating statements
For statements that iterate over and over again, such as for loops, Swift emphasizes
the for-in loop for iteration. This is also known as an enhanced for loop in other
programming languages such as Java. This improves readability and adds terseness
to your code. For example:
var dogs = ["Bulldog", "Terrier", "Dalmatian"]
for dog in dogs {
println("This dog is a \(dog)");
}
However, if you have the need for a Objective-C traditional style for loop, you can
do it with Swift, as follows:
for index = 0; index < 3; ++index {
//do something here
}
Conditional statements
If statements behave the same way as they do in Objective-C, except for a minor
change of syntax as shown here. Do note that the brackets are optional, so we did not
put it around the conditional expression:
if temperatureInCelsius < 10 {
println("It is cold here");
}
Note that in the preceding example, we have a very simple condition, so we have
opted to eliminate our brackets. However, what if you have multiple conditions?
Then, Swift will use the normal rules of precedence that you are familiar with, but
the lack of brackets can make the operations hard to understand. So, in this case,
I would prefer to use brackets for multiple conditions and operations like
the following:
if (temperatureInCelsius < 10) && (temperatureinCelsius > 0)
{
println("It is chilly here");
}
[ 111 ]
Introduction to Swift
However, in Swift, Switch statements have now been made easier for debugging by
not having to fall through the next case. So now the entire switch statement finishes
its execution as soon as the first matching switch case is completed. So, the following
statement will show the following output:
let number = 2
switch number {
case 1:
println("Number is 1");
case 2:
println("Number is 2");
case 3:
println("Number is 3");
}
The output will be "Number is 2" in Swift instead of "Number is 1" and "Number
is 3", which you will see in Objective-C.
Control flows in Swift have been made better where the syntax has been improved to
add readability and to prevent developers from creating non-obvious bugs such as a
Switch case fallthrough due to a missing break statement.
Functions
Functions are the fundamental building blocks of every programming language, and
it is also the same in Swift, but there are some improvements made, which we will go
through now. The syntax for a function has changed quite a bit, so a function in Swift
now has the following syntax:
func animalType(animalName: String)-> String {
let text = "This is a " + animalName
return text;
}
So, you can call it using println(animalType("Dog")). If the function does not
have a return value, you can avoid adding the arrow (->) like this:
func animalType(animalName: String) {
println("This is a \(animalName)")
}
Functions in Swift can now have multiple return values as part of a compound
return value where you can use a tuple return type.
[ 112 ]
Chapter 8
A tuple type is just a fancy term for a comma separated list of zero or types, which
are enclosed in a parenthesis. So, to let a function have multiple return values, a
tuple is what you need as shown here:
func myFunc(iCount: Int) -> (intA: Int, intB: int) {
var intX = 1, intY = 2
intA = iCount + intX
intB = iCount + intY
return (intA, intB)
}
Then to use the return value, you need to assign it to a variable:
let num = myFunction(10)
println("Value is \(num.intA) and \(num.intB)")
Swift allows the default values in a function where a default value is used if a
function parameter is not used:
func add(num1: Int, num2: Int = 0)
{
var total = num1 + num2
}
So, in the preceding example, num2 will have a default value of 0 if you do not pass
in a parameter for the second parameter in the add function, as shown here:
add(1)
Swift functions also allow the function to accept a variable number of arguments,
which is useful when you need to pass in a varying number of parameters to a
function. To enable a function to accept a varying number of parameters, you just
need to add three full stops (...) in your function, shown as follows:
func getAverage(numbers: Double...) -> Double
{
var total: Double = 0
for num in numbers {
total += num
}
total = total&/Double(num.count)
return total
}
[ 113 ]
Introduction to Swift
So, you can call the getAverage function using a varying number of parameters such
as getAverage(1, 2, 3) or getAverage(1, 2, 3, 4, 5). By default, Swift makes
all function parameters as constant to promote good programming practice. This is
one of the more unique features of Swift, which you do not find in other procedural
programming languages such as C++, Objective-C, and so on. So trying to modify a
function parameter will result in an error. However, if you need to modify a function
parameter in your code, you just need to add the var keyword to tell Swift to treat
that function parameter as a variable, not as a constant, shown as follows:
//num is now a variable and can be modified inside the function
myFunction
func myFunction(var num: Int)
{
}
One of the important changes that functions in Swift, different from Objective-C,
is that you can have nested functions where a function is created inside another
function. But do note that the inner function is only available to the enclosing
function. To declare a nested function, you can just use a normal function call:
func adder(num: Int)
{
func addOne(number: Int) -> Int
}
{ return number + 1 }
Classes and structures in Swift
As you know, classes and structures are general purpose data structures that form
the building block of the code of your application. You can define properties and
methods to add functionality to these classes and structures using the same syntax
as you will for the variables, functions, and so on.
Classes and structures in Swift have many common points such as:
•
Defining properties to store values
•
Defining methods to provide added functionalities
•
The ability to be extended to expand their functionalities
•
The possibility to conform to protocols to provide standard functionalities
However, classes have other differences that structures do not possess; they are:
•
Inheritance to allow a subclass to inherit the characteristic of another
•
Type casting, which allows you to check and interpret the type of a class
instance during runtime
[ 114 ]
Chapter 8
•
Reference counting, which allows more than one reference to a class instance
•
Deinitializers, which allow a class to do resource freeing
•
Structures are copied when they are passed around in your code
To declare a class or structure, use the class and struct keyword respectively:
class myClass {
var x = 0
var y = 0
}
struct myStruct {
var x = 0
var y = 0
}
As in Objective-C, to use a struct or class, you need to create an instance of it
before you can use it. So, for struct and class, you need to use the () to create an
instance of a class or struct.
let classA = myClass()//creating an instance of a class
let structB = myStruc()//creating an instance of a struct
To access a property in a class or struct, you can use the "." operator to access it,
as shown here:
var myX = classA.x
var myY = structB.y
For classes, you can define your own custom initializer and deinitializer in your class
file. Initializers for your struct members are automatically created for you, which you
can use, as shown here:
let yourStruct = myStruct(x: 50, y: 80)
Generally, you do not need to do any manual cleanup of your allocated instances
as Swift will do it for you using ARC. However, if you are using some custom
resources, then you may need to do the additional cleanup yourself. One use case
will be when you have a class that opens a text file and writes or appends some
data to it. So, in this situation, you may need to close the file before your instance is
deallocated. An example syntax of deinitialization is as follows:
deinit{
//Your deinitialization code here which could be closing an open
file etc
}
[ 115 ]
Introduction to Swift
One of the most important differences between a Swift class and Swift struct is that
Swift classes are passed by reference, which means that a reference to the existing class
instance is created when you assign it to another instance, and any change to the new
instance will affect the original instance. This is in contrast with pass by value where
a copy of the value is passed to the variable so that what happens in the new variable
will not affect the original variable.
So, depending on this difference, sometimes using a class is more useful in some
situations while in other situations using a struct would be better. It all depends
on the context of your program or application. So, let's use some code to help us
understand this better:
classA =
classA.x
classB =
classB.x
myClass()
= 80
classA
= 100
If you use the following code, you will notice that the classA member x will also
be set to the value of 100 as a reference to classA is passed when you run the code
classB = classA. So, whatever affects classB will also affect classA.
Closures
Closures in Swift are known as blocks in Objective-C. Both have the same concept of
creating self-contained blocks of code that can be passed around and used.
Closures use { and } to denote the beginning and end respectively. So, a very simple
example of creating a closure and calling it would be something like this:
var name = "Gibson"
var greet = { println("Hello \(name)")
greet()
}
You can see the output Hello Gibson appearing in your debug console.
Of course, you will need to pass in arguments and get return values from your
closures. You also need to use ( and ) to enclose your arguments and -> to denote
your return values as you can see here:
var s1: String = "Howdy"
var name: String = "Gibby"
var holler = { (s1: String, name: String) -> String in
return s1 + " " + name
}
var ret = holler(s1, name)
println(ret)
[ 116 ]
Chapter 8
If you run the code, you will get the output Howdy Gibby because I passed in two
string variables of the names s1 and name respectively as you can see from the line
(s1: String, name: String), while I ask a return value of the type string using ->
String.
Next, let's move on to memory management in Swift, which you still need to take
note of as ARC frees you from a lot of memory management techniques, but you still
need to take note of some memory management techniques in Swift as Swift can still
leak memory if you are not careful.
Memory management in Swift
Swift was created to avoid some of the downsides of C, one of which being
memory management. Notice that nowhere in this chapter did I mention anything
about pointers, memory allocation, deallocation, and so on. This is because in
Swift, memory management is made to be as painless as possible so that you, the
developer, can focus more on your application development than on debugging
memory leaks. Every time a new instance of a class is created, ARC will allocate
a chunk of the memory to be used to store information about that instance. This
chunk of memory holds information such as the instance type (string, integer, and
so on) along with the values of the properties that are associated with that instance.
ARC will free up the memory used by that instance when it is no longer needed or
referenced. This is to avoid a situation where instances still occupy precious memory
space when they are no longer being used or needed.
However, if you try to access an instance's properties or methods after ARC has
deallocated it, then a crash will be the likely result that you will see. So, to make sure
that this does not happen to you, ARC will track how many properties, variables,
and constants are currently referencing a class instance, and ARC will not allow
deallocation as long as there is at least one active reference to that instance from
another object in your code somewhere. A strong reference is created when you
assign a class instance to a property, constant, or variable, and this strong reference
keeps a strong hold on that class instance, and ARC will not make a deallocation
call as long as that strong reference remains. Let's illustrate this with some code to
understand this further:
1. Let's declare a class called Dog:
class Dog {
let type: String
init(_type: String) {
self.type = _type
println("Init done")
}
[ 117 ]
Introduction to Swift
deinit {
println("Deinit done")
}
}
2. Then, we will create two references to the Dog class:
var dog1: Dog?
Var dog2: Dog?
Note that there is a ? keyword, which means that dog1 is of an
optional type, which means that it could be nil. In Swift, any variable
with a ? keyword means that there is a possibility that it can hold a
nil value. Since we declared dog1 and dog2 as an optional type, it
means that dog1 and dog2 are initialized with a value of nil and do
not have a reference to the Dog class.
3. Next, we will create an instance and assign two variables, dog1 and dog2
respectively:
dog1 = Dog(type: "Bulldog")
dog2 = dog1//1 strong reference to dog1 is created
So, now there are two strong references to the Dog instance. One is through
dog1 and the other is from dog2 to dog1.
One thing to note about Swift is that the type inference only works for the
initial assignment; assigning another type to the same variable will throw an
error. This is quite different from other languages such as JavaScript, where
no error will be thrown. Let me illustrate what I mean with an example:
var hello = "Hello World"//this means hello is inferred to
have a type of string
hello = 42
//This will throw an error as now you are assigning an
integer to a string variable
4. So, you can try assigning dog1 to nil, as shown here:
dog1 = nil
ARC will see that dog2 still holds a strong reference and will not deallocate
the Dog instance. The only time that the Dog instance will be deallocated will
be when dog2 is set to nil as shown here:
dog2 = nil //this will let ARC deallocate the Dog instance
[ 118 ]
Chapter 8
Conversely, Swift also supports weak references where the reference does not have
a strong reference onto the instance that it references. So, ARC will dispose of an
instance even if it has a weak reference. To create a weak reference, you need to use
the weak keyword as shown here:
weak var cat: String?
Notice that the ? keyword is added at the end of the String keyword as a weak
reference can be allowed to have a value of nil, so all weak references must be
declared as optional using the ? keyword. Notice that it is also declared as a variable
as weak references will have their values changed in the code during runtime.
So, a weak reference cannot be declared as a constant as a weak reference does
not have a strong hold on the instance it refers to. So, when this instance is going
to be deallocated while the weak reference is still referring to it, ARC will set the
weak reference to nil when that situation arises and you can check the value of a
weak reference to see if that object has been deallocated. This way you can avoid a
situation where you end up with a reference to an invalid instance that has already
been deallocated by ARC.
In between strong and weak references, there is another type of reference that keeps
a weak hold on an instance it refers to, but it cannot be set to nil, so it is always
assumed to have a value. This is known as an unowned reference. It can be used
as a replacement for a weak reference and for some use cases as we will see here:
class Country {
let name: String
let capital: City!
init(name: String, capital: String) {
self.name = name
self.capital = City(name: name, country: self)
}
class City {
let name: String
unowned let country: Country
init(name: String, country: Country) {
self.name = name
self.country = country
}
}
[ 119 ]
Introduction to Swift
Notice that we initialize City within the initializer method for Country, but we also
need to initialize Country within the initializer method of City, and this presents itself
as a conundrum since Country depends on the initializer of City and City depends
on the initializer of Country. To get a solution to this, you can declare the capital
variable of Country as an implicit unwrapped optional property, which you denote by
using !. This means that the capital property will have a default value as nil.
The ! keyword also serves as a unwrapping function where you can get the value
of the property without assigning that property to a local variable. As mentioned
earlier, a variable that is denoted with the optional symbol, which is a ? keyword,
can either contain a value or nothing. So, when you are testing against this variable
of the type denoted as optional, you need to know whether there is a value without
directly accessing the underlying value. The ! keyword means that you can unwrap
the variable to get access to the value.
However, this does not absolve you from checking whether that property is nil as
you still need to check for nil in your code.
So, now what happens is that capital has a default nil value and the Country
instanced is considered as fully initialized as soon as the Country instance sets
its name property within its own initializer method. This means that the Country
initializer method can start to reference and pass around its self property as soon
as the name property is set. So now the Country initializer can therefore pass the
self property as one of the parameters for the City initializer when the Country
initializer is setting its own city property.
Summary
As you can see, Swift is a big departure in terms of syntax, style, and paradigm
from Objective-C. Swift was developed to move away from the C paradigm of
programming where we need to wrap our heads around memory management,
allocation, and deallocation. We went through some of the basic features of Swift
and noted that Swift features more terse code, has made memory management,
and is also fuss free, since ARC takes care of memory management for us in Swift.
However, Swift is still in the beta stage at the time of this writing, so it can still be
subject to changes in its journey to alpha and release status. Therefore, you can
expect that some features will be added or removed during this period. However,
the fundamentals of Swift will not be changed significantly, and I hope that this
chapter has given you a better understanding of Swift and has prepared you for
programming in Swift in the near future.
[ 120 ]
Chapter 8
To find out more information about Swift, the best resource to refer to is Apple's
website on Swift programming at https://developer.apple.com/swift/blog/
as it has been updated constantly since Swift was announced.
In the next chapter, we will look at memory management techniques using some of
the excellent tools in Xcode, such as Static Analyzer, and we will also cover more
details on the various techniques so that you will know which debugging tool is the
best tool to use in different situations.
[ 121 ]
Memory Management
and Debugging
Back in the good old days of iOS 3 and previous versions, the management of
computer memory was a laborious affair as every pointer and memory allocation
needed to be tracked precisely, lest you experienced the dreaded situation of
memory leaks due to a missing release keycode in your code and so on. However,
with the release of iOS 4 and higher, Apple introduced ARC and developers all over
the world rejoiced as they thought that the days of memory management were over.
However, sadly, this is not the case as Objective-C is not like other programming
languages such as Java or C#, where there is a garbage collector that will do the
memory management and garbage collection for you. ARC only serves as an enabler
to simplify memory management for us so that we do not need to explicitly call the
release method such as [myArray release], since ARC handles these for us. So
while there are less brain cells that we need to allocate for memory management
when developing an iOS app, we must still do some basic memory management
even with the introduction of ARC, and this chapter will help you along the way
with that. So to get things off the ground, here are the topics that we will cover in
this chapter:
•
Memory leaks
•
Strong/weak references
•
Retain cycles
•
Memory overuse
•
Using the debugger and breakpoints
•
Collecting data on your AppPlumbing leaks
•
Using the LLVM / Clang Static Analyzer
•
Using NSZombie
[ 123 ]
Memory Management and Debugging
Memory leaks
If you are used to calling the release method after an alloc/init method or a
retain statement, ARC allows you to forgo all that as you can still call your alloc/
init methods or retain statements and not add in a release statement as ARC
takes care of this for you. This introduces brevity and makes your code more concise.
Here is an example:
Before ARC:
Class1 *obj1 = [[Class1 alloc] init];
Class1 *obj2 = [obj1 retain];
[obj2 release];
[obj1 release];
After ARC:
Class1 *obj1 = [[Class1 alloc] init];
Class1 *obj2 = obj1;
If you wrote the code without calling the release methods as seen under After ARC,
you will have two memory leaks that will appear in your code due to you forgetting
to put in the two release methods. You will notice that the number of lines has been
reduced and the code is easier to understand, as there is no need to call any release
statements. So with ARC, people will be fooled into thinking that their memory
management woes are over, but actually, memory leaks can still happen with ARC
and I will show you how.
ARC helps in that it automates the addition of retain/release/autorelease
statements to your code, but memory leaks can still occur with ARC. It is not so
obvious to spot because people think that with ARC, there will not be any memory
leaks. However, that is not the case and memory leaks can still occur with the
presence of ARC, but there are some methods that you can use to find memory leaks.
However, first, let's go through some terms.
Strong/weak references
A strong reference is synonymous with the retain property where you increment
the reference count of an object by 1. In the world of ARC, the retain and assign
properties are no longer used and are replaced with strong and weak respectively.
A strong reference is the default property of objects as it means that you want to get
ownership of an object while a weak reference means that another object is holding
ownership to the object you want and then you can't stop it from being deallocated
since ownership does not belong to you.
[ 124 ]
Chapter 9
The strong and weak references are denoted by the Objective-C strong and weak
keyword respectively. Even with ARC, you can still have memory leaks appearing
and some causes of memory leaks using ARC are:
•
Retain cycles
•
Creating secondary threads and not providing it with its own
autorelease pool
•
Using frameworks that have non-ARC code
•
Referencing itself within a block, which creates a strong reference
Retain cycles
A retain cycle occurs when two objects such as a parent and child object have strong
references to each other. A simple example would be the following code:
@interface MyParent : NSObject
@property (strong) MyChild *myChild;
@end
@interface MyChild : NSObject
@property (strong) MyParent *myParent;
@end
You can create an object of the type MyParent with the following code:
MyParent *myParent = [[MyParent alloc] init];
A retain cycle is created with the preceding line of code and here is how it looks:
[ 125 ]
Memory Management and Debugging
In the preceding diagram, you can quickly see what is called a retain cycle since
myParent has a strong reference to myChild, and myChild has a strong reference
to myParent. This is a form of memory leak where if an object tries to release an
instance of the first object, it can't be released because the second object has a strong
reference to the first object and a retain cycle is created. Do note that ARC will not fix
all memory leaks for you, so you, the developer have to fix this type of memory leaks
using some tools, which we will cover later on. As this type of memory leak is not
very obvious, fixing it will require more effort and thinking, but thankfully, Apple
has provided some tools that will aid us greatly in this.
A general rule of thumb to avoid a situation where a retain cycle can occur is to
remember this—if object A wants to retain object B indefinitely, then object A has
to be higher up in the hierarchy tree than object B, where object A has to have a
strong reference to object B. If you have objects that are on the same level in the
hierarchy tree, then you should put a weak reference to avoid a retain cycle. So in
the preceding diagram, to avoid a retain cycles, mySecondObject should not have a
strong reference to myFirstObject. However, if you do need to let mySecondObject
have a reference to myFirstObject, then make it a weak reference instead of a strong
reference. Tree hierarchies are safe and do remember that putting weak references
will avoid a retain cycle and memory leaks.
Memory overuse
If you used enough iOS apps, you will notice that some apps will just force close
themselves after you innocuously tap on a button or do some action. This is an iOS
way of handling memory issues as it basically just says, "this app has a memory leak
and you do not have enough memory to handle it, so this app has to be closed."
Altogether there are three memory warning levels for iOS. Level 1 and 2 will be
displayed in your Xcode console when memory is running low, as shown in the
following diagram. Level 3 occurs when your application crashes and goes back
to Springboard, which is the term used to refer to the iOS home screen:
[ 126 ]
Chapter 9
Using the debugger and breakpoints
One of the most fundamental debugging concepts of using an IDE, such as Xcode, is
the concept of breakpoints, where you can stop your running program at a particular
point in time as denoted by the breakpoint where your code is. Using the breakpoint
is very simple; you just open up your Xcode project and click on the left side of the
window where you code it and a blue indicator will appear, as shown here:
Next, when you run your application and when the program hits line number 26 at
the while(true) statement, the program will halt and you can move your cursor
over any variable before line number 26, and Xcode will show you the value that the
variable contains at that point in time. Breakpoints are useful in debugging memory
leaks where you have an idea of where a leak appears and you want to see the value or
memory address of that variable. You can put multiple breakpoints and use the Step
Over command to step over each line of code to see how your program is executing.
Here is a list of icons, that you will come across when debugging using breakpoints:
[ 127 ]
Memory Management and Debugging
The four icons from the left to right in the preceding screenshot that you can use for
breakpoint debugging are as follows:
Icons
Description
Continue program execution
This will let your program continue executing until it
encounters the next breakpoint, or the program ends
Step Over
This will let your program execute the next line of code
in the current scope
Step Into
This will let your program follow the method into its
own code and view the code for the method
Step Out
This will take you out of the current context and into
calling a method one step up into the program stack
Breakpoints are very useful for checking the values of your variables at a specific point
in time when your program is halted due to the breakpoint and the four icons for
breakpoint debugging will aid you in debugging memory-related and other logic bugs.
Collecting data on your app
Do note that a memory warning level does not necessarily mean that your
application is leaking memory. There could be a situation where your application
is loading or performing operations on large resources such as data files, images,
videos, and so on and this will trigger the memory warning. ARC will handle the
cleaning up later. However, if you see a memory warning level 2, then you should
start to look at your code as the next memory warning level will be the actual
application crash.
Debugging crashes and memory leaks are like the game of hide and seek or playing
detective. There will be a lot of clues lying around, which will lead you to the culprit
in your code that is causing a bothersome crash or memory leak. Apple has provided
us with a lot of tools and logs, which will be useful for us in debugging our code. We
will cover some of the commonly used methods here so that you can get cracking
with regards to fixing those problems as soon as possible.
[ 128 ]
Chapter 9
One of the easier ways is to plug your device into your machine via your cable, fire
up Xcode, which will automatically detect your plugged-in device and then press
Shift + Command + C to activate your debug console, which is a black screen on the
bottom right of your Xcode screen. Or you can select View | Debug Area | Activate
Console from your Xcode menu as shown here:
This will show all NSLog and crash output when you are running your app via a
cable connection to Xcode.
However, there are occasions when you are testing your application, when it is not
connected to your Xcode and it crashes at that moment. The preceding method does
not work in this case, so what can you do? Do not fret, as there is another way to get
your crash log once you are at your table and have plugged your iOS device into
your machine and fired up Xcode.
[ 129 ]
Memory Management and Debugging
Once you have started Xcode and plugged in your device where your app crashed,
Xcode will actually be able to access your crash log on the device. To do so, all you
need to do is click on the window and select Organizer from your Xcode menu, as
shown in the following screenshot:
This will open your Organizer, which actually is a repository of all the devices that
have been connected to Xcode and shows information such as the application's
provisioning profile and screenshots. However, what we are really interested in is
the crash logs.
So, click on the Devices button at the top and you will be shown all the developer
information about all the devices that have connected to your device so far.
Click on your currently connected device, which is denoted by a green circle. Then,
select the Device Logs option, which will then open another list of apps that have
crashed. There you can sort the results by Process, which is the application name,
Type, or Date/Time. Clicking on an item will reveal the crash log on the right side
of the screen. There you can see the backtrace, which is actually a listing of all the
methods that were called leading up to your crash. The last section of the code that
caused your crash will be at the top of the backtrace, and you should start by looking
from the bottom up to see how your app works and see all the functions and methods
that it traversed through leading up to the crash:
[ 130 ]
Chapter 9
Plumbing memory leaks
Next, we will look at a special tool present in Xcode to get in-depth information
about your app while it is running. This special tool is actually a suite of tools that
can perform the following functions:
•
Examine and monitor one or more processes
•
Record a sequence of user actions and replay them, just like a video recorder
•
Save user interface recordings and then access them from Xcode
•
This set of tools is known collectively as Instruments and they are more
useful than NSLogs when tracking down difficult-to-reproduce bugs, such as
random crashes and debugging memory leaks
•
Analyze the performance of your app
•
Perform stress testing on your app
•
Gain a better understanding of how your application works
[ 131 ]
Memory Management and Debugging
In this section, I will teach you the basics of Instruments and how to debug some
code using it. So, to start off, you just need to follow these three simple steps:
1. Click the Xcode menu on the top left of your Xcode IDE.
2. Select Open Developer Tool from the list that appears.
3. A submenu will appear with the Instruments item, which you should
click on:
[ 132 ]
Chapter 9
4. Then, you should see a pop-up window with the following options:
There are options such as Leaks, Allocations, and Time Profiler, which show
all the various tools.
[ 133 ]
Memory Management and Debugging
5. To have a little test run, open the Instruments.xcodeproj file, which has
very leaky code and we will see how to use the Xcode debugging tool called
Instruments to understand how the memory allocation spikes up when the
code is running. So, to start things off, let's use the Xcode profiling tool to
see our memory spike by clicking on the Product | Profile menu option as
shown here:
6. Then, Xcode will show the Instruments window and then you need to select
Allocations options and click on the Profile button. Once you have clicked
the Profile button, the leaky app will start executing and you will see the
following screen. Keep an eye on the graph that you will see spiking up
rapidly and also the All Heap Allocations row, which will show the amount
of memory being consumed increasing in a very fast rate:
[ 134 ]
Chapter 9
So, to reiterate the steps, we need to do the following:
1. Open Xcode.
2. Click on Product | Profile.
3. Click on Allocations | Profile.
4. Look at the All Heap Allocations section.
5. Look at the memory allocation on the graph.
6. Check for retain cycles or usages of itself within blocks that can hint or create
a retain cycle.
[ 135 ]
Memory Management and Debugging
Using the LLVM / Clang Static Analyzer
The Instruments suite of tools is meant to be used when your app is running.
However, sometimes, as the saying goes, an ounce of prevention is worth a pound of
cure. So, before you pull up Instruments to debug your app during runtime, there is
a good step that you should follow and which is performing a static analysis on your
code base.
Static analysis is a mechanism where a collection of algorithms and techniques
are used to analyze your source code to find bugs. This may sound like what you
do during the compilation stage, but there is an important difference. The act of
compiling your code will tell Xcode to check your code base for syntax errors and
flag out any errors or warnings that it detects. Static analysis goes one step deeper
in that it analyzes your code to find potential bugs that will surface during runtime.
Static analysis lets the program calculate all possible executions of a program,
and the code is analyzed for quality, safety, and security so that you are alerted to
bugs such as overflows, divide by zero, pointer errors, and so on. So, think of static
analysis as runtime testing, but before your code has begun executing.
As static analysis goes deeper into your code, the amount of time Xcode takes
to do the static analysis will be longer. So, use static analysis only for debugging
hard-to-fix bugs or as a final step before submitting your app to the iTunes App
Store. To activate static analysis of your app, click on Product | Analyze to let
Xcode start its static analysis of your code:
[ 136 ]
Chapter 9
Depending on the size of your code base, static analysis can take seconds to even
minutes while it dives deep into your code to ferret out any potential issues. A
project that has only a few lines of code will take a few seconds to do the static
analysis while a large project with thousands of lines of code will take a few minutes
or more, depending on the size of the project. Then, click on the left side of your
Xcode screen as shown in the preceding screenshot, to see the potential issues that
Xcode found through static analysis.
By default, static analysis goes down to a deep level to analyze every corner of your
code base. This consumes a lot of resources on your machine, and if you have a
large code base or a slow machine, the amount of time used for static analysis can
be quite big. Hence, you can adjust the level of static analysis that Xcode uses if
you don't want an in-depth analysis, which may not find as many issues as a deep
static analysis, but can still help surface some issues. Static analysis is useful as it can
surface errors such as overflows, divide by zero, and so on, which a compiler can't
detect. To change the level of static analysis, click on your project on the left, then
select Build Settings and then look for the Mode of analysis for 'Analyze' option
and set it to Shallow (faster) as shown here:
Using NSZombie
Last but not least, let me introduce you to the concept of NSZombie. NSZombie is
a memory debugging aid that helps you in debugging memory leaks. As you may
know, when an object has a retain count of 0, that object will be deallocated and not
exist anymore. However, if you enable NSZombie, the object with a retain count of
0 will turn into a NSZombie instance instead. Then, when this NSZombie receives a
message from another place in your code, it will show a warning instead of crashing
your app or exhibiting unpredictable behavior.
NSZombie is useful for debugging subtle overrelease or autorelease bugs as these
types of bugs tend to manifest itself in crashes or weird behavior. NSZombie will
show these crashes and weird behavior as a warning instead, which will help in
your debugging.
[ 137 ]
Memory Management and Debugging
NSZombies exist in a strange half-alive/half-dead state as they are not deallocated
when the retain count is 0, but they are not fully alive either. So, NSZombie is an apt
term to use to describe these half-living/half-dead objects.
However, an important point to note is that NSZombies are to be disabled once you
have finished debugging. NSZombies consume memory like any object with a retain
count of 0, which is turned into NSZombie, which still occupies memory instead of
being deallocated. So, if you do not disable NSZombie it will occupy more memory.
In order to harness the power of NSZombie where it will log a warning instead of
crashing your app or exhibiting unpredictable behavior, just follow these simple
steps to activate NSZombie:
1. Click on the Product menu in your Xcode IDE.
2. Select the Scheme menu item.
3. Proceed to click on Edit Scheme... to open the popup to enable NSZombie:
[ 138 ]
Chapter 9
4. Then, you will see a popup appear with an Enable Zombie Objects option.
Click on this checkbox and NSZombie will be enabled.
5. Finally, run your project and you will see NSZombie in action:
Finally, here is a table outlining which debugging tools should be used in which
context so that you can use the right tool for the right situation:
Debugging tool
Appropriate context
Xcode Instruments
This is used to find memory leaks that cause crashes during
runtime
Static Analyzer
This is used to analyze your code base for issues such as
divide by 0, memory issues before the code is executed, and
so on
NSZombie
This is used to show warnings instead of crashing due to
memory leaks
[ 139 ]
Memory Management and Debugging
Summary
We covered some aspects of the theory of memory management, such as retain
cycles and strong/weak references. Then, we moved to the repercussions of memory
leaks and the various warning levels. Following this, we discovered how to get crash
logs to help you get information about your app and code. We then looked at a list of
the various tools that Xcode possesses, such as Instruments and NSZombies, which
will help us to debug memory leaks that can be caused by a myriad of causes, such
as not releasing objects or releasing objects prematurely. Finally, we closed off with a
description of static analysis and enabling NSZombies and their uses. With all these
tools and information at your fingertips, I hope debugging memory leaks and errors
have been made much easier for you since you have the tools required to make this a
less painful journey.
In the next chapter, we will cover some developer tips for memory management,
such as getters, setters, and other tips. So, let's head to the next chapter.
[ 140 ]
Tips and Tricks for
Memory Management
Memory management is something that every programmer dealing with Objective-C
will encounter although Apple introduces a lot of tools to assist in ferreting out
memory-related issues such as Instruments and NSZombies. There are some more
subtle techniques and tools that are present in Objective-C and Xcode, which we
will be looking into in this chapter. Some are obvious and some will give you a new
perspective with regards to Objective-C. We will also cover some important topics
such as:
•
Using the @property keyword
•
Using the getter/setter methods
•
Understand the property attribute in Objective-C
•
When to avoid KVC and KVO
So, let's get started!
Objective-C, C, and memory management
Objective-C and the C programming language are closely related as Objective-C is
a proper superset of C, which means that anything that works in C will work with
Objective-C. So inherently, it also means that memory management methods and
protocols that you are familiar with in C or C++ will also apply to Objective-C.
However, a good thing about Objective-C is that the compiler does a lot of this
memory management for you under the hood. This means that you do not need to
write too much code to handle memory management in Objective-C compared to C
or C++.
[ 141 ]
Tips and Tricks for Memory Management
However, do note that although you can mix C++ and Objective-C together,
Objective-C is not a superset of C++. This does not mean that you can be totally
hands off with regards to memory management since Objective-C does not have
a garbage collector like what you get in Java.
With the release of Automatic Reference Counting (ARC) support in Xcode 4.2 and
iOS 4 and 5 onwards, developers everywhere thought that their days of laborious
memory management are over, but make no mistake as you need to keep in mind
that ARC is a compile time memory management mechanism, where the compiler
will examine the source code and then add the retain and release messages into
the compiled code. ARC is not the traditional garbage collection mechanism that
Java and C# programmers are familiar with where garbage collection is done
during runtime by the garbage collector.
So, the introduction of ARC means that there is even less typing for you as a
developer as you do not need to type in retain and release messages explicitly
into your code, which makes your code more verbose. However, as we saw in the
previous chapters where we introduced retain cycles and other types of memory
leaks, using ARC means that you will still need to be aware of memory management
principles and that is where Objective-C and Xcode shines compared to their C
programming language counterparts. Its built-in mechanism helps programmers
avoid leaking memory through a series of good practices. So, let's start by looking
at these good practices in detail in this chapter.
Getters and setters
If you have done some Java and C# programming and come from a Java or C#
background, you should be familiar with getter and setter methods or you may also
know them as accessors and mutators, respectively. They are a fundamental pillar
of good programming. Getters/setters or accessors/mutators, are also known as
methods used in keeping the principle of encapsulation where member variables are
made private to protect them from other code which could be potentially malicious,
and the getter/setter acts as a gatekeeper or intermediary between the private
member variable and other code. Take a look at the following lines of code:
public int getAge()
{
return Age;
}
public void setAge(int _age)
{
Age = _age
}
[ 142 ]
Chapter 10
The preceding two methods should not be unfamiliar to you from a Java or C#
perspective. Getters and setters can be considered bad if used improperly. Making a
variable public and yet writing a getter and setter method is a good example as this
violates the concept of encapsulation. Now, getter and setter methods are a good
foundation for recommended programming practices as they confer the following
benefits and more:
•
Hiding the internal state of the objects
•
Setting different access levels such as read only, write only, and so on
•
Creating a public interface will make it easier for you to make code changes
when you need to change the implementation layer, which will be apparent
when you need to make changes across many files
•
Allowing you to enforce strict rules on what can be done and not be done
with your objects via these getter and setter methods
Getter and setter methods generally start with the get and set prefix. This may
come as a surprise to you, but Objective-C has very strong support for getter and
setter methods. However, you may ask, "where are the getter and setter methods in
Objective-C? I don't recall setting any methods or writing any code that start with
get or set?" However, actually, they are present and are already in your code, but
you just do not realize it yet since Objective-C has an abstraction layer for you so
that you do not need to spend too much time writing getter and setter methods.
This abstraction layer allows you to customize your getter and setter methods as
we shall see later on. The way that Objective-C lets you define get and set methods
and the various attributes such as readonly, readwrite, and so on is via the
@property keyword in your code. Getters and setters go hand in hand with memory
management as you can write code to clean up the memory in these methods if you
need to.
The property attribute in Objective-C
If you have been doing some Objective-C programming, you would have come
across the following syntax:
@property (nonatomic, readonly) UIView *rearView;
or
@property (nonatomic, retain) UIActivityIndicatorView
*loadingView;
[ 143 ]
Tips and Tricks for Memory Management
Now, I would bet that you would generally have a foggy idea of what terms such
as nonatomic or retain mean when you are assigning these properties such as
nonatomic and so on to your objects. These keywords, such as nonatomic or
readonly, actually define the properties of your objects, which are used in the getter
and setter methods automatically created for you in Xcode. These terms are coding
keywords related to memory management and access control and were not created
just to baffle you or to give you additional typing to do (at least not as much typing
as typing getter and setter methods themselves). Anyway, let's go through what
these terms mean so that you will get a better understanding of these keywords in
relation to getter and setters:
Attribute name
nonatomic
Description
atomic
This property is used for completeness and will not allow bad
things to happen if a different thread tries to access this object at
some point in your code. However, it is slower than nonatomic
due to additional bookkeeping overhead required.
strong
This is used with ARC and helps by not letting you worry about
the retain count of an object as it is autoreleased when you are done
with it. In code that does not support ARC, it is a synonym for the
retain property.
weak
This means that the reference count is not increased by 1, and it
does not become an owner of an object, but it does hold a reference
to it. This is just another term for unsafe_unretained for the
non-ARC code.
assign
This property will generate a setter method, which will assign the
value to the object instead of copying or retaining it.
copy
This is used for when the object is mutable where you create a
copy of the object. Do note that copy cannot be used together with
retain as the copy of the object will already have its retain count
incremented by 1.
readonly
This property will make the object read-only and no setter method
will be created in the @implementation section of the code.
readwrite
This means that the read and write attribute properties are
applicable and the getter and setter methods are automatically
created for you.
This property is not thread safe, but it is faster than atomic.
So, @property(nonatomic, retain) NSString *text will tell the compiler,
"I have a member variable of the type NSString named text, so I will need a pair
of getter/setter methods, which will use the retain/release procedure."
[ 144 ]
Chapter 10
Now that you have defined the attributes of your member variables such as which
one has readonly, which one has readwrite, and so on, what next?
Next, you will use the @synthesize keyword. The @synthesize keyword will tell
the compiler, "Now that I have declared the property nonatomic and retain for my
NSString *text object, please create the code now for the getter and setter pair of
methods for my NSString *text object."
So, with just these two lines of code, we can tell Objective-C to create our getter and
setter methods for us and assign properties such as read-only, write-only, and so on
for our objects or variables. This is much better than typing in verbose getter and
setter code as you would do in Java or C#.
Do note that @synthesize is automatically provided to you by default
in Xcode 4.4 and onwards, but there may be cases where you need to
add in the @synthesize keyword yourself explicitly, which we will go
through later.
Now you know why @synthesize does what it does. @property and @synthesize
helps to automate the creation of getter and setter methods along with ease of
creation with regards to access rules and controls with only a few lines of code. The
getter and setter methods do exist once you use @property and @synthesize, but
you do not see them physically in your code as these methods do not show up in
your code base, but you can actually have access to them.
Take a look at my property declaration here:
@property (nonatomic, readwrite) int myInt;
@synthesize myInt;
In your implementation file, you will find that the following code will compile
perfectly fine, and this shows that _myInt is accessing the variable directly:
int yourInt = _myInt;
Once the variable is synthesized, an instance variable (or iVar for short) is
automatically created and prefaced with an underscore. The presence of this
underscore in a variable name is a naming convention to indicate that this is
an iVar, and this is done automatically for you within Objective-C.
So, this is why there is no compiler error when you call _myInt as _myInt is
automatically created for you by the compiler when you tell the compiler the
properties of what myInt will do.
[ 145 ]
Tips and Tricks for Memory Management
@synthesize will also create the validation rules, which you assign to a variable
using your @property keyword. Validation rules such as readonly means that when
you try to assign a value to your variable, you will get a compiler error read only
property cannot be reassigned, and that is the validation rule of your automatically
created setter (mutator) method at work without the writing of verbose code.
Let's look at some code, shall we? Let's create an object called UserObject and assign
a variable call Age to it.
So, let's get started!
1. We begin by clicking on File | New or by pressing Command + N on your
keyboard, and select Cocoa Touch and Objective-C class, as shown here:
[ 146 ]
Chapter 10
2. Next, we put in the name of the class, which is UserObject, and leave it as a
subclass of NSObject:
3. Then, click on Next followed by Create and your UserObject class will be
created for you. Then, you should end up with this in your UserObject.h
file. Add an integer called age and assign the nonatomic and readonly
properties to it in your UserObject header file, as shown here:
#import <Foundation/Foundation.h>
@interface UserObject : NSObject
{
int age;
}
@property (readwrite, nonatomic) int age;
@end
4. Now if you try to build your code, you will get a warning, Autosynthesized
property 'age' will use synthesized instance variable '_age', not existing
instance variable 'age', because you have not explicitly added in the code
@synthesize age in the .m implementation file of your UserObject class.
[ 147 ]
Tips and Tricks for Memory Management
This warning is just a friendly reminder that since you did not add in the
@synthesize age code, Xcode will create an instance variable called _age
for all your setter and getter methods. This is a harmless warning, but for me,
I prefer to keep my code as warning free as possible, so I will add the
@synthesize age; line of code to my .m implementation file of UserObject
and get something like this:
@implementation UserObject
@synthesize age;//This is to remove the warning
@end
5. Next, we add NSString *name to our UserObject class and assign the
readwrite, nonatomic property so that our code will now look as follows.
The readwrite property as shown previously will tell the compiler that we
want getter and setter methods to be automatically created for us and that
the nonatomic property means that we are okay with the age variable being
non-thread-safe:
@interface UserObject : NSObject
{
int _age;
NSString *name;
}
@property (readwrite, nonatomic) int age;
@property (readwrite, nonatomic) NSString *name;
@end
while our .m implementation file will look like this
#import "UserObject.h"
@implementation UserObject
@synthesize age, name;
@end
6. We can now create an instance of the UserObject class using UserObject
*user = [[UserObject alloc] init].
[ 148 ]
Chapter 10
7. Next, we can see the magic of Xcode, where we put in the following code:
[user setName:"Joe"];
Notice that we did not create a getter or setter method for our NSString
*name, but Xcode was smart enough to create it for us once we assigned the
properties to NSString *name.
8. However, in some specific cases, you may want to override the default getter
and setter methods that Xcode provides. Doing so is very easy, and using
our int age as an example, we just create the following methods in our
UserObject .h header file:
-(void) setAge:(int)aAge;
-(int) getAge;
9. We put in our custom getter and setter methods in our .m, UserObject
implementation file as follows:
-(void) setAge:(int)aAge;
{
int MIN_AGE = 20;//add in our validation logic for our
setter here
if (aAge < MIN_AGE)
age = 20;
else
age = aAge;
}
-(int) getAge
{
return age;
}
So now, when you call the setAge method explicitly using the syntax such as [self
setAge];, the code will call your custom setter method, since you have added your
own getter and setter code to override the default getter and setter code that Xcode
has created for you. This gives you efficiency and flexibility as Xcode will assume
that you want the default getter and setter methods for your variables, and yet,
you are free to override them if you need to which could occur in special cases.
[ 149 ]
Tips and Tricks for Memory Management
Performance guidelines
Although iOS devices such as iPhones and iPads have a lot of memory compared
to the early Nokia phones, it does not mean that you can be sloppy with regards
to memory management. The iOS memory model and other mobile OSes do not
include disk swap space, which are present on computer OSes, where persistent
storage space is used as an extension of the memory space so that persistent storage
can be used as a form of RAM for situations where low memory is encountered.
So, the apps that you develop for iOS devices are more limited in the amount of
memory that you can access.
Using large amounts of memory will lead to a serious degradation of system
performance and triggering of the three memory warning levels, where the last
warning level will lead to your application crashing. Plus, apps running under
multitasking will share system memory with all other running apps that have higher
priority such as the SMS application and phone application. So, you will never
have 100 percent of the phone memory available for your application under any
circumstance and even a brand new iOS device will have background processes
running. So, reducing the amount of memory used by your iOS app should be a
high priority task and not something that should be filed under a low priority tag.
If there is less free memory available in your device, that means the system will
have a higher probability of being unable to fulfill future memory requests. If such
a situation was to occur, the system will remove suspected apps and nonvolatile
resources from memory. However, this is not a good solution as this is only
temporary and those suspended apps and nonvolatile resources may be needed
again a short while later.
The UIViewController class in UIKit in the iOS SDK provides useful ways to
help you receive memory warnings in the console, which we saw in the previous
chapters. I have listed three ways to implement memory warning notifications:
•
You should implement the applicationDidReceiveMemoryWarning
delegate method as this will be triggered when your application has some
low memory warnings.
•
To get a more granular memory warning such as Received memory
warning. Level=1 or Received memory warning. Level=2 in your debug
console, specifically for your UIViewController, you can implement the
didReceiveMemoryWarning method of your custom UIViewController
subclass.
[ 150 ]
Chapter 10
•
To get down to a class level, you can register your object to receive the
UIApplicationDidReceiveMemoryWarningNotification notification
via the addObserver method to call a specific method once the memory
is running low, as shown here:
[[NSNotificationCenter defaultCenter] addObserver:self
selector:@selector(seeMemoryWarning:) name:
UIApplicationDidReceiveMemoryWarningNotification
object:nil];
- (void) seeMemoryWarning:(NSNotification *)notification
{
NSLog(@"Low memory");
}
Once you see any of these warnings triggered in your code, you should respond
immediately by looking at how you can write the code to free up any unwanted
memory. A few ways to do this can be:
•
Removing any views that are not visible to the user but are still loaded in
memory by calling the removeFromSuperview method such as [myView
removeFromSuperview];
•
Releasing any images that are not on screen by setting them to nil
•
Purging any data structures that are not used by your code at this point in
time by calling the release method
Imagine that you have a memory leak in your application and the leak causing the
crash only appears after using the application for 2 hours. So, if you wish to replicate
the memory leak and trigger the crash in your code, you need to run the application
for 2 hours each time to see the crash. This can be a time consuming task as you
need to leave your app running, but thankfully, Xcode provides a way to trigger the
memory warning without actually producing a memory leak, and this feature comes
courtesy of the iOS simulator. You can click on Hardware | Simulate Memory
Warning in order to trigger a memory warning so that you can write and test your
memory cleanup code under the relevant memory warning method handler.
[ 151 ]
Tips and Tricks for Memory Management
The following diagram shows where you need to click to trigger a memory warning:
Doing so will allow you to test your iOS application under low memory conditions
and then write the relevant code to reduce memory usage.
Don't overthink about memory
management
Memory management is not something that is overly complex or difficult to wrap
your head around. So, in order to further aid you with memory management, here
are a few handy tips:
•
You can try to make your resource files such as audio, images, and property
lists as small as possible. To reduce the space occupied by property list files,
you can use the NSPropertyListSerialization class while the free, open
source command-line tool called Pngcrush can be used to compress PNG files
as you can have savings of 20 percent or more depending on your PNG files.
•
Core Data is more than just a persistent storage framework. Core Data
provides a memory efficient way of managing large data sets, and if you
manipulate large structured data, using the Core Data persistent store or
SQLite database as a data store as opposed to NSData or NSUserDefault will
ensure that you can have efficient memory usage provided by Apple's own
Core Data framework.
[ 152 ]
Chapter 10
•
Resources should always be loaded when you need it, such as when you
only need to see it on the device screen. This is called lazy loading, which
we have seen in the previous chapter. You could be tempted to load all
resources much in advance before you actually use it. However, this will
actually mean that your resource is occupying memory when it is actually
not being used at the current moment. So to optimize memory usage, always
practice lazy loading.
•
Finally, this is a little-known tip that you can use in your Build Settings:
you can add the -mthumb compiler flag to help reduce the size of your code
by using 16-bit instructions instead of 32-bit instructions, which uses up
less space and this can result in savings of up to 35 percent. However, one
caveat is that if your iOS application floating point intensive code and your
application needs to support ARMv6 such as older generation iPod Touches
and older iPhones, then the -mthumb option should not be used for your
application. However, if your code is for ARMv7, then you can enable the
-mthumb option in your Xcode project, which is enabled by default.
When to avoid KVC and KVO
KVC and KVO, which we covered previously in Chapter 7, Key-value Programming
Approaches, seems like a great mechanism for notifications at a very granular
level, but it is possible to go wrong with KVO if you use it incorrectly. The
removeObserver method will crash if you are not the observer for that key path,
so keeping an exact track of the properties that you are observing is a must.
KVO only has one callback method. If you have multiple notifications, you need
to handle them within one callback method, which makes your code inelegant and
clunky like this:
- (void)observeValueForKeyPath:(NSString *)keyPath
ofObject:(id)object change:(NSDictionary *)change context:(void
*)context {
if ([keyPath isEqualToString:@"mySize"])
{
//Do something else
}
else if ([keyPath isEqualToString:@"anotherSize"])
{
//Do something else
}
}
[ 153 ]
Tips and Tricks for Memory Management
With a few more notifications, you will write a lot of if-else statements and you will
be able to see how unwieldy the code will be and many bad things such as crashes,
bugs, and so on will appear, and this requires more debugging time.
KVO registering can crash your app if you do it multiple times. If you have
a superclass that is observing the same parameter on the same object, the
removeObserver method will be called twice and it would lead to a crash
on the second time.
KVO works in a wonderful and magical way in the same way as callbacks. Code
utilizing callback can be painful to debug. So, I would recommend KVO usage if
you have adequate experience with KVO and start with small projects as the API
documentation is sparse and it can lead to debugging problems down the road if
you are not well versed with KVO.
Summary
Finally, we reached the end of this chapter. This chapter covers some details of
Objective-C, such as property attributes, which you have been typing in but do not
have a clear idea of. We also covered memory management guidelines, where I have
outlined some tips and tricks to add to your knowledge of memory management
and debugging memory-related issues in your code. This chapter just covers a
small subset of memory management and I hope that you have dived deep into the
previous chapters, where the various memory management techniques are covered
more in-depth. Finally, one more chapter lies ahead, where we will go through some
of the new tools and functionalities of Xcode 6, which you can use in your projects.
So, let's proceed, shall we?
[ 154 ]
Chapter 11
Features of Xcode 6
In this final chapter, we will go in-depth into the de facto Integrate Development
Environment (IDE) provided by Apple, which is used by developers to create iOS
and Mac OS applications.
We will cover the following topics in this chapter:
•
Introduction to Xcode 6
•
What's new in storyboard?
•
Debugging in Xcode 6
•
An Interface Builder in Xcode 6
•
Exploring playground
Introducing Xcode 6
Xcode 6 was announced by Apple at the Worldwide Developers Conference
(WWDC) on June 2, 2014 and it was officially released on September 17, 2014.
Xcode 6 improved a lot with regards to features and tools for iOS and Mac
developers as it has support for the new Swift programming language created
by Apple and announced in 2014.
Xcode 6 also includes new features such as live rendering within Interface Builder
where your handwritten UI code is displayed within the UI canvas and any change
is also instantly reflected when you type in your code. It also has a new view
debugging tool that you can use to help you see your UI layers in a 3D visualization
so that you can understand the composition of your interface and see and identify
any clipped or overlapped views.
[ 155 ]
Features of Xcode 6
With Apple releasing newer devices every year with different screen sizes, having
to support multiple screen devices is not an easy task to do. However, Xcode 6 now
has new features that are aimed at reducing the tedium of developing iOS apps for
multiple screens. So, let's dig into this chapter and look at the new tools that Apple
has provided for us.
In this entire chapter, we will devote the following paragraphs to examining the
internals and new features that are present in Xcode 6.
What's new in storyboard
Xcode 6 introduces a few new features with regards to storyboards and Interface
Builder. Ever since the introduction of Xcode 4, storyboard allows you to link up
your screen using a visual interface, describe the transition between the various
screens, and have a good conceptual overview of all the screens since they are all
placed into a single file. Storyboards have been an important tool for programmers,
developers, and designers to create interfaces easily and link them up using a GUI.
This is especially useful for designers as it allows them to overcome their fear of
writing code, and storyboard allows them to create intuitive interfaces easily.
Similarly, with the introduction of Xcode 6, there have been new additions and
changes to Storyboard. A few of the new additions are:
•
Allowing storyboard or the NIB file to replace launch images
•
Universal storyboard
Now, let's expand more on the two new features in Xcode 6, which I mentioned earlier.
Allowing storyboard or the NIB file to replace
launch images
When an iOS application is busy loading its initial first screen, the iOS (operating
system) will show a static image, which is inserted into the application by the app
developer. For an optimal effect, the launch image should resemble the user interface
of the application. More information about launch images can be found on Apple's
website at https://developer.apple.com/library/ios/documentation/
userexperience/conceptual/mobilehig/LaunchImages.html, where it
mentions this:
[ 156 ]
Chapter 11
"A launch file or image provides a simple placeholder image that iOS displays
when your app starts up. The placeholder image gives users the impression that
your app is fast and responsive because it appears instantly and is quickly replaced
by the first screen of your app. Every app must supply a launch file or at least one
static image.
In iOS 8 and later, you can create a XIB or storyboard file instead of a static launch
image. When you create a launch file in Interface Builder, you use size classes to
define different layouts for different display environments and you use Auto Layout
to make minor adjustments. Using size classes and Auto Layout means that you can
create a single launch file that looks good on all devices and display environments."
Before iOS 8 and Xcode 6, developers had to provide launch images for each screen
size, which can cover iPad, iPhones 4S, iPhone 5S, and so on. If your application is
a universal application, that means you need to provide multiple versions of the
launch images to support the various devices. But now with the introduction of
using storyboards as launch images, you can use Auto Layout to create a single
launch storyboard and this launch storyboard can be used as the launch image of all
the devices that you are supporting. This is a very handy time-saving methods as
this means that you do not need to create multiple launch images for various screen
sizes anymore.
So, in the next few pages, we will go through a short introduction to using storyboards
as launch images and you will appreciate this additional functionality that has been
added into Xcode 6 for the sake of all developers. Do note that this function only works
on iOS 8 and not on iOS 7. So, if you are targeting devices using iOS 7, then using
storyboards as launch images will not work for you and you need to revert back to the
old method of using static images. However, considering this, most iOS users tend to
upgrade their OS whenever a new version is released. From now on, you should be
using storyboards as launch images often. However, do keep in mind that if you need
to support iOS 7, you can use launch images as a fallback for devices running iOS 7,
and yet use launch storyboards for devices running iOS 8. So, let's get going and I will
walk you through this new nifty feature available in Xcode 6.
[ 157 ]
Features of Xcode 6
Launching images from your app
For this section, we will create a simple app to load a storyboard as a launch image.
So, let's start, shall we?
1. First, we will create our project. For this tutorial, we will use a single view
application after selecting File | New Project:
You will also see the following screen:
[ 158 ]
Chapter 11
Then, we need to create a storyboard that will be the first image that the user
sees when they launch the app, so we need to create a new storyboard and
call it launch.storyboard. Do note that we need to add a view controller
and can add other controls such as UILabels to our launch storyboard:
2. Next, we need to click on our project, which is named LaunchApplication
and then set the Launch Screen File option to launch.storyboard, which is
the storyboard that we just created:
[ 159 ]
Features of Xcode 6
3. To verify, we can go to info.plist and look for this key: Launch screen
interface file. If this key exists, it means the value that is mapped to this key is
the name of the storyboard or NIB file that we are using for our launch image:
4. Then, we need to go to our launch.storyboard file and then select our View
Controller for the launch.storyboard file and then click on the attributes
inspector icon and make sure that Is Initial View Controller is checked.
[ 160 ]
Chapter 11
5. Finally, we need to build the project and run it to see that the launch image
is now showing the launch.storyboard file, which has the text Welcome to
Launch Storyboard:
With just a few steps, we are able to use a storyboard or NIB file to replace our launch
images, PNGs, and with the help of Auto Layout, replacing multiple launch images
with just one storyboard or NIB is made easy in just a few steps.
With just these simple steps, we can use a launch storyboard.
Universal storyboards
Now, let's move on to the next cool feature of Xcode 6 and that is universal
storyboard. Universal storyboards means that your storyboard will be able to
display the UI elements such as UITextfields and UIButtons in the correct position
regardless of whether it is viewed with and iPad, iPhone 6+, and so on. So, you can
create one storyboard and use it for iPad, iPhones, and other devices. The universal
applications, which are applications that can be downloaded once and then run
equally well on iPhones and iPads, are now becoming the norm in the iTunes App
Store. There used to be the issue of generating different set of layouts for iPhone,
iPads, retina devices, and non-retina devices. However, with the introduction of
Auto Layout, it has made life easier for developers everywhere and Xcode 6 has
made it easier for us with the addition of universal storyboards. With universal
storyboards, Xcode 6 now allows us to easily see how our layouts will look with
devices of different resolution after we have used Auto Layout to create the user
interface layout.
To activate universal storyboards, we just need a few simple steps and use our Xcode
project created to launch images to show you the simple steps we need. Do note that
this feature will only work on iOS 8.
[ 161 ]
Features of Xcode 6
First, we need to select our View Controller in Main.storyboard and click the file
inspector icon on the right of our screen and then make sure that Use Size Classes
is checked:
Next, you will notice that at the bottom of your storyboard, there is an icon that you
can click, which you can drag and resize to simulate how your Auto Layout user
interface will look based on various screen layouts such as iPad portrait, iPhone
landscape, and so on. So, feel free to click on it and move it around to see how your
layouts will look and then adjust it according to your preference and specifications:
[ 162 ]
Chapter 11
Debugging in Xcode 6
As you can see, Xcode 6 has added some nifty new tools for us, developers, to aid us
in our work. However, not only this, debugging is easier now with some additional
goodies that are now part of Xcode 6. Here are a few of the debugging goodies that
are provided:
•
View hierarchy debugger
•
Debug gauges
•
Enhanced queue debugging
Out of the list of additional debugging goodies, the view hierarchy debugger is the
one that will prove most useful in terms of impact. Prior to Xcode 6, if you wanted
to see the view hierarchy of your application, you had to use plugins such as Spark
Inspector, Reveal, and so on. However, with the release of Xcode 6, view hierarchy
visualization is now officially supported and you will get the full power of the view
hierarchy in Xcode 6.
[ 163 ]
Features of Xcode 6
To use the view hierarchy debugger in Xcode 6, you need to make sure that your
application is currently running, then you need to click the debug view hierarchy
icon at the bottom of your, Xcode as shown, here and the button will have
mouseover text called Debug View Hierarchy when you move over the icon:
When you click on that icon, you will see a spinning UIActivityIndicator appear for
a few seconds before an image of your current view appears. Then you can just drag
up, down, left, and right to rotate your view along a 3D axis to see the image they
lines up, as shown here:
[ 164 ]
Chapter 11
The view hierarchy debugger will have a few options, as shown here, which you can
use to aid your debugging:
Starting from left to right, the following table shows what the various buttons do:
Icon
Button name
Functionality
Show clipped content
This hides or shows content
that is clipped
Show constraints
This shows the Auto Layout
constraints
Reset viewing area
This resets the view to the
default state
Adjust view mode
This shows the view as
wireframe, with contents
Zoom out, actual size and
zoom in
This sets the scale of the
view
Debug gauges
Debug gauges has been spruced up with two new gauges and they are:
•
The network activity gauge
•
The disk activity gauge
The network activity gauge will show you how much data is being sent and received
alongside a list of open ports and the details such as IP address, as we can see in the
following screenshot. The typical scenario when you will use this network activity
gauge is when you need to track the amount of data being sent and received if you
need to do network optimization, plus see the remote IP address and port number so
that you can have an idea of where the device is connecting to.
[ 165 ]
Features of Xcode 6
These will be useful if you want to minimize the amount of network traffic being
sent and using the network activity gauge will be the first place you should look:
The disk activity debug gauge will show real-time data of all the reads and writes
that your application is doing to disk. It also gives information on all open files
coupled with a log of the disk I/O activity for you to look at, which you can see in
the following screenshot. If you are developing applications that do large read and
writes to disk and are experiencing erratic disk read and write failures, this disk
activity debug gauge will be a enormous boon to you as it will tell you the size of the
read and write activities. This is a great tool for you so that you can use these figures
to track how much data you are actually reading and writing to disk, which will in
turn help you to get a better picture of your situation in order to fix your problems:
[ 166 ]
Chapter 11
What's new in Interface Builder
Interface Builder has few functions that are new in Xcode 6 and they are:
•
Live rendering
•
Size classes
•
Preview assistant
Live rendering functions in exactly the same way as its name suggests. So, what live
rendering does is display and render custom objects such as custom buttons, fonts,
and so on in your Xcode IDE without building a line of code. So, what this means
is that when you update your code for your custom objects, the Interface Builder
design canvas will automatically update itself with the new look that you have just
entered in the editor without requiring you to build and run your project to see it on
the simulator or device. Previously, you had to run your app to see the changes that
you did to custom objects, which are elements such as UIButtons, fonts, and so on
that you created in storyboard or programmatically and which have a customized
look to them. However, now, Apple has made it easier for us by introducing live
rendering into Xcode 6 as it saves us time for development by not letting us waste
time in building and running our code to see custom objects during the course of
your development. You can expect to build and run your code thousands or even
millions of times, so every second saved doing unnecessary building will save you
hours of development time down the line.
[ 167 ]
Features of Xcode 6
One last thing that is new in Xcode 6 is the concept of size classes; we briefly covered
size classes earlier on when I introduced the concept of universal storyboards. To
explain in more detail, size classes for iOS 8 enables a developer to create and design
a single universal storyboard with customized layouts for both iPad and iPhone.
With the introduction of size classes, you can define common views and constraints
once and then add your own custom variations for each supported device screen and
form factor.
Finally, one more exciting feature in Xcode 6 is the preview assistant. The preview
assistant allows you to preview and see how your layout looks one beside the other
in different devices/targets. So, you can see your layout as it will appear on an iPad
or iPhone 4S next to each other. To activate preview assistant, you need to click on
the Show Assistant Editor button on the top right to activate Assistant Editor, then
when Assistant Editor appears, click on the icon with the two interlinked icons,
which will reveal a menu item called Preview. Click on the Preview item and select
the storyboard that you wish to preview as shown here:
[ 168 ]
Chapter 11
Next, you can see a + icon in the bottom-left corner. Click on it and you will see
a list of iOS devices for different screen sizes, such as iPhone 4 inch, iPhone 4.7 inch,
and so on.
These correspond to the various iOS screen devices that you wish to preview.
So, click on a device and a canvas showing that screen size will appear, and in
that canvas, you can see how your selected storyboard looks for that screen size.
So, without building and selecting your targeted simulator, Xcode 6 allows you to
preview how your layout looks without wasting a few seconds of build time. This
features well for storyboard and XIB files too. To sum up, the steps to use preview
assistant are as follows:
1. Click on Show Assistant Editor on the top right to activate Assistant Editor.
2. Click on the icon with the two interlinked icons to reveal a menu
called Preview.
3. Click on the Preview item and select the storyboard you wish to preview.
4. Click on the + icon in the bottom-left corner to select a list of iOS devices
to see how your storyboard will look in that selected device screen.
[ 169 ]
Features of Xcode 6
Playground for Swift
Apple announced the programming language Swift in 2014 during WWDC and in
line with that, Xcode 6 comes with a new feature called Playground where you can
have an interactive work area to write Swift code and get live feedback in Xcode.
This makes writing Swift code simple and fun as you can input in a single line of
code and see the results immediately. And if your code iterates through a loop, you
can see its movement via the timeline assistant. The timeline assistant also displays
your variables in a graph and draws each step when a view is composed. To give
you a better understanding of playground, let's try it out via a simple project:
1. To start off, we need to create a new playground by selecting the File | New
| Playground menu and then giving our playground a name as you can see
here. For this project, let's call our playground project MyPlayground:
2. Next, a screen will appear where you can enter Swift code and the results will
be shown instantly on the right side. To test it, try entering the following code:
import UIKit
var str = "Hello, playground"
var name = "Gib"
var sum = 0
for i in 0...10
{
[ 170 ]
Chapter 11
sum += i
}
sum
3. Next, you will see the results of your Swift input on the right side of the
screen, which you can see here:
Now, that looks pretty cool as the real-time feedback helps by telling you
what the output is and provides validation of your code. This can be useful
for developers who want to test an algorithm without building their code or
for you to display drawing code and see it immediately.
Although playground sounds good, there are some limitations that you have to note
for playground. Here is a list of limitations of what cannot be done with playground:
•
It cannot be used for user interaction
•
Playground only works on the simulator and not on the device
•
Customer libraries and frameworks cannot be imported as only system
libraries and frameworks can be used
Summary
As you can see, Xcode is a big step forward in the right direction for developers with
the introduction of new tools such as view hierarchy debugger, preview editor, and
the addition of new functionalities such as allowing storyboards and NIBs to be used
as launch images for your application instead of just static images. With all these new
components to play with, Apple has made it much easier and better for developers
to create and code cool projects with ease and reduce the effort to do so. With this,
I leave you to your coding tasks and hope that you have a great time reading this
book and getting some useful tips. With this, I bid you, "Goodbye, and enjoy coding."
[ 171 ]
Features of Xcode 6
P.S. If you wish to dig more into Xcode 6, here is a link to the official Apple
documentation for Xcode 6: https://developer.apple.com/library/ios/
documentation/DeveloperTools/Conceptual/WhatsNewXcode/Articles/
xcode_6_0.html.
[ 172 ]
Index
Symbols
B
! keyword 120
@property
creating 51
breakpoint debugging
using 127, 128
breakpoints
using 127, 128
A
Apple autoreleased classes
NSException 30
NSRunLoop 29, 30
overview 29
application data, managing
about 57
caching 62
device memory 57, 58
SQLite 68
ARC (Automatic Reference Counting)
about 13
advantages 14
architecture 14-17
autorelease, using 31
limitations 14
project settings 18
working 14
associated objects
about 97
advantages 97
disadvantages 97
autorelease method 7
autorelease pool blocks
used, for reducing peak memory
footprint 27, 28
autorelease pool mechanism 23-26
C
caching
about 62
object serialization 65-67
SDWebImage 63-65
class
about 36-38
custom class, creating 38-40
mySpecialTableViewController class 38
UITableViewCell class 40
classes, Core Data
NSFetchRequest 74
NSManagedObject 74
NSManagedObjectContext 74
NSPersistentStoreCoordinator 74
NSPredicate 74
classes, Swift
about 114
declaring 115
class keyword 115
closures, Swift 116
classes, Cocoa framework
NSException 29
NSRunLoop 29, 30
conditional statements, Swift 111, 112
[ 173 ]
controls
about 60
creating 60
reusing 60
convenience initializers
about 46
creating 47, 48
Core Data
about 68
code examples 80-83
concepts 72-74
implementing 74-79
need for 72
versus SQLite 68, 69
C programming language 141
custom class
creating 38-40
custom methods
creating 52-54
D
data
deleting, from persistent store 85, 86
saving, into persistent store 83-85
updating 87, 88
debug gauges
about 165
disk activity debug gauge 166
network activity gauge 165
debugging
breakpoints used 127
debugging, in Xcode 6
about 163
debug gauge 165, 166
debugging goodies 163
view hierarchy debugger, using 164, 165
device memory
about 57, 58
control creation 60, 61
image optimization 58, 59
lazy loading 59, 60
E
Enterprise Objects Framework (EOF) 73
F
functions, Swift 112-114
G
getter and setter methods 142, 143
I
image optimization
tips 58, 59
implementation, key-value coding
advantages 100
disadvantages 100
handling 98, 99
inheritance 44, 45
Integrate Development Environment
(IDE) 155
Interface Builder
about 167
functions 167
live rendering functions 167
preview assistant 168
size classes 168
iterating statements, Swift 111
K
key-value coding (KVC)
about 89-92
advantages 95
avoiding 153
compliance requisites, for attributes and
one-to-one relationships 92, 93
compliance requisites, for indexed
one-to-many relationships 93
compliance requisites, for unordered
many-to-many relationships 94
disadvantages 95
implementation, handling 98, 99
[ 174 ]
key-value observing (KVO)
about 100
implementing 100-103
performance considerations 103
avoiding 153
L
lazy loading 59, 60
live rendering functions 167
LLVM/ Clang Static Analyzer
using 136, 137
M
Manual Reference Counting (MRC) 13
Manual Retain Release (MRR) 1
memory leak
about 6, 124
memory overuse 126
plumbing 131-135
retain cycle 125, 126
strong reference 124, 125
weak reference 124
memory management
about 141, 152
C 141
data, collecting on app 128-130
memory leaks 124
Objective-C 141
memory management, Swift 117-120
memory model, Objective-C 19
memory warning notifications
implementing 150, 151
Model-View-Controller (MVC) 68
N
network activity gauge 165
NSBinaryStoreType 73
NSException class 30
NSFetchRequest class 74
NSInMemoryStoreType 73
NSKeyValueCoding protocol
about 92
custom lookup path, advantages 96
custom lookup path, disadvantages 96
manual subsets 95, 96
NSManagedObject class 74
NSManagedObjectContext class 74
NSObject
about 6-10
class 8
protocol 8
NSPersistentStoreCoordinator class 74
NSPredicate class 74
NSProxy 8
NSRunLoop class 29, 30
NSSQLiteStoreType 73
NSXMLStoreType 73
NSZombie
about 139
using 137-139
O
Objective-C
about 105, 106, 141
memory management 2
memory model 19, 20
objects 6
programmer responsibility 49
property attribute 143-149
object ownership
about 2, 3
life cycle 2, 3
reference counting 4, 5
Object-relational mapper (ORM) 73
objects
creating 35, 36
immutability 42, 43
initializing 35, 36
mutability 43, 44
serialization 65
[ 175 ]
P
performance guidelines 150, 151
persistent store
data, deleting from 85, 86
data, saving into 83-85
playground, for Swift
about 170, 171
limitations 171
plist 71
premature deallocation 5
preview assistant
about 168
using 169
project settings, ARC 18
property attribute, Objective-C
about 143-149
assign property 144
atomic property 144
copy property 144
nonatomic property 144
readonly property 144
readwrite property 144
strong property 144
weak property 144
R
reference counting 4, 5
Relational DataBase Management System
(RDBMS) 68
release method 7
retain cycle, memory leaks 125, 126
root class 9, 10
S
SDWebImage
about 63-65
URL 63
selectors, using as keys
about 97
advantages 98
disadvantages 98
serialization 65
singleton pattern 50
size classes 168
SQLite
about 68, 69
use cases 68
versus Core Data 68, 69
static analysis 136
Static Analyzer 139
static method 52
store types
NSBinaryStoreType 73
NSInMemoryStoreType 73
NSSQLiteStoreType 73
NSXMLStoreType 73
storyboard
allowing, to replace launch
images 156, 157
images, launching from app 158-161
string formatting
about 55
specifiers 55
strong reference, memory leaks 124
struct keyword 115
structures, Swift
about 114
declaring 115
Swift
about 105, 106
basics 107
classes 114, 115
closures 116
conditional statements 111, 112
functions 112-114
iterating statements 111
memory management 117-120
structures 114, 115
variable declaration 107-111
U
UIViewController class 150
universal storyboards
activating 161, 162
unowned reference 119
[ 176 ]
V
X
variable declaration, Swift 107-111
view hierarchy debugger
about 163
using 164, 165
Xcode 6
about 155, 156
debugging in 163
features 156
universal storyboards 161, 162
Xcode Instruments
about 139
basics 132
used, for debugging code 132-135
W
weak reference, memory leaks 125
Worldwide Developers Conference
(WWDC) 105
[ 177 ]
Thank you for buying
Objective-C Memory Management
Essentials
About Packt Publishing
Packt, pronounced 'packed', published its first book, Mastering phpMyAdmin for Effective
MySQL Management, in April 2004, and subsequently continued to specialize in publishing
highly focused books on specific technologies and solutions.
Our books and publications share the experiences of your fellow IT professionals in adapting
and customizing today's systems, applications, and frameworks. Our solution-based books
give you the knowledge and power to customize the software and technologies you're using
to get the job done. Packt books are more specific and less general than the IT books you have
seen in the past. Our unique business model allows us to bring you more focused information,
giving you more of what you need to know, and less of what you don't.
Packt is a modern yet unique publishing company that focuses on producing quality,
cutting-edge books for communities of developers, administrators, and newbies alike.
For more information, please visit our website at www.packtpub.com.
Writing for Packt
We welcome all inquiries from people who are interested in authoring. Book proposals should
be sent to author@packtpub.com. If your book idea is still at an early stage and you would
like to discuss it first before writing a formal book proposal, then please contact us; one of our
commissioning editors will get in touch with you.
We're not just looking for published authors; if you have strong technical skills but no writing
experience, our experienced editors can help you develop a writing career, or simply get some
additional reward for your expertise.
iOS 7 Game Development
ISBN: 978-1-78355-157-6
Paperback: 120 pages
Develop powerful, engaging games with ready-to-use
utilities from Sprite Kit
1.
Pen your own endless runner game using
Apple's new Sprite Kit framework.
2.
Enhance your user experience with easy-to-use
animations and particle effects using Xcode 5.
3.
Utilize particle systems and create custom
particle effects.
Application Development in iOS 7
ISBN: 978-1-78355-031-9
Paperback: 126 pages
Learn how to build an entire real-world application
using all of iOS 7's new features
1.
Get acquainted with the new features of iOS7
through real-world, project-based learning.
2.
Take an in-depth look at Xcode 5, Foundation,
and autolayout.
3.
Utilize the full source code and assets present
to build an actual interactive application.
Please check www.PacktPub.com for information on our titles
iOS Development with Xamarin
Cookbook
ISBN: 978-1-84969-892-4
Paperback: 386 pages
Over 100 exciting recipes to help you develop iOS
applications with Xamarin
1.
Explore the new features of Xamarin and learn
how to use them.
2.
Step-by-step recipes give you everything you
need to get developing with Xamarin.
3.
Full of useful tips and best practices on creating
iOS applications.
Xamarin Mobile Application
Development for iOS
ISBN: 978-1-78355-918-3
Paperback: 222 pages
If you know C# and have an iOS device, learn to use
one language for multiple devices with Xamarin
1.
A clear and concise look at how to create your
own apps building on what you already know
of C#.
2.
Create advanced and elegant apps by yourself.
3.
Ensure that the majority of your code can also
be used with Android and Windows Mobile 8
devices.
Please check www.PacktPub.com for information on our titles