/


Text
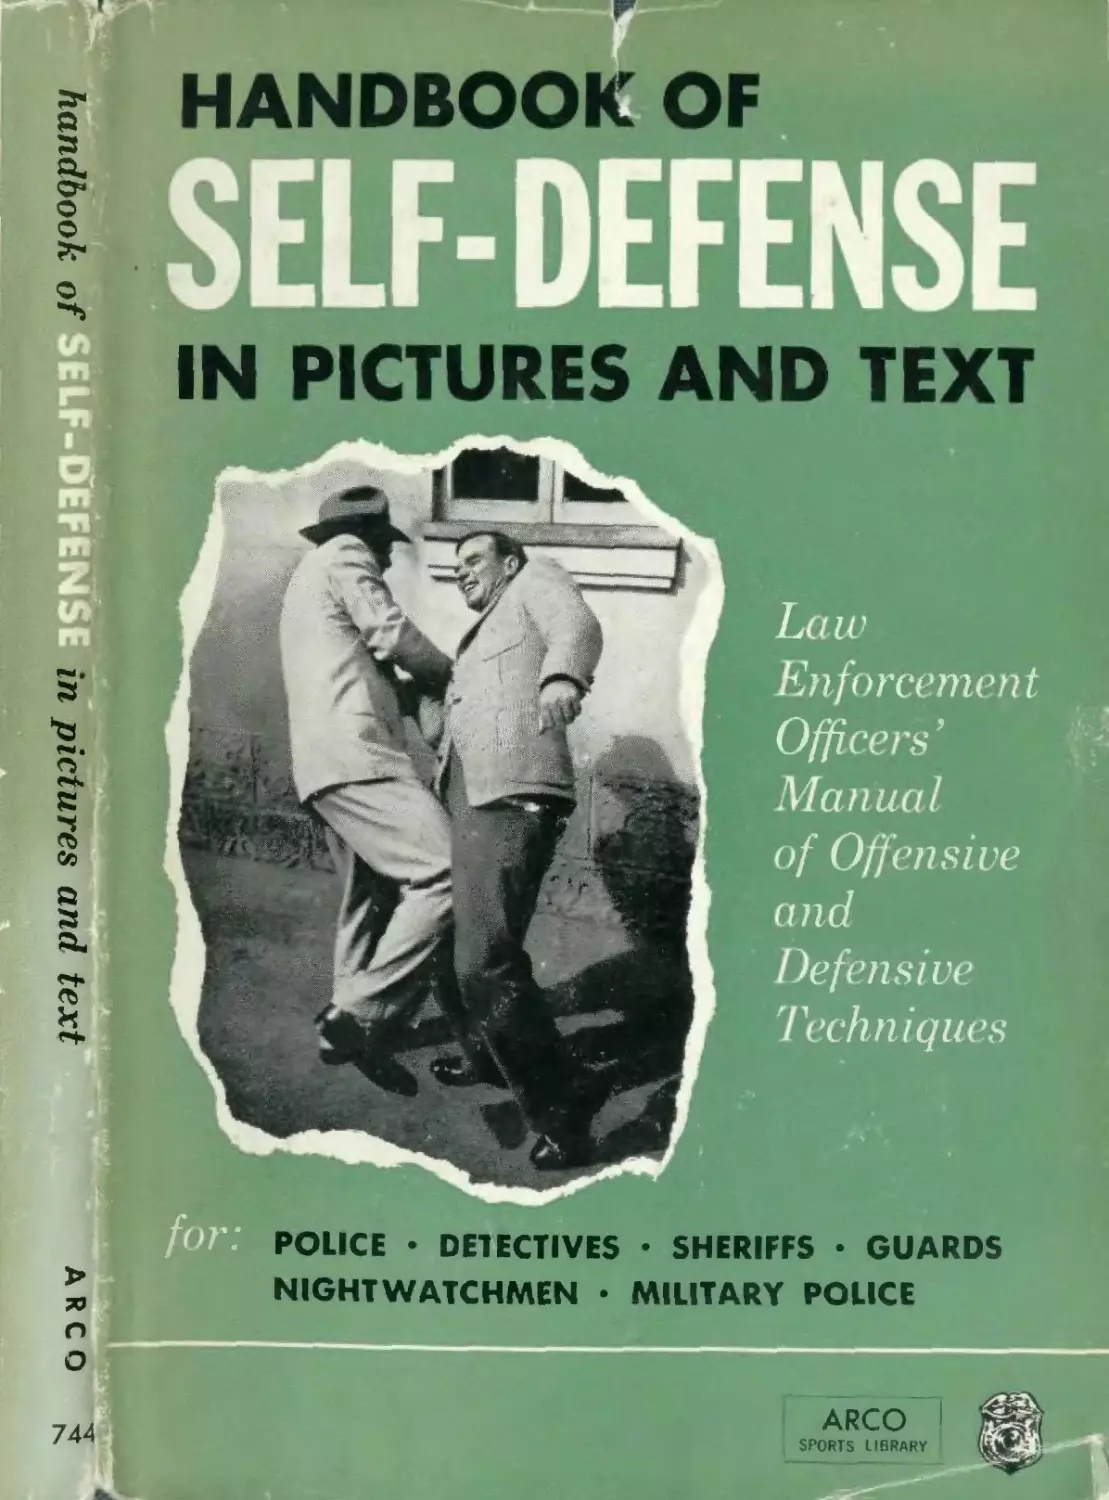
                    HANDBOOK OF
EFENS
IN PICTURES AND TEXT
OLICE • DETECTIVES • SHERIFFS • GUARDS
NIGHTWATCHMEN • MILITARY POLICE
Law
Enforcement
Officers’
Manual
of Off ensive
a nd
Defensive
Techniques
ARCO
SPORTS LIBRARY

Handbook of
Self-Defense
in pictures and text
orcem en / (Officers
Wanual of Offen live ani
l defensive ^JechniaueS
by
LIEUTENANT COMMANDER JOHN MARTONE
United States Coast Guard Reserves
ARCO PUBLISHING COMPANY. INC.
480 Lexington Ave., New York 17, N. Y.
PUBLISHED 1961 BY ARCO PUBLISHING CO., INC.
Third printing ....... May, 1962
Copyright 1955 by Greenberg : Publisher, a Corporation
Published in New fork by Greenberg : Publisher, and
simultaneously in Toronto, Canada, by Ambassador Books, Ltd.
All rights reserved under International and Pan American
Copyright Conventions.
Library of Congress Catalog Card Number: 55-6878
Manufactured in the United States of America
Dedicated to
my son
John D. Martone
Metropolitan Police Department
Washington, D.C.
formerly
H” Company, 3rd Battalion, 7th Regiment
1st Marine Division
Wonsan, Korea
1951 -1952
^Iclinou/^edaements
For their aid and encxniragement I want to express appreciation to the
following:
Brigadier General F. E. Howard, United States Army Forces, Far East
Colonel В. V. Bryant, Deputy Provost Marshal, United States Army
Forces, Far East
Lt. Colonel H. L. Moore, Jr., Former Provost Marshal, Japan Logistical
Command
Lt. Colonel W. A. Shelton, Provost Marshal, 2nd T. Major Port
Major Win. P. R. Thorn, Intelligence Officer, 2nd T. Major Port
Major E. W. Cox, Jr., Former Chief Criminal Investigator, Japan Logis-
tical Command
Major R. T. MacEachem, Jr., Chief Criminal Investigator, United States
Army Forces, Far East
Major H. D. Neal, Jr., Commanding Officer, 44th MP CI Detachment
Major Hans E. Boehm, Commanding Officer, 101st MP CI Detachment
Major Francis A. Niccolls, Jr., Field Office Commander, 101st MP CI
Detachment
Major Harry J. White, Provost Marshal Walter Reed Army Medical Center,
Washington, D. C.
Captain N. A. Perone, Asst. Chief Criminal Investigator, United States
Army Forces, Far East
Captain Philip Cohen,* Executive Officer, 82nd MP CI Detachment
Captain Carl A. Derryberry, Former Commanding Officer, 44th MP CI
Detachment
W/O Edward J. Scott, Asst. Chief Criminal Investigator, Japan Logis-
tical Command
Captain Roger M. Brady, 22nd MP CI Detachment
1st Lt. Marion L. Cooley, 44th MP Cl Detachment
Captain Benedict P. Dolney, Operations Officer, 41th MP CI Detachment
WOJG John L. McCord, 44th MP CI Detachment
WOJG Paul E. Monahan, 22nd MP CI Detachment
All Detachment and Sub-Detachment Commanding Officers and MP CI
Detachment Investigators attached thereto.
I also want to thank the following for the assistance in the completion
of this manuscript:
Mr. M. A. Cowles, Technical Advisor, United States Army Forces, Far East
Mr. M. M. Coff, Technical Advisor, United States Army Forces, Far East
Military Police Investigator Patrick J. Testa, 2nd T. Major Port.
Lieutenant George Hebble, Retired Wliite House Security Detail
Lieutenant Charles Wright, Metropolitan Police, Washington, D.C.
Miss Elizabeth V. Oldfield. Silver Springs, Maryland
Chief of Police, George T. Panagoulis. Greenbelt, Maryland
and
Akio Tsuda, 44th MP CI Detachment, whose willingness and kind coopera-
tion aided greatly in the completion of this manual.
Colonel В. V. Bryant, Deputy Provost Marshal. United States Army
iv
orewor
My first experience with hand-to-hand combat came as a
rude awakening.
It was in 1936. I had just become a member of the New
York Police. I was one of the big men in my class, six-feet-
two, and honestly thought I could handle myself. It started
when Sergeant ‘Izzy” Cantor, one of the top judo and self-
defense men in the country, called me out of class for a
demonstration.
Izzy was a grand old man, just big enough to fulfill the
height requirements for police officers. At the time I felt a
little sorry for him. He was telling the class that regardless
of my size I could not take him into physical custody and
walk him a few feet. The rude awakening came when I
took hold of his arm—I still don’t know just how he did
it—I landed on the floor with a “whoooof.”
Cantor silenced the class with a quiet: "‘Who else wants
to try it?” Then he continued with his first lesson on de-
fense tactics.
I became one of his best students, later teaching disarm-
ing technique myself. Until his untimely death in 1952 I
watched him time and again introduce himself to a new
class of recruits in the same classic manner—always a big
man, always the fall, and always the “whoooof.”
No one that watched this demonstration could ever fail
to fully understand that hand-to-hand combat is a great
deal different than ordinary boxing or wrestling, and that
taking a person into custody involves a little more than
grasping them by the arm and growling: "Come along.”
“My first impression of JohnnVlartones manuscript was
one of pleasure. A manual on defensive and offensive tac-
tics that was written in simple language, that contained
sufficient photographs to fully illustrate the text, and that
hewed strictly to the line of hand-to-hand combat. A
sparsely written book, but one whose economy of words
aids the reader to a better understanding of the text.
It’s a good book because the author knows his subject.
He not only knows what he is talking about, but the effort-
less ease with which he treats each and every phase of his
subject shows a familiarity gained only by those with years
of experience in actually doing what they write about.
The knowledge which may be secured from a careful
reading of this book should be classified as “cheap life
insurance.” Insurance that will pay a benefit to the policy-
holder rather than the beneficiary. Insurance that will help
him avoid injury and sudden death,
PAUL B. WESTON
ontenli
INTRODUCTION	ix
CHAPTER I
Physical Conditioning	1
CHAPTER II
Unarmed Defense	14
CHAPTER III
Offensive Procedures	24
CHAPTER IV
Defensive Procedures	36
CHAPTER V
Pistol Disarming	50
CHAPTER VI
Defense Against Knife, Blackjack, Sharp Instruments 59
CHAPTER VII
Preliminary Search of Prisoners	67
CHAPTER VIII
Securing of Prisoners	84
CHAPTER IX
Police Club (Its Uses and Abuses)	95
PRECAUTIONS TO EXERCISE	110
VJ]
The opinions or assertions contained herein are the private views
of the writer and are not to be construed as official or as reflect-
ing the views of tile Commandant or of the Coast Guard.
vi и
л frodiution
UNARMED COMBAT - INDIVIDUAL DEFENSE
This manual is intended as a guide lor those whose
duties as law enforcement officers place them face to face
daily with mon made desperate by their desire to avoid the
consequences of their actions. It is the sincere hope of the
author that this book may in some measure be of assistance
to the personnel engaged in maintaining the high standards
of efficiency established by law enforcement agencies
throughout the world. Its object is to rectify certain mis-
taken ideas about the art of unarmed defense, and to em-
phasize the mental and physical factors essential to the
successful application of the methods prescribed here.
Mere book knowledge of the offensive and defensive pro-
cedures of unarmed defense does not qualify anyone to
presume that he can defend himself against the ruthlessness
and savagery generally resorted to in a buck alley slug-fest.
Experience is essential.
In physical combat the man who can learn to direct his
attention to more than one thing at a time will succeed far
better than one whose mind is limited to a single direction.
A man of single attention can only sec what is going on in
!ront of him Potential sports champions display keen,
alert, and efficient mental action; they demonstrate the
ability to coordinate their faculties into one harmonious
whole in order to accomplish their mission. Every action of
the true athlete is made to gain an objective. To become an
expert in unarmed defense, a great deal of practice is
necessary.
Hand-to-hand combat procedures are relatively simple
and easy to master. The strategy of the surprise attack,
elementary knowledge of anatomy, and a certain degree of
physical ability—these are the essential ingredients tor siic-
ix
X
INTRODUCTION
cess in hand-to-hand combat.
The physical and me ntal factors necessary to the practice
of hand-to-hand cornhat are:
1.	BODY CONDITION:
Strength
Endurance
Physical agility
Coordination
Conditioned reflexes
The ability to make surprise attack
Follow-through procedures
The ability to use your opponents strength to bring
about his own defeat
2.	KNOWLEDGE OF THE ANATOMY OF THE
HUMAN BODY.
a.	Location of joints
b.	Location of vital organs
c.	Location of nerve centers
Body condition and mental and emotional fitness are the
primary factors which contribute: to building up the
strength and stamina needed for self-detense in any situa-
tion. the man who lacks stamina loses confidence—de-
velops a defeatist attitude. The supporting foundation upon
which strength, endurance, agility, and coordination are
developed is a healthy body free from any physical impair-
ment. Hand-to-hand combat requires a considerable degree
of leg, abdominal, shoulder and arm strength. One test of
muscular endurance ?s a person’s ability to assimilate pun-
ishment and still continue to fight until the opposition has
been subdued.
Physical agility is the skilled control of body movements
which marks the difference between the trained and the
untrained indn idual. 1 he individual who can change the
imnODUCTlON
XI
direction and position of his body in close combat will
always gain the advantage over his opponent.
Coordination is the ability to bring all parts of the body
into simultaneous action in order to accomplish any physi-
cal act. The well coordinated individual eliminates all but
the essential movements. Natural or acquired coordination
serves to increase precision and ability, conserve energy
and develop endurance. A high degree of coordination is
essential to superior performance, < ontinued practice of
any physical activity produces a higher degree of mental
and physical synchronization which results in smoother
performance.
Conditioned reflexes increase the ability to use and con-
trol the action most advantageous to the individual in an
attack or a defensive movement. Precise physical action m
any critical situation can be attributed to conditioned re-
flexes because the well conditioned individual is not ham-
pered by mental indecision.
Surprise attack is the strategy of catching one s opponent
off-guard- when he least anticipates any offensive action.
Follow-through procedures are secondary combative
measures used immediately following the initial attack. The
prime object of the attack should be to maneuver the
adversary into a position which will provide an opening to
follow through with whatever action is necessary to subdue
or cripple the opposition.
Using the opponents strength to bring about his own
defeat is the technique of deviating from Ле normally
expected offensive 01 defensive procedure of attack. The
officer takes advantage of the opponent’s mode and speed
of attack is to bring about his downfall. Tht best way to
avoid being bitten by a rattlesnake coiled to strike is to
side-step. Similarly, side-ste.pp.iug the frontal attack of an
opponent mav make him the victim of his own fonge.
Xll
ANATOMY OF THE HUMAN BODY
To understand hand-to-hand combat thoroughly and to
apply its techniques properly one should have some knowl-
edge of the muscles and skeletal structure of the human
body. Since correct application of leverage and pressure is
necessary in unarmed defense, it is essential to know and
understand how the body joints function. The hinge joints
and the pivot joint play an important part in hand-to-hand
combat. The hinge joint functions in the fingers, toes,
elbows, and knees. A door which operates on hinges can
only be opened in one direction. Any attempt to force it
contrary to the hinge action would dislocate or break the
hinges. Likewise, when pressure is applied against the nor-
mal movements of the finger, toe, elbow, or knee joints,
the action causes pain and can dislocate or break the joints.
The pivot joint, located at the base of the skull, is vulner-
able to any type of blow. A sharp, direct blow delivered
across the pivot joint can prove fatal since it is weak in
construction and unprotected by muscle tissue.
• • 4
Xlll
Figure A
xiv
Figure В
INTRODUCTION
XV
Figure C

(Chapter 1
PHYSICAL CONDITIONING
By devoting one hour daily to some form of physical
conditioning, the law enforcement officer can develop and
maintain a reasonably good level of physical fitness. The
exercises shown in this chapter will help the individual
build a suitable fitness program. He need not follow a
set routine. Common sense should dictate what he can
best do to keep himself from becoming physically incompe-
tent and therefore a liability to his organization.
Along with general toning-up exercises, he should take
an active part in some form of recreational activity. His age
and condition will determine whether the recreation should
be boxing, tennis, volley ball, basket ball, golf, swimming,
bowling, soft-ball, or some other sport. Any physical activity
which will help to develop strength, endurance, agility,
coordination, self confidence, and self-reliance will add to
the genera] all-around efficiency of the officer.
At the onset of any physical conditioning program, par-
ticularly following any long period of inactivity, the par-
ticipant should stri\e to find his point of muscular endur-
ance. No one can determine better than the subject just
how much, or how little, he should do at the start of a
re-conditioning program. In order to guard against “over-
load/* or tearing down physically that which’ one is en-
deavoring to build up, the time of the daily work-out
should be increased very gradually in direct ratio to the
improving degree of bodily condition. Sustained effort will
slowly but surely bring about the desired results. A slow
start is generally an indication of a strong finish, whereas
a strong start usually means a quick fading out of the
initial enthusiasm.
1
Tn all forms of exercise^, competitive sports and comba-
tive games maintaining body balance is without question of
the highest importance. Proper body balance can best be
achieved by maintaining full control of the body weight on
both feet. The four fundamental movements, which station
the body for attack and defense—advancing, retreating,
right movements, and left movements—must be so executed
that they will never tend to unbalance the body. Re-
member: none of the fundamental movements involves the
lifting of the feet other than 1) a forward charging move-
ment or 2 a fast retreat. In ordinary stand combat, the
trained fighter slides his feet into proper balance stance;
the feet arc spread comfortably apart; the knees are slightly
flexed; the weight of the body is evenly distributed, permit-
ting easy movements m all four directions. (See Figure 1).
Figure 1
CHANGING BODY POSITION (WEIGHT SHIFT)
To advance, initiate the movement with the left foot by
sliding the left foot forward and following the slide of the
left foot with the right foot (See Figure 2). The length of
the slide is determined by the normal stride of the
individual.
The slide in retreat of the forward movement is done
in the exact reverse. The right foot slides to the rear, the
left foot follows the backward direction of the right foot
at the angle that maintains correct body balance. (See
Figure 3)
Figure 2
Figure 3
Figure 4
Movements to the right (See Figure 4) are executed by
sliding the right foot to the right side and following up the
slide with the left foot. Body weight is evenly distributed
on both feet.
Movements to the left (See Figure 5) are executed by
sliding the left foot to the left side and following up the
slide with the right foot. Maintain proper foot position at
all times.
Figure 5
4
Do’s and Donts for Proper Body Balance
(Assuming that the Individual is Right-handed)
1.	In all forward or to-the-left movements, never take
the jirst step, with tlie right foot- The right foot should
always follow the lead of the left foot.
2.	In all foot movements to the rear or to the right, the
right foot takes the first position, the left foot follows the
lead of the right foot.
3.	Never under ^aiiy^circiimstances cross the feet right
over left or vice versa. To do so will destroy proper body
balance.
Proper body stance in any position will permit free and
easv movement in anv direction.
1. BREATHING EXERCISE
Starting position: Stand at attention.
Phase #1. Coordinated movements.
Slowly raise arms forward to vertical position overhead
and at the same time slowlv inhale and rise on toes as
illustrated in Figure 6.
Phase #2.
Slowly lower arms, exhale, and
return to starting position.
Repeat at will.
Figure 6
5
2. TRUNK EXERCISE
Starting position: Stand at attention.
Phase #1. Movements.
1.	Place hands on hips and spread legs apart.
2.	Bend body forward as illustrated in Figure 7.
3.	Rotate body on hips to right side, backwards, to left
side and to front position. Repeat at will. Rest.
Phase #2.
Rotate body on hips counter-clock-wise to left side back-
wards, to right side, and to front position. Repeat at will.
In executing the trunk exercise, hold shoulders back and
head up. Do not bend the knees.
3. FULL KNEE BEND EXERCISE
Starting position: Stand at attention.
Phase #1. Coordinated movements.
Extend arms forward palms down and at the same tune
bend knees to full squat as illustrated in Figure 8. Return
to starting position and repeat at will. In executing the
6 full knee bend exercise, hold back and shoulders straight.
Figure 8
4. TRUNK EXERCISE
Starting position: Stand at attention.
Phase #1. Coordinated movements.
Spread legs apart, raise arms to vertical position over-
head, and lock fingers as illustrated in Fig. 9. Bend body
forward and swing arms through open legs as illustrated in
Fig. 10. Repeat at will.
Phase #2.
Alternate. From starting position bend body forward and
swung aims to outside of right knee. Alternate by swinging
arms to outside of left knee. Repeat at will.
Figure 9
fig ure 10
7
5. TOUCH TOES EXERCISE
Starting position: Stand at attention.
Phase #1.
Raise arms to vertical position overhead (stretch body
to full length). Keep the knees straight. Lower body for-
ward and touch toes. See F igure 11.
Phase #2.
Return to vertical position, hands overhead, and repeat
at will.
Figure 11
8
6. TOUCH TOES EXERCISE (ALTERNATE)
Starting position: Stand at attention.
Phase #1. Coordinated movements.
Spread aims to side-shoulder level, spread legs as in
Figure 12.
Phase #2.
Bend body forward and touch left toe with right hand.
Alternate by touching right toe with left hand. Keep head
up throughout the exercise. Repeat at will. See Figure 13.

Figure 14
7. LYING DOWN BREATHING EXERCISE
Starting position: Lie on back, legs straight, feet together,
and arms down at the side.
Phase #1.
Raise arms slowly to overhead position. At the same time
inhale, stretch body to full length, point toes. See Figure 14.
Phase #2.
Lower arms down to side, exhale. Repeat at will.
8. SITTING UP EXERCISE
Starting position: Lie on back, legs straight, feet to-
gether, arms down at the side.
Phase #1.
Raise arms to overhead position, come to sitting position,
and touch toes. See Figure 15. Repeat at will. In executing
this exercise endeavor to keep legs straight throughout and
10 if possible point toes.
Figure 15
9. ALTERNATING LEG RAISING EXERCISE
Starting position: Lie on back, place hands under the
buttocks, keep legs straight, and point toes.
Phase #1.
Raise both legs several inches off the ground. Exercise
by raising and alternating legs up and down. Keep legs
straight and point toes throughout movements. See Figure
16. Repeat at will.
Figure 16
11
10. PUSH-UP EXERCISE
Starting position: Lie flat full length. Bring hands to
shoulder level, palms flat down. See Figure 17.
Phase #1.
Raise body by straightening arms. Maintain body straight
and head up throughout exercise. See Figure 18. Lower
body to starting position and repeat at will. This exercise
is recommended for strengthening the arms, shoulders, and
back.
•*e₽
Figure 17
Figure 18
12
11. SIT-UP ALTERNATING TOUCH TOES EXERCISE
Starting position: Sitting position, back straight, legs
spread out, toes pointed, hands on hips.
Phase #1.
Swing right hand to left toe. Alternate by swinging left
hand to right toe. See Figure. In executing this exercise
maintain back and legs straight, Motion of the hands as
illustrated in Figure 19. T his exorcise is especially good for
reducing the hips and strengthening the back and legs.
Figure 19
13
UNARMED DEFENSE
I he origin of unarmed defense dates had to Early Man.
Hand-to-hand combative measures used today to defeat
physical aggression have evolved from techniques origi-
nated by the cave dwellers. Unarmed defense is a science
of fighting based upon observation and systematized knowl-
edge. It is a technique which makes use of a whole body
of general truths in order to furnish the best operational
methods for offensive and defensive combat.
Once judges, referees, or timekeepers come into the pic-
ture, the fighting is not true hand-to-hand combat. It is
authentic only on the battlefield or in dim-lit alleyways
where the contestants make their own rules set their own
time, and use whatever methods they are capable of to
beat, maim, cripple, torture, or kill their opponents.
True, certain polished techniques of combat are applied
to some competitive sports, but it is only when a man is
aroused and pressed to defend himself that the animal
instincts and savage traits come to the surface. Time has
not modified the law of self-preservation; it is as real today,
under the surface of civilization, as it was during the rule
of the strongest tribe of prehistoric men.
Just as a chain is only as strong as its weakest link, any
law enforcement agency is only as efficient as its weakest
operative. Physical fitness and thorough training in personal
defensive techniques immeasurably help to pave the way
for a better-than-average organization. The epitaph for any
law enforcement officer who is killed because о/ careless-
ness, laxity in its duties, negligence, and indifference to
the fundamental precept of loyalti to one’s self might well
read, ‘‘Killed because he did not believe in efficiency”
14
Hand-to-hand combat is no "gentle art.” It has nothing
to do with sportsmanship. It is simply the highest form of
'dirty fighting” because it is for survival rather than for
any return engagement. While brute strength alone does
not suffice against the techniques of hand-to-hand combat,
neither will brains alone suffice to gain victory over the
individual who is mentally alert and physically and emo-
tionally trained to exercise sound judgment and to exert
maximum physical effort.
All competitive sports call upon skill of body and quick-
ness of brain. Skill of body—proper condition, speedy re-
flexes, coordination, timing, judgment, and reaction—can
only be attained through regular exercise. Quickness of
brain can best be developed by continual repetition of the
techniques.
Never underestimate your opponent. Never give your
adversary a break in any combative struggle. There are
many times in police and investigative work when a person
is justified in using whatever methods of combat he knows
in order to defend himself against a potential killer. He
rightly resorts to doing everything he is capable of in order
to save himself from injury or death.
HAND BLOWS
Although the clenched fist is most commonly used
(among Americans) for purposes of self-protection, the
fingers and under edge of the open hand (from the tip of
the little finger back to the wrist) can be used to much
greater advantage, in a number of instances due to the
location and limited striking area of some of the vital
organs.
15
Figure 20
The орем hand with fingers straightened and held stiff
(see Figure 20) can be used to deliver hatchet, slicing,
and thrust blows to the vulnerable parts of the body.
There are different open blows that can be used to subdue,
disable or even kill an assailant if necessary. A straight
thrust blow to the apex of the ribs—solar plexus—can com-
pletely paralyze the nerve centers. Such a blow (see Figure
21) can cause loss of breath, nausea, or can completely
knock out the assailant.
16
Figure 21
A hatchet blow, delivered with the under edge of the
stiffened hand and fingers violently striking the forearm or
upper arm of an assailant, could easily fracture or break
the bone. Needless to say, the size and development of the
wrist, forearm, upper arm, and hand determine the power
with which a blow can be delivered with the open hand. In
any event this type of blow to an unprotected arm can be
very painful and often tunes takes the initiative away from
an assailant. See Figures 22 and 23.
Figure 22
Figure 23
17
Figure 24
A hatchet blow delivered to the base of the skull (pivot
joint), as in Figure 24, could cause severe injury to the
pivot joint or even prove fatal if the pivot joint was frac-
tured or broken. A broken neck generally results in death.
A severe hatchet blow with a full downward swing of the
arm to cither kidney, unprotected by heavy clothing, will
cause severe pain and enable one to gain the advantage
18 necessary to subdue an assailant- See Figure 25.
Figure 25
I
Figure 26
The open hand with fingers straightened and held stiff
can bn used to deliver a violent lateral blow to the throat
Adam's apple). The result of such a blow to the throat
(Figure 26 would result in severe pain and might even
cause death by strangulation.
A similar blow delivered to the bridge of the itose can
result in a broken bone which in turn could cause internal
hemorrhage and temporary blindness. The victim of such a
blow (Figure 2" would be helpless to defend himself or
offer any resistance.	19
Figure 27
Figure 28
Figure 29
A lateral cutting blow with the under edge of the hand
to either side of the neck across the jugular vein (see
Figure 304 would stun the assailant since such a blow
would temporarily diminish the normal flow of blood to the
brain. With his assailant stunned, the defender would be
free to cripple him further or to apply a restraining hold.
Lateral blows with the open hand, fingers straightened
and held stiff, can be delivered with punishing effect to
the lower and upper lips, as illustrated in Figure* and
29. A blow of this type to the lower or upper lips would
cause severe pain, lacerations of the mouth, and bleeding-
20 injuries sufficient to subdue the most unruly assailant.
Figure 30
Figure 31
The fingers can be used to dig, gouge, grip, pinch, or
tear against certain parts of the body such as the mouth,
nose, eyes, throat and other nerve centers. Often it is pos-
sible to break a body hold (bear hug) by using the fingers
to gouge the eyes of the assailant. The pressure forced at
the eyes, as in Figure 31, will cause the assailant to release
his hold and provide the opening necessary to drive a
knee blow to the groin.
The fingers can also be used effectively as pincers to
grip an attacker s throat and effect release of a body hold.
Sufficient pressure at the throat will cause the assailant to
black out and will afford the necessary opening to disable
him further by driving a blow to the groin or applying a
bone breaking hold. See Figure 32.
Figure 32
Figure 33
Another method of protection against punishment or in-
jury which sometimes becomes necessary is a finger grip
upon the scrotum (testicles) of an assailant to force him
to release a hold or to cripple him to the extent that the
officer can apply a restraining hold. Sec Figure 33.
Pressure can be applied at the depression at the back ot
the ears with the middle finger of each hand (see Figure
34 to force an unruly person to release a grip-hold on a
chair (if he is in a sitting position). The same teclmique
will force a person through a doorway if lie has braced
himself against the door jambs. Pressure at tire depression
point at the back of cither ear will force him to turn his
head to one side, releasing his hold on the door jambs and
providing an opening for further action on the pint of the
22 defender.
Figure 34
Figure 35
Gripping an assailant’s jaws with -thumb and fingers, as
shown in f igure 35, will force the release of a front body
hold and make possible the delivery of a crippling blow to
the groin or the application of a restraining hold to subdue
the assailant.
Digging at the nos tills of an assailant from a rear hold
position, such as is illustrated in Figure 36 will pacify the
most unruly person. If further resistance is offered by the
assailant, the officer can place one knee at the assailant’s
back and force his body backwards to accomplish the
desired results.	23
Figure 36

OFFENSIVE PROCEDURES
Evaluation of Factors Involved in Offensive Procedures
1.	Body condition ..............................  50%
2.	Knowledge of techniques.......................30%
3.	Surprise element, application of holds........-20%
FACING OPPONENT: WRIST BREAK
If, as illustrated in Figure 37A. the assailant tries to
push you with his right arm and open hand at your chest,
bring your left thumb to the bacl and center of his right
hand, grasping the inside, or fleshy part with your fingers
as demonstrated in Figure 37B. Using your right hand to
assist your left, twist sharply and apply pressure, forcing
assailant’s right arm down and outward to his right, away
from the center of his body as illustrated in Figure 37C.
Follow through with a kick to the groin as illustrated in
24 Figure 37D.
Идите 37A	Figure 37B
Fiaure 37C
Figure 37D
FACING OPPONENT: WRIST BREAK AND
RESTRAINING HOLD
Your assailant is facing you. arms hanging at bis side.
Reach forward with your right hand and place your thumb
at the back of his right hand, grasping the fleshy part with
your fingers, as illustrated in Figure 38A. Quickly step to
your left and to the back of your opponent. Bring your left
hand to assist your right and apply pressure to opponents
wrist, forcing his right arm down and out—away from the
center of his back, as in Figure 38B. The hammerlock, as 25
Figure 38A	Figure 388
demonstrated in Figure 38C, is applied by grasping the
opponent’s right wist with your right hand and forcing
his right arm upward towards his shoulders. Bring the
opponent to a standing position by grasping his left
shoulder with your left hand. Do not relax pressure on
opponent’s right arm. The hammerlock hold, as Figure 38<
clearly shows, can be used to punish an unruly assailant
severely by applying upward pressure.
HAMMERLOCK HOLD FROM SIDE POSITION:
STANDING AT RIGHT SIDE OF OPPONENT
The hammerlock can also be used lor a come-along hold.
Once the arrest (Figure 39A ) is made, grasp the opponent’s
right hand with your right hand and at the same time force
his right arm and elbow to the rear position, as illustrated
in Figure 39B, Note that the position of opponents elbow
is vertical). Smash opponent’s right elbow with the heel of
your left hand and at the same time bring his right forearm
inside your leit arm, keeping your left hand at his right
elbow as illustrated in f igure 39C. Straighten opponent by
grasping his left shoulder with your right hand. At the
same time apply constant pressure on his right shoulder and
elbow by using your left arm as a lexer. (See Figure 39D)
This hammcrlock hold can be used effectively as either a
restraining or come-along hold.
26
Fig иге 39A
Figure 39B
Figure 39C
Figure 39D
27
big и re 40A
Figure 40B
HAMMERLOCK HOLD OR KNOCKOUT BLOW:
STANDING, FACING OPPONENT
You are facing your opponent as illustrated in Figtire
40A. Step forward and run your left arm between his
right arm and body; curl your left baud over his right
elbow, as in Figure 40B. Immediately step to his back,
bringing his right arm to the rear position and using the
upper part of your left arm to raise and secure his right
(Figure 40C). Straighten your opponent by grasping his
left shoulder with your right hand, as already shown in
Figure 39D, or liquidate by delivering blow to base of
28 skull as in Figure 40D.
Figure 40C
Figure 40D
Figure 41
FINGER BREAK
The finger break, as illustrated in Figure 41, is an ex-
tremely punishing hold. Stand facing the opponent, grasp
the middle finger, if possible, or failing that, any finger
and apply pressure against the finger joint. The victim can
be forced to his knees and crippled by a knockout blow to
either chin or groin.
FRONT WRIST BREAK
From the front position, grasp opponent’s right hand
with both hands as illustrated in Figure 42. Force his arm
to the right, elbow parallel to the ground. Apply required
pressure against the wrist joint to make assailant buckle at
the knees. Deliver knockout blow to either chin or groin. 29
Figure 42
Figure 43
BACK WRIST BREAK
The wrist break hold from the back position, as illustrated
in Figure 43. permits easy application of the hammerlock.
From a front position wrist break hold, quickly step to the
rear of your opponent, maintaining a steady hold on his
right hand. Hold the wrist break with your left hand and
Erasp the opponent’s right wrist with your right hand, bring-
ing his right arm into a hammerlock position.
Restraining or come-along holds such as illustrated in
Figure 44A, 44B, and 44C, are not advocated. The arm-
lock. in Figure 44A, requires considerable strength to make
the hold effective. Another objection to it is that it permits
the victim to swing his left arm in a counter attack. The
lapel and arm lever hold, as illustrated in Figure 44B. is
even less reliable. The neck and arm lever hold, demon-
strated in Figure 44C, can only be made effective when the
opponent is handicapped in size, weight, and strength. In
fact, all three of these come-along holds can be applied
only when the opponent lacks size, weight and strength.
30
Figure 44A
Figure 44B
Figure 44C
31
Figure 45B
Figure 45A
WRIST AND FINGER HOLD: STANDING
AT RIGHT SIDE OF OPPONENT
This is a simple yet very effective hold. With j our left
hand grasp the inside of your opponent's right wrist and
lock the upper part of his right arm with your left, as
illustrated in Figure 45A. Grasp the middle linger or any
other finger of his right hand and apply breaking pressure
backwards against the normal movements of the finger
hinge joint  as illustrated in Figure 45B. it standing on
the left side of the opponent, reverse procedure.
HAND-SHAKE TO HAMMERLOCK HOLD POSITION
You are Facing your Qpponent. Extend your right hand to
shake hands with him. When the opponent extends his
right hand, shake it, then grasp his right wrist with your
left hand as illustrated in Figure 46A. Raise and swing his
right arm to the left and at the same time step forward
under his raised right arm and move to his back, as Figure
46В show’s. Bring opponent's right arm to hammerlock po-
sition as illustrated in Figure 46C. To effect hammerlock
pressure, release your original handshake hold and grasp
the under part of opponent’s right wrist and apply upward
breaking pressure as illustrated in 1 igure 46D. Straighten
opponent up either by grasping his left shoulder or by
pulling at his hair to force his head back.
32
Figure 46A
Figure 46B
Figure 46C
Figure 46D
33
ELBOW AND WRIST BREAK: STANDING
AT RIGHT SIDE OF OPPONENT
Reach inside opponent’s right ami and grasp the thumb
and index finger of his right hand with your left hand
(Figure 47A). Take a half-step to the right and at the same
time drive his right elbow into your left armpit with your
right hand (Figures 47B and 47C). Release your hold on
his thumb and index finger and apply breaking pressure on
his right wrist as in Figure 47D.
Figure 47B
Figure 47C	Figure 47D
34
CHOKE PRESSURE HOLD FROM REAR POSITION:
RESTRAINING HOLD
\ ou are facing your opponent, as in Figure 48A. Extend
both arms simultaneously, grasp the opponent’s left shoul-
der with your right hand and his right shoulder with your
left hand (E igure 48B). Pull opponent forward with your
right hand and at the same time push backwards against
his right shoulder. Spin him completely around applying
choke hold with your left arm from the rear position as
illustrated in f igure 48C. Apply pressure necessary to sub-
due adversary.
Figure 48A
Figure 48B
Figure 48C
35
C. hap ter 4
UNARMED DEFENSE
and
DEFENSIVE PROCEDURES
Sometimes the best defense is offensive strategy. Time
and again, however, the ability to control physical action
calmly is what turns the tide of battle in favor of the in-
tended victim. Skill in dodging attacks, fundamentally cor-
rect maneuvering of the opponent while on the ground or
in standing position, and a basic knowledge of how to
apply joint-leverage—all these are helpful factors in gaining
advantage over the adversary. Here again it must be
pointed out that merely understanding the fundamentals
wrill not always suffice to insure victory. Body condition,
muscle strength, stamina, endurance, agility, speed of re-
flexes, timing, proper application of holds, and knowledge
of defensive procedures arc important in any defensive
action.
WRIST ESCAPE
To break any wrist hold, either single or both wrists,
direct full force against the opponents thumbs as illus-
trated in Figure 49A. keeping elbows close to your side,
break hold on the wrists by jerking both arms simultane-
ously upward over head (Figures 49B and 49C). Drive to
the groin if necessary, as showm in Figure 49D.
Figure 49A
Figure 49B
36
Figure 49C
Figure 49D
FRONT BODY HOLD UNDER THE ARMS: RELEASE
To break hold pictured in Figure 50A, Jock opponents
right arm above the elbow with your left arm and hold
tight against your body (Figure 50B). With the palm of
your right hand push up hard against the opponent s chin
as shown in Figure 50C. If necessary, drive knee blow to
opponent’s groin.
Figure 50B
Figure 50A
Figure 50C
37
FRONT BODY HOLD OVER THE ARMS: RELEASE
To break the hold illustrated in Figure 51A, drive both
fists to the opponent’s groin (Figure 51B). Gain your
release by directing a knee blow to his groin (Figure 51C).
Kick at shin bone. Stomp on his instep. Disable, knockout
or cripple opponent.
Figure 51A
figure 51В
Figure 51C
38
Figure 52A
Figure 52B
REAR HOLD OVER THE ARMS: RELEASE
Use the back of your head to strike at opponent’s chin
as pictured in Figure 52B.
Scrape or kick at the shin as illustrated in Figure 52C,
or stomp on his instep as illustrated in Figure 52D.
Figure 52D
Figure 52C
Figure 53A
Figure 53B
DEFENSE AGAINST TWO-HANDS
FRONT CHOKE HOLD
Do not attempt to break hold by prying opponent’s
hands apart at your throat. Clench fists, hold elbows close
in, as illustrated in I igtire 53B. (Do not clasp your hands
together). Bend slightly at the knees and drive upward
with full force to break assailant’s hold at your throat, as
pictured in Figure SBC. Then follow through at the same
time with knee blow to thr groin (Figure 53D).
Figure 53C
Figure 53D
40
DEFENSE AGAINST SIDE HEADLOCK
If youi opponent applies a side headlock like that shown
in Figure 54A. break the hold by grasping at his groin, or
stomping on his instep 'Figure 5113).
DEFENSE AGAINST RIGHT HAND BLOW TO HEAD
li your opponent attempts to throw a right hook or
roundhouse blow to your head, as illustrated in Figure
55A, duck the blow by slightly bending the Knees. At the
same time step in and throw your right arm across your
opponent’s neck (Figure 55B). Step quickly to his back
and djive your right hip against opponent’s right hip, as
shown in Figure 55C. Bend at the hips and pull down hard
with your right hand, bringing opponent’s body over your
back and to the ground (Figures 55D and 55E).
41

DEFENSE AGAINST ONE HAND REAR
STRANGLE HOLD
Your opponent approaches you from the rear and throws
his right arm over your right shoulder to apply a rear
strangle hold (Figure 56A). Defense action must be fast.
Grasp opponent s right wrist with your left hand and at
the same time reach up with your right hand and grasp
the outside of your opponents right upper arm, as illus-
trated in Figure 56B. Bend at the knees, drive back with
your hips, and at the same time bring your opponent up
and over your left hip as illustrated in Figure 56C. Smash
opponent to the ground, and take authority.
Figure 56A
Figure 56B
Fjgure 56C
43
DEFENSE AGAINST TWO HAND REAR
STRANGLE HOLD
Your opponent approaches you From the rear and throws
both of his arms over your shoulders to apply strangle hold
as illustrated in Figure 57A. Defensive action must be fast.
Reach up and back with both arms and grasp the outside
of the opponent’s right and left arm as illustrated in
Figure 57B. Bend at the knees, drive back with your hips,
and at the same time pull down hard at opponent's arm
and toss him over your head. Start of throwing procedure
is illustrated in Figure 57C.
DEFENSE AGAINST HEAD HAIR HOLD FROM
FRONT WITH RIGHT HAND
Figure 58A
Figure 58B
Figure 58A illustrates the hair hold with right hand in
front position. To prevent pulling-forward action, reach
upward with your left hand, grasp and bear down on
opponent s right hand, as illustrated in Figure 58B. With
your right hand grasp opponent’s left wrist (Figure 58C).
Release opponent’s hair hold by applying pressure at his
right wrist and at the same time forcing his right arm
down and away from the center of his body (Figure 58D).
Deliver knee blow to opponent’s right elbow, as illustrated
in I igure 58E.	45

DEFENSE AGAINST HEAD HAIR HOLD FROM
REAR WITH RIGHT HAND
Figure 59A
Figure 59A illustrates head hair hold from rear with
right hand. Before turning your body, reach back and up
with your left hand and grasp opponent’s right hand as
illustrated in Figure 59B. Release opponent’s hair hold by
grasping his wrist and pivoting either to left or right. Then
apply pressure to the arm as Ulus tinted in Figure 59C.
Force opponent to his knees as illustrated in Figure 59D.
Deliver knee blow to opponent’s right elbow as illustrated
ifcj’igure 59E, Assume authority.
Figure 59B

DEFENSE AGAINST KICK WITH RIGHT FOOT
Figure 60A
If the opponent aims a right kick at your groin as illus-
trated in Figure 60A. pivot on the ball of your left foot and
twist your body to the right, removing target for opponents
kick. Reach down with your right hand and grasp the
opponent's right heel. With your left hand grasp the op-
ponent's right leg below the knee. Pull forward with both
hands and upset your opponent as illustrated in Figure
60B. Follow through with whatever action is necessary to
subdue the opponent.
Figure 60B
a
PISTOL DISARMING
Let us be frank about it at the outset: pistol disarming
is a skill that requires considerably more courage, coolness,
and nimble wit than the average person possesses. To
defeat the outlaw who is quick on the draw, you must be
quick on the reflex. Pistol disarming is a technique that
demands not only speedy reflexes, but coordination of mind
and body, steady nerves, and the will to live. Beyond all
this, it demands long, thorough, and expert training; a
man who docs not know the correct disarming procedures
should never attempt to disarm an opponent.
Fear is an integral part of our emotional temperament.
We endeavor to control it, but it asserts itself in precarious
moments. We dread fear because we have known it from
early infancy and have never conquered it. Our modern,
highly civilized way of life has tended increasingly to dull
man’s normal instinct of alertness. Today, all too few men
are able to cope with sudden danger. Our innate aggres-
siveness and pugnacity have been tempered over the cen-
turies to the point that man has become a far more passive
creature. Today’s civilized, law-abiding man is a highly
susceptible prey for the criminal element which, in con-
trast, tends to revert to the brutal, animalistic way of the
jungle.
Like any other law-abiding member of society, the man
who becomes a law enforcement officer is not immune from
fear and passivity. How, then, can he hope to overcome
them to the point that he can face the prospect of en-
counters with armed criminals? The answer lies in dis-
cipline, conditioning, and education.
The officer must school himself to build a certain forti-
50
tudc that will permit him to remain mentally stable, reason-
able, and cool in crisis, so that he will not commit some
foolish act inviting death at the hands ol the hold-up man.
He must learn to challenge the motive of the gunman
without revealing his own fears. Pistol disarming requires
excellent body condition, mental and physical adjustment,
timing, and coordination.
The confidence and ability needed to execute the pro-
cedures of pistol disarming will come ultimately—but only
after the learner has had thorough instruction and extensive
practice. The odds for successfully disarming an opponent
are never the same, inasmuch as the mental and physical
adjustment of the man facing the pistol are deciding factors.
Obviously, a mentally alert officer who can move with great
speed has a far better chance to disarm an assailant success-
fully than one who thinks and acts more slowly.
It should be kept in mind that pistol disarming involves
greater risk when the weapon is automatic, because of the
single-action mechanism of the automatic firing piece.
Before a gunman can be successfully disarmed, certain
factors must be carefully appraised and found favorable.
To react instinctively in a precarious situation, such as a
hold-up by an assassin, would be tantamount to committing
suicide.
The proximity of the assailant—whether or not he is with-
in striking distance—must be carefully judged. Before the
officer makes a move it is absolutely imperative for him to
make a quick mental appraisal of his enemy. He must ask
himself: What type of person am I facing? Is he trigger-
happy? Can I talk to him? Is he cool, smart, vicious, or
cowardly or nervous? Is he a dope addict? Is he experi-
enced, or the more ruthless tyne who would be quick on
the trigger? As he quickly an tlvzes his answers to these
questions he will get some picture of the criminal capacity
of his assailant—some clue to his criminal status and experi-
51
cnee. He will also have some picture of his opponents
emotional characteristics and of the seriousness of his intent
to commit a crime. In short, the victim must take stock of
his opponent before he tries to disarm him.
Never attempt to disarm a person with a loaded revolver
if the assailant has cocked the hammer and has his trigger
finger in firing position. The reason is obvious: the least
pressure would release the hammer and discharge the bul-
let. The chances of disarming anyone in this situation are
practically nil; one would be inviting sure death. True,
there are a few rare instances on police records where
officers have disarmed hold-up men by grasping the ham-
mer and preventing the gunman from pulling the trigger—
or by placing the index finger or some other member of
the hand between the cocked hammer point. However, Lady
Luck played for these officers to win.
Obviously, in a sure case of life and death, the victim
of the hold-up must attempt everything. In a hold-up where
the gun is thrust in one’s midsection with definite pressure
contact and the hammer in safety position, the chances of
disarming the attacker are somewhat better, though even
here the slightest hesitation in the execution of the offen-
sive movements might prove fatal.
Before we examine specifically the various methods of
pistol disarming, let us be absolutely clear on this point:
pistol disarming is not impossible, but the odds against its
success are very high. The victim must judge his chances,
but if there is any way to appease the assailant, he should
by all means take it. Plead, caution, advise, feign fear,
falsely pretend, or acquiesce in order to throw the assailant
off guard.
52
DISARMING PROCEDURES
DEFENSE AGAINST REVOLVER HOLD-UP IN FRONT
POSITION (RIGHT HAND): FIRST METHOD
Generally, a hold-up starts without advance warning.
The victim is momentarily stunned. The assailant, particu-
larly the novice, approaches, jams the barrel of the weapon
at the victim’s midsection and is apt to say, “This is a stick-
up, don’t move, keep quiet, do as I say or else.” What
must you do? The first rule of Pistol Disarming is: exercise
every precaution, unless you choose to gamble with sud-
den death. When ordered to raise your hands, do so without
delay. The manner in which the assailant has approached
you and the tone of his voice should indicate clearly and
unmistakably the type of individual you are confronted with.
Play safe. Raise your hands but try to keep your elbows par-
allel to the ground as illustrated in Figure 61.
Figure 61
Figure 62
Think, talk, plead, feign fear; do not antagonize your
assailant. Try to analyze him. Make every effort to distract
his attention from his purpose. Note position, type, and
condition of readiness to fire the weapon.
a.	Is the hammer cocked?
b.	Is the hammer un-cockcd?
If the weapon is cocked, think hard before you attempt
to disarm him. Remember that a slight squeeze on the
trigger may put a bullet through your stomach. The odds
against you are incalculable. But if the weapon is not
cocked and you have reason to believe that you are going
to be shot, swing your left arm downward and strike the
inside of the assailant’s right wrist as hard as you can with
the outer side of your left wrist (Figure 62).
The unforeseen attack and the sudden blow cause him
to drop the weapon. Then drive your knee to the groin
(as illustrated in Figure 63).
The follow-through is a knee blow to the assailant’s
groin, as demonstrated in Figure 63. This procedure can
be executed in a fraction of a second if you remain cool
and collected. Speed and fluidity of movements are
essential.
54
Figure 63
DEFENSE AGAINST REVOLVER HOLD-UP IN FRONT
POSITION (RIGHT HAND): SECOND METHOD
You have been ordered to raise your hands in a hold-up.
Follow through with directions outlined in the first dis-
arming procedure. Raise your arms as illustrated in
Figure 61.
Play safe. Ease the tension of the revolver barrel by
slightly drawing in your abdomen, pivot to the left side on
the ball of your left foot to remove your body from the
direct line of fire, and simultaneously drop your left hand
to lock the cylinder of the weapon as illustrated in
Figure 64. Immediately follow through with your right

Figure 65
hand, grasp the back of the assailant's right hand, and
apply breaking pressure at his wrist, as illustrated in
Figure 65.
Follow through with a knee blow to the opponent’s groin
as illustrated in Figure 66.
Figure 66
DEFENSE AGAINST REVOLVER HOLD-UP AT
BACK POSITION
No attempt should be made to disarm an assailant when
held up from back position other than in a last resort to
save your life.
The following procedure should be used onh when it
has been determined which of the assailant’s hands is hold-
ing the weapon. Do this: turn your head slightly to either
side—a sharp glance from the corner of your eye may tell
you what you need to know. Figure 6" does not, however,
show the victim in such a position. It shows correct position
to assume note hands) when held up from the back
position.
F gure 67
57
Figure 68
When the weapon is pressed against your lower back
and held in the assailants right hand, the following pro-
cedure is recommended: Pivot your body on the ball of
your right foot and the heel of your left foot to the left
side. Swing your left arm in a downward arc to full rear
(cross body), striking the assailant’s right forearm (see
Figure 68).
The follow-through is a right drive to the assailant’s
groin as illustrated in Figure 69. Reverse this procedure if
it has been determined that the assailant is holding the
gun in his left hand.
Figure 69
(Chapter 6
DEFENSE AGAINST KNIFE, BLACKJACK,
BROKEN BOTTLE OR ANY SHARP OR
BLUNT INSTRUMENT
From the standpoint of common sense, a high level of
physical condition is necessary if one is to defend himself
successfully against any armed attack. Let us not white-
wash the fact that muscle strength, endurance, agility,
coordination, timing, and emotional stability are important
factors.
Any attempt to disarm a person with criminal intent
requires pure, unadulterated, intestinal fortitude—“guts”.
Such courage is not a manufactured product, but an ingre-
dient in the make-up of an individual, flow much of it a
man has determines what he may or may not decide to do
in a crisis.
The fact that a man is in excellent condition does not
necessarily mean he has a high degree of courage. However,
the confidence he gains from knowing that he is physically
fit to take care of himself in any hand-to-hand struggle
directly influences the way he responds to апл critical
situation.
In any armed attack, the apparent intent of the assail-
ant is to disable or, if necessary, kill his victim. Depending
upon the type of his weapon, the assailant will endeavor to
cut, slash, smash, knock out, or kill his victim.
The best defense strategy is one that is simple yet thor-
oughly effective. The aim of the victim should be to disable
his assailant rather than to try to disarm him.
Law enforcement, in all of its numerous phases, presents
technical and physical situations which often require an
immediate appraisal and solution. In any violence where
59
the life of another pel son is in jeopardy, the officer of the
law must determine what course of action to take without
inviting direct challenge from the law violator. Any explo-
sive manifestation ol aggressiveness on the part of the
officer would not onl) endanger the lite of the assailant’s
victim, but also place his own in jeopardy. Sound thinl ing —
curbing any desire to provoke a trigger-tense situation—
often brings about the desired results. An attitude of pas-
siveness, while making a mental appraisal of the best
method of attack, may give the officer the necessary7 open-
ing for immediate oflensive action, letting him become
master of the situation.
Armed criminals follow a certain pattern of action which
they have develope d in the perpetration ot their crimes.
Even under the influence. ot alcohol or diugs, they normally
follow a set and rehearsed procedure of attack and defense.
The officer of the law who remains cool and even shows
indifference may not only succeed in easing the tension
but may momentarily offset the criminals initial advantage.
Then, he may counter with a surprise attack, thus taking
command.
Try to be prepared to cope with any situation unless
you want to die young.
The following defensive procedures against knife, black-
jack, broken bottles, or any sharp or blunt instrument arc
offered as a means oJ gaining advantage over the assailant.
60
Figure 70
61
DEFENSE AGAINST DOWNWARD STROKE
Figure 71A
Figure 71В
Your opponent approaches, a weapon in bis upraised
right arm as illustrated in Figures 71A, 71B, and 71C.
The intent of the assailant is to wield his weapon with a
downward stroke aimed at your body. At the instant the
* *
assailant telegraphs (commences to raise his right arm),
his intentions, step in close. Depending upon his height
you may or may not have to bend slightly at the knees to
block the blow. Raise your left arm to an angle of 45
degrees to block the downward thrust with your forearm;
i.e., between the elbow and the wrist as illustrated in
Figures 71D, 7IE, and 71F.
Figure 71C
Figure 71D	Figure 71E
No attempt should be made to disarm the assailant or to
place an armlock on his striking arm.-The knee blow to the
groin should completely disable him. Note Figure 71G.
Figure 72A
Figure 72b
DEFENSE MEASURE AGAINST UPWARD THRUST
OF KNIFE
Your opponent approaches you holding a knife low in
his right hand to thrust at your abdomen, as illustrated in
Figures 72A. The manner of his approach indicates profi-
ciency in the use of the knife. No attempt should be made
to disarm him except as a last resort and to saxe your life.
Move away if possible. Do not permit him to come
within thrusting distance. If the attack occurs indoors, pick
up anything within reach—a chair, broom, poker, club, or
any throwing object. As a last resort, when the assailant
makes a forward lunge (Figure 72B i, side-step to the right
away from his forward right-hand knife thrust (Figure
72C). Use your left hand to smash at your assailant's right
arm, driving his body to the left. Follow through with a
right-hand blow to the most convenient part ol his body
as pictured in Figure 72D.
61
If the knife attack takes place outdoors do not attempt
to disarm your assailant unless your life depends upon it.
Move away from him. Grasp any object which may afford
some degree of protection. Scoop up a handful of dirt and
throw it in his face. Remove your coat, if you have time,
and use it as a shield. Or spit at your opponent to stop him,
if only momentarily. Under the circumstances, any defen-
sive measure is justifiable.
GROUND DEFENSE AGAINST KNIFE ATTACK
Depending upon the hazards of the situation, one may
be forced to assume a ground position to defend himself
against a knife attack. In a situation that offers no other
means of defense the victim should go to the ground and
take a position where he can use his legs to kick, trip,
knock down or in some way hurt his opponent. Any ground
defense against a skilled “knifer” requires agility of both
mind and body as well as strong, well developed leg
muscles.
Figure 72D	Figure 72C
The defensive ground position against a knife attack may
provide the victim with a greater measure of counter attack.
In other words, by constantly moving away from the as-
sailant, the victim may choose the most strategic spot to
fall to the ground in order to defend himself.
In a situation where the assailant steps forward with his
left foot to initiate the attack, hook the inside of your left
foot (instep) around the leg above the heel of the assail-
ant’s left foot (Figure 73A). At the same time, with the
sole of your right foot, smash his left leg below the knee
(Figure 73B). The action of pulling with your left leg
and smashing backwards with your right leg will unbalance
your opponent. Use whatever follow-through you may think
of at the moment to subdue your assailant.
Figure 73A
Figure 73B
ter
PRELIMINARY SEARCH OF PRISONERS
Carelessness not only breeds contempt for law enforce-
ment officers but provides bitter sorrow ashes for police
widows. Carelessness should be regarded as one of the
highest infractions of all police codes. Recruits should be
drilled to shun it as assiduously as they safeguard their
weapons. A preliminary search of the prisoner should be
made at the place of arrest. The cautious and prudent
officer will not presume that the suspect is unarmed nor
be over-confident of his judgment of human nature. The
well-trained, matured officer will exercise the same caution
in dealing with all types of law offenders. He will always
subscribe to the rule: Never underestimate your opponent.
lie will also abide by another rule: Never abuse your
authority. Use only as much force as is necessary to ac-
complish the arrest. The status of a criminal should not
influence the arresting officer to relax his vigilance until
he has complete control of the suspect. The arresting offi-
cer should never approach the suspect in any manner which
might permit him to reach for his weapon, nor should he
engage in a lengthy discourse with the prisoner. The officer
who remains cool, who does not make an unwarranted dis-
play of bravado, but who effects the arrest in an orderly
manner is most apt to live to make other arrests.
67
WALL (FRONT-STOP) SEARCH
Usually the most effective method of making a prelimi-
nary search is the Wall Search. It is used very frequently.
The term Wall Search applies not only to walls but also to
any stationary structure, fence, vehicle, or embankment.
The prisoner is ordered to face and lean against the wall,
or whatever the surface is, with hands widespread and
placed overhead. The legs are also widespread and carried
as far as the body pennits to the rear away from the wall.
Once apprehended (Figure 74A), the prisoner is made to
assume an awkward, off-balance position, as illustrated in
Figure 74B.
Figure 74A	Figure 74B
The advantage of this position is that if he resists while
being searched the searching officer can drop him to the
ground by simply forcing either’ foot beyond the allowable
degree of body balance. The prisoner should not be han-
dled by the arresting officer until he has been made to
68
assume the awkward, off-balance position described. The
arresting officer should take every precaution to determine
whether or not the prisoner is carrying a weapon. He
should warn the prisoner not to remove or attempt to
destroy anything he may have on his person.
In a case involving one prisoner and one arresting officer,
the latter should immediately order the prisoner to assume
the wall position, With the prisoner now in the off-balance
position, the officer can approach him from the rear, starting
his search on the right side and holding his own weapon
in his left hand.
At the same time he should hook his right foot inside
the prisoner’s right loot, as illustrated in Figure 74C. This
step of the searching procedure is important since it lets
the officer be ready to drop his prisoner to the ground
simply by knocking him off balance, should he resist.
Figure 74C
69
The officer should remain at the farthest possible body
distance from the prisoner. He should hold his weapon
(when searching the right side of the prisoner) at the left
hip rather than in the extended arm position. If it happens
to be an automatic, the pistol should be cocked with the
thumb resting on the safety catch. If a revolver is used,
the weapon should never be cocked but fired at double-
action if necessary.
In making the preliminary search (right side), the officer
should first examine the right hand of the prisoner for any
small article that might be taped to the inside of the palm.
The prisoner’s headgear should be removed and a thorough
search made both front and back, from the top of the head
to the inside of the right shoe. The search should be made
by using finger-tips and hand pressure. Only when the
searching officer is completely satisfied that his prisoner has
nothing concealed on the right side of his person, should
he search on the left side. Before proceeding however, the
officer should step back, transfer the weapon from his left to
his right hand and hook the prisoner’s left foot with his
own left foot as illustrated in Figure 74D.
At the completion of the preliminary search, the arresting
officer will step back, get his handcuffs, and order the
prisoner to extend his left arm to the rear. With his weapon
in his left hand, the officer will secure the left wrist of the
prisoner (Figure 74E). Now, retaining a firm hold on the
connecting chain of the handcuffs with the right hand, the
officer will secure his weapon and order the prisoner to
take one step forward and lean his head against the front-
stop. Next he will order the prisoner to extend his right
arm to lull rear and handcuff the right wrist (Figure 74F).
Figure 74G shows the prisoner properly secured and under
complete control.
Figure 74E
Figure 74F
KNEEL SEARCH
If the locale of the arrest (Figure 75A) docs not provide
a wall, vehicle, embankment or any upright structure, the
arresting officer should then order the prisoner to kneel
with his hands (fingers interlaced) at the top ol his head.
The knees and feet should be spread apart and the prisoner
made to lean forward slightly in an off-set position of
normal balance (Figure 75B).
The officer now approaches the prisoner from the rear,
his weapon in his left hand, and drawn back to the left
hip well away from the prisoner. Holding the handcuffs in
his right hand, the officer then orders the prisoner to extend
his left arm back as far as possible with palm inward as
illustrated in Figure 75C.
The gun and handcuff procedure can be reversed if the
officer chooses to retain his weapon in his right hand. When
either wrist is cuffed, the officer then secures a firm hold
on the connecting chain and cuffs the wrists together
Figure 75D). If the prisoner should resist, the officer is
in a position to force him forward to tbe ground, or he
may inflict punishment by jerking sharply on the cuff
chains.
73
Only when both the prisoner’s waists are cuffed should
the officer conduct a preliminary search. Securing a firm
hold on the connecting cull chain with the left hand, the
officer now’ searches the right side of the prisoner, as Figure
75E shows. The same general procedure used in the wall
search is used in the Kneel Search. When the search on
the right side is completed, the officer grasps the con-
necting cuff chain with his right hand and searches the
prisoner's left side with his left hand. Upon completion of
the Kneel Search, the officer can search the prisoner more
completely in the standing position.
KNEEL-SFARCH - ONE ARRESTING OFFICER AND
TWO PRISONERS
One arresting officer can, when necessary, search two or
three prisoners without exposing himself to the same degree
of danger if he uses the prone position search or the stand-
ing position search. The kneeling position search provides
the greatest degree of safety to the officer. When the officer
has two prisoners and deems it necessary to conduct a
preliminary search, they should be ordered to raise their
hands, as illustrated in Figure 76A. The prisoners should
then be ordered to make an about-face, the prisoner on the
left holding his position while the prisoner on the right steps
several paces forward and to the right (see Figure 76B).
When the two prisoners have been spaced apart, they are
then ordered to assume the kneeling position (Figure 76C),
giving the officer good control of the situation.
Figure 76A
75
Figure 76В
Figure 76C
Holding his weapon in his right hand, he first searches
the prisoner kneeling on the left and, when satisfied that he
has no concealed weapon, the officer transfers his weapon to
his left hand and searches the right side of the prisoner,
keeping a close watch on the forward prisoner throughout
the search of the first prisoner (Figures 76D and 76E).
76
Figure 76D
Figure 76E
When the preliminary search of the rear prisoner has
been concluded, the man is ordered to stand and walk
straight forward the same distance that separated him from
the forward prisoner. Then he is ordered to again kneel
(Figure 76F). Before commencing the preliminary search
on the second prisoner, the arresting officer transfers the
i (
Figure 76F
weapon to his right hand and proceeds to search the right
side of the prisoner, keeping both men covered with his
weapon (Figure 76F). Following the search on the right
side, the officer now transfers his weapon to his right hand
and proceeds to search the prisoner on the left side as
illustrated in Figure 76G.
Figure 76G
78
At the completion of the search of both prisoners, the
officer will handcuff the left wrist of the prisoner at the
rear position (Figure 7611), order the prisoner to stand-up,
keeping his right hand at the head position, and walk
straight forward to the left. Again lie will be told to as-
sume the kneeling position on the right side of the forward
prisoner (Figure 761). The officer will then handcuff the
right wrist of the prisoner on the left to the left wrist of the
other prisoner (Figure 761). When the two have been
cuffed together (Figure 76J), the arresting officer can send
for help.
Figure 76H
79
Figure 76J
The Wall Search is not recommended when a lone officer
has arrested two suspects. He would have to assume a
position between the two suspects in order to search the
left side of the prisoner on the right. This would jeopardize
his safety as it would leave him exposed to an attack from
the prisoner on the left. The Kneel Search offers the
arresting officer a greater degree of safety.
80
STANDING SEARCH
If the situation is such that it will permit neither the
Wall nor the Kneel Search, the officer should use the
Standing Search. Here, with drawn weapon the officer
orders the prisoner to turn his back and raise his hands to
full length above his head (Figure 77A).
He then orders the prisoner to lower his hands to the top
ol his head, interlace the fingers, and lean forward
(Figure 77B).
Figure 77B


Figure 77С
Approaching the prisoner from the rear, the officer orders
him to extend his left arm to full rear, parallel to the
ground, palm upward and inward and then proceeds to
handcuff the left wrist (figure 77C). Note that the arrest-
ing officer will have his drawn weapon in his left hand as
he secures the prisoner’s left wrist. There is no reason why
any officer should have to use both hands to handcuff a
prisoner.
Upon cuffing the left wrist and securing a firm hold on
the connecting chain of the handcuffs, the arresting officer
will order the prisoner to bring his right hand to full rear
and proceed to cull the right wrist to the left wrist
82
Figure 77 D
(Figure 77D). The preliminary search is made only when •
the subject has been secured with handcuffs. Retaining a
firm hold on the connecting chain of the handcuffs, and
taking precautions to see that the prisoner does not attack
by kicking backwards, the officer can proceed with his
preliminary search.
V Ren two officers arc present with one prisoner, the
Standing Search is naturally easier, because one officer
covers the prisoner with his weapon while the second hand-
cuffs and searches the suspect with less danger of an
attempted attack.
In all the foregoing methods, the arresting officer is the
sole judge of how much use he must make of his weapon The
apparent physical capabilities of the prisoner should indi-
cate the precautions to exercise.
83
SECURING OF PRISONERS
Every office! who fully senses Ins moral responsibility
for the personal safety of his fellow men recognizes that
anyone engaged in crime should be properly handcuffed
at the time ot arrest.
An untold number of arresting officers have been killed
and countless others inaimed lor life because they’ under-
estimated the potential ability, emotional instability, or
recklessness of their opponents. An officer who pays with
his life for a moment of unwarranted negligence has not
died a hero.
Gangsterism, which has adopted the law of the jungle
(kill or be killed ), does not recognize the principles of
human decency Rather, it victimizes those who display
symptoms of emotional tenderness.
Arresting officers should remain constantly alert, exercise
maximum precaution, discharge their duty with the highest
regard for tlie safety ol their fellow man, and remain con-
scious of the fact that a dead officer brings only insurance
benefits to his family or next of kin.
J
A suspect who is placed under arrest should immediately
be handcuffed at the scene of the arrest. A prisoner regard-
less of his crime, should be handcuffed with the wrists back
to back. To secure a prisoner’s hands meeting in the front
position without double-locking the cuffs is inviting an
attack which may result either in injury or death.
84
Figure 78
Figure 79
SEARCH AND SECURING OF PRISONERS
Two Of icets, Th ree Prisoners, Two Sets of Handcuffs
For the sake of clarity, the prisoners here are numbered
consecutively from left to right, Nos. 1, 2 and 3. The arrest-
ing officers will be designated as A and B, as illustrated in
Figure 7S.
Assume that the three suspects have been placed under
arrest. The method used for conducting the preliminary
search of the prisoners could be cither of the three de-
scribed in the proceeding pages, i. e. the Wall Search, the
Kneel Search, or the Standing Search. In anv case, one
officer takes up the covering position while the second
officer initiates the search. I nder no circumstances should
the officers cross one another’s line of fire. Upon completion
of the preliminary search of the prisoner to the extreme
right, (Number 3 , the searching officer handcuffs him
with his hands to his back, wrists bacl to back as illustrated
in Figure 80. then orders him to take his position at the
extreme left of Prisoner Number 1 (see Figure 81).
85
Figure 80
The officer will then proceed to search Prisoner Number
2, as illustrateed in Figure 81. Upon completion, he will
order the prisoner to walk to the left of the handcuffed
prisoner (Number 3) and again take up the forward lean-
ing awkward off-balance position as illustrated in Figure 82.
Figure 81
Figure 82
x hen Prisoner Number 2 is in proper position, Searching
Officer В will conduct a preliminary search of Prisoner
Number 1. Upon completion, he will approach Officer A
from a safe angle and obtain his handcuffs. Officer В will
then handcuff the left wrist of Prisoner Number 1, and
order him to step to the left and bring his left arm under
the right aim of Prisoner Number 8 (see Figure 83). Next
he will order Prisoner Number 2 to step to the right, place
his right arm over the left arm of Prisoner Number 3. Now
the officer will cuff Prisoner Number 2’s right wrist to the
left wrist. of Prisoner Number 1 (see Figure 84). In this
manner the three prisoners are safely secured with two sets
of cuffs.
87
Figure 83
Figure 84
88
’/ wo Officers, Four Prisoners, Two Seis of Handcuffs
Yon will nole, as illustrated in Figure 85, that the tour
prisoners under arrest are numbered consecutively from
left to right 1, 2 3, 4. The covering officer is designated as
Officer A,, the searching officer as Officer B,
। he method used for conducting the preliminary search
of the prisoners is, as we have seen, usually determined bi
the locale of the arrest. In this situation both officers should
exercise tile greatest precaution since four arrested persons
offer greater danger than a lesser number.
When the four prisoners arc lined up facing the wall for
the purpose, ol conducting the preliminary search, the
searching officer will hrst search Prisoner Number 4 as he is
preparing to do in Figure 85.
Figure 85
89
Figure 86
Next, the officer will order Prisoner Number 4 to step
back from the front-stop, walk to the extreme left of
Piisoner Number 1, and assume the same position against
the front-stop (Figure 86). The officer will then search
Piisonei Number 3 (Figure 86), and upon completion.
Older Prisoner Number 3 to take up his position at the ex-
treme left of Prisoner Number 4 (Figure 87). Officer В
Figure 87
Figure 88
(the searching officer1 will then take the covering position
while Officer A handcuffs the rigid wrist of Piisoner Num-
ber 3 to the left wrist of Prisoner Number 4 as illustrated
in Figures 88 and 89. When Prisoners Number 3 and 4 have
been handcuffed, Officer A will again take up his position as
cov< ring officer while Officer В conducts a preliminary search
of Prisoner Number 2. lie will then order Prisoner Number 2
F-gure 09
Figure 90
to walk to the extreme left of Prisoner Number 3 as illus-
trated in Figure 90. Next, the searching officer will conduct
a preliminary search of Prisoner Number 1 and proceed to
handcuff his left wrist, as illustrated in Figure 91.
The next step in the procedure calls for handcuffing
Prisoner Number 1 to Prisoners Number 3 and 4. This is
accomplished by interlocking the spare cuff to the connect-
ing chain of the handcuffs, thus securing Prisoners Number
3 and 4 (see Figure 92). Officer В will then order Prisoner
Number 2 to step right, in order that his left wrist can be
handcuffed to the cuff that has been interlocked with the
Figure 91

Figure 92
chain cuff seeming Prisoners 3 and 4. Figures 93 and 94
illustrate the maimer in which the four prisoners have been
secured with two sets of handcuffs.
Figure 93	Figure 94
HANDCUFFING
Figures 95A and 9513, show the proper way to begin
handcuffing a prisoner, following the preliminary search.
In the writer’s opinion, the general run of law enforcement
officers need more practice in applying handcuffs. A great
many have difficulty seeming a prisoner’s wrist unless they
use both hands to secure the cuff. Every officer should
make certain that the cuff bracelets he uses work freely and
easily.
Figure 95A indicates the proper way to handcuff one
hand. Note that the weapon is held well away from the
prisoner, whose awkward off-balance position against the
front-stop (building} affords little chance for a counter
attack. The officer is alert, on his toes, and doing his job
in a thoroughly professional manner.
Figure 9«5B portrays the correct way to grip the connect-
ing chain of the handcuffs when one of the prisoner s
wrists has been secured. A firm hold on the connecting
chain of the handcuffs is a safety precaution against counter
attack. Any attempt on the part of the prisoner to fight back
can easily be checked by wrenching the cuff bracelet, thus
94 punishing the wrist.
Figure 95A	Figure 95B
Chapter 9
POLICE CLUB
ITS USES AND ABUSES
Any extension of arm reach in physical combat provides
an advantage because it increases the striking range and
permits the person attacked to remain beyond the reaching
distance of his assailant. The police club is used to offset
any physical advantages the assailant has when he is resist-
ing arrest, and also to enable the officer to protect himself
against any aggressive action initiated by one or more law
violators.
The police club should never be swung at random nor
be used to inflict more than the punishment necessary to
subdue an assailant. When used by an untrained policeman
as a bludgeon to crush the skull of an assailant or to beat
a man into a state of insensibility, a police club provokes
public indignation and psychologically harms the purpose
and intent of any police organization. Law enforcement
officers should be trained to use the police club properly
and effectively.
In acquainting the police recruit with the club, he should
be taught the nomenclature: the thong, club, and grip as 95

Figure 98


The second, and very important, recommendation urged
upon the recruit concerning the club is the proper manner
in which to grip it. All fancy holds should be strictly
taboo; there is only one proper method of gripping the club
and that can only be executed when the thong has been
adjusted to the size of the user’s hand. The thong should
be neither too long nor too short. The loop should be
slipped over the thumb, the thong itself brought across
the back of the hand and to the inside, enabling one to
grasp the grip of the club with a firm hold, as illustrated
in Figures 98 and 99. The thong should never be looped
96
Figure 99
over the wrist. The prescribed method of looping will bind
no part of the hand or wrist in the event that the club is
grasped by the assailant, permitting him to counter-attack
as illustrated in Figures 100A, 100B, 100C, and 100D. 97
Figure 101A
Throat jab
The club is furnished for specific reasons; it is not meant
to be used as a baton, Yo-^o, or made to loop-the-loop.
The key instructions concerning its effectixe use must be
thoroughly understood in order that one may fully appre-
ciate its value. The novice should learn how to use the club
effectively for both offensive and defensive purposes. Blows
similar to those used by7 professional fighters can then be
delivered with greater forcefulness. The straight left jab,
or what is more commonly referred to as ‘the jab/ can
be landed with deadly accuracy and sufficient force to
disable the opposition, as portraved in Figures IOLA, 101B,
98 and 101C.
Figure 101В	Figure 101C
Solar plexus jab	Groin nerve jab
Figure 102B
Figure 102A
The police club should never be used to inflict a vertical
blow to the top of the head since such a blow may cause
concussion or fracture. In some instances the chib may
break but more often it will lacerate the scalp, causing
severe bleeding which may lead bystanders to think that
the officer is inflicting brutal, unnecessary punishment.
Furthermore, a blow delivered to the top of the head can
quite easily be blocked as illustrated in Figures 102A, 102B,
102C, and 102D. Any blows delivered to the head should 99
Figure 102C
Figure 102D
be glancing ones with controlled force, sufficient just t<
stun, rather than maim, the assailant. In delivering the
glancing blow, the wielder of the club should twist his
wrist slightly either inward to the left side or downward
to the outside of the body as illustrated in Figure 103.
Glancing blows can also be delivered to the upper arm,
lower arm. thigh, and other parts of the body, as Figures
100 104A, 104B, and 104C show.
Figure 104A	Figure 104B	Figure 104C

Figure 105
The direct vertical blow can be delivered to the assail-
ants shoulders (see Figures 105 and 106). Remember,
though, that undue force can very easily break the collar
bone. Lateral blows differ from glancing blows in that they
101
Figure 106
Figure 107A
are delivered in a parallel swing. Che impact of a lateral
blow is direct. It has a cutting effect rather than a glancing,
sliding-off motion. A lateral blow at the shin bone delivered
parallel with the ground can subdue the most belligerent
subject (note Figures 107A, 107В, 107C.
102
Figure 108
OTHER WAYS TO USE THE POLICE CLUB
The police club’s usefulness is not limited to offensive
combat measures and defensive procedures. On occasion, the
club can and should be used to restrain an assailant until
more appropriate measures are available. For example, the
thong can substitute for handcuffs: either one or two pris-
oners can be secured by looping the thong over the left
wrist of one subject and the right wrist of the second (note
Figure 108). In the case of one prisoner, both of the wrists
can be secured at his back, as illustrated in figure 109.
Figure 109
103
Figure 110
The club can also be used effectively to apply the rear
choke hold. Holding the grip of the club with the left
hand, bring the weapon to the front and place it against
the assailants throat. Bring the right hand across the left
aim to grasp the far end on the left,. Choking pressure is
applied by pulling hands towards own chest (Figun 110).
The club rear choke hold can be made extremely painful,
or even fatal, by driving the knee at the opponents back
(note Figure 111 <
104
Figure 111
DEFENSE AGAINST THE CLUB
The counter measures to be used against a club attack
are based upon the type of blows that the assailant might
deliver. Undoubtedly the novice who has had sonic training
in the fundamentals of boxing—such as using his arms to
ward oft blows, advancing, retreating, side-stepping, weav-
ing, feinting, and ducking—has much greater hope of de-
fending himself than the untrained person.
Basically, the defense, against a club wielder who is
using a variety of blows is to use vour arms to ward oft
blows directed at any vulnerable part of the body. For
example, a vertical blow should be blocked with the under
part of the forearm as illustrated in Figure 112. The lollow-
through most generally is a blow to the groin which will
disable the assailant.
Figure !12
105
DEFENSE AGAINST CLUB ROUNDHOUSE BLOW
The assailant swings his club in a roundhouse blow to
strike at the upper part of your body as illustrated in
Figure 1I3A. Step in midway on the down swing and bring
your left arm over the assailant’s right; then lock his right
arm at the elbow and apply backward pressure as in Figure
113B. Follow through by placing your right hand at assail-
ant’s right shoulder and force backwards as in Figure 113C.
With continued practice you will master the defensive
procedure shown here and will find the best way to lock
your assailant’s right arm in order to apply pressure at
elbow joint. (Note that the position of the assailant’s arm
in Figure 113B shows that the palm of the right hand is
parallel and facing upward).
Figure 11 ЗА	Figure 113B
DEFENSE AGAINST BACK HAND CLUB BLOW
If the assailant attempts to strike at the upper part of
your body with a left-hand back swing, as illustrated in
Figure 114A, step to the left and block the blow with your
left forearm (see Figure 114B). Follow tlirough with a
right-foot kick to the side of his left knee, as in Figure J14C.
DEFENSE AGAINST DIRECT JAB CLUB BLOW
The direct jab blow is the most difficult to stop since the
assailant who uses it realizes that a straight blow which
offers the minimum blocking target is much more difficult to
get away from than any type described in the preceding
pages. To defend against a straight jab blow one must
have a maximum of body coordination; one must be able
to move in any direction with proper balance and speed.
The physical standard of all personnel can move ahead
only when those engaged in law enforcement deepen their
appreciation of the value oi a high level of education for
physical efficiency.
THE BLACKJACK
The blackjack, commonly referred to as the “sap,”
“stinger/’ “billy,” “convince!,’’ or “equalizer,” is manufac-
tured in assorted styles and sizes. The homemade variety
often presents a more menacing appearance and is every
bit as effective, if not more so. The blackjack, or any object
bearing a similarity to the blackjack, is used to subdue,
paralyze, numb, disable, cripple, or produce concussion or
a fracture. Easily concealed, it can be used most effectively
because of its size. The principles in the method of using
the blackjack are identical to those of swinging the club.
The marked difference however, is the added extension of
reach. The club offers a greater advantage since it is several
times longer than the blackjack and eliminates close body
contact; whereas, in order to apply the blackjack, one must
work in close to the subject. However, the blackjack offers
certain advantages which more than compensate for its
lack of size. For instance, the blackjack can be concealed
in a coat sleeve, allowing the striking end, when needed
to slide into the palm, as illustrated in Figure 115.
108
Figure 115
The jack can be used to deliver lateral, hook, chopping,
and jab blows. Lateral blows can be delivered to either
side of the head and neck, chopping blows to the base of
the skull, shoulders, outstretched arms, and wrists. The jab
blow can best be used to deliver knockout blows to the
solar plexus, throat and groin, and less violent blows to
the liver and kidneys. Like the club, the blackjack should
not be used to crack down at the skull, as it may cause
fracture.
109
[^recciutions to ^xerctie
1.	Don’t play smart. Don’t create a scene. Don’t abuse your
authority.
2.	Don’t be sarcastic. Sarcasm betrays a lack of confidence in
one’s ability to perform his duties.
3.	Don’t argue, make no threats, use no profanity.
4.	Don’t ever use more force than necessary in making an arrest.
5.	Don’t remove your weapon from the holster unless you
intend to use it.
G. Don’t ever permit your prisoners to become separated.
Don’t ever secure a prisoner to any fixed object.
8.	Don’t use the police club to strike a vertical blow to the
top of the head.
9.	Don’t forget to conduct a preliminary search of the suspect
at the scene of arrest.
10.	Don’t fail to use the subject’s belt to limit the freedom of
his arms if the prisoner’s hands arc handcuffed in the front
position.
11.	Don’t grant any request to the prisoner prior to making a
preliminary search.
12	Don’t forget to double-lock the handcuffs.
13.	Don’t as covering officer or searching officer, cross your part-
ner’s line of fire.
11. Don’t ever under-estimate your opponent.
15.	Don’t try to disarm anyone using an automatic pistol or
revolver unless it is a matter of life or death.
16.	Don’t hesitate to call for help when necessary.
17.	Don t neglect to keep your weapon in perfect firing order.
18.	Don t ever permit anyone to come between you and your
prisoner.
19.	Don’t permit your prisoner to remove, destroy, or throw
away anything he may have on his person.
20.	Don’t ever approach your suspect from the side which will
pc emit him to grasp your weapon.
21.	Don t neglect to secure a prisoner properly when transport-
ing him by train or automobile.
110
22.	Don’t fail to move to the back of your prisoner after making
the arrest.
23.	Be Finn, use good judgment, be tactful, and exercise self-
control in all situations.
24.	Perform your duties with honor and dignity.
Ill
11 П "11 пл птллплптплл.п.п плл.ги
Some Opinions of
HANDBOOK OF SELF-DEFENSE
I'he illustrations are. the most graphic and instructive that
1 have seen in any treatment of this subject.”—Brig. Gen.
Francis E. Howard, MFC, Provost Marshal
“Written so that anyone interested can learn without the
use ol an instructor.”—T. 1 smauchi, Japan Judo Professor
Fills a need in the Army not available elsewhere in such a
condensed and comprehensiv e form.”—Colonel В. V.
Bryant, MFC, Provost Marshal
I sincerely hope that a way may be found for its utiliza-
tion in training Military Police.”—Lt ( ol. William A.
Shelton, MFC, Provost Marshal
“No other publication in this field otfers so much . . . in-
valuablc to any individual who must deal officially with the
criminal element. —George C. Ilehble, Lieutenant (Re-
tired'), White House Police
: U L l_ L' l- LAj A. AJ 1_ L LL L L LA LAJ L UAJA. Ll 1