/


Tags: weapons military affairs machine gun
Year: 1969


Text
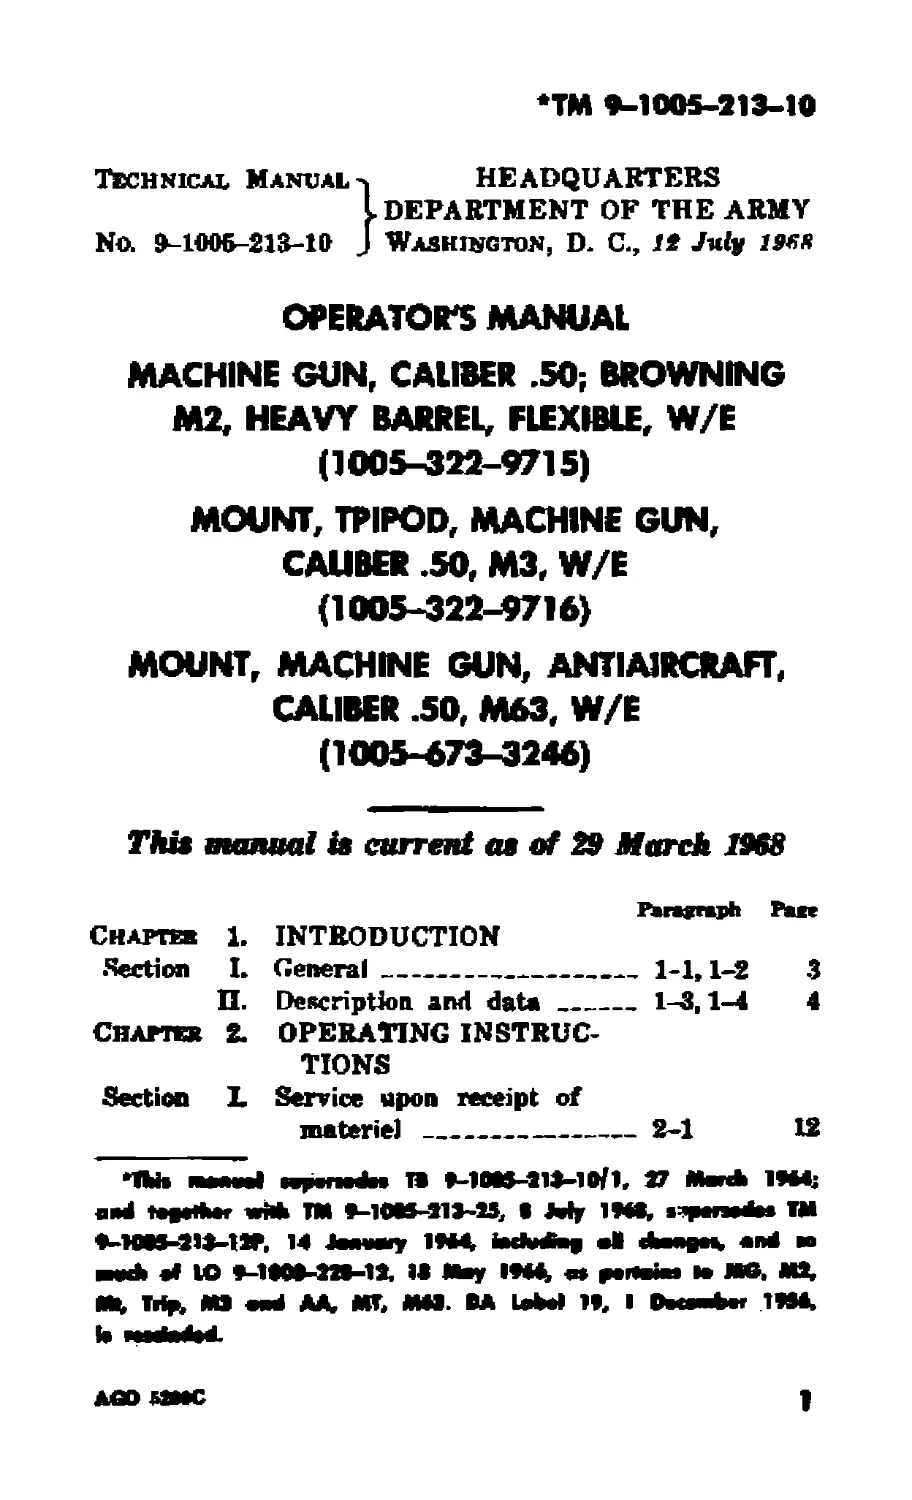
                    •ТМ 9-1005-213-10
Technical Manual-. HEADQUARTERS
I DEPARTMENT OF THE ARMY
No. 9-1005-213-10 J Washington, D. C., it July 19СЯ
OPERATOR'S MANUAL
MACHINE GUN, CALIBER .50; BROWNING
М2, HEAVY BARREL, FLEXIBLE, W/E
(1005-322-9715)
MOUNT, TPIPOD, MACHINE GUN,
CALIBER .50, М3, W/E
(1005-322-9716)
MOUNT, MACHINE GUN, ANTIAIRCRAFT,
CALIBER .50, M63, W/E
(1005-673-3246)
Thu manual i» current a» of 29 Afordb 2968
Ruactaph Pace
Chaptes 1. INTRODUCTION
Section I. General________________1-1,1-2	3
П. Description and data____1-3,1-4	4
Сиднея 2. OPERATING INSTRUC-
TIONS
Section L Service upon receipt of
materiel _________________________2-1	12
ЧЫ1 awwl awpanedba П »-10eS-ll»-ll>/l, 27 Monk 1M4;
and tapedtor wfcfc ТЖ *-lUS-212~2S, • My 1MB, a?penadas TM
^-WOS-212-llP, 14 Jmwmt IMA ‘•**•1 e> Aaapaa, and an
mA af to e-100a-22»-ia, IB Moy IMA « partmna to MG, MS.
Mt, Trip. М2 and AA, MA MU. BA LaW T*. I Oat—fca> IM*.
Ib
ago «вес
1
TtawttMh Vno>
IL Controls and instruments _ 2-2,2-3	13
ГП. Operation under usual
conditions __________________2-4—2-8 17
IV. Operation under unusual
conditions _____________________2-9—2-13 45
Chapter 3. MAINTENANCE IN-
STRUCTIONS
Section I. Operator's tools and
equipment _____________________________3-1	48
П.	Lubrication instructions_3-2—3-4	48
III.	Preventive maintenance
checks and services______3-5	52
Section IV.	Troubleshooting__________3-6, 3-7	56
V	.	Maintenance of machine gun 3-8—3-10	58
VL	Maintenance of Tripod
Mount, М3________________3-11—	83
3-13
VH. Maintenance of Anti-
aircraft Mount, M63_____________3-13—	83
3-16
Chaftbk 4. AMMUNITION 4-1—4-8 86
5. DEMOLITION OF MA-
TERIEL TO PREVENT
ENEMY USE 5-1	»
Антамх A. REFERENCES----------------------- 90
B. BASIC ISSUE ITEMS LIST__________	«
1
CHAPTER 1
INTRODUCTION
Section I.	GBUHtAl
1-1. Scope
This manual contains instructions for the opera-
tion and maintenance of Caliber .50 Machine Gun,
Browning, М2, Heavy Barrel, Flexible, Machine
Gun Tripod Mount, MS, and Machine Gun Anti-
aircraft Mount, M63 allocated to the operator/
crew by the MAC.
1-2. Forms, Record* and Reports
a.	General. DA Forms and procedures used for
equipment maintenance will be only those pre-
scribed in TM 38-750, Army Equipment Record
Procedures.
b.	Recommendations for Maintenance Manual
Improvements. Report of errors, omissions, and
recommendations for improving this publication
by the individual user is encouraged. Reports
should be submitted on DA Form 2028 (Recom-
mended Changes to DA Publications) and for
warded direct to Commanding General, U.S.
Army Weapons Command, ATTN: AMSWE-
SMM-P, Rock Island, DI. 61201.
AOO UWC
3
Section II.	DESCRIPTION AND DATA
1—3. Description
a.	Machine Gun. The machine gun (figs. 1-1
and 1-2) is an automatic, recoil-operated, alter-
nate-feed, link-belt fed, air-cooled, crew-operated
weapon. Ft is used as a ground gun mounted on
Tripod Mount М3 or Antiaircraft Mount M63.
b.	Tripod Mount, М3. The tripod mount (figs.
1-3 and 1-4) is a light weight portable folding
mount which permits a high degree of accuracy
and control of fire.
c.	Antiaircraft Mount, M63. The antiaircraft
mount (figs. 1-5 and 1-6} is a four-legged, low
silhouette, portable mount used for antiaircraft
fire.
1-4. Tabulated Data
a.	Machine Gun.
Weight (approx.) ________________________ .	84 Ih
Weight of barrel ....	.. .--- -------24 lb
Length of gun _____________________ __________65.13 in
Length of barrel_____________ . -45 in
Length of rifling (approx) --------.. ---- - - .41.88 in
Number of lands and grooves ...	---------------8
Twist, right-hand ....................one turn in 15 in
Feed	_______________...--------------link-belt
Operation . ...	....	...... short recoil
Cooling_______________________________ .	........air
Muzzle velocity (approx) ..	_______ . . .	3,050 fps
Rate of fire (cyclic) ______. __. ......450-550 rds/m
Maximum range (approx) 7,440 yd or 6,785 meters
Maximum effective range
(approx) ... ______ . 2,000 yd or 1,830 meters
AGO wosc
ЛОО SMOC
Я •• UH Г rfcf:-! vlfW
Wf
Figure 2-2, Caliber .50 Machine Gun, Browning, M£t ИВ, Flexible.
Ш
Э0№ OOY
BACK PLATE
ASSEMBLY
COVER AND
RECEIVER GROUPS
BOLT GROUP
AND ROD
ASSEMBLY
L
WE 14502
BARREL
GROUP
BARREL BUFFER
GROUP
Figure 1-e. Caliber .50 Machine Gun, Browning, Me, HB, Flexible—
major groups and assemblies.
DRIVING SPRING
ROD ASSEMBLY
BOLT
GROUP
BARREL EXTENSION
GROUP
BARREL CARRIER
ASSEMBLY
SHOULDER HEADLESS
PIN (BOLT STUD)
BARREL
ASSEMBLY
FLASH
HIDER
Figure 1-3, Tripod Mmmt, М3—right rear view.
AGO 5SMC
WE 13432
Figure 1-4. Tripod Mount, MS—Major groups and assemblies.
Figure 1—5. Antiaircraft Mount, MM—te/t rear view.
b.	Tripod Mount, М3.
Weight (approx) . -	44 1b
Length (extended) ....	74.50 tn
Folded ..	___. .	......	45.50 in
Spread of extended rear legs . .	61.50 in
Height . .... ...________________ _____ _______ -.14 in
Traversing range without releasing traversing and
elevating mechanism assembly	.	45"
Free	- ........................   360-
Traversing bar assembly graduation . ...	800 mil
ago szooc
9
Figaro 1-H. Antiaircraft JV«wtt, МвЛ—
major grtntpi and вметЫш.
10
ЛОО ИНС
Maximum devetton------- —.................. .....
Maximum deprearion ......_____________ __________14*
Least inctmnent of elevation . __________________1 aril
e. AnHaireraft Mount, MJS.
Weight (overall) _______________________________144 В
Foor legs----------------------------------------14 lb
Вам assembly ..____________.._________ __________54 lb
Elevator sawmbly---------------------------------12 lb
Cradle assembly . .. ............................44 >
Anununitioo box tray assembly ............ ......10 lb
Height (overall) .. -----------------------------41 in
Length of leg------------------------- ----------M in
Diameter of base (with hg assembled) .. ...... .52 In
Maximum elevation _______________________________85*
Maximum depression------------- ... . ... . -----29*
Traverse__________ .... ........................  MO*
mo same
II
CHAPTER 2
OPERATING INSTRUCTIONS
Section I. SERVICE UPON RECEIPT OF MATERIEL
2-1. Inspecting and Servicing the Equipment
Refer to table 2-1.
Table t-1. Service Upon Receipt of Material
Step	Action	Reference
1	Check for missing items. Net*. Jt*m« must tgrtt with ^uic 1*- вве ItettiB Ldrt. Machine Gun	Appendix В
2	Field strip and inspect for:	Figs. 1-2 and
	Missing parts Proper assembly Ctattiwt.- Make Certain buffer assembly does not contain oiL If oo^ notify organizational main* tenance personnel.	3-1—3-20
3	Clean and lubricate, if necessary.	Table 3-1
4	Reassemble weapon, step 2, above. Neta. laatal арате hamel imwtlbiy to яшке certain П leeka aeeunbr In reedier.
5	Check and adjust headspace and	Tables 2-3
	timing.	and 2-4
«	Hand function, using dummy cartridge М2, 1305-028-5384.
12
AGO UWC
Table t-1—Continued
Step	Aetkm	Kefemee
Tripod Mount, MS
1 Clean and lubricate, if necessary Table 3-1
2 Check traversing and elevating
mechanism assembly for prop-
er function.
Antiaircraft Mount, M61
1 Clean and lubricate, if necessary Table 3-1
2 Examine mount for completeness
Section II. CONTROLS AND INSTRUMENTS
2-2. General
This section describes the various controls and
instruments and provides the operator/crew suf-
ficient information to insure the proper opera-
tion of machine gun, tripod mount, and antiair-
craft mount.
2-3. Controls and Instruments
Refer to table 2-2.
Table t-t, Controls and Instruments
Control or instrument	Function	Bettienee
	Machine Gun
Bott latch	To release the bolt from	Fig. 2-12
release	the rearward position.
Buffer tube	To lock the bolt latch re-	Fig. 2-12
sleeve	lease in the open position
	to permit gun to fire
	automatically.
Back plate	To seeure/releaae back	Fig. 3-3
latch	plate on receiver of gun.
AGO sasoc
13
Table i-г—Continued
Control er irwtrument	Font tian	Reference
Baek plate latch lock	To secure/release hack plate latch.	Fig. 3-3
Trigger	To fire the machine gun.	Fig. 2-12
Retracting slide	To manually cock the ma- chine gun.	Fig. 2-12
asssnbly handle
Cover latch	To secure/release cover as- sembly.	Fig. 3-18
Front and	To zero and accurately	Figs. 3-1
rear	sight the weapon.	and 3-6
sights
Trigger	To connect trigger to sear.	Fig. 2-3
lever
Plain	To adjust timing.	Fig. 2-3
knurled nnt
	Tripod Mount, М3
Front Leg clamping handle	Secures/releases front leg of mount. Keeps mount secured in pre-deter- mined position.	Fig. 2-5
Pintle lock assembly	Secures/releases mount tri- pod pintle on tripod head.	Fig. 2-6
Sliding sleeve	Secures/releases travers- ing bar assembly to right rear leg.	Fig. 2-5
Indexing lever assembly	Permits legs to be extended by alining the stud on indexing lever with holes in leg extension. Se- cures/releases legs by tightening/loosening leg clamping handle.	Fig. 2-5
14
AGO S200C
Table	—Continued
Control or instrument	Function	Retereoee
Quick release pin	Secures/releases rear of machine gun to/from traversing and elevating mechanism assembly.	Fig. 2-6
Sleeve lock latch	Secures/releases right rear leg for correct extended/ open position.	Fig. 2-5
Sliding sleeve stop	Provides support for mount by keeping tra- versing bar assembly and sliding sleeve in cor- rect position.	Fig. 2-5
F ront leg clamping screw nut	Provides support to front leg when clamping han- dle is secured on leg.	Fig. 2-7
Traversing bar assembly	Secures/releases rear legs of mount when in locked/unlocked position.	Fig. 2-5
Yoke	Provides support with quick release pin in instailing/removing ma- chine gun from rear of mount. Antiaircraft Mount, M63	Fig. 2-6
Cradle locking pin	Secures cradle in hori- zontal or vertical posi- tion. Releases when ele- vation change is desired.	Fig. 2-9
Rear mounting pin	Secures/releases rear of machine gun to mount.	Fig. 2-9
Front mounting pin	Secures/releases front of machine gun to mount.	Fig. 2-9
AGO 52NC
15
ТаЫв t-t—Costfamd
СмМог fuatnoant		Btfoene»
Firing handle rod	Provides positive contact with aide plate trigger assembly to fire machine gun.	Fig. 2-14
Side plate trigger assembly	Actuates sear slide to fire machine gun.	Fig. 2-14
Pintle lock elamp	Secures/releases pintle of cradle and yoke* assem- bly to/from elevator as- sembly.	Fig. 2-8
Ammunition box tray lever	Secures/releases ammuni- tion box tray assembly to/from cradle.	Fig. 2-10
Headless shoulder pin	When depressed, locks/re- leases ball bearing as- sernby for removal/in- stallation of the elevator assembly.	Fig. 2-8
Leg alining lug	Provides positive lock of mount leg with mount base.	Fig. 2-8
Bear pressure strap	Maintains required pres- sure on ammunition box to insure continuous feeding of ammunition into machine gun.	Fig. 2-13
Top pressure strap	Insures rapid, continuous feeding of ammunition into gun by keeping belted ammunition from twisting white holding ammunition in place.	Fig. 2-13
1«
AGO SN0C
Table i-S—Continued
Control от initninirTit	Funetkm	Befcronee
Lock assembly	Secures/releases elevator assembly to/from fixed position when machine gun is being fired.	F ig. 2-8
Machine gun gripe	Permits operator to con- trol, aim, and fire ma- chine gun.	Fig. 2-14
Section 111. OPERATION UNDER USUAL CONDITIONS
2-4. Preparation for Operation
Refer to table 2-3.
Tails 2-3. Preparation for Operation
Stev	Procedure	Reference
1	Machine Gun Perform "before firing" preven-	Table 3-3
2	tive maintenance checks and services. Check and/or adjust headspace.	Table 2-4
3	Check and/or adjust timing.	Table 2-5
4	Install barrel carrier assembly.	Fig. 2-4
1	Tripod Mount, MS Open legs on tripod head group.	Fig. 2-5
2	Install traversing and elevating	Fig. 2-6
3	mechanism assembly. Install machine gun on mount.	Fig. 2-6
4	Install barrel assembly.	Fig. 2-7
5	Check and/or adjust headspace.	Table 2-4
6	Check and/от adjust timing.	Table 2-5
400 S30*C
17
Table i-i—Continued
Step	Procndur*	Reference
1	Antiaircraft Mount, M63 Install mount legs on base assembly.	Fig. 2-8
2	Install elevator assembly.	Fig. 2-8
3	Install trigger frame and cradle and yoke assemblies and cradle locking pin to hold in hori- zontal position.	Fig. 2-9
4	Install ammunition box tray assembly.	Fig. 2-9
5	Lock lever of tray assembly.	Fig. 2-10
3	Install machine gun on mount with the front and rear mount- ing pins.	Fig. 2-11
	Nets. After installation of mnehine pin, make certain spring plunger lock as- sembly к in the locked position to prevent accidental firing of machine gnn.	Fig. 2-14
7	Install barrel assembly.	Fig. 3-1
3	Check and/or adjust headspace.	Table 2—4
9	Check and/or adjust timing.	Table 2-5
2-5. Checking and Adjusting Headspace
Refer to table 2-4.
2—6. Checking and Adjusting Timing
Refer to table 2-5.
a	AGO 52S0C
Table t-Л. Checking and Adjusting Headspace
Step	Procedure	Reference
	Note. Headspace must be checked each and every time the bam] и assembled to the machine юти for firing. Warning: Improper headspace ean cause malfunctioning of the machine gm and frequent dam- age to parts and/or injury to per- sonnel.
1	Open cover.	Fig. 3-1
2	Retract bolt (approximately 3/8 inch) using retracting slide handle until locking tag on barrel locking spring is cen- tered in hole of right side plate of receiver.	Fig. 3-1
3	Hold bolt in above position and screw barrel fully into barrel extension. Note. Should handle be released. the re* ccrilini? parts will remain out of battery position (a separation will exist bet**een barrel extension and trunnion block).	Fig. 3-1
4	With handle retracted, unscrew barrel two notches (clicks). Release handle.	Fig. 3-1
5	Cock machine gun. Note. With machine gun cocked, firing pin is withdrawn into face of bolt allott- ing headspace gage to be inserted into T-alot oa bolt. Cautian: Do not fire machine gun when headspace gage ia in T-alot. Thia ceuld damage firing pin and gage.	Fig. 2-1
ago sane
19
Га4£е S-i—Continued
Step	Procedure	Beference
6	Hold handle, release bolt and al- low bolt to return to battery position slowly to prevent bolt slamming.	Fig. 3-1
7	Retract recoiling parts approxi- mately 1/16 inch to insure that locking surfaces of breech lock and bolt are in proper contact.
8	Raise extractor.	Fig. 2-1
9	Insert GO end of headspace gage into center of T-slot between face of bolt and barrel. Cautwi: Do not force gage.
10	If GO end of gage enters T-slot, to center ring of gage, and the NO GO end will not enter, headspace is correct. Headspace too Tight If GO end of gage will not enter T-slot freely, perform follow- ing procedures:
11	Retract bolt, step 2 above.
12	Unscrew barrel one notch (click). Return parts to battery po- sition.	Fig. 3-1
13	Retract recoiling parts, step 7 above.
14	Check headspace, step 10 above. Headspace Too Loose
	If NO GO end of gage enters T-slot, perform following pro-	Fig. 2-1
	reduces:
20
AGO
Table S-t—Continued
оИР	Procedure	Reference
15	Retract bolt, step 2 above.
16	Screw barrel into barrel exten- sion, one notch {click). Re- turn parts to battery position.
17	Retract recoiling parts, step 7 above.
18	Check headspace, step 10 above. Note. If proper headspace adjustment cannot be obtained, notify organiaationai maintenance personnel.
Tabie t-5. Checking and Adjusting Timing
Step	Procedure	Reference
1	Insure headspace is correct.	Table 2-4
2	Cock machine gun. (Retract bolt assembly to rear position and slowly release to forward po- sition.)
3	Raise extractor.	Fig. 2-2
4	Retract bolt sufficiently to insert NO FIRE (0.116-inch) gage between trunnion block and barrel extension group. Re- lease retracting slide handle.
5	Depress the trigger. The firing pin SHOULD NOT RE- LEASE. In the event it does release repeat steps 2 and 3.
	FFtrntfag: Do not attempt to remove back plate unless the bolt ie in forward position. Do not attempt to cock machine gun without the back plate as- sembled to machine gnn.
AGO S80OC
21
Table 2-5—Continued
Step	Procedure	Reference
6	Remove back plate.	Fig. .4-3
7	Screw the timing adjustment nut all the way down (counter- clockwise) .	Fig. 2-3
8	Place the FIRE (0.020-inch) gage between trunnion block and barrel extension group. Release retracting slide handle.	Fig. 2-3
9 10	Attempt to release firing pin by lifting up on rear end of trigger lever. Screw up (clockwise) on timing adjustment nut one click at a time and attempt to release firing pin after each click until the firing pin does release. When the firing pin does re- lease move the adjusting nut two more clicks clockwise (up).	Fig. 2-3
11 12 13 14	Replace back plate assembly. Repeat steps 2 through 5. The firing pin SHOULD NOT RE- LEASE. Repeat steps 2 and 3. Place FIRE gage between trun- nion block and barrel exten- sion and attempt to release firing pin by pressing the trig- ger. The firing pin SHOULD RELEASE. Not*, If proper timing adjustment can- not be obtained, notify orftanhnlkmal maintenance peraonnel.	Fig. 3-3
22
AGO 5N0C
8
о»
I
STEP 2: "NO-GO" ENO Of GAGE INSERTED
IN T-SLOT OF BOLT GROUP.
STEP I: ’СО" END Of GAGE INSERTED IN
T-SIOT OF BOLT GROUP,
WE 14940
Figure, f -i. Checking and adjusting headspace.
AGO 52OOC
Figure 2--Ц. Checking ar-4 mi justing timing. (1 of 2)
STEP 2: ADJUSTING PLAIN KNURLED NUT.
I /	*	\ WE 14939
Figure t-3. Cheeking and adjusting timing. (2 of 2)
AGO -*>20OC
25
STEF I:
POSITIONING BARREL CARRIER ASSEMBLY.
NOTE. HOLD BARREL ASSEMBLY SO THAT MUZZLE
ENO IS DOWN AFTER SLIDING CARRIBI
ASSEMBLY ON.
REMOVE
AT
END
OF
STEP 2: REMOVE/INSTALL BARREL
CARRIER ASSEMBLY.
WE I AS 25
Figure f-4. Inatailation/remaval of barrel carrier assembly.
I

fiffurt i-S. Inatallatwn/removal of Tripod Mount, М3.
в
AGO I^NC
Figure t-6. Installation/removal of machine, gun on Tripod Mount, М3. (1 of 2>
NOTE: RETRACT RETRACTING
SLIDE HANDLE, INSTALL
LINK.
Figure t-7. fnatallation/removai of machine gun on Tripod Mount, Ms. (2 of 2)
Figure t-в- Installation/removal of Antiaircraft Mount, M63. <1 of 3)
30
AGO S200C
fi'iffurr t-g. In»tallatwn/removal of Antiaircraft Mount, M63. (2 of 3)
AGO ИМС
Figure t-10. Installation/removal of Antiaircraft Mount, МвЗ. (9 of 9)
8
5S00C
Aipttre X-ll. Inetallation/removal of machine gun on Antiaircraft Mount, M6S.
2-7. firing Procedure*
Refer to table 2-6.
Table t-в. Firing Procedure*
Step	Frocedore	Beferenee
	Afote. Seteet type of Are desired > «MtHned briow. Semiautomatic Fire The bolt latch release must be in	Figs. 2-12
	the up position (not locked	and 2-14
	down). For each round fired, press the bolt latch release, then the trigger. VanuMg. When bolt latch re- lease and trigger are both held down, machine gun will fire auto- matically. Automatic Fire Press bolt latch release down and	Figs. 2-12
	Jock by turning the sleeve lock	and 2-14
1	on the back plate buffer tube sleeve. Firing Machine Gun on Tripod Mount, MS Loading Open ammunition box cover or	Fig. 2-12
2	remove the cover. Open machine gun cover and in-
3	sert the double loop end of am- munition in feedway until first cartridge is held by belt hold- ing pawls. Close cover of machine gun.
4	Half-Load Machine Gun Retract the retracting slide	Fig. 2-12
	handle assembly, polling the
A6O USSC
Table f-tf—Continued
Step	Procedure	Reference
5	bolt all the way to the rear. Re- lease handle. Note, If machine rod is set for SEMI- AUTOMATIC FIRE the bolt usemUy will remain in retrward position. In thfc event move the retracting handle forward before releasing the bolt with the bolt release. If the machine gua is set for AUTOMATIC FIRE the retracting han- dle will go forward with the bolt when released. Fully Load Machine Gun Repeat step 4.
6	Press trigger to lire the machine	Fig. 2-12
	gun. Note. For immediate action in сам of failure to fire, refer to table 2-7. Removing Ruptured Cartridge Сам
1	Open cover, remove ammunition
2	belt. Clear the machine gun of all live
3	ammunition. With the bolt in the forward
4	position, insert the ruptured cartridge ease extractor into the feedway and hook the cart- ridge extractor assembly of the bolt over the ruptured cart- ridge case extractor. Close cover, retract the bolt and
5	release to forward position. Retract the bolt and the ruptured	Fig. 2-15
6	cartridge case and extractor will be extracted from the chamber. In the event step 3 does not re-	Figs. 2-4
	move the ruptured cartridge	and 2-7
AGO smc
35
Table t-t—Continued
Step	Procedure	Reference
7	case, remove the barrel assem- bly and barrel carrier assem- bly and install the spare barrel and carrier. Ncte. 1л the eve>t that the ruptured cartridge case cannot be rerowed notify organisational maintenance peroonneL Adjust headspace and timing.	Tables 2-4
8	Load and continue firing until	and 2-5
	time permits to extract the ruptured cartridge case from the barrel. Vote. Ал емка aa possible notify organi- zational maintenance personnel to replace flash hkler аавешЫу. Firing Machine Gun on
1	Antiaircraft Mount, M63 The loading and firing procedures	Figs. 2-13
	are the same as those for the	and 2-14
2	mount, М3, except the machine gun is fired by pressing the machine gun grips which con- trol the firing lever connected by a linkage to the side plate trigger mounted on the left side plate of the machine gun. Note. The «ide plate trigger operatea through the side plate to the sear slide oa the bolt stediibtr The «ear slide roost bo assembled into the bolt вмеглЫу from the LEFT SIDE so the «nan end of the sear slide will mate with the aide plate trigaer. The machine gun may be fired
3	using the trigger on the back plate, if desired. The mount and machine gun can
	be traversed by unlocking the
3*
AGO SSSOC
Table S-6—Continued
Step	Procedure	Ref-emee
lock assembly on the elevator
assembly.
4 The firing lock assembly on the
left side of the trigger frame
is used as a safety. The cradle
lock pin must be removed to
elevate or depress the machine
gun.
After Firing
1	Raise cover and remove ammuni-
tion belt.
2	dose cover.
3	Retract bolt and lock in rear-
ward position.
4	Raise cover and inspect chamber.
5	Hold handle, release bolt, and al-
low bolt to move slowly
forward.
6	Press trigger.
FFnrautg. When machine gun
han been in action, dear ma-
chine gun before anyone moves
in front of mnzdet Clearing
consists of unloading the ma-
chine gun, but not releasing the
bolt or pressing the trigger.
7	Perform after-operation preven- Table 3-3
tive maintenance checks and
services.
Removal of Machine Gun and
Tripod Mount, М3
Refer to figures 2-5 through 2-7.
Removal of Machine Gun and
Antiaircraft Mount, M63
Refer to figures 2-8 through
2-11.
AGO 32MC
37
W
CO
AGO
b'igure 2-12. Loading, firing and unloading of machine gun on Tripod Mount, М3.
Figure 1-13. Loading, firing and unloading of
machine gun on Antiaircraft Mount. MfiS. (1 of 2)
AOO SJOOC
39
AGO Г.'
Figure 2-1 Л. Loading, firing and unloading of machine gun on Antiaircraft
Mount, M63. (2 of 2)
8
ASSEMBLY
WE 14488
Figure S-1S. Rmoval of rupturod cartridpe eaot.
2-4, Firing MolfuncHcMM
a.	General. The malfunctions classified as mis-
fires, hangfires, cook-offs and stoppages are nor-
mally the result of improper weapon or ammuni-
tion maintenance and/or the use of unauthorized
ammunition. The precautions described below are
applicable to each specific type of malfunction
rather than the occurrence of the malfunction in
a specific weapon. All personnel concerned will
know the nature of each malfunction, described
below, as well as the proper preventive and cor-
rective procedures in order to avoid injury tc
personnel or damage to materiel.
b.	Misfire, Hangfire, Cook-off, and Stoppage.
(1)	Misfire. A misfire is the failure of a
chambered round to ignite when the firing mech-
anism is actuated. Such failure can be due to an
ammunition defect or faulty firing mechanism in
the weapon. A misfire in itself is not dangerous,
but because it cannot be immediately distin-
guished from a hangfire, it should be handled as
described in table 2-7.
Warning. Because of the possibility of a
cook-off, (3) below, never attempt to remove a
round that is chambered in a very hot weapon.
All personnel should emain dear of the breeeh.
(2)	Hangfire. A hangfire is a delay in the
igniting of the propellant charge after the primer
has been struck by the firing pin. It is not easily
distinguished from a misfire. Time intervals pre-
scribed in table 2-7 must be observed before open
mg the cover after a failure to fire.
43
AGO ИИС
Warning. During the prescribed time in-
tervals, the weapon win be kept trained on the
target and all personae] will stand clear of the
barrel assembly.
(3)	Cook-off. A cook-off is the igniting of a
round, caused by the heat of a very hot barrel,
and not caused by actuating the firing mechanism.
Observe the same precautions as for a hangfire.
A cookoff may be avoided by immediately firing
ammunition loaded in a hot machine gun or by
unloading the weapon in the time specified in
table 2-7.
(4)	Stoppage. Stoppage is any interruption
in the cycle of operation caused by faulty action
of the machine gun or ammunition. Any stoppage
must be handled as a misfire.
c.	Immediate Action in Case of Failure to Fire.
liefer to table 2-7.
Table t-7. Immediate Action in Cate of Failure to Fire
8Up
РпаЛчп
Cool Weapon
When a stoppage occurs (failure to fire) before
completing a ISO-round series (starting from a
cool machine gun), perform the steps listed below,
in given order:
Note. Keep wnpoe temed on tareet.
1 Wait 5 seconds in the event of a hangfire.
2 Retract bolt, and push retracting slide handle
forward.
3 Depress bolt latch (when applicable) to return bolt
to battery position.
4 Depress trigger and attempt to fire.
Net*. If the ЪоК Ыек nl»«e> aad trlseer ate detmeeed at tbe
AGO UMC
Table f-7—Continued
Procedure
6
7
1.
2
3
4
44
вате time, the bolt gon forward and the weapoa ahould Яте
Mtoaielballr,
If weapon still fails to fire, wait' 5 seconds, retract
bolt (engage with bolt latch) and return handle
forward.
Note. If the bolt latch release fa in loclnd (decreased) position,
the baft haa moved forward and another пал nd can be chambered.
Open cover assembly, and remove belted ammunition.
Note. InapeeL to Loan re -weapon fa clear.
Check to determine cause of stoppage, refer to table
3-4.
Hot Weapon
When a stoppage occurs (failure to fire) after firing
150 rounds, either spasmodically or continuously
within 2 minutes, perform the steps listed below,
in given order:
Cntfonr Do not open cover ааомвЫу.
Wait 5 seconds in the event of a hangfire.
Immediately retract bolt, and return handle forward.
Wernfay. The danger of a cook-off exists when the
barrel u hot. Immediate action most he applied
within 10 seconds. Under NO circumstances will
the cover be opened during thia period.
Attempt to fire by depressing bolt latch release and
trigger at the same time.
If firing cannot be resumed, repeat steps 1 and 2
above and perform following procedures:
1—Open cover assembly, and remove belted ammuni-
tion.
Note. Inspect to inasre «reopen fa
2—Cheek to determine cause of stoppage, refer to
table 3-4.
If the bolt cannot be retracted when applying im-
mediate action, the bolt must remain locked in
battery position {do NOT open cover assembly).
ago ease
ГеЫг £-7—Ceotiomd
AUbw we]M* to cool al leati 5 minutes to guard
against a cook-off. After waiting 5 minutes, per-
form the operations outlined for a eool weapon.
6 In the event a misfire occurs after an intentional
cessation of firing, and the bolt is forward at time
trigger is depressed, the bolt must remain locked
in battery position (do NOT open cover assembly).
Allow weapon to tool at least 5 minutes to guard
aaginst a cook-off. After waiting 5 minutes, per-
form the operations outlined for a coo] weapon.
Section IV. OPERATION UNDER UNUSUAL CONDITIONS
2-9. Operation in Extreme Cold
a.	All moving parts of machine gun and mounts
must be kept free of moisture. Before firing in
temperatures below 0° F., completely disassemble
and clean all parts of the machine gun and oil
with weapons lubricating oil, LAW (MIL-L-
14107).
b.	When the machine gun and mounts are
moved indoors they must be brought to room
temperature, cleaned, and lightly oiled with LAW.
c.	If the machine gun has been fired, the bore
must be immediately swabbed out with several
patches satured with CR (MIL-C-52399), use dry
patches to remove all solvent film.
2-10. Operation in Extreme Heat
In climates where temperature and humidity are
high, the weapon and mounts should be
AGO ЛМ6С
45
thoroughly inspected daily, and if necessary, dis-
assembled to permit drying and oiling of parts.
2-11. Operation in Dusty or Sandy Areas
a.	In climates where sand and dust can enter
the working parts and bore of the weapon, the
nachine gun should be disassembled and wiped
dean at least once daily.
b.	The lubricants on exposed and noncriticai
operating surfaces of the mounts should be wiped.
This will prevent windbown sand from sticking
to the lubricating oil and forming an abrasive.
c.	Immediately upon leaving sandy terrain,
clean and lubricate with general purpose lubricat-
ing oil, PL special (MIL-L-644).
d.	After handling, wipe with a dry cloth to re-
move perspiration which will cause rust.
e.	During sand or dust storms the machine
gun and mounts should be kept covered, if pos-
sible.
2-12. Operation in Hot, Humid or Salty Atmosphere
Hot, humid, or salty atmospheric conditions
necessitate more frequent cleaning and lubri-
cating of bore and exposed metal surfaces. When
weapon and mounts are not in use, cover surfaces
with a film of general purpose lubricating oil, PL
special, and keep covers in place.
2-13. Operation After Exposure to Water
After exposure to water (accidentally splashed
or submerged), water seepage into lubricated
4*
AGO SZOSC
parts will occur. Drain, wipe dry, clean and lubri-
cate the weapon and mounts which have been
exposed to water, especially salt water, as soon
as practical.
AGO MKC
47
CHAPTER 3
MAINTENANCE INSTRUCTIONS
SecHon I. OPERATOR'S TOOLS ANO EQUIPMENT
3—1. Special Tools and Equipment
Refer to appendix B.
SecHon R. LUBRICATION INSTRUCTIONS
3—2. Cleaning and Lubrication Materials
Refer to table 3-1 for cleaning and lubrication
materials and stock numbers for requisitioning
purposes.
3-3. Detailed LubricaHen Information
Refer to table 3-2.
3—4. Reports and Records
Report unsatisfactory performance of material
or adverse effect of prescribed lubricants and
preserving materials, using DA Form 2407, Main-
tenance Request
4R
AGO ИЯС
Tatte 3-1. Msieriah Rtftmi for Mmiomux 7теЯм>
Mcrkl steak Mb.	im
8020-244-0153	BRUSH, ARTISTS: tnetal, ferrate, flat, chieel edges, 7/16 w, 1-1/8 1g exposed bristle
7920-205-2401	BRUSH, CLEANING, TOOL ANO PARTS: Rd, 100 percent tampieo fiber, 1-1/16 at ferrate brush dia, 2-7/8 dear of block brush 1g
6850-965-2332	CARBON REMOVING COMPOUND: (P-C-lll) (5 gal pail) CLEANING COMPOUND SOLVENT: (CR)
6850-224-6656	2 ox can
6850-224-6657	6 ox can
6850-224-6663	1 gal can
5350-221-0872	CLOTH, ABRASIVE: crocus, ferric oxide and quartz, jean-cloth-backing, dosed coating, 9 w, 11 lb, 50 sh-sleeve (CA)
6850-281-1985	DRY CLEANING SOLVENT: (SD) (1 gal can) LUBRICATING OIL, GENERAL PURPOSE; {PL Special)
9150-273-2389	4 ox can
9150-231-6689	1 qt can
9150-292-9689	LUBRICATING OIL, WEAPONS: {LAW) (1 qt can)
7920-205-1711	RAG, WIPING: cotton (50 lb bale)
AGO ttKC
49
ТаЫс )-!. Detailed Lubrication Information
1
2
3
4
б
6
7
1
2
3
М
USUAL CONDITIONS
Machine Gun
Immediately after firing, dean all powder fouled
rarfaces with (CR) solvent cleaning compound
(MIL-C-6 2399).
Caution: Do not use cleaaing solvent to dean back
plate sssrwbly. Use dean dot!» to remnve foreign
matter. Lubricate exterior VERY LIGHTLY with
ой saturated doth.
Disassemble machine gun into major groups and
assemblies (figs. 3-1 through 3-20).
Note. White arrows shown on ilktstrations Indicate fineernWy,
Marlr, arrow* indicate nutmhly.
Clean the components with SD, dry cleaning solvent
(P-D-680).
Wipe dry and oil with PL special (MIL-L-644) gen-
eral purpose lubricating oil, above 0* or LAW
(MIL-L-U107), weapons lubricating oil, below 0°
Thereafter, dean and oil as above every 90 days,
unless inspection reveals more frequent servicing
is required.
Assemble the major groups and assemblies (figs. 3-1
through 3-20).
Remove oil from barret bore before firing.
Tripod Mount М3
Disassemble mount into major groups and assem-
blies (figs. 2-Б through 2-7).
dean with SD, dry cleaning solvent (P-D-S80).
Ifeie. ТЫ teaveniiw and dnaUngr mcehaidm —irmfcly will
be cleaned wttb a dry deth only.
Wipe dry and oil moving surfaces with PL special
(MIL-L-644), general purpose lubricating oil,
above O' or LAW (MIL-H4107), weapons lubri-
cating oil, below 0*.
AGO Mate
Step
4
5
1
2
4
Б
1
2
3
ago
Table S-i—Continued
PToeedm
Thereafter, clean and oil as above every 90 days
unless inspection reveals mere frequent servicing is
required.
Assemble the major groups and assemblies. (Reverse
steps in figure 2-6 through 2-7).
Antiaircraft Mount M63
Disassemble mount into major groups and assemblies
(figs. 2-8 through 2-10).
Clean with SD, dry cleaning solvent (P-D-680).
Wipe dry and oil all moving surfaces with PL special
(MIL-L-644), general purpose lubricating oil
above 0* or LAW (MIL-L-14107), weapons lub-
ricating oil, below 0*.
Thereafter, dean and oil as above every 90 days
unless inspection reveals more frequent servicing
is required.
Wets. Bscry 30 dsyi notify огвшйхаЫш! malirtensnes penvn-
nel for issateHos ui snashui with artilkry ктеаее (GAA)
(MIL-G-IOOM) of the bearing alem an< bcarins aascnMr. if
Decenary.
Assemble the major groups and assemblies. (Reverse
steps in figures 2-8 through 2-10).
UNUSUAL CONDITION
Machine Gun and Mounts
Reduce lubrication intervals if inspection indicates
rust or corrosion.
Changing grade of lubricants:
a.	Lubricants are prescribed in accordance with
temperature ranges: above aero and below aero.
b.	When to change grade of lubricants is deter-
mined by maintaining a close check on the operation
of the weapon during the approach to change over
periods in accordance with weather forecast data.
In extreme cold weather lubricate sparingly.
same
51
ТвШ 3-£—Coninwed
Step	РпесЛвге
Note. Make oocteHi all parte are 4r* and free from eendewa-
tion, then lubricate.
4	Extreme hot weather or humid salt-air conditions
require more frequent servicing since these con-
ditions tend to dissipate the lubricants.
5	Lubricated surfaces are to be inspected and cleaned
of fouled lubricants under sandy er dusty condi-
tions.
6	After immersion, or as soon as tactical situation
permits, accomplish steps 2 through 6, under usual
conditions.
Section HL PMVBfflVE MAINTENANCE
CHECKS AND SERVICES
3—5. OmmuI
To insure that the machine gun and mounts are
ready for operation at all times, they must be
inspected systematically so that defects may be
discovered and corrected before they result in
serious damage or failure. The necessary pre-
ventive maintenance checks and services to be
performed are listed in table 3-3. The item num-
bers indicate the sequence of minimum inspection
requirements. Defects discovered during opera-
tion will be noted for future correction, to be
made as soon as operation has ceased. Stop opera-
tion immediately if a deficiency is noted which
would damage the equipment if operation were
continued. All deficiencies, shortcomings, and cor-
rective action taken will be recorded on DA Form
2407 at the earliest opportunity.
52
AGO HMC
Table S-3. Preventive Maintenance Check» and Services
&
latarvd
Operator
84					В—Before operation	A—After operation 	D—Durlne operation		W-Warth
"1	в	D	л	w	item to be Inepeeted	Procedure	SMctwaes
i 2 8 4 Б в	X X X X X X		X	X	Machine Gun Barrel assemblies Back plate assembly Cover group Rear sight assembly Retracting	Assure conformance to lubrication in- structions. Field strip to insure that all moving parts an clean, lightly oiled and function freely. Assure sear slide is properly assembled. Assure that bore and chamber are dry and free of obstruction. Assure positive functioning of latch and latch lock. Assure positive engagement of cover latch. Assure sight assembly is clean and lightly oiled. Sight setting should bo a 1,000 windage sero and leaf assem- bly down. Operate retracting slide assembly to as-	Table 8-8 Table 3-2 Fig. 8-8 Fig. 8-18 Fig. 8-8 Fig. 8-1
к

Table 3-3—Continued
Operator
Item Hunker	в	D	A	W	В Before operation	A—After operation 	D—DnrlfHt Operation	W—Weekly
						Item Um	 Inspeeted	PrtetduH	Reterrne*
					tide assembly	sure fredom of movement.
1	X				Headspace and timing Tripod Mount, М3	Check and/or adjust headspace and tim- ing.	Tables 3-4 and 2-Я
1	X			X	Traversing and elevating mechanism assembly	Make certain sleeve is secured to the traversing bar assembly when tra- versing slide lock lever is in locked position. Traversing and elevating handwheels must function properly.	Fig. 2-6
2	X			X	Leg and tripod head	Legs must be forced slightly apart and must contact side of tripod head to in- sure rigidity of mount. Pintle must be secured to tripod head by pintle lock assembly.	Figs. 2-S and 2-6
эот oov
1 X
2 X
X
X
X
X
X
Antiaircatft
Mount, M68
Ammunition
box tray
assembly
Trigger frame
assembly
3 X
4 X
б X
Side plate
trigger
Cradle and
yoke
assembly
Mount leg,
elevator
assembly,
and base
assembly
group
IS
Check lever for proper functioning. Fig. 2-10
Check positive action of machine gun
grips and firing handle rod to operate
side plate trigger assembly. Check
lock assembly for proper functioning.
Determine that side plate trigger as-
sembly is secured to side of machine
gun and operates freely.
Check front and rear mounting pins< and
cradle locking pin to insure that they
operate freely.
Examine pintle lock clamp for freedom
of operation. Check lock assembly for
freedom of operation. Toggle bolt
should operate freely. Check alining
lug on leg for damage. Check headless
shoulder pin on base assembly for
freedom of movement.
Fig. 2—14
Fig. 2-14
Fig. 2-9
Fig. 2-8
Section iv. пюимвноогою
3-6- ТгоиЫмЬмЙпд Procedures for МшЫпе Gun
Refer to table 3-4.
Note. For malfunctions encountered bat not listed, or
if corrective action does not remedy condition, notify or-
ganizational maintenance personnel.
3-7. Troubleshooting Procedures for Tripod Mount
М3 and Antiaircraft Mount M63
When the mounts fail to traverse and elevate or
the machine gun cannot be property secured to
mounts, refer to organizational maintenance per-
sonnel
Table !-4. TranNcsAooting
MaHvnetioa	Probable «авм

	Machine Gun
Failure to feed	Defective	Remove damaged
to feed Failure to	ammunition belt Defective ammunition (short round) Improper timing Obstruction in	link or reposi- tion rounds Remove faulty round Adjust timing (table 2-6) Remove obstrue-
chamber	barrel assembly chamber or receiver group Damaged round	tion; dean and lubricate, as re- quired (table 3-2) Remove round
Failure to lock	Headspace too tight	Adjust headspace (table 2-4)
Failure to fire	Improper timing	Adjust timing (table 2-5)
56
AGO SMC
Figm S-4—Continued
МЙКввеЫп	РпШшн	Cprreeth» веИов
	Defective ammunition	Remove round
	Incorrectly assembled sear slide	Assemble correctly
	Obstruction in firing pin well	Remove obstruction, dean and lubri- cate as required (table 3-2)
Failure to unlock	Defective unmunitton (short recoil)	Remove round
Failure to extract	Defective ammunition (ruptured car- tridge case)	Remove round
	Headspace too loose or inde- pendent move- ment between the bolt and the barrel and bar- rel extension	Adjust beadspace (table 2-4)
	Defective barrel assembly (pitted cham- ber)	Replace barrel as- sembly (fig. 3-1)
Failure to eject	Defective ammu- nition (short recoil)	Clear and reload mach.ne gun
Failure to cook	Incorrect timing	Adjust timing (table 2-5)
ago smoc
57
Section V. MAINTENANCE Of MACHINE GUN
3—в. Removal/lnstallaHon
Refer to table 2-6.
3-9. Disassembly/Assombly
Refer to figures 3-1 through 3-20.
Note. White arrows shown on illustrations indicate dis-
assembly, black arrows indicate assembly.
3-10. Cleaning, Inspection and Repair Procedures
Warning. Before starting an inspection, be sure
to dear the weapon. Do not actuate the trigger
until the weapon has been cleared. Inspect the
chamber to insure that it is empty, and check to
see that no ammunition is in position to be intro-
duced.
a.	Clearing. Refer to table 3-2.
b.	Inspection. Refer to table 3-5.
c.	Repair. Replace barrel assembly (fig. B-l)
if damaged, or unserviceable. Evacuate machine
gun to organizational maintenance personnel for
further repair.
M
AGO case
8
Э0«5
Figure 3-1. Ditaeiemblg/aetembly of Caliber .50 Machine Gun, Mt. (1 of 20)
$
AGO S2OOC
Wf 15561
Fiffure 3-t. Disassembly/assembly of Caliber .50 Machine Gun, Mt. (2 of 20)
BACK PLATE LATCH LOCK
REMOVE/) NST ALL BACK PLATE ASSEMBLY.
CAUTION: BL SURE BOLT IS IN THE FORWARD POSI-
TION WHEN REMOVING BACK PLATE ASSEMBLY.
REMOVE; PULL OUTWARD ON LOCK. PULL UP ON
LATCH AND SLIDE BACK PLATE ASSEMBLY FROM
RECEIVER.
INSTALL: BACK PLATE ASSEMBLY IN RECEIVER
GROOVES PULL OUTWARD ON LOCK, PULL UP
ON LATCH AND SLIDE DOWN UNTIL ENGAGED
IN RECEIVER.
WE 15543
Figure 3-3. Dieaeeembly/aeeembly of Caliber .50 Machine Gun, Af2. (3 of 20)
МОП oov
CT
Figure 3-4. Dioaoeembty/aotembly of Calibor M Machine Gun, MS. (4 of 20)
8
Figure 3-5. Disassembly/авве-mbfy of Caliber .50 Machine Gun. Mt. (5 of 20)
&
INSTALLATION NOTE:
1-	BEFORE INSTALLING MAKE CERTAIN
COCKING LEVER IS FORWARD.
2-	PUSH BOLT FORWARD INTO RECEIVER
UNTIL BOLT LATCH ENGAGES NOTCHES
IN TOP OF BOLT.
CAUTION: WHEN INSTALLING BOLT
GROUP, DO NOT TRIP ACCELERATOR.
эм» oov
WE 1556E
Figure S-в. Dita»»«mbly/aeefmblif of Caliber .SO Machine Gun, MS. (6 of 20)
ЛОО taoc
EXTRACTOR SO THAT GROOVES IN SWITCH
ALINE WITH GROOVES OF BOLT FOR LEFT
HAND (L) FEED.
REMCVE/INSTALL BOLT SWITCH AND CARTRIDGE
EXTRACTOR.
RELEASE FIRING PIN SPRING,
WE 14492
Figure 3-7. Ditateembfy/aeeembly of Caliber Л0 Machine Gun, Mt. (1 of 20)
AGO MWC
DISENGAGE COCKING LEVER PIN.
CAUTION* PUSH COCKING LEVER
FORWARD BEFORE ASSEMBLY INTO
GUN.
NOTE-. AFTER ASSEMBLY, PUSH LEVER TO ITS
REAR POSITION. PRESS IN ON SEAR SLIDE.
A SHARP CLICK WILL INDICATE BOLT GROUP
IS IN WORKING ORDER.
REMOVE/INSTALL COCKING LEVER AND
COCKING LEVER PIN.
Figure 3~s. Dieattembly/aeaemblv of Caliber jo Machine Gun, Mt. (8 of 20)
RELEASE ACCELERATOR STOP LOCK.
REMOVE/iNSTALL LOCK.
WE 14490
Figure S-t. Ditaeeemblg/auetnbig of Caliber .50 Machine Gun, Mt, (9 of 20)
DEPRESS ACCELERATOR STOP.
Figure 3-10. Dieatiembty/aeacmbly of Caliber .80 Machine Gun, Mt. (10 of 20)
REMOVE STOP.
WE I449T
caution, mat sea* helical commission
SMING MOPERLY. SMING (SEAR)
INSTALL STOP*	WMOVMNSTALL SEAR SLIDE, SEAR AND HELICAL
COMPRESSION SMING (SEAR).
Figw* Л-ll. Diaaawmbly/tmembty cf Caliber M Machine Gun, Mf. (11 of 20)
8
AGO ШвС
REMOVE/, NSTALL FIRING PIN EXTENSION ASSEMBLY, REMOVE/lNSTALL FIRING PIN AND EXTENSION.
WE 15536
Figure S-lt. Ditaetemblg/aetemblg of Caliber JO Machine Gun, Mt. (12 of 20)
ЛОО uwc
BARREL EXTENSION
GROUP
REMOVE BARREL BUFFER AND
BARREL EXTENSION GROUPS.
INSTALL BARREL BUFFER AND
BARREL EXTENSION GROUPS.
WEI4M4
Figure 3—13. Ditaeeemilg/aaMmblif of Caliber .50 Machine Gun, Mt. (18 of 20)
3
PUSH FORWARD ON TIPS OF ACCELERATOR
AND DISCONNECT BUFFER GROUP FROM
BARREL EXTENSION GROUP.
ACCELERATOR UP, ENGAGE NOTCH ON
SHANK or BARREL EXTENSION WITH CROSS-
GROOVE IN PISTON ROD OF BUFFER.'ALINE
AGO ММС
SEPARATE BARREL BUFFER AND BARREL EXTENSION
GROUPS,
DEPRESSORS IN GROOVES OF BARREL EX-
TENSION AND PUSH BUFFER FORWARD.
ASSEMBLE BUFFER GROUP AND BARREL
EXTENSION GROUP.
WE 1553?
Figure J-14. DiMutetnUg/auemblg of Caliber .SO Machine Gun, Ml (14 of SO)
21
AGO sate
REMOVE/INSTALL BARREL BUFFER BODY ASSEMBLY.	WE 15540
FiffUre $-15.	of Caliber .SO MacAt'ne Gun, Mt. (16 of 20)
Figure 3-1 Я, DisauemMg/auemblg of Caliber .SO Machine Gun, MS. (16 of 20)
Figure 3-17. Dieaeeembly/aaeembly of Caliber .so Machine Gun, Mt. (17 of 20)
REMOVE/lNSTAll MIT FEED LEVtR LOCK MN.
RTVOT
STUO
SHOULDER
l« ADLESS
FIN
IE LT
FEED
SHOE
I RUSH Mil FEED
LEVER TO THE
RIGHT UNTIL TOR
ENO IS IN LINE
WITH THE SLOT
IN THE COVER,
— RIMOVE UVER.
HOTI
MAKE CERTAIN
THAT SHOULDER
HEAOUSS FIN
ANO STRING DO
NOT FLY OUT.
TOE ENO or
MIT FEED LEVER
HVOt MIT FEED
LEVER UNTIE IT IS
ALIGNED WITH THE
SLOTS OF THE COVER
ANO SHOE
TRESS IN ON
SHOULDER FIN
ANO INSTALL
leva 4
REMOVE/INSTAU MIT FEED LEVER GROUT.
WE U57«
Figure S-IH. Dieateemblg/aeeemblg of Caliber Л0 Machine Gun, Mi. (18 of 20)
ЛОО UWC
REMOVE/1NSTALL BEIT FEED SLIDE GROUP.
Figure 3-19. Dieaaeembty/aeeemblg of Caliber .60 Machine Gun. Mt. (19 of 20,
INSTALLATION POSITION FOR LEFT HAND FEED,
WE 14523
3
AGO М#вС
POSITION FOR INSTALLATION
TRIGGER
(Nol«:
Figure 3-10. Ditaeaemblg/anemblg of Caliber .SO Machine Gun, Mt. (20 of 20)
REMOVE/lNSTAll TRIGGfR LtVtR,
W£ 15545
AOO UMC
Table 3—5. Inepection Procedure» For Machine Gun
Group or MMtnbly	Inspect for
Barrel assemblies	Deformity of lands and grooves, bulges, cracks, and rings in bore. Nott. А кар between the Stellite liner and tube la allowad at manu- facture to permit hmt expansion. This кар or ring does not neceeaarUy reflect a rinsed or bulged bore. Chamber for pits and foreign matter. The barrel locking spring notches for undue damage.
Back plate assembly	Guides for straightness. Latch and latch lock for function and retention of back plate assembly in receiver group. Missing or broken locking pins. Trigger and bolt latch release for function.
Bolt group and rod assembly	Sharp corners on any surface of bolt group. Driving spring rod assembly for deformation. Inspect for bent or broken pin or rod assembly. Bolt cam grooves and bolt switch for roughness. Extractor assembly for deformation, and loose or unstaked ejector pin. Check for broken ejector. Cocking lever for deformation, particularly on camming
ends.
8
ГаМе 4-4—Continued
(кош» or оомтЫг	Import for
	Accelerator stop and lock (when assembled) for deforma- tion. Sear slide for binding and proper assembly. A fine finish on sear engaging notch. (Angle must be sharp without a feather edge.) Sear spring for deformation and set. Deformation and damaged sear notch on firing pin ex- tension. Firing pin in bolt with extension assembled for free move- ment, deformation or cracked point (The firing pin point must be smooth and well rounded.)
Barrel buffer group	Body spring lock for tension, staking and retention in body. Accelerator for broken claws or tips. Cheek pin for broken or missing spring. Nets. Breech lock depreeoore must have illsht verttaal play but no toasltudinal or lateral movement.
Barrel extension group	Barrel extension for bent condition and defective bolt guideways. Barrel locking spring for staking in its groove. Wear on
AGO 3K<C
Retracting elide
Cover group
Receiver group
the spring detent and be sure that spring has sufficient
tension to prevent the barrel from turning during flring.
Breech lock pin for broken or missing spring.
Broken segments of wire and Incorrect lacing.
Broken and damaged handle.
Rust, burs, or cracks on slide and bracket
Cover latch spring for weakness. Distortion of cover ex-
tractor spring.
Belt feed lever for deformation and free movement on
pivot stud when assembled in cover and slide (should
not bind). Missing plunger and spring.
Beit feed slide for protruding pin when assembled (should
be flush). Pin for broken or missing spring.
Belt feed pawl for broken pin. Pawl arm for deformation
and cracks.
Correct assembly of all components.
Working surfaces will be smooth and free from defects
tending to affect smoothness of operations. Freedom of
obstruction in feedway and guide cuts for the back
plate assembly.
Defective or missing bolt stop, loose or bent belt holding
pawl brackets.
Table S-5“Continued
Group or numbly	Inapeflt for
	Deformation of aide plate, опеке at back plate grooves, and clearance for free movement of bolt stud. Binding of the bolt stud against the lower portion of the slot in the side plate. Deformation of trigger lever. Trigger lever must not bind between the plate bracket and top plate bracket stud. Broken lock in trigger lever pin assembly. Belt holding pawls for cracks and proper functioning. Correct operation of front and rear sights. Side plate trigger assembly or tripod mount n’"tle for damage and make certain It is secure.
Section VI. MAINTENANCE OF ТИЮО MOUNT, М3
3-11. Removal/lnslalkrtion
Refer to figures 2-5 through 2-7.
3-12. Disassembly/Assembly
No further disassembly is authorized.
3-13. Cleaning, Inspection and Repair Procedures
a.	Cleaning. Refer to table 3-2.
b.	Inspection. Refer to table 3-5,
c.	Repair. Return mount to organizational
maintenance personnel for any repairs.
Section VR. MAINTENANCE OF ANTIAIRCRAFT
MOUNT, M63
3-14. Removal/lnstaDalion
Refer to figures 2-8 through 2-11.
3-15. Disassembly/Assembly
No further disassembly is authorized.
3—16. Cleaning, Inspection and Repair
a. Cleaning. Refer to table 3-2.
t>. Inspection. Refer to table 3-6.
c. Repair. Return mount to organizational
maintenance personnel for any repairs.
AGO (MSC
AGO S20OC
Table 3-6. Zwpech'on Procedures For Mount»
Group or «мешЫг	Inspect for
Tripod Mount, М3 Traversing and elevating mechanism assembly	Proper functioning of traversing and elevating hand- wneels. Sleeve for dirt or rust Lever lor correct operation. Quick release pin and chain assembly for burs and other damage.
Leg and tripod head	Bolts, nuts, pintle and tnpod head for wear, locking action of pintle lock assembly. Proper function of front leg damping screw nut, begs for distortion. Spado* for cracks. Leg clamping handle and indexing lever as- sembly for correct operation.
Antiaircraft Mount, M63 Ammunition box tray assembly	Top and rear pressure straps for rust and damage. Tray assembly for cracks at weld seams and other damage.
Trigger frame assembly	Cracks in tubes or welds. Security of H-frama to cradle. Grips and firing handle rod for looseness, cracks and correct operation. Support for damage. Side plate trig- ger container assembly for damage.
Cradle and yoke assembly
Mount lei, elevator assembly and baee
assembly group

Cradle and yoke for cracks. Front and rear mounting pins
and chain for damage.
Cracks in legs. Damage to spade feet Pintle lock clamp
for proper functioning. Lock assembly for retention
elevator assembly and for correct operation. Bottom
elevator assembly for bun or other damage. Base
sembly for damage. Leg sockets and toggle bolt
functioning and damage. Headless shoulder pin
positive operation.
CHAPTER 4
AMMUNITION
4-1. General
The ammunition (fig. 4-1) for the machine gun
is classified as small arms ammunition and is
issued in the form of a complete round. The
round (cartridge) consists of the projectile (bul-
let), cartridge case, propellant powder, and
primer necessary to fire the weapon. For addi-
tional information, refer to SC 1305/30-FL.
4-2. Articles for Instructional Um
a.	Dummy Cartridge. The following item will
be taken into the field upon permanent change of
station and into the theater of operations:
tfiut of
FSAT	item	Jfamre
13O5-O28-63M DUMMY CARTRIDGE, CAL ea
.50: М2
b.	Graphic Training Aid. The following item
will not be taken into the field upon permanent
change of station or into the theater of opera-
tions. Units will turn in all equipment to the Com-
manding Officer of the station from which it
departs. The receiving officer will make a report
to the Army Commander, without delay, showing
number, type, and condition of item received.
ЗД	AGO &2*0C
BALL, МДОЭЭ
WGH-FIESSJJRE TEST, Ml
Ftyure 4-1. Types of eaUber JO amntttxition.
AGO «мае
•7
ilm
GRAPHIC TRAINING AID, 9-15 (19 chute)

4-3. MalhmcRom Involving AnwmmMon and Expio-
aivos*
Refer to AR 700-1300-8.
M
AQO UtK
CHAPTER 5
DEMOLITION OF MATEREL TO PREVENT
BIEMYUSE
5-1. Gemral
a.	Destruction of the machine gun, tripod
mount, and antiaircraft mount, when subject to
capture or abandonment in the combat zone, will
be undertaken only when, in the judgment of the
Commander concerned, such action is necessary.
The authority for ordering the destruction of
equipment is vested in divisional or higher com-
manders when the situation requires. If destruc-
tion is resorted to, the equipment must be so
badly damaged that it cannot be restored to a
usable condition in the combat zone either by
repair or cannibalization. The reporting of the
destruction of equipment is to be done through
command channels.
b.	Priorities for destruction of parts are:
Receiver
Barrel Assembly
Sighting equipment
Bolt group and rod assembly
Mounts
All tools and equipment
Firing tables and range cards
ago attc

CbcMffM ta forest С 1
TM *-1005-213-10
Cl
CHANGE J HEADQUARTERS
S DEPARTMENT OF THE ARMY
No. 1	| Washington, D.C., 99 Auywt 1973
Operator's Manual
МАСНЖЕ GUN, CAUBflt .50
«OWNING, М2, HEAVY BARREL, FLEXIBLE, W/I
(1005-322-9715)
MOUNT, TRIPOD, MACHINE GUN
CALIBER .50, М3, W/E
(1005-322-9716)
MOUNT, MACHINE GUN, ANTIAIRCRAFT
CALIBER .50 M63, W/E
(1005-673-3246)
TM 9-1005-213-10. 12 July 1968. is changed as
follows:
Раде 3. Paragraph 1-25 is superseded as follows:
b. Reporting of Equipment Publication Im-
provement». The reporting of errors, omissions,
and recommendations for improving this publica-
tion by the individual user is encouraged. Reports
should be submitted on DA Form 2028 (Recom-
mended Changes to Publications) and forwarded
direct to Commander, US Army Weapons Com-
mand, ATTN: AMSWE-MAS, Rock Island, IL
6120L
Page 49. Make the following changes to table
ТМ «^1009-213-10, с 1
C*Mtt	г»
Cleaning compound	Cleaaing compound,
solvent: (CR).	rile ten: (ВВС).
Add the following at the end of table:
1005-281-3565 SWAB, SMALL ARMS CLEANING:
Cutton, 2H in eq (1000 in pkg. I
Page 50. Make the following changes tv table 3-2
under:
USUAL CONDITIONS
Machine Gun
In step 1, change “(CR) solvent cleaning compound
(MIL-C-52399)” to read "(RBC) rille bore cleaning com-
pound (MIL-C-372).”
In step 4, change “(MIL-L-644)” to “(VV-L-lOO).''
Tripod Mount М3
In step 3, change "(MIL-L-644)” to “(VV-L-S00).”
Page 51.
Antiaircraft Mount M63
In step 3. change “(M1L-L-644)’ to "(VV-L-300).”
Page 91. Appendix В (with the exception of il-
lustrations B-l and B-2) is superseded as fol-
lows :
APPENDIX В
BASIC ISSUE ITEMS LIST
ANO
ITEMS TROOP INSTALLED OR
AUTHORIZED LIST
loctioe 1. INTRODUCTION
1.	Scope
This appendix lists basic issue items and items
troop installed or authorised required by the
crew/operator for operation of the М2 machine
ТМ 9-1005-213-10, с 1
gun, М3 tripod mount and M63 antiaircraft
mount
2.	General
These basic issue items and items troop in-
stalled or authorized lists are divided into the
following sections:
a.	Basic Issue Items List—Section II. A list in
alphabetical sequence of items which are fur-
nished with, and must be turned in with, the end
item.
b.	Items Troop Installed or Authorised List—
Section HL A list in alphabetical sequence of
items which, at the discretion of the unit com-
mander, may accompany the end item, but are
not subject to be turned in with the end item.
3.	Explanation of Column
The following provides an explanation of
columns found in the tabular listings:
a. Federal Stock Number. This column indi-
cates the Federal stock number assigned to the
item 'which will be used for requisitioning pur-
poses
l>. Description. This column indicates the Fed-
eral item name and a minimum description re-
quired tn identify the item. The last line indicates
the reference number followed by the applicable
Federal supply code for manufacturer (FSCM)
in parentheses. The FSCM is used as an element
in item ntification to designate the manufac-
turer. dinriLutor, or Government agency; etc.,
3
m ^1005-113-10, c t
and is identified in SB 708-42. Items that are
included in kits and sets and listed below the
name of the kit or set with the quantity of each
item in the kit or set indicated in front of the
item name.
c.	Unit of Measure (U/M). This column indi-
cates the standard or basic quantity by which the
listed item is used in performing the actual main-,
tenance function. This measure is expressed by
a two-character alphabetical abbreviation; e.g.,
ea, in., pr; etc., and is the basis used to indicate
quantities. When the unit of measure differs from
the unit of issue, the lowest unit of issue that will
satisfy the required units of measure will be
requisitioned.
d.	Quantity Furnished with Equipment (Basie
Issue Items Only). This column indicates the
quantity of the item furnished with the equip-
ment.
e.	Quantity Authorized (Items Troop Installed
or Authorized Only). This column indicates the
quantity authorized to be used with the equip-
ment.
f.	Illustration (Basic Issue Items Only). This
column is divided as follows:
(1) Figure Number. This column indicates the
figure number of the illustration in which the
item is shown.
(2) Item Number. This column indicates the
number used to identify each item called out in
the illustration.
Section II. BASIC ISSUI ITIMS LIST
hfcftl stock No.	(1> Dmcriptinn R«f*r*nc. numbm1 * mfr. cod.	<•> Unit of hmm	(4> Qty font with equip	(4| Illuctratlon
				to) Fit. No.	<b) Ilrnt N
1005-726-6131	BARREL ASSEMBLY: 7266131 (19204).	ea	1	fa-1
4033-716-0041	EXTRACTOR, RUPTURED CAR- TRIDE CASE: 7160041 (19204).	ea	1	B-2	2
1005-716-2072	FLASH HIDER: 7162072 (19204).	ea	1	B-2	7
4033-535-1217	GAGE, HEADSPACE AND TIMING: 5351217 (19204).	ea	1	B-2	1
TM 9-1005-213-10, С 1
Uctlon III. ITEMS TROOP INSTALLED OR AUTHORIZED LIST
(1) F«4«bI U«k Na	<> DMtriptton JUfrr.nH numter * Mfr. rodr	Unit •t MU	(<> Qty •uth.
1005-766-09J 5	BRUSH, CLEANING, SMALL ARMS: Chunter 7790737 (19204).	«	1
1005-714-2701	BRUSH, CLEANING, SMALL ARMS: Firing pin hob 7182702 (19204).	M	1
1005-550-4037	BRUSH. CLEANING, SMALL ARMS: M4 tern 5504037 (19204).	CM	2
8105-921-5021	CASE, SMALL ARMS ACCESSORIES: 11686430 (19204).	on	1
1005-781-9108	COVER, MACHINE GUN, CAL. .50: Arctic им only 8444960 (19204).	an	1
1005-059-1031	COVER, SPARE BARREL: 6591031 (19204).	M	1
8105-555-9896	ENVELOPE: Ml, врага parte 5559696 (19204).	•a	1
8415-266-8843	MITTEN, ASBESTOS: 27-M-394 (81349).	ea	1
1005-653-5441	ROD, CLEANINd, SMALL ARMS: M7 jointed 6535441 (19204).	an	1
TM *-1005-111-10, С 1
1005-650-7302	ROLL, ORDNANCE WEAPONS SPAKE PARTS: 6507302 (10204).
5140-650-7328	ROLL, TOOL: Cenv„, «mpty, Ml fl 6507328 (10204).
1008-710-2704	SWAR HOLDER SECTION. SMALL ARMS CLEANING ROD: 71П2701 (I'.i’fi-I i.
ТМ *-1005-213-10, С 1
By Order of the Secretary of the Army:
CREIGHTON W. ABRAMS
General. United Stateg Army
Official:	Chief of Staff
VERNE L. BOWERS
Major Gtueral, United States Army
The Adjutant General
[Jistiibution:
To be distributed in accordance with DA Form 12-40
<qty rqr block Ko. fill Operator’s Maintenance Require-
ments for Machine Gun, Caliber -50 М2 and Mount*.
8
Ошчм m <•»*• С I anri С 1
ТМ *-1005-313-10
С 3
Change
No. 2
HEADQUARTERS
DEPARTMENT OF THE ARMY
Washington, D.C., /5 October tt73
Operator's Maanvnl
MACHINE GUM, CALIBER .50
BROWNING, Ml, HEAVY BARREL, FL EX I HE, W/E
(1005-312-9715)
MOUNT, TRIPOD, MACHINE GUN
CAUBER .50. М3. W/E
(1005-312-9716)
MOUNT, MACHINE GUN, ANTIAIRCRAFT
CALIBER .50, M63, W/E
(1005-673-3246)
TM 9-1005-213-10, 12 Joly 1068, ia changed as follows:
Page iJ Table 2-7 is superseded as follows:
Table i-<. Immediate Action tn Cate of Failure to Fire
Sty	Pnxnliirt
COOL WEAPON
1	Immediately fully retract the bolt assembly and re-
lease it. Observe the ejection as the bolt returns to
its battery position.
2	If a live roundffired case ejects, re-lay oa the target
and attempt to fire.
TAGO Э1В7А
1
Table 2-t. immediate Action ги Case of Failure to Fire
(Continxedl
Stfj»	ri-iKFti/trr
3	1Г the weapon fires, continue.
4	If the weapon fails to fire, open the cover assembly.
Remove the ammunition belt, close the cover, fully
retract the bolt assembly and release it. The bolt
returns to its battery position. If no ejection oc-
curs, retract the bolt part way back, open the
cover, and inspect the chamber. If the chamber is
clear, proceed to step 5. If not, a second man
(standing off to the side) inserts a cleaning rod into
muzzle (bolt held part way back w/cover open), and
gently taps the round/case out of the chamber. The
weapon is not clear.
5	Cheek the weapon (disassemble) to determine the
cause of the stoppage.
HOT WEAPON
CAUTION
Do not open the cover assembly.
WARNING
Immediate action must be applied within
10 seconds. The danger of a cook-off con-
dition exists when the barrel is hot. Keep
the weapon trained on the target.
When a stoppage occurs after firing 150 rounds within
a 2-minute period, perform the steps listed below:
wort
If bolt cannot be retracted, keep the
weapon trained down range. Allow 5 min-
utes for cooling. Notify organizational
ТйЫе 2-7. Immediate Action in Саи of Failure to Fin
(Continued)
maintenance for assistance. NEVER
remove the backplate assembly from any
weapon until the chamber has been
cleared.
1	Apply immediate action. Fully retract the bolt assem-
bly (return handle forward). Observe if the ejection
occurs at the same time.
2	If a live round/fired case ejects, attempt to fire the
weapon.
3	Xf the weapon fires, continue to fire.
4	If the weapon fails to fire, allow at least 5 minutes of
waiting (cooling period).
5	After 5 minutes cooling, open the cover assembly,
remove the ammunition belt, close the cover, re-
tract the bolt assembly (return handle forward), and
observe the ejection.
6	If a live round/fired case ejects, proceed to step 8.
The weapon is clear.
7	If no ejection, open the cover assembly and retract
the bolt assembly part way back. A second man
(standing off to the side) inserts a cleaning rod into
the muzzle and gently taps the round/case out of
the chamber. The weapon is not clear.
8	Check the weapon (disassemble) to determine the
cause of the stoppage.
3
By Order of the Secretary of the Amy:
CREIGHTON W. ABRAMS
GefiertU, United State» An»f
Official:	Ckitf of Staff
VERNE L. BOWERS
Major General, United State* Army
Пе Adjutant General
Diatribution:
To be dbtribeted in accordance with DA Form 12-40
(qty rqr block No. 91) Operator end Crew Maintenance
Requirementa for Machine Gun, Caliber .60, М2 and Mounts.
Change* In force: Cl, C2, and C3
TM 9-1005-213-10
C3
CHANGE)	HEADQUARTERS
}	DEPARTMENT OF THE ARMY
no. з )	Washington, dc, зо Ли»
Operator’s Manual
MACHINE GUN, CALIBER .50
BROWNMG, М2, HEAVY BARREL, FLEXIBLE, W/E
(1005-00-322-9715)
MOUNT, TRIPOD, MACHINE GUN
CALIBER .50, М3, W/E
(1005-00-322-9716)
MOUNT, MACHINE GUN, ANTIAIRCRAFT
CALIBER .50, M63, W/E
(1005-00-673-3246)
TM 9-1005-213-10. 12 July 1968. is changed as
follows:
Page /. Reporting of Errors is added before table
of contents as follows:
REPORTING OF ERRORS
You con help improve this manual by
recommending improvements using DA
Form 2028 (Recommended Changes to
Publications and Blank Forms) and mail
the form direct to Commander, US Army
Armament Materiel Readiness Command,
ATTN; DRSAR-MAS, Rock Island, IL
61201. A reply will be fumidied direct
to you.
Page 2.	Appendix В in table of contents is changed to
read as follows:
Appendix	Paragraph	Page B. COMPONENTS OF END
Section	ITEM LIST J. Introduction			B-l—B-3	9J
Page 2.	IL Integra] components of end items	 III. Basic issue items			 Appendix C and D are added to the table of
contents as follows:
Appesimk	Paragraph Page C. ADDITION A!. AUTHOR!-
Section	ZATION LIST 1. Introduction 	C-l—C-3
AfwviMK	JJ. Additional authorization list 	 D. EXPENDABLE SUPPLIES
Seciion	AND MATERIALS LIST I. Introduction 	D-I.D-2 II. Expendable supplies and materials list
Page 3.	Paragraph 1 -2b is deleted.
Раке 49. Table 3-1 is deleted.
Page 52. Section III is superseded as follows:
Section III. PREVENTIVE MAINTENANCE
CHECKS AND SERVICES (PMCS)
3-5. General
a.	Before Tou Operate. Always keep in mind
the CAUTIONS and WARNINGS. Perform your
before (B) PMCS.
b.	After Tow Operate. Be sure to perform your
after (A) PMCS.
c.	If Your Equipment Fails to Operate. Trouble-
shoot with proper equipment. Report any deficien-
cies using the proper forms, see TM 38-750.
2
3-5.1. Preventive Maintenance Checks and
Services (PMCS)
a.	PMCS Procedures.
(I)	General. The PMCS procedures are con-
tained in table 3-3. They are arranged in logical se-
quence requiring a minimum amount of time and
motion on the part of the persons performing them and
are arranged so that there will be a minimum inter-
ference between persons performing checks simulta-
neously on the same end item.
(2)	hem number column. Checks and services
are numbered in chronological order regardless of
interval. This column shall be used as a source of item
numbers for the TM Number" column on DA Form
2404. Equipment Inspection and Maintenance Work-
sheet, in recording results of PMCS.
(3)	Interval columns. The columns headed "B."
"A." and "W" contain a dot (•) opposite the appropri-
ate check. Thus, if a given check is performed before
operation, a dot is placed opposite the checks in the
"B" column; if the check is accomplished after opera-
tion, the dot is placed in the column headed "A." and if
the same check is made in two or more periods, a dot is
placed in each applicable column.
3
(4)	Item to be inspec ted column. The itf ms to be
inspected are to be identified by as few words, usually
the common name, as will clearly identify the item,
e.g., “Machine Gun.“ "Barrel Assembly," "Headspace
and Timing."
(5)	Procedures column. This column contains
a brief description of the procedure by which the
check is to be performed. It contains all the informa-
tion required to accomplish the checks and services,
including appropriate tolerances, adjustment limits,
and instrument and gage readings.
(6)	For readiness reporting, equipment is not
ready.'available if: column. This column contains the
criteria which will cause the equipment to be classified
as not ready available because of inability to perform
its primary mission.
b.	Special Instructions. If an item in a longer inter-
val chart requires more frequent checking and servicing
when the equipment is used in an unusual environment,
the special intervals are indicated by an asterisk before
the sequence number, and a letter after the sequence
number, footnotes are used to explain special intervals.
4
Table J-.t Operator! Crew Preventive Maintenance Checks and Services
NOTE. Within designated interval, these checks are to be performed in the order listed.
В-Before	A-After	W-Weekly
Item No.	IrnerwJ			hem to be Inspected	Procedure* Check for and hnve repaired or adjusted vs necessary	For Readiness Reporting. Equipment is Not Ready/Available if
	В	A	W
				Caliber .50 Mac hine Gun М2
I	•			Machine (iun	Hand operate the gun using dummy cartridges - check Iced components and trig- ger.	Will not function,
2	•	•		Barrel Assembly	Check barrel for obstruct- ions or damage,	Obstruction in barrel or bar- rel damaged.
3	•			Headspace and liming	Check for proper headspace and timing (table 2-4 and 2-5)	Proper head- space and timing cannot be obtained.
Table J-3 - Continued
NOTE: Within designated interval, these checks are to be performed in the order listed.
B-Before	А-After	W-Weekly
Item No.	Interval			Item io be Inspected	Procedures Check far and have repaired Or adjusted as iieCessary	For Readiness Reporting, Equipment is Not Ready/Available if
	в	A	w
4 J				Rear Sight Assembly f alibi Legs and Tripod Head	Assure sight assembly is clean and lightly oiled. Sight setting should be a 1.1)00 windage zero and lea! assembly down. iRel tig. .1-6.) >r .W Trifled Meuiv M.< Legs must he separated anil must contact stile itl tripod head to insure rigidity ol mount. Pintle must he secuicd to tiipod head by pintle lock assem- bly (Kel. figs.. 2-5 ami 2-6 1	Pintle will not secure to tripod head.
Table 3-3—Continued
NOTE: Within designated interval, these checks are to be performed in the order listed.
B-Before	A-After____________________________ W-Weckly
Item No.	Interval			Item to be Inspected	Procedures Check lor and have repaired or adjusted as necessary	For Rcadineu Reporting. Equipment ii Not Ready/Avniltbte if;
	в	A	w
6	a			1 reversing and Eleva- ting Mech- anism	Make certain sleeve is secured to the traversing bar assembly when travers- ing slide lock lever is in locked position. Travers- ing and elevating hand- wheels must function properly. (Ref. fig. 2-6.)	Broken, bind- ings uorn or missing parts.
				Caliber SO A A Mount M65
7	•			Mount Leg, Elevator Assembly, and Base Assembly Group	Examine pintle lock clamp for freedom of operation. Check lock assembly for freedom of operation. Toggle bolt should operate freely. Check alining lug	Broken, bind- ing. worn, or missing parts.
Table 3-3—Continued
NOTE: Within designated interval, these checks are to be performed in the order listed.
B-Before	____ A-After	W-Weekly
lira No	Interval			Item to be Inspected	Procedures Check for and hive repaired or adjusted as necessary	For Readiness Reporting Equipment is Not R«idy/Av«ilabls If
	В	A	W
					on leg for damage. Check headless pin on base assembly for freedom of movement. (Ref. fig. 2-8.)
8	«		•	Cradle and Yoke Assembly	Check front and rear mount- ing pins and cradle lock- ing pin to insure that they operate freely. (Ref. fig. 2-9.)	Damaged, bind- ing. or mis- sing parts.
9	•			Ammunition Box Tray	Check lever for proper functioning. (Ref. fig. 2-10.)	Binding, bent, damaged, or missing parts.
Table 3-3—Continued
NOTE: Within designated interval, these checks are to be performed in the order listed.
B-Before	A-After	W-Weekly
Item No.	Interval			Item to be Inspected	Procedures Check for end hove repaired or adjusted naeessary	For Readineas Reporting, Equipment is Not Ready/Available if:
	в	A	w
10 II	• •			Trigger Frame Assembly Side Plate Trigger Assembly	Check positive action of machine gun grips rind firing handle rod to operate slide plate trigger assembly. Check lock assembly for proper functioning. (Ref. fig. 2-14.) Determine that side plate trigger assembly is secured to side of machine gun and operates freely. (Ref. fig. 2-14.)
Page 91. Appendix В is superseded as follows:
APPENDIX В
COMPONENTS OF END ITEM LIST
Section I. INTRODUCTION
B-1. Scope
This appendix lists integral components of and basic
issue items for Caliber .50 Machine Gun М2, Caliber .50
Tripod Mount М3, and Caliber .50 AA Mount M63 to
help you inventory items required for safe and efficient
operation.
B-2. General
This Components of End Item List is divided into the
following sections:
a.	Section il. Integral Components oj the End Item.
These items, when assembled, comprise the Caliber .50
Machine Gun М2. Caliber .50 Tripod Mount М3,and
Caliber .50 AA Mount M63 and must accompany them
whenever they arc transferred or turned in. The illustra-
tions will help you identify these items.
IO
b.	Section III. Basic Issue Items. These are the
minimum essential items required to place the Caliber
.50 Machine Gun М2, Caliber .50 Tripod Mount М3,
and Caliber .50 A A Mount M63 in operation, to operate
them, and to perform emergency repairs. Although
shipped separately packed they must accompany the
Caliber .50 Machine Gun М2. Caliber .50 Tripod
Mount М3, and Caliber .50 AA Mount M63 during
operation and whenever they are transferred between
accountable officers. The illustrations will assist you
with hard-to-identify items. This manual is your au-
thority to requisition replacement ВП. based on
TOE/MTOE authorization of the end item.
B-3. Explanation of Columns
a.	Illustration. This column is divided as follows:
(1)	Figure Number. Indicates the figure number
of the illustration on which the item is shown.
(2)	Item Number. The number used to identify
item called out in the illustration.
b.	National Stock Number. Indicates the National
stock number assigned to the item and which will be
used for requisitioning.
II
c.	Part Number. Indicates the primary number
used by the manufacturer, which controls the design
and characteristics of the item by means of its engineer-
ing drawings, specifications, standards, and inspection
requirements, to identify an item or range of items,
d.	Description. Indicates the Federal item name
and. if required, a minimum description to identify the
item.
e.	Location. The physical location of each item
listed is given in this column. The lists are designed to
inventory all items in one area of the major item before
moving on to an adjacent area.
f.	Usable on Code. Not applicable.
g.	Quantity Required (Qty Reqd). This column
lists the quantity of each item required for a complete
major item.
h.	Quantity. This column is left blank for use dur-
ing an inventory. Under the Rcv'd column, list the quan-
tity you actually receive on your major item. The Date
columns are for your use when you inventory the major
item at a later date; such as for shipment to another site.
12
Section II. INTEGRAL COMPONENTS OF END ITEM
in ILLUSTRATION		(2) NATIONAL STOCK NUMBER	(П PAR Г NO	|41 DFSCKIPIION	(51 1.ОСЛ1 ION	(6) I.SAfll F ON coin.	|7> QTY RTQD	(R) QUANTITY
(a) FIGURE NO.	(Ы ITEM NO							KCV'O	DA It	DATE	DATE
				None
14
(i> ILLUSTRATION		(21 NATIONAI STOCK NUMBER	(31 PARI NO.	(41 DESCRIPTION	(51 LOCATION	(6l USABLE ON CORE	11) QTY REQD	QUANTITY
(11 FIGURE NO.	(b) ITEM NQ							RCVD	DATE	DATE	DATE
B-l B-l B-t B-t B-l B-t	1 2 3 4 5 6	4933-00-535-1217 4933-00-716-0041 Ш03-О0-71 fi-2072 1005-00-716-2702 1005-00-726-6131 K4I5-00-266-S64.3	5351217 7160041 7162072 7162702 7266131 27-M-394	CiAliF. HEADSPACE AND 1 IMINO: FX tRACIOR. RUP- 11; Rli 1 > CAR ERI)Mit: CASE FLASH HIDER BRUSH, CLEANING: Oring pin holr BAR RE I. ASStMBl V. MITTEN, ASBESTOS: 1 M 9-IIX15-2I.I-IO			I I 1 t ) 1 1

Page 107 Appendix C is added as follows:
APPENDIX C
ADDITIONAL AUTHORIZATION LIST
Section I. INTRODUCTION
C-1. Scope
This appendix lists additional items you are autho-
rized for the support of the Caliber .50 Machine Gun
М2, Caliber .50 Tripod Mount М3, and Caliber .50 AA
Mount M63.
C-2. General
This list identifies items that do not have to accom-
pany the Caliber .50 Machine Gun М2. Caliber .50 Tri-
pod Mount М3, and Caliber .50 AA Mount M63 and
that do not have to be turned in with them. These items
are all authorized to you by СТА, MTOE, TDA, or
JTA.
C-3. Explanation of Listing
National stock numbers, descriptions, and quantities
are provided to help you identify and request the addi-
tional items you require to support this equipment.
16
Section II. ADDITIONAL AUTHORIZATION LIST
id NATION Al S1 <X'K NUMBER	t7l IM-SA RIPIION PART NUMBER A FSCM	USABLE ON CODE	<3> U/M	<41 QTV AUTH
1005-00-550-4037	BRUSH, CLEANING. SMALL ARMS: M4 bore. 5504037 (19204)	EA	J
1005-00-766-0915	BRUSH. CLEANING. SMALL ARMS CHAMBER: 7790737 (19204)	EA	1
8103-00-921-5821	CASE, SMALL ARMS. ACCESSORIES: 11686430 (19204)	EA	1
1005-00-796-4436	COVER. SPARE BARREL: (for turret type (TT) only). 7964436 (19204)	EA	1
1005-00-487-4100	COVER. MACHINE GUN. CALIBER .50: (for TT only). 11631791 (19204)	EA	1
1003-00-653-5441	ROD. CLEANING, SMALL ARMS: M7 jointed. 6535441 (19204)	EA	1
1005-00-716-2704	SWAB HOLDER SECTION: 7162704 (19204)	EA	1
Page 107 Appendix D is added as follows:
APPENDIX D
EXPENDABLE SUPPLIES AND MATERIALS LIST
Section I.	INTRODUCTION
D-1. Scope
This appendix lists expendable supplies and materials
you will need to operate and maintain the Caliber .50
Machine Gun М2, Caliber .50 Tripod Mount М3, and
Caliber .50 AA Mount M63. These items are authorized
to you by СТА 50-970, Expendable Items (Except
Medical, Class V, Repair Parts, and Heraldic Items).
D-2. Explanation of Columns
a.	Column 1—Item Number. This number is
assigned to the entry in the listing and is referenced in
the narrative instructions to identify the material (e.g.,
"Use cleaning compound, item 5, app. D*).
b.	Column 2—Level. This column identifies the
lowest level of maintenance that requires the listed item.
C—Operator/ Crew
18
c.	Column 3—National Stock Number. This is
the National stock number assigned to the item; use it to
request or requisition the item.
d.	Column 4—Description. Indicates the Federal
item name and, if required, a description to identify
the item. The last line for each item indicates the part
number followed by the Federal Supply Code for
Manufacturer (FSCM) in parentheses, if applicable.
e.	Column 5 - Unit of Measure (Ui M). Indicates
the measure used in performing the actual maintenance
function. This measure is expressed by a two-character
alphabetical abbreviation (e.g., ea, in, pr). If the unit of
measure differs from the unit of issue, requisition the
lowest unit of issue that will satisfy your requirements.
19

Section II.	EXPENDABLE SUPPLIES AND MATERIALS LIST
(1) ITEM NUMBER	(2) LEVEL	(J) NATIONAL STOCK NUMBER	(4> DESCRIPTION	(3) U/M
1	C	«020-00-244-0153	BRUSH. ARTISTS: H-B-241 (81348) CARBON REMOVING COMPOUND dip tvpe, rinsing required P-C-’lJI. type И IS 1348)	FA
2	C	6850-00-965-2332	5 gal can CLEANING COMPOUND. SOLVENT degreasing self emulsifving M1L-C-11090 (81349)	EA
3	c	6850-00-224-6656	2 oz container CLEANING COMPOUND. SOLVENT rille bare cleaner (RBC) MIL-C-372 (81349)	EA
4	c	6850-00-224-6657	8 tv ran	EA
5	c	6850-00-224-6663	1 gal can	EA
	(1) ITEM NUMBER	(2) LEVEL	(3) NATIONAL STOCK NUMBER	И) DESCRIPTION	(5) U(M
	6	С	6850-00-281-1985	DRY CLEANING SOLVEN T: P-D-680. iyp< 1. (81349) 1 gal can	EA
	7	С	9150-00-190-0907	GREASE. AUTOMOTIVE AND AR I II.I.ERY: (GAA) minus 65'F to plus 125" F efficient temp range. MIL-G-10924 (81349) 35 lb ctin	ЕЛ
	8	С	9150-00-273-2589	LUBRICATING OIL. GENERAL PURPOSE: medium (PI -M), VV-I -8(K)M (81349) 4 or can	EA
ю
(1) ITEM NUMBER	(2) LEVEL	(3) NATIONAL STOCK NUMBER	(4) DESCRIPTION	(3) U/M
9	C	9150-00- 231-6689	LUBRICATING Oil . GENERAL PURPOSE; special preservative (Pl.-S) VV-L-800. (81349) 1 qt can	EA
10	C	9150-00-292-9689	LUBRICATING OIL. WEAPONS. М1Ы.-141 (81349) 1 qtcan	EA
11	c	7920-00-205-1711	RAG. WIPING: codon, bleached or unbleached, mixture of white or colored, designed for general purpose use DDD-R-.W (813481 50 lb bale	EA
By Older of the Secretary of die Алву:
BERNARD W. .ROGERS
General, United States Army
Chief of Staff
Official:
PAUL T. SMITH
ЛГцюг General United States Army
The Adjutant General
Distribution:
To be distributed in accordance with DA Form
J2-40, Operator and Crew Maintenance Requirements
for Gun. Machine, CaL 50. М2 and Mounts.

Change» in Force:Cl, C2, C3, and C4
TM 9-1005-2134о
C 4
Change
No. 4
BEADQUARTERS
DEPARTMENT OF THE ARMy
Washington, DC, 20 April isn
Operator'» Manual
MACHINE GUN, CALIBER .50
BROWNING, М2, HEAVY BARREL,
FLEXIBLE, W/E
(1005-00-322-9715)
MOUNT, TRIPOD, MACHINE GUN
CALIBER .50, М3, W/E
(1005-00-322-9715)
MOUNT, MACHINE GUN, ANTIAIRCRAFT
CALIBER .50, M63, W/E
(1005-00-573-3245)
TM 9-1005-213-10, 12 Jul? 1968, is changed
follows:

Page 3. Paragraph 1-2.1 is added as follows:
1-2.1. Hand Receipt
Hand receipts for Basic Issue Items (Bll) and Addition-
al Authorized List (AAL) item* are published in a
Hand Receipt Manual The Hand Receipt Manual nu-
merical designation is the same as the related Tech-
nical Manual with the letters HR added to the num-
ber. These manuals are published to aid in property
accountability and are available through:
Commander, US Army Adjutant General Publication
Center, ATTN: AGDL-OD, 1655 Woodson Road,
St. Louis, MO 63114.
1
Page 97. Section Ill of Appendix В is superseded as follows:
Section III.	Basic Issue Items
B-l. (Superseded) Basic Issue Items
These items must accompany weapon during operation and whenever it Is
transferred between accountable officers. This manual Is your authority
to requisition replacement III.
th ILLUS		til NATIONAL BTOCK NUMBER	IB FART NO.	(41 DESCRIPTION	1Л LOCATION	W U8A8LE ON CODE	n> QTY REQD	1*1 QUANTITY
lai fio №_	ITEM NO.							RCVO	OATS	DATE	DATE
B-l B-t B-L B-l	L 2 3 4 5	«ЮЬОО-ЗД-бШ 1003-00-716-2072 MIMO-2004M1 *9 J MO-7 1040* 1 **33-00-533-1217	7266131 7161072 11653902 7t600*1 3331217	BARREL, OUN FLASH HIDER MITTEN, CLOTH ASBESTOS EXTRACTOR. RUPTURED CARTRIDGE GAGE. HEADSPACE AND TIMING			I 1 ] I 1
Section ll of Appendix C (added by change 3) is superseded as follows:
Section 11. ADDITIONAL AUTHORIZATION LIST
(1) NATIONAL STOCK NUMBER	(2) DESCRIPTION PART NUMBER Л FSCM	USARI.E ON CODE	(3) U/M	(4) QTY AUTH
8105-00-921-5821	BAG, ORDNANCE WEAPON 11686430 (19204)	EA	1
1005-00-550-4037	BRUSH, CLEANING, SMALL ARMS, BORE 5504037 (19204)	EA	1
1005-00-766-0915	BRUSH, CLEANING, SMALL ARMS, CHAMBER 7790737 (19204)	EA	1
1005-00-716-2702	BRUSH. CLEANING, SMALL ARMS 7162702 (19205)	EA	1
(!)	(2)	(3)	(4)
	DESCRIPTION
NATIONAL
STOCK			QTY
NUMBER	PART NUMBER &. FSCM	USABLE ON CODE	U/M	AUTH
1005-00-487-4100	COVER, MACHINE GUN 11631791 (19207)	EA	1
1005-00-796-4436	COVER, SPARE BARREL 7964436 (19207)	EA	1
1005-00-653-5441	ROD, CLEANING. SMALL ARMS 6535441 (19204)	EA	1
1005-00-556-4102	ROD. CLEANING, SMALL ARMS 5564102(19204)	EA	1
1005-00-716-2704	SWAB HOLDER SECTION 7162704 (19205)	EA	1
Section II of Appendix D (added by change 3) is superseded as follows:
Section II. EXPENDABLE SUPPLIES AND MATERIALS LIST
(1) ITEM NUMBER	(2) LEVEL	(3) NATIONAL STOCK NUMBER	(4) DESCRIPTION	(5) U/M
1	c	7920*00-205-2401	BRUSH, CLEANING TOOL: M1L-S-4387I (81349)	EA
2	c	8020-00-2440153	BRUSH, ARTISTS: H-B-241 (81348) CARBON REMOVING COMPOUND: dip type, rinsing required P-C-Ill.type 11 (81348)	EA
3	c	6850-00-965-2332	5 gal can	EA
(1) ITEM NUMBER	(2) LEVEL	(3) NATIONAL STOCK NUMBER	(4) DESCRIPTION	(3) U/M
4	c	6850-00-224-6656	CLEANING COMPOUND, RIFLE: degreasing self emulsifying MIL-C-372 (81349) 2 oz container	EA
5	c	6850-00-224-6657	CLEANING COMPOUND, RIFLE: rifle bore cleaner (RBC) MIL-C-372 (81349) 8 oz can	EA
6	c	6850-00-224-6663	1 ga l can	EA
(i) ITEM NUMBER	(2) LEVEL	(3) NATIONAL STOCK NUMBER	(4) DESCRIPTION	(3) U/M
7	c	5350-00-221-0872	CLOTH, ABRASIVE P-C-458 (81348) DRY CLEANING SOLVENT: P-S-661 type 1. (02978)	SH
8	c	6850-00-281-1985	1 gal can	GL
9	c	9150-00-190-0905	GREASE, AUTOMOTIVE ARTILLERY: BRAYCOTE-610 (98308) GREASE,AUTOMOTIVE AND ARTILLERY: (GAA) minus 65 F to plus I25F efficient temp range	LB
(1) ITEM NUMBER	(2) LEVEL	(3) NATIONAL STOCK NUMBER	(4) DESCRIPTION	(5} U/M
10	C	9150-00-190-0907	BRAYCOTE-6IO (98308) 35 lb can	LB
II	c	9150-00-231-6689	LUBRICATING OIL, GENERAL PURPOSE: medium (PL-M) VV-L-800 (81348) I qt can	QT
12	c	9150-00-273-2389	4 oz can	OZ
13	c	9150-00-292-9689	LUBRICATING OIL. WEAPONS: BRAYCO-855 (79550) 1 qt can	QT
(1) ITEM NUMBER	(2) LEVEL	(3) NATIOAL STOCK NUMBER	DESCRIPTION	(5) U/M
14	C	7920-00-205-1711	RAG, WIPING: cotton, bleached or unbleached, mixture of white or colored, designed for general purpose use DDD-R-30 (81348) 50 lb bale	LB
By Order of the Secretary of the Army:
BERNARD W. ROGERS
General, United State* Army
Official:	Chief of Staff
J. C. PENNINGTON
Major General, United State* Army
The Adjutant General
Distribution:
To be distributed in seeordsnee with DA Form 12-40,
Operator merntenance requirements far Gun, Machine, Cal Л0,
М2 A Mounts.

Chapgea in Force: Cl, C2, СЗ, C4, and CS
TV 0-1005-213-10
C5
CHANGE	HEADQUARTERS
DEPARTMENT OF THE ARMY
NO. 5	WASHINGTON, DC. 20 Angutt 198}
Operator’s Manual
МАСНШЕ GUN, CALIBER M
BROWNING, М2, HEAVY BARREL,
FLEXIBLE, W|E
(1005-0M224715)
BBBT ПМРМ, MACMK MR
CALMER Л0, MS, WK
(1005-00-322-0716)
MOUNT, MACHINE GUN, ANTUURCRAFT
CALMER Л0, MM, WK
(100540473-3246)
m wioaMi3-ia, 12 Mr i«m> ohmaea м мтж
AM ttkn fnHnwIng warning! an a warning page:
1
WARNING
Improper headspace can cause malfunctioniug of the
machine gun and frequent damage to parts and/or injury
to personnel.
Do not attempt to remove back plate unless the bott is in
forward position. Do not attempt to coek machine gun
without the back plate assembled to machine gun.
Ibis weapon generates harmful levels of noise when fir*
ing. Hearing protection must be worn when firing this
weapon.
When boh latch release and trigger are both held down,
machine gun will fire automatically.
When machine gun has bees in action, clear machine gun
before anyone moves in front of muzzle. Clearing consists
of unloading the machine gun, but not releasing the bolt
or pressing the trigger.
Because of the possibility of cook-off, never attempt to
remove a round that is chambered in a very hot weapon.
All personnel should remain dear of the breech.
During the prescribed time intervals, the weapon will be
kept trained on the target and all personnel will stand
dear of the barrel assembly.
Immediate action must be applied within !• seconds. The
danger of a cook-off condition exists when the barrel is
hot. Keep the weapon trained on the target.
Before starting an inspection, be sure to «ear ine weapon.
Do not actuate the trigger until the weapon has been
cleared. Inspect the chamber to insure that it is empty,
and eheck to see that no ammunition is in position to be
introduced.
2
Page 18. Change “Table 2-2-Contmued” to
“Table 2-3~Continued”
Page 34. Add the following warning to table 2-6:
Warning: Thia weapon generates harmful levels
of noise when firing. Hearing protection must
be worn when firing this weapon.
Page 61. Change the caution in figure 3-3 to the
following warning:
Warning: Do not attempt to remove back plate
unless the bolt is in forward position. Do not
attempt to cock machine gun without the back
plate assembled to machine gun.
3
ty Older of the Secratvy of the Алву:
E. C. MEYER
General, United Statu Ara,
Chief of Staff
Offiml:
ROBERT M. JOYCE
Broodier Genera/, United State» Army
The Adjutant Genera/
Distribution:
To be distributed in accordance &A Ferm
Operator and Crew reouirenents for Gun Hach?^
Cal 50, М2 and Mounts.
Changes in Force; Cl, C2,C3,C4,C5 and C6
TM 9-1005-213-10
C6
CHANGE	HEADQUARTERS
DEPARTMENT OF THE ARMY
No. 6	WASHINGTON, DC, ц june 1985
Operator’s Manual
MACHINEGUN, CALIBER .50
BROWNING, М2, HEAVY BARREL. FLEXIBLE, W/E
{1005-00-322-9715)
MOUNT, TRIPOD. MACHINE GUN
CALIBER .50. М3, W/E
(1005-00-322*9716)
MOUNT, MACHINE GUN, ANTIAIRCRAFT
CALIBER .50, M63.W/E
(1005-00-673-3246)
TM 9-1005-213-10,12 July 1968, is changed as follows:
Change 4, page 4, is further changed as follows. Add the following
item:
(1)	(2)	(3) (4)
1005-00-550-4080	Carrier Assembly Barrel	ea	1
5504080(19204)
Page 4, paragraph l-4a, line 13, change “7,440 yd or 6,765
meters” io “7,400 yd or 6,764 meters.”
Page 18, Table 2-3, add step 5.1, as follows; “Notify organiza-
tional maintenance to install side plate trigger assembly before the
weapon is installed on the M63 AA mount."
18.;; jr-i Z-5.ii/ir 2-3 jjbup.-. •. iziKj as
CHECKING AND ADJUSTING HEADSPACE
WARMNG: Мак* sun, gun is dur of ammo befwa sitr’nn;.
Improper haadspeca inn iming can csuu mdiunctionaig of msdme gun, damage to gun and in-
r.r'f to soldier.
1 Raise cover HI M the way up. Grasp
charging handh (2k
2 With sMa bandit 121, retract boh about 3,'B inch
until barrel locking spring lug (3) is cantertd м
holt 141 on right sidt oi гесеяег.
CHECKING AND ADJUSTING HEADSPACE - Continued
3 HoM boh in this position (you can stick a cal .50 metal link betwom trunnion block and barrel
extension or aha keep bolding handkl and screw barrel (51 fully into banal extension. If
you use a link, insert the snail loop.
4 With boh stBI retracted, unscrew barrel two notches (clicks). Refeeso handto (or remote link, if you use one! end allow
bolt to go forward.
WARNING: At this point, check barrel to insure it is locked ns blows: With ths boh in tha forward position, at-
tempt to turn barrel in either direction; barrel should not turn. If barrel doos turn, stop hare; DO NOT ATTEMPT TO FIRE
THE GUN. Notify tha unit armorer to check tha barrel notches and/or barrel locking spring lor homage. Try both irerteis.
CHECKING AND ADJUSTING HEADSPACE - Continued
5 Pul bolt to mar with handle (21 and hold. TNs cocks №a weapon (with-
draws firing pin intn bohl. Cthotwisa hoadspaca gage won't fit at al
6 Molding handle (2), release bort and sfowfy rrwit bolt forward. Don't prass
trigger... and NO SLAMMINGI
7 Ramon stack in tha bolt and barrel exienuon by retracting tha charging
handta (2) until tha barrel extension (61 begins to separata (but not more
than 1116 of an inch) from tha minion block (71.
CHECKING AND ADJUSTING HEADSPACE - Continued
8 Rai» eiUKTor (6) out of the way so you can see belter and try both ends ol GO/NO GO gaga IS) a* shown
below, while holding The operating handle to the rear to keep the 1/16'' separation.
3 If GO end of gag* enters T-tlot tn writer ring of gage, and the NO GO end will not enter, headspaw is correct. Remove
gage (B). Headspace adjustment is now comphta.
CHECKING AND ADJUSTING HEADSPACE - Continued
HEADSPACE TDD TIGHT
IF GO sad of gage wil not antar Lslst frady, continua as fdlows
10 Retract bolt so you cm see band locking lug spring {3} in cantv of гасаиг bob [41 on right aide of meaner.
11 Unscrew band {5] one notch (dickL
12 Slowly return bolt forward: than retract recoiling parts 1,1S inch {Slap 71.
13 Racheck head space (Slap 9k
14 Keep repeating slaps 10 thru 13 until GO gage fits and NO GO gage does not fit
Note: On not unscrew barrel more lhan a told of litre notches (dicks! beyond last salting ol
vi two dicks.' if this condition occurs, turn in randans gen to unit armorer for inspection.
CHECKING AND ADJUSTING HEADSPACE - Continued
HEADSPACE TOO LOOSE
If NO GO and of gaga anion T-slot. *dj u*t ming нгг» procedure u above, eicapt that you urew barrel into barrel nienuoa
Keep repeating above «laps, one click el e lime,
until NO GO gage doew’t fit and GO gage done
fit.
Page 18, para 2-6, Table 2-5 is superseded as follows:
CHECKING AND ADJUSTING TIMING
WARNING: Make sure gun is clear of ammunition before starting. Improper headspace and timing can
cause malfunctioning of machine gun, damage to gun and injury to soldier.
CHECKING TIMING
1	Check headspace first (pages 2 and 3).
2	Puli bolt to rear-with handle and then ease bolt forward to cock machine gun.
CHECKING AND ADJUSTING TIMING - Continued
4 Depress trigger: gun SHOULD NOT fire. Go to
step 5.
Note: И it does tire, you hove early timing . . ,
go on to steps 7 thru 14.
5 Retract bolt just enough to remove NO FIRE
gage and insert FIRE gage between barrel
extension (l) and trunnion block (2). Release
charging handte slowly.
4 Depress trigger: gun SHOULD FRE. И it does fire, timing adjustment is now complete.
No**: if it doos not fire, you have late timing ... go ho step 7 thru 14.
CHECKING AND ADJUSTING TIMING - Continued
ADJUSTING TIMING (EITHER EARLY OR LATE)
7 Remove gage, code gun, and return bolt forward a* before.
WARNING : Never cock gun with back plate off.
8 Remove back plate.
9 Screw timing adjustment
nut (3) all the way down
(to the left.  clockwise).
10 insert FIRE gage as
before.
11 Try to fire gun by push-
ing up on rear of trigger
bar. Gun SHOULD NOT
fire.
CHECKING AND ADJUSTING TIMING - Continued
12	Screw timing odjustment nut |3) up (to
the right . . . counterclockwise) one
click at a rime. Push up on trigger bar
after each click. Keep doing this until
gun fires.
13	Now turn nut two more clicks up (to the right). NO MORE.
14	Remove gage, replace back plate, and puli bolt to rear to cock machine gun. Ease
bolt forward with charging handle. Do not allow bolt to slam into batter/ unassisted.
15	Recheck riming with FIRE/NO FIRE gage two more times after backplate is installed
to make sure adjustment is correct.
Page 24, Figure 2-2, Step 1 figure i* changed ал follows.
Figure t-t. Checking and adjusting timing. (1 of 2)
NJ
Page 25, Figure 2-3, Step 4 figure is changed as follows:
Figure t-3. Checking and adjusting timing. (2 of 2)
Раке 37, Table 2-6. step 6, add a second warning and a note as
follows "WARNING: To prevent accidental firing, immediately
after a finng exercise organizational maintenance must remove trie
side plate trigger assembly from the receiver wnen tile М2 flexible
machine gun has beet! used on the M63 АД mount
“NOTE. The Side plate trigger assembly is to be stored in trie
container attacned to the M63 mount."
13
Page 52, Table 3-3 is continued as follows:
Table JJ Continued
INTERVAL
OPERATOR
				В - НЕГОКЕ OPERATION A  AFTER OPERATE>N 1) • DURING OPERATION
ITEM NO.	В	D	A	ITEM TO BE INSPECTED	PROCEDURE	REFERENCE
1	X			MIO Charger	Assure the moving parts are kept clean and lubricated.	Fig. 3-21
2	X		X	Charger Housing	Cheek the housing to make sure its not twisted, cracked, dented or loose on gun.	Fig. 3 21
3	X		X	Spring Housing	Check to make sure the housing is not cracked or busted and that the spring is clean, lubricated and works properly.	Fig. 3-21
4	X		X	Charger Cover	Check to make sure the cover is not cracked, dented, twisted and that the lips are not bent or broken.	Fig. 3-21
'/able J J - Continued
INTERVAL
OPERATOR
	ITEM NO.	В	1)	A	В - HE FORE OPERATION A - AFTER OPERATION D • DURING OPERATION
					ITEM TO BE INSPECTED	PROCEDURE	REFERENCE
	5	X		X	Charger Swivel	Check to make sure the swivel moves freely. Does not bind and the. roller (pulley) does not have sharp edges, is not burred and rolls freely.	Fig. 3-21
	6	X		X	Charger Cable	Check to make sure the cable is not broken, frayed, kinked and that the ball ends are not missing. Make sure the handle is securely fastened to cable and is not cracked or burred.	Fig. 3-21
U1	7	X		X	Charger Slide	Check the slide to make sure it does not bind, is not burred or cracked, ('heck the pulley for sharp edges and burrs.	Fig. 3-21
fft
INTERVAL				Table 3-J - Continued
OPERATOR
				II - BEFORE OPERATION	A - AFTER OPERATION D - DURING OPERATION
ITEM NO.	В	D	A	ITEM TO BE INSPECTED	PROCEDURE	REFERENCE
8	X		X	Charger Latches	Check the Latches to make sure they hold the cover and swivel pulley plate securely and are not broken or cracked.	Kg. 3-21
9	X		X	Safety Wire	Check the safety wire to make sure it is properly installed and riot broken.	Fig. 3-21
ige 54, Table 3-3, change item “7*' to item “8”. Add a new item
as follows; place an “X” in column B; Item to be inspected
ieadspace and timing gage"; Procedure "Check for broken, bent,
sted, pitted, or exhibit other forms of mutilation that could
feet the dimensional tolerance of the gages."
.ge 55, Table 3-3, add new item 3.1 as follows: Place an "X" in
4umn A; Item to be inspected “Side plate trigger Procedure
Irganizational maintenance must remove the side plate trigger
sembly from the receiver when the М2 flexible machine gun has
en used on the M63 AA mount. The side plate trigger is to be
sred in the container attached to the M63 mount.
17
Page 75, Figure 3-17 is changed as follows;
NOTE: Numbers on breech
lock face away from the
threaded end on the barrel
extension assembly.
REMOVE
BREECH LOCK
INSTALL
REMOVE
BARREL EXTENSION
INSTALL ASSEMBLY
BEVELED EDGE
NOTE: MAKE SURE DOUBLE-BEVELED
EDGE IS UP AND TO THE FRONT
REMOVE/lNSTALL BARREL EXTENSION GROUP.
PIN
ASSEMBLY
WE 15542
Figure 3—17. Dittaaaembly/aeaemblg of Caliber .50 Machine Gun, Mg.
Add Figure 3-21 alter Figure 3-20.
COVER
HOUSING
handle
Figure 3-21. M10 MANUAL CHARGER