


Tags: confectionery pastry recipes modern baking eclairs sweet puffs savory puffs dessert recipes gourmet pastries french pastries baking techniques patisserie pastry chef cooking tips
ISBN: 978-0-544-55719-2
Year: 2016


Copyright © 2016 by Jenny McCoy
Interior photography © 2016 by Pernille Loof
All rights reserved.
Prop styling by Brian Heiser
Food styling by Junita Bognanni
Recipe testing by Joanne Allegra and Carly DeFilippo
For information about permission to reproduce selections from this
book, write to trade.permissions@hmhco.com or to Permissions,
Houghton Mifflin Harcourt Publishing Company, 3 Park Avenue, 19th
Floor, New York, New York 10016.
www.hmhco.com
Library of Congress Cataloging-in-Publication Data
McCoy, Jenny.
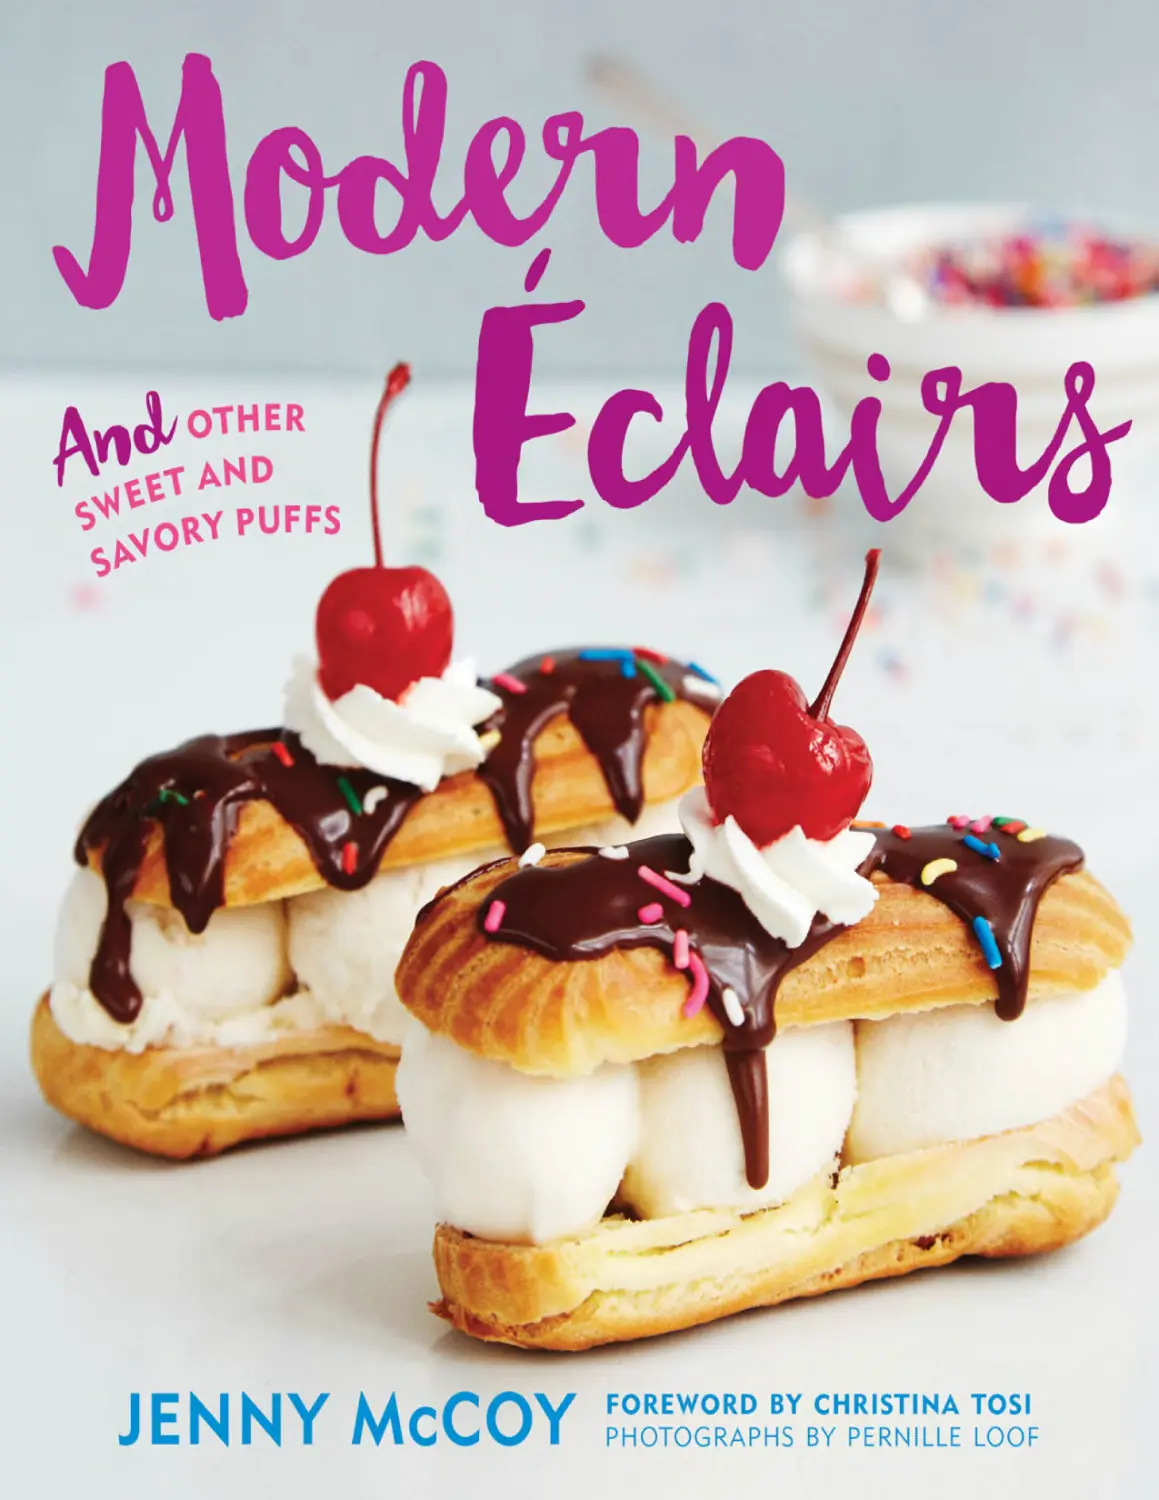
Modern éclairs : and other sweet and savory puffs / Jenny McCoy ;
Photography by Pernille Loof.
pages cm
Includes index.
ISBN 978-0-544-55719-2 (paper over board); 978-0-544-55826-7
(ebook)
1. Pastry. 2. Desserts I. Title
TX773.M165 2016
641.86'5—dc23
2015019994
Design by Rachel Newborn
v1.0316
Contents
FOREWORD
INTRODUCTION
INGREDIENTS
TOOLS
THE PASTRY TIPS
THE BASICS
Classic
Fruity
Chocolate
Frozen
Holiday
Savory
ACKNOWLEDGMENTS
RETAIL THERAPY
INDEX
Foreword
In the wild world of dessert, there is always a pastry that intrigues and
inspires. Where possibilities are endless and imagination runs
rampant. Éclairs are just that. The flavors! The fillings! The size! The
shape! The textures! They’re modern, hip, and forever exciting. It’s no
surprise that Jenny’s obsession with them has led to this sweet and
savory pastry adventure ahead.
I don’t believe I’ve ever met anyone who knows how to balance the
fun and sweet side of life with the skill of a trained pastry chef quite
like Jenny. She has an amazing drive and passion that is like no other,
and it comes through in everything she does, especially her food.
Jenny worked her way up through the highest acclaimed restaurants,
so it’s no wonder she’s a star. She is clever and creative, but honors
simplicity through the classics like the pro that she is. Anything and
everything that she dreams up is as such—remarkably simple, yet
refined and utterly delicious.
Christina Tosi
Chef and founder, Momofuku Milk Bar
Introduc tion
OH, PÂTE À CHOUX, IT’S FINALLY YOUR TURN FOR THE
LIMELIGHT
Move over, macarons and meringue . . . it’s time for another classic
French sweet to get a makeover. And this time, we are not only going
sweet, but we are going savory, too.
Did you know that pâte à choux literally translates to “paste of
cabbage”? Doesn’t that sound delicious? Are you beginning to
wonder if this book is about cabbage cookery? Of course not! This
cookbook is the exploration of pâte à choux, a glorious dough that,
when baked, puffs into a shape that sort of resembles a head of
cabbage. (Hence the reason for the name, which, by the way, really
means a pastry that puffs—as in cream puffs, éclairs, profiteroles, and
so forth.)
To make pâte à choux, all you need are seven staple baking
ingredients: water, milk, butter, salt, sugar, bread flour, and eggs. With
just a few basic tools—a saucepan and a rubber spatula—you can
whip up a batch of the dough. Armed with a pastry bag and a few
piping tips, you can create a variety of shapes. Pop them in the oven,
and voilà! You have puffed delights that can be filled and adorned with
any flavor combination you can think up.
Pâte à choux is truly amazing. In my humble opinion, it is
unparalleled in both ease of preparation and versatility. How many
types of pastry dough can be used for both sweet and savory
recipes? How many types of pastry dough can be piped into any
shape imaginable? Not many. So get ready to have some fun without
much fuss!
WHAT’S SO MODERN ABOUT PÂTE À CHOUX, ANYWAY?
Throughout my career as a professional pastry chef, my specialty has
been taking the tried and true, the traditional, the terribly typical, and
making them better. Tweaking a base recipe to my perfection, then
exploring how to use that recipe in a variety of ways, is my forte. This
book is my love letter to pâte à choux. Its recipes will inspire you to
make all sorts of new and delicious sweets and savories and give you
the tools to create new flavor combinations of your own.
Most recipes for pâte à choux are fairly similar, with a minor twist
here and there—some call for a combination of milk and water, some
use just water, and some use instant dry milk. Some require allpurpose flour and some require bread flour. Some are baked at a
very high temperature, and some at a low temperature. It’s not my
pâte à choux recipe that is especially modern. What is modern is how
I’ve used it throughout the book to create imaginative baked goods
that you will not find in your local bakery case.
WHAT THE PUFF IS IN THIS COOKBOOK?
In the beginning, I will teach you the technique for making pâte à
choux. Although I’ve made the recipe very simple, be sure to read it
through entirely before you get started. Mastering this one easy
recipe will ensure your success when making recipes throughout the
rest of the book.
It would have been unthinkable to write a book on pâte à choux
without a generous nod to the traditional pastries it’s known for. So in
the next chapter, you will learn how to make the most celebrated
recipes for pâte à choux, such as Cream Puffs filled with whipped
cream (recipe), Chantilly Swans (recipe), and Classic Profiteroles with
vanilla bean ice cream and chocolate sauce (recipe). You will also
learn a few twists on the classics, like a colorful take on a traditional
croquembouche (recipe), the exquisite French dessert often served at
weddings.
As for the next four chapters—Fruity, Chocolate, Frozen, and
Holiday—you will find recipes for modern interpretations such as
Fruity Pâte à Choux Pops (recipe), Mississippi Mud Puffs (recipe),
Banana Split Éclairs (recipe), and coconut-dusted Snowflakes (recipe).
In the final chapter—Savory—we will go way beyond the typical
sweet application of pâte à choux. I will teach you new and exciting
ways to use pâte à choux for scrumptious salty recipes. Yes, we’ve all
heard of gougères (a.k.a. cheese puffs), but have you ever made a
lobster roll in an éclair shell, or a BLT in a cream puff shell? I didn’t
think so. I hope now you will.
THE BRIEFEST HISTORY OF PÂTE À CHOUX (AS I KNOW
IT)
According to legend (and some seriously dusty cookbooks), pâte à
choux was invented by Catherine de’ Medici’s famous chef, Pantanelli
(spelled various ways, depending on the source), in 1540 or so. There
are two possibilities:
1) Pantanelli invented a pastry that could be made quickly while
traveling at the request of his employer. (Remember: Catherine was
forced to leave Florence . . . and thankfully, she had the good sense to
bring along her chef while on the run.)
2) Pantanelli was a culinary genius who, upon Catherine’s
marriage to the Duke of Orléans (who later became the King of
France, Henry II), decided to make a gâteau with a newly invented
dough, pâte à Pantanelli, for the king.
The dough changed names as it changed hands over the
centuries, and was used in many applications, mostly those similar to
popovers. But it didn’t reach its full potential until finally being
perfected and published in 1815 by the great French chef MarieAntoine Carême, in his famous cookbook Le Pâtissier royal parisien.
Carême’s version of the dough recipe is what is now most commonly
used when making profiteroles, cream puffs, and éclairs.
And the rest is history. . . .
LET’S GET A LITTLE NERDY. JUST A LITTLE.
Pâte à choux dough is different from many other baked types of
dough because it doesn’t require a chemical leavening agent, such as
baking soda or baking powder.
Pâte à choux dough uses the simple magic of heat and a lot of
moisture to create steam. Mixing the dough vigorously strengthens
the gluten in the bread flour. The steam trapped in the strong gluten
molecules is what creates large pockets in the dough. The pockets are
what cause the pâte à choux to have a hollow interior and rise to its
glorious heights.
Pretty cool, huh?
GET CREATIVE! PRETTY, PRETTY PLEASE . . .
This book is about having fun! I encourage you to use your
imagination to make a pastry that combines a different filling or glaze
than I’ve directed. For example, if a pistachio Paris-Brest, using
Pistachio Pastry Cream (recipe) for the filling, sounds delicious to you,
go for it! Or, if you want to swap out the Lemon Curd (recipe) for
Bittersweet Chocolate Mousse (recipe) to make chocolate cream pie
éclairs instead of lemon meringue, I see no reason to stop you.
Ingredients
MMM . . .
IT’S TIME FOR THE GOOD STUFF
Bread Flour and All-Purpose Flour:
I recommend King Arthur brand unbleached flours. They are a bit
more expensive than other brands, but well worth the investment
because they are a very consistent product and will make your final
results equally consistent.
Butter:
Be sure to use unsalted butter for all the recipes in this book. Do not
substitute margarine, as it will not produce the correct results.
Chocolate and Cocoa Powder:
I used Guittard chocolate chips, bars, and cocoa powder for all of the
recipes in this book. They are a good-quality chocolate, sold for a
good price and made by a family-run operation in San Francisco. If
you are making cocoa pâte à choux or chocolate glaze, I suggest you
use Dutch-processed cocoa powder (a.k.a. alkalized cocoa powder),
which has a stronger flavor and a darker color. If you don’t have it on
hand or can’t find it, natural cocoa powder will still work just fine. You
may notice your cocoa pâte à choux or glaze is a little bit lighter in
color, but it will still taste delicious.
Edible Glitters, Sprinkles, Dragées, Sanding Sugars, Luster Dusts, and
Petal Dusts:
There are no rules when it comes to decorations, so get creative with
your pastries! Chef Rubber has an incredible array of options, as does
N.Y. Cake (see Retail Therapy).
Fine Sea Salt:
La Baleine fine sea salt is my standard salt for baking, but you can use
regular table salt for all of the recipes if you wish.
Fresh Fruits:
It is always best to bake with fruits when they’re in season, so that the
fruit in your recipes tastes the absolute best. Shop at your local
farmers’ market for the cream of the crop.
Frozen Puff Pastry:
If you can find frozen puff pastry that is made from all butter (versus
butter and shortening), you will like your Gâteaux Saint-Honoré even
better. I like Dufour brand, which is available in most Whole Foods
grocery stores.
Gel Paste Food Colorings:
I used AmeriColor Soft Gel Paste for all the glaze recipes in this book.
Gold and Silver Leaf:
These decorations are quite pricey, so remember that a little goes a
long way. You can also substitute them with less expensive
decorations, like gold edible glitter or sprinkles.
Heavy Cream:
For whipped cream, try to find a heavy cream that does not include
additives such as guar gum. Some brands of organic heavy cream are
available without gums. I find these additives give whipped cream a
slightly grainy texture. As for the rest of the recipes, use whichever
heavy cream you like best.
Instant Espresso Powder:
I prefer Medaglia d’Oro Instant Espresso Coffee for my coffeeflavored recipes, but any brand of instant espresso or coffee will work
just as well.
Milk:
For pâte à choux dough, you can substitute low-fat milk, but not nonfat.
For the pastry cream or ice cream recipes, it is best to use whole milk
for a rich and creamy texture.
Nut Butters and Nut Pastes:
For the best flavor use the highest-quality nut butters or nut pastes you
can find. Gourmet or specialty food retailers are your best source.
Vanilla Beans:
I’m in love with vanilla beans from Singing Dog Vanilla in Eugene,
Oregon. Their beans are organic, sustainably sourced, and sold at a
great price. Store your vanilla beans in a resealable bag in the freezer
to keep them fresh for up to a year.
Xanthan Gum:
Because of the popularity of gluten-free baking, xanthan gum isn’t too
hard to find. Check your local natural foods store to see if they have it
in stock. Bob’s Red Mill is probably the most widely distributed brand.
And don’t worry about buying xanthan gum even if you don’t plan to
use it a lot; it has a 24-month shelf life.
I use xanthan gum in my recipes for ice cream, a more modern
(and super-easy!) method. I find it makes for a softer, creamier
textured ice cream, especially when using a home ice cream maker. If
you prefer, you can substitute the xanthan gum and cornstarch with 4
large egg yolks and cook the ice cream base following the classic
tempering cooking method.
Tools
DE LA TRADE
Baking Sheets:
I recommend using commercial-quality 18-by-13-inch aluminum
baking sheets (a.k.a. bun pans or half-sheet pans). They are durable,
inexpensive, and a heavy gauge, which will make for evenly baked
goods.
Heat-Resistant Rubber Spatula:
Invest in a good-quality silicone or high-heat-resistant (up to 400°F)
rubber spatula. It is the tool most often used in the recipes in this
cookbook, and essential to cooking pâte à choux dough without
melting a spatula in the process. It is also the best tool for folding
mousses, filling pastry bags, and scraping bowls absolutely clean. Le
Creuset silicone spatulas are my favorite, and I never bake or cook
without one handy.
Parchment Paper:
Whatever you do, do not substitute waxed paper for parchment paper.
The waxed paper will leave a film on your baked pâte à choux.
Pastry Bags:
I prefer plastic pastry bags, even though they are not the most ecofriendly. This is because they are the most commonly used type of
pastry bag in professional kitchens and what I am used to. If you
prefer cloth pastry bags, all of the recipes will work perfectly fine with
them.
Piping Tips:
I use Ateco piping tips for all the recipes in this book. You can use any
brand you prefer, so long as they are the same shape and size.
Plastic Bowl Scraper:
This is a great $1 purchase. I use it to transfer pâte à choux dough to a
pastry bag.
Pots and Pans:
I exclusively use All-Clad stainless steel pots and pans for my cooking,
but any brand of good-quality, heavy stainless steel is fine for cooking
the pâte à choux dough and pastry cream recipes in this cookbook.
When using a nonstick pan, note the difference in cooking time in the
recipe.
j
Pas tr y Tips
WHIPPING UP PÂTE À C HOUX DOU GH
• It’s best to sift the bread flour before using it. This will
prevent lumps from forming in the dough.
• Use a heavyweight saucepan for cooking your pâte à
choux. It will ensure more even heat distribution as you
cook the dough.
• I use whole milk for my pâte à choux, but if you only have
low-fat milk on hand, that’s fine to use instead.
• Make sure you bring the water, milk, butter, salt, and sugar
mixture to a full rolling boil. This will help with some of the
evaporation, and the quick cooking, needed to make
great pâte à choux.
• Just dump all the flour into the pot at once. Seriously, it is
not going to cause an issue.
• After adding the flour, be sure to stir your dough in the pot
constantly, but not vigorously (unless you want arms like a
drummer!). Continue to cook the dough until you see a
light golden-colored skin on the bottom of the saucepan.
• Adding the eggs is when it’s time to stir vigorously
(drummer arms!). Don’t worry: You can’t overmix pâte à
choux.
• To save a few minutes, you can transfer the cooked dough
to the bowl of a stand mixer fitted with the paddle
attachment, and add the eggs one at a time. Be sure to
mix the dough on the lowest speed and scrape down the
sides of the bowl between the addition of each egg.
• When letting your dough cool before using it, you don’t
need to cover the bowl. Just let it stand at room
temperature.
• If you would prefer to make pâte à choux dough in
advance, you can store the cooled dough in an airtight
container in the refrigerator for up to 1 day before piping
and baking.
PIPING YOUR PÂTE À CHOUX —YOU’RE
HALFWAY THERE
• Pâte à choux dough is sticky stuff. When filling your pastry
bag, fold the bag down in order to place the dough in the
bottom of the bag.
• Use a plastic bowl scraper to push the dough toward the
piping tip in the pastry bag. This will also help push air
bubbles out of the pastry bag, which can affect your
piping. Twist the back of the bag closed to prevent the
dough from escaping when piping. Alternatively, you can
use a strip of plastic wrap to tie the bag tightly closed.
• Dab a fingertip’s worth of pâte à choux dough on each
corner of the baking sheet to help secure the parchment
paper. This will prevent the parchment paper from lifting
off the baking sheet as you are piping.
• When piping éclairs, use a ruler and pencil on the
parchment to create straight lines as a piping guide. But
be sure to turn the paper over so the pencil marks are on
the underside before piping. For cream puffs or Paris-Brest
shapes, a set of round cookie cutters, small ramekins,
cups, or any other circular household item can be used as
a guide. Remember: Piping takes practice!
• To properly hold a pastry bag, use your dominant hand to
hold the bag. Squeeze your hand like you are making a
fist on the back of the bag to squeeze the dough out of
the bag evenly. Use your non-dominant hand to steady
the bag as you pipe your shape. If your wrist hurts from
piping, try filling the pastry bag less full. Piping thick
dough can strain your wrist if you don’t pipe very often.
• Always stop the pressure on the piping bag before lifting
the pastry tip away from your piped shape—this will
prevent peaks and points from forming. If you do have
unwanted peaks and points, dip your fingertip in a bit of
cold water and smooth the dough.
• If you’re not happy with your piped shapes, not to worry!
Just scrape up the dough from the parchment paper, put
the dough back into the pastry bag, and pipe it again.
BAKING PÂTE À CHOUX—T HE FINAL
STEP
• Remember: The larger the shape of pâte à choux, the
more it will puff. Be sure to leave about 1 inch of space
between small cream puffs and small éclair shells and
about 2 inches of space between large cream puffs, large
éclairs, and Paris-Brest shells.
• Be sure to bake the pâte à choux in an oven with the
convection setting off. The fan of a convection oven can
cause pâte à choux to rise too quickly and unevenly.
Additionally, the convection fan can cause the exteriors of
the pâte à choux to bake too quickly.
• I always set a timer for the halfway point in a recipe’s bake
time. This reminds me to rotate the baking sheet, if
needed, and assess just how much more time my dessert
needs to bake. Because all ovens can operate a little
differently, you may find that your pâte à choux needs to
bake for a bit more time, or a bit less, to achieve the
desired results.
• When baking cocoa pâte à choux, it can be difficult to
determine when it is done. As the dough begins to dry out,
it will have a matte surface where tiny cracks will appear.
• To determine if your pâte à choux is fully baked, remove a
shell from the oven and place on a cooling rack at room
temperature. If it deflates, it is too moist on the inside and
needs more time to bake. If it holds its shape, tear it open.
If the center is still very moist and gummy, continue to let
it bake until the center dries out almost completely.
• Baking pâte à choux in advance is one of the best things
about this dough—it stores really well! You can store the
baked pâte à choux in an airtight container for up to 3
days at room temperature, or in the freezer for up to 3
weeks.
• Is it best to “refresh” baked and unfilled pâte à choux
shells in the oven or toaster oven if you make them in
advance. This will help them crisp back up. I suggest
preheating an oven to 350°F and baking room
temperature shells for 5 to 8 minutes, or frozen shells for
about 12 minutes.
PASTRY CREAMS—THE CRÈM E DE L A
CRÈME
• Save the egg whites left over from pastry cream recipes to
make meringue! (Or, save the yolks left over from
meringue recipes to make pastry cream!)
• Remember to use a heavyweight saucepan when making
pastry cream. It will ensure more even heat distribution
and offer less opportunity for overcooking.
• Set the bowl of eggs and cornstarch on a folded kitchen
towel when adding the hot milk to hold the bowl in place
while whisking.
• It is very important to be able to judge the thickness of
pastry cream while you are cooking it. Whisk the mixture
slowly until just thickened—this will prevent a layer of
foamy bubbles from forming in the pot, something that
can make it difficult to determine the thickness of the
pastry cream. Once the pastry cream is thickened and
shows signs of lumps, then you can increase the speed of
whisking to help smooth out the texture of the pastry
cream.
• Do not mistake lumps in your pastry cream for scrambled
eggs—sometimes you just need to whisk the cream more
vigorously to smooth it out.
• Don’t forget to add the butter to your pastry cream! It’s
really easy to forget, especially if you are concerned about
immediately straining the cream. If you happen to forget,
you can add the butter to the pastry cream after it has
been strained.
LES GL A ZES
• If you don’t like using corn syrup, you can use a lightcolored honey instead. But keep in mind that your glaze
will have a light honey flavor.
• When mixing the glaze, do not whisk too vigorously. That
would create lots of bubbles in your glaze. However, if you
end up with bubbles on your glazed pastries, use a
toothpick to pop them while the glaze is still wet.
• When coloring glazes, add the color one drop at a time—
you can always add more, but you can never take it away.
If you need just a tiny bit more color, dip the tip of a
toothpick into the coloring and stir into the glaze.
• If you don’t want drips of glaze on your cream puffs or
éclairs, hold the dipped pastries upside down until all the
excess glaze drips away before inverting. Use a clean
fingertip to wipe away any glaze that drips down the sides.
• To set the glaze more quickly, you can place your glazed
pastries in the refrigerator for about 10 minutes.
Otherwise, let them set up at room temperature for about
20 minutes.
• Your glaze should have a thick consistency that still allows
for dipping. To make a thicker glaze, add sifted
confectioners’ sugar until the glaze reaches the desired
consistency. To make a thinner glaze, add water, 1
teaspoon at a time.
ASSEMBLING YOUR PASTRY
MASTERPIECES
• The best way to approach the recipes in this cookbook is
to make the fillings first. While they are chilling or setting,
make the pâte à choux. And make the glaze just before
you are ready to use it.
• I use the same piping tip to pierce the holes in my cream
puff and éclair shells as I do to fill them. However, if you
have a bismarck tip (or a doughnut filling pastry tip), you
can pierce and fill your shells in one step!
• If you find that using a pastry tip to pierce holes in your
cream puff or éclair shells is causing them to crack, switch
to using the tip of a paring knife to create a little hole for
the filling.
• To fill cream puff or éclair shells completely full, pipe the
filling into the shell until it feels heavy and you can see the
cream just squeezing out at the opening of the hole.
• If you want to get ahead, you can make most of the
components for any individual recipe and store them
separately until you are ready to assemble your pastries.
This will create pastries with the best texture.
SERVING AND STORAGE—IT’S T IME TO
EAT !
• Assembled pâte à choux pastries are best when served
within a few hours of assembly. However, most can be
stored for up to 8 hours before getting soft. Keep in mind,
the assembled pastries won’t go bad if stored overnight,
but they will lose most of their crisp texture.
• I prefer to store my assembled pastries on a platter or in a
paper cake box when storing them in the refrigerator.
Attempting to cover them with plastic wrap usually just
messes up all the decorations.
The Basics
Pâte à Choux Dough
Vanilla Bean Pastry Cream
Chocolate Pastry Cream
Chocolate Glaze
White Glaze
Whipped Cream
Royal Icing
Pâte à Choux Dough
MAKES ENOUGH FOR
1 6 TO 1 8 S M A L L É C L A I R S H E L L S
1 0 TO 1 2 L A RG E É C L A I R S H E L L S
3 0 TO 3 6 S M A L L C R E A M P U F F S H E L L S
1 4 TO 1 6 L A RG E C R E A M P U F F S H E L L S
O R 8 TO 1 0 PA R I S - B R E ST S H E L L S
⅓ cup (80 grams) water
⅓ cup (80 grams) whole milk
5 tablespoons (70 grams) unsalted butter, cut into small pieces
1 teaspoon sugar
¼ teaspoon salt
¾ cup (105 grams) bread flour, sifted
3 large eggs
1
In a medium saucepan, bring the water, milk, butter, sugar, and
salt to a rolling boil and cook until the butter has melted. Turn off
the heat and add the flour all at once. Using a heat-resistant
rubber spatula, stir the mixture until no lumps of dry flour
remain, 1 to 2 minutes.
2
Turn the heat to medium and cook the dough, stirring constantly,
until it forms a ball and leaves a skin on the base of the pot, 3 to
4 minutes. (If using a nonstick pan, a skin may not form on the
base of the pot. Simply set a timer for 4 minutes instead.)
3
Transfer the dough to a large bowl and stir to cool the dough just
slightly, about 2 minutes. Add the eggs, one at a time, stirring
vigorously until the mixture is smooth. Scrape down the sides of
the bowl with the rubber spatula between each addition of egg.
Once the dough is fully combined, let it stand at room
temperature to cool for about 10 minutes.
4
Pipe and bake shells as directed on page 31 to 36.
Cocoa Pâte à Choux Dough
Add 2 tablespoons (15 grams) cocoa powder, sifted, with the bread
flour when making the dough. Proceed as directed, cooking the
dough in Step 2 for a full 4 minutes.
MAKING PÂTE À CHOUX
A D D T H E WAT E R , M I L K , B U T T E R , S U G A R , A N D S A LT TO T H E
S AU C E PA N
B R I N G T H E I N G R E D I E N TS TO A RO L L I N G B O I L
CO O K U N T I L T H E B U T T E R H A S M E LT E D
T U R N O F F T H E H E AT A N D A D D T H E F LO U R A L L AT O N C E
ST I R I N T H E F LO U R
CO O K U N T I L T H E D O U G H F O R M S A B A L L A N D L E AV E S A S K I N O N
T H E B OT TOM O F T H E P OT
T R A N S F E R T H E D O U G H TO A B OW L A N D A D D T H E EG G S , O N E AT A
TIME
ST I R V I G O RO U S LY U N T I L T H E D O U G H I S S MO OT H
L E T CO O L F O R A B O U T 1 0 M I N U T E S
For Small Éclair Shells
M A K E S 1 6 TO 1 8 P I EC E S
1
Preheat the oven to 350ºF. Line a baking
sheet with parchment paper.
2
Fill a pastry bag fitted with a star piping
tip (such as Ateco #866) with the pâte à
choux dough or cocoa pâte à choux
dough and pipe straight lines, 3 inches
long and ¾ inch wide, onto the baking
sheet, leaving about 1 inch of space
between each. (If desired, use a ruler to
draw 3-inch-wide columns on the
parchment paper to serve as a tracing
guide when piping. Be sure to place the
parchment paper marked side down on
the baking sheet before piping the
éclairs.) Lightly moisten a fingertip with
cold water and gently smooth any peaks
or points created when piping.
3
Bake for 35 to 40 minutes, until deep golden brown and cooked
through in the center. Let cool on the baking sheet to room
temperature.
PIPING AND BAKING PÂTE À CHOUX
SHAPES
F O L D T H E TO P E D G E O F T H E PA ST RY B AG D OW N A N D F I L L W I T H
DOUGH
U S E A P L A ST I C B OW L S C R A P E R TO P U S H T H E D O U G H TOWA R D T H E
PIPING TIP
T W I ST T H E TO P O F T H E B AG C LO S E D
T R AC E D E S I R E D S H A P E S O N TO T H E PA RC H M E N T A N D F L I P T H E
PA P E R OV E R
DA B P Â T E À C H O UX D O U G H O N TO T H E CO R N E R S TO S EC U R E T H E
PA RC H M E N T
H O L D T H E PA ST RY B AG ST R A I G H T U P A N D D OW N TO P I P E
MO U N D S F O R C R E A M P U F F S
P I P E D O U G H I N TO R I N G S F O R PA R I S - B R E ST S H E L L S
H O L D T H E PA ST RY B AG AT A N A N G L E TO P I P E É C L A I R S H E L L S
U S E A MO I ST E N E D F I N G E RT I P TO S MO OT H A N Y P E A K S O R P O I N TS
For Large Éclair Shells
M A K E S 1 0 TO 1 2 P I EC E S
1
Preheat the oven to 350ºF. Line a baking
sheet with parchment paper.
2
Fill a pastry bag fitted with a star piping
tip (such as Ateco #868) with the pâte à
choux dough or cocoa pâte à choux
dough and pipe straight lines, 5 inches
long and 1 inch wide, onto the baking
sheet, leaving about 2 inches of space
between each. (If desired, use a ruler to
draw 5-inch-wide columns on the
parchment paper to serve as a tracing
guide when piping. Be sure to place the
parchment paper marked side down on
the baking sheet before piping the
éclairs.) Lightly moisten a fingertip with
cold water and gently smooth any peaks
or points created when piping.
3
Bake for 50 to 55 minutes, until deep
golden brown and cooked through in the
center. Let cool on the baking sheet to
room temperature.
For Small Cream Puff Shells
M A K E S 3 0 TO 3 6 P I EC E S
1
Preheat the oven to 350ºF. Line two
baking sheets with parchment paper.
2
Fill a pastry bag fitted with a round
piping tip (such as Ateco #806) with the
pâte à choux dough or cocoa pâte à
choux dough and pipe small mounds,
1¼ inches in diameter and 1 inch tall,
leaving about 1 inch of space between each mound. (If desired,
use a 1¼-inch round cookie cutter to trace circles on the
parchment paper to serve as a guide when piping. Be sure to
place the parchment paper marked side down on the baking
sheets before piping the cream puffs.) Lightly moisten a
fingertip with cold water and gently smooth any peaks or points
created when piping.
3
Bake for 35 to 40 minutes, until deep golden brown and cooked
through in the center. Let cool on the baking sheets to room
temperature.
For Large Cream Puff Shells
M A K E S 1 4 TO 1 6 P I EC E S
1
Preheat the oven to 350ºF.
Line a baking sheet with
parchment paper.
2
Fill a pastry bag fitted with a
round piping tip (such as
Ateco #809) with the pâte à
choux dough or cocoa pâte à
choux dough and pipe
mounds, 1¾ inches in
diameter and 1¼ inches tall,
leaving about 1 inch of space
between each mound. (If desired, use a 1¾-inch round cookie
cutter to trace circles on the parchment paper to serve as a
guide when piping. Be sure to place the parchment paper
marked side down on the baking sheet before piping the cream
puffs.) Lightly moisten a fingertip with cold water and gently
smooth any peaks or points created when piping.
3
Bake for 45 to 50 minutes, until deep golden brown and cooked
through in the center. Let cool on the baking sheet to room
temperature.
For Paris-Brest Shells
M A K E S 8 TO 1 0 P I EC E S
1
Preheat the oven to 350ºF.
Line a baking sheet with
parchment paper.
2
Fill a pastry bag fitted with a
star piping tip (such as Ateco
#827) with the pâte à choux
dough or cocoa pâte à choux
dough and pipe rings 2¾
inches in diameter, leaving
about 1 inch of space
between each ring. (If desired, use a 2¾-inch round cookie
cutter to trace circles on the parchment paper to serve as a
guide when piping. Be sure to place the parchment paper
marked side down on the baking sheet before piping the shells.)
Lightly moisten a fingertip with cold water and gently smooth
any peaks or points created when piping.
3
Bake for 45 to 50 minutes, until deep golden brown and cooked
through in the center. Let cool on the baking sheet to room
temperature.
Vanilla Bean Pastry Cream
MAKES ABOUT 3 CUPS
4 large egg yolks
1 large egg
¼ cup plus 3 tablespoons (53 grams) cornstarch
2 cups (480 grams) whole milk
½ cup plus 2 tablespoons (126 grams) sugar
¼ teaspoon salt
Seeds from 1 vanilla bean
5 tablespoons (70 grams) unsalted butter, cut into small pieces
1
In a large bowl, whisk the egg yolks, egg, and cornstarch until
completely smooth.
2
In a medium pot, bring the milk, sugar, salt, and vanilla seeds to
a boil. Slowly pour the hot milk over the egg yolk mixture while
whisking constantly. Return the mixture to the pot and cook over
medium-low heat, whisking constantly but slowly, until just
thickened and bubbles rise to the surface, about 4 minutes.
Increase the speed of whisking to smooth the custard and cook
until it has thickened to the consistency of pudding and coats the
back of a spoon, about 2 more minutes.
3
Remove the pot from the heat, add the butter, and whisk until
fully melted and smooth. Strain through a fine-mesh sieve into a
large bowl and cover the pastry cream with plastic wrap directly
on the surface to prevent a skin from forming. Refrigerate until
cold and fully set, about 2 hours, or up to 3 days.
You can substitute 2 teaspoons of vanilla extract for the vanilla
bean. Add the extract with the butter in Step 3.
No te
Chocolate Pastry Cream
MAKES ABOUT 3 CUPS
4 large egg yolks
1 large egg
¼ cup (30 grams) cornstarch
2 cups (480 grams) whole milk
½ cup (100 grams) sugar
¼ teaspoon salt
1 cup (170 grams) bittersweet chocolate, chopped or chips
5 tablespoons (70 grams) unsalted butter, cut into small pieces
1
In a large bowl, whisk the egg yolks, egg, and cornstarch until
completely smooth.
2
In a medium pot, bring the milk, sugar, and salt to a boil. Slowly
pour the hot milk over the egg yolks while whisking constantly.
Return the mixture to the pot and cook over medium-low heat,
whisking constantly but slowly, until just thickened and bubbles
rise to the surface, about 4 minutes. Increase the speed of
whisking to smooth the custard and cook until it has thickened to
the consistency of pudding and coats the back of a spoon, about
2 more minutes.
3
Remove the pot from the heat, add the chocolate and butter, and
whisk until fully melted and smooth. Strain through a fine-mesh
sieve into a bowl and cover the pastry cream with plastic wrap
directly on the surface to prevent a skin from forming.
Refrigerate until cold and fully set, about 2 hours, or up to 3
days.
Chocolate Glaze
MAKES ABOUT ¾ CUP
1½ cups (180 grams) confectioners’ sugar, plus more for adjusting glaze
¼ cup (30 grams) cocoa powder
¼ cup (60 grams) water, plus more for adjusting glaze
2 tablespoons (40 grams) light corn syrup
¼ teaspoon salt
Sift the confectioners’ sugar and cocoa powder into a large bowl. Add
the remaining ingredients and whisk by hand until smooth. To make a
thicker glaze, slowly add sifted confectioners’ sugar until you reach
the desired consistency. To make a thinner glaze, add water, 1
teaspoon at a time, to reach the desired consistency. Cover the bowl
with plastic wrap and set aside at room temperature until ready to use,
or up to 1 day.
The glaze should create a nearly opaque coating on the tops of
the shells that are being glazed—thick enough so the shell is barely
visible through the glaze, yet thin enough to allow for dipping with
ease.You may find you need to adjust the consistency as you are
working with the glaze, as well.
No te
White Glaze
MAKES ABOUT ¾ CUP
1½ cups (180 grams) confectioners’ sugar, plus more for adjusting glaze
¼ cup (60 grams) water, plus more for adjusting glaze
2 tablespoons (40 grams) light corn syrup
¼ teaspoon salt
Gel-paste food coloring (optional)
Sift the confectioners’ sugar into a large bowl. Add the water, corn
syrup, and salt and whisk by hand until smooth. To thicken the glaze,
slowly add sifted confectioners’ sugar until the glaze reaches the
desired consistency. To thin, add water, 1 teaspoon at a time. To tint
the glaze, if desired, add food coloring, one drop at a time, stirring
until evenly combined, until the glaze reaches the desired color.
Cover the bowl with plastic wrap and set aside at room temperature
until ready to use, up to 1 day.
The glaze should create a nearly opaque coating on the tops of
the shells that are being glazed—thick enough so the shell is barely
visible through the glaze, yet thin enough to allow for dipping with
ease.You may find you need to adjust the consistency as you are
working with the glaze, as well.
No te
Whipped Cream
MAKES ABOUT 4 CUPS
2 cups (480 grams) heavy whipping cream
½ cup (60 grams) confectioners’ sugar, sifted
By hand or using a stand mixer fitted with the whisk attachment, whip
the cream and confectioners’ sugar until stiff peaks form. Cover and
refrigerate until ready to use, up to 2 hours. If the whipped cream
softens while sitting in the refrigerator, re-whip until stiff peaks form
before using.
Royal Icing
MAKES 2½ CUPS
4 cups (480 grams) confectioners’ sugar, sifted
½ teaspoon cream of tartar
3 large egg whites
In a large bowl, whisk all the ingredients until smooth. Cover the bowl
tightly with plastic wrap until ready to use, up to 2 hours.
Classic
Cream Puffs • Classic Éclairs • Chouquettes •
Chantilly Swans • Religieuses • Classic Profiteroles
• Praline Paris-Brests • Pets de Nonne •
Gâteaux Saint-Honoré • French Crullers •
Double Espresso Éclairs • Croquembouche
Cream Puffs (recipe)
Cream Puffs
M A K E S 1 4 TO 1 6 L A RG E C R E A M P U F F S
Whipped Cream (recipe)
14 to 16 Large Cream Puff Shells (recipe)
Confectioners’ sugar, for dusting
1
Fill a pastry bag fitted with a star piping tip (such as Ateco #826)
with the whipped cream and refrigerate until ready to use.
2
Using a serrated knife, cut the cream puff shells in half
horizontally. Pipe a generous mound of the whipped cream on
the base of each cream puff. Gently place the top of the cream
puff on the cream. Serve immediately, or refrigerate for up to 4
hours. Lightly dust with confectioners’ sugar just before serving.
These classic cream puffs are filled with lightly sweetened
whipped cream, but you can always doctor them up a bit. Sifted
cocoa powder, almond extract, or a little lemon zest in the whipped
cream make for fun filling additions!
No te
Classic Éclairs
M A K E S 1 0 TO 1 2 L A RG E É C L A I R S
10 to 12 Large Éclair Shells (recipe)
Vanilla Bean Pastry Cream (recipe)
Chocolate Glaze (recipe)
Edible gold leaf, for decorating (optional)
Bittersweet chocolate, finely chopped, for decorating (optional)
1
Place a round piping tip (such as Ateco #802) on the tip of your
index finger, or use the tip of a paring knife, and pierce three ¼inch holes in the bottom of each éclair shell.
2
Fill a pastry bag fitted with the same round piping tip with the
pastry cream. Piping into the holes in each éclair, gently fill with
pastry cream.
3
Dip the top one-third of each éclair into the glaze, allowing the
excess glaze to drip away from the éclair before inverting.
Decorate with gold leaf and chopped chocolate, if desired. Set
aside at room temperature until the glaze has fully set and
hardened, about 20 minutes. As you are dipping the éclairs,
adjust the thickness of the glaze as needed (see page 25). Serve
immediately, or refrigerate for up to 8 hours.
Edible gold leaf can be found at specialty baking and pastry
retailers (see Retail Therapy).
No te
Classic Éclairs (recipe) and Double Espresso Éclairs (recipe)
Chouquettes (recipe)
Chouquettes
MAKES ABOUT 36 CHOUQUETTES
Pâte à Choux Dough (recipe)
1 large egg, lightly beaten
¼ cup (56 grams) pearl sugar
1
Preheat the oven to 350ºF. Line two baking sheets with
parchment paper.
2
Fill a pastry bag fitted with a round piping tip (such as Ateco
#806) with the pâte à choux dough and pipe small mounds,
about 1¼ inches in diameter and 1 inch tall, onto the baking
sheets, leaving about 1 inch of space between each mound.
Lightly brush the tops of each mound with the beaten egg and
sprinkle generously with the pearl sugar. Bake for 35 to 40
minutes, until puffed and golden brown. Serve warm.
Chouquettes can be made 3 days ahead and refrigerated in an
airtight container, or frozen for up to 1 month. If made in advance,
preheat the oven to 300ºF and reheat until just warm and crisp, about
10 minutes, before serving.
No te
Chantilly Swans
M A K E S A B O U T 1 4 SWA N S
Pâte à Choux Dough (recipe)
Chantilly Cream (recipe)
1
Preheat the oven to 350ºF. Line two baking sheets with
parchment paper.
2
For the swan bodies: Fit a pastry bag with a large round piping
tip (such as Ateco #809) and fill with three-quarters of the pâte à
choux dough. Pipe 14 large teardrops of dough, about 2 inches
long and ¾ inch tall, on one of the baking sheets, leaving about 1
inch of space between each teardrop.
3
For the swan necks and heads: Fit a second pastry bag with a
smaller round piping tip (such as Ateco #803) and fill with the
remaining one-quarter of the pâte à choux dough. On the
second baking sheet, pipe 14 or more small shapes similar to
the numeral “2” and about 2 inches long. Start at the top end
with a small dot of dough (the head) and then continue without
stopping, slightly curving to form the rest of the “2” (the neck).
Then, dip your fingertips into cold water and pinch the base of
the dot to create a round head that is defined from the rest of the
neck. Dip your fingertips into cold water again, and pinch the
very tip of the head to create a pointed beak.
4
Transfer both baking sheets to the oven; bake until deep golden
brown, 20 to 25 minutes for the swan necks and heads and about
15 minutes longer for the swan bodies. Let cool to room
temperature.
5
Fill a pastry bag fitted with a star piping tip (such as Ateco #826)
with the chantilly cream and refrigerate until ready to use.
6
Using a serrated knife, cut the swan bodies in half horizontally.
Cut each top half into 2 pieces, lengthwise, for the wings. Pipe 2
mounds of chantilly cream on the bottom of each swan body,
making the one in back slightly higher. Place two wing pieces on
the back of the cream. Place a swan neck and head into the
smaller mound of cream on each body, anchoring the base of
the neck at the point where the wings meet. Serve immediately,
or refrigerate for up to 8 hours.
When you are piping the swan necks and heads, don’t become
frustrated. They often look strange on the baking sheet. But once you
assemble your little birdies, they will become super cute!
No te
Chantilly Swans (recipe)
CHANTILLY CREAM
MAKES ABOUT 3 CUPS
1½ cups (360 grams) heavy whipping cream
3 tablespoons (21 grams) confectioners’ sugar, sifted
1 teaspoon vanilla extract
By hand or using a stand mixer fitted with the whisk attachment, whip
the cream, confectioners’ sugar, and vanilla until stiff peaks form.
Cover and refrigerate until ready to use, up to 2 hours. If the cream
softens while sitting in the refrigerator, re-whip until stiff peaks form
before using.
Religieuses (recipe)
Religieuses
MAKES ABOUT 18 RELIGIEUSES
Pâte à Choux Dough (recipe)
Chocolate Pastry Cream (recipe)
Chocolate Glaze (recipe)
1
Preheat the oven to 350ºF. Line two baking sheets with
parchment paper.
2
For the small cream puffs: Fit a pastry bag with a round piping
tip (such as Ateco #806) and fill with two-thirds of the pâte à
choux dough. Pipe 18 small mounds, about 1¼ inches in
diameter and 1 inch tall, on one of the baking sheets, leaving
about 1 inch of space between each mound. Bake for 40 to 45
minutes, until deep golden brown and cooked through in the
center. Let cool on the baking sheet to room temperature.
3
For the miniature cream puffs: Fit a second pastry bag with a
round piping tip (such as Ateco #804) and fill with the remaining
one-third of the pâte à choux dough. Pipe 18 tiny mounds, about
¾ inch in diameter and ½ inch tall, on the other baking sheet,
leaving about ½ inch of space between each mound. Bake for
35 to 40 minutes, until deep golden brown and cooked through
in the center. Let cool on the baking sheet to room temperature.
4
Place a round piping tip (such as Ateco #802) on the tip of your
index finger, or use the tip of a paring knife, and pierce a ¼-inch
hole in the bottom of each of the small and miniature cream
puffs.
5
Fill a pastry bag fitted with the same round piping tip with the
pastry cream. Piping into the hole in each of the small and
miniature cream puffs, gently fill with pastry cream. Reserve the
remaining pastry cream in the refrigerator until ready to
assemble the religieuses.
6
Dip the top one-third of each cream puff into the glaze, allowing
excess glaze to drip away from the cream puff before inverting.
Set aside until the glaze has fully set and hardened, about 20
minutes. As you are dipping the cream puffs, adjust the thickness
of the glaze as needed (see page 25).
7
To assemble the religieuses: Pipe a ¼-inch round dollop of the
pastry cream on the top of each small cream puff. Set a
miniature cream puff on the pastry cream, pressing gently to
stabilize. Decoratively pipe a small dot of the pastry cream on
the top of each religieuse. Serve immediately, or refrigerate for
up to 8 hours.
Oftentimes, religieuses also include chocolate buttercream
piped between the cream puffs. But I omitted the buttercream here
because you need so little of it, and I find an extra recipe just makes
these pastries too fussy. Less is more.
No te
Classic Profiteroles
M A K E S 9 S E RV I N G S
Vanilla Bean Ice Cream (recipe), or 2 pints store-bought
36 Small Cream Puff Shells (recipe)
Chocolate Sauce (recipe)
1
Remove the ice cream from freezer to soften. Slice the cream
puff shells in half horizontally, setting the top of each cream puff
next to its corresponding bottom.
2
Using an ice cream scoop dipped into warm water, place a
scoop of ice cream on the bottom of each cream puff, then set
the top of each cream puff on the ice cream. Place the
assembled profiteroles on a baking sheet and transfer to the
freezer to set, about 20 minutes.
3
To serve: Set three profiteroles on a serving dish and drizzle
with the chocolate sauce. Place one more profiterole on top to
create a small pyramid. Drizzle with more chocolate sauce and
serve immediately.
Remember: You’re not lazy if you buy vanilla ice cream or even
the chocolate sauce! Instead, consider yourself time efficient.
No te
Classic Profiteroles (recipe)
VANILLA BEAN ICE CREAM
M A K E S A B O U T 1 Q UA RT
½ cup (100 grams) sugar
1 tablespoon (8 grams) cornstarch
½ teaspoon xanthan gum
¼ teaspoon salt
2 cups (480 grams) whole milk
1½ cups (360 grams) heavy whipping cream
Seeds from 1 vanilla bean
1
In a medium pot, whisk the sugar, cornstarch, xanthan gum, and
salt until well combined. Add the milk, cream, and vanilla seeds
and bring to a simmer. Cook, whisking occasionally, until
thickened, 8 to 10 minutes. Strain the mixture through a finemesh sieve into a large metal bowl. Place the bowl of ice cream
base over another bowl filled with ice water and stir the base
until cooled to room temperature. Refrigerate until cold, about 2
hours.
2
Freeze the ice cream base in an ice cream machine according to
the manufacturer’s instructions until the ice cream has a smooth,
soft-serve texture. Store in the freezer for 4 hours to set before
serving.
To make coffee ice cream, replace the vanilla with 3
tablespoons (18 grams) finely ground coffee.
No te
Chocolate Sauce
MAKES ABOUT 2 CUPS
1⅓ cups (227 grams) semisweet chocolate, chopped or chips
1 cup (240 grams) heavy whipping cream
2 tablespoons (40 grams) light corn syrup
¼ teaspoon salt
1 teaspoon vanilla extract
1
Place the chocolate in a medium bowl.
2
In a small saucepan, bring the cream, corn syrup, and salt to a
boil. Remove from the heat, pour over the chocolate, and add
the vanilla. Let the mixture stand for 2 minutes to soften the
chocolate, then whisk until smooth. Serve warm.
Praline Paris-Brests (recipe)
Praline Paris-Brests
M A K E S 8 TO 1 0 PA R I S - B R E ST S
Pâte à Choux Dough (recipe)
1 large egg, lightly beaten
¾ cup (90 grams) sliced almonds
Praline Pastry Cream (recipe)
Confectioners’ sugar, for dusting
1
Preheat the oven to 350ºF. Line a baking sheet with parchment
paper.
2
Fill a pastry bag fitted with a star piping tip (such as Ateco #827)
with pâte à choux and pipe rings 2¾ inches in diameter on the
baking sheet, leaving about 1 inch of space between each ring.
(If desired, use a cookie cutter to trace circles on the parchment
before piping. Be sure to place the parchment paper marked
side down on the baking sheet.) Lightly brush the rings with the
beaten egg and sprinkle with the almonds. Bake for 40 to 45
minutes, until deep golden brown and cooked through in the
center. Let cool on the baking sheet to room temperature.
3
Using a serrated knife, slice the Paris-Brests in half horizontally.
Fill a pastry bag fitted with a star piping tip with the pastry
cream and pipe rings onto the Paris-Brest bases. Place the top of
each Paris-Brest on the pastry cream. Lightly dust with
confectioners’ sugar. Serve immediately, or refrigerate for up to
1 day.
Get creative! If you love pistachios best, you can always fill
your Paris-Brests with pistachio pastry cream (recipe) and top them
No te
with chopped pistachios, or swap the filling for chocolate pastry
cream (recipe) and glaze with chocolate glaze (recipe). Paris-Brest
shells can be used for any flavor combination you like.
PRALINE PASTRY CREAM
MAKES ABOUT 3 CUPS
4 large egg yolks
1 large egg
¼ cup plus 2 tablespoons (45 grams) cornstarch
2 cups (480 grams) whole milk
½ cup plus 2 tablespoons (126 grams) sugar
¼ teaspoon salt
½ cup (150 grams) praline paste
5 tablespoons (70 grams) unsalted butter, cut into small pieces
1
In a large bowl, whisk the egg yolks, egg, and cornstarch until
completely smooth.
2
In a medium pot, bring the milk, sugar, and salt to a boil. Slowly
pour the hot milk over the egg yolks while whisking constantly.
Return the mixture to the pot and cook over medium-low heat,
whisking constantly but slowly, until just thickened and bubbles
rise to the surface, about 4 minutes. Increase the speed of
whisking to smooth the custard and continue to cook until it has
thickened to the consistency of pudding and coats the back of a
spoon, about 2 more minutes.
3
Immediately remove the pot from the heat, add the praline paste
and butter, and whisk until fully melted and smooth. Strain the
mixture through a fine-mesh sieve into a large bowl and cover
the pastry cream with a sheet of plastic wrap directly on the
surface to prevent a skin from forming. Refrigerate until cold and
fully set, about 2 hours, or up to 3 days.
Praline paste, made of equal parts roasted almonds and
hazelnuts, is a popular ingredient in French desserts. However, if
praline paste isn’t readily available to you, either hazelnut paste or
almond butter will substitute very nicely.
No te
Pets de Nonne
M A K E S A B O U T 2 4 P I EC E S
½ cup (120 grams) water
½ cup (120 grams) whole milk
6 tablespoons (85 grams) unsalted butter
1 tablespoon (13 grams) granulated sugar
¼ teaspoon salt
1 cup (128 grams) unbleached all-purpose flour
3 large eggs
2 large egg whites
Canola oil, for frying
1 to 2 cups (120 to 240 grams) confectioners’ sugar, for coating
1
In a medium saucepan, bring the water, milk, butter, sugar, and
salt to a rolling boil. Turn off the heat and add the flour all at
once, while continuing to stir. Turn the heat to medium-low and
cook the dough, while stirring constantly, until it forms a ball and
leaves a skin on the base of the pot, 3 to 4 minutes.
2
Transfer the dough to a large bowl. Add the whole eggs, one at a
time, stirring vigorously to combine between each addition.
Scrape down the sides of the bowl with a rubber spatula as
needed between each addition. Add the egg whites and mix the
dough until the eggs are fully combined and the mixture is
smooth.
3
To fry the pets de nonne: Heat 2 inches of oil in a heavy pot to
375ºF on an instant-read thermometer. Sift the confectioners’
sugar into a large bowl. Place a rack on a baking sheet.
4
Using a ¾- to 1-ounce-size cookie scoop, carefully drop one
scoop of dough at a time into the oil. Continue to add more
dough to the oil, taking care to leave about 1 inch of space
between each piece. Fry the dough until deep golden brown, 4
to 7 minutes. Using a slotted spoon, carefully remove the pets de
nonne from the oil, allowing the excess oil to drain back into the
pot. Immediately transfer them to the bowl of confectioners’
sugar and gently toss to completely coat. Set on the rack to cool,
or serve immediately.
This recipe cracks me up each time I make it. Pets de nonne
translates to nuns’ farts?! Of course their little puffs would be
confectioners’ sugar-coated and just heavenly.
No te
Pets de Nonne (recipe) and French Crullers (recipe)
Gâteaux Saint-Honoré
M A K E S 9 I N D I V I D UA L G Â T E AUX
Bread flour, for rolling
1 sheet (about 8 ounces) frozen puff pastry dough, thawed
36 Small Cream Puff Shells (recipe)
Vanilla Bean Pastry Cream (recipe)
2½ cups (500 grams) sugar
½ cup (120 grams) water
¼ cup plus 2 tablespoons (120 grams) light corn syrup
About 3 cups Whipped Cream (recipe)
1
Preheat the oven to 375ºF. Line a baking sheet with parchment
paper.
2
On a lightly floured surface, roll out the puff pastry to ⅛ inch
thick. Using a 3½-inch round cookie cutter, cut 9 circles from the
dough. Place the circles of dough on the baking sheet. Prick
several small holes over the entire surface of the dough circles
with a fork, to prevent the dough from puffing too much. Transfer
the puff pastry to the freezer to harden, about 10 minutes.
3
Cover the puff pastry with a sheet of parchment paper and then
another flat baking sheet, to prevent the puff pastry from rising
too much as it bakes. Bake for about 30 minutes. Carefully
remove the top baking sheet and top layer of parchment and
continue to bake for 5 to 10 more minutes, until crisp and deep
golden brown. Let the puff pastry cool on the baking sheet.
4
To assemble the gâteaux: Place a round piping tip (such as
Ateco #802) on the tip of your index finger, or use the tip of a
paring knife, and pierce a ¼-inch hole in the bottom of each
cream puff.
5
Fill a pastry bag fitted with the same round piping tip with the
pastry cream. Piping into the hole in each cream puff, gently fill
with pastry cream, taking care not to overfill. Set aside at room
temperature until ready to use.
6
Prepare a large ice water bath. Line a baking sheet with
parchment paper.
7
In a small saucepan, bring the sugar, water, and corn syrup to a
boil, swirling the pan occasionally until the sugar has dissolved.
Continue cooking until the caramel is light golden amber in
color. Remove the pan from the heat, and plunge the bottom of
the pan into the ice water bath to stop the cooking.
8
Very carefully dip the top of each of the filled cream puffs into
the hot caramel, allowing any excess caramel to drip from the
cream puff before inverting and setting aside on the prepared
baking sheet. Let stand at room temperature until the caramel
hardens, about 10 minutes. Set aside 9 of the cream puffs.
9
Very carefully dip the bottoms of the remaining 27 cream puffs,
one by one, in the caramel, and then arrange them on the puff
pastry circles in rings of 3, using the caramel to secure the
cream puffs to the puff pastry. (If the caramel begins to harden
before you are done, return the saucepan to the stovetop and
reheat over medium heat until liquid.) Let the gâteaux stand at
room temperature until the caramel cools and hardens, about 10
minutes.
10 Fill a pastry bag fitted with a star piping tip (such as Ateco #826)
with the whipped cream and pipe 3 stripes of whipped cream
between the cream puffs. Pipe a small rosette of cream on top of
the gâteaux. Place one of the reserved cream puffs on the top of
each rosette of cream. Serve immediately, or refrigerate for up
to 1 day.
To avoid caramel burns, wear a pair of heat-resistant rubber
dishwashing gloves while assembling your Gâteaux Saint-Honoré.
No te
To clean the pot of caramel, fill with water and bring to a full
boil. Continue to boil until the caramel dissolves completely.
No te
Gâteaux Saint-Honoré (recipe)
French Crullers
M A K E S 1 2 TO 1 4 C RU L L E R S
½ cup (120 grams) water
½ cup (120 grams) whole milk
6 tablespoons (84 grams) unsalted butter
1 tablespoon (13 grams) sugar
¼ teaspoon salt
1 cup (128 grams) unbleached all-purpose flour
3 large eggs
2 large egg whites
Nonstick cooking spray
Canola oil, for frying
French Cruller Glaze (recipe)
1
In a medium saucepan, bring the water, milk, butter, sugar, and
salt to a rolling boil. Turn off the heat and add the flour all at
once, while continuing to stir. Turn the heat to medium-low and
cook the dough, while stirring constantly, until it forms a ball and
leaves a skin on the base of the pot, 3 to 4 minutes.
2
Transfer the dough to a large bowl. Add the whole eggs, one at a
time, stirring vigorously to combine between each addition.
Scrape down the sides of the bowl with a rubber spatula as
needed between each addition. Add the egg whites and mix the
dough until the eggs are fully combined and the mixture is
smooth. Fill a pastry bag fitted with a star piping tip (such as
Ateco #826) with the dough and set aside at room temperature.
3
Cut out fourteen 3-inch squares of parchment paper and lightly
coat them with nonstick cooking spray. Pipe a ring onto each
square, about 2½ inches in diameter. Place the rings of dough
on a baking sheet and freeze until fully hardened, about 30
minutes, or until ready to fry.
4
To fry the crullers: Heat 2 inches of oil in a heavy pot to 375ºF
on an instant-read thermometer. Place a cooling rack over a
baking sheet.
5
Carefully place one cruller at a time into the oil, paper side up.
Gently remove the paper with tongs. Continue to add crullers to
the oil, taking care to leave about 2 inches of space between
each cruller. Fry the crullers until deep golden brown, 3 to 4
minutes on each side. Using a slotted spoon, carefully remove
the crullers and set on the rack to cool. Once cool enough to
handle, but still quite warm, dip the crullers into the glaze, on
one or both sides, and return to the rack to cool completely. The
crullers can be made 1 day ahead and stored in an airtight
container at room temperature until ready to serve.
Save the original container the oil was purchased in and, once
cooled to room temperature, pour it back into the container to store
for reuse or disposal. You can reuse oil for frying two or three times
before disposing of it. Simply strain the oil before reusing.
No te
FRENCH CRULLER GLAZE
MAKES ABOUT 1½ CUPS
2¼ cups (270 grams) confectioners’ sugar, plus more for adjusting glaze
4 tablespoons (56 grams) unsalted butter, melted
3 tablespoons (45 grams) water
2 tablespoons (30 grams) whole milk, plus more for adjusting glaze
1 teaspoon vanilla extract
¼ teaspoon salt
Seeds from 1 vanilla bean (optional)
Sift the confectioners’ sugar into a large bowl. Add the remaining
ingredients and whisk by hand until smooth. The glaze should have
the consistency of buttermilk, thick yet liquid. If the glaze needs to be
thickened, slowly add confectioners’ sugar until the glaze reaches the
desired consistency. To thin the glaze, add milk or water, 1 tablespoon
at a time. Cover the bowl with plastic wrap and set aside at room
temperature until ready to use, up to 2 hours.
Double Espresso Éclairs
M A K E S 1 6 TO 1 8 S M A L L É C L A I R S
16 to 18 Small Éclair Shells (recipe)
Espresso Pastry Cream (recipe)
Espresso Glaze (recipe)
Whole coffee beans, finely chopped, for decorating (optional)
1
Place a round piping tip (such as Ateco #802) on the tip of your
index finger, or use the tip of a paring knife, and pierce two ¼inch holes in the bottom of each éclair shell.
2
Fill a pastry bag fitted with the same round piping tip with the
pastry cream. Piping into the holes in each éclair, gently fill with
pastry cream.
3
Dip the top one-third of each éclair into the glaze, allowing the
excess to drip away from the éclair before inverting. Sprinkle
the tops of the éclairs with a few pinches of chopped coffee
beans, if desired. Set aside until the glaze has fully set and
hardened, about 20 minutes. As you are dipping the éclairs,
adjust the thickness of the glaze as needed (see page 25). Serve
immediately, or refrigerate for up to 8 hours.
Some of the filling recipes will produce more than needed for
the amount of pâte à choux—this is because your pâte à choux puffs
and éclairs may need more or less filling based on how much they
puff while baking. If you end up with extra filling, just eat it by the
spoonful!
No te
ESPRESSO PASTRY CREAM
MAKES ABOUT 3 CUPS
4 large egg yolks
1 large egg
¼ cup plus 3 tablespoons (53 grams) cornstarch
2 cups (480 grams) whole milk
½ cup plus 2 tablespoons (126 grams) sugar
¼ cup plus 1 tablespoon (20 grams) instant espresso powder
¼ teaspoon salt
5 tablespoons (70 grams) unsalted butter, cut into small pieces
1
In a large bowl, whisk the egg yolks, egg, and cornstarch
together until completely smooth.
2
In a medium pot, bring the milk, sugar, espresso powder, and
salt to a boil. Slowly pour the hot milk over the egg yolks while
whisking constantly. Return the mixture to the pot and cook over
medium-low heat, whisking constantly but slowly, until just
thickened and bubbles rise to the surface, about 4 minutes.
Increase the speed of whisking to smooth the custard and
continue to cook until it has thickened to the consistency of
pudding and coats the back of a spoon, about 2 more minutes.
3
Immediately remove the pot from the heat, add the butter, and
whisk until fully melted and smooth. Strain the mixture through a
fine-mesh sieve into a large bowl and cover the pastry cream
with a sheet of plastic wrap directly on the surface to prevent a
skin from forming. Refrigerate until cold and fully set, about 2
hours, or up to 3 days.
ESPRESSO GLAZE
MAKES ABOUT ¾ CUP
¼ cup (60 grams) warm water, plus more for adjusting glaze
3 tablespoons (12 grams) instant espresso powder
1½ cups (180 grams) confectioners’ sugar, plus more for adjusting glaze
2 tablespoons (40 grams) light corn syrup
¼ teaspoon salt
Combine the water and espresso powder in a large bowl and stir until
dissolved. Sift the confectioners’ sugar over the espresso mixture. Add
the corn syrup and salt and whisk until smooth. To make a thicker
glaze, slowly add sifted confectioners’ sugar until the glaze reaches
the desired consistency. To make a thinner glaze, add water, 1
teaspoon at a time. Cover the bowl with plastic wrap and set aside at
room temperature until ready to use, up to 1 day.
The glaze should create a nearly opaque coating on the tops of
the shells that are being glazed—thick enough so the shell is barely
visible through the glaze, yet thin enough to allow for dipping with
ease.
No te
Croquembouche
M A K E S 1 2 TO 1 4 S E RV I N G S
72 Small Cream Puff Shells (recipe)
Vanilla Bean Pastry Cream (recipe)
Chocolate Pastry Cream (recipe)
Espresso Pastry Cream (recipe)
2 recipes White Glaze (recipe)
Assorted gel paste food coloring
Assorted colored sprinkles, edible glitters, and luster dusts, for decorating
(optional)
Royal Icing (recipe)
1
Cover a 12-inch Styrofoam cone with parchment paper (the
cone can be found at most craft supply stores) and place the
cone on a parchment paper–lined baking sheet.
2
Place a round piping tip (such as Ateco #802) on the tip of your
index finger, or use the tip of a paring knife, and pierce a ¼-inch
hole in the bottom of each cream puff shell.
3
Fill a pastry bag fitted with the same round piping tip with the
vanilla pastry cream. Piping into the hole in each of 24 of the
cream puffs, gently fill with pastry cream. Fill another 24 cream
puffs with the chocolate pastry cream, and then fill the last 24
cream puffs with the espresso pastry cream.
4
Divide the glaze into small bowls and color each portion with
food colorings. If using sprinkles, glitter, or luster dust, color the
glazes a shade or two lighter than the decorations. Cover the
bowls of glaze with plastic wrap until ready to use.
5
Working with one color at a time, dip the top half of some of the
cream puffs into one of the bowls of glaze, allowing the excess
glaze to drip away from each cream puff before inverting. (For
the croquembouche pictured, I used six colors, with 12 cream
puffs in each color.) Set the glazed cream puffs aside for a few
minutes to let the glaze begin to set. Decorate the cream puffs
with sprinkles, glitter, or luster dust, if desired. Repeat with the
remaining cream puffs and different colored glazes. Let the
finished cream puffs stand at room temperature until the glaze
has fully set, about 20 minutes.
6
Fill a pastry bag fitted with a coupler and a small piping tip
(such as Ateco #5) with the royal icing.
7
To assemble the croquembouche: Pipe a ring of royal icing on
the bottom of one of the cream puffs. Immediately press the
cream puff against the cone at the very base, and hold in place
until the icing allows the cream puff to adhere to the cone.
Repeat with more cream puffs, working slowly and carefully,
placing them in a ring at the base of the cone. Add more cream
puffs in a second ring, just above and staggered slightly to the
right of the first, taking care to arrange the puffs as close
together as possible to hide the cone and create a tight pattern.
If needed, rotate the cream puffs to find the sides that best fit
together, much like jigsaw puzzle pieces. With each ring, fit the
cream puffs between the two cream puffs arranged just below. If
needed, pipe a small dot of icing on the sides of the cream puffs
to help secure them to each other. Continue to attach the cream
puffs until the entire cone is covered. Once the croquembouche
is fully assembled, let it stand for 1 to 2 hours to allow the icing to
fully set. Serve within 4 hours of assembling.
8
Reserve the remaining royal icing in the pastry bag, and press a
toothpick into the piping tip to seal the bag from air so the icing
won’t dry out. If any of the puffs fall off the croquembouche, use
the reserved icing to reattach.
The croquembouche is a classic French wedding cake. Be
forewarned: This recipe is the absolute hardest in this book. The end
result will have you feeling glorious, but it takes a lot of time,
patience, and planning. Ask yourself, “Am I in the mood to make a
wedding cake today?” If yes, go for it and don’t look back!
No te
Make your life easier and break this recipe into a multiday
project. Bake the puffs on one day, up to 2 weeks in advance if you
plan to freeze them. Make the pastry creams on another day, no
more than 3 days before you plan to fill the puffs. Finish on the day
you plan to serve the croquembouche by making the glazes,
assembling, and decorating.
No te
Croquembouche (recipe)
Fruit y
Strawberry-Rhubarb Religieuses •
Strawberry Shortcakes • Peaches and Cream Puffs •
Fruity Pâte à Choux Pops •
Peanut Butter and Jelly Éclairs • Blueberry
Cheesecake Gâteaux Saint-Honoré •
Citrus Gâteaux Saint-Honoré • Melon, Mint, and
Yogurt Mousse Éclairs • Mango-Pineapple Éclairs •
Jasmine-Pomegranate Éclairs •
Banana Pudding Puffs • Lemon Meringue Pie Éclairs
• Pistachio–Black Mission Fig Éclairs •
Apple Butter Bombs
Strawberry-Rhubarb Religieuses (recipe)
Strawberry-Rhubarb Religieuses
MAKES ABOUT 18 RELIGIEUSES
Pâte à Choux Dough (recipe)
Vanilla Bean Pastry Cream (recipe)
Strawberry-Rhubarb Jam (recipe), or 1 cup (about 225 grams) store-bought
White Glaze (recipe), tinted pink
1
Preheat the oven to 350ºF. Line two baking sheets with
parchment paper.
2
For the small cream puffs: Fit a pastry bag with a round piping
tip (such as Ateco #806) and fill with two-thirds of the pâte à
choux dough. Pipe 18 small mounds, about 1¼ inch in diameter
and 1 inch tall, onto one of the baking sheets, leaving about 1
inch of space between each mound. Bake until deep golden
brown and cooked through in the center, 40 to 45 minutes. Let
cool on the baking sheet to room temperature.
3
For the miniature cream puffs: Fit a second pastry bag with a
smaller round piping tip (such as Ateco #804) and fill with the
remaining dough. Pipe 18 tiny mounds, about ¾ inch in
diameter and ½ inch tall, on the other baking sheet, leaving
about ½ inch of space between each mound. Bake for 35 to 40
minutes, until deep golden brown and cooked through in the
center. Let cool on the baking sheet to room temperature.
4
Place a round piping tip (such as Ateco #802) on the tip of your
index finger, or use the tip of a paring knife, and pierce a ¼-inch
hole in the bottom of each of the small and miniature cream
puffs.
5
Fill a pastry bag fitted with the same round piping tip with the
pastry cream. Fill a second pastry bag, fitted with another round
piping tip (such as Ateco #802), with the jam. Piping into the
holes on the bottom, gently fill each of the small cream puffs with
the pastry cream. Gently fill each of the miniature cream puffs
with the jam.
6
Dip the top one-third of both the small and miniature cream puffs
into the glaze, allowing the excess to drip away from each cream
puff before inverting. Set aside until the glaze has fully set and
hardened, about 20 minutes. As you are dipping the cream puffs,
adjust the thickness of the glaze as needed (see page 25).
7
To assemble the religieuses: Pipe a ¼-inch round dollop of
pastry cream on the top of each small cream puff. Set a
miniature cream puff on the pastry cream, pressing gently to
stabilize. Decoratively pipe a small dot of pastry cream on the
top of each religieuse. Serve immediately, or refrigerate for up
to 8 hours.
Feel free to skip the pastry cream and go all jam. The recipe
for the jam will make plenty to fill all the puffs in the recipe.
No te
STRAWBERRY-RHUBARB JAM
MAKES ABOUT 2 CUPS
1 pound (454 grams) rhubarb, fresh or frozen, sliced into ½-inch pieces
½ pound (227 grams) strawberries, hulled and chopped
½ cup (120 grams) water
Seeds from ½ vanilla bean
2½ cups (400 grams) sugar
¼ teaspoon salt
Juice of 1 lime
1
In a large pot, combine the rhubarb, strawberries, water, and
vanilla seeds over medium heat and cook, stirring frequently,
until the rhubarb is just tender, about 10 minutes.
2
Add the sugar and salt. Adjust the heat to low and cook, stirring
occasionally, until the jam has just thickened, skimming off and
discarding any foam that rises to the surface. Continue cooking
until the jam reaches 220ºF on an instant-read thermometer.
Remove from the heat and stir in the lime juice. Let cool until
cool enough to handle, then transfer the mixture to a blender
and puree until smooth. Refrigerate, uncovered, until chilled and
set, about 2 hours. If making ahead, store the jam in an airtight
container in the refrigerator for up to 2 weeks.
This jam recipe yields about three-quarters more than you will
need to fill the religieuses. But it is so good that I suggest you follow
the recipe as is, and enjoy the extra on toast or over vanilla ice
cream.
No te
Strawberry Shortcakes
M A K E S 8 TO 1 0 S H O RTCA K E S
8 to 10 Paris-Brest Shells (recipe)
Lemon Whipped Cream (recipe follows)
½ pound (227 grams) strawberries, hulled and thinly sliced
Using a serrated knife, slice the Paris-Brest shells in half horizontally,
setting the tops next to their corresponding bottoms. Fill a pastry bag
fitted with a star piping tip (such as Ateco #827) with the whipped
cream and pipe rings on the Paris-Brest bases. Cover the whipped
cream with an even layer of strawberry slices, then gently set the tops
of the Paris-Brest shells on the fruit. Serve immediately, or refrigerate
for up to 8 hours.
Lemon Whipped Cream
MAKES ABOUT 3 CUPS
1½ cups (360 grams) heavy whipping cream
¼ cup plus 2 tablespoons (44 grams) confectioners’ sugar, sifted
Finely grated zest of ½ lemon
By hand or using a stand mixer fitted with the whisk attachment, whip
the cream, confectioners’ sugar, and lemon zest until stiff peaks form.
Cover and refrigerate until ready to use, up to 2 hours. If the cream
softens while sitting in the refrigerator, re-whip until stiff peaks form
before using.
Strawberry Shortcakes (recipe) and Peaches and Cream Puffs (recipe)
Peaches and Cream Puffs
M A K E S 1 4 TO 1 6 L A RG E C R E A M P U F F S
Whipped Cream (recipe)
3 ripe peaches
14 to 16 Large Cream Puff Shells (recipe)
Fresh Peach Glaze (recipe)
1 cup (about 300 grams) good-quality peach preserves
1
Fill a pastry bag fitted with a round piping tip (such as Ateco
#804) with the whipped cream and refrigerate until ready to use.
Halve, pit, and cut the peaches into ⅛-inch slices. Using a
serrated knife, slice the cream puff shells in half lengthwise and
arrange the tops and bottoms side by side until ready to glaze
and fill.
2
Dip the top of each cream puff into the glaze, allowing the
excess to drip away from the cream puff before inverting. As you
are dipping the cream puffs, adjust the thickness of the glaze as
needed (see page 25).
3
Spread about 2 teaspoons of the peach preserves on the bottom
of each puff. Pipe the whipped cream in spirals over the
preserves, filling each puff about 1 inch high. Fan a few peach
slices over the filling. Set the peach-glazed tops on top.
Refrigerate the puffs for about 30 minutes to allow the filling to
set before serving, or for up to 8 hours.
If you find yourself at the farmers’ market and the summer
nectarines or plums look better than the peaches, use them instead!
There’s no need to follow a recipe such as this exactly. . . .
No te
FRESH PEACH GLAZE
MAKES ABOUT ¾ CUP
½ ripe peach
1 tablespoon (20 grams) honey
1½ cups (180 grams) confectioners’ sugar, plus more for adjusting glaze
¼ teaspoon salt
Halve, pit, and chop the peach. Puree the peach and honey in a
blender until completely smooth. Sift the confectioners’ sugar into a
medium bowl. Add the peach puree and salt and whisk until smooth.
The glaze should have a thick consistency that still allows for dipping.
To make a thicker glaze, slowly add sifted confectioners’ sugar until
the glaze reaches the desired consistency. To make a thinner glaze,
add water, 1 teaspoon at a time. Cover the bowl with plastic wrap and
set aside at room temperature until ready to use, up to 2 hours.
Fruity Pâte à Choux Pops (recipe)
Fruity Pâte à Choux Pops
M A K E S 3 0 TO 3 6 P Â T E À C H O UX P O P S
30 to 36 Small Cream Puff Shells (recipe)
Vanilla Bean Pastry Cream (recipe)
1½ cups (about 340 grams) store-bought fruit preserves, such as cherry,
strawberry, or black raspberry
White Glaze (recipe), tinted to desired colors
Assorted luster dusts, for decorating
1
Place a round piping tip (such as Ateco #802) on the tip of your
index finger, or use the tip of a paring knife, and pierce a ¼-inch
hole in the bottom of each cream puff shell.
2
Fill a pastry bag fitted with the same round piping tip with the
pastry cream. Fill another pastry bag, fitted with another round
piping tip, with the preserves. Piping into the holes on the
bottom, fill each cream puff about halfway with the preserves. (If
you plan to make more than one flavor of fruity pops, pipe
different flavors of jam into the cream puffs.) Then fill each cream
puff with the pastry cream until full.
3
Dip the top half of each cream puff into the glaze, allowing the
excess glaze to drip away from the cream puff before inverting.
Decorate the cream puffs with luster dusts. Let the cream puffs
stand at room temperature until the glaze has fully set, about 20
minutes. Place a lollipop stick into each of the puffs, using the
hole previously made for filling the puffs, and serve immediately,
or refrigerate for up to 8 hours.
It’s much easier to store the pops without their sticks. If you
plan to make them in advance, pop the sticks into the puffs just
before serving.
No te
Peanut Butter and Jelly Éclairs
M A K E S 1 0 TO 1 2 L A RG E É C L A I R S
10 to 12 Large Éclair Shells (recipe)
1 (16-ounce) jar (about 450 grams) creamy peanut butter
1 cup (about 300 grams) Concord grape jelly
Roasted peanuts, finely chopped, for sprinkling (optional)
Using a serrated knife, cut each éclair shell in half lengthwise. Spread
the top halves with some of the peanut butter and spread the bottom
halves with grape jelly. Sprinkle the peanut butter with chopped
peanuts, if desired. Press the tops and bottoms together to create a
sandwich. Serve immediately.
This is an incredibly kid-friendly recipe to make and eat. Of
course, we Americans love our grape jelly, but you can certainly
swap it for any jelly or jam you love best.
No te
Peanut Butter and Jelly Éclairs (recipe)
Blueberry Cheesecake Gâteaux Saint-Honoré (recipe) and Citrus Gâteaux Saint-Honoré
(recipe)
Blueberry Cheesecake Gâteaux
Saint-Honoré
M A K E S 9 I N D I V I D UA L G Â T E AUX
Bread flour, for rolling
1 sheet (about 8 ounces) frozen puff pastry dough, thawed
36 Small Cream Puff Shells (recipe)
3 cups (about 680 grams) blueberry jam
White Glaze (recipe), tinted blue
Whipped Cream Cheese (recipe)
Blueberries, for decorating
1
Preheat the oven to 375ºF. Line a baking sheet with parchment
paper.
2
On a lightly floured surface, roll the puff pastry to ⅛ inch thick.
Using a 3½-inch round cookie cutter, cut 9 circles from the
dough and then place them on the baking sheet. Prick several
small holes over the entire surface of the dough circles with a
fork, to prevent the dough from rising too much. Transfer the
dough to the freezer to harden, about 10 minutes.
3
Remove the baking sheet from the freezer and cover with a
sheet of parchment paper and another flat baking sheet, to
prevent the puff pastry from rising too much as it bakes. Bake
the pastry for about 30 minutes. Carefully remove the top baking
sheet and top layer of parchment paper and continue to bake for
about 5 more minutes, until crisp and deep golden brown. Let
the puff pastry cool on the baking sheet.
4
To assemble the gâteaux: Place a round piping tip (such as
Ateco #802) on the tip of your index finger, or use the tip of a
paring knife, and pierce a ¼-inch hole in the bottom of each
cream puff shell.
5
Fill a pastry bag fitted with the same round piping tip with the
blueberry jam. Piping into the hole in each cream puff, gently fill
with jam, taking care not to overfill. Set aside at room
temperature until ready to use.
6
Dip the top of each cream puff into the glaze and set aside until
the glaze has fully set and hardened, about 20 minutes. Set aside
9 of the cream puffs.
7
Dip the bottoms of the remaining 27 cream puffs, one by one,
into the glaze, and then arrange them on the puff pastry in rings
of 3, using the glaze to secure the cream puffs to the puff pastry.
Let the cream puffs stand at room temperature until the glaze
hardens, about 20 minutes.
8
Fill a pastry bag fitted with a star piping tip (such as Ateco #826)
with the whipped cream cheese and pipe 3 stripes of whipped
cream cheese between the cream puffs. Pipe a small rosette on
top of the gâteaux, and then place one of the reserved cream
puffs on the top. Garnish each gâteau with a few blueberries.
Serve immediately, or store in the refrigerator for up to 1 day.
Several recipes call for store-bought jams and jellies in this
book. That’s because they are yummy and easy to use, especially for
recipes that already require several made-from-scratch components.
If you are extra adventurous, you can always make them homemade.
No te
WHIPPED CREAM CHEESE
MAKES ABOUT 2 CUPS
1 cup (240 grams) heavy whipping cream
1 cup (225 grams) cream cheese, softened
¼ cup (30 grams) confectioners’ sugar, sifted
1 teaspoon vanilla extract
Juice of ½ lemon
In the bowl of a stand mixer fitted with the whisk attachment, whip the
cream and cream cheese on medium speed until just smooth. Reduce
the speed to low, slowly add the confectioners’ sugar, vanilla, and
lemon juice and continue to mix until combined. Scrape down the
sides of the bowl, raise the mixer speed to high, and beat until
thickened and stiff peaks form, about 1 minute. Set aside in the
refrigerator until ready to use, up to 4 hours.
Citrus Gâteaux Saint-Honoré
M A K E S 9 I N D I V I D UA L G Â T E AUX
Bread flour, for rolling
1 sheet (about 8 ounces) frozen puff pastry dough, thawed
36 Small Cream Puff Shells (recipe)
Lemon Curd (recipe)
White Glaze (recipe), tinted lime green
Yellow and white nonpareils, for decorating (optional)
Lime Whipped Cream (recipe)
1
Preheat the oven to 375ºF. Line a baking sheet with parchment
paper.
2
On a lightly floured surface, roll the puff pastry to ⅛ inch thick.
Using a 3½-inch round cookie cutter, cut 9 circles from the
dough. Place the circles of dough on the baking sheet. Prick
several small holes over the entire surface area of the dough
circles with a fork to prevent the dough from rising too much.
Transfer the baking sheet with the dough circles to the freezer to
harden, about 15 minutes.
3
Remove the dough from the freezer and cover with a sheet of
parchment paper and then another flat baking sheet, to prevent
the puff pastry from rising too much as it bakes. Bake for about
30 minutes. Carefully remove the top baking sheet and top layer
of parchment paper and continue to bake the puff pastry for
about 5 more minutes, until crisp and deep golden brown. Let
the puff pastry cool on the baking sheet to room temperature.
4
To assemble the gâteaux: Place a round piping tip (such as
Ateco #802) on the tip of your index finger, or use the tip of a
paring knife, and pierce a ¼-inch hole in the bottom of each
cream puff shell.
5
Fill a pastry bag fitted with the same round piping tip with the
lemon curd. Piping into the hole in each cream puff, gently fill
with lemon curd, taking care not to overfill. Set aside at room
temperature until ready to use.
6
Dip the top of each cream puff into the glaze. Decorate with
nonpareils, if desired. Set aside until the glaze has fully set and
hardened, about 20 minutes. As you are dipping the cream puffs,
adjust the thickness of the glaze as needed (see page 25). Set
aside 9 of the glazed cream puffs.
7
Dip the bottoms of the remaining 27 cream puffs into the glaze,
and arrange them on the puff pastry circles in rings of 3, using
the glaze to secure them to the puff pastry. Let stand at room
temperature until the glaze hardens, about 20 minutes.
8
Fill a pastry bag fitted with a star piping tip (such as Ateco #826)
with the whipped cream and pipe 3 stripes of whipped cream
between the cream puffs. Pipe a small rosette of whipped cream
on top of the gâteaux and then place one of the reserved cream
puffs on the top. Serve immediately, or refrigerate for up to 1
day.
To save yourself a bit of kitchen labor, you can buy a jar of
good-quality lemon curd instead of making it from scratch. I promise
I won’t judge you.
No te
LIME WHIPPED CREAM
MAKES ABOUT 4 CUPS
2 cups (480 grams) heavy whipping cream
¼ cup (30 grams) confectioners’ sugar, sifted
Finely grated zest of 2 limes
Juice of 2 limes
By hand or using a stand mixer fitted with the whisk attachment, whip
the cream, confectioners’ sugar, and lime zest until soft peaks form.
Add the lime juice and continue to whip until stiff peaks form. Cover
and refrigerate until ready to use, up to 2 hours. If the cream softens
while sitting in the refrigerator, re-whip until stiff peaks form before
using.
Melon, Mint, and Yogurt Mousse
Éclairs
M A K E S 1 0 TO 1 2 L A RG E É C L A I R S
10 to 12 Large Éclair Shells (recipe)
½ ripe honeydew melon, seeds removed
½ ripe cantaloupe, seeds removed
Yogurt Mousse (recipe)
Leaves from 3 or 4 sprigs fresh mint
1
Using a serrated knife, trim off the top one-third of each éclair
shell lengthwise and discard the tops.
2
Using various size melon ballers, ranging in size from ¼ to ½
inch in diameter, scoop an assortment of balls from the
honeydew and cantaloupe.
3
Fill a pastry bag fitted with a round piping tip (such as Ateco
#803) with the mousse. Pipe dots of mousse onto the base of
each éclair to fill. Set the melon balls on top of the filling to
create an irregular dotted pattern, leaving some of the filling
exposed. Tear the mint leaves into very small pieces and
garnish each éclair with the mint. Serve immediately.
Clockwise from top left: Mango-Pineapple Éclairs (recipe); Melon, Mint, and Yogurt Mousse
Éclairs (recipe); and Jasmine-Pomegranate Éclairs (recipe)
YOGURT MOUSSE
MAKES ABOUT 2 CUPS
1 cup (225 grams) whole-milk yogurt
1 teaspoon powdered gelatin
⅓ cup (80 grams) whole milk
1 tablespoon (13 grams) granulated sugar
2 tablespoons (40 grams) honey
¼ teaspoon salt
½ cup (120 grams) heavy whipping cream
1
Place the yogurt in a large bowl.
2
Sprinkle the gelatin over the milk in a small pot and let stand for
1 minute to soften. Add the sugar, honey, and salt and gently
warm to a simmer over low heat, stirring until the sugar and
gelatin are dissolved. Strain the mixture through a fine-mesh
sieve over the yogurt and whisk until smooth.
3
By hand or using a stand mixer fitted with the whisk attachment,
whip the cream until stiff peaks form. Gently fold the whipped
cream into the yogurt mixture, using a whisk, and refrigerate
until thickened, about 2 hours.
Prefer a little less time in the kitchen? Skip making the mousse
and fill the éclairs with plain Greek yogurt. Add a little sugar to the
yogurt to sweeten it before using.
No te
Mango-Pineapple Éclairs
M A K E S 1 6 TO 1 8 S M A L L É C L A I R S
¼ to ½ ripe pineapple
16 to 18 Small Éclair Shells (recipe)
Mango Mousse (recipe)
Fine sea salt, for garnish
Gold dragées, for decorating (optional)
1
Peel and core the pineapple and cut into wedge-shaped spears
about ½ inch wide. Cut the spears into thin slices about ⅛ inch
thick.
2
Using a serrated knife, trim off the top one-third of each éclair
shell lengthwise and discard the tops. Spread the mousse in the
base of each éclair until filled just to the top. Lay several
pineapple slices of on top of the mousse. Sprinkle each éclair
with a pinch of sea salt. Decorate with gold dragées, if desired.
Serve immediately, or store in the refrigerator for up to 8 hours.
MANGO MOUSSE
MAKES ABOUT 1¼ CUPS
1 large ripe mango
3 tablespoons (45 grams) water
1 teaspoon powdered gelatin
2 tablespoons (26 grams) granulated sugar
½ cup (120 grams) heavy whipping cream
1
Peel, pit, and cut the mango into small chunks. Transfer the
mango to a blender or food processor, add 2 tablespoons of the
water, and puree until smooth. Measure 1 cup (about 275
grams) of the mango puree and reserve. In a small bowl,
sprinkle the gelatin over the remaining 1 tablespoon water and
let it soften.
2
In a medium saucepan, bring the reserved mango puree and
the sugar to a simmer. Remove from the heat, add the gelatin
mixture, and stir until completely dissolved. Transfer the fruit
puree to a large bowl and let it cool to room temperature.
3
By hand or using a stand mixer fitted with the whisk attachment,
whip the cream until stiff peaks form. Carefully fold the whipped
cream into the cooled fruit puree. Refrigerate until ready to use,
up to 4 hours.
Jasmine-Pomegranate Éclairs
M A K E S 1 0 TO 1 2 L A RG E É C L A I R S
10 to 12 Large Éclair Shells (recipe)
2 large pomegranates
Jasmine Whipped Cream (recipe)
Light pink dragées, for decorating (optional)
1
Using a serrated knife, trim off the top one-third of each éclair
shell lengthwise and discard the tops.
2
Cut the pomegranates in half lengthwise. In a bowl of cold water
to prevent juice from spraying, use your hands to separate the
seeds from the membrane. Reserve the seeds and discard the
membrane. Drain the seeds and pat dry. Refrigerate until ready
to use.
3
Just before serving, spread the whipped cream in the base of
each éclair until filled just to the top. Generously sprinkle the
pomegranate seeds on top. Decorate with pink dragées, if
desired. Serve immediately.
Purchasing prepared pomegranate seeds will save you time in
this recipe. However, the flavor of freshly seeded pomegranate is far
superior.
No te
JASMINE WHIPPED CREAM
MAKES ABOUT 2 CUPS
1 cup (240 grams) heavy whipping cream
¼ cup (30 grams) confectioners’ sugar, sifted
1 teaspoon jasmine extract, or to taste
Seeds from 1 vanilla bean
By hand or using a stand mixer fitted with the whisk attachment, whip
the cream and confectioners’ sugar until soft peaks form. Add the
jasmine extract and vanilla seeds, and continue to whip until stiff peaks
form. Cover and refrigerate until ready to use, up to 2 hours. If the
cream softens while sitting in the refrigerator, re-whip until stiff peaks
form before using.
My favorite source for jasmine extract is ChefRubber.com, but
it can also be found in natural foods or beauty supply stores that sell
flower extracts and essential oils.
No te
Banana Pudding Puffs
M A K E S 1 4 TO 1 6 L A RG E C R E A M P U F F S
Banana Pudding Filling (recipe)
14 to 16 Large Cream Puff Shells (recipe)
White Glaze (recipe), tinted yellow
2 ripe bananas
Turbinado sugar, for caramelizing bananas
1
Fill a pastry bag fitted with a round piping tip (such as Ateco
#802) with the banana pudding and refrigerate until ready to
use. Using a serrated knife, slice the cream puff shells in half
lengthwise.
2
Dip the top of each cream puff into the glaze, allowing the
excess to drip away before inverting. As you are dipping, adjust
the thickness of the glaze as needed (see page 25).
3
Pipe the banana pudding in spirals over the bases of the cream
puffs, filling each puff about 1 inch high. Set the glazed tops over
the filling.
4
Peel the bananas and cut them into ¼-inch-thick slices. Place on
a baking sheet or a piece of aluminum foil. Generously dust the
top of each banana slice with the turbinado sugar. Using a
handheld kitchen torch, caramelize the sugar to a light golden
brown. Let cool to room temperature before using.
5
Pipe a ¼-inch round dollop of pudding on the top of each cream
puff, then set a caramelized banana slice on top for decoration,
pressing gently to stabilize. Serve immediately.
To caramelize the banana slices without a torch, place the
banana slices, topped with turbinado sugar, on a baking sheet. Broil
on low just until the sugar melts and becomes golden.
No te
Banana Pudding Puffs (recipe) and Lemon Meringue Pie Éclairs (recipe)
BANANA PUDDING FILLING
MAKES ABOUT 3 CUPS
3 very ripe bananas
4 large egg yolks
1 large egg
¼ cup plus 3 tablespoons (53 grams) cornstarch
1¾ cups (420 grams) whole milk
½ cup plus 2 tablespoons (126 grams) sugar
¼ teaspoon salt
Seeds from 1 vanilla bean (optional)
5 tablespoons (70 grams) unsalted butter, cut into small pieces
1
Peel and chop the bananas and puree until smooth in a blender
or food processor.
2
In a large bowl, whisk the egg yolks, egg, and cornstarch until
completely smooth.
3
In a medium pot, bring the pureed bananas, milk, sugar, salt,
and vanilla seeds to a boil. Slowly pour the hot milk over the egg
yolks while whisking constantly. Return the mixture to the pot
and cook over medium-low heat, whisking constantly but slowly,
until thickened and bubbles rise to the surface, 5 to 6 minutes.
4
Immediately remove the pot from the heat, add the butter, and
whisk until fully melted and smooth. Strain the mixture through a
fine-mesh sieve into a large bowl and cover the pudding with a
sheet of plastic wrap directly on the surface to prevent a skin
from forming. Refrigerate until cold and fully set, about 2 hours,
or up to 2 days.
Lemon Meringue Pie Éclairs
M A K E S 1 6 TO 1 8 S M A L L É C L A I R S
Italian Meringue (recipe)
16 to 18 Small Éclair Shells (recipe)
Lemon Curd (recipe)
1
Fill a pastry bag fitted with a round piping tip (such as Ateco
#805) with the meringue and refrigerate until ready to use.
2
Using a serrated knife, cut off the top one-third of each éclair
lengthwise and discard the tops. Spread the lemon curd into
each éclair shell, filling just over the top. Decoratively pipe three
large drops of meringue on top of the lemon curd. Serve
immediately, or refrigerate for up to 8 hours.
LEMON CURD
MAKES ABOUT 3 CUPS
¾ cup (150 grams) sugar
Finely grated zest of 4 lemons
1 cup (240 grams) freshly squeezed lemon juice (from about 8 lemons)
8 large egg yolks
3 large eggs
¼ teaspoon salt
2 sticks (226 grams) unsalted butter, cut into small pieces
1
Bring a medium pot filled with about 2 inches of water to a
simmer.
2
In a large heatproof bowl, whisk the sugar, lemon zest and juice,
egg yolks, eggs, and salt together until evenly combined. Place
the bowl over the simmering water and, while whisking
constantly, cook the curd until the mixture thickens and reaches
165ºF on an instant-read thermometer, 10 to 12 minutes.
3
Immediately remove the curd from the heat, add the butter, and
whisk until fully melted and smooth. Strain the mixture through a
fine-mesh sieve into a large bowl and cover the curd with a
sheet of plastic wrap directly on the surface to prevent a skin
from forming. Refrigerate until cold and fully set, about 2 hours,
or up to 1 week.
ITALIAN MERINGUE
MAKES ABOUT 3 CUPS
3 large egg whites
1 cup (200 grams) sugar
½ cup (120 grams) water
1 tablespoon (20 grams) honey
¼ teaspoon salt
1
In the bowl of a stand mixer fitted with the whisk attachment,
whip the egg whites on low speed.
2
Meanwhile, combine the sugar, water, honey, and salt in a small
saucepan and cook over medium heat until the mixture reaches
238ºF on an instant-read thermometer, about 12 minutes.
3
Immediately remove from the heat, increase the speed of the
mixer to medium-high, and very slowly pour the hot sugar
mixture over the egg whites, taking care not to pour the hot
mixture onto the moving whisk.
4
Raise the speed of the mixer to high and whip until tripled in
volume, thick, glossy, and cooled to room temperature, about 10
minutes. Refrigerate until ready to use, up to 4 hours (or freeze in
an airtight container for up to 1 week).
Lemon curd stores easily in the refrigerator for up to a week.
And Italian meringue can be stored in the freezer for up to a week.
So if you like a midnight sweet, you can do what I do—assemble an
éclair or two each night for a week when no one is looking.
No te
Apple Butter Bombs (recipe) and Pistachio–Black Mission Fig Éclairs (recipe)
Pistachio–Black Mission Fig
Éclairs
M A K E S 1 0 TO 1 2 L A RG E É C L A I R S
10 to 12 Large Éclair Shells (recipe)
Pistachio Pastry Cream (recipe)
12 large Black Mission figs, cut into quarters
Using a serrated knife, cut off the top one-third of each éclair shell
lengthwise and discard. Spread the pastry cream into the bottom of
each éclair until just full. Fill a pastry bag fitted with a petal piping tip
(such as Ateco #104) with the remaining pastry cream. Decoratively
pipe the pastry cream in a zigzag pattern over the top of each éclair.
Decorate with the quartered fig. Serve immediately, or refrigerate for
up to 8 hours.
If fresh Black Mission figs are out of season, simply substitute
sliced dried figs to make these treats any time of the year.
No te
PISTACHIO PASTRY CREAM
MAKES ABOUT 3 CUPS
4 large egg yolks
1 large egg
¼ cup plus 2 tablespoons (45 grams) cornstarch
2 cups (480 grams) whole milk
½ cup plus 2 tablespoons (126 grams) sugar
¼ teaspoon salt
½ cup (150 grams) pistachio paste or pistachio butter
5 tablespoons (70 grams) unsalted butter, cut into small pieces
1
In a large bowl, whisk the egg yolks, egg, and cornstarch until
completely smooth.
2
In a medium pot, bring the milk, sugar, and salt to a boil. Slowly
pour the hot milk over the egg mixture while whisking
constantly. Return the mixture to the pot and cook over mediumlow heat, whisking constantly but slowly, until just thickened and
bubbles rise to the surface, about 4 minutes. Increase the speed
of whisking to smooth the custard and continue to cook until it
has thickened to the consistency of pudding and coats the back
of a spoon, about 2 more minutes.
3
Immediately remove the pot from the heat, add the pistachio
paste and butter, and whisk until fully melted and smooth. Strain
the mixture through a fine-mesh sieve into a large bowl and
cover the pastry cream with a sheet of plastic wrap directly on
the surface to prevent a skin from forming. Refrigerate until cold
and fully set, about 2 hours, or up to 3 days.
Apple Butter Bombs
M A K E S 1 4 TO 1 6 P I EC E S
14 to 16 Large Cream Puff Shells (recipe)
Vanilla Bean Pastry Cream (recipe)
1½ cups (340 grams) store-bought apple butter
Confectioners’ sugar, for dusting
1
Place a round piping tip (such as Ateco #802) on the tip of your
index finger, or use the tip of a paring knife, and pierce a ¼-inch
hole in the bottom of each cream puff shell.
2
Fill a pastry bag fitted with the same round piping tip with the
pastry cream. Fill another pastry bag, fitted with another round
piping tip, with the apple butter. Piping into the hole in each
cream puff, gently fill with the apple butter until one-third full.
Then gently fill each cream puff with the pastry cream until full.
Dust with confectioners’ sugar and serve immediately, or
refrigerate for up to 8 hours.
Not enough time to make pastry cream? You can buy storebought vanilla pudding instead, or fill these bombs with only apple
butter.
No te
Chocola te
Whoopie Puffs • White Chocolate–Yuzu Éclairs •
Passion Fruit–Chocolate Éclairs • Chocolate Truffles
• Lavender–White Chocolate Gâteaux Saint-Honoré
• Red Velvet Éclairs • Turtle Éclairs •
Black Forest Éclairs • Tiramisu •
Chocolate Chip Cannoli Éclairs •
Mississippi Mud Puffs • Nutella Cream Puffs •
Persian-Spiced Chocolate Cream Puffs •
S’mores Éclairs • Chocolate and Churros •
Chocolate and Sea Salt Seashells
Whoopie Puffs
MAKES 24 PUFFS
Cocoa Pâte à Choux Dough (recipe)
¼ cup (12 grams) freeze-dried raspberries
2 tablespoons (18 grams) roasted pistachios
Swiss Meringue Buttercream (recipe)
1 tablespoon (8 grams) cocoa powder, sifted
1 to 2 teaspoons ground cinnamon
Finely grated zest of 1 lemon
Seeds from ½ vanilla bean
1
Preheat the oven to 350ºF. Line two baking sheets with
parchment paper.
2
Fill a pastry bag fitted with a round piping tip (such as Ateco
#806) with the pâte à choux dough and pipe 28 small disks
(you’ll have 4 extra, for any mishaps or for snacking), about 1½
inches in diameter and ½ inch thick, on the baking sheets,
leaving about 1 inch of space between each disk. Lightly
moisten a fingertip with cold water and gently smooth any peaks
or points created when piping. Bake for 35 to 40 minutes, until
cooked through in the center. Let cool on the baking sheets to
room temperature.
3
To flavor the buttercream: Grind the freeze-dried raspberries
to a fine powder in a food processor. Grind the pistachios to a
fine powder.
4
Divide the buttercream into six small bowls. Fold the freezedried raspberry powder, ground pistachios, cocoa powder,
cinnamon, lemon zest, and vanilla seeds into each of the small
bowls of buttercream until well combined and smooth.
5
Using a serrated knife, cut the pâte à choux disks in half
horizontally. Spread a generous dollop of buttercream on the
base of each disk, enough so the filling spills slightly over the
sides, dividing the different buttercream flavors onto 4 disks
each. Gently set the tops of the disks on the buttercream to
create sandwiches, and smooth the sides of the buttercream with
a spatula if needed. Serve immediately, or refrigerate for up to 1
day.
If making several flavors of buttercream filling feels way too
complicated, make your life easy and just pick your favorite flavor or
two. Good bakers always know their limits.
No te
Whoopie Puffs (recipe)
SWISS MERINGUE BUTTERCREAM
MAKES ABOUT 3 CUPS
3 sticks (336 grams) unsalted butter, softened
4 large egg whites
⅔ cup (133 grams) sugar
¼ teaspoon salt
1
Cut the butter into small pieces.
2
Place the egg whites, sugar, and salt in the bowl of a stand
mixer. Place the bowl over a saucepan filled with about 2 inches
of simmering water and whisk constantly until the sugar is
dissolved and the bowl is warm to the touch. Transfer the
mixture to the base of the stand mixer, fitted with the whisk
attachment, and whip the egg-white mixture on high speed until
thick, glossy, and cooled to room temperature.
3
Reduce the speed of the mixer to low and slowly add the
softened butter, one piece at a time. Scrape down the sides of
the bowl, raise the mixer speed to high, and whip until thickened
and completely smooth, about 5 minutes. Let stand at room
temperature until ready to use.
Buttercream can be made up to 5 days in advance and
refrigerated until ready to use. Let the buttercream stand at room
temperature until softened. If the texture is not smooth, re-whip in
the mixer until lightened and fluffy. This can take up to 10 minutes.
No te
Passion Fruit-Chocolate Éclairs (recipe) and White Chocolate-Yuzu Éclairs (recipe)
White Chocolate–Yuzu Éclairs
M A K E S 1 6 TO 1 8 S M A L L É C L A I R S
16 to 18 Small Éclair Shells (recipe)
White Chocolate–Yuzu Mousse (recipe)
Yuzu Glaze (recipe)
Lime zest, for decorating (optional)
1
Place a round piping tip (such as Ateco #802) on the tip of your
index finger, or use the tip of a paring knife, and pierce two ¼inch holes in the bottom of each éclair shell.
2
Fill a pastry bag fitted with the same round piping tip with the
mousse. Piping into the holes in each éclair, gently fill with
mousse. Set the éclairs aside in the refrigerator until ready to
glaze.
3
Dip the top one-third of each éclair into the glaze, allowing the
excess to drip away from the éclair before inverting. Decorate
with lime zest, if desired. Set aside until the glaze has fully set
and hardened, about 20 minutes. As you are dipping the éclairs,
adjust the thickness of the glaze as needed (see page 25).
Yuzu juice can usually be found in the refrigerator case at a
Japanese grocery store or a grocery store with a large selection of
specialty ingredients.
No te
WHITE CHOCOLATE–YUZU
MOUSSE
MAKES ABOUT 3 CUPS
¾ cup (180 grams) heavy whipping cream
1¼ cups (213 grams) white chocolate, chopped or chips
3 large egg yolks
3 tablespoons (39 grams) sugar
2 tablespoons (30 grams) water
1 tablespoon (20 grams) light corn syrup
¼ teaspoon salt
1 teaspoon powdered gelatin
2 tablespoons (28 grams) yuzu juice
1
In the bowl of a stand mixer fitted with the whisk attachment,
whip the cream until soft peaks form. Transfer to a large bowl
and refrigerate until ready to use.
2
In a heatproof bowl set over a pot of simmering water, melt the
white chocolate. Remove from the heat and let stand at room
temperature until ready to use.
3
In the clean bowl of the stand mixer, fitted with the whisk
attachment, beat the egg yolks on medium speed. Meanwhile, in
a small pot, cook the sugar, water, corn syrup, and salt until the
mixture reaches 220ºF on an instant-read thermometer.
Immediately remove the pot from the heat and slowly pour over
the egg yolks, with the mixer running, taking care not to pour the
hot mixture onto the moving whisk. Add the gelatin and mix until
combined. Raise the mixer speed to high and whip until light,
fluffy, and cooled to room temperature.
4
Remove the bowl of whipped egg yolks from the mixer, add the
melted chocolate, and quickly fold until smooth. Fold onequarter of the whipped cream into the mousse until combined.
Add the remaining whipped cream and gently fold until smooth.
Add the yuzu juice and fold until evenly incorporated. Use
immediately, or refrigerate until ready to use, up to 4 hours.
If you would prefer to use a more common ingredient,
grapefruit juice is a fine substitute. Use it in place of the yuzu juice,
and add the zest of ½ grapefruit, too.
No te
YUZU GLAZE
MAKES ABOUT ¾ CUP
1½ cups (180 grams) confectioners’ sugar, plus more for adjusting glaze
2 tablespoons (40 grams) light corn syrup
2 tablespoons (28 grams) yuzu juice, plus more for adjusting glaze
¼ teaspoon salt
Sift the confectioners’ sugar into a large bowl. Add the remaining
ingredients and whisk by hand until smooth. The glaze should have a
thick consistency that still allows for dipping. To make a thicker glaze,
slowly add sifted confectioners’ sugar until the glaze reaches the
desired consistency. To make a thinner glaze, add yuzu juice, 1
teaspoon at a time. Cover the bowl with plastic wrap and set aside at
room temperature until ready to use.
Passion Fruit–Chocolate Éclairs
M A K E S 1 0 TO 1 2 L A RG E É C L A I R S
10 to 12 Large Éclair Shells (recipe)
Passion Fruit Curd (recipe)
Chocolate Glaze (recipe)
Bittersweet chocolate, finely chopped, for decorating (optional)
1
Place a round piping tip (such as Ateco #802) on the tip of your
index finger, or use the tip of a paring knife, and pierce three ¼inch holes in the bottom of each éclair shell.
2
Fill a pastry bag fitted with the same round piping tip with the
passion fruit curd. Piping into the holes in each éclair, gently fill
with passion fruit curd.
3
Dip the top one-third of each éclair into the glaze, allowing the
excess to drip away from the éclair before inverting. Sprinkle
with chopped chocolate, if desired. Set aside until the glaze has
fully set and hardened, about 20 minutes. As you are dipping the
éclairs, adjust the thickness of the glaze as needed (see page
25). Serve immediately, or refrigerate for up to 8 hours.
PASSION FRUIT CURD
MAKES ABOUT 2 CUPS
½ cup (100 grams) sugar
½ cup (125 grams) frozen passion fruit puree, thawed
4 large egg yolks
2 large eggs
¼ teaspoon salt
1 stick (112 grams) unsalted butter, cut into small pieces
1
Bring a medium pot filled with about 2 inches of water to a
simmer.
2
In a large heatproof bowl, whisk the sugar, passion fruit puree,
egg yolks, eggs, and salt until evenly combined. Place the bowl
over the simmering water and, while whisking constantly, cook
the curd until it reaches 165ºF on an instant-read thermometer or
the mixture just begins to thicken, 10 to 12 minutes.
3
Immediately remove the curd from the heat, add the butter, and
whisk until fully melted and smooth. Strain the mixture through a
fine-mesh sieve into a large bowl and cover the curd with a
sheet of plastic wrap directly on the surface to prevent a skin
from forming. Refrigerate until cold and fully set, about 2 hours,
or up to 5 days.
Frozen passion fruit puree can be found at most grocery stores
that specialize in Latin foods. However, if your grocery store doesn’t
carry it, but they do carry Goya brand products, don’t hesitate to ask
the buyer to special-order the puree for you. You’d be surprised at
how happily they will accommodate.
No te
Chocolate Truffles
M A K E S 3 0 TO 3 6 S M A L L C R E A M P U F F S
30 to 36 Small Cream Puff Shells (recipe)
Cocoa powder, for coating
Pistachios, finely ground, for coating
Unsweetened shredded coconut, for coating
2 cups (340 grams) bittersweet chocolate, chopped or chips
Bittersweet Chocolate Mousse (recipe)
1
Place a round piping tip (such as Ateco #802) on the tip of your
index finger, or use the tip of a paring knife, and pierce a ¼-inch
hole in the bottom of each cream puff shell. Sift the cocoa
powder into a shallow dish or bowl. Place the pistachios and
coconut in separate shallow dishes or bowls.
2
Melt the chocolate in a heatproof bowl set over a pot of
simmering water. Once melted, turn off the heat and keep warm
until ready to use.
3
Fill a pastry bag fitted with the same round piping tip with the
chocolate mousse. Piping into the hole in each cream puff,
gently fill with mousse. Wipe away any excess mousse from the
exterior of the cream puffs. Drop 2 or 3 filled cream puffs into
the melted chocolate and, using a fork, roll them around in the
chocolate until completely coated. Using the fork, remove the
coated cream puffs from the melted chocolate, allowing excess
chocolate to drip away. Drop the coated cream puffs into the
cocoa powder, pistachios, or coconut and, using a separate fork
for each, gently roll the cream puff to coat. Transfer the coated
truffles to a rack and let sit until the chocolate coating has
hardened, about 15 minutes. Transfer the truffles to a plate or
baking sheet and refrigerate until set, about 15 minutes or up to
4 hours. Just before serving, let the truffles warm slightly at room
temperature for about 15 minutes. Truffles are best eaten
immediately.
Chocolate Truffles (recipe)
BITTERSWEET CHOCOLATE
MOUSSE
MAKES ABOUT 3 CUPS
1 cup (140 grams) heavy whipping cream
1½ cups (256 grams) bittersweet chocolate, chopped or chips
4 large egg yolks
¼ cup (52 grams) sugar
¼ cup (60 grams) water
2 tablespoons (40 grams) light corn syrup
2 teaspoons (10 grams) vanilla extract
½ teaspoon salt
½ teaspoon powdered gelatin
1
In the bowl of a stand mixer fitted with the whisk attachment,
whip the cream until soft peaks form. Transfer to another bowl
and set aside at room temperature until ready to use.
2
In a heatproof bowl, set over a pot of simmering water, melt the
chocolate. Remove from the heat and let stand at room
temperature until ready to use.
3
In the clean bowl of the stand mixer, fitted with the whisk
attachment, whip the egg yolks on medium speed. Meanwhile,
in a small pot, cook the sugar, water, corn syrup, vanilla, and salt
until the mixture reaches 220ºF on an instant-read thermometer,
about 3 minutes. Immediately remove the pot from the heat,
reduce the speed of the mixer to low, and slowly pour the sugar
mixture over the egg yolks, with the mixer running, taking care
not to pour the hot mixture onto the moving whisk. Add the
powdered gelatin and mix until dissolved, about 1 minute. Raise
the mixer speed to high and whip until light, fluffy, tripled in
volume, and cooled to room temperature, about 6 minutes.
4
Remove the bowl of whipped egg yolks from the mixer, add the
melted chocolate, and quickly fold until smooth. Gently fold the
whipped cream into the mousse. Cover the mousse with plastic
wrap and refrigerate until ready to use, or up to 4 hours.
Making chocolate mousse can be a bit tricky. The key is to
combine the components when they are at similar temperatures to
ensure they blend well. That means don’t let the melted chocolate
get too hot, and don’t let the whipped cream get too cold. If you find
that the melted chocolate in your mousse sets up and creates little
chips of chocolate when you add the whipped cream, don’t fret. This
is because the chocolate was a bit too hot, the cream was very cold,
or you folded the two together a little too slowly. When this happens,
I just call it “chocolate chip mousse” and enjoy it anyway, because
the mousse tastes just as delicious!
No te
MEXICAN CHOCOLATE MOUSSE
Add 2 teaspoons (6 grams) ground cinnamon and ½ teaspoon
cayenne pepper after the melted chocolate in Step 4.
Lavender–White Chocolate Gâteaux Saint-Honoré (recipe)
Lavender–White Chocolate
Gâteaux Saint-Honoré
M A K E S 9 I N D I V I D UA L G Â T E AUX
Bread flour, for rolling
1 sheet (about 8 ounces) frozen puff pastry dough, thawed
36 Small Cream Puff Shells (recipe)
White Chocolate Mousse (recipe)
White Glaze (recipe), tinted lavender
Purple sanding sugar, for decorating (optional)
Lavender Whipped Cream (recipe)
Blackberries, for decorating
1
Preheat the oven to 375ºF. Line a baking sheet with parchment
paper.
2
On a lightly floured surface, roll the sheet of puff pastry dough to
⅛ inch thick. Using a 3½-inch round cookie cutter, cut 9 circles
from the dough and then place them on the baking sheet. Prick
several small holes over the entire surface of the dough circles
with a fork, to prevent the dough from rising too much. Transfer
the dough to the freezer to harden, about 10 minutes.
3
Remove the dough from the freezer and cover with a sheet of
parchment paper and another flat baking sheet, to prevent the
puff pastry from rising too much as it bakes. Bake the pastry for
about 30 minutes. Carefully remove the top baking sheet and top
layer of parchment paper and continue to bake for about 5 more
minutes, until crisp and deep golden brown. Let the puff pastry
cool on the baking sheet.
4
To assemble the gâteaux: Place a round piping tip (such as
Ateco #802) on the tip of your index finger, or use the tip of a
paring knife, and pierce a ¼-inch hole in the bottom of each
cream puff shell.
5
Fill a pastry bag fitted with the same round piping tip with the
mousse. Piping into the hole in each cream puff, gently fill with
mousse, taking care not to overfill. Set aside at room
temperature until ready to use.
6
Dip the top of each of the filled cream puffs into the glaze.
Sprinkle with purple sugar, if desired, and set aside until the
glaze has fully set and hardened, about 20 minutes. Set aside 9
of the cream puffs.
7
Dip the bottoms of the remaining 27 cream puffs into the glaze
and then arrange them on the puff pastry in rings of 3, using the
glaze to secure them to the puff pastry. Let stand at room
temperature until the glaze hardens, about 20 minutes.
8
Fill a pastry bag fitted with a star piping tip (such as Ateco #826)
with the whipped cream and pipe 3 stripes of whipped cream
between the cream puffs. Pipe a small rosette of cream on top of
each gâteau, then place one of the reserved cream puffs on top.
Decorate with the blackberries. Serve immediately, or
refrigerate for up to 1 day.
WHITE CHOCOLATE MOUSSE
MAKES ABOUT 3 CUPS
¾ cup (180 grams) heavy whipping cream
1¼ cups (213 grams) white chocolate, chopped or chips
3 large egg yolks
3 tablespoons (39 grams) sugar
2 tablespoons (30 grams) water
1 tablespoon (20 grams) light corn syrup
¼ teaspoon salt
1 teaspoon powdered gelatin
1
In the bowl of a stand mixer fitted with the whisk attachment,
whip the cream until soft peaks form. Transfer to another bowl
and set aside at room temperature until ready to use.
2
In a heatproof bowl set over a pot of simmering water, melt the
white chocolate. Remove from the heat and let stand at room
temperature until ready to use.
3
In the clean bowl of the stand mixer, fitted with the whisk
attachment, whip the egg yolks on medium speed. Meanwhile,
in a small pot, cook the sugar, water, corn syrup, and salt until
the mixture reaches 220ºF on an instant-read thermometer.
Immediately remove the pot from the heat and slowly pour over
the egg yolks, with the mixer running, taking care not to pour the
hot mixture onto the moving whisk. Add the gelatin and mix until
combined. Raise the mixer speed to high and whip until light,
fluffy, and cooled to room temperature.
4
Remove the bowl of whipped egg yolks and sugar from the
mixer, add the melted chocolate, and quickly fold until smooth.
Fold one-quarter of the whipped cream into the mousse until
combined. Add the remaining whipped cream and gently fold
until smooth. Use immediately, or refrigerate until ready to use,
up to 4 hours.
LAVENDER WHIPPED CREAM
MAKES ABOUT 4 CUPS
2 cups (480 grams) heavy whipping cream
2 teaspoons (2 grams) dried lavender flowers
¼ cup (30 grams) confectioners’ sugar, sifted
1
In a small saucepan, bring the cream and lavender flowers to a
simmer. Remove from the heat and let stand at room
temperature to steep for 10 minutes. Strain the mixture through a
fine-mesh sieve and refrigerate until cold, about 1 hour.
2
By hand or using a stand mixer fitted with the whisk attachment,
whip the lavender-infused cream and confectioners’ sugar until
stiff peaks form. Set aside in the refrigerator until ready to use,
up to 2 hours. If the cream softens while sitting in the refrigerator,
re-whip until stiff peaks form before using.
Red Velvet Éclairs
M A K E S 1 0 TO 1 2 L A RG E É C L A I R S
10 to 12 Large Éclair Shells (recipe)
Whipped Cream Cheese (recipe)
White Glaze (recipe), tinted red
2 (4-ounce) bars (226 grams) white chocolate
1
Place a round piping tip (such as Ateco #802) on the tip of your
index finger, or use the tip of a paring knife, and pierce three ¼inch holes in the bottom of each éclair shell.
2
Fill a pastry bag fitted with the same round piping tip with the
whipped cream cheese. Piping into the holes in each éclair,
gently fill with the cream cheese.
3
Dip the top one-third of each éclair into the glaze, allowing the
excess to drip away from the éclair before inverting. Using a
vegetable peeler, shave the bars of white chocolate over the
tops of the éclairs. Set aside until the glaze has fully set and
hardened, about 20 minutes. As you are dipping the éclairs,
adjust the thickness of the glaze as needed (see page 25). Serve
immediately, or refrigerate for up to 8 hours.
Turtle Éclairs
M A K E S 1 0 TO 1 2 L A RG E É C L A I R S
10 to 12 Large Éclair Shells (recipe)
Caramel Mousse (recipe)
Chocolate Glaze (recipe)
1 cup (120 grams) roasted and salted pecans, chopped
1
Place a round piping tip (such as Ateco #802) on the tip of your
index finger, or use the tip of a paring knife, and pierce three ¼inch holes in the bottom of each éclair shell.
2
Fill a pastry bag fitted with the same round piping tip with the
mousse. Piping into the holes in each éclair, gently fill with
mousse.
3
Dip the top one-third of each éclair into the glaze, allowing the
excess to drip away from the éclair before inverting. Garnish
with a generous coating of the chopped pecans. Set aside until
the glaze has fully set and hardened, about 20 minutes. As you
are dipping the éclairs, adjust the thickness of the glaze as
needed (see page 25). Serve immediately, or refrigerate for up
to 8 hours.
My caramel mousse is a bit of a faux caramel mousse, in that
it’s just a mix of homemade caramel sauce and mascarpone cheese.
Don’t tell.
No te
Clockwise from top left: Red Velvet Éclairs (recipe), Turtle Éclairs (recipe), and Black Forest
Éclairs (recipe)
CARAMEL MOUSSE
MAKES ABOUT 4 CUPS
½ cup (100 grams) sugar
1 tablespoon (20 grams) light corn syrup
1 tablespoon water
½ teaspoon salt
1 cup (240 grams) heavy whipping cream
1½ cups (338 grams) mascarpone cheese
1
In a small saucepan, bring the sugar, corn syrup, water, and salt
to a boil. Cook until the mixture reaches 350ºF on an instant-read
thermometer. Immediately remove from the heat, slowly add ½
cup of the cream, and whisk until smooth. Transfer the caramel
mixture to a heatproof bowl and refrigerate until cold, 1 to 2
hours.
2
Transfer the caramel mixture to the bowl of a stand mixer fitted
with the whisk attachment. Add the remaining ½ cup cream and
the mascarpone and whip until the mixture thickens and has a
consistency similar to softly whipped cream. Refrigerate until
ready to use, up to 4 hours.
Be careful of steam and bubbling that may occur when you add
the cream to the hot caramel.
No te
Black Forest Éclairs
M A K E S 1 0 TO 1 2 L A RG E É C L A I R S
10 to 12 Large Cocoa Éclair Shells (recipe)
2 cups (½ recipe) Whipped Cream (recipe)
Bittersweet Chocolate Mousse (recipe)
30 to 48 (about 60 grams) store-bought brandied cherries
Cacao nibs, for decorating (optional)
Silver leaf, for decorating (optional)
1
Using a serrated knife, trim the top one-third of each éclair shell
lengthwise and discard the tops.
2
Fill a pastry bag fitted with a round piping tip (such as Ateco
#804) with the whipped cream. Fill a second pastry bag fitted
with a round piping tip (such as Ateco #806) with the chocolate
mousse.
3
Pipe the mousse onto each éclair until filled just to the top of the
trimmed shell. Pipe dots of whipped cream and the remaining
mousse, irregularly alternating between the two, to cover the
entire surface of each éclair.
4
Place 3 or 4 of the brandied cherries on top of the filling, leaving
some of the filling exposed. Garnish each éclair with pinches of
cacao nibs and silver leaf, if desired. Serve immediately, or
refrigerate for up to 8 hours.
Feel free to substitute chopped chocolate chips for the cacao
nibs if you don’t want to purchase an extra ingredient for this recipe.
No te
Tiramisu
M A K E S 8 S E RV I N G S
8 Large Cocoa Cream Puff Shells (recipe)
Tiramisu Filling (recipe)
Tiramisu Soak (recipe)
Cocoa powder, for dusting
1
Place eight 4-ounce ramekins on a baking sheet. Using a
serrated knife, slice the cream puff shells in half lengthwise and
press each half flat with your hands. Transfer the tiramisu filling
to a pastry bag without a piping tip.
2
Pipe about one-third of the filling into an even layer over the
bases of each ramekin, filling each ramekin about one-third full.
Submerge one half of a flattened cream puff in the tiramisu soak
and let it absorb the liquid until just soft. Place the soaked cream
puff on top of the filling. Repeat the layering with another onethird of the filling, place another soaked cream puff half on top,
and then divide the remaining filling evenly among the ramekins
to fill. Using an offset metal spatula, spread the top of the filling
until perfectly smooth. Cover with plastic wrap pressed directly
on the top of the filling and refrigerate for 4 hours to overnight to
set. Dust generously with cocoa powder just before serving.
Use caution when consuming raw eggs due to the slight risk of
food-borne illness such as salmonella. To reduce this risk, use grade
A or AA eggs that are fresh, have been properly refrigerated, and
have their shells intact. Organic, free-range eggs are best.
No te
Tiramisu (recipe) and Chocolate Chip Cannoli Éclairs (recipe)
TIRAMISU FILLING
MAKES ABOUT 5 CUPS
1 cup (240 grams) heavy whipping cream
2 large eggs
¼ cup plus 1 tablespoon (63 grams) sugar
1¼ cups (280 grams) mascarpone cheese, softened
2 tablespoons (30 grams) amaretto
2 tablespoons (30 grams) Kahlúa
2 teaspoons (10 grams) vanilla extract
1
In the bowl of a stand mixer fitted with the whisk attachment,
whip the cream until stiff peaks form. Transfer to another bowl
and refrigerate until ready to use.
2
In the clean bowl of the stand mixer, fitted with the whisk
attachment, whip the eggs and sugar on high speed until light,
fluffy, and tripled in volume, about 8 minutes. Add the
mascarpone, amaretto, Kahlúa, and vanilla and whip until
thickened and the texture is similar to softened buttercream.
Remove the bowl from the mixer and gently fold in the whipped
cream until evenly incorporated. Set aside in the refrigerator
until ready to use, or up to 1 day.
TIRAMISU SOAK
MAKES ABOUT 1¼ CUPS
¾ cup (180 grams) water
¼ cup (60 grams) Kahlúa
¼ cup (60 grams) amaretto
3 tablespoons (12 grams) instant espresso powder
1 tablespoon (15 grams) vanilla extract
Whisk all the ingredients together in a large bowl until the espresso
powder has dissolved.
Chocolate Chip Cannoli Éclairs
M A K E S 1 6 TO 1 8 CA N N O L I
½ cup (85 grams) finely chopped bittersweet chocolate
16 to 18 Small Cocoa Éclair Shells (recipe)
Chocolate Chip Cannoli Filling (recipe)
1
Spread the chocolate on a plate and reserve for decorating.
2
Using a serrated knife, cut about ¼ inch off the ends of each
éclair shell on a diagonal. Using a chopstick or your finger,
press the excess dough in the center of the éclairs to create
hollow tubes. Fill a pastry bag fitted with a round piping tip
(such as Ateco #805) with the cannoli filling. Pipe the filling into
one end of a shell to the center, then into the other end. Repeat
with the remaining shells and filling. Dip both ends of each éclair
in the chopped chocolate on the plate. Serve immediately, or
refrigerate for up to 4 hours.
CHOCOLATE CHIP CANNOLI
FILLING
MAKES ABOUT 2 CUPS
2 cups (450 grams) whole-milk ricotta cheese
¼ cup plus 2 tablespoons (76 grams) sugar
Finely grated zest of ¼ lemon
½ teaspoon ground cinnamon
¼ teaspoon salt
½ cup (85 grams) finely chopped bittersweet chocolate
In the bowl of a food processor, puree the ricotta, sugar, lemon zest,
cinnamon, and salt until smooth, scraping down the sides of the bowl a
few times as it blends. Transfer the mixture to a large bowl, add the
chopped chocolate, and fold until smooth. Refrigerate until ready to
use, up to 2 days.
Mississippi Mud Puffs
M A K E S 3 0 TO 3 6 S M A L L C R E A M P U F F S
1 (4½-ounce) package (about 125 grams) chocolate wafer cookies
30 to 36 Small Cocoa Cream Puff Shells (recipe)
Chocolate Pastry Cream (recipe)
1½ sticks (170 grams) unsalted butter, melted and slightly cooled
1
Process the chocolate wafer cookies in a food processor until
finely ground. (Alternatively, place the cookies in a resealable
plastic bag and pound with a mallet or small pan until finely
ground.) Transfer the cookie crumbs to a bowl and set aside.
2
Place a round piping tip (such as Ateco #802) on the tip of your
index finger, or use the tip of a paring knife, and pierce a ¼-inch
hole in the bottom of each of the cream puff shells.
3
Fill a pastry bag fitted with the same round piping tip with the
pastry cream. Piping into the hole in each cream puff, gently fill
with pastry cream.
4
Using a fork, dip each cream puff into the melted butter, allowing
the excess to drip away. Drop the puffs in the ground chocolate
wafer cookies and roll to coat. Transfer to the refrigerator to set,
about 10 minutes. Serve immediately, or refrigerate for up to 8
hours.
If you can’t find chocolate wafer cookies, you can grind crèmefilled chocolate cookies for the crumb coating. (You can also scrape
off and eat all the crème filling first, if you’re a little piggy like me.)
No te
Clockwise from top left: Nutella Cream Puffs (recipe), Mississippi Mud Puffs (recipe), and
Persian-Spiced Chocolate Cream Puffs (recipe)
Nutella Cream Puffs
M A K E S 1 4 TO 1 6 C R E A M P U F F S
Nutella-Mascarpone Filling (recipe follows)
14 to 16 Large Cocoa Cream Puff Shells (recipe)
Chocolate Glaze (recipe)
½ cup (70 grams) roasted hazelnuts, finely chopped
1
Fill a pastry bag fitted with a round piping tip (such as Ateco
#802) with the Nutella-mascarpone filling. Using a serrated
knife, slice the cream puff shells in half lengthwise, arranging the
tops and bottoms side by side.
2
Pipe a large dollop of the filling over the bases of the cream
puffs, filling each puff about 1 inch high. Set the tops over the
filling. Drizzle with the glaze and generously sprinkle the tops
with the chopped hazelnuts. Serve immediately, or refrigerate
for up to 1 day.
This filling is far more than a cream puff filling. I use it for a
cake or crepe filling, or a cupcake frosting, or I just smear it on
toasted bread with a drizzle of olive oil for an afternoon snack.
No te
NUTELLA-MASCARPONE FILLING
MAKES ABOUT 3 CUPS
2 cups (600 grams) Nutella
1 cup (225 grams) mascarpone cheese
In a large bowl, fold the Nutella and mascarpone together until
smooth. Cover and refrigerate until ready to use, or up to 3 days. If
needed, stir the filling to soften before using.
Persian-Spiced Chocolate Cream
Puffs
M A K E S 1 4 TO 1 6 L A RG E C R E A M P U F F S
14 to 16 Large Cocoa Cream Puff Shells (recipe)
Chocolate Pastry Cream (recipe)
Chocolate Glaze (recipe)
Persian Spice Topping (recipe)
1
Place a round piping tip (such as Ateco #802) on the tip of your
index finger, or use the tip of a paring knife, and pierce a ¼-inch
hole in the bottom of each cream puff shell.
2
Fill a pastry bag fitted with the same round piping tip with the
pastry cream. Piping into the hole in each cream puff, gently fill
with pastry cream.
3
Dip the top of each cream puff into the glaze, allowing the
excess to drip away from the cream puff before inverting. Very
generously sprinkle the tops of the puffs with the spice topping
to completely coat the glaze. Set the puffs aside at room
temperature until the glaze has fully set and hardened, about 20
minutes. As you are dipping the cream puffs, adjust the thickness
of the glaze as needed (see page 25). Serve immediately, or
store in the refrigerator for up to 1 day.
PERSIAN SPICE TOPPING
MAKES ABOUT 1½ CUPS
¼ cup (36 grams) sesame seeds
2 tablespoons (12 grams) coriander seeds
2 tablespoons (18 grams) cumin seeds
¼ cup (35 grams) roasted pistachios
¼ cup (35 grams) roasted hazelnuts
¼ cup (20 grams) unsweetened shredded coconut
½ teaspoon salt
¼ teaspoon ground black pepper
1
In a dry skillet, toast the sesame, coriander, and cumin seeds
over medium heat until fragrant, light golden brown, and the
seeds just begin to pop. Pour onto a plate and let cool to room
temperature.
2
Transfer the toasted spices to the bowl of a food processor. Add
the pistachios, hazelnuts, coconut, salt, and pepper, and pulse
until finely ground. Store in an airtight container at room
temperature until ready to use, up to 1 month.
This recipe makes about twice as much of the topping as you
will need for the cream puffs. Use the extra to sprinkle over a bowl of
hummus, as a crust for lamb or chicken, or as a topping for a
chocolate sundae.
No te
S’mores Éclairs (recipe)
S’mores Éclairs
M A K E S 1 6 TO 1 8 S M A L L É C L A I R S
16 to 18 Small Éclair Shells (recipe)
1 (10-ounce) bag (about 280 grams) miniature marshmallows
1 (4-ounce) bar (113 grams) bittersweet chocolate, chopped
1 (4-ounce) bar (113 grams) milk chocolate, chopped
1 (4-ounce) bar (113 grams) white chocolate, chopped
Using a serrated knife, cut the éclair shells in half lengthwise. Place
the éclairs on an unlined baking sheet. Scatter the marshmallows on
the top half of each éclair. Scatter the chopped chocolates on the
bottom halves. With a handheld kitchen torch, gently melt the
chocolate (alternatively, microwave the éclair halves with the
chocolate until melted). Then, with the handheld kitchen torch, gently
toast the marshmallows to a light golden brown (alternatively, set the
baking sheet in the broiler to gently toast the marshmallows to a light
golden brown, 1 to 2 minutes). Press the tops and bottoms together
and serve immediately.
If you prefer more highbrow s’mores, make the Bittersweet
Chocolate Mousse (recipe) and the Italian Meringue (recipe) for the
fillings and skip the chopped chocolate and miniature
marshmallows.
No te
Chocolate and Churros
M A K E S A B O U T 1 0 S E RV I N G S
½ cup (120 grams) water
½ cup (120 grams) whole milk
1 tablespoon (13 grams) sugar
6 tablespoons (84 grams) unsalted butter
¼ teaspoon salt
1 cup (128 grams) unbleached all-purpose flour
3 large eggs
2 large egg whites
Nonstick cooking spray
Canola oil, for frying
Spiced Sugar (recipe)
Hot Chocolate Dipping Sauce (recipe)
1
In a medium saucepan, bring the water, milk, sugar, butter, and
salt to a rolling boil. Turn off the heat and add the flour all at
once, while continuing to stir. Turn the heat to medium-low and
cook the dough, stirring constantly, until it forms a ball and
leaves a skin on the base of the pot, 3 to 4 minutes.
2
Transfer the dough to a large bowl. Add the whole eggs, one at a
time, stirring vigorously to combine between each addition.
Scrape down the sides of the bowl with a rubber spatula as
needed between each addition. Add the egg whites and mix the
dough until the eggs are fully combined and the mixture is
smooth. Fill a pastry bag fitted with a star piping tip (such as
Ateco #824) with the dough and refrigerate until ready to use.
3
Line two baking sheets with parchment paper and lightly coat
them with nonstick cooking spray. Pipe the dough in lines, 2 to
2½ inches in length. Place the baking sheets with the dough
strips in the freezer until fully hardened, about 30 minutes, or
until ready to fry.
4
To fry the churros: Heat 2 inches of oil in a heavy pot to 375ºF
on an instant-read thermometer. Place a cooling rack over a
baking sheet.
5
Carefully remove the strips of dough from the parchment paper
and drop into the oil. Continue to add the churros to the oil,
taking care to leave about 1 inch of space between each piece.
Fry the churros until deep golden brown, 3 to 4 minutes on each
side. Using a slotted spoon, carefully remove the churros and set
on the rack. Sprinkle generously with the spiced sugar while still
warm and serve with the dipping sauce. Churros are best
served warm, but they can be made 1 day ahead and stored at
room temperature until ready to serve.
Save the original container the oil was purchased in and, once
cooled to room temperature, pour it back into the container to store
for reuse or disposal. You can reuse oil for frying two or three times
before disposing of it. Simply strain the oil before reusing.
No te
Chocolate and Churros (recipe)
SPICED SUGAR
MAKES ABOUT ½ CUP
½ cup (100 grams) sugar
1 teaspoon ground cinnamon
¼ teaspoon salt
Combine the sugar, cinnamon, and salt together in a small bowl. Set
aside until ready to use.
HOT CHOCOLATE DIPPING SAUCE
M A K E S A B O U T 1 0 S E RV I N G S
½ cup (100 grams) sugar
2 tablespoons (16 grams) cornstarch
¼ teaspoon salt
4 cups (960 grams) whole milk
1⅓ cups (227 grams) bittersweet chocolate, chopped or chips
1
Stir the sugar, cornstarch, and salt together in a small bowl.
2
Bring the milk to a boil in a medium pot. Remove from the heat,
add the chocolate, and whisk until smooth. Add the sugar
mixture and cook over medium-low heat, while whisking
constantly, until the sauce thickens, 10 to 12 minutes. Remove
from the heat and whisk until smooth. Divide the dipping sauce
among small cups and serve warm with the churros.
Chocolate and Sea Salt Seashells (recipe)
Chocolate and Sea Salt Seashells
M A K E S 3 0 TO 3 6 P I EC E S
Cocoa Pâte à Choux Dough (recipe)
1 large egg, lightly beaten
1 tablespoon (10 grams) flaky sea salt, such as Maldon brand
1
Preheat the oven to 350ºF. Line a baking sheet with parchment
paper.
2
Fill a pastry bag fitted with a star piping tip (such as Ateco #866)
with the pâte à choux dough. Pipe the dough into shells about 1
inch wide and 1½ inches long by holding the tip at a 45-degree
angle and squeezing the dough onto the baking sheet. While
continuing to apply pressure, gently lift the tip slightly up and
then gradually relax the pressure as you lower the tip and pull
the bag toward you until the tip reaches the surface of the baking
sheet. Stop the pressure and pull the bag away to make the
dough come to a point. Leave about ½ inch of space between
each shell.
3
Lightly brush each shell with the beaten egg and sprinkle with
the sea salt. Bake for 40 to 45 minutes, until puffed, dry on the
surface, and cooked through in the center. Serve immediately,
while warm.
Don’t skimp on the sea salt. It may seem like a lot, but once
baked, these pastries are deliciously salty and sweet.
No te
Frozen
Strawberry-Buttermilk Sherbet Parfaits •
Peachy Parfaits • Mocha Profiteroles •
Butterscotch Bombs • Vanilla Malt Profiteroles •
Salty Caramel-Almond Profiteroles •
Pumpkin Pie Profiteroles •
Pistachio-Raspberry Swirl Éclairs •
Orange Creamsicle Éclairs • Key Lime Pie Éclairs •
Mint Chocolate Chip Ice Cream Cake •
Banana Split Éclairs • Cookies and Cream Ice
Cream Sandwiches • Honey-Cinnamon Ice Cream
Sandwiches • Chocolate-Coconut Gâteaux SaintHonoré
Peachy Parfaits (recipe) and Strawberry-Buttermilk Sherbet Parfaits (recipe)
Strawberry-Buttermilk Sherbet
Parfaits
M A K E S 8 S E RV I N G S
1 pound (454 grams) ripe strawberries, hulled and quartered
3 tablespoons (42 grams) light brown sugar
¼ teaspoon salt
Strawberry-Buttermilk Sherbet (recipe), or 2 pints store-bought
16 Small Cream Puff Shells (recipe)
1½ cups (360 grams) heavy whipping cream
1
Toss the strawberries with the brown sugar and salt, and let
stand at room temperature to macerate until the juices release
from the fruit and the sugar dissolves, about 10 minutes.
2
Remove the sherbet from the freezer to soften. By hand, tear the
cream puff shells into small pieces.
3
By hand or using a stand mixer fitted with the whisk attachment,
whip the cream until soft peaks form. Refrigerate until ready to
use.
4
Just before serving, assemble the parfaits: In 8 small serving
glasses or dessert bowls, layer a couple teaspoons of the cream
puff shell pieces, a few heaping spoonfuls of sherbet, some
macerated strawberries, and a dollop of whipped cream. Repeat
the layers until the glasses are full. Serve immediately.
Because the pâte à choux in this recipe is torn into small
pieces, it doesn’t matter how expertly the shells are piped, making
No te
this a great beginner recipe for practicing your piping skills.
STRAWBERRY-BUTTERMILK
SHERBET
M A K E S A B O U T 1 Q UA RT
⅔ pound (300 grams) ripe strawberries, hulled and quartered
2 cups (490 grams) buttermilk
1¼ cups (250 grams) sugar
¼ cup (80 grams) light corn syrup
Juice of ½ lemon
¼ teaspoon salt
1
Combine all the ingredients in a blender and puree until
liquefied. Strain the mixture through a fine-mesh sieve and
refrigerate until cold, about 2 hours.
2
Freeze the mixture in an ice cream machine according to the
manufacturer’s instructions until the sherbet has a smooth,
creamy texture. Store in the freezer for 4 hours before serving,
or up to 4 weeks.
If you have any leftover empty cream puff or éclair shells from
recipes you’ve already made, don’t throw them away. Pop them in a
resealable plastic bag and freeze them until you are ready to make
parfaits.
No te
Peachy Parfaits
M A K E S 8 S E RV I N G S
Nonstick cooking spray
8 ripe peaches, pitted and sliced
2 tablespoons (40 grams) honey
¼ teaspoon salt
¼ teaspoon ground cinnamon
Peach Sorbet (recipe), or 2 pints store-bought
16 Small Cream Puff Shells (recipe)
1½ cups (360 grams) heavy whipping cream
1
Preheat the oven to 450ºF. Line a baking sheet with aluminum foil
and lightly coat with nonstick cooking spray.
2
In a bowl, toss the peaches, honey, salt, and cinnamon together.
Spread the fruit into a single layer on the baking sheet and roast
until the fruit just begins to brown on the edges, about 25
minutes. Let cool to room temperature.
3
Remove the sorbet from the freezer to soften. Tear the cream
puff shells into small pieces.
4
By hand or using a stand mixer fitted with the whisk attachment,
whip the cream until soft peaks form. Refrigerate until ready to
use.
5
Just before serving, assemble the parfaits: In 8 small serving
glasses or dessert bowls, layer a couple teaspoons of cream puff
shell pieces, a few heaping spoonfuls of sorbet, some peach
slices, and a dollop of whipped cream. Repeat until the glasses
are full. Serve immediately.
The best way to roast fruit is with very high heat. As it cooks,
you will smell their sugars burning and they may possibly create
smoke—this is okay and will make for delicious flavor.
No te
PEACH SORBET
M A K E S A B O U T 1 Q UA RT
10 very ripe peaches
1¼ cups (300 grams) sweet white wine, such as Sauternes
1¼ cups (250 grams) sugar
½ cup (120 grams) water
¼ teaspoon salt
Seeds from 1 vanilla bean
1
Pit and cut the peaches in half, keeping the skins on.
2
In a large saucepot, bring all of the ingredients to a full boil.
Reduce the heat to medium and simmer until the fruit is soft and
just beginning to break down, about 15 minutes. Remove from
the heat, transfer the mixture to a heatproof bowl, and place over
a large bowl of ice water. Stir occasionally until the peach
mixture is cooled to room temperature.
3
Transfer the mixture to a blender and puree until completely
smooth. Strain the mixture through a fine-mesh sieve into a
container and refrigerate the sorbet base overnight.
4
Freeze the sorbet base in an ice cream machine according to
the manufacturer’s instructions until the sorbet has a smooth,
creamy texture. Store in the freezer for 4 hours before serving,
or up to 4 weeks.
Mocha Profiteroles
M A K E S 7 O R 8 S E RV I N G S
2 pints coffee ice cream (see Note, page 59, or store-bought)
14 or 16 Large Cocoa Cream Puff Shells (recipe)
Chocolate Sauce (recipe)
Chocolate-covered espresso beans, finely chopped, for decorating (optional)
1
Remove the ice cream from the freezer to soften. With a serrated
knife, slice the cream puff shells in half horizontally, setting the
tops next to their corresponding bottoms.
2
Using an ice cream scoop dipped into warm water, place a
scoop of ice cream on the bottom of each cream puff, then set
the top of each cream puff on the ice cream. Place the
assembled profiteroles on a baking sheet and transfer to the
freezer to set, about 20 minutes.
3
To serve: Set two profiteroles on a serving dish, drizzle with the
chocolate sauce, and garnish with a pinch of chocolate-covered
espresso beans, if desired.
Profiteroles can be assembled and frozen up to 3 days in
advance of serving. Lightly cover them with plastic wrap or store
them in an airtight container, then drizzle them with sauce and
garnish with the espresso beans just before serving.
No te
Pumpkin Pie Profiteroles (recipe), Salty Caramel-Almond Profiteroles (recipe), Butterscotch
Bombs (recipe), and Mocha Profiteroles (recipe)
Butterscotch Bombs
M A K E S 7 O R 8 S E RV I N G S
Butterscotch Ice Cream (recipe), or 2 pints store-bought
14 or 16 Large Cream Puff Shells (recipe)
Butterscotch Sauce (recipe)
Butterscotch candies, finely chopped, for decoration (optional)
1
Remove the ice cream from the freezer to soften. With a serrated
knife, slice the cream puff shells in half horizontally, setting the
tops next to their corresponding bottoms.
2
Using a small ice cream scoop dipped into warm water, place a
scoop of ice cream on the bottom of each cream puff, then set
the top of each cream puff on the ice cream. Place the
assembled profiteroles on a baking sheet and transfer to the
freezer to set, about 20 minutes.
3
To serve: Set two profiteroles on a serving dish, drizzle with the
butterscotch sauce, and garnish with a pinch of the butterscotch
candies, if desired. Serve immediately.
Profiteroles can be assembled and frozen up to 3 days in
advance of serving. Lightly cover them with plastic wrap or store
them in an airtight container, then drizzle them with sauce and
garnish with the butterscotch candies just before serving.
No te
BUTTERSCOTCH ICE CREAM
M A K E S A B O U T 1 Q UA RT
1 tablespoon (8 grams) cornstarch
½ teaspoon xanthan gum
¼ teaspoon salt
2 cups (480 grams) whole milk
1½ cups (360 grams) heavy whipping cream
¾ cup (168 grams) firmly packed dark brown sugar
2 tablespoons (28 grams) unsalted butter
2 tablespoons (30 grams) Scotch or bourbon
1 tablespoon (15 grams) vanilla extract
1
In a medium bowl, whisk the cornstarch, xanthan gum, and salt
until well combined. Add the milk and cream and whisk until
well combined.
2
In a medium pot, cook the brown sugar and butter over
medium-high heat until the mixture is bubbly, 3 to 4 minutes.
Add the milk mixture, reduce the heat to low, and bring to a
simmer. Cook, whisking occasionally, until thickened, 8 to 10
minutes. Strain the mixture through a fine-mesh sieve into a large
metal bowl. Add the Scotch and vanilla. Place the bowl of ice
cream base over another bowl of ice water and stir until the
base is cooled to room temperature. Refrigerate until cold, about
2 hours.
3
Freeze the ice cream base in an ice cream machine according to
the manufacturer’s instructions until the ice cream has a smooth,
soft-serve texture. Store in the freezer for 4 hours to set before
serving, or up to 4 weeks.
If you choose to use store-bought ice cream, butterscotch
might not be the easiest flavor to find. Either caramel or butter
pecan would be a fine substitute.
No te
BUTTERSCOTCH SAUCE
MAKES ABOUT 1 CUP
4 tablespoons (56 grams) unsalted butter
½ cup (120 grams) heavy whipping cream
½ cup (112 grams) firmly packed dark brown sugar
¾ teaspoon salt
2 tablespoons (30 grams) Scotch or bourbon
1 tablespoon (15 grams) vanilla extract
In a small saucepan, melt the butter. Add the cream, brown sugar, and
salt and bring to a boil. Reduce the heat and let simmer until
thickened, stirring occasionally, about 10 minutes. Remove from the
heat, add the Scotch and vanilla, and let cool to room temperature.
Cover and refrigerate until ready to use, up to 1 week. Serve warm or
chilled.
Vanilla Malt Profiteroles
M A K E S 7 O R 8 S E RV I N G S
Vanilla Bean Ice Cream (recipe), or 2 pints store-bought
14 or 16 Large Cream Puff Shells (recipe)
Malted White Chocolate Sauce (recipe)
Malted milk balls, finely chopped, for topping (optional)
1
Remove the ice cream from the freezer to soften. Using a
serrated knife, slice the cream puff shells in half horizontally,
setting the tops next to their corresponding bottoms.
2
Using a small ice cream scoop dipped into warm water, place a
scoop of ice cream on the bottom of each cream puff, then set
the top of each cream puff on the ice cream. Place the
assembled profiteroles on a baking sheet and transfer to the
freezer to set, about 20 minutes.
3
To serve: Set two profiteroles on a serving dish, drizzle with the
white chocolate sauce, and garnish with a pinch of chopped
malted milk balls, if desired. Serve immediately.
If you’re more of a chocolate malt fan, fill the profiteroles with
chocolate ice cream.
No te
Profiteroles can be assembled and frozen up to 3 days in
advance of serving. Lightly cover them with plastic wrap or store
them in an airtight container, then drizzle them with sauce and
garnish with the malted milk balls just before serving.
No te
MALTED WHITE CHOCOLATE
SAUCE
MAKES ABOUT 1 CUP
⅔ cup (113 grams) white chocolate, chopped or chips
¼ cup plus 2 tablespoons (90 grams) heavy whipping cream
3 tablespoons (45 grams) barley malt syrup
2 tablespoons (18 grams) malted milk powder
¼ teaspoon salt
1
Place the white chocolate in a medium bowl.
2
In a small saucepan, bring the cream, barley malt syrup, malted
milk powder, and salt to a boil. Remove from the heat and pour
over the white chocolate. Let the mixture stand for 2 minutes to
soften the chocolate, then whisk until smooth. Serve warm.
Barley malt syrup is a dark brown and very sticky sweetener
made from sprouted barley. It looks a lot like molasses, but has a
distinctly “malty” flavor. Jars of it can be found alongside the honey
and maple syrup in most natural or gourmet food stores.
No te
Salty Caramel-Almond
Profiteroles
M A K E S 7 O R 8 S E RV I N G S
Salty Caramel-Almond Ice Cream (recipe), or 2 pints store-bought
14 or 16 Large Cream Puff Shells (recipe)
Caramel Sauce (recipe)
Roasted almonds, finely chopped, for garnish
1
Remove the ice cream from the freezer to soften. Using a
serrated knife, slice the cream puff shells in half horizontally,
setting the tops next to their corresponding bottoms.
2
Using a small ice cream scoop dipped into warm water, place a
scoop of ice cream on the bottom of each cream puff, then set
the top of each cream puff on the ice cream. Place the
assembled profiteroles on a baking sheet and transfer to the
freezer to set, about 20 minutes.
3
To serve: Set two profiteroles on a serving dish, drizzle with the
caramel sauce, and garnish with a pinch of chopped almonds.
Serve immediately.
Profiteroles can be assembled and frozen up to 3 days in
advance of serving. Lightly cover them with plastic wrap or store
them in an airtight container, then drizzle them with sauce and
garnish with the almonds just before serving.
No te
SALTY CARAMEL-ALMOND ICE
CREAM
M A K E S A B O U T 1 Q UA RT
1 tablespoon (8 grams) cornstarch
¾ teaspoon salt
½ teaspoon xanthan gum
¾ cup (150 grams) sugar
2 tablespoons (30 grams) water
1 tablespoon (20 grams) light corn syrup
2 cups (480 grams) whole milk
1½ cups (360 grams) heavy whipping cream
¾ cup (105 grams) roasted almonds, roughly chopped
1
In a small bowl, whisk the cornstarch, salt, and xanthan gum until
well combined.
2
In a medium pot, bring the sugar, water, and corn syrup to a
boil. Cook until the mixture reaches 380ºF on an instant-read
thermometer. The caramel will be very dark in color and begin
to smoke slightly. Immediately remove from the heat and very
slowly add the milk and cream. If the caramel seizes, continue to
whisk until it dissolves. Slowly sprinkle the cornstarch mixture
over the surface of the caramel mixture, while whisking
constantly, until fully dissolved. Return to the stove, bring to a
simmer, and cook, whisking occasionally, for 8 to 10 minutes,
until thickened. Strain the mixture through a fine-mesh sieve into
a large metal bowl. Place the bowl of ice cream base over
another bowl of ice water and stir until the base is cooled to
room temperature. Refrigerate until cold, about 2 hours.
3
Freeze the ice cream base in an ice cream machine according to
the manufacturer’s instructions until the ice cream has a smooth,
soft-serve texture. Quickly add the chopped almonds and fold
until evenly dispersed in the ice cream. Store in the freezer for 4
hours to set before serving, or up to 4 weeks.
If you would prefer to use store-bought ice cream, it may not
be easy to find salted caramel and almond ice cream, but you can
certainly find caramel ice cream easily enough in your local grocery
store. To make your store-bought caramel ice cream perfect for this
recipe, let it soften just a bit and then fold chopped almonds and sea
salt into the ice cream. Pack it back in the ice cream containers and
freeze until it hardens again.
No te
CARAMEL SAUCE
MAKES ABOUT 1 CUP
½ cup (100 grams) sugar
2 tablespoons (30 grams) water
1 tablespoon (20 grams) light corn syrup
¼ teaspoon salt
½ cup (120 grams) heavy whipping cream
In a small saucepan, bring the sugar, water, corn syrup, and salt to a
boil. Cook until the mixture reaches 380ºF on an instant-read
thermometer. The caramel will be very dark in color and begin to
smoke slightly. Immediately remove from the heat, and very slowly
add the cream, whisking until smooth. If the caramel seizes, continue
to whisk until it dissolves. Transfer the mixture to a heatproof bowl and
let stand at room temperature until ready to use, up to 2 hours.
Be careful of steam and bubbling that may occur when you add
the cream to the hot caramel.
No te
Pumpkin Pie Profiteroles
M A K E S 7 O R 8 S E RV I N G S
Pumpkin Pie Ice Cream (recipe), or 2 pints store-bought
14 or 16 Large Cream Puff Shells (recipe)
Confectioners’ sugar, for dusting
1
Remove the ice cream from the freezer to soften. With a serrated
knife, slice the cream puff shells in half horizontally, setting the
tops next to their corresponding bottoms.
2
Using an ice cream scoop dipped into warm water, place a
scoop of ice cream on the bottom of each cream puff, then set
the top of each cream puff on the ice cream. Place the
assembled profiteroles on a baking sheet and transfer to the
freezer to set, about 20 minutes.
3
To serve: Set two profiteroles on a serving dish and dust with
confectioners’ sugar. Serve immediately.
Profiteroles can be assembled and frozen up to 3 days in
advance of serving. Lightly cover them with plastic wrap or store
them in an airtight container, then dust with confectioners’ sugar just
before serving.
No te
PUMPKIN PIE ICE CREAM
M A K E S A B O U T 1 Q UA RT
1 tablespoon (8 grams) cornstarch
½ teaspoon xanthan gum
½ teaspoon ground cinnamon
¼ teaspoon salt
¼ teaspoon ground ginger
¼ teaspoon ground nutmeg
2 cups (480 grams) whole milk
1½ cups (360 grams) heavy whipping cream
1 cup (315 grams) maple syrup, preferably Grade A Dark Robust
1 cup (250 grams) pumpkin puree
1
In a medium bowl, whisk the cornstarch, xanthan gum,
cinnamon, salt, ginger, and nutmeg until well combined. Add the
milk and cream and whisk until well combined.
2
In a medium pot, bring the maple syrup to a simmer and cook
until reduced by half, about 10 minutes. Add the milk-spice
mixture and bring to a simmer. Cook, whisking occasionally, for
8 to 10 minutes, until thickened. Remove from the heat and add
the pumpkin puree. Strain the mixture through a fine-mesh sieve
into a large metal bowl. Place the bowl of ice cream base over
another bowl of ice water and stir until the base is cooled to
room temperature. Refrigerate until cold, about 2 hours.
3
Freeze the ice cream base in an ice cream machine according to
the manufacturer’s instructions until the ice cream has a smooth,
soft-serve texture. Store in the freezer for 4 hours to set before
serving, or up to 4 weeks.
You can use homemade roasted pumpkin puree or canned
pumpkin puree. Be sure to purchase plain pumpkin puree and not
canned pumpkin pie filling, which is already seasoned.
No te
Pistachio-Raspberry Swirl Éclairs
M A K E S 1 0 TO 1 2 L A RG E É C L A I R S
10 to 12 Large Éclair Shells (recipe)
White Glaze (recipe), tinted pink
Pistachios, finely chopped, for decorating (optional)
Freeze-dried raspberries, finely chopped, for decorating (optional)
Pistachio-Raspberry Swirl Ice Cream (recipe), or 2 pints store-bought pistachio ice
cream (see Note, page 183)
1
Using a serrated knife, cut the éclair shells in half lengthwise and
set the tops and bottoms next to each other on a baking sheet.
Dip the top of each éclair into the glaze, allowing the excess to
drip away from the éclair before inverting. Sprinkle the tops
generously with pistachios and freeze-dried raspberries, if
desired. Place the tops back on the baking sheet and set aside
in the freezer until the glaze has fully set and hardened, about 5
minutes. As you are dipping the éclairs, adjust the thickness of
the glaze as needed (see page 25). Meanwhile, remove the ice
cream from the freezer to soften.
2
Remove the éclair shells from the freezer. Using a small ice
cream scoop dipped into warm water, place a row of ice cream
scoops on the bottom of each éclair shell. Set the top of each
éclair on the ice cream. Transfer to the freezer to set, about 20
minutes, or until ready to serve.
If you can’t find freeze-dried raspberries, you can garnish the
éclairs with homemade dried raspberries. Just scatter fresh
raspberries on a baking sheet and bake at 100ºF for up to 10 hours,
No te
until completely dry and brittle. Let cool and then store in an airtight
container until ready to use.
Pistachio-Raspberry Swirl Éclairs (recipe)
PISTACHIO-RASPBERRY SWIRL ICE
CREAM
M A K E S A B O U T 1 Q UA RT
½ cup (100 grams) sugar
1 tablespoon (8 grams) cornstarch
½ teaspoon xanthan gum
¼ teaspoon salt
3 cups (720 grams) whole milk
1 cup (240 grams) heavy whipping cream
½ cup (150 grams) pistachio paste or pistachio butter
¾ cup (about 225 grams) seedless raspberry jam
1
In a medium pot, whisk the sugar, cornstarch, xanthan gum, and
salt until well combined. Add the milk and cream and bring to a
simmer. Cook, whisking occasionally, until thickened, 8 to 10
minutes. Remove from the heat, add the pistachio paste, and
whisk until smooth. Strain the mixture through a fine-mesh sieve
into a large metal bowl. Place the bowl of ice cream base over
another bowl of ice water and stir until the base is cooled to
room temperature. Refrigerate until cold, about 2 hours.
2
Freeze the ice cream base in an ice cream machine according to
the manufacturer’s instructions until the ice cream has a smooth,
soft-serve texture. Gently fold the raspberry jam into the ice
cream to swirl. Store in the freezer for 4 hours to set before
serving, or up to 4 weeks.
For a really quick version of this ice cream, let 2 pints of storebought pistachio ice cream soften a bit and then fold the raspberry
No te
jam into the ice cream to swirl. Pack it back in the ice cream
containers and freeze until it hardens again.
Orange Creamsicle Éclairs
M A K E S 1 0 TO 1 2 L A RG E É C L A I R S
Vanilla Bean Ice Cream (recipe), or 2 pints store-bought
2 pints orange sherbet
10 to 12 Large Éclair Shells (recipe)
Kumquats, thinly sliced, for decorating (optional)
1
Remove the ice cream and sherbet from the freezer to soften.
Using a serrated knife, cut off and discard the top one-third of
the éclair shells.
2
Using a small ice cream scoop dipped into warm water, place a
row of ice cream scoops on the bottom of each éclair shell,
alternating between scoops of vanilla ice cream and orange
sherbet. Garnish with kumquat slices, if desired. Place the
assembled éclairs on a baking sheet and transfer to the freezer
to set, about 20 minutes or until ready to serve.
Orange Creamsicle Éclairs (recipe) and Key Lime Pie Éclairs (recipe)
Key Lime Pie Éclairs
M A K E S 1 0 TO 1 2 L A RG E É C L A I R S
Key Lime Ice Cream (recipe), or 2 pints store-bought
10 to 12 Large Éclair Shells (recipe)
2 full-size graham crackers
1 cup (240 grams) heavy whipping cream
1
Remove the ice cream from the freezer to soften. Using a
serrated knife, cut the éclair shells in half lengthwise and discard
the tops. Break the graham crackers into small pieces.
2
Using a small ice cream scoop dipped into warm water, place a
row of ice cream scoops on the bottom of each éclair shell. Place
the assembled éclairs on a baking sheet and transfer to the
freezer to set, about 20 minutes.
3
By hand or using a stand mixer fitted with the whisk attachment,
whip the cream until stiff peaks form. Transfer the whipped
cream to a pastry bag fitted with a star piping tip (such as Ateco
#824). Set aside in the refrigerator until ready to use, up to 2
hours.
4
To serve: Pipe a small rosette on top of each scoop of ice cream.
Garnish each rosette with a small piece of graham cracker and
serve immediately.
Don’t feel like making Key lime ice cream? That’s OK! Just fold
freshly grated lime zest into softened vanilla ice cream to taste. Pack
the ice cream back in the containers and freeze until it hardens
again.
No te
KEY LIME ICE CREAM
M A K E S A B O U T 1 Q UA RT
¾ cup (150 grams) sugar
1 tablespoon (8 grams) cornstarch
½ teaspoon xanthan gum
¼ teaspoon salt
1½ cups (360 grams) heavy whipping cream
1 cup (240 grams) whole milk
Finely grated zest of 4 limes
1 cup (240 grams) Key lime juice
1
In a medium pot, whisk the sugar, cornstarch, xanthan gum, and
salt until well combined. Add the cream, milk, half of the lime
zest, and the lime juice and bring to a simmer. Cook, whisking
occasionally, until thickened, 8 to 10 minutes. Strain the mixture
through a fine-mesh sieve into a large metal bowl. Add the
remaining lime zest. Place the bowl of ice cream base over
another bowl of ice water and stir until the base is cooled to
room temperature. Refrigerate until cold, about 2 hours.
2
Freeze the ice cream base in an ice cream machine according to
the manufacturer’s instructions until the ice cream has a smooth,
soft-serve texture. Store in the freezer for 4 hours to set before
serving, or up to 4 weeks.
Mint Chocolate Chip Ice Cream Cake (recipe)
Mint Chocolate Chip Ice Cream
Cake
M A K E S O N E 8 - I N C H RO U N D CA K E
3 recipes Cocoa Pâte à Choux Dough (recipe)
2 quarts (2 recipes) Mint Chocolate Chip Ice Cream (recipe), or 2 quarts storebought
Italian Meringue (recipe)
1
Preheat the oven to 350ºF. Line four baking sheets with
parchment paper. (If you don’t have four baking sheets, the
remaining dough can stand at room temperature while you bake
in batches.)
2
Fill a pastry bag fitted with a round piping tip (such as Ateco
#806) with the pâte à choux dough and pipe 4 disks, one on
each baking sheet, about 8 inches in diameter and ⅜ inch thick.
Lightly moisten a fingertip with cold water and gently smooth
any peaks or points created when piping. Bake 2 disks for 35 to
40 minutes, until cooked through in the center. Let cool on the
baking sheets to room temperature, and bake the remaining
disks. Set the base of an 8-inch springform pan on top of each
disk to use as a guide and trim the disks to a perfect 8-inch
circle.
3
Remove the ice cream from the freezer to soften. Re-assemble
the springform pan and have ready a second 8-inch springform
pan.
4
Press one of the pâte à choux rings into the bottom of a
springform pan. Top with heaping spoonfuls of ice cream to
make a 1-inch-thick layer, and smooth with an offset spatula to
remove any air pockets. Top with a second disk of pâte à choux
and press it firmly onto the ice cream. Top with more ice cream
to fill to the top of the springform pan, and smooth with an offset
spatula. Repeat with the remaining 2 disks and the remaining ice
cream in the second springform pan to make a second ice
cream cake. Cover the top of the cakes with plastic wrap and
freeze for at least 6 hours or up to overnight to firmly set.
5
Remove the cakes from the freezer, unwrap, and discard the
plastic wrap. Use a handheld kitchen torch to lightly warm the
sides of the pans, or let the cakes stand at room temperature
until the ice cream just begins to soften, and then remove the
outer ring of each springform pan. Remove the springform
bottoms from the bottom of the cakes and stack the cakes on top
of one another. Place the cake on a large serving platter and
return the cake to the freezer to set, about 45 minutes.
6
Mound the meringue onto the top of the cake and, using a large
offset spatula, ice the top and sides of the cake with a thick, even
layer of meringue. Apply a bit of pressure to the tip of the spatula
as you are frosting to create a swirled texture. Serve
immediately, or freeze until ready to serve, up to 1 week.
Be sure to cut the ice cream cake with a serrated knife, dipped
into warm water, just before serving. The cake will slice much more
easily.
No te
This recipe works best using two 8-inch springform pans.
However, if you only have one, you can still make it: Either spread
the ice cream a little thinner in order to fit all four layers in one pan;
or make the cake in two batches, freezing the first half entirely and
transferring it to the serving platter before assembling and freezing
the second half using the same pan.
No te
MINT CHOCOLATE CHIP ICE
CREAM
M A K E S A B O U T 1 Q UA RT
½ cup (100 grams) sugar
1 tablespoon (8 grams) cornstarch
½ teaspoon xanthan gum
¼ teaspoon salt
2 cups (480 grams) whole milk
1½ cups (360 grams) heavy whipping cream
1 cup (30 grams) fresh mint leaves, stems removed
Green gel paste food coloring (optional)
½ cup (85 grams) chopped semisweet chocolate
1
In a medium pot, whisk the sugar, cornstarch, xanthan gum, and
salt until well combined. Add the milk, cream, and mint leaves
and bring to a simmer. Cook, whisking occasionally, until
thickened, 8 to 10 minutes. Strain the mixture through a finemesh sieve into a large metal bowl. Place the bowl of ice cream
base over another bowl of ice water and stir until the base is
cooled to room temperature. Add food coloring if desired, one
drop at a time, and stir until the ice cream base reaches the
desired color. Refrigerate until cold, about 2 hours.
2
Freeze the ice cream base in an ice cream machine according to
the manufacturer’s instructions until the ice cream has a smooth,
soft-serve texture. Quickly add the chopped chocolate and fold
until evenly dispersed in the ice cream. Store in the freezer for 4
hours to set before serving, or up to 4 weeks.
ITALIAN MERINGUE
MAKES ABOUT 4 CUPS
4 large egg whites
1⅓ cups (267 grams) sugar
½ cup (120 grams) water
1 tablespoon (20 grams) honey
¼ teaspoon salt
1
In the bowl of a stand mixer fitted with the whisk attachment,
whip the egg whites on low speed.
2
Meanwhile, combine the sugar, water, honey, and salt in a small
saucepan and cook over medium heat until the mixture reaches
238ºF on an instant-read thermometer, about 12 minutes.
3
Immediately remove from the heat, raise the mixer speed to
medium-high, and very slowly pour the hot sugar mixture over
the egg whites, taking care not to pour the hot mixture onto the
moving whisk.
4
Raise the mixer speed to high and whip until tripled in volume,
thick, glossy, and cooled to room temperature, about 10 minutes.
Refrigerate until ready to use, up to 4 hours (or freeze in an
airtight container for up to 1 week).
Banana Split Éclairs
M A K E S 1 0 TO 1 2 L A RG E É C L A I R S
Banana Ice Cream (recipe), or 2 pints store-bought
10 to 12 Large Éclair Shells (recipe)
1 cup (240 grams) heavy whipping cream
Chocolate Sauce (recipe)
10 to 12 maraschino cherries
Multicolored sprinkles, for decorating (optional)
1
Remove the ice cream from the freezer to soften. Using a
serrated knife, cut the éclair shells in half lengthwise, placing the
tops next to their corresponding bottoms.
2
Using a small ice cream scoop dipped into warm water, place a
row of ice cream scoops on the bottom of each éclair shell, then
set the top of each éclair on the ice cream. Place the assembled
éclairs on a baking sheet and transfer to the freezer to set, about
20 minutes.
3
By hand or using a stand mixer fitted with the whisk attachment,
whip the cream until stiff peaks form. Set aside in the refrigerator
until ready to use.
4
To serve: Transfer the whipped cream to a pastry bag fitted with
a star piping tip (such as Ateco #824). Drizzle each éclair with
the chocolate sauce, pipe a small rosette of whipped cream on
top, and place a cherry in the center of the rosette. Garnish with
sprinkles, if desired, and serve immediately.
Banana Split Éclairs (recipe)
BANANA ICE CREAM
M A K E S A B O U T 1 Q UA RT
½ cup (100 grams) sugar
1 tablespoon (8 grams) cornstarch
½ teaspoon xanthan gum
¼ teaspoon salt
2 cups (480 grams) whole milk
1½ cups (360 grams) heavy whipping cream
4 (about 400 grams) very ripe bananas, chopped
1
In a medium pot, whisk the sugar, cornstarch, xanthan gum, and
salt until well combined. Add the milk and cream and bring to a
simmer. Cook, whisking occasionally, until thickened, 8 to 10
minutes. Strain the mixture through a fine-mesh sieve. Transfer
the mixture to a blender. Add the bananas and puree until
smooth. Pour the ice cream base into a large metal bowl. Place
the bowl of ice cream base over another bowl of ice water and
stir until the base is cooled to room temperature. Refrigerate
until cold, about 2 hours.
2
Freeze the ice cream base in an ice cream machine according to
the manufacturer’s instructions until the ice cream has a smooth,
soft-serve texture. Store in the freezer for 4 hours to set before
serving, or up to 4 weeks.
If you really want to go bananas, try tossing the bananas with a
little sugar and then roasting them before using them in the ice
cream. It will give the ice cream an even richer banana flavor.
No te
Cookies and Cream Ice Cream
Sandwiches
M A K E S 8 TO 1 0 I C E C R E A M S A N DW I C H E S
Nonstick cooking spray
Cocoa Pâte à Choux Dough (recipe)
Cookies and Cream Ice Cream (recipe), or 2 pints store-bought
1
Preheat a pizzelle iron according to the manufacturer’s
instructions.
2
Lightly coat the iron with nonstick cooking spray and spoon
about 1½ tablespoons of the pâte à choux dough onto the center
of the pizzelle press. Cook the pizzelles until the steam from the
dough stops escaping from the sides of the press, about 1½
minutes. Repeat with the remainder of the dough. Set aside 16 to
20 of the nicest-looking pizzelles. In the bowl of a food
processor, grind the remaining 4 to 8 pizzelles into crumbs and
reserve for making the Cookies and Cream Ice Cream (recipe).
3
Remove the ice cream from freezer to soften.
4
Using an ice cream scoop dipped into warm water, place a
scoop of ice cream on half of the pizzelles. Set a second pizzelle
on top of the ice cream and gently press to sandwich. Using a
small offset spatula, smooth the sides of the ice cream, if
needed. Place the assembled ice cream sandwiches on a
baking sheet and transfer to the freezer to set before serving,
about 30 minutes.
Don’t forget to save the extra pizzelles to be used in the
Cookies and Cream Ice Cream recipe.
No te
Cookies and Cream Ice Cream Sandwiches (recipe) and Honey-Cinnamon Ice Cream
Sandwiches (recipe)
COOKIES AND CREAM ICE CREAM
M A K E S A B O U T 1 Q UA RT
½ cup (100 grams) sugar
1 tablespoon (8 grams) cornstarch
½ teaspoon xanthan gum
¼ teaspoon salt
2 cups (480 grams) whole milk
1½ cups (360 grams) heavy whipping cream
Cocoa Pâte à Choux pizzelle crumbs, reserved from recipe (from 4 to 8 cookies)
1
In a medium pot, whisk the sugar, cornstarch, xanthan gum, and
salt until well combined. Add the milk and cream and bring to a
simmer. Cook, whisking occasionally, until thickened, 8 to 10
minutes. Strain the mixture through a fine-mesh sieve into a large
metal bowl. Place the bowl of ice cream base over another bowl
of ice water and stir until the base is cooled to room
temperature. Refrigerate until cold, about 2 hours.
2
Freeze the ice cream base in an ice cream machine according to
the manufacturer’s instructions until the ice cream has a smooth,
soft-serve texture. Gently fold the pizzelle crumbs into the ice
cream. Store in the freezer for 4 hours to set before serving, or
up to 4 weeks.
Honey-Cinnamon Ice Cream
Sandwiches
M A K E S 8 TO 1 0 I C E C R E A M S A N DW I C H E S
Honey-Cinnamon Ice Cream (recipe), or 2 pints store-bought
16 to 20 Pâte à Choux Pizzelles (recipe)
1
Remove the ice cream from the freezer to soften.
2
Using an ice cream scoop dipped into warm water, place a
scoop of ice cream on half of the pizzelles. Set a second pizzelle
on top of the ice cream and gently press to sandwich. Using a
small offset spatula, smooth the sides of the ice cream, if
needed. Place the assembled ice cream sandwiches on a
baking sheet and transfer to the freezer to set before serving,
about 30 minutes.
Save any extra pizzelles for snacking, or use them as crackers
for a cheese board as suggested in the Note on page 280.
No te
HONEY-CINNAMON ICE CREAM
M A K E S A B O U T 1 Q UA RT
1 tablespoon (8 grams) cornstarch
½ teaspoon xanthan gum
½ teaspoon ground cinnamon
¼ teaspoon salt
2 cups (480 grams) whole milk
1½ cups (360 grams) heavy whipping cream
¾ cup (240 grams) honey
1
In a medium pot, whisk the cornstarch, xanthan gum, cinnamon,
and salt until well combined. Add the milk, cream, and honey
and bring to a simmer. Cook, whisking occasionally, until
thickened, 8 to 10 minutes. Strain the mixture through a finemesh sieve into a large metal bowl. Place the bowl of ice cream
base over another bowl of ice water and stir until the base is
cooled to room temperature. Refrigerate until cold, about 2
hours.
2
Freeze the ice cream base in an ice cream machine according to
the manufacturer’s instructions until the ice cream has a smooth,
soft-serve texture. Store in the freezer for 4 hours to set before
serving, or up to 4 weeks.
Chocolate-Coconut Gâteaux
Saint-Honoré
M A K E S 9 I N D I V I D UA L G Â T E AUX
Bread flour, for rolling
1 sheet (about 8 ounces) frozen puff pastry dough, thawed
Coconut Sherbet (recipe), or 2 pints store-bought
36 Small Cream Puff Shells (recipe)
Chocolate Glaze (recipe)
Coconut Whipped Cream (recipe)
1
Preheat the oven to 375ºF. Line a baking sheet with parchment
paper.
2
On a lightly floured surface, roll the sheet of puff pastry dough to
⅛ inch thick. Using a 3½-inch round cookie cutter, cut 9 circles
from the dough, and place them on the baking sheet. Prick
several small holes over the entire surface of the dough circles
with a fork, to prevent the dough from rising too much. Transfer
the dough to the freezer to harden, about 15 minutes.
3
Remove the dough from the freezer and cover with a sheet of
parchment paper and another flat baking sheet, to prevent the
puff pastry from rising too much as it bakes. Bake the pastry for
about 30 minutes. Remove the top baking sheet and top layer of
parchment paper and continue to bake the puff pastry for about
5 more minutes, until crisp and deep golden brown. Let cool on
the baking sheet to room temperature.
4
Remove the sherbet from the freezer to soften.
5
To assemble the gâteaux: Slice the cream puff shells in half
horizontally, setting the tops next to their corresponding
bottoms.
6
Using an ice cream scoop dipped into warm water, place a
scoop of sherbet on the bottom of each cream puff, then set the
top of each cream puff on the sherbet. Place the assembled
puffs on a baking sheet and transfer to the freezer to set, about
20 minutes. Remove from the freezer and drizzle each puff with
the chocolate glaze. Return to the freezer until ready to use.
7
Working with one gâteau at a time, generously spread about a
tablespoon of glaze on the surface of a disk of puff pastry.
Arrange three sherbet-filled puffs in a circle on the puff pastry,
using the glaze to secure them. (You will still have 9 cream puffs
remaining.) Place the assembled gâteaux on a baking sheet and
transfer to the freezer to set, about 20 minutes, or until ready to
serve, up to 4 days.
8
Just before serving, fill a pastry bag fitted with a star piping tip
(such as Ateco #826) with the whipped cream. Remove the
assembled gâteaux from the freezer and pipe 3 stripes of
whipped cream between the cream puffs. Pipe a small rosette of
cream on top of each gâteau, then place one of the remaining
cream puffs on top of each rosette. Serve immediately.
Making all of the components from scratch for this recipe is an
all-day affair, enough to make even the most seasoned baker go,
well, coconuts. I suggest dividing the labor over a few days, or
purchasing a good-quality coconut sherbet or sorbet to save a bit of
time.
No te
Chocolate-Coconut Gâteaux Saint-Honoré (recipe)
COCONUT SHERBET
M A K E S A B O U T 1 Q UA RT
2¼ cups (540 grams) whole milk
1½ cups (375 grams) canned coconut milk
1½ cups (120 grams) unsweetened shredded coconut
1½ cups (300 grams) sugar
¾ cup (200 grams) canned cream of coconut, such as Coco Lopez
1 tablespoon (15 grams) vanilla extract
¼ teaspoon salt
1
Combine all the ingredients in a large pot and bring to a boil.
Reduce the heat to a simmer and cook, stirring occasionally, for
about 10 minutes. Remove from the heat and let cool until warm
enough to handle. Strain the mixture through a fine-mesh sieve
into a large metal bowl. Place the bowl of warm sherbet base
over another bowl of ice water and stir until the base is cooled to
room temperature. Refrigerate until cold, about 2 hours.
2
Freeze the sherbet base in an ice cream machine according to
the manufacturer’s instructions until it has a smooth, creamy
texture. Store in the freezer overnight to set before serving, or
up to 4 weeks.
COCONUT WHIPPED CREAM
MAKES ABOUT 3 CUPS
1½ cups (360 grams) heavy whipping cream
3 tablespoons (21 grams) confectioners’ sugar, sifted
1 teaspoon coconut extract
By hand or using a stand mixer fitted with the whisk attachment, whip
the cream, confectioners’ sugar, and coconut extract until stiff peaks
form. Cover and refrigerate until ready to use, up to 2 hours. If the
cream softens while sitting in the refrigerator, re-whip until stiff peaks
form before using.
Holiday
Valentine’s Day Rose Water Hearts •
Mardi Gras King Cakes • Easter Eggs •
Mother’s Day Éclairs • Fourth of July Sparklers •
Halloween Spider Webs • Day of the Dead Éclairs •
Thanksgiving Turkeys • Hanukkah Sufganiyot (Jelly
Doughnuts) • Snowflakes • Christmas Wreaths •
Gingerbread Éclairs • Eggnog Éclairs •
New Year’s Eve Champagne Poppers
Valentine’s Day Rose Water Hearts (recipe)
Valentine’s Day Rose Water
Hearts
M A K E S A B O U T 1 0 H E A RT S
Pâte à Choux Dough (recipe)
Rose Water Glaze (recipe)
Pink dragées, for decorating (optional)
1
Preheat the oven to 350ºF. Line two baking sheets with
parchment paper.
2
Fill a pastry bag fitted with a star piping tip (such as Ateco #827)
with the pâte à choux dough and pipe hearts 3 to 4 inches wide,
leaving about 1 inch of space between each heart. Lightly
moisten a fingertip with cold water and gently smooth any peaks
or points created when piping. Bake for 40 to 45 minutes, until
deep golden brown and cooked through in the center. Let cool
on the baking sheet to room temperature.
3
Dip the top half of each heart into the glaze, allowing the excess
to drip away from the heart before inverting. Sprinkle with pink
dragées, if desired. As you are dipping the hearts, adjust the
thickness of the glaze as needed (see page 25). Set aside to
allow the glaze to set, about 20 minutes, and then serve
immediately.
ROSE WATER GLAZE
MAKES ABOUT ¾ CUP
1½ cups (180 grams) confectioners’ sugar, plus more for adjusting glaze
¼ cup (60 grams) water, plus more for adjusting glaze
2 tablespoons (40 grams) light corn syrup
1 teaspoon rose water
¼ teaspoon salt
Pink gel paste food coloring (optional)
Sift the confectioners’ sugar into a large bowl. Add the water, corn
syrup, rose water, and salt and whisk by hand until smooth. The glaze
should have a thick consistency that still allows for dipping. To make a
thicker glaze, slowly add sifted confectioners’ sugar until the glaze
reaches the desired consistency. To make a thinner glaze, add water,
1 teaspoon at a time. Add food coloring, one drop at a time, stirring
until evenly combined, until the glaze reaches the desired color.
Cover the bowl with plastic wrap and set aside at room temperature
until ready to use, up to 1 day.
Mardi Gras King Cakes
M A K E S 8 TO 1 0 K I N G CA K E S
8 to 10 Paris-Brest Shells (recipe)
White Glaze (recipe)
Purple, green, and gold sanding sugar or sprinkles, for decorating (optional)
¾ cup (about 315 grams) strawberry jam
Whipped Cream Cheese (recipe)
1
Using a serrated knife, slice the Paris-Brest shells in half
horizontally, setting the tops next to their corresponding
bottoms. Gently spread a thick coating of glaze on each of the
tops and immediately sprinkle with colored sugars to decorate,
if desired. Set aside to allow the glaze to set, about 20 minutes.
2
Gently spread a heaping tablespoon of the strawberry jam on
the bottom of each Paris-Brest shell. Fill a pastry bag fitted with a
star piping tip (such as Ateco #827) with the whipped cream
cheese and pipe it on top of the strawberry jam, dividing evenly
among the Paris-Brest shells. Gently place the Paris-Brest tops
on the whipped cream cheese. Serve immediately, or refrigerate
for up to 8 hours.
To color your own sugars, rub a few drops of food coloring
and granulated sugar together until you have the desired color.
Don’t forget to wear rubber gloves!
No te
Mardi Gras King Cakes (recipe)
Easter Eggs (recipe)
Easter Eggs
M A K E S A B O U T 1 2 EG G S
Pâte à Choux Dough (recipe)
Vanilla Bean Pastry Cream (recipe)
White Glaze (recipe), tinted as desired
Assorted pastel-colored edible glitters and luster dusts, for decorating
Gold and silver leaf sheets, for decorating
1
Preheat the oven to 350ºF. Line a baking sheet with parchment
paper.
2
Fill a pastry bag fitted with a round piping tip (such as Ateco
#806) with the pâte à choux dough. Pipe the dough by holding
the tip at a 45-degree angle and squeezing the dough onto the
baking sheet while slowly pulling the piping tip back to create
an oval shape that is about the size of a large egg, leaving about
1 inch of space between each oval. Bake for 40 to 45 minutes,
until deep golden brown and cooked through in the center. Let
cool on the baking sheet to room temperature.
3
Place a round piping tip (such as Ateco #802) on the tip of your
index finger, or use the tip of a paring knife, and pierce a ¼-inch
hole in the bottom of each of the Easter eggs.
4
Fill a pastry bag fitted with the same round piping tip with the
pastry cream. Piping into the hole in each Easter egg, gently fill
with pastry cream.
5
Dip the top two-thirds of each Easter egg into the colored glaze,
allowing the excess to drip away from the Easter egg before
inverting. Decorate with assorted glitters, luster dusts, and gold
or silver leaf. Set aside until the glaze has fully set and hardened,
about 20 minutes. Serve the Easter eggs immediately.
When decorating with gold or silver leaf, use a small
paintbrush or toothpick to remove the leaves from their book and
place them on the glazed eggs.
No te
To create the torn gold and silver leaf effect in the photo
(recipe), place a large piece of the leaf on the glaze while it’s wet. As
the excess wet glaze drips down the sides of the egg, the leaf will
tear and take on an abstract look.
No te
Mother’s Day Éclairs
M A K E S 1 0 TO 1 2 L A RG E É C L A I R S
10 to 12 Large Éclair Shells (recipe)
Lemon Pastry Cream (recipe)
Lemon Glaze (recipe)
Fresh edible flowers, such as pansies, for decorating (optional)
Purple dragées, for decorating (optional)
1
Place a round piping tip (such as Ateco #802) on the tip of your
index finger, or use the tip of a paring knife, and pierce three ¼inch holes in the bottom of each éclair shell.
2
Fill a pastry bag fitted with the same round piping tip with the
pastry cream. Piping into the holes in each éclair, gently fill with
pastry cream.
3
Drizzle the tops of the éclairs with the glaze. Decorate with fresh
flowers and dragées, if desired. Set aside until the glaze has fully
set and hardened, about 20 minutes.
Mother’s Day Éclairs (recipe)
LEMON PASTRY CREAM
MAKES ABOUT 3 CUPS
4 large egg yolks
1 large egg
¼ cup plus 3 tablespoons (53 grams) cornstarch
2 cups (480 grams) whole milk
½ cup plus 2 tablespoons (126 grams) sugar
¼ teaspoon salt
Finely grated zest of 2 lemons
5 tablespoons (70 grams) unsalted butter, cut into small pieces
1
In a large bowl, whisk the egg yolks, egg, and cornstarch
together until completely smooth.
2
In a medium pot, bring the milk, sugar, salt, and lemon zest to a
boil. Slowly pour the hot milk over the egg yolks while whisking
constantly. Return the mixture to the pot and cook over mediumlow heat, whisking constantly but slowly, until just thickened and
bubbles rise to the surface, about 4 minutes. Increase the speed
of whisking to smooth the custard and continue to cook until it
has thickened to the consistency of pudding and coats the back
of a spoon, about 2 minutes.
3
Immediately remove the pot from the heat, add the butter, and
whisk until fully melted and smooth. Strain the mixture through a
fine-mesh sieve into a large bowl and cover the pastry cream
with a sheet of plastic wrap directly on the surface to prevent a
skin from forming. Refrigerate until cold and fully set, about 2
hours, or up to 3 days.
LEMON GLAZE
MAKES ABOUT ¾ CUP
1½ cups (180 grams) confectioners’ sugar, plus more for adjusting glaze
2 tablespoons (40 grams) light corn syrup
Finely grated zest of 2 lemons
2 tablespoons (28 grams) freshly squeezed lemon juice, plus more for adjusting
glaze
¼ teaspoon salt
Yellow gel paste food coloring (optional)
Sift the confectioners’ sugar into a large bowl. Add the corn syrup,
lemon zest and juice, and salt and whisk by hand until smooth. The
glaze should have a thick consistency that still allows for dipping. To
make a thicker glaze, slowly add sifted confectioners’ sugar until the
glaze reaches the desired consistency. To make a thinner glaze, add
lemon juice, 1 teaspoon at a time. Add food coloring, one drop at a
time, stirring until evenly combined, until the glaze reaches the
desired color. Cover the bowl with plastic wrap and set aside at room
temperature until ready to use, up to 4 hours.
Fourth of July Sparklers
M A K E S 3 0 TO 3 6 S PA R K L E R S
Pâte à Choux Dough (recipe)
1½ cups (255 grams) white chocolate, chopped or chips
Red, white, blue, and silver nonpareils or sprinkles
1
Preheat the oven to 350ºF. Line two baking sheets with
parchment paper.
2
Fill a pastry bag fitted with a star piping tip (such as Ateco #862)
with the pâte à choux dough and pipe straight lines, 8 inches
long and ¼ inch wide, onto the baking sheets, leaving about ½
inch of space between each. (If desired, use a ruler to draw 8inch wide columns on the parchment paper to serve as a tracing
guide when piping. Be sure to place the parchment paper
marked side down on the baking sheets before piping the
dough.) Lightly moisten a fingertip with cold water and gently
smooth any peaks or points created when piping. Bake for 25 to
30 minutes, until deep golden brown. Let cool on the baking
sheets to room temperature.
3
Gently melt the white chocolate in a heatproof bowl set over a
pan of simmering water. Remove from the heat.
4
Dip one end of each pâte à choux stick into the melted white
chocolate, allowing the excess to drip from the stick, to create a
thin coating. Immediately decorate the dipped ends of the sticks
with nonpareils. Set the sparklers on a baking sheet and
refrigerate until the chocolate fully hardens, about 20 minutes.
Serve immediately, or refrigerate for up to 8 hours.
Fourth of July Sparklers (recipe)
Halloween Spider Webs (recipe)
Halloween Spider Webs
M A K E S 1 4 TO 1 6 L A RG E C R E A M P U F F S
Royal Icing (recipe)
14 to 16 Large Cream Puff Shells (recipe)
Vanilla Bean Pastry Cream (recipe)
Chocolate Glaze (recipe)
1
Fill a pastry bag fitted with a coupler and a small round piping
tip (such as Ateco #1) with the royal icing. On a sheet of waxed
paper, carefully pipe about 24 spider webs, about 2 inches in
diameter. (The decorations are very delicate and often break
when removed from the waxed paper, so it is necessary to make
extras.) Let stand at room temperature to harden for 4 hours or
up to overnight.
2
Place a round piping tip (such as Ateco #802) on the tip of your
index finger, or use a paring knife, and pierce a ¼-inch hole in
the bottom of each cream puff shell.
3
Fill a pastry bag fitted with the same round piping tip with the
pastry cream. Piping into the hole in each cream puff, gently fill
with pastry cream.
4
Very carefully remove the spider webs from the waxed paper by
loosening with a small metal offset spatula and peeling the
waxed paper away. Dip the top of each cream puff into the glaze,
allowing the excess to drip away from the cream puff before
inverting. As you are dipping the cream puffs, adjust the
thickness of the glaze as needed (see page 25). Carefully place
one spider web on the top of each cream puff and set aside until
the glaze has fully set and hardened, about 20 minutes. Serve
immediately.
You can print an image of a spider web outline, from the
Internet or another source, and place it under the waxed paper to
use as a stencil when piping your decorations.
No te
Day of the Dead Éclairs
M A K E S 1 0 TO 1 2 L A RG E É C L A I R S
Royal Icing (recipe), tinted as desired (optional)
10 to 12 Large Cocoa Éclair Shells (recipe)
Mexican Chocolate Mousse (recipe)
Chocolate Glaze (recipe)
1
Fill a pastry bag fitted with a coupler and a small round piping
tip (such as Ateco #1) with royal icing. On a sheet of waxed
paper, carefully pipe the outline of 18 skulls, about 1 inch in
diameter. On another sheet of waxed paper, pipe the outlines of
several small flowers and scroll decorations. Transfer the colored
icing(s) to a paper cornet (see Note, page 228) and, using the
cornet, fill in the outlines of the skulls, flowers, and scrolls in your
desired colors, ensuring all the lines of icing connect to create a
solid decoration. (The decorations are very delicate and often
break when removed from the waxed paper, so it is necessary to
make extras.) Let stand at room temperature to harden for 4
hours or up to overnight.
2
Place a round piping tip (such as Ateco #802) on the tip of your
index finger, or use the tip of a paring knife, and pierce three ¼inch holes in the bottom of each éclair shell.
3
Fill a pastry bag fitted with the same round piping tip with the
chocolate mousse. Piping into the holes in each éclair, gently fill
with mousse.
4
Dip the top one-third of each éclair into the glaze, allowing the
excess to drip away from the éclair before inverting. Carefully
remove the decorations from the waxed paper and place on top
of the éclairs. Set aside until the glaze has fully set and
hardened, about 20 minutes. As you are dipping the éclairs,
adjust the thickness of the glaze as needed (see page 25). Serve
immediately, or refrigerate for up to 8 hours.
If the idea of making royal icing skulls and decorations makes
you want to drop dead, skip them! The spicy chocolate mousse
filling and chocolate glaze are good enough to honor the dead.
No te
A paper cornet (pictured on page 218) is a small piping bag
made from parchment paper that is used for making fine
decorations. To use one, roll a triangle of parchment paper into a
cone shape (search for tutorials online if you need help). Fill the
cone no more than two-thirds full with icing. Fold the top corners of
the cone inward, then fold the top of the cone down at least twice to
close the cone. Using sharp scissors, trim the very tip of the cone to
create a small hole to pipe.
No te
Day of the Dead Éclairs (recipe)
Thanksgiving Turkeys (recipe)
Thanksgiving Turkeys
M A K E S 1 4 TO 1 6 T U R K E Y S
Royal Icing (recipe)
Red, orange, and yellow petal dusts
14 to 16 Large Cream Puff Shells (recipe)
Vanilla Bean Pastry Cream (recipe)
1
Fill a pastry bag fitted with a coupler and a very small round
piping tip (such as Ateco #1) with the royal icing. On a sheet of
waxed paper, carefully pipe each turkey tail in the shape of a
fan. Start with the smallest feathers and work outward to create
three rows of feathers, ensuring all of the lines of piped icing
connect. Repeat to make 24 tails. (The decorations are very
delicate and often break when removed from the waxed paper,
so it is necessary to make extras.) Let stand at room temperature
to harden for 4 hours or up to overnight.
2
On another sheet of waxed paper, pipe the outline of 24 turkey
heads, about 1½ inches tall and ½ inch wide, with the royal icing,
taking care to include the shape of the beak and wattle. Let stand
at room temperature to harden, about 30 minutes. Carefully fill in
the outline of each turkey head with royal icing, piping a small
dot for the eye and a second layer of icing to accentuate the
beak and wattle. Let stand at room temperature to harden for 4
hours or up to overnight. Reserve the remaining icing in the
pastry bag, inserting a toothpick into the piping tip to prevent
the icing from drying out by sealing the bag from air.
3
Keeping the piped decorations on the waxed paper and using
small paintbrushes, paint the tails with the red, orange, and
yellow petal dusts to create an ombré pattern. Paint the heads
lightly with the red petal dust, and paint the wattles with a
second layer of red petal dust. Paint the beaks with the yellow
petal dust.
4
Place a round piping tip (such as Ateco #802) on the tip of your
index finger, or use the tip of a paring knife, and pierce a ¼-inch
hole in the bottom of each cream puff shell.
5
Fill a pastry bag fitted with the same round piping tip with the
pastry cream. Piping into the hole in each cream puff, gently fill
with pastry cream.
6
Very carefully remove the turkey heads and tails from the waxed
paper by loosening with a small metal offset spatula and peeling
the waxed paper away.
7
Using a paring knife, cut a small and narrow slit in the top of
each cream puff to match the width of each turkey head.
Carefully insert a turkey head into each slit. Secure the heads
with a thin line of piped icing, if needed, and hold in place until
the icing hardens, about 5 minutes.
8
Working with one tail at a time, pipe a thin line of the reserved
icing along the bottom edge of the tail. Gently press the tail
against the cream puff and pipe additional icing to secure the tail
to the cream puff so that is it well adhered. Hold the tail in place
by propping it against something stable (such as a rolling pin set
on a kitchen towel or a stack of cookbooks) until the icing
hardens, about 20 minutes. Repeat to attach the remaining tails.
Serve the cream puffs immediately.
Make extra royal icing feathers and heads, as they tend to
break easily. If they break, don’t fret. You can use a little more royal
icing to glue them back together. Let them dry until they have fully
hardened again before decorating and attaching to the cream puff
shells.
No te
Oftentimes, a ridge emerges on the top of large cream puff
shells as they bake. This ridge is a great place to affix the turkey’s
tail feathers, as it hides the additional royal icing needed to secure
them in place.
No te
Hanukkah Sufganiyot (Jelly
Doughnuts)
M A K E S 2 0 TO 2 4 D O U G H N U T S
½ cup (120 grams) water
½ cup (120 grams) whole milk
6 tablespoons (85 grams) unsalted butter
1 tablespoon (13 grams) granulated sugar
¾ teaspoon salt
1 cup (128 grams) unbleached all-purpose flour
3 large eggs
2 large egg whites
Canola oil, for frying
1 cup (100 grams) superfine sugar
2 teaspoons (6 grams) ground cinnamon
½ teaspoon ground cardamom
2½ cups (about 375 grams) seedless raspberry jam
1
In a medium saucepan, bring the water, milk, butter, granulated
sugar, and ¼ teaspoon of the salt to a rolling boil. Remove from
the heat and add the flour all at once, while continuing to stir.
Turn the heat to medium-low and cook the dough, while stirring
constantly, until it forms a ball and leaves a skin on the base of
the pot, 3 to 4 minutes.
2
Transfer the dough to a large bowl. Add the whole eggs, one at a
time, stirring vigorously to combine between each addition.
Scrape down the sides of the bowl with a rubber spatula as
needed between each addition. Add the egg whites and mix the
dough until the eggs are fully combined and the mixture is
smooth.
3
To fry the sufganiyot: Heat 2 inches of oil in a heavy pot to
375ºF on an instant-read thermometer. Stir the superfine sugar,
cinnamon, cardamom, and the remaining ½ teaspoon salt
together in a large bowl for coating the doughnuts later. Place a
rack on a baking sheet and set aside.
4
Using a 1- to 1½-ounce cookie scoop, carefully drop one scoop
of dough at a time into the oil. Continue to add more dough to
the oil, taking care to leave about 1 inch of space between each
piece. Fry the sufganiyot until deep golden brown, 5 to 7
minutes. Using a slotted spoon, carefully remove the sufganiyot
from the oil, allowing the excess oil to drain back into the pot.
Immediately transfer them to the bowl of superfine sugar and
gently toss to completely coat in sugar. Set on the rack to cool
until cool enough to handle.
5
Place a round piping tip (such as Ateco #802) on the tip of your
index finger, or use the tip of a paring knife, and pierce a ¼-inch
hole in the bottom of each doughnut.
6
Fill a pastry bag fitted with the same round piping tip with the
raspberry jam. Piping into the hole in each doughnut, gently fill
with jam. Serve immediately.
Professional doughnut makers use a pastry tip called a
bismarck to pierce and fill doughnuts with jam or cream in one step.
It is a long pastry tip with a pointed end (pictured on page 19) and
worth purchasing if you like to make homemade doughnuts often.
No te
Hanukkah Sufganiyot (Jelly Doughnuts) (recipe)
Snowflakes
M A K E S A B O U T 1 0 S N OW F L A K E S
Pâte à Choux Dough (recipe)
1 cup (80 grams) unsweetened shredded coconut, for coating
White Glaze (recipe)
1
Preheat the oven to 350ºF. Line two baking sheets with
parchment paper. Draw the outline of 5 snowflakes, 3 to 4 inches
in diameter, on each piece of parchment paper. Flip the paper
over on the baking sheets, so the side with the writing is facing
down.
2
Fill a pastry bag fitted with a very small round piping tip (such
as Ateco #6) with the pâte à choux dough and pipe onto the
baking sheets, tracing the lines of the snowflakes on the
parchment paper. Bake the snowflakes for 16 to 20 minutes, until
light golden brown. Let cool on the baking sheets.
3
Have the coconut ready in a shallow bowl. Dip the top of each
snowflake into the glaze, allowing the excess to drip away
before inverting. Immediately press the snowflake into the
coconut to coat the glaze. Set aside at room temperature until the
glaze hardens, about 20 minutes. Serve immediately, or store in
an airtight container for up to 2 days.
If you’d like to make this recipe simpler, you can omit the glaze
and coconut and just dust the snowflakes with confectioners’ sugar.
No te
You can print an image of a snowflake outline, from the
Internet or another source, and place it under the parchment paper
No te
to use as a stencil for piping the pâte à choux.
Christmas Wreaths (recipe) and Snowflakes (recipe)
Christmas Wreaths
M A K E S 8 TO 1 0 W R E AT H S
8 to 10 Paris-Brest Shells (recipe)
White Glaze (recipe)
30 peppermint hard candies, finely chopped, for decorating
Peppermint Cream (recipe follows)
1
Using a serrated knife, slice the Paris-Brest shells in half
horizontally, setting the tops next to their corresponding
bottoms.
2
Spread a very thick coating of glaze on each of the tops and
immediately sprinkle with the peppermint to decorate. Set aside
to allow the glaze to set, about 20 minutes. Fill a pastry bag fitted
with a star piping tip (such as Ateco #827) with the whipped
cream and pipe it in rings, dividing evenly among the Paris-Brest
bases. Place the tops on the whipped cream. Serve immediately,
or refrigerate for up to 8 hours.
PEPPERMINT CREAM
MAKES ABOUT 4 CUPS
2 cups (480 grams) heavy whipping cream
½ cup (60 grams) confectioners’ sugar, sifted
½ teaspoon peppermint extract
By hand or using a stand mixer fitted with the whisk attachment, whip
the cream, confectioners’ sugar, and peppermint extract until stiff
peaks form. Refrigerate until ready to use or up to 2 hours.
Gingerbread Éclairs
M A K E S 1 0 TO 1 2 L A RG E É C L A I R S
15 (about 100 grams) gingersnap cookies
10 to 12 Large Éclair Shells (recipe)
Gingerbread Pastry Cream (recipe)
White Glaze (recipe)
1
In a food processor, process the gingersnaps into finely ground
crumbs, or crush by hand. Spread the crumbs on a large plate
and set aside. Place a round piping tip (such as Ateco #802) on
the tip of your index finger, or use the tip of a paring knife, and
pierce three ¼-inch holes in the bottom of each éclair.
2
Fill a pastry bag fitted with the same round piping tip with the
pastry cream. Piping into the holes in each éclair, gently fill with
pastry cream.
3
Dip the top one-third of each éclair into the glaze, allowing the
excess to drip away from the éclair before inverting. Roll the
glazed éclairs in the ground gingersnap crumbs to completely
coat the glaze. Set aside until the glaze has fully set and
hardened, about 20 minutes. As you are dipping the éclairs,
adjust the thickness of the glaze as needed (see page 25). Serve
immediately, or refrigerate for up to 8 hours.
If you want to dress up your gingerbread pastry cream a bit,
try adding a bit of orange zest to brighten the flavor. It’s an
unexpected, but lovely, flavor combination.
No te
Gingerbread Éclairs (recipe) and Eggnog Éclairs (recipe)
GINGERBREAD PASTRY CREAM
MAKES ABOUT 3 CUPS
4 large egg yolks
1 large egg
¼ cup plus 3 tablespoons (53 grams) cornstarch
2 cups (480 grams) whole milk
½ cup plus 2 tablespoons (126 grams) sugar
¼ cup (90 grams) molasses
2 teaspoons ground ginger
1 teaspoon ground cinnamon
½ teaspoon ground cloves
½ teaspoon ground allspice
¼ teaspoon salt
¼ teaspoon ground black pepper
5 tablespoons (70 grams) unsalted butter, cut into small pieces
1
In a large bowl, whisk the egg yolks, egg, and cornstarch until
completely smooth.
2
In a medium pot, bring the milk, sugar, molasses, ginger,
cinnamon, cloves, allspice, salt, and pepper to a boil. Slowly
pour the hot milk over the egg yolks while whisking constantly.
Return the mixture to the pot and cook over medium-low heat,
while whisking constantly but slowly, until just thickened and
bubbles rise to the surface, about 4 minutes. Increase the speed
of whisking to smooth the custard and continue to cook until it
has thickened to the consistency of pudding and coats the back
of a spoon, about 2 more minutes.
3
Immediately remove the pot from the heat, add the butter, and
whisk until fully melted and smooth. Strain the mixture through a
fine-mesh sieve into a large bowl and cover the pastry cream
with a sheet of plastic wrap directly on the surface to prevent a
skin from forming. Refrigerate until cold and fully set, about 2
hours, or up to 3 days.
Eggnog Éclairs
M A K E S 1 0 TO 1 2 L A RG E É C L A I R S
10 to 12 Large Éclair Shells (recipe)
Eggnog Pastry Cream (recipe)
Rum-Nutmeg Glaze (recipe)
Whole nutmeg, for grating (optional)
1
Place a round piping tip (such as Ateco #802) on the tip of your
index finger, or use the tip of a paring knife, and pierce three ¼inch holes in the bottom of each éclair shell.
2
Fill a pastry bag fitted with the same round piping tip with the
pastry cream. Piping into the holes in each éclair, gently fill with
pastry cream.
3
Dip the top one-third of each éclair into the glaze, allowing the
excess to drip away from the éclair before inverting. Sprinkle
with freshly grated nutmeg, if desired. Set aside until the glaze
has fully set and hardened, about 20 minutes. As you are dipping
the éclairs, adjust the thickness of the glaze as needed (see
page 25). Serve immediately, or refrigerate for up to 8 hours.
This recipe is truly seasonal, as finding eggnog in the grocery
store before November or after December is nearly impossible.
No te
EGGNOG PASTRY CREAM
MAKES ABOUT 3 CUPS
4 large egg yolks
1 large egg
¼ cup plus 3 tablespoons (53 grams) cornstarch
2 cups (530 grams) eggnog
½ cup (100 grams) sugar
¼ teaspoon salt
5 tablespoons (70 grams) unsalted butter, cut into small pieces
1 teaspoon vanilla extract
1
In a large bowl, whisk the egg yolks, egg, and cornstarch until
completely smooth.
2
In a medium pot, bring the eggnog, sugar, and salt to a boil.
Slowly pour the hot eggnog over the egg yolks while whisking
constantly. Return the mixture to the pot and cook over mediumlow heat, whisking constantly but slowly, until just thickened and
bubbles rise to the surface, about 4 minutes. Increase the speed
of whisking to smooth the custard and continue to cook until it
has thickened to the consistency of pudding and coats the back
of a spoon, about 2 more minutes.
3
Immediately remove the pot from the heat, add the butter and
vanilla, and whisk until fully melted and smooth. Strain the
mixture through a fine-mesh sieve into a large bowl and cover
the pastry cream with a sheet of plastic wrap directly on the
surface to prevent a skin from forming. Refrigerate until cold and
fully set, about 2 hours, or up to 3 days.
RUM-NUTMEG GLAZE
MAKES ABOUT ¾ CUP
1½ cups (180 grams) confectioners’ sugar, plus more for adjusting glaze
1 teaspoon ground nutmeg
2 tablespoons (40 grams) light corn syrup
2 tablespoons (28 grams) rum, plus more for adjusting glaze
¼ teaspoon salt
Sift the confectioners’ sugar and nutmeg into a large bowl. Add the
remaining ingredients and whisk by hand until smooth. The glaze
should have a thick consistency that still allows for dipping. To make a
thicker glaze, slowly add sifted confectioners’ sugar until the glaze
reaches the desired consistency. To make a thinner glaze, add rum, 1
teaspoon at a time. Cover the bowl with plastic wrap and set aside at
room temperature until ready to use, or up to 1 day.
New Year’s Eve Champagne Poppers (recipe)
New Year’s Eve Champagne
Poppers
M A K E S 3 0 TO 3 6 S M A L L C R E A M P U F F S
30 to 36 Small Cream Puff Shells (recipe)
Champagne Sabayon (recipe)
Champagne Glaze (recipe)
Assorted gold decorations, such as dragées, edible gold leaf, edible glitter, and
sprinkles
1
Place a round piping tip (such as Ateco #802) on the tip of your
index finger, or use the tip of a paring knife, and pierce a ¼-inch
hole in the bottom of each cream puff shell.
2
Fill a pastry bag fitted with the same round piping tip with the
sabayon. Piping into the hole in each cream puff, gently fill with
the sabayon.
3
Dip the top of each cream puff into the glaze, allowing the
excess to drip away from the puff before inverting. Decorate
with gold decorations and set aside until the glaze has fully set
and hardened, about 20 minutes. As you are dipping the cream
puffs, adjust the thickness of the glaze as needed (see page 25).
Serve immediately, or refrigerate for up to 1 day.
CHAMPAGNE SABAYON
MAKES ABOUT 3 ½ CUPS
8 large egg yolks
¾ cup (170 grams) Champagne
¼ cup plus 2 tablespoons (76 grams) sugar
¼ teaspoon salt
¾ teaspoon powdered gelatin (optional)
¾ cup (180 grams) heavy whipping cream
1
In a medium saucepan, bring about 2 inches of water to a
simmer.
2
Whisk the egg yolks, Champagne, sugar, salt, and gelatin, if
using, in a large heatproof bowl that is a few inches wider than
the saucepan. Place the bowl over the simmering water and
cook, while whisking constantly, until thickened, light in color,
and an instant-read thermometer reads 170ºF, 8 to 10 minutes.
Place the bowl of sabayon over another larger bowl of ice water
and stir occasionally until the sabayon reaches room
temperature.
3
In the bowl of a stand mixer fitted with the whisk attachment,
whip the cream until stiff peaks form. Gently fold the whipped
cream into the sabayon, cover the bowl with plastic wrap, and
refrigerate until chilled and set, about 2 hours, or up to 1 day.
If you prefer not to use gelatin in this recipe, that is fine. The
filling will just be a bit softer.
No te
CHAMPAGNE GLAZE
MAKES ABOUT ¾ CUP
1½ cups (180 grams) confectioners’ sugar, plus more for adjusting glaze
2 tablespoons (40 grams) light corn syrup
2 tablespoons (30 grams) Champagne, plus more for adjusting glaze
¼ teaspoon salt
Beige gel paste food coloring
Sift the confectioners’ sugar into a large bowl. Add the corn syrup,
Champagne, and salt and whisk by hand until smooth. The glaze
should have a thick consistency that still allows for dipping. To make a
thicker glaze, slowly add sifted confectioners’ sugar until the glaze
reaches the desired consistency. To make a thinner glaze, add
Champagne, 1 teaspoon at a time. Add food coloring, one drop at a
time, stirring until evenly combined, until the glaze reaches the
desired color. Cover the bowl with plastic wrap and set aside at room
temperature until ready to use or up to 1 day.
Savor y
Everything “Bagels” • Croque Monsieur Éclairs •
Deviled Egg-clairs • Gruyère and Thyme Gougères •
Cheddar, Chipotle, and Roasted Corn Gougères •
BLT Sandwiches • Italian Muffuletta Sandwiches •
Parmesan-Prosciutto Sticks •
Aged Gouda and Bacon Gougères •
New England Lobster Rolls • Caprese Éclairs •
Egg Salad Éclairs • Pâte à Choux Pizzelles
Everything “Bagels”
M A K E S A B O U T 1 0 B AG E L S
1 teaspoon caraway seeds
1 teaspoon sesame seeds
1 teaspoon poppy seeds
1 teaspoon granulated onion
1 teaspoon granulated garlic
1 teaspoon flaky sea salt, such as Maldon brand
Pâte à Choux Dough (recipe)
1 large egg, lightly beaten
Cream cheese, softened, for serving
1
Preheat the oven to 350ºF. Line two baking sheets with
parchment paper.
2
Using a glass or cookie cutter, trace circles about 2¾ inches in
diameter on the parchment paper, leaving 2 inches of space
between each circle. Flip the parchment so the traced side is
facing down. In a small bowl, stir all the seeds and spices
together.
3
Fill a pastry bag fitted with a star piping tip (such as Ateco #827)
with the pâte à choux dough and pipe rings, following the traced
circles. Lightly brush the dough with the beaten egg and
generously sprinkle with the seed-spice blend. Bake for 40 to 45
minutes, until deep golden brown and cooked through in the
center. Let cool on the baking sheets to room temperature.
4
Using a serrated knife, slice the rings in half horizontally. Spread
with cream cheese and replace the tops. Serve immediately.
Everything Bagels can also be “nothing bagels” by eliminating
all the toppings. But where’s the fun in that?
No te
Everything “Bagels” (recipe)
Croque Monsieur Éclairs (recipe)
Croque Monsieur Éclairs
M A K E S 1 0 TO 1 2 L A RG E É C L A I R S
10 to 12 Large Éclair Shells (recipe)
Béchamel Sauce (recipe)
24 thin slices Virginia ham
½ cup (40 grams) grated Gruyère cheese
Ground black pepper, to taste
1
Preheat the oven to 375ºF. Line a baking sheet with aluminum
foil.
2
Using a serrated knife, cut off the top one-third of each éclair
shell lengthwise and discard. Spread 2 tablespoons of the
béchamel sauce on the bottom of each éclair shell. Arrange the
ham over the sauce.
3
Place the éclairs on the baking sheet. Sprinkle the ham
generously with the cheese, season with pepper to taste, and
bake for about 10 minutes, until the sandwiches are warm and
the cheese has melted. Turn on the broiler, transfer the baking
sheet to the broiler, and cook until the cheese has lightly
browned, about 3 minutes. Serve immediately.
If you really want to get fancy, garnish your sandwiches with
fried quail eggs and make your éclairs croque madames.
No te
BÉCHAMEL SAUCE
MAKES ABOUT 2 CUPS
4 tablespoons (56 grams) unsalted butter
2 tablespoons (16 grams) unbleached all-purpose flour, sifted
1½ cups (360 grams) whole milk, warmed
½ teaspoon salt
2 cups (160 grams) grated Gruyère cheese
Pinch of ground nutmeg
Ground black pepper, to taste
1
In a medium saucepan, melt the butter over medium-low heat.
Add the flour and whisk until smooth and dissolved. Continue to
cook, while whisking constantly, until the mixture is light golden
brown, about 3 minutes.
2
Slowly add the warm milk and salt, while whisking constantly
until perfectly smooth. Cook until just thickened, about 7
minutes. Remove from the heat, add the cheese, nutmeg, and
pepper to taste, and stir with a wooden spoon until well
combined and the cheese has melted. Use while still warm, or
refrigerate in an airtight container until ready to use, up to 2
days.
Deviled Egg-clairs
M A K E S A B O U T 1 2 EG G S
Pâte à Choux Dough (recipe)
Deviled Egg Filling (recipe)
Paprika, for dusting (optional)
Sprigs of fresh flat-leaf parsley, for garnish (optional)
1
Preheat the oven to 350ºF. Line a baking sheet with parchment
paper.
2
Fill a pastry bag fitted with a round piping tip (such as Ateco
#806) with the pâte à choux dough. Pipe the dough by holding
the tip at a 45-degree angle and squeezing the dough onto the
baking sheet while slowly pulling the piping tip back to create
an oval shape that is about the size of a large egg, leaving about
1 inch of space between each oval. Bake for 40 to 45 minutes,
until deep golden brown and cooked through in the center. Let
cool on the baking sheet to room temperature.
3
Using a serrated knife, cut the top one-third off of the oval shells
and discard.
4
Fill a pastry bag fitted with a star piping tip (such as Ateco #825)
with the deviled egg filling and pipe a rosette in the center of
each egg éclair shell. Garnish with a pinch of paprika and a
sprig of parsley, if desired. Serve immediately, or refrigerate for
up to 8 hours.
If taking these on the road, pack the shells and filling
separately, and fill on site just before serving.
No te
DEVILED EGG FILLING
MAKES ABOUT 2 CUPS
12 large eggs, hard-boiled (see recipe) and peeled
½ cup (110 grams) mayonnaise
1 tablespoon (15 grams) Dijon mustard
2 teaspoons (10 grams) distilled white vinegar
Salt, to taste
Ground black pepper, to taste
Cut the eggs in half lengthwise. Remove the yolks and transfer to a
large bowl. Add the mayonnaise, mustard, and vinegar to the yolks,
and stir together until smooth and creamy. Season with salt and
pepper to taste. Refrigerate until ready to use, up to 1 day.
Don’t throw those leftover hard-boiled egg whites in the trash!
Serve them with chopped avocado, olive oil, salt, and a pinch of red
pepper flakes for an incredibly delicious and healthy breakfast.
No te
Deviled Egg-clairs (recipe)
Gruyère and Thyme Gougères (recipe)
Gruyère and Thyme Gougères
M A K E S 3 0 TO 3 6 P I EC E S
⅓ cup (80 grams) water
⅓ cup (80 grams) whole milk
5 tablespoons (70 grams) unsalted butter, cut into small pieces
1 teaspoon sugar
¼ teaspoon salt
¾ cup (105 grams) bread flour, sifted
4 large eggs
1¼ cups (100 grams) grated Gruyère cheese, plus more for topping
2 teaspoons (2 grams) fresh thyme leaves
Ground black pepper, to taste
1
Preheat the oven to 350ºF. Line two baking sheets with
parchment paper.
2
In a medium saucepan, bring the water, milk, butter, sugar, and
salt to a rolling boil and cook until the butter has melted. Remove
from the heat and add the flour all at once. Using a heat-resistant
rubber spatula, stir the mixture until no lumps of dry flour
remain, 1 to 2 minutes. Turn the heat to medium and cook the
dough, while stirring constantly, until it forms a ball and leaves a
skin on the base of the pot, 3 to 4 minutes. (If using a nonstick
pan, a skin may not form on the base of the pot. Simply set a
timer for 4 minutes instead.)
3
Transfer the dough to a large bowl and add 3 of the eggs, one at
a time, stirring vigorously until the mixture is smooth between
each addition. Scrape down the sides of the bowl with the
rubber spatula as needed between each addition. Stir in the
cheese, thyme, and pepper. Once the dough is fully combined,
let it stand until it reaches room temperature, about 10 minutes.
4
Fill a pastry bag fitted with a round piping tip (such as Ateco
#806) with the dough and pipe small mounds, about 1¼ inches
in diameter and 1 inch tall, onto the baking sheets, leaving about
1 inch of space between each mound.
5
In a small bowl, lightly beat the remaining egg and then brush
the tops of the mounds with the egg wash. Sprinkle each with a
small pinch of grated cheese. Bake for 35 to 40 minutes, until
deep golden brown and cooked through in the center. Serve
warm, or let cool on the baking sheets to room temperature and
store in an airtight container for up to 2 days.
Gougères can be flavored with any combination of hard or
semihard cheeses and fresh herbs, so use whatever you have on
hand!
No te
Cheddar, Chipotle, and Roasted
Corn Gougères
M A K E S 3 0 TO 3 6 G O U G è R E S
½ cup (75 grams) fresh corn kernels, cut from the cob
1 teaspoon olive oil
⅓ cup (80 grams) water
⅓ cup (80 grams) whole milk
5 tablespoons (70 grams) unsalted butter, cut into small pieces
1 teaspoon sugar
¼ teaspoon salt
¾ cup (105 grams) bread flour, sifted
4 large eggs
¾ cup (90 grams) shredded sharp cheddar cheese, plus more for topping
½ teaspoon ground chipotle chile pepper
1
In a small sauté pan, cook the corn in the olive oil over medium
heat until the kernels are mostly light golden brown, about 5
minutes. Transfer the corn to a small bowl and let cool to room
temperature.
2
Preheat the oven to 350ºF. Line two baking sheets with
parchment paper.
3
In a medium saucepan, bring the water, milk, butter, sugar, and
salt to a rolling boil and cook until the butter has melted. Remove
from the heat and add the flour all at once. Using a heat-resistant
rubber spatula, stir the mixture until no lumps of dry flour
remain, 1 to 2 minutes. Turn the heat to medium and cook the
dough, while stirring constantly, until it forms a ball and leaves a
skin on the base of the pot, 3 to 4 minutes. (If using a nonstick
pan, a skin may not form on the base of the pot. Simply set a
timer for 4 minutes instead.)
4
Transfer the dough to a large bowl and add 3 of the eggs, one at
a time, stirring vigorously until the mixture is smooth between
each addition. Scrape down the sides of the bowl with the
rubber spatula as needed between each addition of eggs. Stir in
the cheese, corn, and chipotle chile pepper. Once the dough is
fully combined, let it stand until it reaches room temperature,
about 10 minutes.
5
Fill a pastry bag fitted with a round piping tip (such as Ateco
#806) with the dough and pipe small mounds, about 1¼ inches
in diameter and 1 inch tall, onto the baking sheets, leaving about
1 inch of space between each mound.
6
In a small bowl, lightly beat the remaining egg and then brush
the tops of the mounds with the egg wash. Sprinkle each with a
small pinch of cheese. Bake for 35 to 40 minutes, until deep
golden brown and cooked through in the center. Serve warm, or
let cool on the baking sheets to room temperature and then store
in an airtight container for up to 2 days.
If you have cayenne pepper on hand, you can easily substitute
¼ teaspoon of that for the chipotle chile pepper.
No te
BLT Sandwiches
M A K E S 1 4 TO 1 6 S A N DW I C H E S
14 to 16 Large Cream Puff Shells (recipe)
½ cup (110 grams) mayonnaise
16 slices (16 ounces/453 grams) bacon, cooked and cut in half
2 ripe vine tomatoes, thinly sliced
8 large leaves Bibb lettuce, torn
Using a serrated knife, cut the cream puff shells in half horizontally.
Spread the cut sides of each top and bottom with mayonnaise. Evenly
divide the bacon, tomato, and lettuce among the bases of the cream
puff shells, then place the tops over the lettuce. Serve the sandwiches
immediately.
Italian Muffuletta Sandwiches (recipe) and BLT Sandwiches
Italian Muffuletta Sandwiches
M A K E S 1 4 TO 1 6 S A N DW I C H E S
14 to 16 Large Cream Puff Shells (recipe)
Olive Salad (recipe)
14 to 16 slices shaved mozzarella cheese
14 to 16 slices shaved capicola or other cured Italian ham
14 to 16 slices shaved Genoa salami
14 to 16 slices shaved mortadella
14 to 16 slices shaved pepperoni
14 to 16 slices shaved provolone cheese
Using a serrated knife, cut the cream puff shells in half horizontally,
setting the tops next to their corresponding bottoms. Spread the cut
sides of each top and bottom with about 1 tablespoon of the olive
salad per side. Layer 1 slice each of the mozzarella, capicola, salami,
mortadella, pepperoni, and provolone on the bottom of each cream
puff shell. Set the tops of the cream puff shells over the provolone to
sandwich together. Serve immediately, or refrigerate for up to 2 hours.
OLIVE SALAD
MAKES ABOUT 2 CUPS
1 cup (115 grams) mild or hot Italian giardiniera relish, store-bought
½ cup (85 grams) pimento-stuffed green olives, finely chopped
¼ cup (42 grams) Kalamata olives, pitted and finely chopped
2 tablespoons (20 grams) extra-virgin olive oil
2 tablespoons (20 grams) canola oil
1 tablespoon (15 grams) red wine vinegar
2 teaspoons (2 grams) dried oregano
1 teaspoon dried parsley
Salt, to taste
Ground black pepper, to taste
Stir all the ingredients together, transfer to an airtight container, and
marinate in the refrigerator for at least 1 hour, or up to 1 week.
I highly recommend you make a double batch of the olive
salad, because you will want to eat it by the spoonful.
No te
Parmesan-Prosciutto Sticks (recipe)
Parmesan-Prosciutto Sticks
M A K E S A B O U T 3 0 ST I C K S
⅓ cup (80 grams) water
⅓ cup (80 grams) whole milk
5 tablespoons (70 grams) unsalted butter, cut into small pieces
1 teaspoon sugar
¼ teaspoon salt
¾ cup (105 grams) bread flour, sifted
3 large eggs
⅔ cup (75 grams) grated Parmesan cheese
30 thin slices (450 grams) prosciutto
1
Preheat the oven to 350ºF. Line two baking sheets with
parchment paper.
2
In a medium saucepan, bring the water, milk, butter, sugar, and
salt to a rolling boil and cook until the butter has melted. Remove
from the heat and add the flour all at once. Using a heat-resistant
rubber spatula, stir the mixture until no lumps of dry flour
remain, 1 to 2 minutes. Turn the heat to medium and cook the
dough, while stirring constantly, until it forms a ball and leaves a
skin on the base of the pot, 3 to 4 minutes. (If using a nonstick
pan, a skin may not form on the base of the pot. Simply set a
timer for 4 minutes instead.)
3
Transfer the dough to a large bowl and add the eggs, one at a
time, stirring vigorously until the mixture is smooth between
each addition. Scrape down the sides of the bowl with the
rubber spatula as needed between each addition. Stir in the
cheese. Once the dough is fully combined, let it stand until it
reaches room temperature, about 10 minutes.
4
Fill a pastry bag fitted with a round piping tip (such as Ateco
#803) with the pâte à choux dough and pipe straight lines, about
8 inches long and ¼ inch wide, onto the baking sheets, leaving
about ½ inch of space between each. Lightly moisten a fingertip
with cold water and gently smooth any peaks or points created
when piping. Bake for 30 to 35 minutes, until deep golden
brown. Let cool on the baking sheets to room temperature.
5
Wrap a slice of prosciutto around the tip of each Parmesan stick
and serve immediately.
Aged Gouda and Bacon Gougères
M A K E S 3 0 TO 3 6 G O U G È R E S
⅓ cup (80 grams) water
⅓ cup (80 grams) whole milk
5 tablespoons (70 grams) unsalted butter, cut into small pieces
1 teaspoon sugar
¼ teaspoon salt
¾ cup (105 grams) bread flour, sifted
4 large eggs
¾ cup (75 grams) grated aged Gouda cheese, plus more for topping
6 slices (6 ounces/170 grams) bacon, cooked and crumbled
Ground black pepper, to taste
1
Preheat the oven to 350ºF. Line two baking sheets with
parchment paper.
2
In a medium saucepan, bring the water, milk, butter, sugar, and
salt to a rolling boil and cook until the butter has melted. Remove
from the heat and add the flour all at once. Using a heat-resistant
rubber spatula, stir the mixture until no lumps of dry flour
remain, 1 to 2 minutes. Turn the heat to medium and cook the
dough, while stirring constantly, until it forms a ball and leaves a
skin on the base of the pot, 3 to 4 minutes. (If using a nonstick
pan, a skin may not form on the base of the pot. Simply set a
timer for 4 minutes instead.)
3
Transfer the dough to a large bowl and add 3 of the eggs, one at
a time, stirring vigorously until the mixture is smooth between
each addition. Scrape down the sides of the bowl with the
rubber spatula as needed between each addition. Stir in the
cheese, bacon, and pepper to taste. Once the dough is fully
combined, let it stand until it reaches room temperature, about
10 minutes.
4
Fill a pastry bag fitted with a round piping tip (such as Ateco
#806) with the dough and pipe small mounds, about 1¼ inch in
diameter and 1 inch tall, onto the baking sheets, leaving about 1
inch of space between each mound.
5
In a small bowl, lightly beat the remaining egg and brush the
tops of the mounds with the egg wash. Sprinkle each with a
small pinch of cheese. Bake for 35 to 40 minutes, until deep
golden brown and cooked through in the center. Serve warm, or
let cool on the baking sheets to room temperature and then store
in an airtight container for up to 2 days.
Freeze an extra batch of your baked gougères for a last-minute
dinner party hors d’oeuvre. Just place them in a 350°F oven for about
12 minutes to thaw and crisp up again before serving.
No te
New England Lobster Rolls
M A K E S 1 0 TO 1 2 LO B ST E R RO L L S
4 (1- to 1¼-pound) Maine lobsters, or about 1 pound lobster meat, or 1 pound
(454 grams) cooked lobster meat
¼ cup (55 grams) mayonnaise
¼ cup (30 grams) finely chopped celery, celery leaves reserved for garnish
2 tablespoons (28 grams) freshly squeezed lemon juice
2 pinches cayenne pepper
Salt, to taste
Ground black pepper, to taste
10 to 12 Large Éclair Shells (recipe)
1 stick (112 grams) unsalted butter, melted
1
In a very large pot of boiling salted water, cook the lobsters until
they turn bright red, 8 to 10 minutes. Using tongs, remove the
lobsters from the boiling water and submerge in an ice water
bath to stop the cooking, about 3 minutes. Remove the lobsters
from the ice water bath, drain, and let cool to room temperature,
about 20 minutes.
2
Separate the lobster tails and claws from the bodies of the
lobsters and discard the bodies. Remove the meat from the tails
and claws and chop the lobster meat into ¼-inch pieces.
Transfer the chopped lobster meat to a strainer set over a bowl
and refrigerate until very cold, at least 1 hour. (To cook raw
lobster meat: Drain the juice from the meat. Over medium heat,
bring 4 cups water and 4 tablespoons butter to a boil. Reduce
the heat to a simmer. Place the meat in the simmering water and
let cook for 4 to 6 minutes, or until firm. Drain the meat into a
fine-mesh strainer and run under cold water until cooled to
room temperature. Refrigerate the cooked lobster meat until
very cold, at least 1 hour.)
3
In a large bowl, stir the chilled lobster meat with the mayonnaise,
celery, lemon juice, cayenne, salt, and black pepper until well
combined.
4
Using a serrated knife, split the éclair shells down the center like
a hot dog bun. Brush the insides of each éclair shell with the
melted butter. Fill each éclair shell with the lobster salad,
garnish with the reserved celery leaves, and serve immediately.
You can use éclair shells as an alternative for buns on any
recipe you like to make. For example, they also make fun hot dog
buns.
No te
New England Lobster Rolls (recipe)
Caprese Éclairs
M A K E S 1 0 TO 1 2 L A RG E É C L A I R S
10 to 12 Large Éclair Shells (recipe)
¾ cup (200 grams) store-bought or homemade pesto sauce
1½ to 2 cups (225 to 300 grams) heirloom cherry tomatoes, halved or quartered
1½ to 2 cups (250 to 325 grams) bocconcini (small fresh mozzarella balls)
Leaves from 8 sprigs fresh basil
Extra-virgin olive oil, for drizzling
Salt, to taste
Ground black pepper, to taste
Using a serrated knife, cut off the top one-third of each éclair
lengthwise and discard. Spread a few teaspoons of the pesto in the
bottom of each éclair shell. Arrange the mozzarella, tomatoes, and
basil on top. Drizzle lightly with olive oil and season with salt and
pepper to taste. Serve immediately.
To make this éclair a bit more gourmet, substitute burrata, an
extra-creamy style of fresh mozzarella, for the bocconcini.
No te
Caprese Éclairs (recipe)
Egg Salad Éclairs (recipe)
Egg Salad Éclairs
M A K E S 1 0 TO 1 2 L A RG E É C L A I R S
10 to 12 Large Éclair Shells (recipe)
Egg Salad (recipe follows)
1 bunch watercress
Coarse sea salt, for sprinkling
Ground black pepper, for sprinkling
Using a serrated knife, cut off and discard the top one-third of the
eclair shells. Spoon the egg salad into the shells and garnish with
watercress leaves. Sprinkle with a pinch of salt and pepper and serve
immediately.
EGG SALAD
MAKES ABOUT 3 CUPS
12 large eggs, hard-boiled and peeled
½ cup (110 grams) mayonnaise
¼ cup (35 grams) minced sweet onion
¼ cup (55 grams) sweet pickle relish
1 tablespoon (15 grams) Dijon mustard
Salt, to taste
Ground black pepper, to taste
Finely chop the eggs and place in a large bowl. Add the mayonnaise,
onion, relish, and mustard, and stir together until well combined and
smooth. Season with salt and pepper to taste. Refrigerate until ready
to use, up to 2 days.
To perfectly hard-boil large eggs, place the eggs in a large
pot and fill with cold water to cover by about 1 inch. Over medium
heat, bring the water to a boil. Cover the pot and remove from the
heat. Let stand for exactly 12 minutes. Be sure to set a timer. Drain
the eggs in a colander and place under cold running water to stop
them from cooking. Peel as soon as they are cool enough to handle
to prevent the shells from being difficult to remove.
No te
Pâte à Choux Pizzelles
M A K E S 2 0 TO 2 4 C R AC K E R S
Nonstick cooking spray
Pâte à Choux Dough (recipe)
1
Preheat a pizzelle iron according to the manufacturer’s
instructions.
2
Lightly coat the iron with nonstick cooking spray and spoon
about 1½ tablespoons of the pâte à choux dough onto to the
center of the pizzelle press. Cook the pizzelles until the steam
from the dough stops escaping from the sides of the press, about
1½ minutes. Repeat with the remainder of the dough. Serve
immediately, or store in an airtight container for up to 3 days.
Since these pâte à choux pizzelles, also used for ice cream
sandwiches (recipe), aren’t sweet, they make an excellent cracker to
serve alongside savory spreads or a cheese platter.
No te
Pâte à Choux Pizzelles (recipe)
Acknowledgments
To the many, many hands that helped me bake up this cookbook:
I am especially grateful for my agent, Vicky Bijur. Thank you for
being the first to recognize the potential of my pâte à choux project.
To my editor, Stephanie Fletcher: I am so appreciative for your
immense faith in my abilities as a pastry chef and author. You gave me
the freedom to write this book as creatively as I envisioned it.
To my photographer, Pernille Loof; my prop stylist, Brian Heiser;
and my food stylist, Junita Bognanni—thank you for making my
desserts look even better than I could make them. I missed you from
all the way over on the other side of the room.
To graphic designer Rachel Newborn: Your masterful and
magnificently whimsical designs captured my recipes and my voice
just perfectly. Thank you for making this book totally adorable and
approachable.
Thank you to those who tested every recipe, sometimes over and
over and over again: Joanne Allegra, Carly Defilippo, Maia Baff, and
Nevia Giles. Your hard work, detailed notes, feedback, and sometimes
unwanted opinions helped shape my ideas into recipes that I am
proud to share.
To Christina Tosi, thank you for your support and enthusiasm in
this project. A lot of Milk Bar coffee and Compost Cookies got me
through the writing of my manuscript.
Many thanks to the Institute of Culinary Education, especially
Andrea Tutunjian, Director of Education and the Dean of the School of
Pastry & Baking Arts, for being in full support of this cookbook, as well
as a great employer. Your collaboration and facilities allowed me to
execute this endeavor with ease.
A million and one thanks to the amazing cake designer, Kate
Sullivan of Cake Power in NYC, and her lovely family, David, Sam, and
CJ. I am so grateful for your generosity—letting my team take over
your home and lives for a week of photos and great fun, and making
the decorations for the Day of the Dead Éclairs (recipe).
All the cooks in the kitchen, I thank you for your efforts in helping
me bake hundreds of desserts for the photos in the book: Eve
Bergazyn, Jacqueline Evertsz, Dawn Kinard, Catherine Liu, Sandra
Palmer, Christina Pagan, Camilla Tinoco, BéAnne Vivas, and Keren
Weiner.
To my dear friend and pastry chef, Sandra Palmer, thank you. I
could not have completed this book without you cheering me along
the whole way.
To my friends and family: Sorry I didn’t share more leftover éclairs
from my recipe testing. I owe each one of you a batch of cream puffs.
SPECIAL THANKS
A very generous thanks to the Institute of Culinary Education, ABC
Carpet and Home, Chef Rubber, Guittard, Le Creuset, Microplane,
Vitamix, and Wüsthof for supplying bakeware, cookware, tableware,
countertop appliances, tools, knives, chocolate, specialty ingredients,
and decorations used for the recipe testing and photographs in this
book.
Retail Thera py
INGREDIENTS
American Almond Products
718.875.8310
americanalmond.com
Coombs Family Farms Maple Syrup
888.266.6271
coombsfamilyfarms.com
Goya
201.348.4900
goya.com/English
Guittard Chocolate Co.
800.HOT.CHOC
guittard.com
King Arthur Flour
802.649.3361
kingarthurflour.com
Nellie and Joe’s Famous Key West Lime Juice
800.LIME.PIE
keylimejuice.com
Nielsen-Massey
800.525.PURE
nielsenmassey.com
Odense Almond Paste
800.243.0897
odense.com
Singing Dog Vanilla
888.343.0002
singingdogvanilla.com
The Spice House
847.328.3711
thespicehouse.com
TOOLS AND SUPPLIES
ABC Carpet & Home
646.602.3101
abchome.com
All-Clad
800.255.2523
all-clad.com
Ateco
516.676.7100
atecousa.com
Chef Rubber
702.614.9350
chefrubber.com
Crate and Barrel
800.967.6696
crateandbarrel.com
Cuisinart
800.211.9604
cuisinart.com
Fishs Eddy
862.772.3971
fishseddy.com
KitchenAid
800.541.6390
kitchenaid.com
Le Creuset of America
877.418.5547
lecreuset.com
Microplane
800.555.2767
us.microplane.com
N.Y. Cake
212.675.CAKE
nycake.com
Williams-Sonoma
877.812.6235
williams-sonoma.com
Wüsthof
800.289.9878
wusthof.com
Index
A
Almond(s)
-Caramel Profiteroles, Salty, photo
Praline Paris-Brests, photo
Apple Butter Bombs, photo
B
Bacon
and Aged Gouda Gougères
BLT Sandwiches, photo
“Bagels,” Everything, photo
Banana
Pudding Puffs, photo
Split Éclairs, photo
Black Forest Éclairs, photo
Blueberry Cheesecake Gâteaux Saint-Honoré, photo
Buttercream, Swiss Meringue
Butterscotch Bombs, photo
C
Cakes
Mardi Gras King, photo
Mint Chocolate Chip Ice Cream, photo
Caramel
-Almond Profiteroles, Salty, photo
Gâteaux Saint-Honoré, photo
Mousse
Champagne Poppers, New Year’s Eve, photo
Chantilly Swans, photo
Cheese. See also Cream Cheese; Mascarpone
Aged Gouda and Bacon Gougères
É
Caprese Éclairs, photo
Cheddar, Chipotle, and Roasted Corn Gougères
Chocolate Chip Cannoli Filling
Croque Monsieur Éclairs, photo
Gruyère and Thyme Gougères, photo
Italian Muffuletta Sandwiches, photo
Parmesan-Prosciutto Sticks, photo
Cherries
Banana Split Éclairs, photo
Black Forest Éclairs, photo
Chocolate. See also list of éclairs on page 119; White Chocolate
Bittersweet, Mousse
buying, for recipes
Chip Mint Ice Cream
Cocoa Pâte à Choux Dough
-Coconut Gâteaux Saint-Honoré, photo
Dipping Sauce, Hot, photo
Glaze
Mocha Profiteroles, photo
Mousse, Mexican
Pastry Cream
Sauce, photo
Chouquettes, photo
Christmas Wreaths, photo
Churros and Chocolate, photo
Cinnamon
-Honey Ice Cream Sandwiches, photo
Spiced Sugar
Coconut
-Chocolate Gâteaux Saint-Honoré, photo
Chocolate Truffles, photo
Persian Spice Topping
Snowflakes, photo
Coffee. See also Espresso
Ice cream
Mocha Profiteroles, photo
Cream. See Whipped Cream
Cream Cheese
Blueberry Cheesecake Gâteaux Saint-Honoré, photo
Everything “Bagels”, photo
Mardi Gras King Cakes, photo
Red Velvet Éclairs, photo
Cream Puffs, photo
large, preparing, photo
small, preparing, photo
Croquembouche, photo
Curd, Lemon
Curd, Passion Fruit
E
Easter Eggs, photo
Éclairs
chocolate, list of
classic, list of
frozen, list of
fruity, list of
holiday, list of
large, preparing, photo
savory, list of
small, preparing, photo
Eggnog Éclairs, photo
Egg(s)
Deviled Egg-clairs, photo
Salad Éclairs, photo
Espresso
Double, Éclairs, photo
Tiramisu, photo
F
Fig, Black Mission, –Pistachio Éclairs, photo
Fourth of July Sparklers, photo
French Crullers, photo
Fruit. See specific fruits
G
Gâteaux Saint-Honoré, photo
Blueberry Cheesecake, photo
Chocolate-Coconut, photo
Citrus, photo
Lavender–White Chocolate, photo
Gingerbread Éclairs, photo
Glazes
Champagne
Chocolate
Espresso
French Cruller
Fresh Peach
Lemon
preparing
Rose Water
Rum-Nutmeg
White
Yuzu
Gougères
Aged Gouda and Bacon
Cheddar, Chipotle, and Roasted Corn
Gruyère and Thyme, photo
H
Halloween Spider Webs, photo
Ham
Croque Monsieur Éclairs, photo
Italian Muffuletta Sandwiches, photo
Parmesan-Prosciutto Sticks, photo
Hanukkah Sufganiyot (Jelly Doughnuts), photo
Hazelnuts
Nutella Cream Puffs, photo
Persian Spice Topping
Praline Pastry Cream
Honey-Cinnamon Ice Cream Sandwiches, photo
I
Ice Cream
Banana
Butterscotch
Coffee
Cookies and Cream, photo
Honey-Cinnamon, photo
Key Lime Pie
Mint Chocolate Chip
Pistachio-Raspberry Swirl
Pumpkin Pie
Salty Caramel-Almond
Vanilla Bean, photo
Icing, Royal
Italian Meringue, [1], [2]
J
Jam, Strawberry-Rhubarb
Jasmine-Pomegranate Éclairs, photo
Jelly
Doughnuts (Hanukkah Sufganiyot), photo
and Peanut Butter Éclairs, photo
L
Lavender–White Chocolate Gâteaux Saint-Honoré, photo
Lemon
Citrus Gâteaux Saint-Honoré, photo
Meringue Pie Éclairs, photo
Mother’s Day Éclairs, photo
Whipped Cream
Lime
Key, Pie Éclairs, photo
Whipped Cream
Lobster Rolls, New England, photo
M
Mango-Pineapple Éclairs, photo
Mardi Gras King Cakes, photo
Mascarpone
Caramel Mousse
-Nutella Filling
Tiramisu Filling
Melon, Mint, and Yogurt Mousse Éclairs, photo
Meringue, Italian, [1], [2]
Mint
Chocolate Chip Ice Cream Cake, photo
Christmas Wreaths, photo
Melon, and Yogurt Mousse Éclairs, photo
Mississippi Mud Puffs, photo
Mocha Profiteroles, photo
Mother’s Day Éclairs, photo
Mousse
Bittersweet Chocolate
Caramel
Mango
Mexican Chocolate
White Chocolate
White Chocolate–Yuzu
Yogurt
N
Nutella Cream Puffs, photo
O
Olive(s)
Italian Muffuletta Sandwiches, photo
Salad
Orange Creamsicle Éclairs, photo
P
Parfaits
Peachy, photo
Strawberry-Buttermilk Sherbet, photo
Paris-Brest
Praline, photo
shells, preparing, photo
Passion Fruit–Chocolate Éclairs, photo
Pastries
assembling, tips for
serving and storing
Pastry Cream
Chocolate
Eggnog
Espresso
Gingerbread
Lemon
Pistachio
Praline
preparing
Vanilla Bean
Pâte à Choux
baked, storing
baking
Dough
Dough, Cocoa
dough, step-by-step, photo
ingredients for
mixing
piping
shapes, piping and baking, photo
tools for
Peach(es)
and Cream Puffs, photo
Peachy Parfaits, photo
Peanut Butter and Jelly Éclairs, photo
Pets de Nonne, photo
Pineapple-Mango Éclairs, photo
Pistachio(s)
–Black Mission Fig Éclairs, photo
Chocolate Truffles, photo
Persian Spice Topping
-Raspberry Swirl Éclairs, photo
Whoopie Puffs, photo
Pizzelles, Pâte à Choux, photo
Pomegranate-Jasmine Éclairs, photo
Pops, Fruity Pâte à Choux, photo
Praline Paris-Brests, photo
Profiteroles
Butterscotch Bombs, photo
Classic, photo
Mocha, photo
Pumpkin Pie, photo
Salty Caramel-Almond, photo
Vanilla Malt
Prosciutto-Parmesan Sticks, photo
Pumpkin Pie Ice Cream
R
Raspberry(ies)
-Pistachio Swirl Éclairs, photo
Red Velvet Éclairs, photo
Religieuses, photo
Religieuses, Strawberry-Rhubarb, photo
Rhubarb-Strawberry Religieuses, photo
Rose Water Hearts, Valentine’s Day, photo
Royal Icing
Rum-Nutmeg Glaze
S
Sandwiches
BLT, photo
Italian Muffuletta, photo
New England Lobster Rolls, photo
Sauces
Béchamel
Butterscotch
Caramel
Champagne Sabayon
Chocolate, photo
Dipping, Hot Chocolate, photo
Malted White Chocolate
Seeds
Everything “Bagels”, photo
Persian Spice Topping
Sherbet
Coconut
Strawberry-Buttermilk
Shortcakes, Strawberry, photo
S’mores Éclairs, photo
Snowflakes, photo
Sorbet, Peach
Strawberry
-Buttermilk Sherbet Parfaits, photo
-Rhubarb Religieuses, photo
Shortcakes, photo
Sugar, Spiced
T
Thanksgiving Turkeys, photo
Tiramisu, photo
Tomatoes
BLT Sandwiches, photo
Caprese Éclairs, photo
Turtle Éclairs, photo
V
Valentine’s Day Rose Water Hearts, photo
Vanilla Bean(s)
Ice Cream, photo
Pastry Cream
Vanilla Malt Profiteroles
W
Whipped Cream
Chantilly Cream
Coconut
Jasmine
Lavender
Lemon
Lime
Peppermint Cream
White Chocolate
Fourth of July Sparklers, photo
–Lavender Gâteaux Saint-Honoré, photo
Mousse
Red Velvet Éclairs, photo
Sauce, Malted
S’mores Éclairs, photo
Whoopie Puffs, photo
–Yuzu Éclairs, photo
Whoopie Puffs, photo
Y
Yogurt Mousse, Melon, and Mint Éclairs, photo
Yuzu–White Chocolate Éclairs, photo